

mij
-
Posts
224 -
Joined
-
Last visited
Reputation Activity
-

 mij reacted to shipmodel in Queen Anne's Revenge 1710 by shipmodel - FINISHED - 1/36 scale
Hi again to all, and thanks for the likes and comments.
I replaced the images on page 5 that disappeared, but I ended up with some duplicate images that I could not remove. Just ignore them. I am also having trouble with line spacing, so this is stretched out more than it should be. If anyone knows how to fix this, please let me know.
When the last segment ended, a month ago, the ship had the basic hull structure done and planked as was the visible portion of the gun deck. The initial cambered deck structures were in place, ready for planking.
There has been a good deal of work done since then, so this segment is fairly long.
With the quarterdeck structure in place I could do the upper gunports with their square wreaths. They were located from the inside of the bulwarks such that the 4-pounder cannon would run out through their centers. A series of small holes were drilled around the perimeter of the port to allow the square lining tube to slide through, as I had done for the larger lower ports. Fit was done carefully, but did not need to be precise, since the outer edges would be covered by the port wreath and the inner edges would be covered by the bulwark planking that would be added later.
The wreaths have simple decorations done with small carving bitts in the Dremel. The circular carving was done with a sharpened brass tube. An image of the first one was sent off to the museum for review. Once it was approved, the rest were shaped and installed.
Next came the gangway ladders and hull loading skids on both sides of the hull. These require 10 vertical pieces, all fitted to the curve of the hull and notched around the several horizontal moldings and wales. It started with a paper pattern cut from an index card. Where I cut it too large at the bottom a small piece of sticky note pad was laid on to cover the gap. Then a wooden pattern was cut from the paper one and fitted to the hull.
Once I was happy with it the top surface was blackened to remind me not to use it on the model (I will need it for model #2). I cut and stacked 5 layers of cherry with the pattern on top. These were all given a coat of clear finish and then “spot welded” to each other with CA glue, one of the few times when CA was used.
The inner faces with the notches were cut on the band saw, then the outer faces were shaped with a tabletop belt sander to match the profile of the pattern. In the photo you can see the small piece of wood with perpendicular faces that was used to keep the stack aligned and vertical during the shaping process.
Once they were shaped they were popped apart with a blade between the layers. The clear finish does not let the CA enter the grain, so there is no wood splintering or loss. This is a technique I use frequently when multiple parts are called for.
The first side of the ladder was installed on the hull and secured with metal pins. Treads ½” long (18” in scale) were glued to the hull with PVA glue and the second side of the ladder was fitted to them and to the hull.
Once the three skids were installed they were reinforced with shorter pieces at their lower ends, similarly notched and fitted. This is the port side, with the gunports open for the eventual installation of the broadside.
And here is the starboard side with closed gunports where the cannon will be shown housed on deck.
In the photo you can also see the sheaves for the sheets of the fore course and spritsail, as well as the chesstree for the tack of the main course. The chesstree was made of cherry, carved with various drill bitts and carving tools, then secured with glue and metal pins. This may be overkill, but for museum work I try to insure that pieces will not fall off any time soon.
You can also see the details of the gunport and its lid. As with the gunport lid on the stern ports in the counter, the hinges are made from 1/16” brass strip with the hinge barrels coiled with wire bending pliers. Three holes for bolts were drilled in each and they were chemically blackened before installation. I have not tried the copper/liver of sulphur technique that Ed Tosti and others use, but it looks like something I want to try. No matter how well I clean the brass before immersion, the finish always comes out uneven. Eyebolts were made up and installed in the lower corners and the lifting ropes were tied. The central one leads through a hole in the hull and ties off to a cleat above the gunport.
The iron fittings for the recoil rope and train tackle protrude from the hull and have diamond shaped washers. They are mounted quite low on French ships, as you can see in this photo of L’Hermione, the reproduction ship that is the subject of a series of current articles by Roger Marsh in S-i-S. Although that ship is larger and almost 70 years later than QAR, these fittings seem to be consistent.
On the inner side of the bulwarks the gun tackle fittings are also a bit different. Rather than an upper eyebolt for the train tackle there is a hook in the bulwark. This matches the fittings recovered during the excavation of La Belle by the folks at Texas A&M. Here is how it is represented on L’Hermione.
And here are the fittings on the model. I did not mount the breach rope rings loose since they will all either be hidden or in use.
Next I turned to the quarter badges. These are a combination of the simple one from the Advice Prize and the florid one from Budriot’s Le Mercure. Because the interiors will not be seen, I did not have to piece them together, as Chuck is doing with his Winchelsea, but could make them solid. Here is the final layout which is sized to the moldings on the hull, along with the base plate of 1/16” thick cherry and the structure piece made from 3/8” basswood.
The basswood was cut to be 1/8” smaller than the base plate all around, then the side panels were angled down from the central flat section to the edges.
An initial color coat of blue for the panels was painted on, with a dark grey for the backing of the light. The window is framed by fluted columns topped by molding capitals. Here you can see the several pieces that made them up. The flutes were cut as channels in a long strip on the table saw, then parted off with the miter guage set to the proper angle.
Once the columns were set, the upper rounded framing piece was shaped and the moldings were cut and applied. Then the basswood piece was mounted on the cherry base plate.
Additional pieces of cherry veneer were cut and installed around the perimeter of the piece, as were the window mullions. The decorative elements were shaped to fit the spaces below the black molding. A modified scallop shell was carved at the bottom of the drop. Window glass was simulated by painting the panes with white glue and letting it dry while lying flat.
Here are the two mirror image quarter badges. They are not precisely symmetrical since the hull moldings are slightly different on the two sides of the model.
Once completed, they were offered up against the hull and the moldings beneath them were chiseled off to let them lay flat against the hull planking.
The deck structures were laid in and tested for their final locations. The grating and other fittings on the quarterdeck were laid out, which gave me the final locations of the mast holes and the length of the captain’s cabin and poop deck.
The three removable deck pieces were planked in the same manner as the gun deck, although the tops of the binding strakes were not raised above the rest of the planking. A square hole was cut into the quarterdeck for the grating, which was sunk till it matched the level of the binding strakes. The outboard sections were made from sheets of holly veneer with the planks scribed in. This simplified the process of tapering the planks immensely on the quarterdeck and poop deck pieces. Deck beam locations were penciled in and fasteners for each plank were drilled, filled, and sanded flush.
For the foredeck the cherry margin plank was installed first, then the central planks and binding strakes. The outboard pieces were cut overlarge to allow me to shape them as if they were nibbed into the margin planks. Once they were cut they were offered to the deck and the outline of the nibbing was drawn on the margin plank. The overlaps were carefully chiseled out of the margin plank till the holly pieces fit tightly into their spaces.
Caprails were cut from 1/16” cherry. These were fairly simple straight pieces, although the width tapered from 10mm (15”) at the waist to 7mm (10”) at the extreme aft where the rail meets the transom.
With the quarterdeck located and planked, the square holes for the anchor davits could be cut. Above them the curved caprail was shaped from five pieces of cherry, scarfed together, the given a final shaping after installation. In the photo some temporary straight anchor davits are laid in, but will be removed and replaced with bent ones in the final fitting out.
So here is the current progress. Not visible are the steps for the fore and mizzen masts that lie under the decks, as well as the mounting block for the bowsprit. These were drilled and carefully aligned so the masts would line up along the centerline with the correct rake for each.
Next I will detail the transom and put together the headrail structures. I hope to bring this to you soon.
Be well
Dan
-

 mij got a reaction from ccoyle in Xebec by mij - FINISHED - 1:60 scale
I used Bisley gun blue for the swivel guns
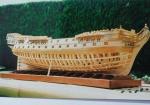
The model I started the beginning of January this year has now been completed.
The planking of the hull is Cherry and all the carvings are from Box.
Here are some photos of her
-
mij reacted to Bruno Siljeg in HMS Pandora 1779 by Bruno Siljeg - 1/48 - Navy Board Style
HMS Pandora was a 24-gun Porcupine-class sixth-rate post ship of the Royal Navy launched in May 1779. She is best known as the ship sent in 1790 to search for the Bounty
Material for the building-
-Fruitwood(wild cherry)
-Brass
-Varnish(Shelac)
-Ebony
-Teak
-Mahagony
-
 mij got a reaction from themadchemist in Xebec by mij - FINISHED - 1:60 scale
Hi Brian
The hundreds of hours I put into a model, I get great pleasure.
The cost is very low when you scratch build and the small return I get from the sale, The Admiral has half and my half gos towards tools and timber.
I get the pleasure in building and others get the pleasure in looking.
Regards
mij
-
 mij got a reaction from GrandpaPhil in Xebec by mij - FINISHED - 1:60 scale
I used Bisley gun blue for the swivel guns
The model I started the beginning of January this year has now been completed.
The planking of the hull is Cherry and all the carvings are from Box.
Here are some photos of her
-
 mij got a reaction from NMBROOK in MORDAUNT 1681 by NMBROOK - Euromodel - 1:60 - Beyond Bashed
Hi Nigel
She`s looking good.
mij
-
mij reacted to NMBROOK in MORDAUNT 1681 by NMBROOK - Euromodel - 1:60 - Beyond Bashed
Work is slowly progressing on the port side.As I have proved everything on the starboard side,this acts as a template for the port side.This has enabled me to fit the gunport frames earlier in the process to make it easier to shape the internal profile.The handy thing with the gunport design is that tweaks are easy.Some of the holes for the linings have been adjusted and boxwood veneer shims used to ensure perfect alignment when sighting down the side of the hull.I have also been able to fit the lower counter side timber earlier than before.The rather random looking pear blocks at the bow are for shaping to match the other side.The are placed to ensure adequate material to carve the shape out of.
Kind Regards
Nigel
-
-
mij got a reaction from themadchemist in Xebec by mij - FINISHED - 1:60 scale
One would need a rather large house to keep all your models you build over the years.
I live in a small bungalow.
mij
-
 mij got a reaction from Archi in Xebec by mij - FINISHED - 1:60 scale
I used Bisley gun blue for the swivel guns
The model I started the beginning of January this year has now been completed.
The planking of the hull is Cherry and all the carvings are from Box.
Here are some photos of her
-
mij reacted to pirozzi in Royal William by pirozzi - FINISHED - Euromodels - 1/70
Construction of the main deck staircase from scratch. This is included on the plans but not supplied in the kit. Even though it will not be visible once the upper decks are placed, it was a nice touch and a challenge to build.
Each step is made up of 2 parts and needs to be beveled at 45 degrees. I jig was made from lumber and the steps placed on top of each other. Once the whole thing is completed, it can be lifted off the jig.
I did find some nice stanchions at Model Expo that were pretty close to the correct size, and only had to be cut down a little and beveled on the tops.
I finished the whole thing in red walnut and weathered it to look old. Once the main deck is installed and planked, the staircase hole will be cut and the assembly placed down into the deck. A "C" shaped bannister will have to be constructed to match the staircase and attached to the outside wings so it encloses the opening in the deck on 3 sides.
Vince P.
-
mij reacted to MEDDO in Xebec by mij - FINISHED - 1:60 scale
I am amazed you did this in only 4 months. It looks wonderful. I always liked the way these ships looked. They just look fast....
-
mij reacted to AntonyUK in Xebec by mij - FINISHED - 1:60 scale
Hello MIJ.
Wow you have done sooooo much. And all to your excellent standards.
Where are you going to display the completed model ?
Regards Antony.
-
 mij got a reaction from DougM in Xebec by mij - FINISHED - 1:60 scale
I used Bisley gun blue for the swivel guns
The model I started the beginning of January this year has now been completed.
The planking of the hull is Cherry and all the carvings are from Box.
Here are some photos of her
-
 mij got a reaction from tadheus in Xebec by mij - FINISHED - 1:60 scale
I used Bisley gun blue for the swivel guns
The model I started the beginning of January this year has now been completed.
The planking of the hull is Cherry and all the carvings are from Box.
Here are some photos of her
-
mij got a reaction from GrandpaPhil in Xebec by mij - FINISHED - 1:60 scale
Milling the sides of the gun carriages
Drilling the holes for the 4mm blocks for the carriages
Turning a step suport
New carving of a rabbit
Model so far
-
mij reacted to shipmodel in Queen Anne's Revenge 1710 by shipmodel - FINISHED - 1/36 scale
Hi again to everyone following this log. Thanks for all the support, comments and likes.
Here is the work that has happened in the last week. I usually put two or more weeks of work into a log entry, but I am going on vacation with the family all of next week, and didn’t want to postpone it.
At the end of the last entry I noticed some symmetry problems at the bow. The thin molding was low on the port side, and the starboard bulwark was too high.
Here I have corrected the problems. I think that the fix is satisfactory, but I will continue to examine the model to see if there are any others that need work.
Next I started on the planking for the gun deck where it will be visible in the waist. The insides of the bulwarks were planked just like the outer surface of the hull, with individual planks of birch veneer glued on with contact cement. Planks were trimmed to cover the gunport frames and linings. Treenail fasteners were done in the usual manner.
The planking of the deck in the waist is a little different. Budriot’s plans indicate that the central section of the deck was made up of thicker planks than the rest of the deck. The outermost of these planks were let into the deck beams beneath and are known as binding strakes. They helped lock the deck to the deck beams and strengthened the entire core of the ship.
On the model I did not lock them into the structure so they are not binding strakes, but they are made of thicker stuff than the planks. Examination of photos of contemporary French models in the Musee de la Marine (Budriot, Historic Ship Models) indicates a pretty consistent look to this section of the deck. The binding strakes and the gratings are dark, even painted black, while the central planking is lighter and matches the color of the rest of the deck planking.
I started with the gratings which I made earlier. These were made on the English pattern, so I crowned them and set them down into the raised strakes so they are nearly flush. These are the first of the early pieces to be permanently attached to the model. The binding strakes are cherry, like the coamings for the gratings, while the central planking is holly. This is a veneer and was glued to crowned sections of basswood to match the curve of the gratings.
Once this section was in place and pinned to the deck substrate, I drew the locations for the deck beams, starting with those at each end of the gratings and filling in from there. They laid out with a pretty consistent pattern of 4 scale feet center to center.
Now I used the holly veneer to plank outward from the center section. I was going to saw up a bunch of individual planks and do the deck as I had done the outer surface of the hull. But then I decided to try using one large sheet of veneer with the planks marked and scribed on. After a satisfactory test piece was made I decided to go for it.
A paper pattern was made that fit the area from the binding strake to the base of the bulwark. This was laid out onto a piece of holly veneer, but not cut. Using a long metal ruler as a straightedge a series of 6mm wide planks were laid out on the wood. With the veneer clamped under the ruler a pencil line was drawn with a 0.5mm mechanical pencil so all the lines would be a consistent width. Without unclamping I scribed the line into the wood with two light passes using the back of a #10 blade. The markings were made permanent with two coats of spray satin finish.
With the planks lined out I cut and trimmed the veneer piece until it fit snugly into the space from binding strake to bulwark. I test fit the piece in place and lightly marked the beam locations onto the veneer. Using the straightedge and a small square the butt joints were marked out, penciled and scribed as before. I used a 3-step pattern with a 1-3-2-4 stagger. I don’t know if this is historically correct for French ships of the period, but it looks right.
After a final sanding to smooth the deck substrate several coats of thinned contact cement were painted onto the deck and the veneer piece. When dry the piece was laid in place and burnished down to the substrate. This is a permanent bond, like a kitchen counter, but the treenails that will be installed doubly guarantee adhesion.
At the base of the bulwarks a margin plank, finish plank, and chamfered waterway were installed. They are cherry and contrast nicely with the birch of the bulwark and the holly of the deck.
Now all the fastening holes could be drilled. Careening the model in the cradles gave me access without straining.
As with the hull planks, I used square treenail sticks pressed into round holes and clipped short, leaving just nubs of wood above the surface of the planks.
When all the holes were filled they were painted with dilute white glue. When the glue dried the nubs were cut off flush with a small sharp chisel. The fastenings are birch which subtly contrasts with the holly without becoming overbearing. The fastenings in the cherry binding strakes were made of walnut, also for a bit of contrast.
With the waist planked it will soon be time to work on the upper decks. Here I have laid up the substrates for the three sections. They are made up of two layers of 1/16” basswood glued over a curved form. The laminated pieces held their shapes quite well after the glue dried. Paper patterns were used to get the right outlines. The pieces were cut on the band saw and refined with a bench disc sander.
With the deck pieces temporarily installed I fitted out the waist with cannon, the ship’s boat, and my figures.
I don’t see anything when I examine the model or in the photos that looks obviously wrong, but my eyes are getting old and I am a bit biased. If anyone sees anything, please tell me now while I can still get at it to change it.
Thanks
Dan
-
mij reacted to the learner in Triton 1/48 by The Learner
I wanted to upload some more pictures but need to shrink them down to meet the 2K size so I will post them later.
Below is pretty much where I am at now
-
mij reacted to the learner in Triton 1/48 by The Learner
Jaerschen, sorry for the delay but work comes first! Above is a pictureof the fwd cant frames. I was a little concerned about the shape but both sides are the same and it looks ok so it appears I am going with this
Guy
-
mij reacted to rafine in Frigate Essex by Rafine - FINISHED - Model Shipways - Kitbashed
Thanks Thomas. The cannon barrels are painted with what little I have left of my Pollyscale engine black (no longer available).
I've now completed another section of the quarterdeck framing. Before doing that, however, I had to do a chart of rigging sizes so that I could attach the main lower yard sheets to the bulwark cleats that would be inaccessible under the deck framing. The rope sizes were determined by using the tables and formulas set forth in Lees. Rather than using a spreadsheet, I chose to mark the sizes directly on copies of the sequential rigging drawings from the Essex AOTS. I then made a table to convert these sizes to correspond to the rigging line sizes available from Chuck.
I then used the appropriate line size to do the sheets and ran them through the bulwark sheaves and attached them to the cleats. When this was done, I glued down the aft portion of the deck framing, which previously had been left sitting loose. After that, I built two further deck sections off the model, installed them, added hanging knees to them and then filled in the open portions with lodging knees, ledges and carlings. The whole assembly was given an application of Wipe-on Poly.
The final portion of the quarterdeck framing will be done in conjunction with work on the pumps and mainmast bitts, which will be the next items of work.
Bob
-
mij reacted to NAZGÛL in Wasan 1628 by Nazgul - FINISHED - Billing Boats Vasa 1:75
I finished the small sculptures for the rudder. I used the BB lion as except his head looking straight up is pretty good. I reshaped the legs and removed the long tail to get that rather cute teddybear shape as can be seen on the 1:10 model. BB didn't include the mascaron with his tounge out and I really wanted that character on the ship so I carved him out of pear wood.
FIrst the one on the 1:10 at the museum:
And here are mine:
It was first after finishing them it occured to me that I just made the last planned sculptures for this model. It's a mixed feeling as I really enjoy the sculptures. The stern is also finished now.
/Matti
-
mij reacted to Maury S in Echo by Maury S - FINISHED - Cross-Section
Thanks for the likes. I appreciate the critical comments as well. This is a learning experience and I've got a lot to learn. Pics. follow: Testing the fit of the aft-hanging knee. The space available behind the beam is short, so I made the aft knees a bit thinner. Installing and clamping the hanging knees. The closeup of the installed knee shows it's not as perfectly fit as Greg's, but I'm getting better. The "iron bolts" visible on this pic. Ledges coming up next and a few challenges.
Maury
-
mij reacted to MEDDO in Halifax 1768 by MEDDO - FINISHED - Lauck Street Shipyard - 1/4" scale
Good suggestion, I will consider this
-
 mij got a reaction from MEDDO in Halifax 1768 by MEDDO - FINISHED - Lauck Street Shipyard - 1/4" scale
Hi Michael
A treenail fitted into the base of each frame would help to secure them.
Regards
mij
-
mij reacted to greatgalleons in Niagara by greatgalleons - FINISHED - Model Shipways
bowsprit ratlines, these are harder than it looks, good luck brian.