MORE HANDBOOKS ARE ON THEIR WAY! We will let you know when they get here.
×


Kevin
-
Posts
7,006 -
Joined
-
Last visited
Content Type
Profiles
Forums
Gallery
Events
Everything posted by Kevin
-

Gun Port Hatches
Kevin replied to acaron41120's topic in Building, Framing, Planking and plating a ships hull and deck
in a continuation to this thread, Victory had, vents fitted, was this common practice, -
even worse, she is a 4 decker
-
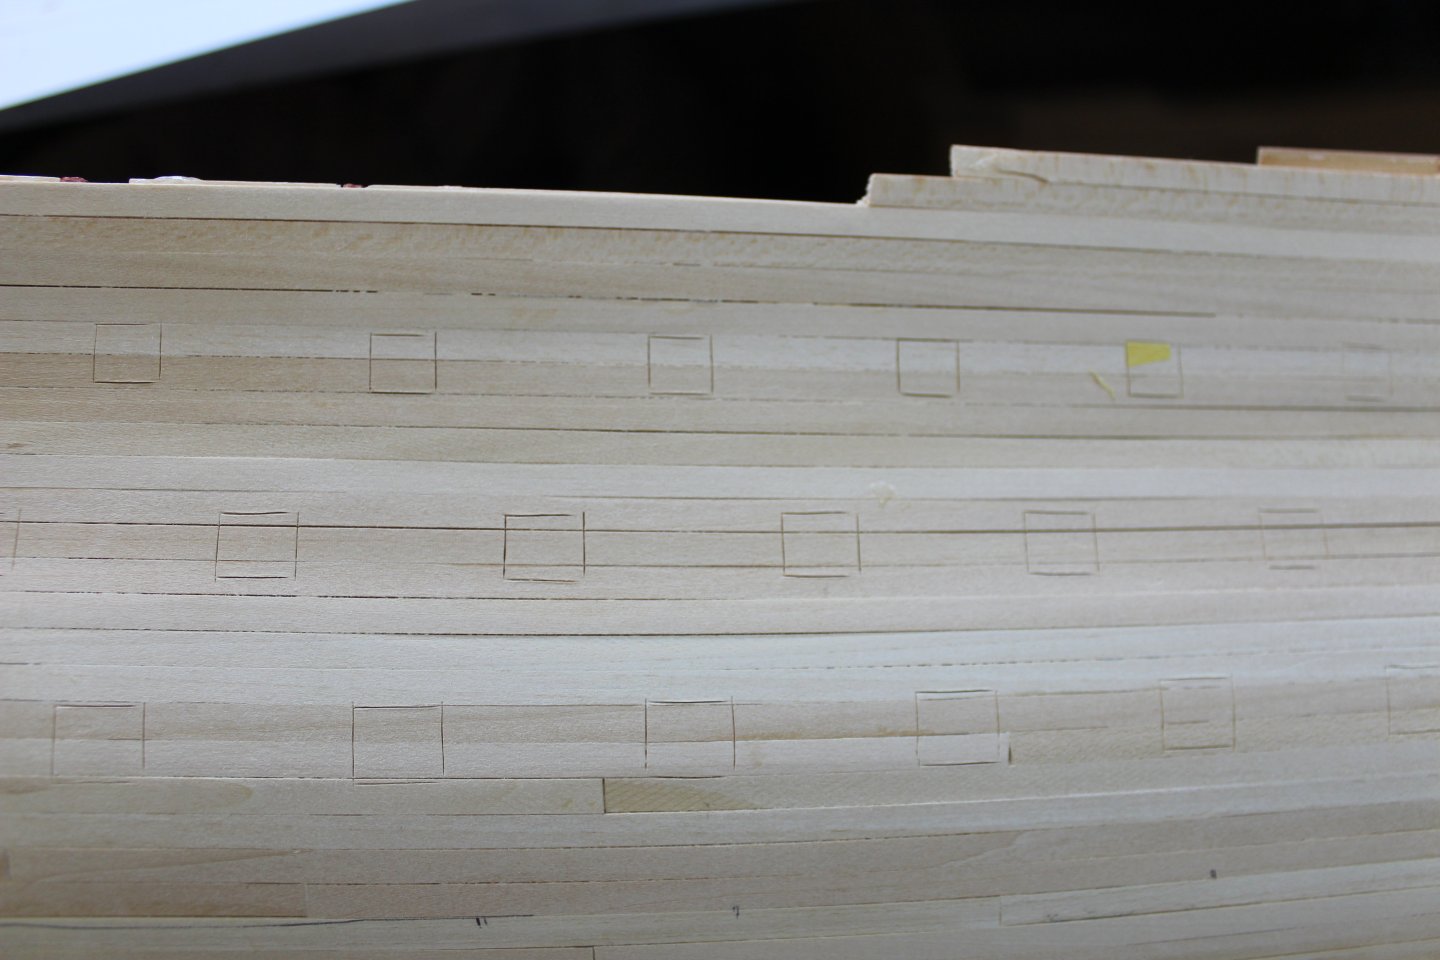
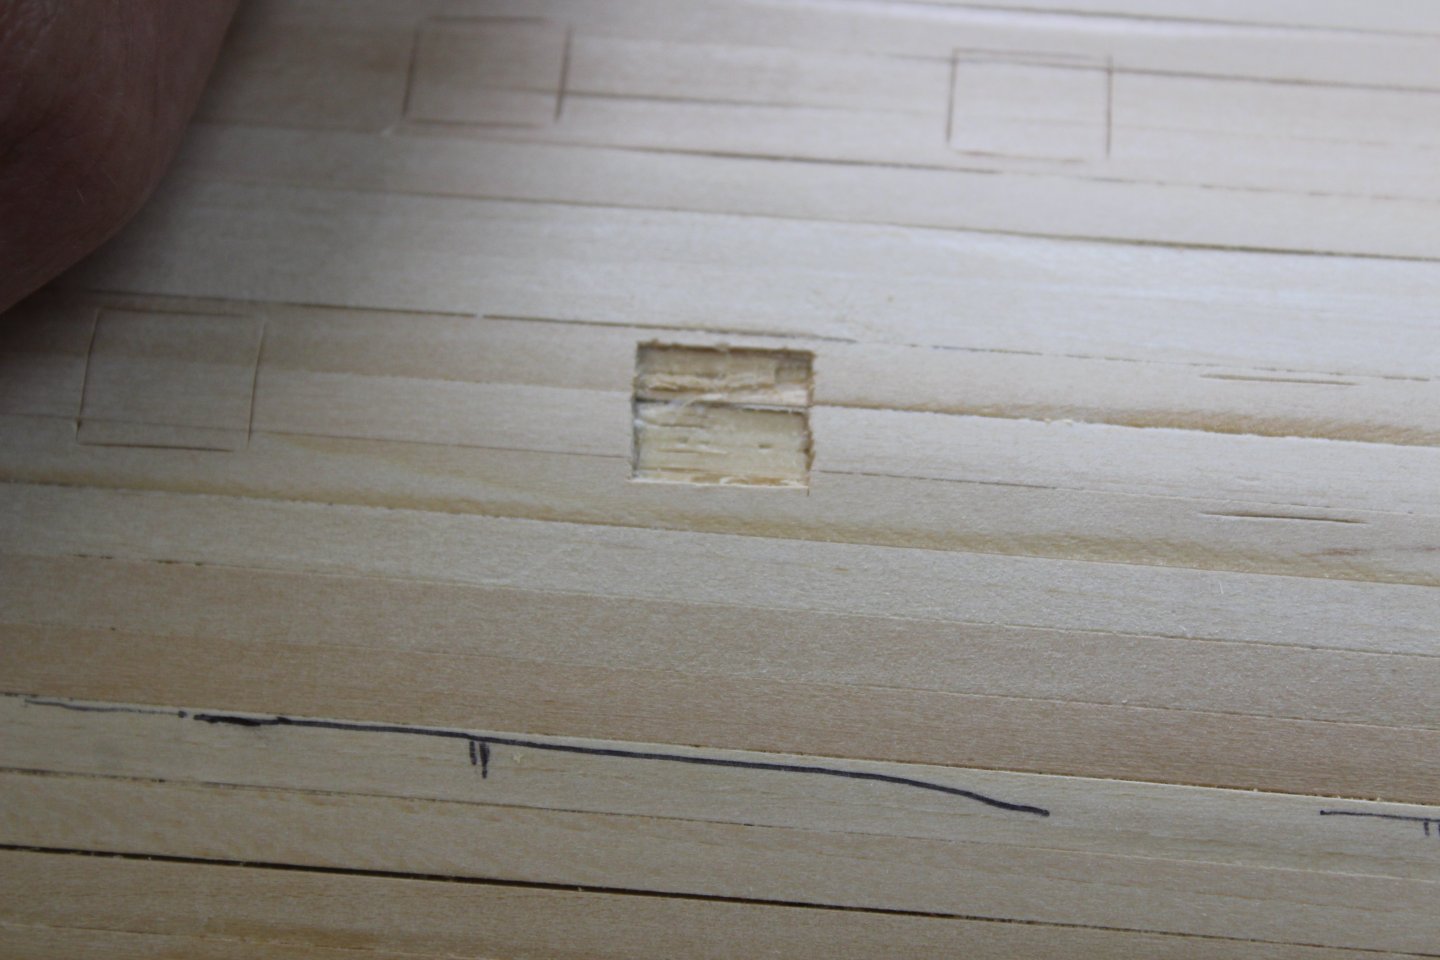
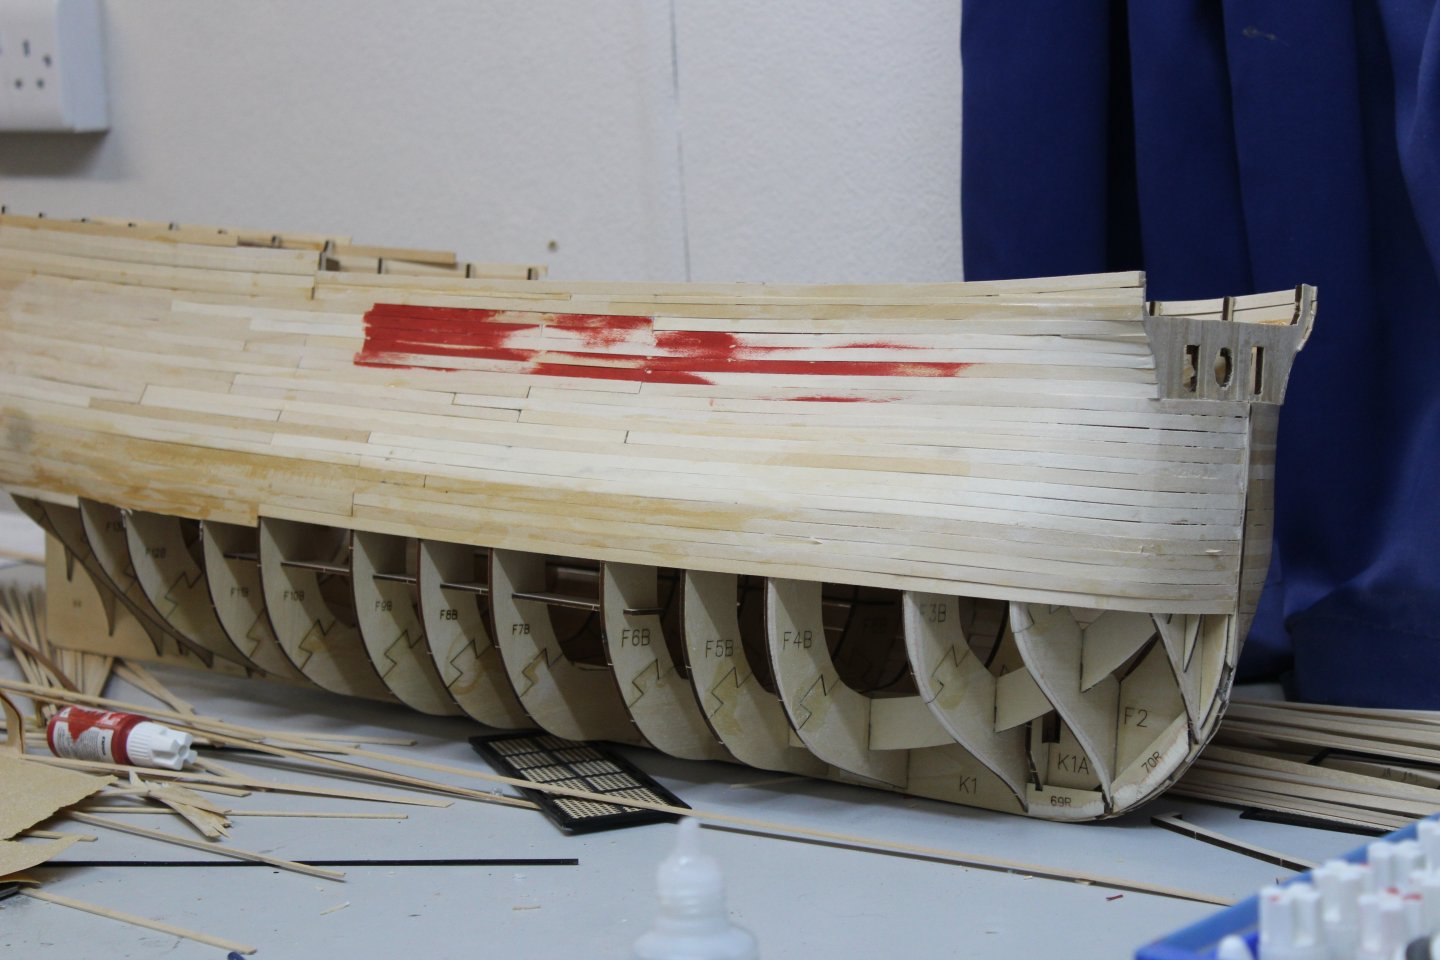
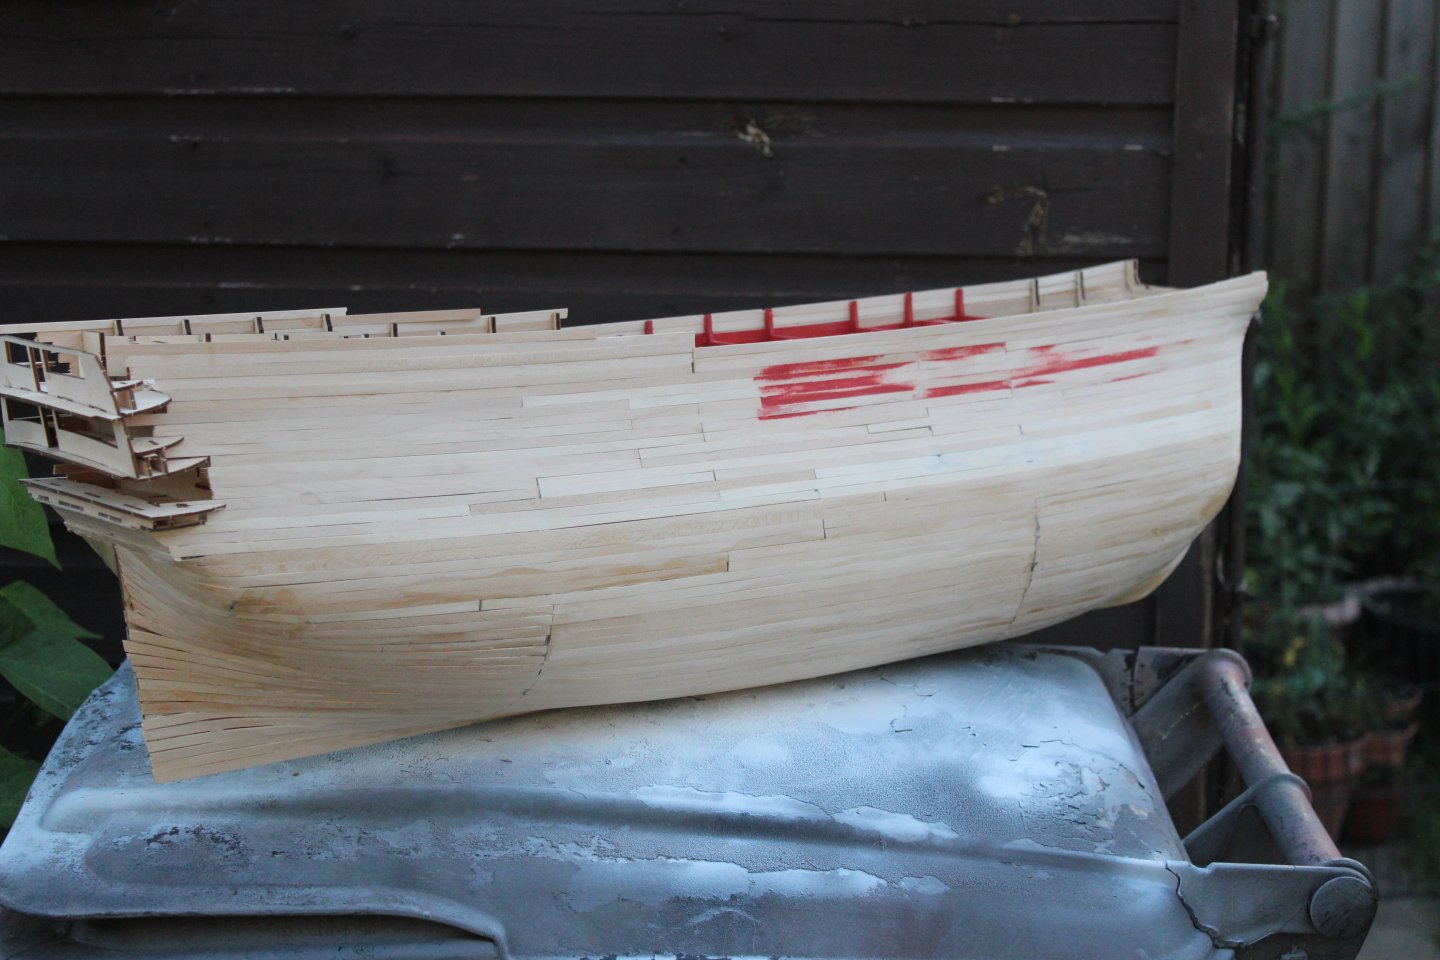
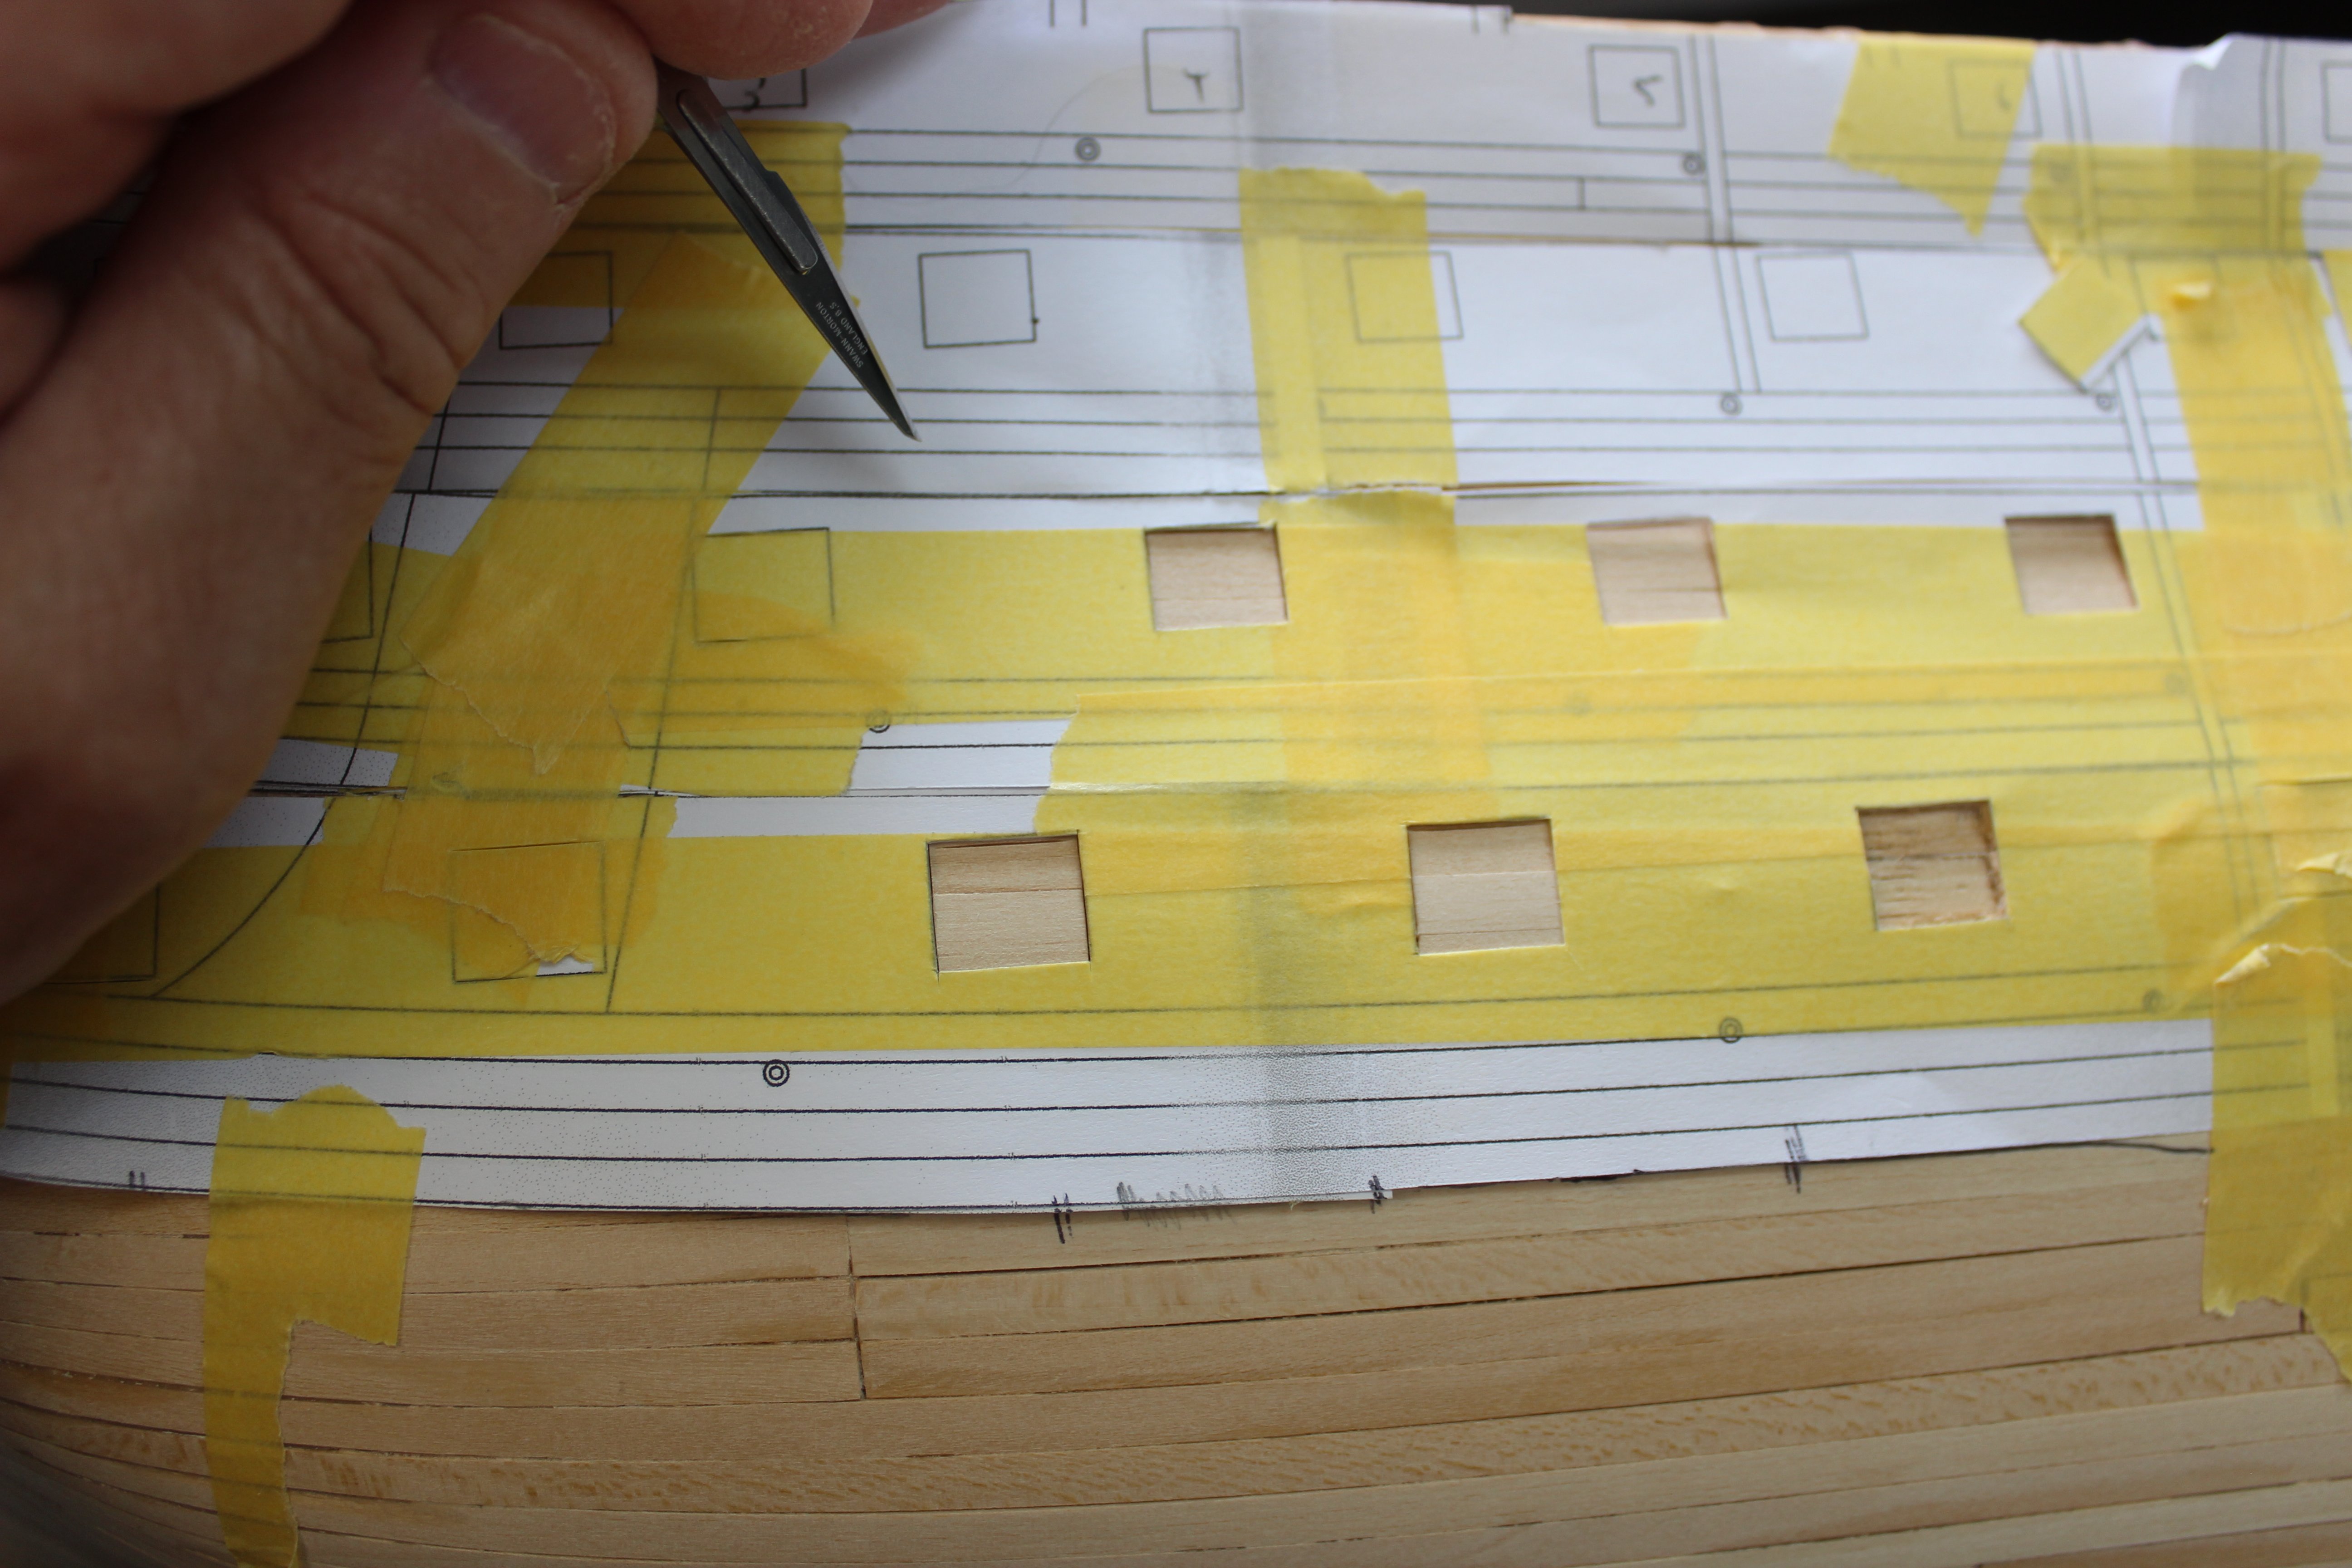
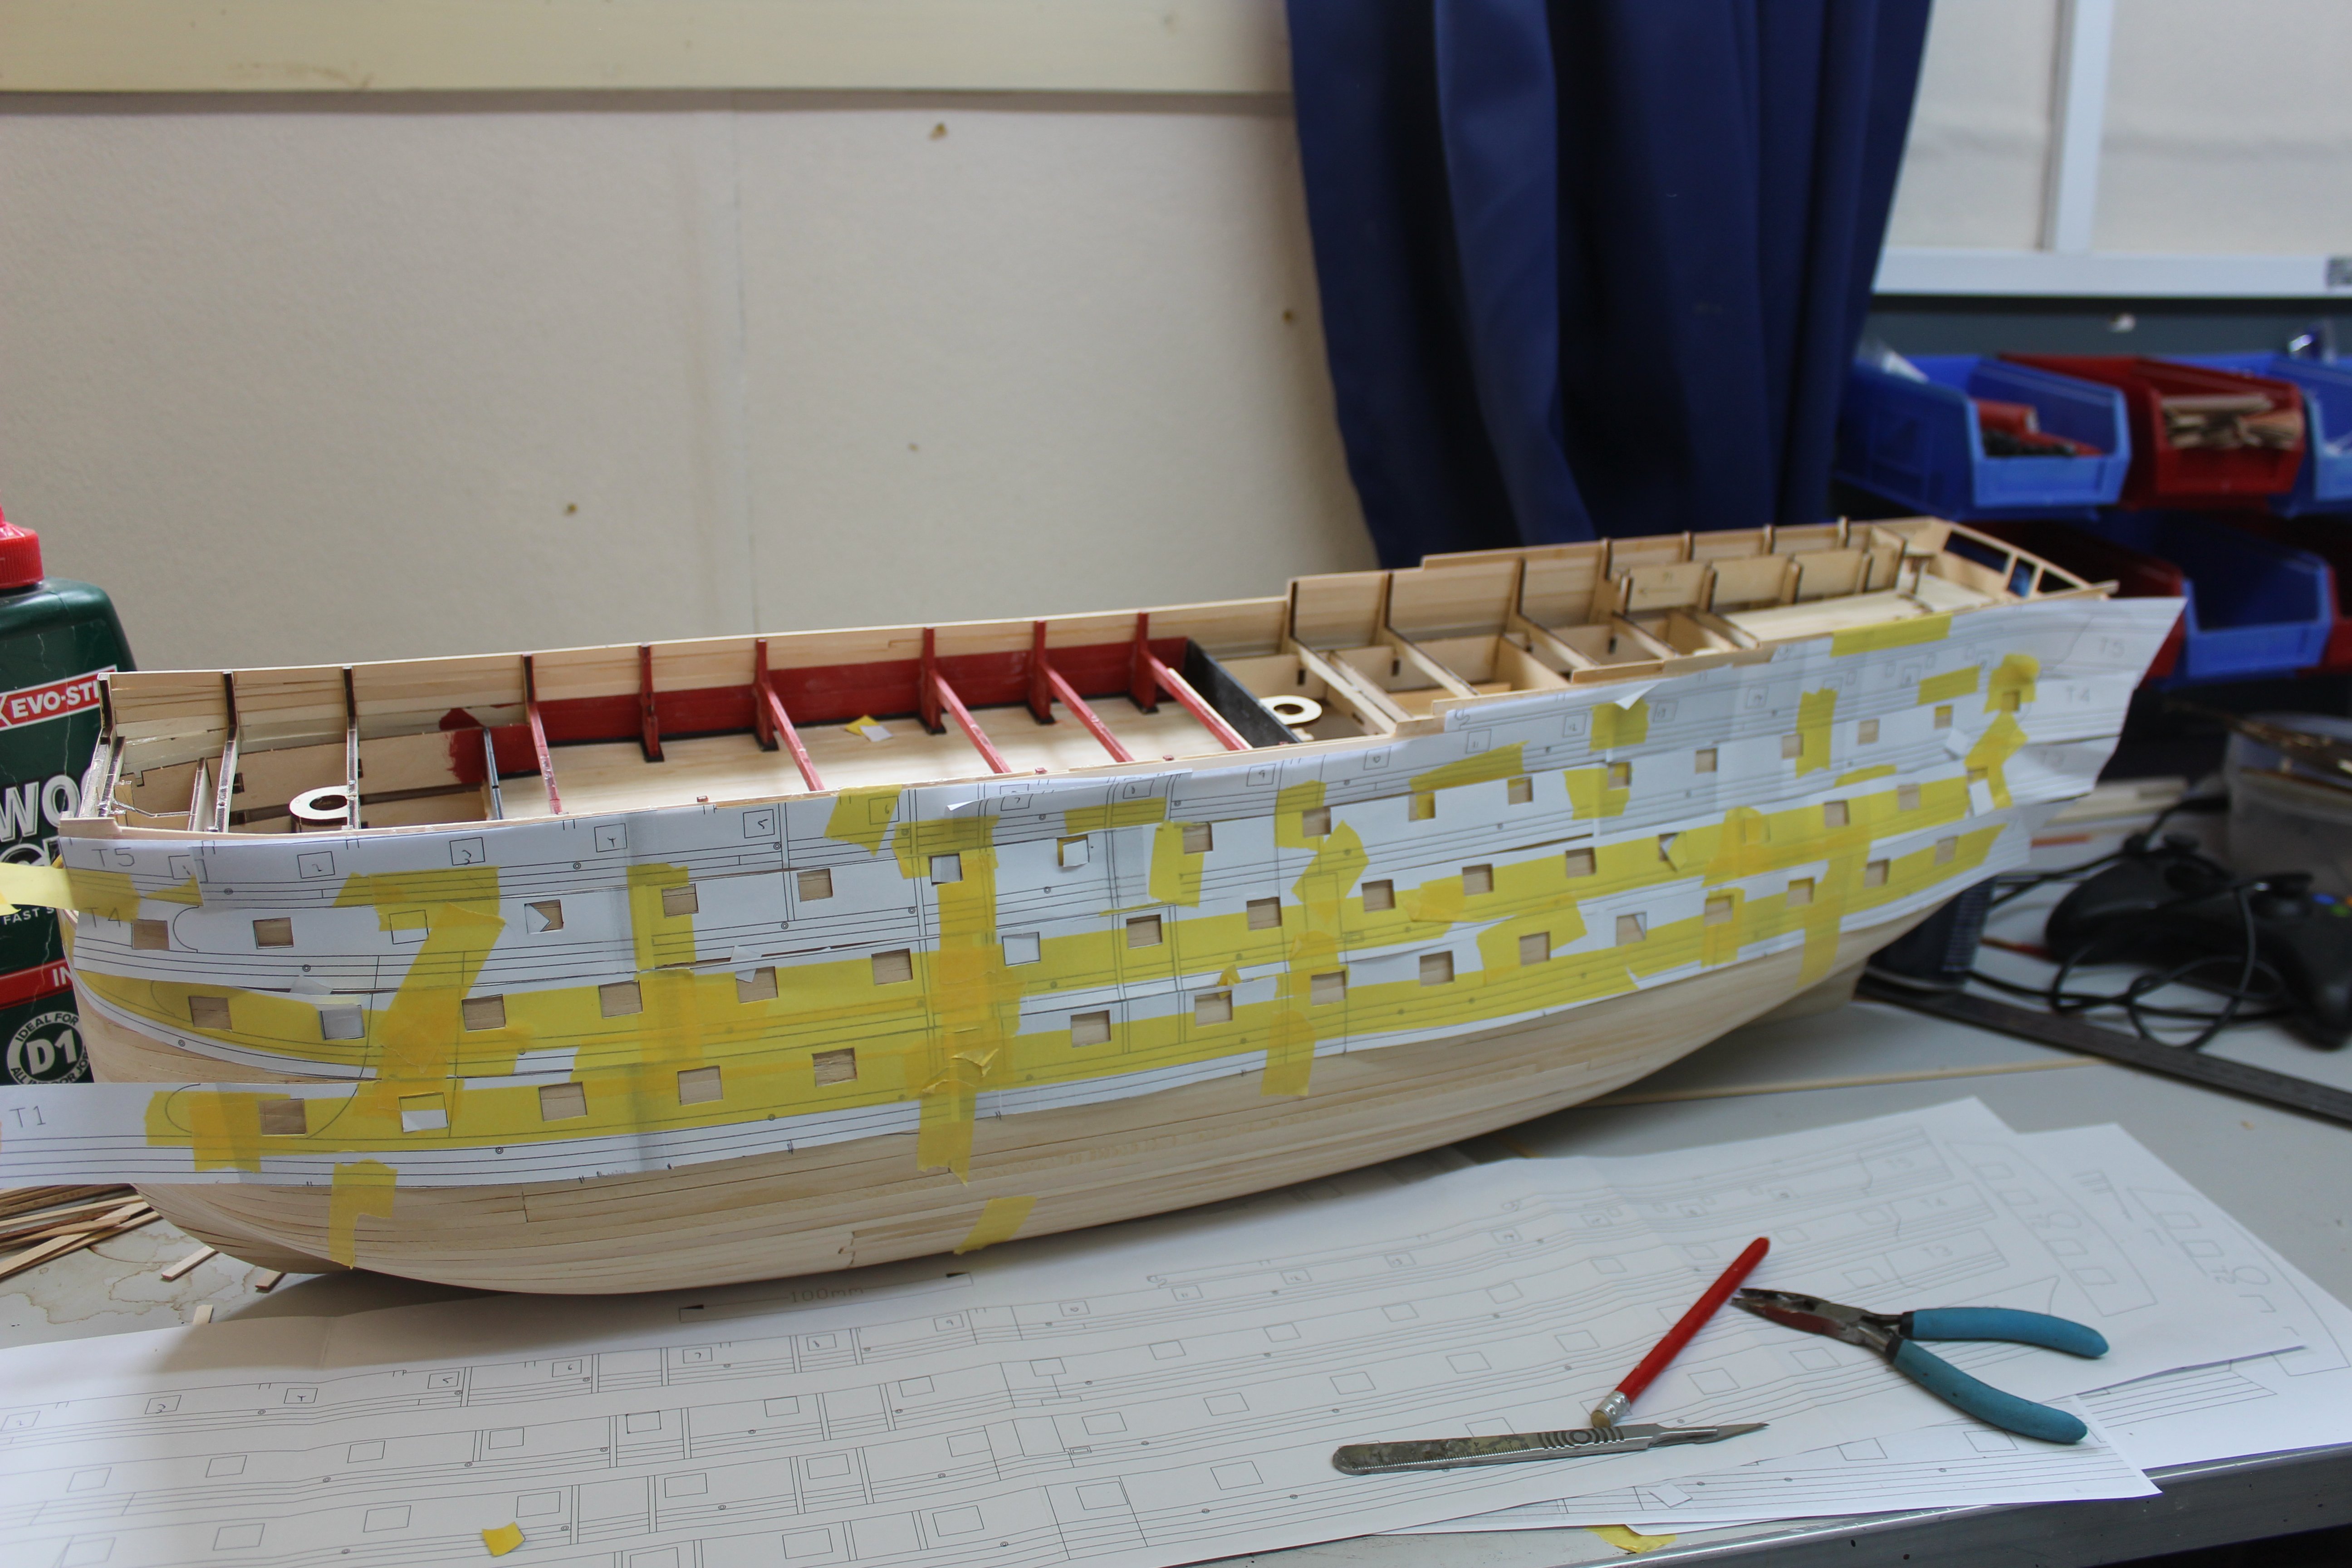
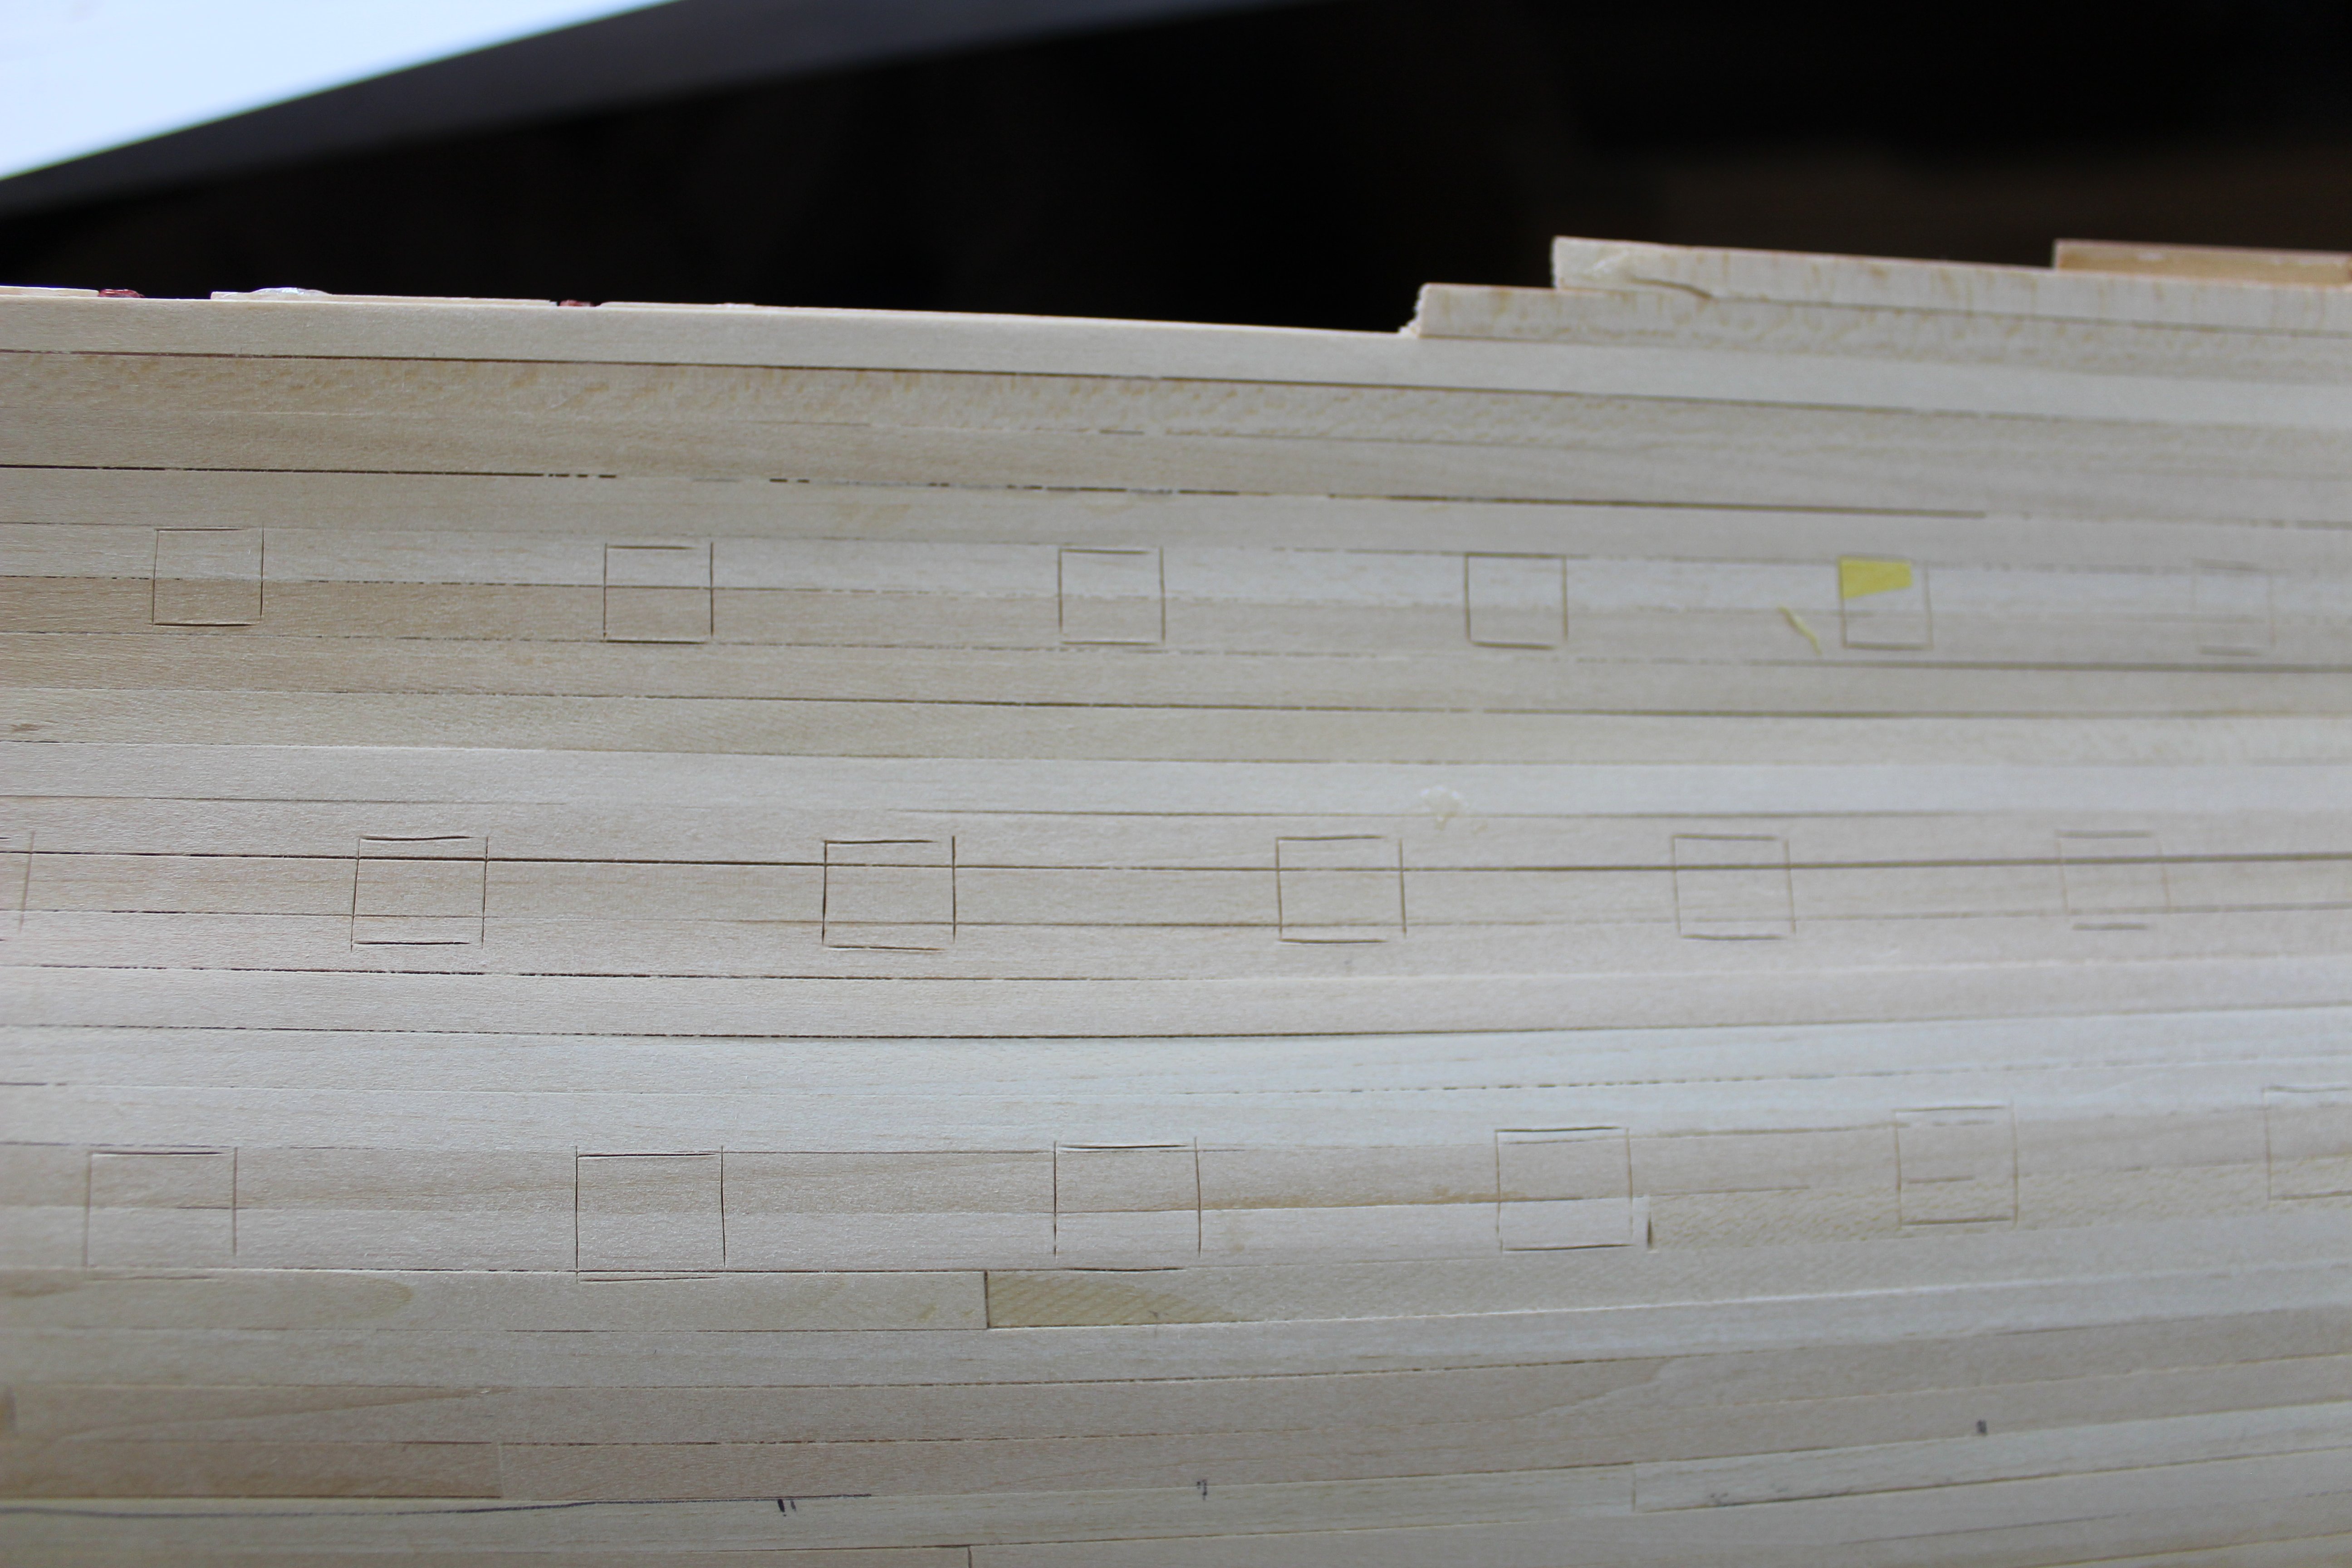
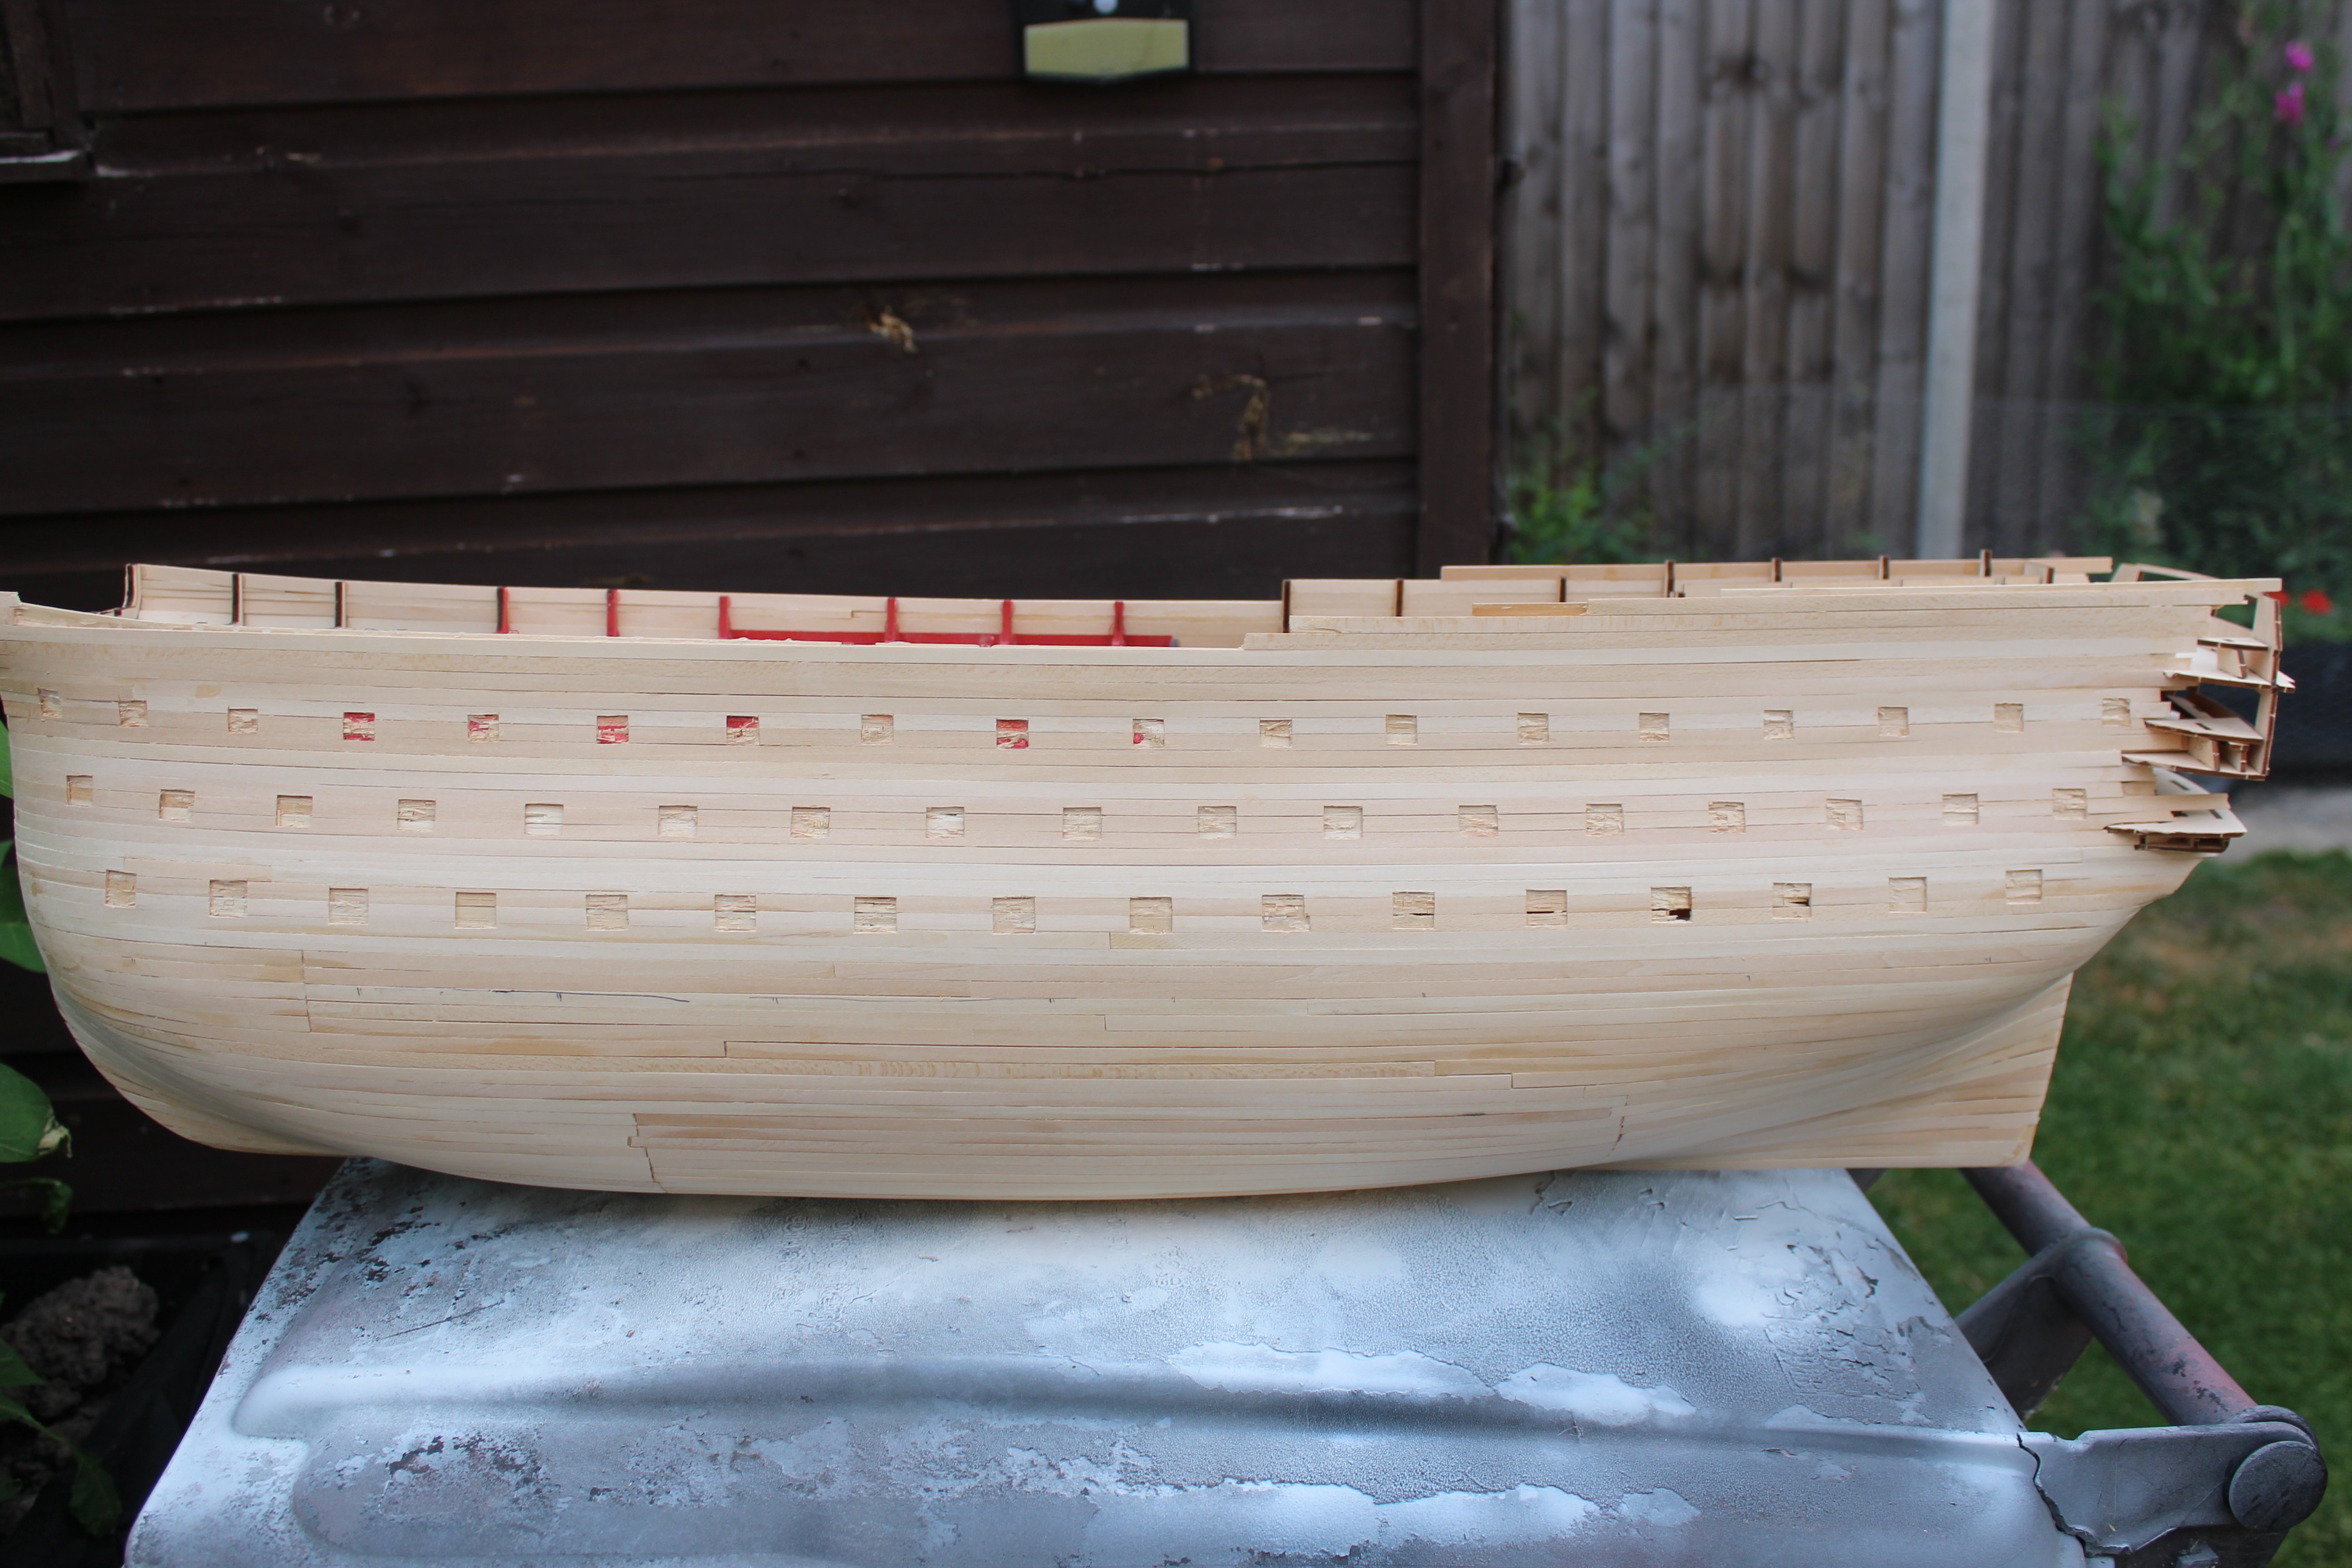
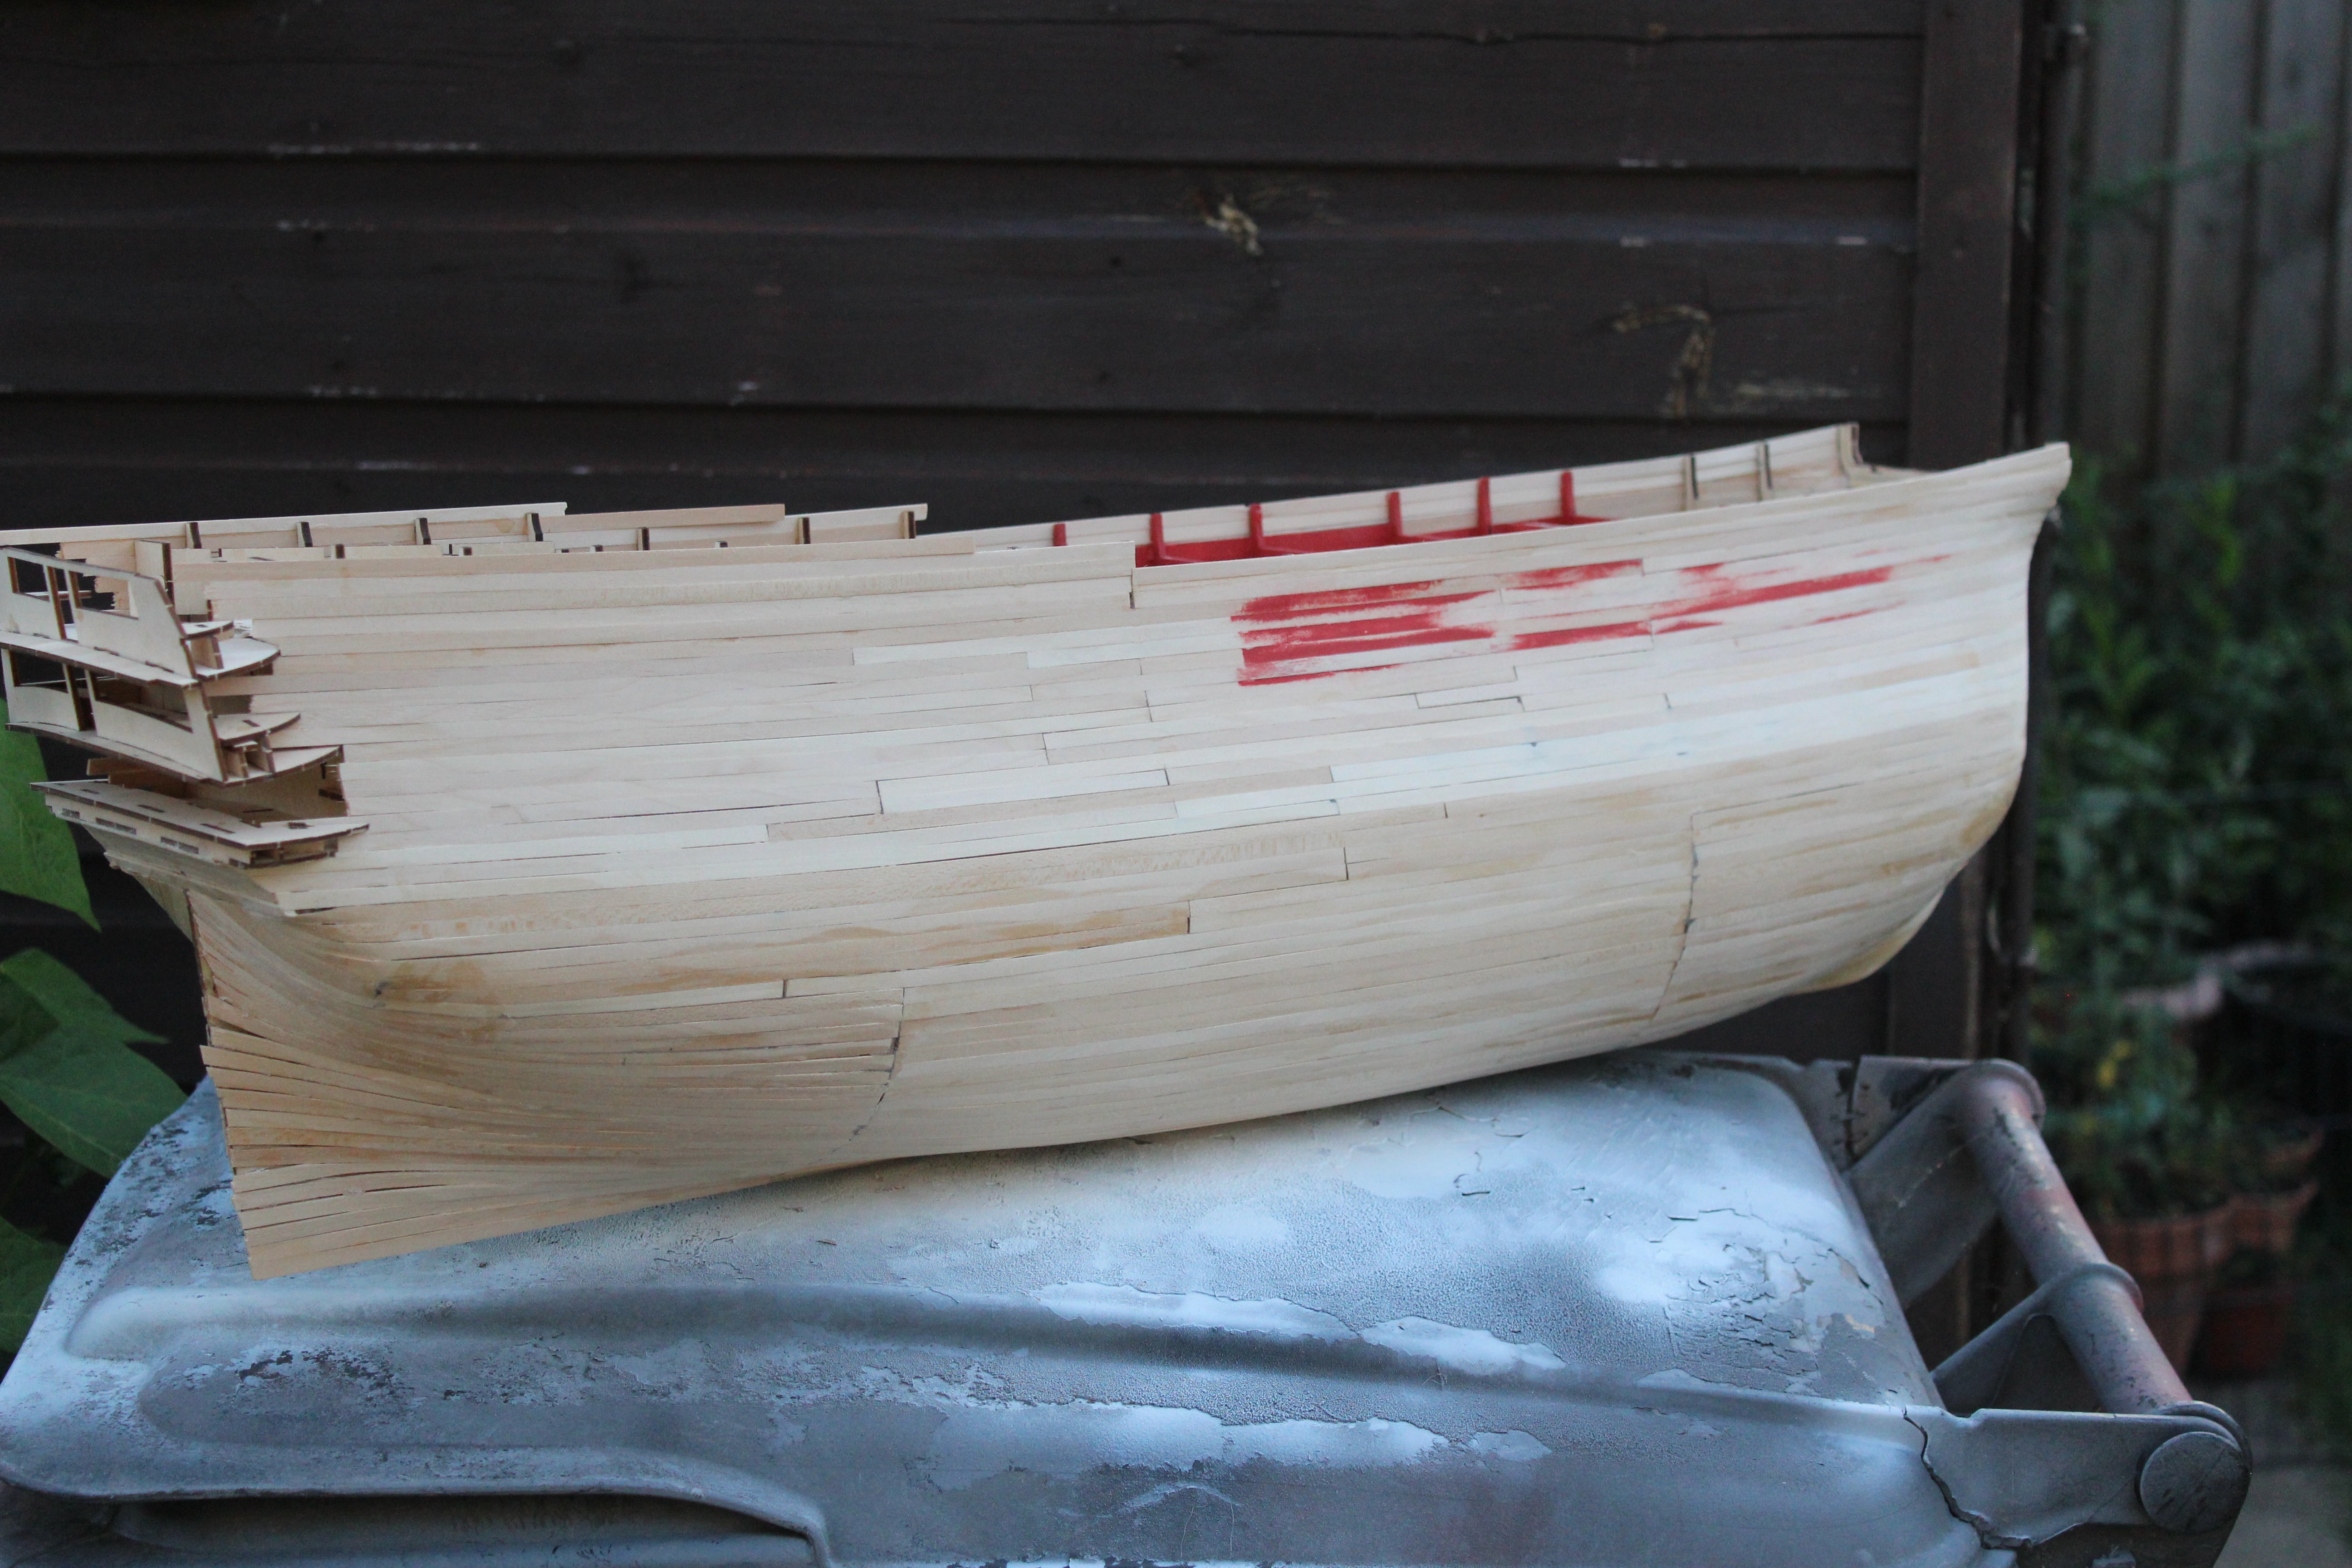
Good evening everyone, thank you for comments and likes day 19- a recipe for disaster but so far avoided- hinged gunports Come on AL there has to be a better way for a gunport template I copied the template onto printer paper, cut them out and built them up on the original template, took a lot of messing around to hopefully have them in the right place as non of these are going to be open, i just had to remove the top planking, this side has now been roughly removed, and require some tidying up to get the lids to fit free flood ports still to be marked out


-
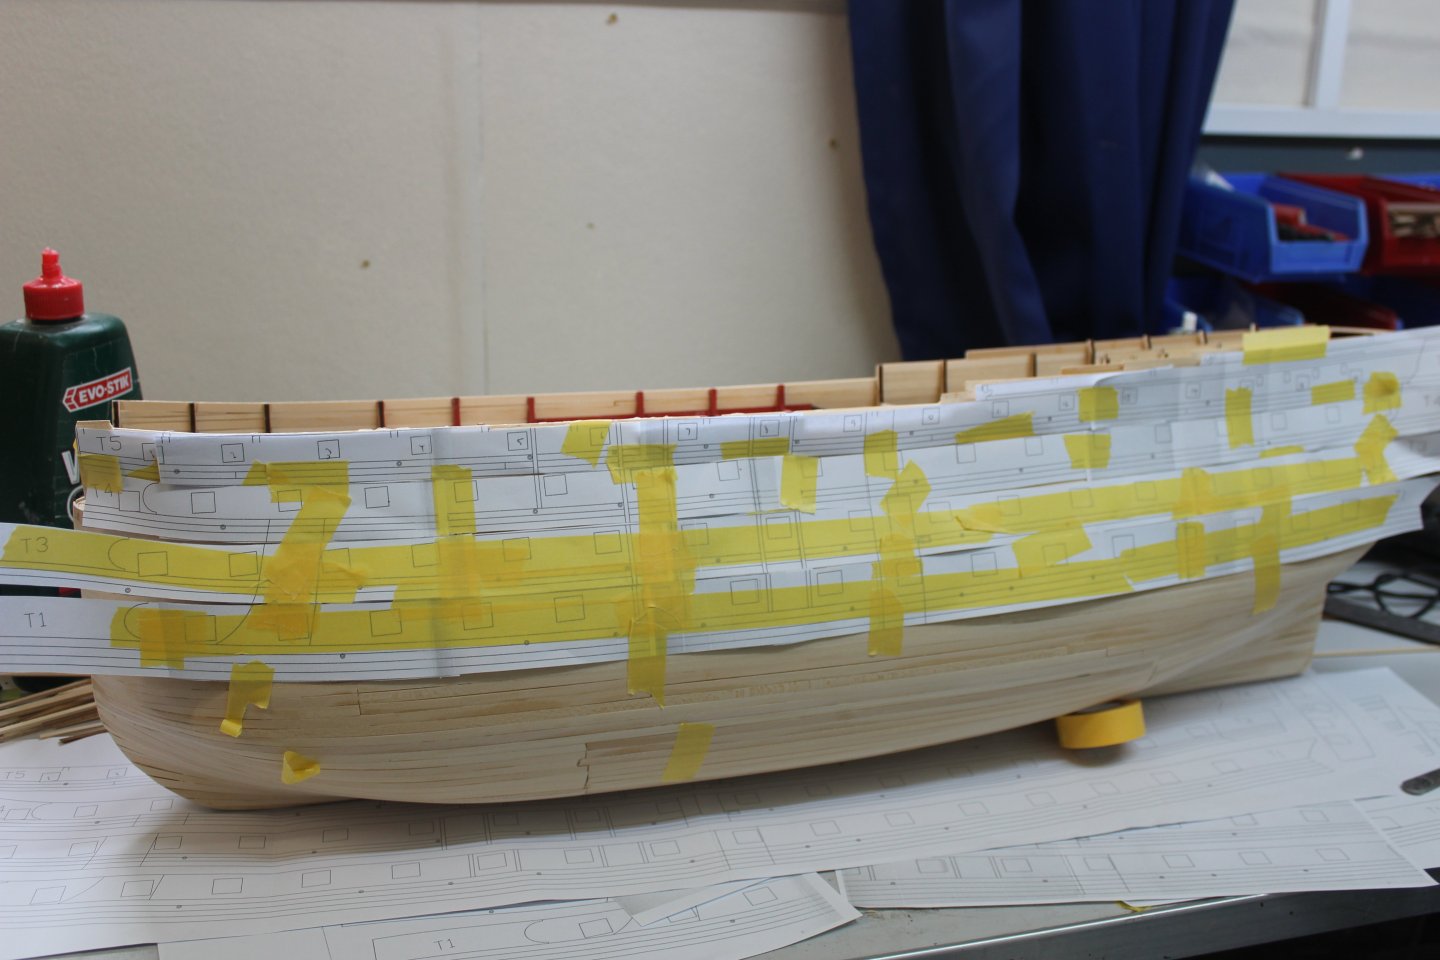
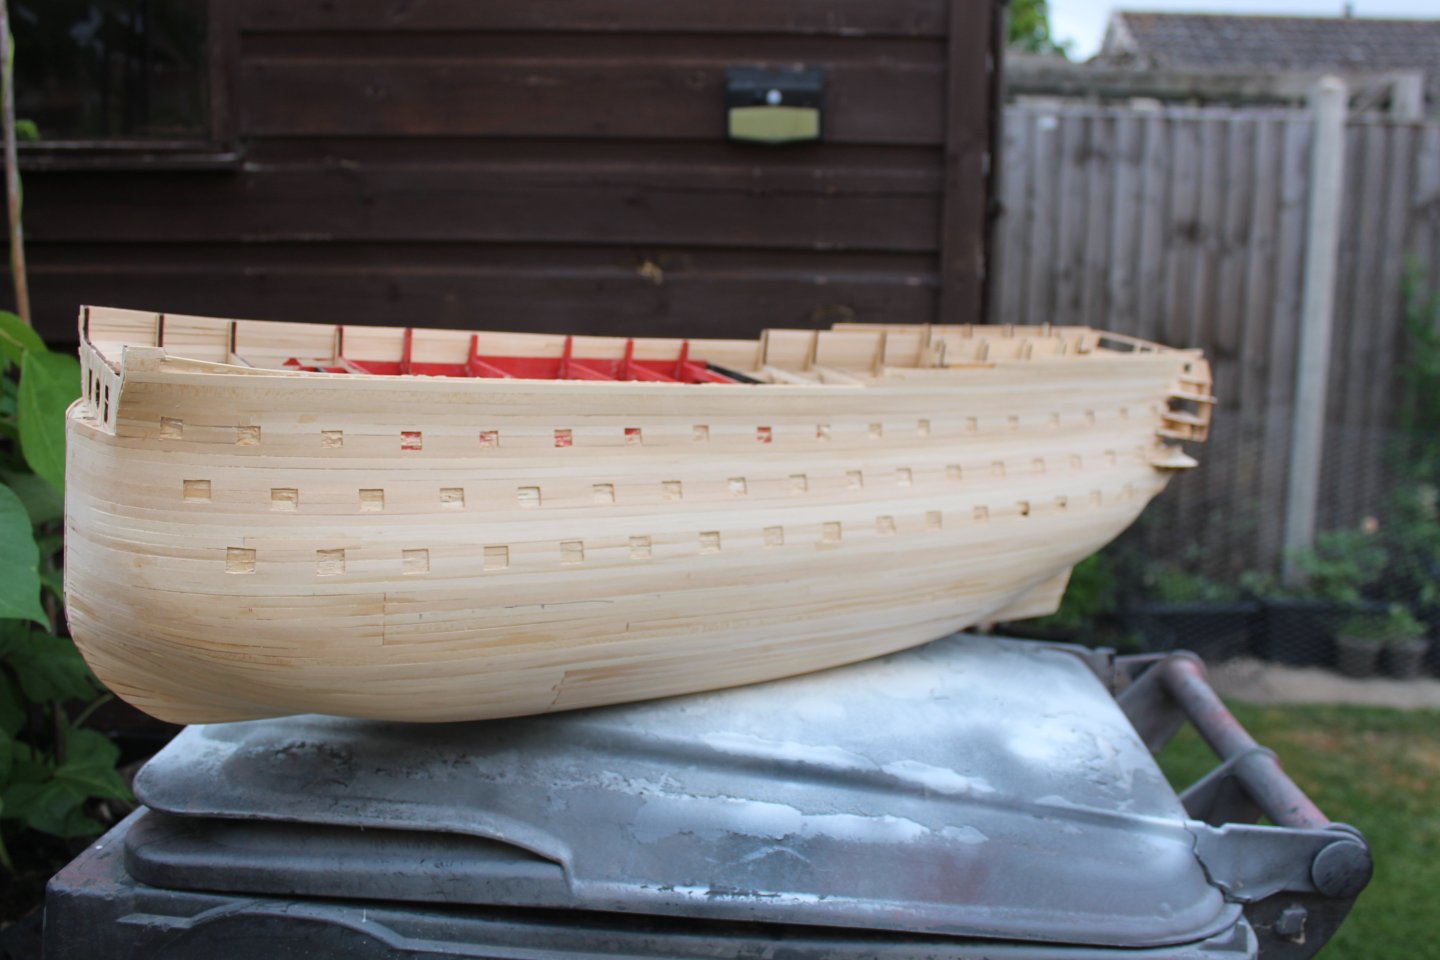
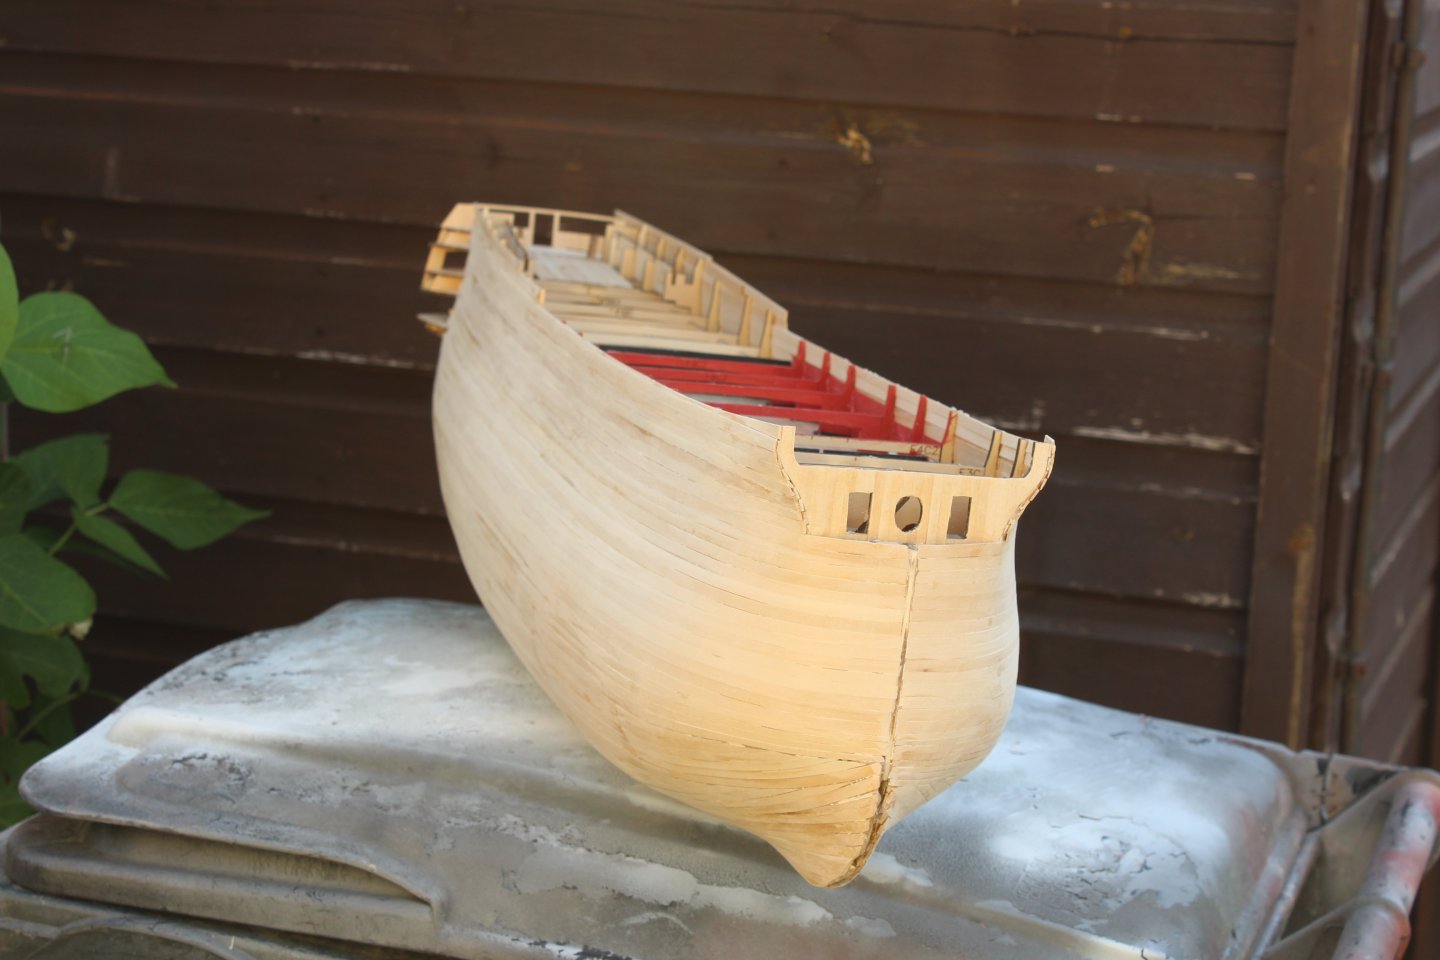
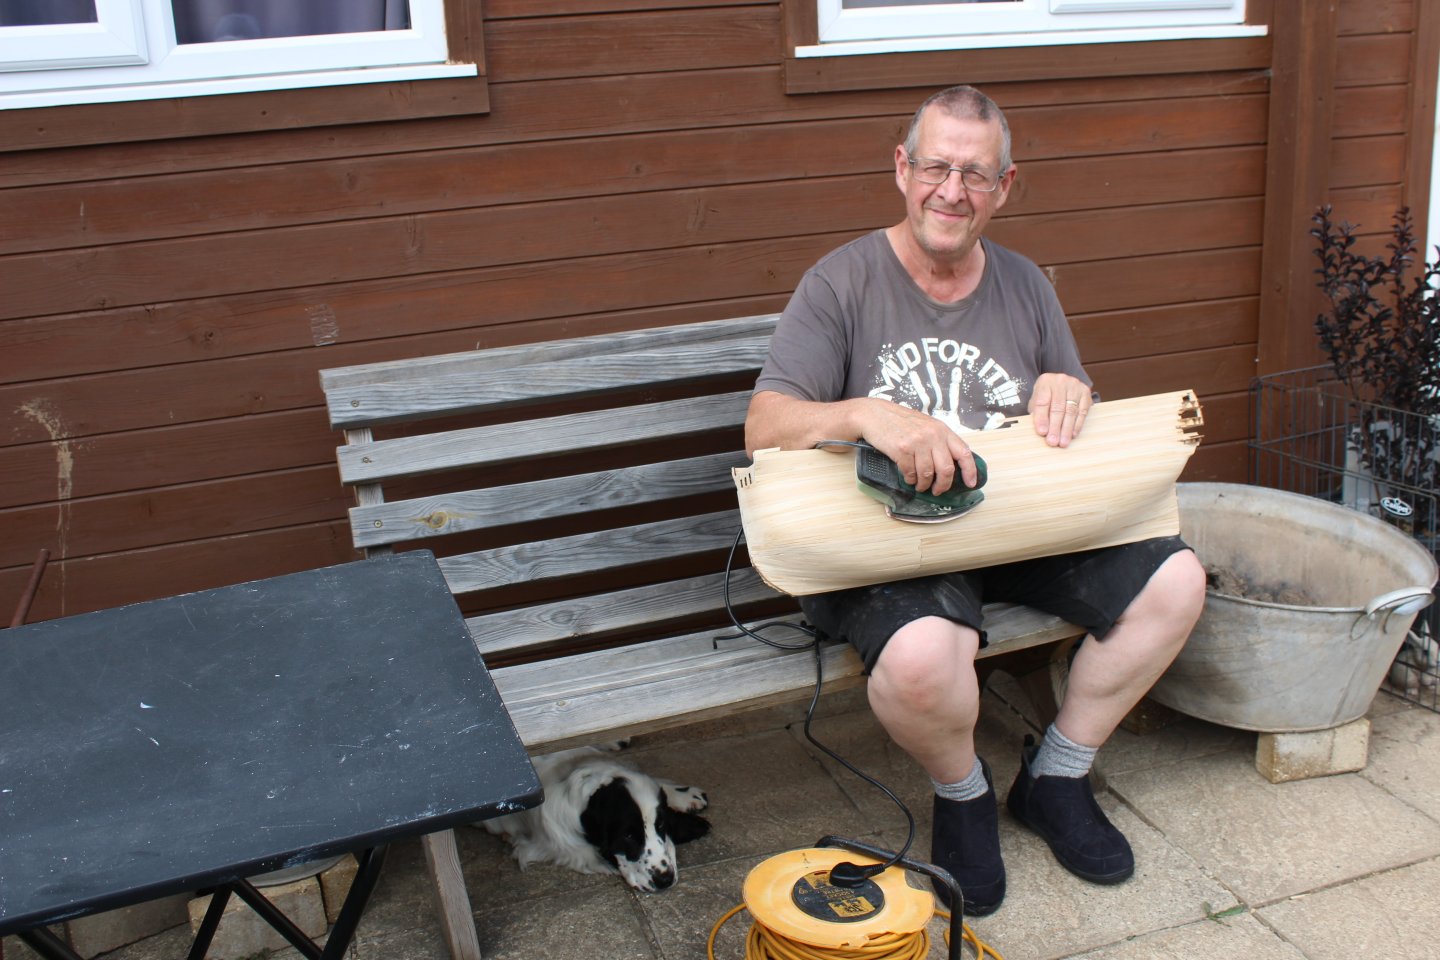
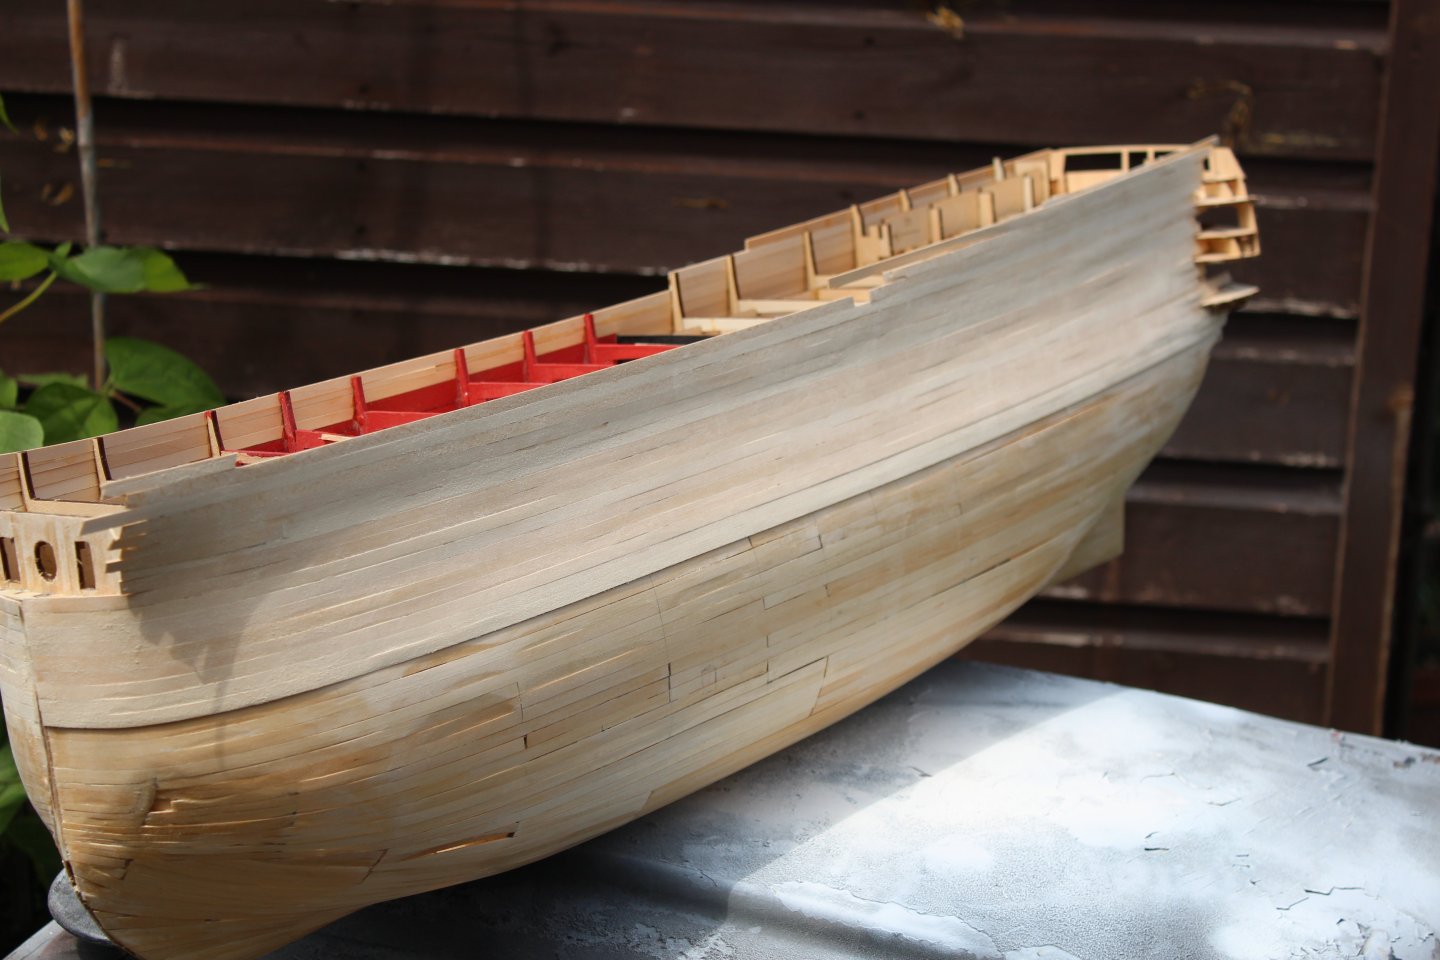
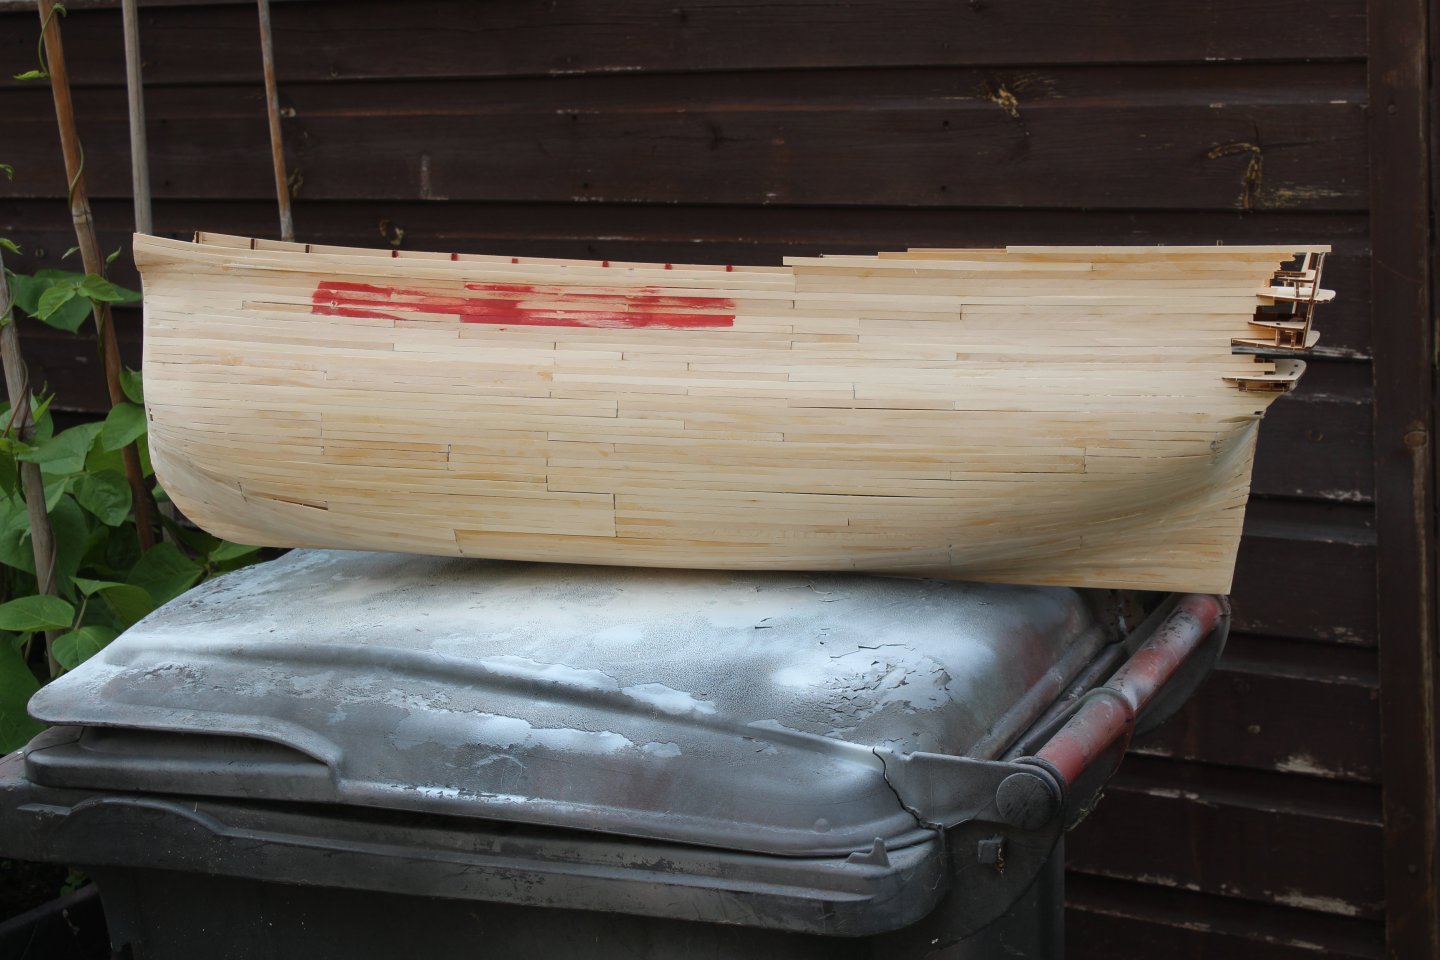
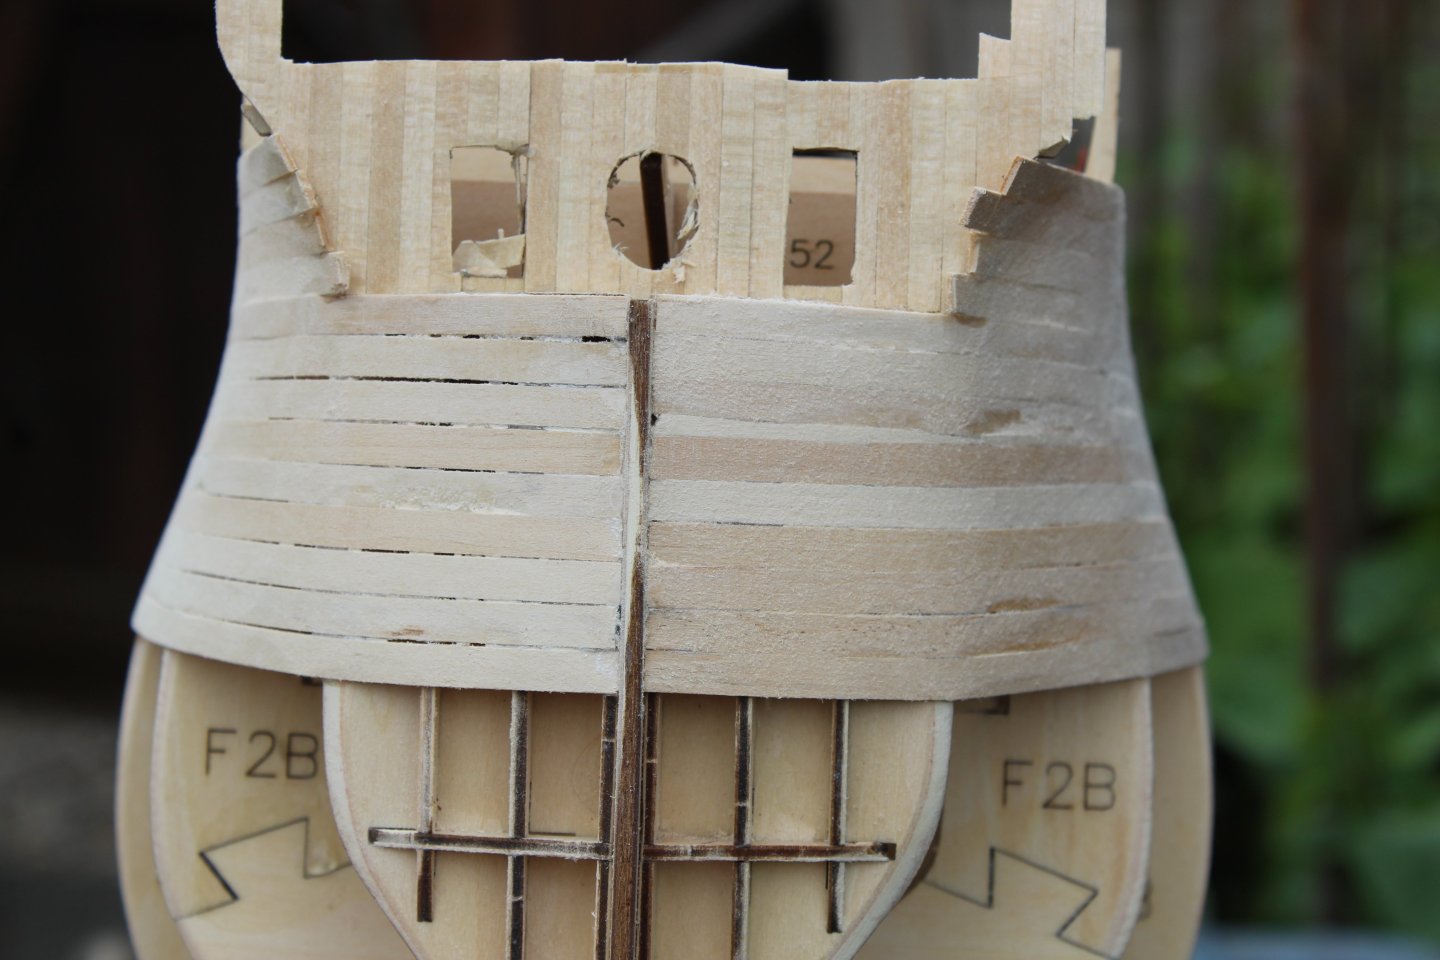
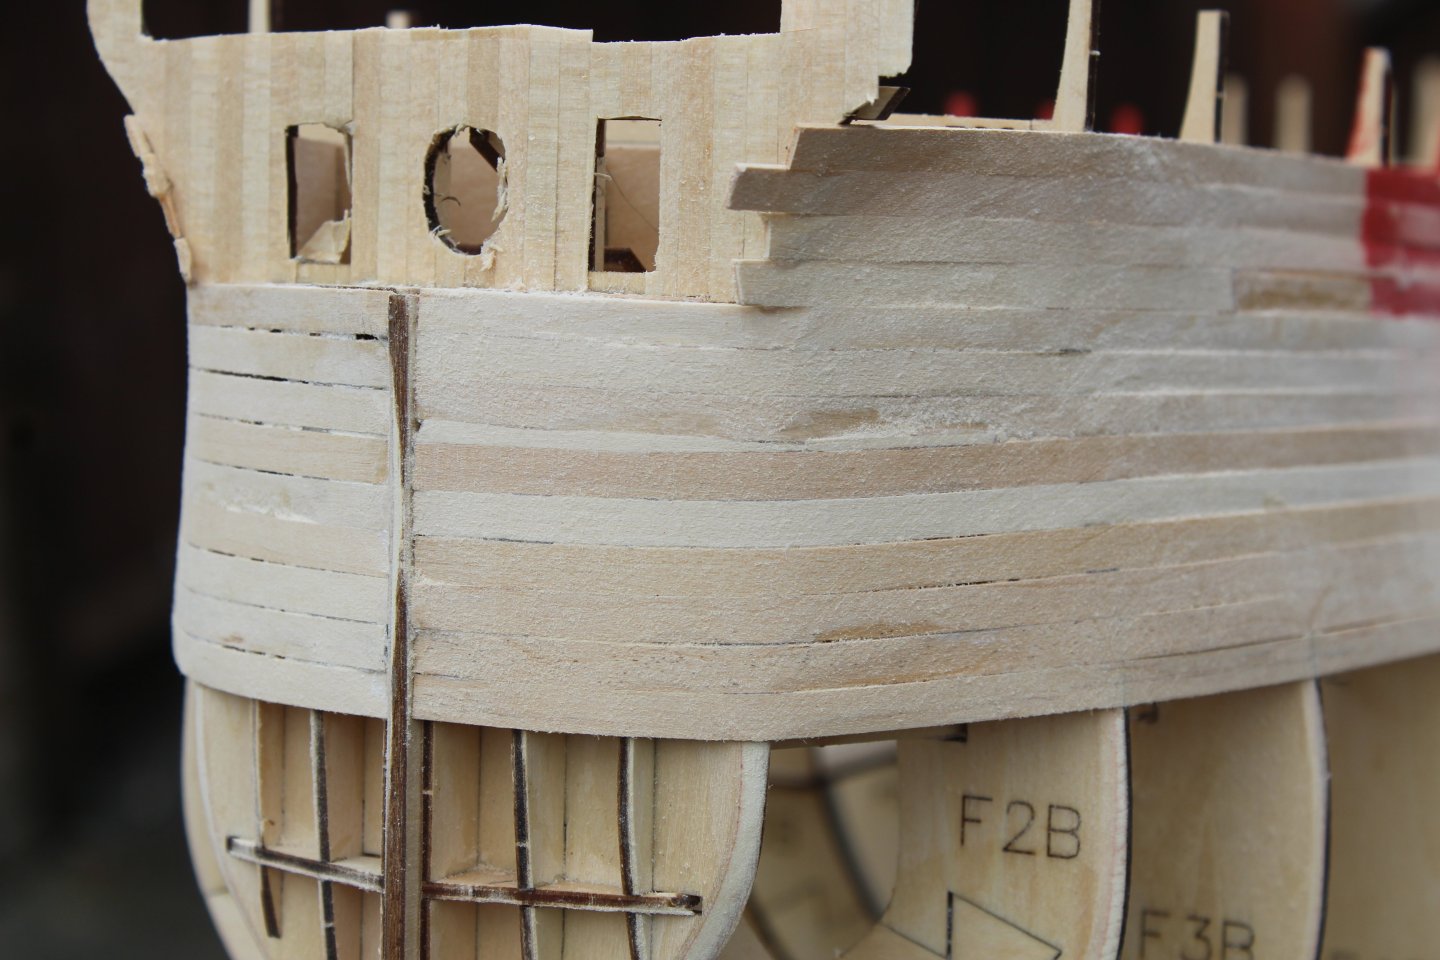
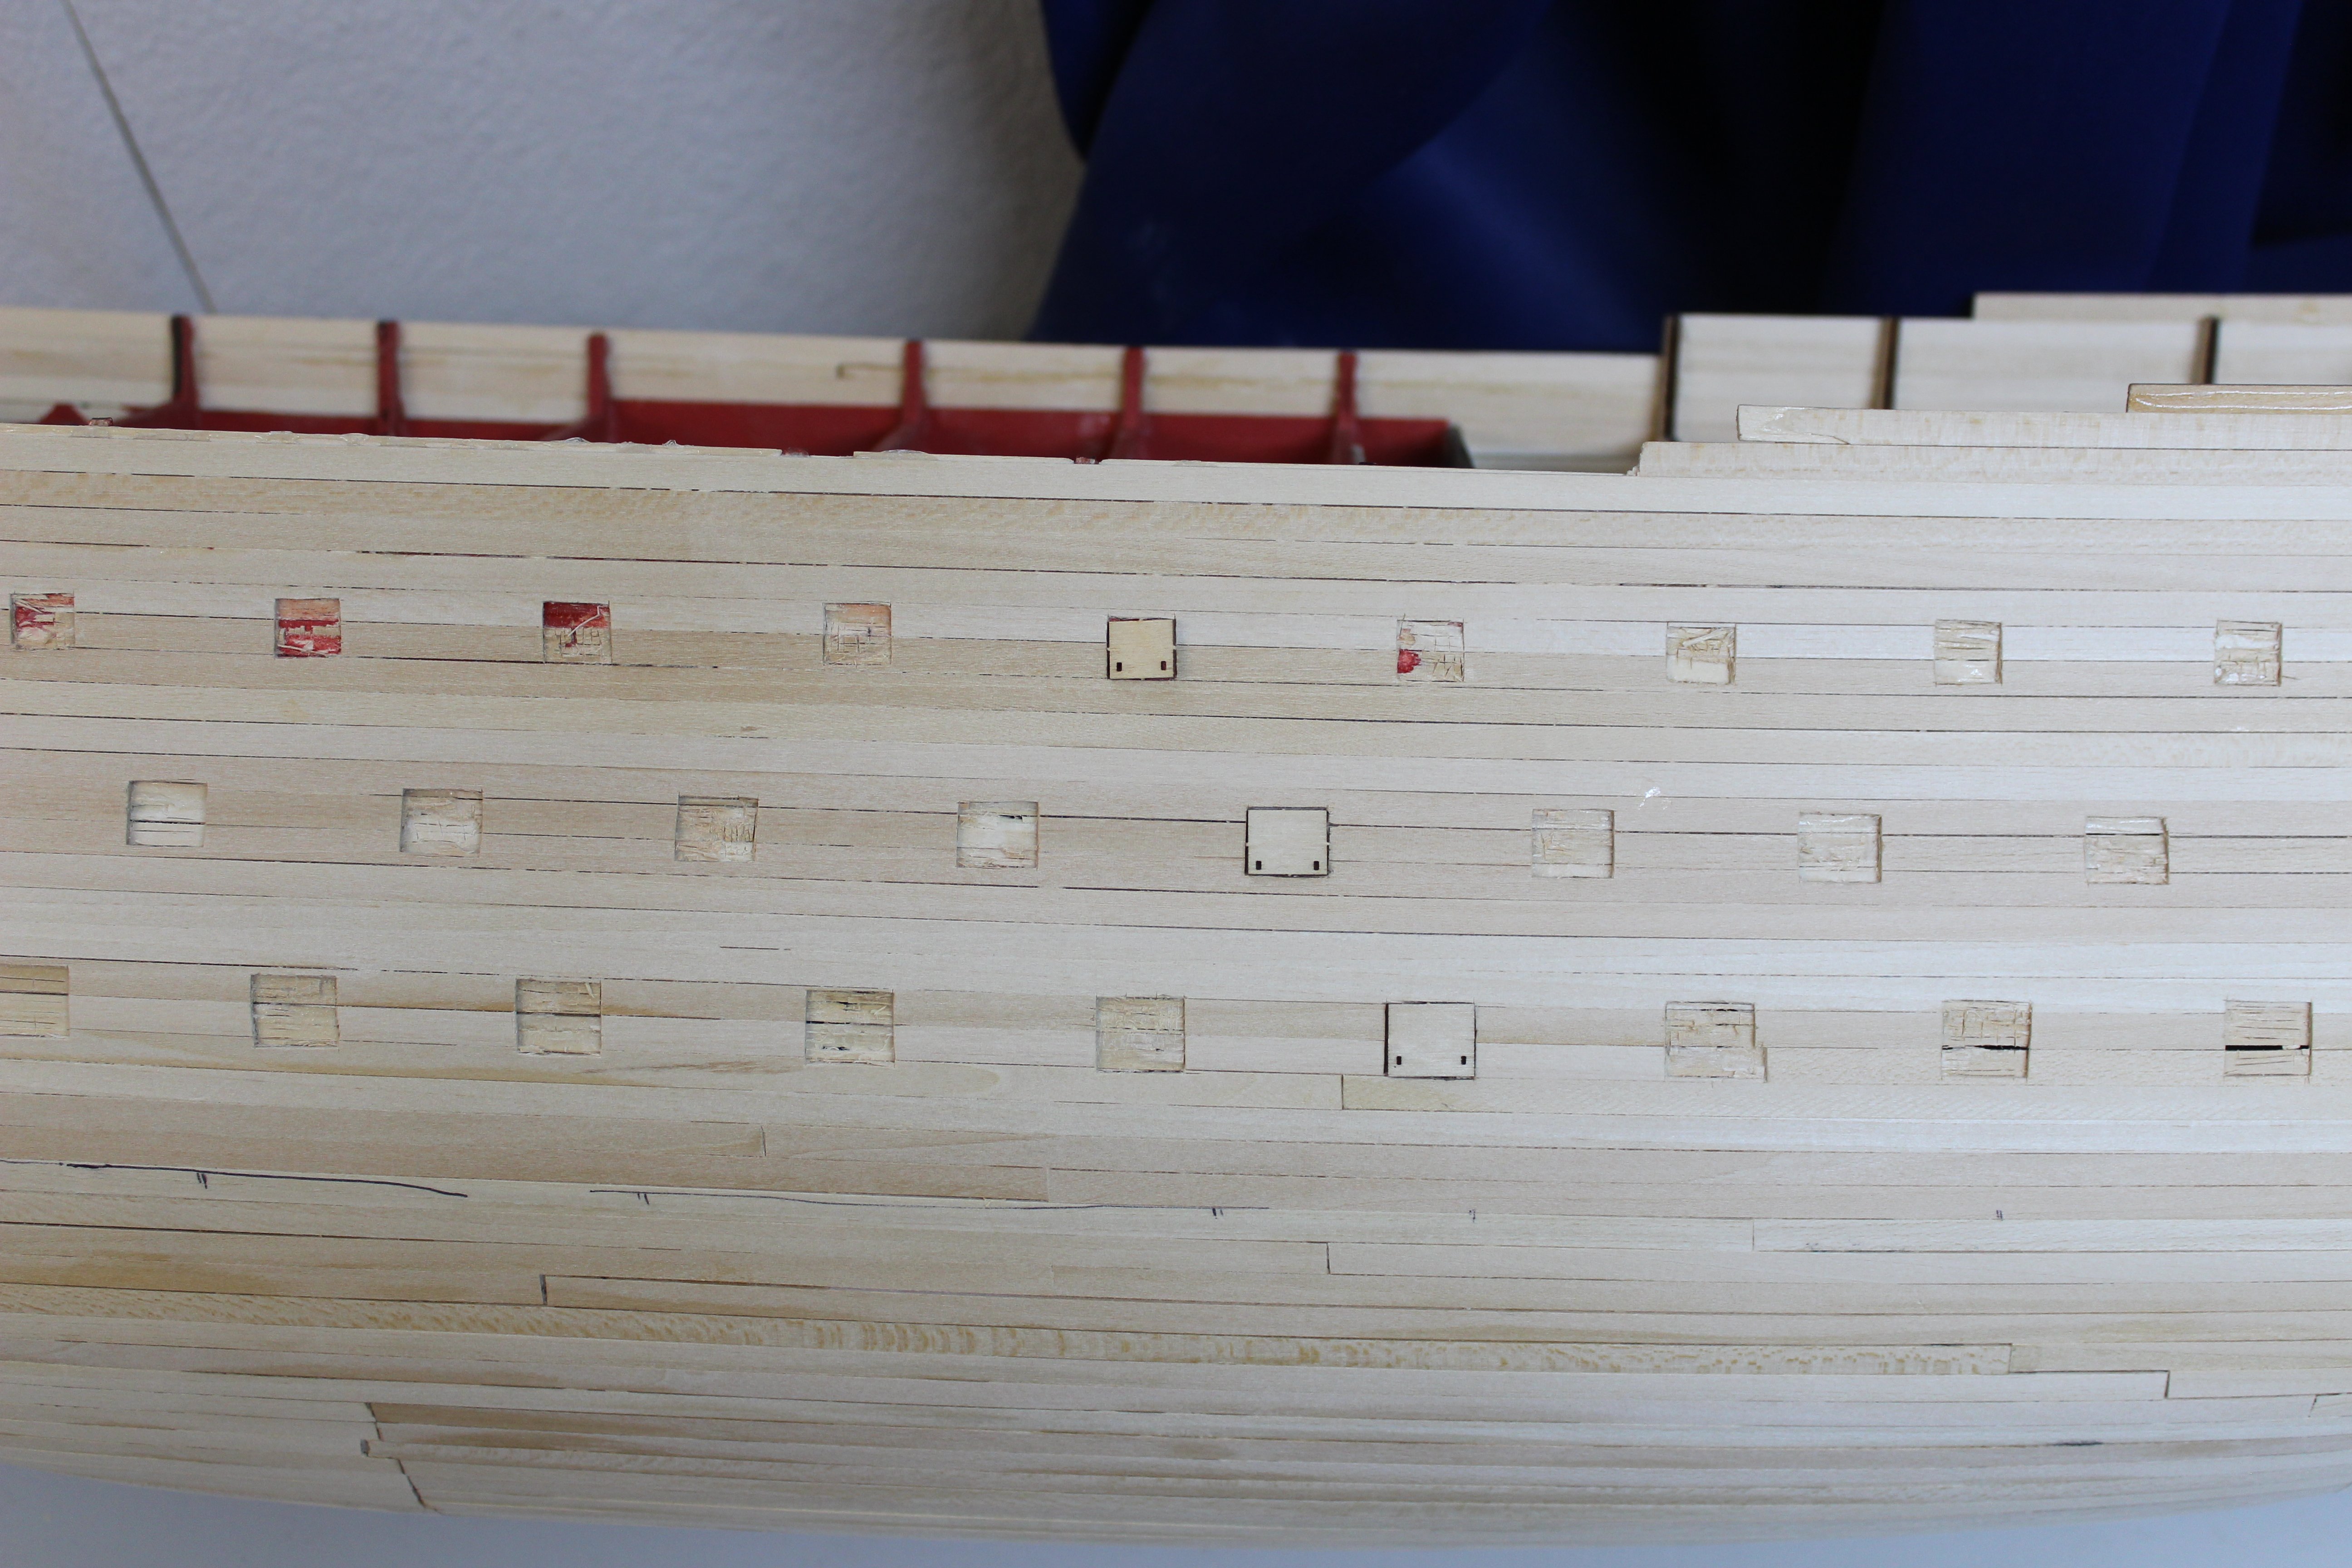
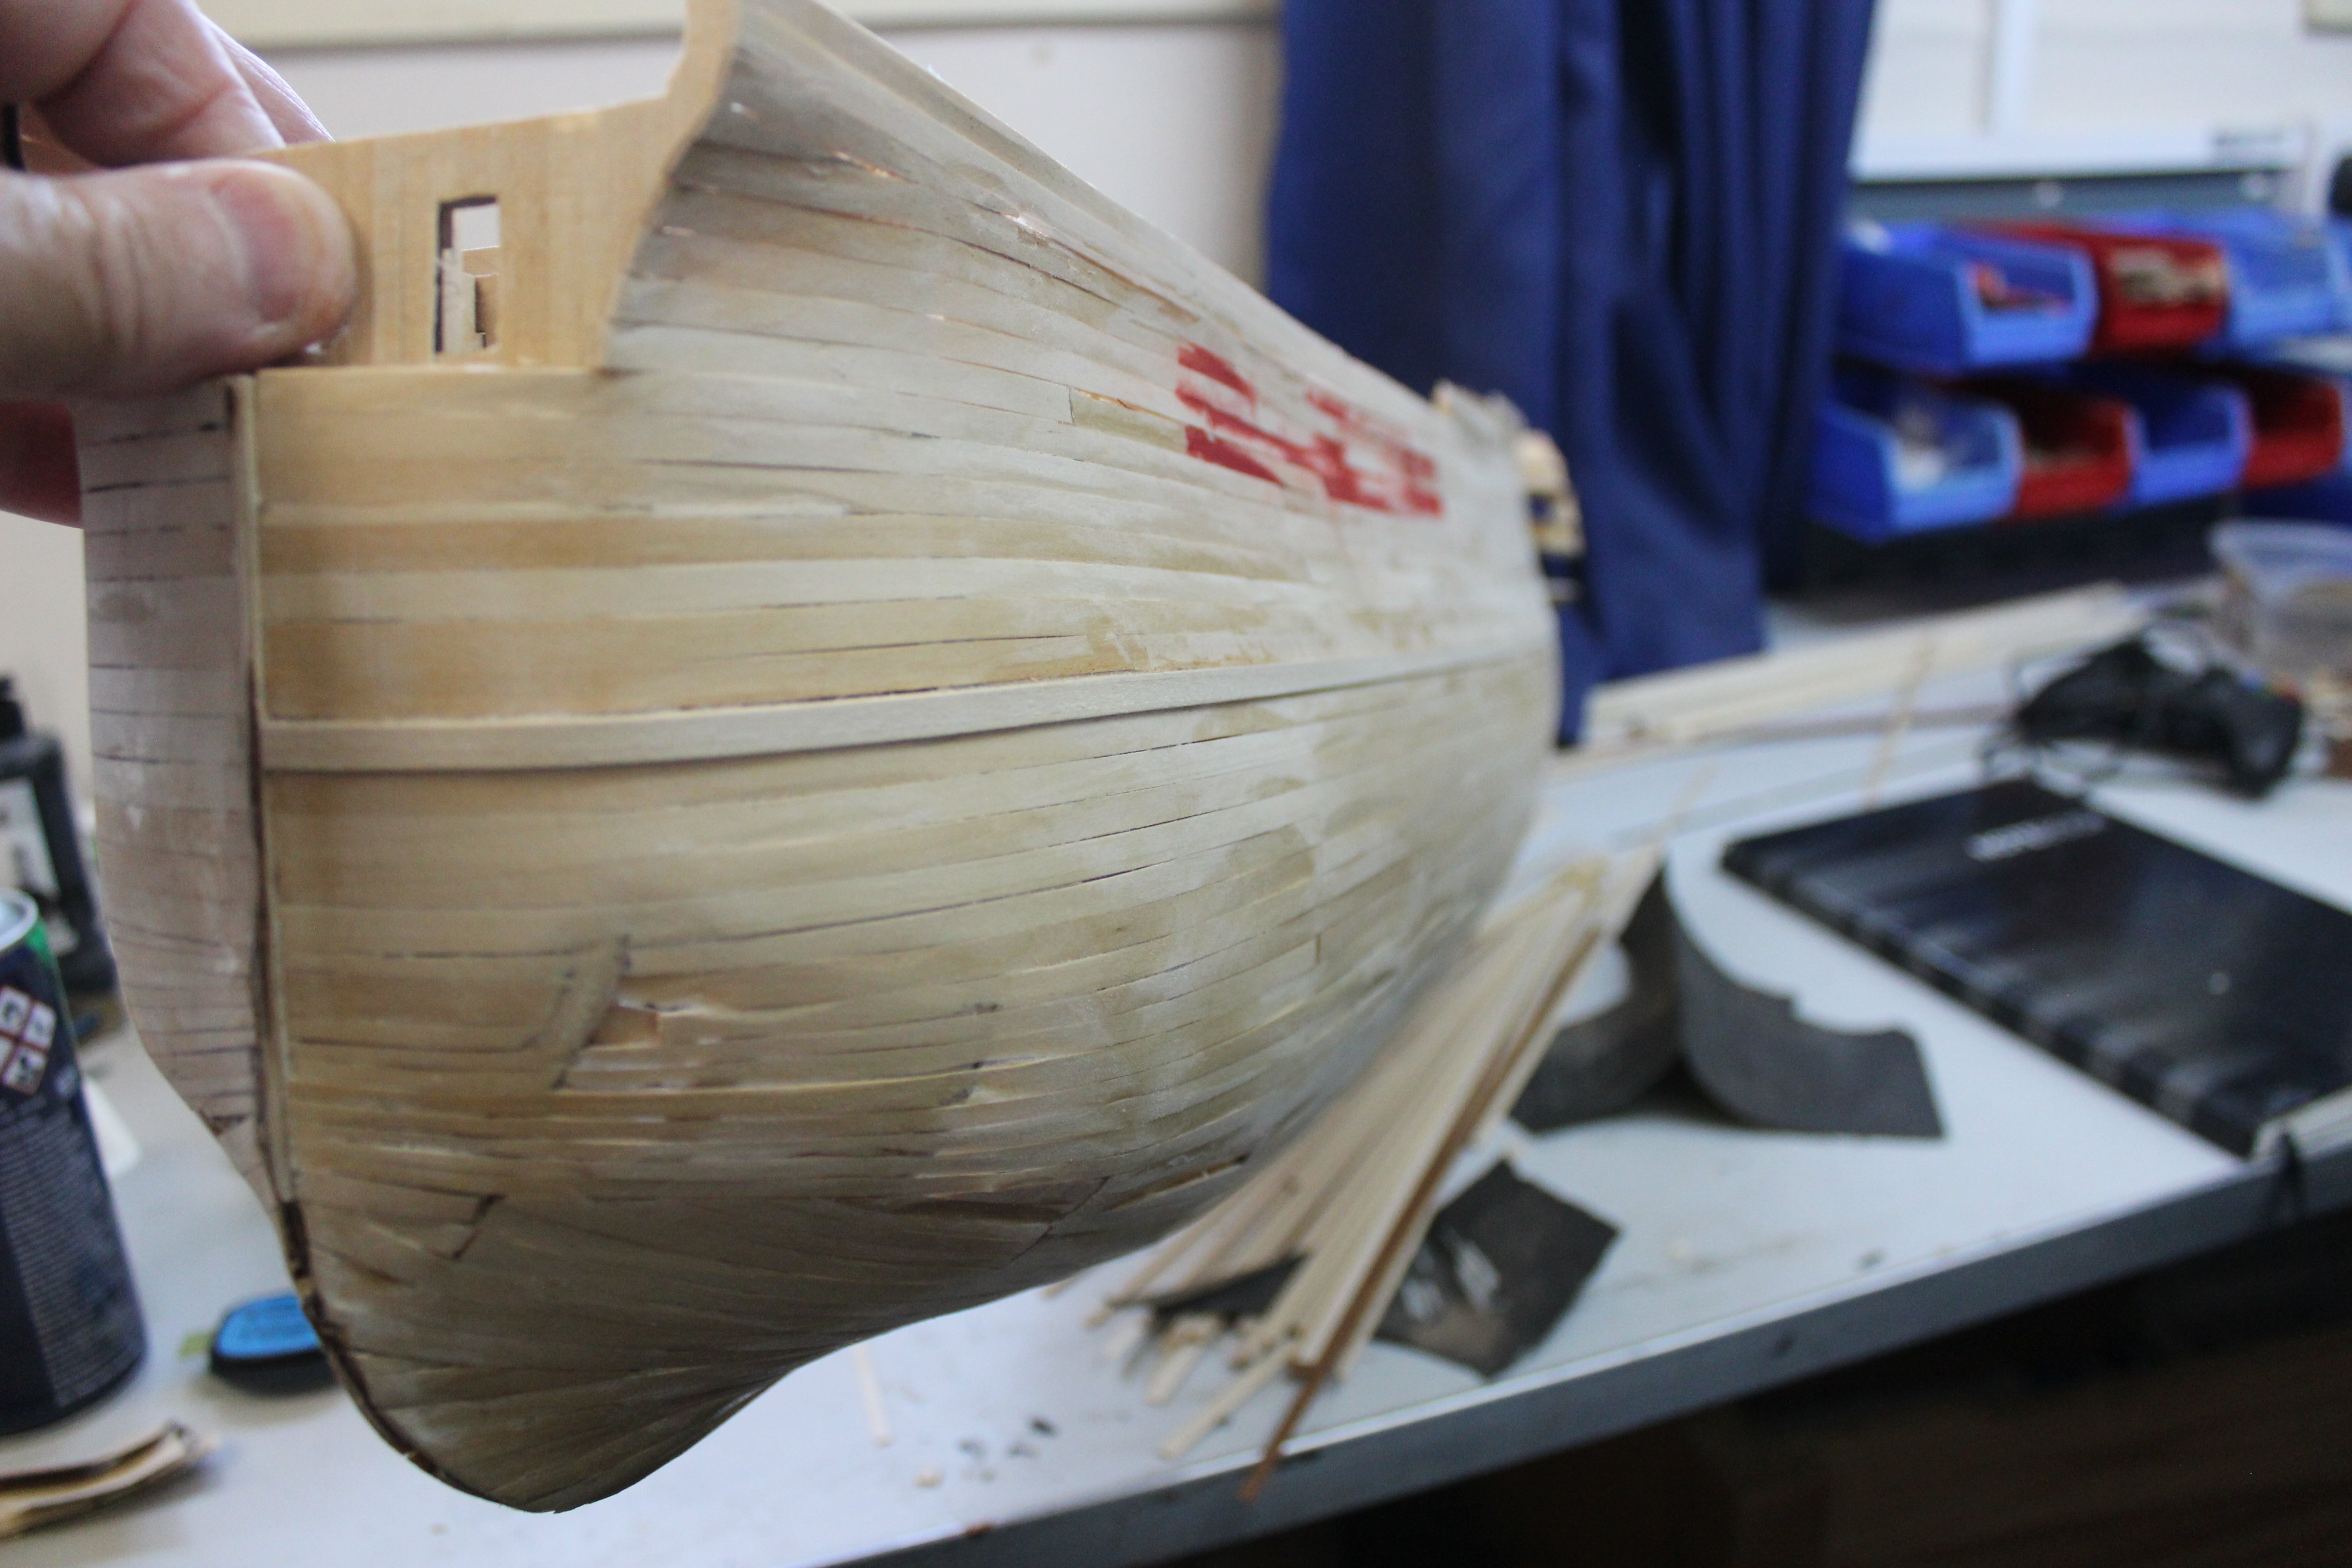
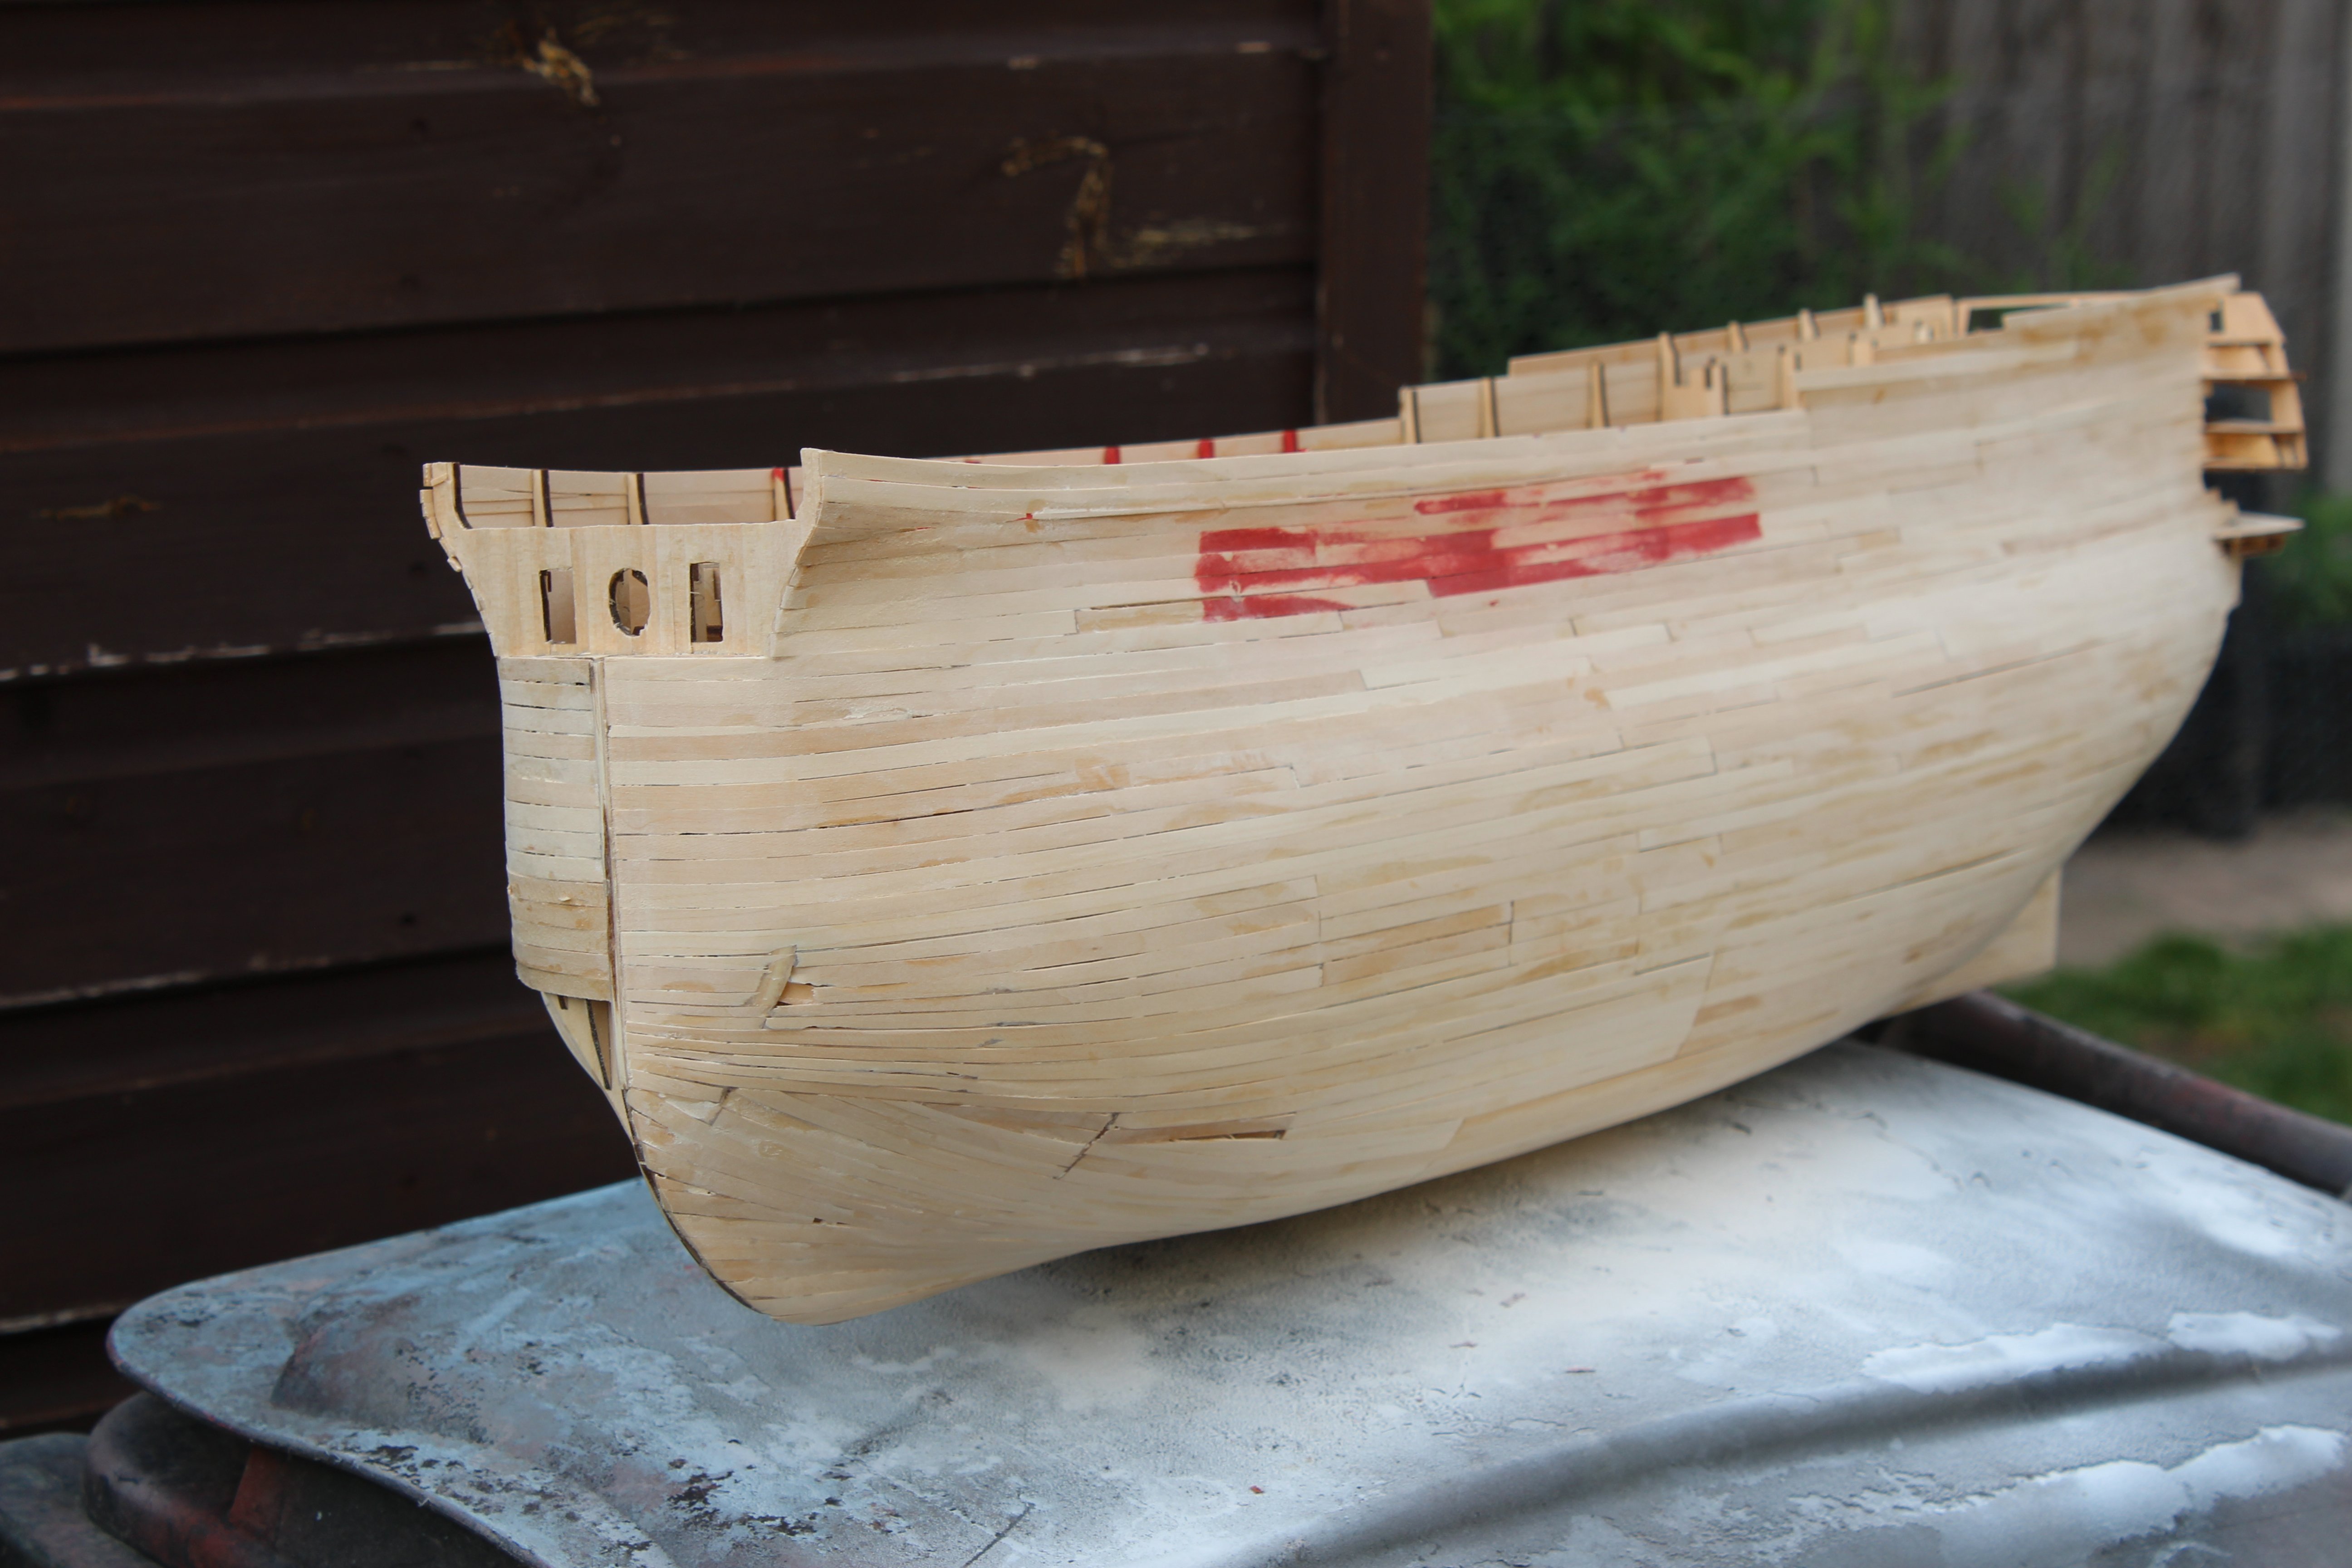
good evening everyone thank you for comments and likes Day 18 completed 2nd planking not in a hurry to do that again, double planking using 1mm x 5mm used appx 150 meters sanded using 240 grit, will do again later with a finer grade after touching up a few places, like the stern where the rudder post will eventually go, worse to come soon (gunports)


-
there is certainly nothing wrong with that, it looks fantastic
-
i will still have to rebate the lids into 2nd planking, but none of the 140 odd liners needed, apart from the upper deck ones, i doubt very much that with a full set of sails there would be many lids open, Sails to get right will be the issue on this build, was going to do then on a 1/64 Cutty Sark, but thats not available for now
-
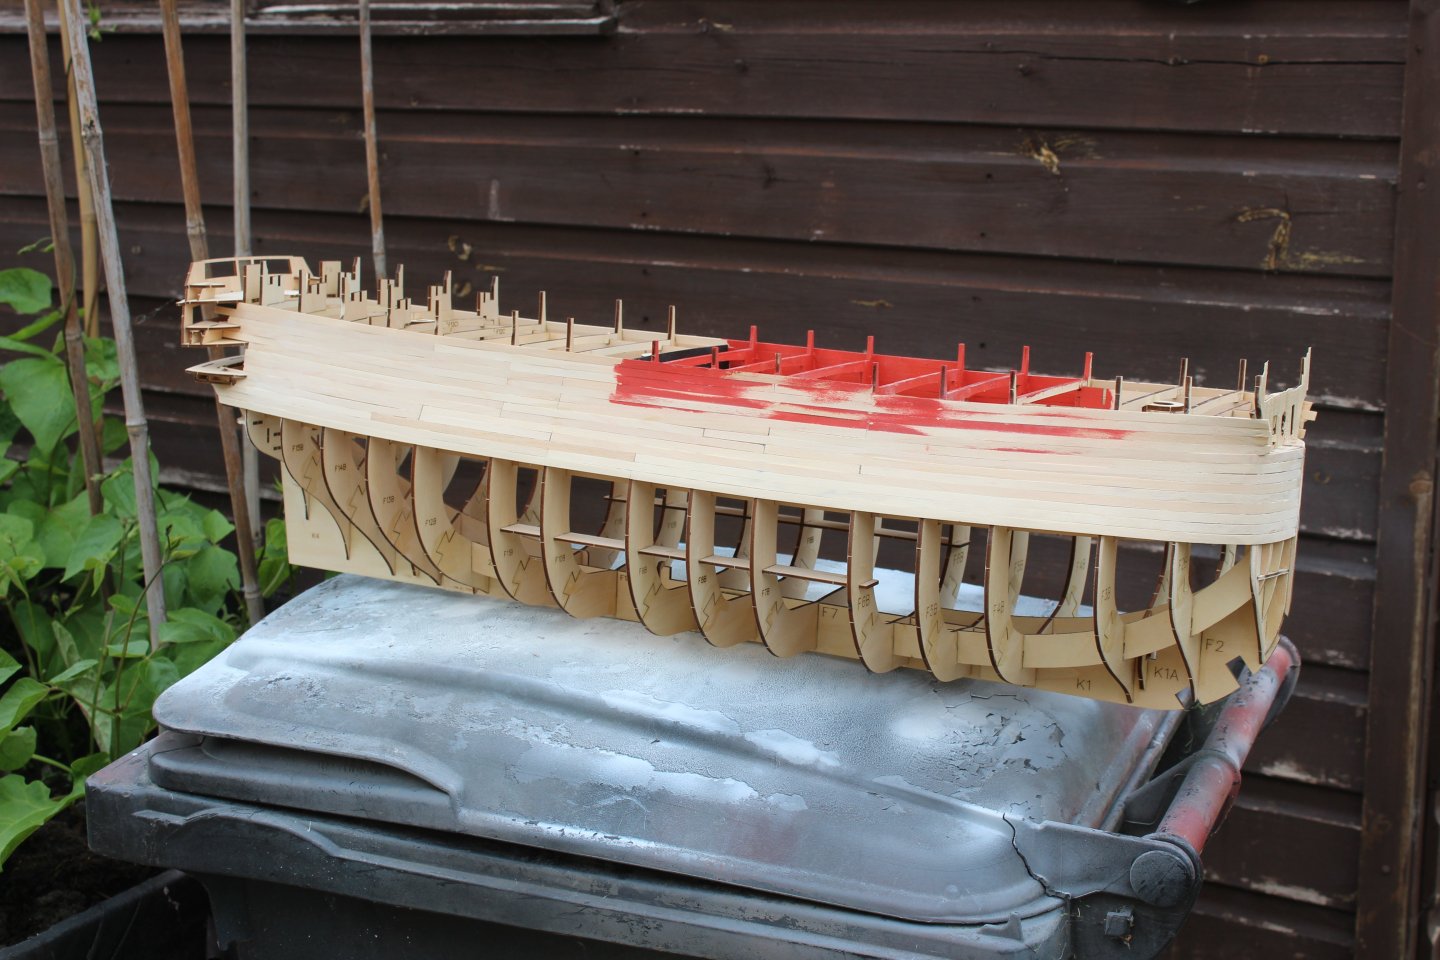
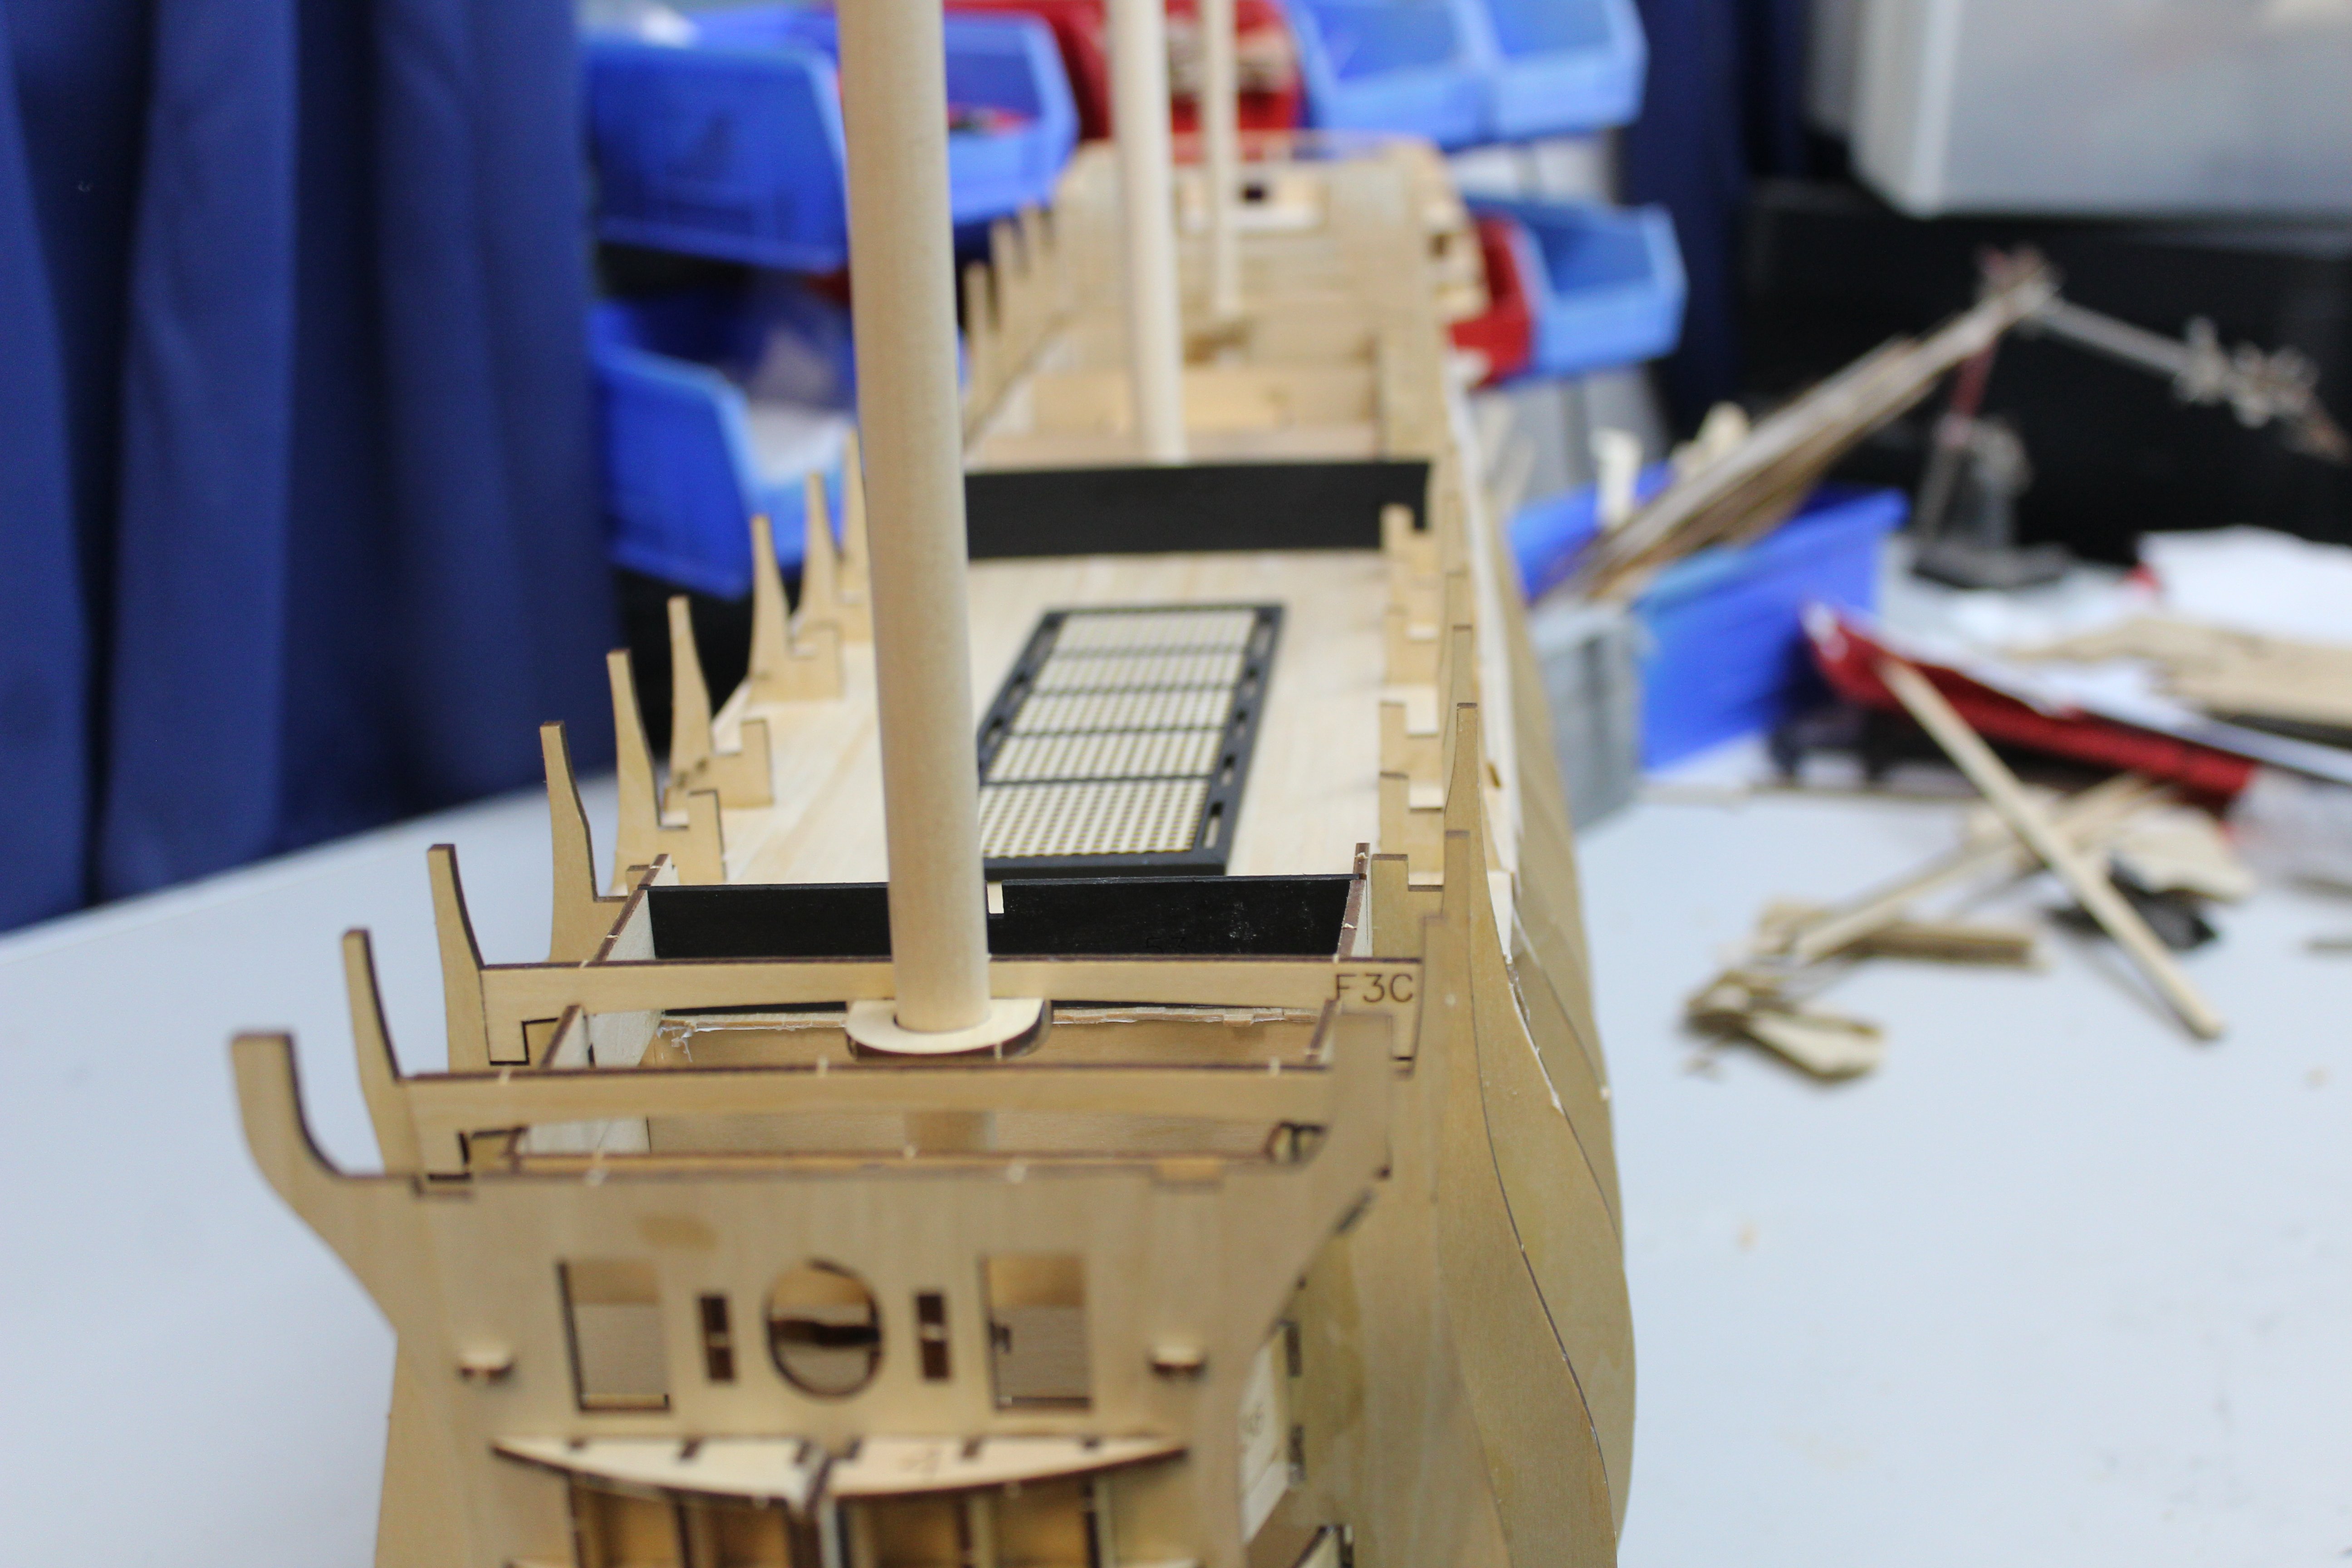
Good evening everyone, thank you for comments and likes day 14 started 2nd planking Well the 1st planking was very messy, but it was so very well worth the trouble to do it, im not a lover of planking in the first place, but with 16 frames using 2mm stripwood in 300mm lengths would have done me in i have thought quite a bit how i would like to present this build and have decided - wait for it...................... A all gunport lids will be shut B i will attempt to do sails on her, whether to use the kit supplied ones or do my own, still to be decided C_ put some lights on her


-
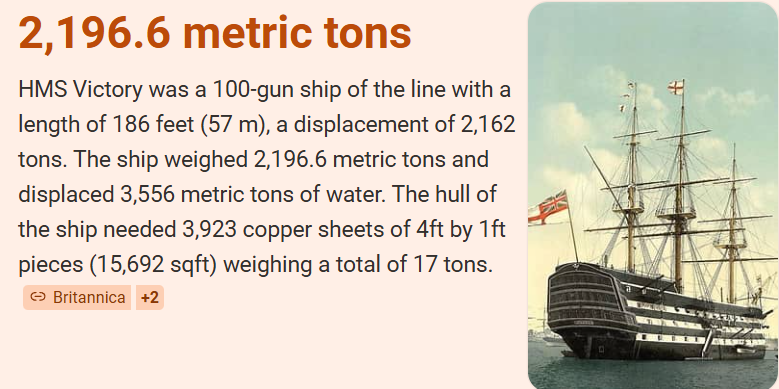
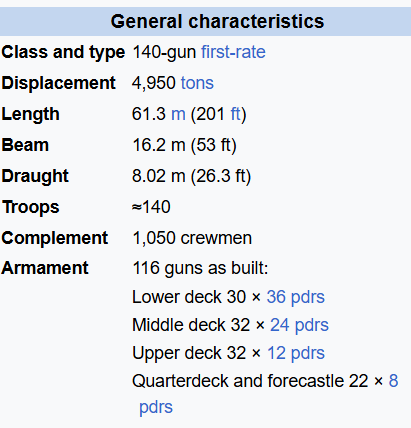
thats my wife, LOL apparently she was over 4000 tons compared to just over 2000 tons for Victory Santísima Trinidad
-
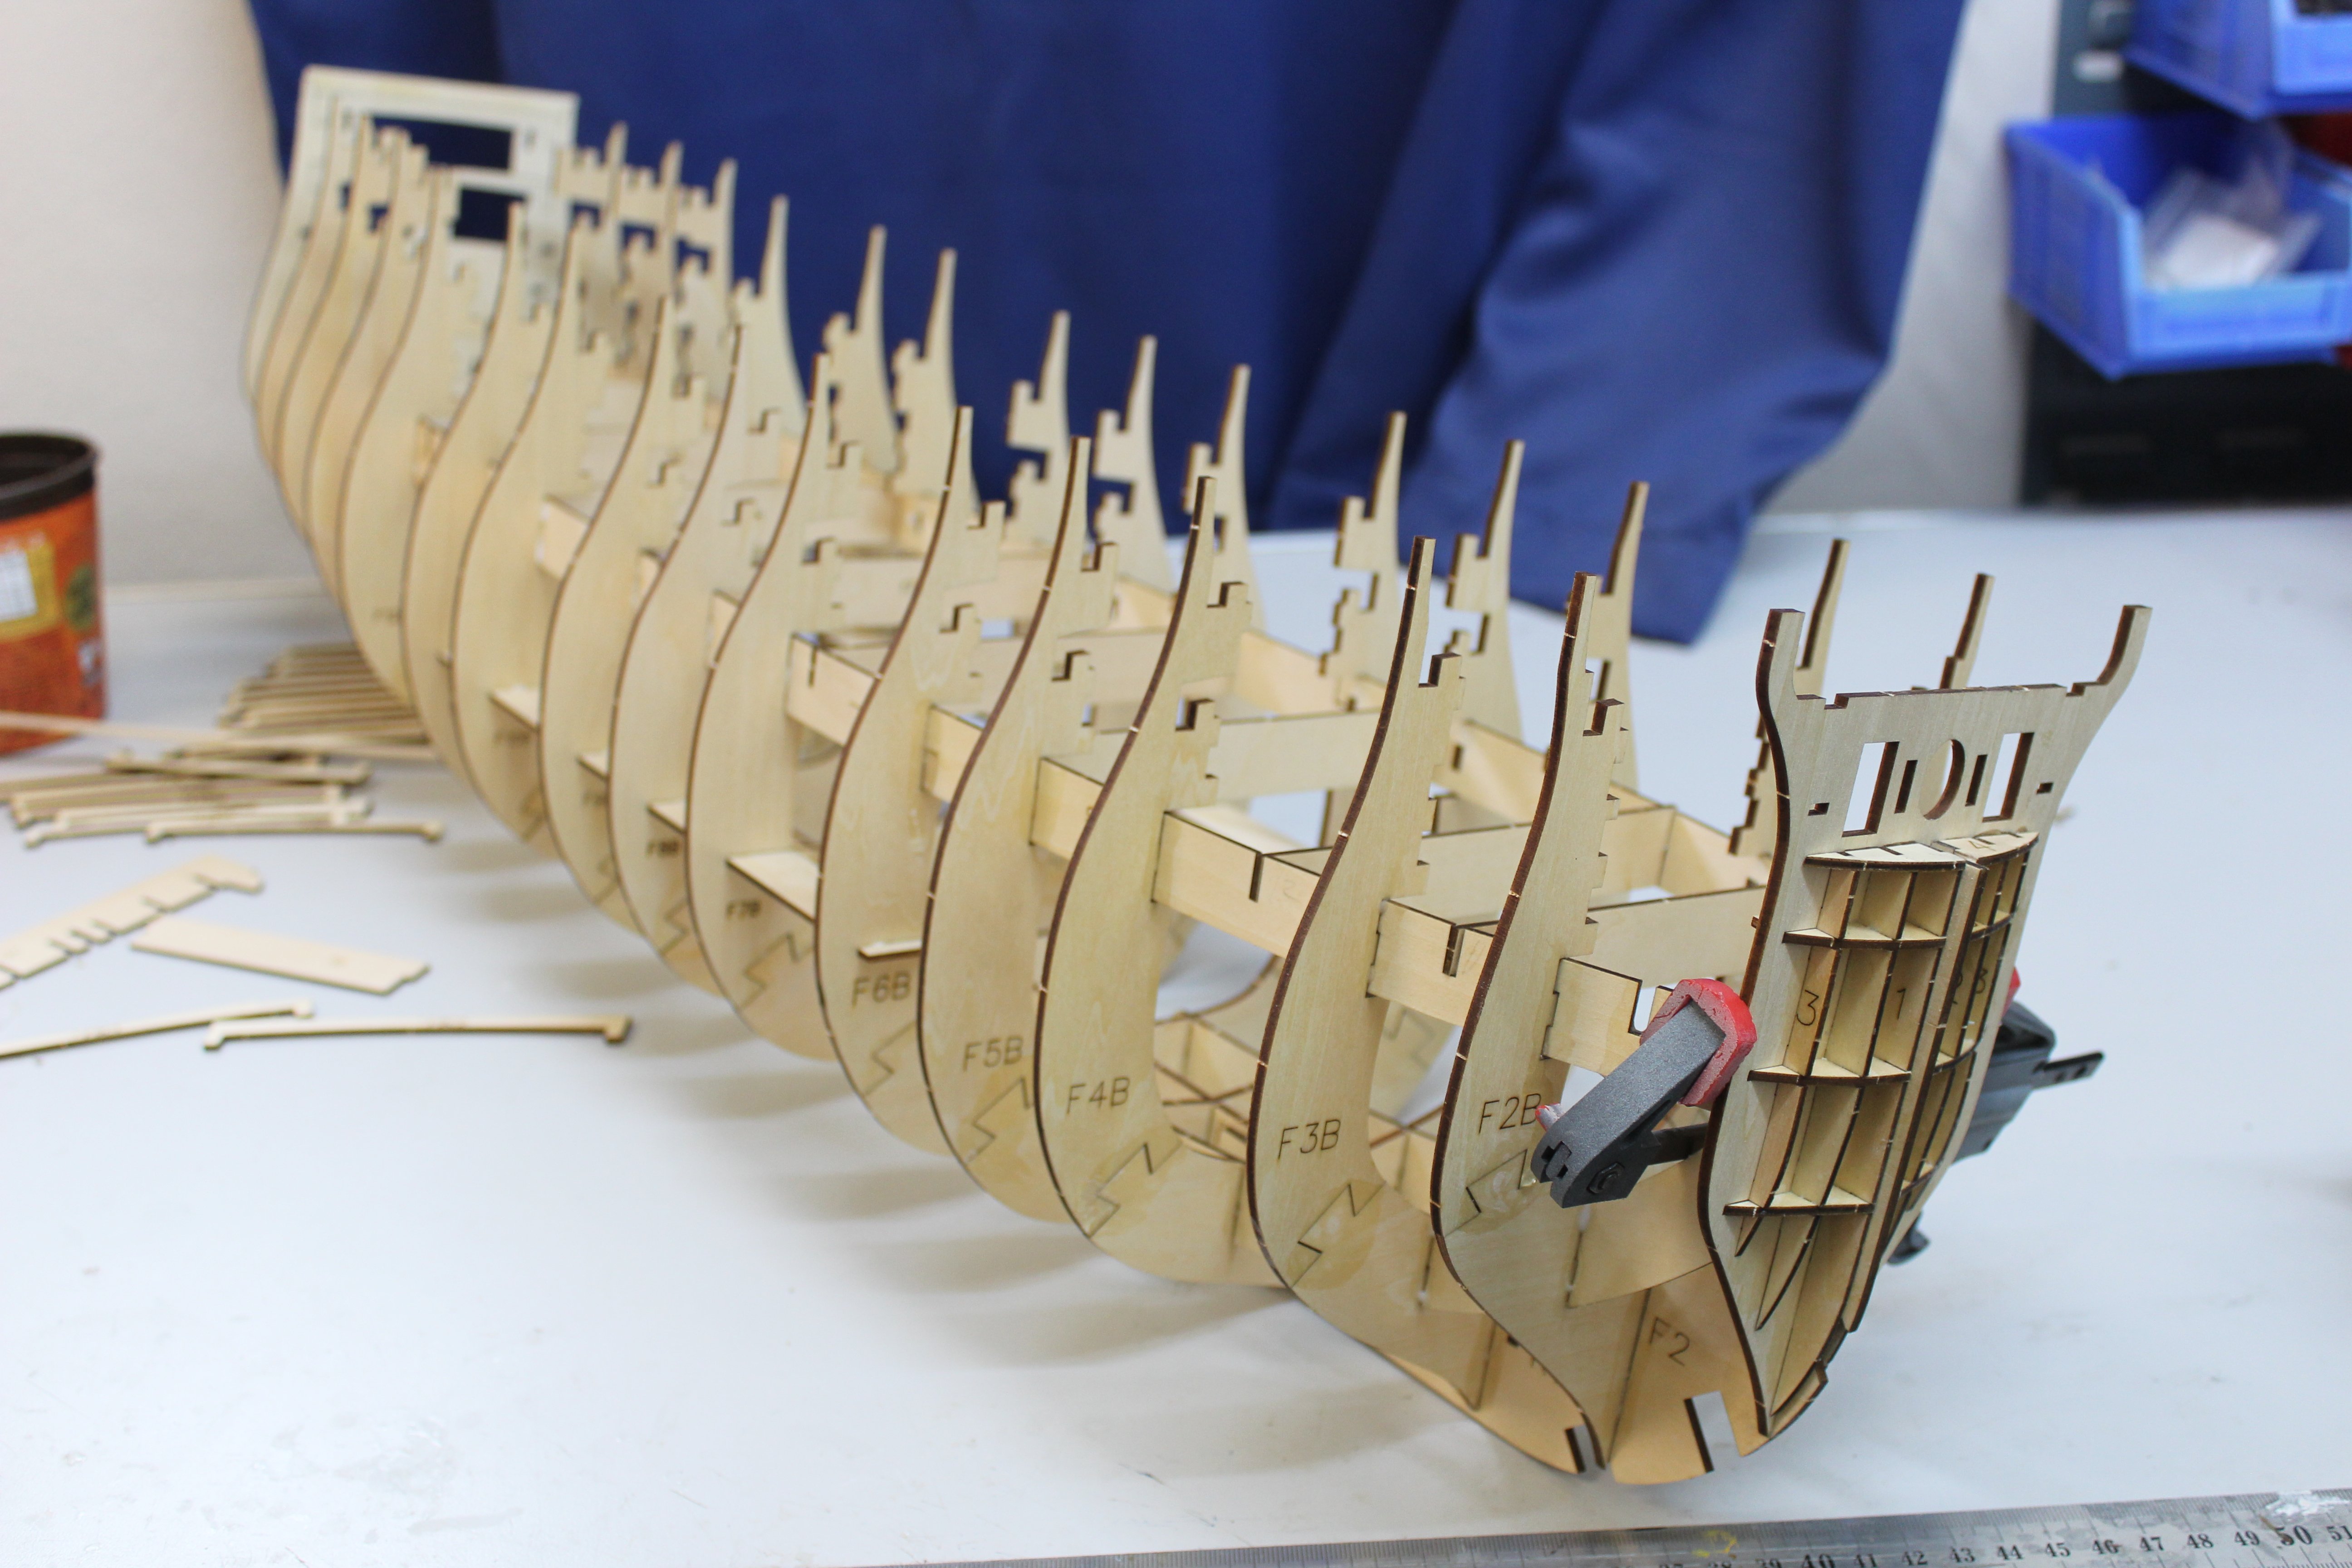
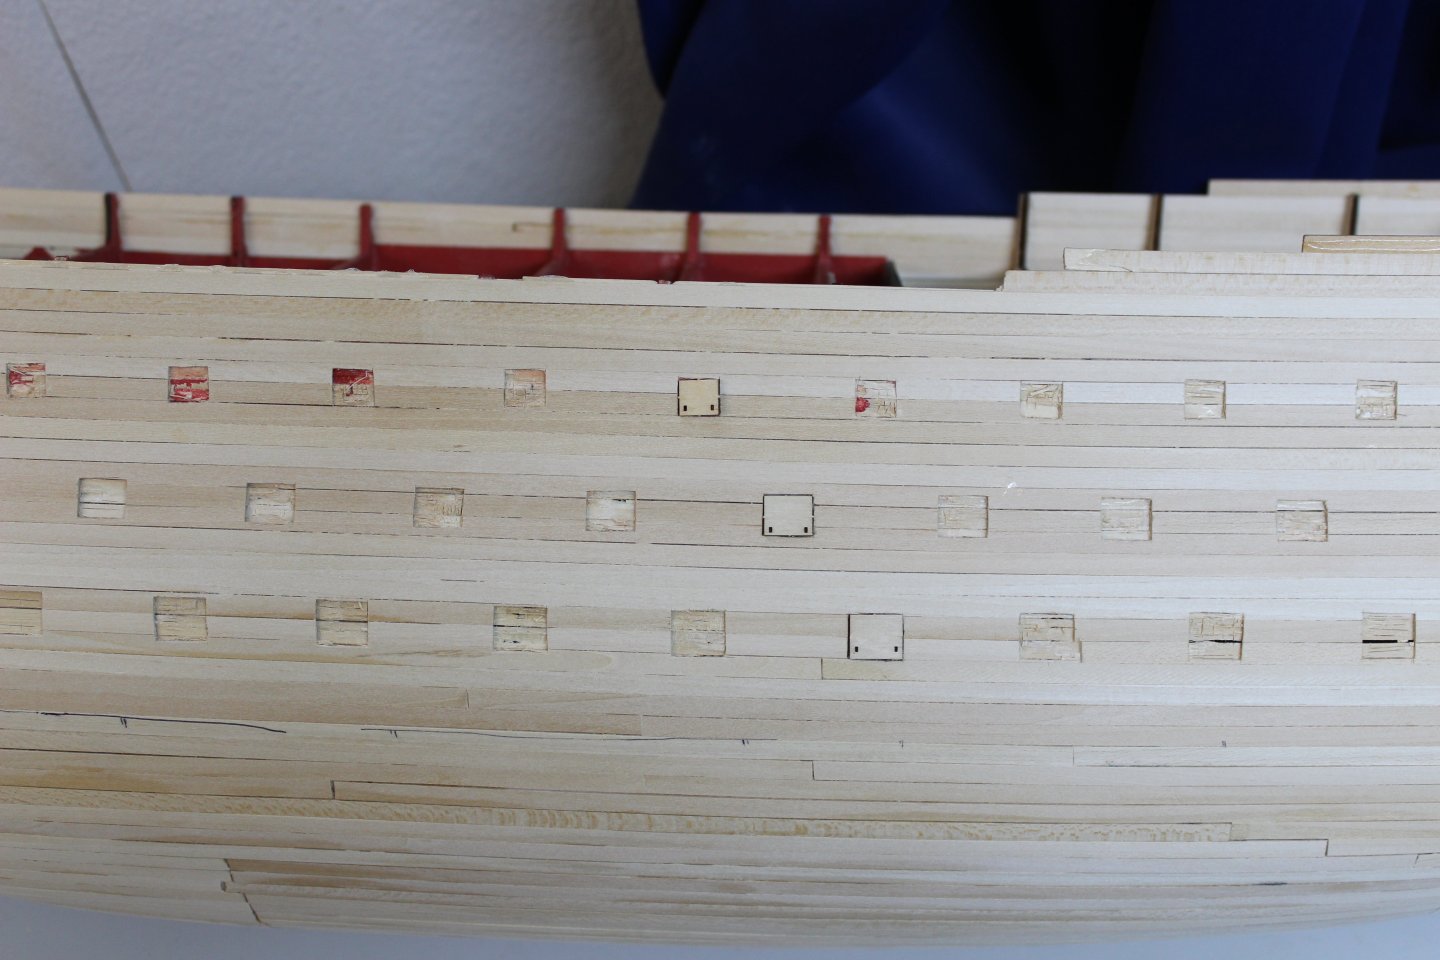
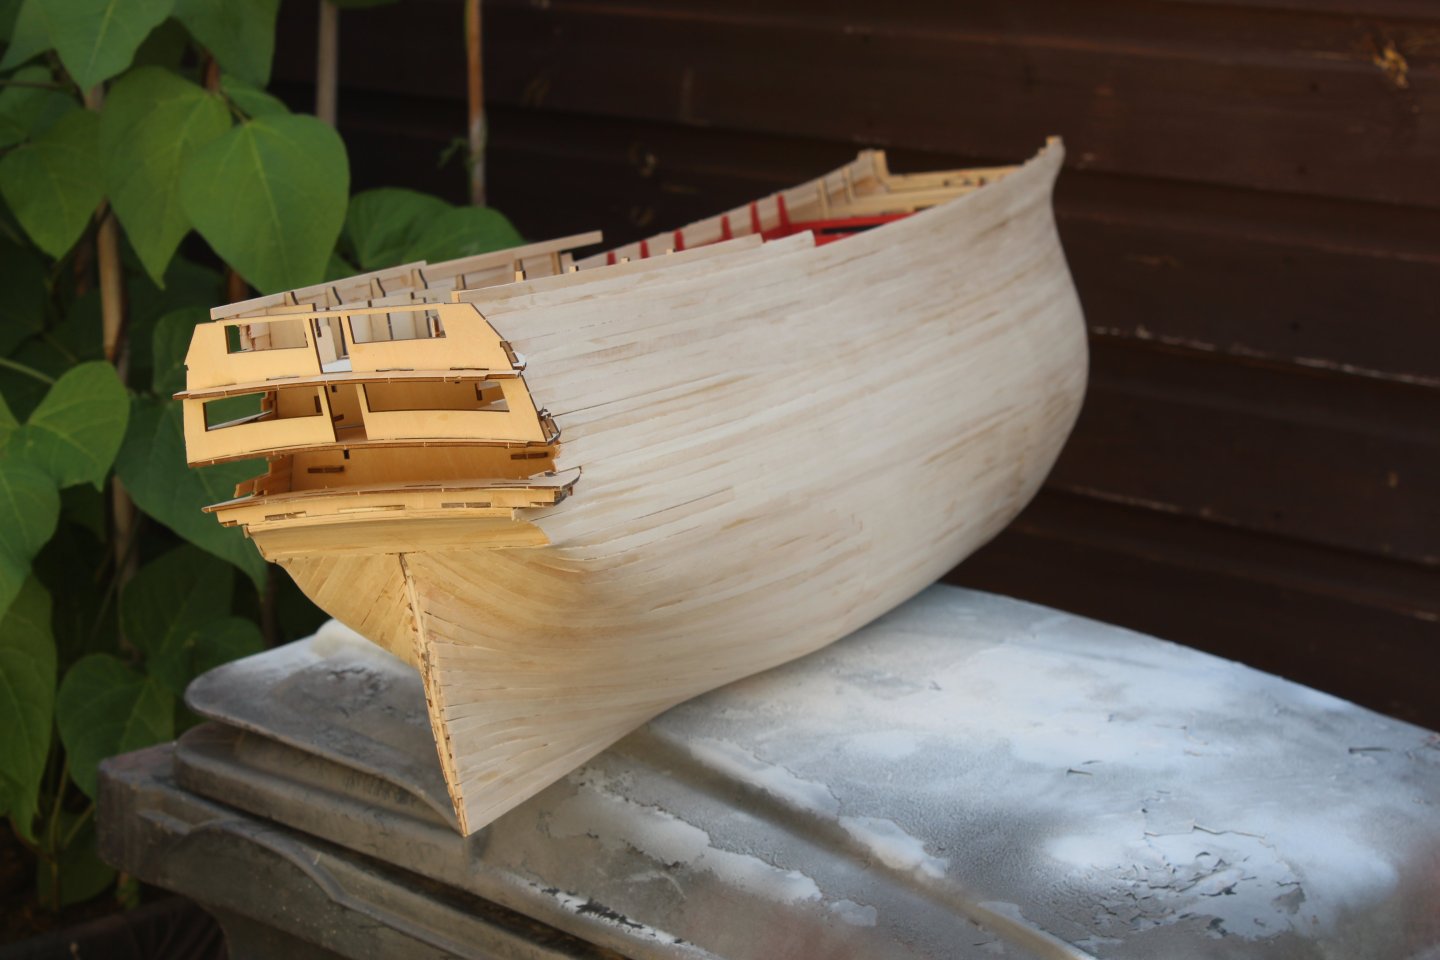
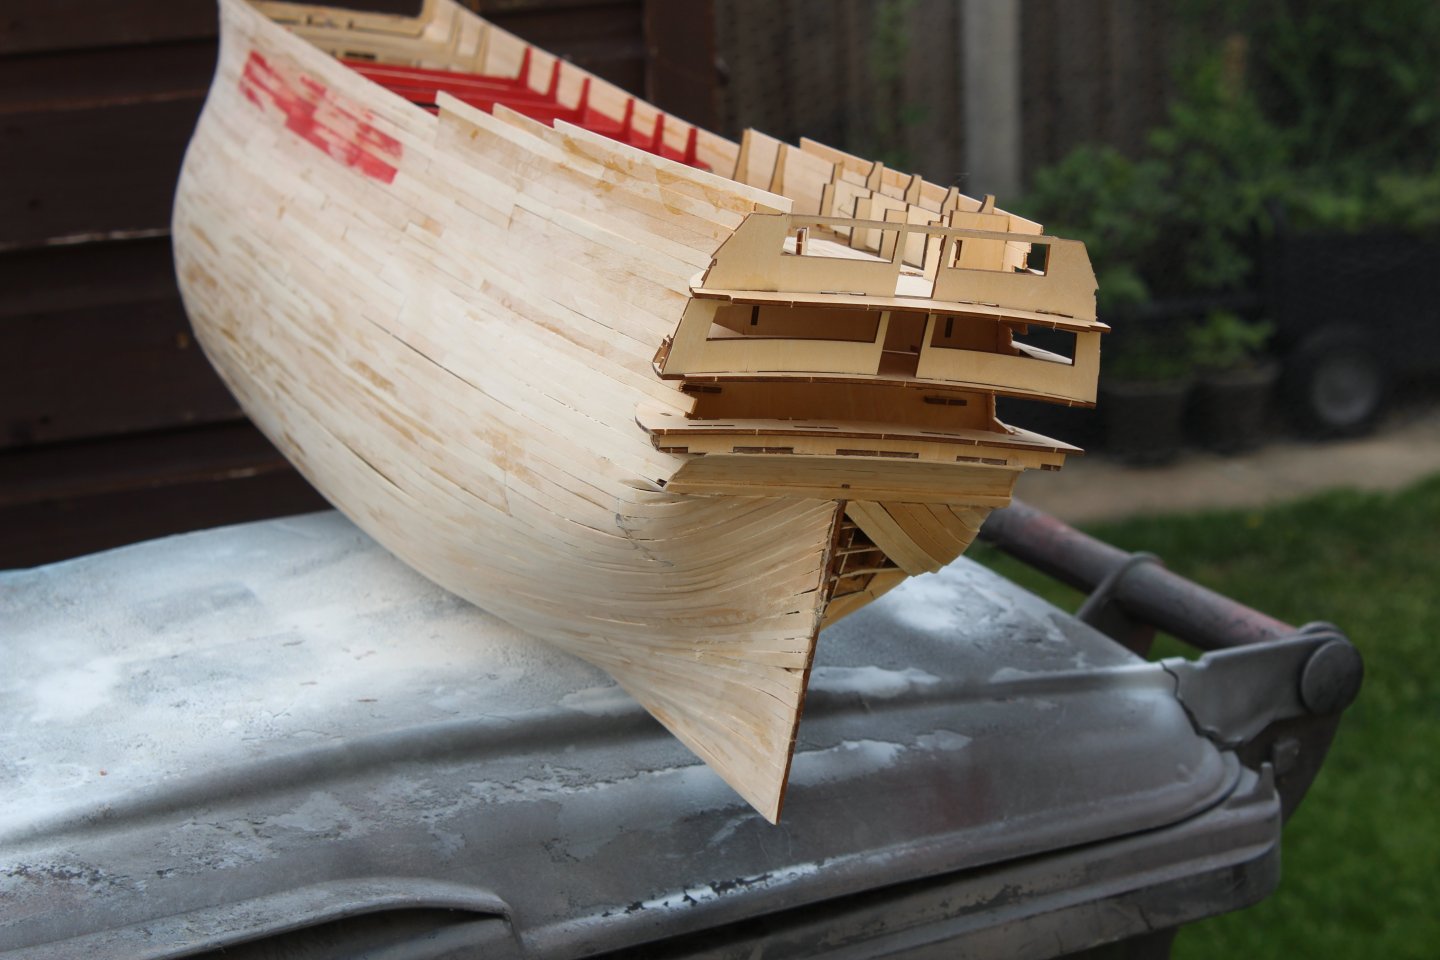
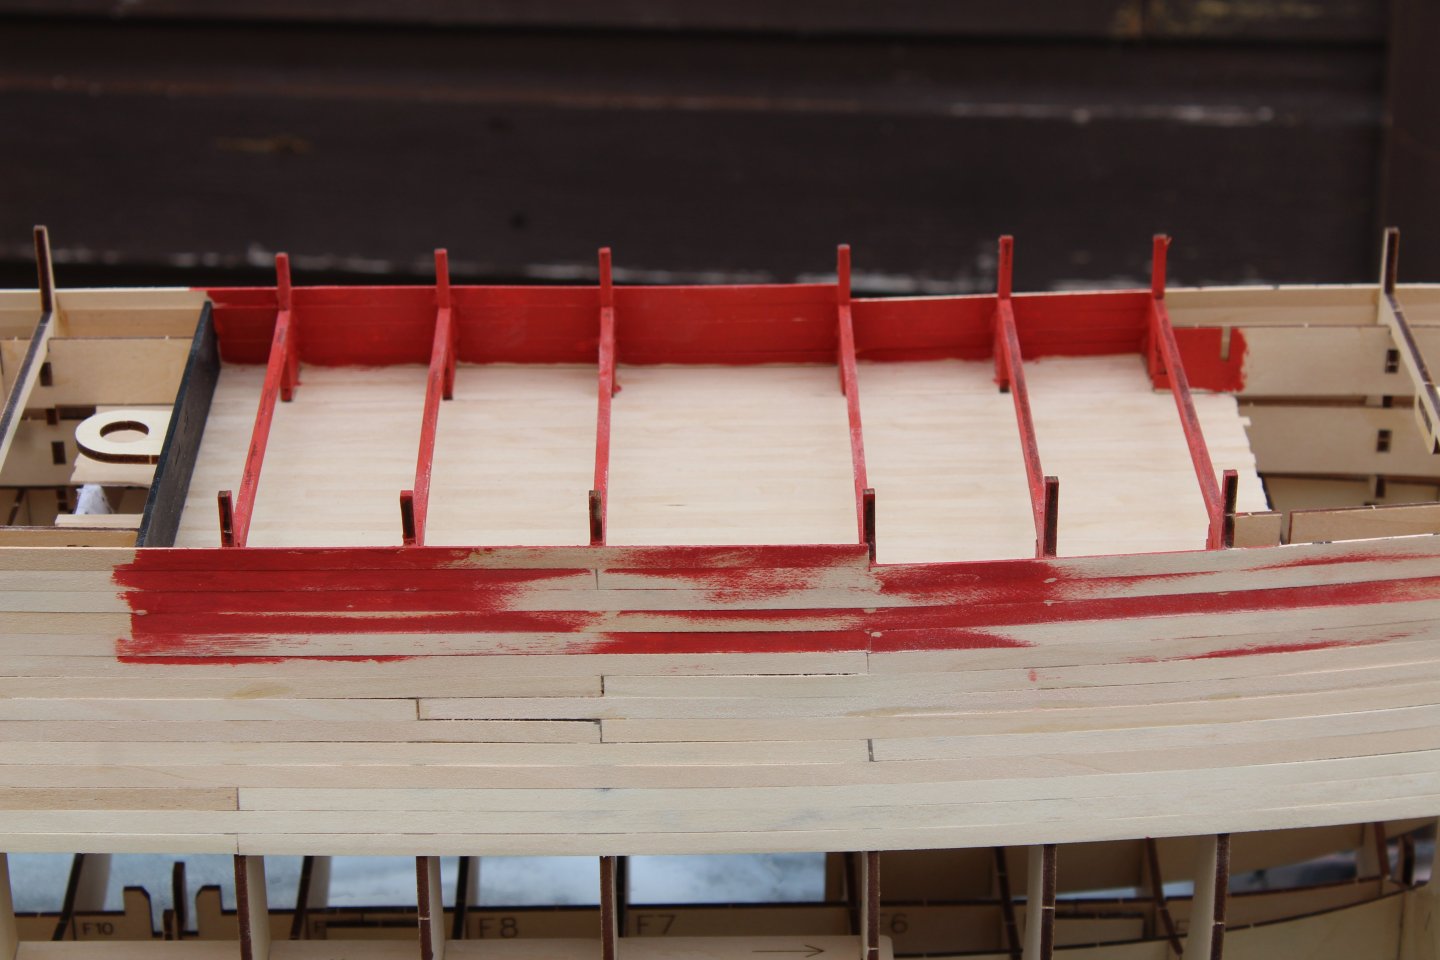
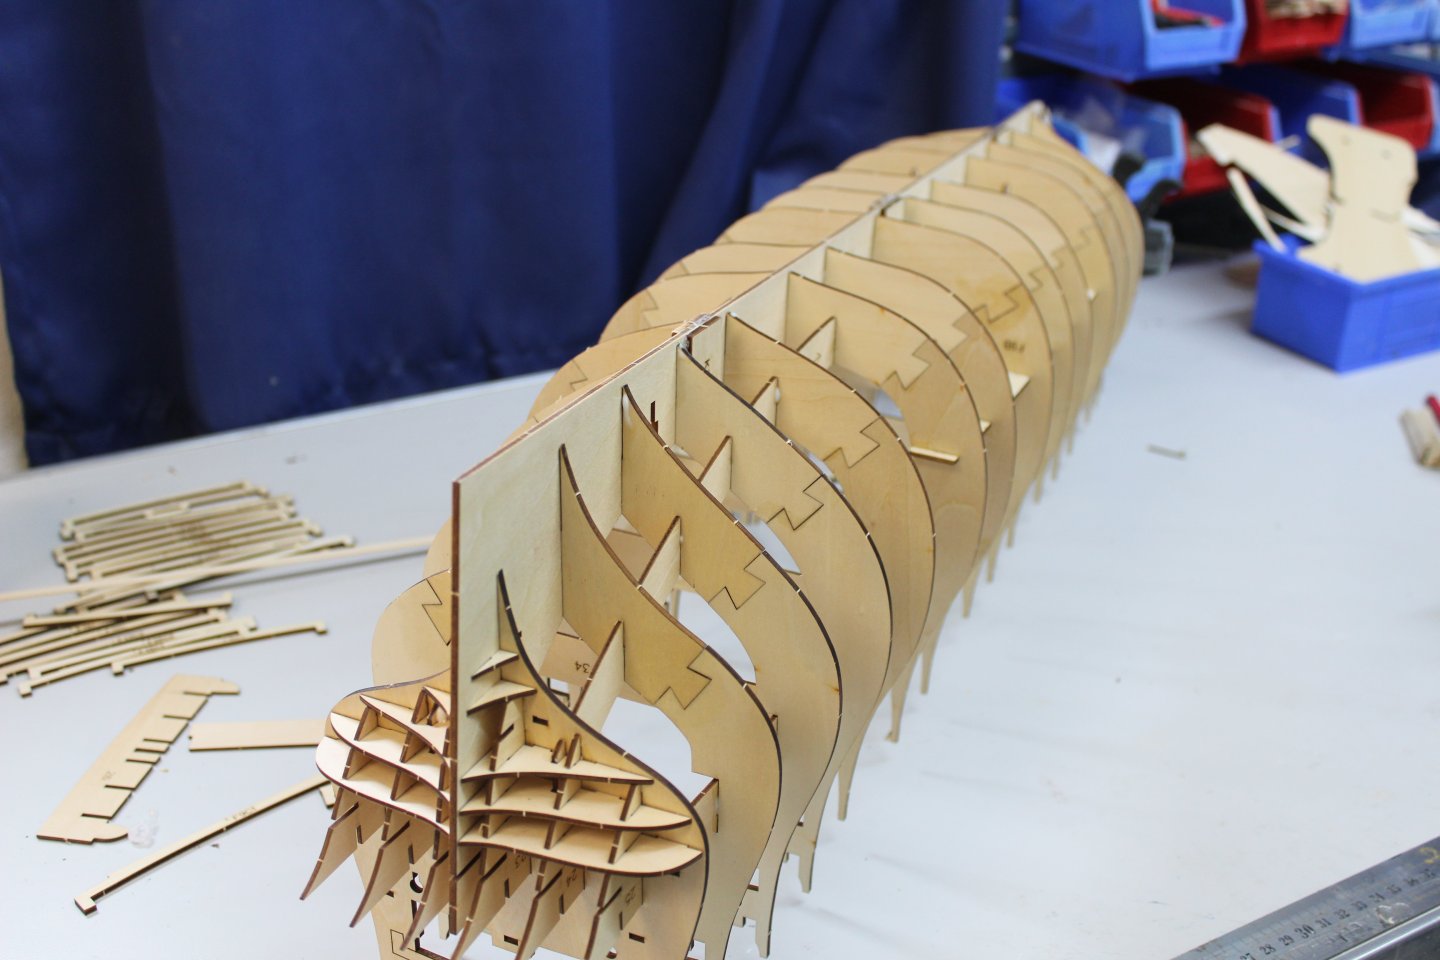
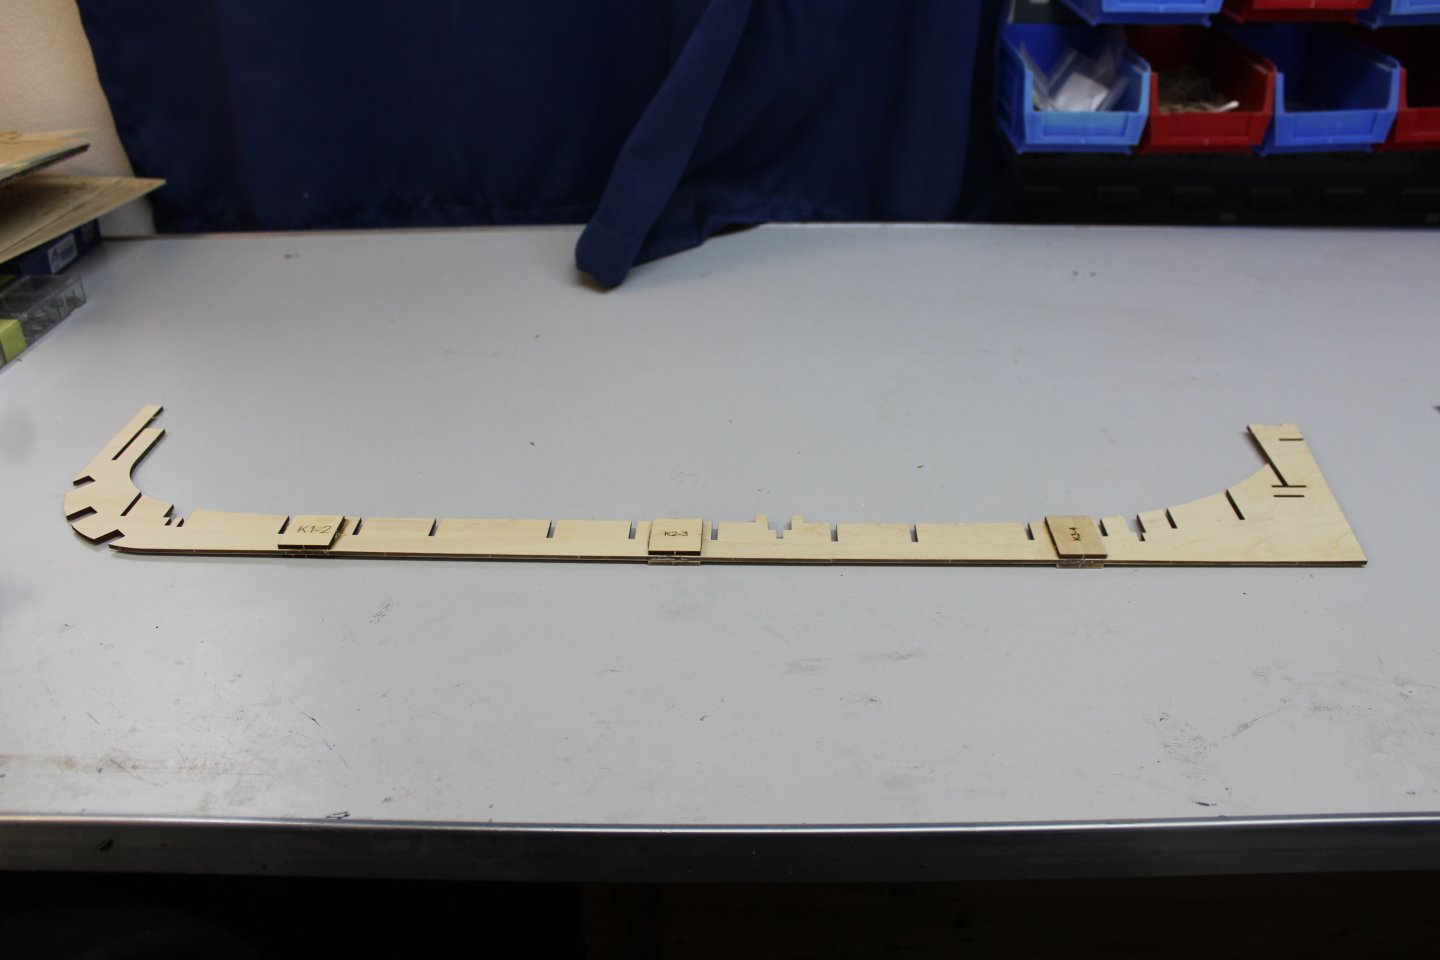
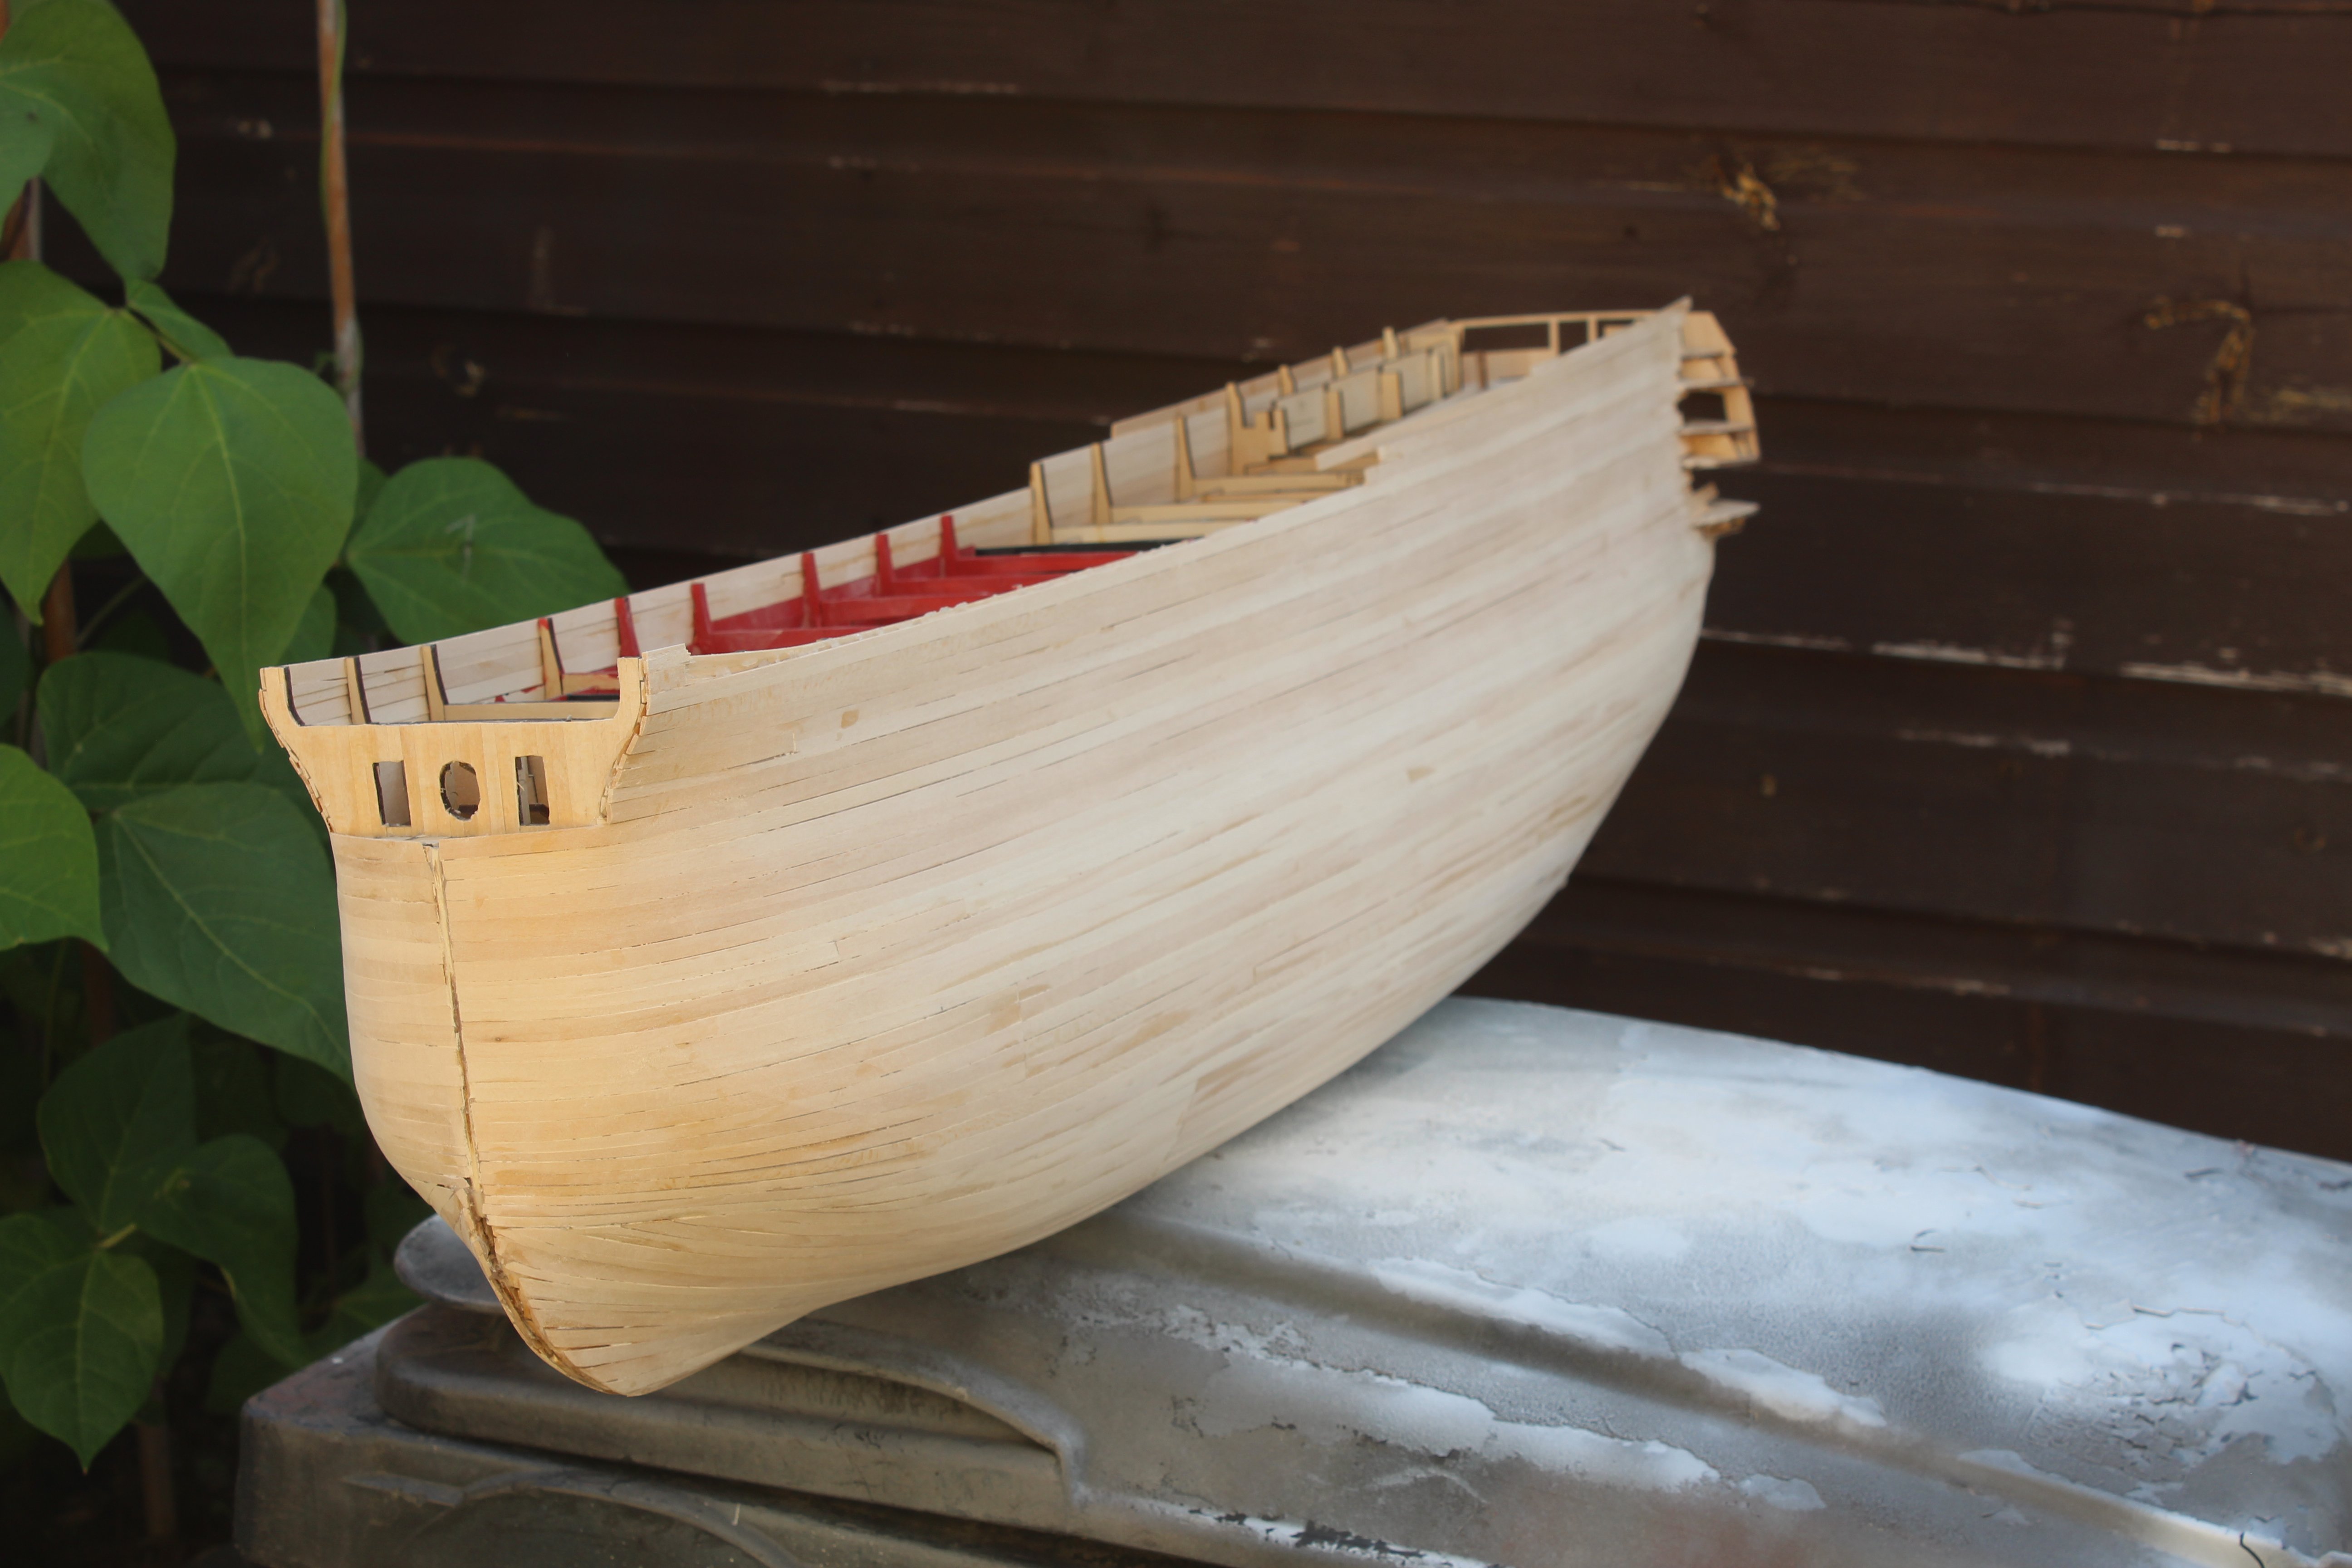
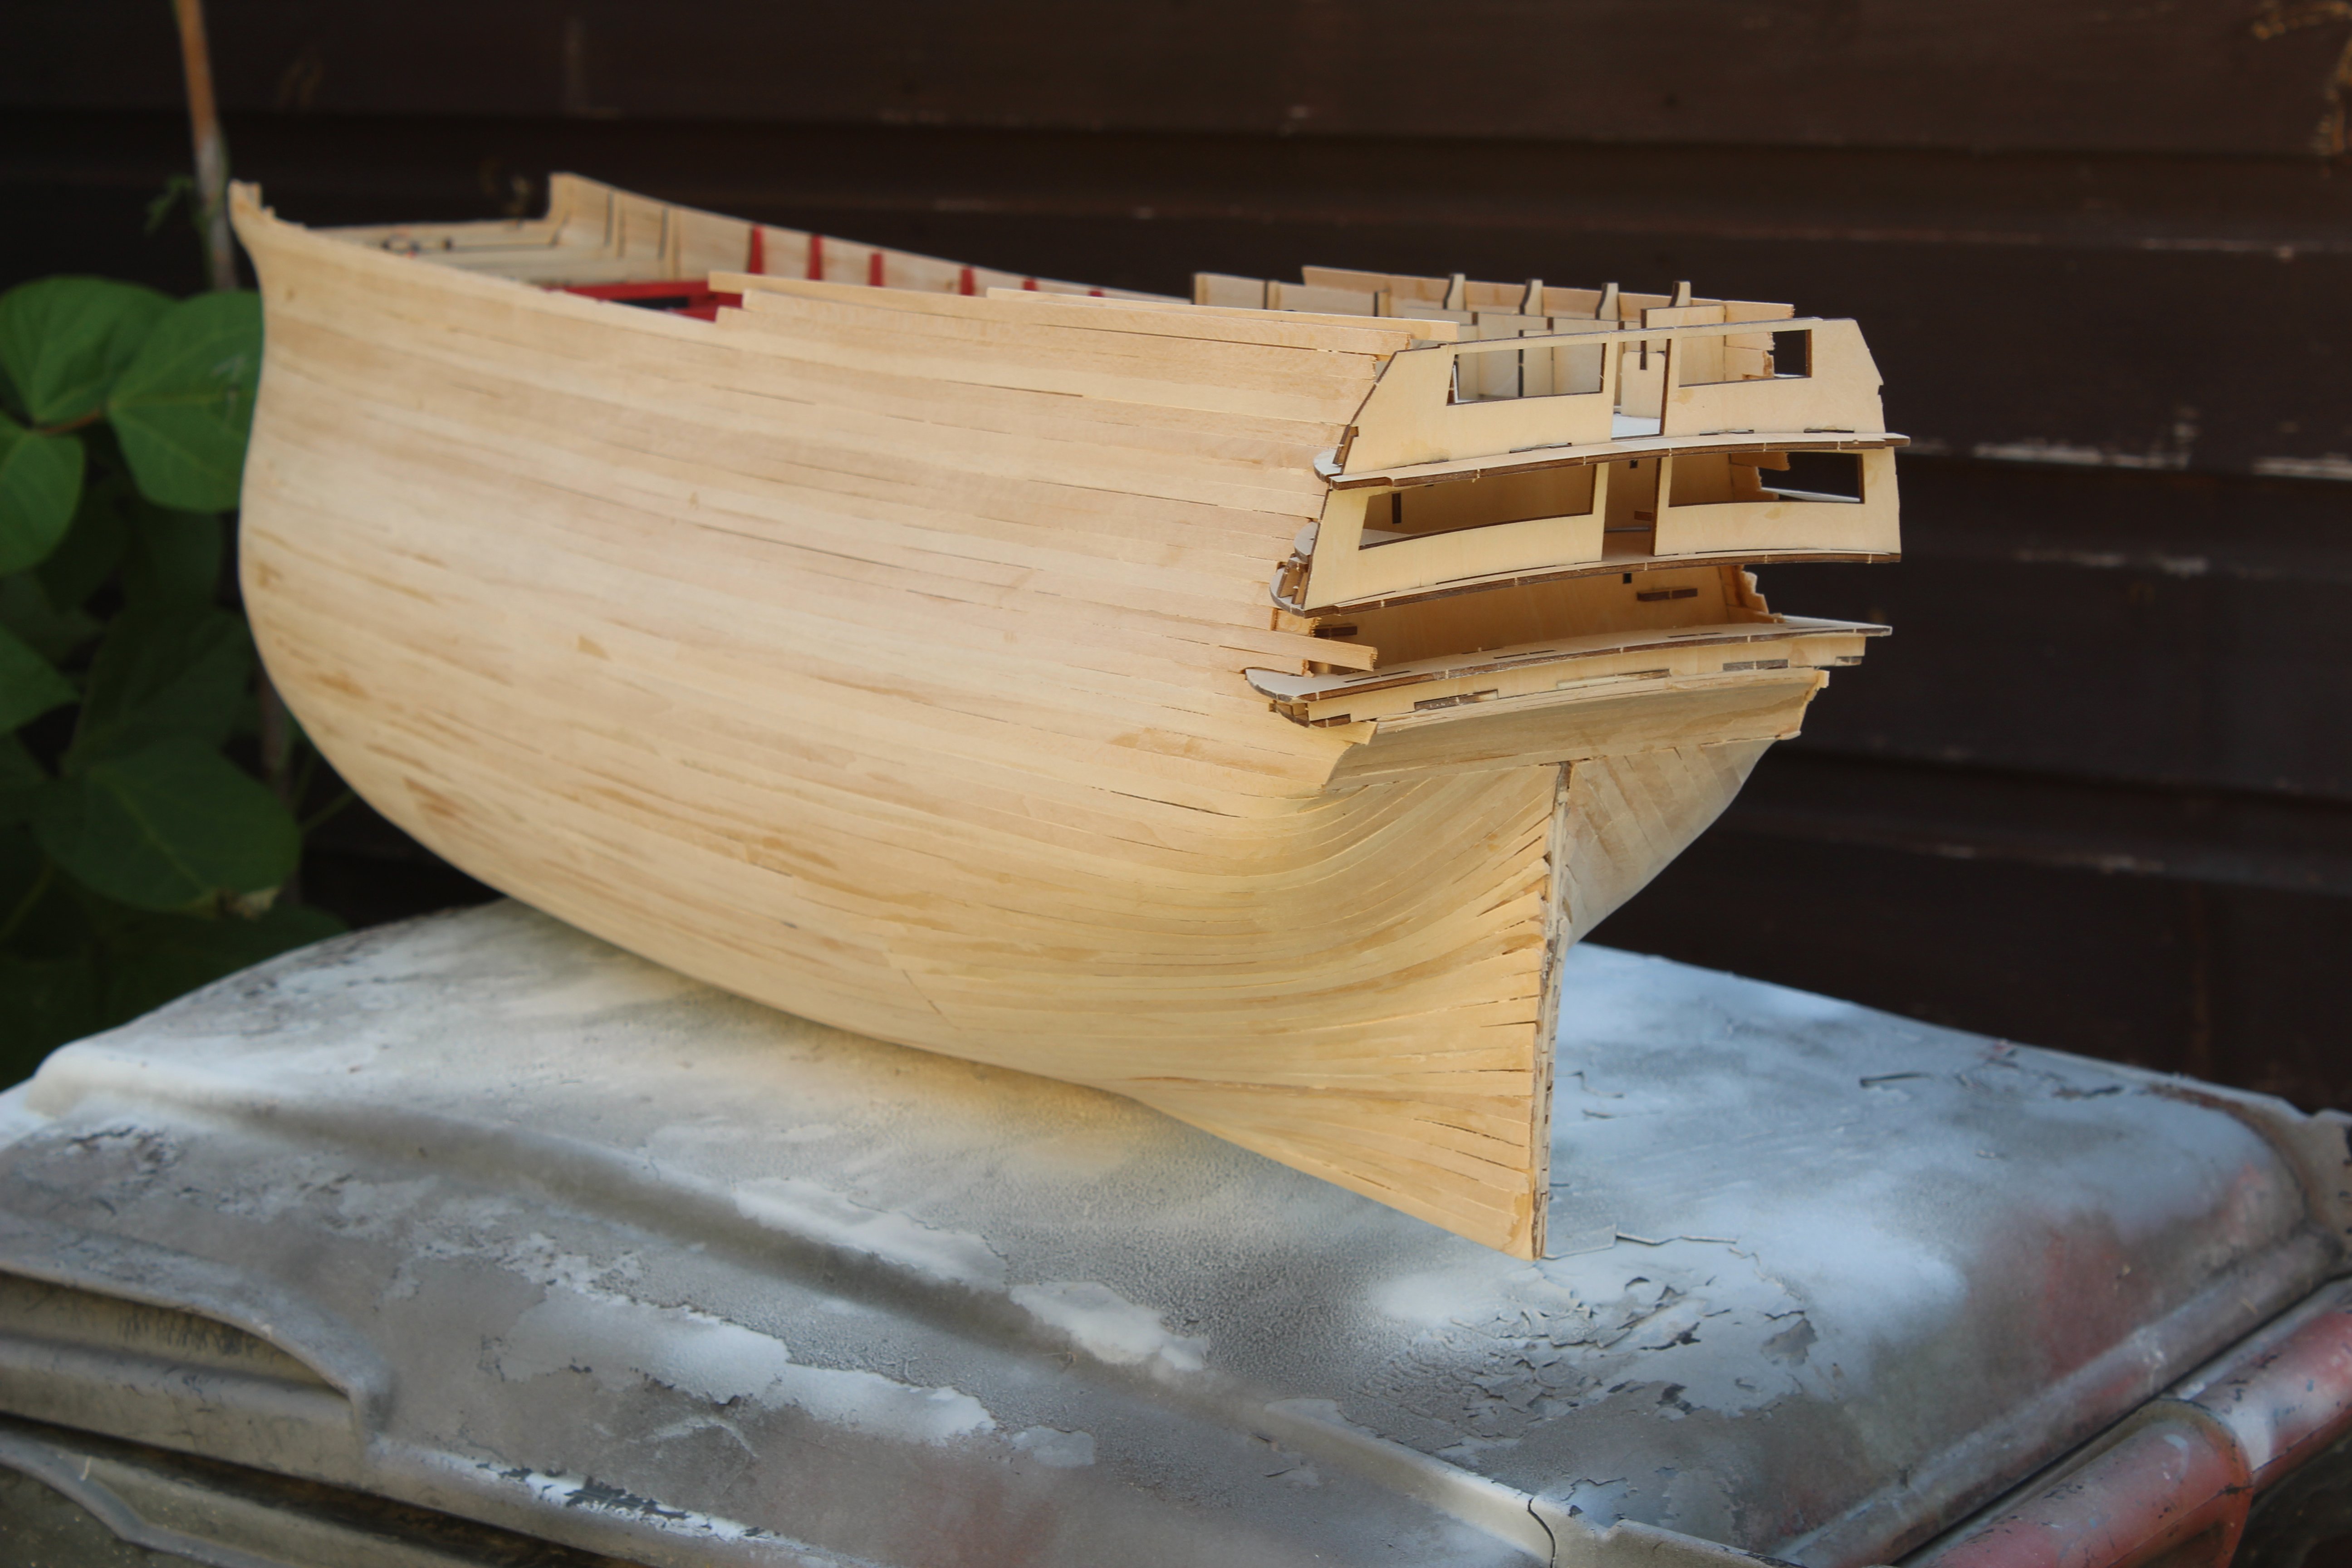
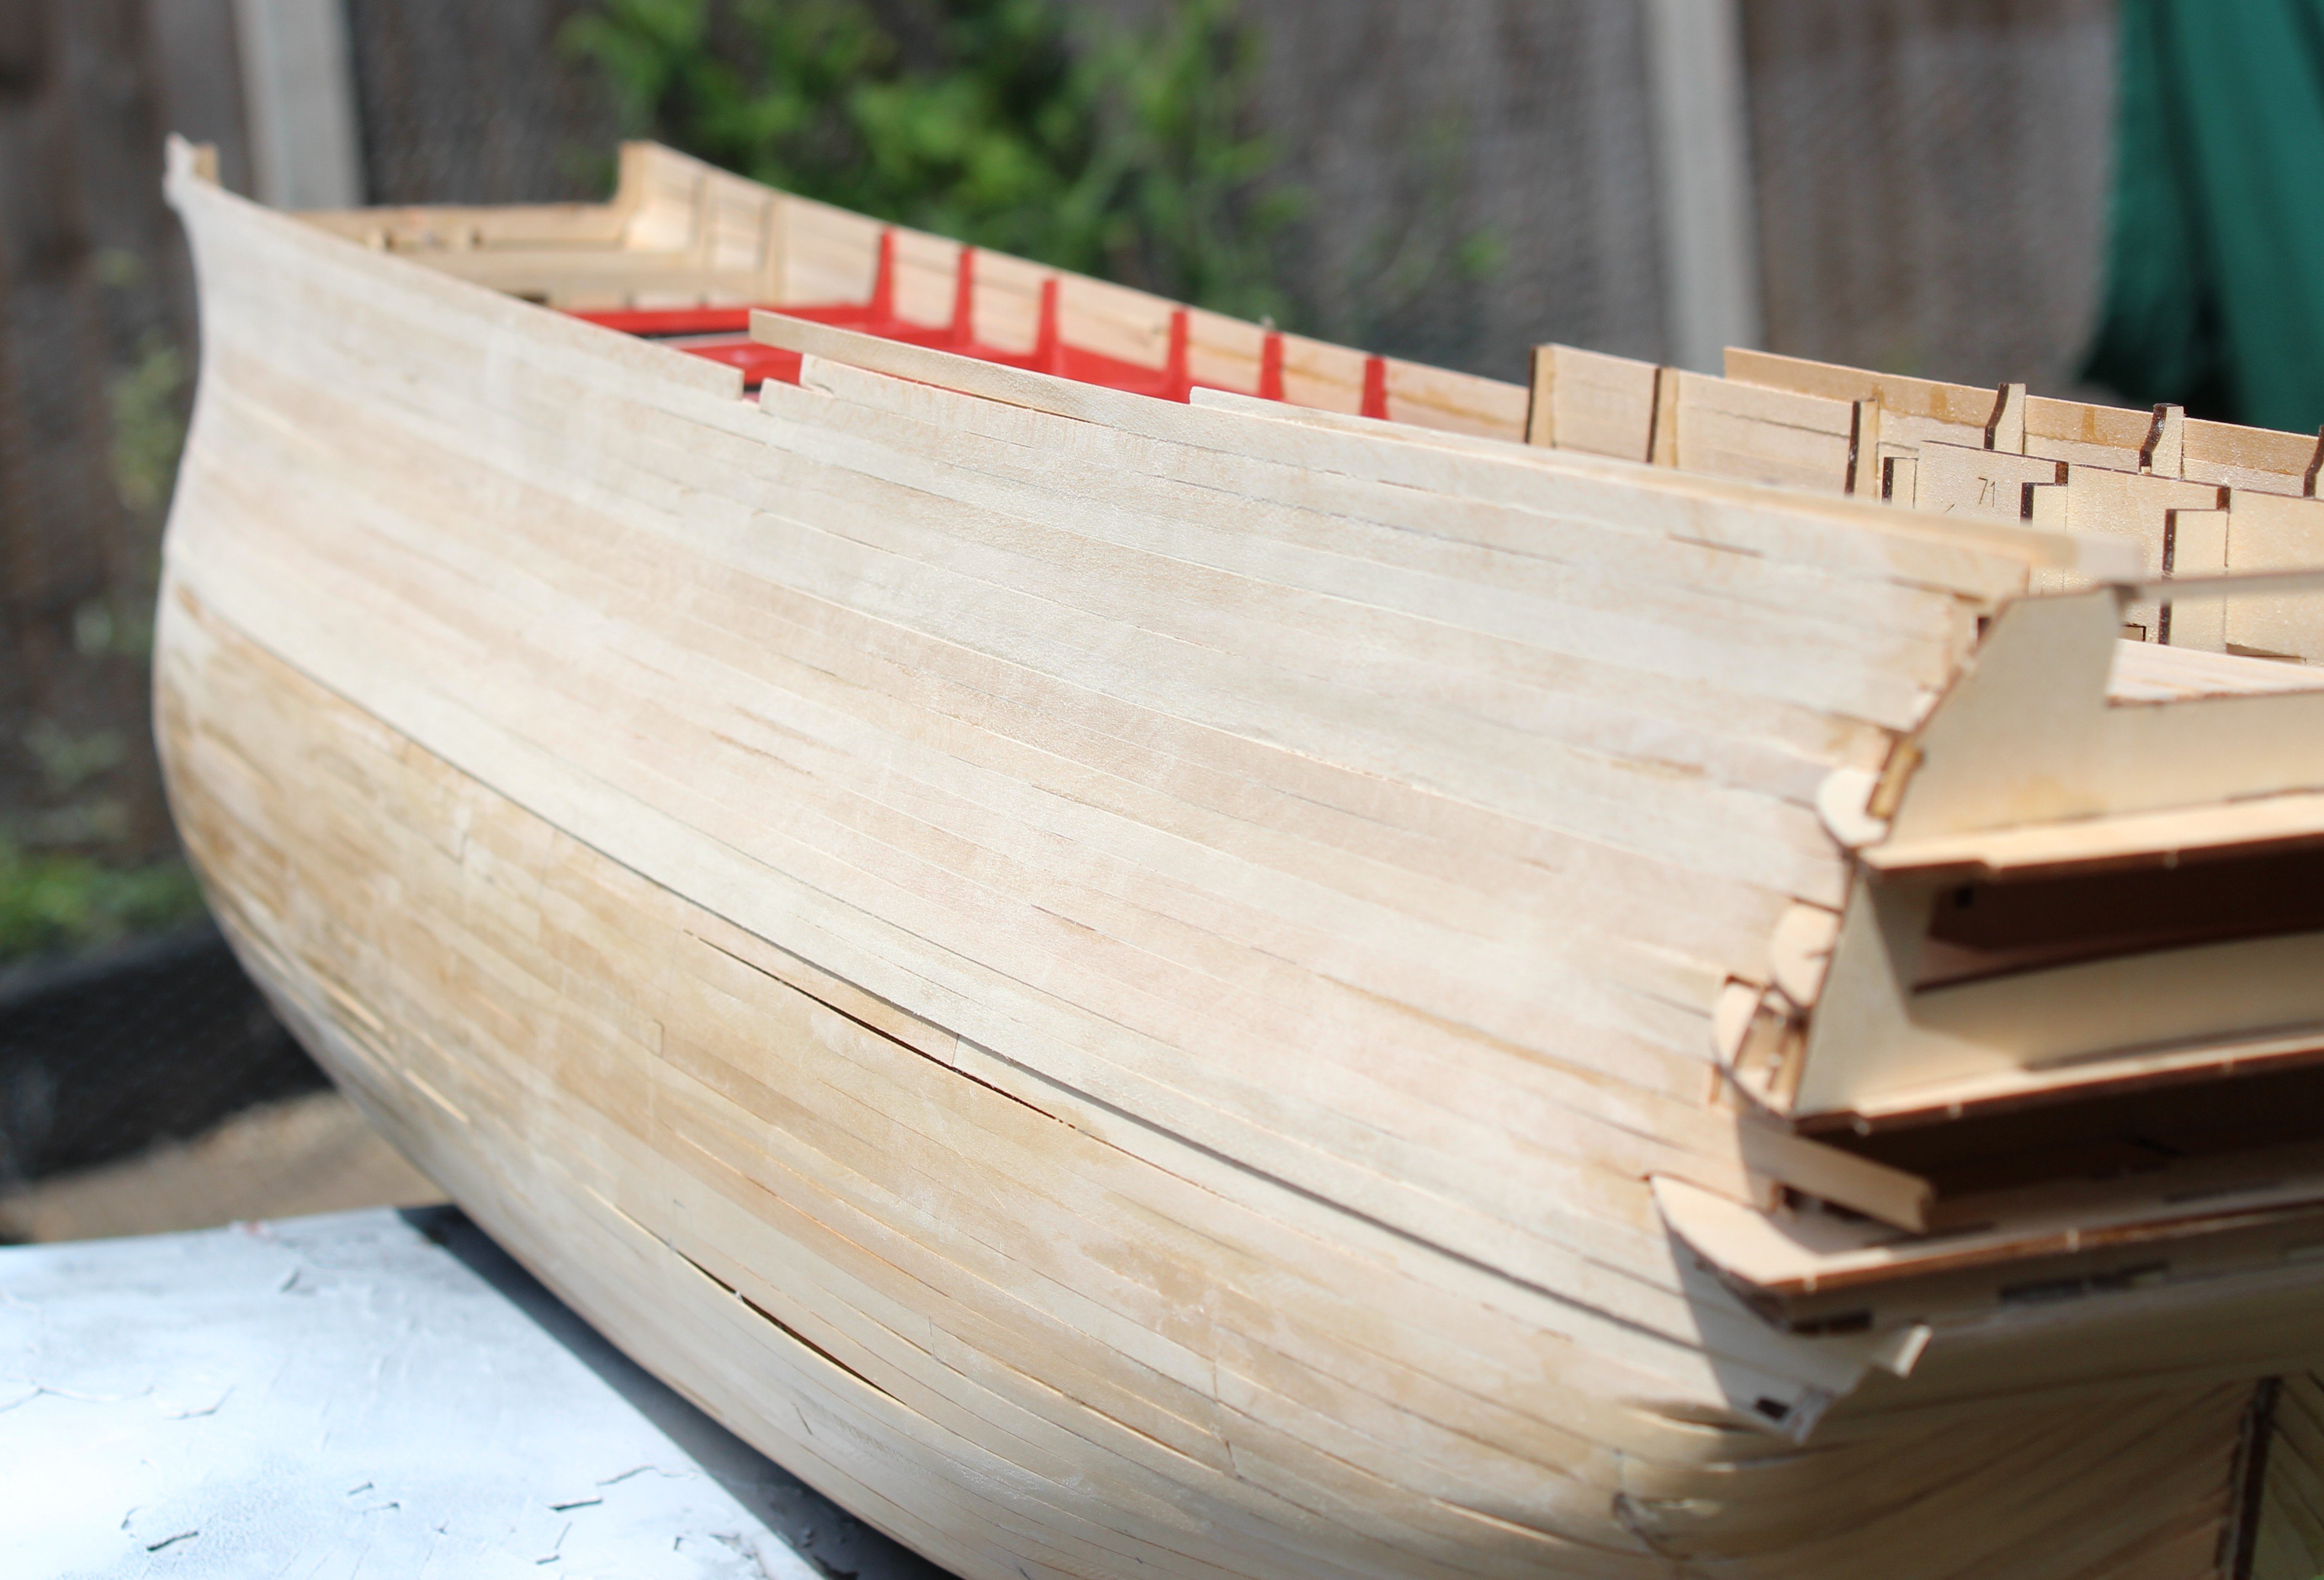
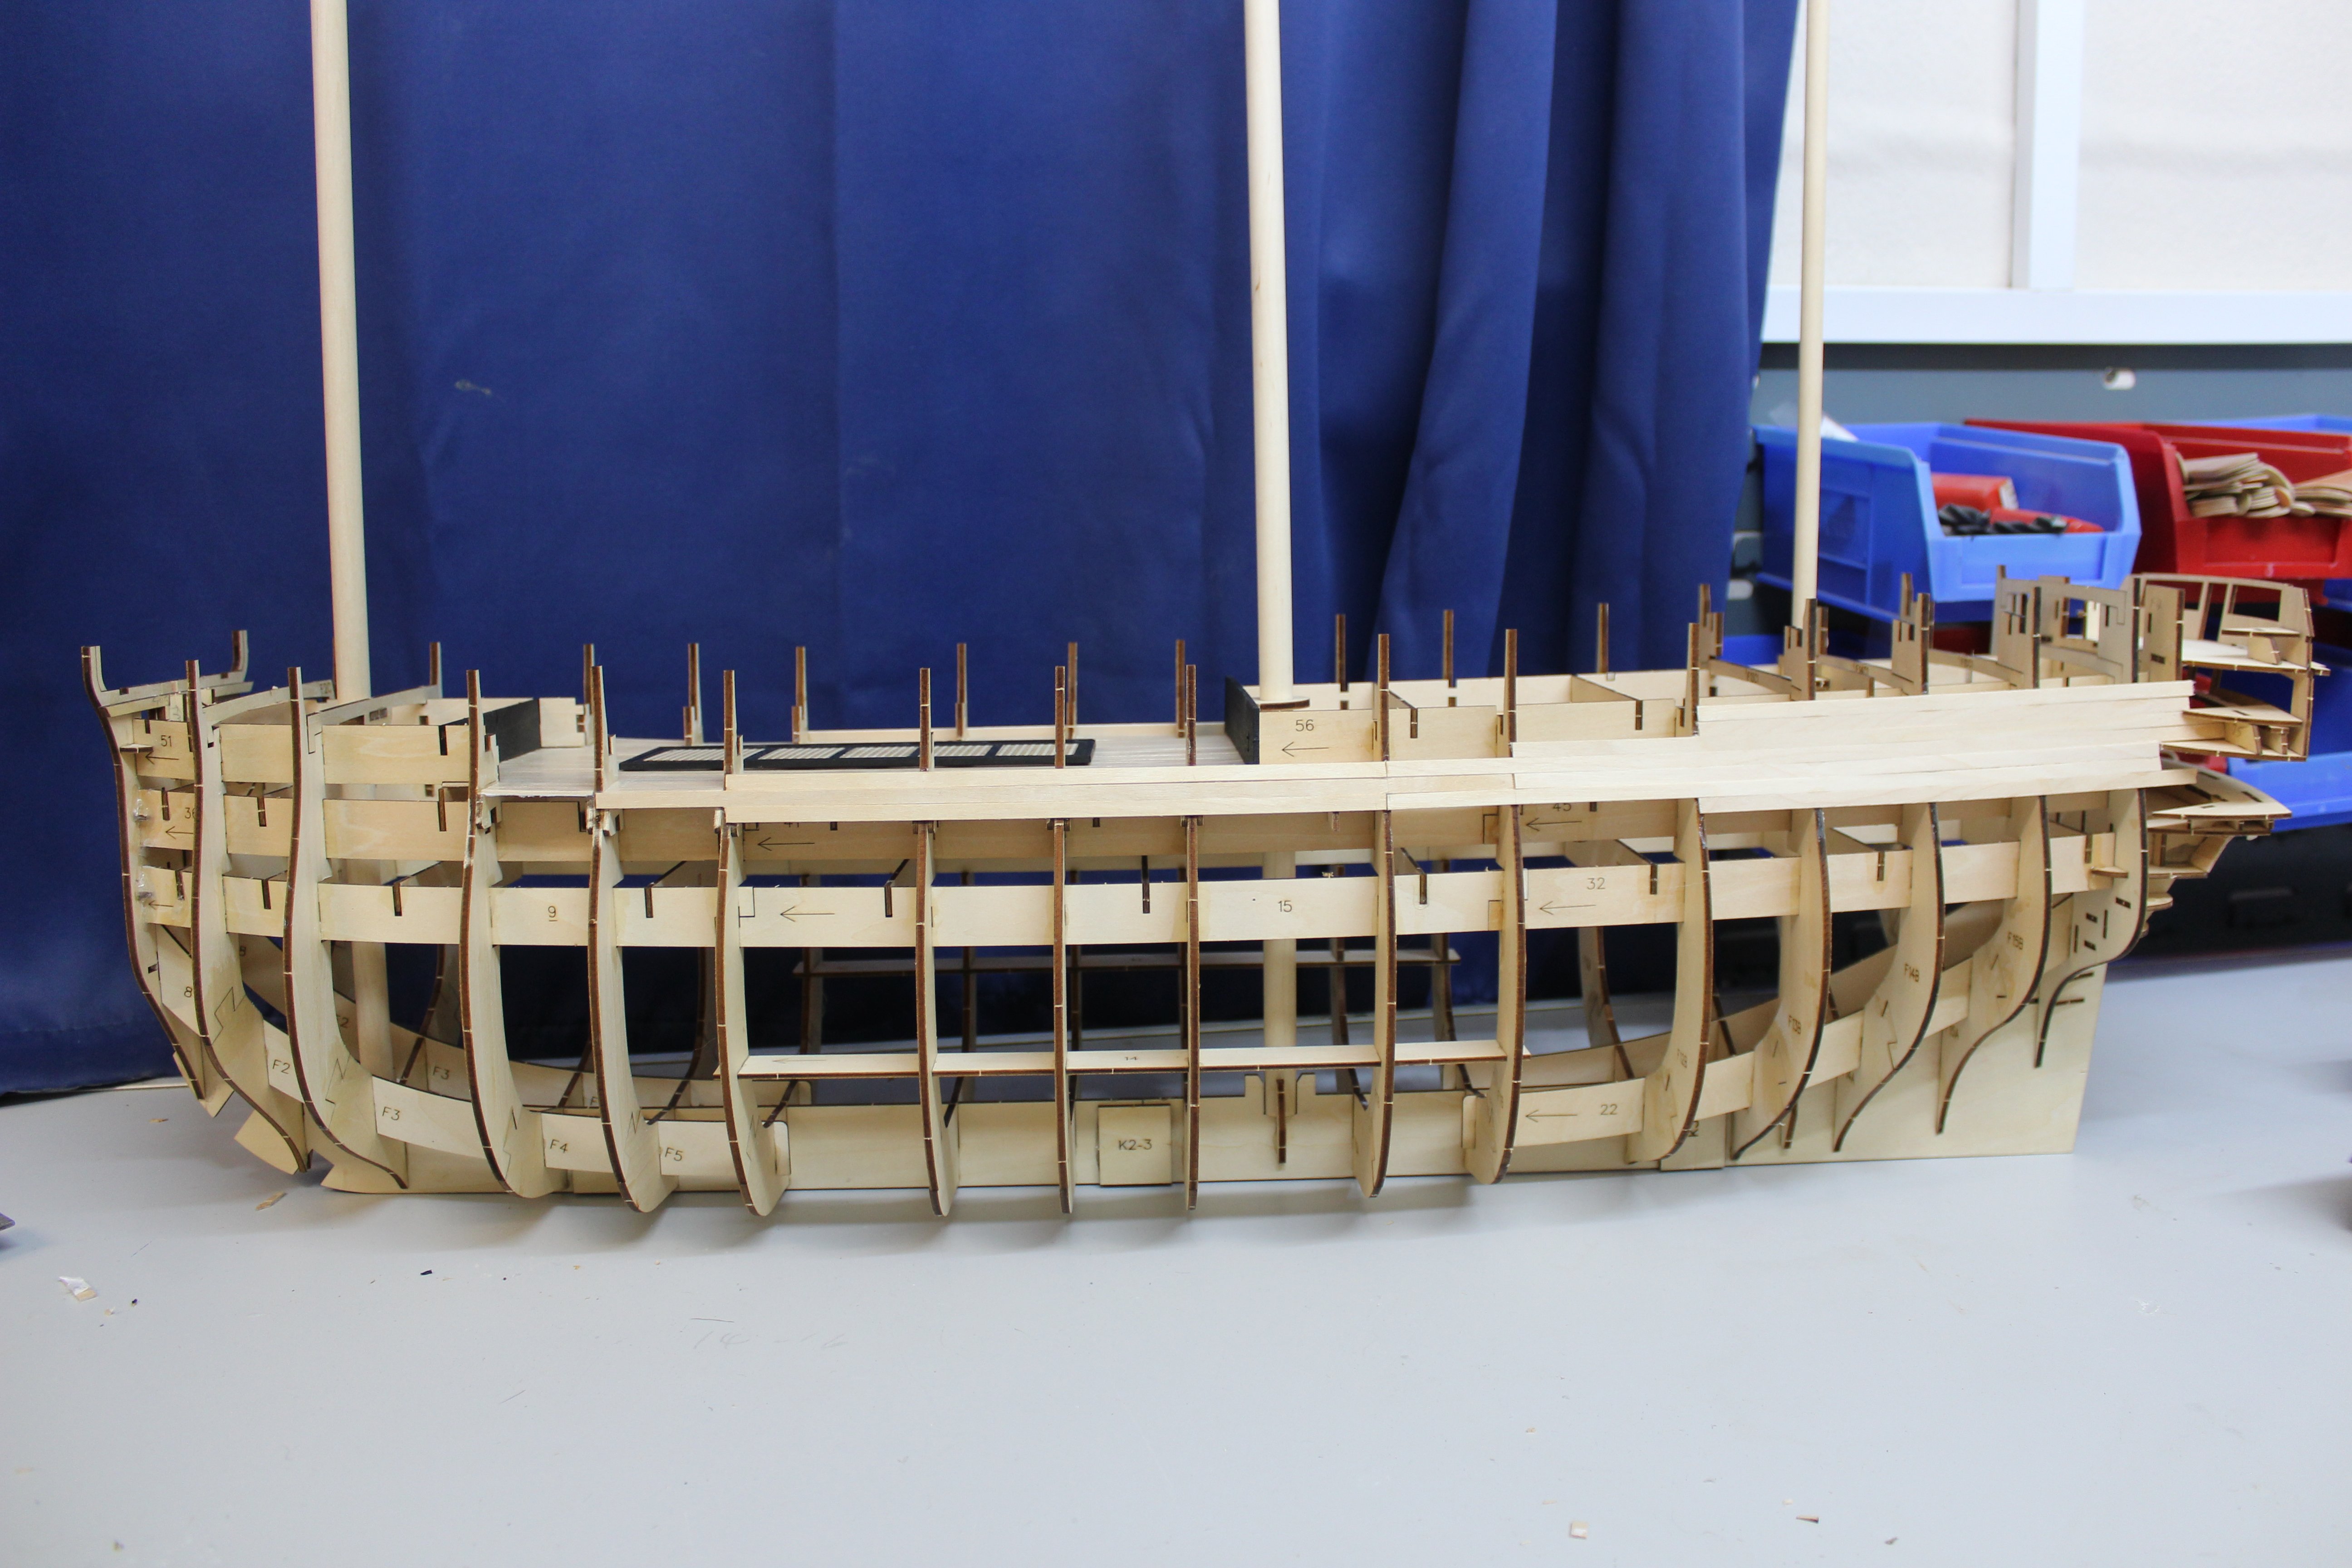
good evening everyone Day 10 1st planking port side complete thank you for comments and likes this build is quite the monster, i have just finished 1st planking the port side and she has taken 50 lengths of 1x5mm lime strip, the other side is progressing. Although a slightly smaller scale than the 1/72 Victory she looks a far bigger hull. (i need to check that fact out), will certainly dominate the display area when completed The planking is not pretty at all but gives me a lovely base for the next layer once the planking is complete i need to mark out the gunports over 4 deck levels

-
day 6 1st planking good evening everyone no regrets at all on changing the planking from single to double, i have 100m of 1x5mm lime strip on its way, might need some more, at present im using anything left from previous builds gave her a bit of a sanding, starting to look like the instructions now, working on the gundeck before it more of less gets covered over


-
wow @Waldemar fantastic reply, thank you so very much
-
unless you try the Marcle SD14 cargo ship
-
welcome from the person who has lots of ships, and hardly ever finishes them
-
no fairing required at all in that area, to wet outside for sanding, had the planks been longer than 300mm i would have had to do some
-
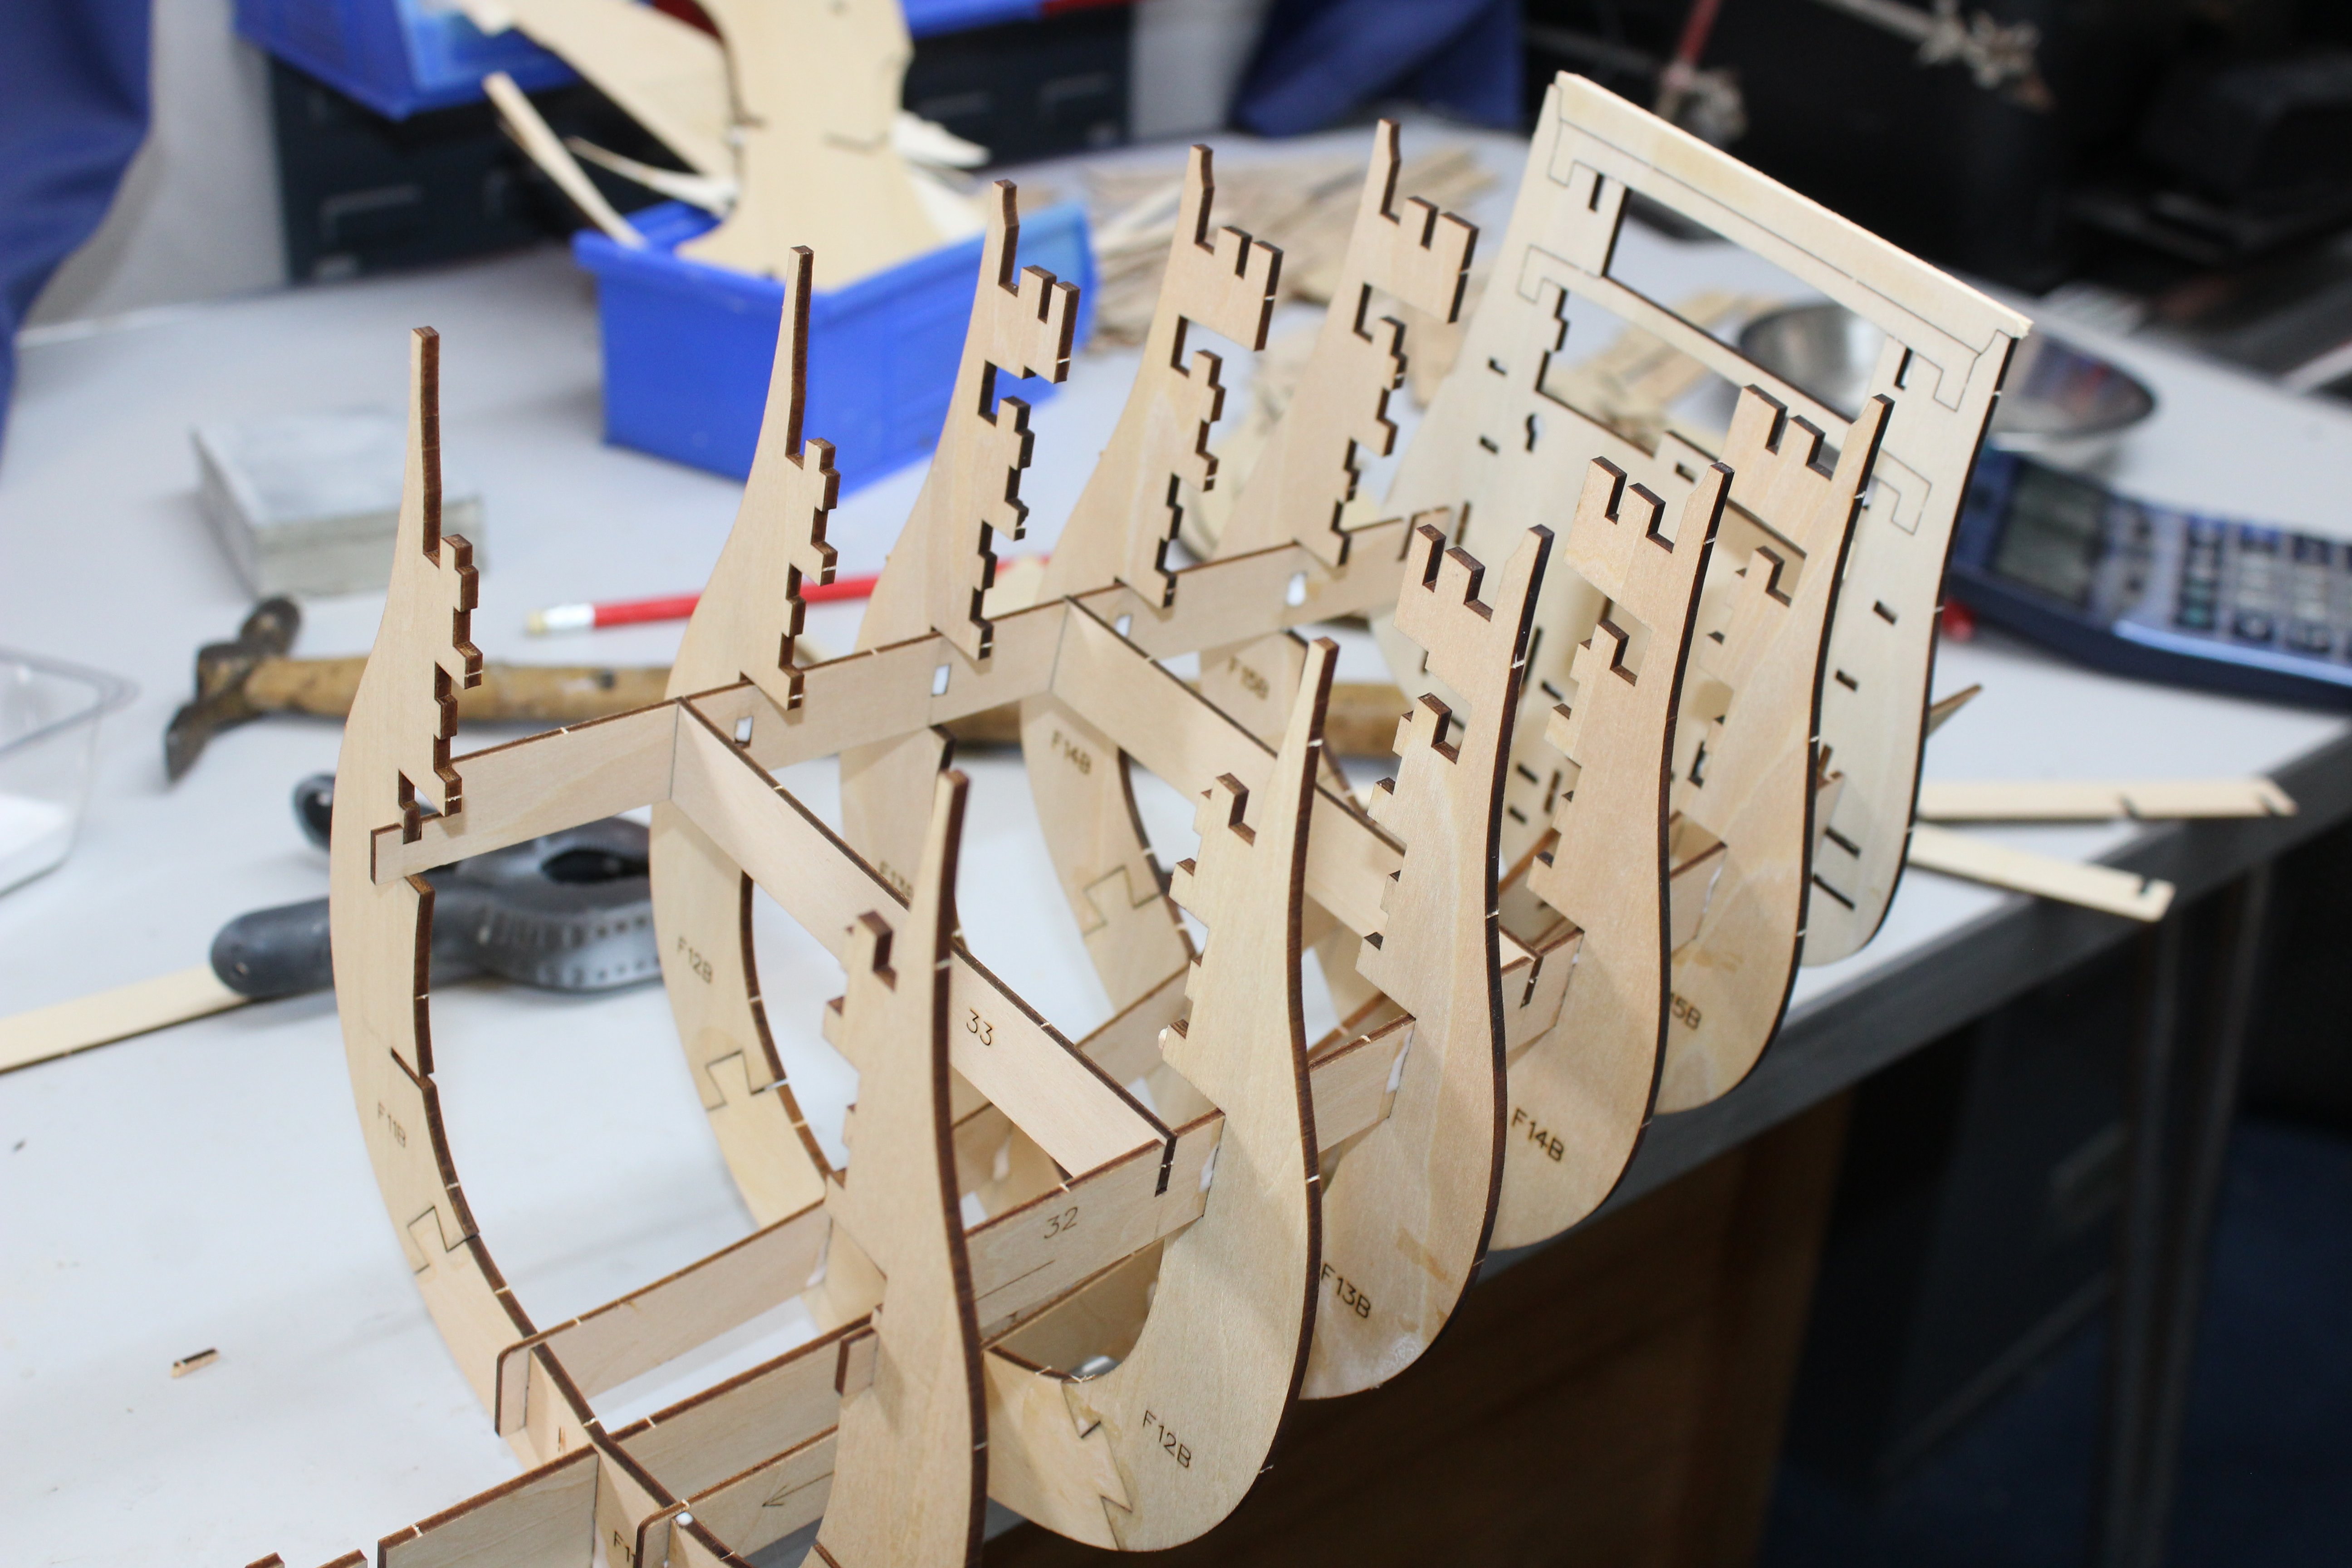
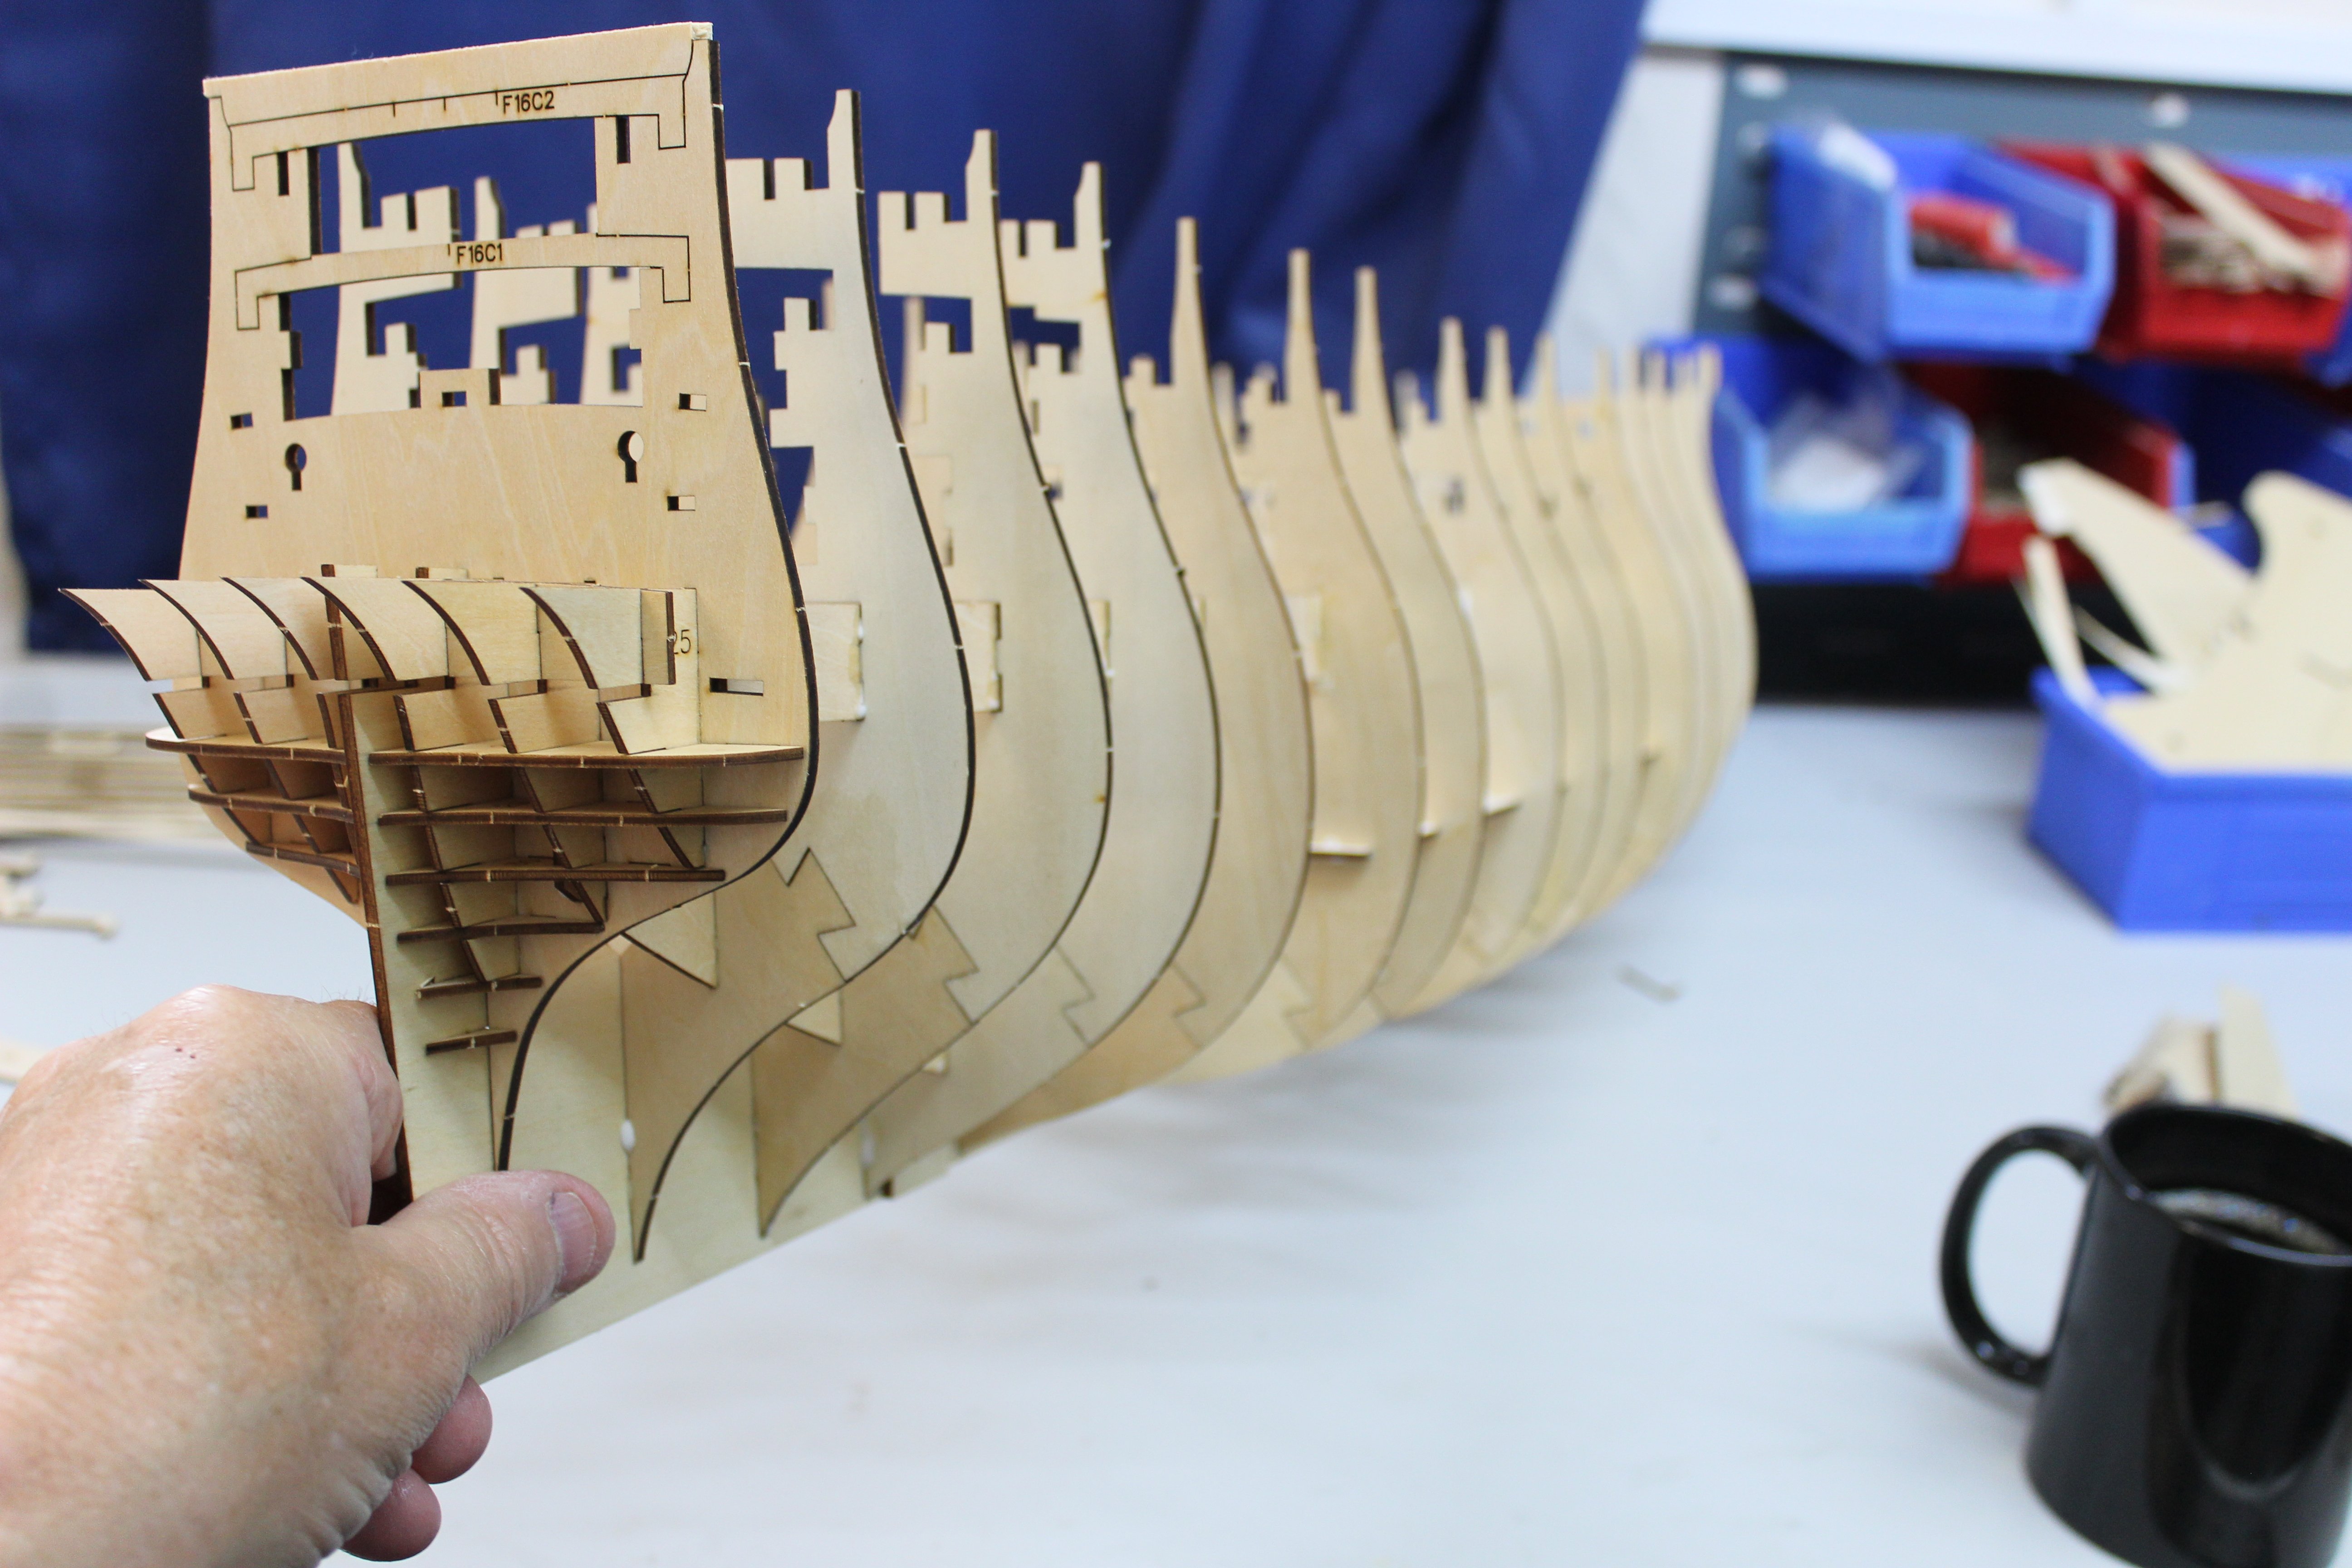
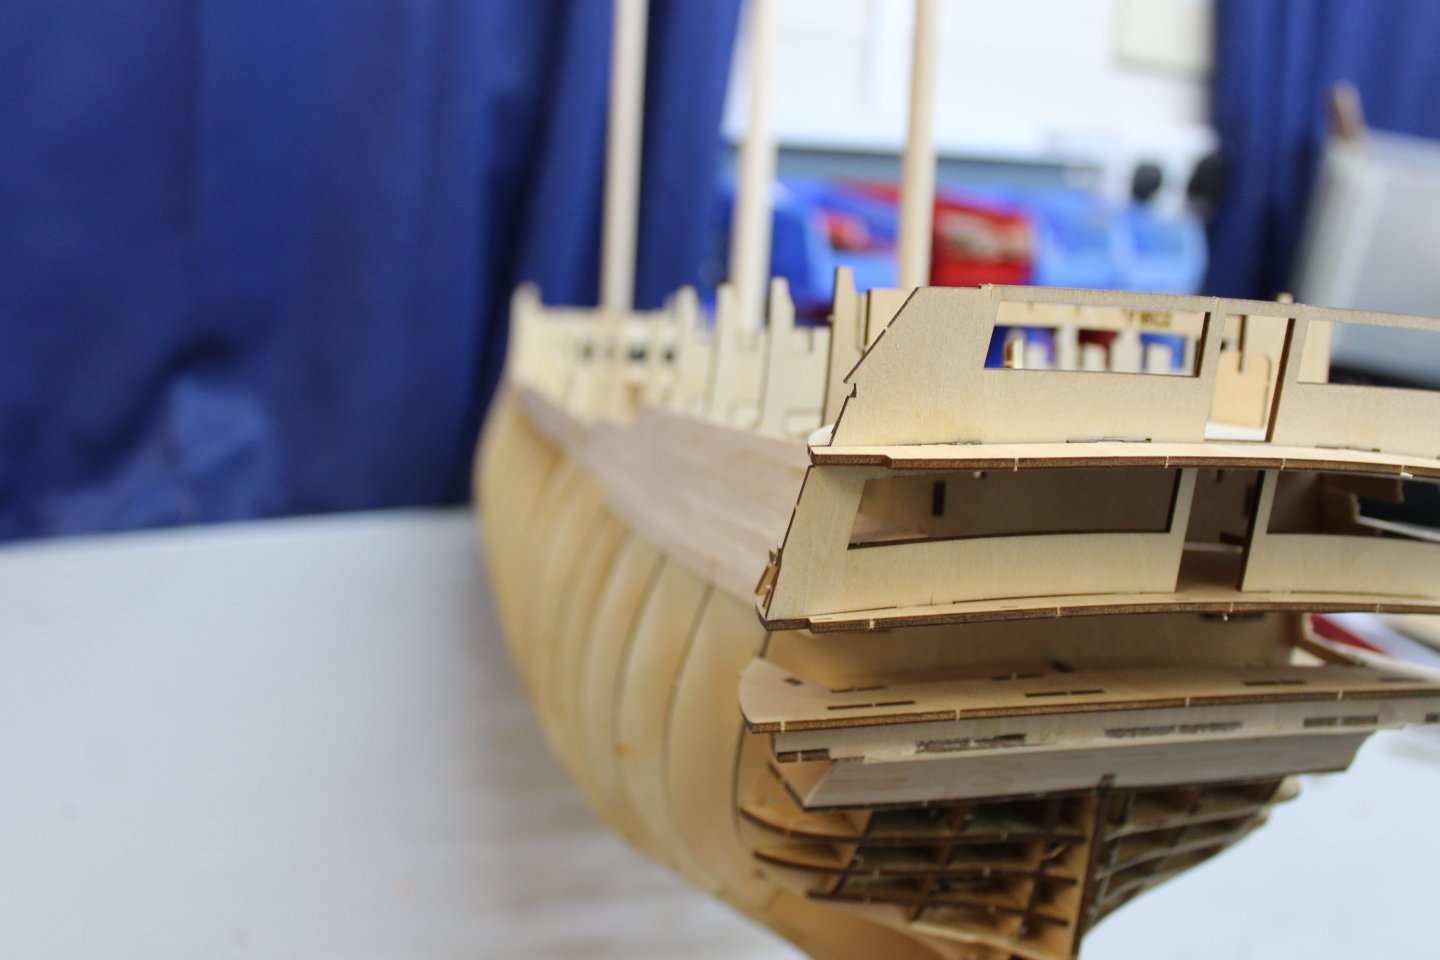
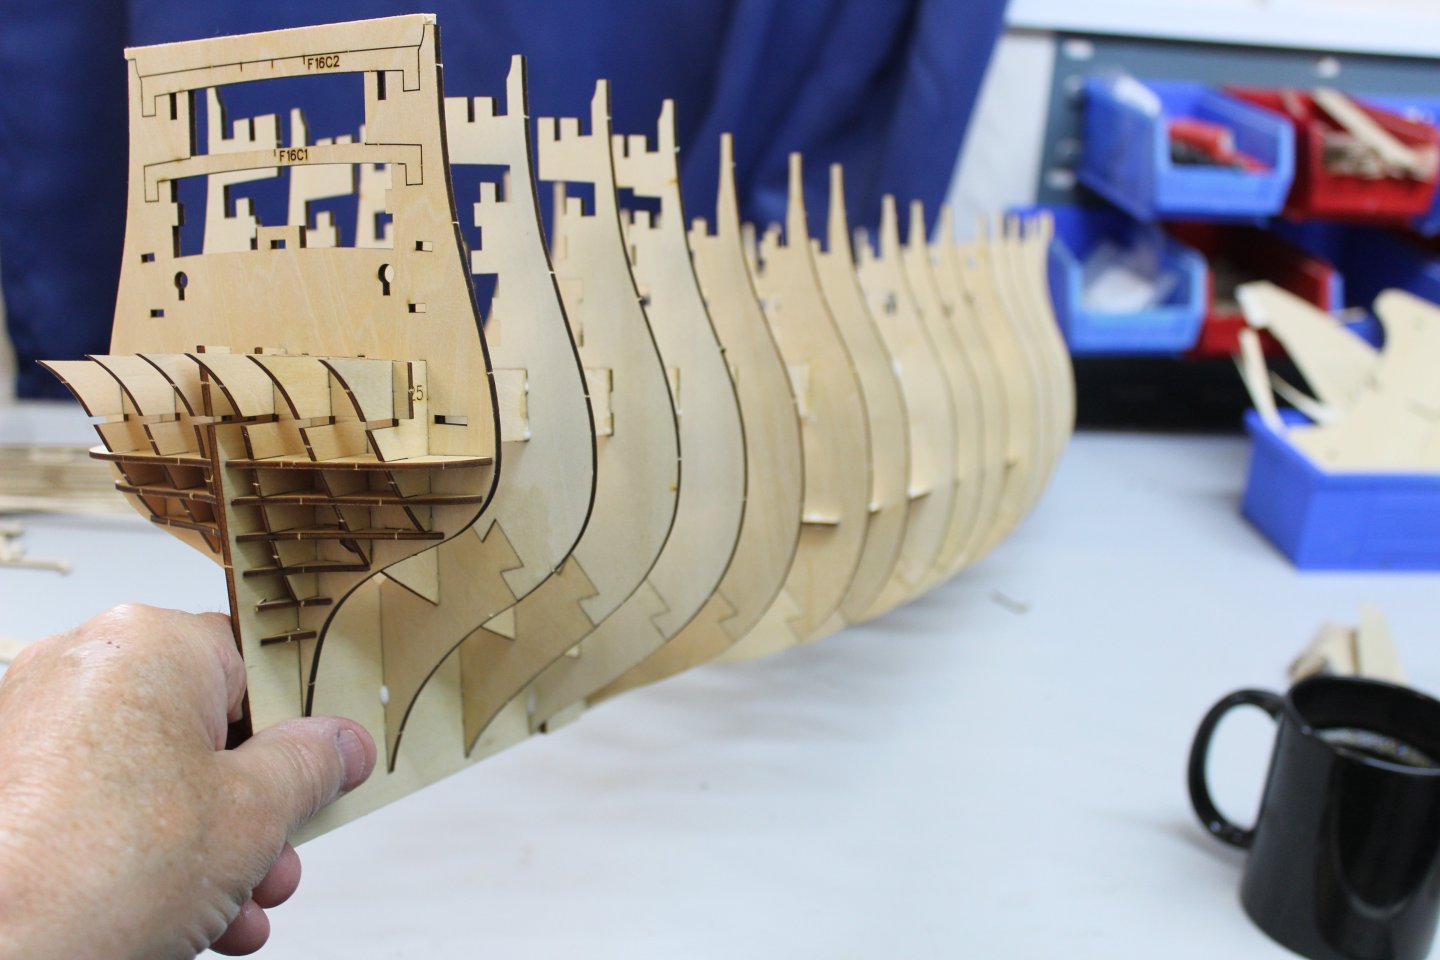
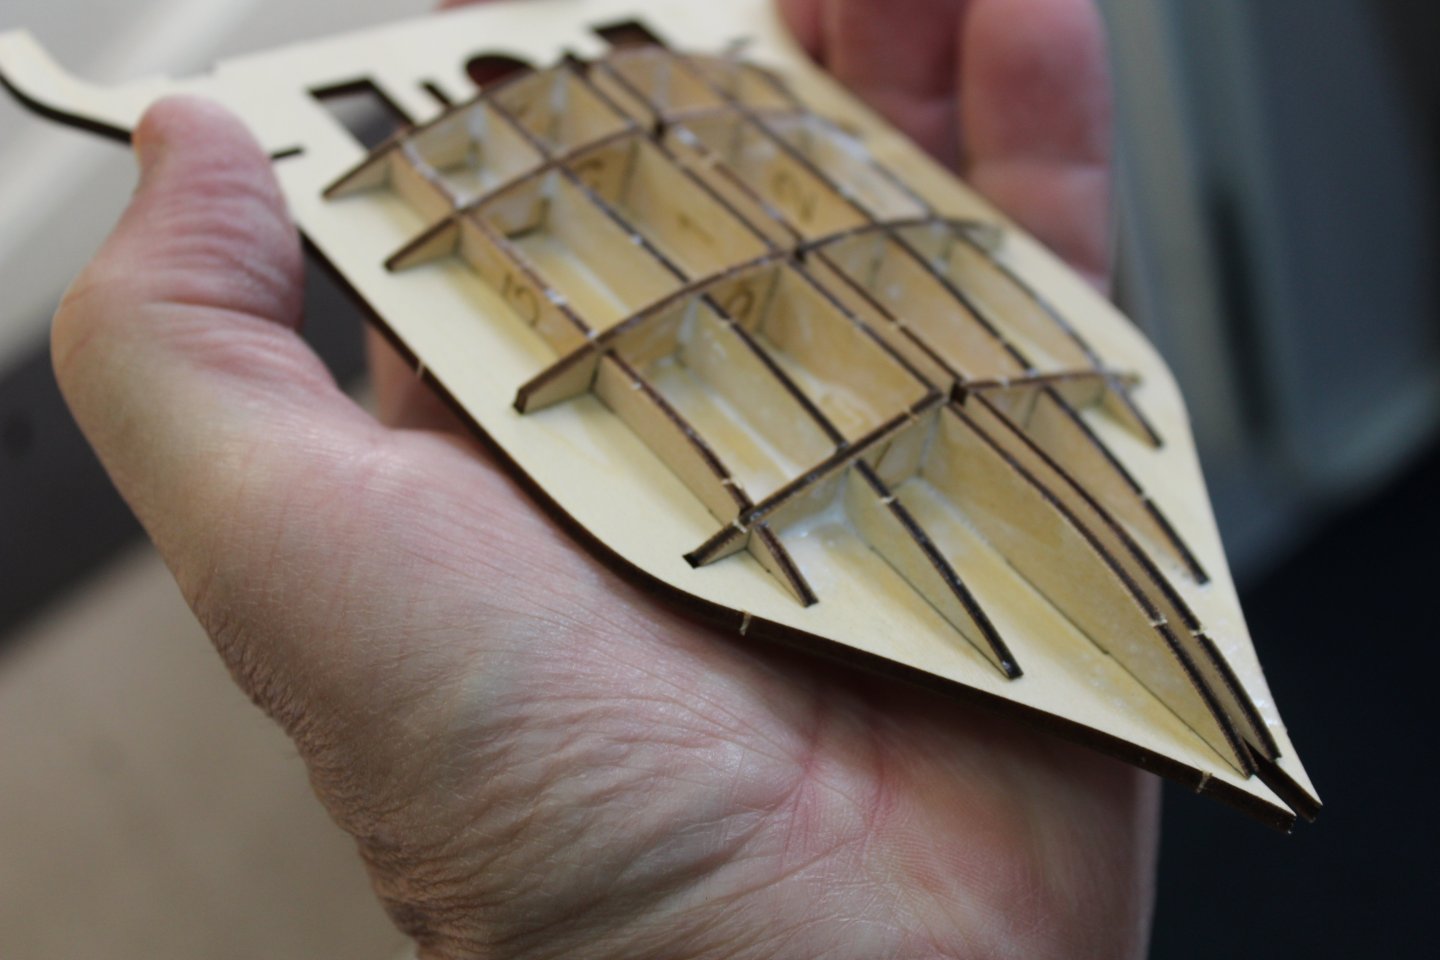
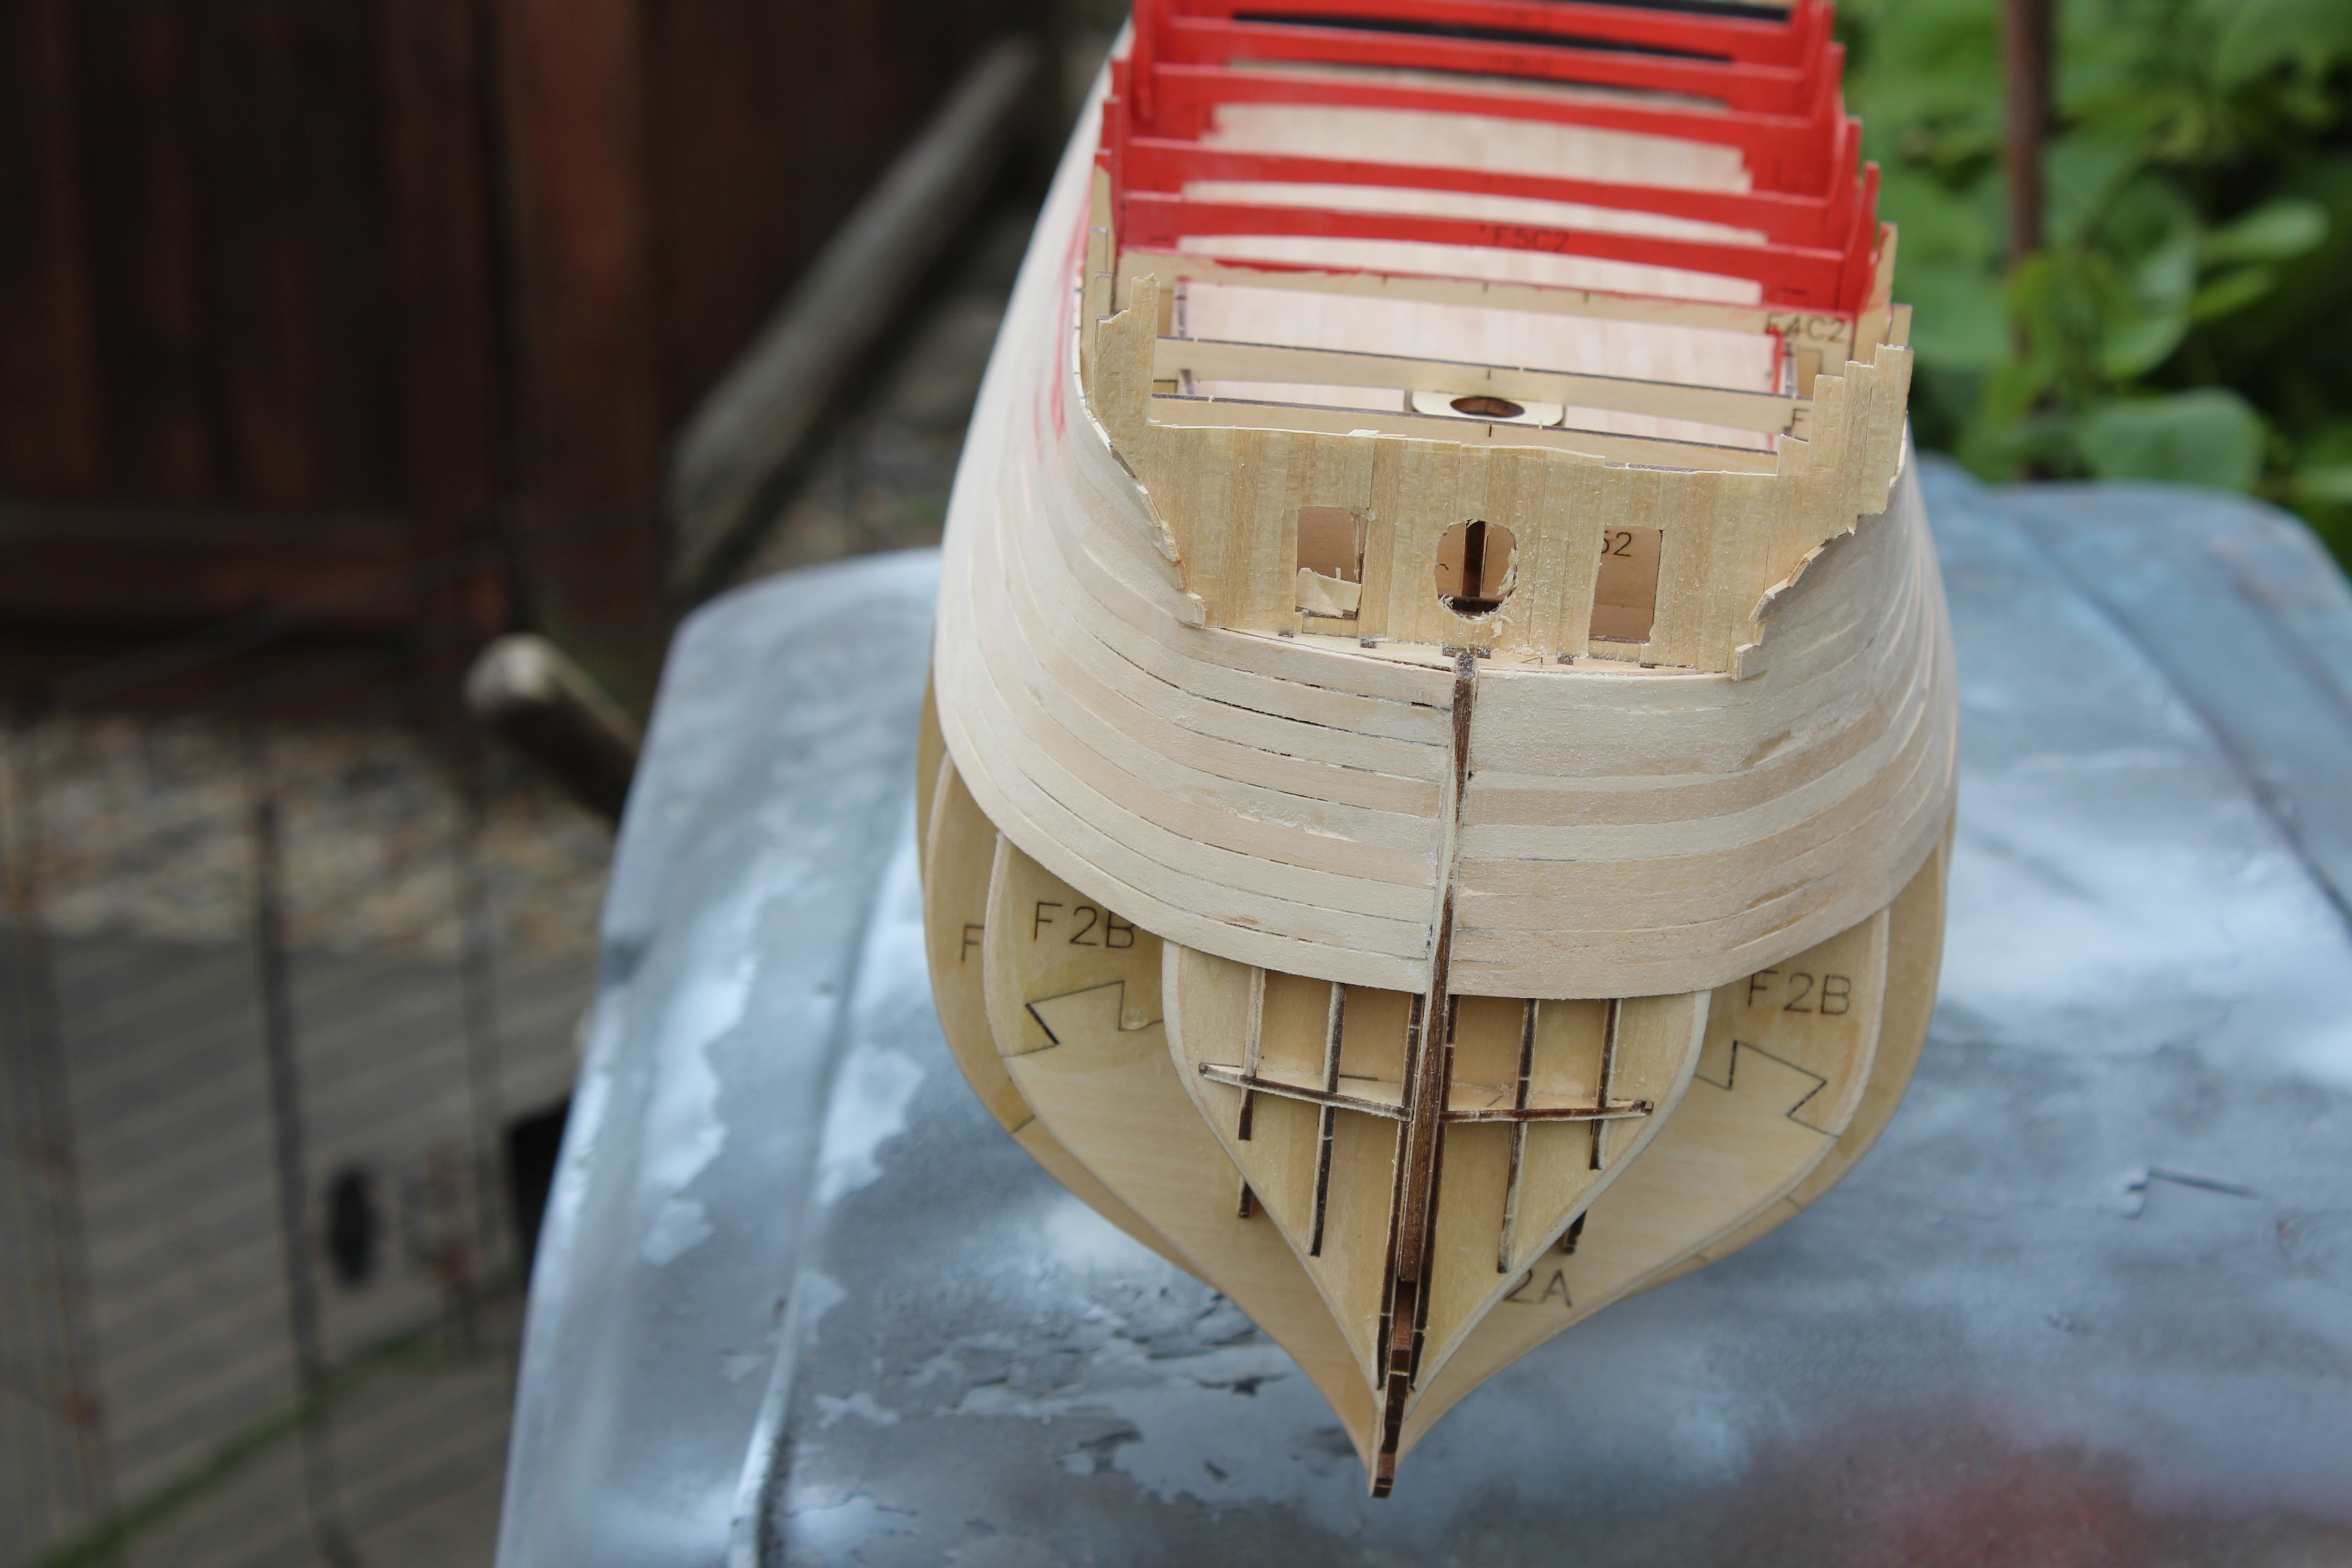
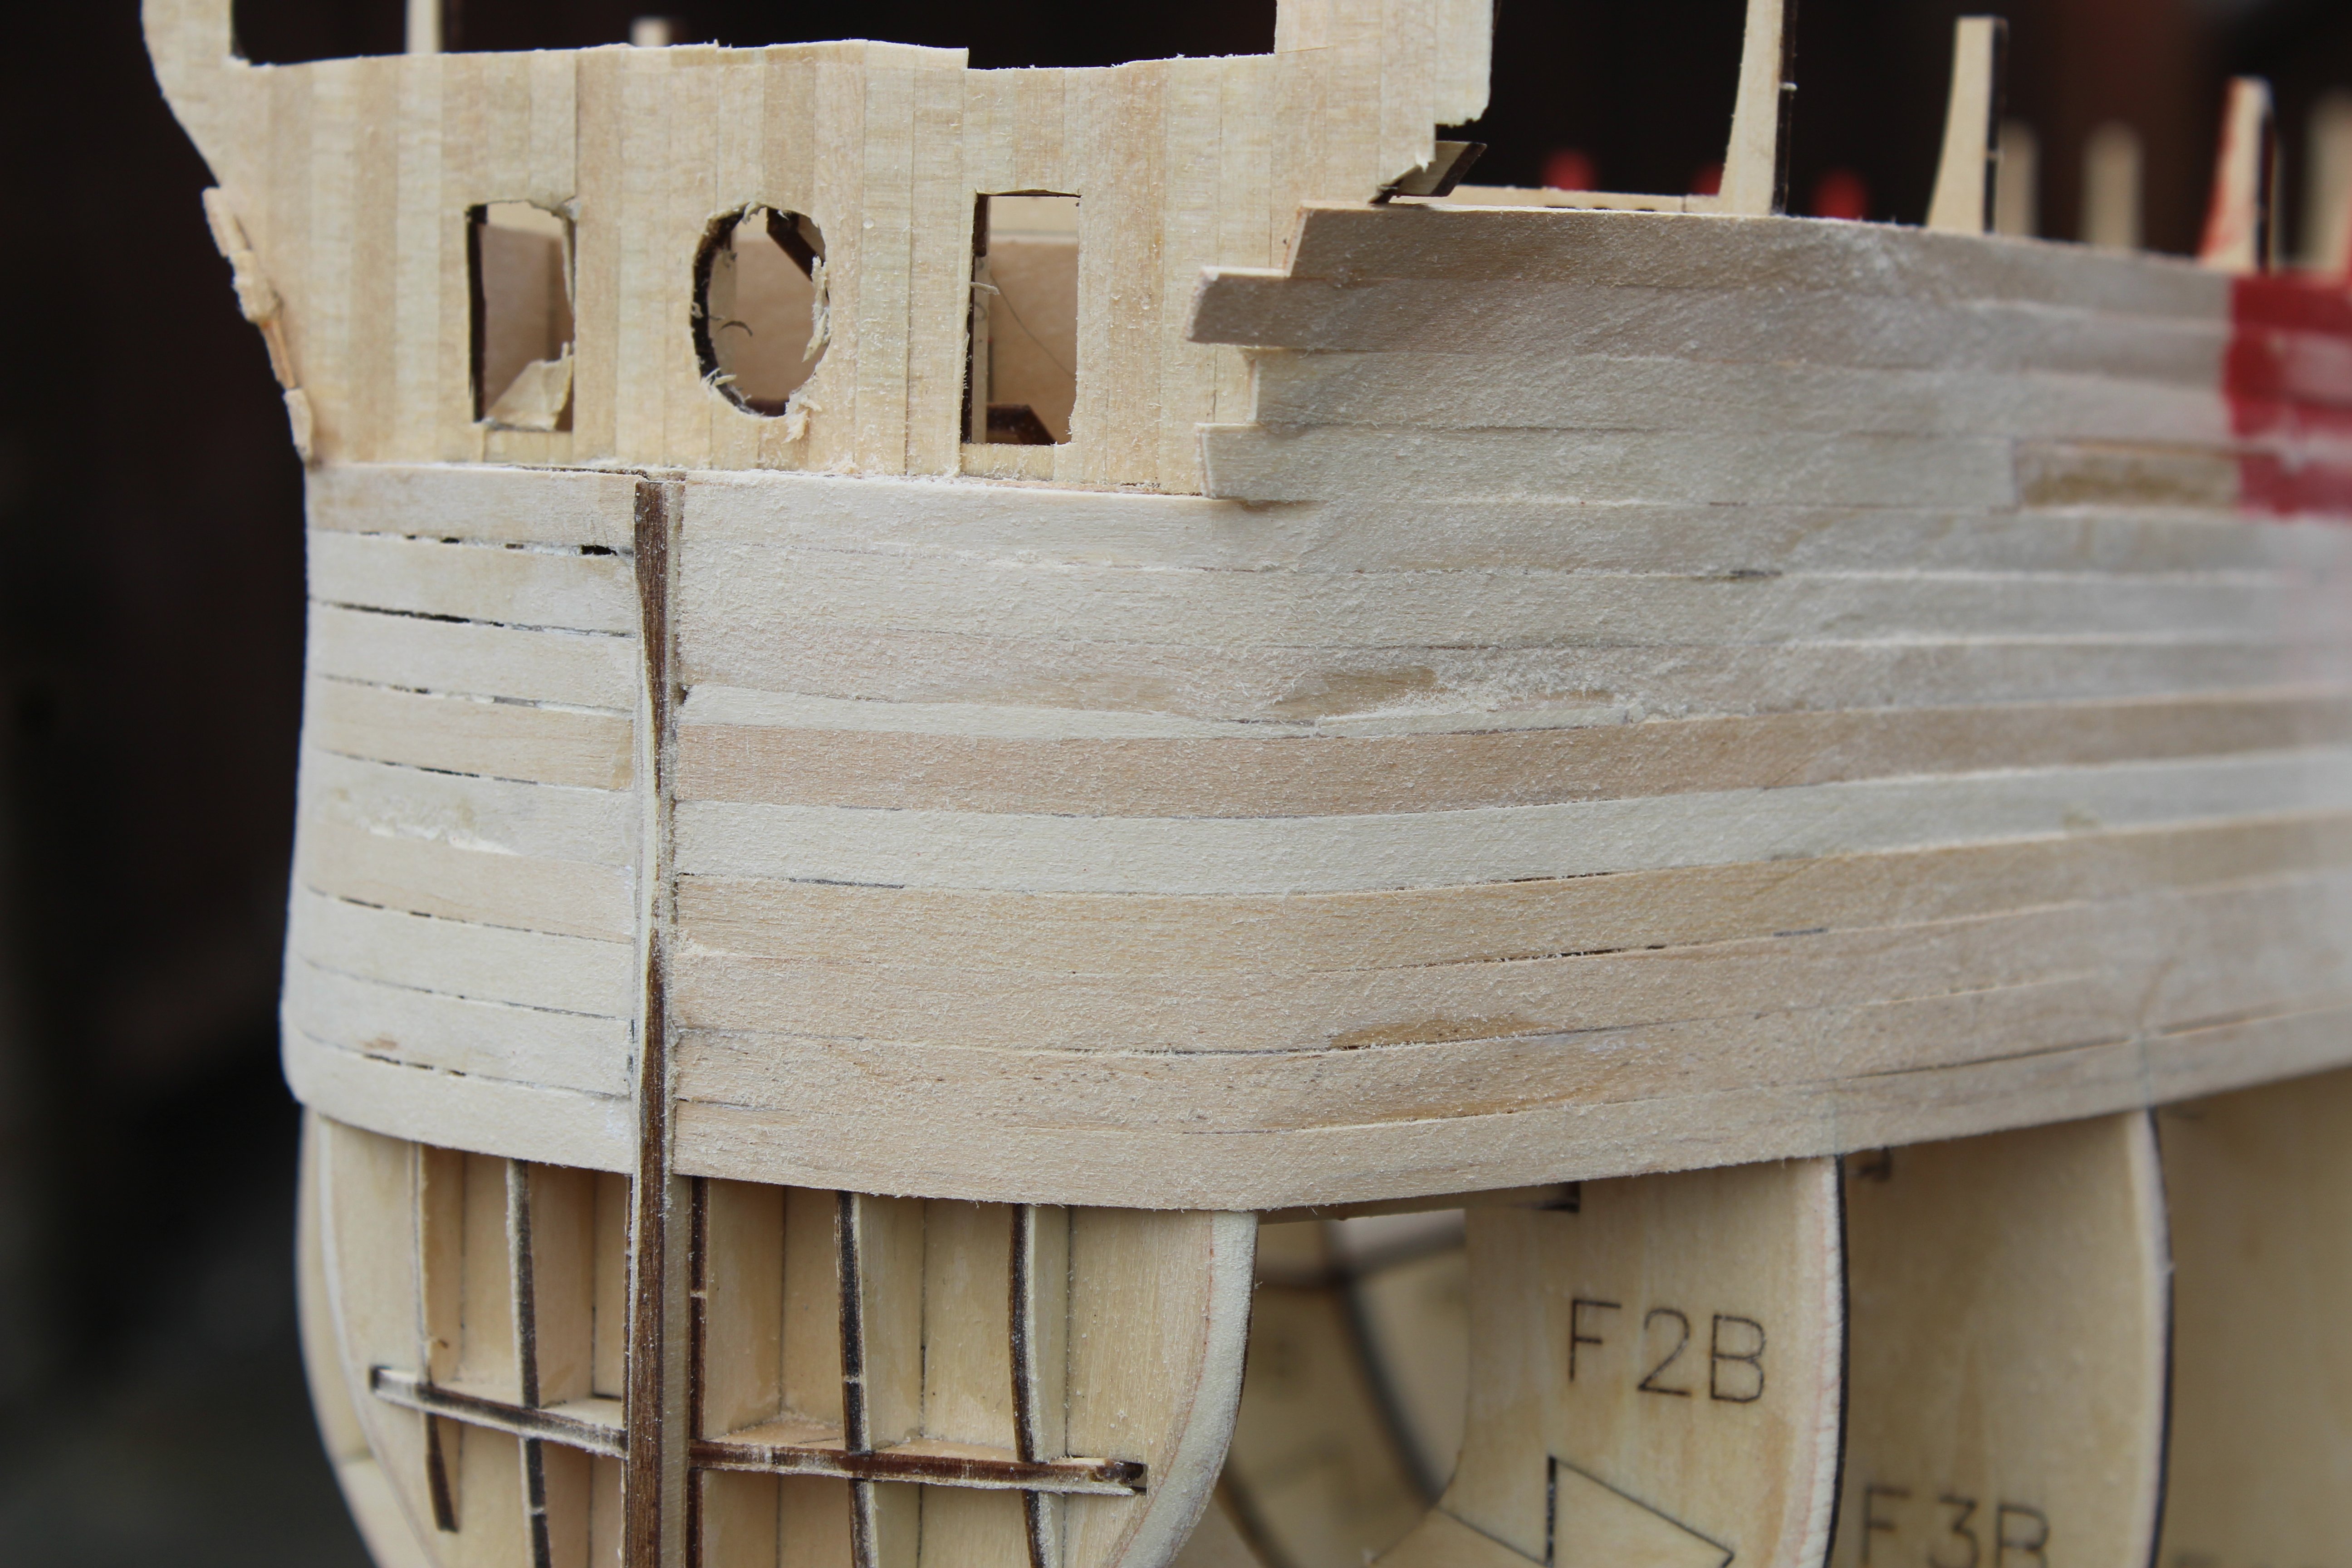
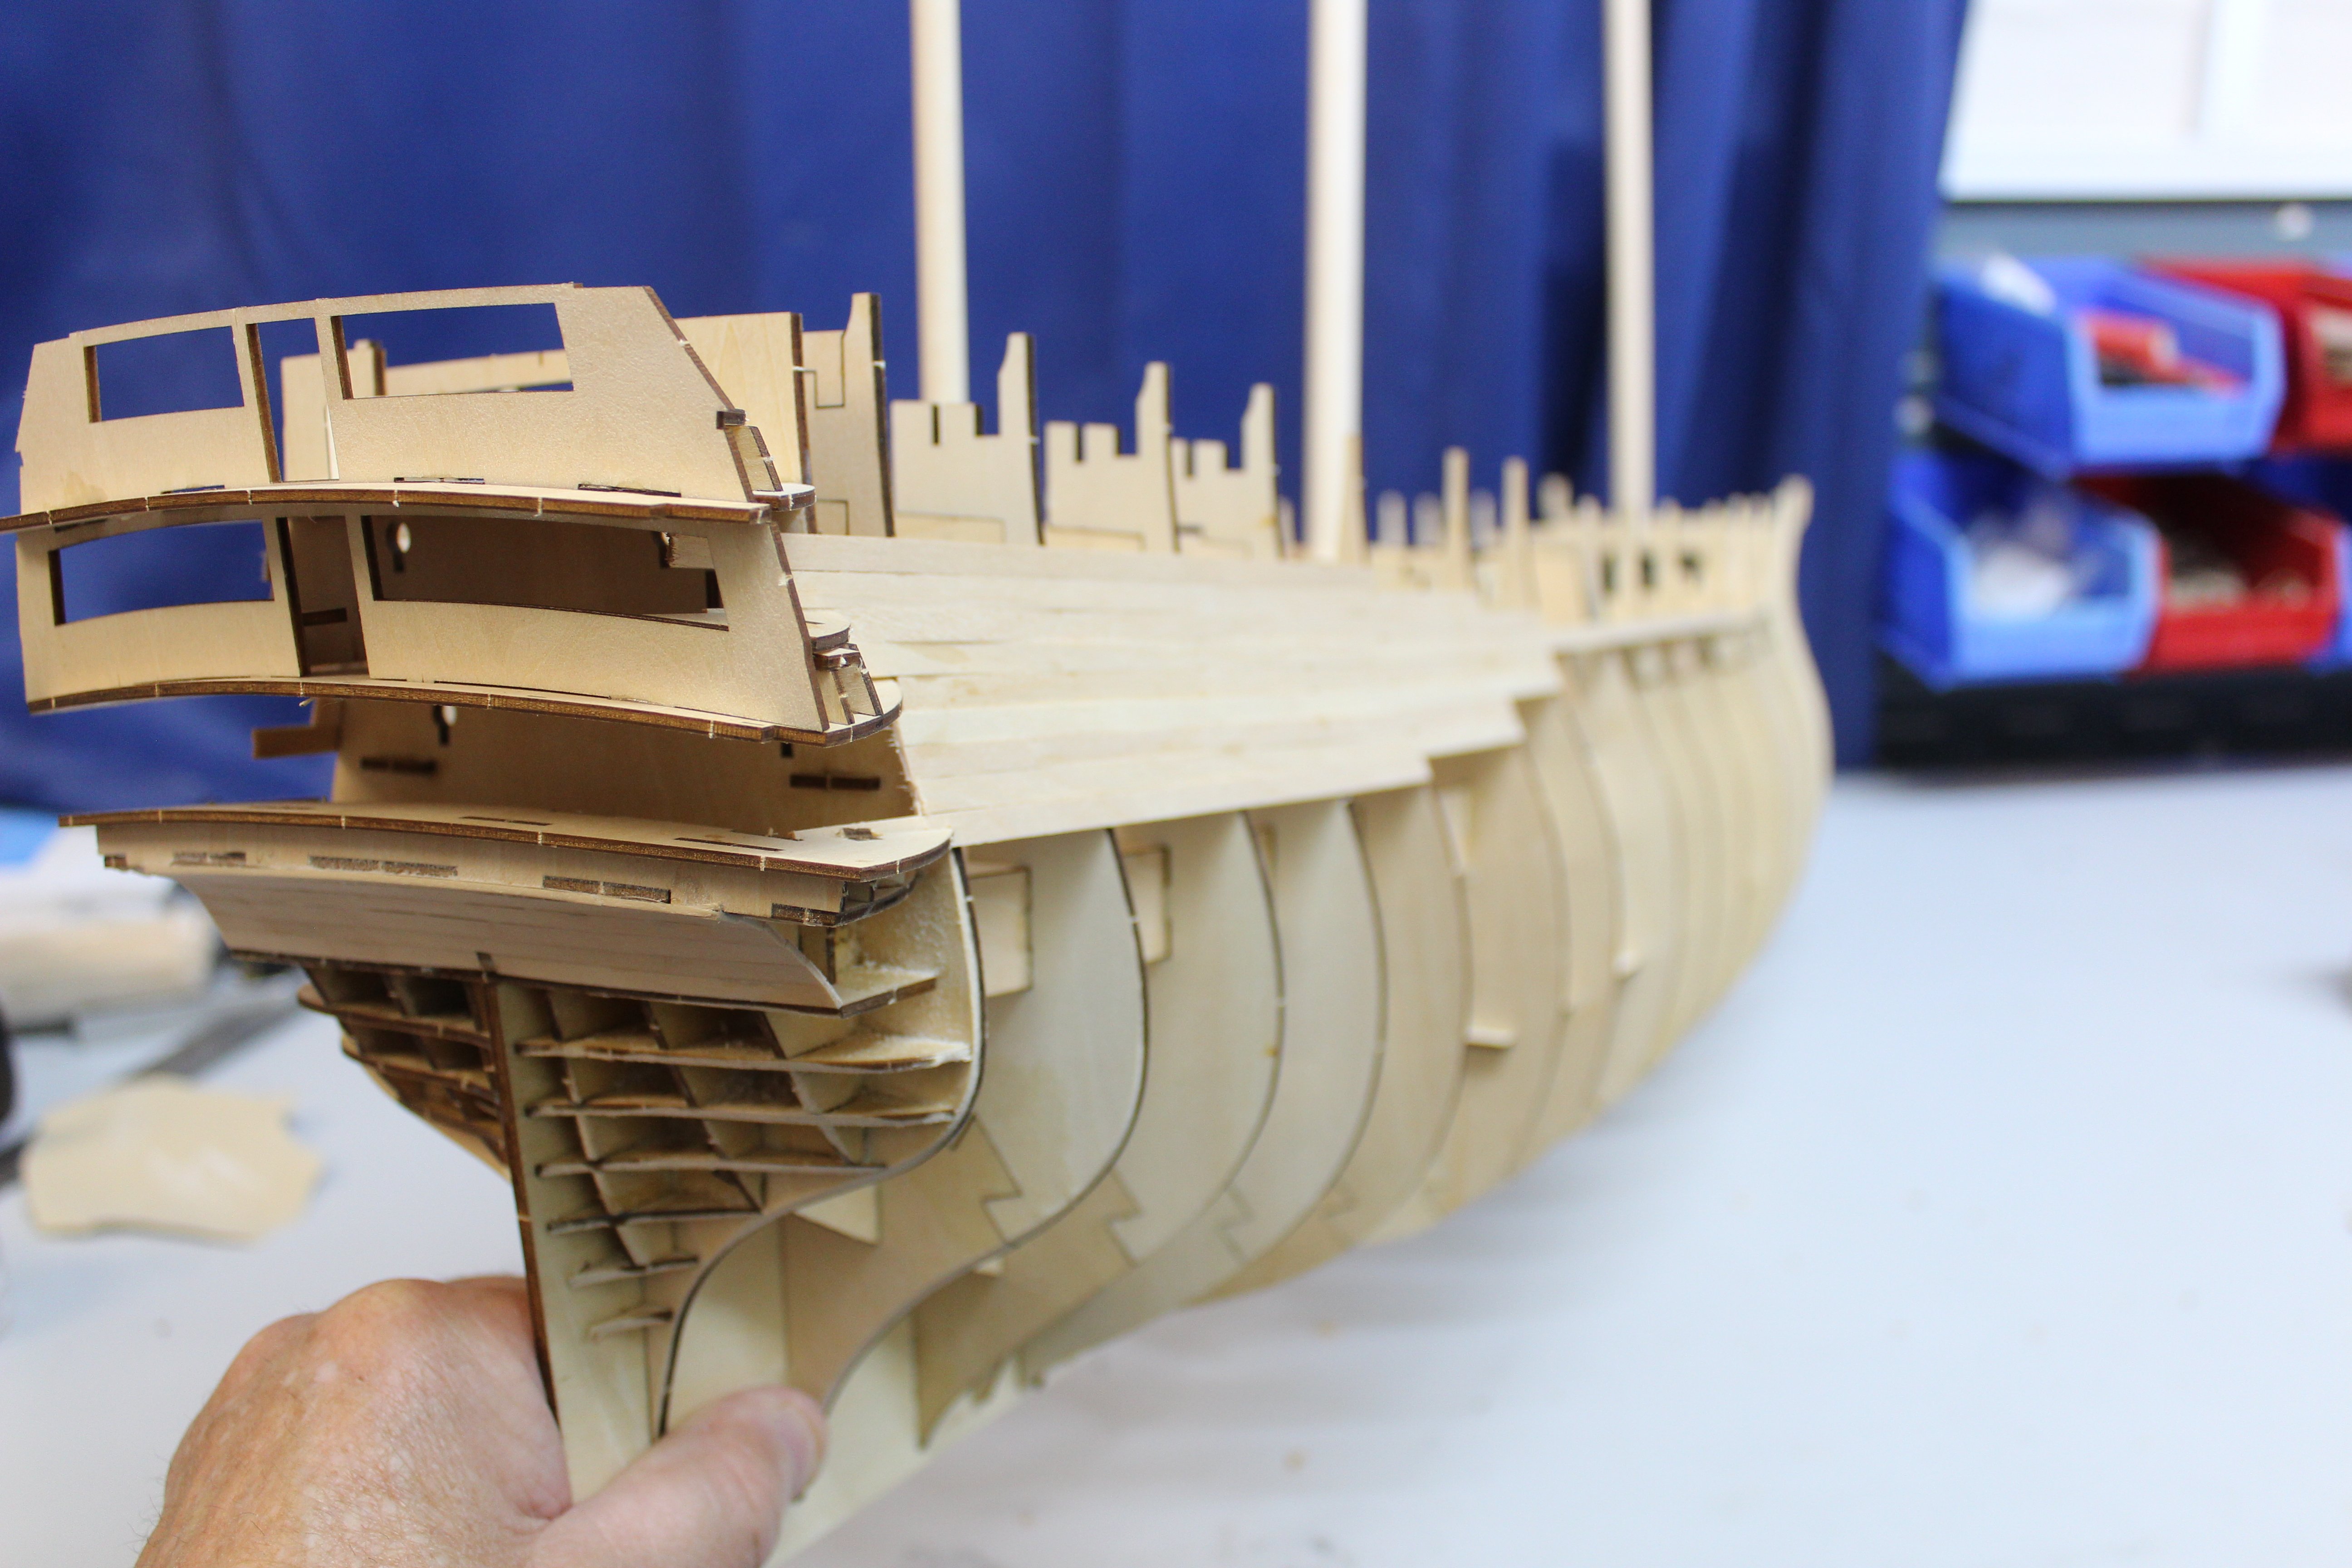
good evening everyone day 4, hull build up, and galleries, with some 1st planking pleased with myself on how this id going so far, 90% of the frame is complete, stern galleries have been made up i have changed the kits requirement from singe planking to double, therefore using the kits 1x5mm in the wrong places until my ordered stock arrives.by planking the galleries now, i can protect them better, by going to double planking i think i will be in a better position to display the gunports shut, without having to do the lid linings the light kit arrived today, Thank you @chris watton and i will be possibly sorting that out in a couple of days that pretty well sums it up for today


-
i had planned for her to be with a full sail set, then changed my mind, also i had not seen one in that configuration, and my latest build will be the same,
-
wonderful work, so very clean and tidy
-
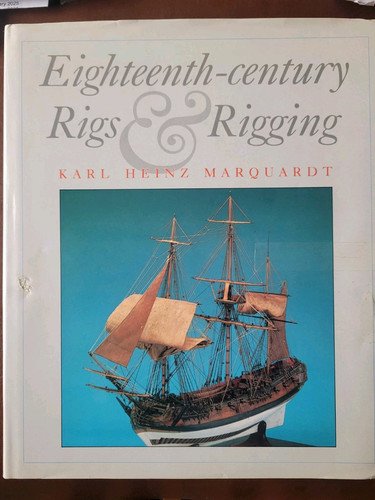
on recommendation i have now purchased this EIGHTEENTH - CENTURY RIGS& RIGGING. KARL HEINZ MARQUARDT. IST ENGLISH EDITION...
-
yep its me, asking silly questions again having just finished the Vanguard Models HMS Indefatigable, i have moved on to the Santìsima Trinidad, and it seams to me that she is certainly lacking in the amount of rigging, if i was to rig her with info from my Caldercraft HMS Victory would i be that far out, or is there a decent POR i can turn to, were allied 3/4 deckers more or less the same
.thumb.JPG.3cf09d298f270567ce8f4b0e475bd304.JPG)
-
Have a look all the instructions are here Wooden Model Kit Spanish Line Ship Santísima Trinidad 1:84
-
i have been spoilt by just finishing a well designed kit from @chris watton but like most wooden kits, im enjoying the journey
-
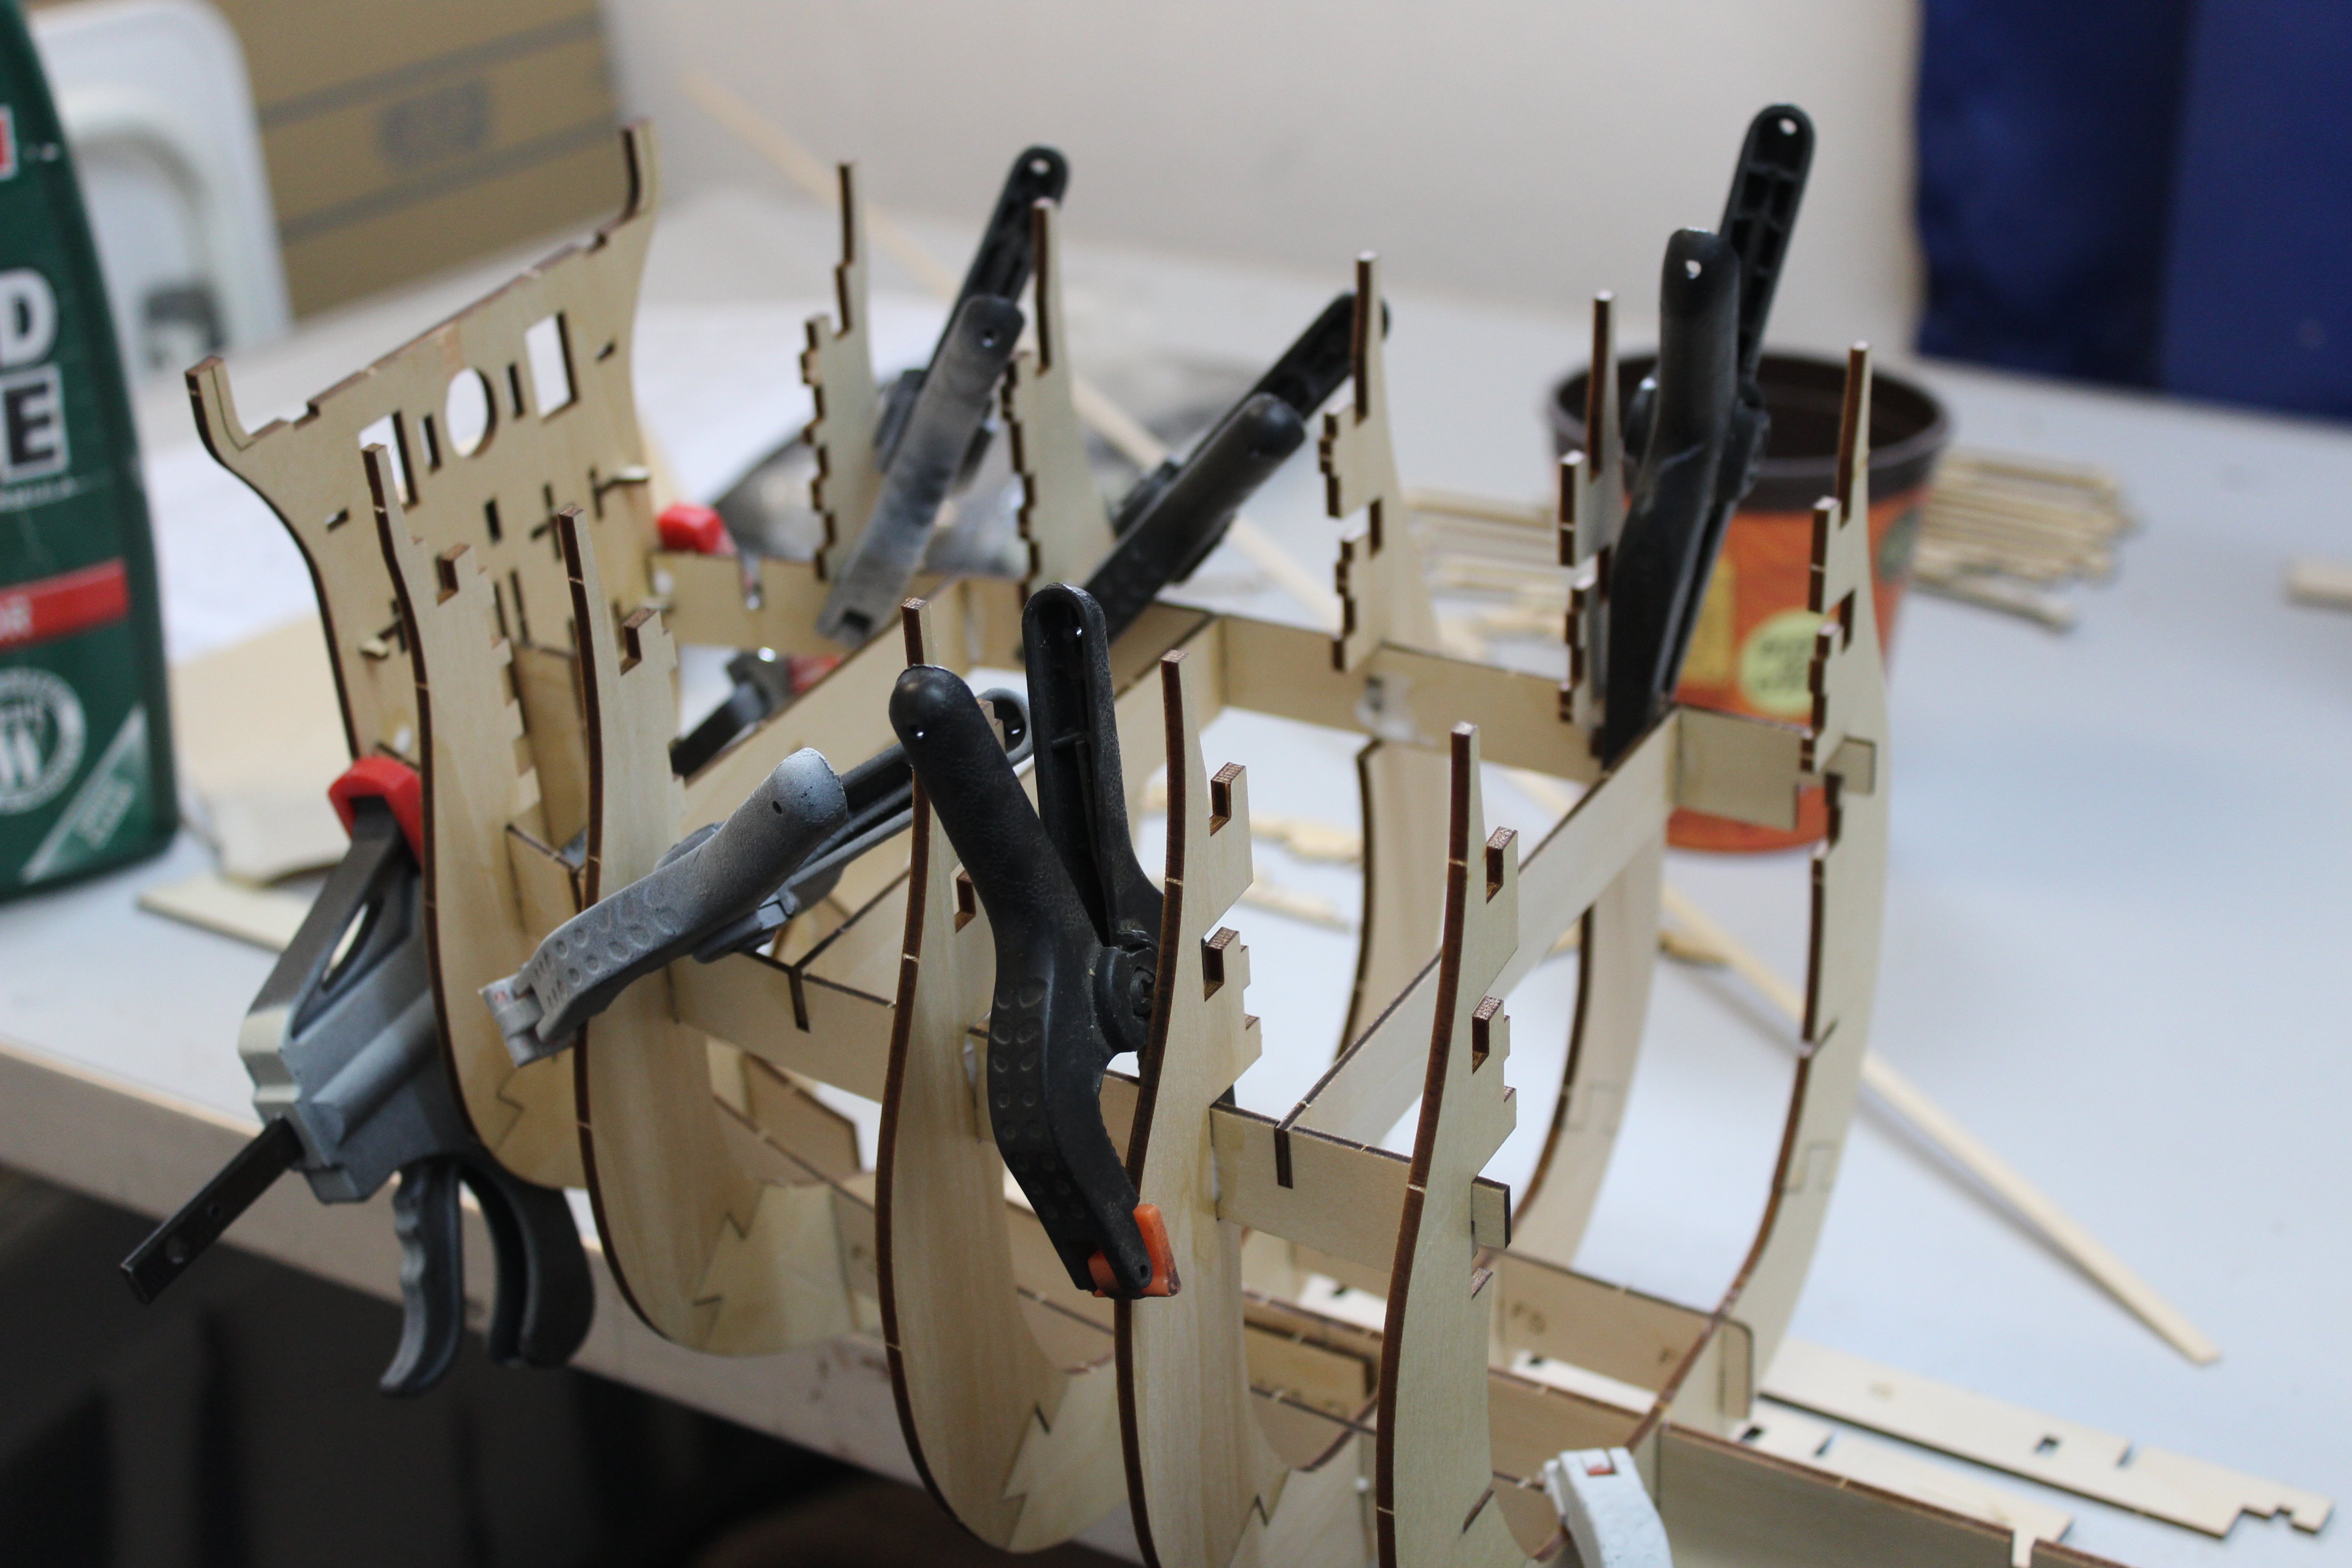
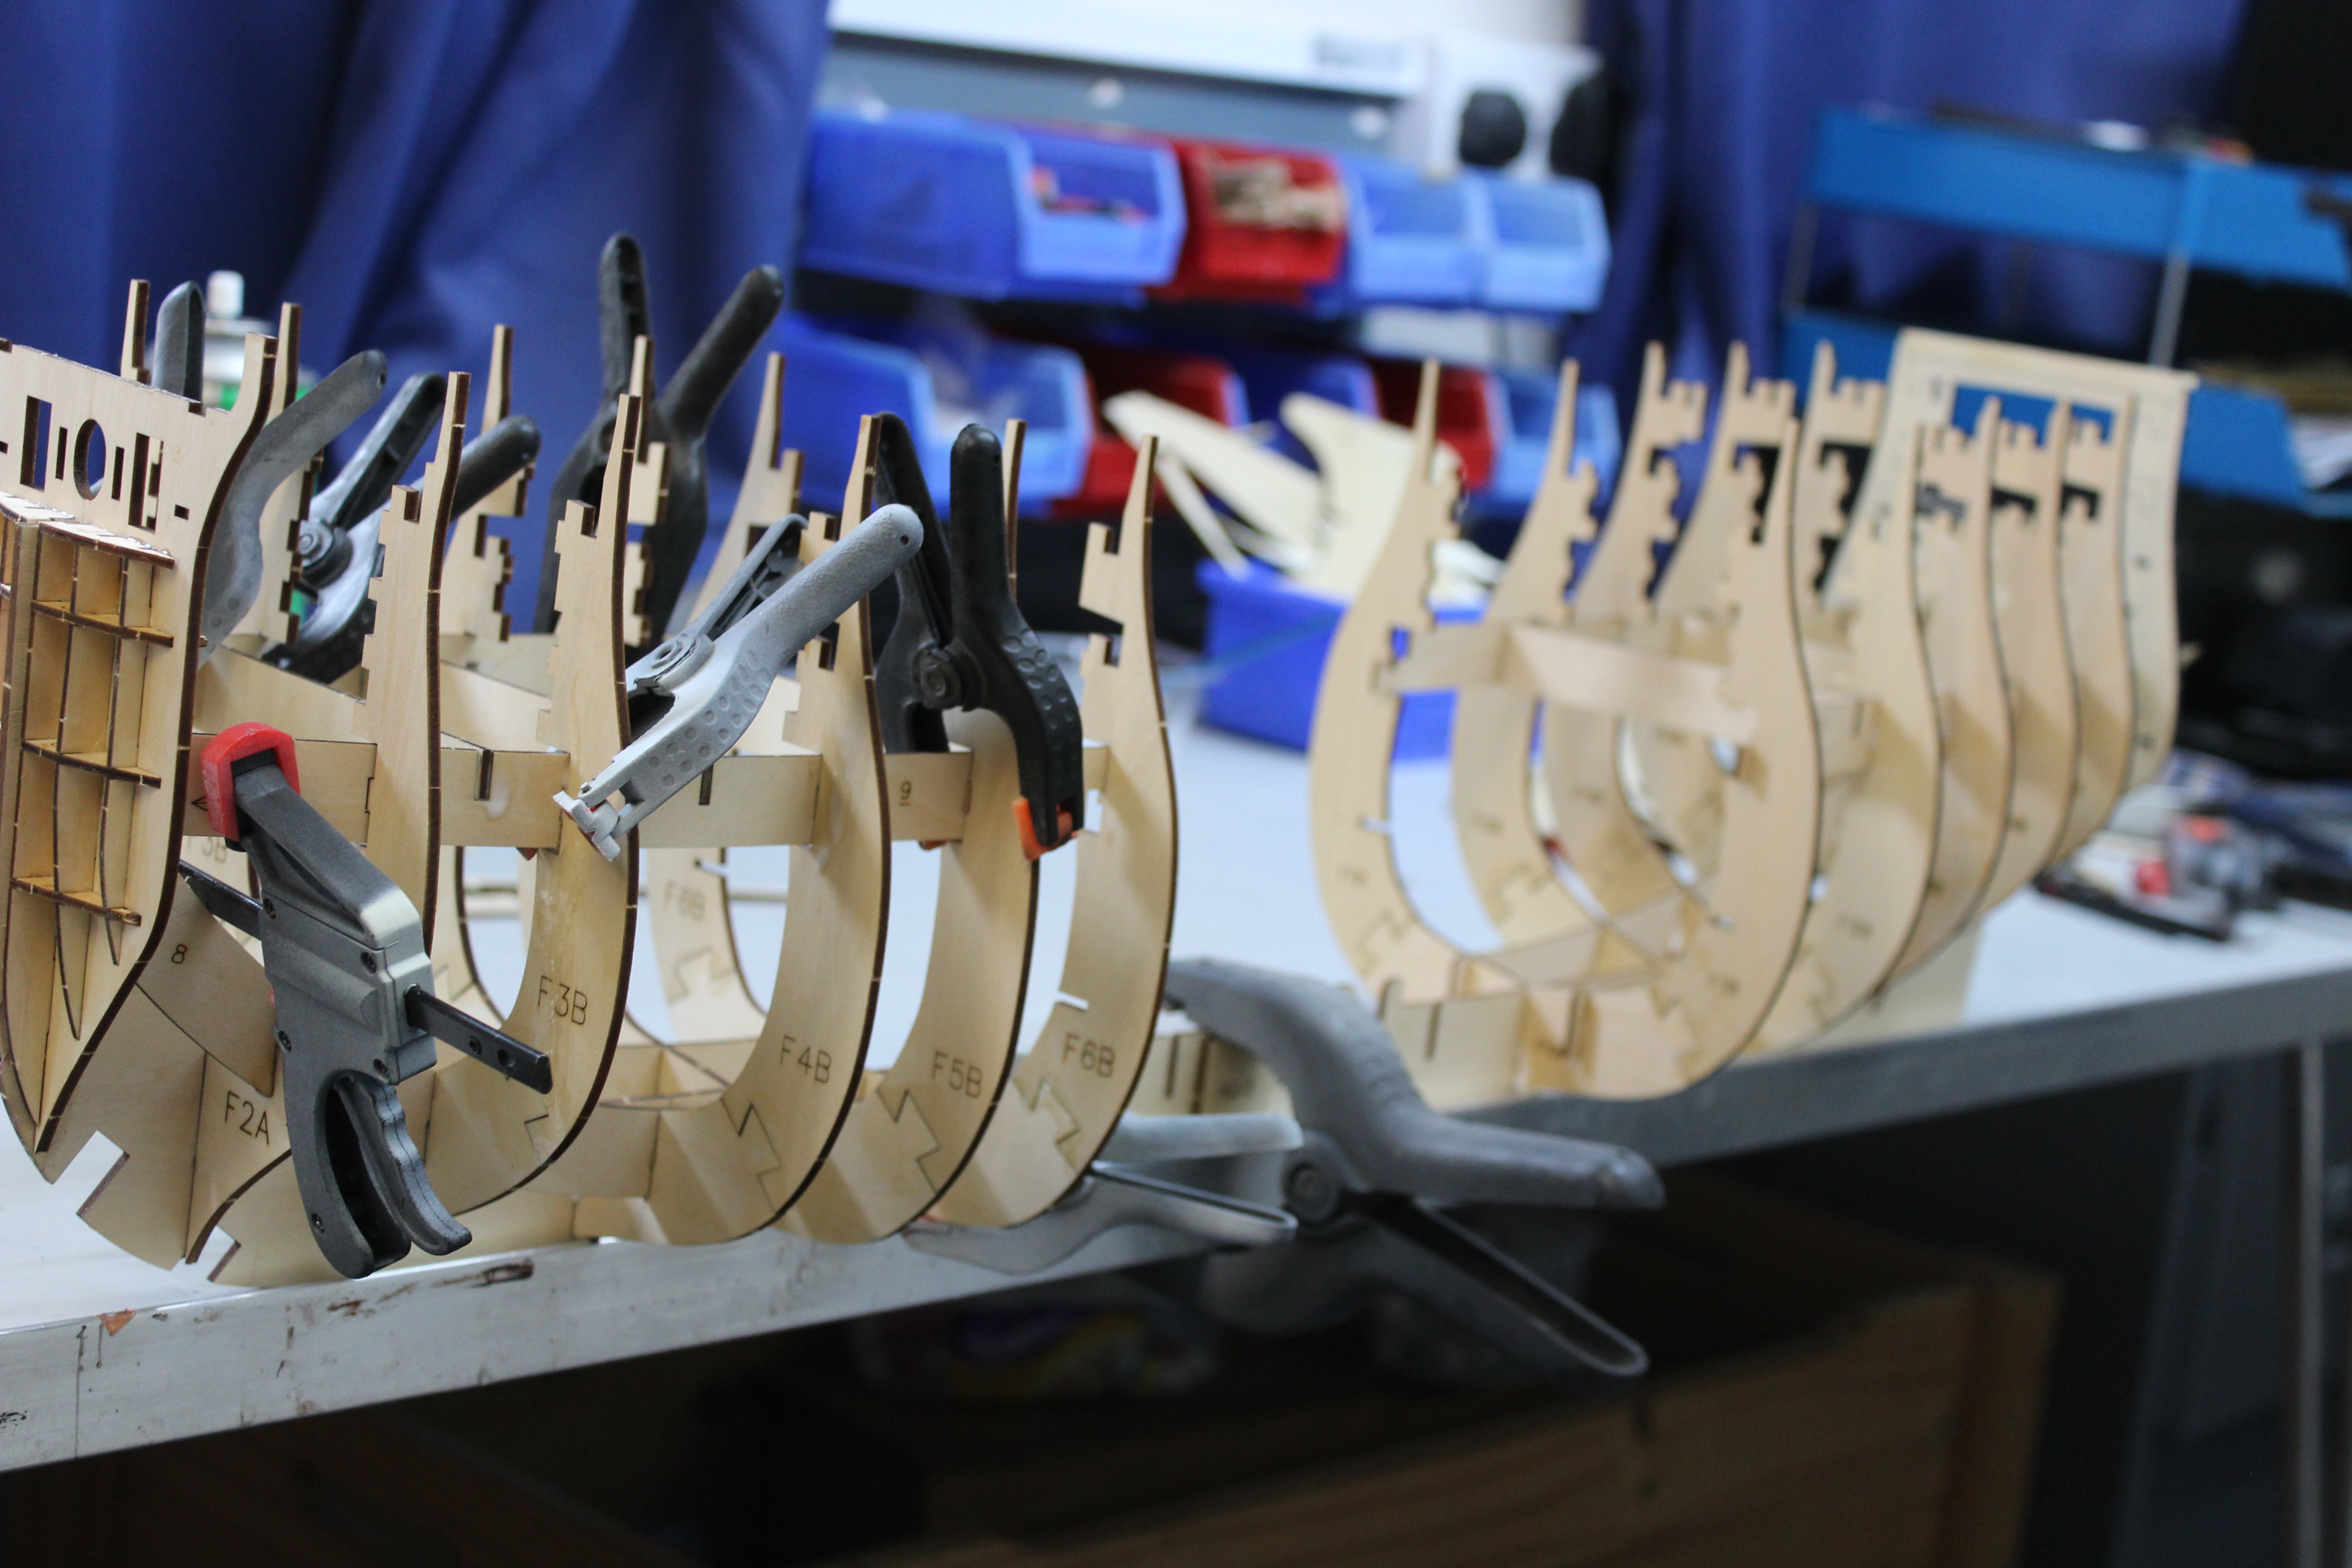
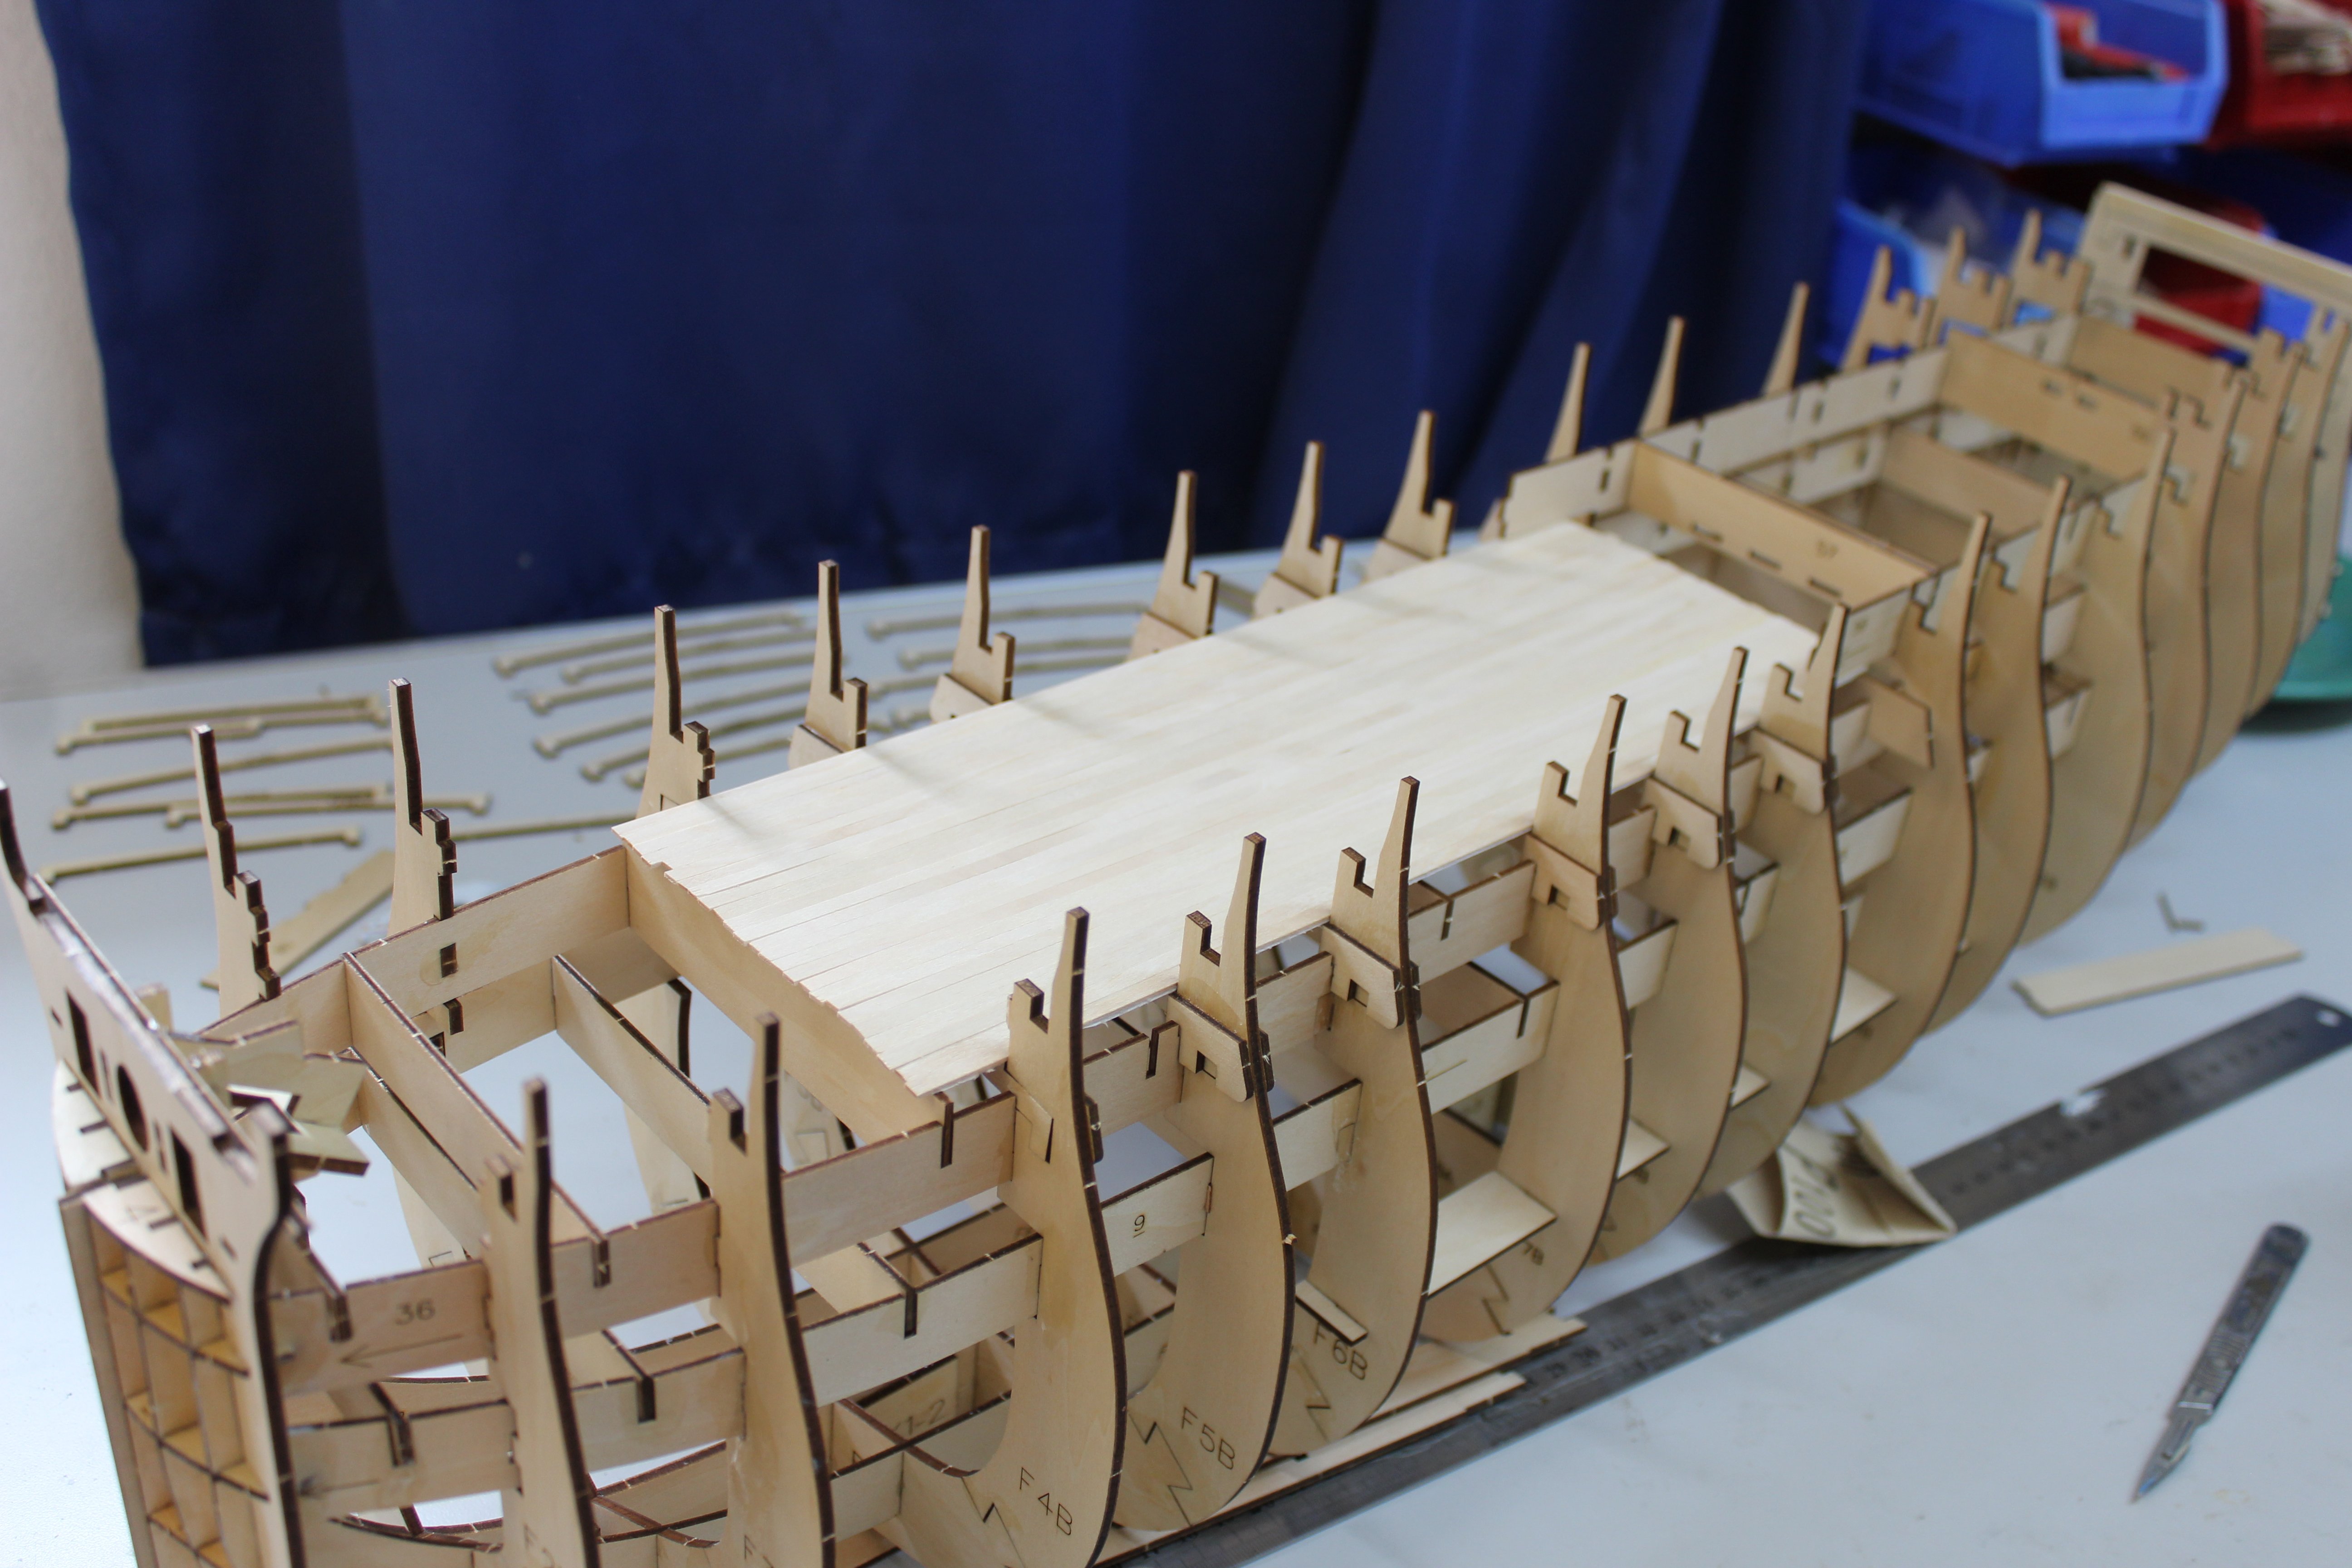
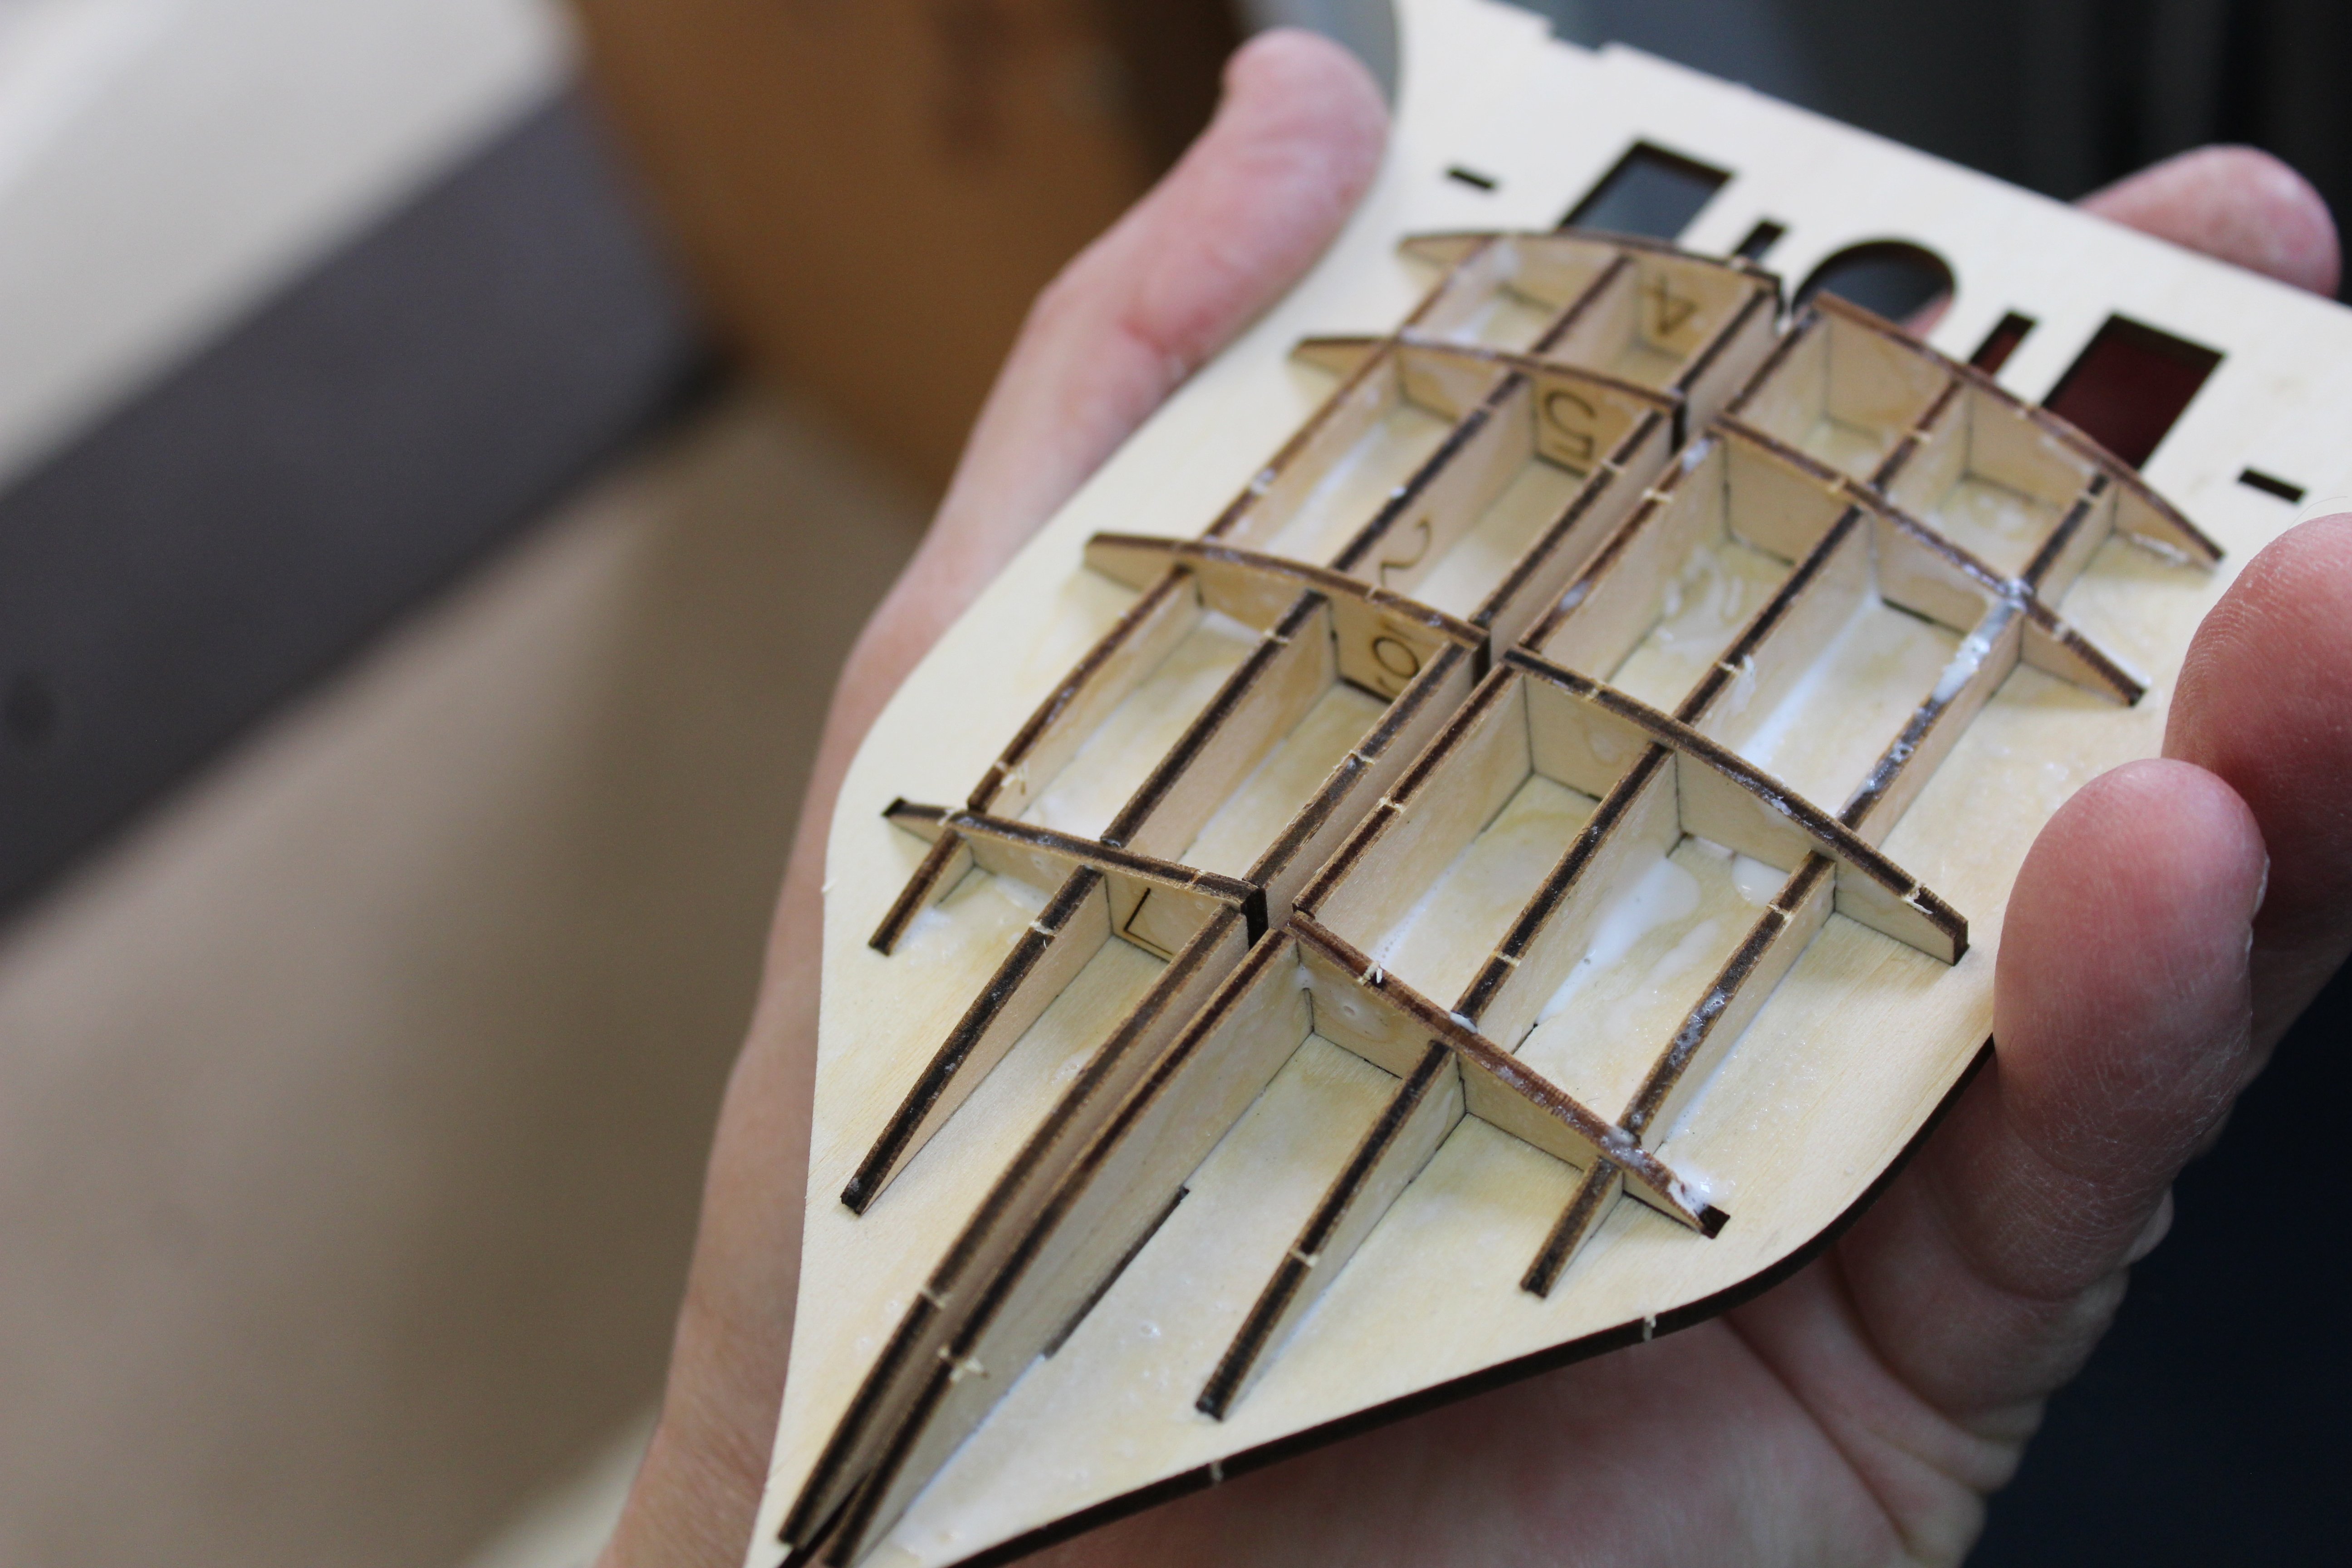
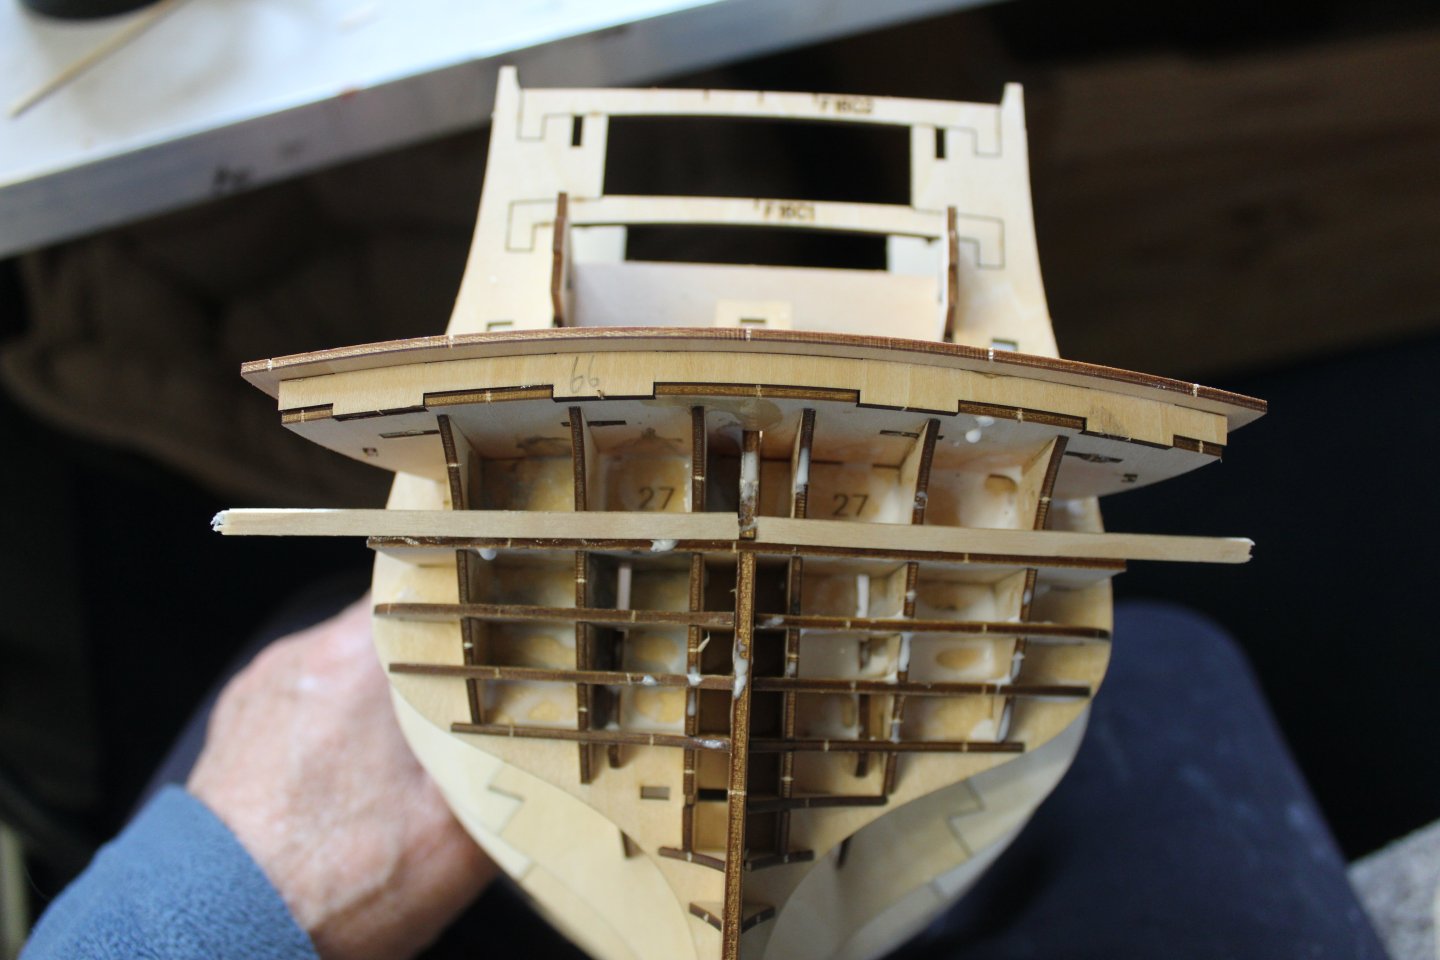
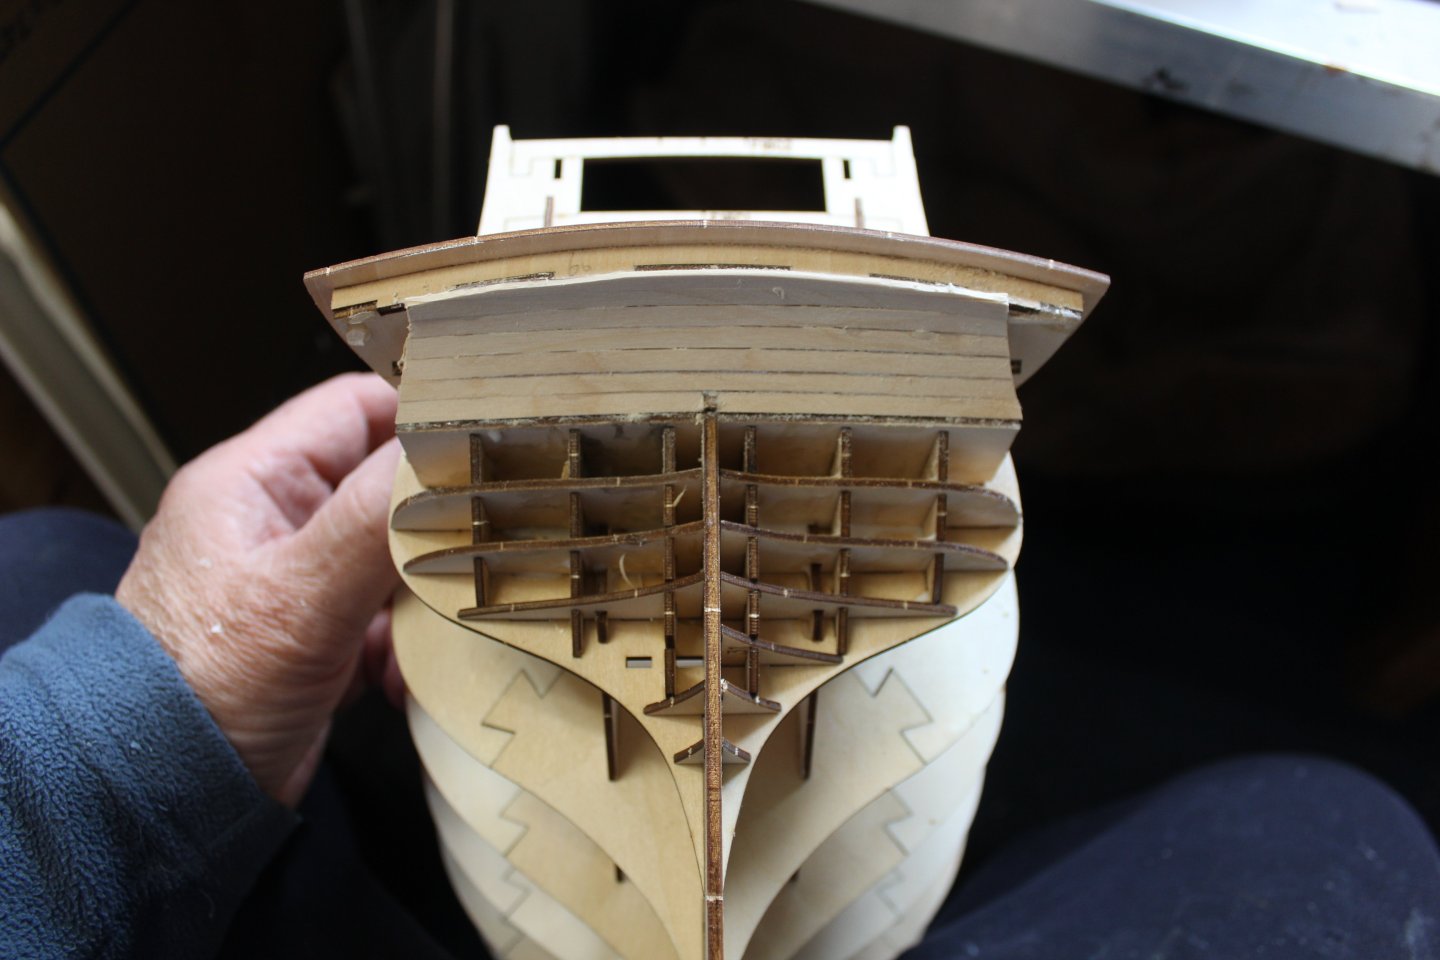
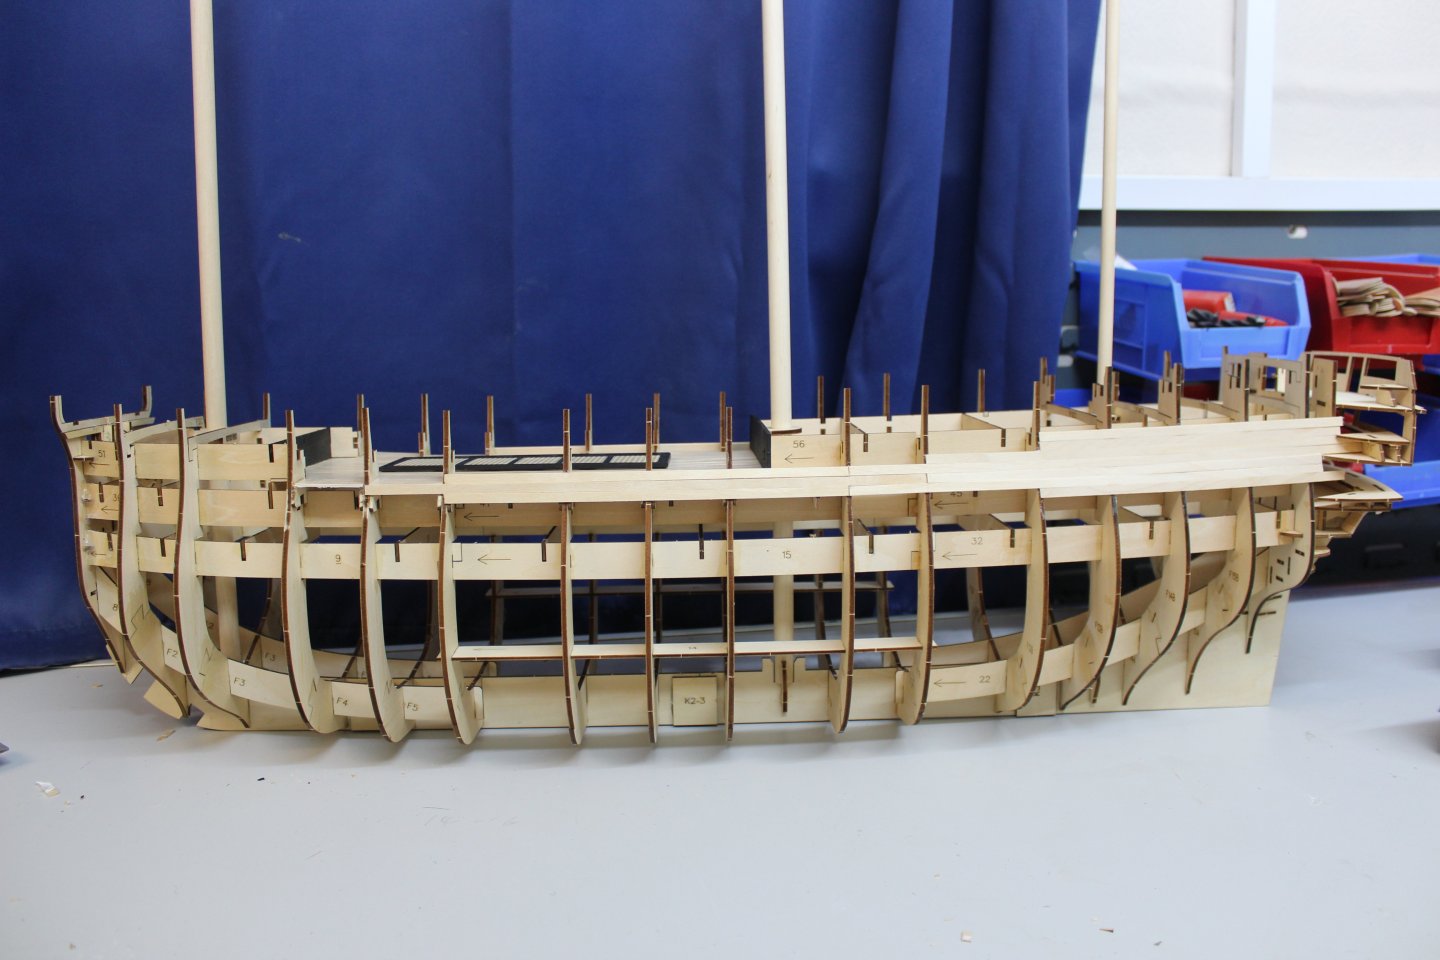
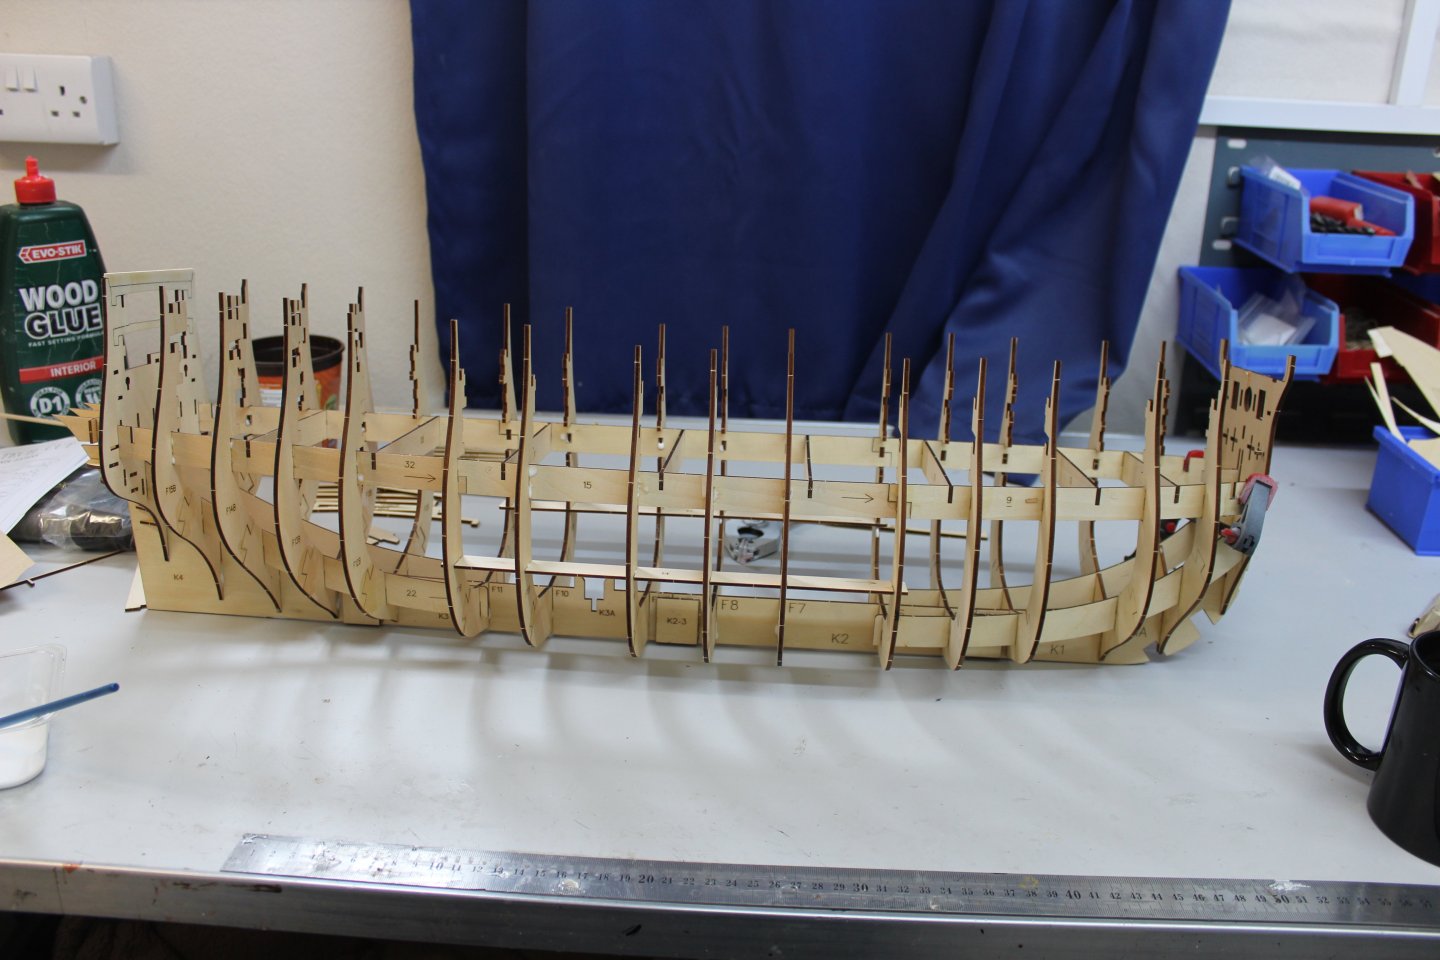
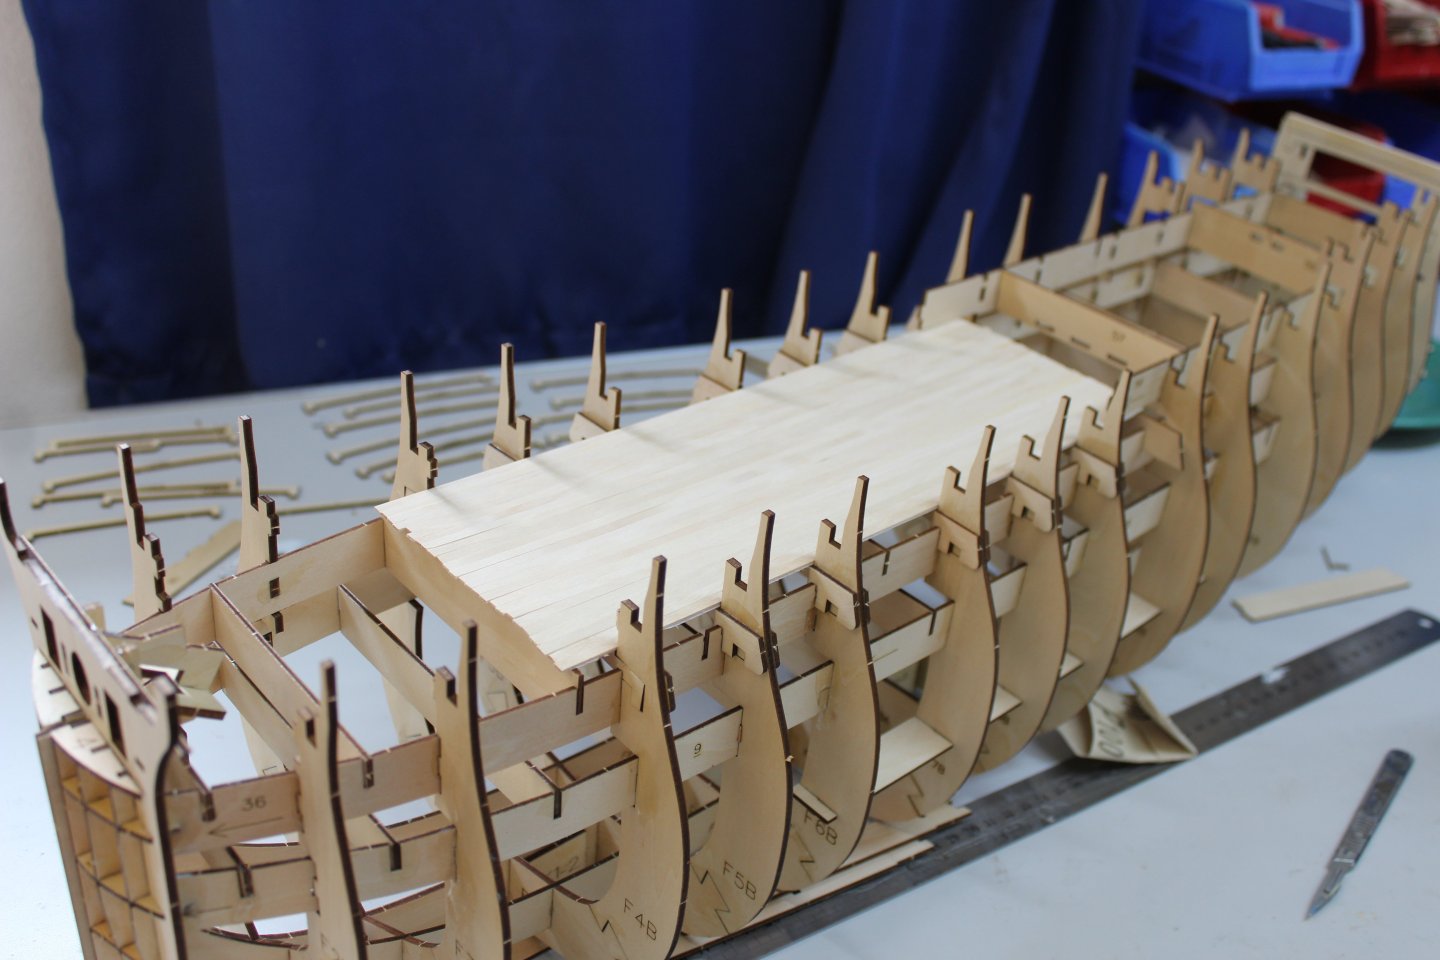
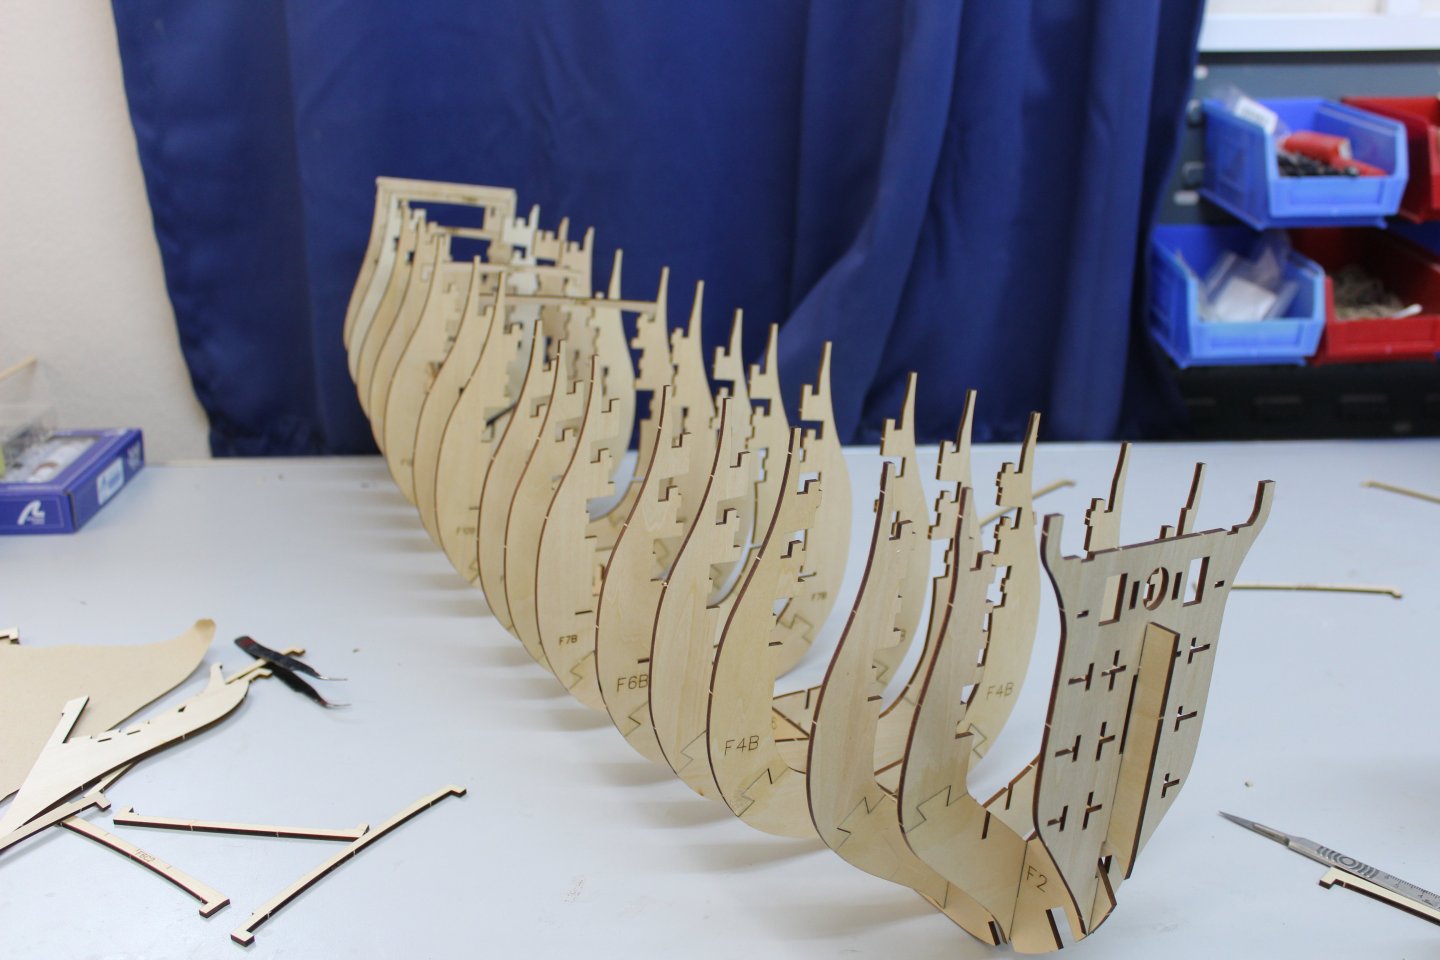
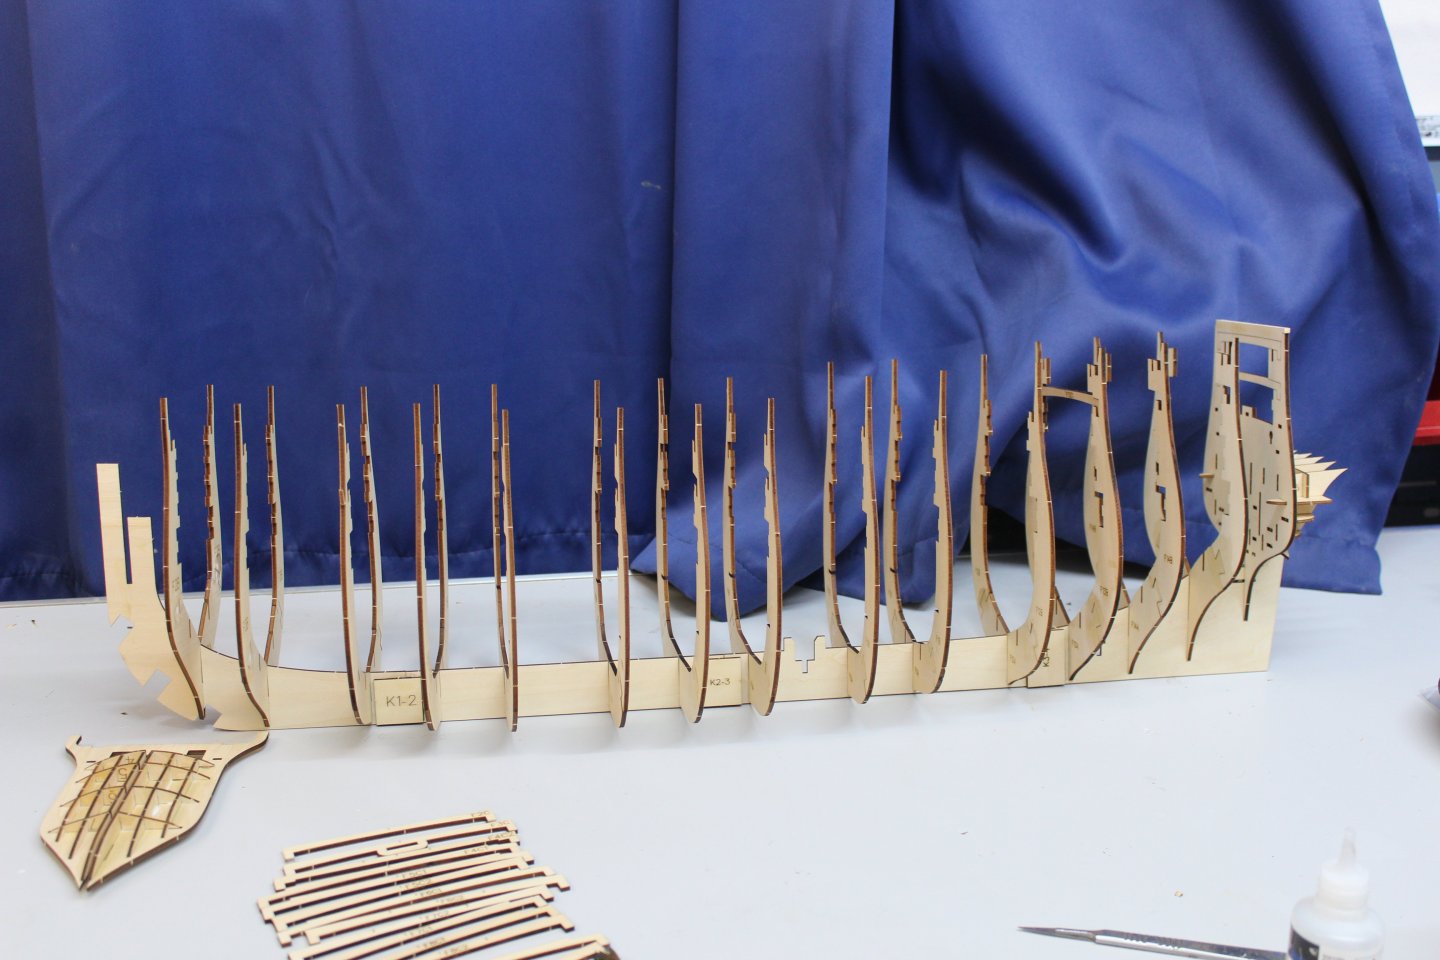
day 2 hull build up Good evening everyone My concerns for a sloppy loose joint build have gone away, i did a test fit of everything, and wasn't impressed, but once all the locking tabs are inserted and the glue allowed to dry the hull is quite sturdy. but still feels very light weight and looks fragile, i am already onto planking the middle gun deck, this needs to be done now before the rest of the upper hull is fitted looking ahead and seeing the lack of frames, i am going to convert her to a double planled hull and order some 1X4mm lime strips. she will then have a decent base for coppering, i also do not intend to have her with all guns showing, hoping to do the same as my Vic and have them in vent or shut
.thumb.JPG.ac7f7ab313326d4094a1d5d505edcad6.JPG)


-
Will the poor join allow light bleed into the the deck level?
-
very nice indeed, i like the painted hull, very clean and tidy
-
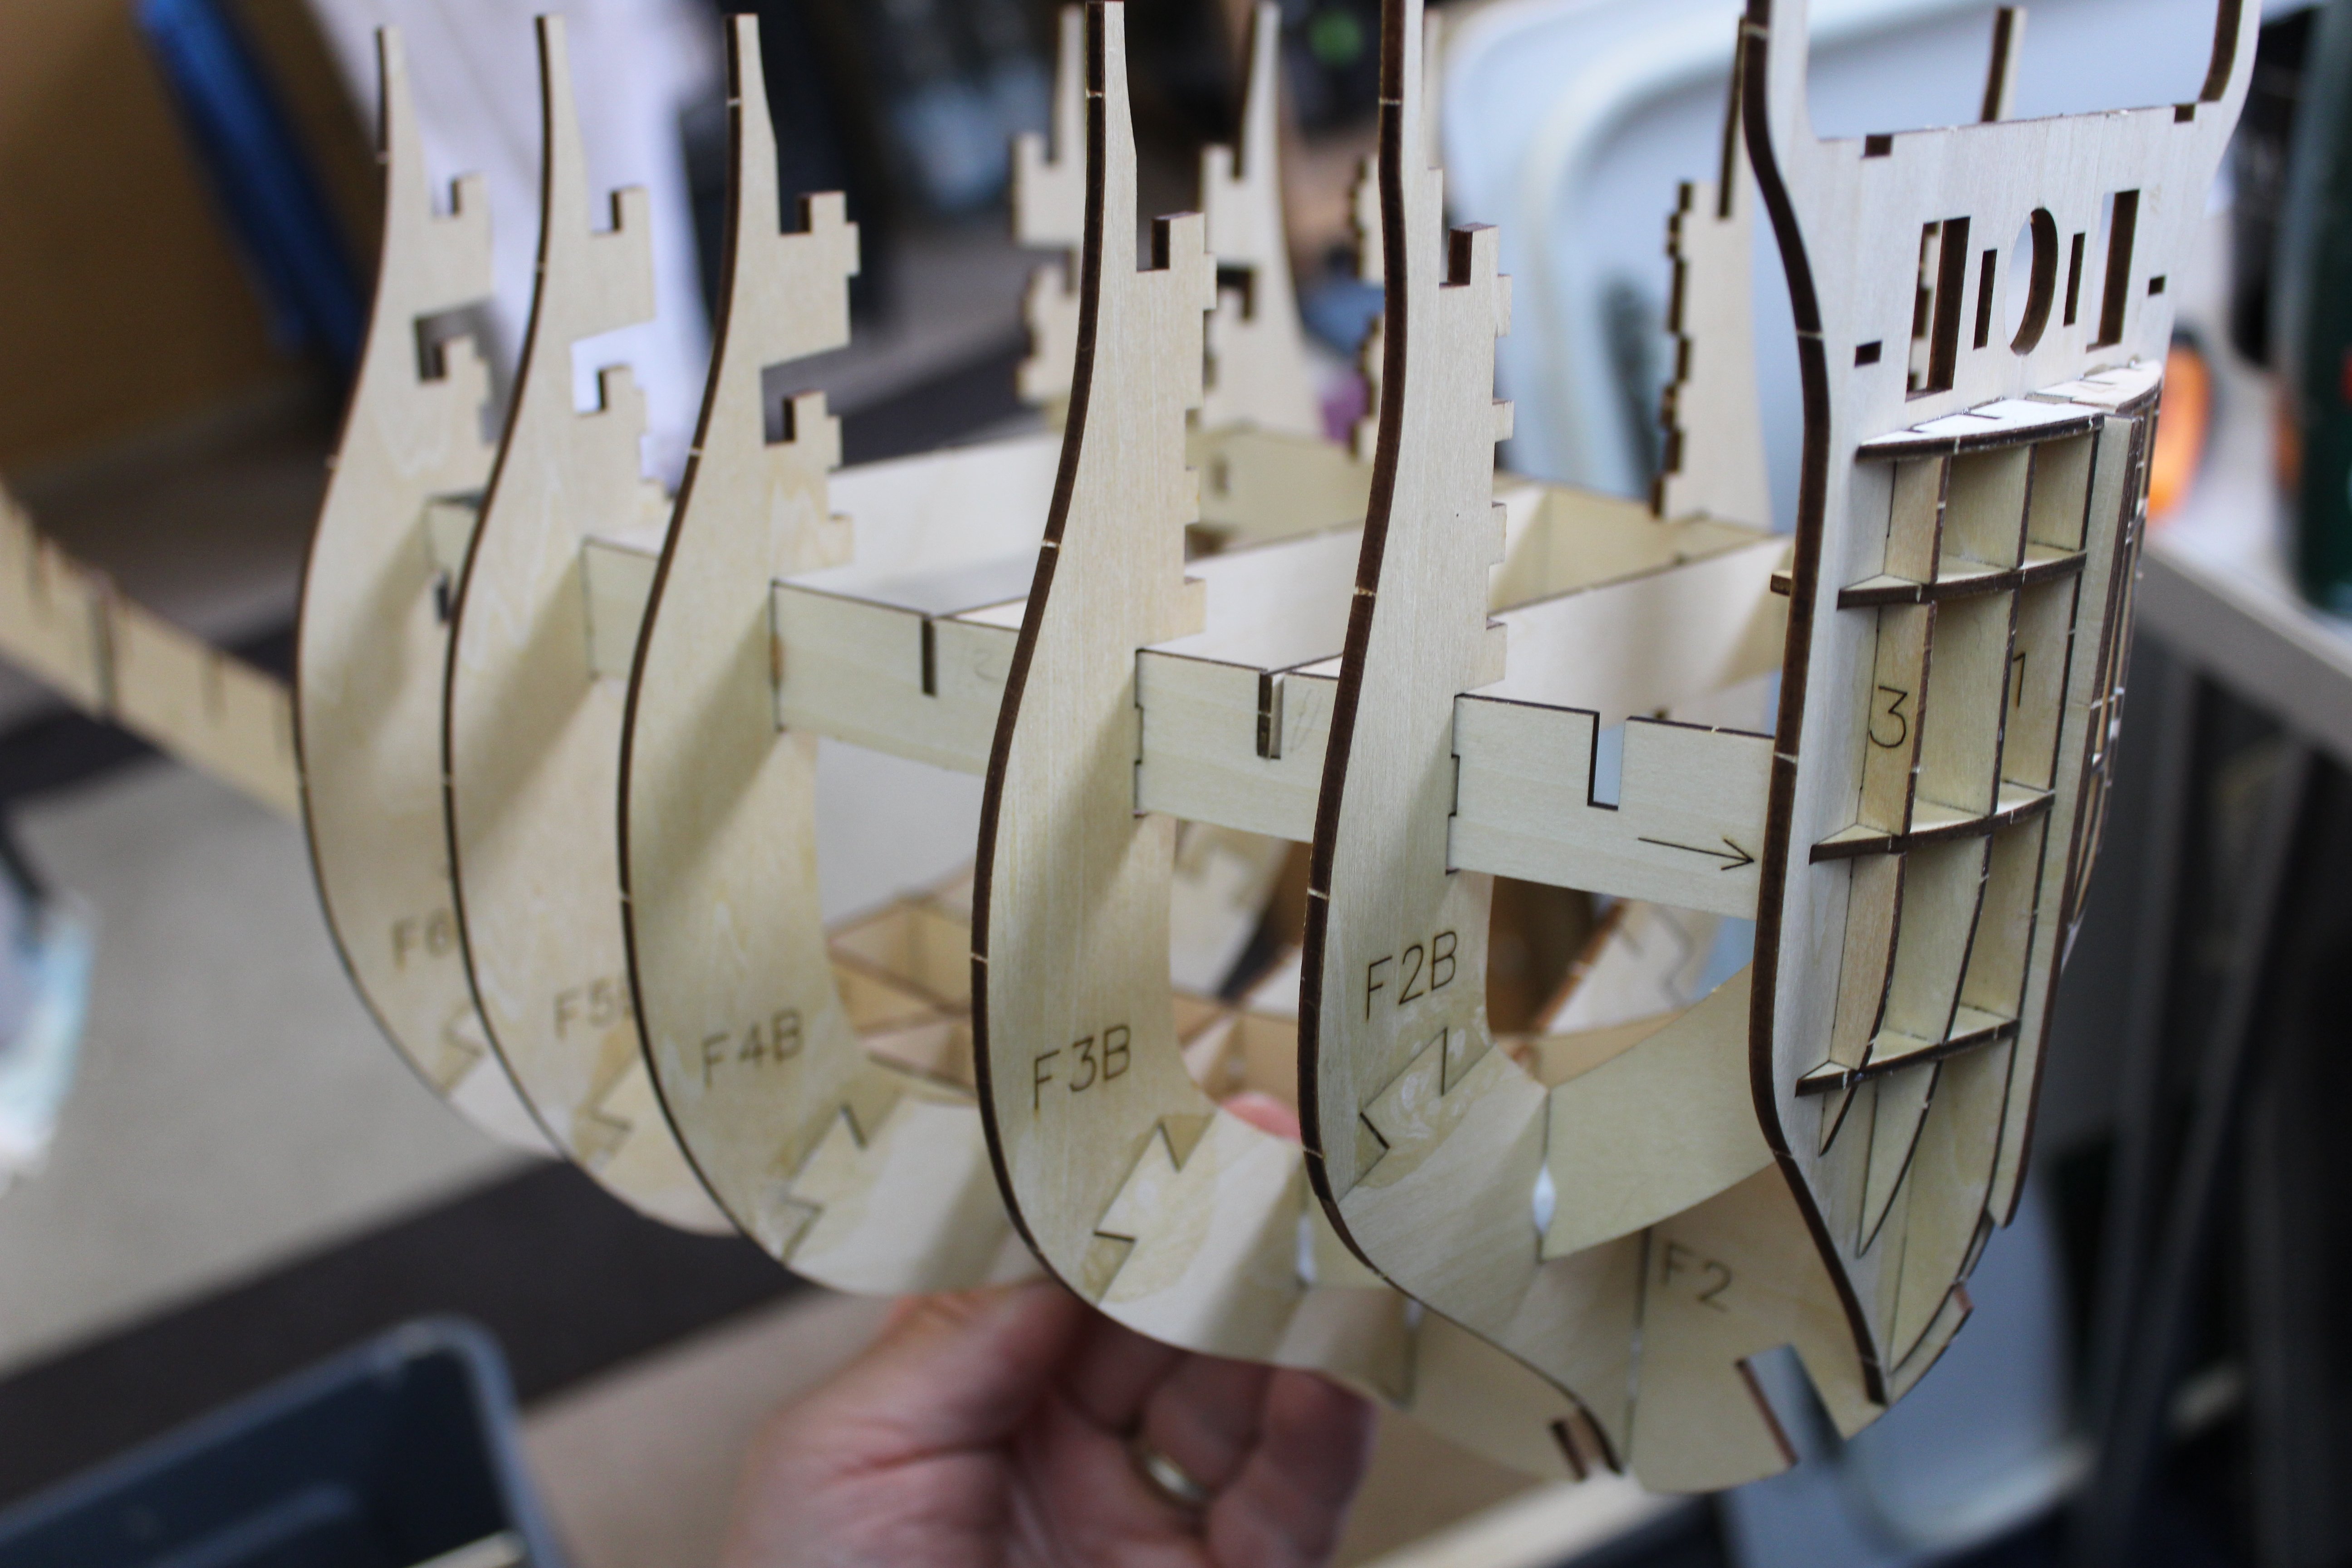
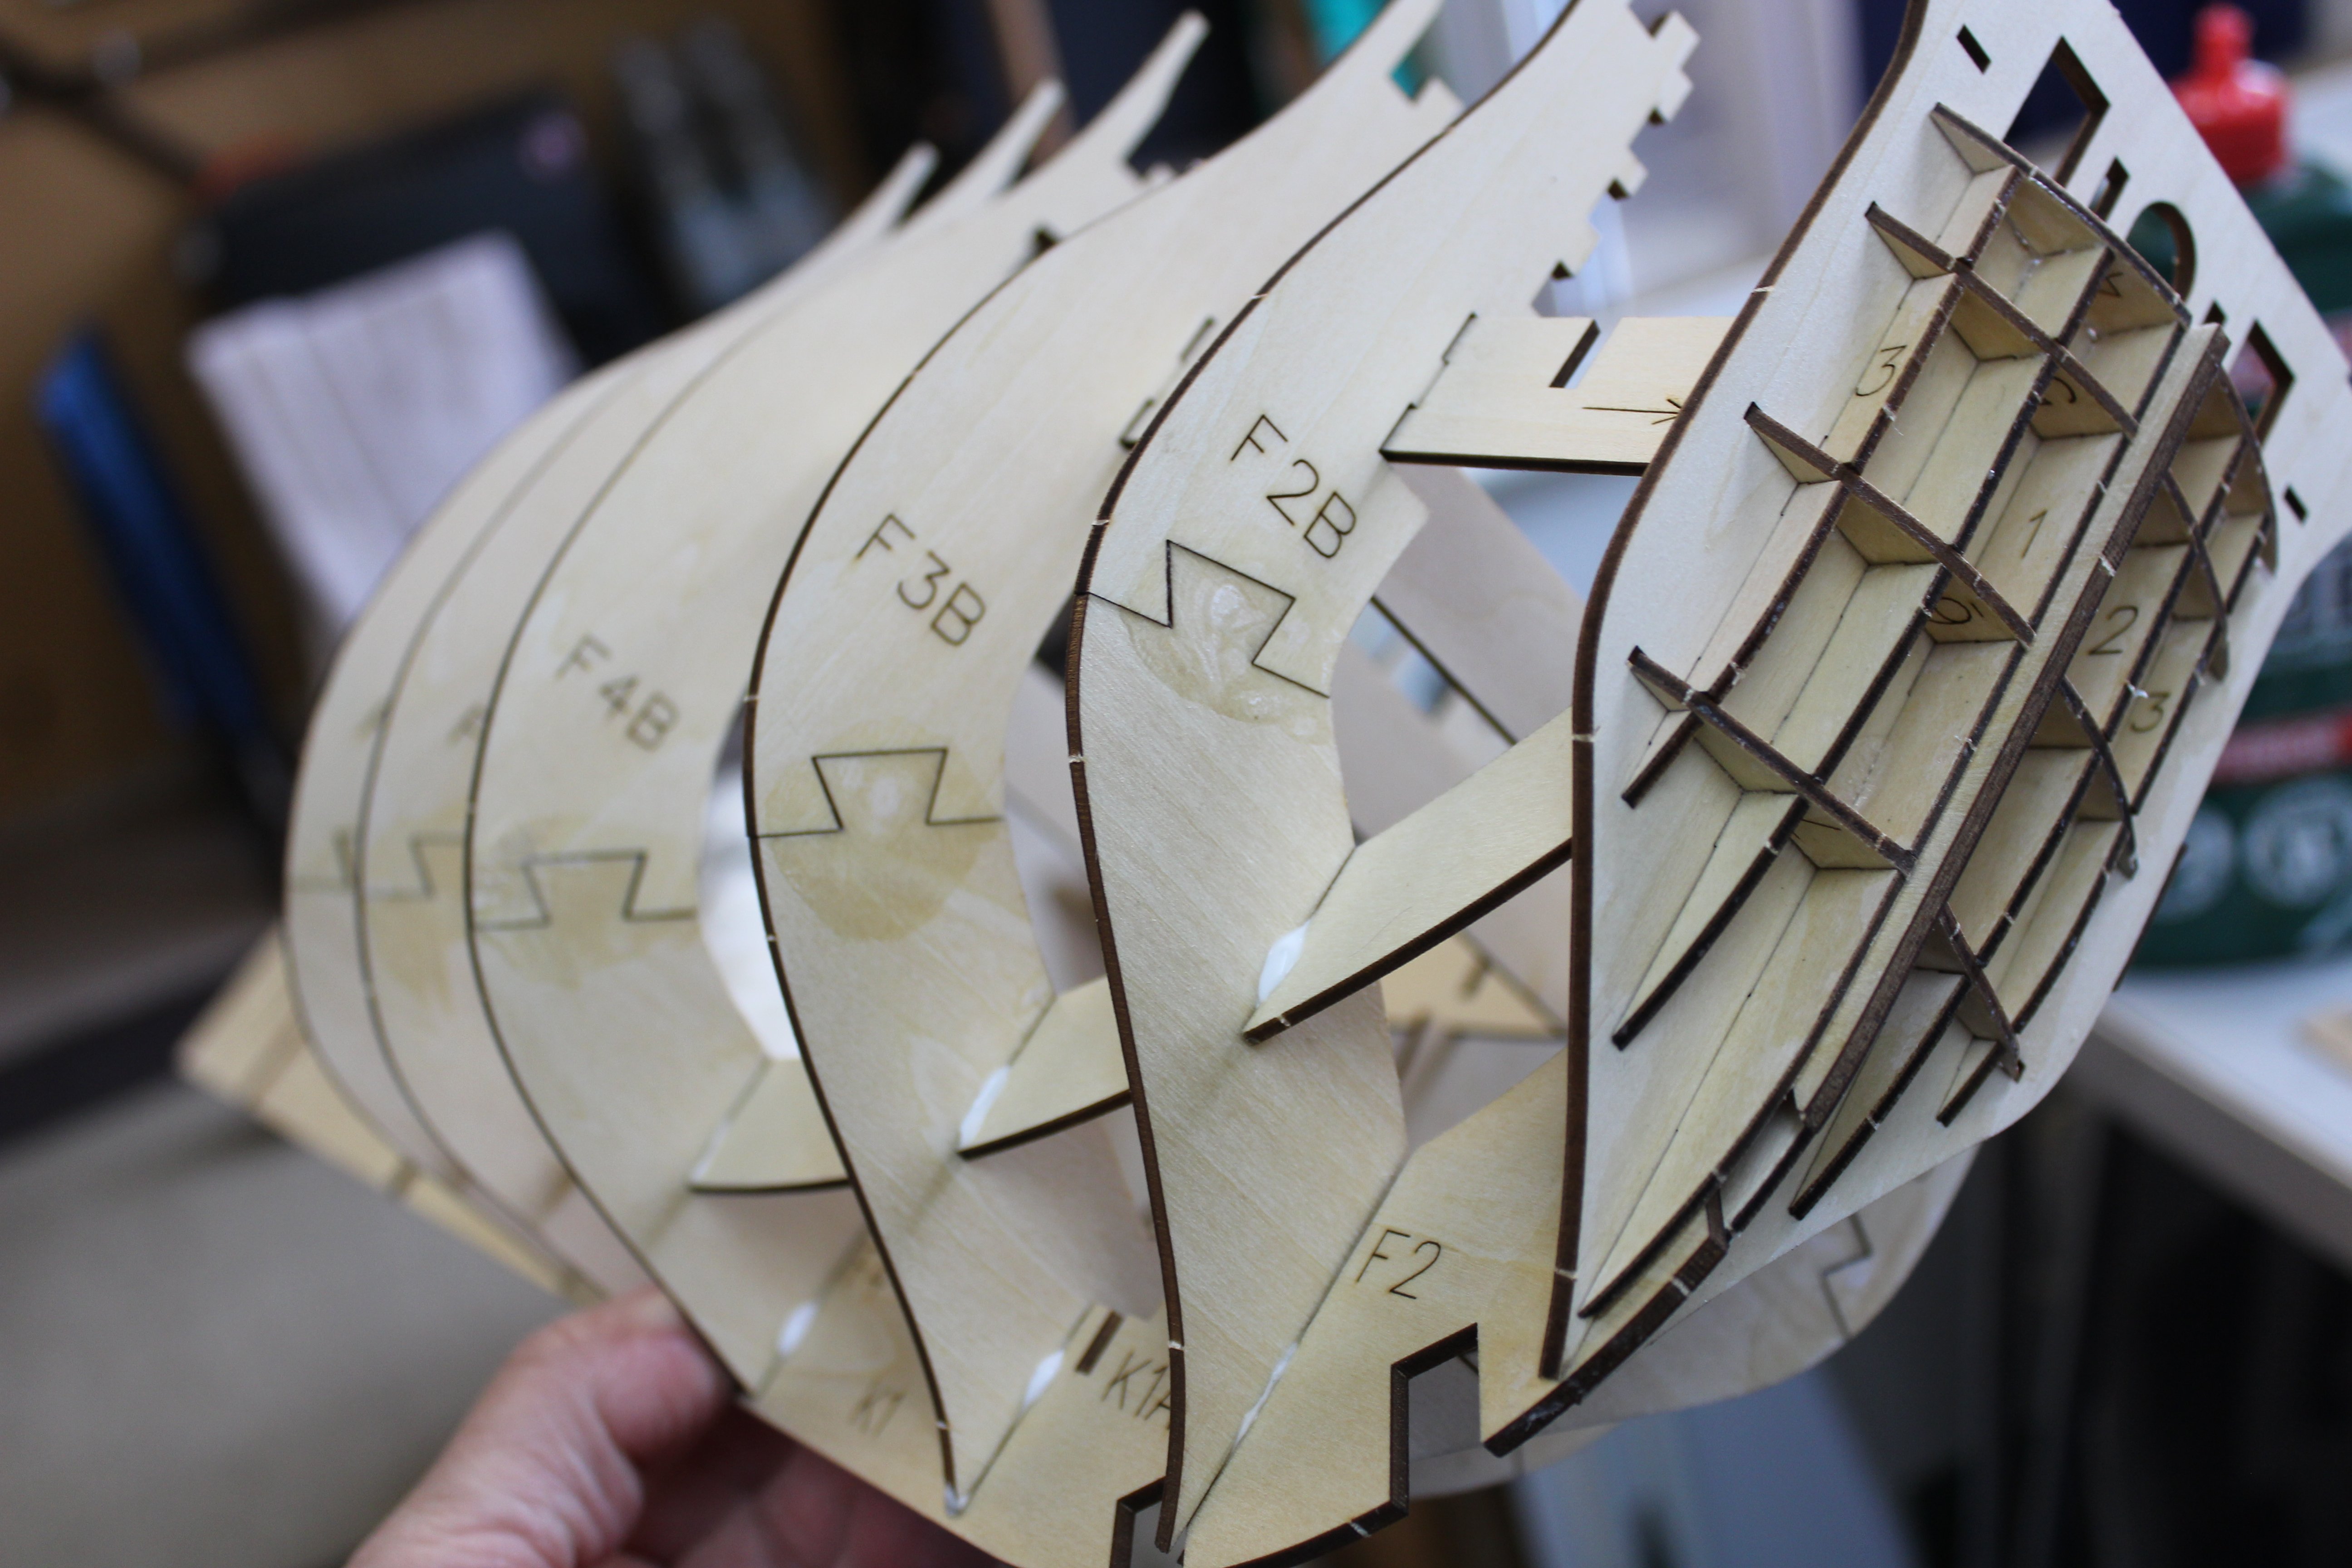
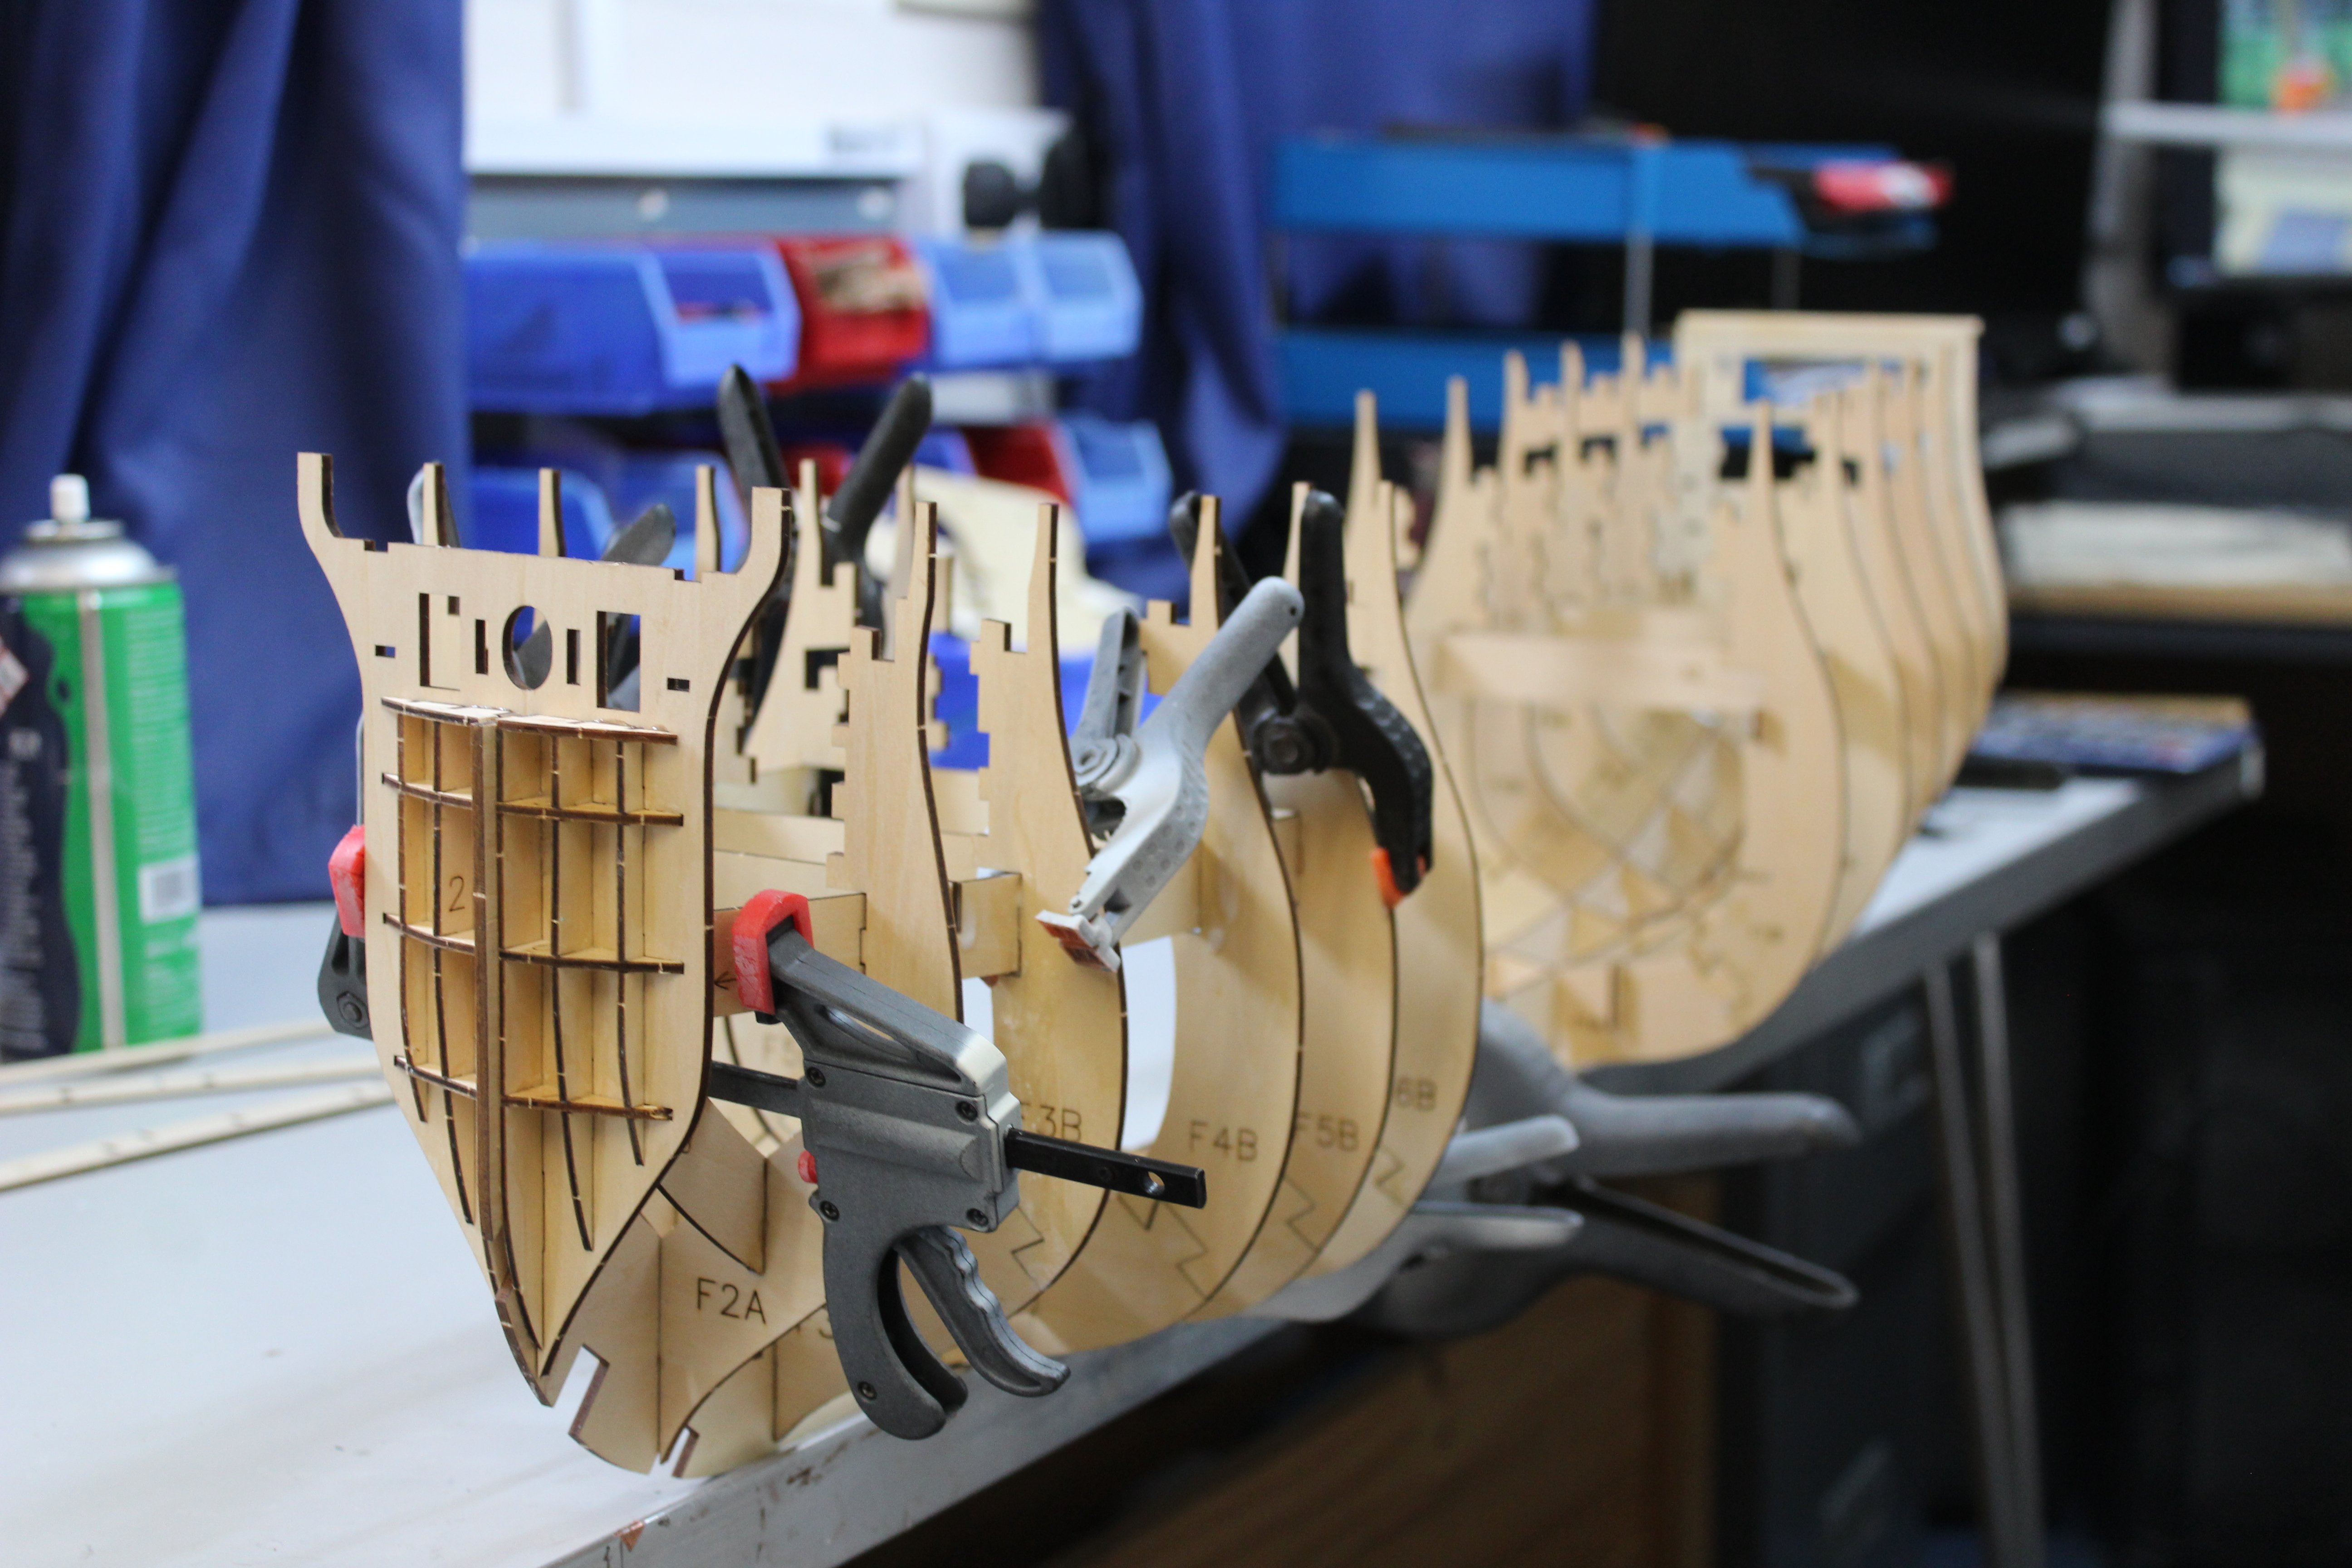
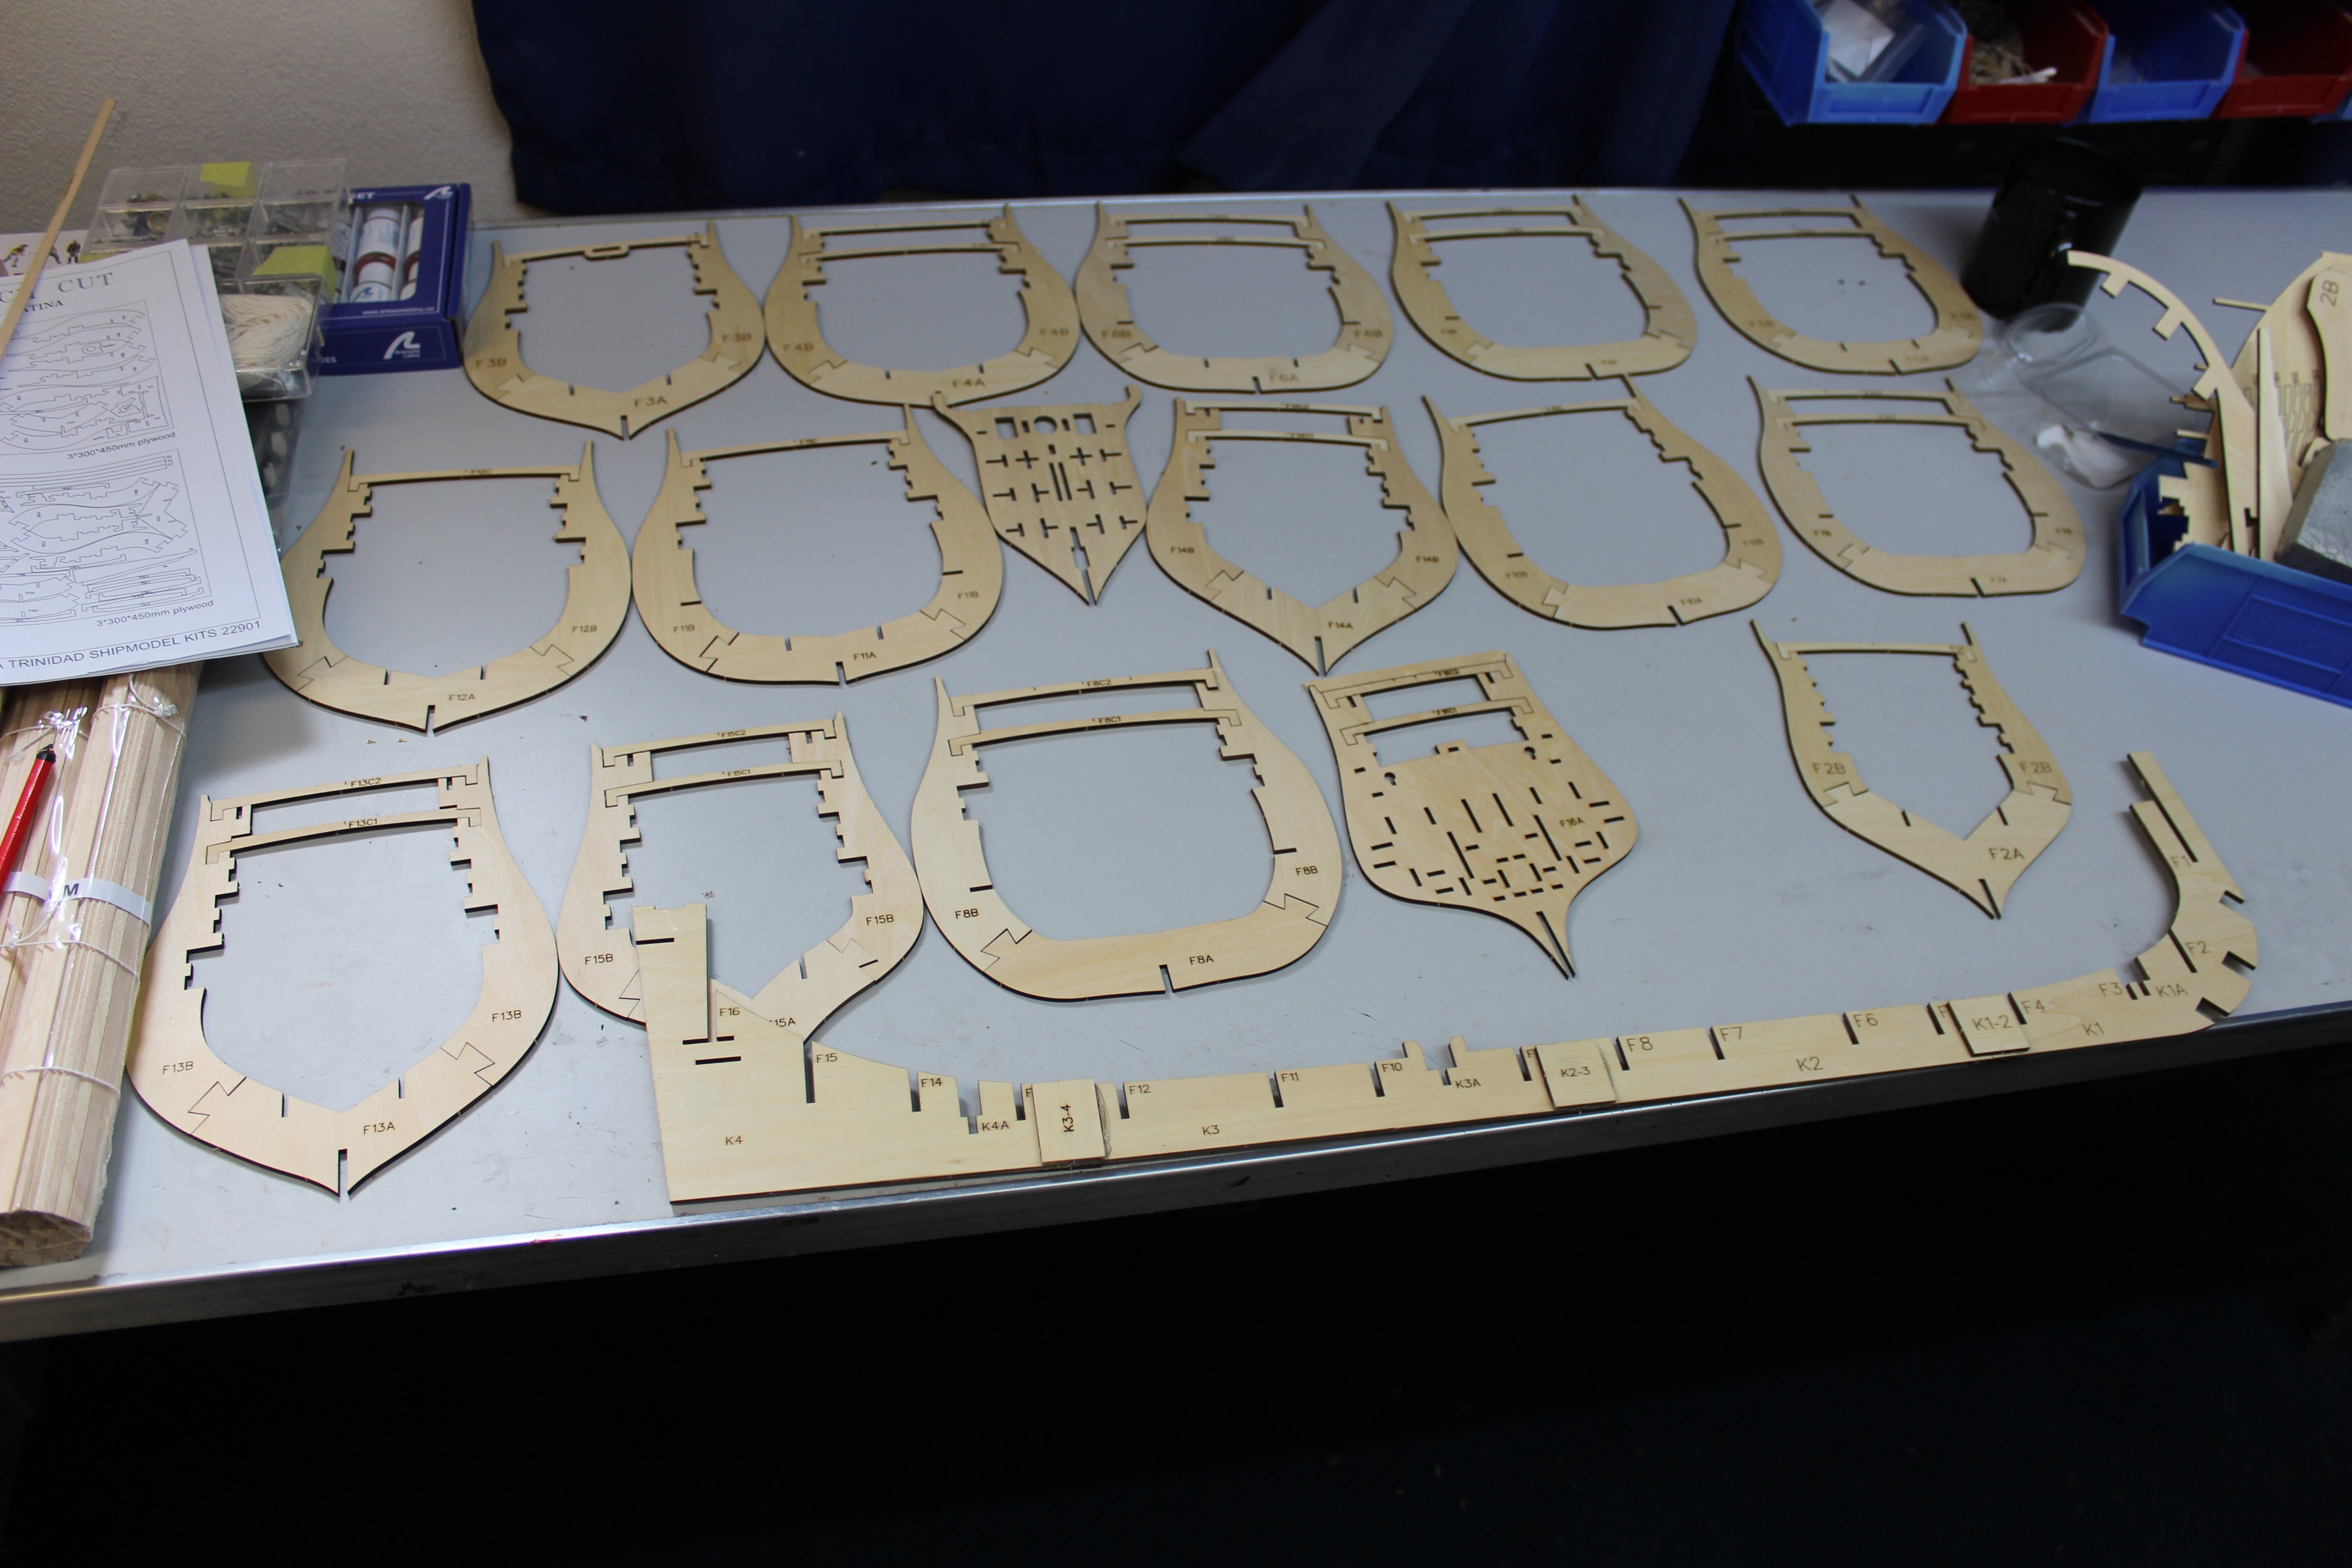
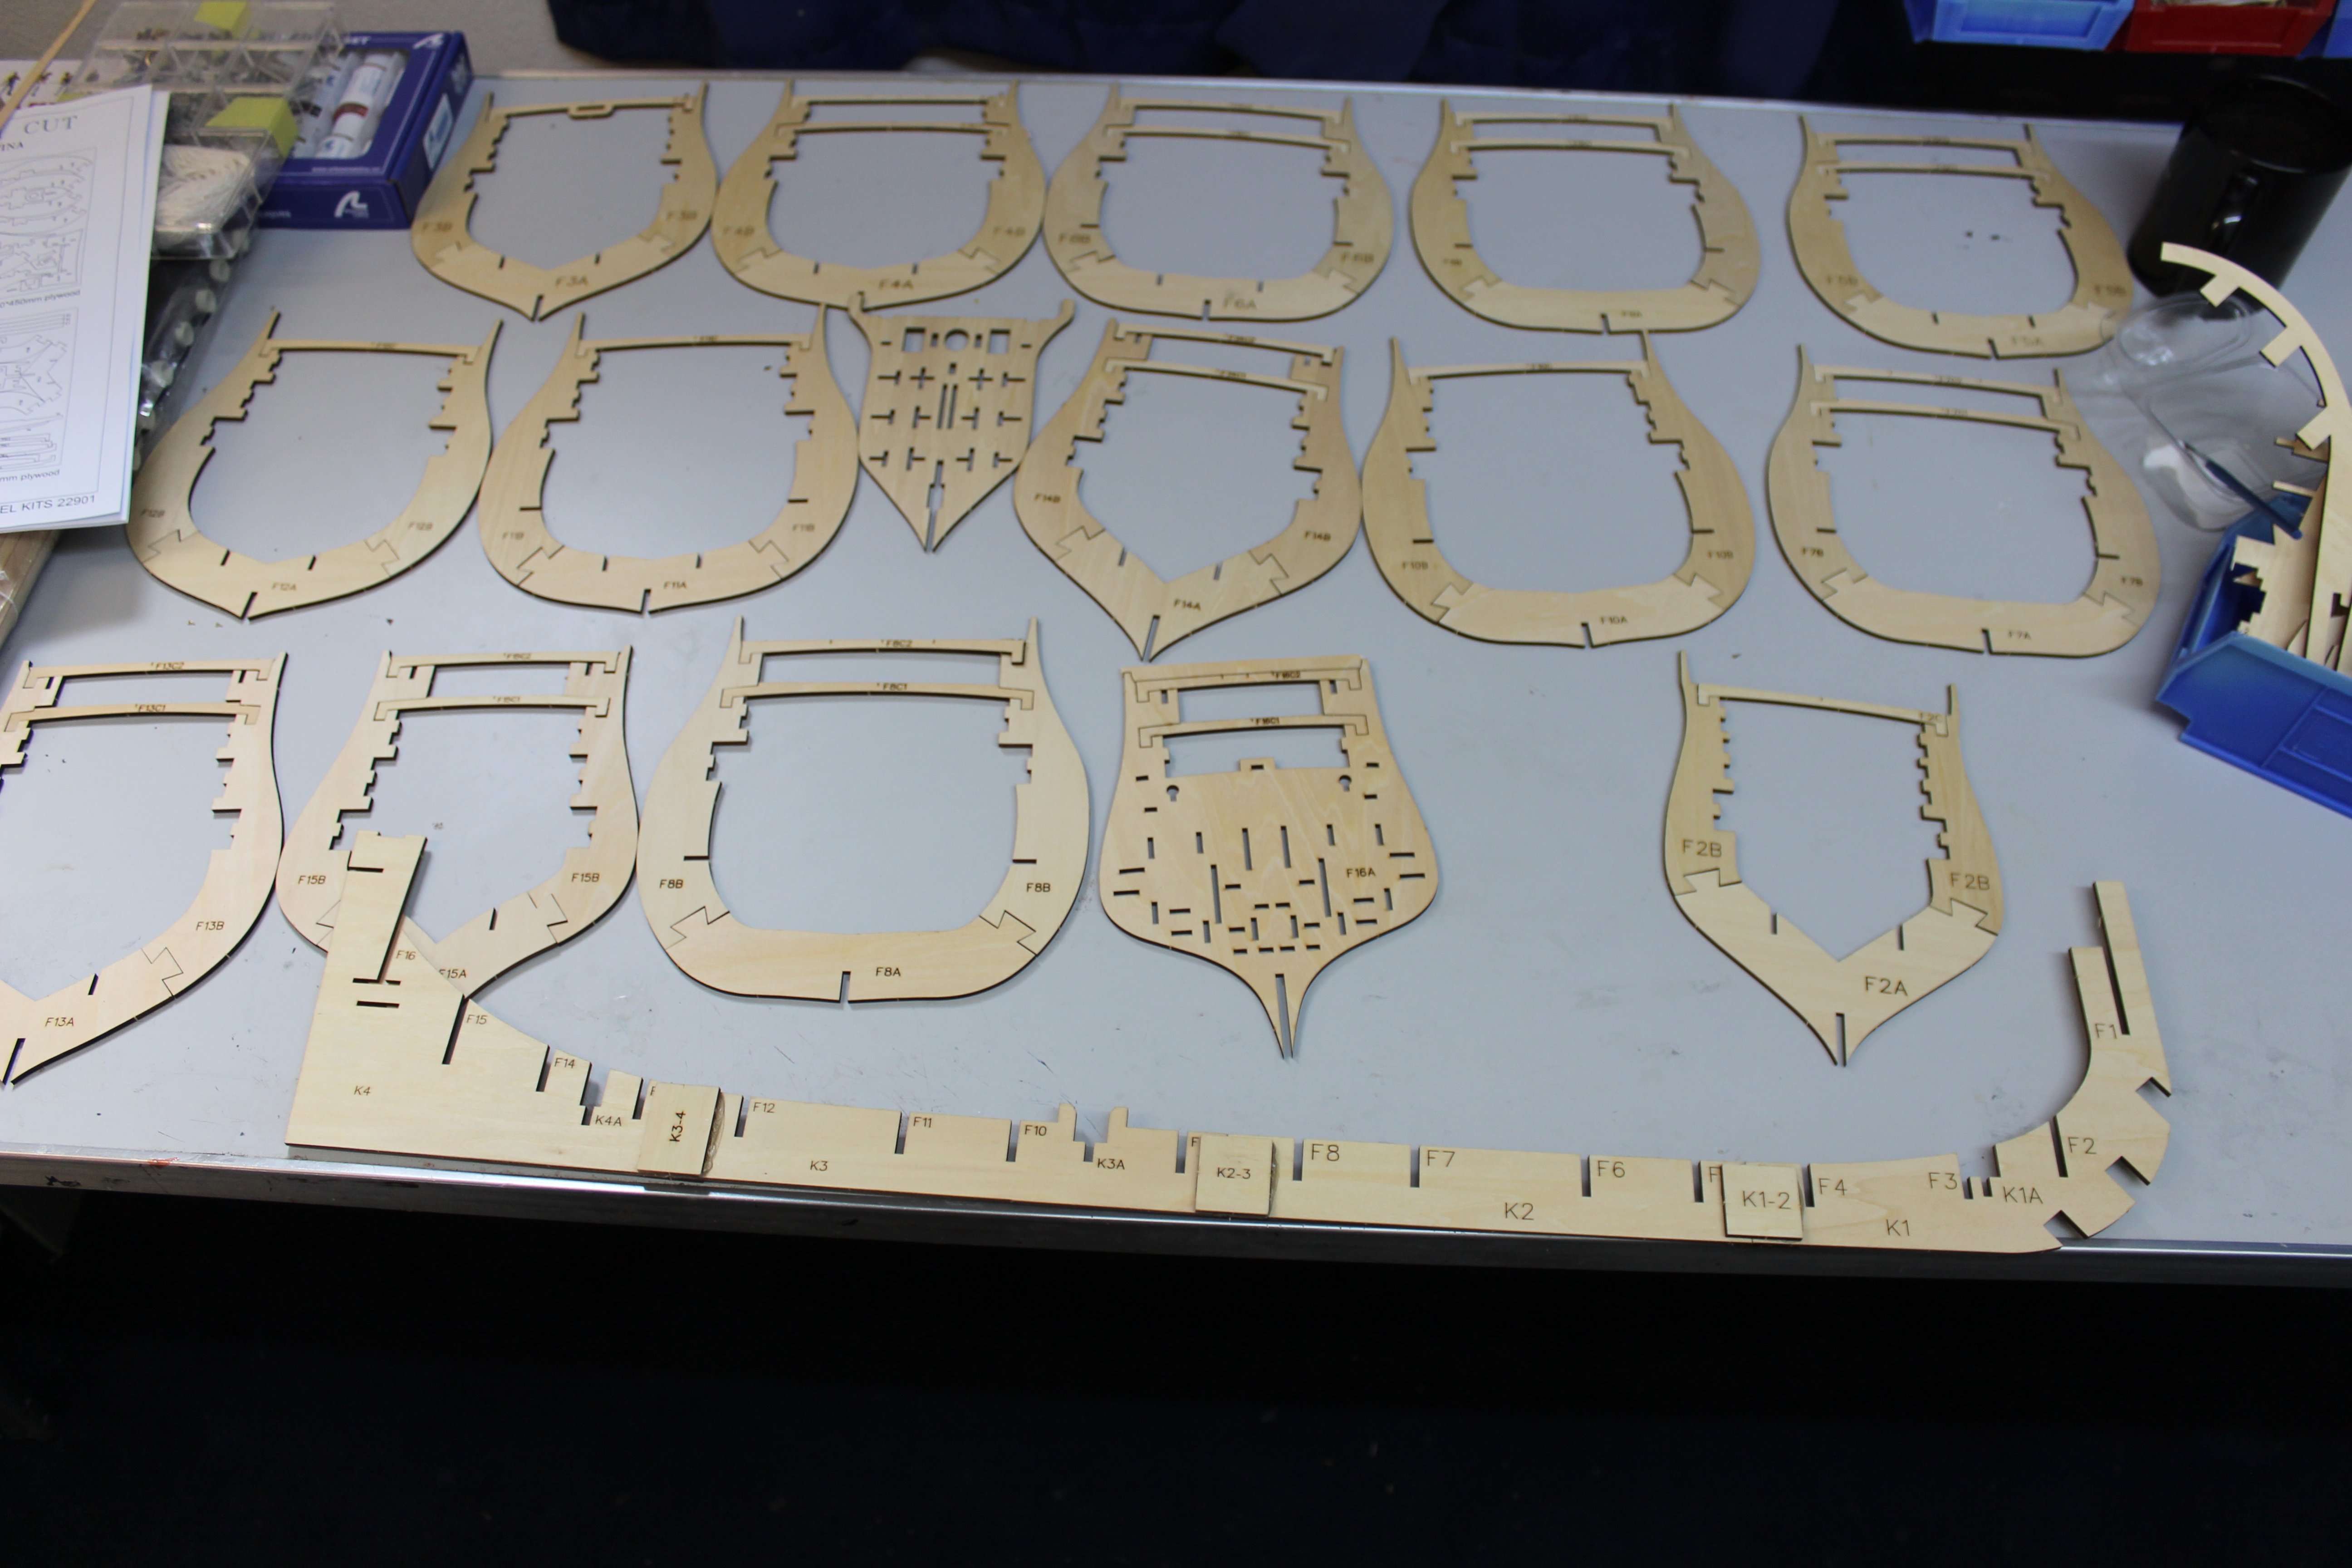
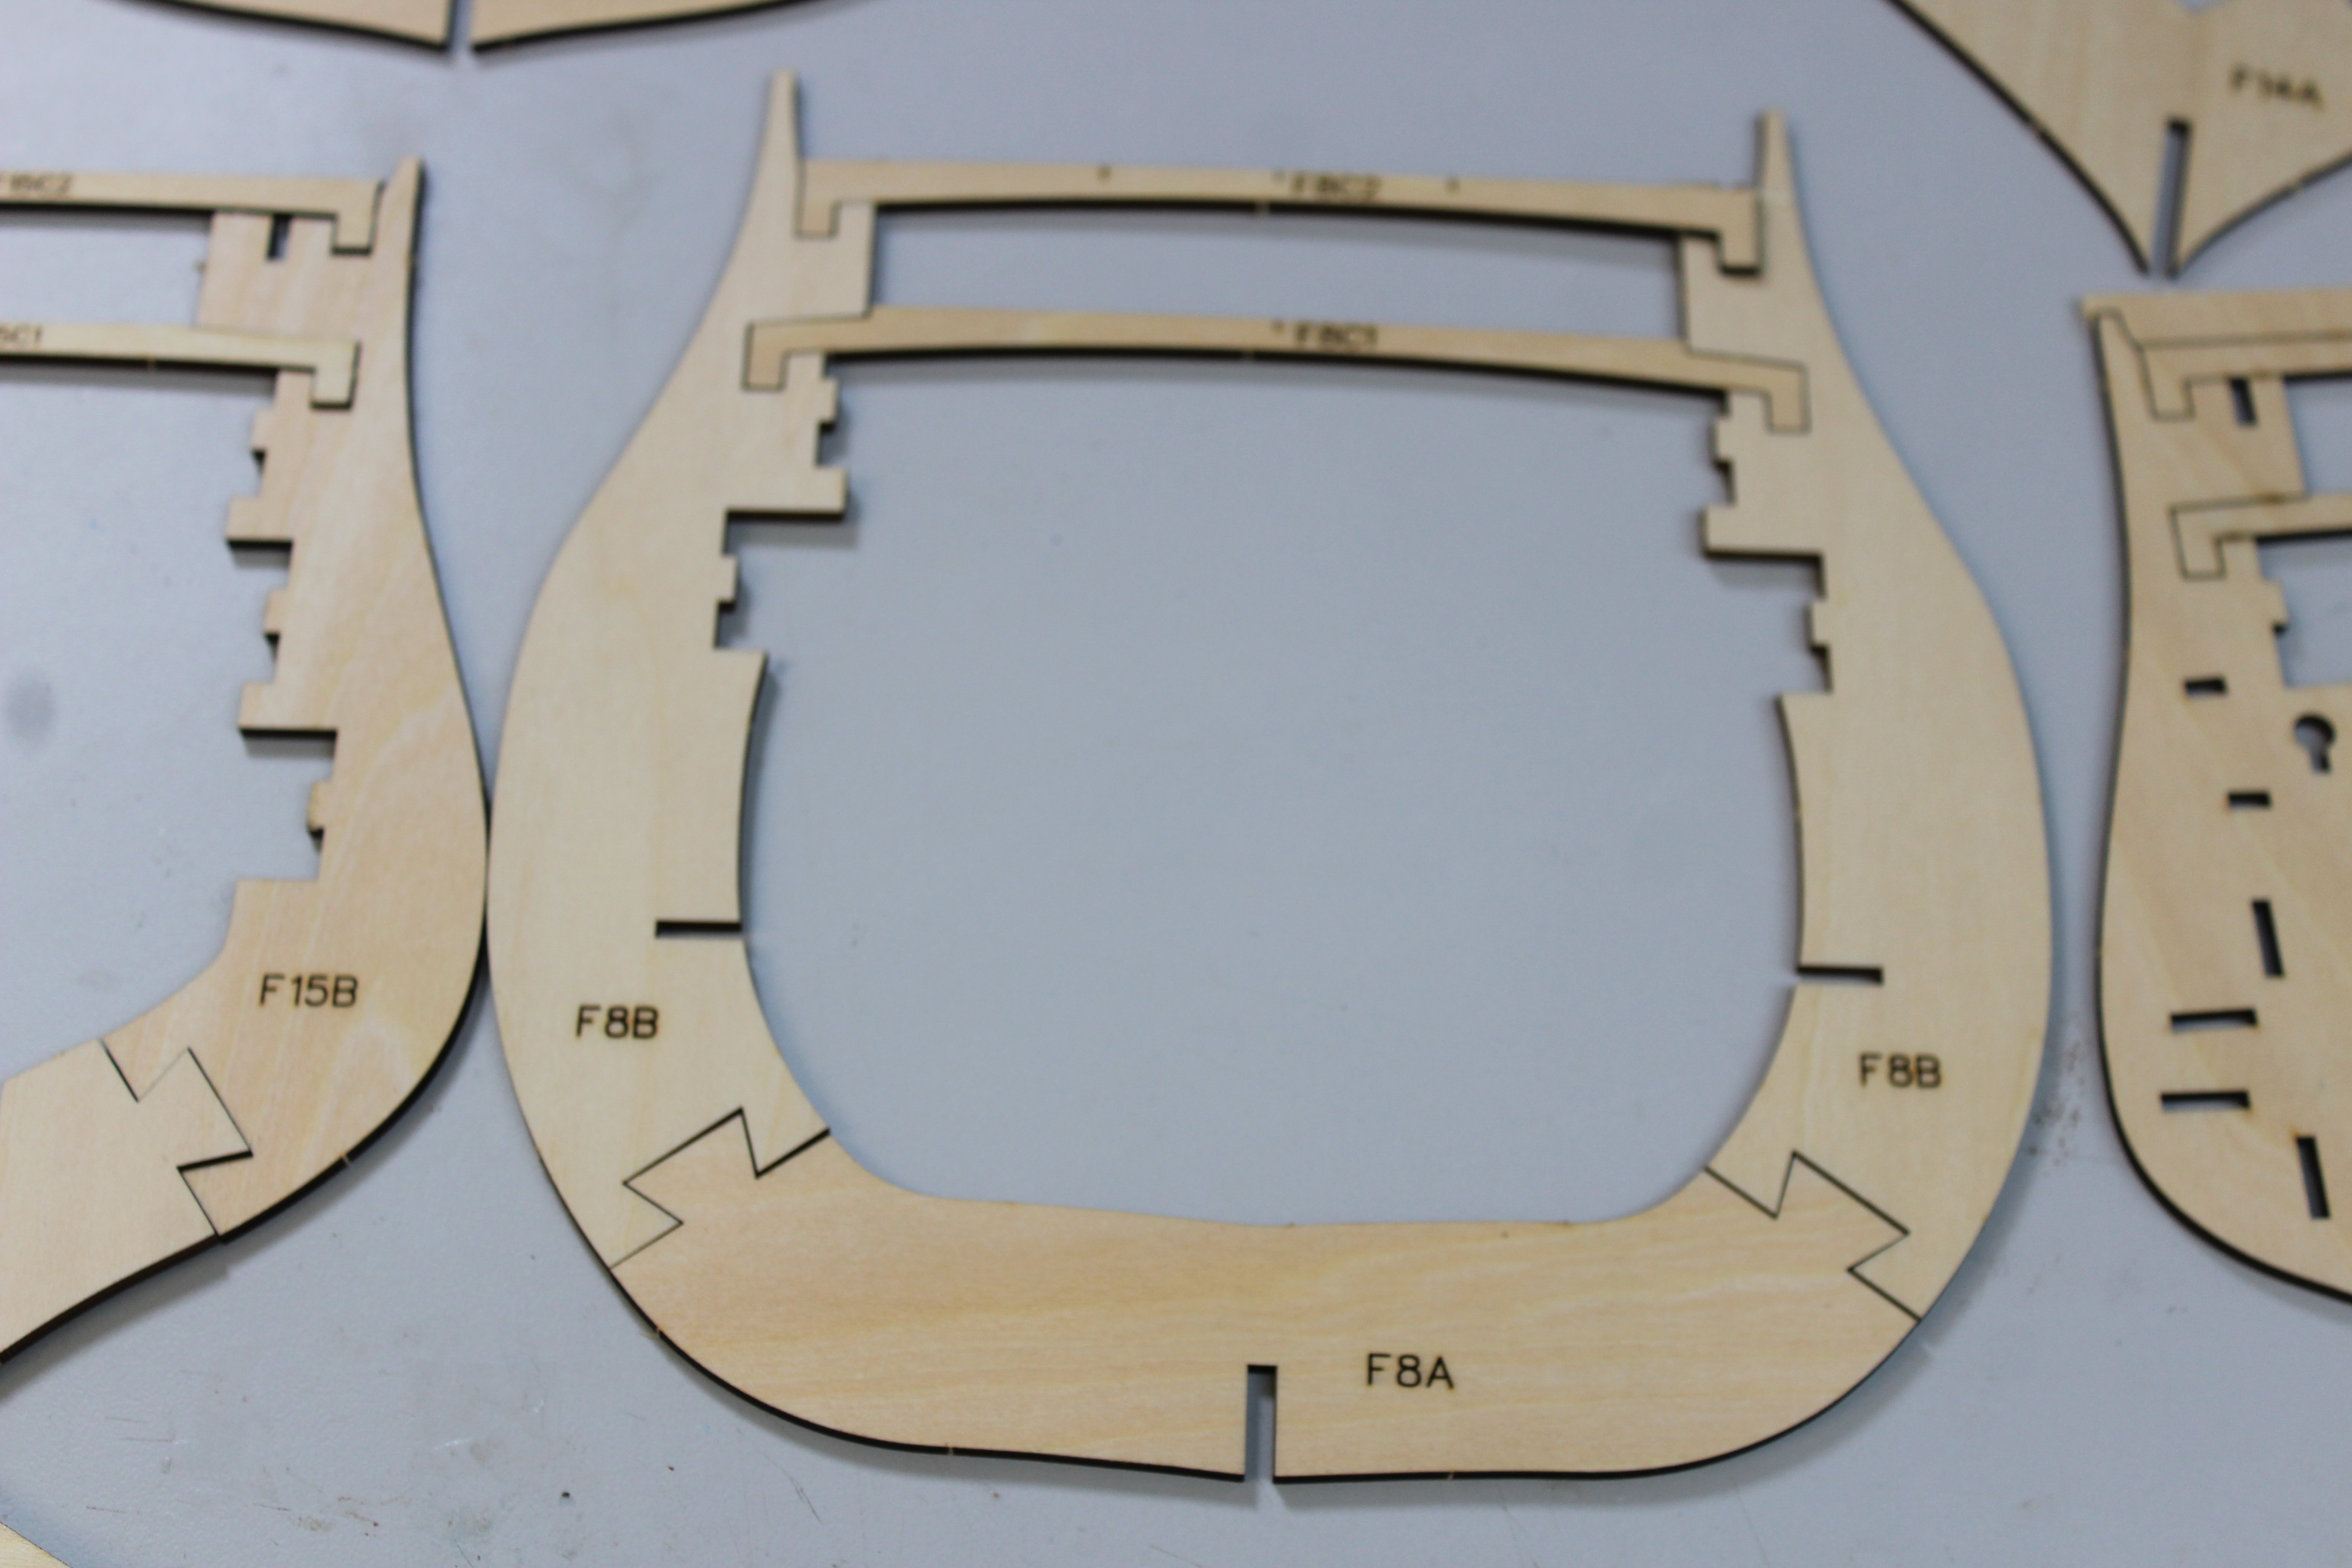
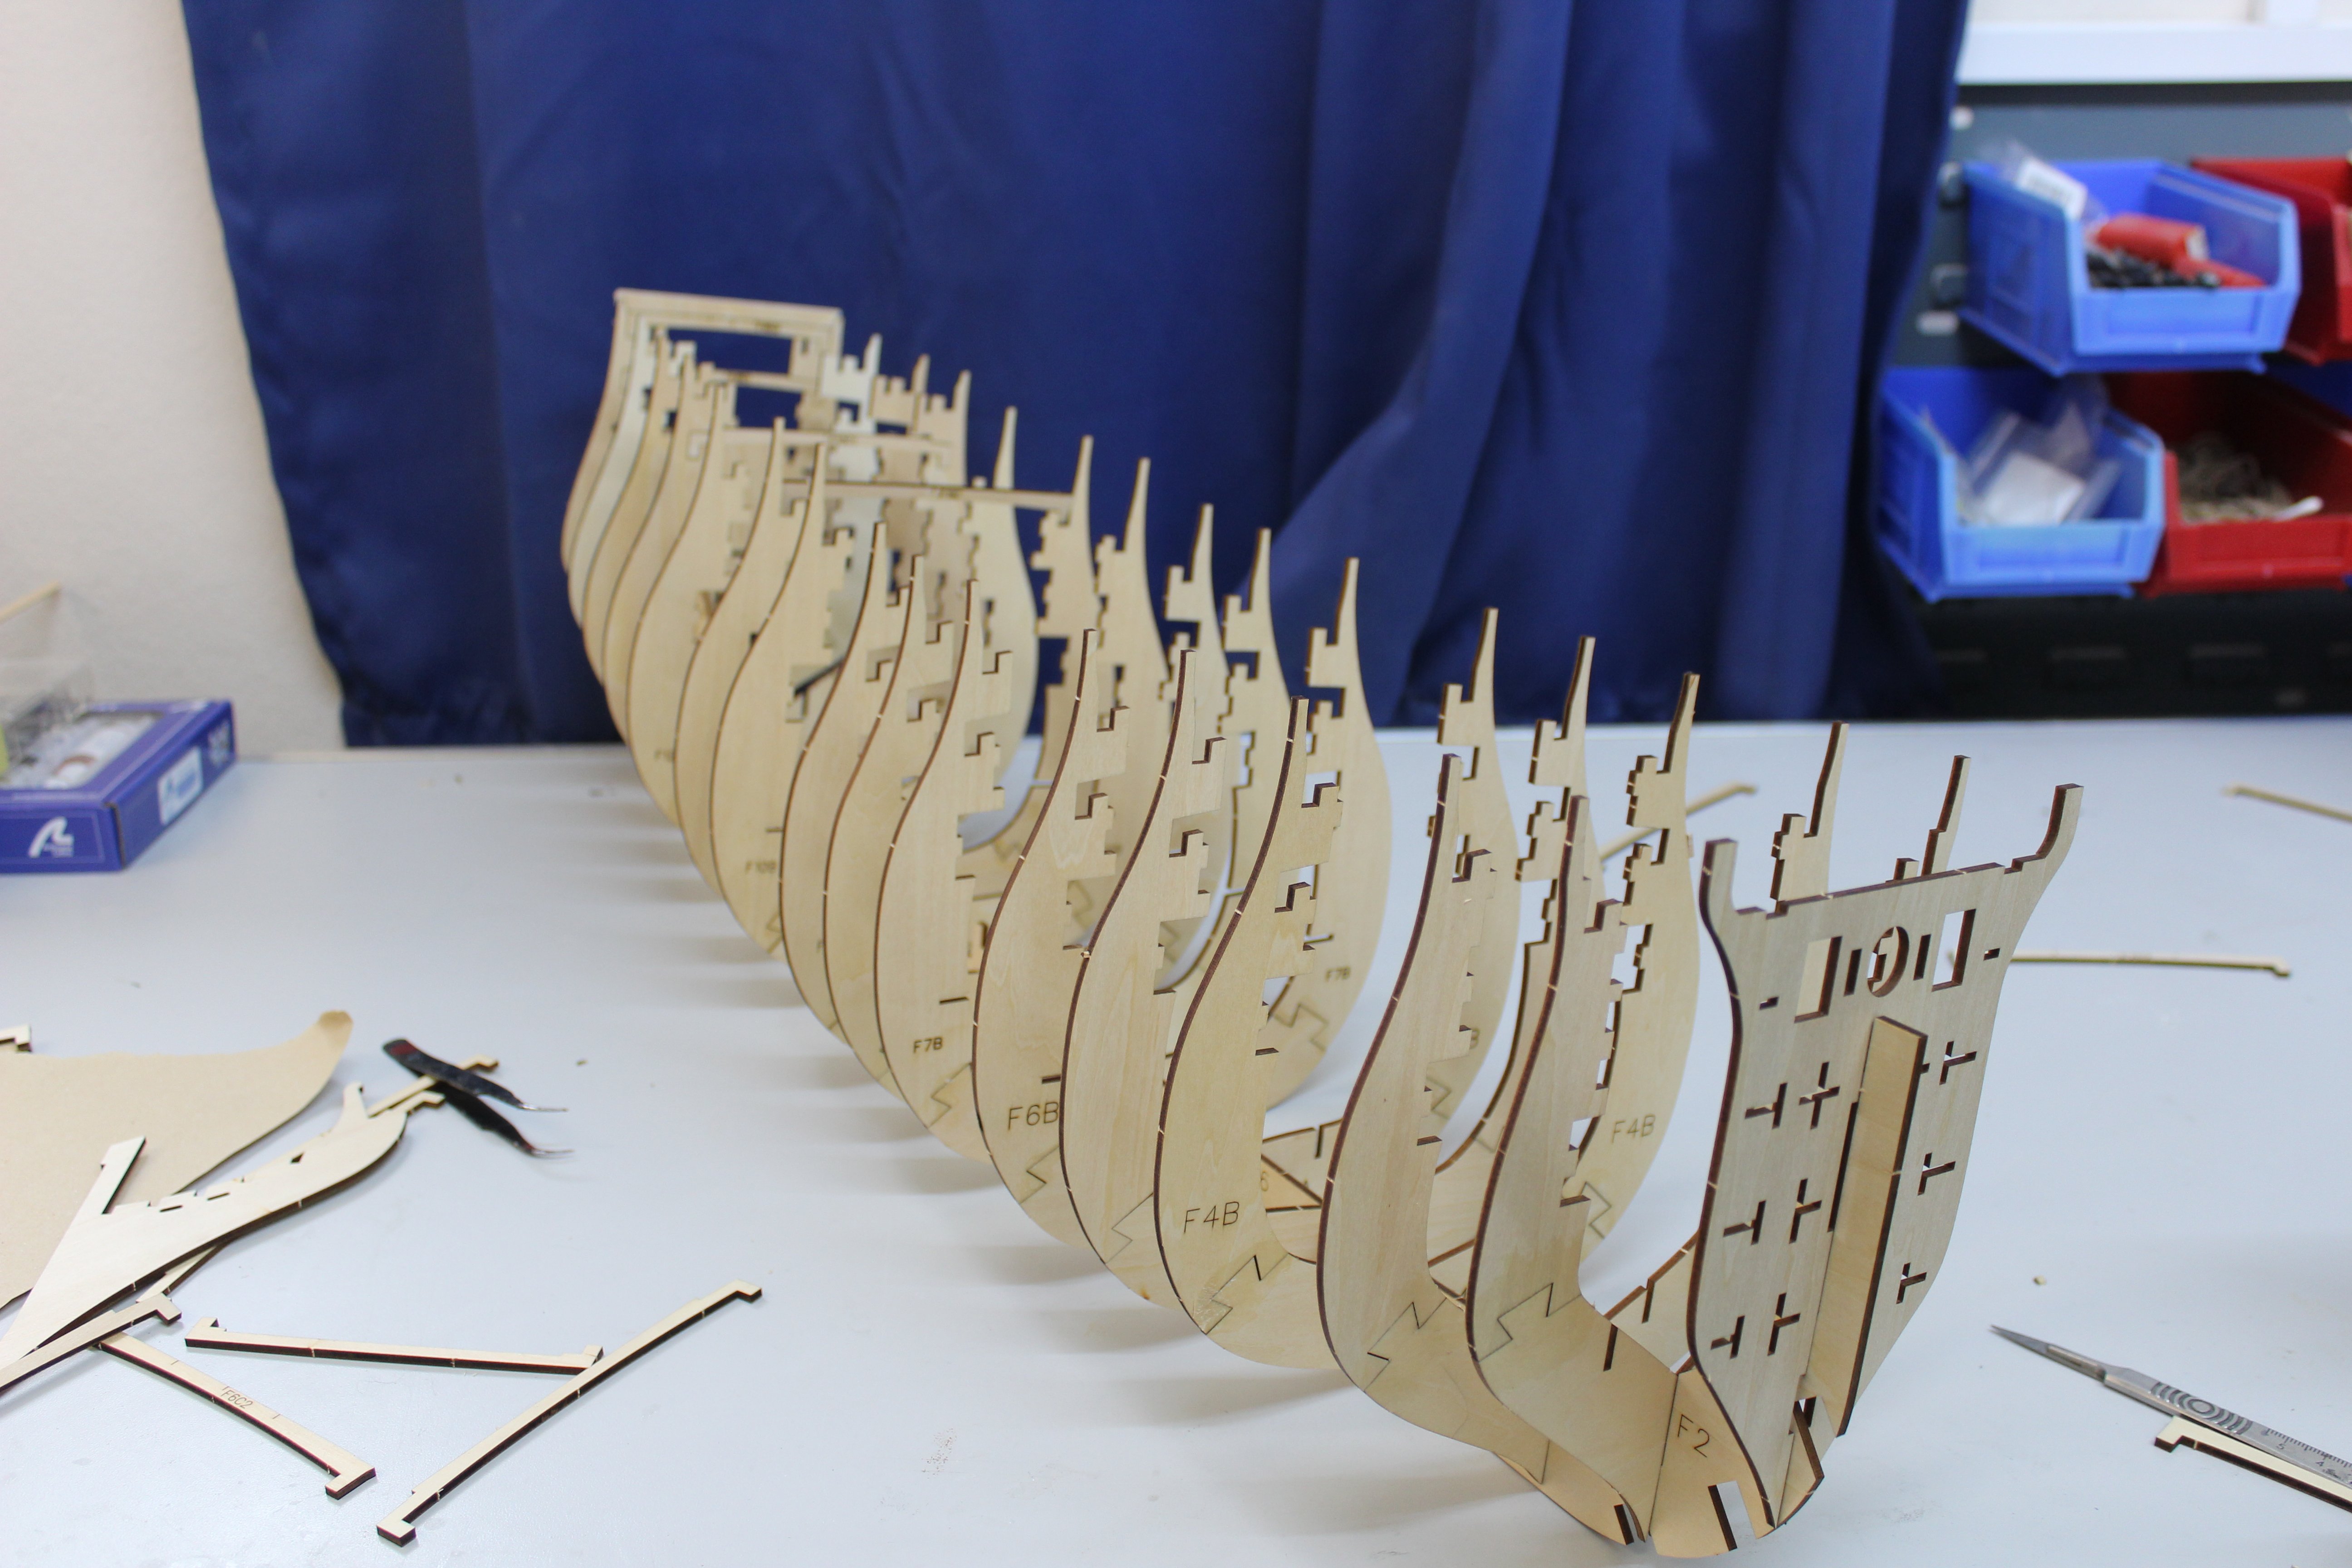
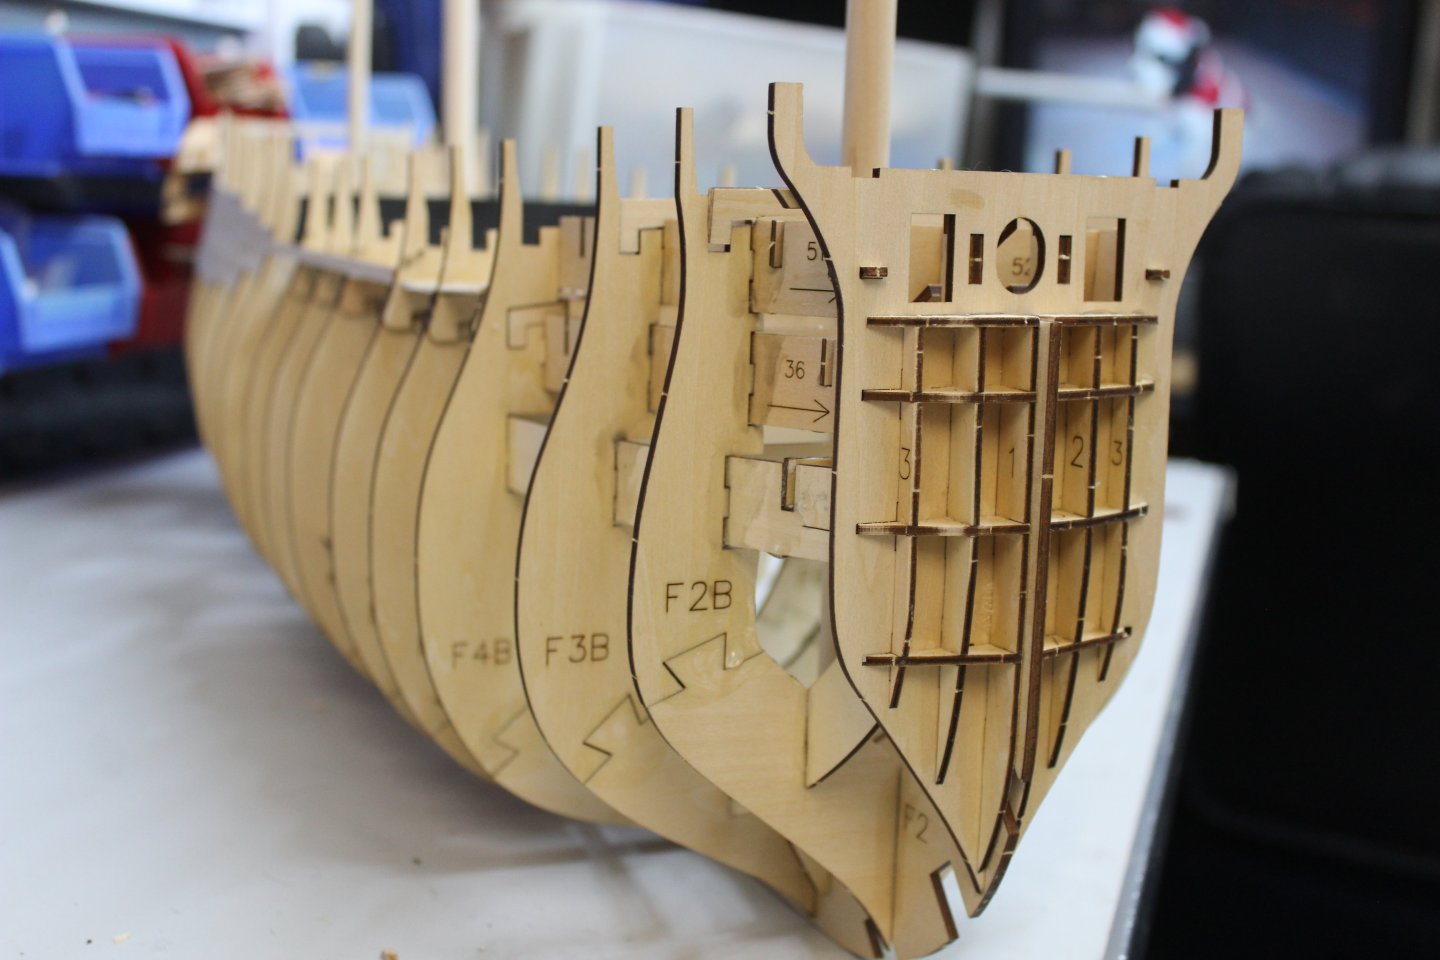
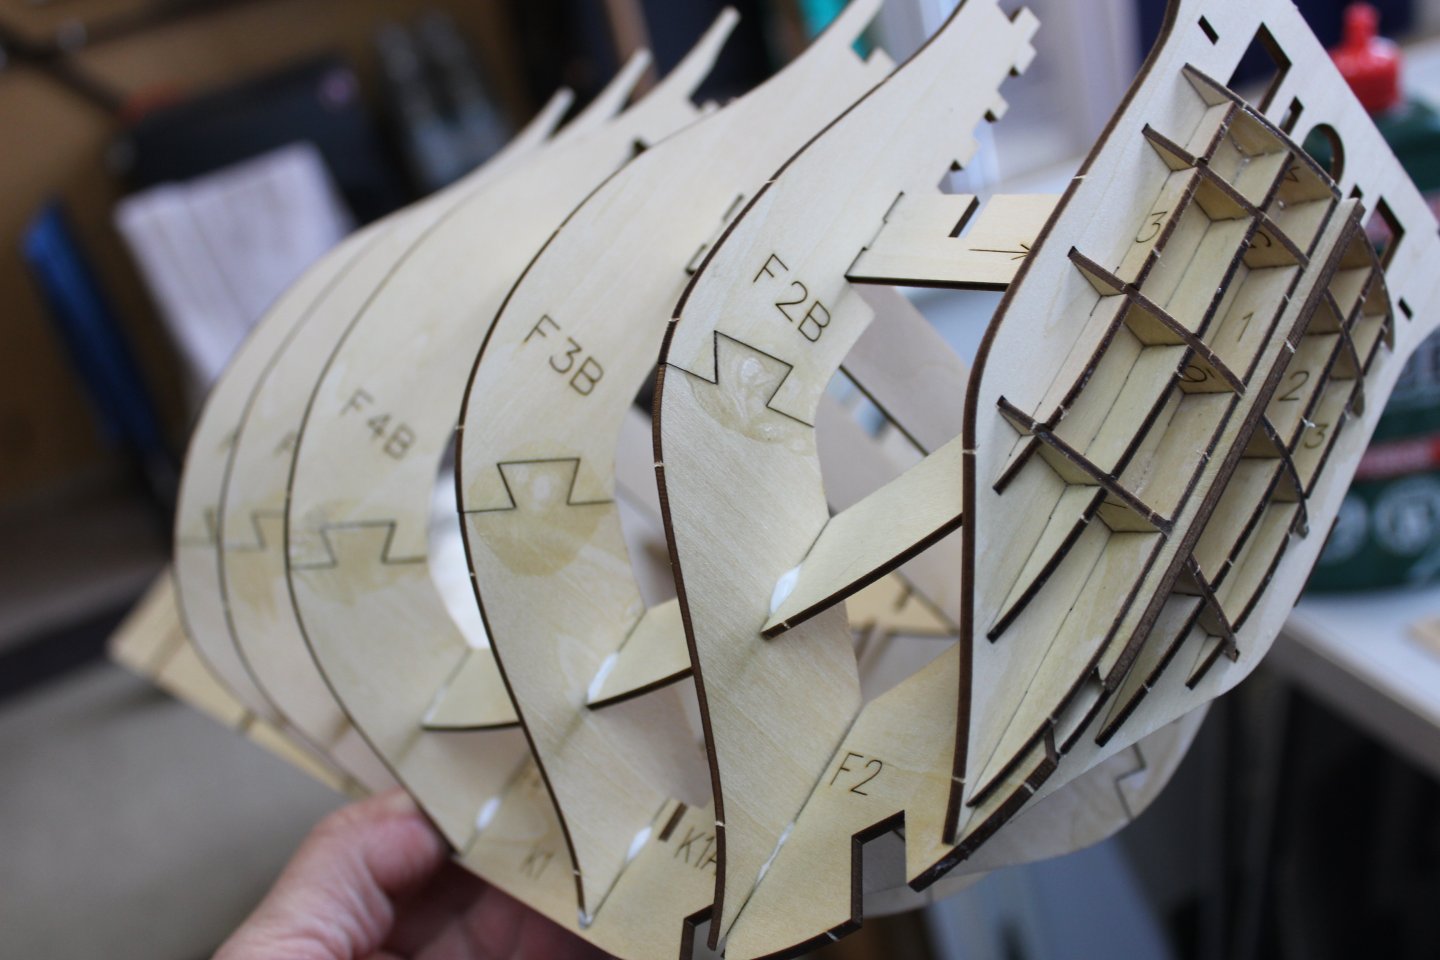
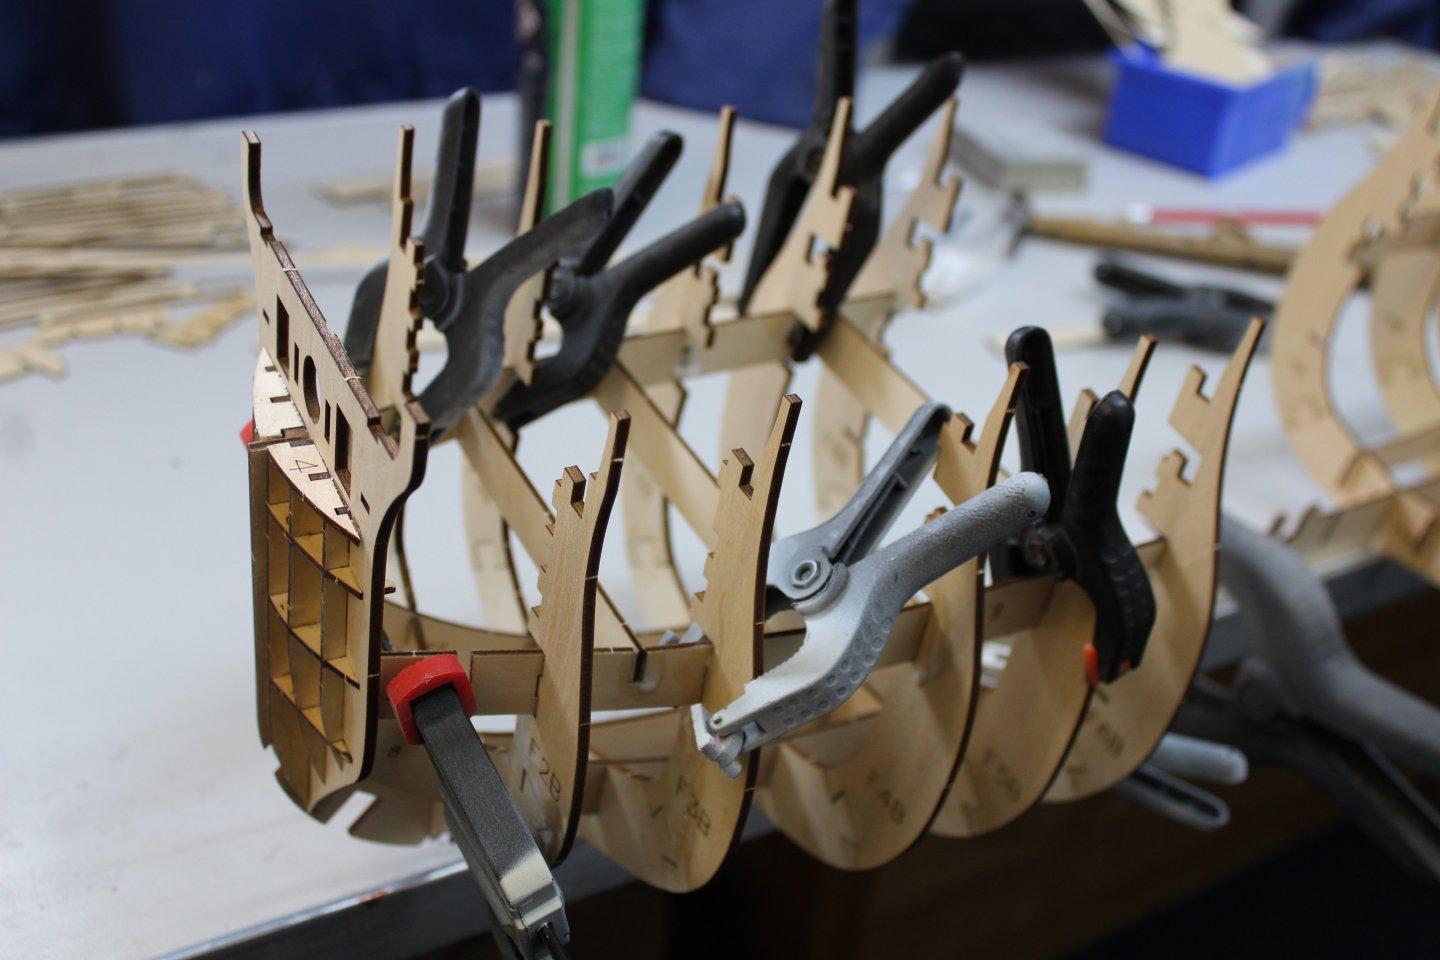
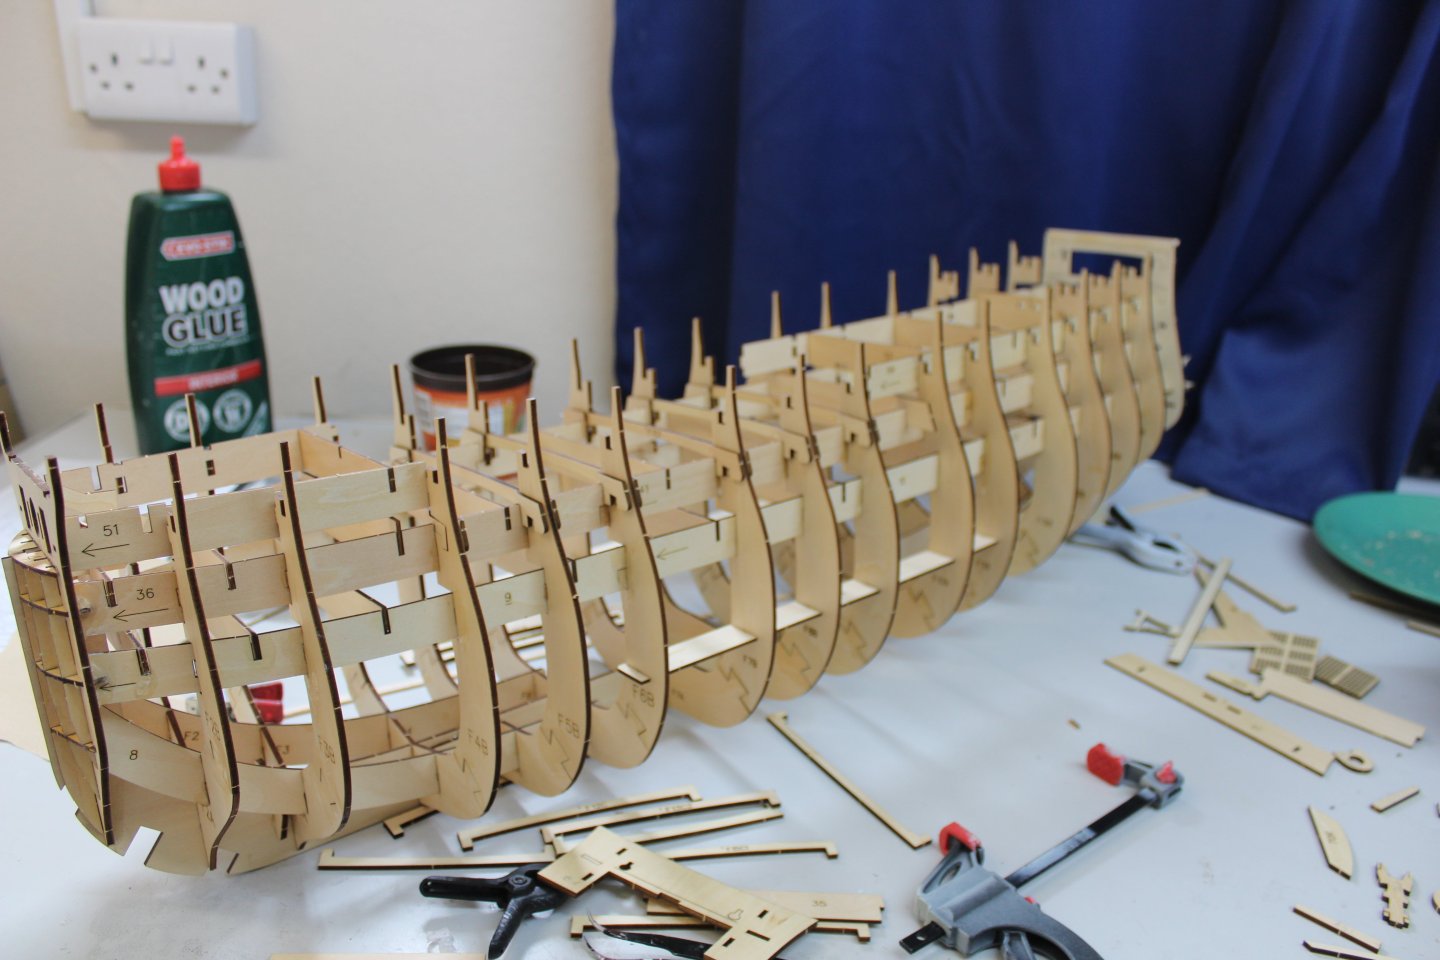
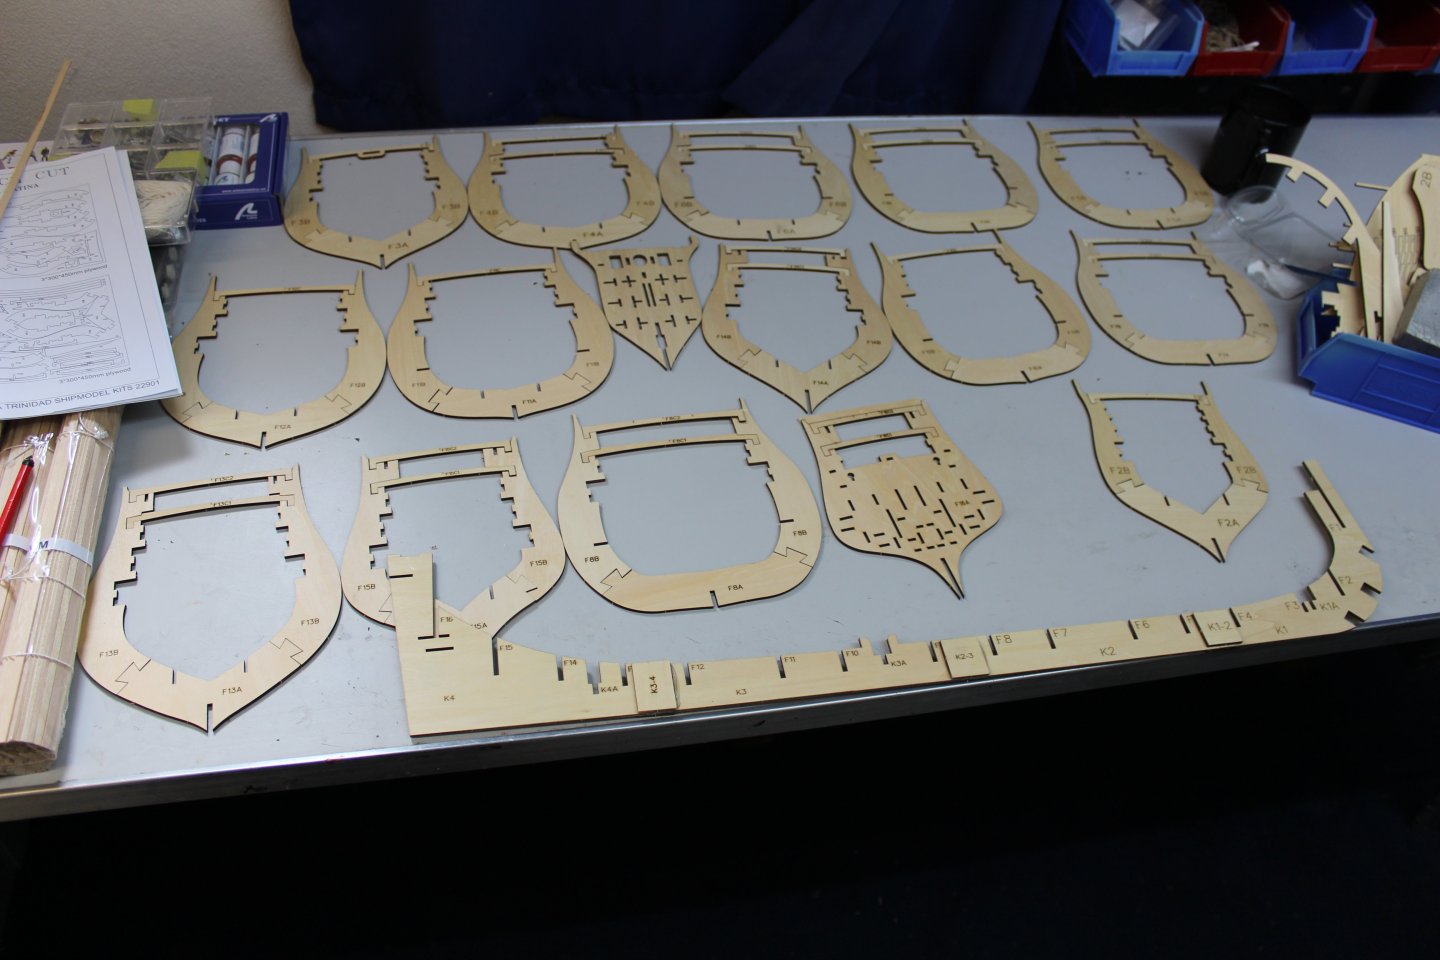
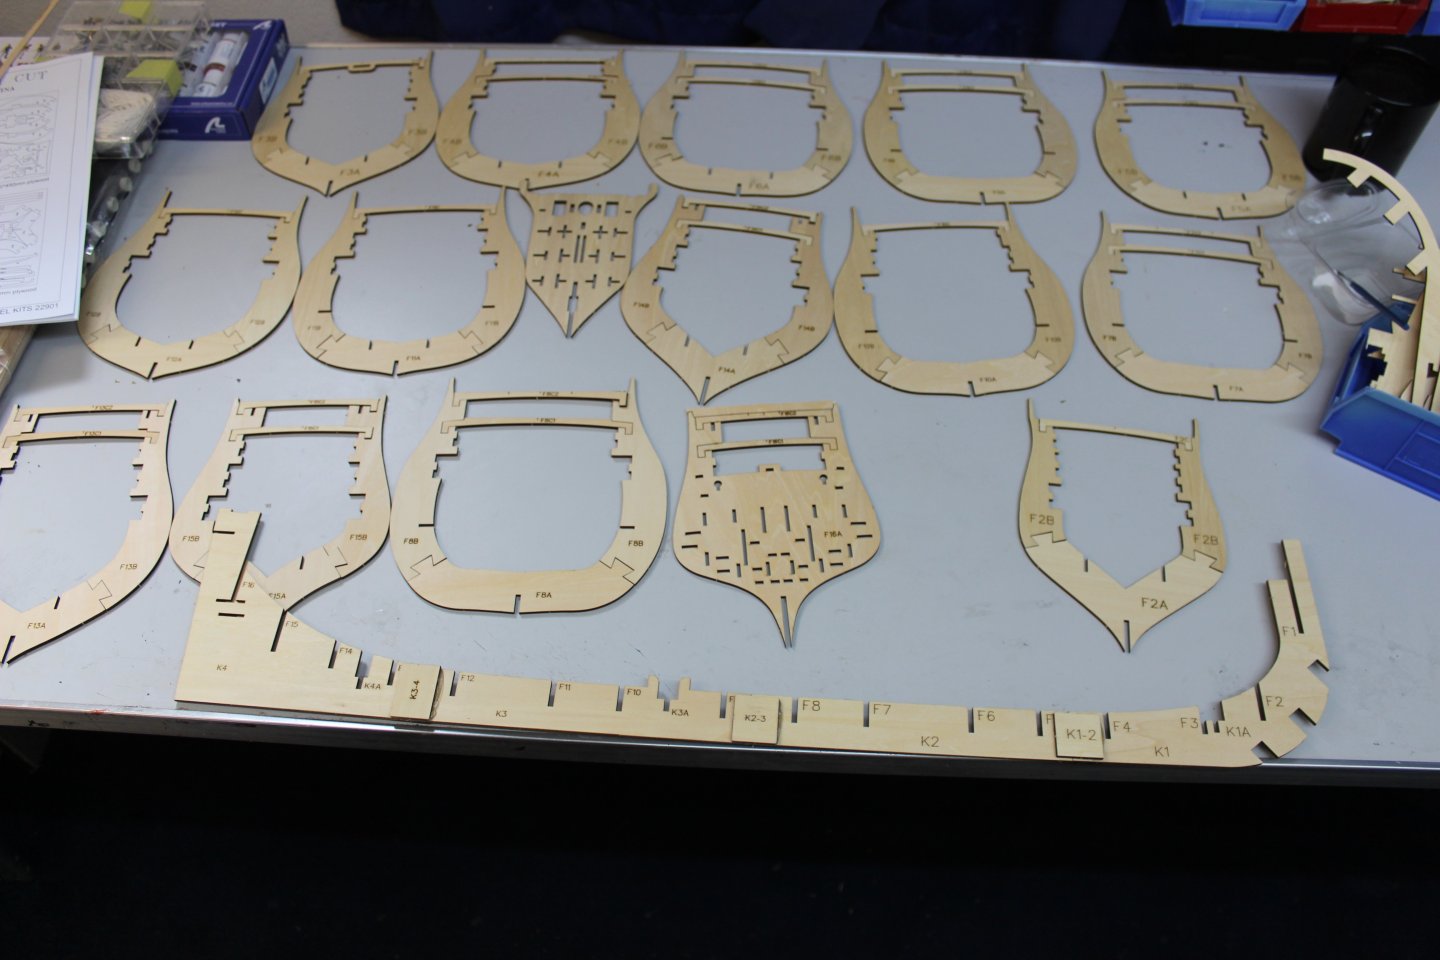
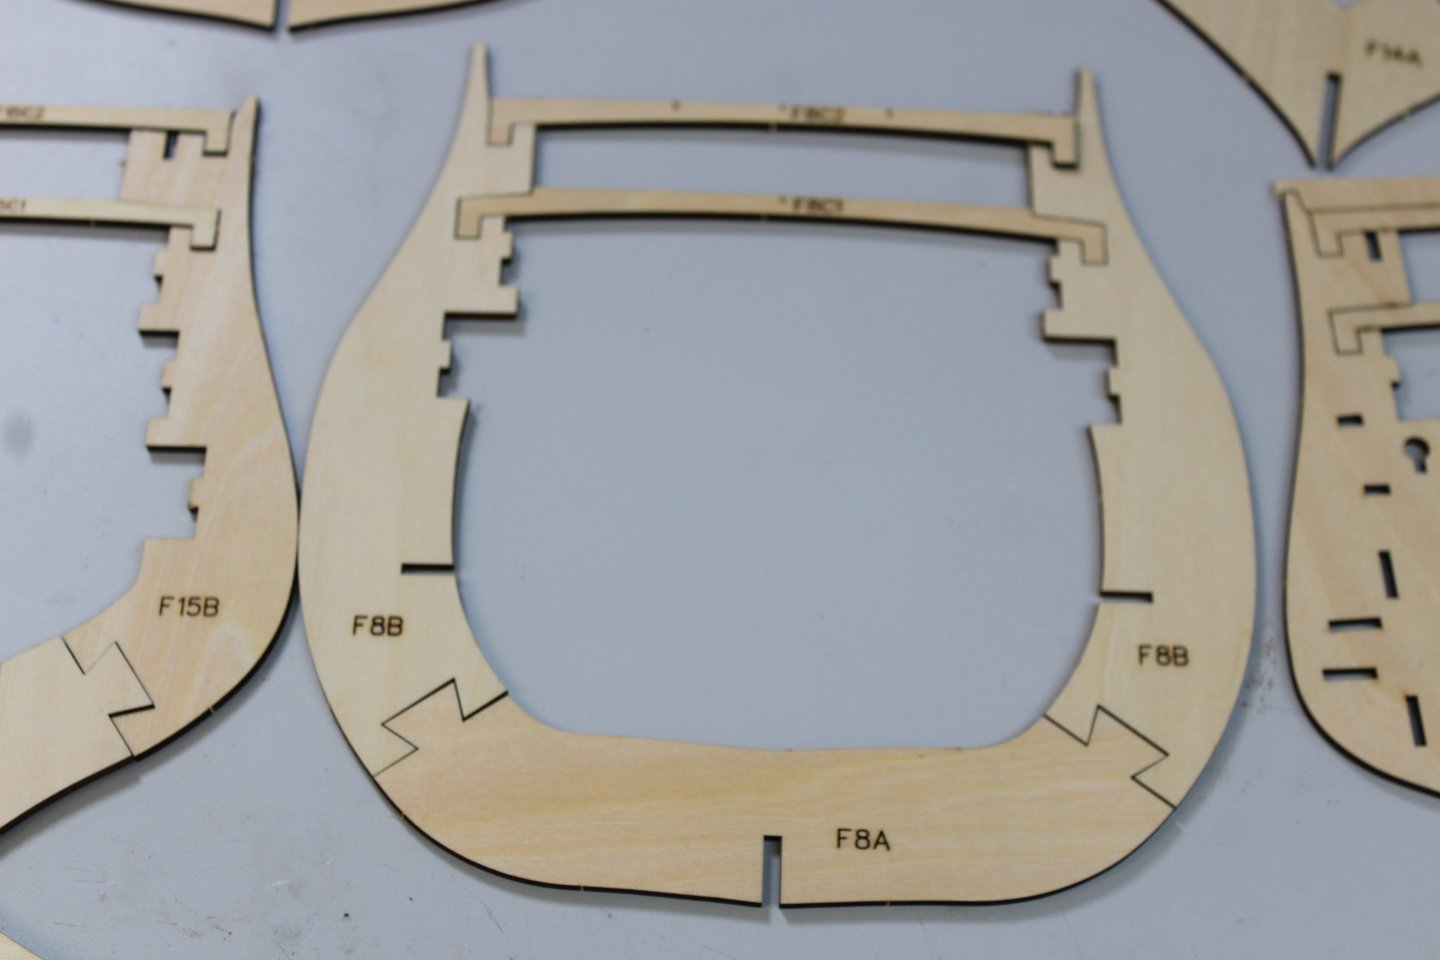
Good evening everyone Welcome to my new build, this kit is the very same kit that was reviewed By @James H, and i would like to thank him for donating the kit to me for completion day 1 Frames No written instructions for this, its all online, but lots of it first impressions The frames are 2.5mm ply, and quite good quality, the laser cuts are clean, and the pieces can be pushed out quite easily, but on test fitting, all the joints are quite sloppy, and care is needed to ensure, each frame is kept as tight as possible, they are made up of at least 4 pieces, some are five Centre line why have one piece when you can have four. i quess it saves warping, but its a bit daft, considering as above all the joints are quite sloppy, side plates are added to add strength to the join bow and stern sections have been made up as well, again, well glued, because as soon as they are raised vertical to the centre line the bits fall off

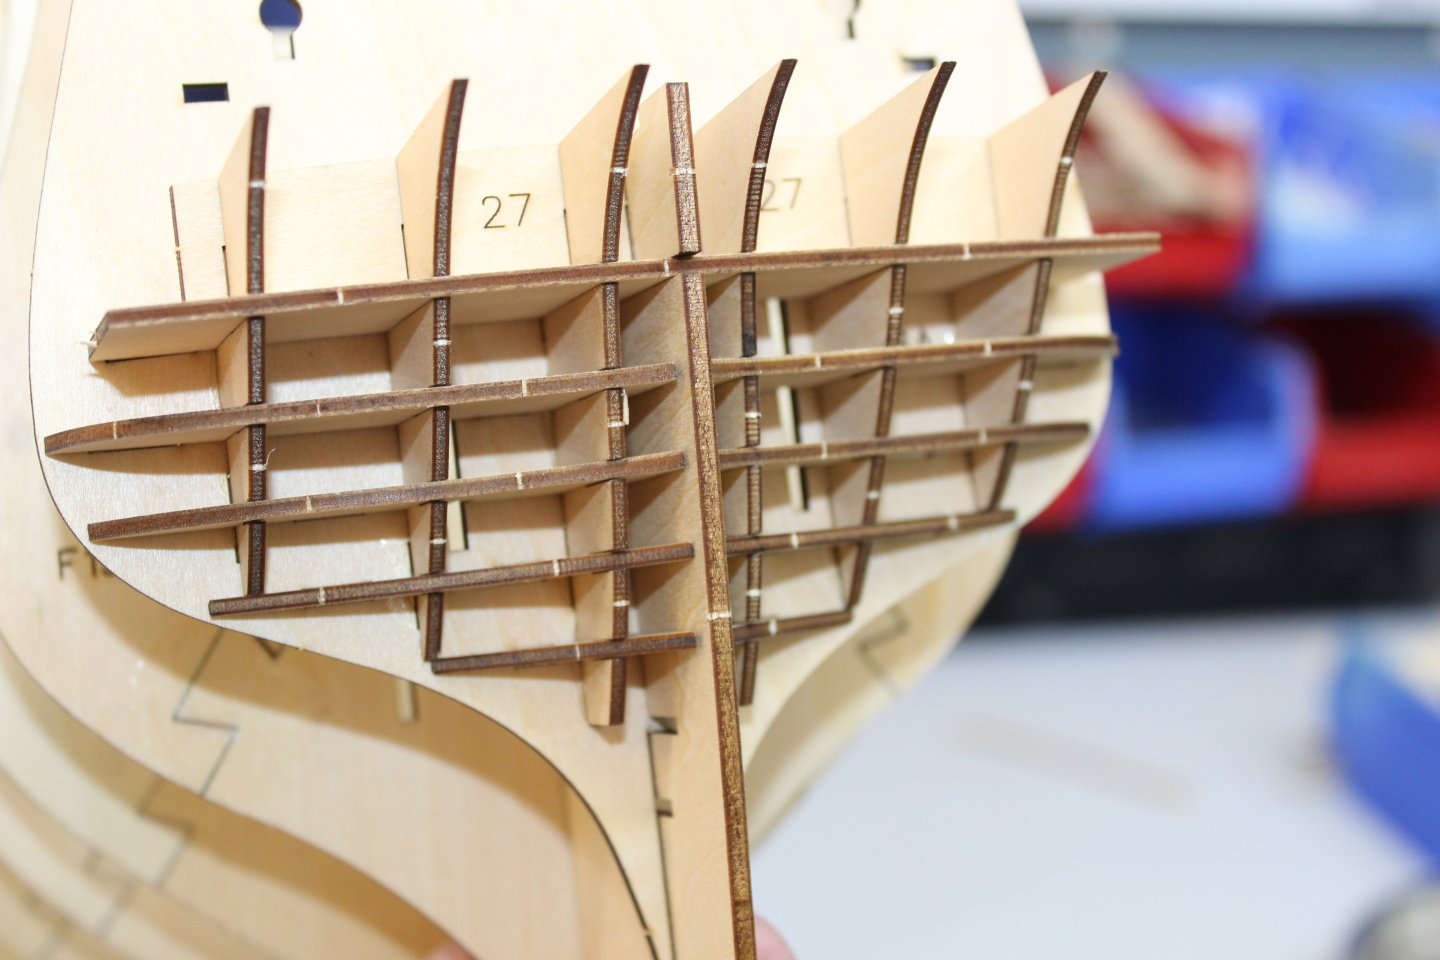
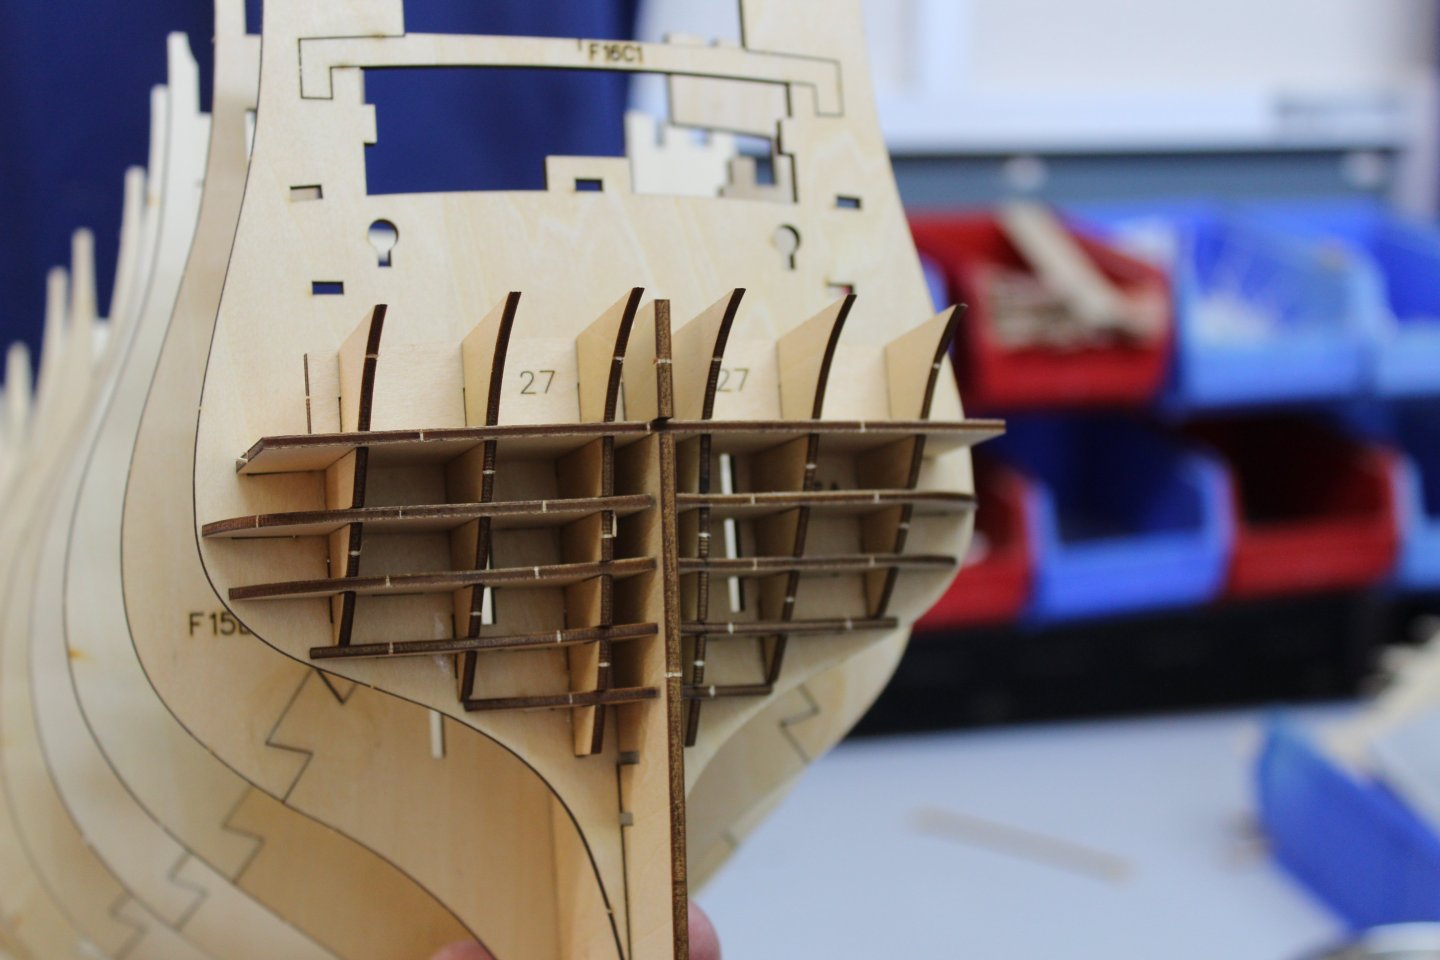


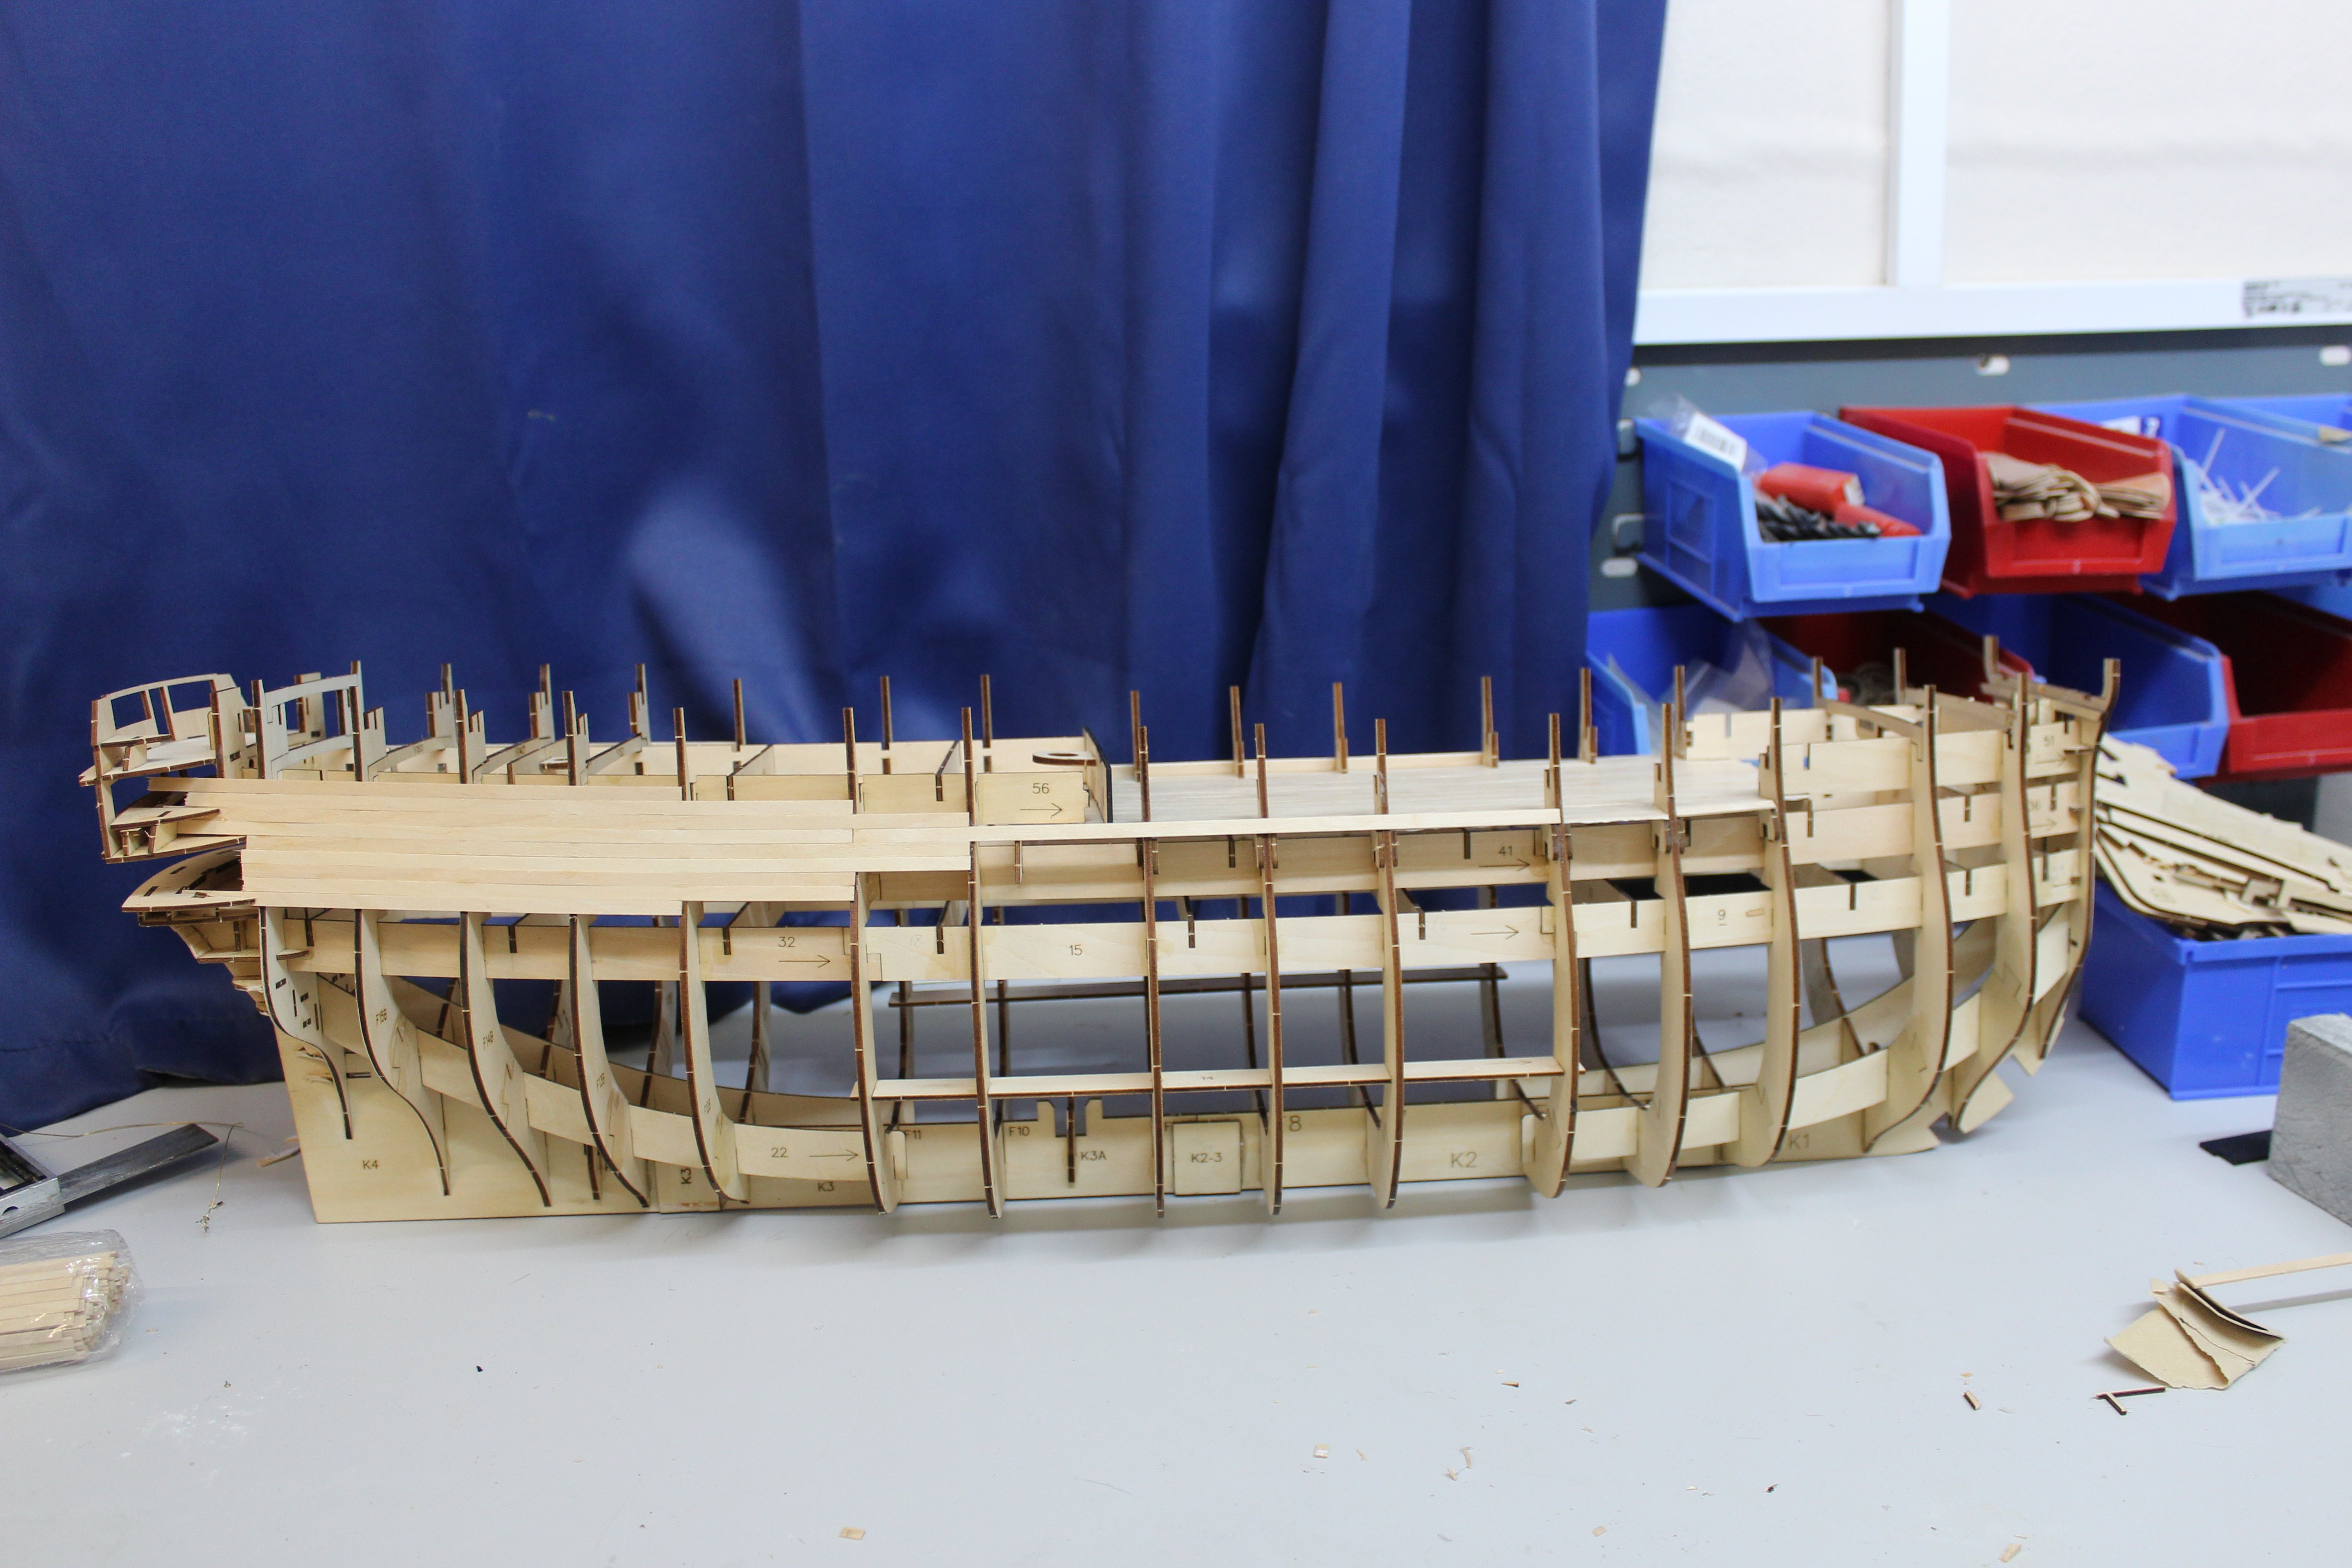


.JPG.808a76509934715098da7ea9c5cefd15.JPG)
.JPG.d0a1486cf8b2887fbdfb5840c5524148.JPG)