Kevin
-
Posts
7,028 -
Joined
-
Last visited
Content Type
Profiles
Forums
Gallery
Events
Everything posted by Kevin
-

I Have an Itch to Scratch
Kevin replied to SaltyScot's topic in Modeling tools and Workshop Equipment
can i make a suggestion, instead of going the whole hog with a full scratch, try something like a CAF kit, and take it from there, now i will leave the room and not come back until invited Sailing ship -
welcome to MSW, im the one who starts and never finishes anything, Here in the UK i get my bits from Cornwall Model Boats, and my Kits from Vanguard Models – Wooden Ship Kits & Accessories
-
you have done a lovely job so far, how times have changed, buying a kit, where nothing has been laser cut, will seam very alien to some of the newer generation of builders. i will continue to check in on yr progress
-
I was wondering just how all the internal fittings are going to stay pristine and in place when it comes to hull fairing/any planking
-
great progress, as much as i want this kit, i have a Victory kit built
-
real shame, but they missed the opportunity to extend/modify the range
-
looking at the Royal William again yesterday and the opening banner reads this,
-
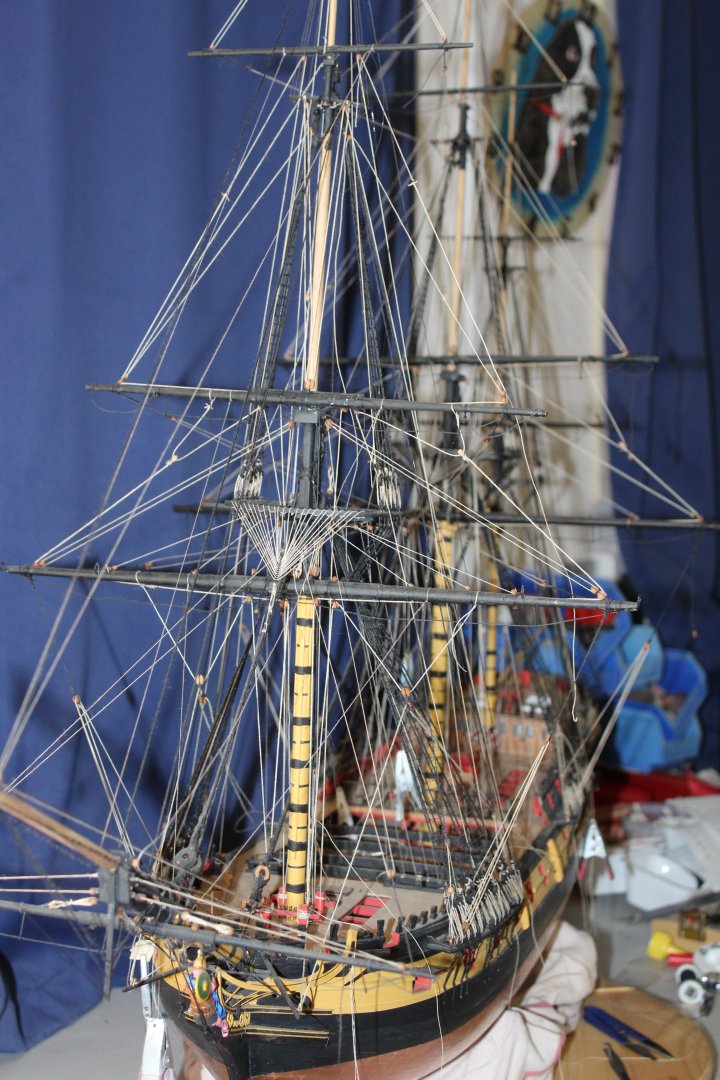
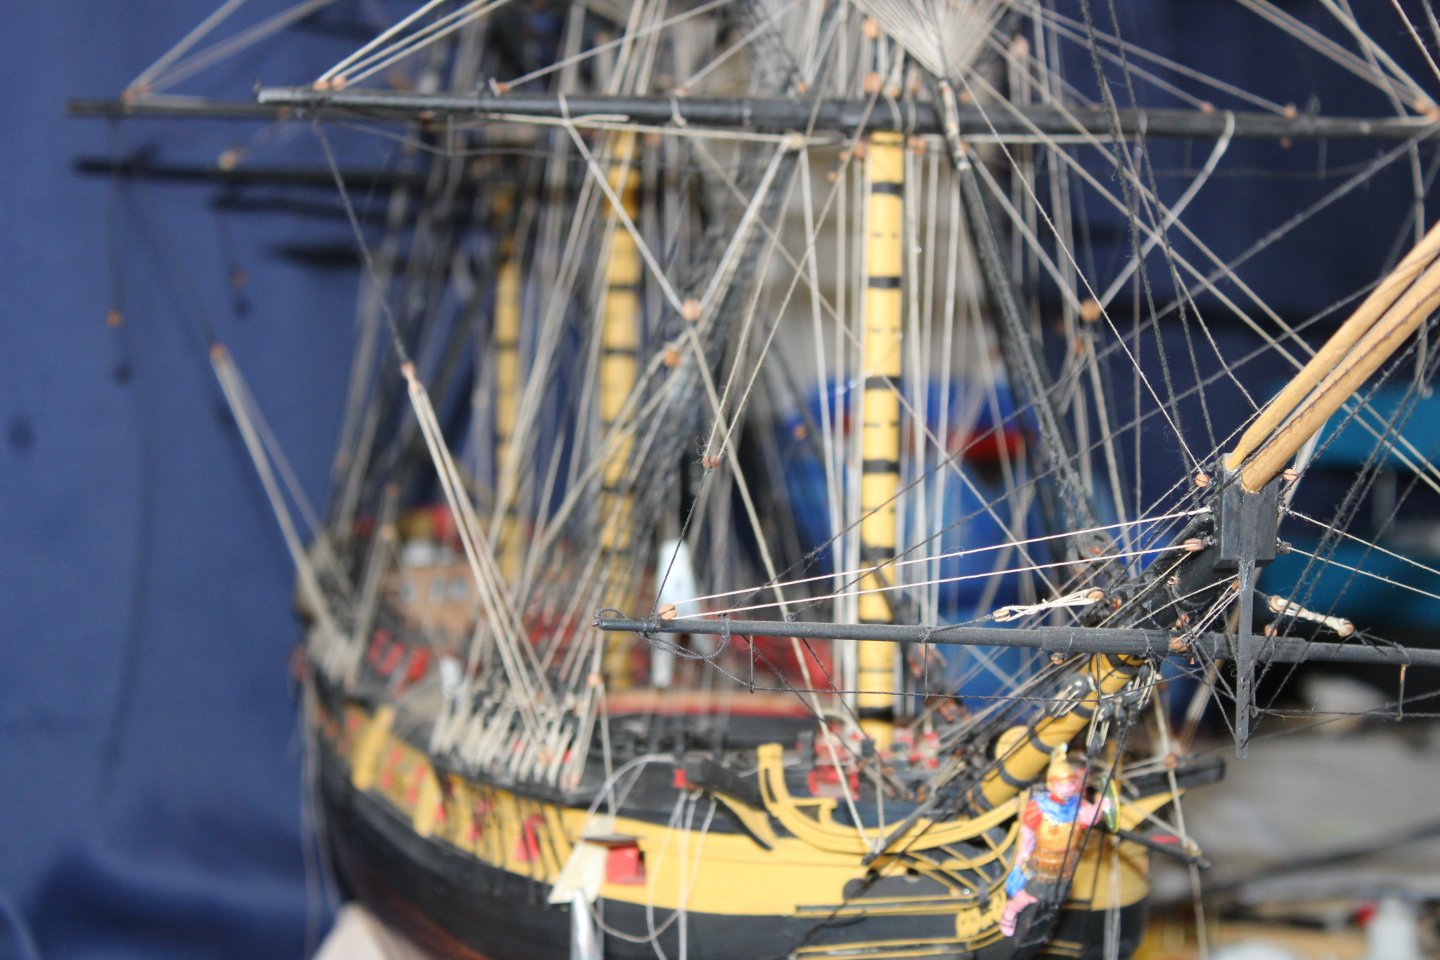
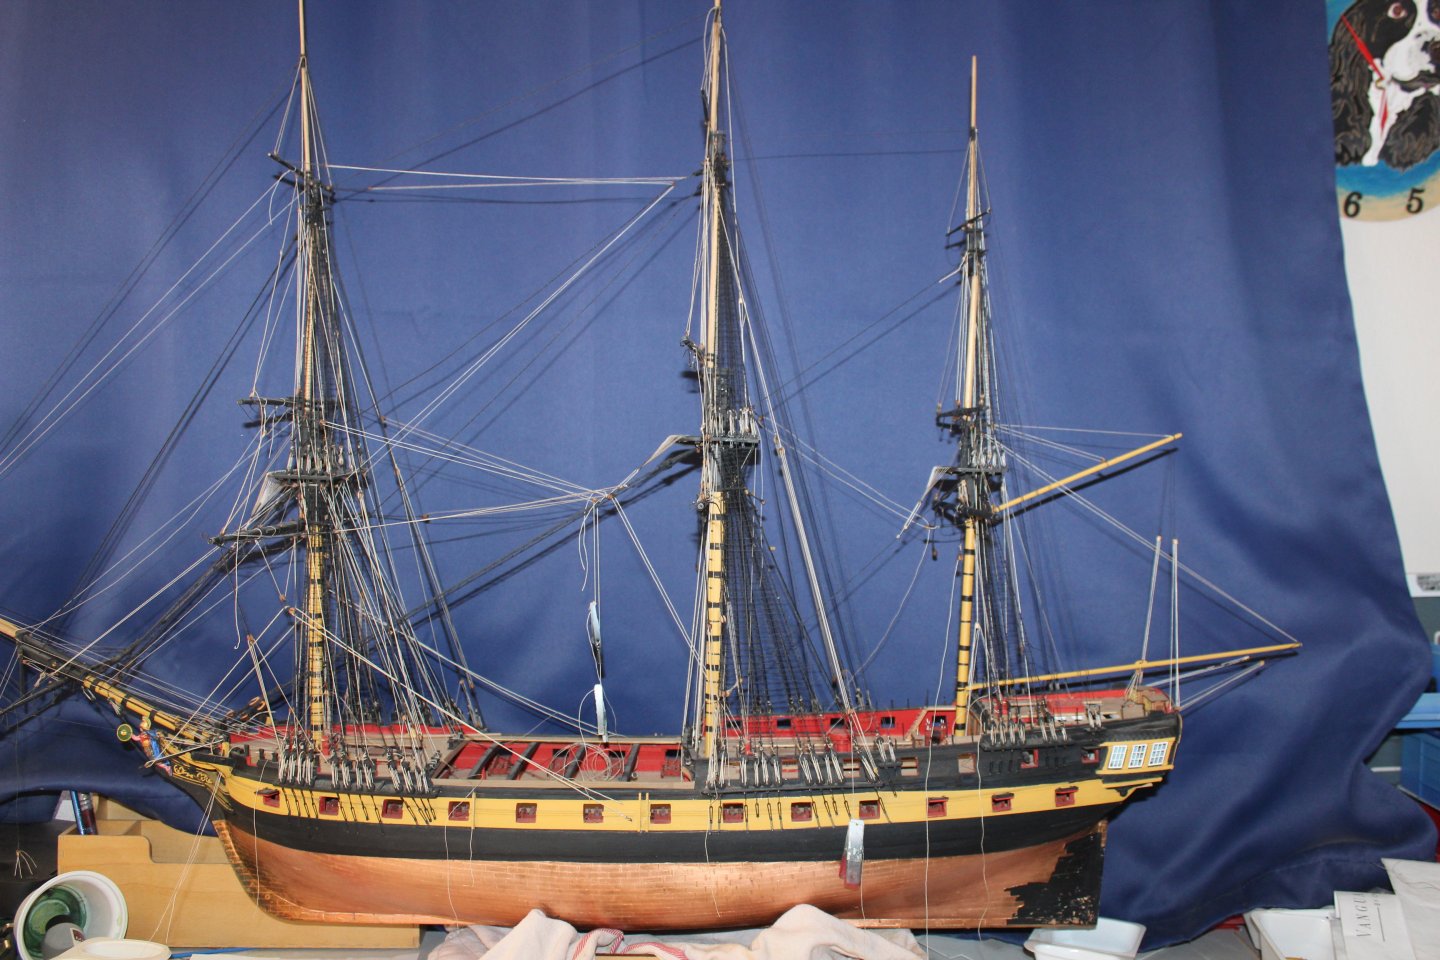
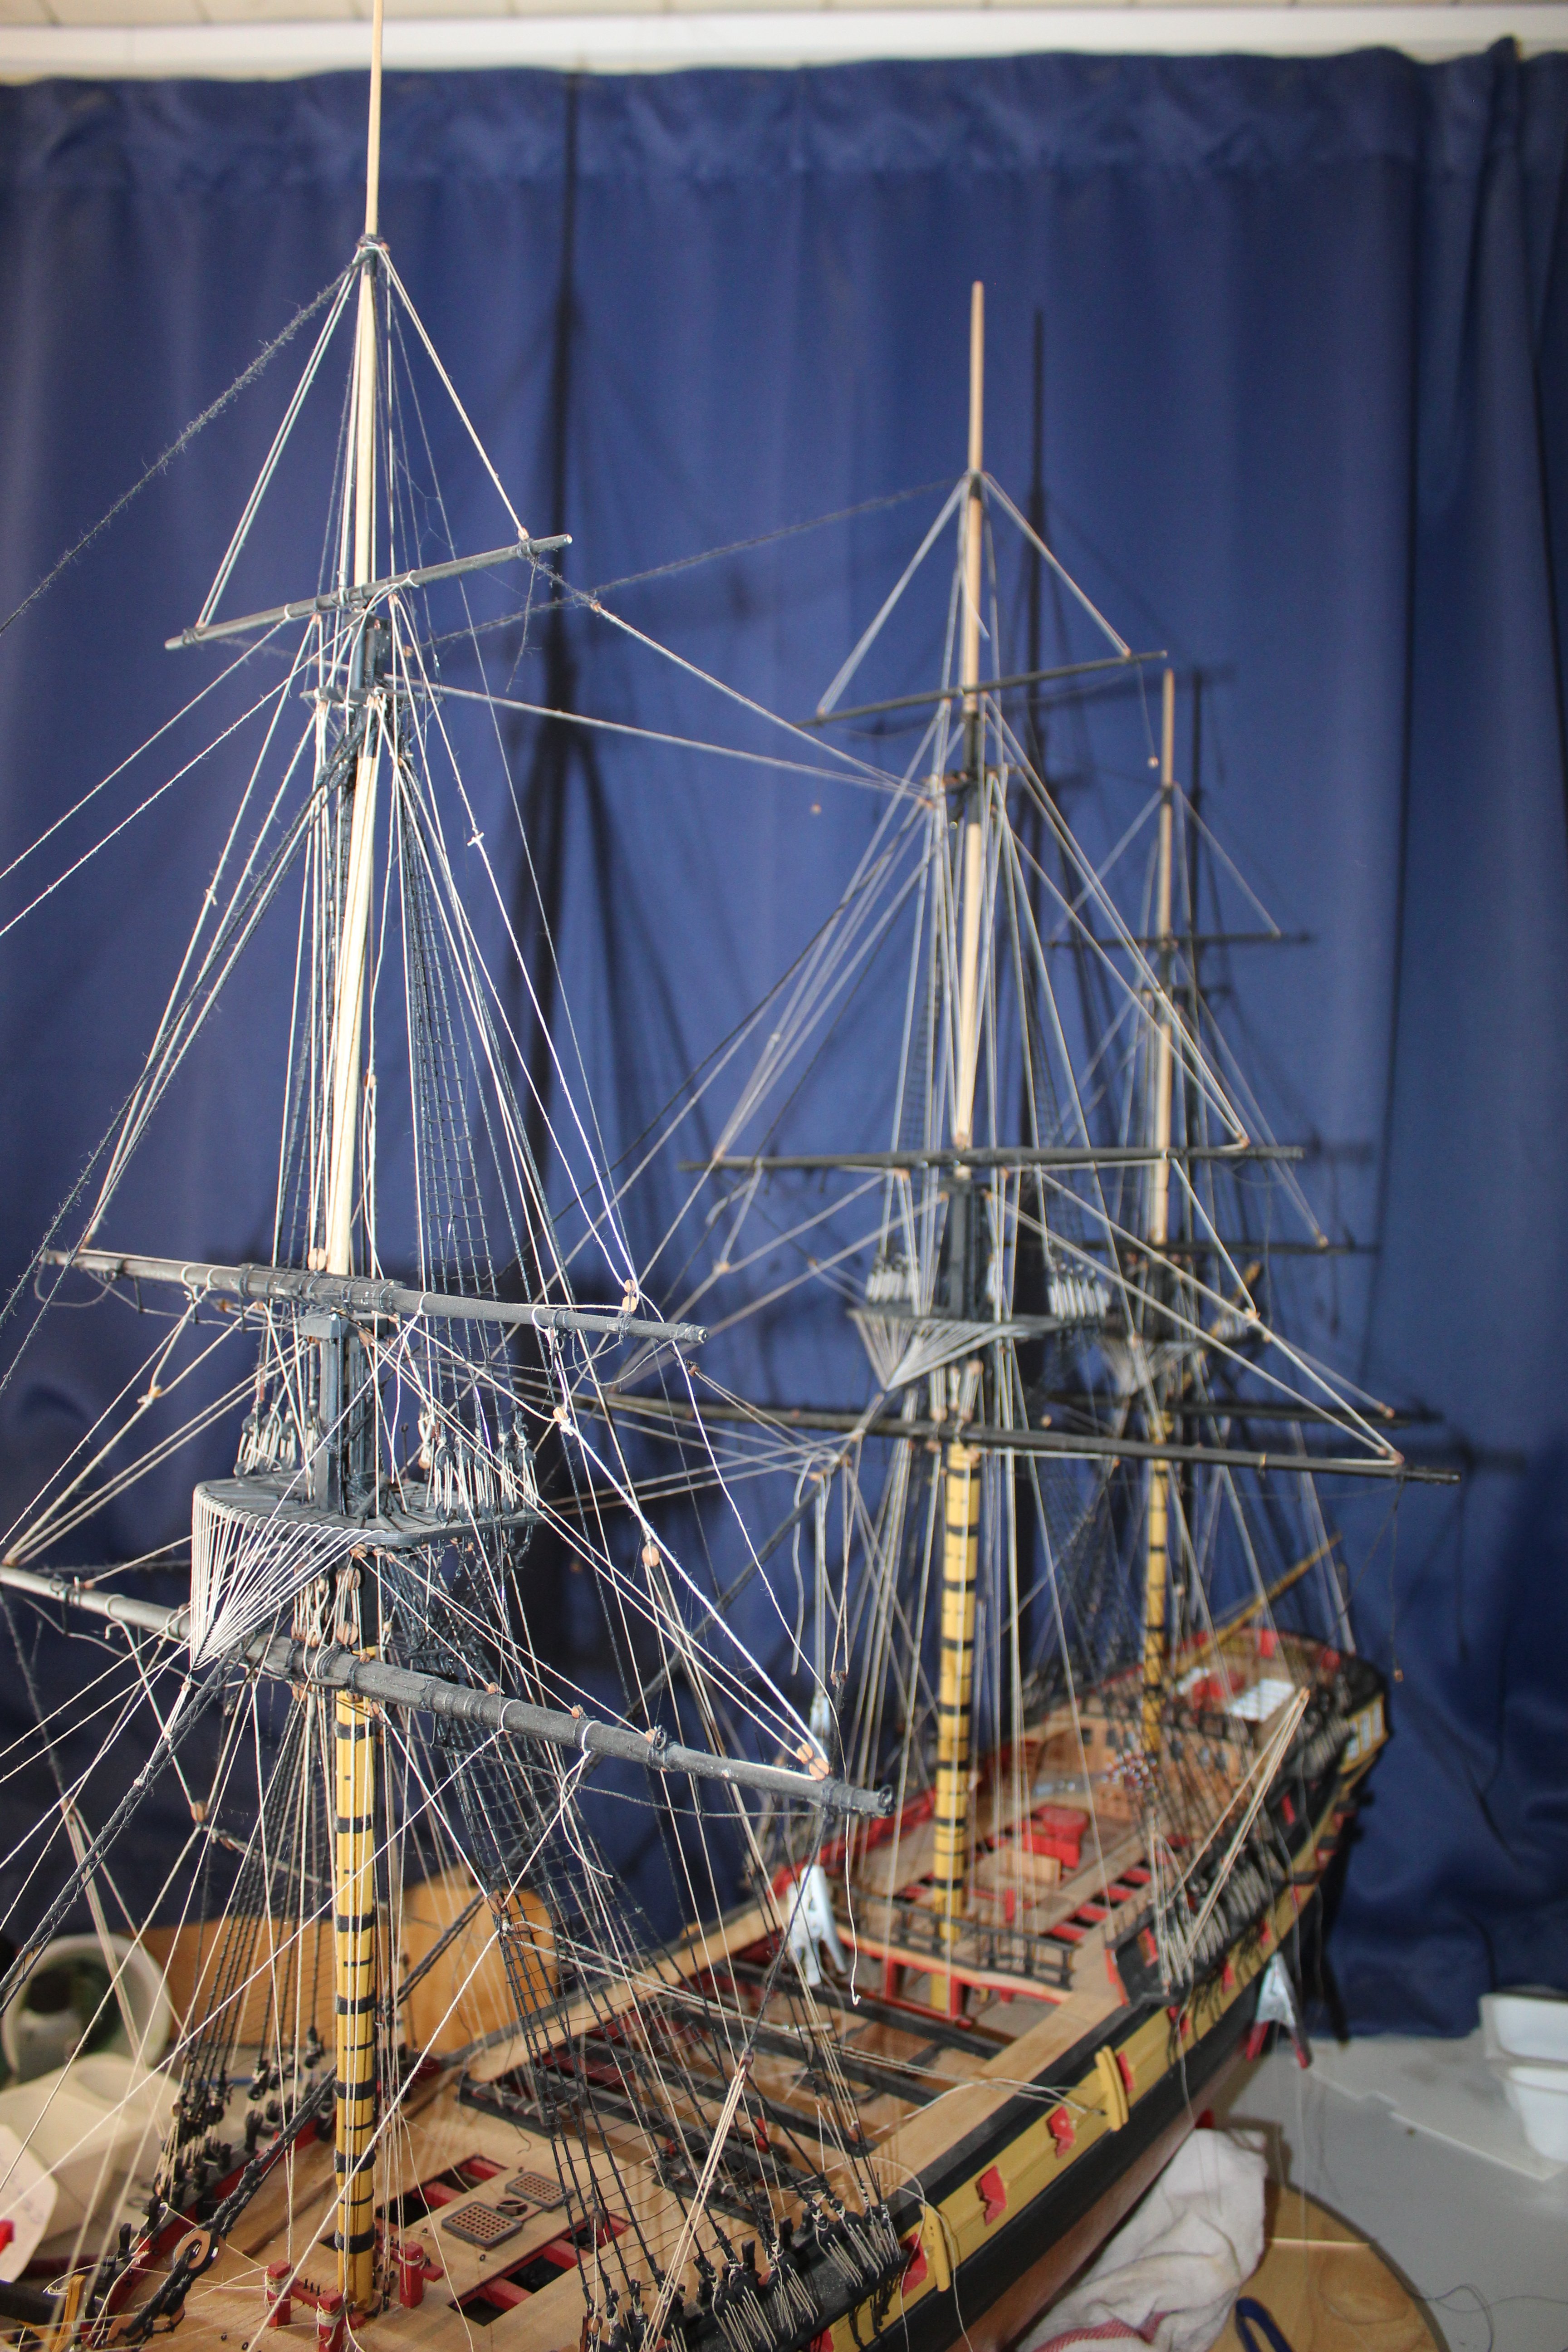
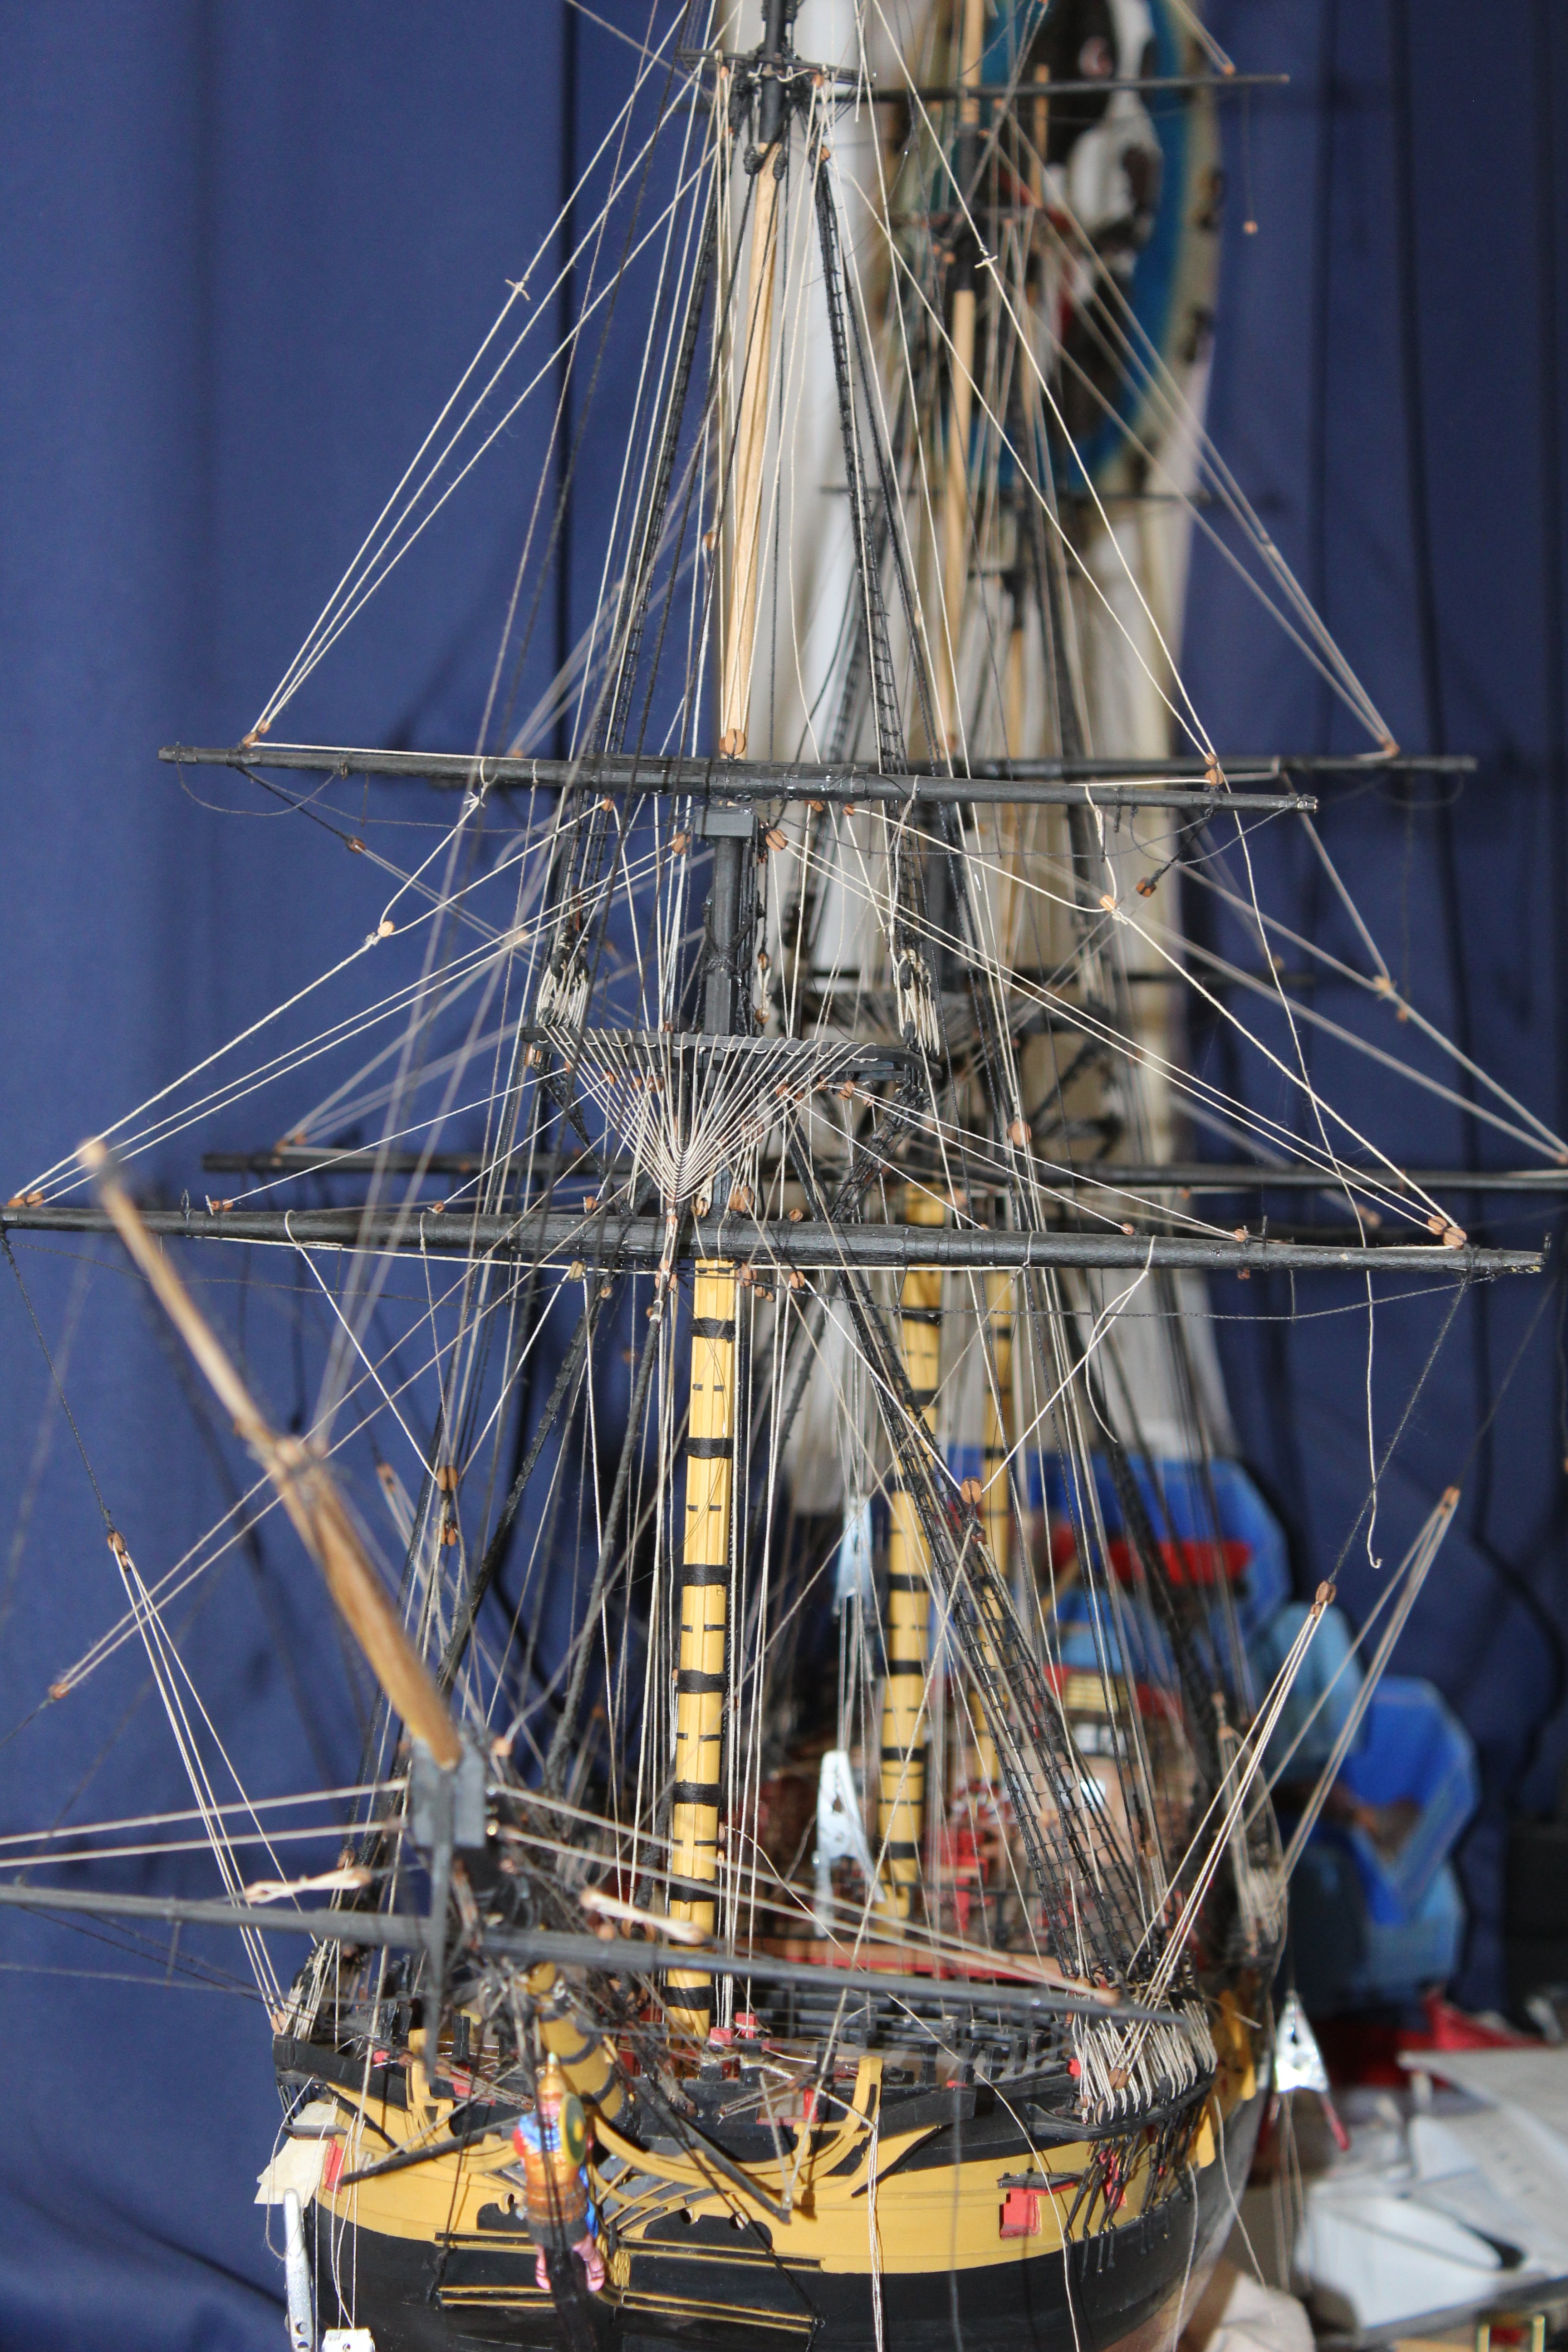
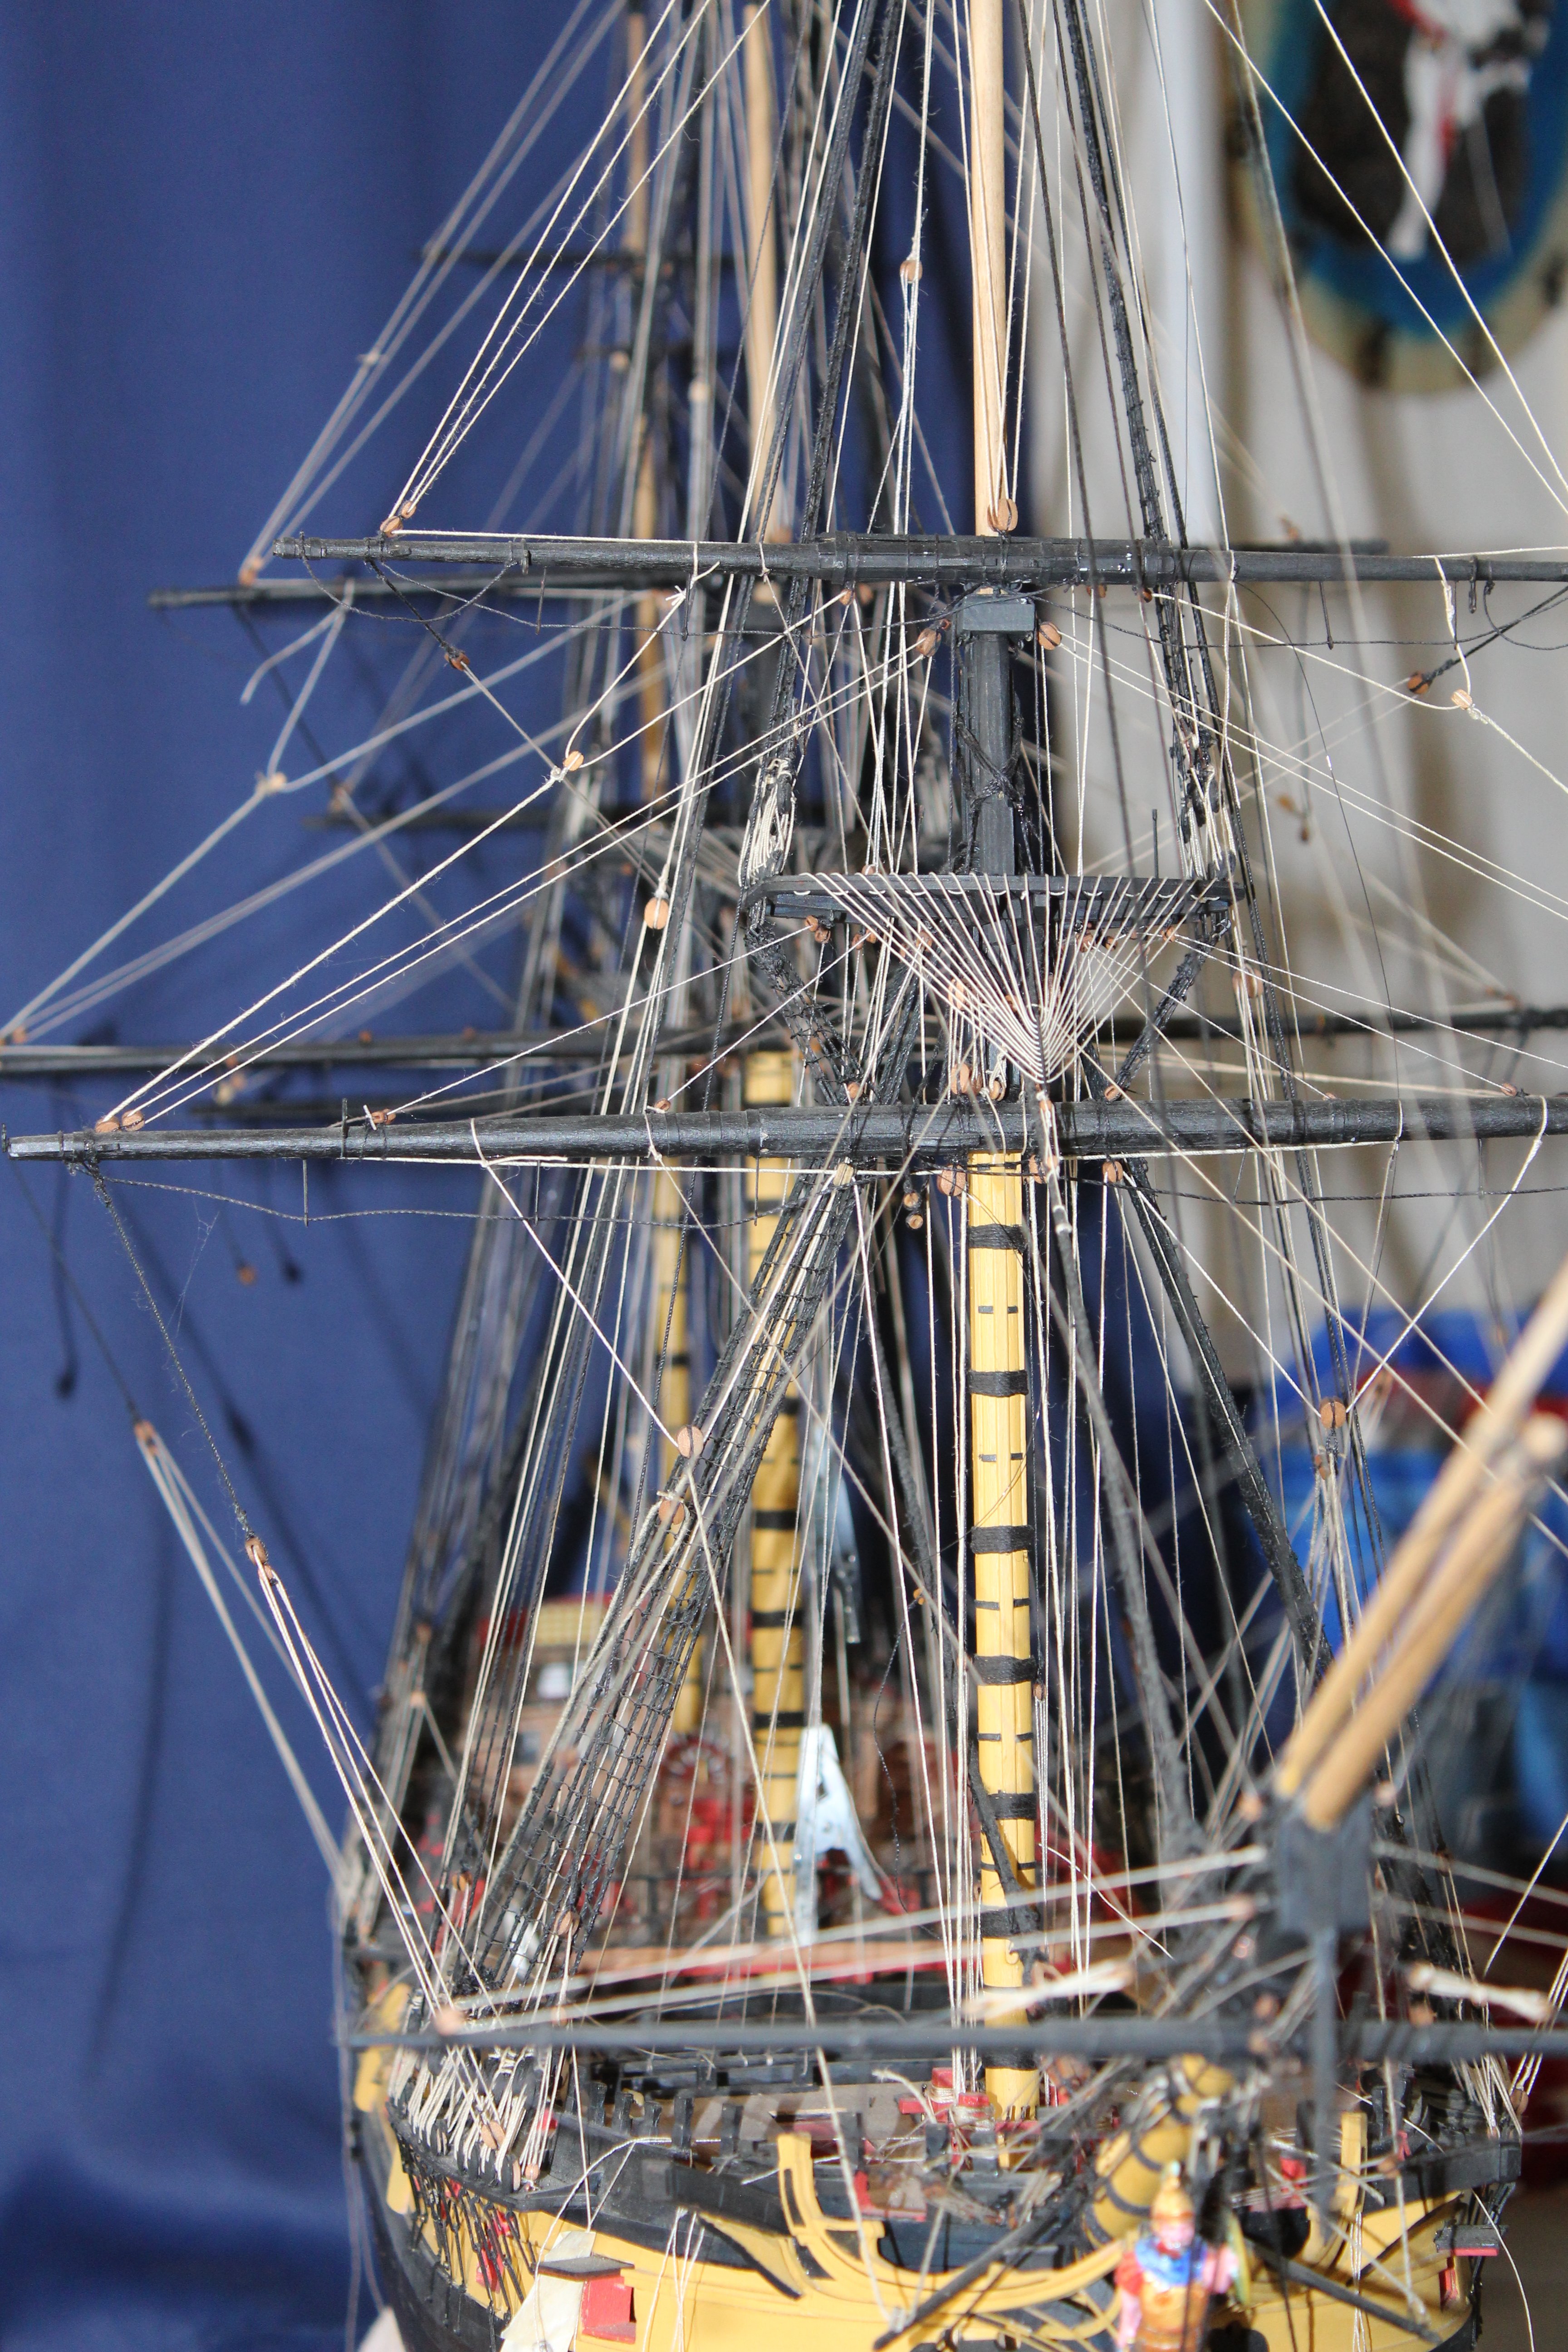
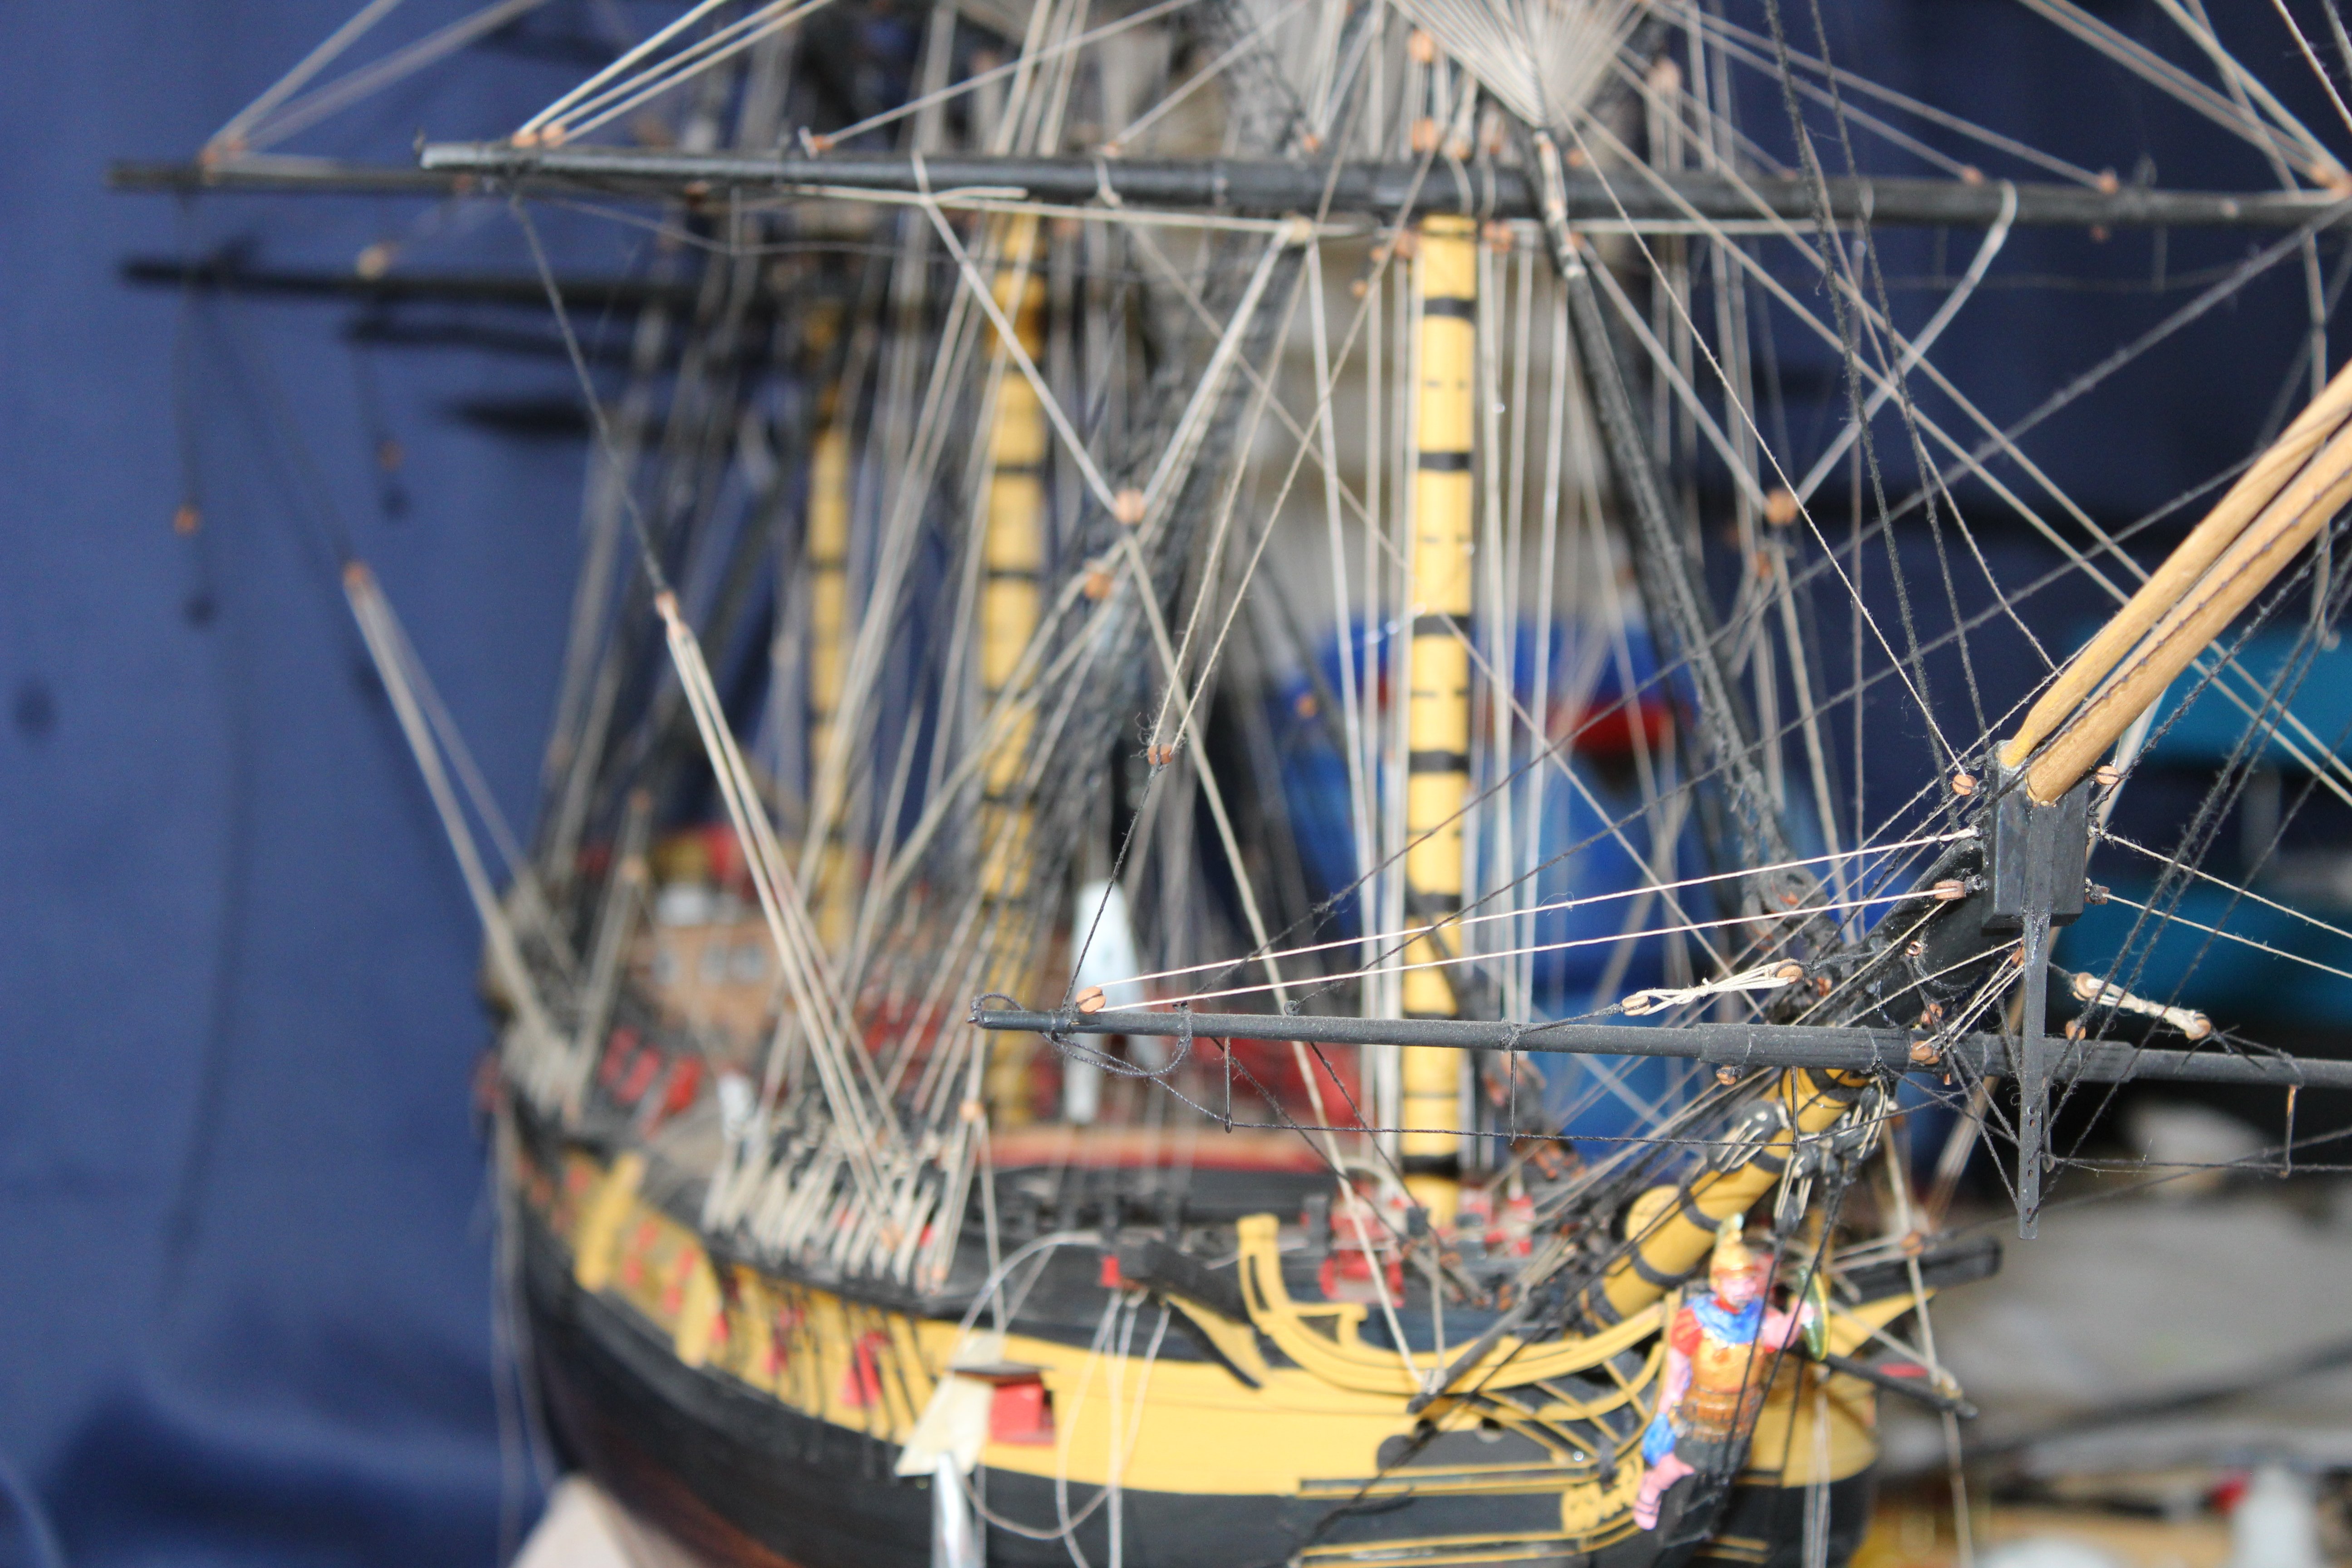
well indy is certainly back, and i hope to complete her by the end of this month May 2025. just completed the mizzen yard lifts the stern copper plates, wore away from handling ( another tape error i have learnt, and will be replace before the rudder is fitted, the bow is not so bad i certainly understand full fat rigging now, just how many more lines should i have hade to put on the Caldercraft HMS Victory sorry about the pants photos the room is long enough but not the width, so hope to get her outside this week and the bois say hello


- 443 replies
-
- 19
-

-

-
- Indefatigable
- Vanguard Models
- (and 1 more)
-
i love Mountfleet kits, the metalwork does require a lot of cleaning up, but does turn out nice, this is my St Nectan, good luck with the rest of the build
.thumb.JPG.016eaa436c20bce44a7b393fb4f51f15.JPG)
- 6 replies
-
- 6
-
-
-
- Boston Typhoon
- Mountfleet Models
- (and 1 more)
-
I appreciate, video viewers may be interested in the process of the PE blackening, but would it be simpler to just spray black
-
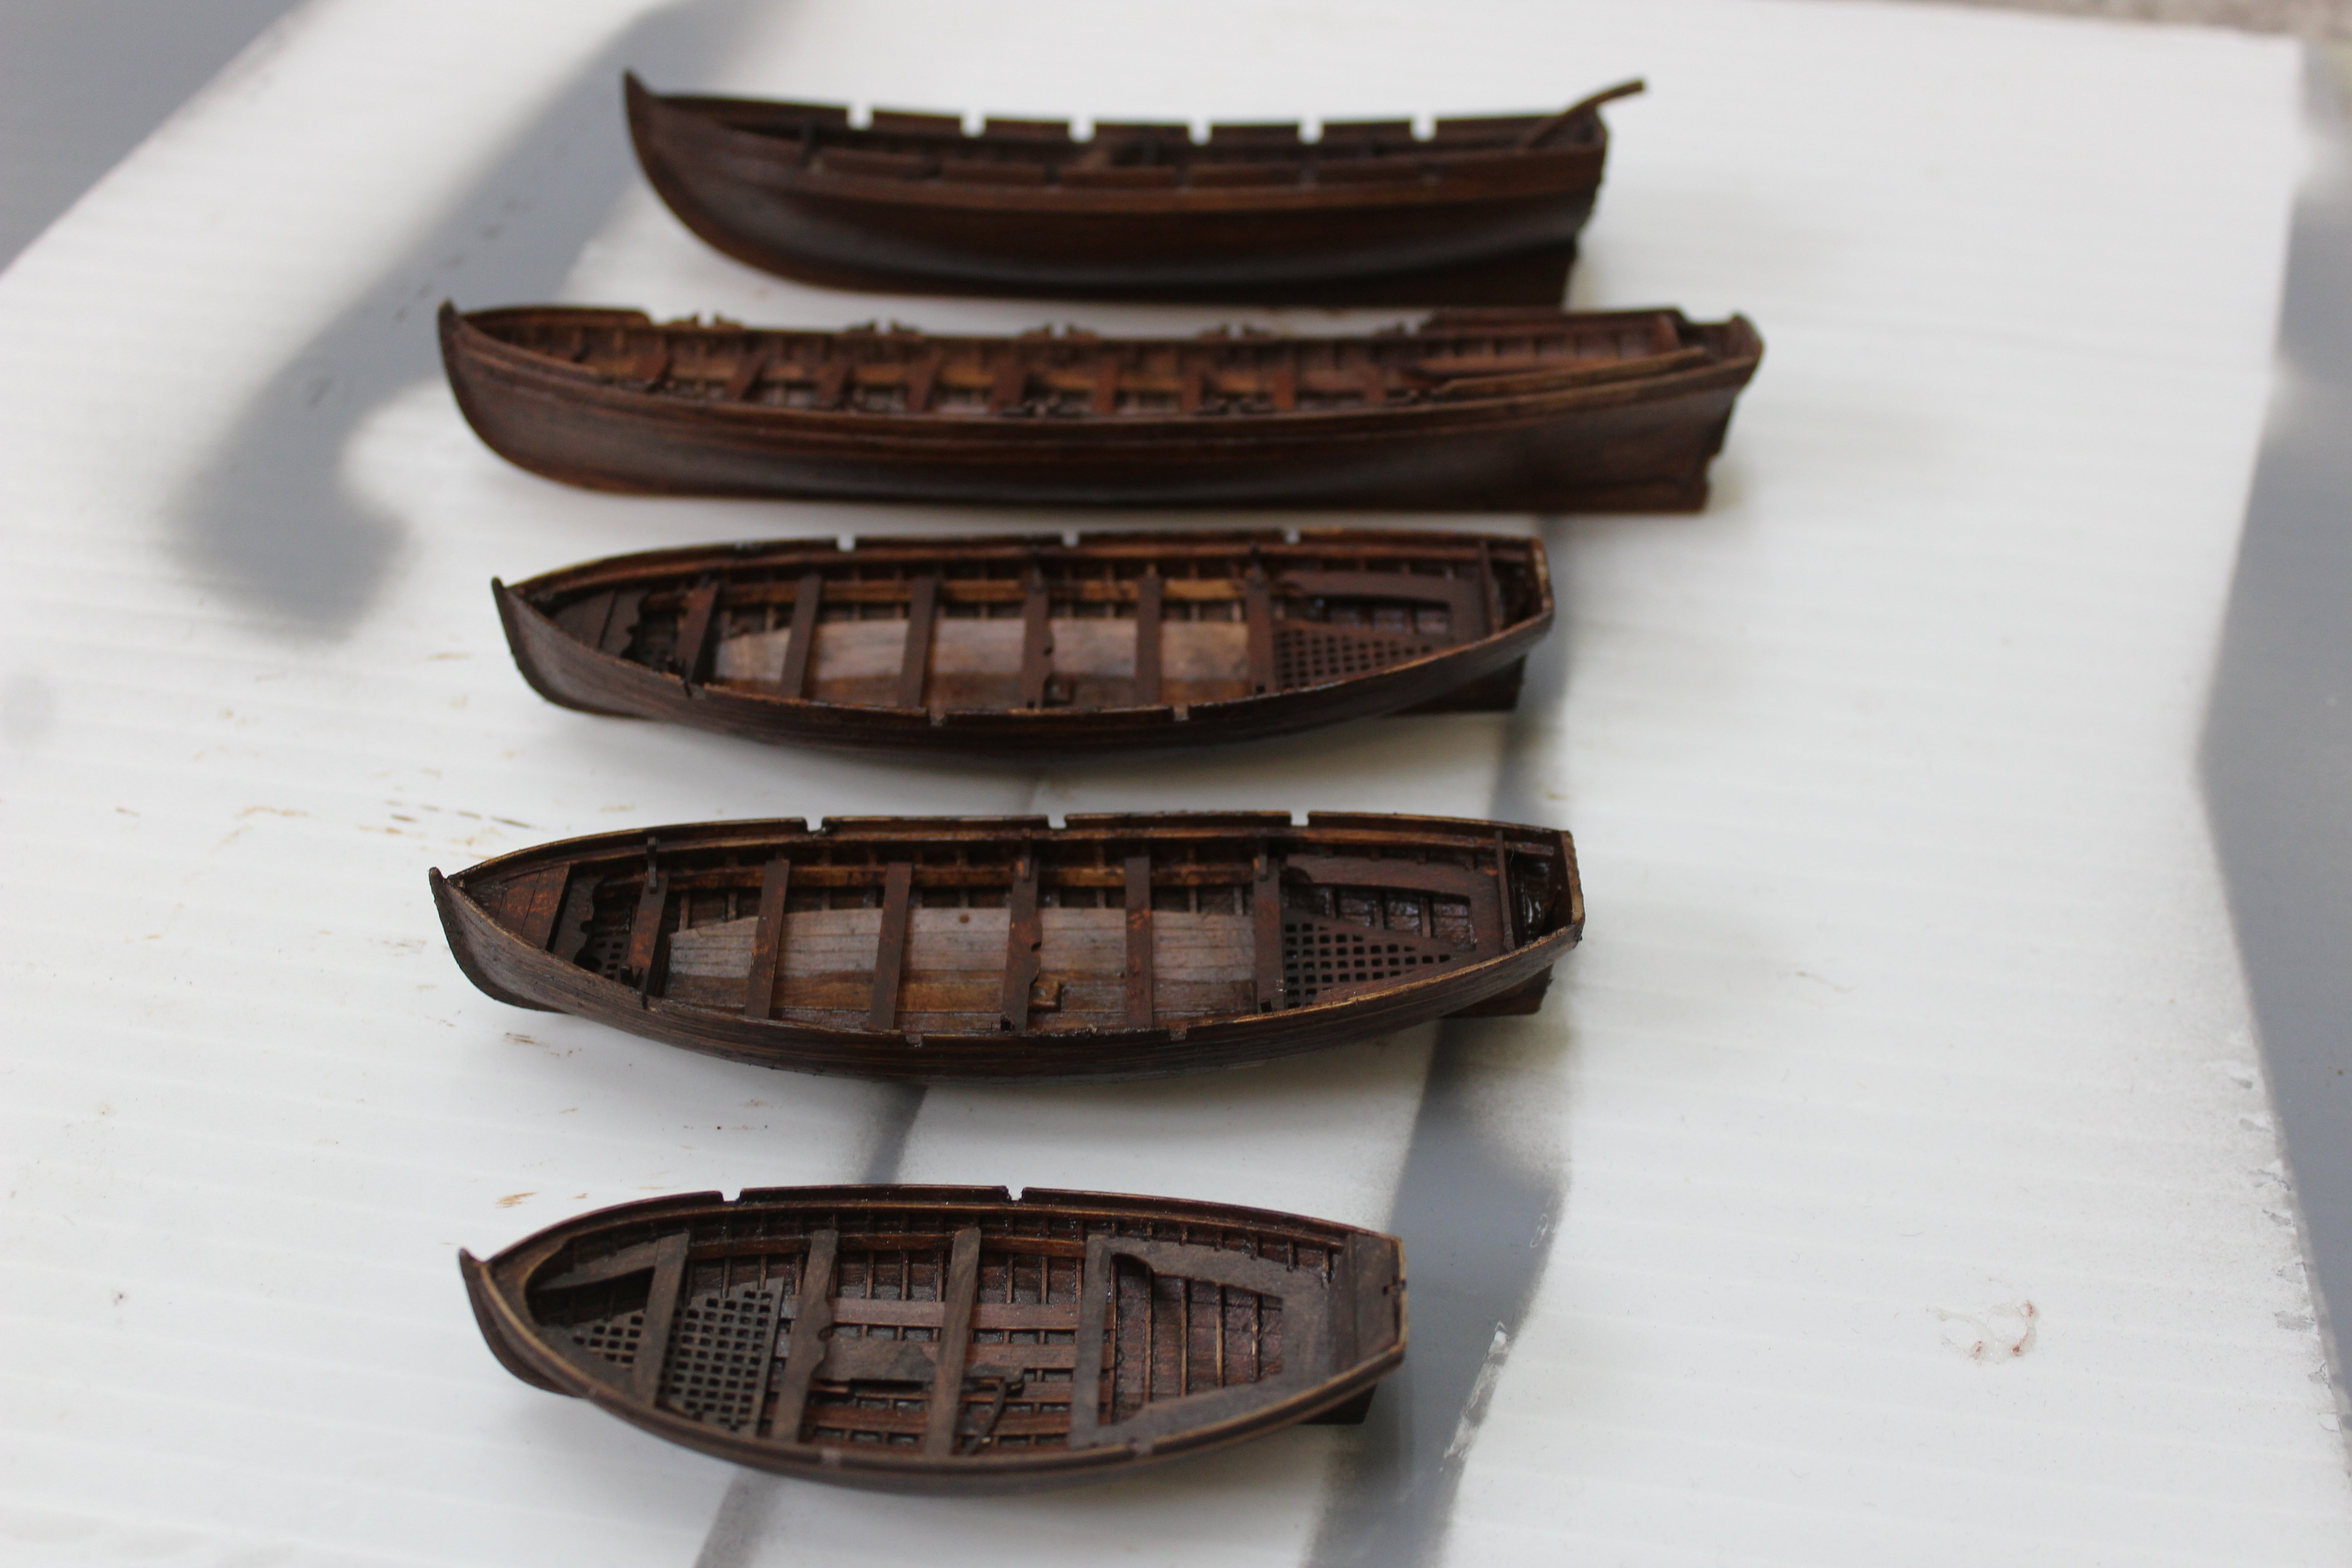
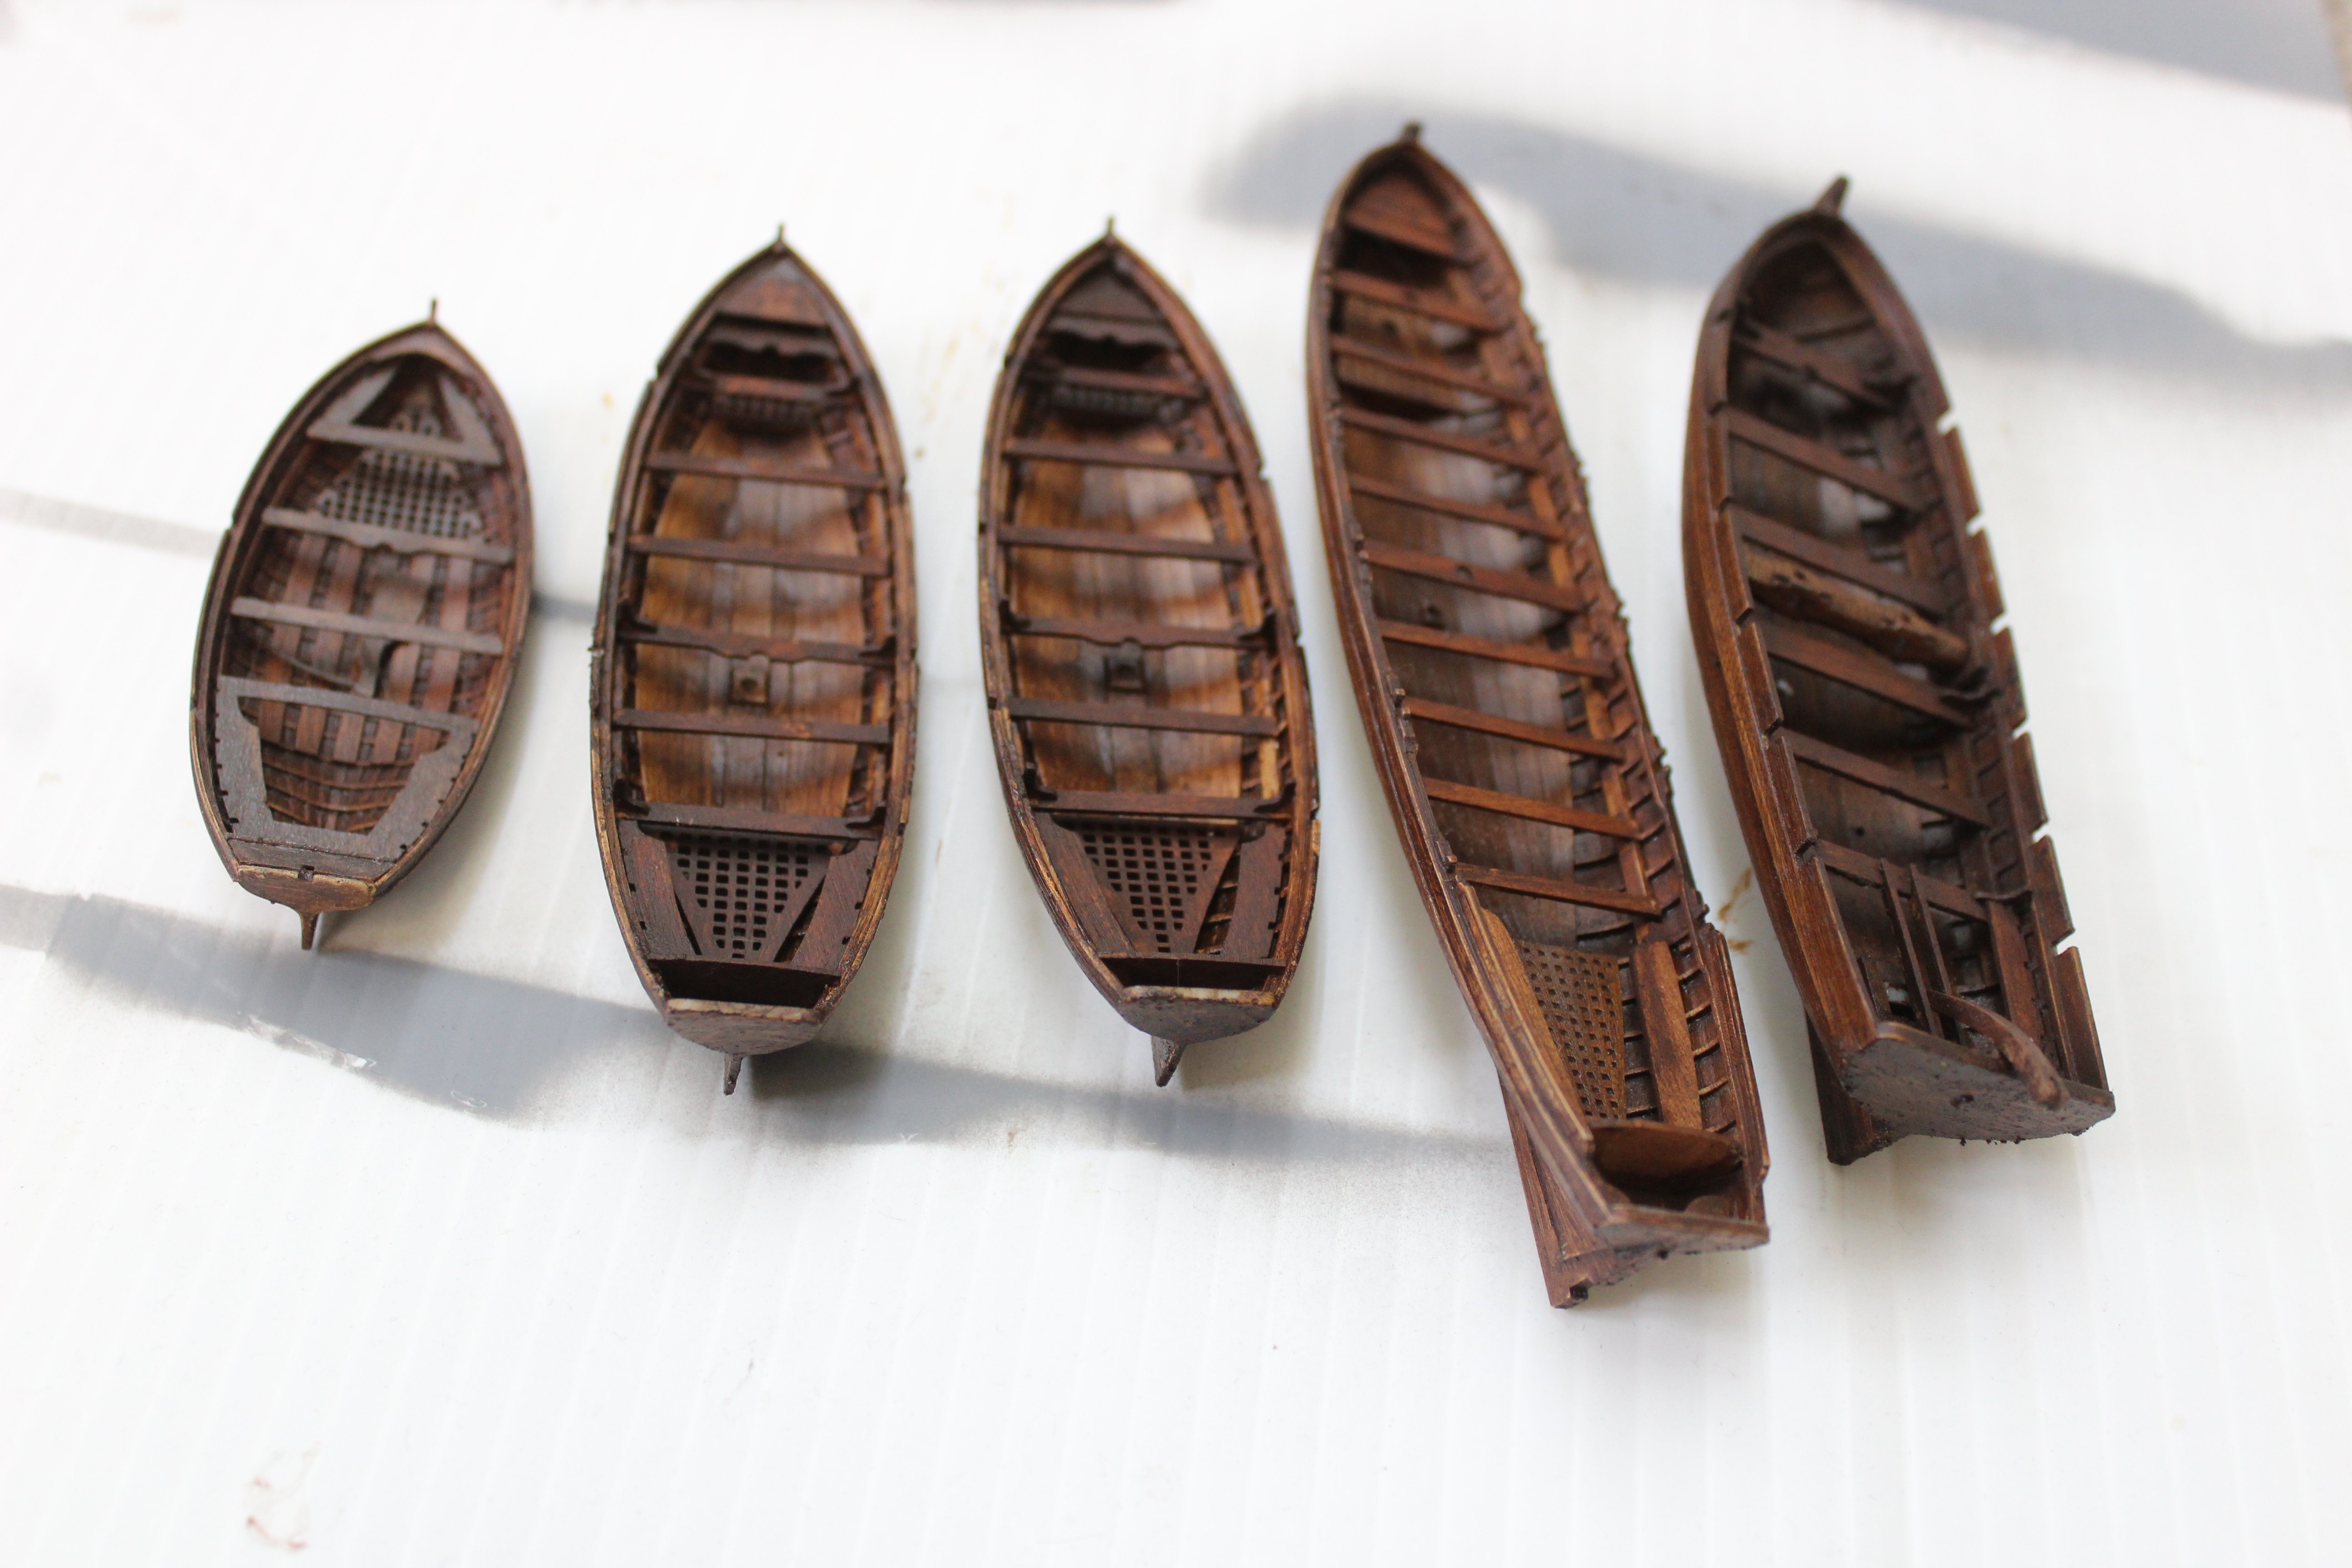
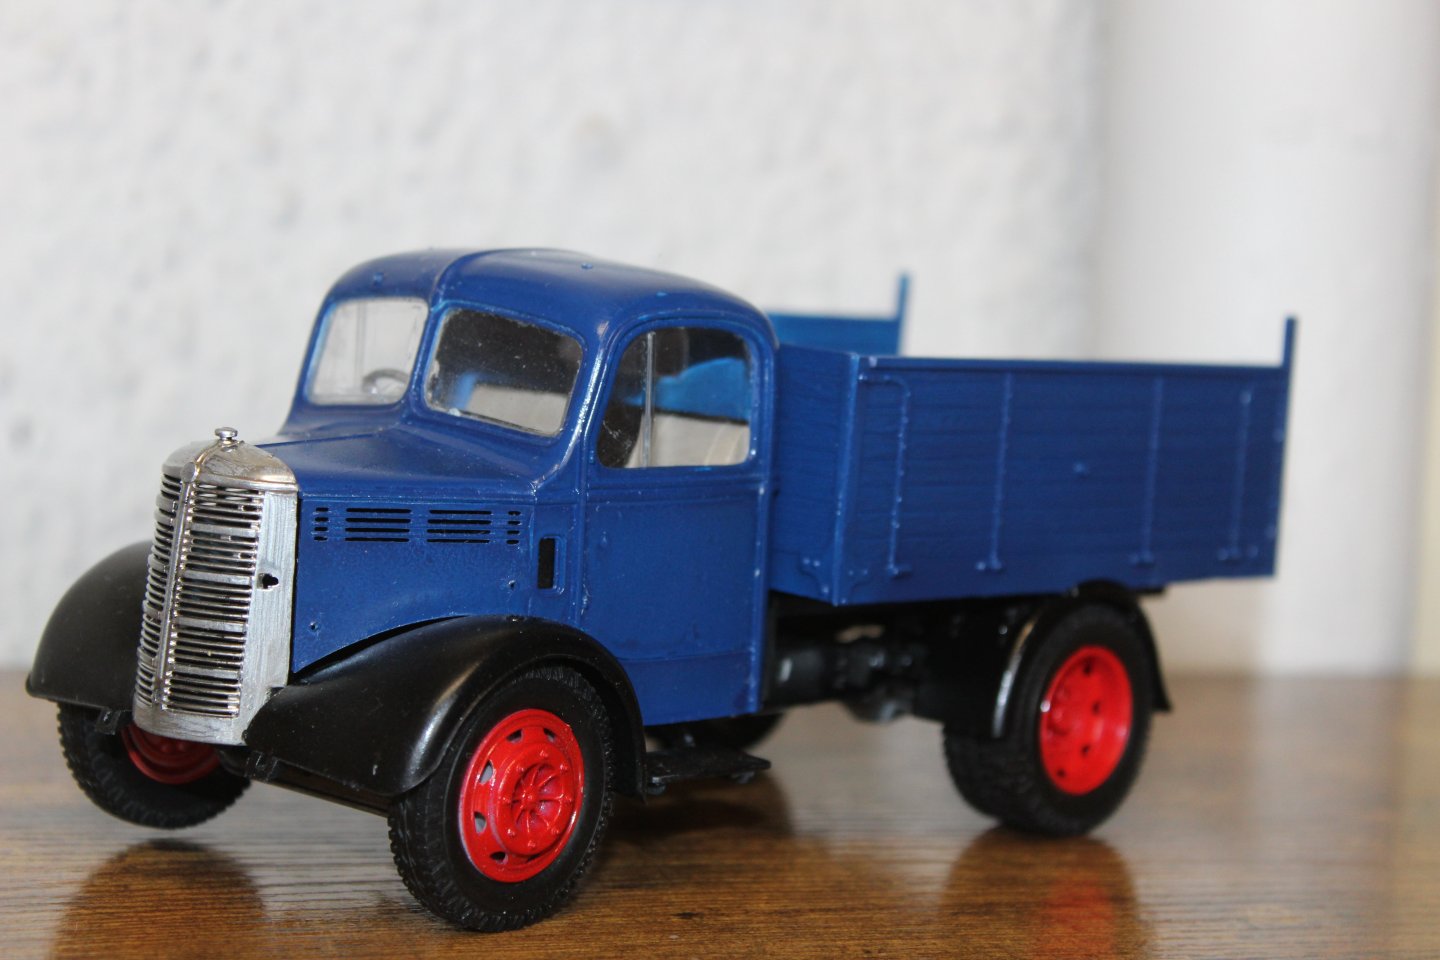
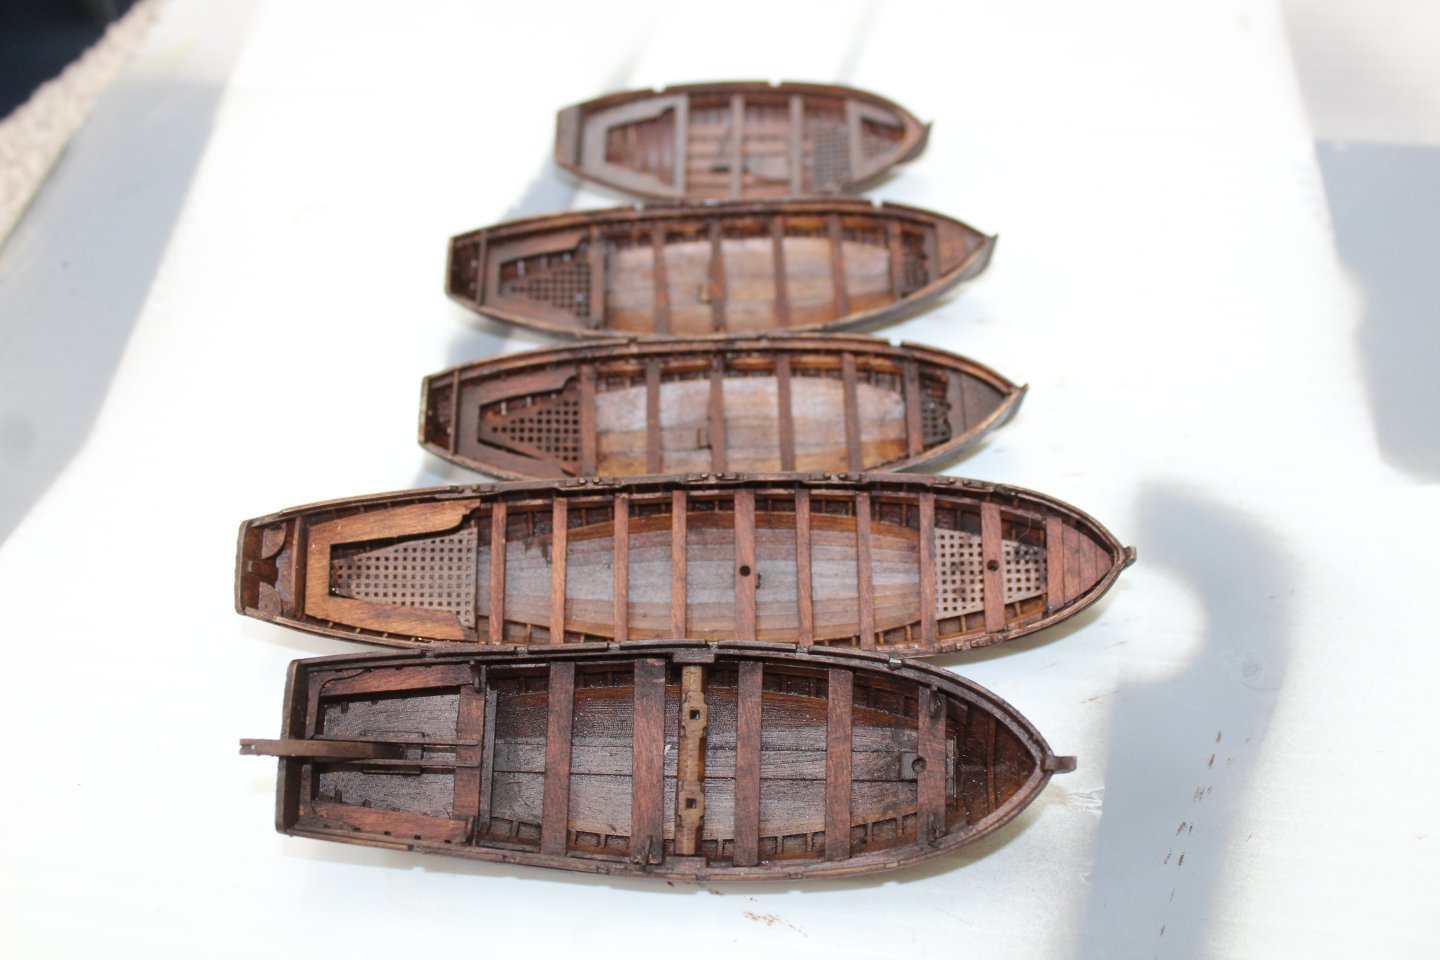
good evening everyone thank you for comments and likes @hollowneck thats a lovely build @brunnels up to last week i have only ever used rattle cans and hairy sticks all five boats have had the outer coats changed from oils to matt white, i dont have the cradles fitted yet so not in any proper position taught myself to airbrush this weeks, by making up one of the Emhar 1/24 trucks
- 443 replies
-
- 10
-
-
- Indefatigable
- Vanguard Models
- (and 1 more)
-
San Felipe by Roy812 - OcCre - 1/86
Kevin replied to Roy812's topic in - Kit build logs for subjects built from 1501 - 1750
you could cut the broken side panel and remove, and place some support under the deck and reapply -
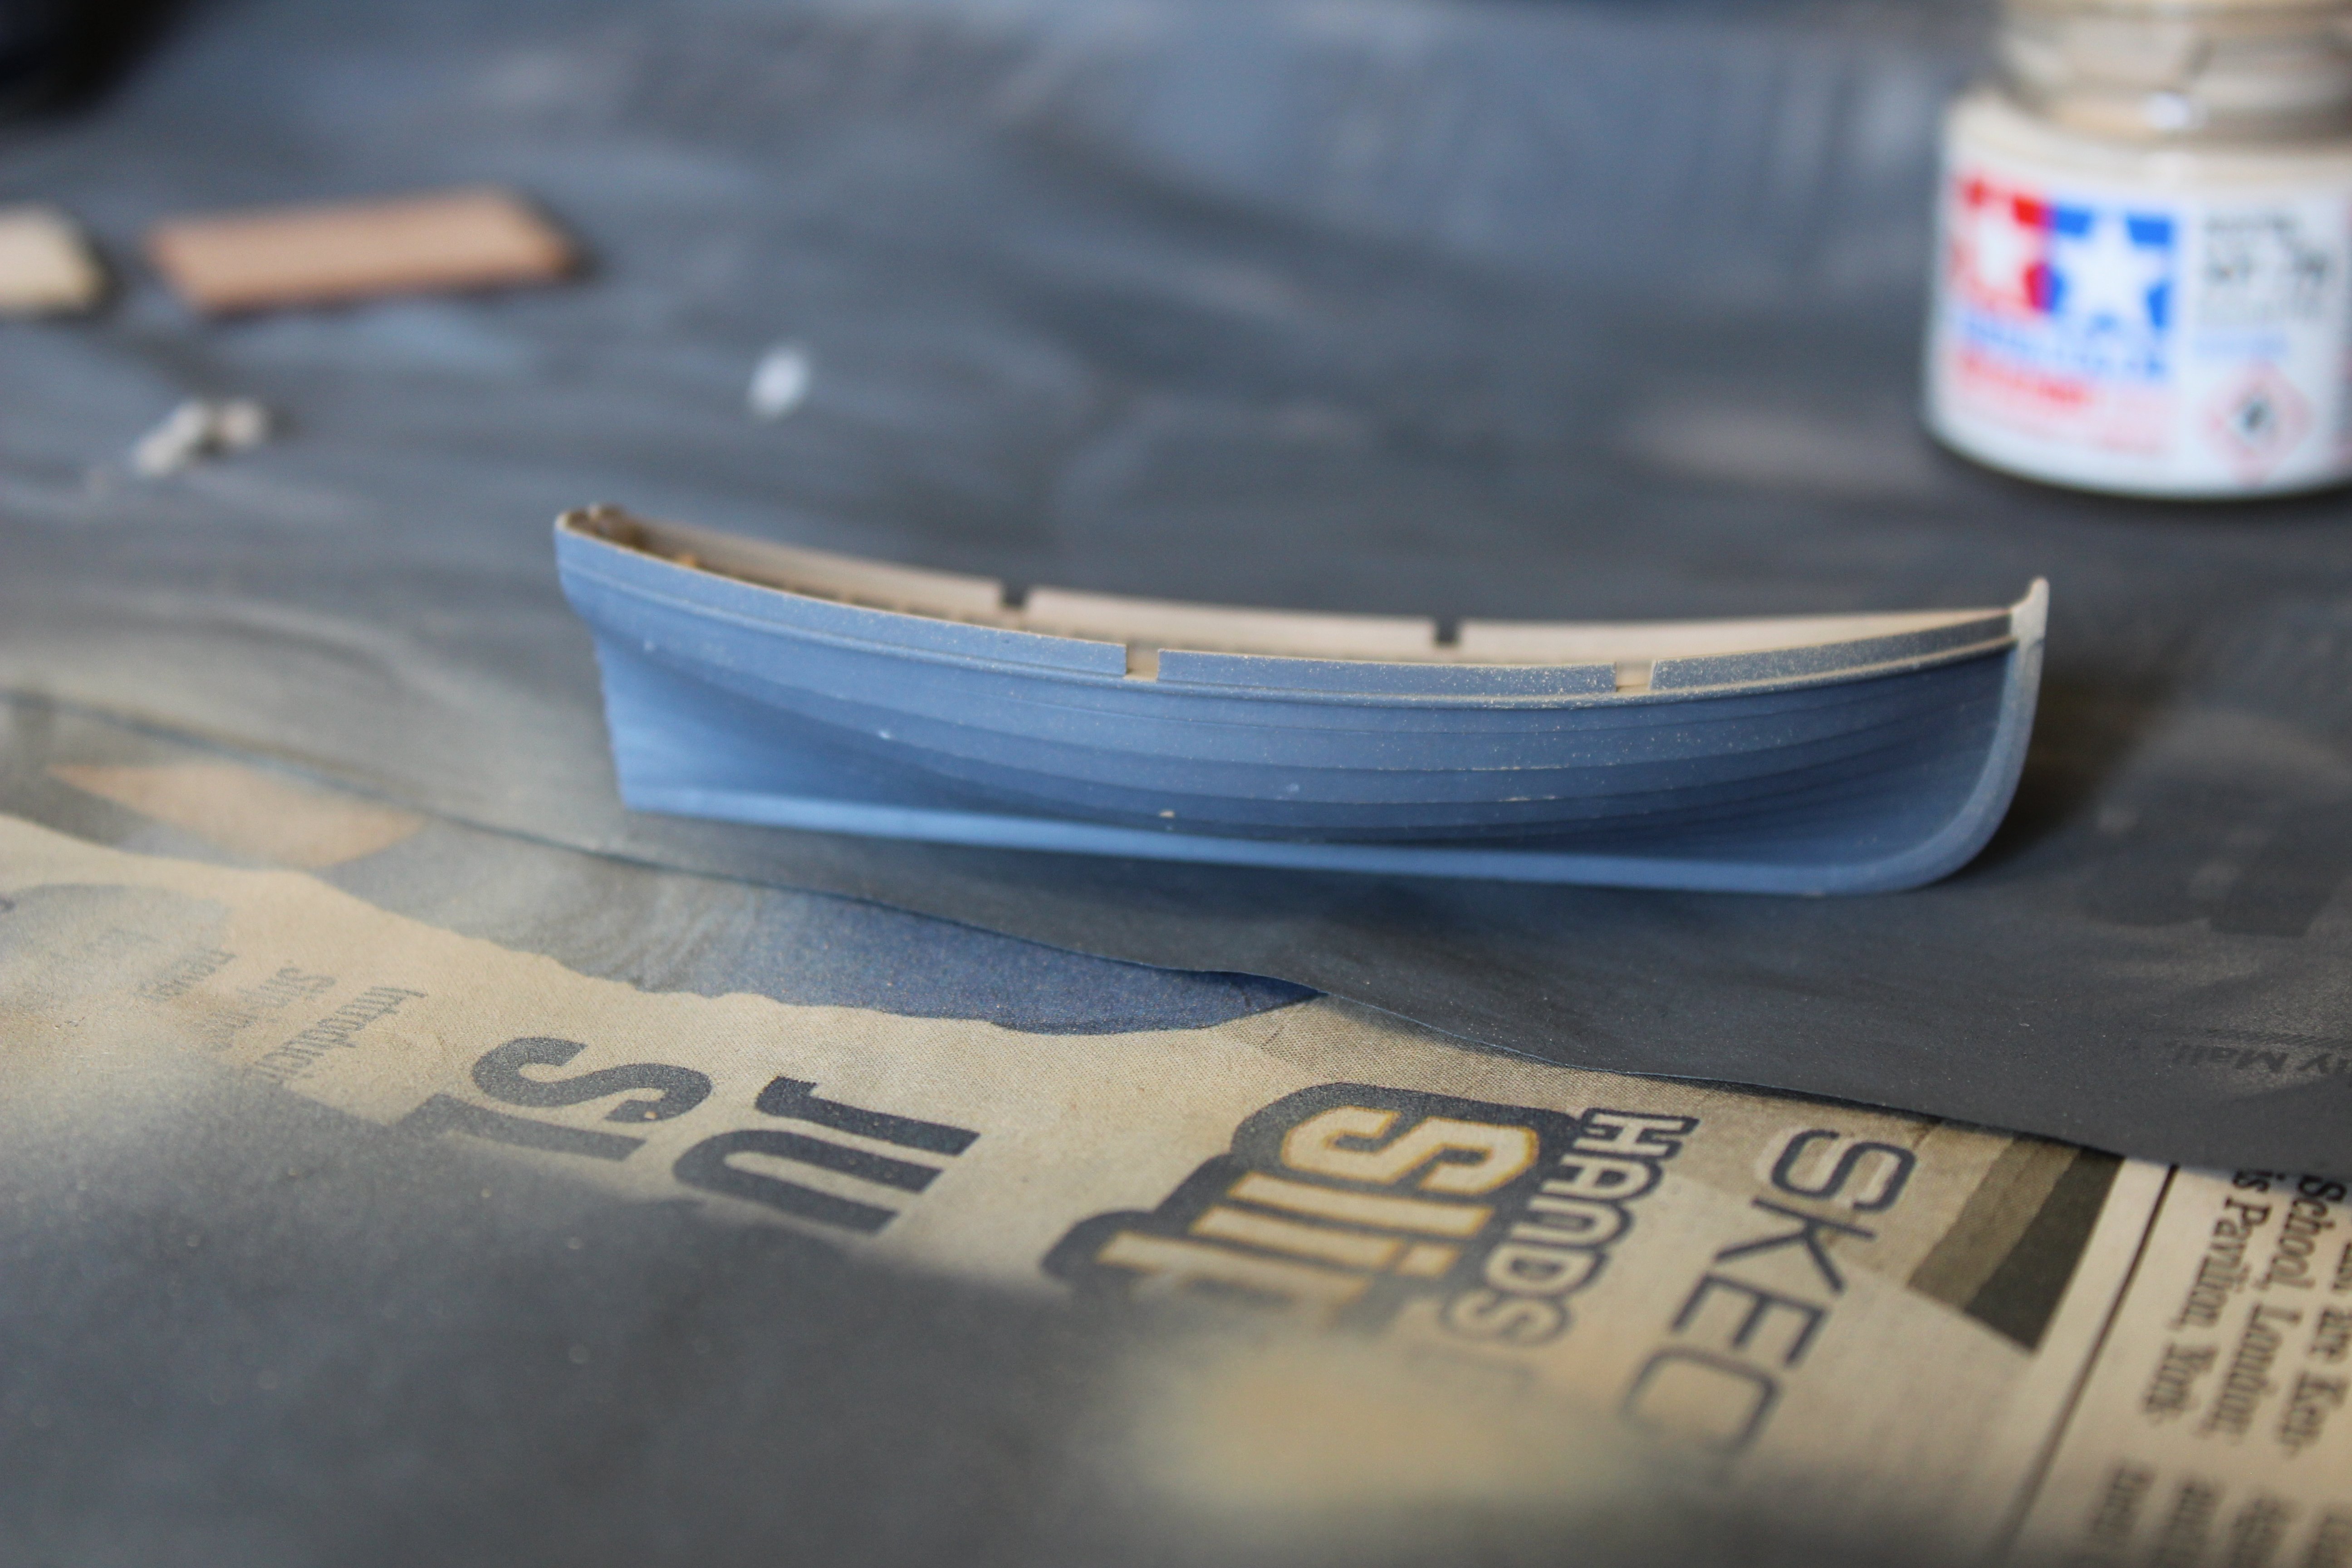
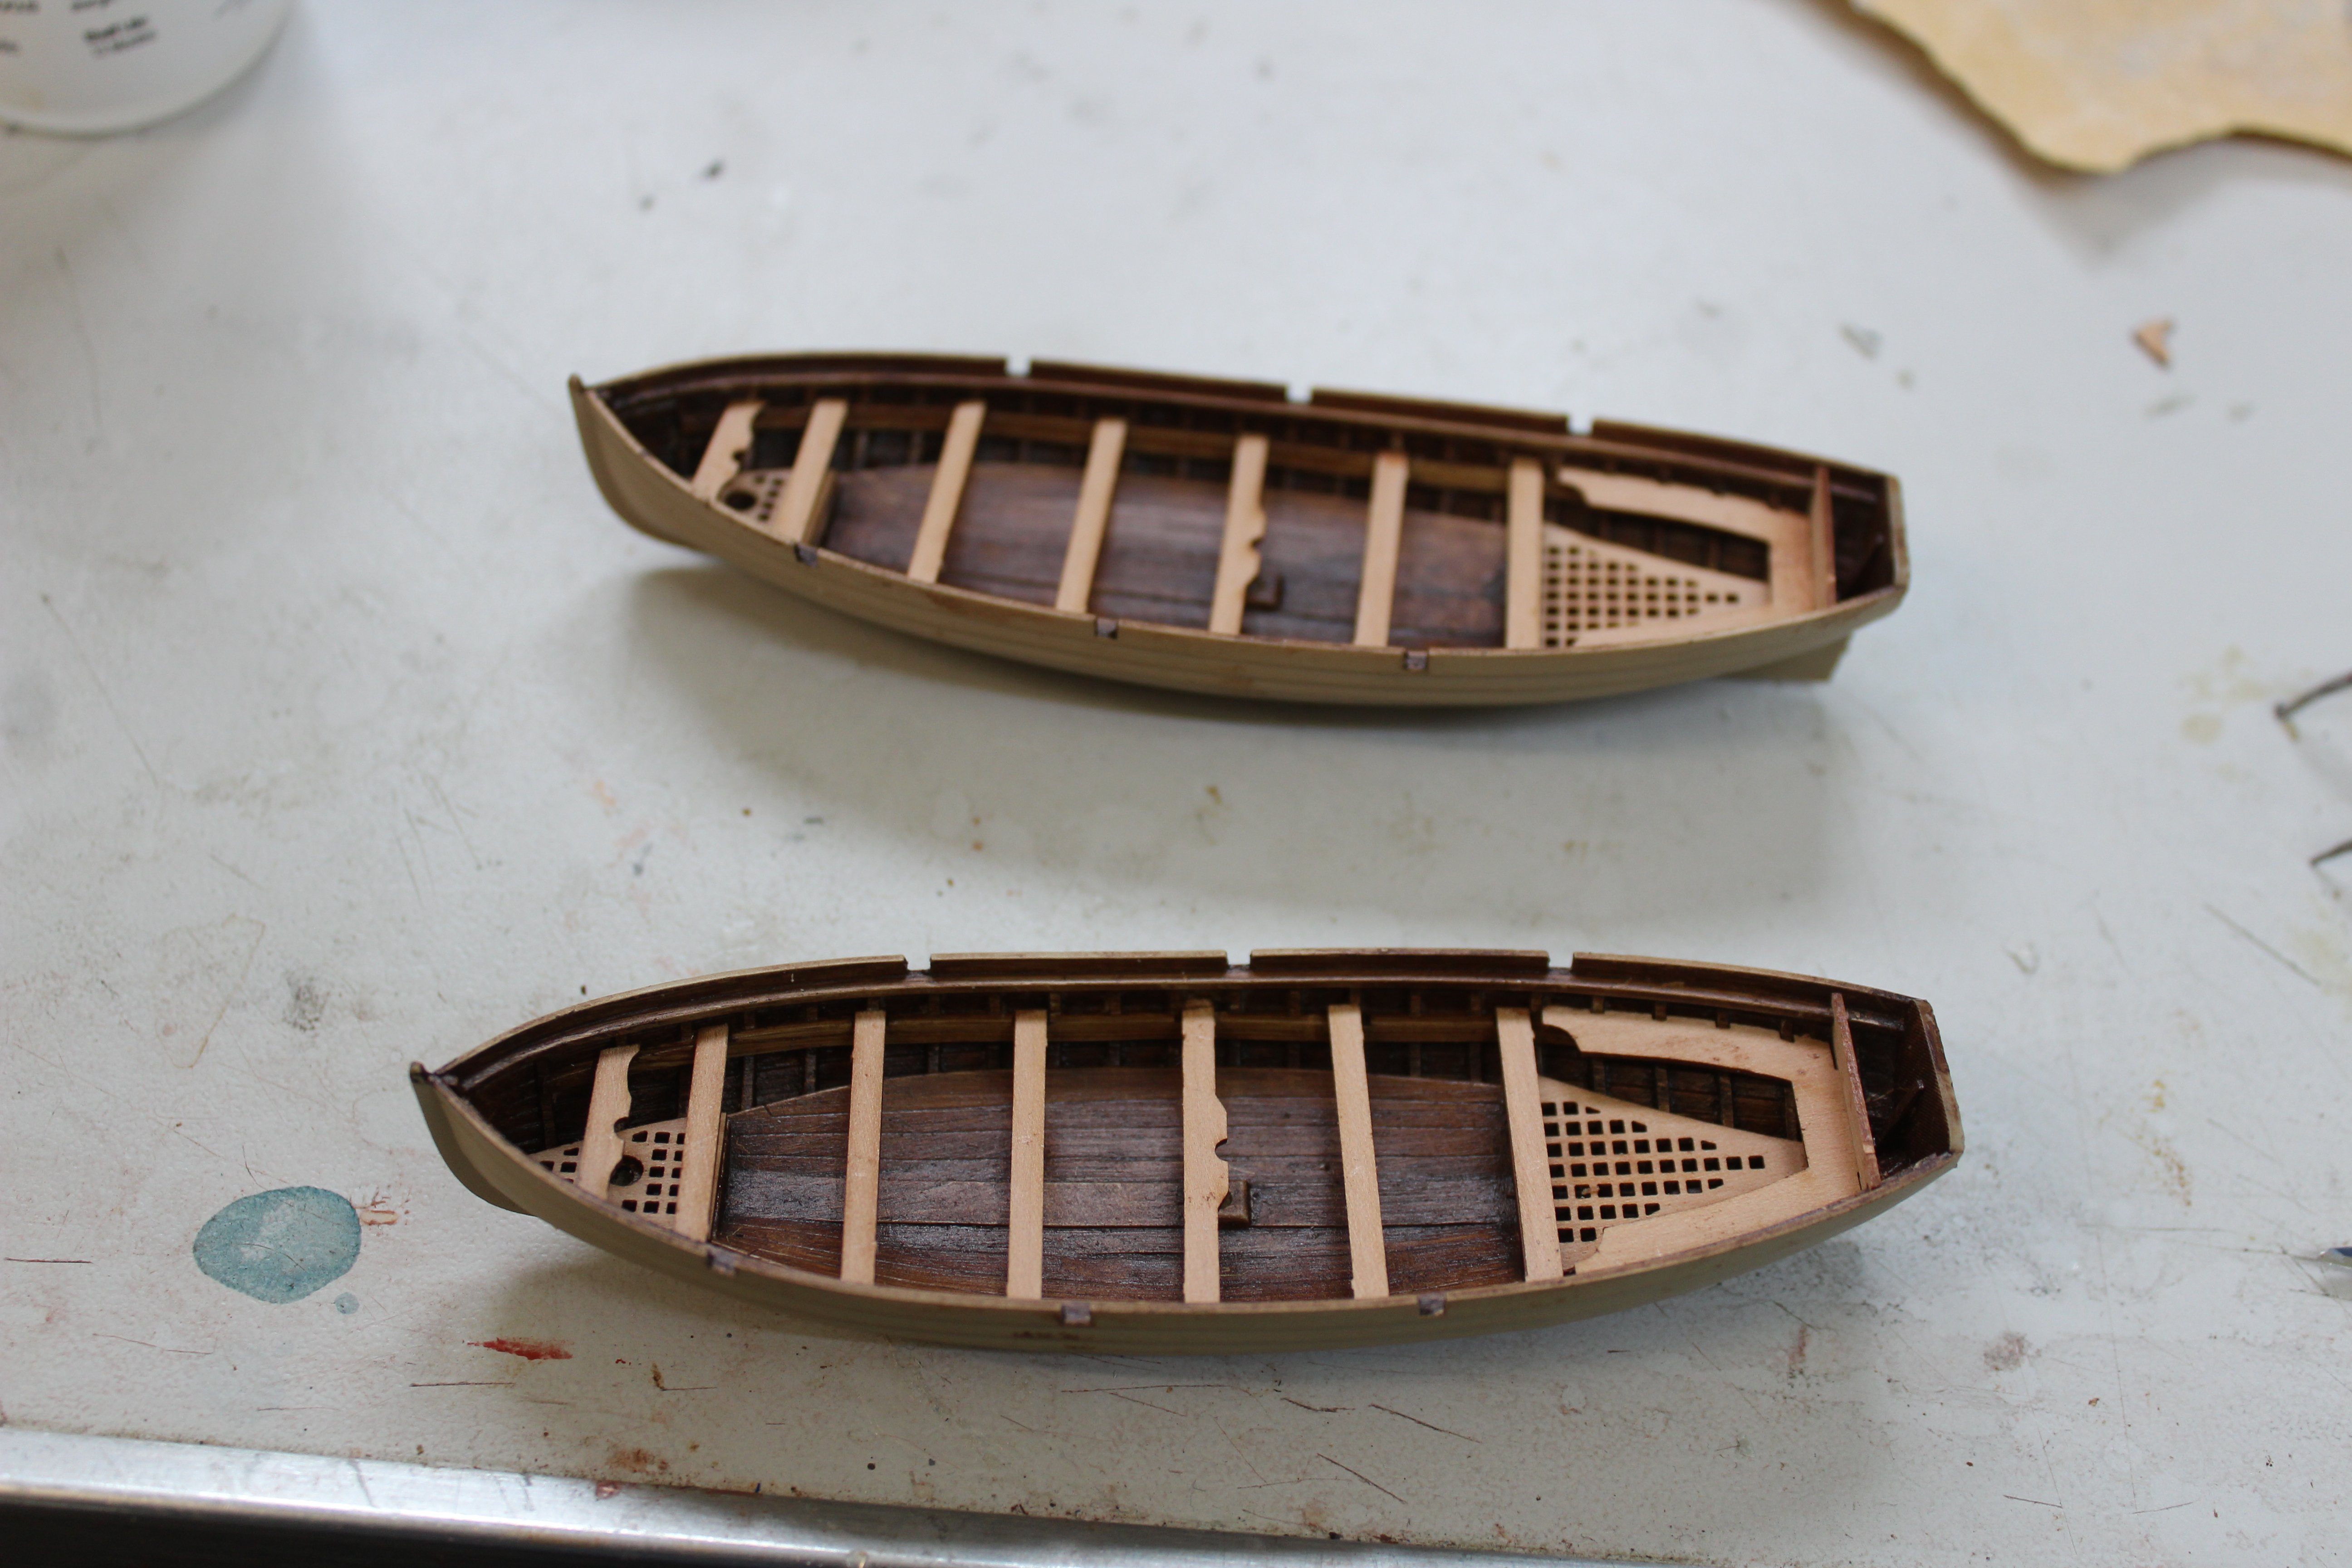
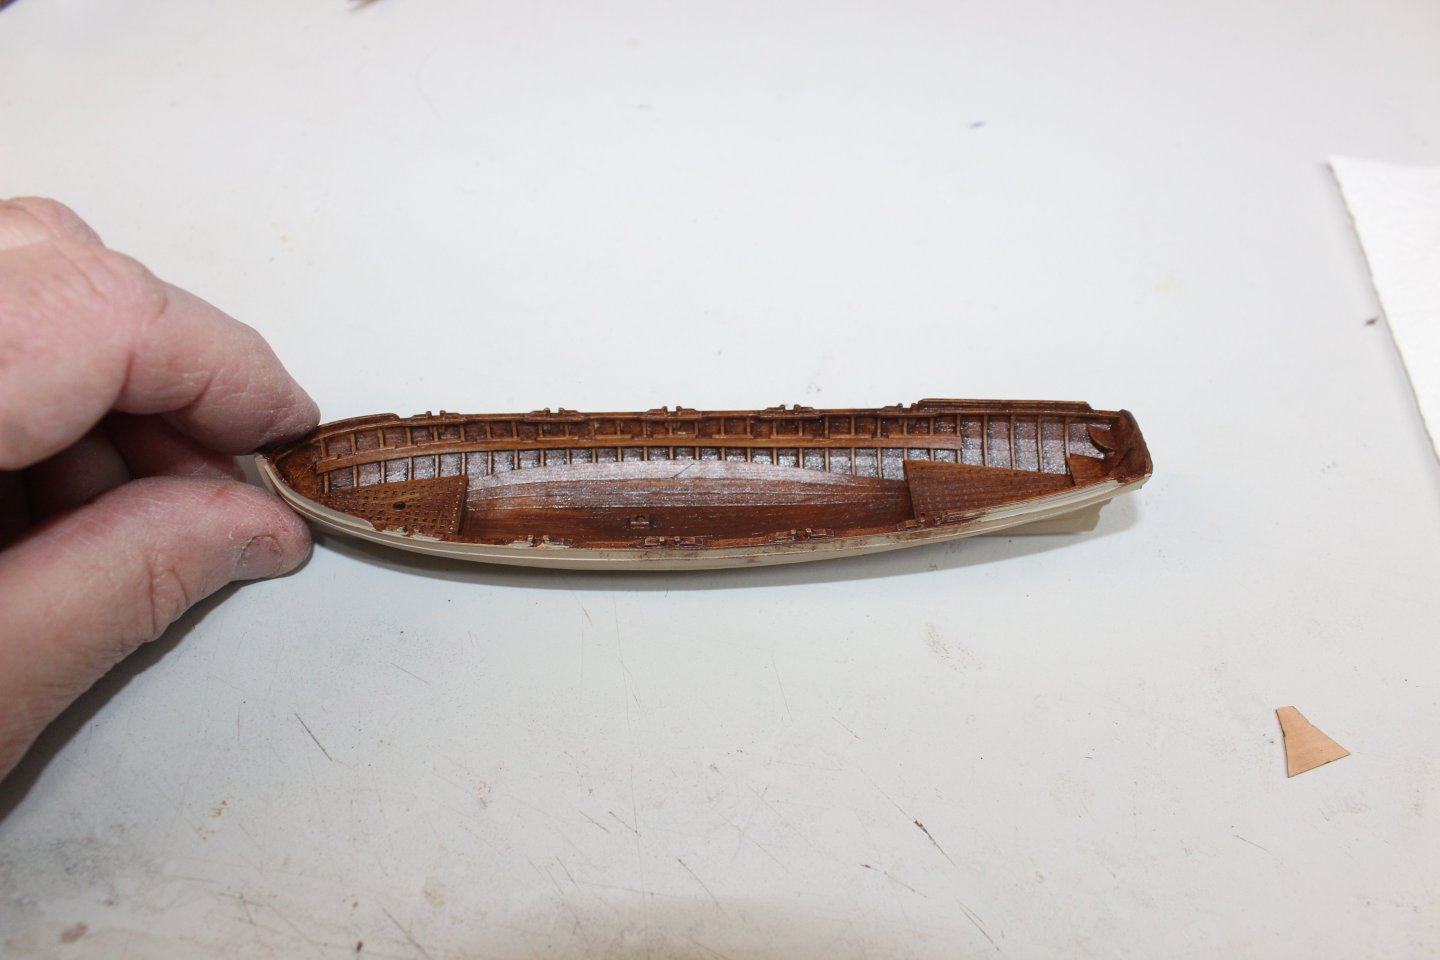
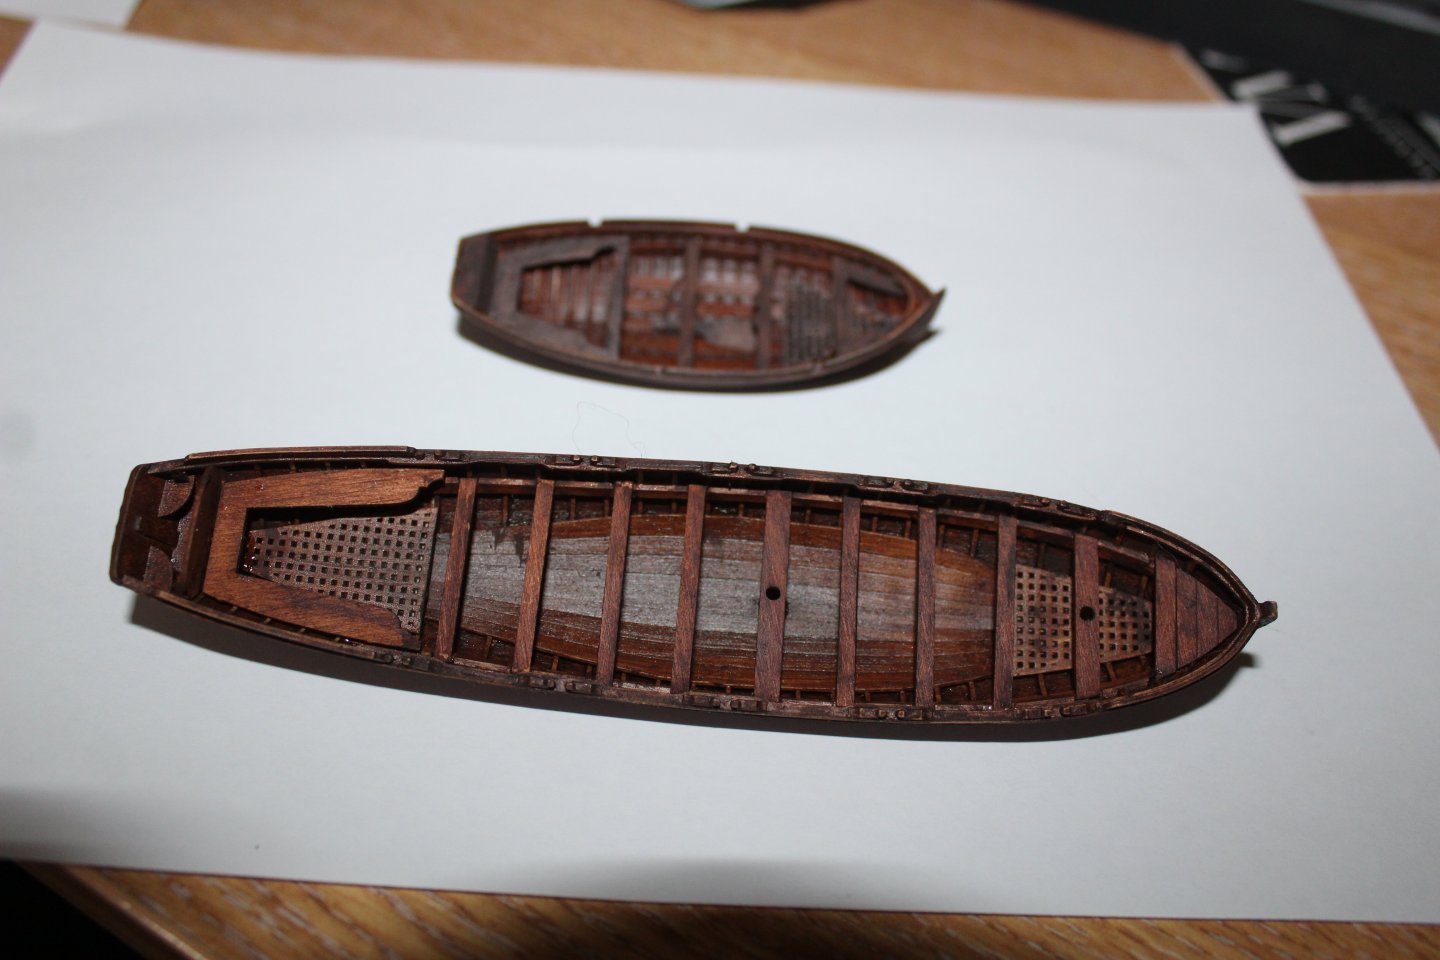
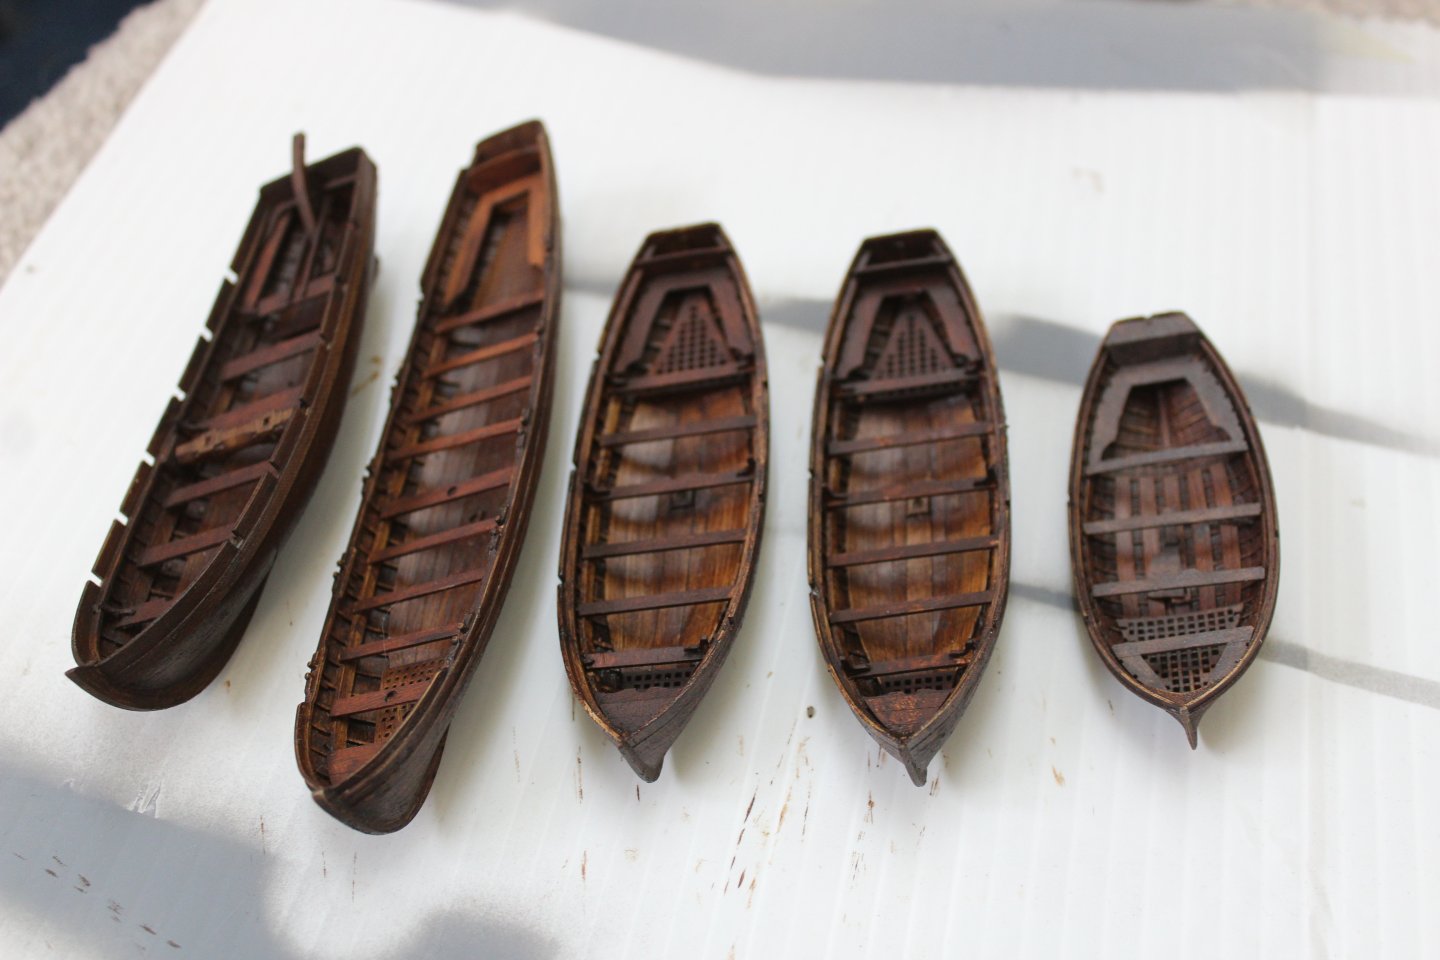
On friends recommendations, it was suggested that i remove the oils from the boats and paint white, it does look better, any other suggestions to make them look different?


- 443 replies
-
- 13
-
-
- Indefatigable
- Vanguard Models
- (and 1 more)
-
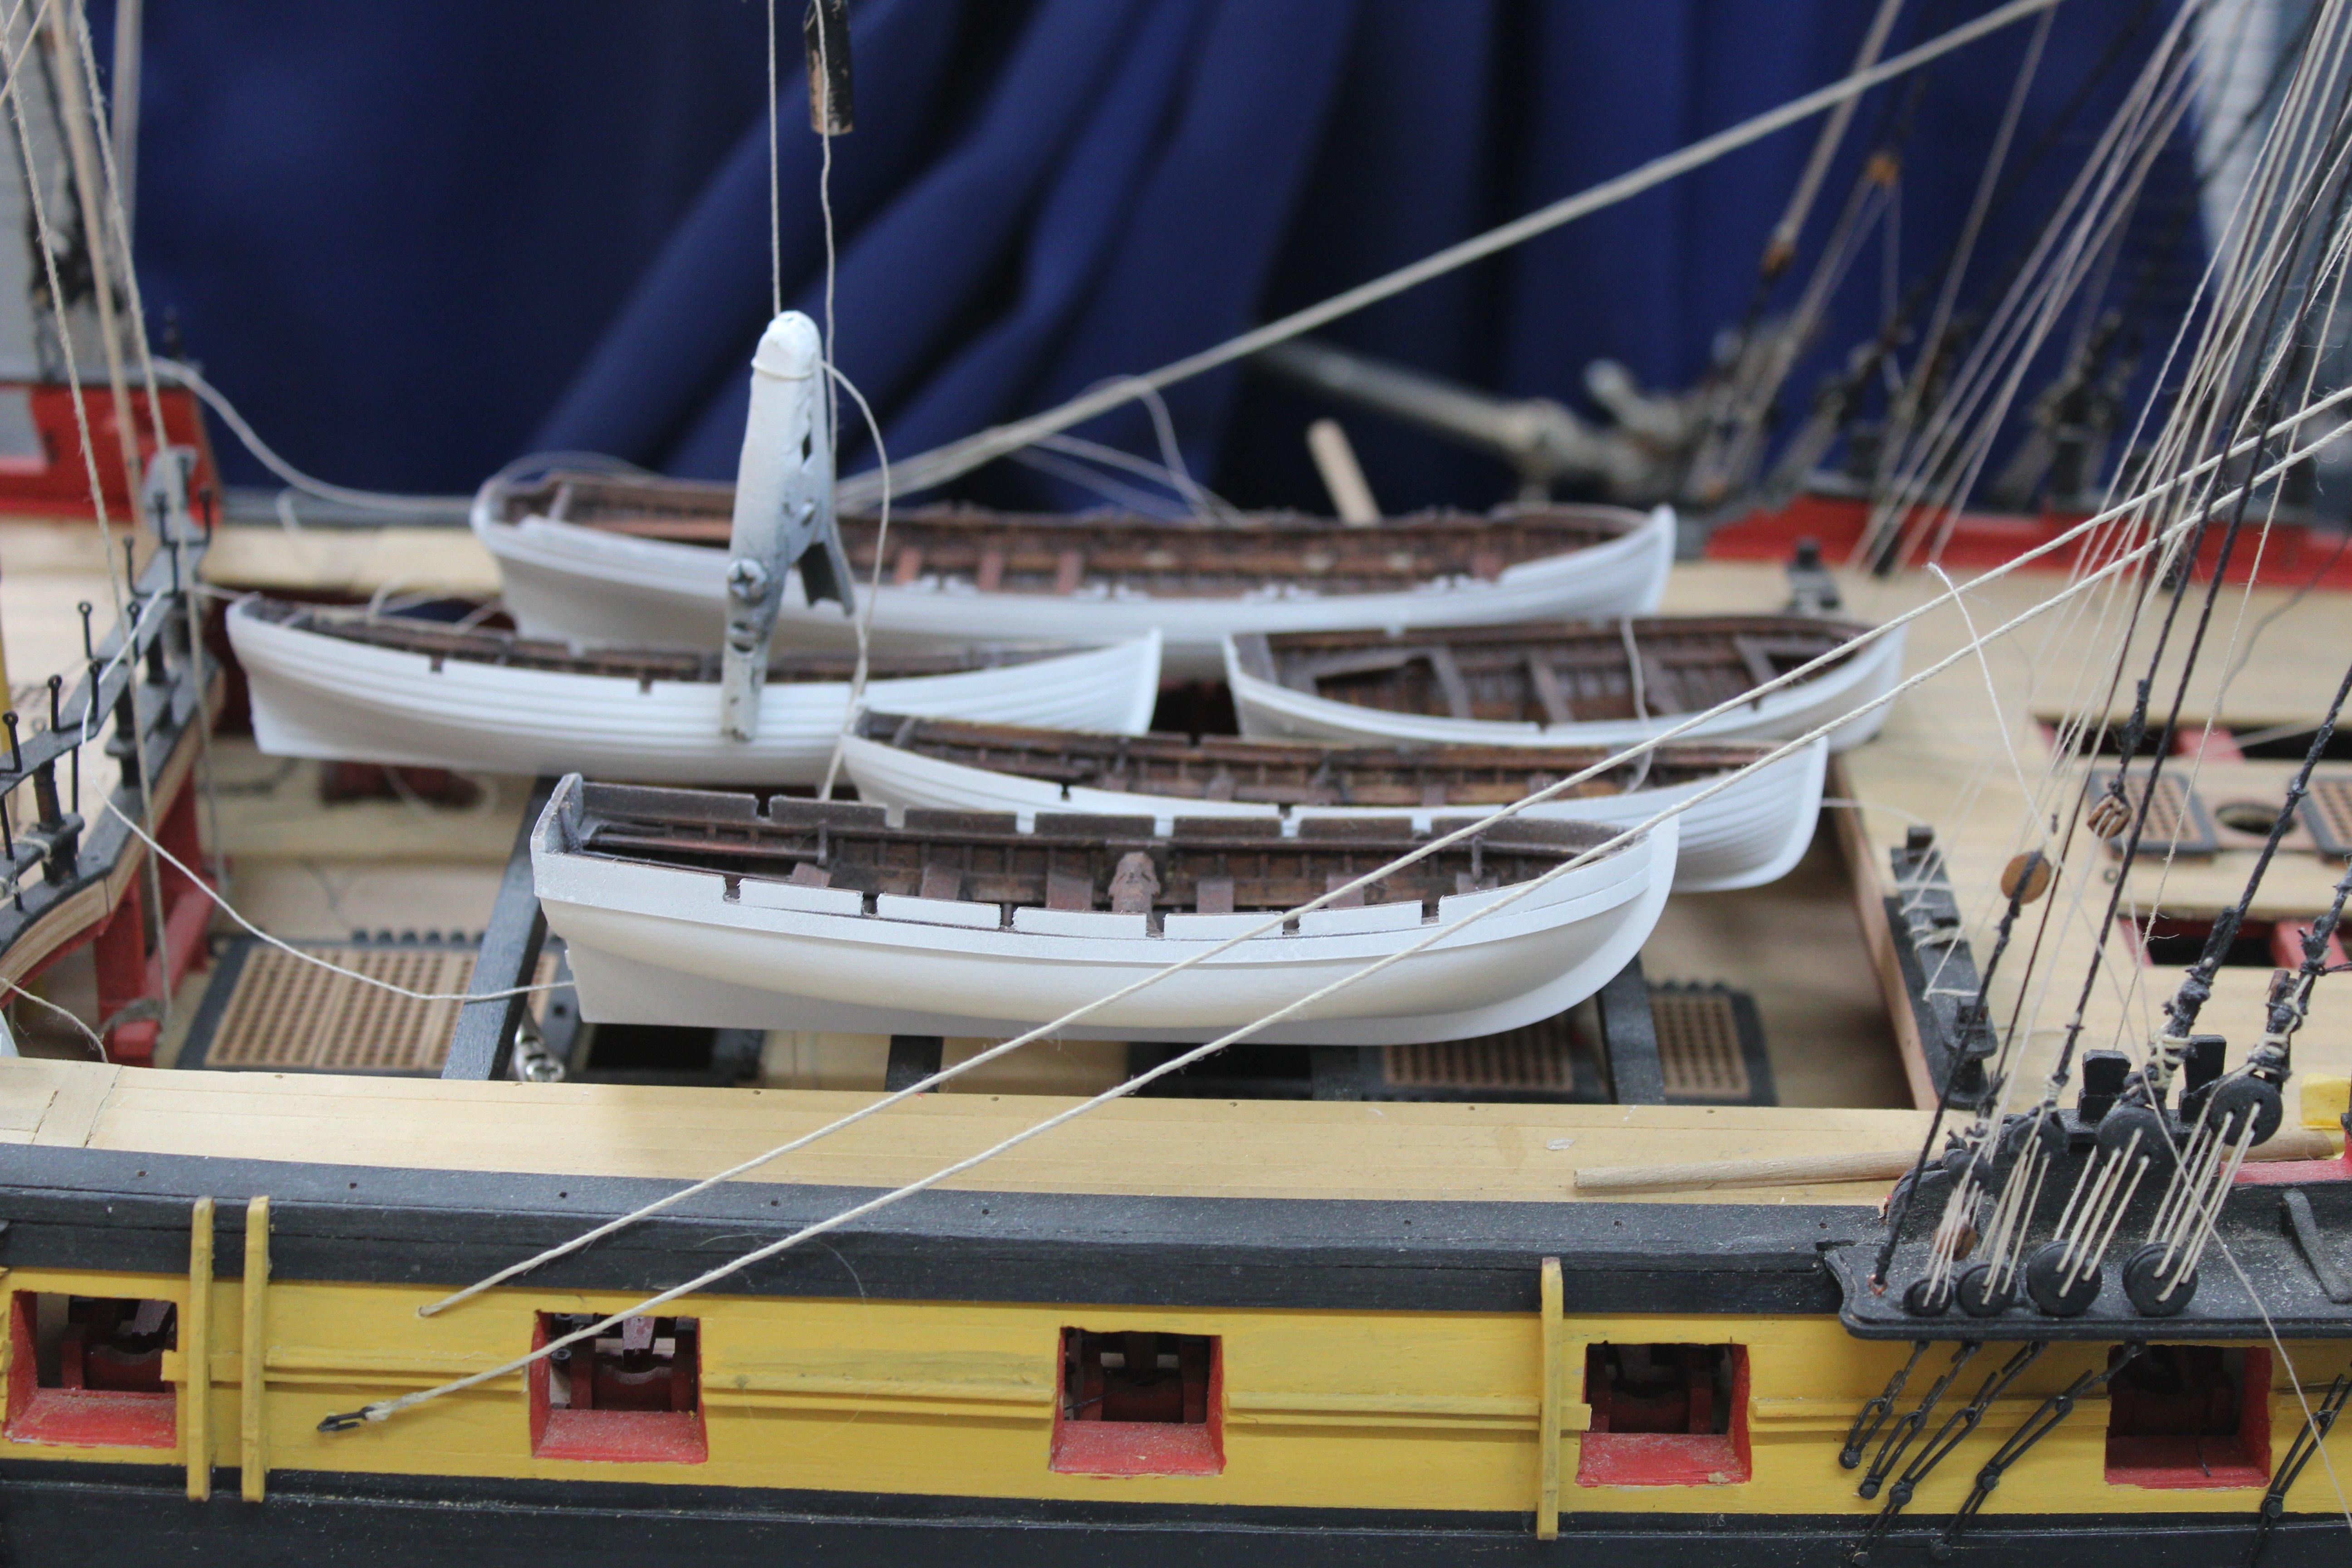
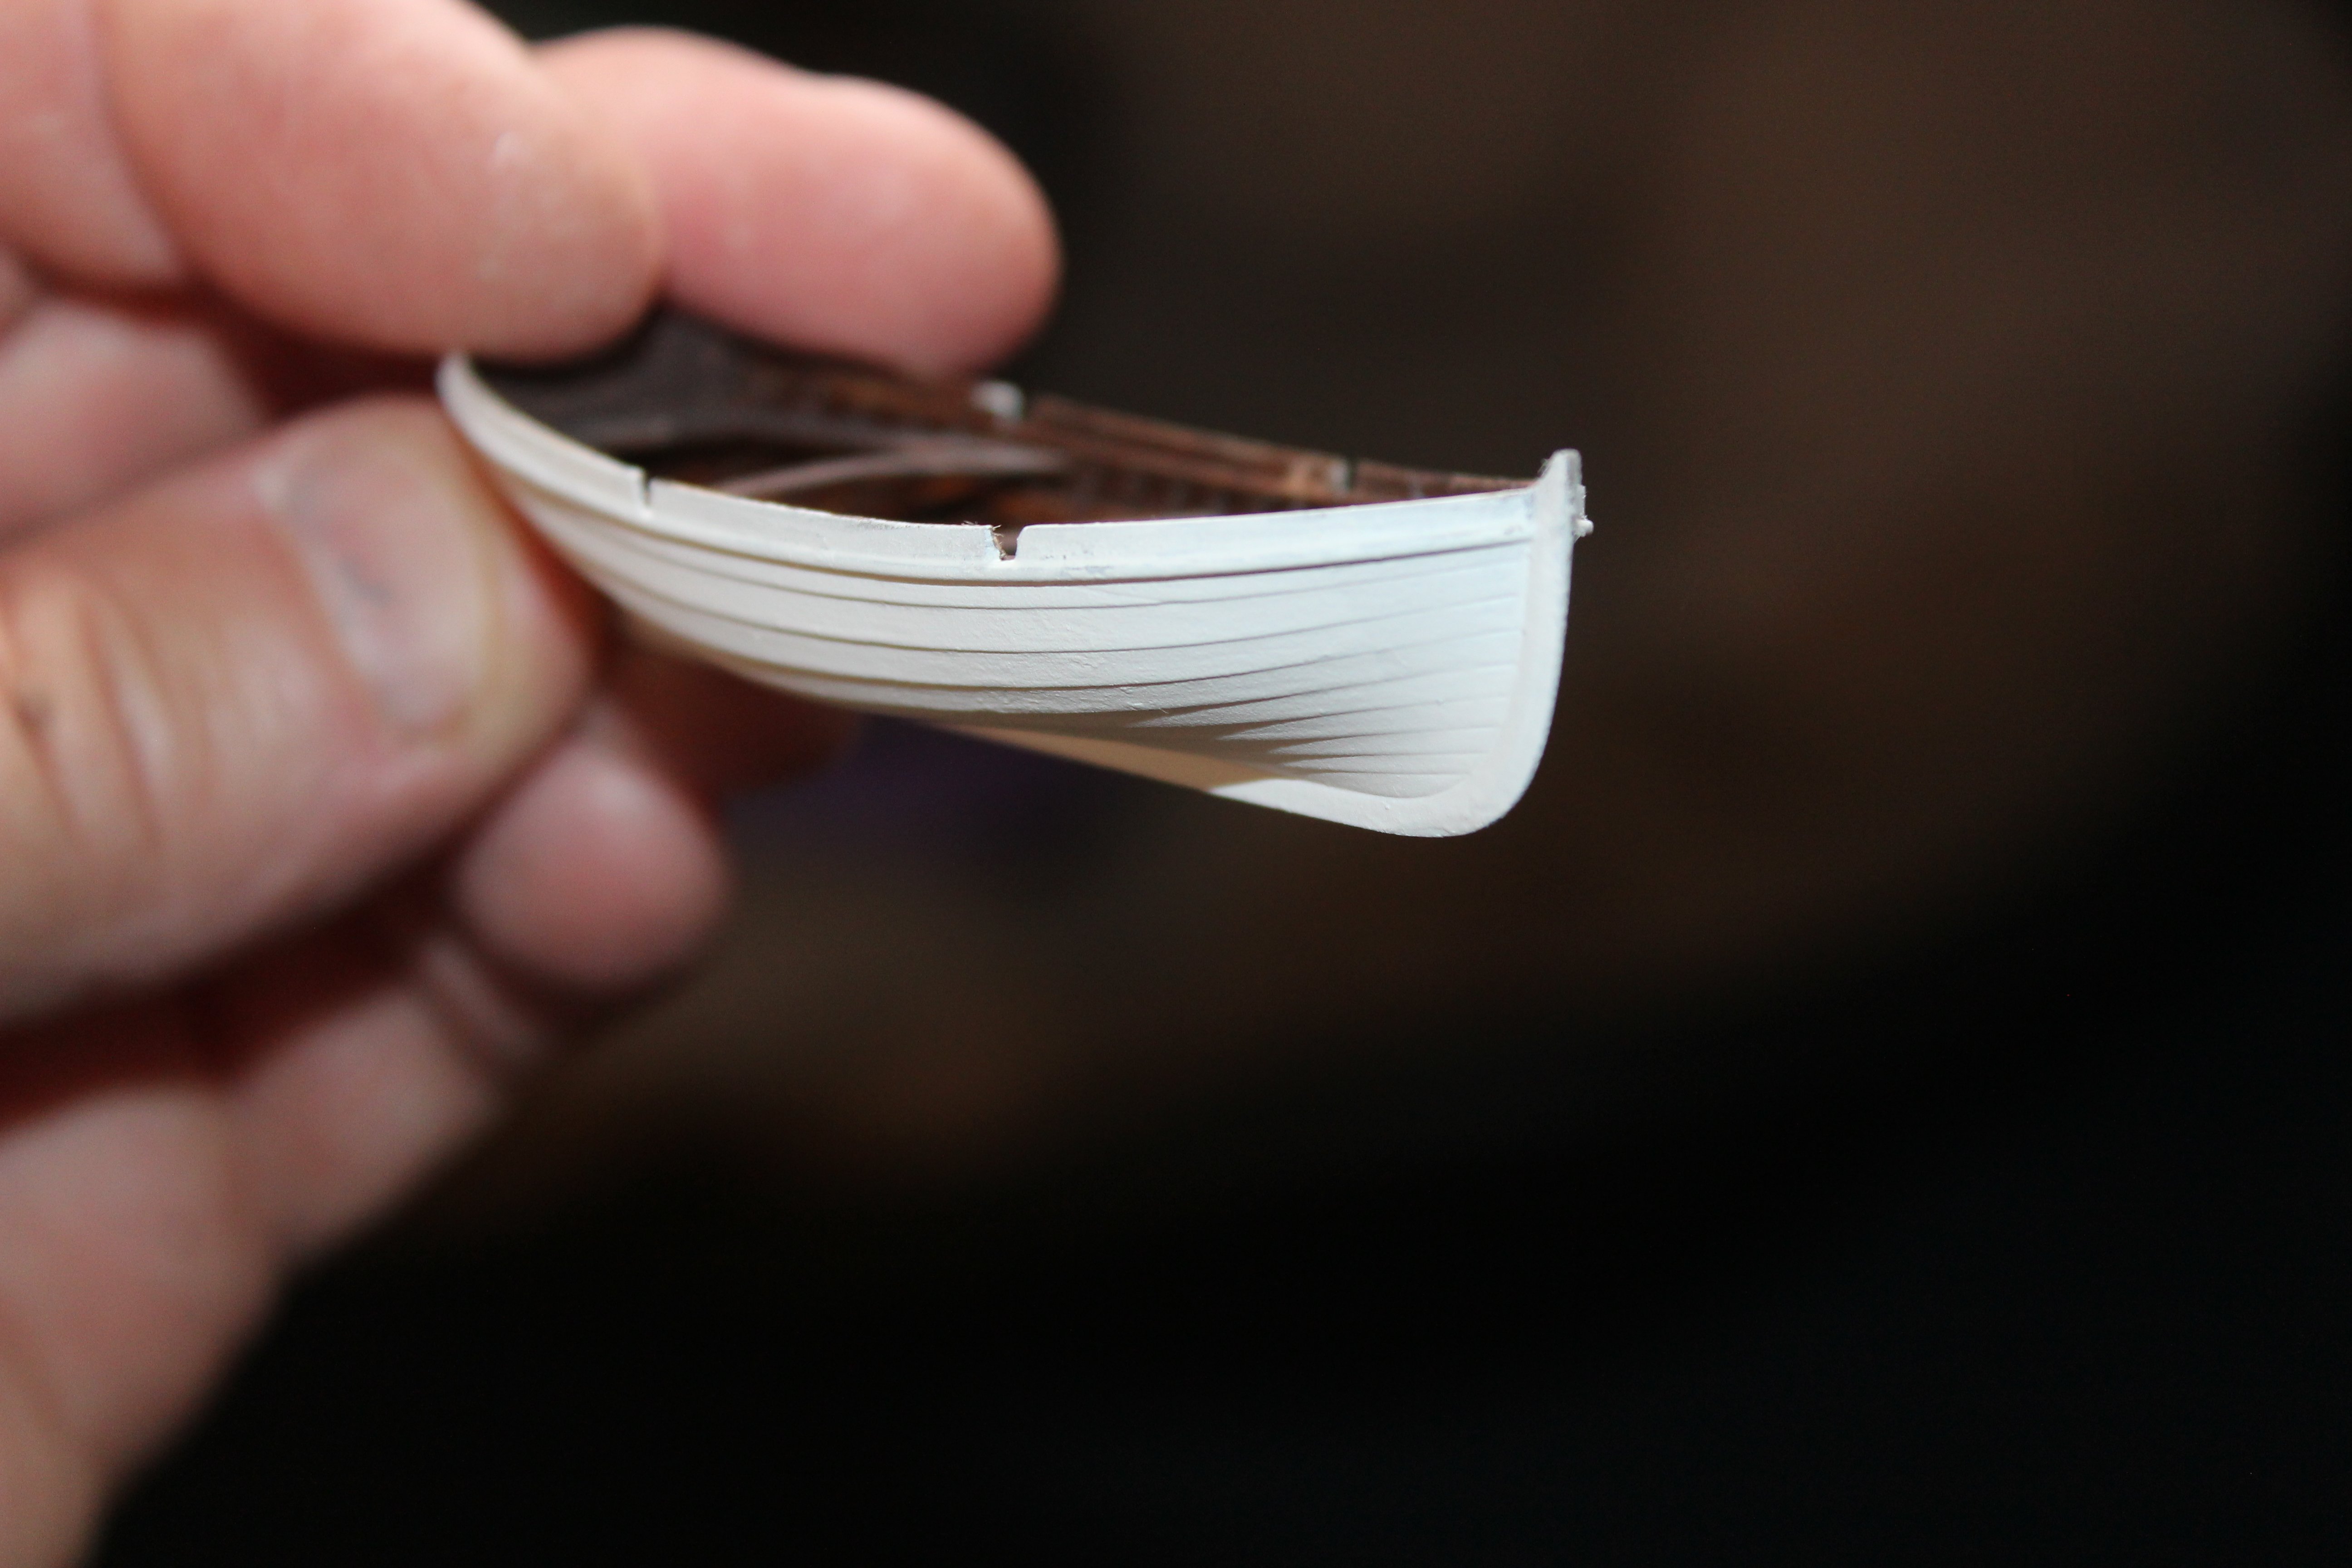
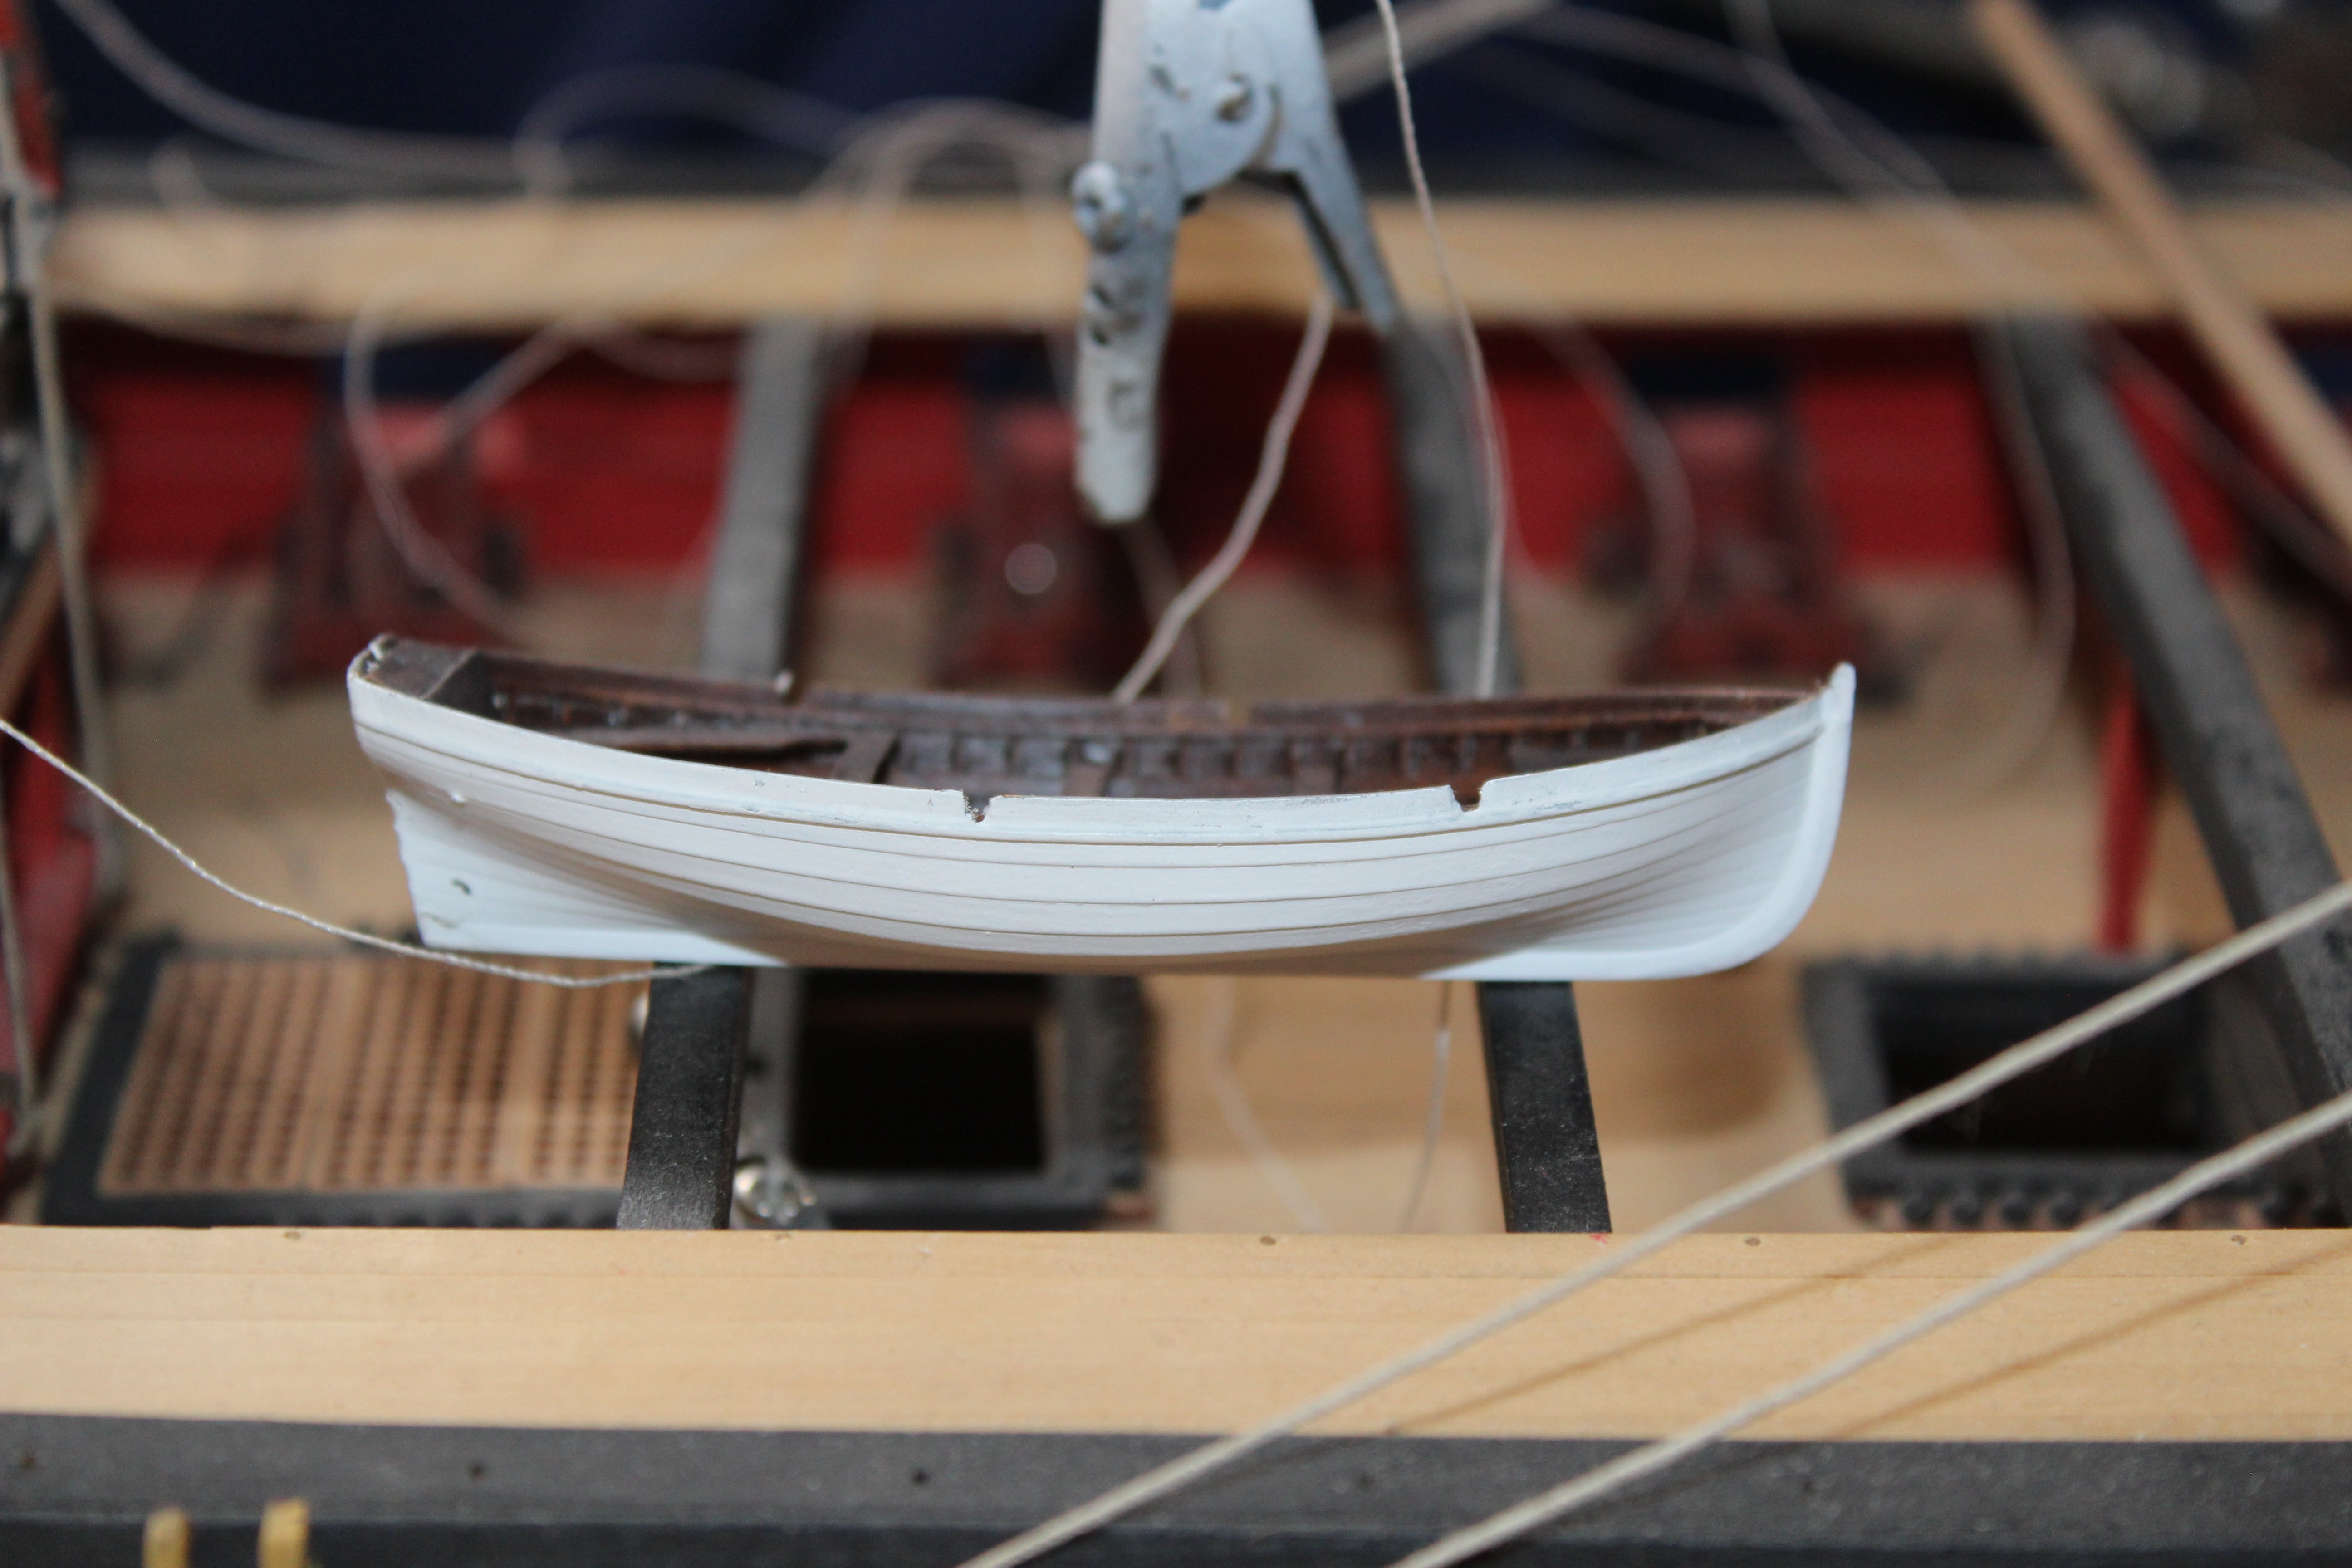
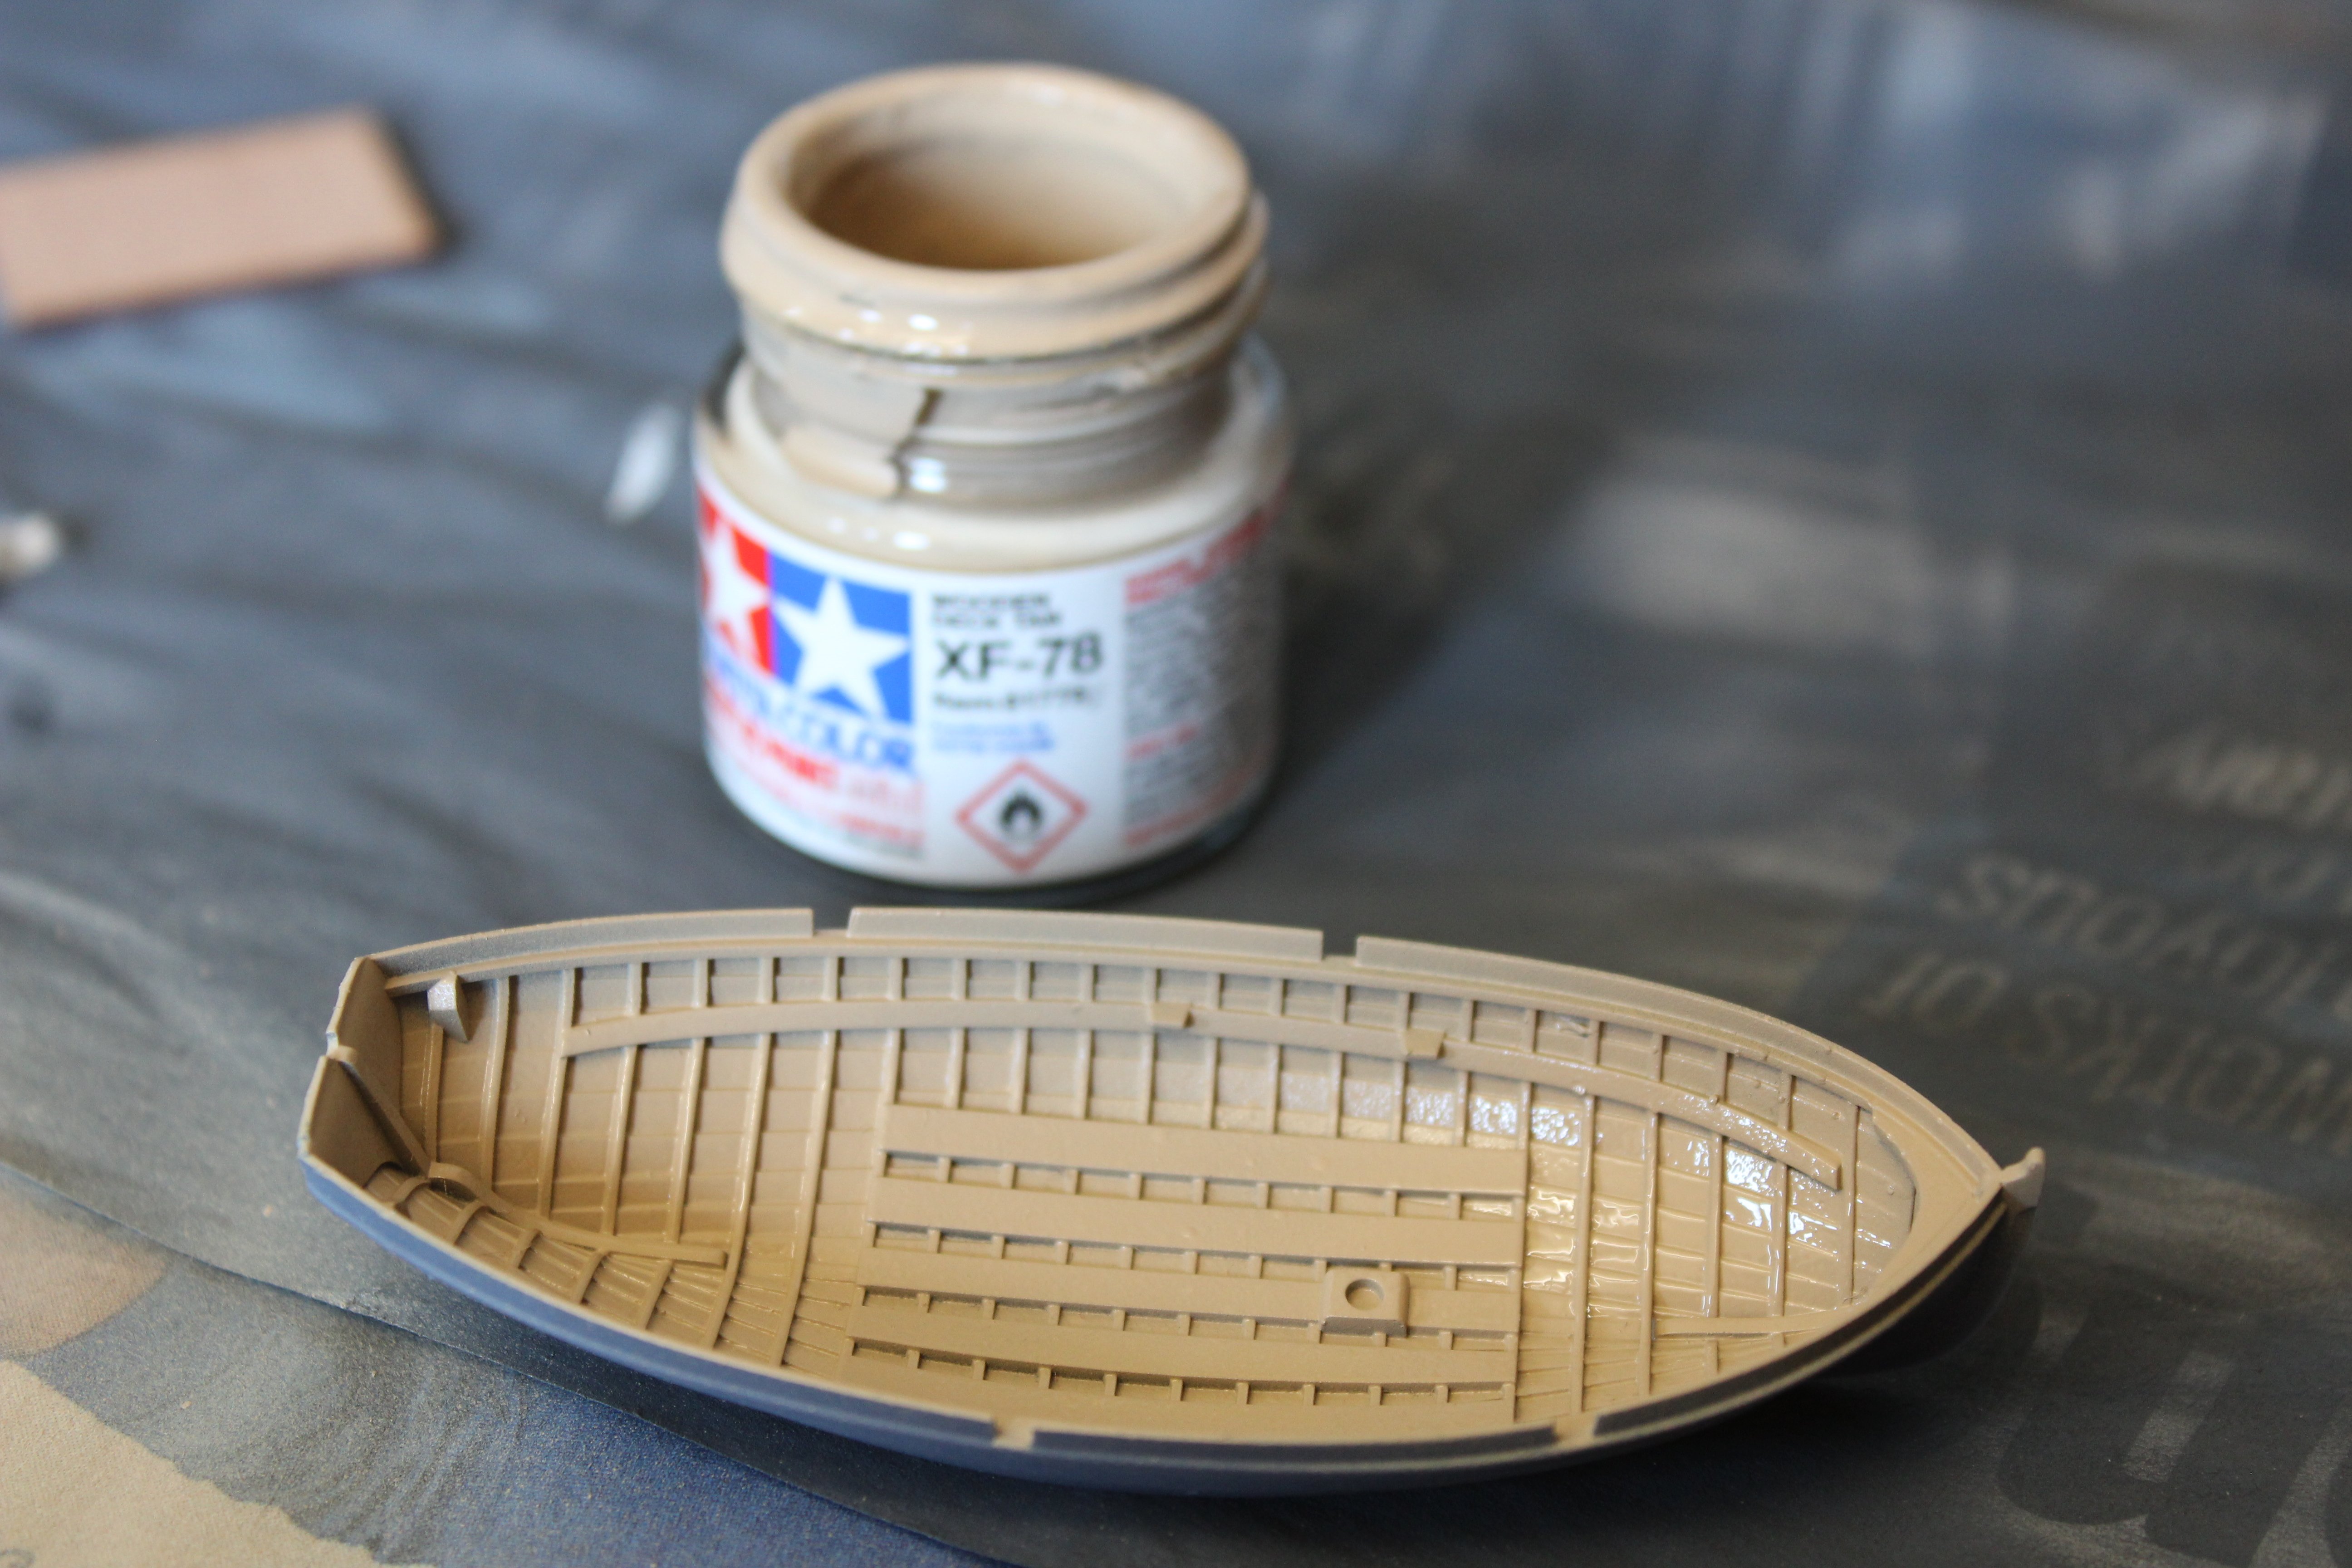
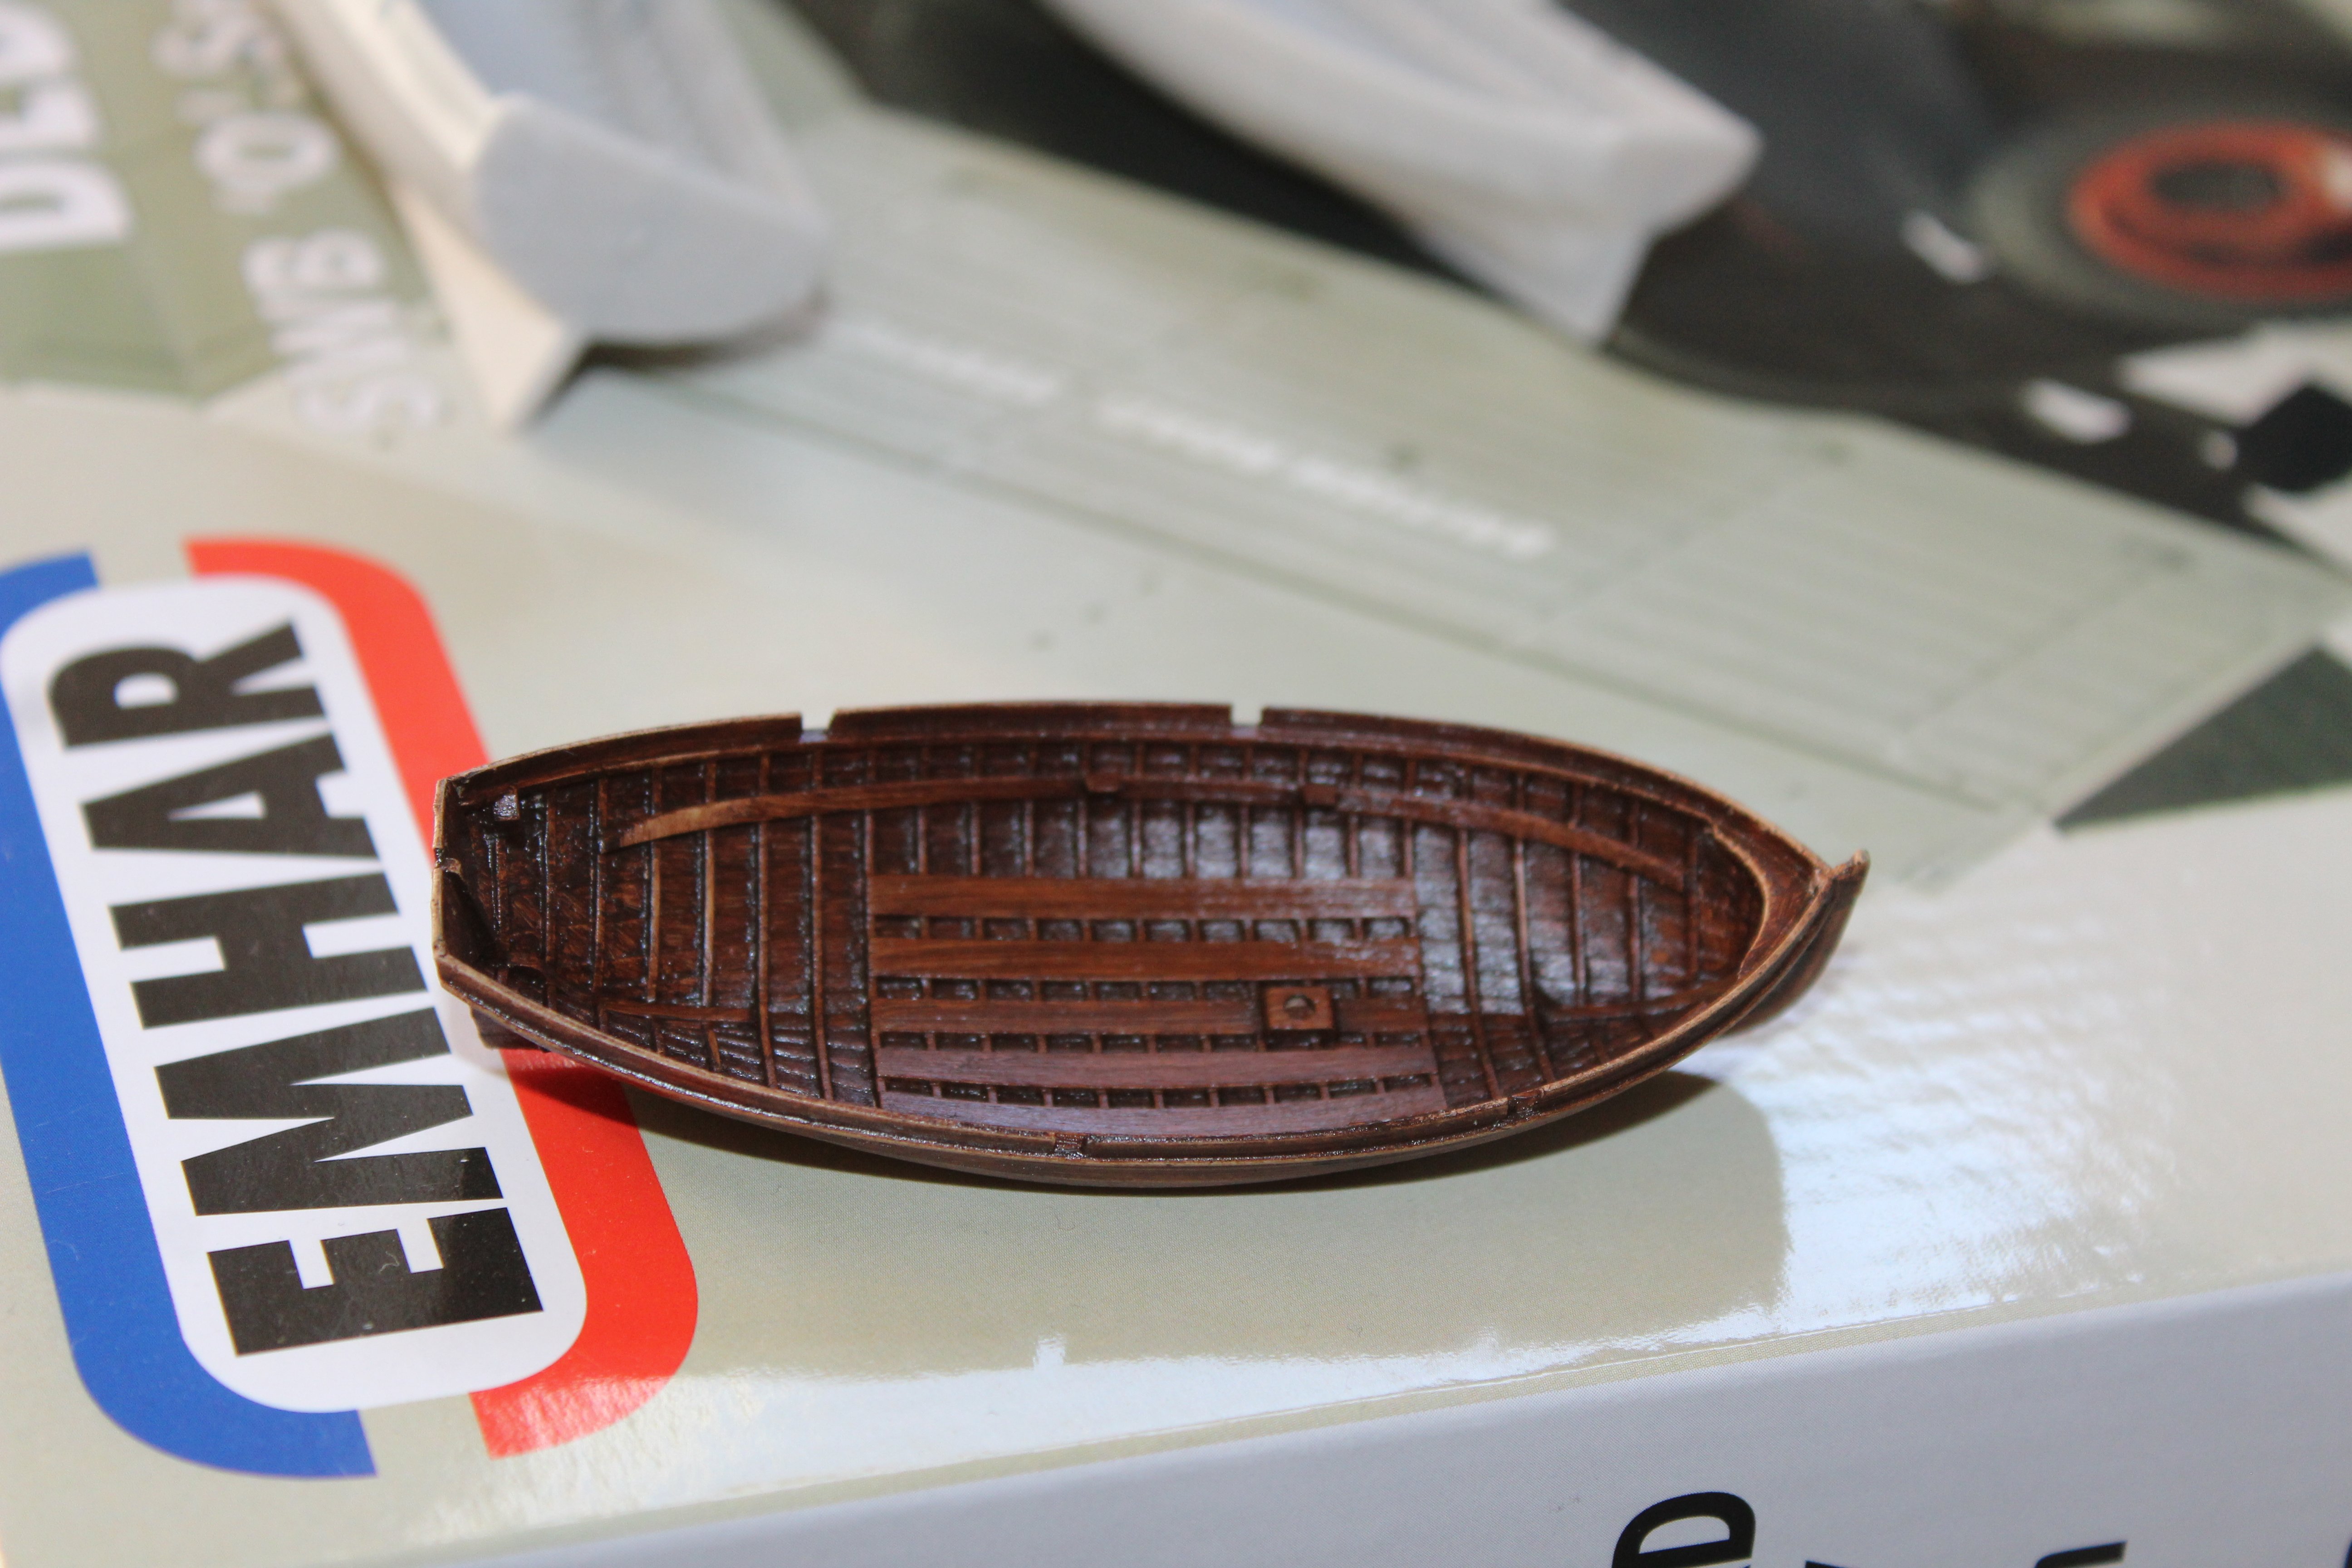
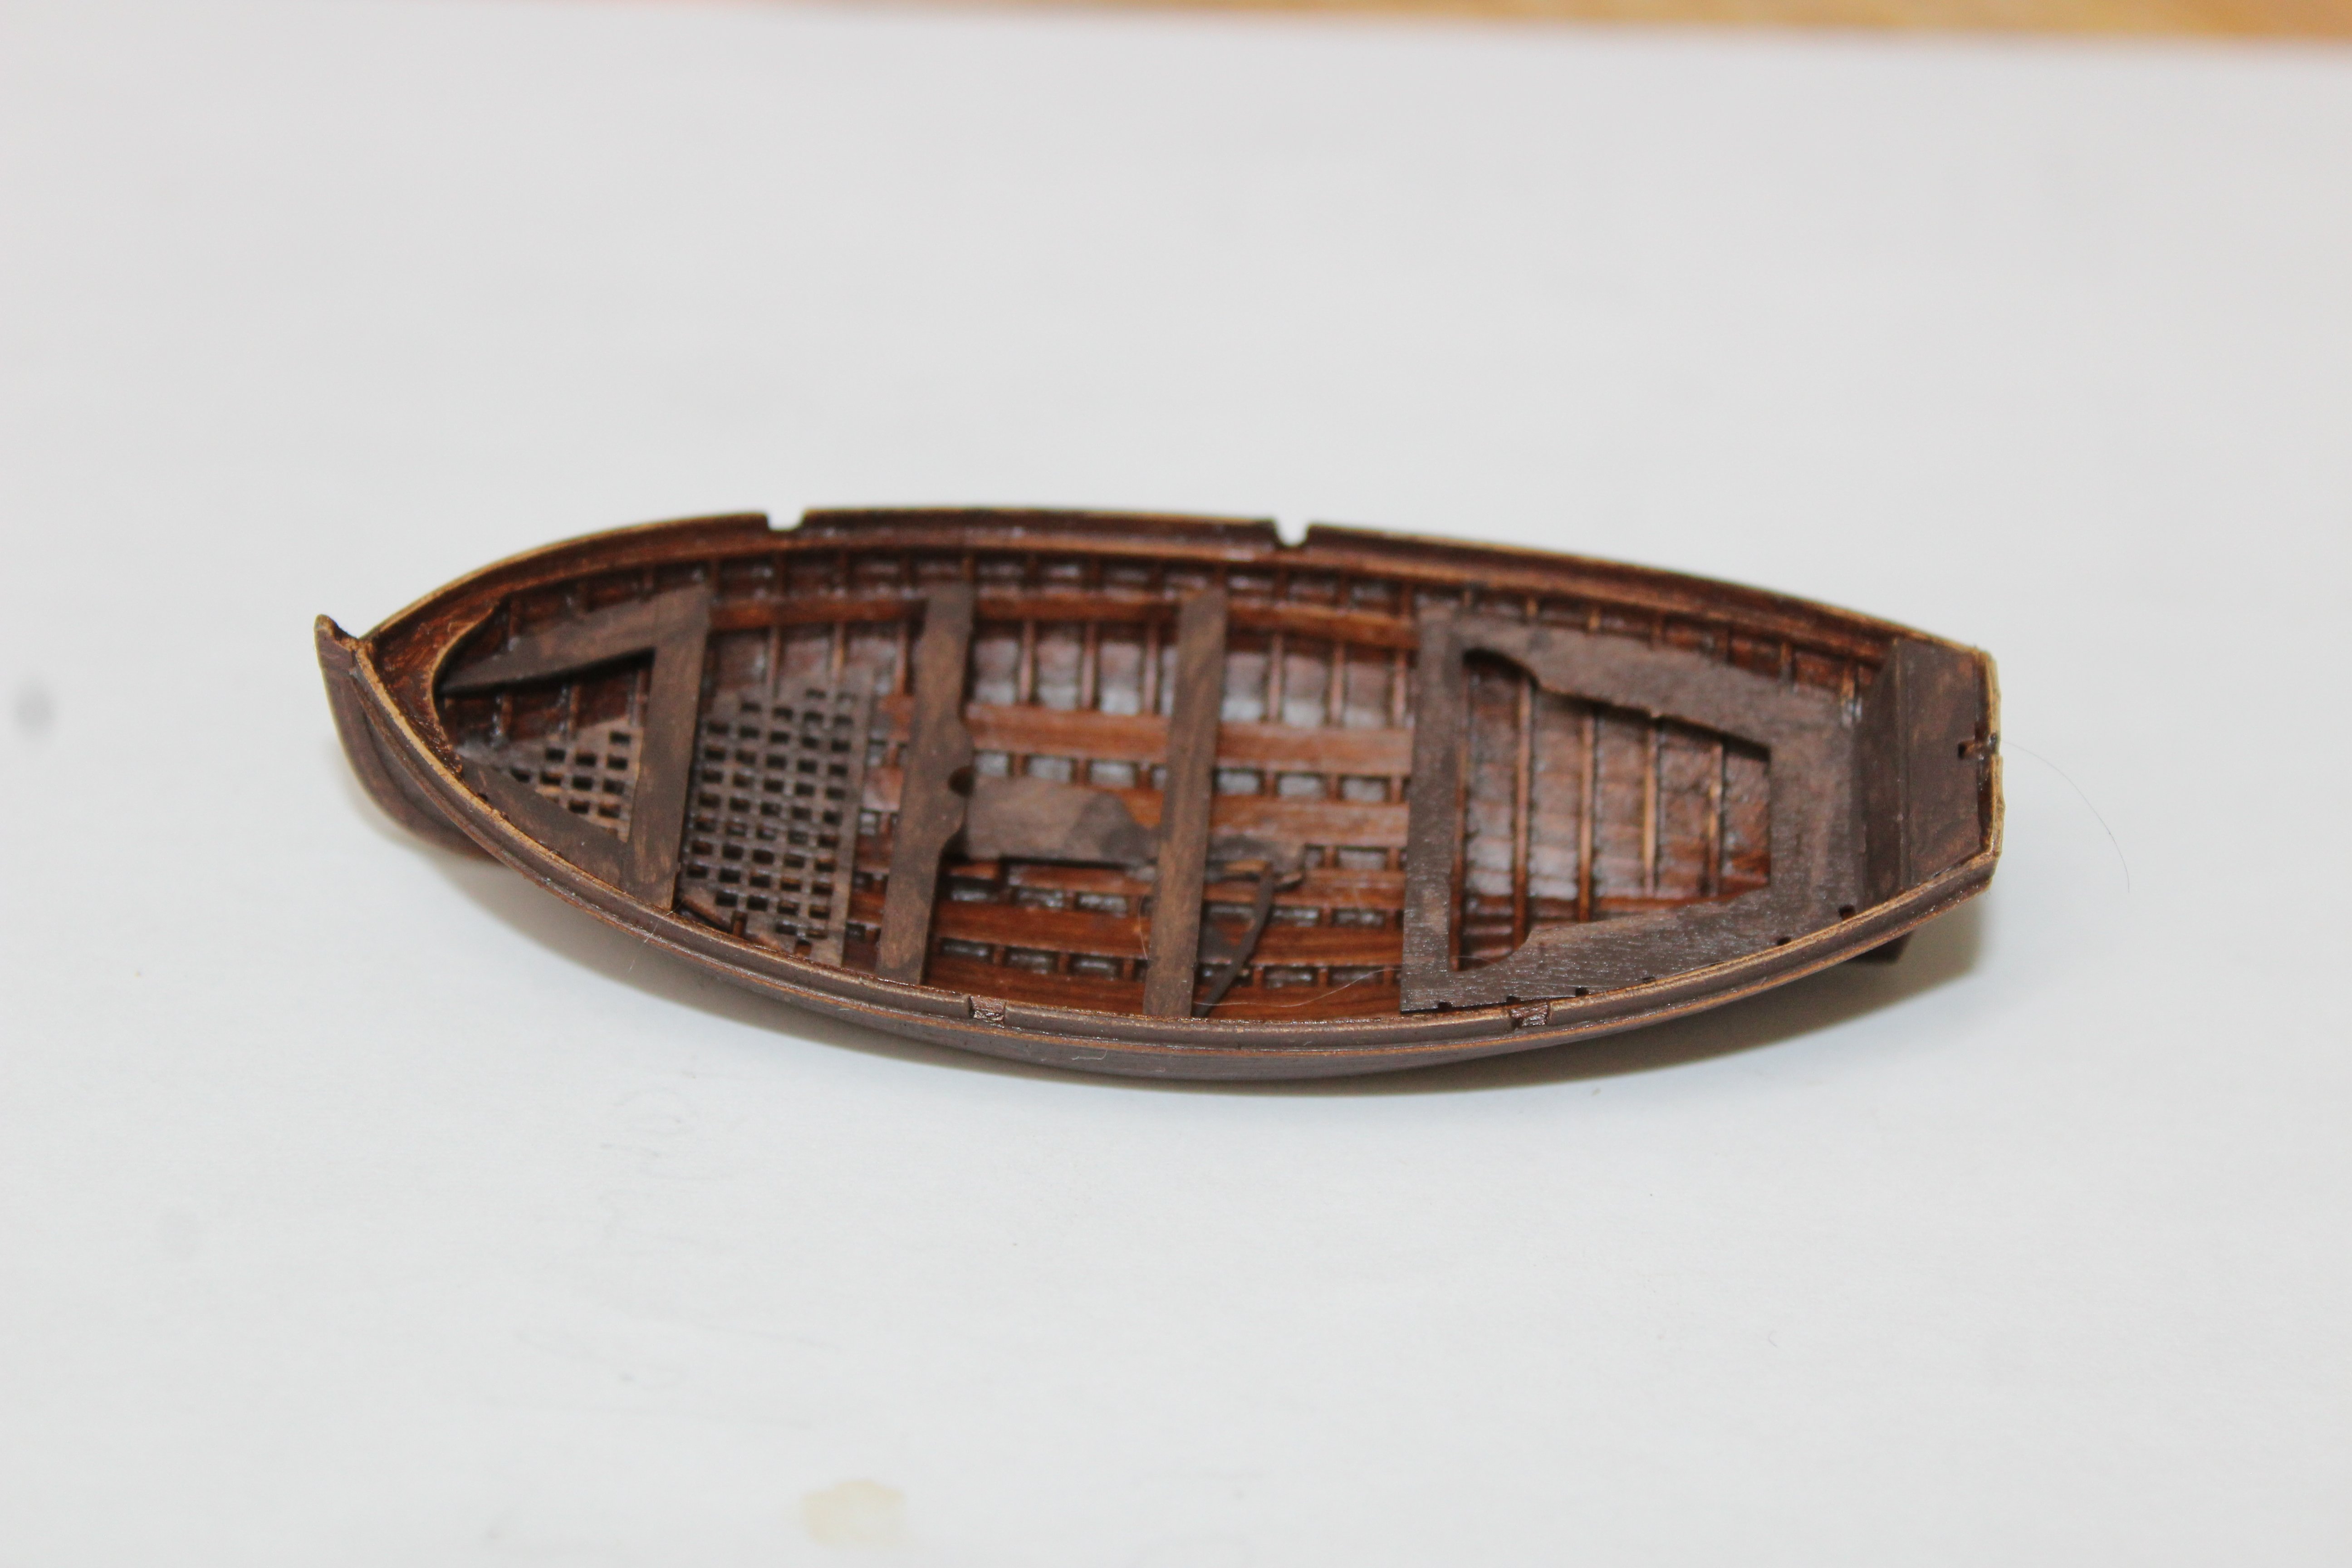
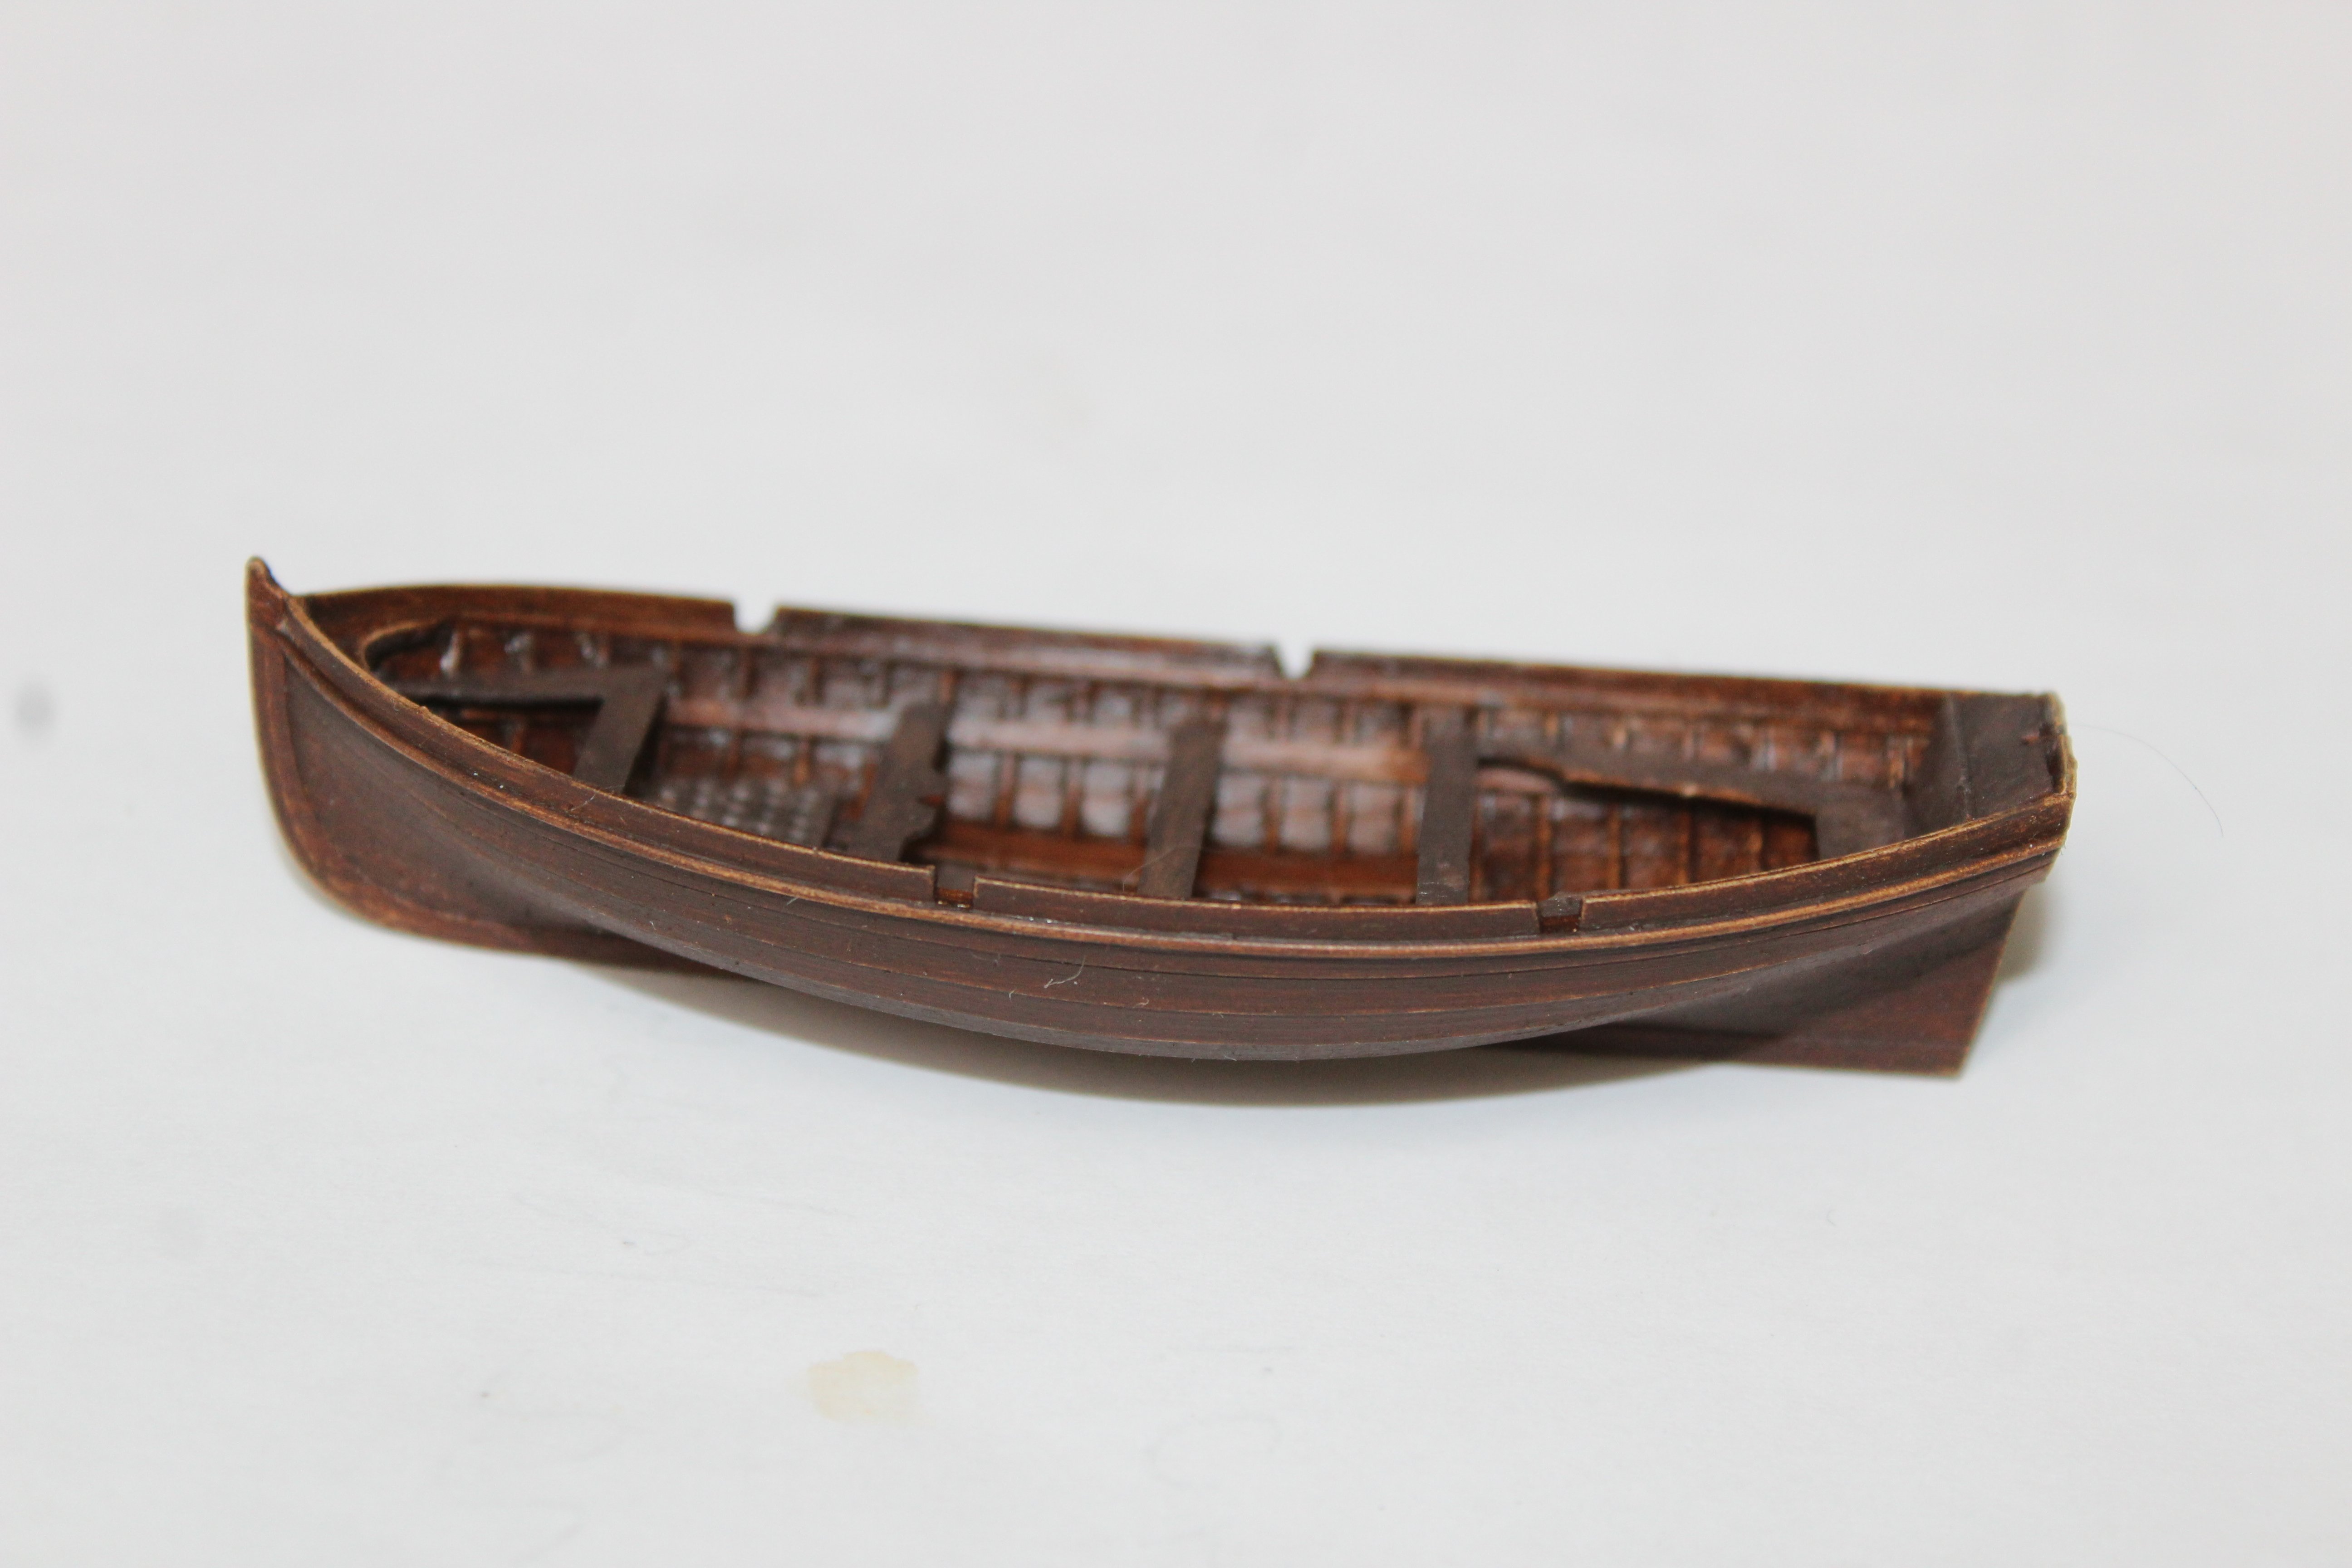
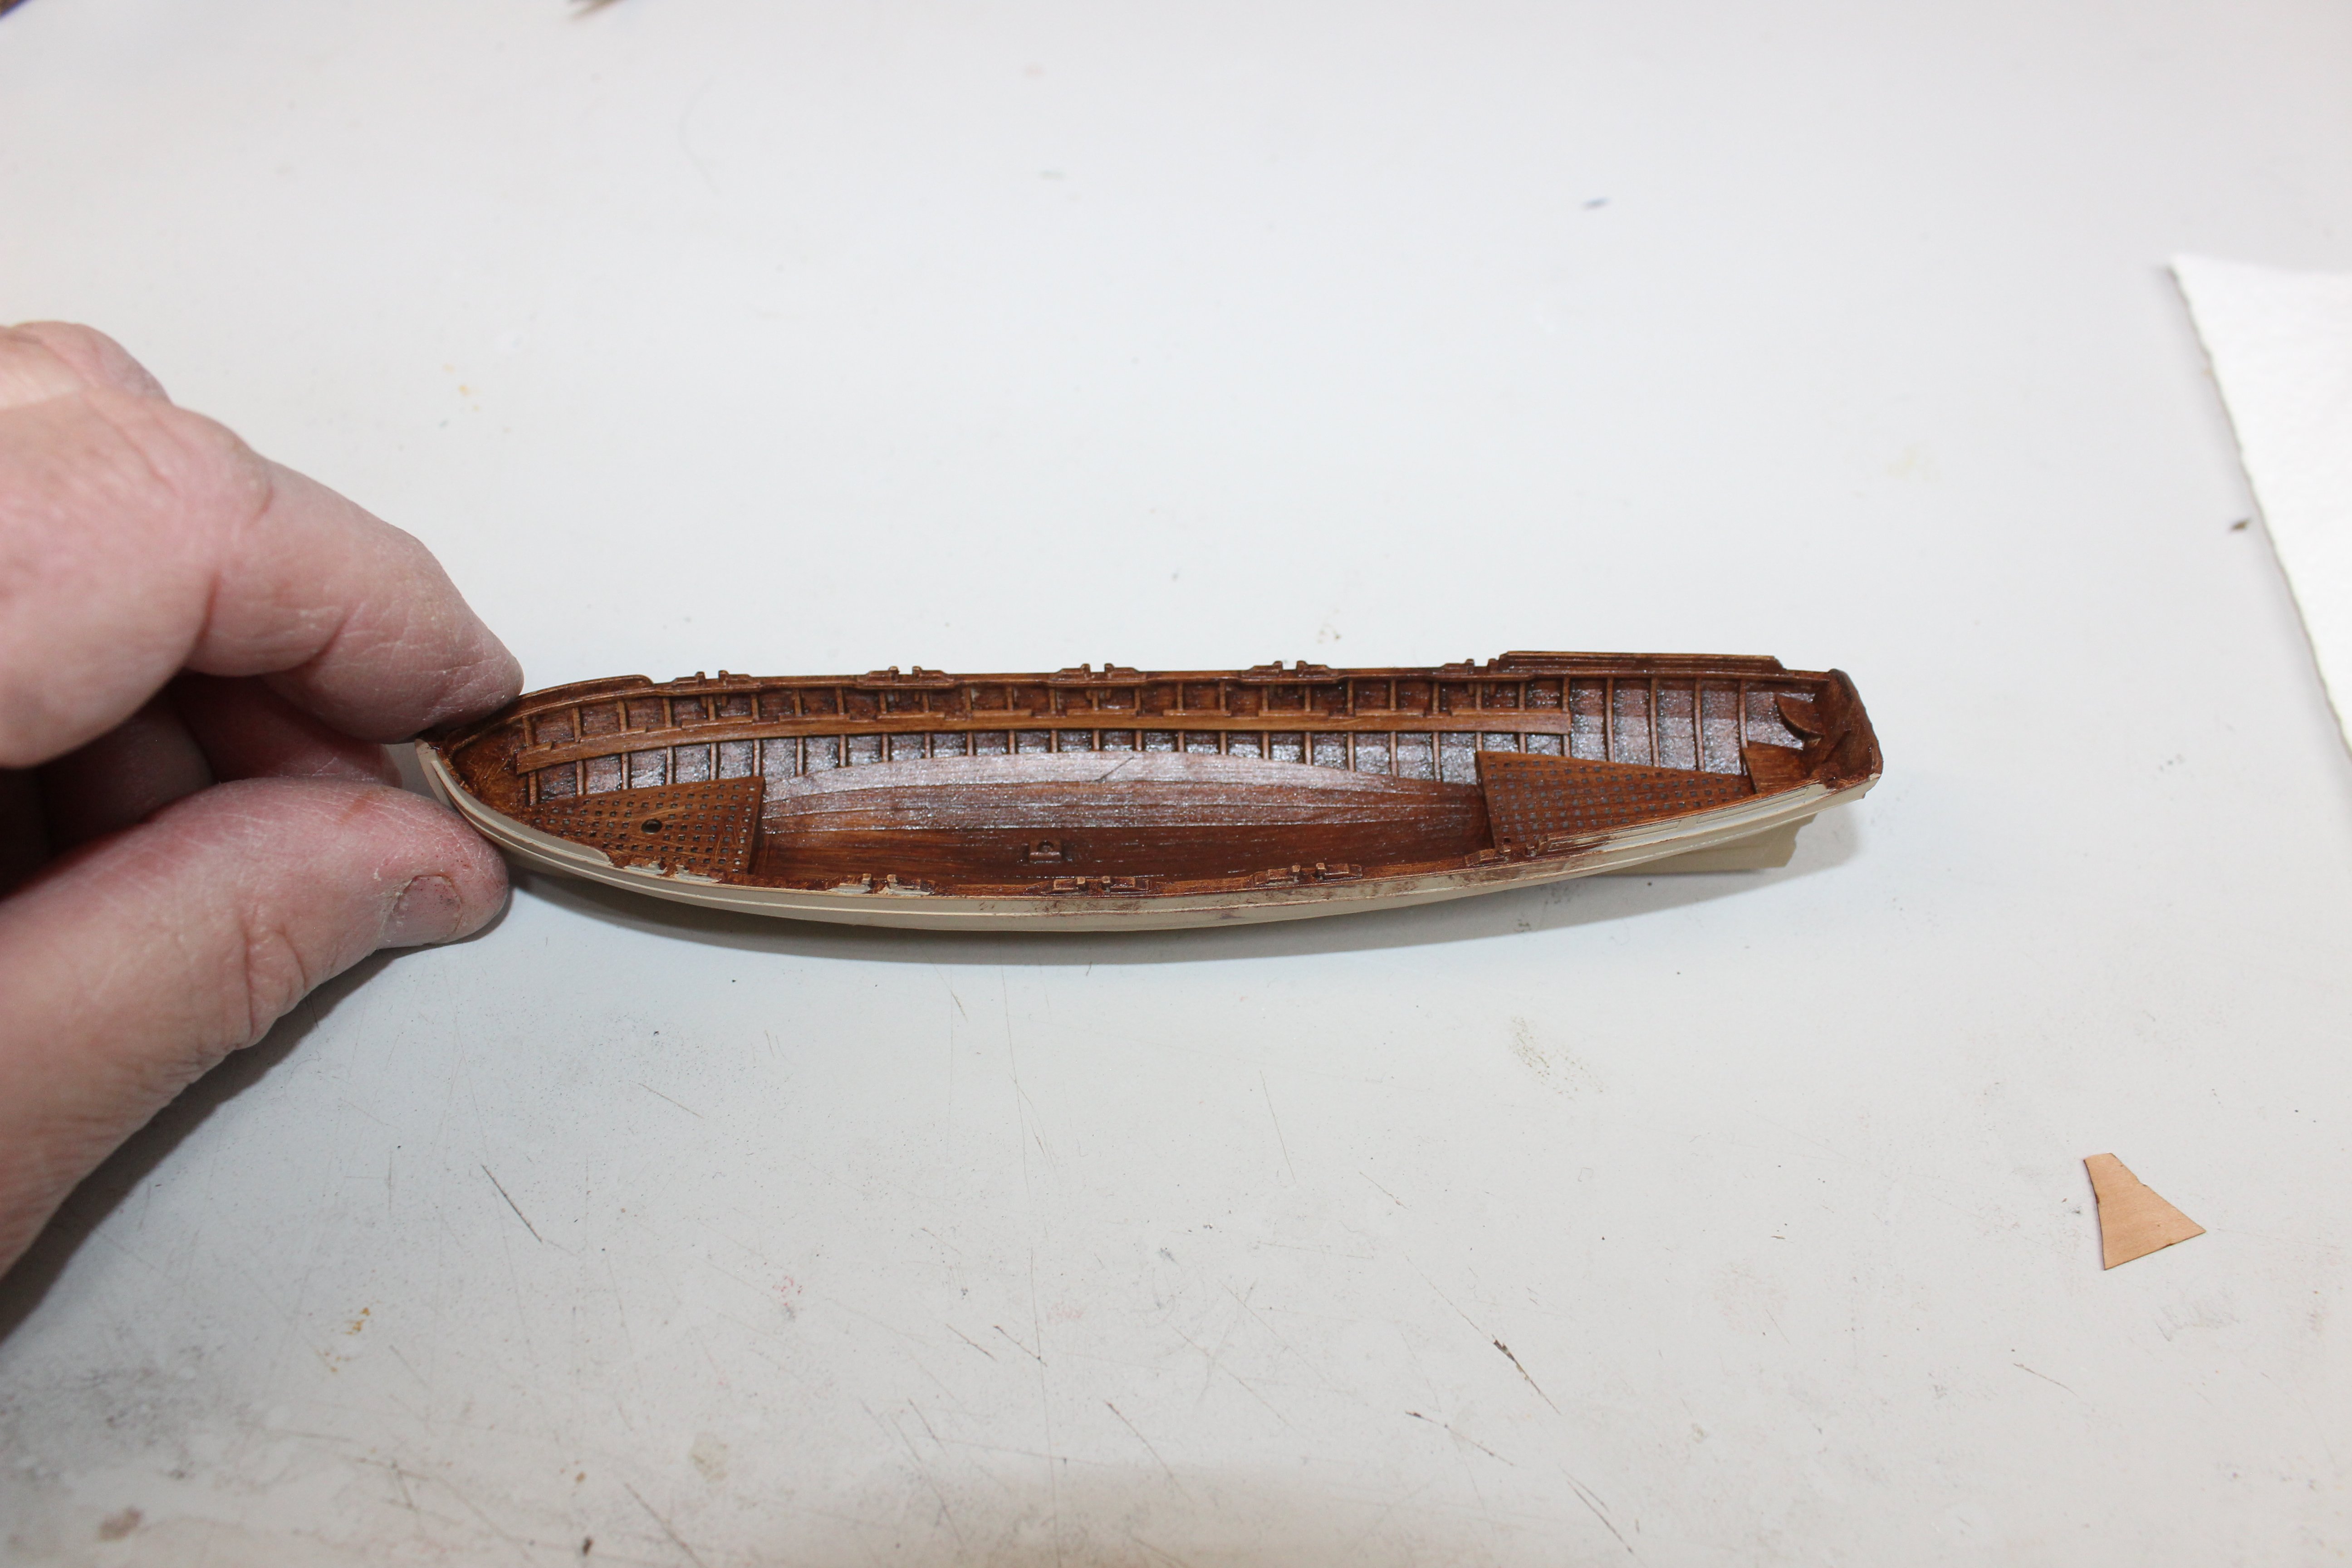
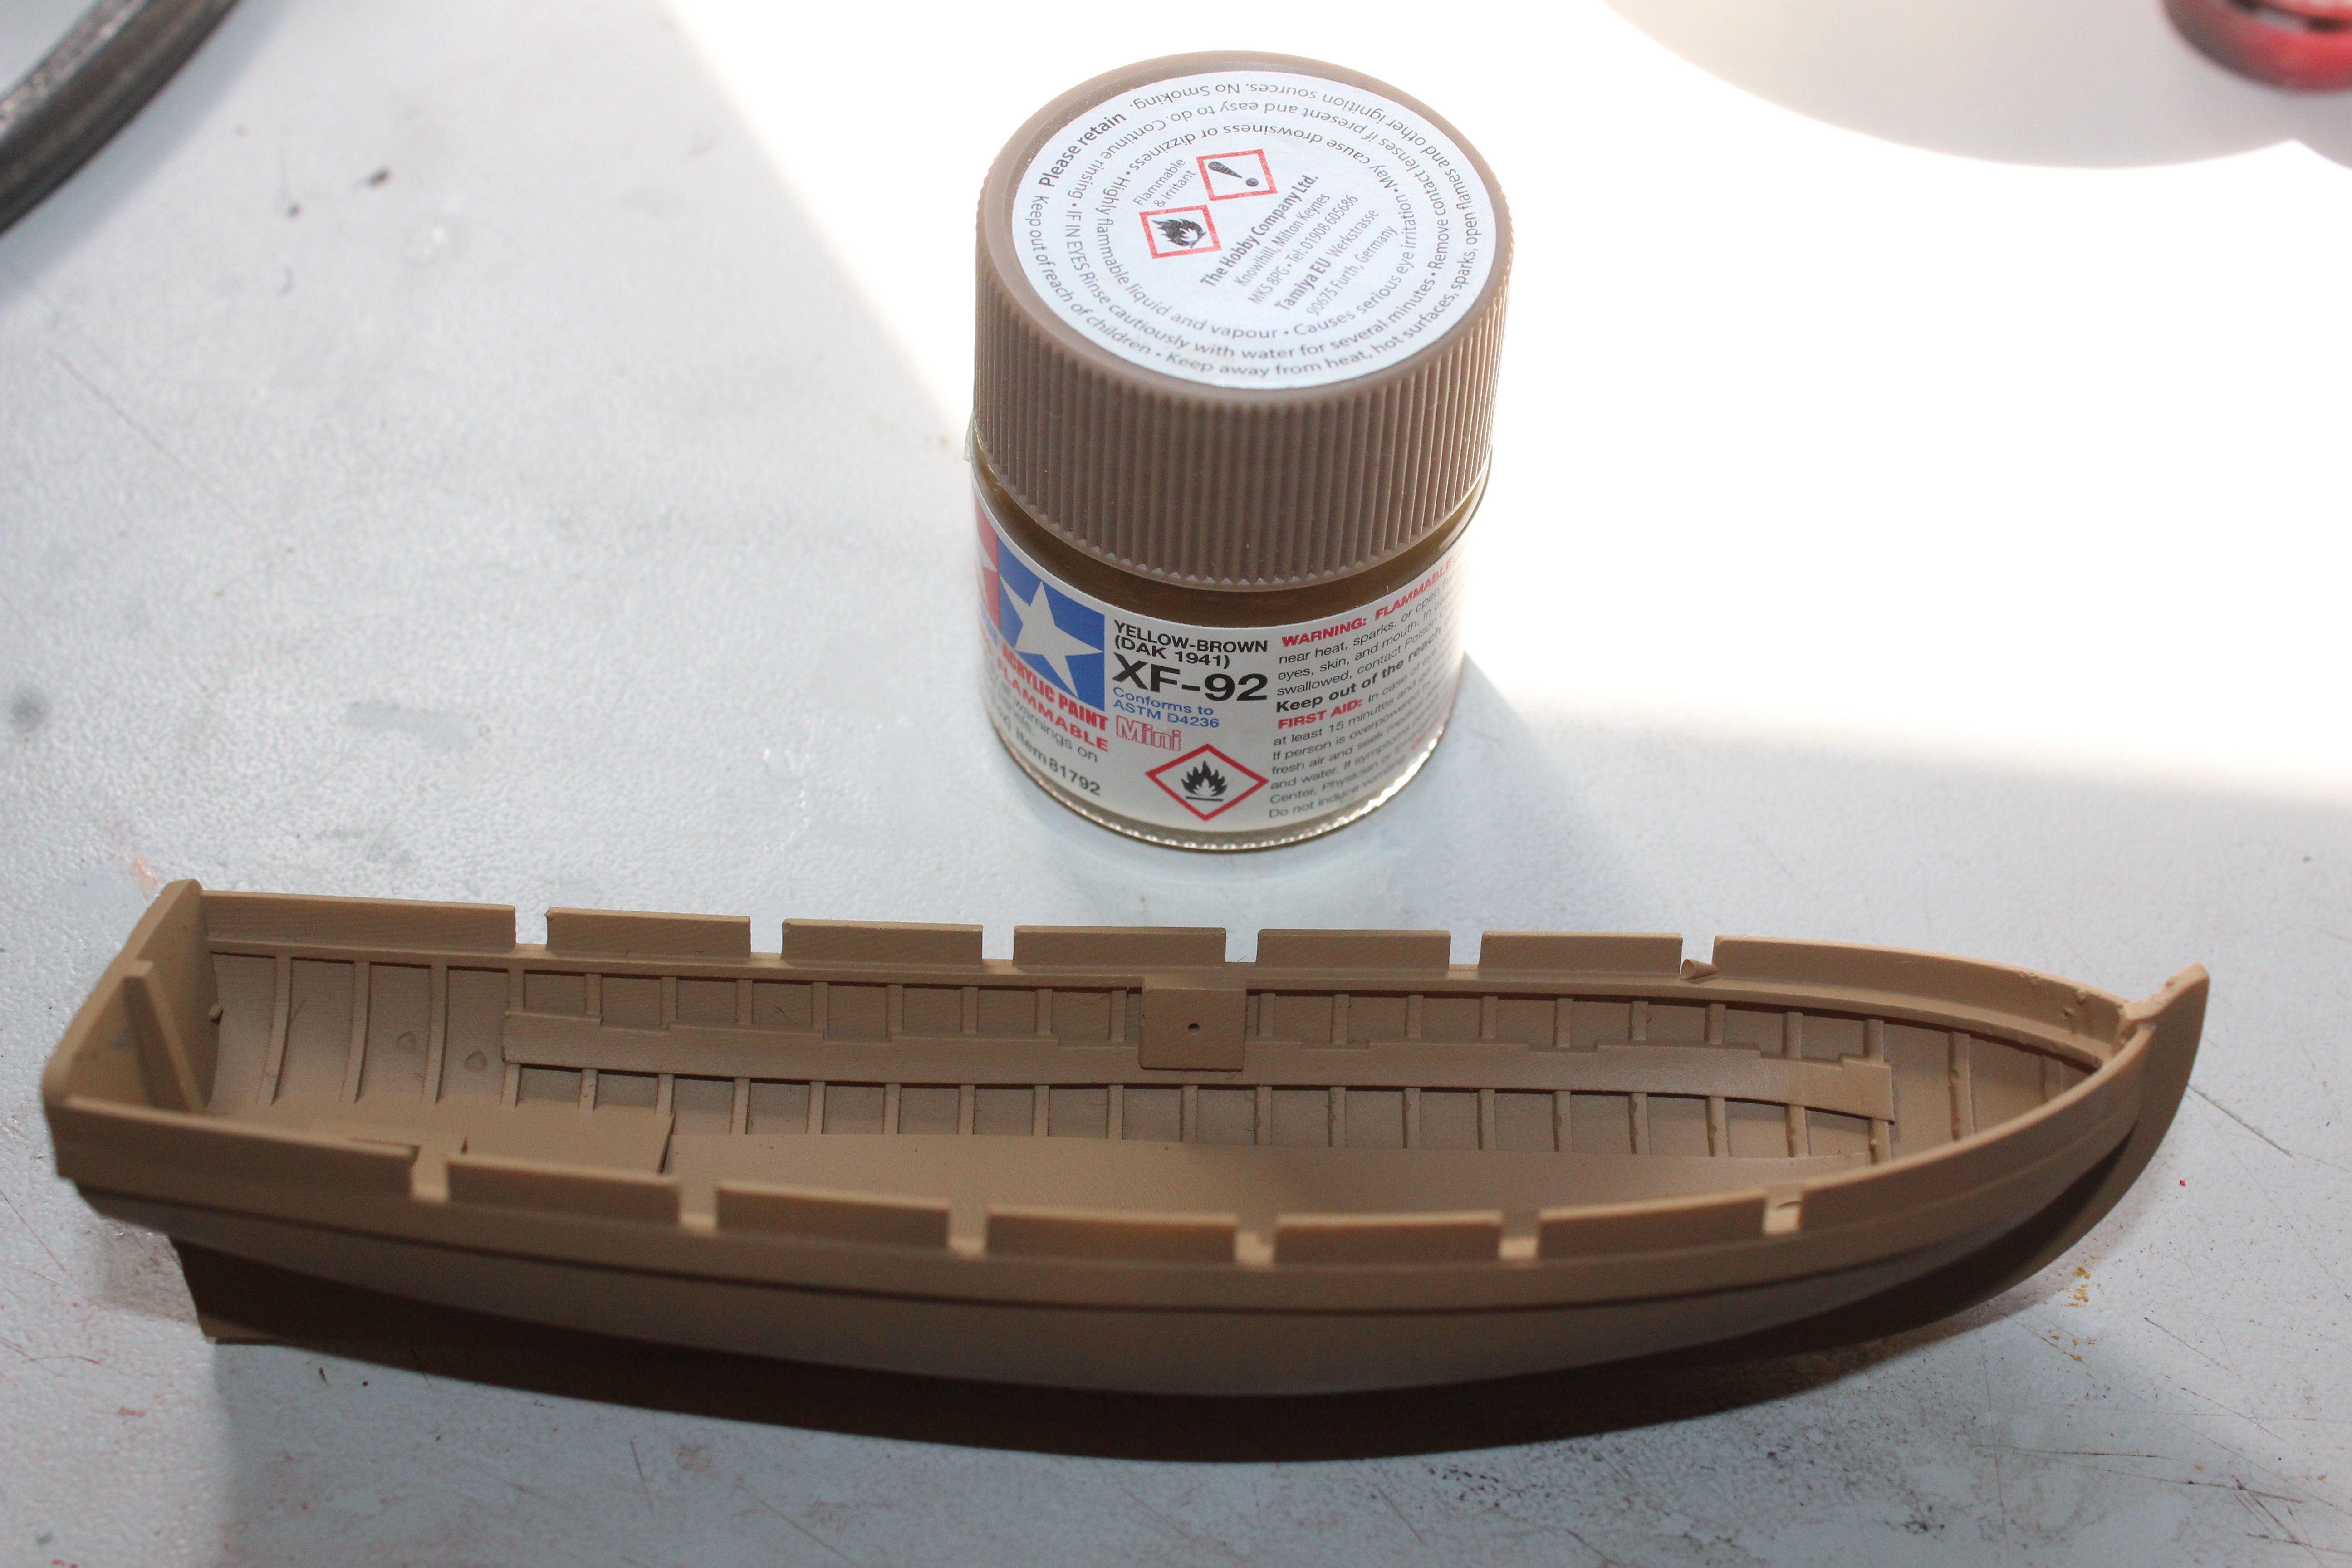
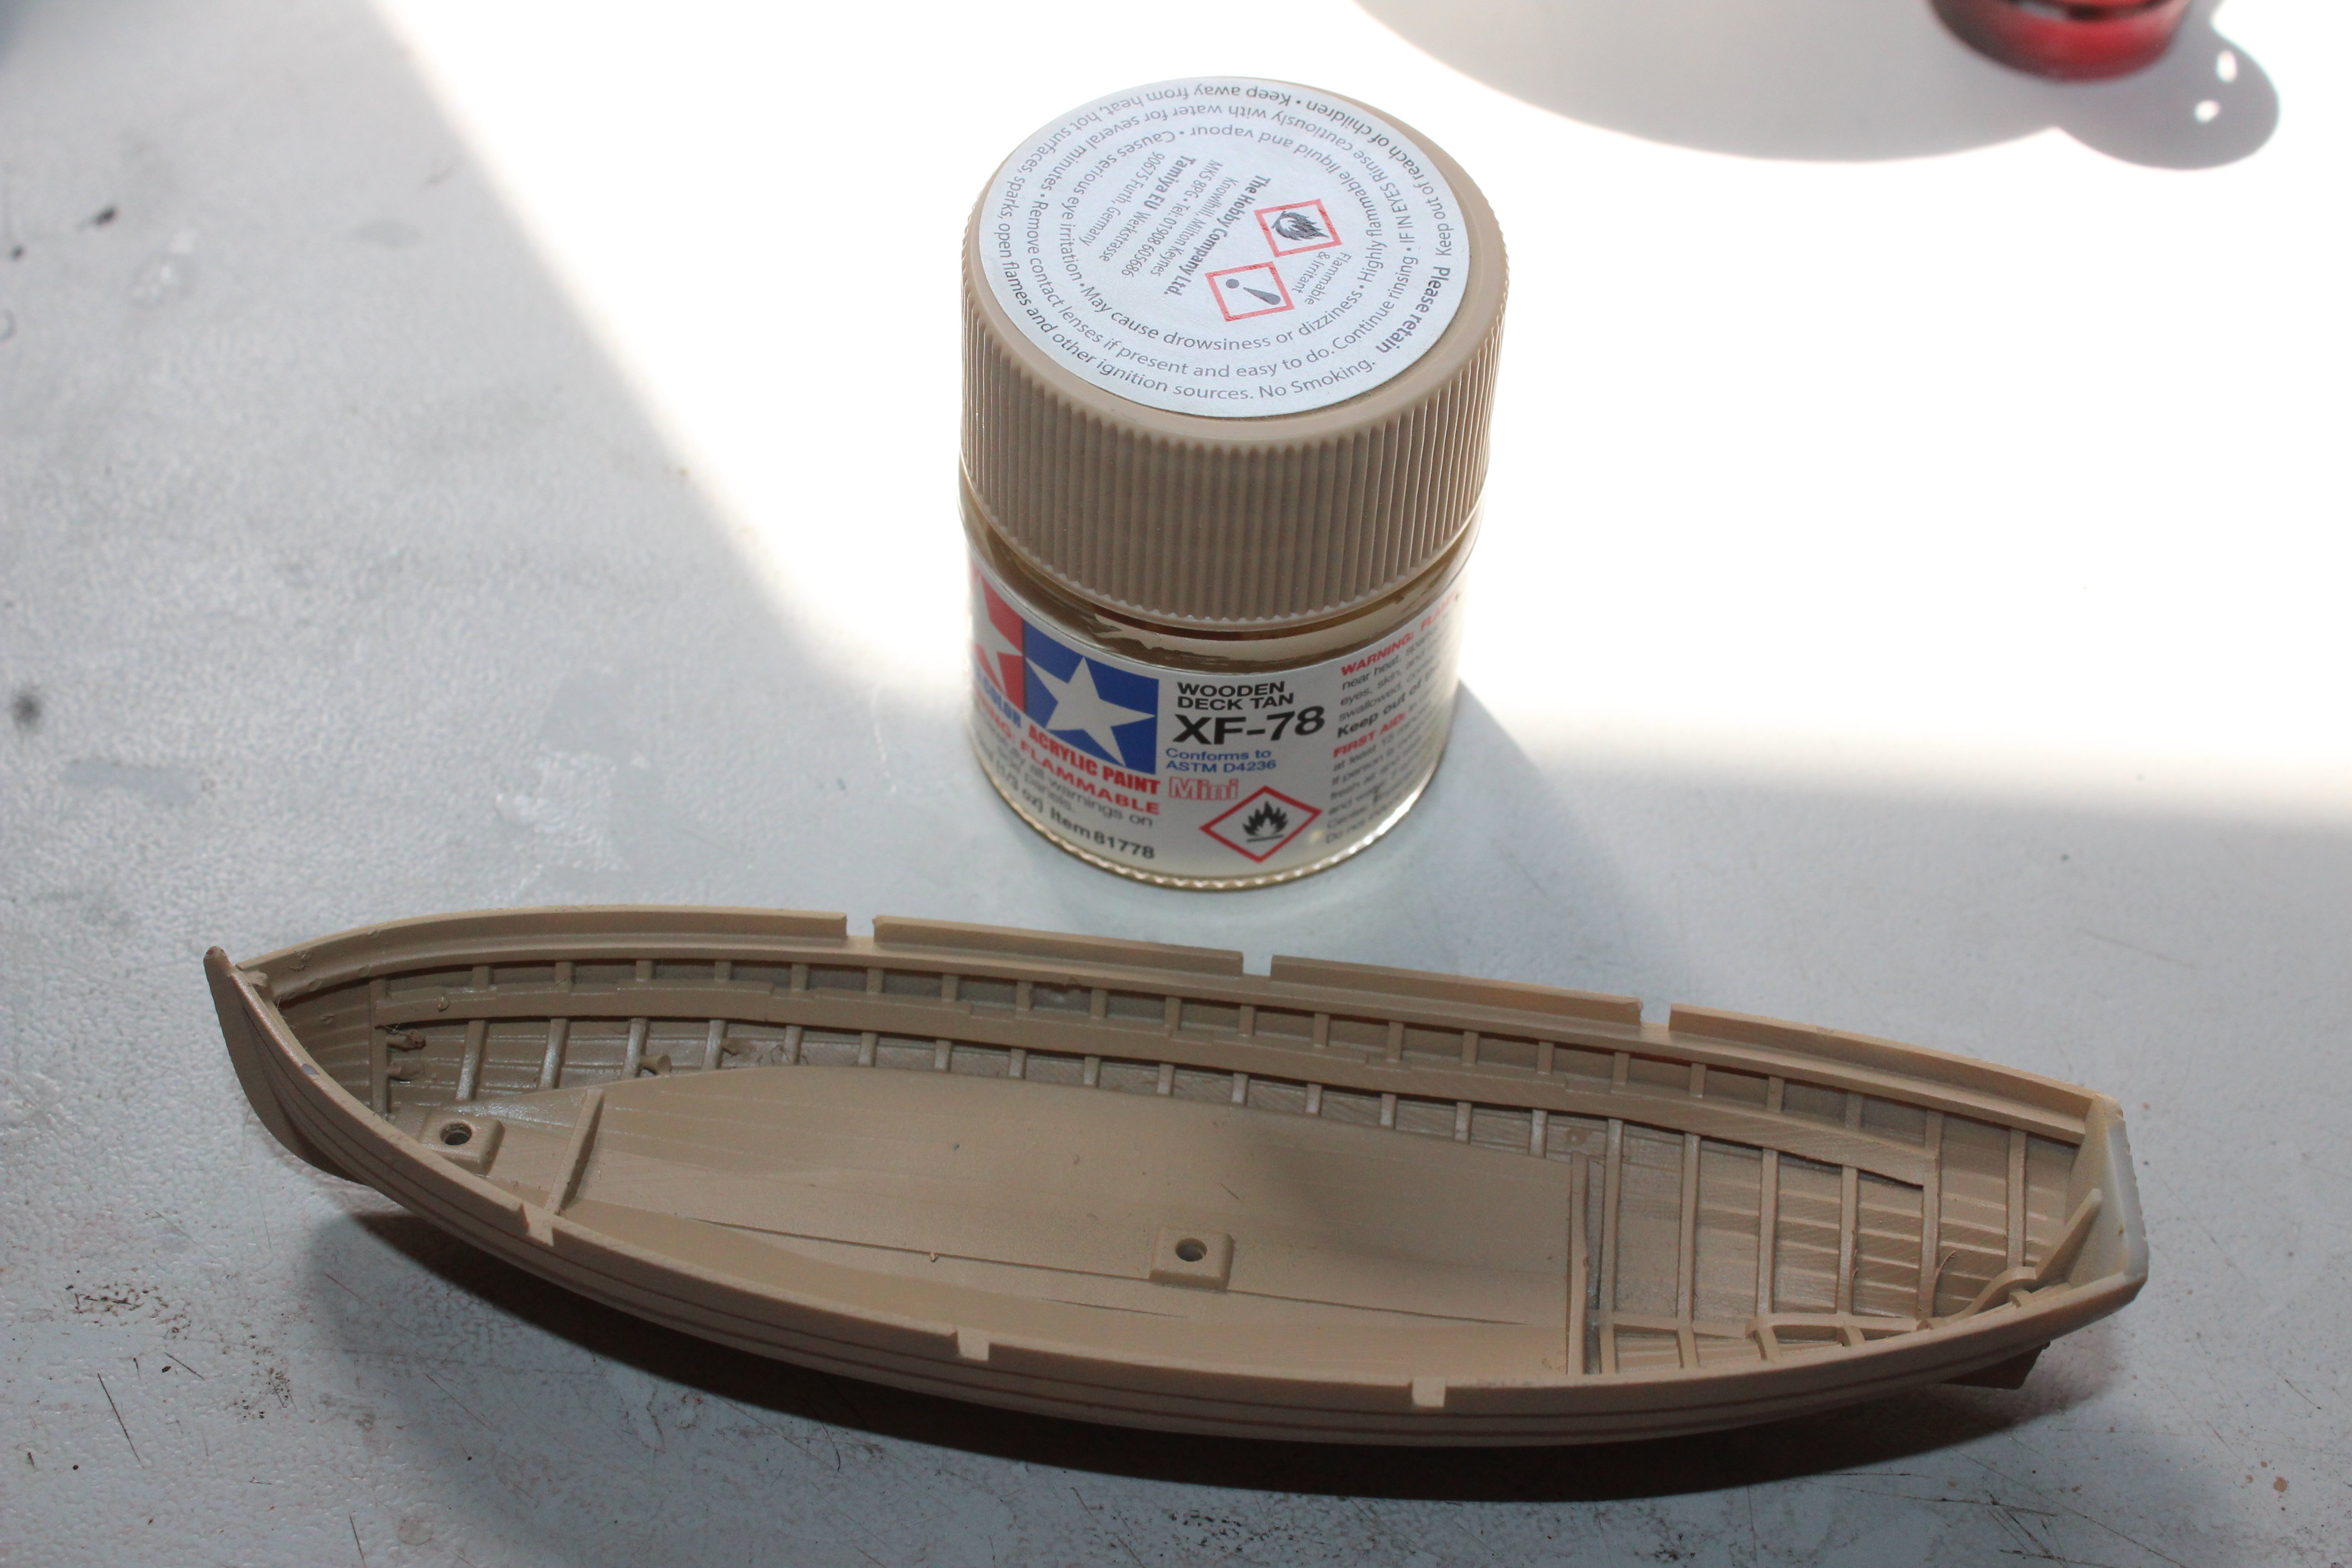
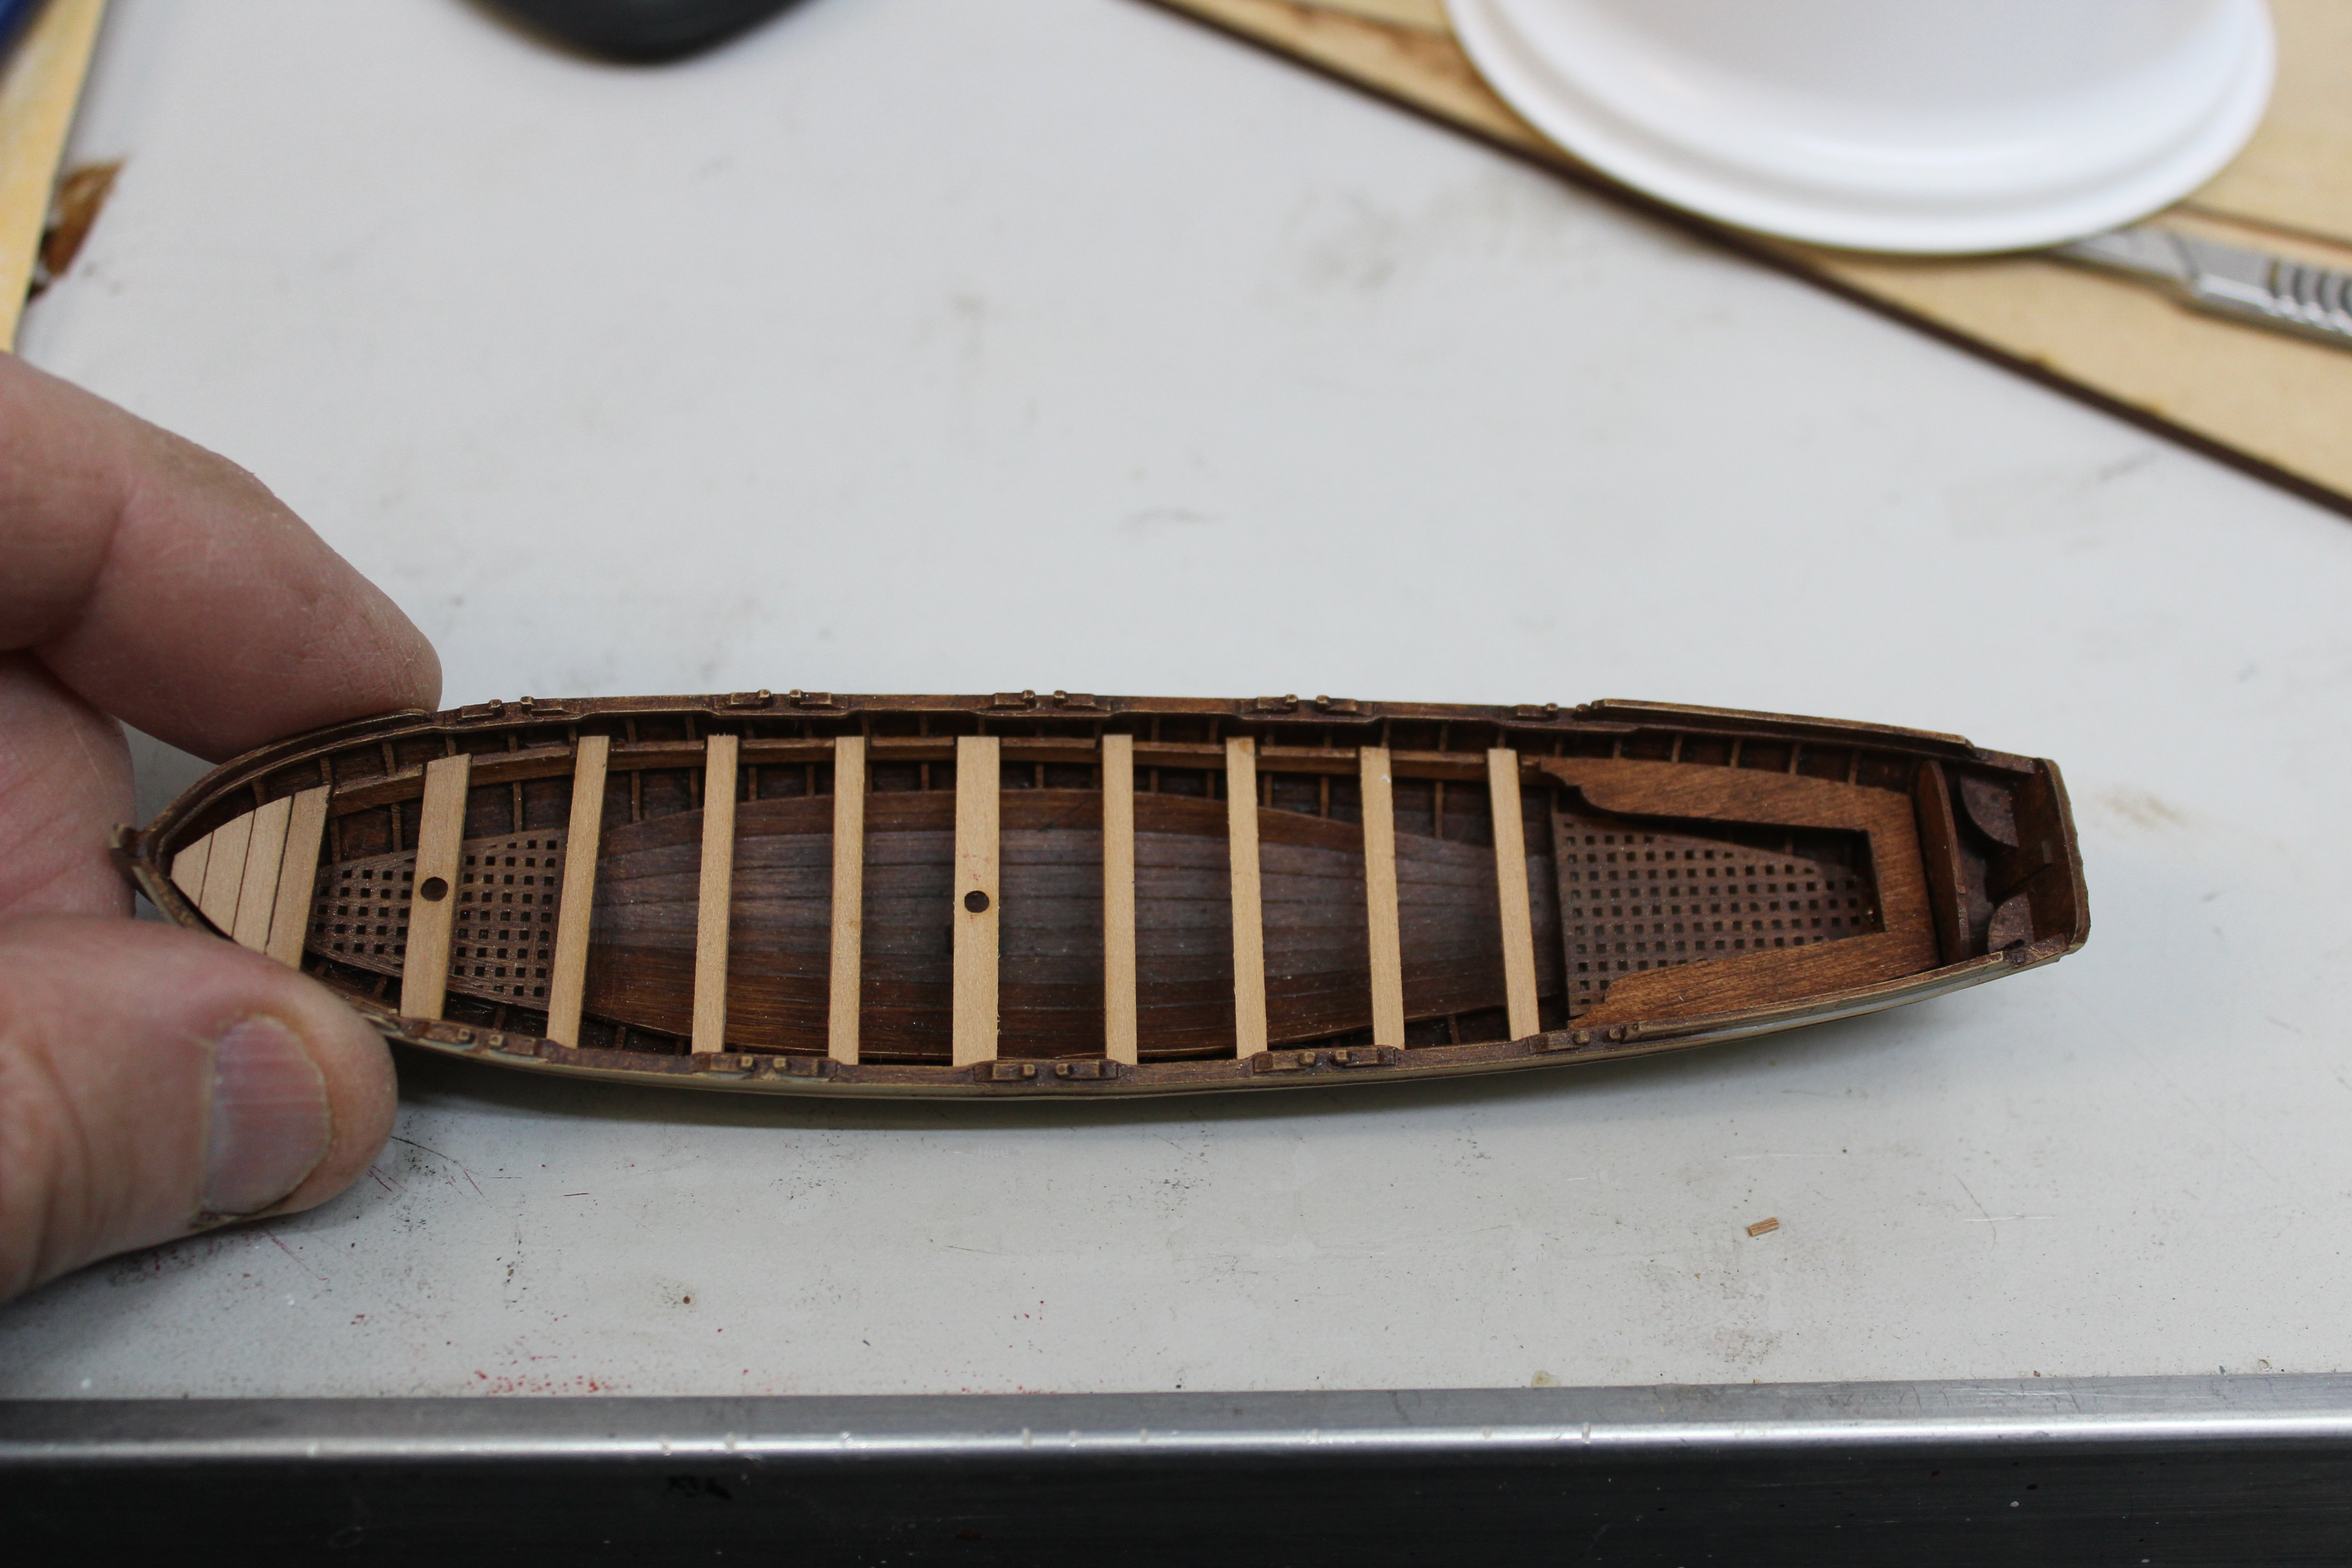
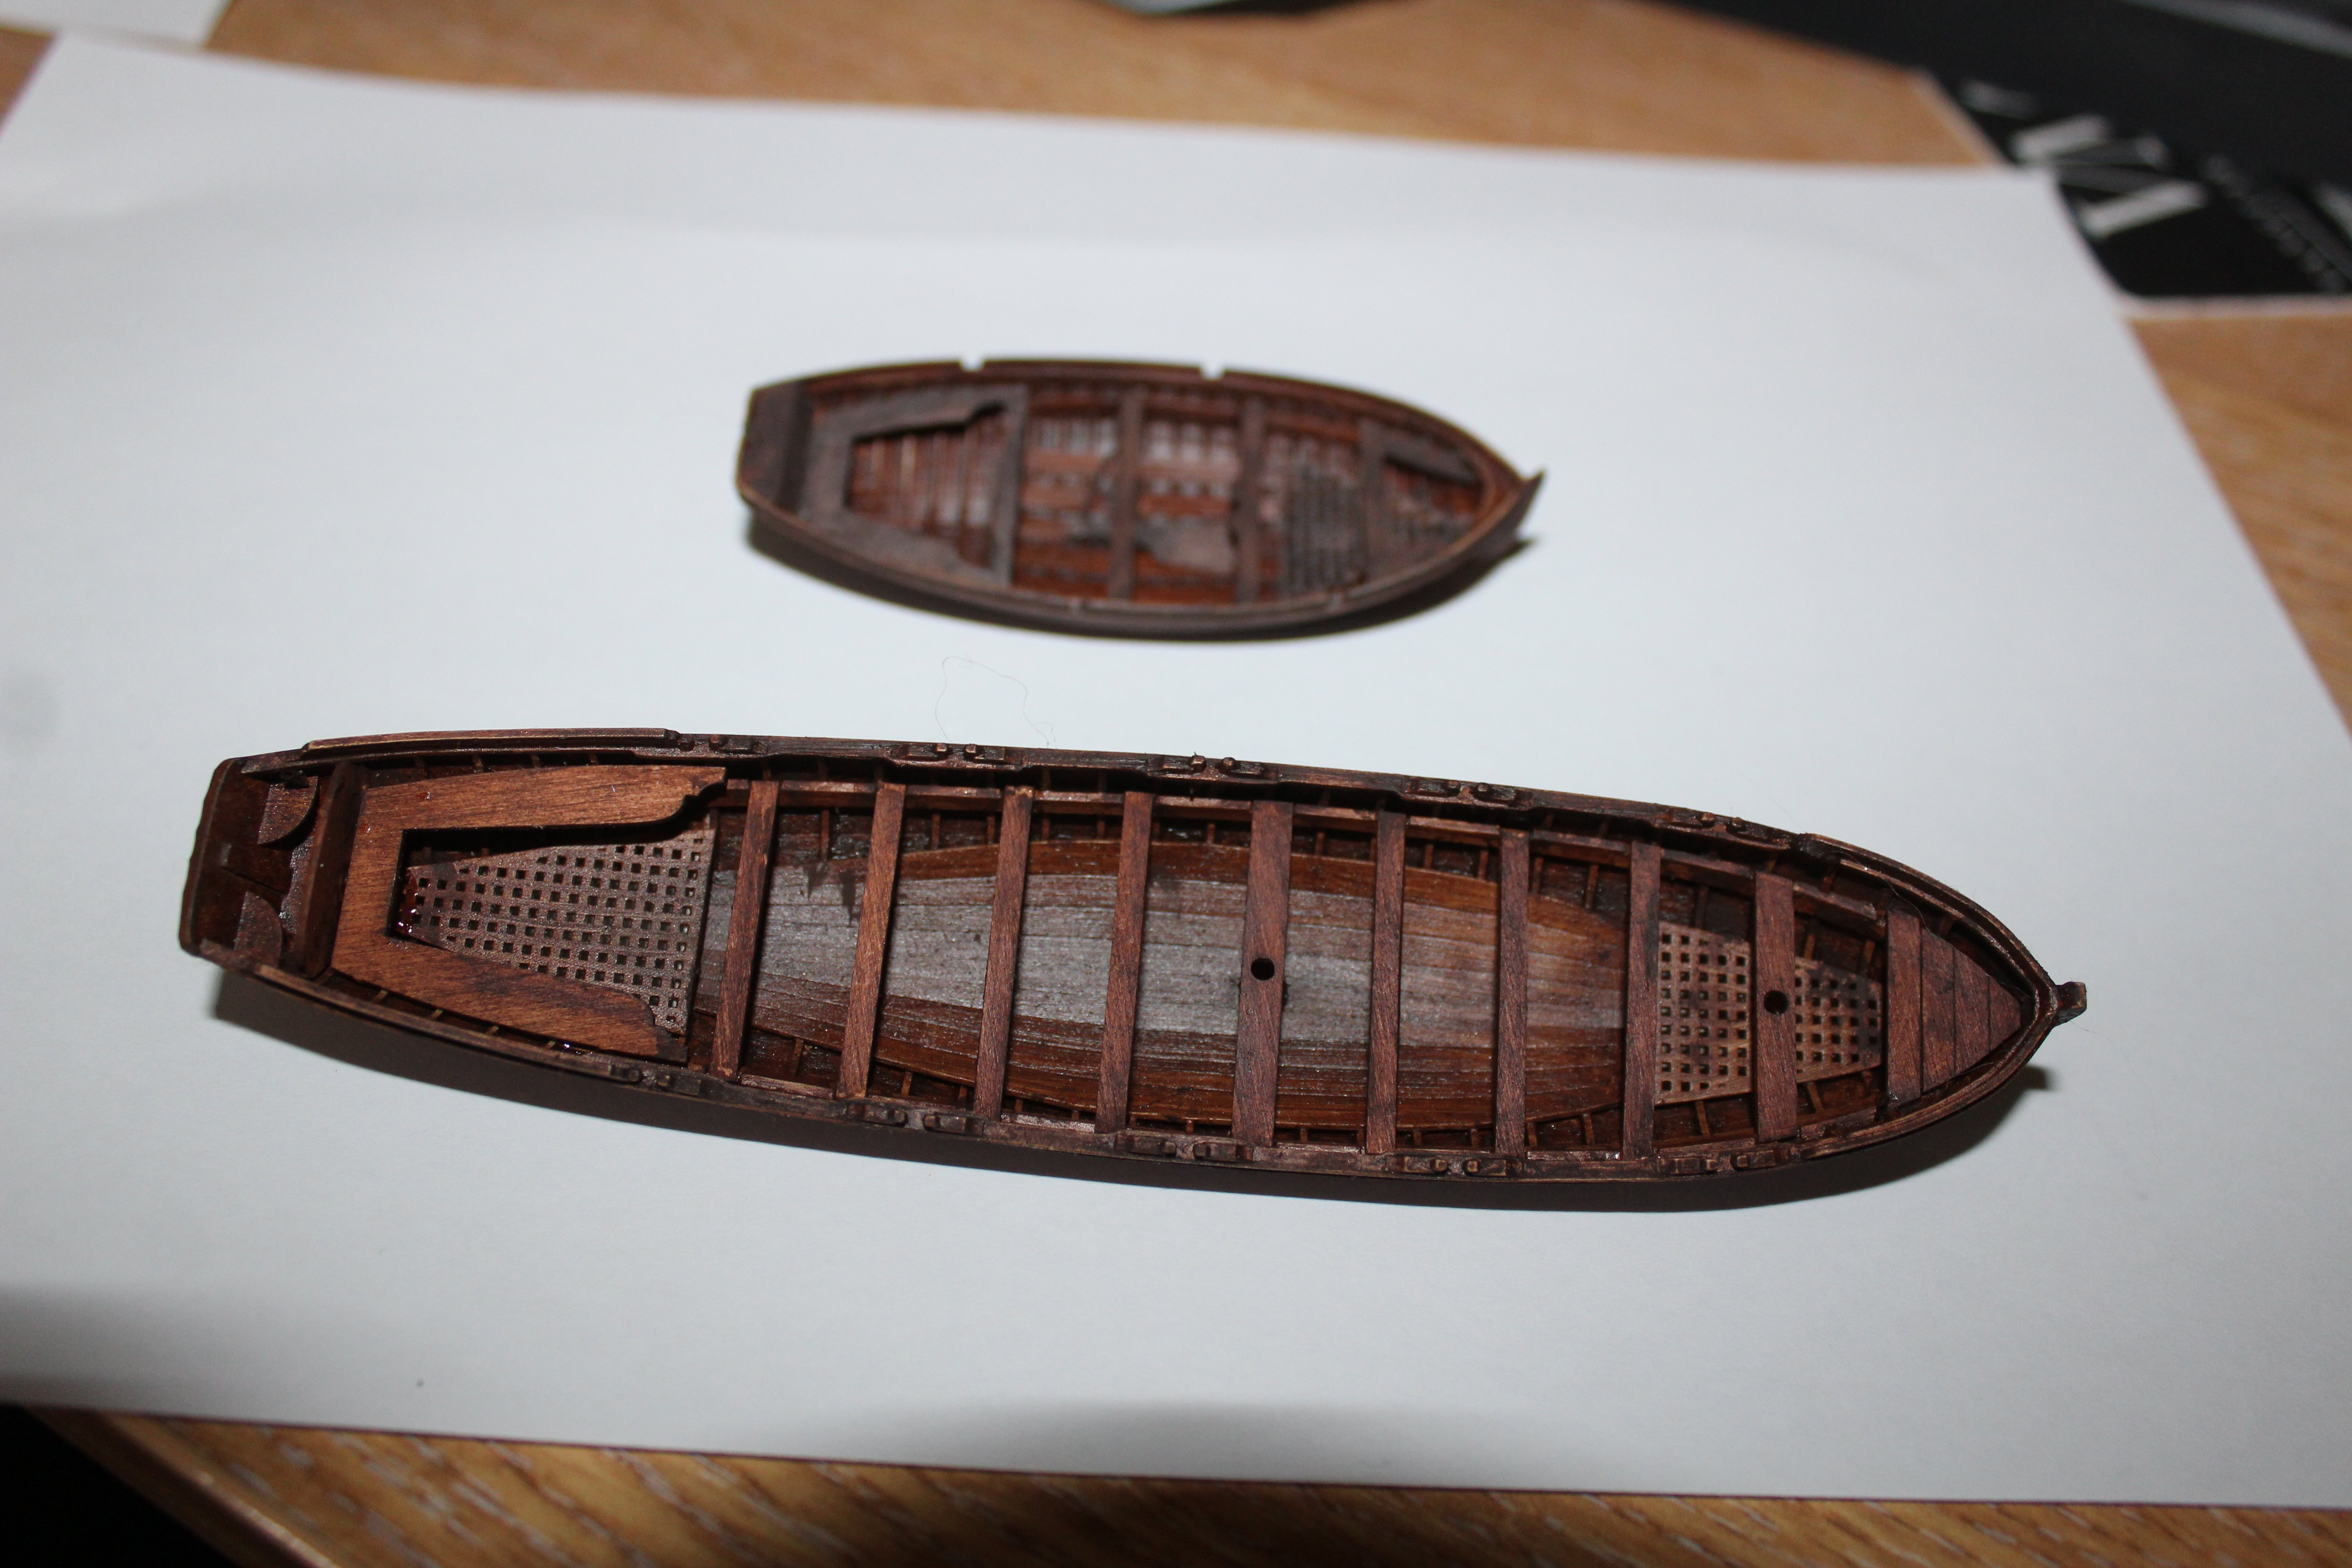
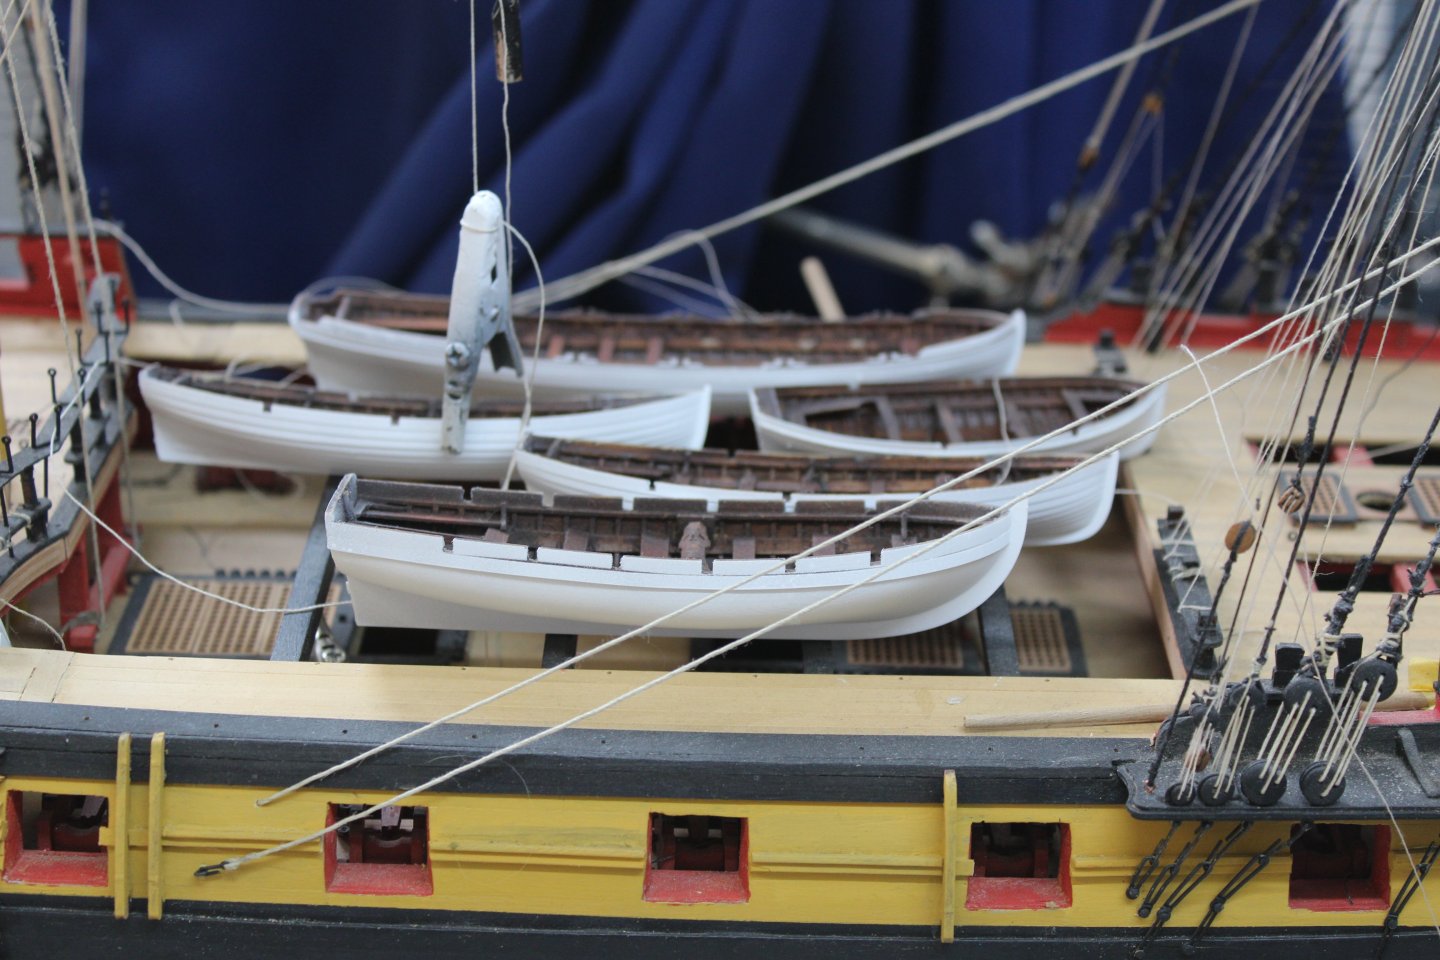
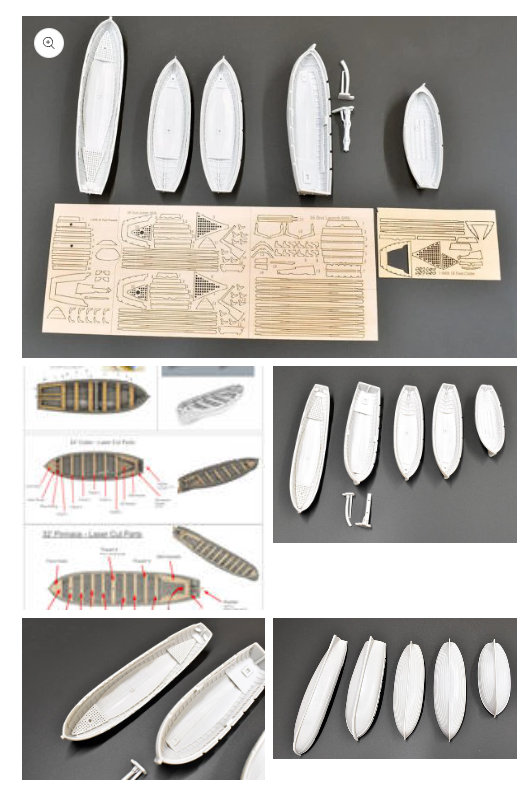
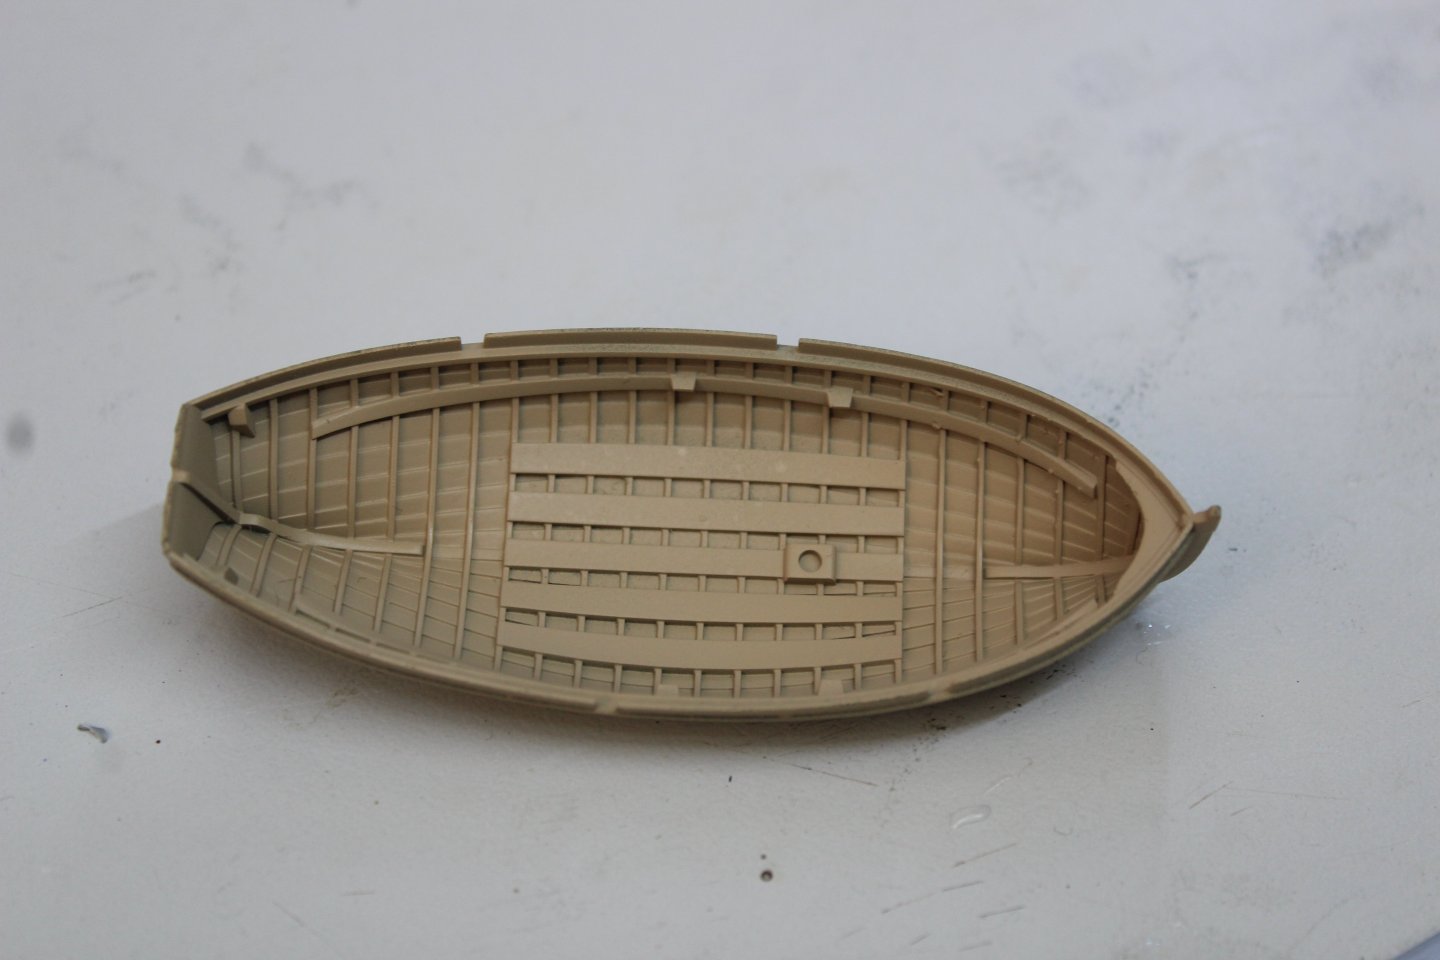
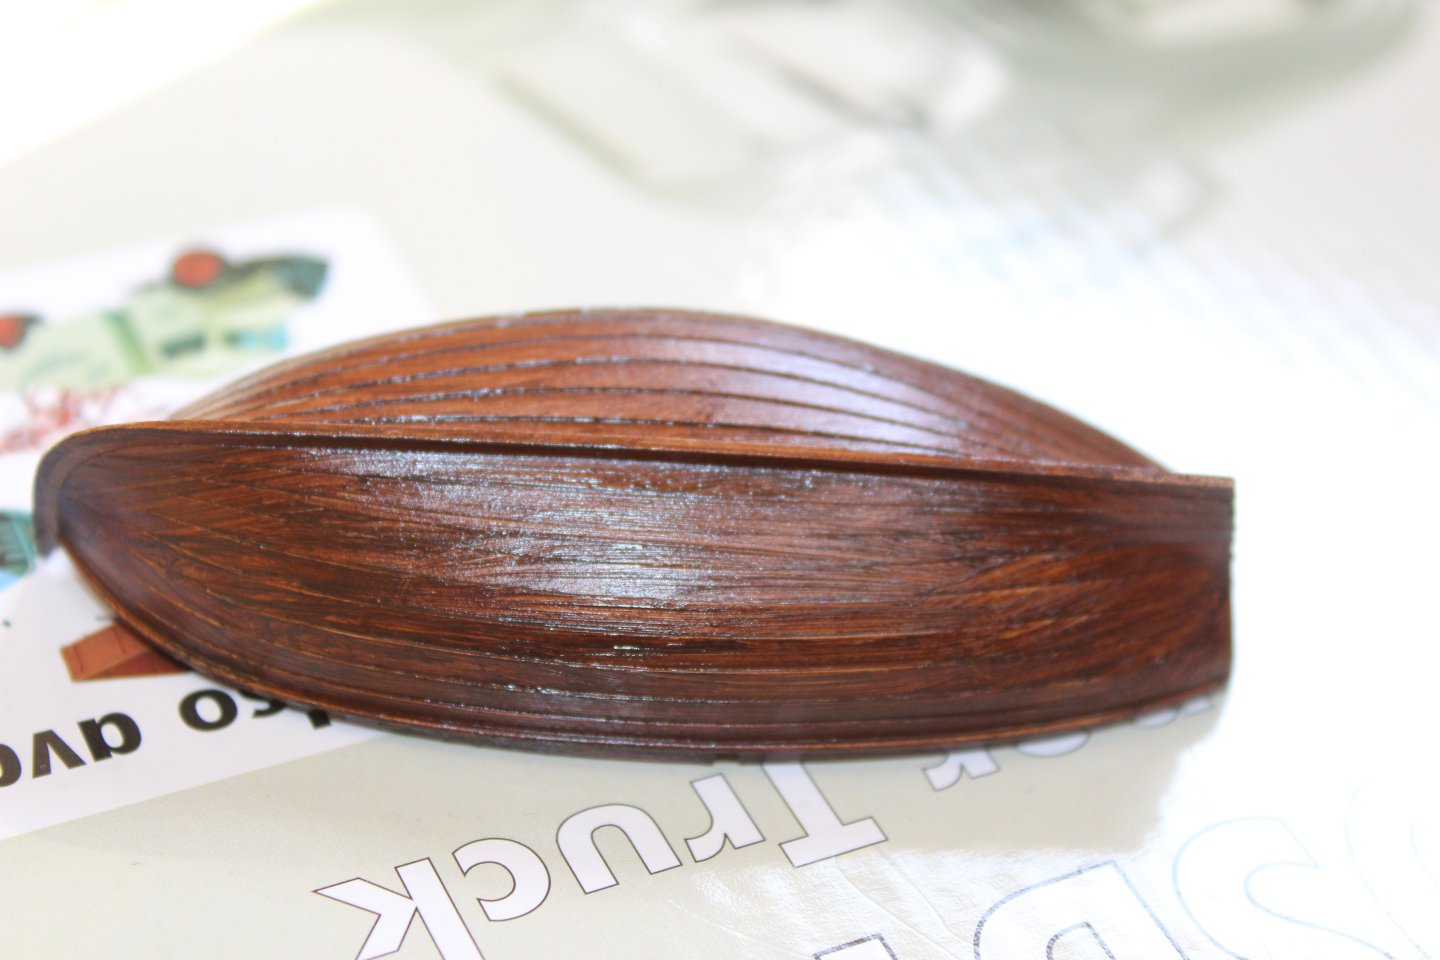
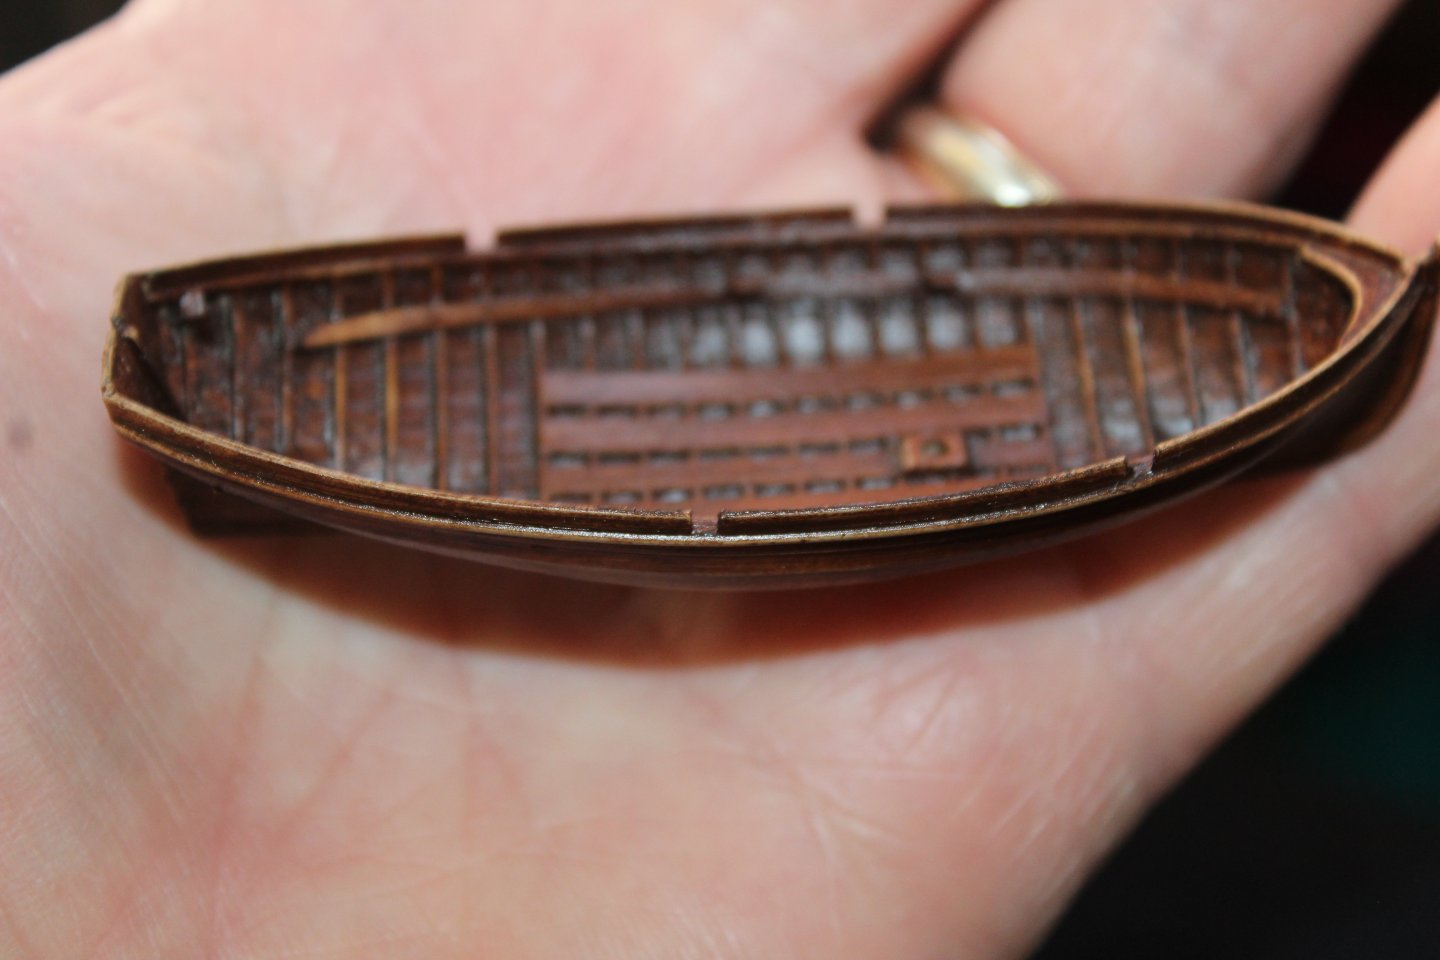
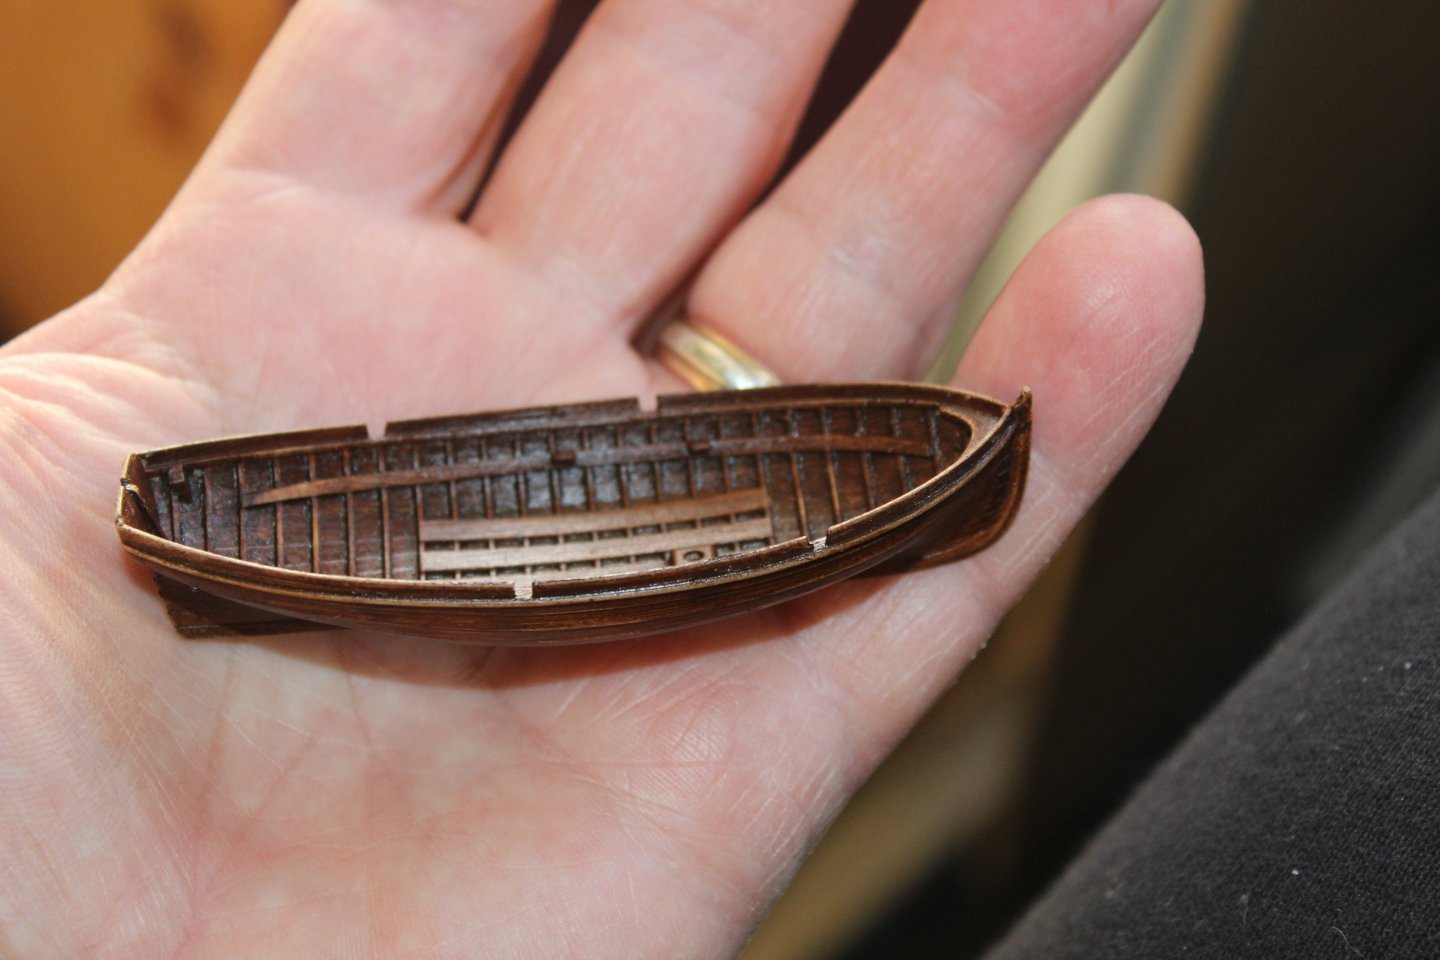
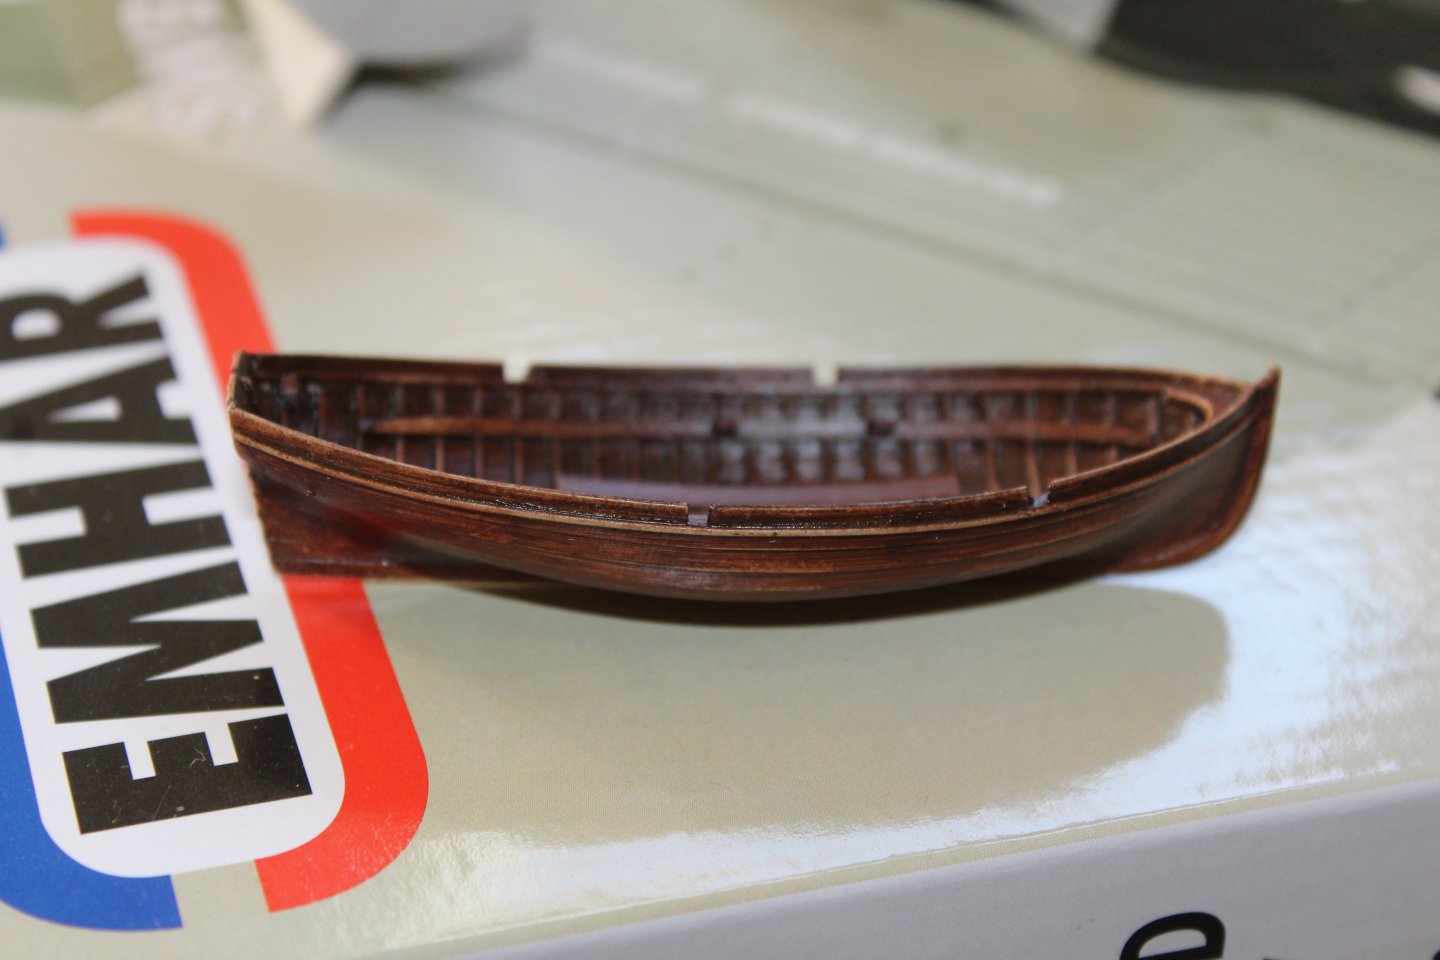
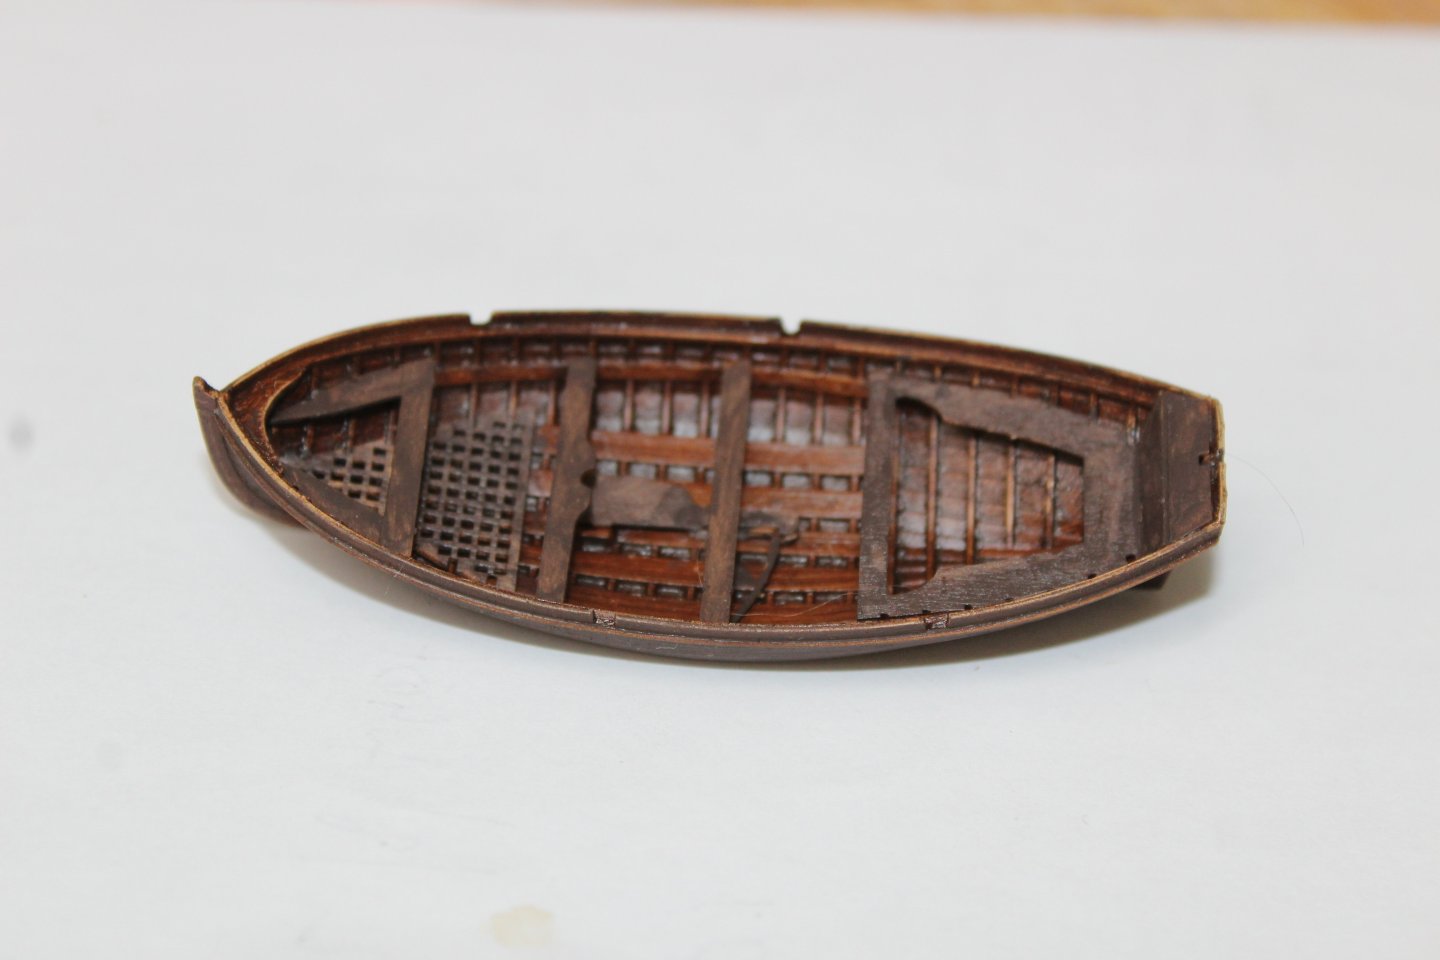
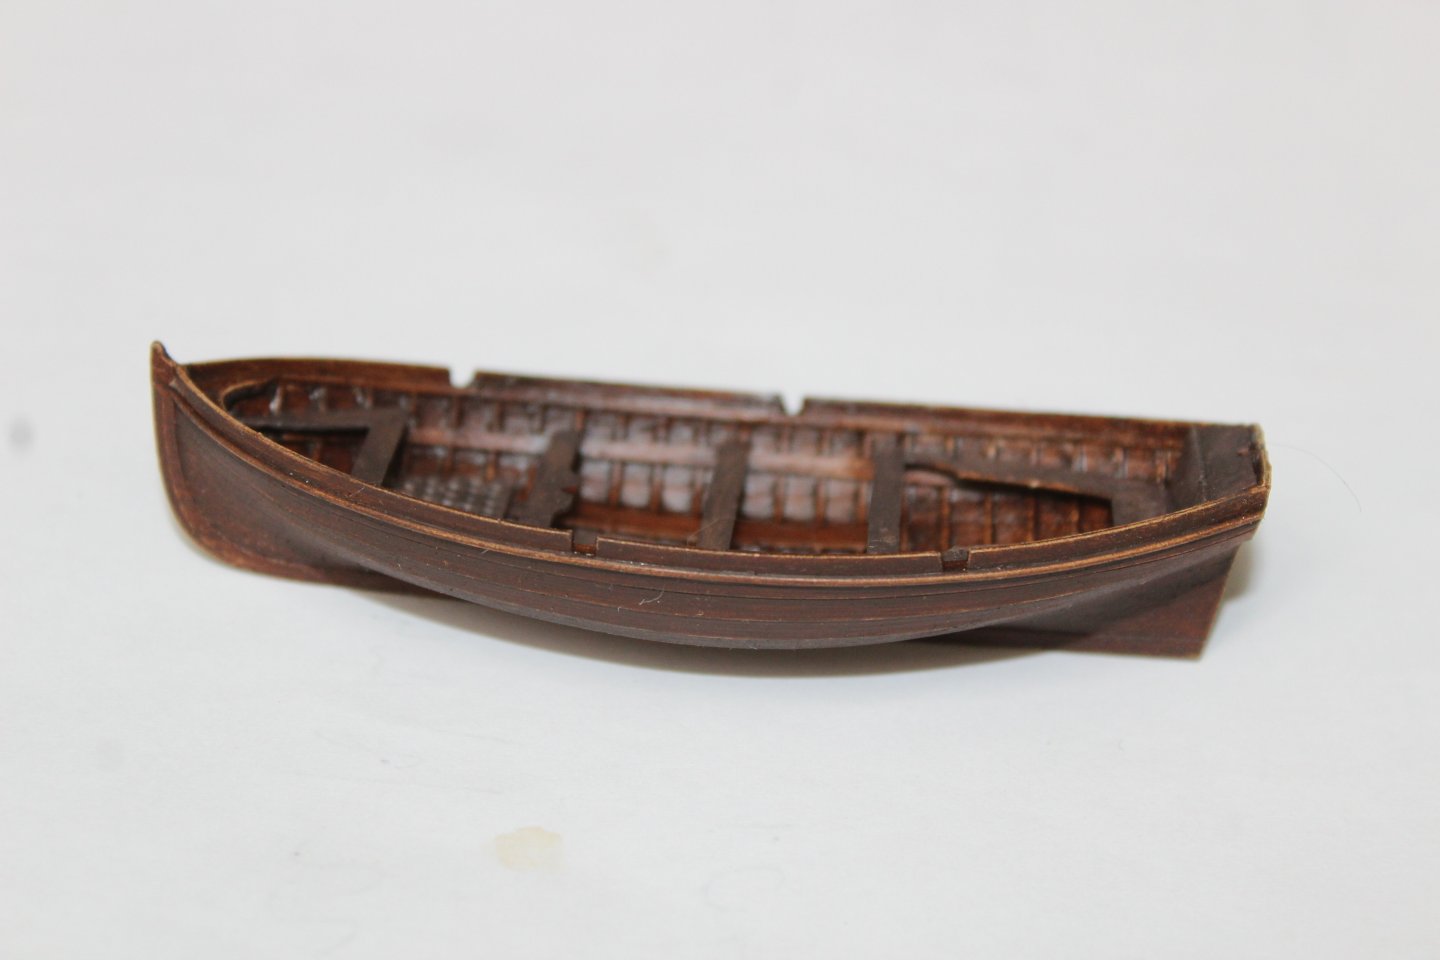
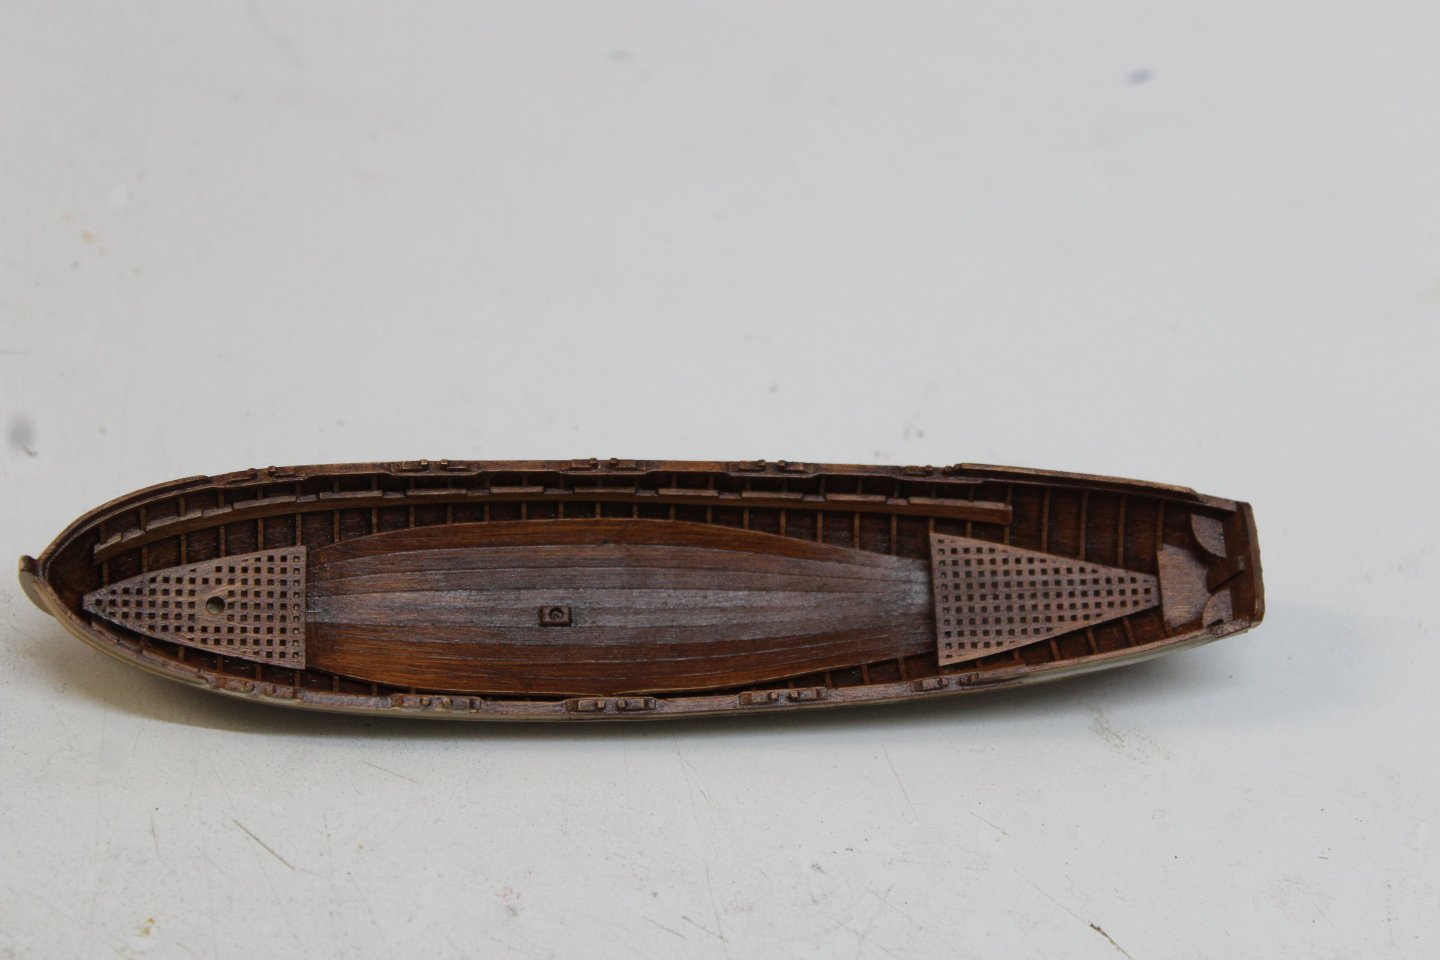
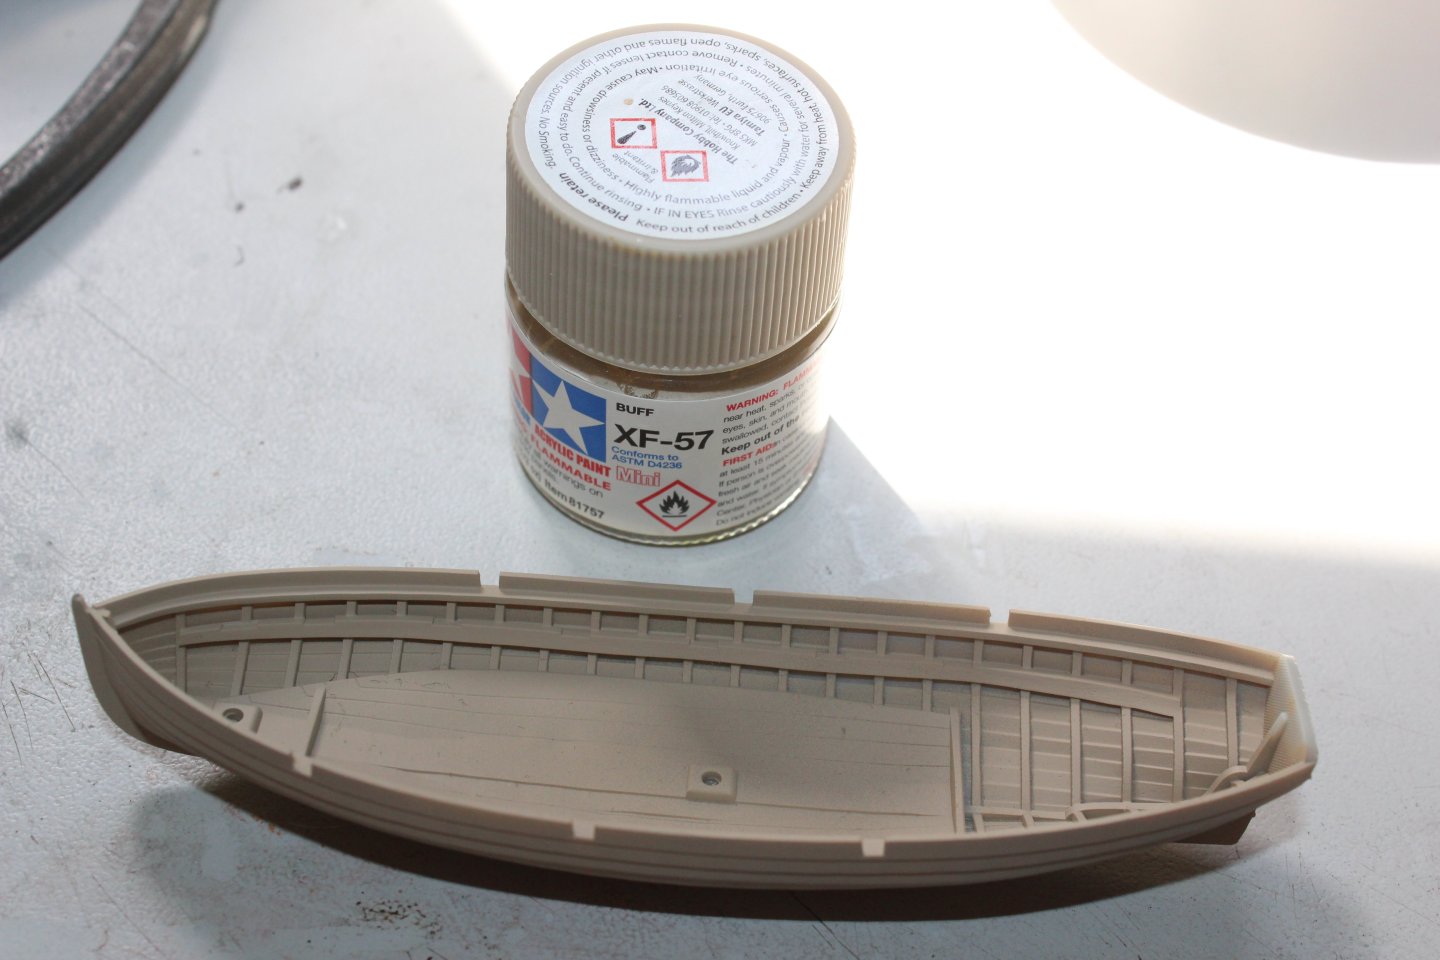
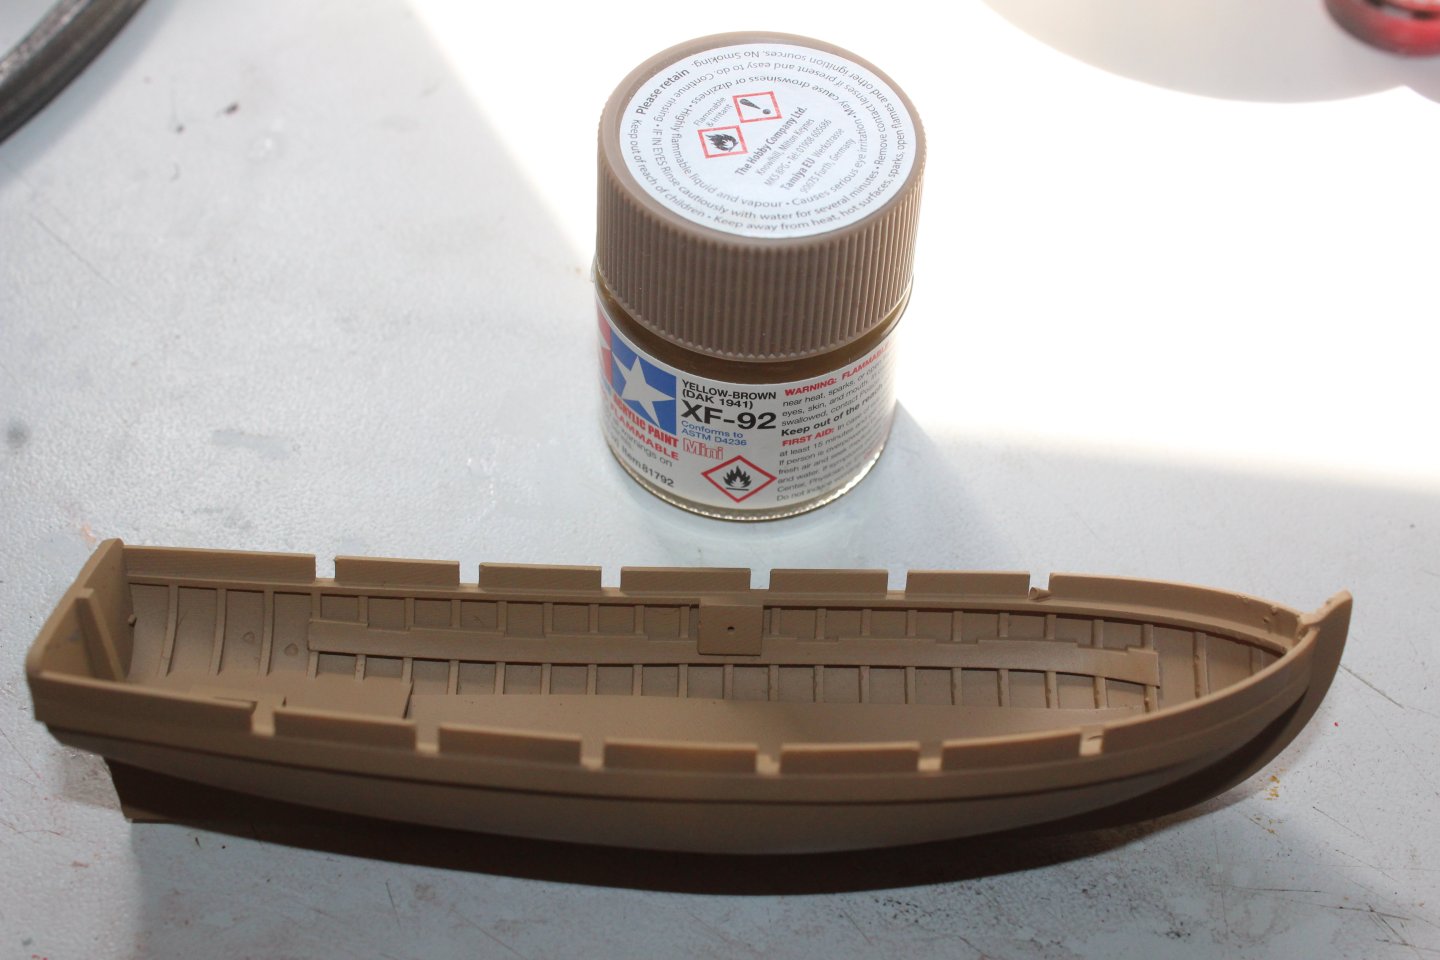
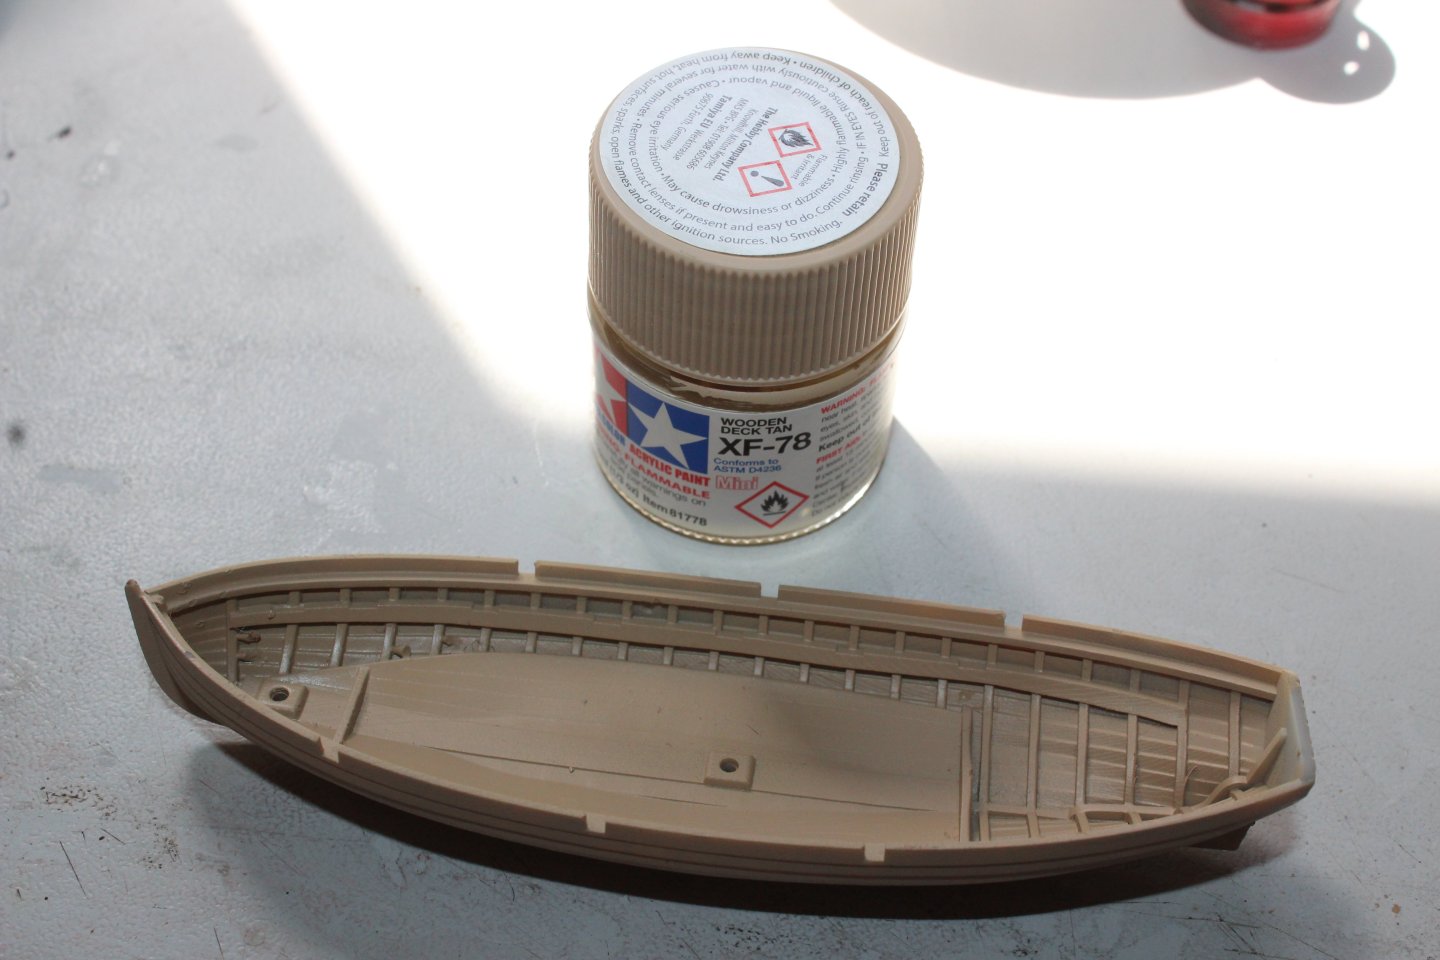
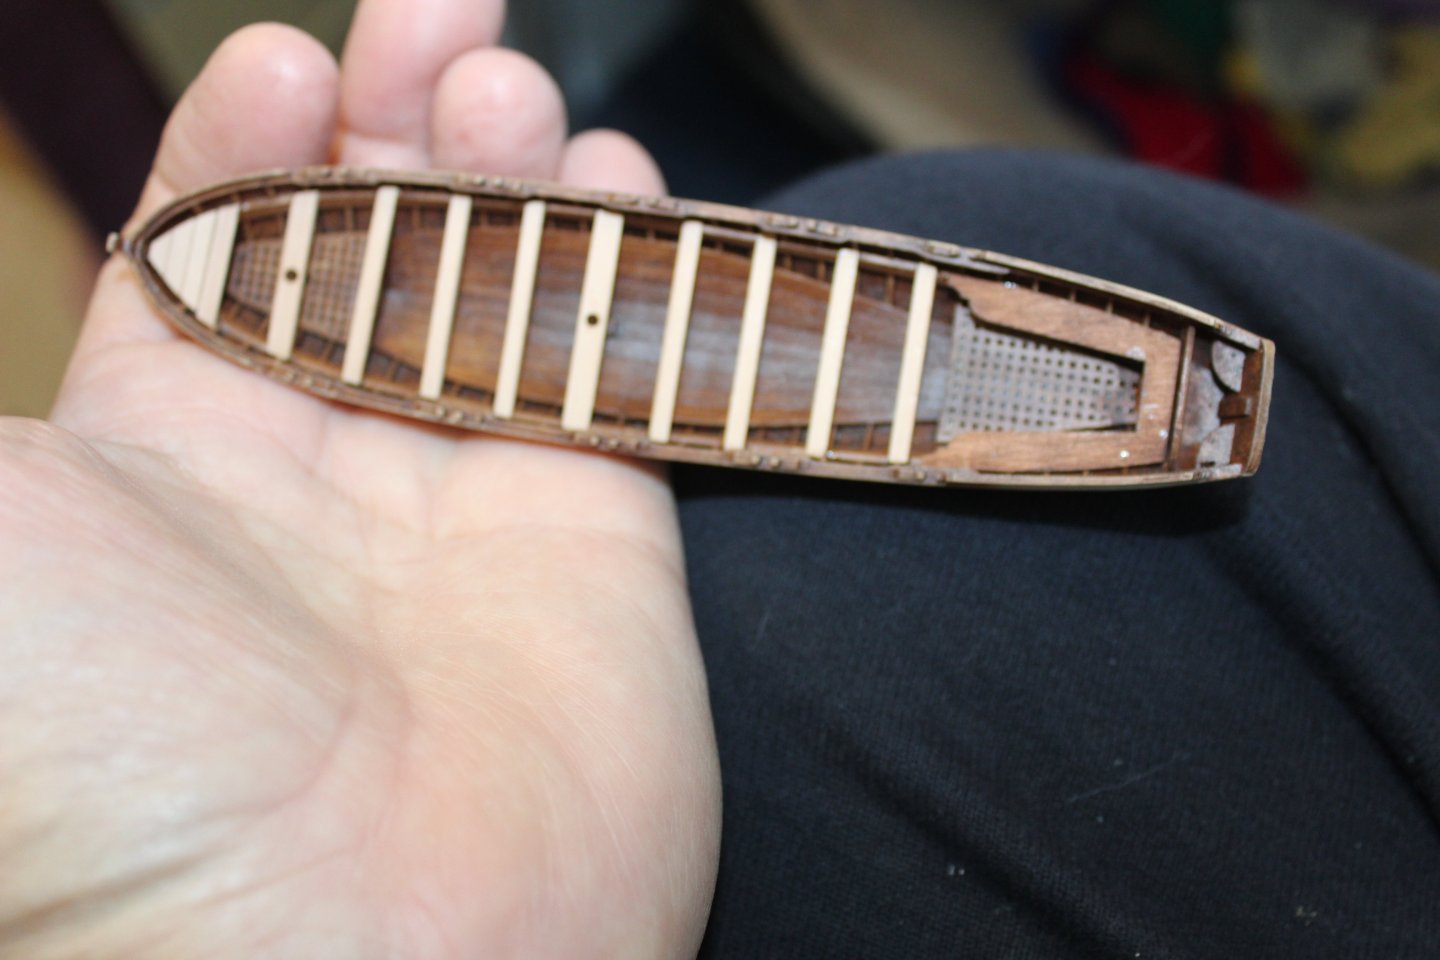
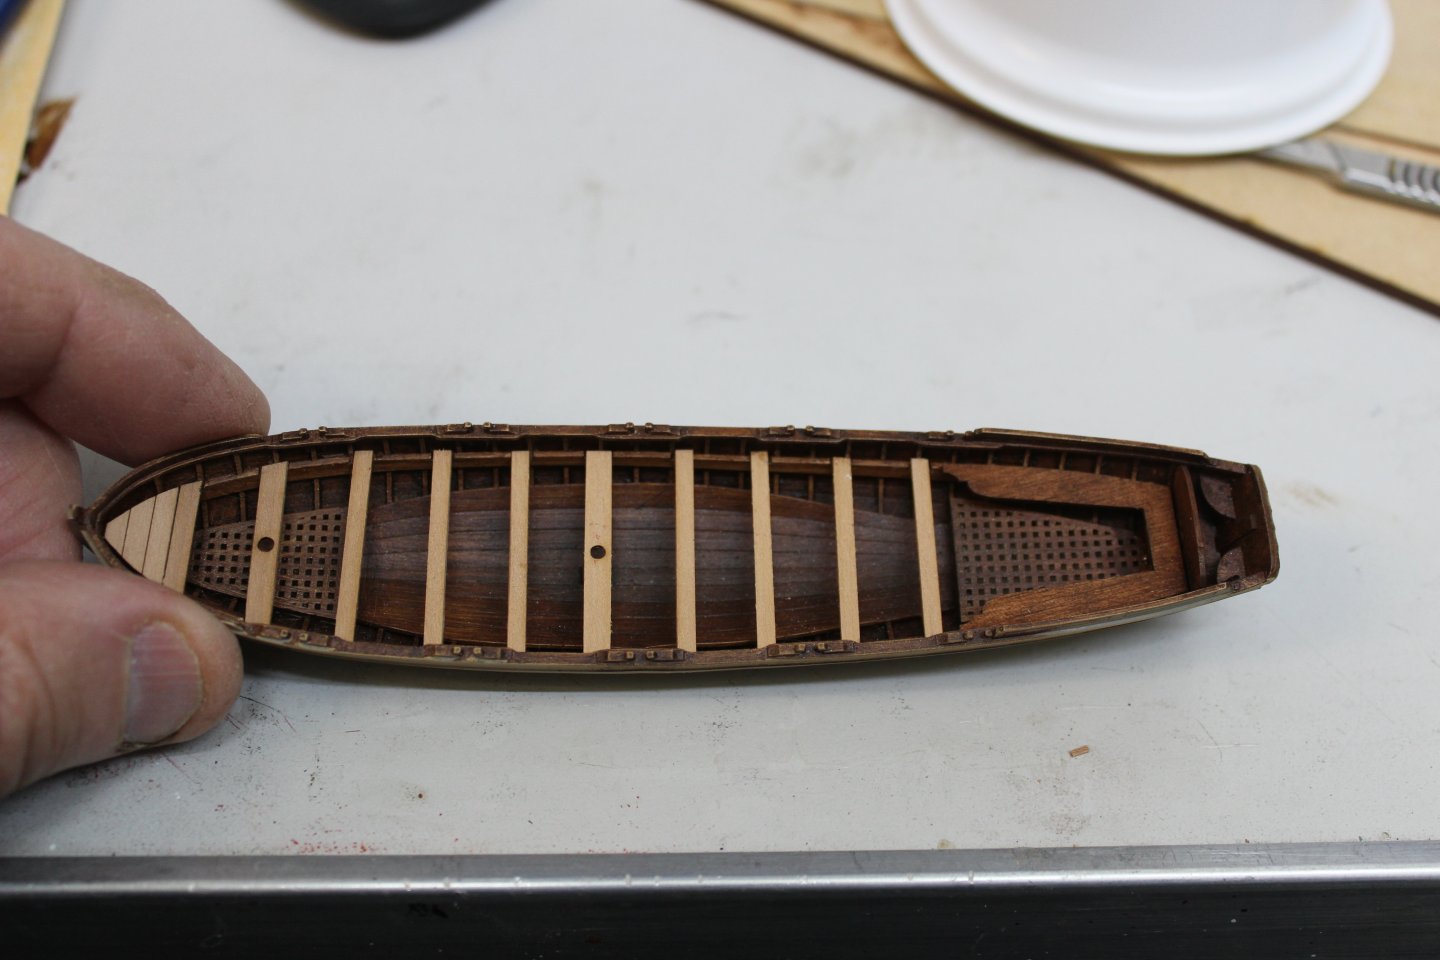
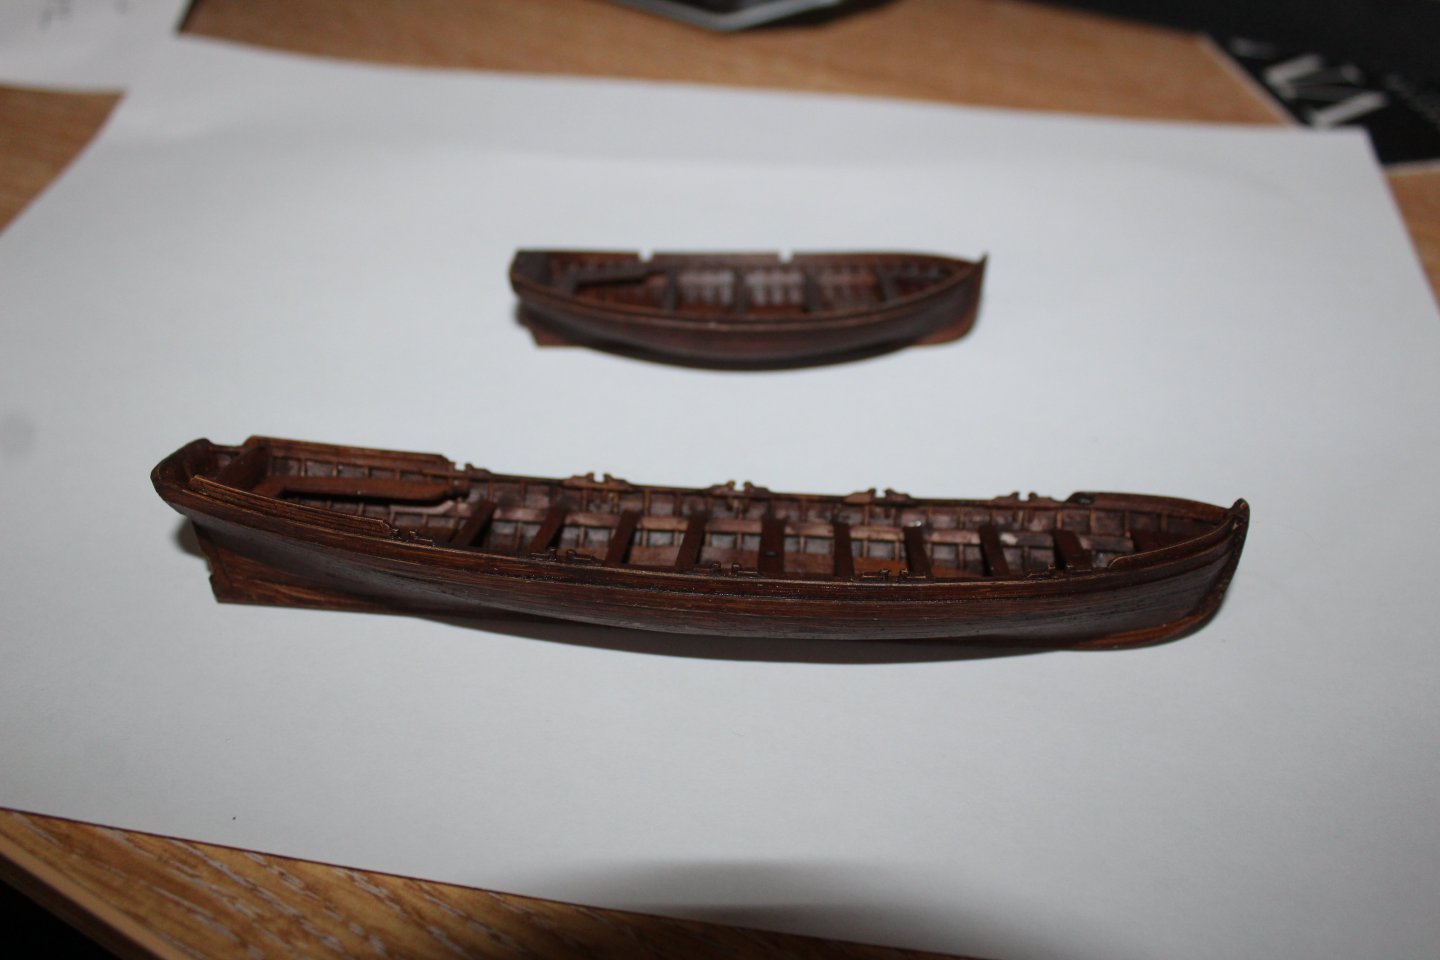
good evening everyone been nearly a year since i did any work on indy, and now hope to complete her in the next few months I have not been away, lots of modelling done, but a lot has not been shown due to circumstances, i may just show then here, rather than bore you with build logs anyway one thing on building these long term builds are the ships boats, i dont like building them, and at times having done so, i hate how they turned out. so i bought a set from @chris watton at Vanguard Models the hulls are very nicely produced, and come with the supplied wood pack to finish them off although i thought a lot about what colour to do them i kept going back to the idea of simulating then in wood phot from https://vanguardmodels.co.uk/products/hms-indefatigable-boat-set using an airbrush i used various different Tamiya buff colours, and oil Burnt Umber (reeves) base colour allowed to dry painted inside the hull with oils, not to wet like a wash but not to thick either, diluted with Turpentine after 10 minutes pull a dry brush over the oils in the like of imaginary planking add thwarts etc, paint those with a more diluted oils then do the outer hull i will possibly redo the outer hulls prior to fitting


- 443 replies
-
- 18
-
-
-
- Indefatigable
- Vanguard Models
- (and 1 more)
-
good evening nice to be back posting daily, now need to catch up on members logs, and two other Forums i post too Another Balcony top is the kit, and my version kit railings taken apart to shorten them by 10mm in German grey and fitted in position


- 26 replies
-
- 14
-
-
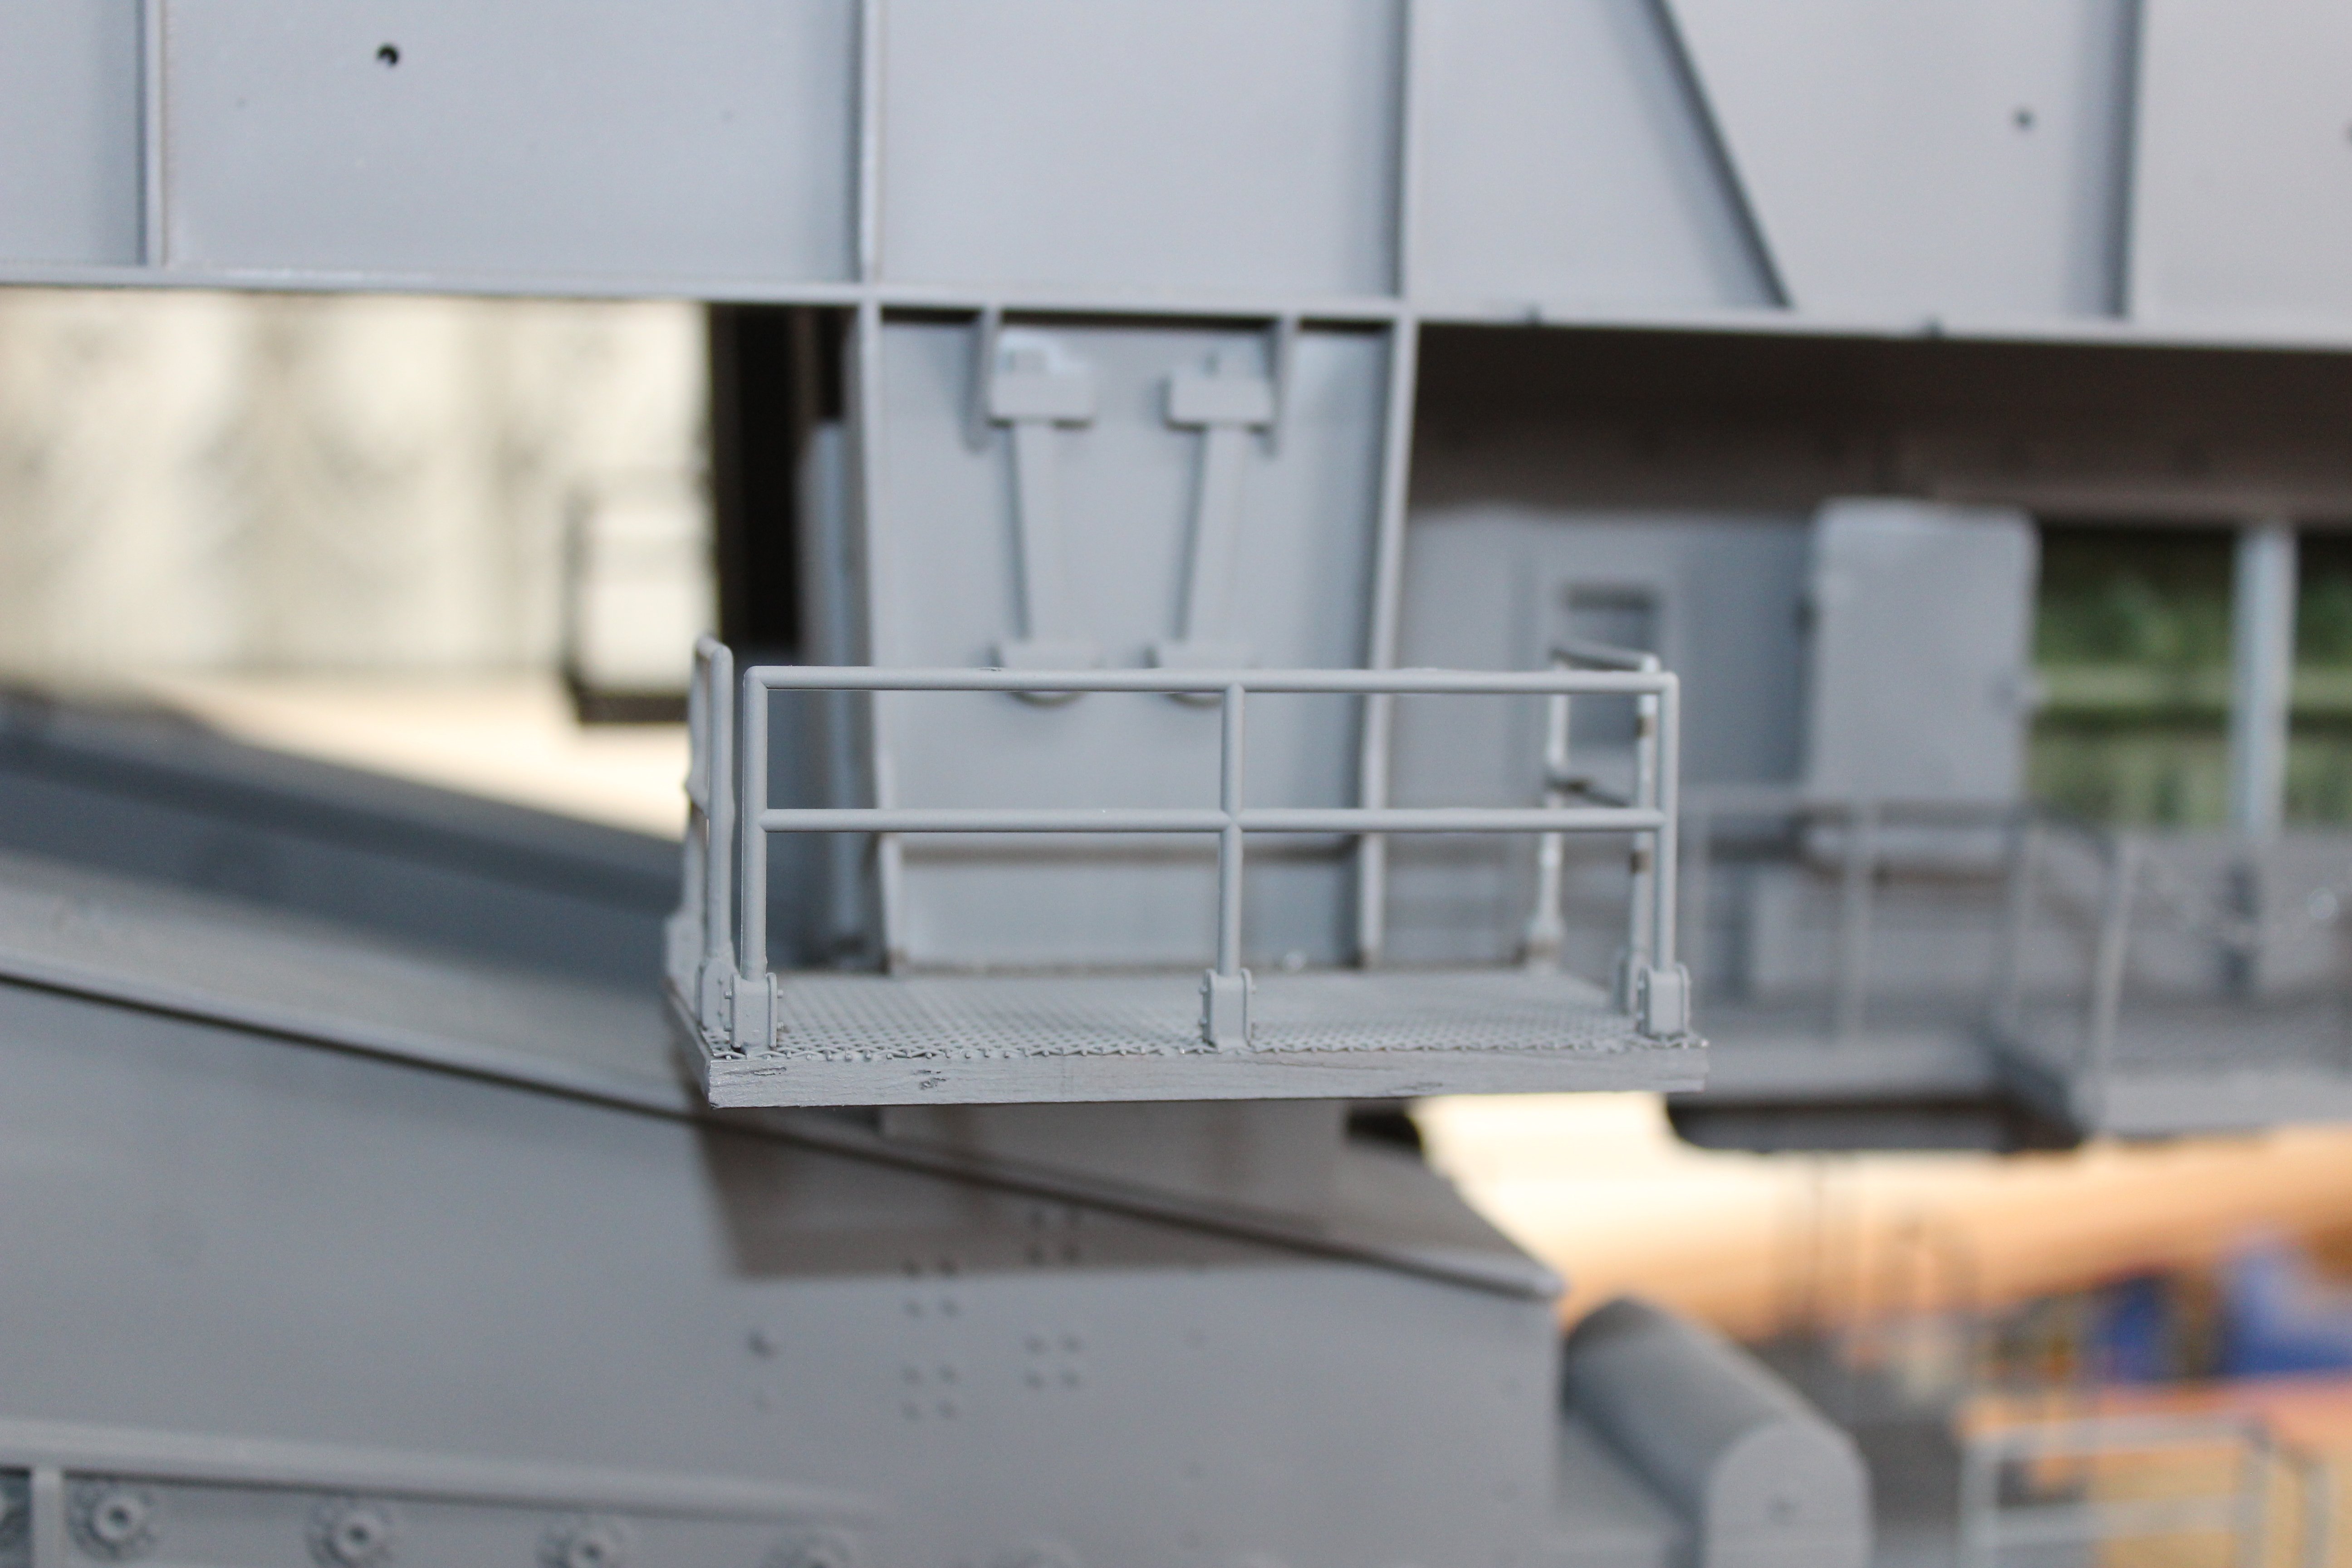
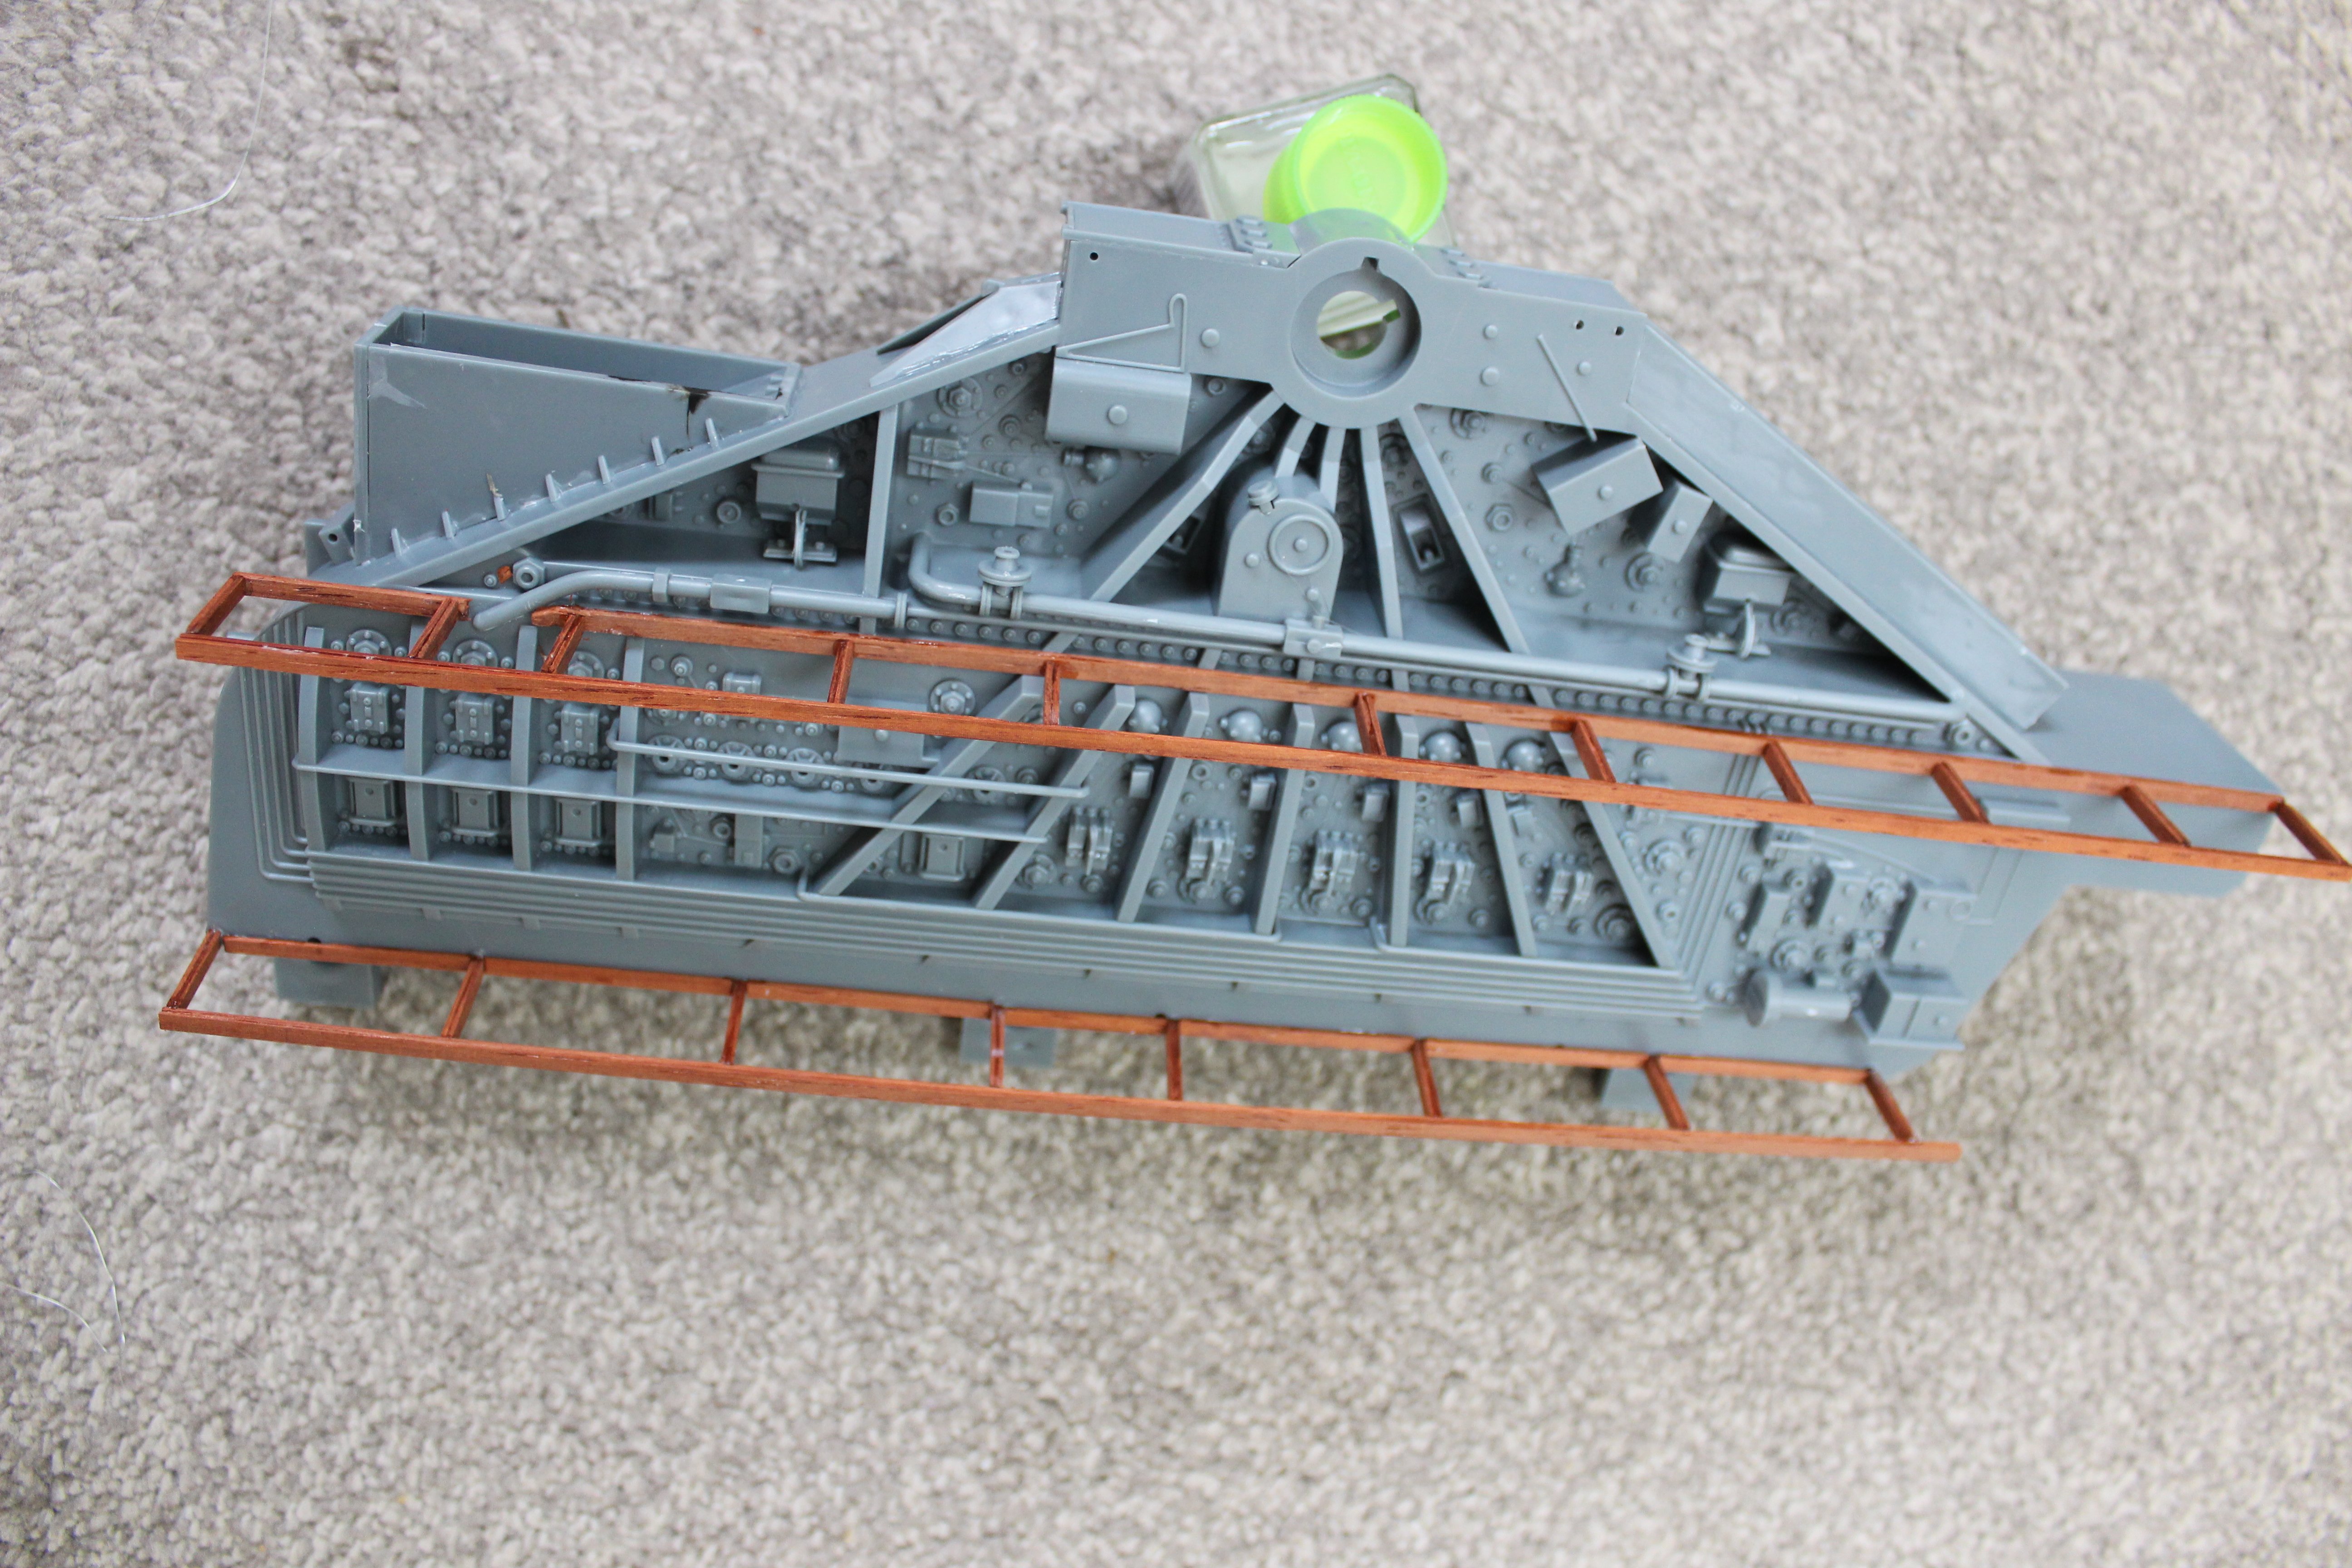
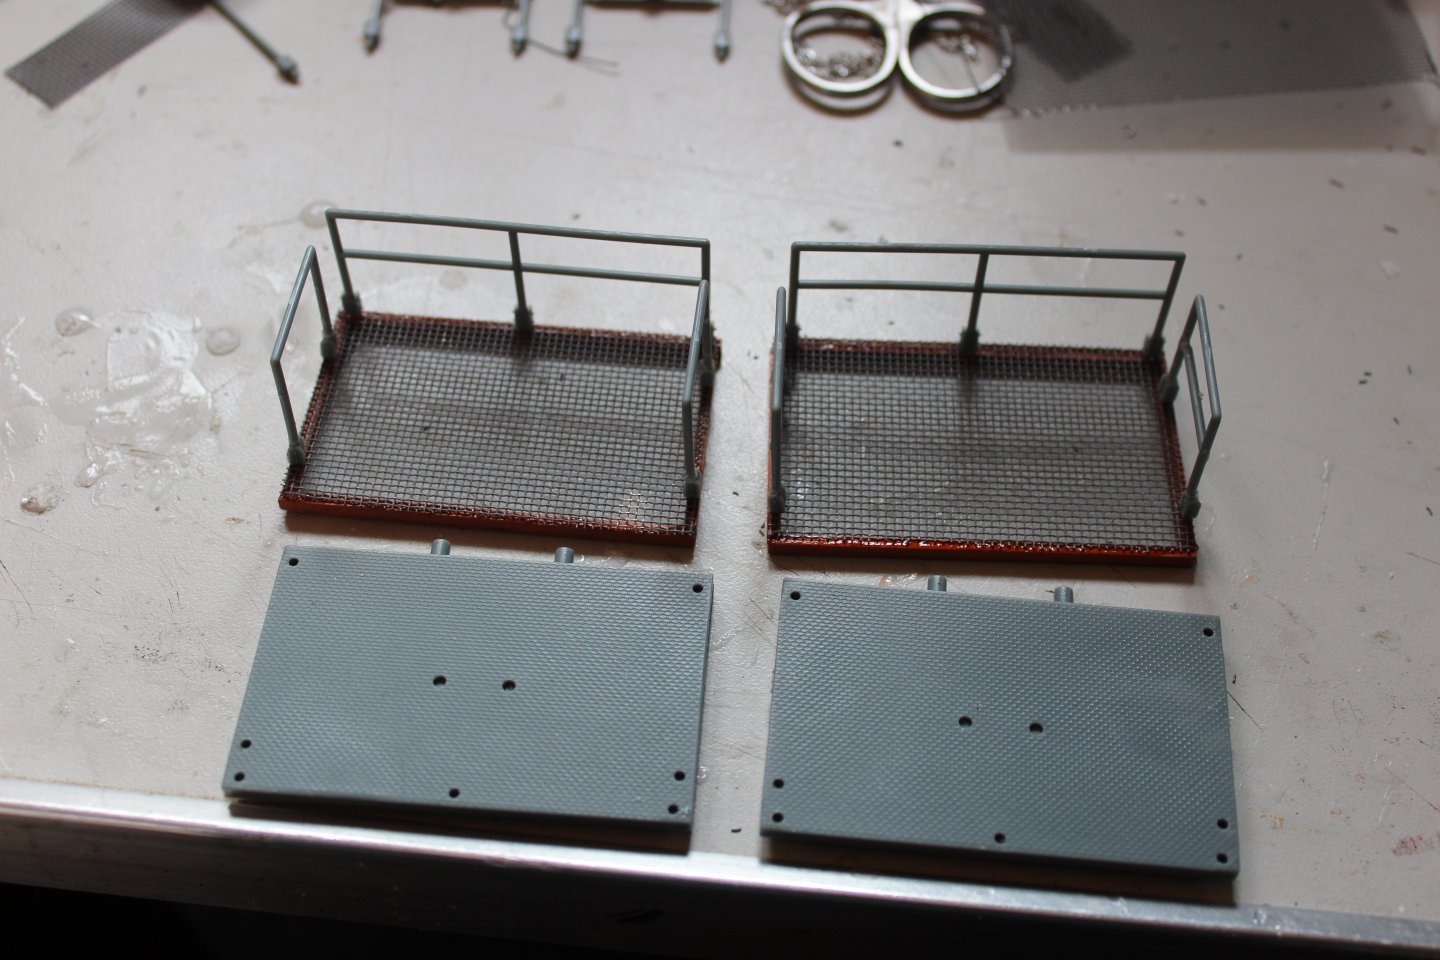
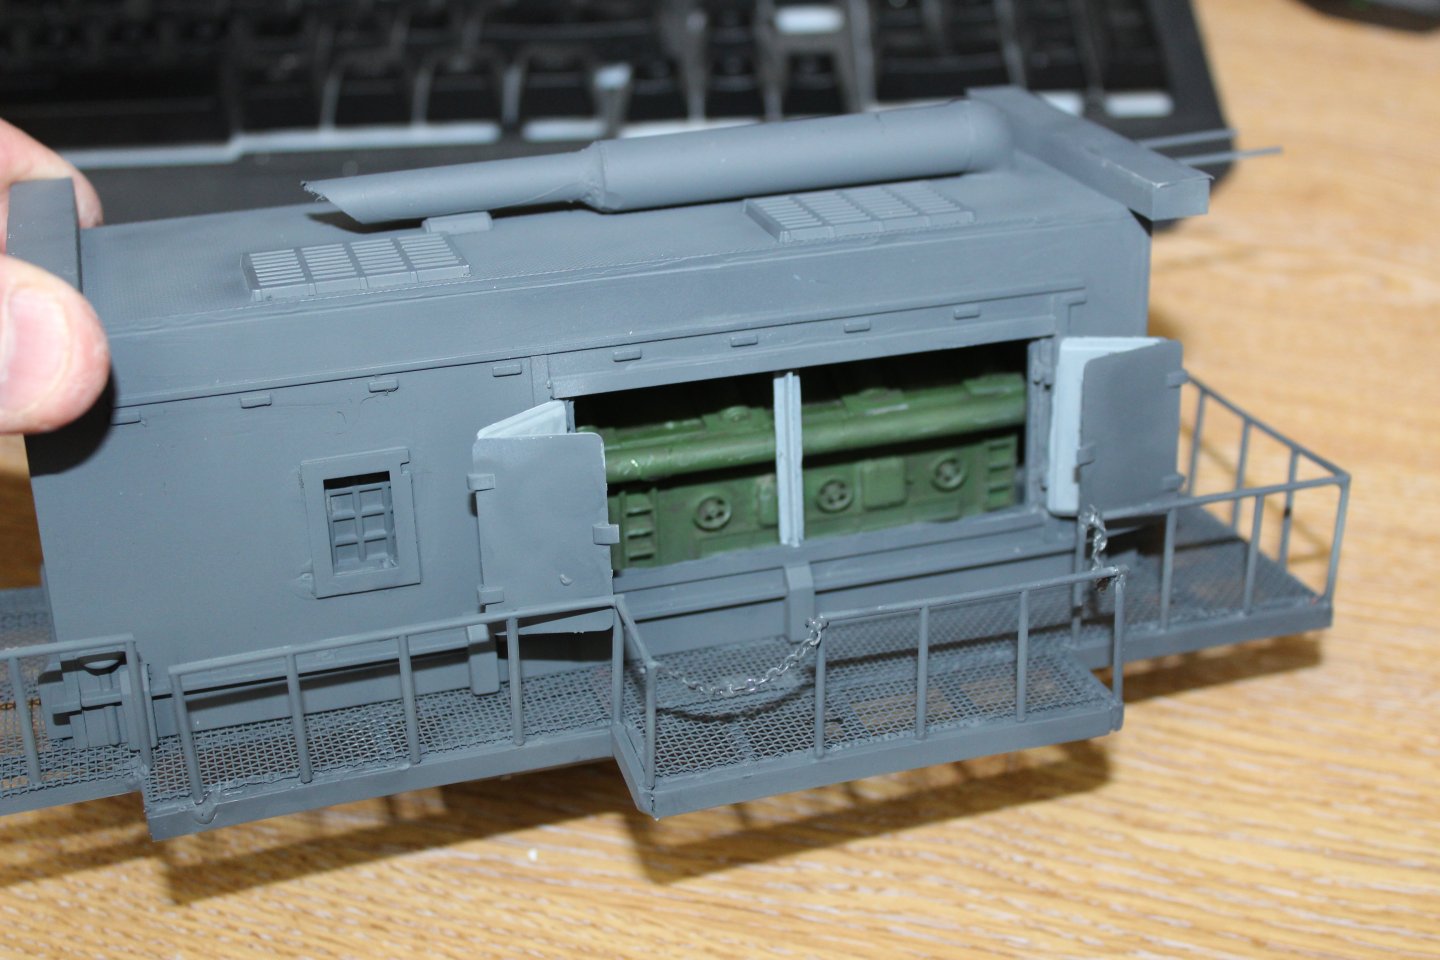
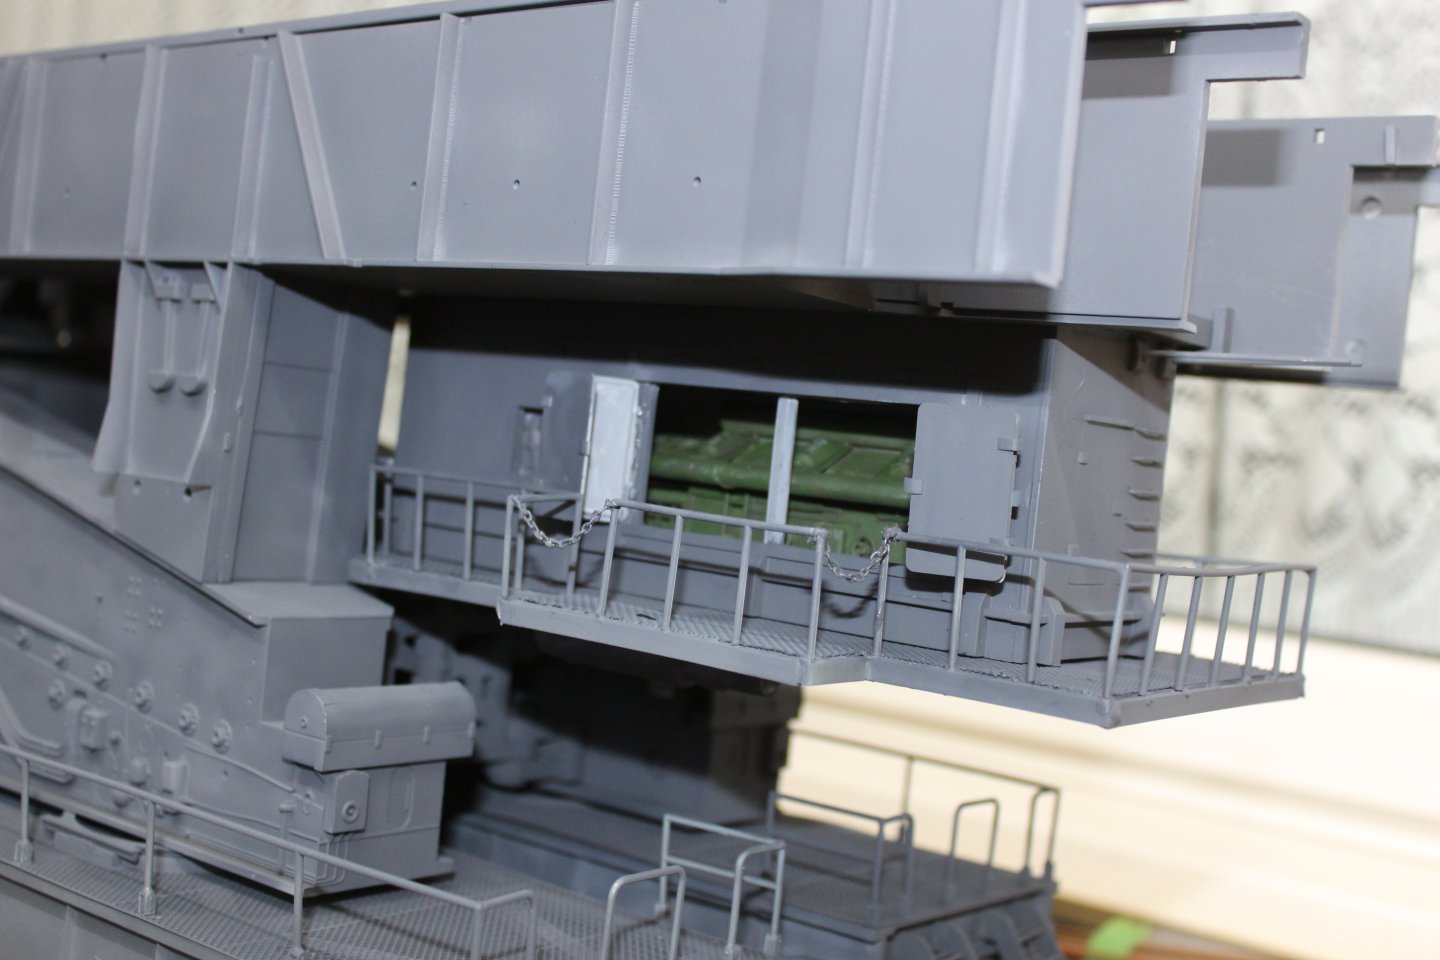
cargo/safety net looks great
-
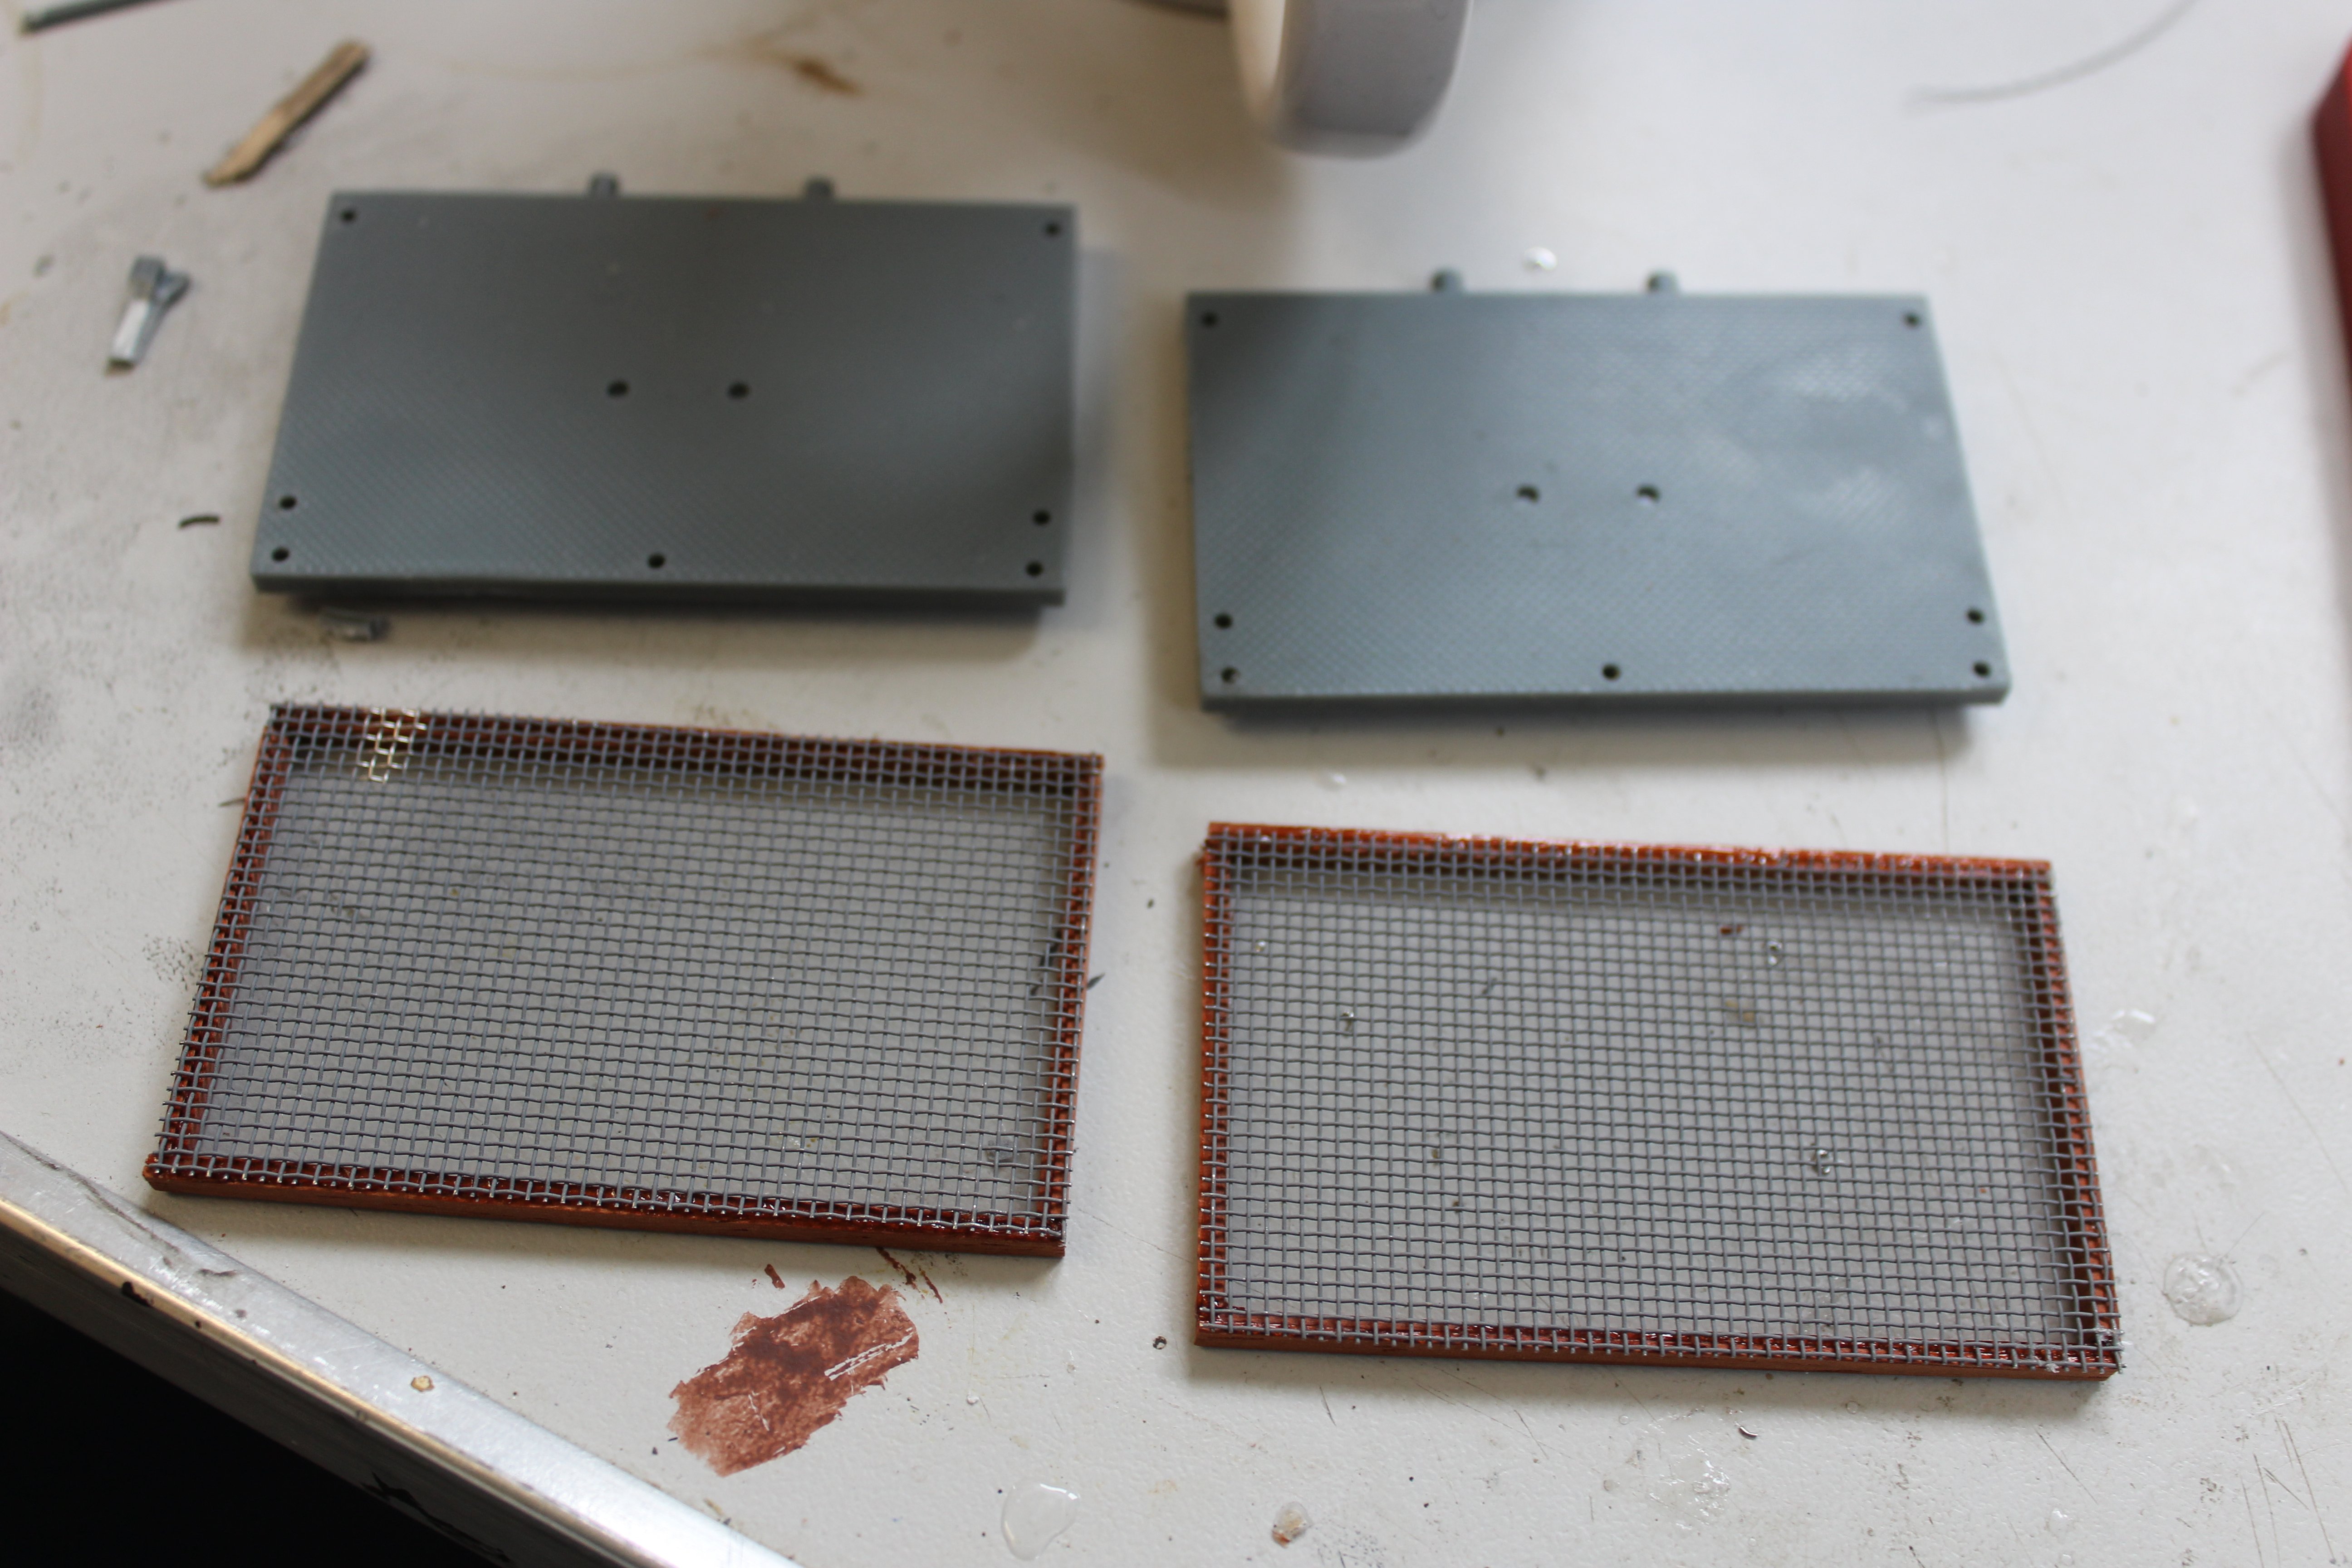
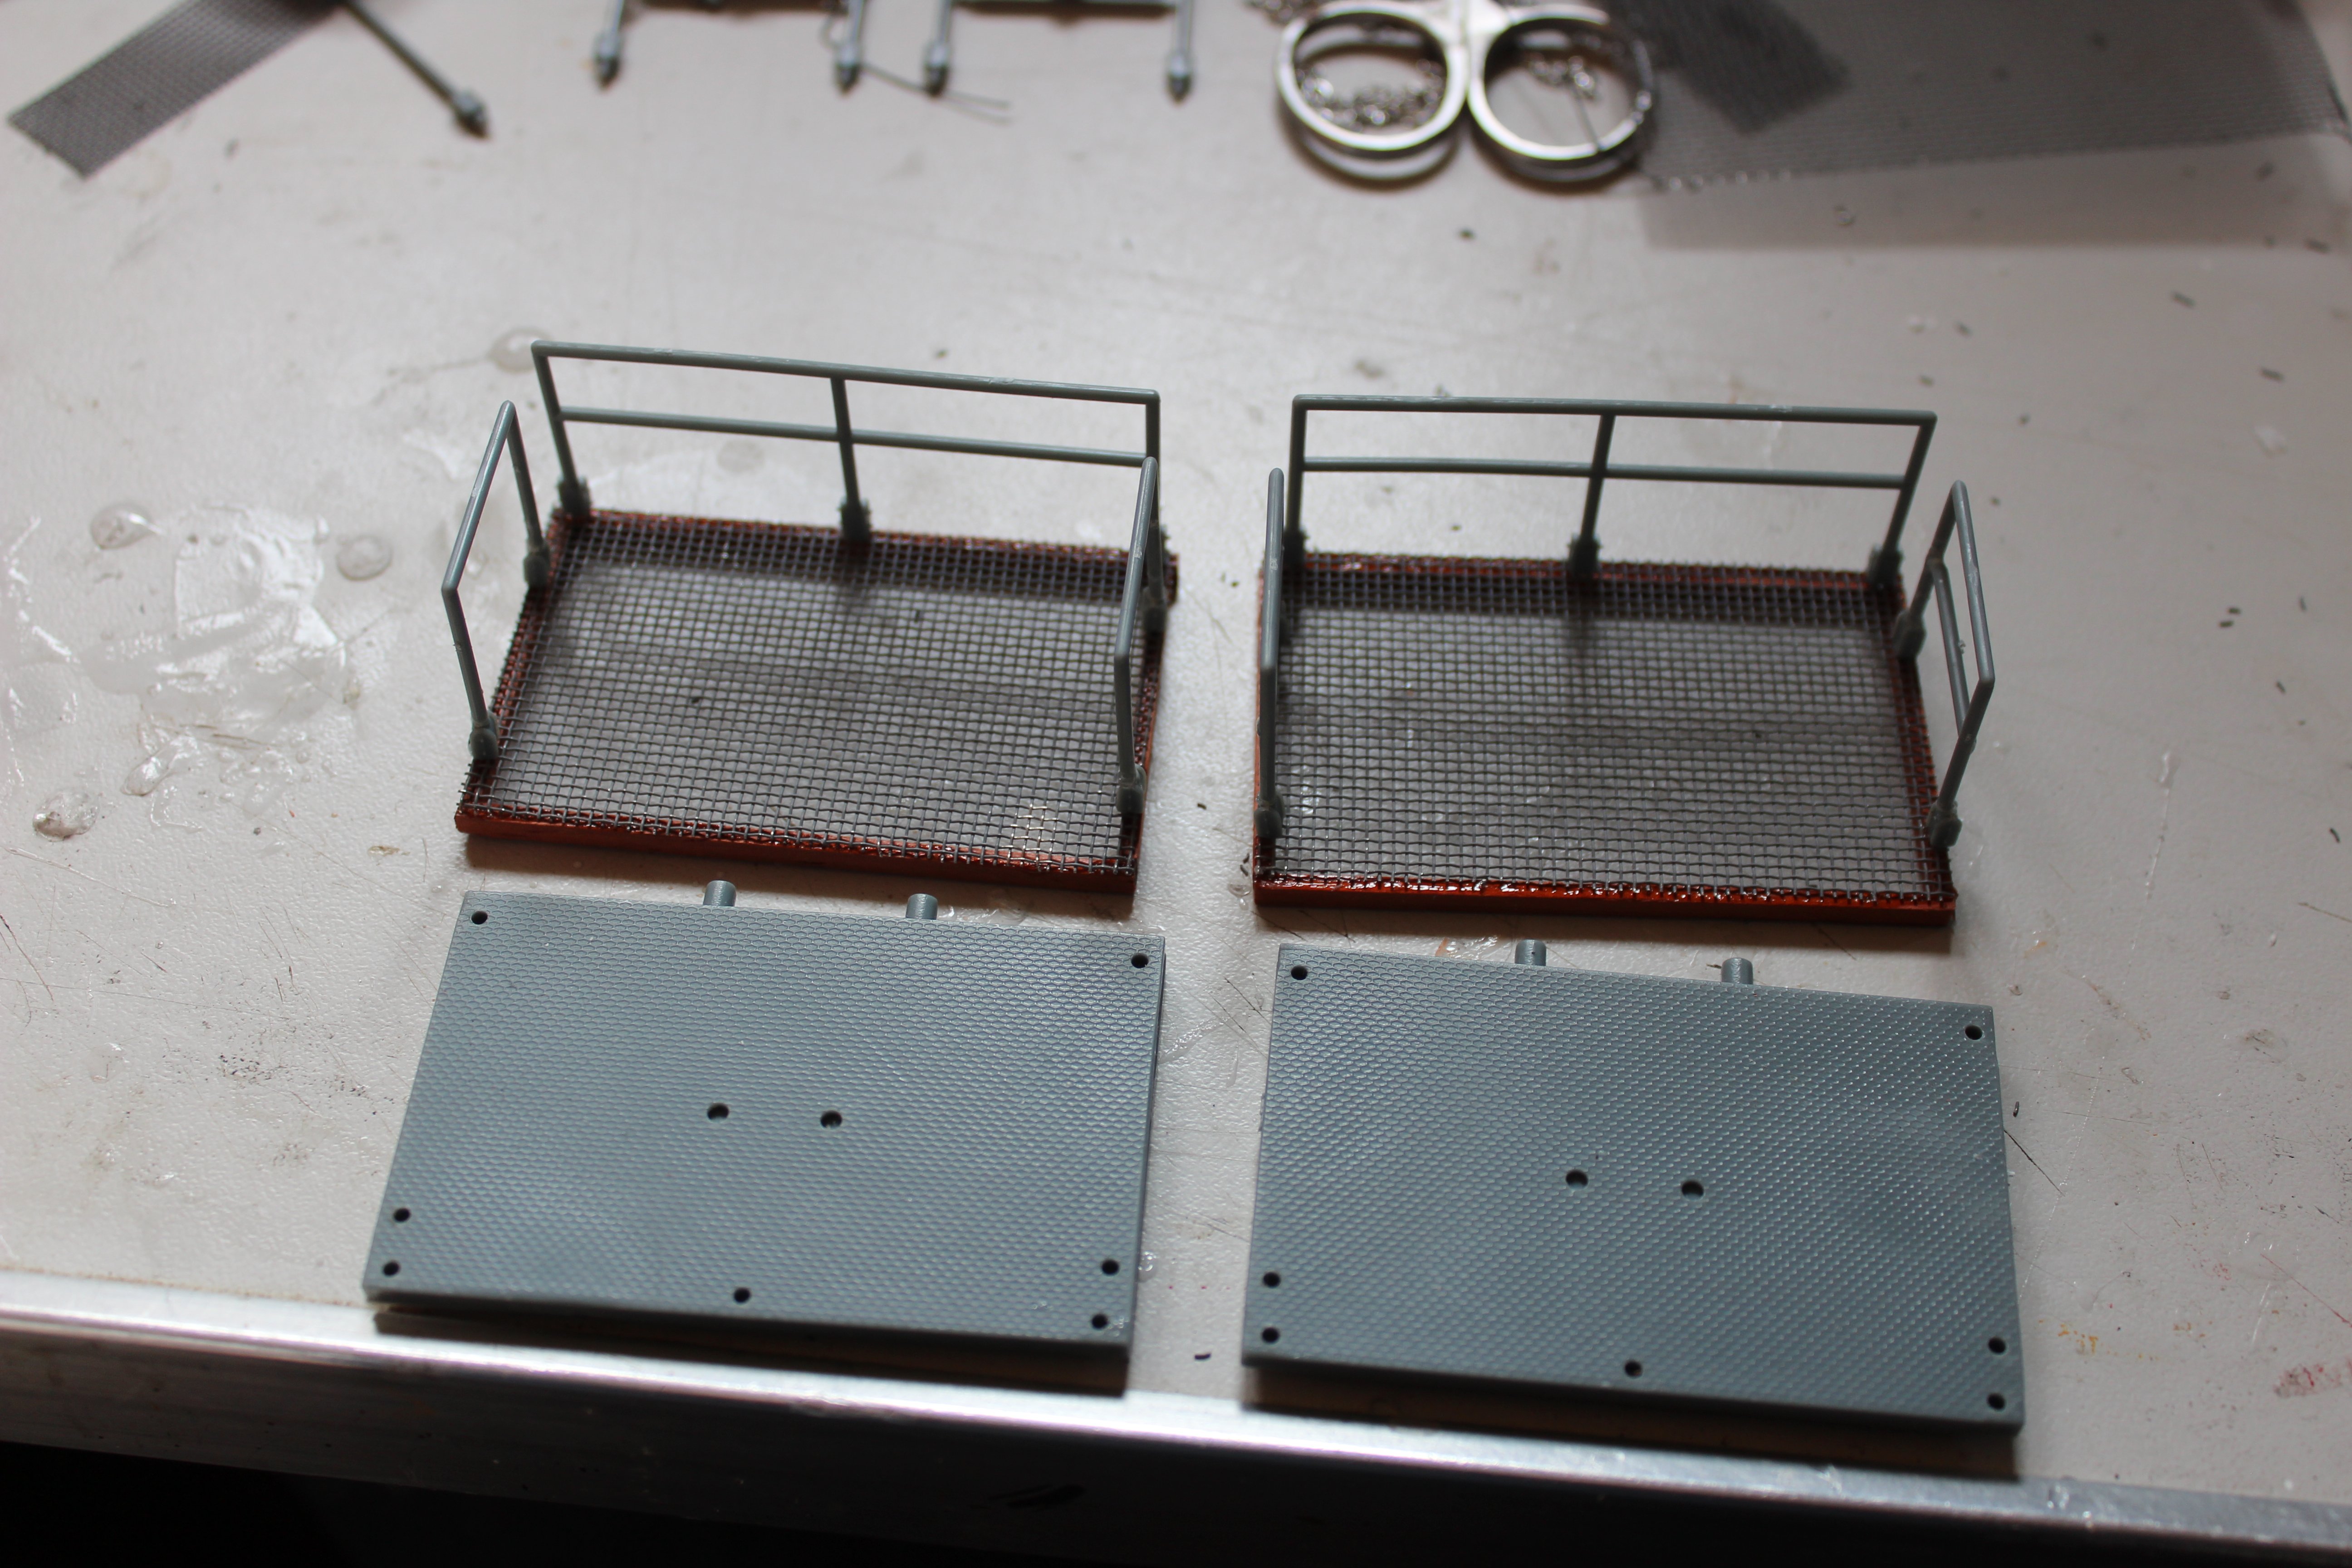
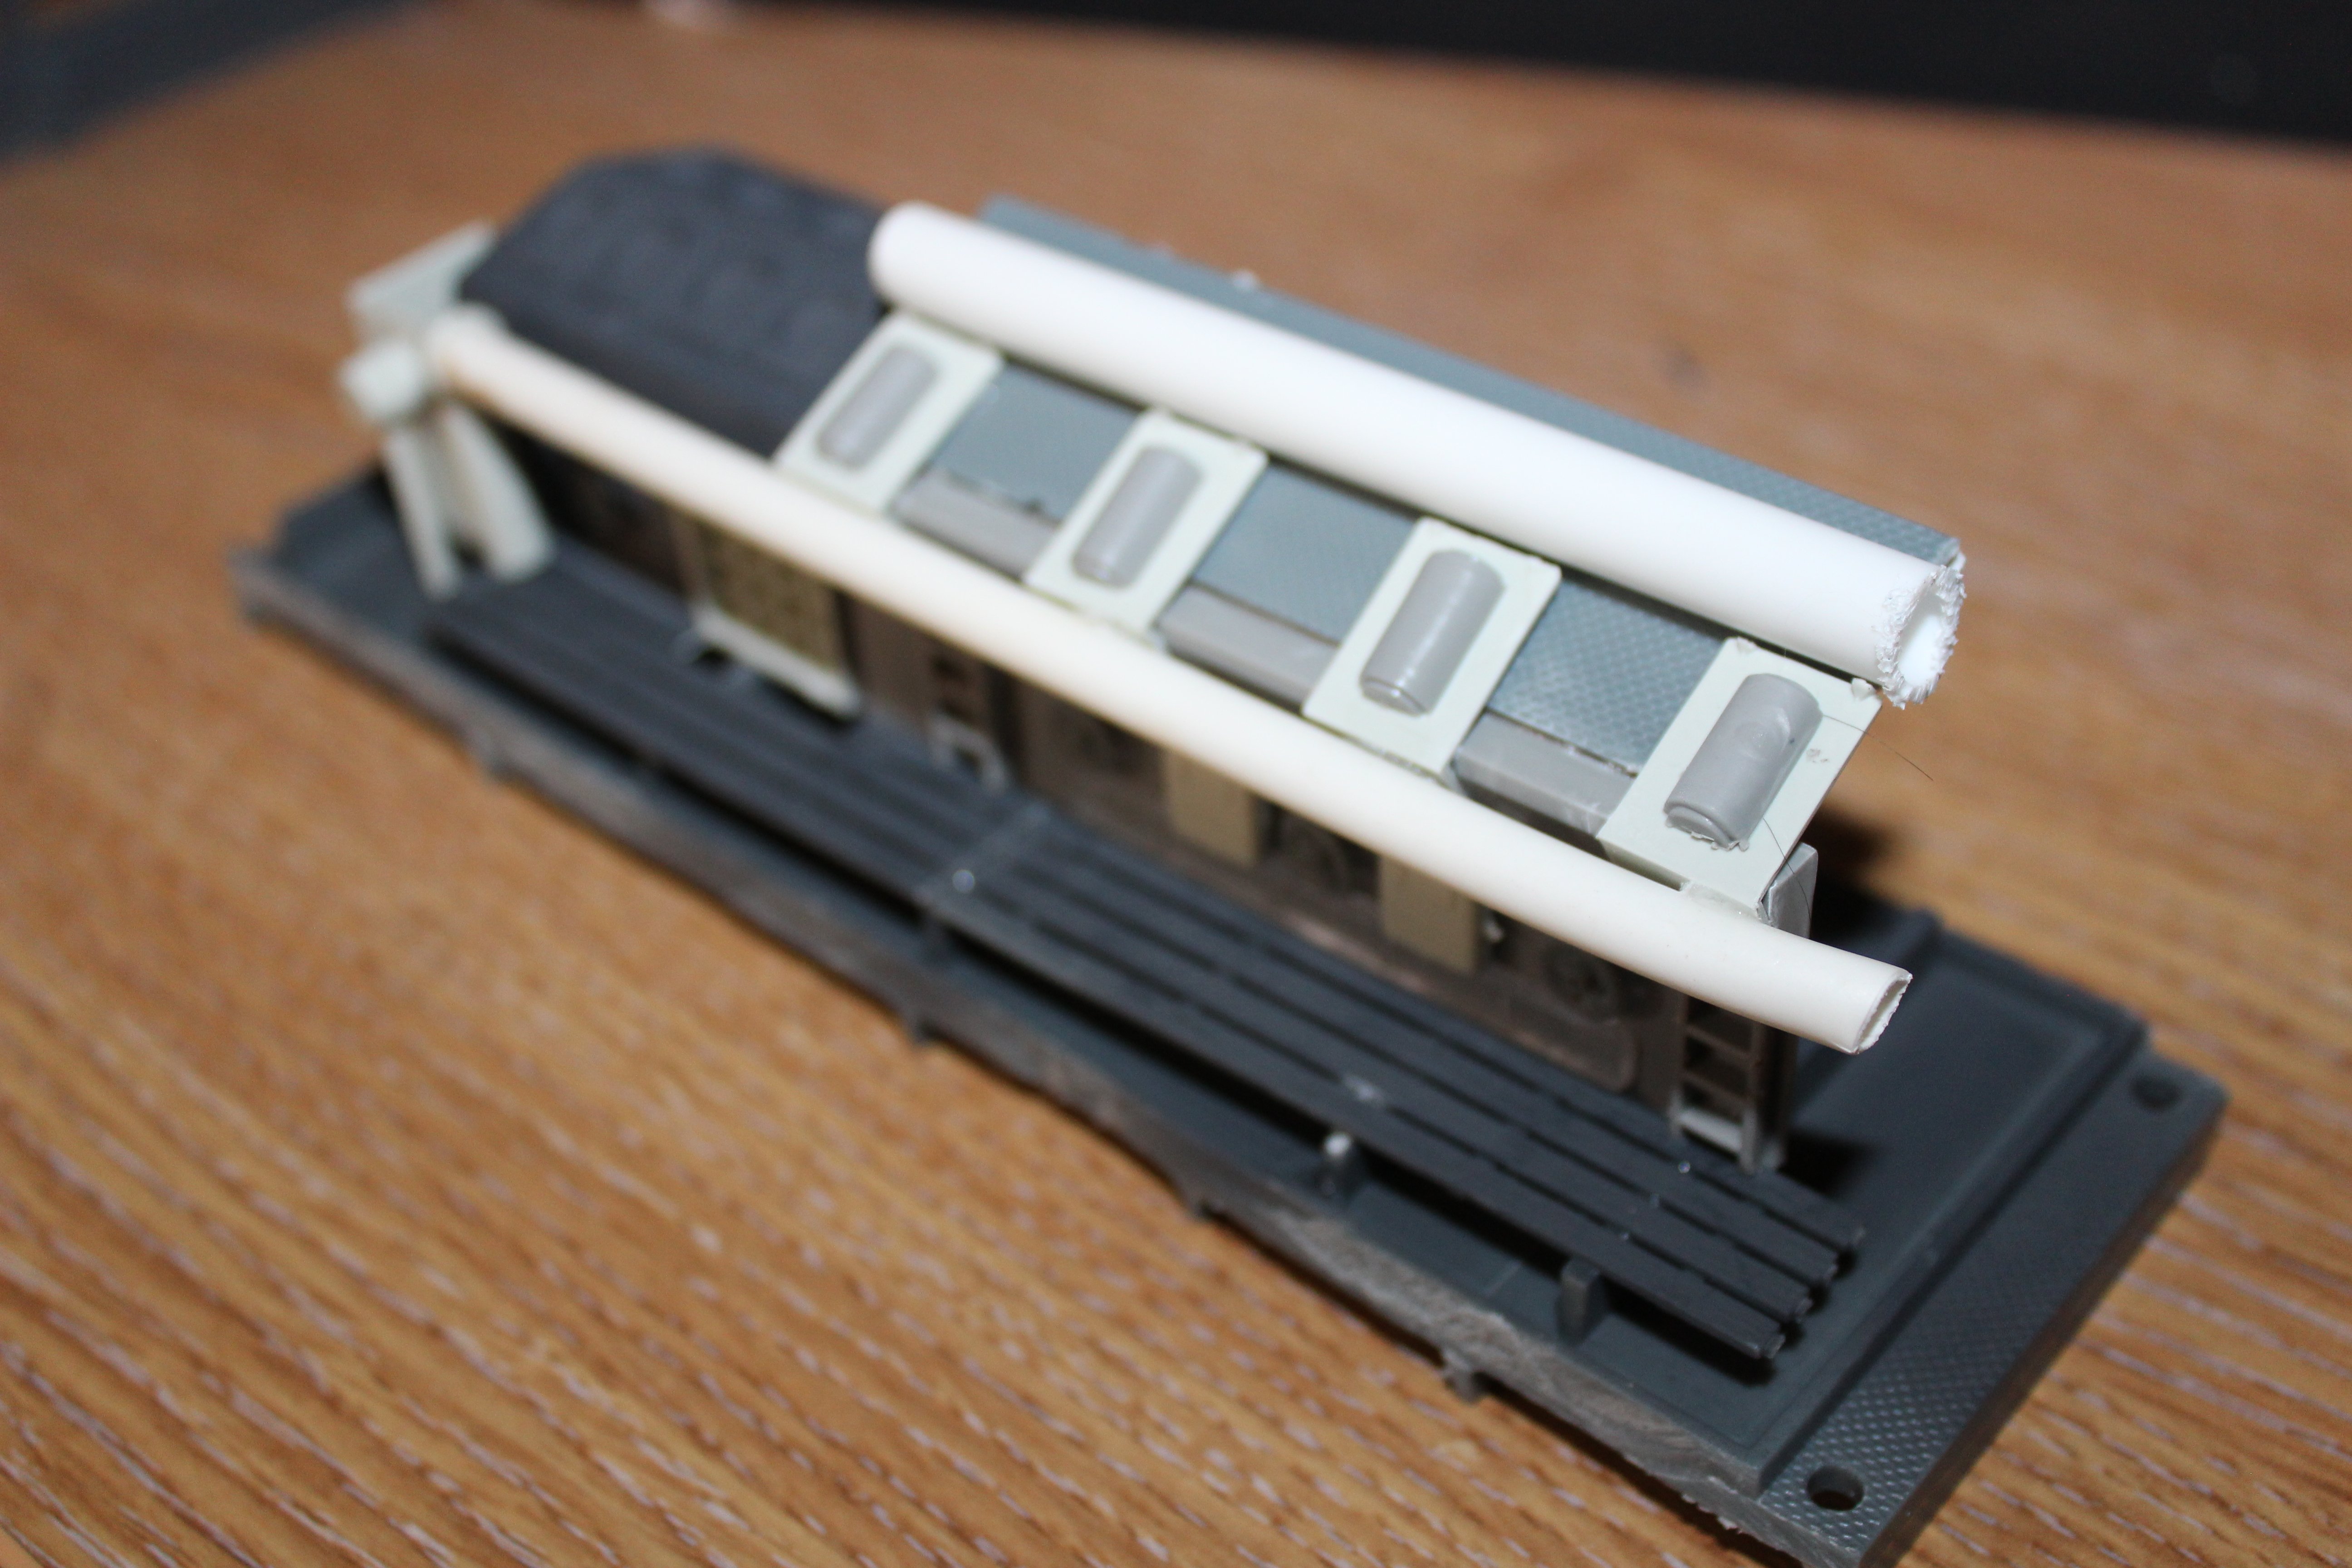
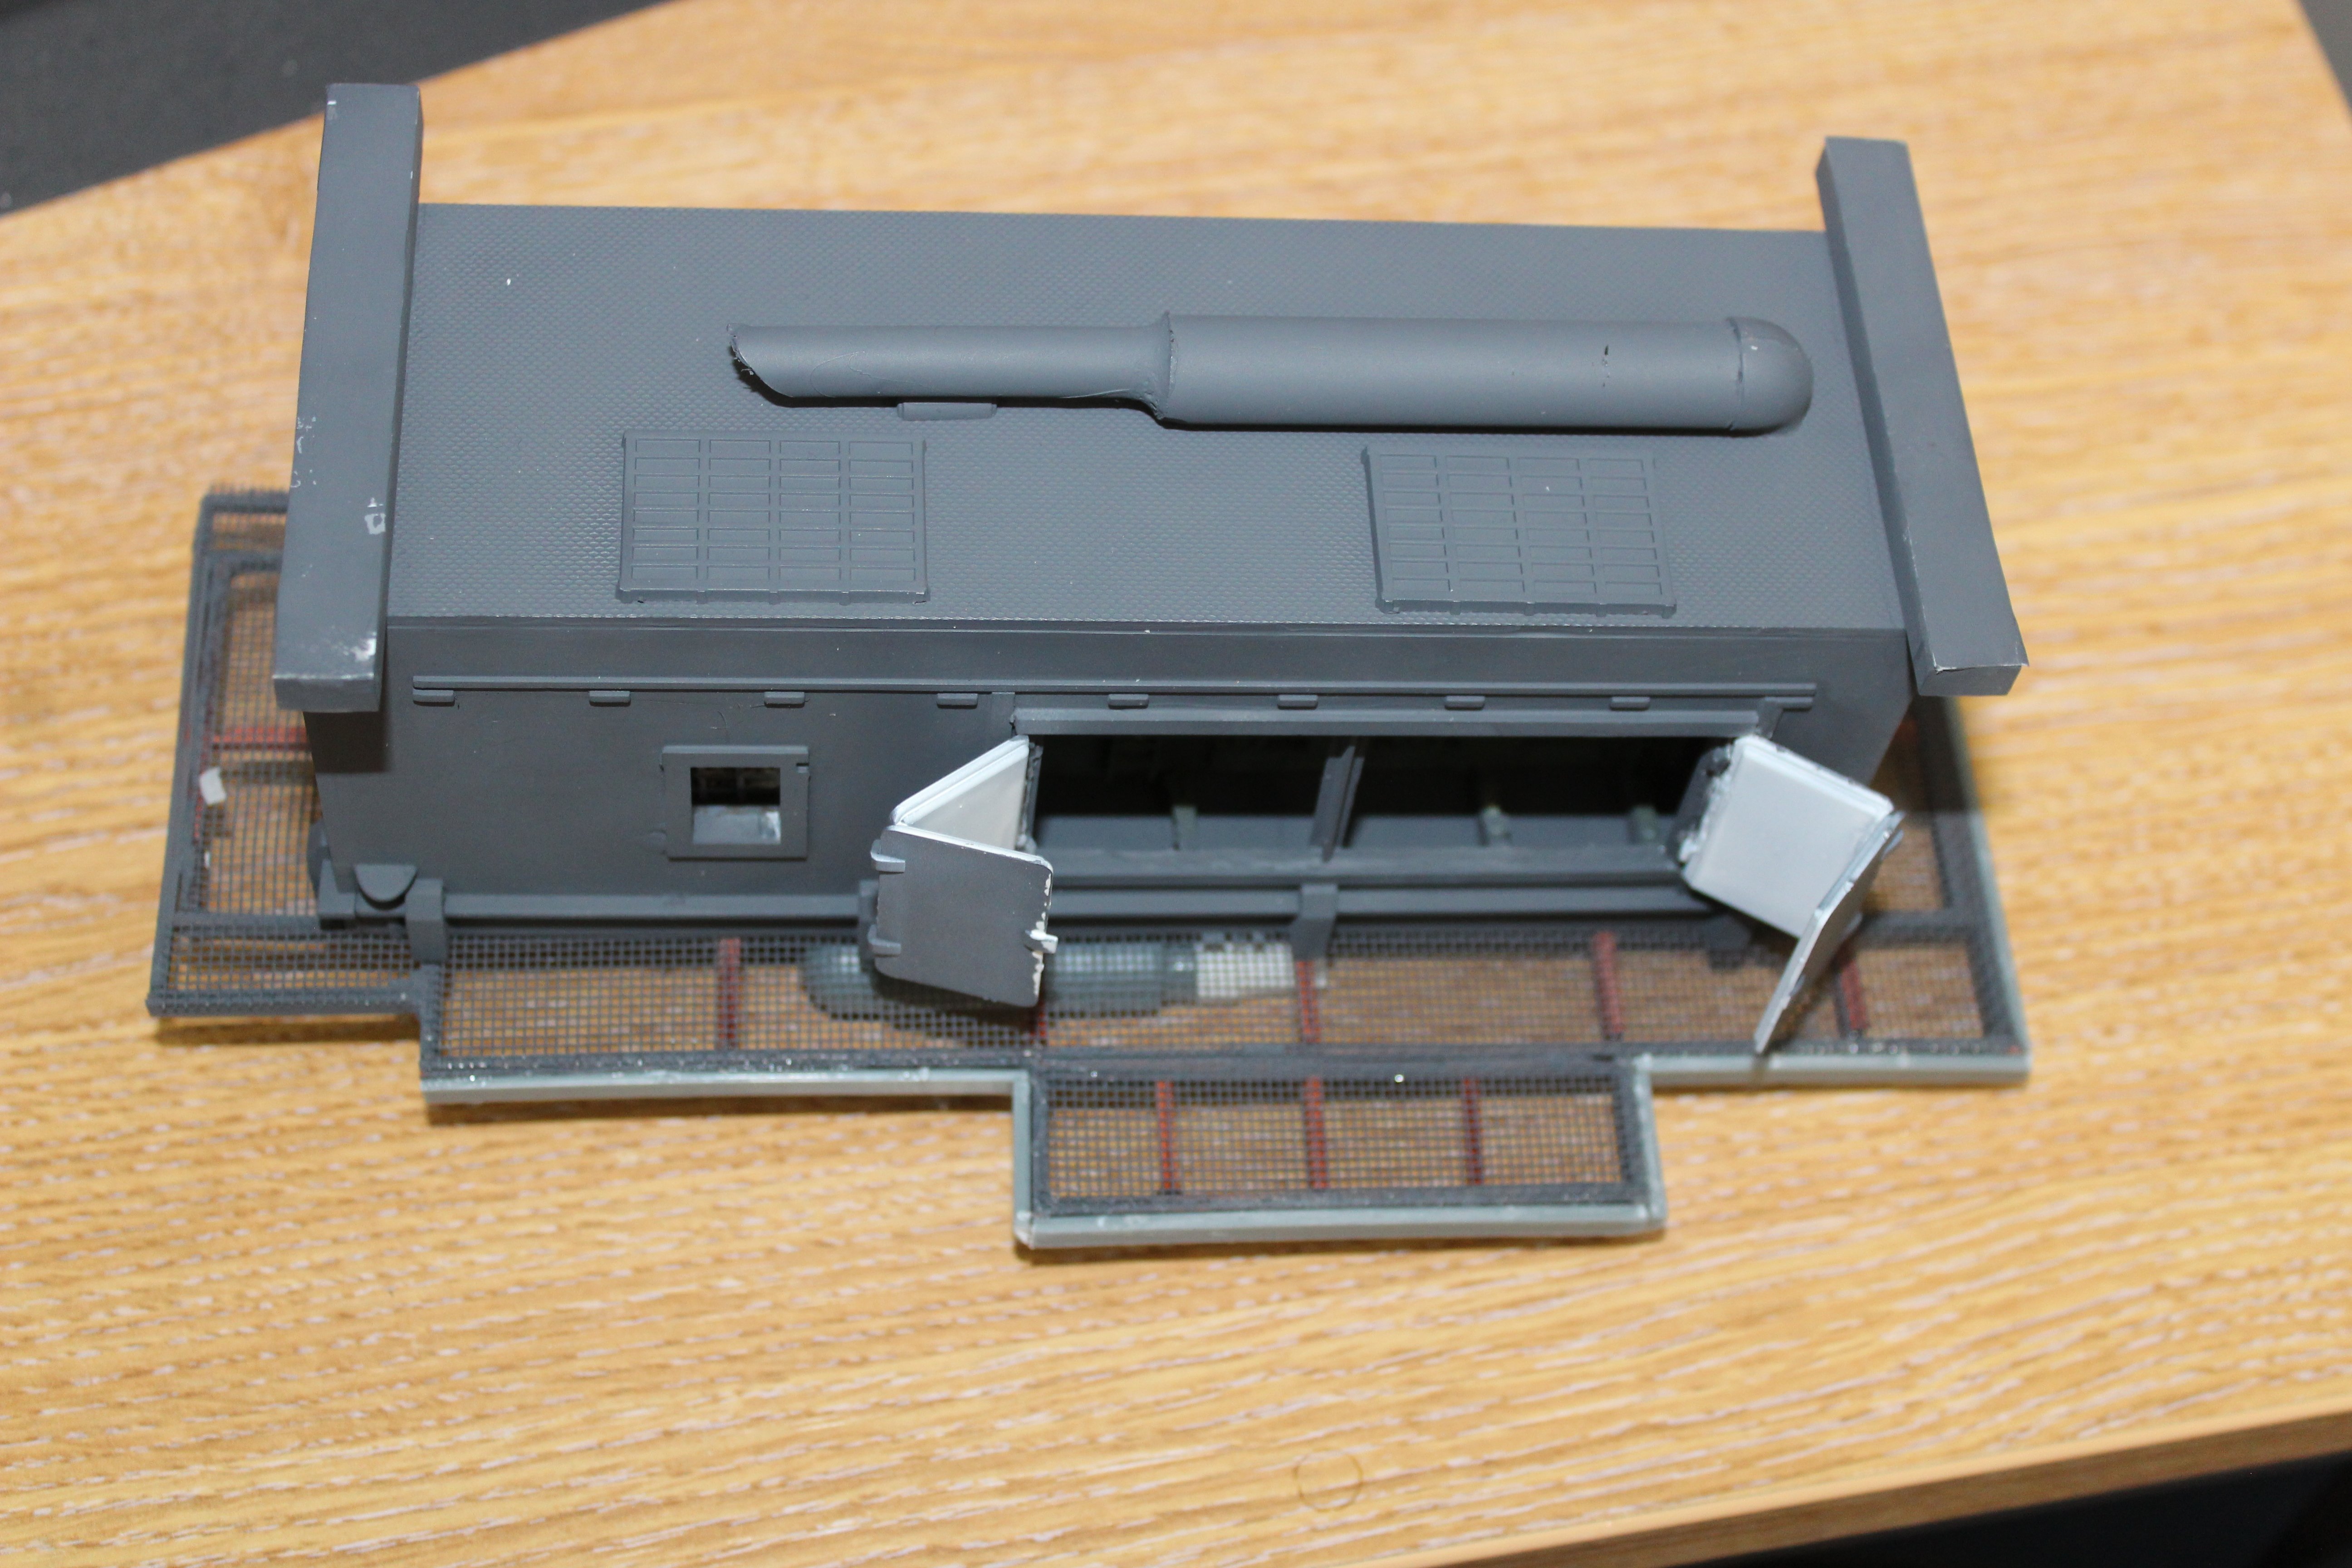
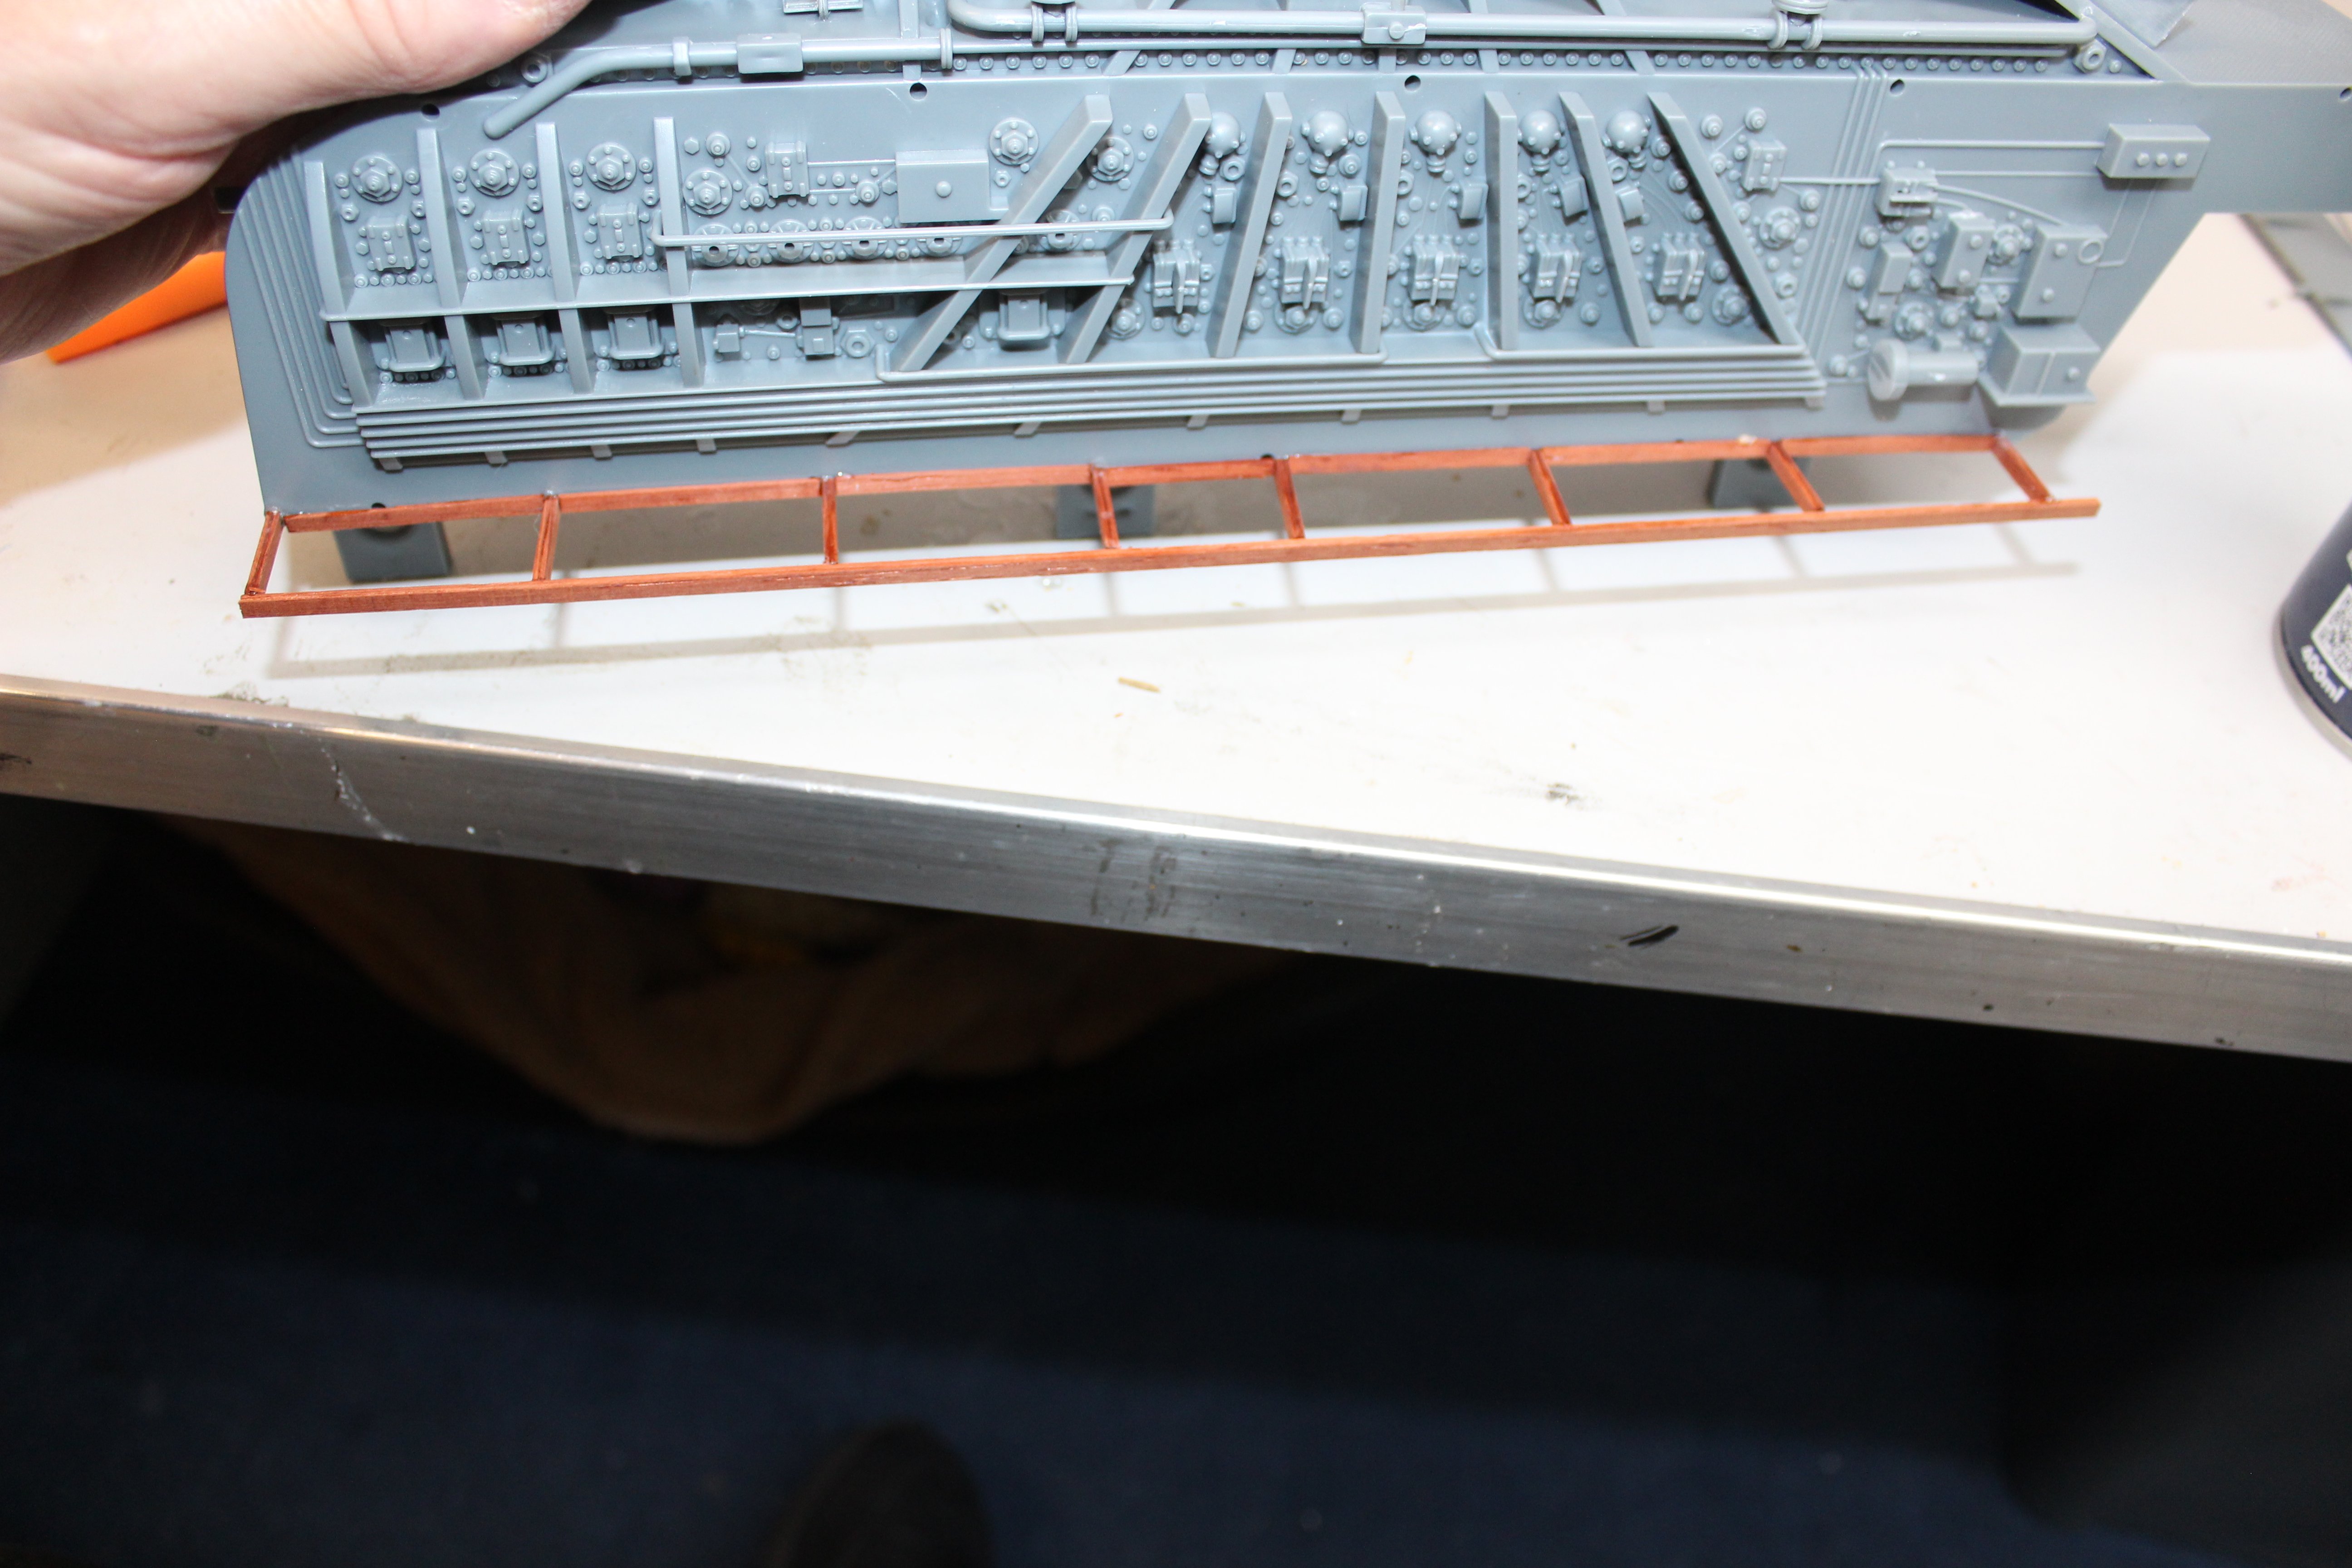
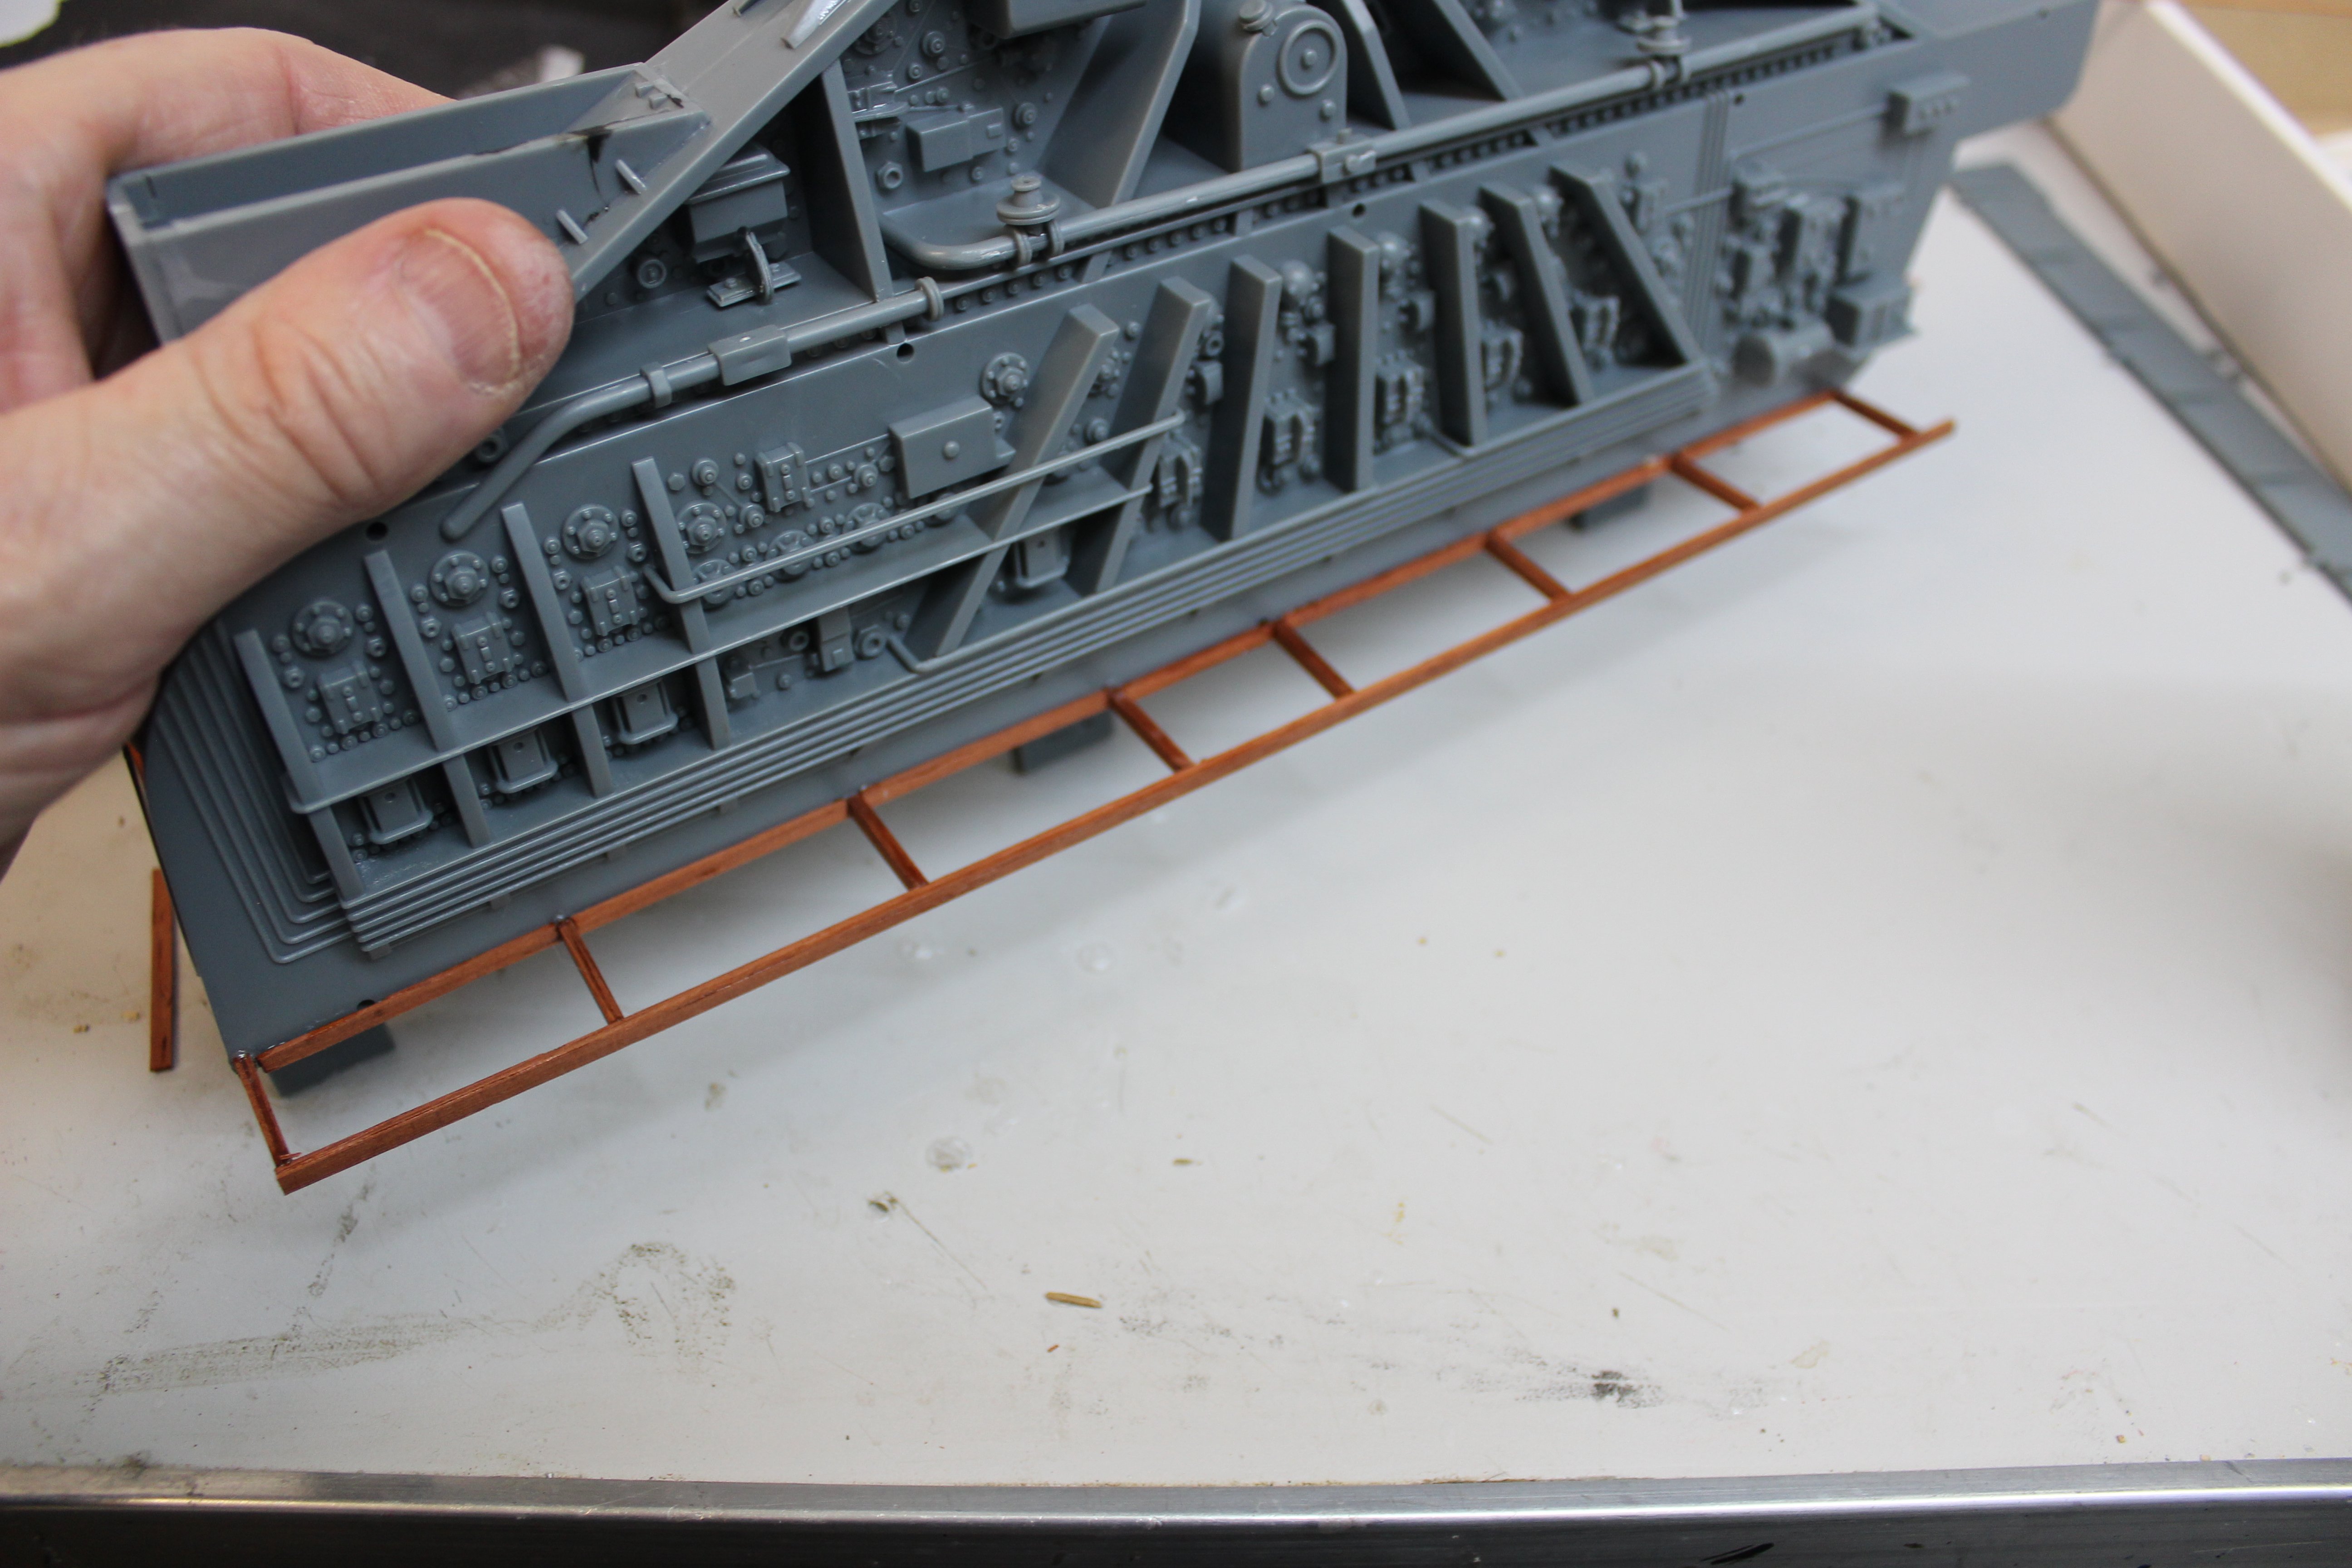
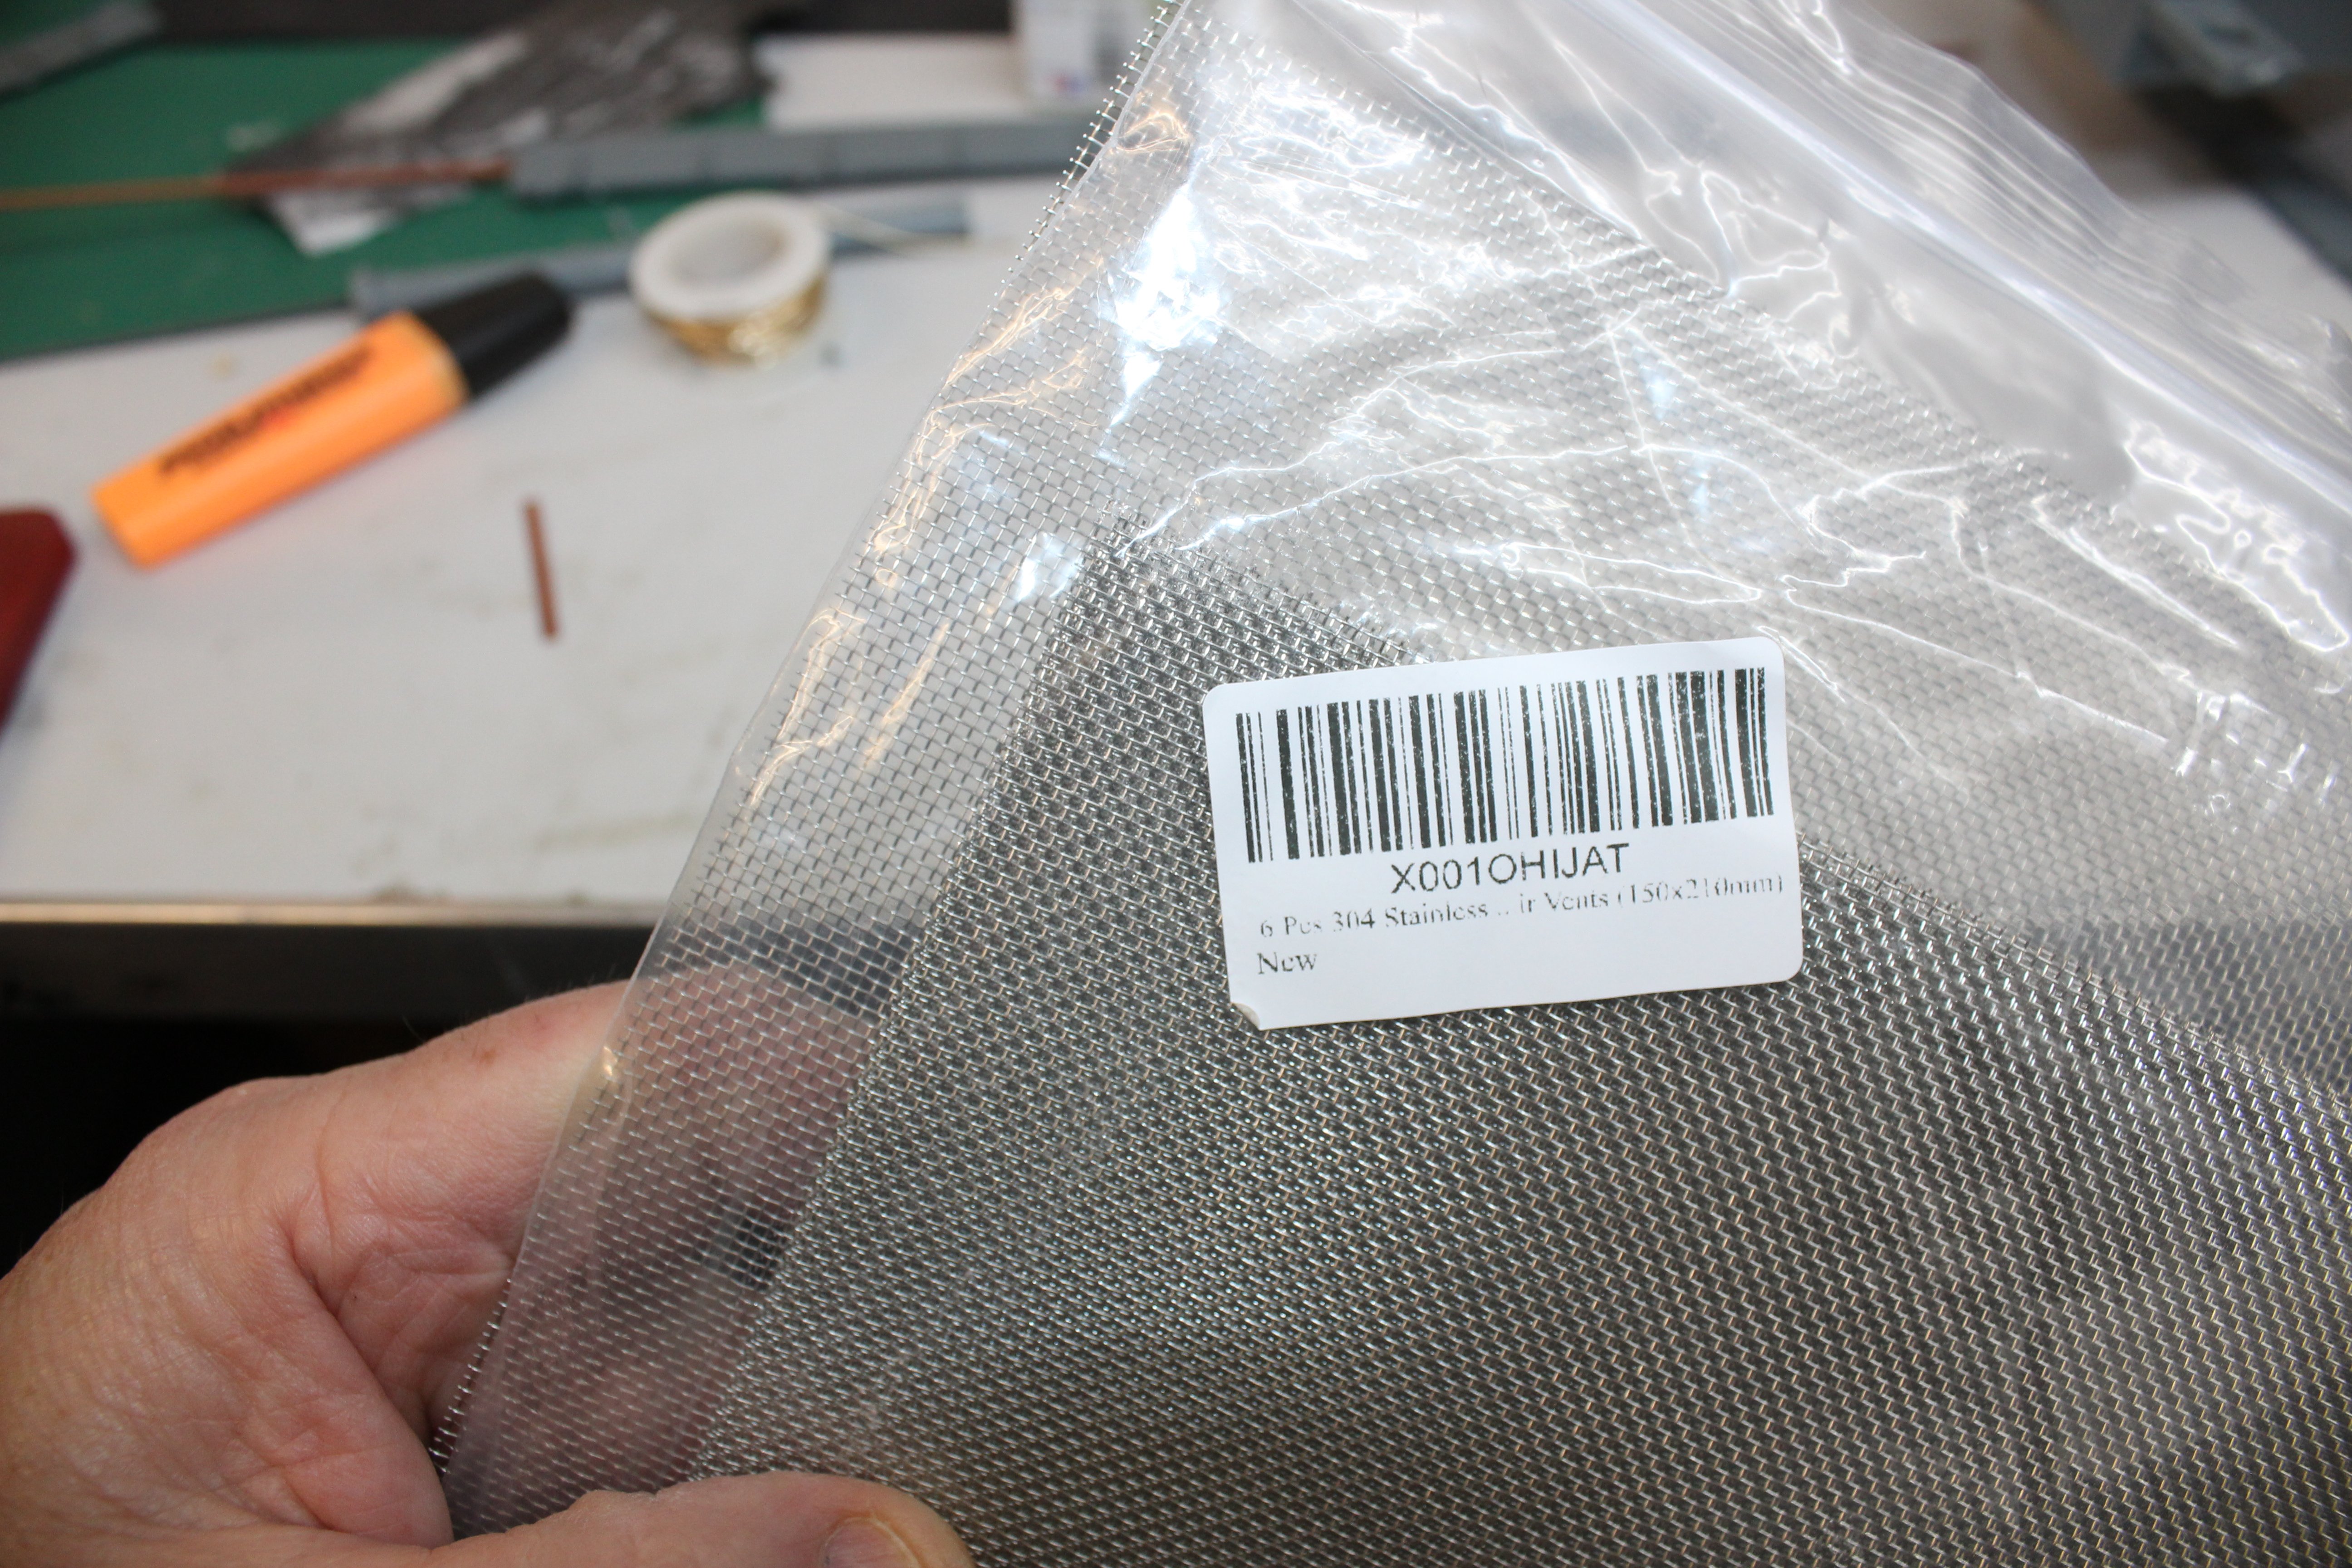
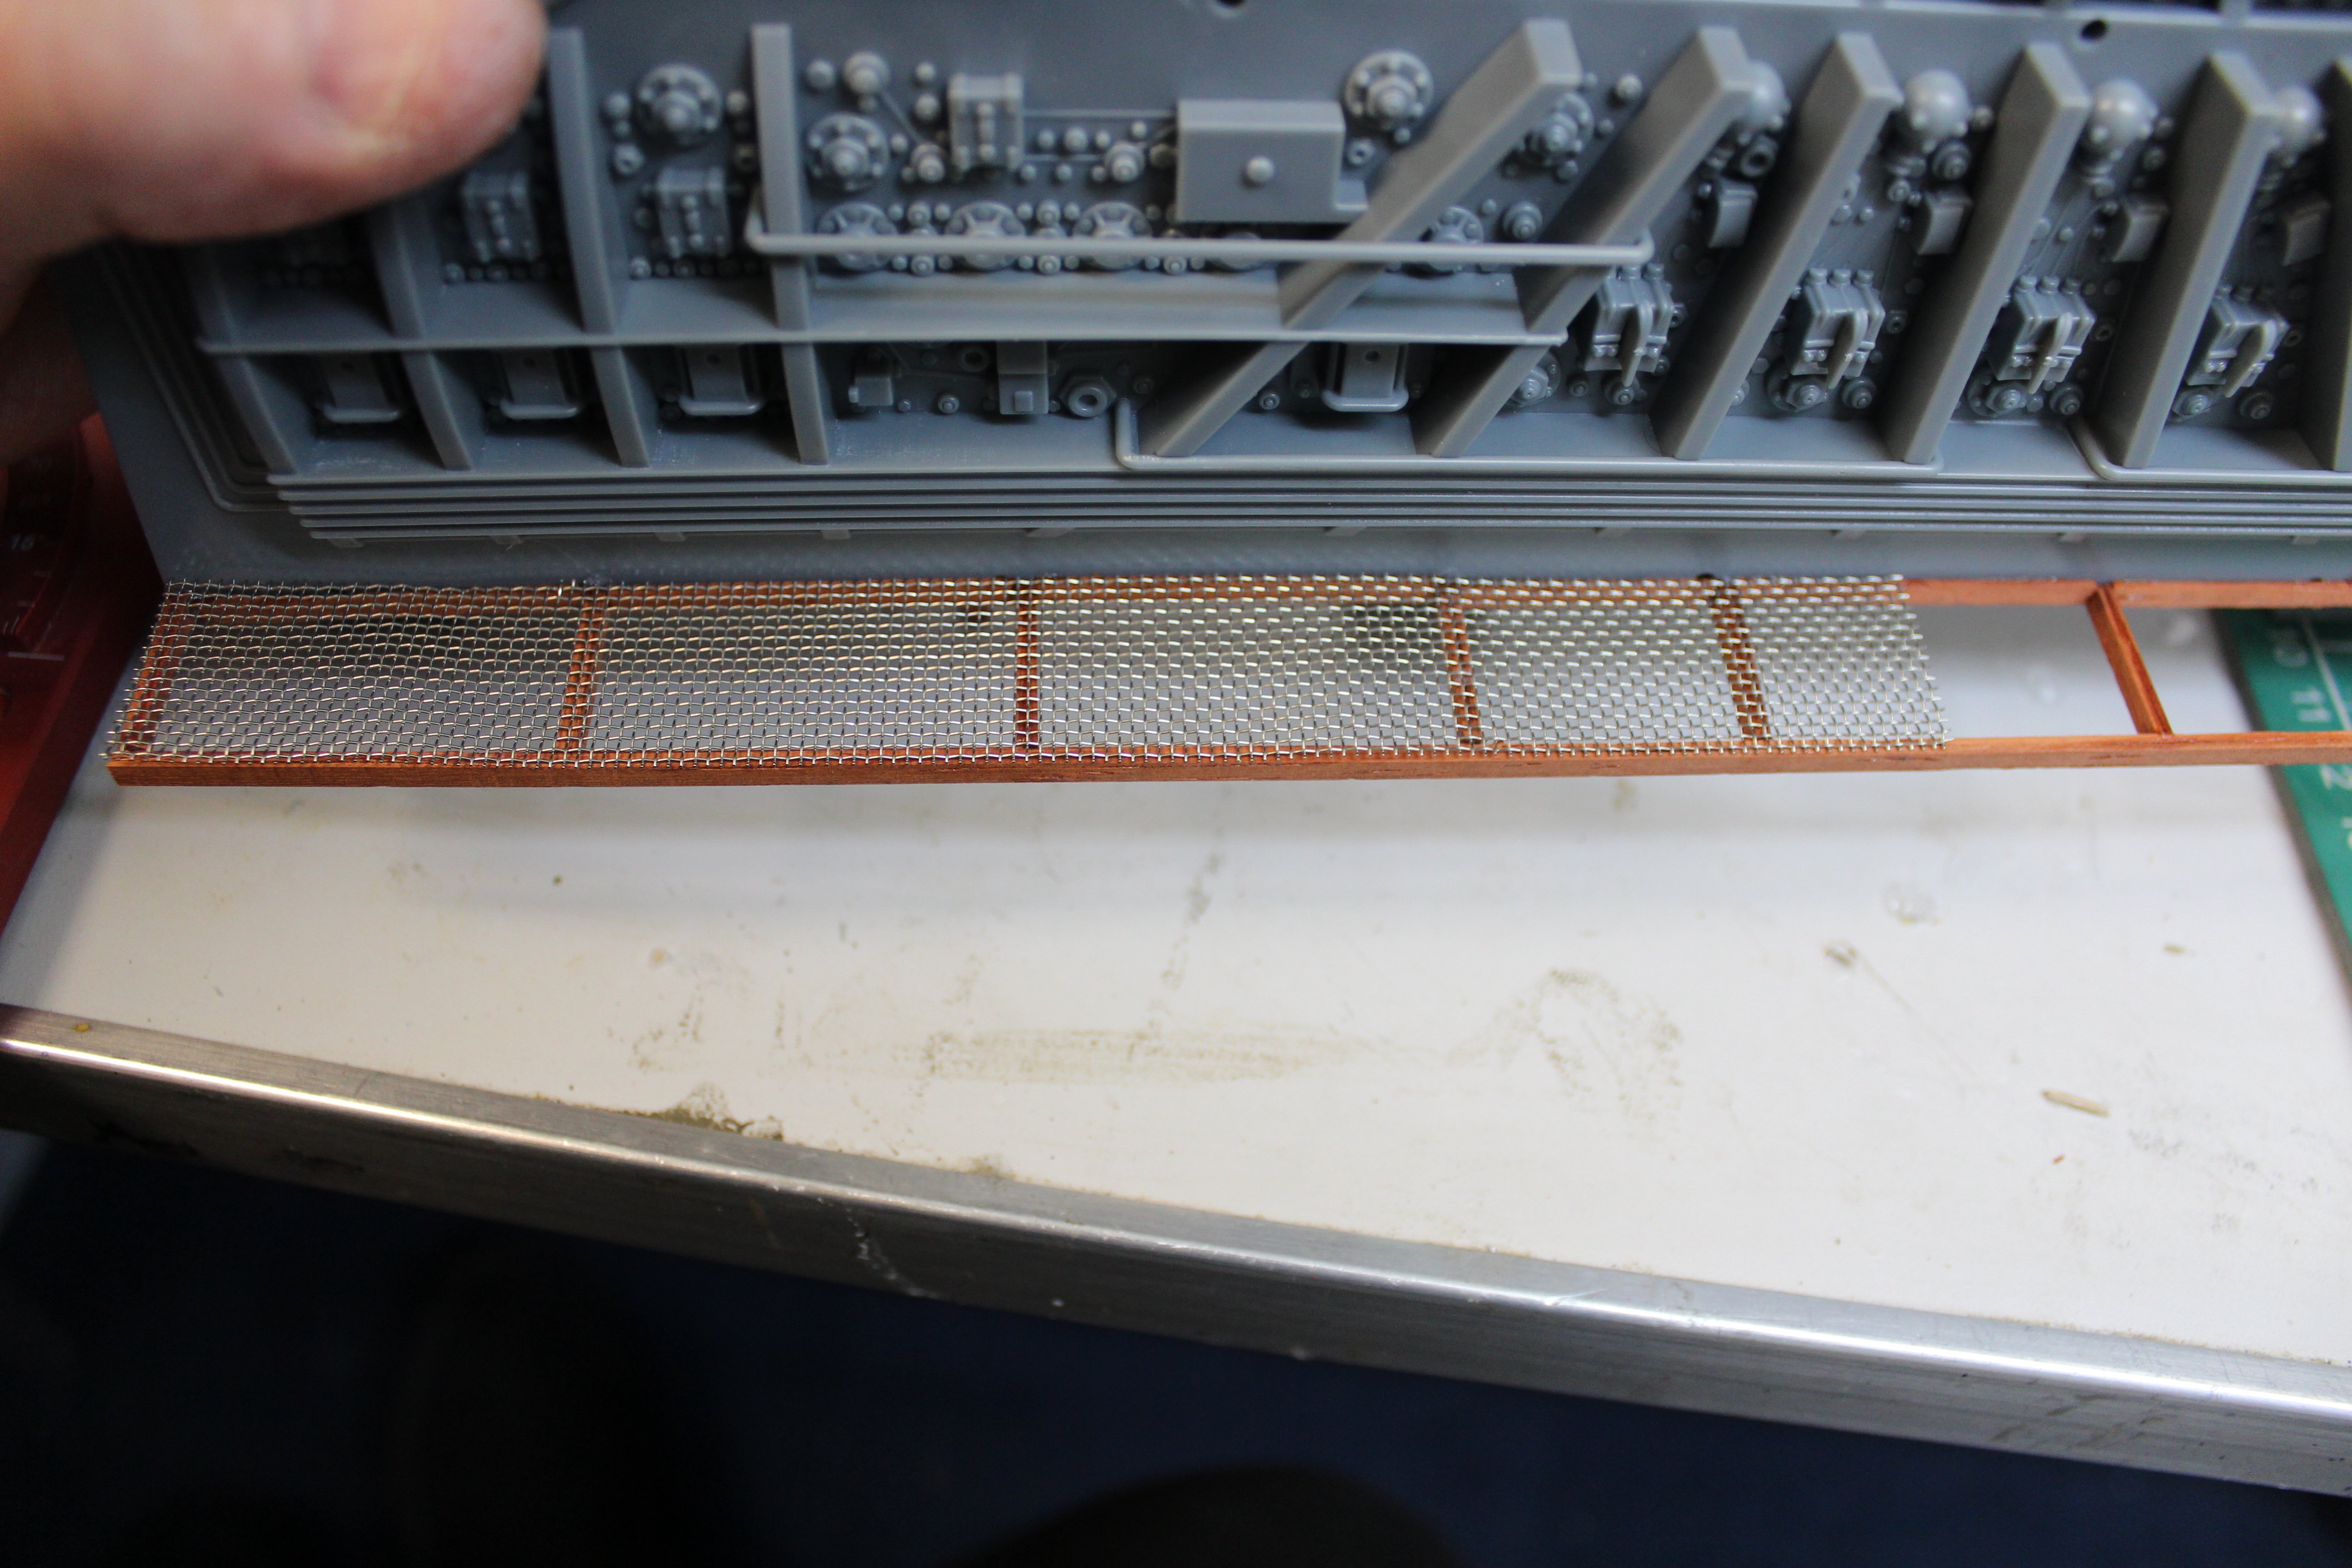
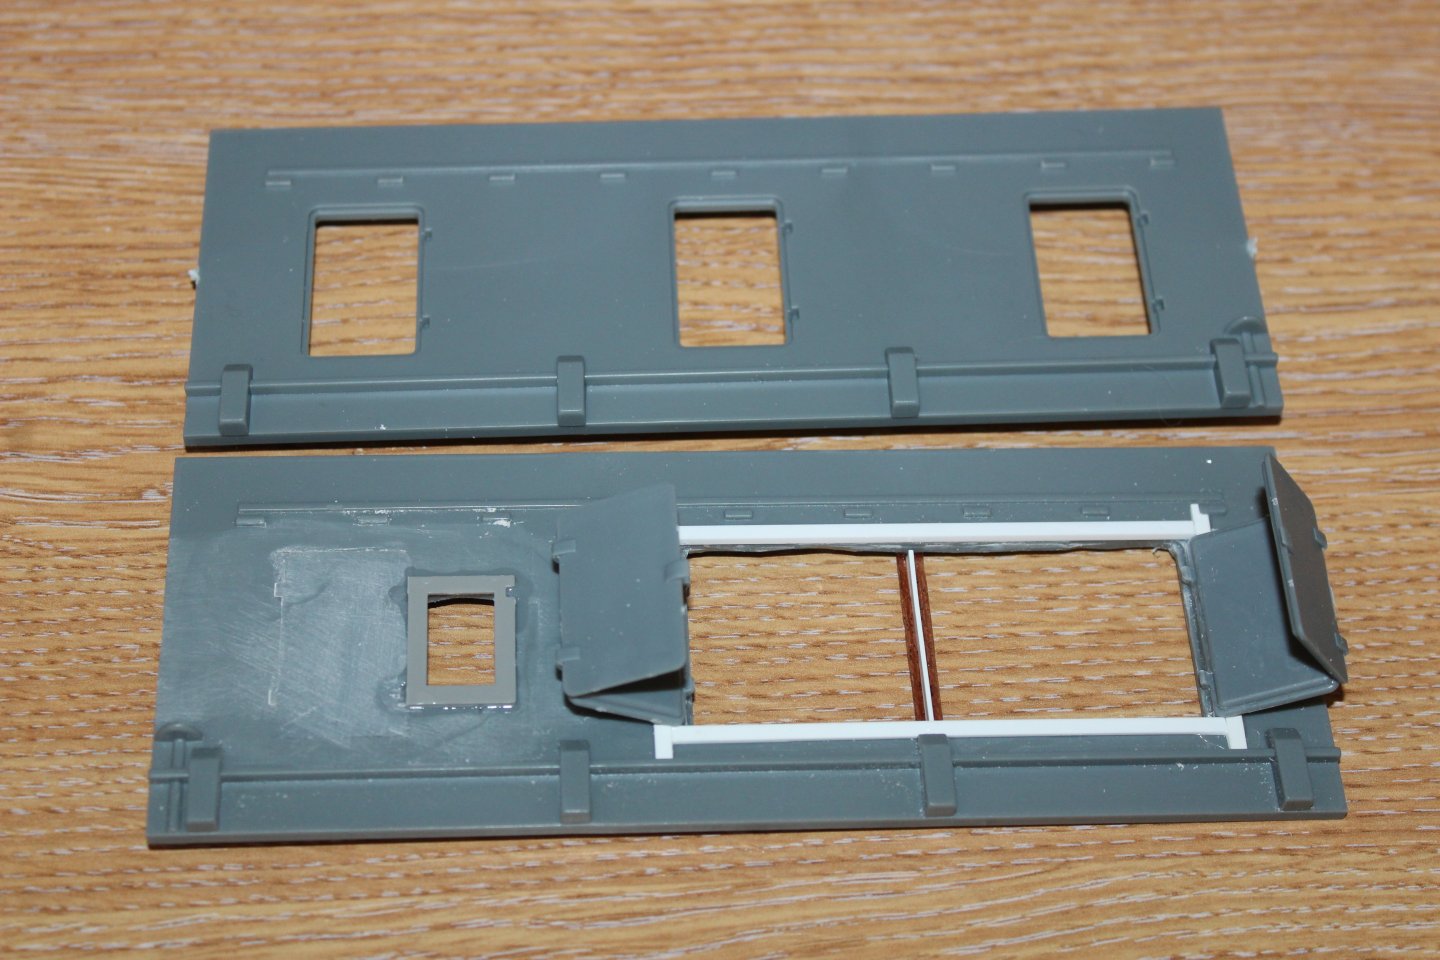
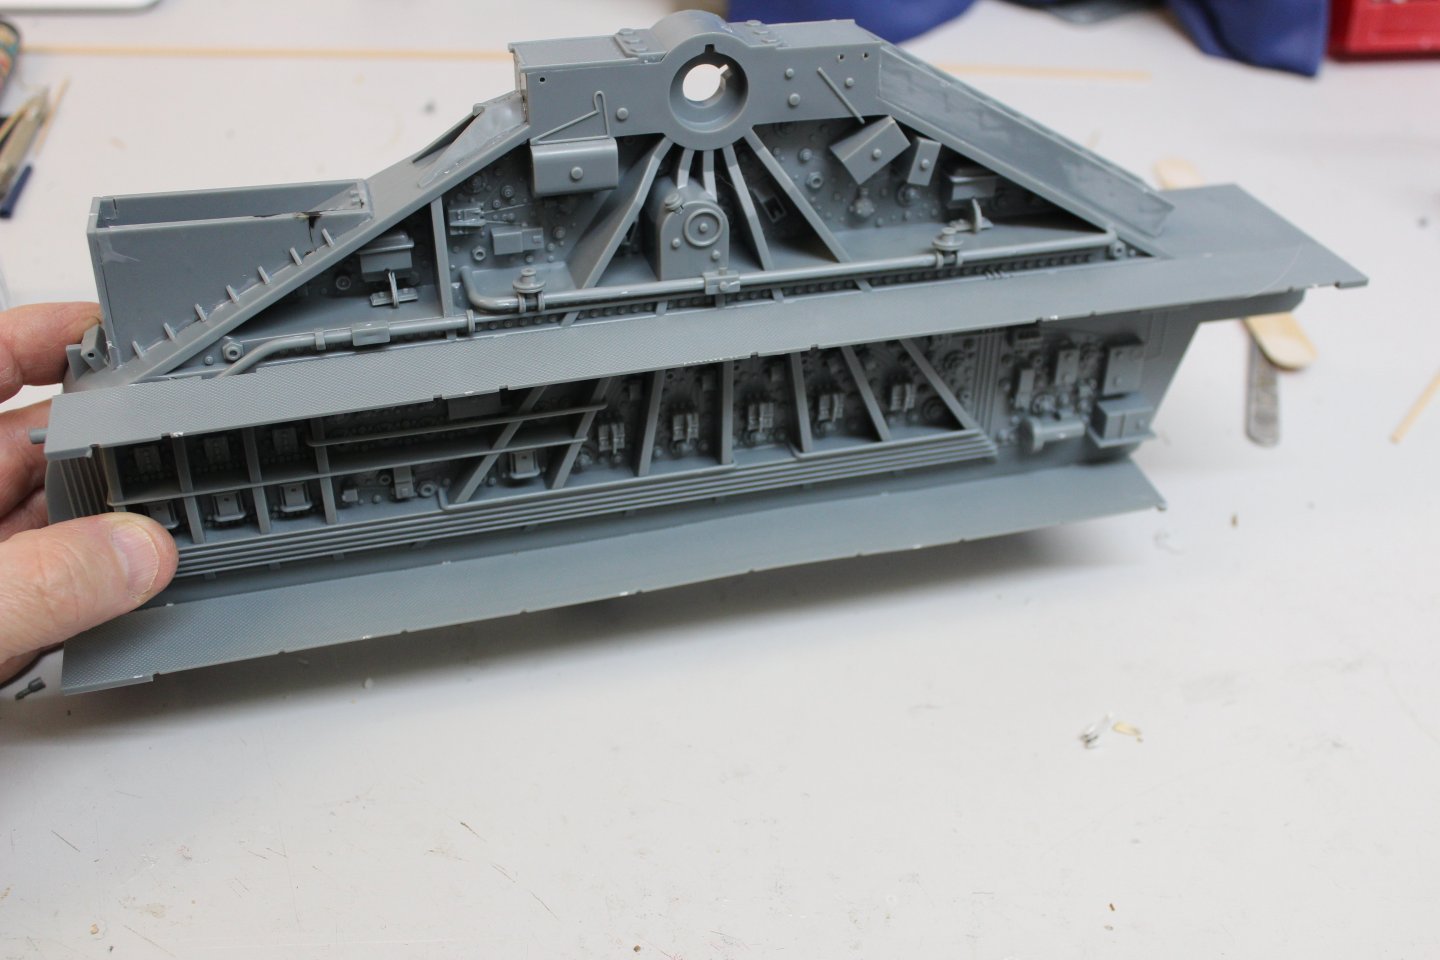
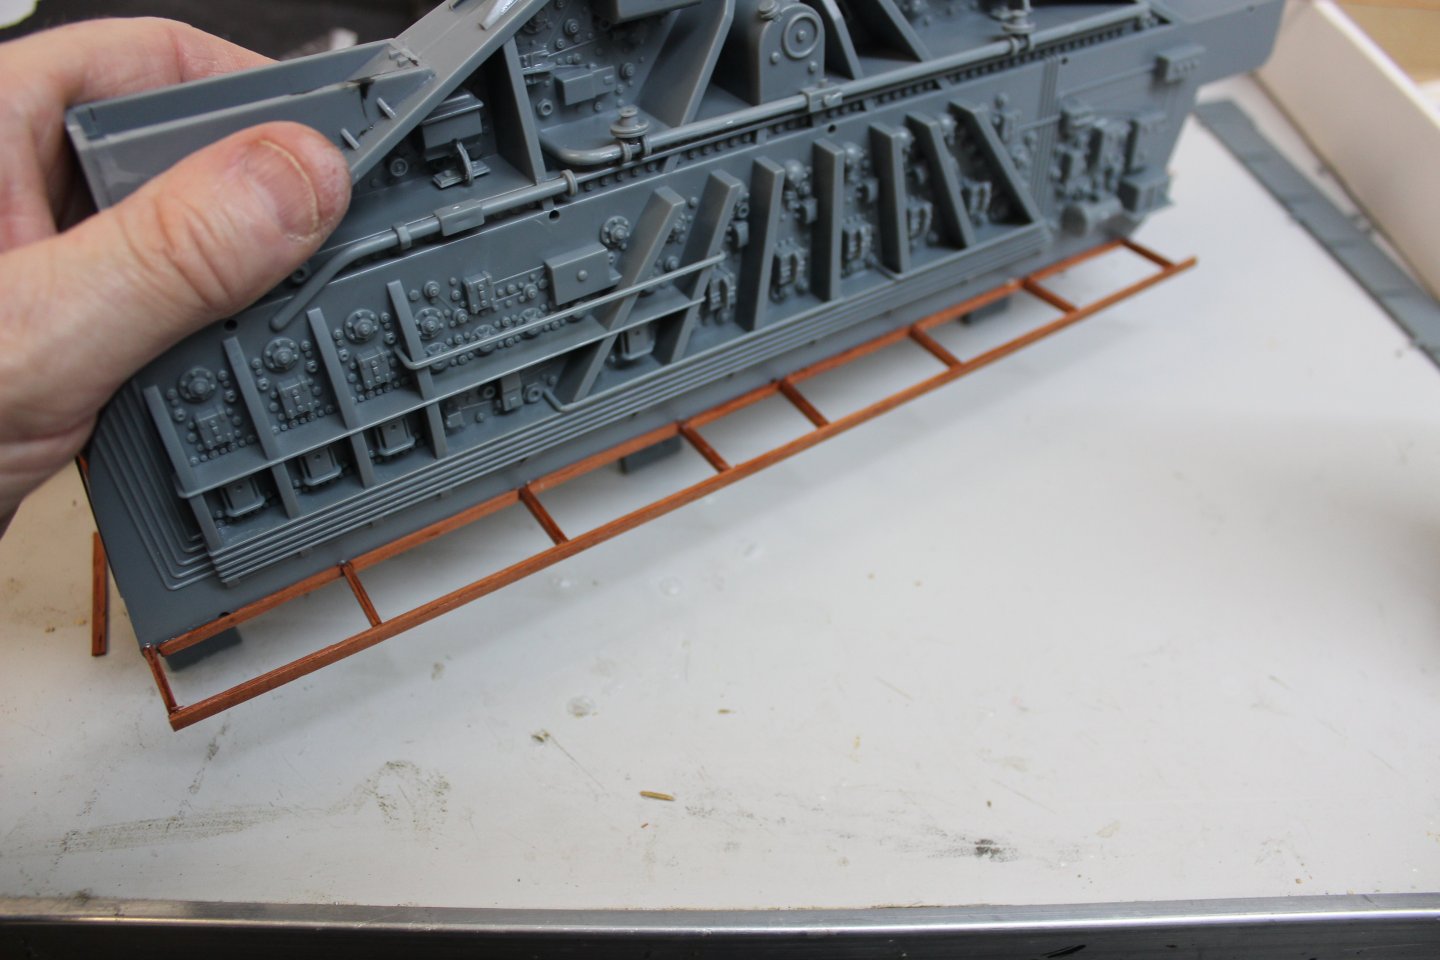
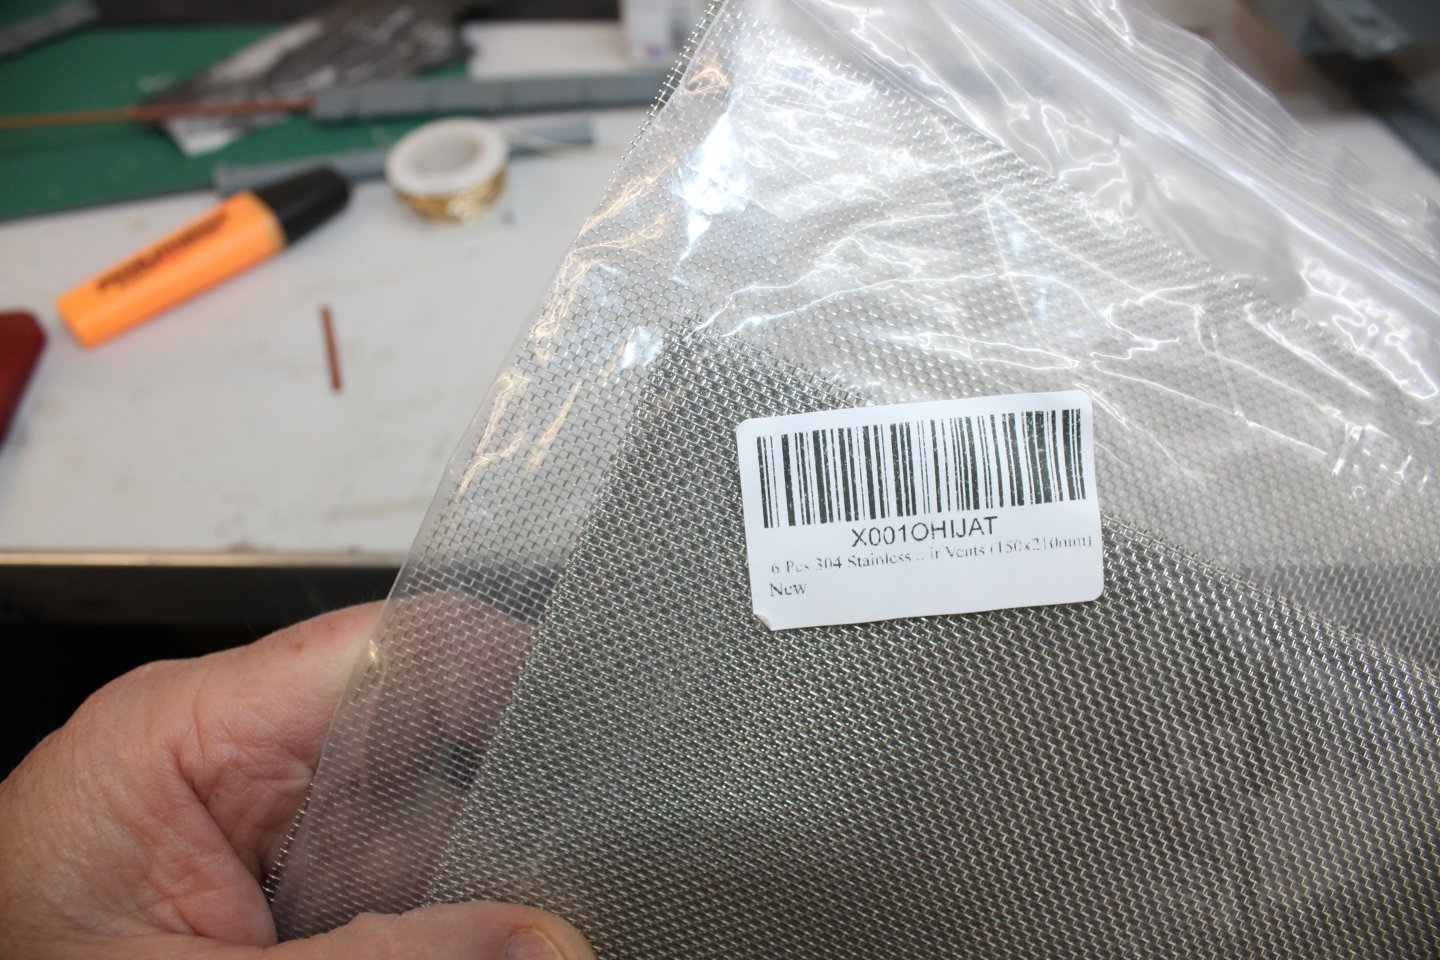
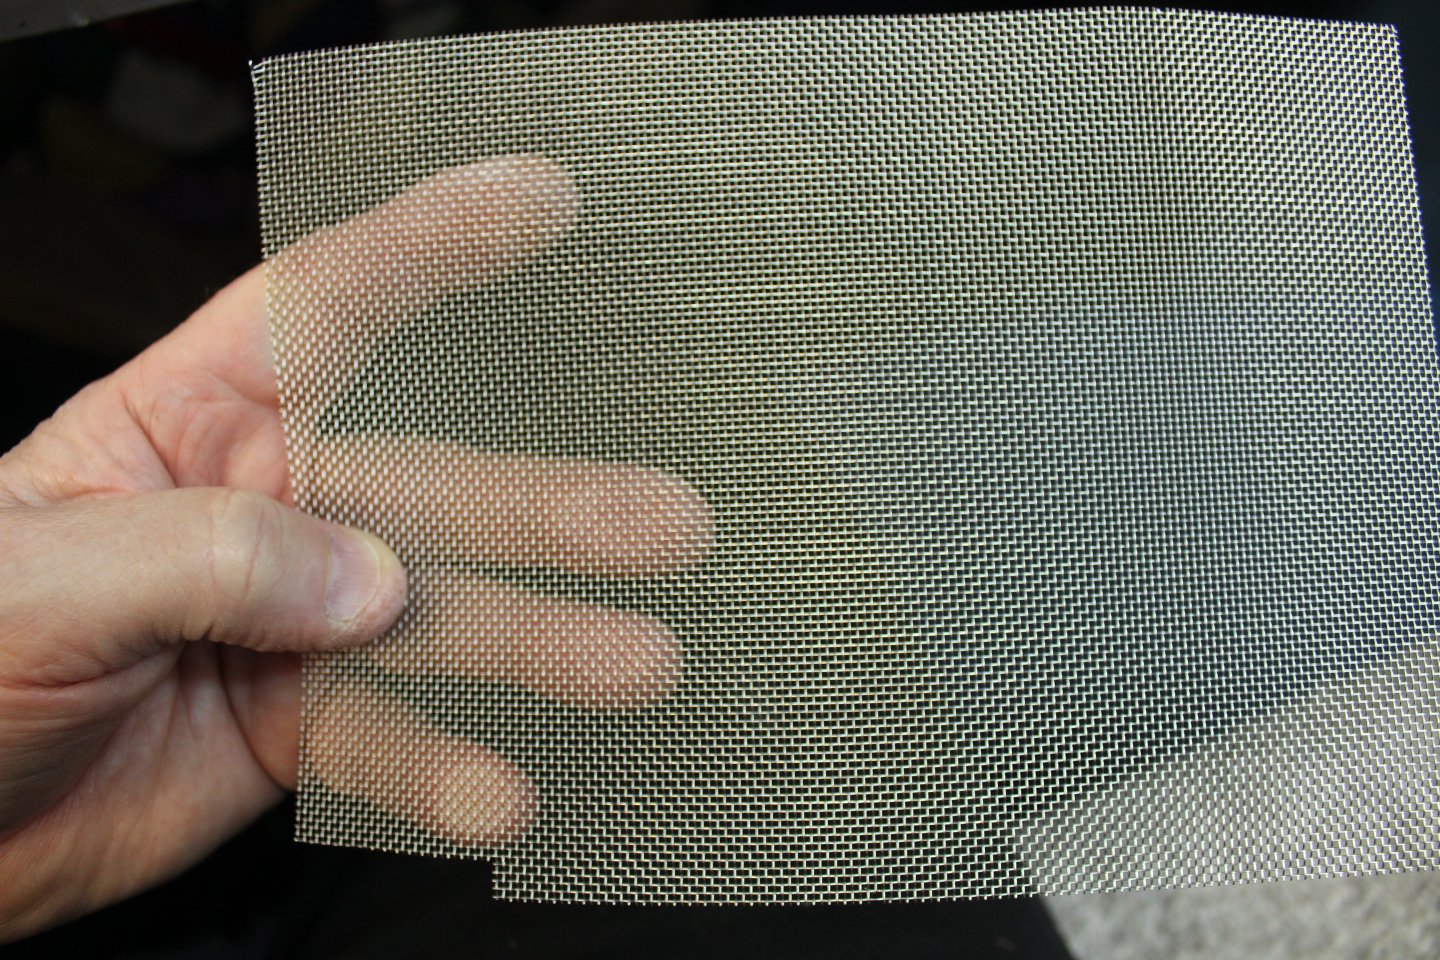
good evening everyone thank you for the likes Generator room not my photo, found on the web kit contents. just a large box walkways removed to replace with mesh open the front up resembles nothing, does nothing, but far better than my first attempt new walkways kit railings adapted to fit the new shape and 1cm removed from the height


- 26 replies
-
- 12
-
-
-
that came out very nice Andy
-
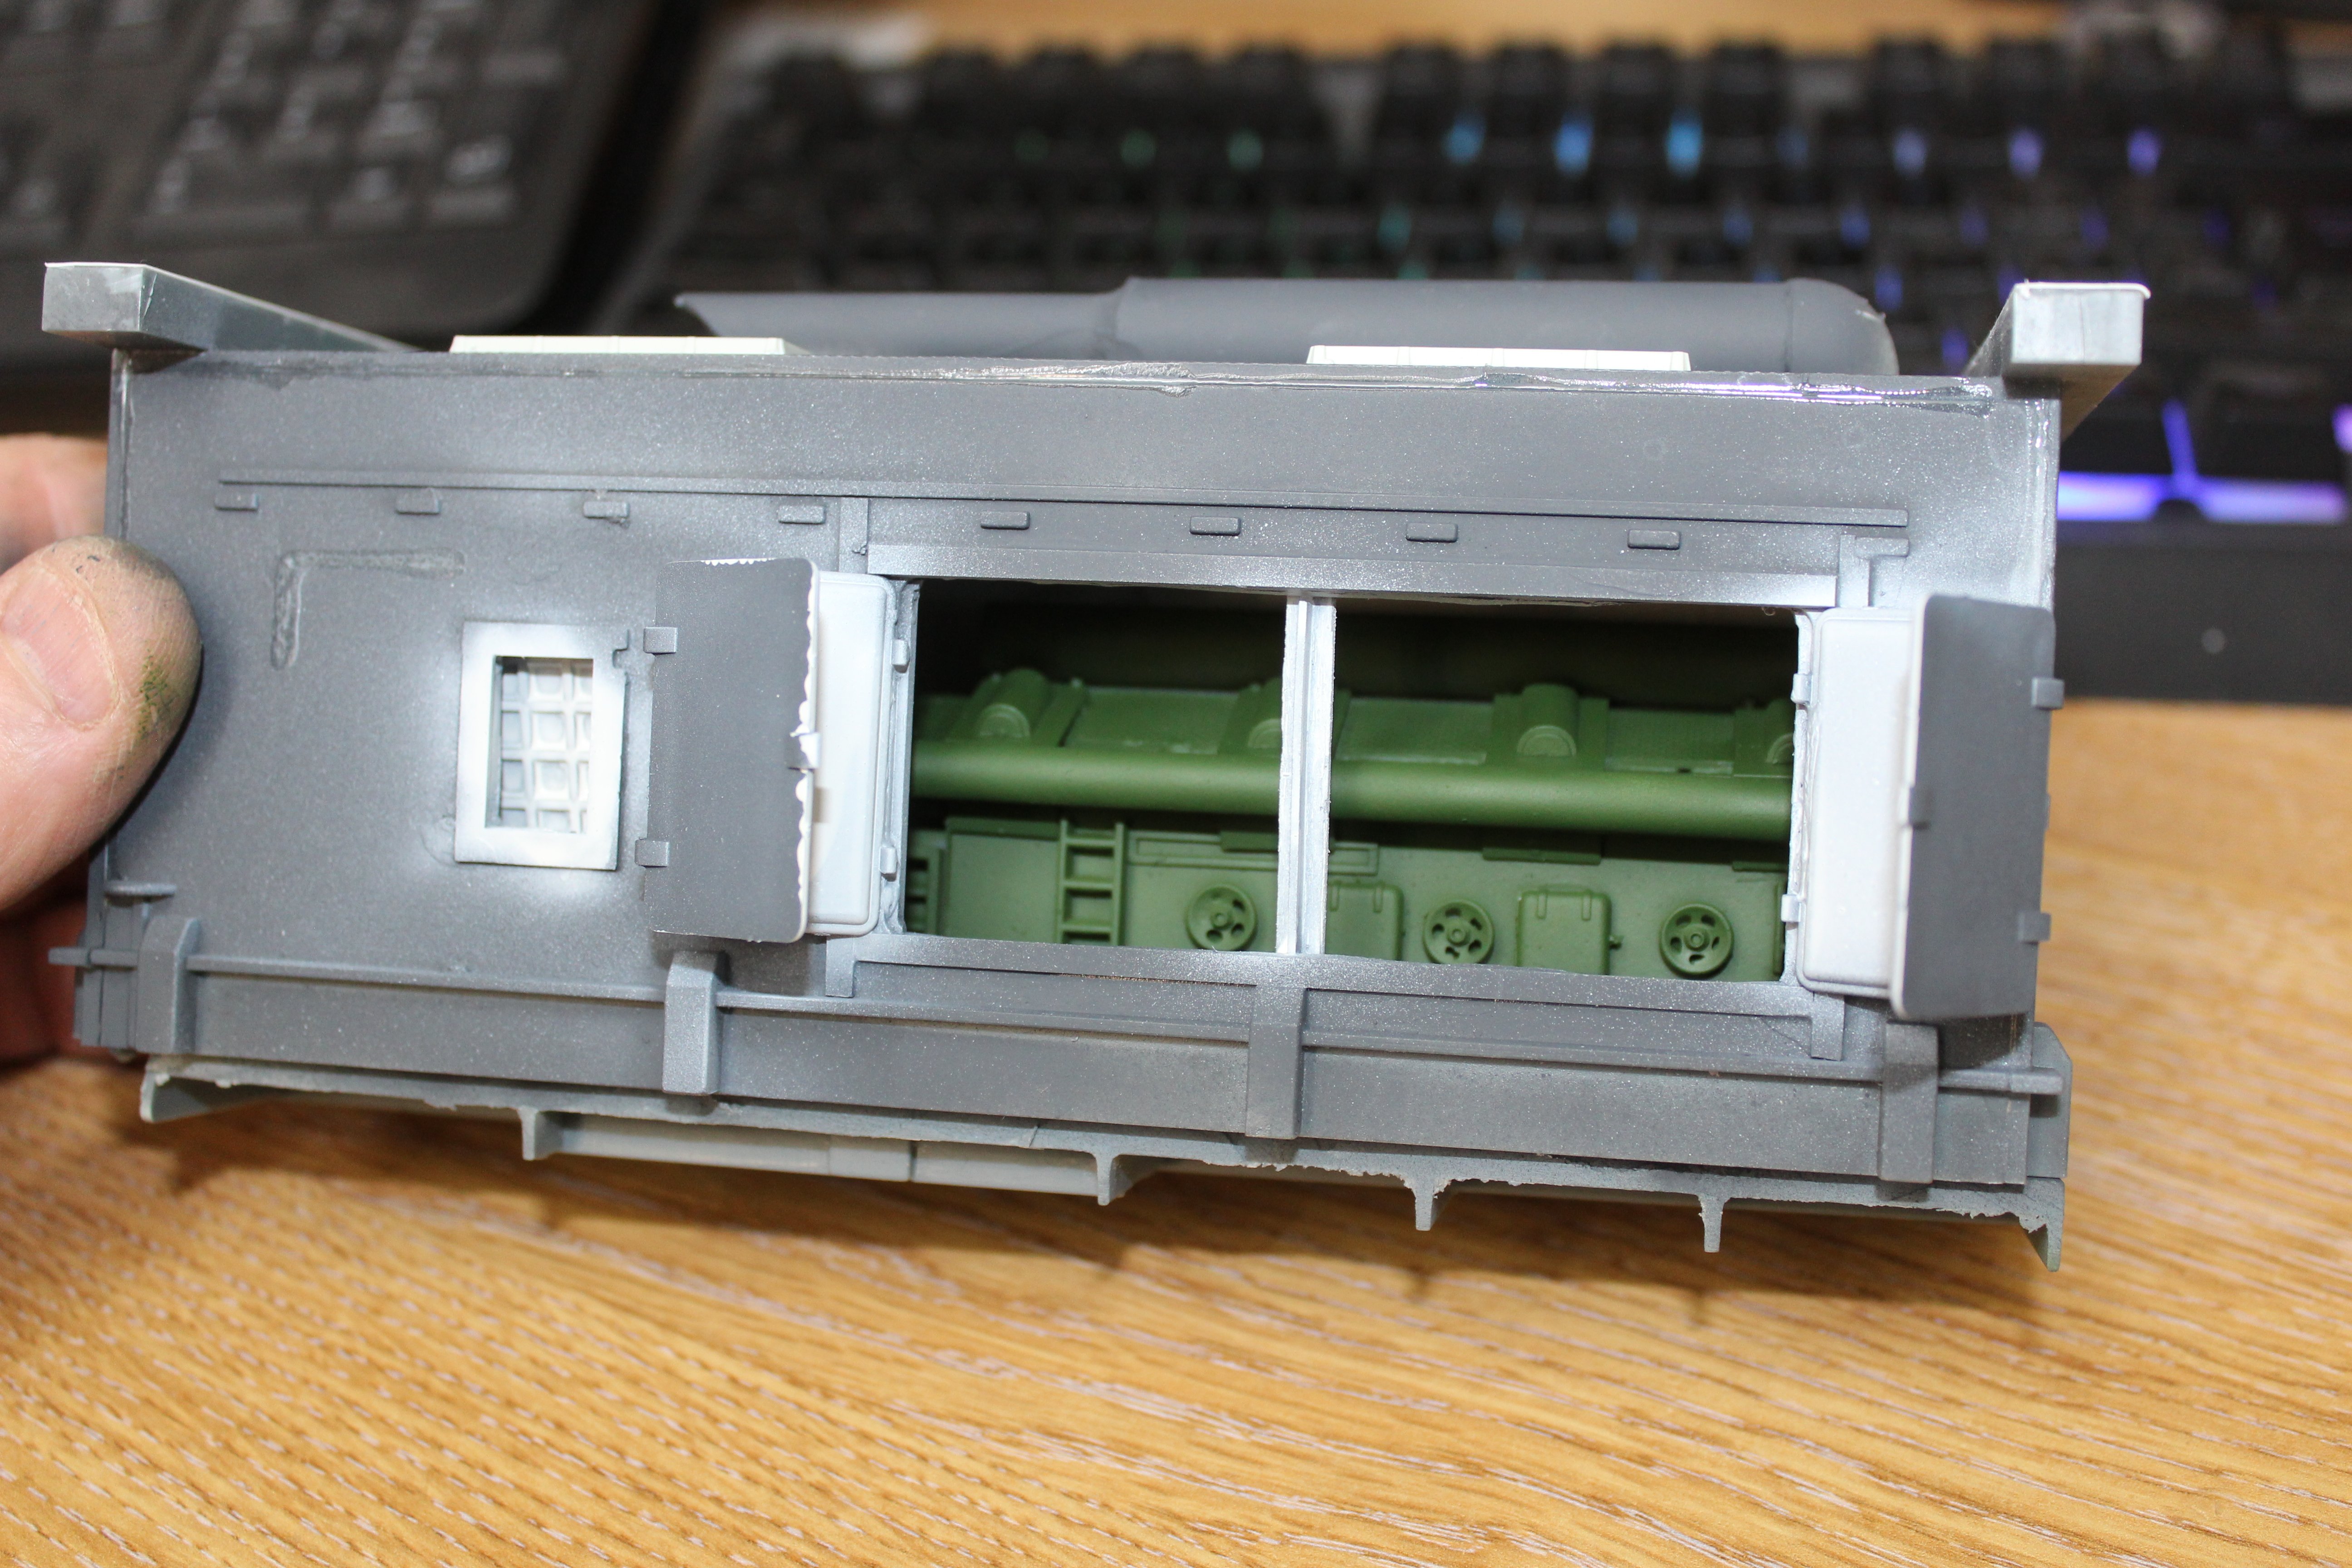
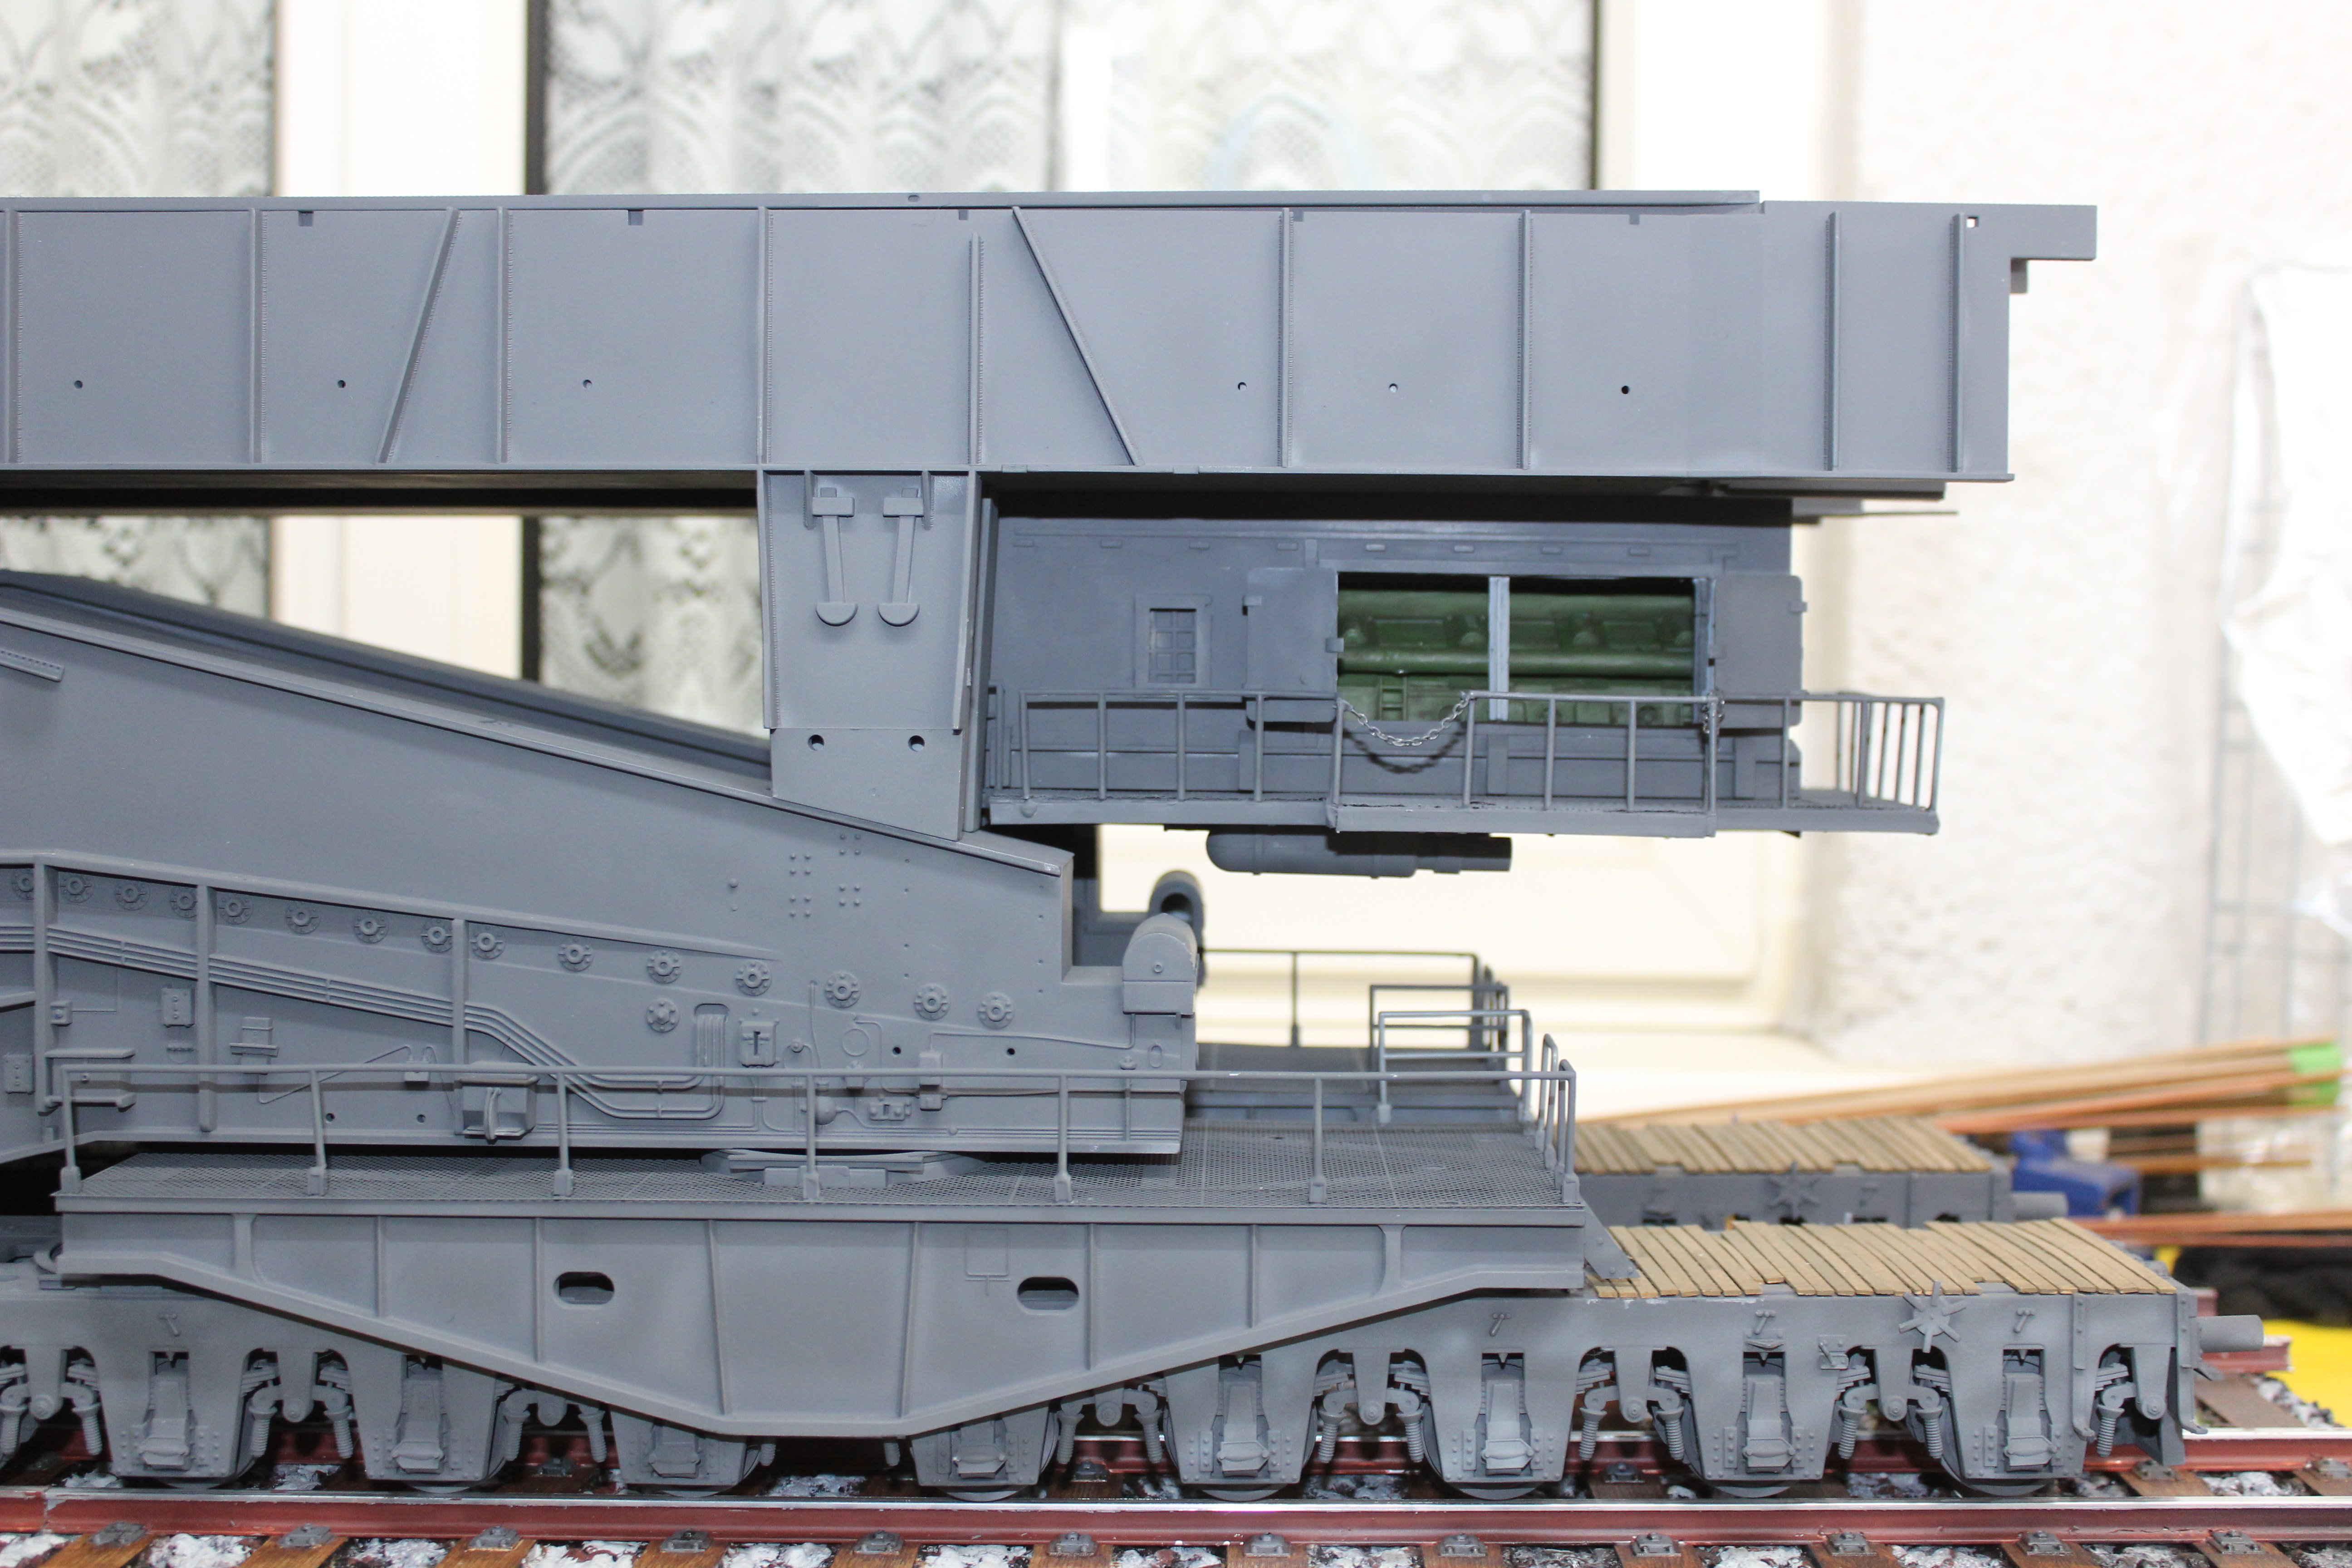
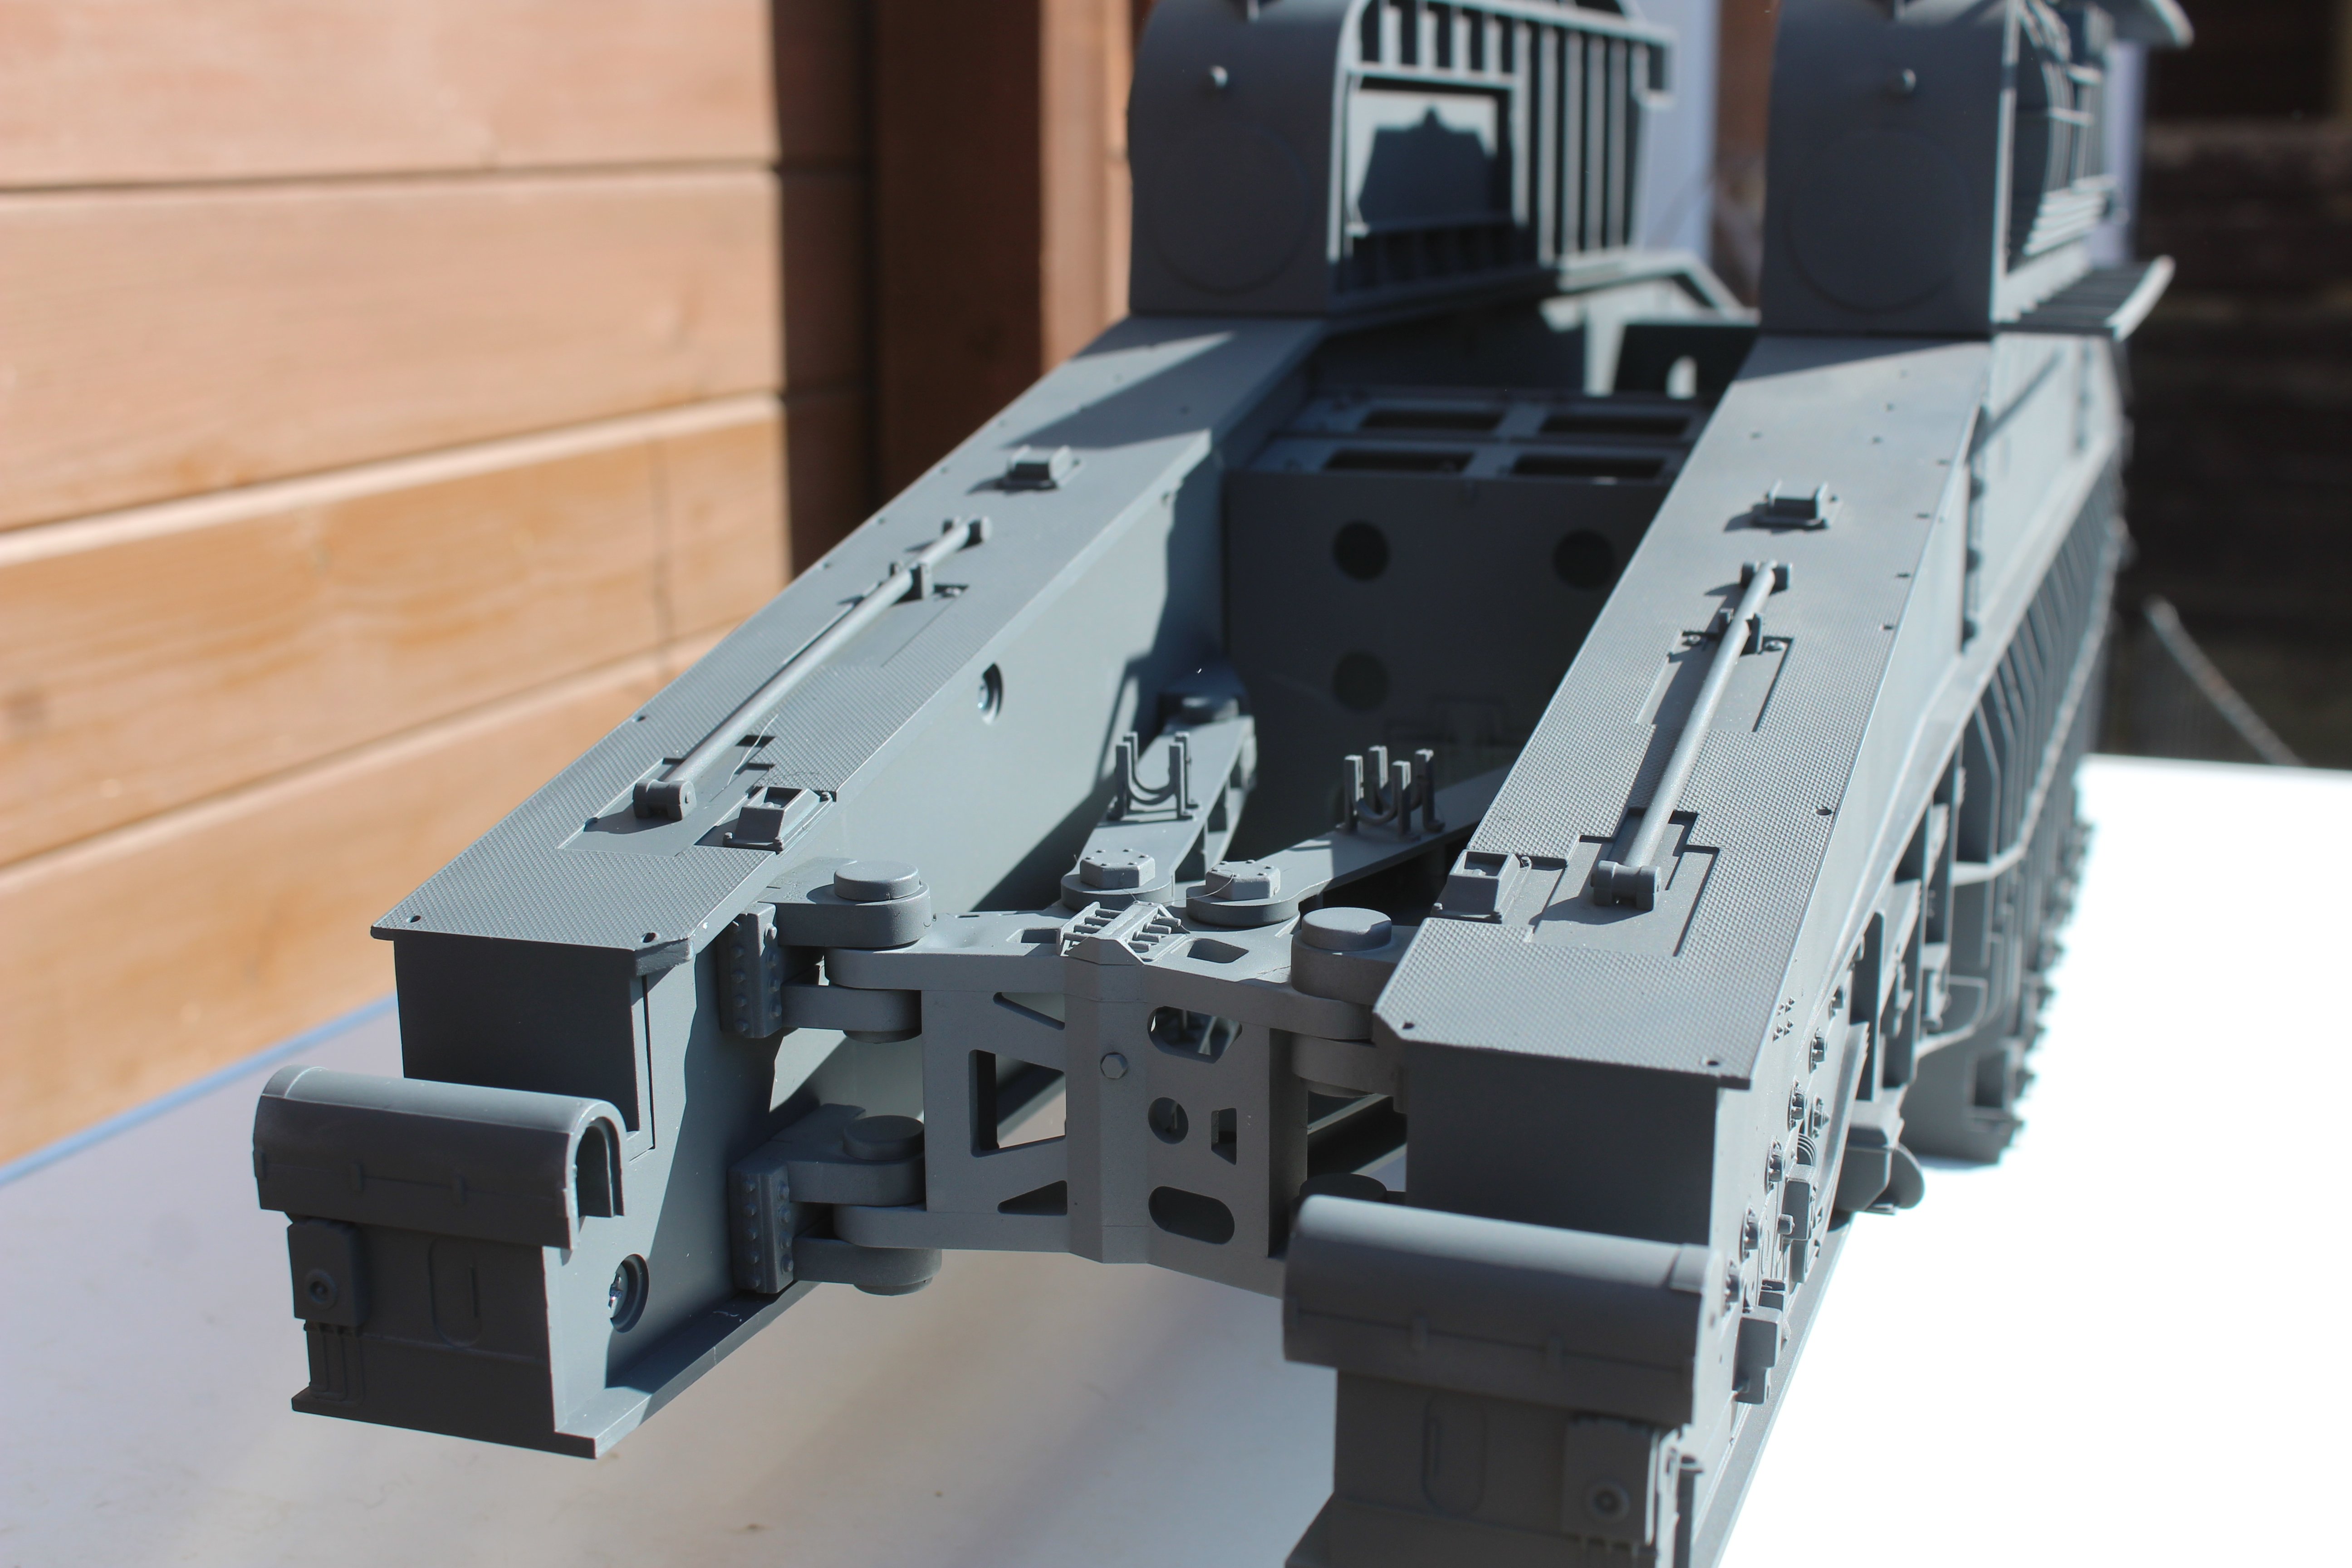
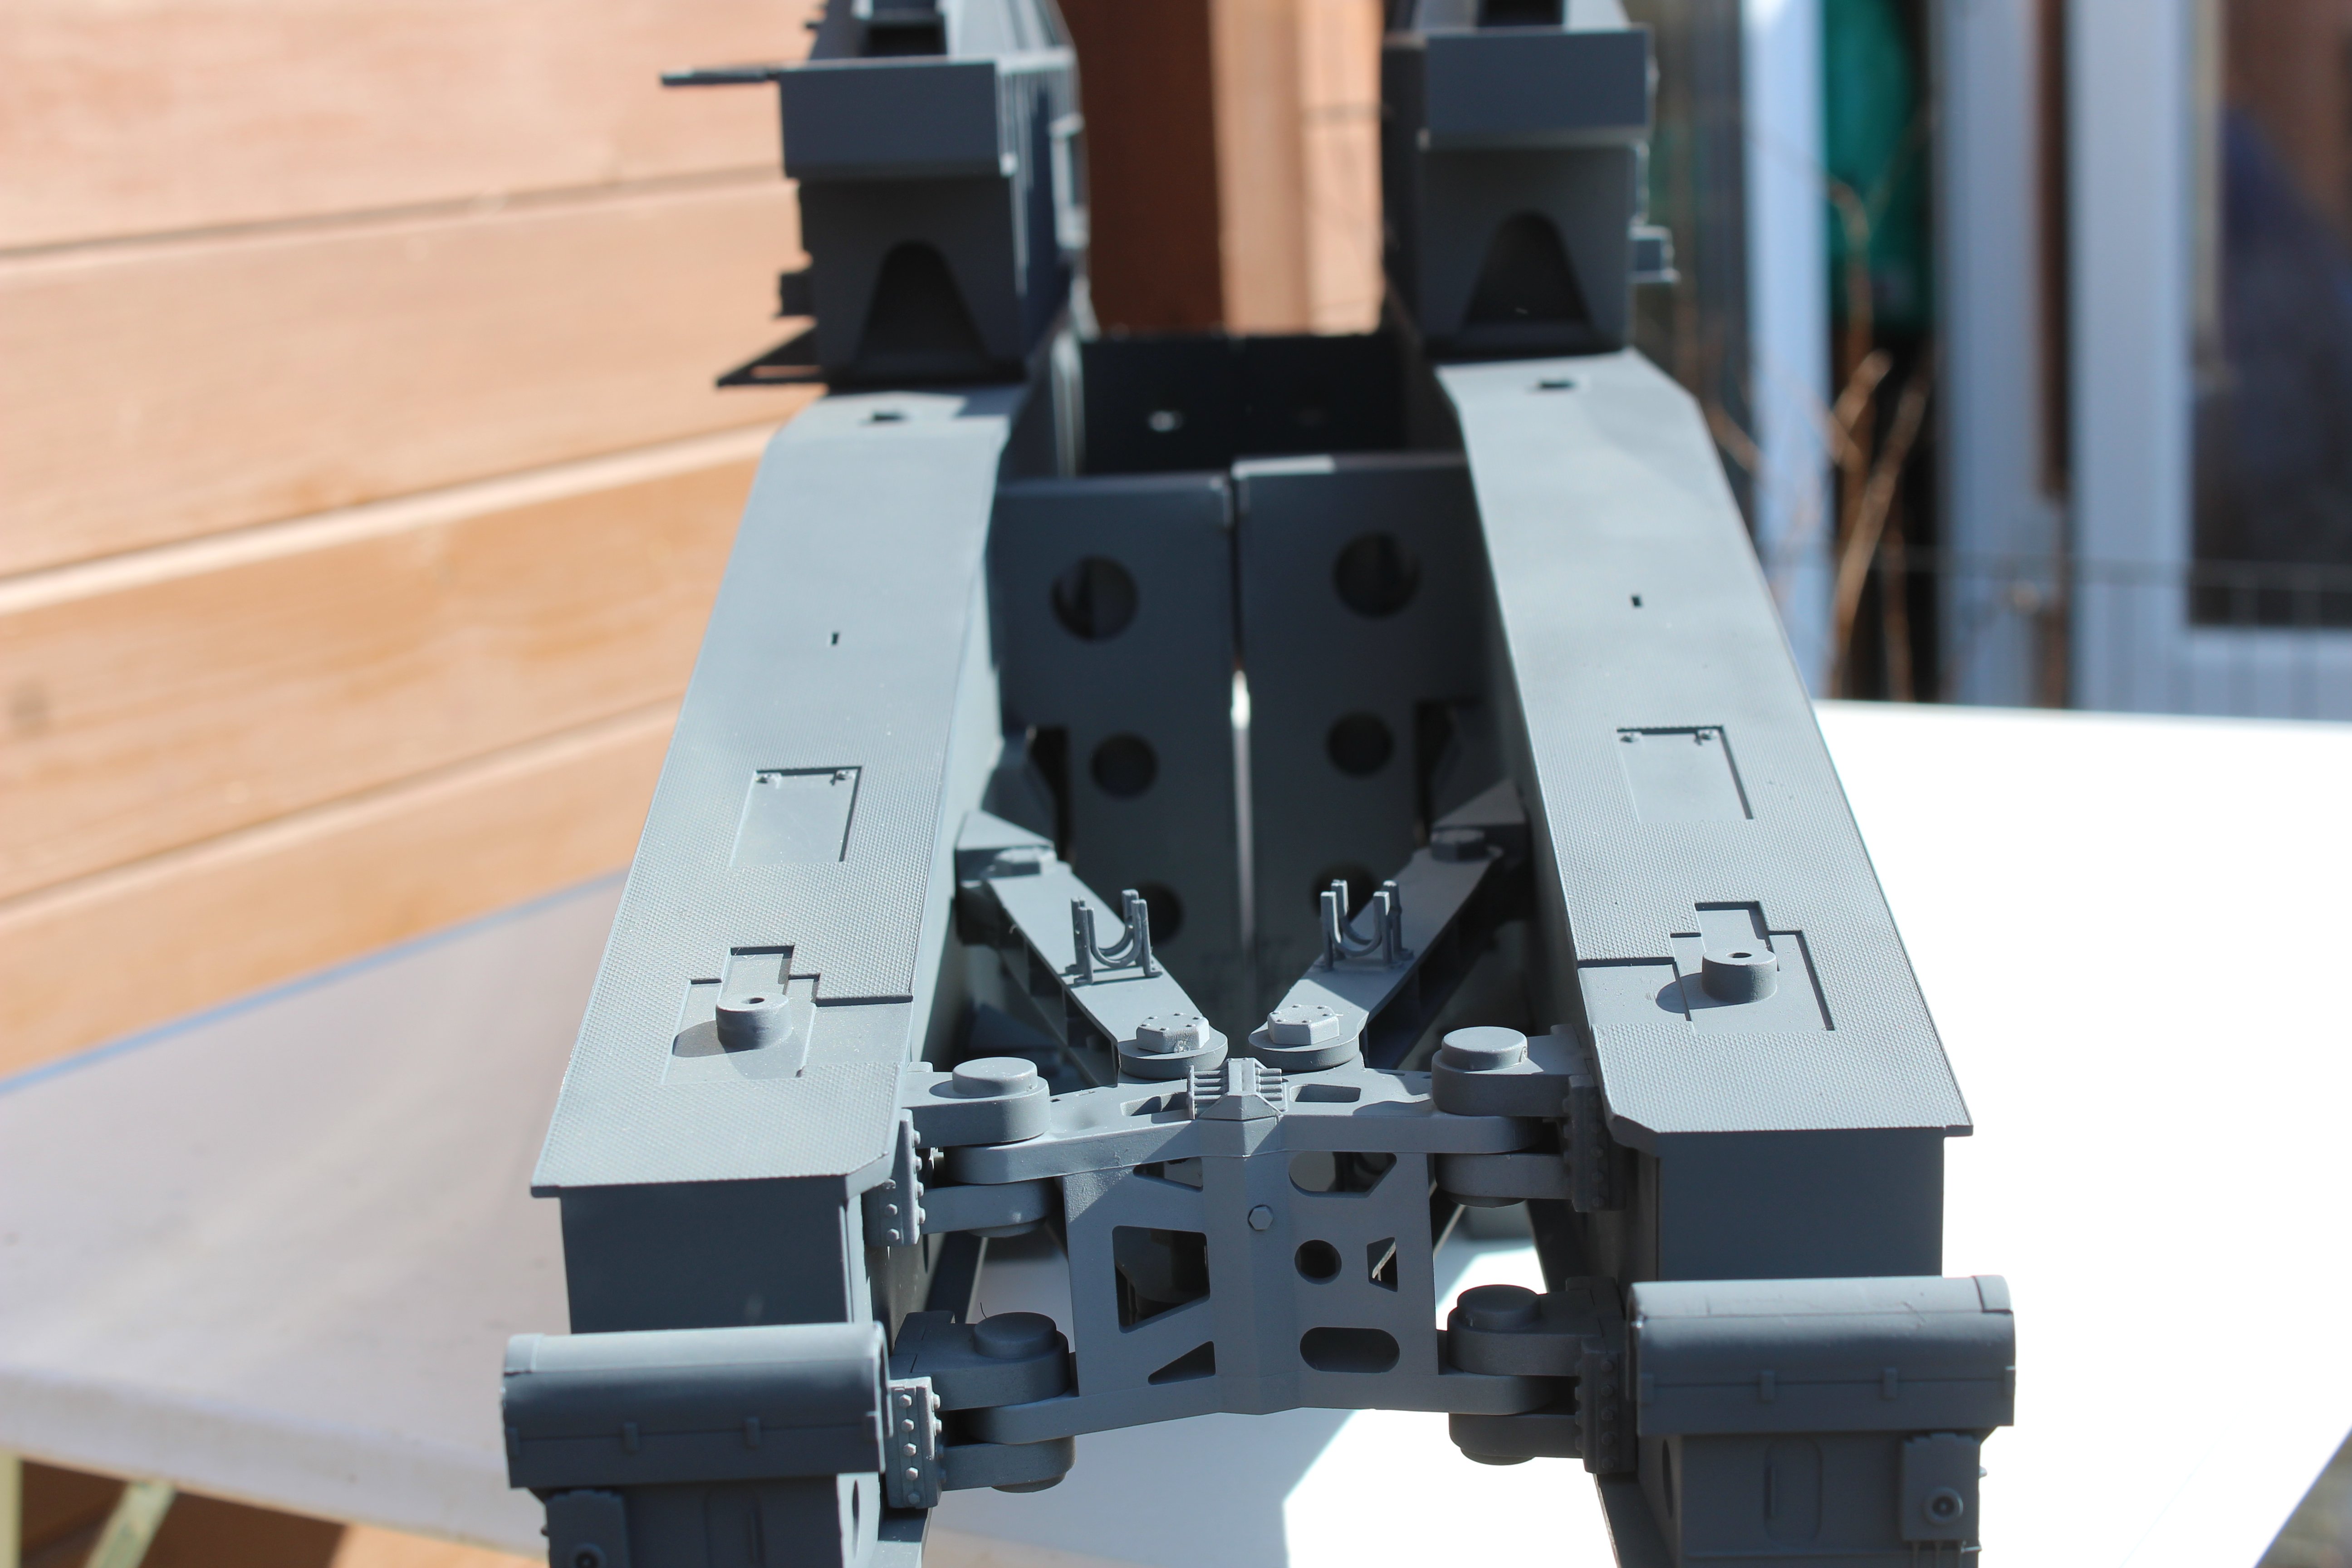
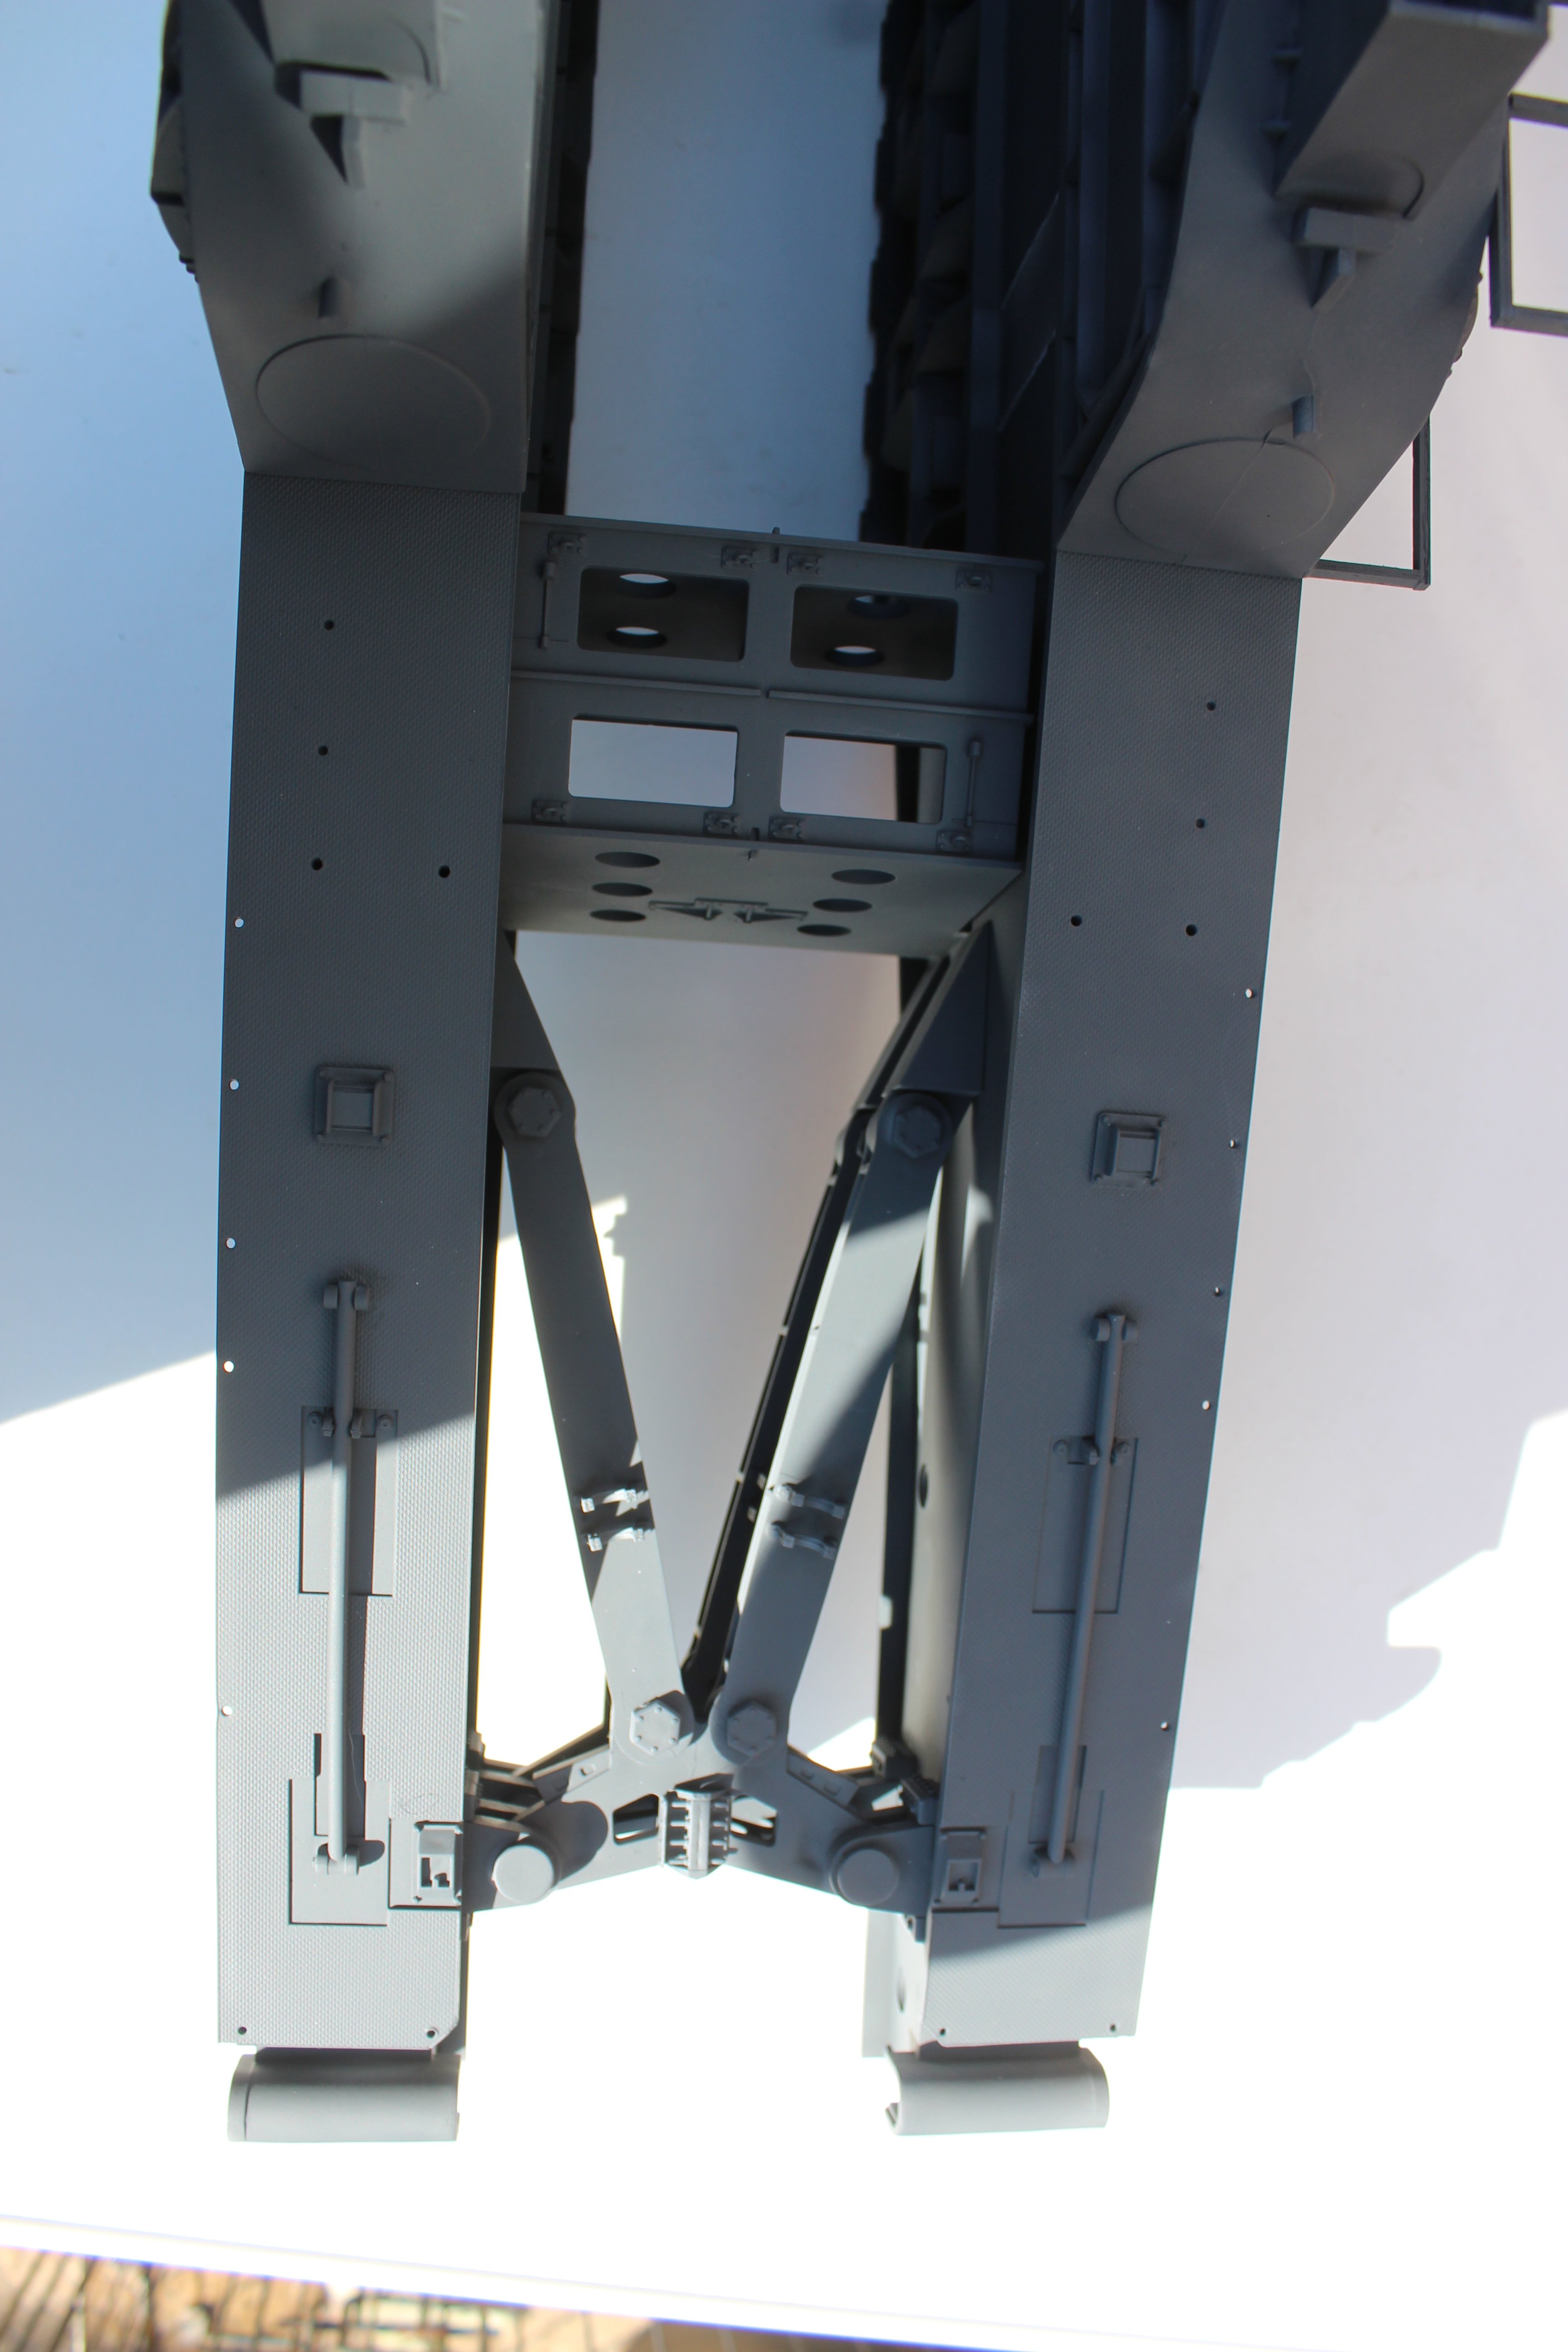
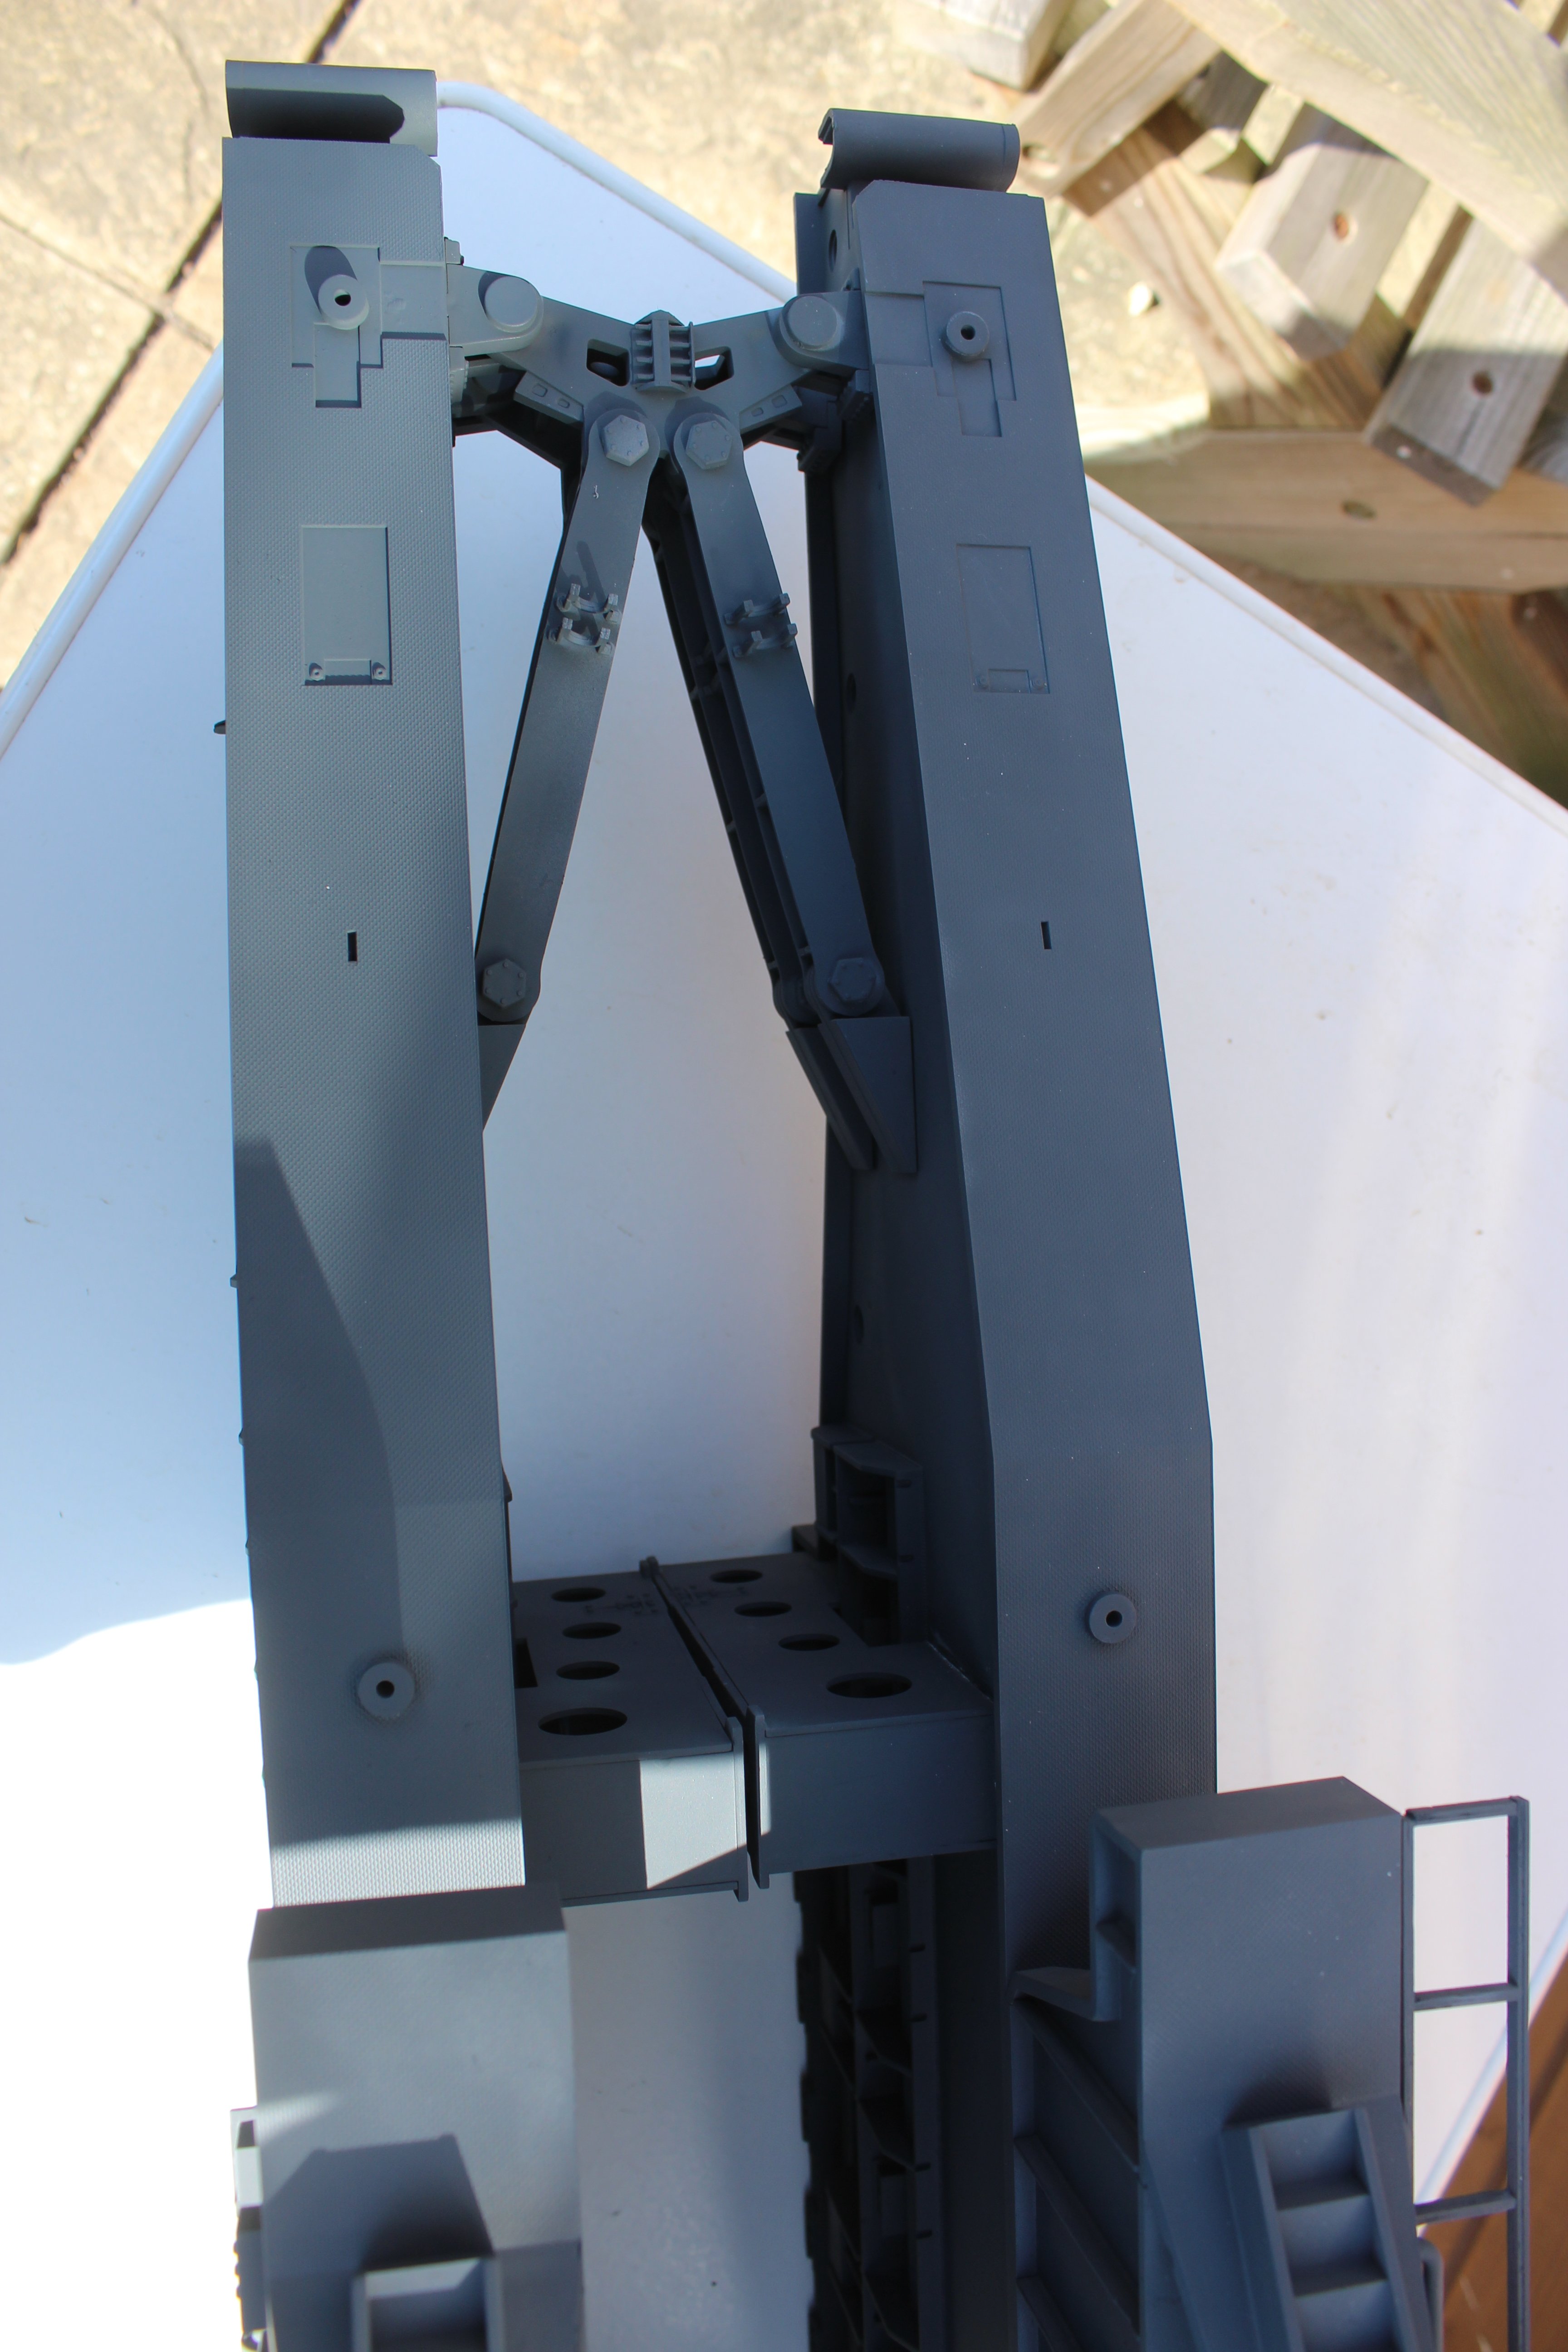
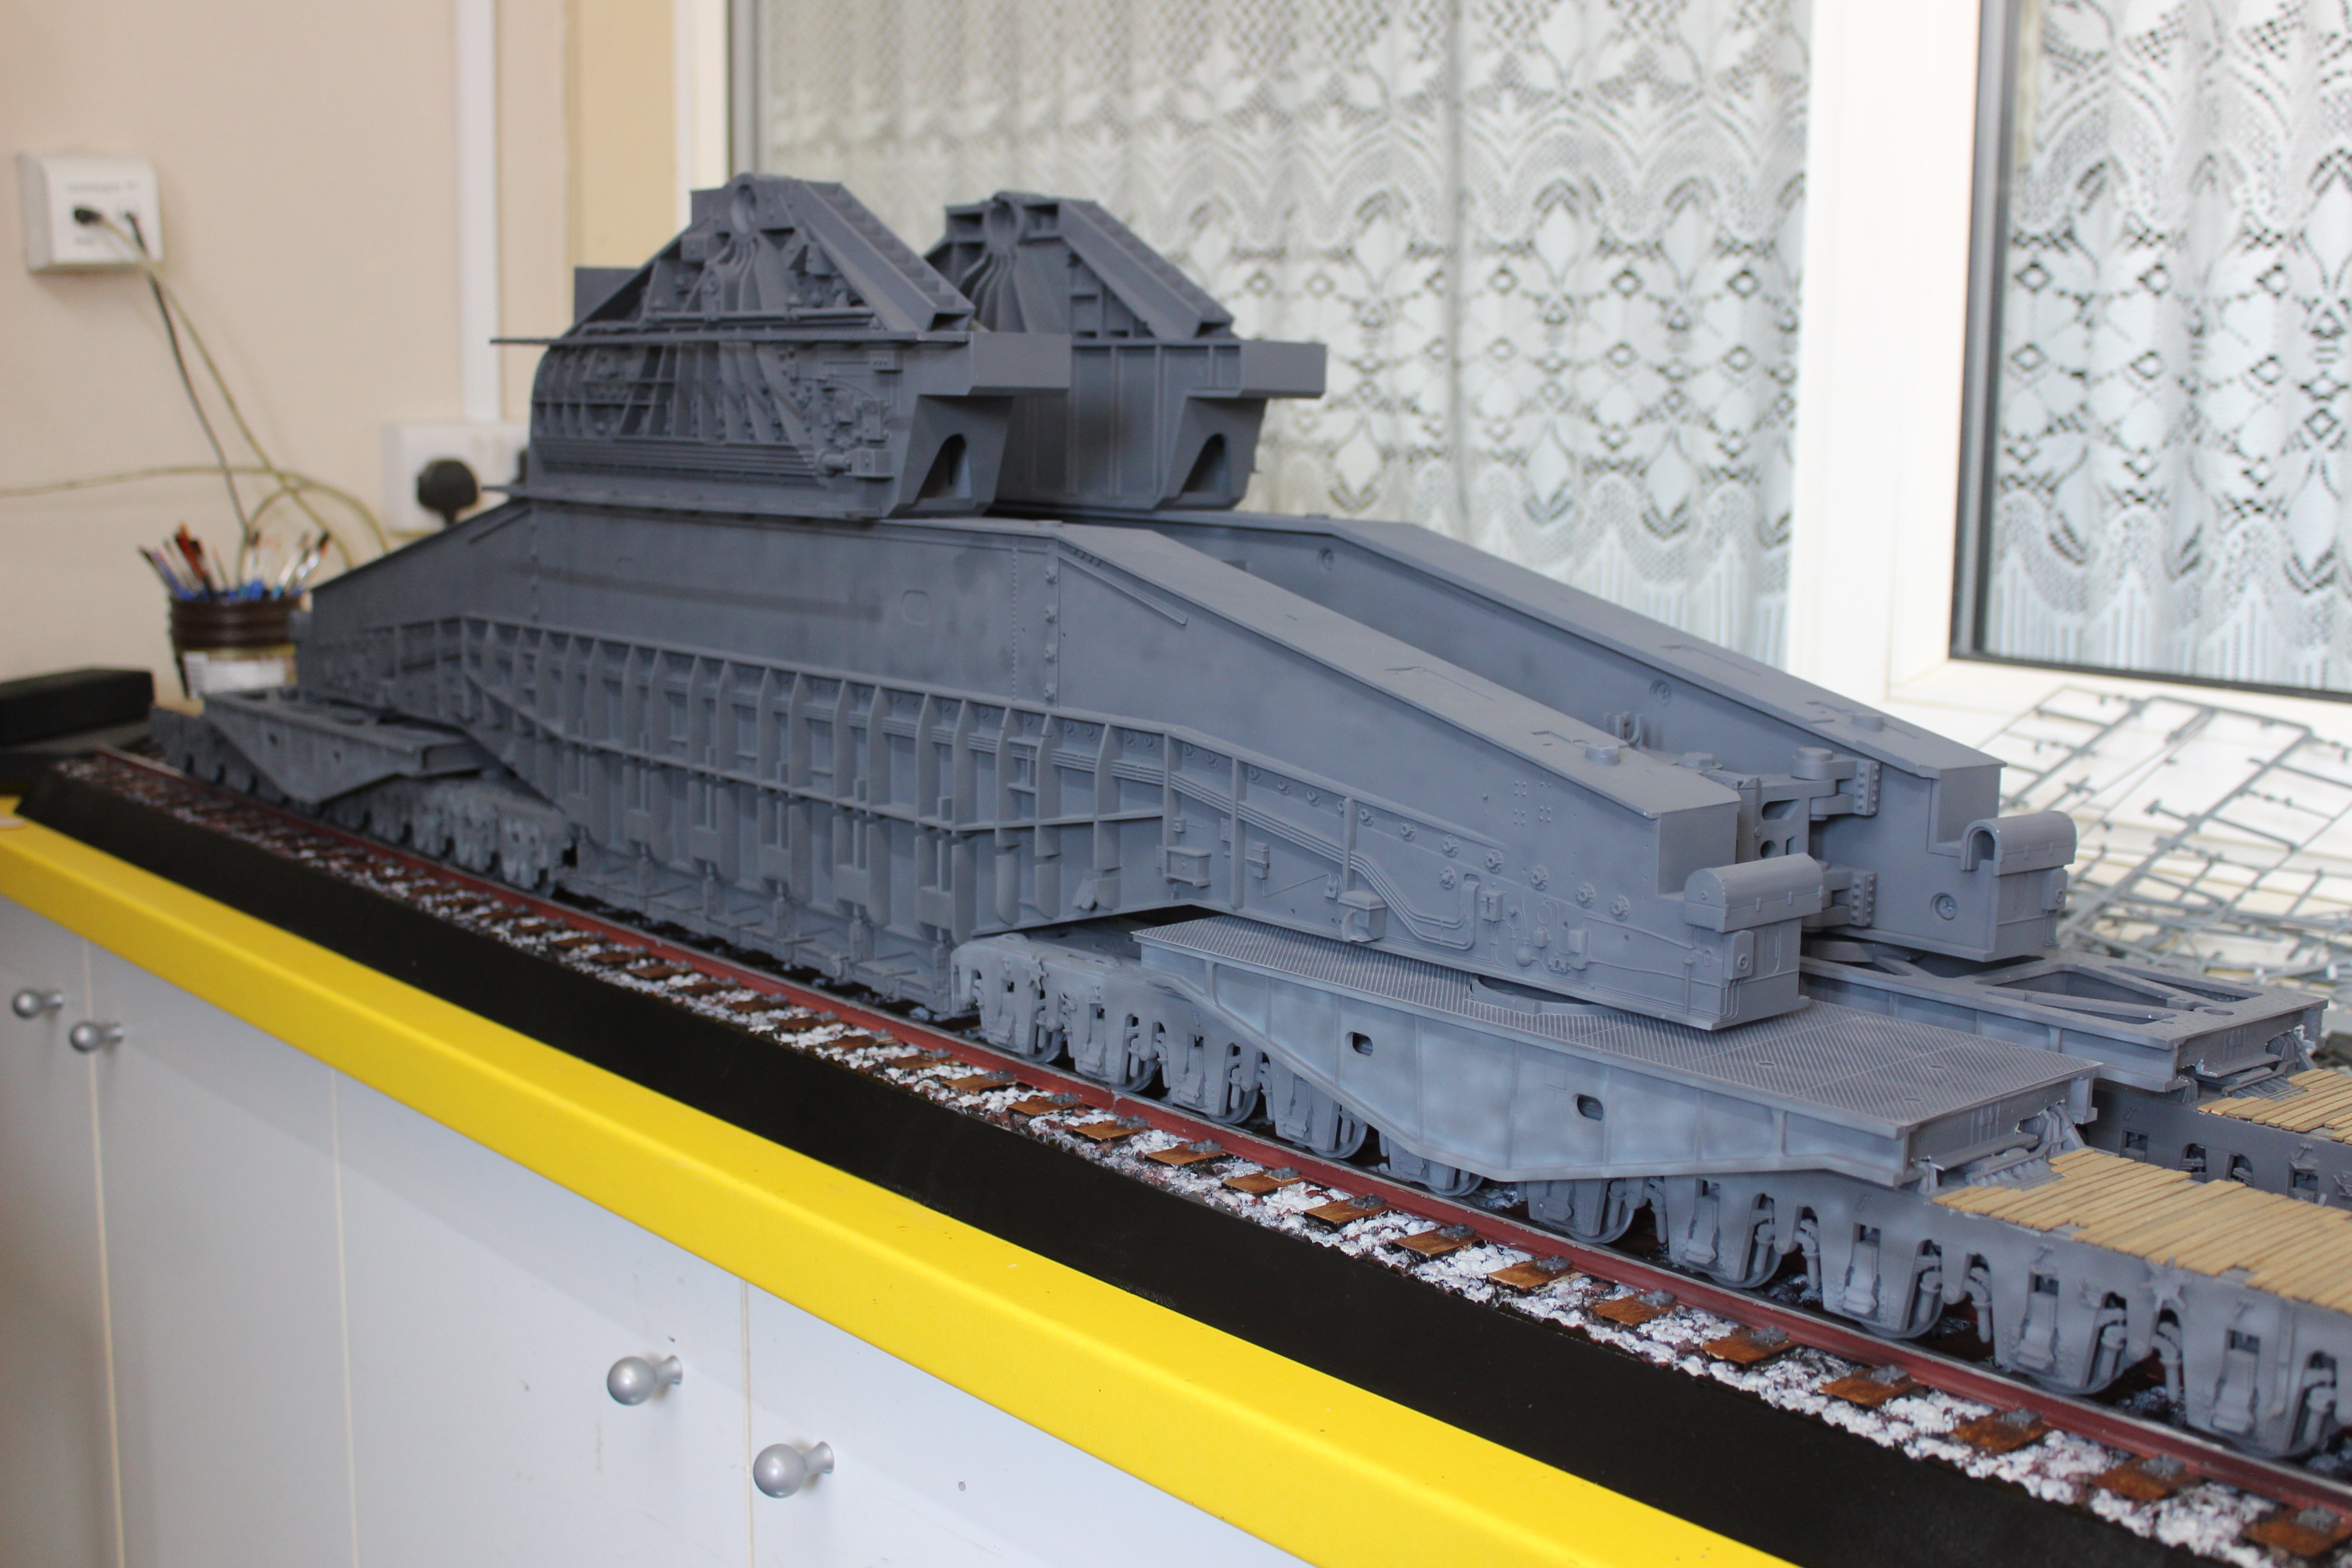
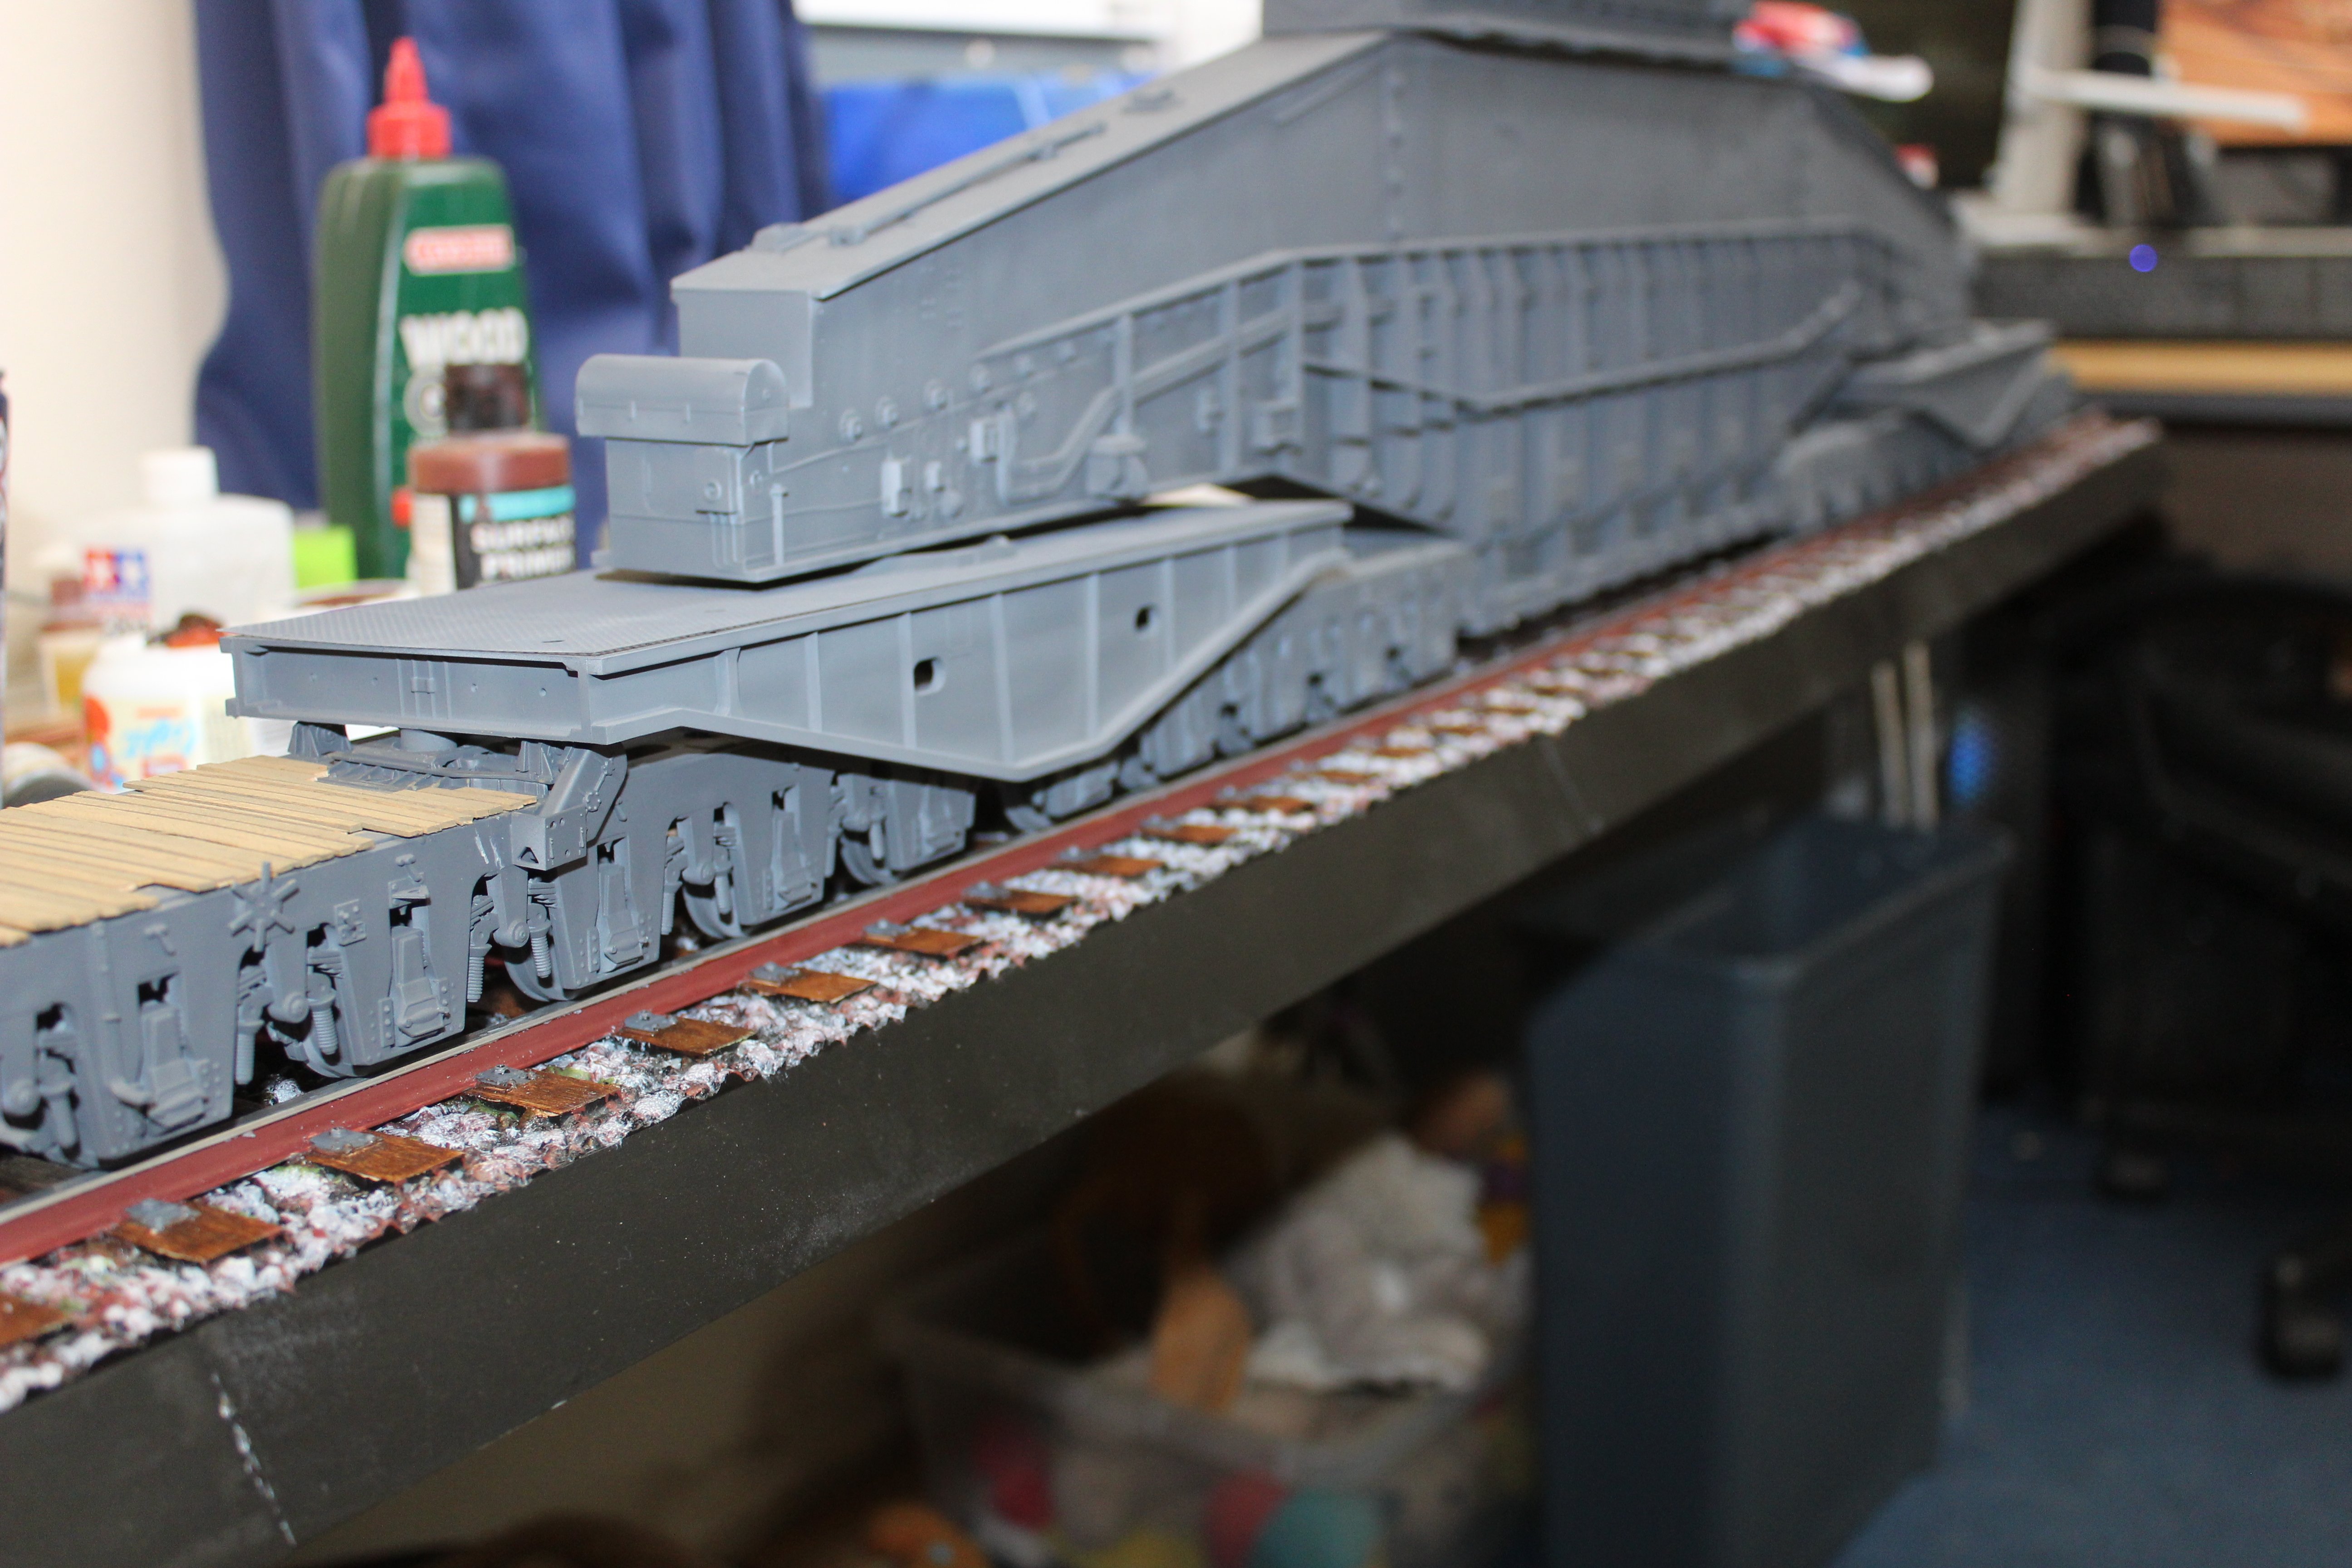
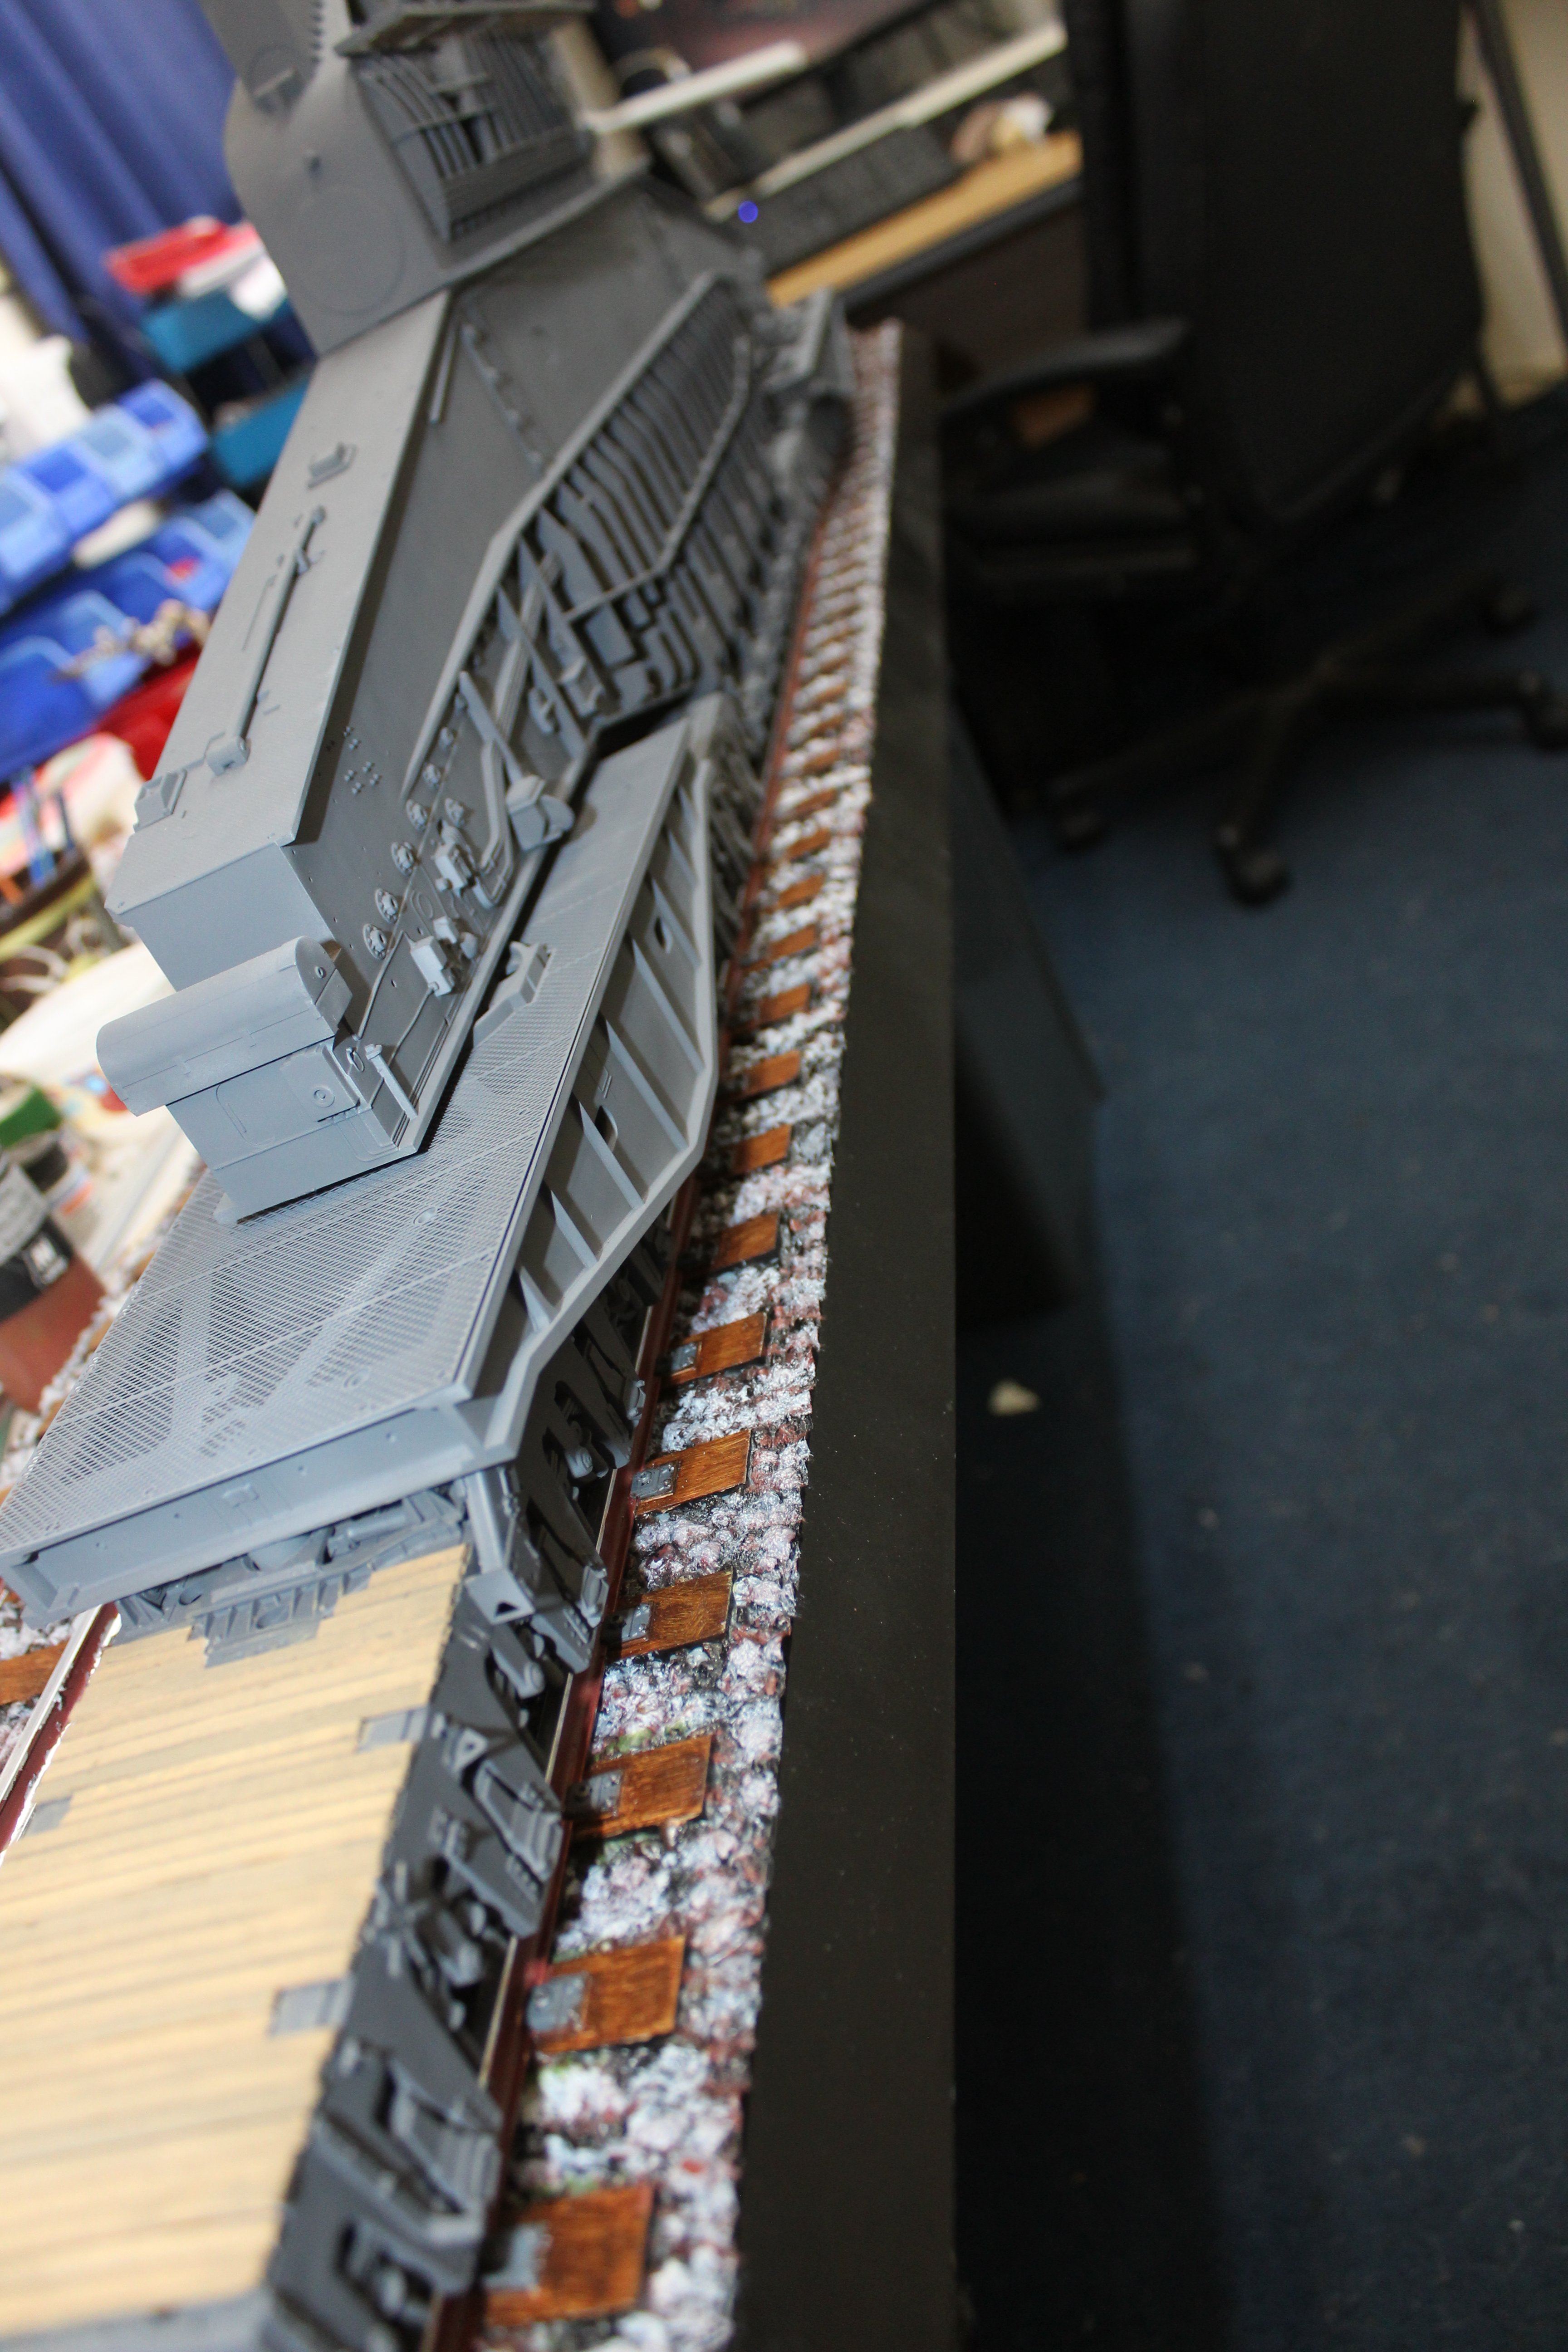
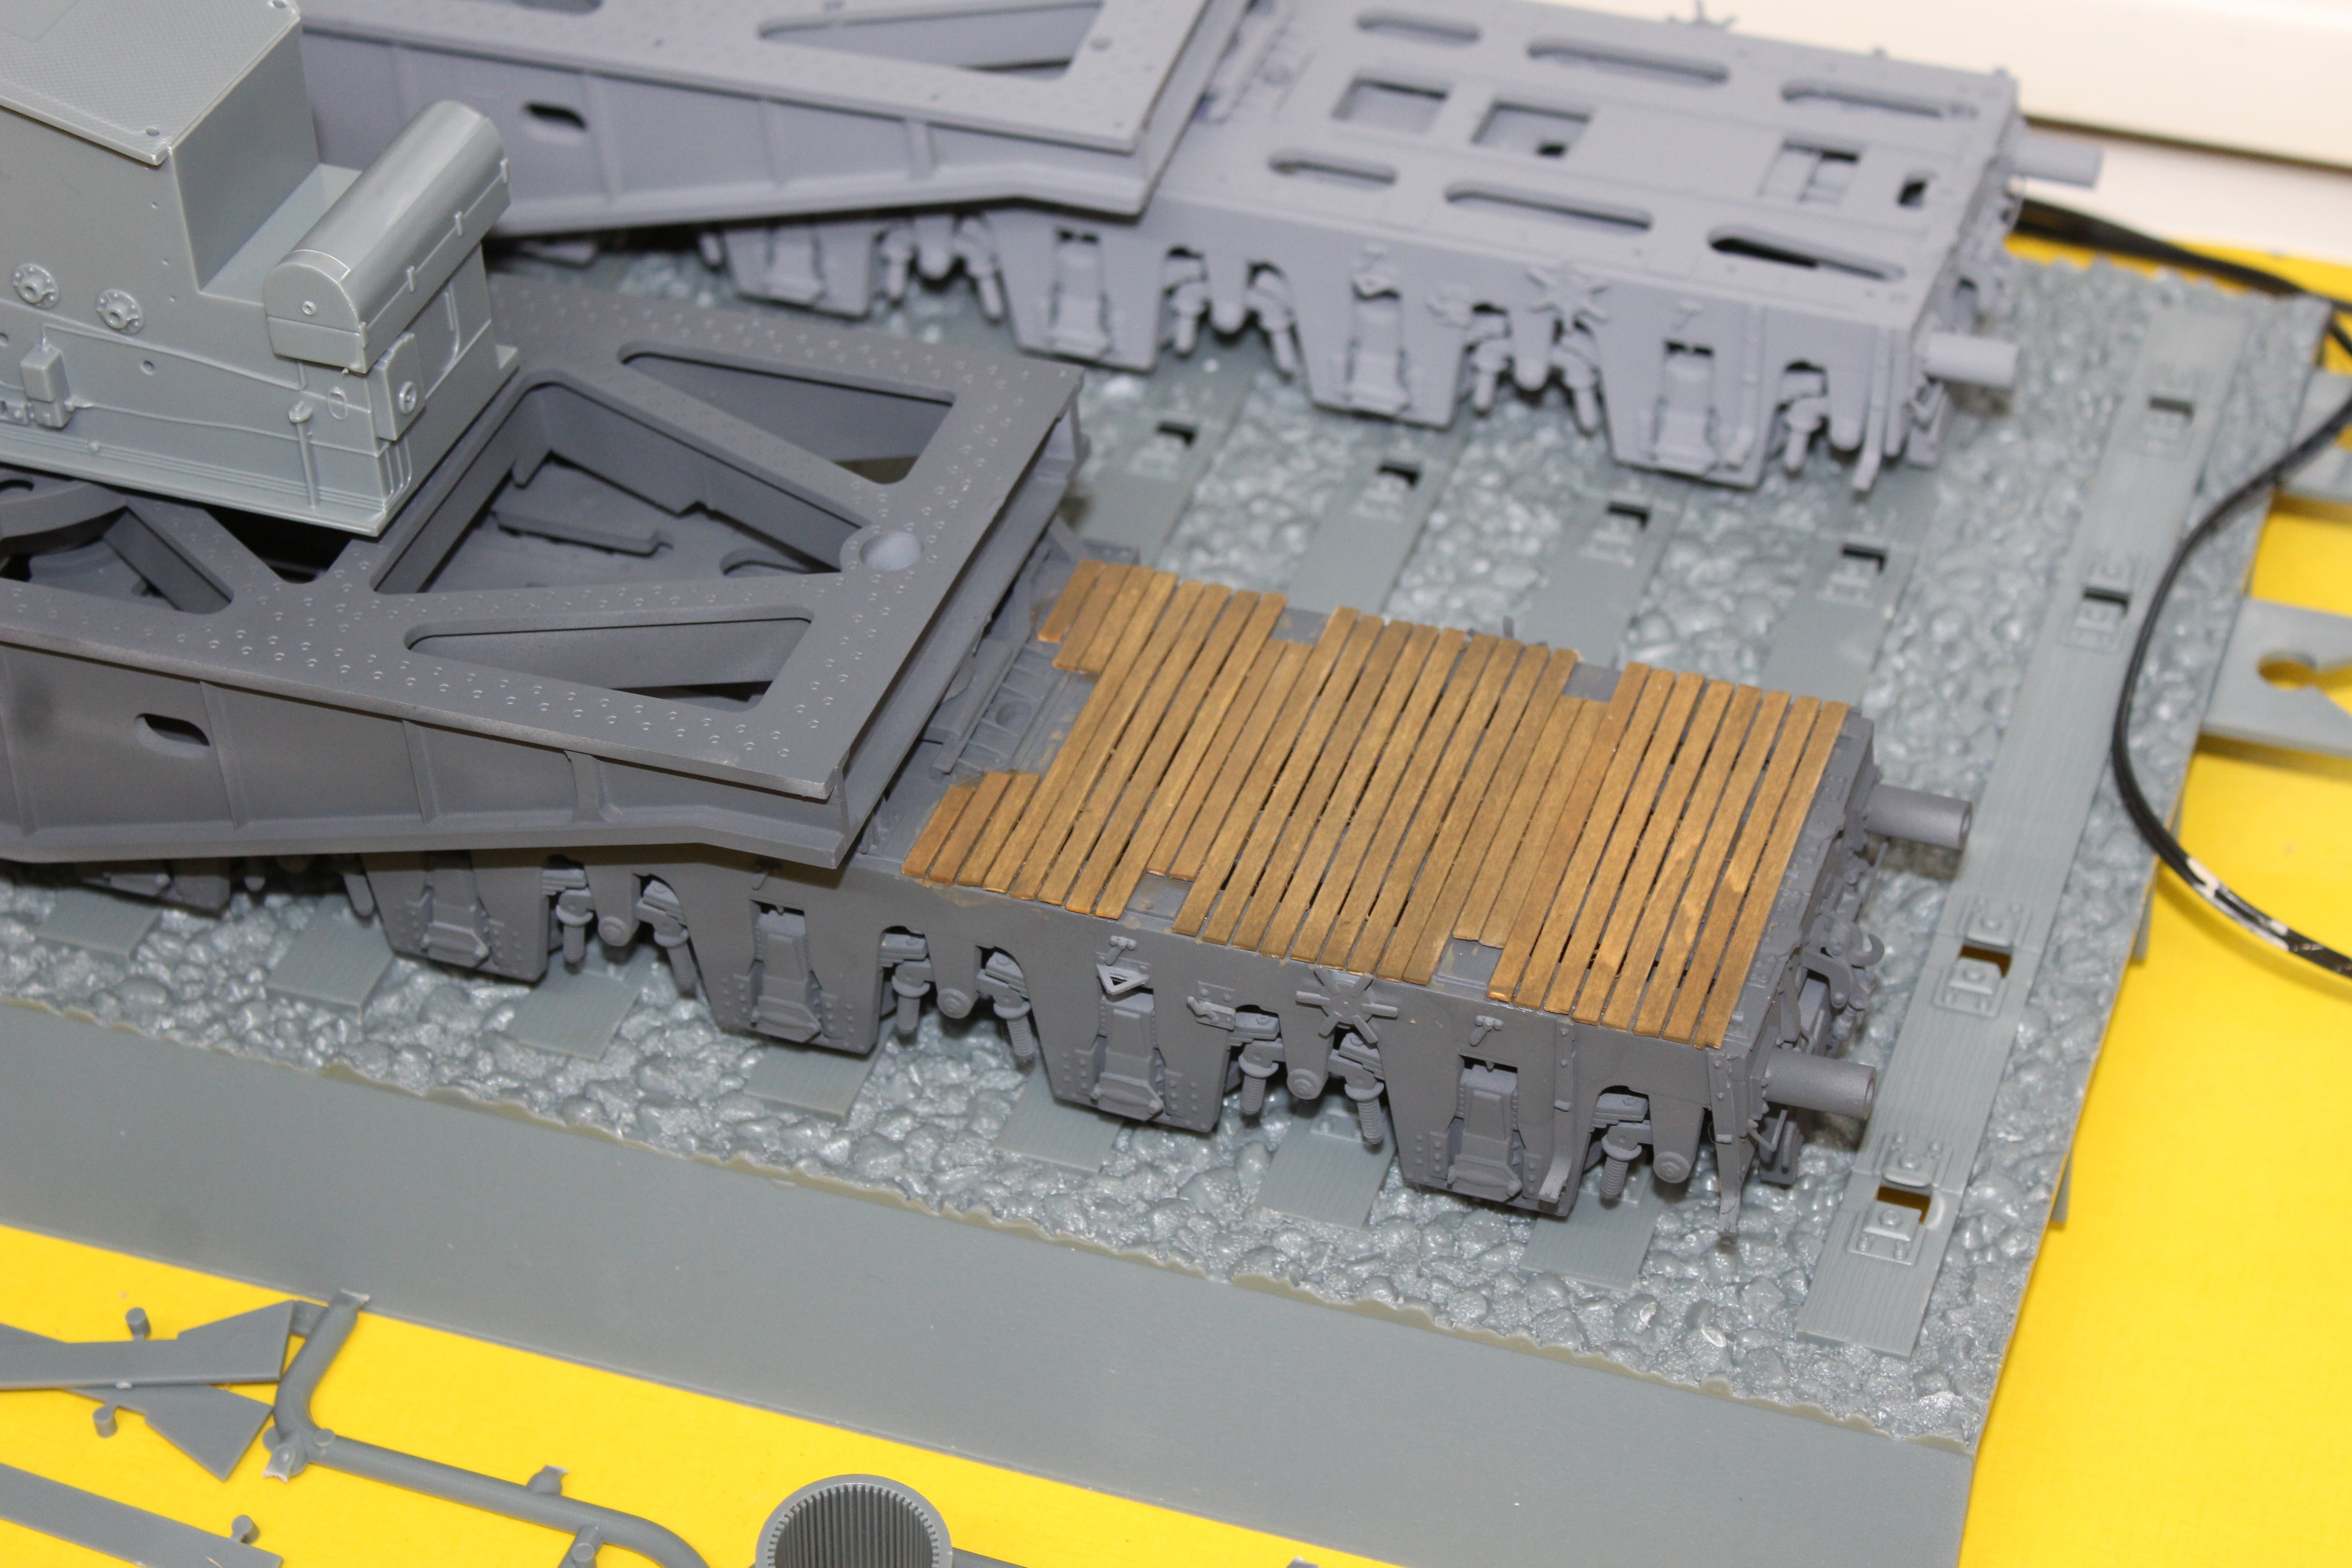
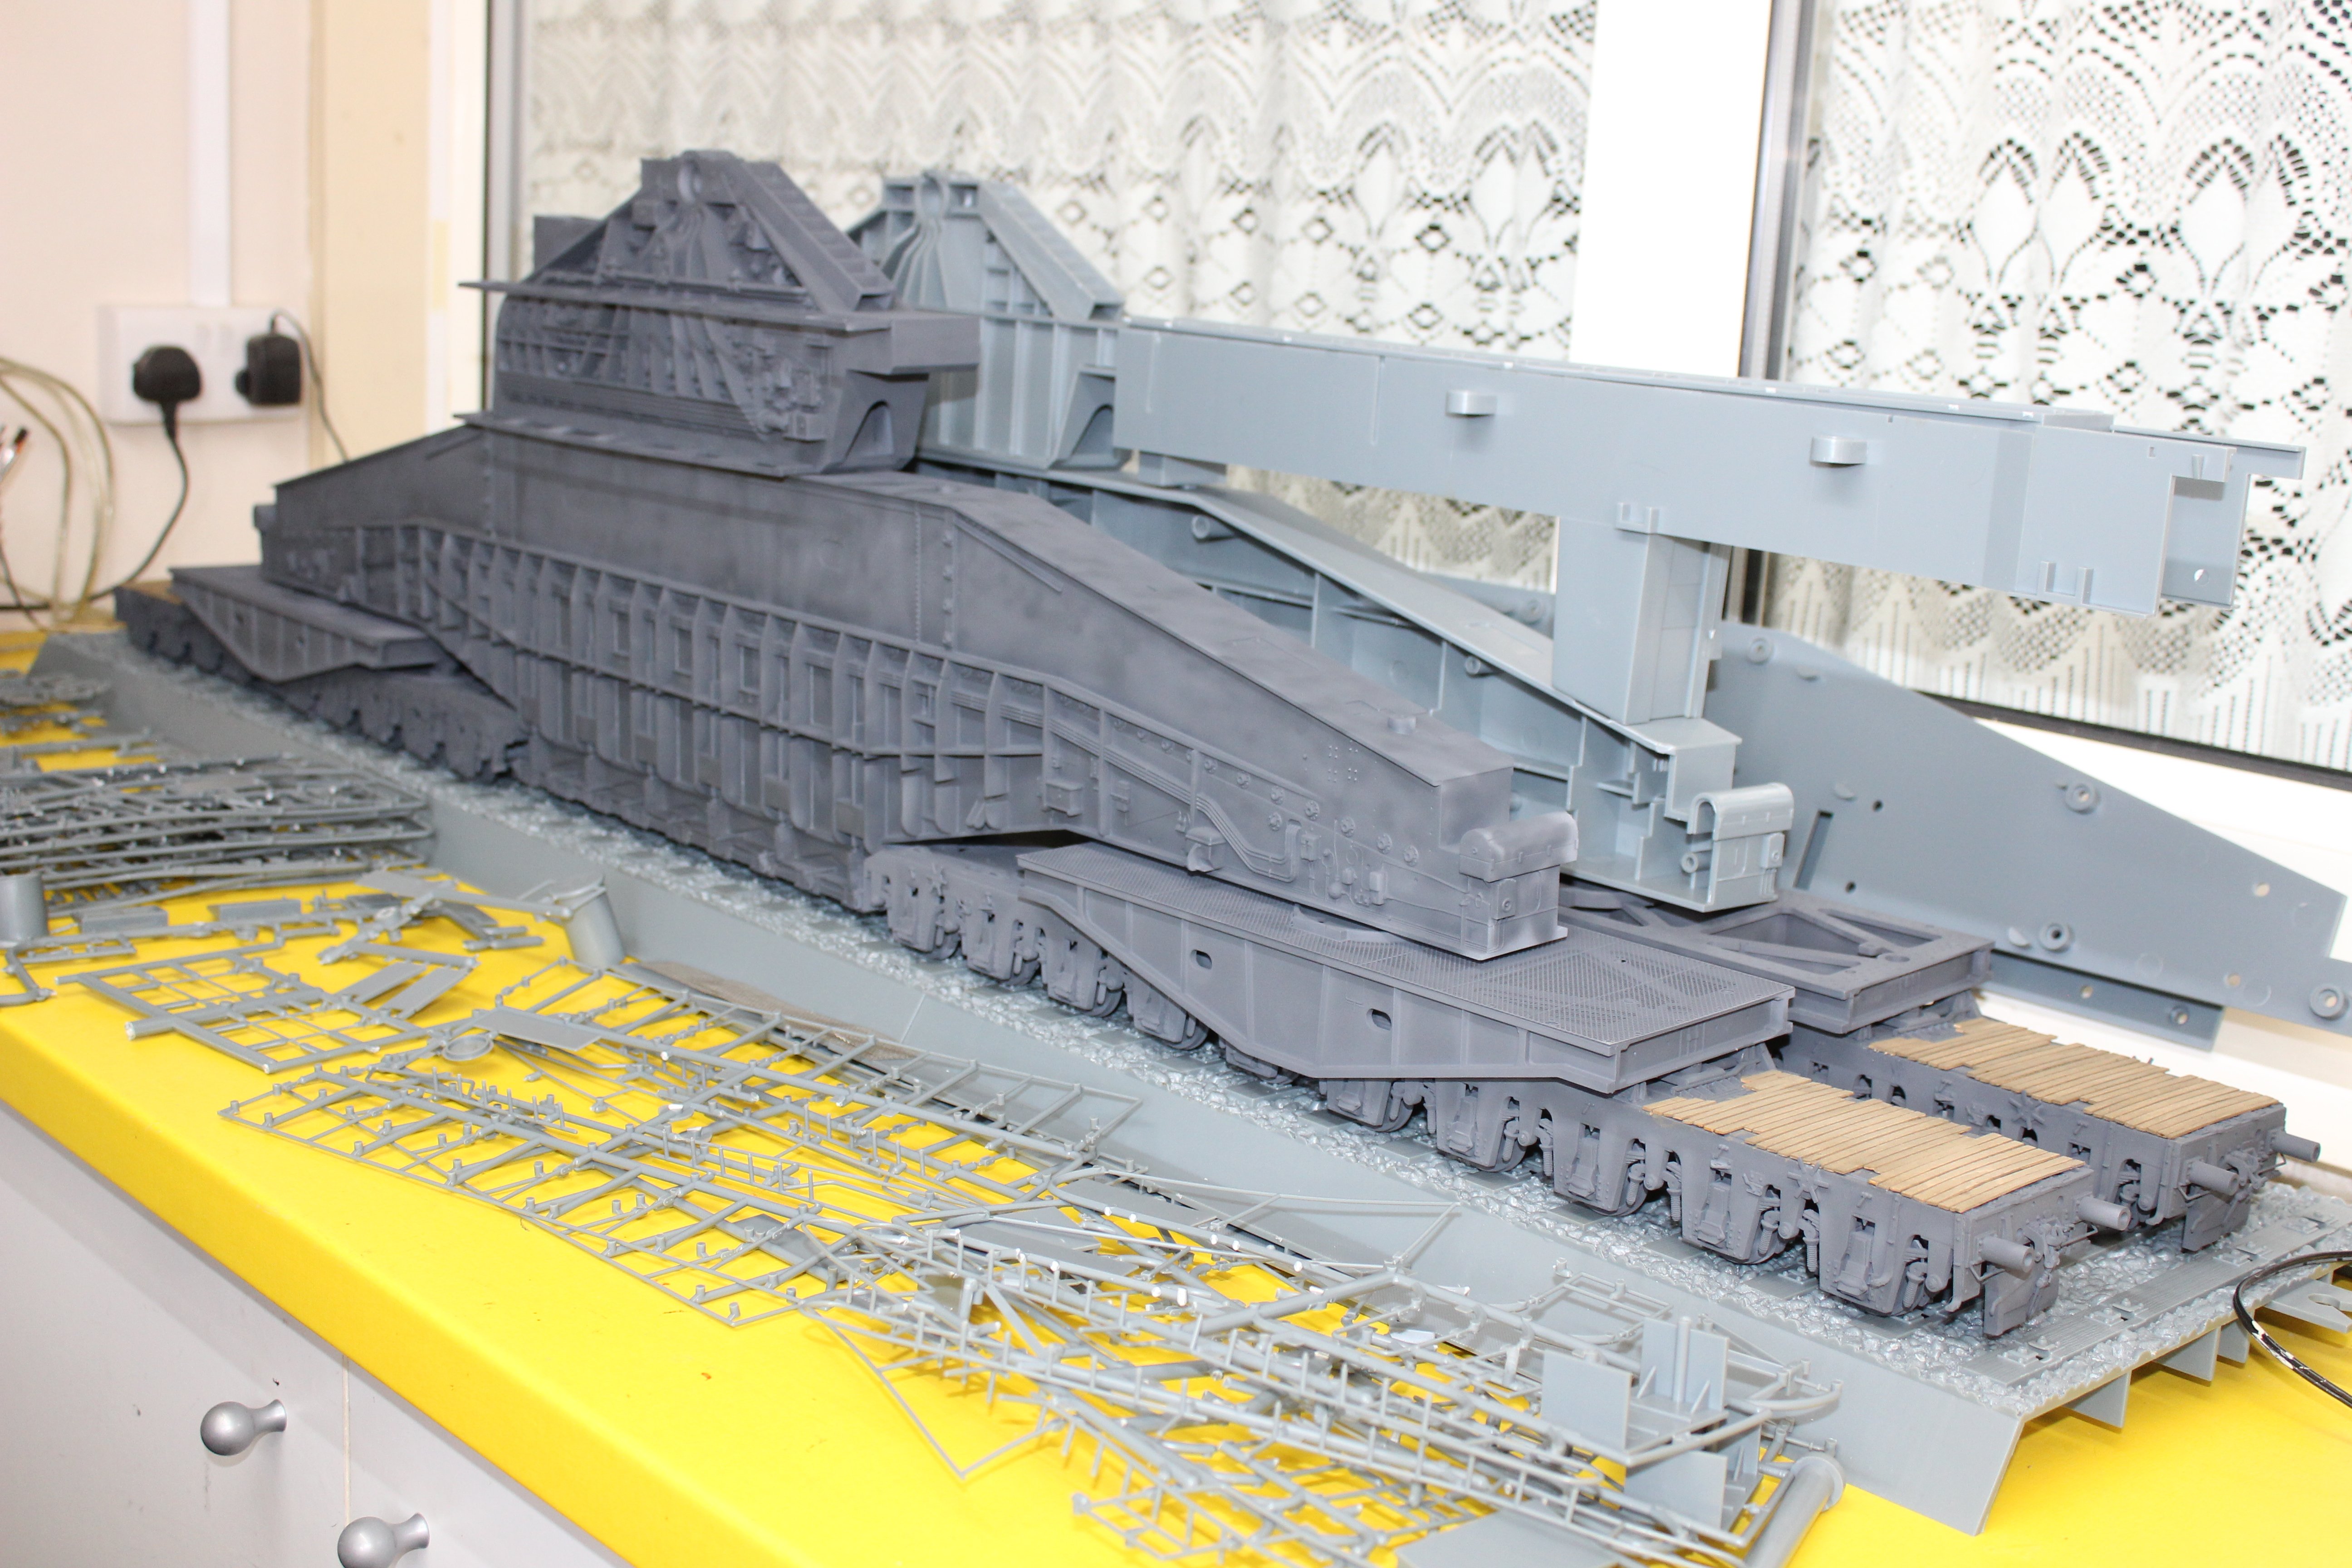
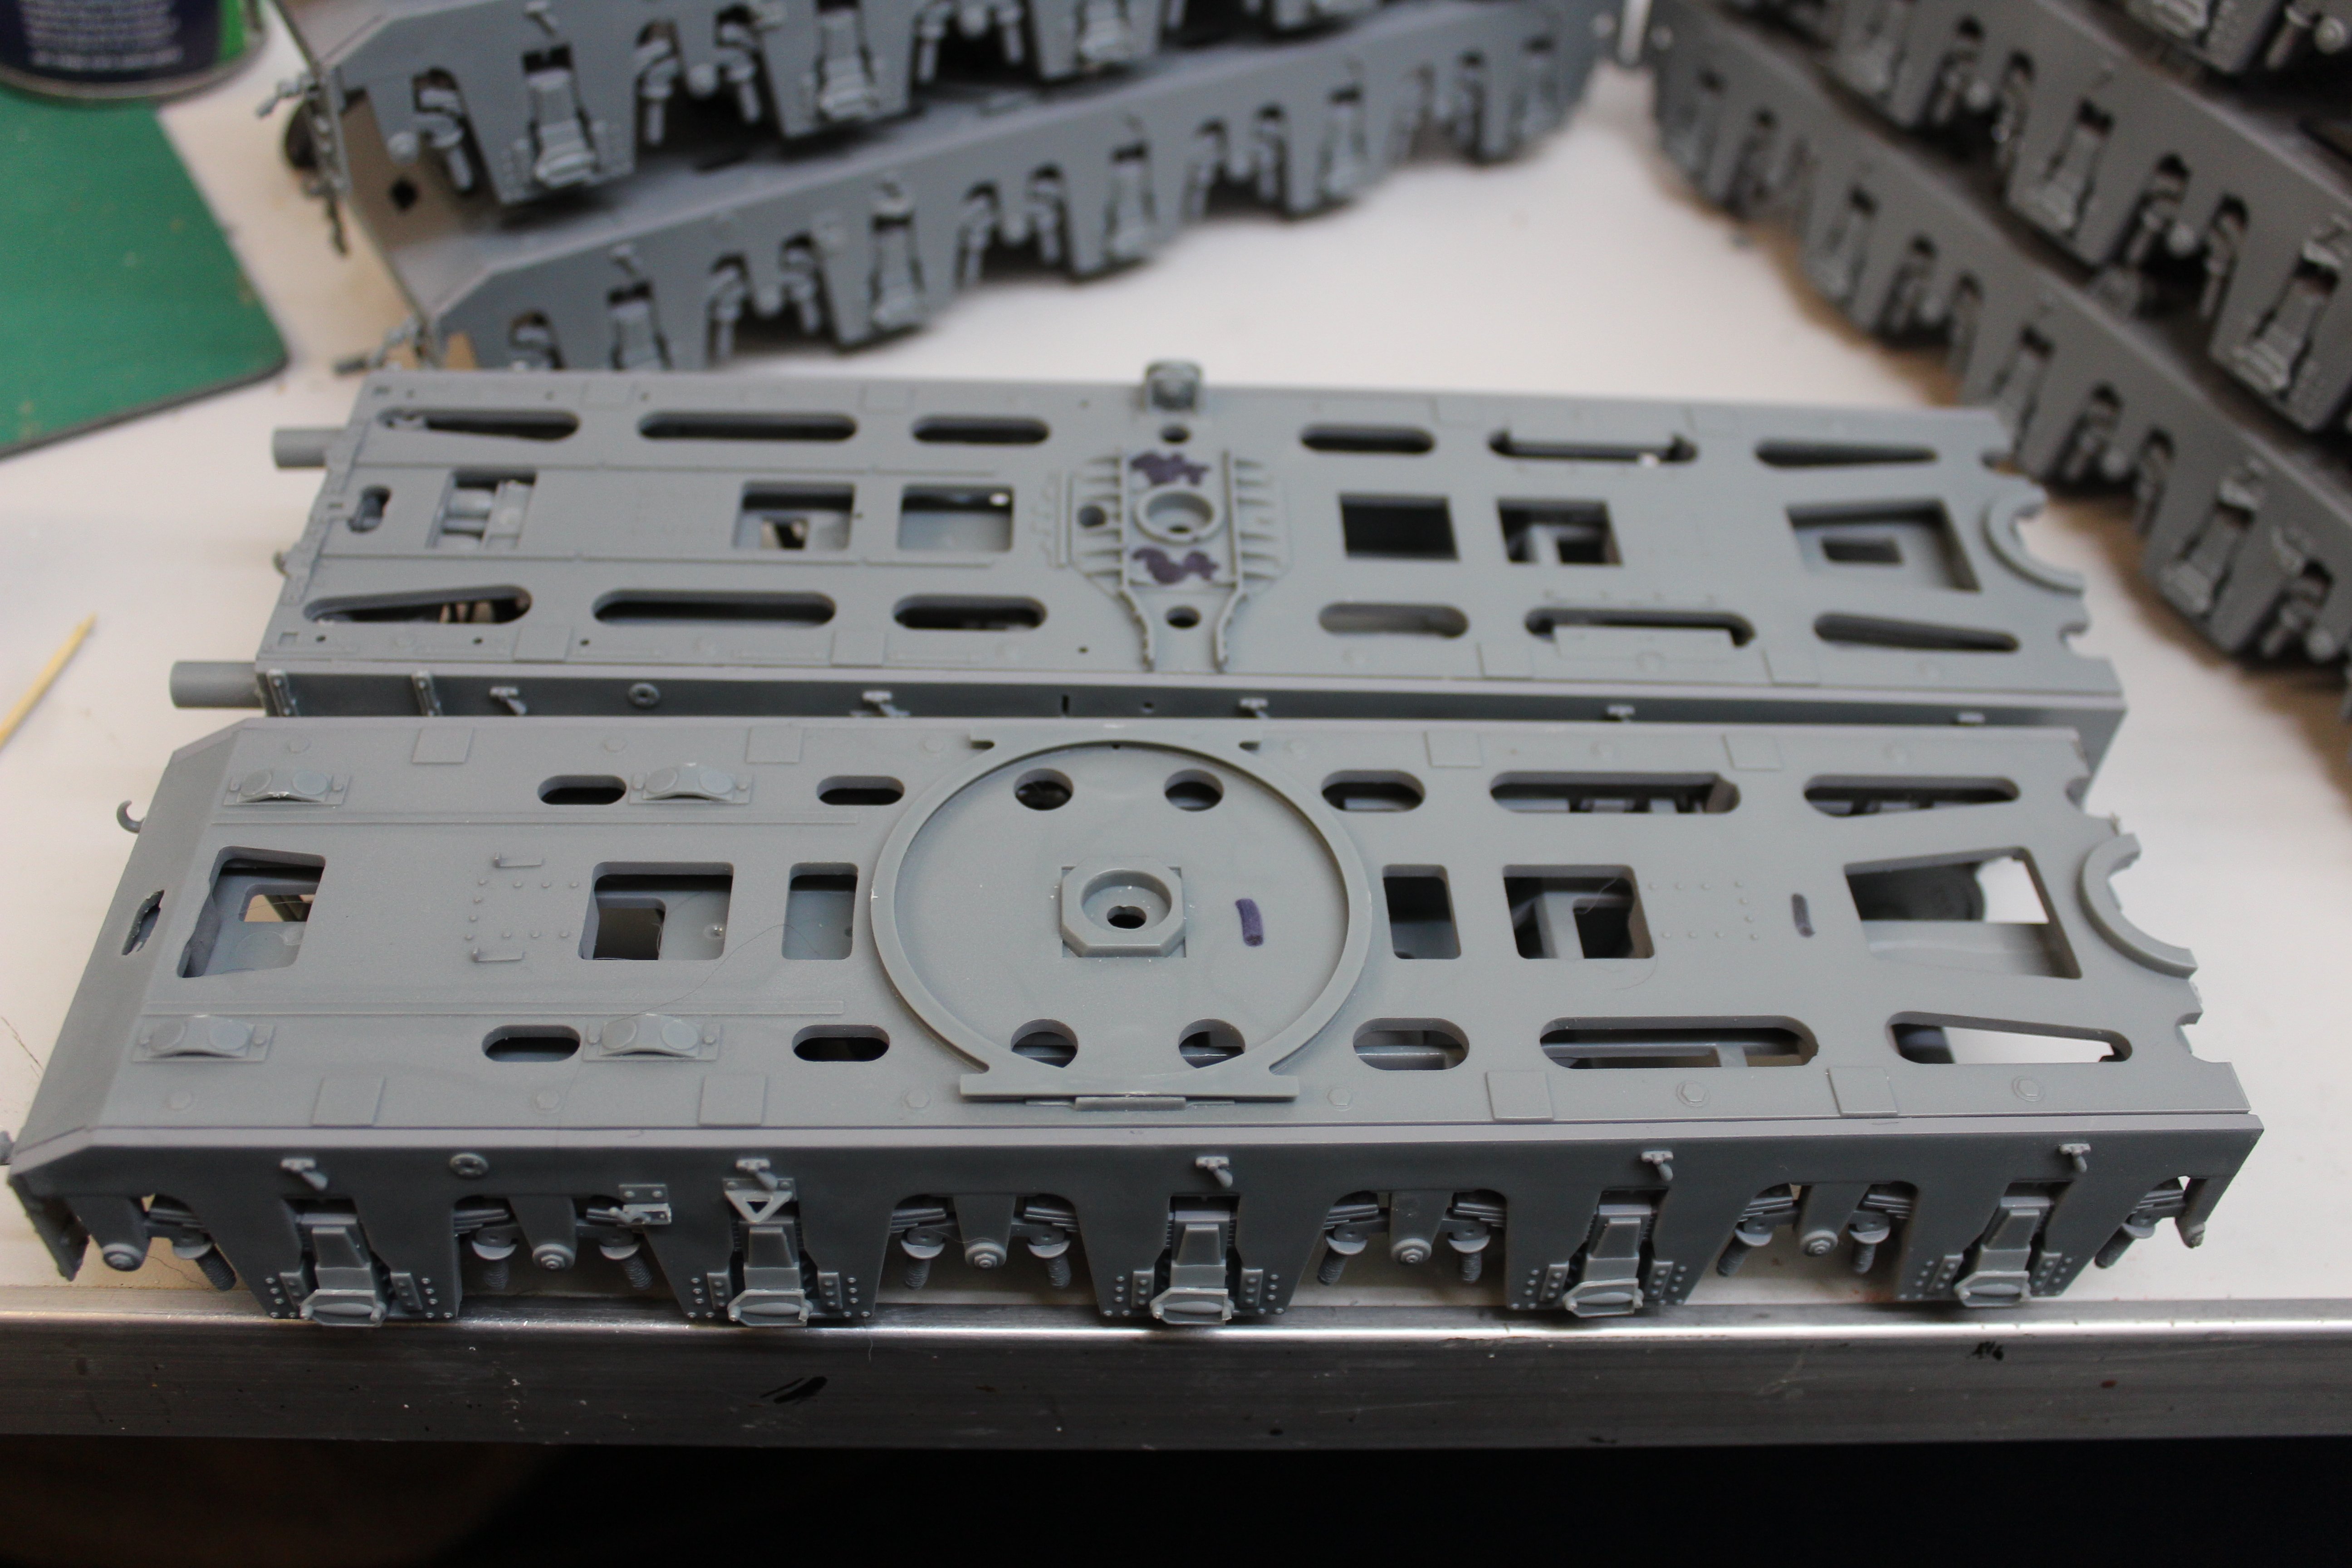
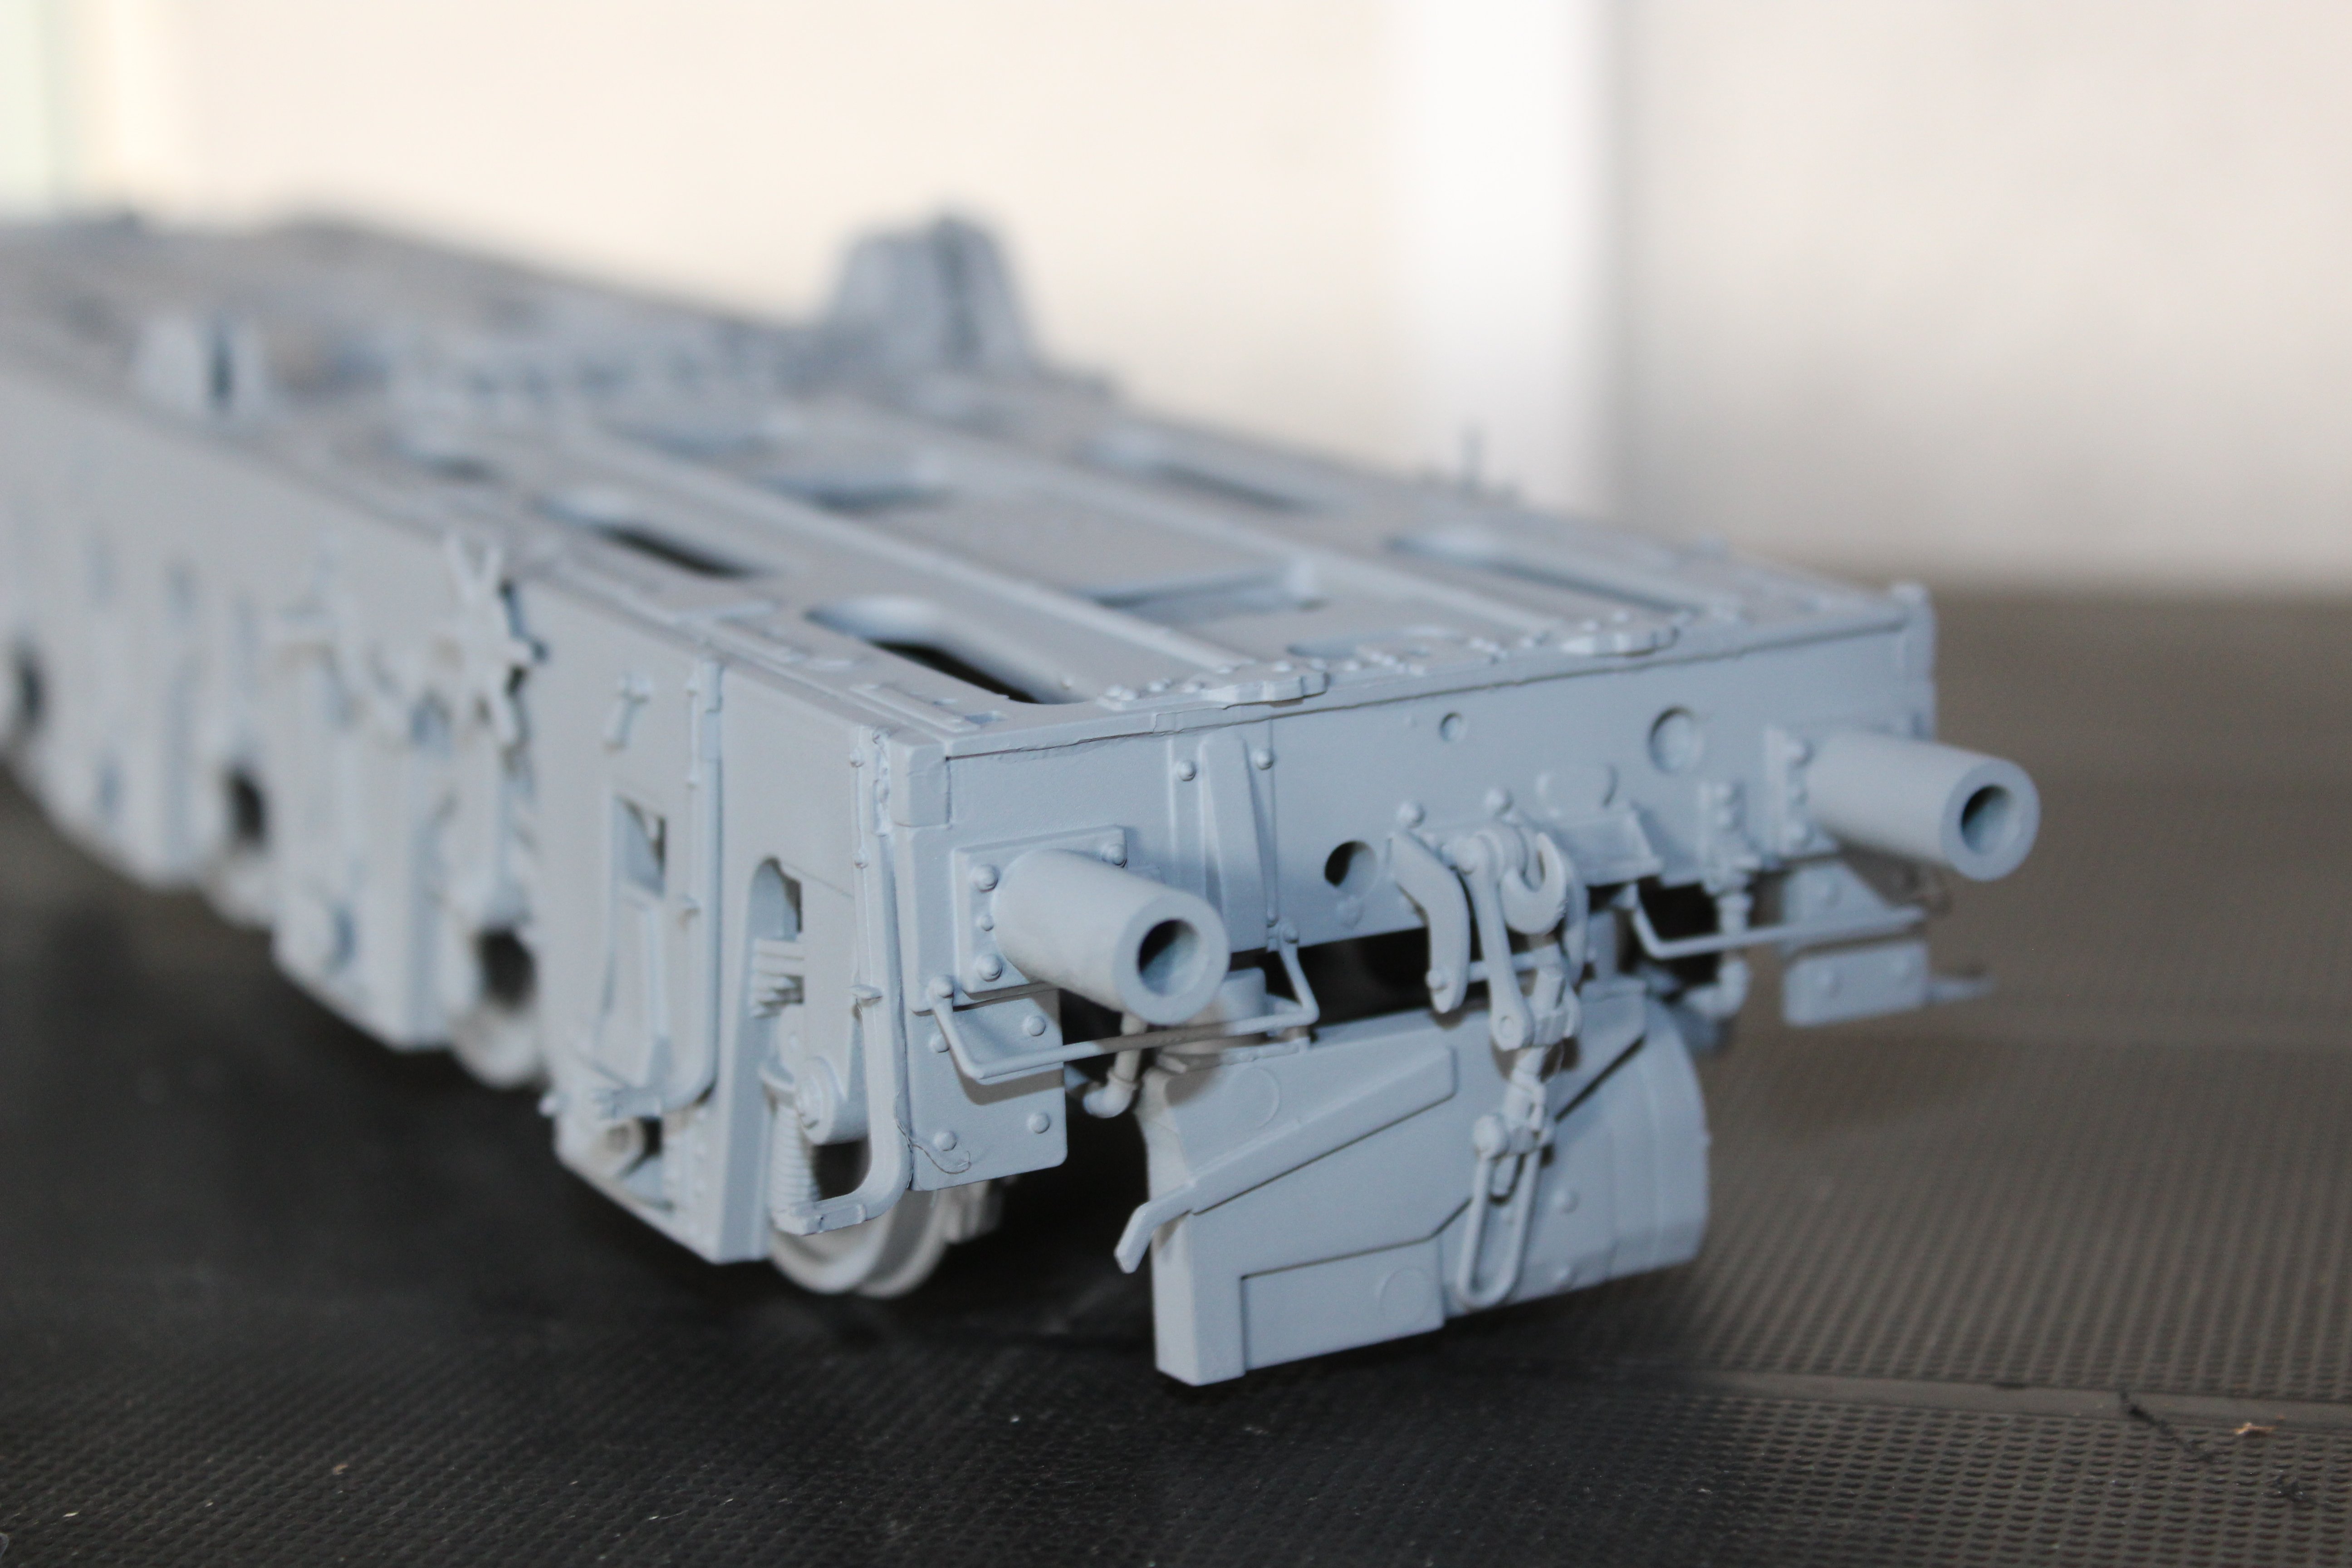
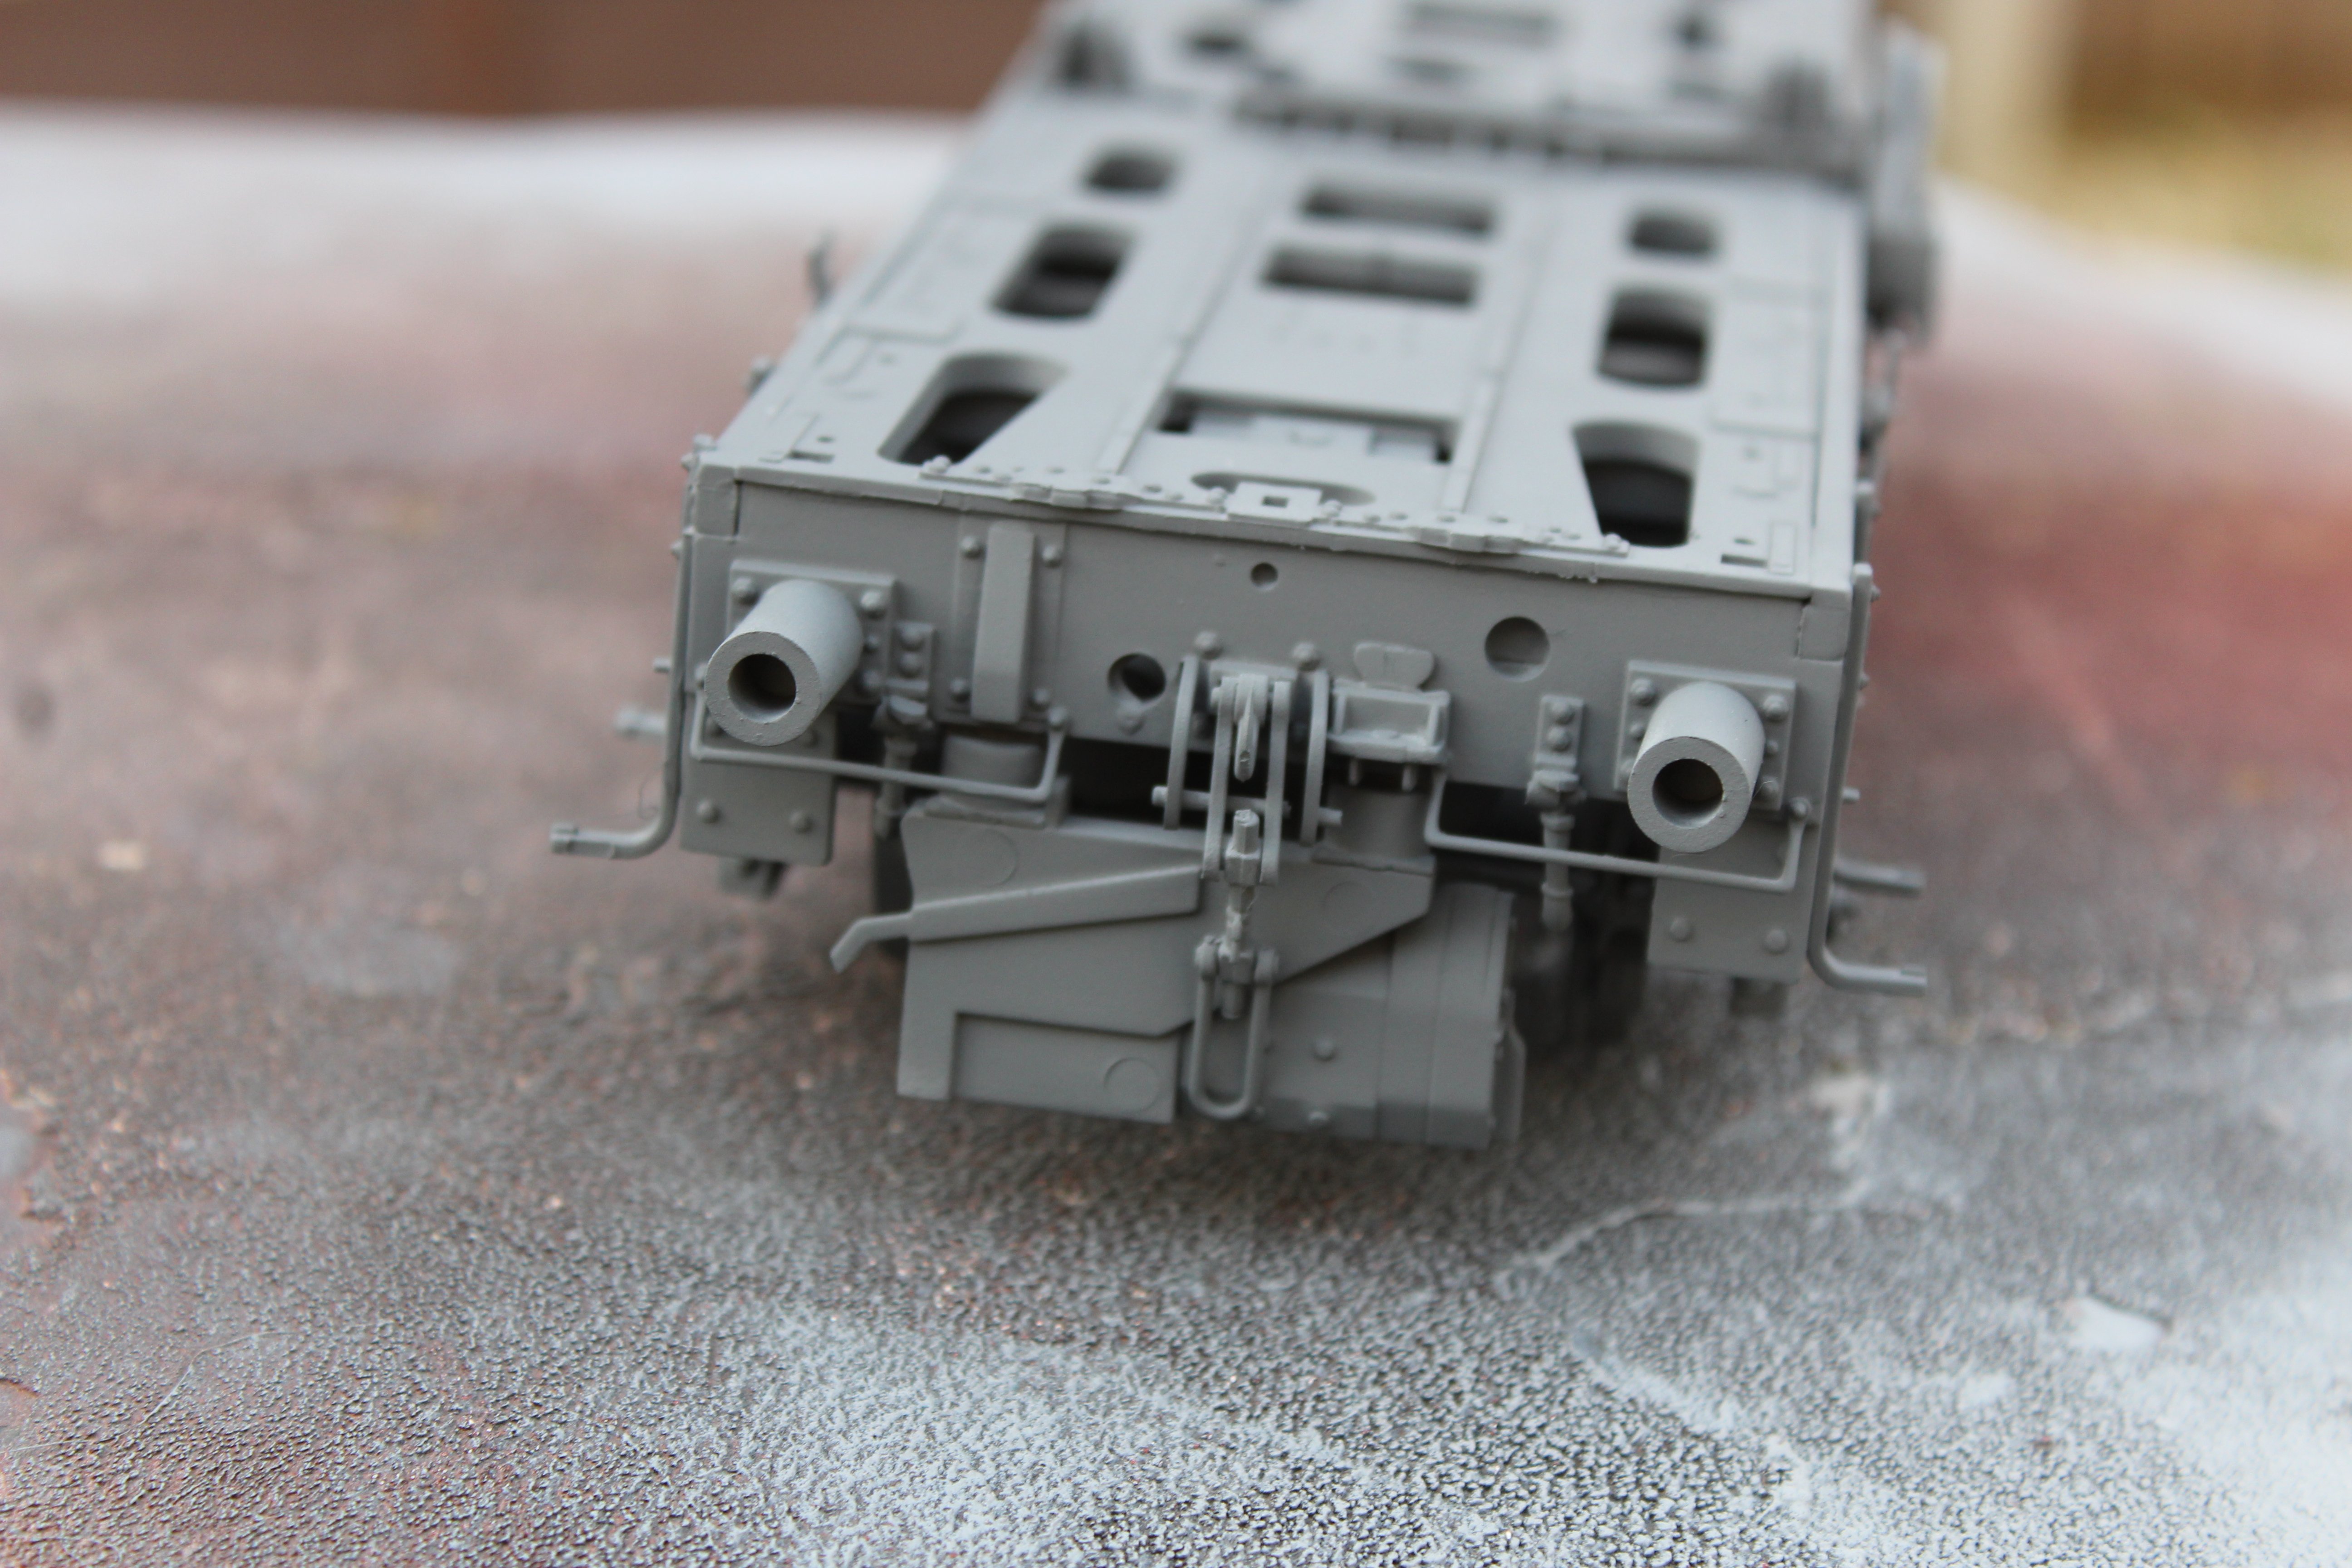
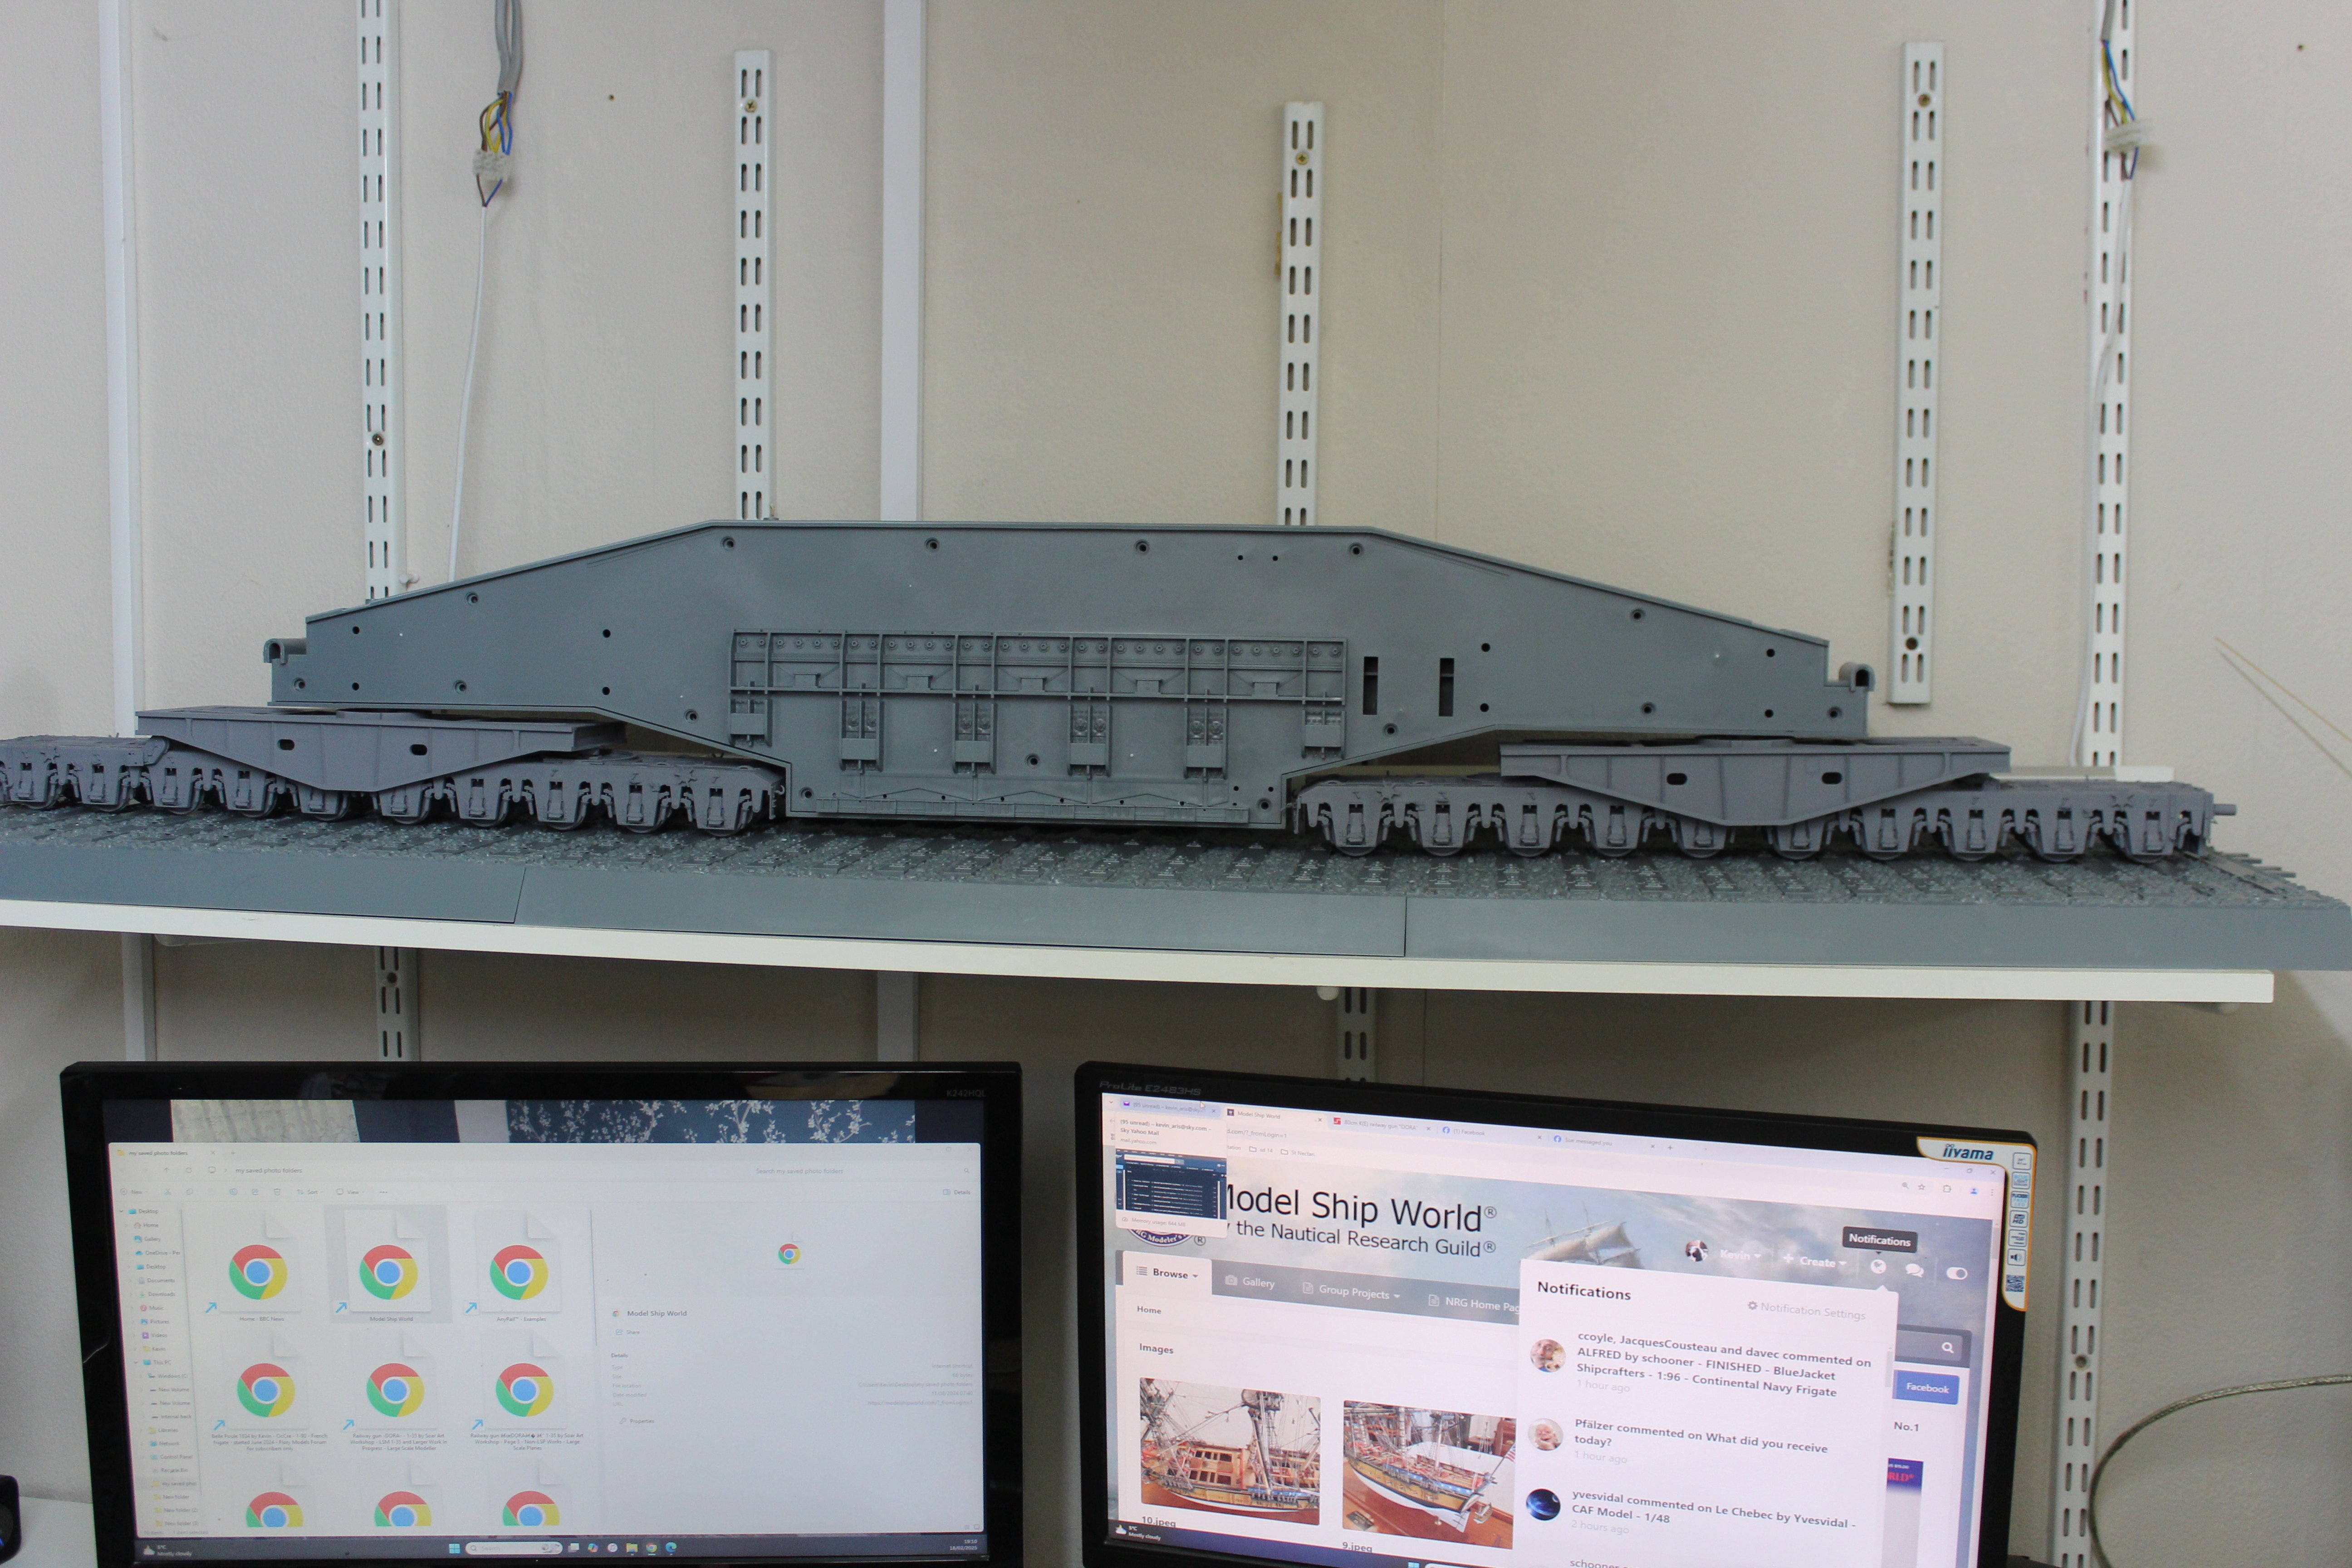
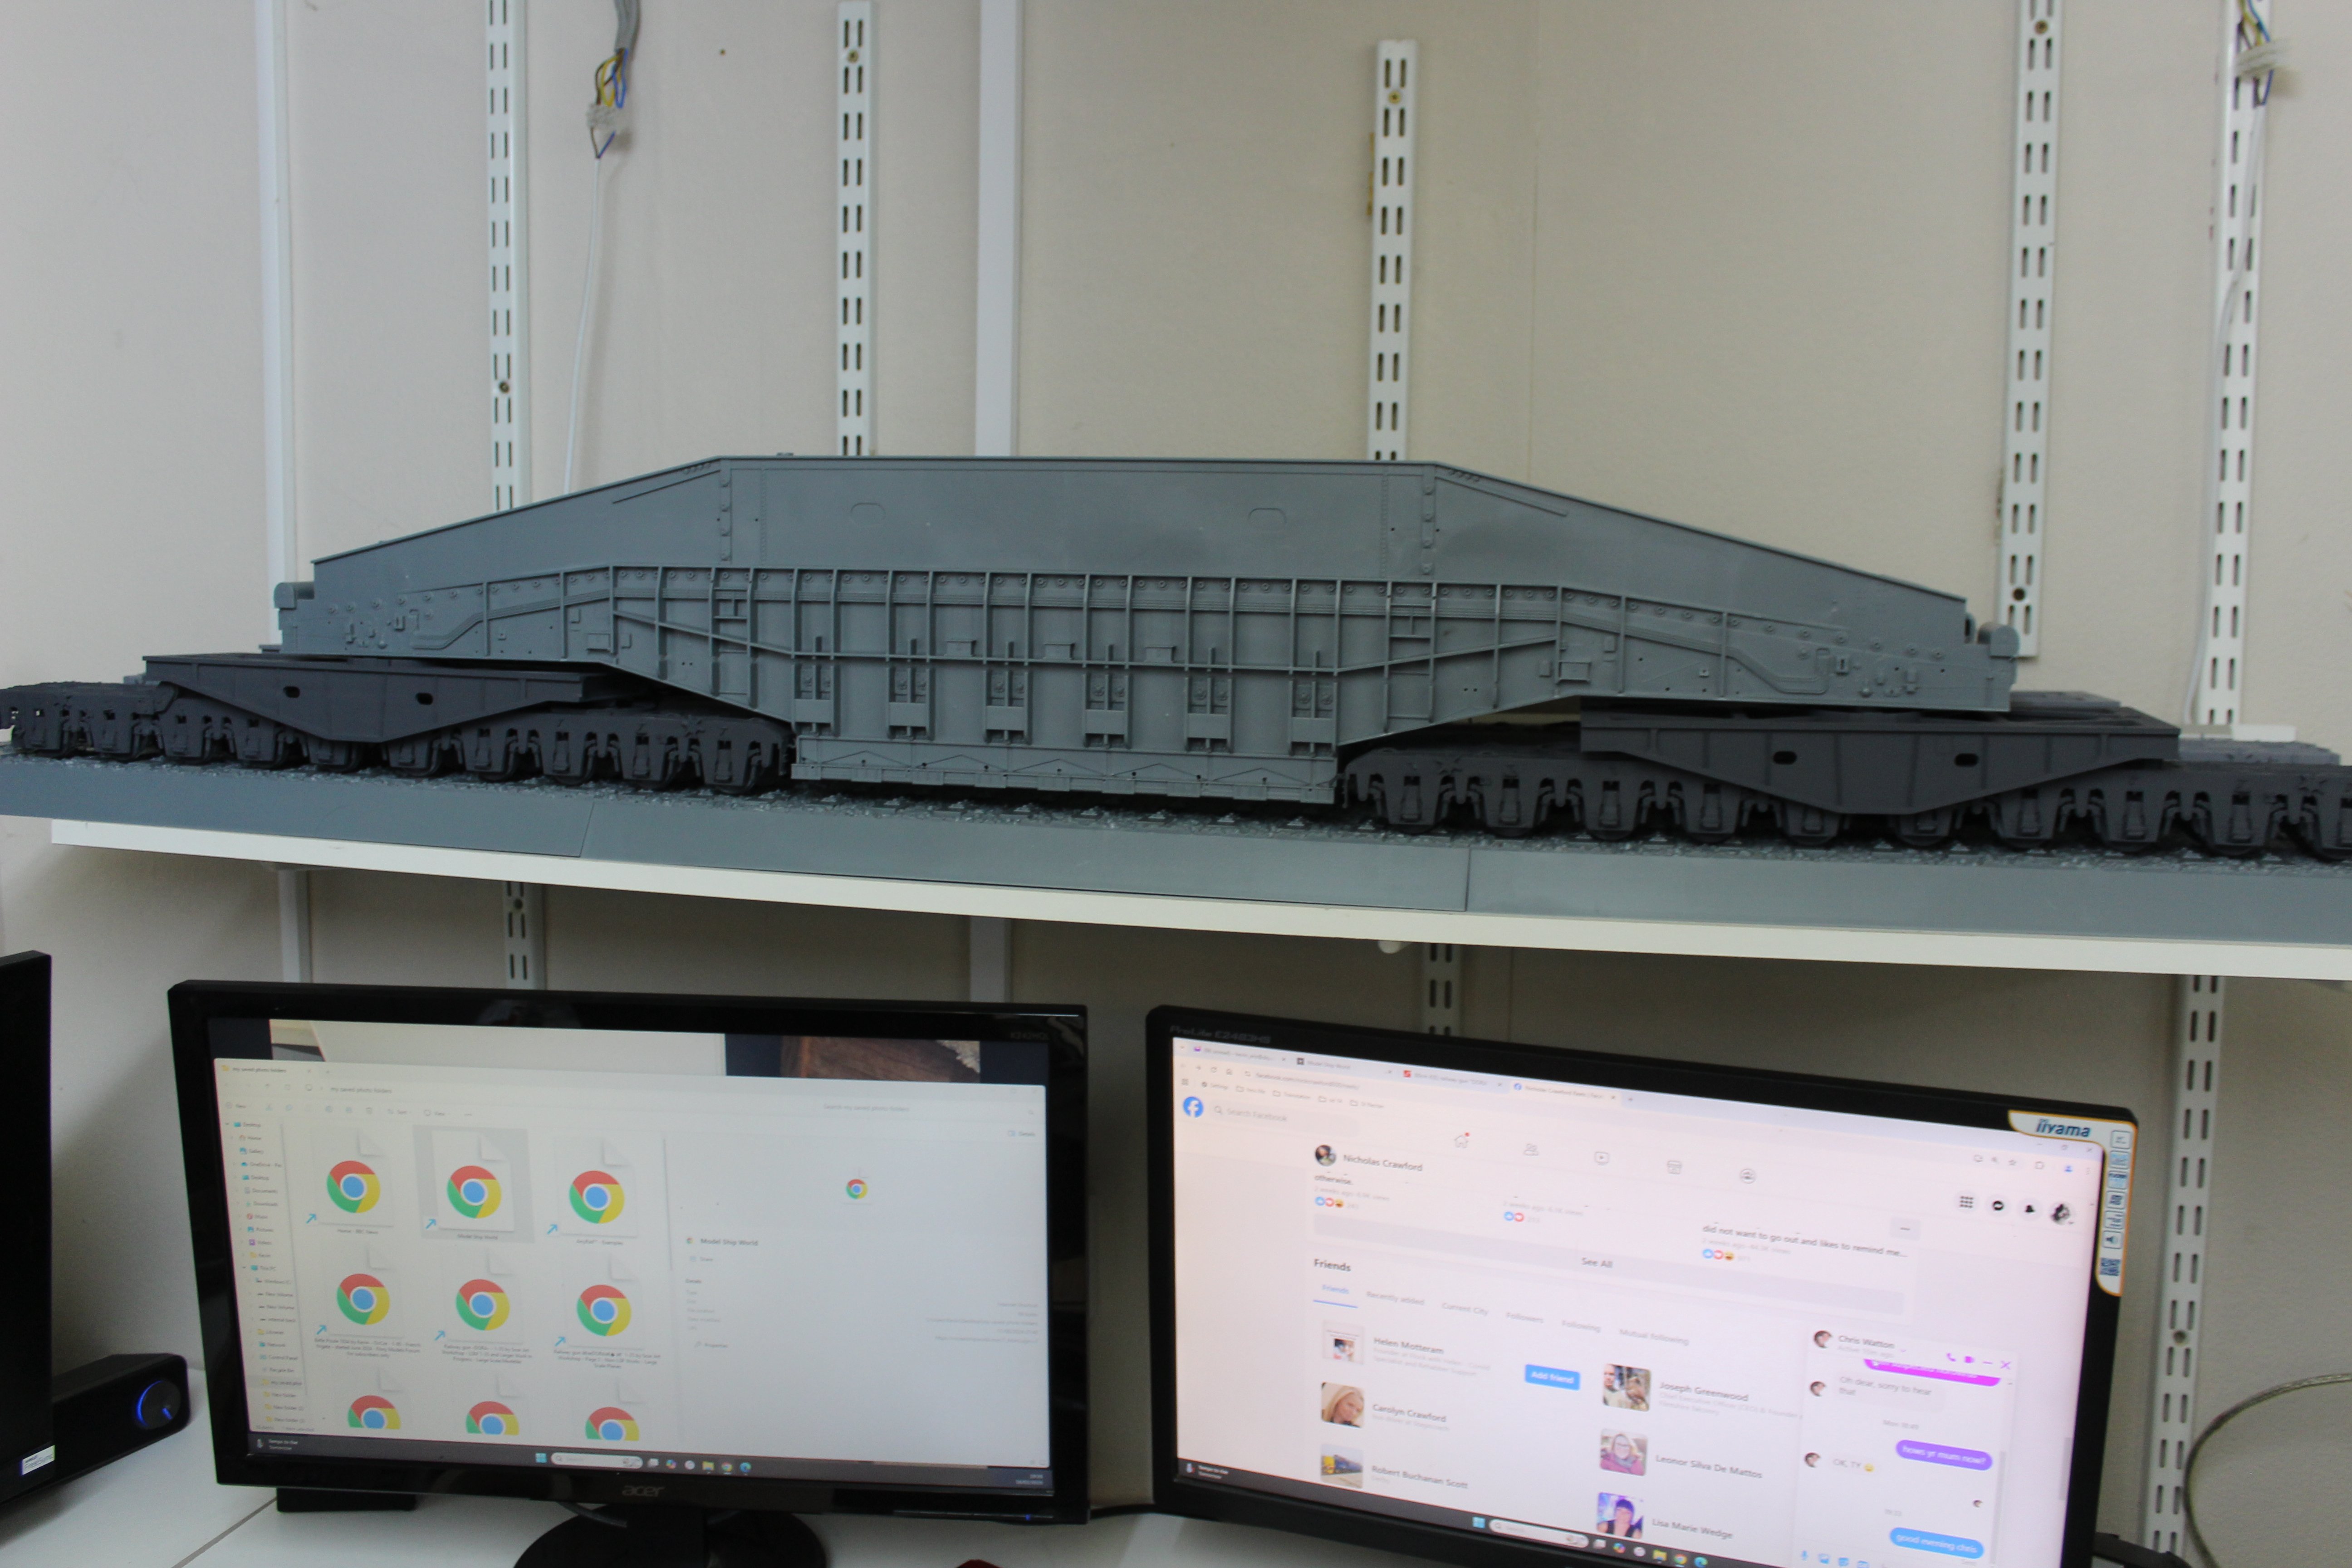
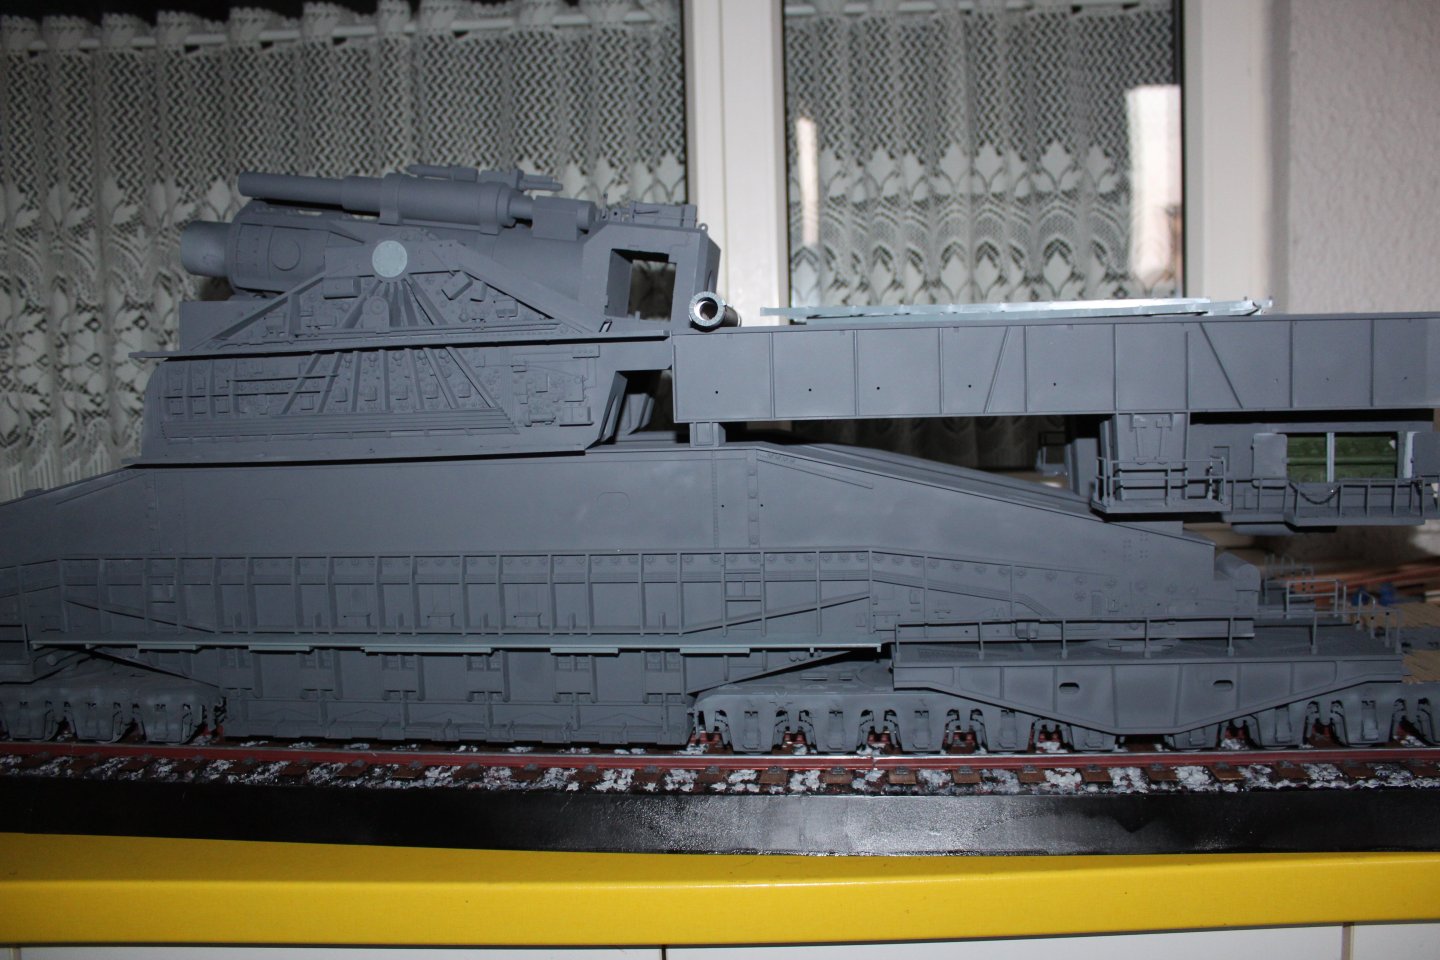
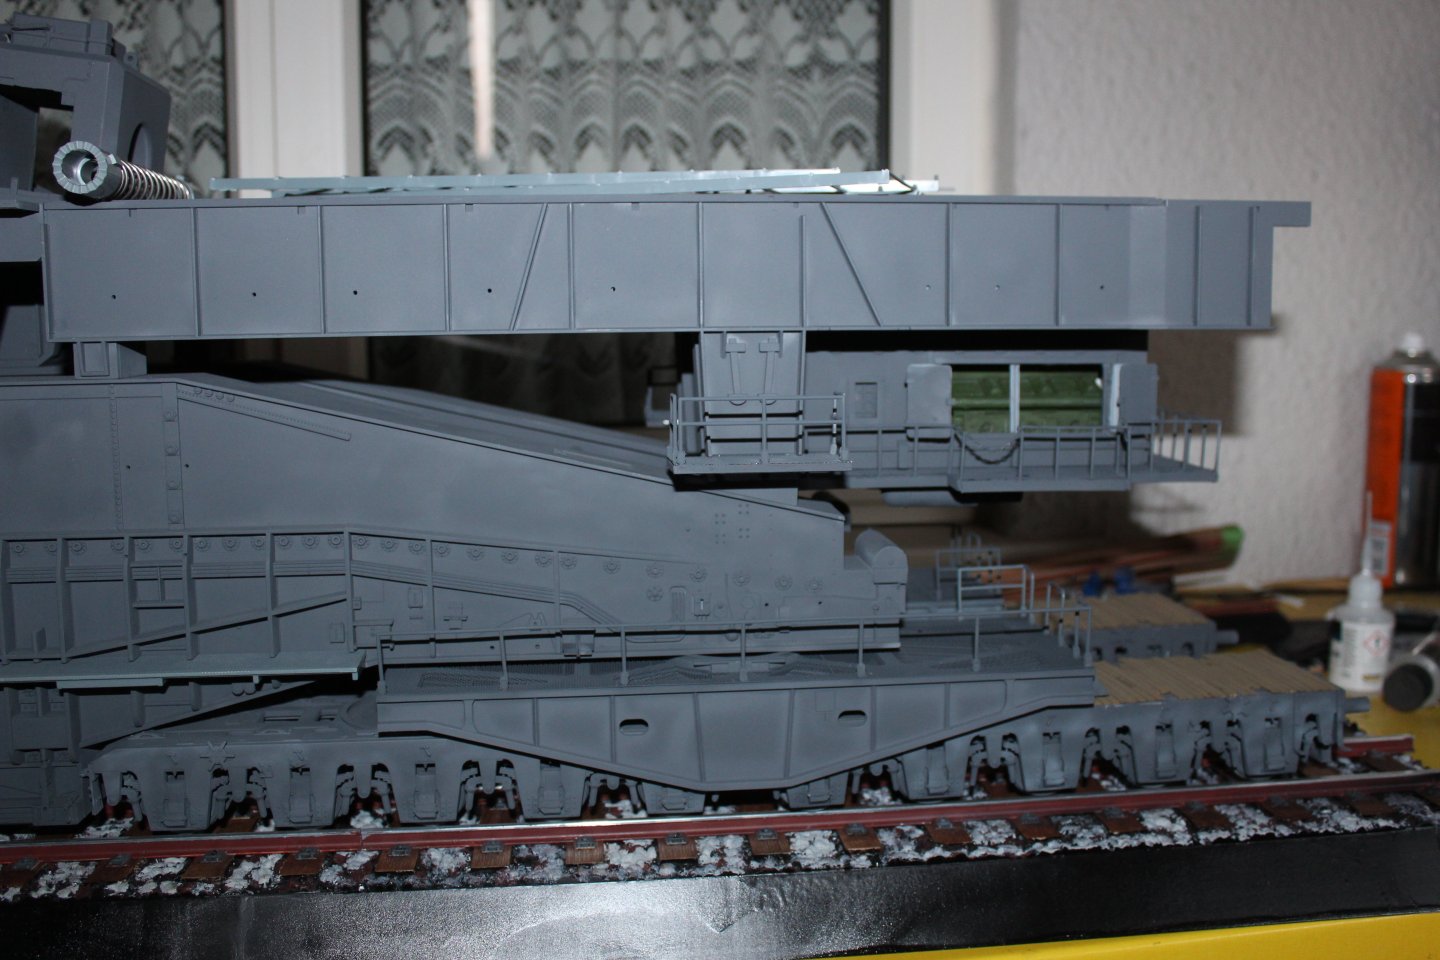
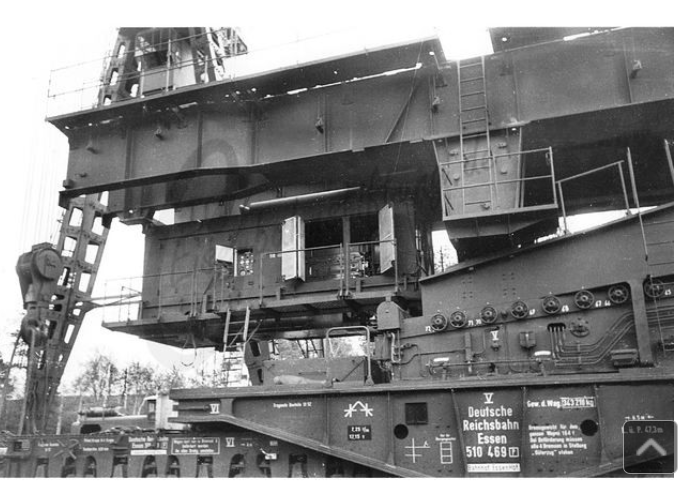
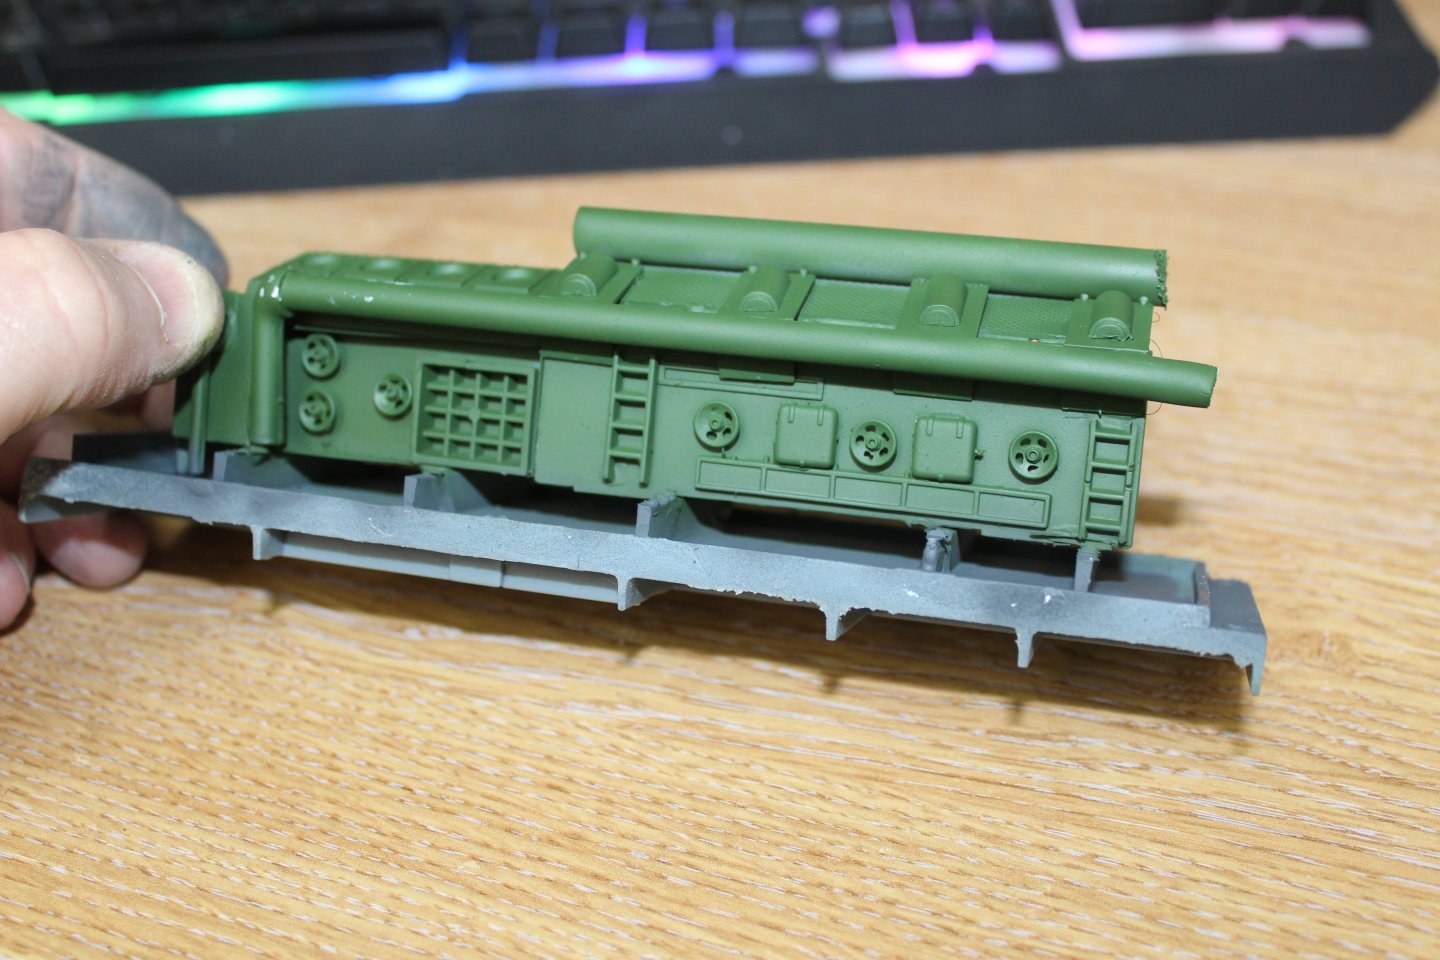
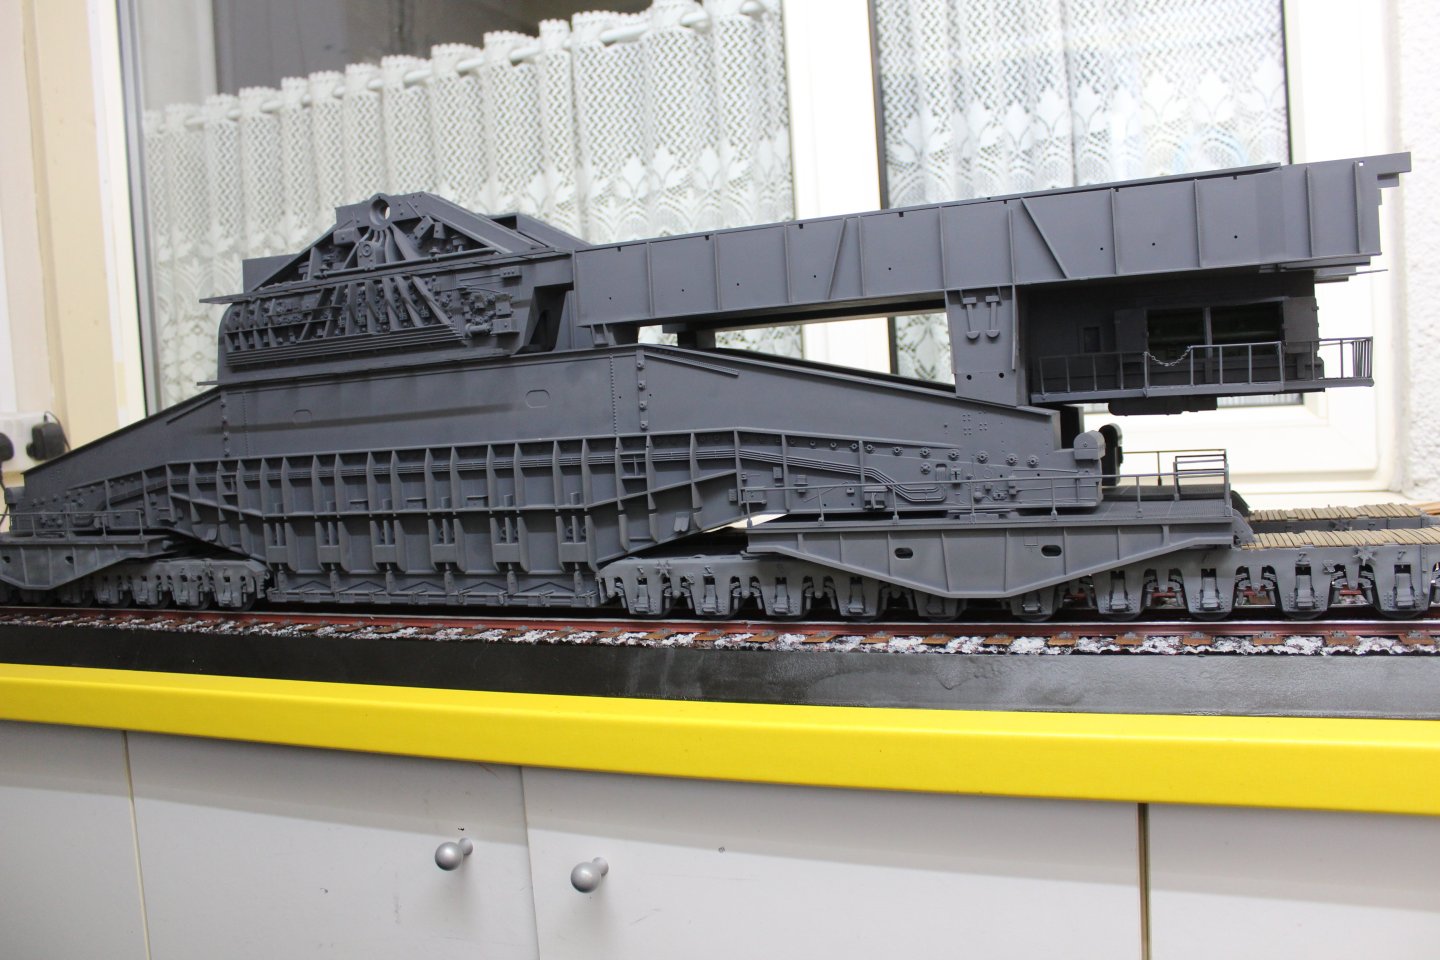
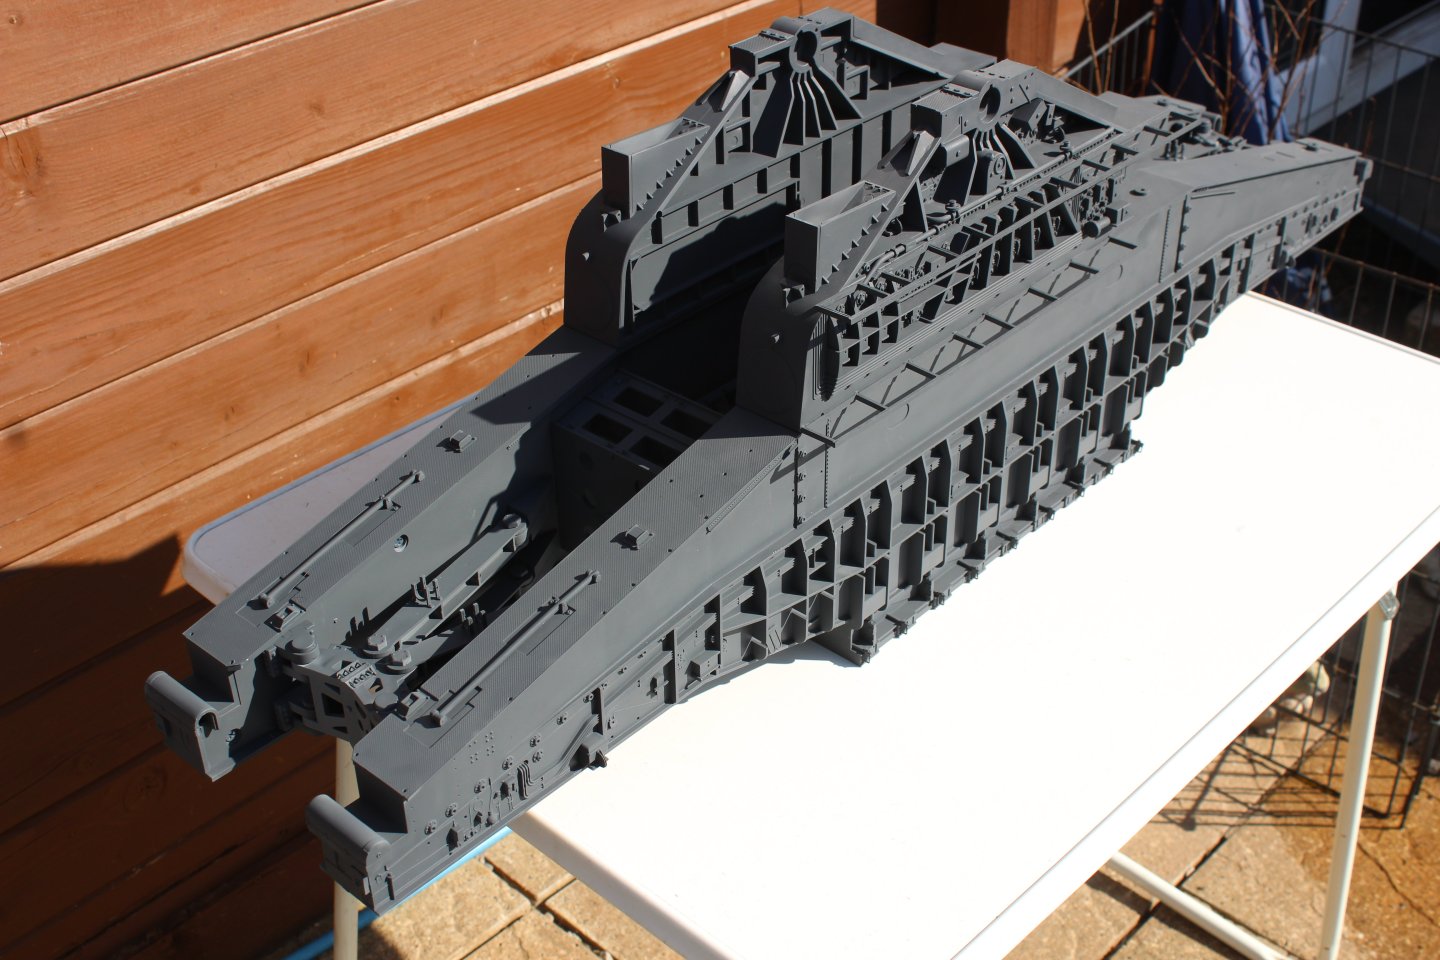
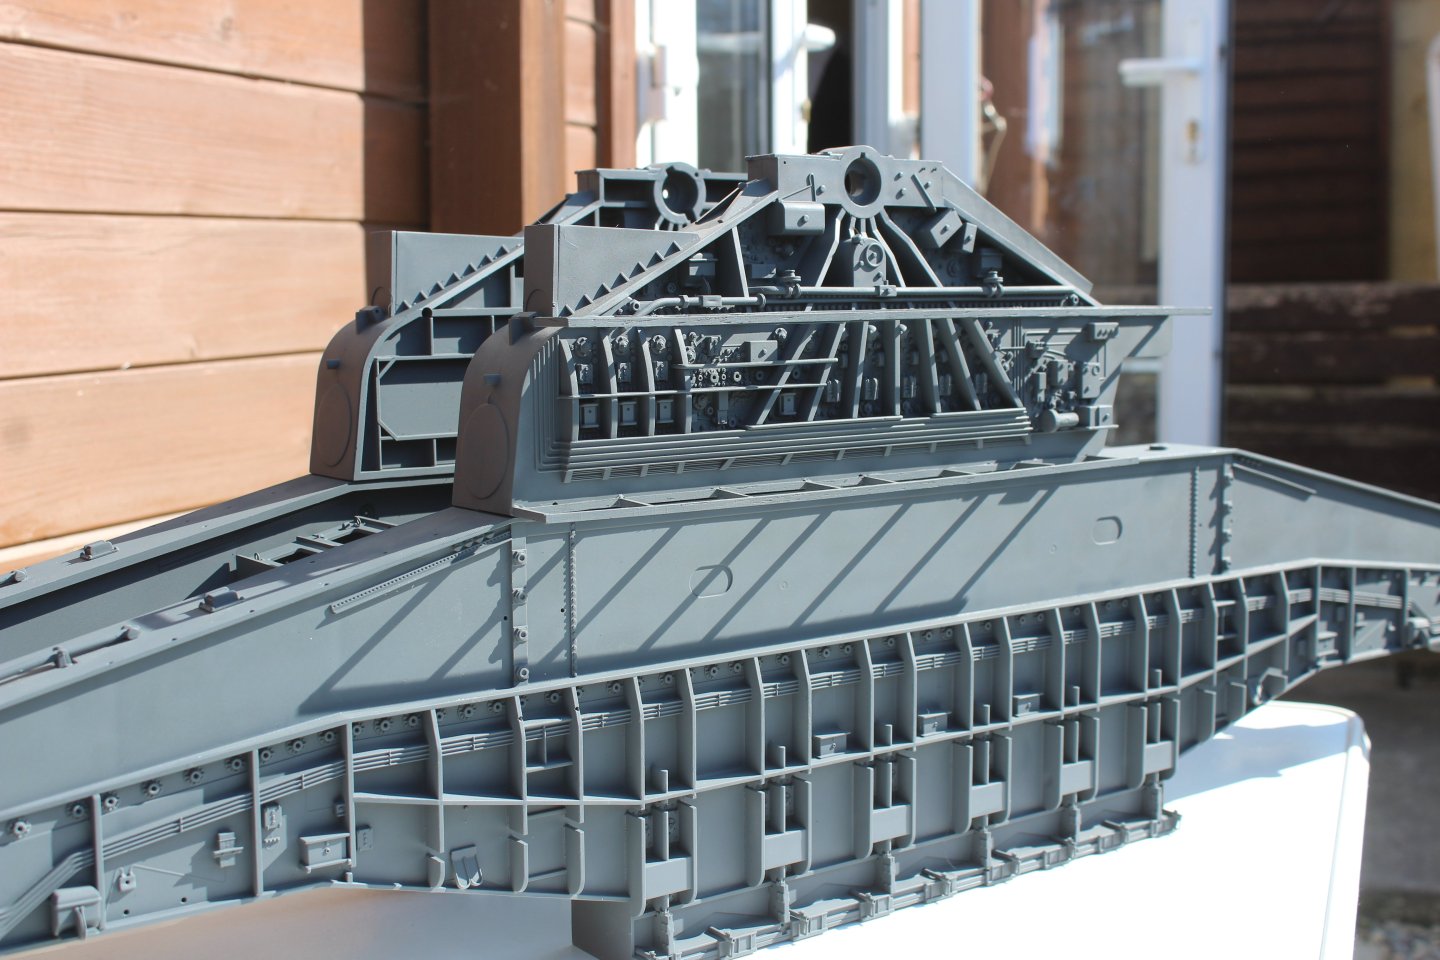
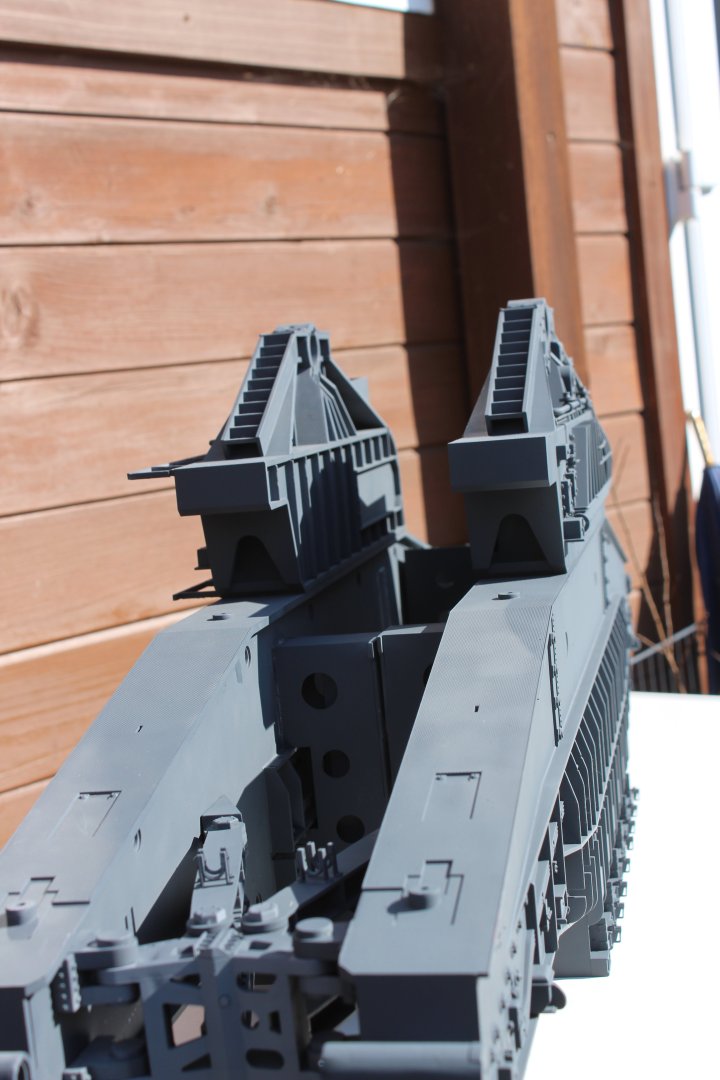
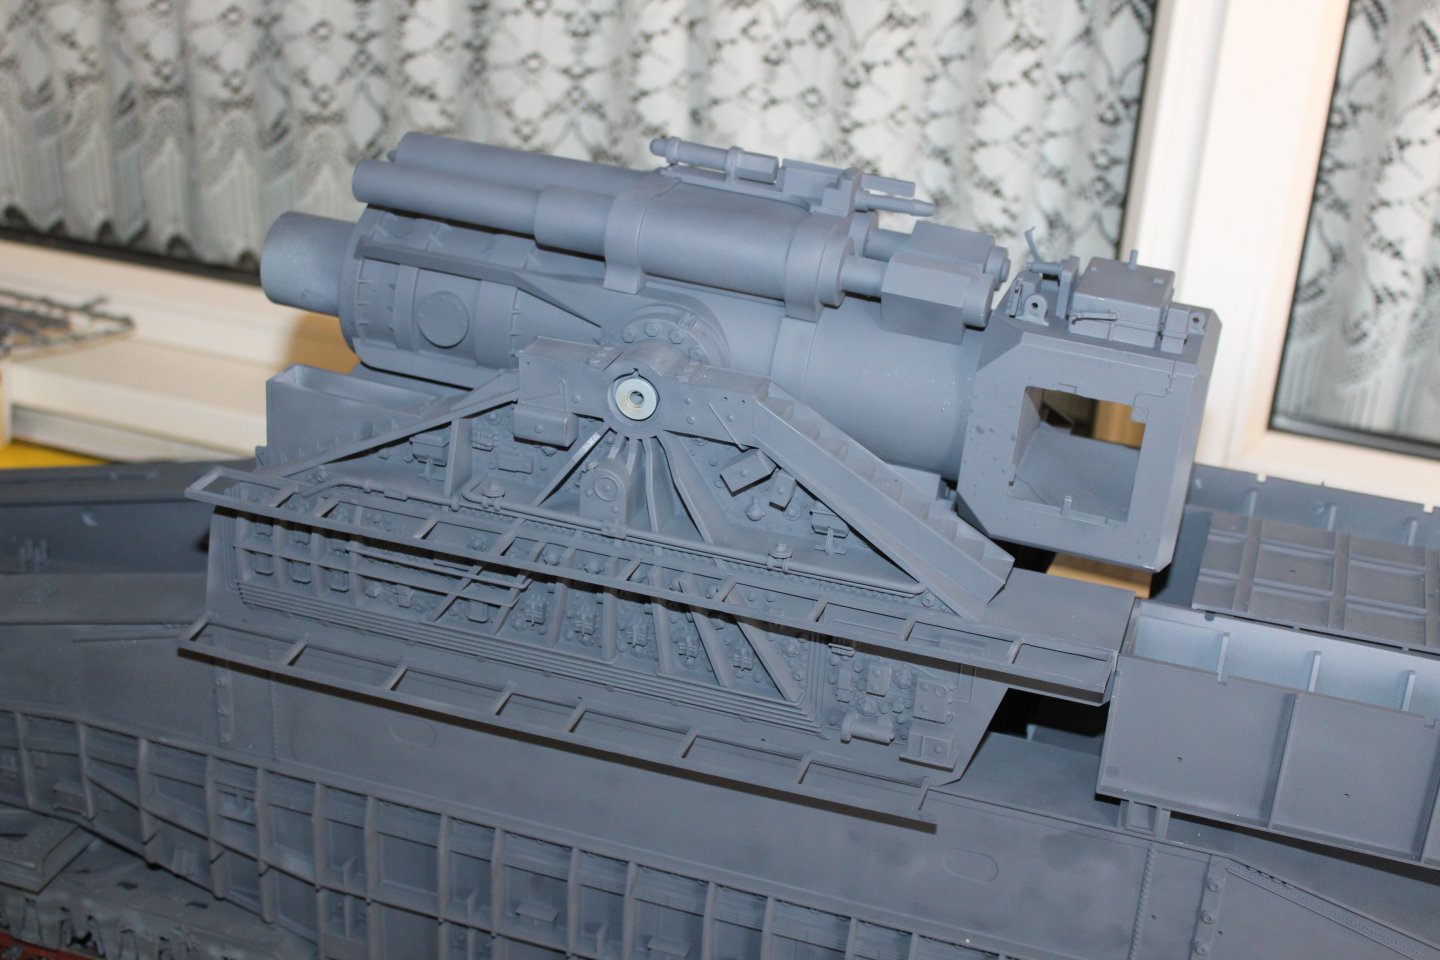
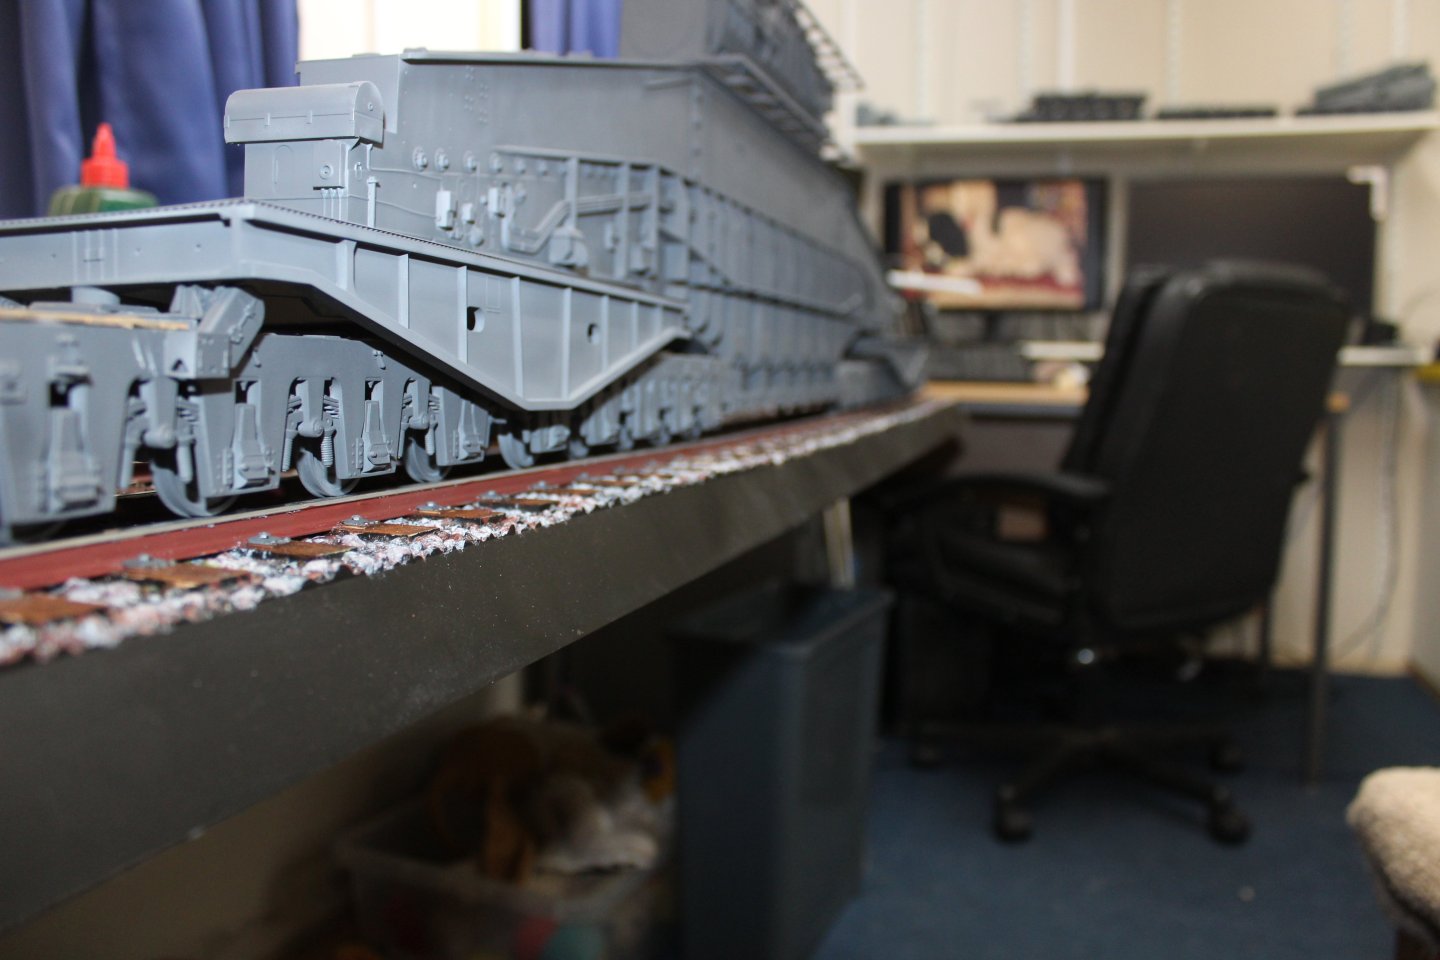
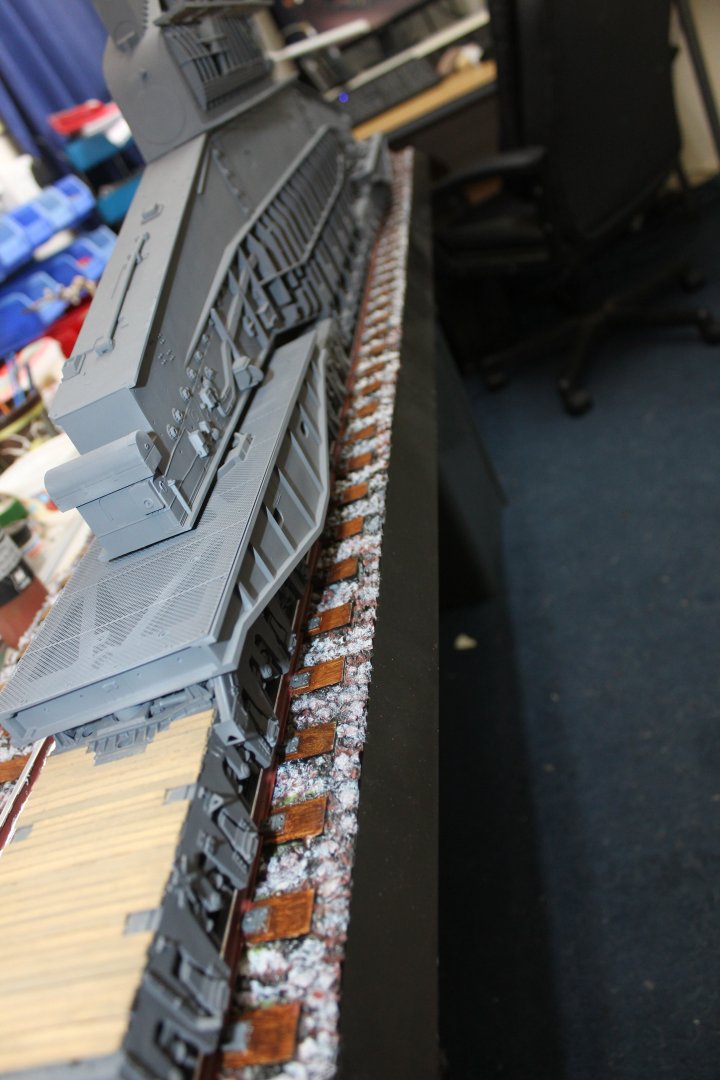
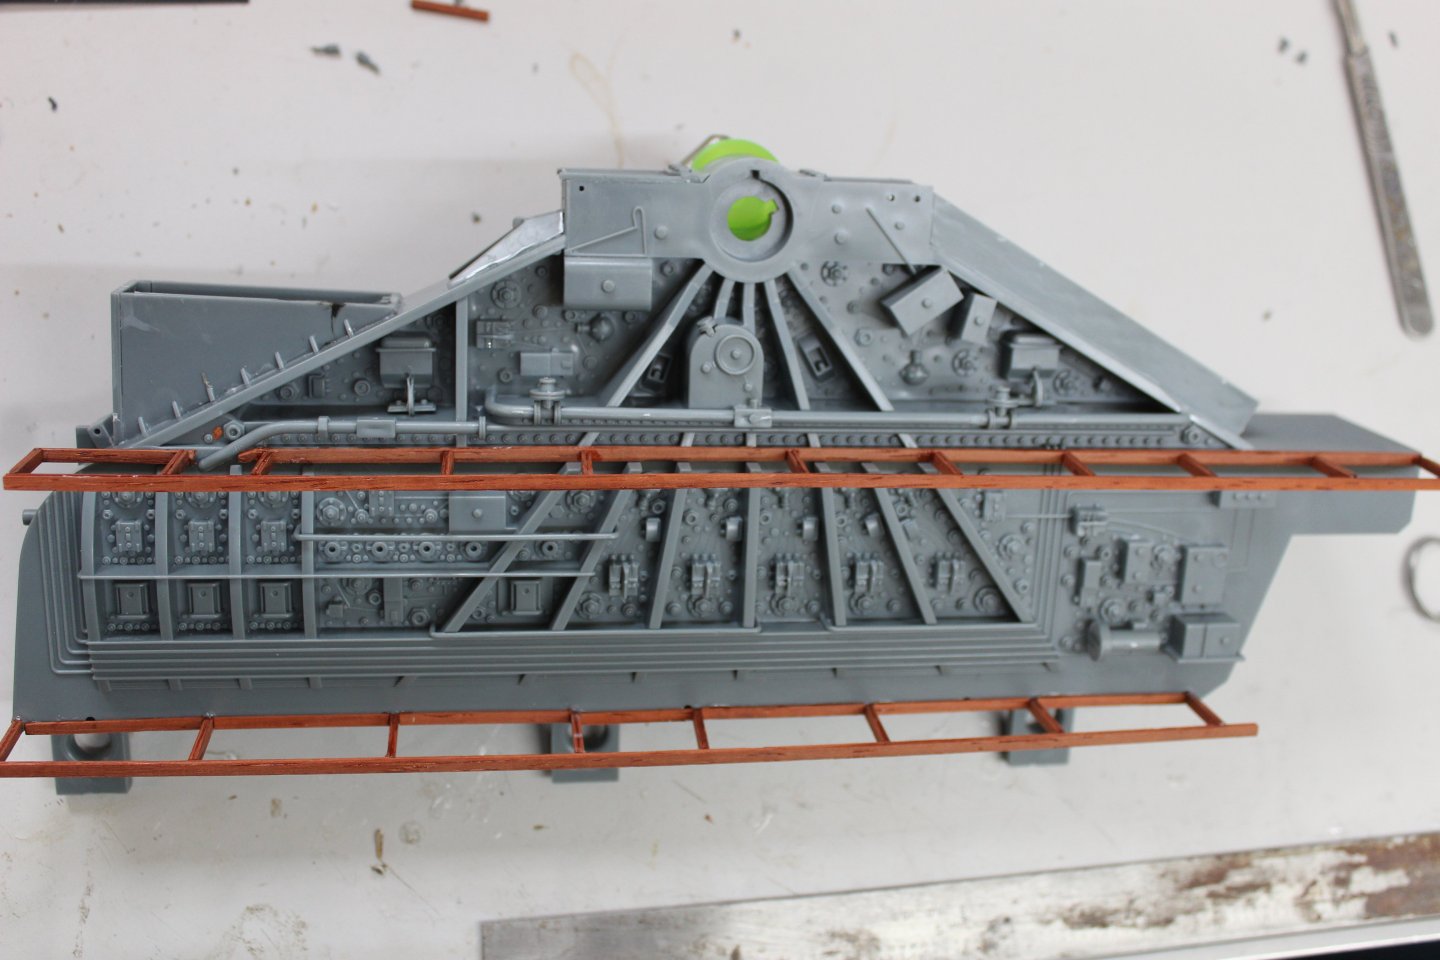
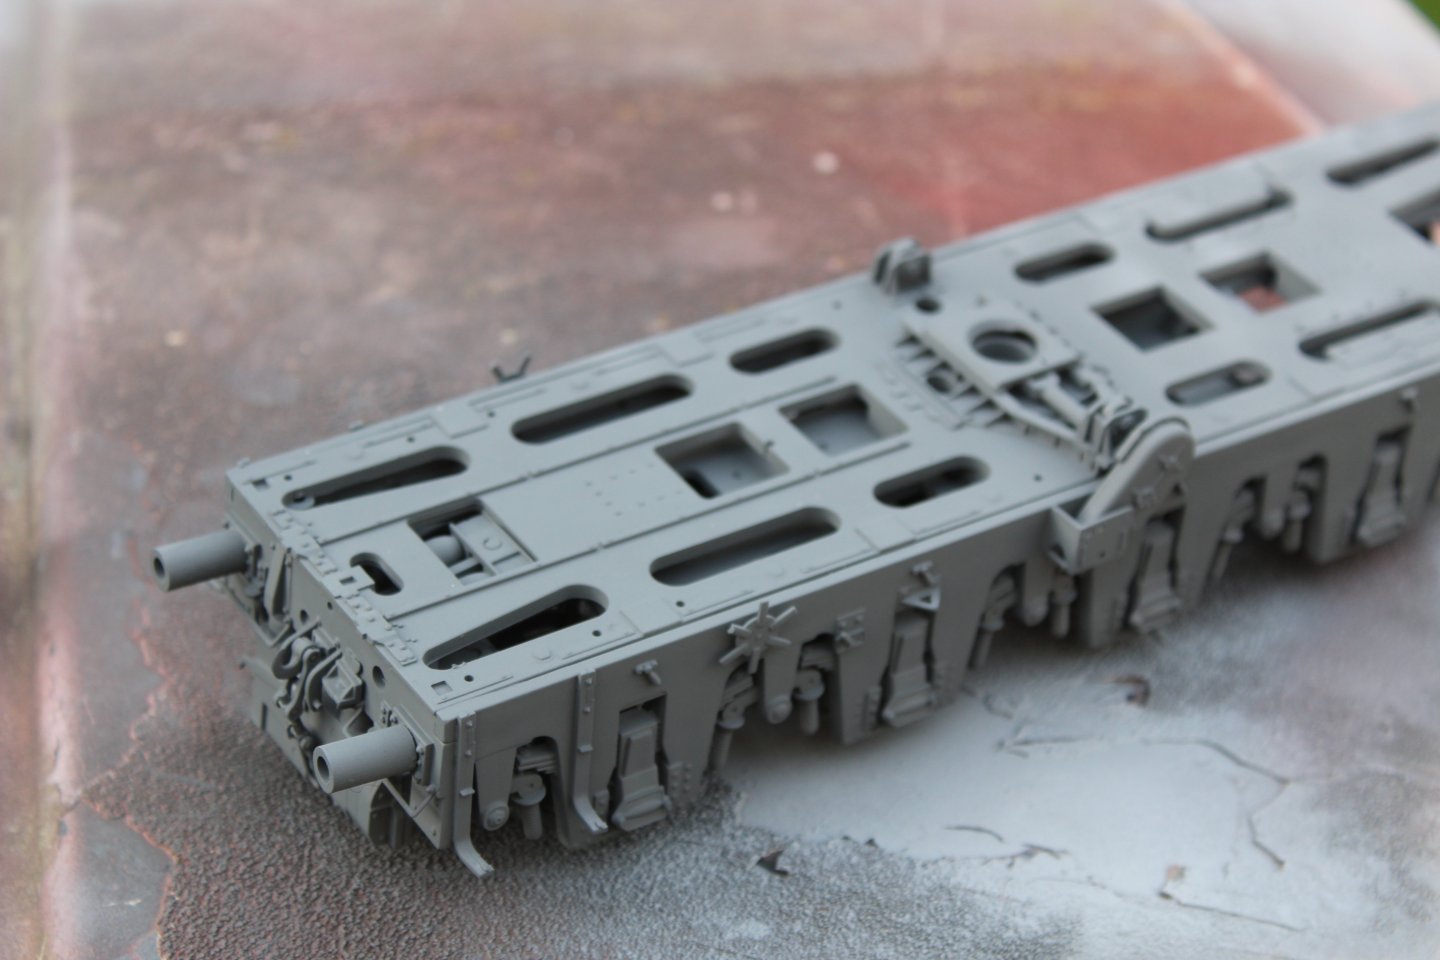
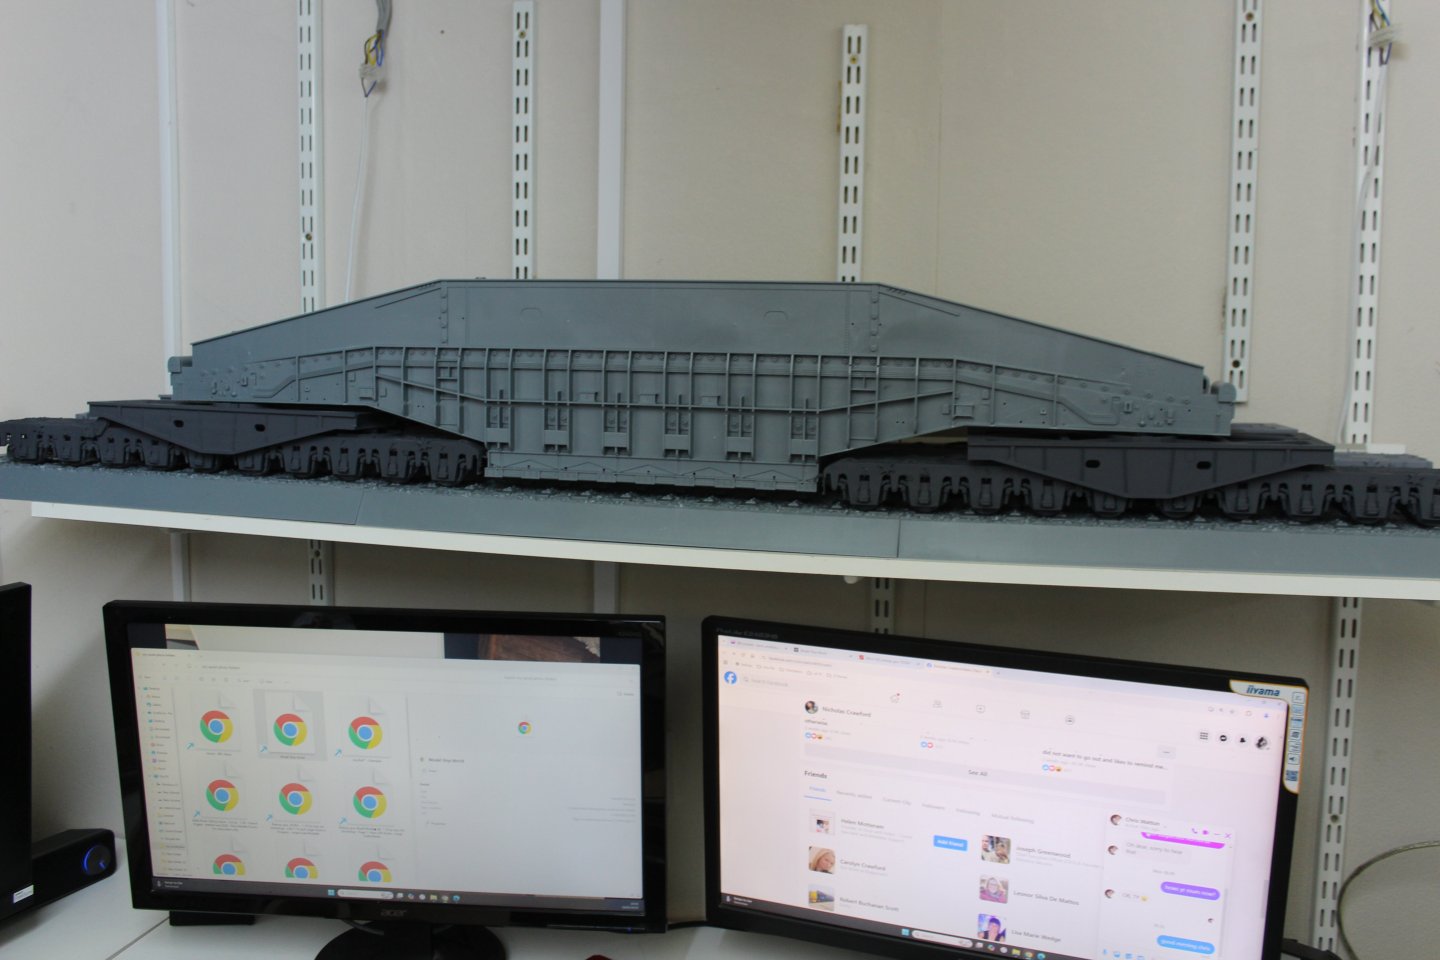
Good morning everyone Thank you for comments and likes lesson learnt - Just because it is on yr bucket list- does not mean you have to buy and build yep to all those who said its just a very and expensive, badly detailed kit = i fully agree but i continue Apart from the barrel and all the to be replaced walkways, the rest of the kit now sits on the bogies Ihe two large side links are supposed to be separate units, and connected by a link system forward and aft so that they can move at different angles on curves, In the centre between the linkages are two large box sections , the after one is two halves where as the forward on is strangely only one section ( its the unit in the photo with the three large holes(, i have left it to late to do surgery on this, in real life chains were used to keep them from separating, being one piece would prevent it whole assembly from moving on a radius i will cover the breech assembly in the next update


- 26 replies
-
- 16
-
-
lol Maybe you are looking at the wrong modelling site, these are my slippers which have so far not been destroyed by the boi's

- 26 replies
-
- 12
-
-

-
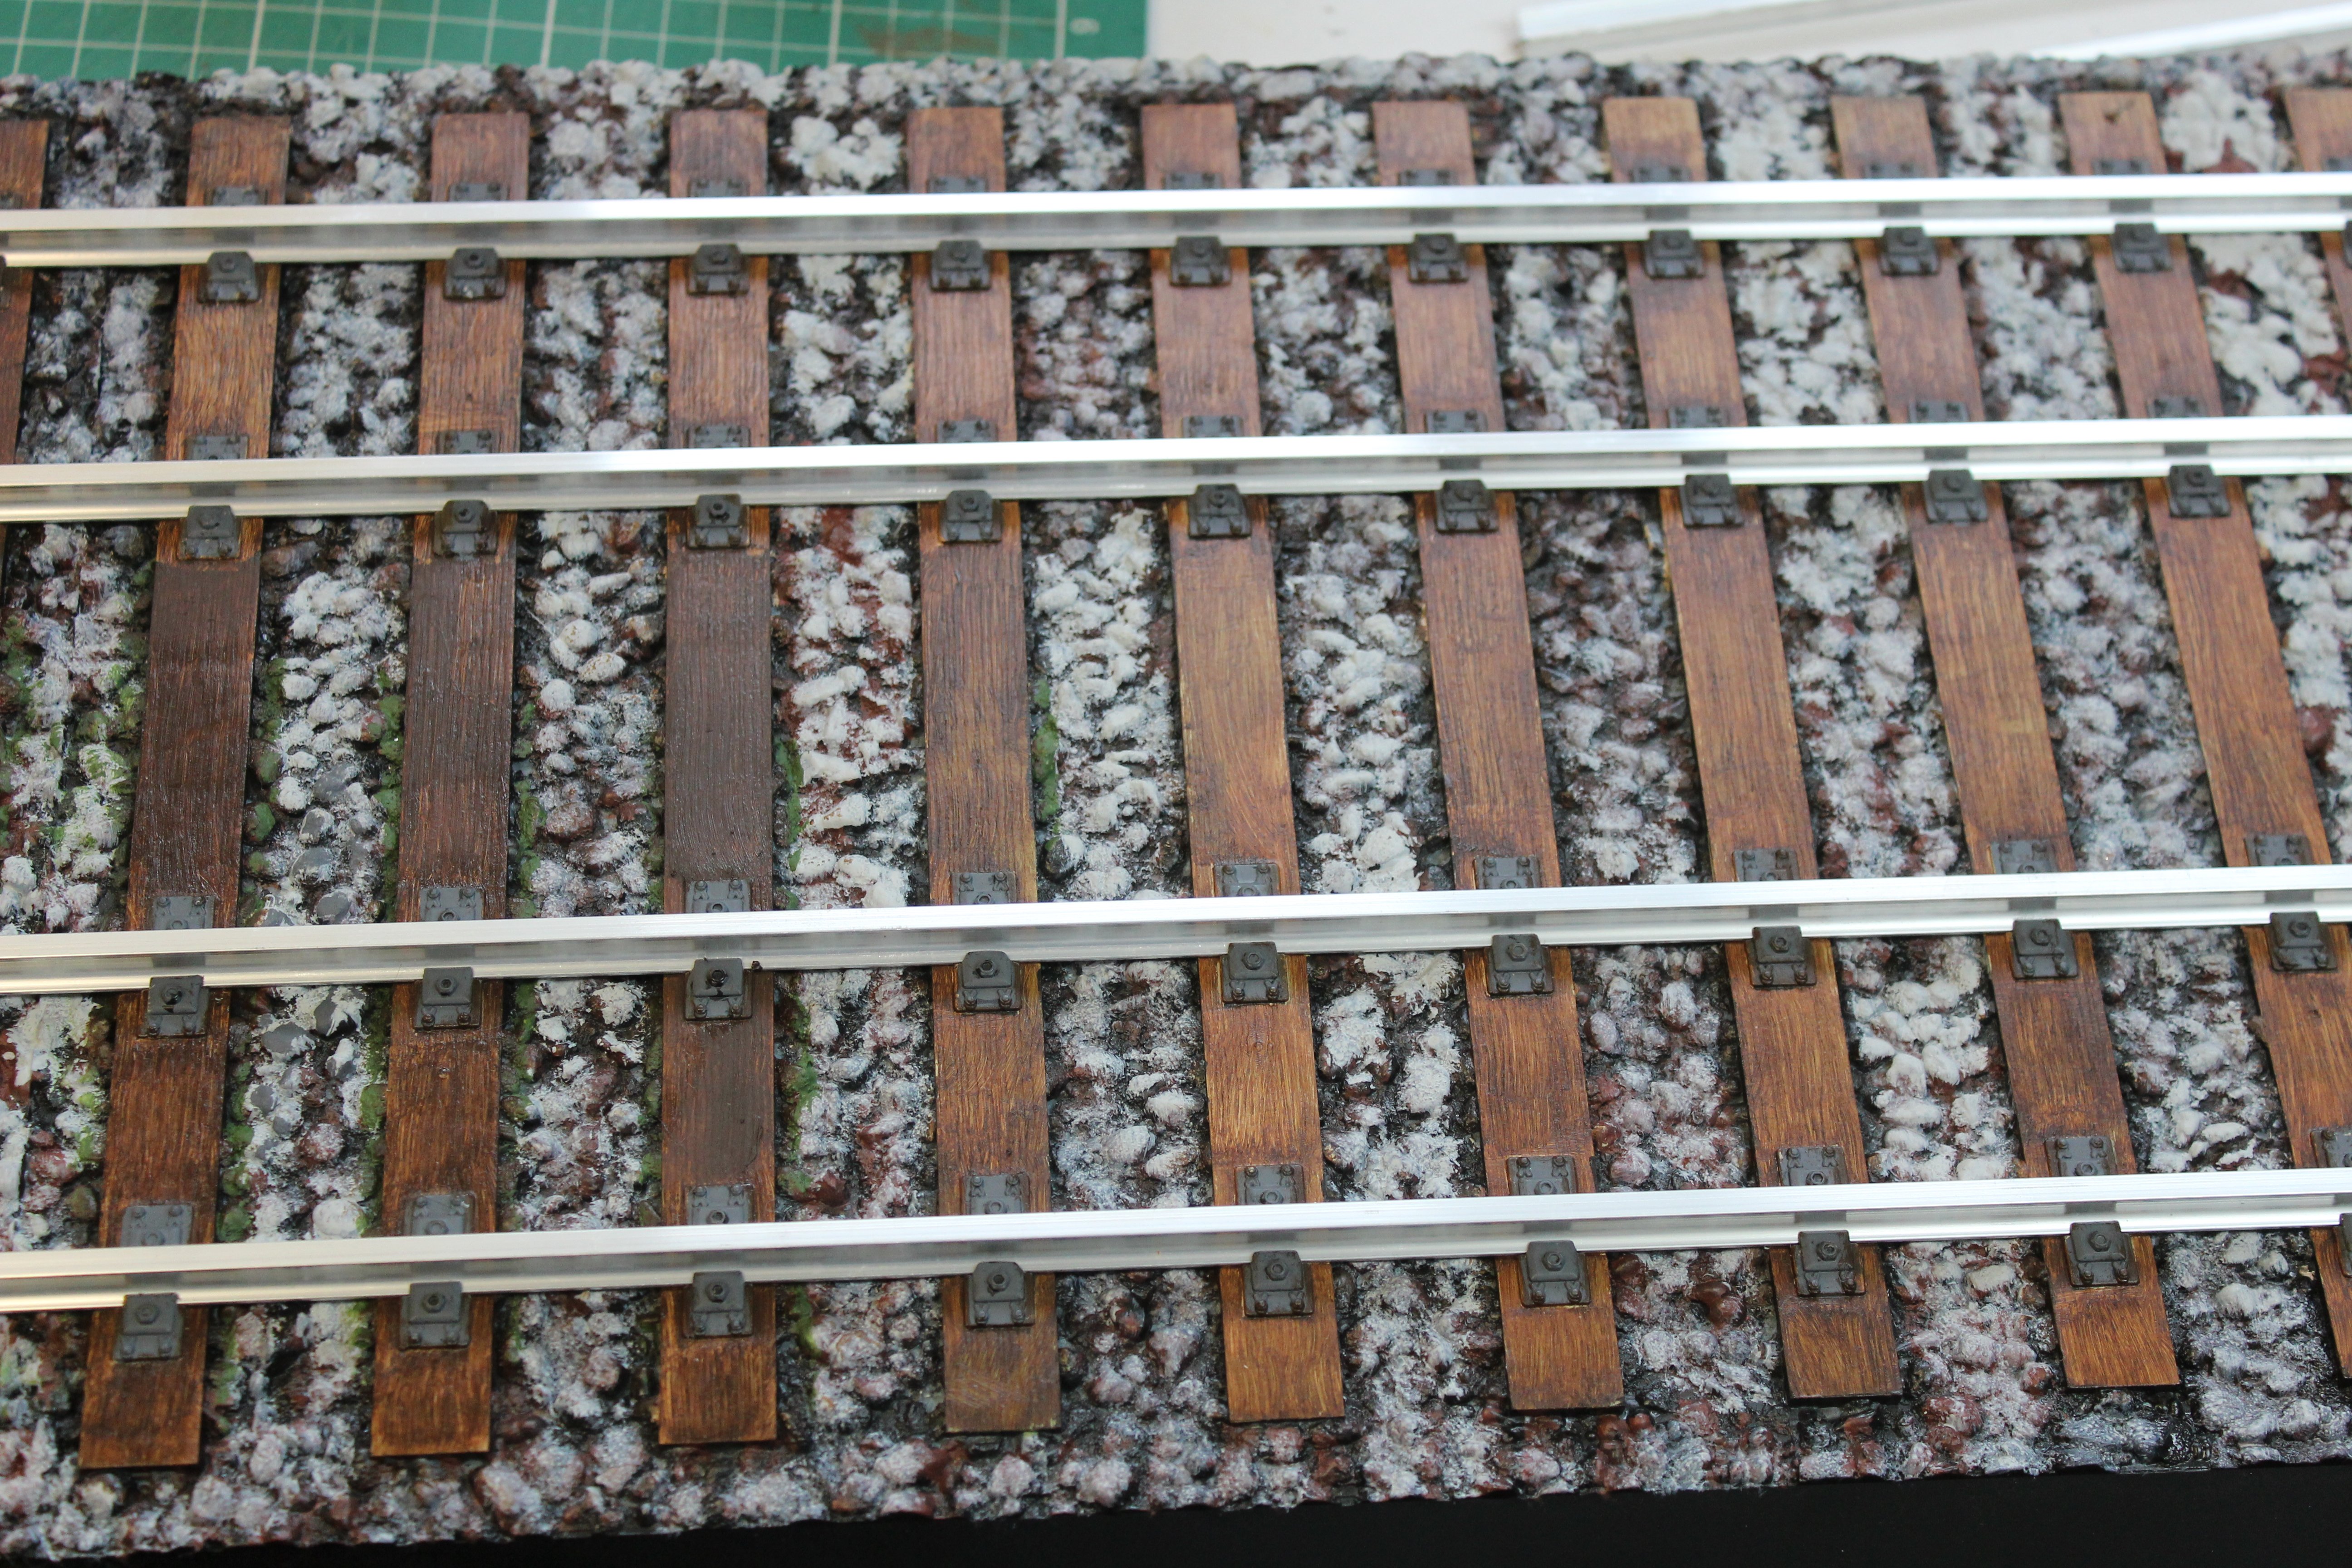
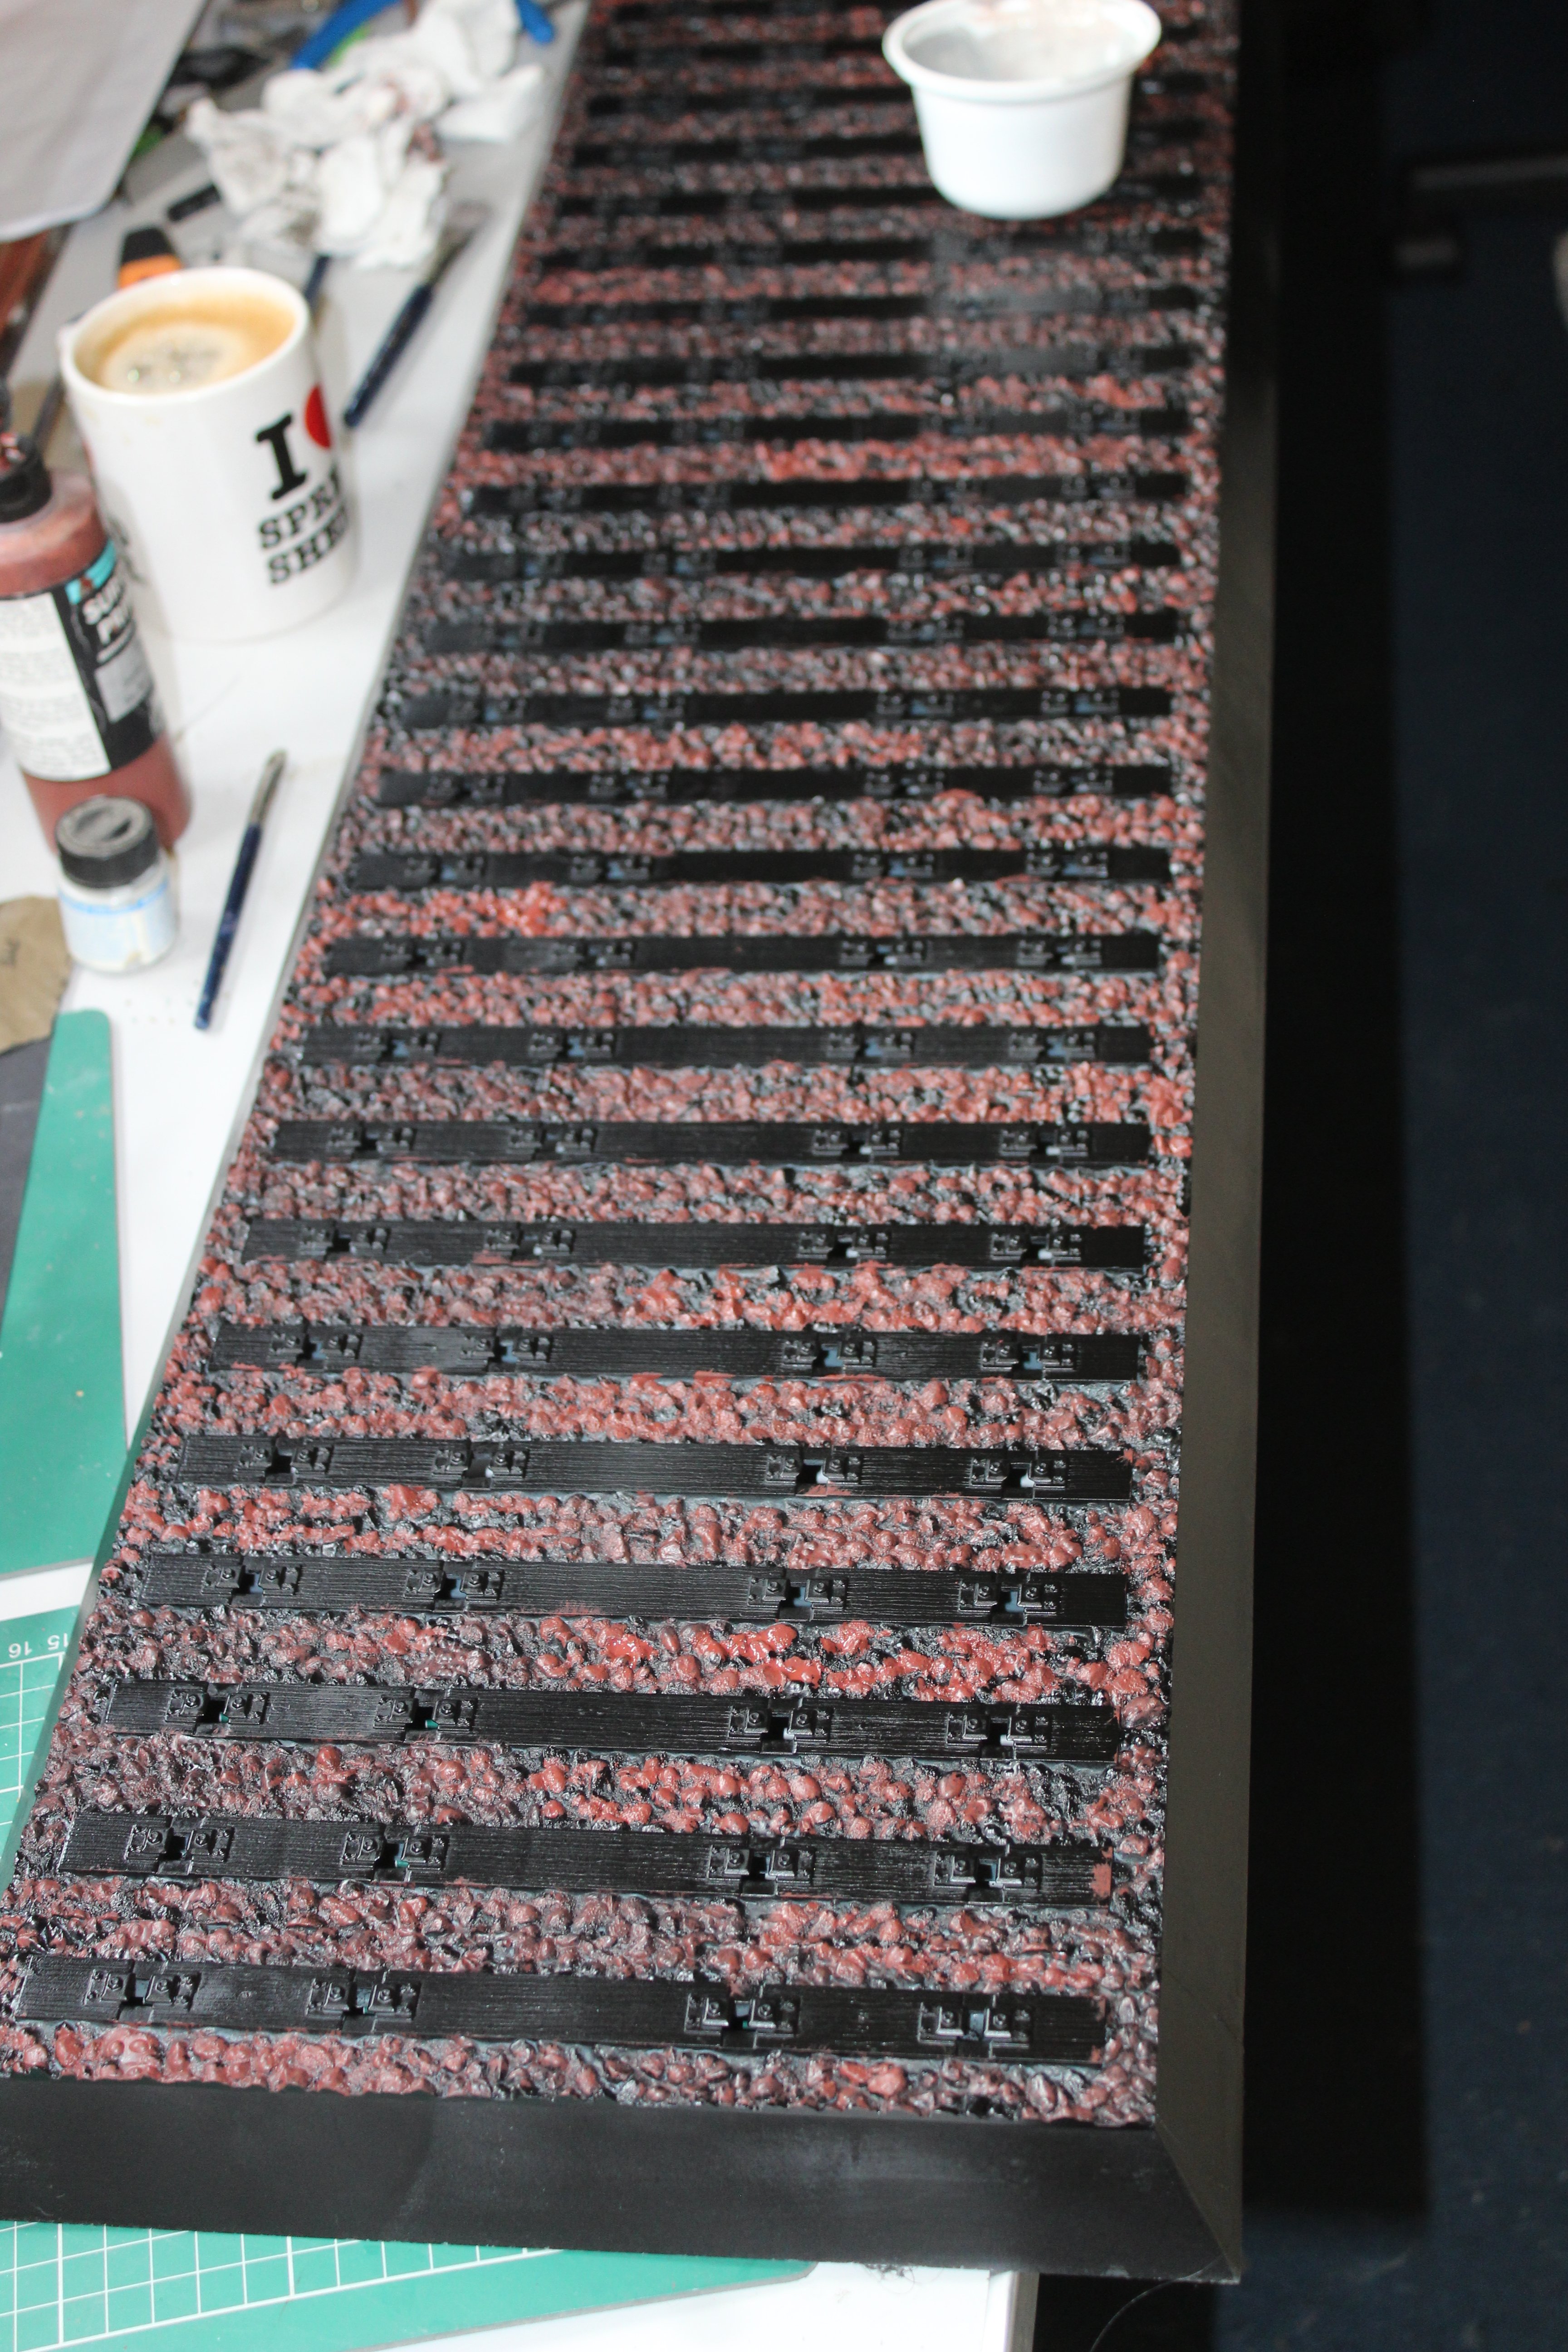
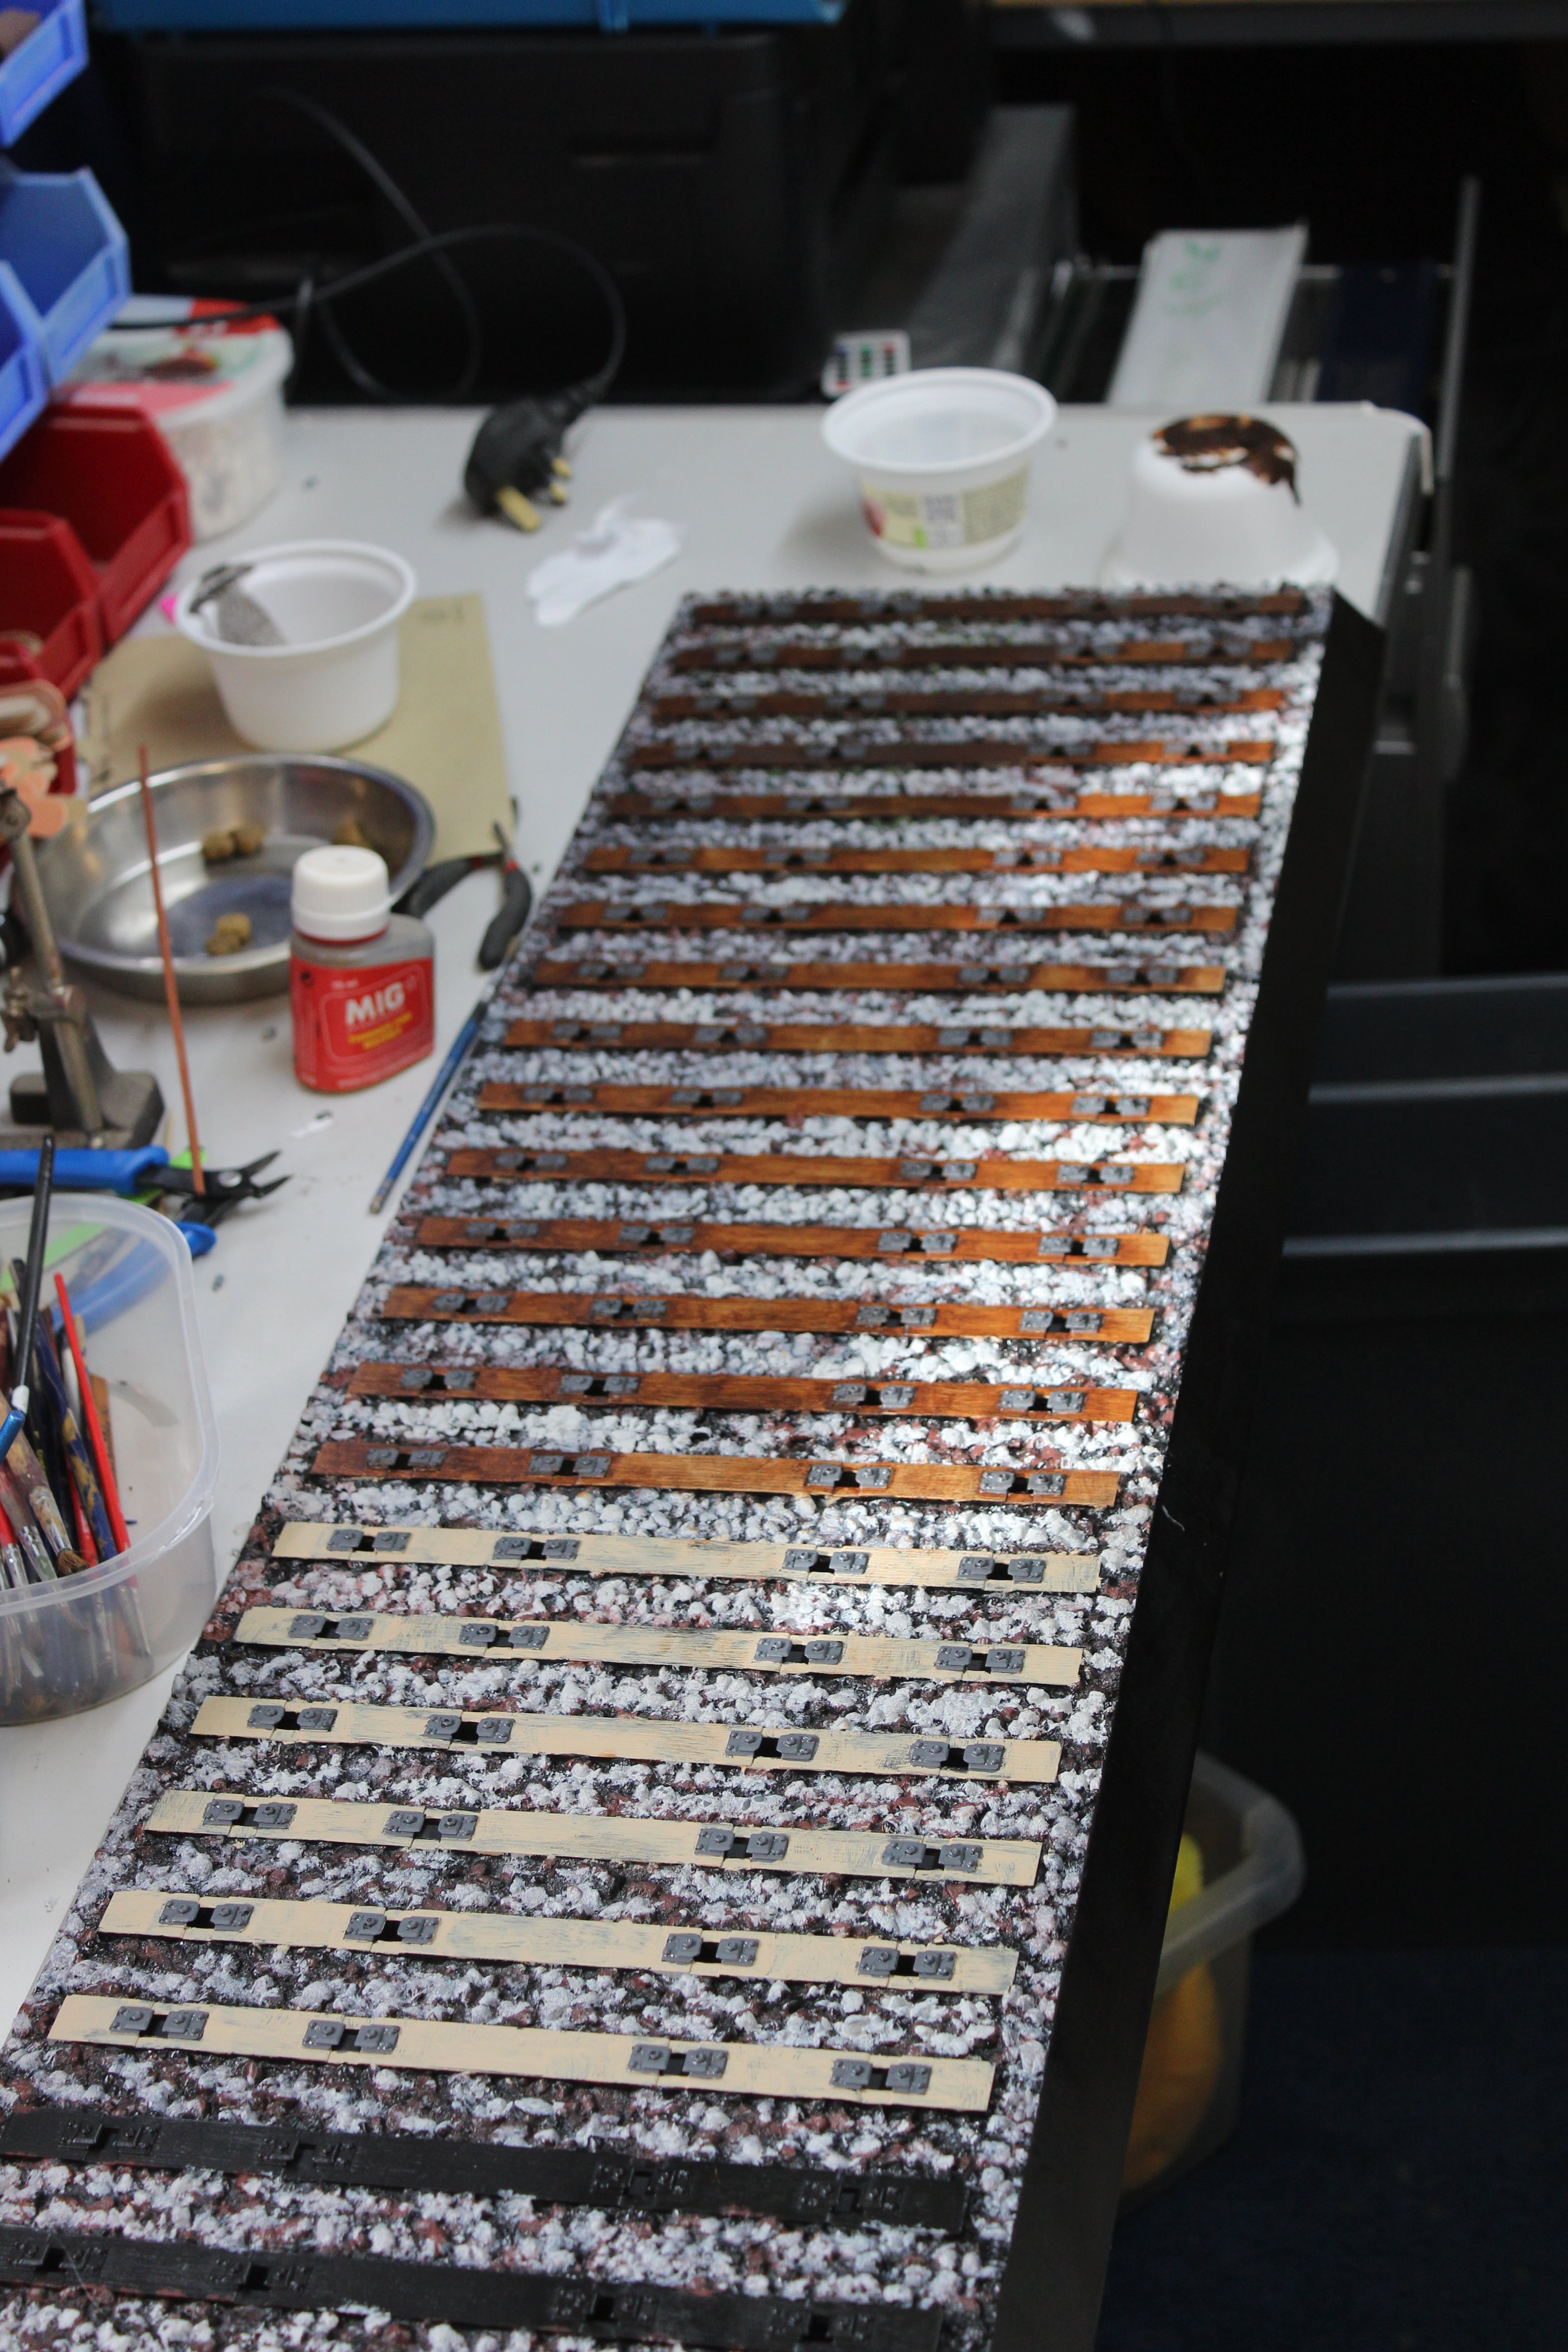
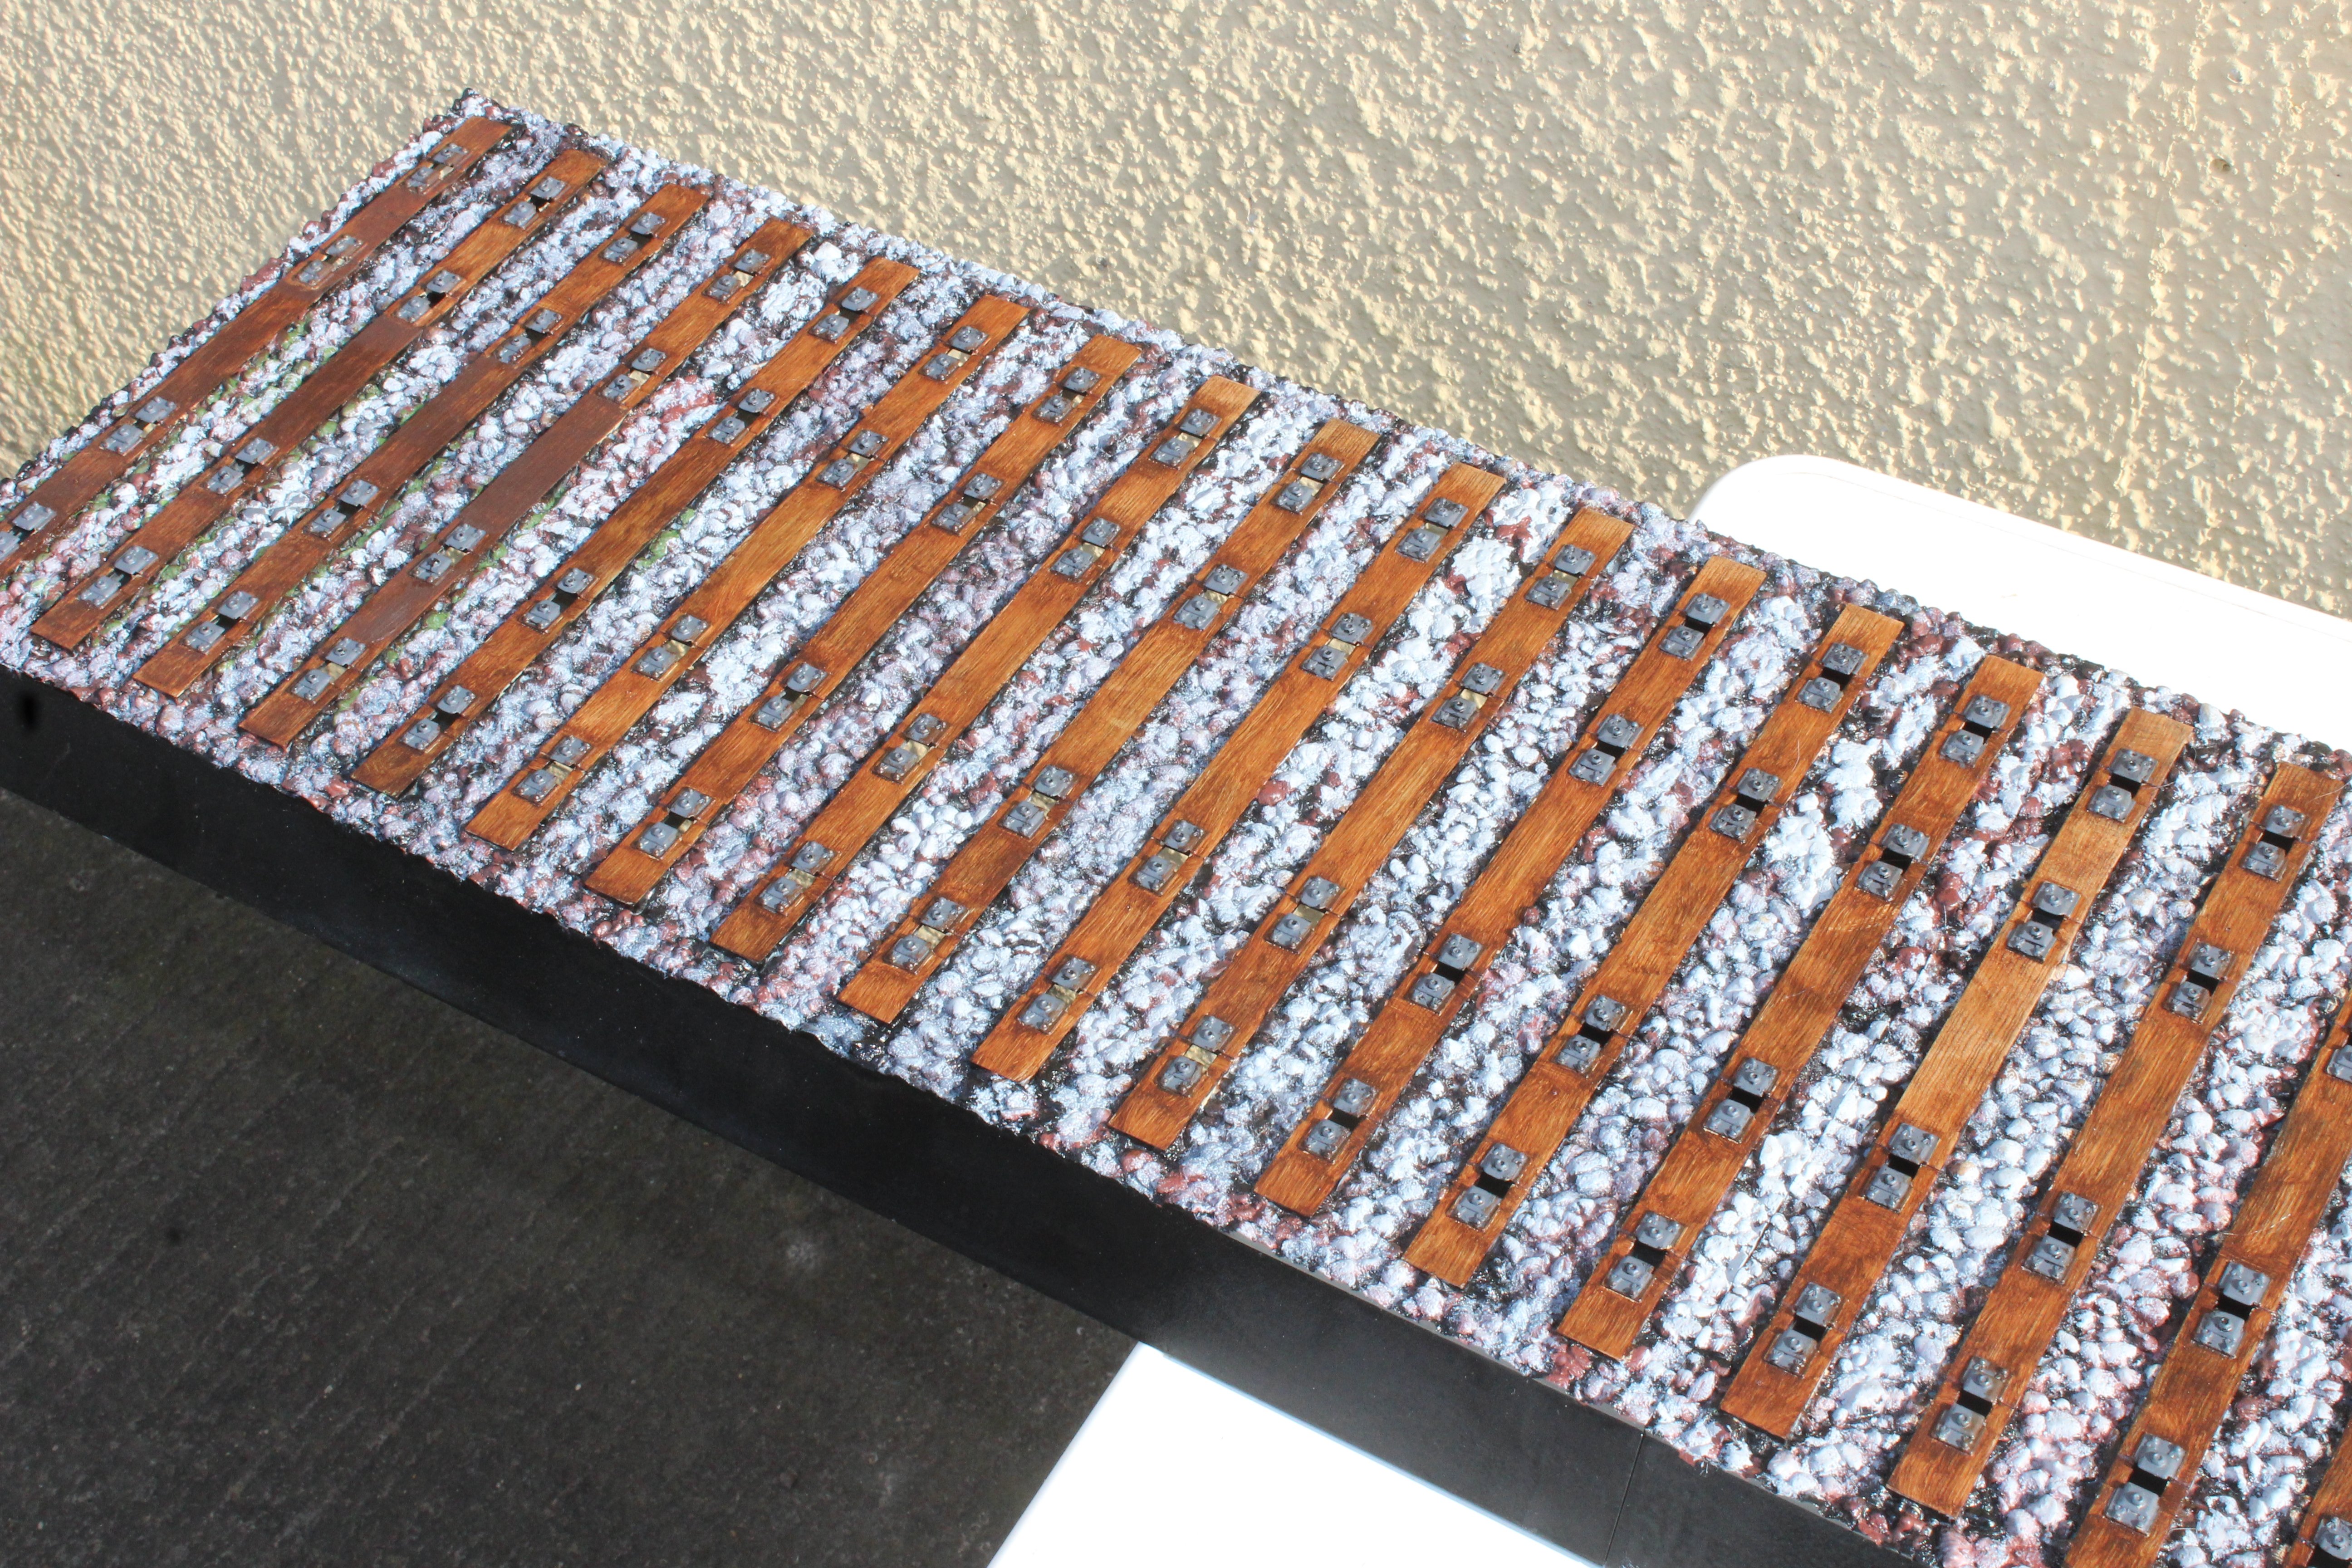
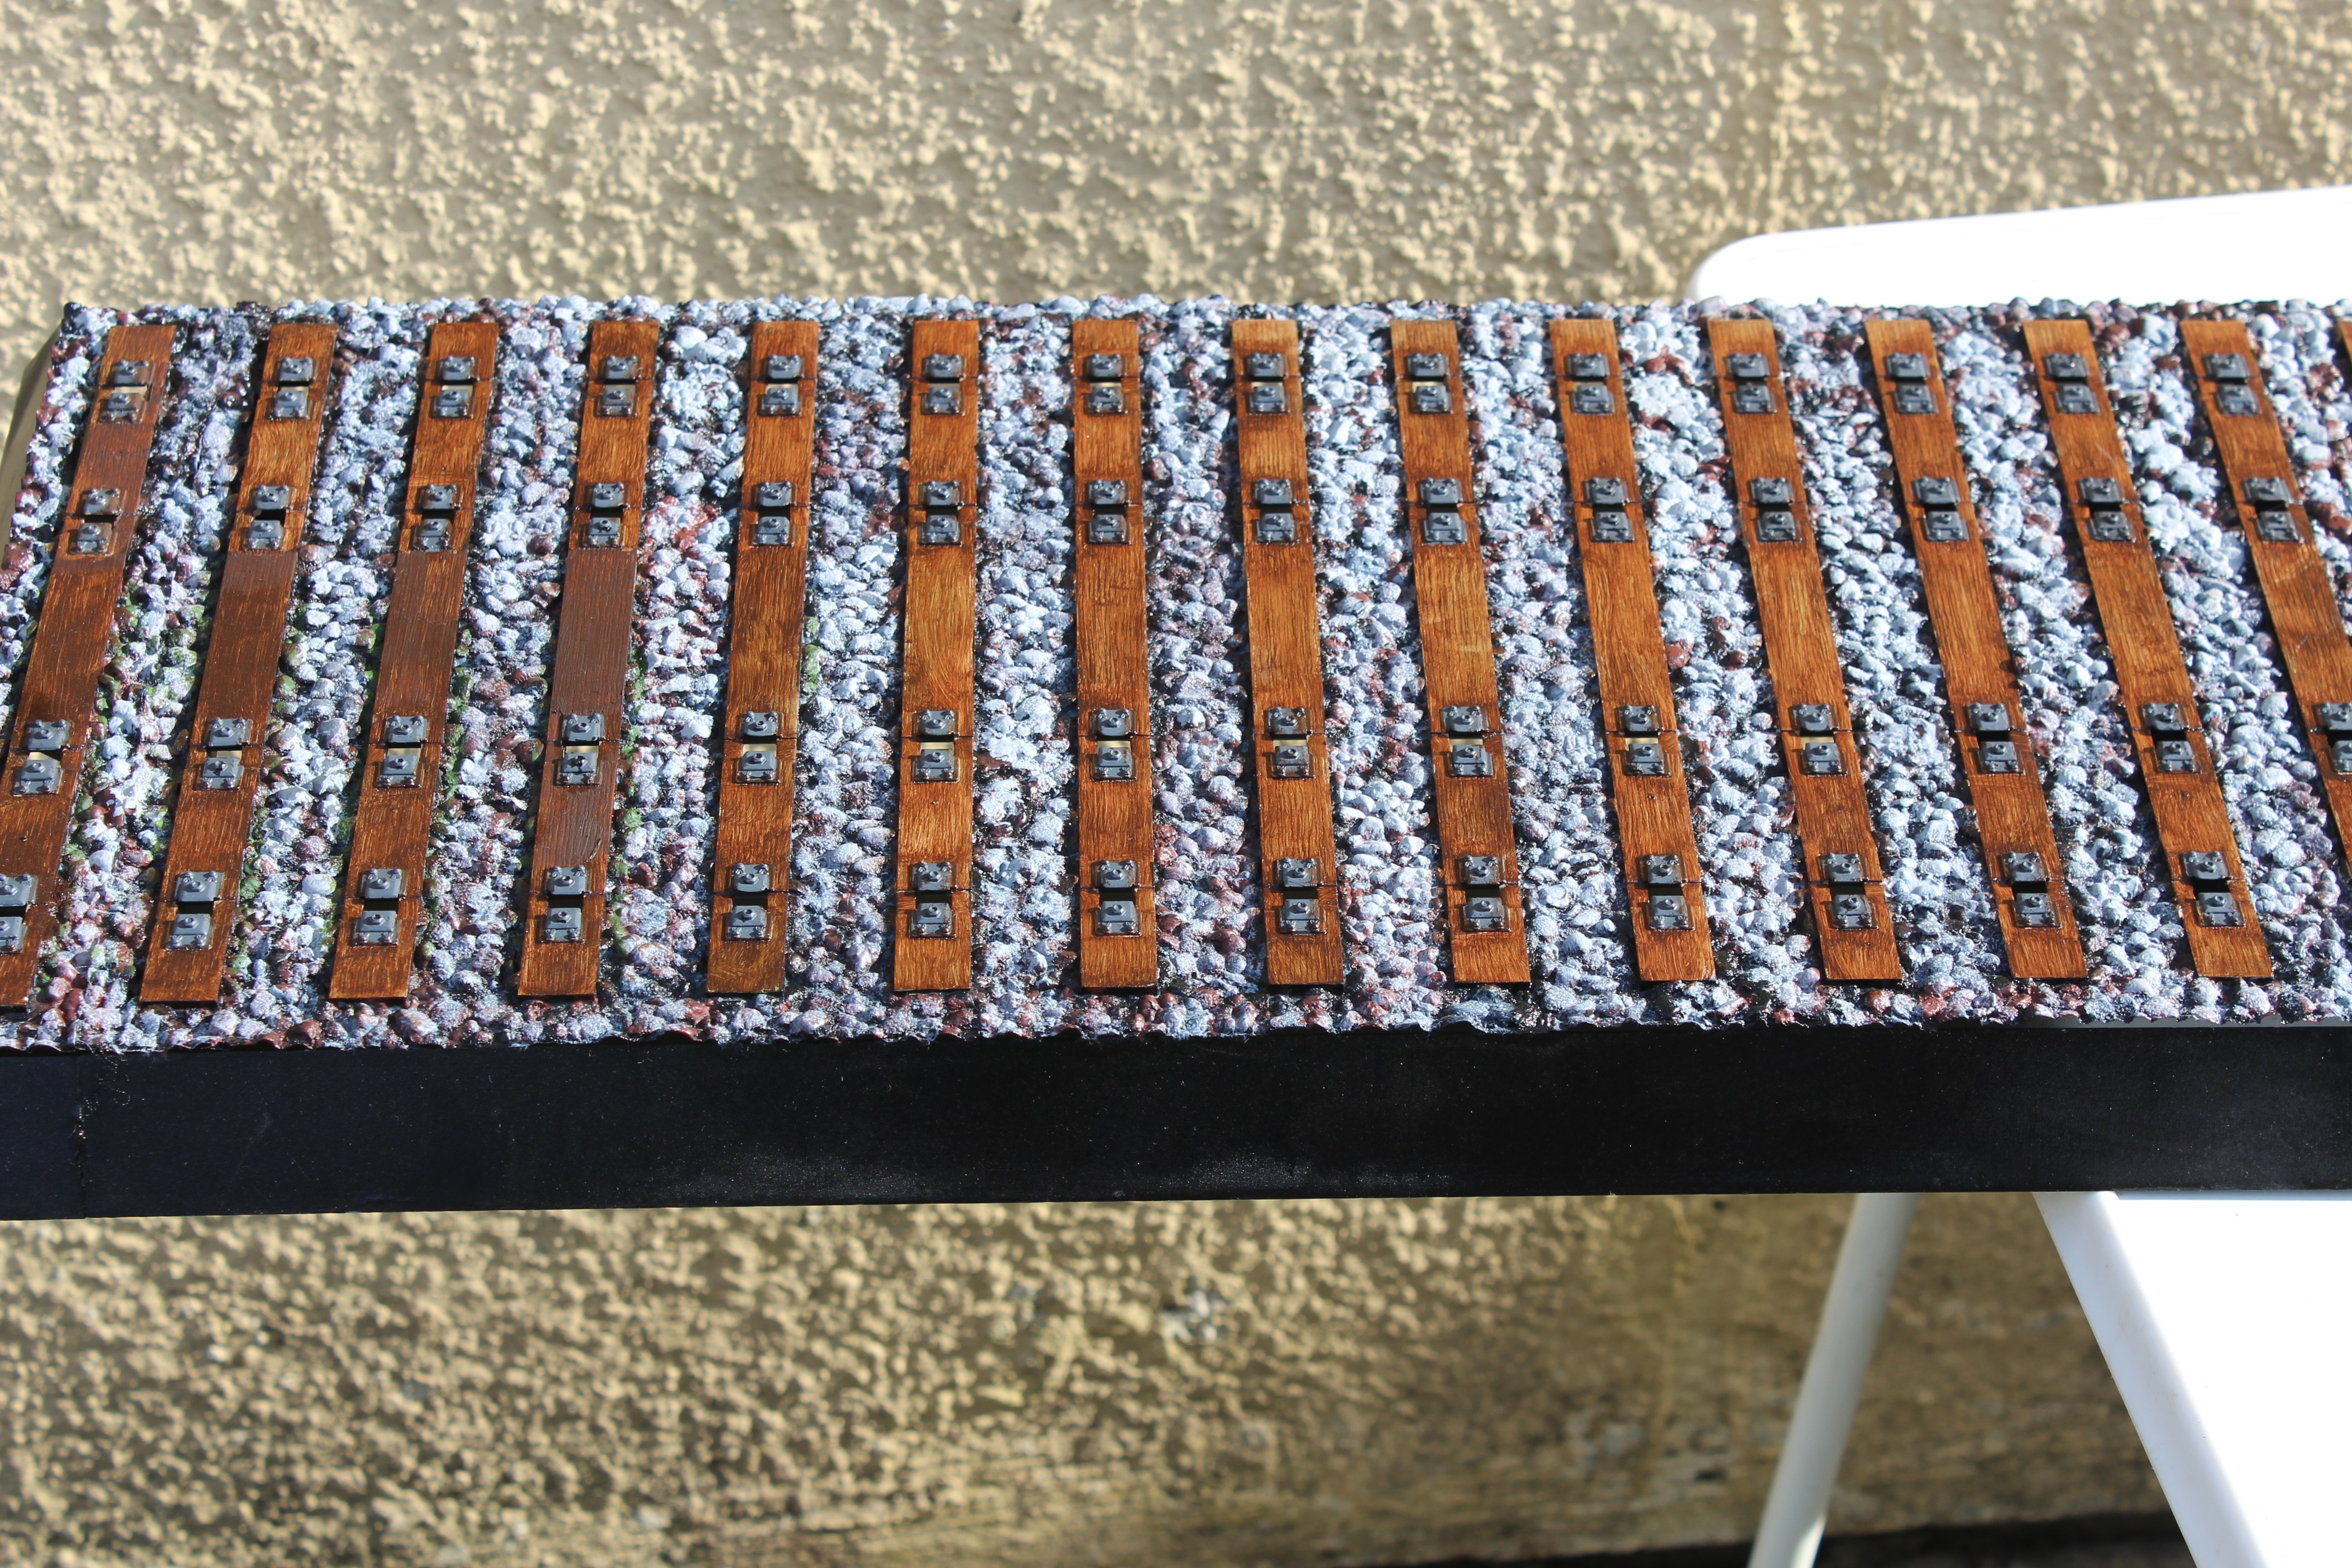
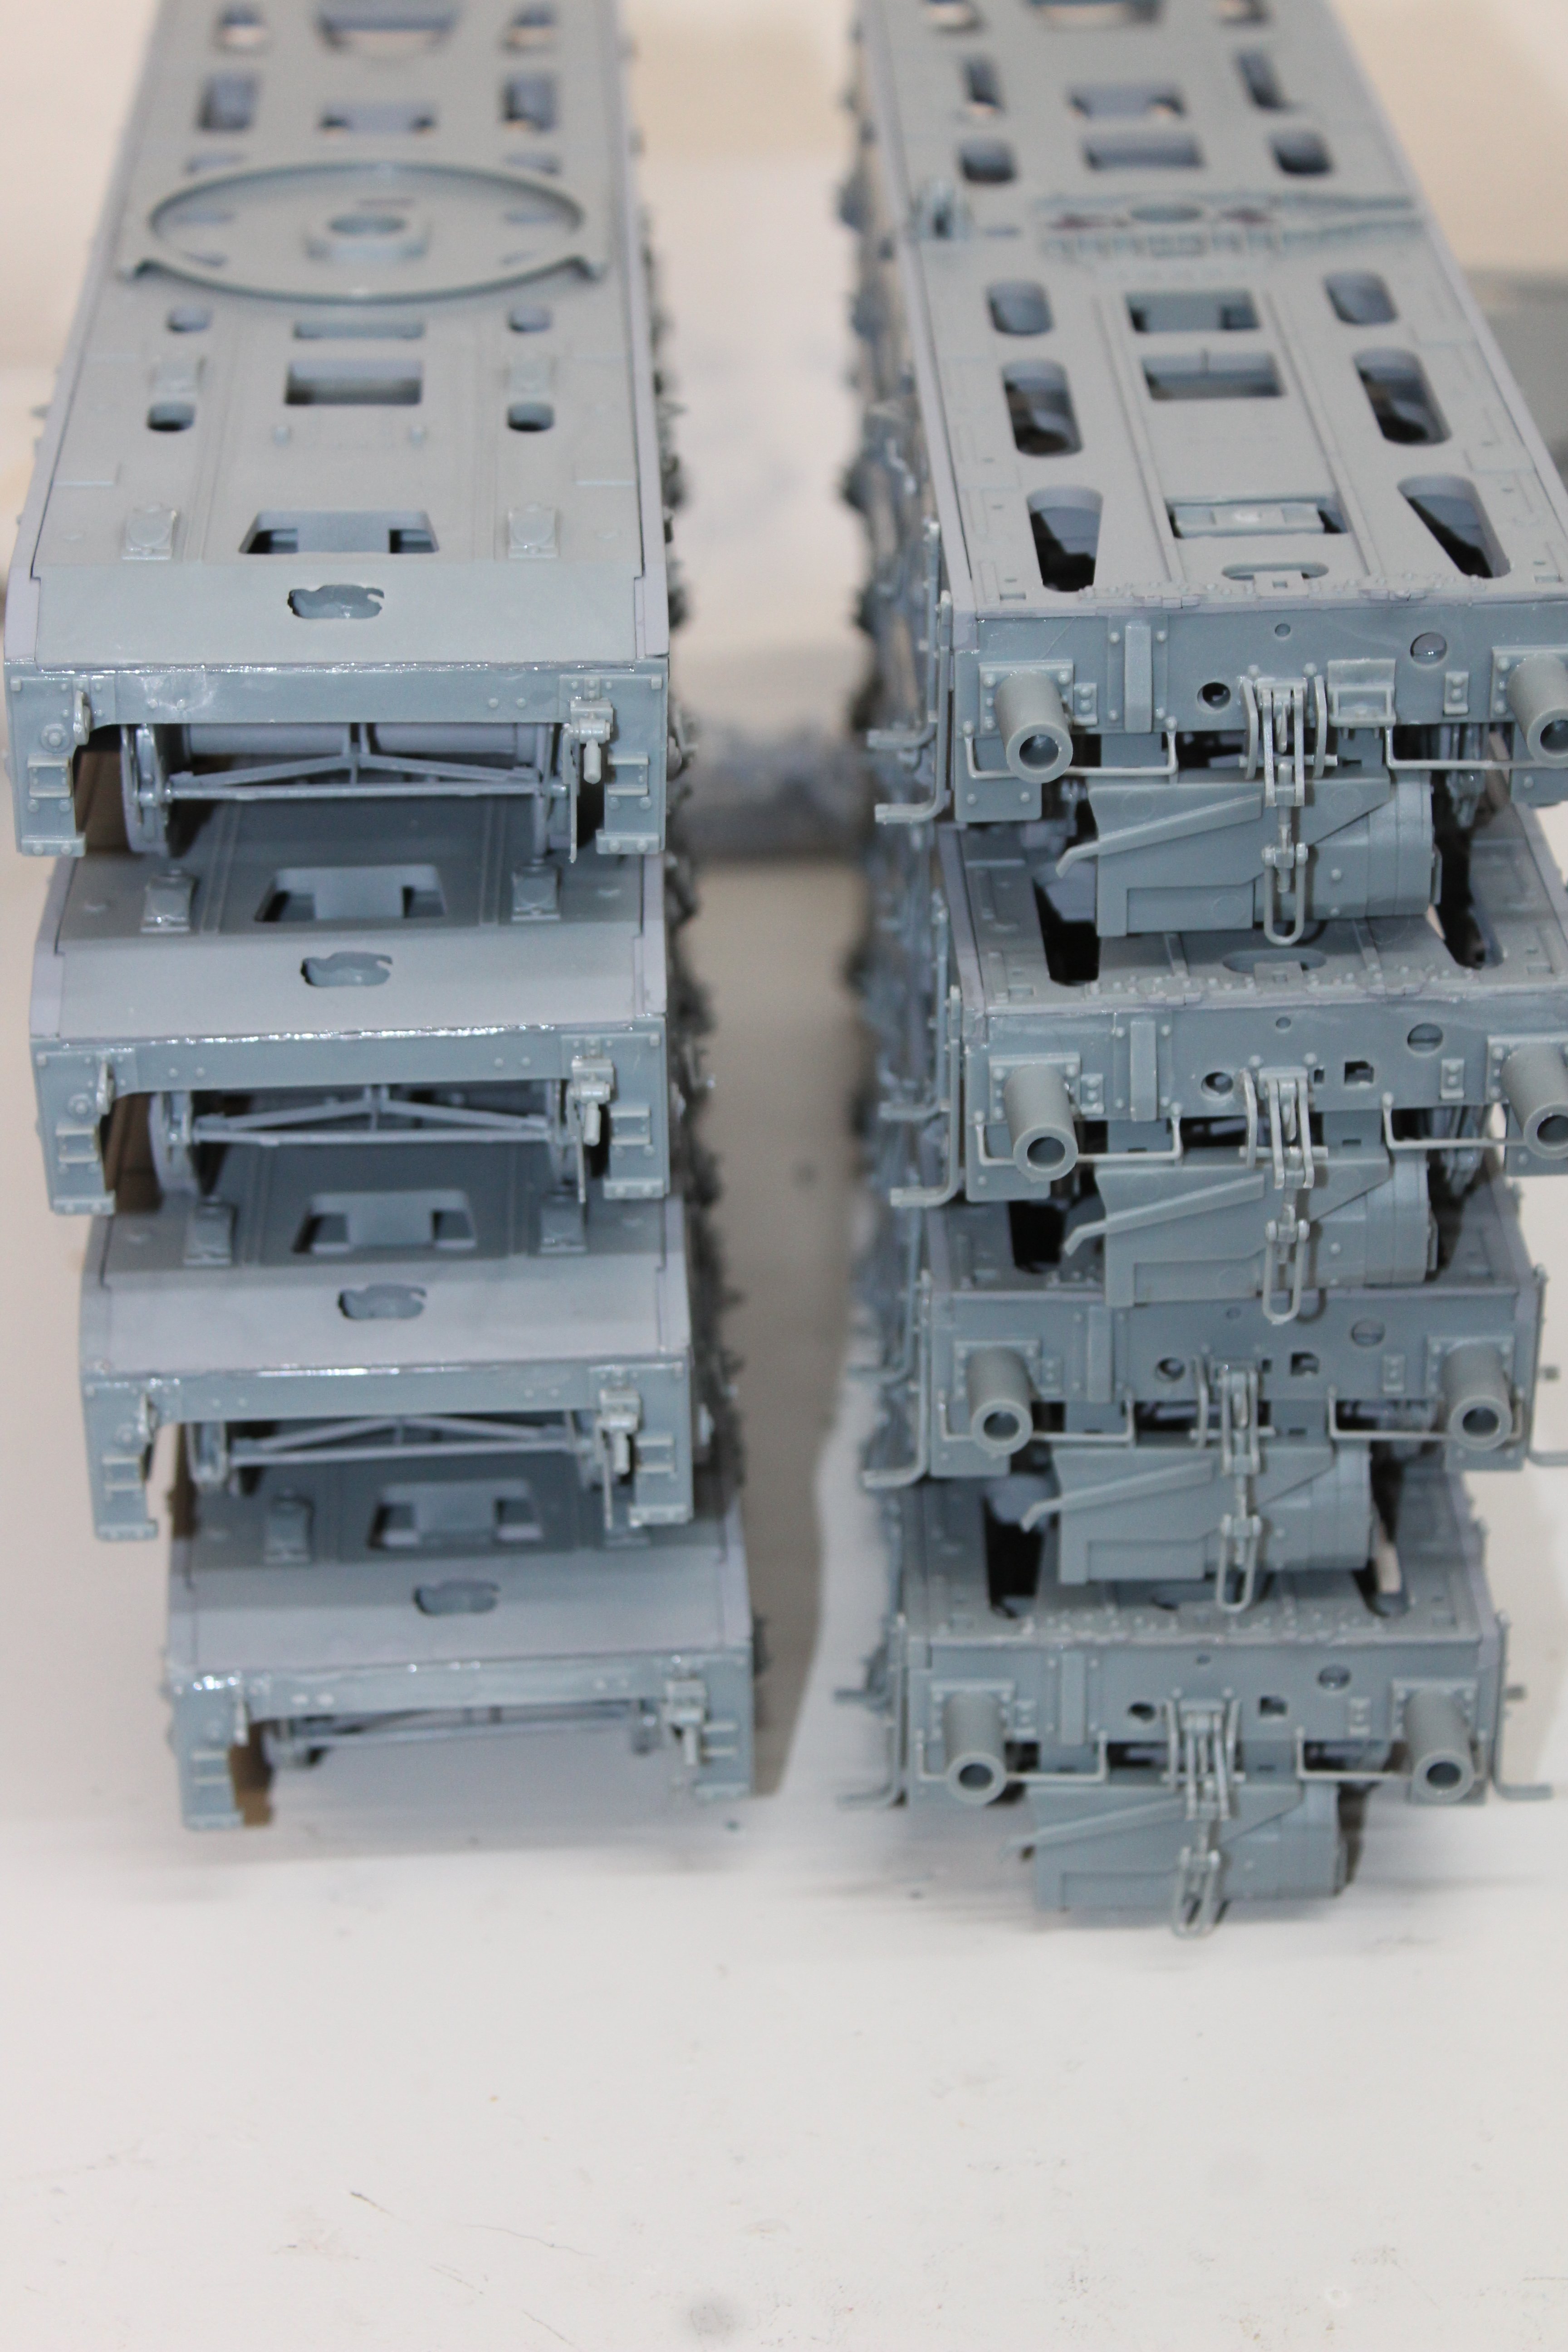
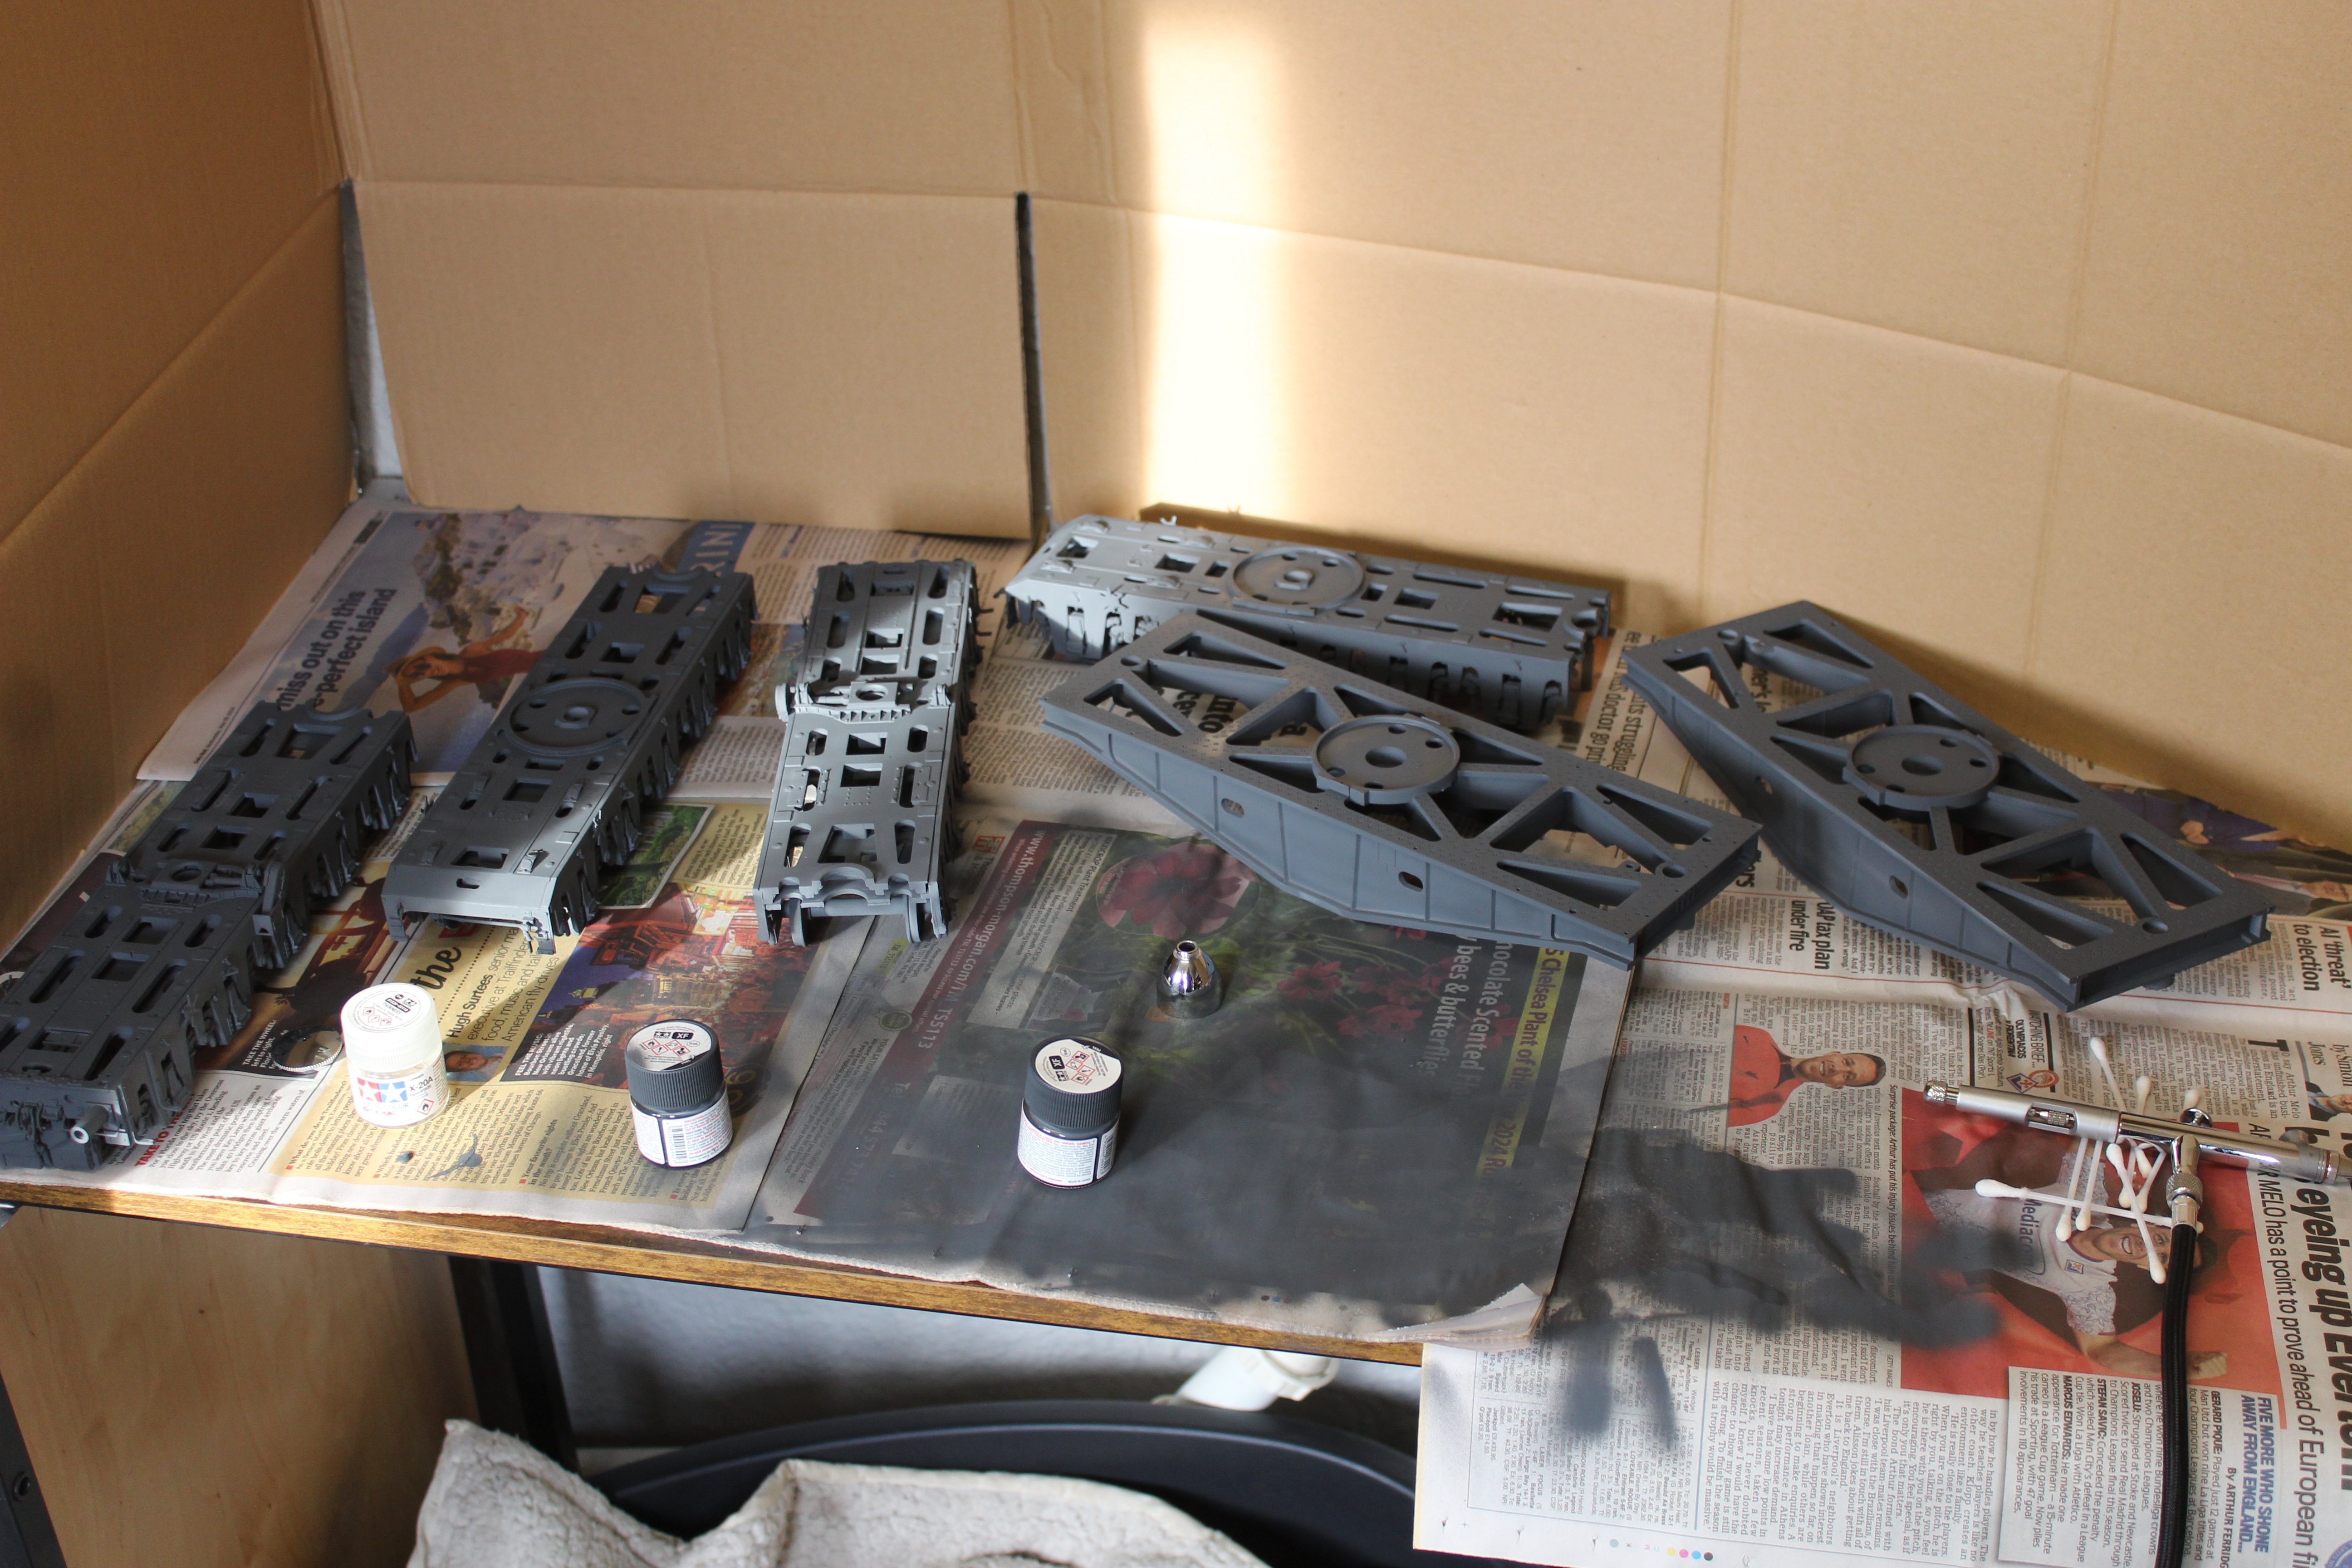
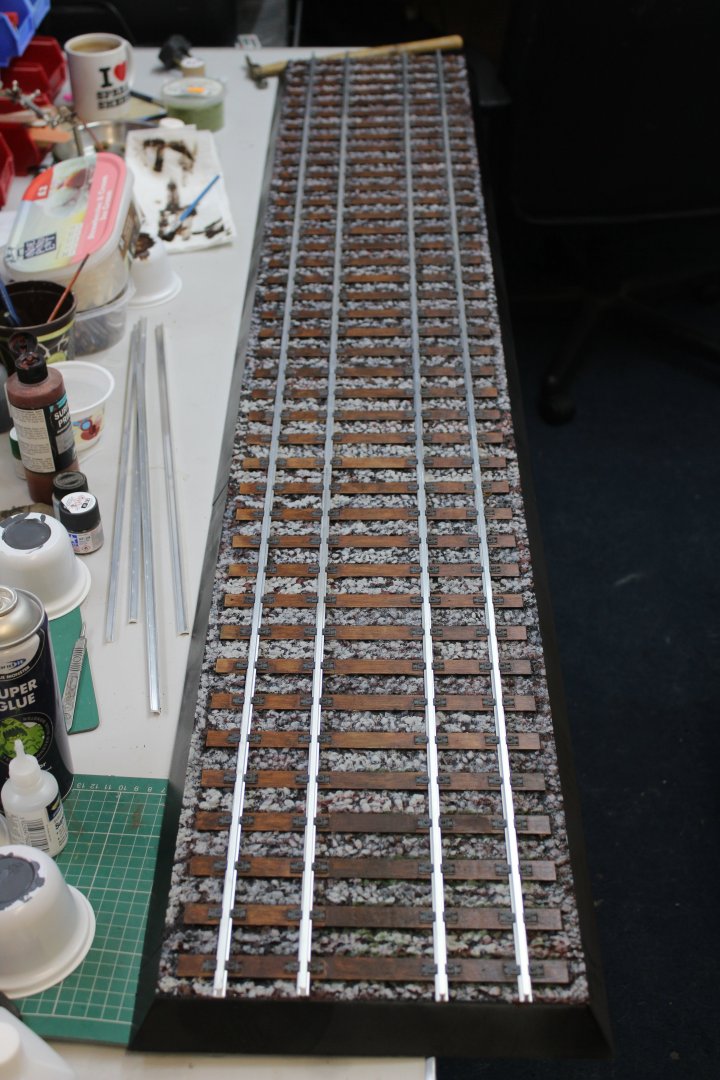
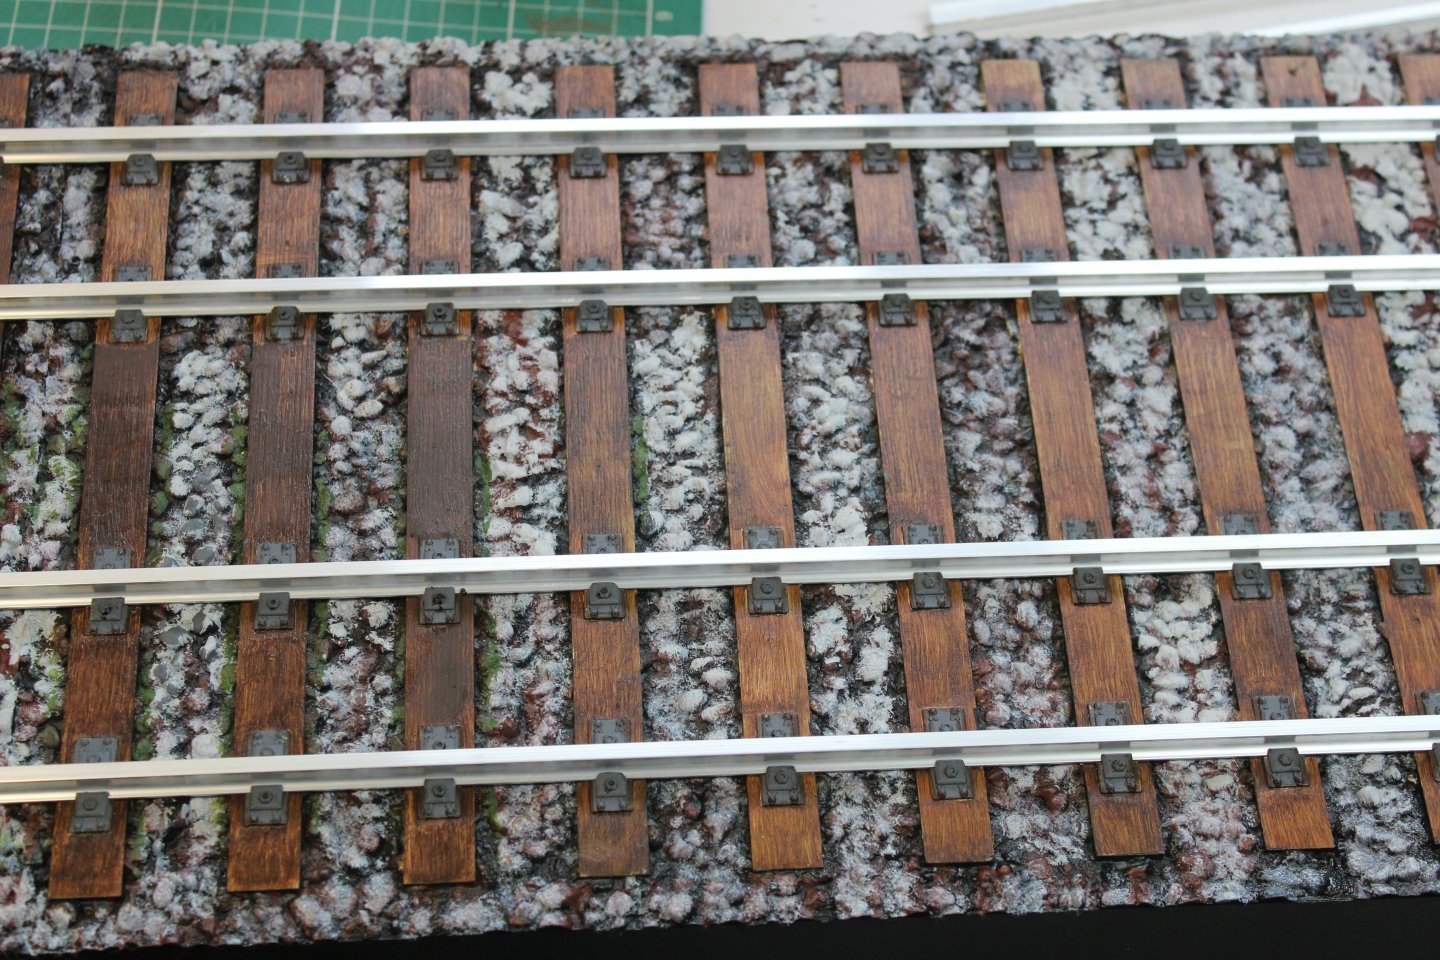
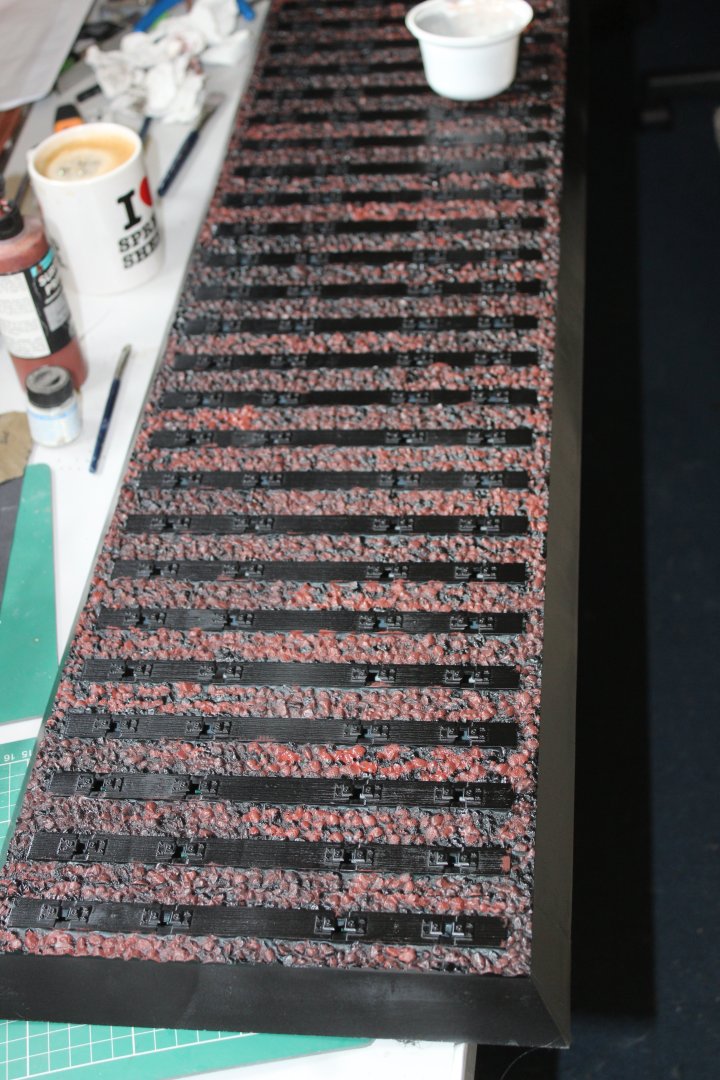
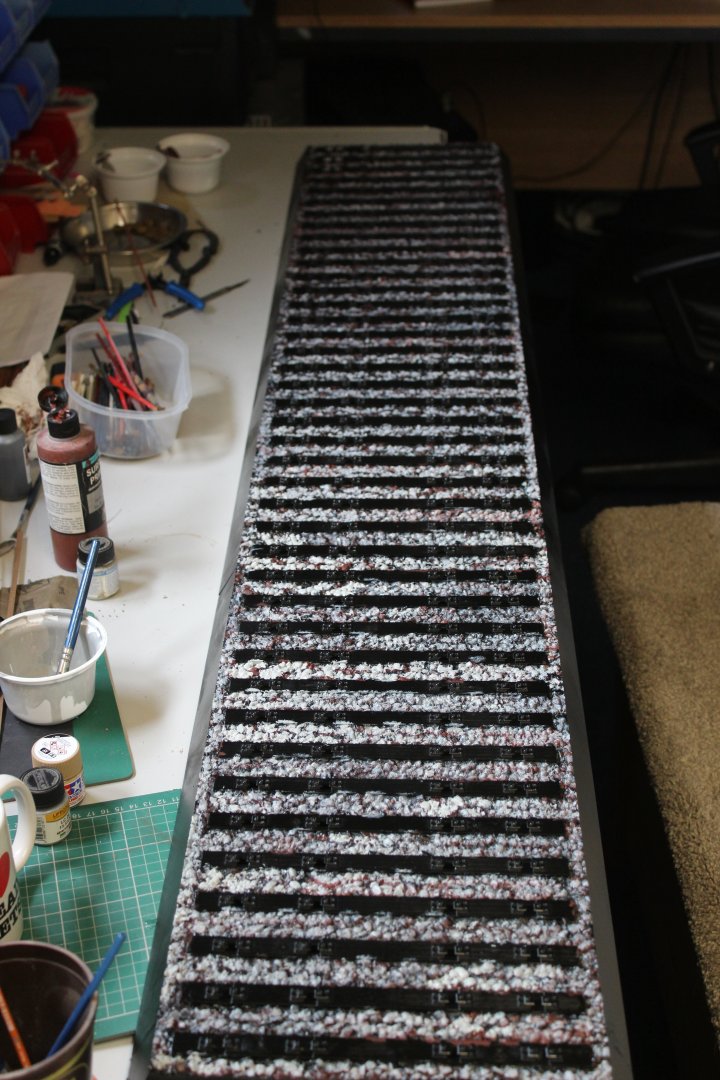
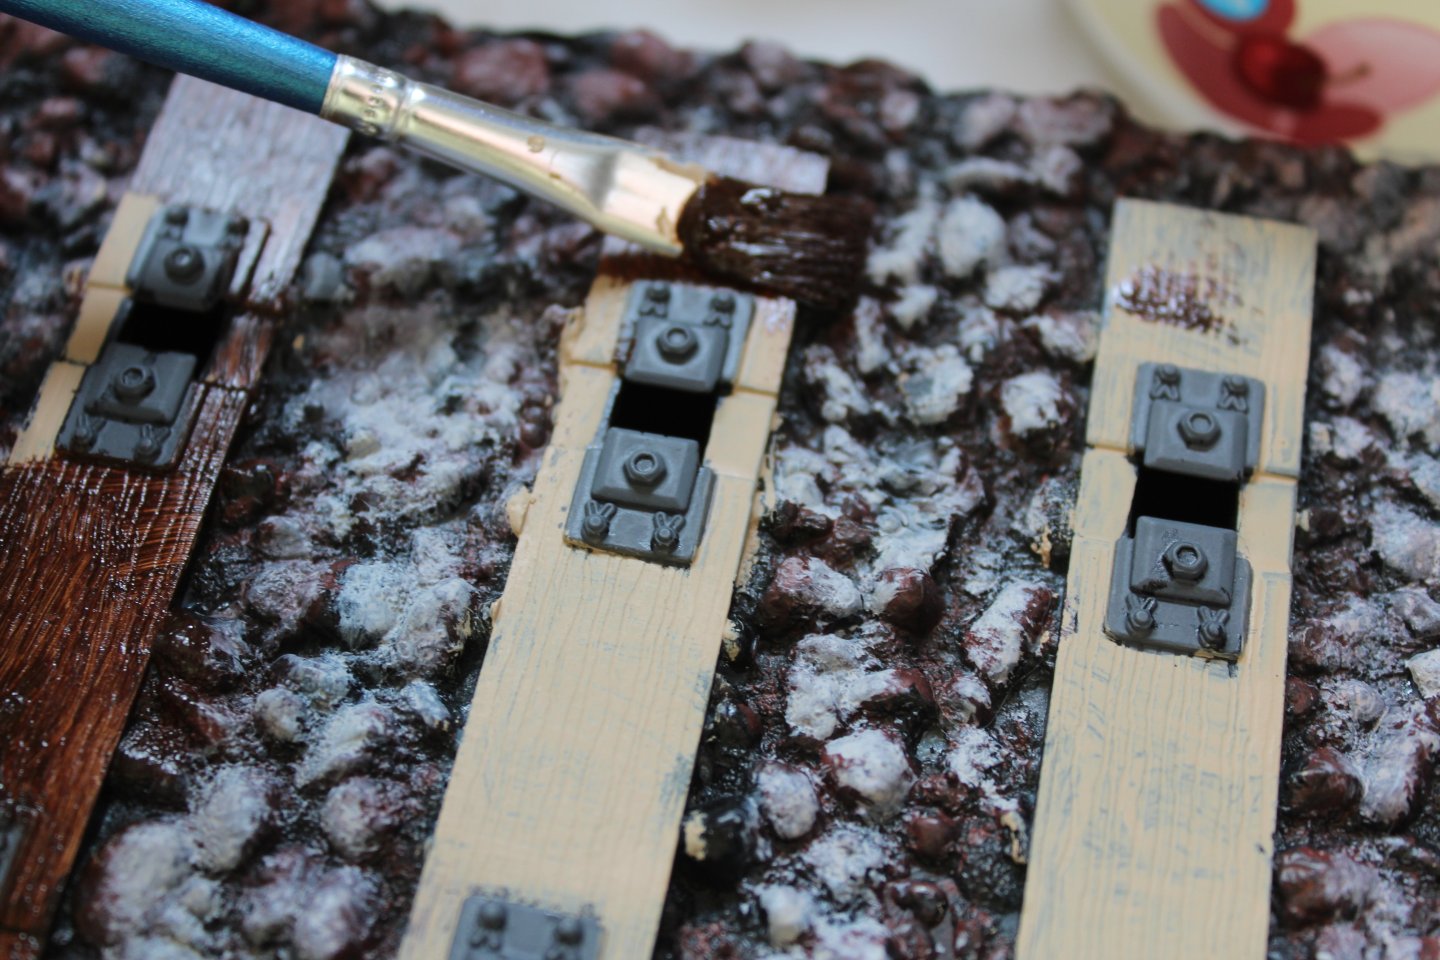
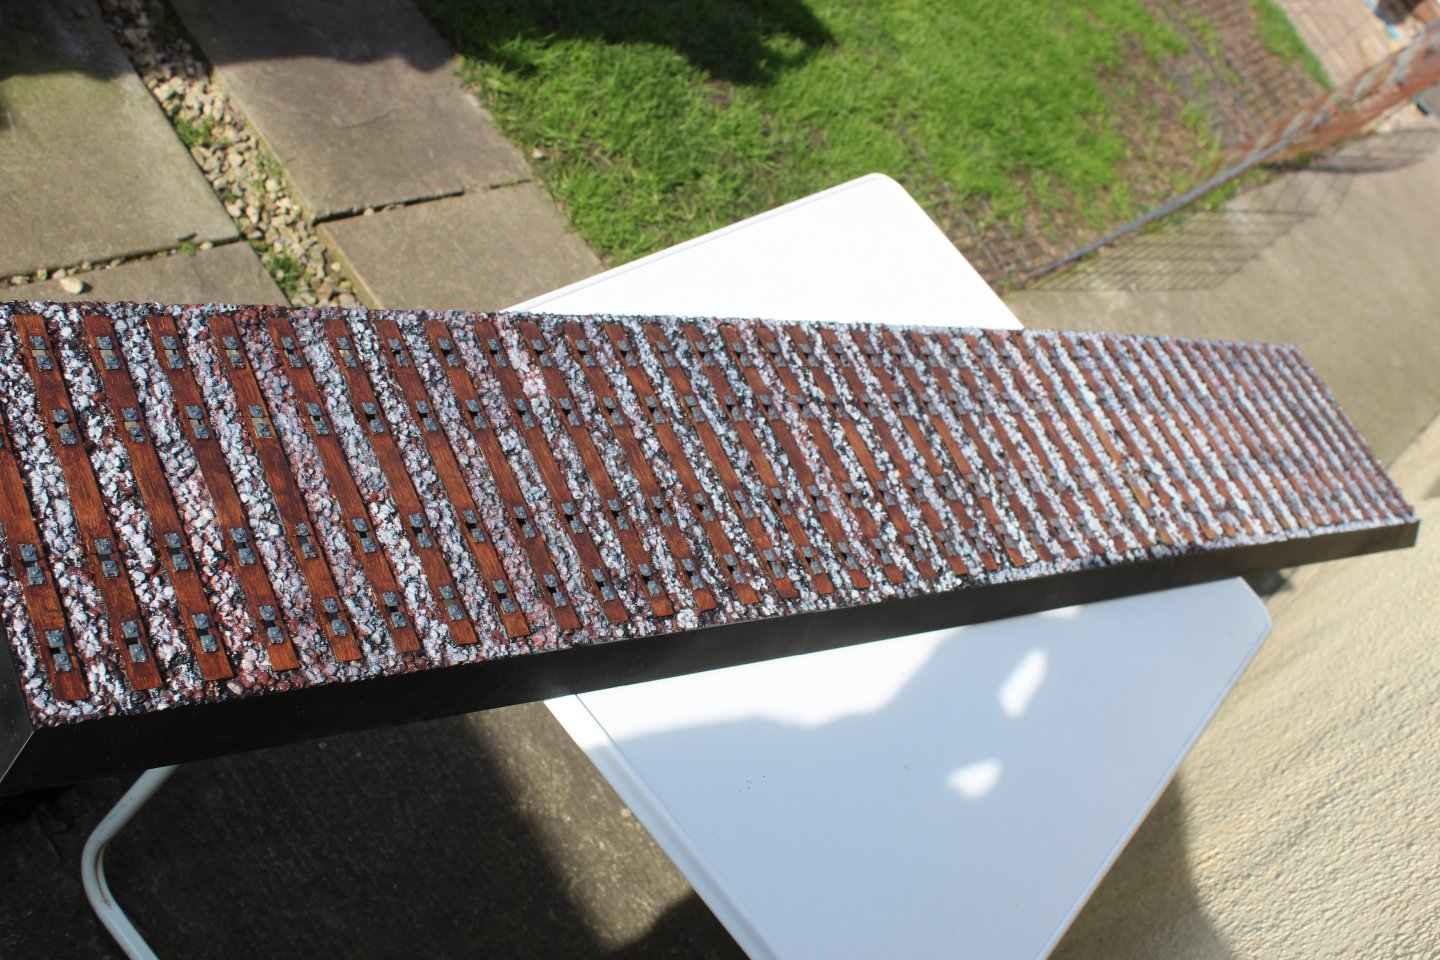
Good morning everyone Track bed (rail) The kit comes with aluminium rails, which have been primed and then painted in Red Ochre, the running surfaces will then be cleaned off I put some of the units together to see what the effect would be when complete,- the jury is out, looks far to clean

- 26 replies
-
- 14
-
-
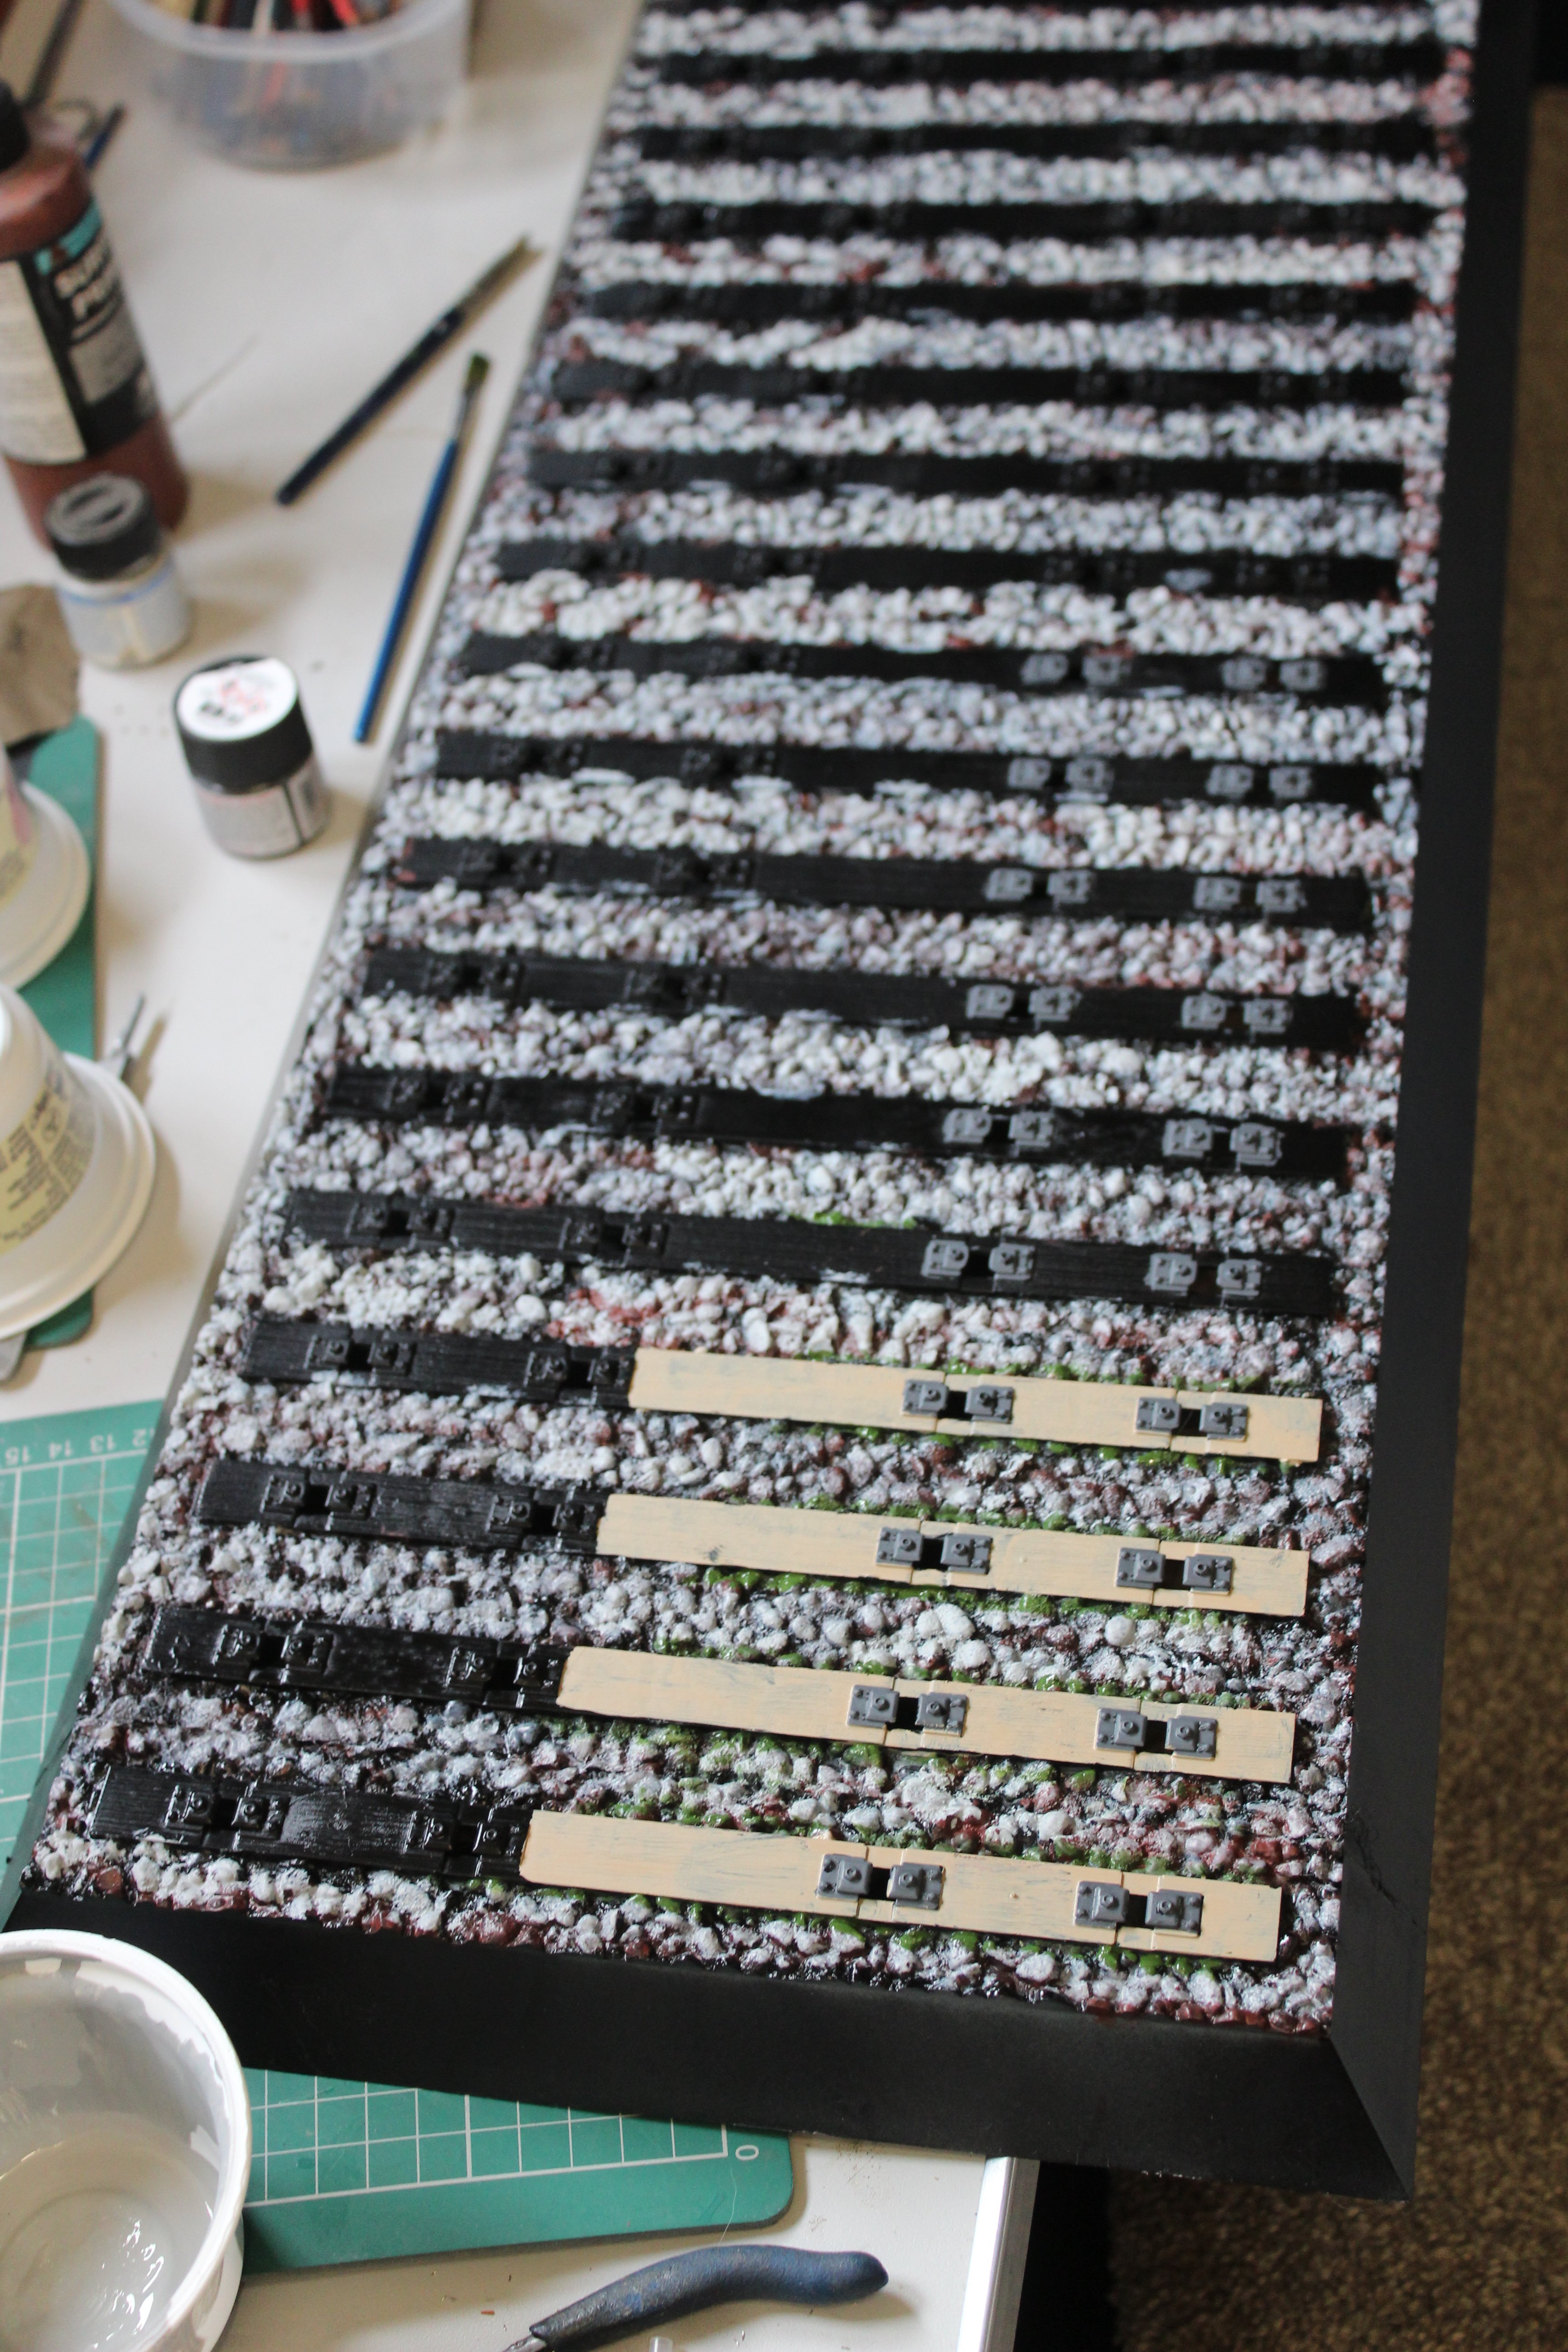
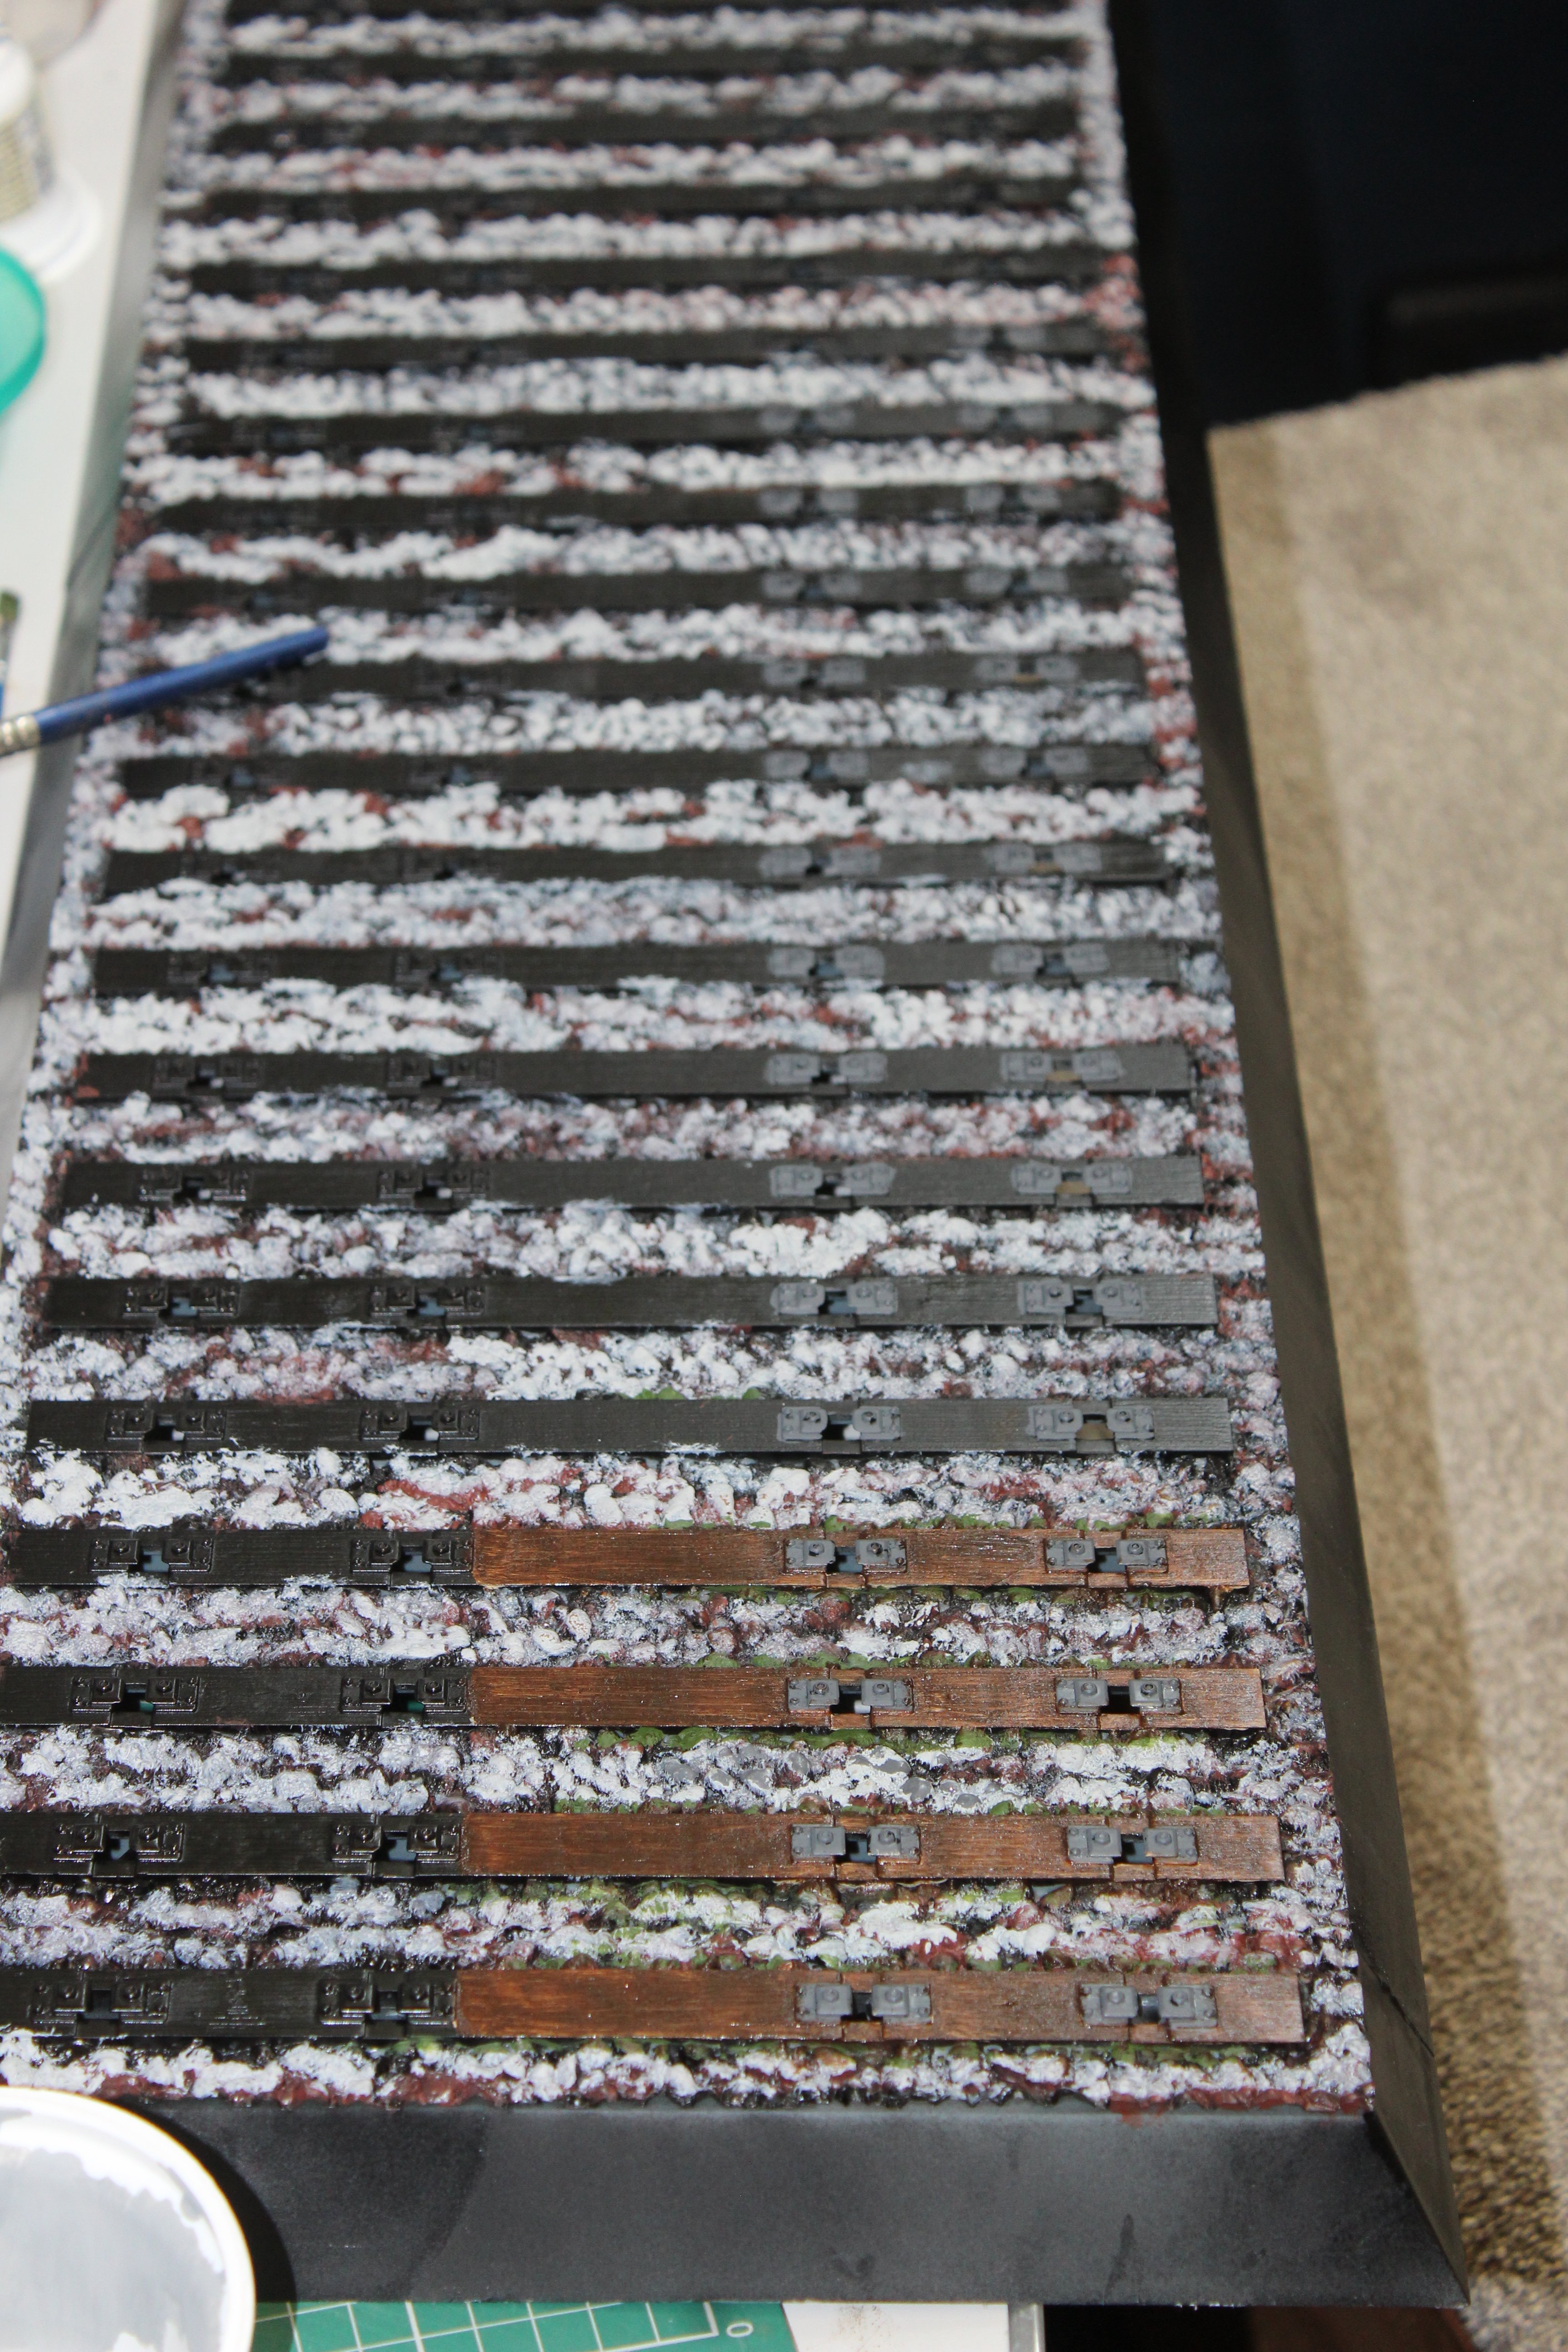
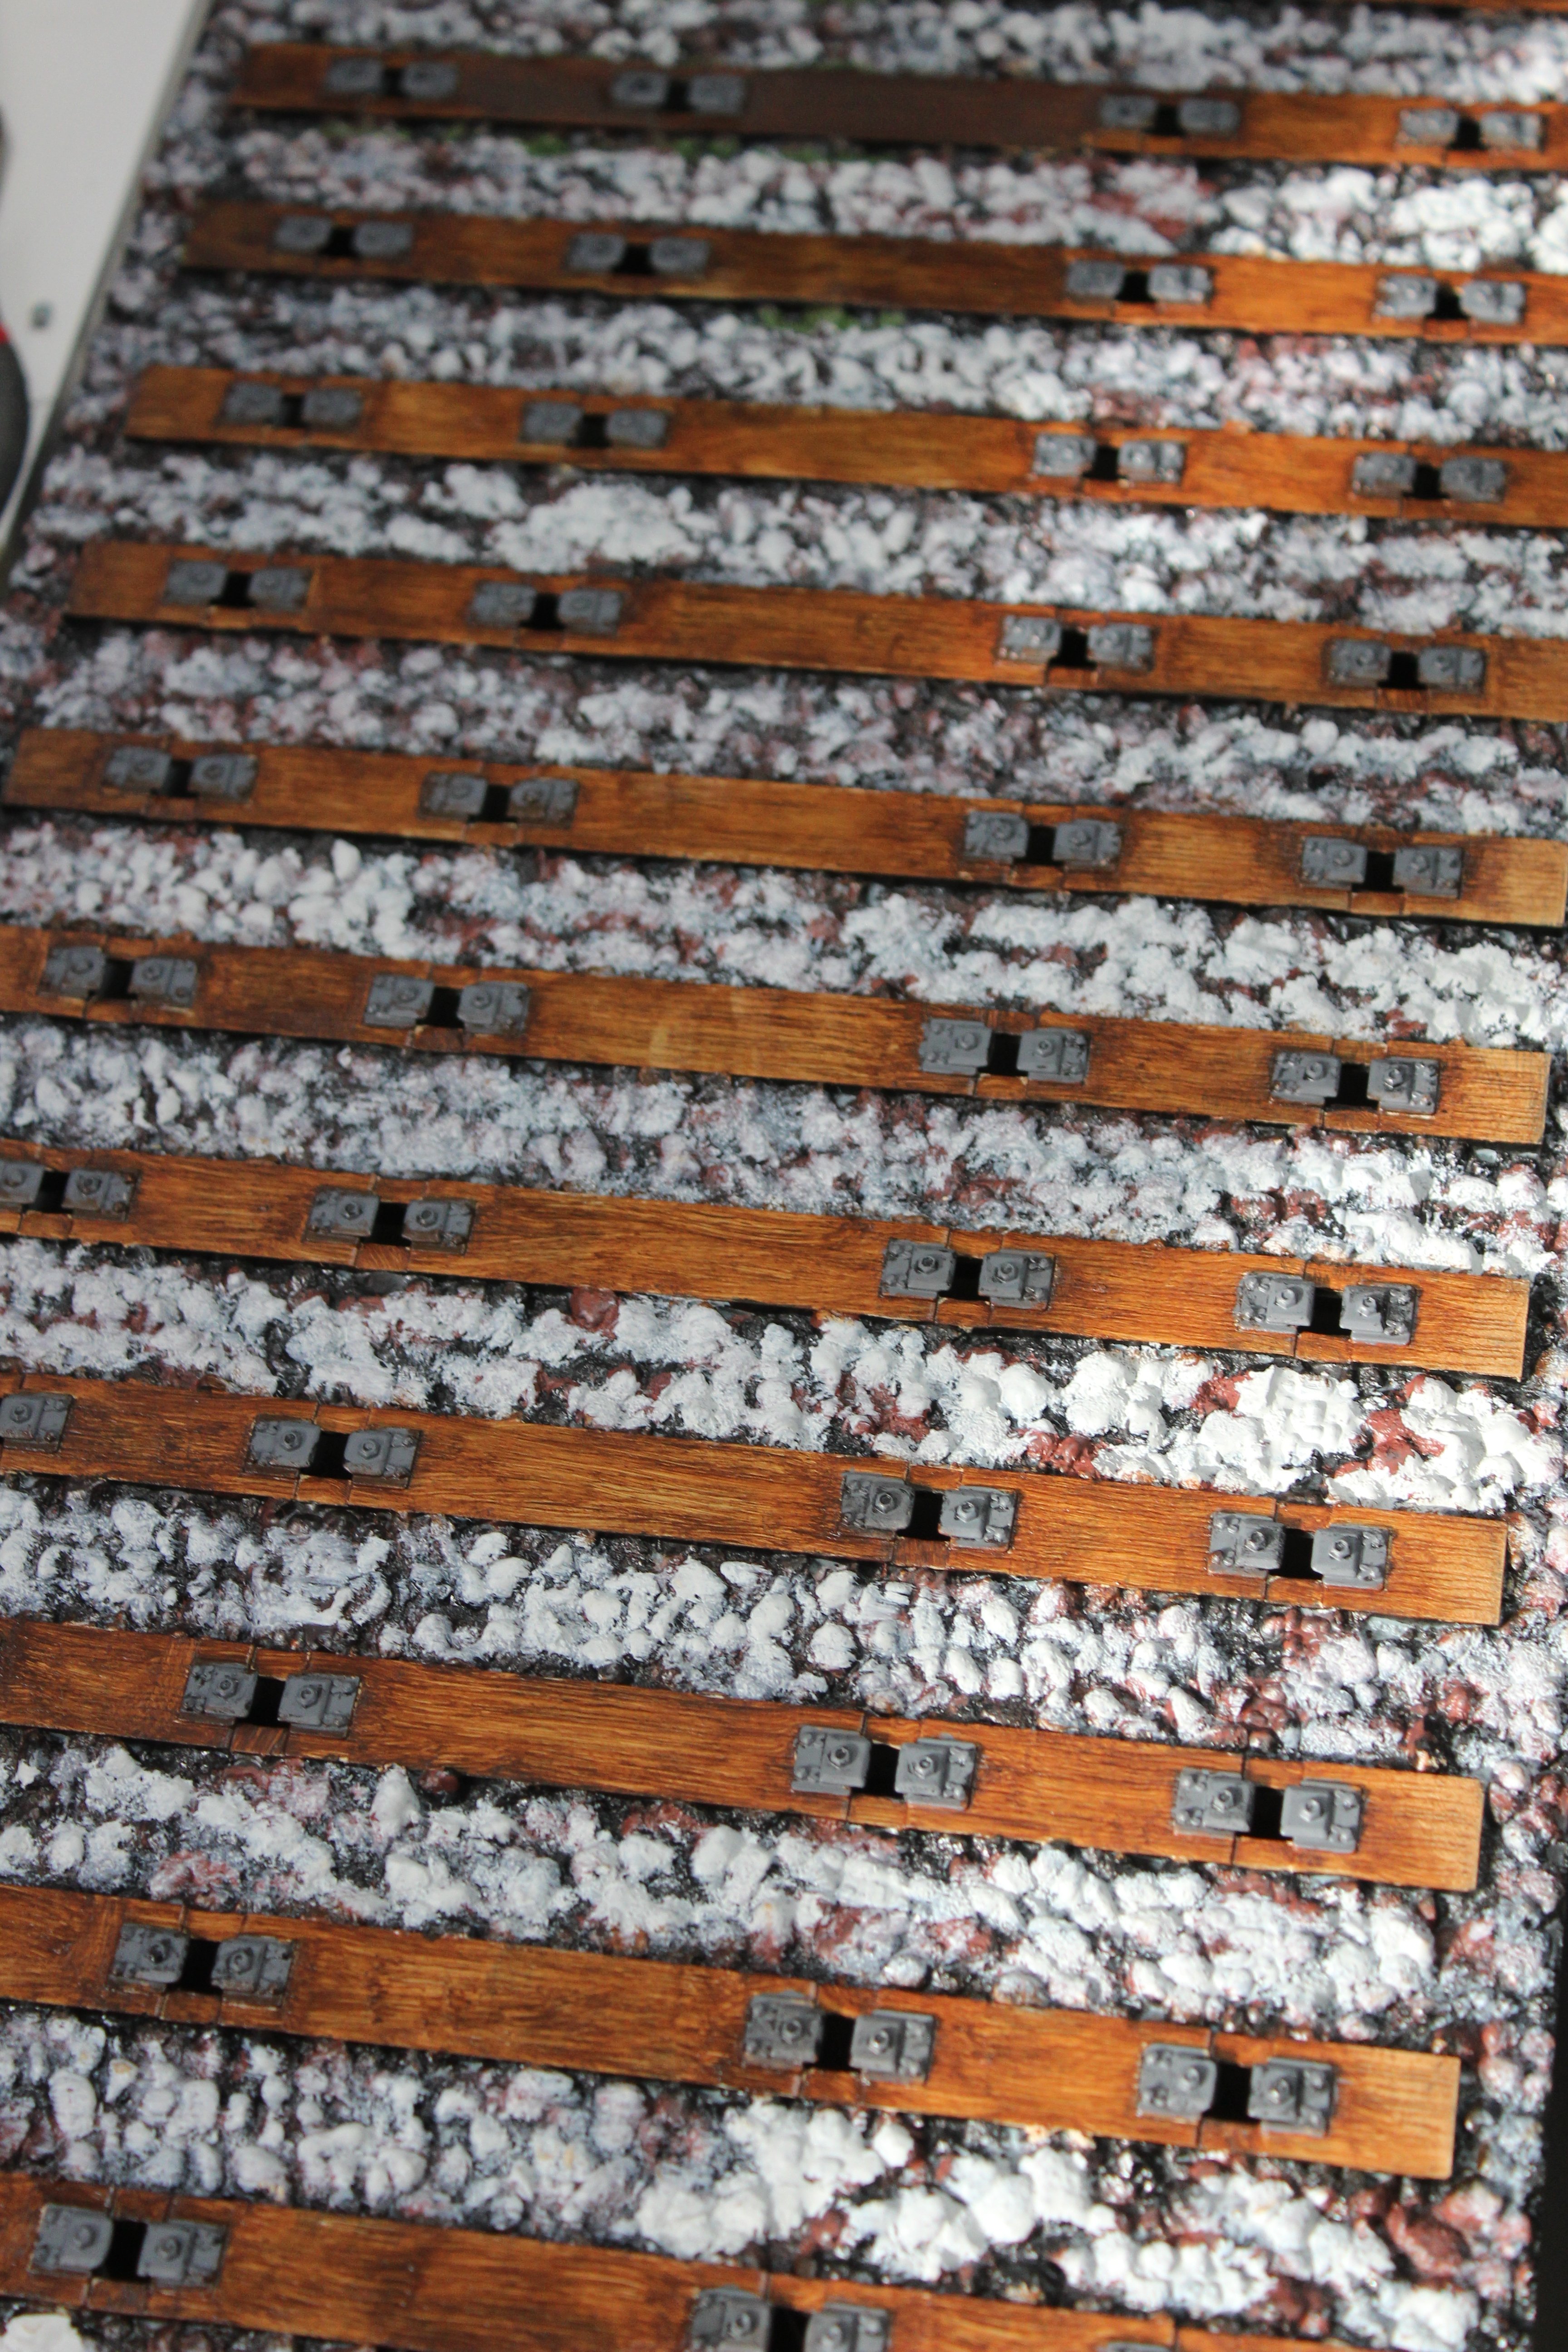
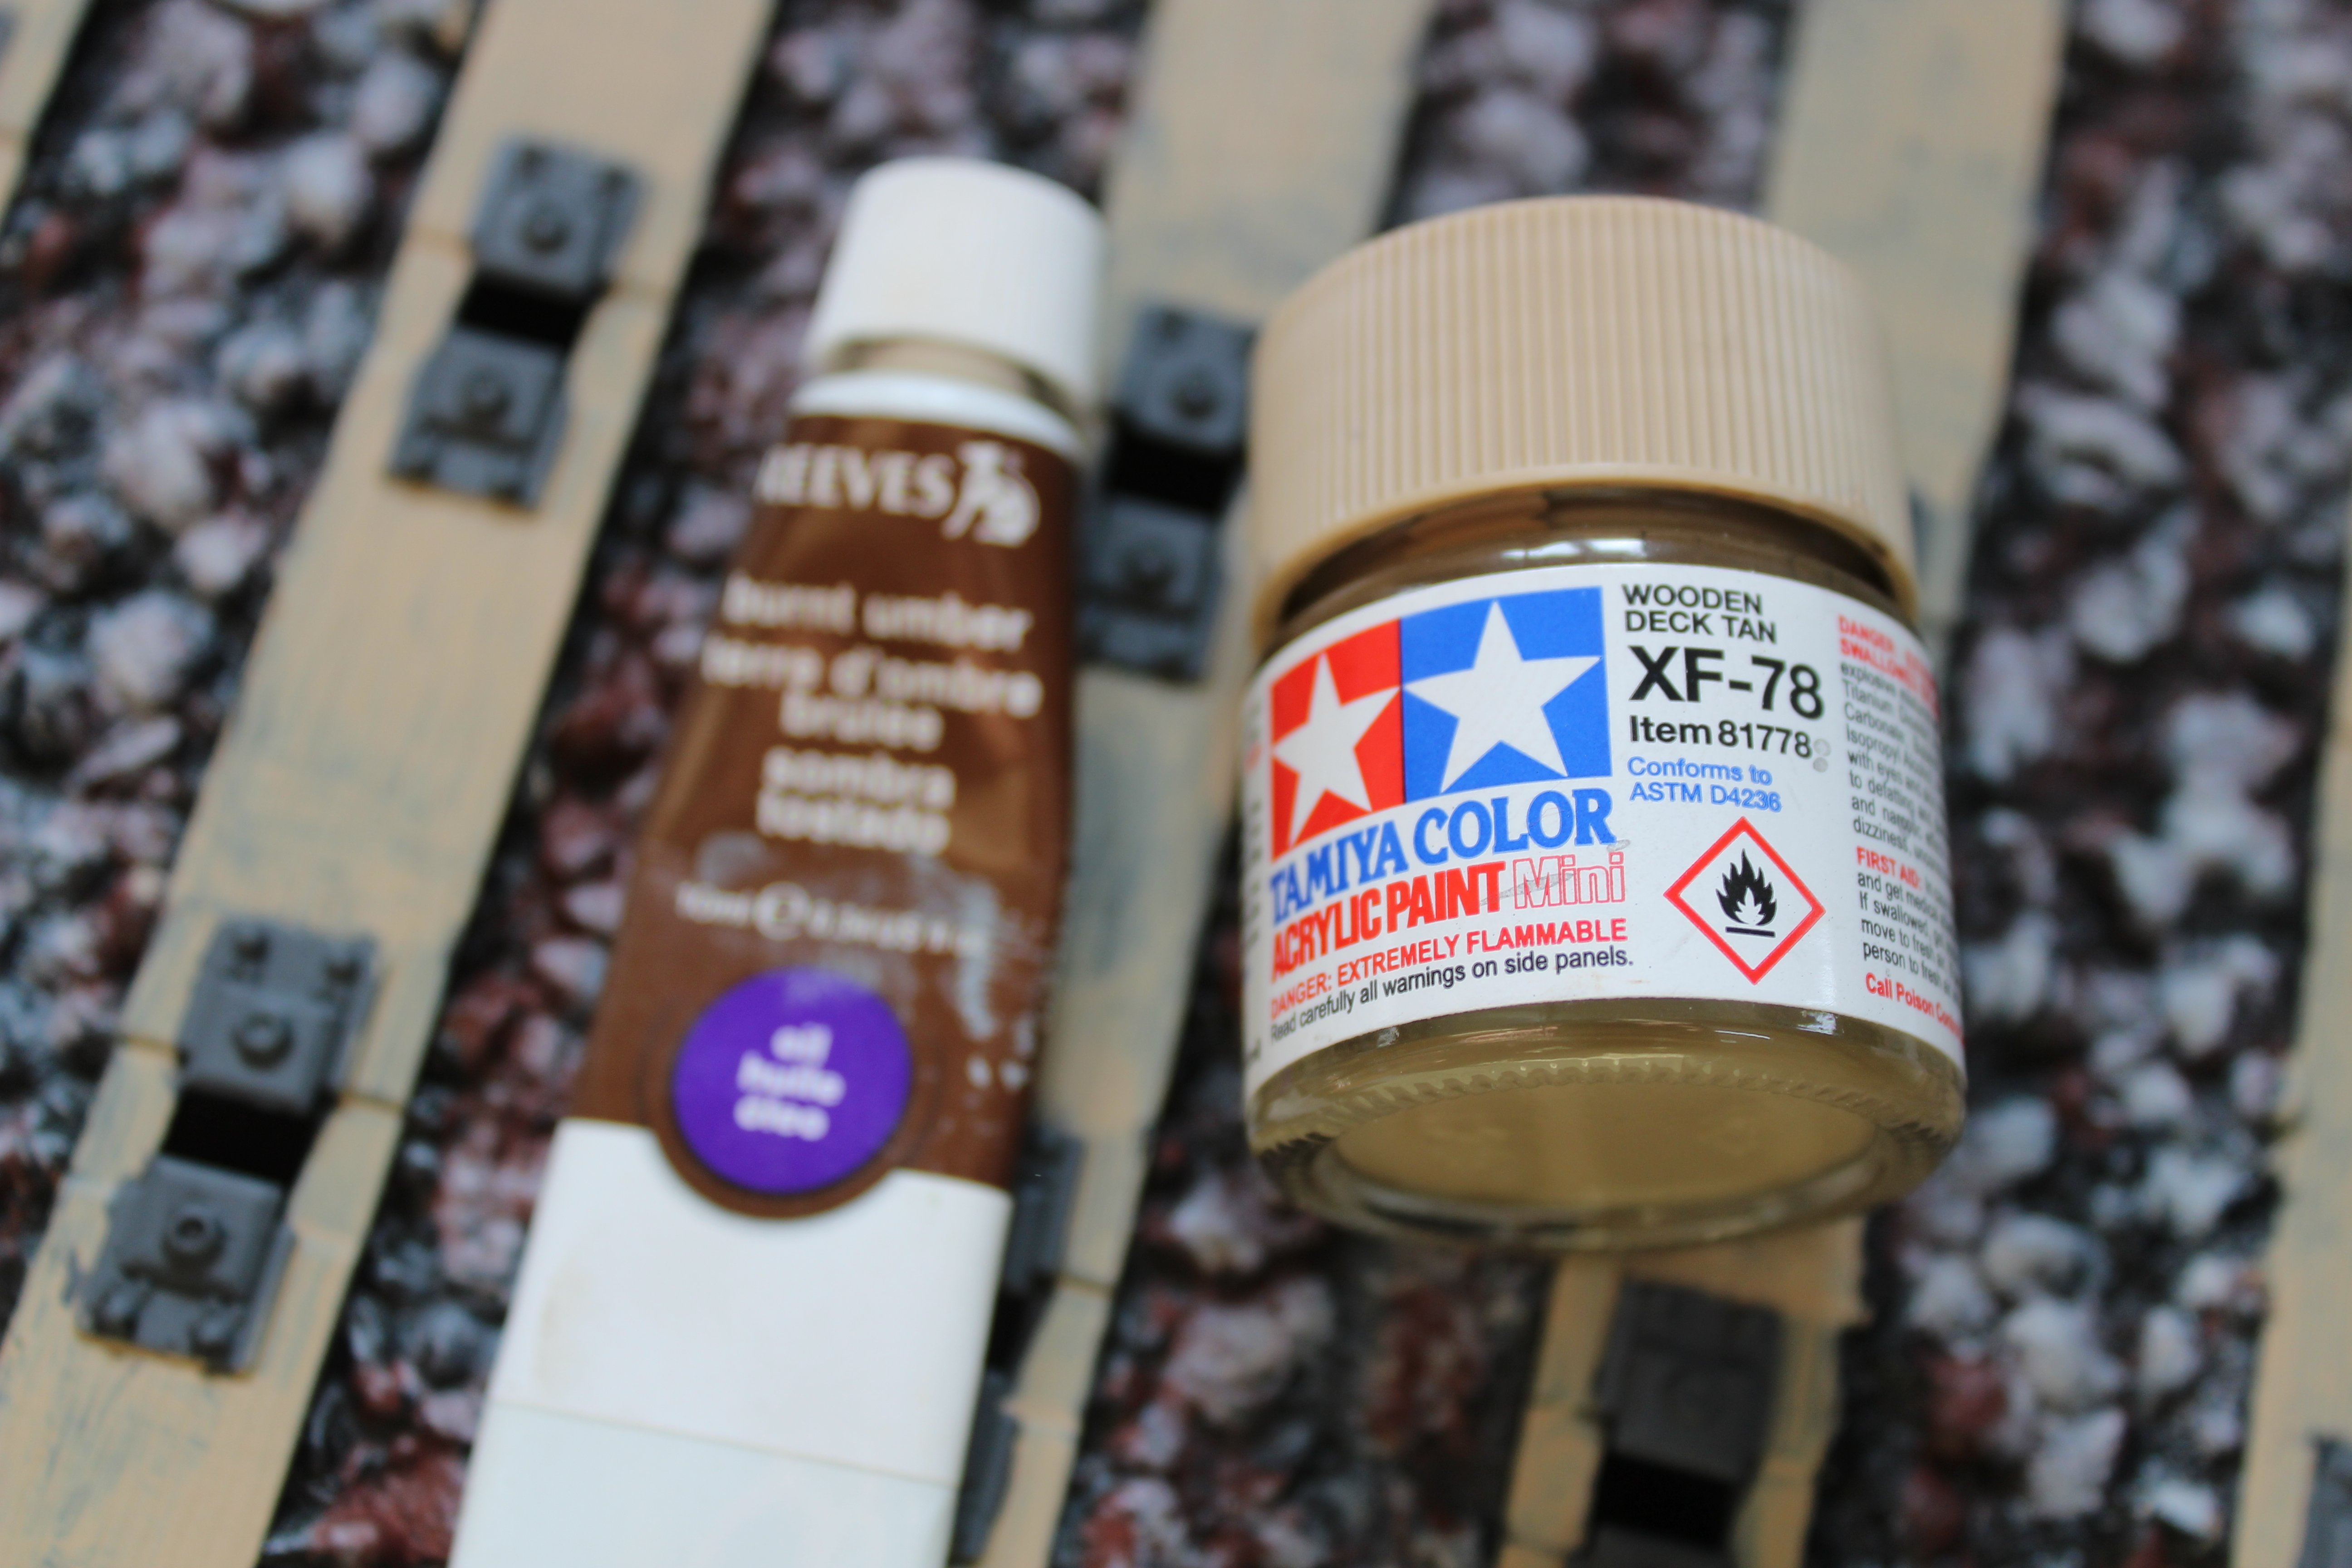
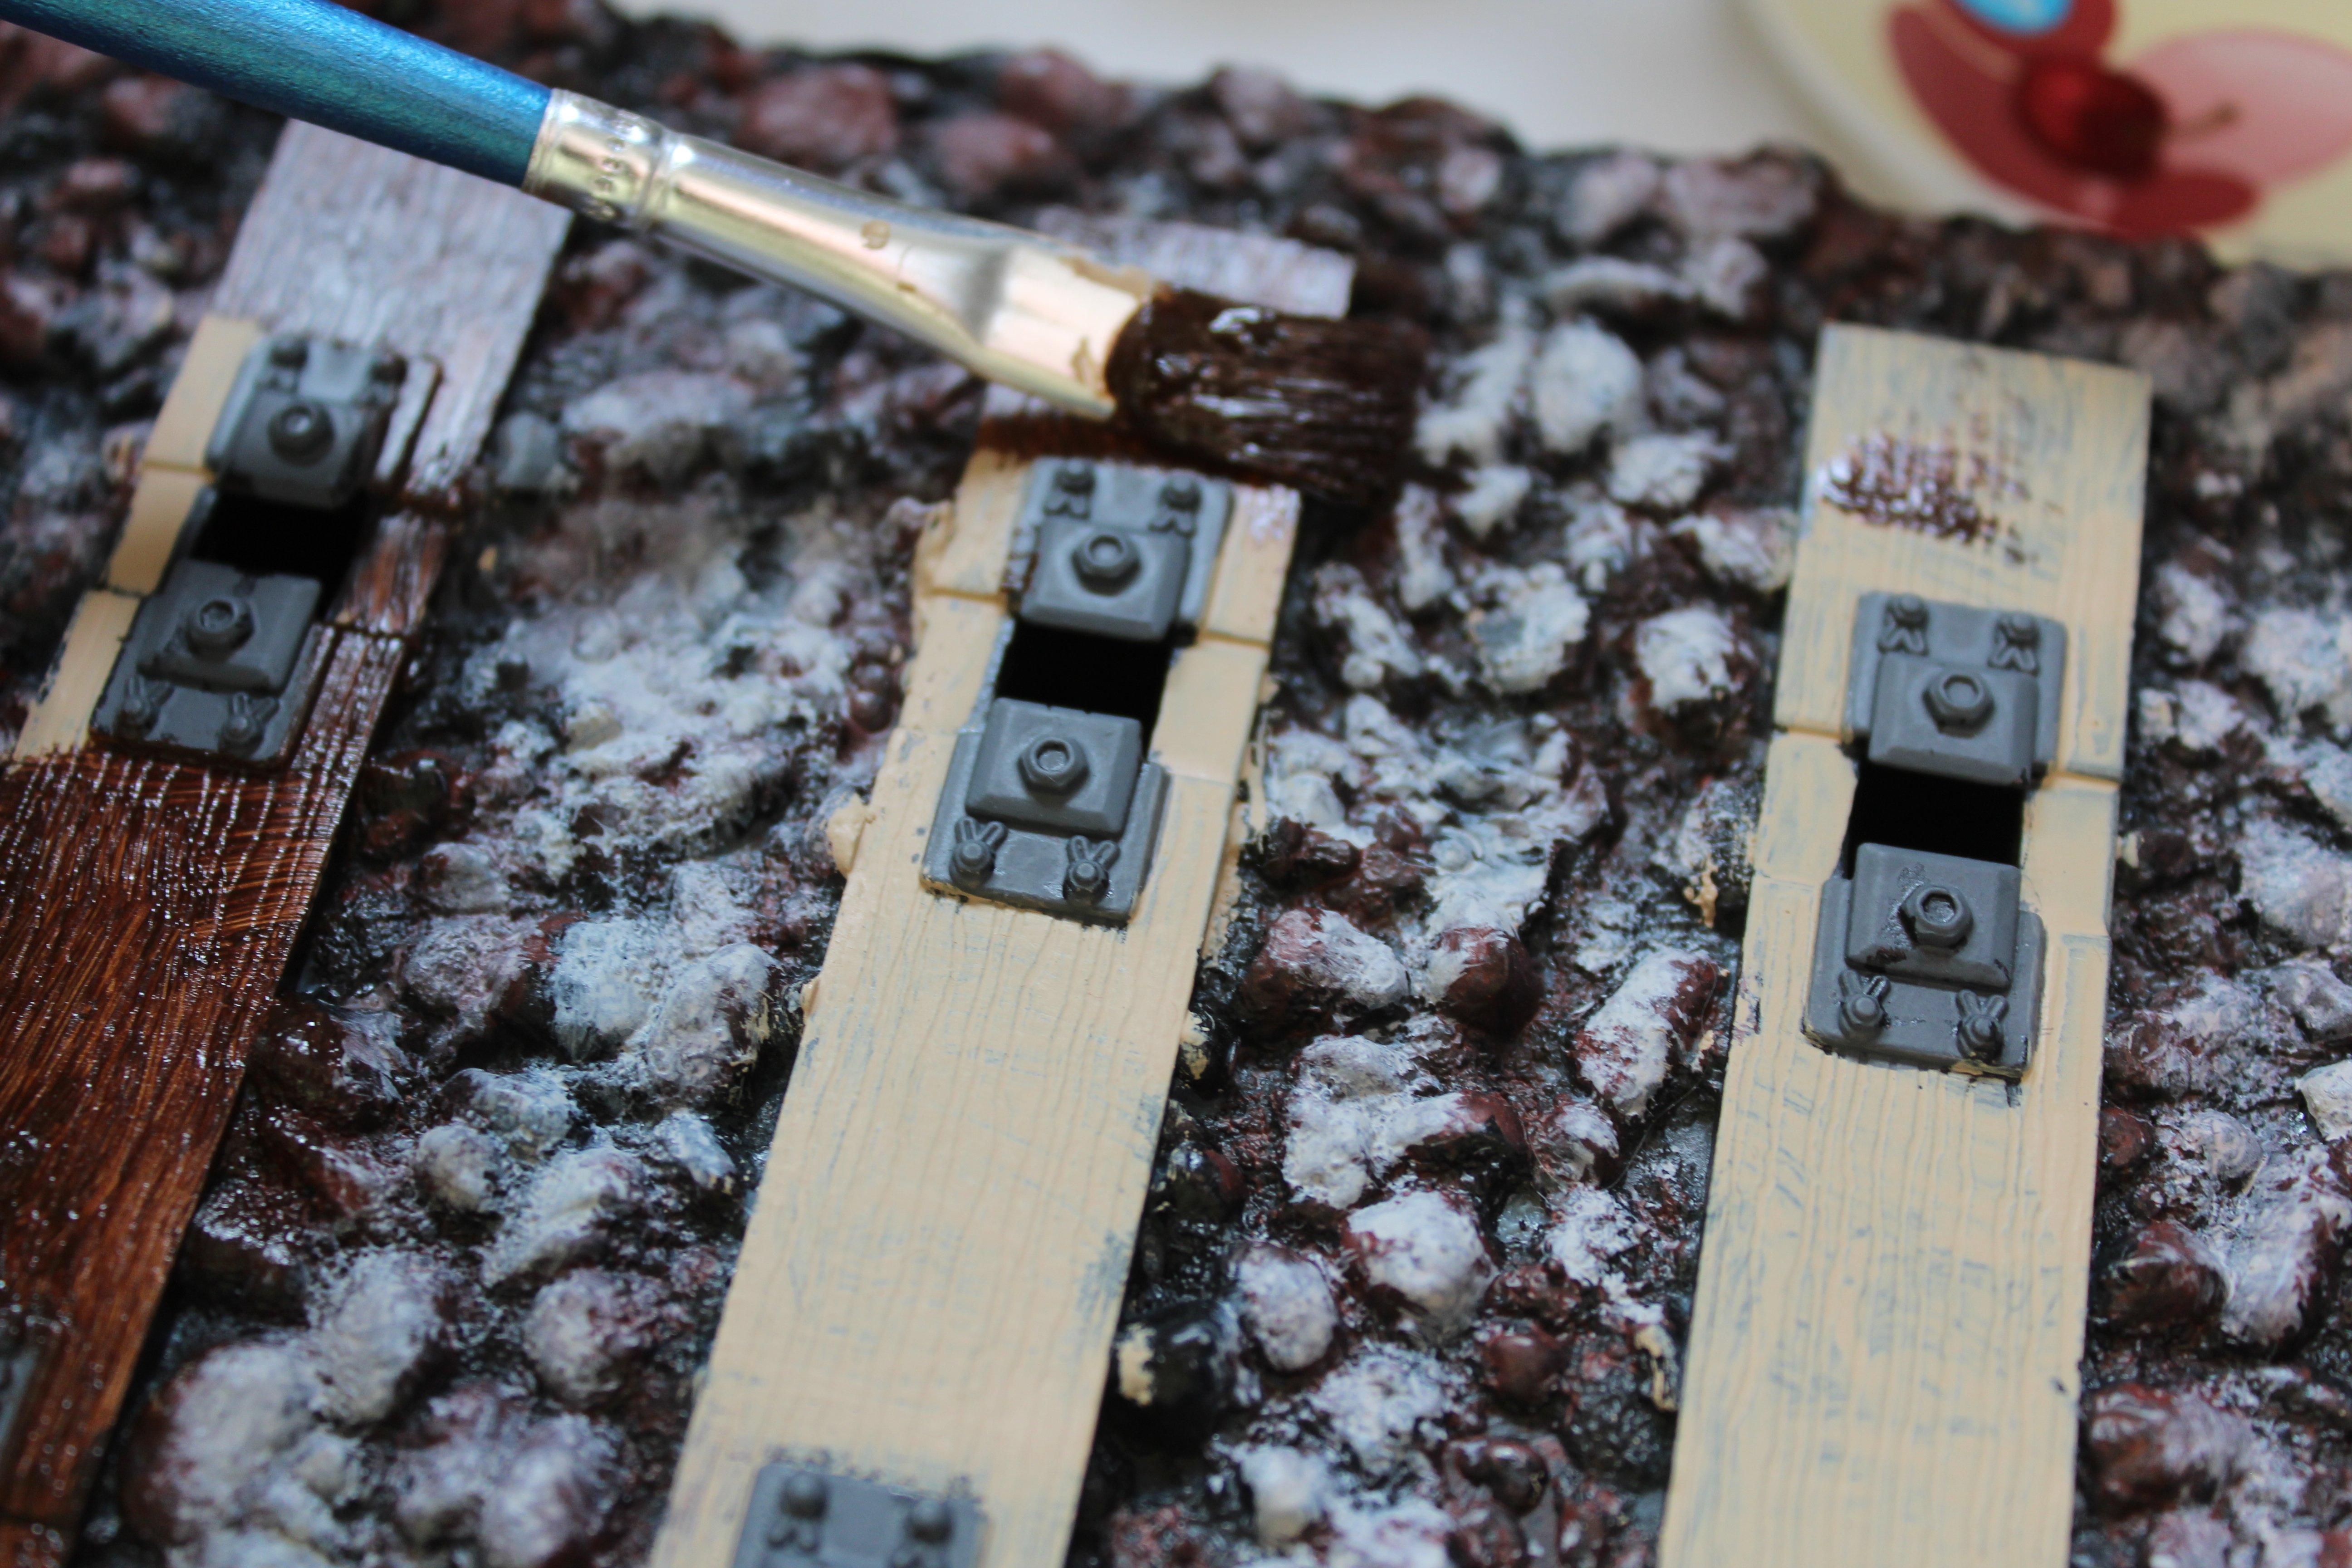
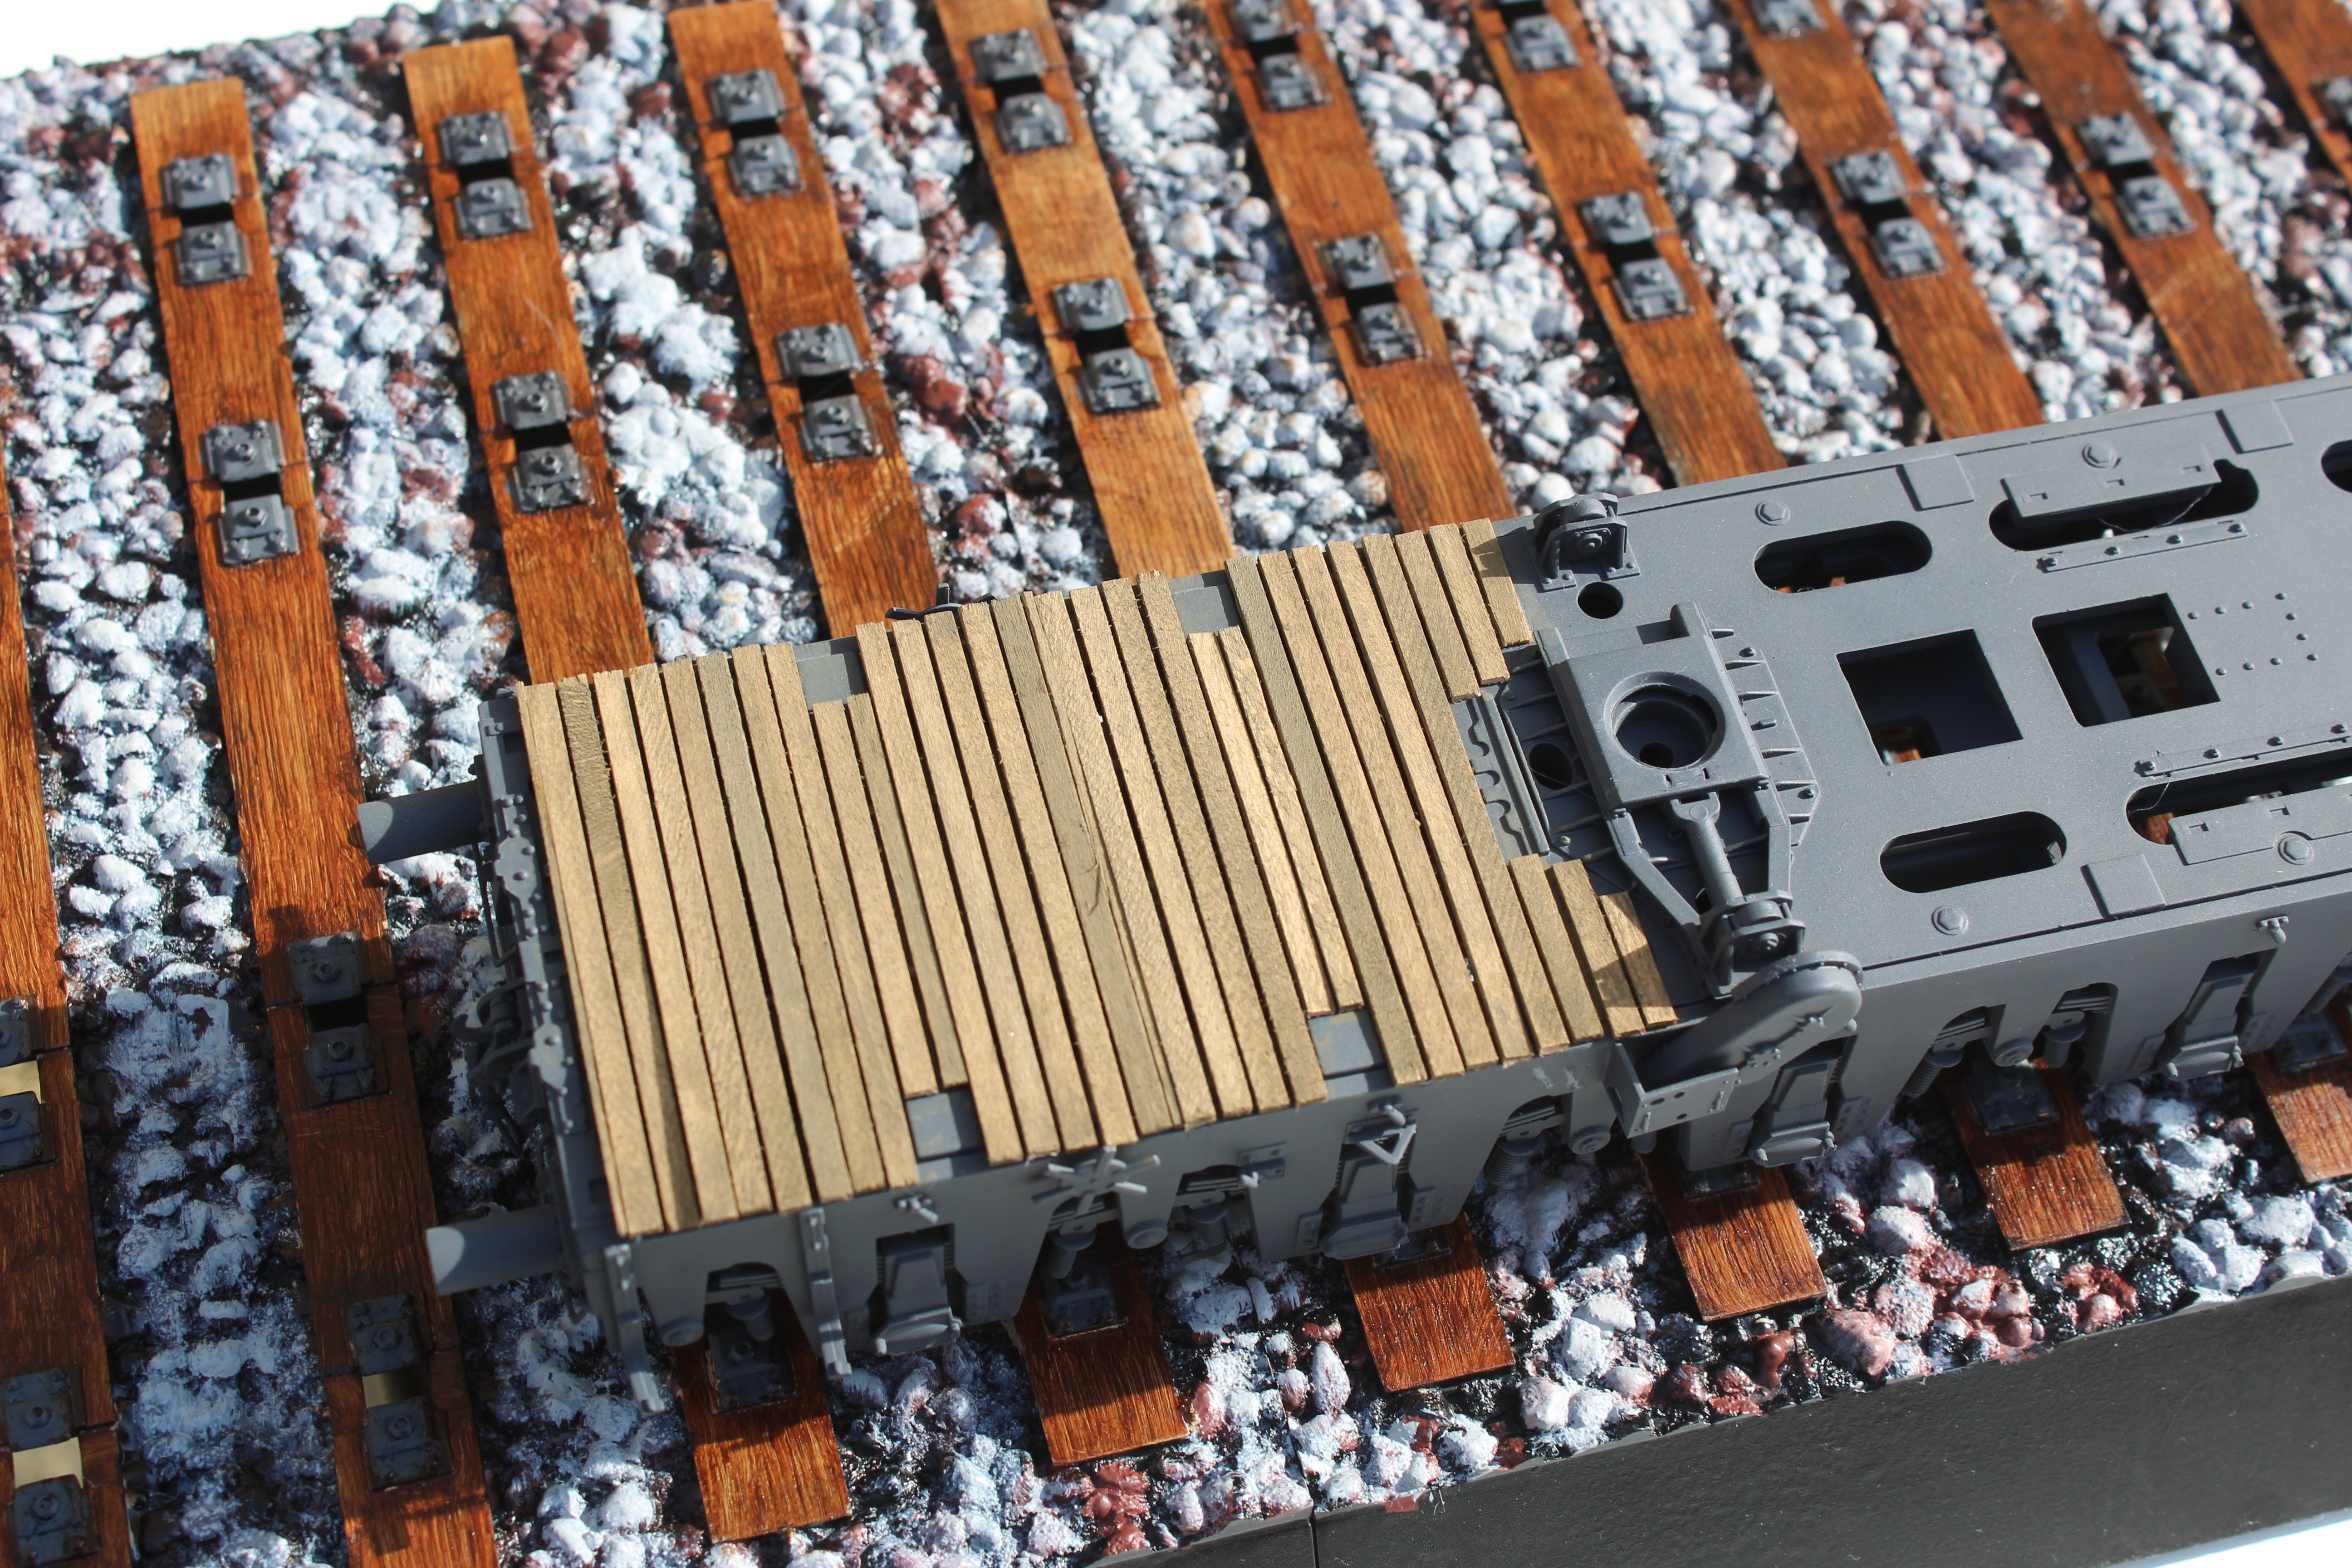
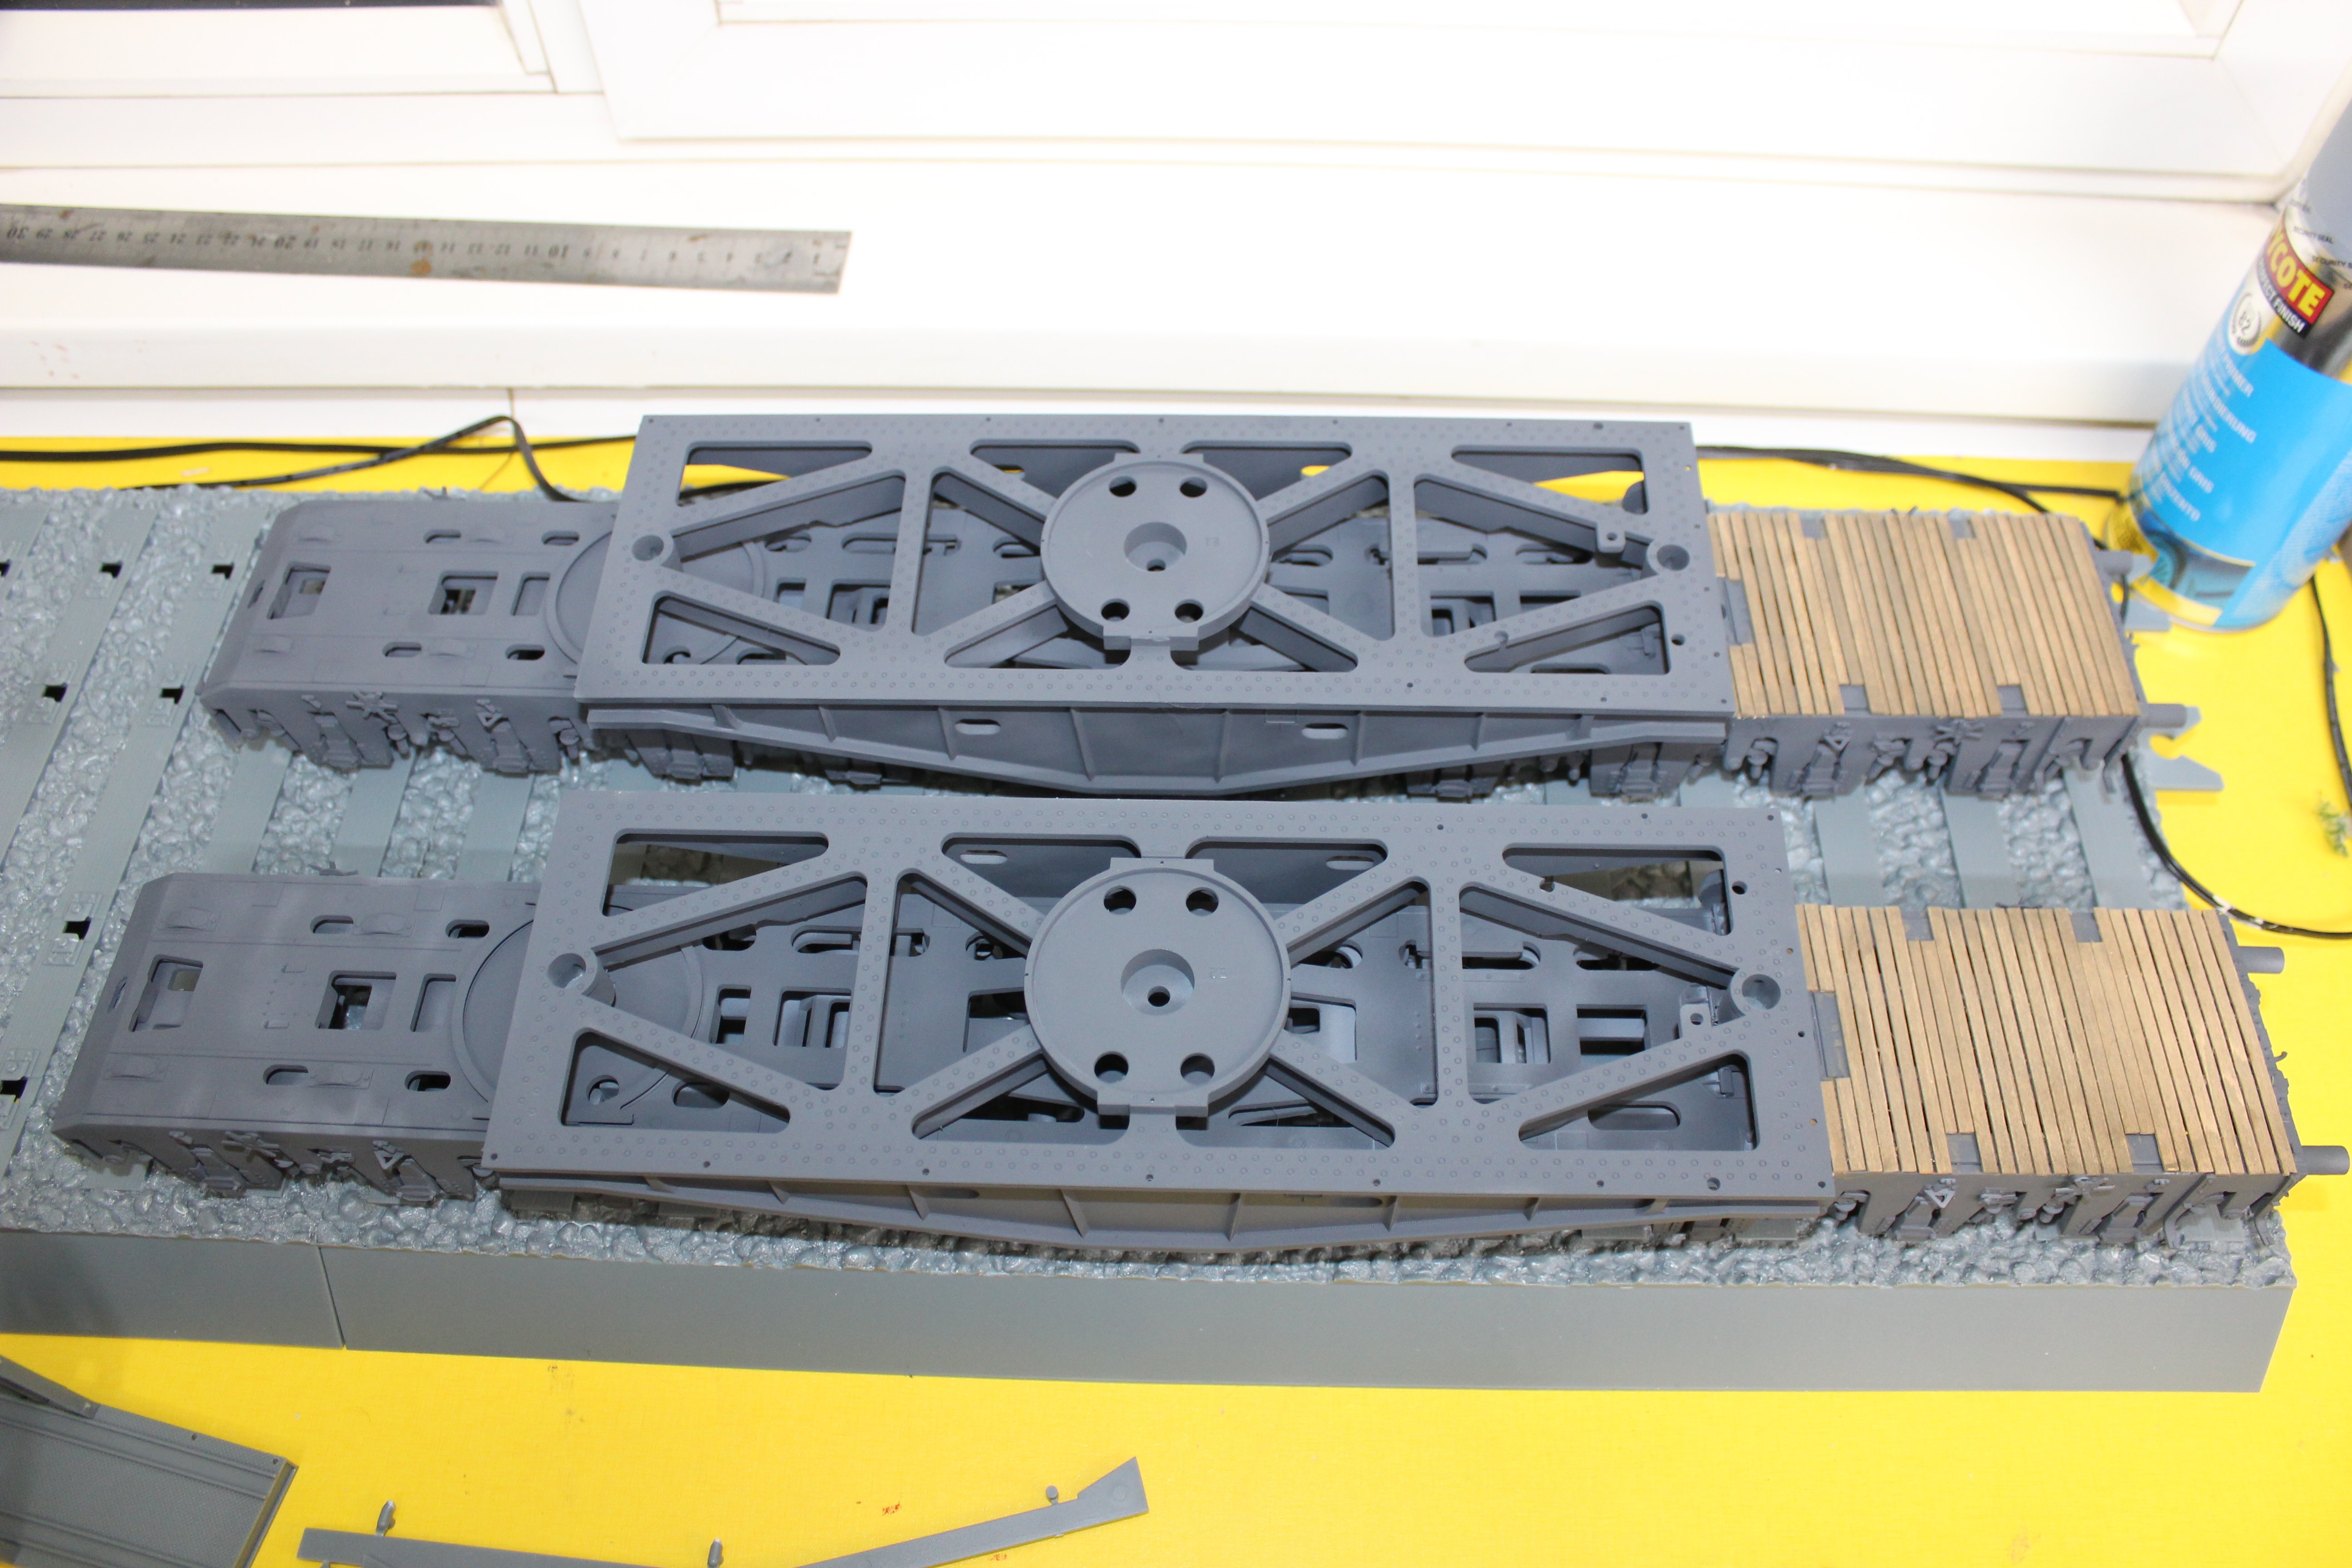
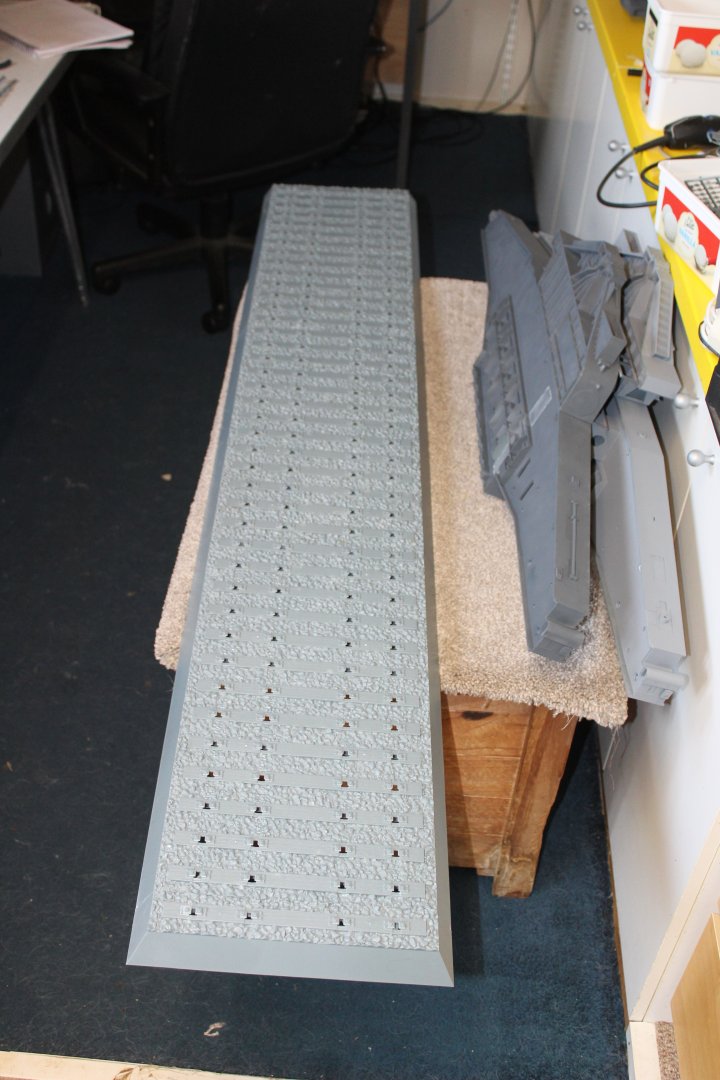
good evening everyone Track Base spent the last few days working on the base, i read that if the barrel to reduced to the correct size i will only need 3x30cm beds and the end caps so thats what i have gone with i had been hoping to use some trumpeter rolling stock on it as well but the track width distances are quite a way out, in grey primer and black top coat ballast reds and greys paints used for the wood XF-78 wooden deck tan oils burnt umber
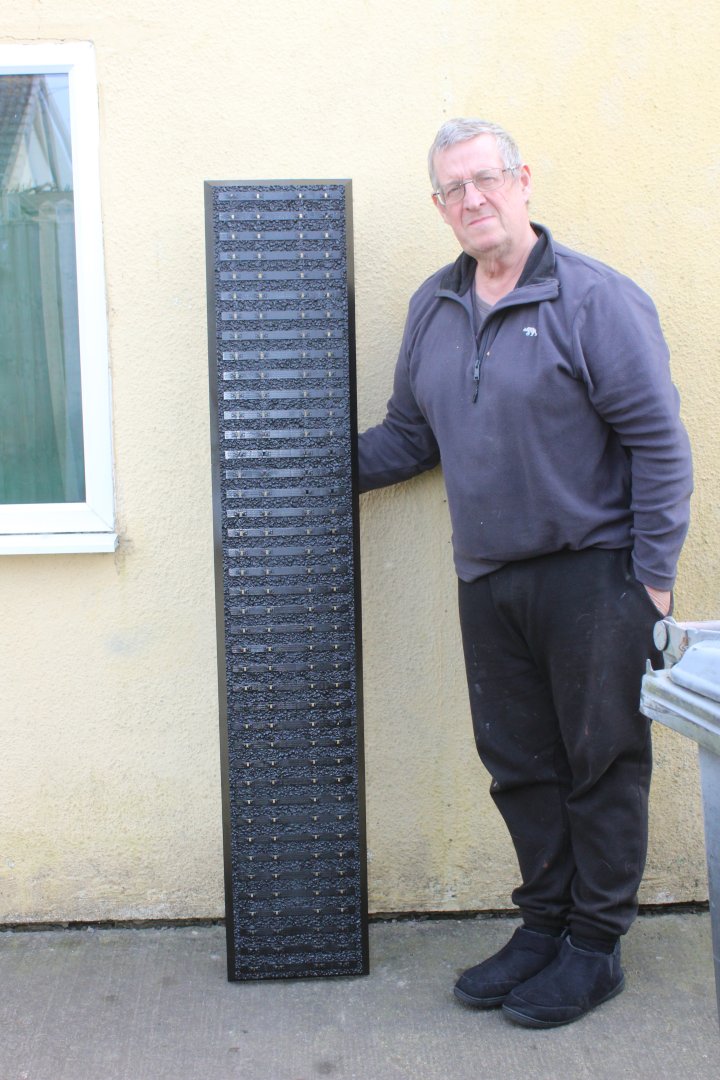


- 26 replies
-
- 16
-
-
-
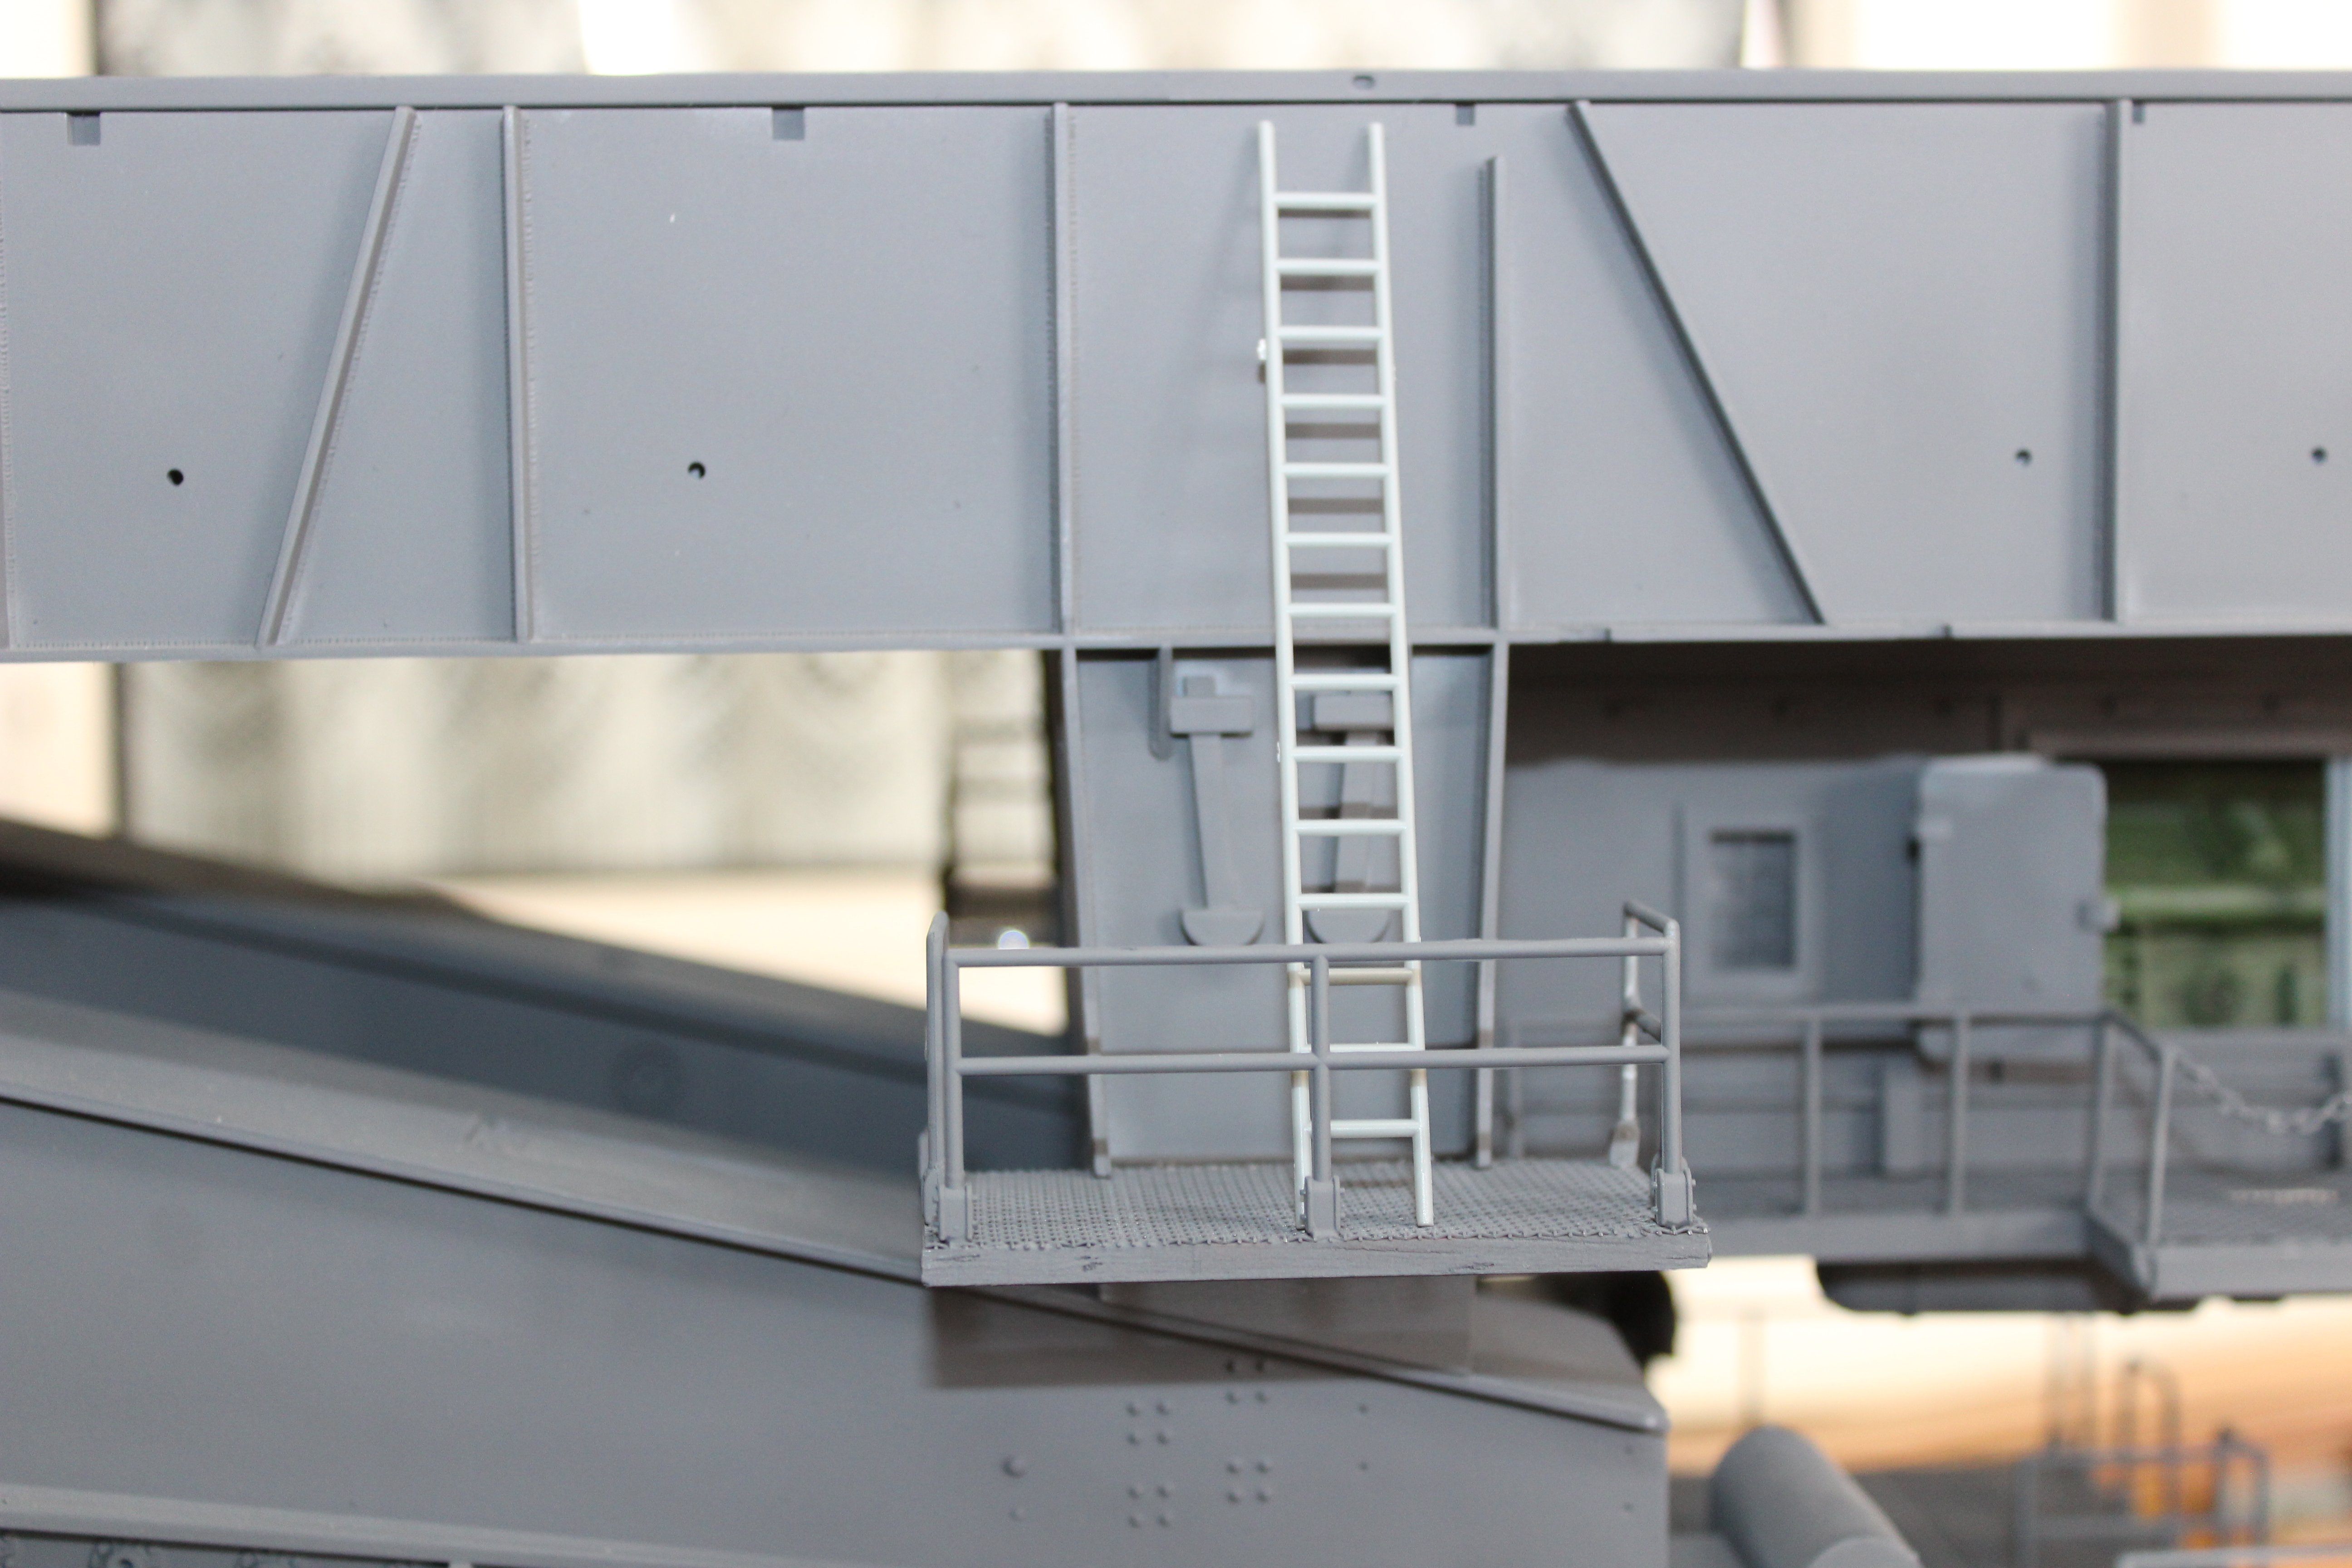
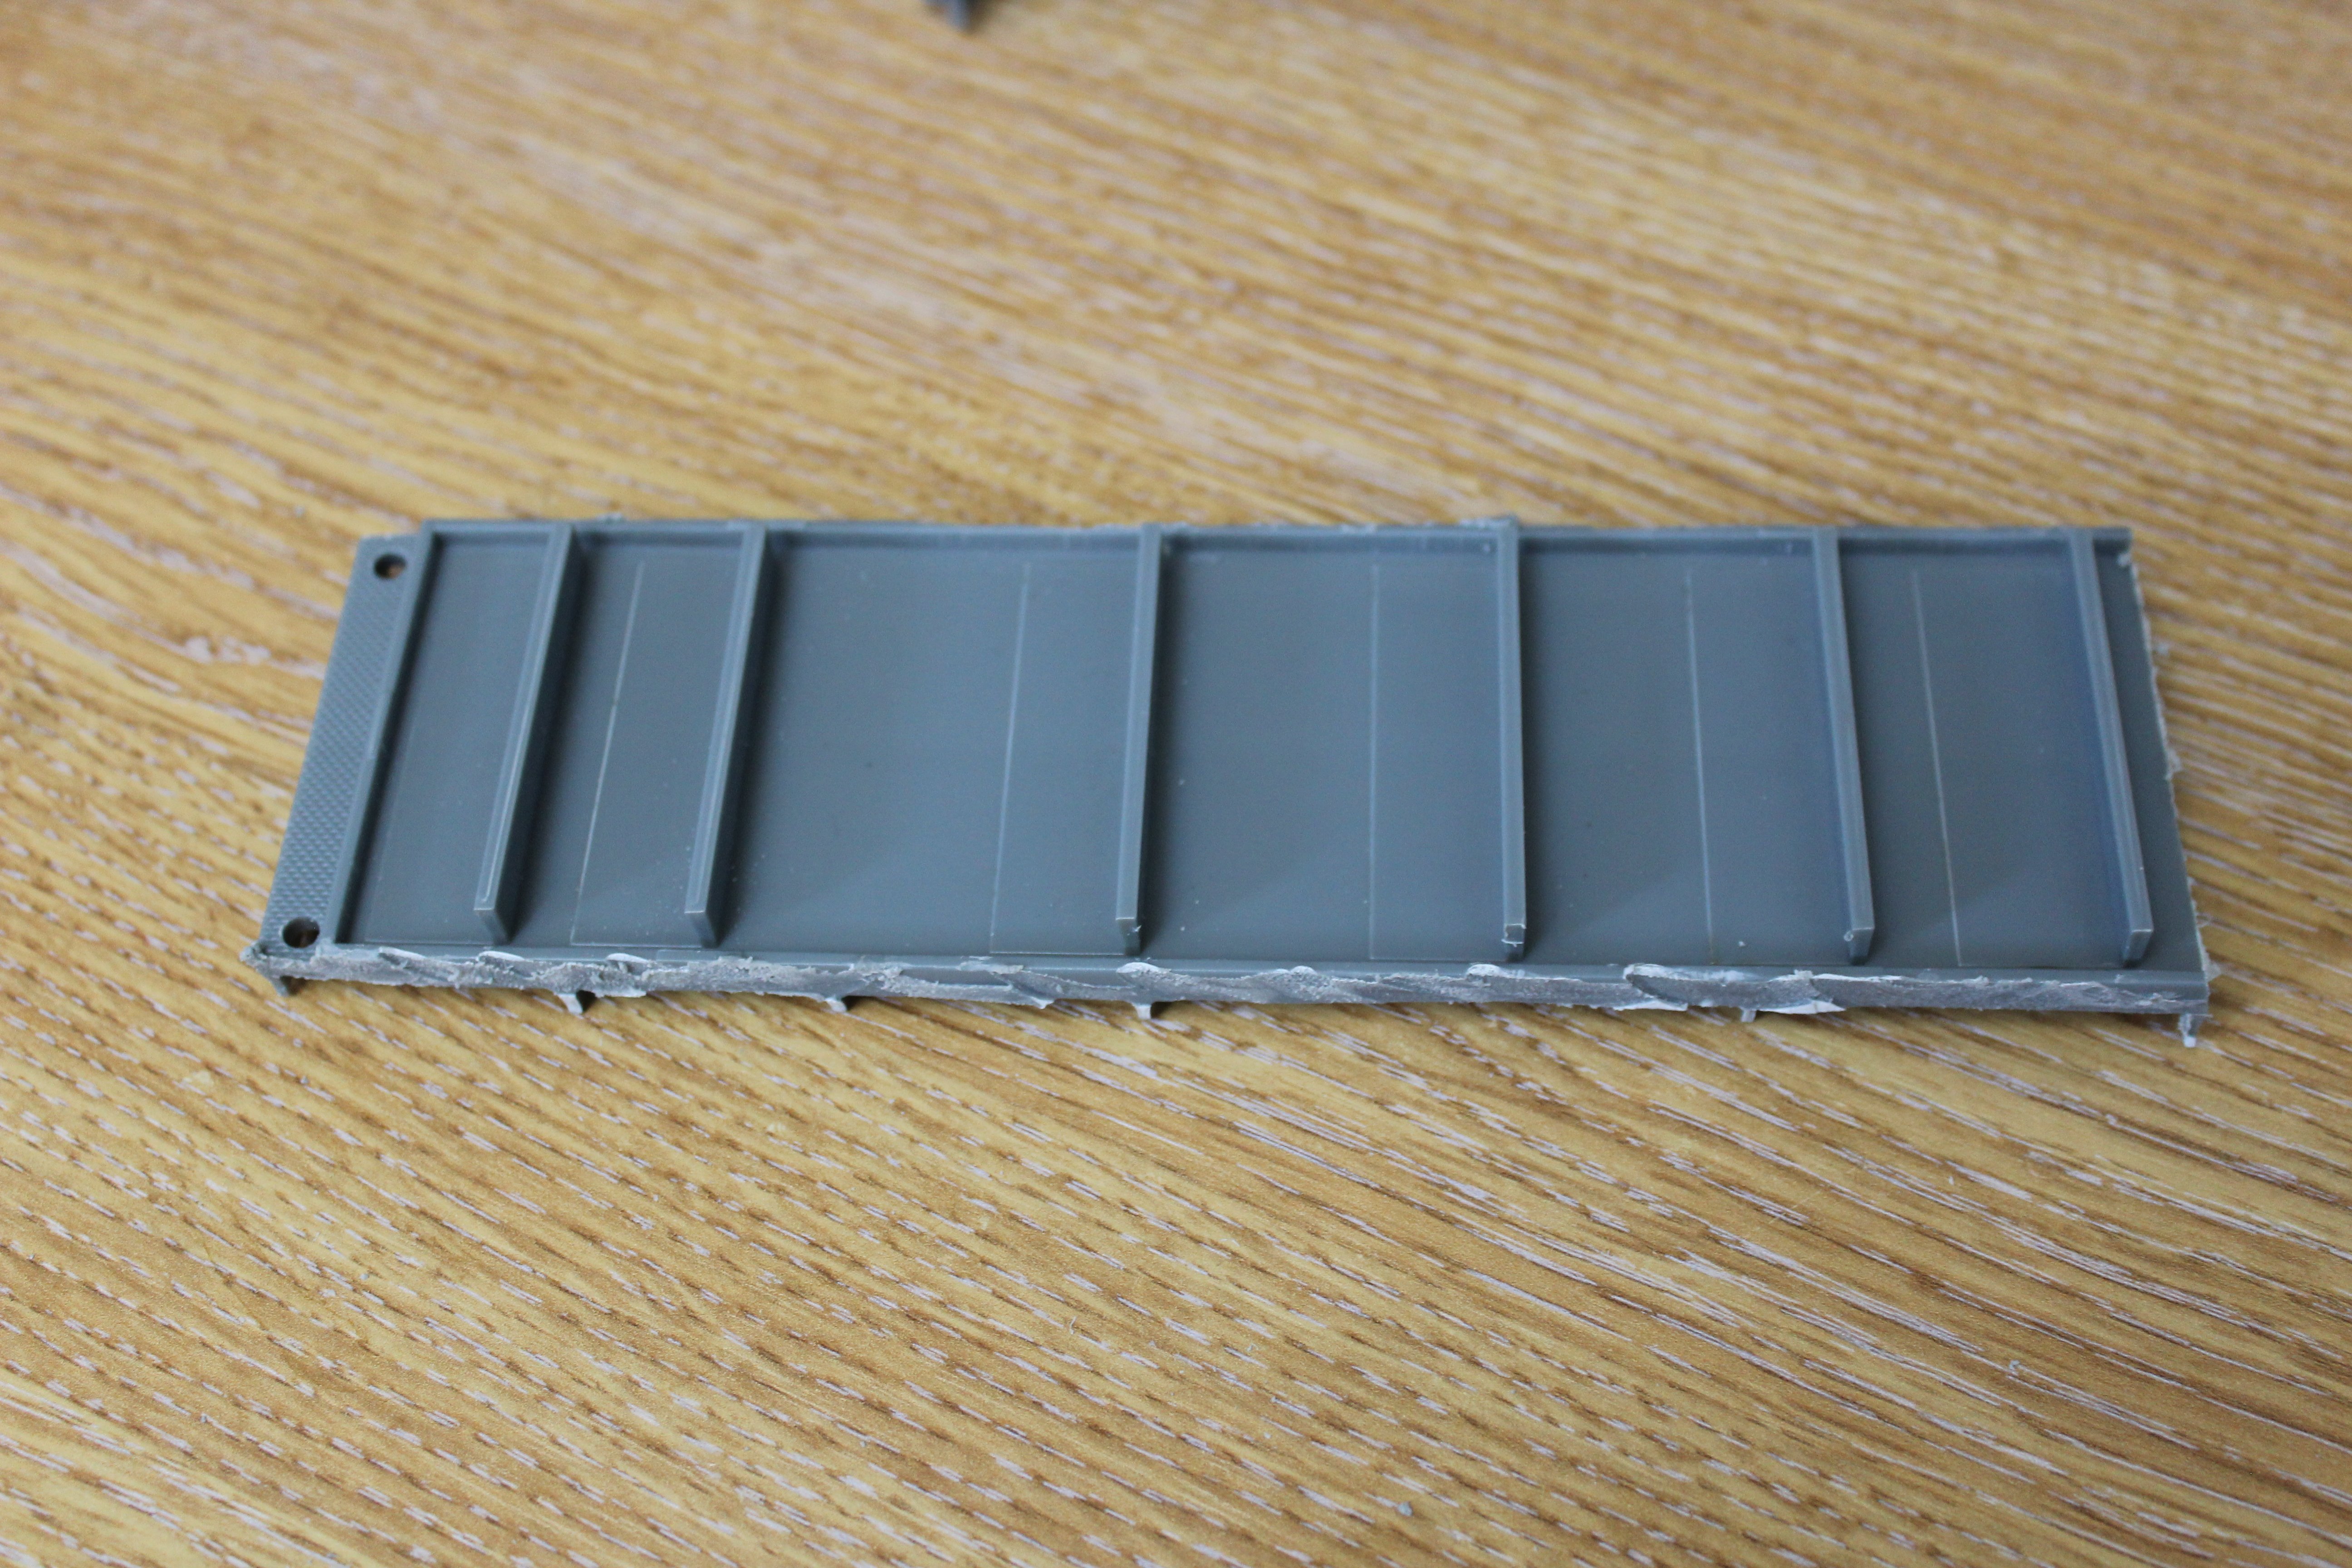
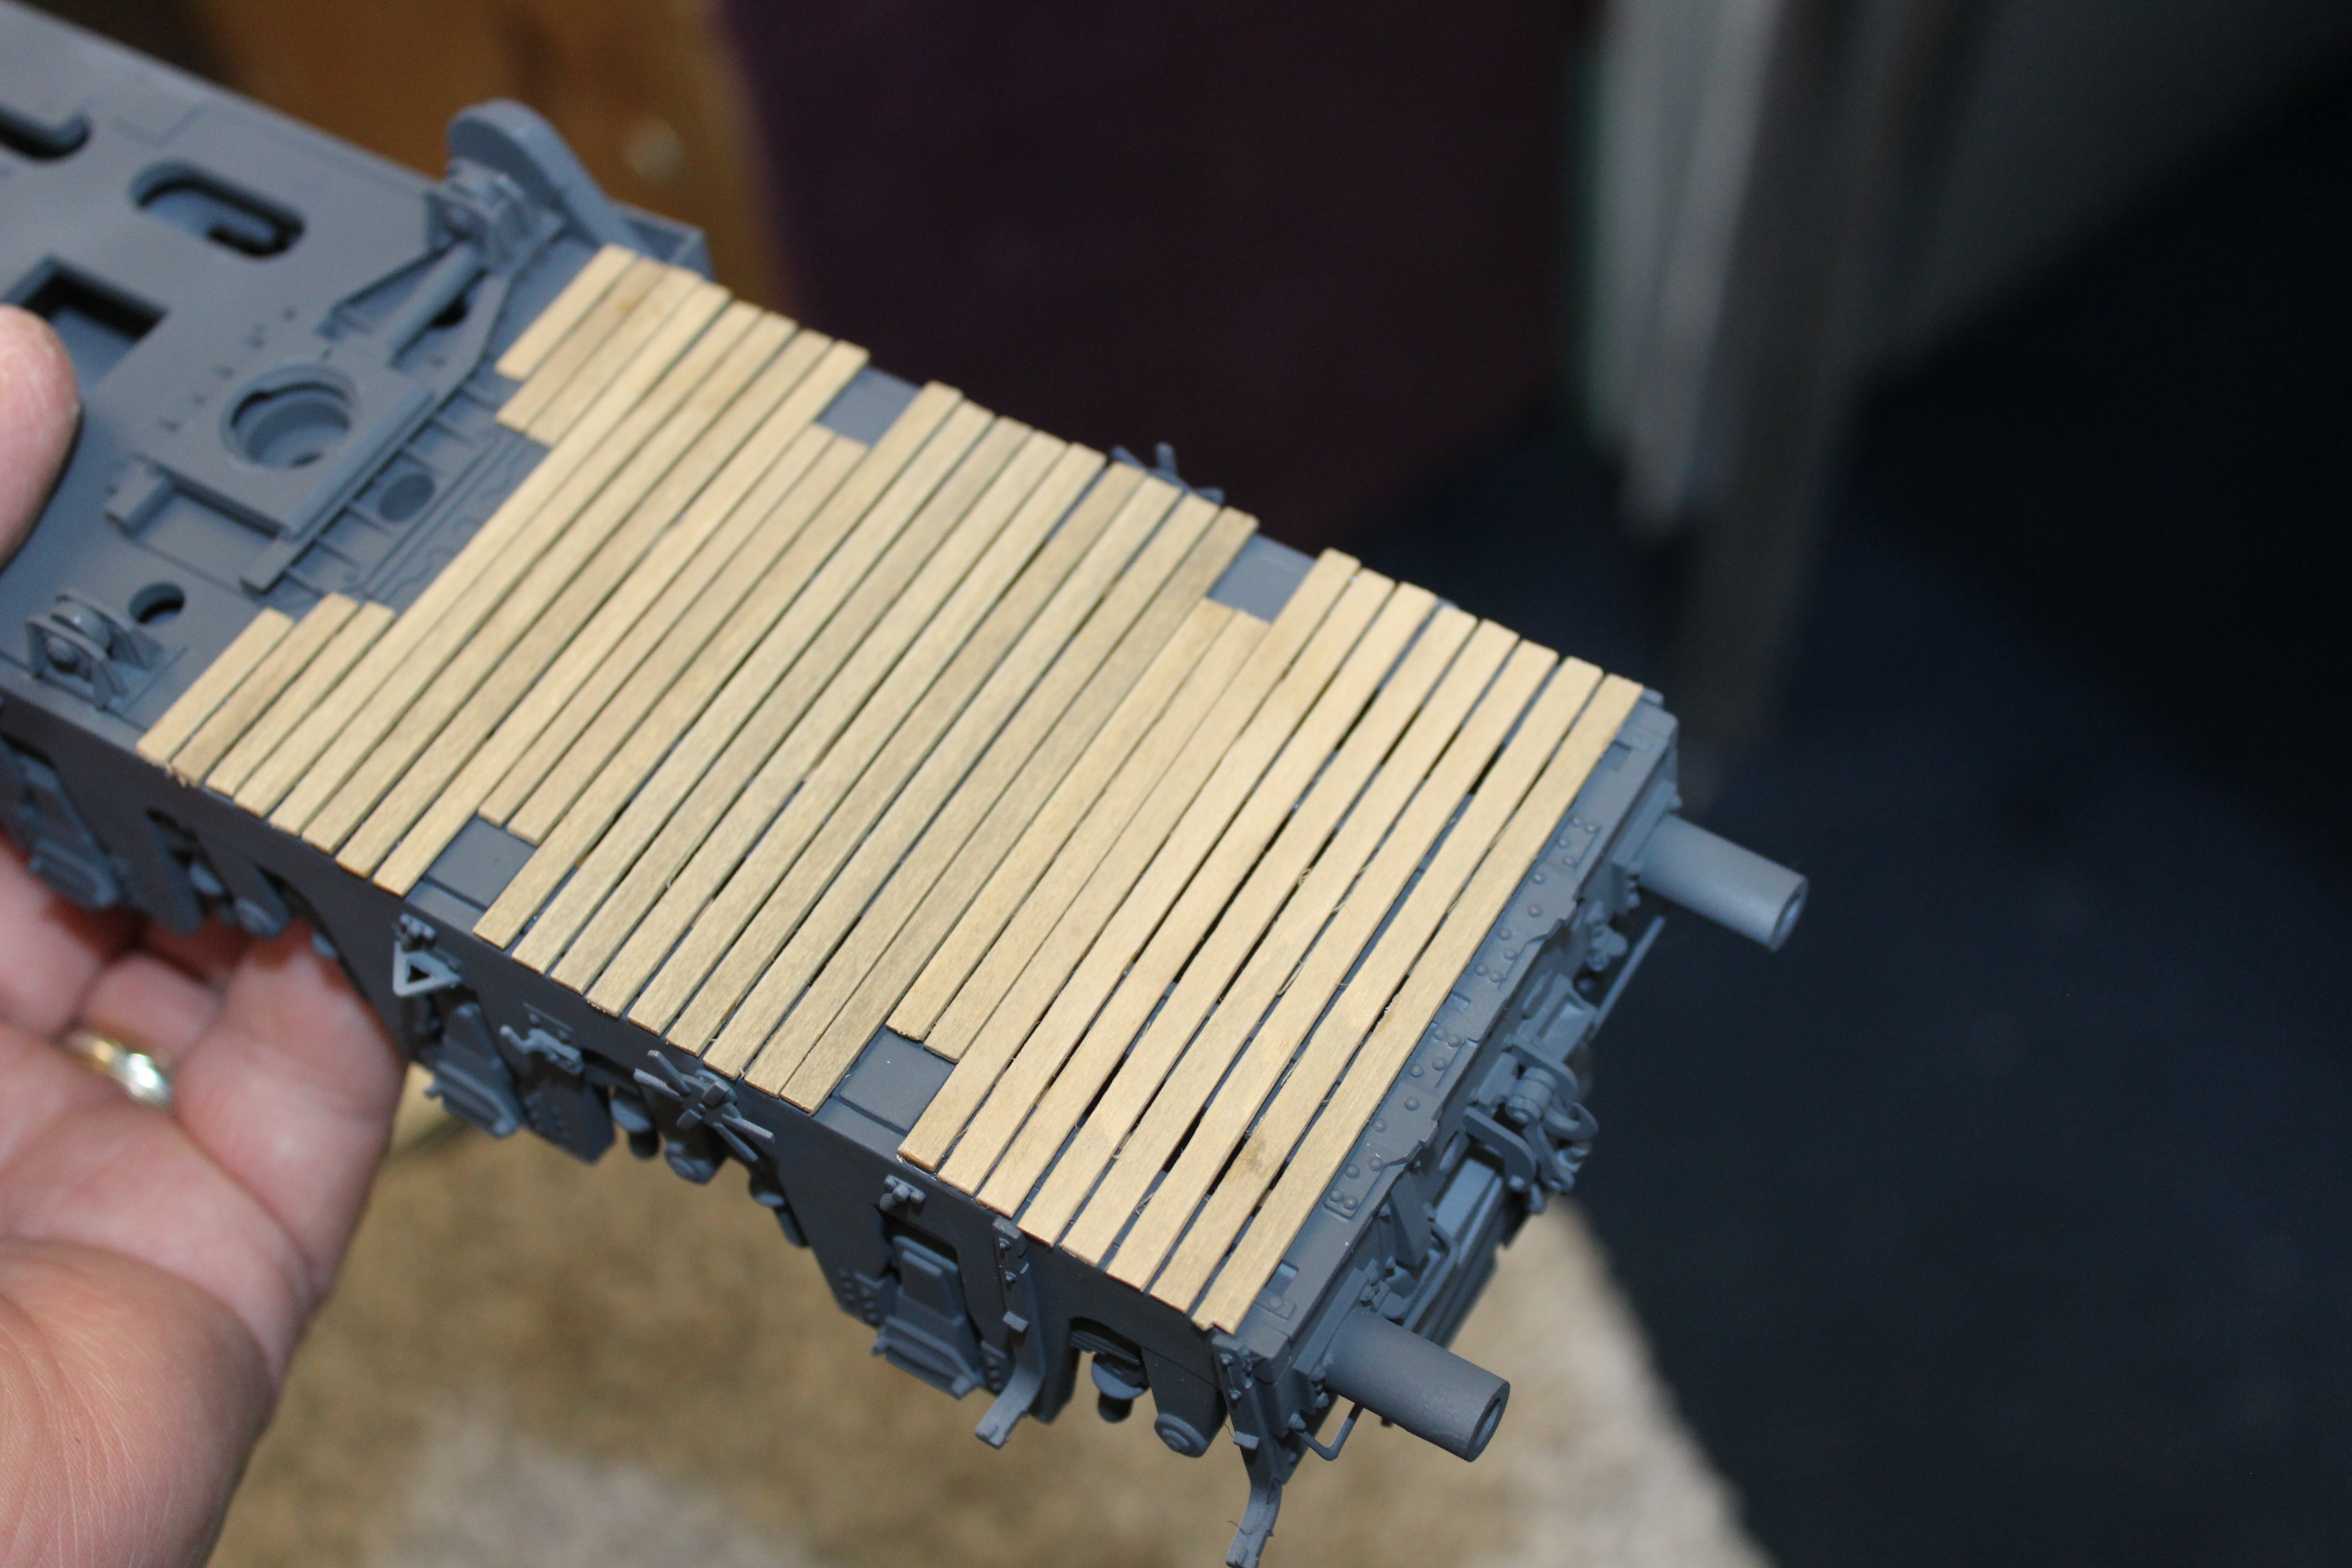
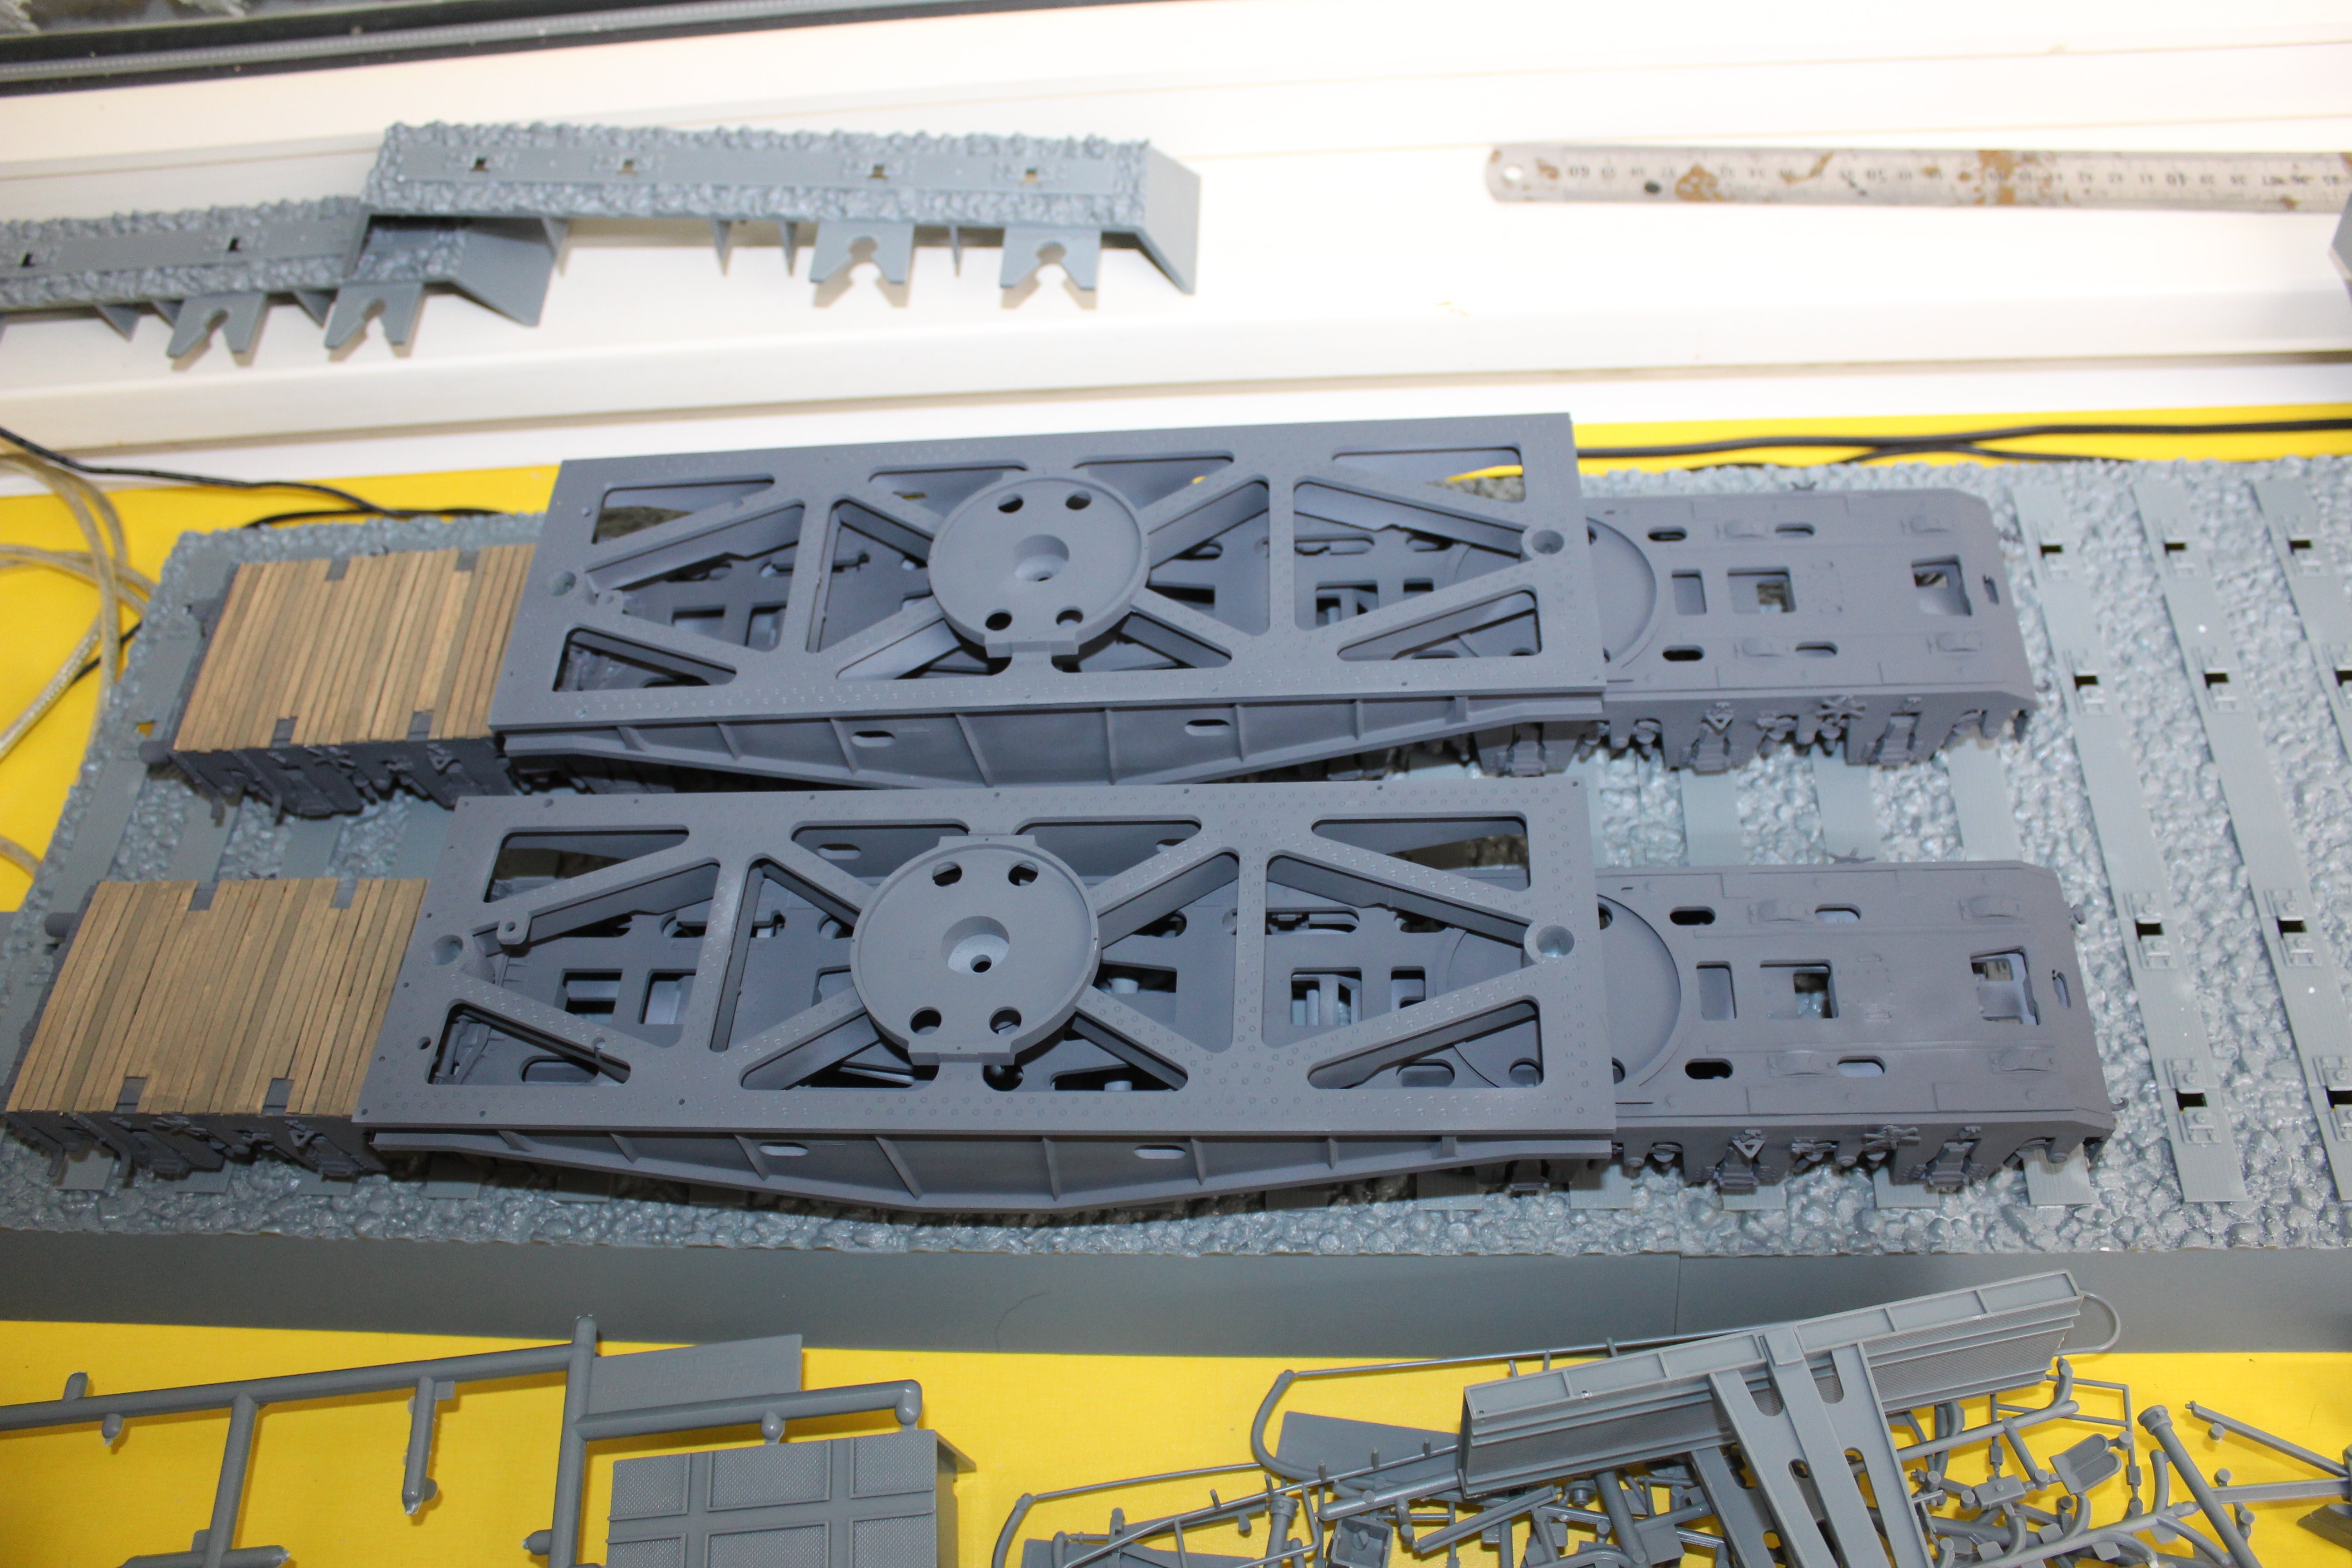
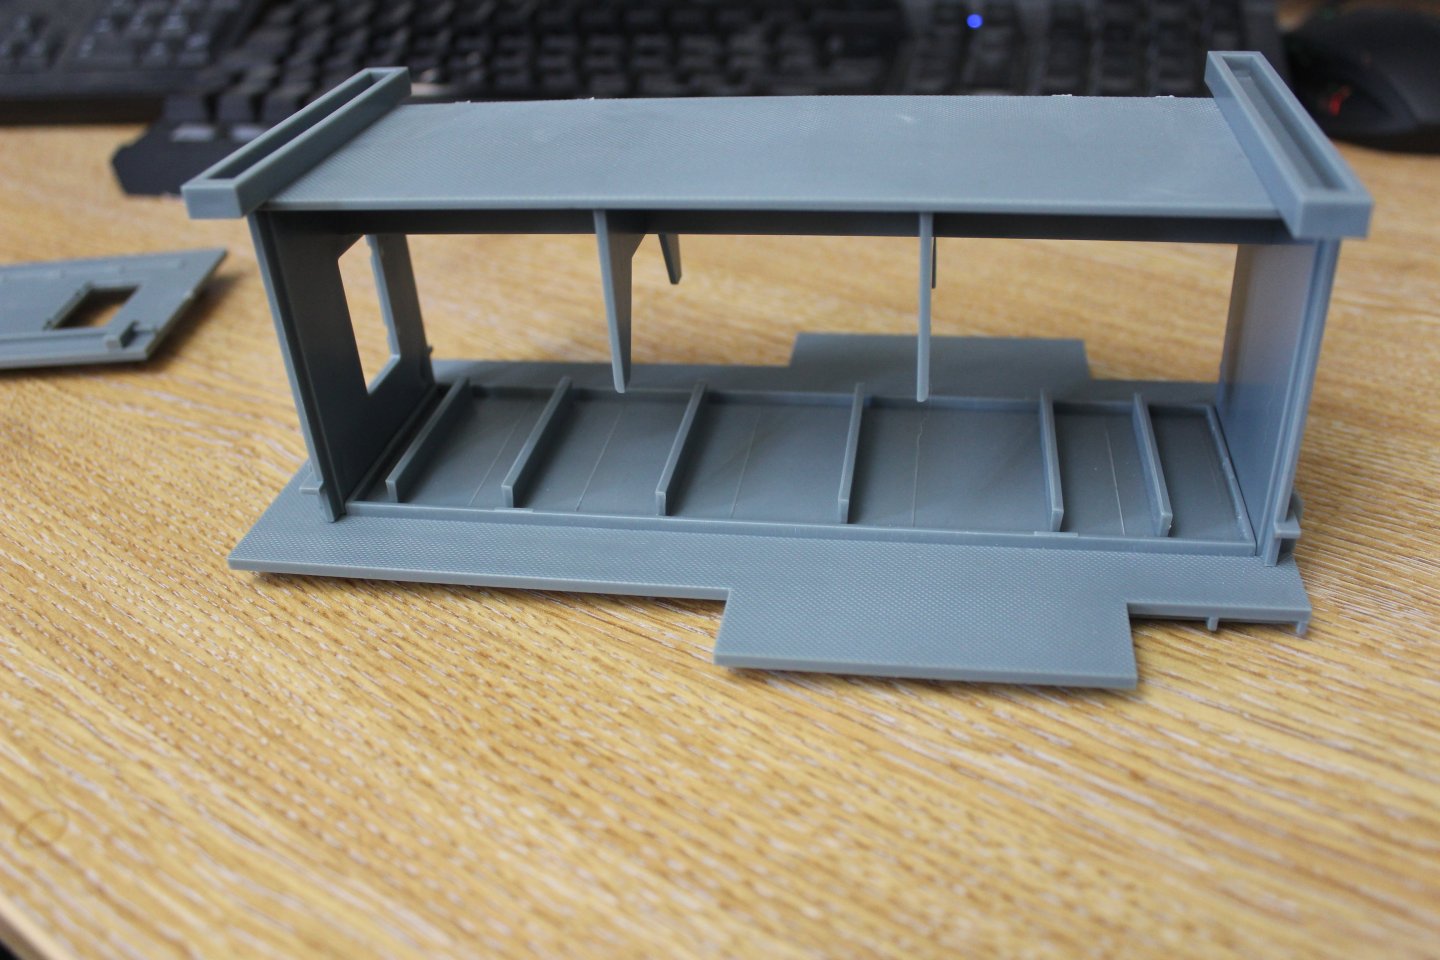
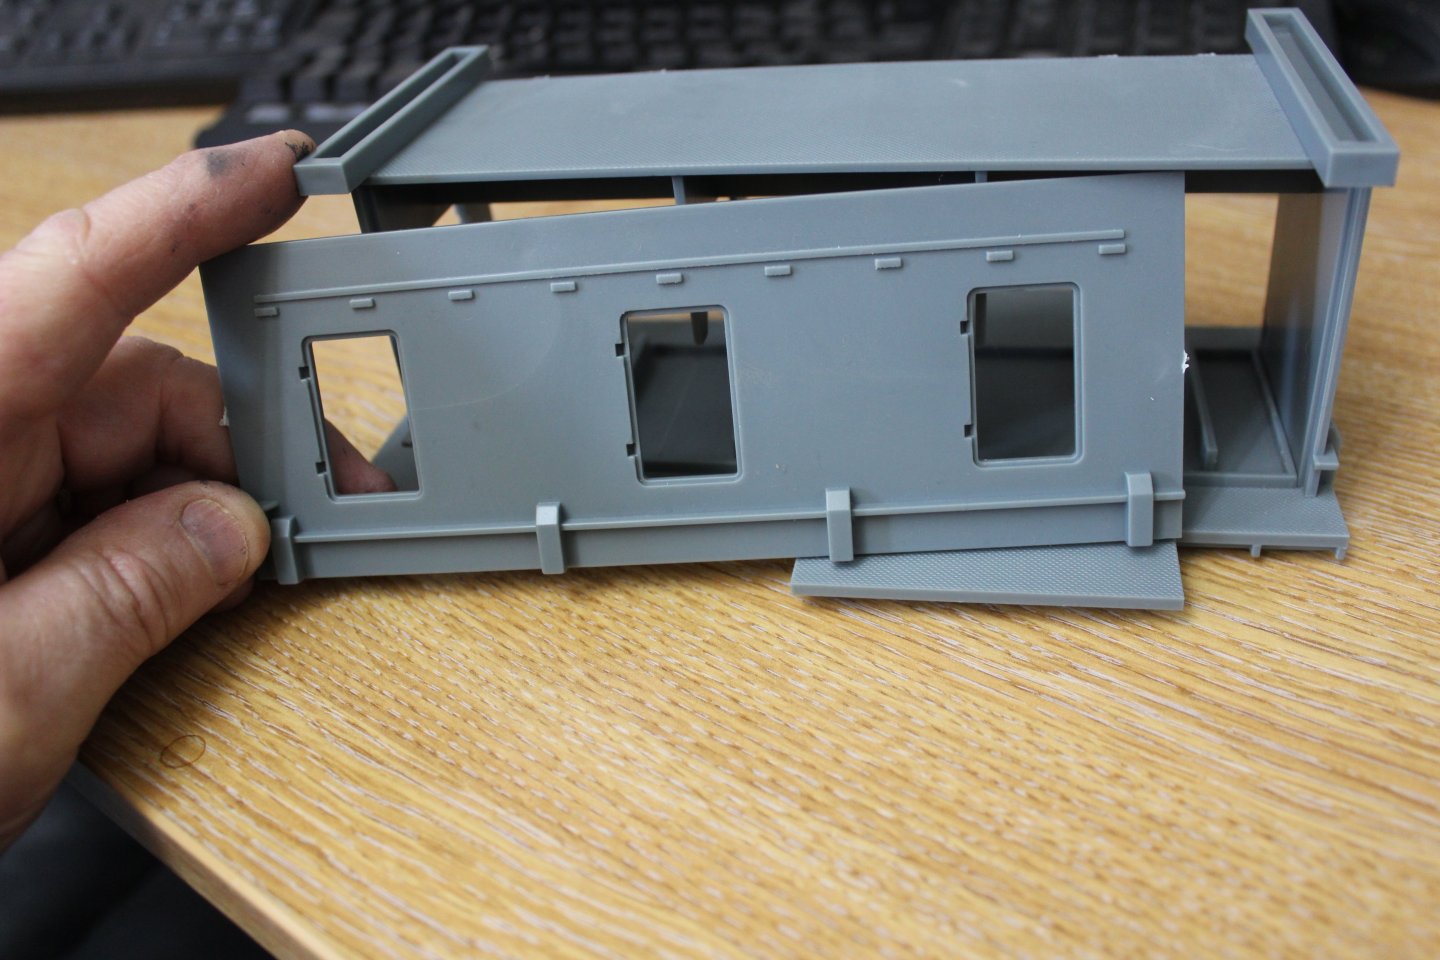
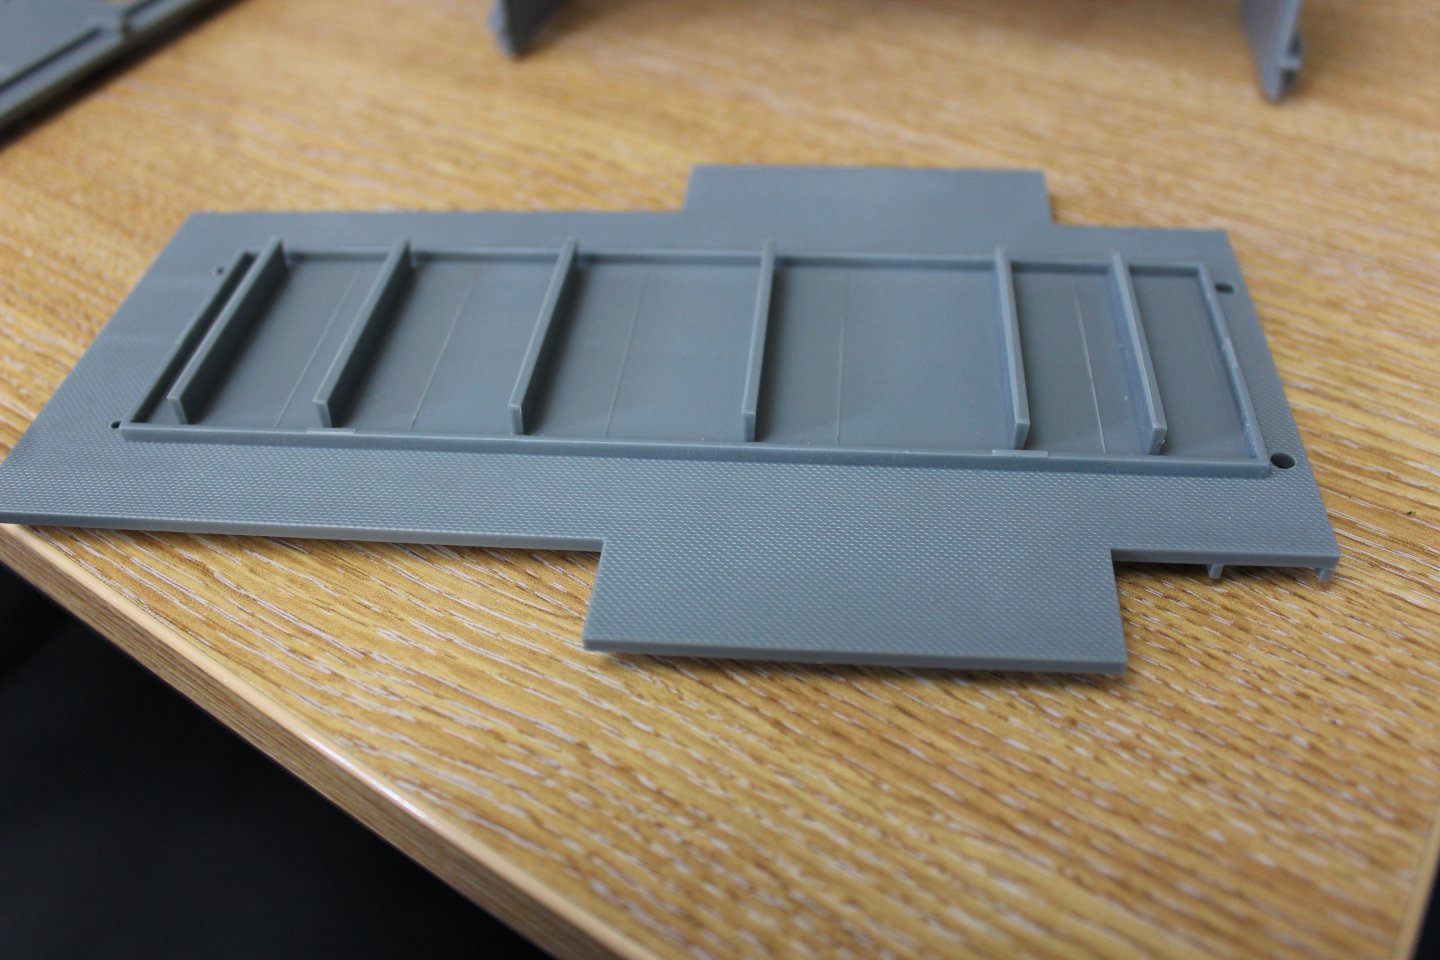
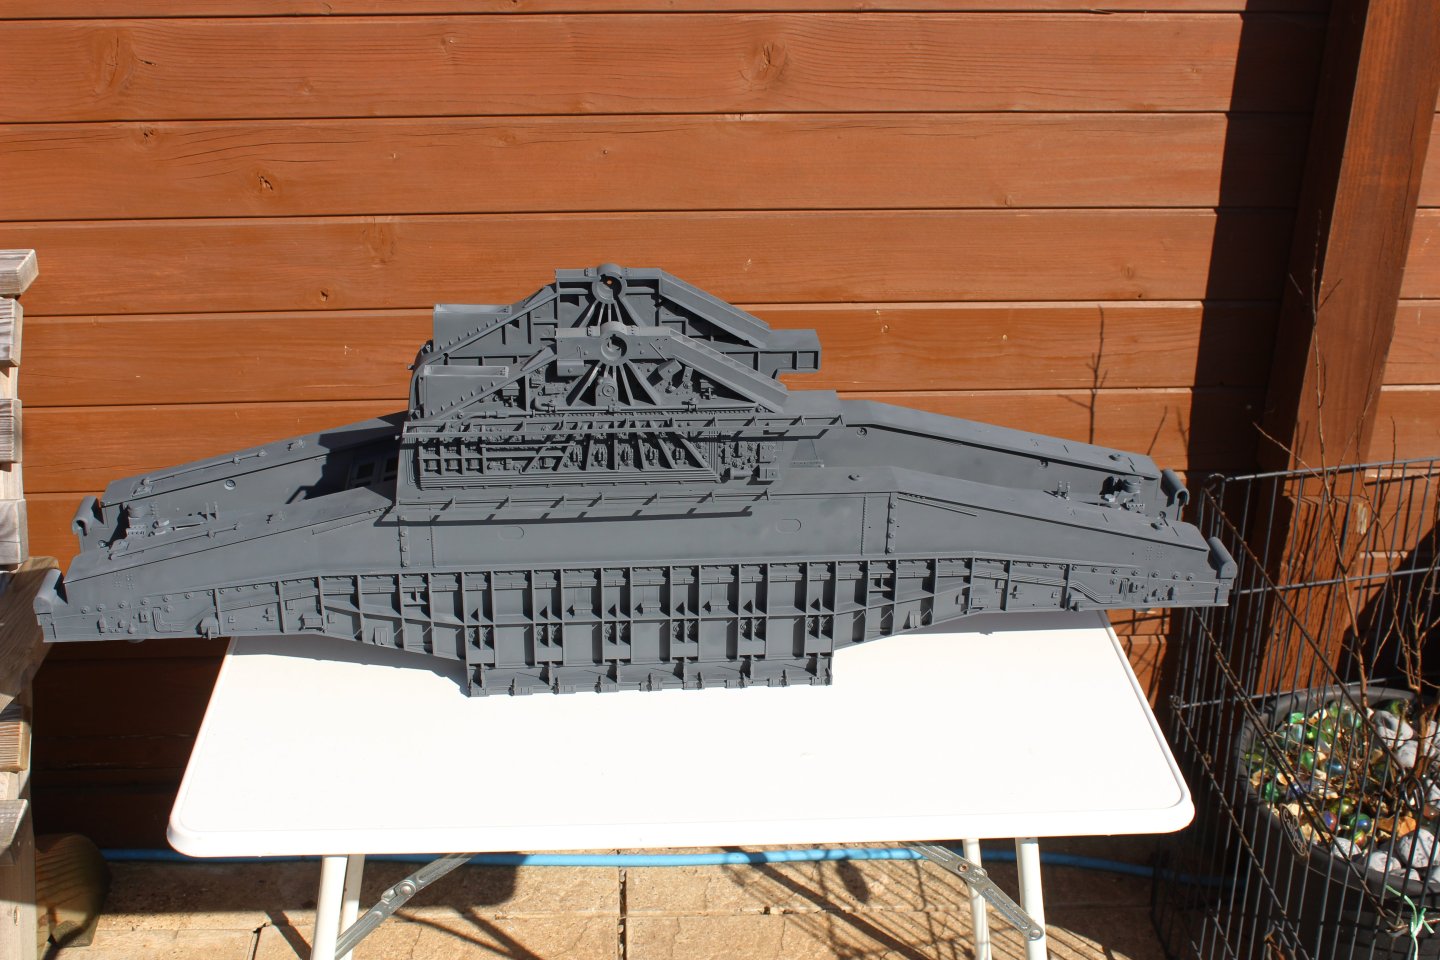
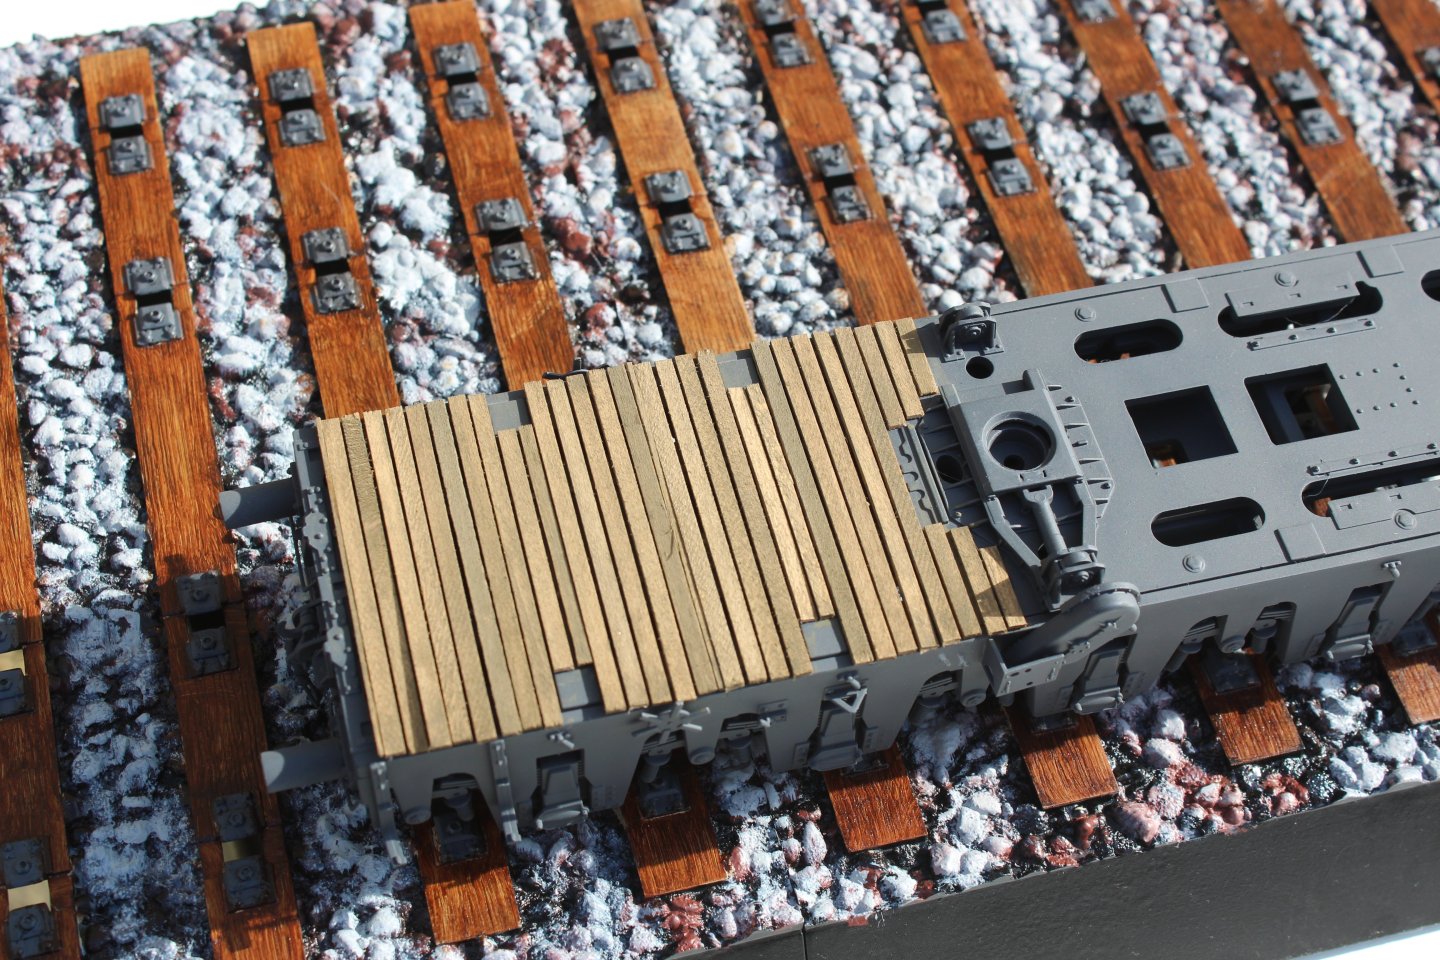
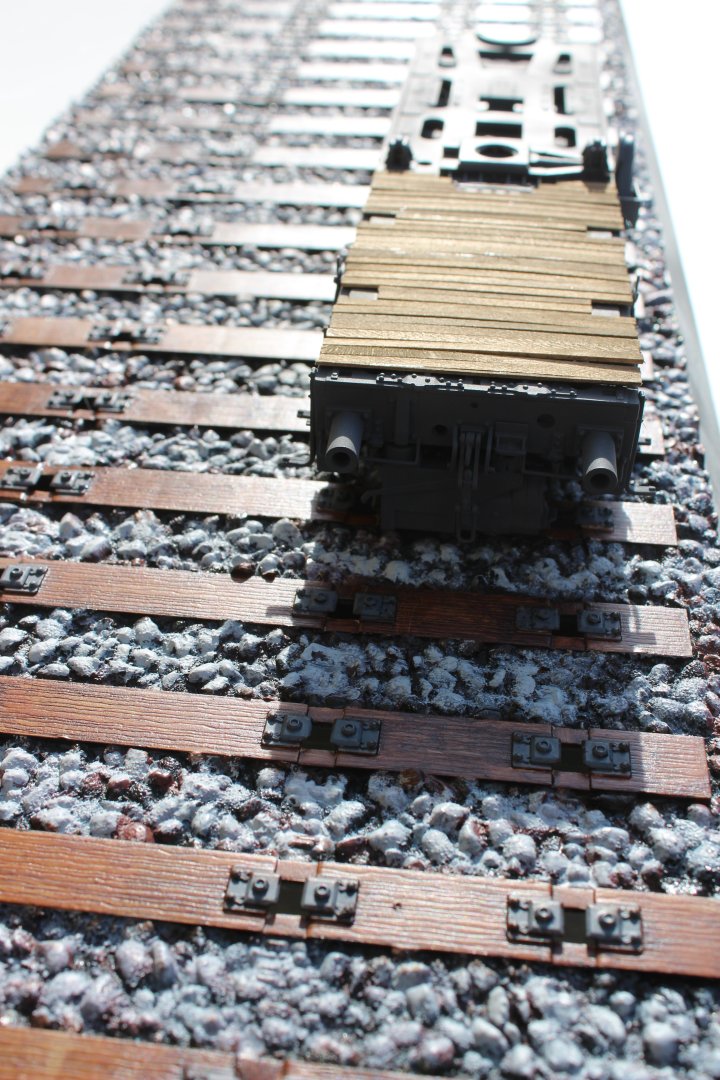
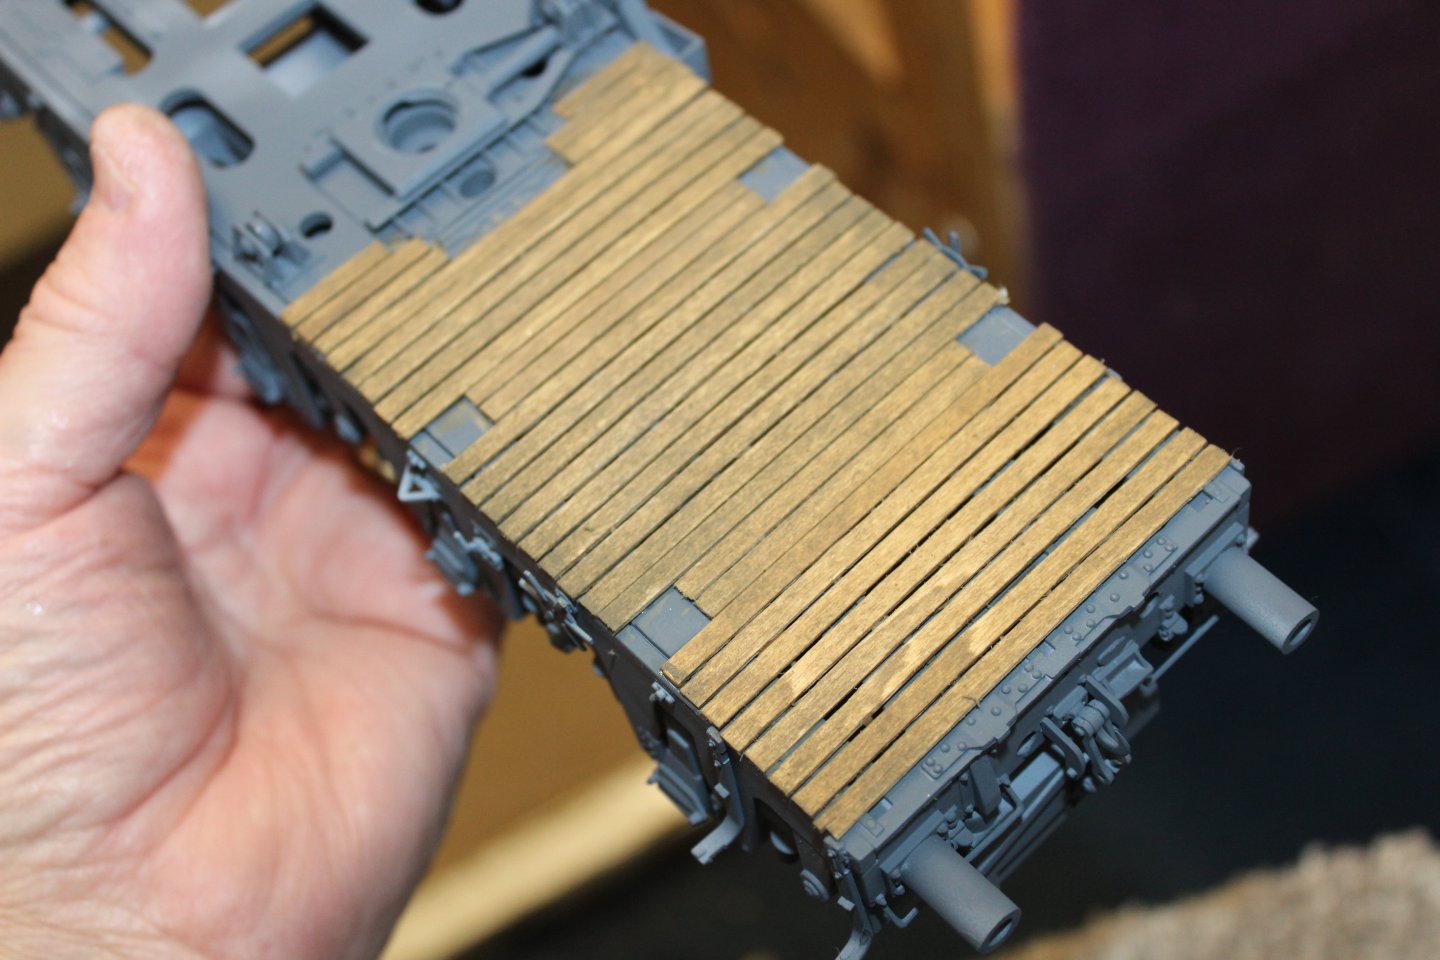
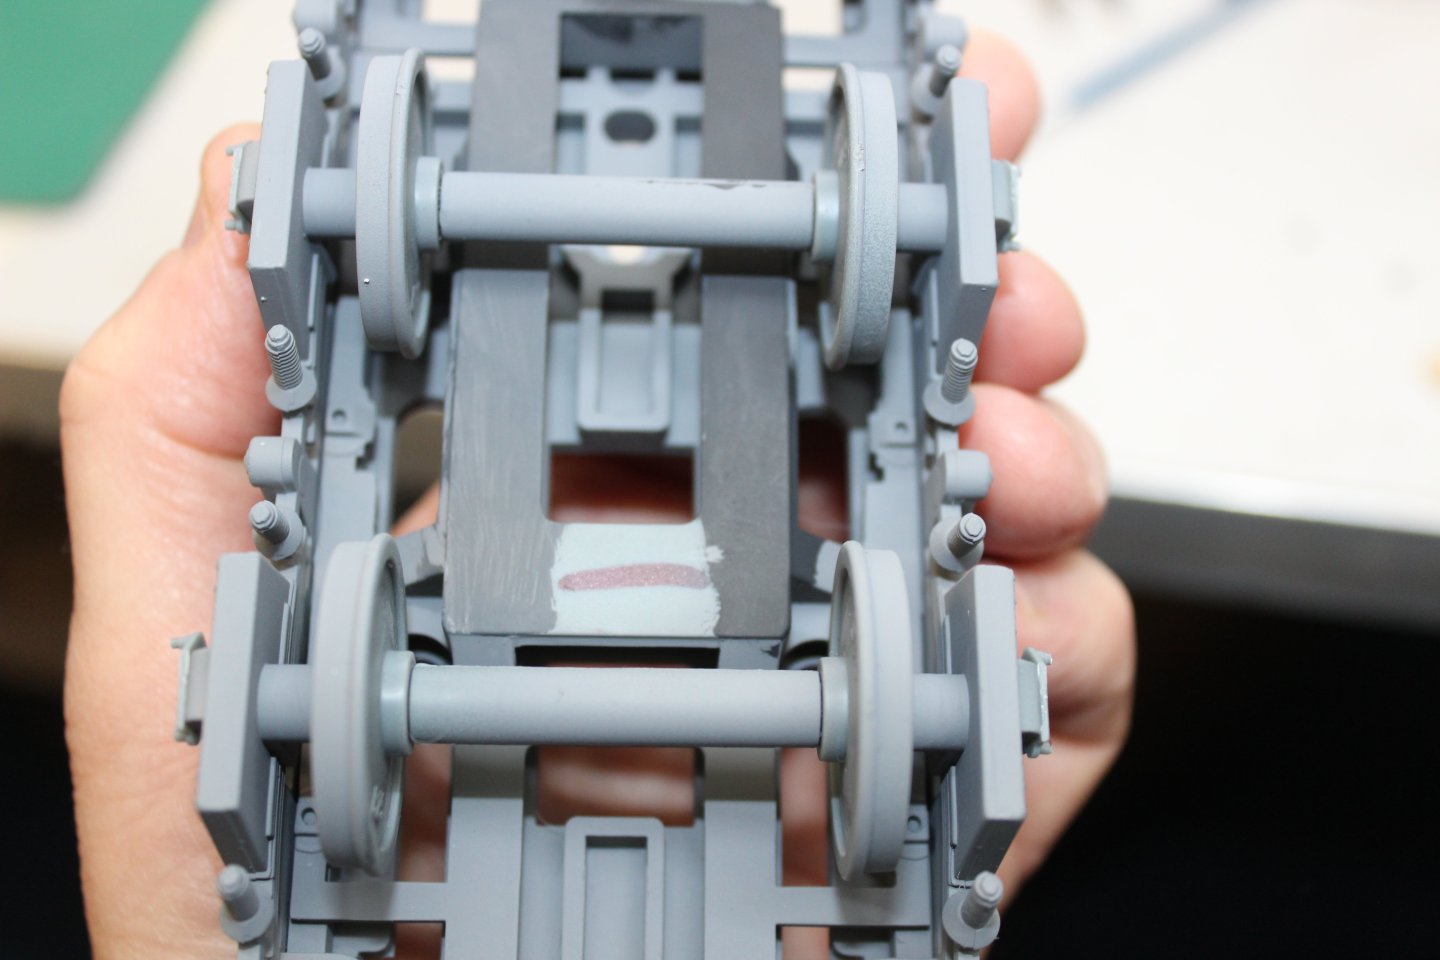
good evening, thank you for comments and likes the bogies had the forward sections planked, this replaced the plastic profile, and a grime wash added this completes these units other than the hand rails and storage boxes all the walkways have to be replaced as they are just a solid plastic profiles, but were steel mesh in real life, i found a cheap alternative to buy some for a fraction of the cost the walkways supports were constructed from wood, for my first attempt i think they turned out ok as you can see i am much further ahead in the build, but i am doing other jobs between paint drying. and not jump around to much if it stops raining i will get some outside shots


- 26 replies
-
- 15
-
-
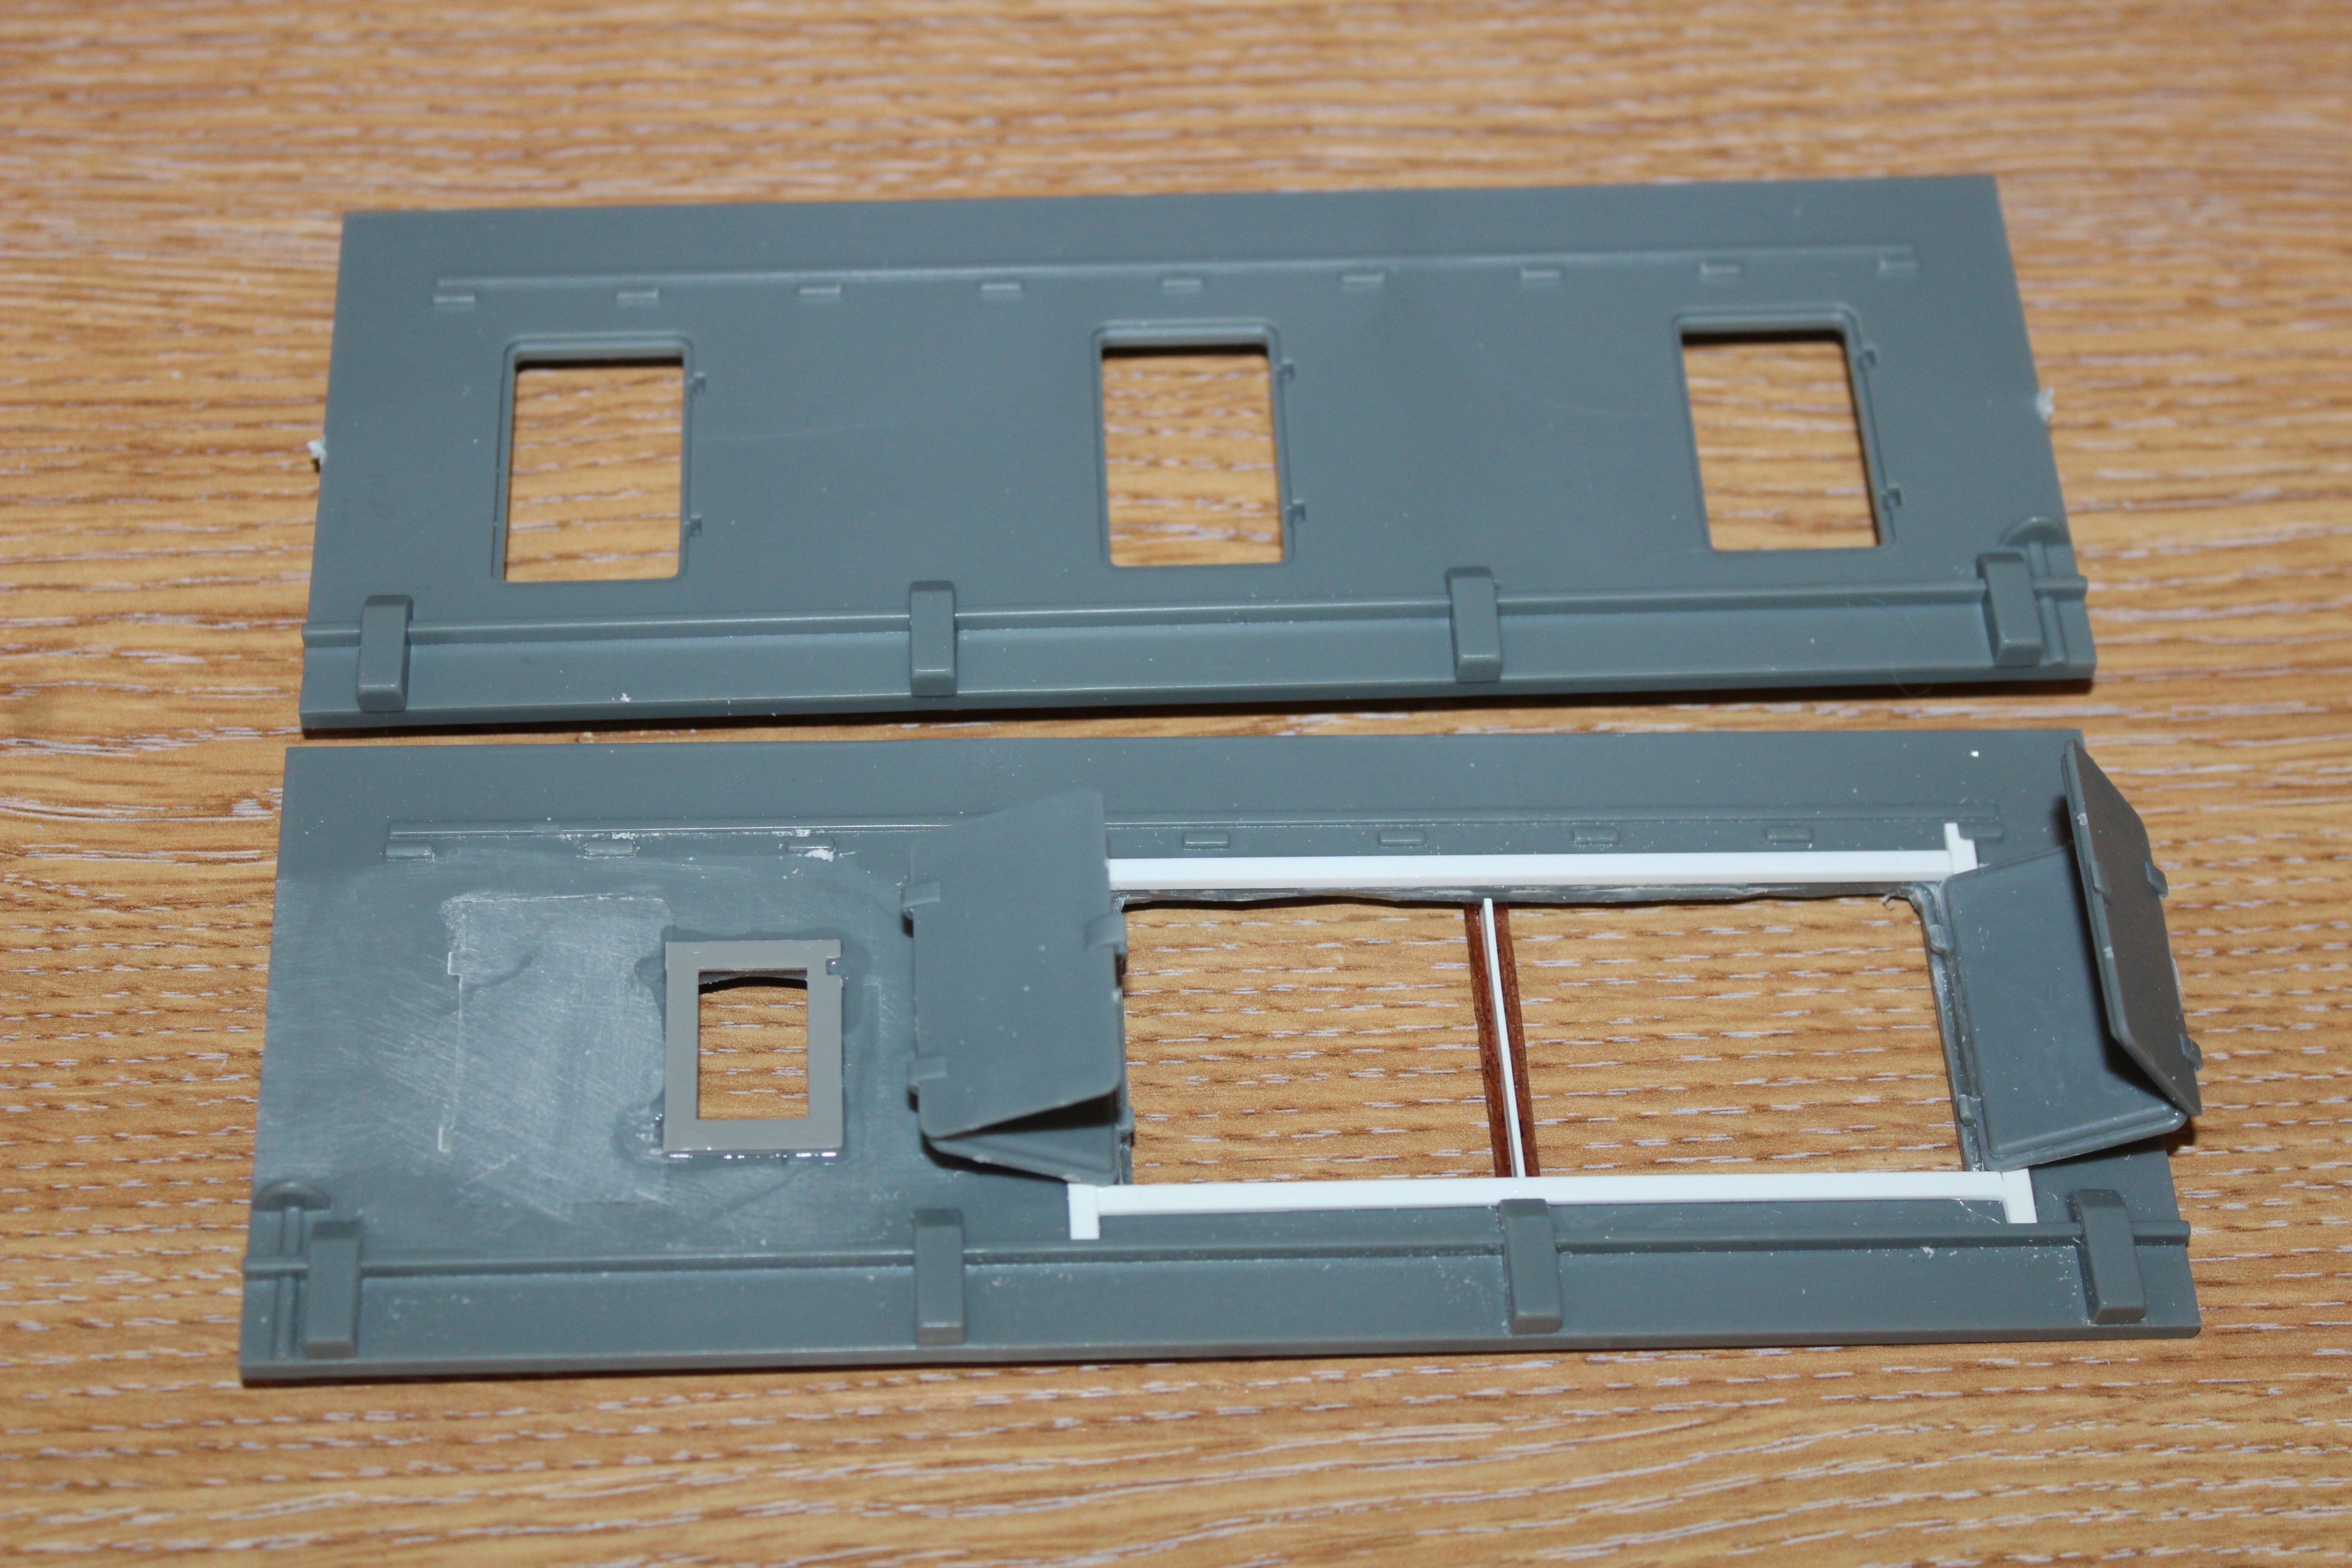
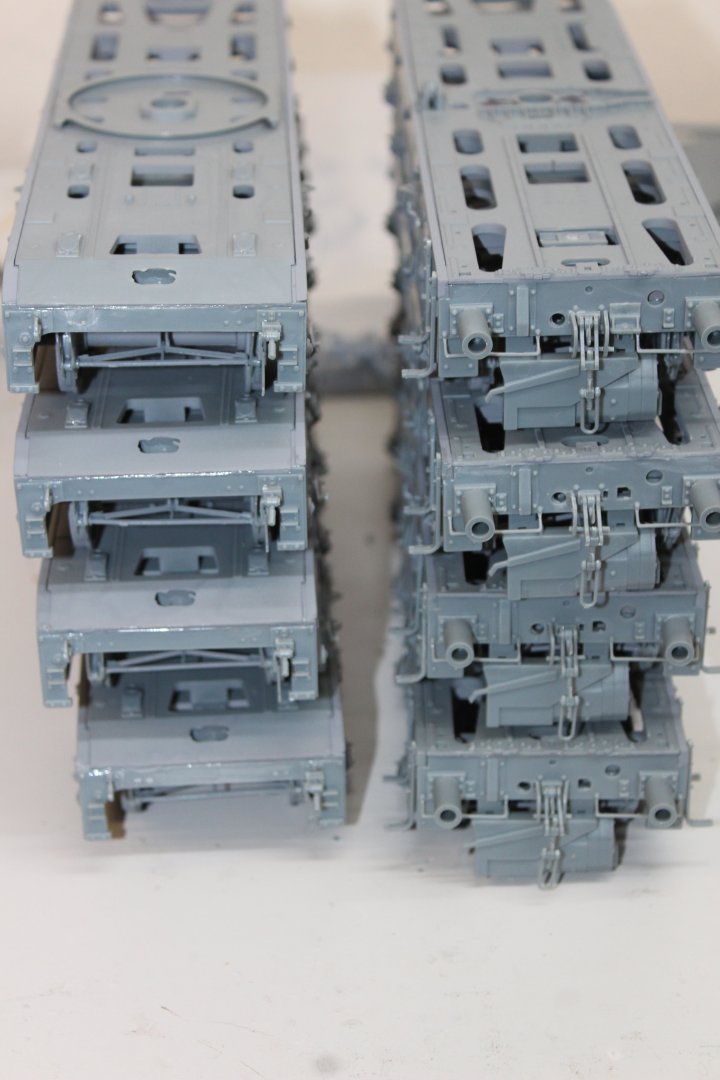
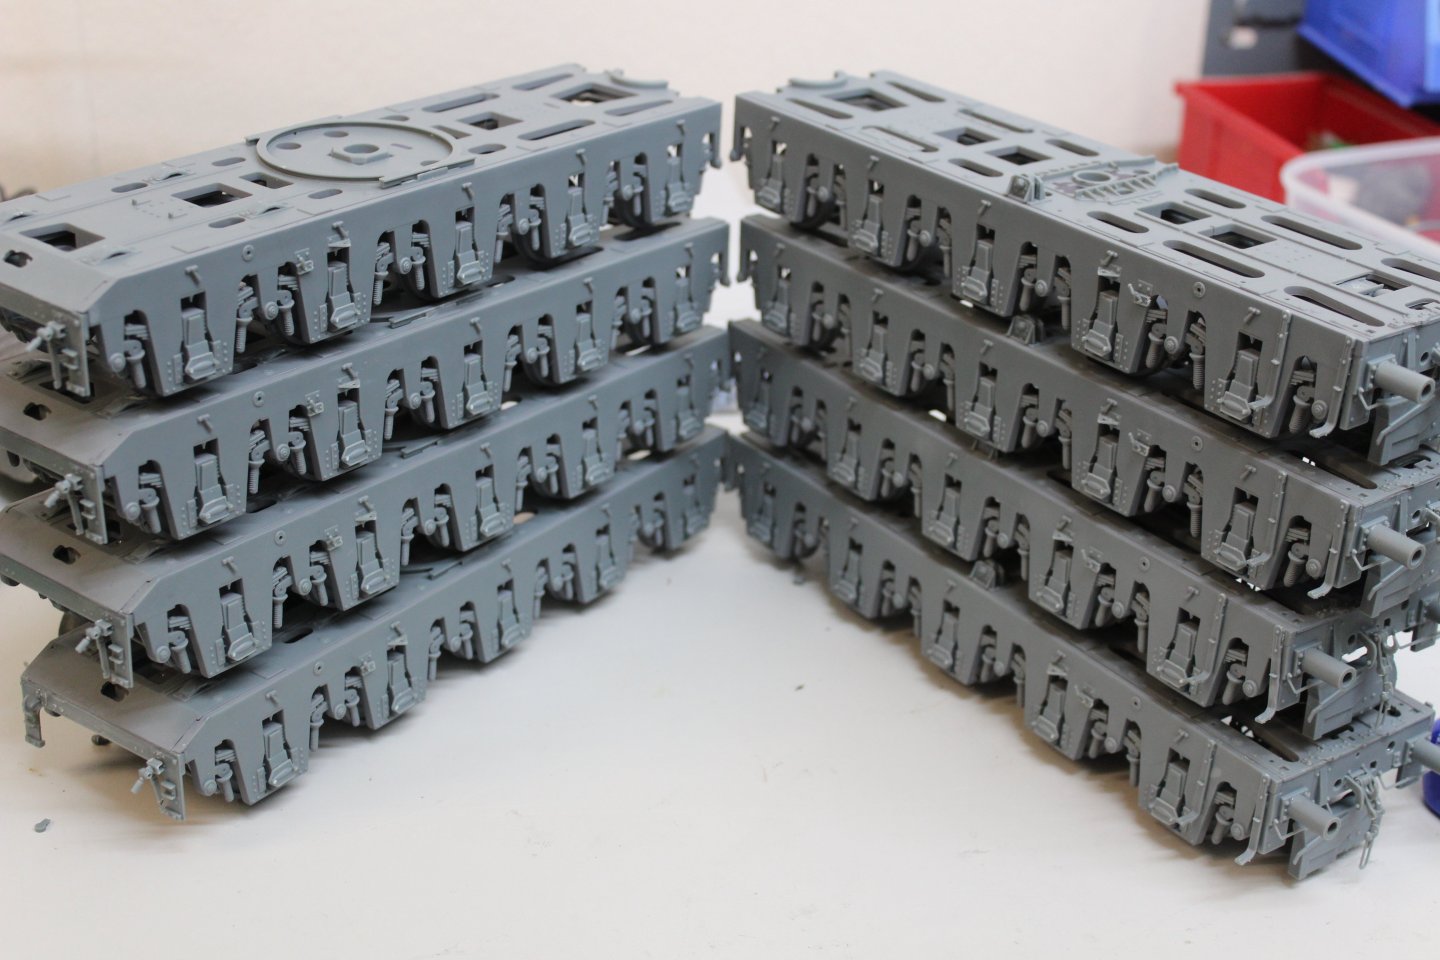
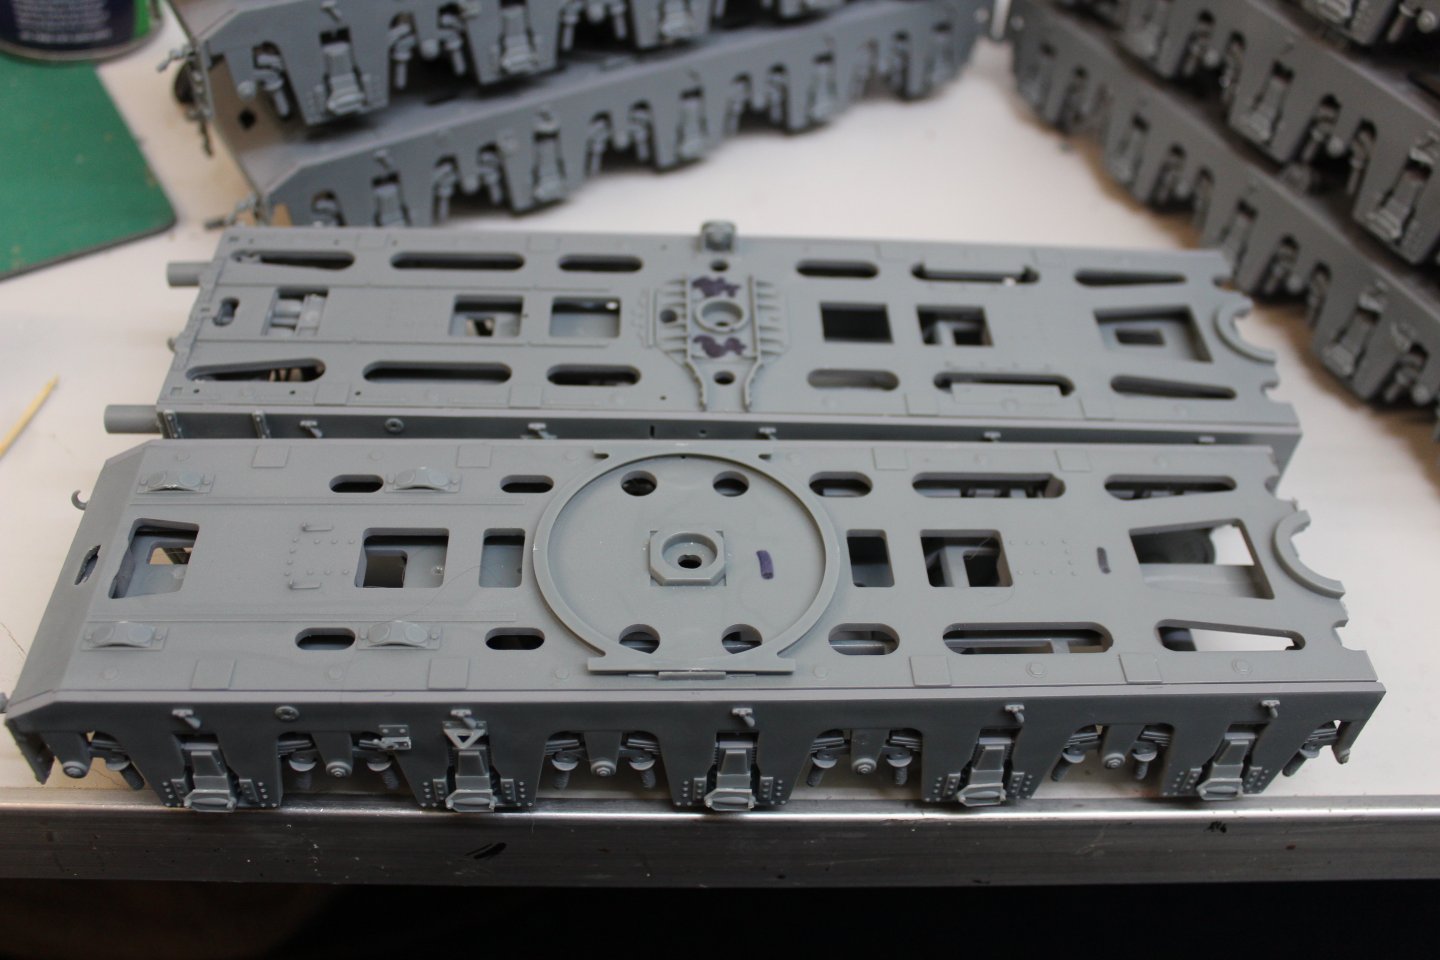
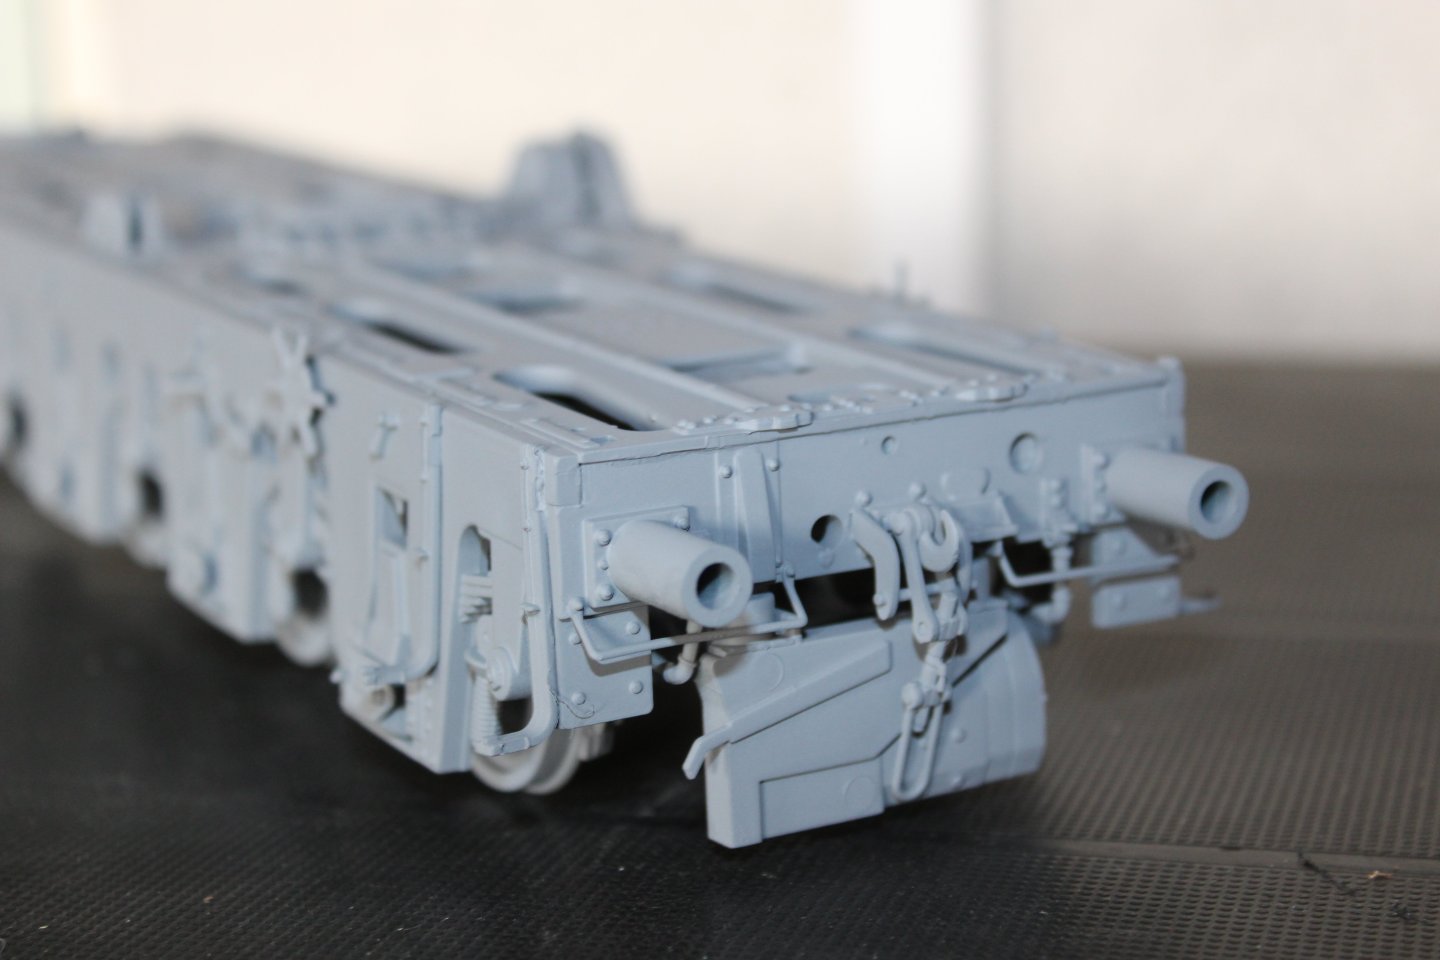
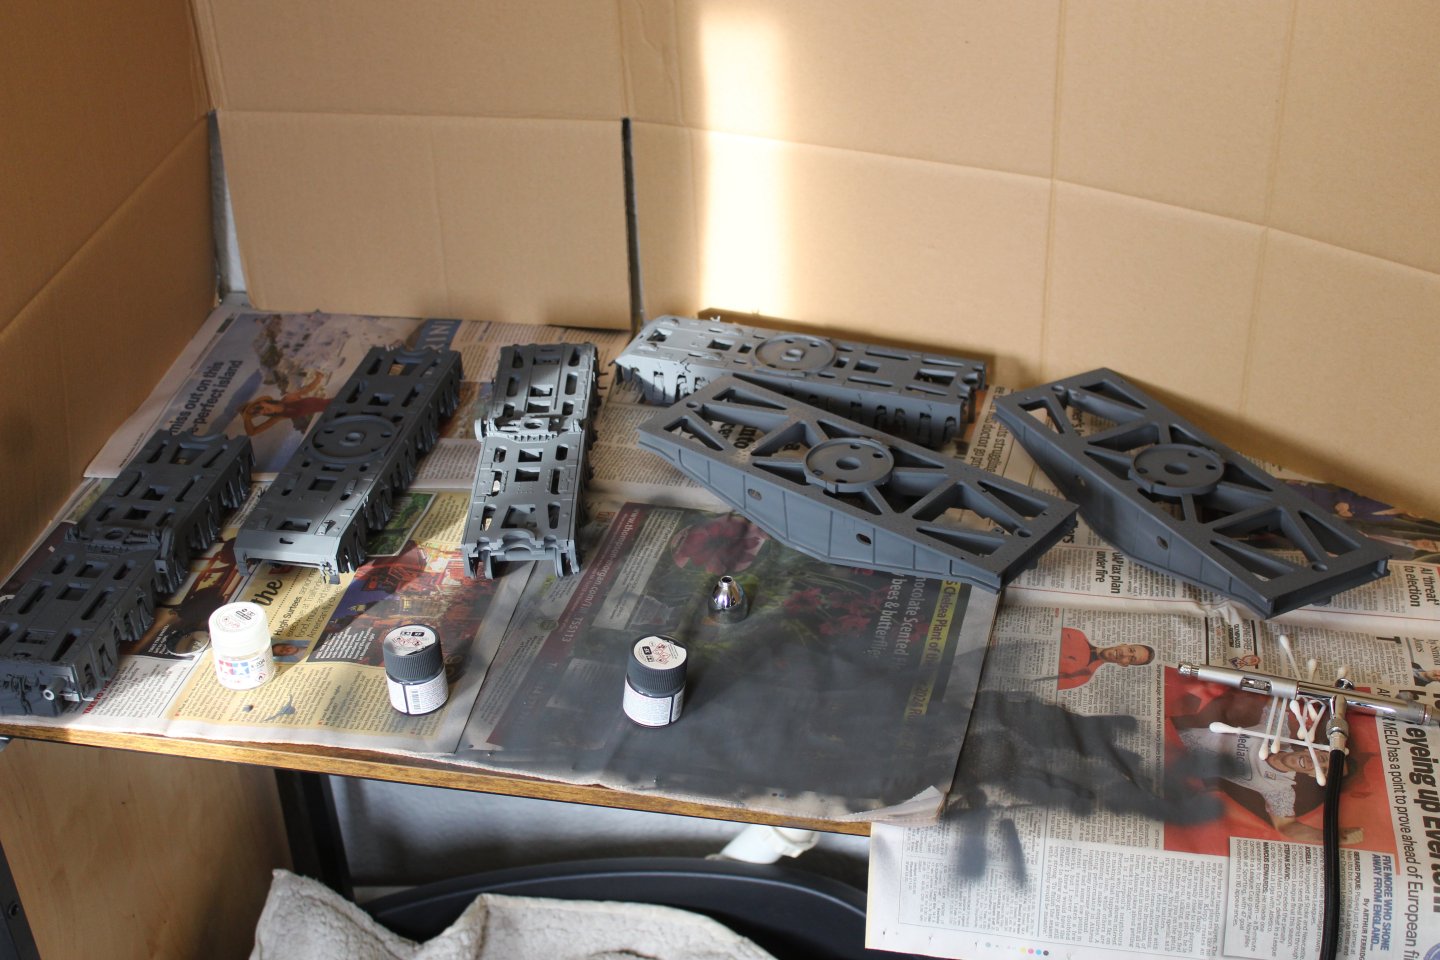
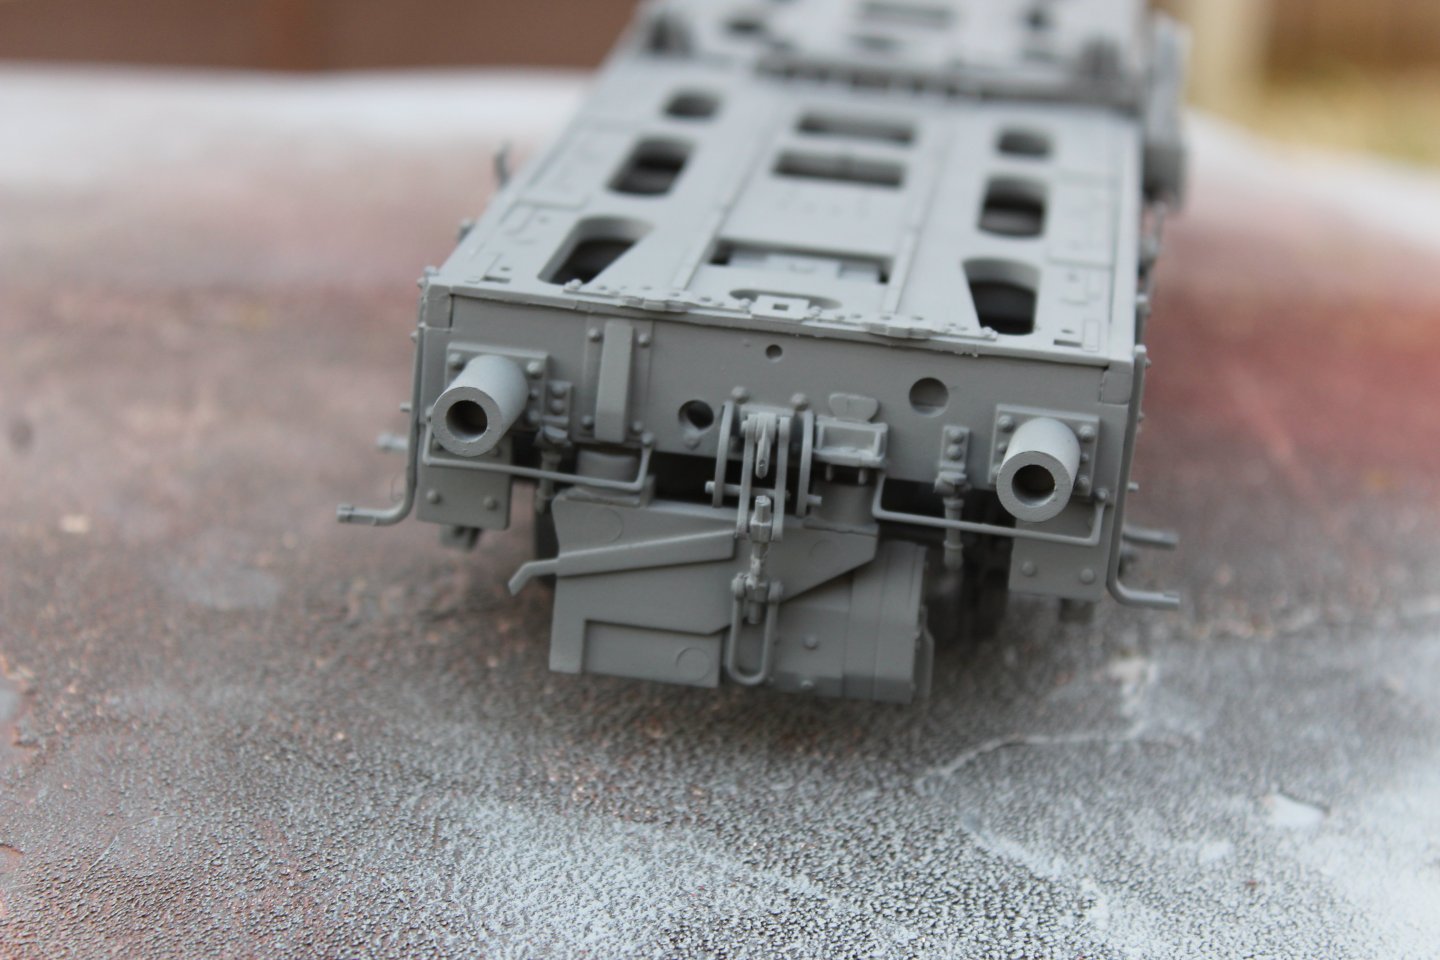
Good evening everyone thank you for comments and likes All the plastic on the carriages is now complete with the exception of the rails, the plastic decking is being replaced by wood. Primed in Hycote spay grey primer, and using Greman Grey by Tamiya as the top coat Test patch with dark grey and German grey (recommended) opposite ends with most of the detailing on in primer makeshift spray booth German Grey top coat still in primer some now in German Grey

- 26 replies
-
- 17
-
-


.JPG.23bac416c81bc2cf59535c364ab705c6.JPG)