HOLIDAY DONATION DRIVE - SUPPORT MSW - DO YOUR PART TO KEEP THIS GREAT FORUM GOING! (Only 75 donations so far out of 49,000 members - C'mon guys!)
×


Kevin
-
Posts
7,012 -
Joined
-
Last visited
Content Type
Profiles
Forums
Gallery
Events
Everything posted by Kevin
-
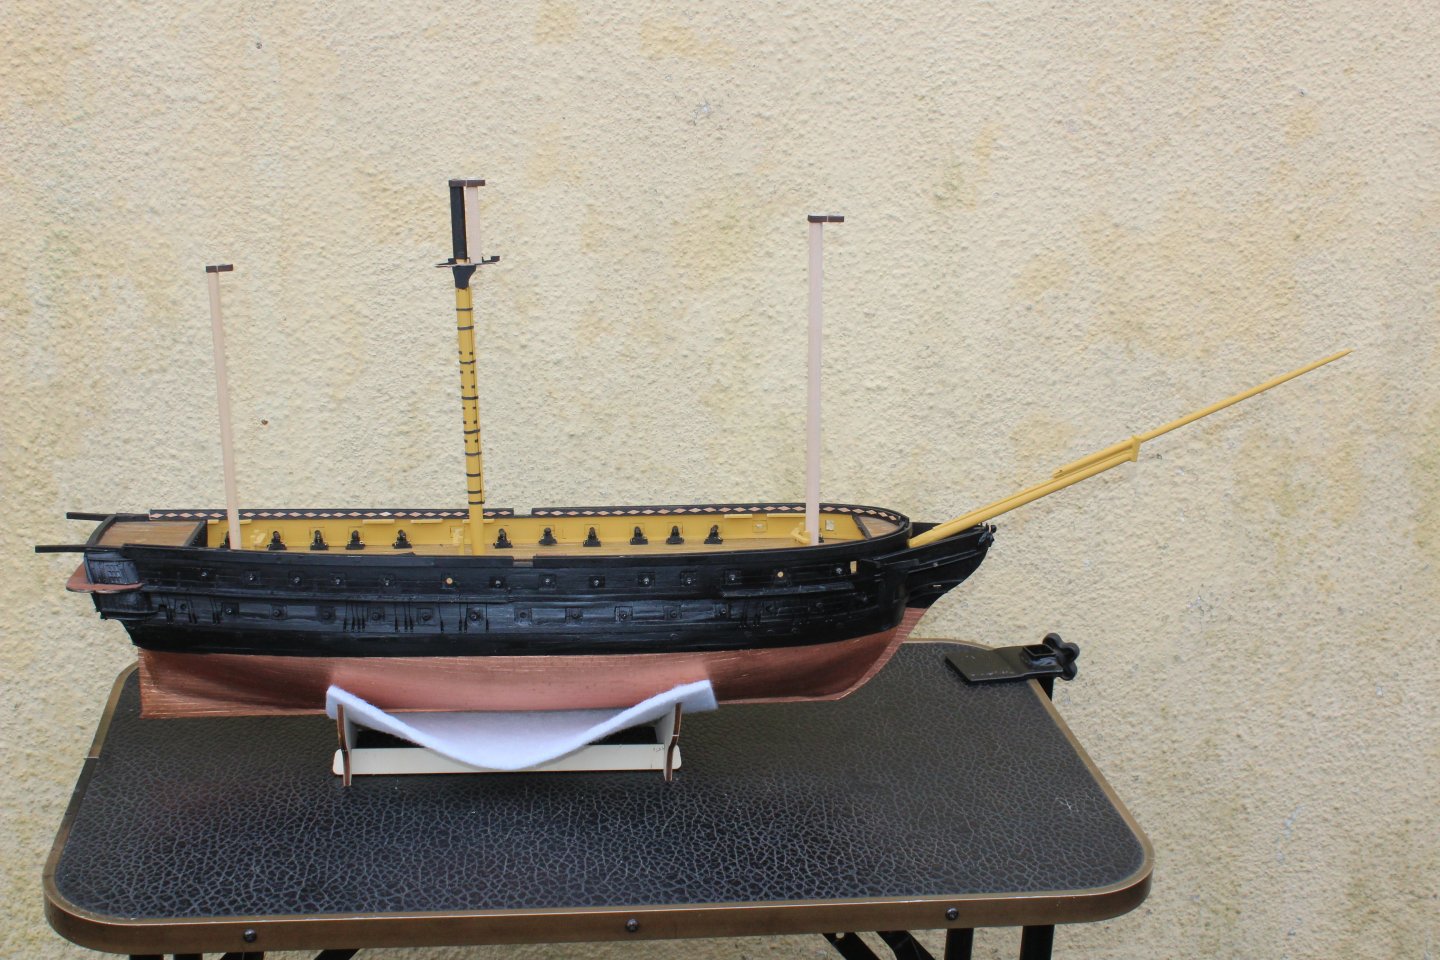
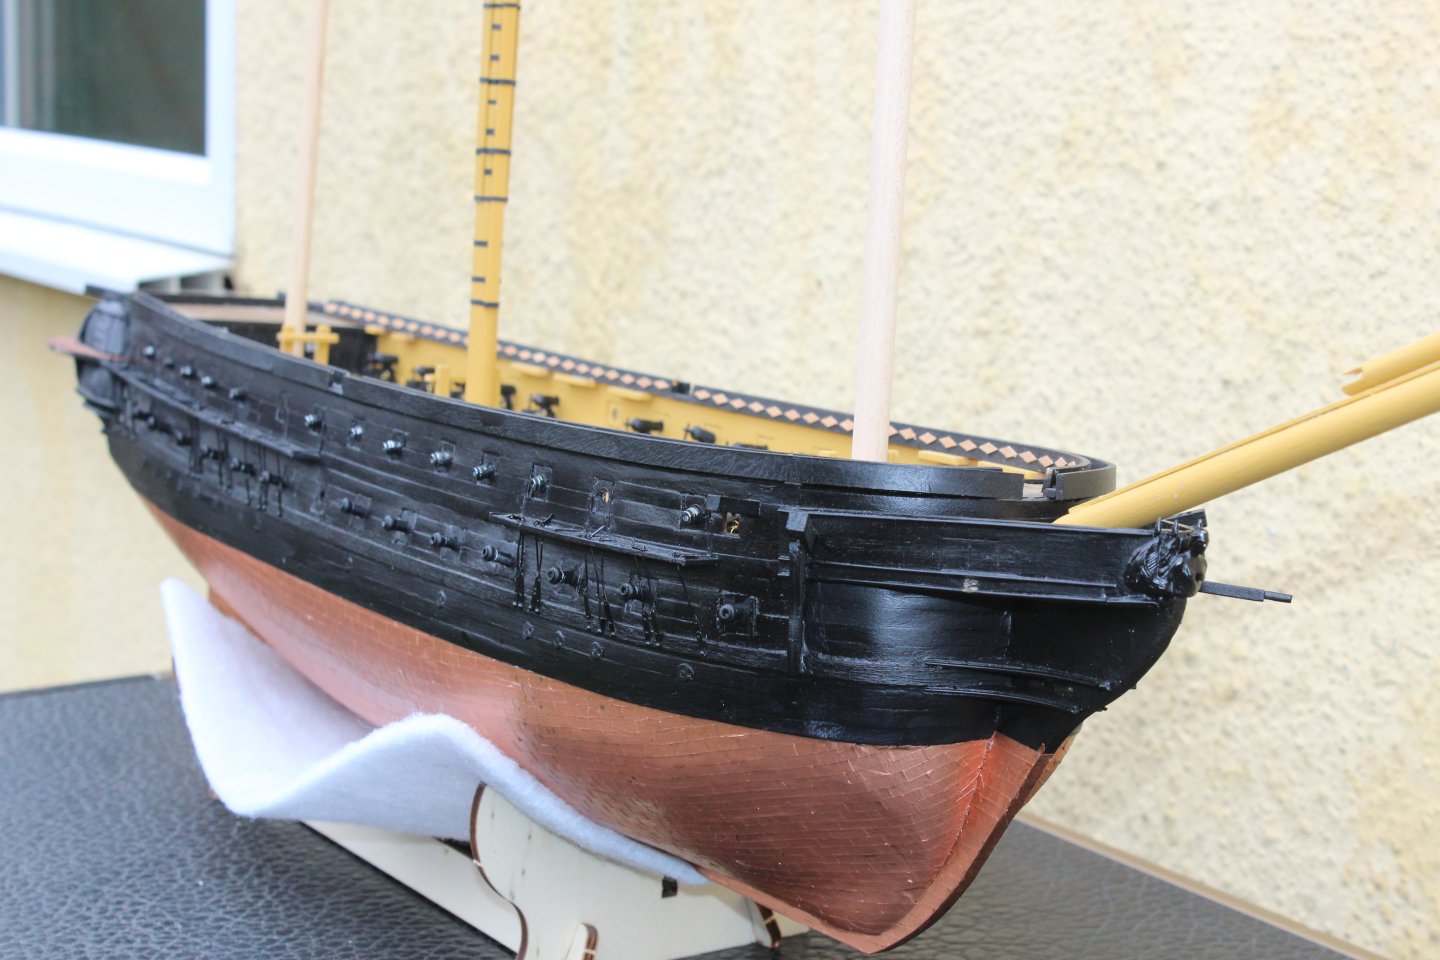
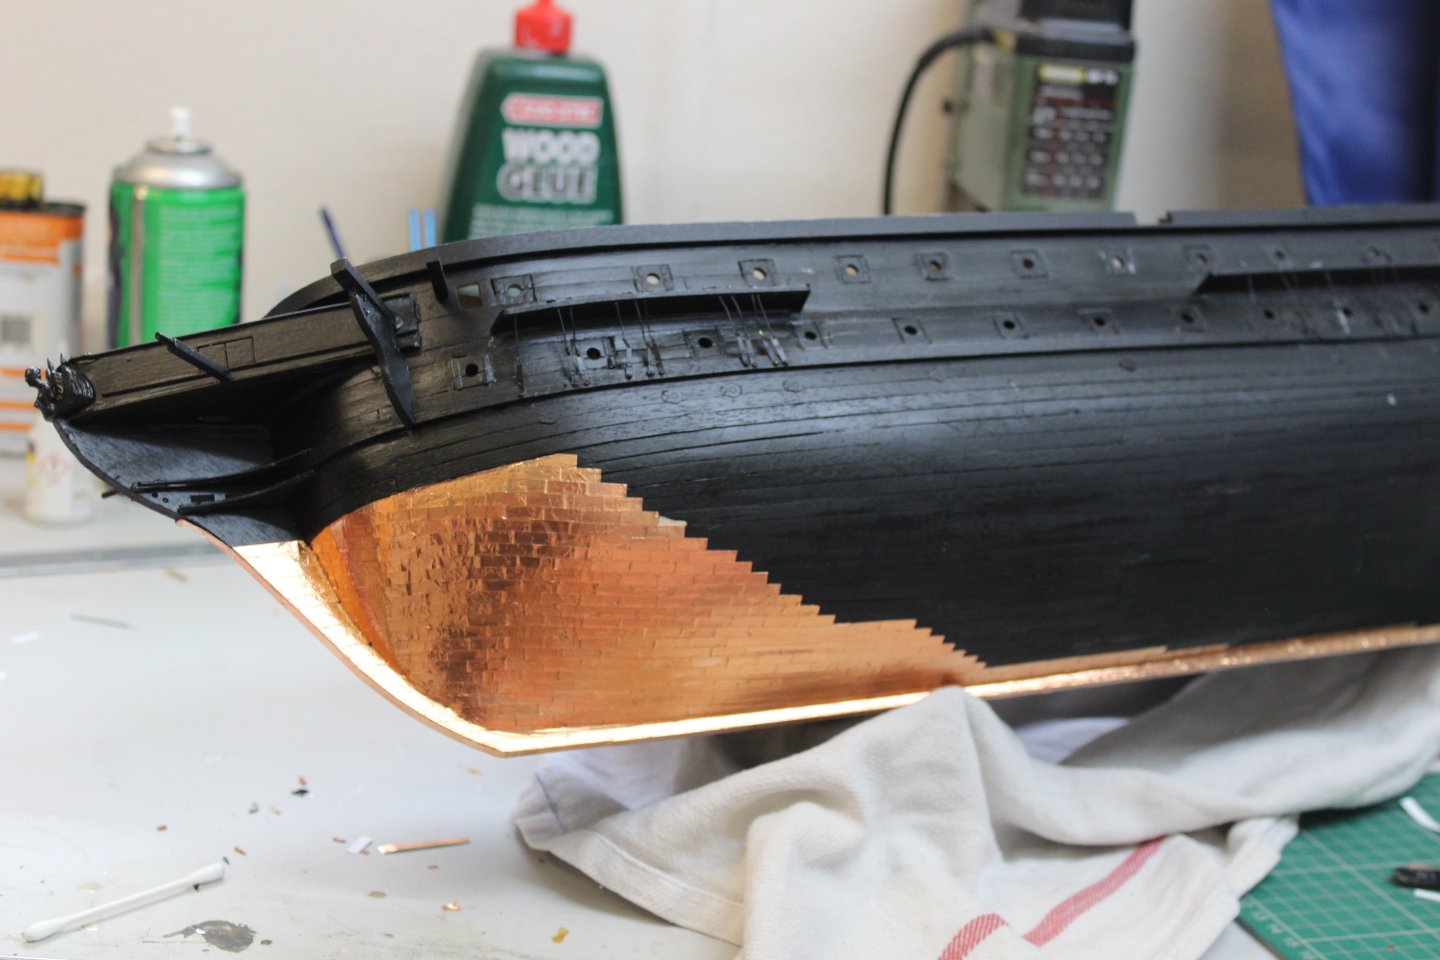
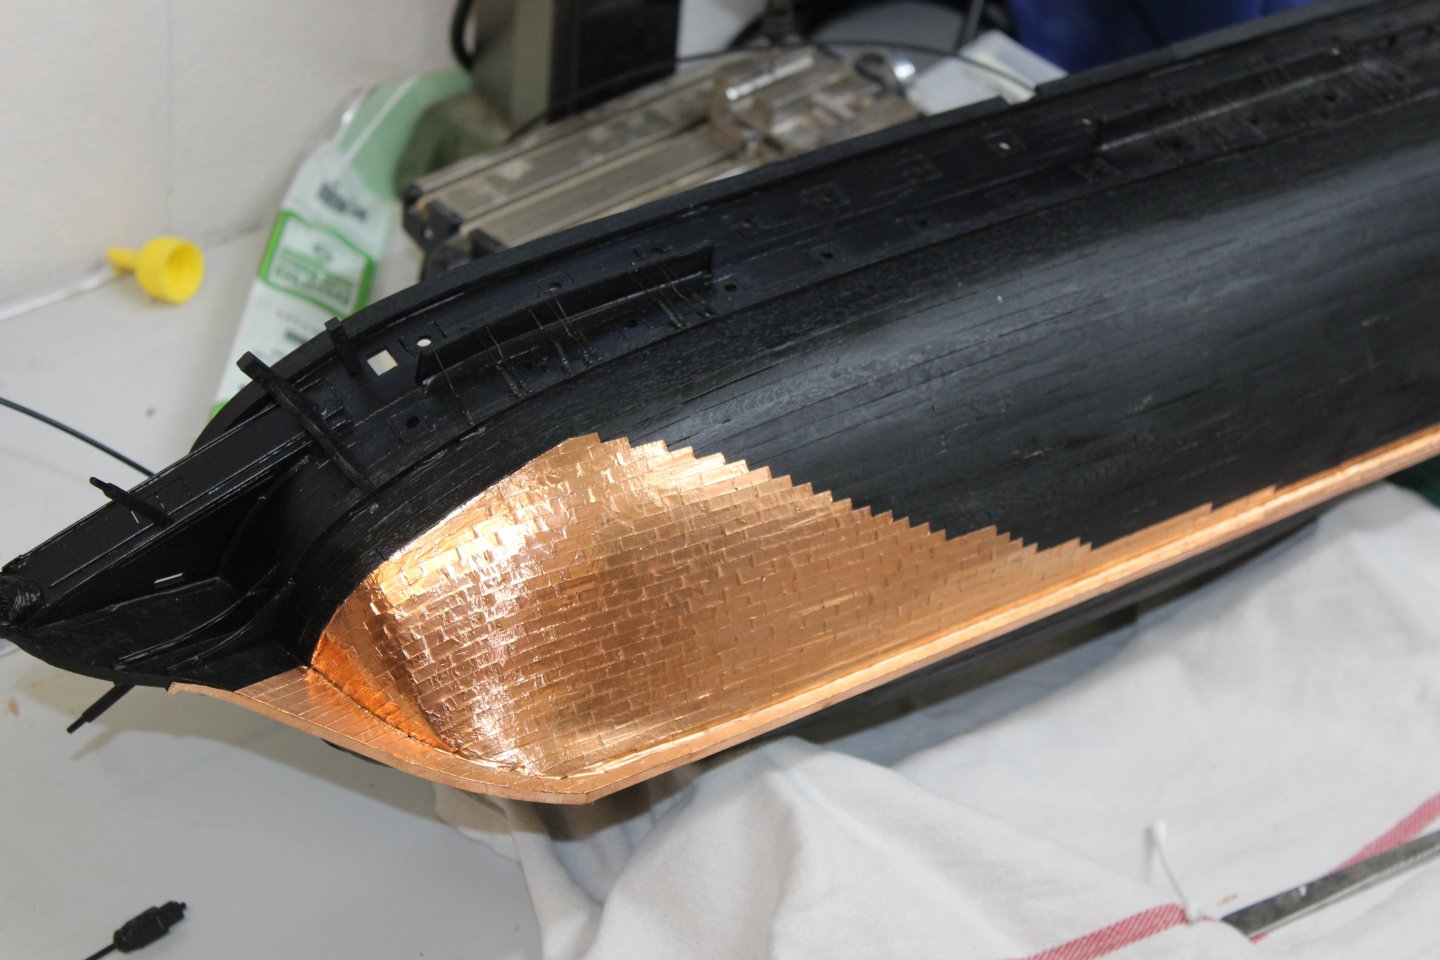
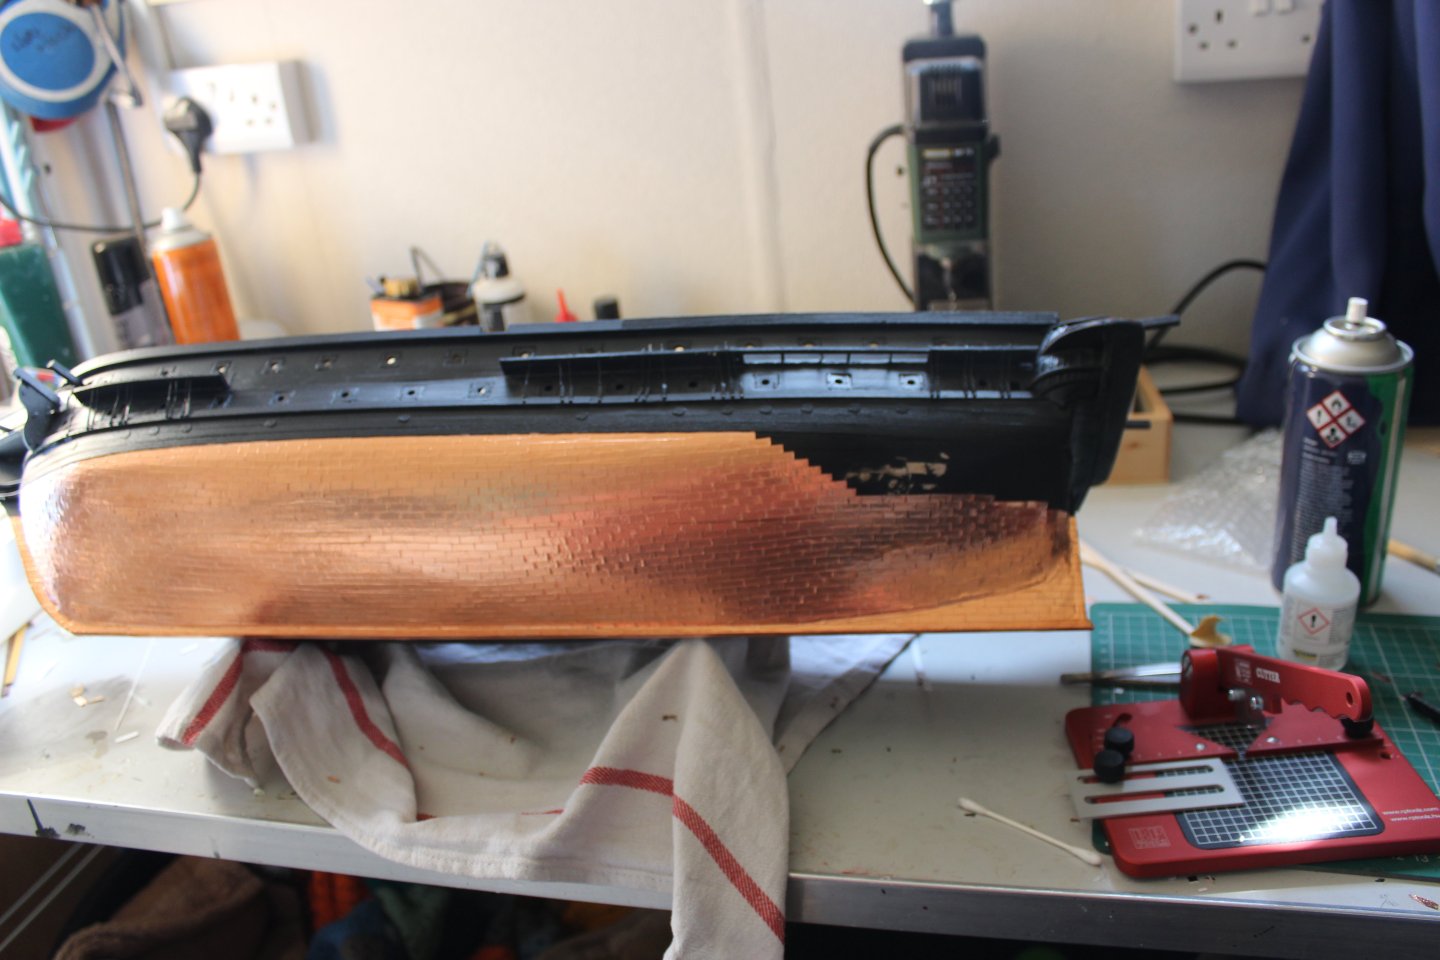
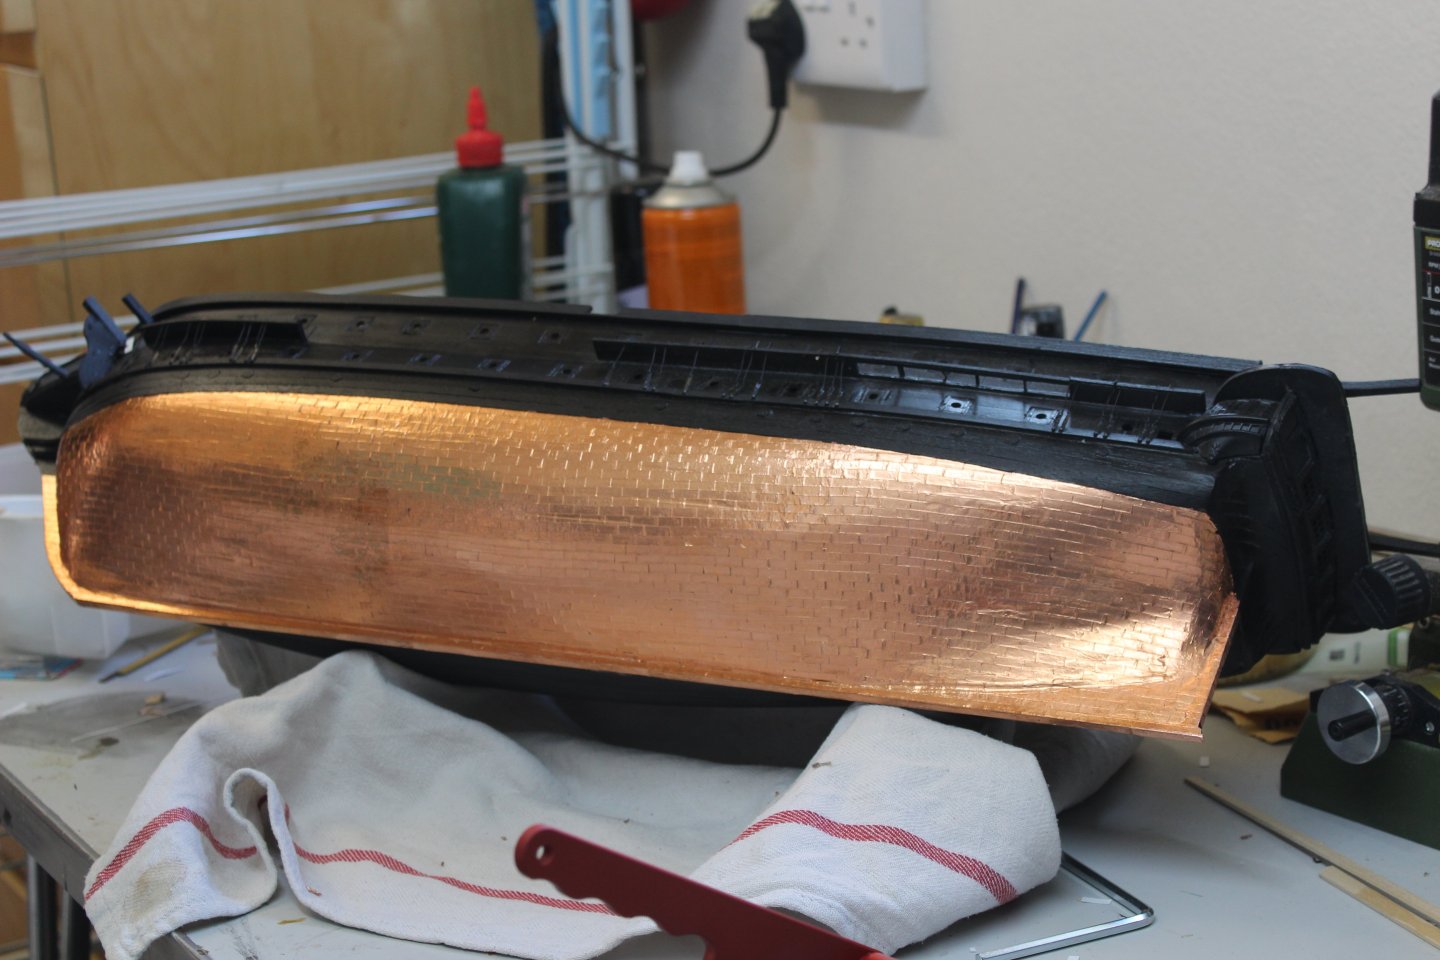
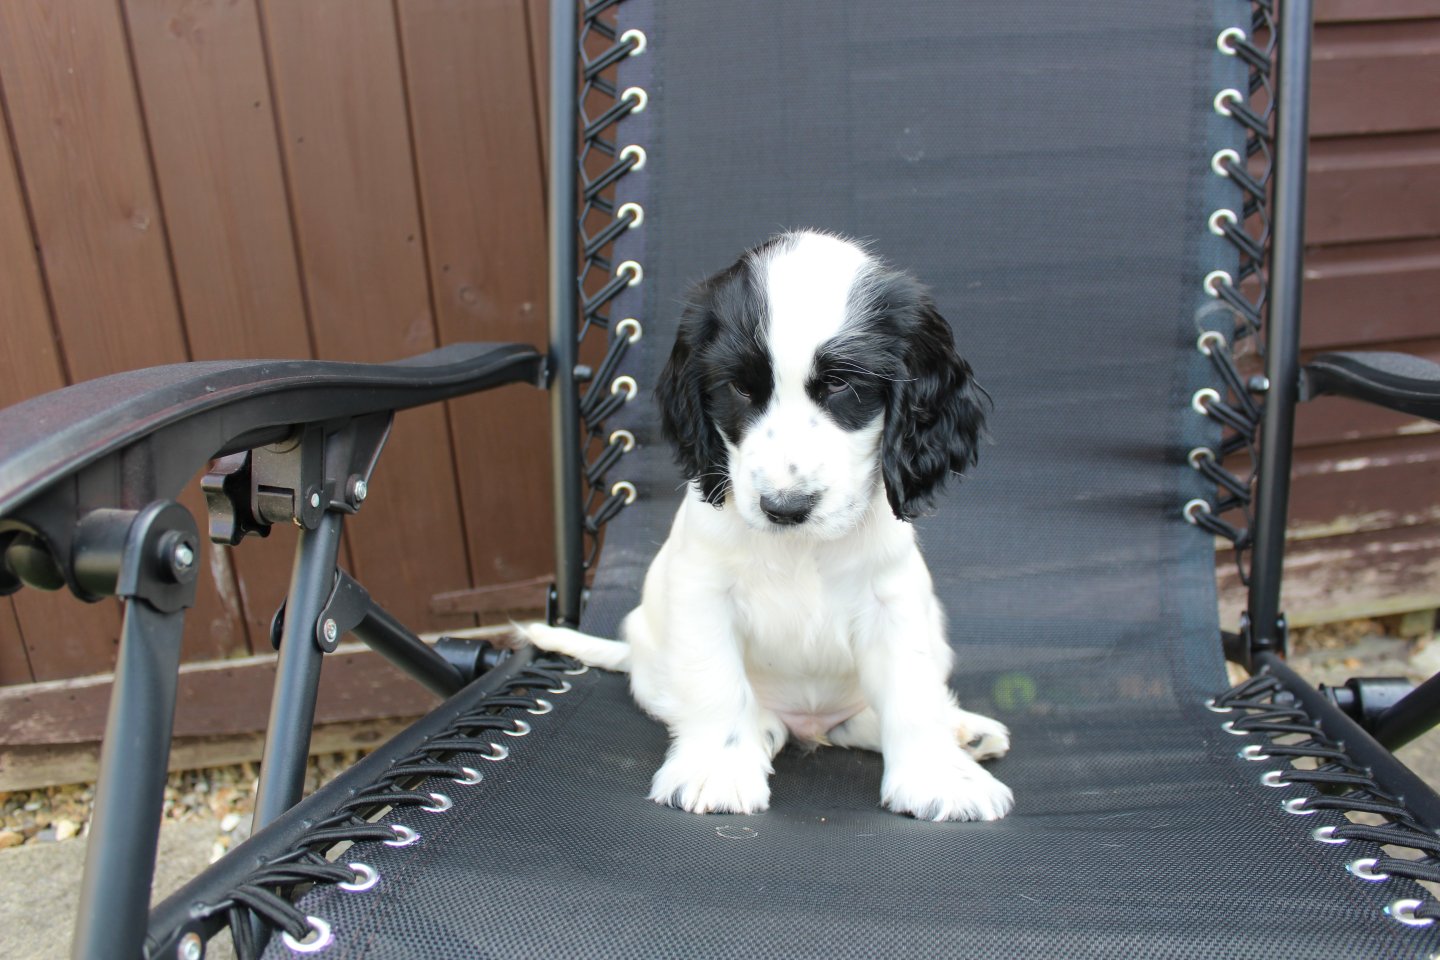
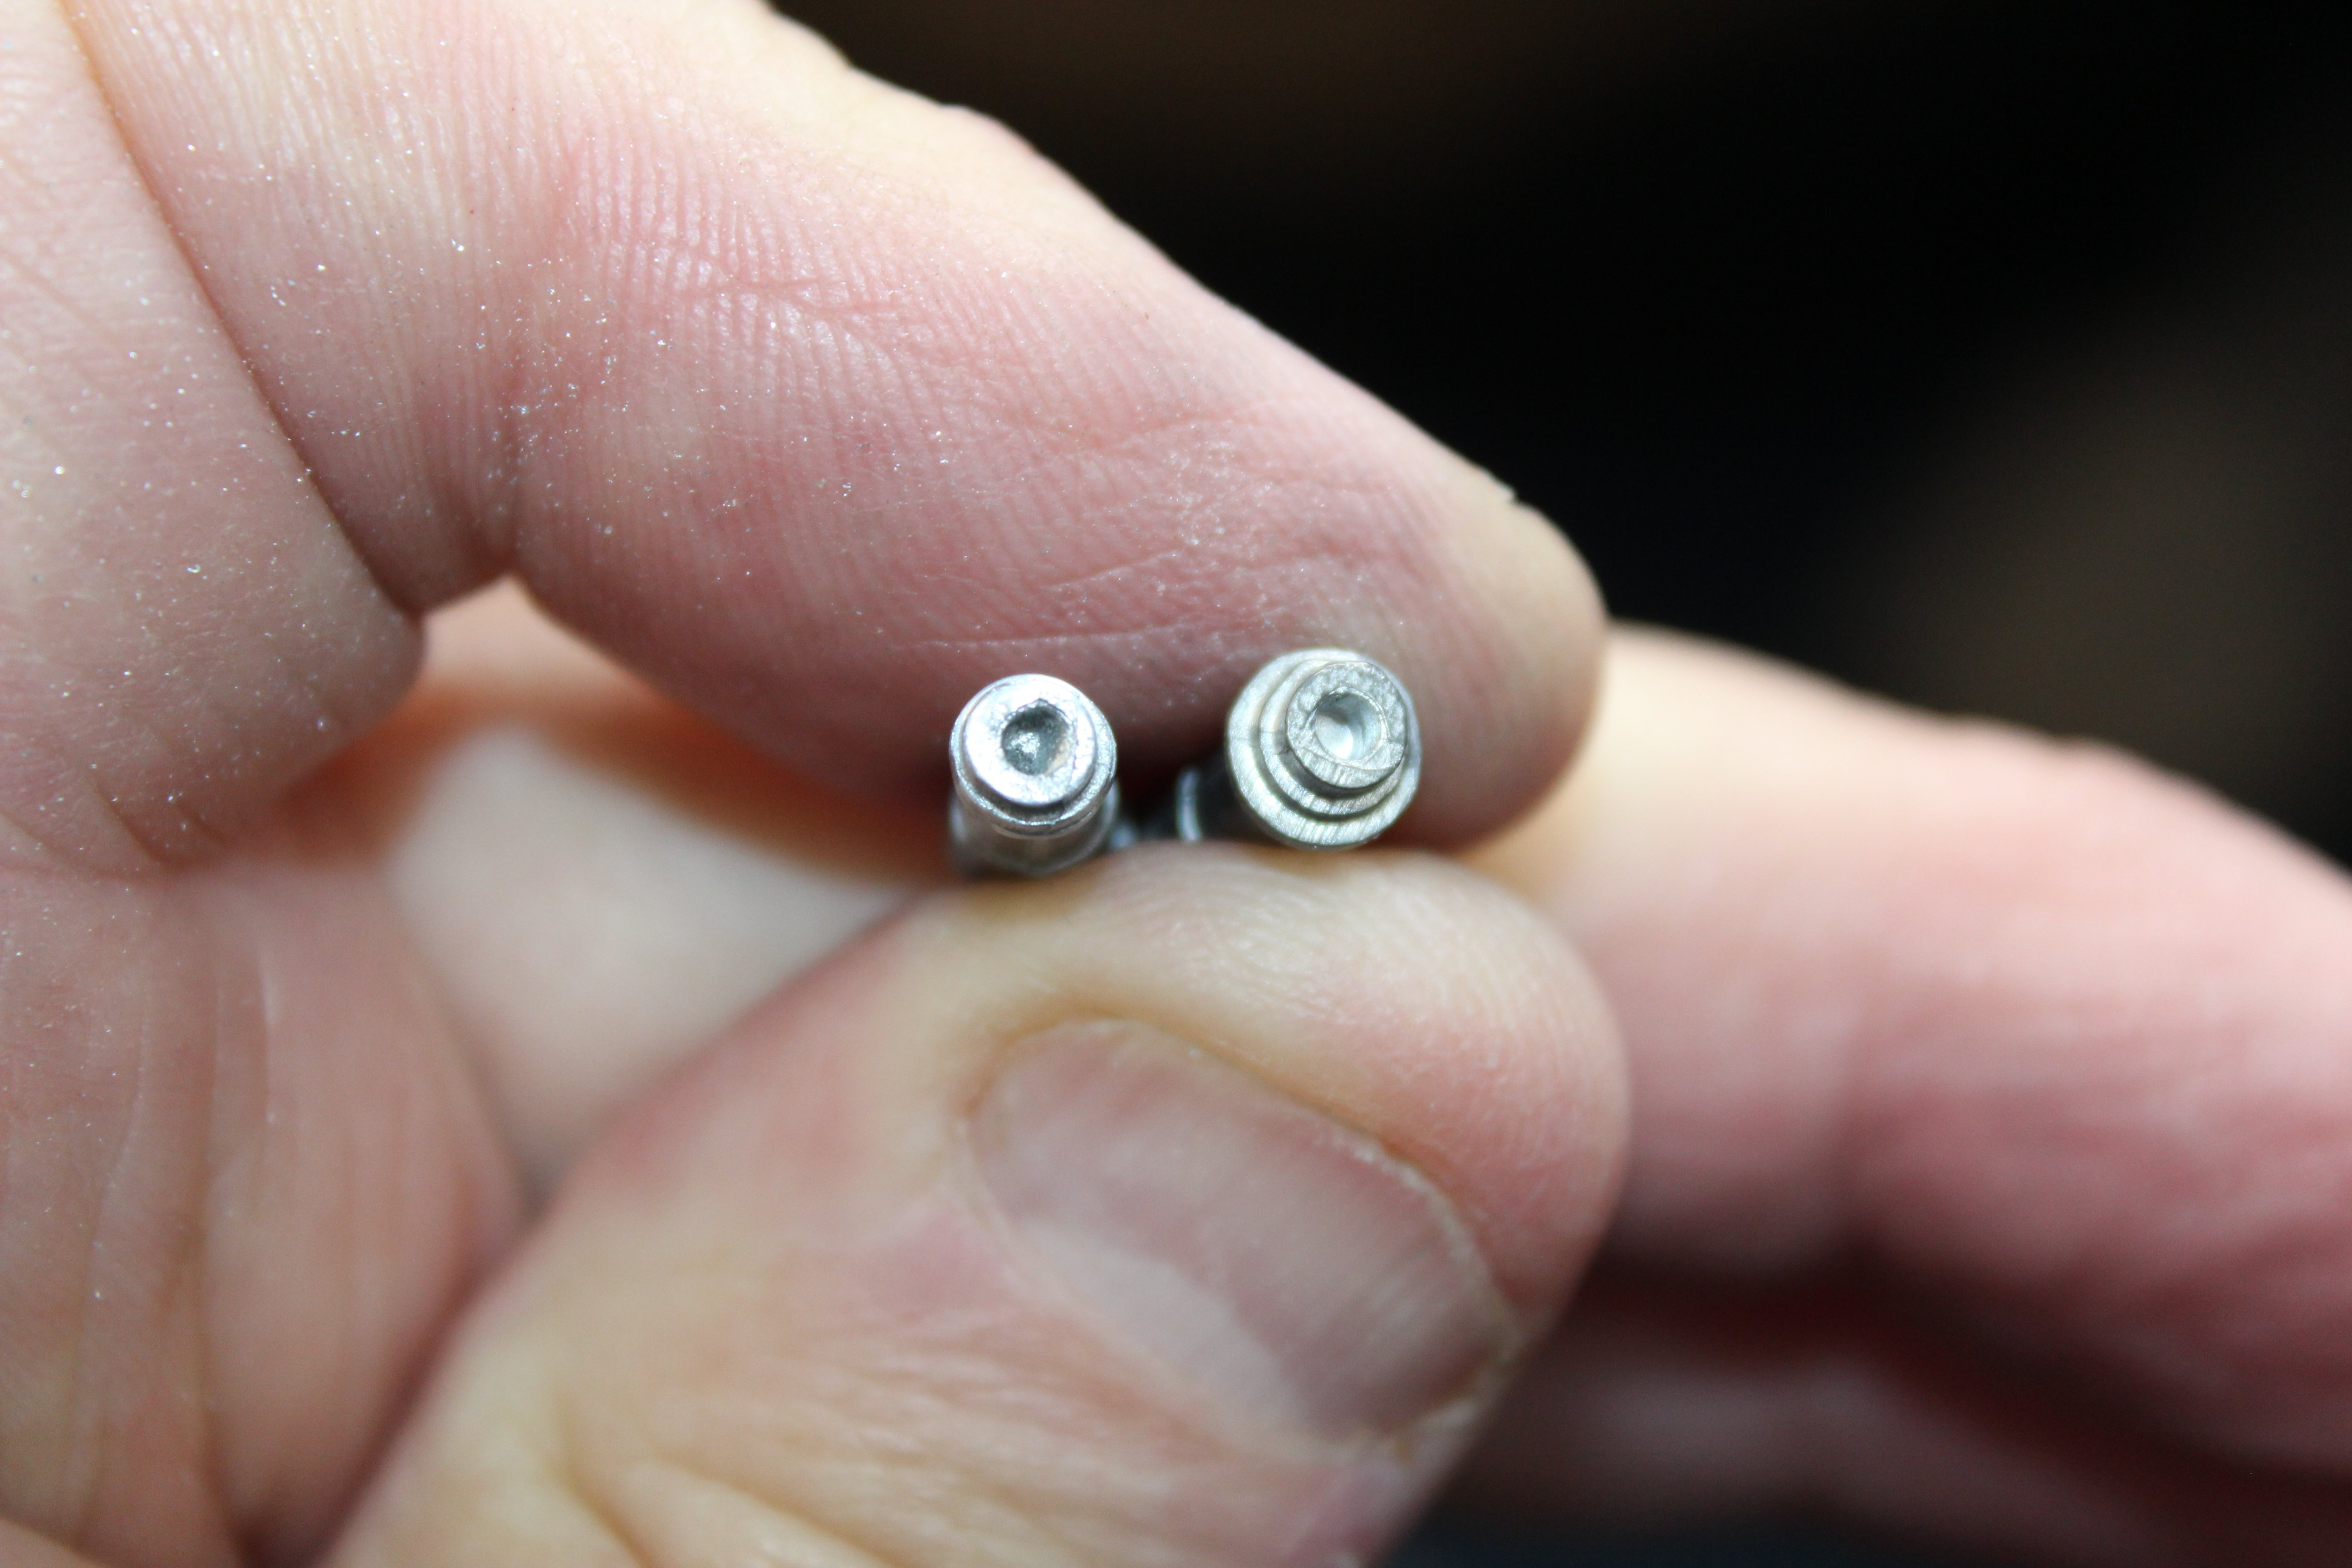
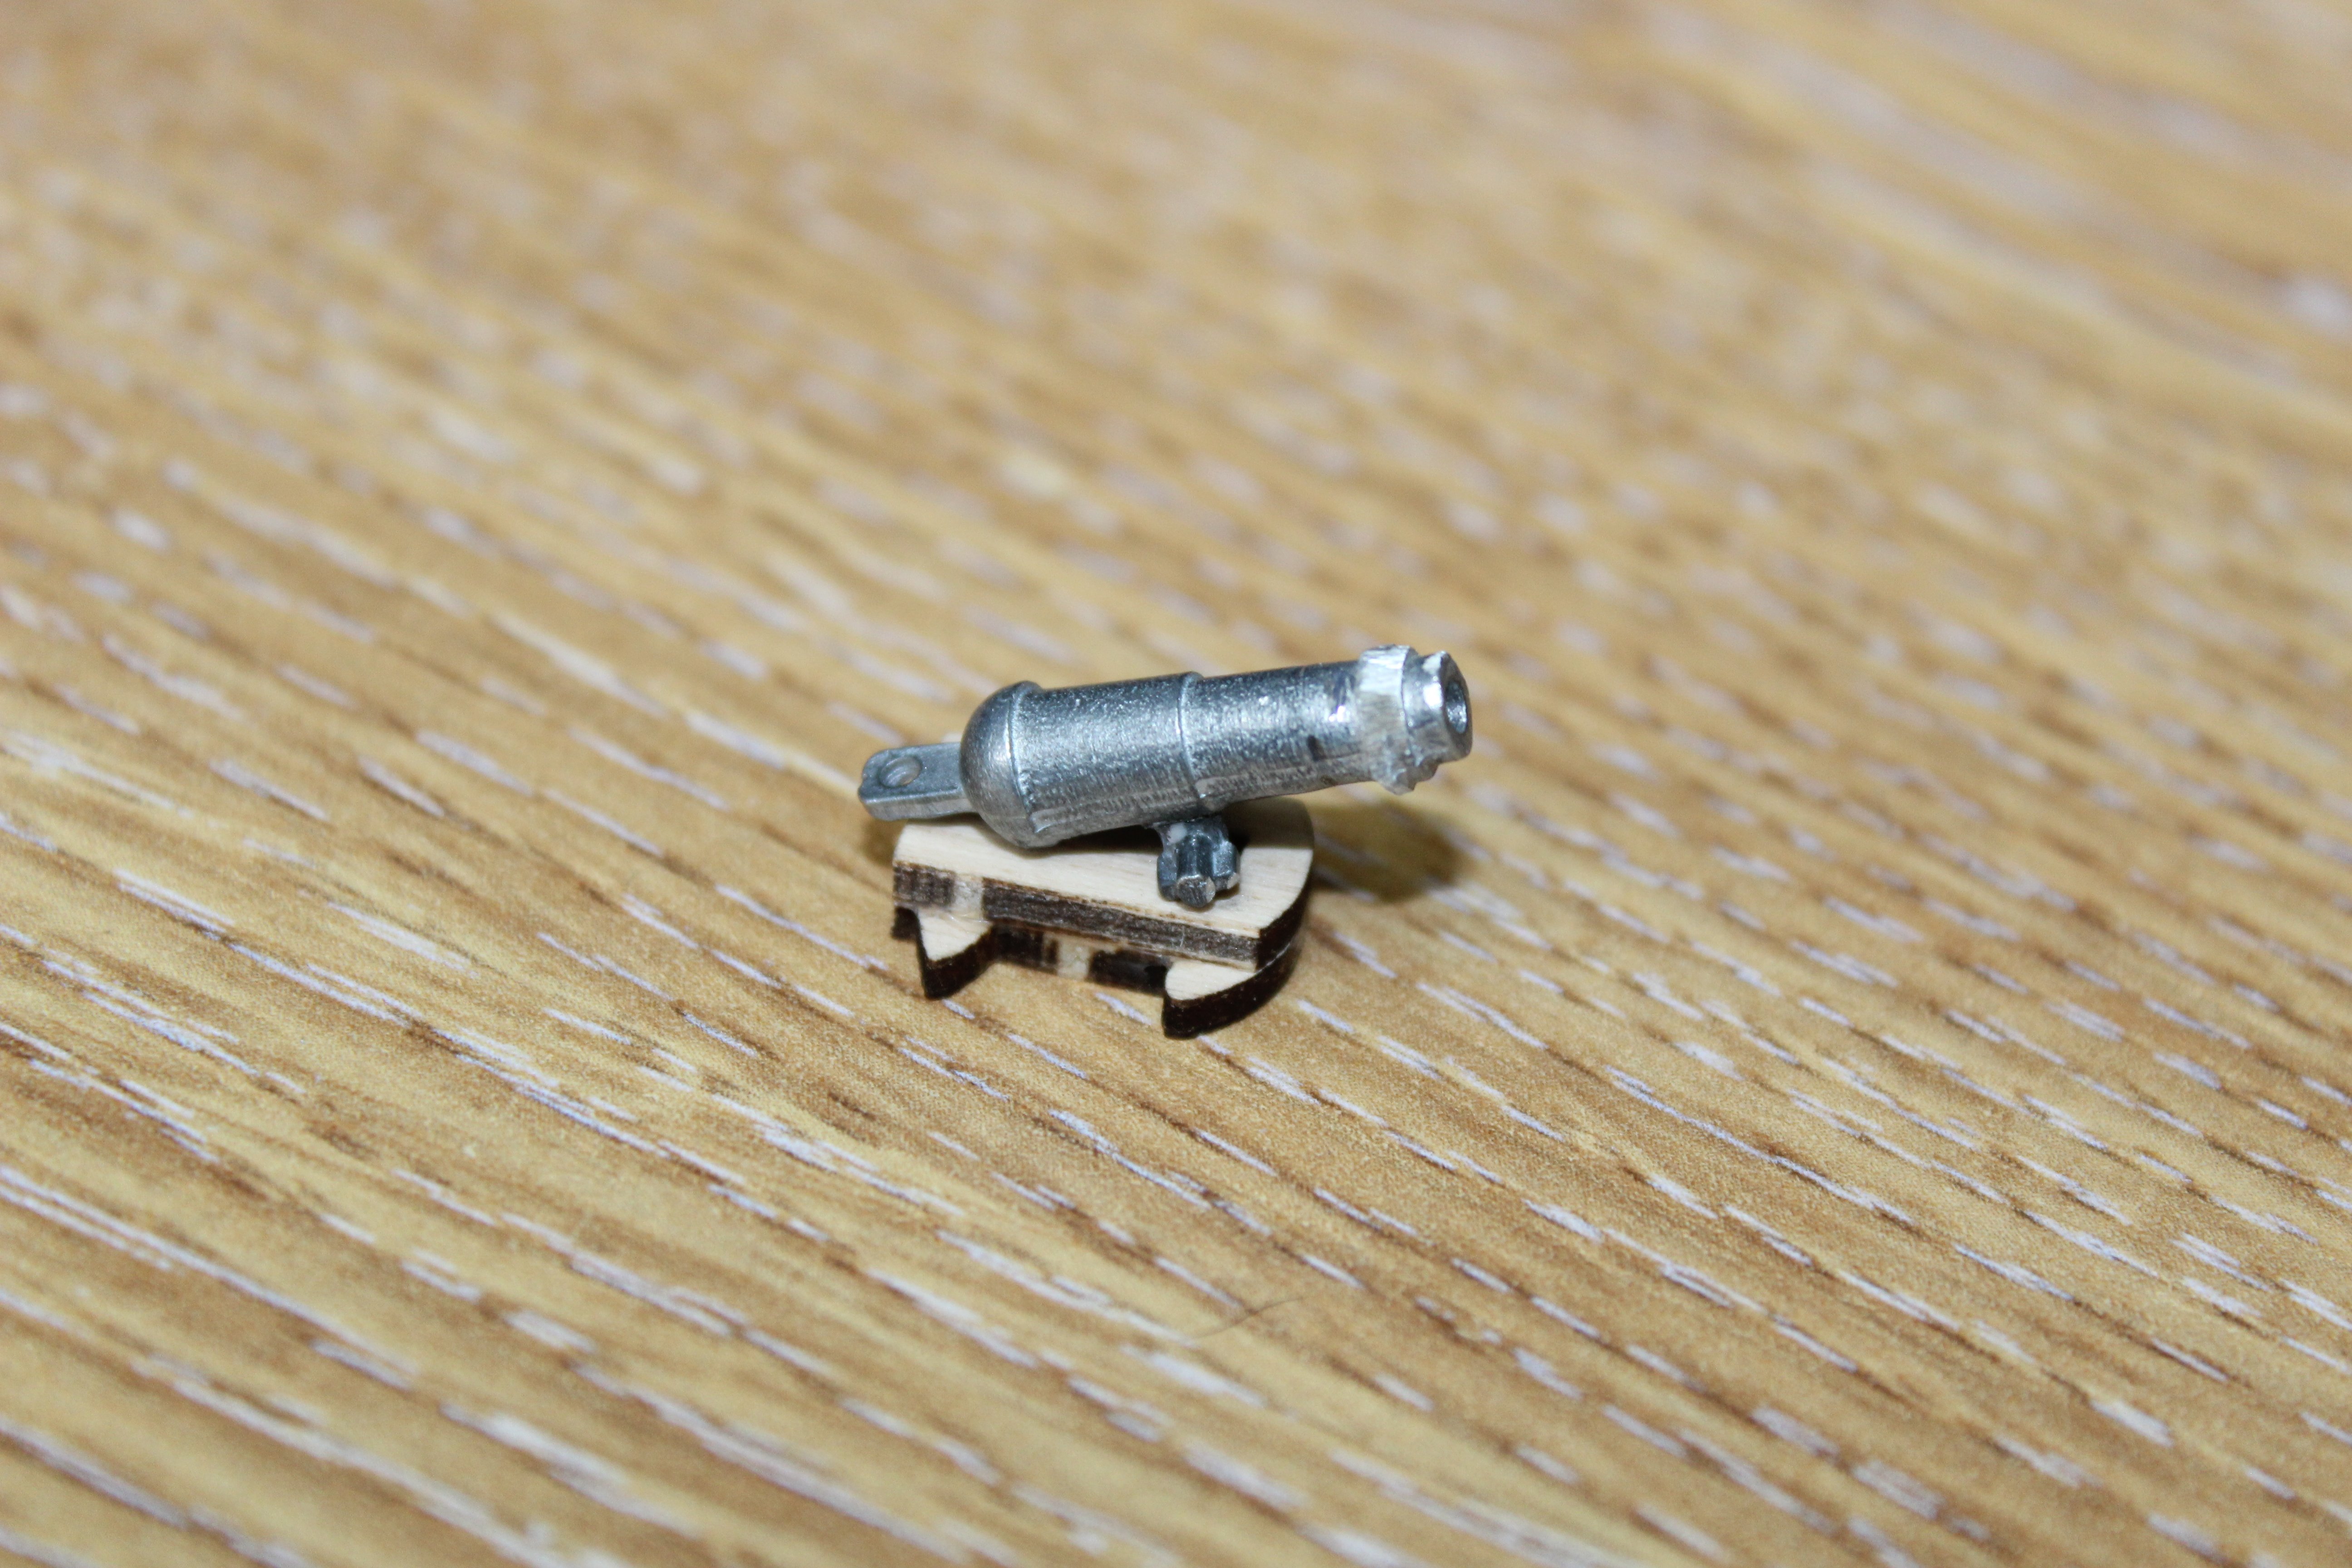
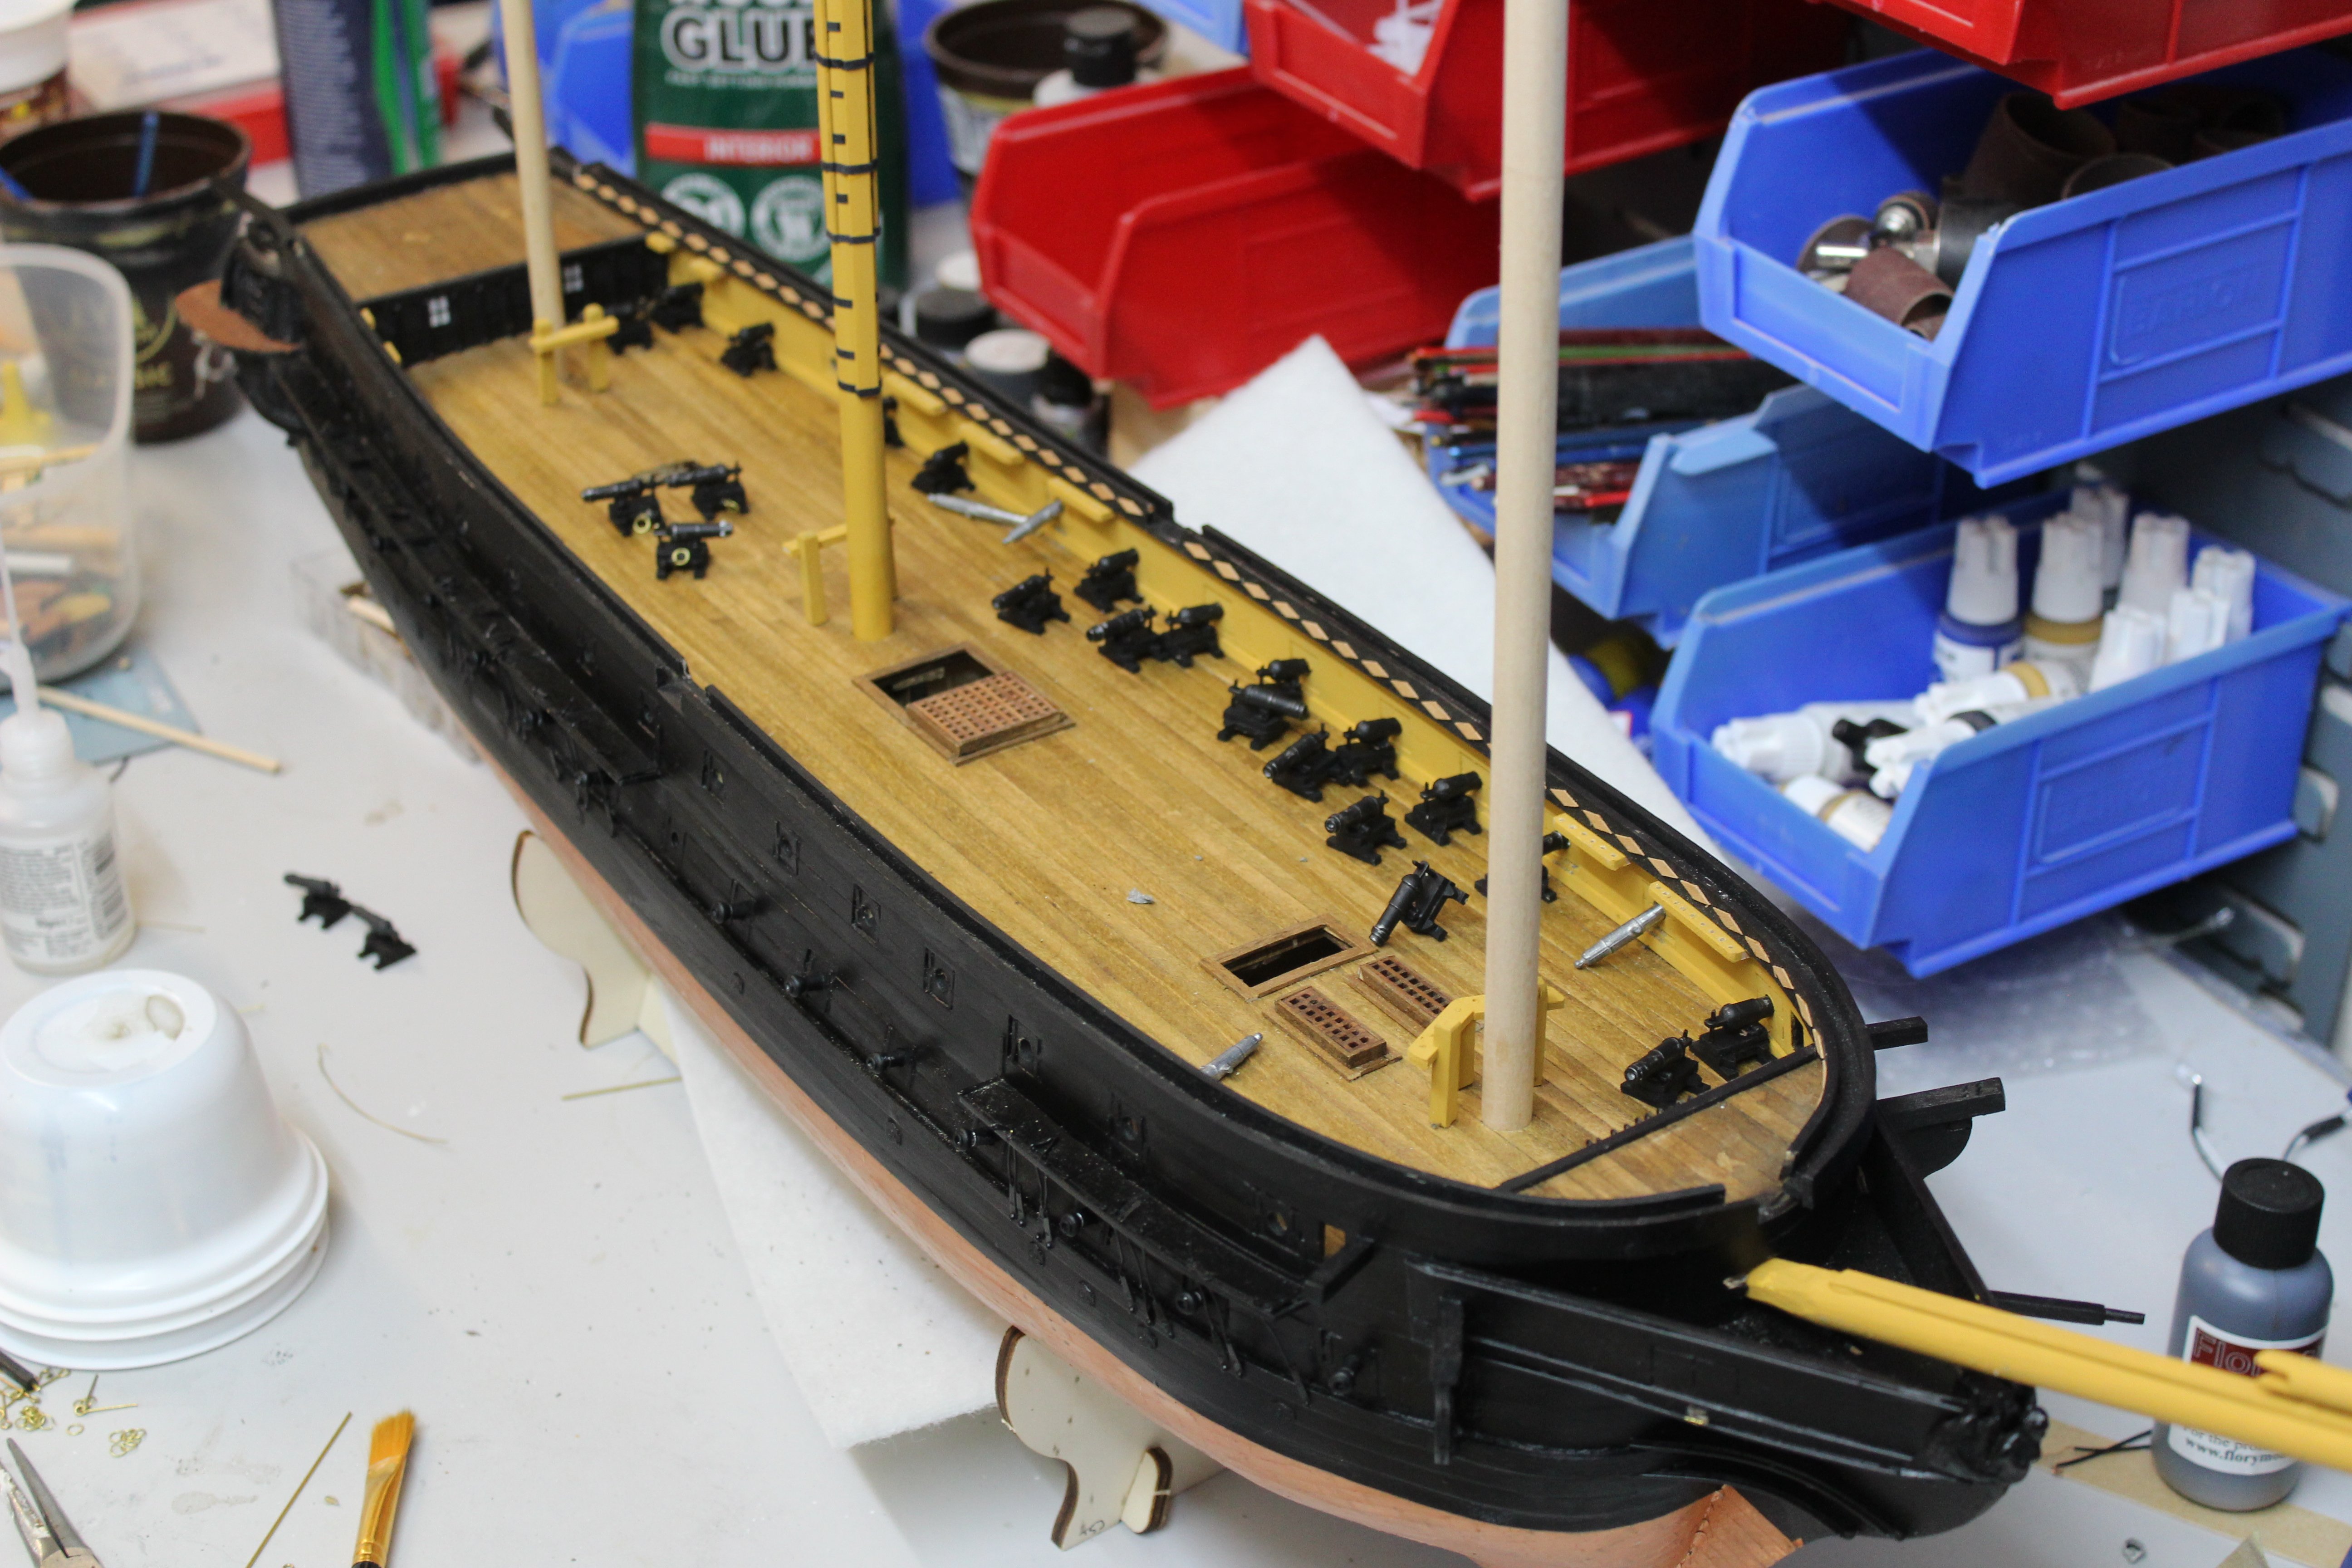
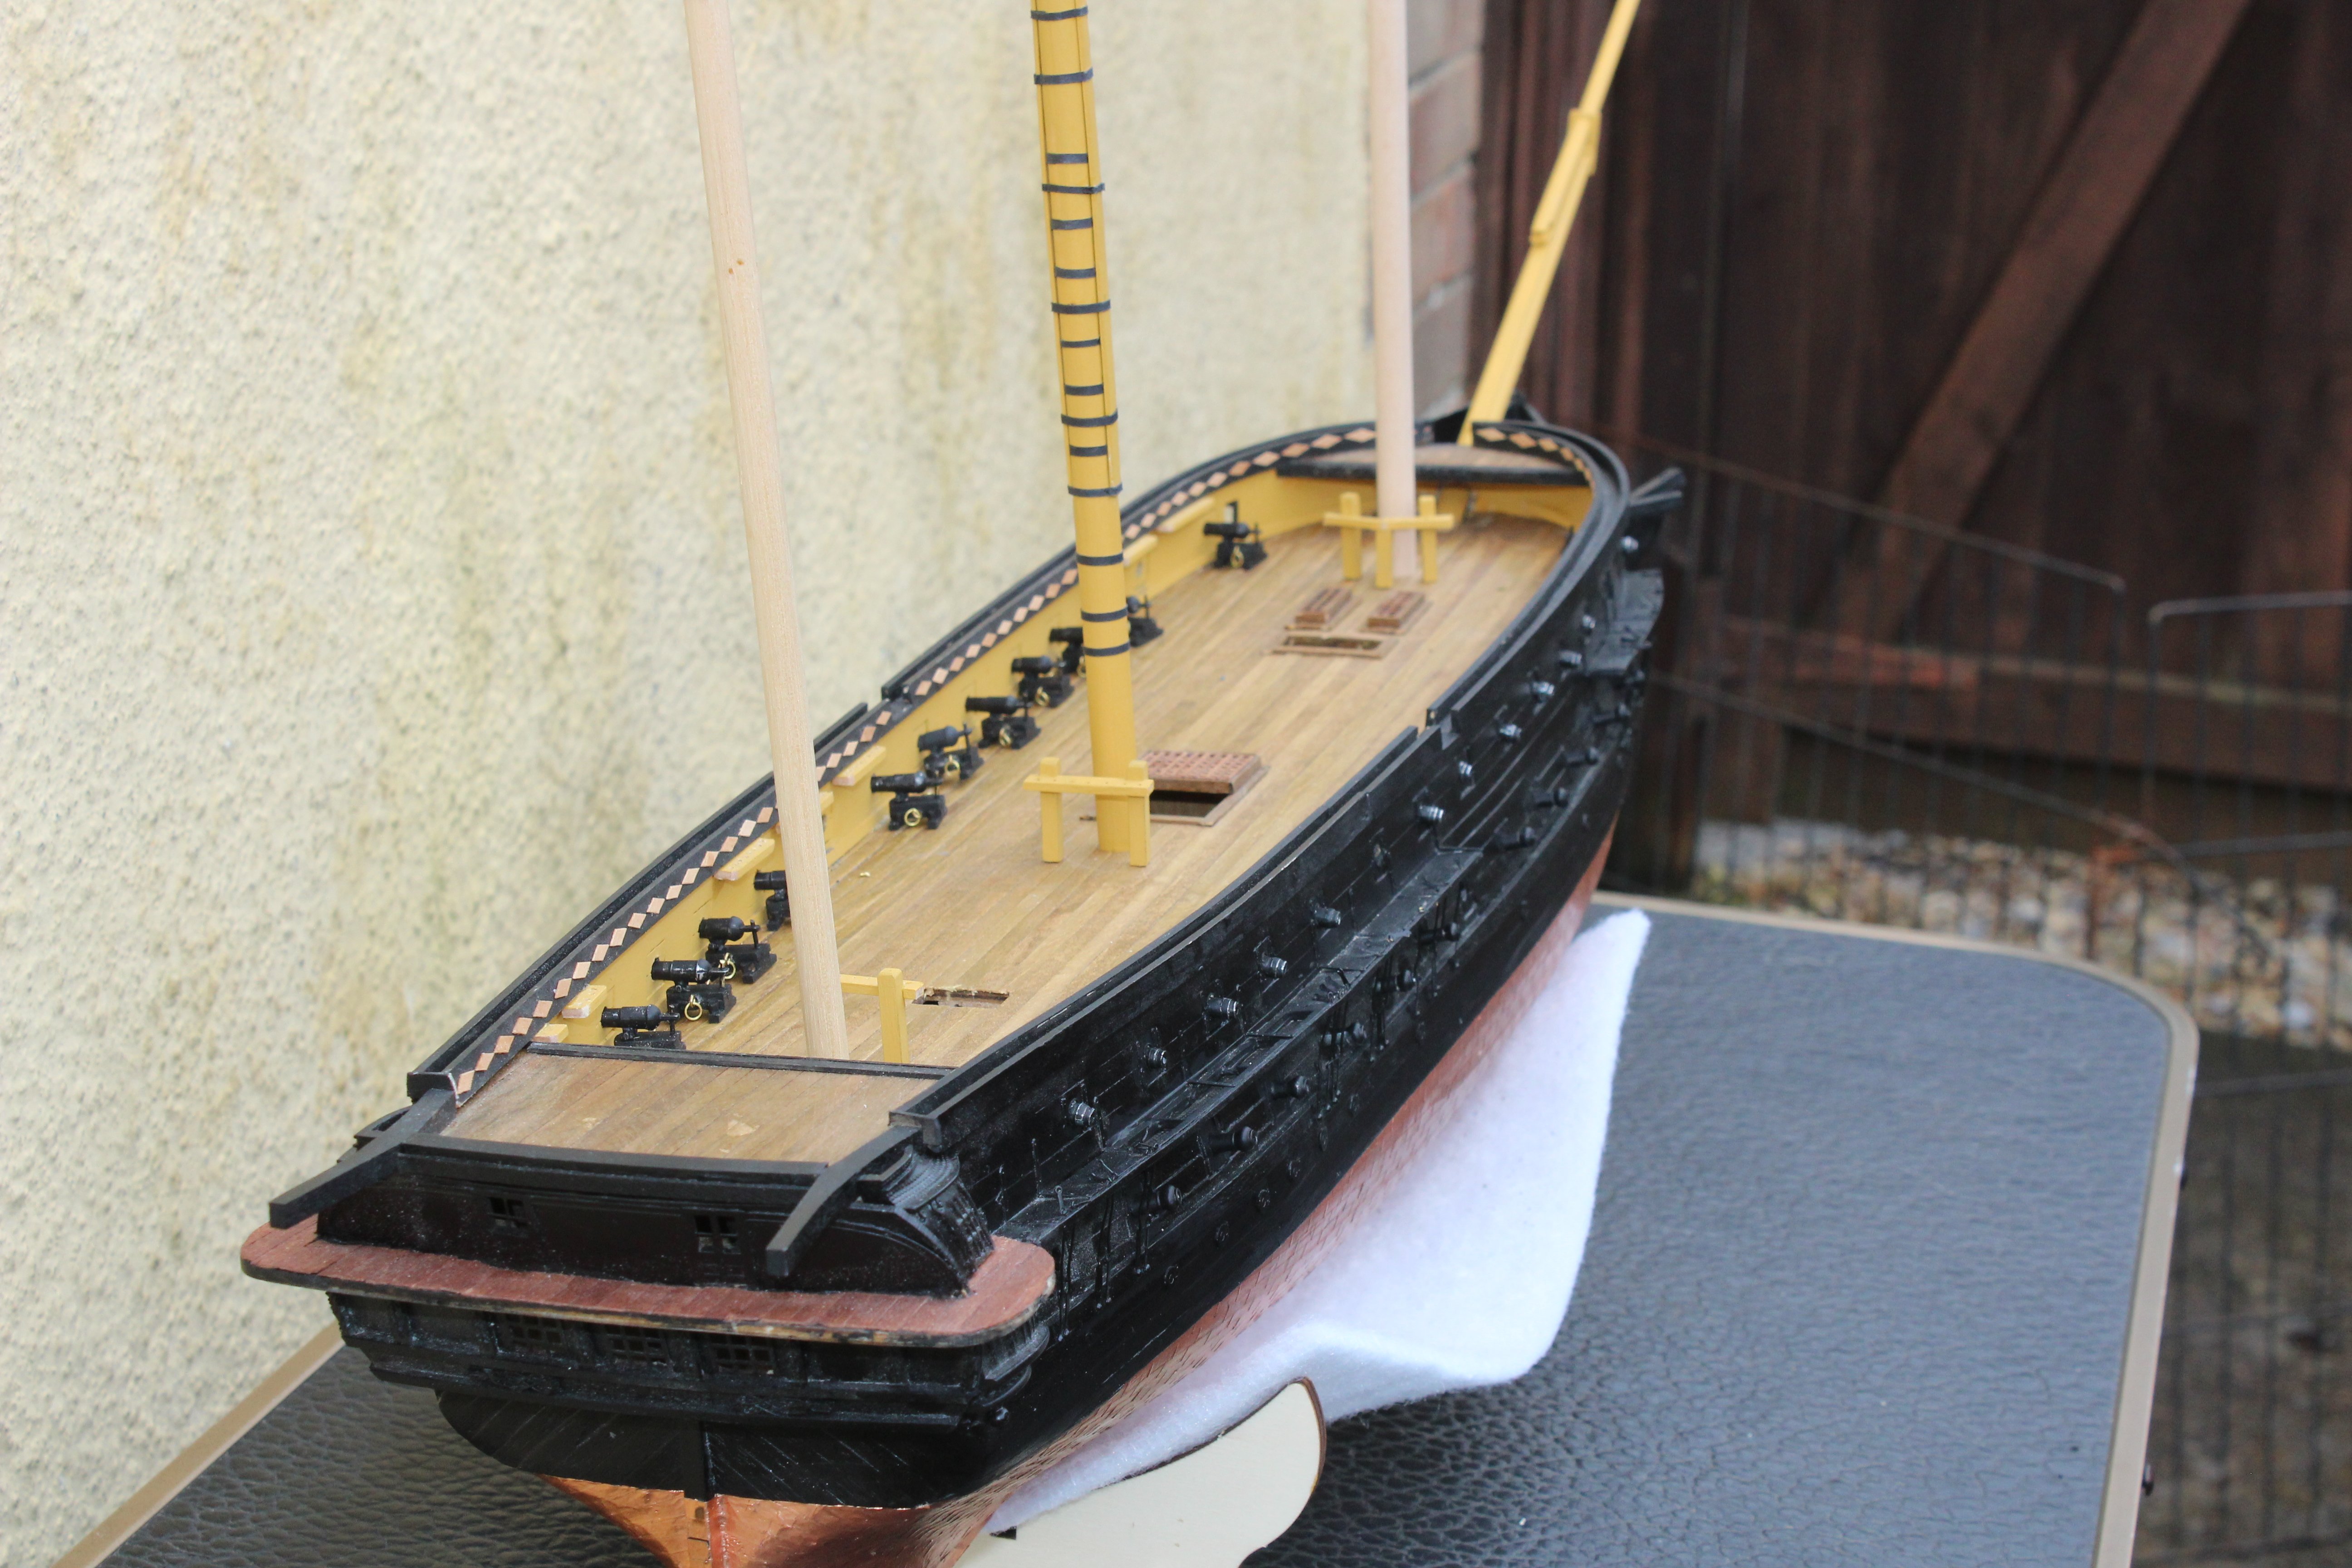
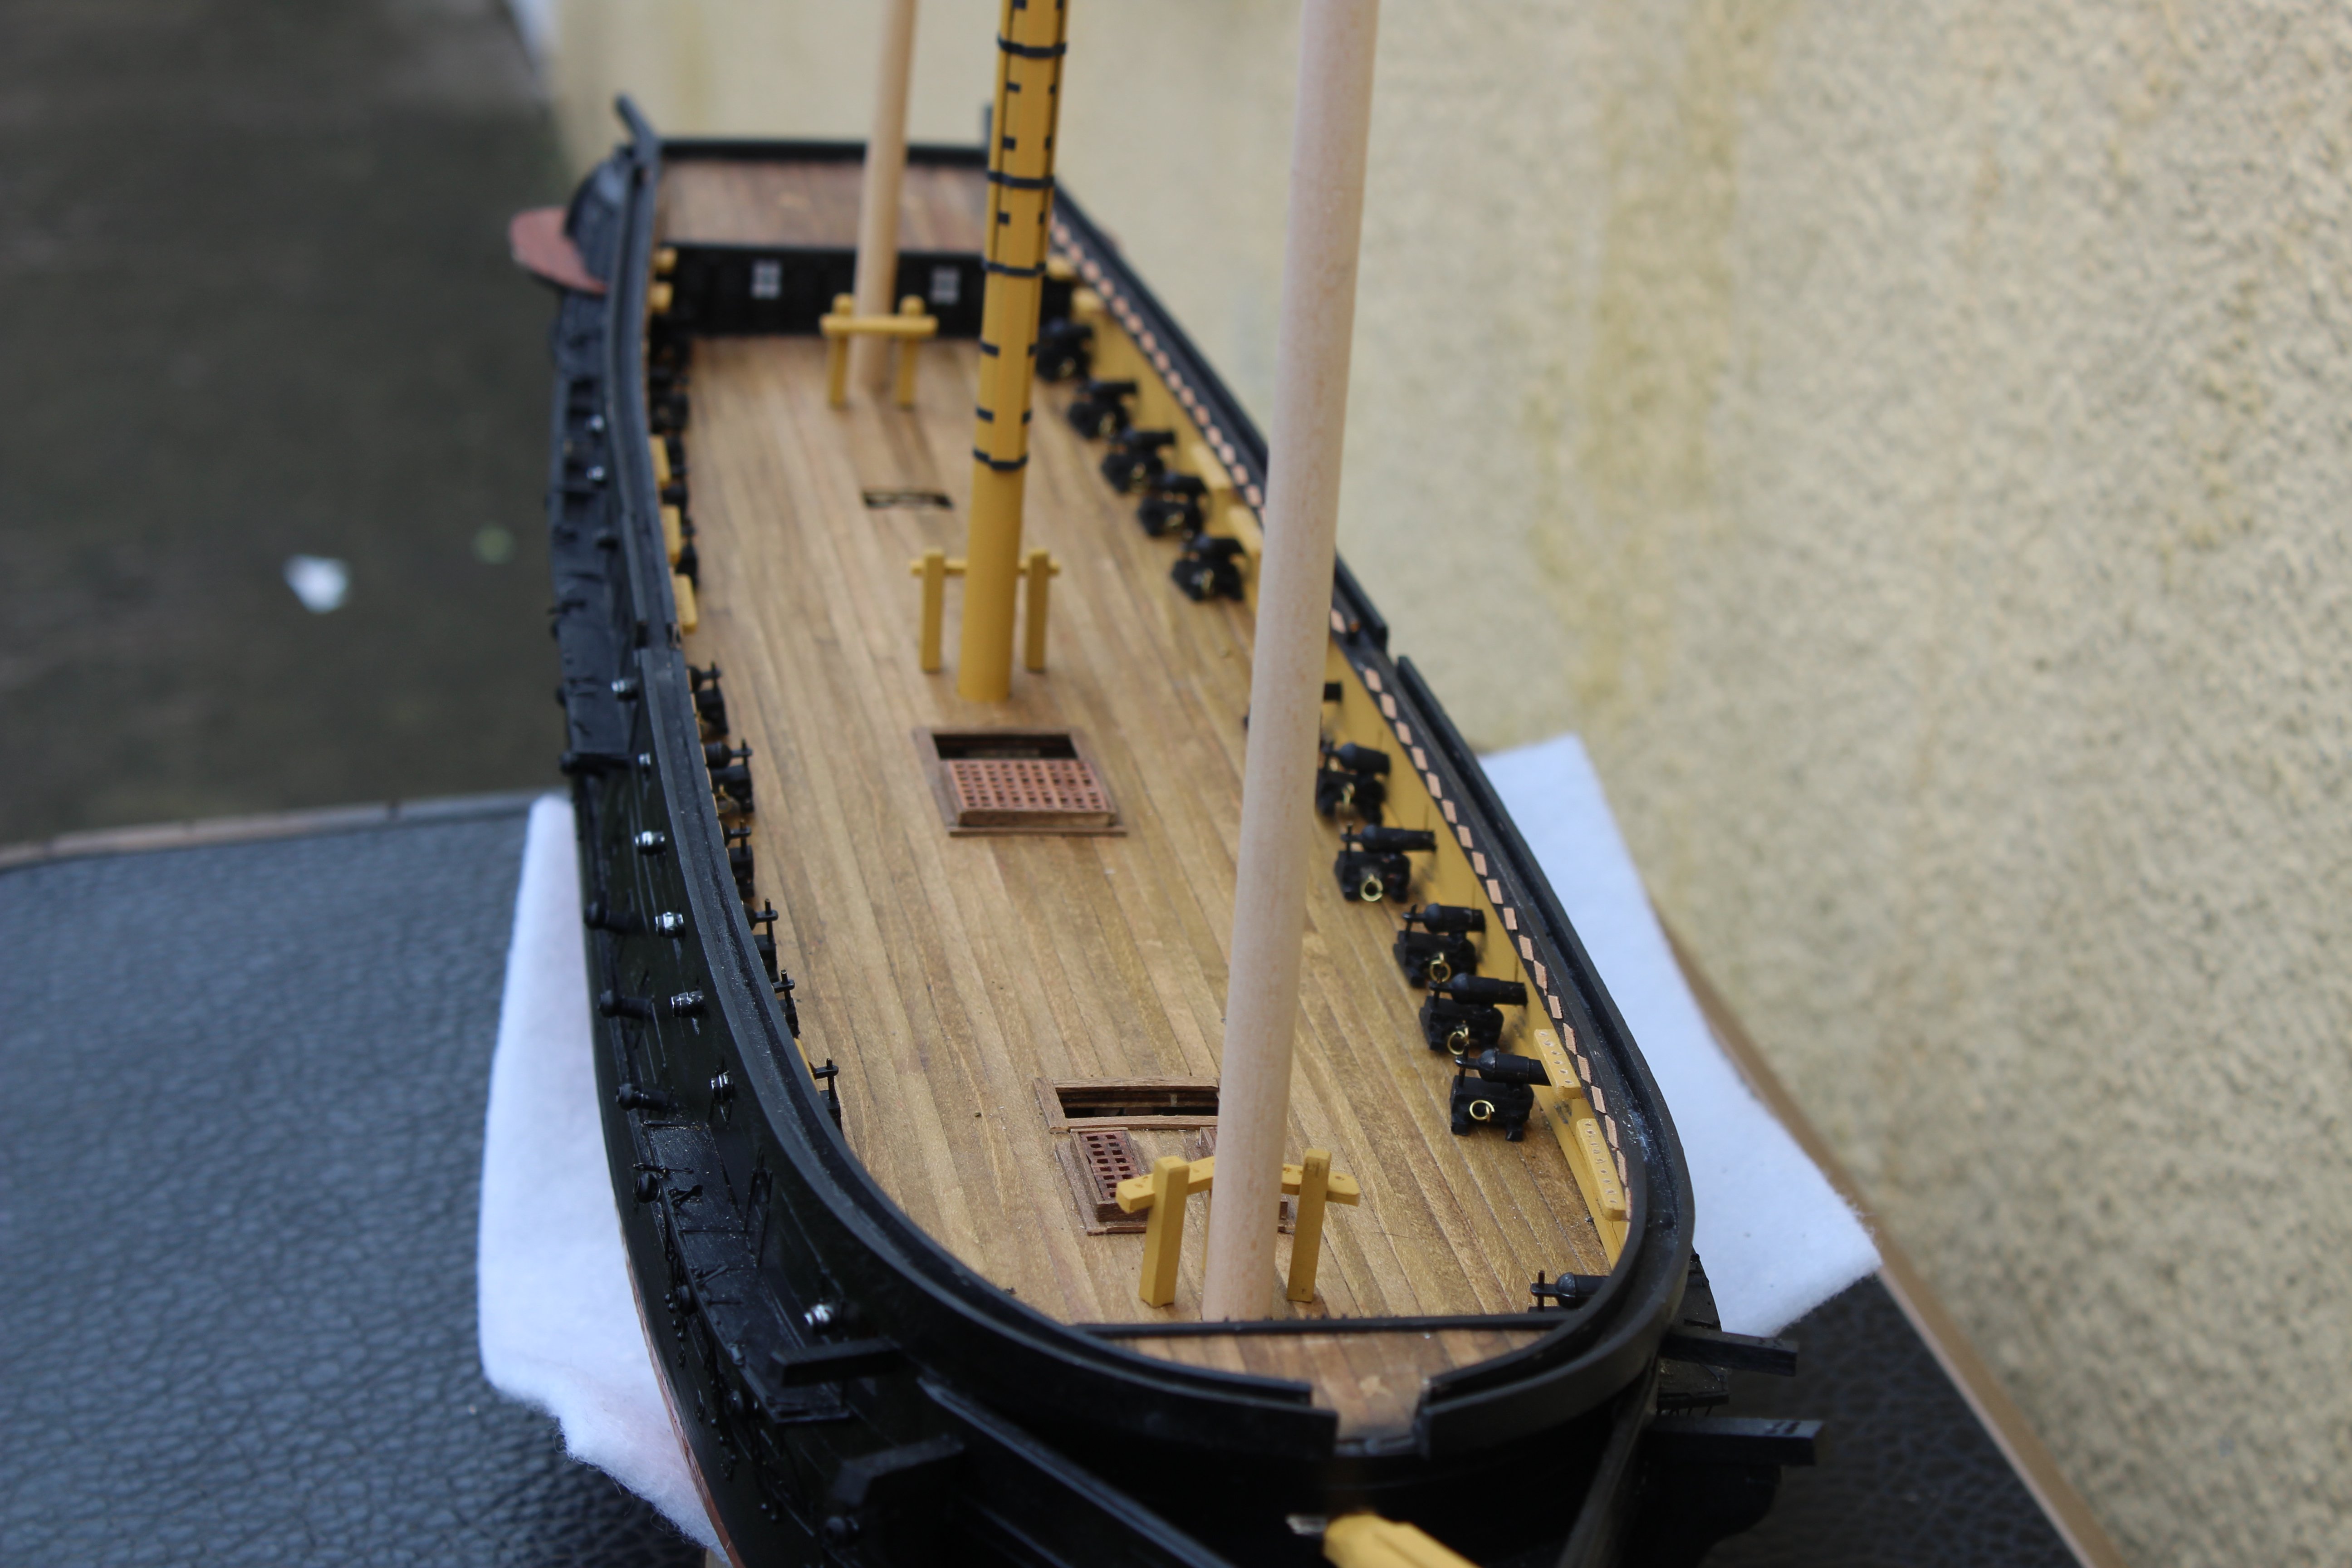
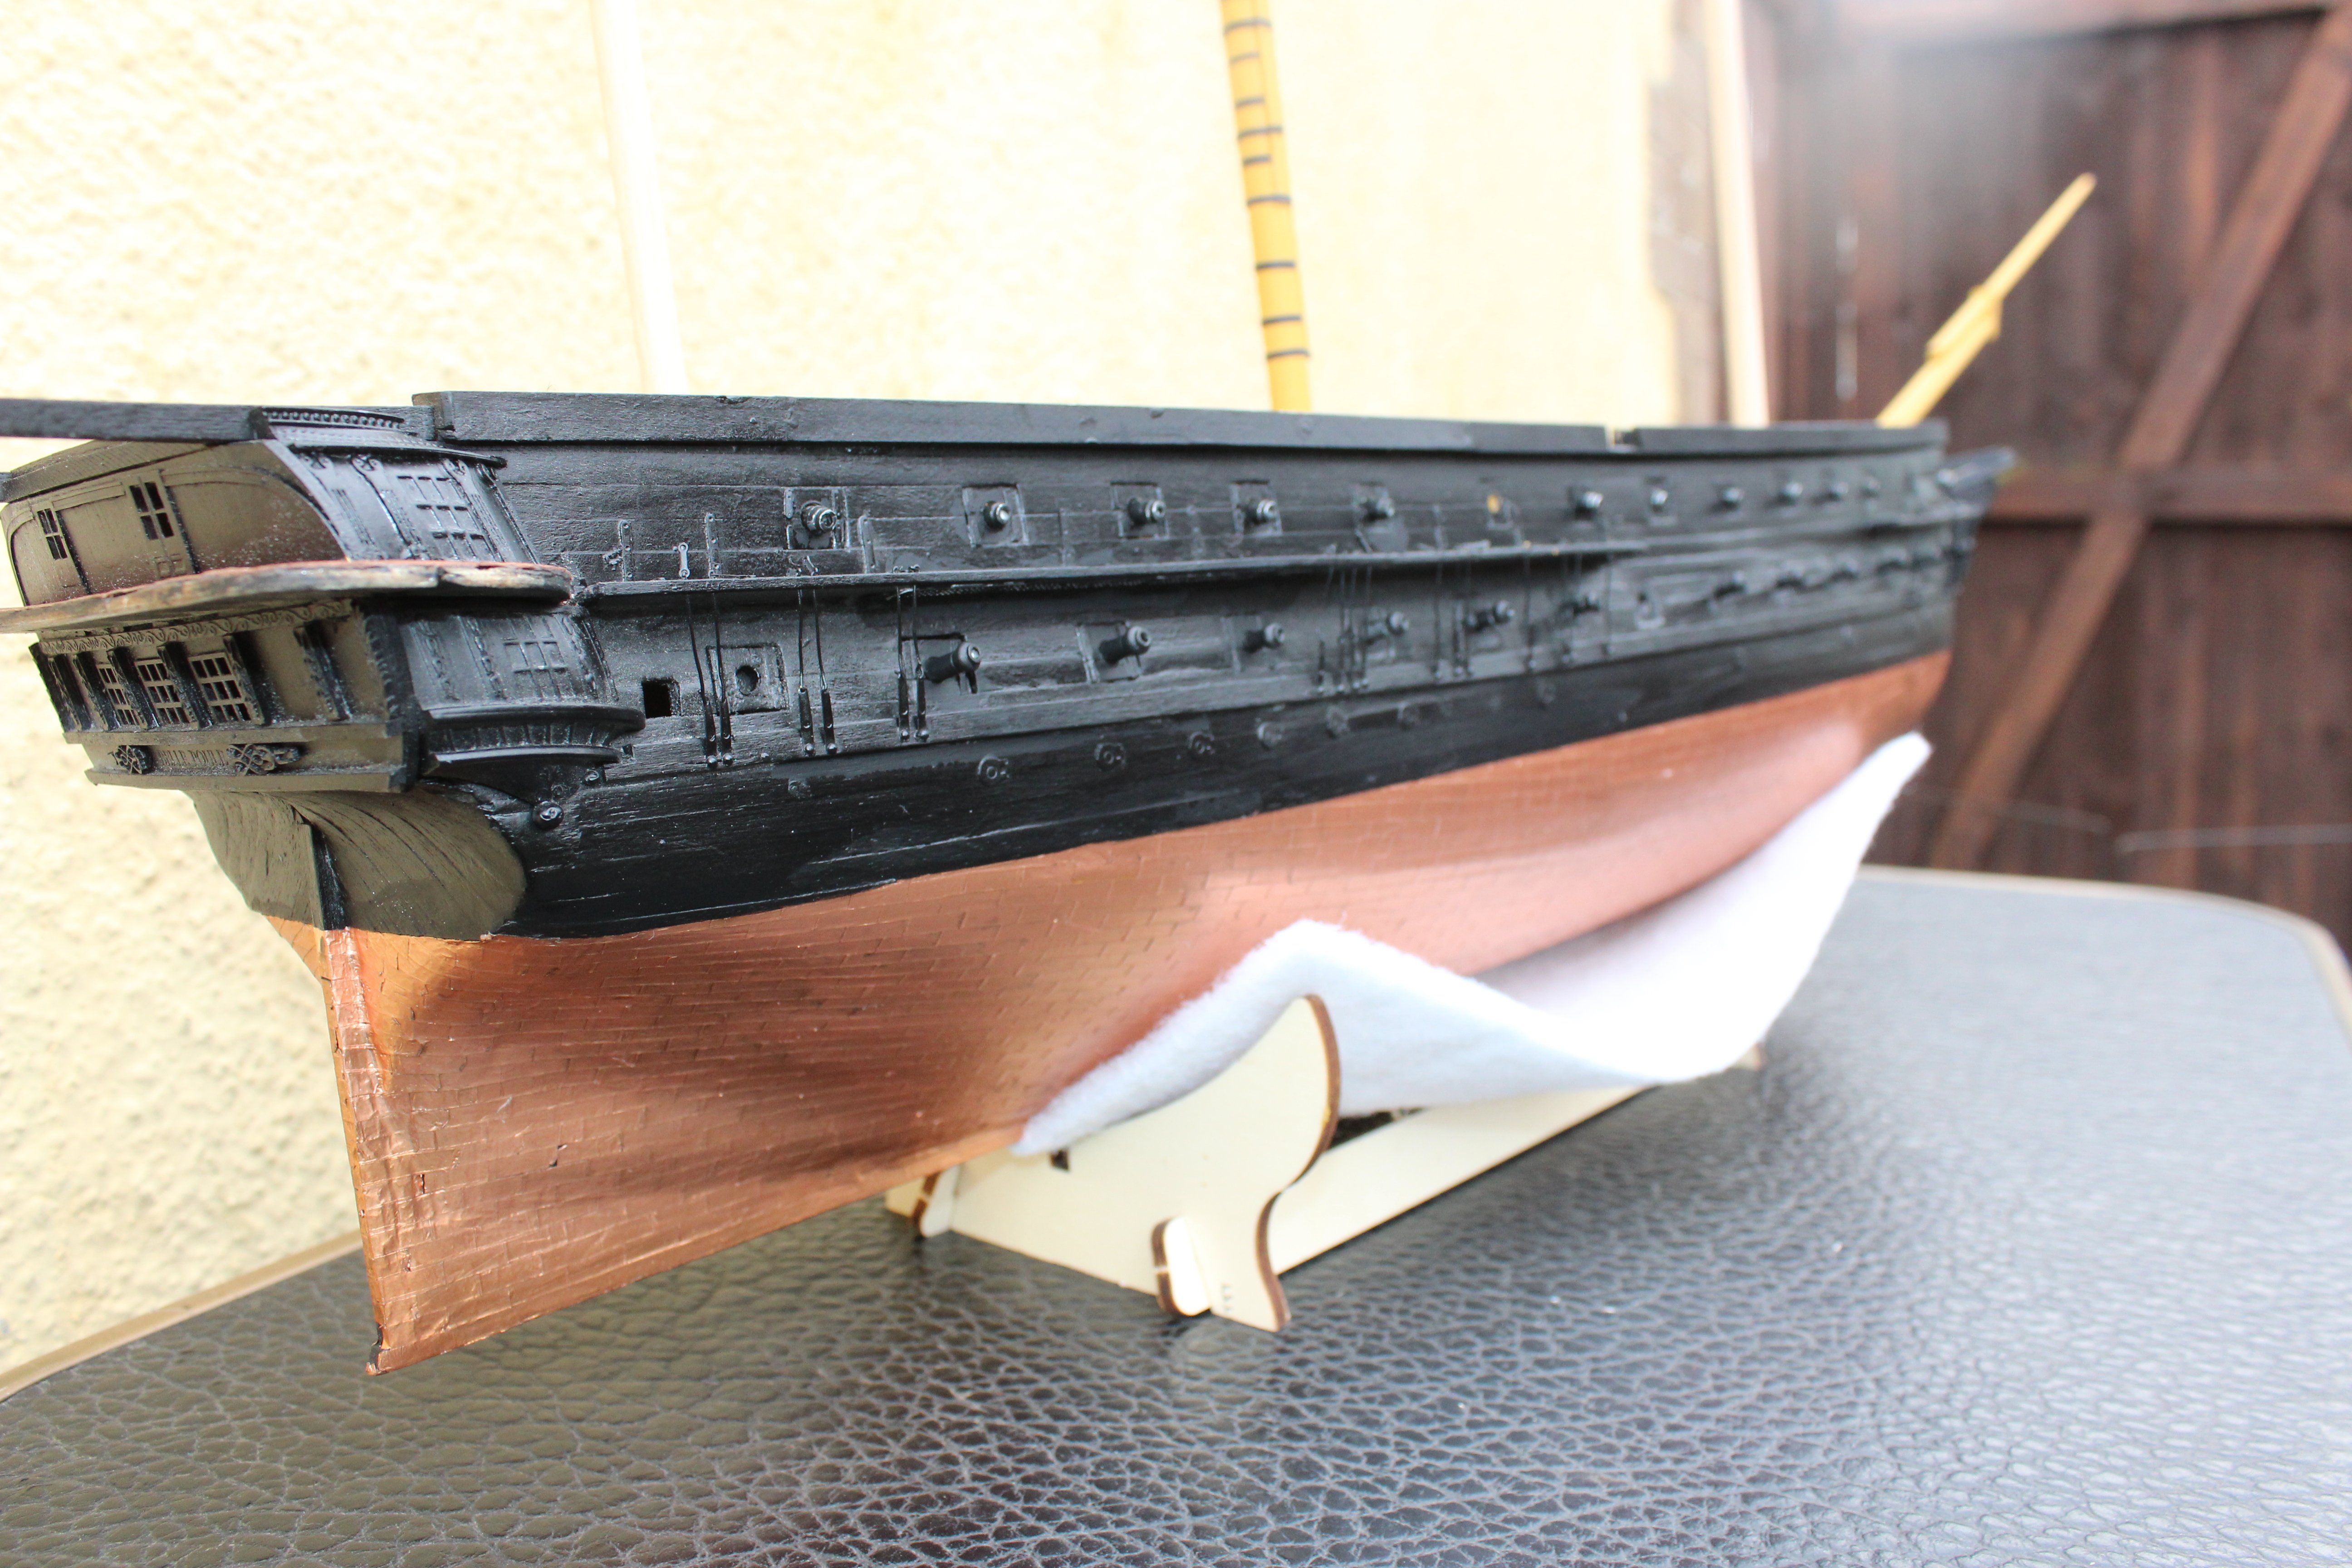
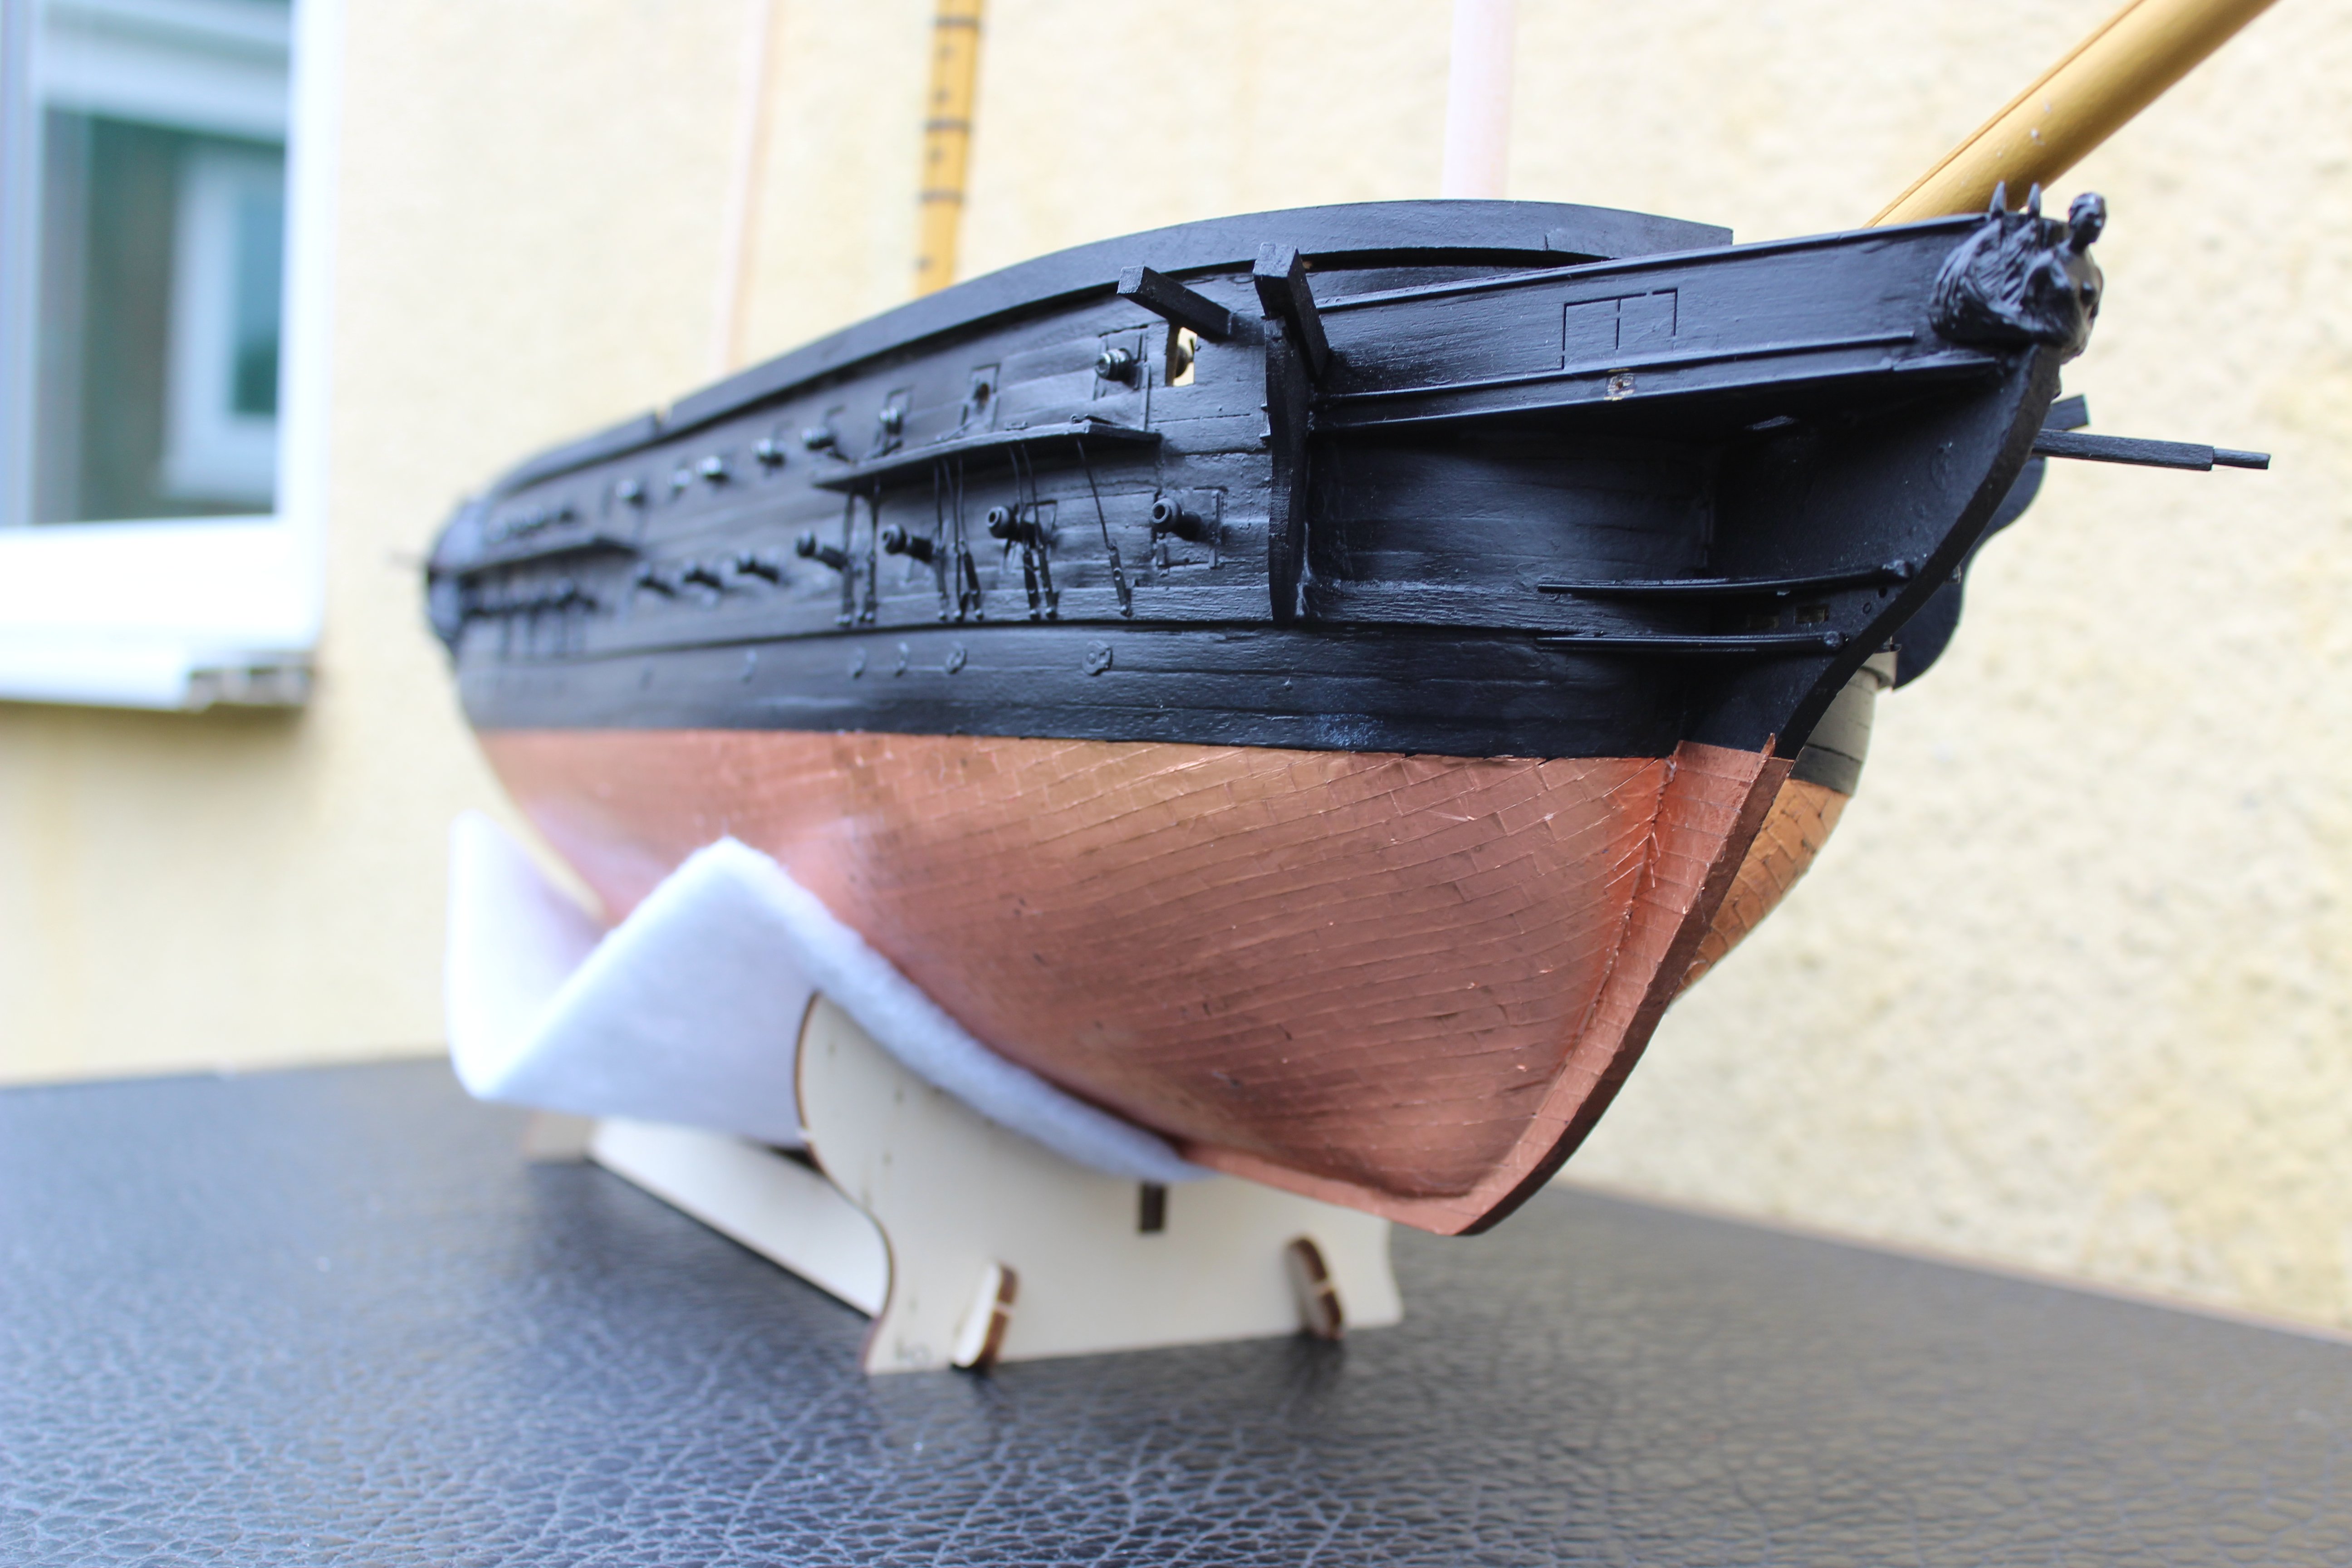
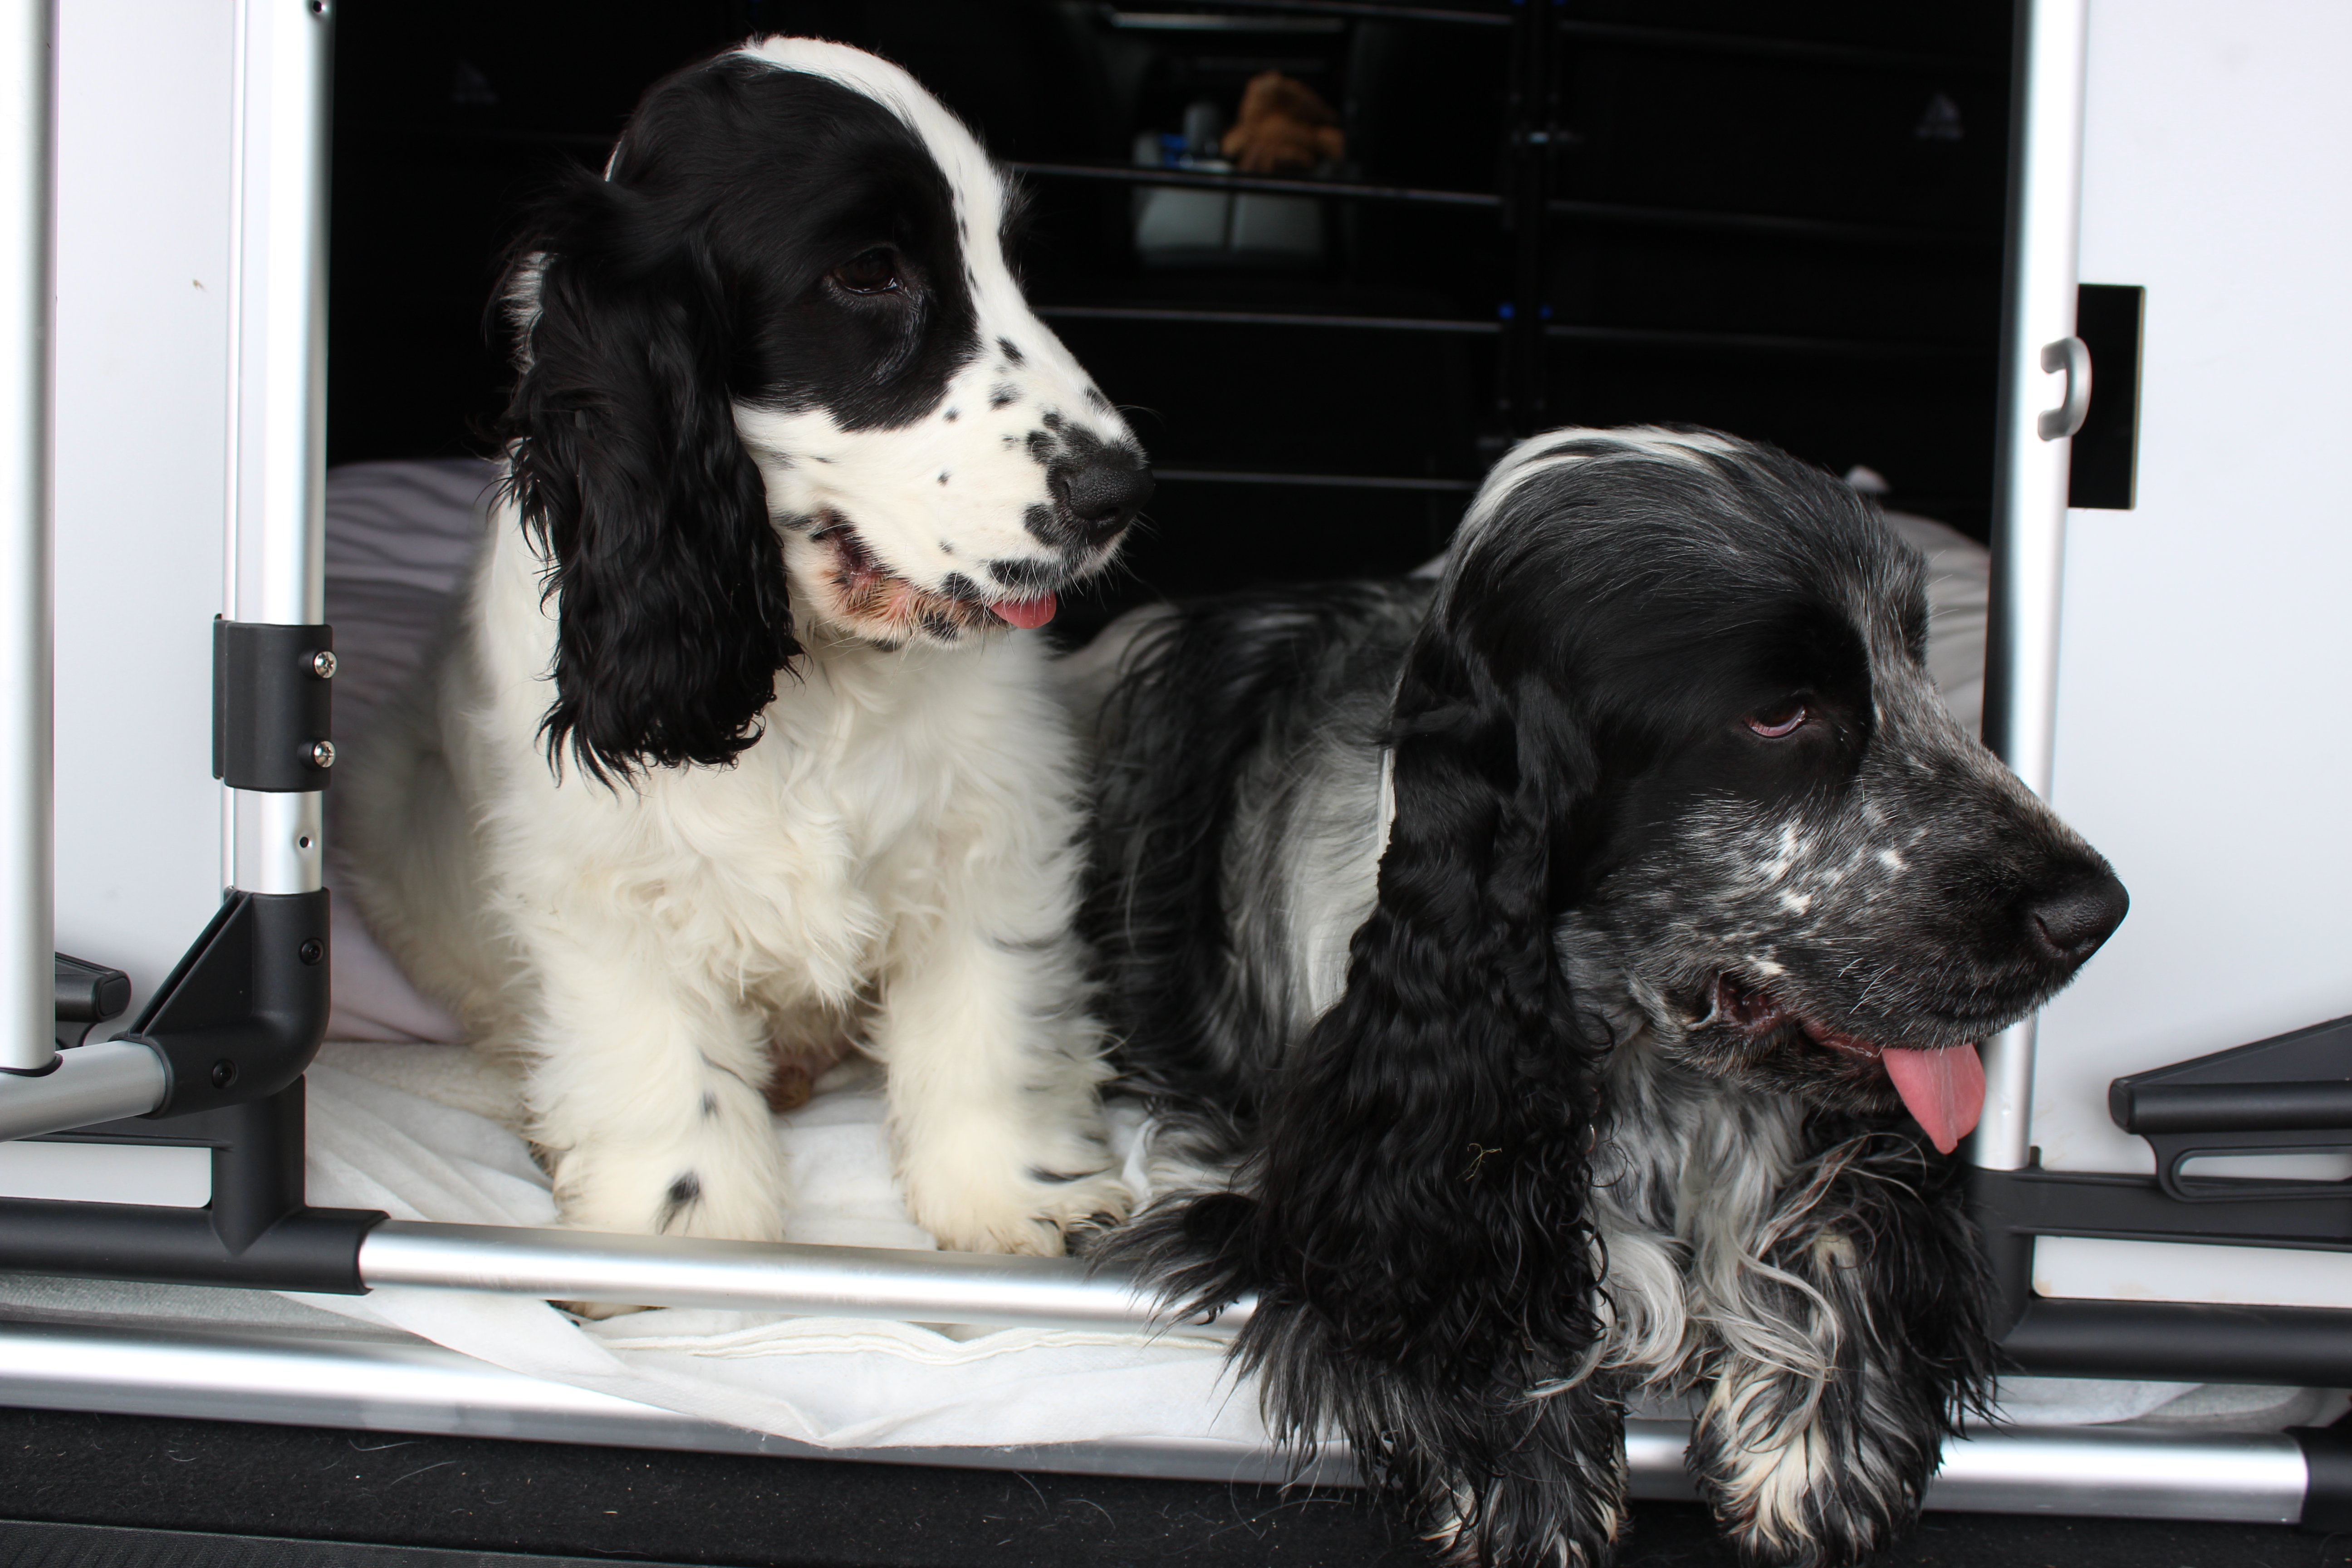
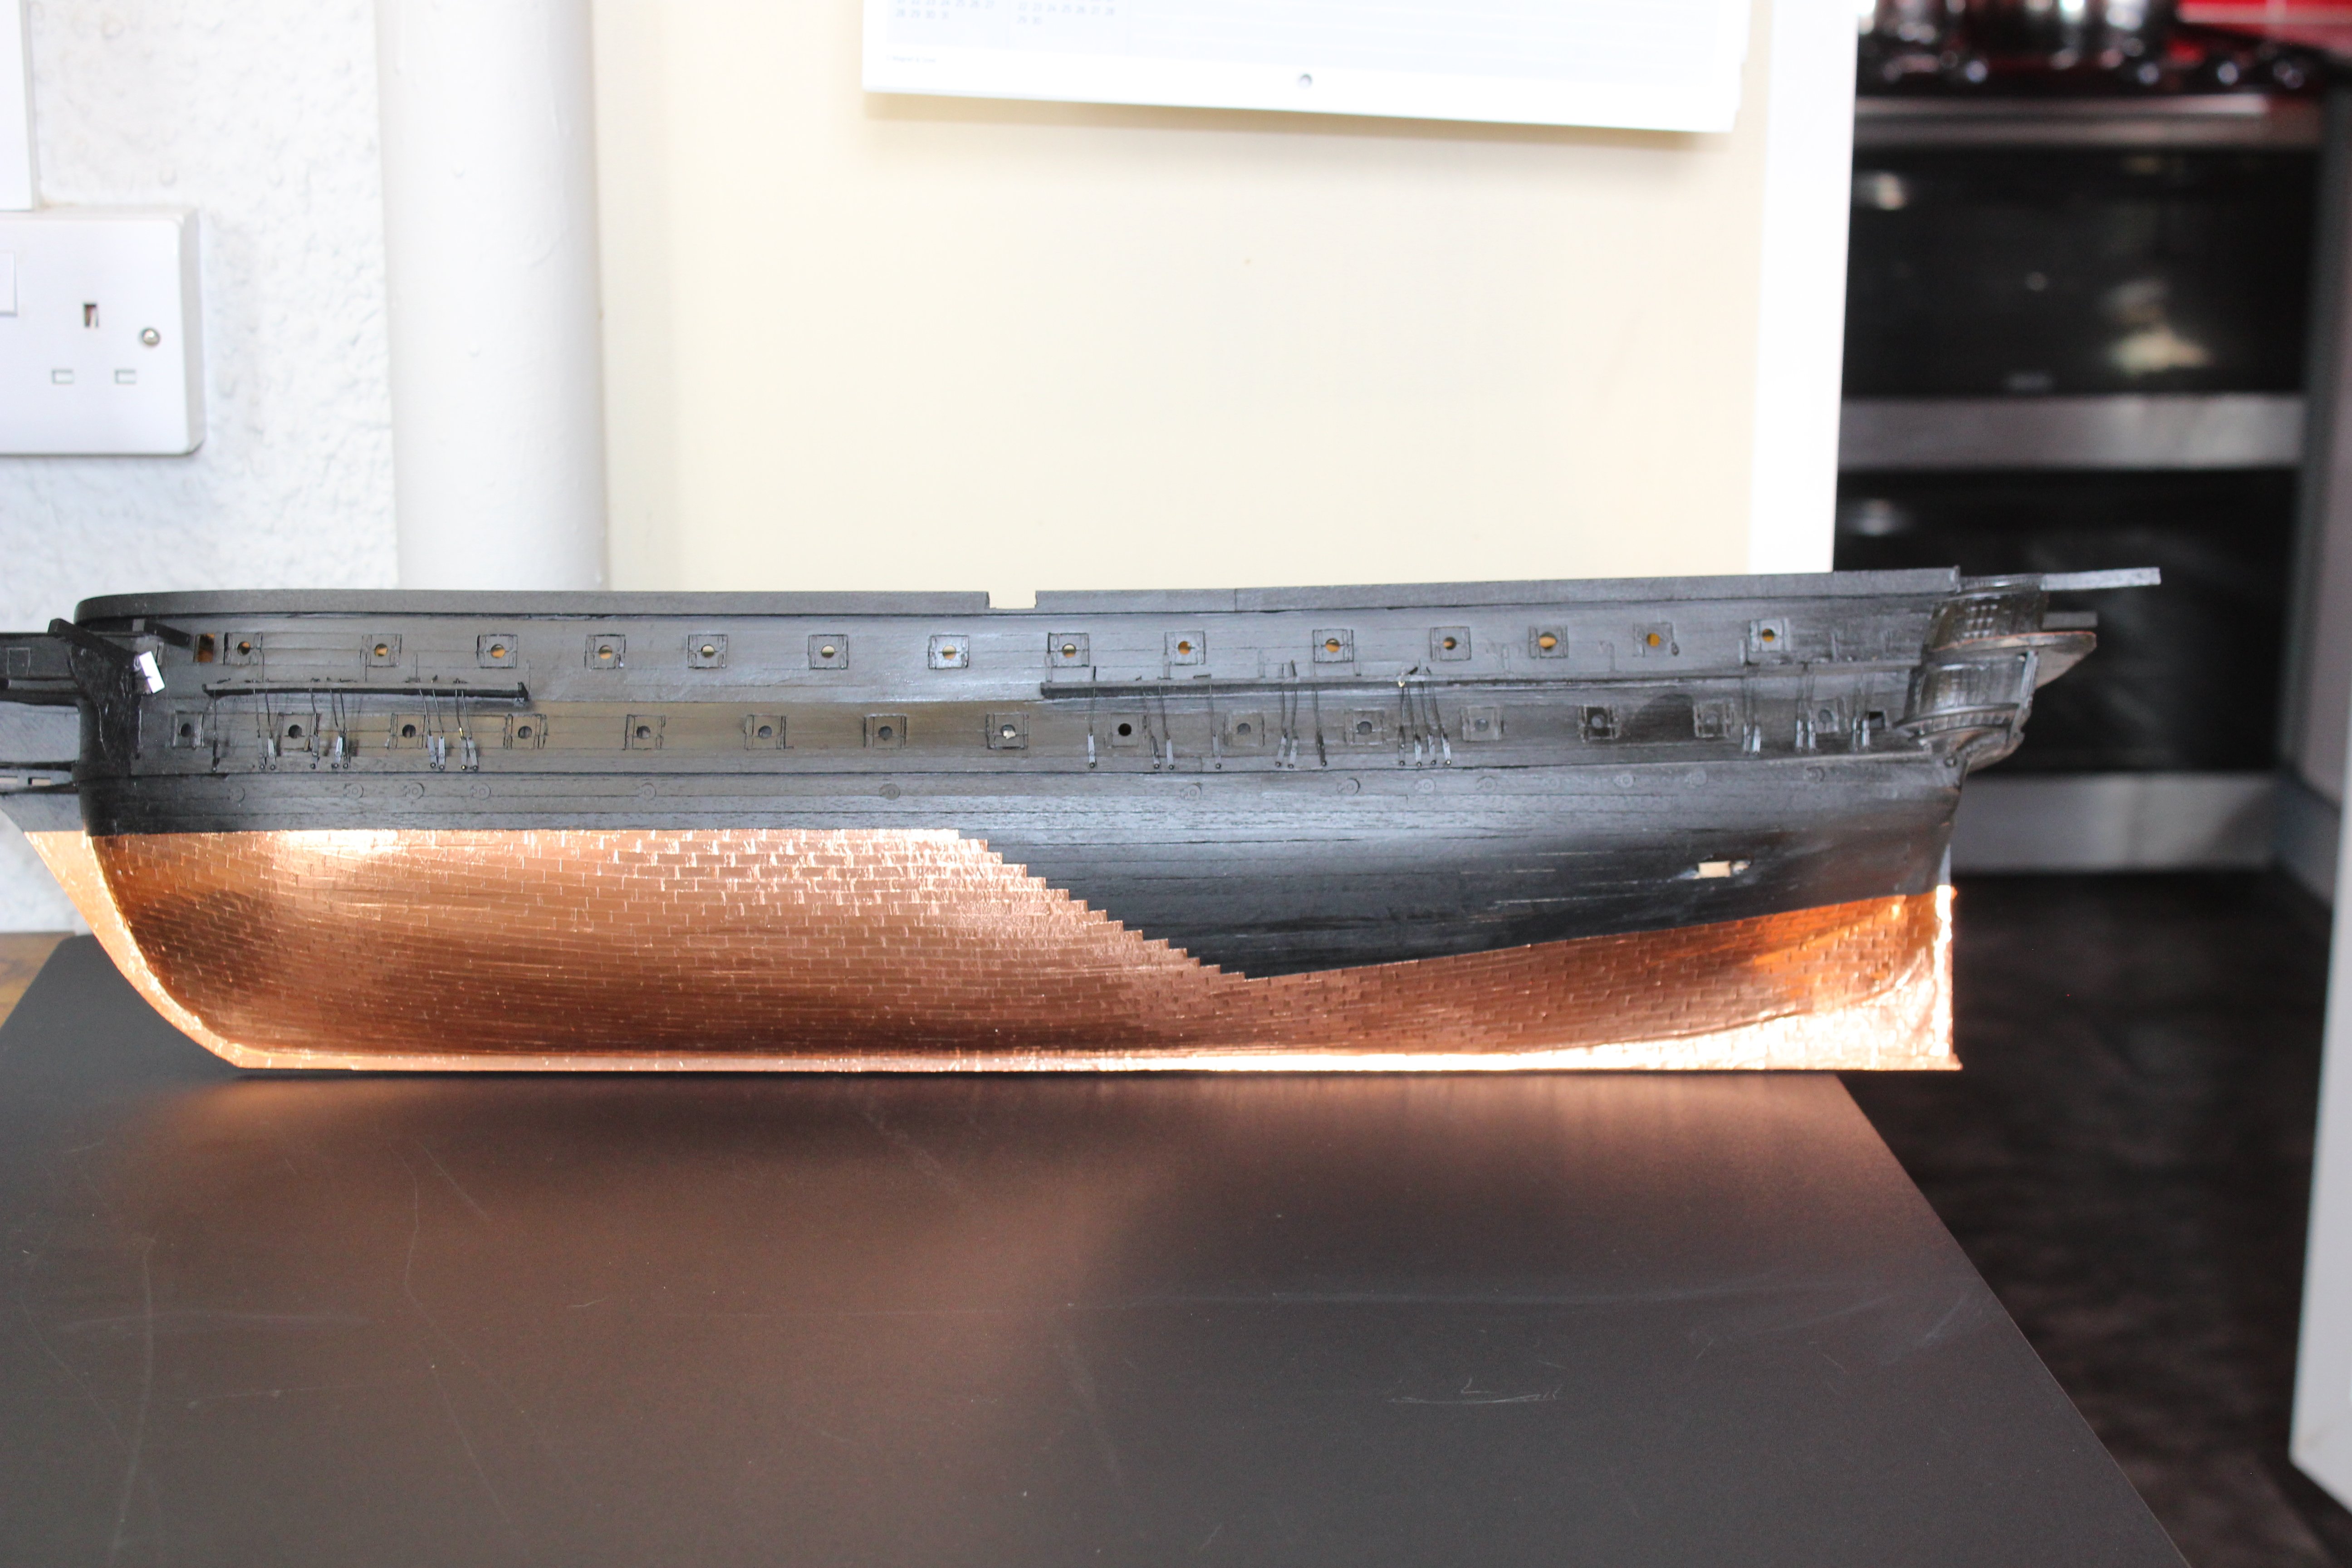
 good evening everyone im back, well i never really went away, just got lost in the mists of real life and bring two young dogs up, so apologies for those that follow me and i will be back with my regular updates and general bad model making and sillyness the copper tiling on the hull was completed, i may have undersized to tiles, and seam to take ages to complete, sealed with a matt acrylic varnish in tried to make her up as in the museum photo, with guns run out and lids shut, but the cannom muzzels are to thick to fit through the port, so i put each barrel in a drill and turn them on a file after and before they fitted ok, but were then not high enough (1.5mm) so i fitted some feet on, and a few brass rings to break up the amount of black this hull has the last few photos were taken yesterday, with the lower main mast done, but that brings her UpToDate. the bois Odin on the left 5 months and Apollo 14 months
.thumb.JPG.2411c83dcbc90a582abaebe74d171de1.JPG)
.thumb.JPG.a7799e2b165d3a444027aa6bc0e53cb4.JPG)
.thumb.JPG.9d4b0dbc8e4503c1d26c3f5d0ee01535.JPG)


- 62 replies
-
- 13
-

-
- belle poule
- OcCre
- (and 1 more)
-
the sizes given in the email reflect those of the 1/200 trumpeter American battle ship

-
Morning Chris, its good to be back
-
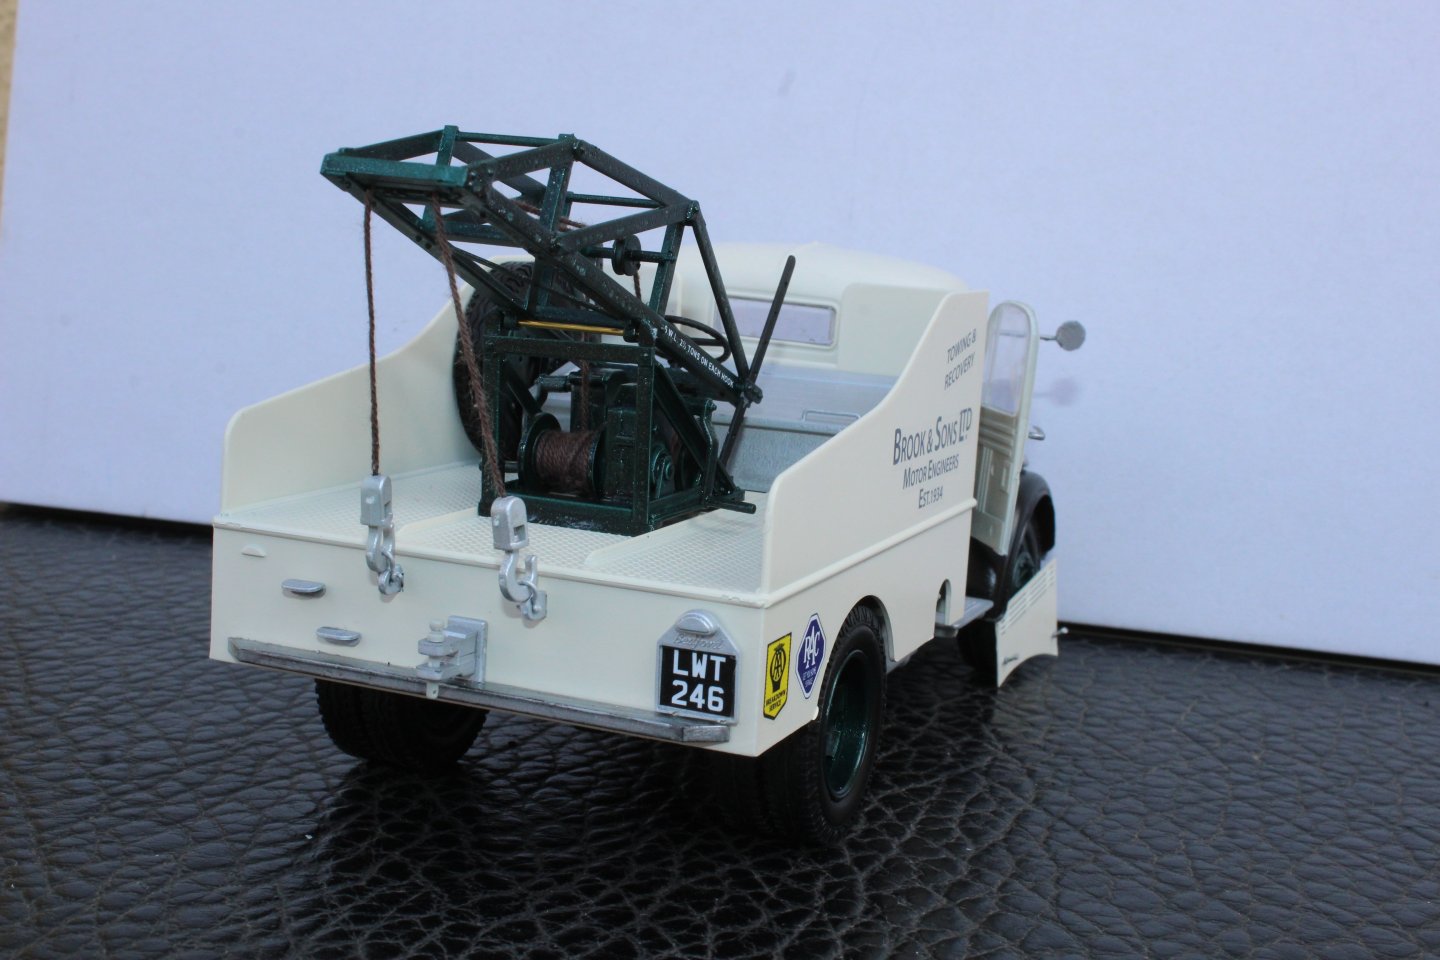
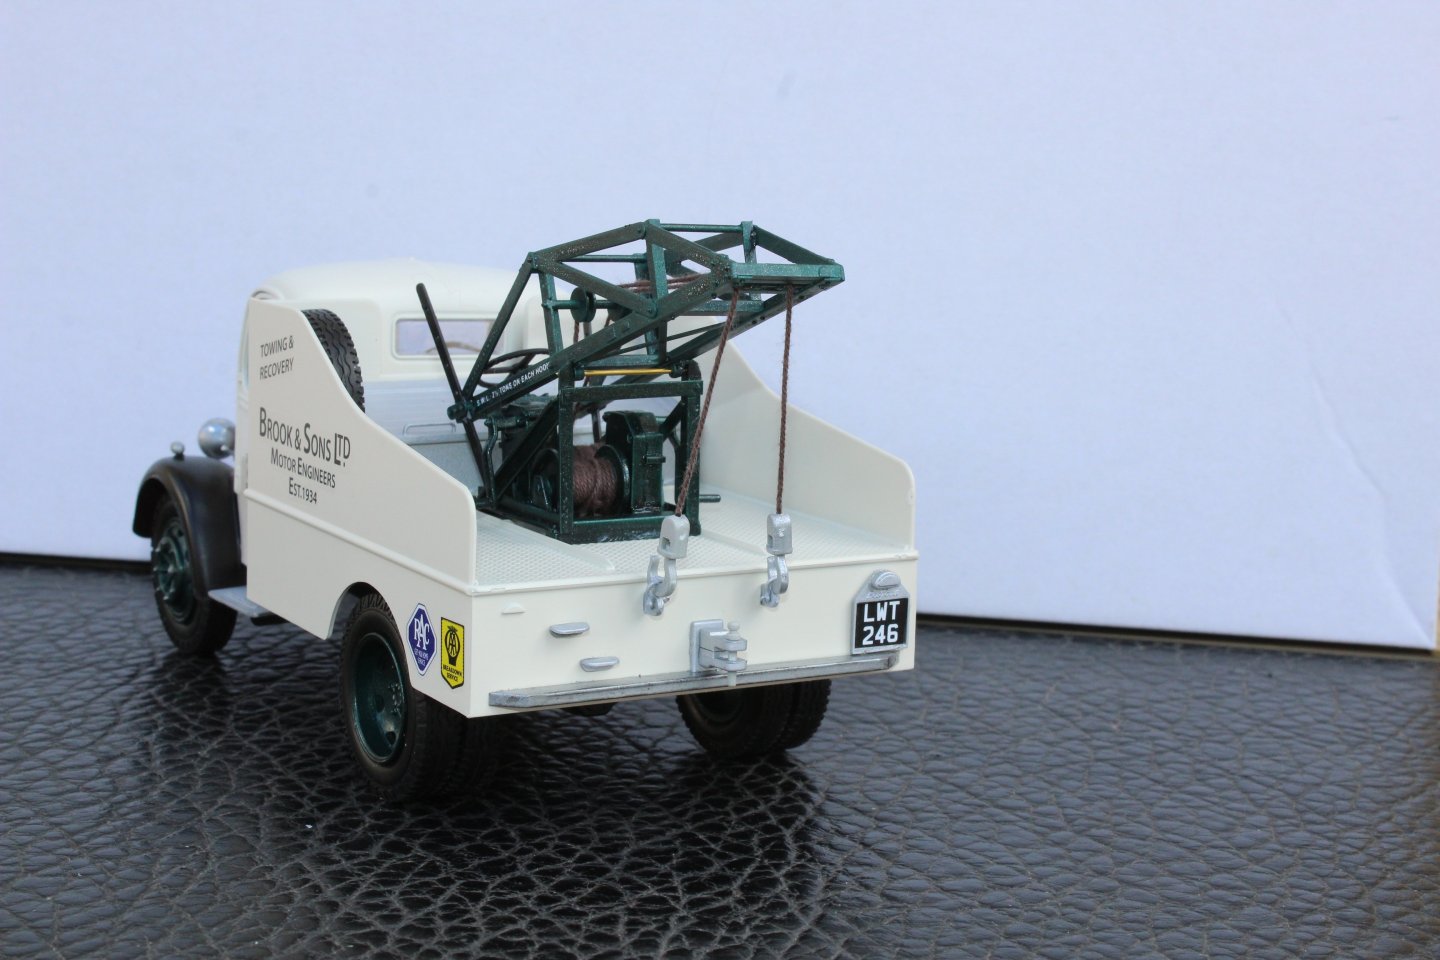
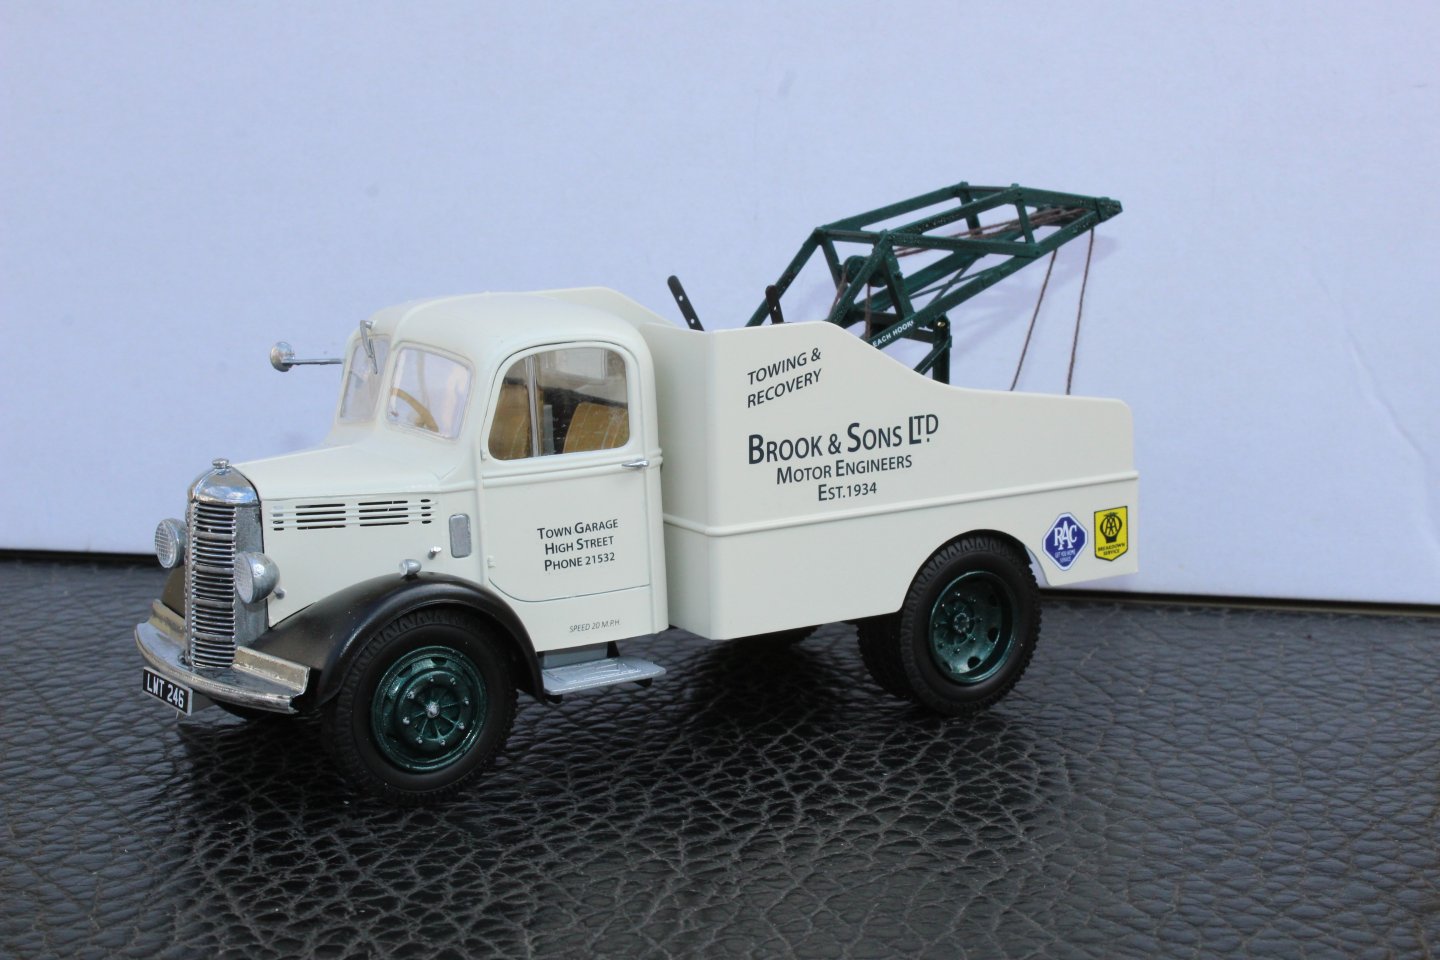
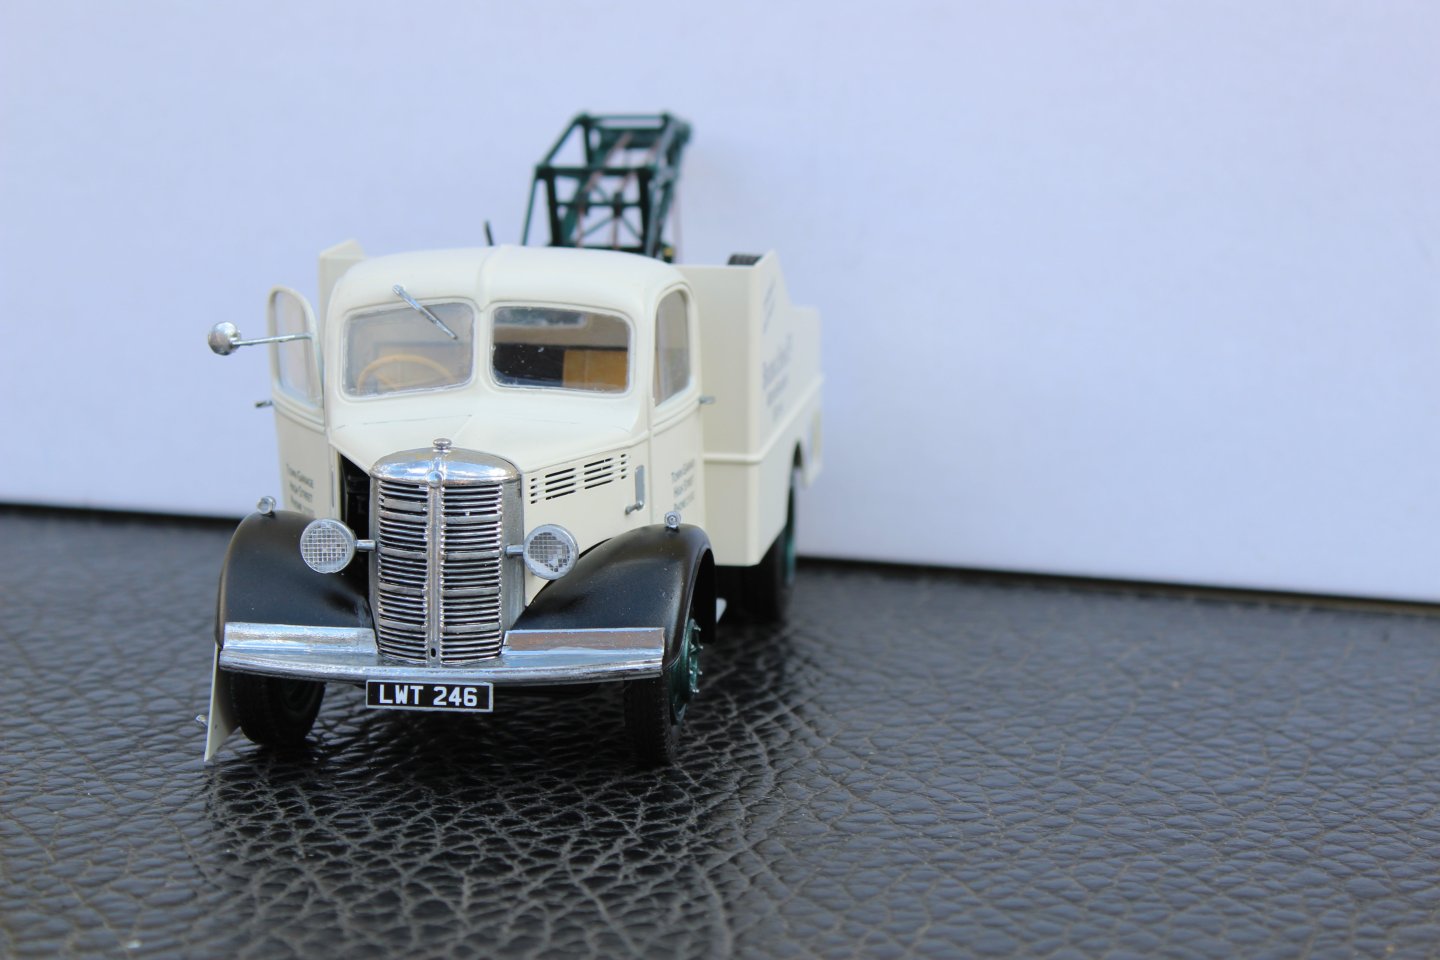
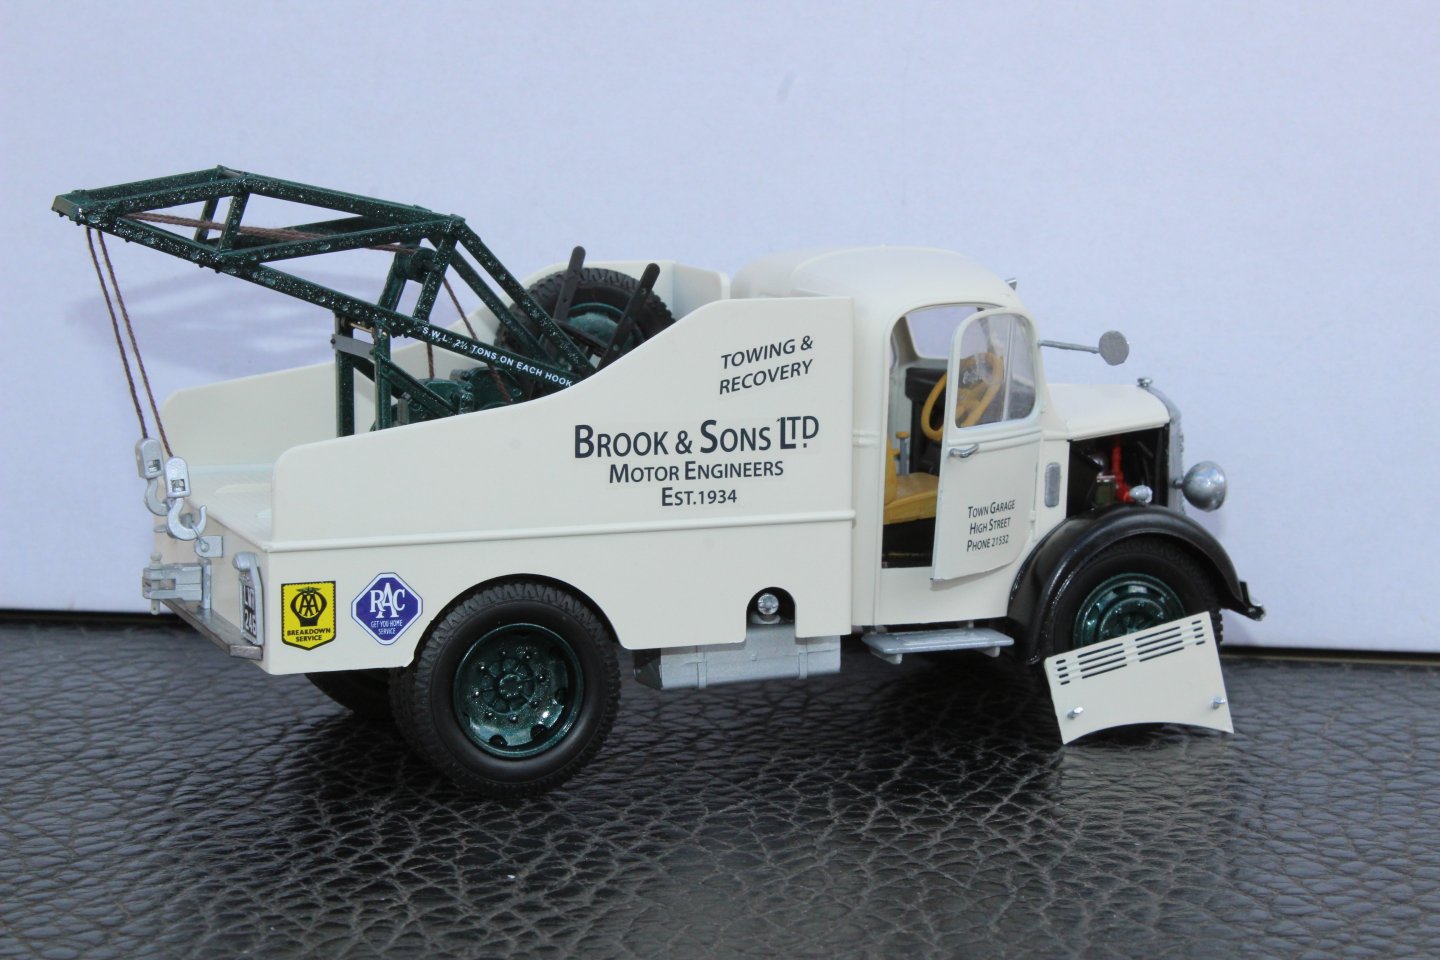
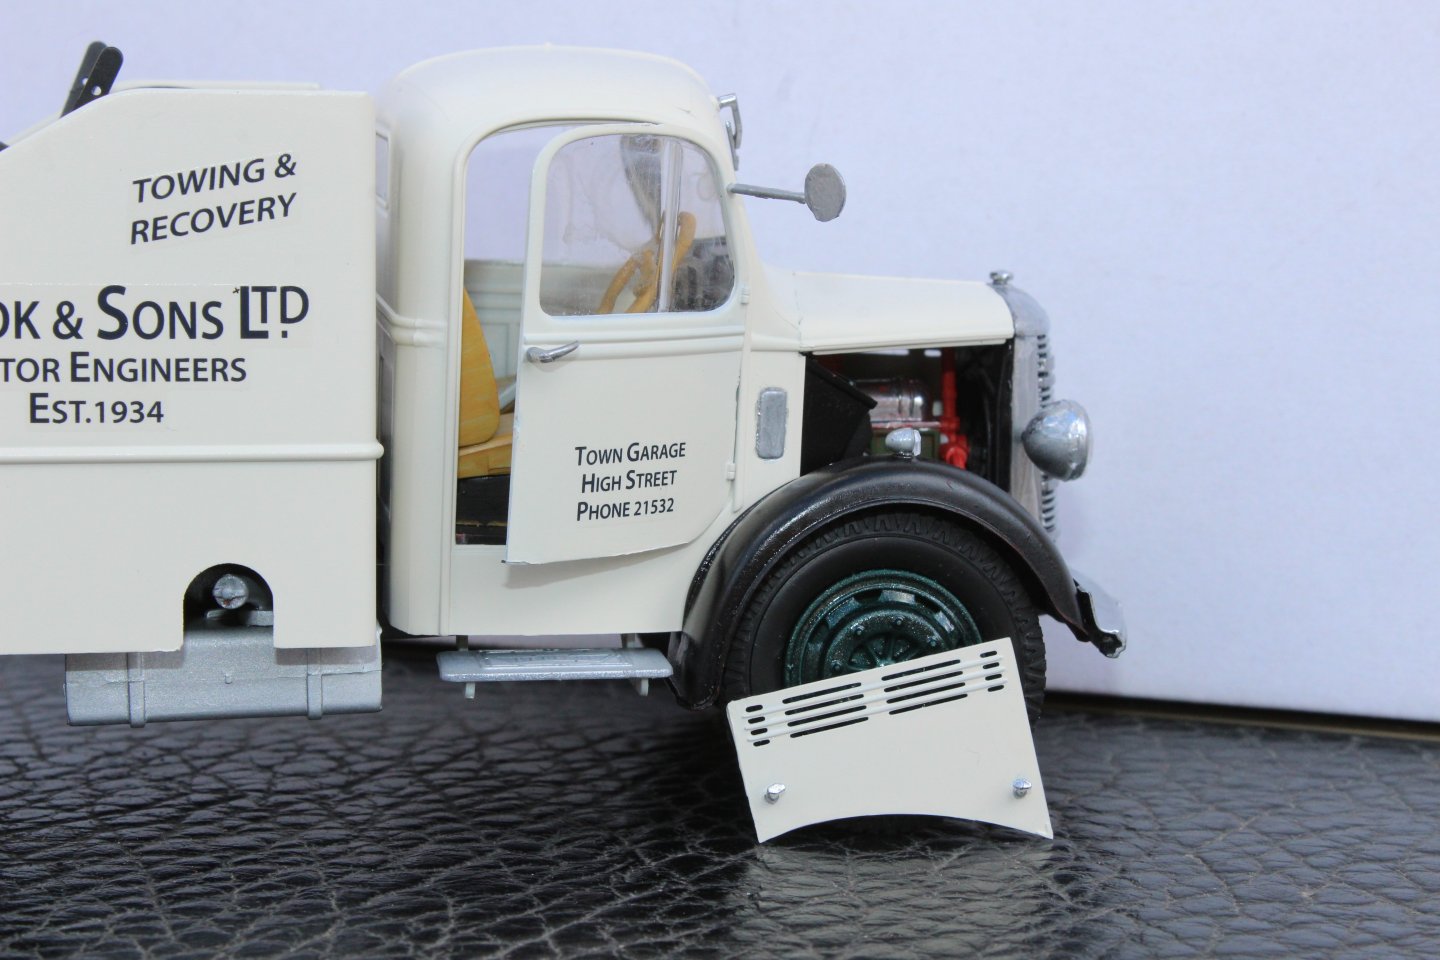
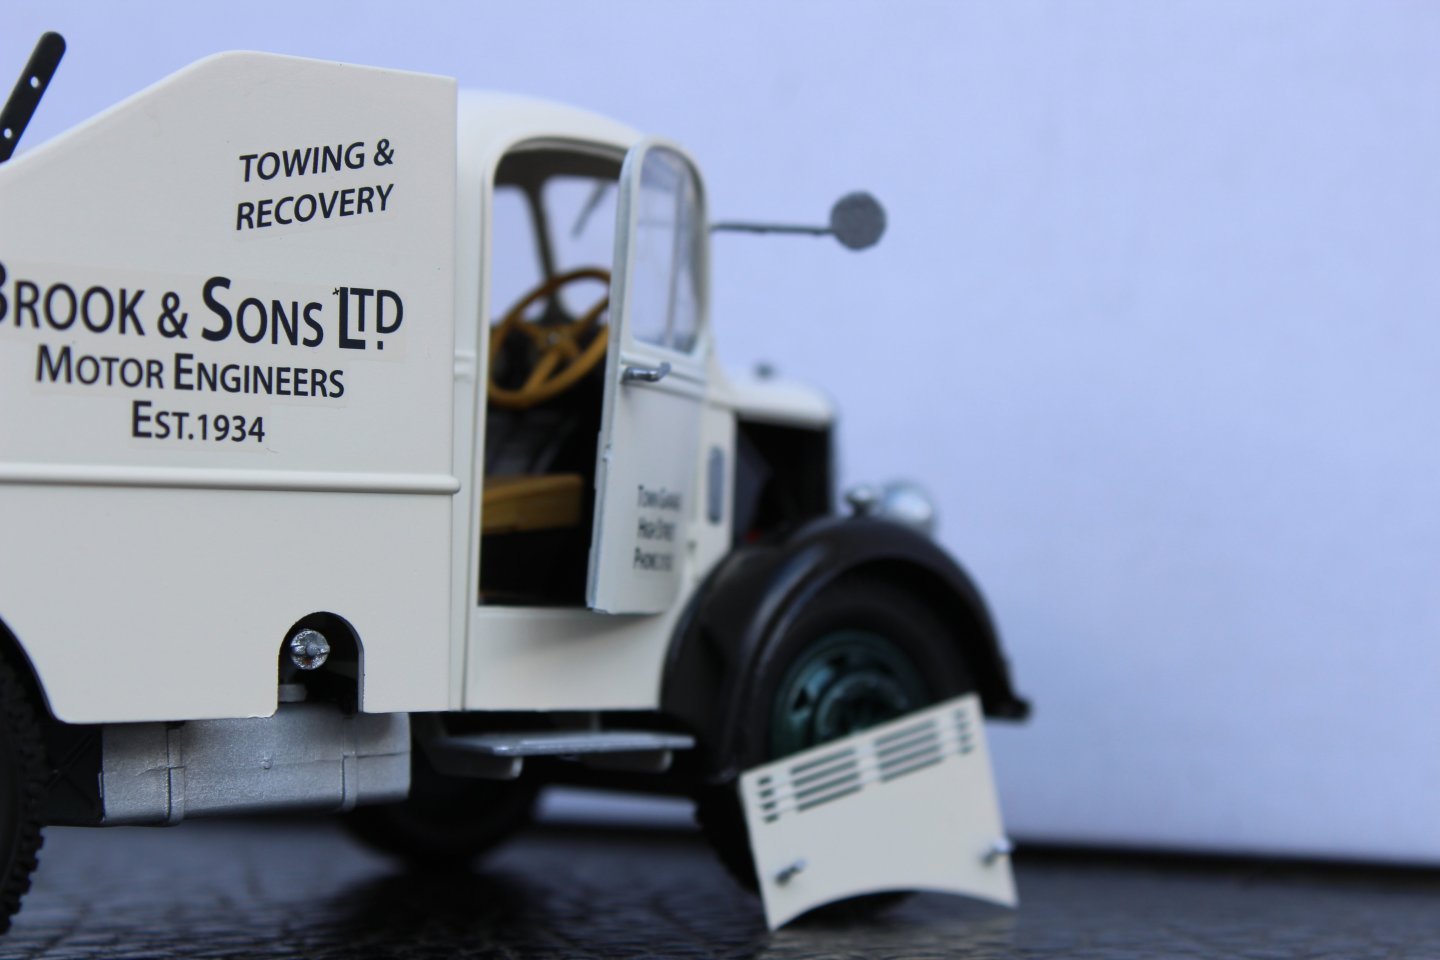
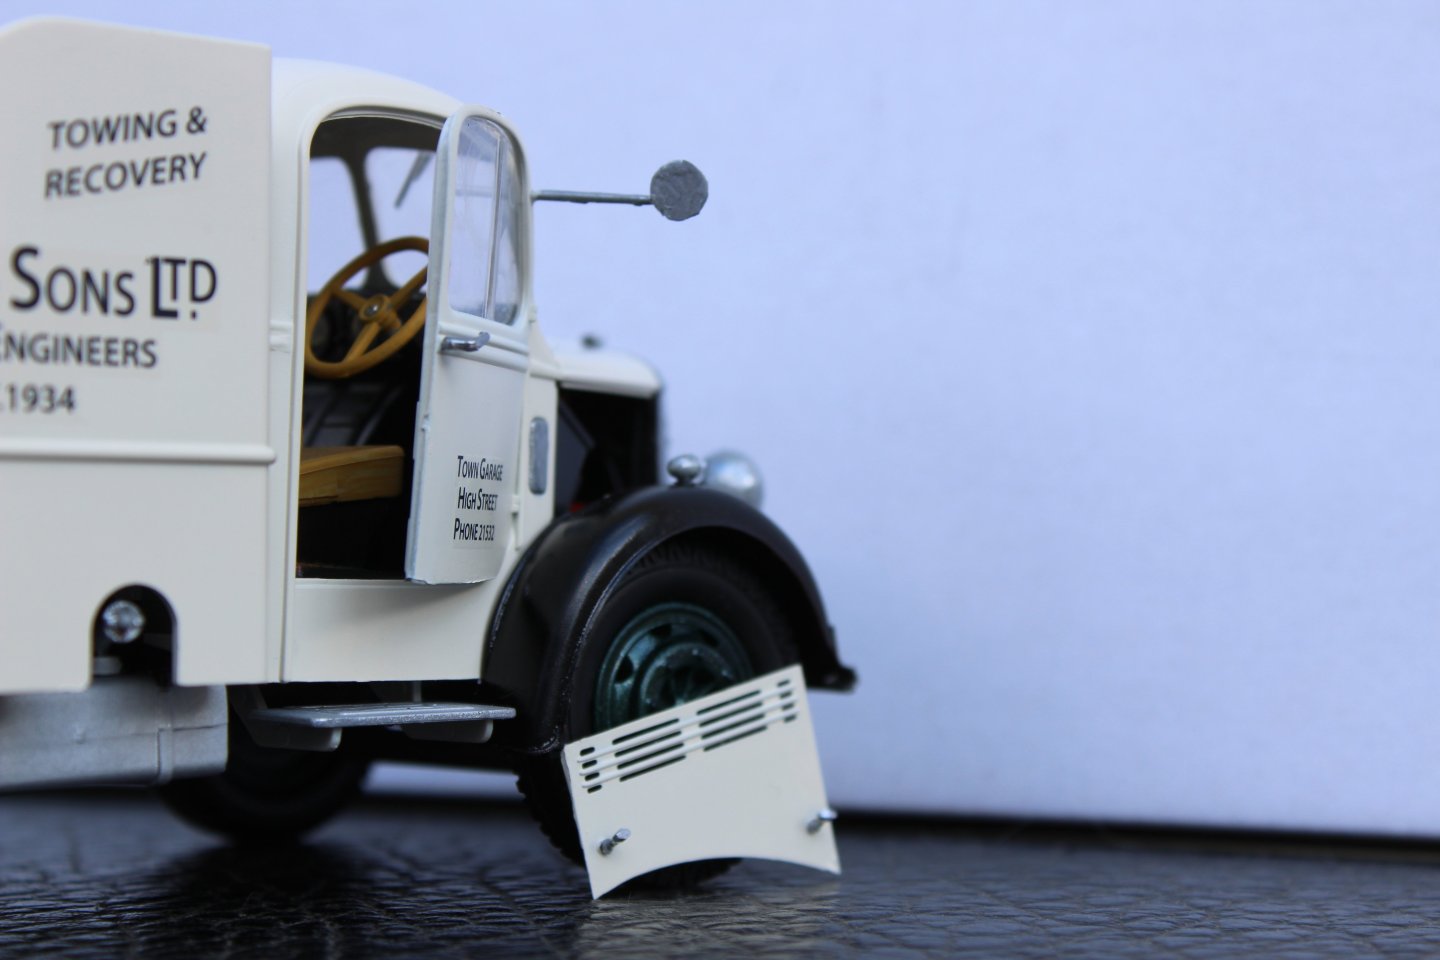
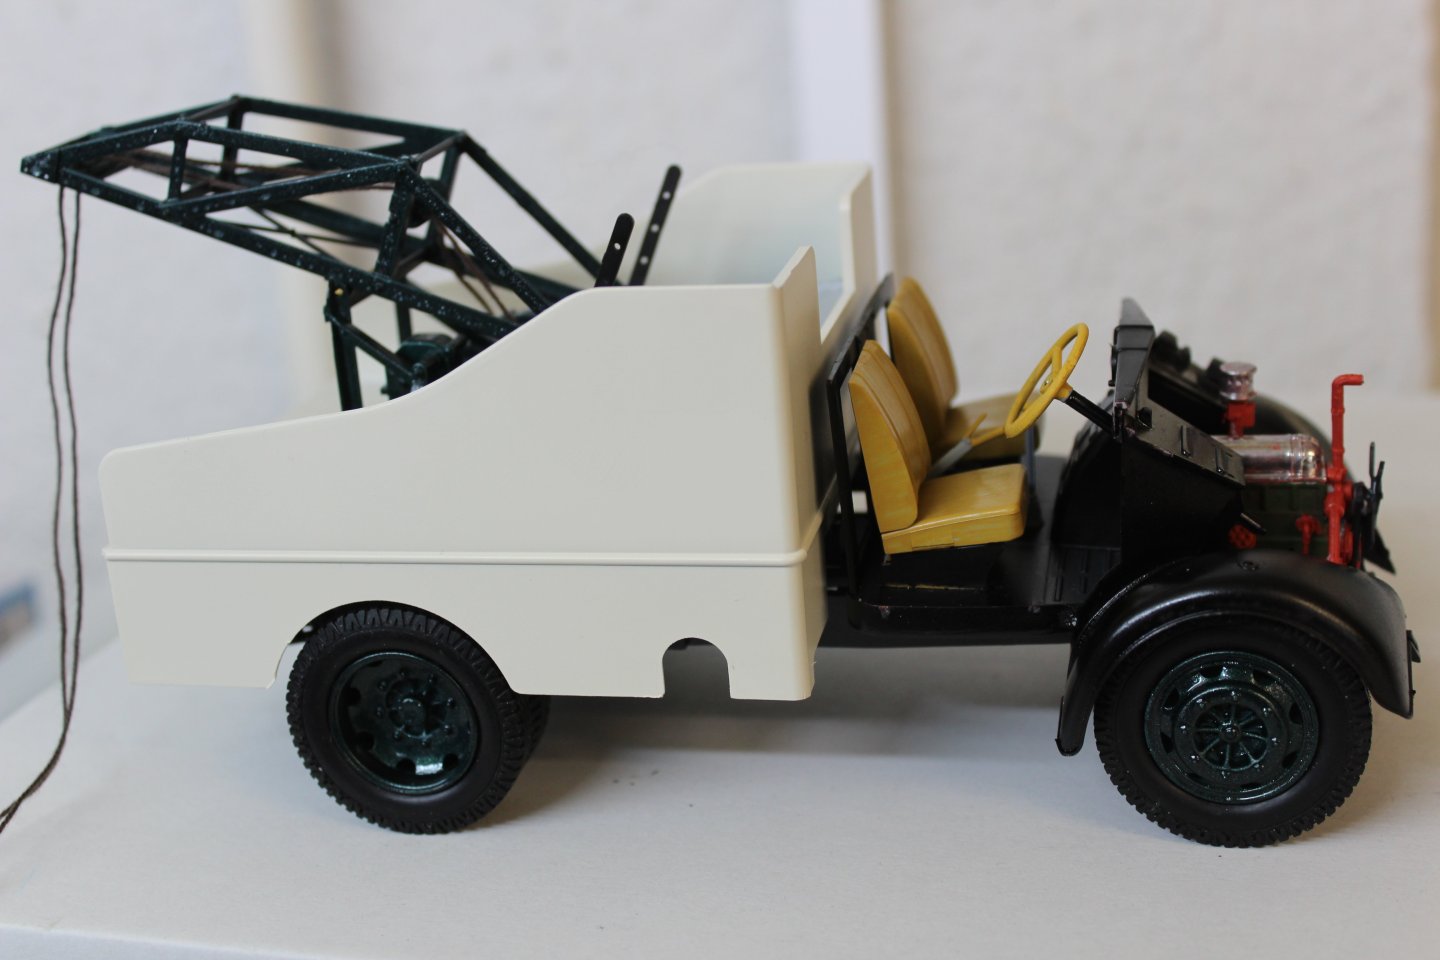
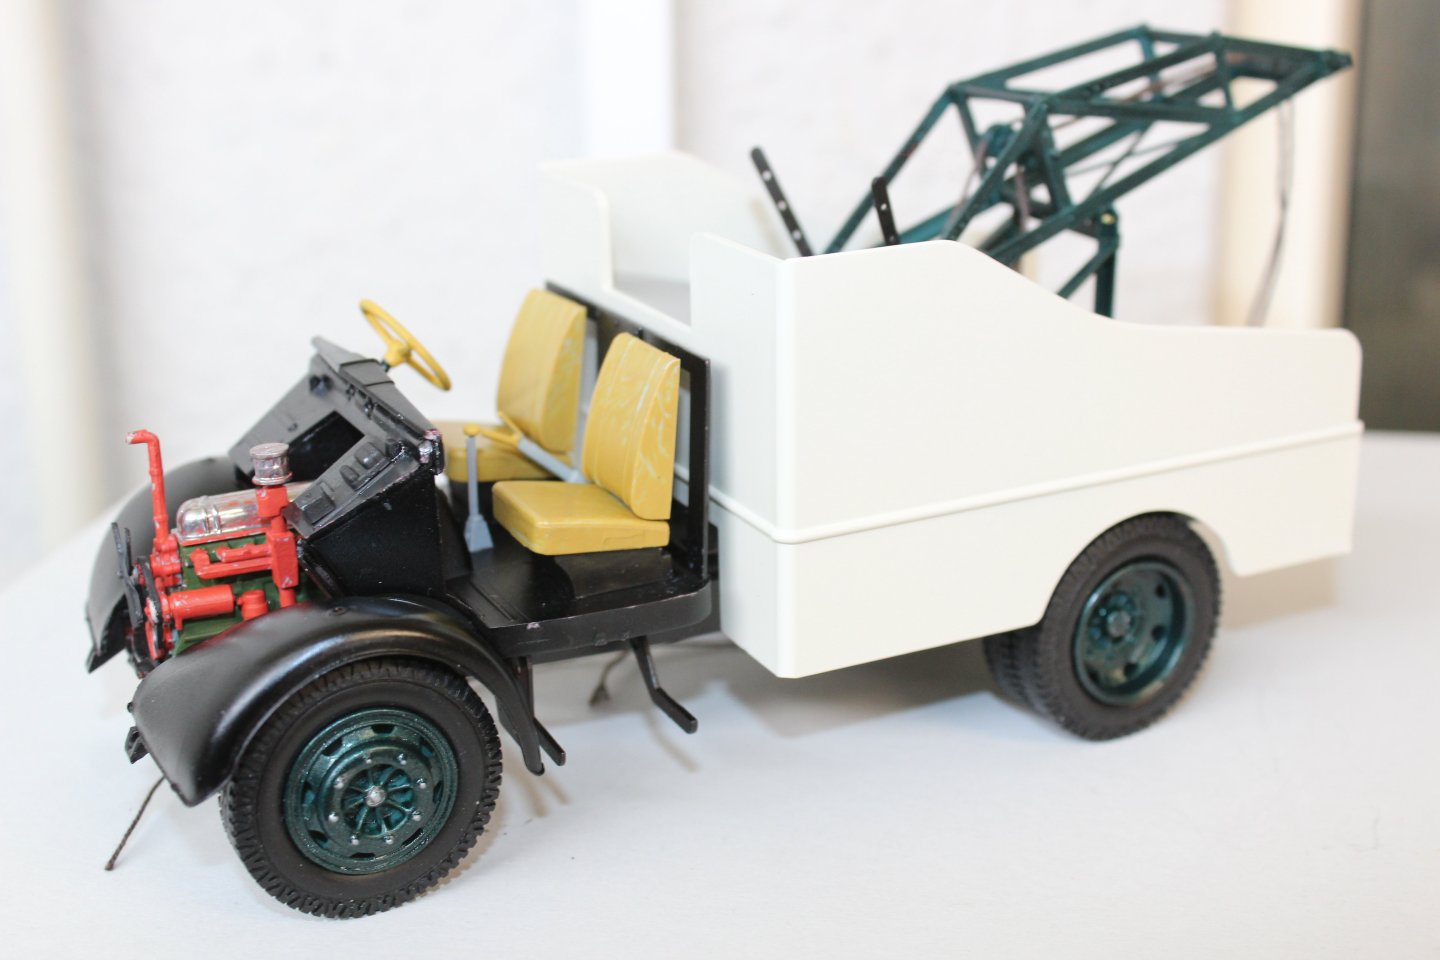
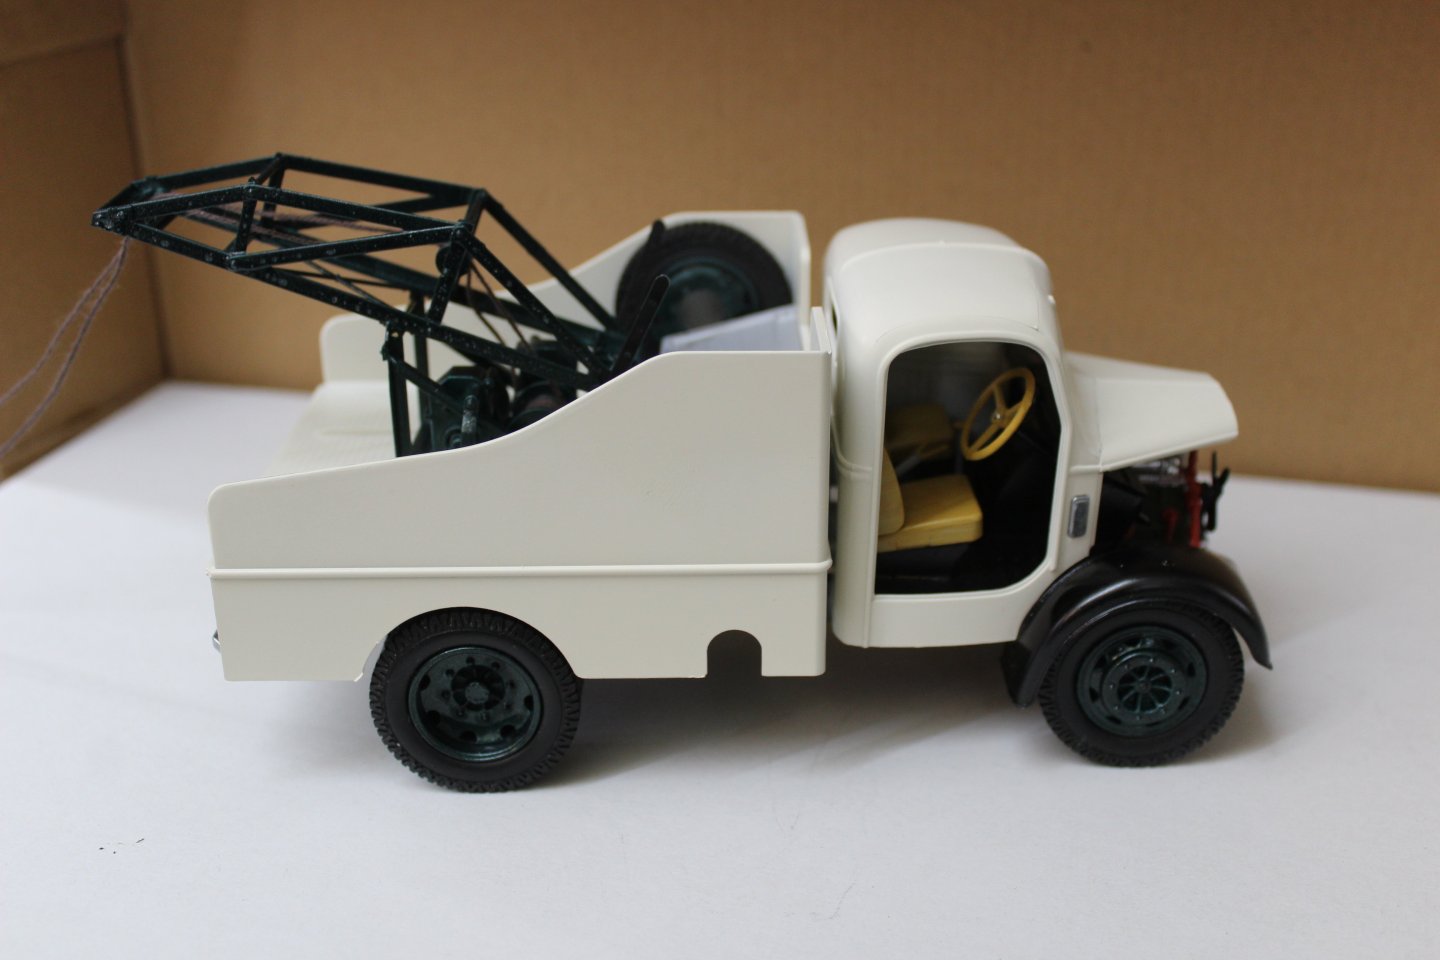
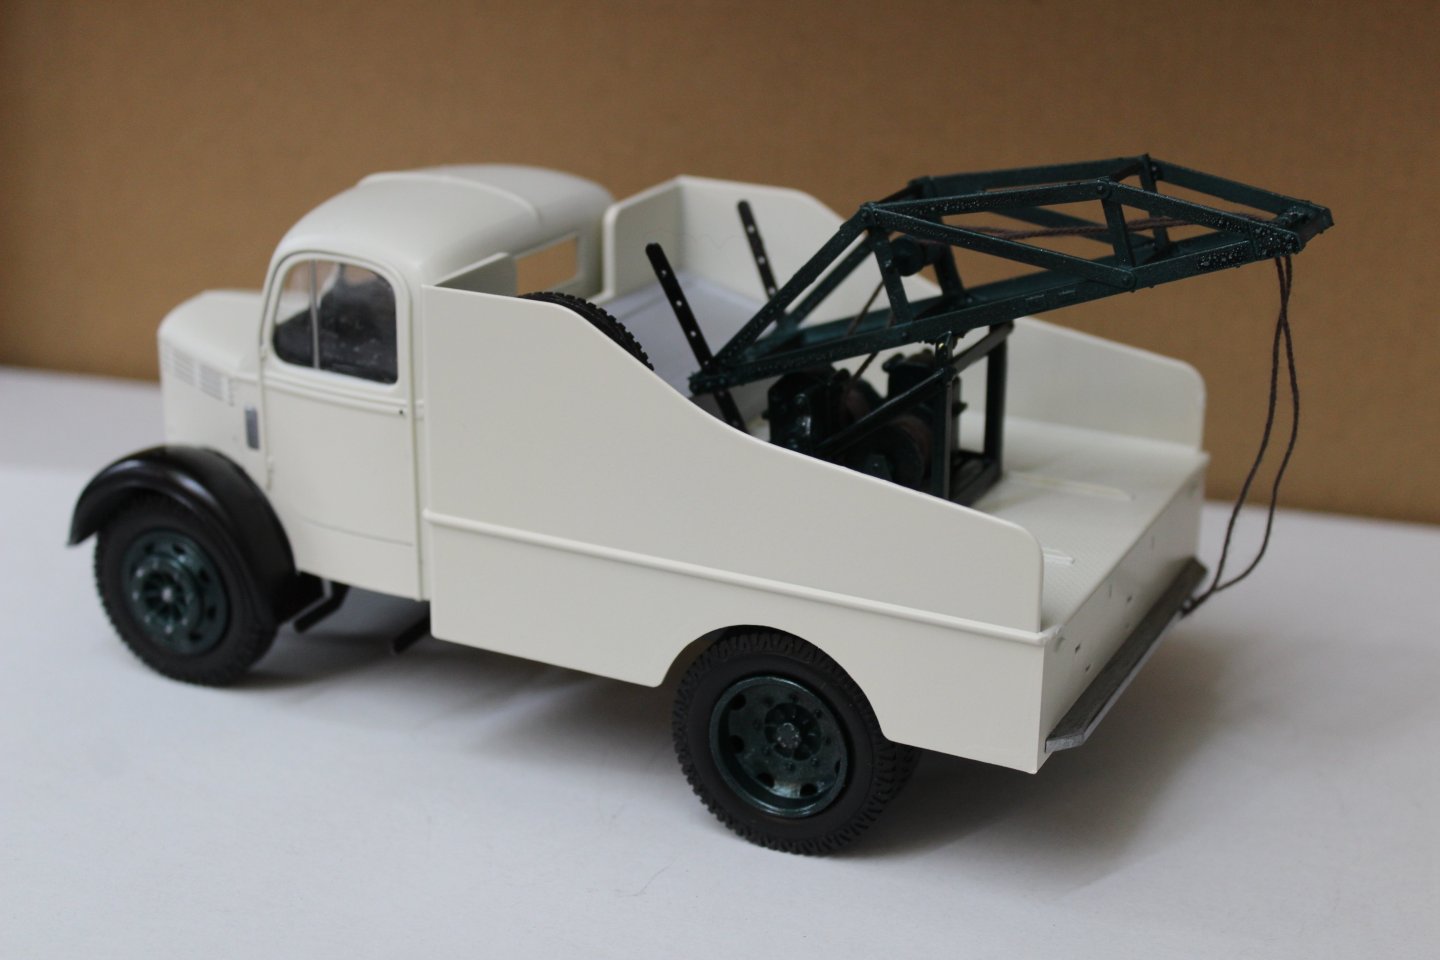
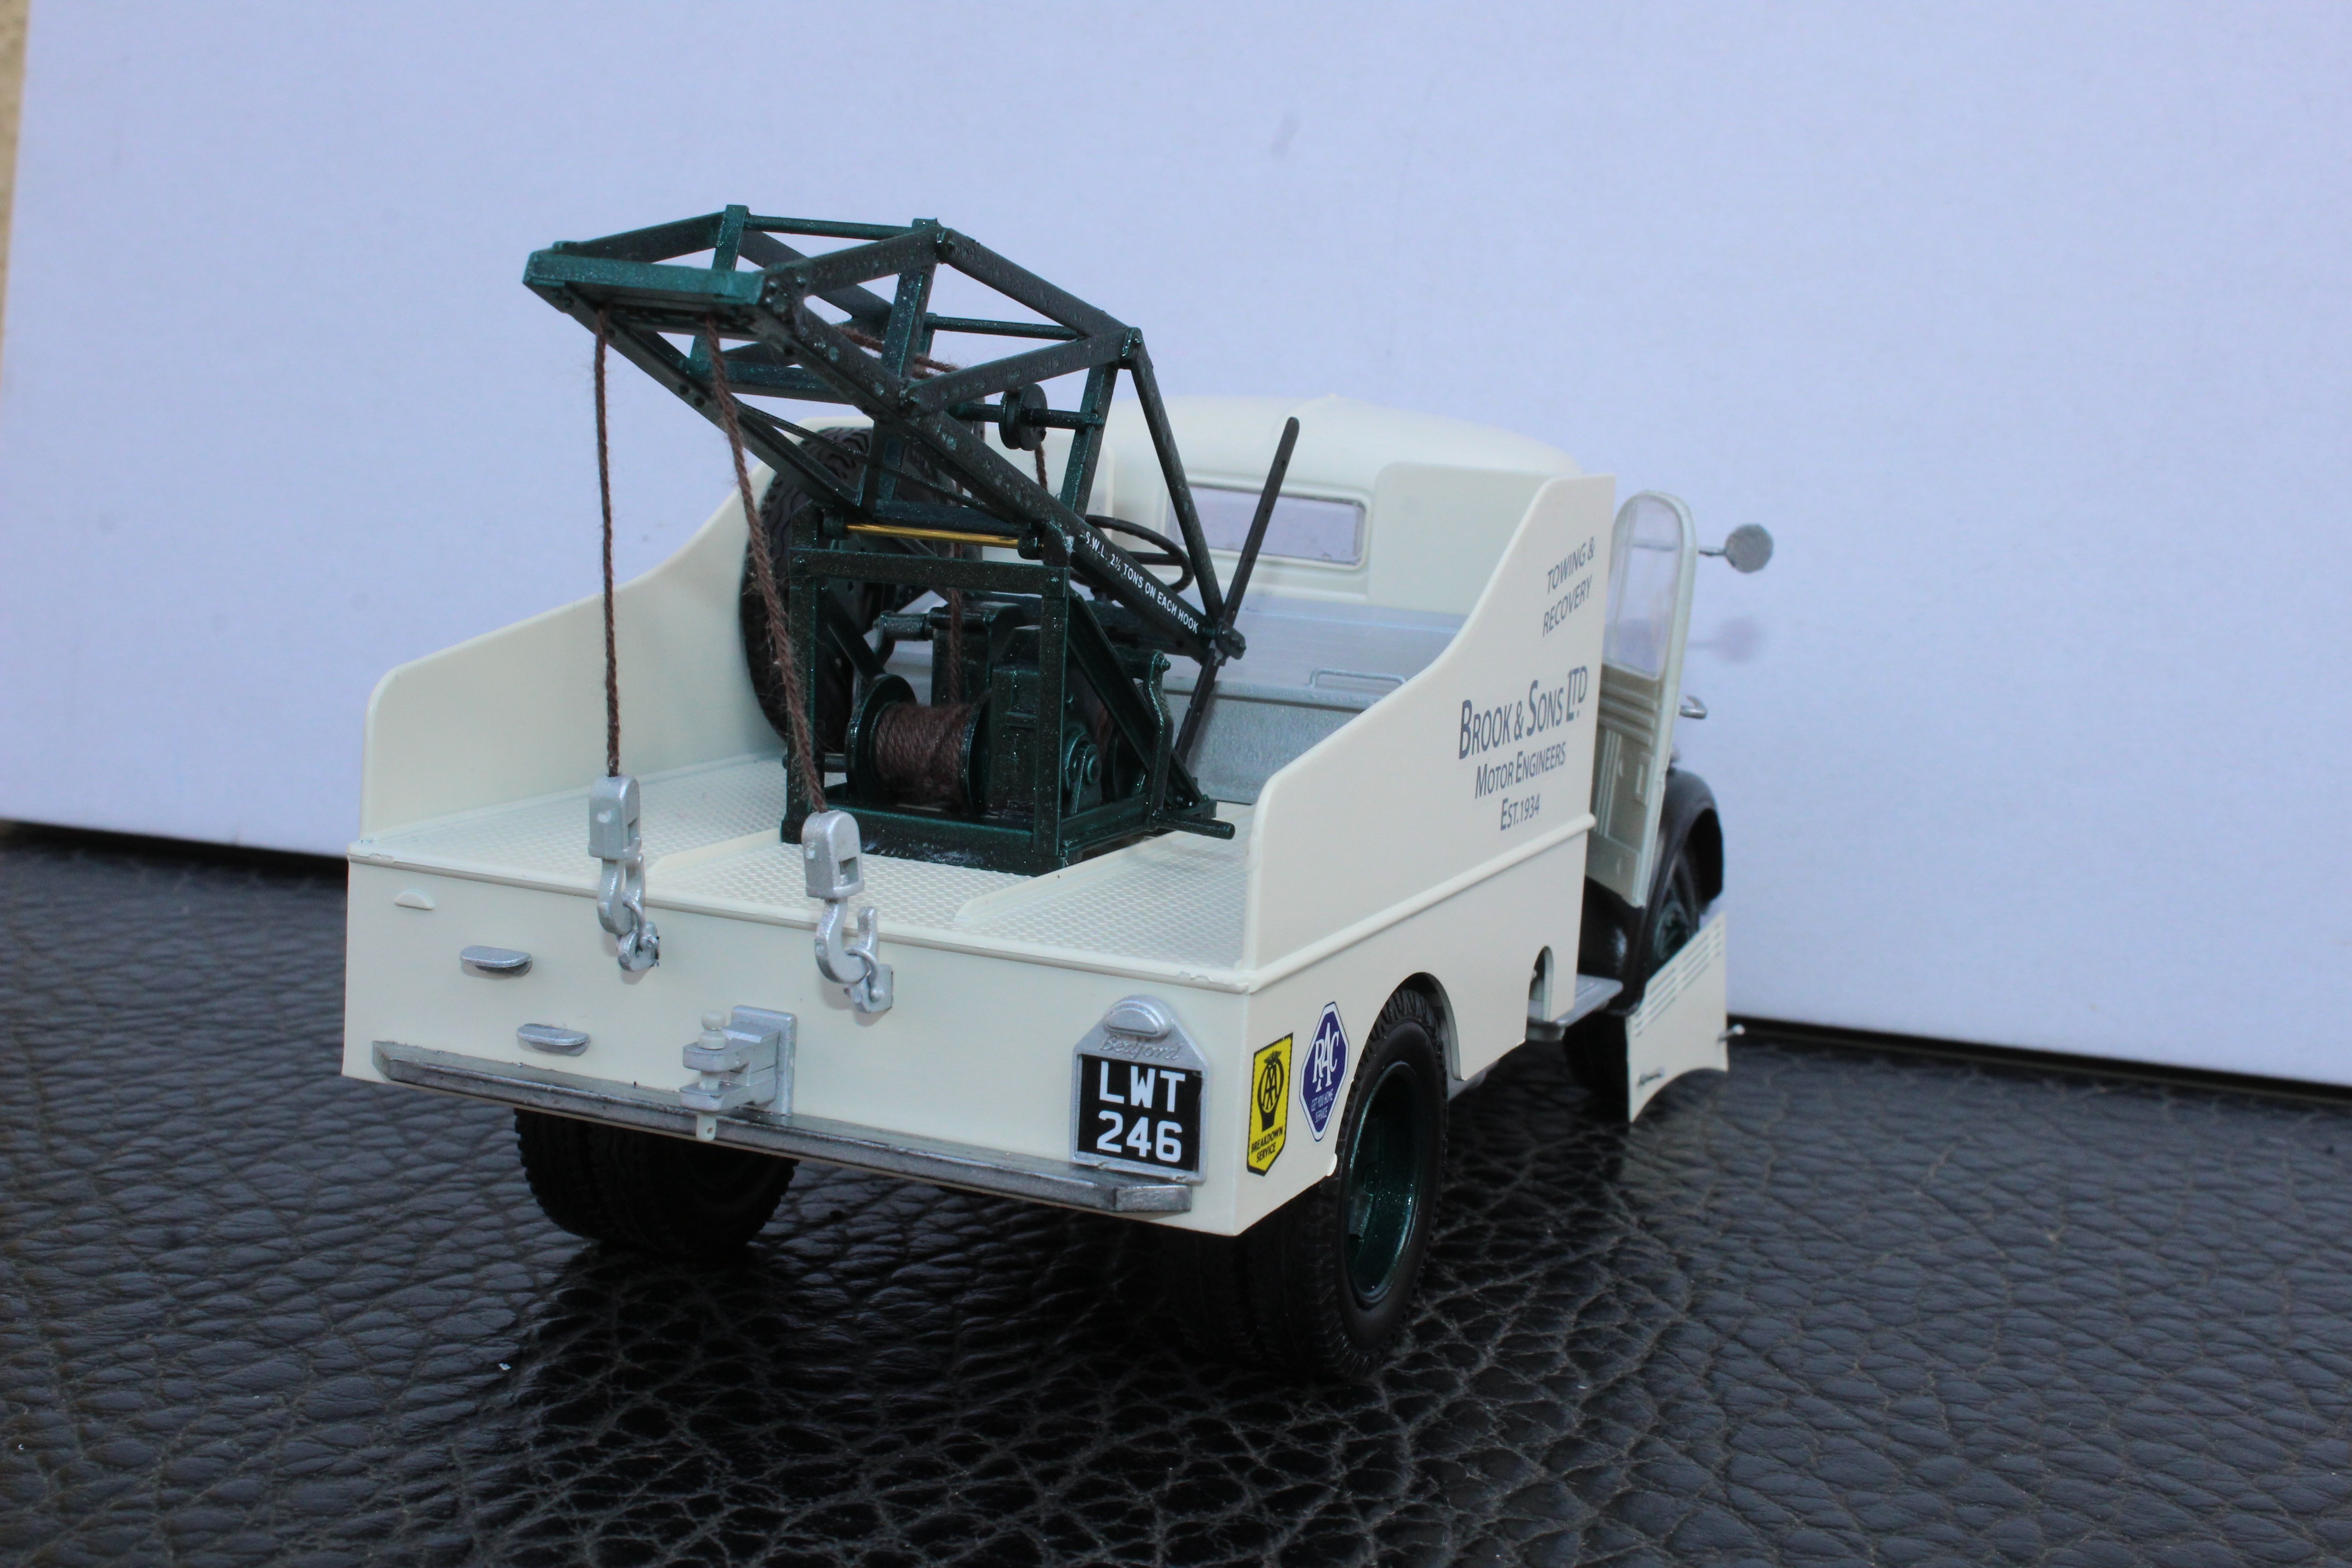
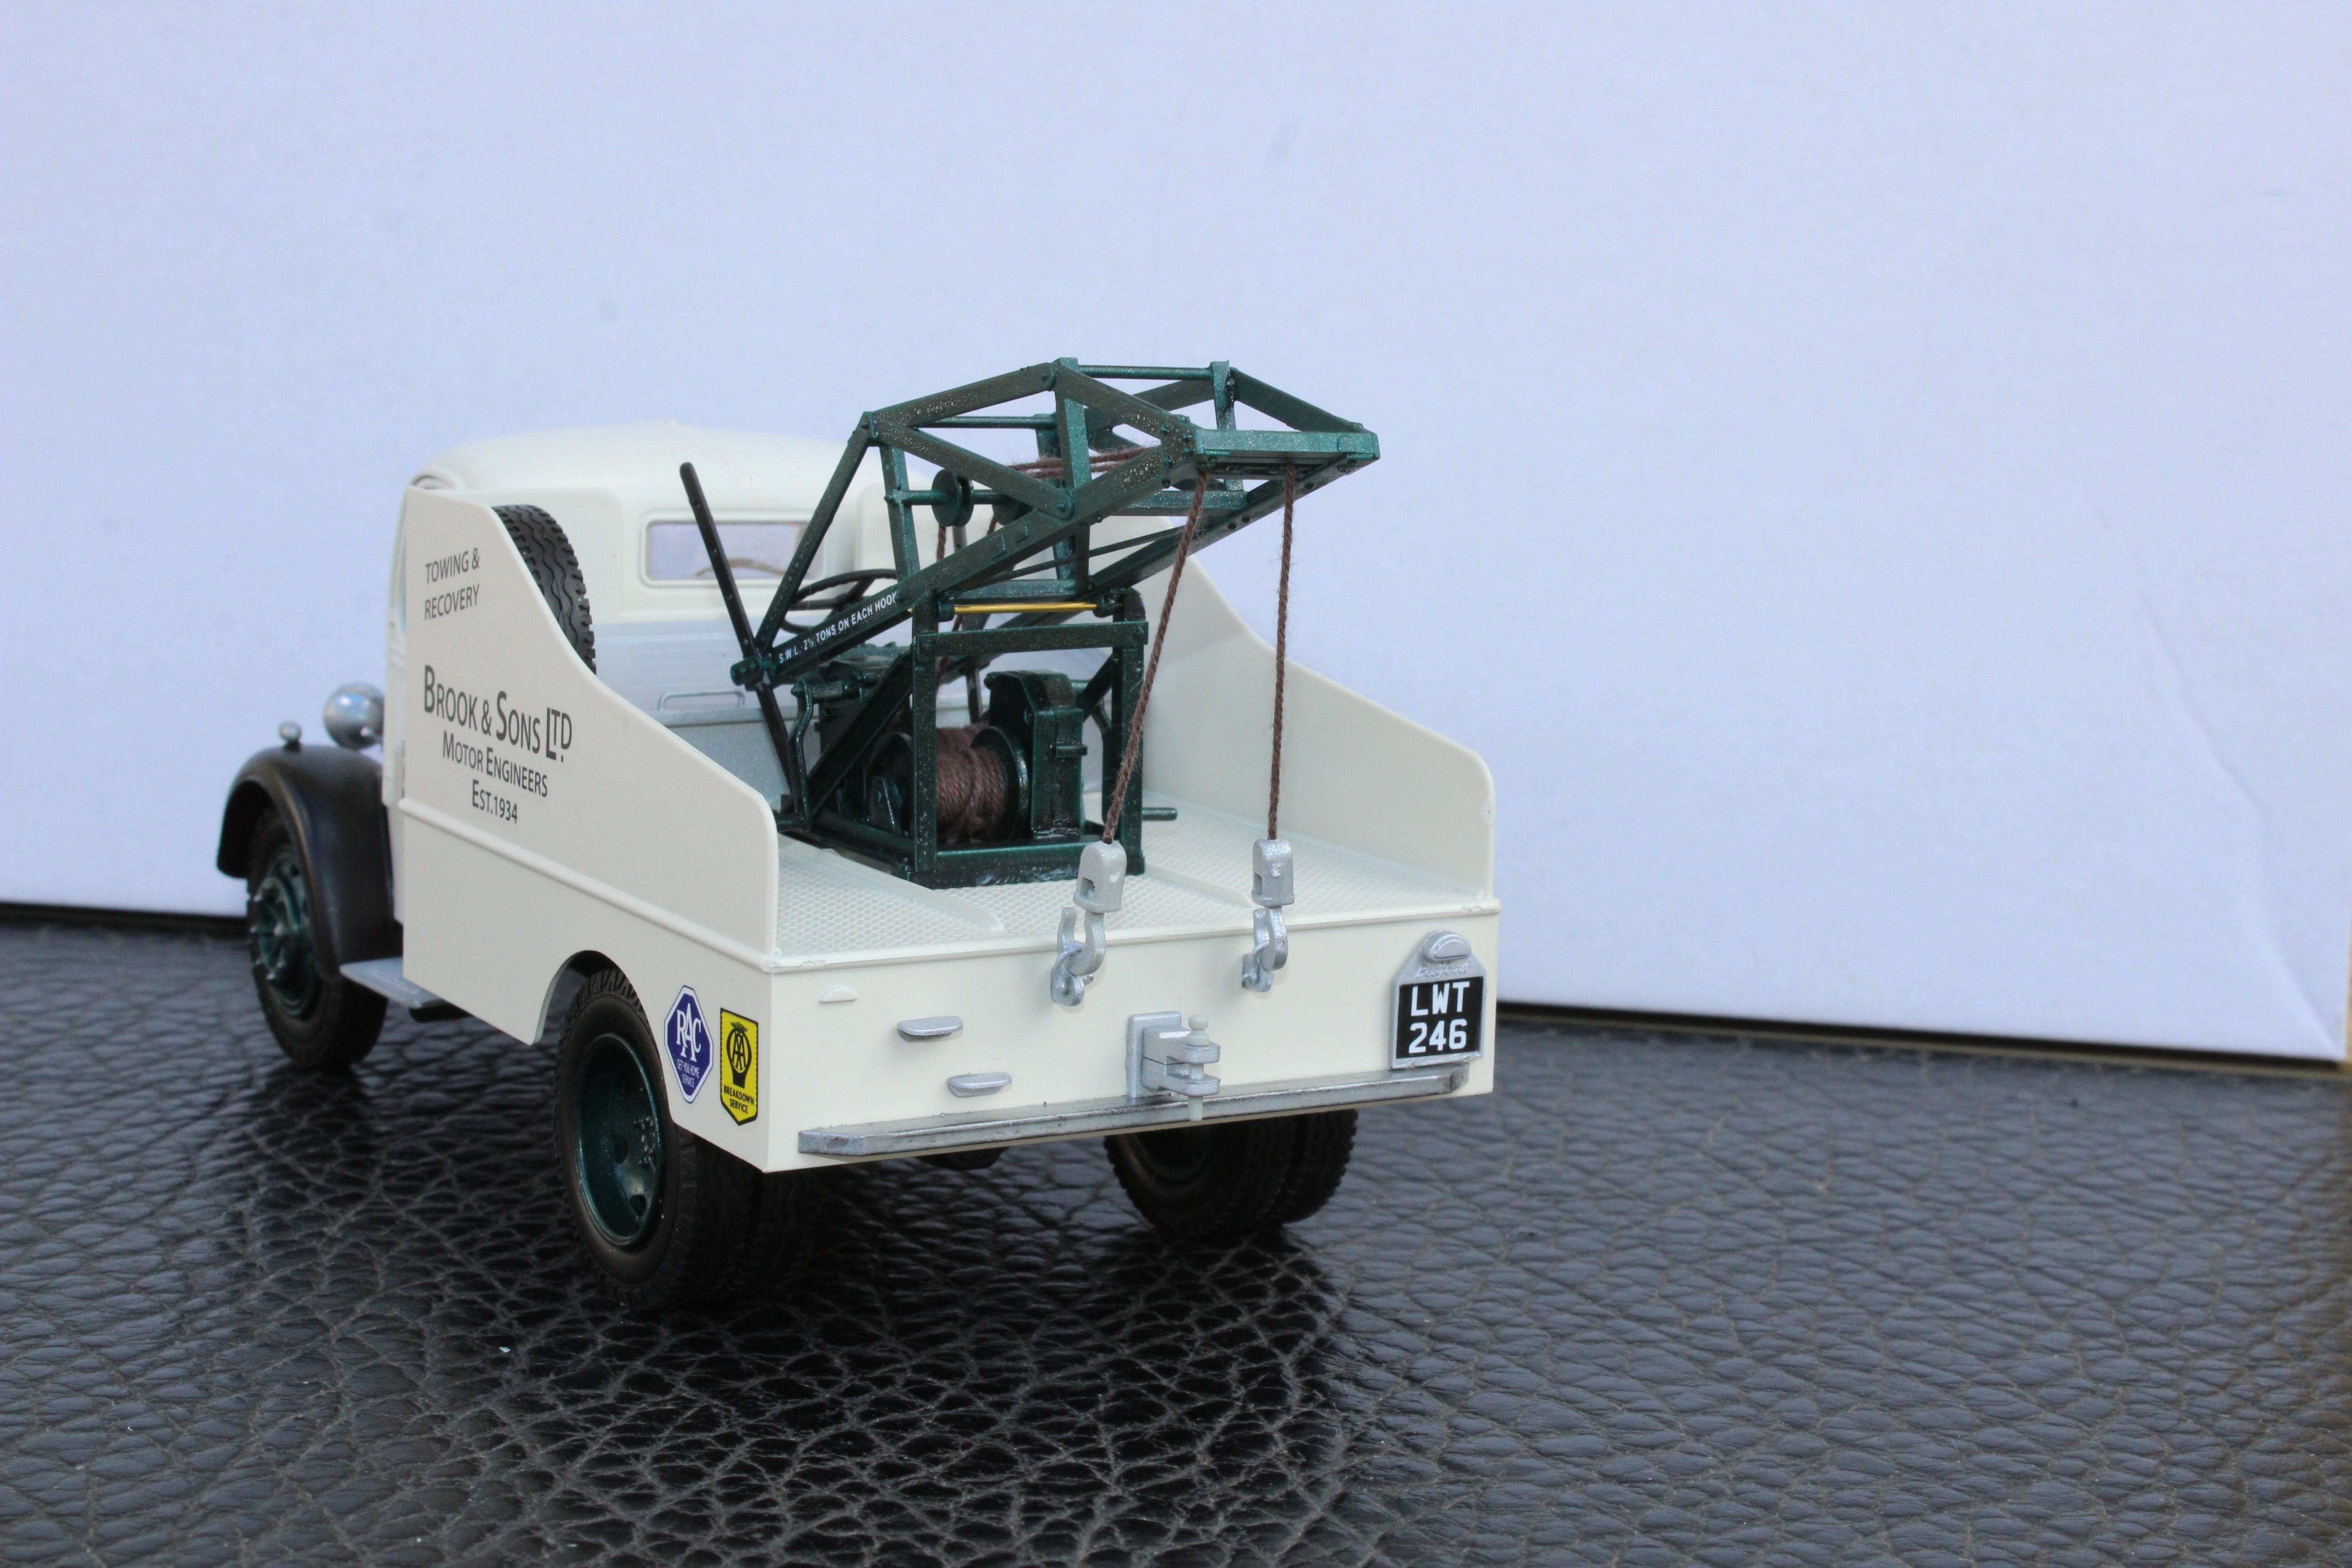
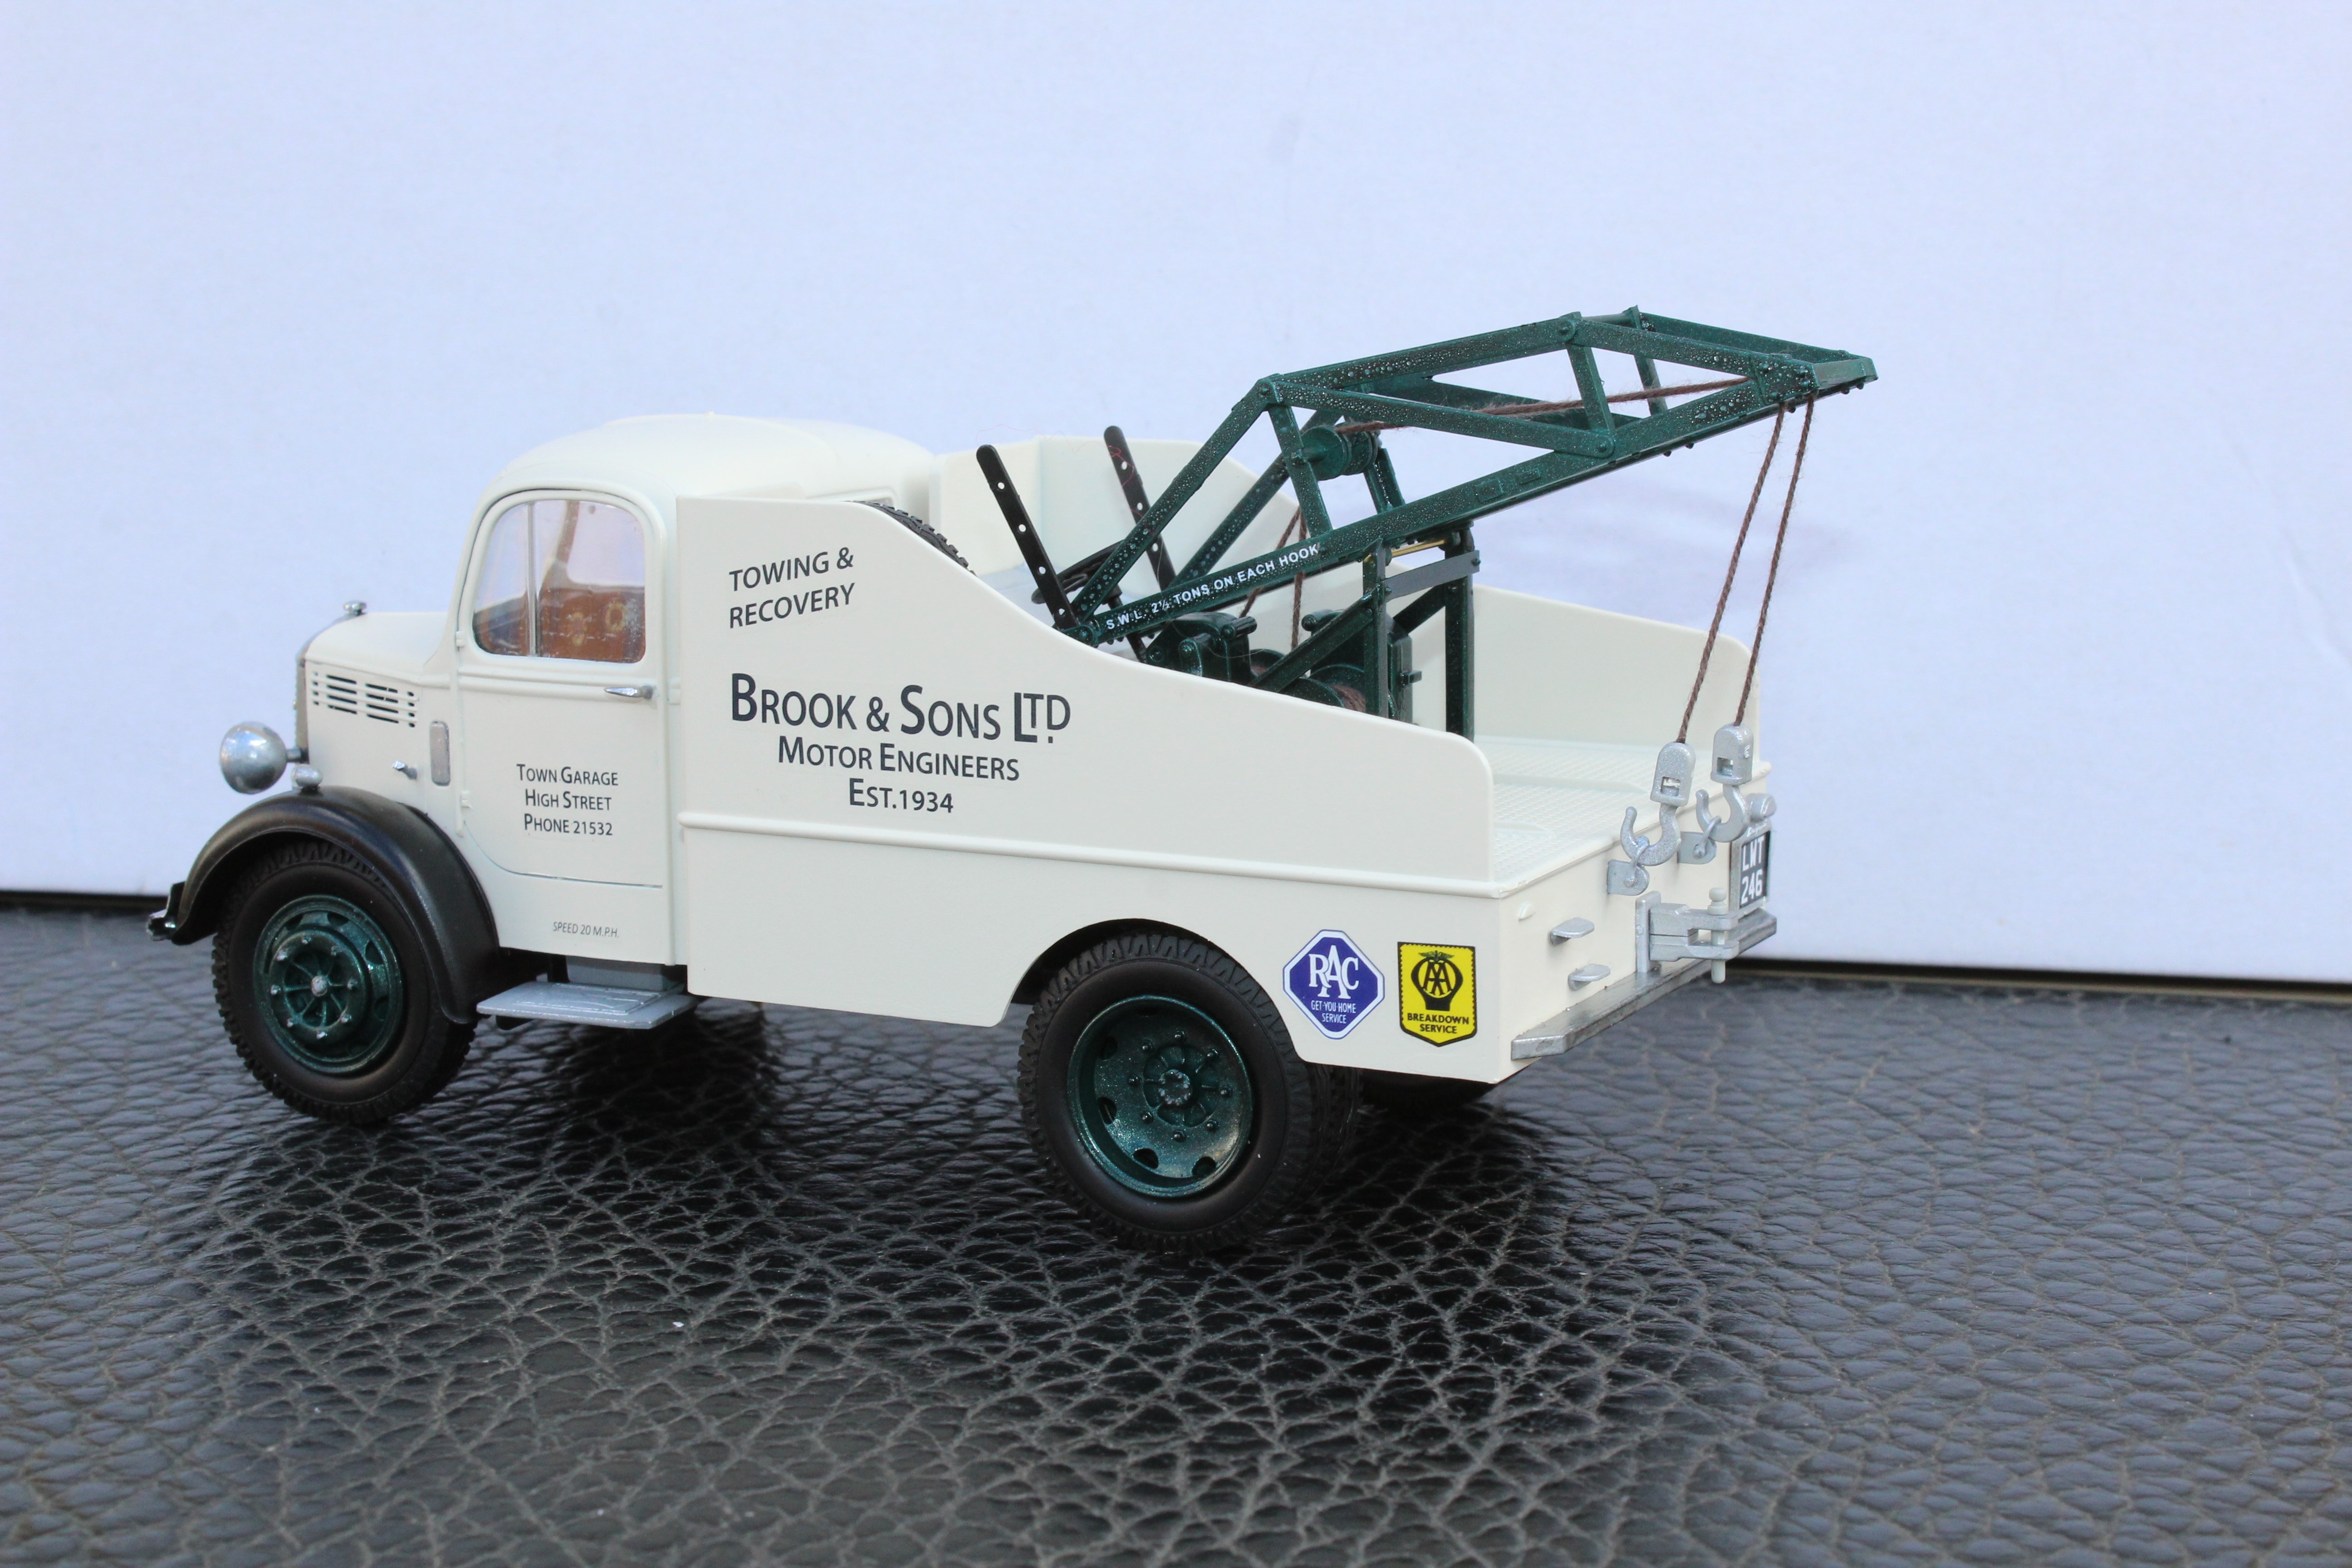
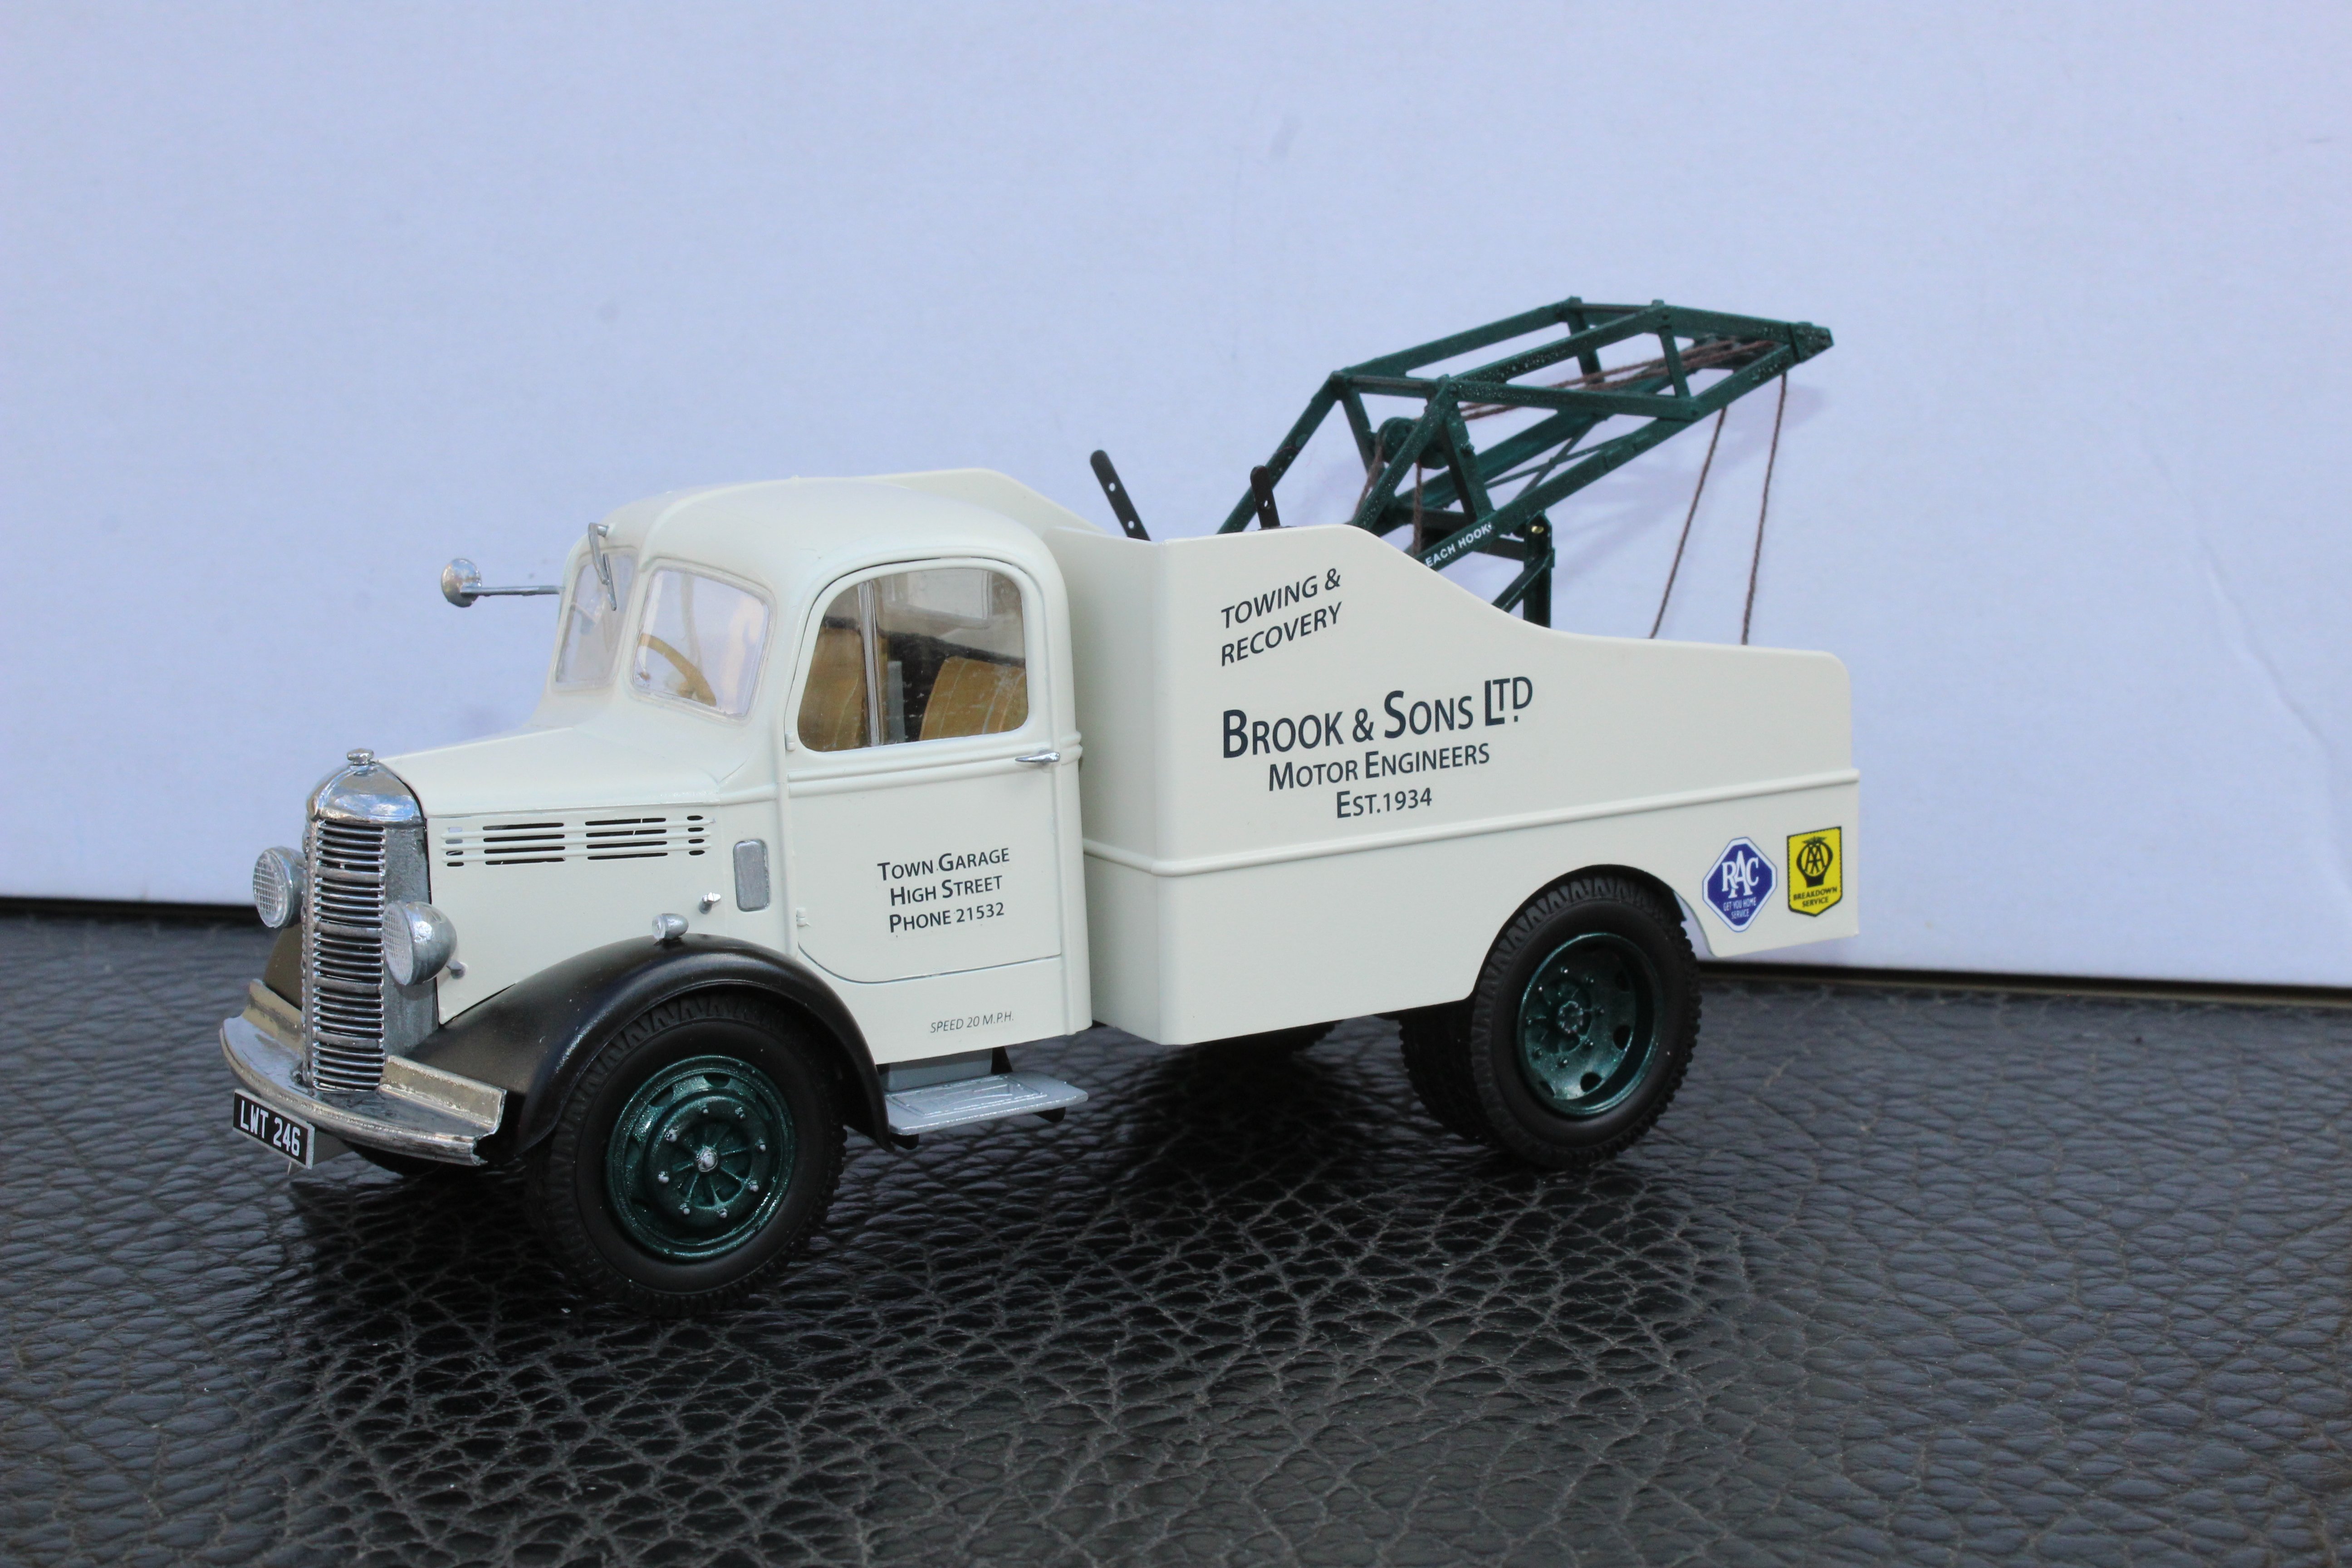
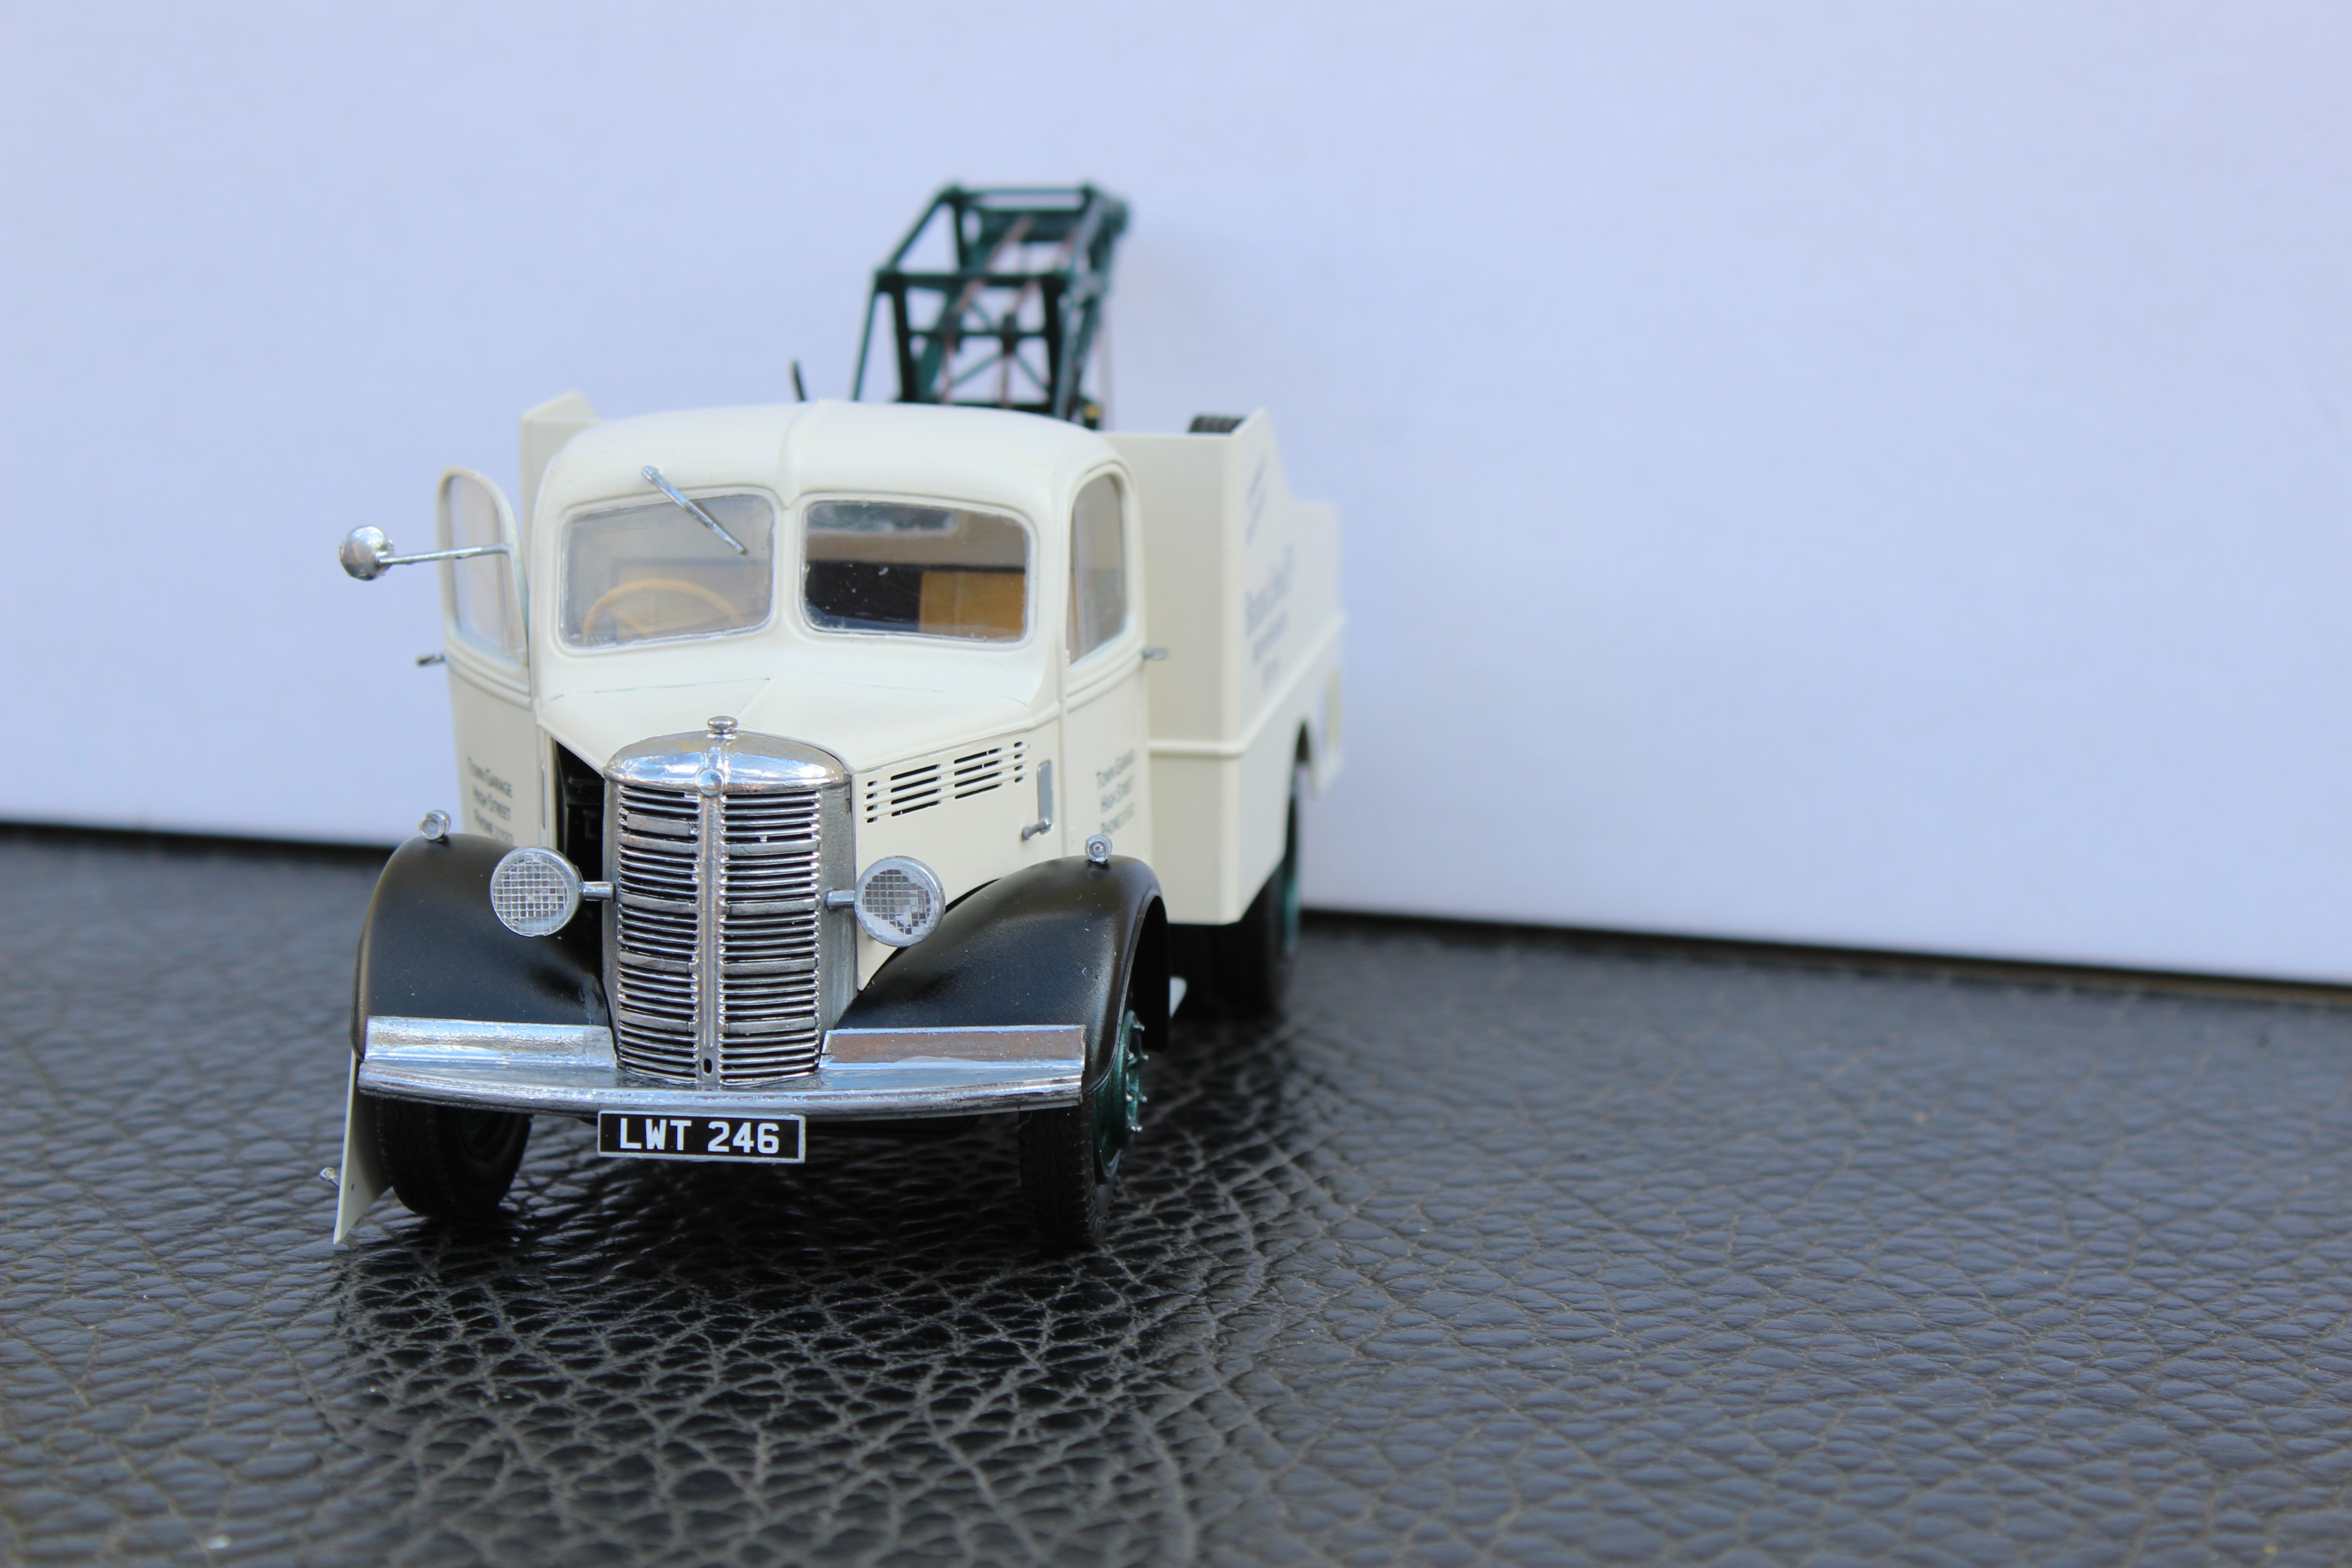
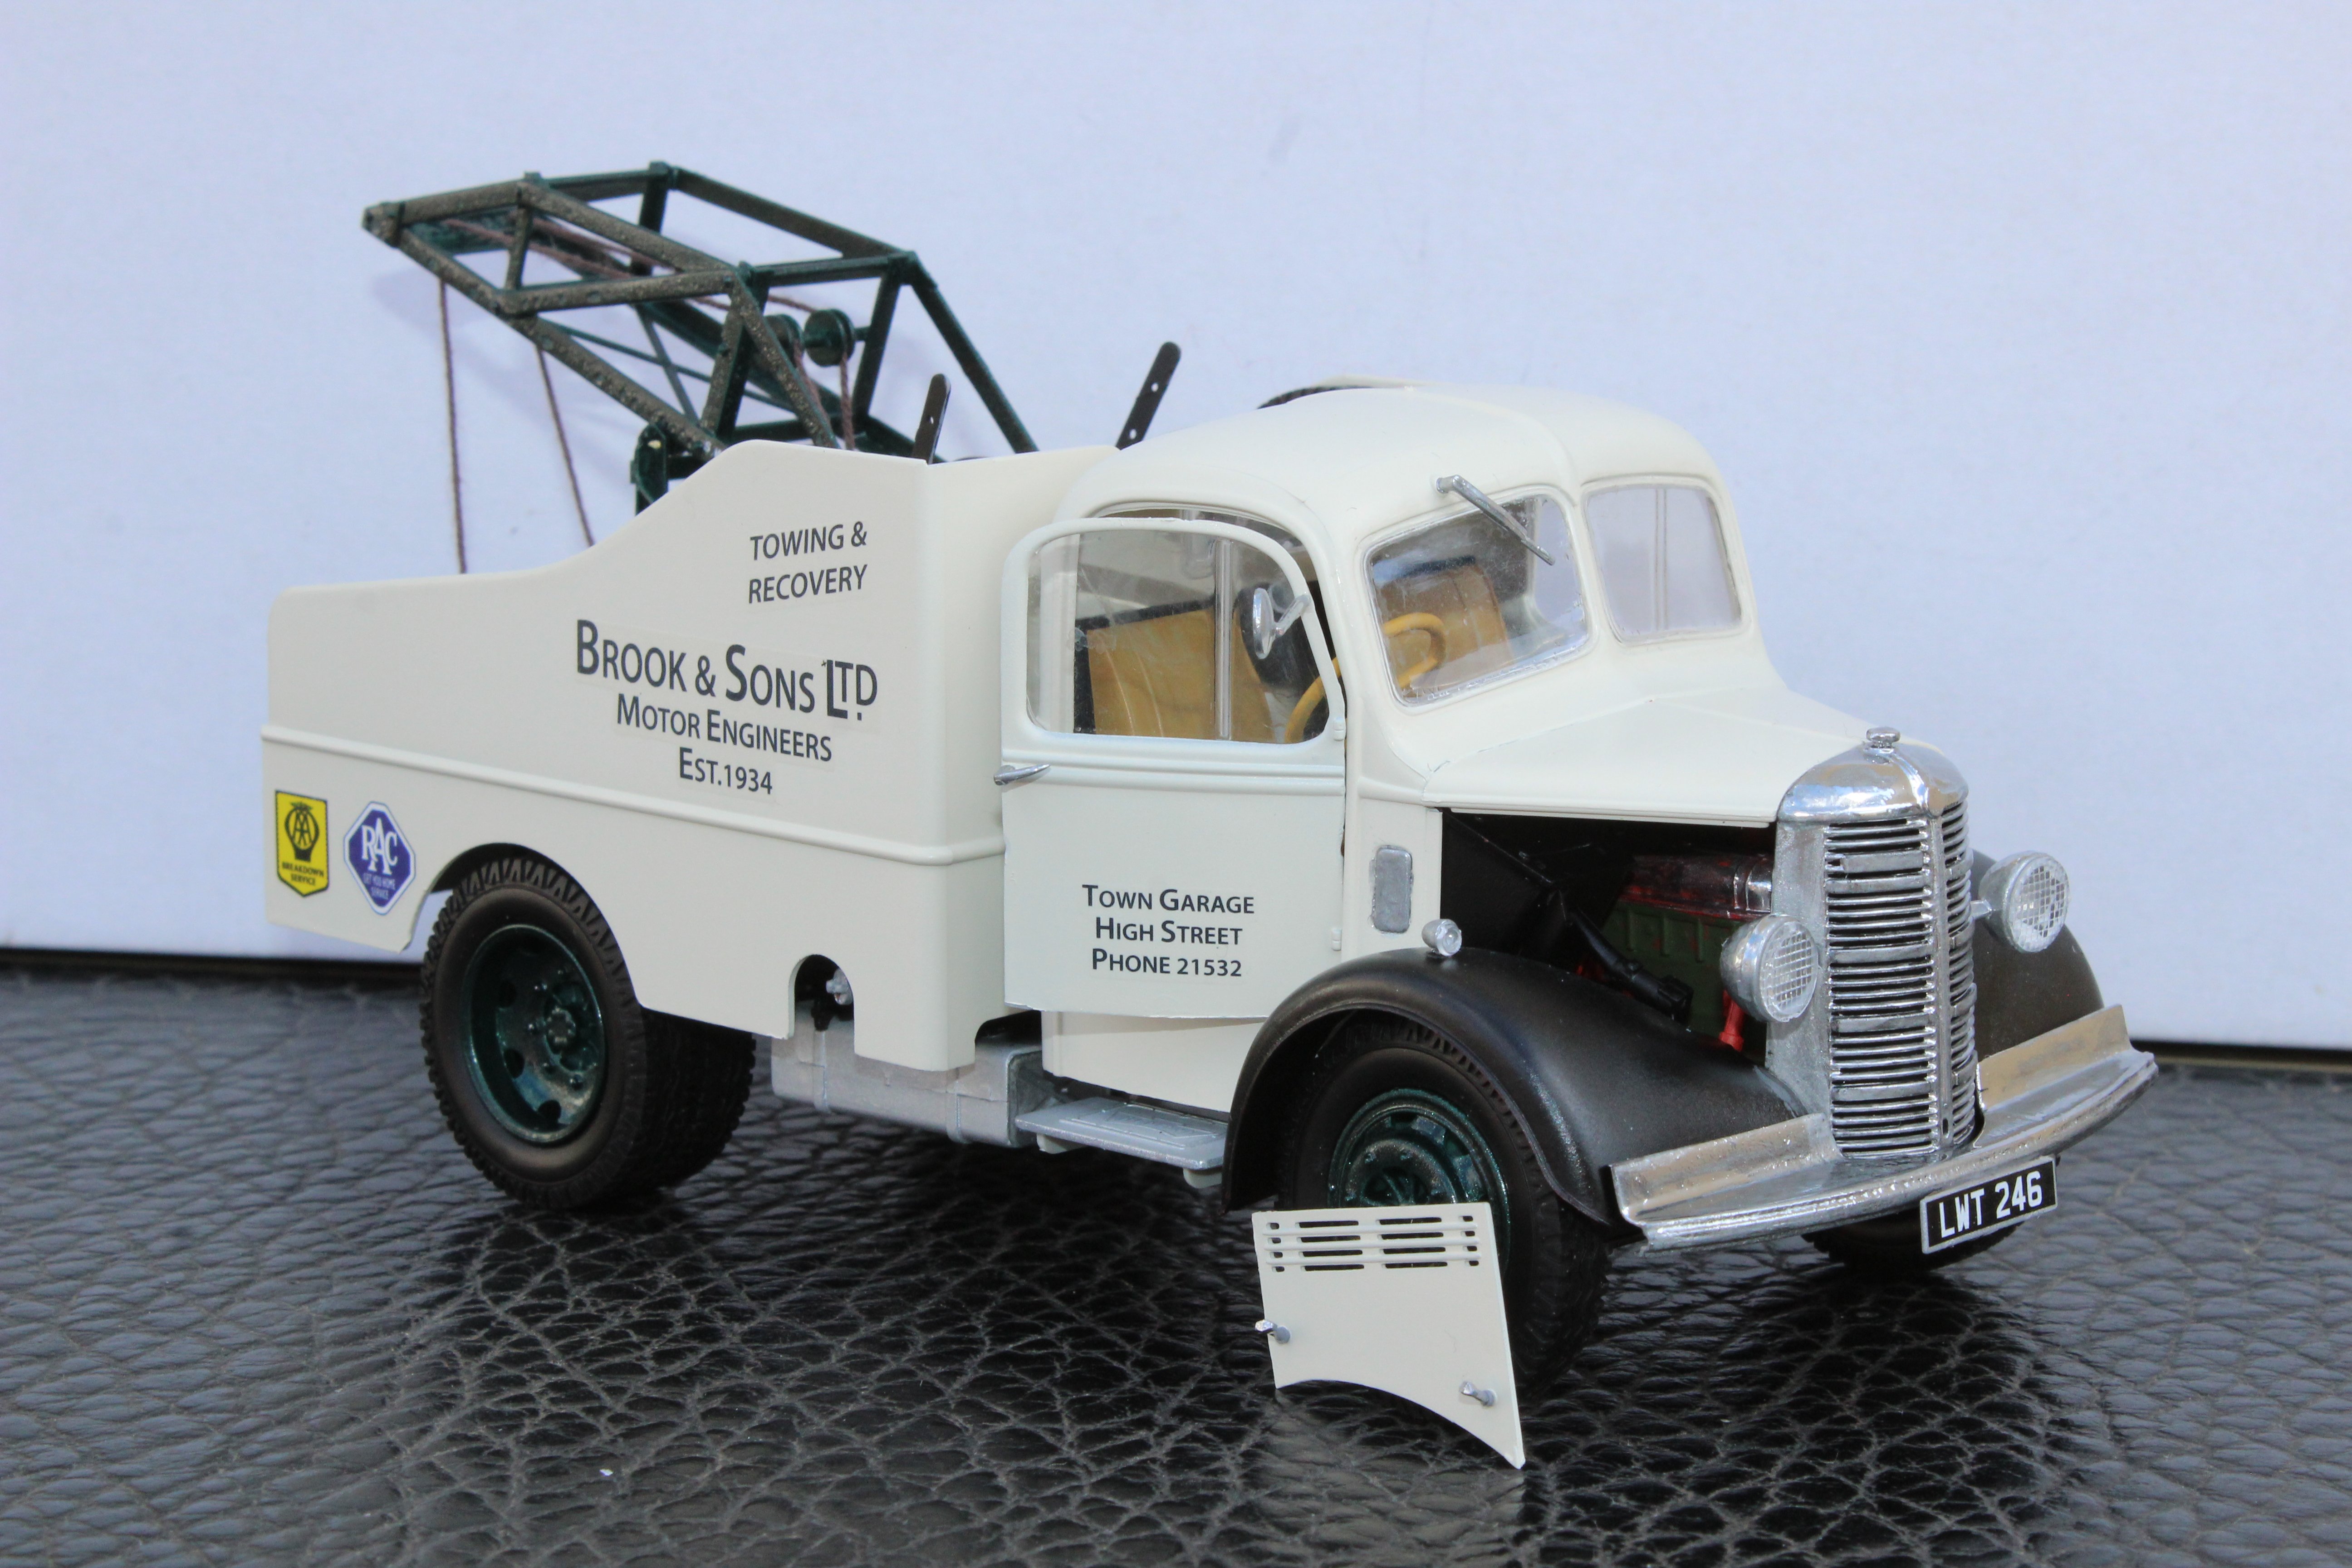
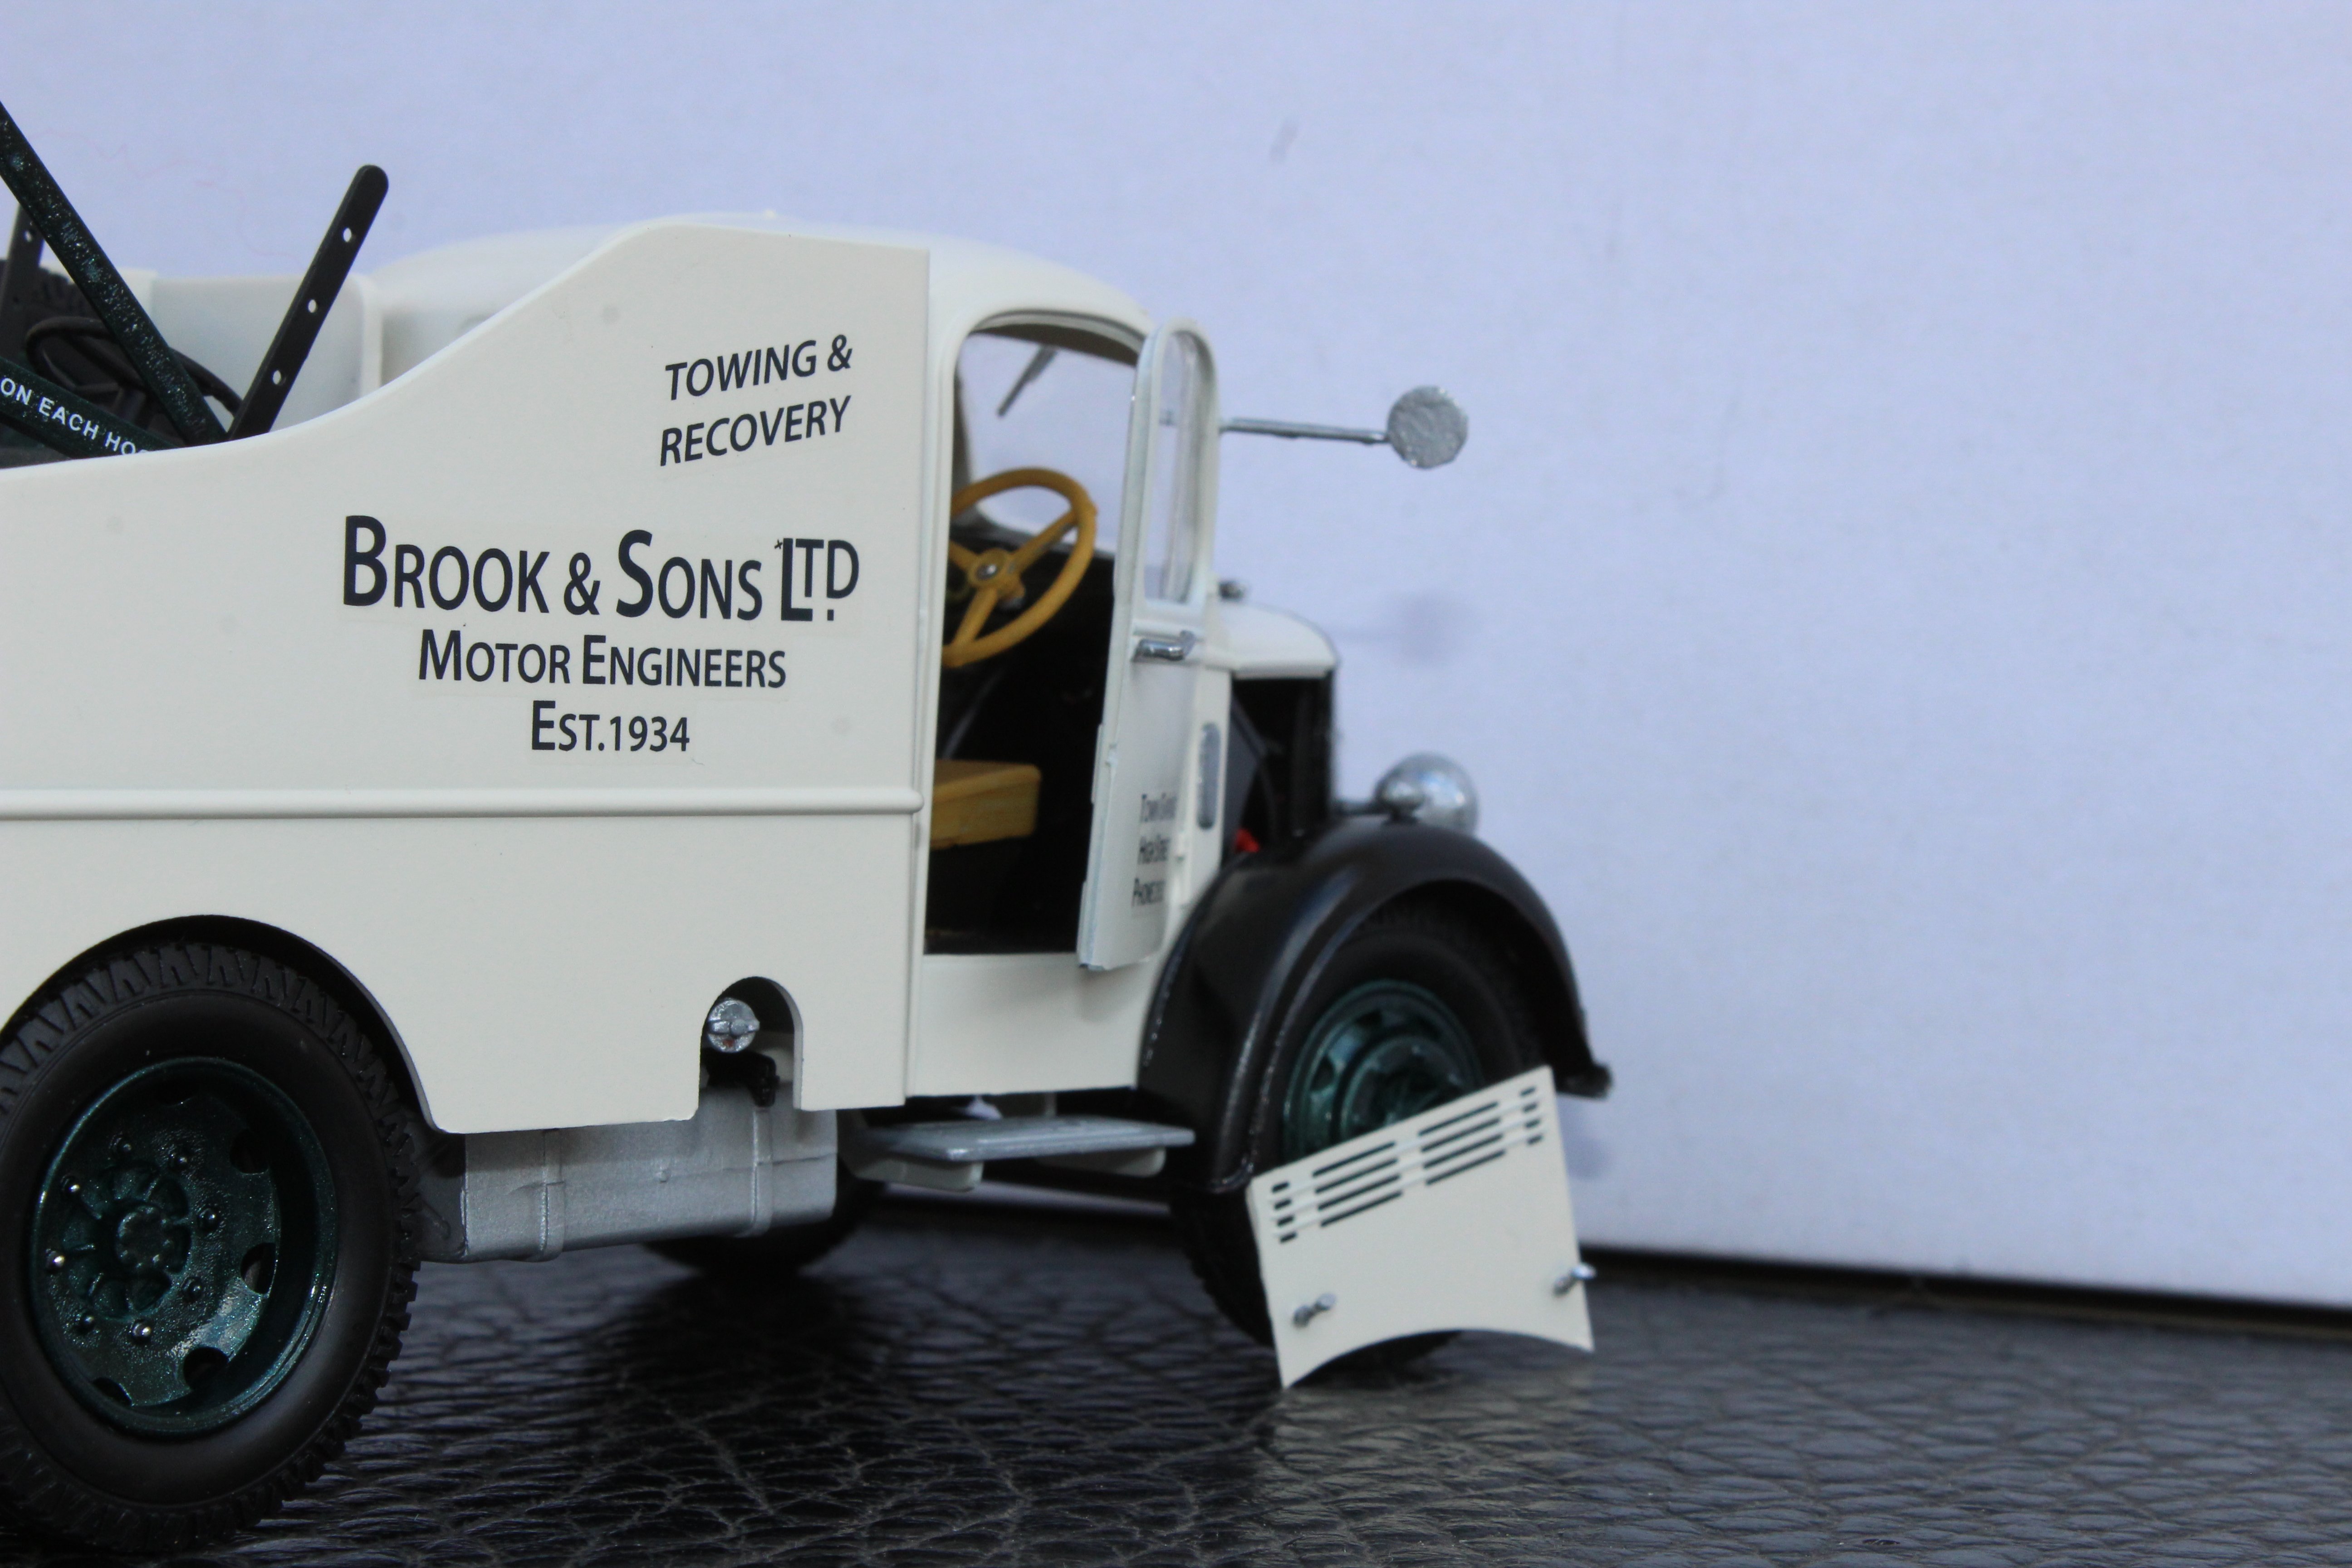
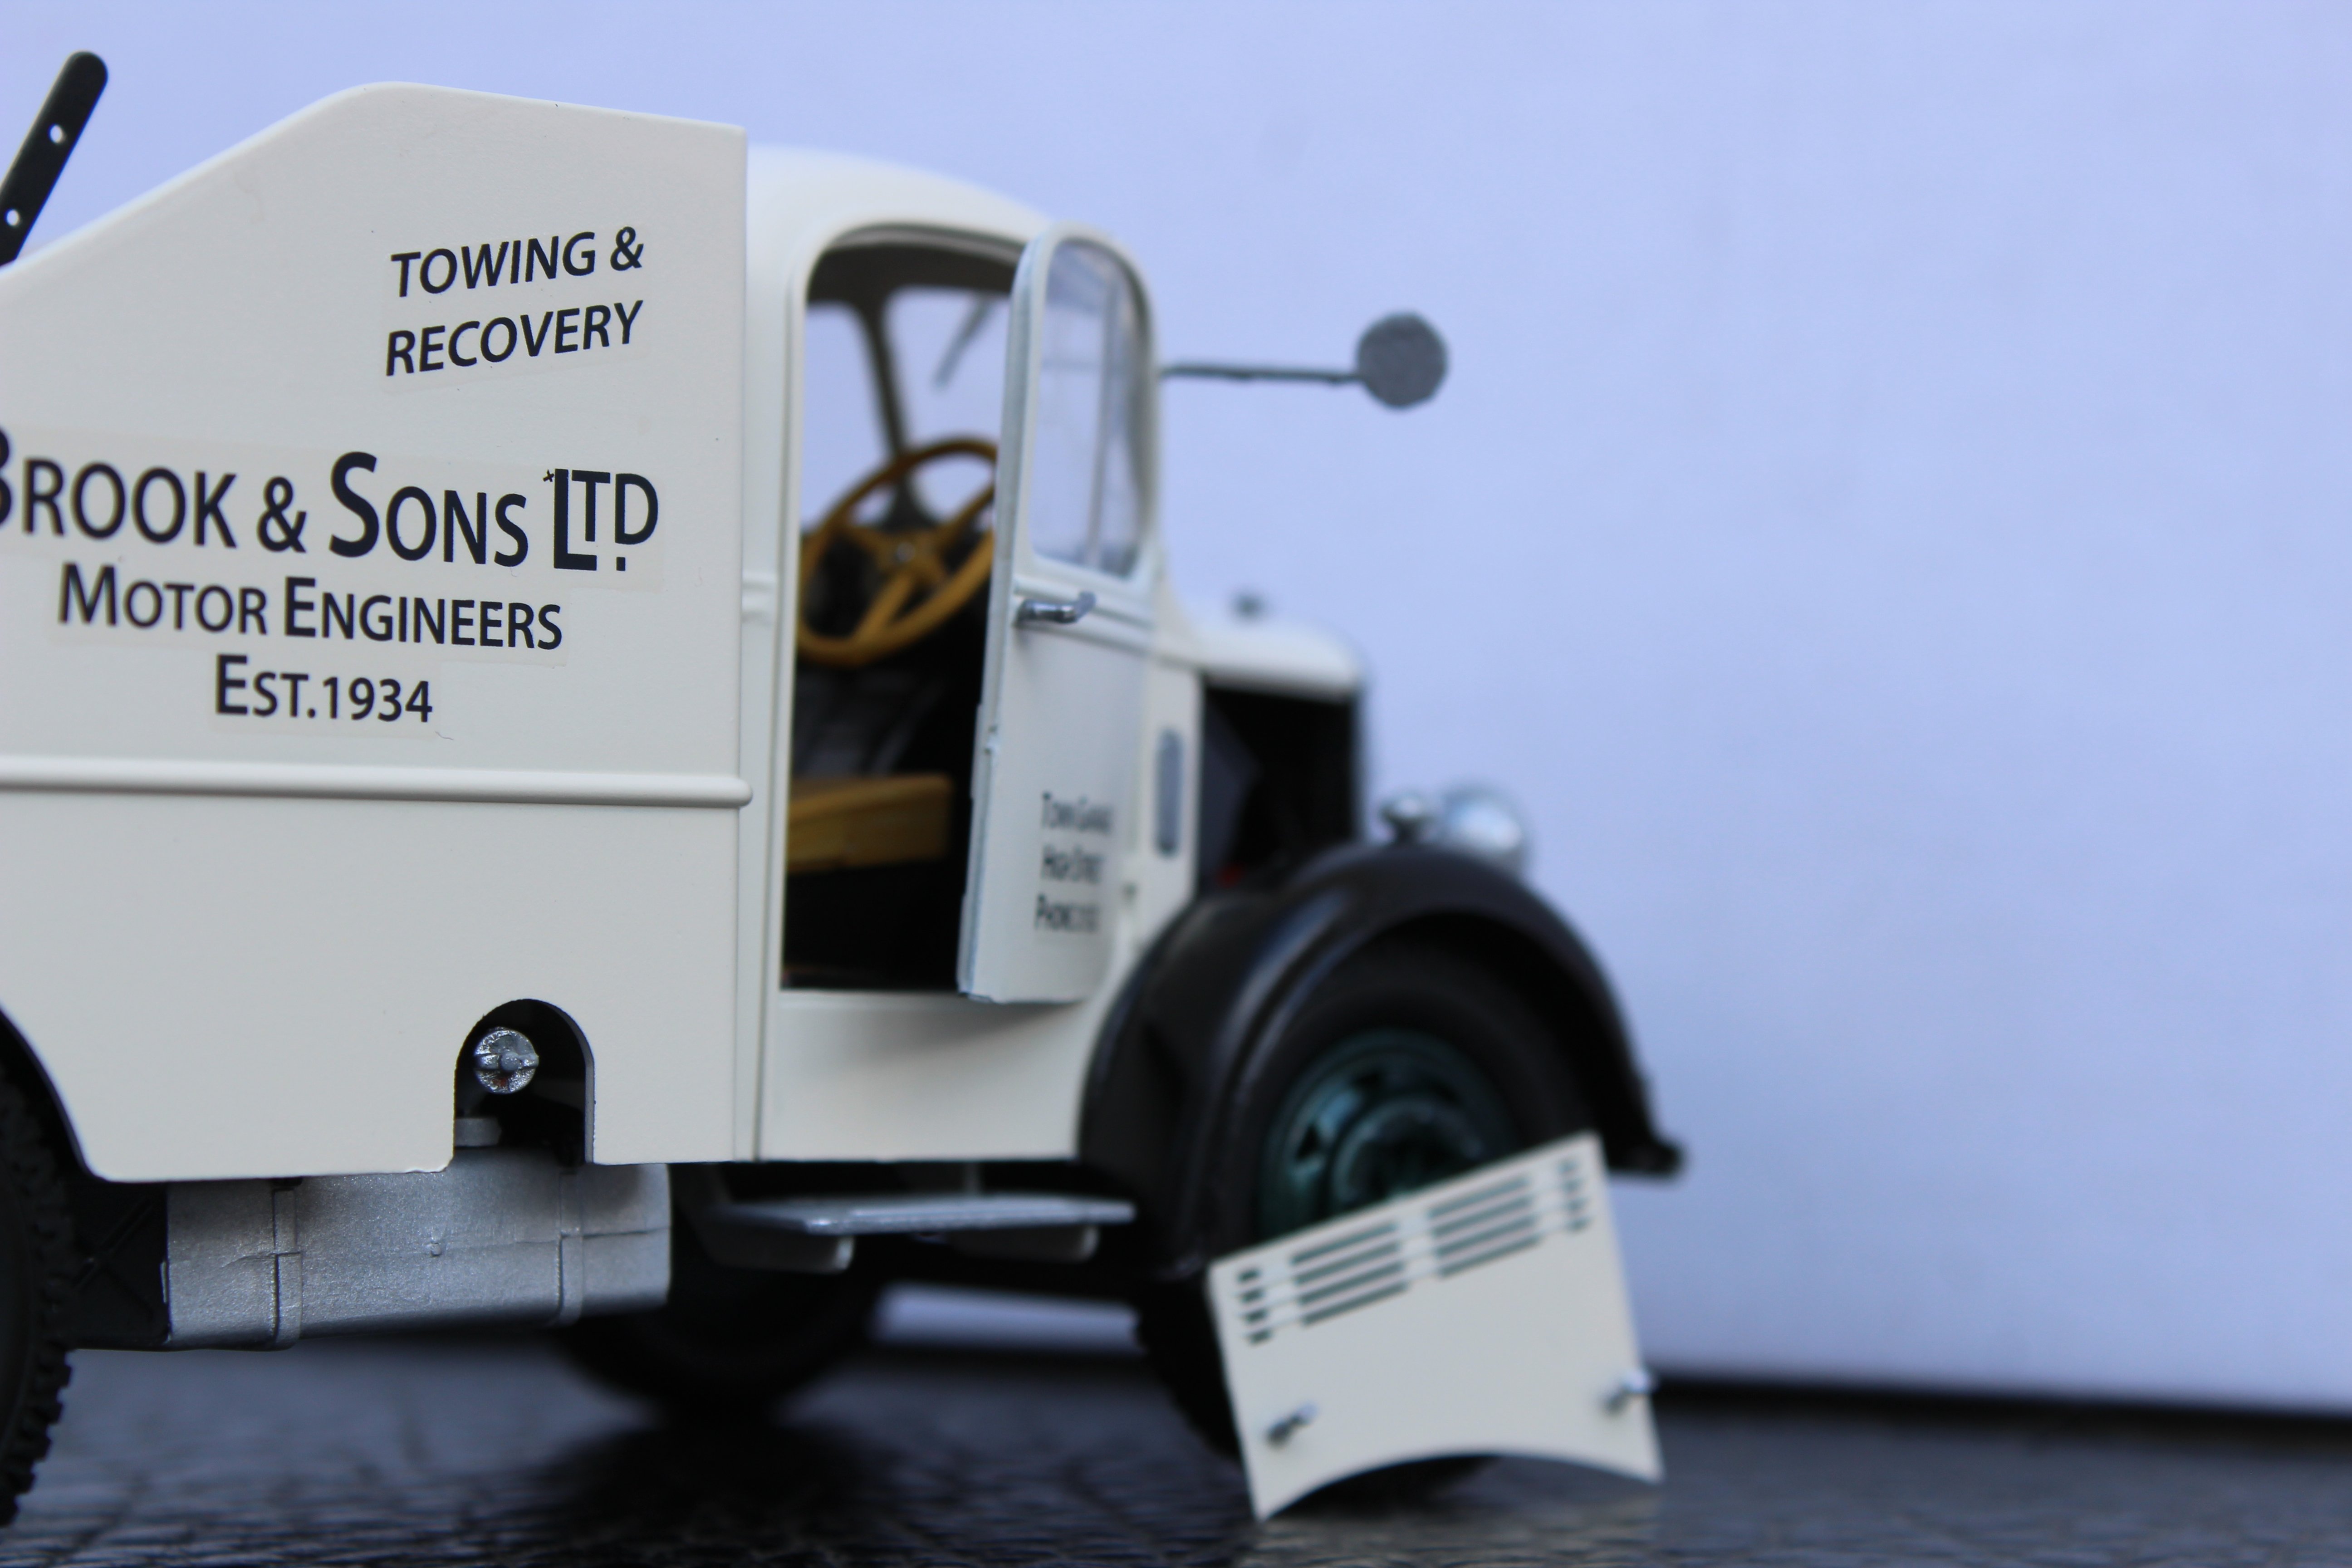
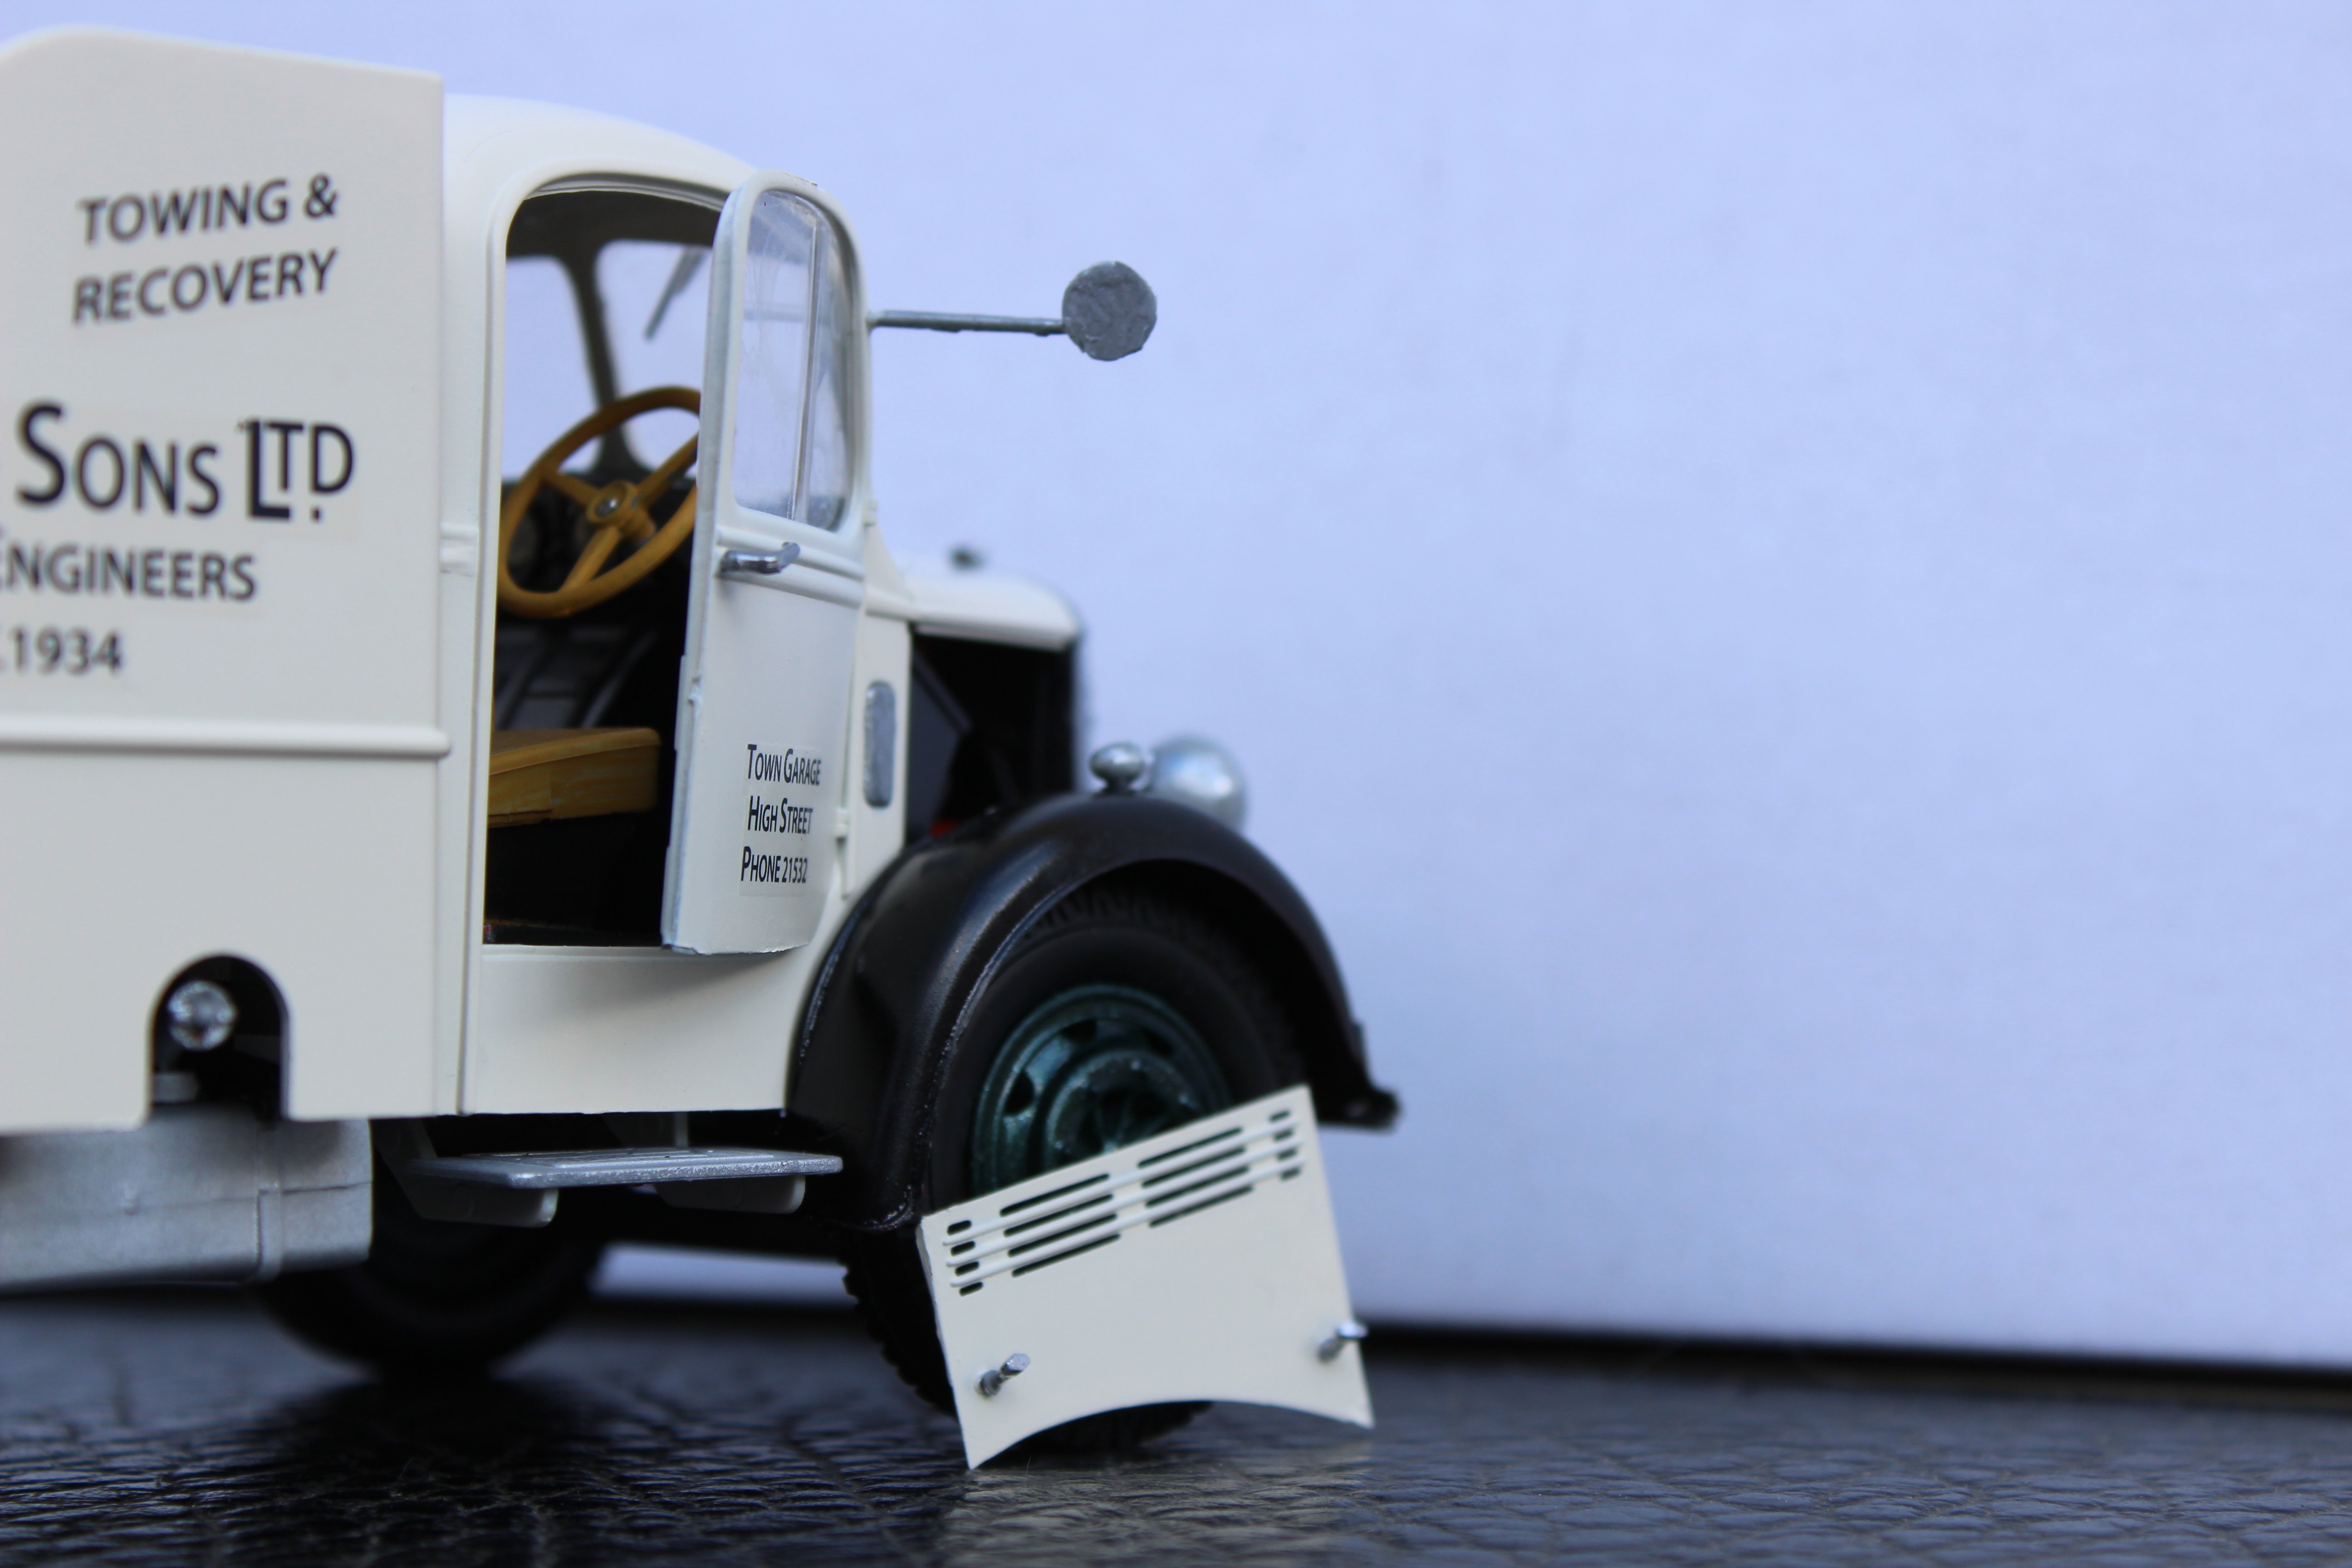
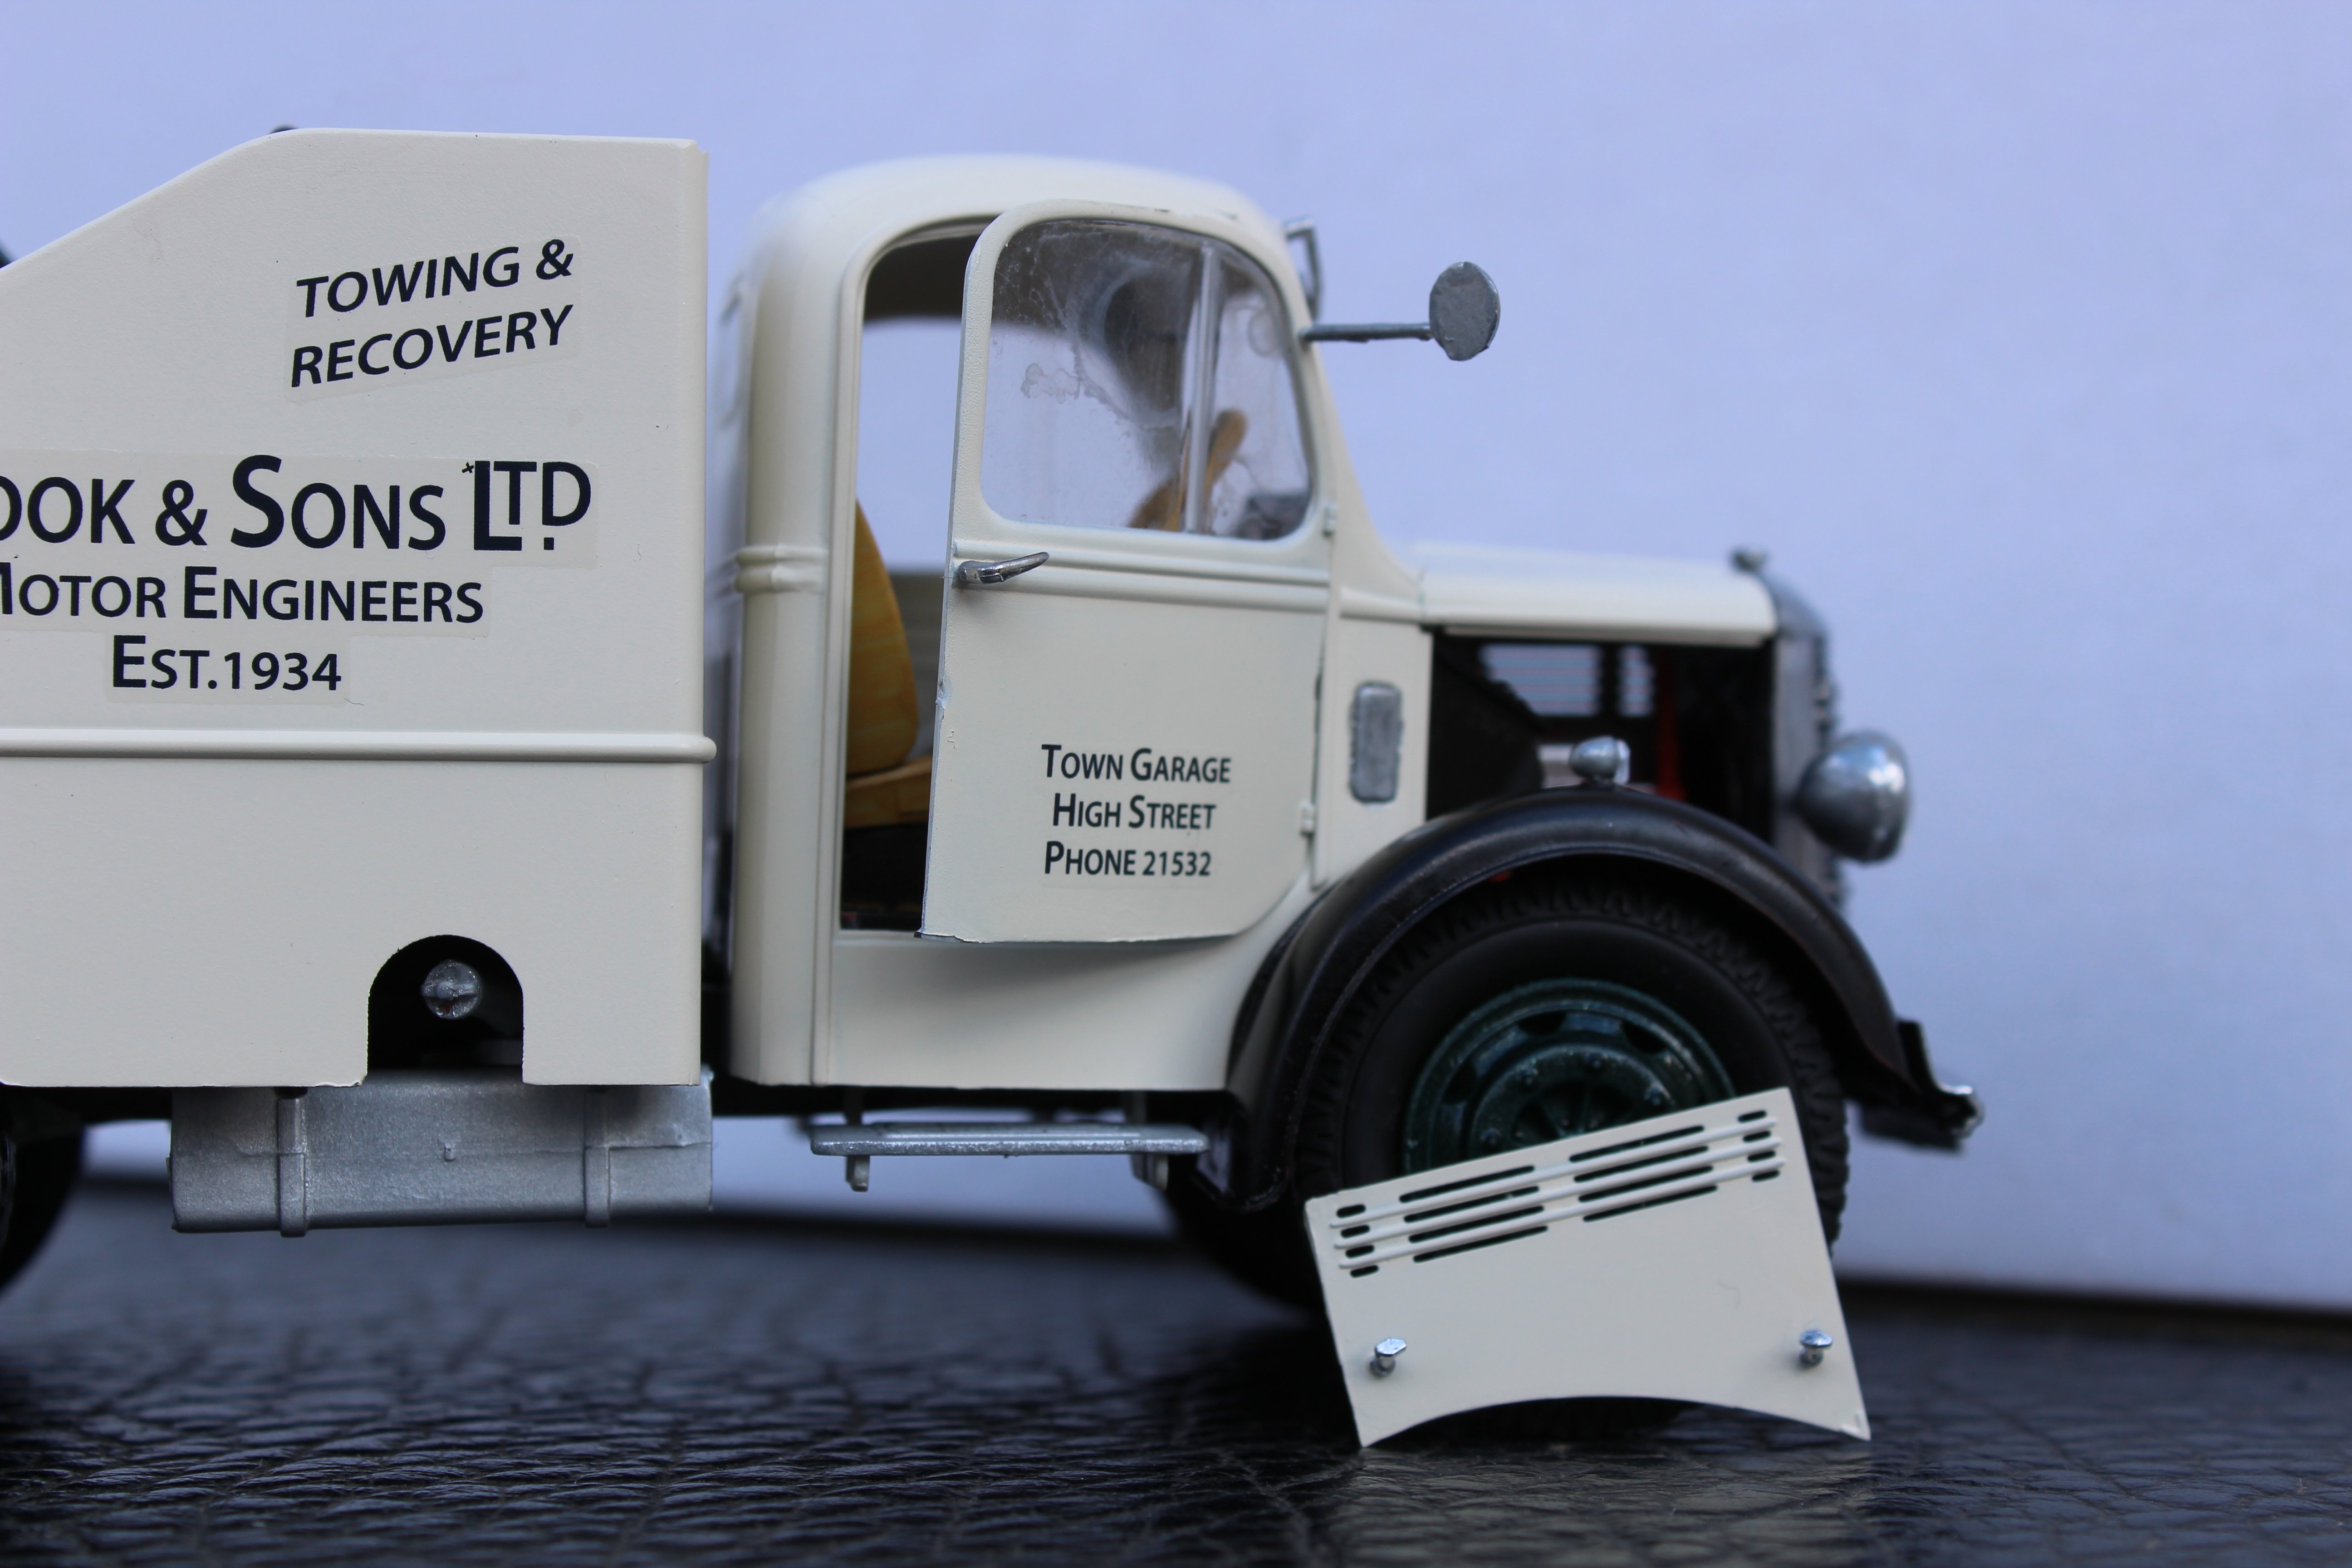
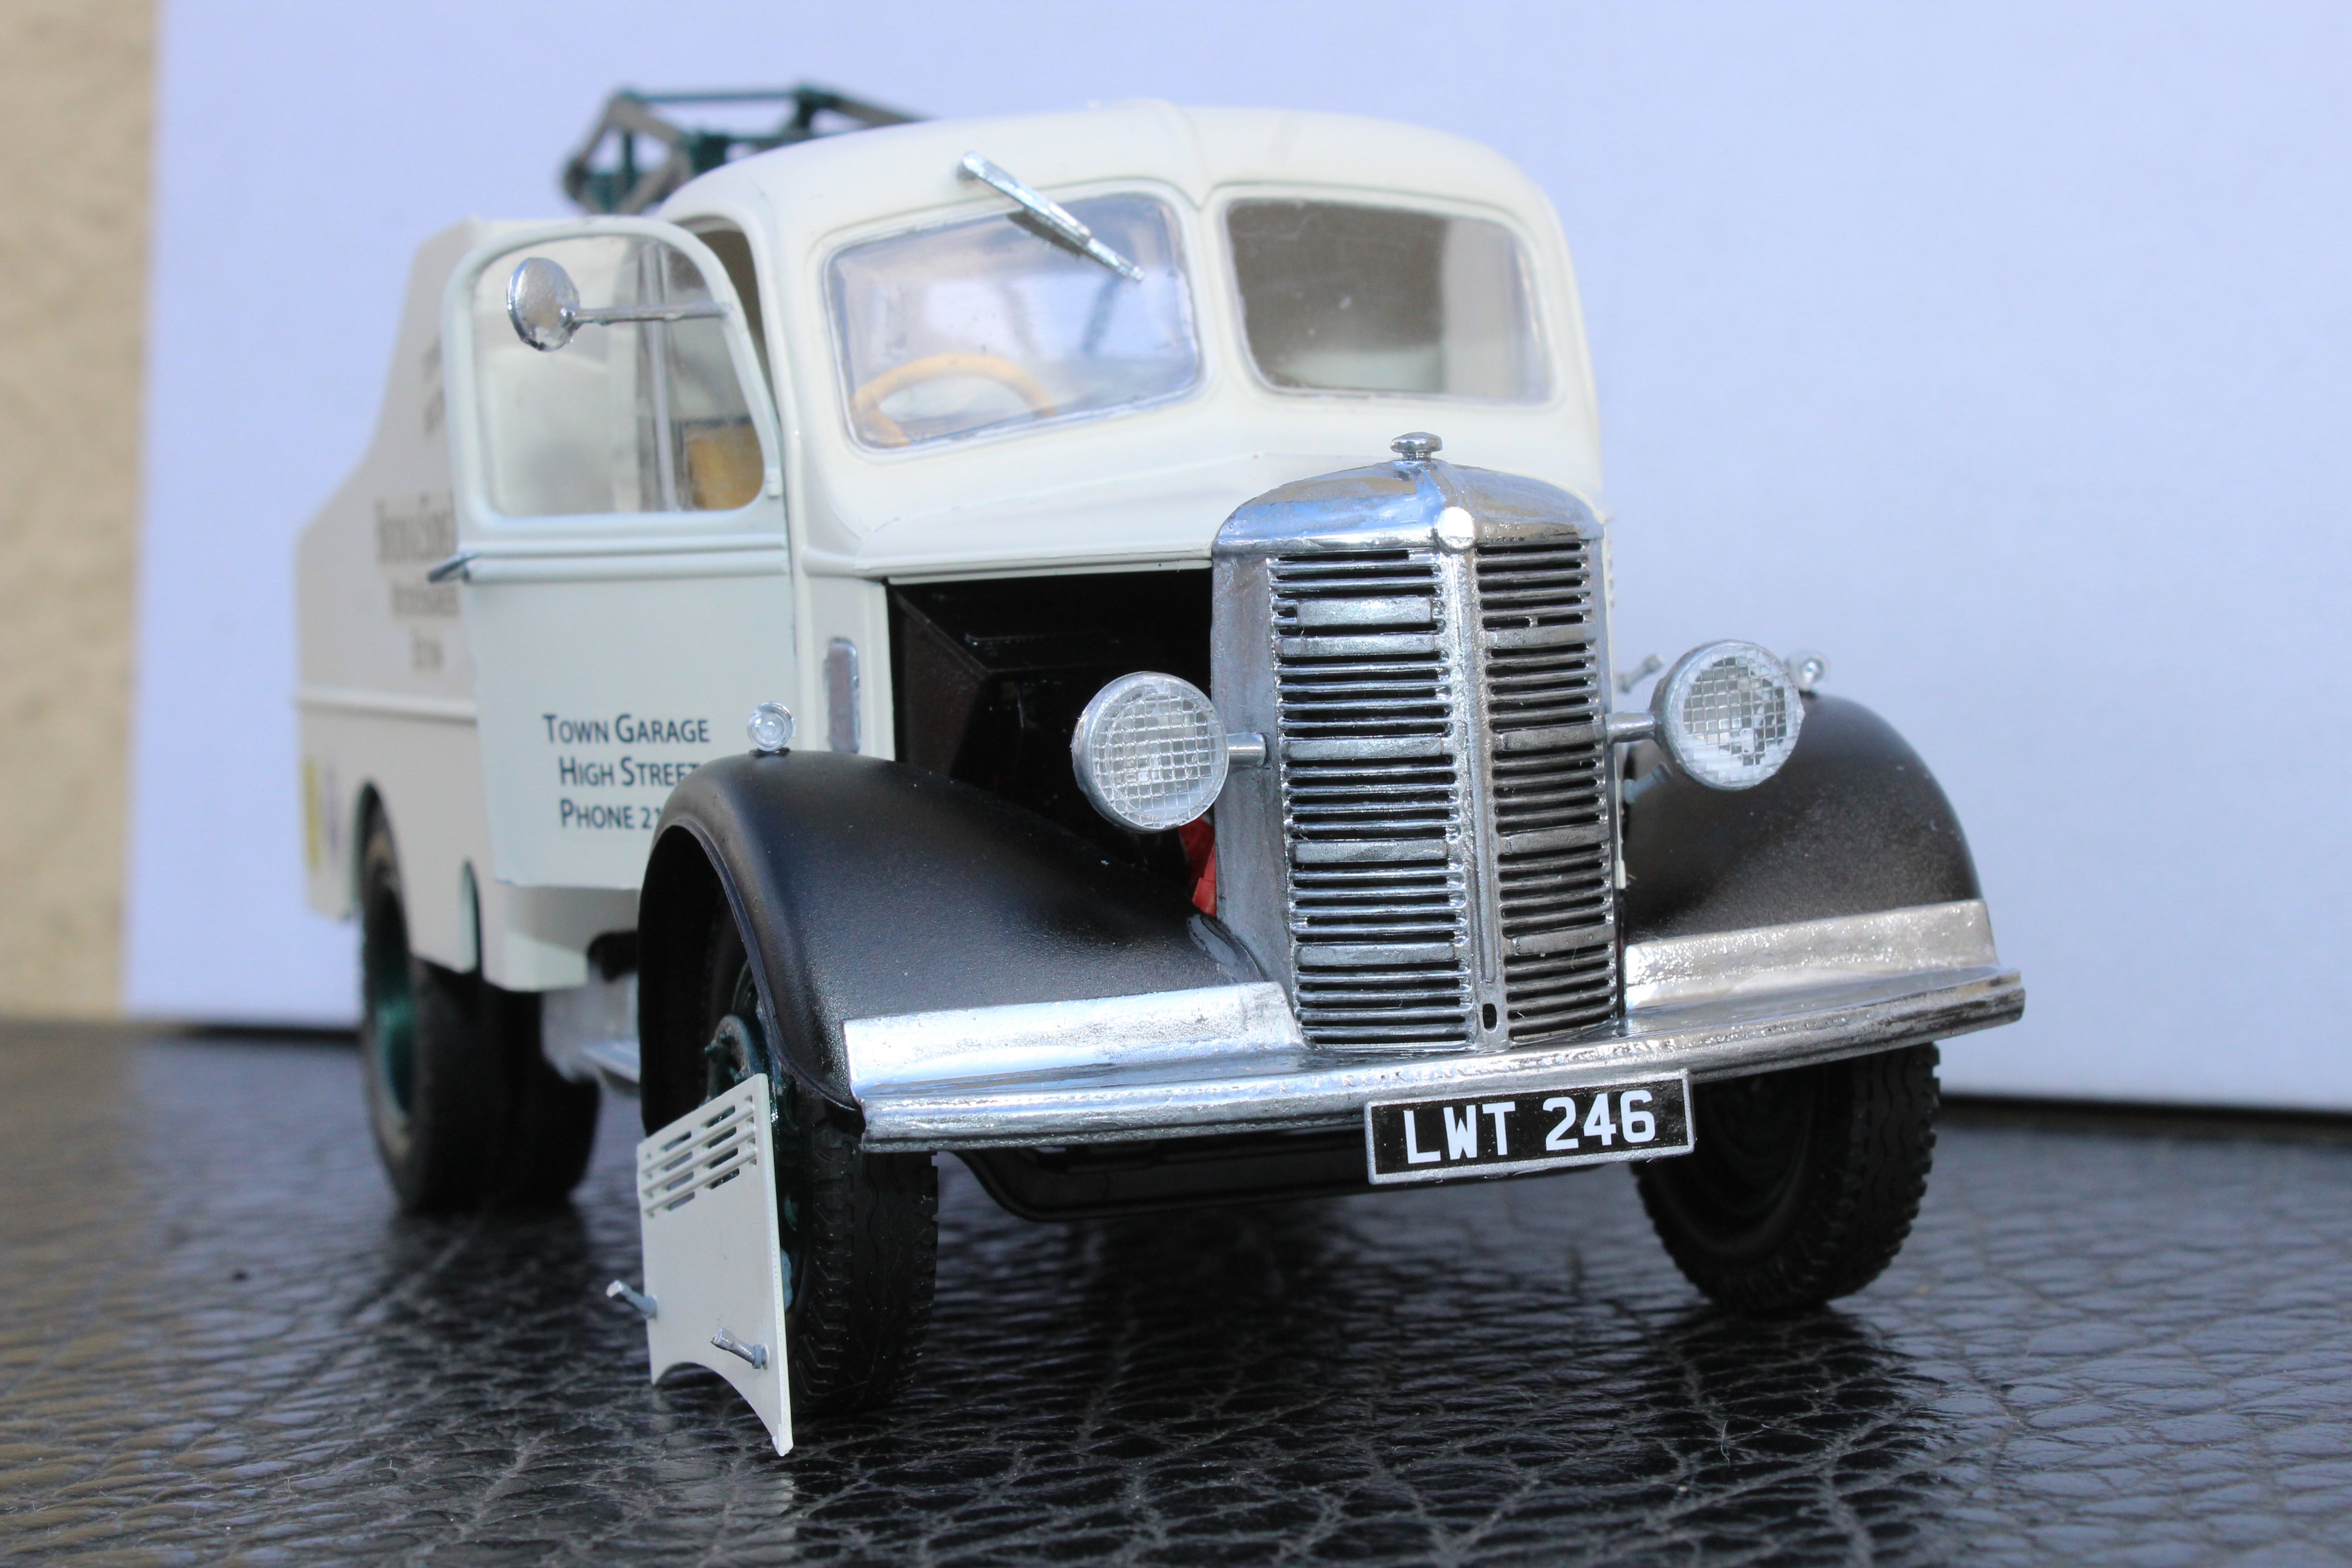
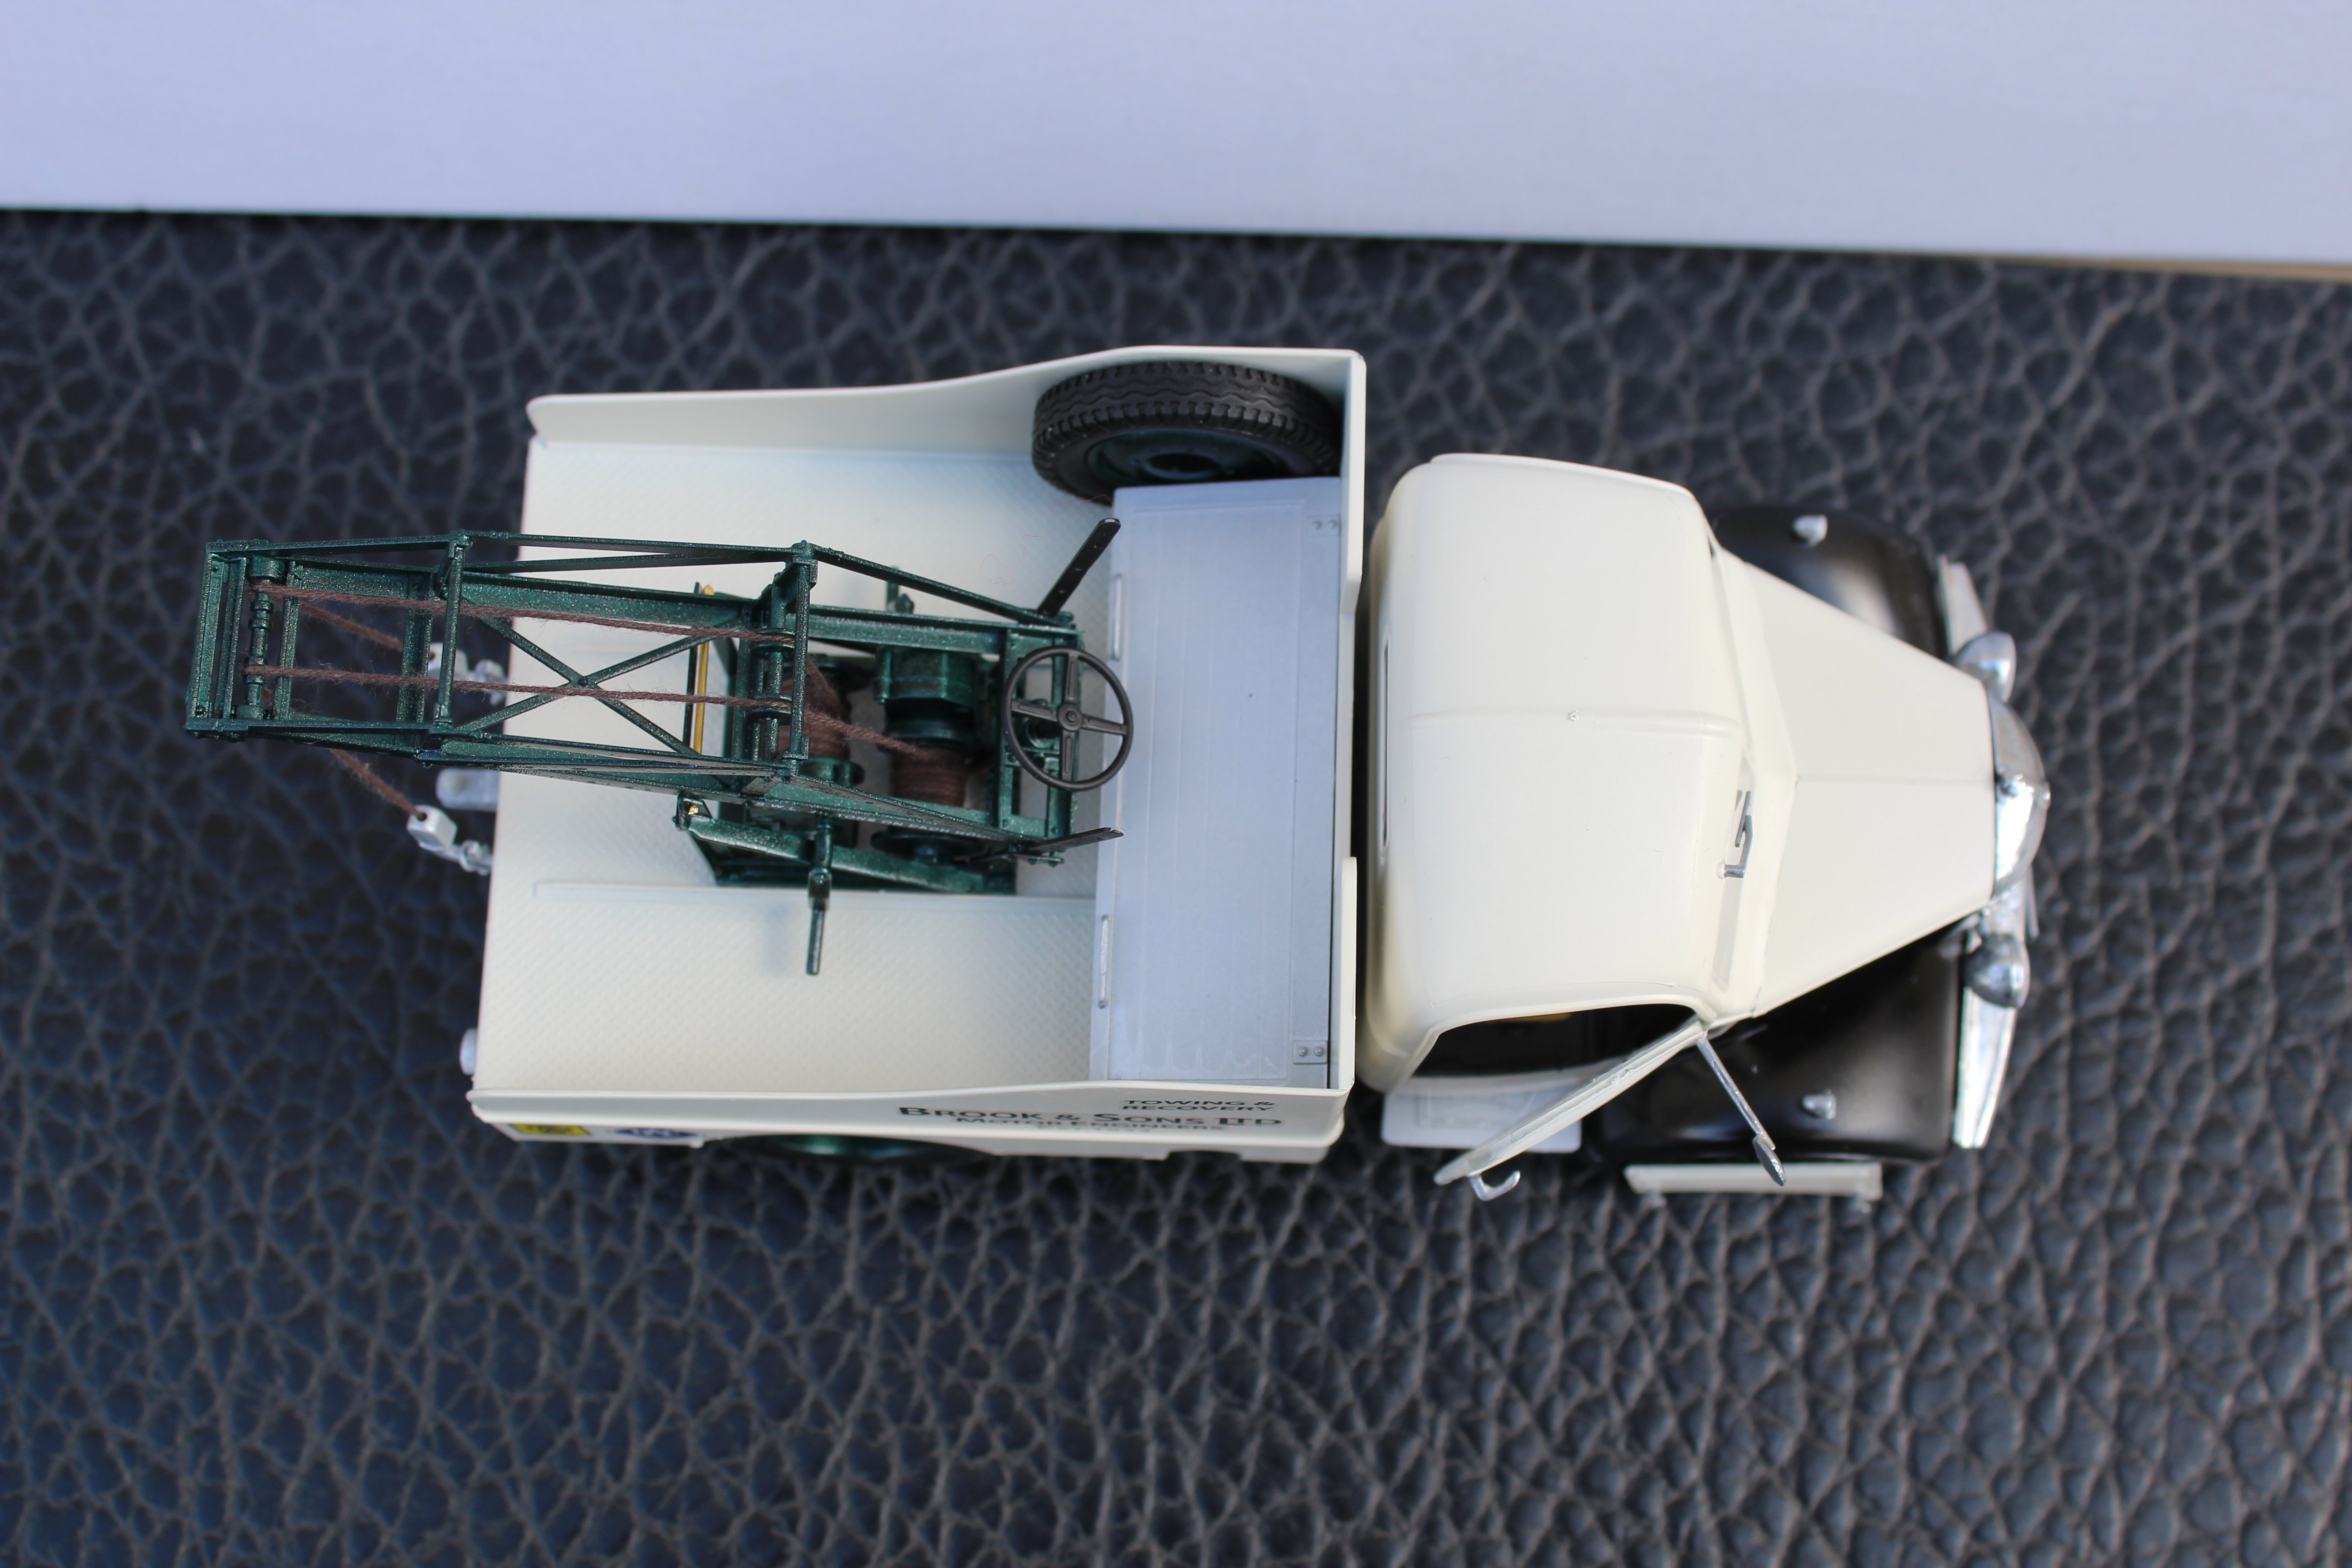
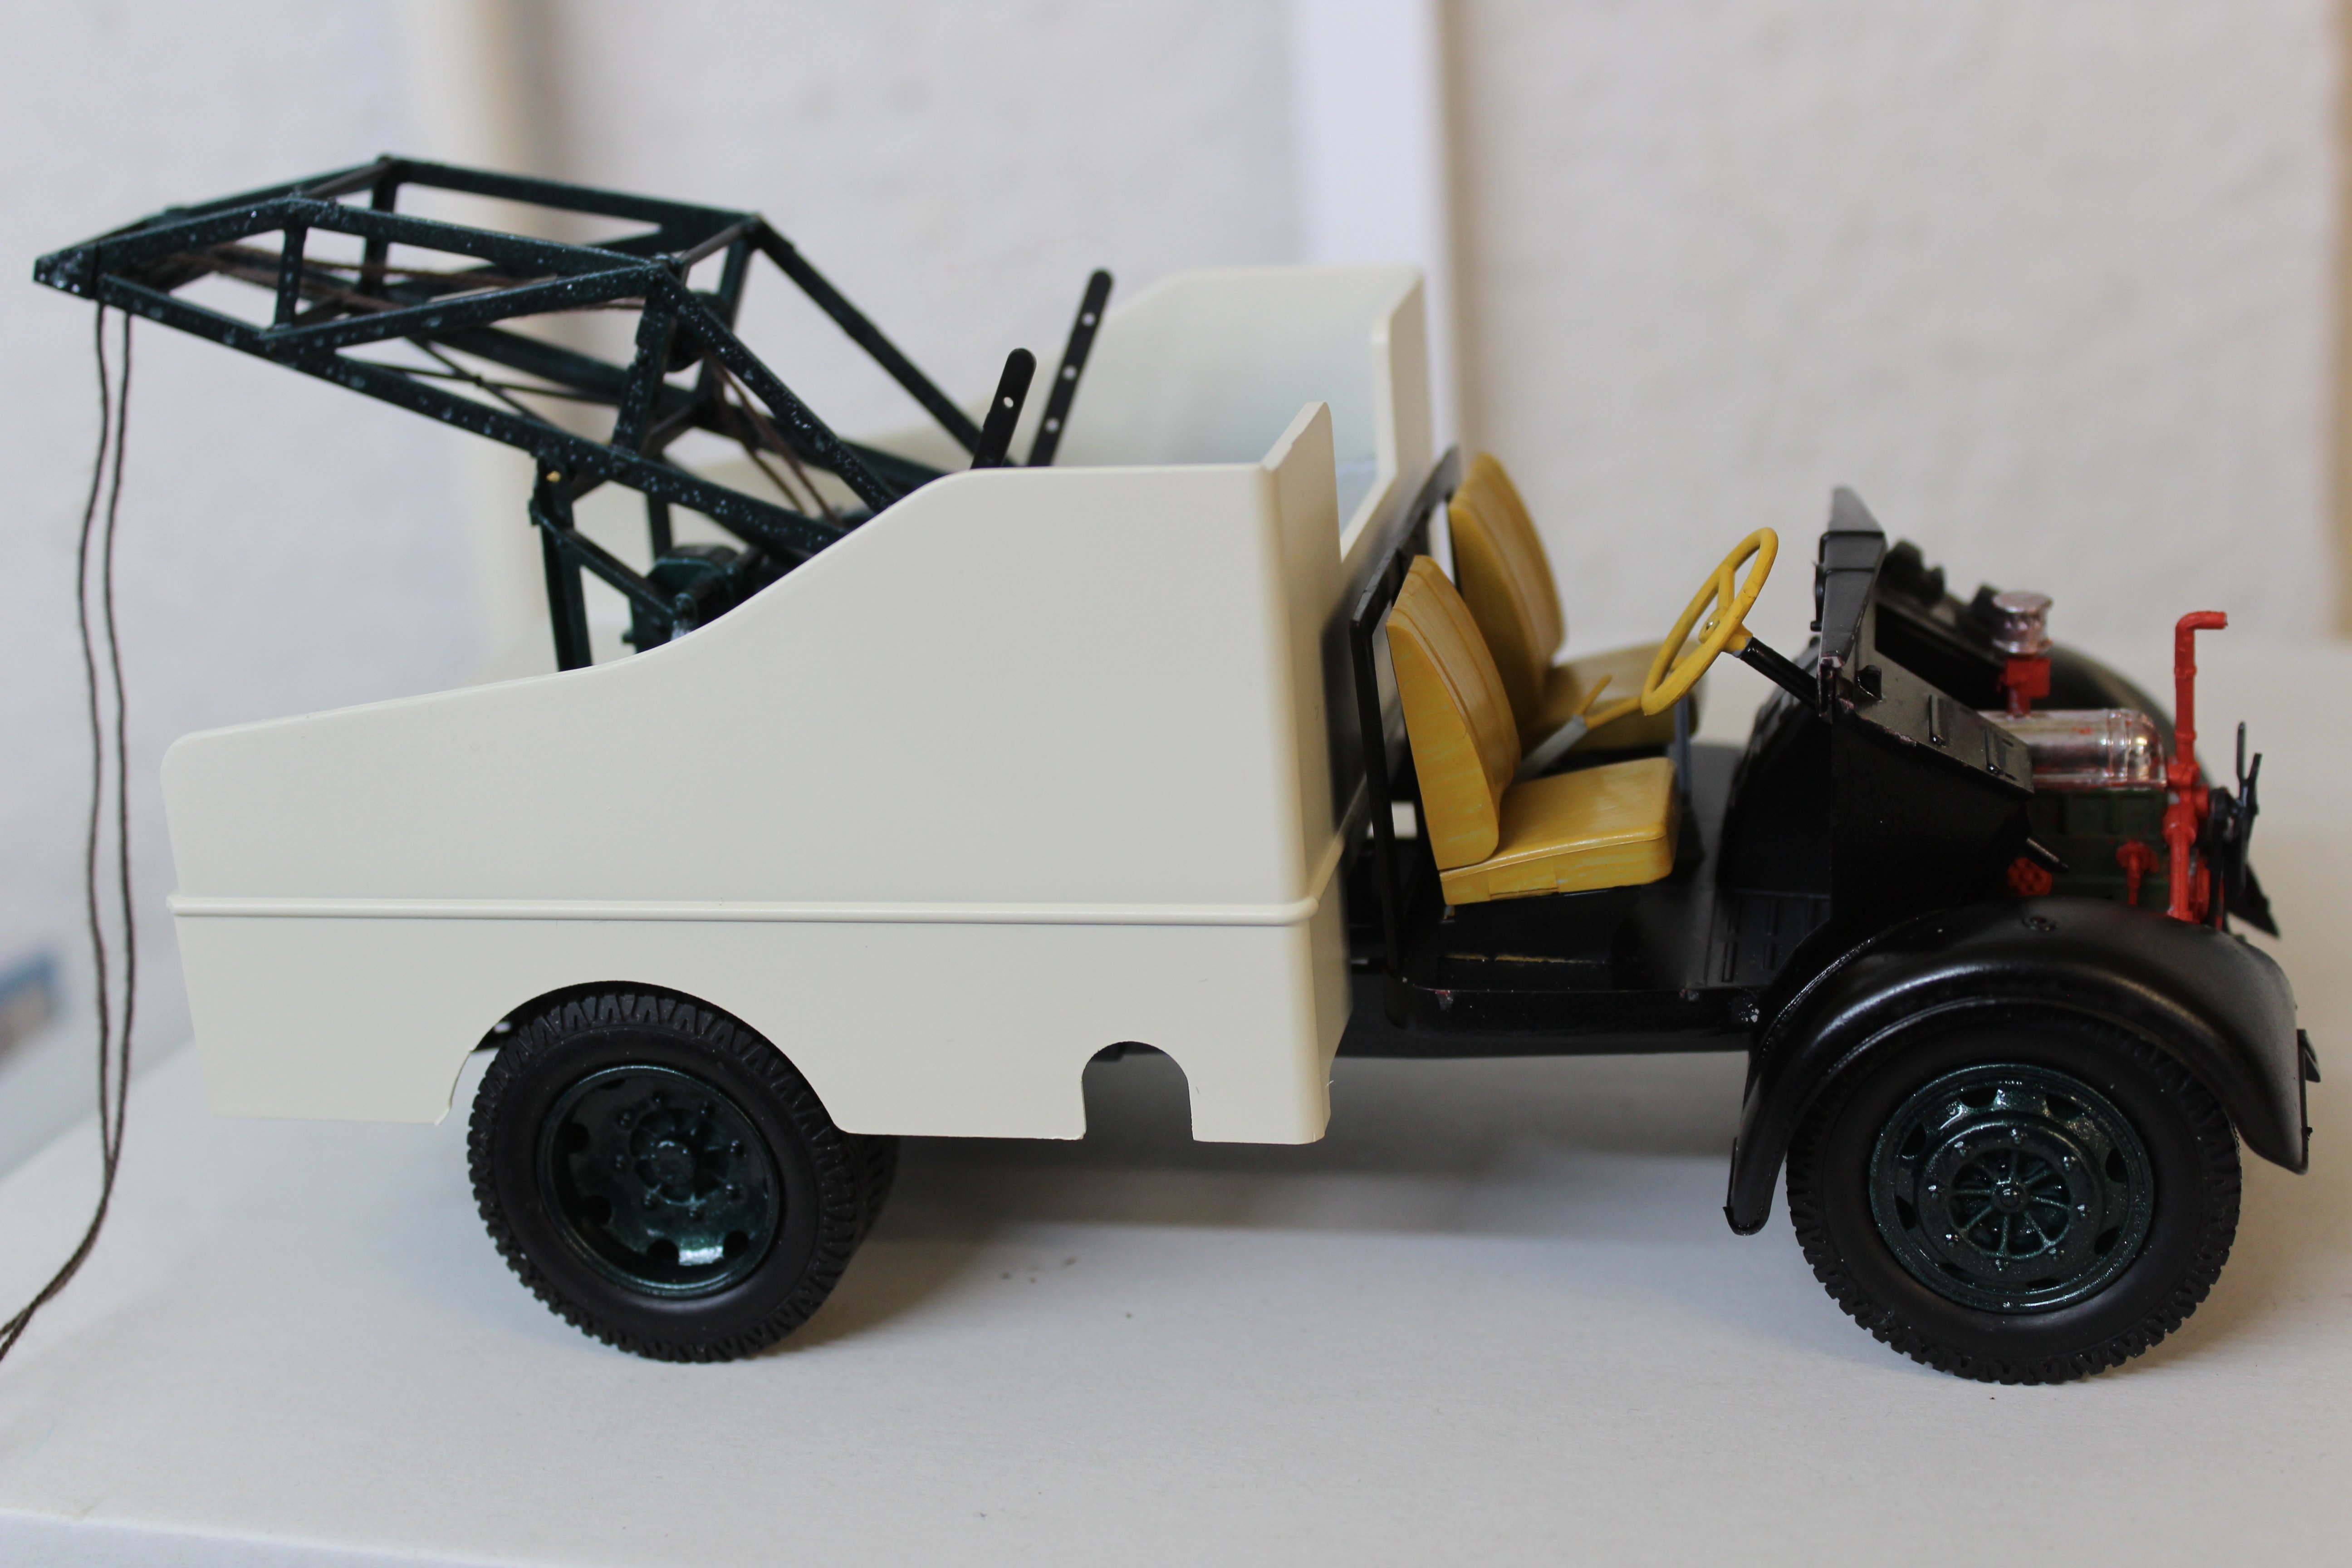
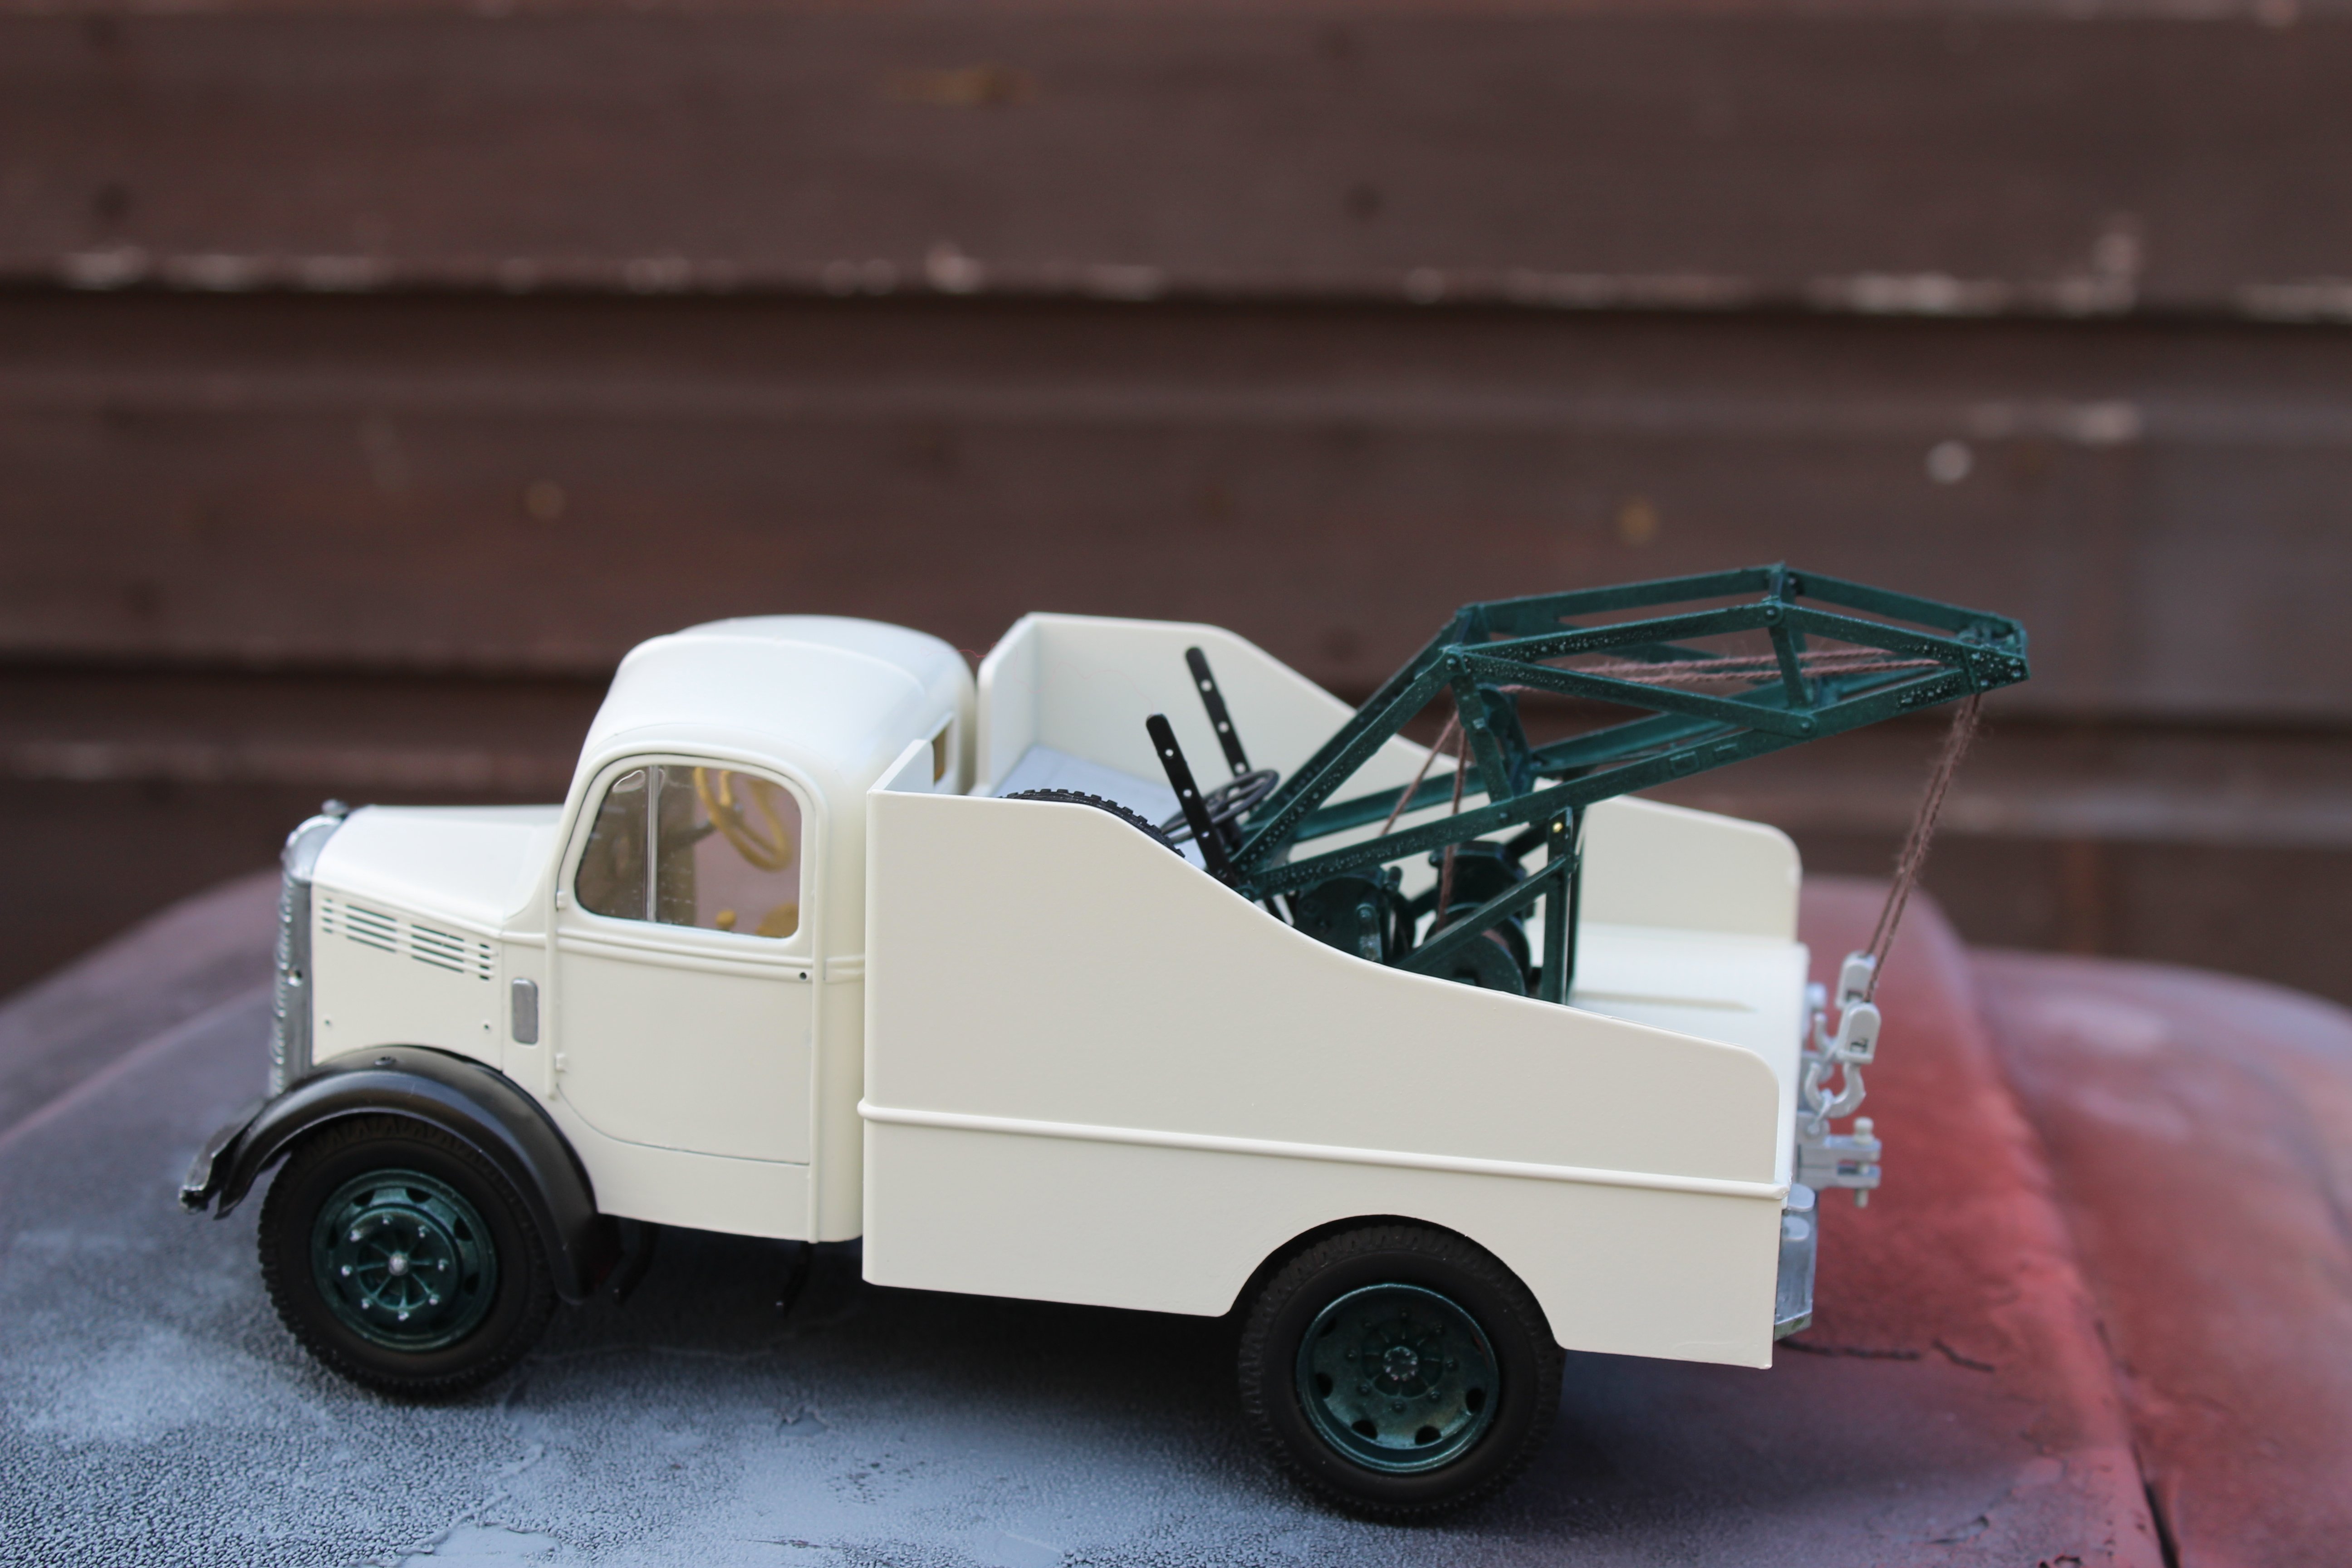
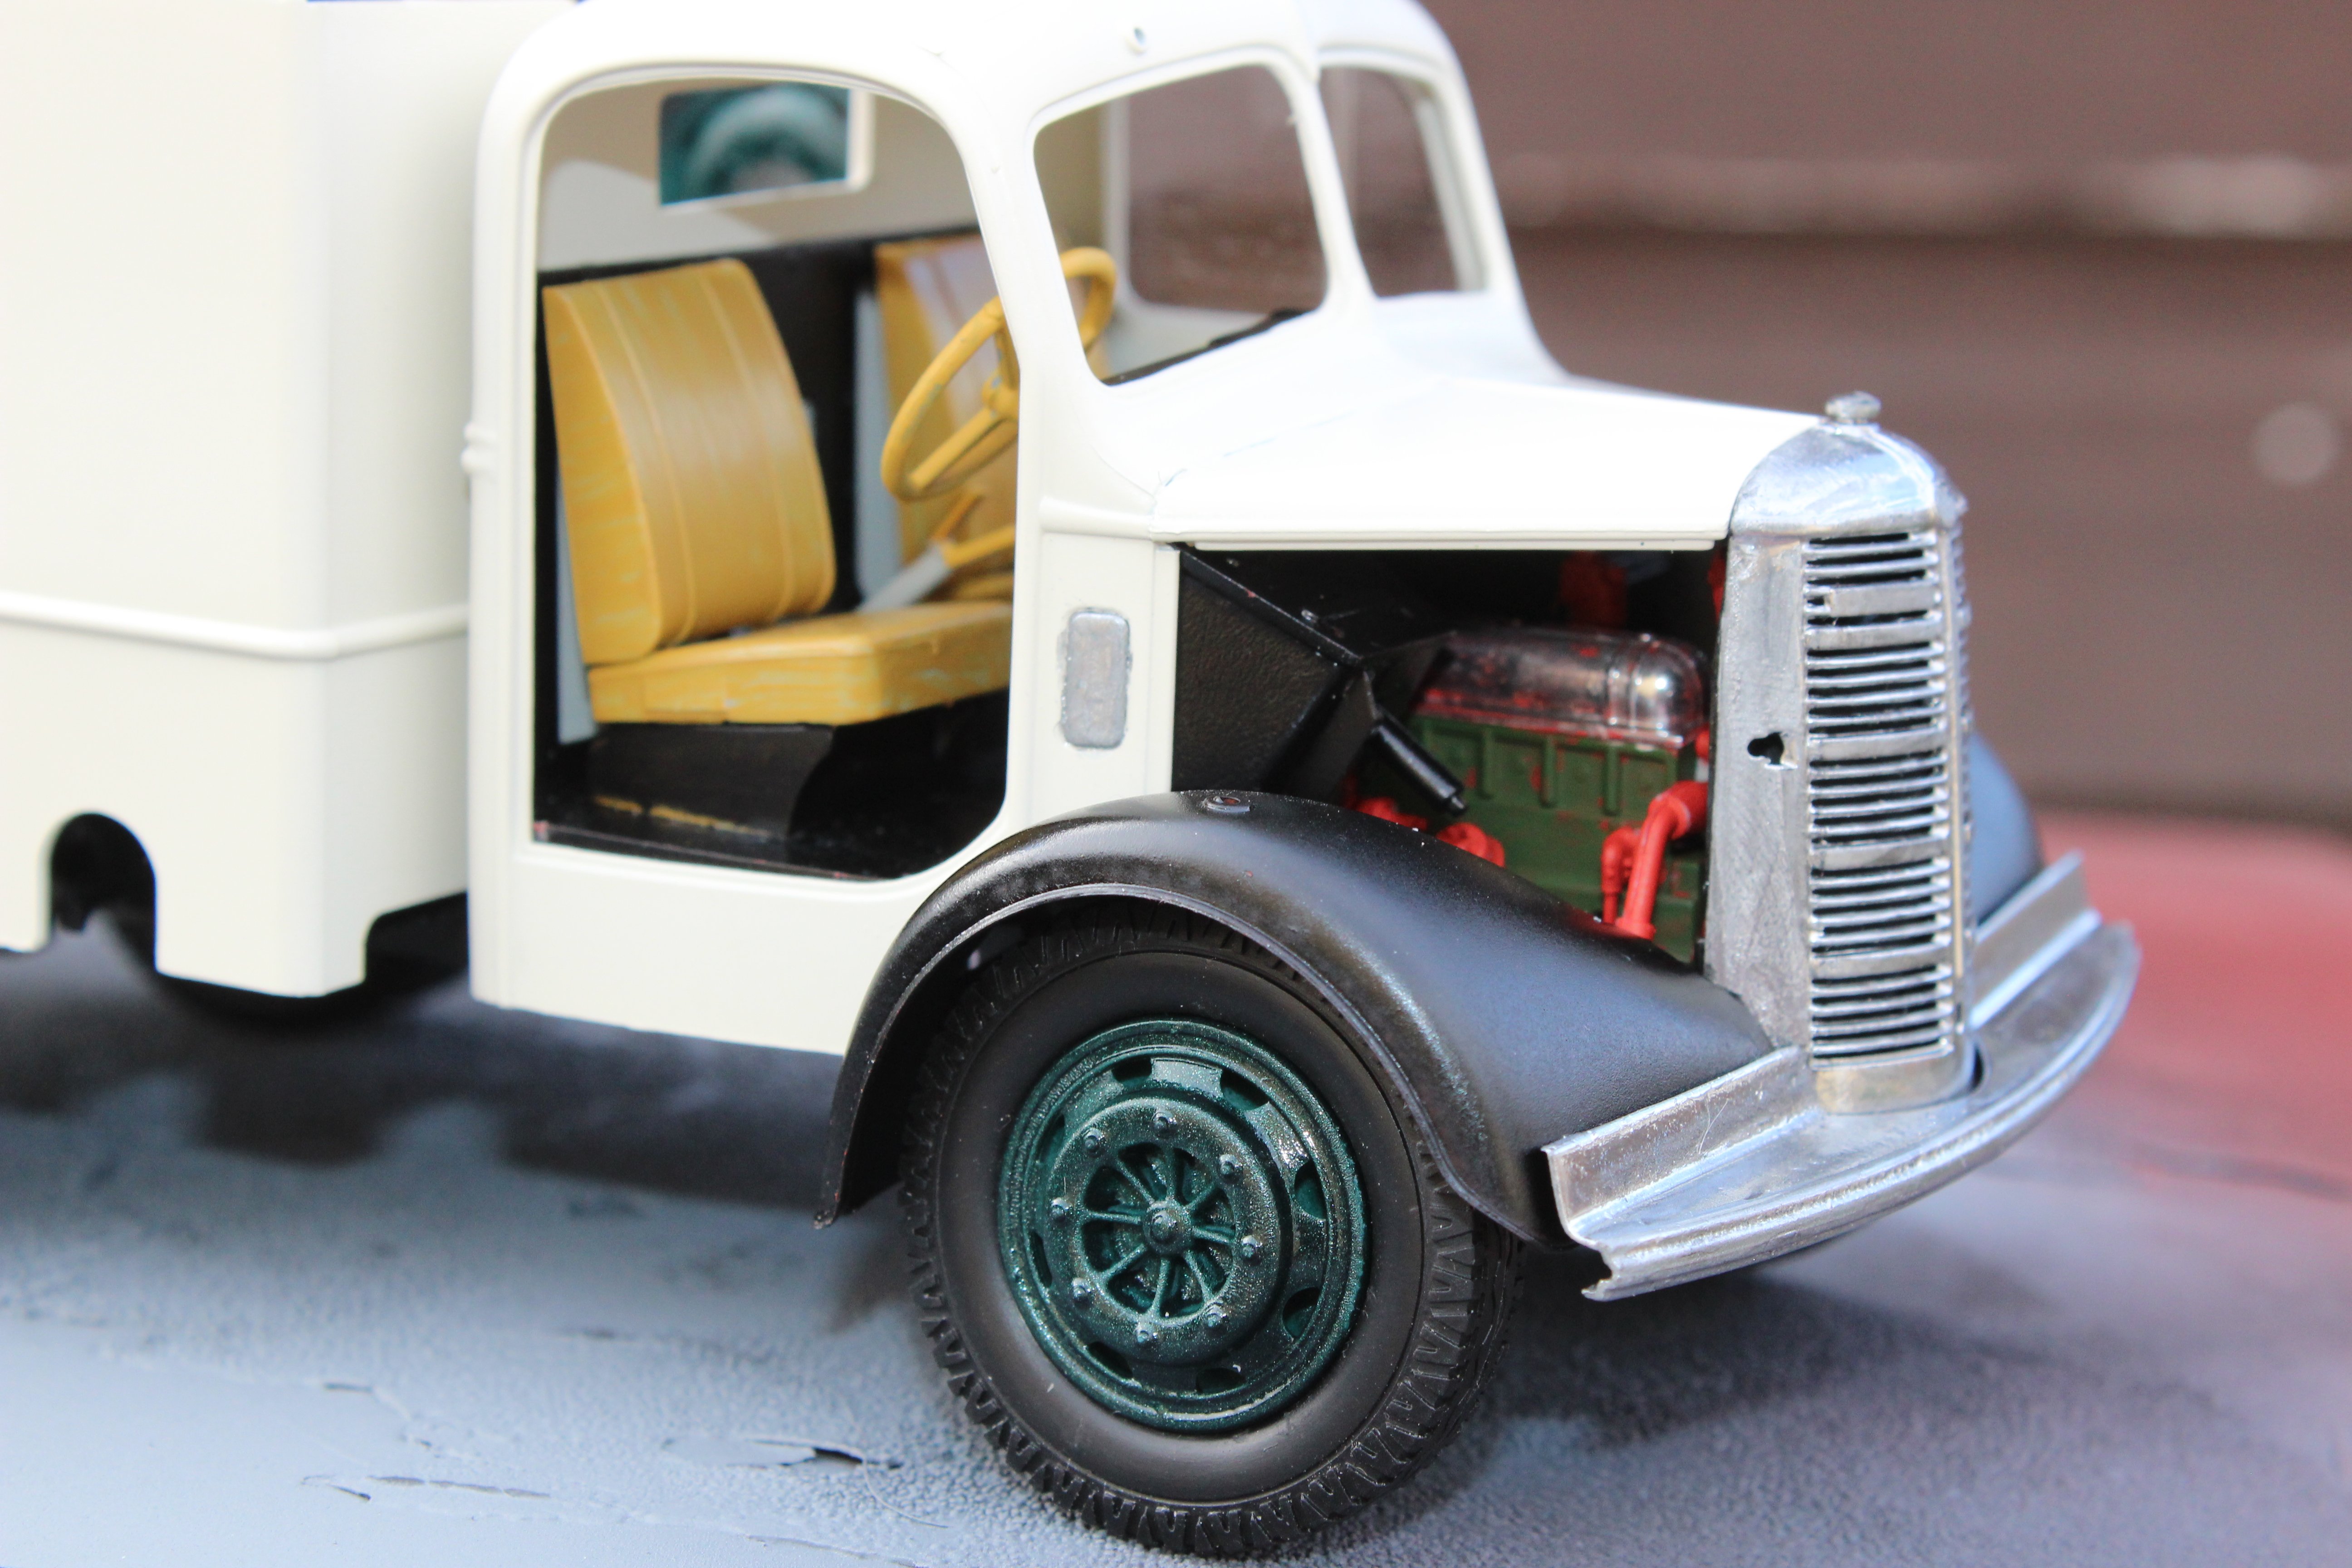
final reveal Halfords Grey Primer for everywhere Halfords black stain for chassis Halfords S9-070 Beige - body work Halfords British Racing Green - crane, wheels green stuff World for the Chrome i give the kit 7/10, for quality, very heavy tabs attach parts to sprues i give 3/10 for my attempt to build it pain to get the glass in place on the front of the cab i never dealt with seam lines properly to much not allowing primer to dry propely before adding top coat an enjoyable week, with a finished kit


-
Bedford Vehicles - Wikipedia fully intended to be OOB and have her done as soon as possible here are some of the build photos
.thumb.JPG.027effd006f1f95f88170357adf3cfd5.JPG)
.thumb.JPG.e0f8ad8adc1f83f21ab0bf5f33c6764b.JPG)
.thumb.JPG.9b6ee48ac76bdc8d73aeb948d6543311.JPG)
.thumb.JPG.e4b61c560d165a4e86baeb9f78cb445d.JPG)
.thumb.JPG.c6a84fc6e894997ec2d22a27800d5776.JPG)
.thumb.JPG.33820a25e5a6ebae6d78fd2985ef5441.JPG)
.thumb.JPG.24bec531812fa2f0879d62c42fa20810.JPG)
.thumb.JPG.890339c28c47b3f6cb9bd4792786f354.JPG)
.thumb.JPG.1ad1694b5cd8b7eb19522f9dfd91fc47.JPG)
.thumb.JPG.87d994c66cd8917971d59a67667d9c92.JPG)
.thumb.JPG.602d5c0b44ce604b257f4b830fe2640d.JPG)


-
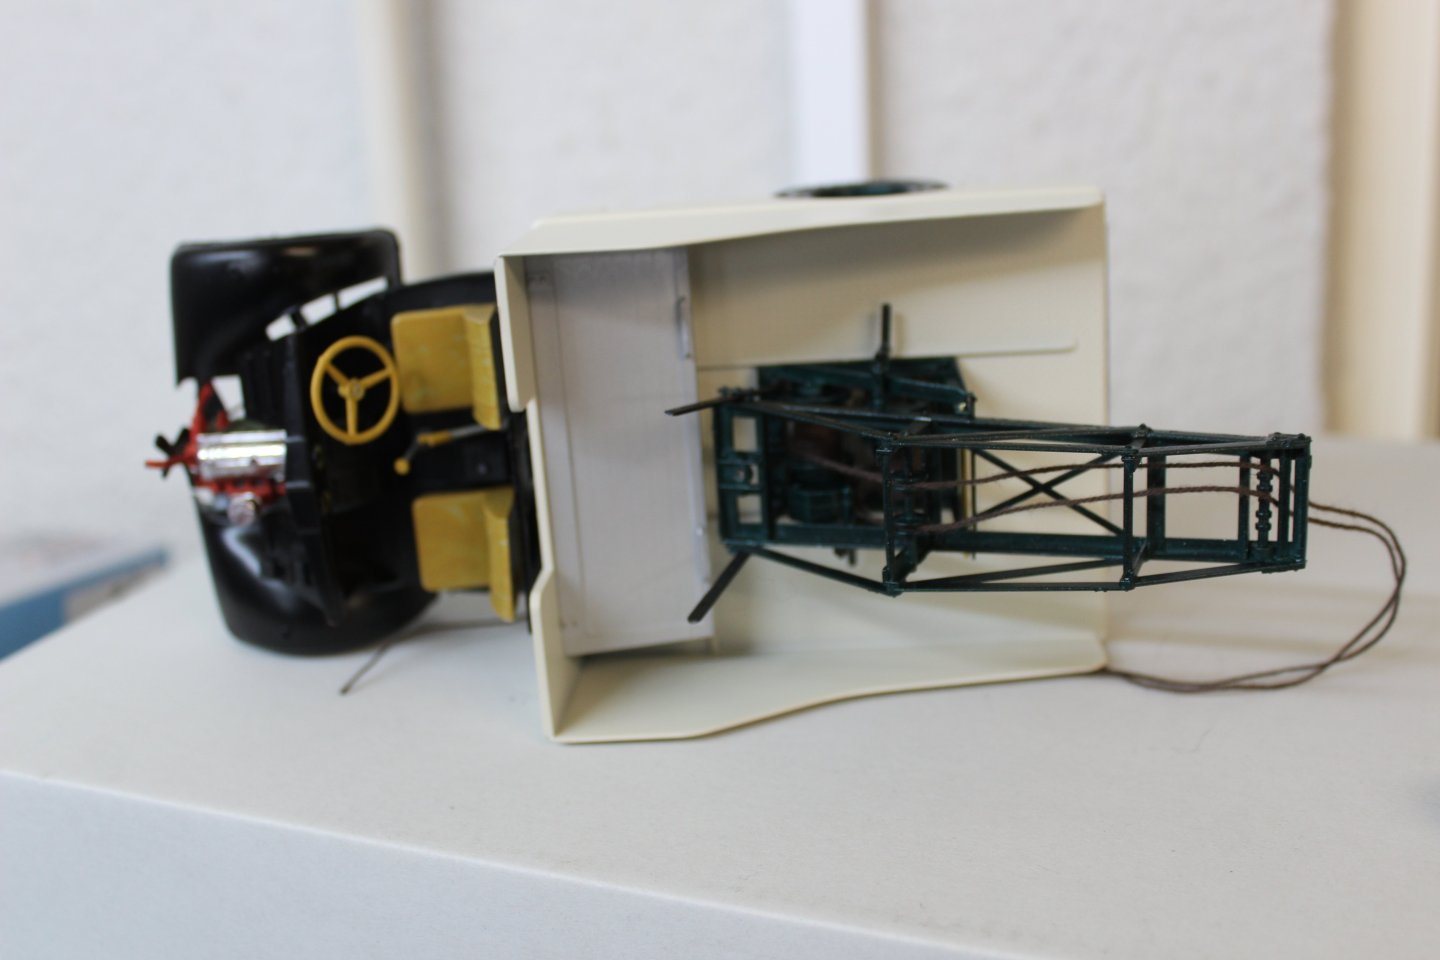
good afternoon everyone been a pants year, and as a result i pretty well lost my mojo for anything, even contemplated packing up building altogether, But I seam to be over that now and to get me in the mood, i was looking for something interesting and a relativity quick build. Jadlams came to the rescue, by selling all four of the Emhar 1/24 Bedford trucks set with 60% off a week or so back so i purchased them very little flash, minimal detailing, no PE, seams like a basic Trumpeter kit, when you open the box the four kits in the set are two short wheel base and two as long wheel base, and as a result the two versions share a lot of the sprues, like chassis and cabs all the simulated wooden panels are discarded for the set, just the Chassis is used
.thumb.JPG.866bfdb2de1e04c207a121fb5a7c28ec.JPG)
.thumb.JPG.e3961206ad9a10fdb1b0f50a33c3a694.JPG)
.thumb.JPG.8ef1480f4b9fdcd9401b826220808875.JPG)
.thumb.JPG.bff19c62afc8e139dd79884f626f5c53.JPG)
.thumb.JPG.93b5f1c6912279b3e4c67613d7457838.JPG)
.thumb.JPG.9b42ed1cab27516154b1bb5ec40a78bb.JPG)
.thumb.JPG.0c48b471a9f8af94d740460126b308ca.JPG)
.thumb.JPG.bb2c10fad2e65da4b0b2a0d43c07e926.JPG)
.thumb.JPG.fd7529a060b22426e95a3cb7cd3fbbd8.JPG)
.thumb.JPG.db05803072c1066536020dc016eabca0.JPG)
.thumb.JPG.1067f10818155fd15a9af5bfa292c3e8.JPG)
.thumb.JPG.bbb2f0781cf169431773647e938c486a.JPG)
.thumb.JPG.b7cf448d798a6fc0bdd344326ff21bf3.JPG)
.thumb.JPG.eb0bb886e20d7e6bc652fcc924d50738.JPG)
.thumb.JPG.1352f0da128be1108b5d1cb7840130d6.JPG)
-
wonder why the glow plugs are not supplied
-
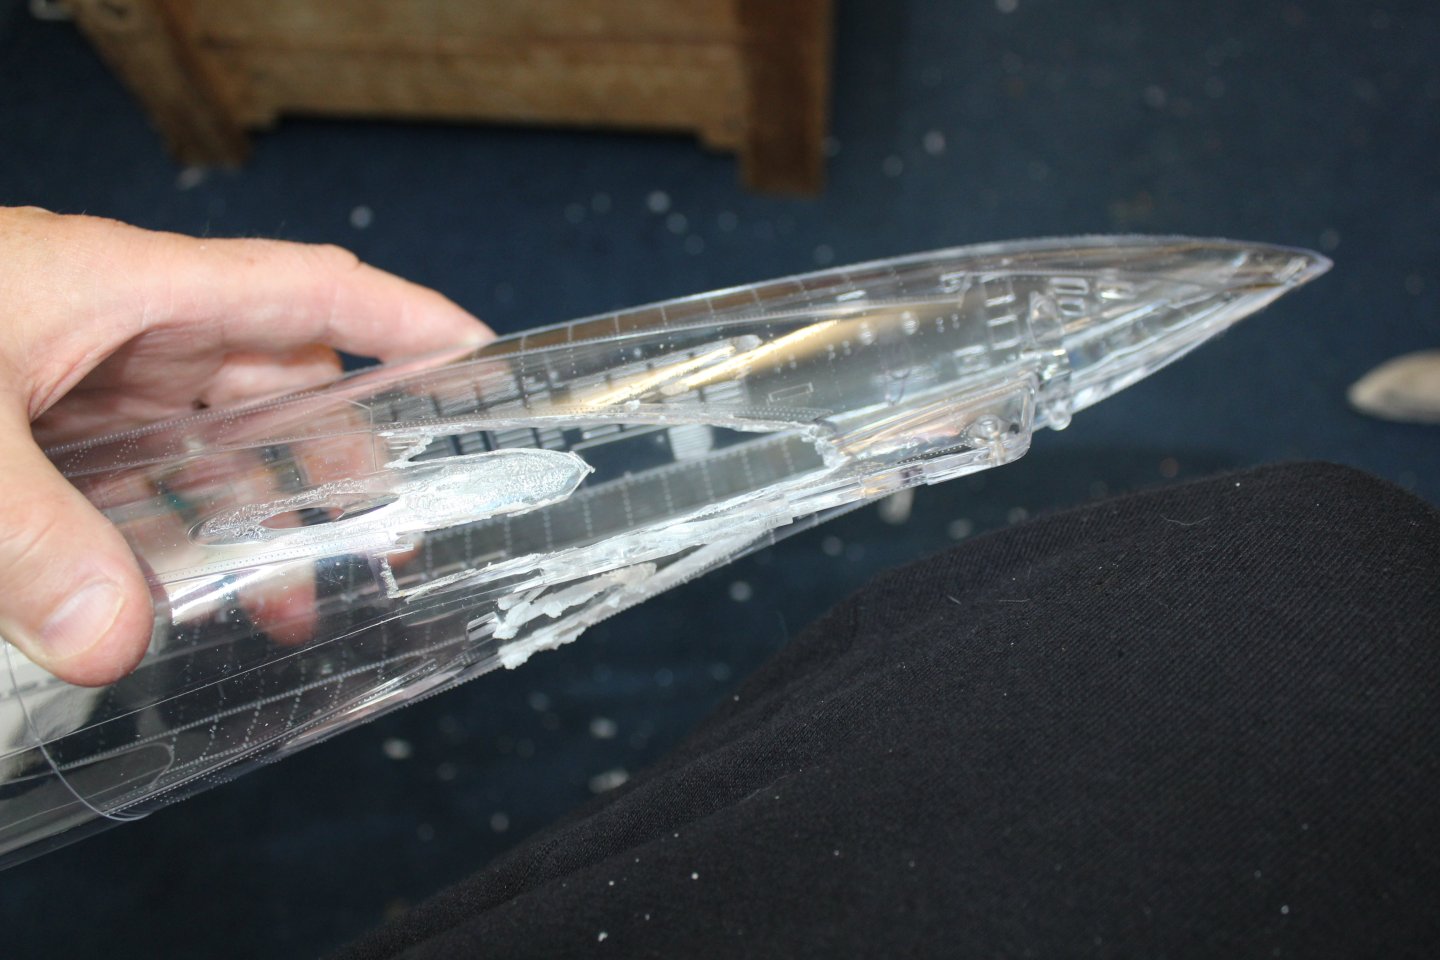
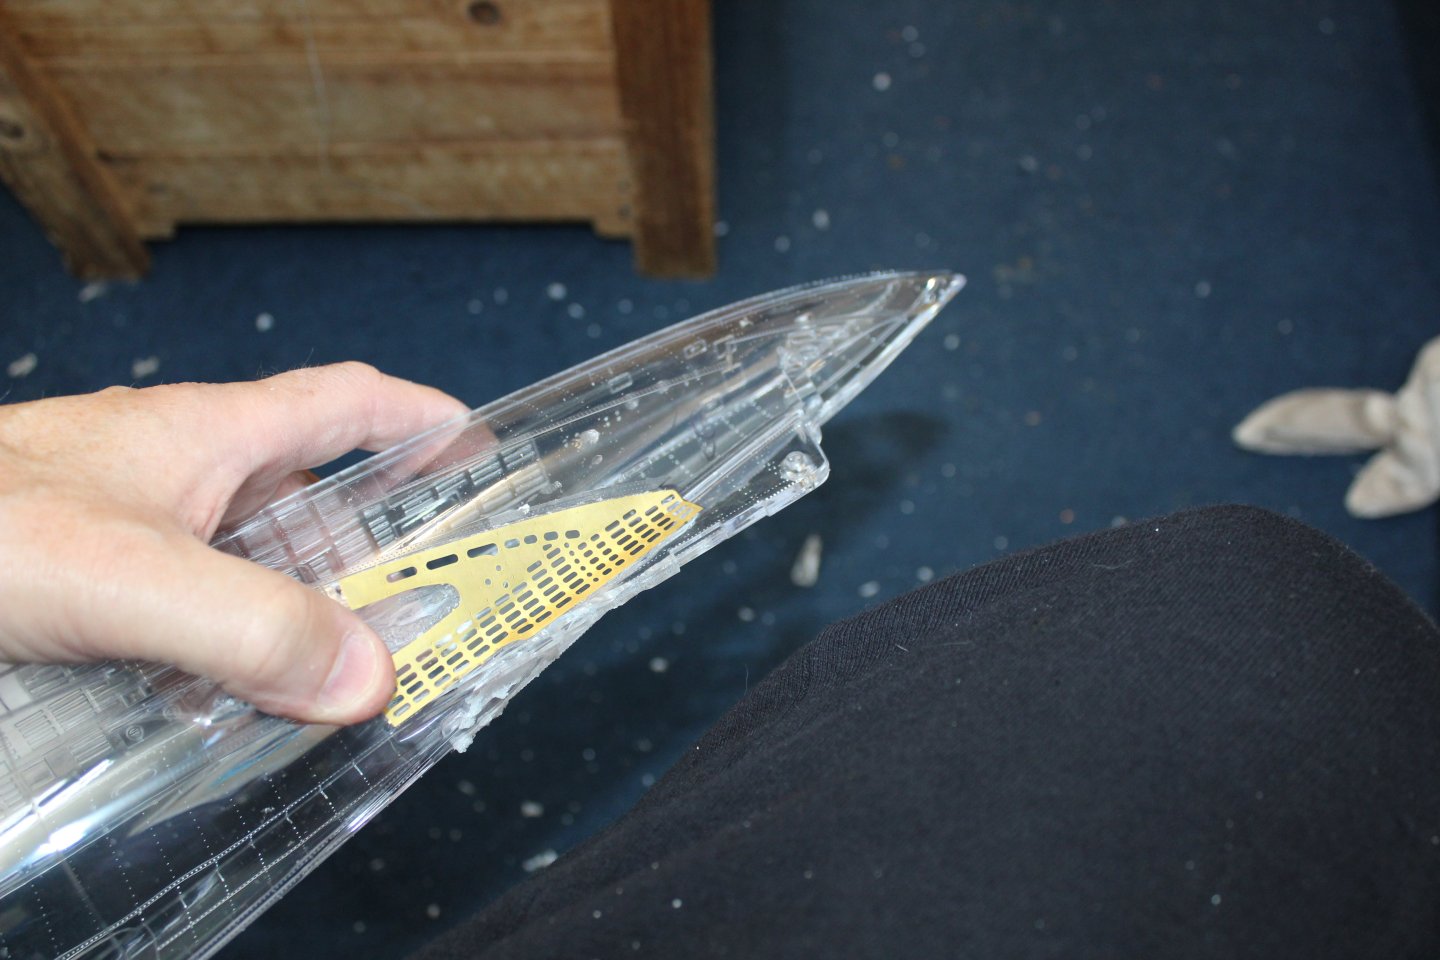
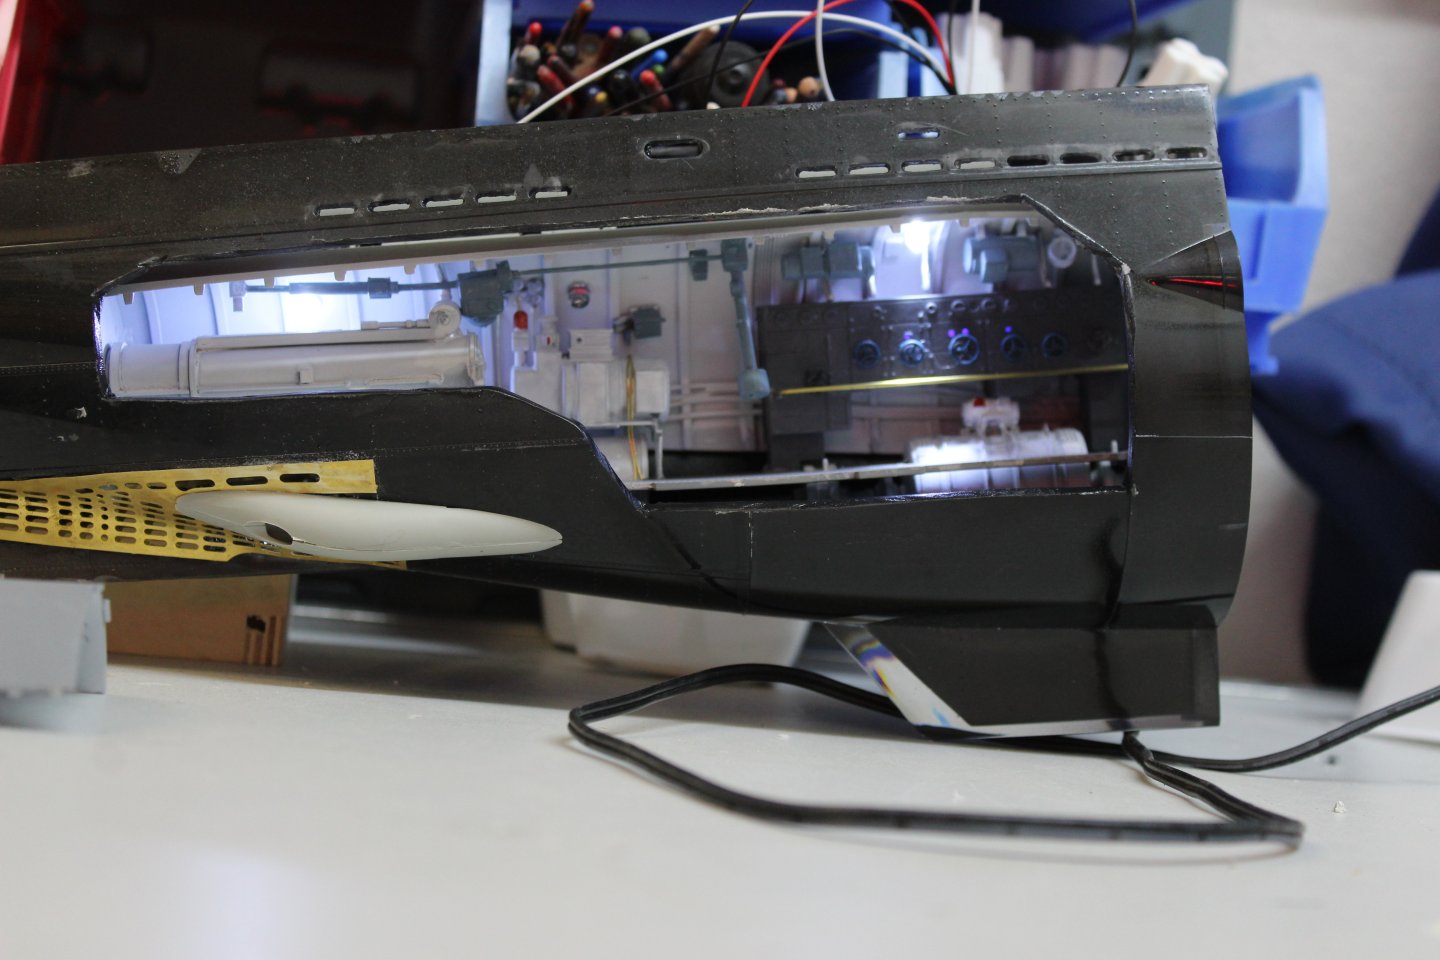
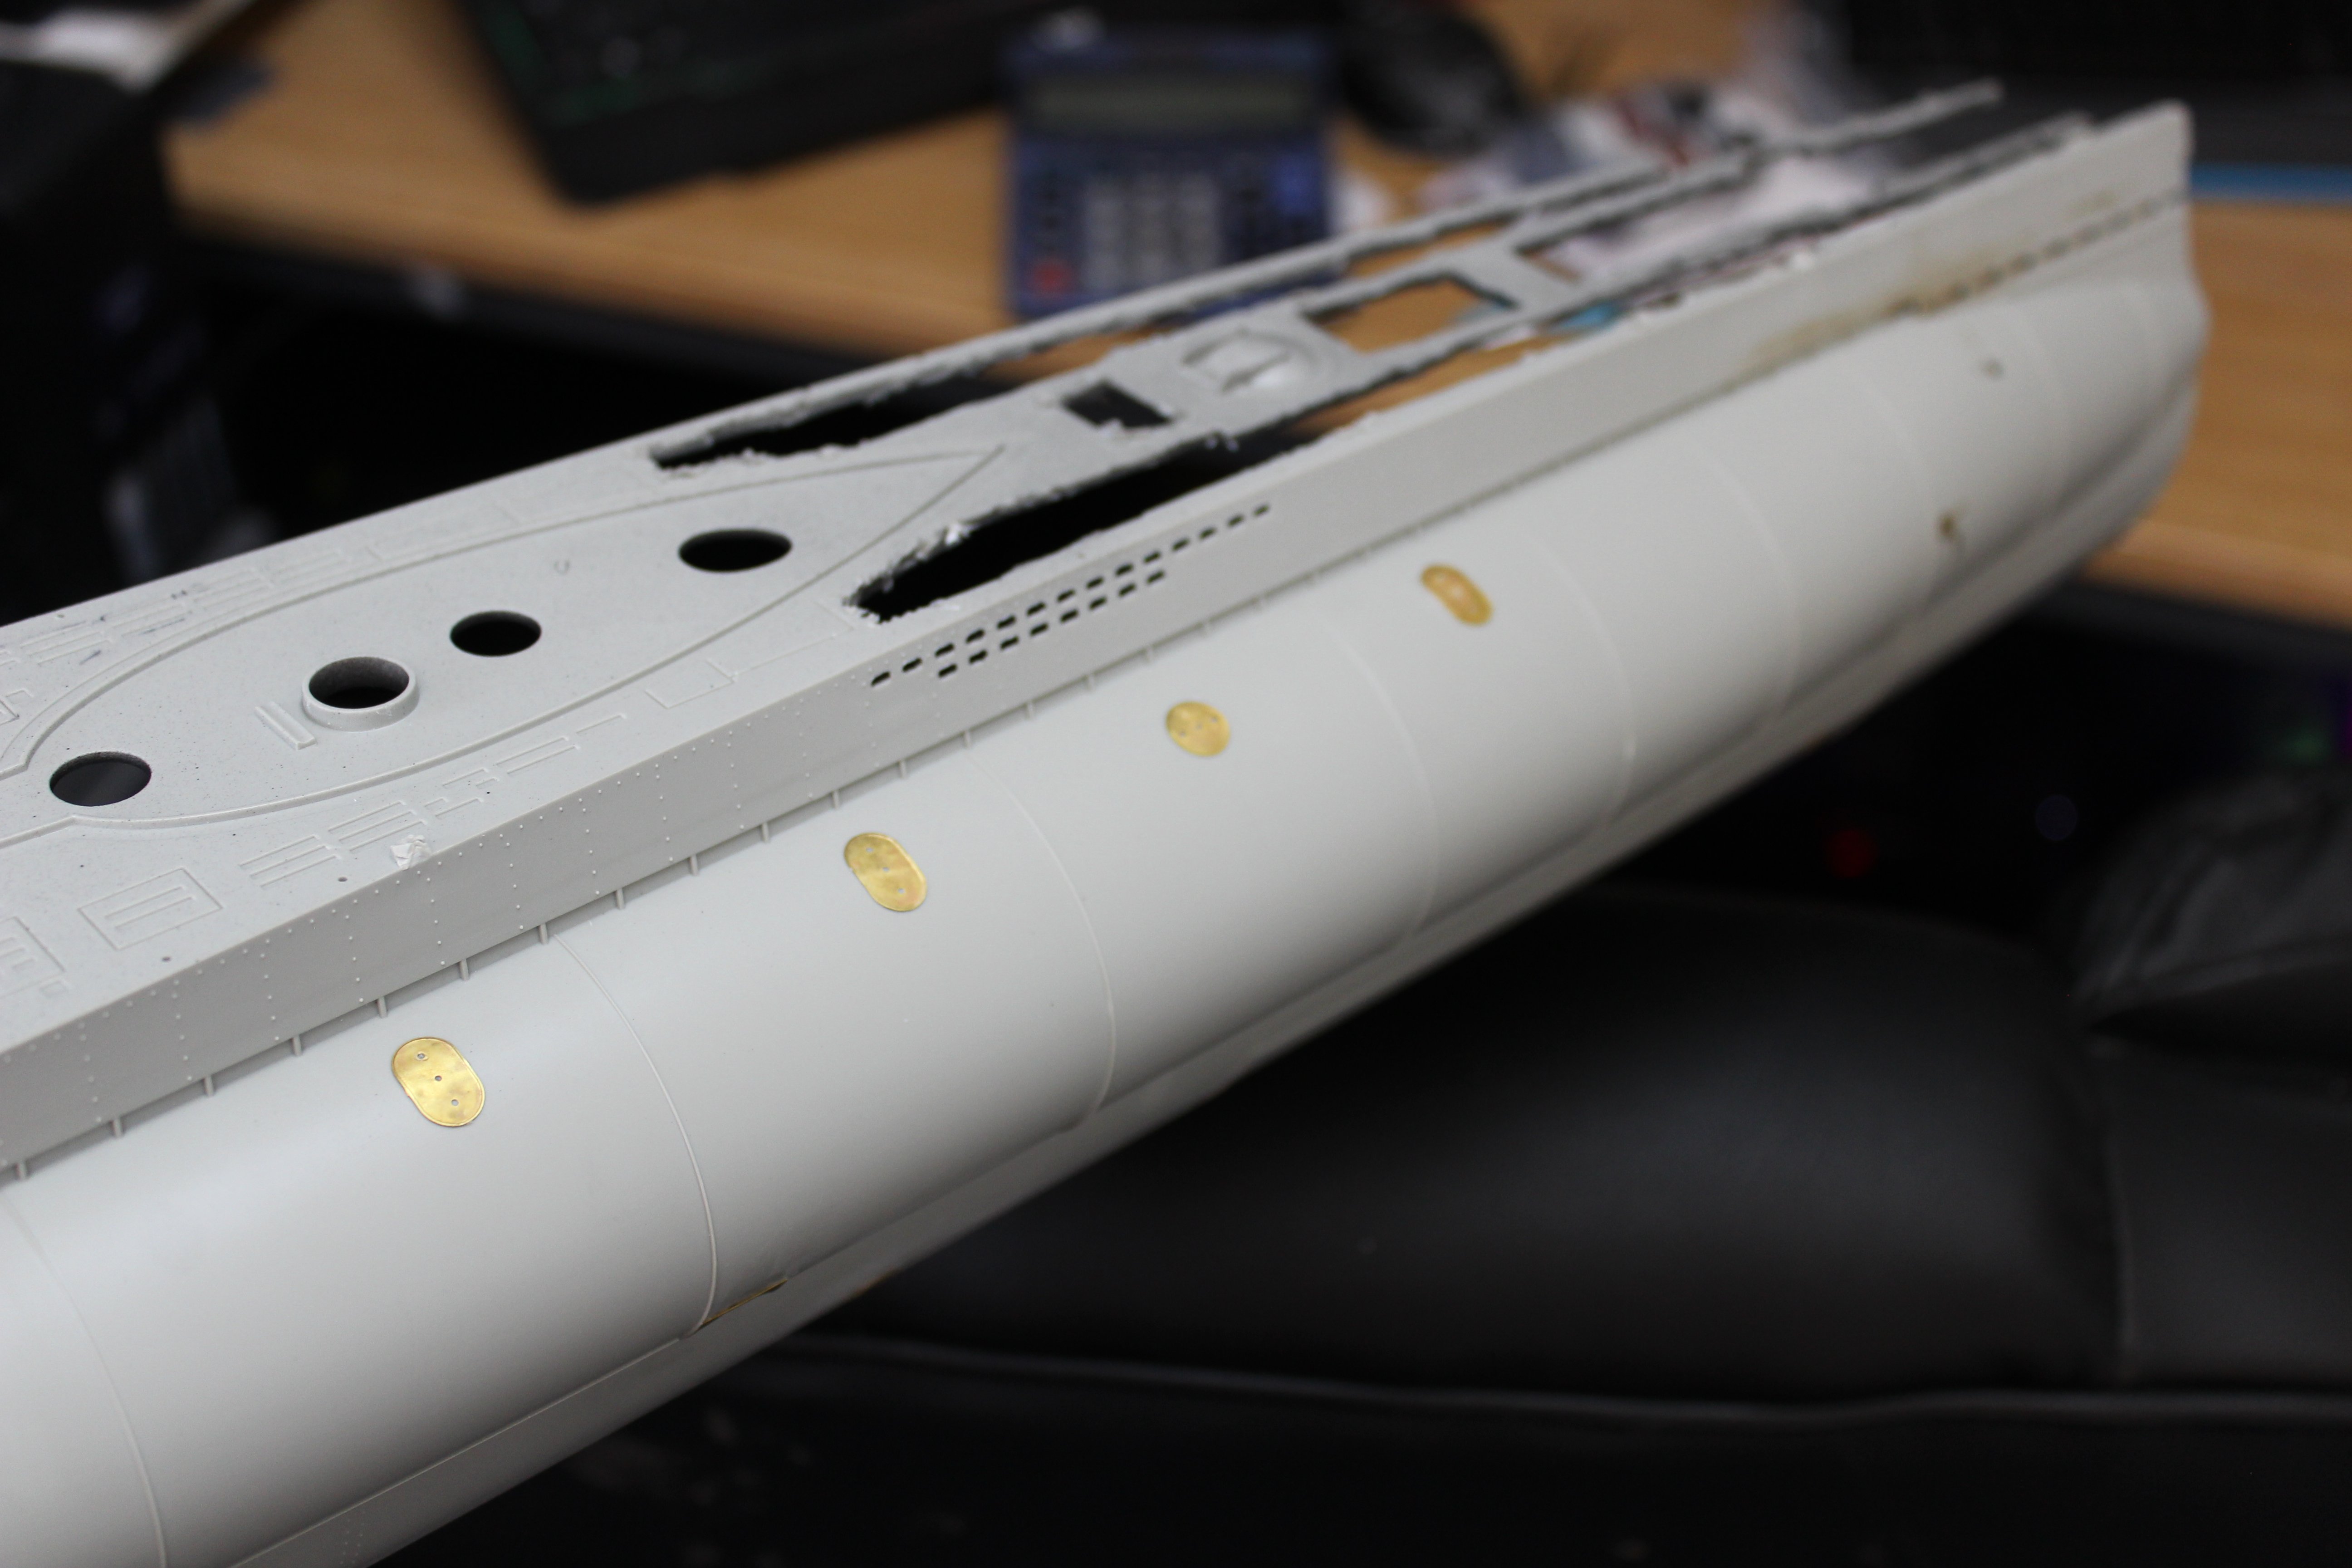
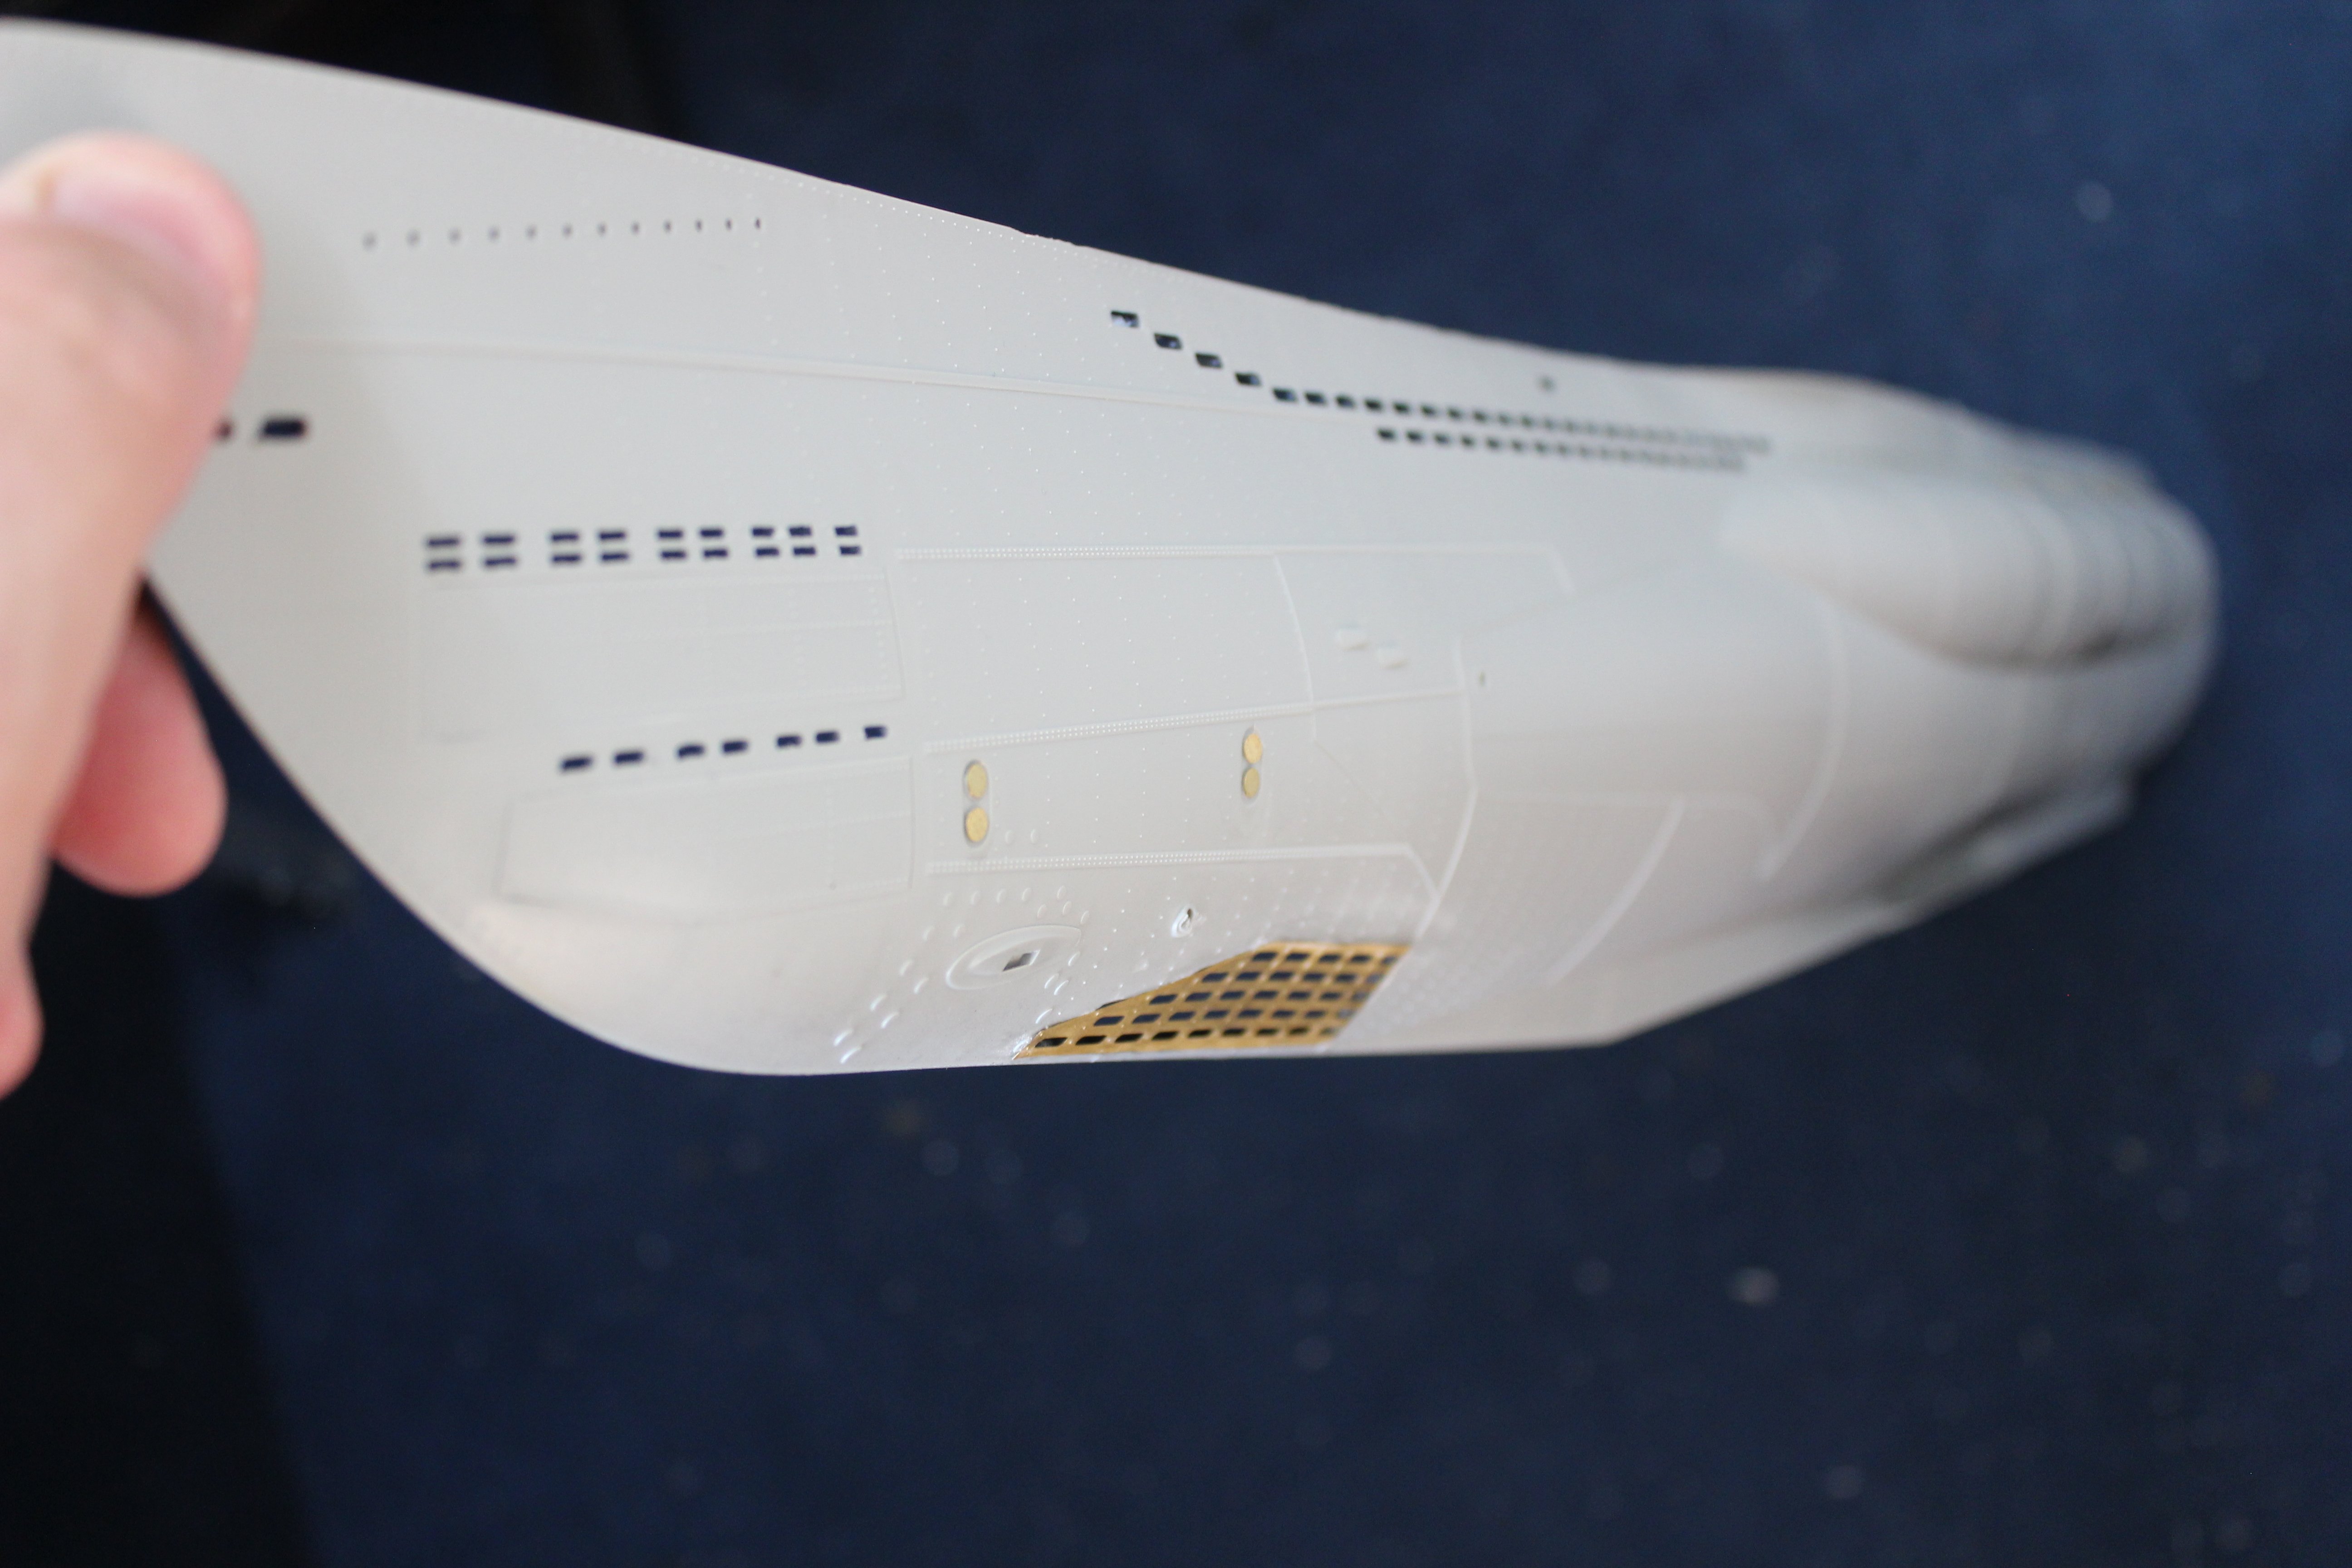
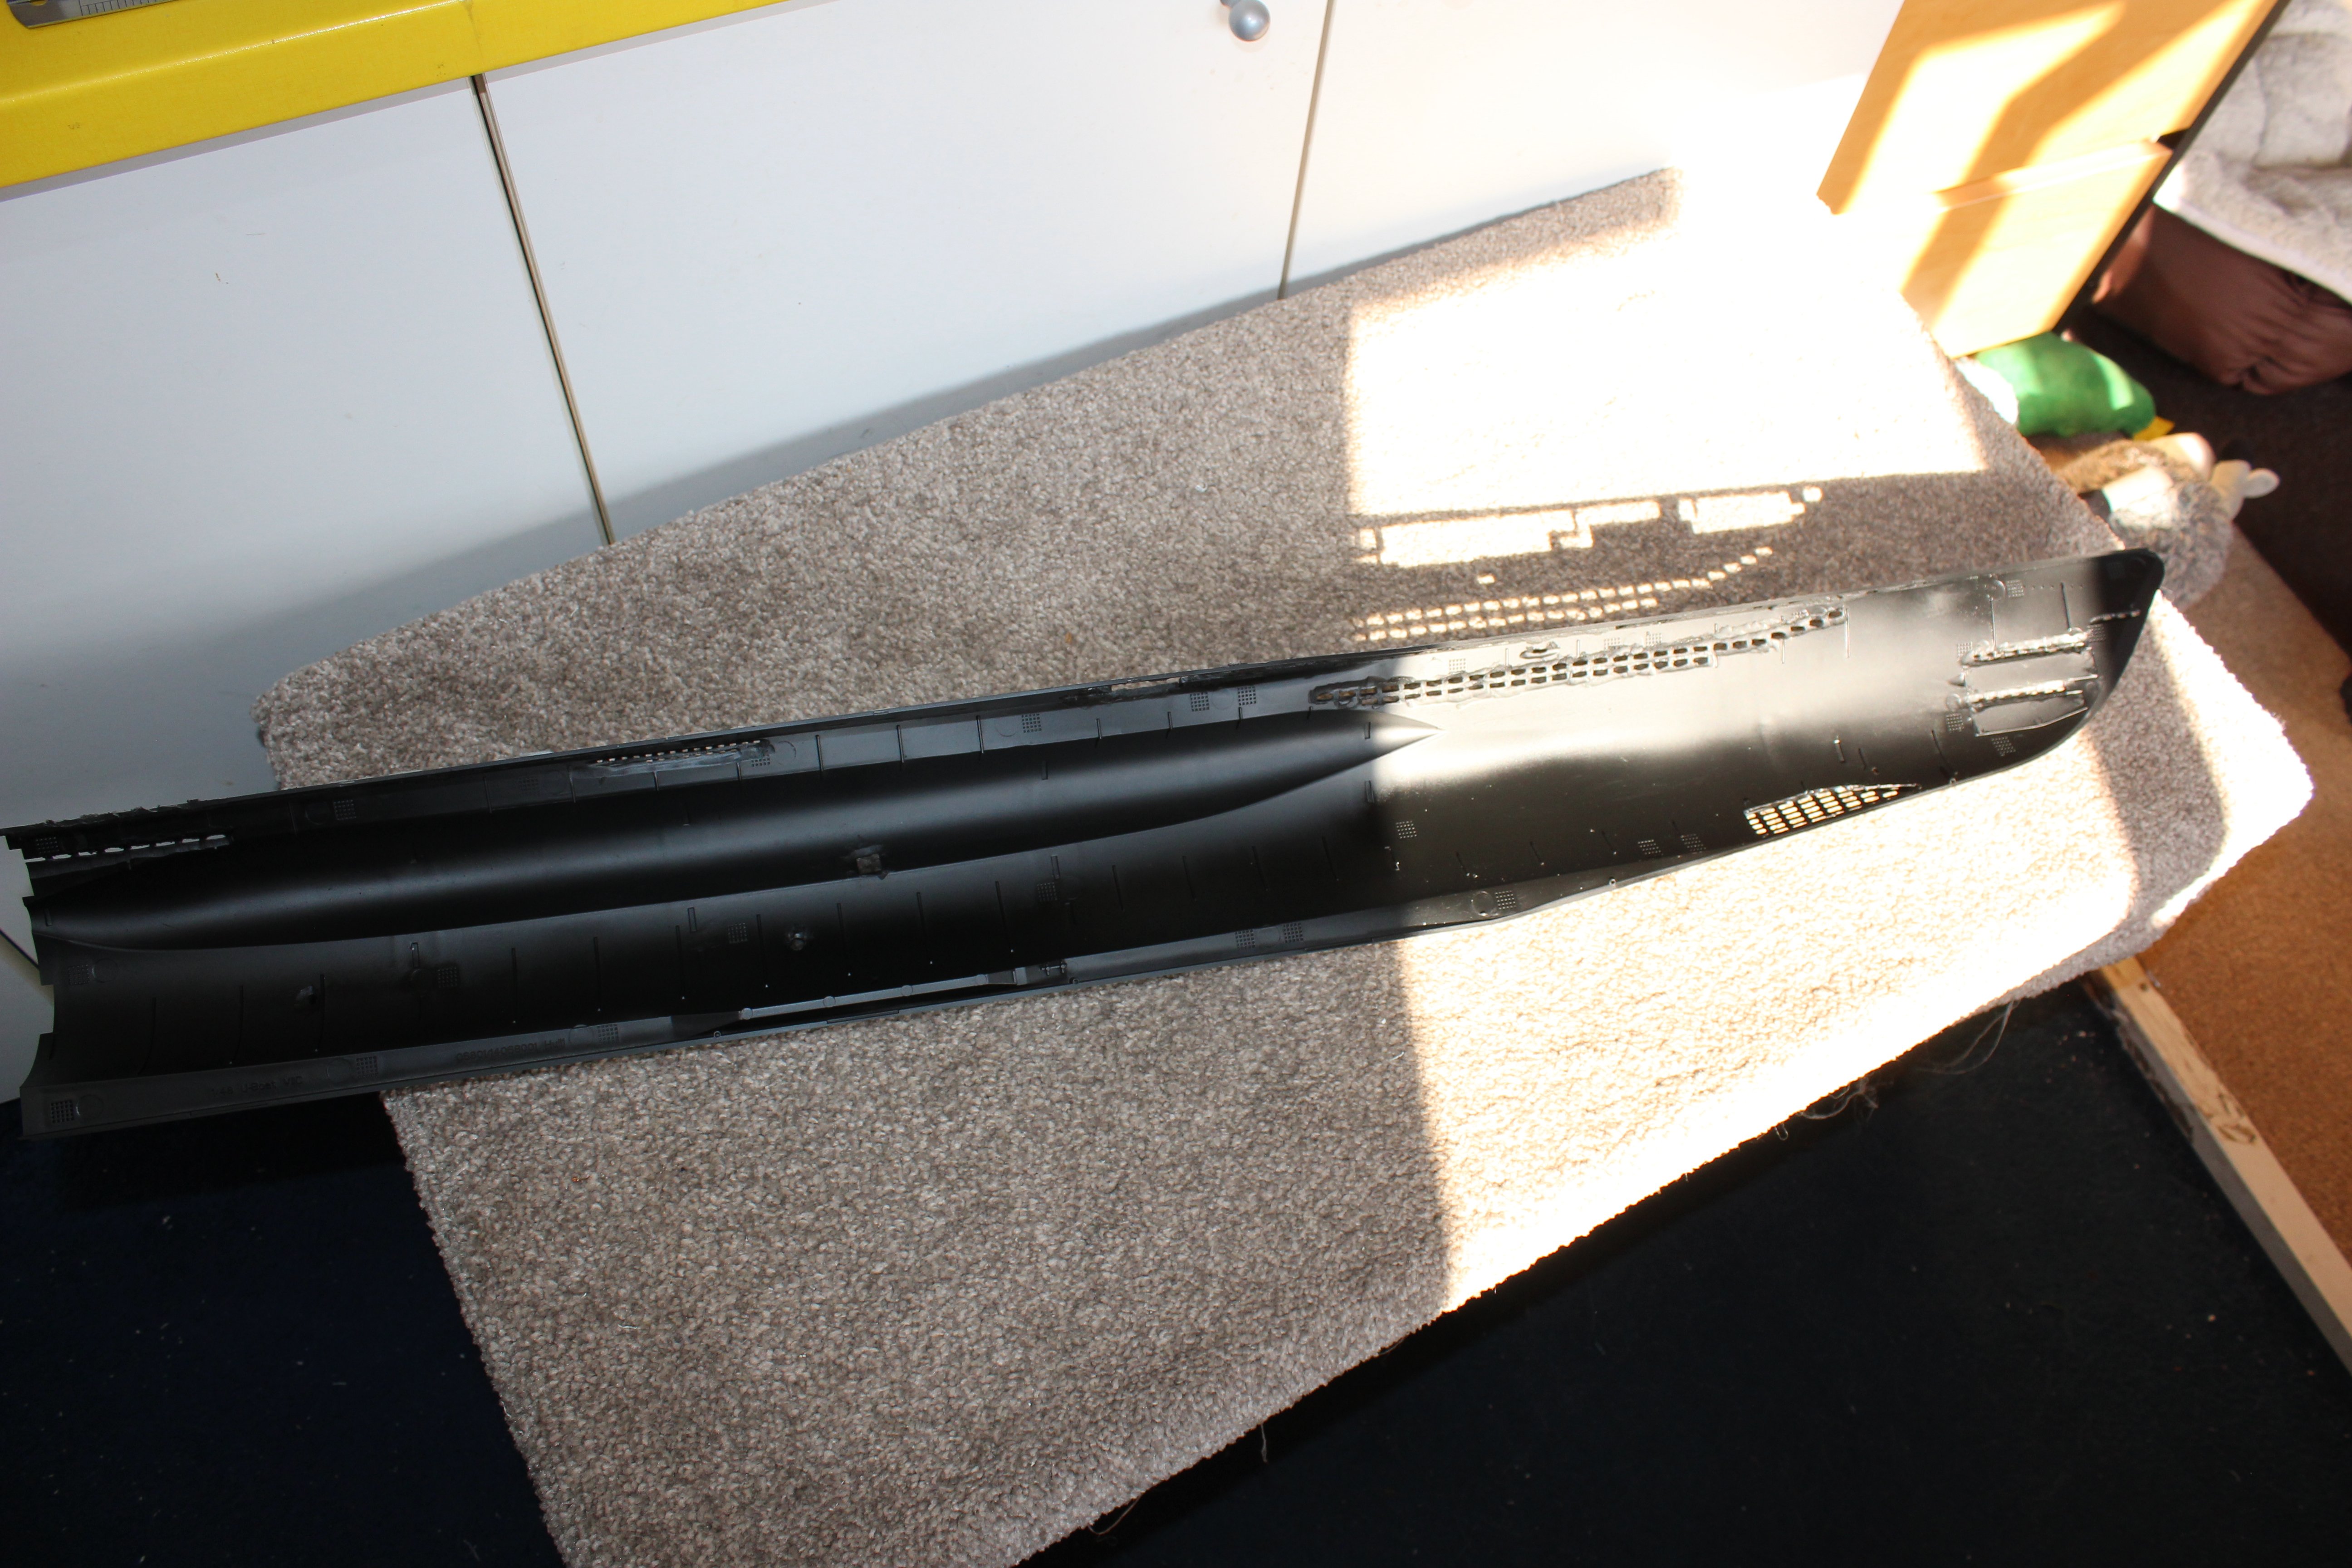
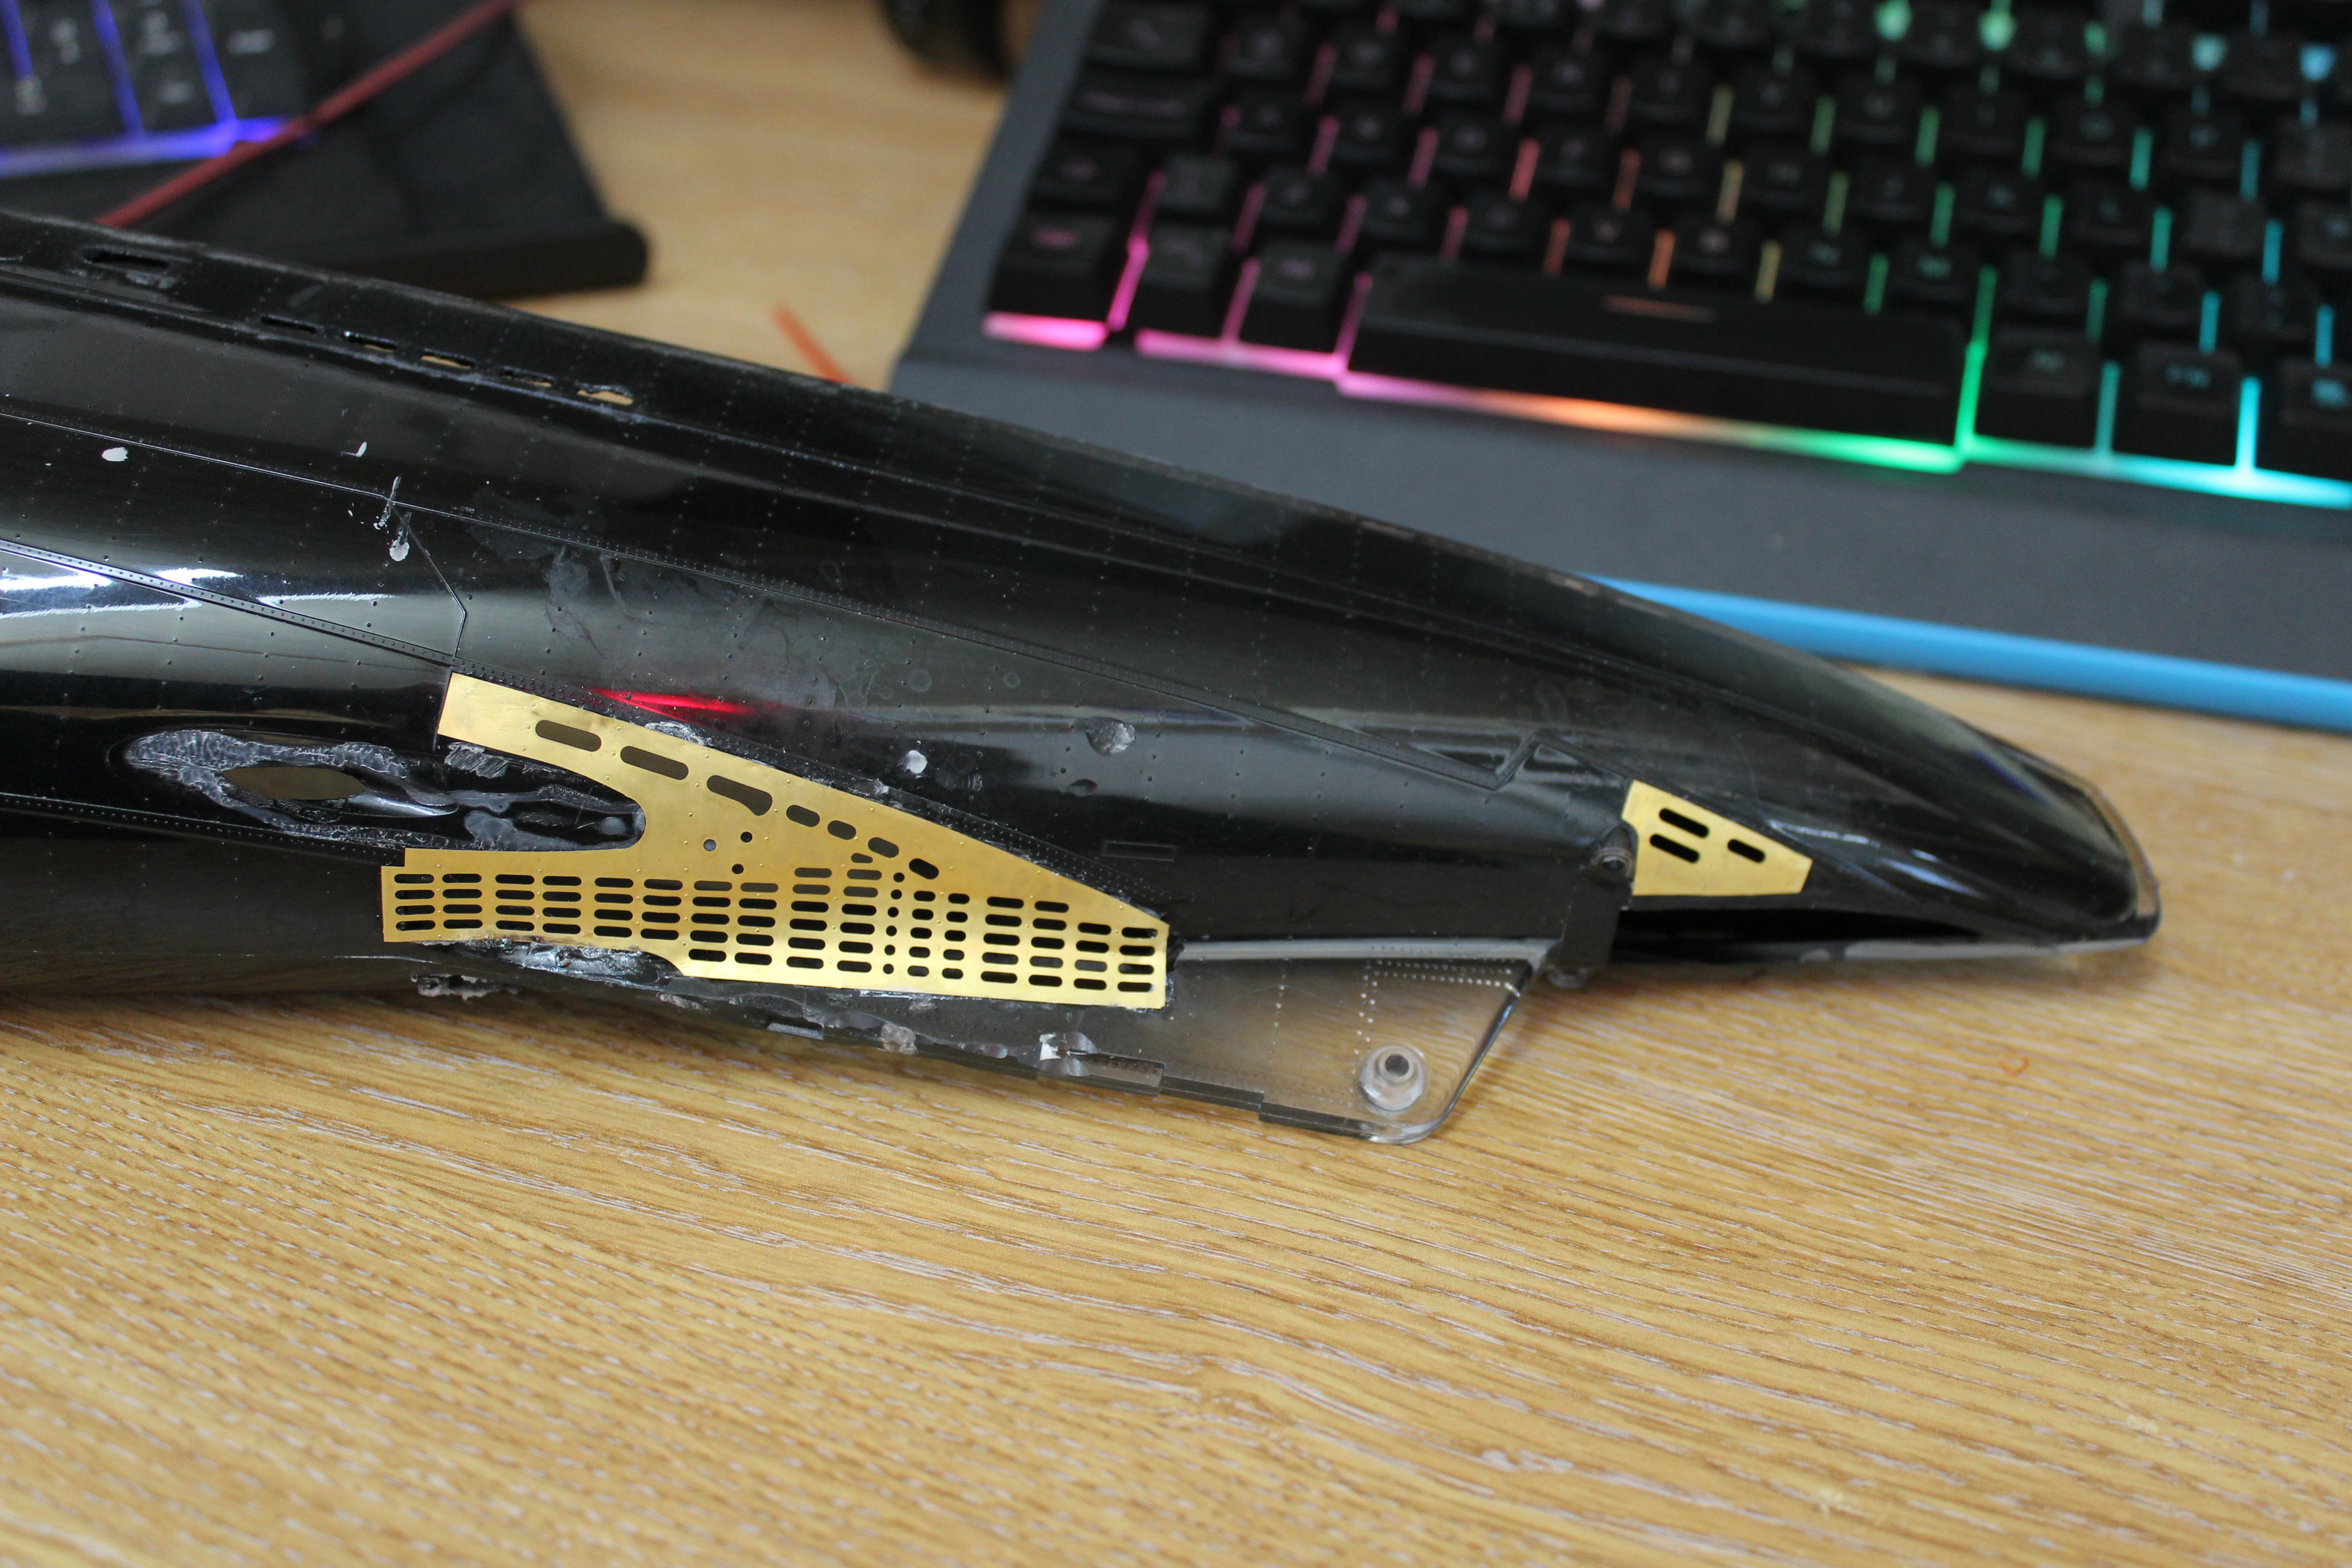
good evening everone thank you for comments and likes put a rattle can spray over the stern section to see what needs to be sorted, and to be honest it was mainly OK apart from around where the PE had been added, she will remain like this for a while whilst i go back to the the forward sections what comes first the chicken or the egg, the hull needs doing before the compartments go in, but i need the compartments doing as i dont want to damage the hull the hull work won that argument, on the port side i cut out all the free flood holes and area to be replaced with etch, painted inside matt black and rattle can grey external, i have messed the top deck up big style, and went way to far on the cutting out, but not the end of the world, just a lot more work, to reinforce when infact should be getting on with the Belle Poule


- 90 replies
-
- 10
-
-
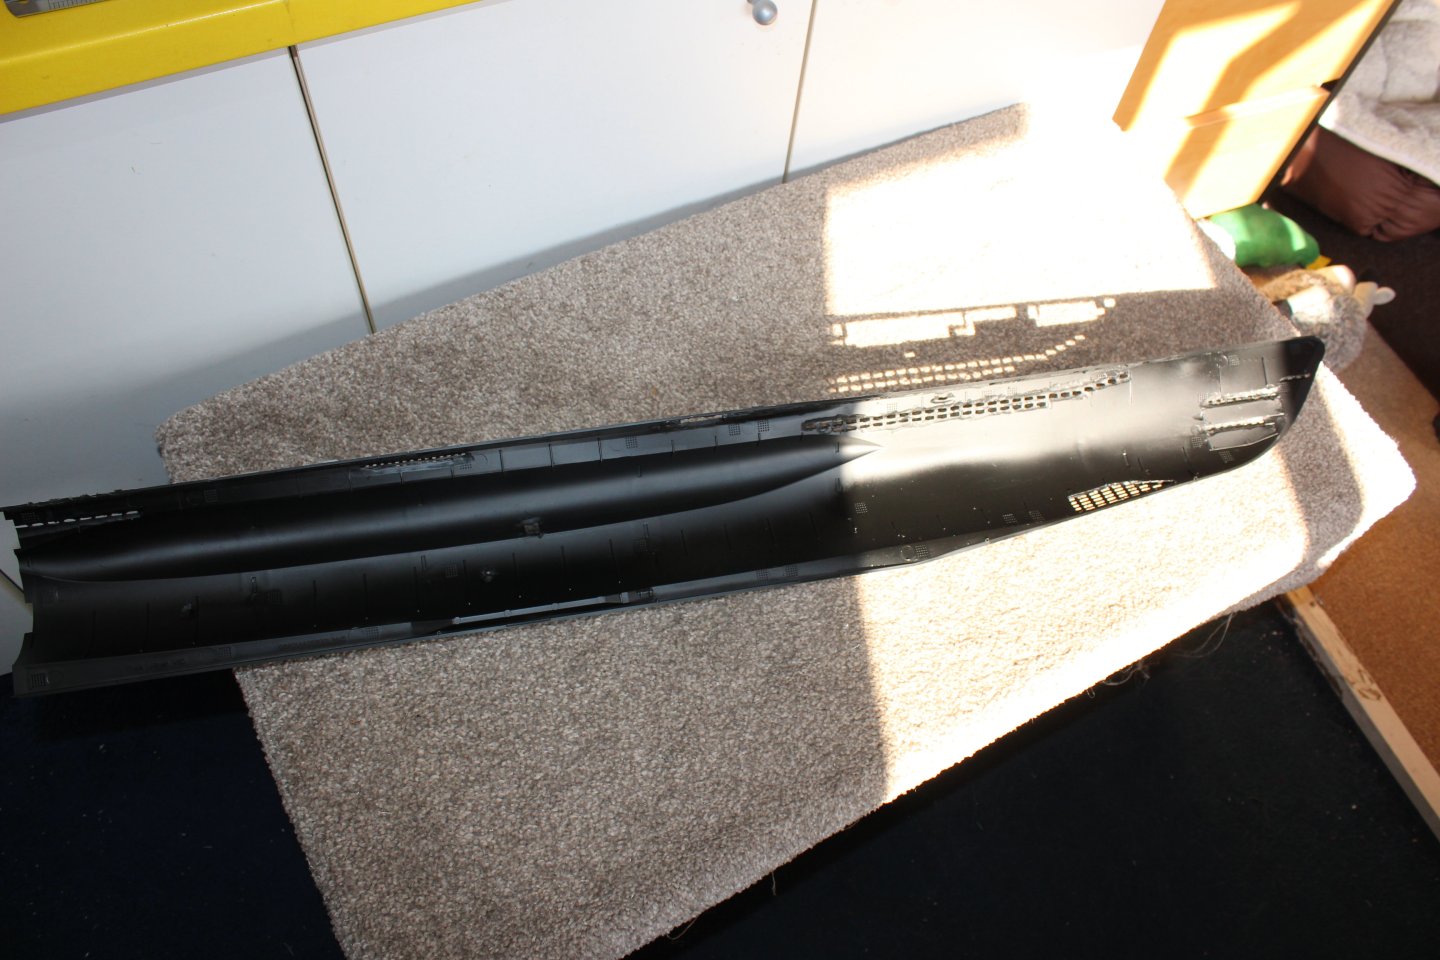
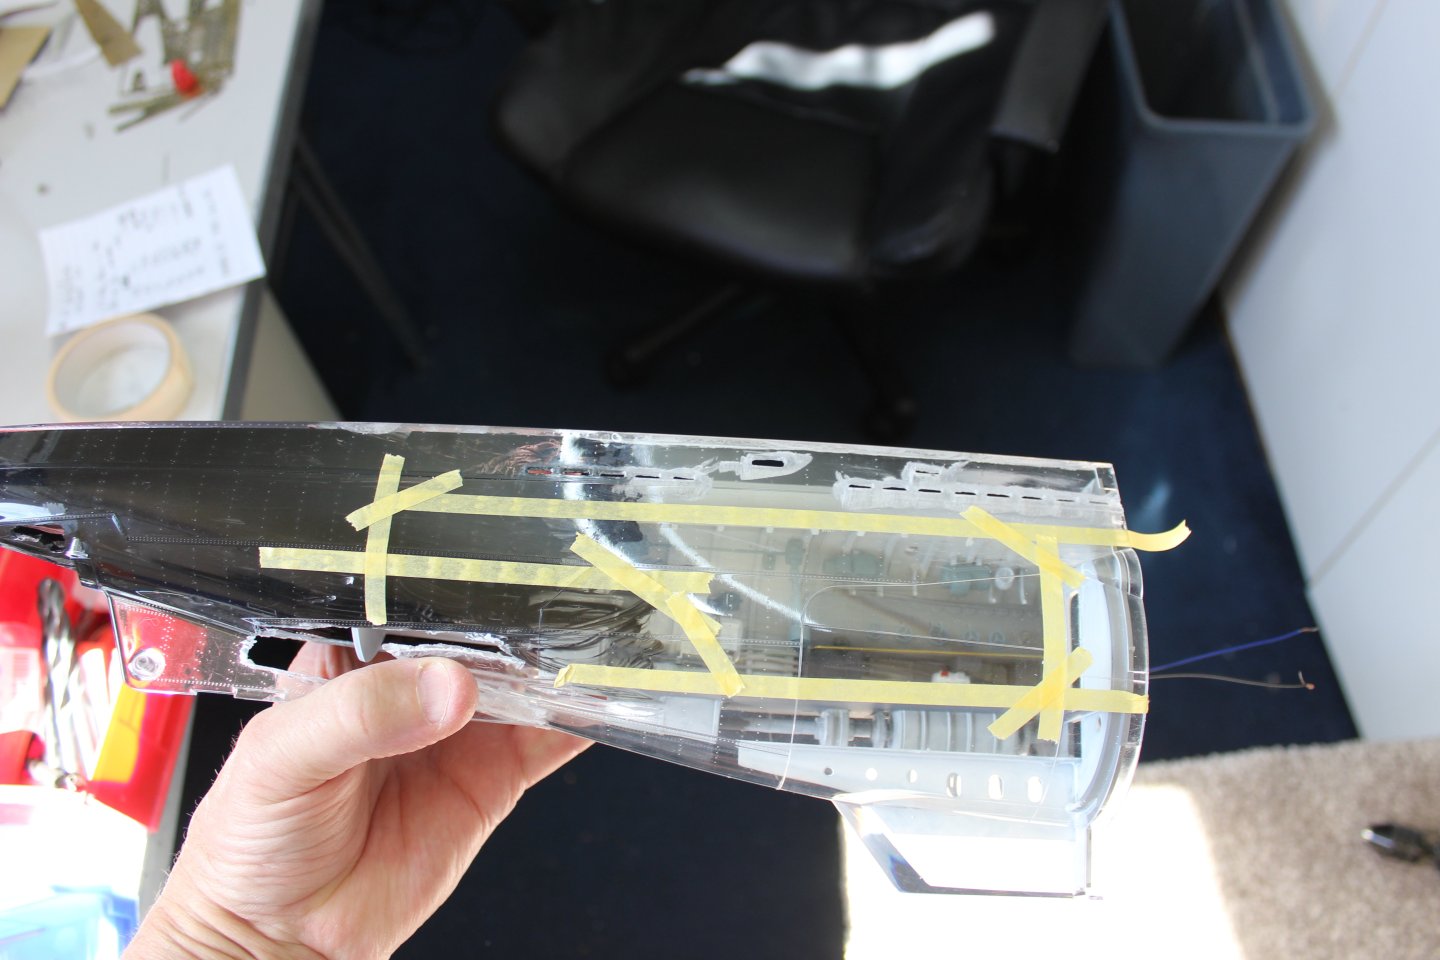
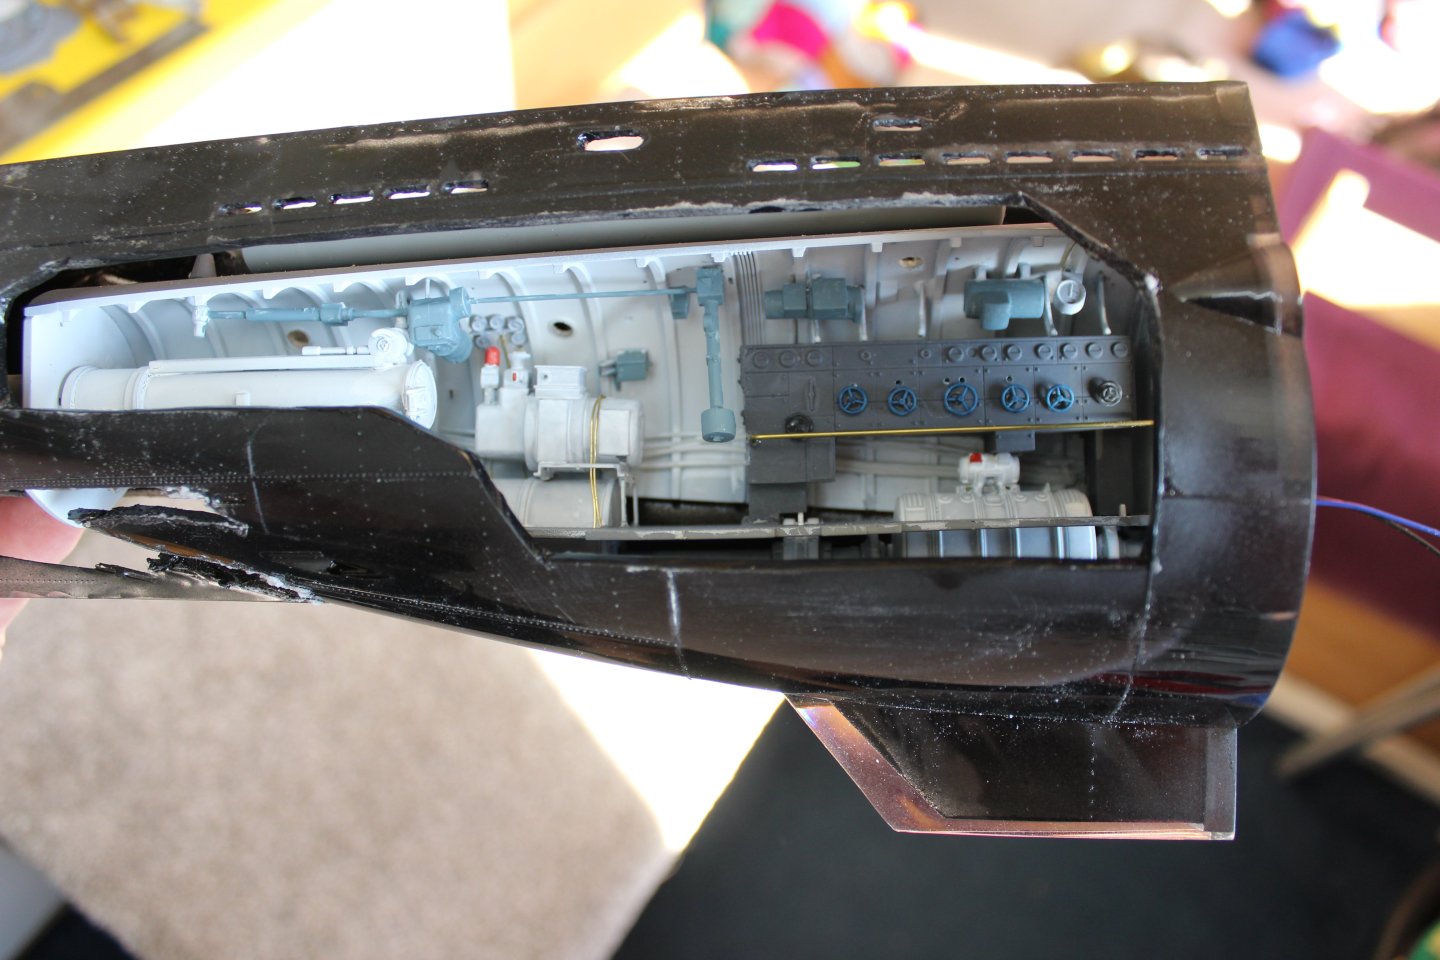
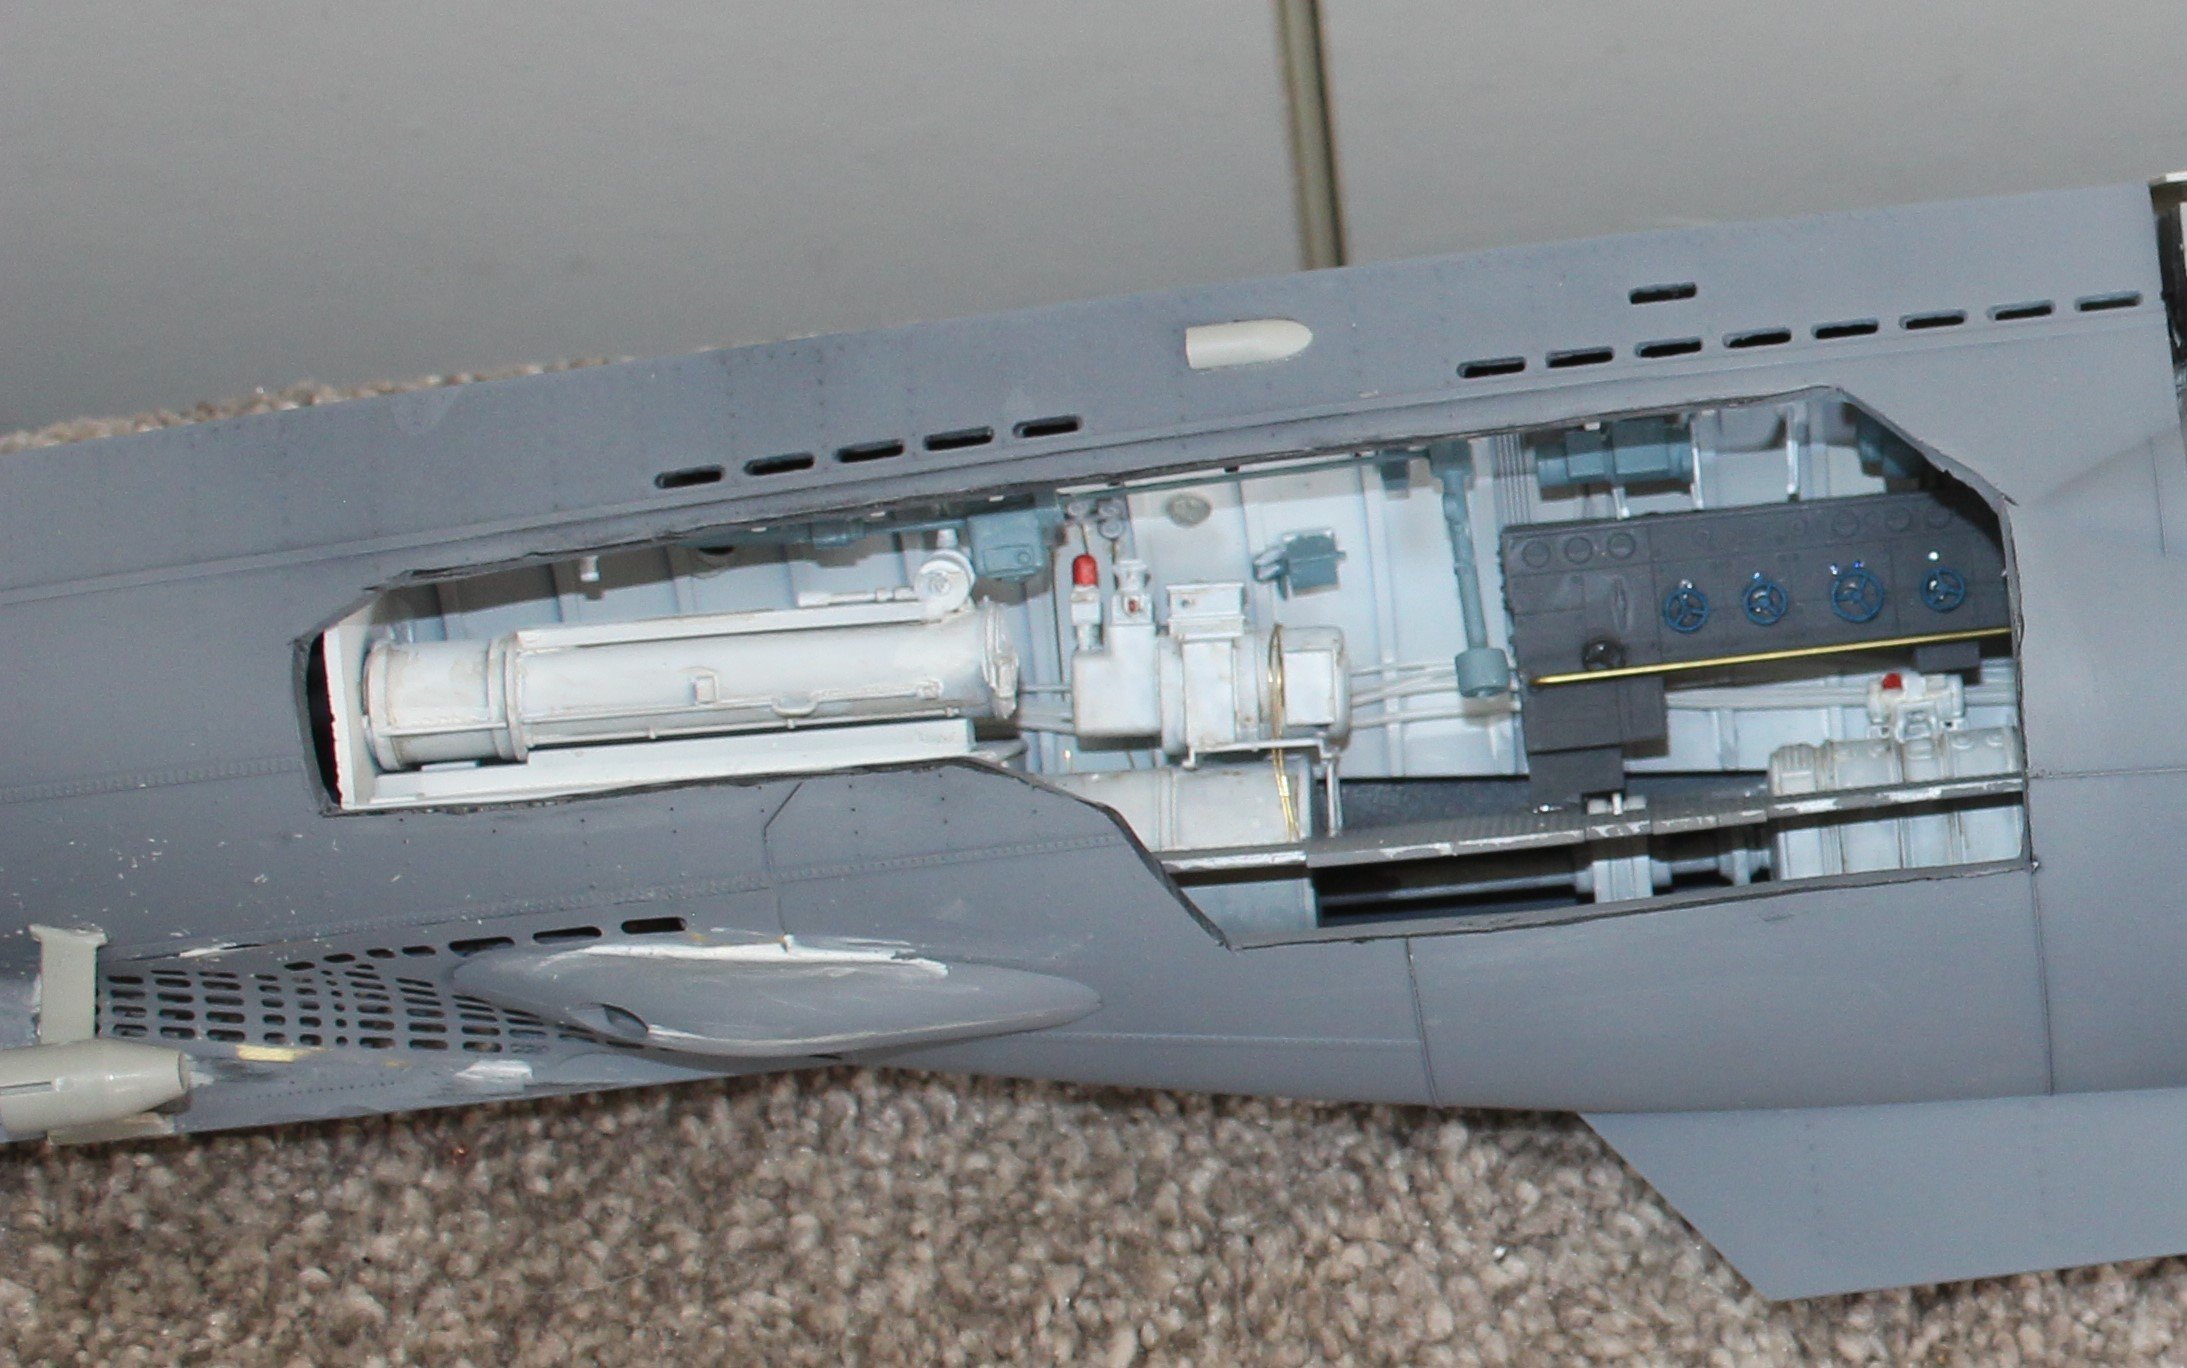
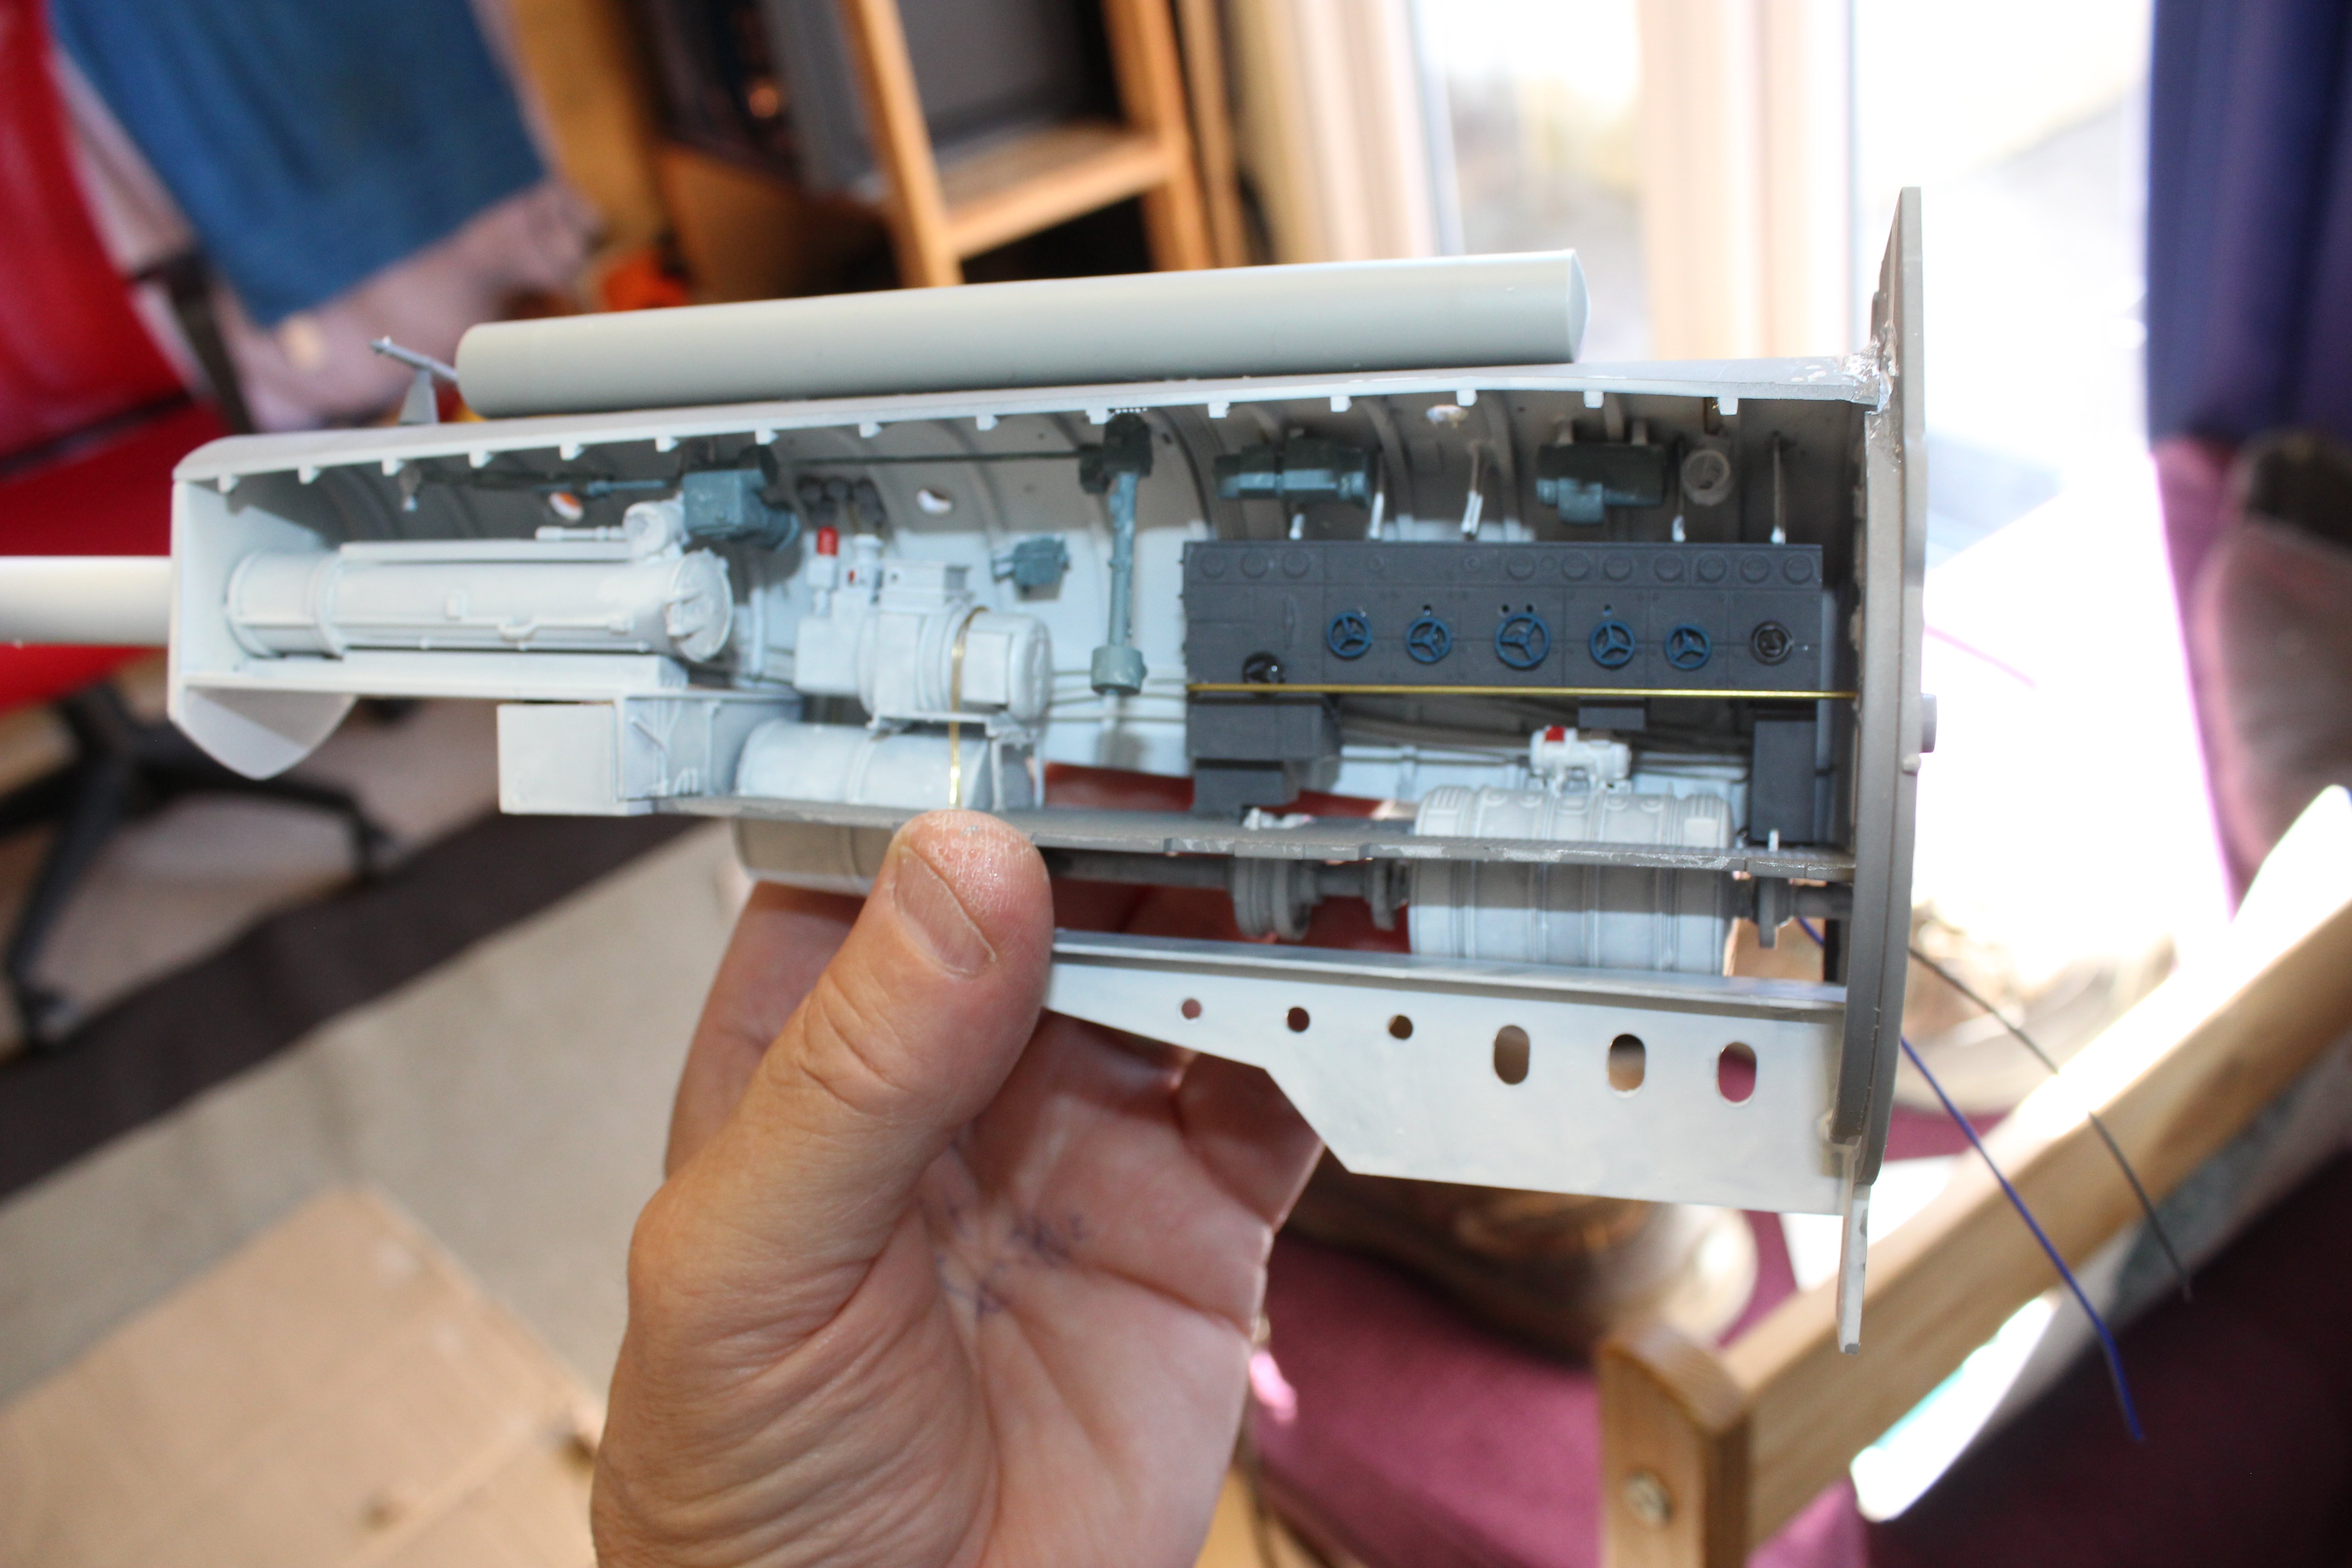
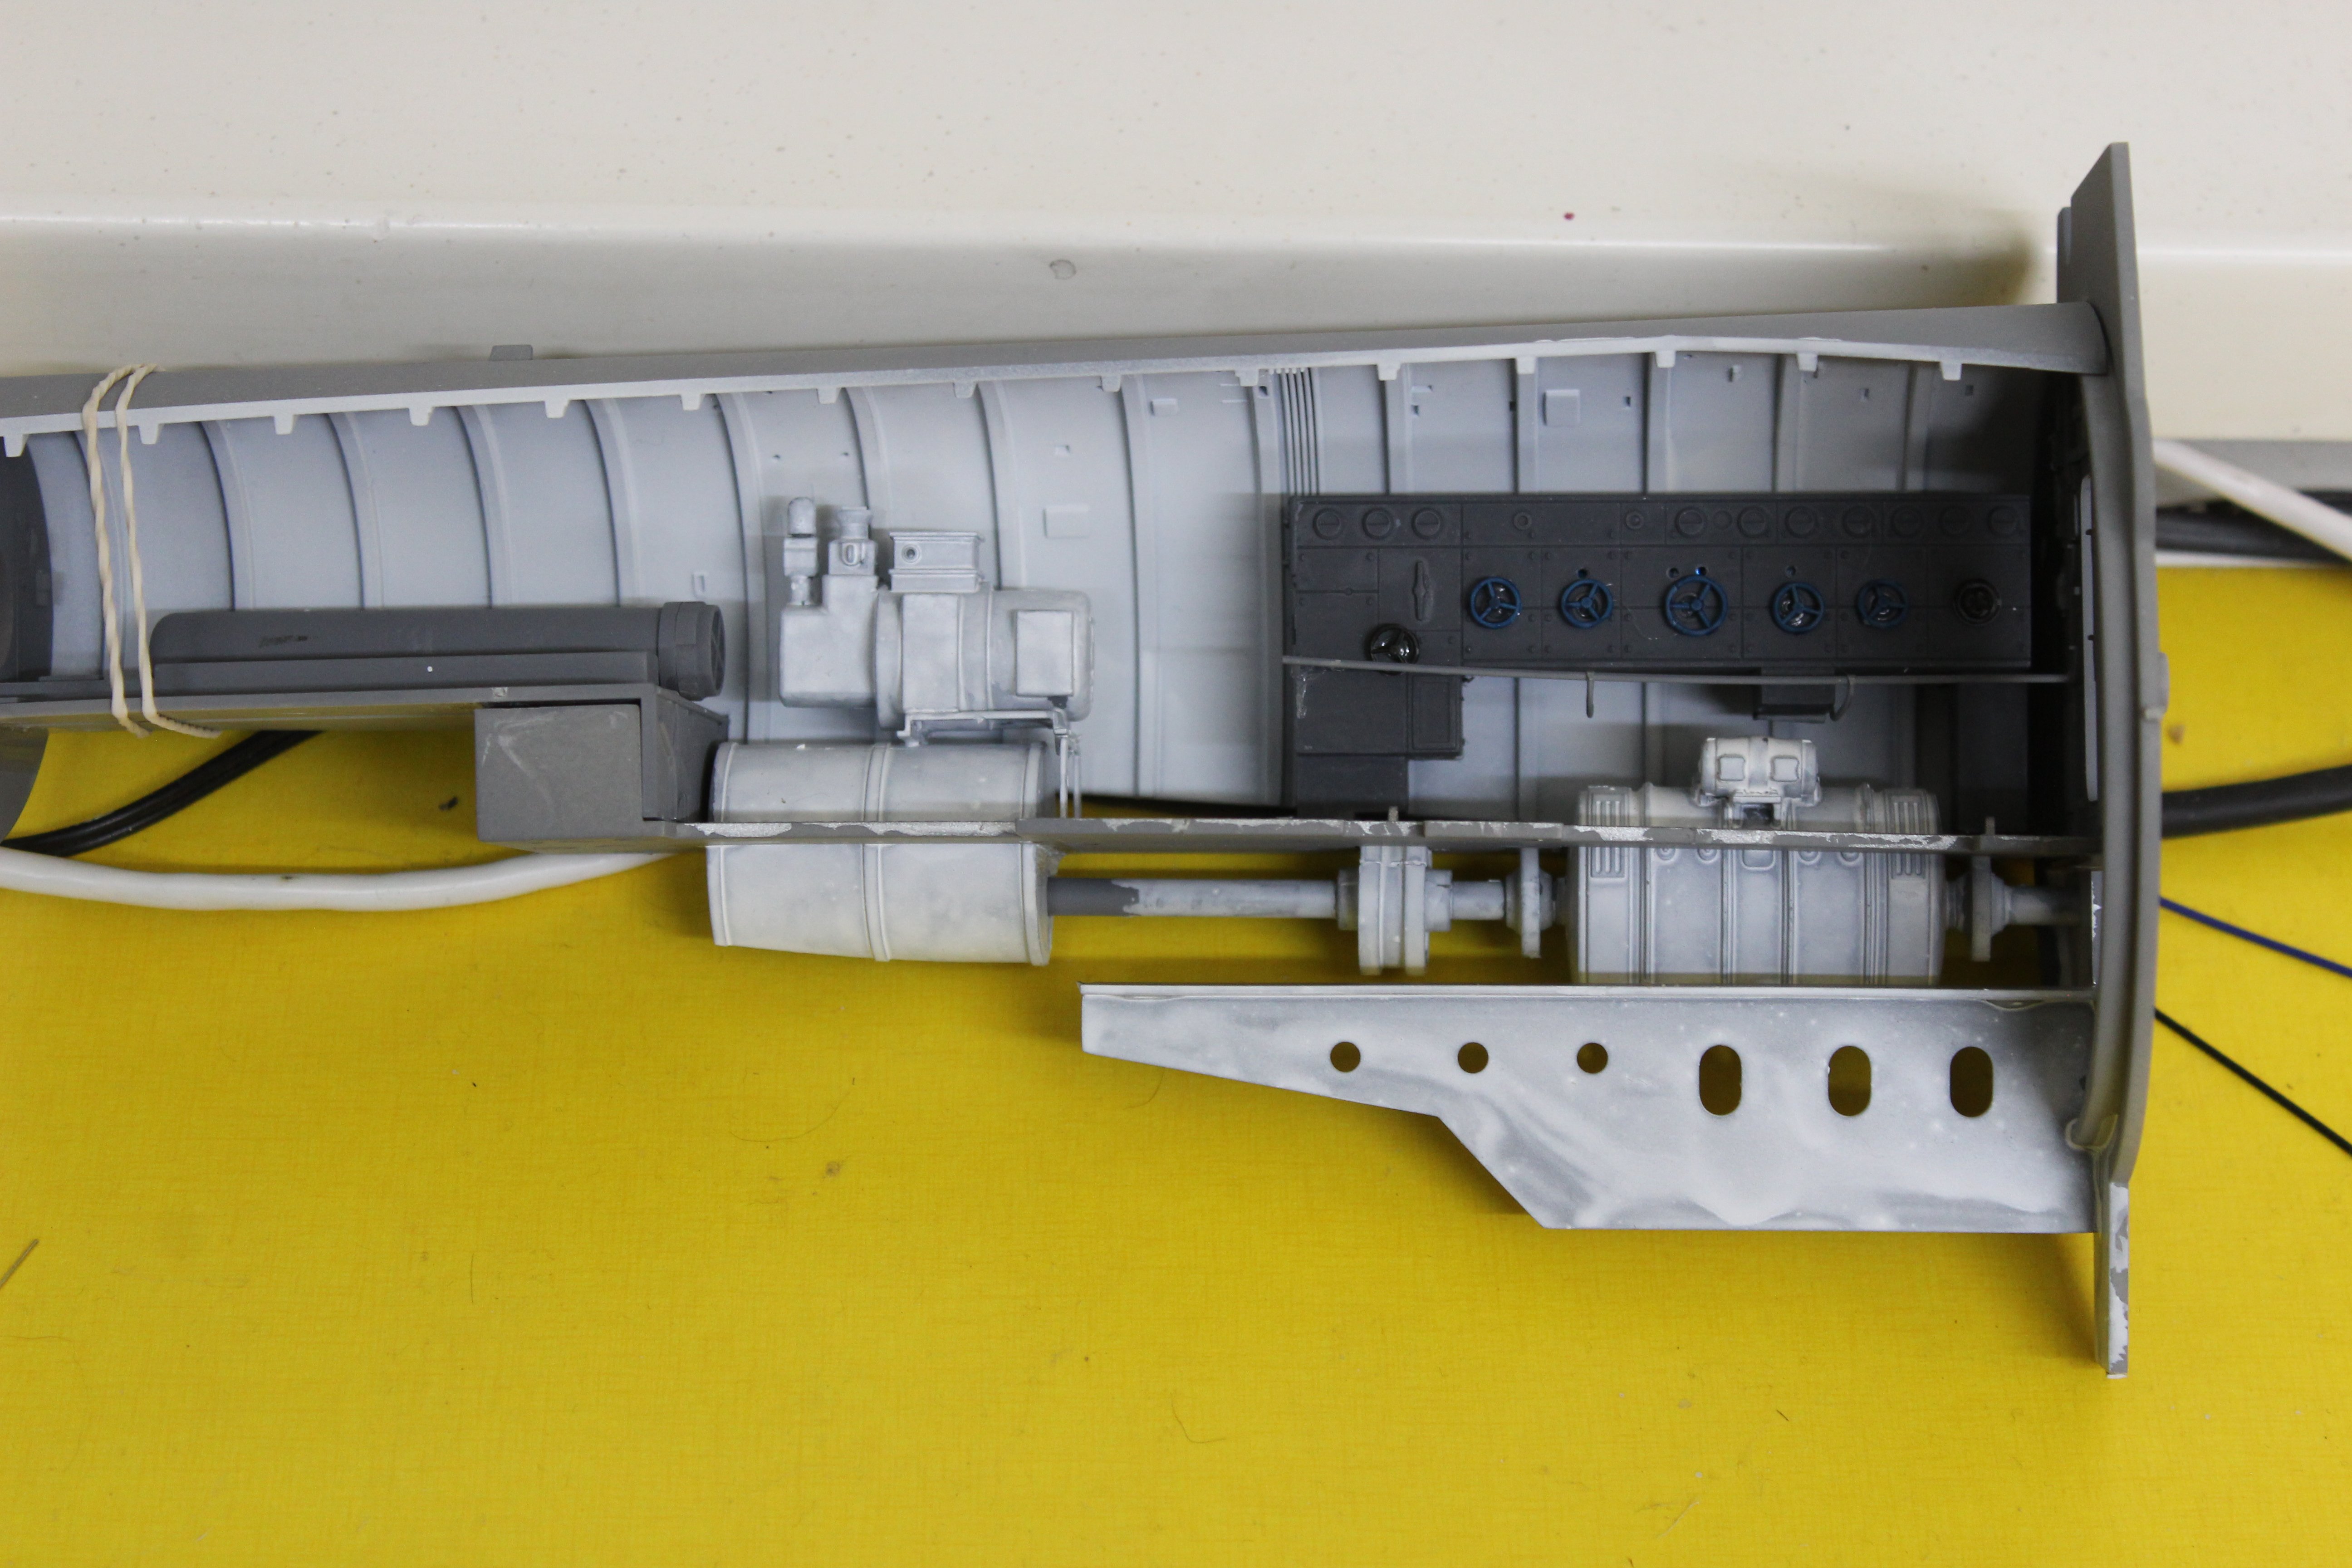
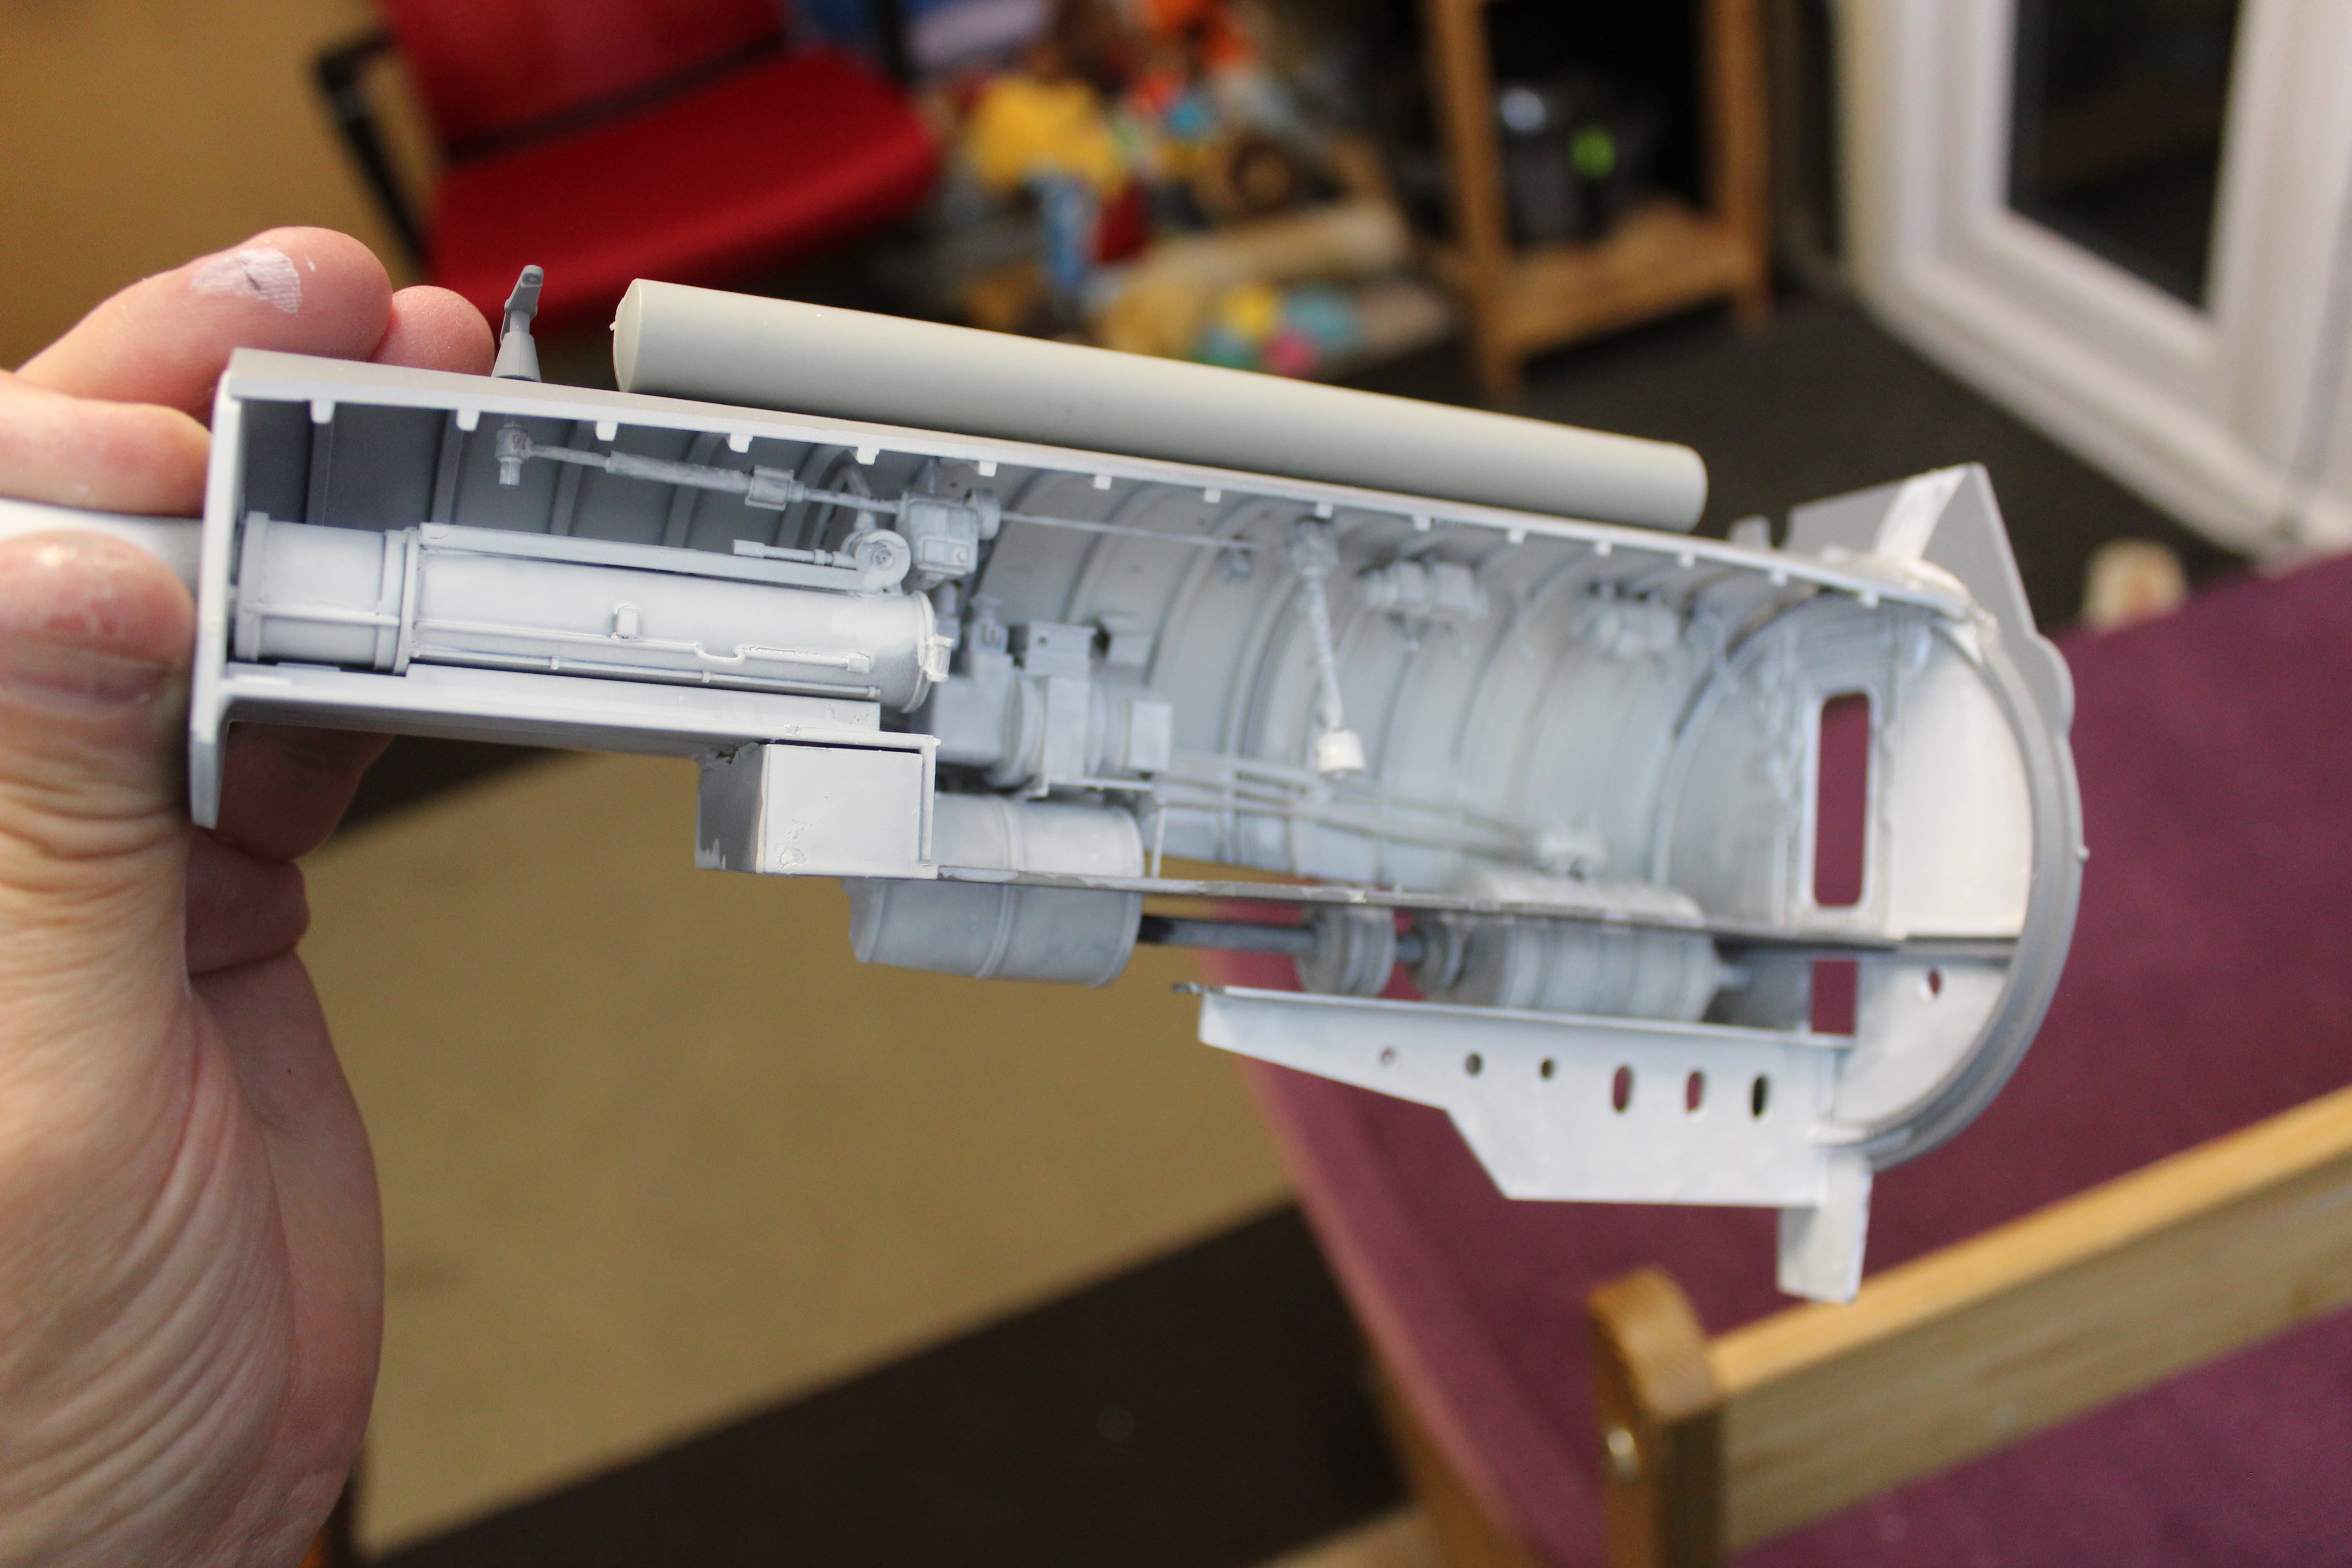
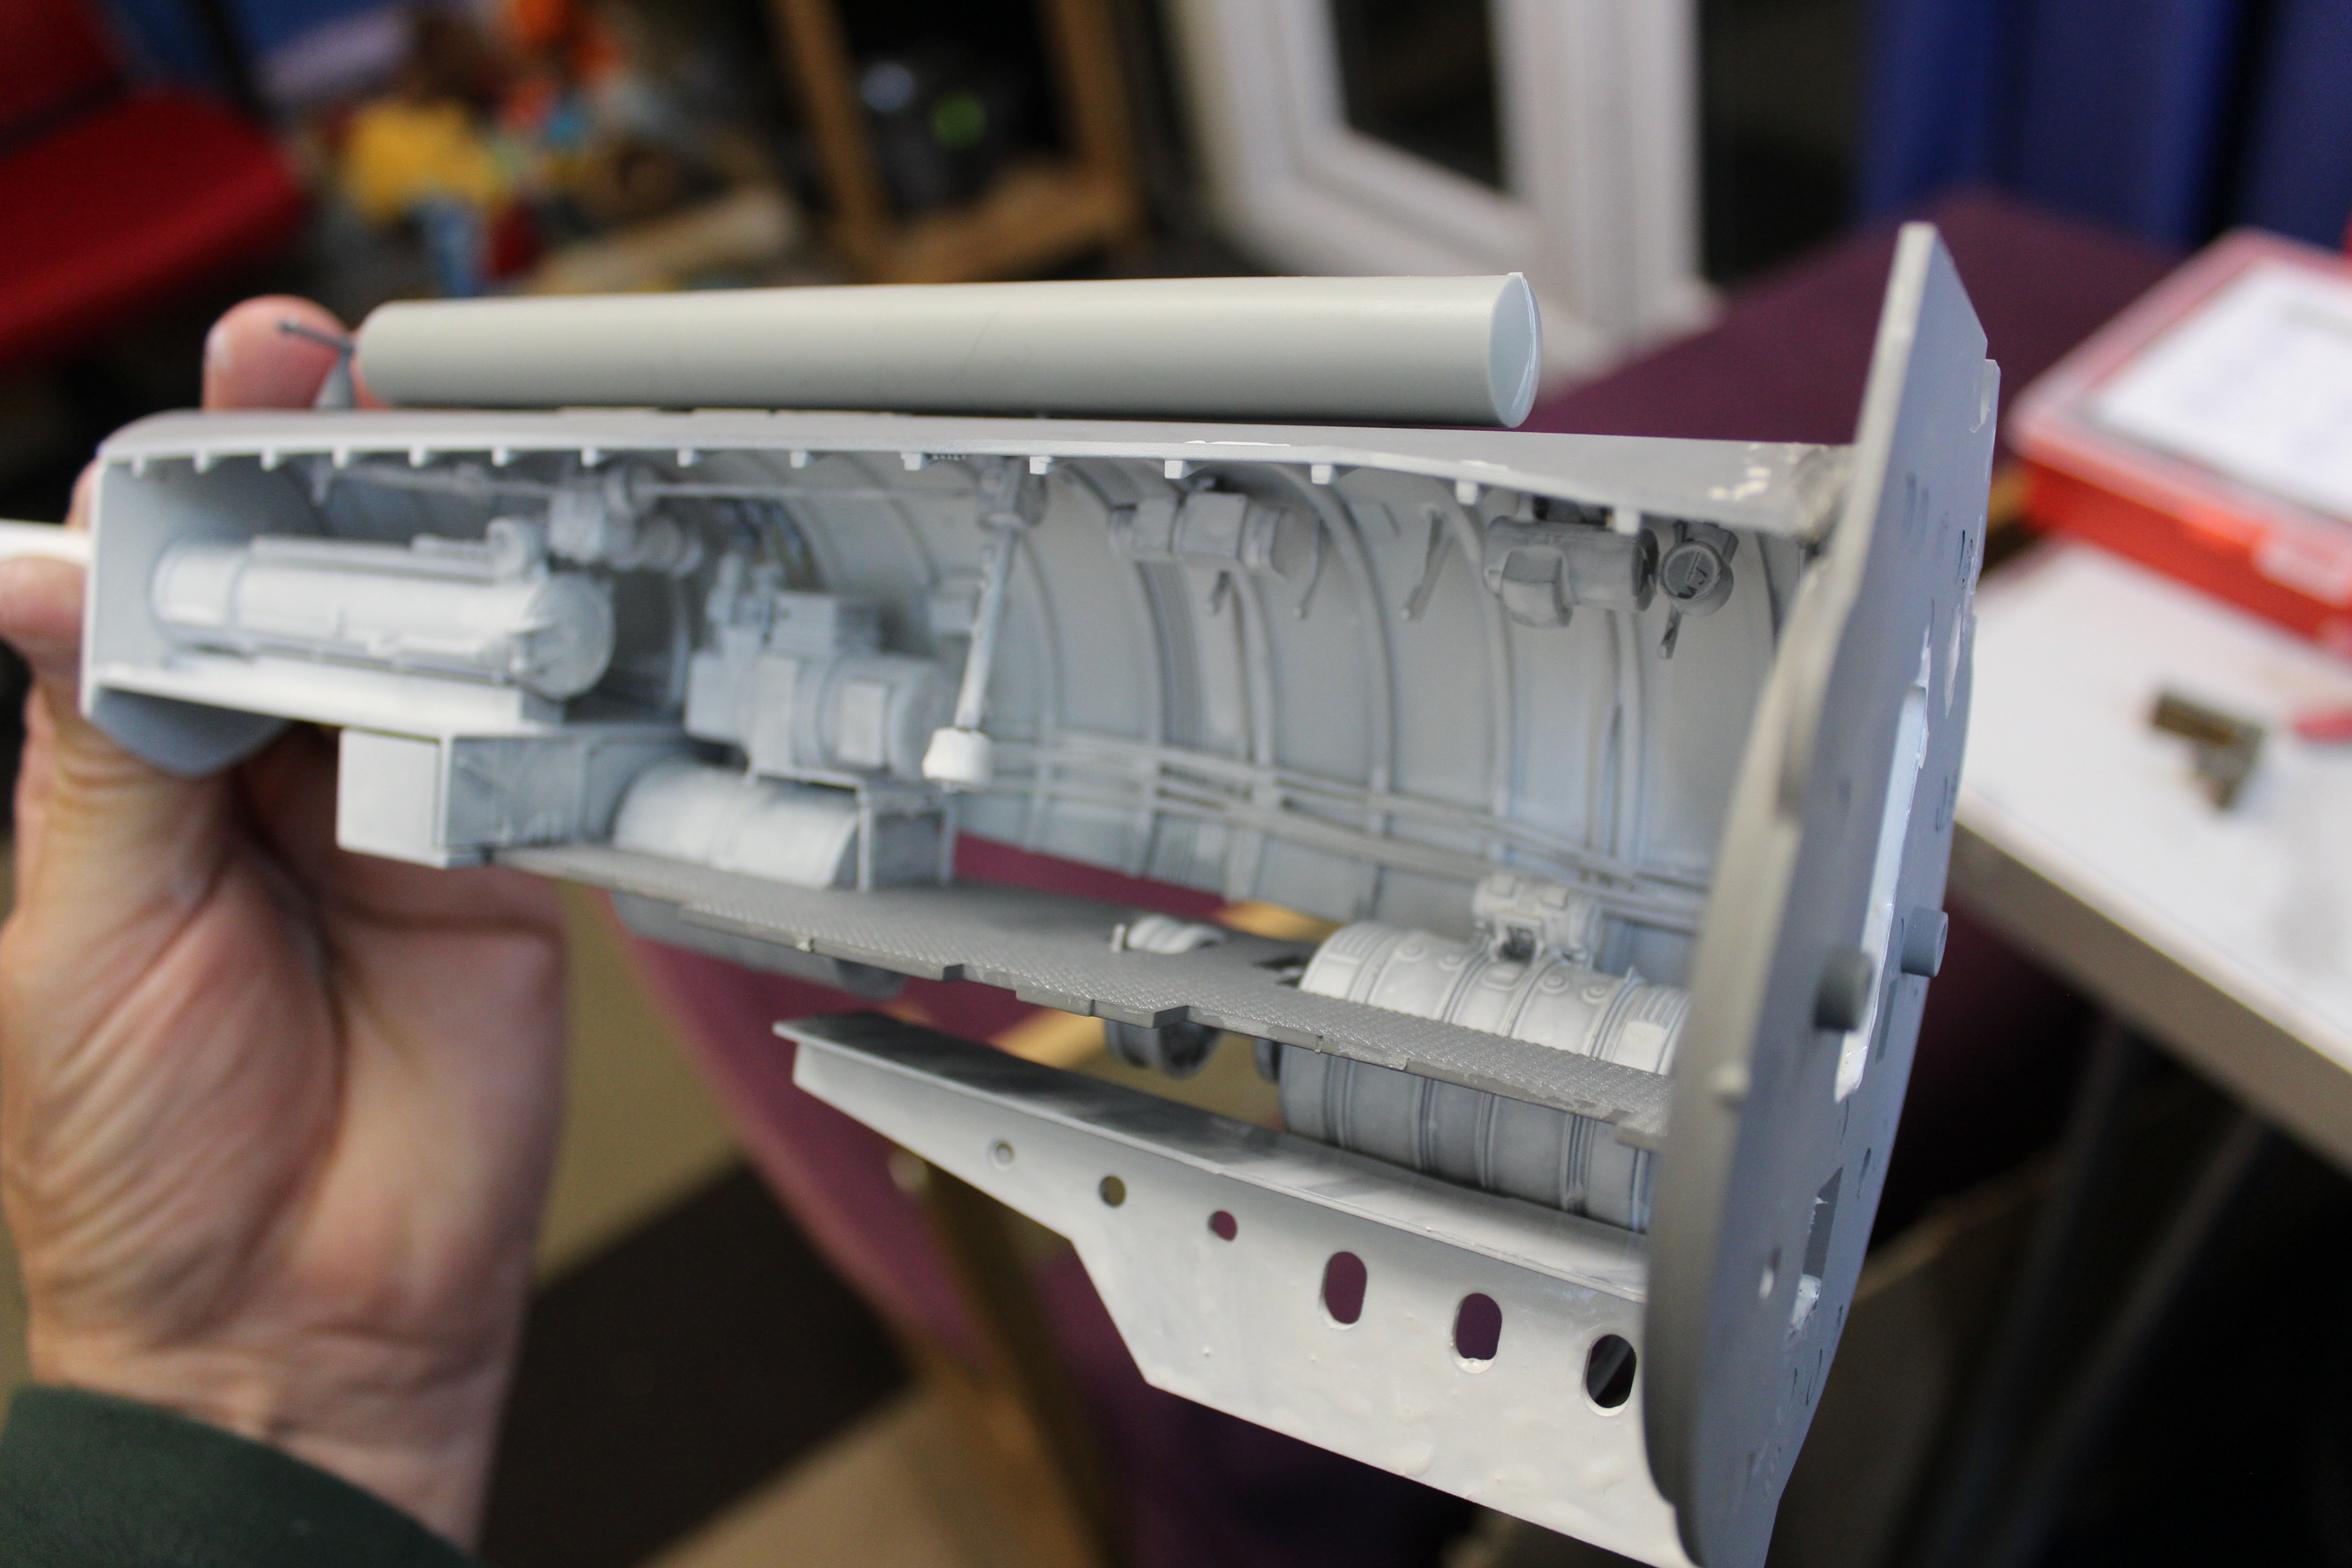
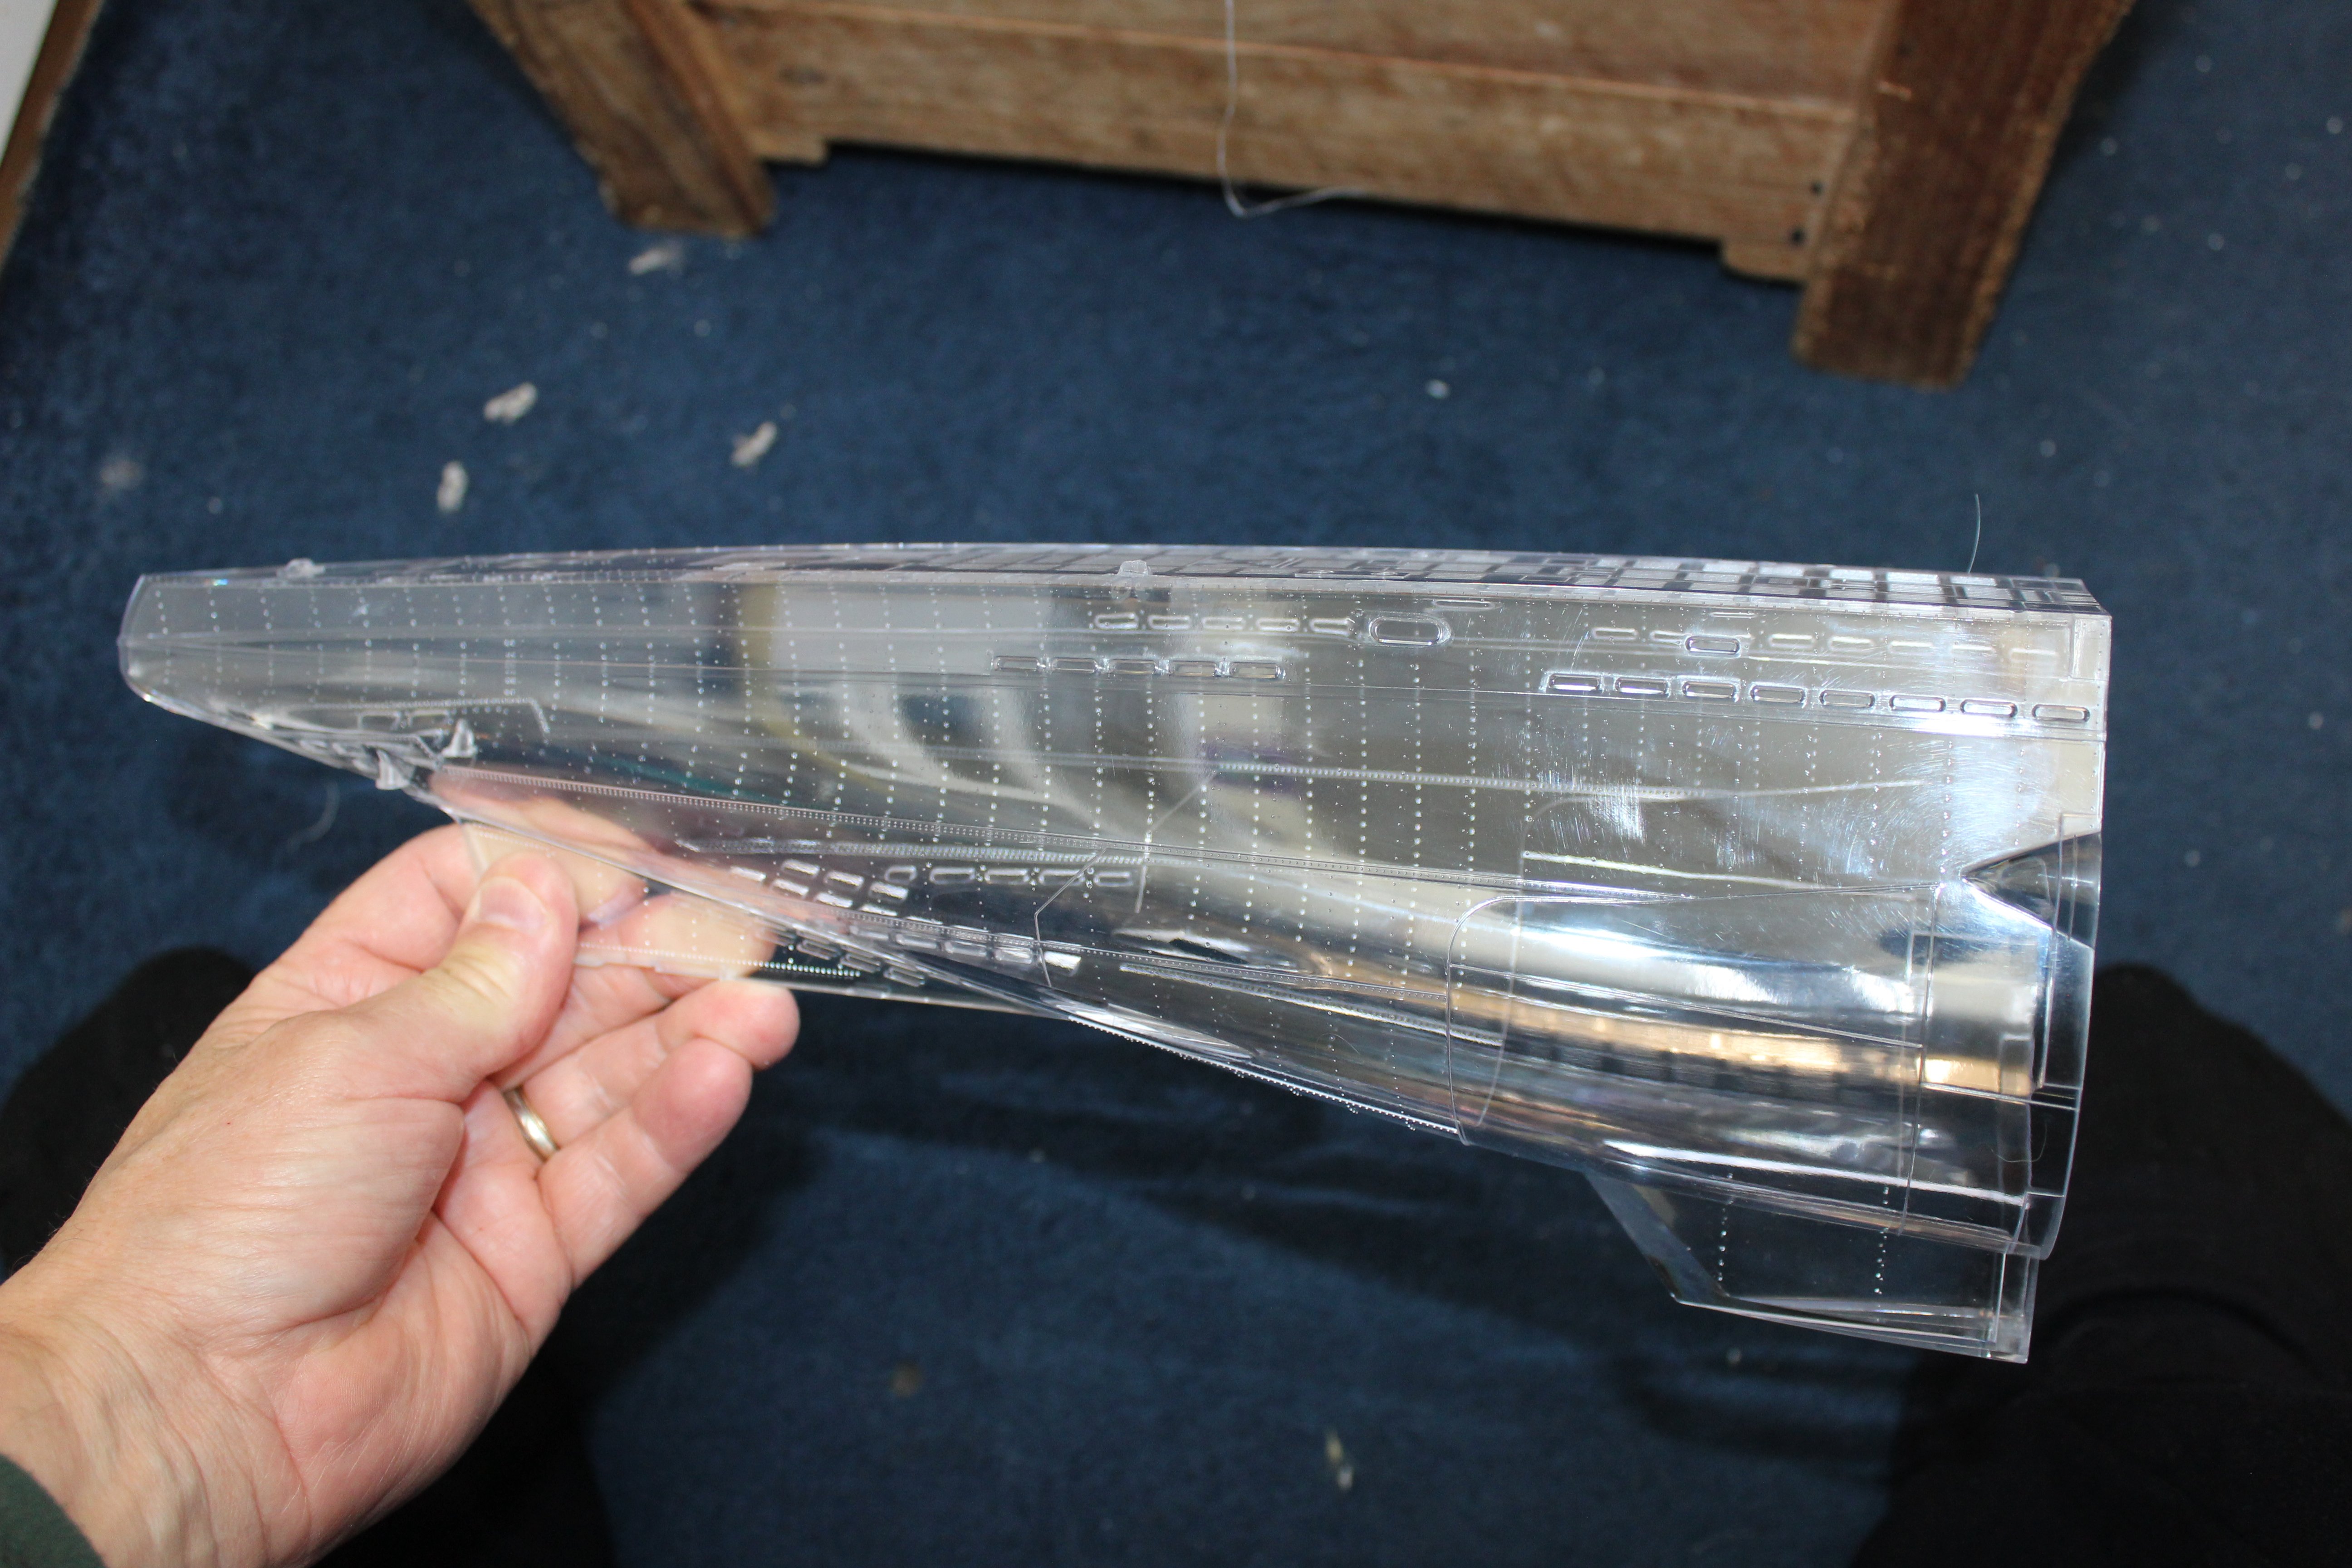
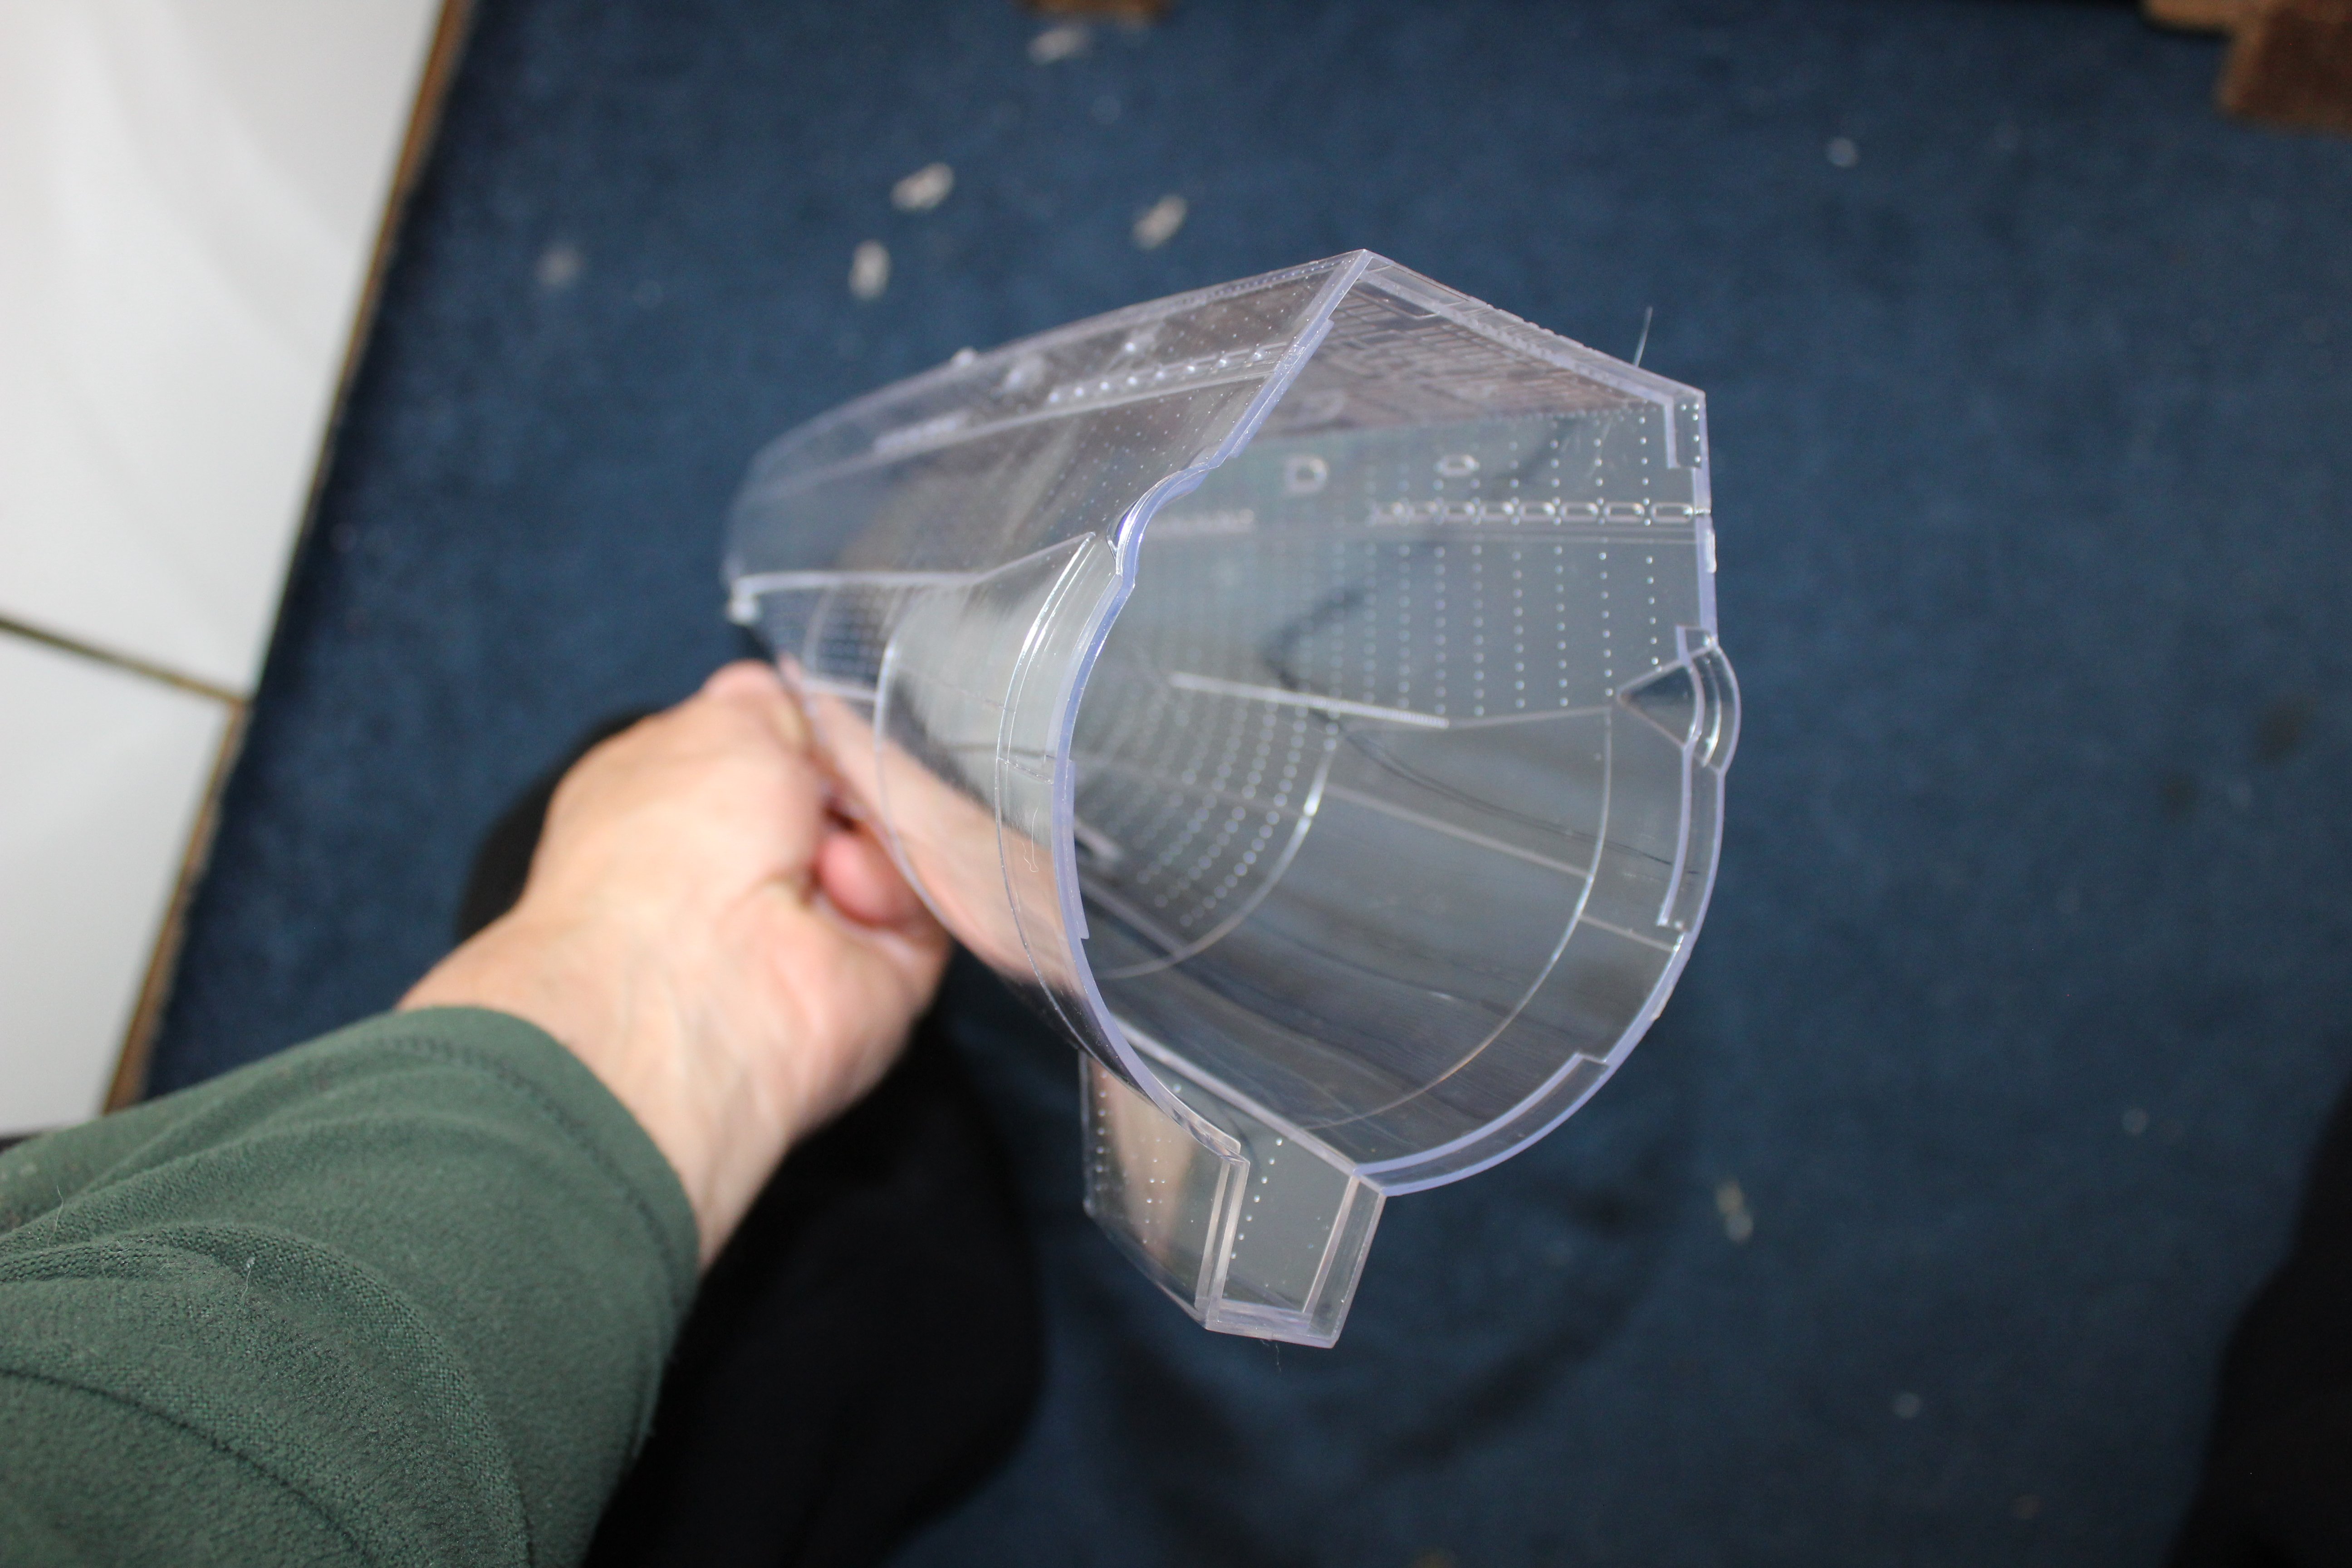
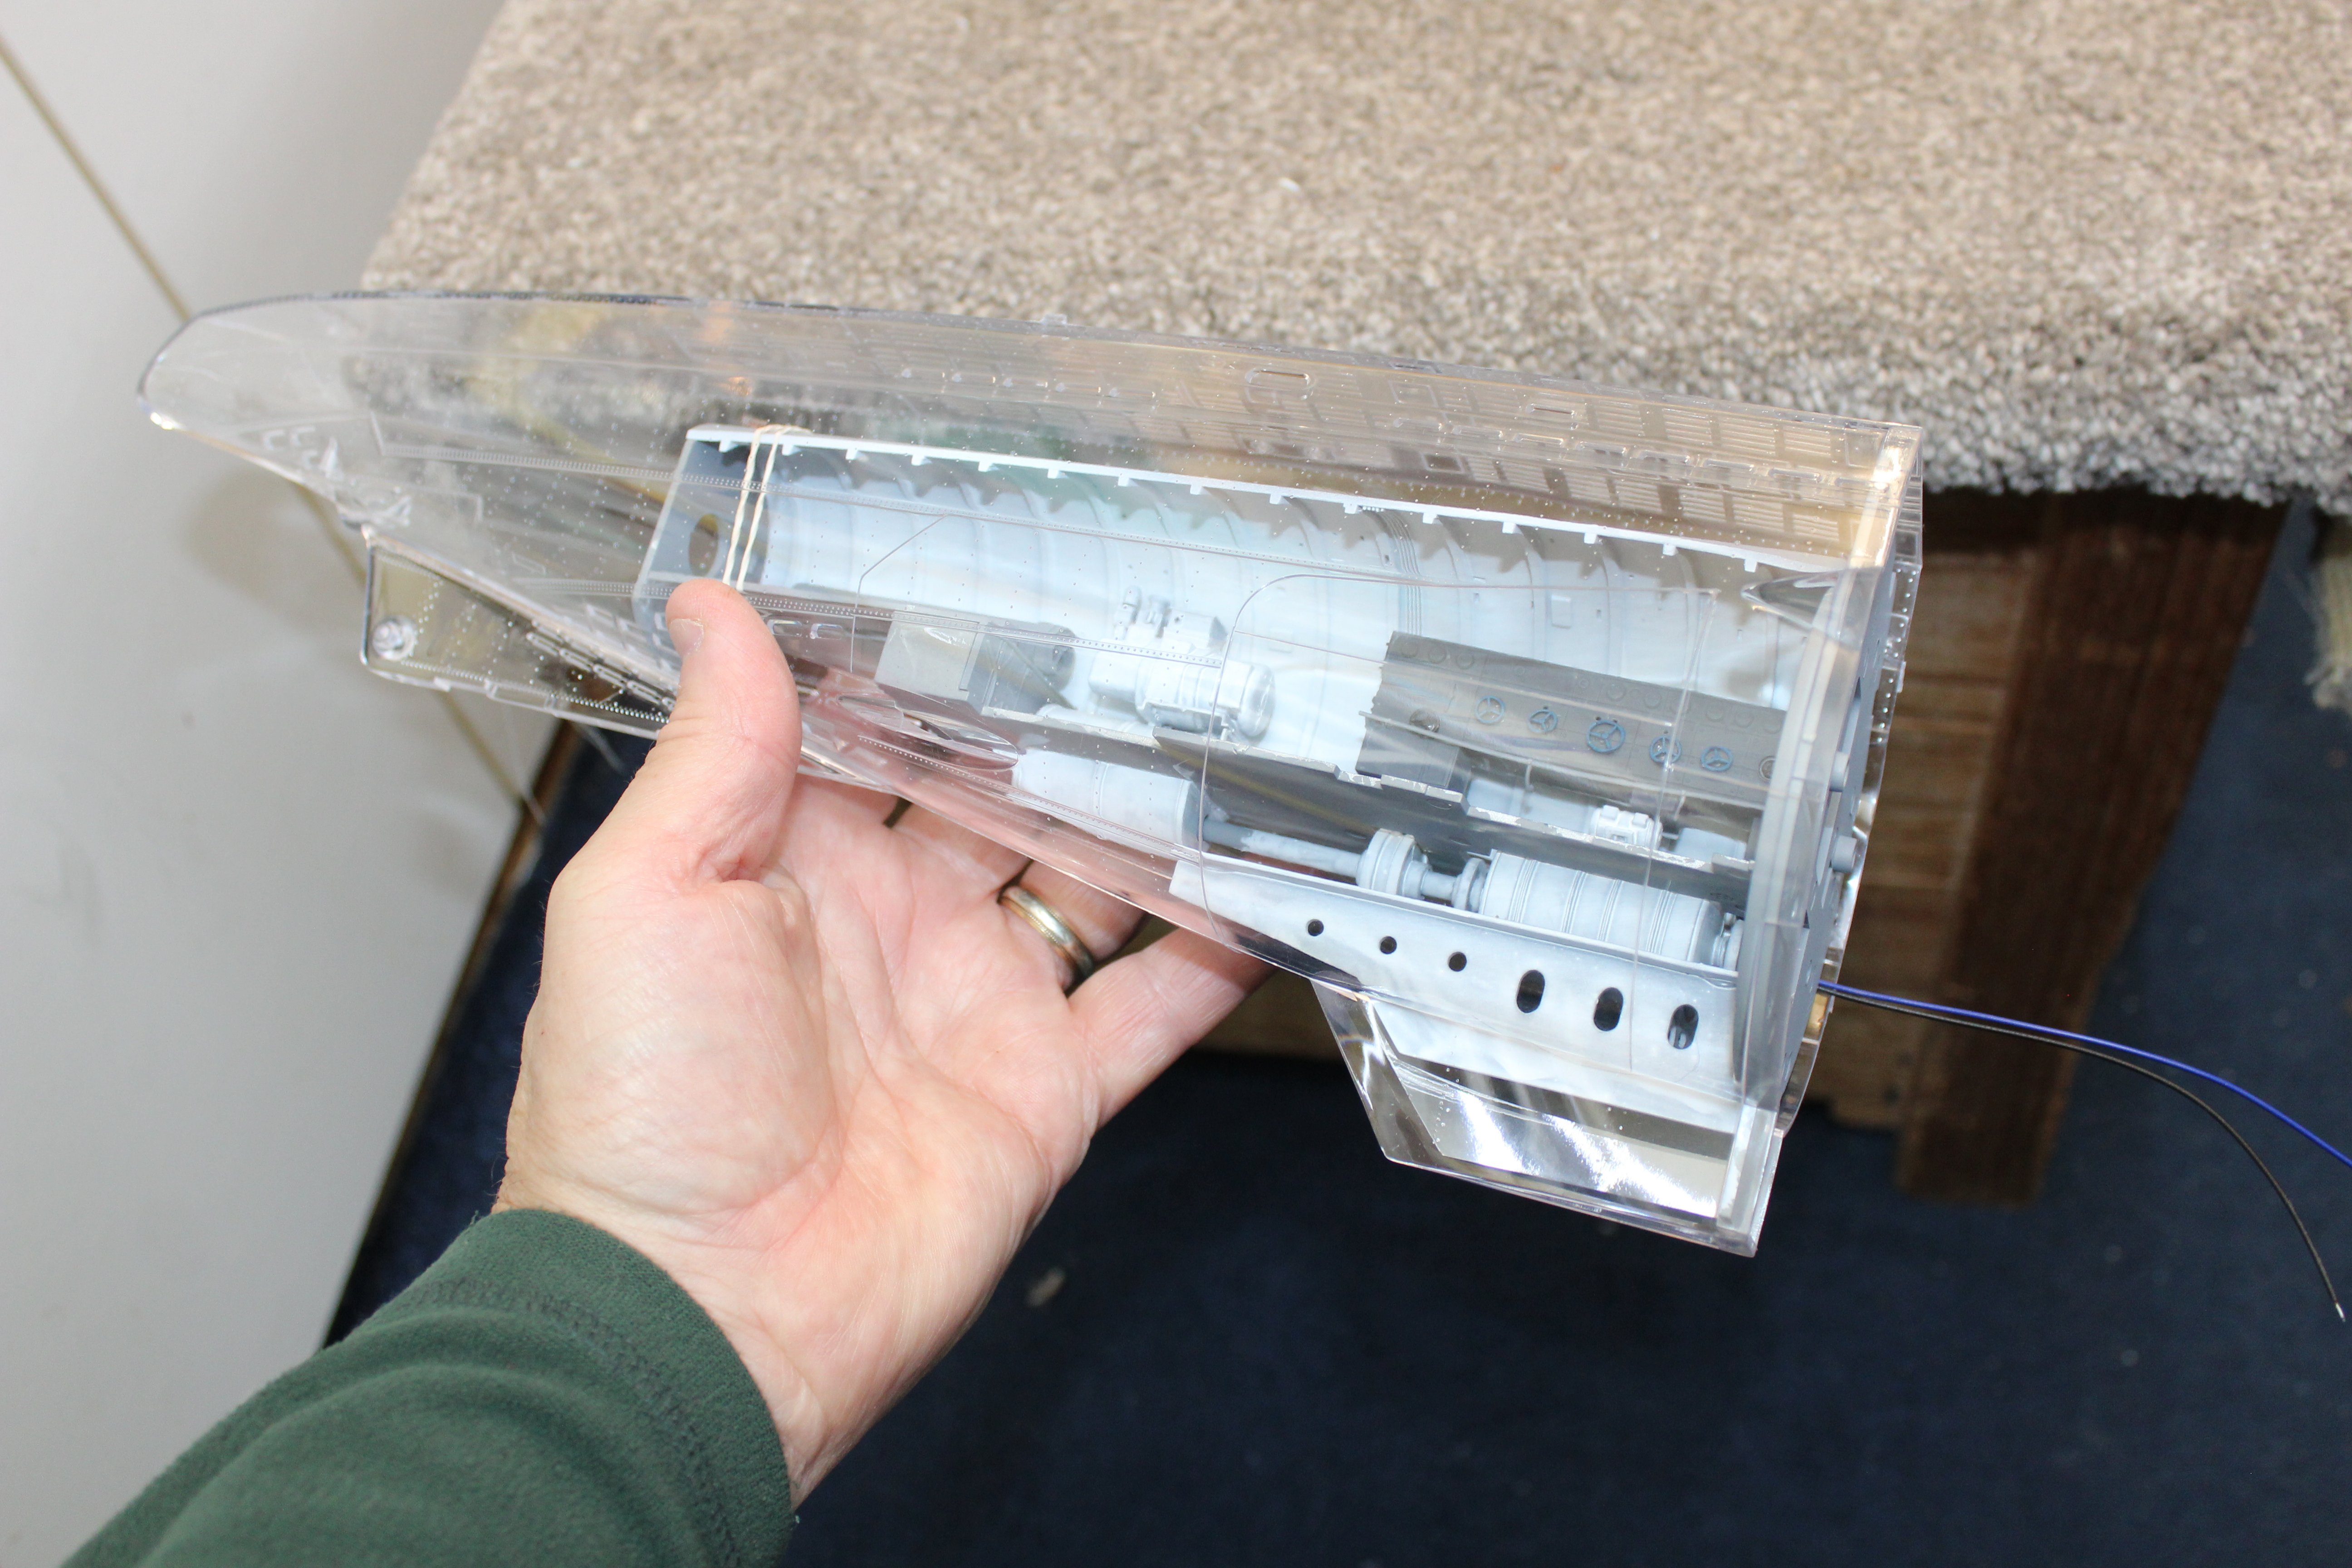
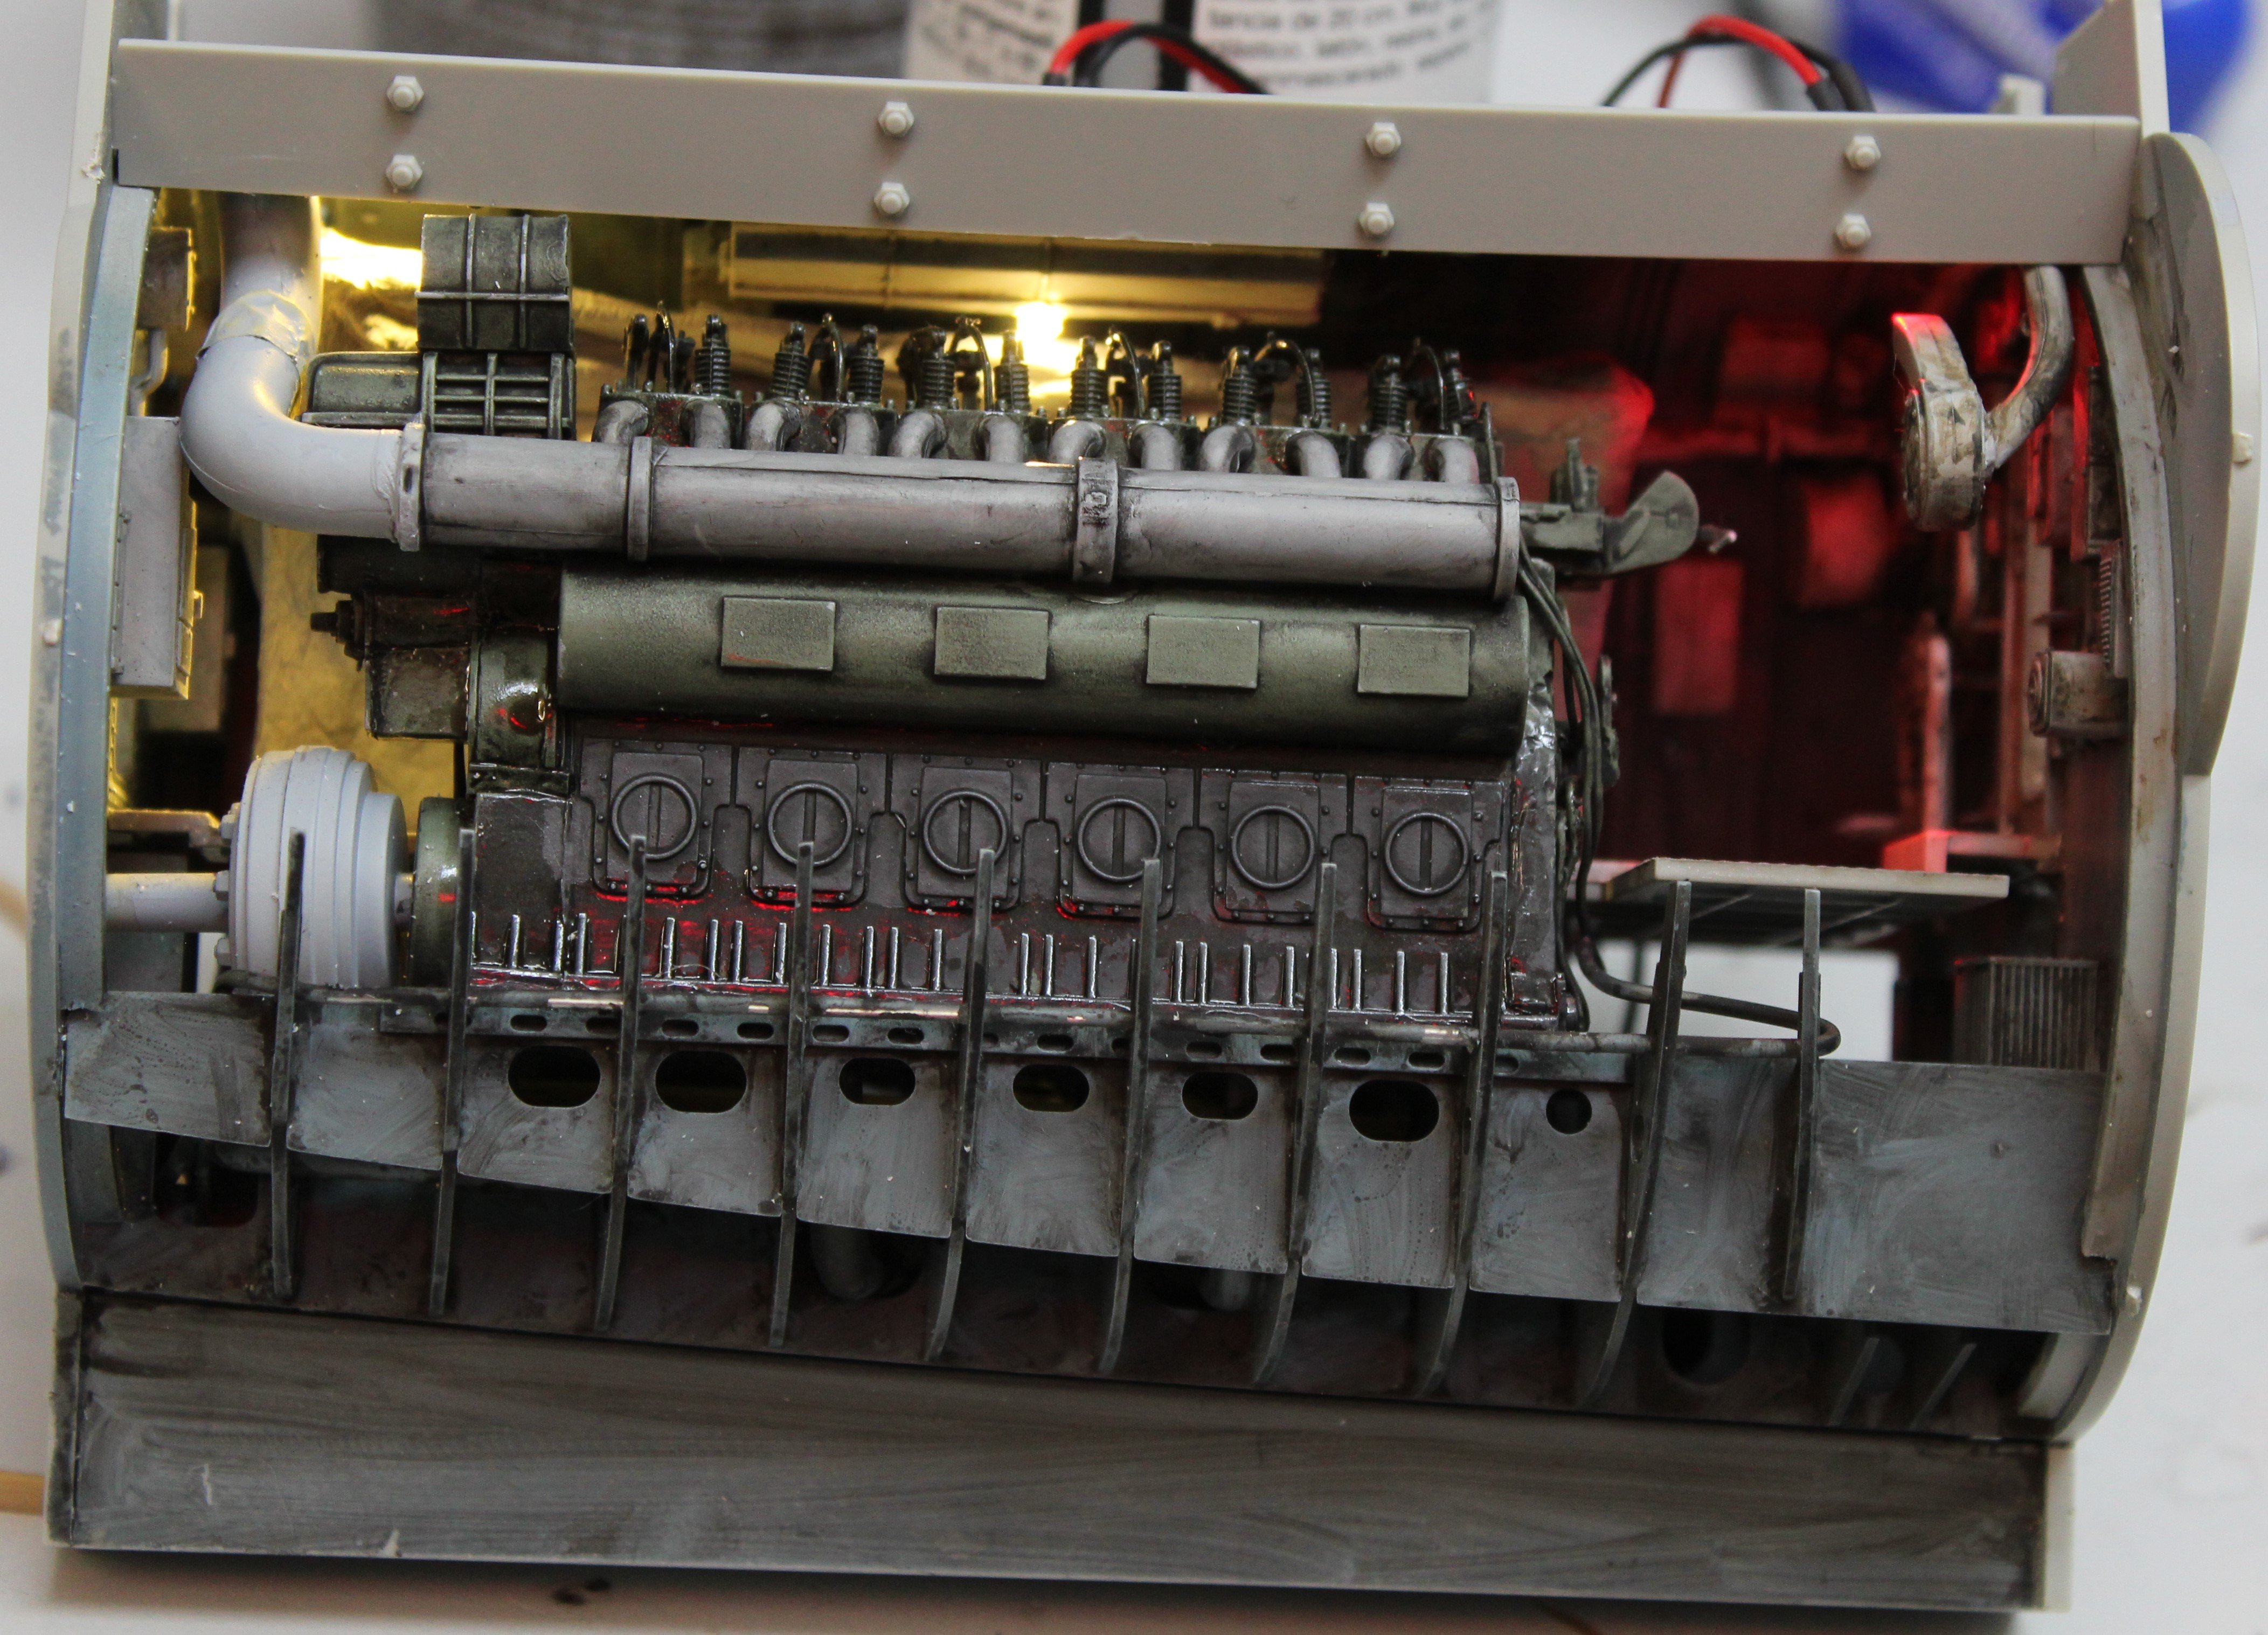
Stern Section nice easy section to build up, have added some extra details in to show some interest, But only half the equipment comes with the kit ie main motors switch board etc, i understand why, but shows nothing as to how these vessels operated/space, cold, dark and very cramped The stern hull is a separate section to the rest of the boat, i guess to reduce the size of the box, but it also differs in that the whole hull section is in a one piece clear plastic, where as the rest of the Port side hull is grey plastic but i have a plan the inside of the hull will be matt black to avoid any light seepage with grey primer external before any top coats the enhancement kits replaces a lot of the moulded free-flood holes and require cutting out and the PE being inserted i have also cut the top out to replace with the new PE deck and opened up a viewing panel oh and put some lights in


- 90 replies
-
- 10
-
-

-
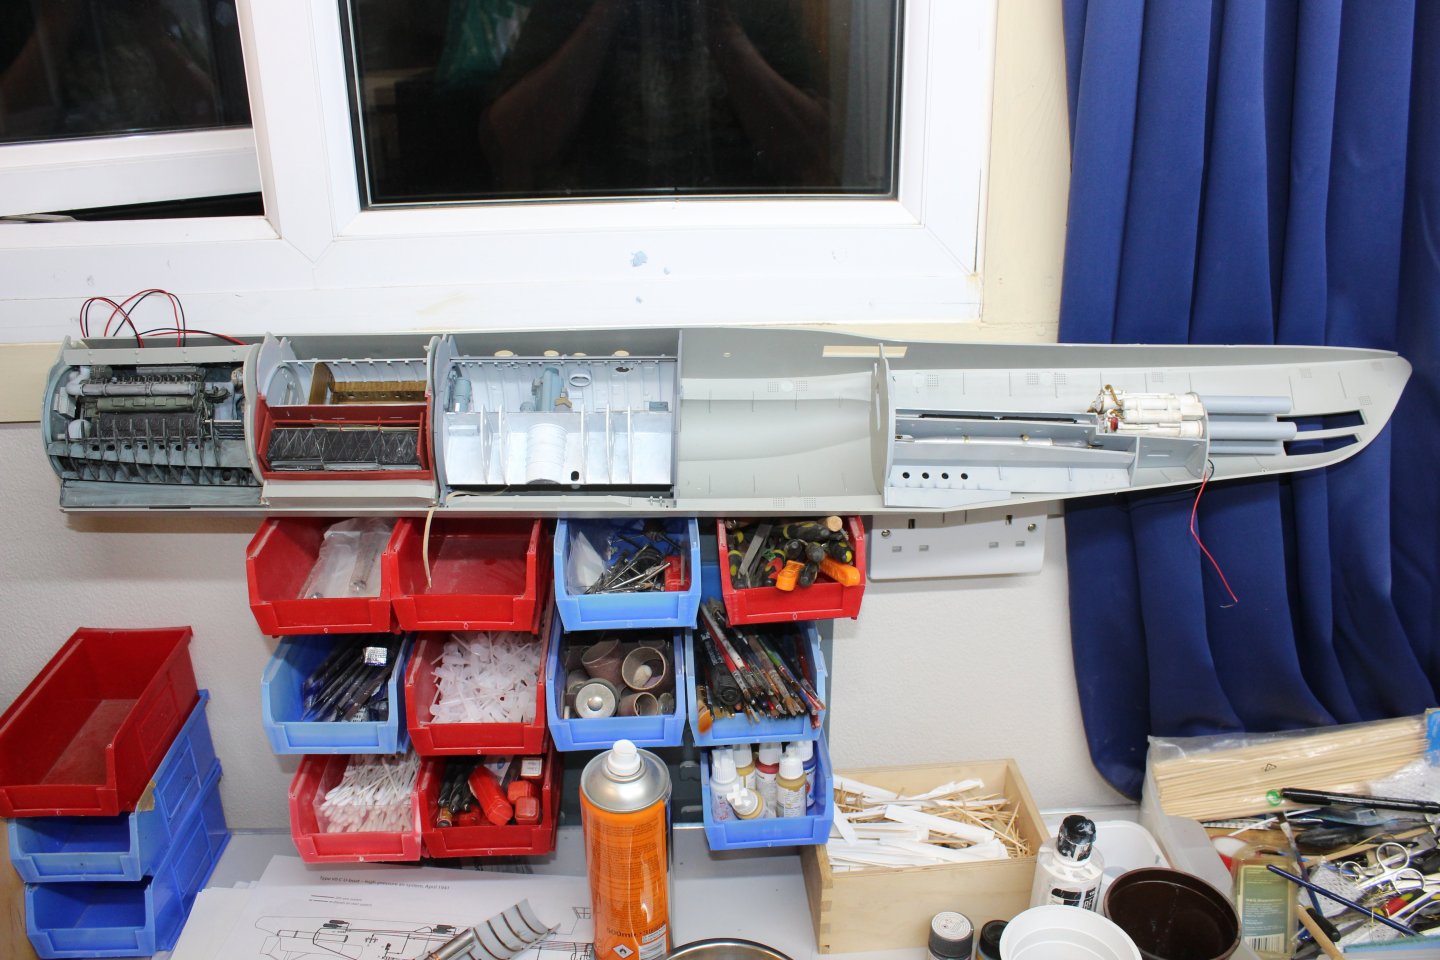
two young dogs in the house has slowed any model making progress this year, after all they come first, but now they are old enough, im slowly getting back into a routine, but for the next week or so i have gone back to plastic and brought the Trumpy 1/48 U552 back to the table which was last seen 3 years ago, the engine room is now slowly heading towards completion, for this section i modified the Port Engine and put it on the other side, a lot more weathering and detail still to add

-
I used plates on my Victory and tape on the Indefatigable, not sure i will go back to tiles again
.thumb.JPG.07fbe44c941e611eda7cbf72f9518e71.JPG)
.thumb.JPG.f32684fc3fa73082f949eb0abefe17ab.JPG)
- 62 replies
-
- 10
-
-
- belle poule
- OcCre
- (and 1 more)
-
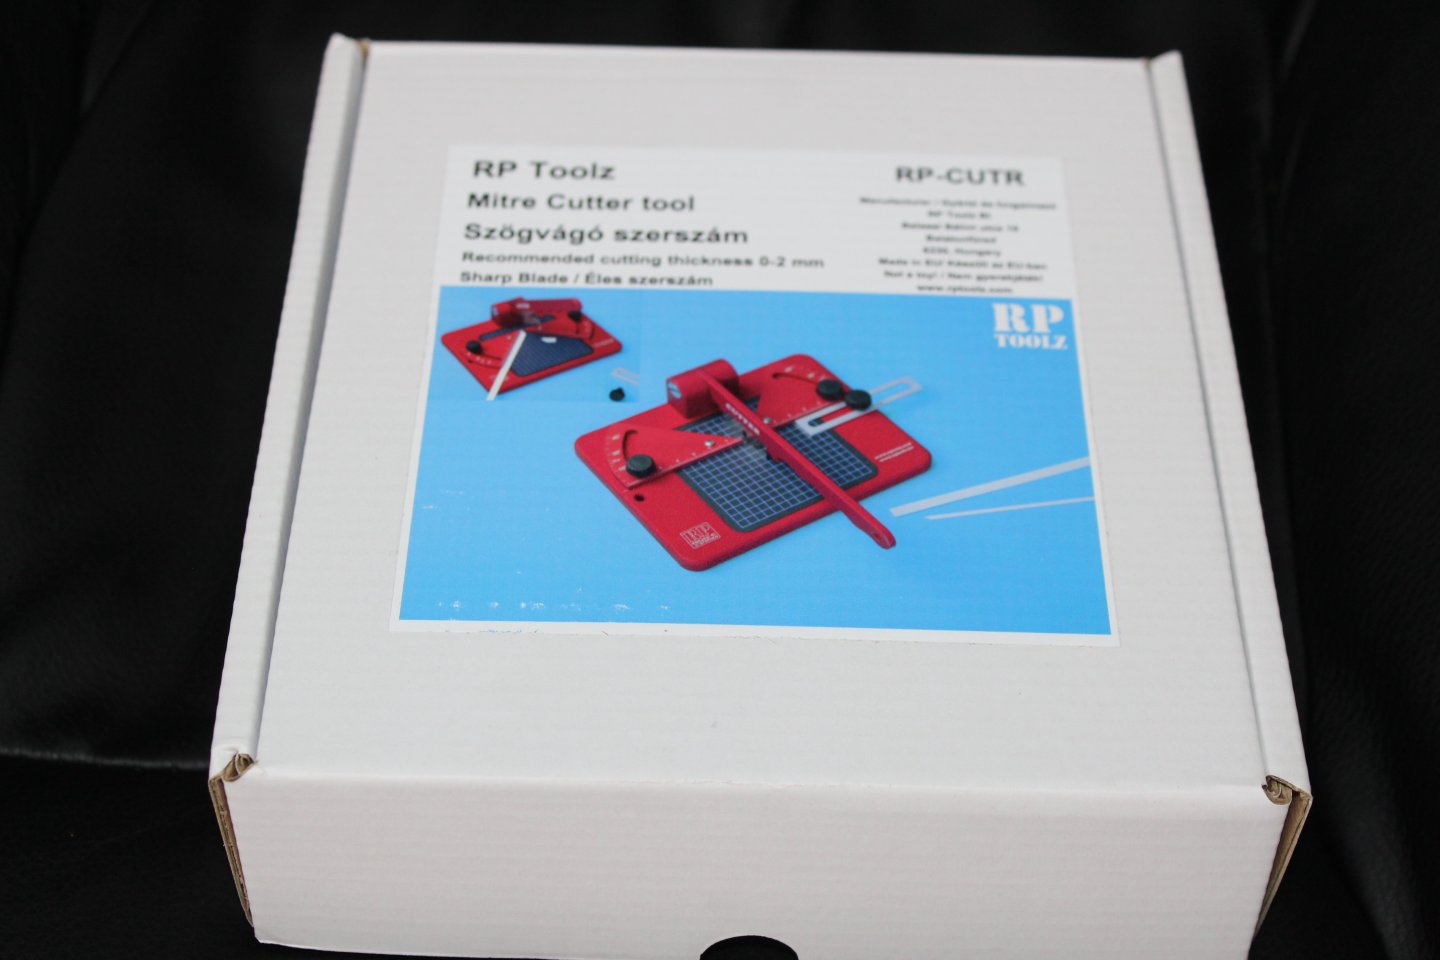
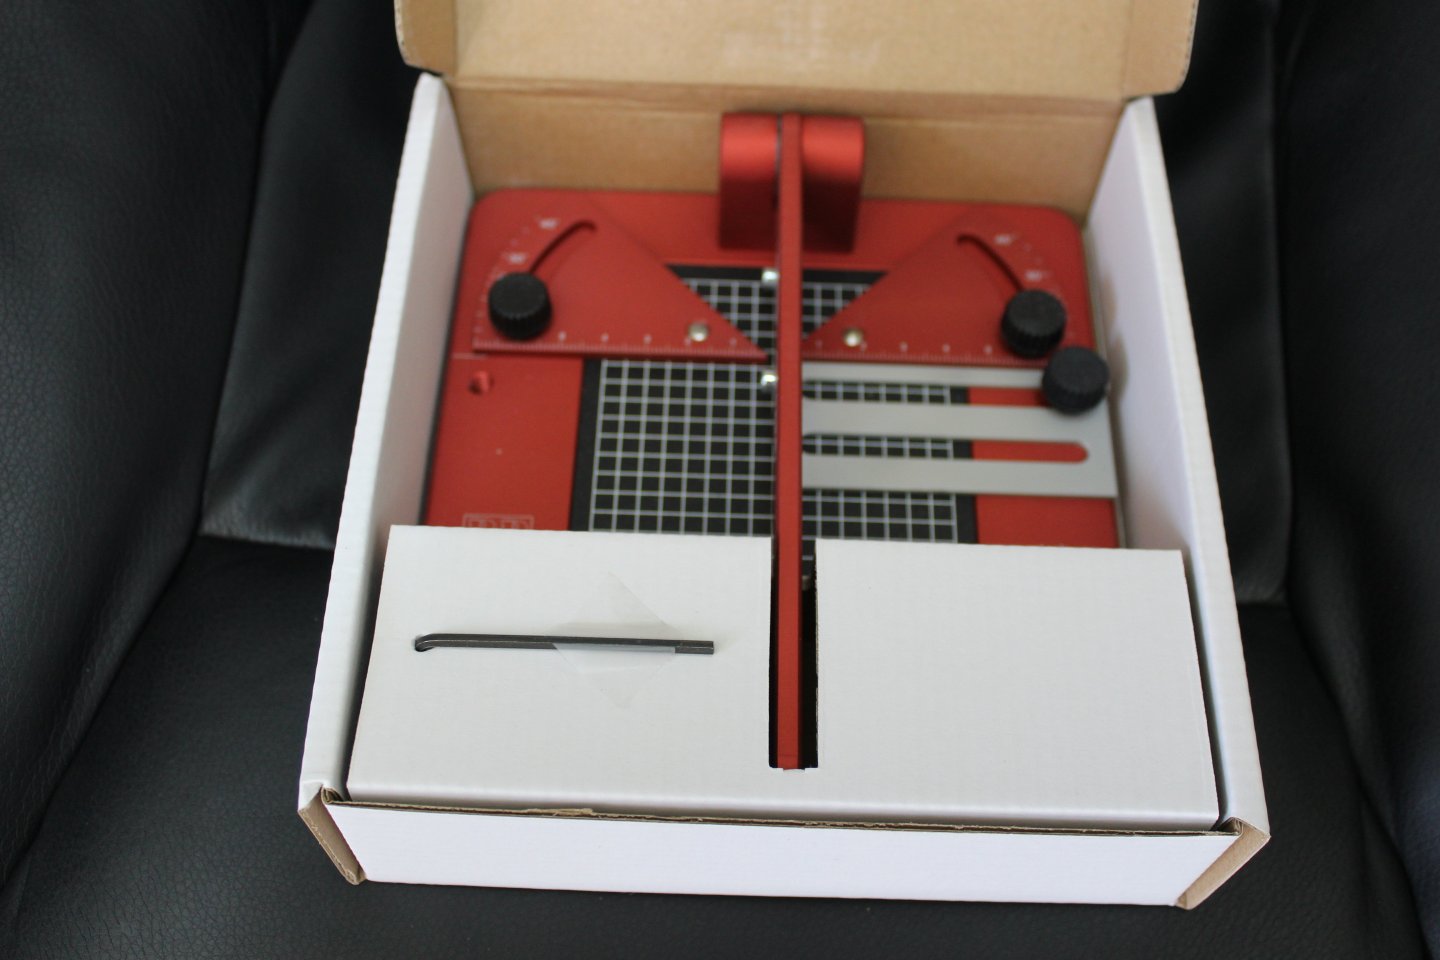
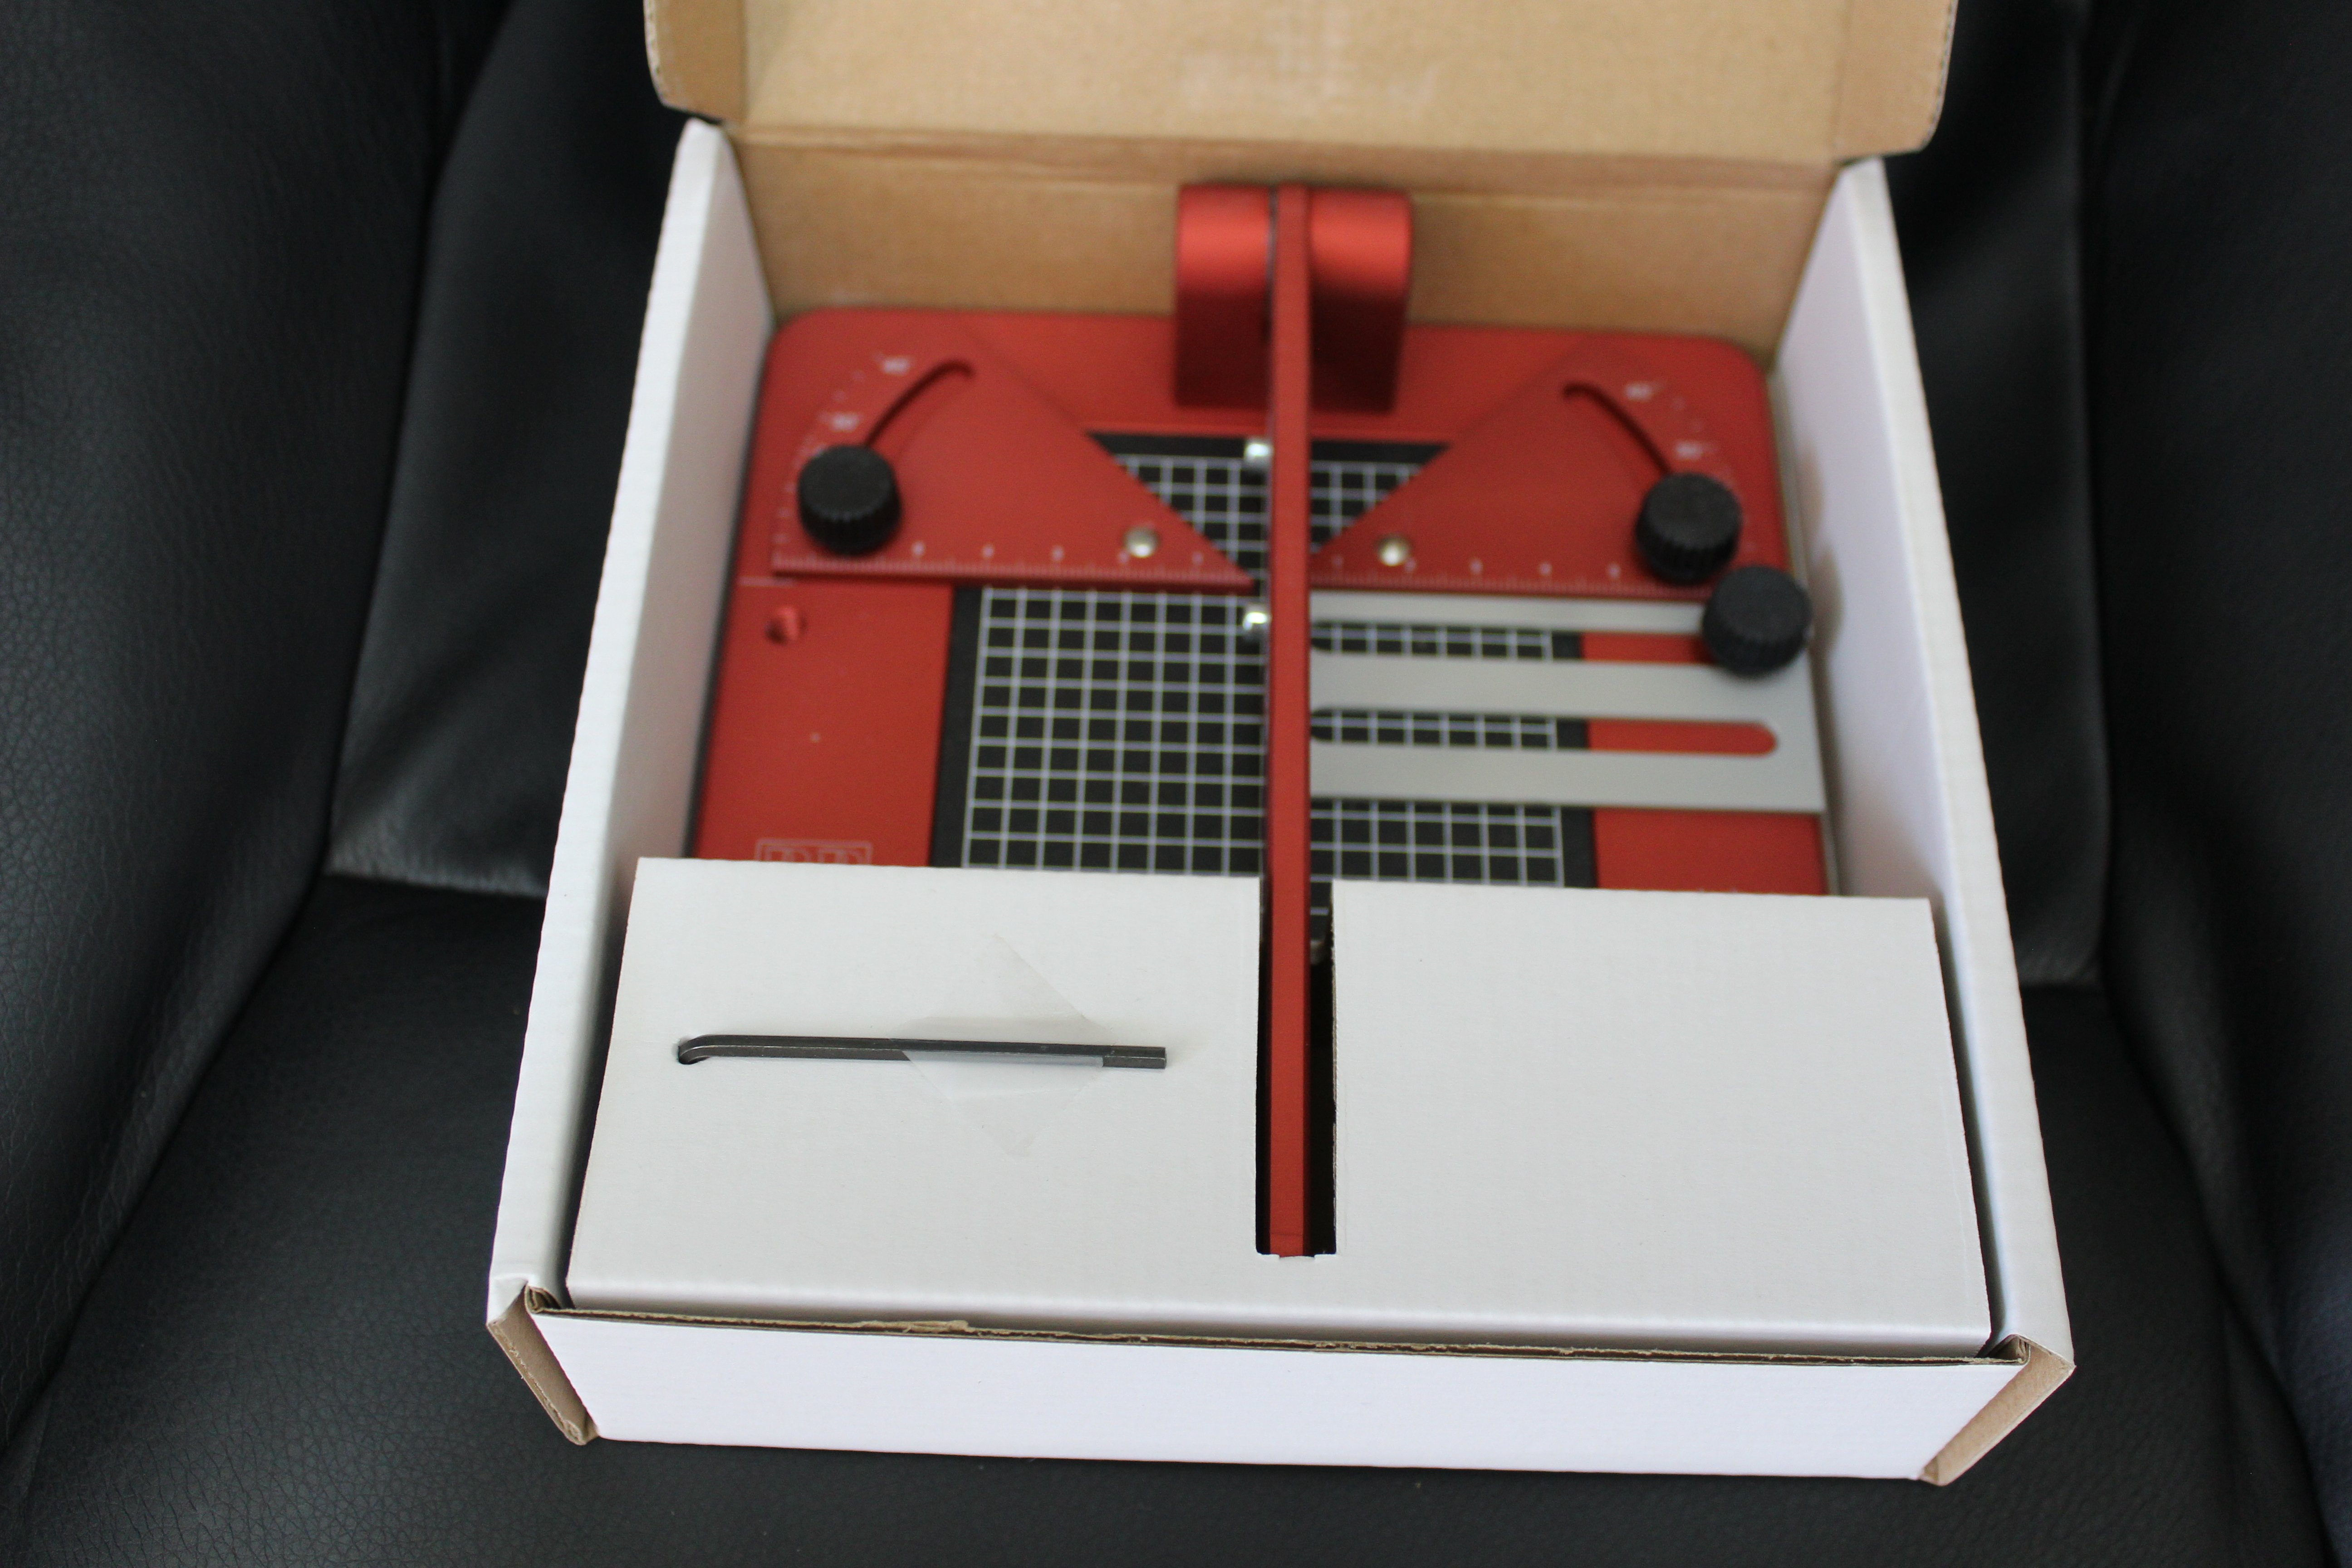
Just cut over 1500 tiles with my cutter, and the first one is exactly the same size as the last, The mat cannot be turned as it has location pins to line it up, however, i dont know if it can be reversed/ turned over though. The handle did tighten up quite a bit, but i slightly loosened the heavy duty bolt, and added a few drops of light oil, much happier with the result. Ordered through AK Interactive with a price tag of £90 using PayPal 1in 3, and came directly from Spain For reference WRT price, this will last for many years, as its a very well made tool,
-
I was unable to find the right size, so i looked at what was used on the Indy @1/64 and scaled from there the cutter is very good, here is the review @James H did Cutter/Mitre Tool - RP Toolz - REVIEWS: Model Shipwrighting Tools, Parts and fittings - Model Ship World™
- 62 replies
-
- 4
-

-
-
- belle poule
- OcCre
- (and 1 more)
-
coppering was done with 4mm tape into 12mm strips, one side is completed as off today on the recommendation of @James H i bought the RP Toolz Mitre cutter, brilliant tool


- 62 replies
-
- 13
-
-
-
- belle poule
- OcCre
- (and 1 more)
-
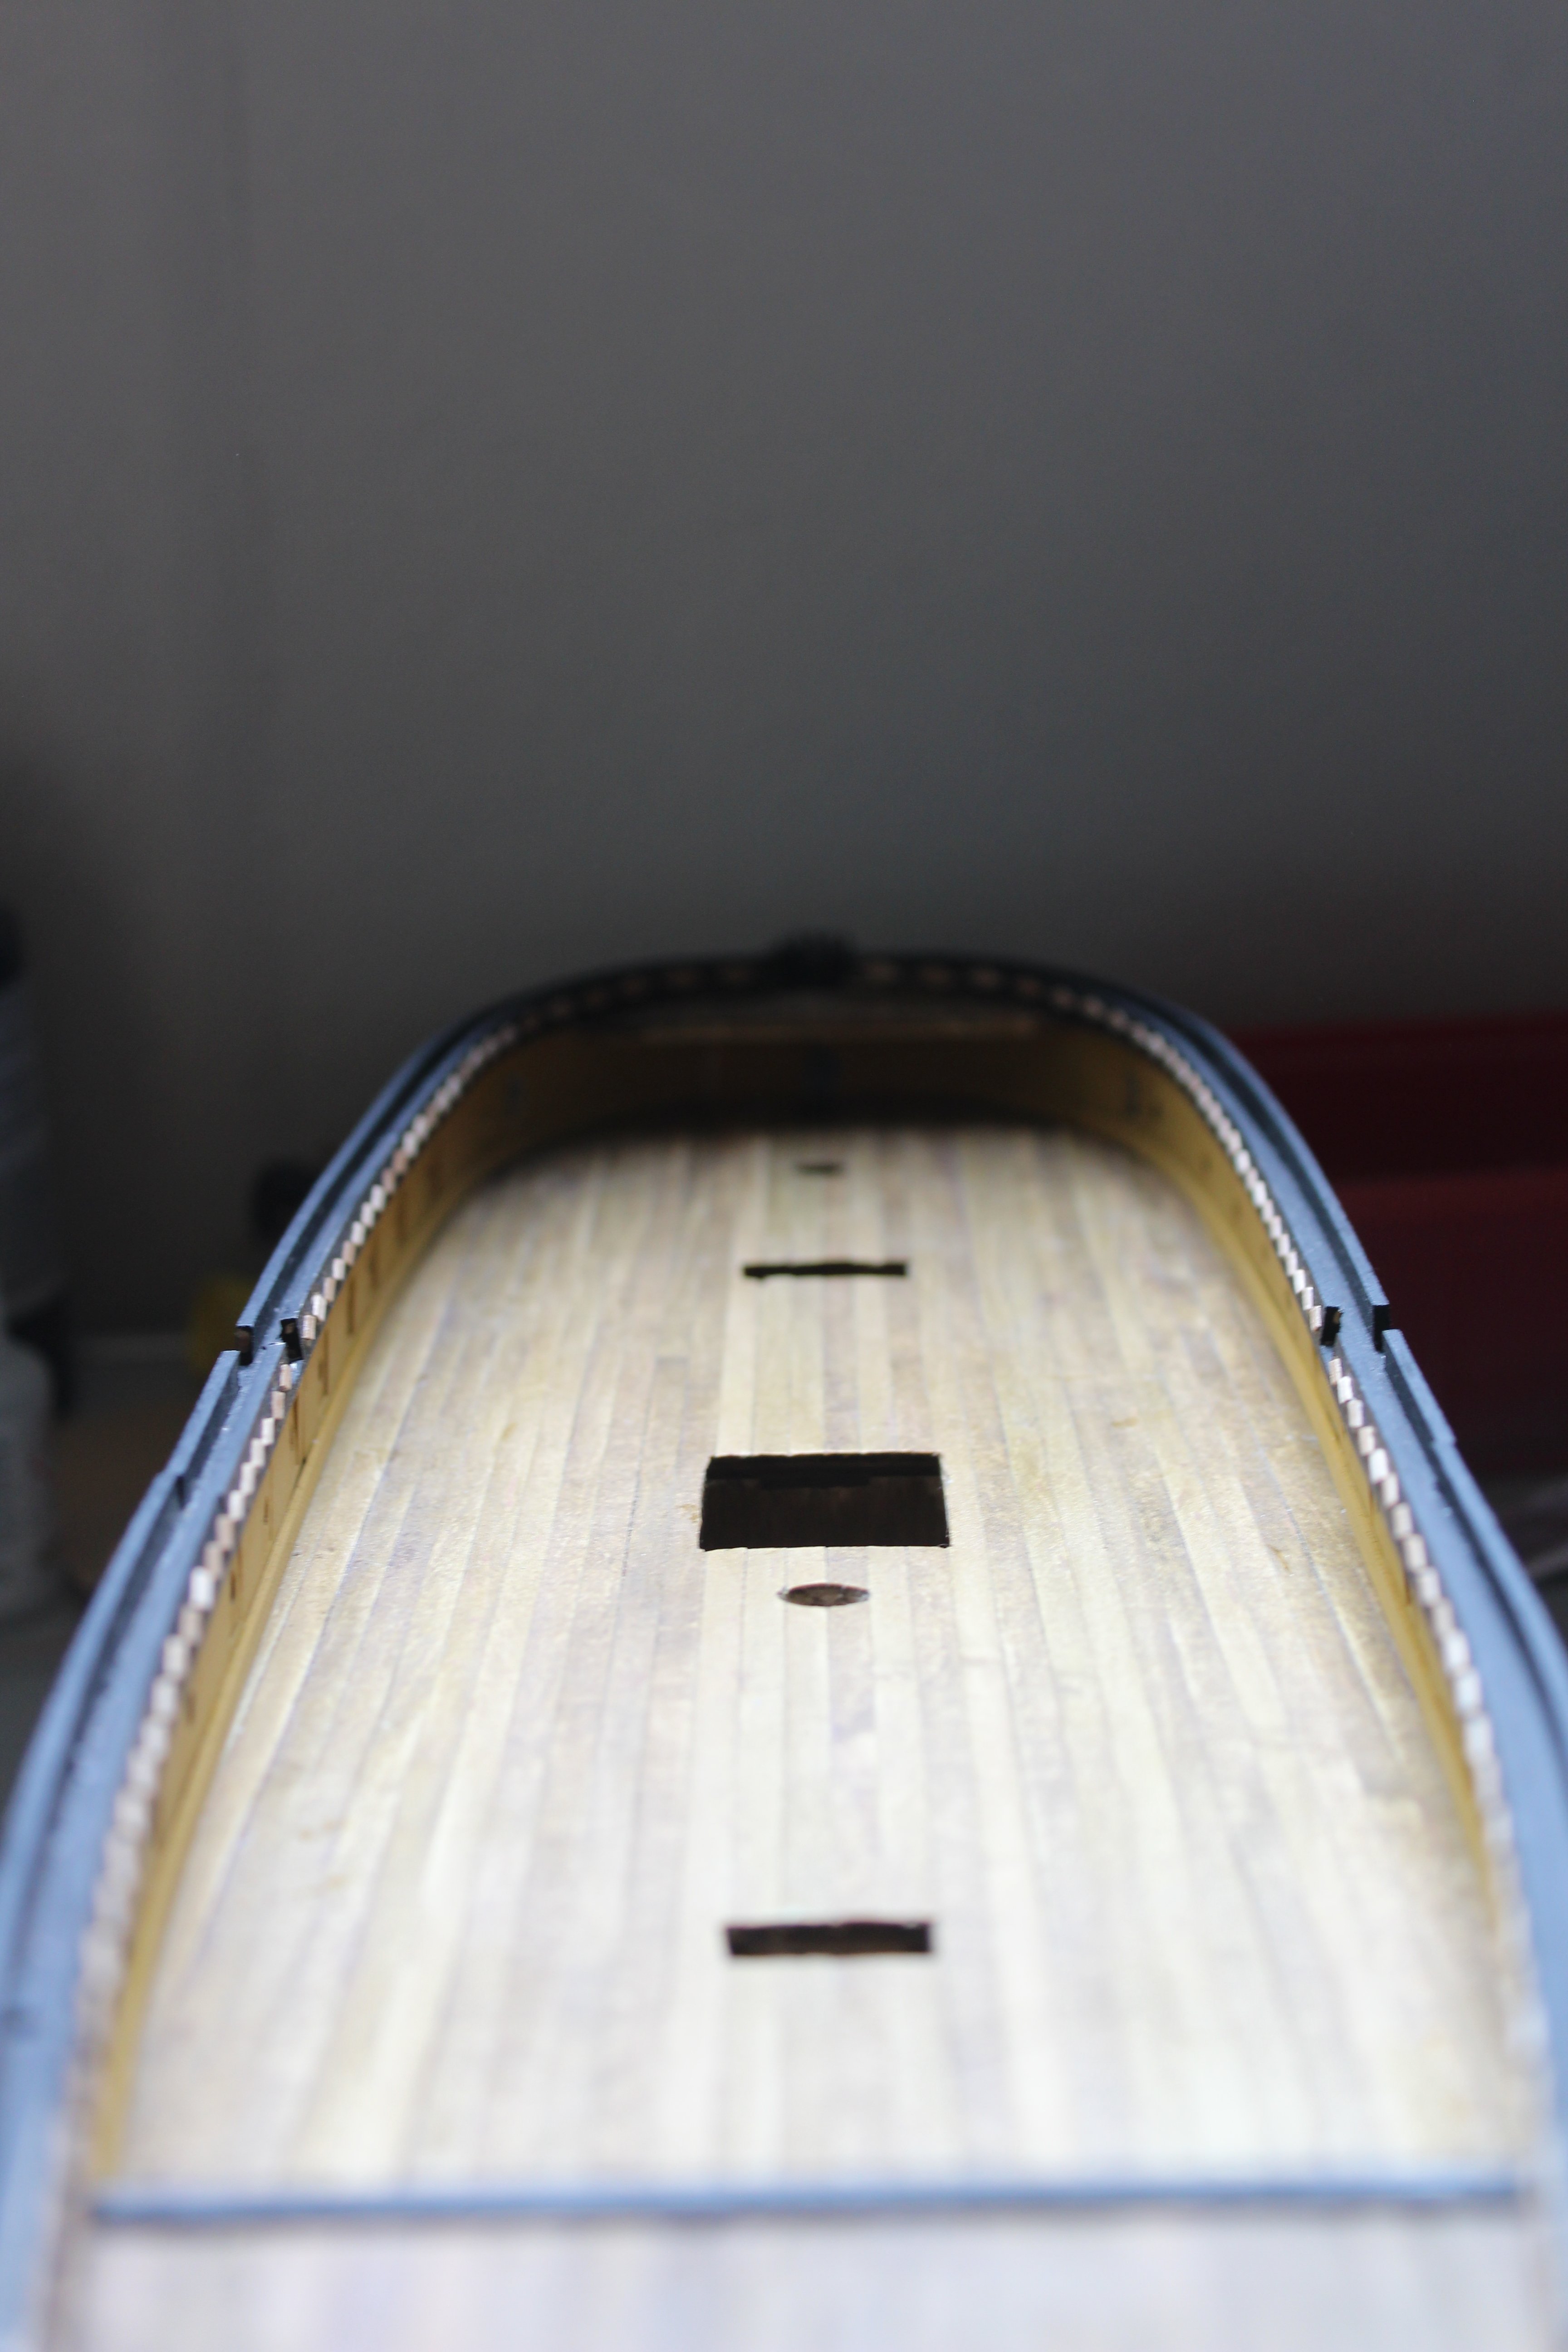
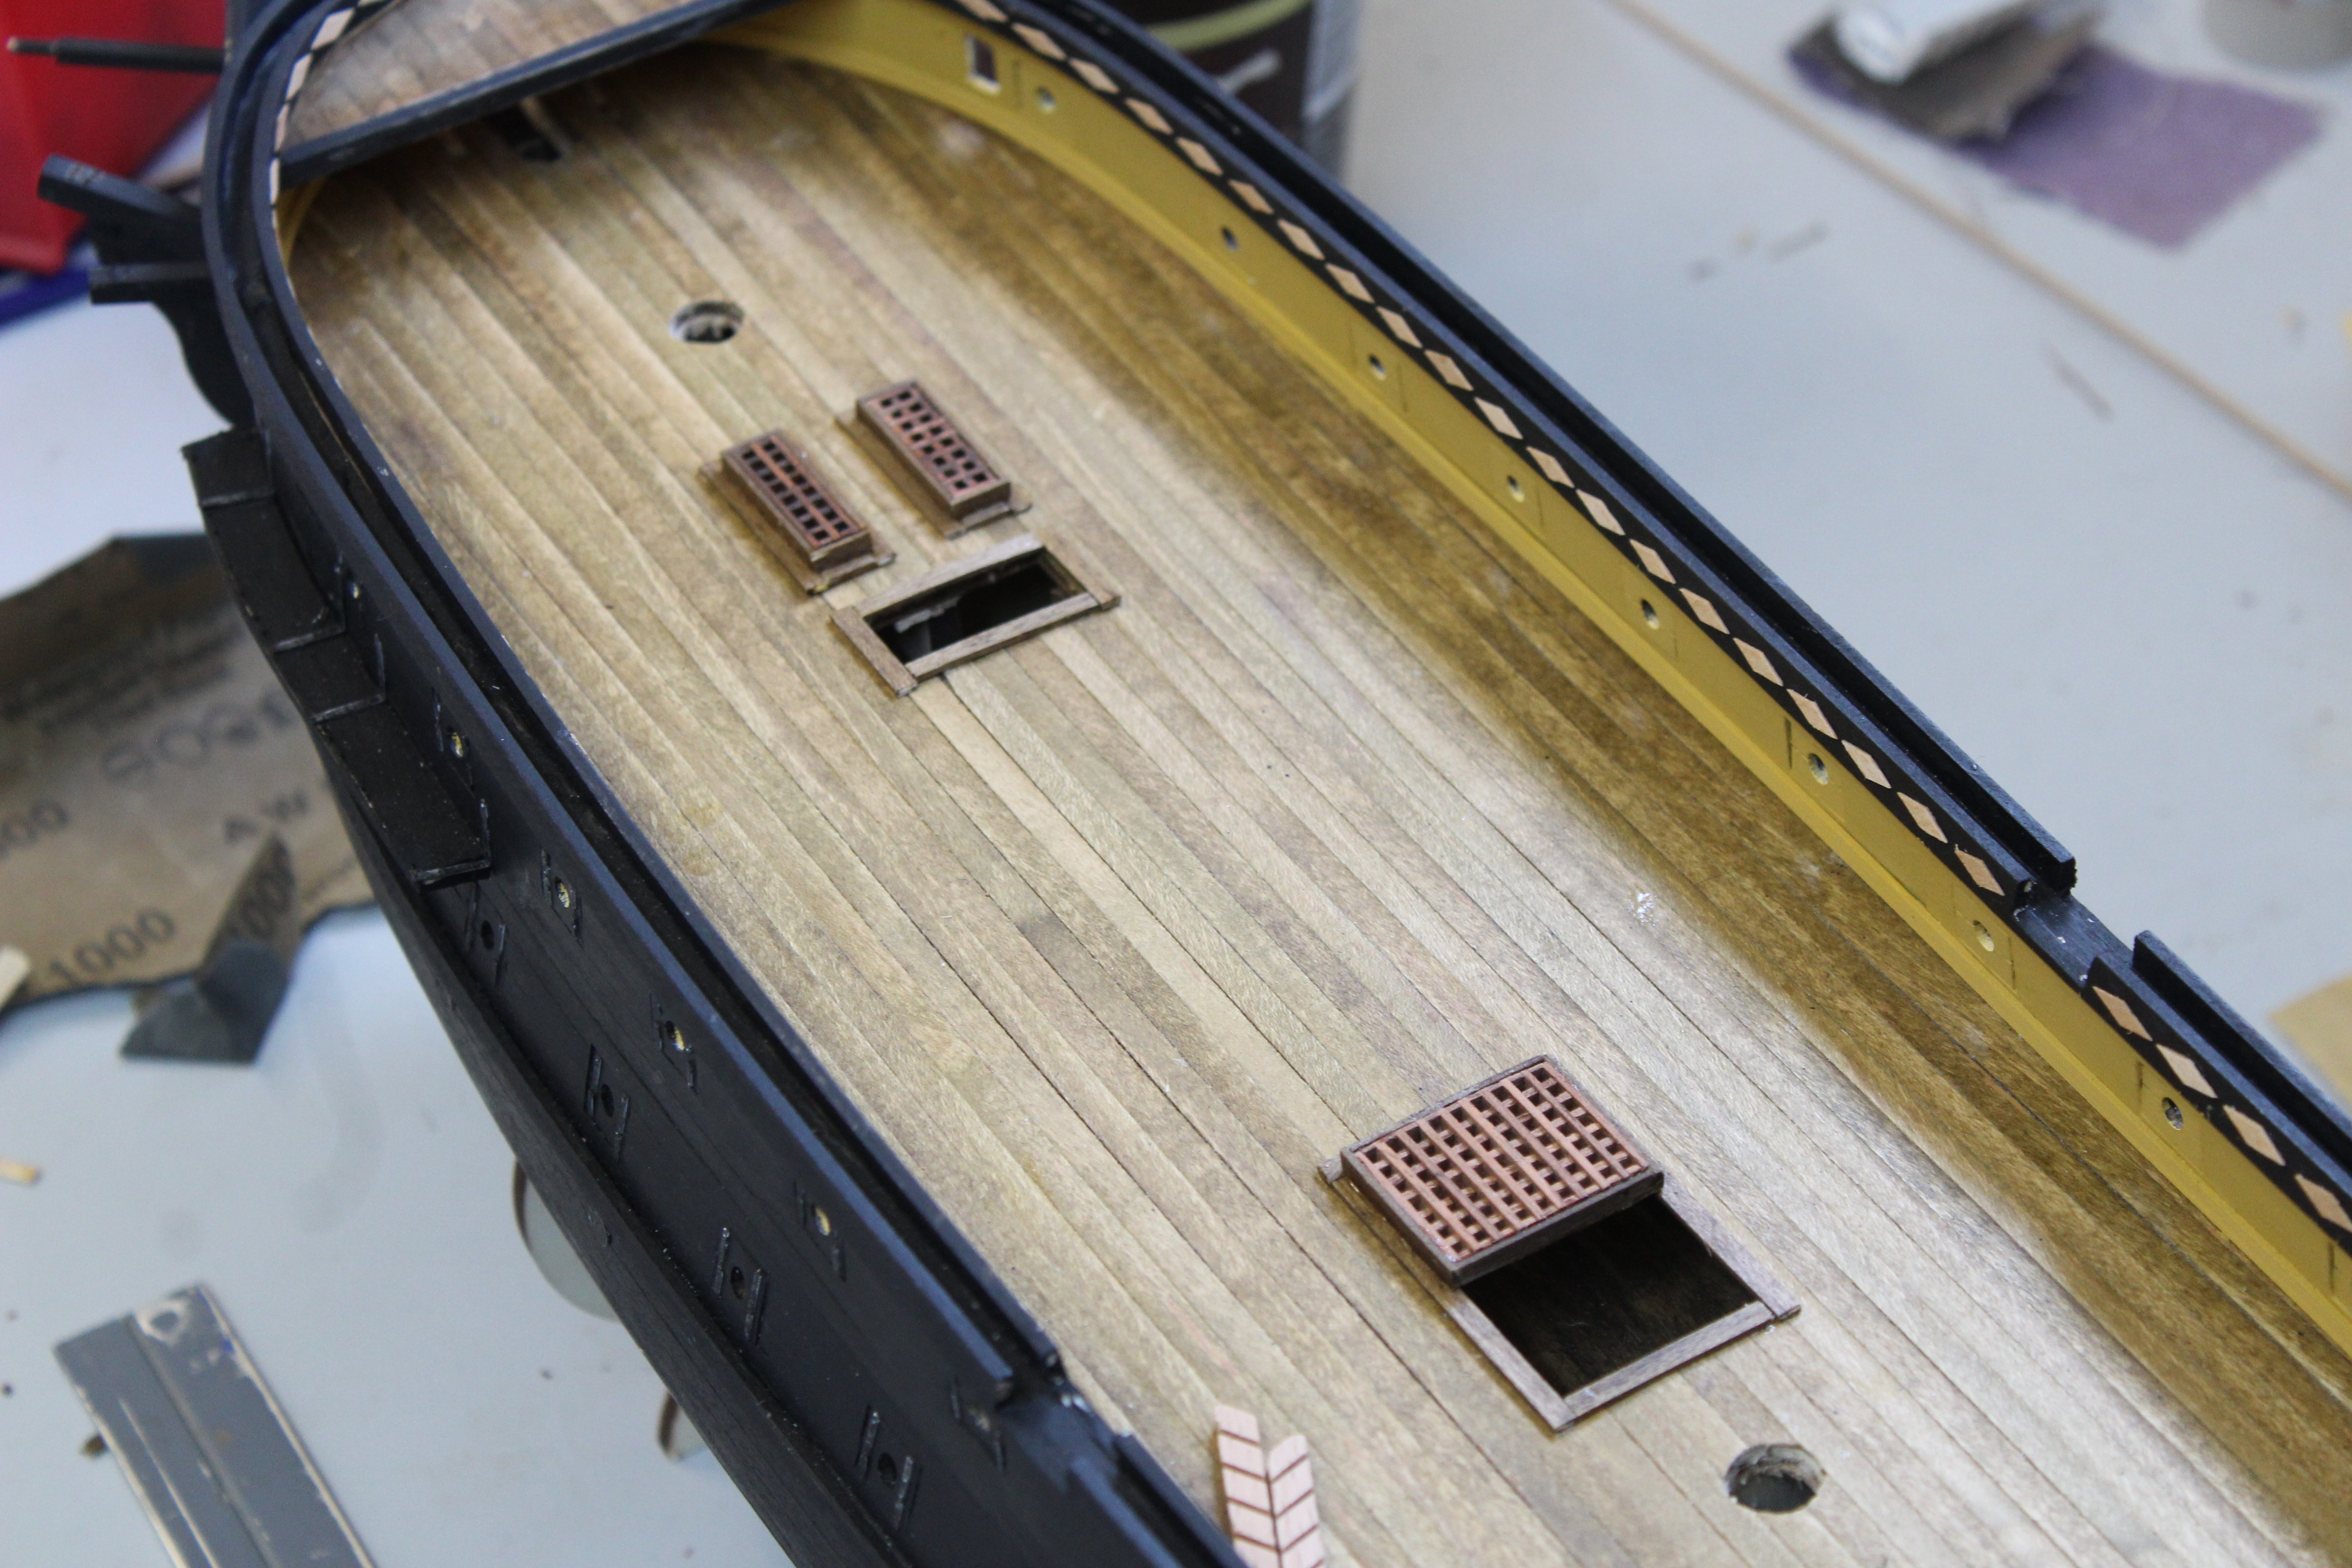
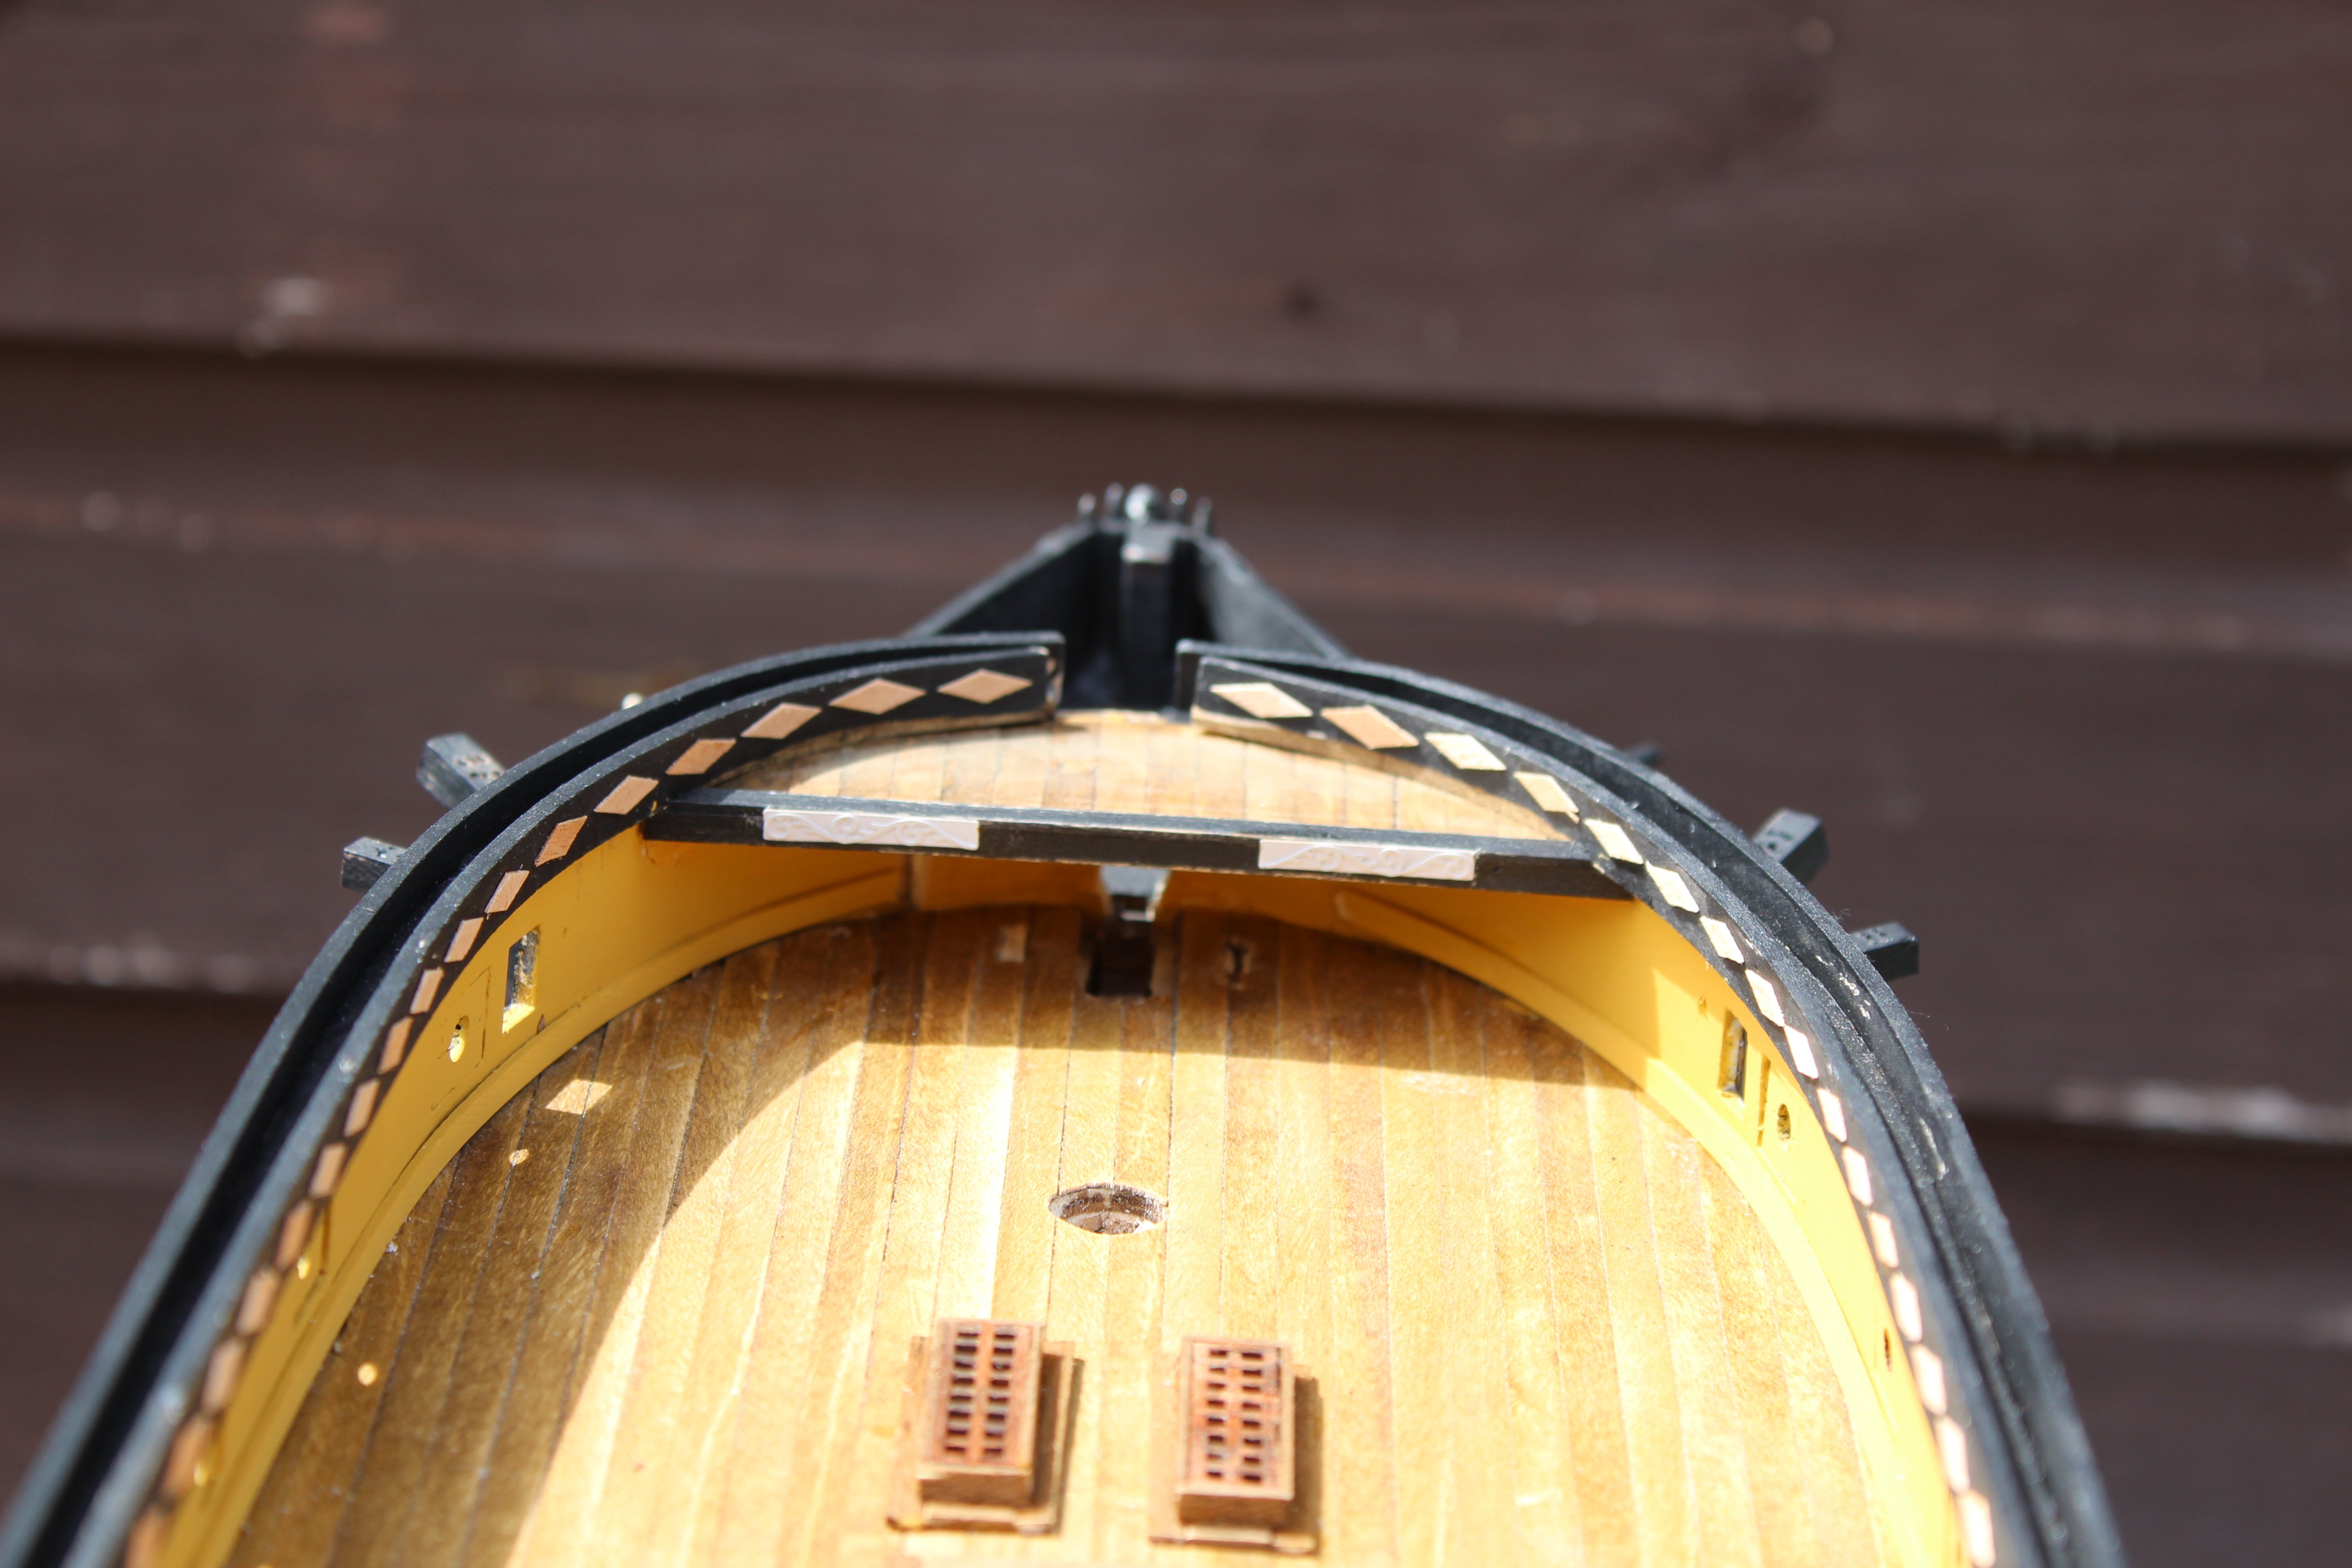
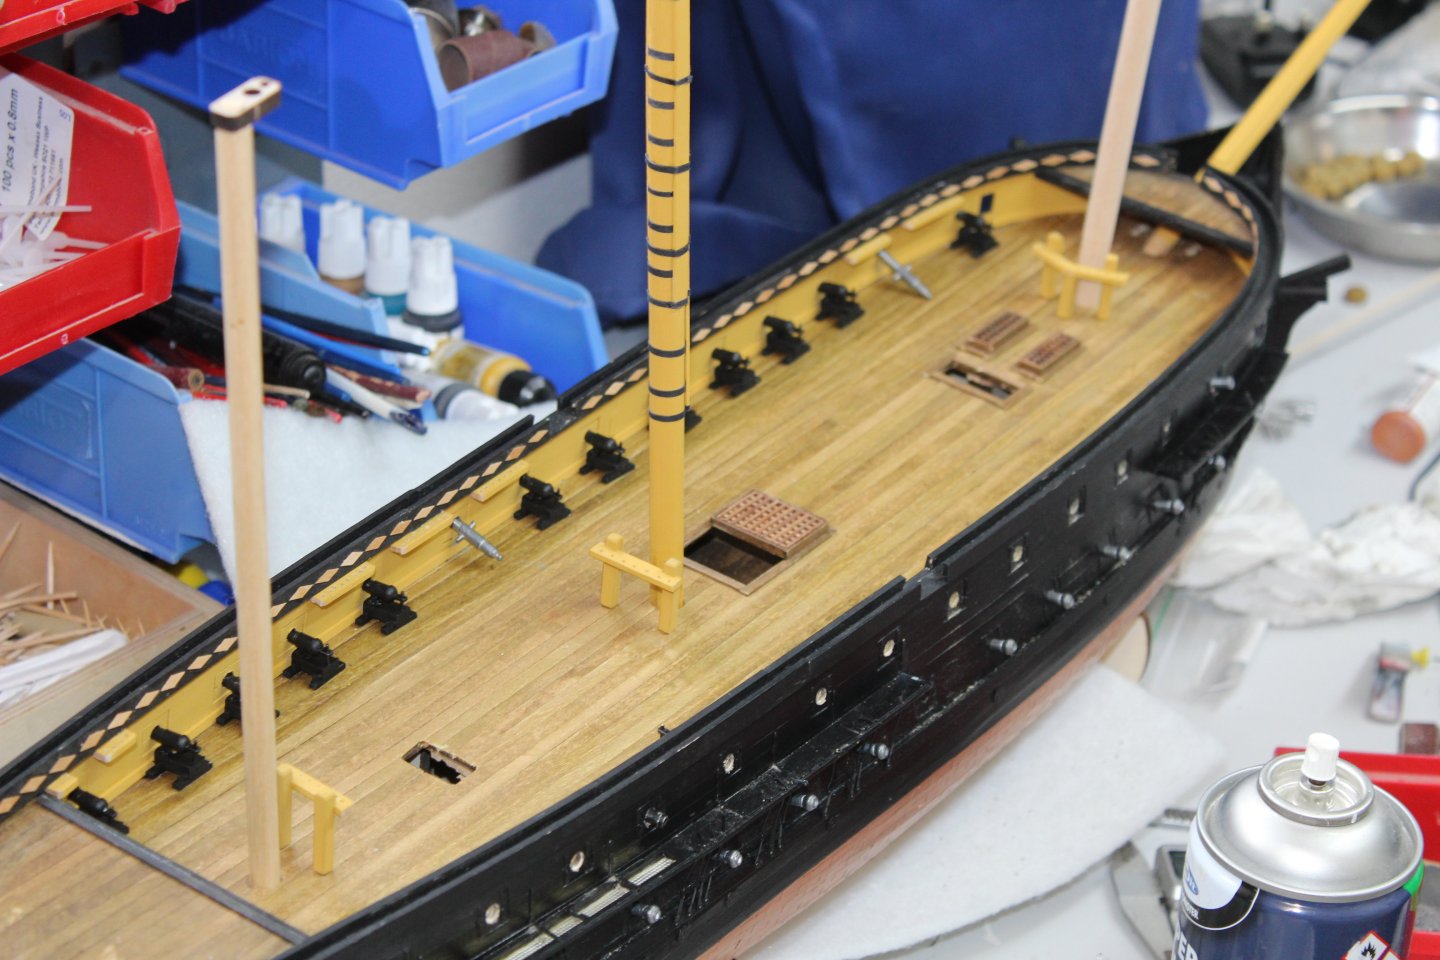
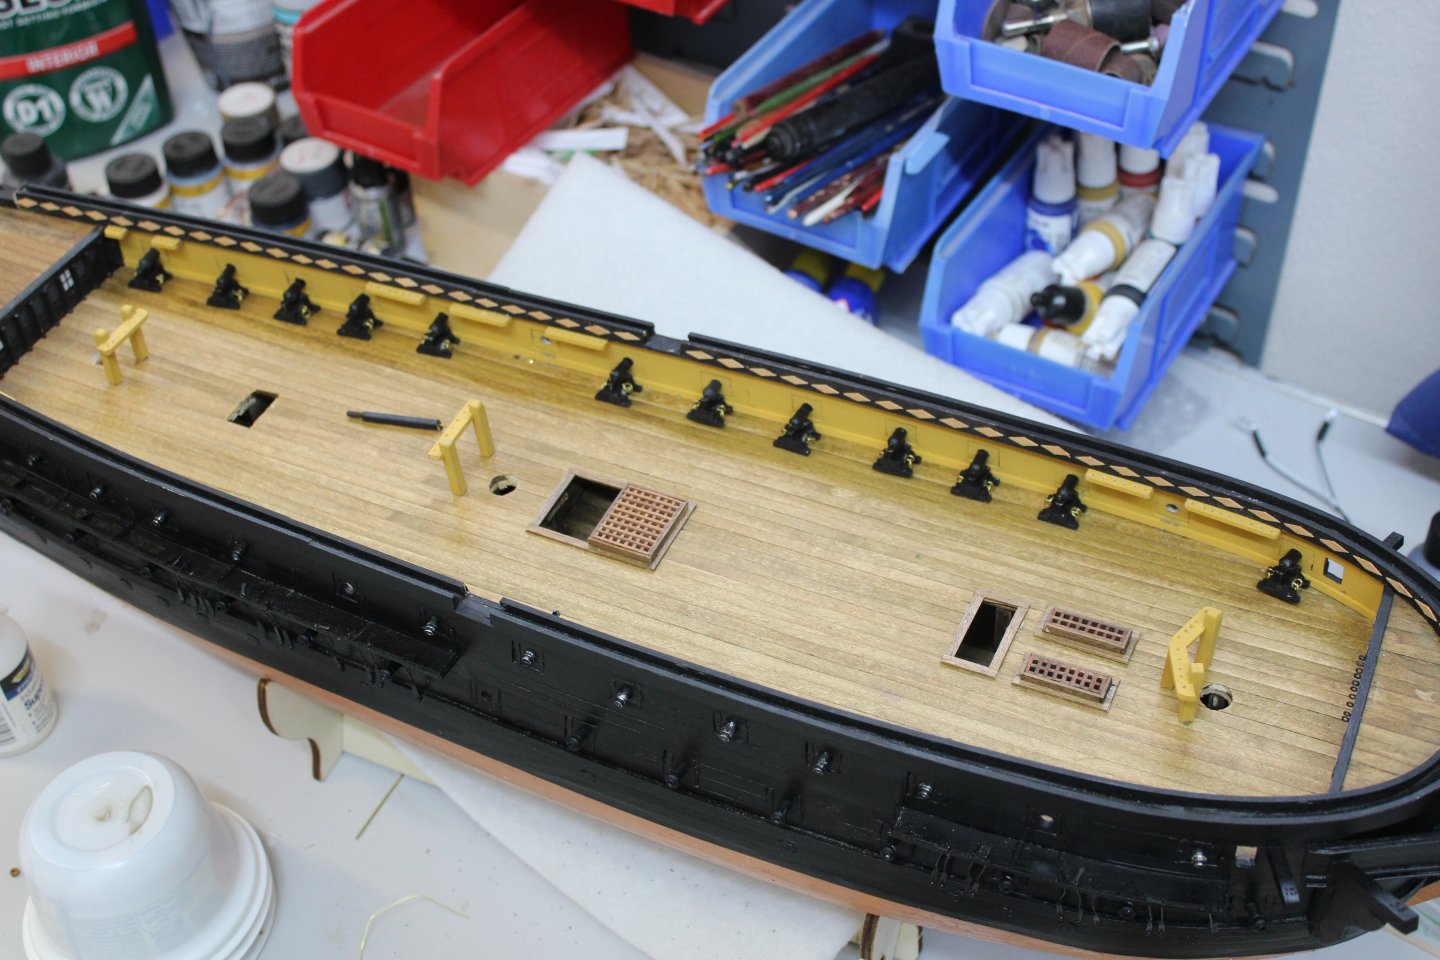
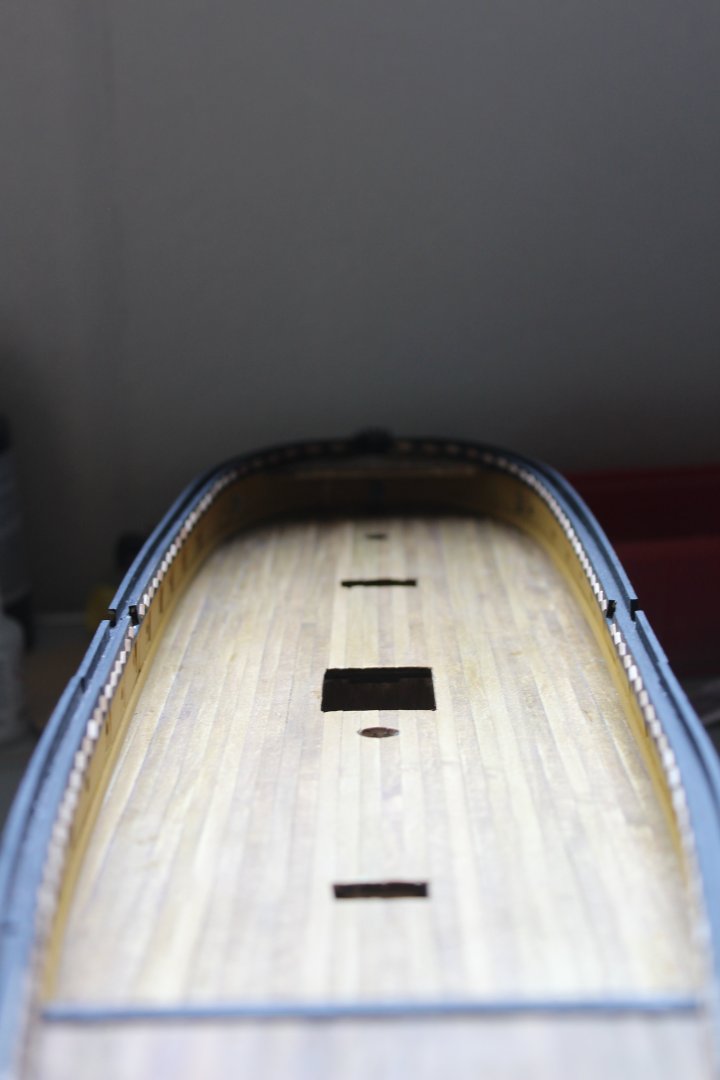
as for the build, it has been a slow progression, of trying to do some everyday, in my last post i was attempting to fit the gun port in the closed position the stern galleries took a bit of fine tuning to get them symmetrical i wanted to get as much deck fittings and chain plates done before coppering
.thumb.JPG.16685b30381234209b791862aa7d3457.JPG)
.thumb.JPG.eb24767f678a3f1367c2202ff97c0b52.JPG)
.thumb.JPG.e3679c0fca50313da4dd0a48793cdc5e.JPG)
.thumb.JPG.16772aa2a593b500756f5a3a273b4550.JPG)
.thumb.JPG.59346d95788056b1ce05df96a5b76e34.JPG)
.thumb.JPG.2005f6c25e7d396c54df7eb40148a6cc.JPG)


- 62 replies
-
- 9
-
-
- belle poule
- OcCre
- (and 1 more)
-
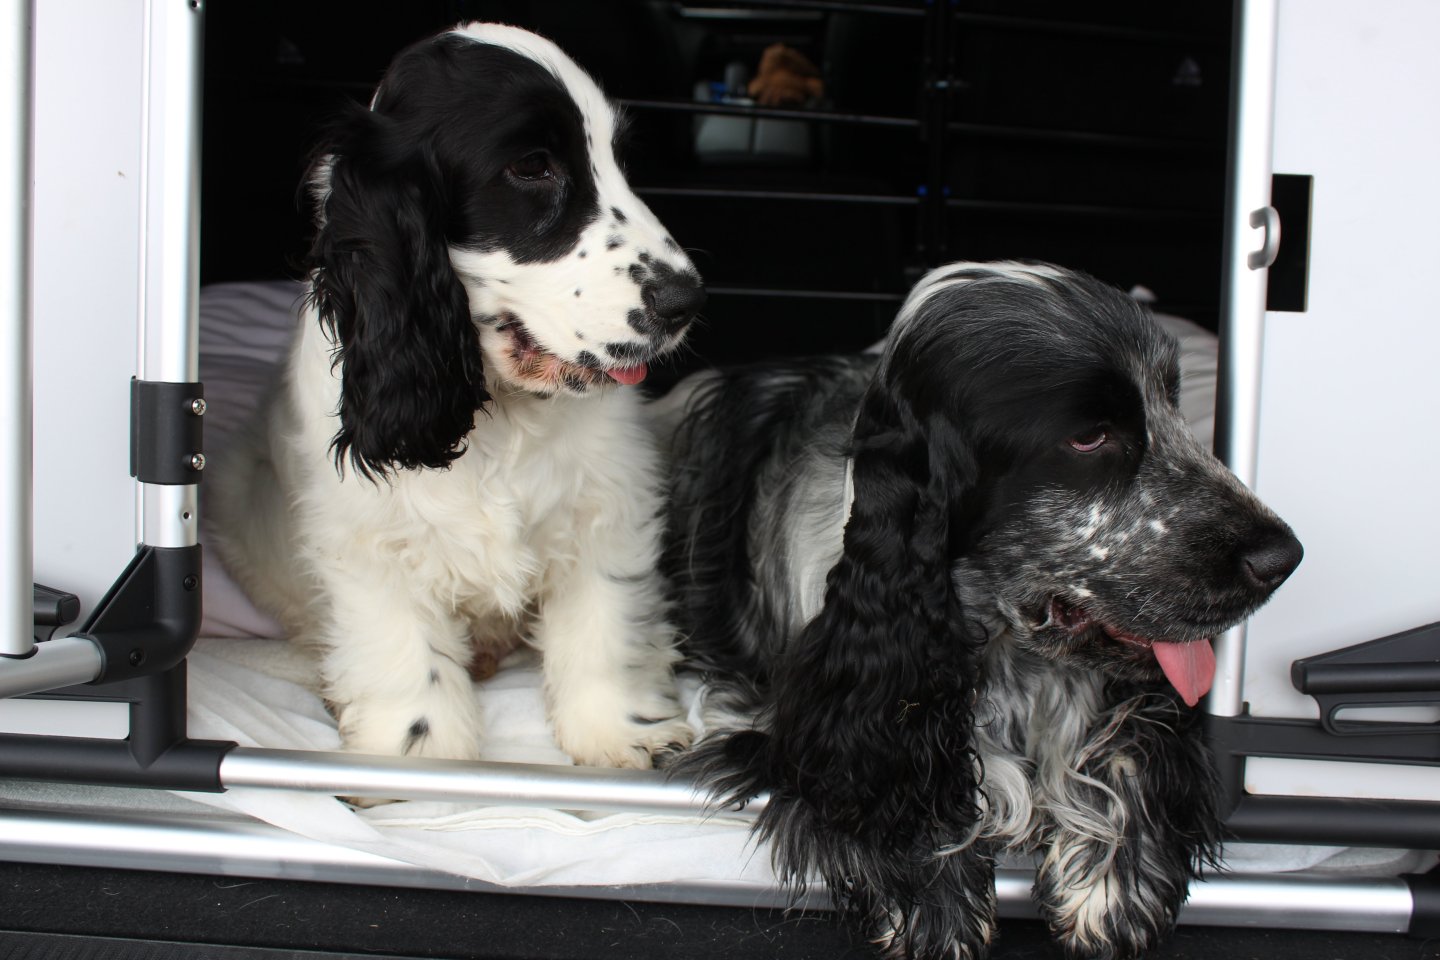
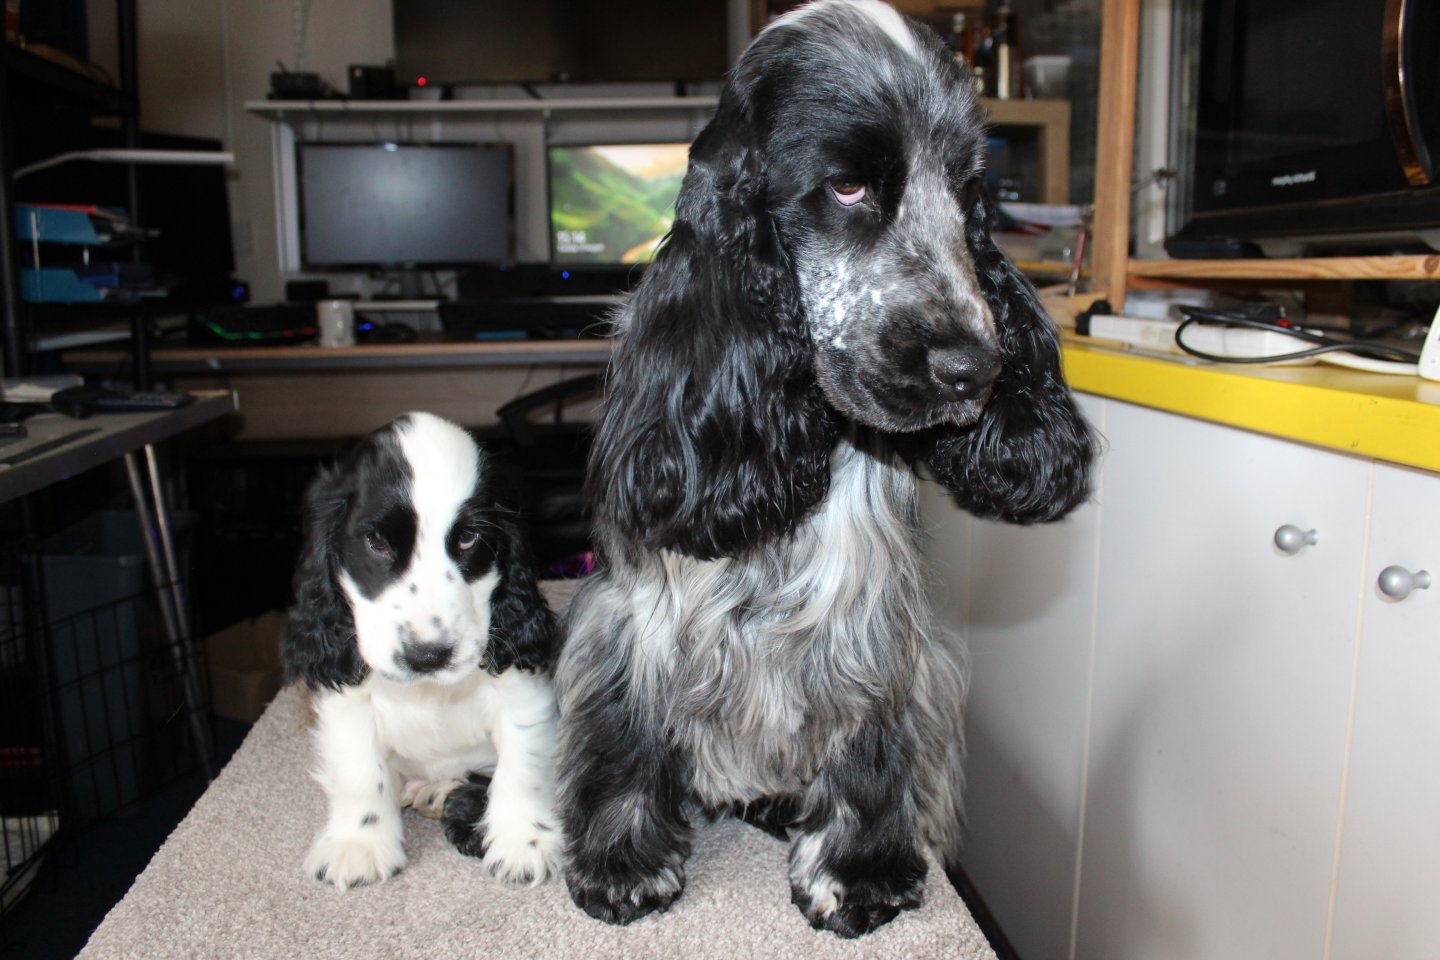
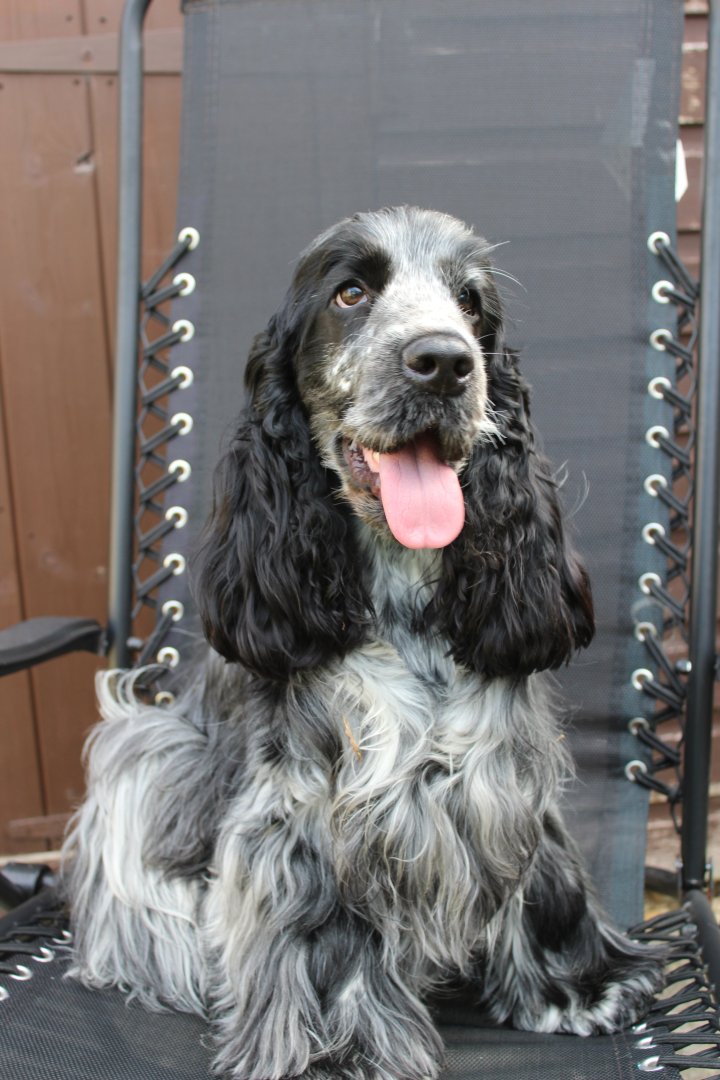
good evening everyone Been over two months since my last post, but had lots going on, but here is one of the reasons this is Odin Minimoo (minimoo in tribute to Dobbie whom we lost earlier this year), we have now had him for 5 weeks so 13 weeks old now, and is such a sweet puppy, again he is a English Cocker Spaniel (show type) and gets along lovely with out 1 year old Apollo
- 62 replies
-
- 9
-
-
- belle poule
- OcCre
- (and 1 more)
-
Fantastic work Jim, hope you enjoy your a well deserved holiday
- 76 replies
-
- 7
-
-
- Harpy
- Vanguard Models
- (and 1 more)
-
what a wonderful kit, i have always made the Catharpins look messy
- 80 replies
-
- 3
-
-
- rigging/masts
- NRG
- (and 2 more)
-
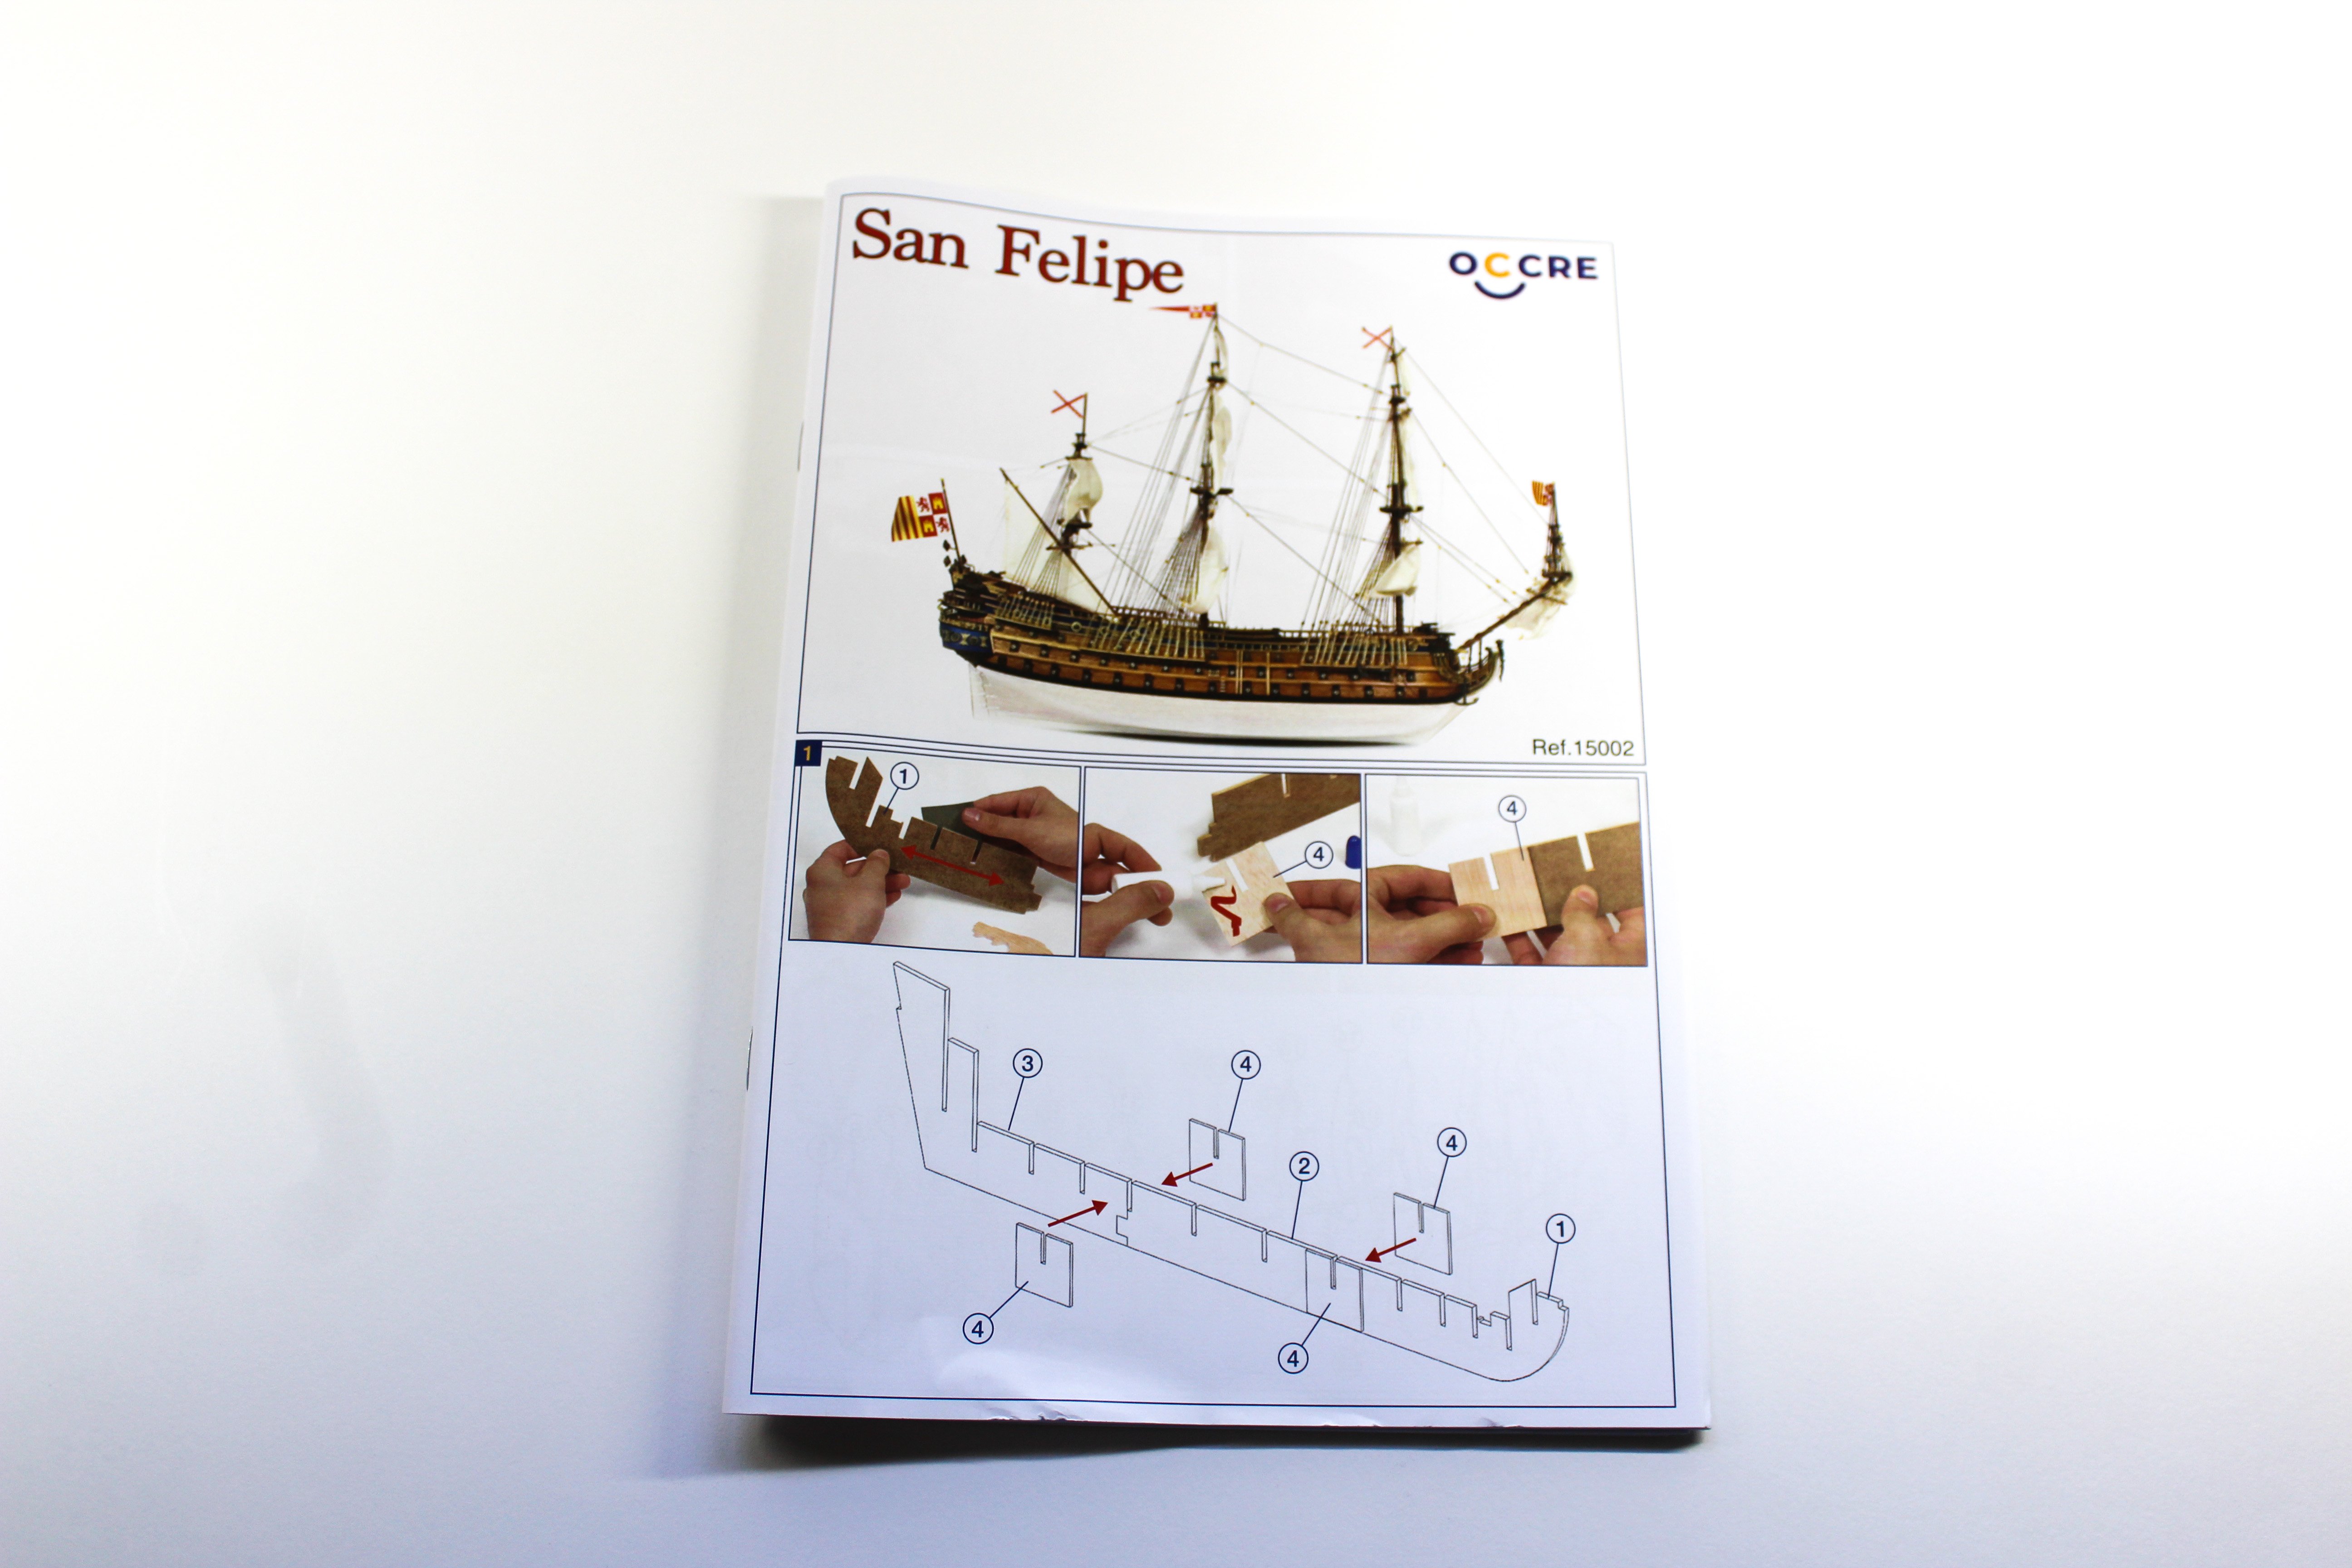
Kit review San Felipe - OcCre - 1/86 - review by Kevin
Kevin replied to Kevin's topic in REVIEWS: Model kits
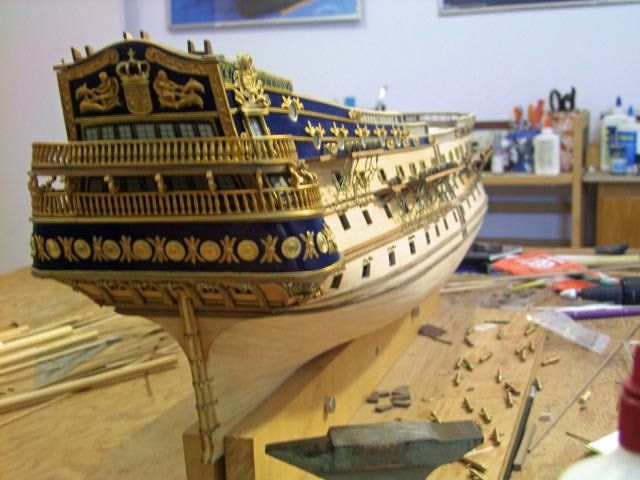
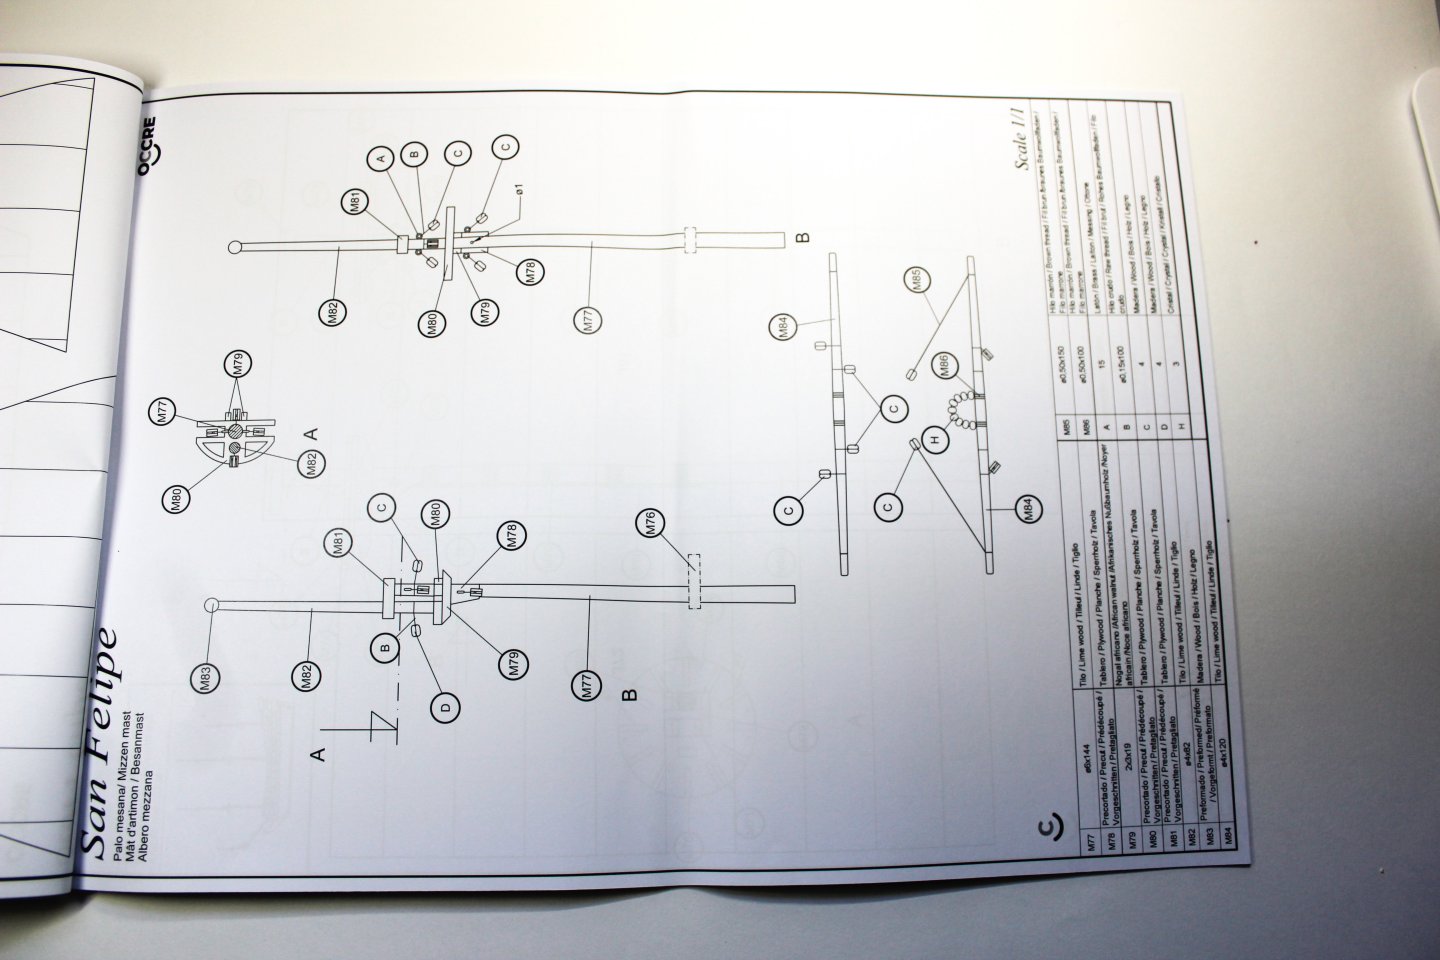
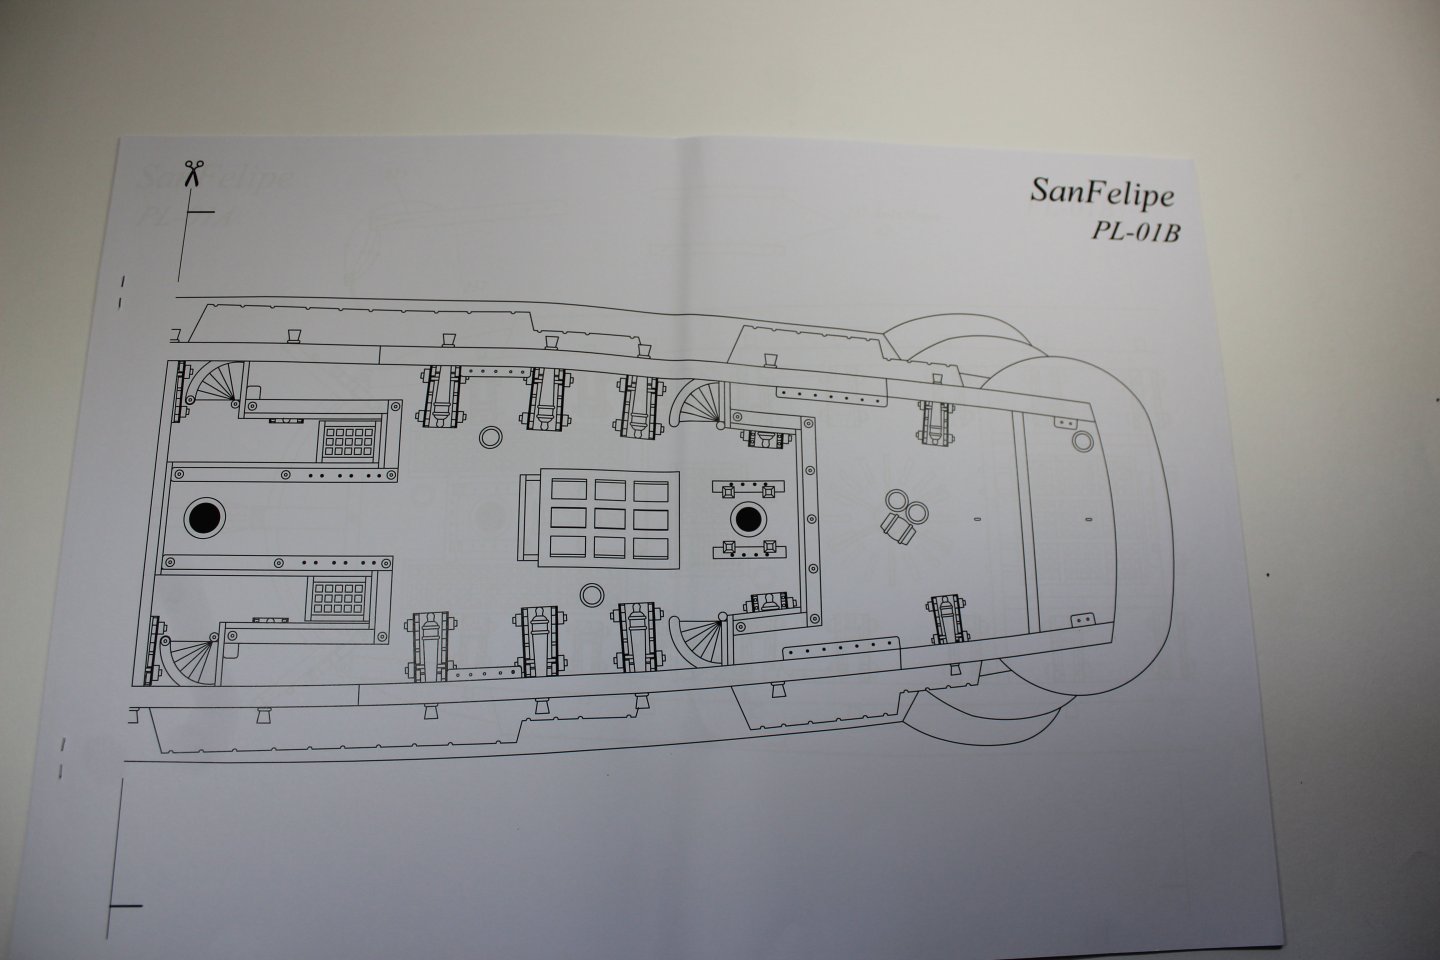
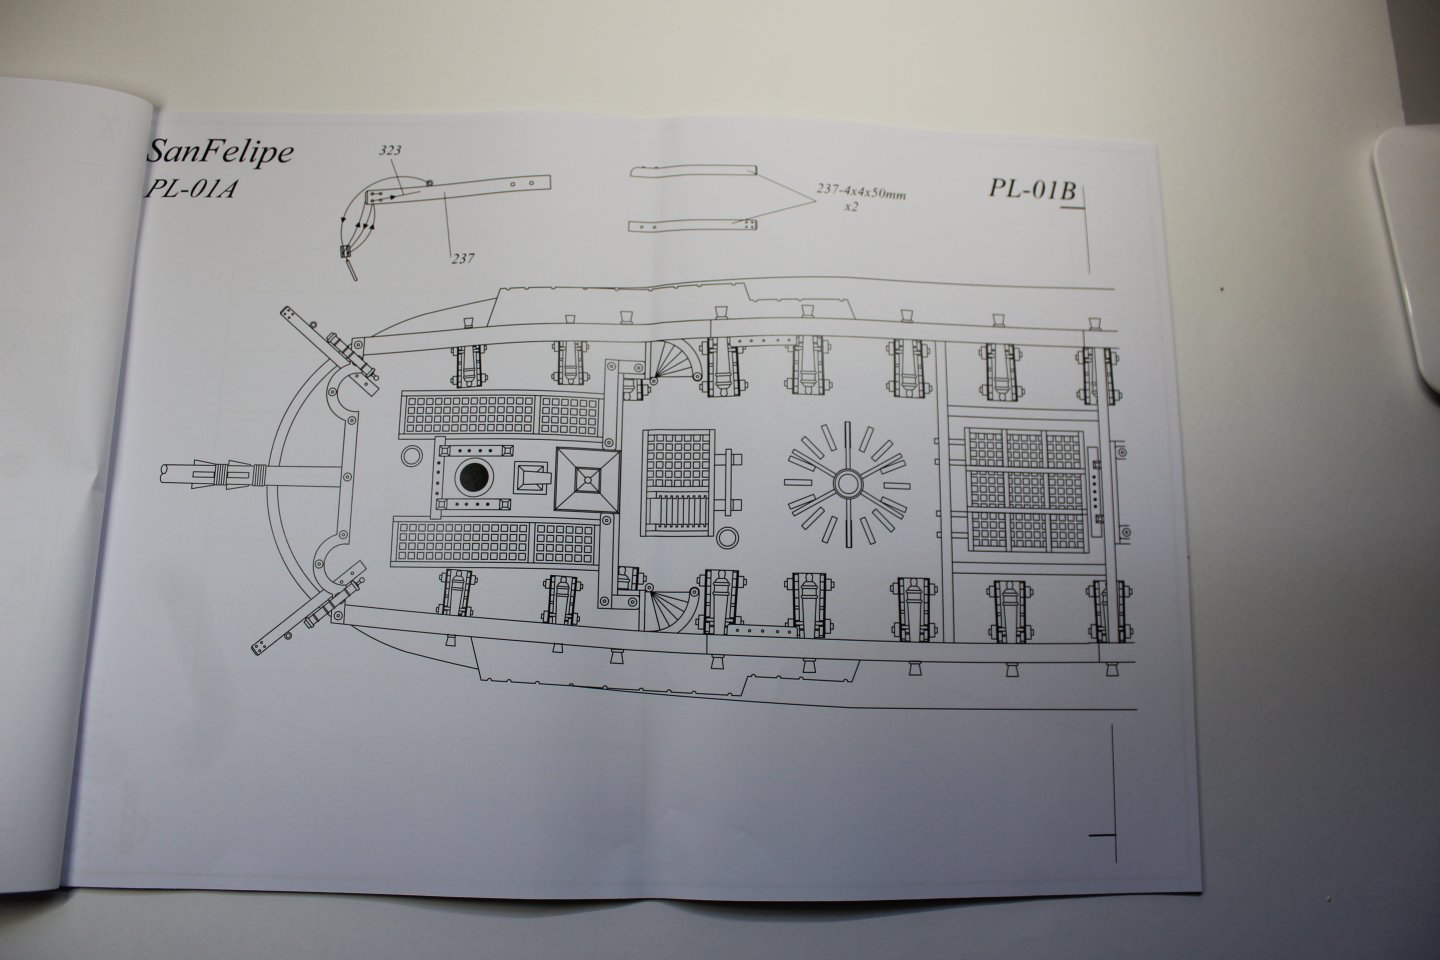
Conclusion i am very much looking forward to building this, but research is needed to make a reasonable non OOB build a lot of generic fittings need to be replaced, like blocks, belaying pins, gratings no tapering instructions for the masts, i may obtain instructions from the Panart kit the way the stern is presented needs work to make it look right, a comparrison of Occre v Panart 2nd photo taken from google i believe is from a MSW member @testazyk
-
Kit review San Felipe - OcCre - 1/86 - review by Kevin
Kevin replied to Kevin's topic in REVIEWS: Model kits
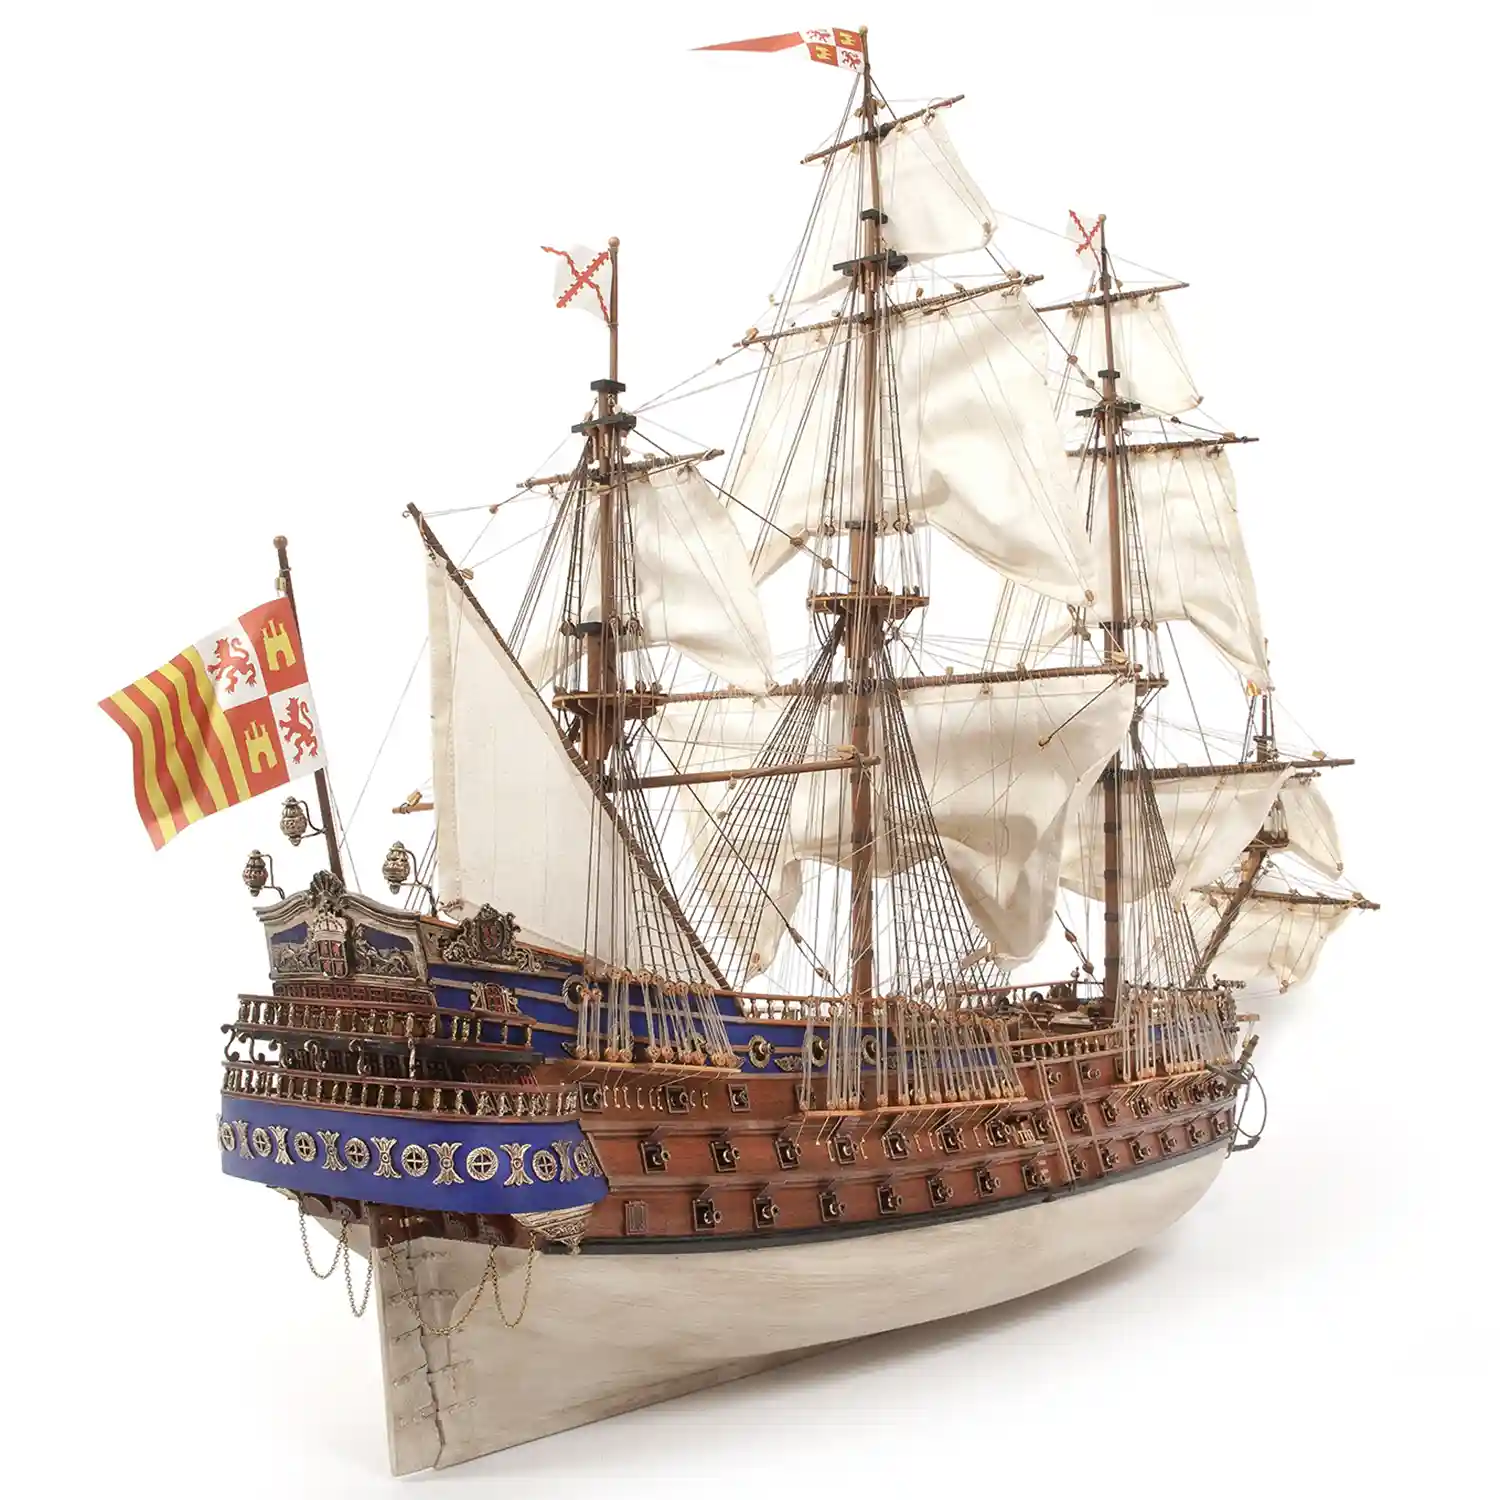
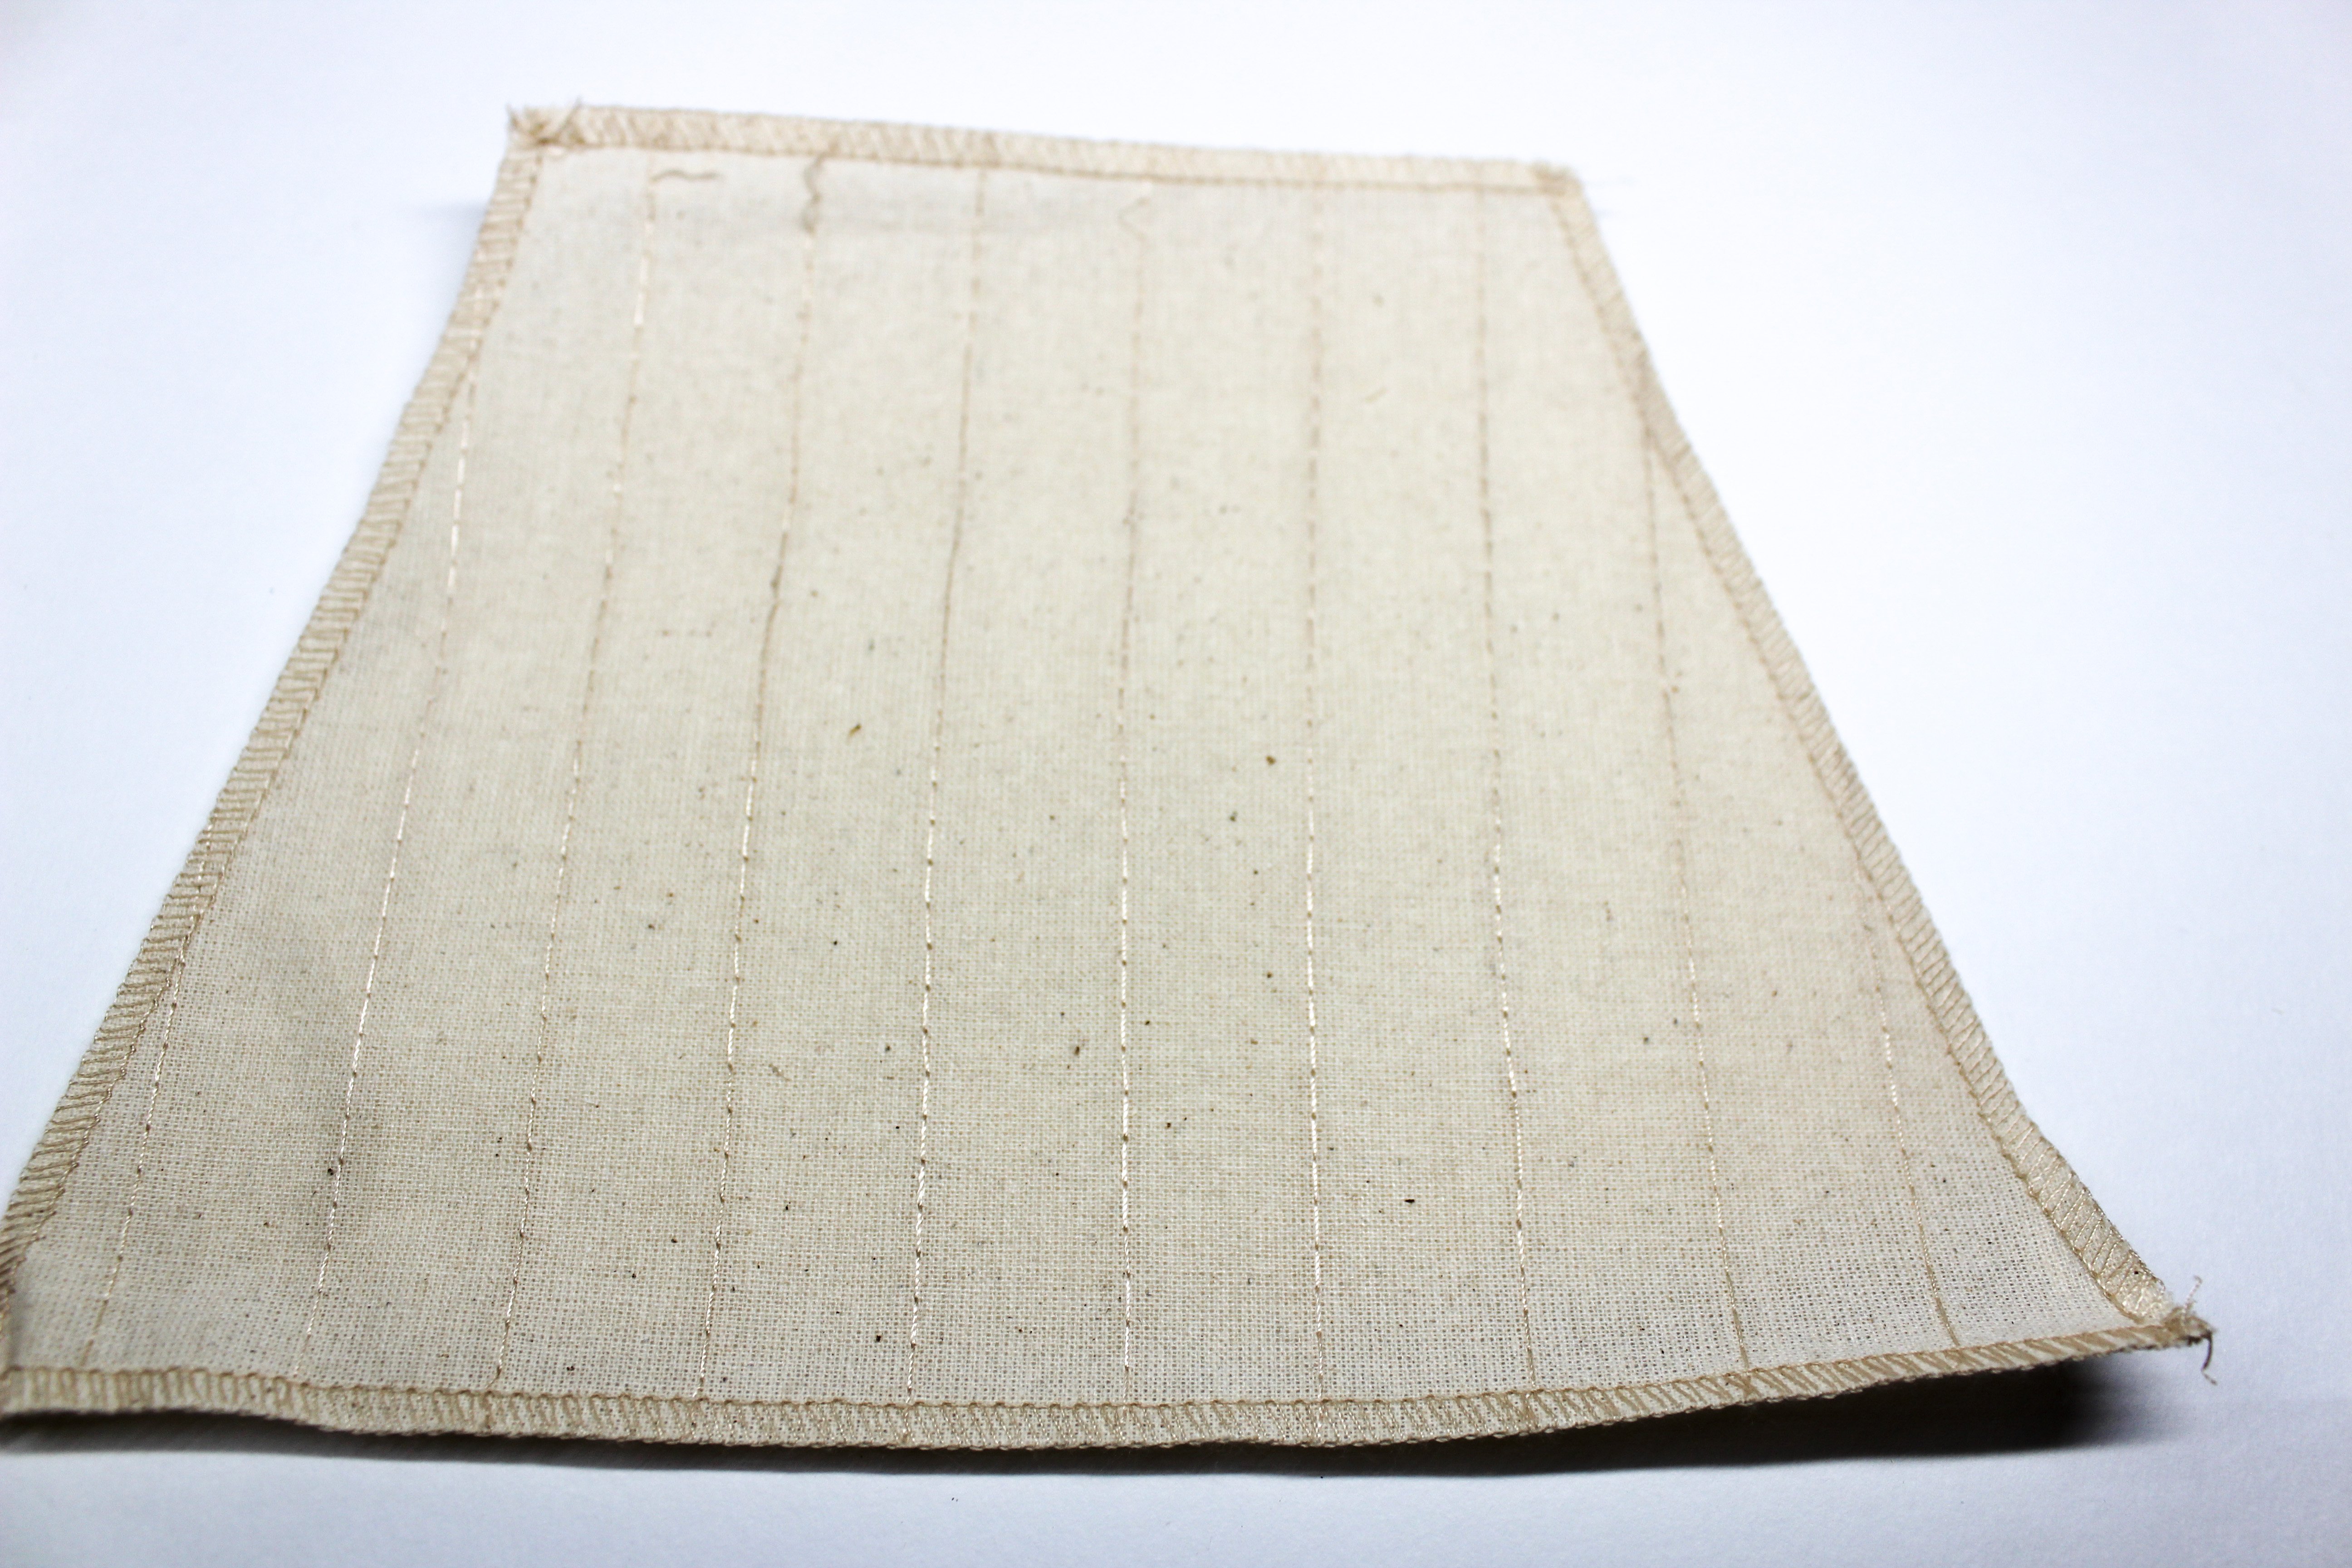
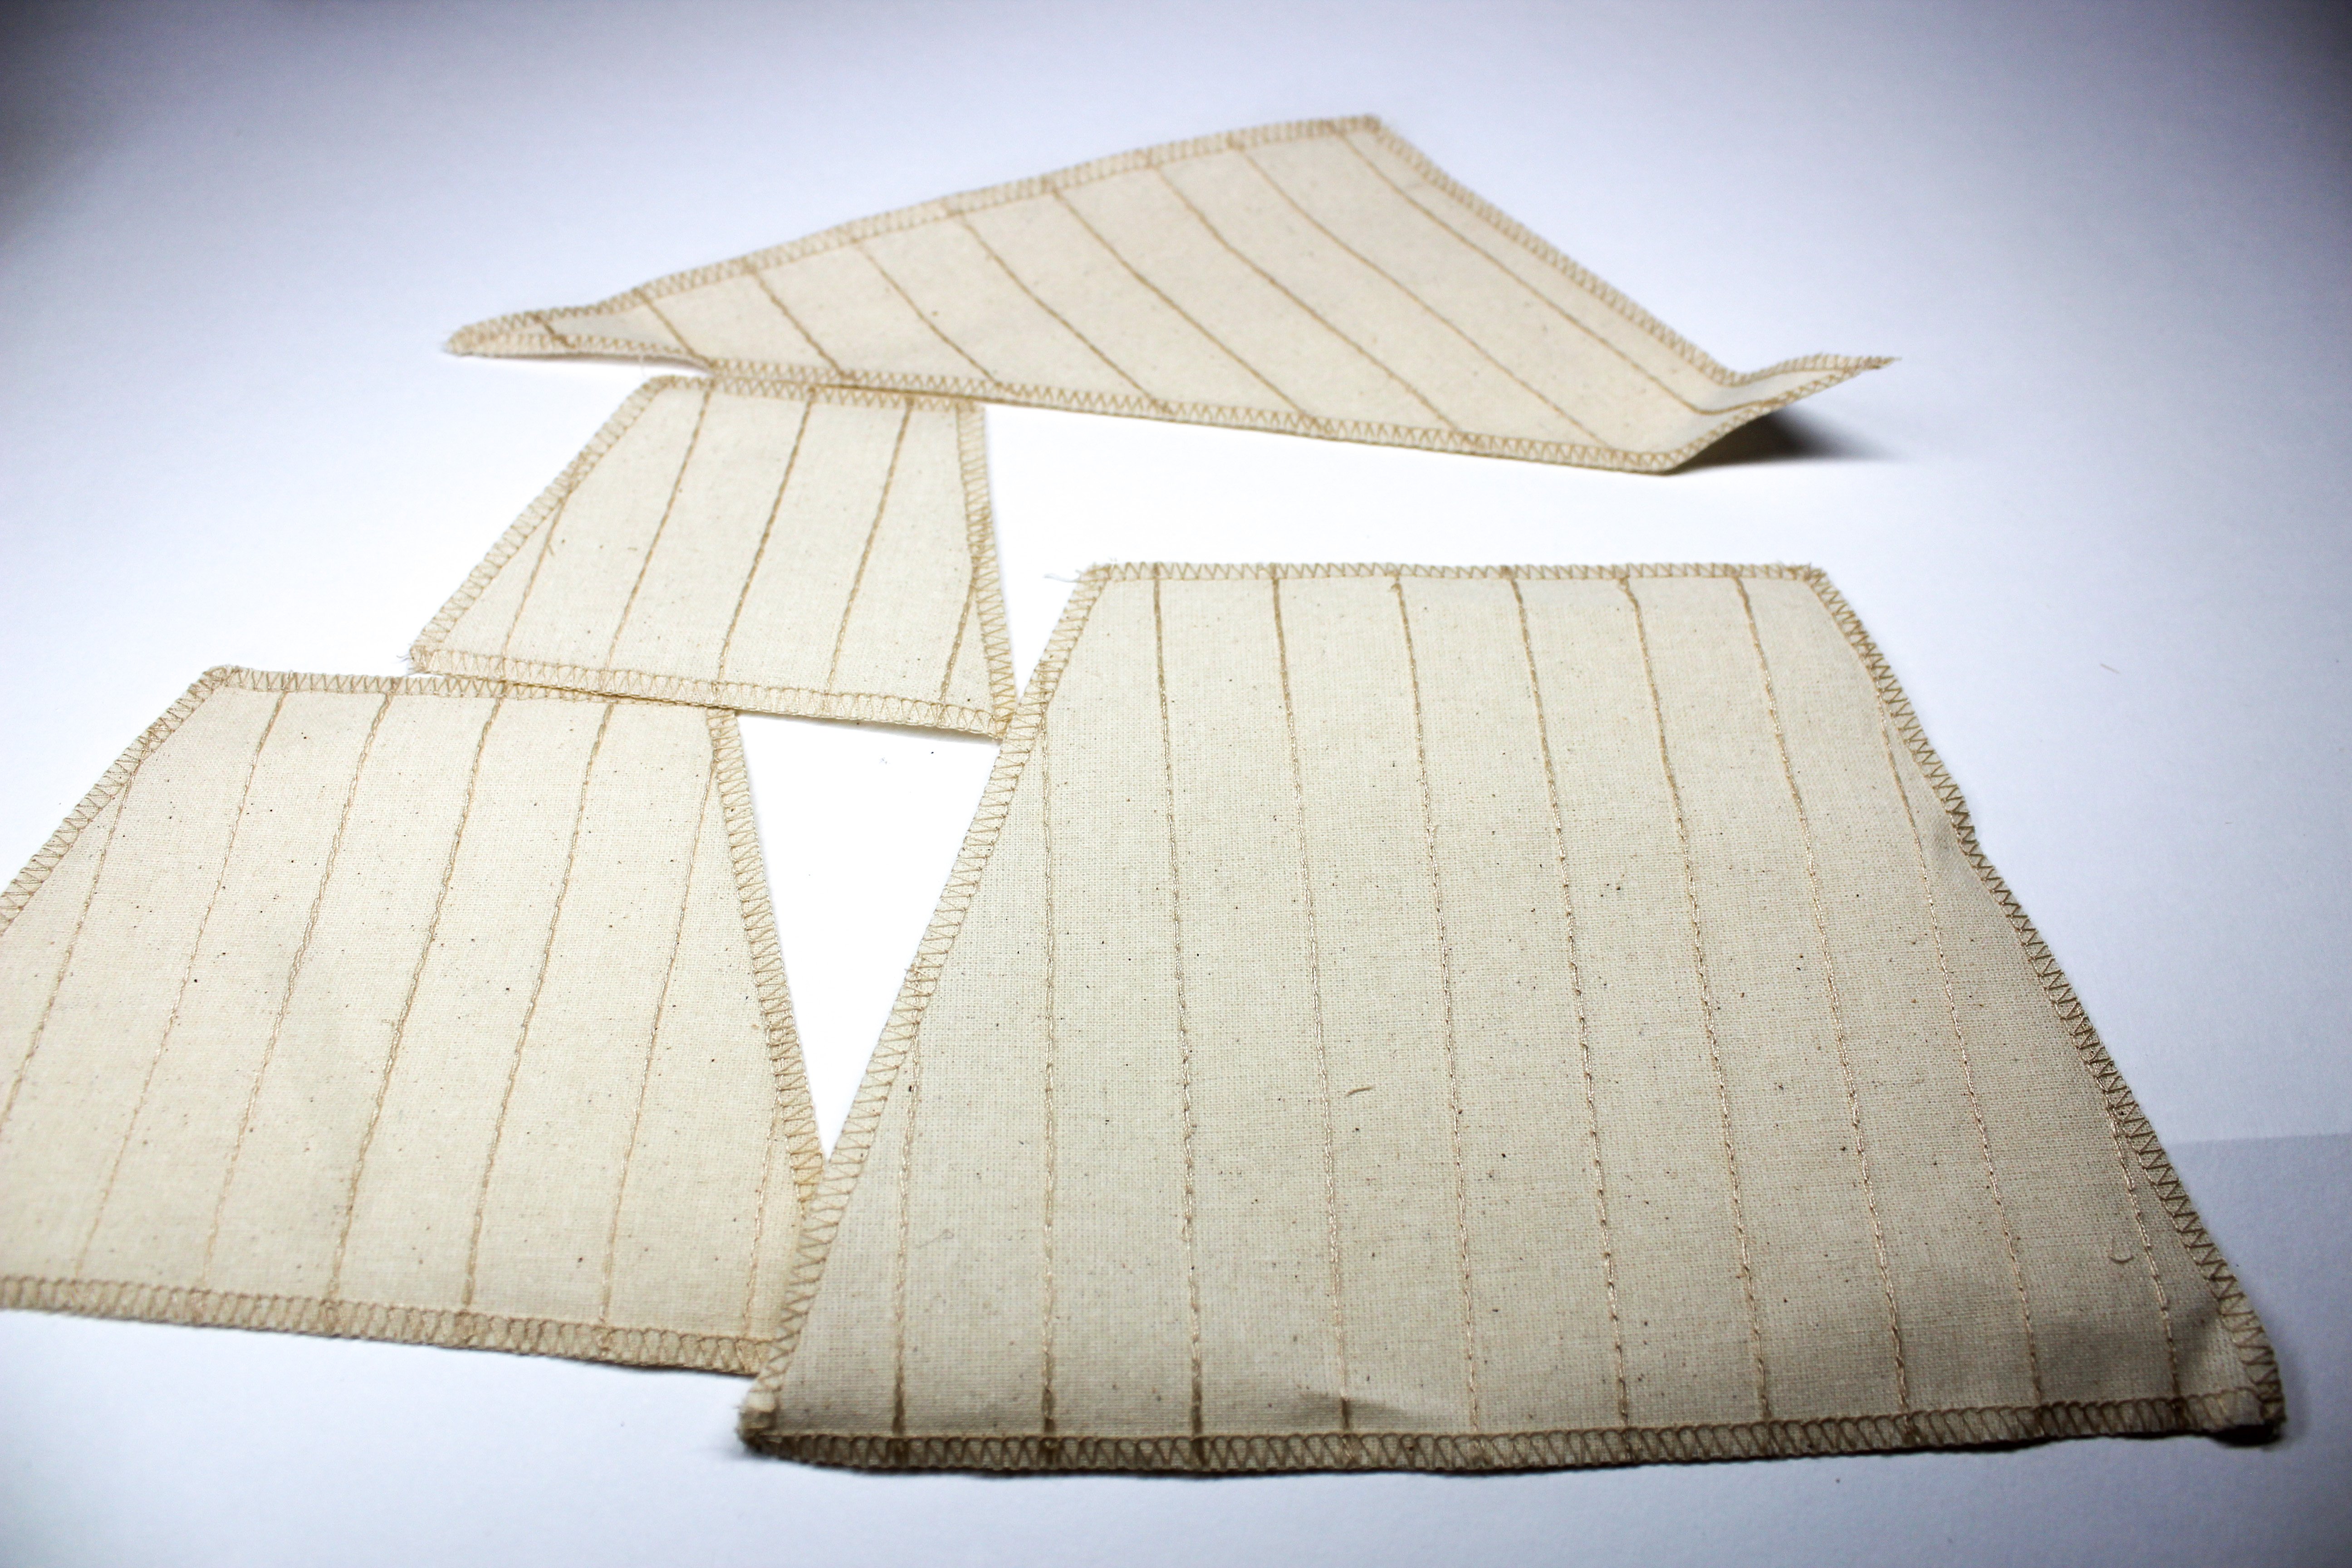
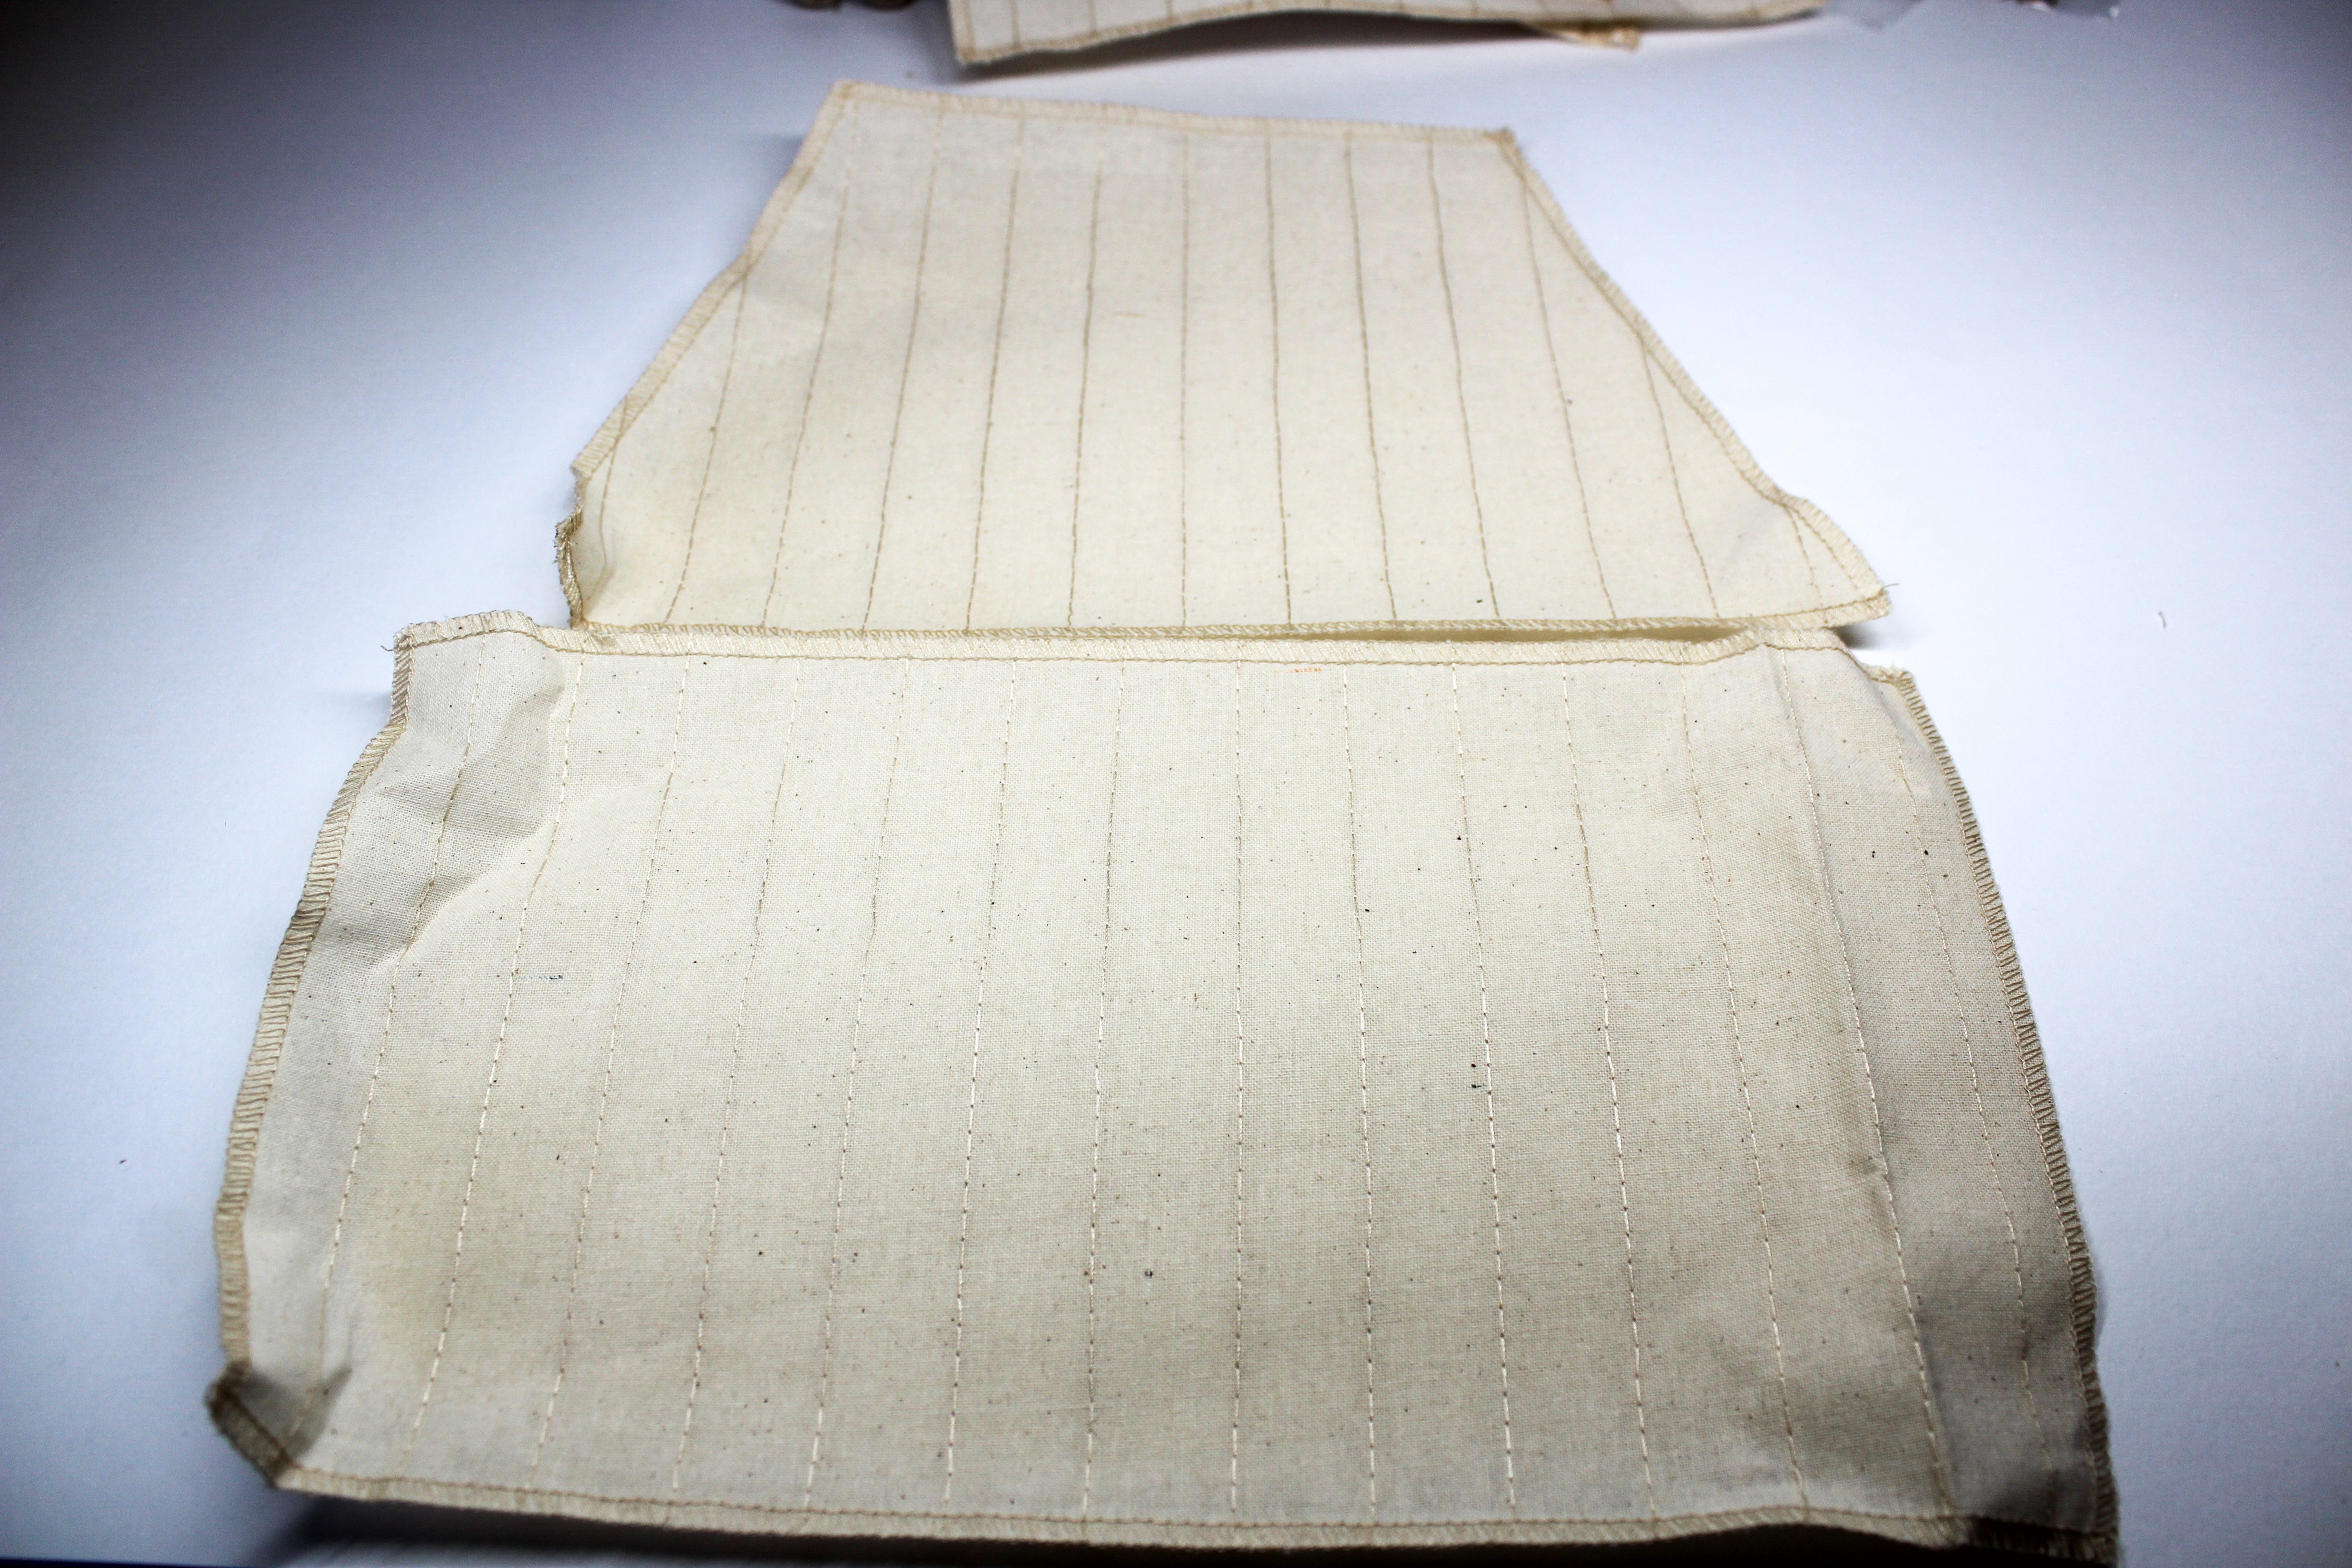
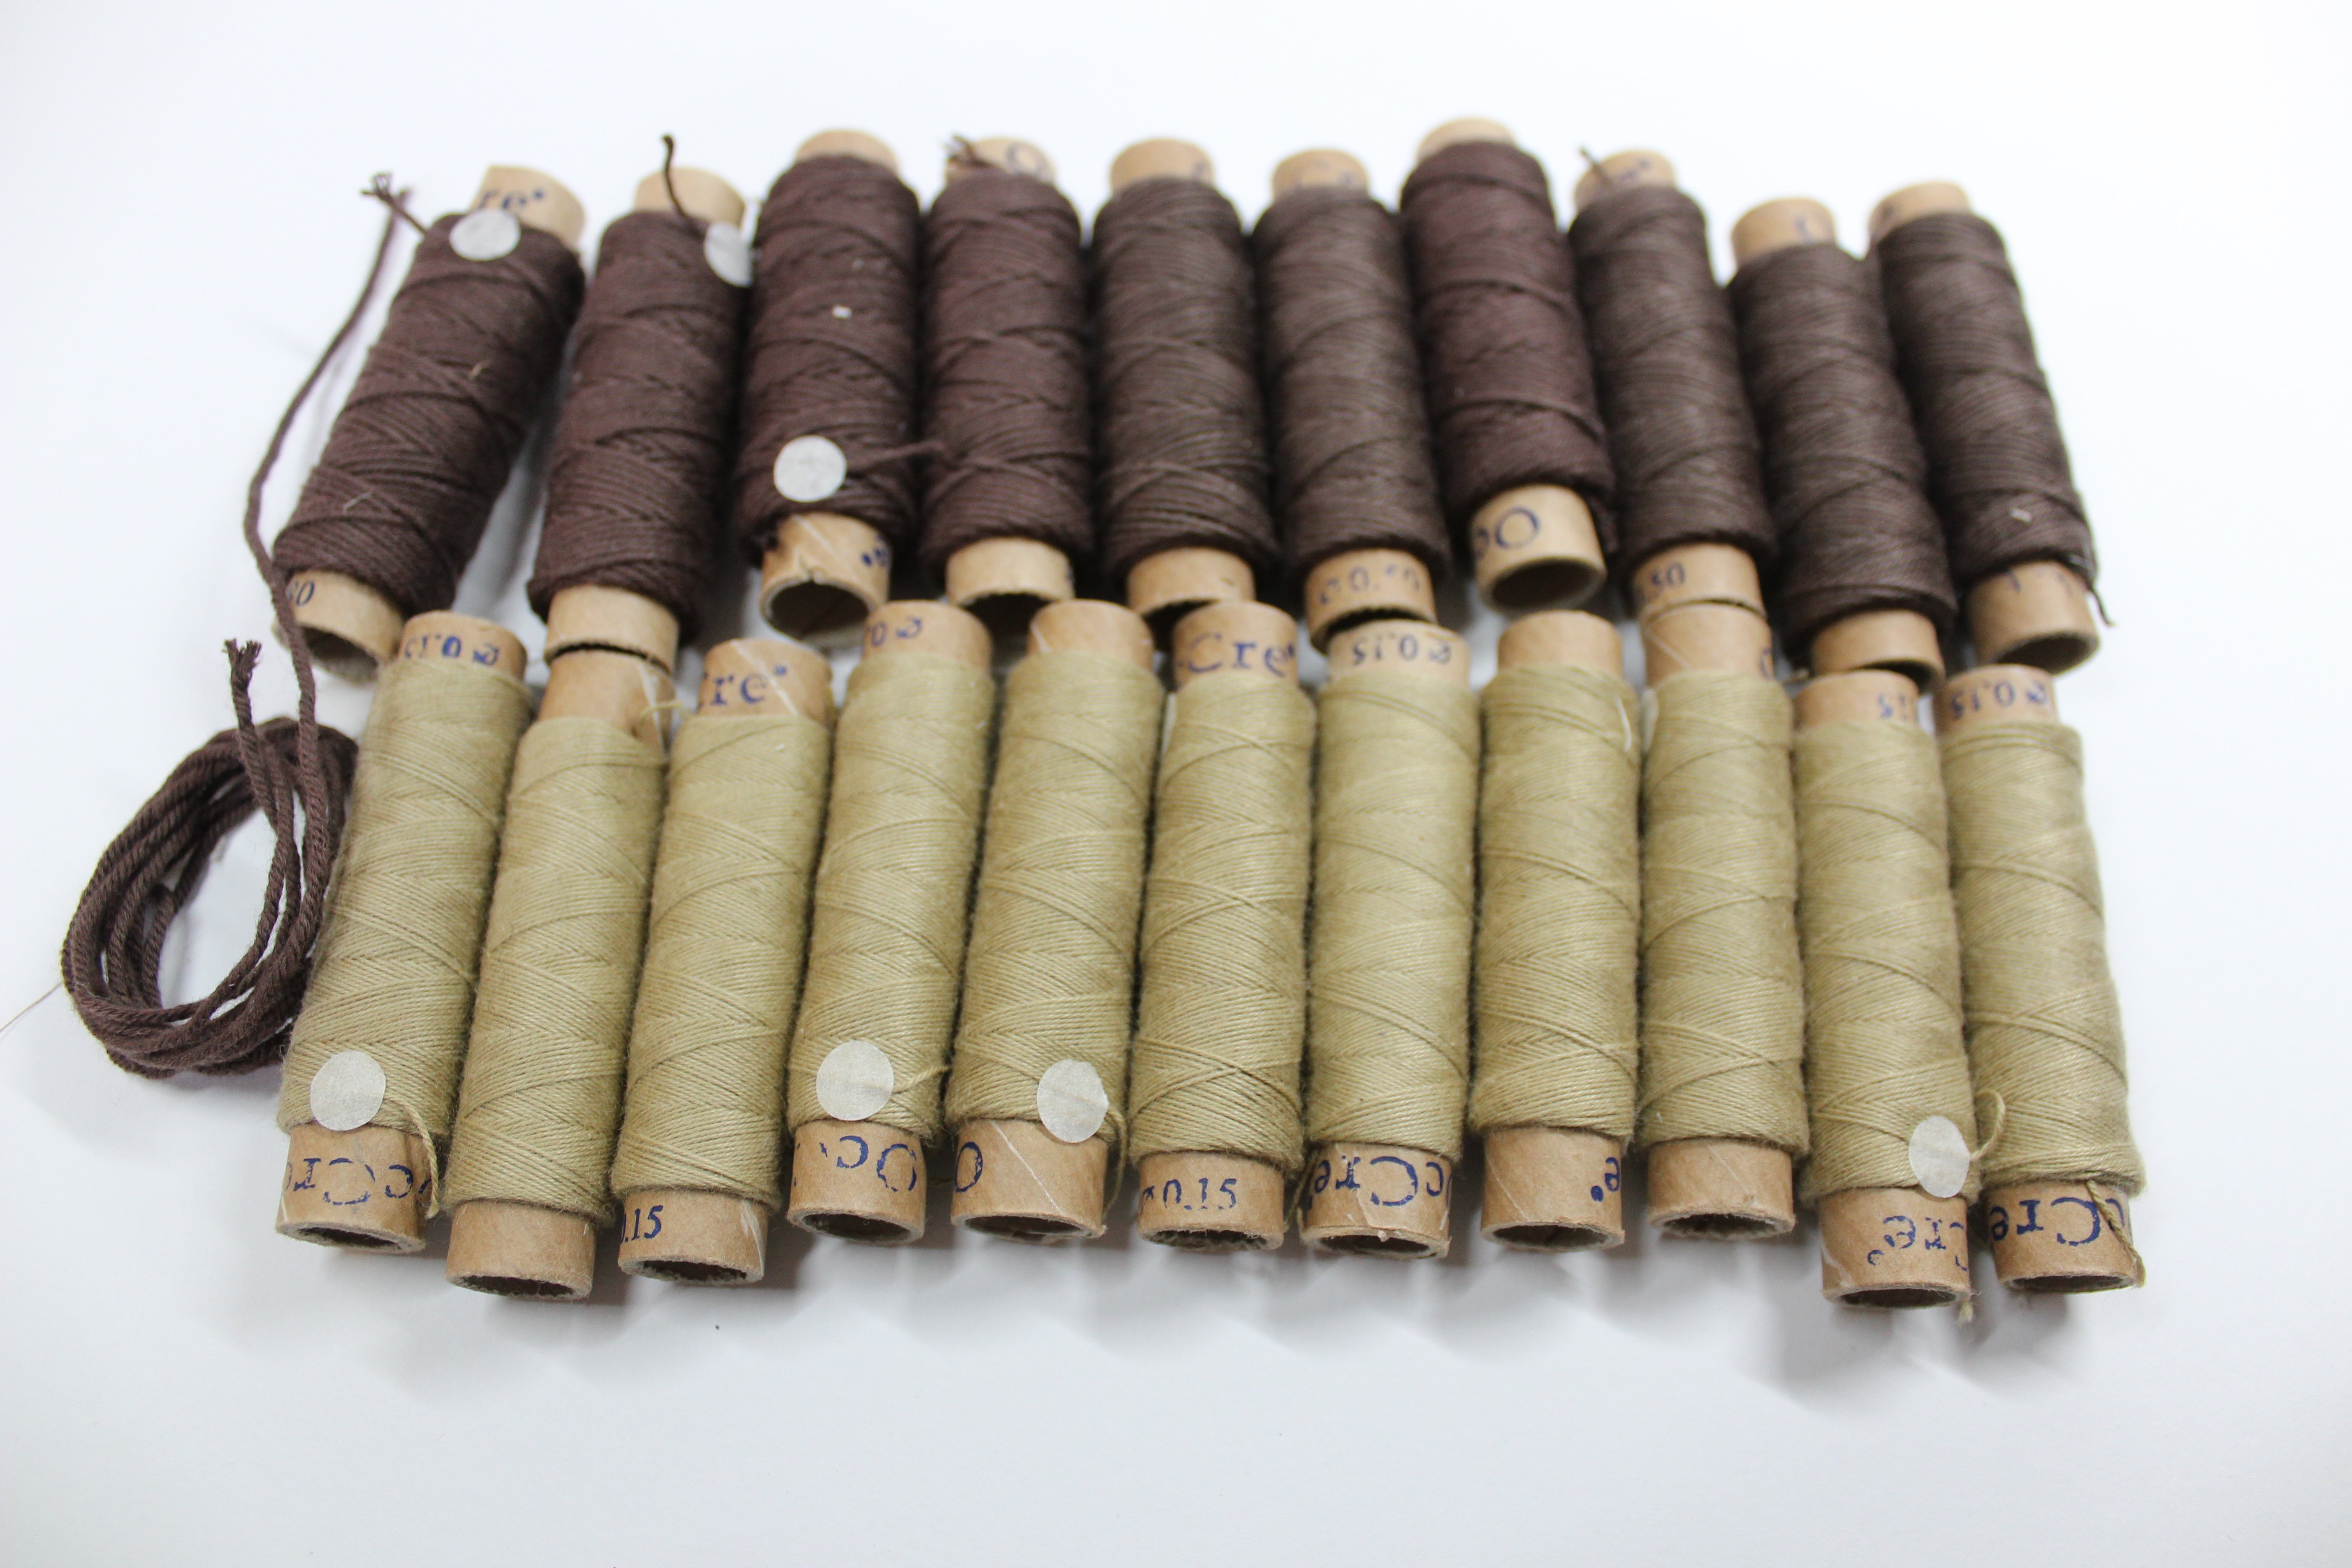
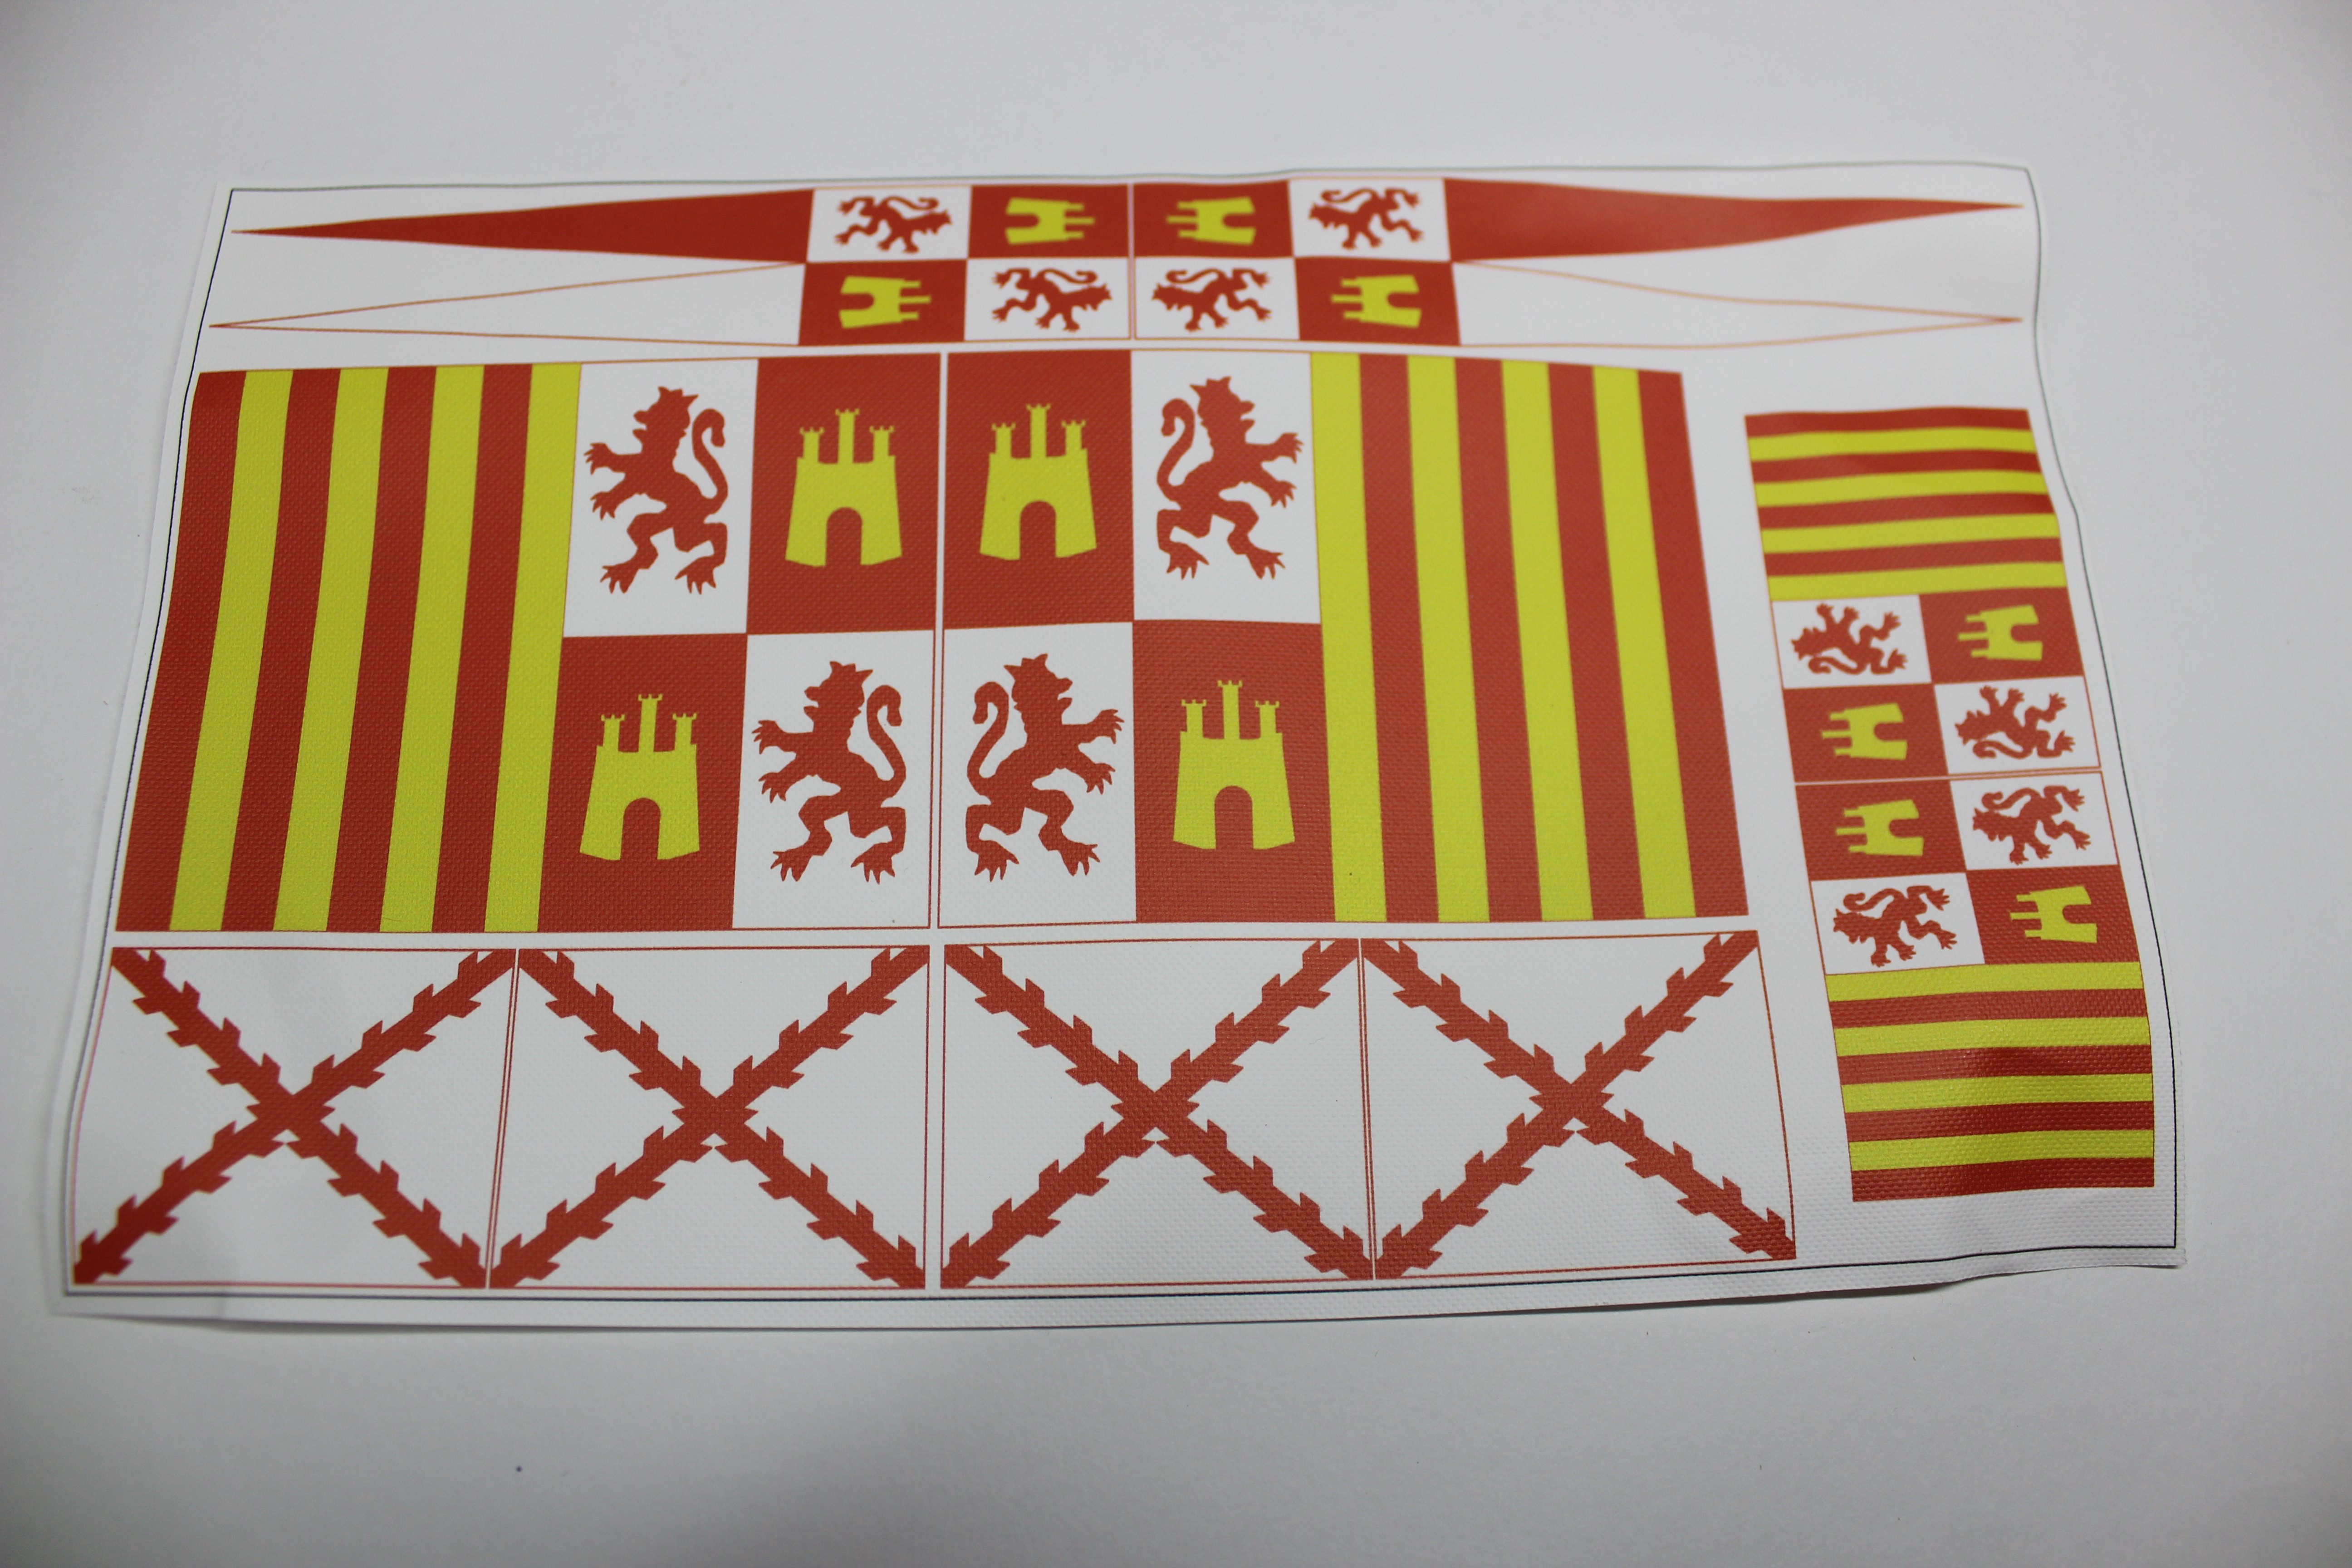
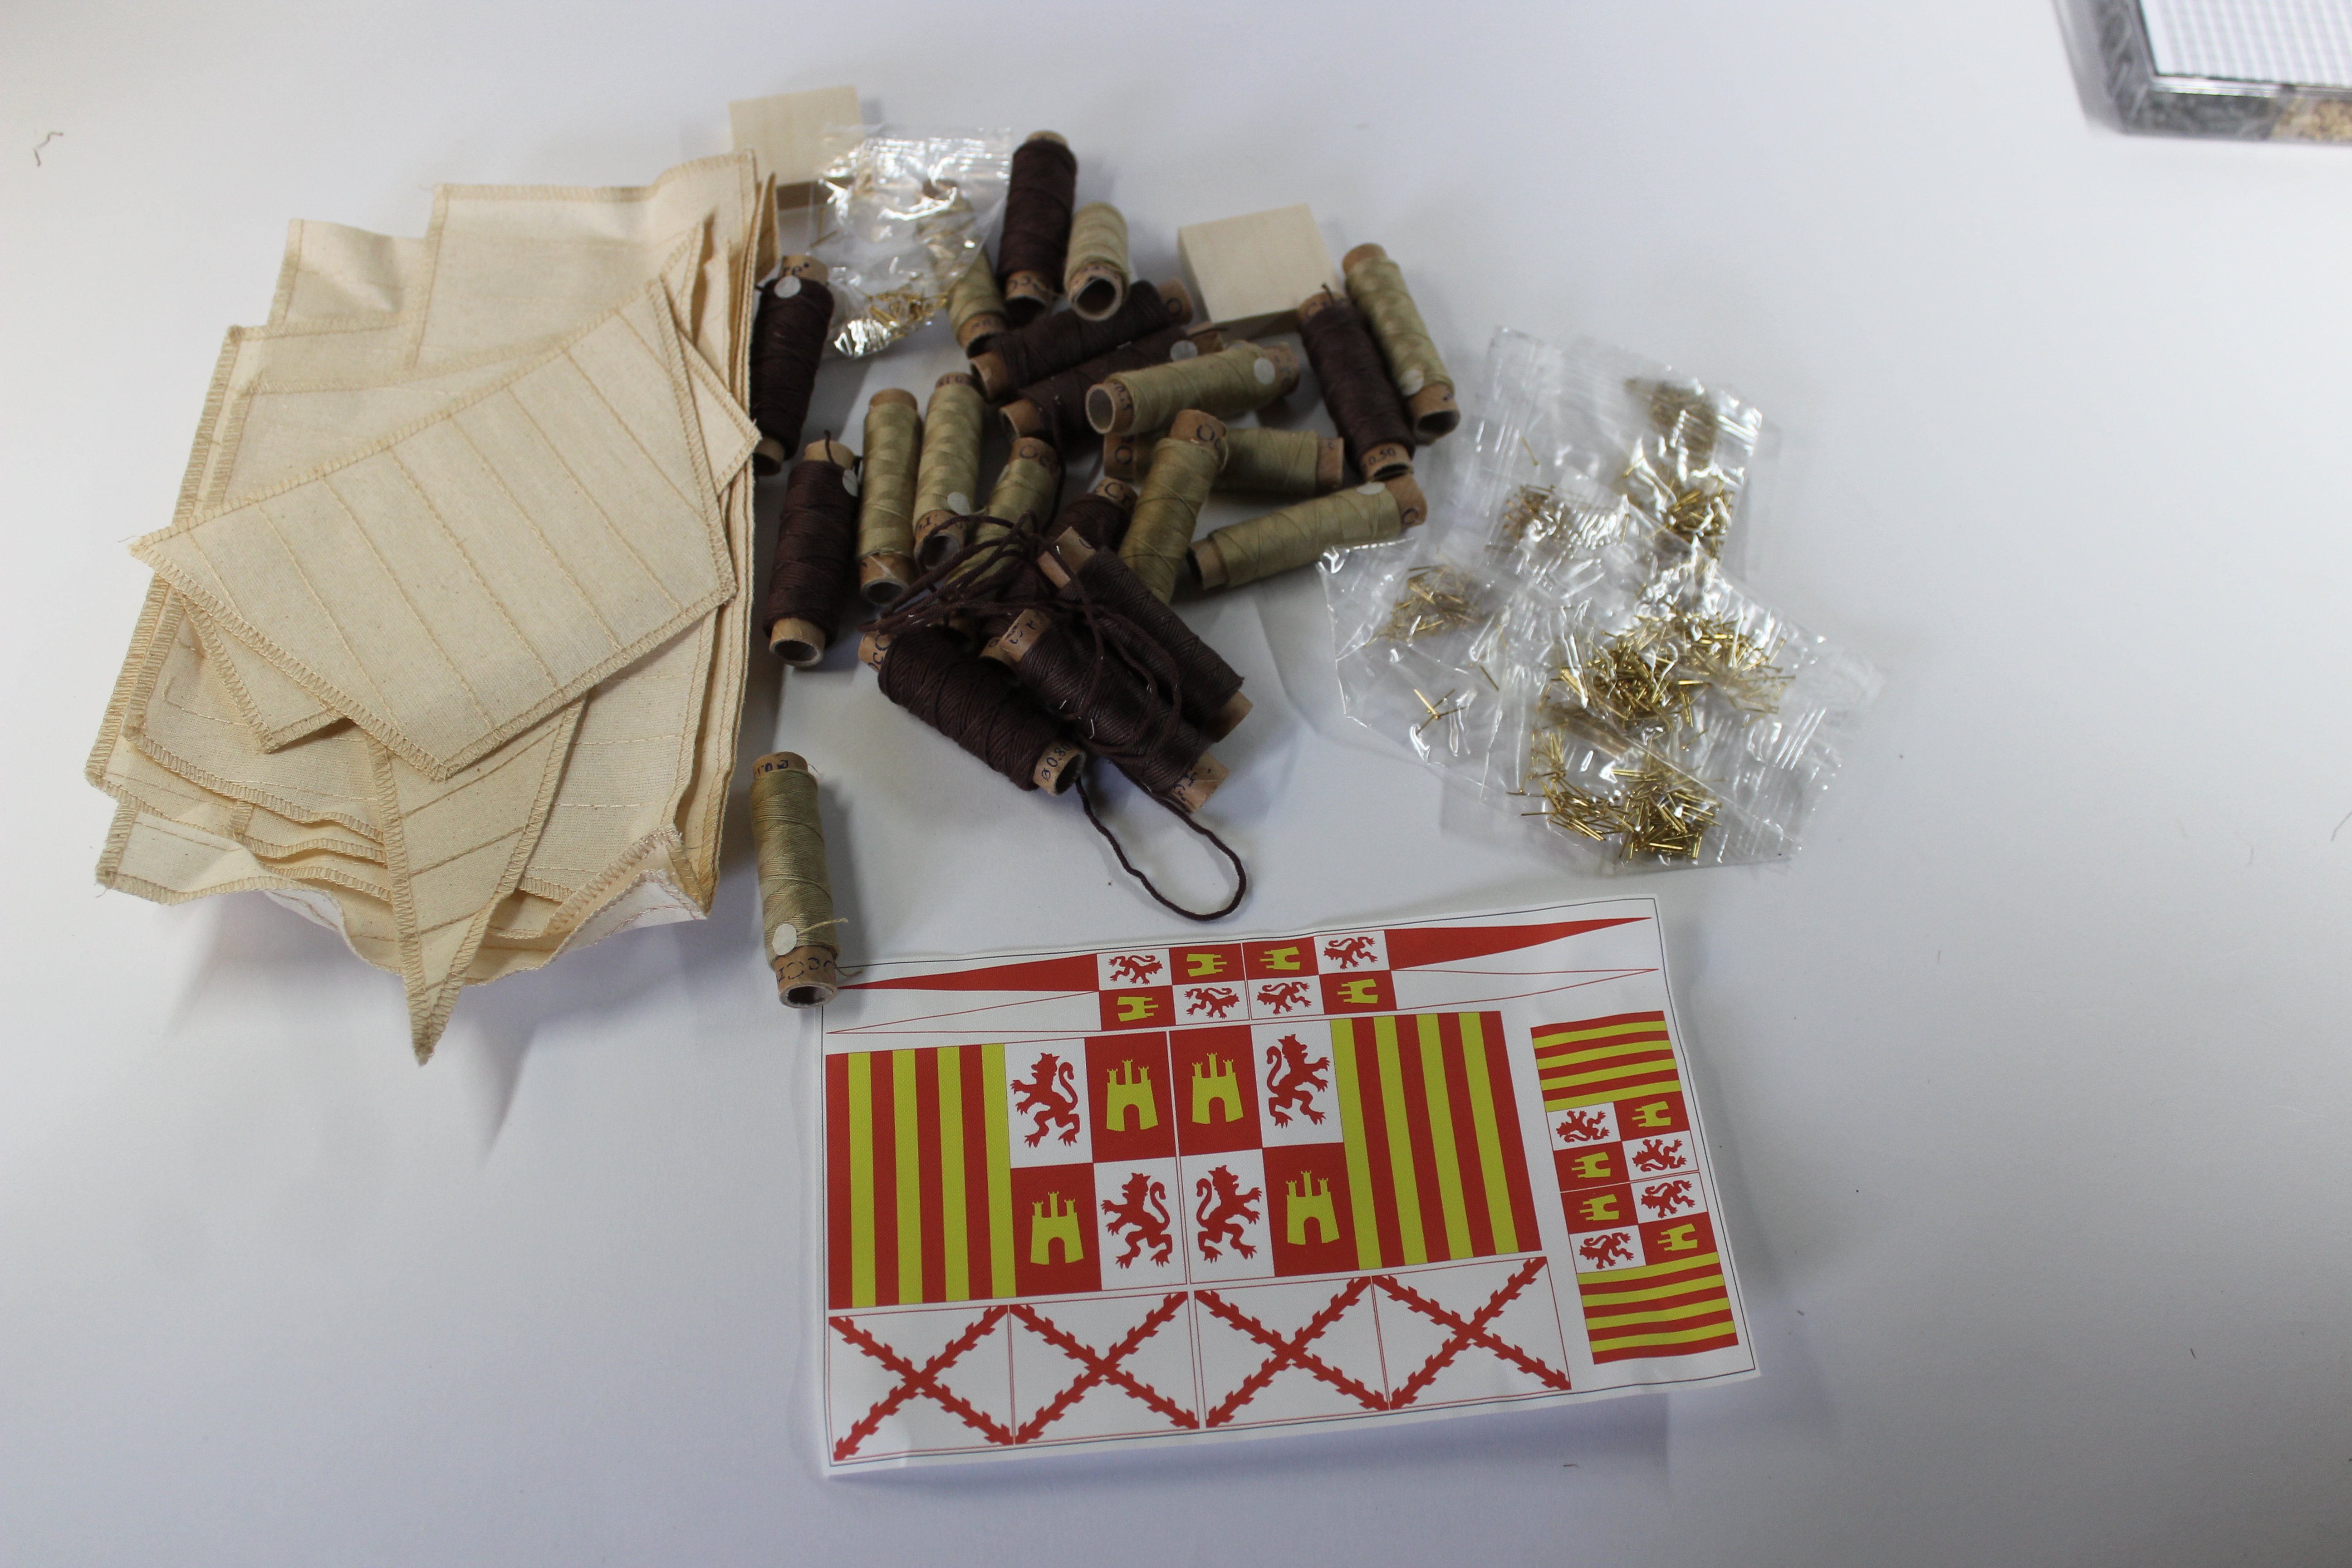
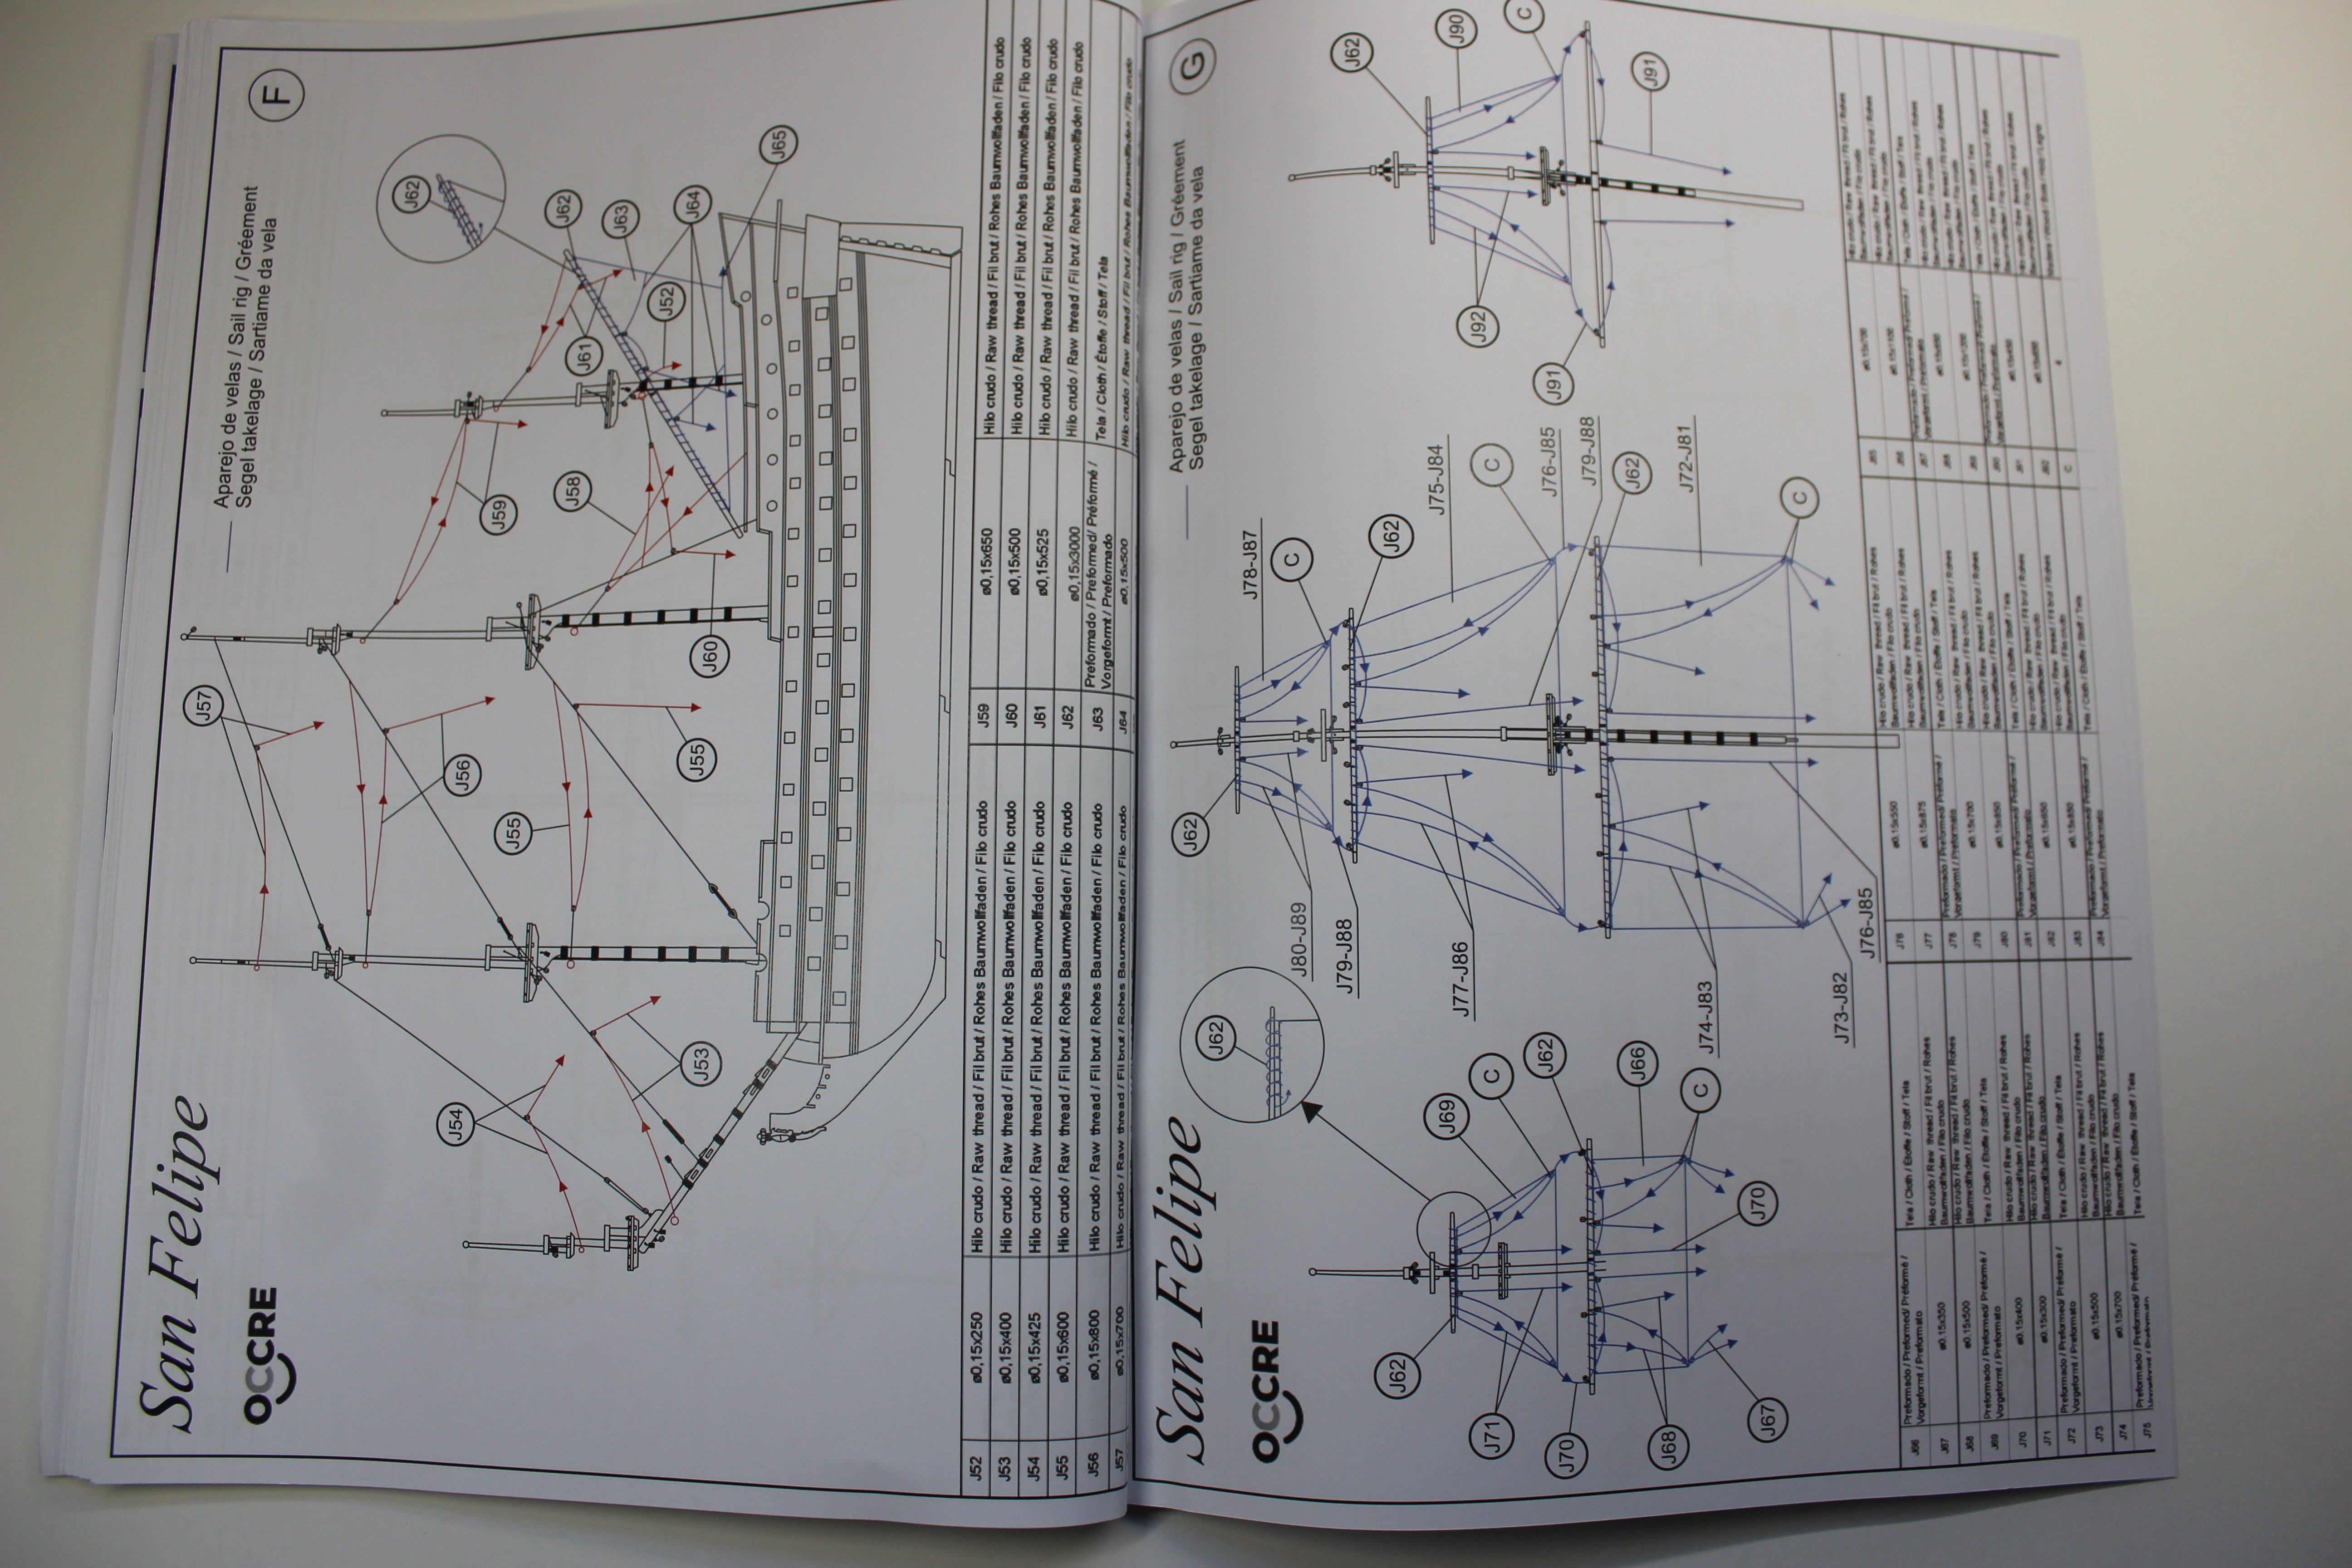
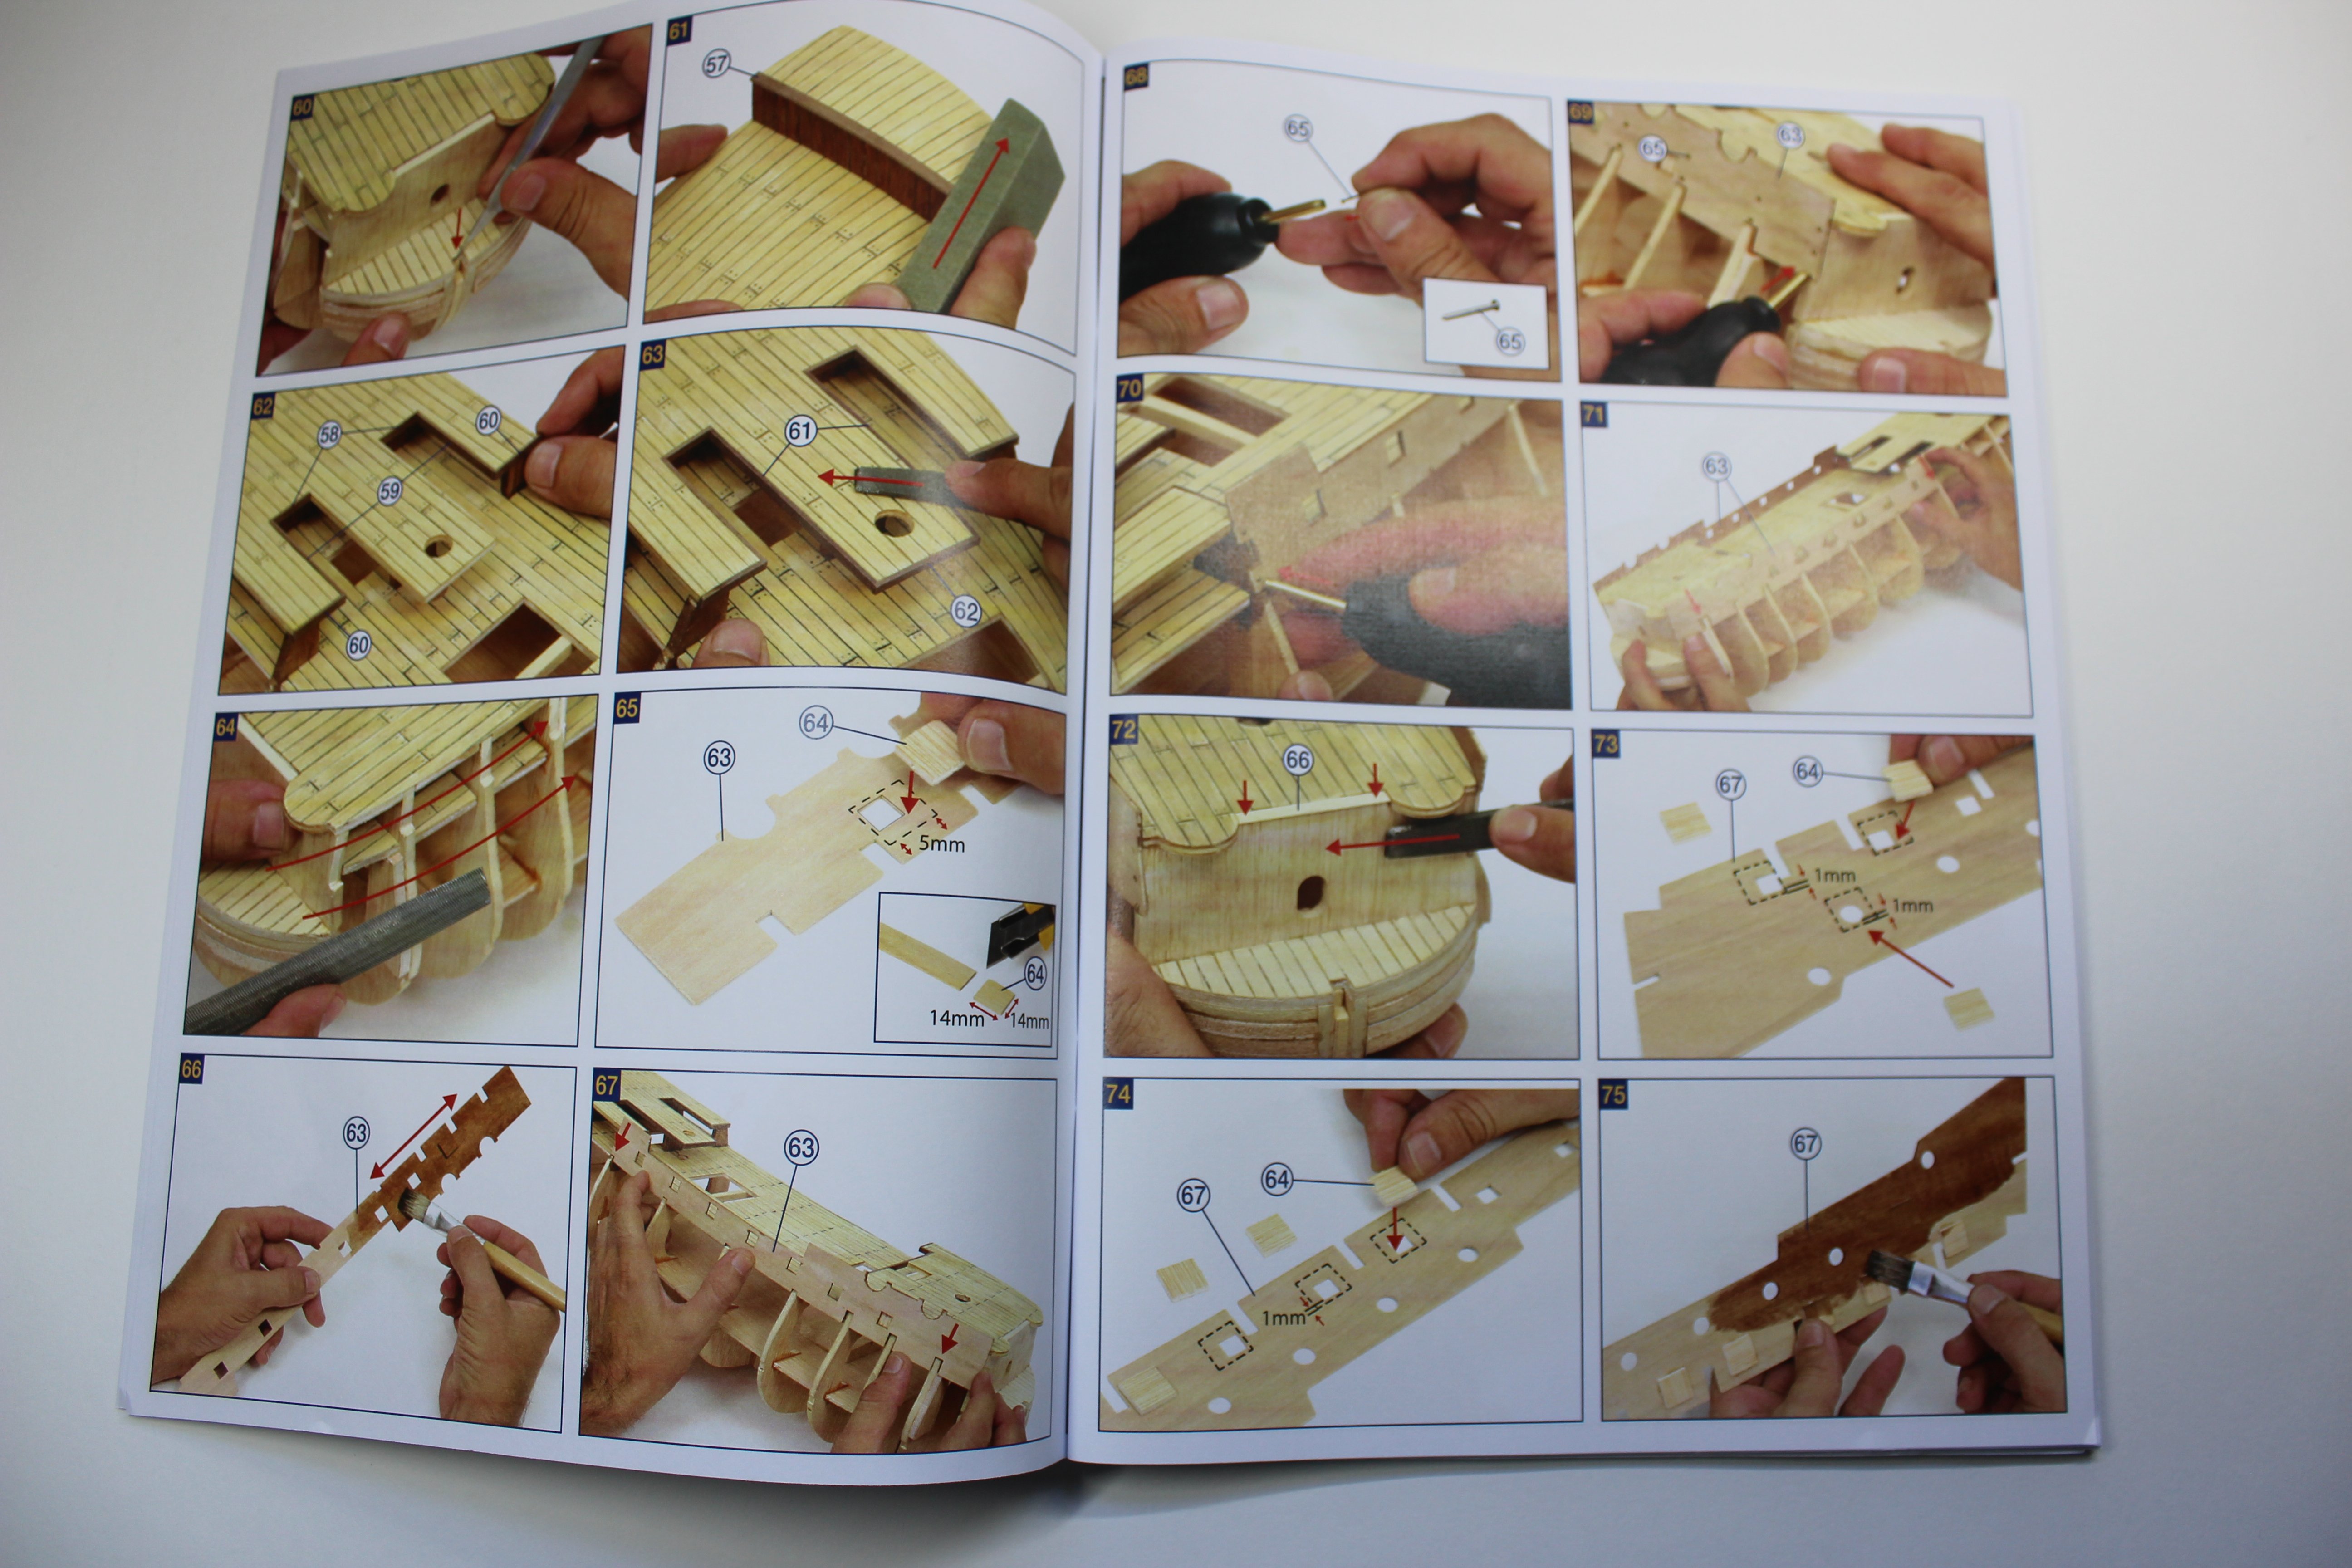
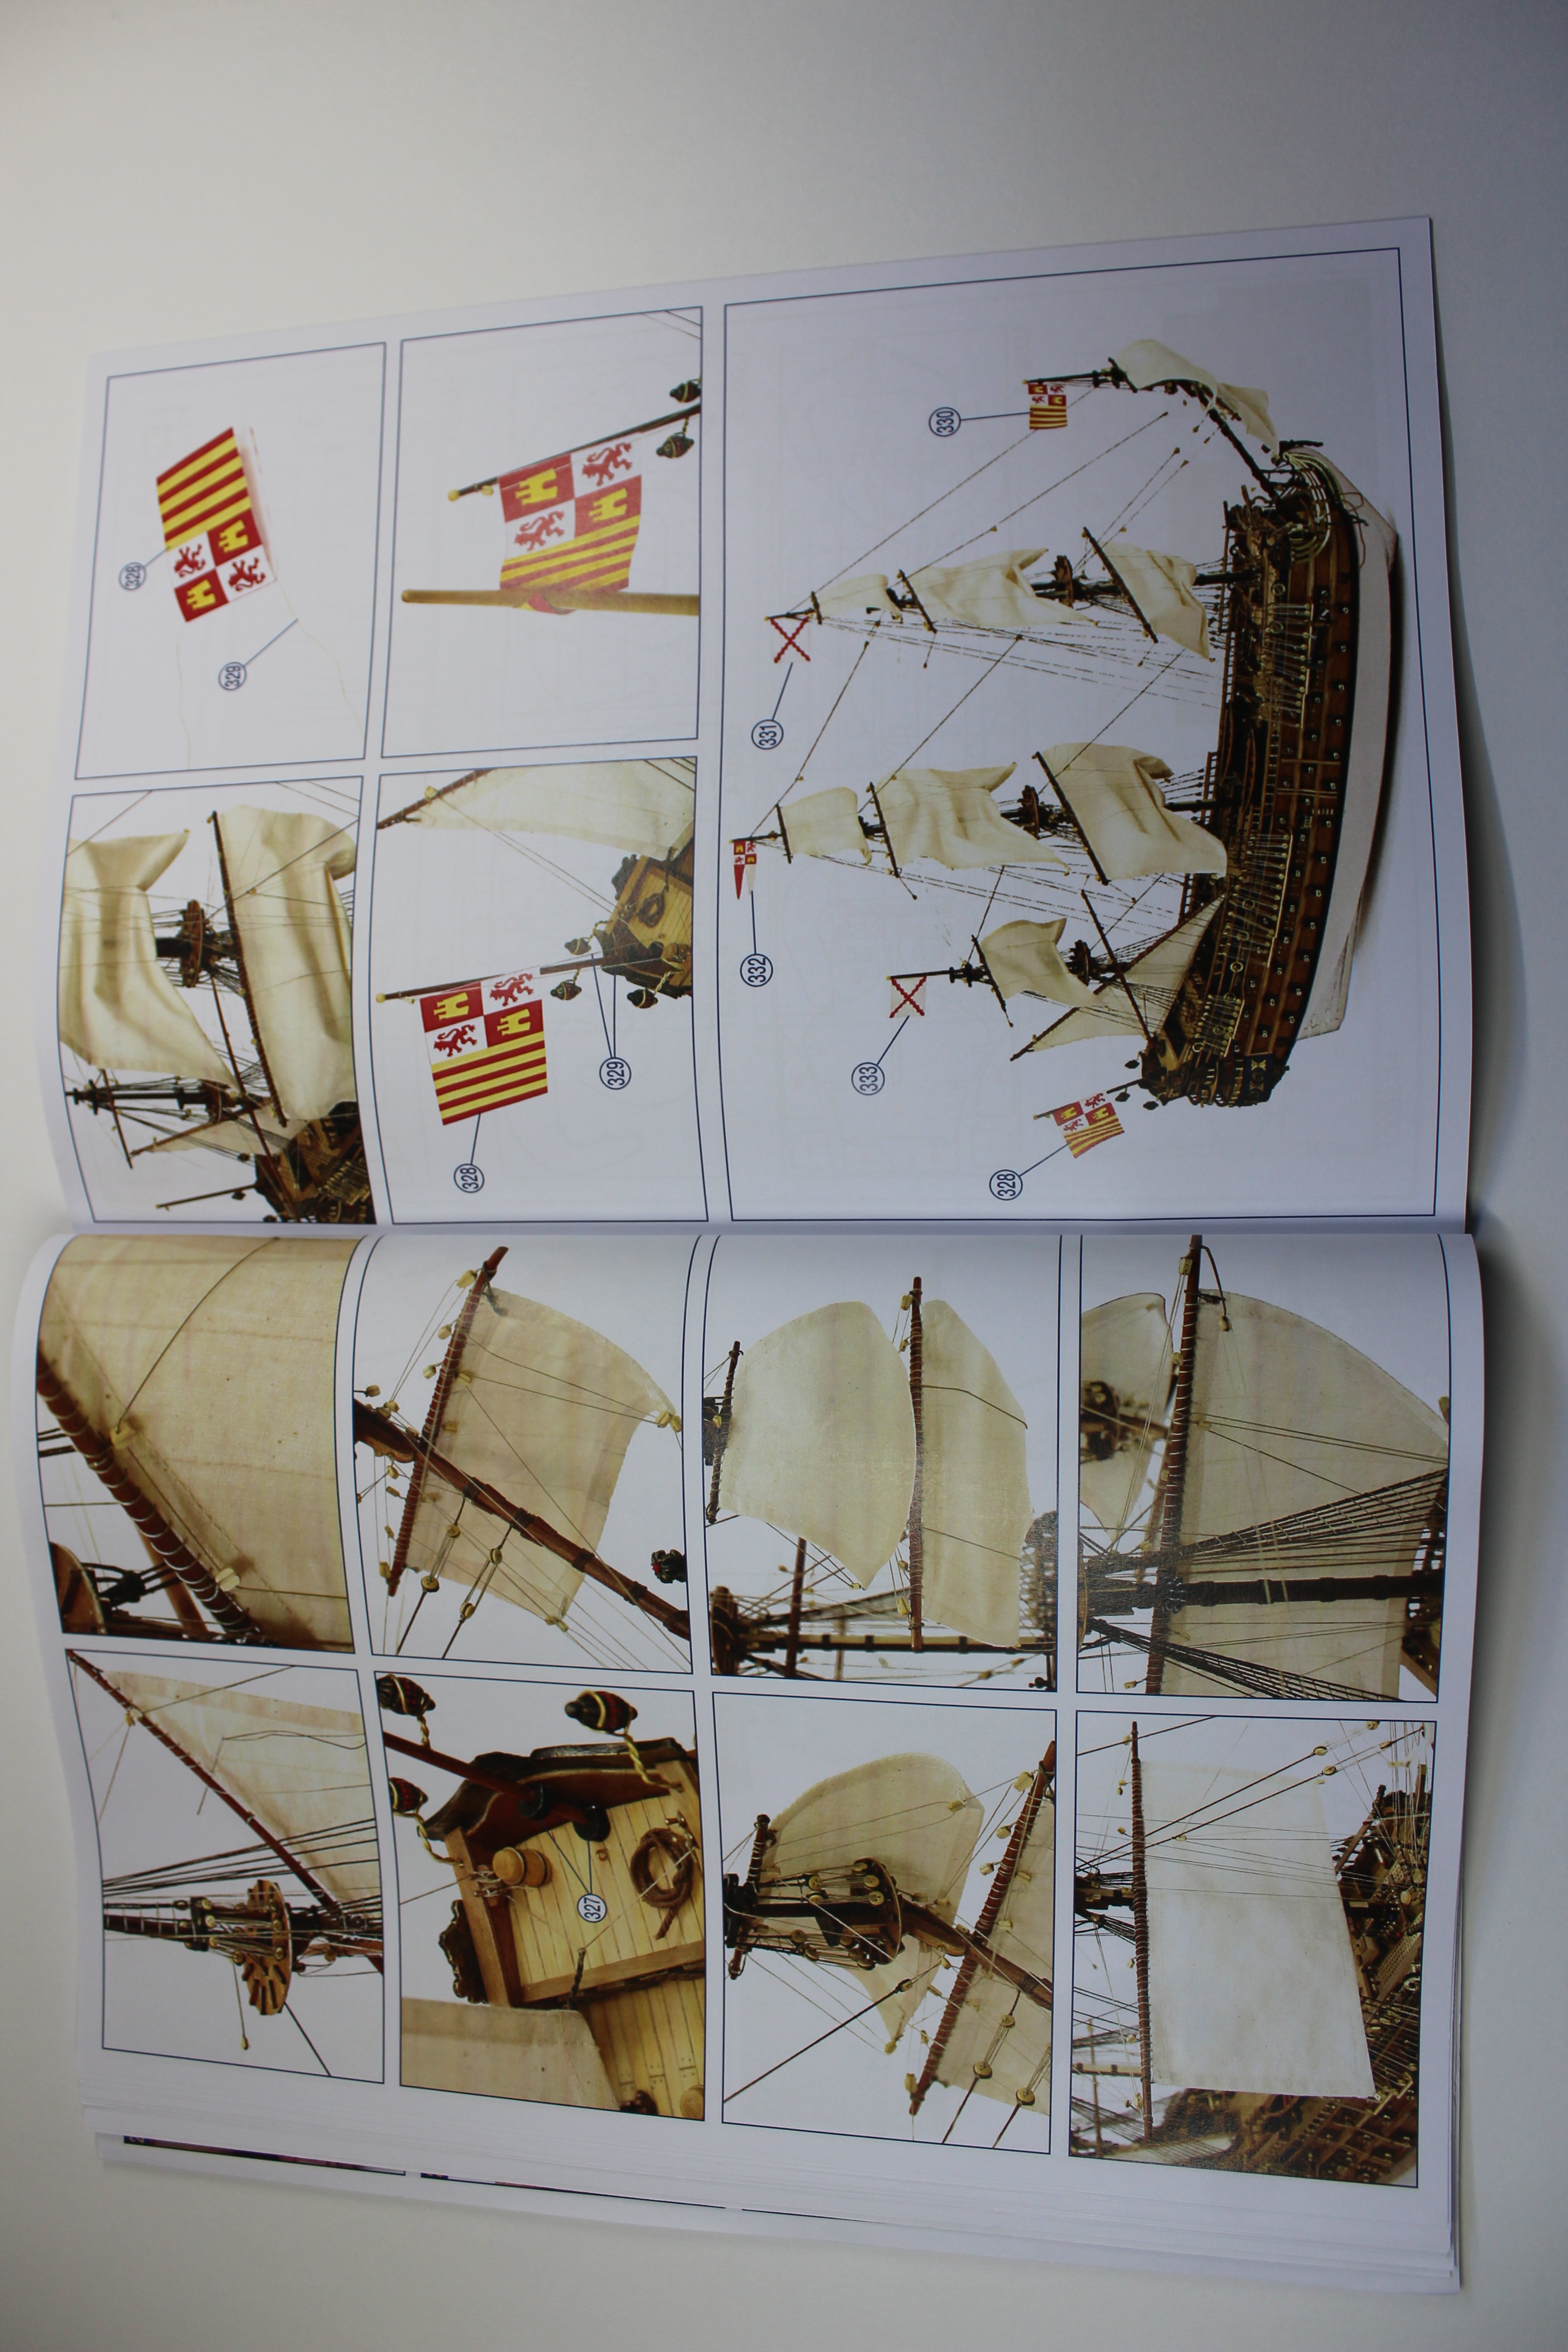
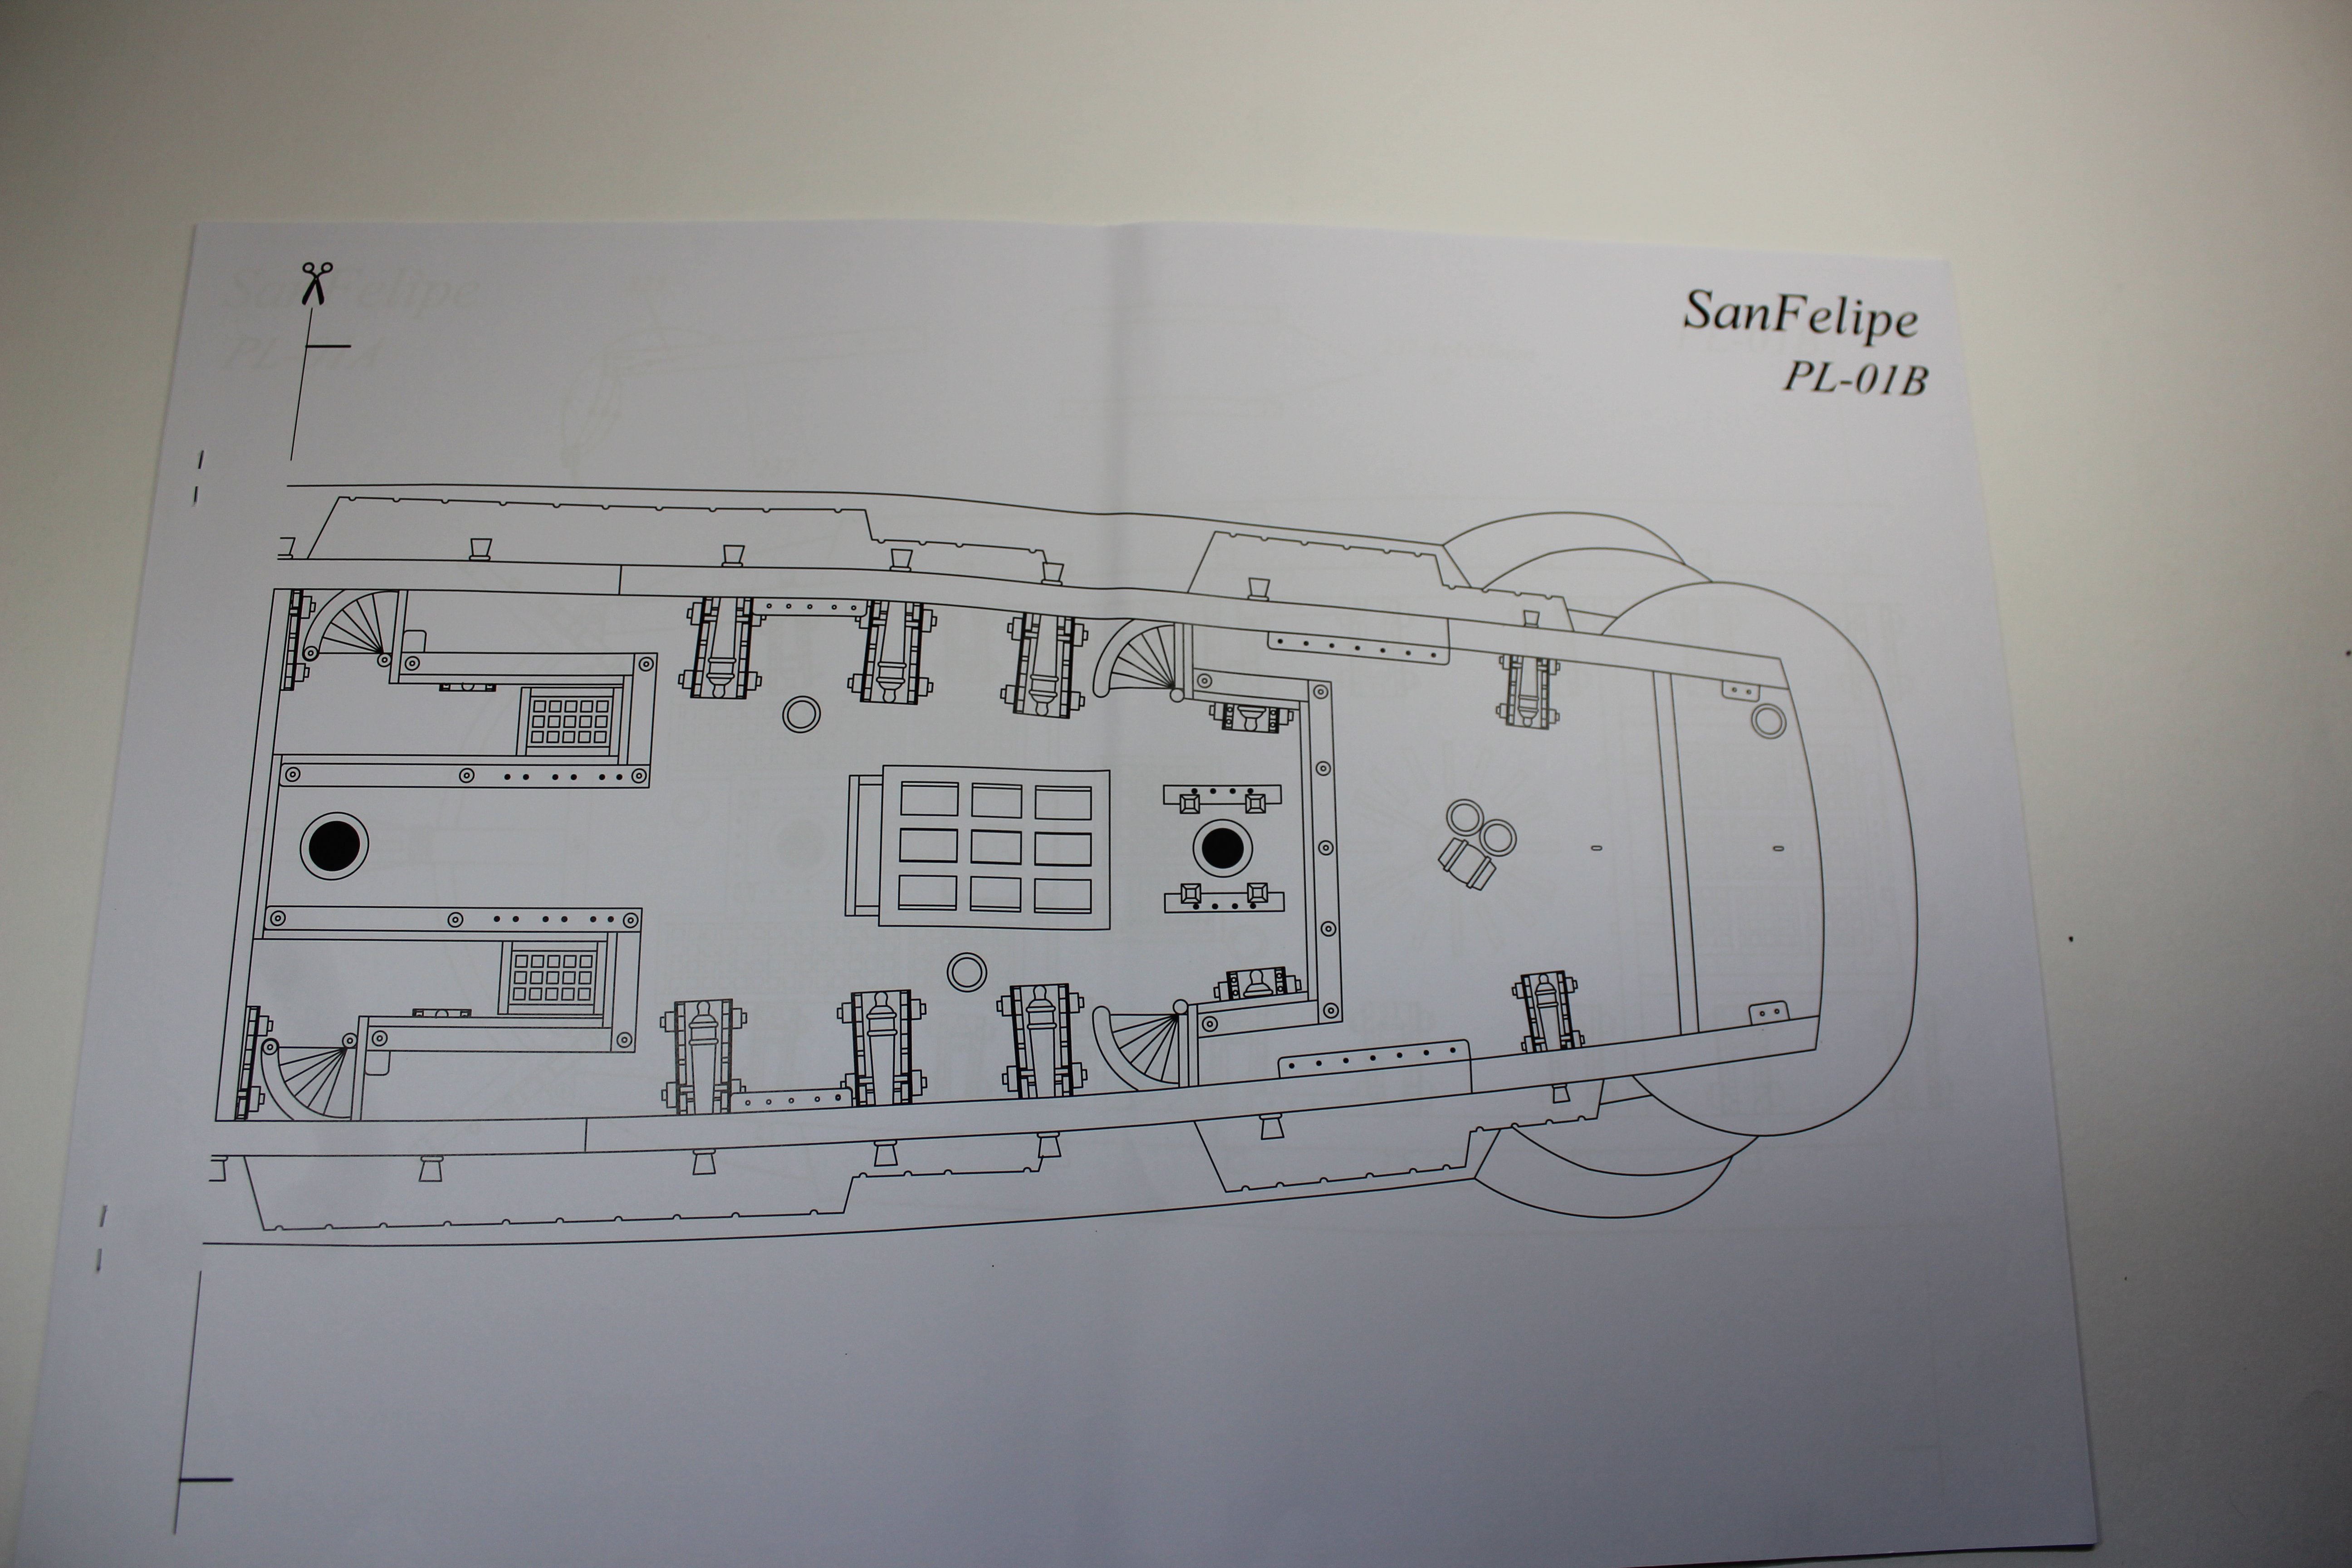
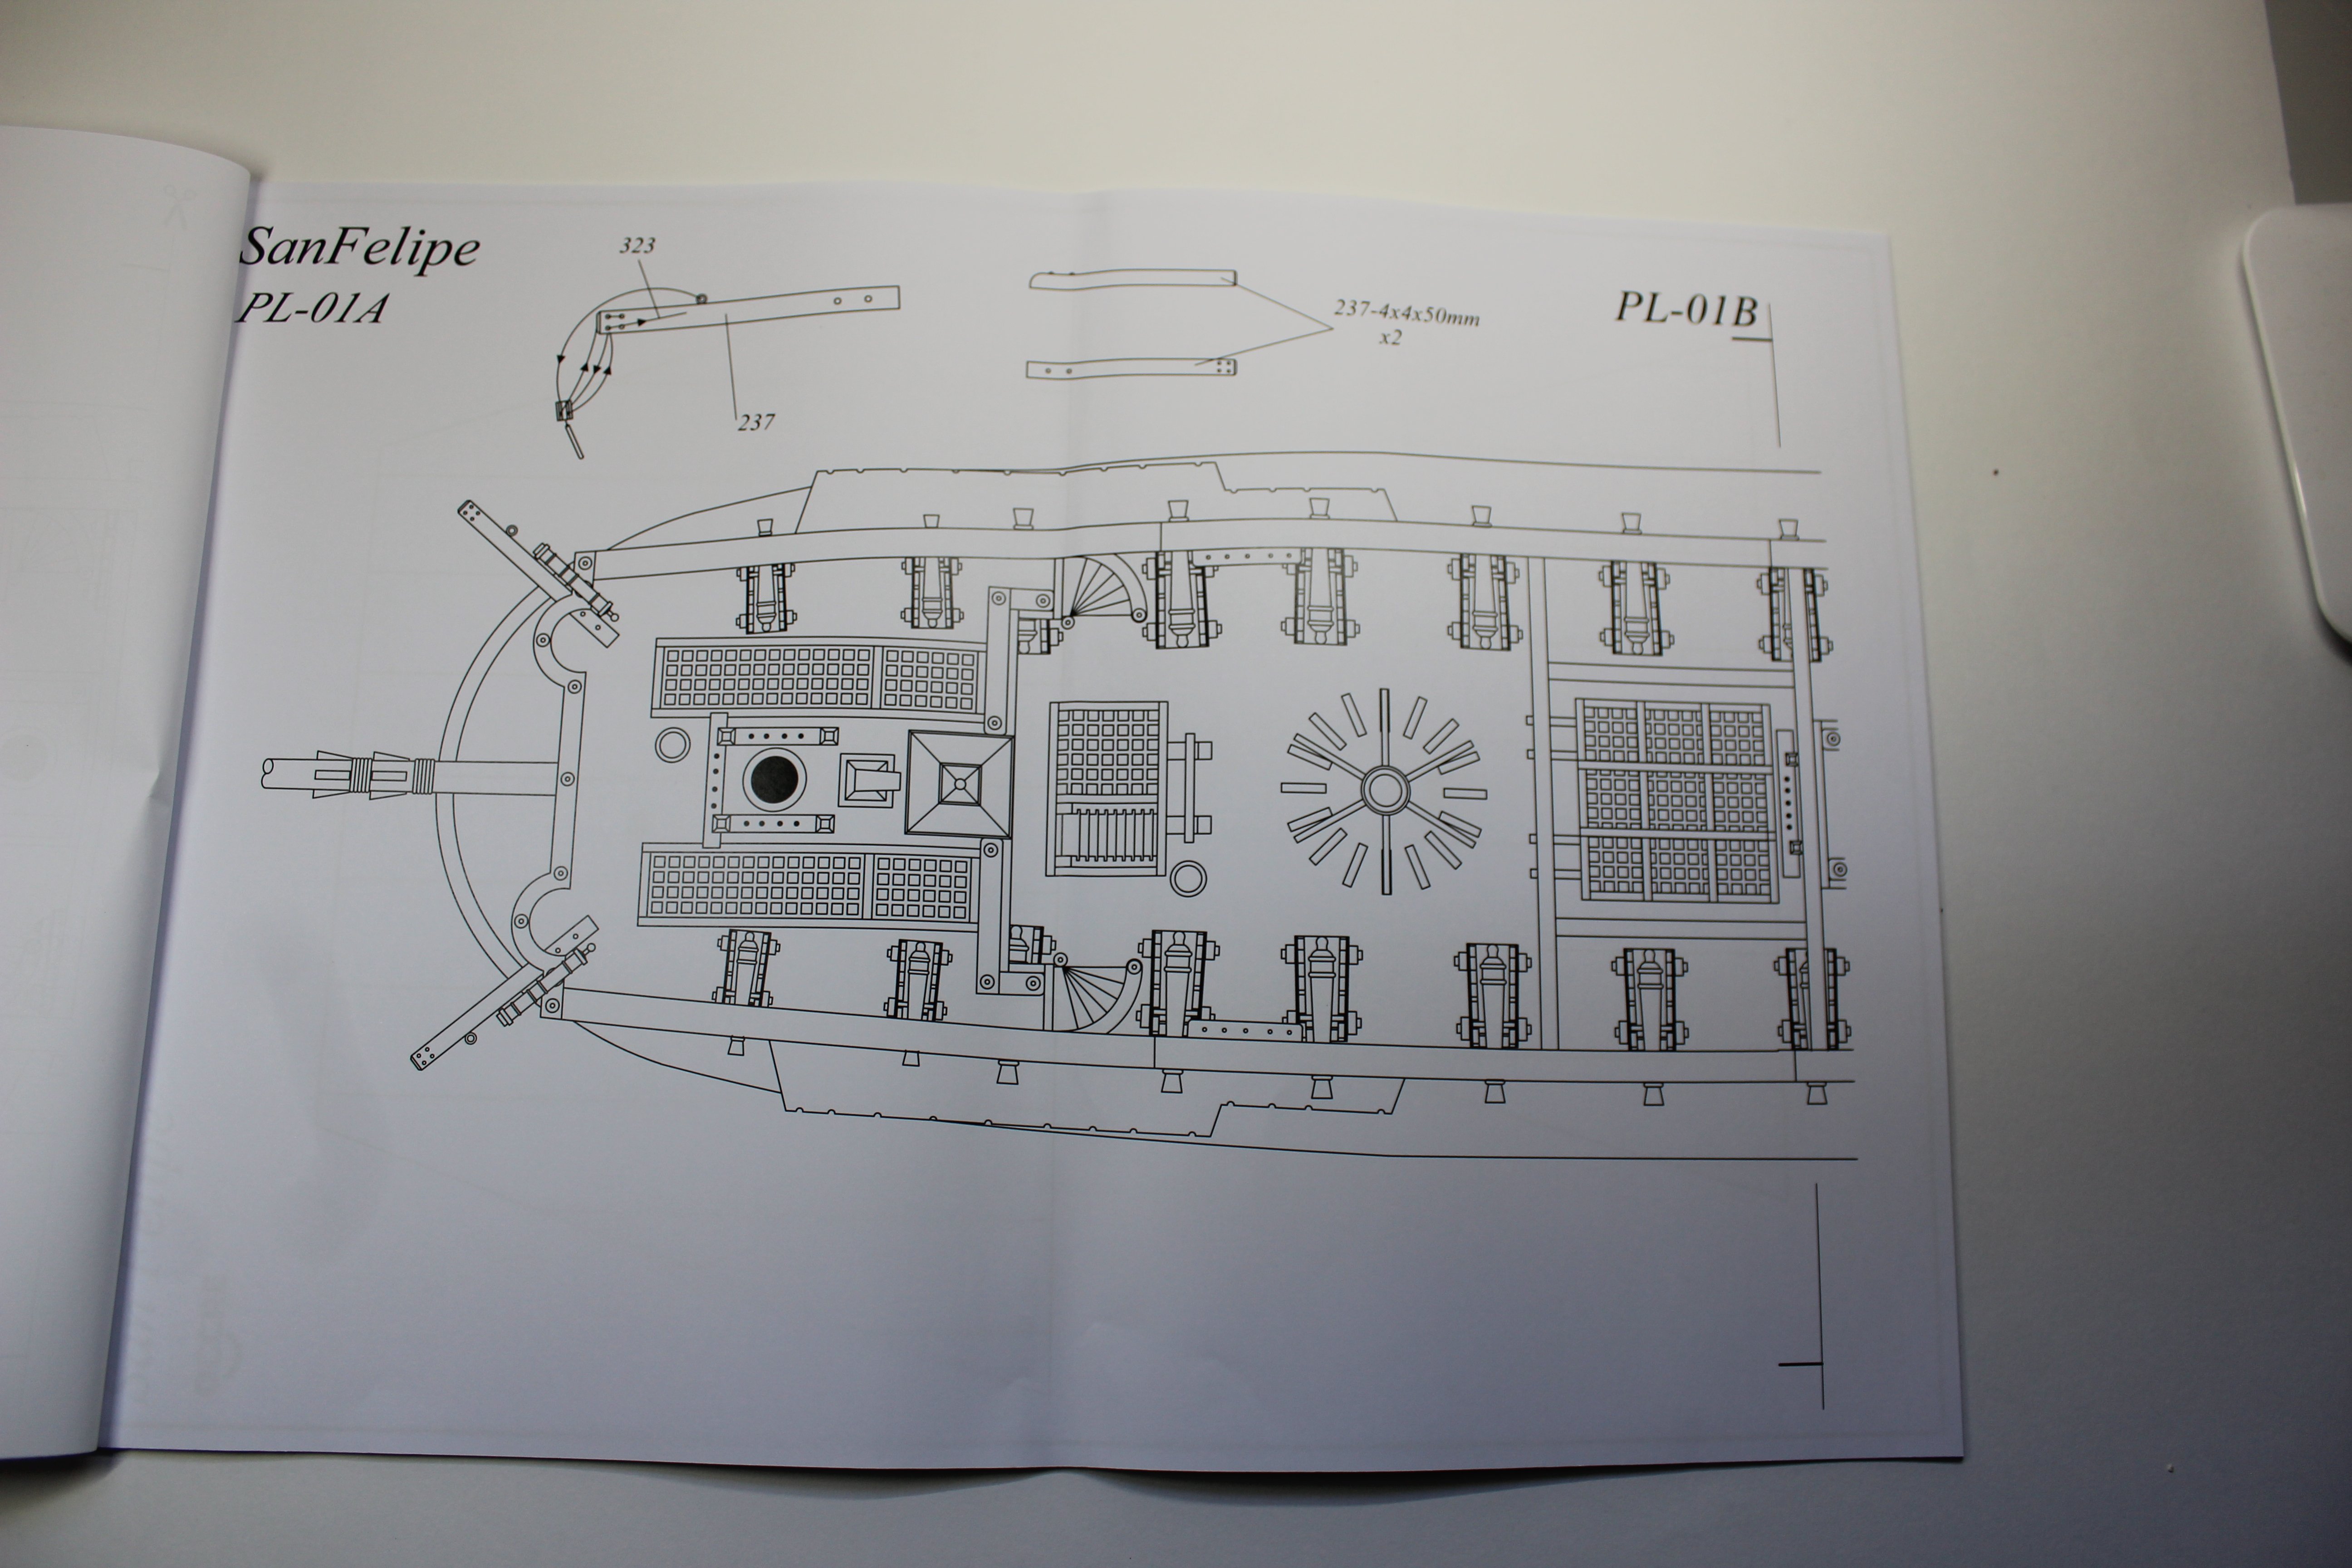
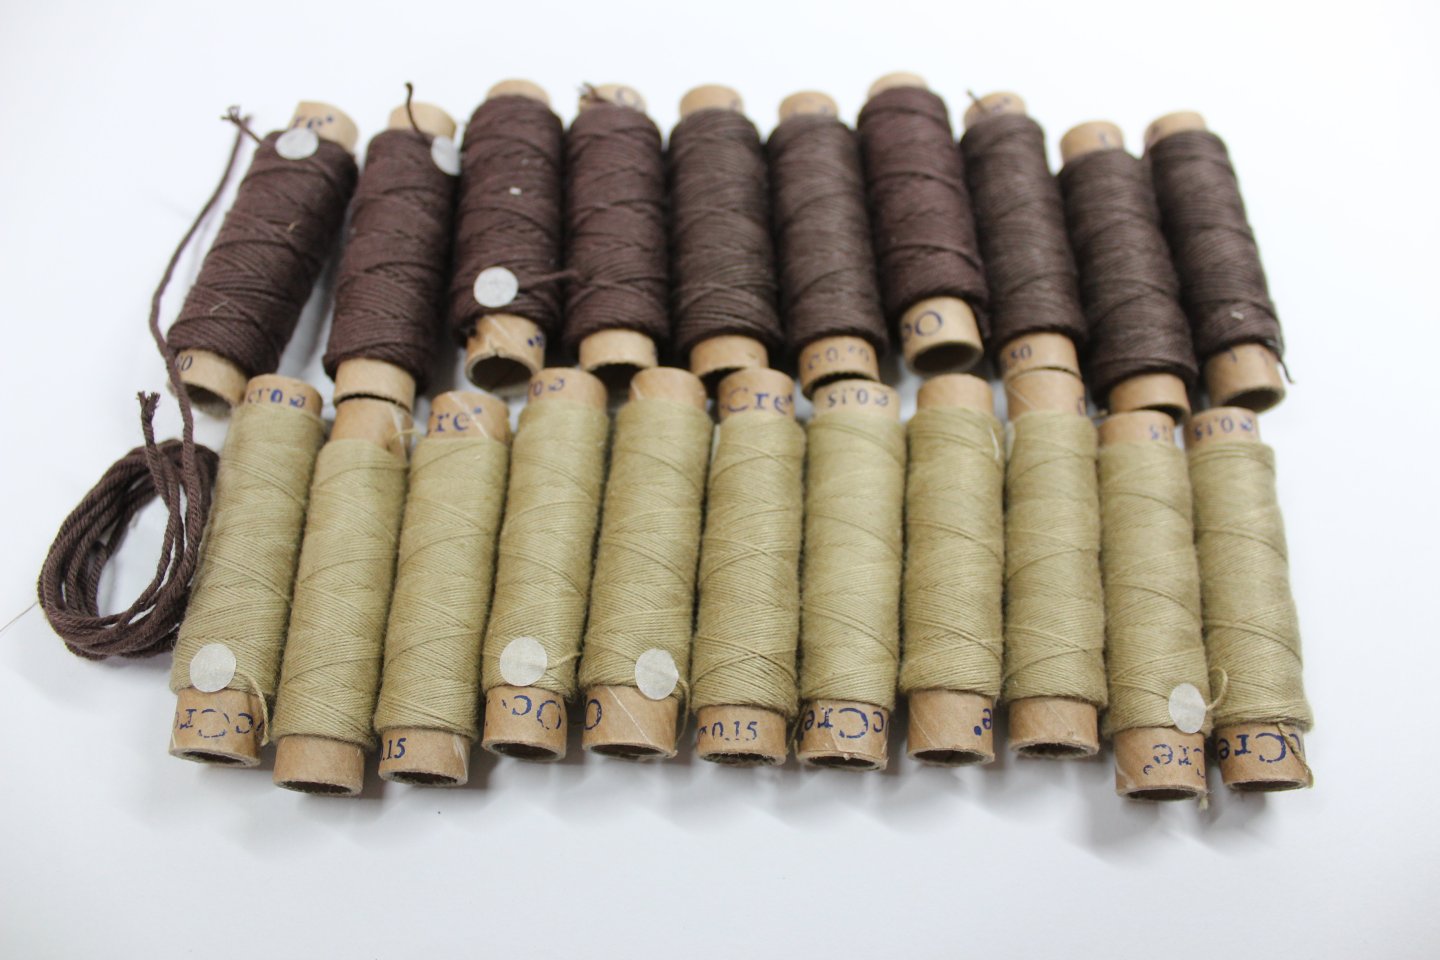
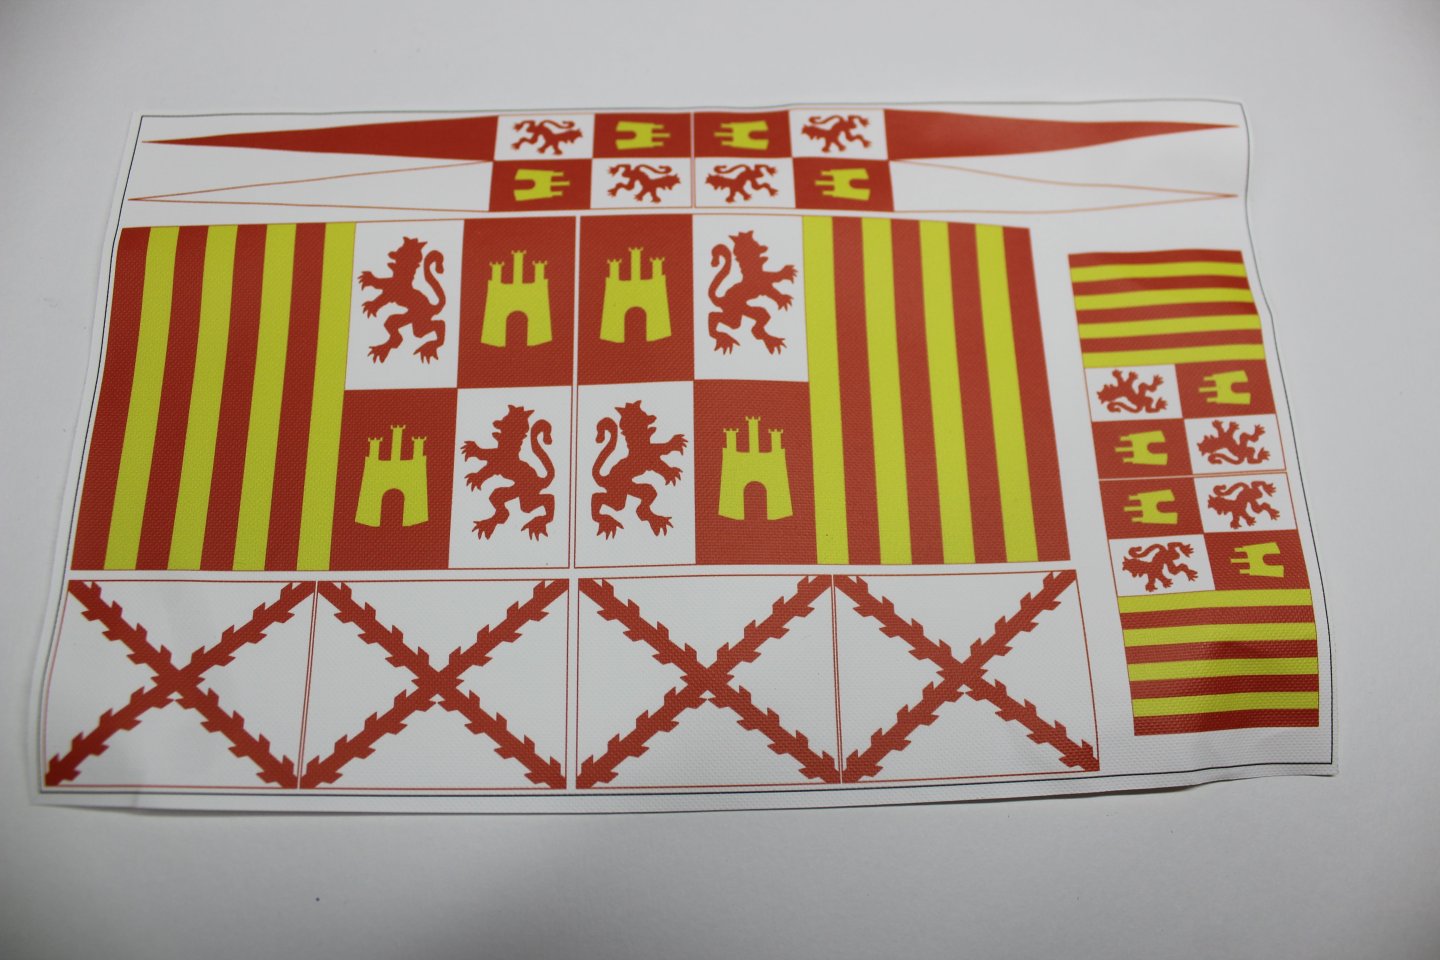
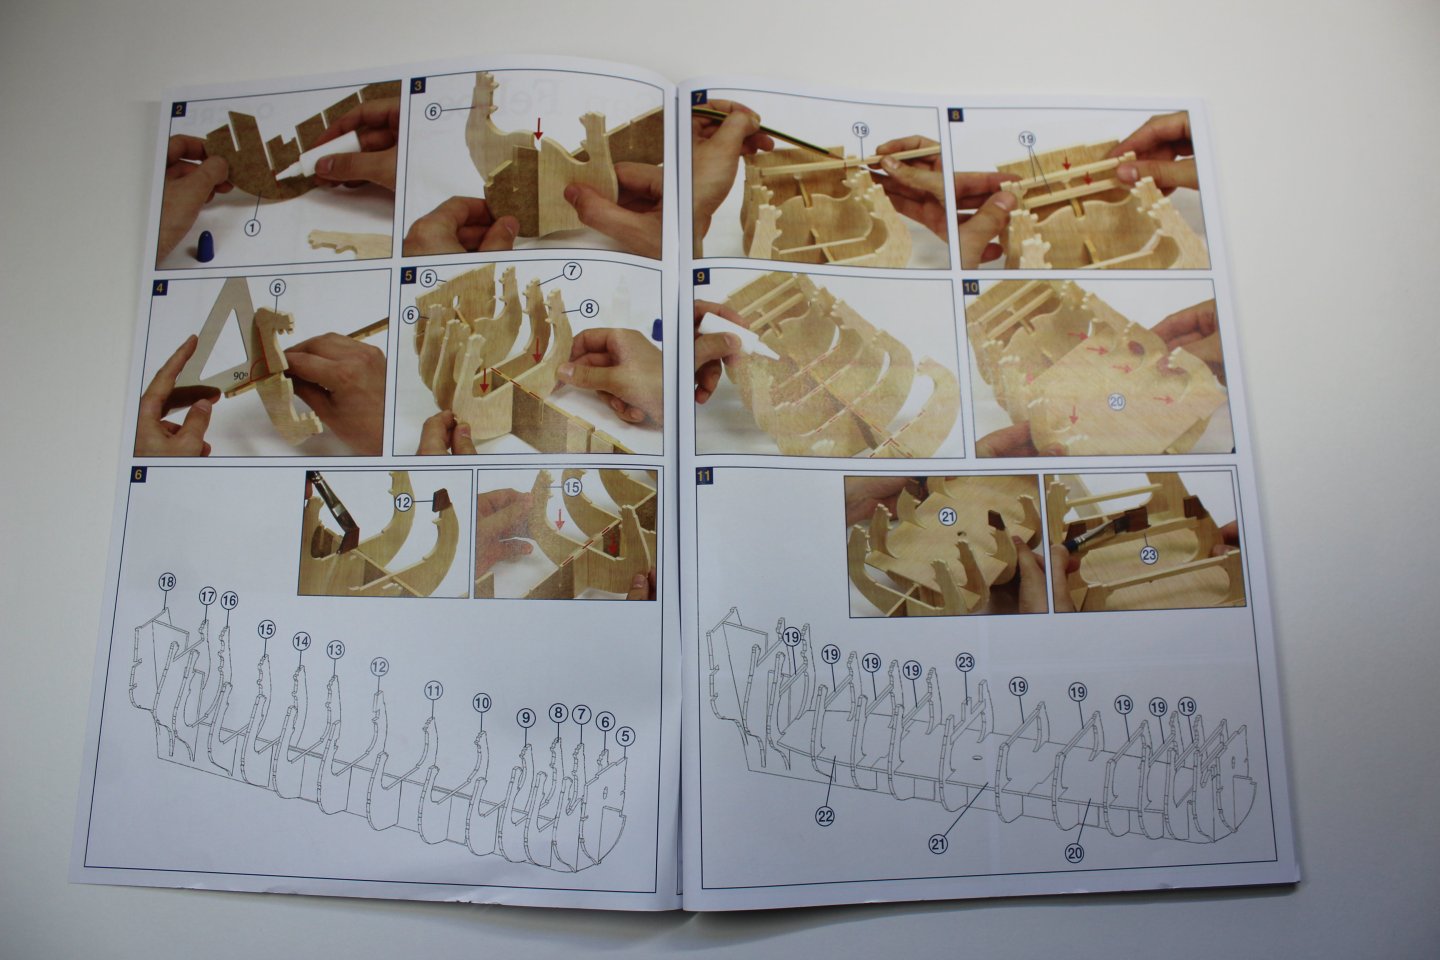
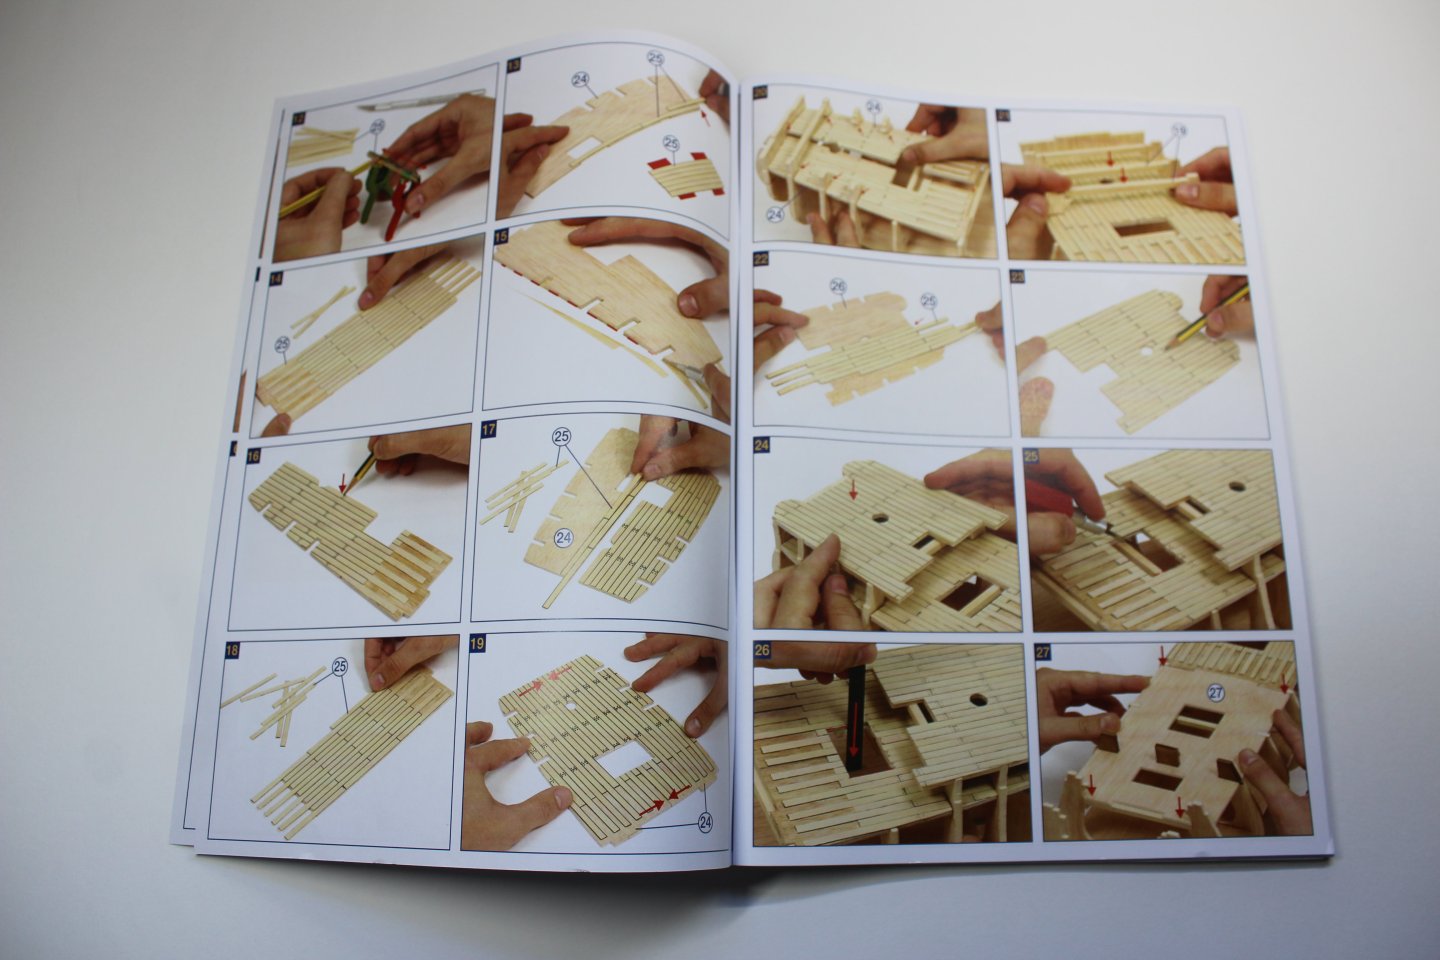
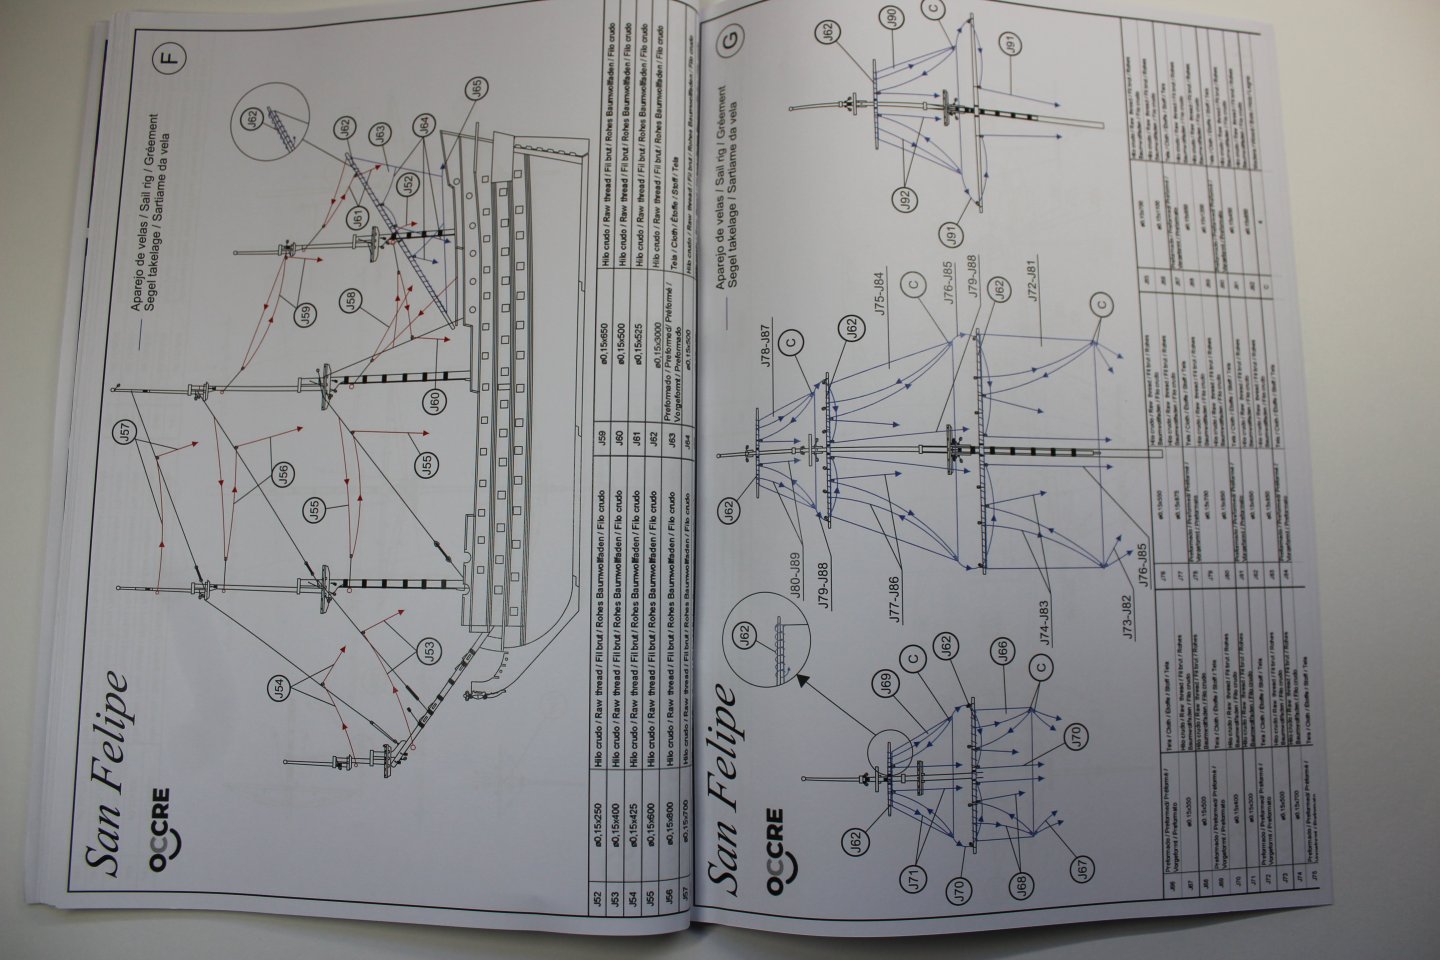
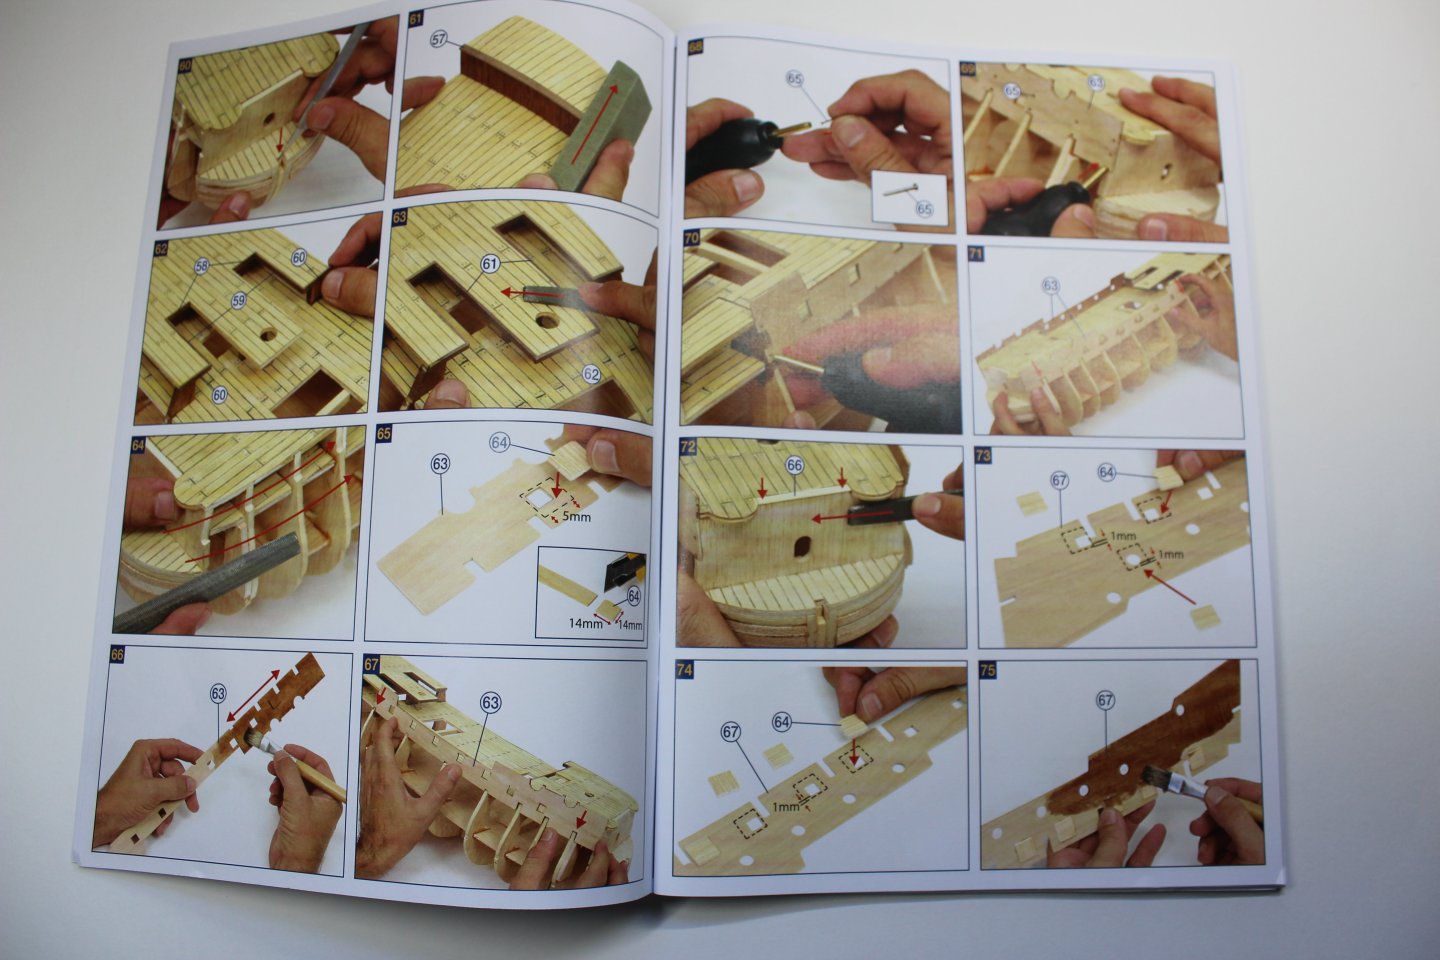
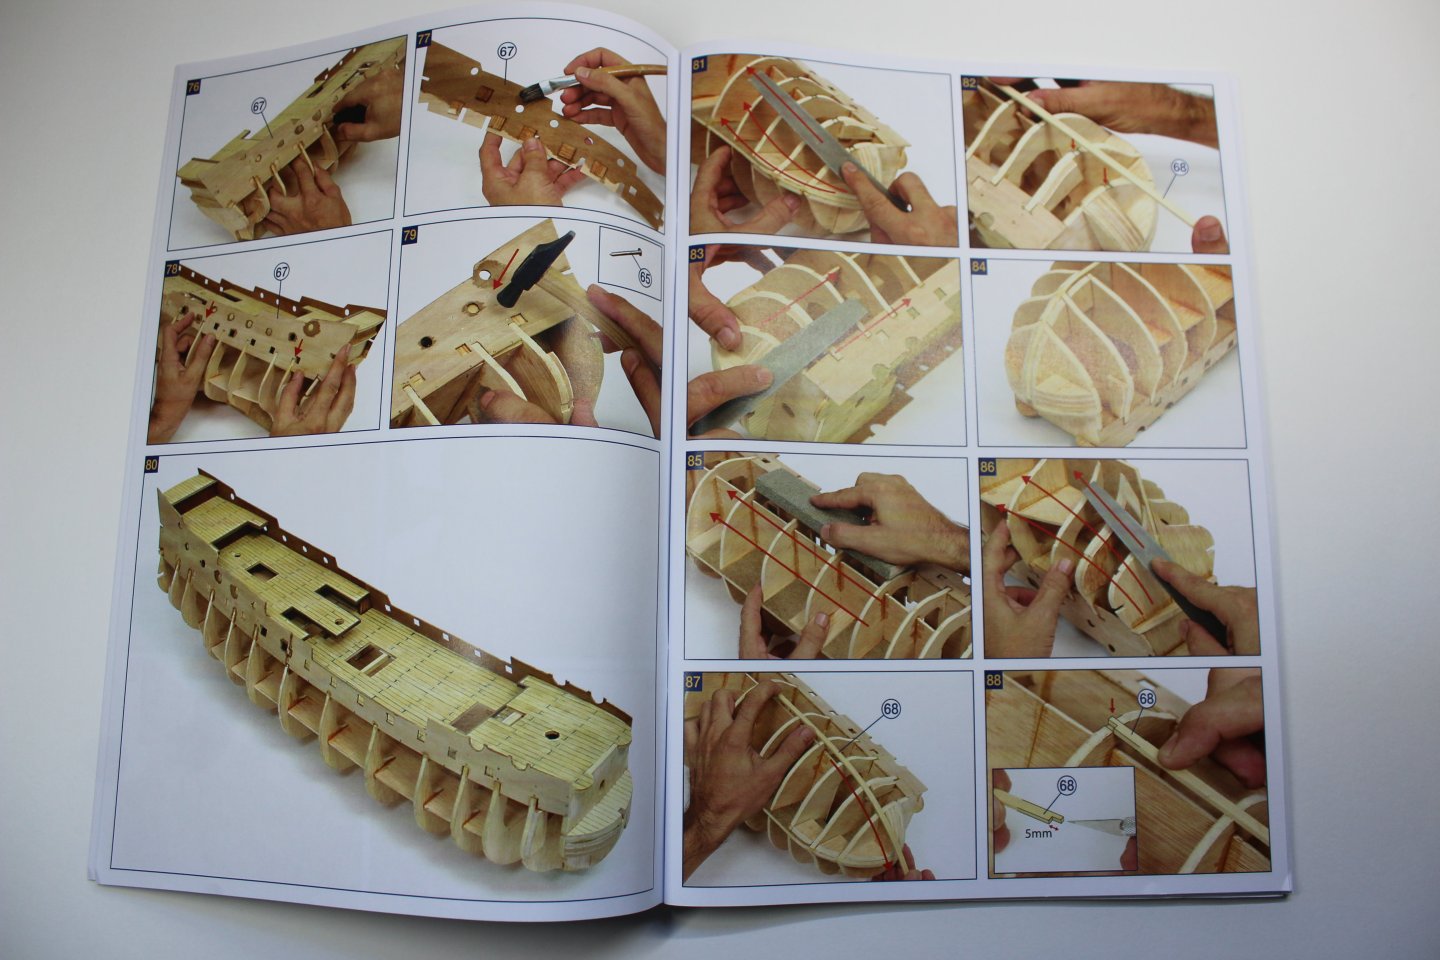
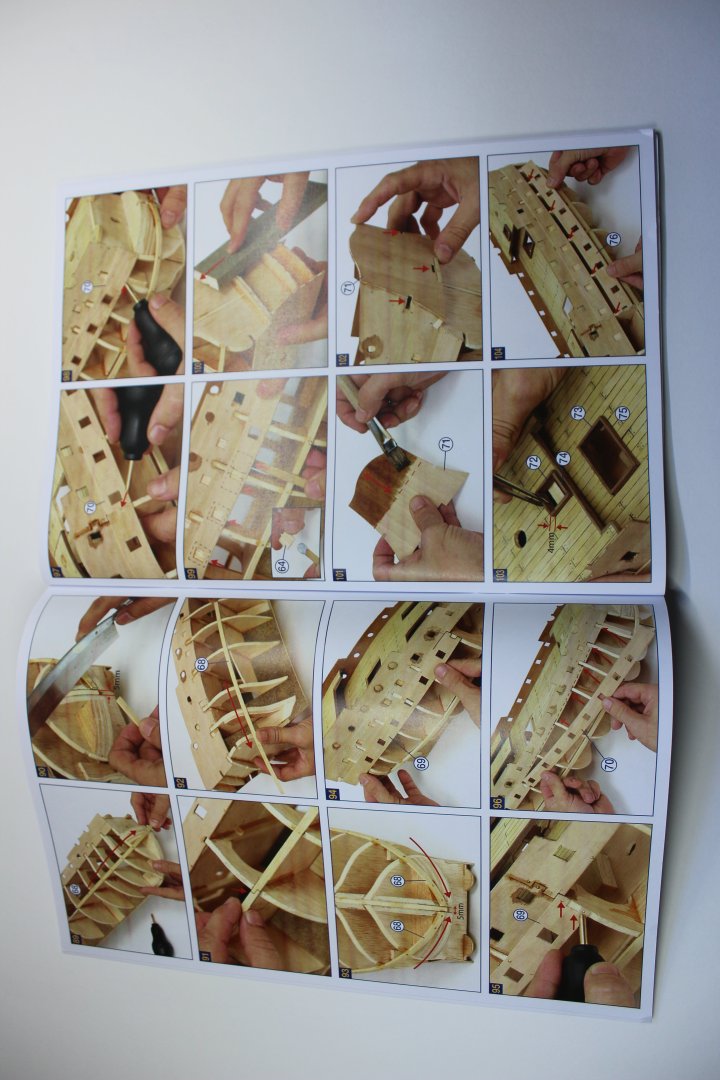
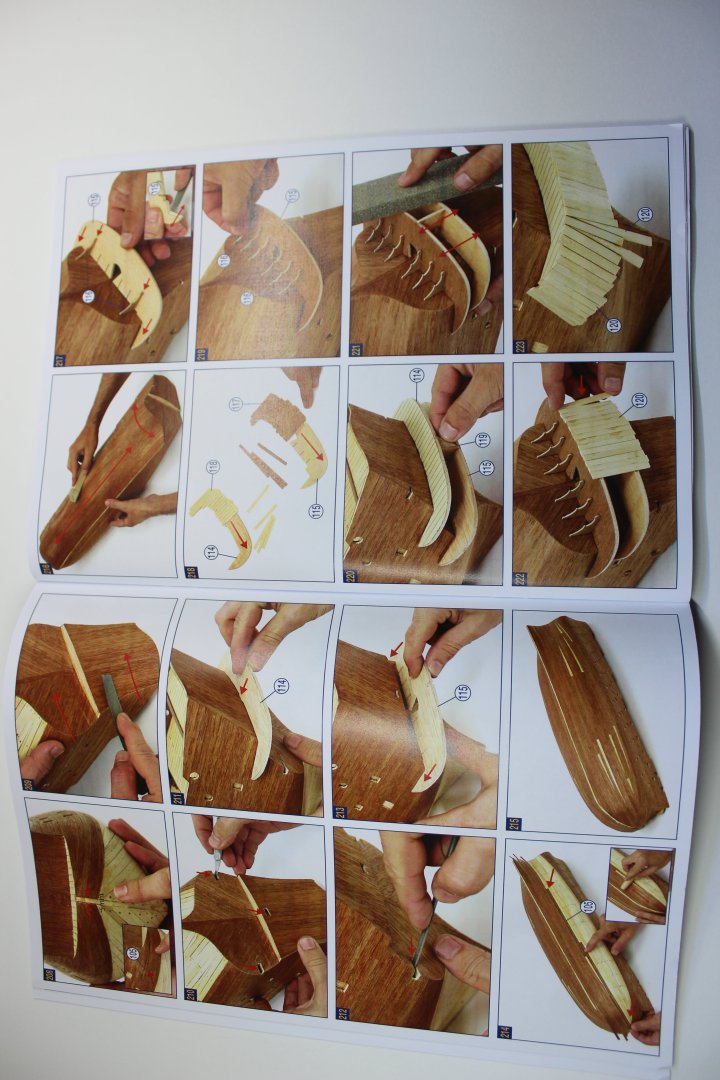
Sails a full set is included. although i don't know how accurate they are, they look quite well made threads and flags and plans i find Occre threads to fluffy and quickly replace them, and i have never used brown on any of my builds many page illustrated instructions, which shows everything when completed, very little build processes are shown a separate instruction book shows the construction of the mast in the right scale, there is no tapering measurements


.JPG.47bfbffe1954fb431366def107acc96e.JPG)
.JPG.044733650f4d8563f76a4919fa31d6aa.JPG)
.JPG.9f50c202282f26faf9f51b65398d69fc.JPG)


.JPG.3c16c4cd1b23abb1da4f5556ef663bdc.JPG)
.JPG.d8eb7c404d6f6807d0e14b92f3a75f6f.JPG)
.JPG.7bb2c65b453ceb3514bb0c4f499834c0.JPG)
.JPG.fe8d00d5cf20f785b04d4441fc6d4848.JPG)
.JPG.b2a21cbabe90cb0b8240bc850e897c5f.JPG)
.JPG.79ff662ddcb63ec3018bc723f037dda1.JPG)
.JPG.a6b281666c8fef5e499eb55dbcc97a6f.JPG)
.JPG.0b665853f36591048944ca7f0236c4de.JPG)
.JPG.7f6b0c43e3950d89014b170e987ce621.JPG)
.JPG.cd53412776ac9d1329560db4449e6c7c.JPG)
.JPG.9ea12057993f0478da8e75672f80d784.JPG)


.JPG.96fc167e0fda9f9751778668a1969ef0.JPG)
.JPG.5d0cd4f2528d7d18d1d2e7bcf460ee34.JPG)
.JPG.e86da59931e29b5a521ecda2cb952da7.JPG)
.JPG.75a2b78aee3bd103d86c93be0687191b.JPG)
.JPG.35aac8228ee0b606d5e8fb1777e88f61.JPG)
.JPG.d6091c7bfc0626b911e07c332082d569.JPG)
.JPG.8aaebda68a2dfe85e2bdf76ece136523.JPG)
.JPG.001959daf4172647b957fcf9cdffbdca.JPG)
.JPG.d4a602687b509bdd7be5088138f51ce4.JPG)
.JPG.a39b3ee2bf169ecd065d6dde015ff686.JPG)
.JPG.f5b0b96403542f0fb05e74e263dbbe3e.JPG)
.JPG.4138a5ea1446fcef764f56274ede10f8.JPG)
.JPG.4363be37ec778824cb13a6f0f6aaef4b.JPG)
.JPG.12c1f3f1db07c6ed1cee6567dfa822d4.JPG)
.JPG.13e806767a48322700cfe7e68caab259.JPG)


.JPG.31e1e1f1e042b2d84864aacf7dc82ab7.JPG)
.JPG.9705f2cd14267829c45bf360ca320204.JPG)


.JPG.855955c4f8c24aef9b9860273843d135.JPG)
.JPG.13f1d698d3aa78d3c0cb5e05549378e1.JPG)
.JPG.932ec71763cf5e5e5f7972ad883a1d49.JPG)
.JPG.3420424d6a877ec6112e4270d3ea6eea.JPG)
.JPG.2b2229674c876dc6238dc02fca5324f7.JPG)
.JPG.7d6f1ccb433f879c50813ec2c7df4183.JPG)