


monello
-
Posts
34 -
Joined
-
Last visited
Content Type
Profiles
Forums
Gallery
Events
Posts posted by monello
-
-
Thank you all for the replies and advice.
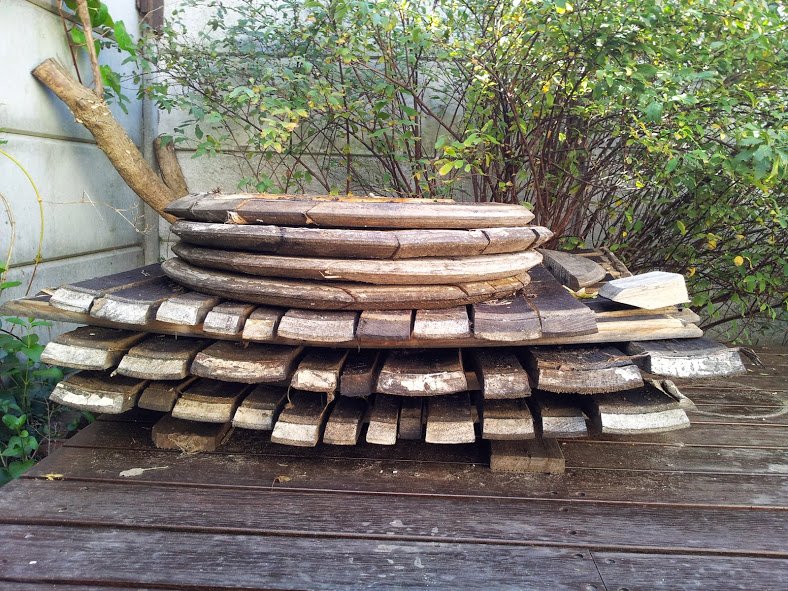
I spoke with a gentlemen this weekend who is very good at woodworking (He has not built a model ship yet, but can clearly see the complexity of such a project). He gave me some valuable advice, the most important of this was that I should NOT use the barrel wood. The shape of the planks are insane and it will just be way too difficult to square these up into useable planks... it would take a lot of skill, experience and tools I cannot afford at this time.
So I will now be reading over all your comments again, as some of you have "warned" me that this is not the best wood.
I will go see Country Woods, Rare Woods. I'm hoping to buy wood that will be closer to planks I'll need.
I will go digging through this forum to find out what the best woods are, I'm sure this topic has been discussed many times.
So still not quitting, but still no progress either... what did I get myself into here?!
-
In the way of tools may I suggest a small band saw, a table top planner/jointer and a table top table saw. I know there is expense there but the amount of wood you have to cut, plane, shape and sand they will certainly get a lot of use.There is always second hand kit out there.
Expense is the problem at the moment. I've spent so much already and still cannot get nice workflow going. I think the problem might be the wood I'm trying to size, It's all curved to the shape of wine barrels, actually whiskey barrels, so I need to figure out a plan to either work with this wood or buy some wood that is flat and only needs sizing.
I don't know
 Am a bit discouraged at the moment. WIll see how it goes, but agree I need better tools.
 -
I don't know about others but from my experience, oak was not a friendly wood in terms of cutting, carving, or chiseling and the large grain is not attractive in most model scales. I know you have that lovely stack of dried timber, but this is something to consider and I for one would like to hear if anyone else has had bad experiences in using oak.
Hi Alan
I hope you are wrong, but I think now is the best time to find out. I'll see how is goes for now, but my biggest problem is getting the planks from curved to straight so that I have something to work with!
I may have to pay Rare Woods a visit and see if I can buy some more better wood.
-
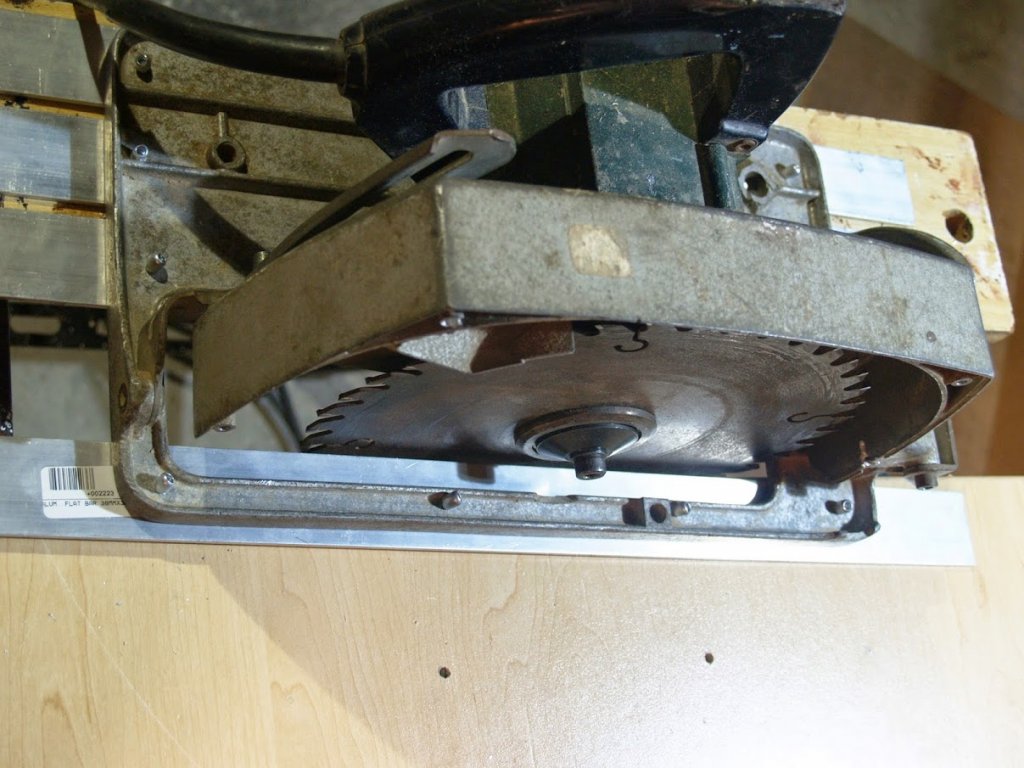
So it took me a while and many trial and error attempts, restarts, throwing tools across the room and a good dose of madness, but I build my own table saw.
I was hoping the cuts would be more accurate than they are, but I'm going to use is to get the planks close to size (instead of perfectly on size) and then sand it to perfect size using the sander.
Started with a Circular Saw and added some Aluminium strips that extend the foot so I can attach the saw to a frame.
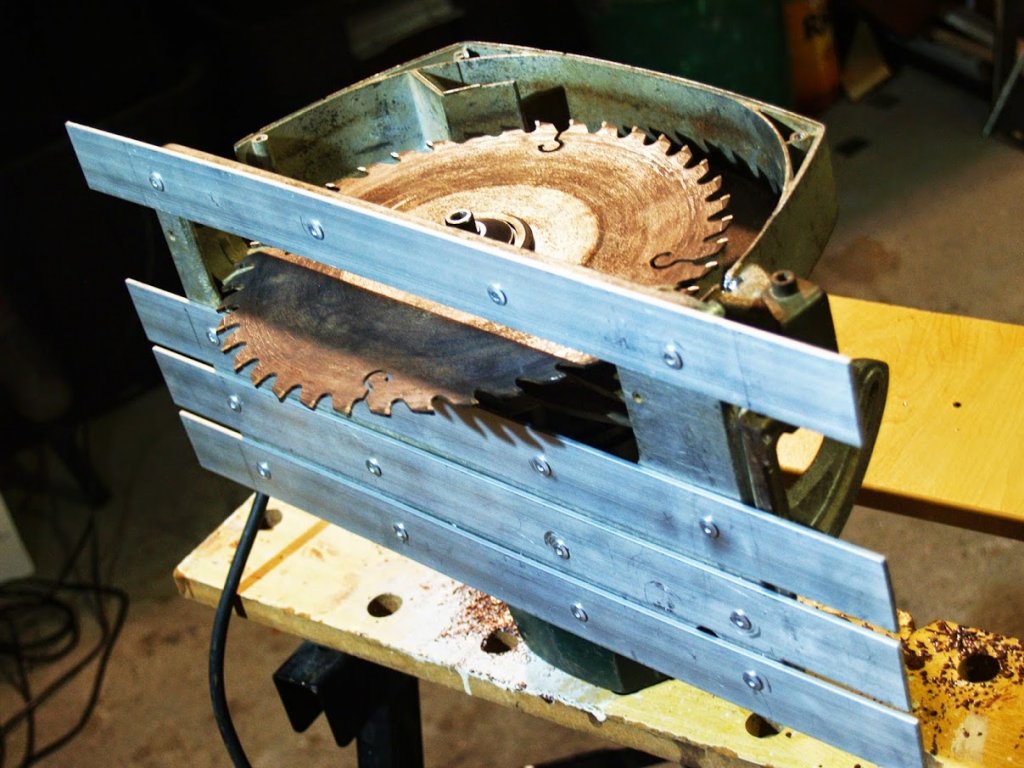
Made a frame and attached the saw to it...
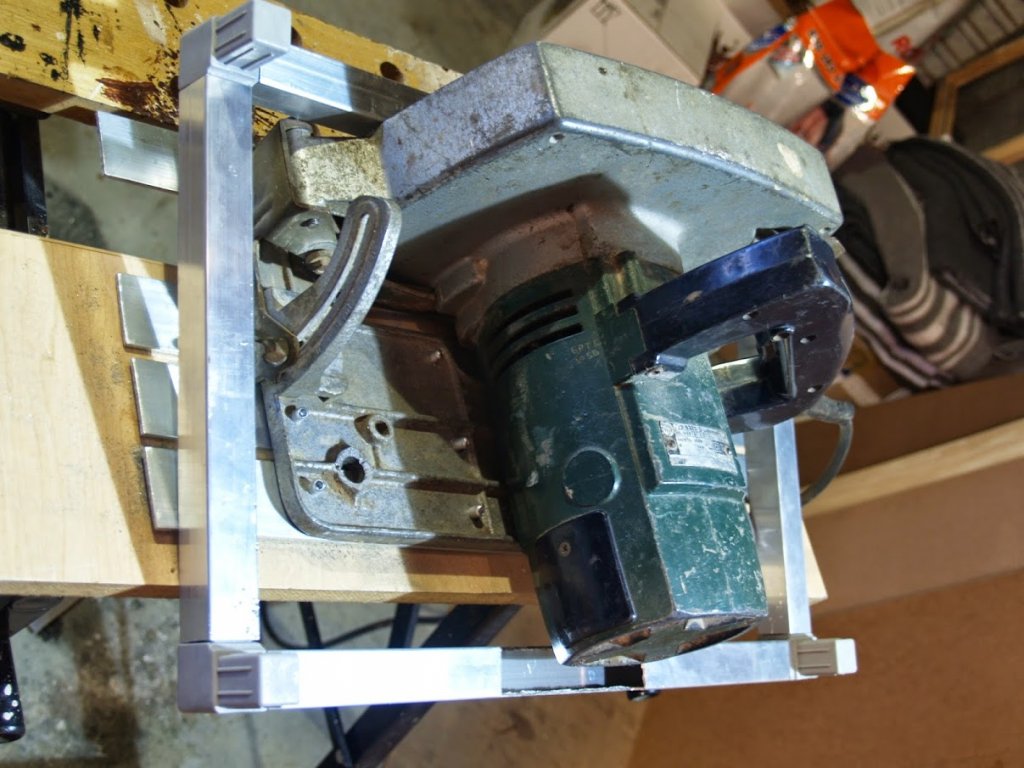
Added a table top to it
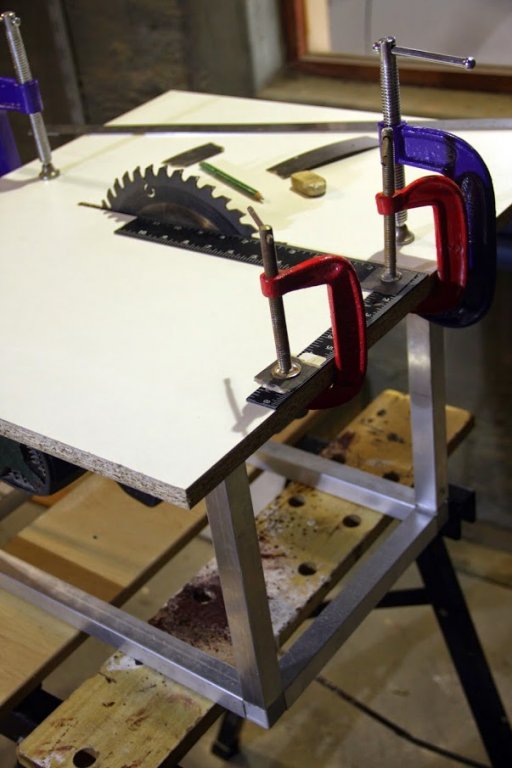
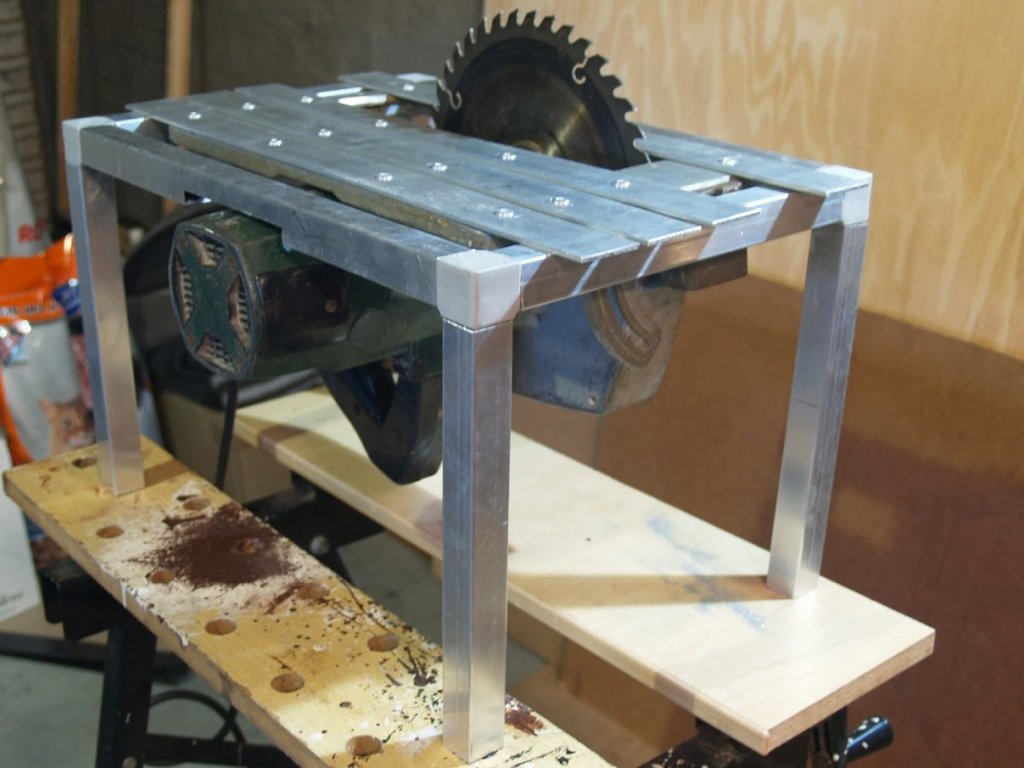
And added some channels for the fence to run in
And finally added a fence.
.jpg.4bef74ba4c3934b4abfefd9445f2d341.jpg)
.jpg.ec666ac8c6288ff3e9c5e2c7dd73d648.jpg)
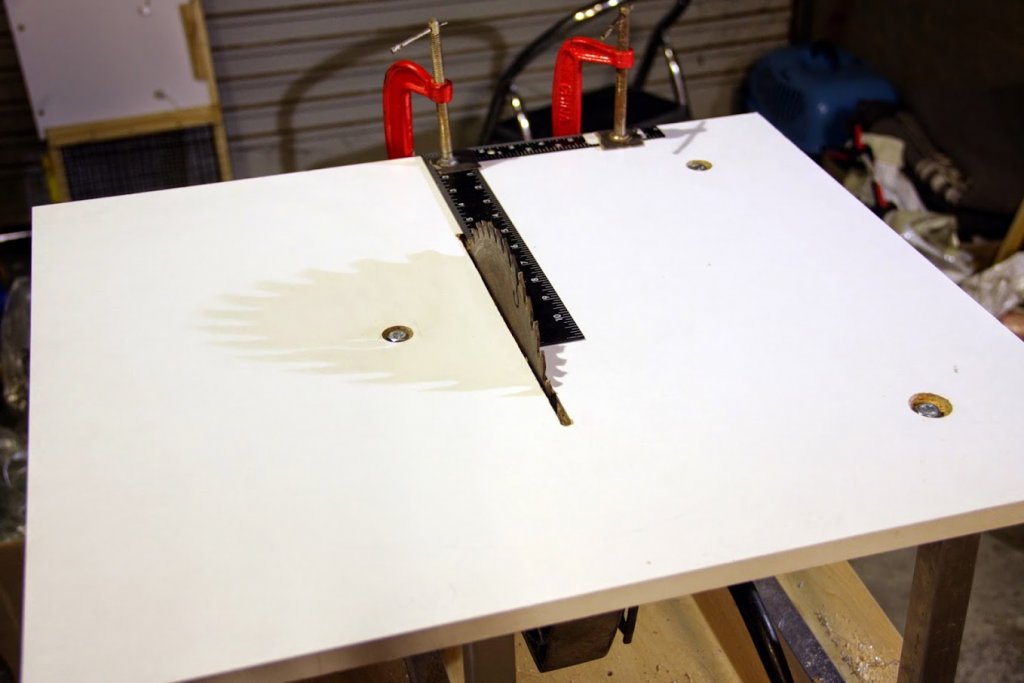
It works okay, but for all the effort of the last couple of weeks (this is version 3 of the saw!!) I was hoping for more accurate cuts.
So now I'll try to rip the wine barrel planks down to a cut list and HOPEFULLY... FINALLY have some progress to show on the actual model.
-
Wow, that musket is truly amazing!
-
May I suggest two tools for cutting the scarfs...chisels and a hobby-sized miter saw. Actually three tools as you will need a way to sharpen the chisels as they become dull. Make a bill of materials for the thicknesses of wood you will need for the keel, deadwood, transoms and frames. Then carry your barrel staves to a local cabinet maker and let them cut the wood to the correct thicknesses. Although you will need a table saw at some point, this is relatively inexpensive and will allow you to get building sooner.
Thank you Toni
I really like your suggestions!
-
-
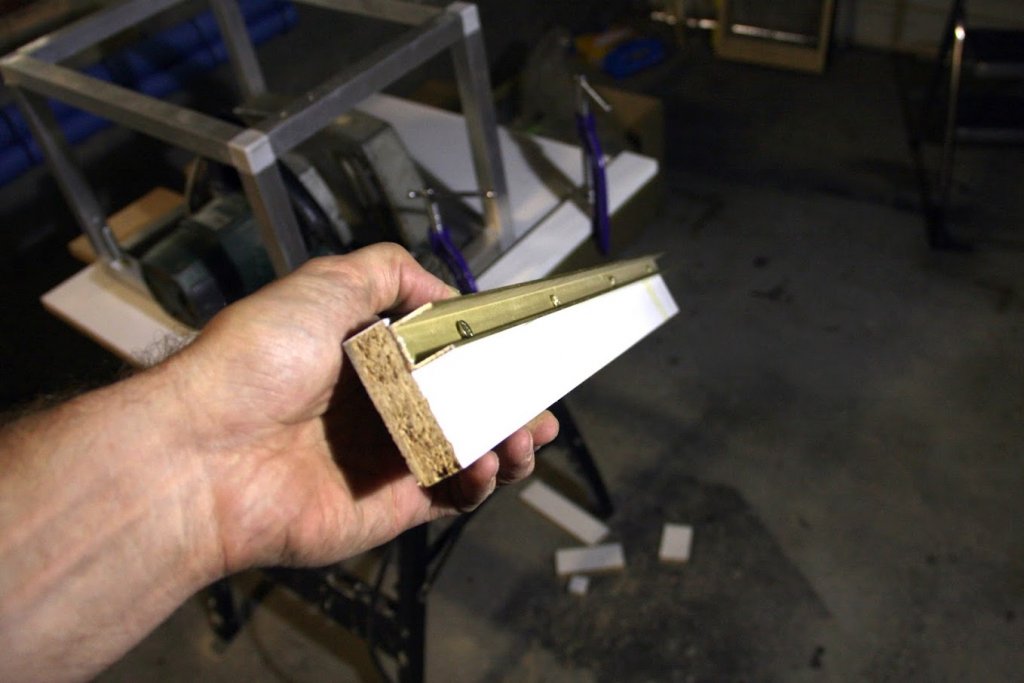
This weekend I got a whole new level of respect for what you all do!I started building on my model and as you can see from the pictures below, it did not go entirely as well as planned. It took me approx. 90 minutes to make 1 piece. I got as far as 2 pieces.The shape of the 2 sections of the keel I made came out fairly well, but as soon as I attempted the scarphs/joins I quickly knew I was in deep trouble.

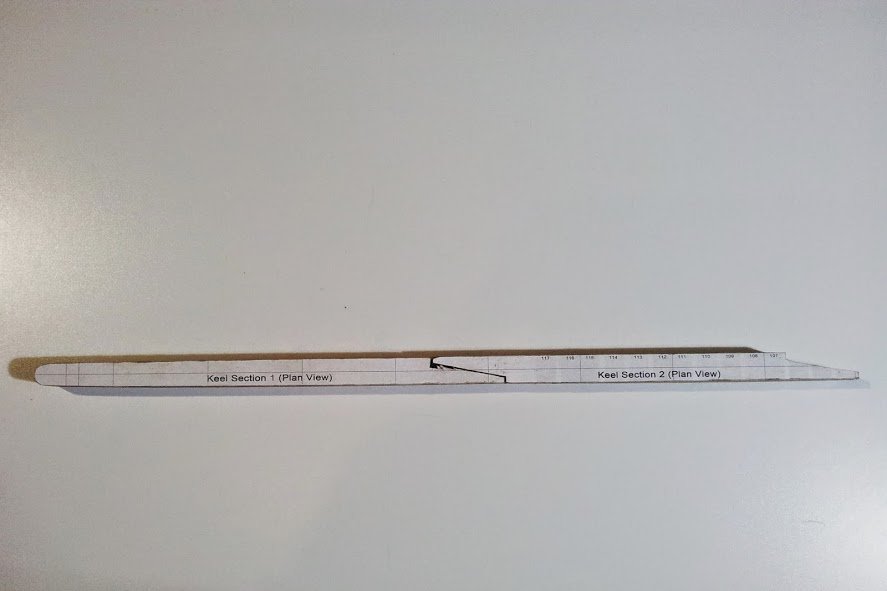 I started with the piece of the barrel wood.
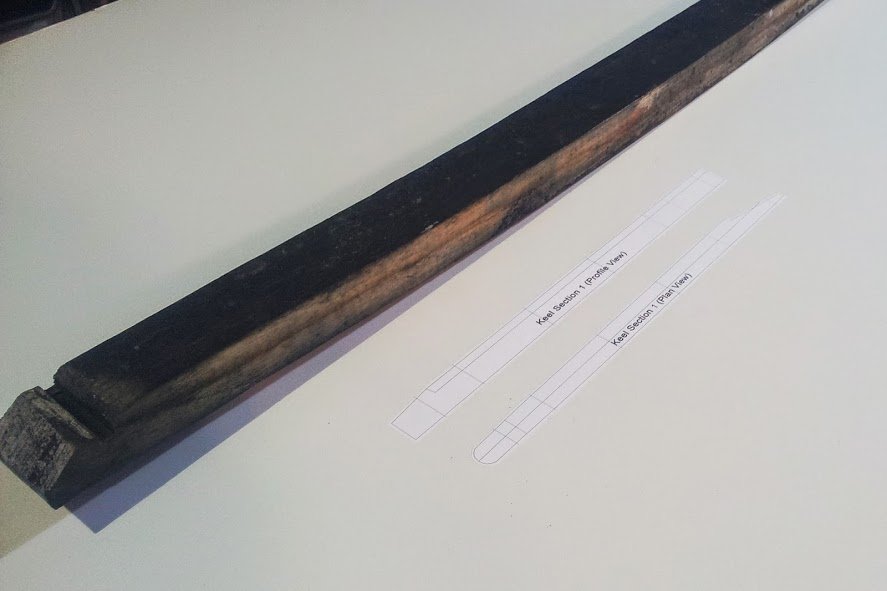 The lay the cut-out over it to get a rough idea if the sizes to cut it down to.
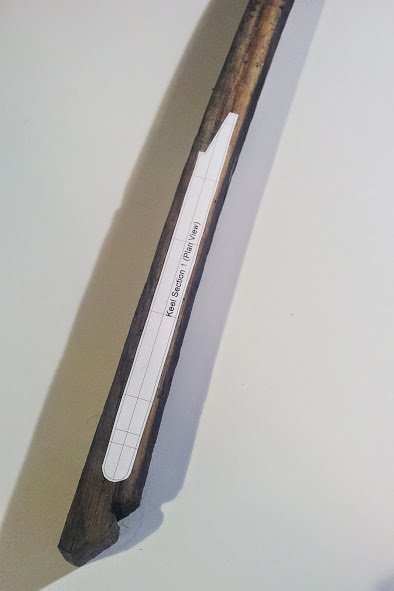 And cut it....
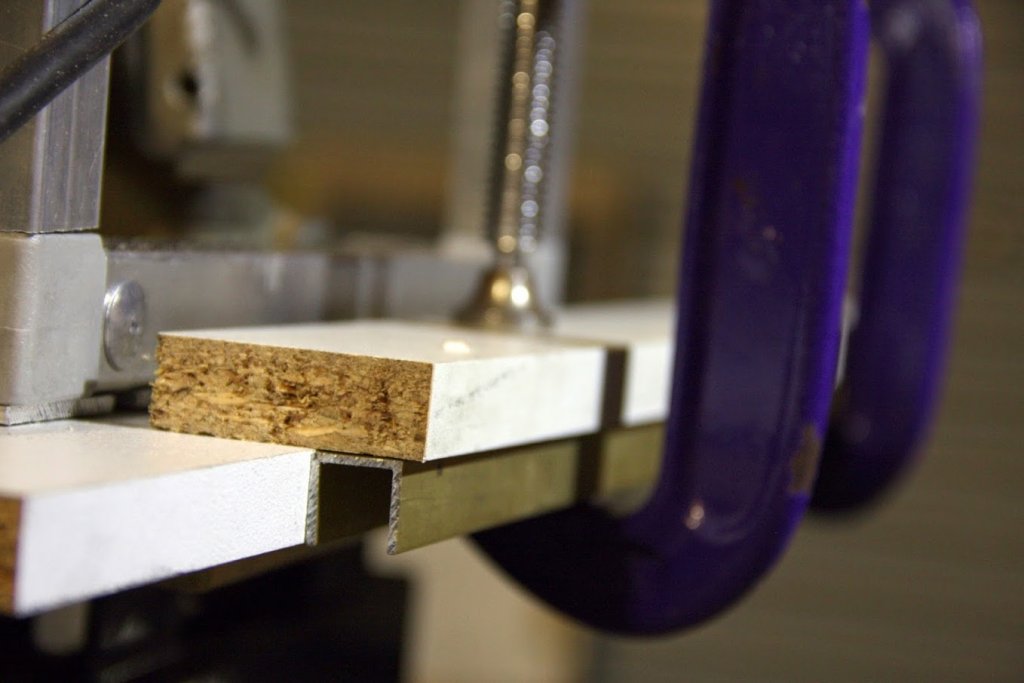
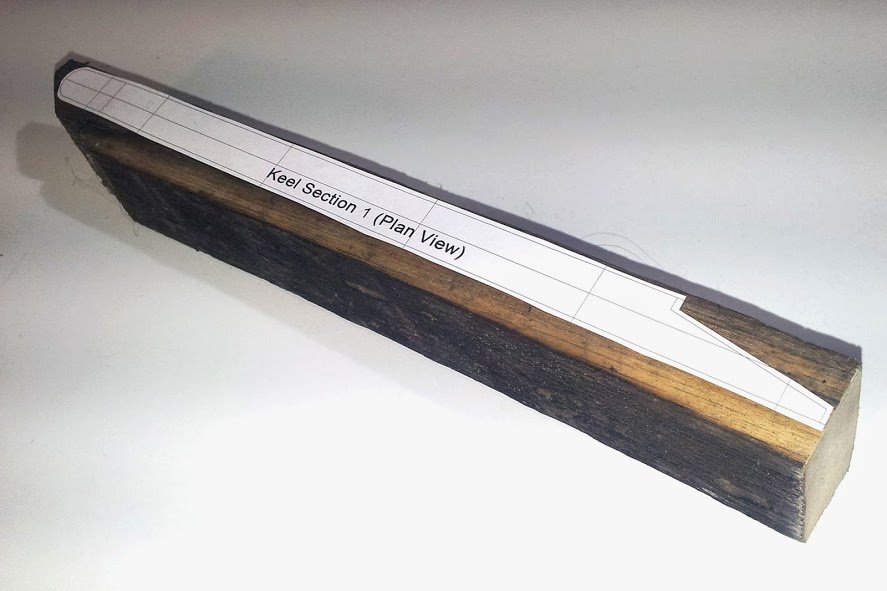 I then realized that I need something more accurate and effective than a jig saw to get this piece down to size.I had no choice but to abuse the scroll saw and belt sander.And eventually got it to shape you see in the first 2 pics.Alas! I will re-start again the entire thing soon, but I did learn the following:1. I cannot dream of doing this project without a table saw.2. I thought I'd be able to cut the wine barrel planks close to size with a jig saw, then plane them down to size with the belt sander and cut the scarphs with the scroll saw... was I wrong!I will be saving for a table saw first as I need a way to cut the wood to the correct sizes. I wish I could afford a proper planer. (Any alternative tips very welcome). I guess I didn't do too badly to get the wood to size, but I spent way too much time on the belt sander. A table saw will get me much closer and be a lot more accurate.As for the vertical joins in the keel, I will be using the Dremel tool on it's stand (workstation) with the router bit and a new angle table I built. A few tests I did worked okay, but it will still take rather long.I guess I'll be back as soon as I have my tools situation sorted out.And so the learning begins...
-
Monello,
I assume you know of all the plans available at NMM, many of which can be found on their web site. Details abound! http://collections.rmg.co.uk/collections/objects/79916.html is but one example from 1765.
Now, start making some saw dust!
Allan
Hi Allan
Thanks I've seen those plans yes, very pricey. I think I'm sorted for a while with my McKay plans.
I did make some saw dust this weekend. I'll post some pics.
-
Monello,
One does not have to start small, nor with a kit. I believe you can do it. About 1976-1982 I built Victory and actually sold it, then built it again. Both were scratch and my first completed models so I know you can do it. (They were NOT as big your model will be)
I look forward to following your build log.
Allan
Hi Allan
That is good to hear. I will most likely take longer than 8 years, but who's timing us anyway.
Many people have commented on the size of the (yet non-existent) model, and I feel like a bit of a "cheat" as I specifically decided on a larger size hoping it would be EASIER to create all the detail when building from scratch and in my completely inexperienced mind that "cheat" still makes sense, however there is also another reason for this specific size... and it is actually a bit of a funny story.
After some research on the ideal model ship I'd like to build, I picked the Victory. (The reasons why Victory, are another topic all together.) So, as many of you, I bought the book "100 Gunship Victory" (this is more than 10 years ago now). At the time I had no access to computers and scanners etc, just a photocopier, which happened to have had the functionality to enlarge drawings 250%. Immediately a light went on in this chronically-over-ambitious mind of mine.
The plan was simple: (1) copy all the drawings in the book and enlarge them 250%, (2) rinse and repeat.... and that got me from the original 1:192 scale in the book to 1:38, which felt like a decent size at the time. The only other problem was this copier could only print A4 size so I had to cut and glue countless sheets of paper, not to mention keeping all the sheets in order and I quickly realized I needed a better plan LOL
The point is that since then, in my blissful ignorance, I had my heart set on a 1:38 size model. Of course, lots of research later I realized its a tad larger than the average modeler's project, but what the heck, I'm going to stick to this plan... its too late to change my mind now anyway as I've done way too much planning and scaling on this size.
-
Hi Monello,
I see that you are starting seriously to work on this project. It has been a while since you were looking for the plans....
I am glad you didn't give up.
Regards,
Alexandru
Hi Alexandru
Yes your build (not to take away anything from all the other fantastic build logs on this site) was the one that originally truly inspired me. In fact I was Googl'ing something to the likes of "HMS Victory models ships" and found your log which lead me to this Model Ship World.
I will be copying your work in many ways and really hope you don't mind. My tools are a few levels more amateur than yours, but lets see were this takes me.
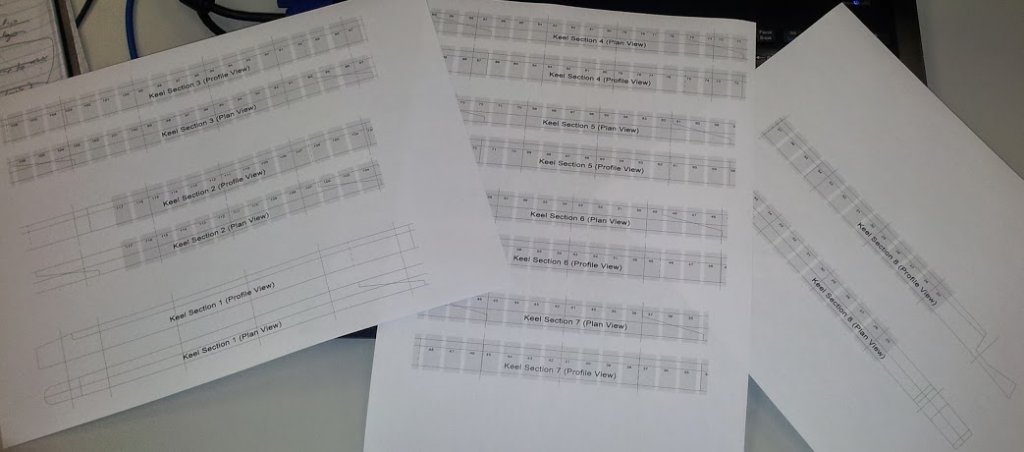
Yes. its been quite some time since I asked you about the plans. I bought the plans at a smaller scale than I'm building, so I've spent most of my time since we last spoke to scale and trace them.
Thank you for checking in.
-
Take your time with your bulid.
We are all here to help if required.
Thank you mij, So far this members here have been extremely supportive, its truly motivating me to at least keep the posts coming even if I'm yet to lay the keel. That will happen soon... promise

-
Are you planing to fit out the interior from keel up deck by deck, cutaways ?
I'm not sure what you mean by cutaways :/, but I think I get the gist of your question. Yes I will be building her up deck by deck. Fitting at much detail as I can (time will tell what that last few words really mean haha)
I recently purchased 160 LEDs that flicker like candles so will even attempt to rig up lanterns that each flicker independently as if it has a candle in it.
-
-
What type of construction are you going to use. IE bulkhead. Solid. Frammed. .?
And what timber are you planning to use in your build.
And do you have a forklift truck for moving LOL.
Hi Anthony
I'm going for the whole bang shoot ... Framed. Pretty much using Alexandru's model as my inspiration (http://modelshipworld.com/index.php?/topic/570-hms-victory-by-alexandru-scale-148-plank-on-frames/) and also Remco's model (http://modelshipworld.com/index.php?/topic/18-hms-kingfisher-by-remco-1770-english-14-gun-sloop-pof-148/)
As for the wood. I will be using the Oak from nicely weathered Jack Daniel Whisky barrels. I'll add a few pics below.
And a forklift... well Lets talk again in approximately 20 years when I'm done LOL
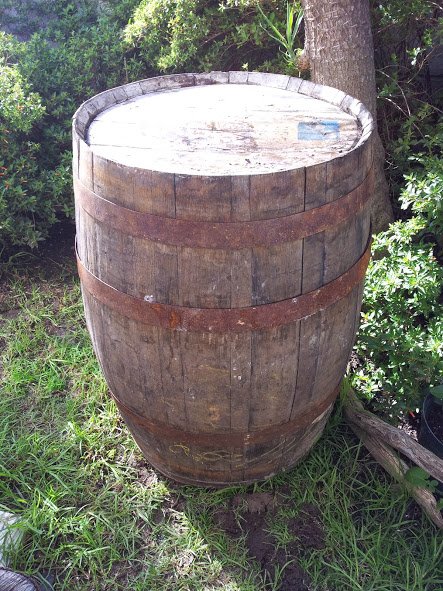
I bought 3 of these so should have enough timber for the all the framing.
When it comes to the planking I visit a company called Rare Woods who sell off-cuts in a bargain bin. I'll have to still figure out how I will be milling the planks to size, but that is still in the distant future. (advice is still welcome in the meantime)
- AntonyUK, qwerty2008, Elmer Cornish and 4 others
-
 7
7
-
Besides the book by McKay, you will probably find the 'Anatomy of Nelson's Ships', by C Nepean Longridge, most useful. Despite the title, it is about his (rather smaller scale) model of the Victory that he built and now in the Science Museum in London, but not (unfortunately) on display. You'll find a clip or two of it on Utube. Although originally written in the the 1950's, it contains line drawings and photographs – and is still considered almost as the 'bible' on the Victory.
I agree on the 'Anatomy of Nelson's Ships book. I own a copy of that. I would love to get my hands on a copy of the 'HMS Victory – Her Construction, Career and Restoration' it has been recommended before. Just very pricey. Will keep looking to to see if I can find a good quality copy and an affordable price.
-
It is a complex model for a first build, I admire your pluck, and trust you have the energy to work through until completion, I will follow along.
Michael
All I can say is that I am confident that I will see it through. The rest is up to "Time" to prove

I've started and re-started so many times over the last 10 years... each time learning more and more. The most learning was done since I discovered this site and started asking questions here. I believe I am now ready to start on the model that will be the real (Final) thing. I'm just going to have to learn as I go from here on forward.
Also since I took the plunge and bought a decent set of plans, I pretty much threw away all my previous work (scaling and tracing on Photoshop) and re-started from scratch...again inspired by the work of the members of this forum.
The one thing that really keeps me going is to prove the owner of the Model Shipyard in Mosselbay wrong. (They build huge model ships for movies etc. so he really knows what he's talking about) he said I would never finish it... I felt a bit offended I have to admit, but it inspires me. It's been 2 years later and I'm still plucking away. Friends tend to laugh and joke (in a nice way!!) as I have no physical model to show for all I've done thus far, but that is because I'm under no illusion of the complexity that lies ahead. I believe my planning and prep-work will pay off.
-
I'm jealous of all your Dremel tools! Good luck! You've selected the hardest model there is to build. Take your time and ask a lot of questions. Like they say....How do you eat an elephant?......You start chewing on the toe!
Thank you. I hope the Dremel tools will do the thing. I have feeling I'll need more tools as I progress. I work within a budget here and so far these tools were the best I could do within it. Still drooling over some of those Proxxon tools I see some members use, but I decided to start with these and see how things go. The tools in the photo above was just the new tools, fortunately I have a few others.
Lets hope my elephant does not turn white!! haha
-
This is a really ambitious project! Looking forward to watching it come together - will you be able to get it out of the workshop when it's done?
hamilton
Yup is is ambitious, but will be taking my time. I should be able to get it out of the workshop yes. I fit my wife car in there everyday

-
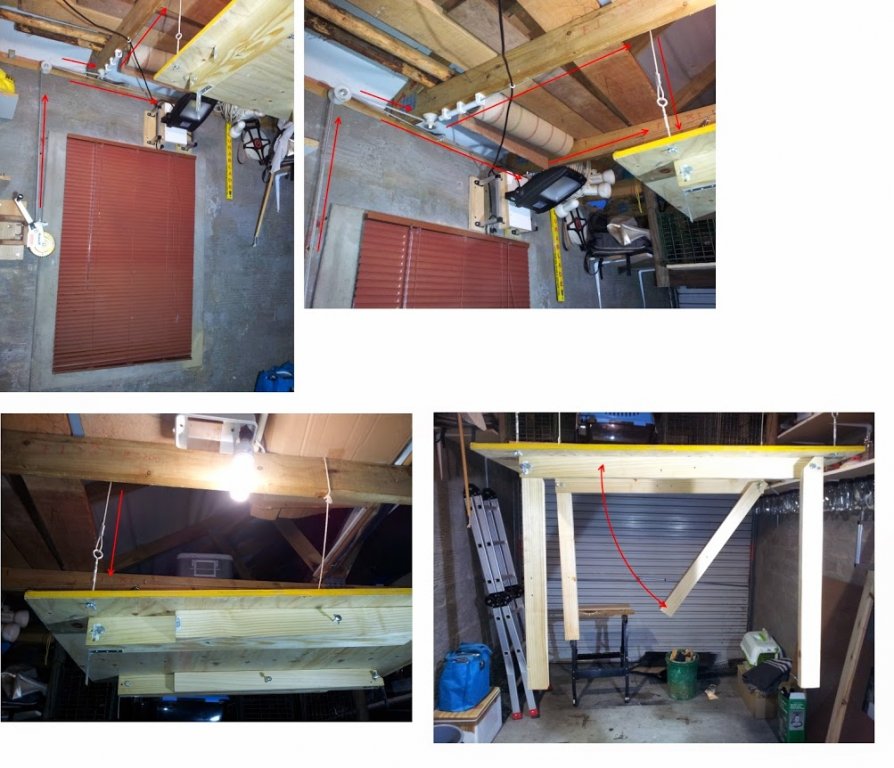
And here is the table I will be building the ship on.
It can be hoisted up to between the roof space. I need to do this as my space is limited and the ship will be large

- dcsw, Mike Y and Elmer Cornish
-
3
-
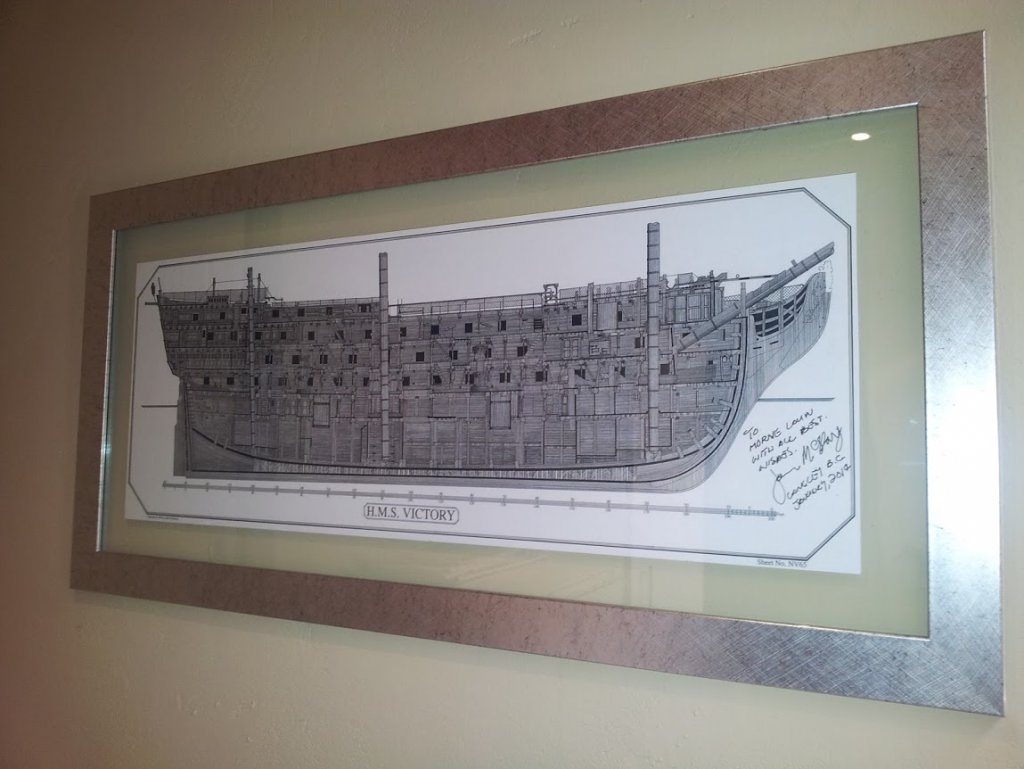
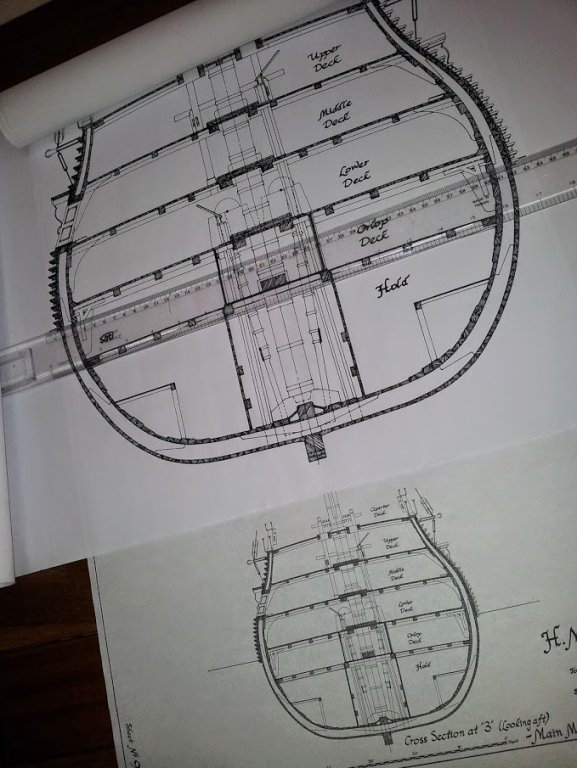
Oh and just for fun here is a signed copy of one of the drawings!
-
Another look at the scale of the model.
The image below shows the size of the drawings (1:96) I purchased from Mr. McKay, the top shows the scaled up version at the size I'll be building it (1:38).
-
I see now why it is so important to start the build log on this site...
Over the last month since I started my log I felt a bit of pressure to keep going, because all you kind people are now commenting and following to see my next move, but alas I have not started the actual model yet... that doesn't mean I have not been doing anything.
I did some tests with the tools I bought and soon broke the one and found that the other will just simply not do the job I was hoping it would.
Here are the tools I (initially) purchased:
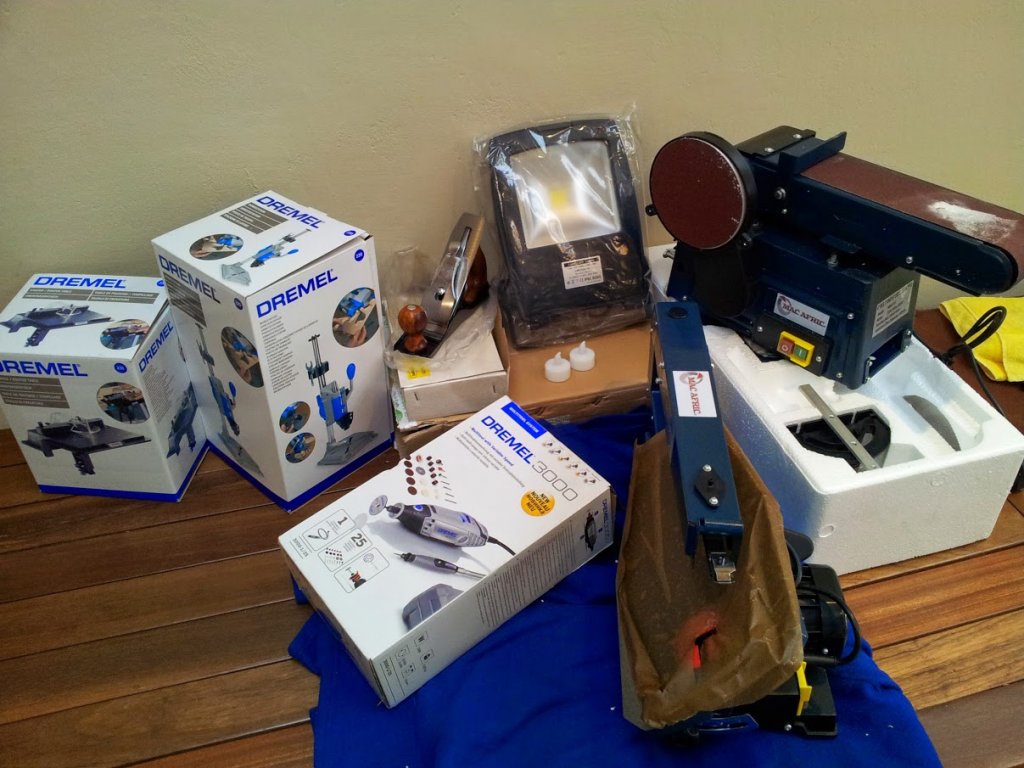
Now the Sanding machine you see there has a little platform/table attachment you use to rest the piece on that you are sanding, I guess I applied a tad too much downward pressure, as the hinges broke off within a minute
Many compliments and thanks to Andre at Adendorff tools (http://www.adendorff.co.za/) who replaced the machine, no questions asked.
The scroll saw was just a big disappointment. It just couldn't handle the thickness of the wood I was trying to cut, it was virtually impossible to make accurate cuts and the overall build quality of the machine is really sub-standard.
Again Andre at Adendorff tools felt my pain and refunded me in full... no questions asked. I replaced the scroll saw with the Dremel Moto-saw and it works like a dream.
Apart from playing with all my new tools, I also had to finish up my work-space and this took a surprising amount of time to do. You know how you sometimes have some plans in your head and when you build it you realize that you missed some things.... Well my modeling table, I mentioned in a previous post, was simply not solid enough. I had to reinforce the table-top and had to add legs to it that can fold in when raised to the roof beams. I was going to rest it on a smaller fold-able workbench, but in practice that was VERY unstable!. I'll post some pics to show my solution.
So this time I hope I am truly ready to get to the good stuff... building a model ship!
- Elmer Cornish and HIPEXEC
-
2
-
Build her a bit larger and you will have a place to go when things get stormy in the house.
Good Luck on the build. I must ask, what are you going to do with her when completed?

jud
Teehee. The best plan yet! Now... don't think that I haven't thought about it yet!

I will have to see when get there I guess. I will need a special place for it, right now I just need to get building first, prep is taking longer than I thought.
ROYAL CAROLINE 1749 by Doris - 1:40 - CARD
in - Build logs for subjects built 1501 - 1750
Posted
Congratulations on the new job.