HOLIDAY DONATION DRIVE - SUPPORT MSW - DO YOUR PART TO KEEP THIS GREAT FORUM GOING! (Only 13 donations so far - C'mon guys!)
×


dashi
-
Posts
248 -
Joined
-
Last visited
Content Type
Profiles
Forums
Gallery
Events
Everything posted by dashi
-
 No word from Jotika yet Slog, but haha yeah imagine that thing taking off over the deck after firing. Who needs enemys when you have a gun like this lol :-).
 -
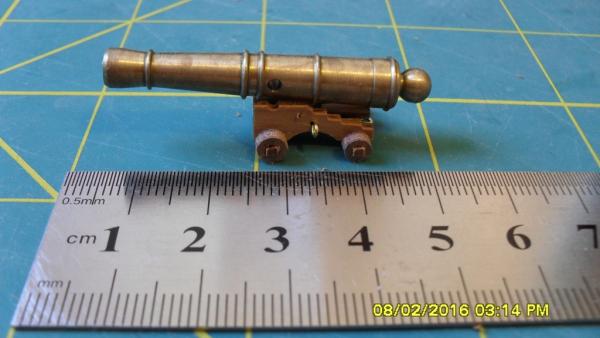
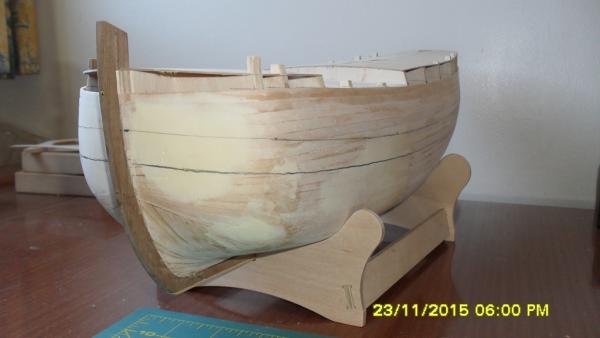
Second layer of hull almost finished, photo's to follow in a few days all going well. Meanwhile the height of the gunwale capping sits at deck level according to the bulkhead tabs which looks too low. I made up a gun carriage with bashed eyebolts and allowed for the gunwale to be approx 3 to 4 mm above deck level giving room for the breach robe eyebolt. Looking at photo's of the replica the gun tackle sits under the breach robe so is mostly out of view so I might settle with just a breach robe at this stage. While I was about it I thought I'd place one of the overscaled guns they supplied in the kit on its carriage.
-
Impressive work.
-
Chris she's looking good. Here's a link to some photos of the replica build if you haven't already found them. I used the one of the bow below the wale as a guide. http://www.seacoastnh.com/endeavour/
-
Cheers Chris. Here's a link to the replica build with a photo of the bow planking under the wale that I used as a guide. http://www.seacoastnh.com/endeavour/
-
Thanks Slog. Yeah I think that's what I'll do and sure my old subconscious will figure out how to construct and form it. Looking at the replica it appears the 'anchor lining', actually runs from the bulwark capping down to the rubbing strakes, but it is hard to notice because it is painted blue above the sheer strake. The ATS book also has an 'anchor lining bolster' where it joins to the rubbing strakes, but theirs runs from the sheer strake down which matches the kit. Paul I contacted Cornwall Model Boats before xmas about the cannons and they also sent an email to Caldercraft. I've since followed up with a letter and re-registration form so will wait and see. But thanks for reminding me that it is what it is and hopefully will get sorted eventually. After some more thinking on this I realize the gun carages and guns are normally fitted and rigged prior to the masts and standing rigging while there is room with acess. Hmmmm, I still have a bit to do before then including the ships boats. If the guns haven't arrived by that stage, then I could prepare and semi rig the carriages with their eye bolts and drill the holes inside the bulwarks ready to take the train tackle and breeching eyebolts at a later stage if that makes sense and sounds plausible?
-
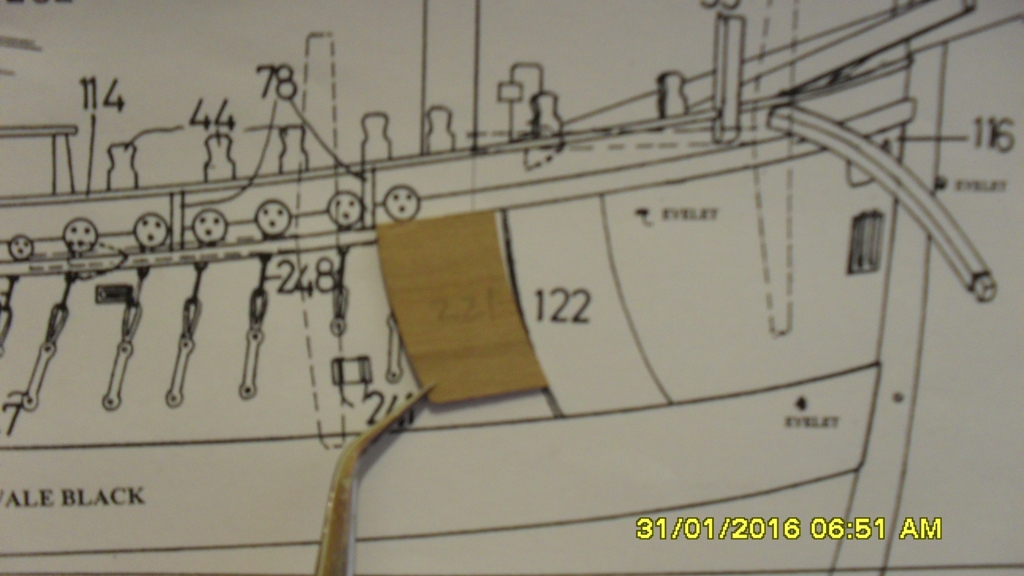
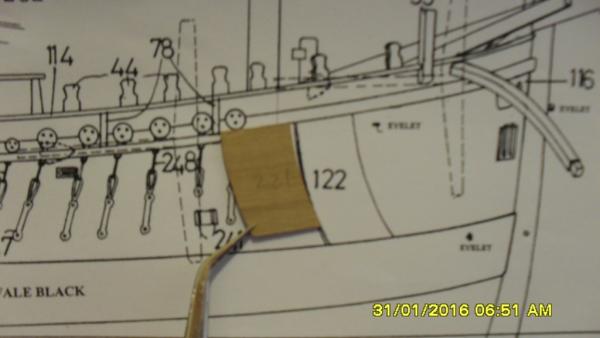
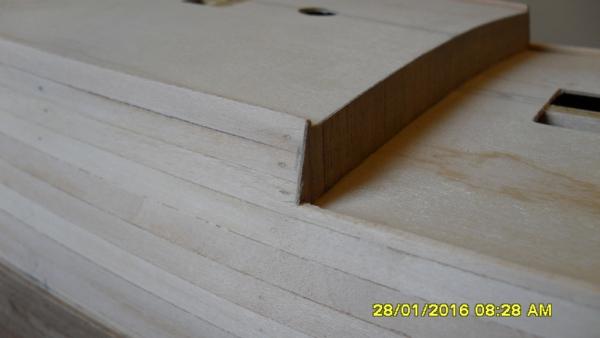
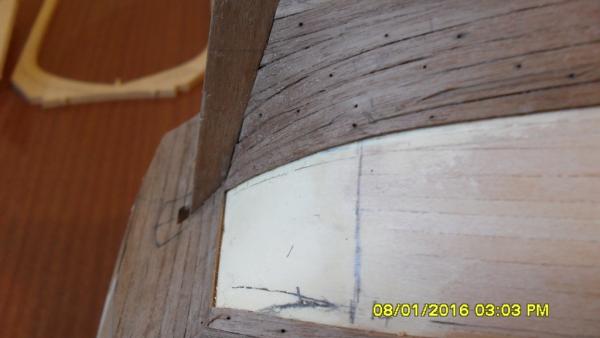
Ok looking ahead to the position of the anchor slide plate part 122. So looking at the plans and comparing to the part and oh no. Part 122 is 5 mm too short and 5 mm too wide. I quess I will just have to bash this part when I come to it using 1x4 mm walnut off cuts. While on the subject, 3 months and still no kit updates or replacement deck cannons. Not to mention I'm counting the full lengths of 1x4 mm walnut as several lengths were cross grained or with knots. It's going to be close. More thoughts after looking at the replica I see the lining is lighter timber so won't use walnut but instead cut them from either lighter timber or the plywood spree from the false deck.
-
Thanks Paul, I was wondering about that. But 24 hours later the first coat seems to have taken so applied a second coat of the metal black paint which gave an ok finish.
-
Thanks Paul for confirmation re those hatchs and hinges. Tried painting some hinges with the Admiralty paint. I wasn't too impressed with the initial result.
-
Cheers Paul. Heres some photos. I won't add the hatch covers to bulkhead 10 until after the deck is laid, then they won't be in the way of sanding. Also won't add the stern fascia until after the hull is planked but before I lay the deck. As for the counter hatch covers they will go on with the rest of the covers after the hull is finished as I think they will be in the way of sanding and possibly the first varnish coat.

-
Cheers Chris, Dave and Paul for taking the time to answer my question. Sorry my discription was a bit vague with out a photo, but If you look at plan sheet 2 you can make out a short piece of 2 mm thick vertical bulwark capping which runs between the quarter and mid deck bulwarks and which has an eyebolt into it for attaching a sheet block. The ATS book also shows it on the cover and in the drawings with a double sheet fairleed here instead of a block which I may also bash. Cheers
-
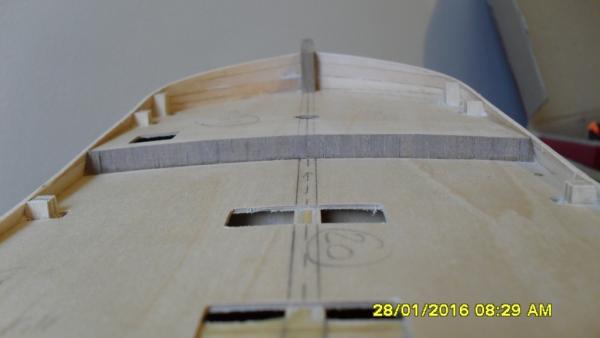
Looking a head I notice on sheet 2 there is a short piece of capping on the outer edge of bulkhead 10 between the quarter and mid decks, but I can't seem to locate any more references to these. Sheet 1 has the plan for covering the exposed bulkhead 10 and lime ends with 0.5 x 4 walnut but that's all. Does anyone have any other clues regarding this area? At this stage my solution will be to make these short cappings from some ply spree that the rails come from to keep it the same and paint them black. I'm still planking the hull and will post photos of my progress a little later. Cheers
-
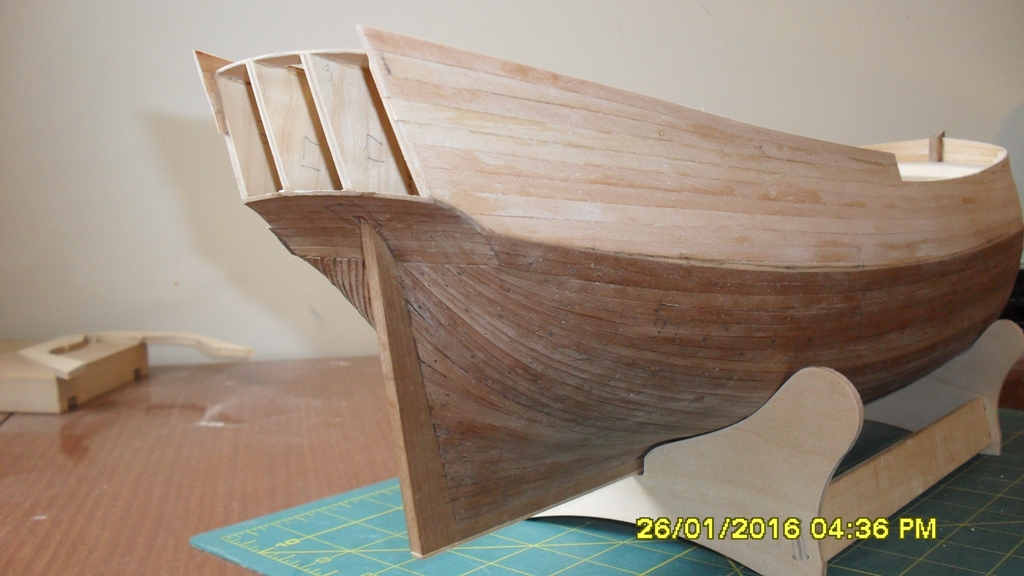
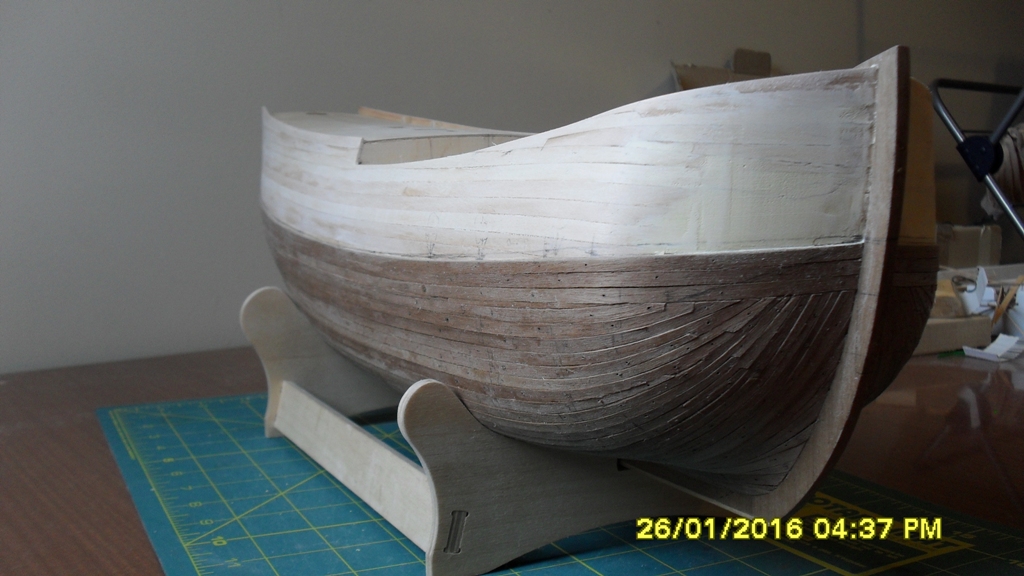
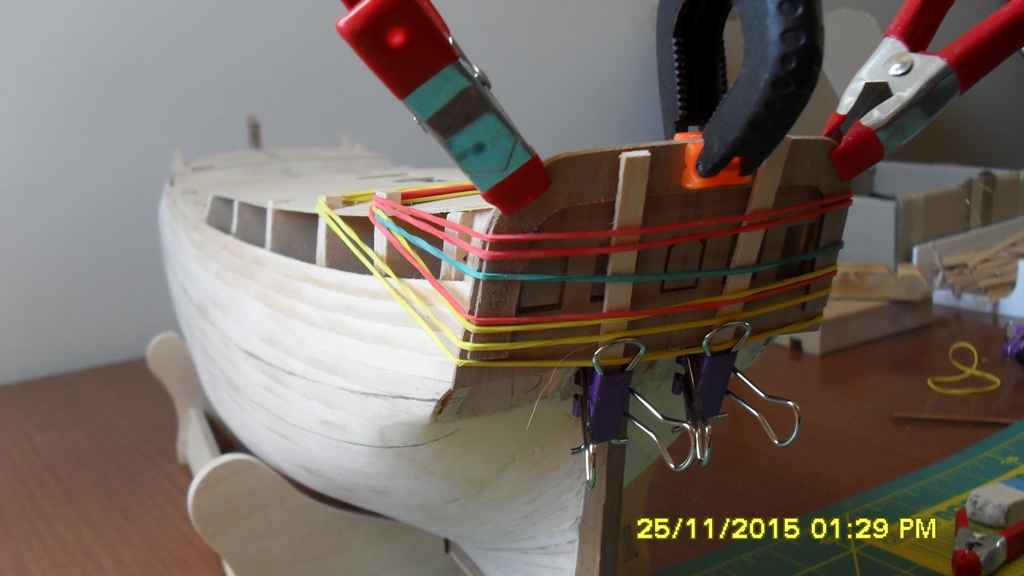
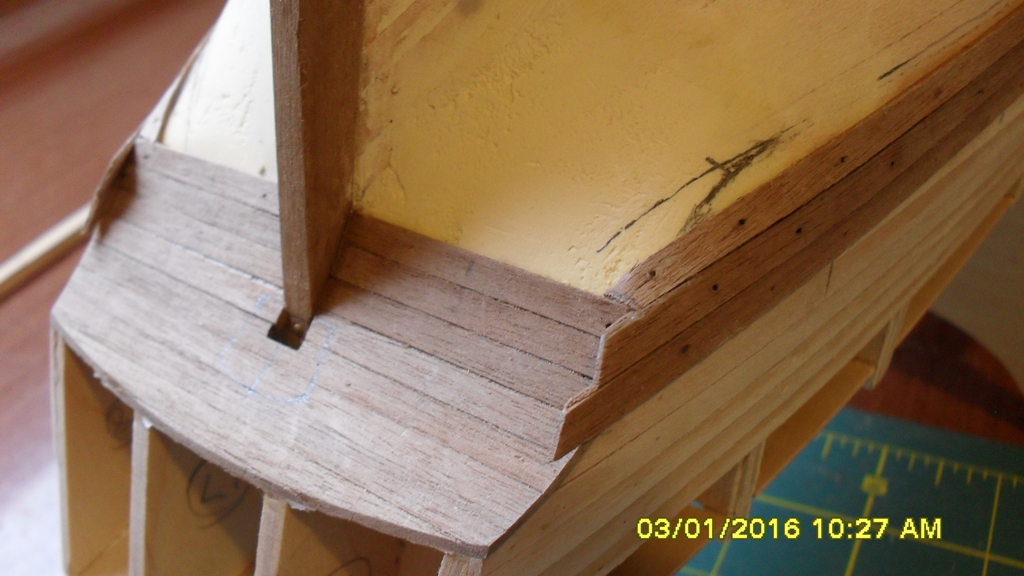
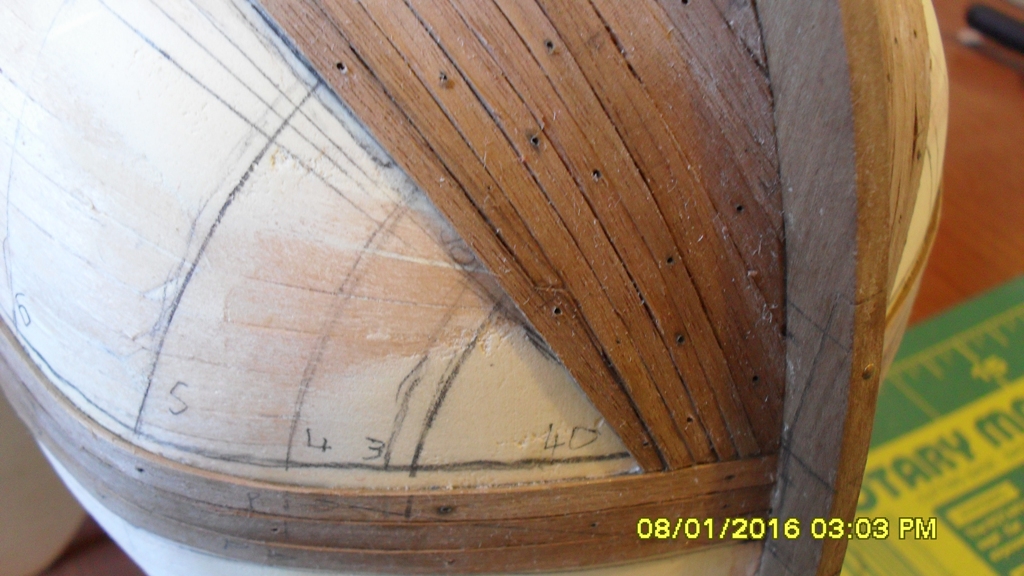
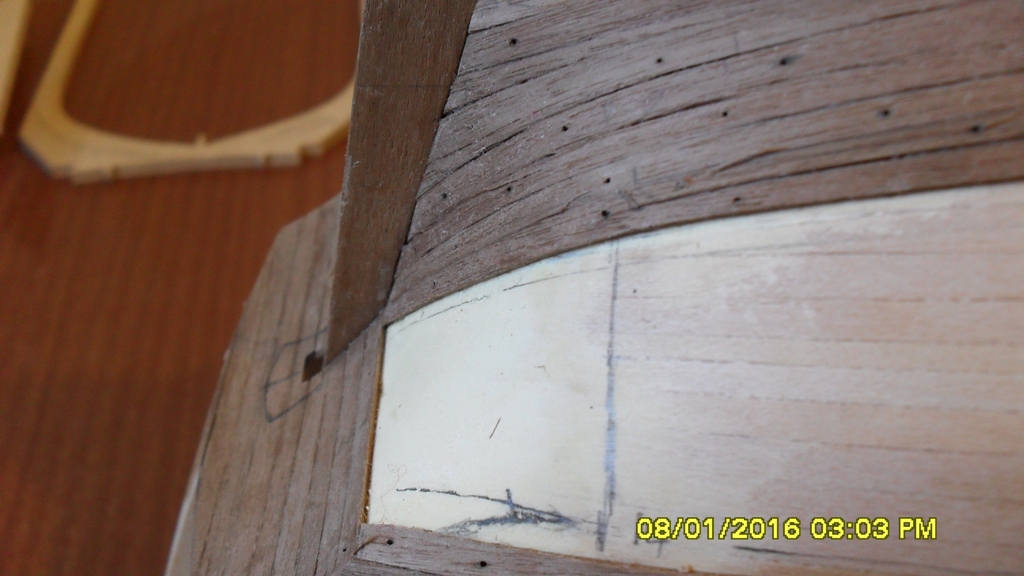
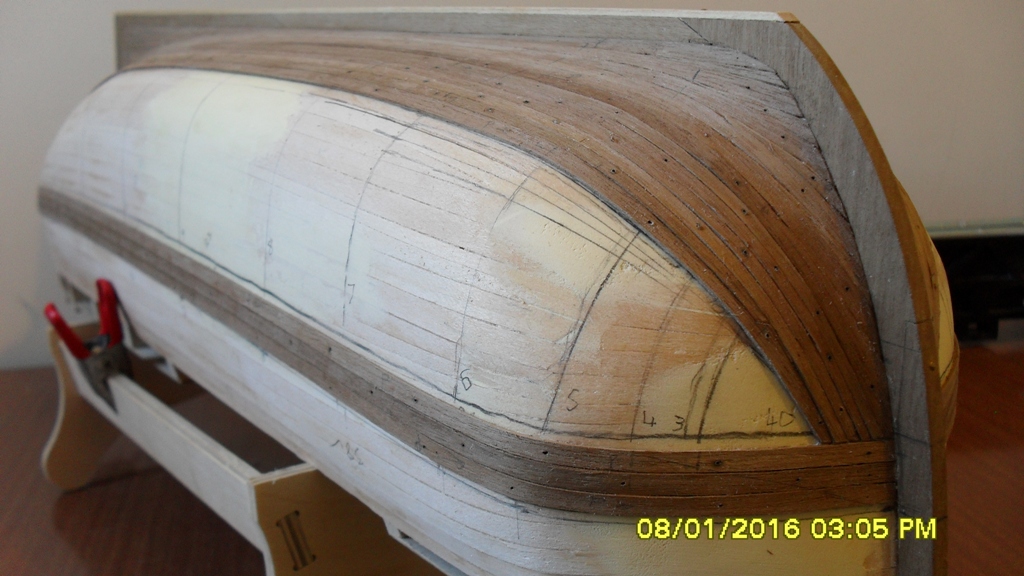
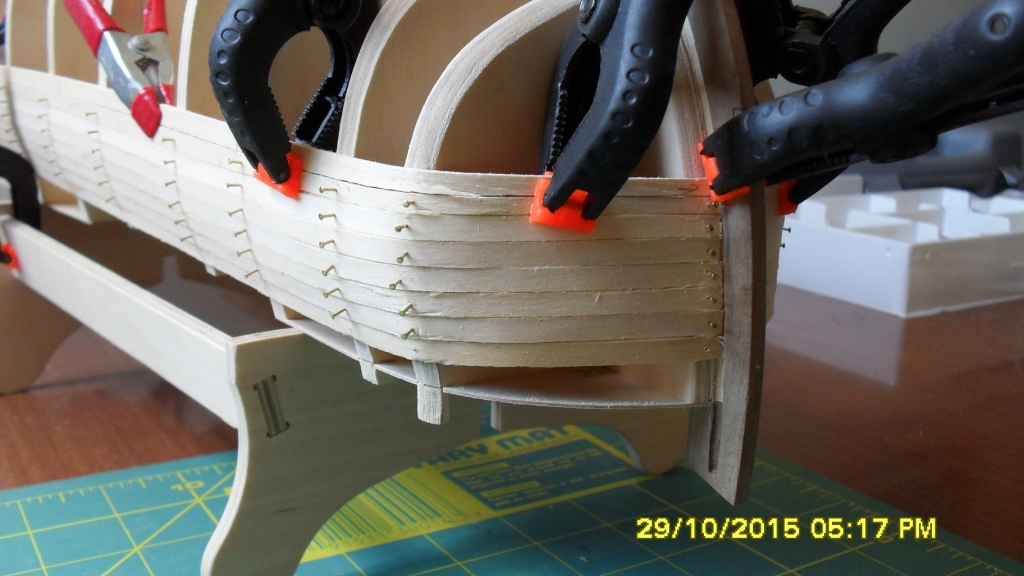
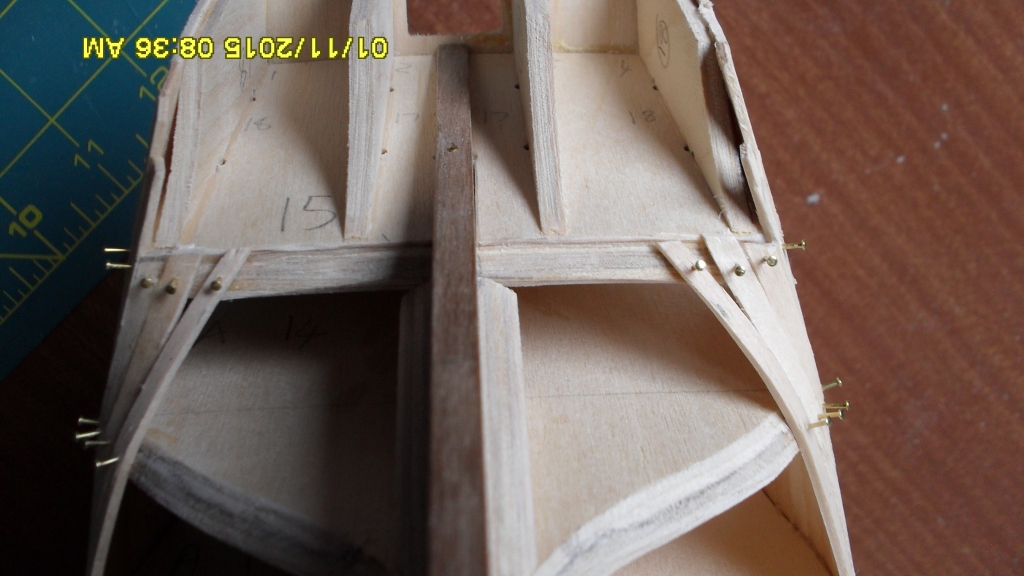
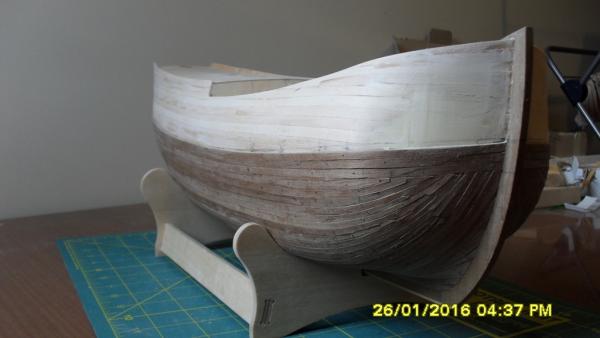
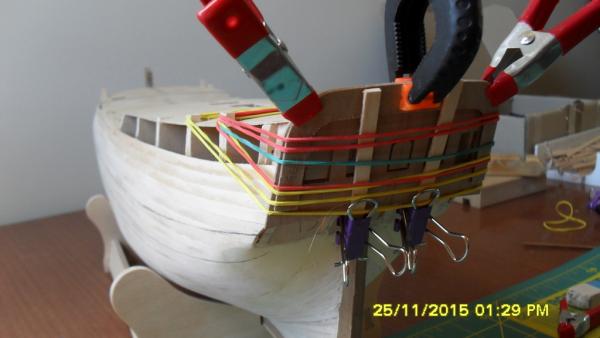
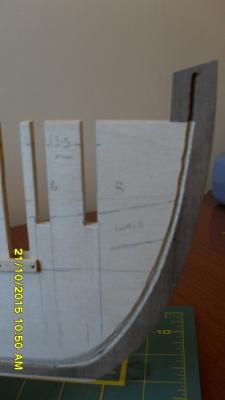
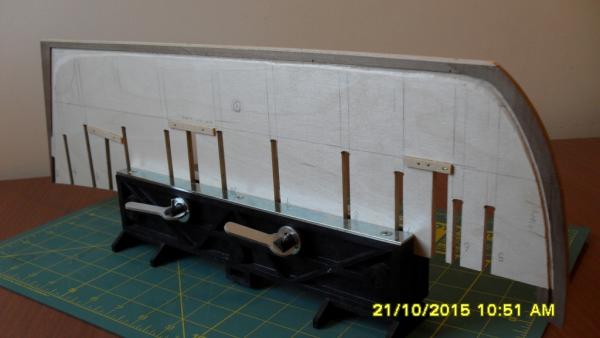
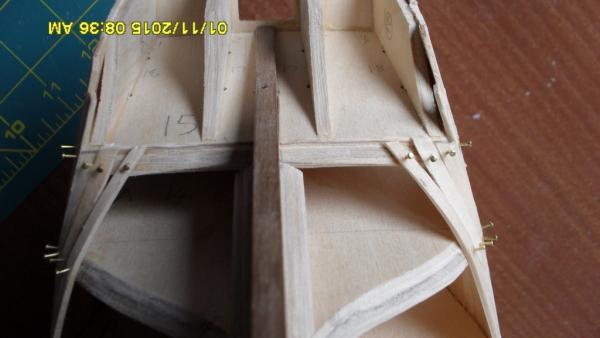
Ok thought I'd post a little update. Hull, 2nd Layer 4x1mm walnut, half way from the keel to the wale (rubbing strakes). Method - measure, cut and shape, soak 4 hrs min to overnight, gently bend by hand, lay on hull drilling and pinning at random uniform points representing spike holes, adding drop planks if needed, when dry (overnight) then glueing and pinning with builders white outdoor pva. Part way down I realized I needed to plank under the wale to provide a rabbet for the forward and aft hull strakes to wedge into. But to do this I needed to plank under the counter, and to do this I first needed to side track myself by shaping the stern facia by soaking them for 10 to 15 minutes (don't want the ply to blister) and then holding them in position using rubber bands to the tabs (good thing I haven't planked the bulwarks). I've now reached the curve where I need to reduce 2 strakes into half a strake fore and aft. I'm using the replica hull as a guide. First time I got wrong so put them to one side as they should fit better near the wale. So a serious rethink and close measuring my second attempt succeeded. Hopefully the photos will show it better.


-
Hi Harry, Looking good. Just found this so I know this is a bit late, but I've just started the Caldercraft Endeavour. I cut the bearding then fitted the keel then cut a rabbet prior to the fitting the bulkheads. I am now starting the second layer and having a rabbet with bearding has allowed for a nice fit and finish of the garboard thus far. Cheers dashicat
-
Cheers Paul, All the best to you and yours and everyone over the feastive season and for 2016. stay safe.
-
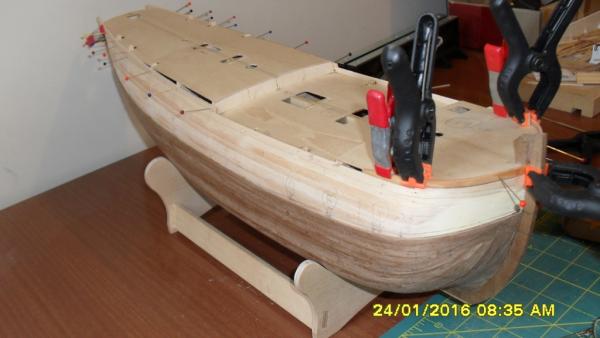
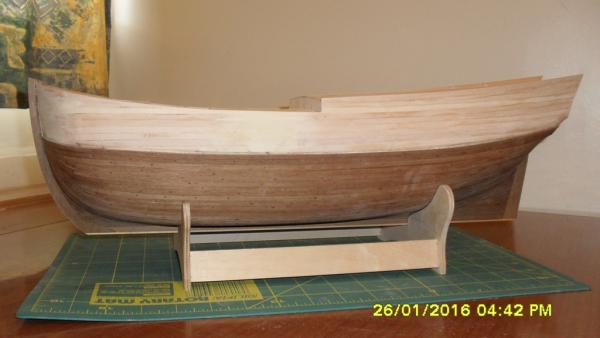
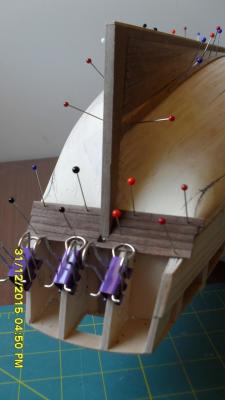
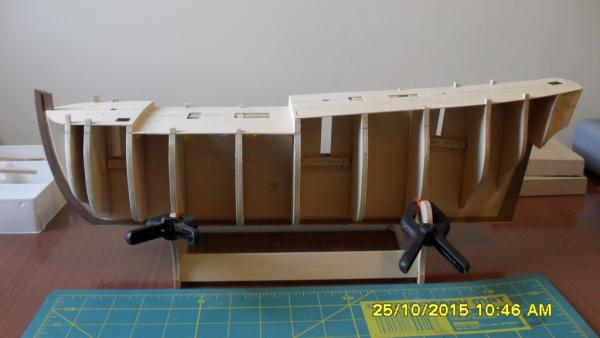
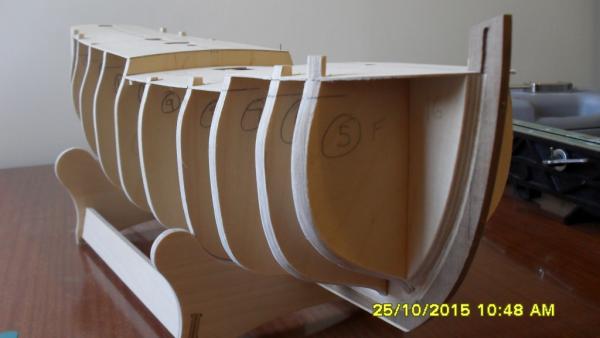
Update: First hull planking is finished to upper deck level and wale is marked from the drawings. You can see where I had to change my method of planking when I had serious spill problems. To do this I had to fit blocks into the bow for the strakes to follow and attach to. I think I've saved it and am happy with the results so far, but hopefully will know better if there is a next build. I plan to deviated slightly from the order of construction in the kit because I don't wish to risk damage to the bulwarks when planking the second layer below the wale with the hull upside down. So won't finish these until after I've planked the second layer below the wale starting at the keel to allow for the lay of the strakes. I'll plank the counter after the second layer of hull planking is laid across the underside of the aft bulkhead 15, then I'll flip the hull upright and complete the faces of bulkheads 7 and 10, then both layers of the bulwarks. Finally I'll trim the stern strakes and fit the stern facia etc, to get a clean finish. At least that's the plan for now.

-
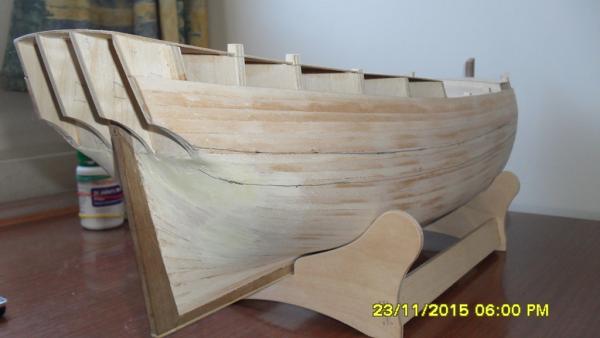
Cheers Paul, Yeah I noticed the mast measurements earlier, but thanks for the heads up, and the confirmation re those cannon. First layer of hull planking almost done, soaking then shaping then glueing. Takes a while but the end result is worth it. However it won't be winning any medals. I've hashed the tapering and lay trying to follow the plans. That bluff bow and stern are unforgiving, but I think I've saved it after adding some packing. Nothing that I can't fill and sand. I'll put up some photos of the first layer when it's complete. For the second layer I'll lay from the keel to the wale following the lay of the bulkheads like on the Fremantle replica from a photo I found when the first layer started to spill.
-
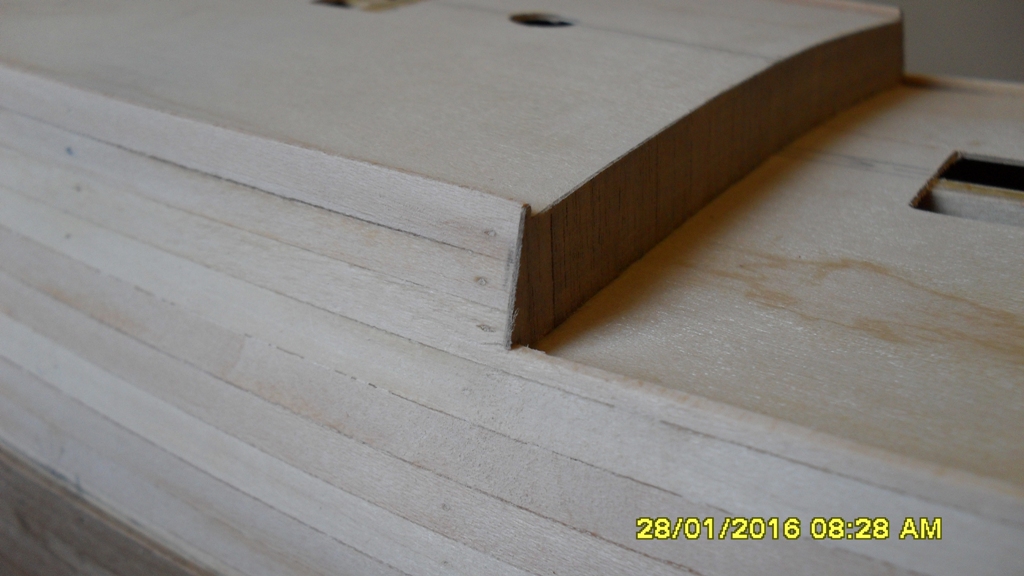
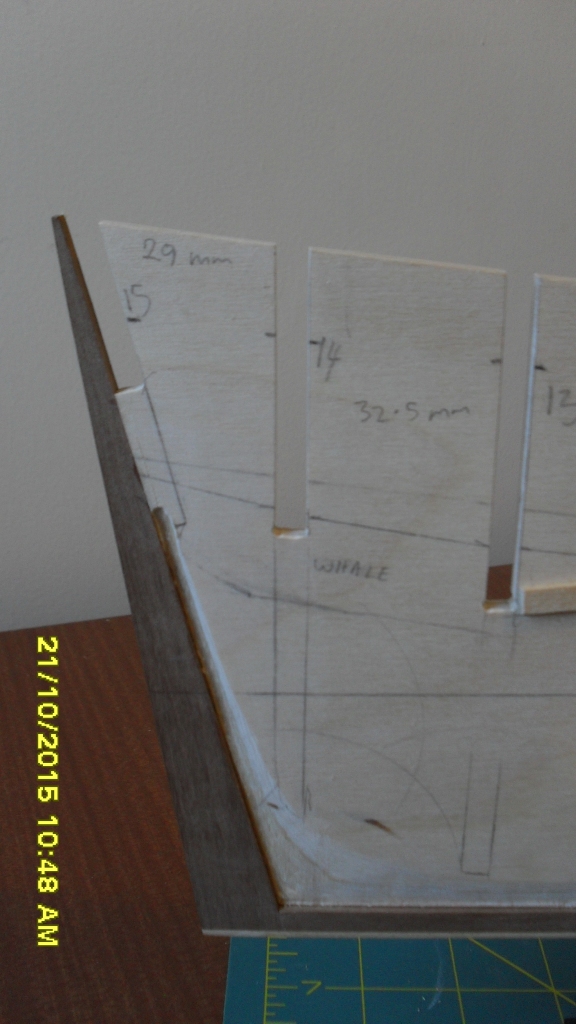
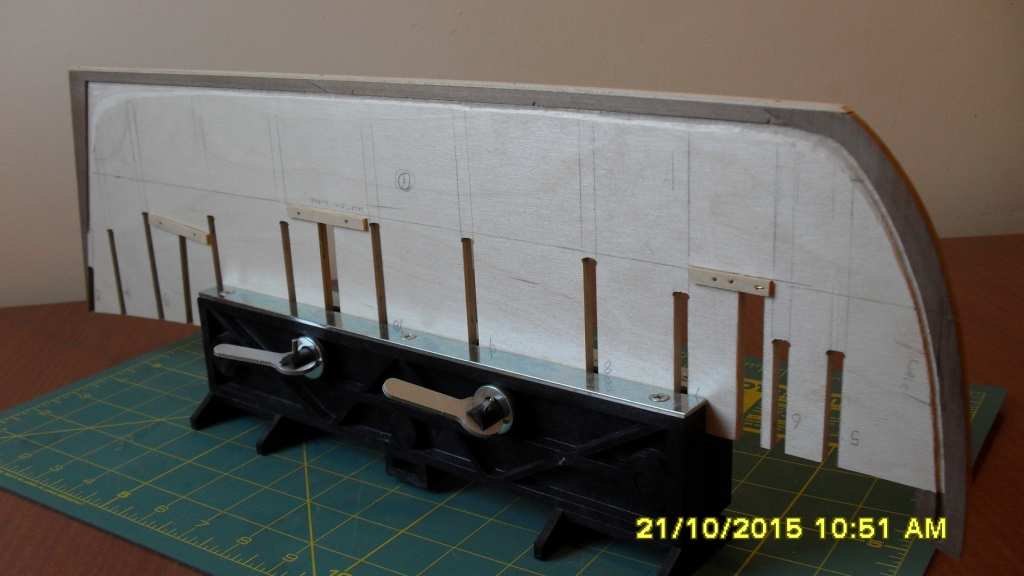
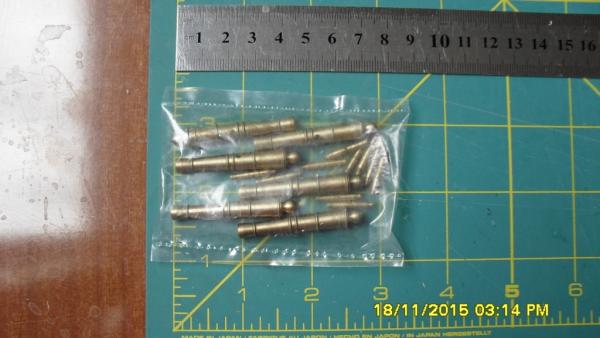
This is only my 5th build, first bluff hull. I was hoping to not create a build log but have run into some minor problems with the kit. I intend to keep this brief with mainly photo updates and limit comments if any. First problem with the kit are the six 4lb deck cannons. I think they should be 26 mm instead of the 45 mm supplied in the kit. I've contacted JoTika Ltd who posted the replacement cannons out 5 weeks ago, which have not yet arrived. So I'm following up with them regarding this. Also I ordered the Brown Admiralty paint set and the White set came instead, which I've decided to go with and use the replica paint scheme, even though Cornwall Model Boats kindly offered to re-send me the correct paint set. The next problem I had was with the bulkheads meeting flush with the ply at the keel. The keel is not deep enough for the rabbet (there is a conflict on the drawings as they seem to have forgotten to allow for the thickness of both layers of hull planks) so I had to cut the rabbet out of the false ply keel. Do do this I first had to trim around 2.5 mm from the underside of each bulkhead while maintaining the curve because the first planking is 1.5 mm plus the second planking is 1 mm. Then I marked and cut the bearding before glueing the stem, stern and keel on. Then I carefully dremeled a rabbet. Photos coming...


-
HM Bark Endeavour by UdoK - Caldercraft
dashi replied to UdoK's topic in - Kit build logs for subjects built from 1751 - 1800
Hi, I've had this kit in storage for a while and just starting it now. I read your post regarding the deck cannons being too big and after checking mine against the plans discovered that I had the same problem. According to the plan they should be 30mm not 45mm long. So thanks for the heads up and to the advise to contact JoTiKa which I've just done. Cheers and hope the build is coming along ok.