HOLIDAY DONATION DRIVE - SUPPORT MSW - DO YOUR PART TO KEEP THIS GREAT FORUM GOING! (Only 13 donations so far - C'mon guys!)
×


dashi
-
Posts
248 -
Joined
-
Last visited
Content Type
Profiles
Forums
Gallery
Events
Everything posted by dashi
-
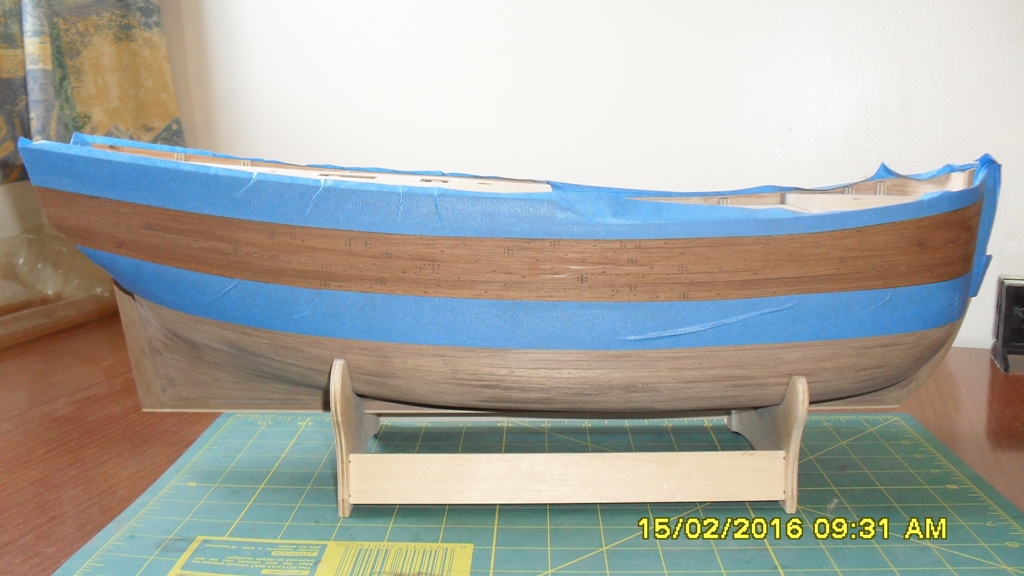
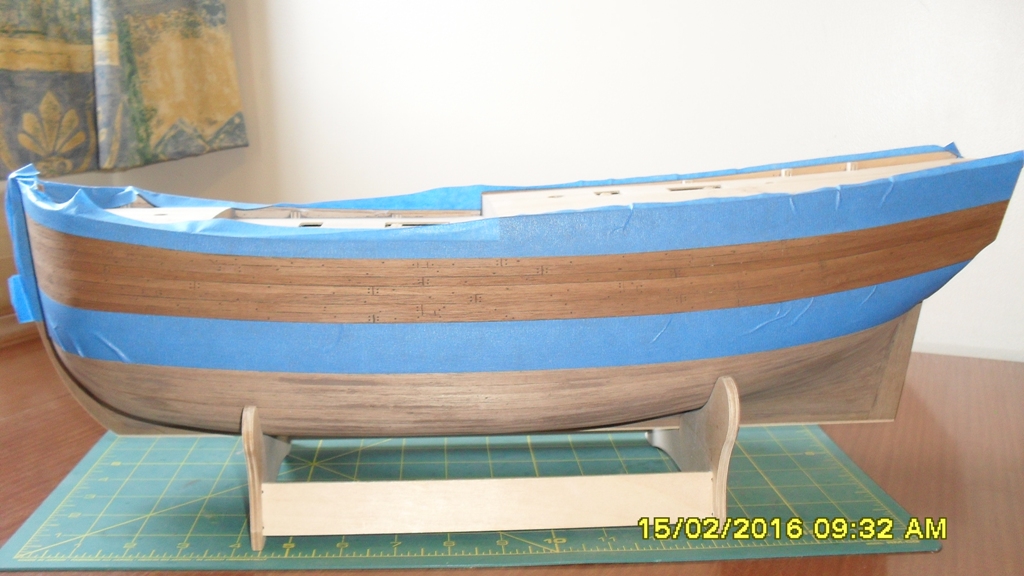
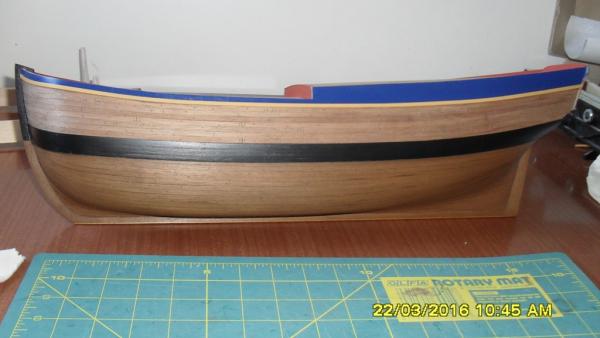
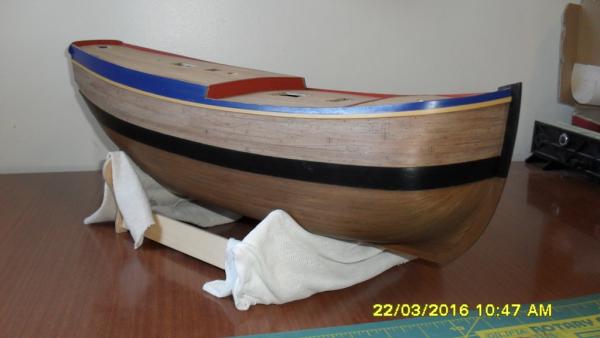
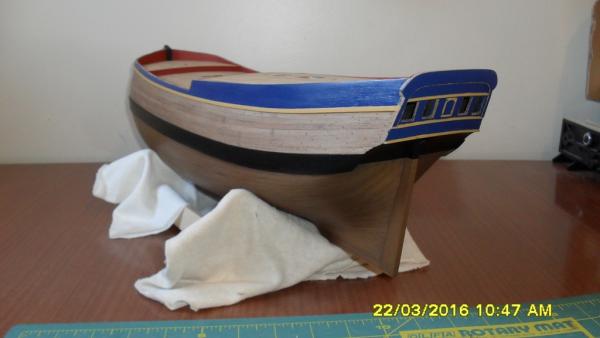
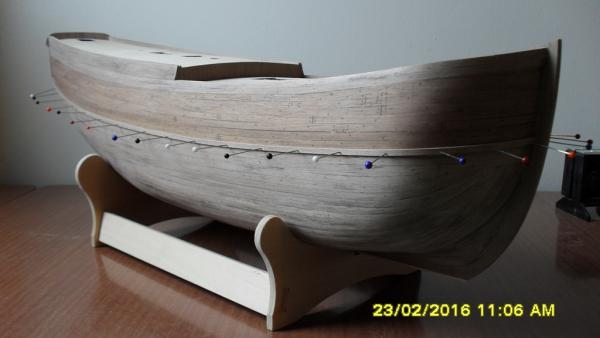
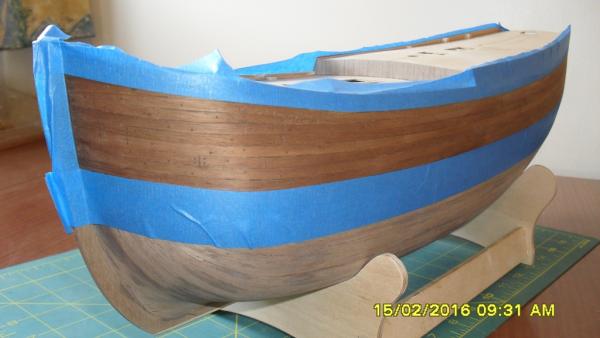
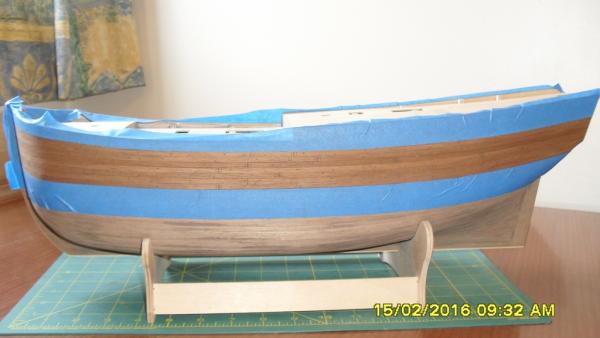
 Thanks for the comments. Painting and staining: initial coats are on and looks darker in real life. When the hull is dry I will touch up the wale and then apply the first coat of matt poly. I penciled in strake butts below the whale which appear subtle now the stain is on. I'm happy with the colour and effect of not losing the strakes under a solid coat of paint.
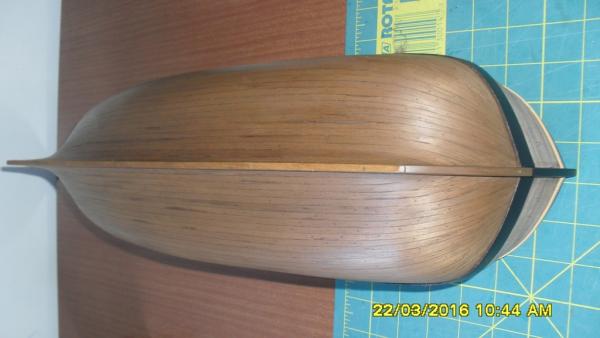
-
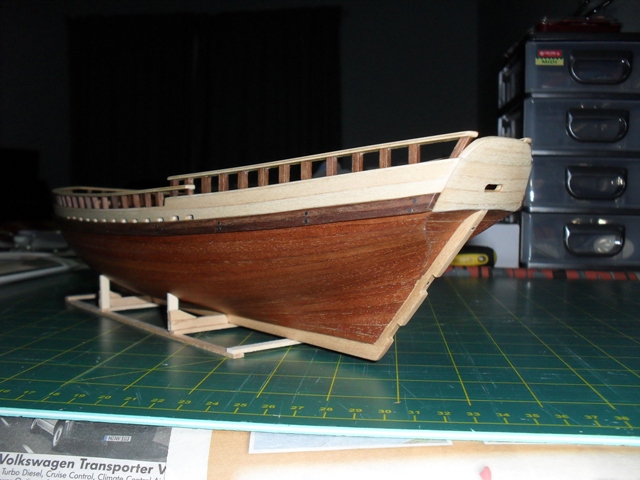
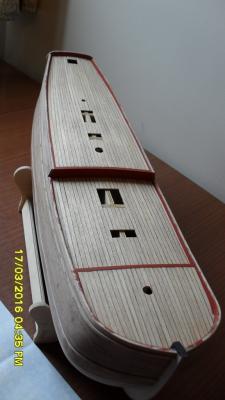
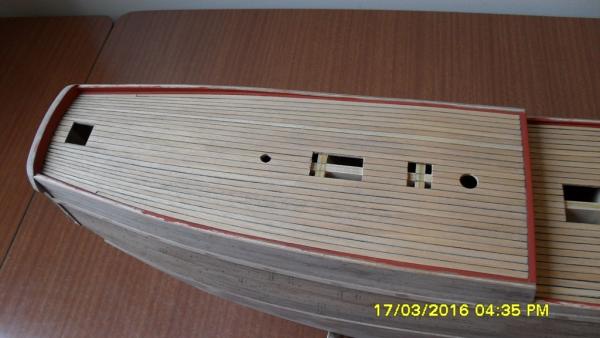
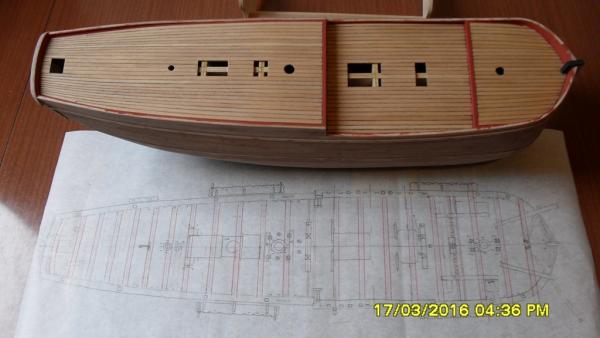
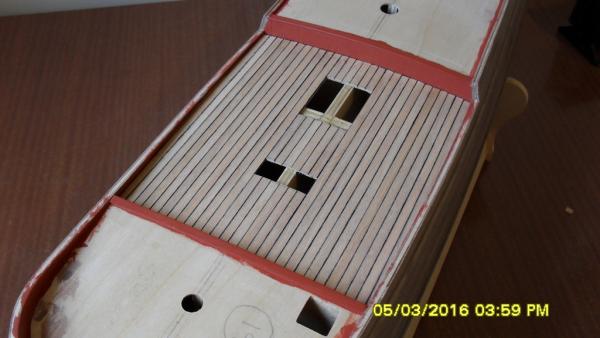
Stage one of decking complete: Laid, sanded and first varnish. Next decking stage is to mark the positions of deck furniture so I can work out the postion of butts and trennels. I have traced the layout ready to make a stencil and included the likely positions of the deck beams. Slight problem is I don't trust the scale or layout of the plans which do line up with mast holes but not quite with the other holes. So I'm thinking I might need to make up the deck furniture and dry fit to get more exact positions before marking the butts and trennels. For butts and trennels I'll be using artists fine tip pigmented pens which have a range of nib sizes from 0.3, 0.5 and 0.7mm. In the meantime I'm thinking I would like to get the hull painted to provide some protection from grease and glue etc. This would include making the rudder and bashing the helm port as part of the deck furniture which isn't included in the kit. I;ve also noticed another kit exclusion which is the aft fireplace flue which comes up under the bent metal tiller arm according to the AOTS. Painting the hull: I have been given a can of pigmented stain which I will darken with some walnut stain to try and produce my own 'brown stuff' for under the whale which was my original choice instead of the white I was going with because of the paints I was sent. When I'm up to it I plan on doing some tests of this before finally committing to doing it on the hull. Because I'm using matt poly as a final coat then this should from experience protect the hull from handling. Input is welcome regarding the order of things and making the 'brown stuff' which was a mixture of pitch and sulphur.
-
You have got her looking really nice Jack. I'm looking forward to watching the rest of this build. Cheers Dash
- 170 replies
-
- 1
-

-
- gokstad
- dusek ship kits
- (and 1 more)
-
Cheers Slog, Yeah I looked into to those monsters on the Cornwall Model Boats Ltd website and think they are Caldercraft 1:64 18 pounders. I'd imagine you would need one big solid ship to fire them from, or more likely the sort of thing you'd expect to see used in a shore or castle battery I quess?
-
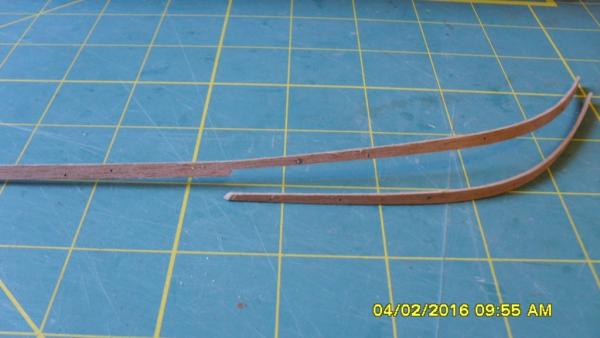
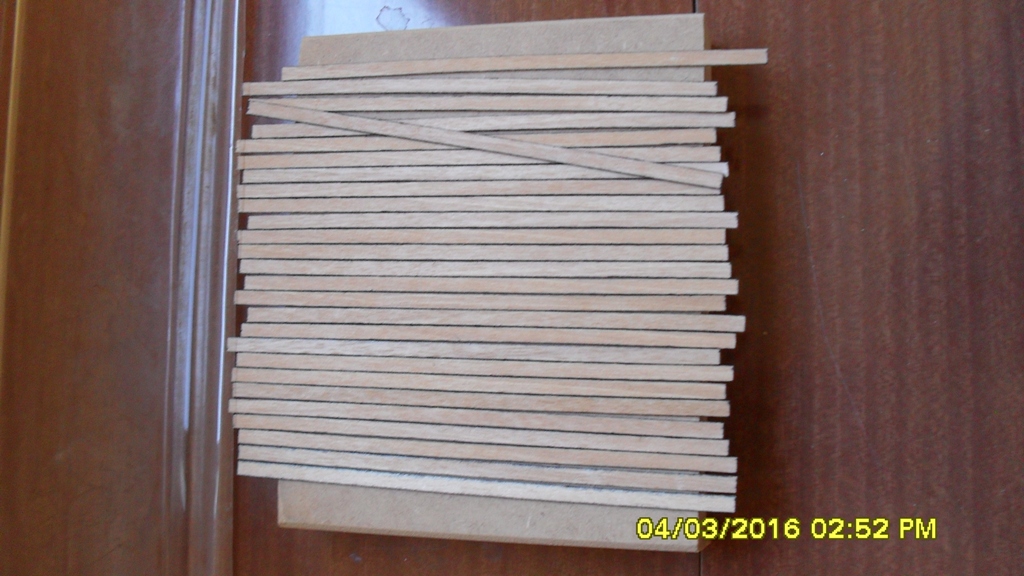
Update: The replacement cannons have arrived from Jotika so I quickly mocked one up on its carriage to see if it fits. And it does thanks Jotika. Forecastle deck is laid and sanded awaiting a coat of matt varnish along with the other decks when finished. Then I will mark the positions of butts and trennels. I wasn't happy with the finish of the mid deck so after some research on this site I found some very helpful info regarding historical methods of decking. From this and using the replica and AOTS book as a guide I have added a waterway and tapered the deck timbers. To do this first I had to remove the outer mid deck timbers and carefully cut a left over 1x4mm length of walnut down to two 1x2mm lengths to use for the waterway. Looking at the replica forecastle photos there is no nibbing and the waterway seems not to run around the bow but finishes somehow before it turns (can't find a photo with the angle to show it). So I've loosely followed this to my best interpretation.
-
Hi Dave, Just found your build log. I am impressed with your craftmanship and attention to detail. Keep up the good work Dash :-)
-
Update: Cheers Paul, they have a good website. Good to know thanks. Sanded and painted inside bulwarks using Admiralty Paints Red Ochre. Layed mid deck using a black permanent marker along both edges and ends to simulate pitch caulking. I used plain white pva glue to give me some time to position the planks. Once fitted I added and painted the cross pieces of decking. On the plan there is no indication of what to use here, so following the replica painting scheme I used 1x4 walnut so it could be painted. Next: lay the other decks, sand, matt varnish, mark the butts and trennels, second varnish over deck and inner bulwarks. I won't be drilling trennels. On another note re-those cannon. Email from Jotika Ltd. "Sorry for sending the wrong parts and the time it took to get them. Replacement parts have been sent by airmail." Thanks Jotika for this, and special thanks to the supplier Cornwall Model Boats for going into bat for me. So fingers crossed they will be arriving shortly, watch this space...

-
Do some tests until you find a finish you like. I ended using 1 coat of natural wood paint then the stain, then a couple of coats of matt varnish on my Oseburg. The paint sealed the exposed ply edges and provided a uniform surface for the stain. But what ever you do, test first to be sure its going to work.
- 6 replies
-
- 1
-
-
- Hull
- woos stain
- (and 2 more)
-
Cheers Paul. Yes I plan on rigging the breaching robe for the cannon, but might be able to fit that and the carriages without the cannon if they havn't arrived in time. A few months up my sleeve until then. Re: your blocks and rigging cord. Have you contacted Jotika about it? They havn't even bothered to reply to my follow up emails regarding the cannon. I will think twice before purchasing a Caldercraft kit again. I did a quick estimate and it seems I have the right amount of the 0.25 natural per the kit, but whether it is enough to do the job I don't know. The kit does seem to be a little tight on parts as a couple of extra lengths of 1x3 walnut wouldn't go a miss. It wouldn't be a big problem if I was still in Aussy, but here in NZ I couldn't even get slow ca gel from the hobbie shop and then if I could it would cost an arm and a leg. It reaches the point where it's not worth the risk if the kit manufacturer dosn't back up their product.
-
Wow she is looking good. When building the Amati viking ship I experimented with finishes that would seal the exposed ply edges, cover any glue and look like tar. What I ended up doing was applying a first coat of natural wood colour paint. Then when that had dried I applied the stain and then a couple of coats of matt varnish.
- 170 replies
-
- 2
-
-
- gokstad
- dusek ship kits
- (and 1 more)
-
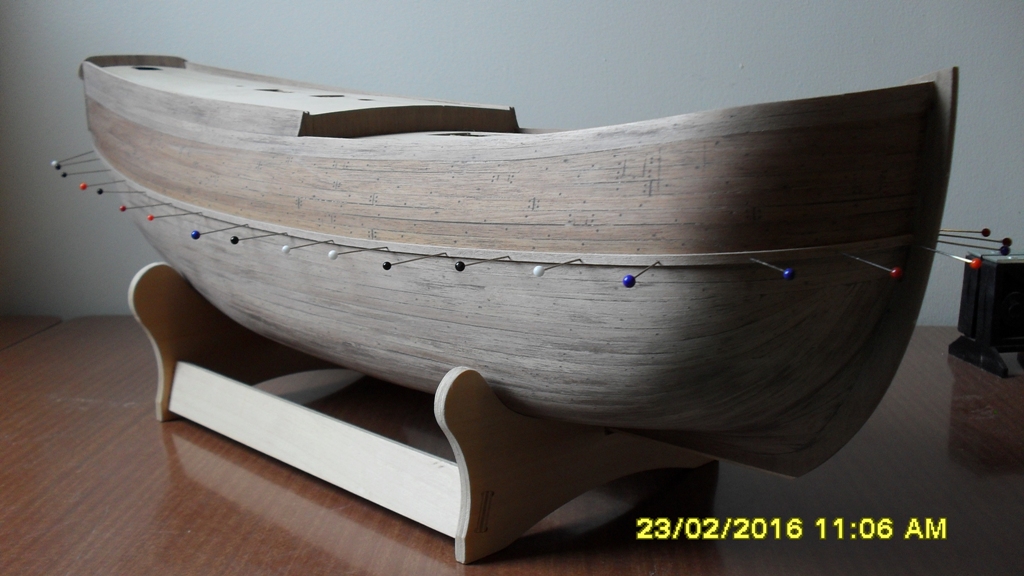
Thanks everyone for looking in on my build and for your help and comments. Update: wales/rubbing strakes and sheer strake fitted with medium sand. Next will be to vacuum out the pin holes and fill and sand. Then I'll be onto the decking, but before that I might paint inside the bulwarks so I don't get any on the unsealed deck, and then I can varnish the deck and inside the bulwarks too. At least that's plan A.


-
A package from Jatika arrived yesteday with a post date of November 2015? So thanks Jotika but unfortunately they were not the 4lb deck cannon, but instead more swivel cannon which I don't need. So this time I included the photo of the kit supplied over scale cannon on its kit carriage with my response. There is still hope I think...
-
Hi Ben, Glad you got that bend sorted. I'm not sure if I've understood your question and can't exactly remember what I did here except for these photos from my old build log if thats any help?
- 38 replies
-
- 4
-
-
- artesania latina
- Virginia
- (and 1 more)
-
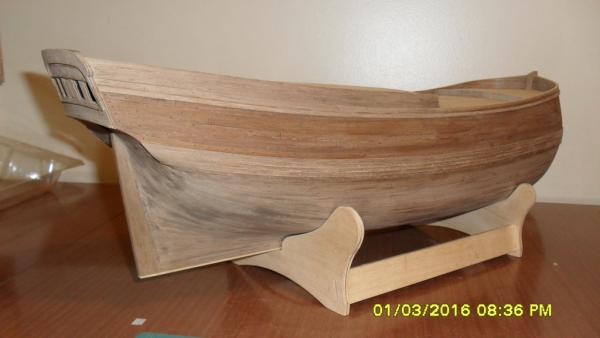
Minor update: Walnut splinters are very small and impossible to remove. Thanks Paul for your input re the hight of the bulwarks. A closer inspection of the 1x3 mm walnut used for the sheer and rubbing strakes revealed that 4 lengths had knots with cross grain in the middle of their lengths and some are splintery and splinter even after soaking when being fitted at the bow. All have saw tooth marks along their edges which need sanding especially if the edge is exposed which can drop the width down to about 2.5 mm. So I sparingly camfer the non exposed edges. Remembering the experience I had with the previous cross grain cut plank and having no other options I will try and lose them in between the good planks while being very careful when handling and bending to fit so as not to break them. If I wasn't painting the wale then this would have been a major problem to the finish of the model.
-
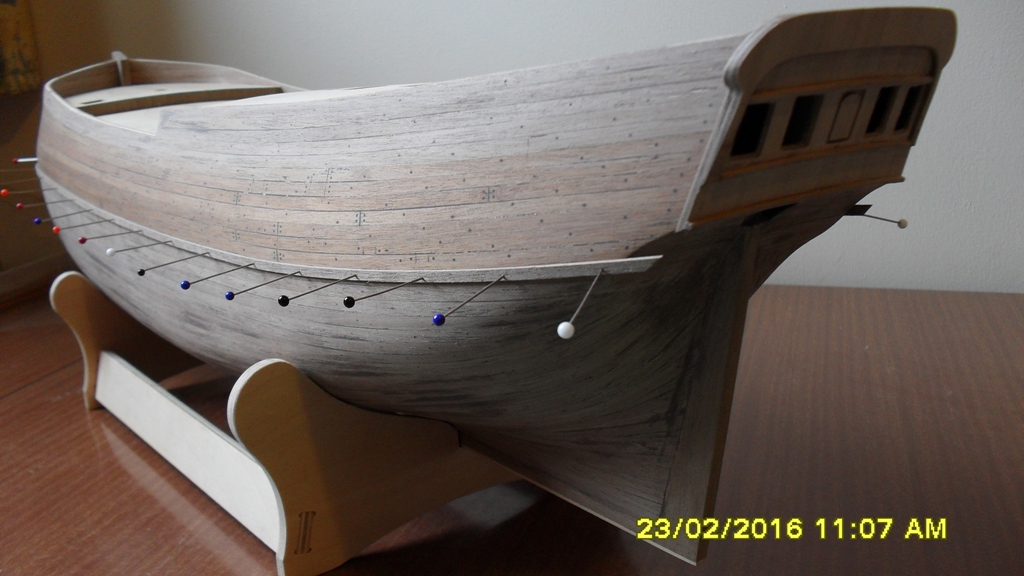
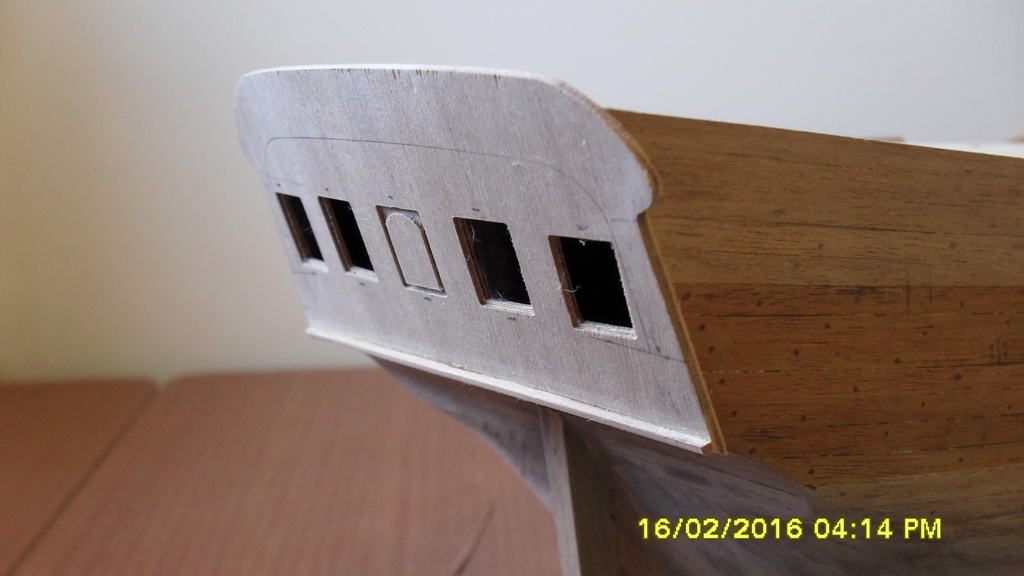
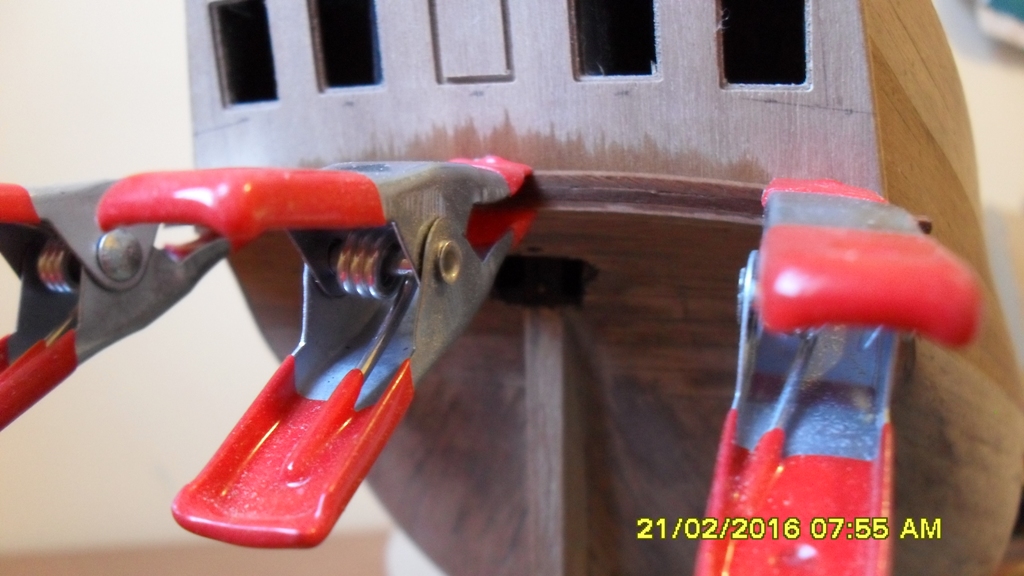
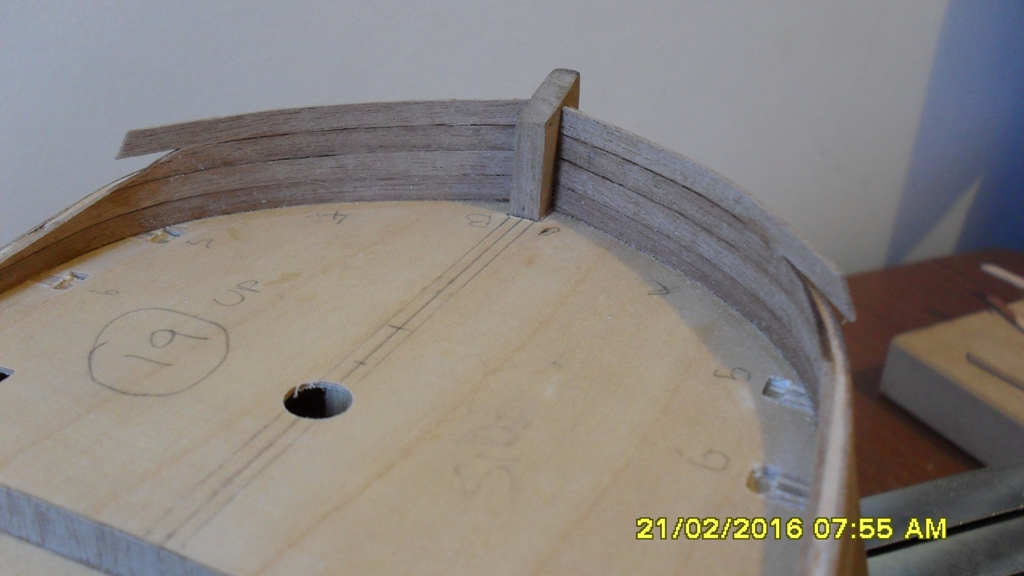
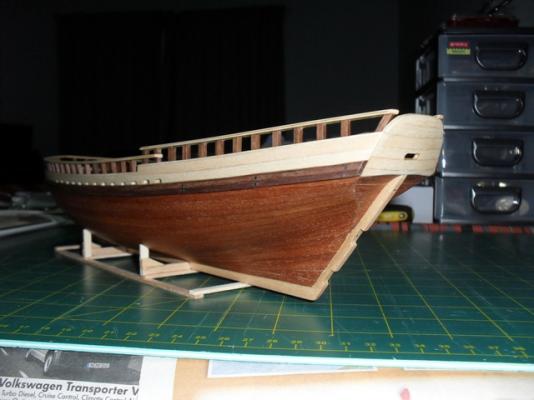
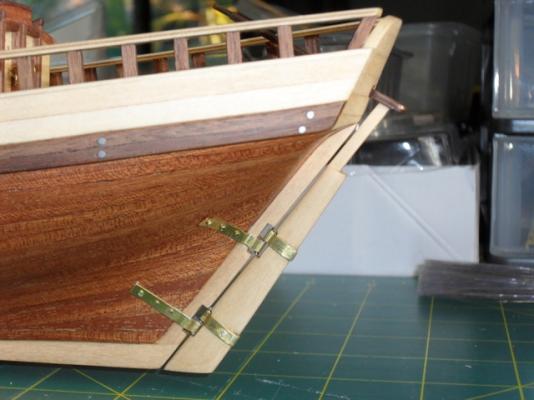
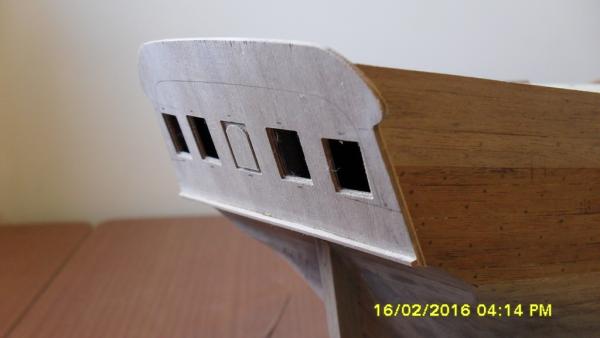
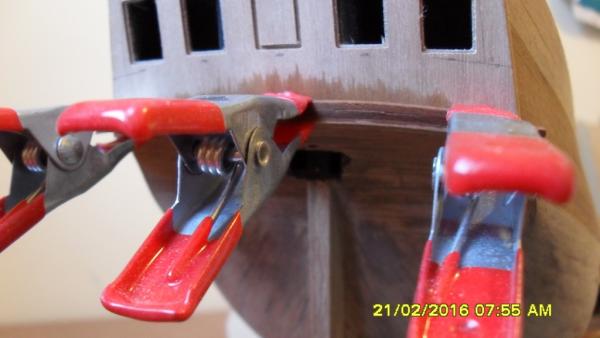
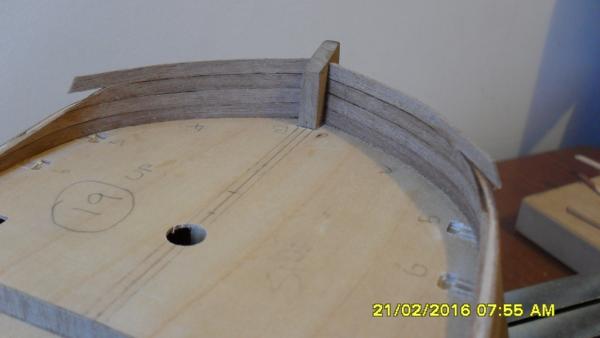
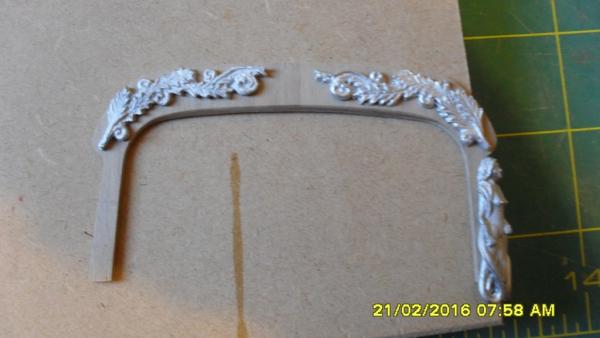
Update: I changed my mind and thought it better to attach the stern facia part 139 before removing the bulwark tabs as this provides structural support to the bulwarks in this area. I like to use contact adhesive for this, but its important to have everything measured and marked correctly because it can't be moved if it's wrong. Then I removed the tabs using the dremel saw and planked the inner bulwarks as described in the kit. I prefer the stern facia in the AOTS book and decided before fitting the sheer strake I'd shape and fit its wood work because the sheer strake butts into it. To get the 1.5 x 1.5 ledgers running parallel and in the correct positions I soaked and shaped the lower first. When it had dried over night I glued it with contact adhesive. Then to shape the window ledges I soaked and clamped them to it. Then carefully marked their positions and glued with contact adhesive also. Then I shaped the taffrail and trimmed the window ledges to take it. I also angled the lower edges of the taffrail for the figurines. Finally I carefully sanded the top of the taffrail parallel to the water line. I'm not sure whether I need (or indeed if I can) add a capping to the taffrail. There is no mention of this in the kit, but wouldn't need to do that until after the rubbing strakes are on which is my next task. So time to think on that. Last I cut the rabbets in the bow for the sheer and rubbing strakes.


-
Hi Jack, hope your shoulder recovers soon. Thanks for taking the time to explain what you meant here. When I was building the Amati Viking ship I came across the account and drawings of the Gokstad discovery. It's got some very detailed tech drawings of the ship. I had a look at it last night and the sheer plan does show the bow as narrower than the stern. Thinking back now my Viking build might have looked a little pinched at the bow at that stage too so it might just sort itself out. I'll be following your build as I've wanted to build the Gokstad ship and didn't know there was a kit for it. Some things I noted from my research was when they found the ship it had small boats complete with masts. The book makes the point that up until that discovery they had assumed the tye passed through a sheave in the top of the mast. But none of the masts from the small boats had sheaves through their tops? Maybe they used jeers but to my knowledge no blocks have been found, but there were references to 'worn tye holes' in some of the saga's. Another interesting point are the booms and boom footings. All the stone depictions of these ships show a broad low sail on a short mast that can be lowered without interfering with the stern peak which is how I bashed my build. With this rig then I found the use of a boom is critical to the set of the sail and I'm guessing, as I'm not a sailor, allowed for the ship to efficiently exploit the coastal winds using one boom in the clue. take care dashi
- 170 replies
-
- 2
-
-
- gokstad
- dusek ship kits
- (and 1 more)
-
A very tidy build Jack. Don't know if its just the angle but there appears to be a dip in the strakes at the rh end in pic? Is this where the frame is that you say should be different?
- 170 replies
-
- 2
-
-
- gokstad
- dusek ship kits
- (and 1 more)
-
Yes clamp it in between the bulkheads which is how my jig worked, along with nils idea could be the go.
- 38 replies
-
- 3
-
-
- artesania latina
- Virginia
- (and 1 more)
-
Hi Ben. I think I had the same problem and in the end made a cradle that held the false keel straight while I planked the hull. On my next builds I cut a bearding line and rabbet along with attaching the keel. Then I attach the garboard which also helps to hold the keel rigid. If you look at other builds you will get an idea of the rigs others use to clamp the keel straight.
- 38 replies
-
- 2
-
-
- artesania latina
- Virginia
- (and 1 more)
-
Seeing your first strake brings back memorys. On my first hull I didn't know to gently coax a bend in the wet planks with thumbs and fore fingers before positioning and then letting them dry before finally glueing (this also prevents gaps which weaken the hull, so it's important to glue the edges of the strakes too). Gently bending the soaked plank by hand gives the right curve or shape between the bulkheads, otherwise they tend to bend at the bulkhead and then run flat between them, which affects the final appearance of the hull and which is what happened with my first build.
- 38 replies
-
- 2
-
-
- artesania latina
- Virginia
- (and 1 more)
-
Welcome aboard gonzz0. Like you I started with this kit to learn the skills so I could build the HMB Endeavour which was a childhood dream of mine and after 4 builds I'm finally on to it. All my previous build logs were lost in the great crash, but I'm thinking of just up loading the photos of the builds to new logs if I can get around to it. Upright time with my back is limited. However it looks like you are off to a good start. As for the rigging I never used their wire with the blocks as it was too brittle so used cord from the get go on the advice from this forum which I'm glad I did. I found the running rigging impossible to follow from the kit plans so after much research and a few re riggs figured it out and learned heaps in the process. But you are a long way from that stage. I also scratch built the chain plates which I think from memory is worth doing on that kit also. Anyways enjoy.
- 38 replies
-
- 2
-
-
- artesania latina
- Virginia
- (and 1 more)
-
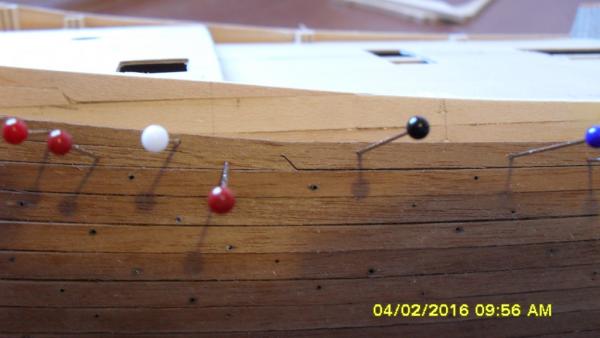
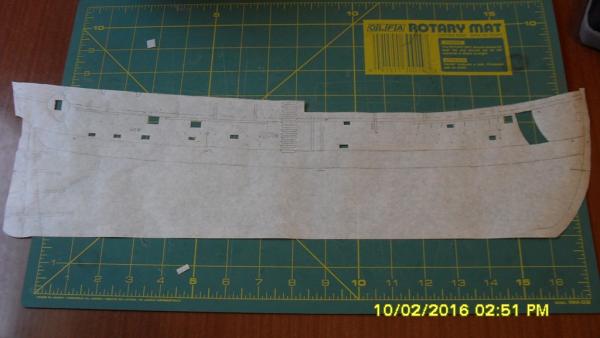
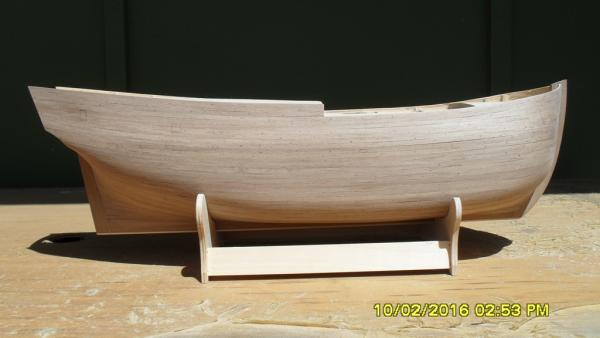
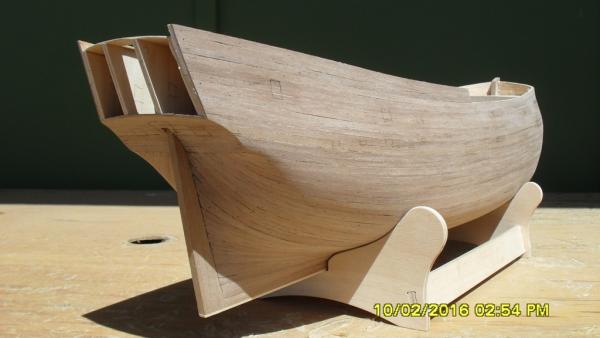
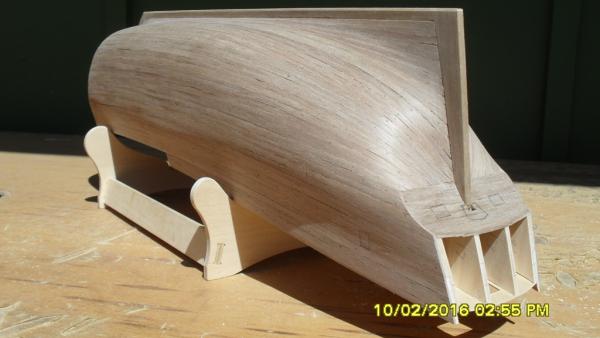
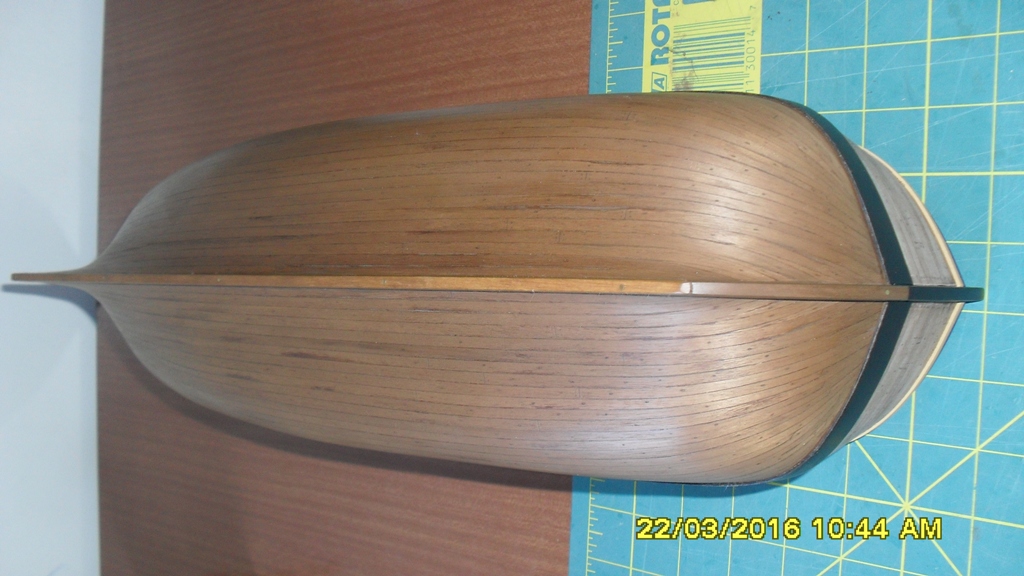
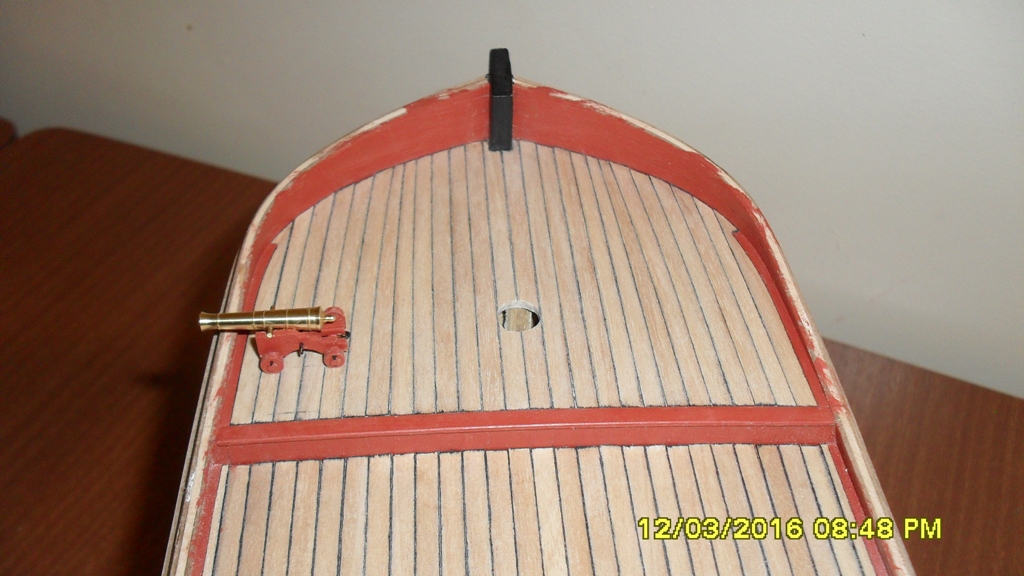
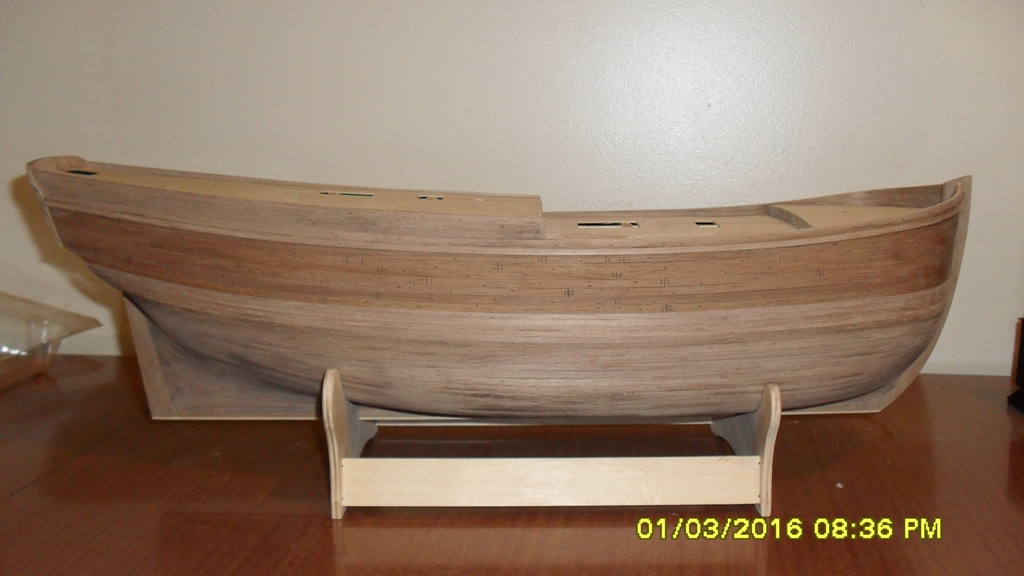
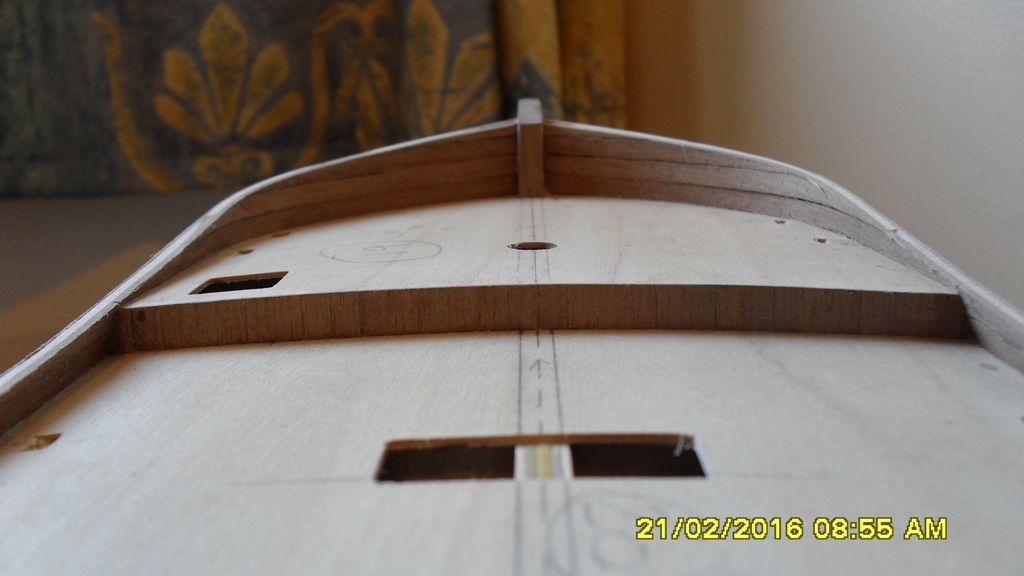
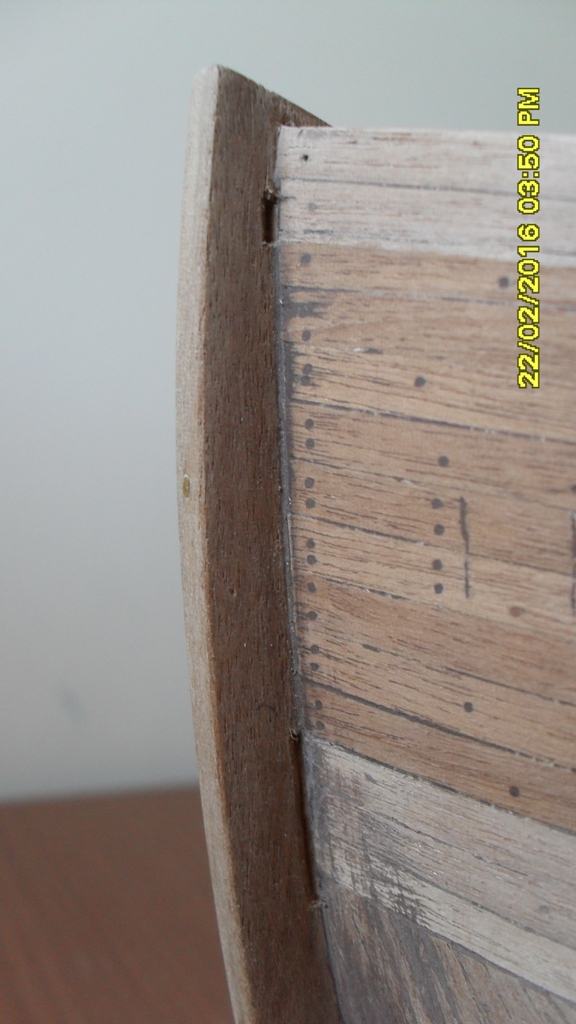
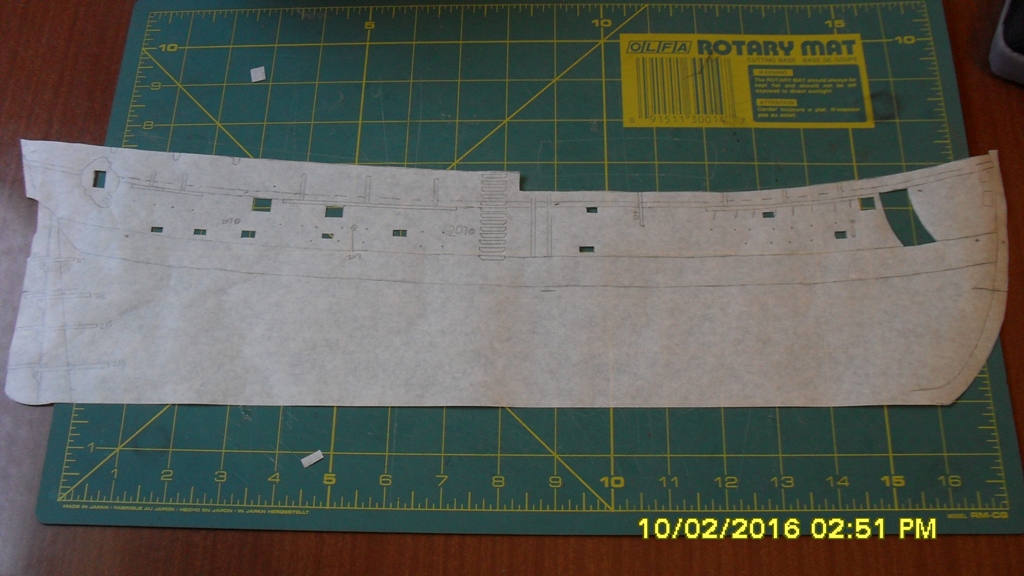
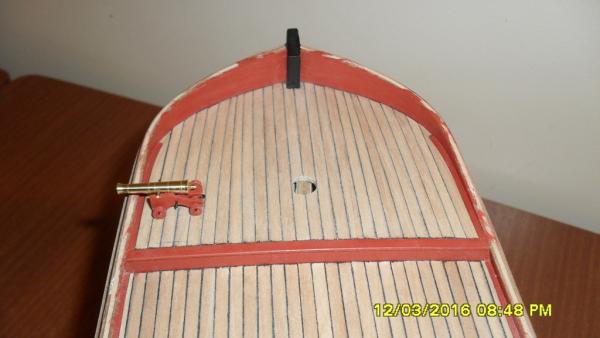
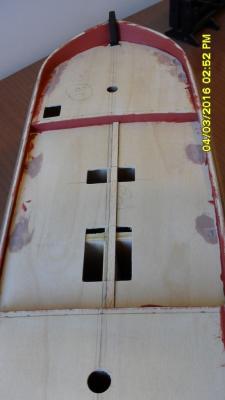
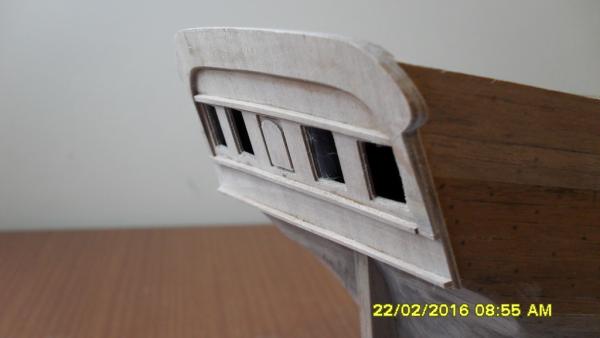
Update: Marked and dremeled pins holes in the hull using a fine round routing bit which gave the cleanest holes for trennels. Marked and scored butt joins copied from photos of the replica, scored hatch, and anchor slide positions and dremeled trennel holes on both sides of hatch positions. Darkened some mahogany filler with black filler for the caulking and trennels which I then filled all the holes and cracks with. After it had dried I sanded everything back to expose the wood finishing with 400 grit paying particular attention to the area of hull between the sheer strake and wale that I'm leaving as exposed wood like on the replica. Then after masking off the area between the wale and sheer strakes I applied one coat of matt polyurethane to protect the wood from grease etc. when handling. When I come to attaching the hatch covers I'll scrap the poly from their positions first. Not sure what the best glue would be for attaching the hatches?

-
Cheers Chris, Until this build I'd only used veneer for the second planking so using 1x4 mm walnut was a new and interesting challenge which required me to learn a new approach. Basically, the first thing was to get the line of the wale or top rubbing strake in the correct position according to the kit plans. Then using a length of veneer I could work out when I needed a drop plank or stealer. As for bending I soaked for several hours and gently introduced a bend by hand. It wasn't until coming up the wale to the bulwarks when I discovered I could introduce a slight lateral curve to the wet strakes which I then drilled and pinned in place 1 at time and let shape over night. Indroducing this lateral curve helped to reduce spilling as I came up and over the curve at the bow. As for not needing to trim at the bow that was more luck on my part and I think credit must go to the kit plans for getting the line of the wale or rubbing strakes in the right position. But yeah one strake a day was a managable and enjoyable pace although that bluff bow gave me nightmares, but we got through that with minor scars so can take a breath now.
-
Cheers Slog. I think I've found another measurement problem with the plans and scale as Paul pointed out in an earlier post. Plan sheet 1. the measurement of the of the stern from top to counter on the top frame side side elevation prior to the fitting of the stern facia is the same measurement after the addition of the bulwarks and stern facia according to plan sheet 2, bottom side elevation. This means that all the following side elevations of this area aft, are drawn shorter than what they should be. To get the correct measurement here add the hight of the aft bulwark as shown in plan sheet 2 to the measurement from the side elevation of this area of framing on plan sheet 1. Hope I'm making sense here? So when stenciling the aft hull fittings and position of the aft shear strake and side window I aligned my stencil with the top of the aft rubbing strakes and not the top of the quarter deck bulwarks plus used my judgment incase the line of my rubbing strake was slightly out. I think the positioning of the top rubbing strake or wale drawn on plan sheet 1 lower side elevation looks to be correct and to scale so I've taken this as my datum line.
-
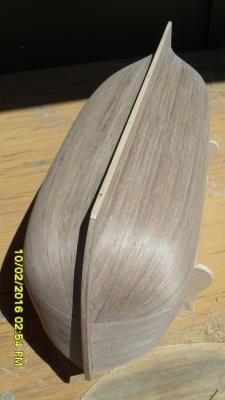
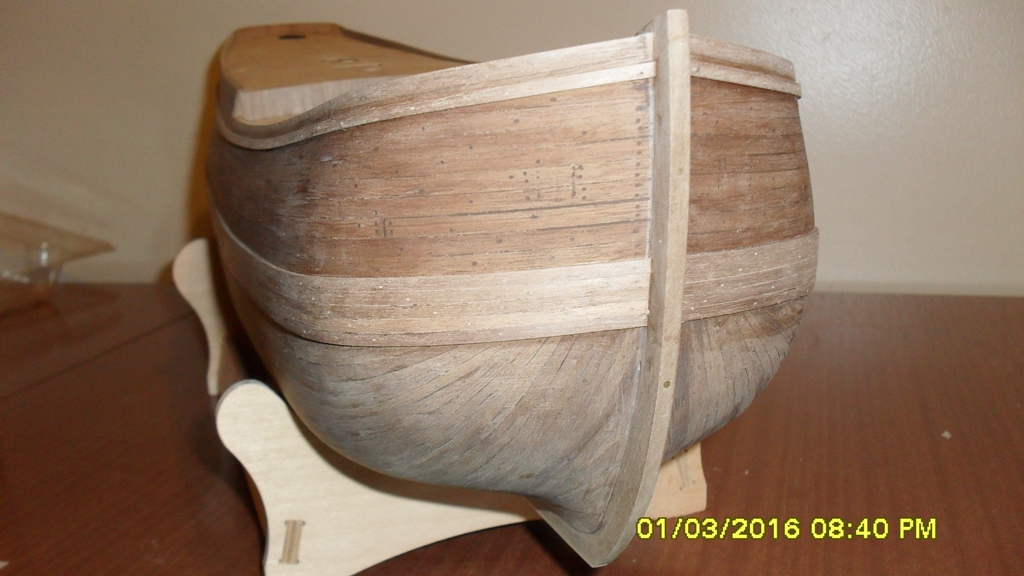
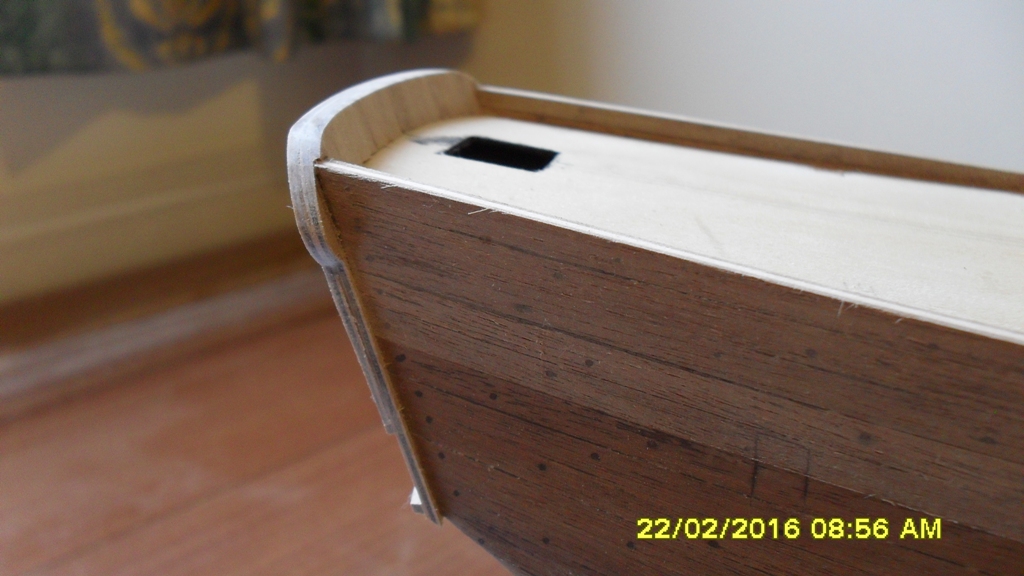
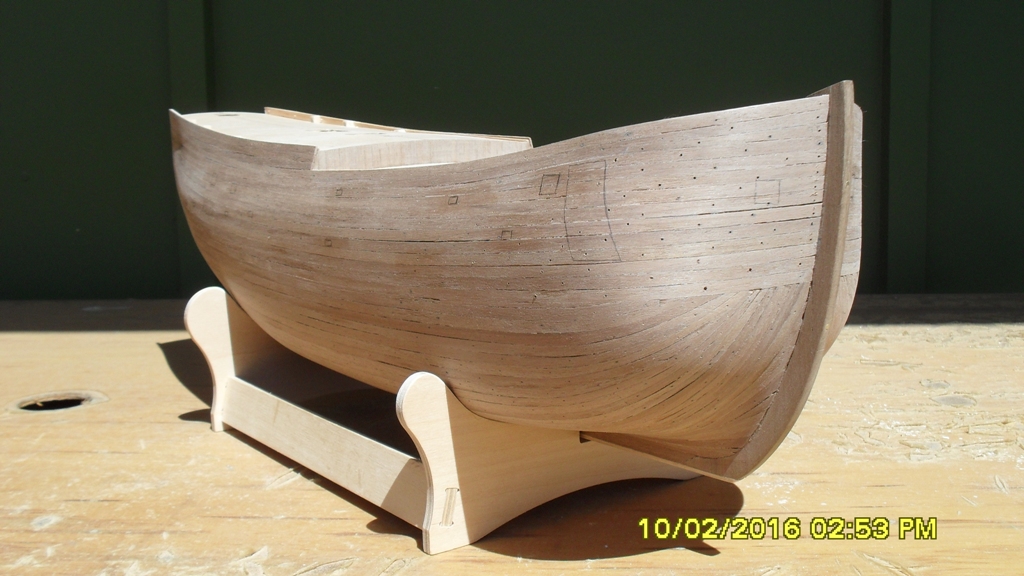
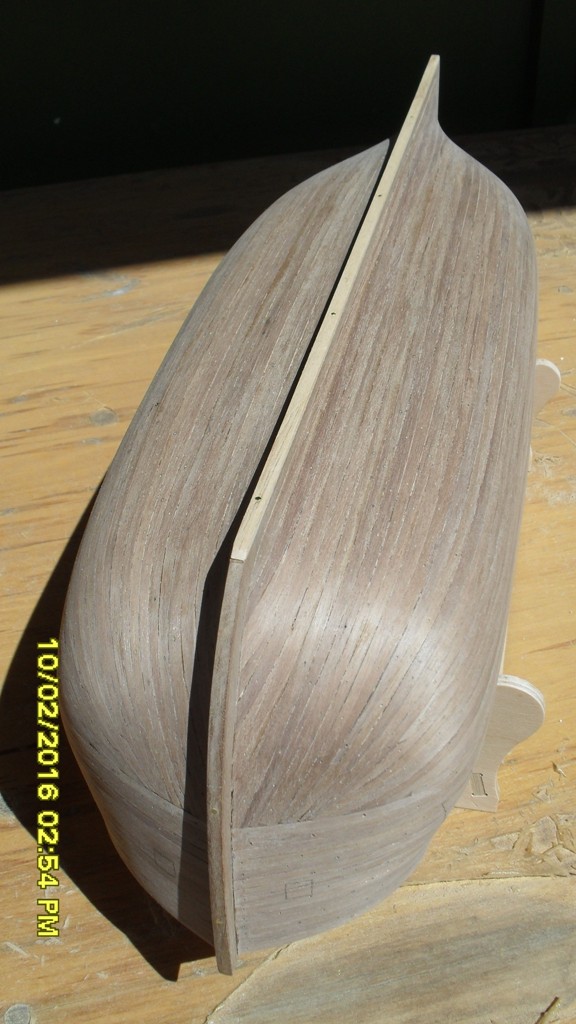
Second layer of hull planked with the 1x4mm walnut. I needed 2 half stealers at the bow bulwarks for the peak, but apart from that managed to come up the bow without trimming. At the stern I had to do some slight trimming to finish at approximately the top of the quarter deck bulwark. She has had a coarse and medium sand. Then I made a stencil of the hatches, anchor slide etc. and traced these onto the hull so they don't interfere with the trennels and strake butts. Note: I've finished the forward bulwarks 1.5 mm above the frame tabs which has worked out good when stenciling on the hull fittings in relation to the position of the rubbing strakes. (I'm wondering if the thickness of the finished deck hasn't been included, just the false deck for the size of the frames and tabs which is the problem I encountered at the keel with the thickness of hull planks)? Next I will drill out the pin holes with a no7 bit to form trennels and mark and cut in the strake butts and drill the corresponding trennel holes. I will also drill trennel holes on either side of the hatch positions (which I've penciled on). Then the plan is (which I havn't done or heard of before) to mix up some mahogany water based wood filler with a little black filler to get it a shade darker than the walnut. This I will use to fill the drill holes and joins to simulate the hull trennels and caulking. Then when this is all dry a fine sanding. (If anyone has used this method for simulating trennels, then could you please let me know how it went with links to photos if any cheers)? As for the stern facia I will cut the rudder hole and plank the inside of the quarter deck bulwarks before adding this so I can sand them down to match the facia before gluing. Also will need to trim some ply away from framing parts 17 and 18 as I will be adding some projector film to the windows to simulate glass and don't want the inside to be covered with framing.