ziled68
-
Posts
158 -
Joined
-
Last visited
Content Type
Profiles
Forums
Gallery
Events
Everything posted by ziled68
-
 Hey Al, Dragging your anchor? That might be the lightest anchor ever. Does it float? LOL. Sir, you are progressing much faster than I did. In no time flat you'll catch up and pass me by.
 -
Tim, I really appreciate your vote of confidence. I have Woody singing back-up for me which makes everything better. LOL. I will get started on the trestletree once I get home today. By chance, would you happen to have any drawings with dimensions for a typical tressletree? Just thought I'd ask.
-
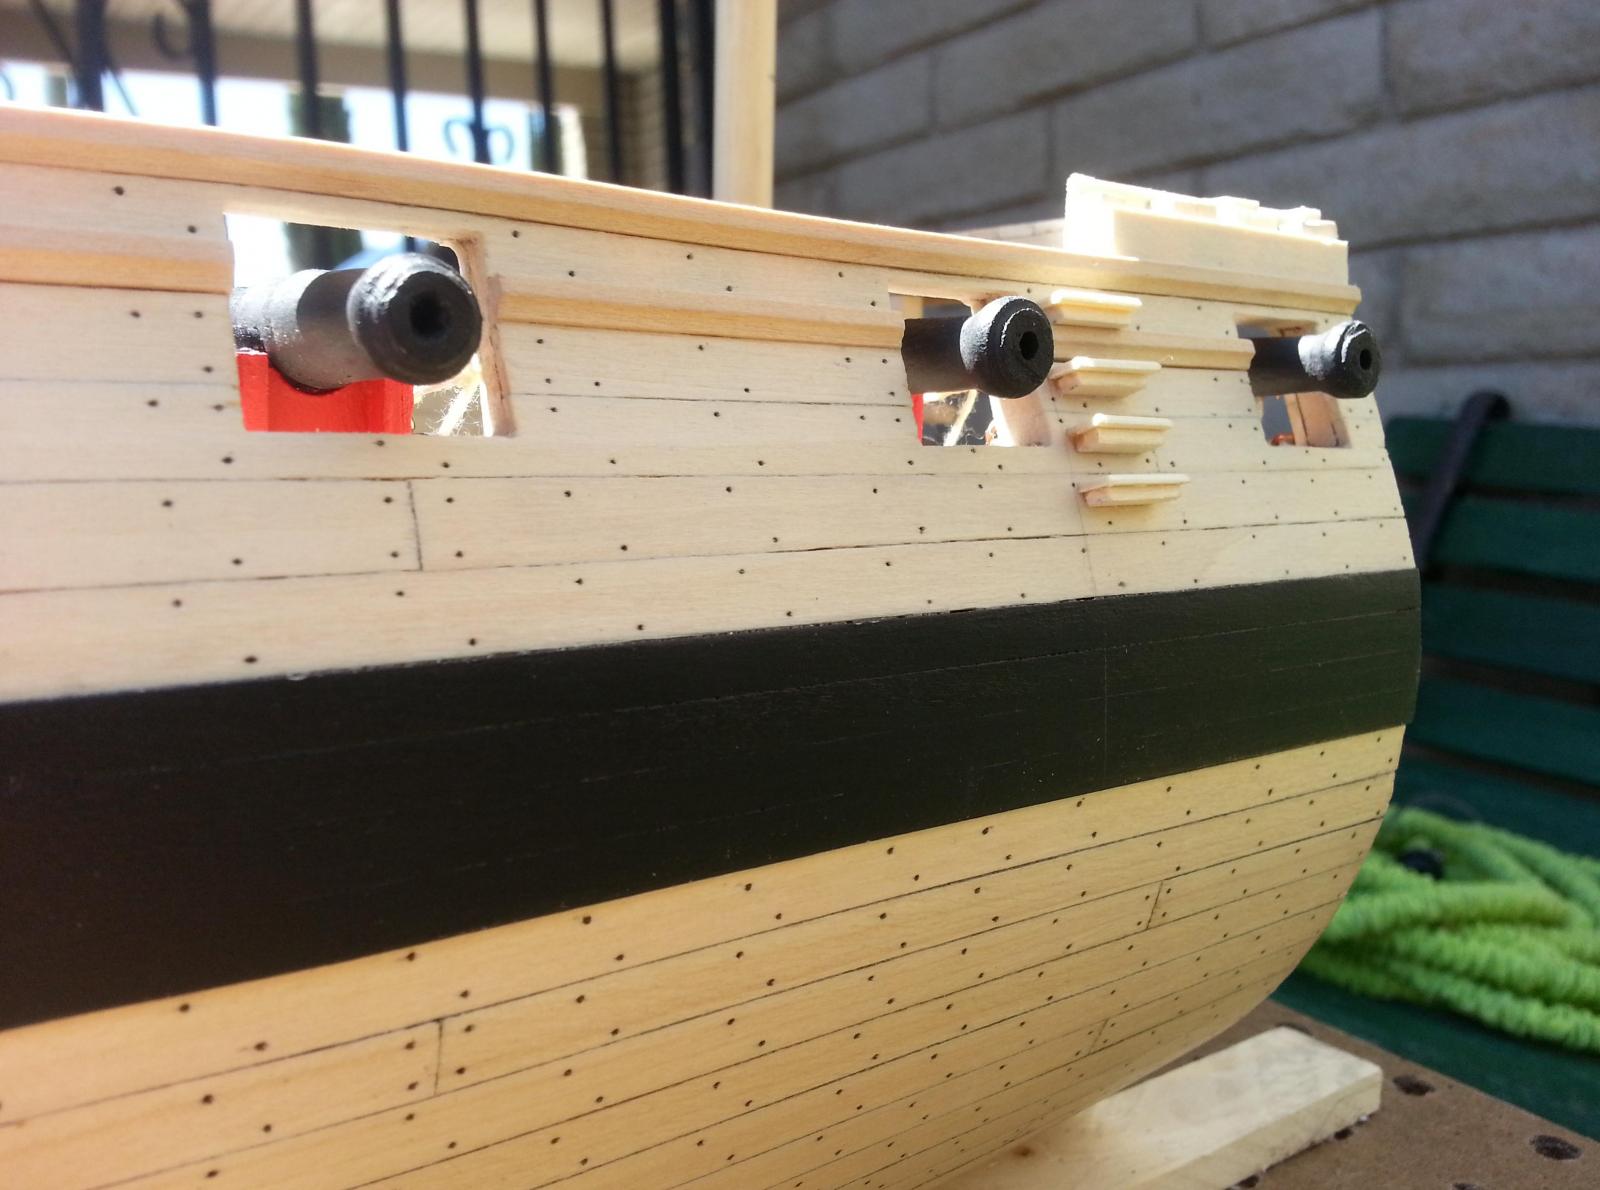
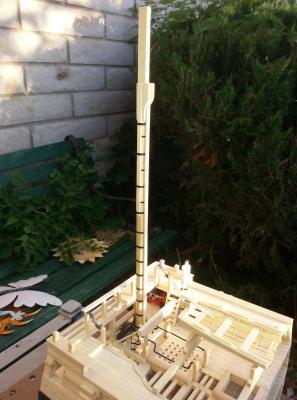
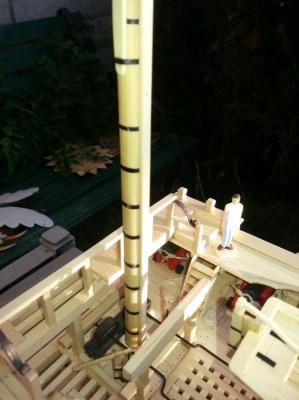
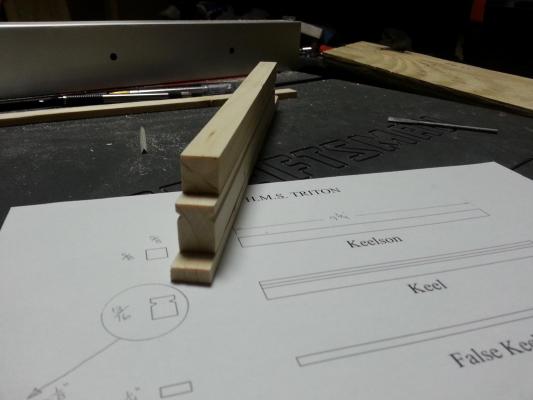
Greetings to all, Well it’s that time to get started on the mast and spar for my Triton. I went ahead and made and installed the bibbs for the mast followed by iron loops that were simulated with painter’s tape that was blackened with a sharpie and cut into 1/16 inch strips. After the loops were completed, I made and added the hounds followed by more iron hoops. I finished the mast by adding the rubbing paunch and finished that off with simulated treenails.
-
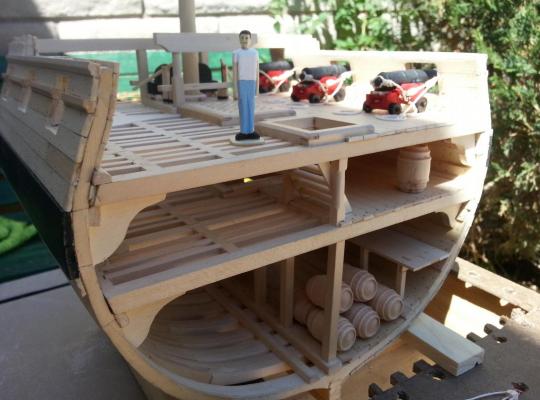
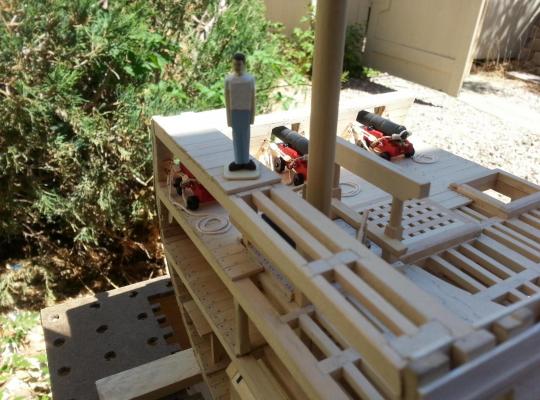
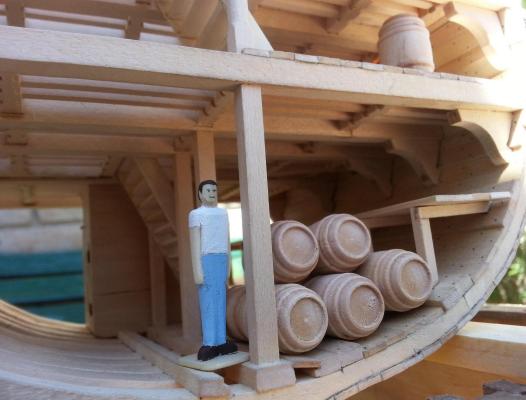
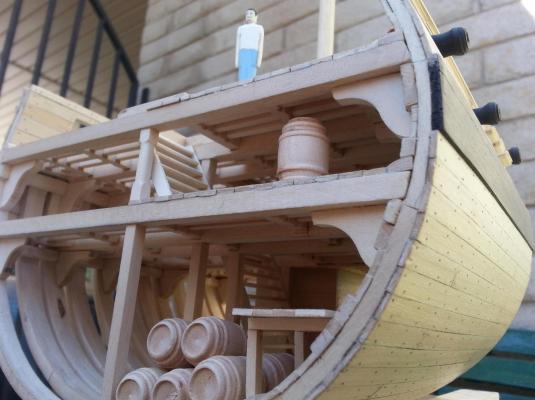
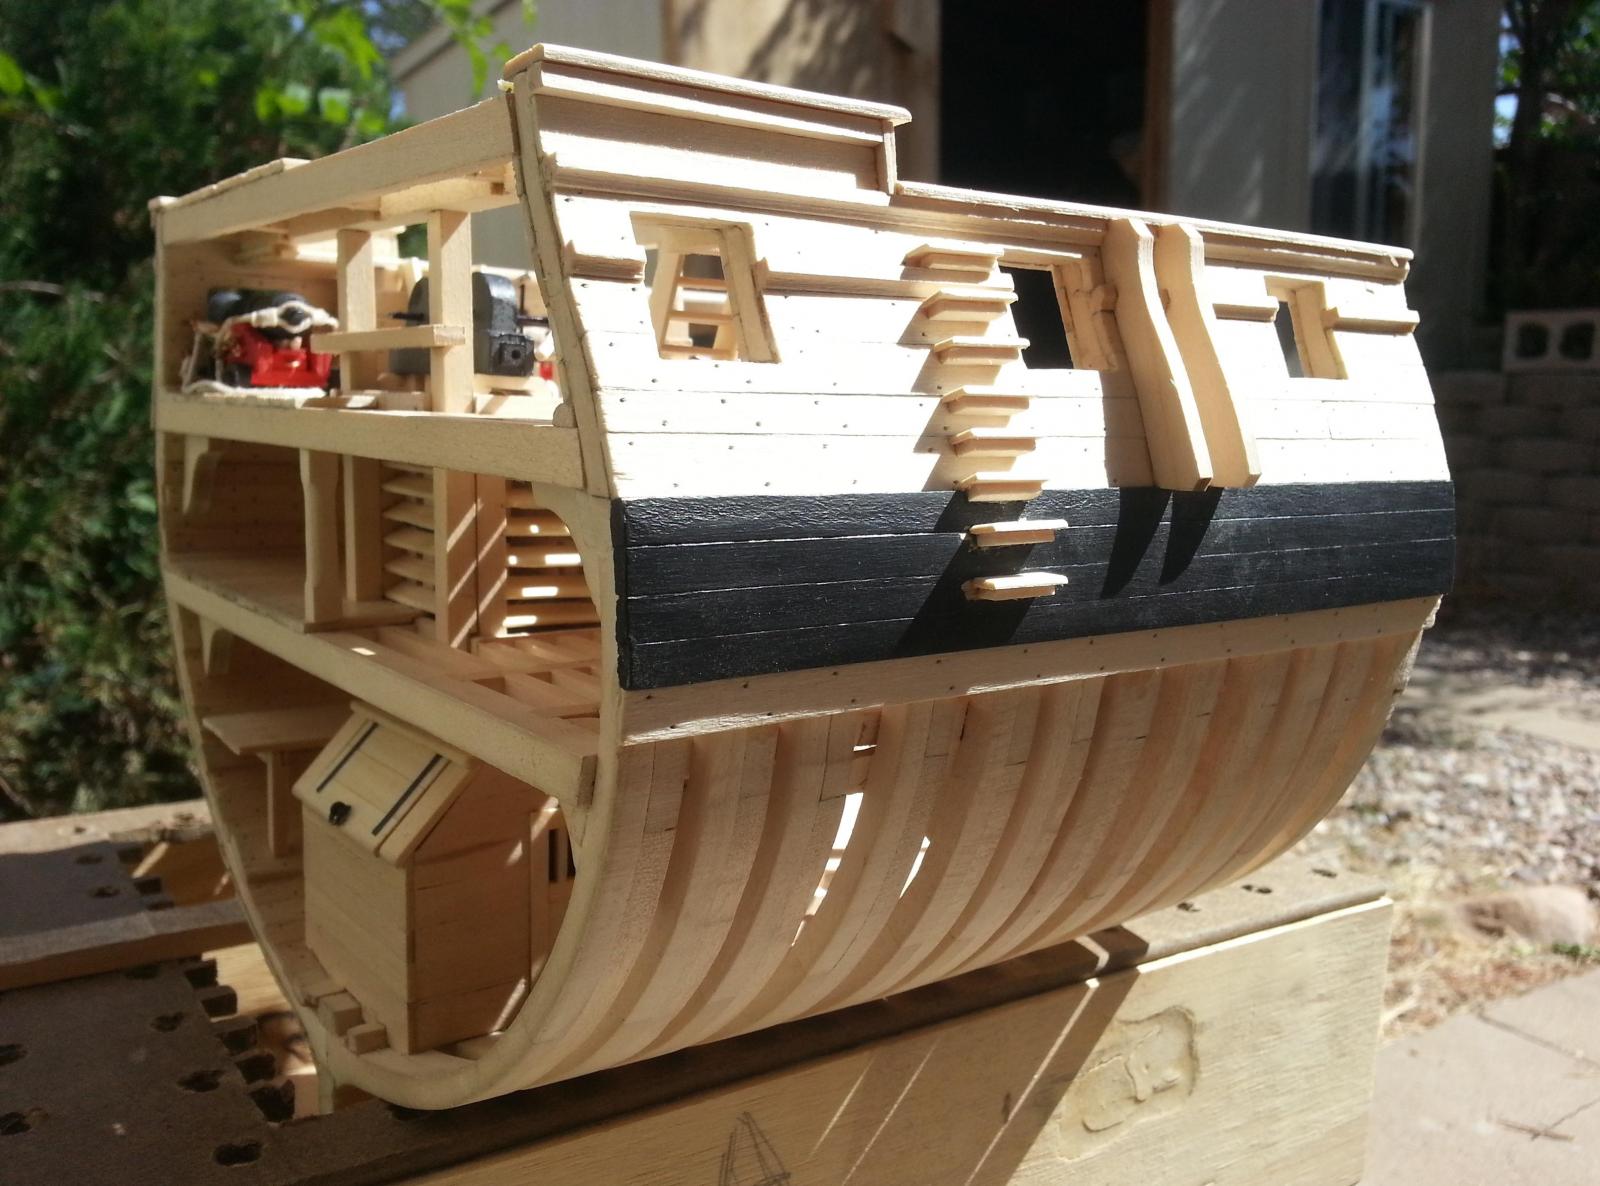
Thanks Tim, I believe that would more than likely be the main mast and spar, water barrels and ballast in the main hold, and a few supply crates on the main hold's platform. Once again, thanks for your kind words.
-
Good Morning Mark, I really appreciate your comment. I mean with almost 6,000 comments that you've made on everyones forums and you stating that you've never seen anything like my build means a lot. Thanks for making my day.
-
Greetings to all, Many thanks for the kind words and I must admit that it's great to be back. I have another small milestone to report. After viewing Jonathan’s forum, “Model Shipways Typical Ship’s Boat”, I thought his description and his attention to detail was so well articulated, I’d give it a try and build one from scratch. I went ahead and made a half section of the boat and placed it temporarily on the skid beam as a means of seeing how it will look and I like the look of it. I must admit that if not for his forum I’d never even have tried it and I am quite pleased to say that I found the build quite enjoyable and easy to do. So Jonathan, “Kudos to you Sir”.


-
Hey AL, That is looking great. Since I'm a kid at heart, when I grow up I want to be just like you. LOL.
-
Thanks Al, but to be perfectly honest with you, I believe your Triton will look better than mine.
-
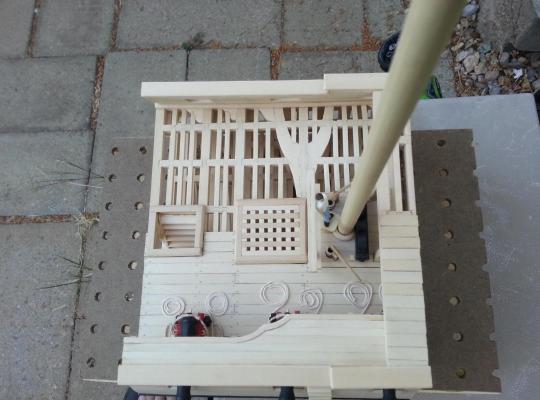
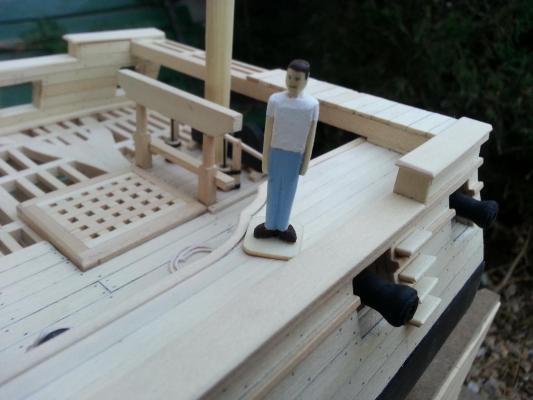
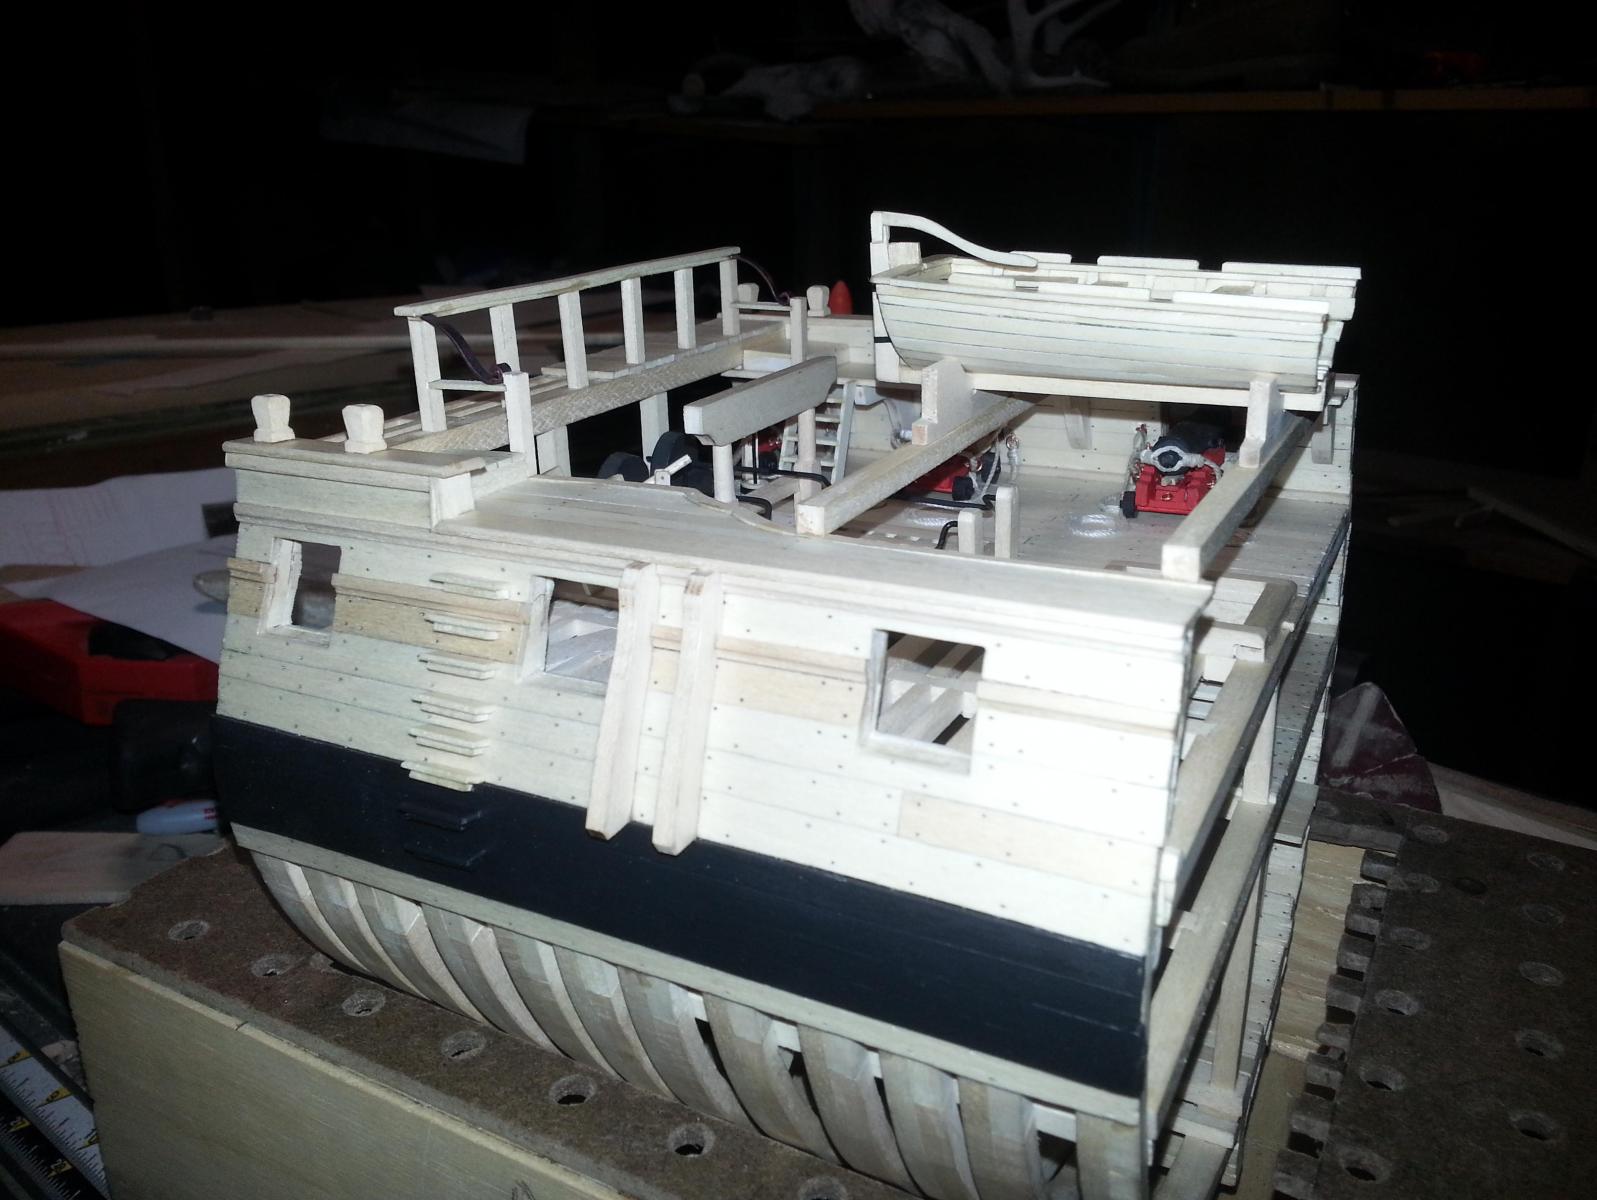
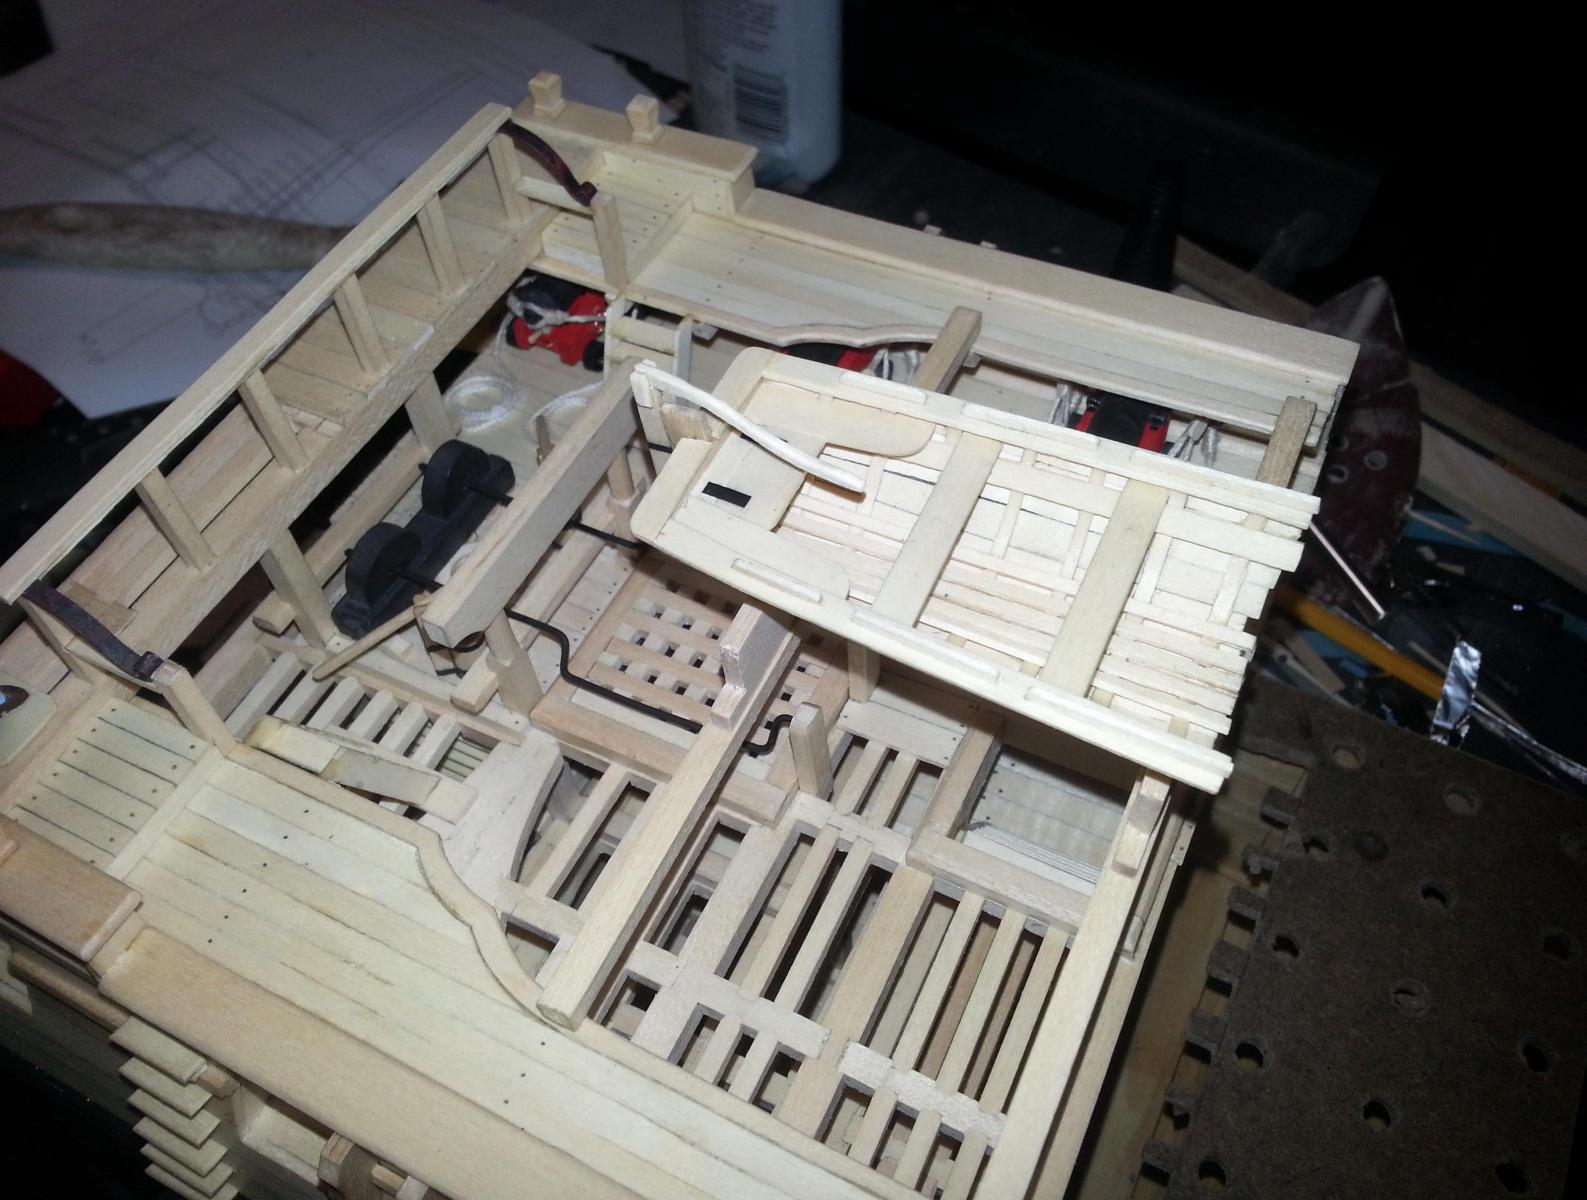
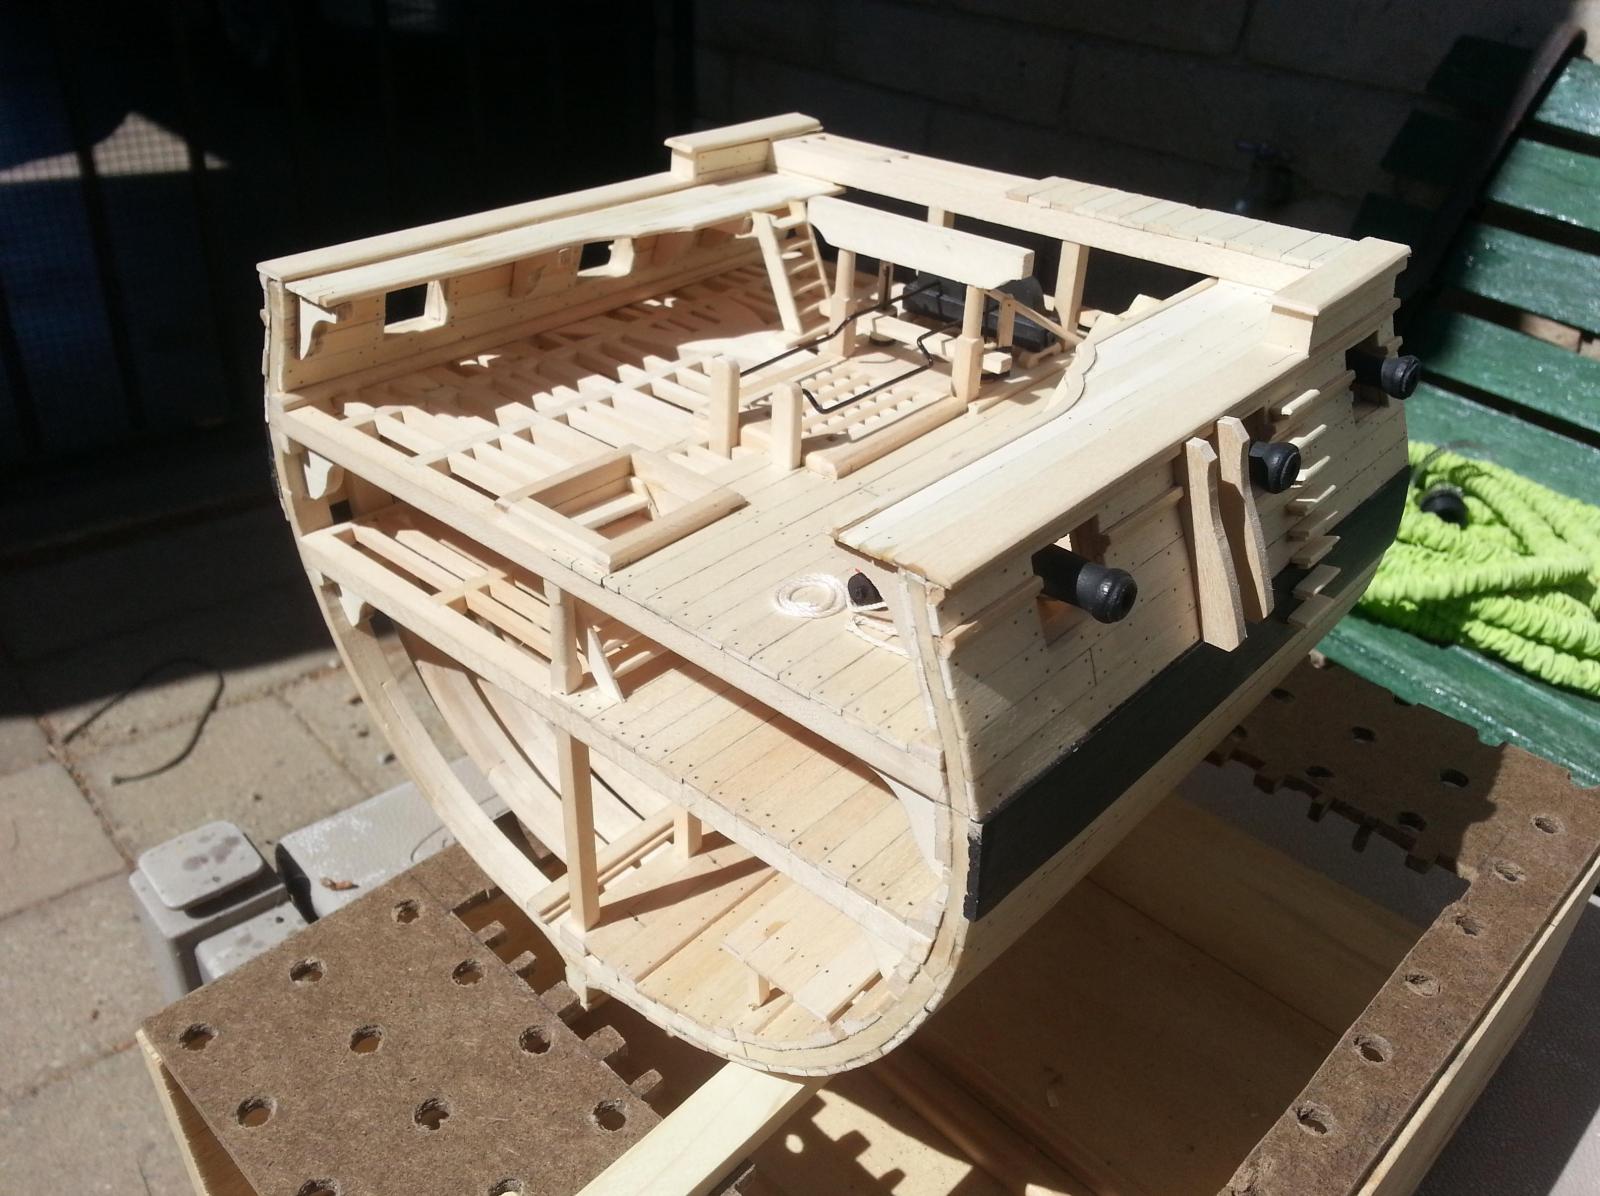
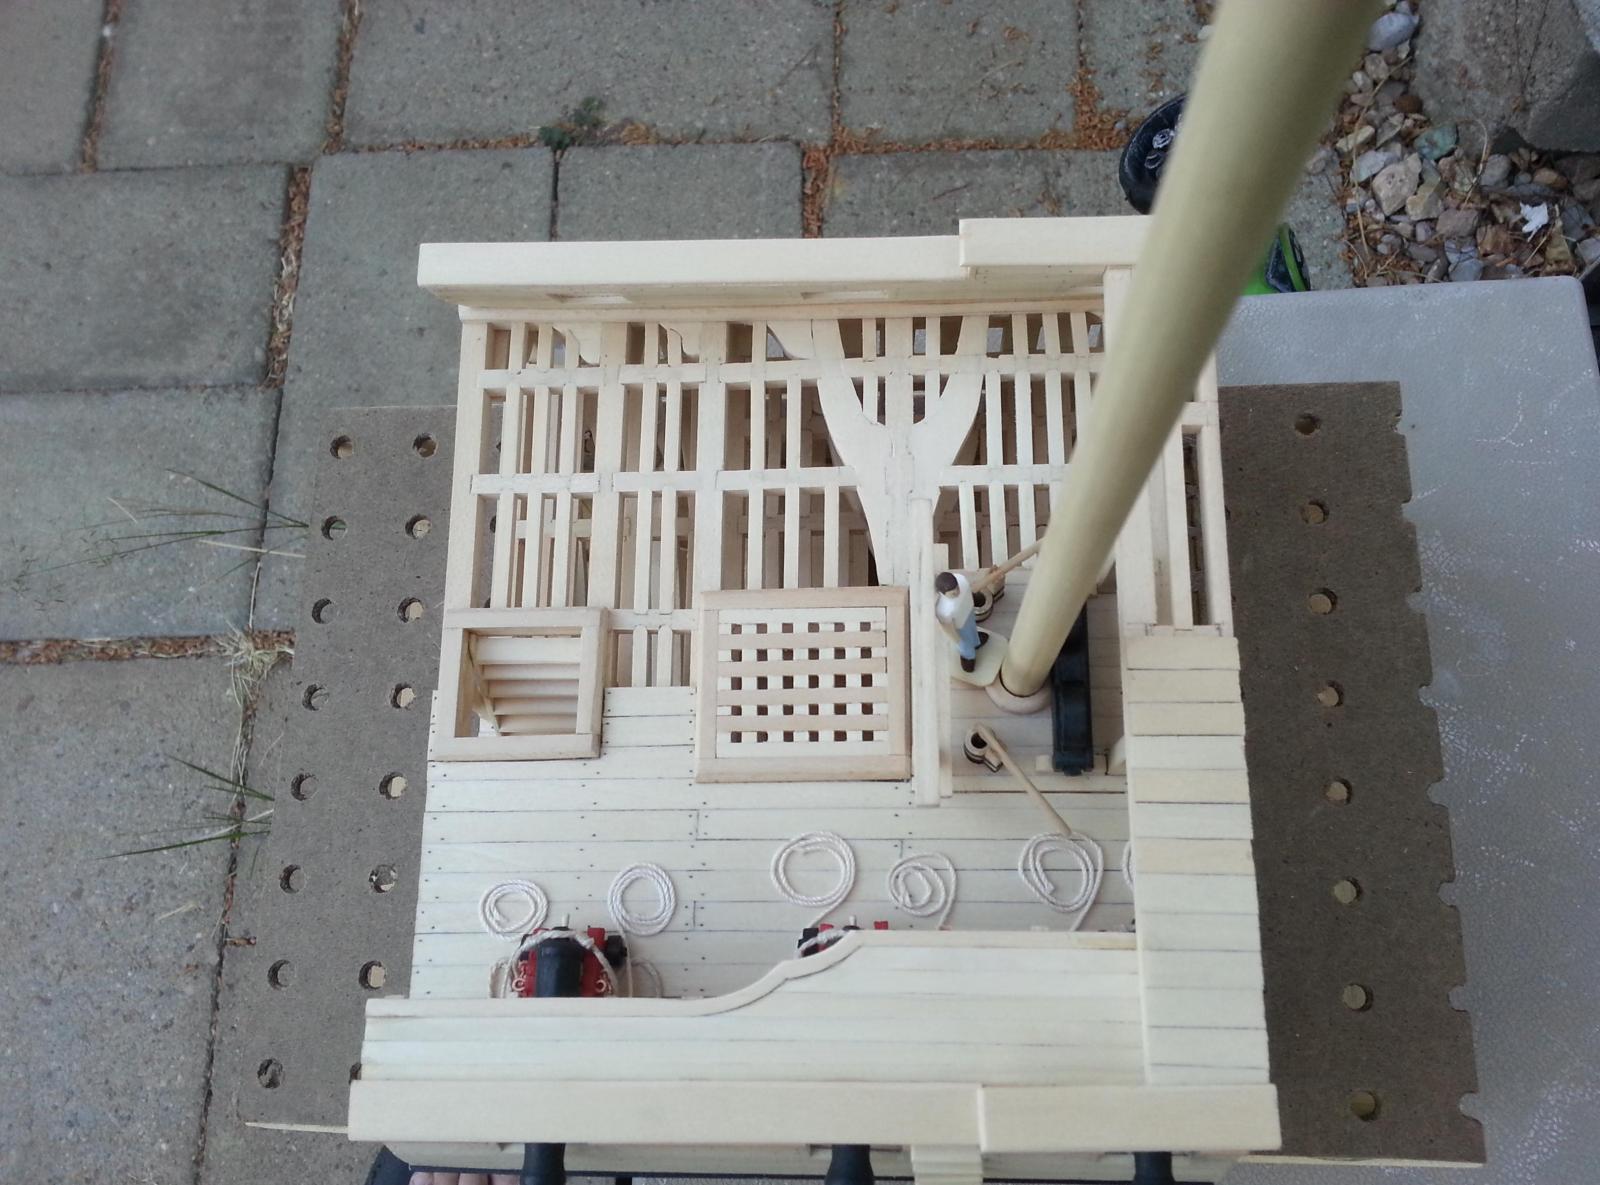
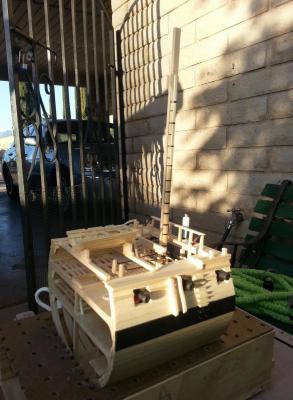
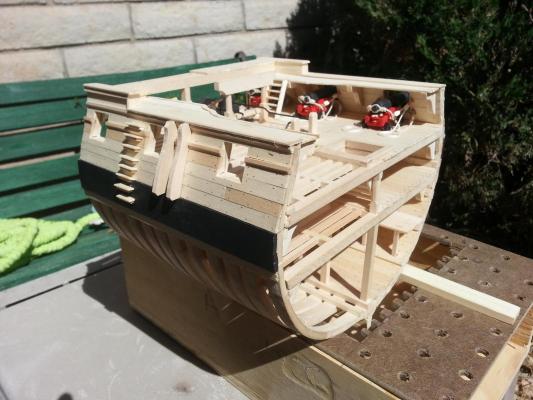
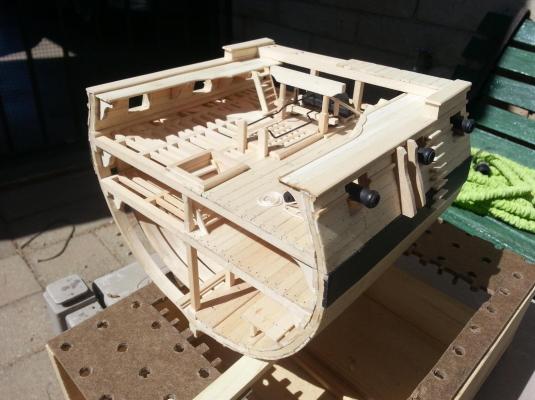
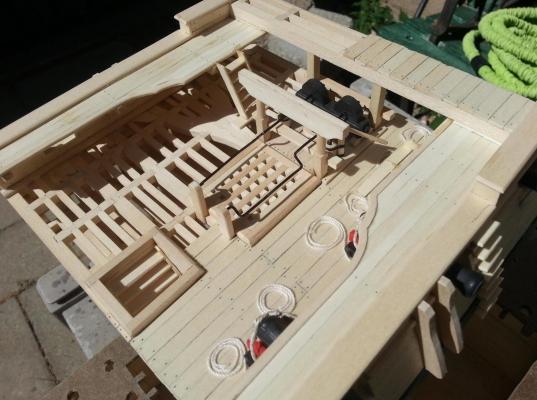
Greetings to all, Another minor update to my Triton but update just the same. I know that it’s been a while since my last update due to the fact that I went on vacation to Puerto Rico (which I might I add I enjoyed immensely). Upon returning, I decided to tackle the starboard side gangway with its wooden brackets. Upon completion of the gangways, I then made and added the ladders to each gangway and finished it off the gangway with simulated treenails. If you note, there is a height on the aft QD from the gangway that I find to be too high for a man’s natural step. I will add one step at the base of the QD’s beam in order for a man to step naturally from gangway to QD. I have also finished the entry steps to both sides of the Triton, added each side’s fenders, and also added the brakes to the ship’s cistern system. The next thing on my agenda is to make and install the QD rails, add the skid beams, work on the mast, make and install the lower hold’s platform ladder, and add barrels and ballast. I know that there is still quite a few items left to work on but I figure that if I make a temporary checklist in order to be sure that I tackle the main items, I won’t get to the end and realize that I missed something.


-
Good Morning Al, I am looking forward to seeing the completed carriages for your cannons (which I might add came out very nice). At this size you should be able to incorporate a lot of nice details on your completed cannons.
-
Good Morning Chris, If you are careful with the amount of pressure you use on every pass of the triangular file, up to the depth of your rabbet line, you will not mark the outside too bad. Just remember to go slow and careful. I've attached a photo so you can see that the rabbet is not too deep.
- 144 replies
-
- 2
-

-
- corsair
- bermuda boat
- (and 1 more)
-
Hey Al, I cannot help but ponder your comment about wishing you had made your cannons a wee bit beefier when I am looking at the cannons you have now and think that messing with a ship with that type of armament would be like poking a hibernating bear with a twig. I personally wouldn’t want you to open up that “Can of Whoop A$$” on me. LOL.

-
Hey Buddy, I pray for the best to you and yours.
-
Hello Blakeny, Your model is coming along nicely. If you have not started your rabbet you may try using the method I use for making them. I'll draw my rabbet line where it needs to be and then carefully follow the line with an X-acto blade just to score the line. Once that is complete, I will run a triangular file along the score and press ever so slightly with every pass until I get the correct depth of my rabbet.
- 144 replies
-
- 2
-
-
- corsair
- bermuda boat
- (and 1 more)
-
Hola Daniel, Your build is looking great. Do not worry about the amount of work you do. The Grand Canyon in Arizona was started with a single drop of water.

-
Al, I am in total awe at how your cannons came out. Super Kudos to you Sir.
-
Al, You're a good sport about the pacifier comment. LOL. I believe this new design you're working on allows the cascabel to have more meat on that edge thus allowing for a smoother cut.
-
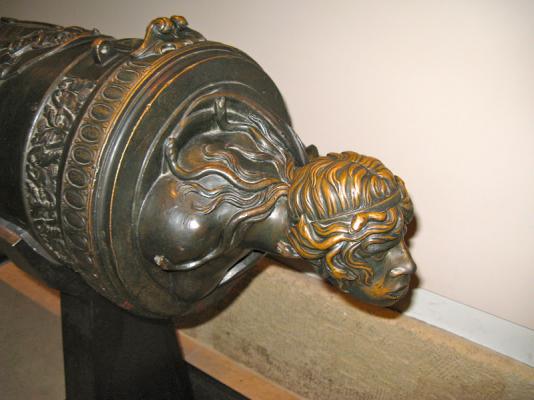
Hey Al, You are doing some excellent work with your cannons. Since I went on vacation to see my granddaughter, I can't help but see the last few pictures as pacifiers. LOL. Do not worry, I know that they are actually the cascabels for your cannons. I can't wait to see more progress on your build. Since we're talking cascabels, what do you think of this one? Pretty ornate isn't it?
-
Hola Daniel, I am glad that you liked the idea of Woody and the way I have the main hold area set up. I am also glad that you were honest about not liking the ropeway of my cannons. Only friends can be honest and blunt with each other "Mi Amigo". LOL.
-
Al, My hat is off to you Sir. Well done.
-
Tim, I am truly enjoying my vacation but as any other modeler, I am also thinking of how to go about something on my build. The way I see it, if you look/think before you leap you will be able to see a SNAFU long before you get to it. Ron, I am glad I was able to re-inspire you to get back to your build. Your first inspiration being that of the beauty of the Triton and (I am going out on a limb here) seeing how one brings their own ideas/drive to make something totally their own. I look forward to the completion of "Your Build".
-
WBlakeny, You have made excellent progress since I last checked. She is really starting to come along. I too have wondered the same in regards to caulking along the keel assembly. In looking at how everything is placed together, I can see how you may have water slowly leak into your Corsair via the keel unions. I believe this will be an instance in which the captain of the Corsair would rather be safe than sorry.
- 144 replies
-
- 1
-
-
- corsair
- bermuda boat
- (and 1 more)
-
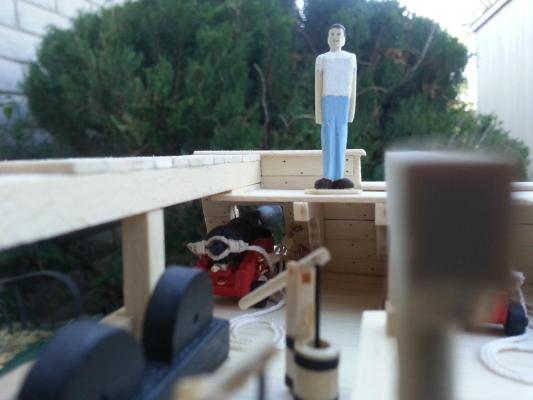
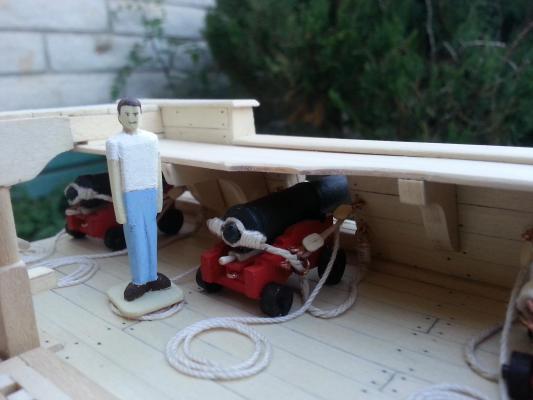
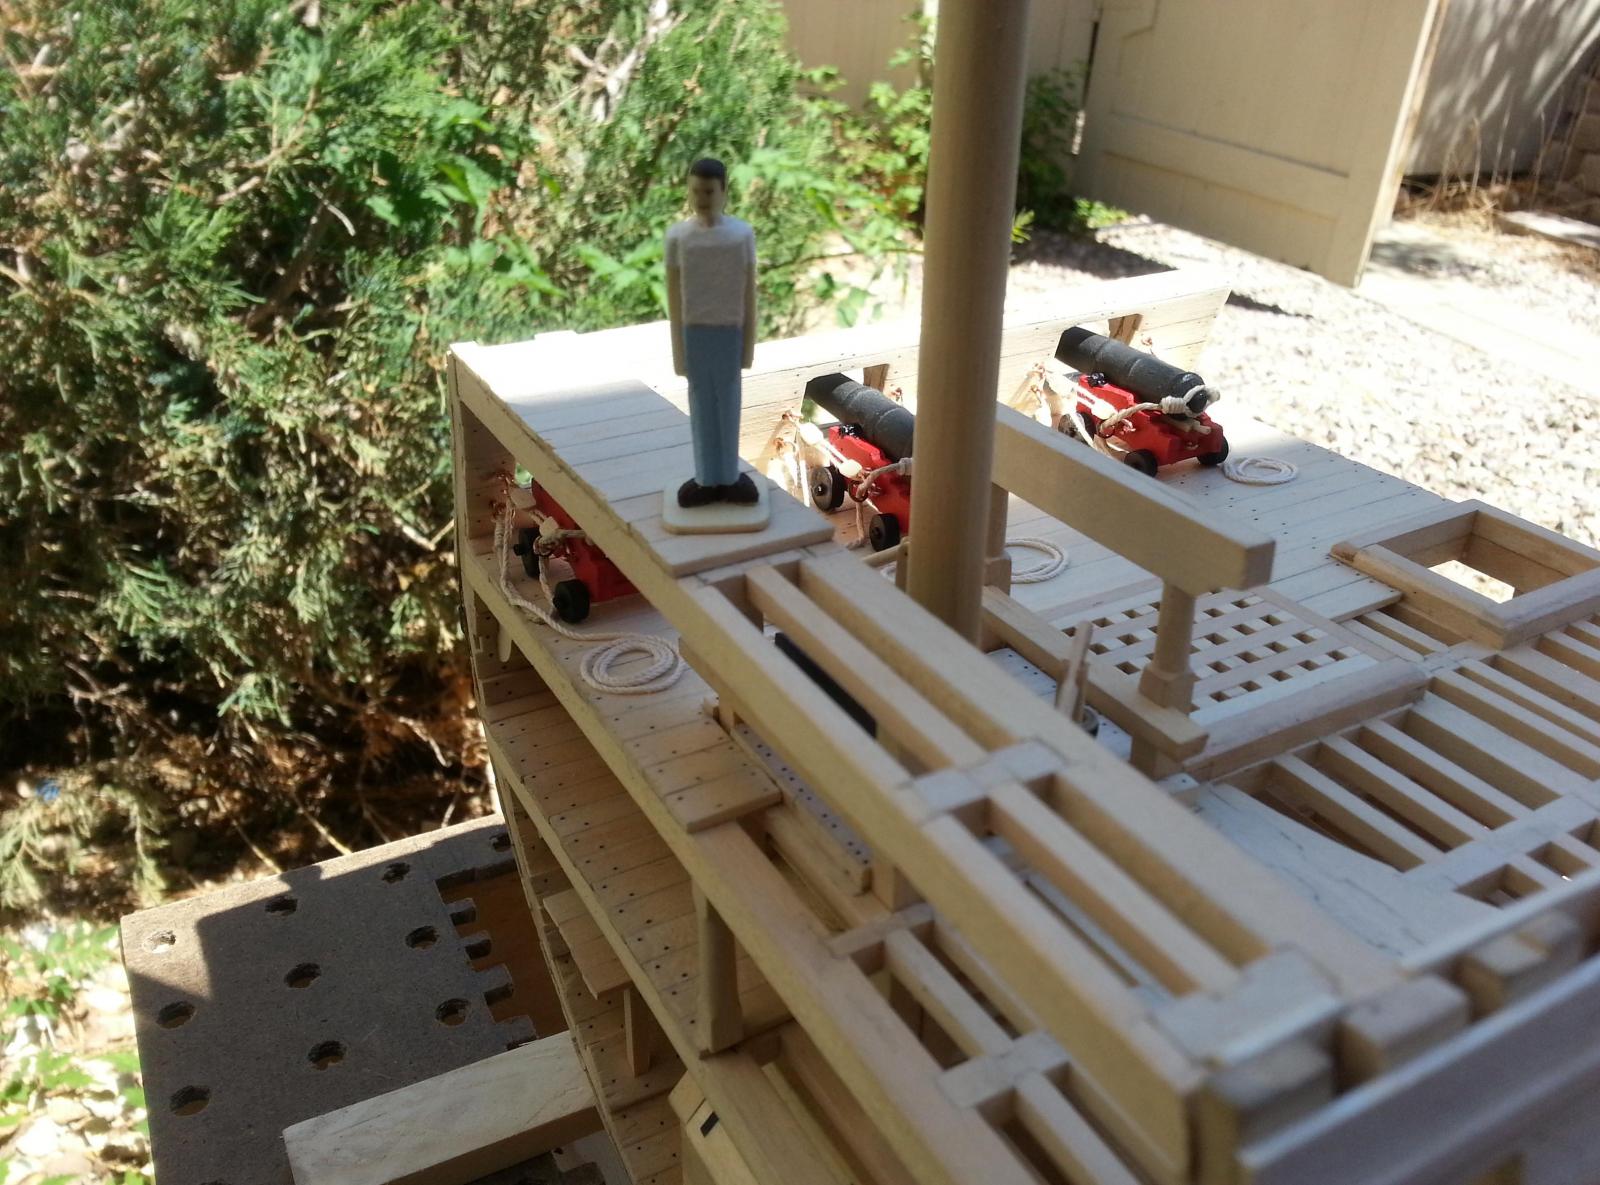
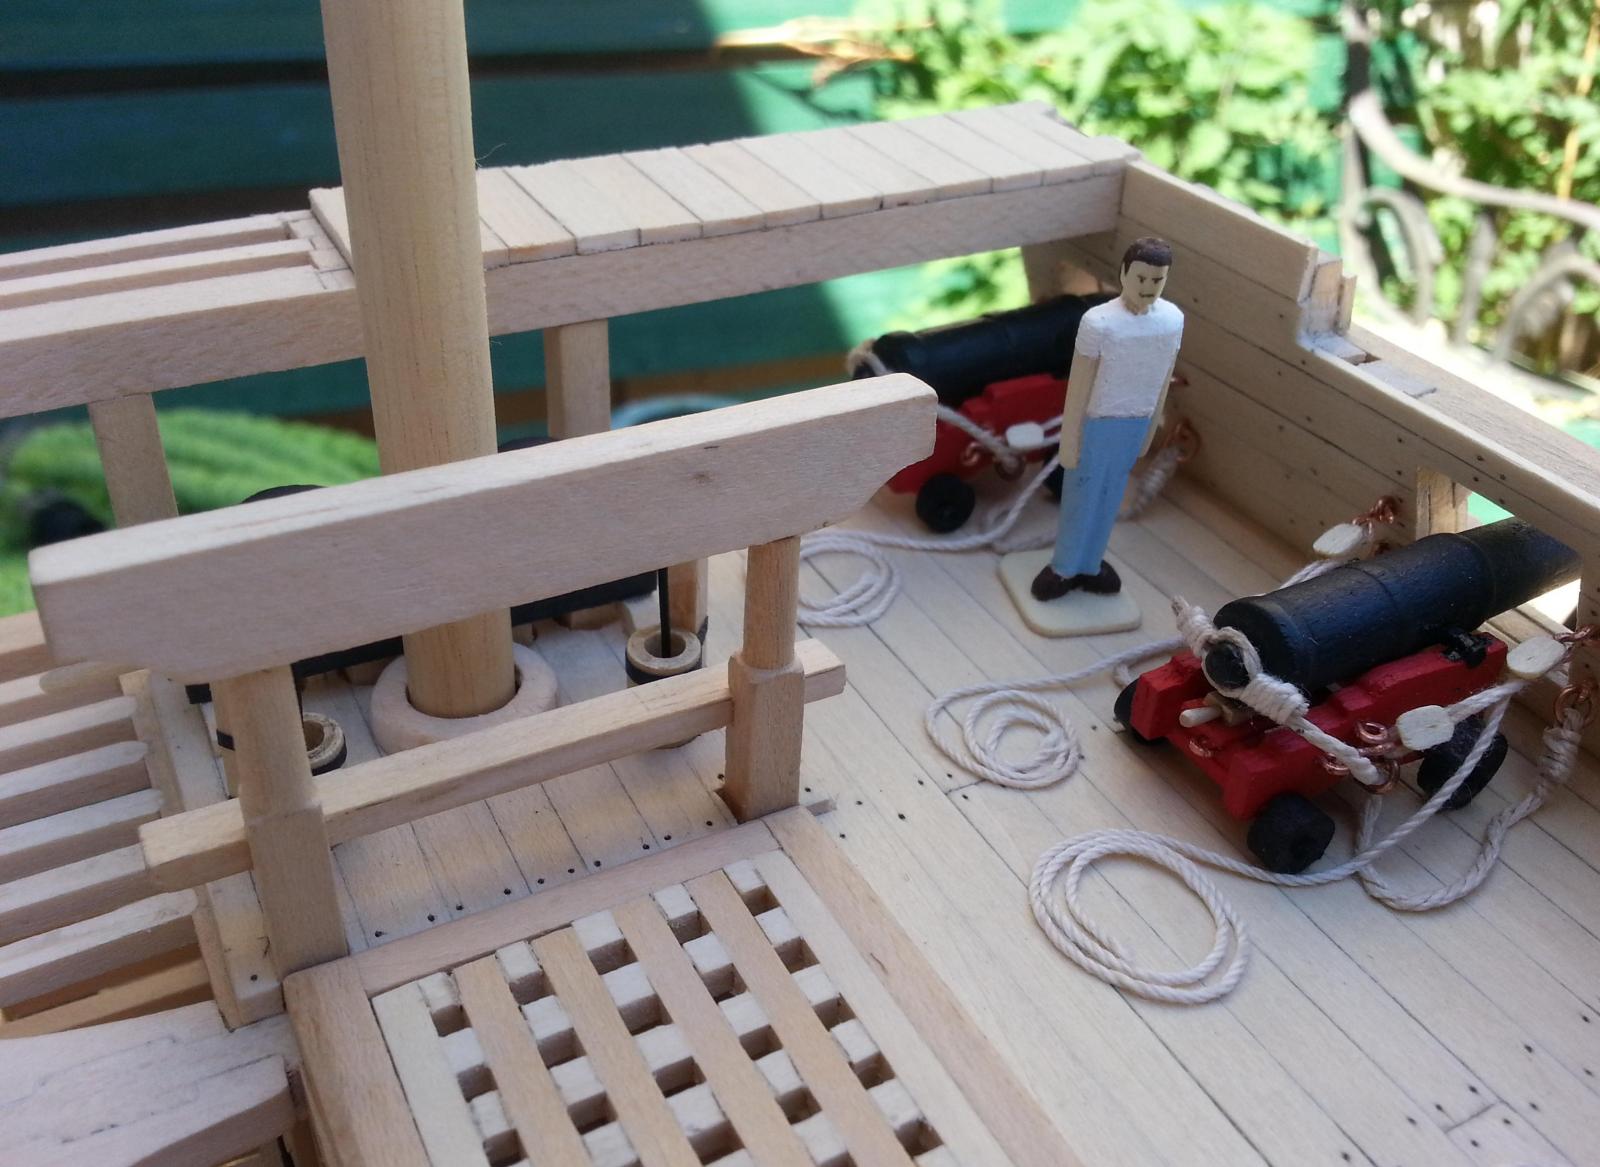
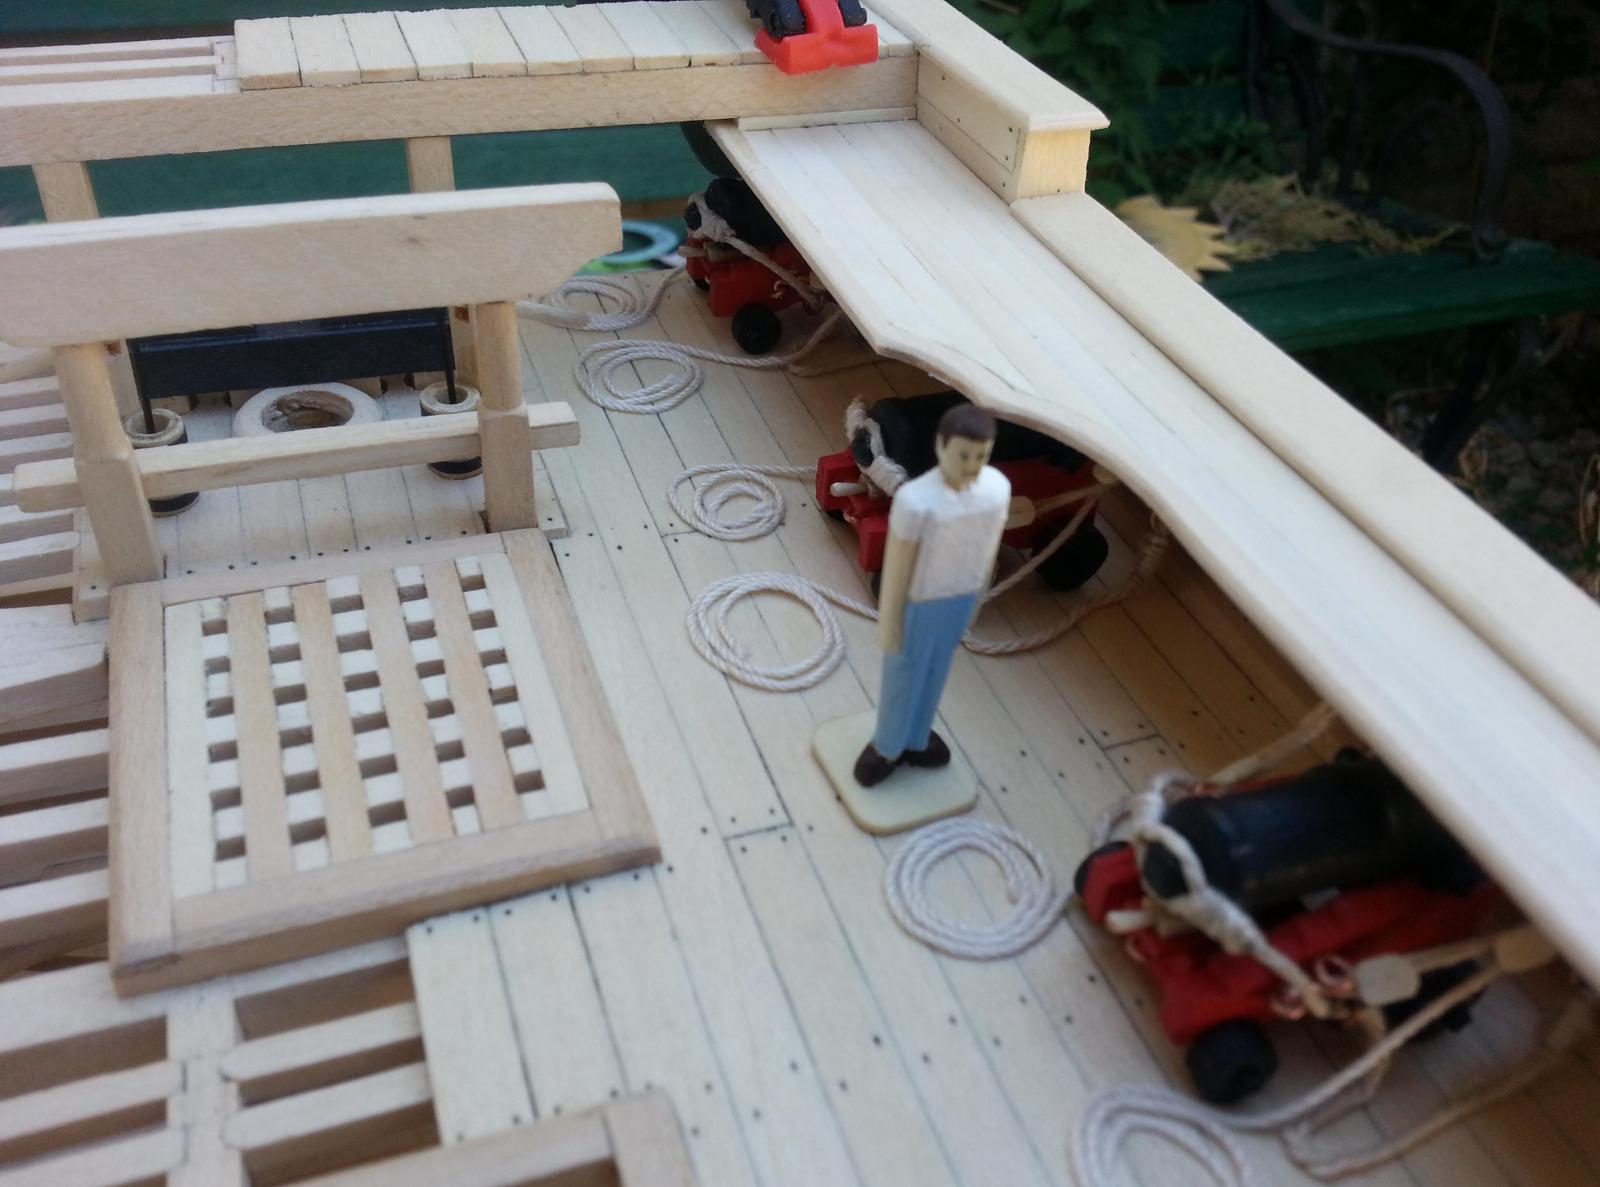
Good Morning Matrim, It's funny you should mention "Splinter" as I have been pondering how to go about making a hunched over figure for the lower deck area. In regards to Woody's actual height of 6' tall (1.5 inches), I did not know people were that much smaller. If my math is correct, a person who is 5'7", or to make matters simpler 5'6", my model should be 1 and 3/8 of an inch tall. I guess Splinter will be the first thing I create once I get back from vacation.
-
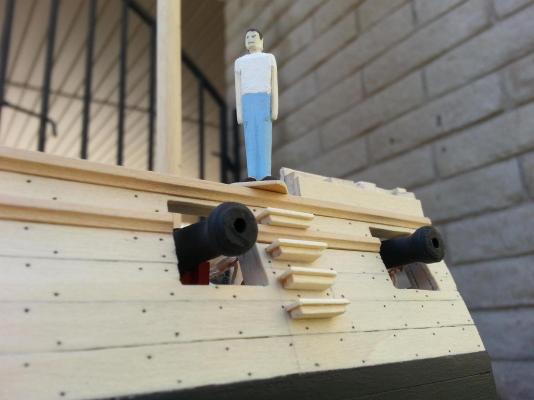
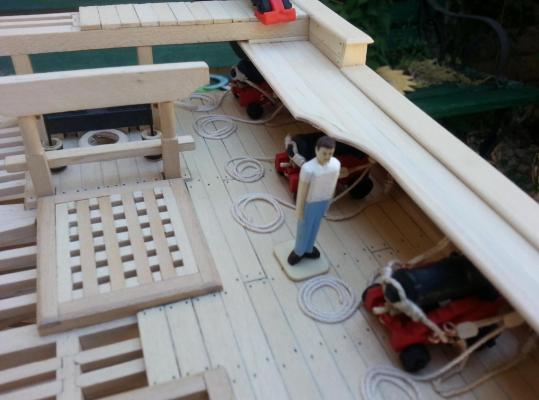
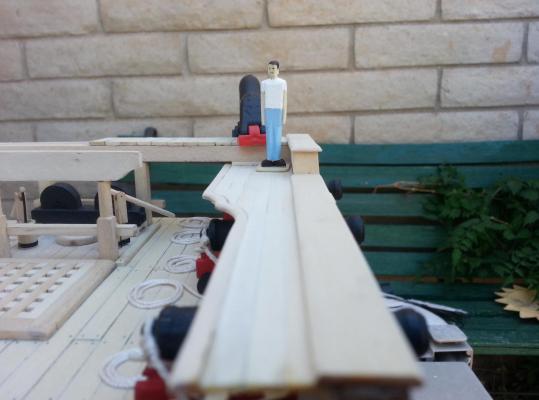
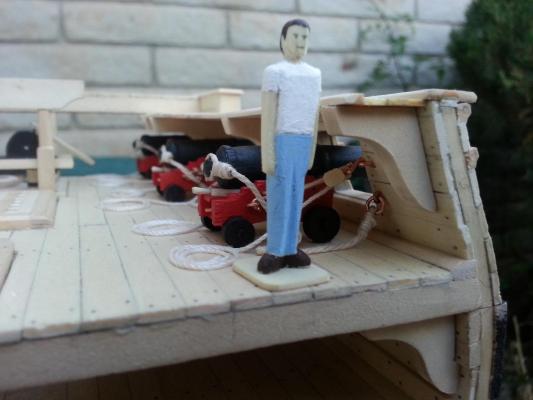
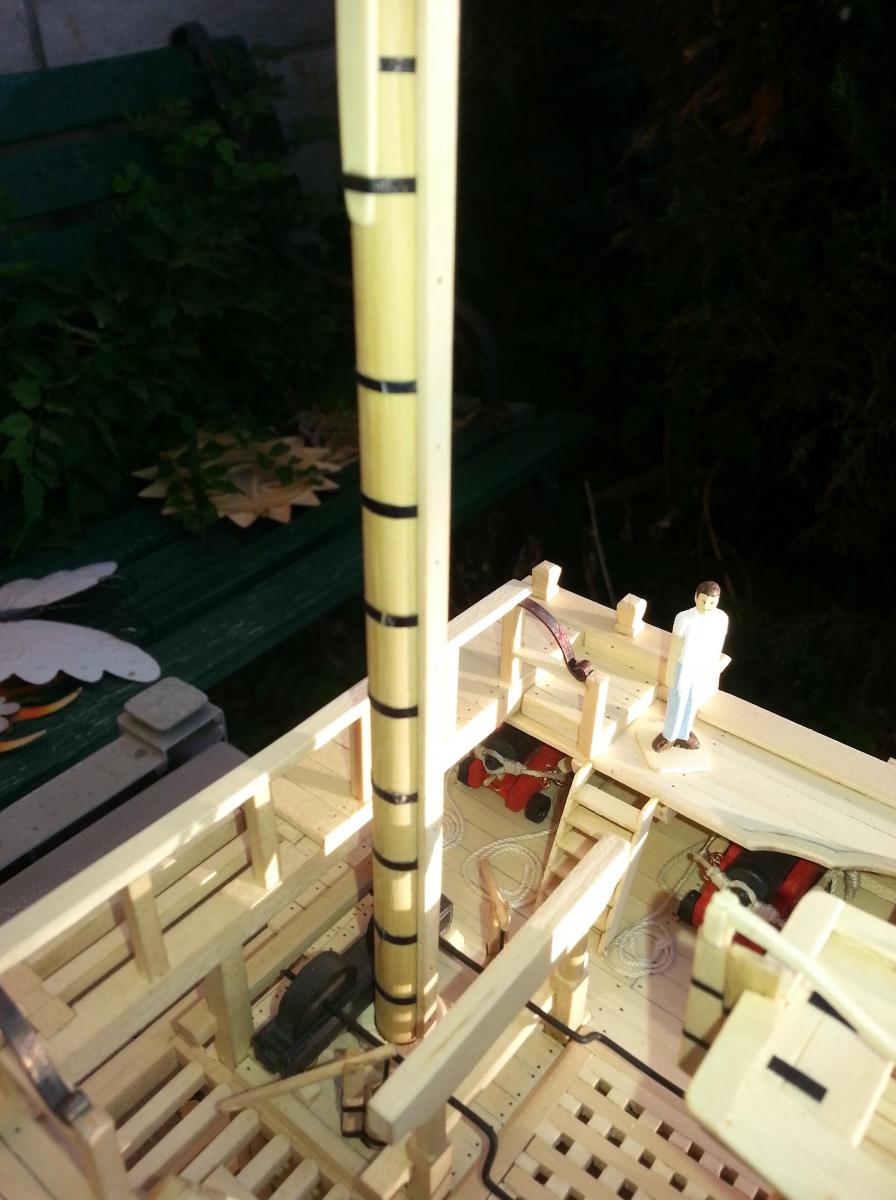
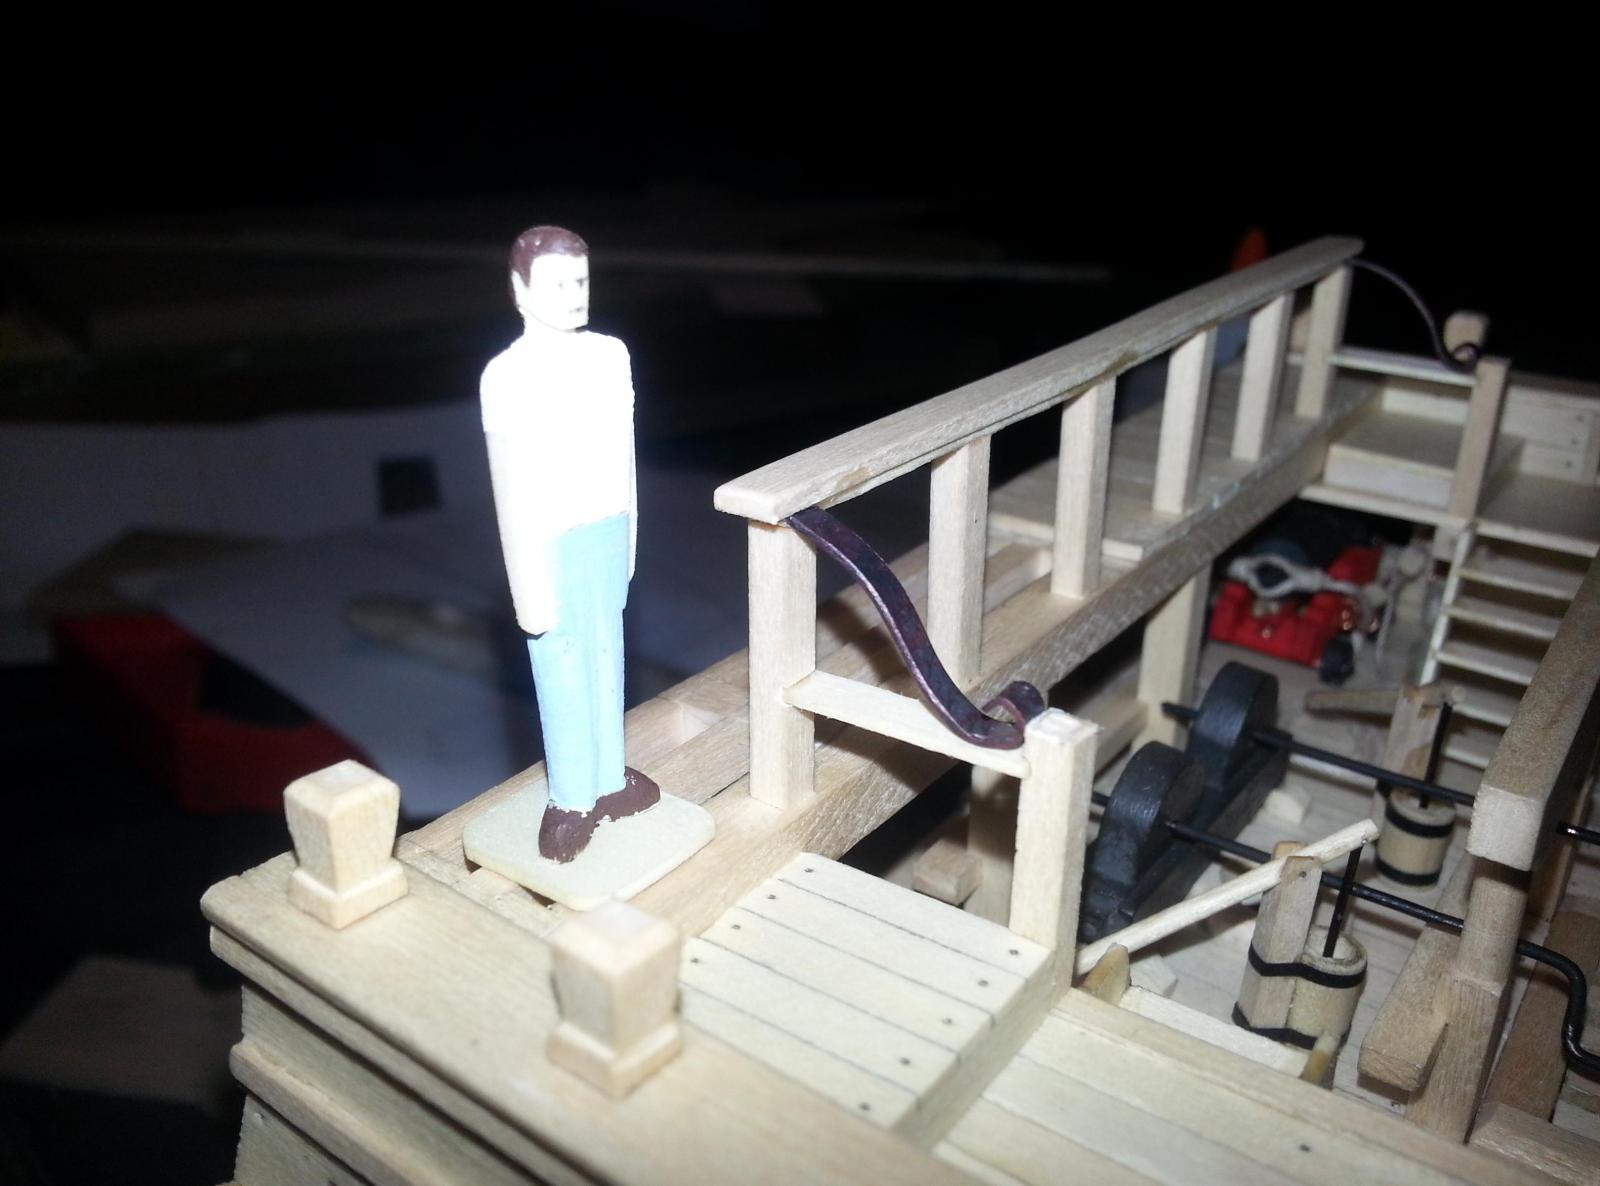
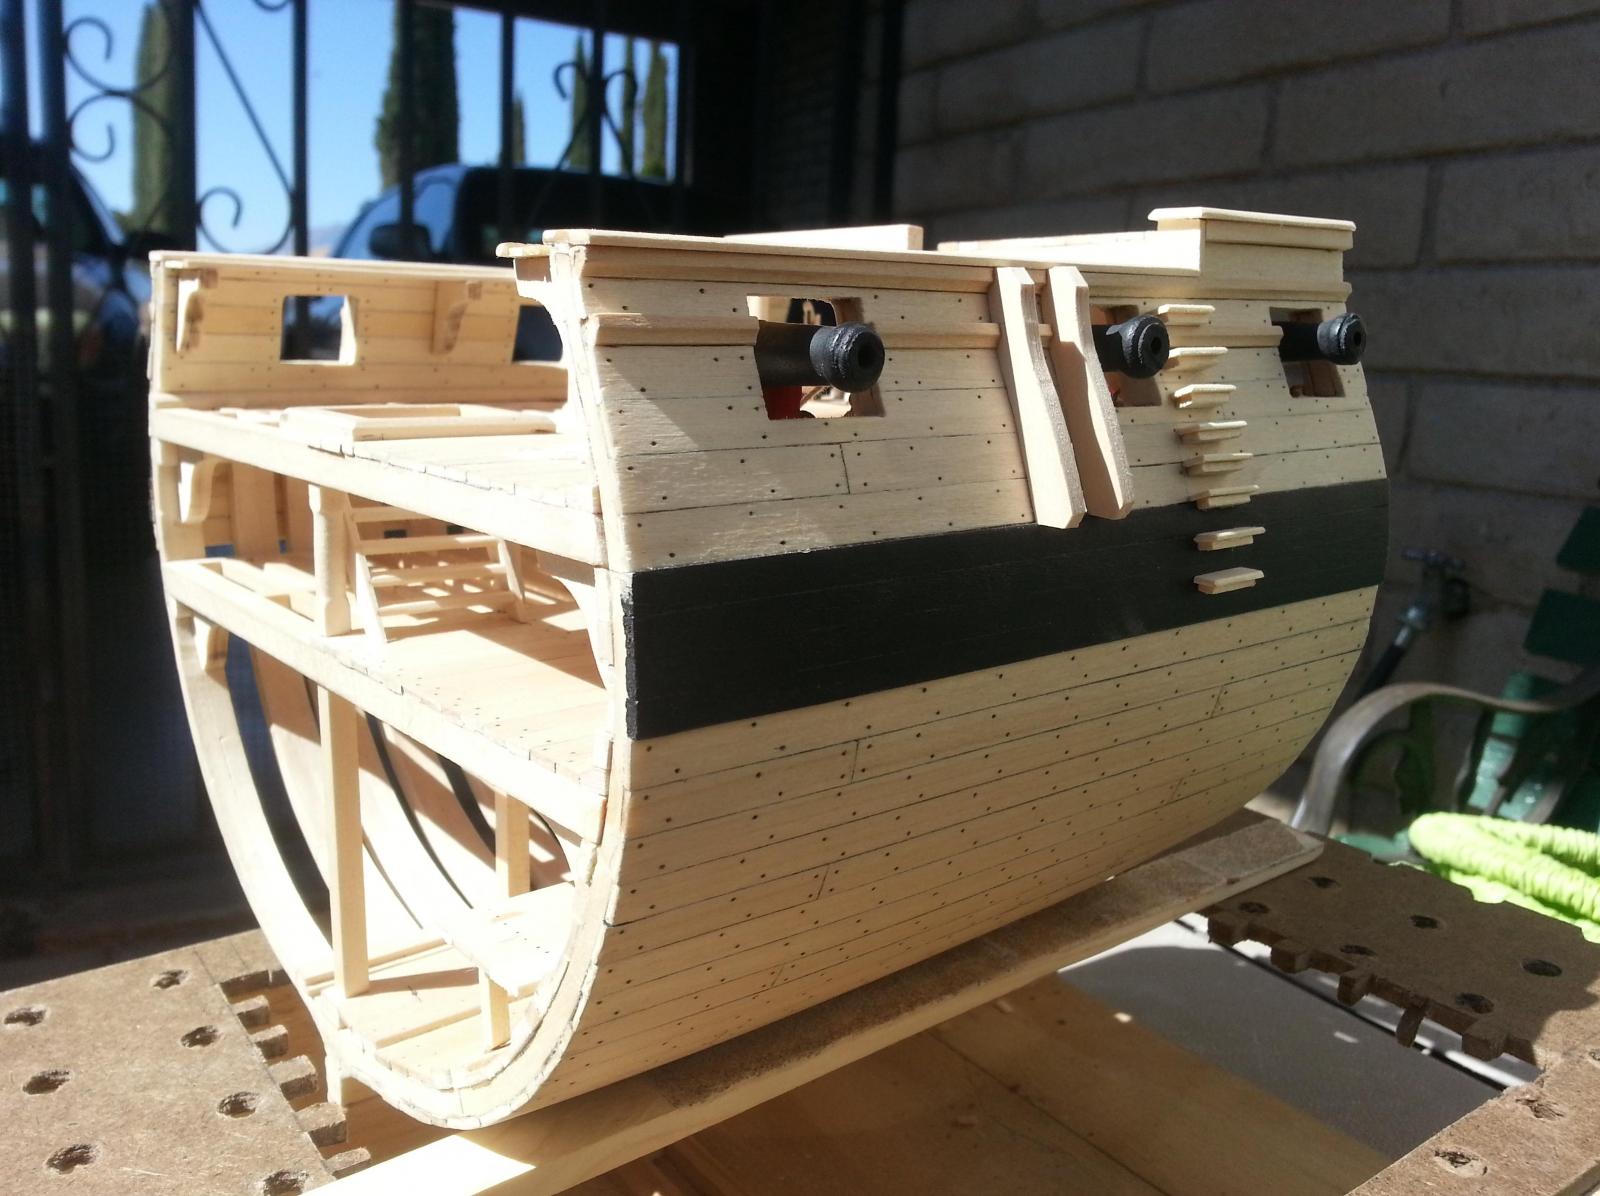
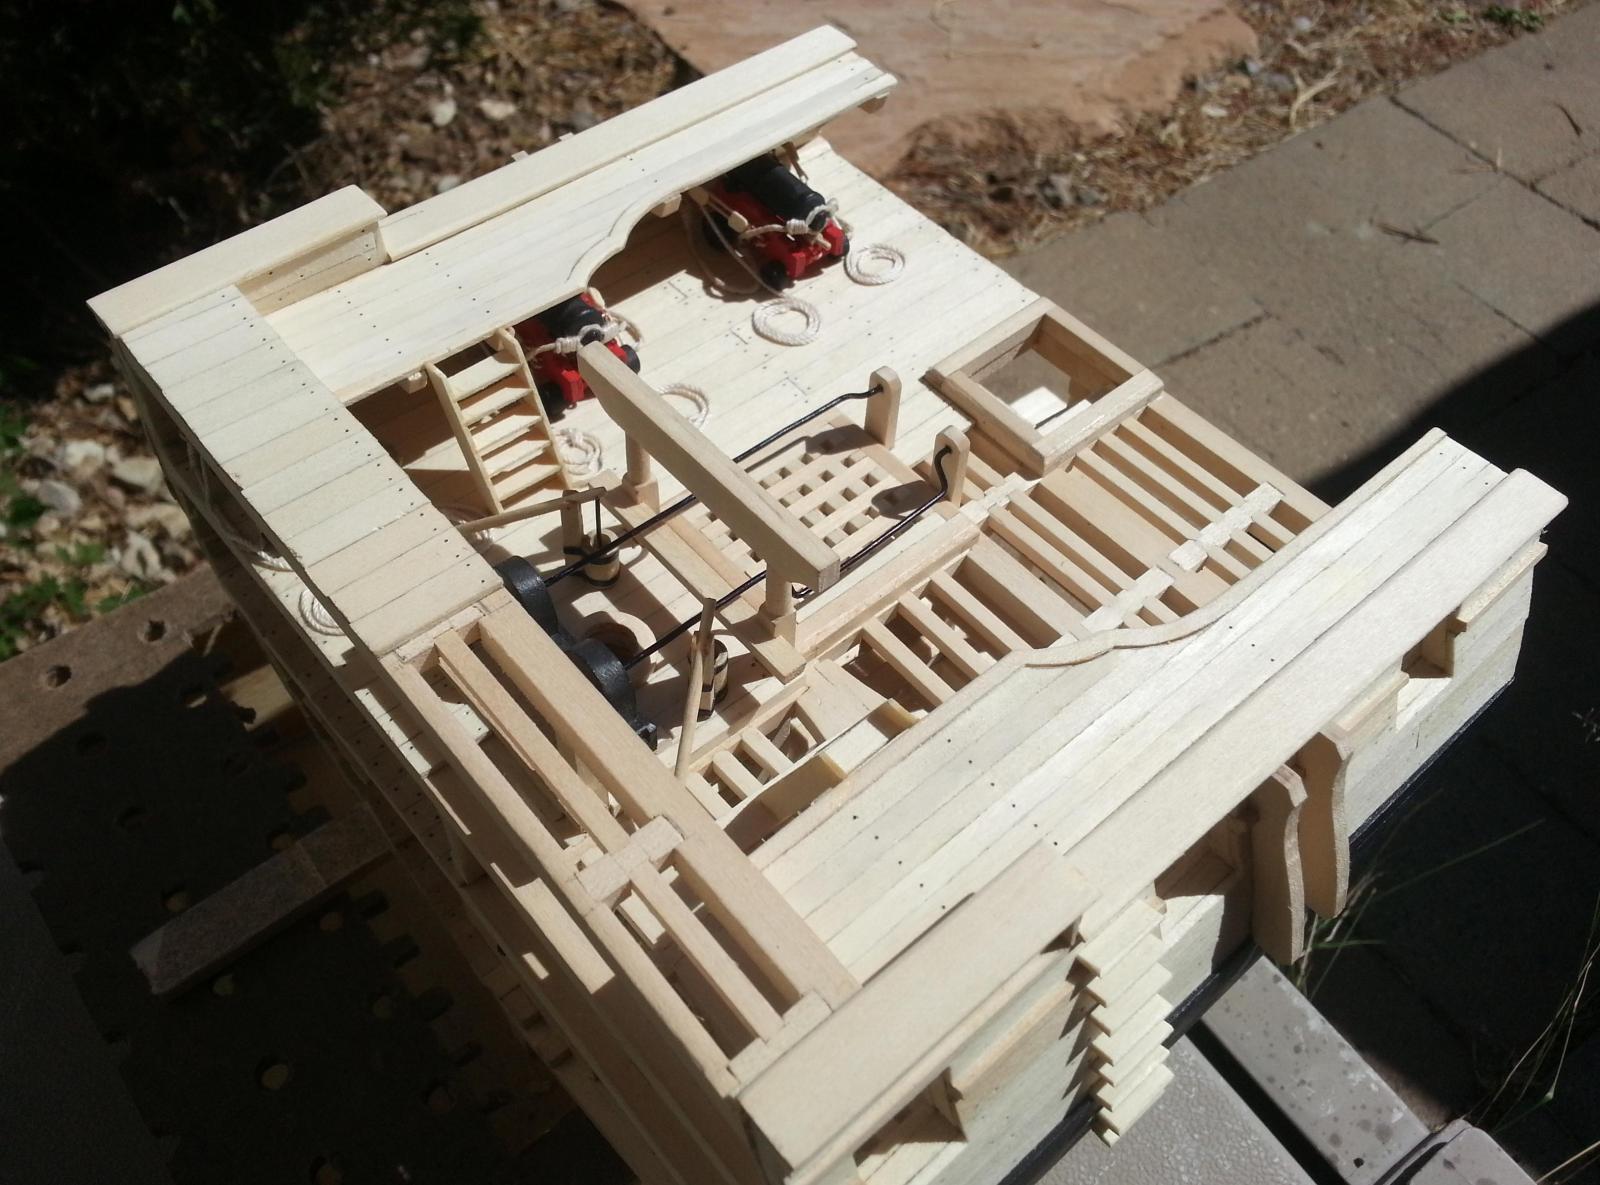
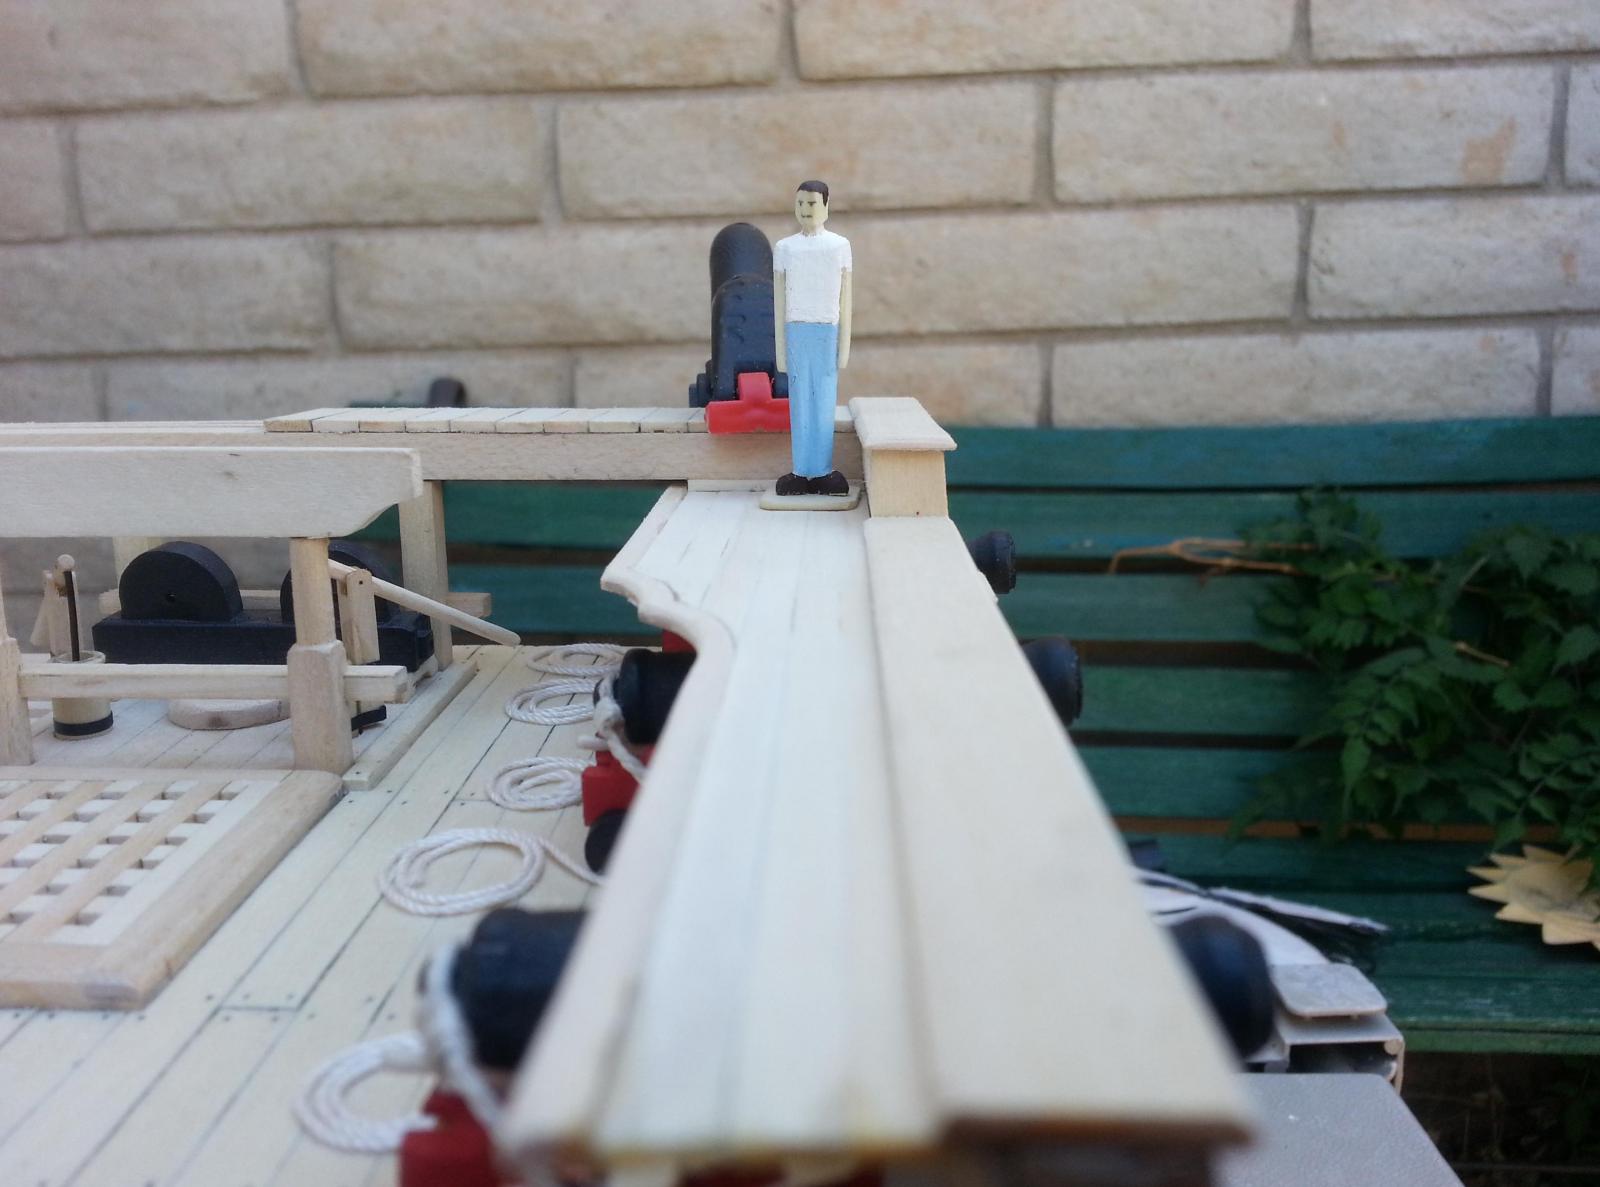
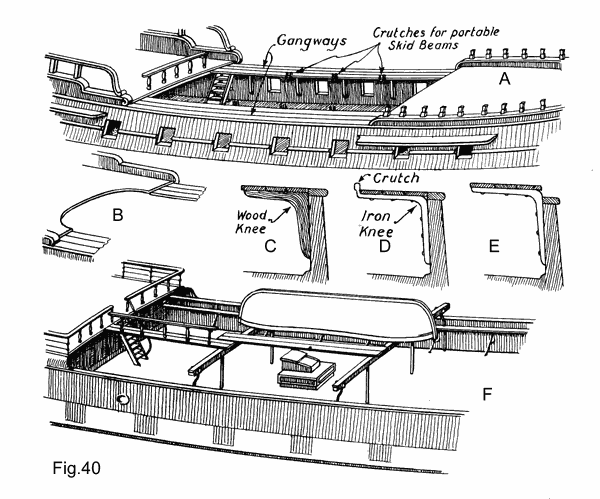
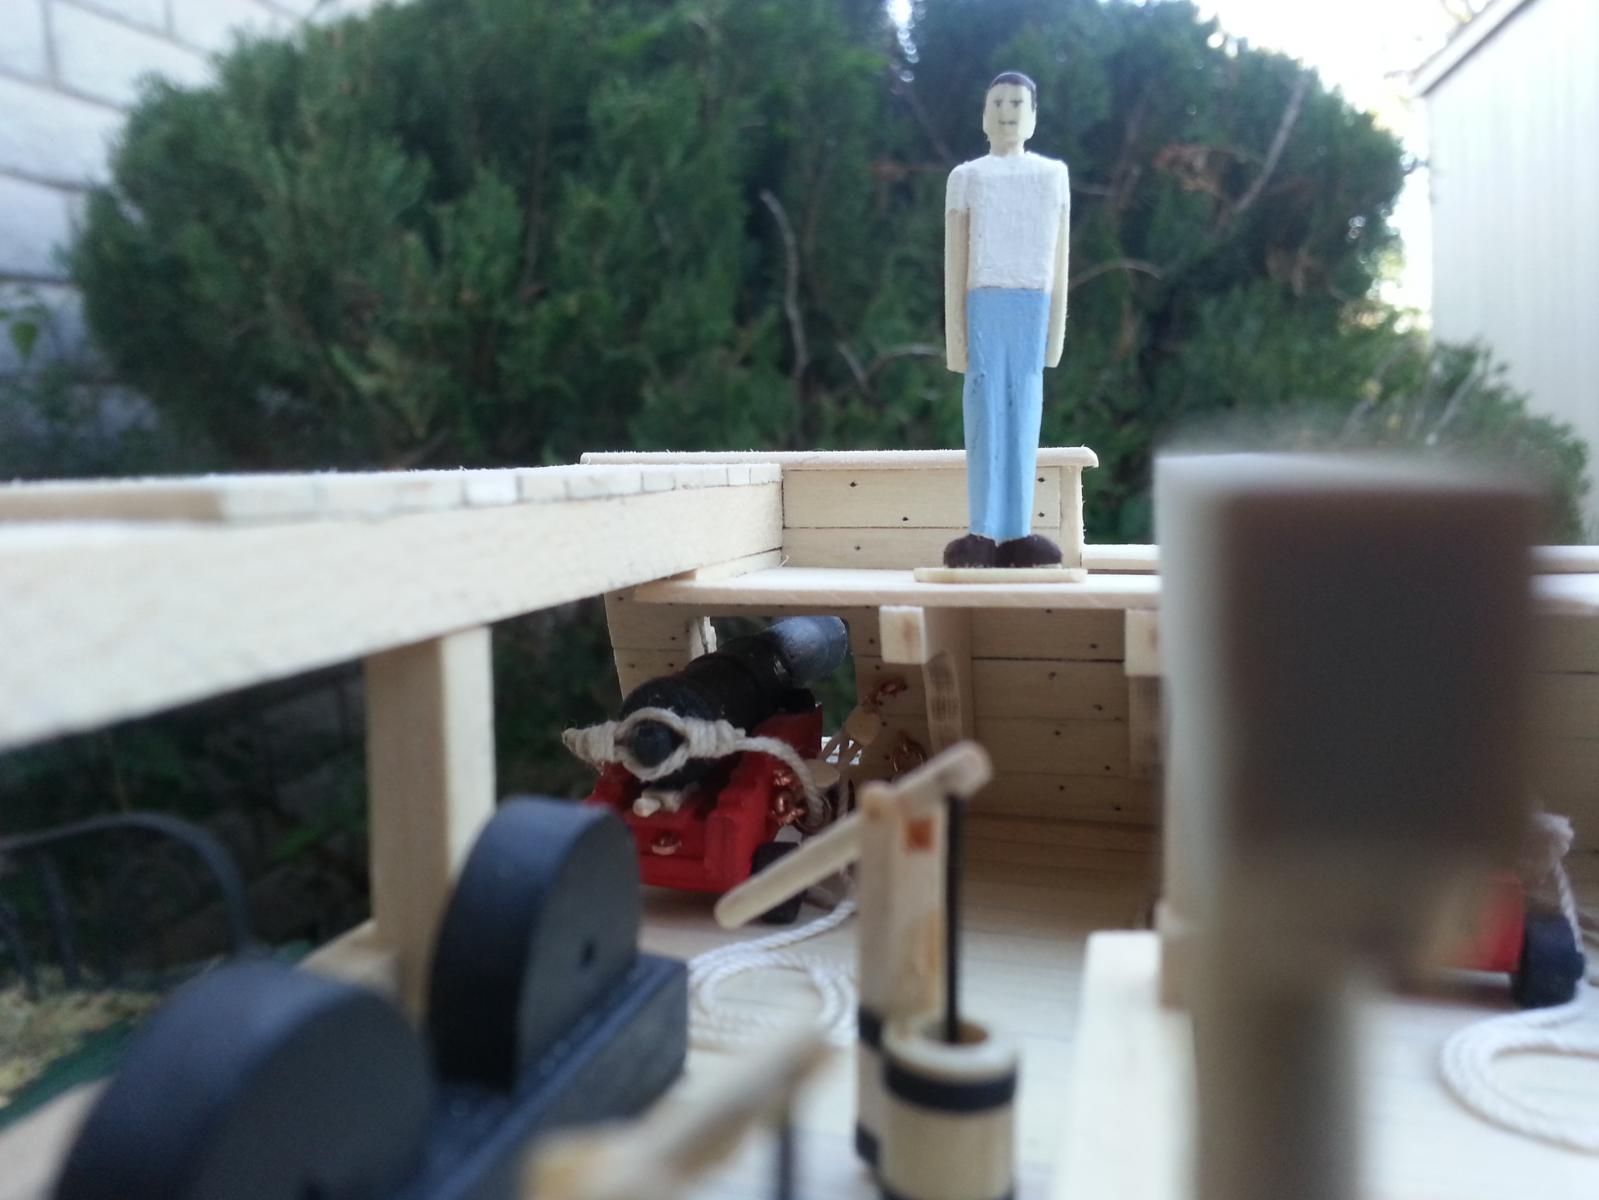
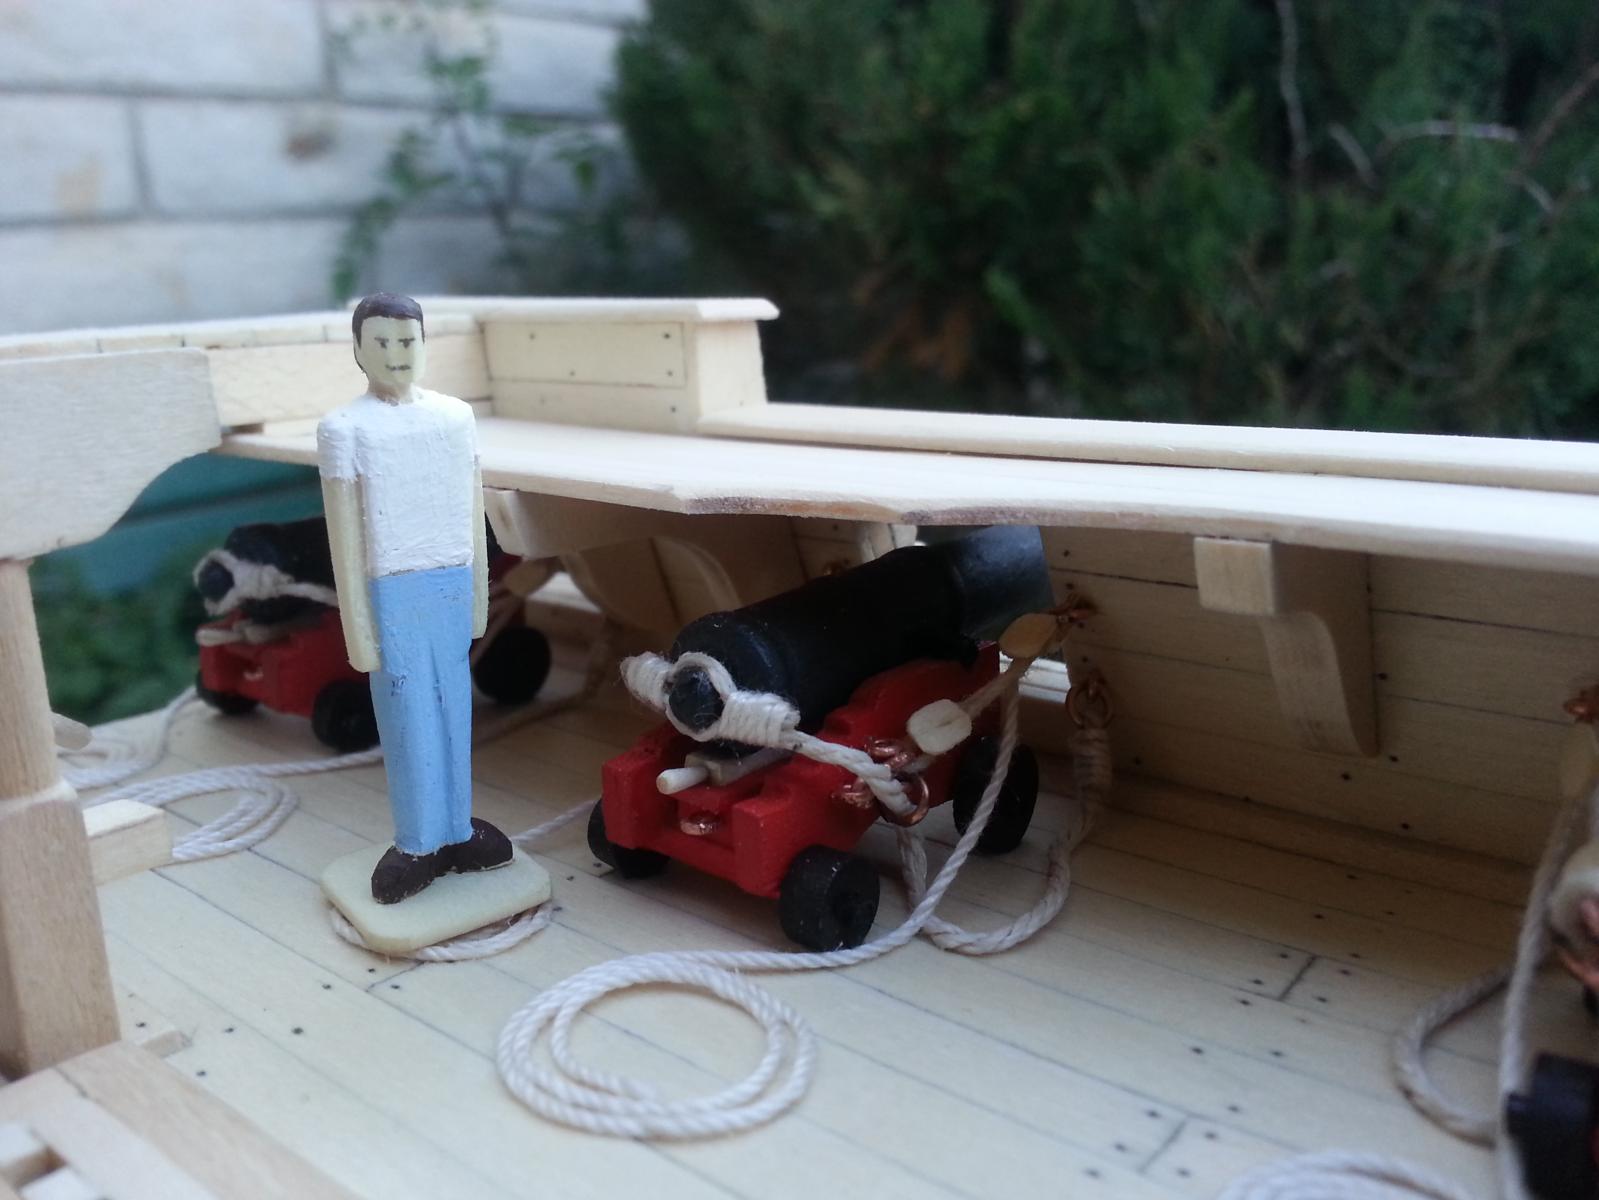
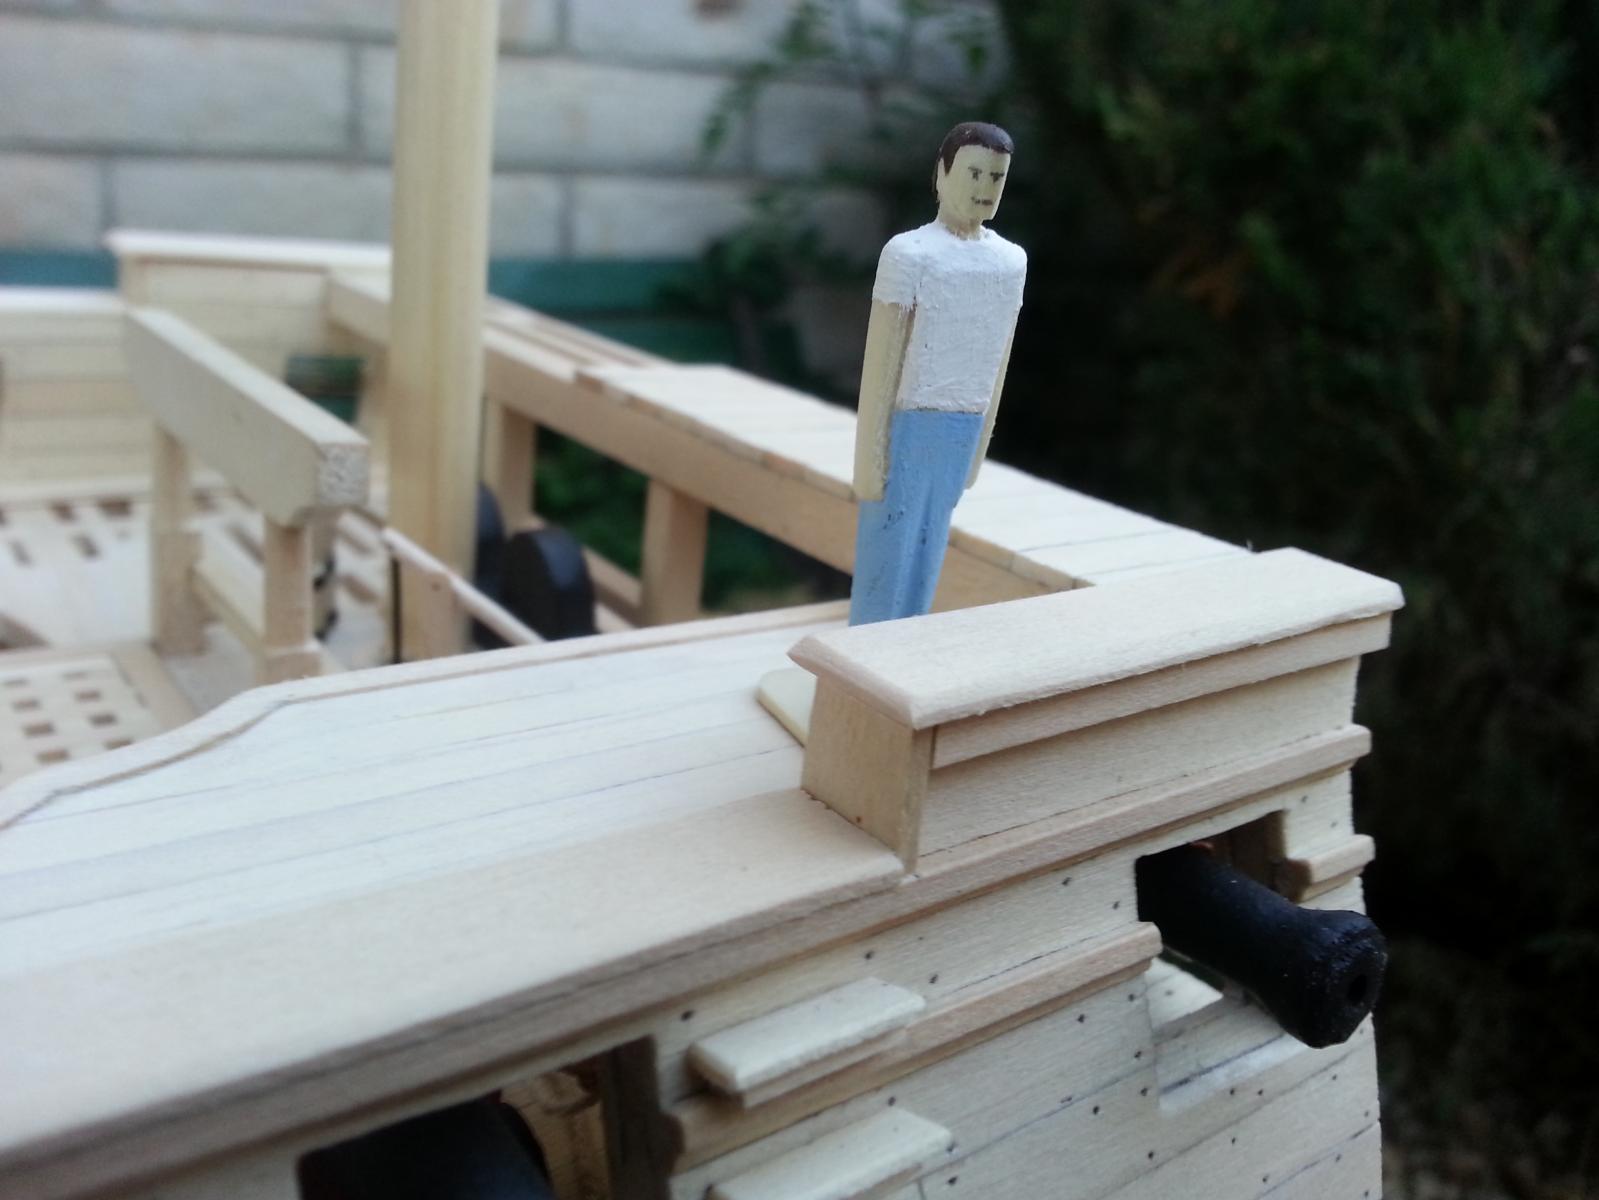
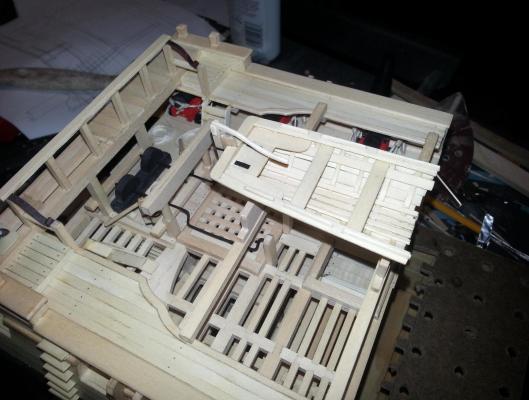
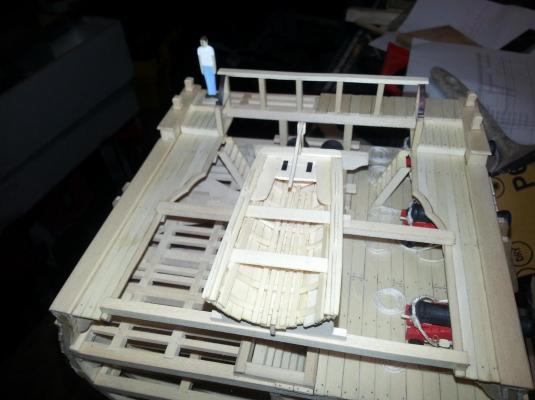
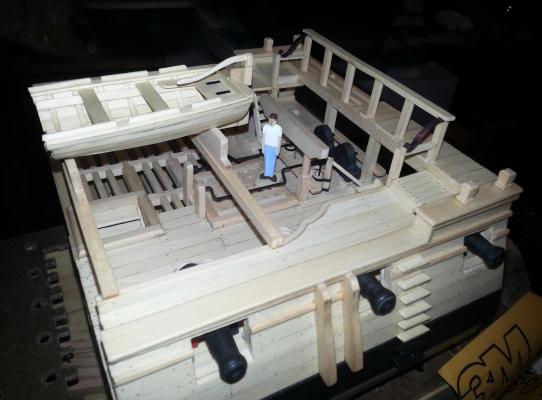
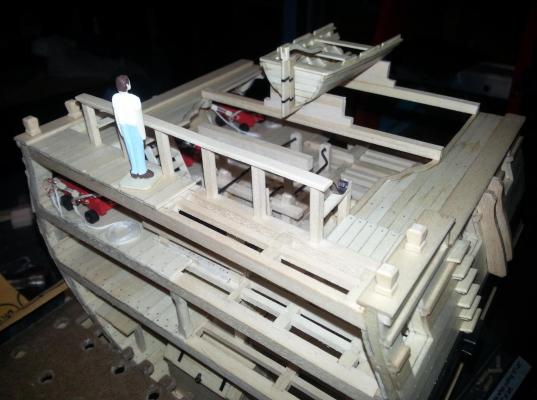
Greetings to all, Mark, Tim, Pete, and Bindy thanks for looking in on my build and for the advice, motivation, and/or kudos. You all inspire me to continue giving my best and looking for ways to improve myself. I thought Woody blended in too well (like a ninja), into the surrounding ship and decided to paint him so that he could stand out a bit. I decided to also get started on the aft quarterdeck and framed the QD beam by adding the carlings and ledges, and planking the port side of it. I’ve managed to start on the entry steps but still have to get started on the fenders. I also started on the gangway in order to best determine how I would go about making the brackets. I will be honest with all of you and confess that soldering the brackets was not my cup of tea and I did a little research on line and came across a web site (http://model-ship-plans.com/Campbell/Deck%20furniture.html ) and it explained that gangway brackets were made with either iron or wood. Since I am not too savvy on soldering and I have already incorporated plenty of wooden knees on my Triton, I decided to make wooden brackets for my gangway. The following photos will show how she is starting to look. On a side note, whenever I place Woody on board the Triton, I tend to forget he’s there and move my ship from place to place, hence Woody falling to the ground a lot (I believe he may be a little suicidal, what do you think?).