HOLIDAY DONATION DRIVE - SUPPORT MSW - DO YOUR PART TO KEEP THIS GREAT FORUM GOING! (Only 20 donations so far - C'mon guys!)
×


ziled68
-
Posts
158 -
Joined
-
Last visited
Content Type
Profiles
Forums
Gallery
Events
Everything posted by ziled68
-
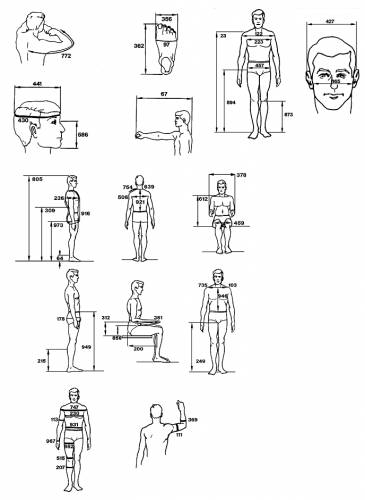
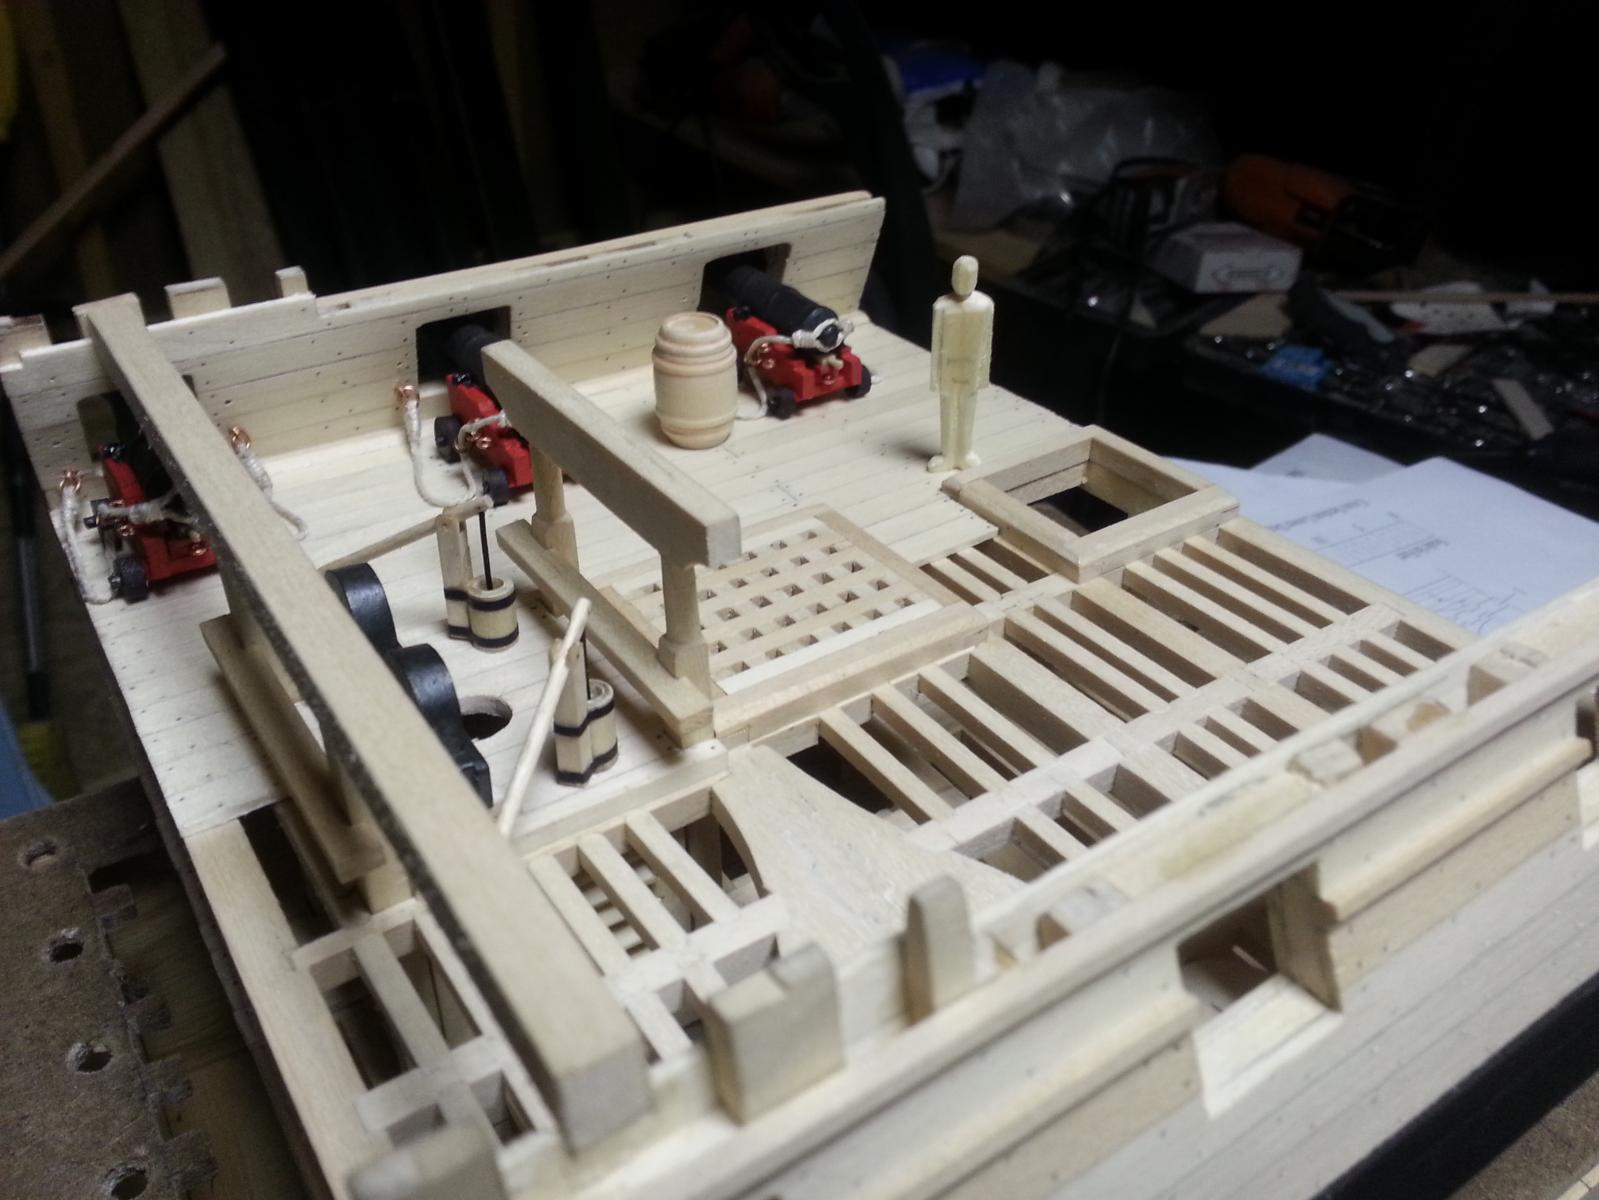
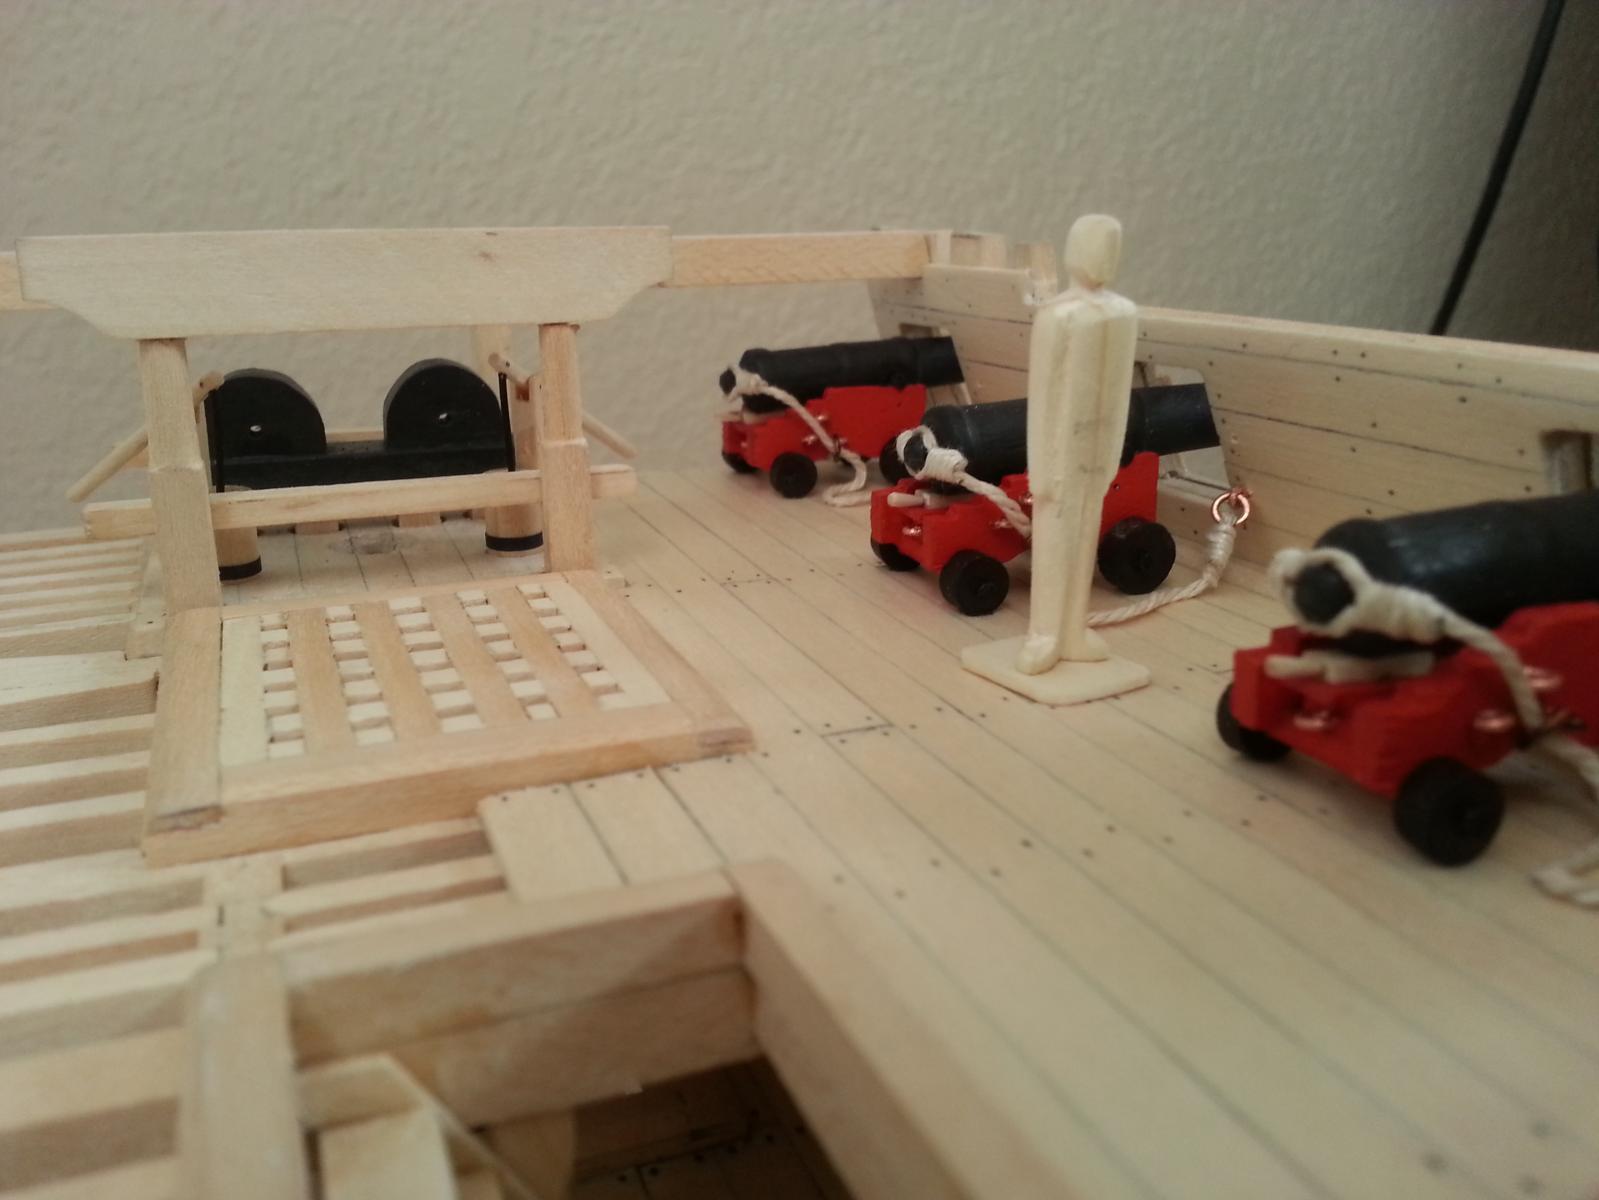
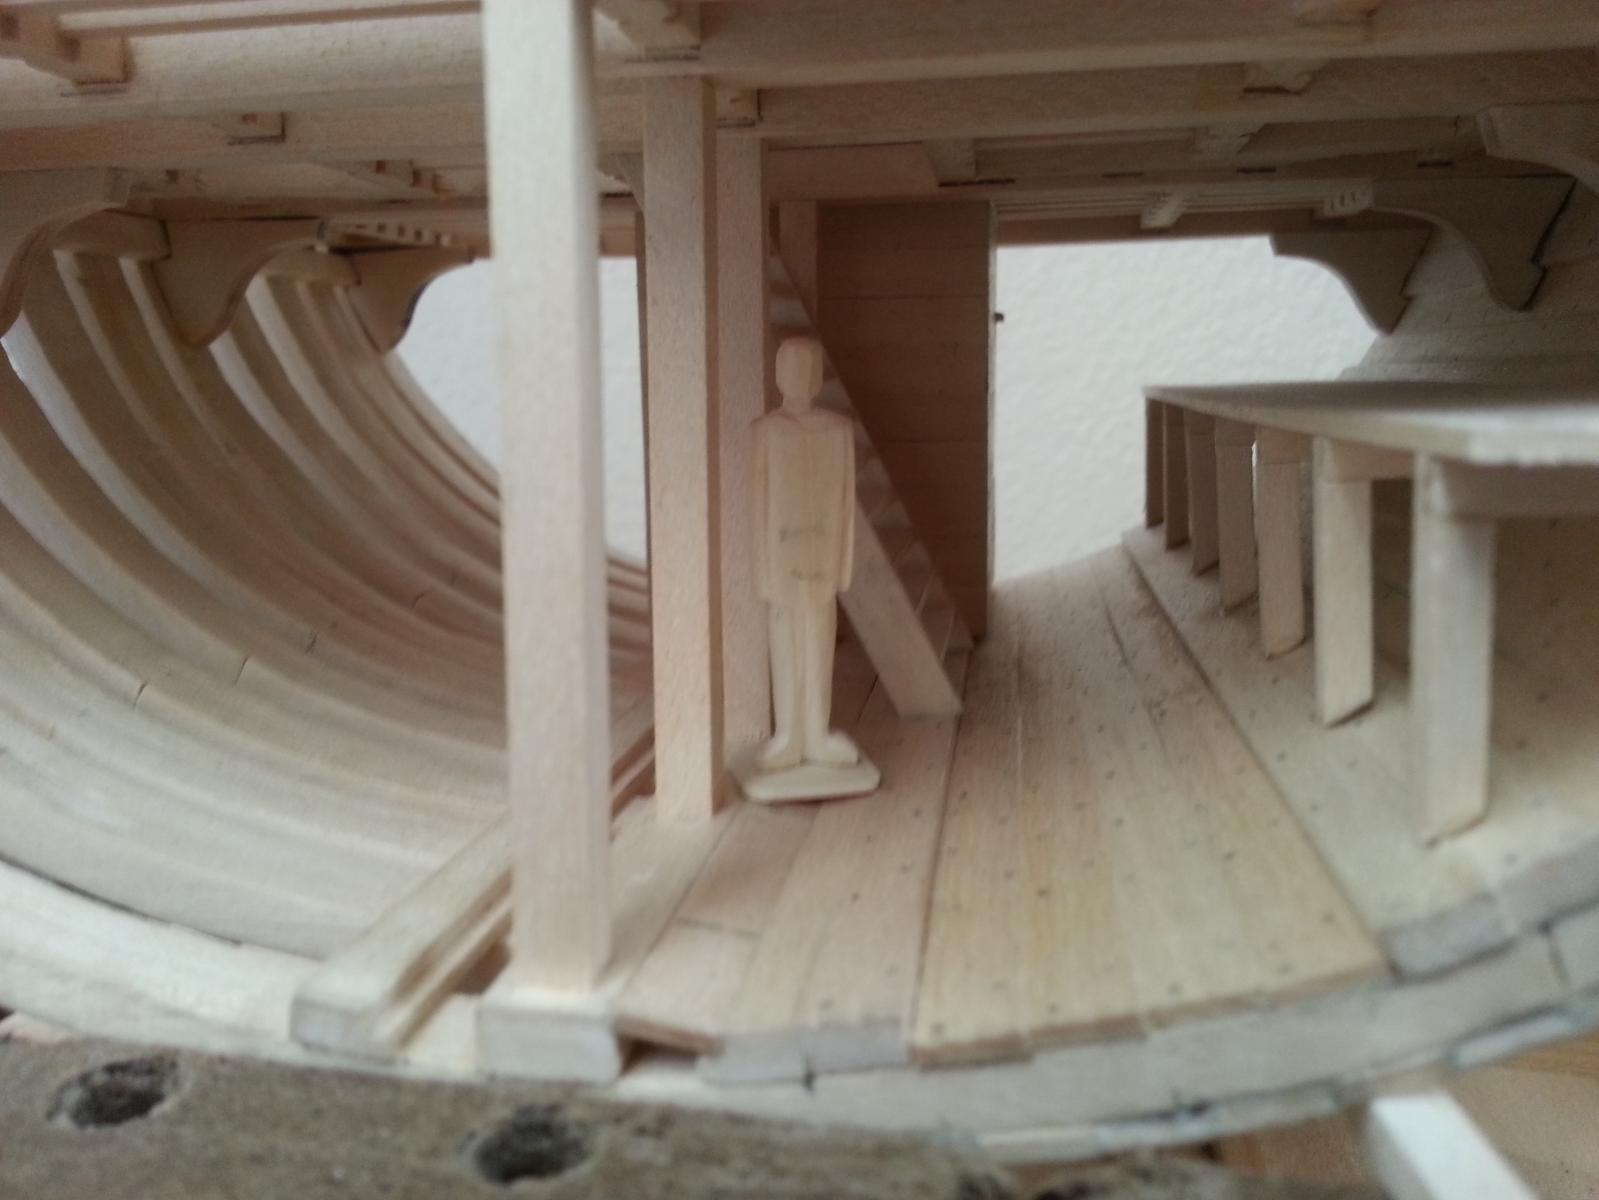
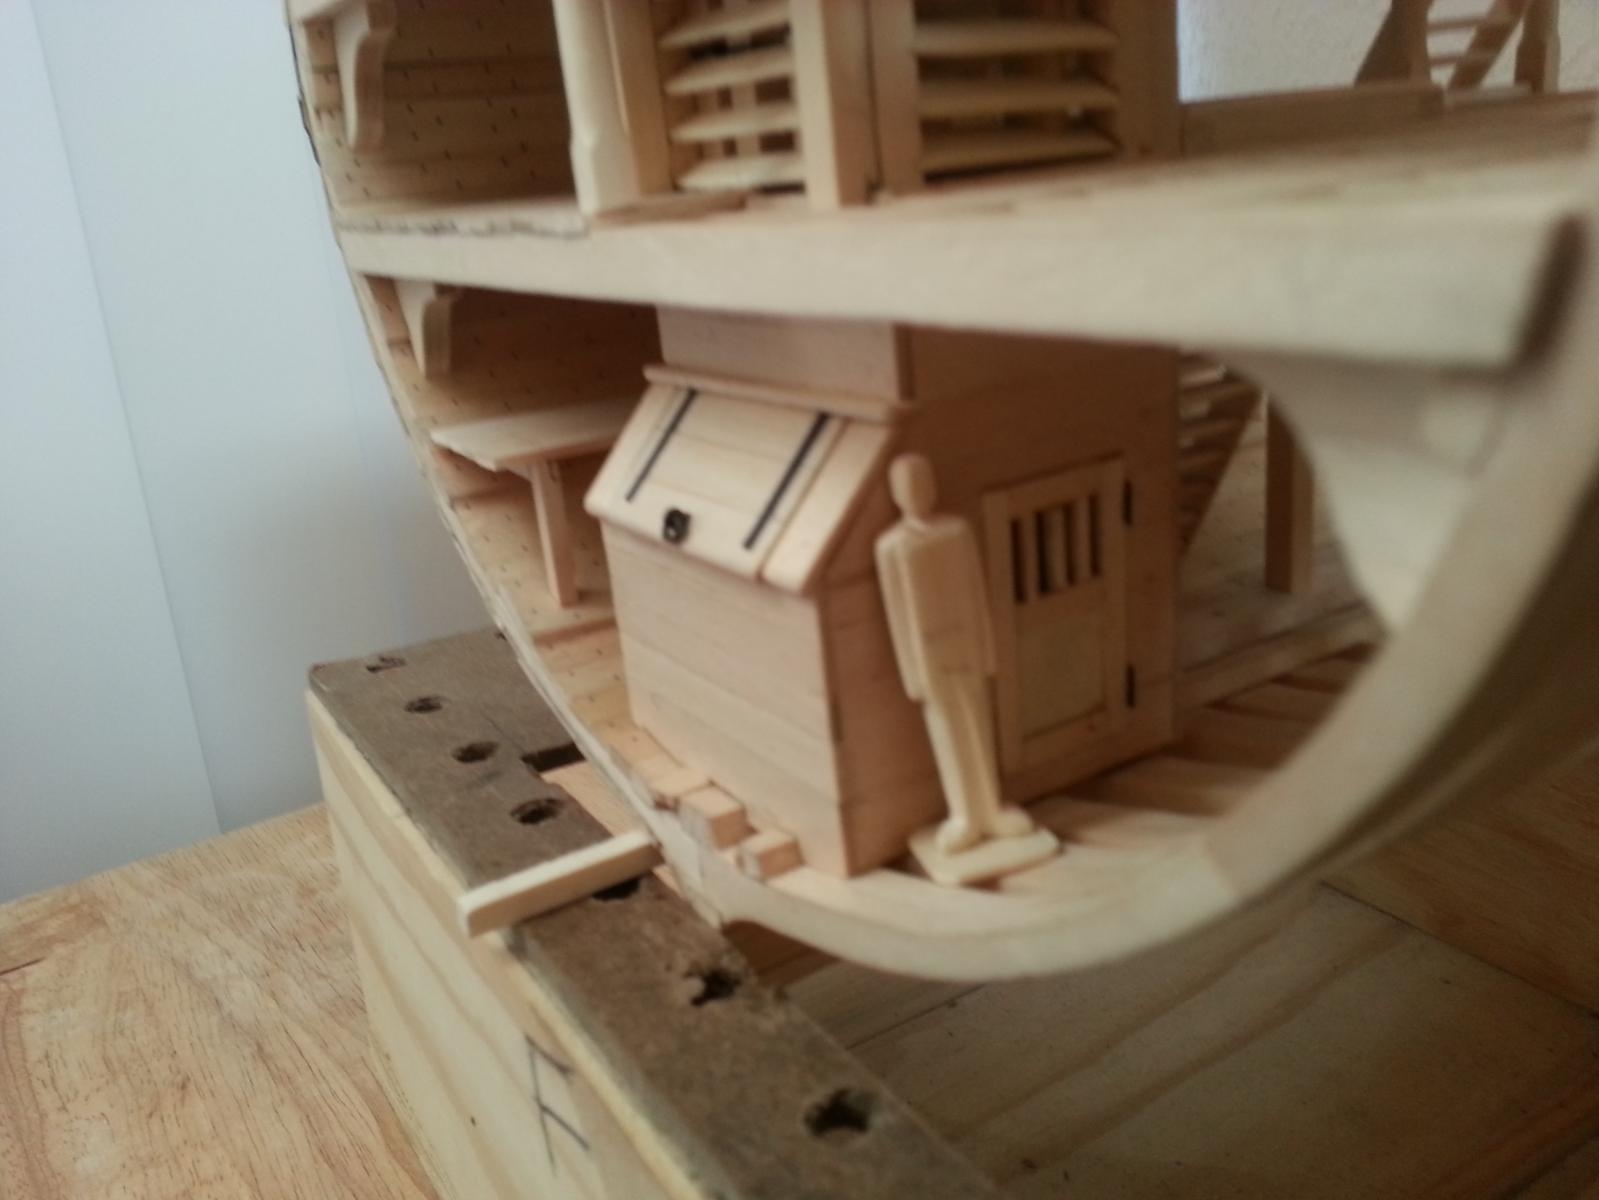
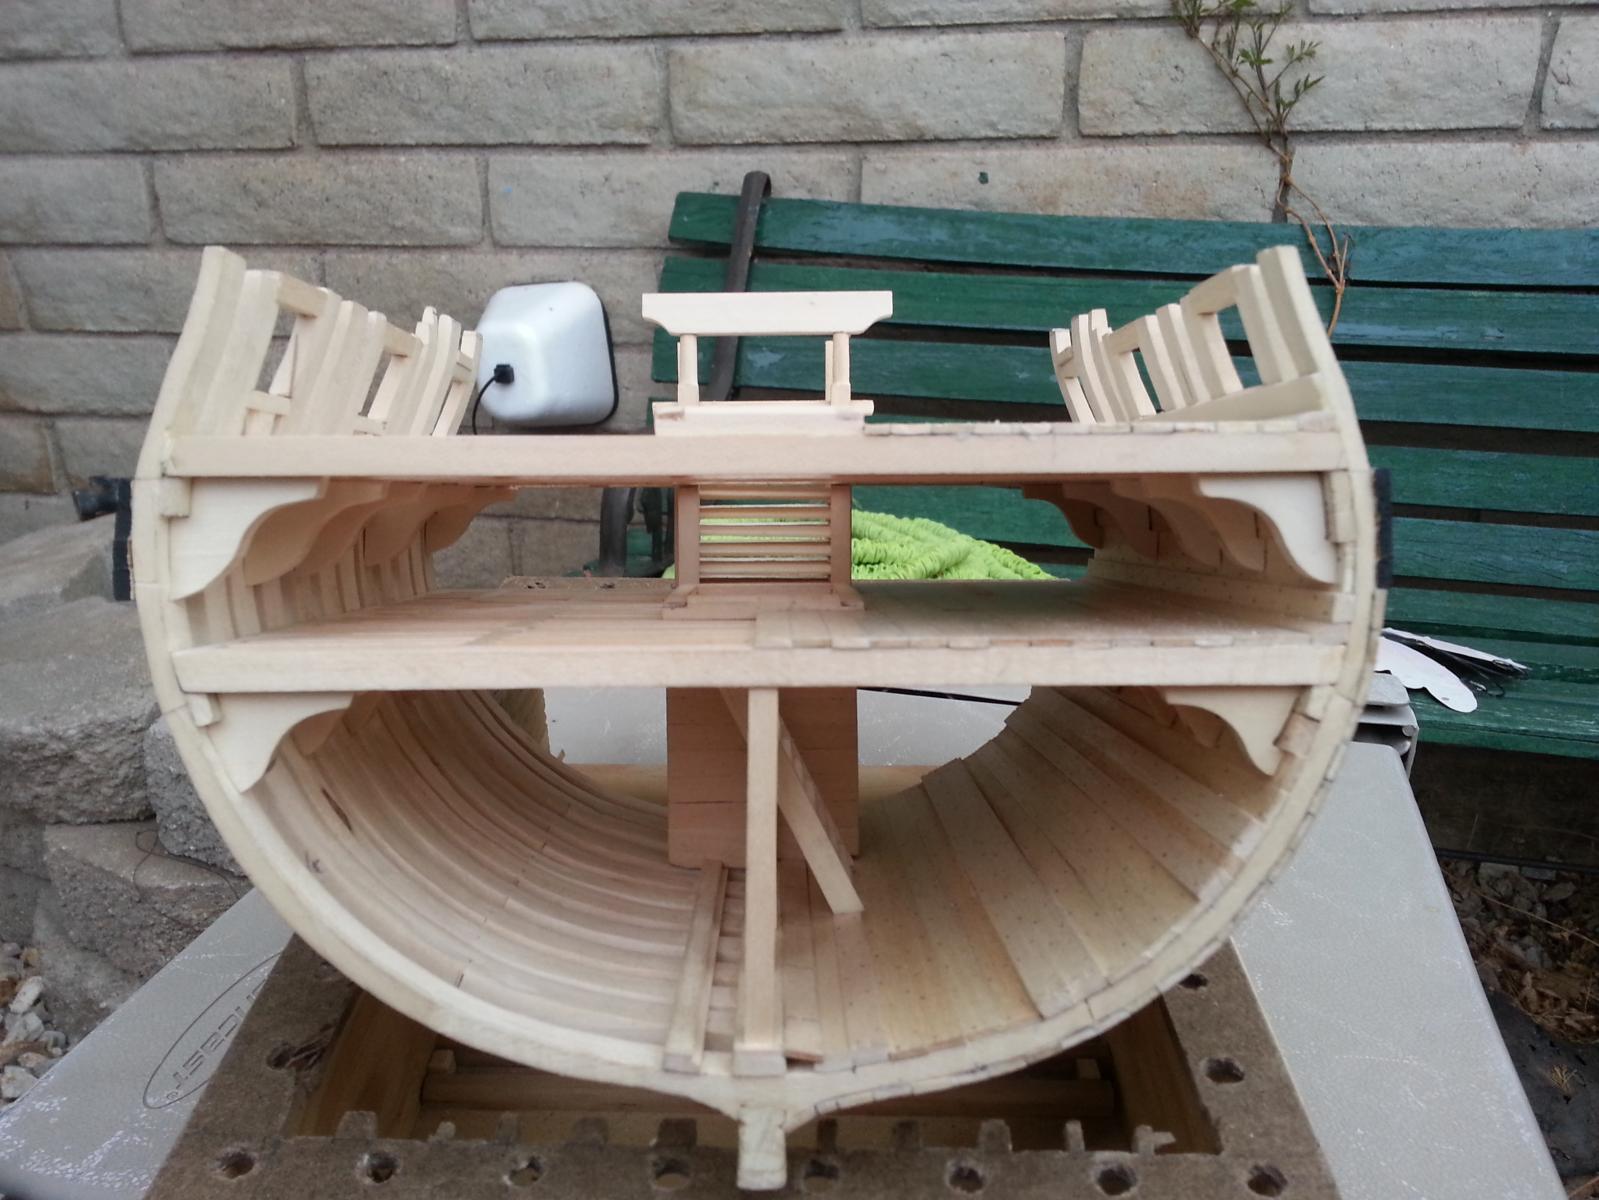
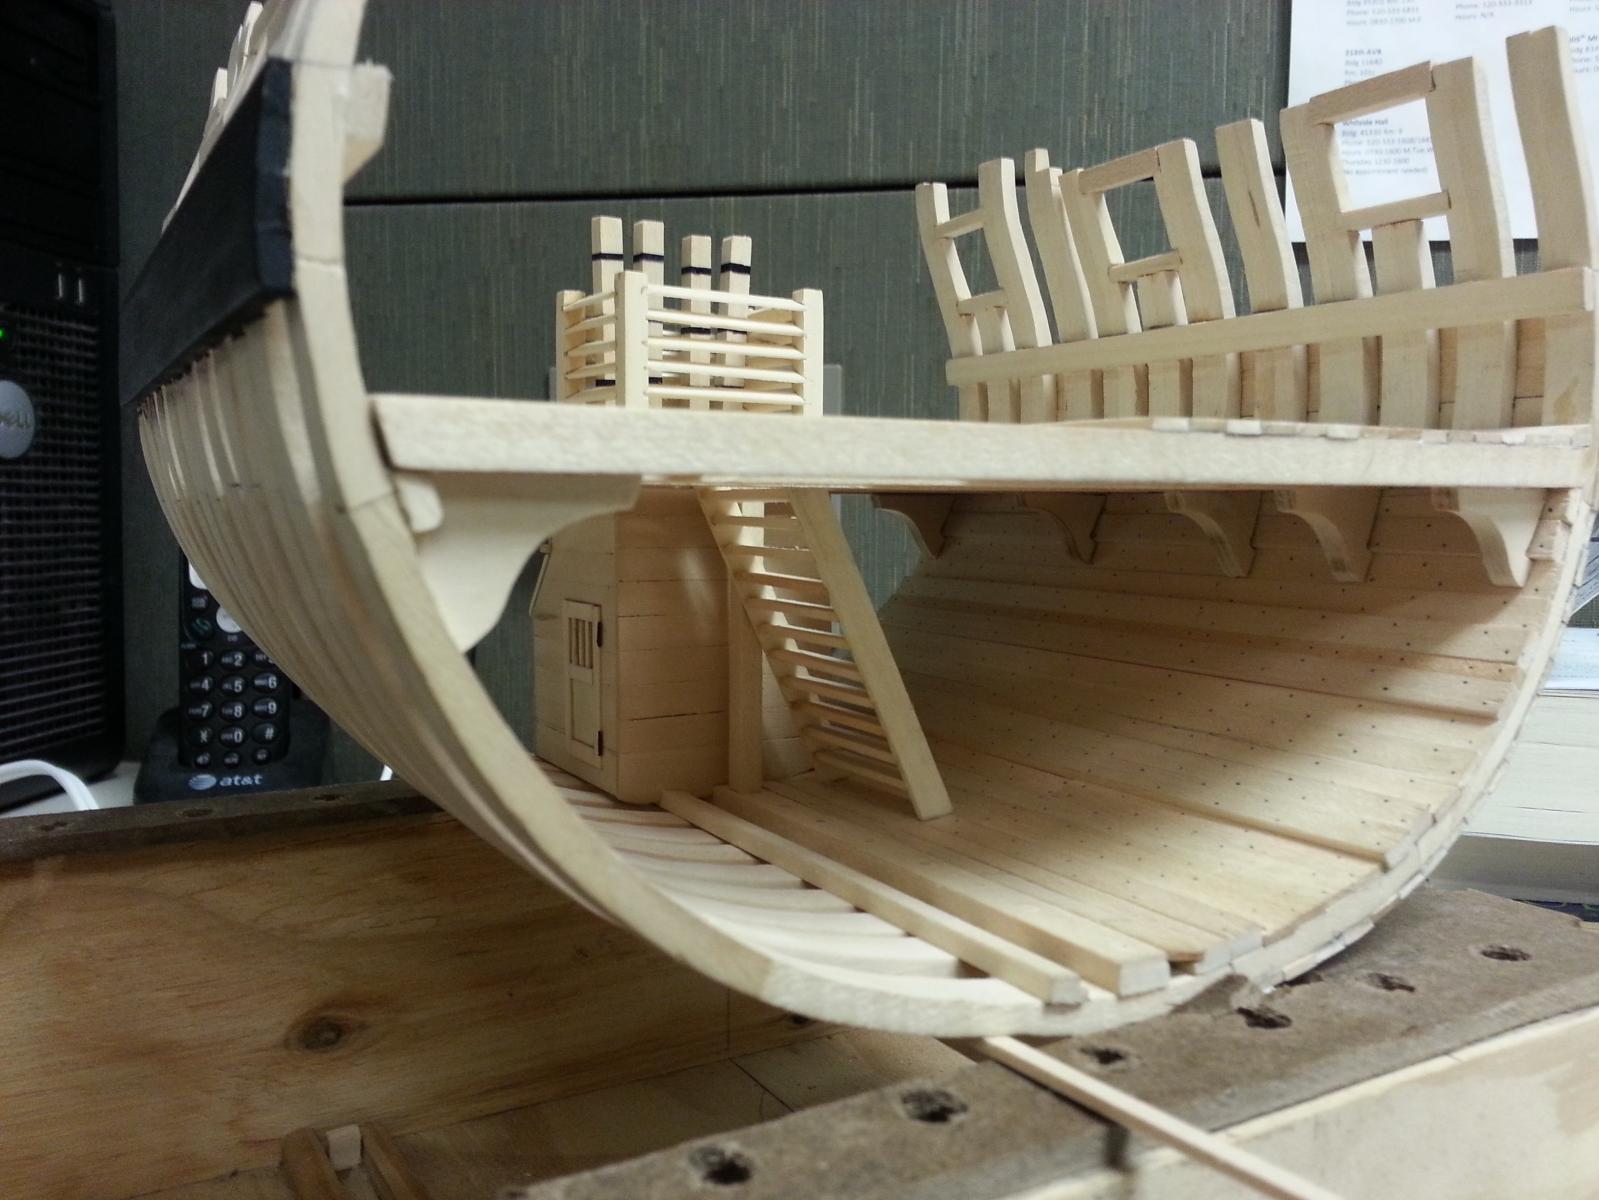
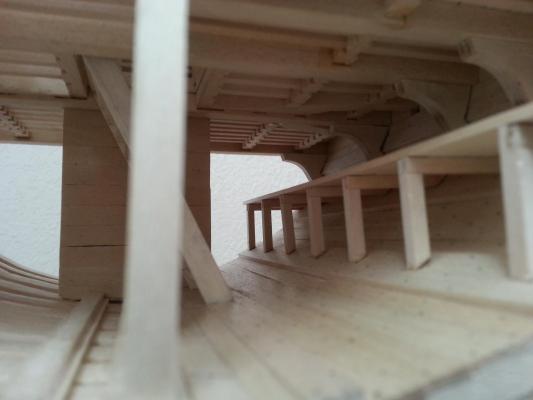
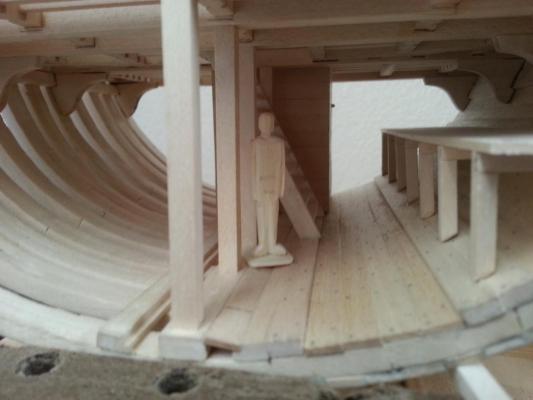
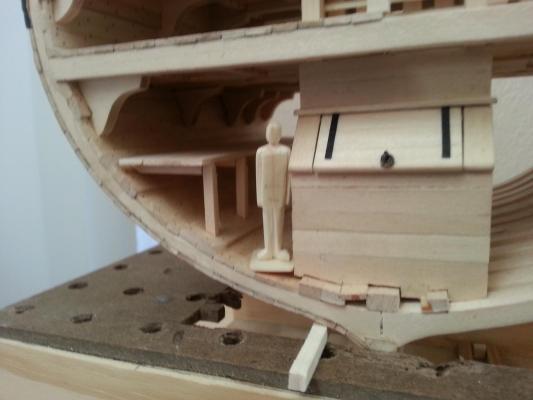
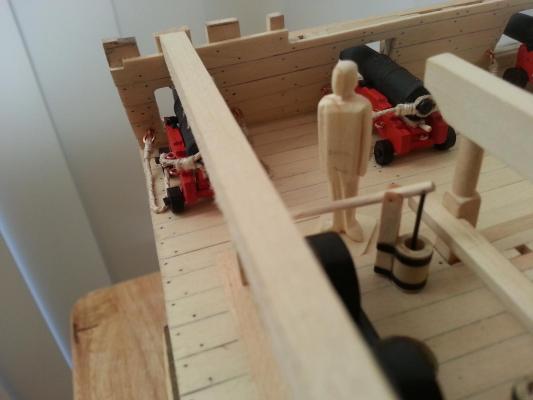
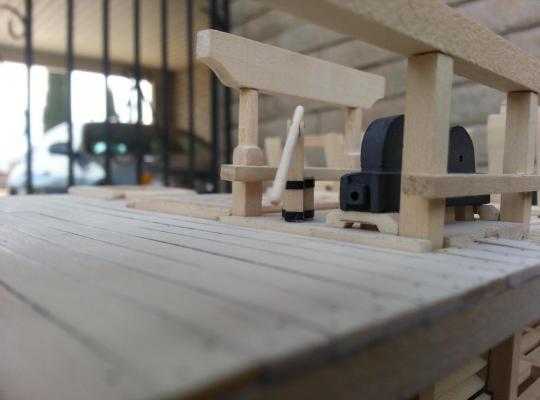
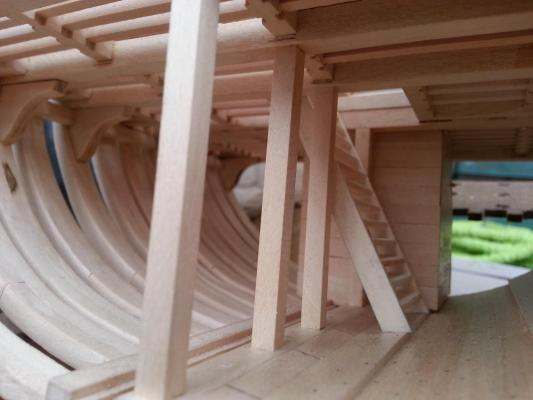
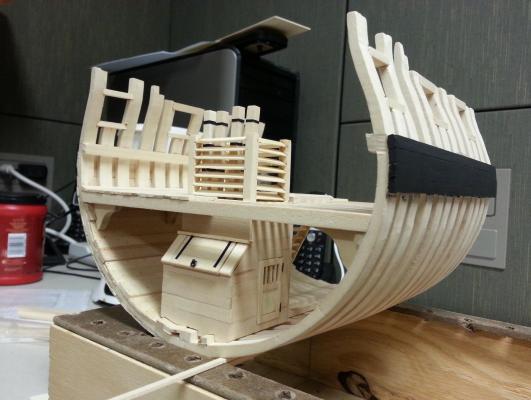
 Greetings to all, I went ahead and added the ladder to the lower deck and made and installed the platform for the port side lower hold area. The next step is to make the ladder in order to have access to the platform where the fresh water barrels will be stored. So far, everything has been constructed in terms of inches and/or millimeters. While everything was made according to measurements, one cannot truly appreciate scale. Keeping this in mind, I decided to make a wooden man in order to get a better feel as to the size of the Triton. At 1:48 scale, a 6 foot tall man would be 1.5 inches in height. I went on line and searched for male dimensions to make certain that my effigy of a man would be at the correct proportion, hence the birth of “Woody”. I’ve placed Woody at different areas on the Triton and I am truly surprised at how large these ships really were. The following photos will show you Woody standing near certain elements on the Triton as a means of seeing how everything compares to a 6 foot tall man.
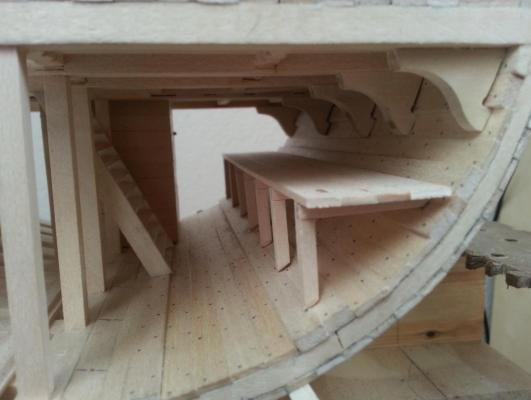


-
Chaloupe armee by aykutanşin - SMALL
ziled68 replied to aykutansin's topic in - Build logs for subjects built 1801 - 1850
Hello Aykut, I have been fascinated with this particular model and will follow your progress. Enjoy the build and take plenty of pictures, Raymond -
Hello WBlakeny, I just found your post and decided to follow along on your build. It is never too late to start a scatch-build model. It seems that you are off to a good start and I wish you have plenty of joy in the construction of this little beauty. Ray
-
Al, Your cannon looks extremely smooth considering it just left the CNC. I am still in the process of learning how to use a lathe and my cannon doesn't look anyway near as nice as yours. I look forward to seeing more of your work.
-
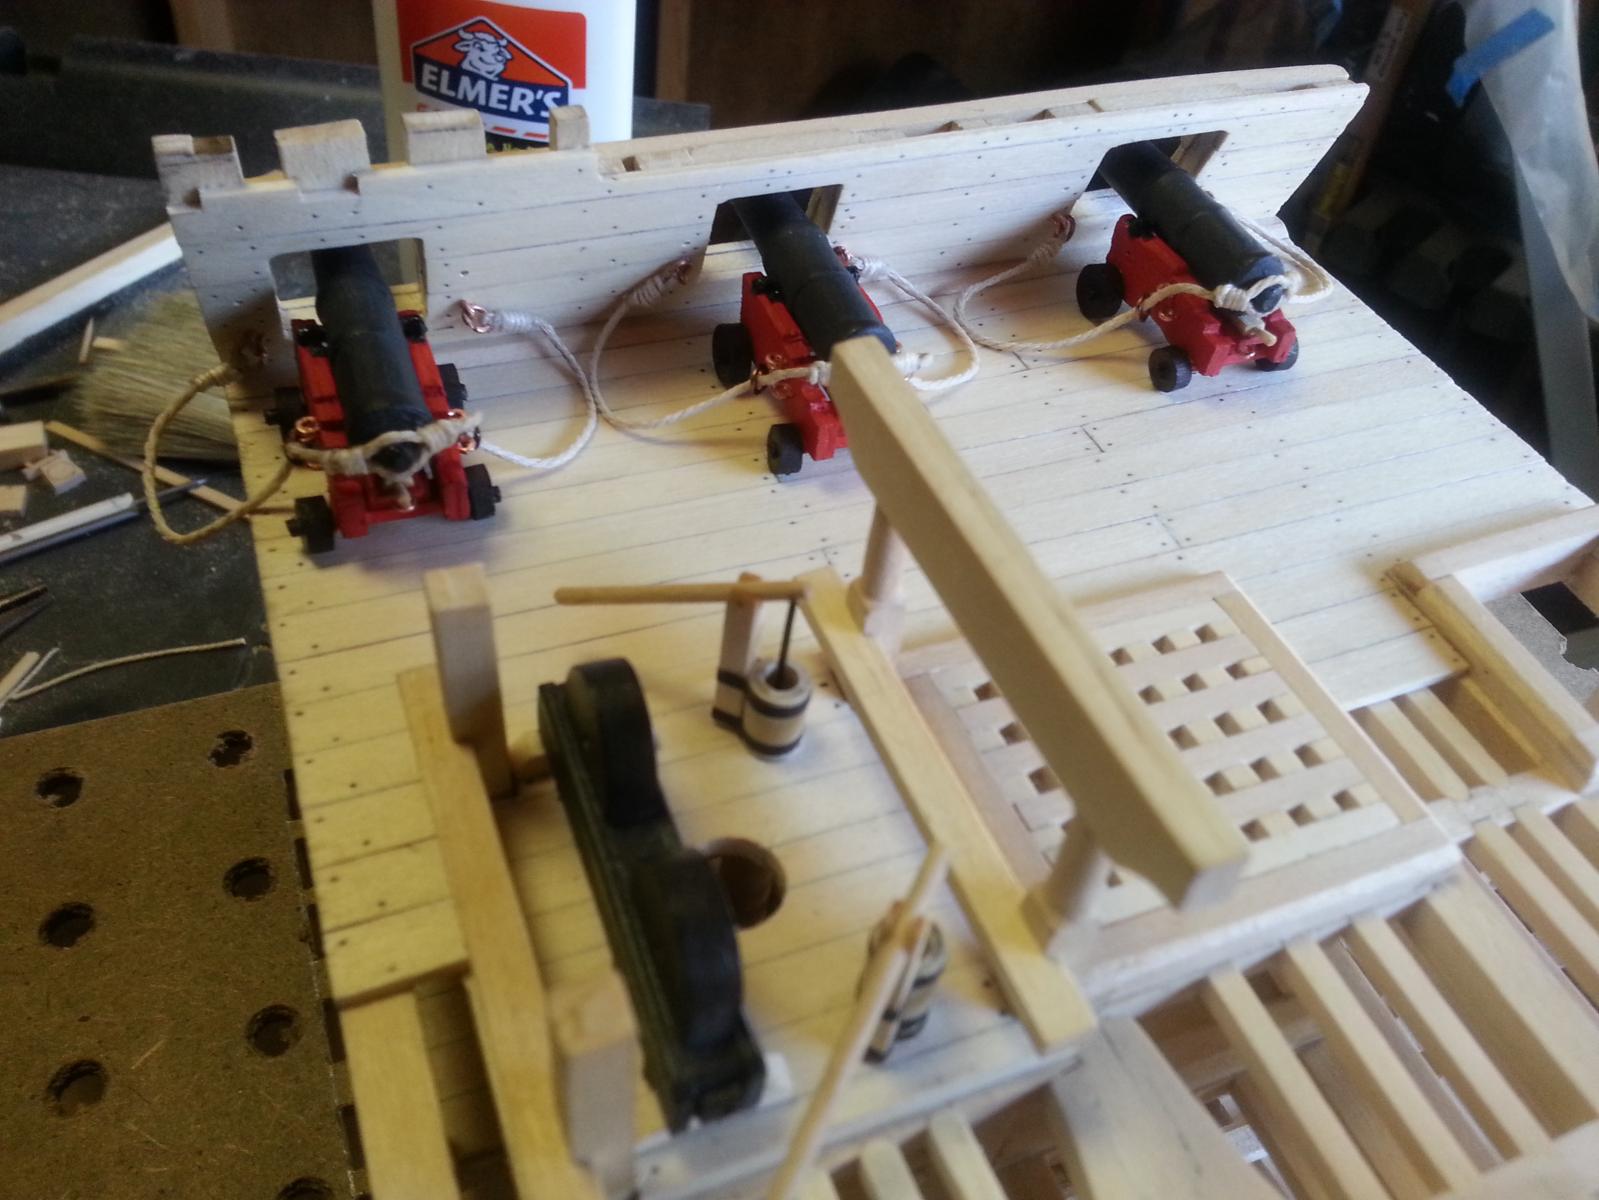
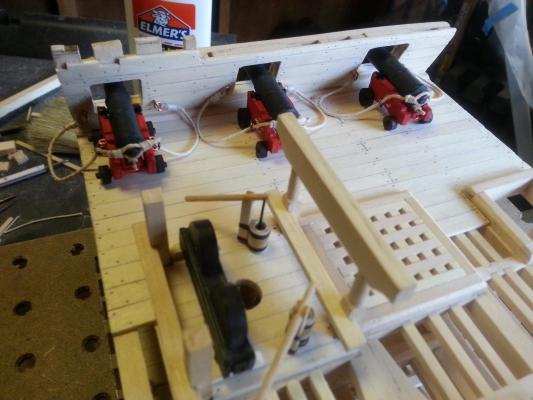
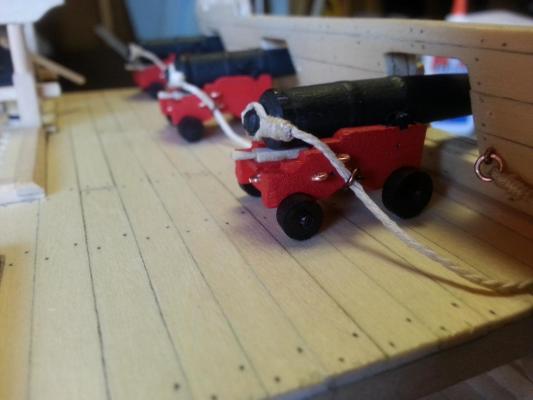
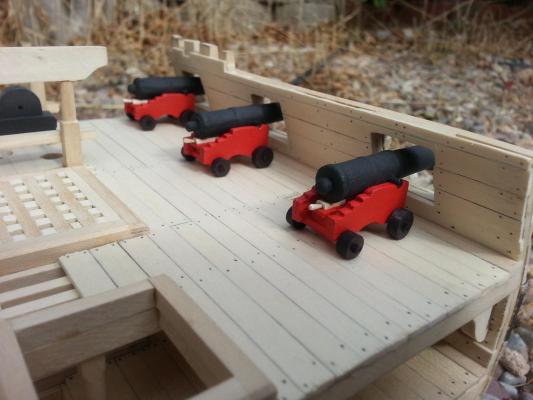
Hello Everyone, Here’s another update to the Triton, this time in the form of canons. Well yesterday I mentioned that I would go ahead and start working on adding the eyebolts to the carriage assembly. Not only did I add the eyebolts, I also added the breeching as well and went ahead and secured them to the bulkhead. I still need to work on the gun tackles but that is for another day. Cheers, Raymond

-
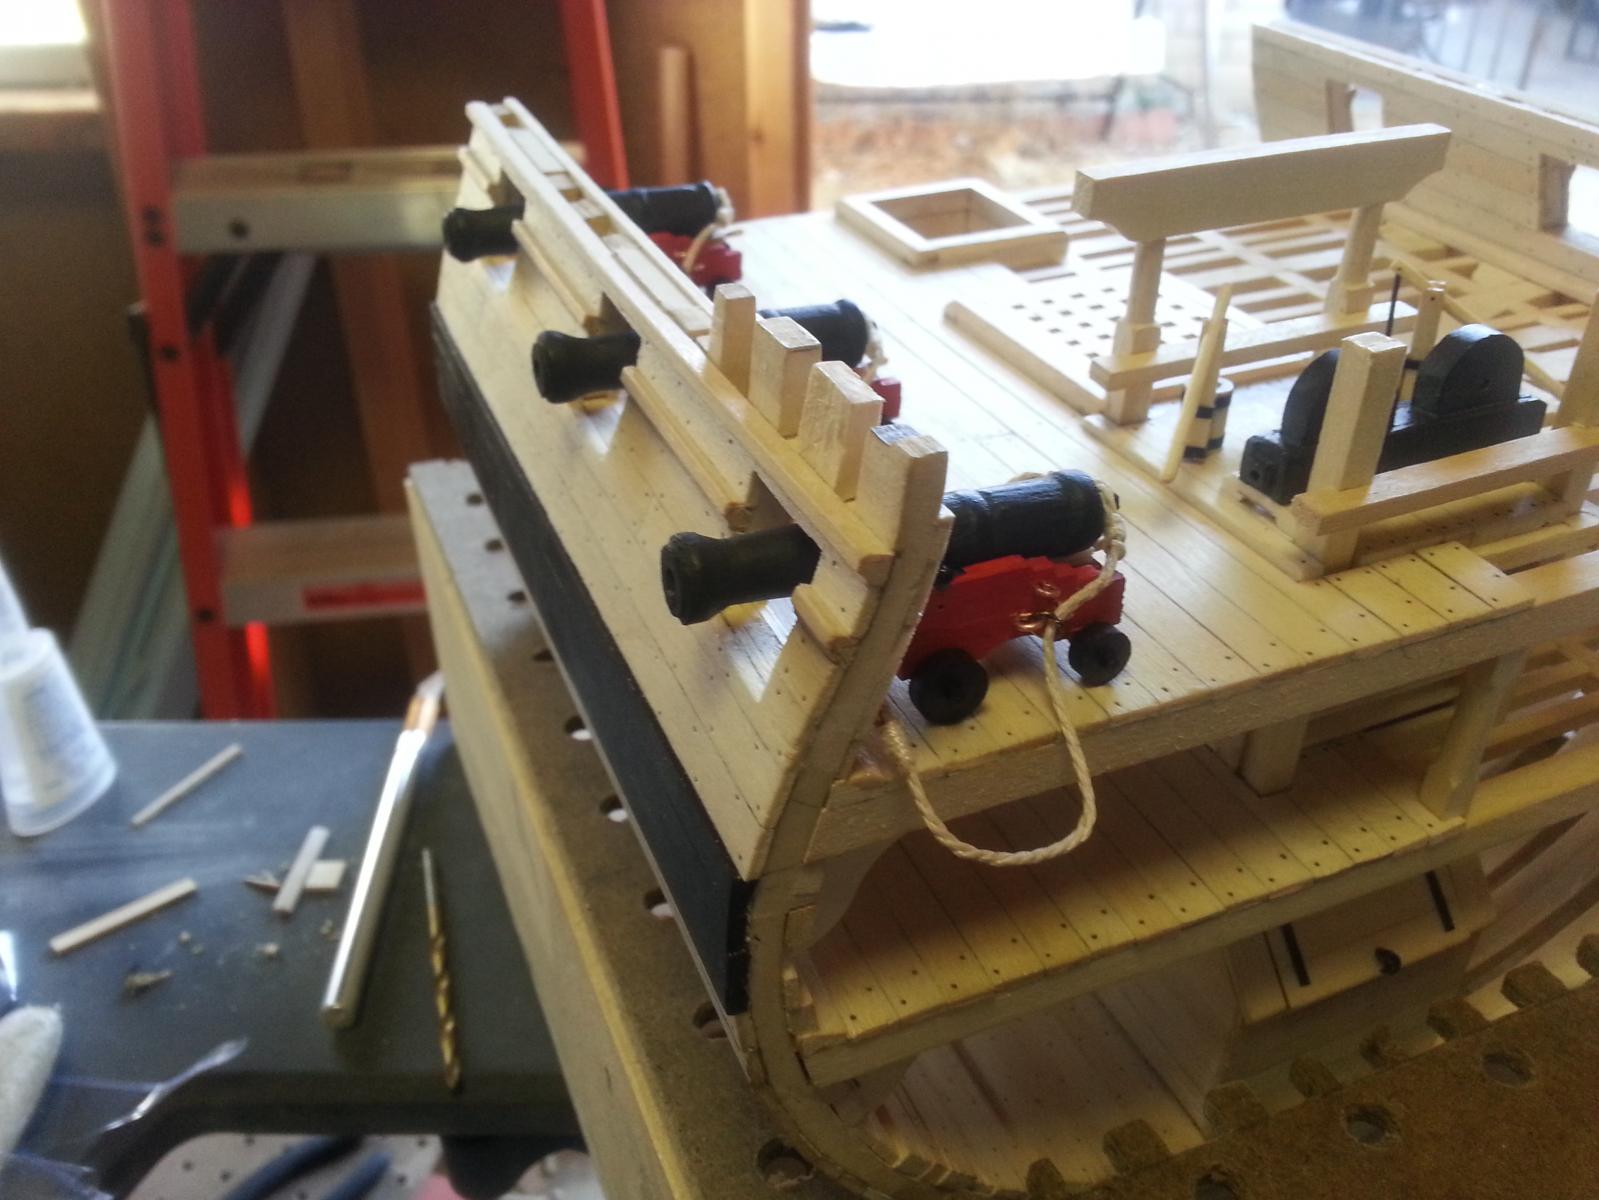
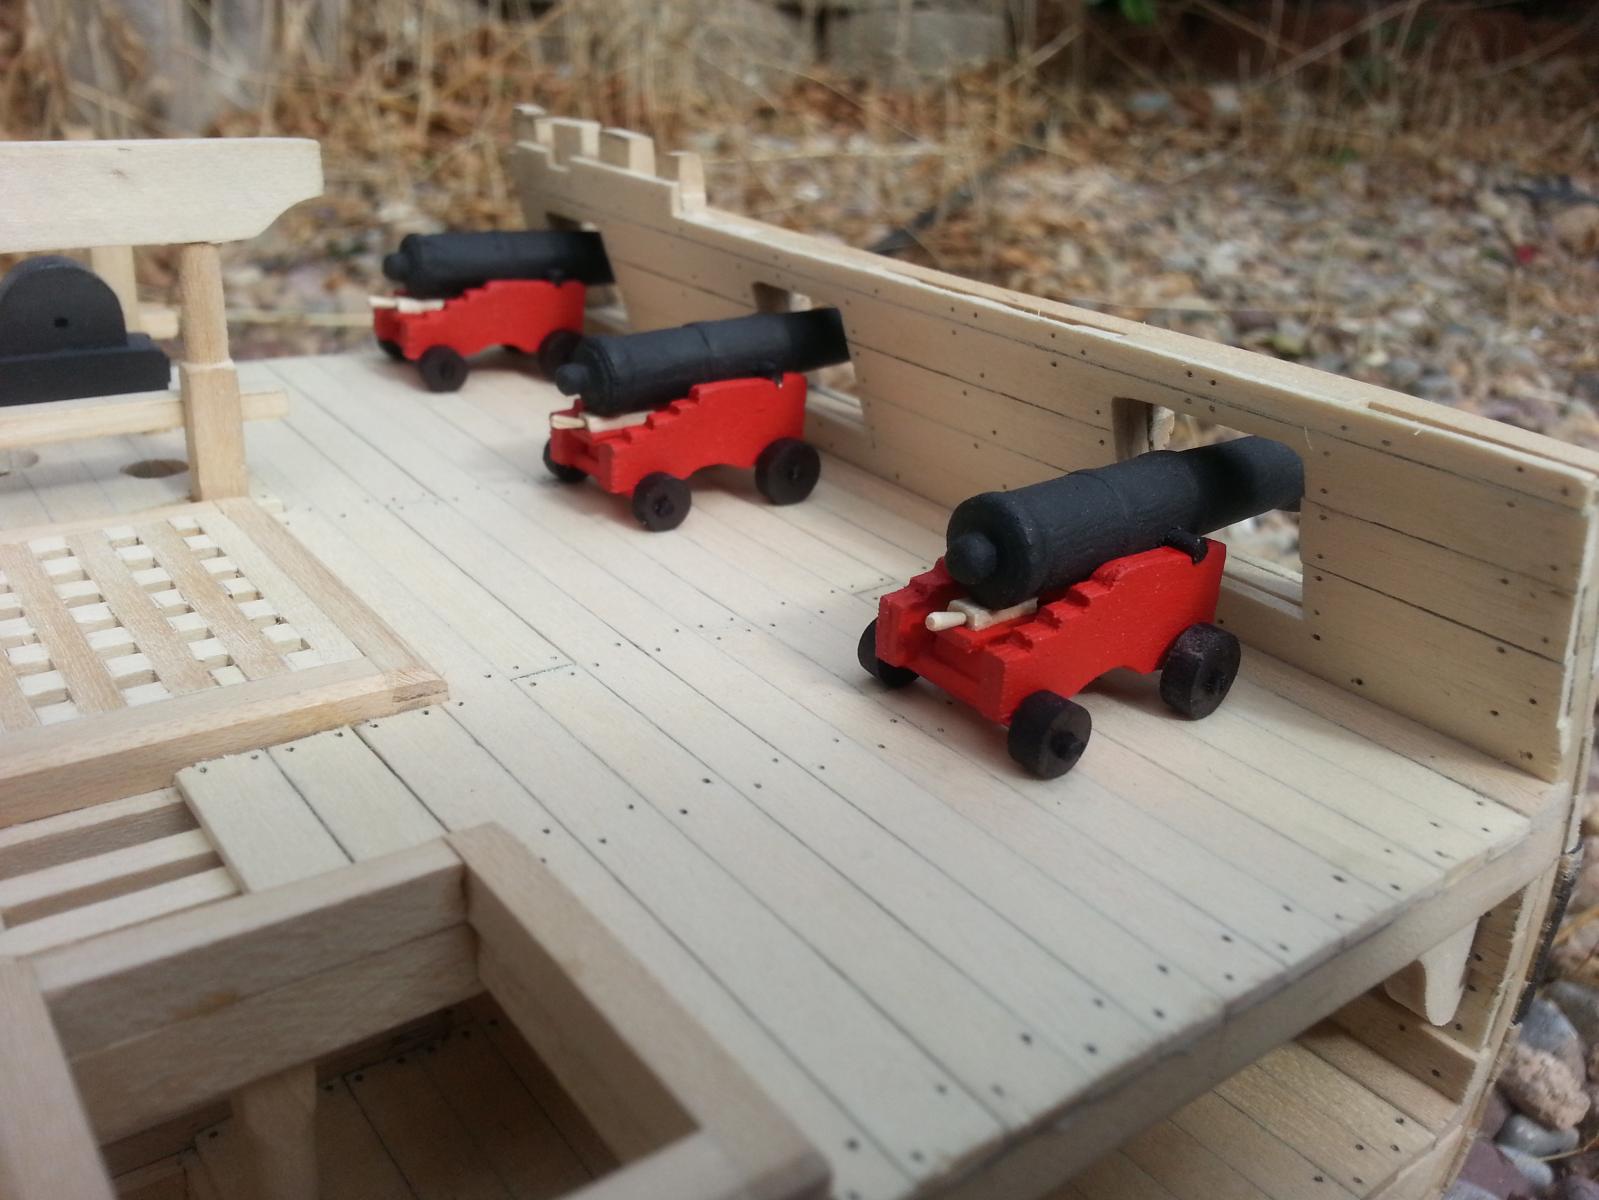
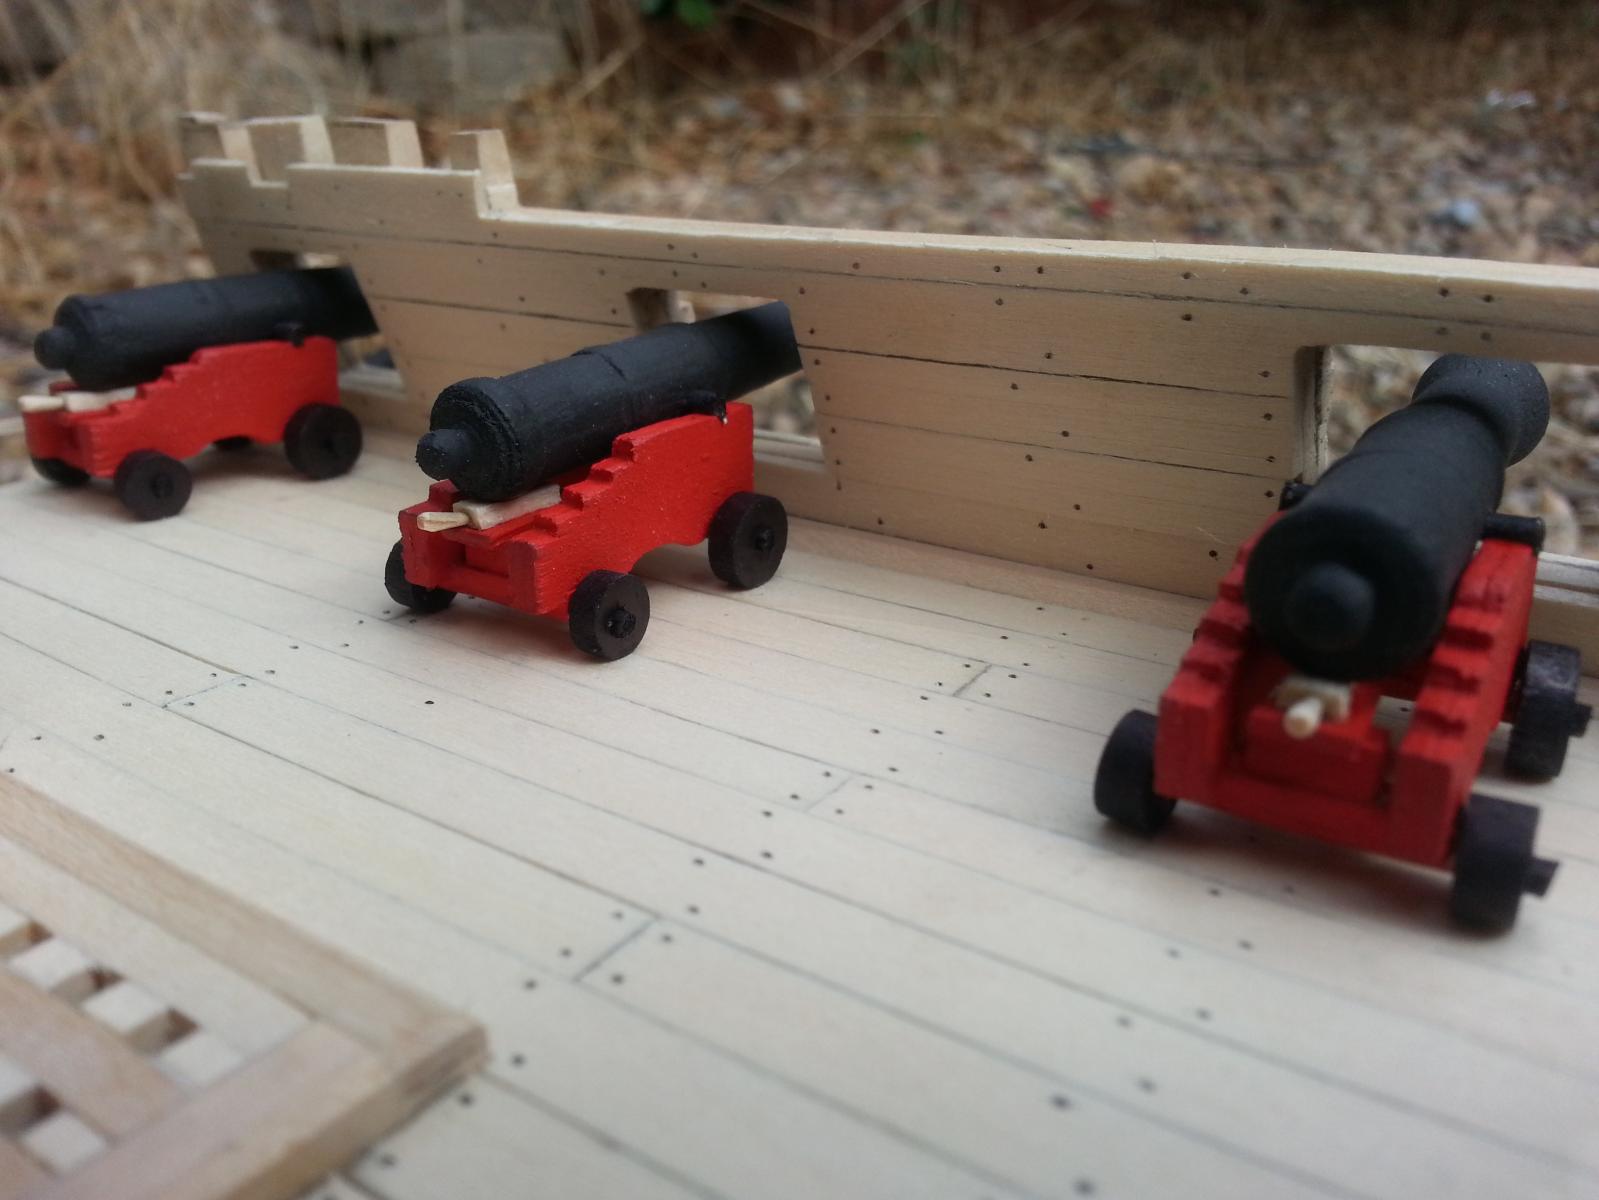
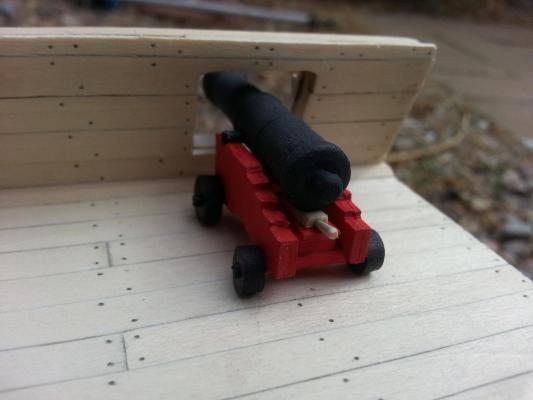
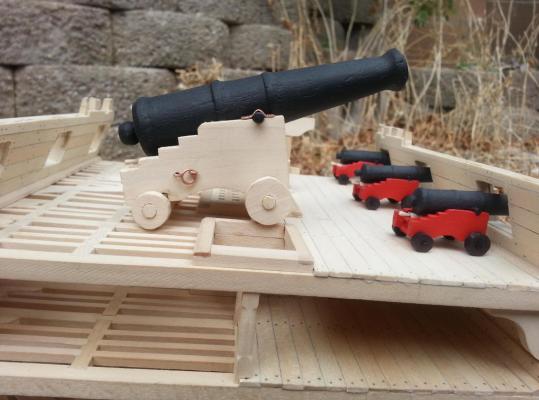
Hello Everyone, Sorry for the delay since my last post. I didn’t have a lathe in order to turn my canons and was contemplating how to go about making them. Well I happened to go to the thrift store here on Fort Huachuca, AZ and was able to buy a lathe for $75.00. The only problem was that it did not have a faceplate but she still purred like a kitten and decided to buy it anyway. I was able to get a faceplate for it at Wood Craft for $30.00 and now I have a complete lathe capable of turning the canons. The next step was to learn how to use it since I’ve never owned one and all I had was a concept of how it must be used. Well I decided to turn a canon at twice the size the plans called for in order to get comfortable with it and I’m happy to report that I was able to make my first canon. I also made the carriage for the canon and added all the eyebolts and rings for it. Since I was feeling comfortable, I decided to go ahead and make the three canons at the correct scale for my Triton. I also made the carriages for my canons with the exception of adding the eyebolts which I will try to do tomorrow. I went ahead and emulated my mentor by painting my carriages red but leaving the quoins natural in order to have color contrast. I also made the gun deck stanchions and added them into place. The following photos will show you what she is looking like along with my first try at the canon. Cheers, Raymond

-
Hello Gabe, I just went over your post and am impressed with your take on the Triton. I believe that it will make for a very attractive addition to your models. Keep up the great work via photos and narative (I truly enjoyed your narative because I felt like I was there when frame three snapped).
-
Al, I would have to agree with Matrim on this one. Try as we might to get it perfect there is always a place we have to address with cosmetics be it sanding, filing, or adding wood filler. Sir, you are off to a great start. Ray
-
Al, I'll be honest with you, I am definitely looking forward to seeing this beast at this scale. It will truly be massive.
-
Al, Your treenails look great. Sometimes treenails look a little bit exagerated and at times they are too small to even see and it leaves one wondering if the effort is even worth it. BTW, the cherry stain/sealer looks awesome.
-
Gentlemen, I greatly appreciate the CNC lessons you are providing. I must admit that what I've seen so far has impressed the snot out of me. This looks like something I'd like to try once I retire in another 5 years but that being said, I believe that I can at least see do the research. Al, I really look forward to seeing how you finish up "Your Triton".
-
Good Morning Al, I was just looking over your full post and it seems that you program your computer in order for it to tell the machine what to cut and how to cut material. I believe that is what I got out of it and if so, how much would something like this cost? I ask because when it comes to anything dealing with computers I'm all thumbs take for instance this post I'm writing. I'm actually typing using the hunt and peck method. Any info you could provide would be greatly appreciated. Ray
-
Thanks Al, I look forward to seeing "your build" of the Triton
-
Dios mio Mija, That is outstanding what you've been able to accomplish. I mean the simple act of adding the lights gives it a lot of class. Out of curiosity, will this be a night light for someone? Please continue to work and inspire all of us to try a little bit harder on our builds.
-
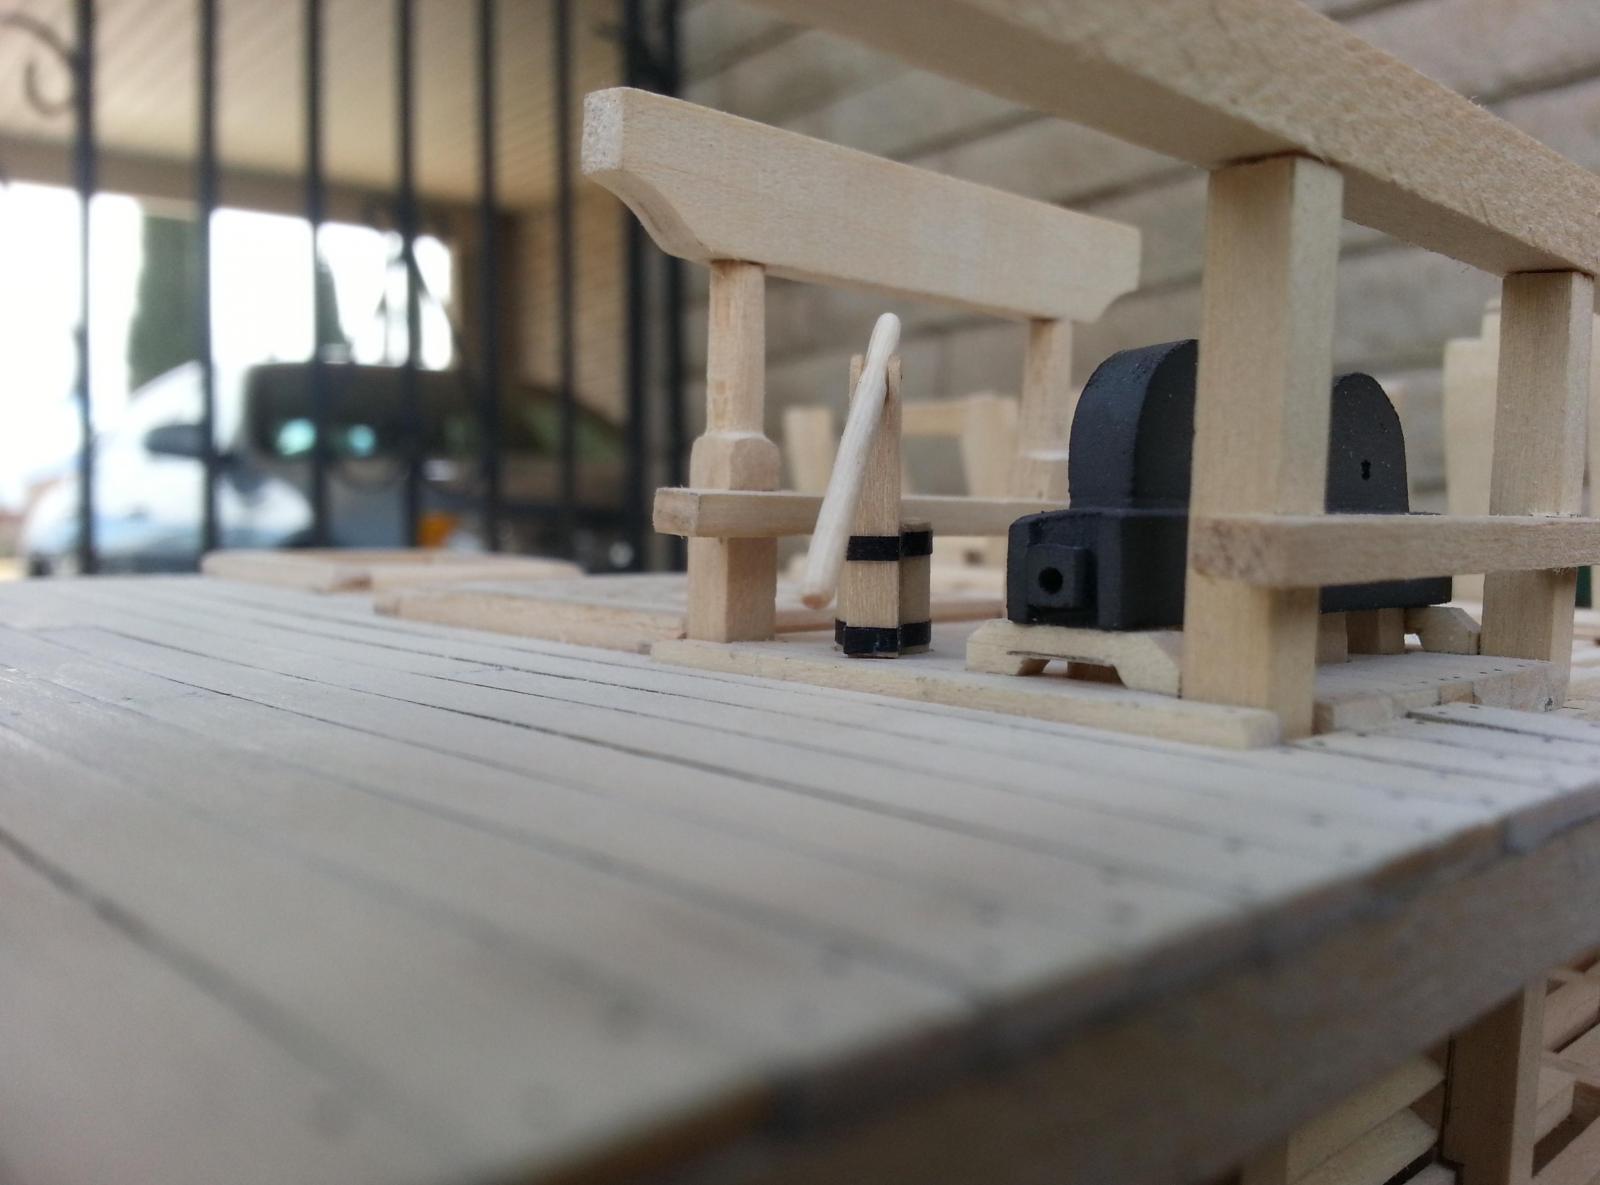
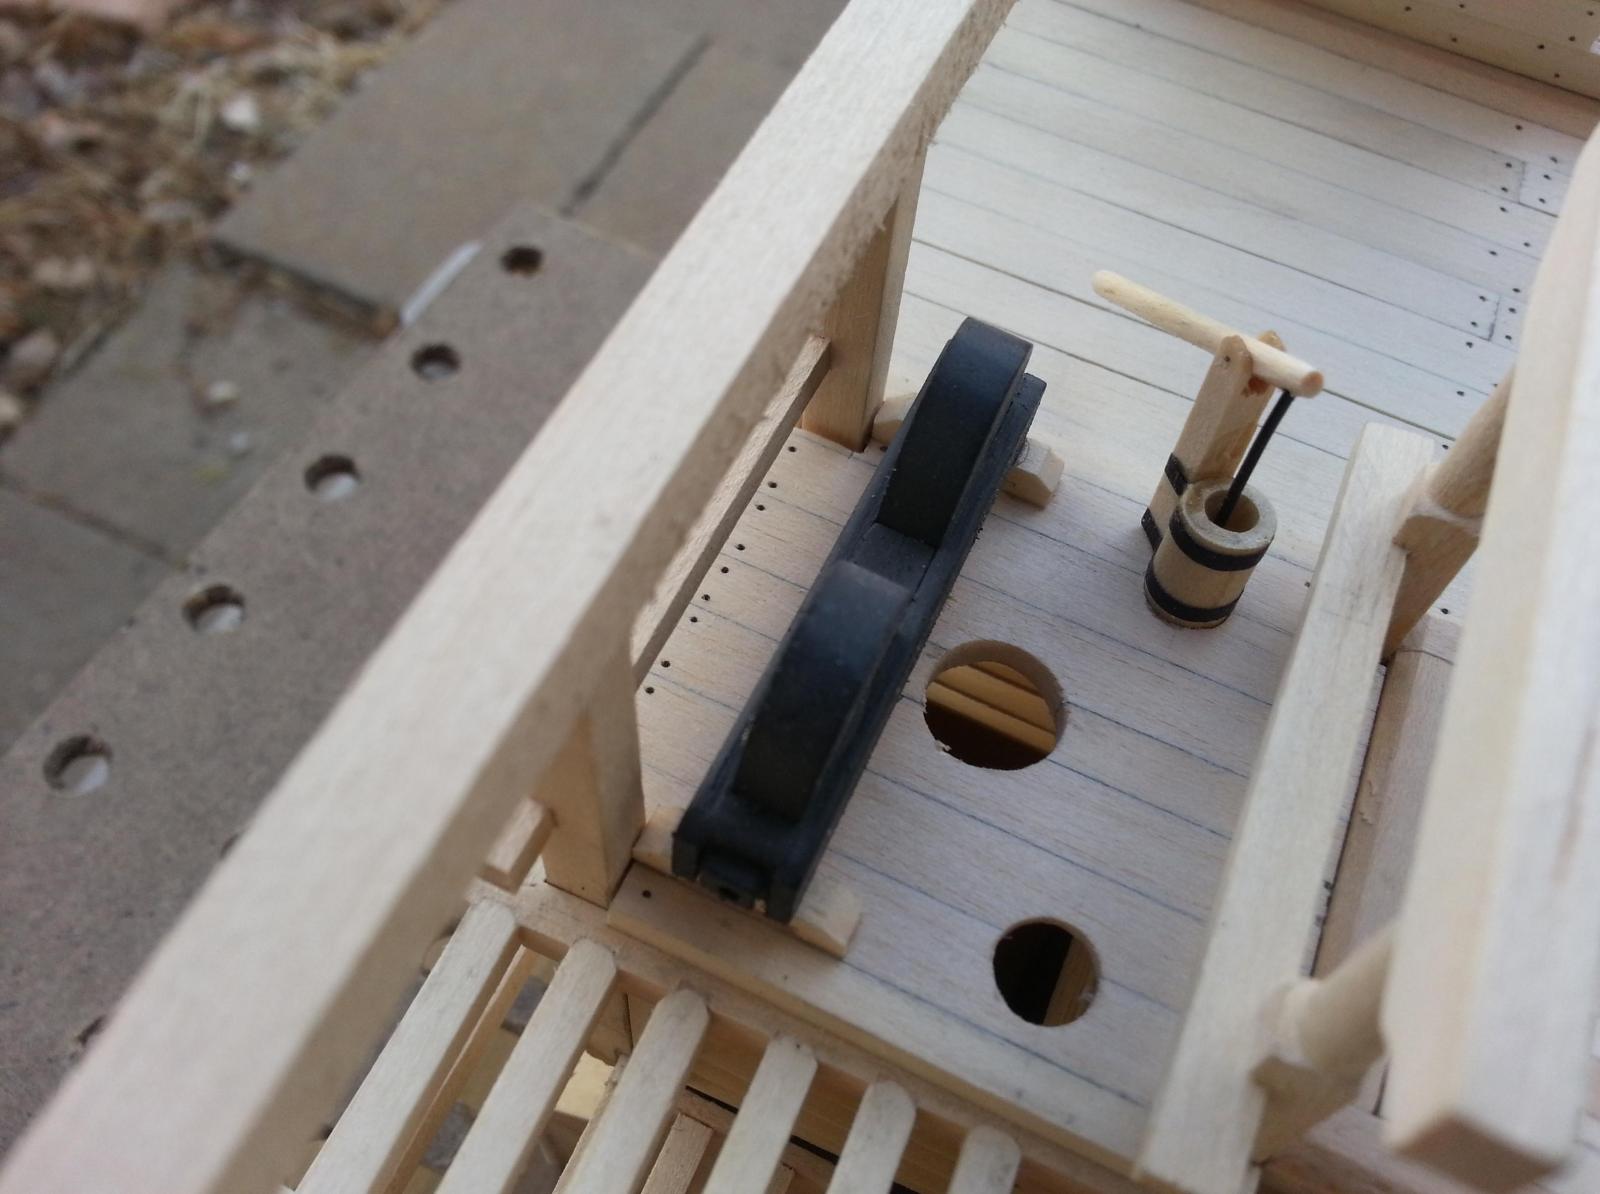
Hola Daniel, I really appreciate the site you added to your post. I looked over the hold details and I thought every single item was excellently represented in a ship of that time frame. Once again thank you for the link. Greetings and Salutations Matrim, I appreciate the kudos for the pictures. I just thought that if I was someone else looking at my progress, I would like to see it from different angles to really get a feel for what actually drives someone to spend many hours on some areas that would likely get overlooked. I mean take the single hand pump I made for the Triton. I spent about an hour and a half on that single item and I really like the way she came out.
-
Gentlemen, I really appretiate the prompt reply. I will dig in a little deeper in order to see how much detail I can add. Once again many thanks.
-
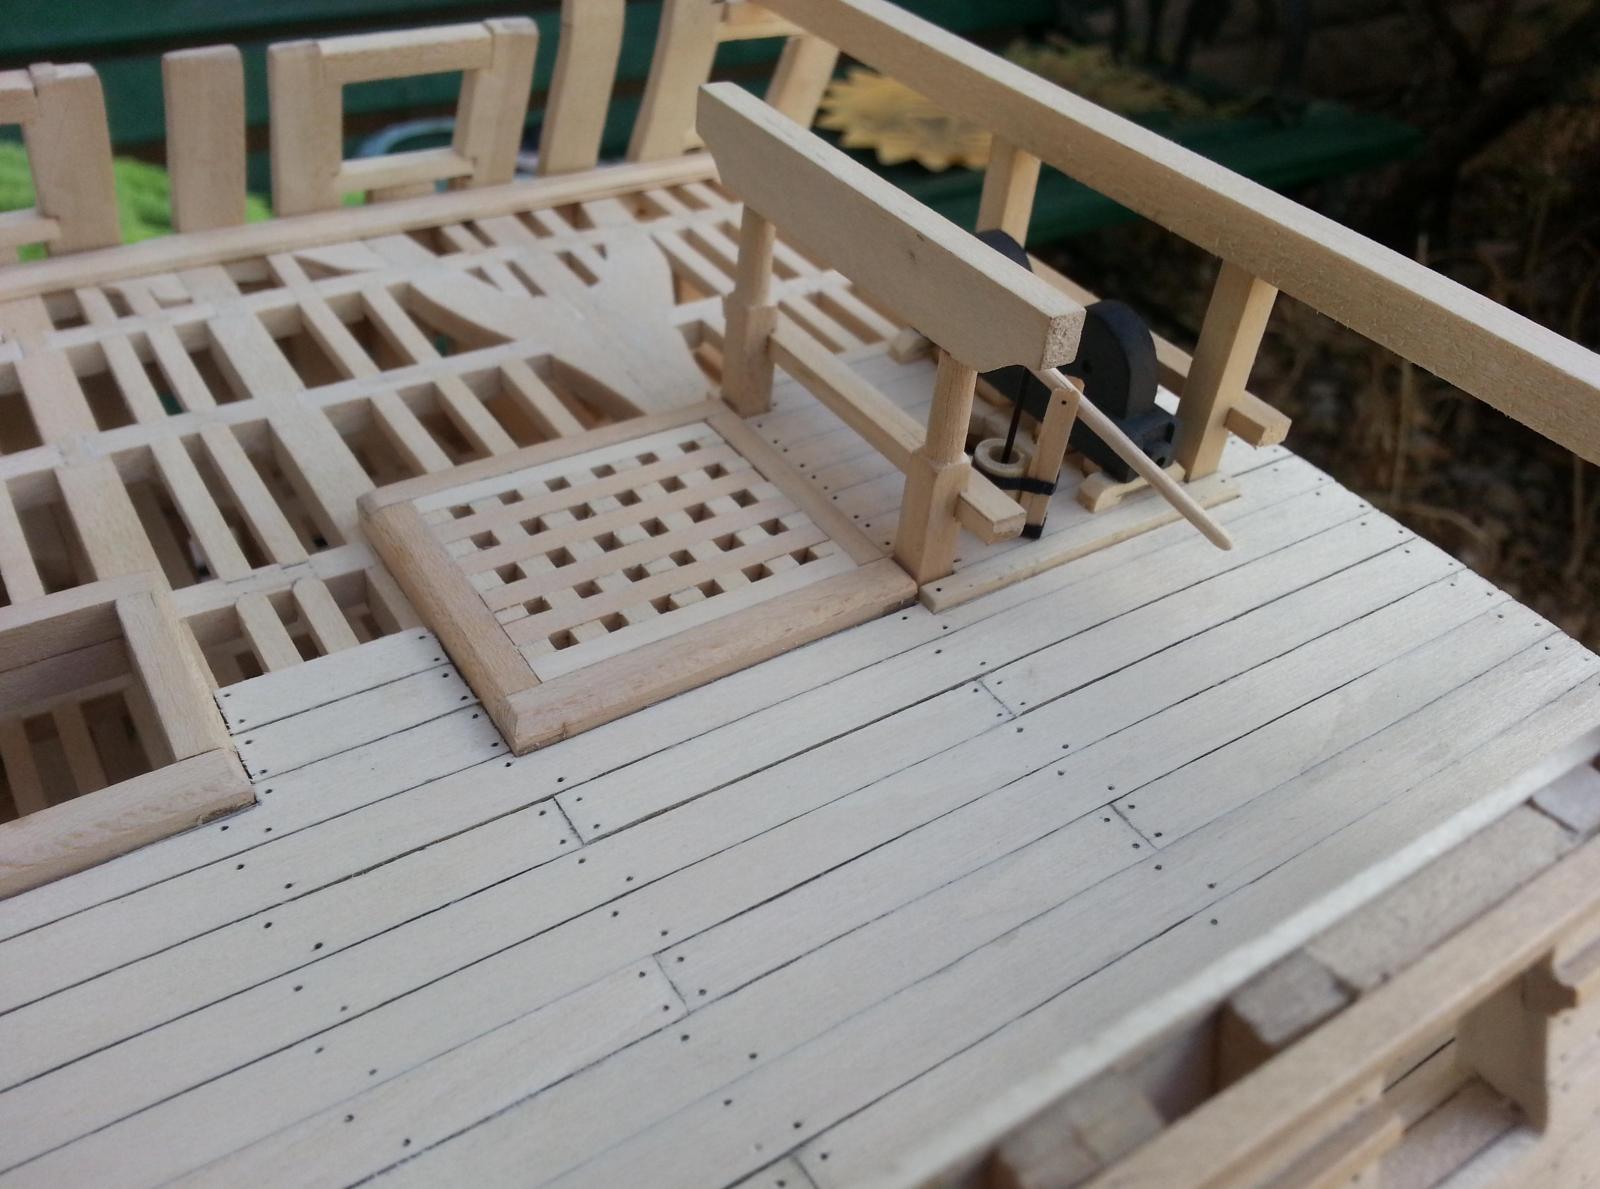
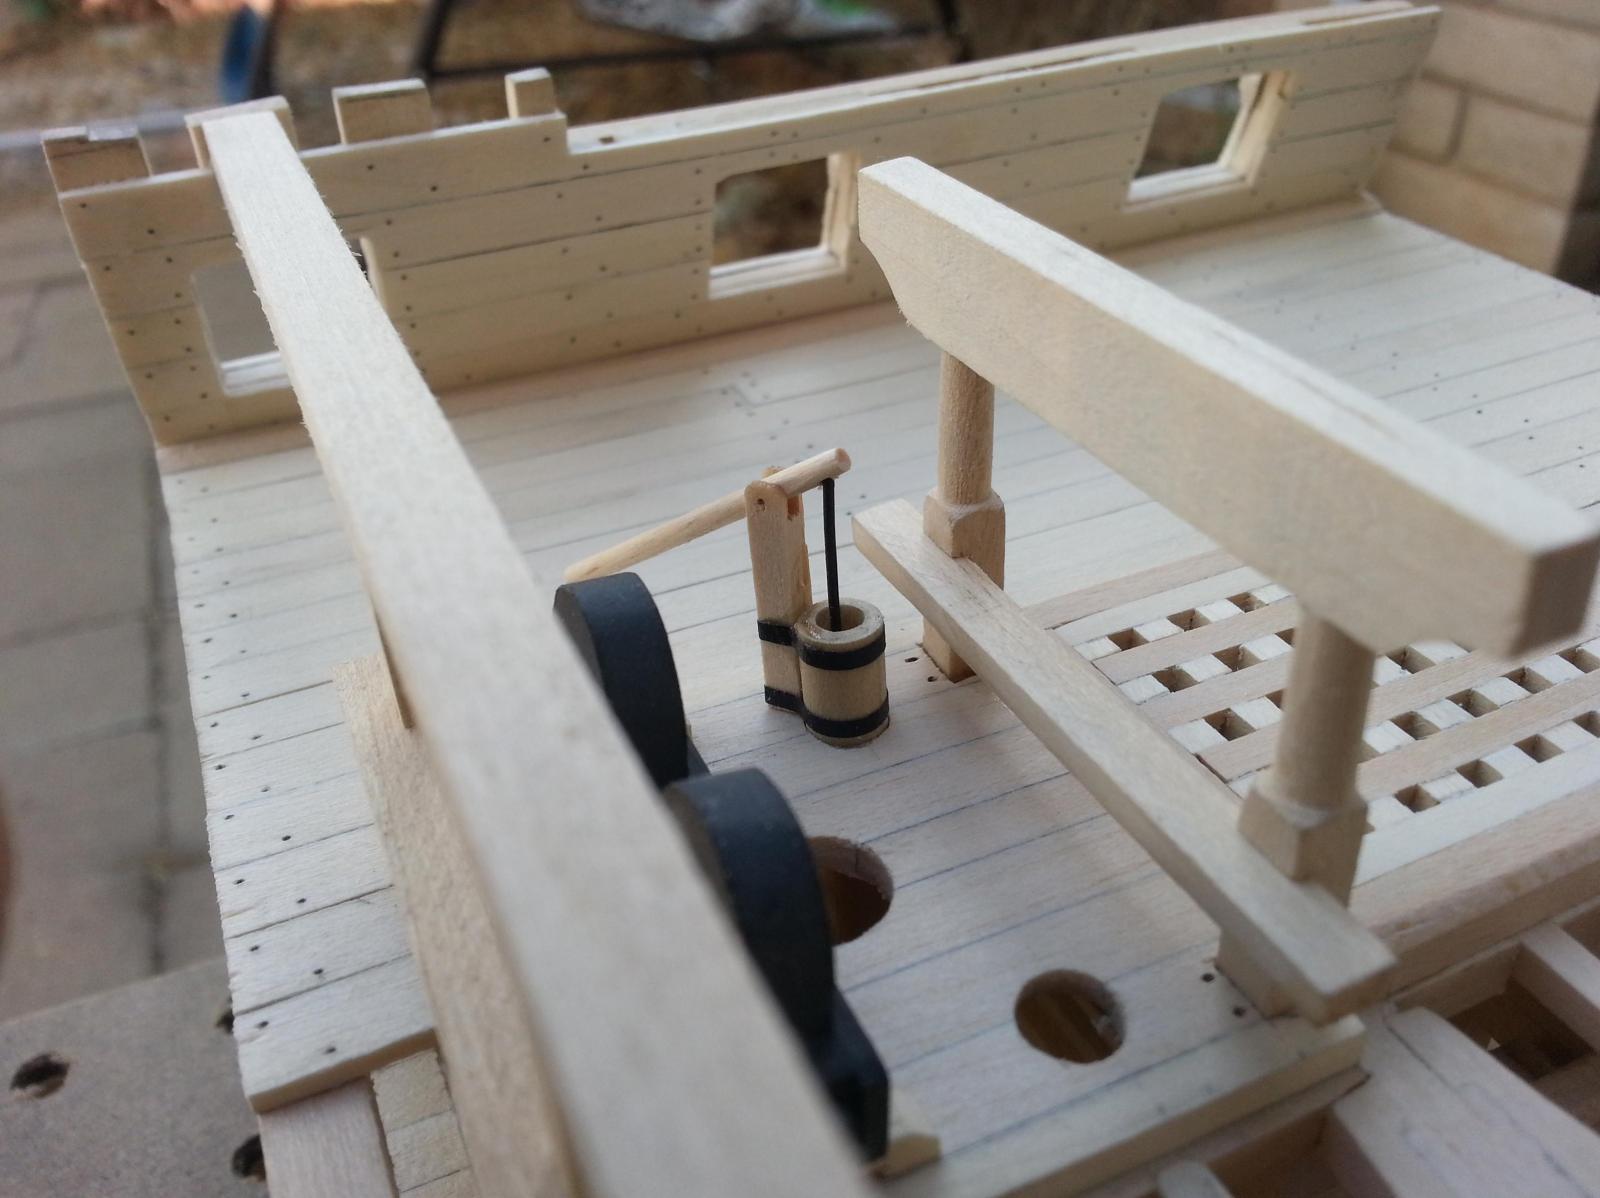
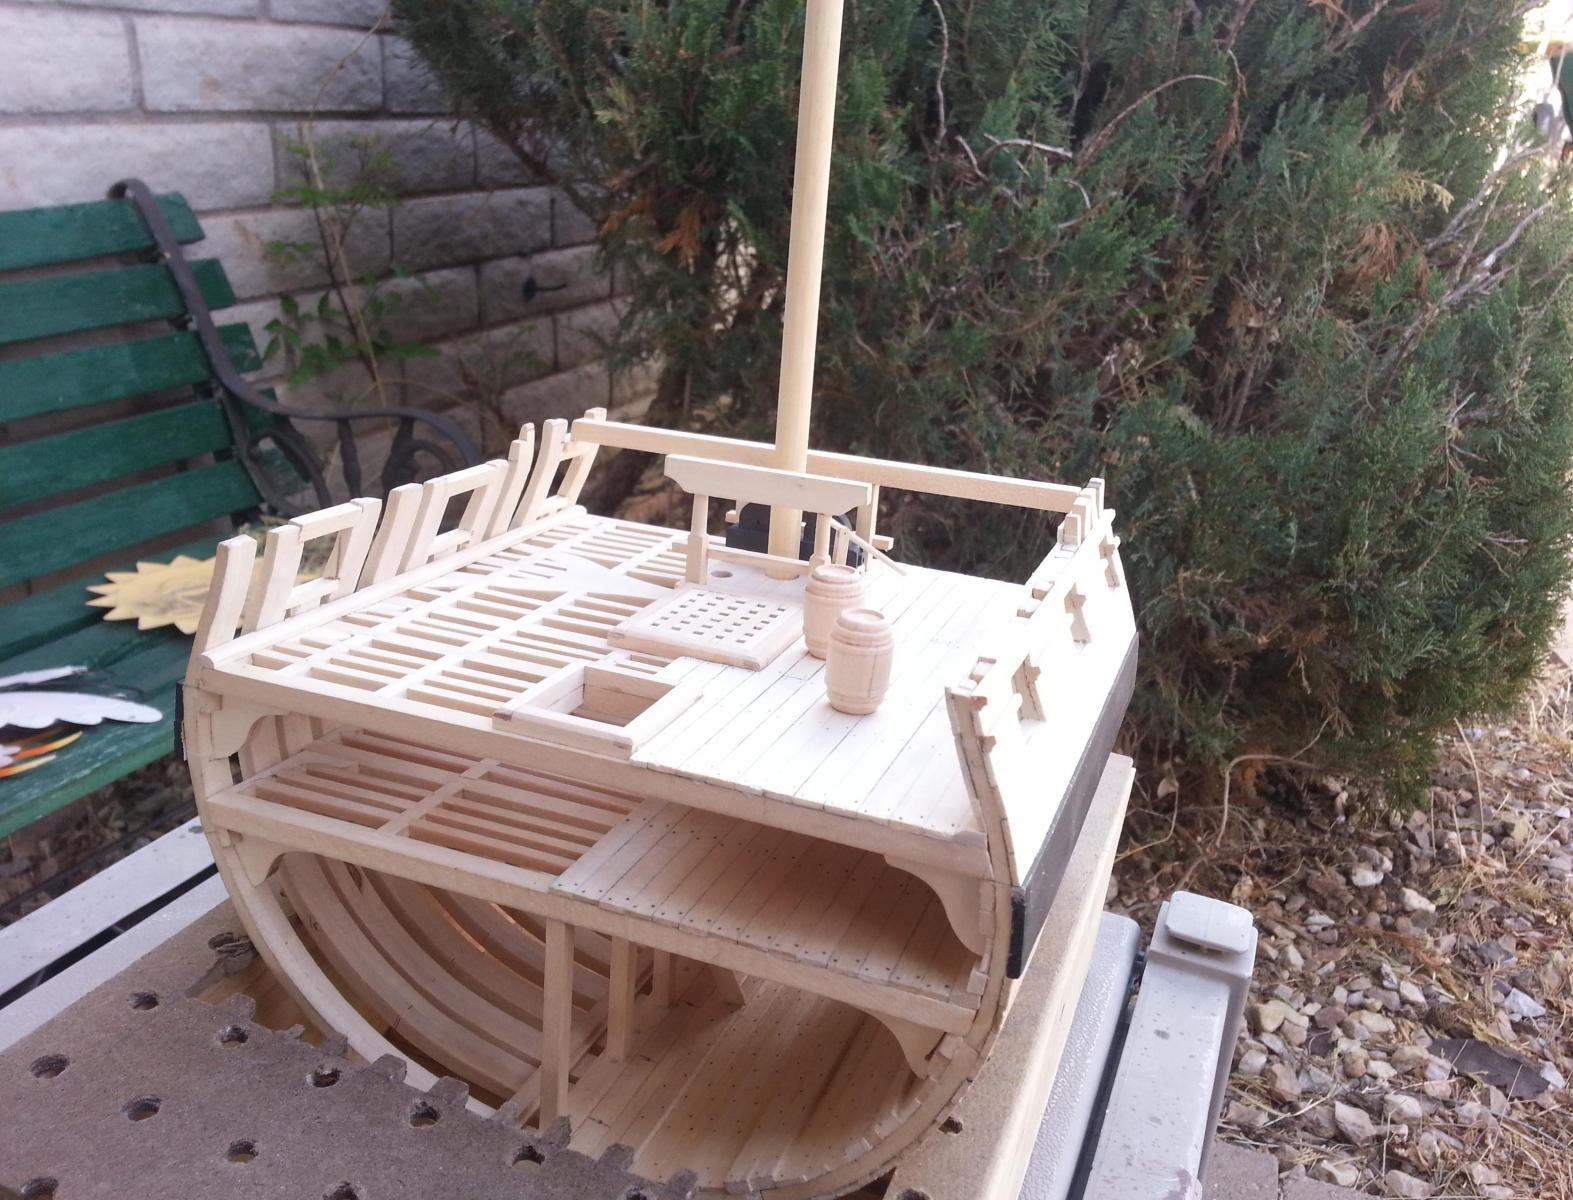
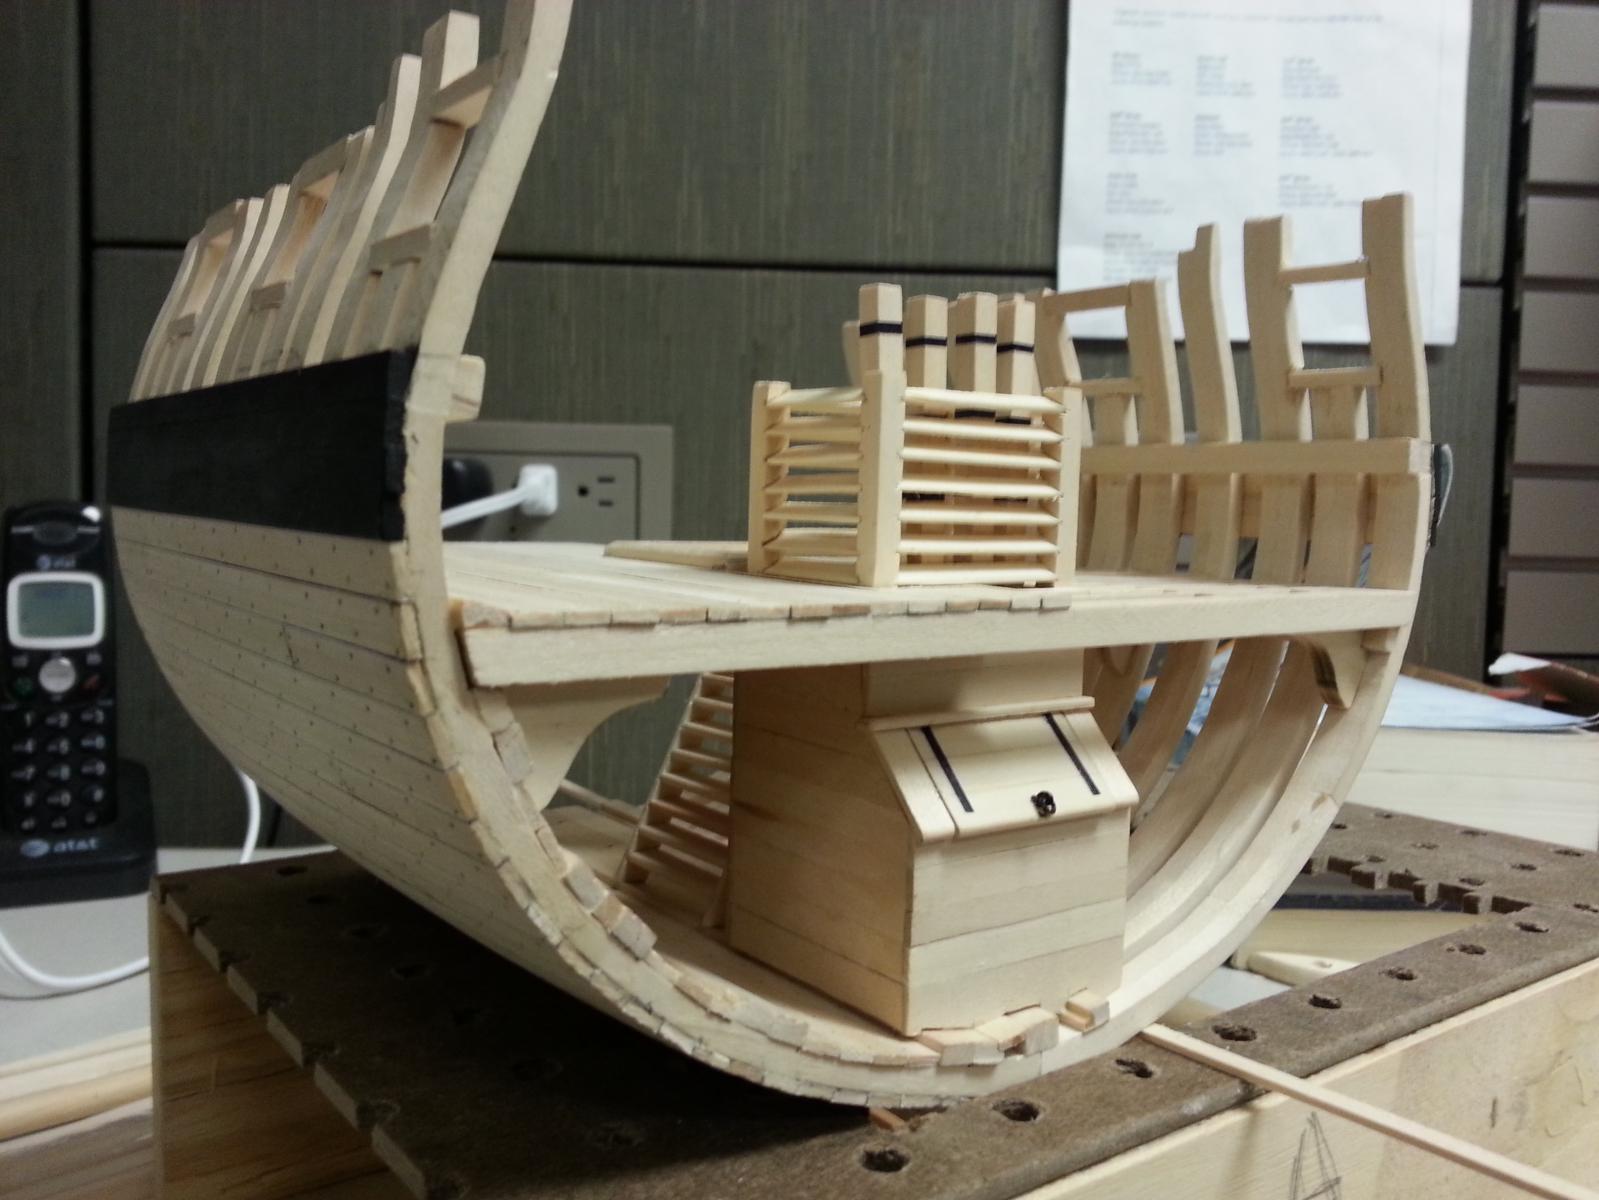
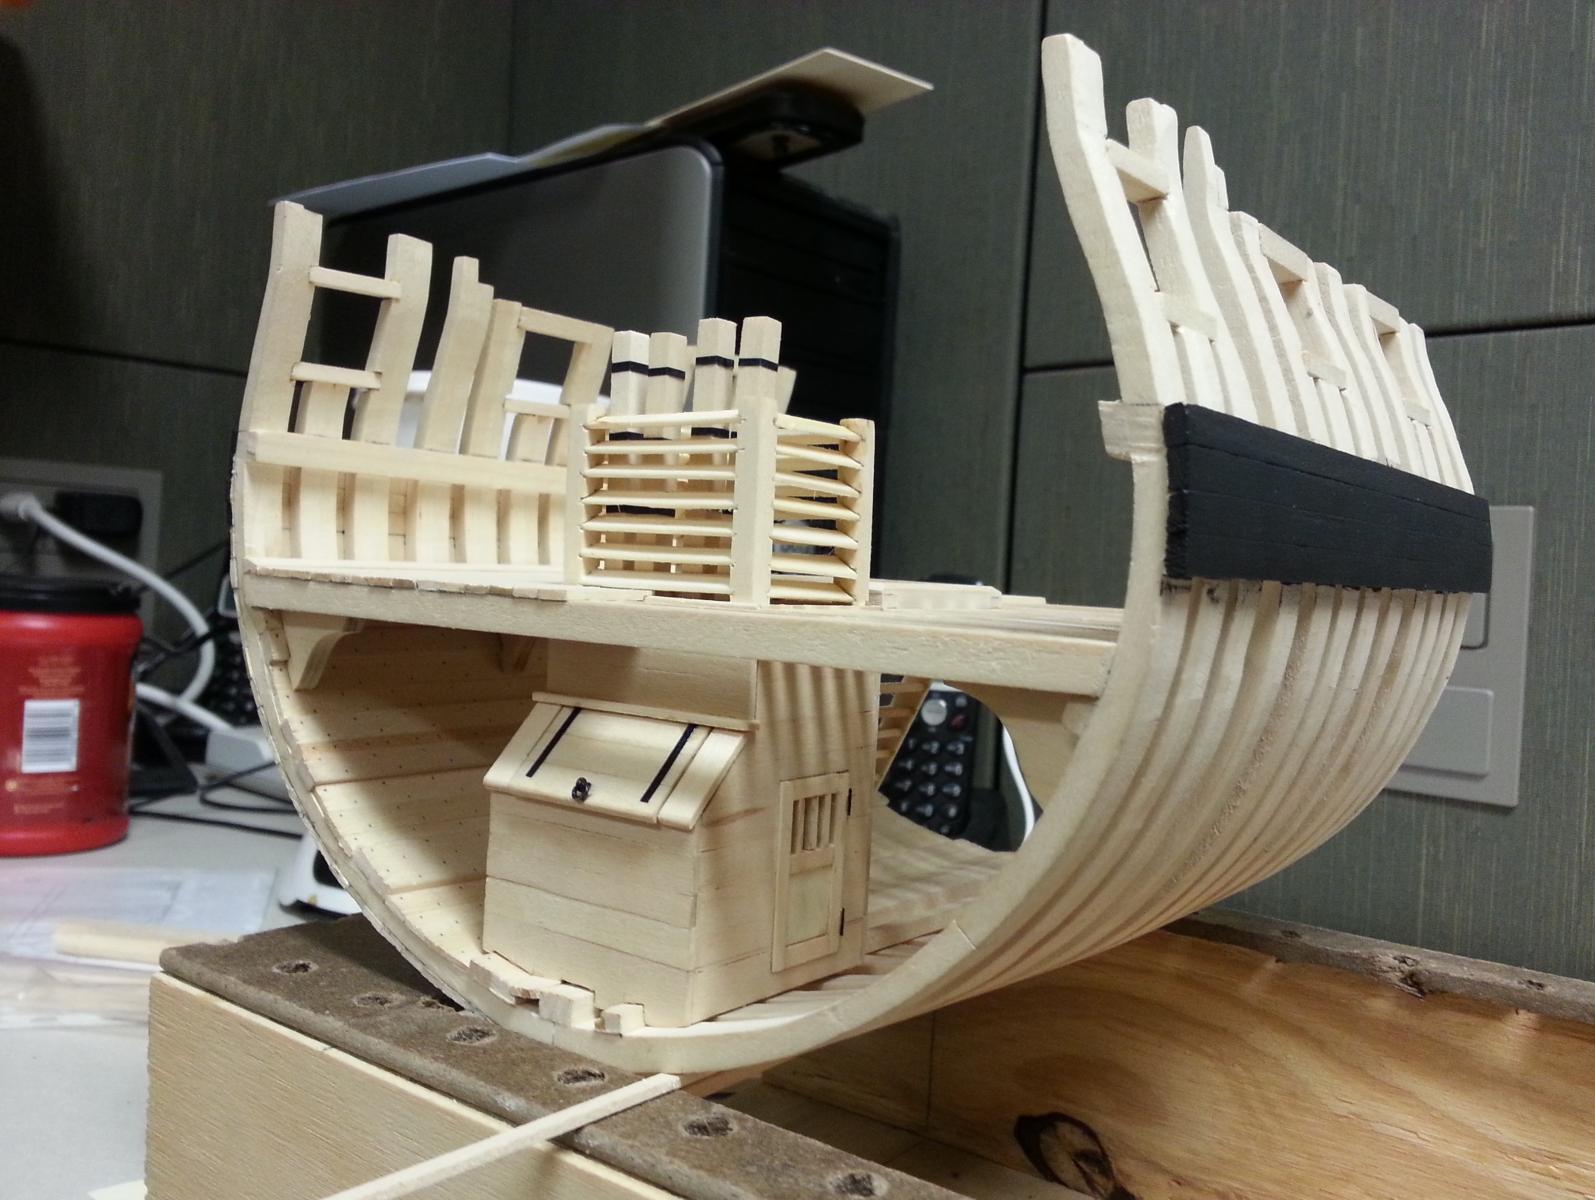
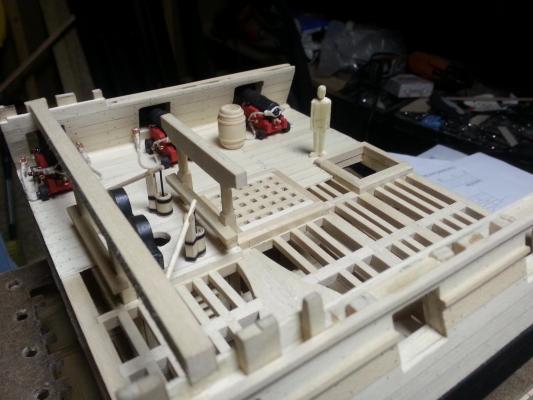
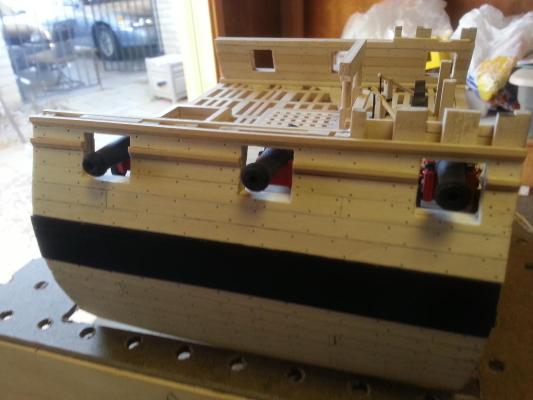
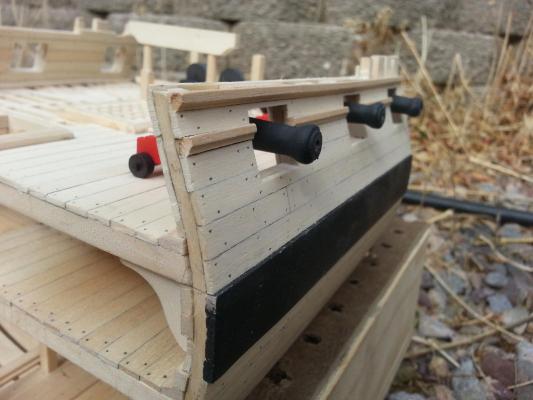
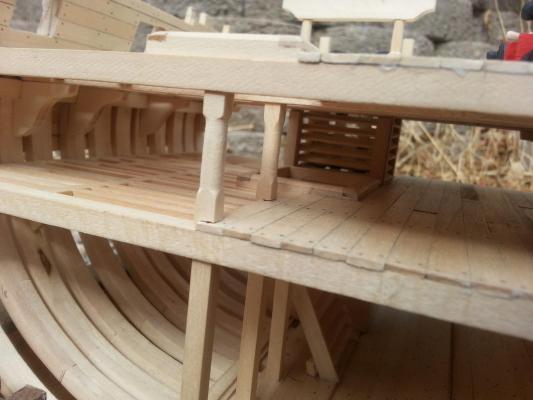
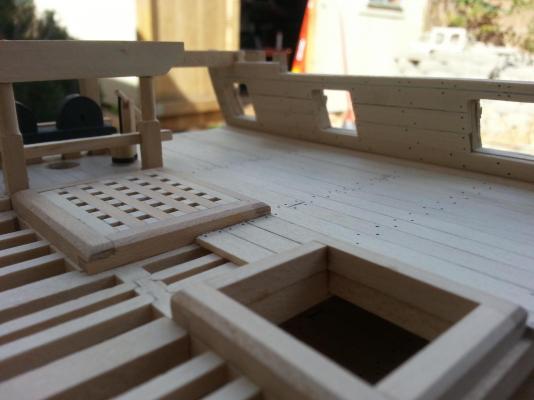
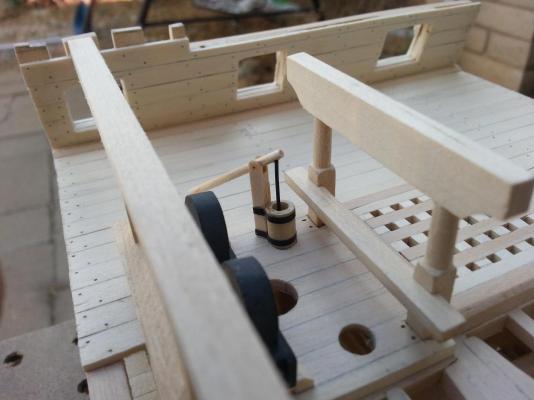
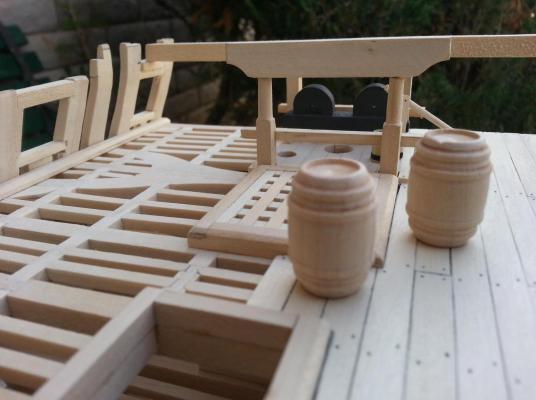
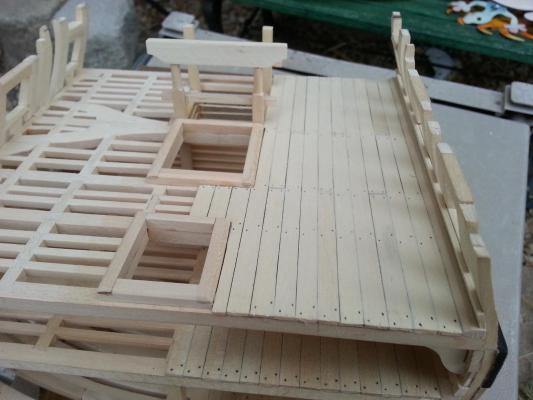
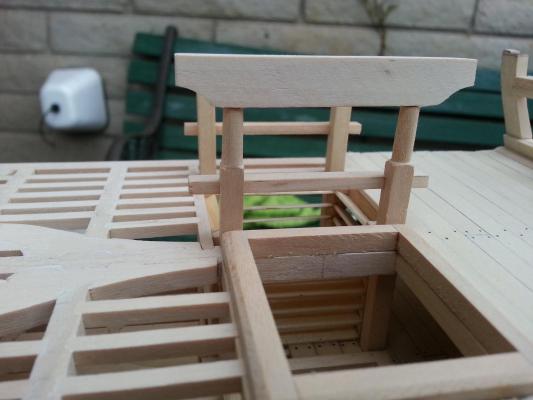
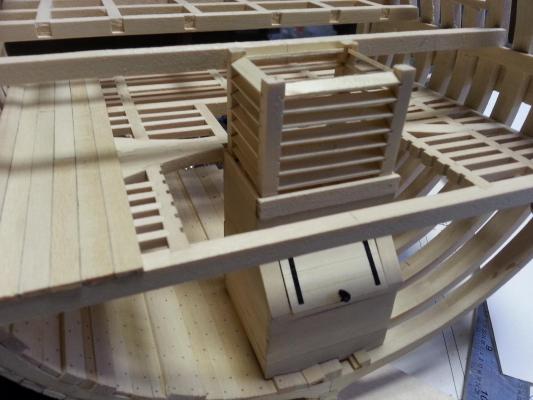
Greetings to all, The newest update to my Triton consists of planking around the gun ports both inboard and outboard (to include the outboards trim moldings). I’ve also completed the gun deck’s section of planking over the chain pump casing well, permanently attached both main topsail sheet bitts. I constructed the chain pump, one of the two hand pumps leading down the well, and installed the gun deck’s grating. I’ve also placed the first quarterdeck beam as a means of establishing how it is going to look once I get started on its. Now here is my dilemma, in a couple of photos below you will see a couple of 7/8” barrels I purchased in Hobby Lobby. At this scale, the barrels will be equal to 42” in height which I believe are ideal size for the storage of the ships freshwater supply. My question is, did the Triton have platforms in its hold area? I ask because I believe that it will add for more details in the hold’s area and at the same time allow for the storage of barrels.


-
Hello Kenny, I've just went over your post and you're doing an excellent job. I'm also working on the cross section as a means of understanding and getting a feel for how these marvelous ship were constructed back in the day. I look forward to seeing the rest of your build.
-
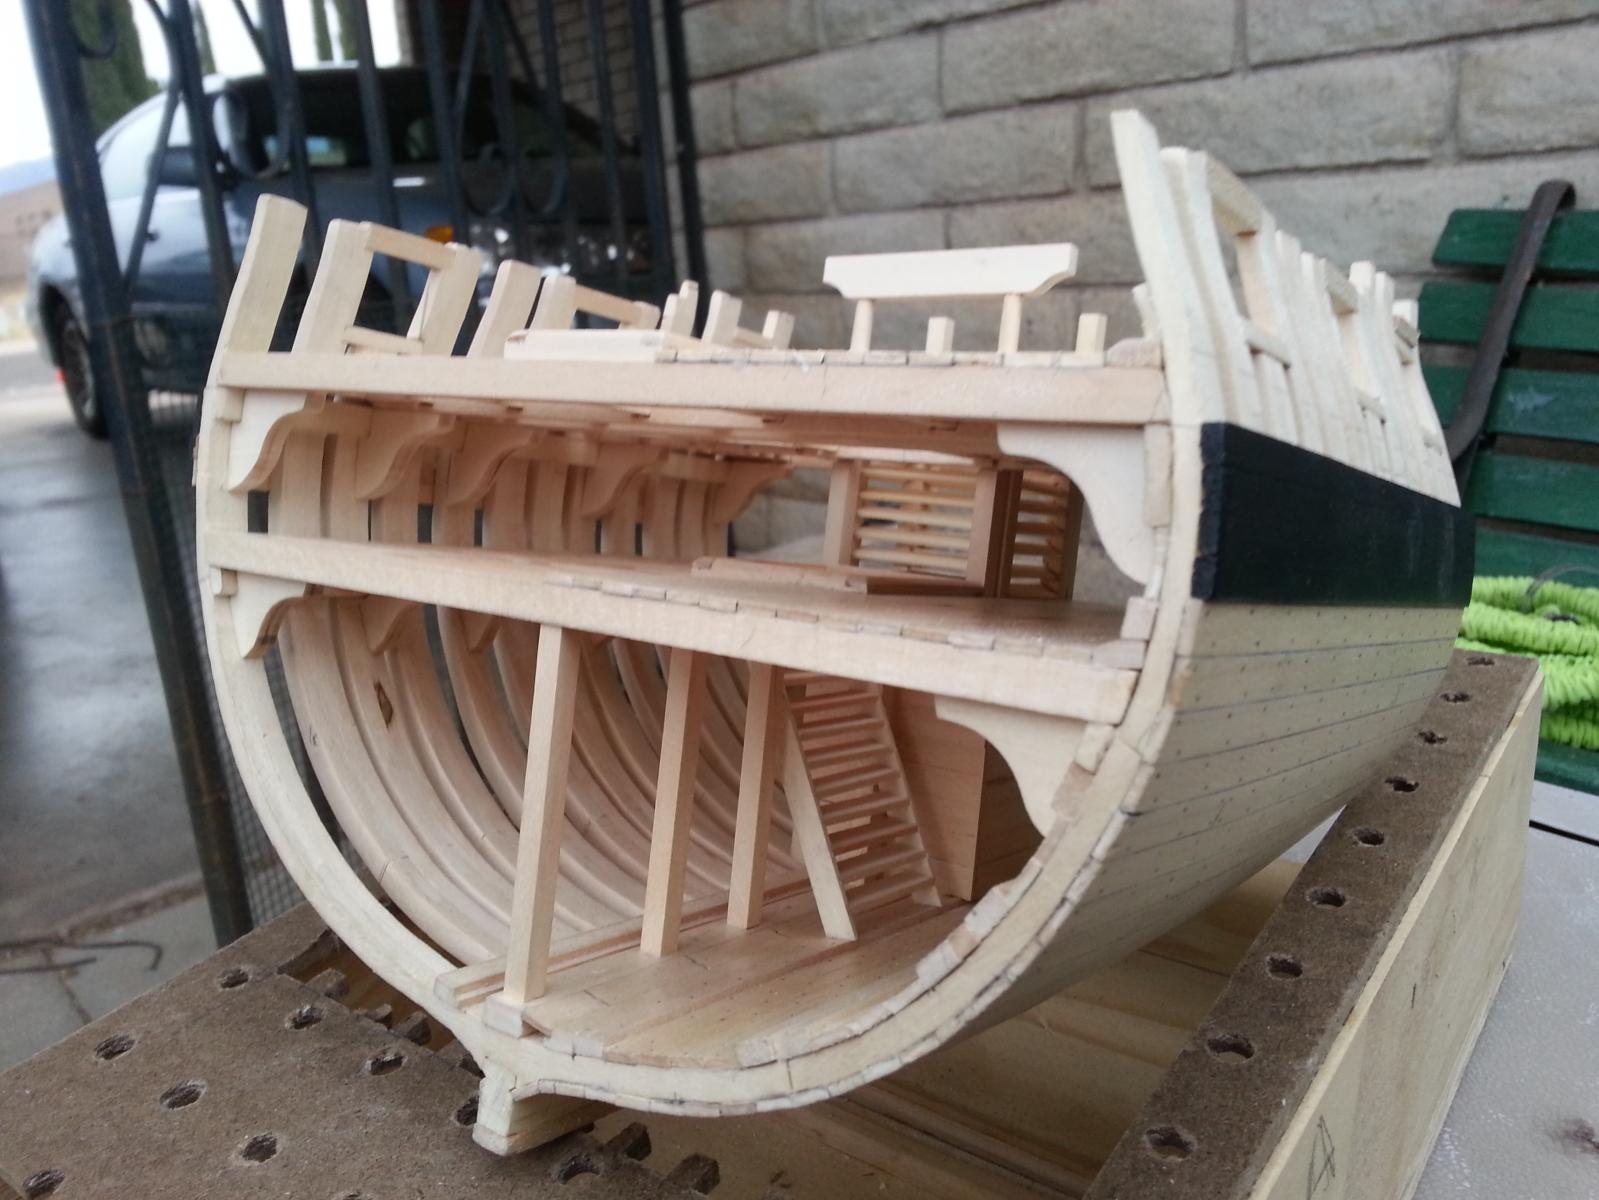
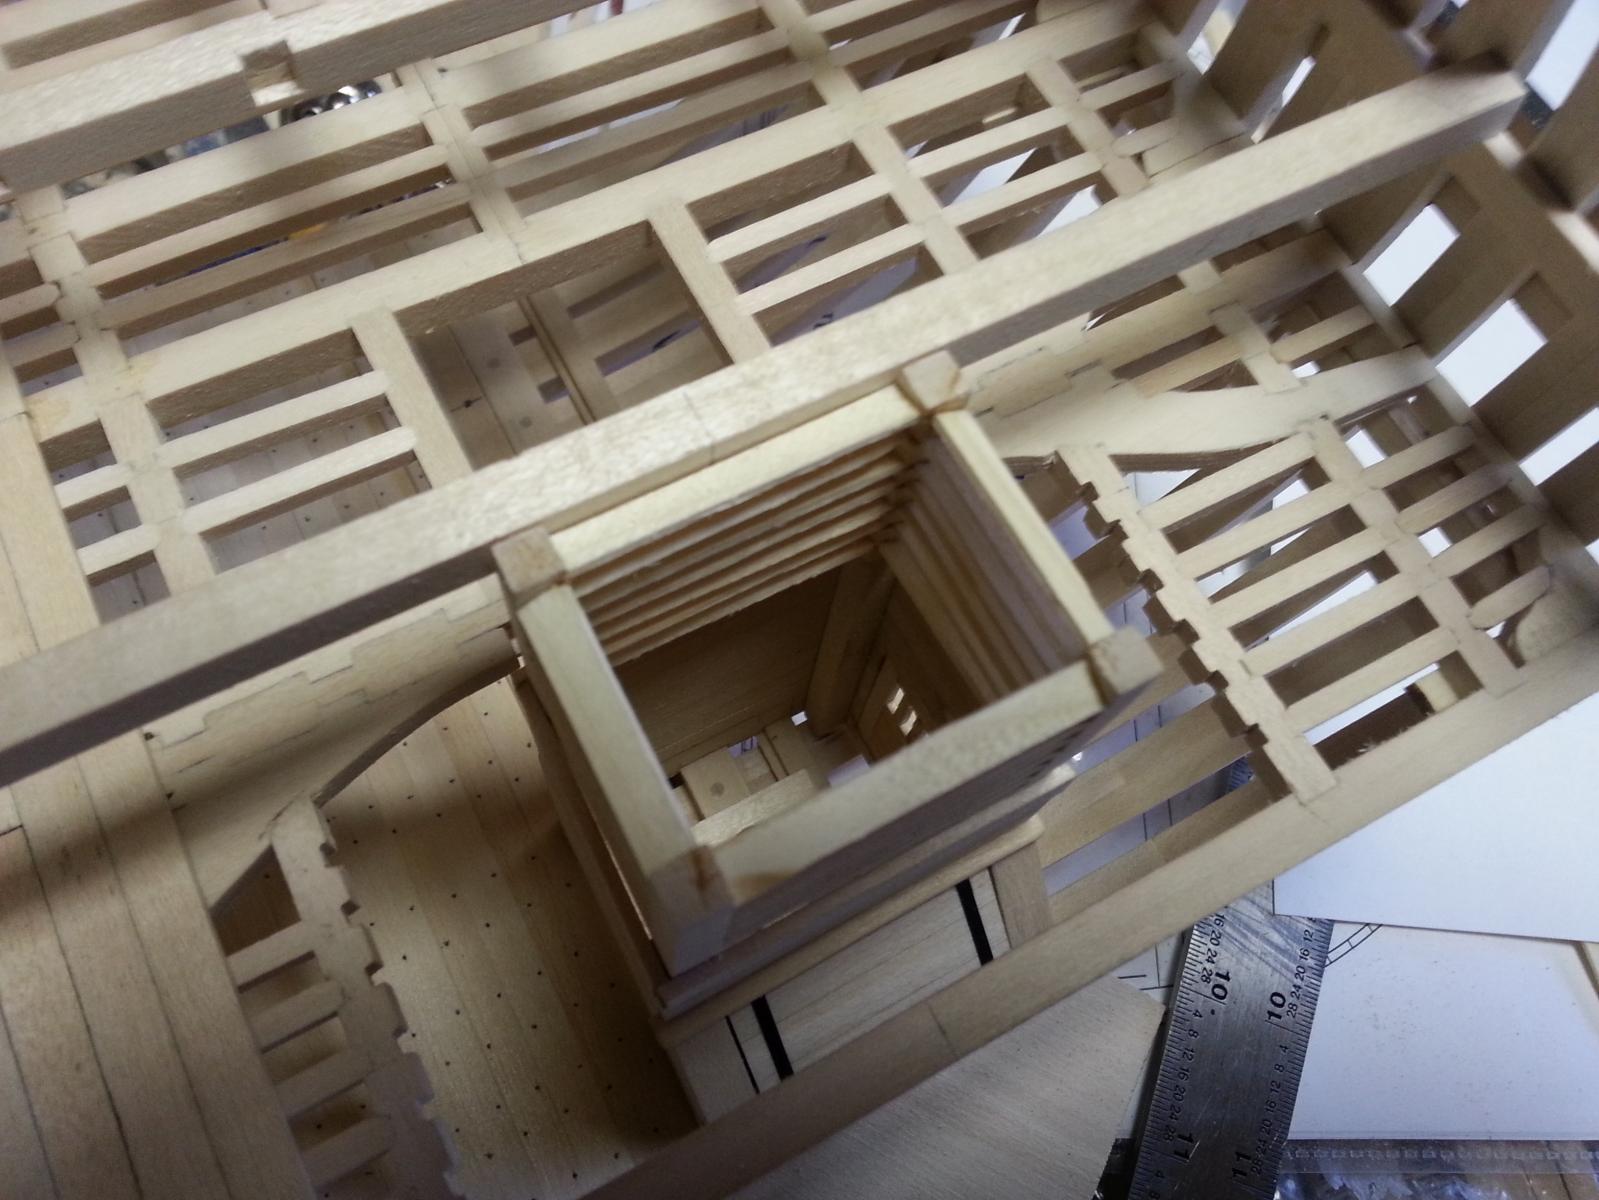
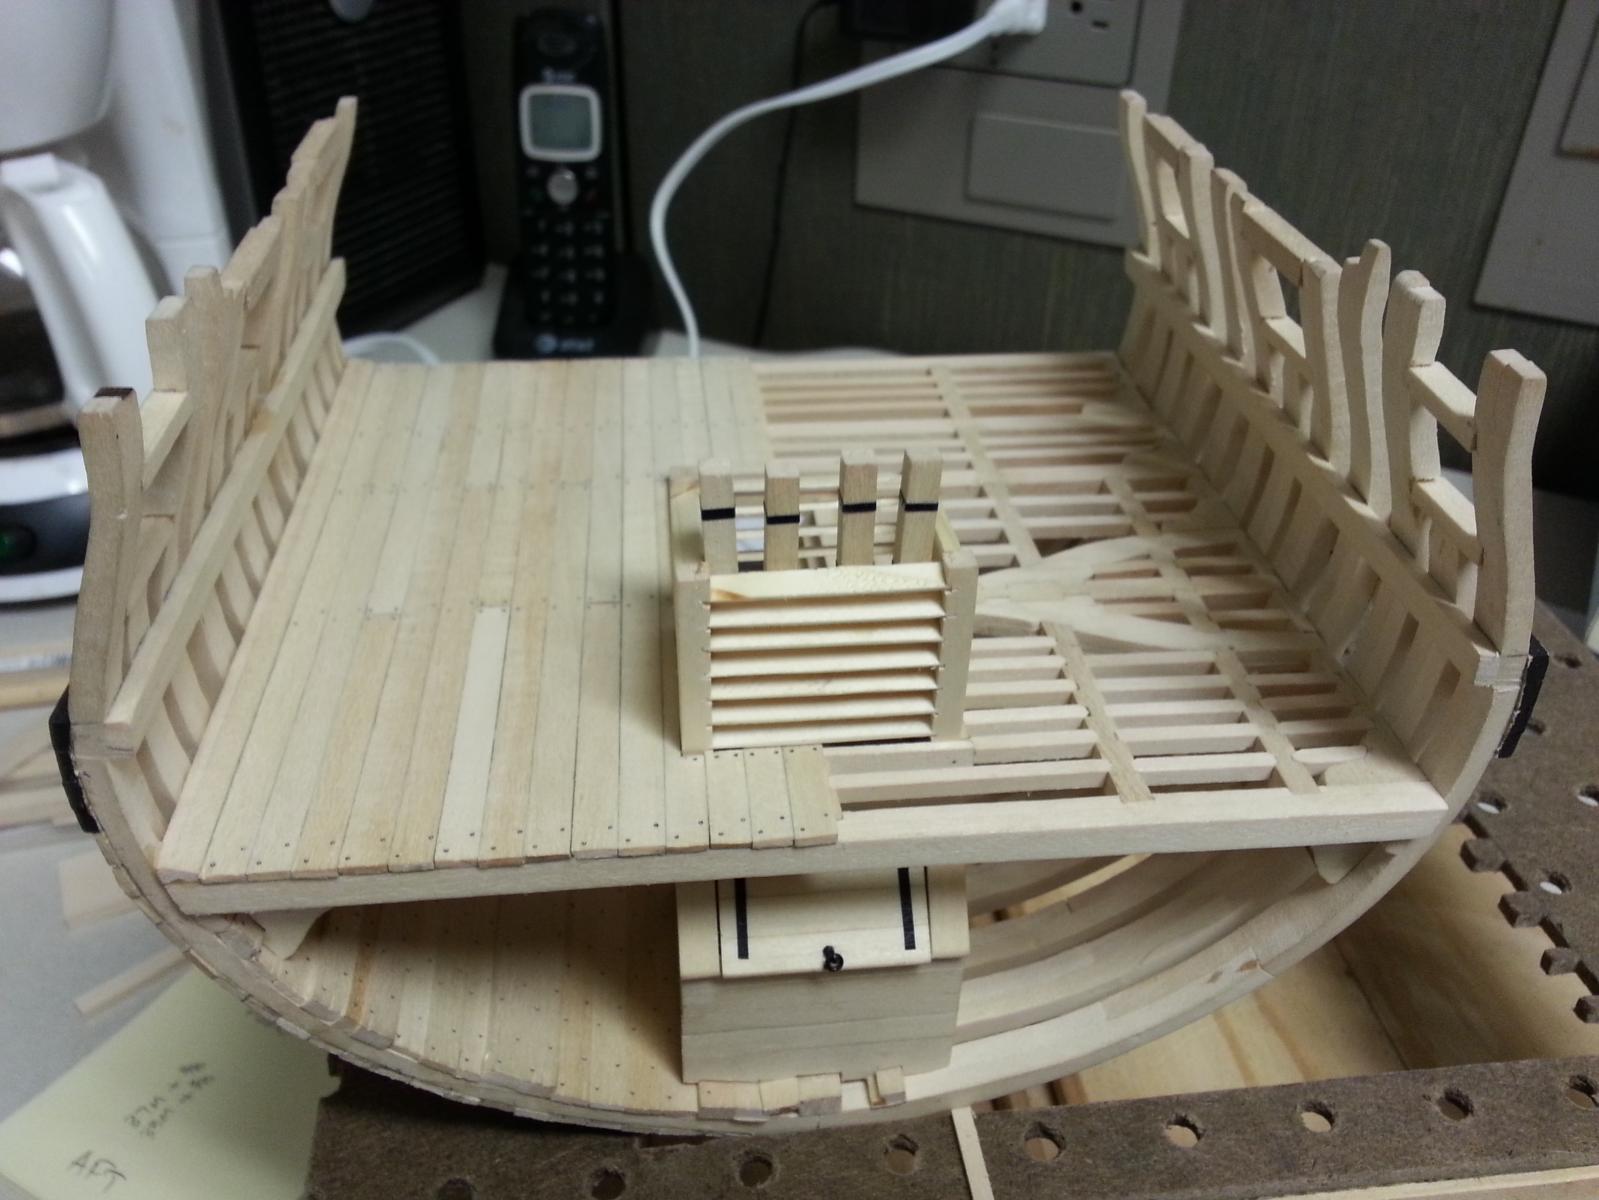
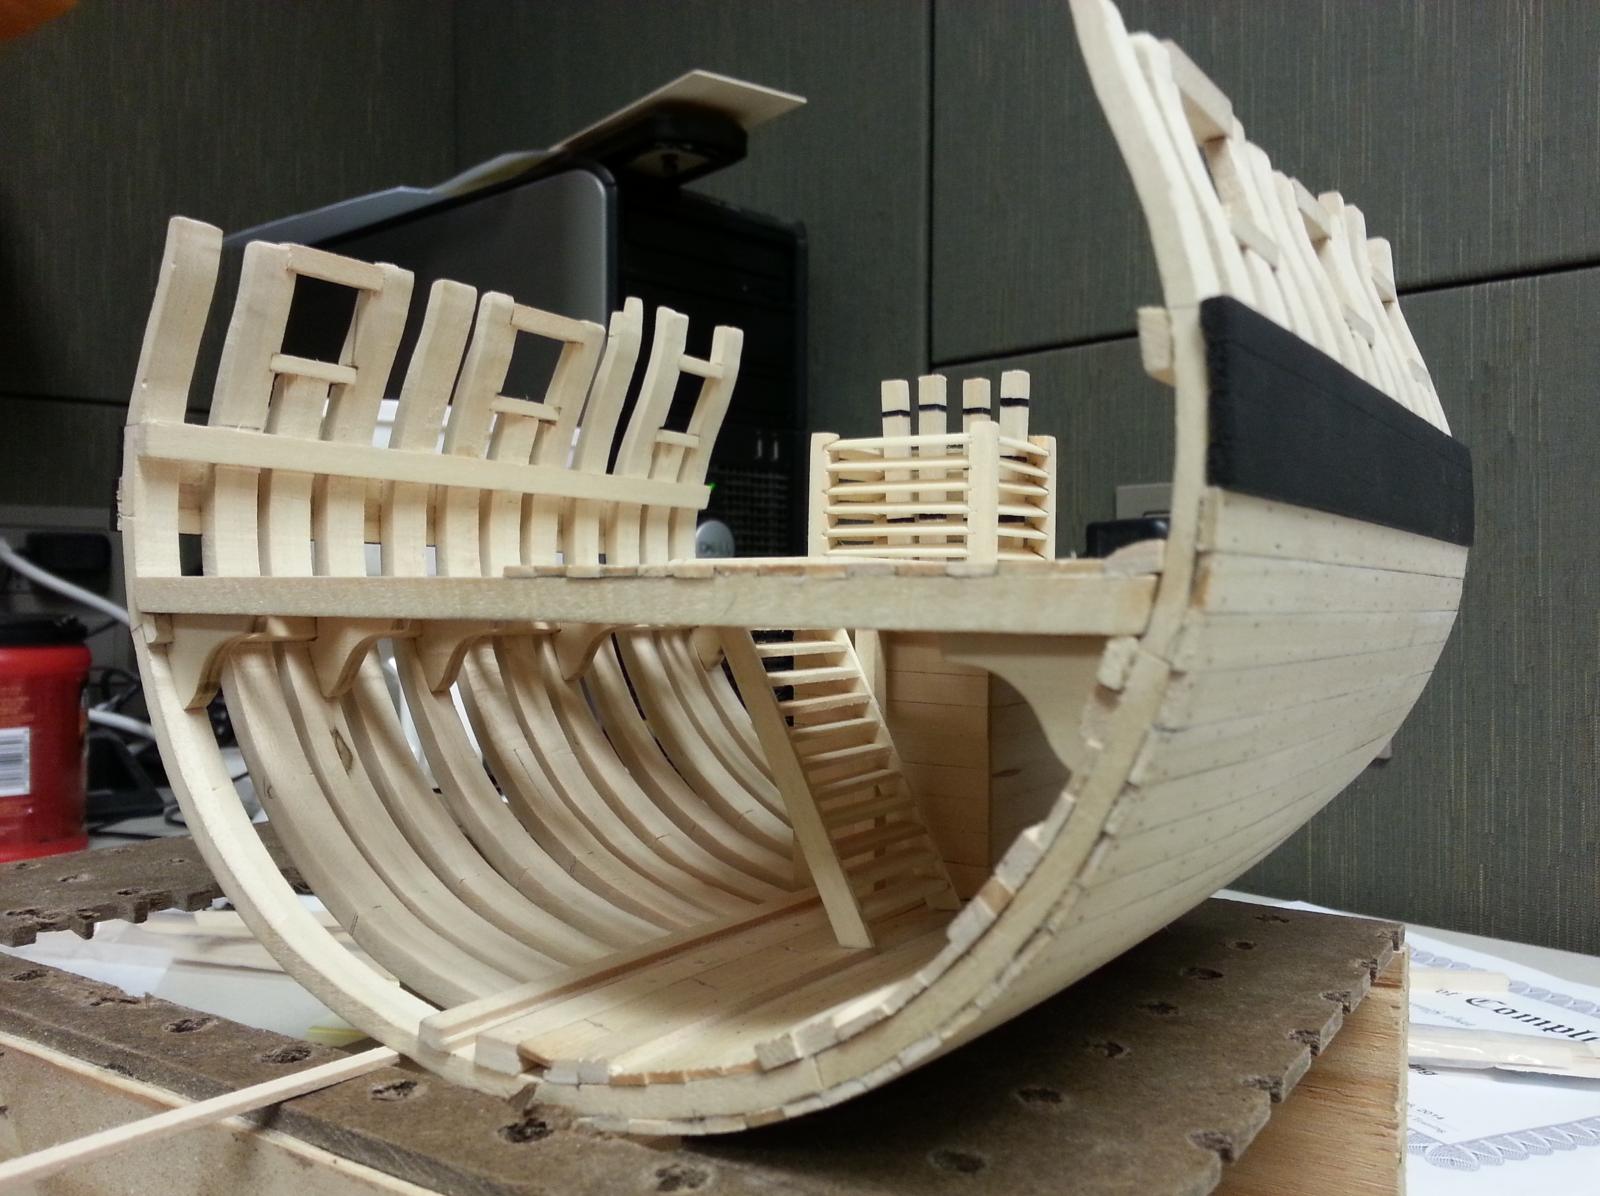
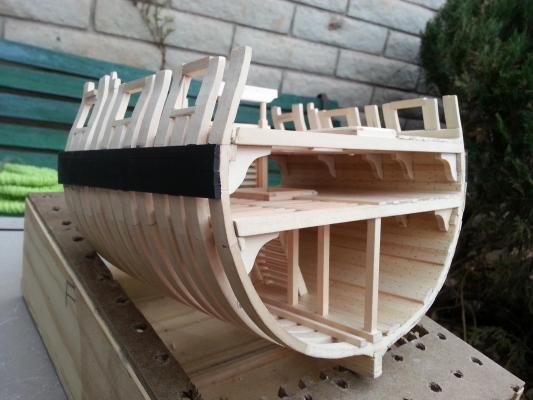
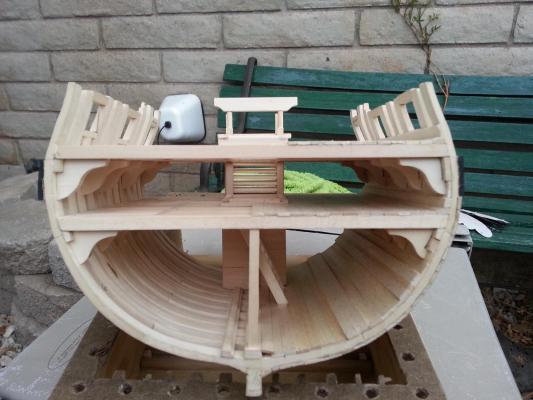
Greetings to all, Many thanks to all for your kind words. Please excuse me for not posting lately. I just feel as if I don’t have enough to post, then I should continue to work on my model until I do have enough. Now that being said, here it goes. I last left off with just the lower deck planked, lower deck hanging knees, and ladder going into the lower hold complete. Since I’ve only been working small items at a time, I’ve managed to install the hold pillars, add the gun deck beams (which have been planked to include the waterway and spirketting). Added the gun deck hanging knees, coamings for the gun deck hatch and ladder way, and made the main topsail sheet bitts. I plan to make the gun deck stanchions, quarterdeck clamps and beam, and start planking around the gun ports over the weekend. The following photos will show you what she is starting to look like.


-
Hola Mija, I've just finished going over your latest posts and they look wonderful. You have put more thought into your Red Dragon than Ive put into my Vietnamese Junk. I will continue to look into your progress. Keep up the good work.
-
I believe this is the stage of the build when you have to actually slow down to ensure all the details are paid attention to. If not, then the results of the finished product would be disasterous. But between us, it's the most fun part of any build.
-
Will do Kemo-Sabe.
-
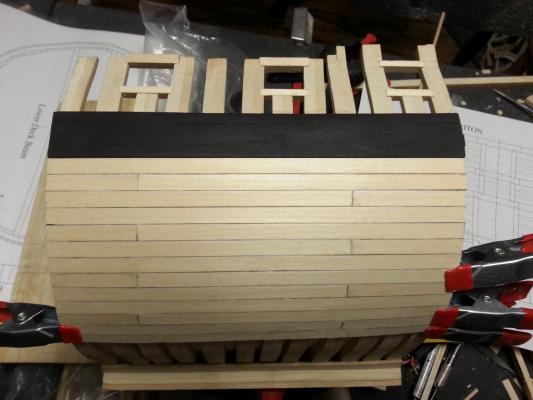
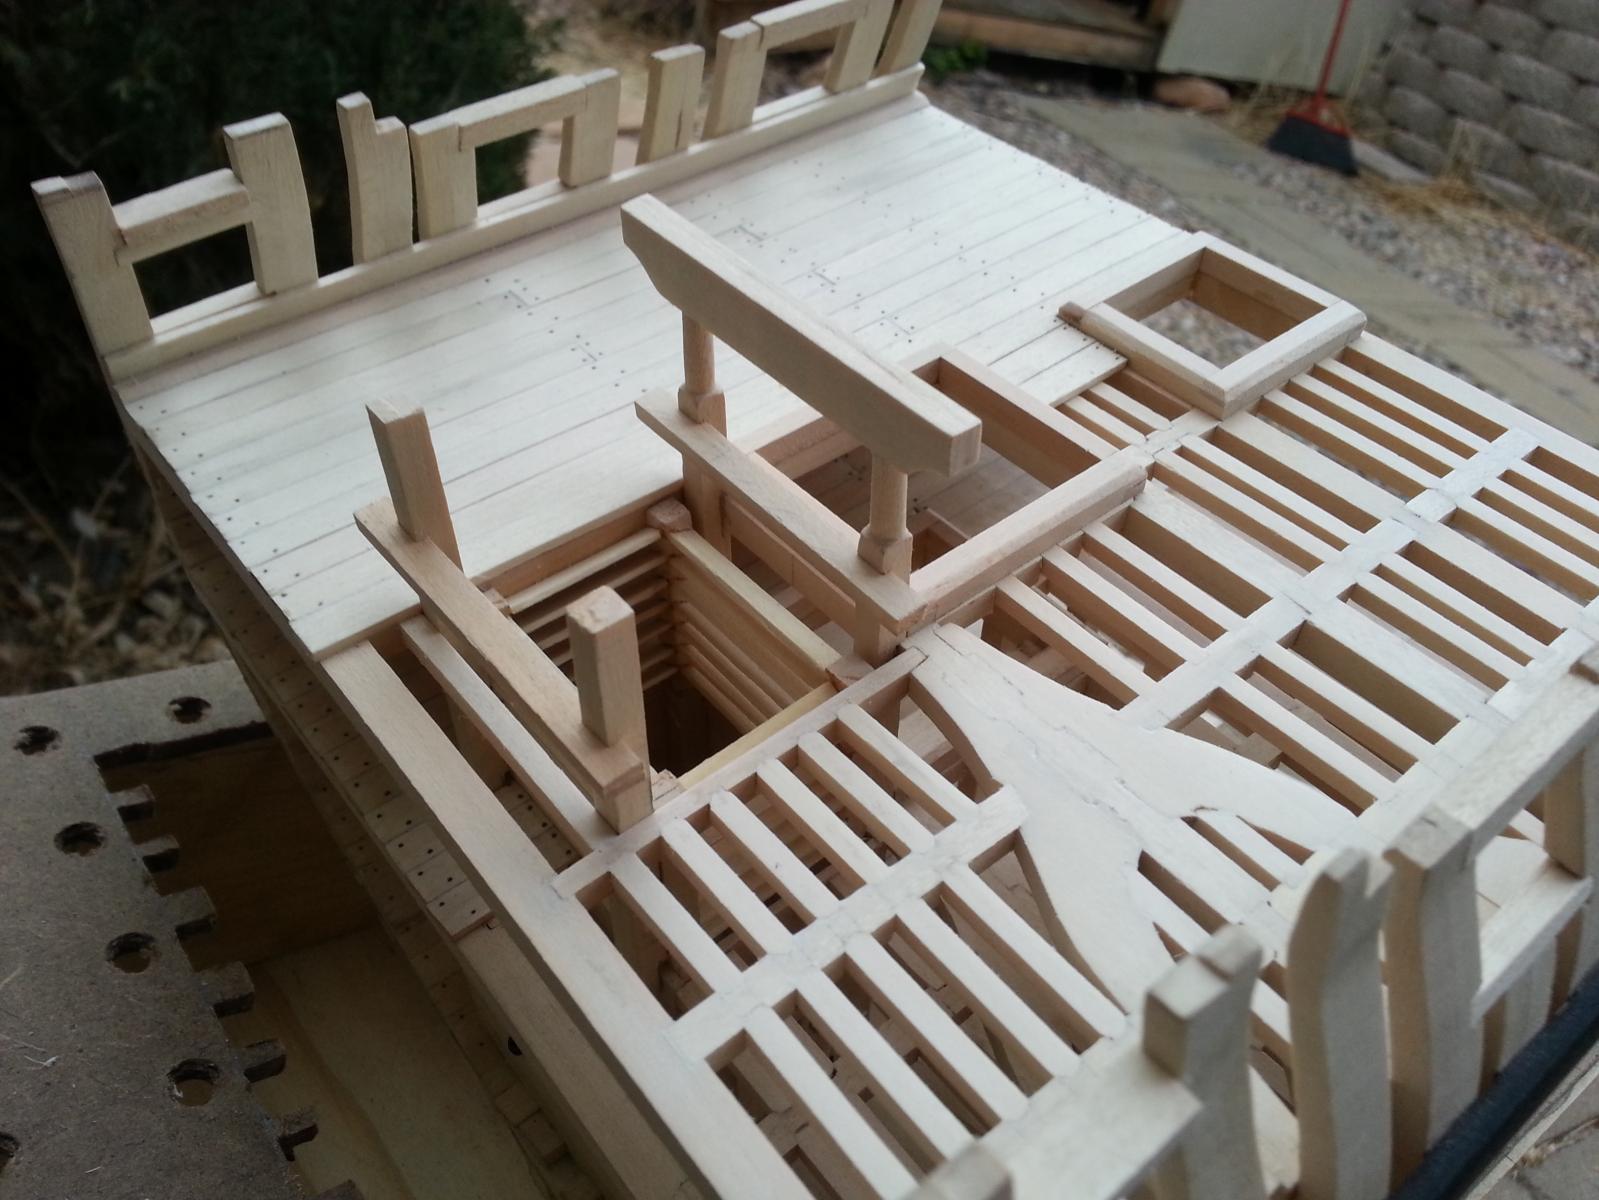
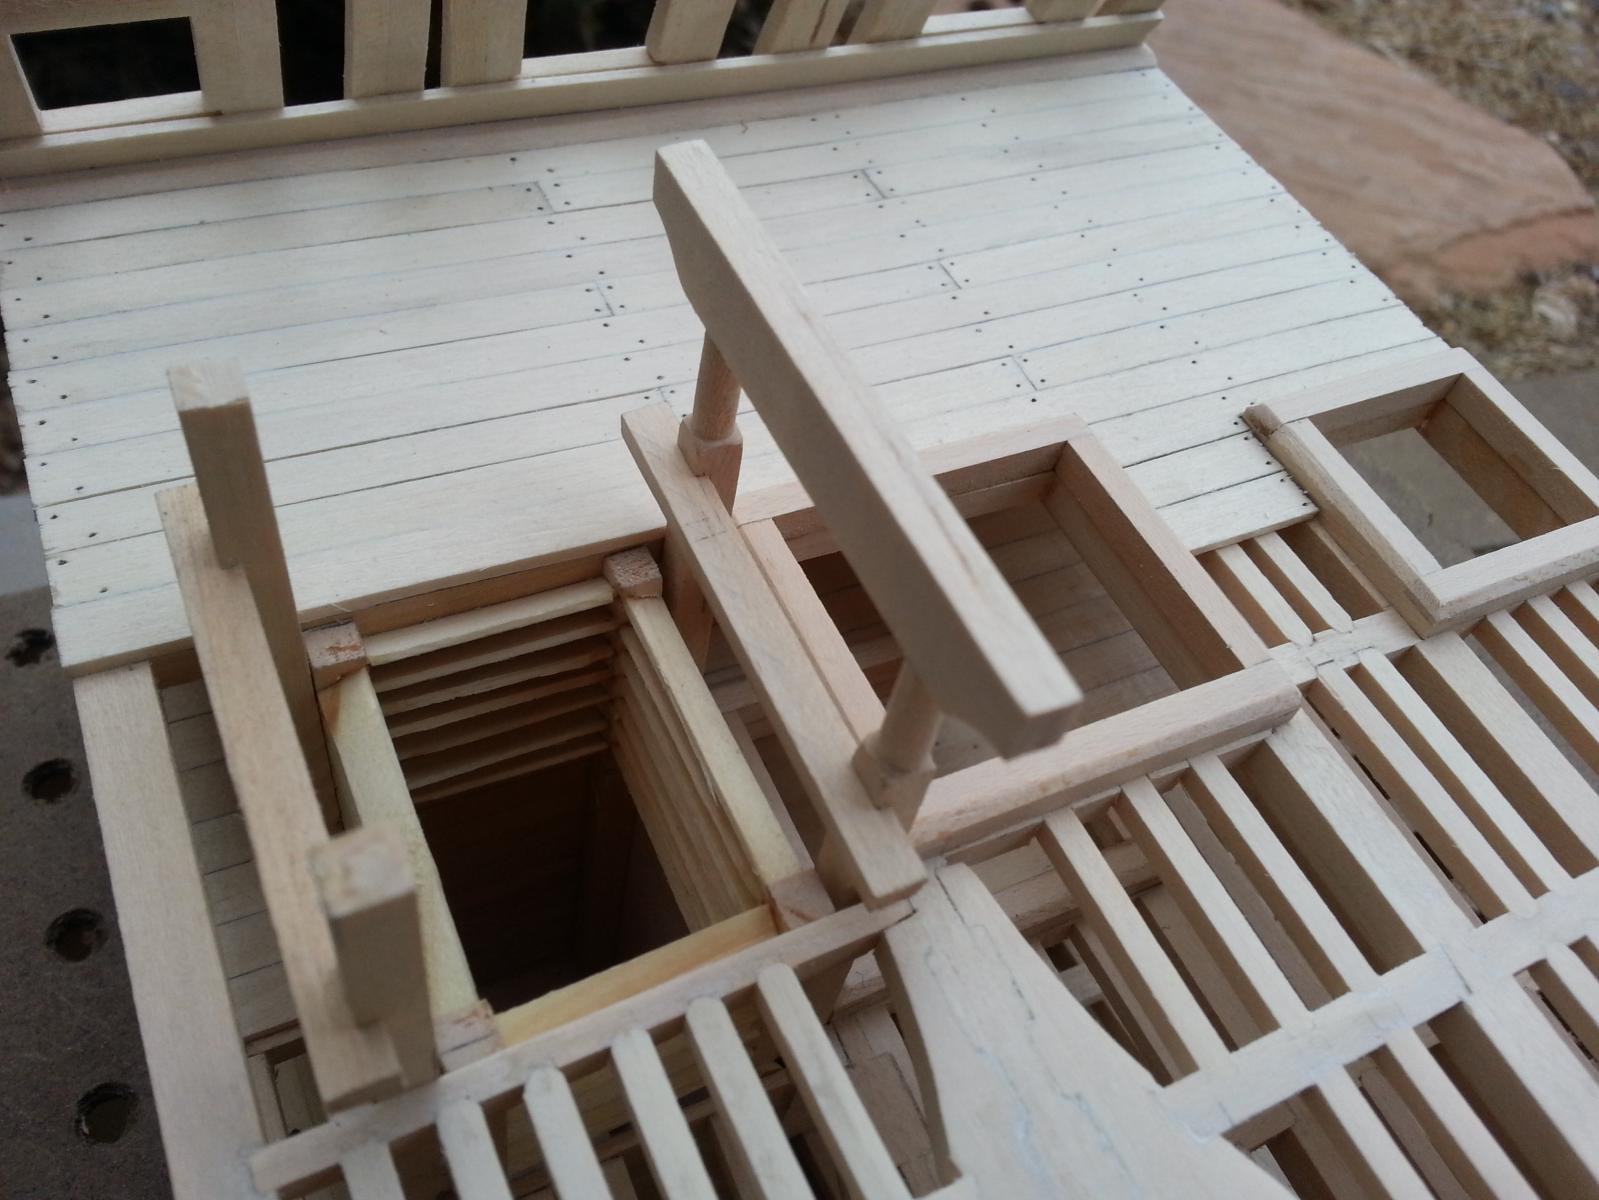
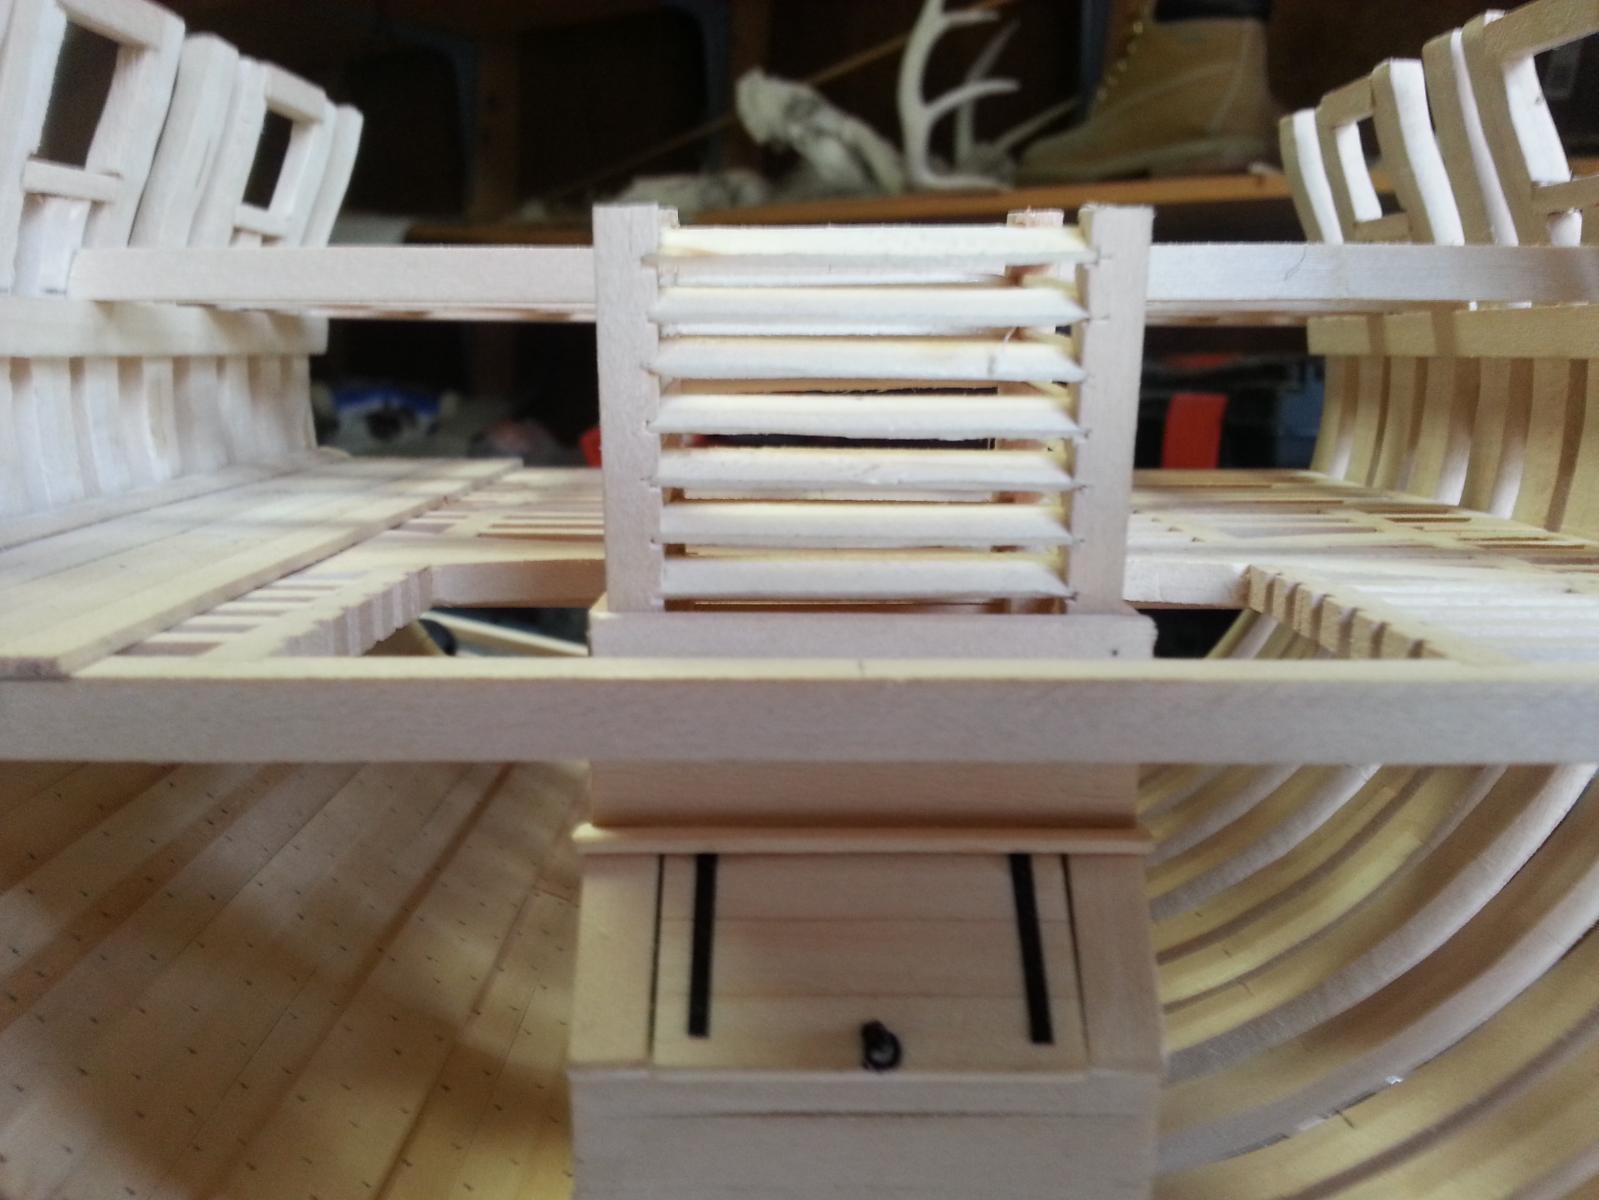
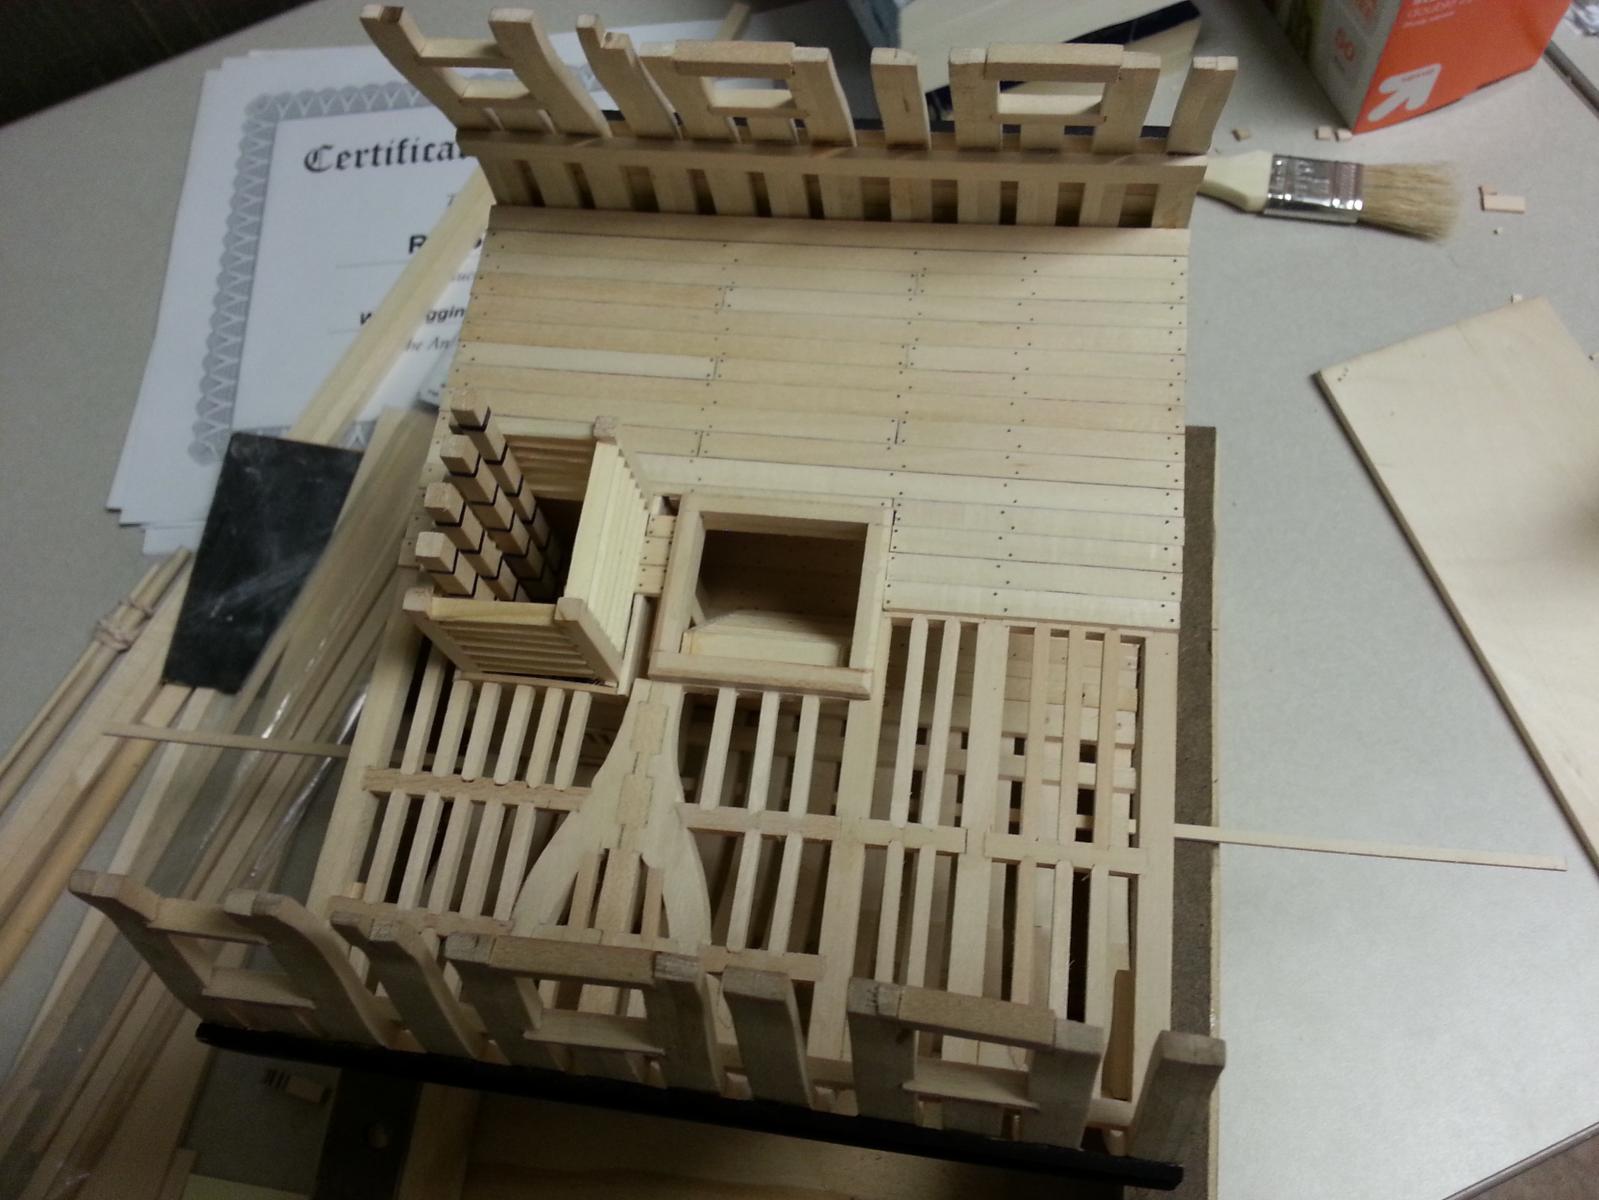
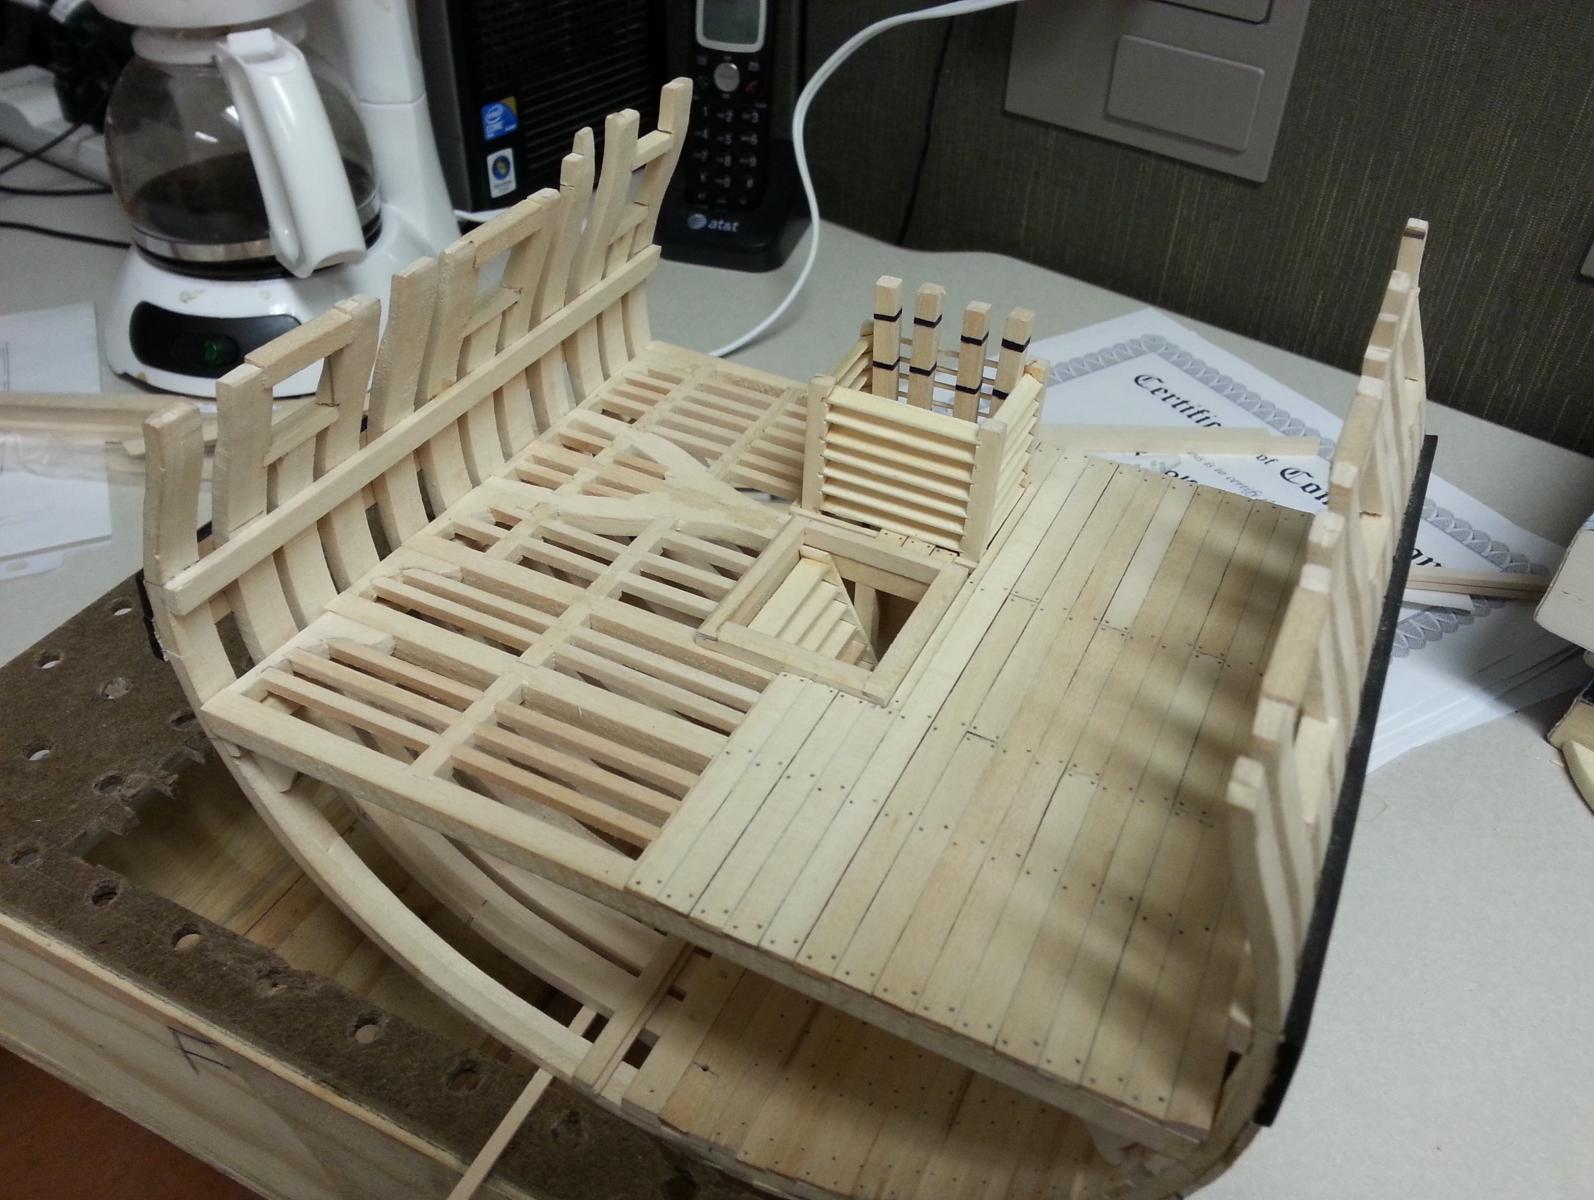
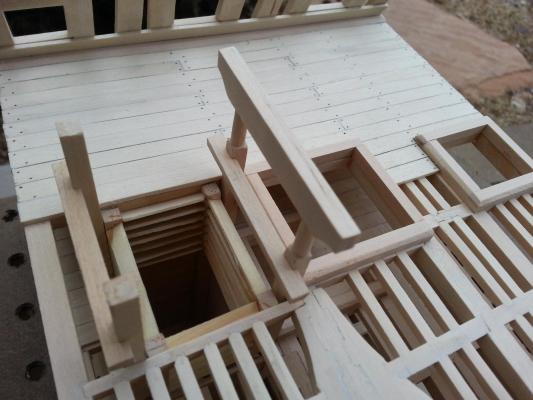
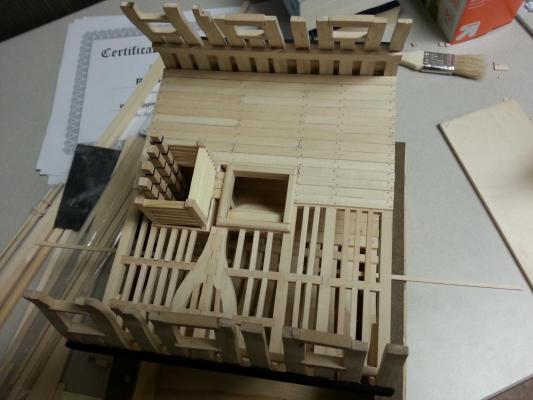
Greetings to all, Well, where to begin. I know it’s been a while since my last post but I must confess that I’ve only been working on my model for one to two hours a day or at the very least every other day. Guess what, that adds up pretty quickly and before I knew it I was already getting started on the second deck. I am currently pulling a 24-hour shift at my job and after I got here, I realized that the gun deck I had already started stayed at the house and I was not able to get any more work on it. So I concentrated on finishing all of the ledges, add the louvers on the lower deck, plank the lower deck, install the hatch coaming, make and place the ladder to the lower hold area (which I thought I needed hence its placement), add limber boards against the keelson, and finally finish the outboard planking. All of my planking received simulated tree nails by using an awl to mark the location and following up with a pencil. The following photos will show you where I am so far. P.S. I forgot to mention that I've also added the hanging knees on the lower deck (Hooray).


-
Hola Mija, The furniture looks beautiful and I believe it would be nice if you can also add rugs and/or paintings to the walls. Keep up the good work, I can hardly wait for the next installment. Tu amigo, Raymond
-
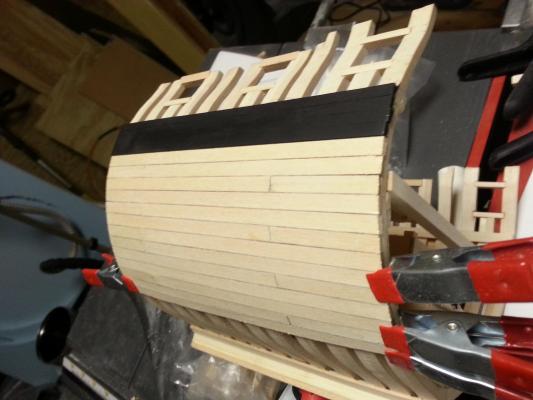
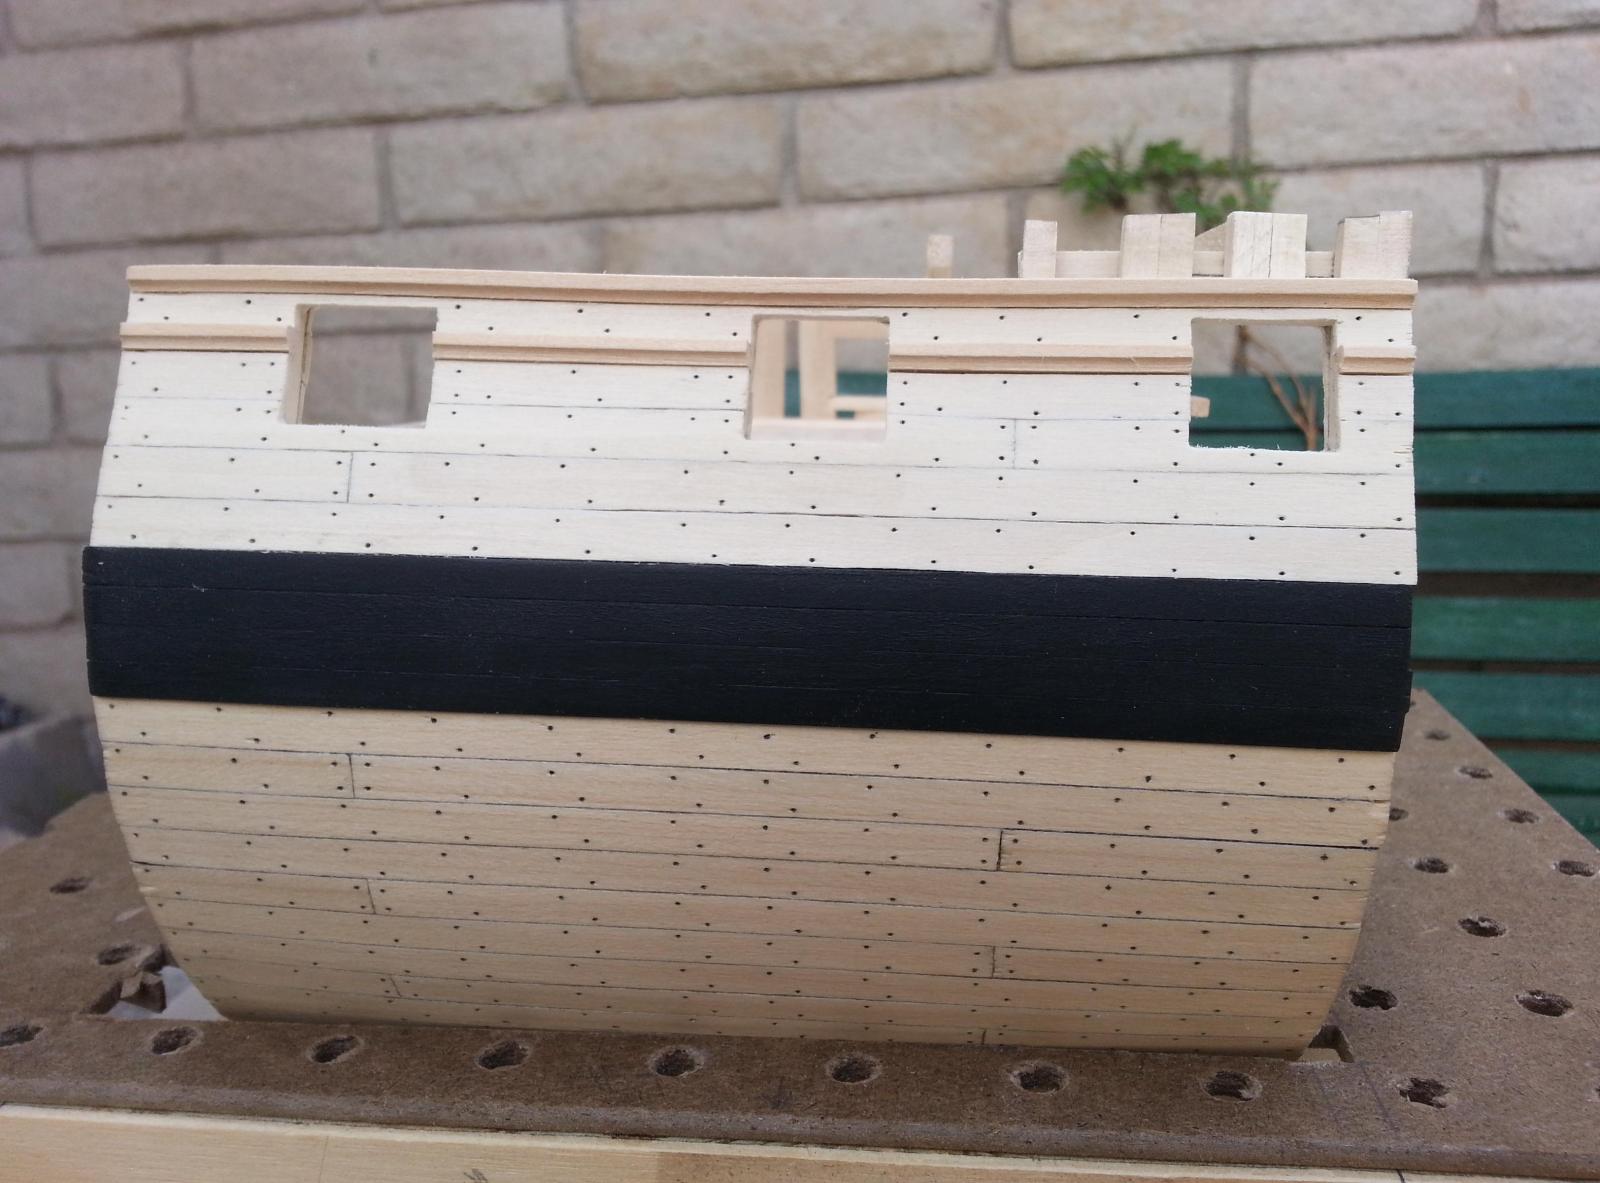
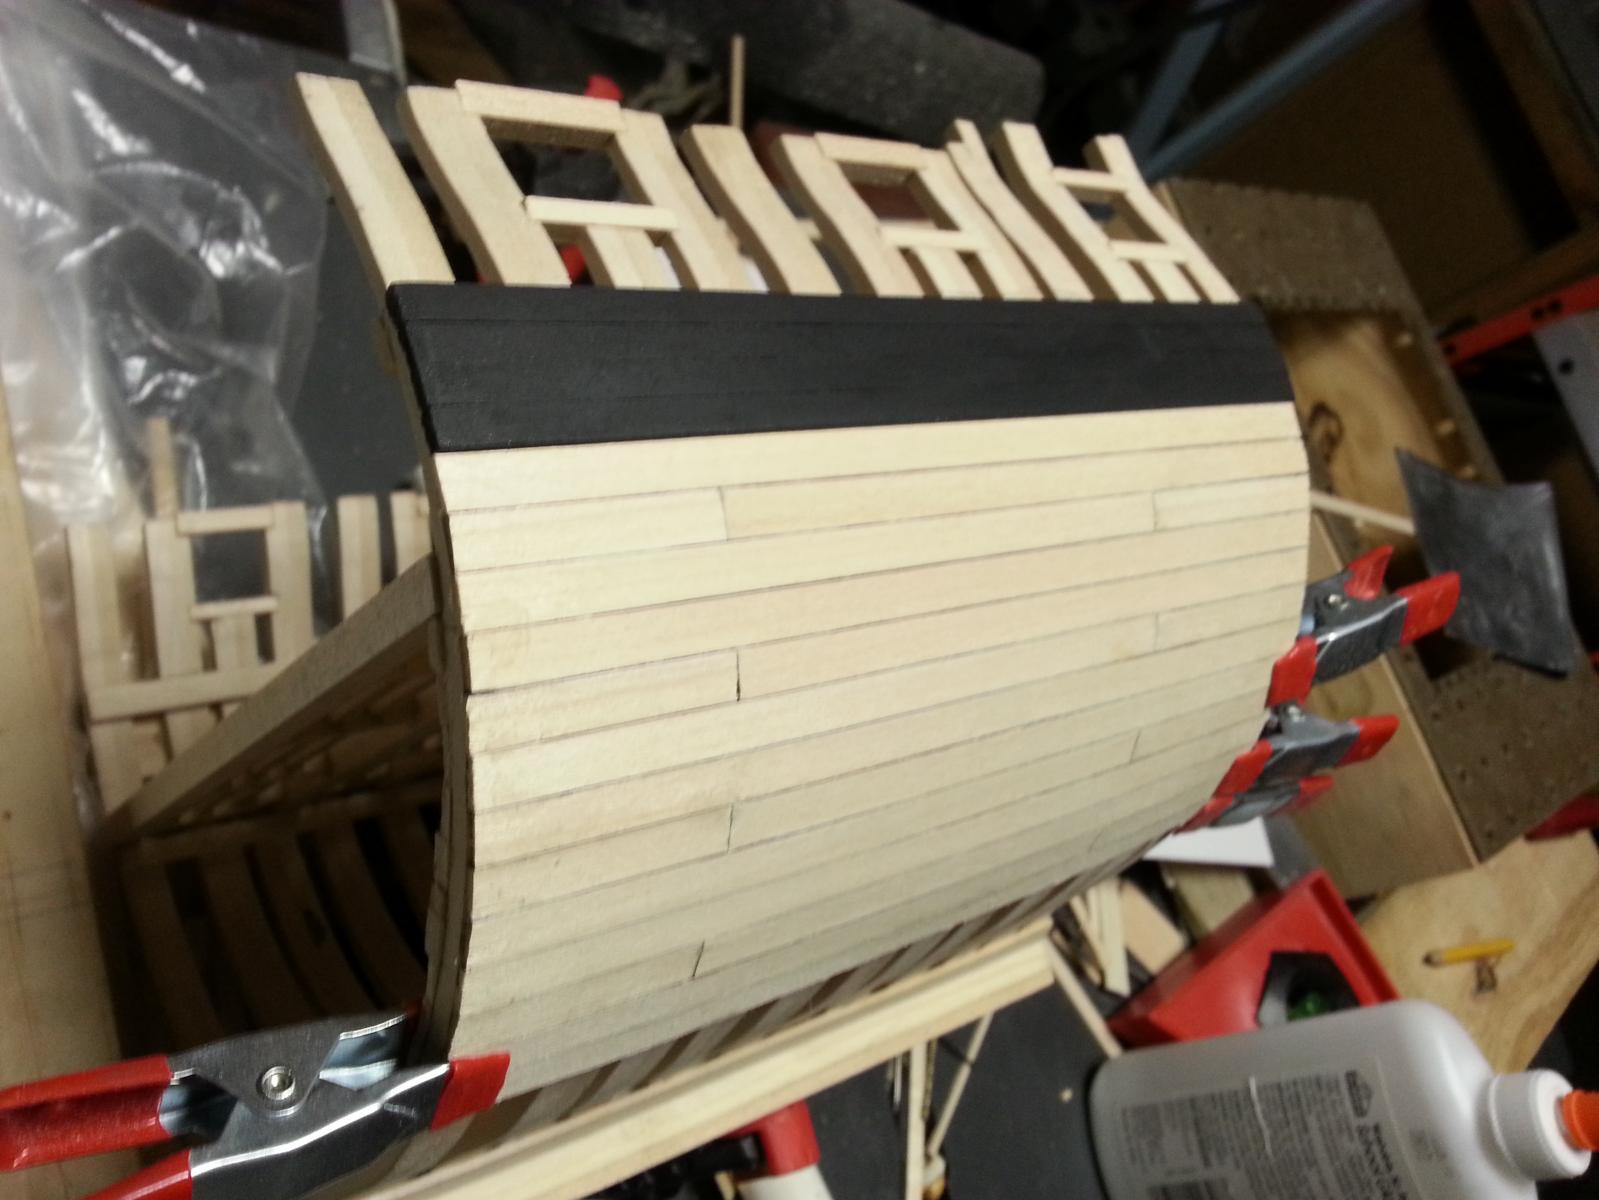
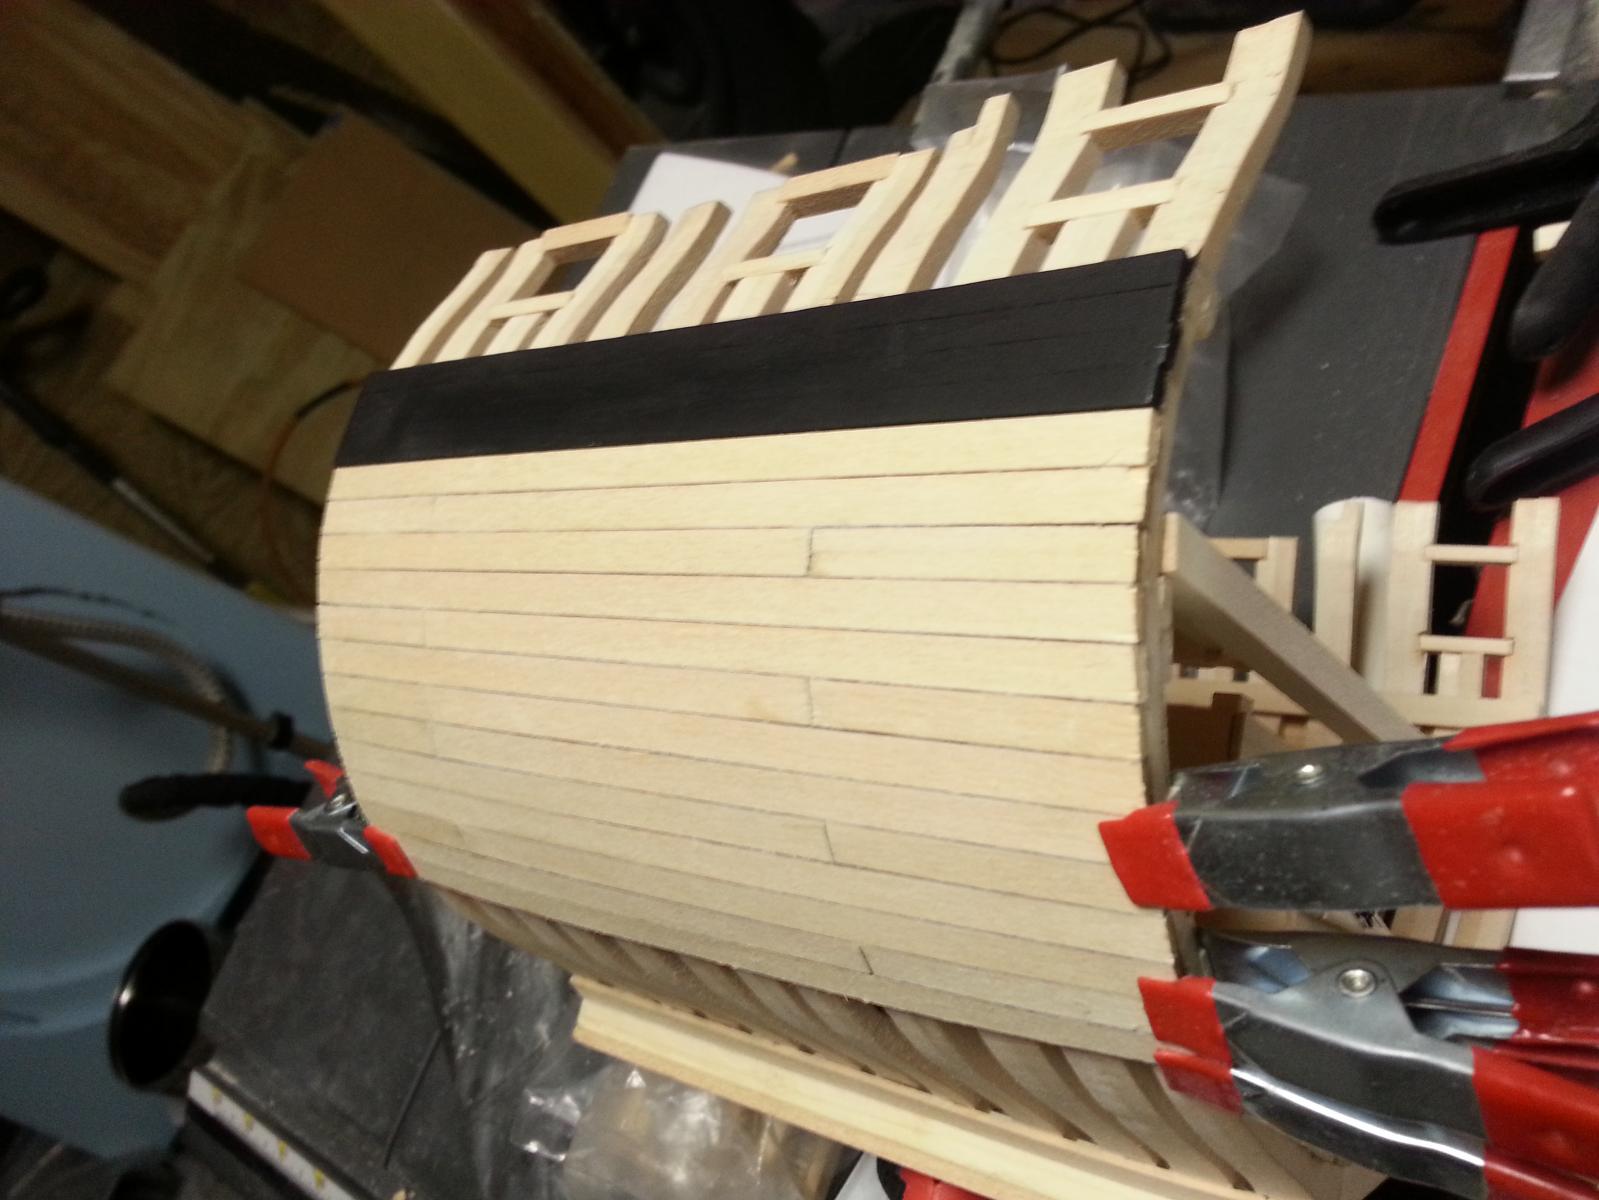
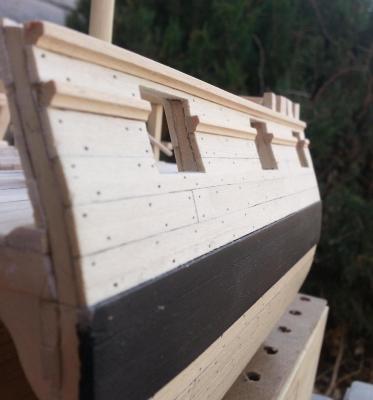
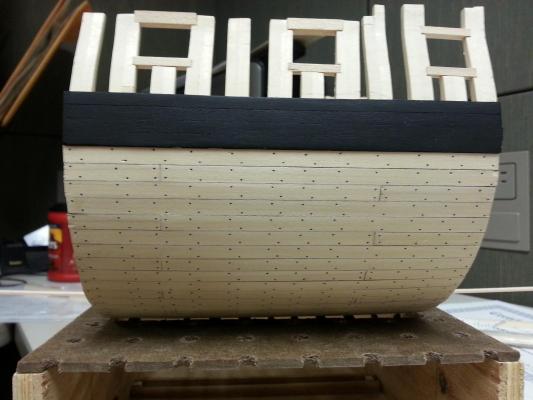
Greetings to all, Well I said I would finish the lower deck by this week in order to get started on the gun deck but for some strange reason I find myself shying away from the hanging knees. I know that I have to get them done and incorporate them into my model. What I will do is follow Arthur’s suggestion and mount and secure my rotary tool onto a base frame and use it as a spindle sander to sand my hanging knees into shape. You may all wonder, “If Ray isn’t working on the hanging knees, then what in the heck is he doing?” Well I’m glad you asked. I am currently planking the port side of my model below the wales and she is starting to look rather sexy. The following pictures will show you what I’m talking about.