KenW
-
Posts
1,232 -
Joined
-
Last visited
Content Type
Profiles
Forums
Gallery
Events
Everything posted by KenW
-
 I’ve set the jib sail and completed all the rigging. There just remains tying off and gluing the lines at their cleats and adding some coils. I also need to raise the flag.
 -
The mainsail and foresail have been rigged to the boat. I’m having problems getting the sails to flare out from the hull so it looks like it's sailing in the wind. Of course, there is no wind. Therefore there is no force pushing the sails out and when I tighten the sheets, the lines keep pulling the sails closer to the boat. And the sheets never look tight, always loose. Not the look I want. Also the stove and some jars have been added to the forward locker. There is a small jar heating water for tea.
-
December 20, 2023 I’m now working on the foresail. The unique feature here is the bonnet. It should be attached by a lacing, not the crazy sewing shown on the photo (see the first entry). I found the proper way in the book, “Historic Ship Models”, by Wolfram zu Mondfeld (see photo below on left). The method is shown in the photo on the right. My attempt is in the last picture. Still need some shaping of the sail.
-
Great job ! What thread do you use to make the rope? I really don't like the polyester thread recommended by Chuck. It doesn't behave the way the old Syren rope behaved. And white glue doesn't work on the polyester. That causes the rope changes color when you glue it. That nice brown rope turns to black. I'm going to go to various yarn/sewing shops to see what I can find. Cheers.
-
The mainsail is completed and rigged onto the boat. That includes the reefing ties. The sail looks like the wind is at its back. I may try to do a little more shaping, but I think it is done. I’ve been wondering about how ‘fancy’ the rigging should be. When my wife, in-laws and I were in Palermo we met Dino. Dino was a ‘tok-tok’ driver whom we agreed to let him give us a tour of the city. His tour actually turned out to be great. However during the ride, the door next to me swung open and the inside latch on the ‘tok-tok’ fell on the floor at my feet. I showed it to him and pointed out he could fix it with just 4 screws and nuts. His reply was that he could find ‘a’ screw. He wasn’t navy; he was just a ‘tok-tok’ driver trying to ‘make a buck’. I wonder if the owner of my pilot boat was just like Dino - just a guy trying to ‘make a buck’. Would he spring for parels on the lines securing the gaffs and boom to the mast? Would he want to spend on tar to protect the few lines of standing rigging? I’m going to include those things, but I don’t know if what I'm doing is really authentic.
-
So I made a tea kettle at 1:48. It's very small but not that hard to make. I generally avoid knives; every time there’s a breakage I’m holding my x-acto. Files and sanding sticks are best. Also, when I make something from a dowel, I don’t remove what I’m making until it’s as close to finished as possible.
-
Thanks BD. I check it out.
-
The sails will be printed on the starboard side only, along with the cloths. I made a stove a while ago, but I noticed that at a scale of 1:48, the bricks would be 18-21 inches long. Too big. So I made a new stove with bricks about 2 inches x 4 inches x 8 inches. I also added some coal bits and dry painted some coal residue. Now I need a kettle to brew tea.
-
I attended my club meeting and did a small remote presentation of my model. They also pointed out that tea wasn't the best to use on the sails. They recommended sepia ink; which I ordered. Once it arrives I'll experiment and post the results. Watch this space.
-
I also have a question about the sails I'm making. In one of my 'experiments' I added the reinforcing cloths attached to the leeches. Using pieces of Silk Span, they completely blended in. You can't see that they're there. However, on one of the photos on TomShipModel's presentation shows full sails he made and the reinforcing cloths look 'shaded'. I'm wondering how that shading was obtained. Any ideas are welcome.
-
I’ve been experimenting with the sails. I wanted to have the bolt ropes outside the sails, but didn't want to sew them. So I got some “Tacky Glue” and, after folding the two outside sheets over, I glued a few bolt ropes onto the jib and lower foresail. But Tacky Glue attaches itself to my desktop as well as a piece of wax paper which makes using it difficult. And you can hardly see the rope. So I decided to put the rope inside the fold. Also I printed the boat name onto both sides of the upper foresail. The printing didn’t line up well, plus there were kinks in the sail, so I made a new set of sails. They aren’t finished yet but I enclose photos of my rejects. My question is: Should I have the name on both sides of the sail? Should both names be printed on top of each other? Or just one name on the starboard side?
-
I’m back from a summer of disaster. But modeling can continue. I’ve cut the masts and gaffs and am starting to make sails. I’m using a composite of entries by TomShipModel from Chuck Pissaro’s Medway Longboat blog. It is found at: https://modelshipworld.com/topic/28900-sails-for-a-cutter-rigged-long-boat-medway-longboat/ I cut out sails on paper to get the sizes right and drew the lines to simulate the sewing of the clothes. The boat has a mainsail, a foresail and a jib. A photo of my layouts is below. Now to actually make the sails from Silk Span.
-
Thanks Allan. I’m not totally sure it’s too much easier except that I’m not cutting as many frames. Given my lack of power tools and my inexperience with them, I’m sure I’d have to spend a lot of time sanding and fairing. But so far, I’m enjoying the process. Just have to wait and see how it all comes out. Cheers.
-
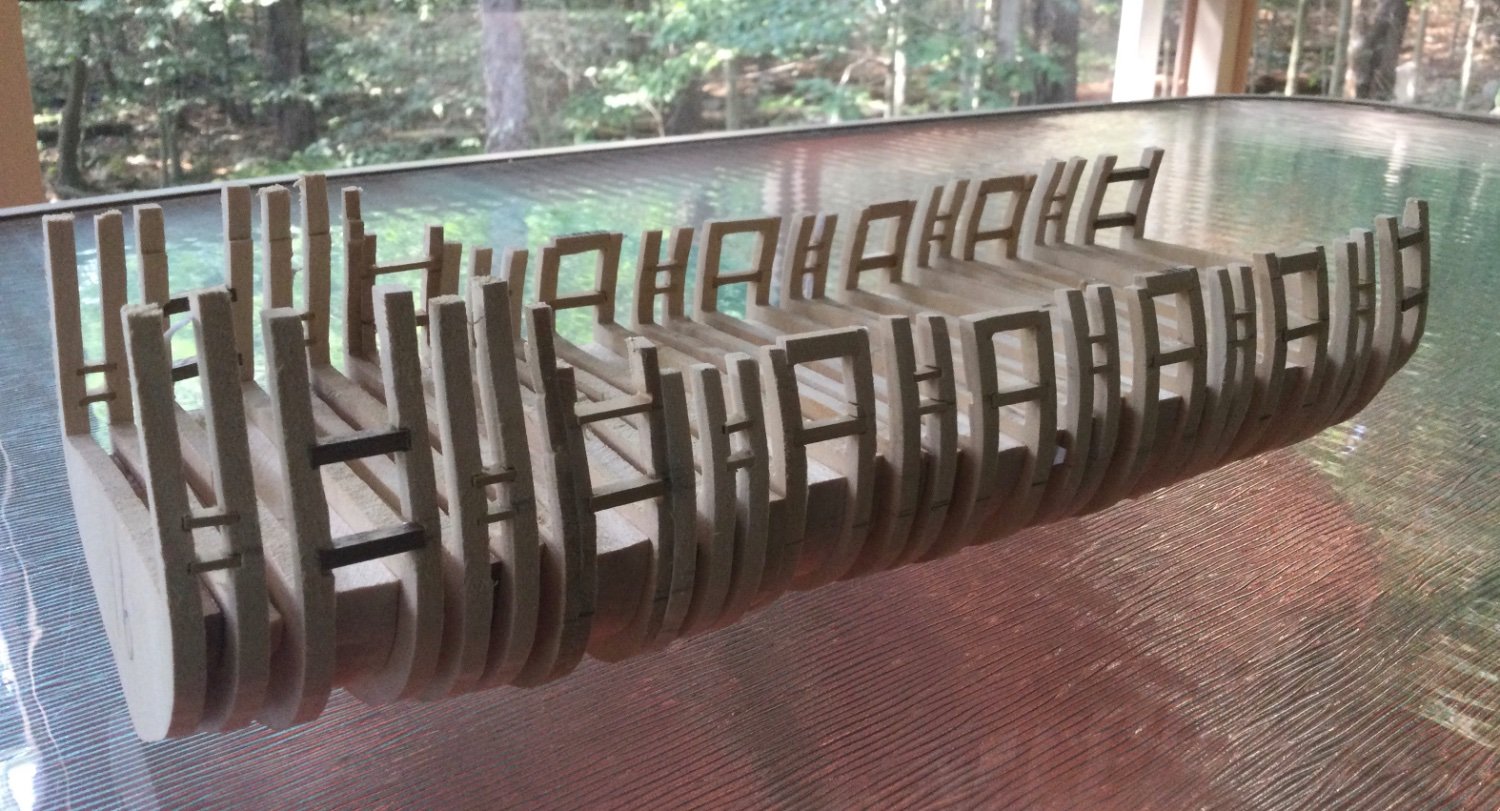
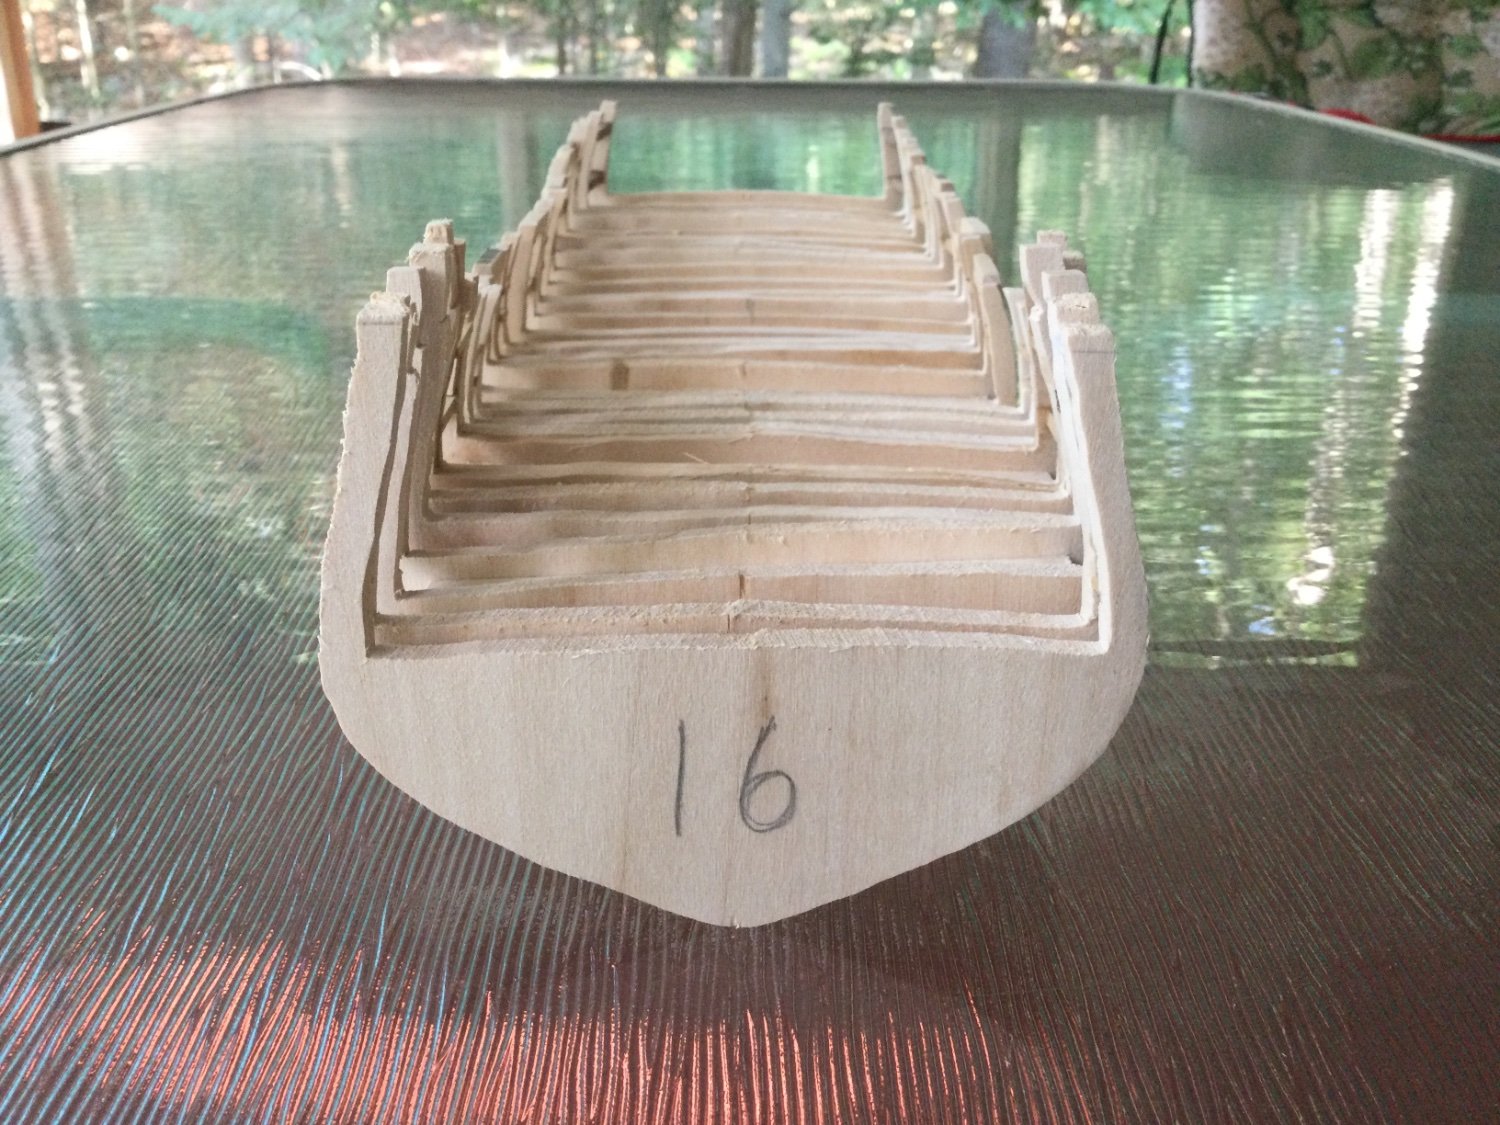
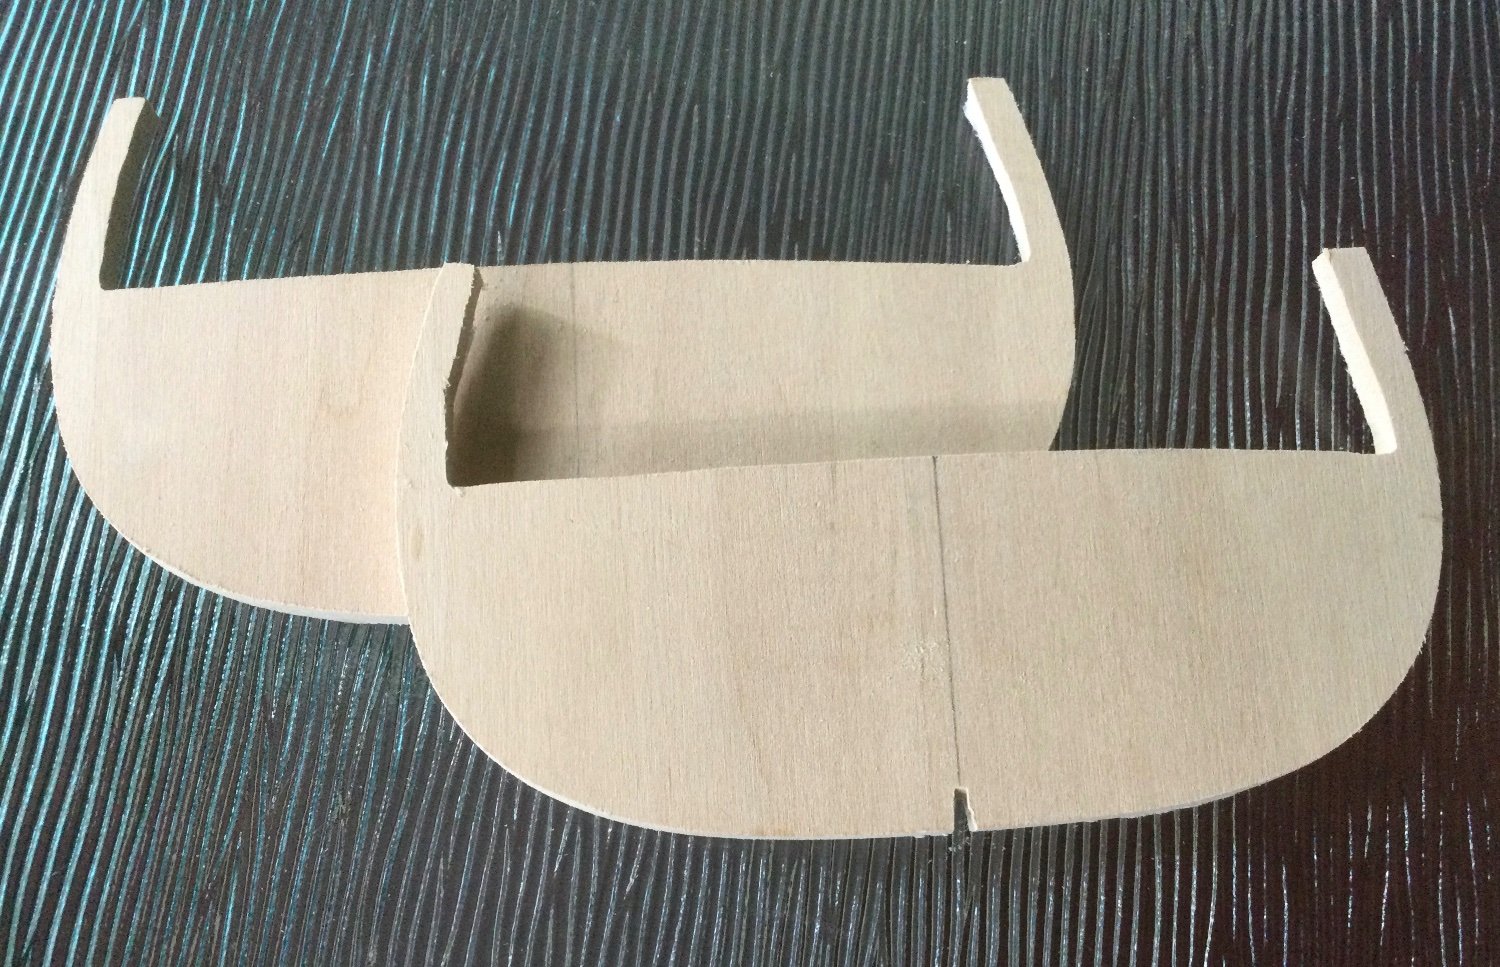
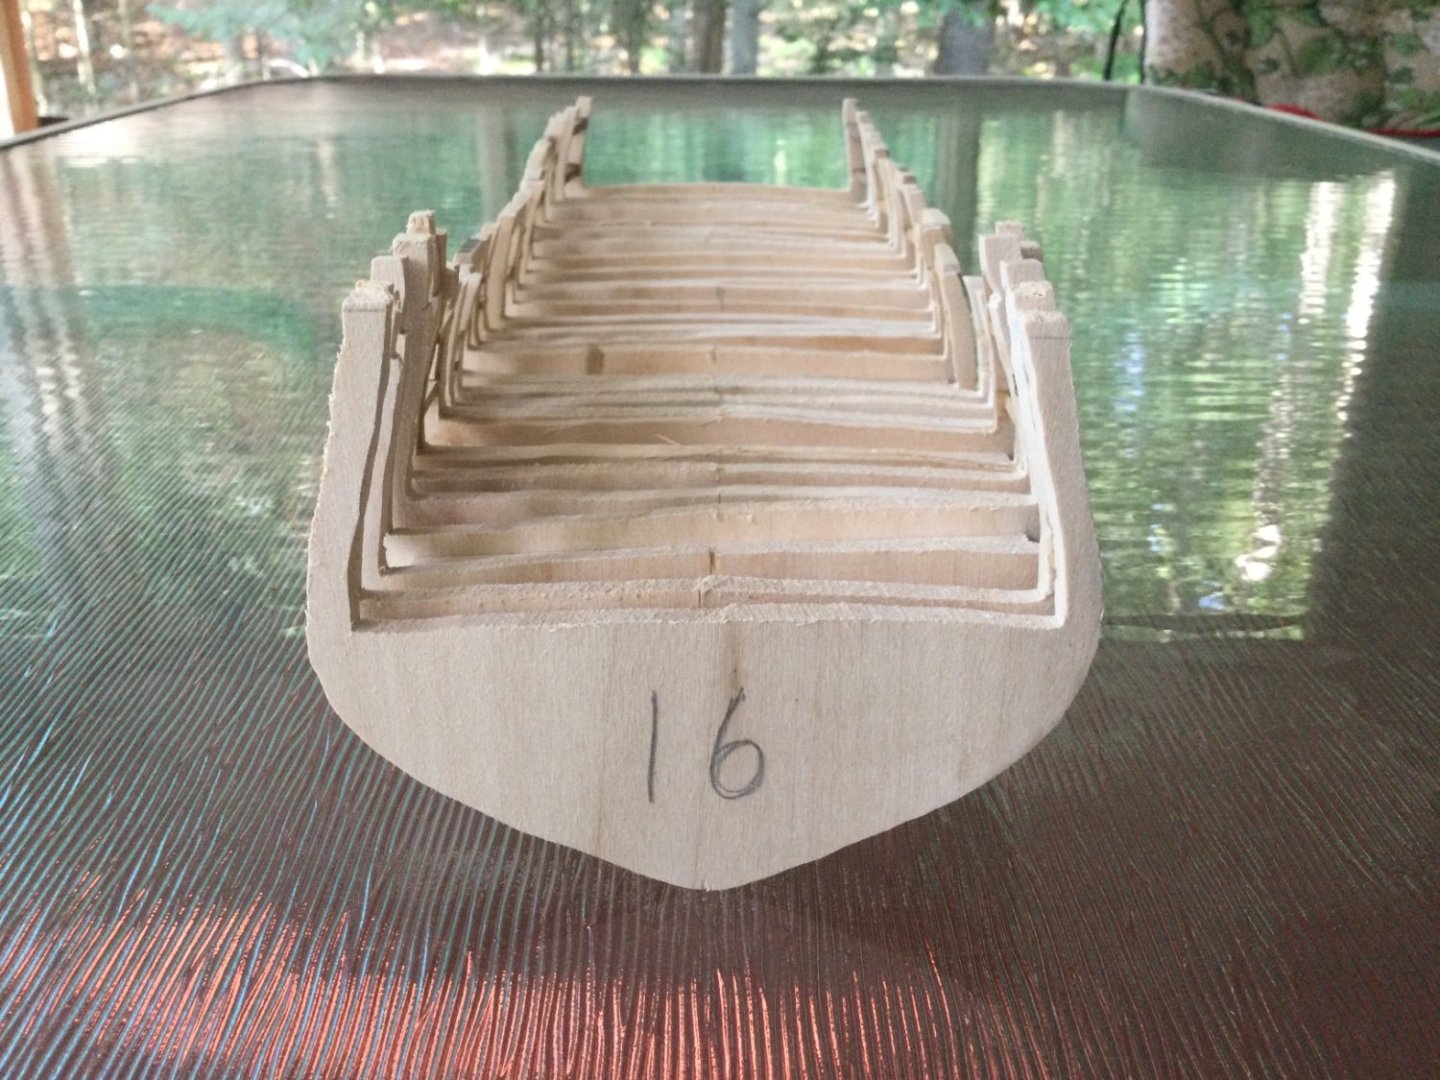
I’ve finished the frames excluding the bow and stern frames. I want to determine how to all these frames together before I decide how to create the bow and stern. Neither will be easy. To be honest, so far, nothing has been easy. But that’s what makes this whole project so interesting and fun. I have some photos of the frames lined up and it’s obvious that I will need a lot of sanding sticks before I even start to think of planking. Summer is almost over and I’ll be heading back to Brooklyn to continue working on the Pilot Boat Mary. I’ll try to divide my time between both models.

-
So far I’ve made four frame sets with gunports and four sets with sweep ports. I used pieces of ½ inch square dowels to line them up the gunport frames. When placed upside down on two blocks of wood you can see the amount of fairing I’ll need to do. Another photo shows all the frame sets placed on the plans. Still have to make the spacers to fill in the spaces between them. Lots more work to do.
-
I completed the first ‘set’ of frames that include a gunport. The frames are for the central port and include the two frames shown in my previous post plus a spacer that is the width of the gunport. A lot of sanding was done, and of course a lot more will be done when the hull is assembled and the sides are faired. So far so good. By the way - does anyone know if the original boat was painted? The photo in my first post looks like the wales are black. But if that so - and what about the rest? I’m trying to decide if I want a model completed in uncolored boxwood or paint it to show how the boat really looked. Thanks.
-
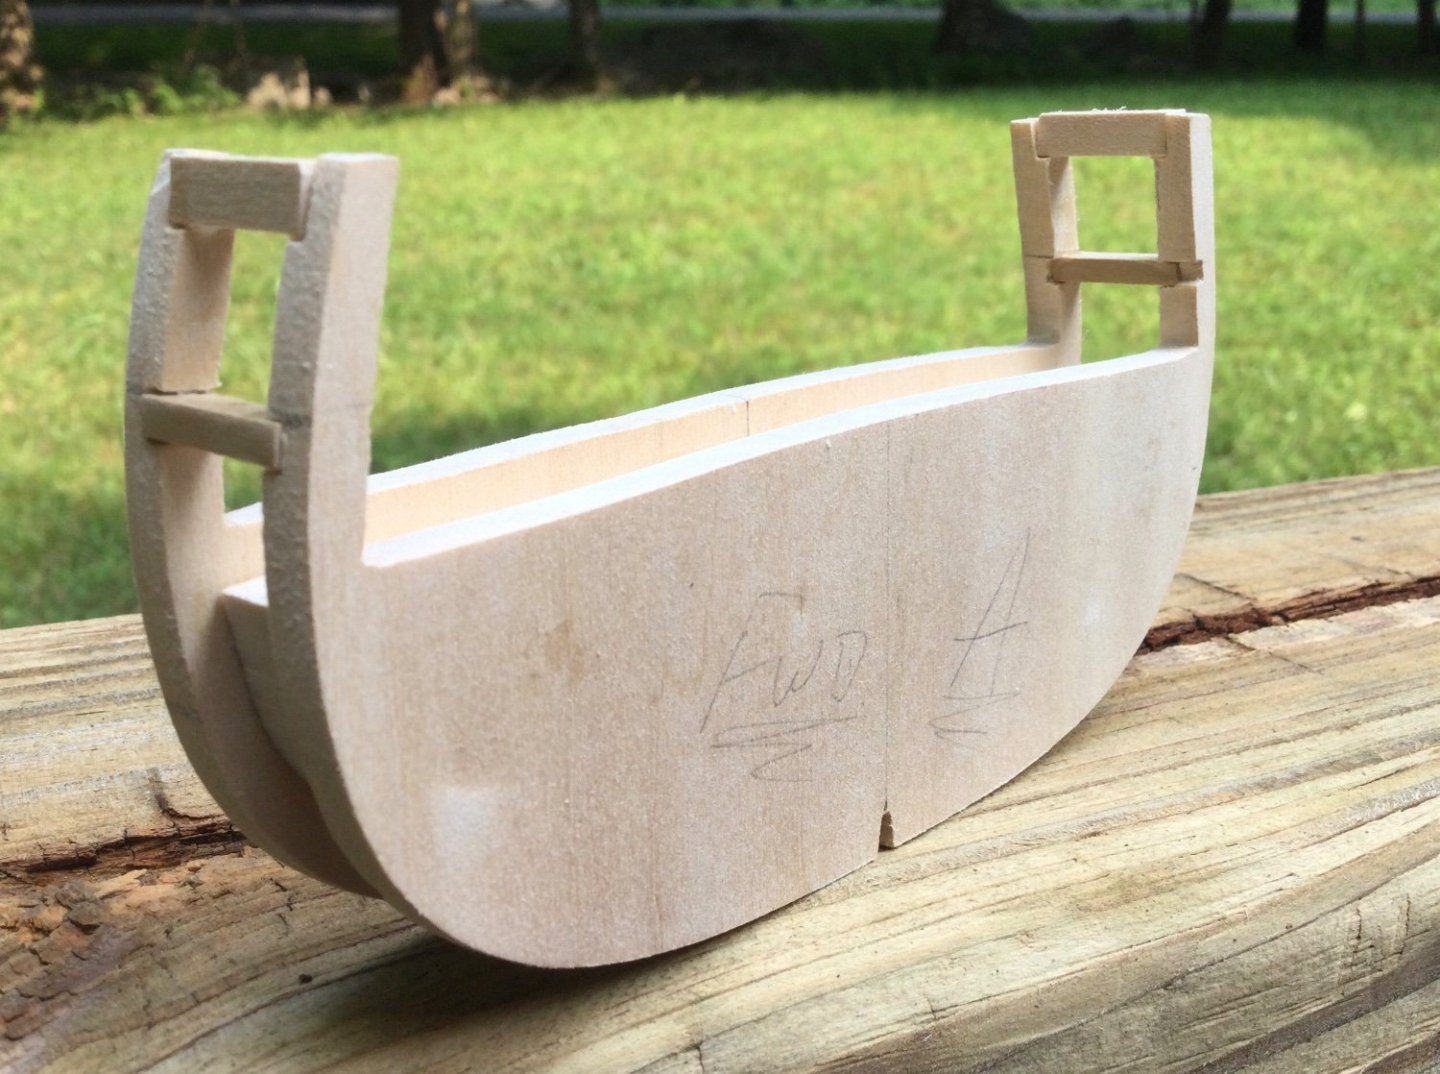
I’m using the plans from the Nautical Research Guild for a POF model, but making some adjustments. I don’t have the skills or use of power tools so I’m going to make the model Plank-on-Bulkhead. Also, I’m going to follow the method described by Richard Simon in his article, “L’Egyptienne: A 1:160-scale 24-pounder frigate of 1799 (A work in progress)”. The article is in the Nautical Research Journal, Summer 2023, Vol. 68, No.2. After some study and thought, etc, I started with frames needed to make the gunport openings. First, I will use two frames that make up the outside (vertical) of the port. There will be notches for the upper and lower gun port ledges. The plan’s frames are very accurate for the shape of the hull. I’m going to make the upper portions of the insides a little wider in order to avoid accidentally breaking them. They will be sanded down once the outer planking is done. The portion of the frame below deck will be solid (or rough) and modified for the camber for the deck. Below are the frames for the center gun ports.

-
Thanks Bill. I’m not building it POF, but rather POB. Stay tuned for the details. Cheers
-
Modeling has been discontinued for the summer. I’ll be starting on a new project while vacationing away from Brooklyn’s heat. I’ll continue with the rigging in the fall. See you in September.
-
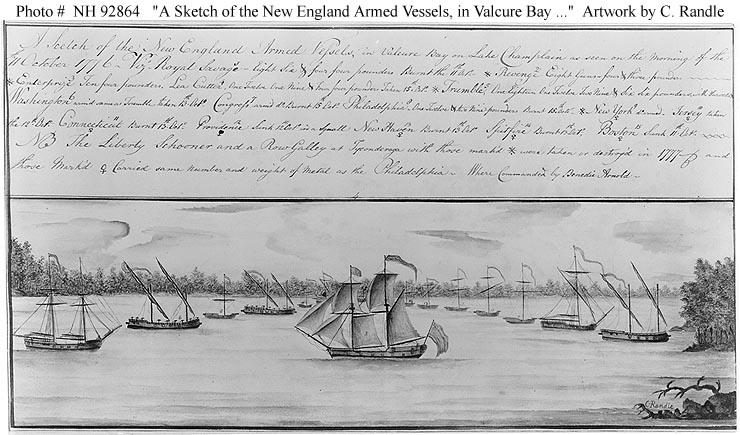
The Continental Galley Washington was a lateen-rigged, two-masted row galley built in the autumn of 1776 on Lake Champlain at Skenesboro N.Y. On October 6 1776, she joined the small fleet established and commanded by Brigadier General Benedict Arnold. The fleet consisted of schooners Royal Savage, Revenge and Liberty. Also the sloop Enterprise, and 8 gundalows outfitted as gunboats: New Haven, Providence, Boston, Spitfire, Philadelphia, Connecticut, Jersey, New York, and the cutter Lee. Washington was among three galleys built, the others being the Congress and Trumbull. A Sketch of the New England Armed Vessels, in Valcure Bay on Lake Champlain as seen in the morning of 11 October 1776 A Contemporary watercolor drawing of the American line of battle by Charles Randle. In the drawing Washington is shown as the second ship from the left.
-
I made a cradle for the model. I have some books showing models at the National Maritime Museum in London. I found one I liked and created a design, cut it out of basswood with my jeweler’s saw. Squared everything with a sanding stick, added some plastic spongy material, and applied some coats of Wipe-on-Poly.
-
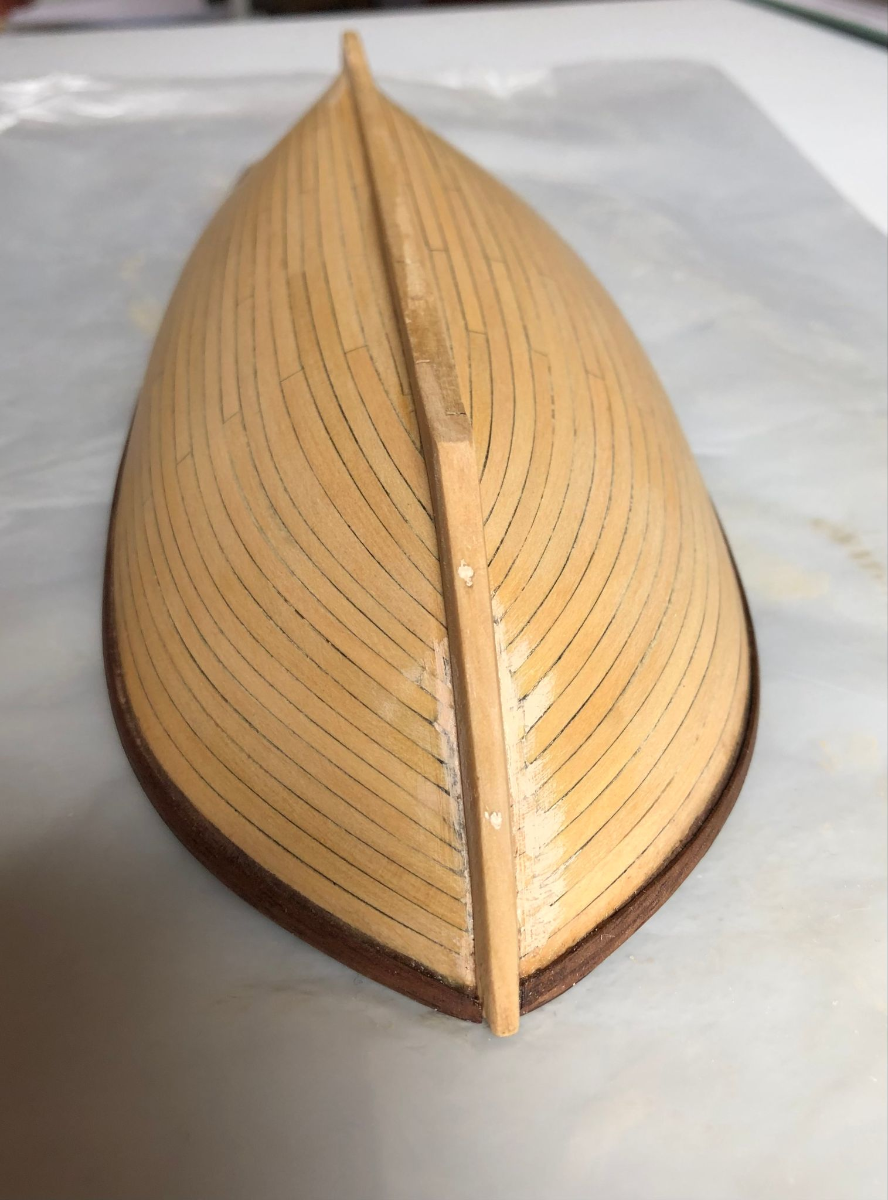
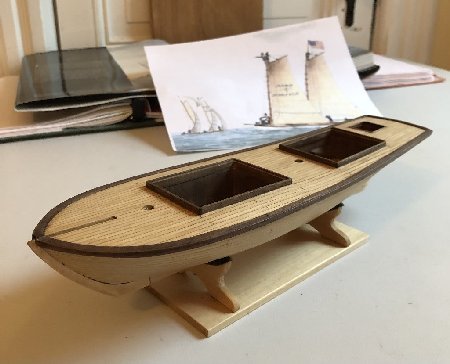
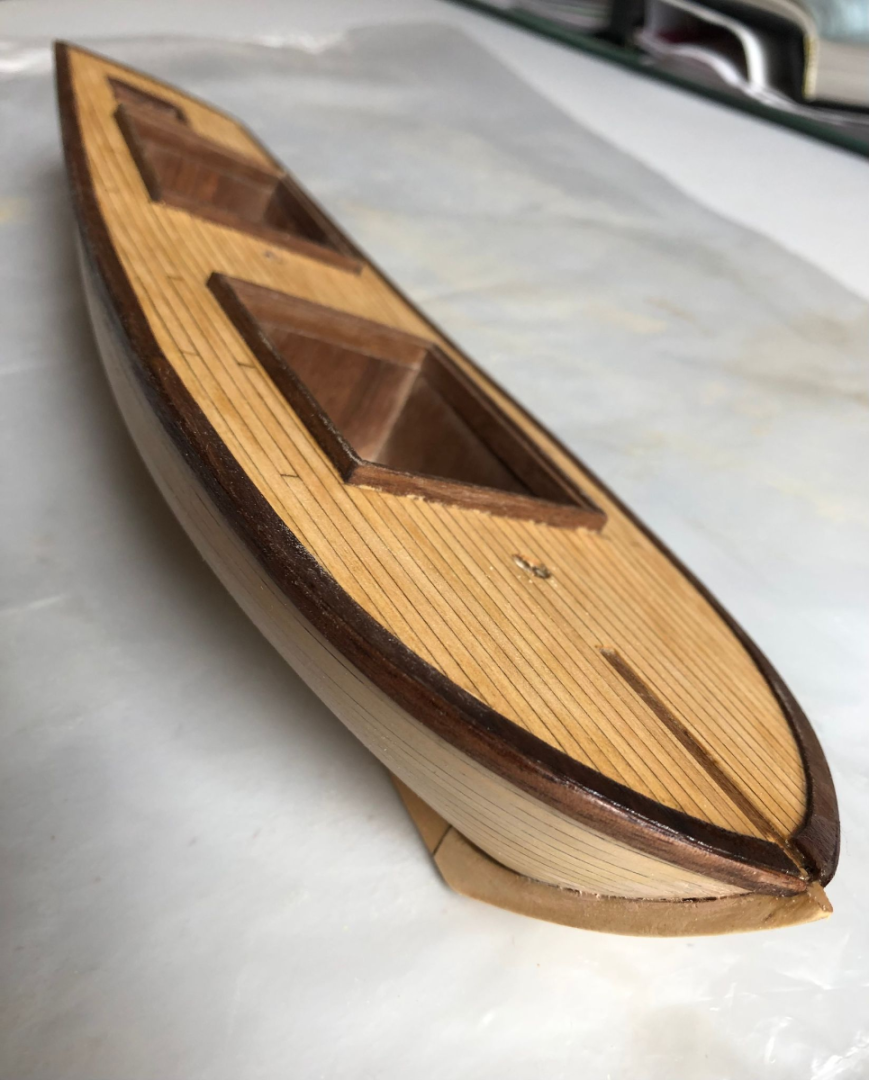
Moving on. I’ve almost finished the hull. I tried to improve the look of the bow with some wood filler. It came out better than I thought it would, but you can still see the problem. I reinforced the rail so it stands out from the hull and sanded both the deck and hull. I use several grades of sandpaper; in this case the final grade is 400 - very smooth. After a few coats of Wipe-on Poly, I’ll do a final sanding with 600 and then a few more coats. The same goes with the hatch coverings. I don't feel I can leave them open since I don’t know what’s in them.

-
If you want to choose one, I like the tassels. That's my vote. Also there seems to be moulding below the counter.
-
It's a beautiful masterpiece! Amazing!