lambsbk
-
Posts
910 -
Joined
-
Last visited
Content Type
Profiles
Forums
Gallery
Events
Everything posted by lambsbk
-
I have thought about supporting the gun deck with glued braces from the keel to the underside of the deck. I think this will accomplish 2 things: 1) It will give a sturdy platform for glueing the deck peices together and 2) it will make them even at the seems. Downside: I am not sure if it will affect the overall fit of the Spar deck. Any thoughts from other members on this plan are appreciated. There will be no going back and correcting this modification should it prove unworkable for the rest of the build.
-
The work you are doing is inspiring Andy. Thanks for the excellent log.
-
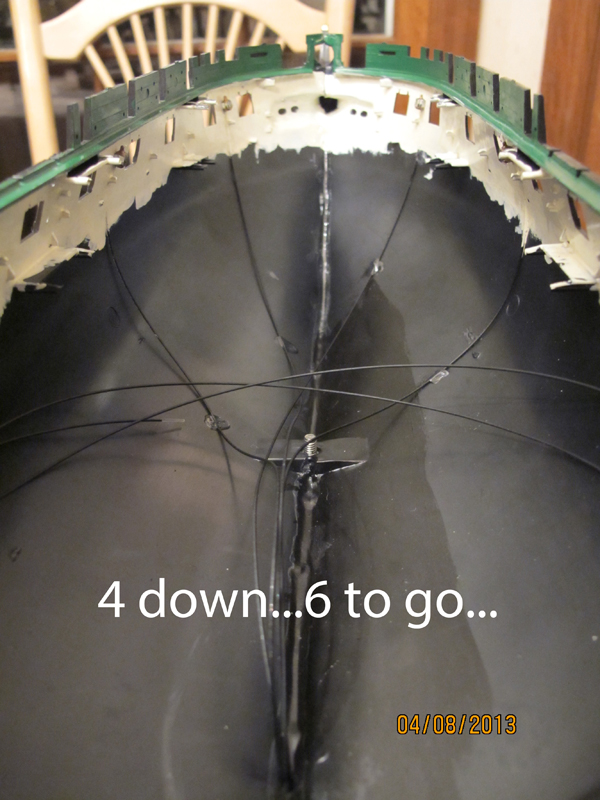
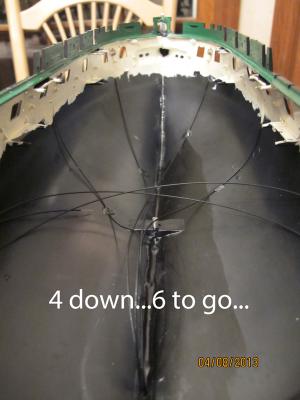
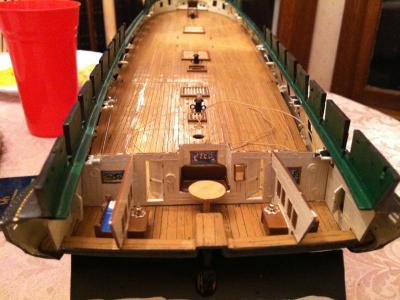
Lamp install is now 'underway.' 4 out of 10 are done. I only made one jig for the lamps so each one has to be glued and dry before moving on to the next one. I planned on 10 lanterns (5 port, 5 starboard) evenly spaced. Well, the FIRST ONE PLACED was off by 'a gun port' so they are not going to be even. Oh well, MEASURE TWICE CUT ONCE, I know, I know. Maybe the mistake won't be so bad...Most of the lanterns now will be concentrated in the darker areas of the deck; We'll see when the deck is closed in.
- 601 replies
-
- 2
-

-
- constitution
- revell
- (and 1 more)
-
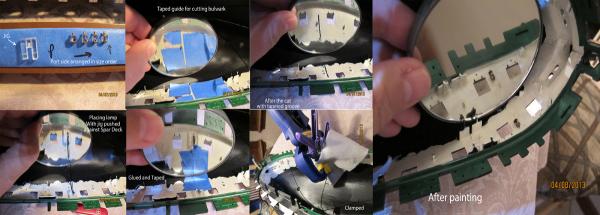
I agree. The Frog tape is superior to most masking tape. It was the first thing I tested on the spare hull before starting to paint my model...noticeable difference in 'leakage'. I taped andthen brush painted the stripe. It took at least 2 coats AND some touch-up. Good work on the painting by the way. - I like the way you used the brush stroke to mimick the longitudinal wood grain of the bulwark...nice!
-
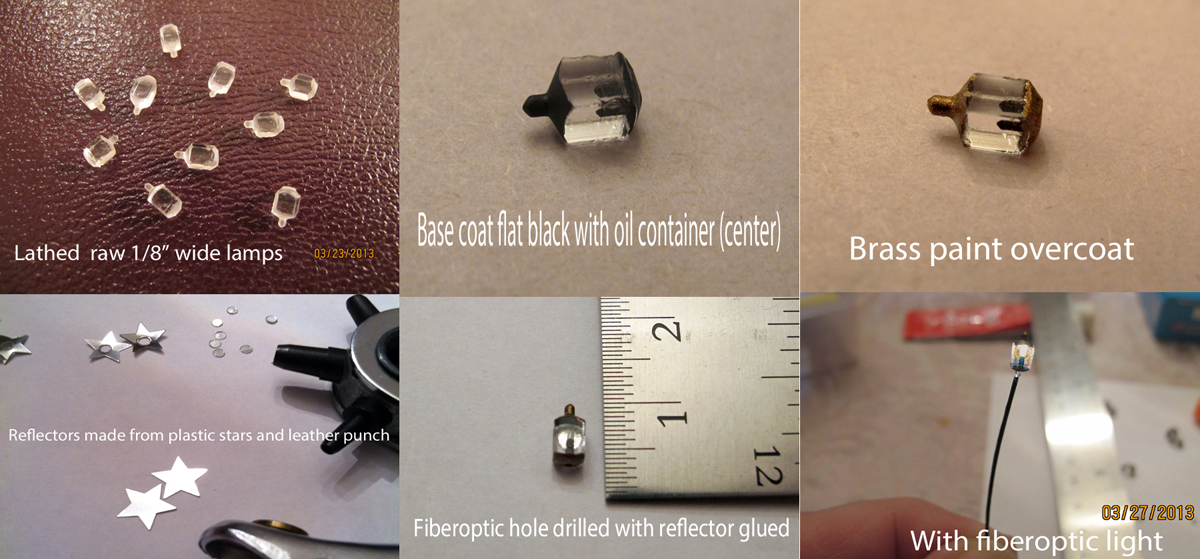
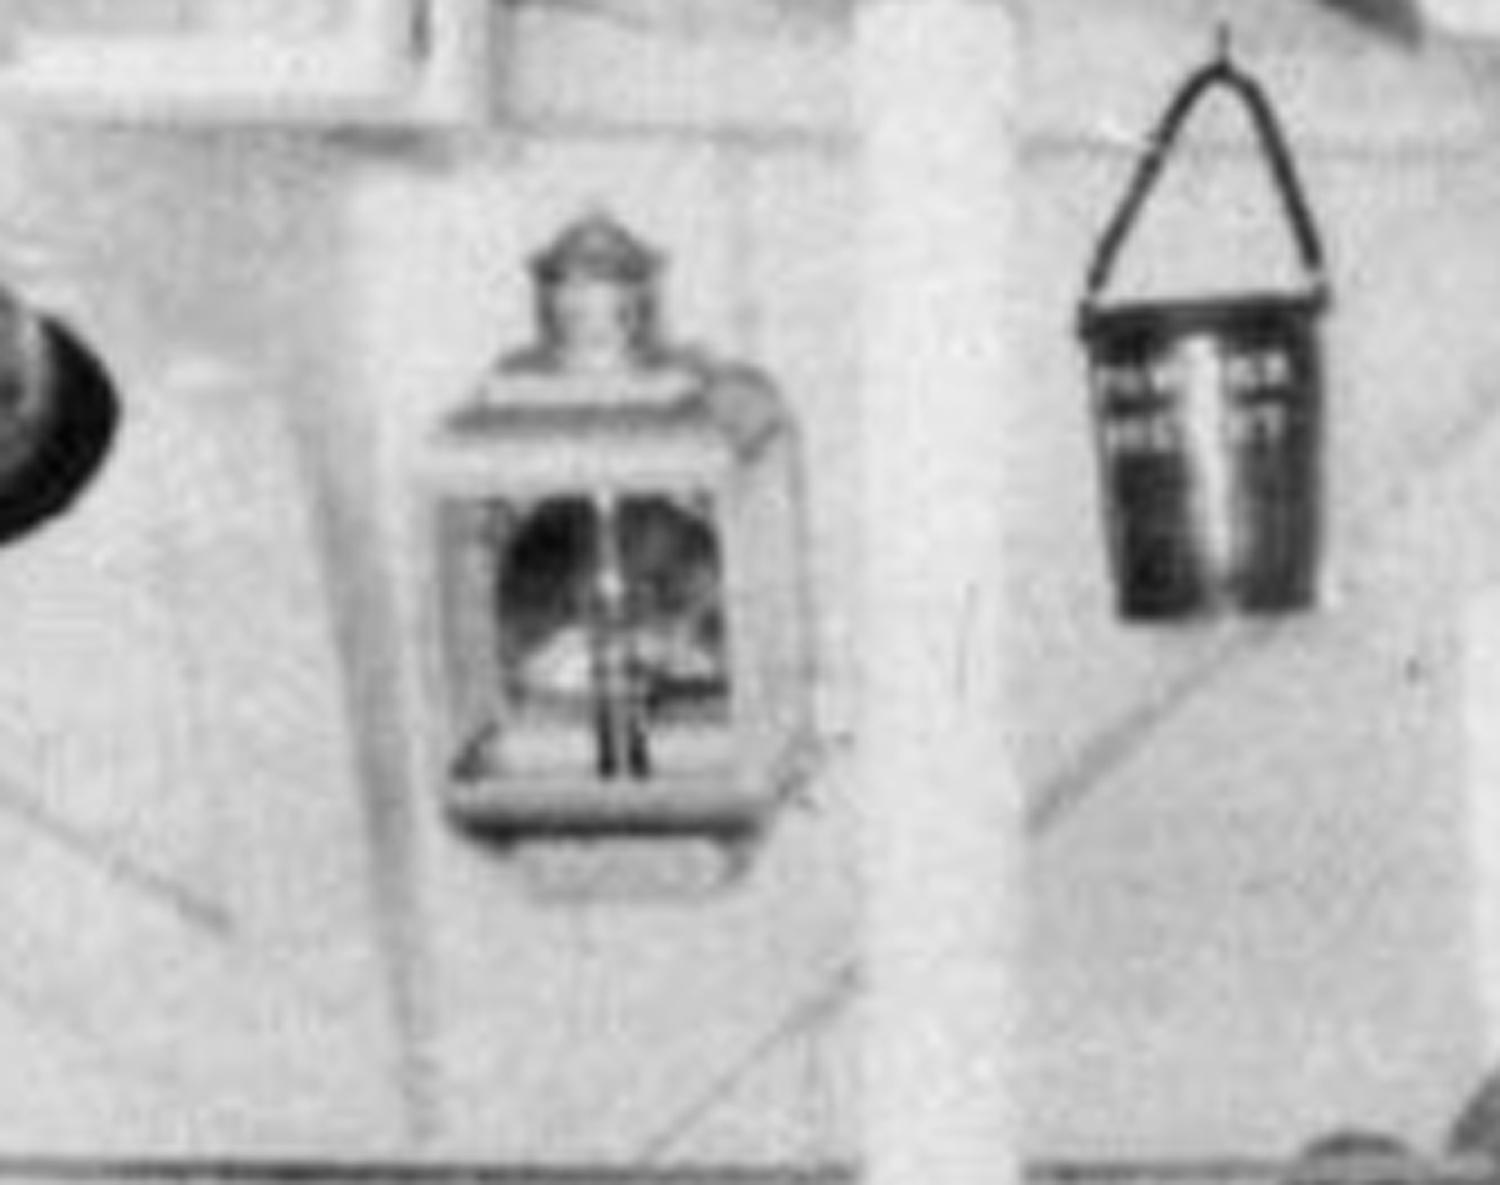
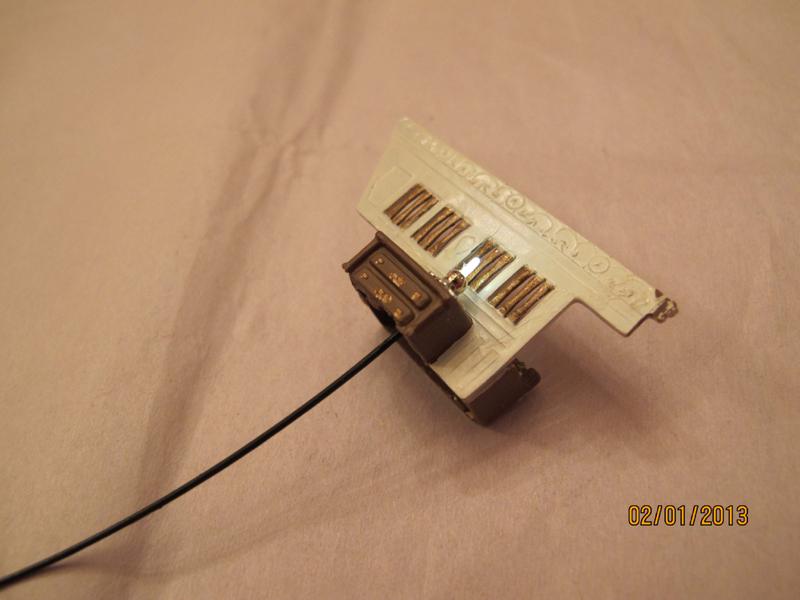
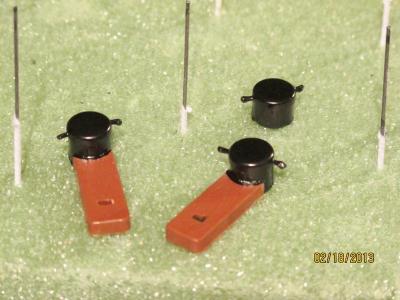
Thanks Patrick. I can give you a more detailed 'how to' if you are interested and hopefully help you avoid a lot of trial and error. The 1/8" plastic is simply square stock. Centering the stock in the lathe or drill press is crucial. Dimensions of the turned lamps are: cap width 1.2mm, cap length 1.5mm, lamp 'glass' length 3.0mm, total lamp length 6.8mm. These dimensions worked out well with the width 1/8" stock. They were taken from the above photo and converted. The plastic heats quickly so low speed is needed on the turn. I used fine files for shaping. Drill a center hole for the 'oil' container from the bottom of the lamp and paint it flat black inside with a microbrush. Paint the top and bottom of the lamp flat black to prevent light bleed-through then top coat with a metal color of choice. Lastly, drill a slightly tandem hole diagonally and parallel (starting from the rear bottom and center of the lamp) with the oil container hole so that it rises BEHIND and ABOVE it. That puts the fiberoptic near the bulwark (or bulkhead) and allows for running the optic cable.The hole size will depend on the fiberoptic stock (I used 0.75mm plastic). There is fiberoptic cable bleed-through so I painted most of it's coarse black to reduce this problem. (some fiberoptic cable is better than others - maybe there is some out there with less side firing than what I bought) File 1/32" to 1/16" of the optic tip at 45 degrees angle with fine sand paper so it glows when lit. Insert this into the fiberoptic hole. Done. A bit tedious but really, what isn't when adding detail? I think it will look good when installed this weekend (hopefully). For those of you interested I started a separate thread to describe how I made the lanterns. Check it out at http://modelshipworld.com/index.php?/topic/3163-fiber-optic-lanterns-ca-1845-196/
- 601 replies
-
- 1
-
-
- constitution
- revell
- (and 1 more)
-
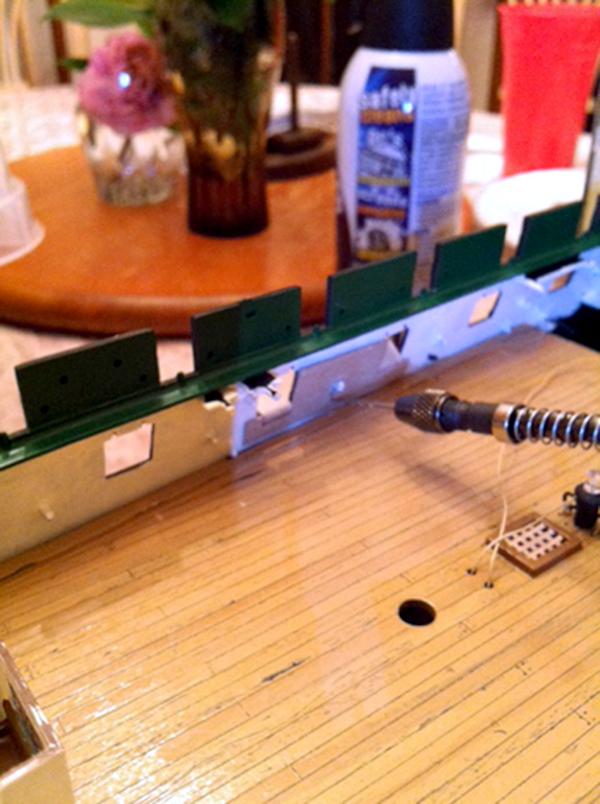
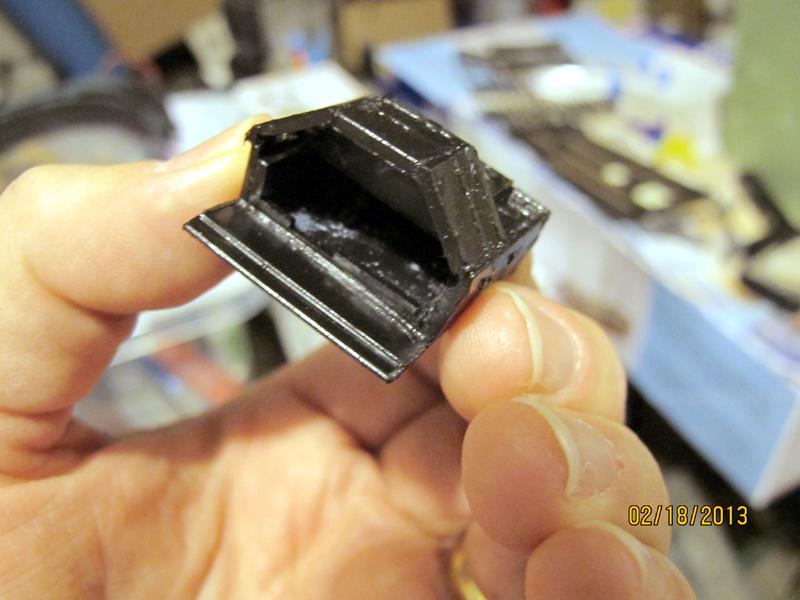
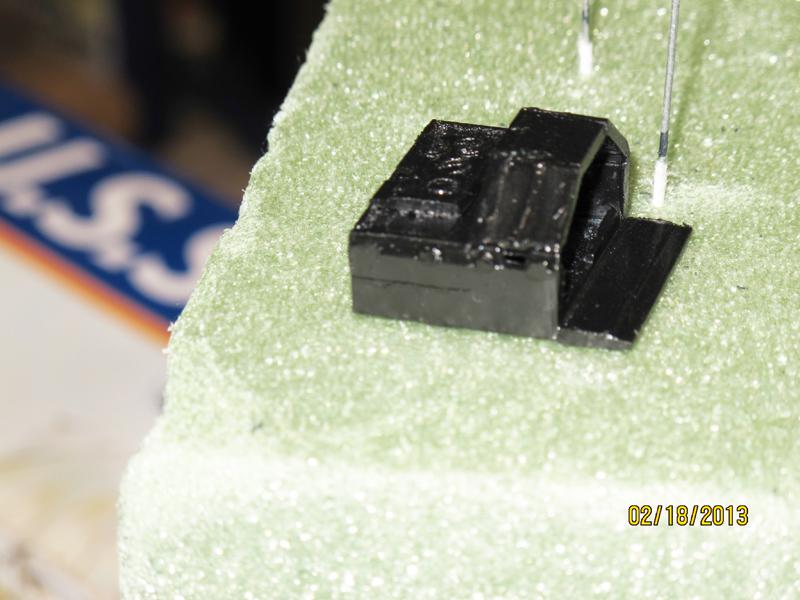
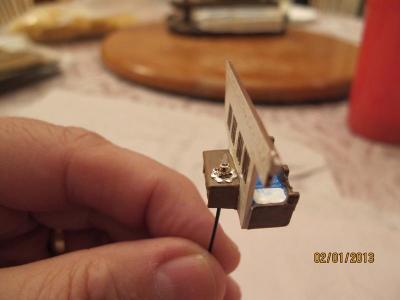
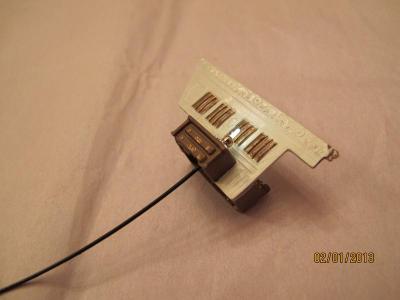
The progress has been slow this week but I have completed the fiberoptic lamps for the Gun Deck and have been experimenting getting them onto the bulwarks on the spare hull. Hopefully I will start mounting these lamps on the model this weekend. After that I will tackle the guns with their tackle. Eyebolts will be added to the gun carriages to facilitate same. For those interested there is a detailed separate log for the 'how to' on these lanterns: http://modelshipworld.com/index.php?/topic/3163-fiber-optic-lanterns-ca-1845-196/

- 601 replies
-
- 6
-
-
- constitution
- revell
- (and 1 more)
-
The prototype ship's lanterns have been refined and I was able to get the reflector behind it as well. Mostly it is a matter of getting used to turning the 1/8" square clear plastic stock on the drill press in a lathe like action. Drilling the plastic is not that difficult and painting the lanterns is the easiest step. Next up is to try to put the fiberoptics into the bulwarks so they are not seen. I will be using a Dremel with a small engraving bit to groove the plastic. This is a technique I am going to have to perfect on the practice ship (old vintage set hull) before moving to "real" thing. Nonetheless, I will be sweating these cuts more than any steps thus far taken on this model. Fortunately, I am at conference this week so it'll have to wait 'till next week...more time to think about this upcoming "surgery." Pics to follow.
-
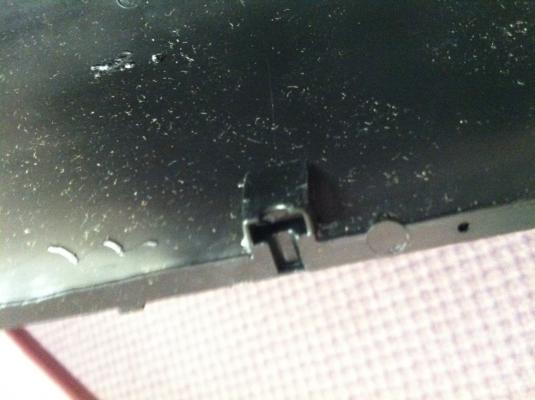
I discovered 2 things this week which other members warned about: 1) those gun port doors really DO break off easily and 2) the black plastic eyebolts (like some people) DO NOT perform well with pressure. .
-
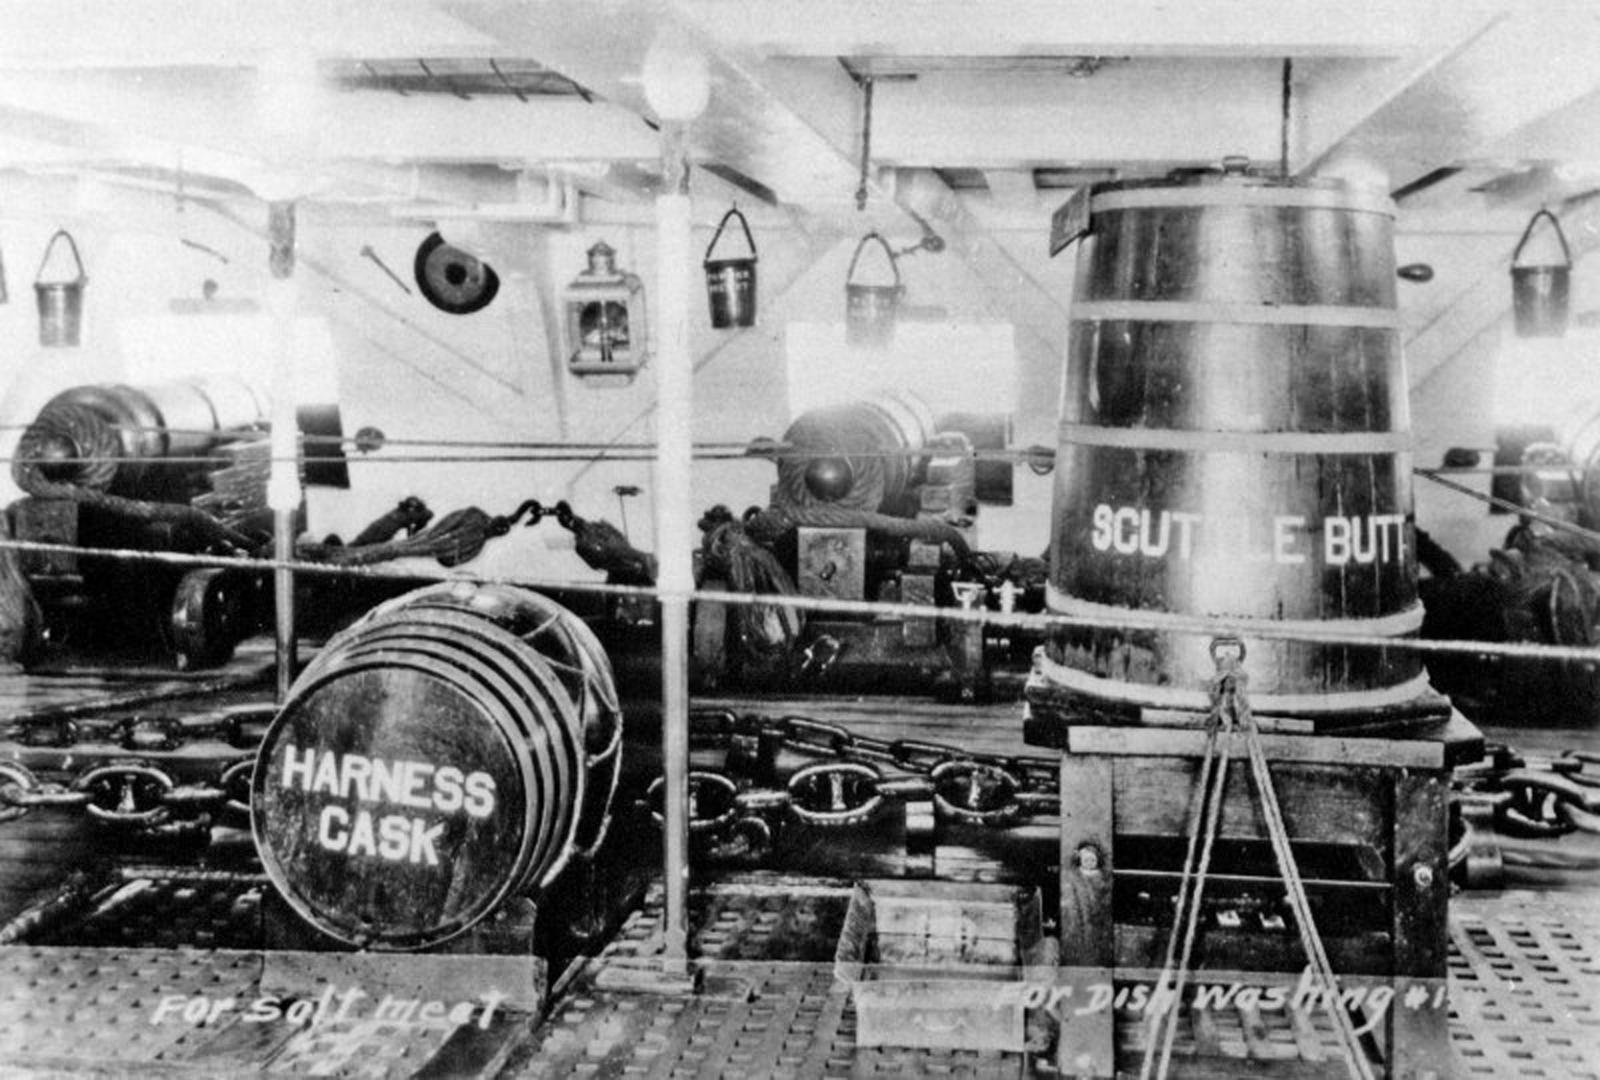
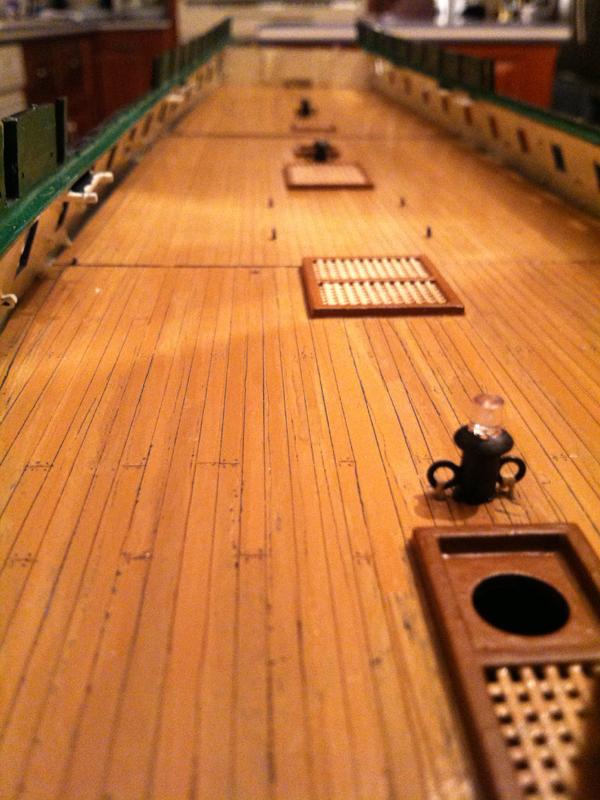
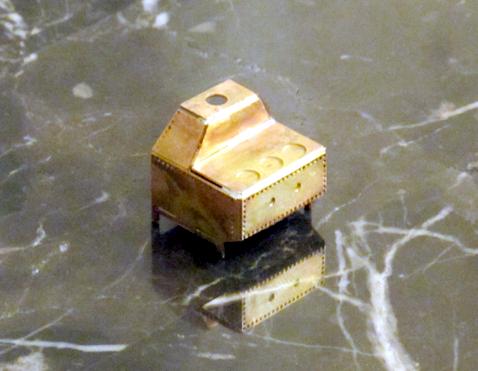
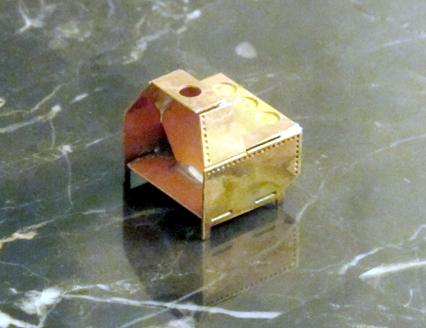
I have not had a lot of time to work on the build this week but have experimented. Fun. I hate the lights I put on the Gun Deck so they are history. I will replace them with a scuttlebutt and salt barrels. Fiberoptic lanterns have been replicated and will go on the bulwark. I am going with evenly spaced 5 per side but if anyone knows the particulars I would love the info. Pics to follow. I have also experimented with improving the guns by adding the tackle with their blocks and adding eyebolts for these lines and blocks. I won't change the knob or button lines. The camboose has been soldered (made of brass from Blue Jacket, Connie PE - and NO I am not a good solderer I have discovered - paint will cover a multitude of overdone here). After these I will add some bitts and pumps and then move on...hopefully to the Spar Deck.


- 601 replies
-
- 2
-
-
- constitution
- revell
- (and 1 more)
-
Yes, I did. I had to use an emory board to re-shape tha tab and knock a little bit off of the door frame. After that it was a simple matter of shortening the overhanging tab. I have a small gap on the bottom. I will probably add a little cement as I fear it will only worsen when the Spar Deck is added. I believe you are talking about the gap between the gallery bulkhead and the bulwark. I have considered closing that off since this deck will be lighted but I am not sure just how to do it. I suppose a well cut and placed peice of styrene might work...in theory.
- 601 replies
-
- 4
-
-
- constitution
- revell
- (and 1 more)
-
U.S.S Constitution - Revell - 1:96 - decking
lambsbk replied to lambsbk's topic in Plastic model kits
Thanks Andy. I am not a more skilled builder but I would love to eliminate any gap. I will keep a little styrene handy just in case. Thanks. -
Well, I am almost to the point of installing the gun deck on the my Connie build and had to ask: Is there a reason Revell does not glue the deck to the bulwarks? Those deck sections would be more easily joined if the decking were stabilized on the hull. Do they need to "float" for proper fitting of the masts or to allow the spar deck to be an easier fit?
-
I am glad to see them together. Yes, they were from the vintage kit. In comparing the parts it does seem that less trimming is needed for the vintage parts. Curious. I wonder if Revell uses the same mold or copies it...i.e copy of a copy of a copy, etc.
-
I got the Bluejacket Camboose today...but I have not worked with the photo etched suff before. If you don't mind explaining: how did you go about assembling this piece? Did you use styrene backing? I do have some. Thanks. http://modelshipworld.com/index.php?/topic/444-uss-constitution-–-revell-–-plastic-–-196-a-fresh-build/
-
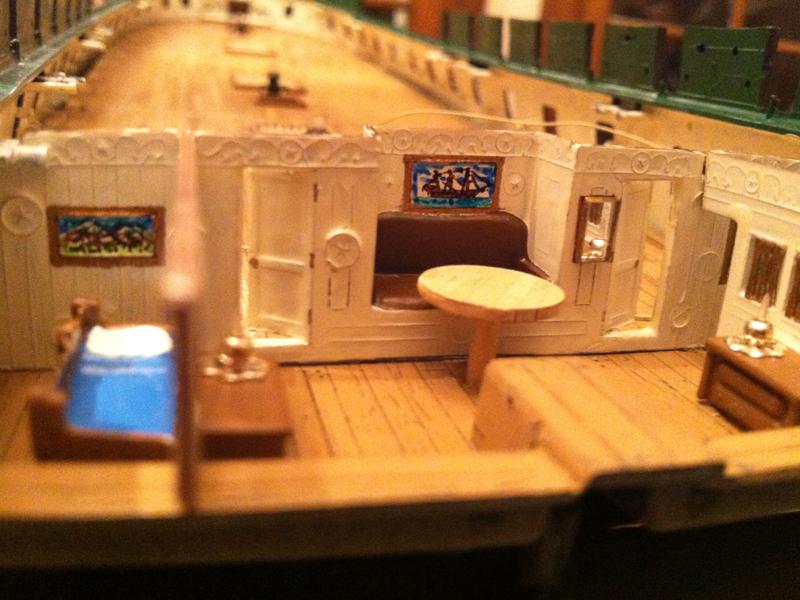
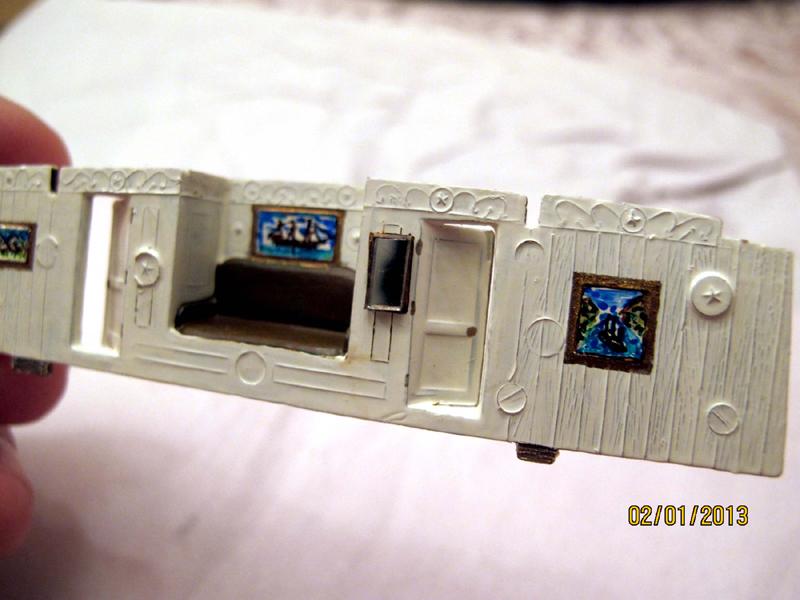
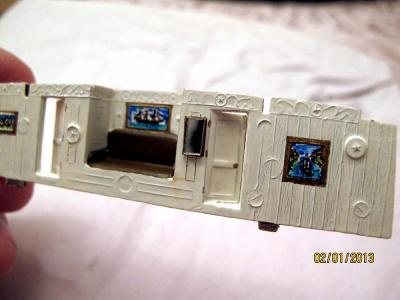
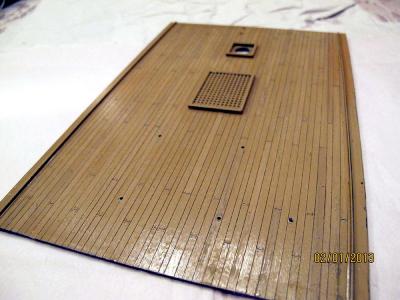
The decks took very little time following the Revell instructions: sprayed 2 to 3 times (flat black followed by wood tan) then sanded. Maybe a couple of hours? Using Andy's method took longer. Probably 10 man hours if not a little more. A couple of points: a good no. 11 exacto knife is a must. Alignment is critical. I used the hatches for parallel syncronization. I noticed that Force9 used a similar technique of alignment as well. I also tried to align the scribed marks between the deck sections but I have not seen if that effort has panned out yet. When the upper deck is glued I will know. The detail in the paintings was acheived with a set of permanent markers from Hobby Lobby. I gave the remaining ones to my daughter so I am not sure who made them. I suspect any permanent marker would do...I bought a multicolor set with the finest tips I could find. I believe, in retrospect, I only used blue, green, brown, yellow, and maybe light green. The white in the paintings is simply the wall color. The frames are painted gold with a fine brush. I wish I had scored the wood plank lines off where the frames are painted. Yes, it is a mirror. The molded Revell pic at this location was a portrait! I am not that good of an artist. So I started keeping my eyes out for a small plastic mirror with fair reflectivity. I wanted to see some of the Gallery windows from inside and a reflection seemed the only hope of doing that (I will be framing the windows from the inside when I get closer to closing them in). I was also hoping the mirror would improve the lighting effect from the fiberoptic lamps. I actually found what I was looking for in my desk drawer by chance. A pharm. company had given it to me years ago (one of those small, personnal grooming types).To cut the mirror out I tried hot knifing the small mirror but that warped the reflected image. I finally found that simply cutting in the same groove over and over with the exacto gave a clean line without the warpage. I glued it with hypocement, again, to avoid warpage of the plastic and the reflection. I wish I had known you were interested as I have a lot of material left over and could have sent some over with the cannons (yes, they are the vintage 1970 cannons).
-
After thinking about it for a few days I am going to spend some time on the gun deck. I am kind of anxious to move on with the build but I know I will regret not working in the gun deck detail later. I will not be able to add the diagonals and cross beams I have seen in other modelers builds (I just don't think I have those skills) but will add what I can. I also FINALLY saw a photo of the gun deck lighting. I am going to try to replace what has been put on the decks (fabricated) for some individual bulwark mounted lights (lanterns) using smaller (0.25mm or 0.50mm) fiber optic. This rework should be a bit closer to authentic.
- 601 replies
-
- 1
-
-
- constitution
- revell
- (and 1 more)
-
Fascinating work Force9. Amazing detail. I am looking forward to your future posts.
- 446 replies
-
- 1
-
-
- Revell
- Constitution
- (and 1 more)
-
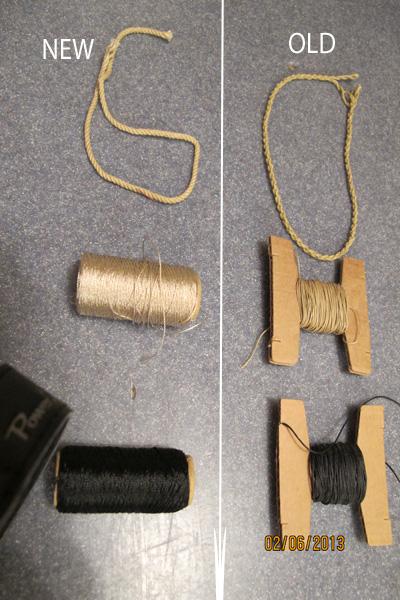
I am not happy with the poor detail of the revel kit concerning the Gun Deck and am trying to work some detail into the deck. A Camboose was attempted but did not turn out so great. I ended up buying the BlueJacket EP version (still in the mail). Also, since I have a lot of spare eyebolts from the second kit I am thinking of using them on this deck to enhance the detail of the guns and their moorings. Thoughts on that from anyone are appreciated. Cable Bitts which I do not belive was on the early version of the ship. I probably won't use these at all. If I do they will need modification. Curiously the rigging is different in the new kit compared to the 1970's version. The old stuff actually looks BETTER. I think I will use it instead of the new but I wonder how it will hold up in the long run.


- 601 replies
-
- 2
-
-
- constitution
- revell
- (and 1 more)
-
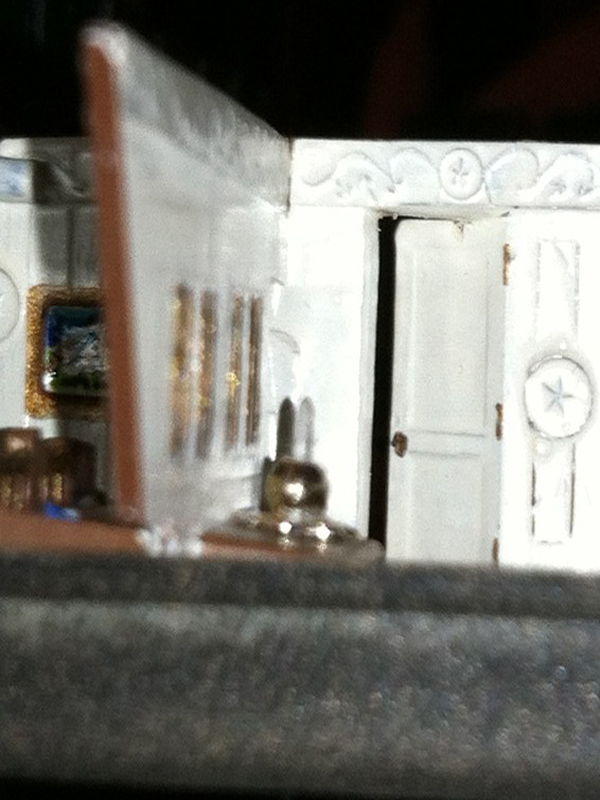
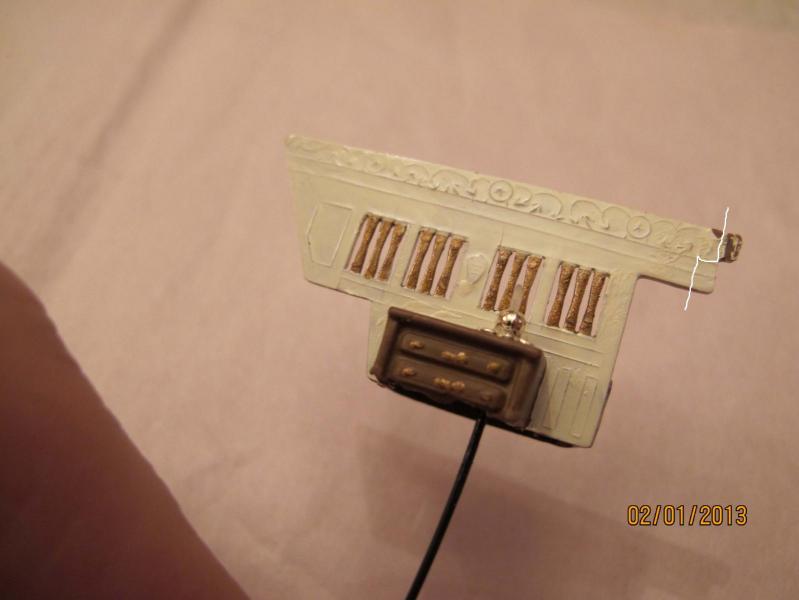
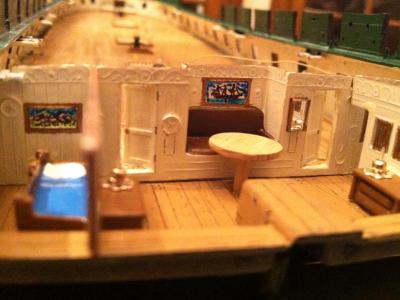
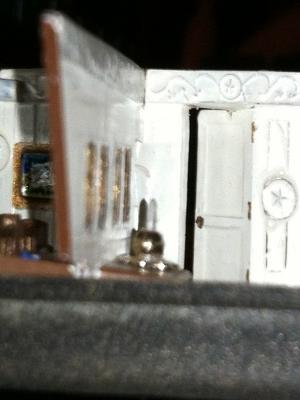
After doing this work I thought it a shame to just close it in unseen so I began experimenting with lighting the rooms. First I tried grain of rice lights but they got too hot to be in a plastic model. So fiber optics seemed more plausible. Plastic type 0.75mm with tapered ends worked best. I drilled holes in the dresser after dry fitting them and carefully threaded them to the hull. An exit hole has been drilled mid keel. I bought some silver bead jewelry pieces and hypo-cemented them to the dressers. Vintage? Probably not. But the effect will, I hope, be worth the sacrifice. The Gallery glass is 3/8” microscope cover slips glued with hypocement. There should be no chance of the windows ‘aging’ and clarity should be at its best. Gun Deck optics and lights were added which I hope WON’T be seen much since they are pure fabrications (I tried in vain to find some reference or picture to help with an authentic reproduction to no avail). I am still working them but probably they will not get much better. (Note: See below for a change in the gun deck lilghting...I did get an idea of the lanterns used on the deck from a photo included below.)

- 601 replies
-
- 5
-
-
- constitution
- revell
- (and 1 more)
-
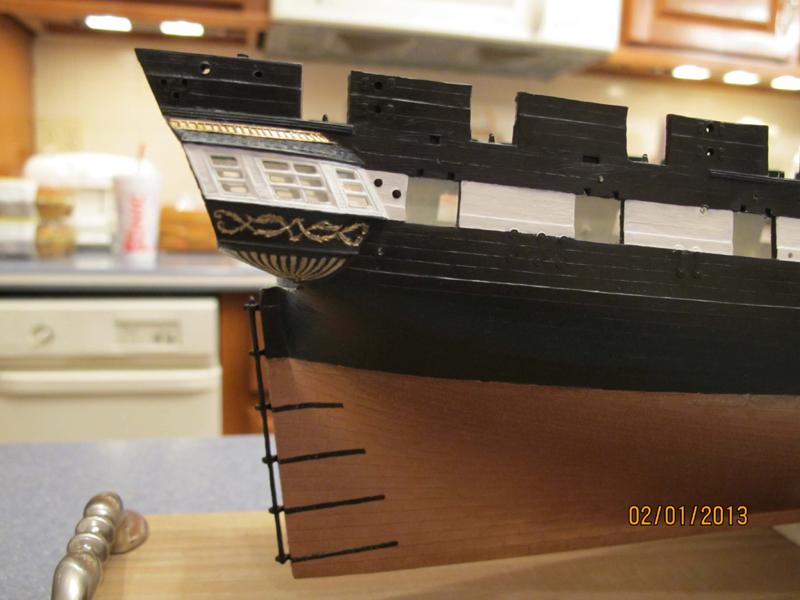
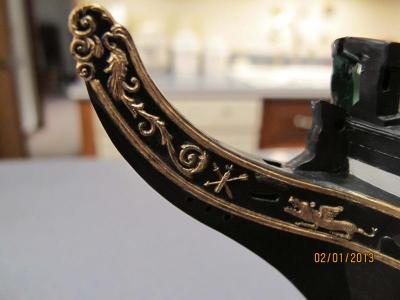
Next, I worked on painting the hull detail and stern detail. The stern and Gallery were first painted flat white and gold. The flat white undercoat brought out the red and green colors better than painting over the black plastic. This doubled (or tripled) the work but looks much better. I used a home made antique white for the Gallery walls and Gun Deck: 1 gloss ivory, 2 flat white, and 2 gloss white. Gallery detail: the wall paintings were molded into the plastic by Revell but not visible after painting the walls (bulwarks?) so detail was added with permanent markers to ‘paint’ the Gallery wall paintings.


- 601 replies
-
- 7
-
-
- constitution
- revell
- (and 1 more)
-
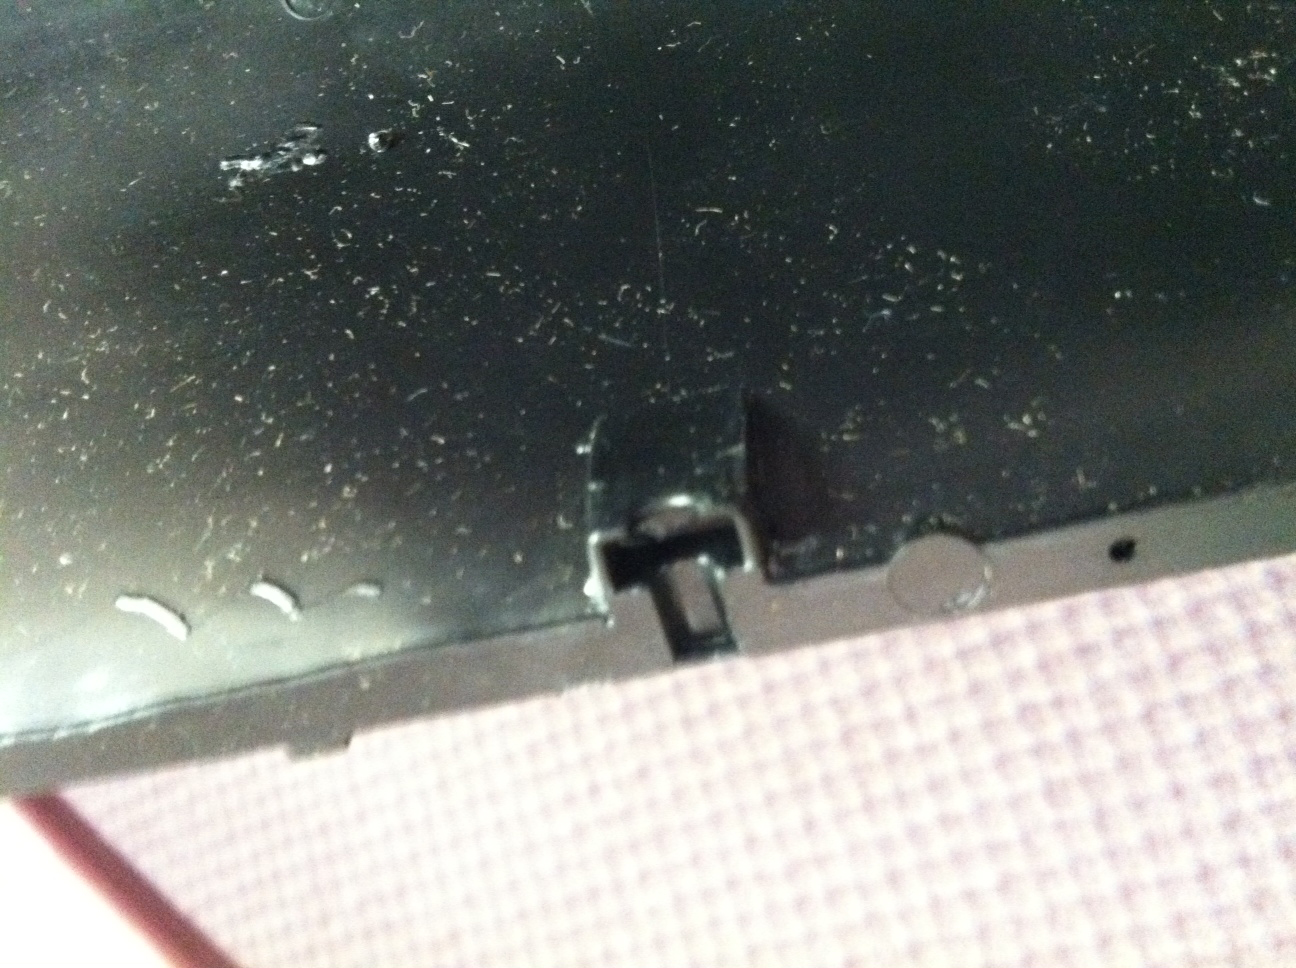
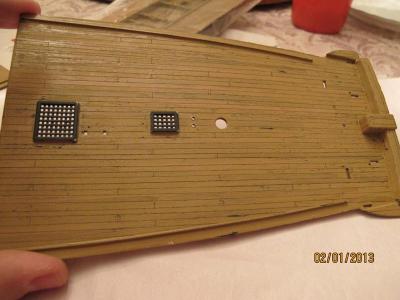
First, I want to say thank you to the MSW staff for their continued perseverance in the rebuilding of the MSW forum. It is great that you are back up and running. I had not posted a great deal before the data loss and will try to rebuild the information previously posted. When I was a teenager I loved building plastic models. My last one built was a Revell 1:96 USS Constitution which I managed to build as far as the standing rigging before enlisting in the USAF and transferred out. It was several years before I asked my family where the model was stored so I could finish it. Alas, they thought I had lost interest and it went out with a spring cleaning. Years pass…and while on a visit home I saw a case displayed 1:96 Connie at my brother in law’s house. It really looked good and my thoughts were taken back in time. In September this year I saw an Ebay listed Revell 1:96 Connie kit and thought why not give it another try. After it arrived I realized in a small way the project scope and its difficulty so I started trying to remember all I had forgotten about plastic builds. My first decision point was to figure out the final look of the build: new or with patina. To assist with this I bought a second model which had been started in the 1970’s but only got as far as the hull halves bonding. I got a pretty good price and it allows for some spare parts for the first kit. The copper antiquing was a thumbs down by my wife who liked the fresh copper look better even though I got a pretty good patina with a blue-green wash. So a fresh build without antiquing was the plan. I followed the Revell directions for the deck detail but wasn’t entirely happy with the look. About this same time I started to follow the MSW site and saw the decks created by AndyMech. They looked far better than mine but I thought there was no un-doing the work I had already done.. I thought about the differences for a month before finally deciding to just dive in and try Andy’s method OVER the work already completed on my decks. So the result is actually a combination of the two: First flat black spray to the decks followed by wood tan spray per the Revell directions. They were then sanded with 6-0 sandpaper spray glued to paint stirring sticks to give flat sanding control. This added a nice ‘worn weather’ look to the decks which I was not expecting and took away the gloss sheen. Next I followed Andy’s directions to a tee. I discovered the scoring of the planks works best the closer the ruler and blade are to the work. The result is, in my opinion, not as good as Andy’s but I was much happier with the detail his deck method had added. In addition I had made a decision to mount the ship on pedestal type mounts to allow the fiber optic cable to get under the base. Some of the Connie hulls have a molded spot at the keel to drill out and put bolts in to mount the ship. In addition, they will allow an easy transition from cradle (see below) to base. The square nuts were placed before the hull halves were glued. After the glue dried the hull was carefully aligned parallel to the drill press and using a 11/64" bit the holes were drilled through the keel. See pics below.The insert is for a square nut and the keelson and keel can be CAREFULLY drilled out to accommodate a bolt for pedestal mounting. The square nut has to be placed before gluing the hull halves together (well, it can be placed after but then requires some repair). You then drill top down with a small diameter bit (through the eye of the square nut) and then flip the ship keel up and, change the bit, and drill the exact diameter hole to accommodate the bolt, stopping short of the nut placed in the hull. If you are careful, you will not see the drilled hole externally.
- 601 replies
-
- 2
-
-
- constitution
- revell
- (and 1 more)