lambsbk
-
Posts
910 -
Joined
-
Last visited
Content Type
Profiles
Forums
Gallery
Events
Everything posted by lambsbk
-
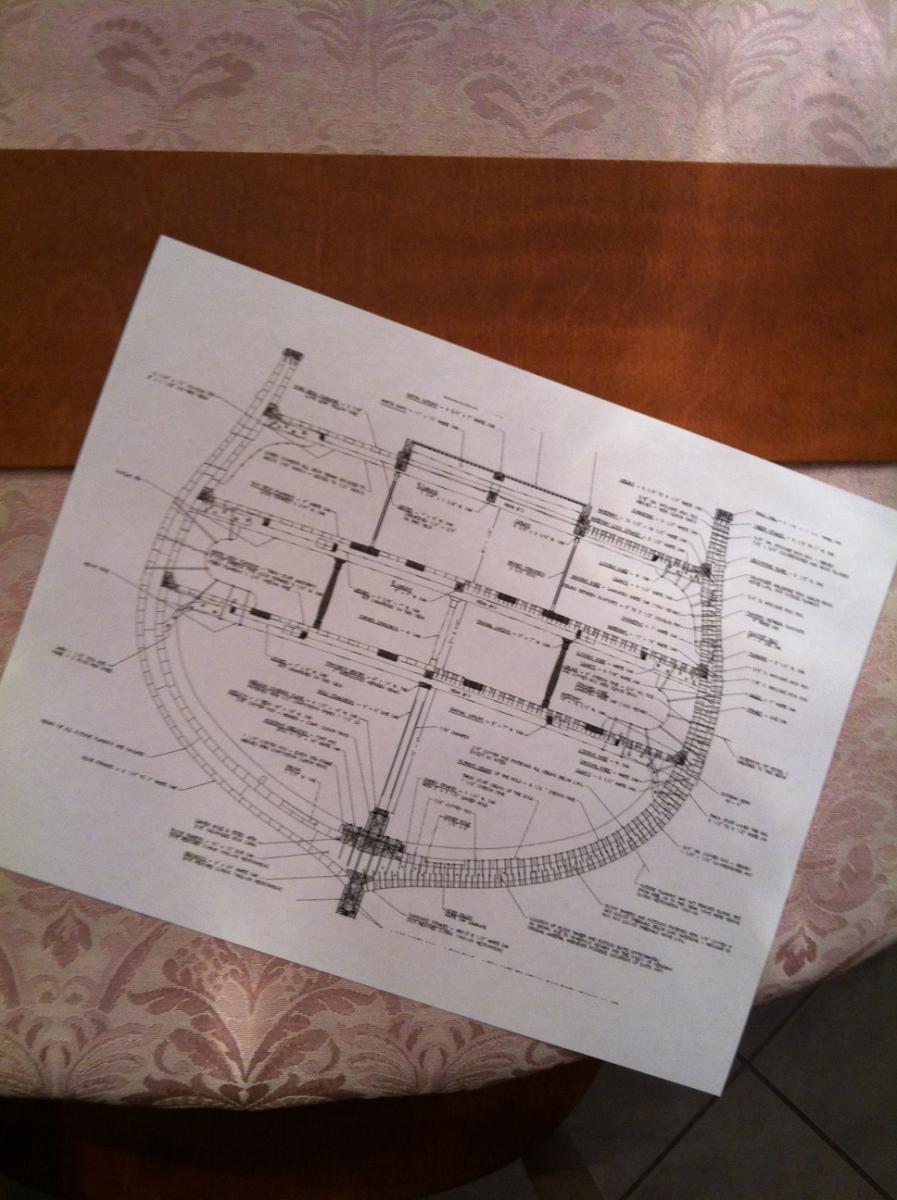
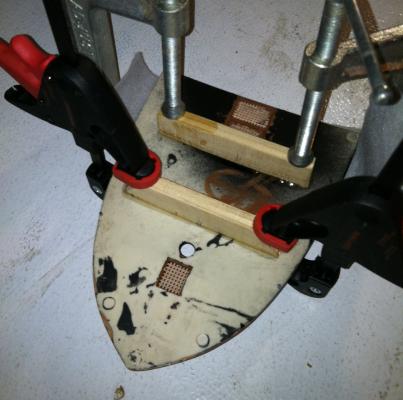
The gun deck camber CAN be established using the radius of an arc method with a 50" radius and it is reproducible. I used a bench sander with a 6" disc and attached it to a 50" arm and arced through the disc. These will be cut into 3/8" wide supports. The plastic deck however does not give the camber effect with a brace on either end of the 3 deck pieces so I will be gluing wood beneath the deck at 2" intervals to give the proper camber to the deck.
- 601 replies
-
- 1
-

-
- constitution
- revell
- (and 1 more)
-
It's a work of art Andy and you've raised the bar. I am certain you have inspired me to do detail work which I would have neglected and will also incorporate in the future as my build moves along. Thank you.
-
Ah...great job John. Nice to see those pics. I, as you know from my log, am at least a year behind you and Andy. Keep those pics coming.
-
Force9: I know it is not mounted permanently yet but is the camboose stack backward?
- 446 replies
-
- 1
-
-
- Revell
- Constitution
- (and 1 more)
-
I am glad to see you work on the bell (great detail) as I too was considering how to install it. Did you turn the brass for your bell? I was going to wait and see if the rigged main mast would allow the placement where it is currently mounted. Your solution is fascinating.
-
I found your link after all. I am looking forward to following your completion of this build. I am sorry you had to do a rebuild. I had a similar experience but my first Connie was the victim of my aunt's spring cleaning (thinking I lost interest in completing the model). Alas.
-
Texxn5: Do you have a link to your Connie? I would love to take a look and can't find it in the forum. Thanks.
-
Thanks Texxn5. I thought that might be the case as well so the forward gun ports will be left vacant. I hope that will help site through some of the Gun deck. Even if it does not I am still enjoying adding detail that does not come with the kit. The 'how to do it' is fun to work out.
-
I am going to have to scrap my brace design for the gun deck. I just can't quite get the gentle camber reproduced EXACTLY twice. So I used the radius of an arc equasion to get the radius of the camber for the 1:96 Connie to 50". I made a jig to run a brace through this arc on a sander and am hoping to get some reproducibility with it... I'll know in a couple of days.
-
I just saw your build referenced by Andymech and checked it out. A wonderful build. (I don't think I will ever be truly happy with plastic model ships again!) Really inspiring.
-
I trimmed the slag with a no. 11 knife and then lightly touched up the exposed black plastic. The windows are very tight but also not seen so much. The eye tends to draw to the gold trim, for whatever it's worth.
- 79 replies
-
- 1
-
-
- constitution
- revell
- (and 1 more)
-
Amazing work Force9. Can't wait to see it detailed and painted.
-
In reference to the above comment on rigging and beeswax: when I did my first never completed build of the Connie I used some beeswax that was in thin wax sheets that resembled a honeycomb pattern (from the 1970's). These could be folded and rolled for craft use but the wax was also softer and came in white AND black colors. I have not seen this in hobby stores so far but maybe some members have. The advantage is the blend on the rigging seemed easier to achieve. Now I am using a solid block of beeswax which, at least on one occasion, actually broke through the rigging fiber while applying it...and I haven't even started to get to the heavy rigging job yet. Nonetheless, it was the only beeswax version I could find.
-
Well, I attempted to back up the blog but I can't find a *.pdf option in my printers. I think I will have to do some program searching this weekend.
-
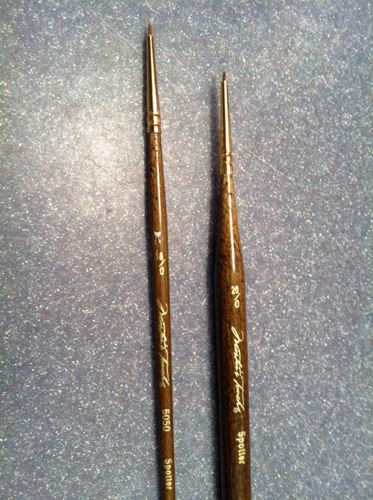
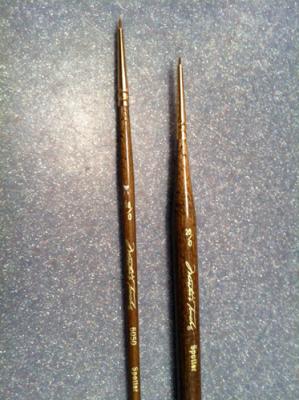
The brushes are Spotter 18/0 and 20/0 bought at either Michaels or Hobby Lobby.
-
I just saw your build and am really wowed by it...I have not tried or really even thought about doing a wooden build but your work is a convincing argument. I look forward to following your progress.
-
I'll have to check which brush I used after work today. I'll get back to you on that...
-
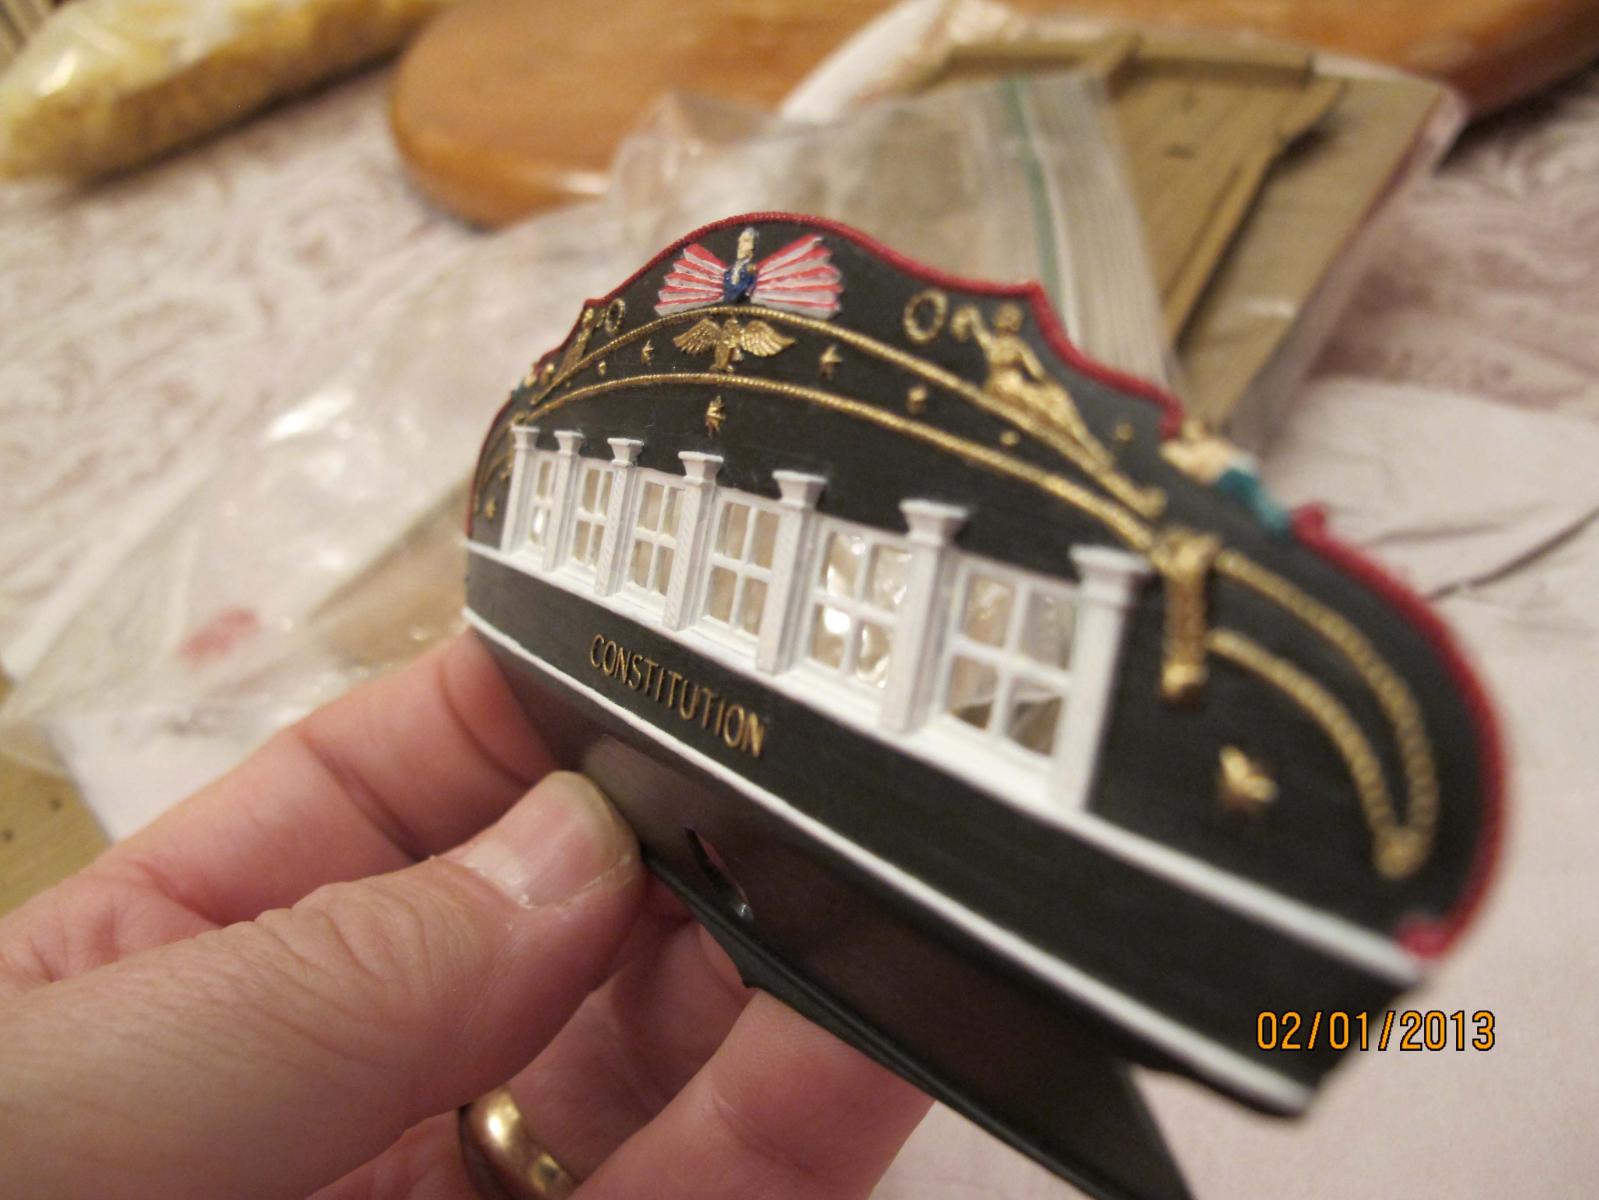
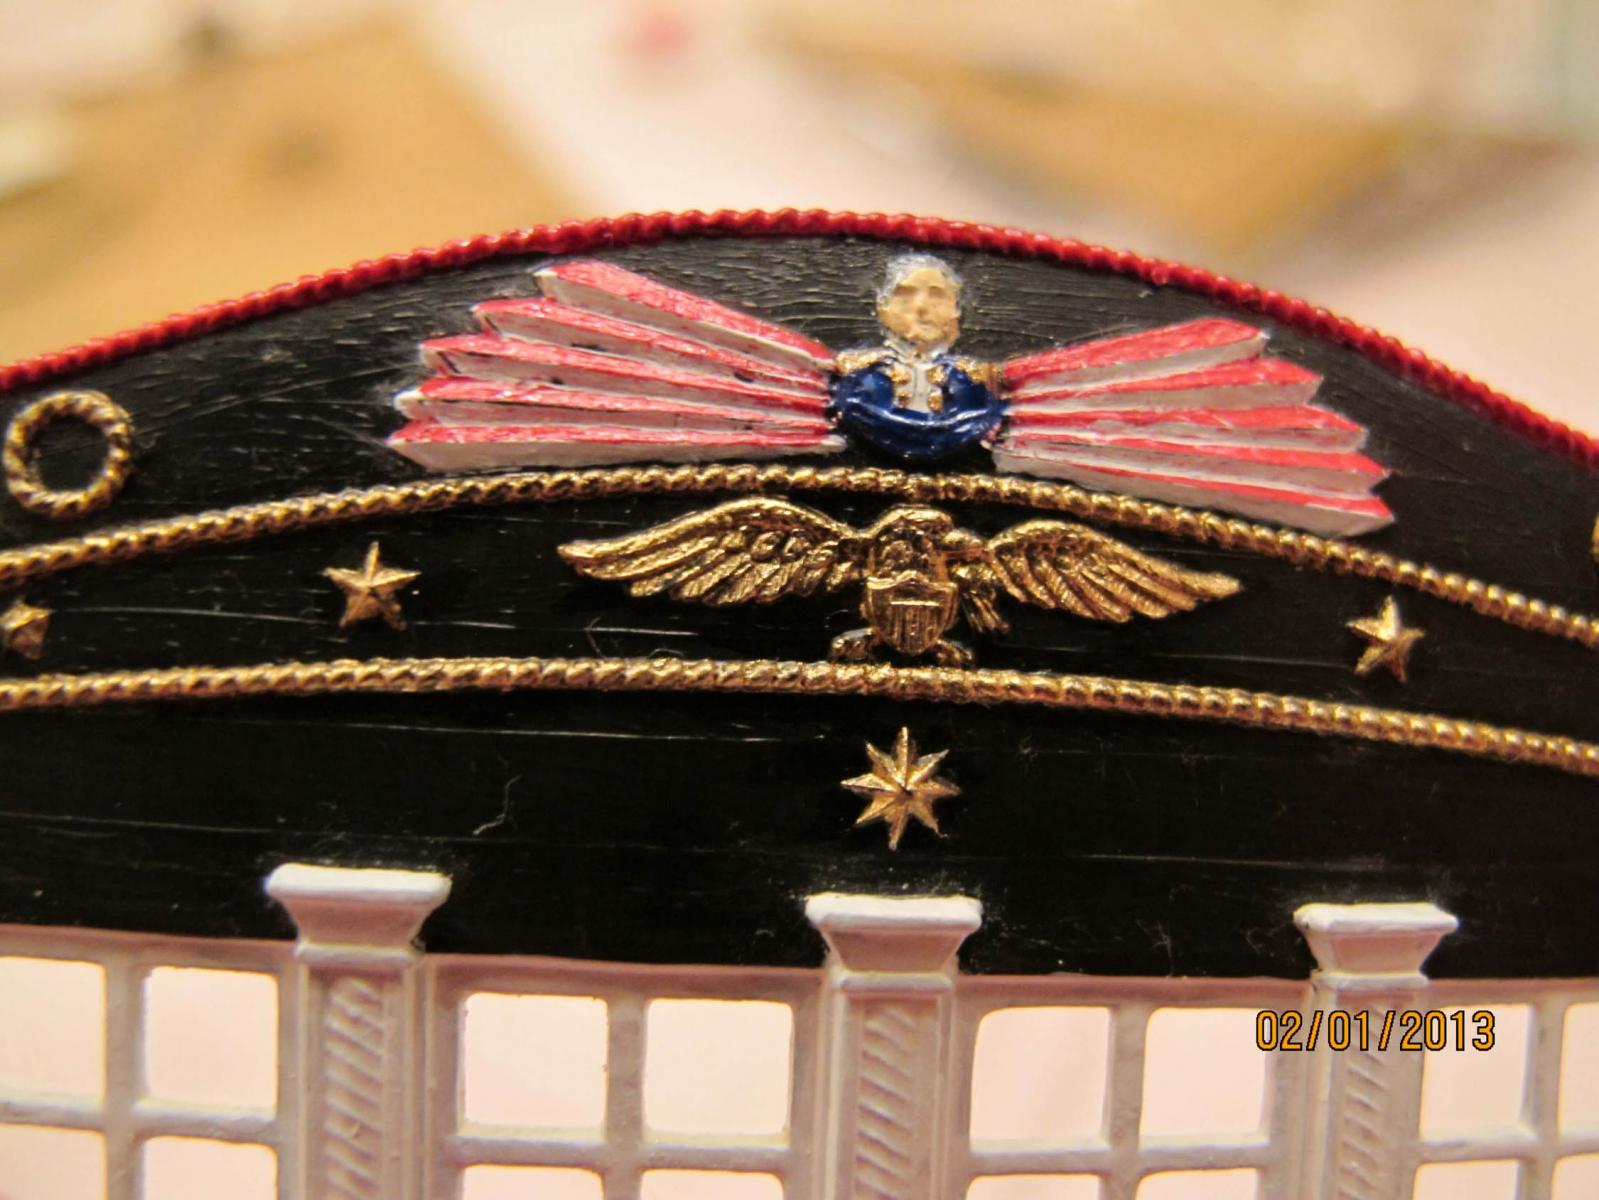
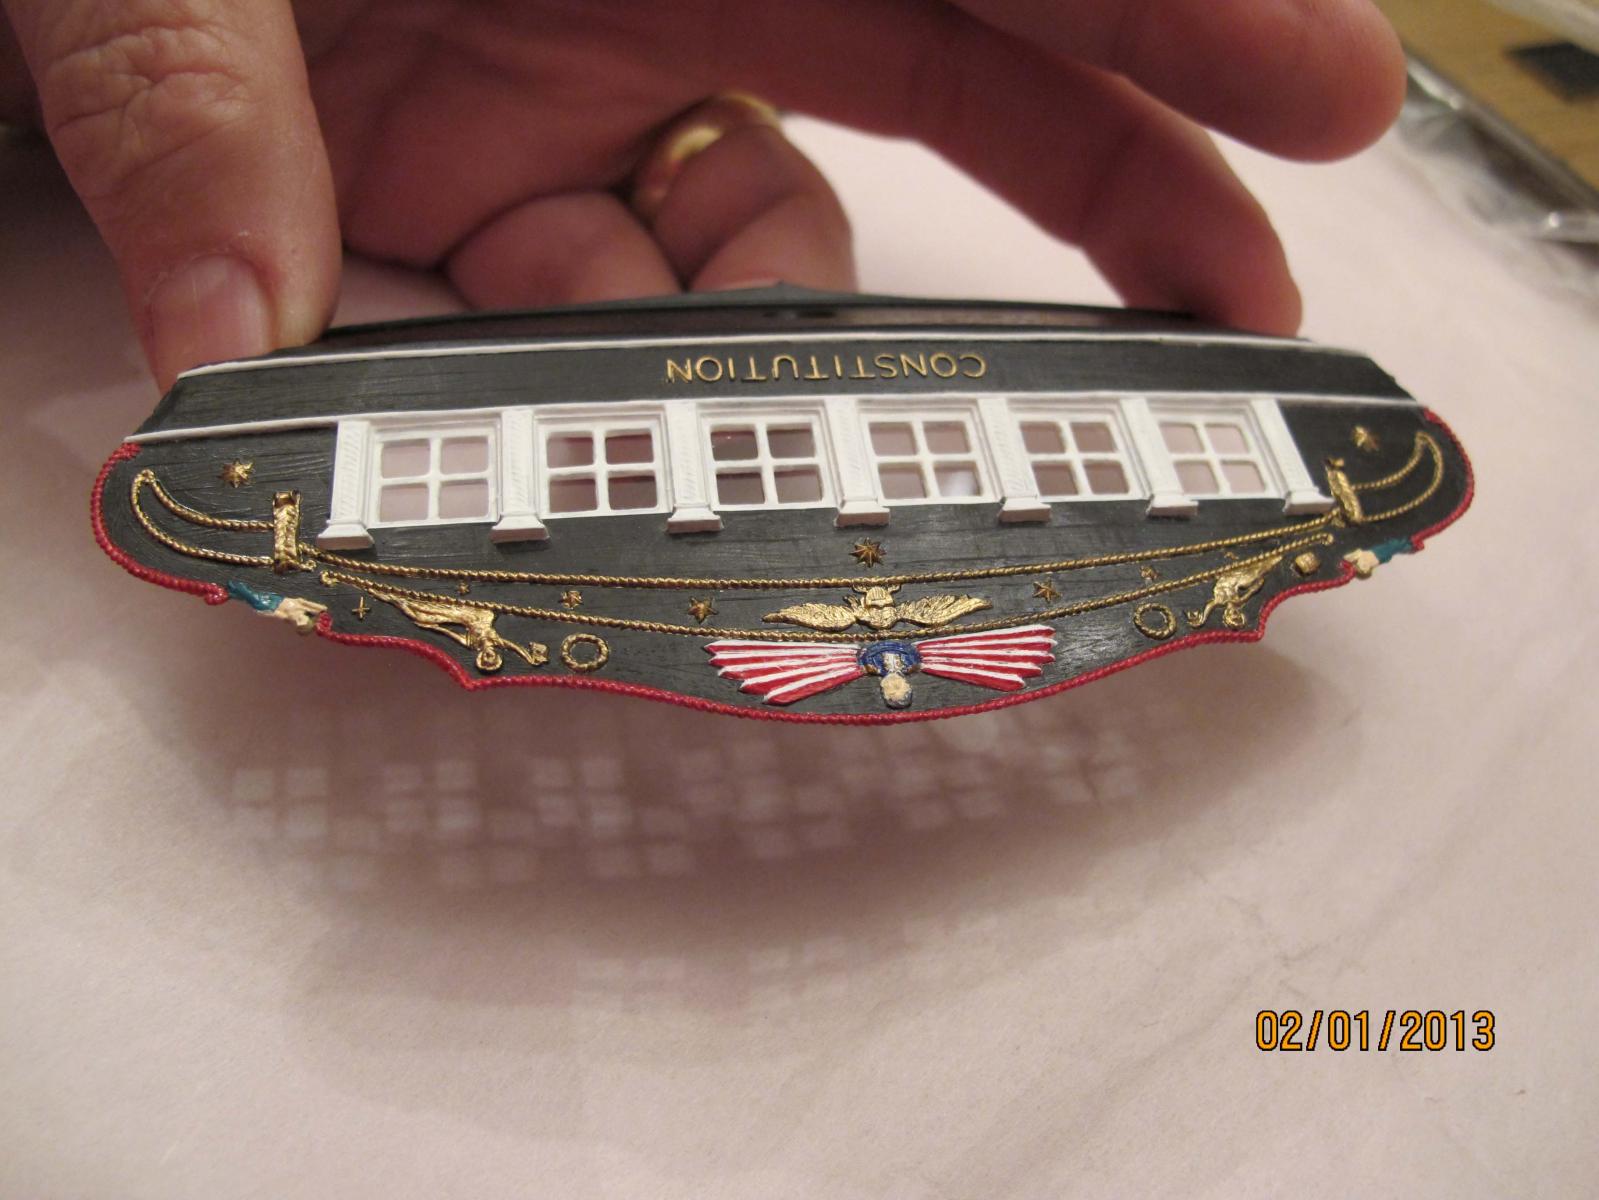
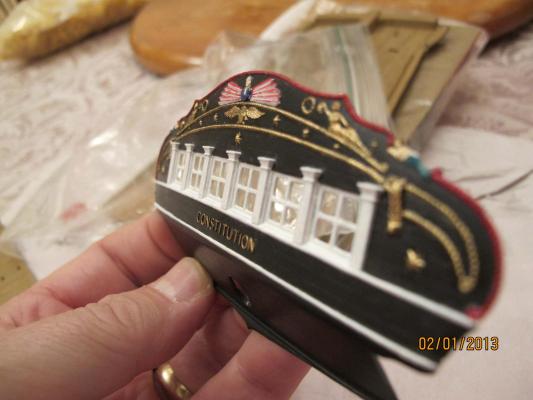
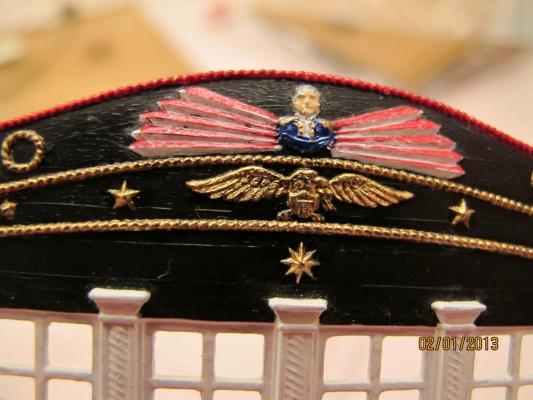
I spent at least a week on the transom alone. I experimented with the spare part before taking on the model. Here is what I learned: At least 2 coats of flat white paint (I believe it was actually 3 coats) were needed. In addition I found that a single flat white undercoat brought out the colored portions of the transom better. (This did not include the gold color which was painted un-diluted directly to the black plastic. Again, at least 2 coats.) I tried doing the Revell stripes on the windows but like Andy really did not like the look and stayed with what I believe is more of a colonial look of simply flat white. The figures port and starboard are mermaids and I painted them as such: blue green mix for lower body, cream for torso, and hair color...whatever you like. I attempted to paint my wife's hair color on my ship's mermaids (although I don't think I have told her that yet). The central figurine is a military figure. I painted him with a colonial blue jacket with brass buttons (almost impossible to see), brass chevrons, and gray white hair (I left the paint roughly mixed for a mottled color look - again, I don't know if this is visible). Rope detail is red. The flutes are painted flat white first (2 coats here) and then the superior portion of each flute was attempted to be painted red. When dry, I had to scrape red over-paint off of the inferior portion of the flutes CAREFULLY (with a no. 11 blade) as to not dig back to the black plastic (that is why 2 to 3 coats of white are needed first - prevents gouging to the base plastic). Depending upon the viewing angle it looks pretty good (especially from the transom anle view shown below). It is not perfect but I will not go back over it again.I carefully scraped excess paint off of the black original plastic whenever there was overage on each portion of the transom. The 'CONSTITUTION' was painted with gold using a 'stamp' method. I dipped a pencil eraser into the gold paint on the inside cap of the gold bottle (not too heavily) and stamped the gold onto the ship's name LIGHTLY. The windows are microscope cover slips but I think the included Revell plastic would have been just as good. I just did not want time to dim or yellow the windows due to the included fiber optic lighting of the gallery seen above. Good luck. Let me know if you have any other questions. Andy also worked a lot of detail into his transom and may have some other pointers. The stripes on the transom were first taped with Frog tape and then painted 2 coats of flat white. Minor overage was again cleaned up with gentle scraping.

- 601 replies
-
- 3
-
-
- constitution
- revell
- (and 1 more)
-
Force9: I am just about ready to start the detail work for the gun deck and am following some of your already tried methods. The capstan dimensions are tight (9/16" for the ring of the gundeck capstan). How did you fit them to the plastic Revell decking? i.e. between the ladders and the coamings? Thanks
-
It's looking good Radman. How do you back up an entire log build? I saw you mentioned it to Andymech.
- 79 replies
-
- 1
-
-
- constitution
- revell
- (and 1 more)
-
Thanks Radman for the encouragement. Hmmm...looking back on my last post I have to disclaim: the 'Imperial Walker' look to the brace is purely coincidental. Well, it won't be seen.
-
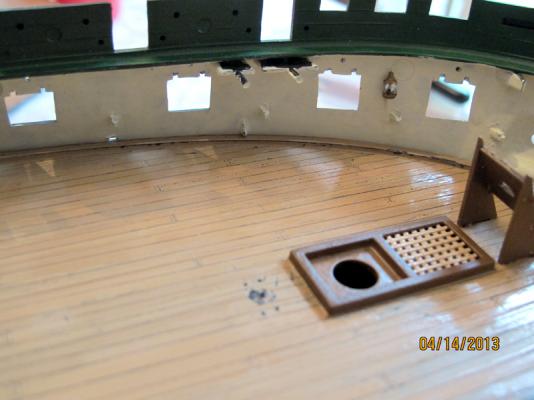
I want to re-establish the gentle gun deck camber for water run-off and also provide a stable platform that allows some gun deck mobility for the future mast placement. This might also help me join the deck sections but if not at least they will align better. I first used a cross section amid ship and traced out the arc. I then then reduced the ratio to match the model and traced the arc to the plywood in order to cut out a rough brace. I'll put some flat styrene on the wood which will allow the deck to float above the brace. I plan on externally compressing the hull to match the compression of the fitted Spar deck so I can add the guns with their tackle and not have to worry about the tackle changing shape or position when the Spar deck is finally glued to the bulwark. Then I will release the temprary compression clamping and hopefully all will remain as placed on the Gun deck. These deck braces are the first item placed in this overall plan.


- 601 replies
-
- 2
-
-
- constitution
- revell
- (and 1 more)
-
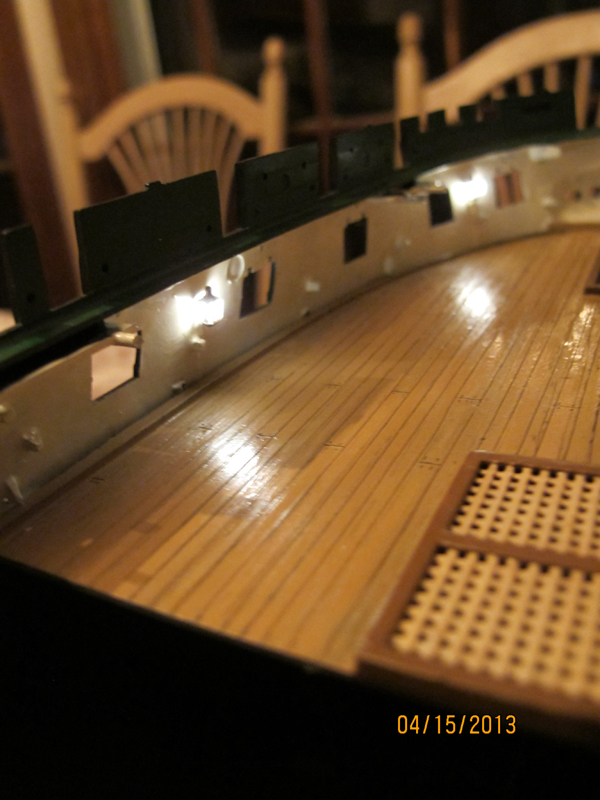
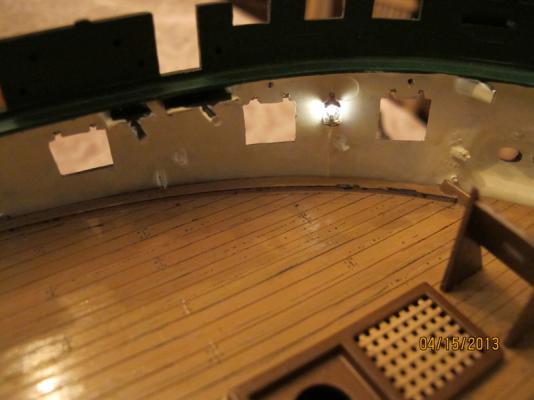
I put a little light to the lanterns to show what they can do.

- 601 replies
-
- 2
-
-
- constitution
- revell
- (and 1 more)
-
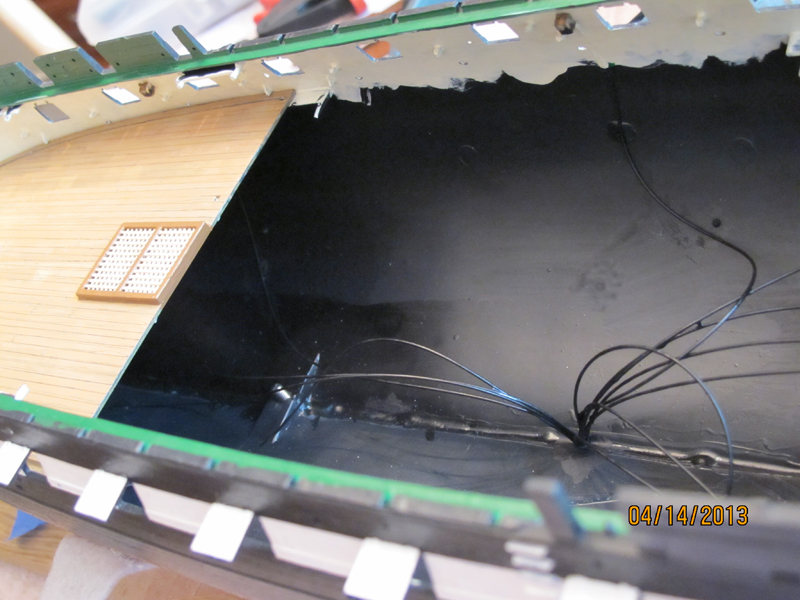
Well all the lanterns are installed. Most of them did well. If I had to do it again I would complete this step before any of the deck was installed. Since the aft portion of the gun deck was in place the 4 aft lanterns were tricky to place in the bulwark and did not turn out as good as I would have liked. They are not bad...just not good. The only lantern that came out a little crooked was the port no. 4. I had drilled the optic hole at a slight angle and there just wasn't any correcting this when glueing the lantern. The next step from here is to brace the deck from below and compress the hull to install the guns and their tackle. The optic detail exiting through the keel. Close up of lantern no. 1, port.

- 601 replies
-
- 2
-
-
- constitution
- revell
- (and 1 more)
-
Thanks Andy. Given that info I will let the deck float over the braces. I mainly need a center support to prevent any future sagging and to align the deck peices mid ship. Something like an "A" brace will suffice with the feet braced on the hull.