lambsbk
-
Posts
910 -
Joined
-
Last visited
Content Type
Profiles
Forums
Gallery
Events
Everything posted by lambsbk
-
Thanks for the heads up on the AOTS book. I will use the info but try to corroborate through other sources before including it in my build.
-
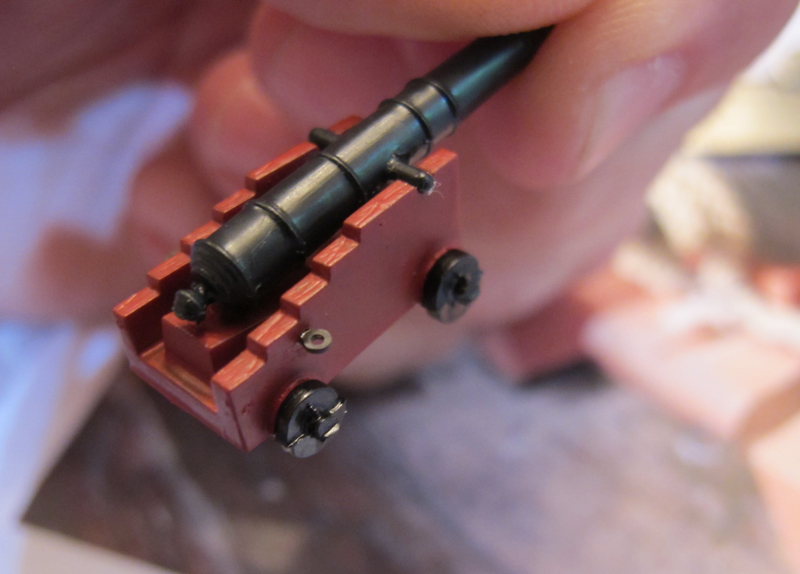
Thanks guys. Doing this build is like learning a new language (and I thought medical terminology was hard!). I appreciate your help very much. After thinking about it I will be trying to do a pre-breeching line rigging. I figure if it does not turn out well (as far as attaching it to the bulwark after completion) I can undo it and mount the cannons one at a time. I have extra rigging line from a second kit... With Tropical Storm Andrea passing over I will probably try it this weekend. The capsquares are mostly done. I may add a ringbolt for the train tackle although I do not believe I will add the train tackle itself. Thanks again.
-
I just looked at the drawing again with the info you gave me and you are correct. The drawing mislabeled the breeching and called it a rammer! Anyway, the rest of the article read well.
-
Thanks Russ. I picked up the term in an online search for 1820 smooth bore gun nomenclature. The link is: http://www.history.navy.mil/library/online/consitutiongundeck.htm (see page 4). I may be interpreting the drawing incorrectly or perhaps the article is incorrect.
-
Yes. I believe it was called a Rammer's line.
-
A question for some of you more experienced shipwrights: I am thinking of measuring the amount of 'between the guns' line needed and pre-rigging the rammer line on the 24 pounder canons daisy chain style. then attaching it to the bulwark and gluing the guns before working the side tackle lines with their hooks and blocks. Has anyone tried this approach? What do you think are the pro's and con's?
-
Thanks also for the Marquardt reference. I just bought the book online and can't wait to review it.
-
John: I just realized I steered you wrong: it was not MS but BLUE JACKET that sells the brass. Sorry about that error.
-
Yes. I just now saw it. I have 2 anchor cables and would like to push them through the gun deck transitioned from the hull hause holes. Your info is very helpful as I was sure the hause holes to the cable locker are currently aft of the original position. Thanks for your help.
-
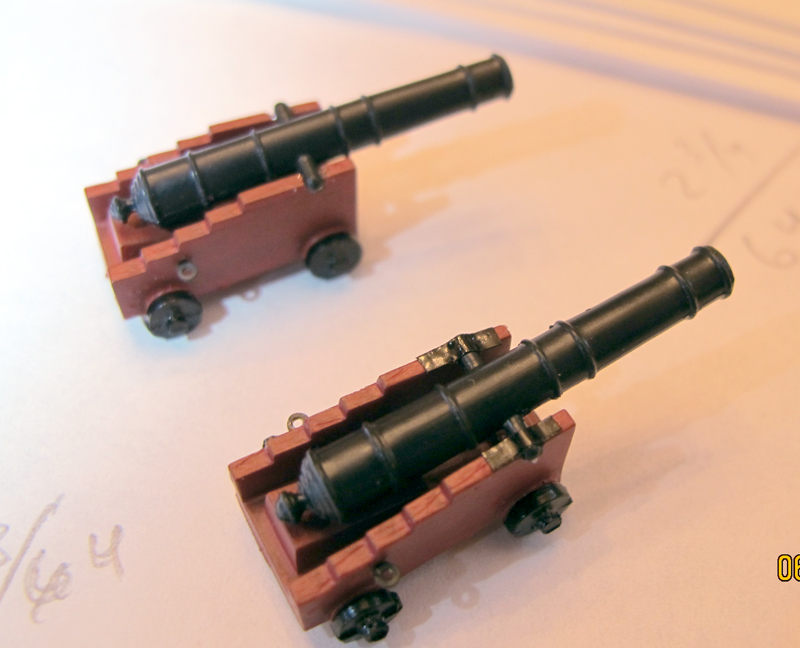
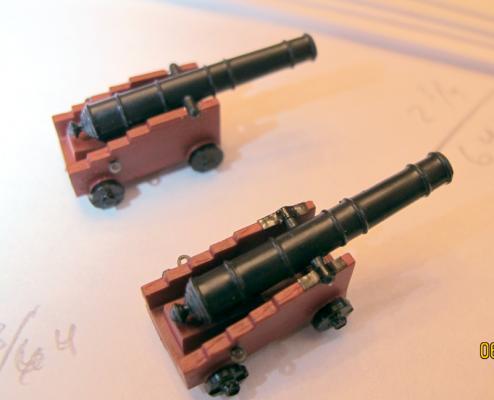
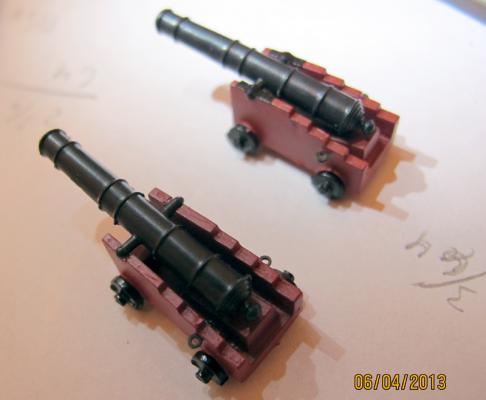
Russ suggested adding a capsquare to the carriage. First up is pinstriping. It is a bit labor intensive since the width and length has to be cut to 5/128" x 3/16" and the tape is a little 'soft.' I am not sure if it will stay put on the carriages long term. It is appplied decal style. What do you think of these with and without carriages?
- 601 replies
-
- 2
-

-
- constitution
- revell
- (and 1 more)
-
Well...Force9 mentioned them in his Connie build. Apparently they were not excited about selling them but they had extras and said 'yes' to my pleading. The info on how to do that is in his blog. I did let them know that I was a new customer and will return to look at their model products when this build is complete...not committal but I will give their company preferential treatment.
-
Thanks Russ. I was wondering about that yesterday and styrene (even very thin stuff) did not seem useful. The tape is an excellent idea. I will give it a try.
-
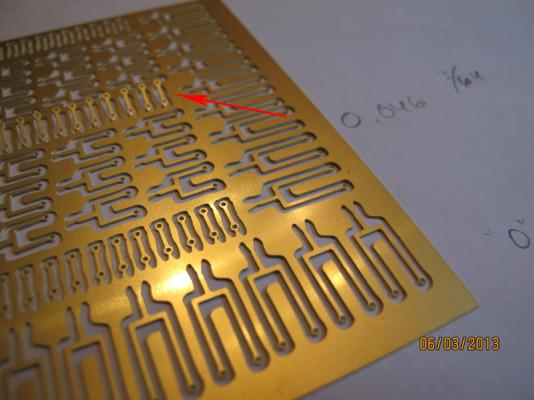
I then drilled the carriages and CA'd the bolts in place. This method was easy, scaled, and I still have plenty of these smaller eyebolts for the rest of the build.

- 601 replies
-
- 2
-
-
- constitution
- revell
- (and 1 more)
-
So I snipped them out and smoothed the edge before cutting them in half.

- 601 replies
-
- 1
-
-
- constitution
- revell
- (and 1 more)
-
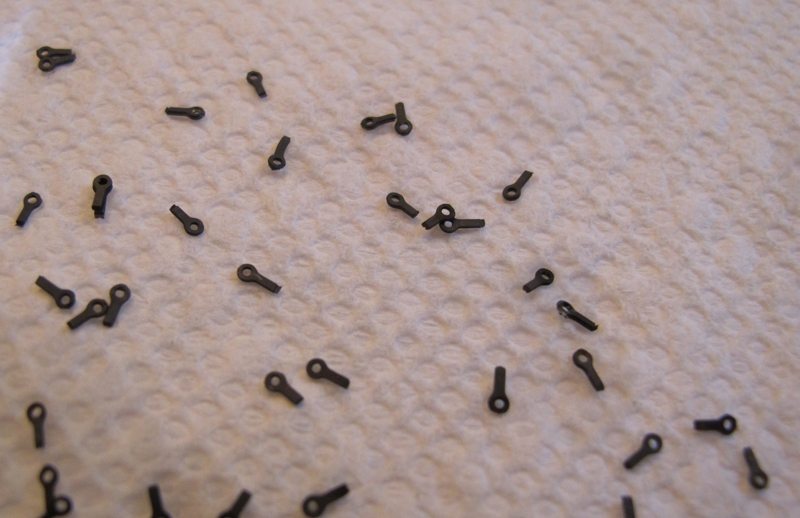
Thanks for the encouragement DCooper and ScottRC. Today I finally got back to the gun tackle. The eyebolts from the Revell kit were about twice the size needed. When scaling the carriage eyebolts they came up to 3/64". (Revell's kit eyebolts are 5/64".) Hmmm...well I had bought the camboose from Blue Jacket and there is a lot of other 'stuff' that came with it: brass transom, cable ties, hammock slings, and these...although I am not exactly sure what they are used for, they are 3/64"!
- 601 replies
-
- 2
-
-
- constitution
- revell
- (and 1 more)
-
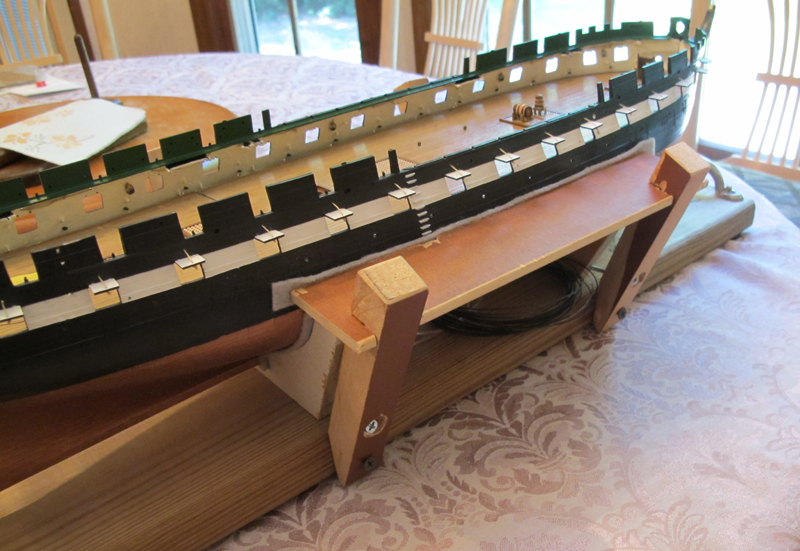
Nice job on the gallery windows Force9. I love watching how you think outside the box. Although my hull stress problem is a little different in nature I pre-stressed the hull by attaching external wood clamps. This has held the gun deck in relative position while I work it and can be relieved once the spar deck is glued. It was only moved by 1/8" or so but that amount makes a huge difference in the gun tackle line tension. I enjoy (and am inspired) watching your work.
-
Thanks Russ: actually it depends on the light. Hopefully it will be ok in the closed in deck with the lamps lit. John: I already had that very peice give slightly when I pressure tested it. I reapplied liquid plastic cement and am HOPING it will hold. Thanks for the heads up.
-
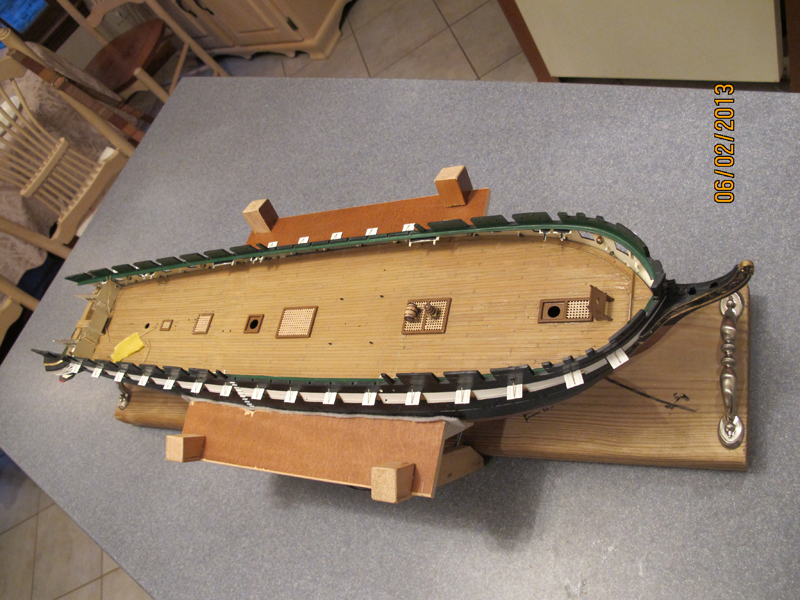
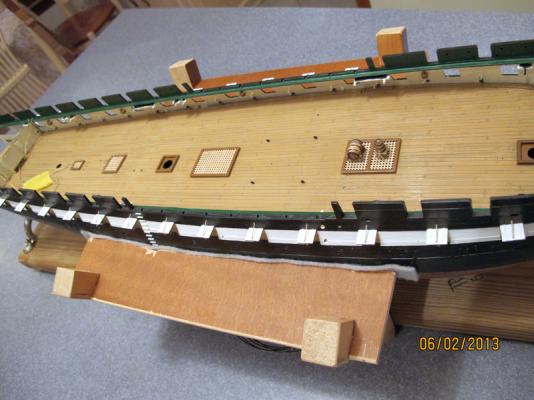
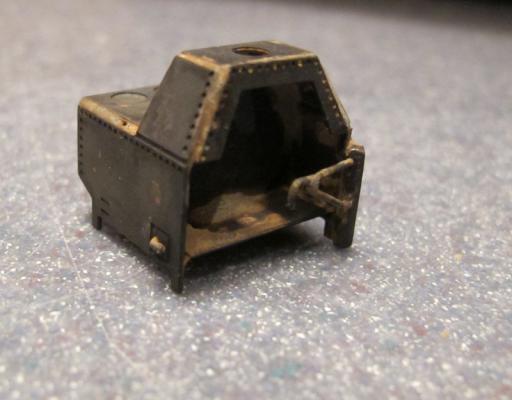
Well I joined the gun deck sections today. I'ld just like to say "what was Revell thinking?" After glueing on tabs on the underside of the sections, keeping their relative heights the same and CAREFULLY trying to align the boards I still got just MARGINAL results. My hat's off to you guys that put the deck together first by glueing and sanding (and in some cases planking). Wooden models surely do not have these problems of alignment. ANyway, I posted a pic of the result. I also just about finished the camboose. It still needs an ember tray but I did get it blackened so it can hold the paint. I need to thicken the legs a bit as well with some styrene.

- 601 replies
-
- 4
-
-
- constitution
- revell
- (and 1 more)
-
Force 9: Have you seen any info on the anchor cable storage. When the Connie went to chain it went into a chain locker amid ship. But the hemp cables were stored on the Orlop deck and laid out specifically to dry and in such a way to prevent fowling when dropping anchor. However, I can not find HOW the cable transitioned from the Gun deck to the Orlop deck. If you have any info on this I would love a reference. Thanks.
-
I have finished making the clamps to pre-stress the hull into position for both decks. There are 4 adjustment points (2 per side) which give me pretty good ability to adjust the lateral tension fore and aft, port and starboard. These clamps should hold until the Spar deck is glued.

- 601 replies
-
- 2
-
-
- constitution
- revell
- (and 1 more)
-
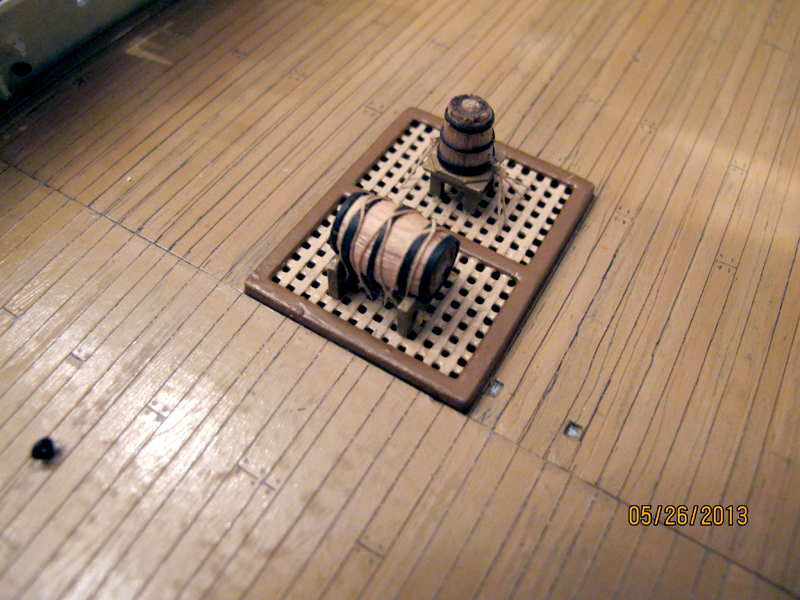
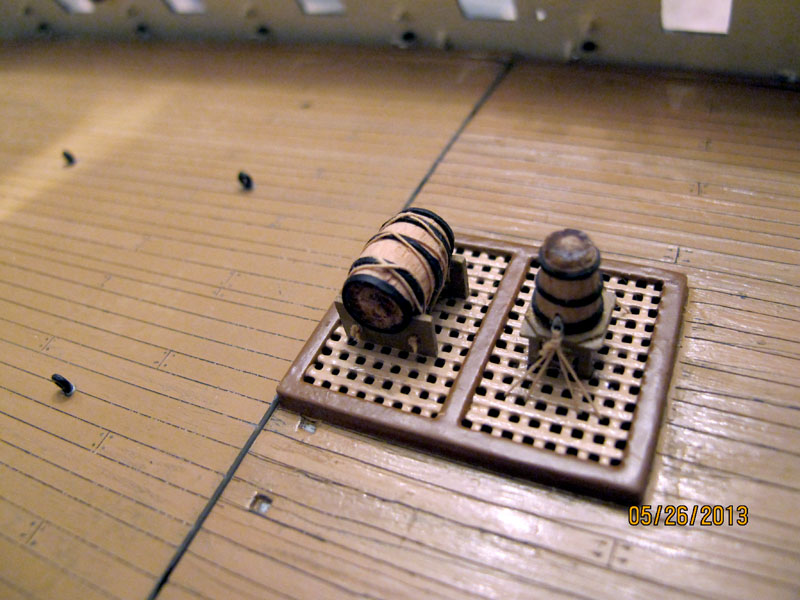
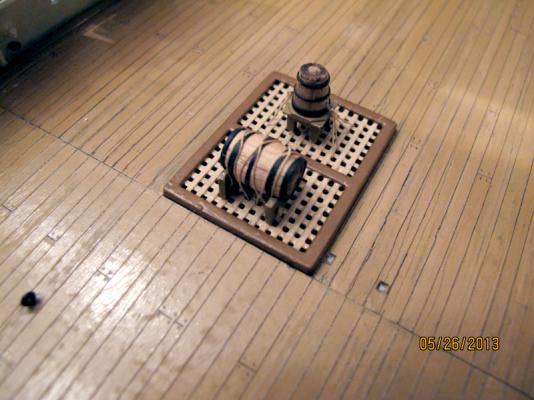
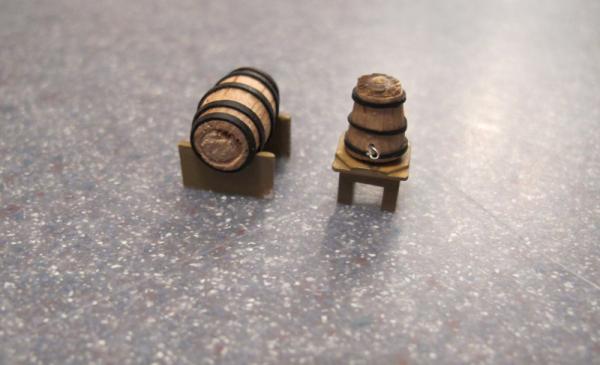
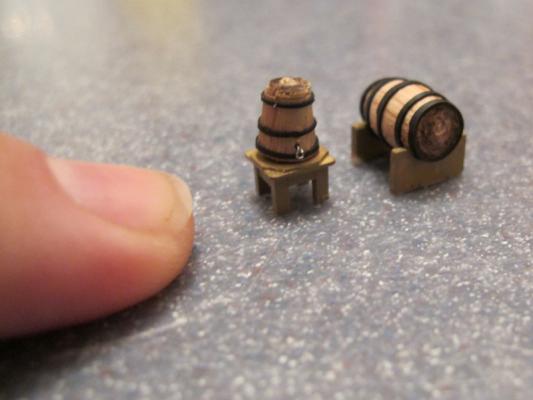
Not much done so far this weekend. I did get the Butt and Barrel lashed to the gun deck and have dry fit the deck into position. Tomorrow I will put 'the squeeze' on the hull externally to align the deck and glue the sections together. Then on to the guns.

- 601 replies
-
- 4
-
-
- constitution
- revell
- (and 1 more)
-
NIce start John. Have a great memorial day.
-
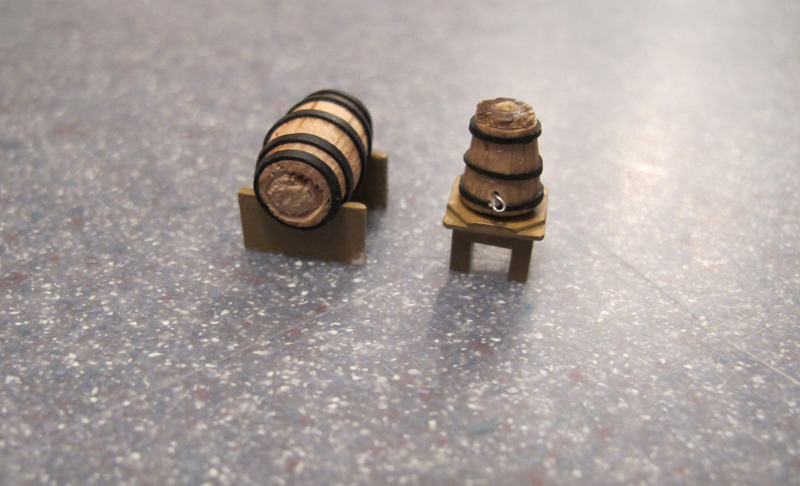
Well...some progress this week but not much. I worked on the Galley in preparation to putting in the mid section of the gun deck so I can move onto mounting the guns. The scuttlebutt has to be secured to the coaming near the galley in the forward section of the gun deck. I will need to thread the line through the coaming. I have finished making it and have reduced the barrel size to a more appropriate 150 gallon size. Hopefully I will have them lashed to the deck tomorrow.
- 601 replies
-
- 2
-
-
- constitution
- revell
- (and 1 more)
-
Jay: Is it possible to drill and pin the rail diagonally to the deck? I think this would give a little more verticle strength perhaps.