lambsbk
-
Posts
910 -
Joined
-
Last visited
Content Type
Profiles
Forums
Gallery
Events
Everything posted by lambsbk
-
Ya...I don't Facebook but I MSW! Good luck with this build John. I'll be following.
-
It's a good idea. I am afraid I have a lot of touch up painting to do. Nothing is lost that can not be re-done though (yet).
-
It is a cool idea Radman. I can't wait to see how it turns out. The added detail I think will emphasize the plates nicely. I have the same trouble with the brush and straight lines. When you do the decks try this: I had a piece of finished wood (about an inch thick) and put a small bit of felt over it. This allowed my hand to slide down the wood. I just lined up the wood to the deck planking, dipped the brush in paint, and drew a line by sliding along the wood. Crude but effective. Dave
- 79 replies
-
- 1
-

-
- constitution
- revell
- (and 1 more)
-
I'll try to size them a bit. My skills are limited as well as my modeling tools but I have some time to experiment. The bulwark eye bolts were placed port side yesterday and I am almost ready to secure the gun deck. After that it is full steam ahead on the guns! Hopefully I will have worked out the blocks by then but if not I have a lot of extra Revell 'aa' blocks. I won't be as happy but may have to settle for them.
-
Great job John. You and Andy were neck in neck on this one. I agree with the chemist: was the wood beckoning? Congratulations!
-
Thanks Jay. I have just started to experiment. I agree the blocks with a hook are TIGHT in the small space needed. Do you think the aa size blocks are too big?
-
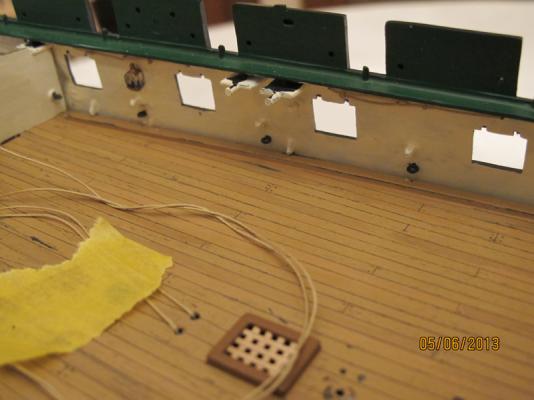
Bulwark eye bolts port side installed to anchor additional gun tackle.
- 601 replies
-
- 2
-
-
- constitution
- revell
- (and 1 more)
-
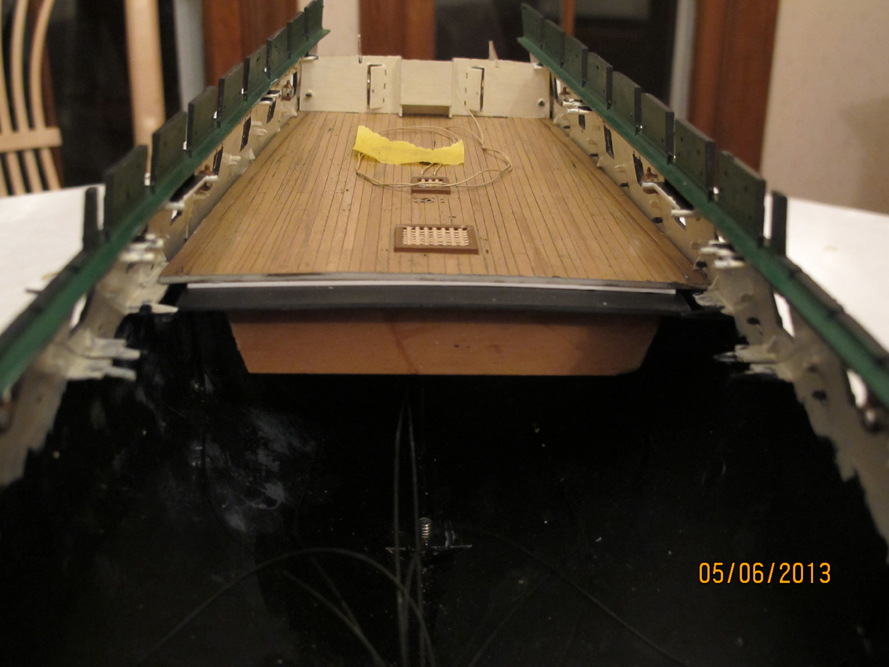
This is a pretty good pic of the camber effect on the aft deck.

- 601 replies
-
- 3
-
-
- constitution
- revell
- (and 1 more)
-
Well, just an update. I had a bit of a slow weekend as far as Connie progress. The deck camber is established with the under-deck bracing. I am now in the process of adding the eye bolts to the gun carriages and bulwark. Although each gun is supposed to have has it's own set of eye bolts to attach to the tackle on the bulwark I will have to place one eye bolt between the ports for the guns adjacent to each other to share.
-
Thanks for the above Jay. I am just getting ready to add tackle to my gun deck guns - first with eye bolts on the gun carriages and bulwark and then block and tackle with hooks. I will try your method. I am not certain what is my gauge wire but will look at that tonight. Thanks for sharing your technique.
-
Ha. I am not sure I WANT to know. The pics look great John. It must be great seeing the light at the end of the tunnel.
-
Absolutely beautiful build. Congratulations Andy.
-
Can't wait to see the pics John. Dave
-
I will look for some at Hobby Town. Thanks.
-
Thanks John. I saw your build is nearing completion. It looks great. I look forward to seeing it completed.
-
Thanks Russ. I am afraid I am a little naive on this: Is dullcoat a product?
-
Maybe some of you more experienced folks can answer this: I have noticed a 'wearing' effect on some of the earliest painted parts of my Revell 1:96 Connie (specifically the gold color on the figurehead area) which will need touch-up. This wear is apparent after continuing the build and gets exposed to some touching on the bench. I had applied 2 coats of Testors Gold enamel. I worry that the transom may be next although no signs of wear are yet apparent here. Is that kind of wear typical or should I be using a clear sealant to protect these enamels from erosion?
-
Thank you for the advice. I will move the post. I have put 2 coats of gold Testors enamel.
-
Maybe some of you more experienced folks can answer this: I have noticed a 'wearing' effect on some of the earliest painted parts (specifically the gold color on the figurehead area) which will need touch-up. I worry that the transom may be next although no signs of wear are yet apparent here. Is that kind of wear typical or should I be using a clear sealant to protect these enamels from erosion? (moved to the paint techniques section 05/03/2013)
-
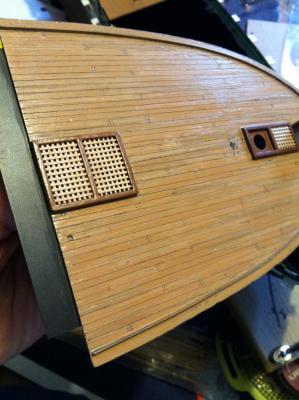
The gun deck fore section turned out well but I did not anticipate a difference in the thickness of the deck sections. I corrected that with styrene on the aft section but had to file the foreward mid-deck section to give a smooth transition. The completed foredeck camber is pictured below and I will update with a pic of the completed gun deck in a few days. Hopefully the sections will a align well.
- 601 replies
-
- 1
-
-
- constitution
- revell
- (and 1 more)
-
Sorry about the camboose stack comment Force9...I just realized it is SUPPOSED to face forward. Duh...live and learn.
-
U.S.S Constitution - Revell - 1:96 - decking
lambsbk replied to lambsbk's topic in Plastic model kits
I have decided, at least for the gun deck, to reestablish the camber with under deck supports and then support the deck part seams with styrene mounted on these supports which transition to the keel. I am not certain yet as to the result as this is a work in progress. Follow my build lo to see the results as they are available. -
Andy, how did you strop those blocks? I'ld love to try that.
-
Thanks, John for the encouragement. I am enjoying the build.