

drtrap
-
Posts
904 -
Joined
-
Last visited
Content Type
Profiles
Forums
Gallery
Events
Posts posted by drtrap
-
-
Chuck P mentions here: http://modelshipworld.com/index.php?/topic/918-sources-for-boxwood-blocks/page-2?hl=%2Bblocks+%2Bchuck#entry38771
that he will have boxwood single and double blocks as small as 2 mm in the near future. Perhaps he still has some of his pre-production blocks available.
Yes, I saw it.
That's a possible final option for me...
Thanks!
-
Well I think I'll try to reduce to 2mm the 3 mm blocks using my proxxon pern sander....
http://www.chippingaway.com/WoodCarving/SandingProducts-ManualandPower/ProxxonPowerPenSander.htm
-
Finally I've found the supplies we were looking for...
http://modelshipworld.com/index.php?/topic/918-sources-for-boxwood-blocks/
Anyone in Europe ??
-
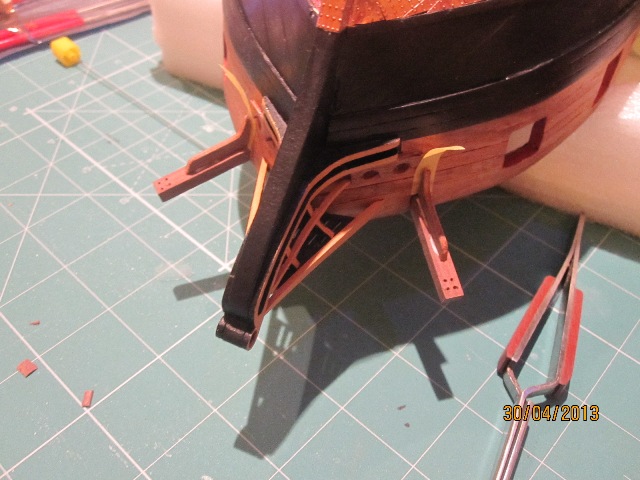
This unexplained wear of the No 55 walnut stern facia lower border is my current problem (as walnut planks splintering...).
It is supposed (and is real) I did'nt trim it or sand it al all, but this unpleasant lower border's (and around the left gunport) peeling-like appearance must change.
I'm think to test walnut wood stain to sort out this current concern.
Any advice or experience on this?
Thanks again.
-
Stergios, 2mm blocks would probably be best, but no-one supplies double blocks in a 2mm size, 3mm is the smallest I could find. Also different manufacturers seem to measure their sizes differently. I stuck with Caldercraft for consistency. I bought a 'block sander' from Model Shipways, basically it acts like a rock tumbler and should take of the sharp edges, this also has the benefit of making the block look smaller. I'm still experimenting but will post a pic when I can.
...very interesting option Jason!
Wait to see your results.
Goodnight.
-
"mm blocks are best suited scale size for the caronnades, I posted a couple of pictures in my NMM thread in the Museums section - shows how they were rigged in a period model of the Crusier.
Norman
Could u please provide the relative link of the pics in the museums section, Norman? I can't locate them...
-
"mm blocks are best suited scale size for the caronnades, I posted a couple of pictures in my NMM thread in the Museums section - shows how they were rigged in a period model of the Crusier.
Norman
" mm blocks? Do you mean 2 mm blocks, Norman?
-
Hi Stergios, yes, I think we're on our own on that, although there seem to be plenty of references. I ordered some extra blocks and copper ringbolts to allow them to be rigged more fully (3mm double and singles which seem to be that smallest doubles that can be found), Jim has some good pictures of the ones he has rigged. I'm still debating on how I want to approach this but hope to have some pics soon.
Hi Jason, thank you for replying so promtly!
I've seen Jim's pics of the carronade and I wonder whether 2mm blocks are matched better (in ratio) with the size of standard carronades,carriages and slides provided with the kit....
-
...................
Taken me most of today to rig up one carronade. Breaching rope and also a set of tackle have been rigged up. Need to touch up the eyepins and hooks and then thats the first carronade complete. Only 17 more to go......
Hi Jim
these carronade eyelets and hooks belong to the standard kit supplies or did you get them afterwards?
What;s the size and type of the blocks that you have mounted?
Thanks
Stergios
-
Trying to study the carronades installation and figure out my next steps...
I'm not seeing any instructions for the guns eyelets, hooks etc except a single comment about the breech tackle only....so I wonder whether those fittings belong to the extra-aftermarket items...
Have I missed anything?
Thank you
-
Hello again to everyone!
As I'm about to place an order to my kit supplier I'm thinking to use some kind of walnut wood staining to "enhance" grating wood borders, masts etc.
Have you used or do you think to use any kind of wood enhancing material (except wood varnishes) to improve the final results?
Thanks.
-
-
I know the extra pack, I did place my order before yours, the point is that I opened the wheel;s pack yesterday and realized that I needed another one wheel !!
I think that Cornwall Model Boats description was 'nt the appropriate one on this...
Cheers !
-
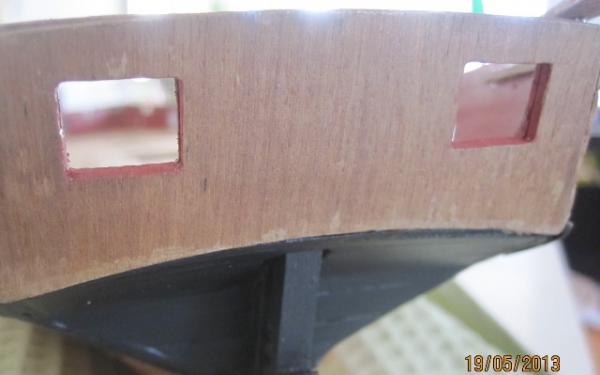
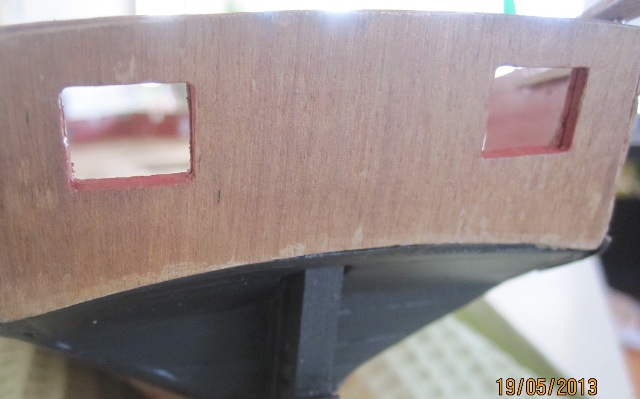
I've mesuared the dimensions of the deck openings as 2,35X2,35 cm approximately, and I'm about to cut the strips to these lengths before assembling and gluing the gratings.
Hope to be in the right way...
Yes, I'm in the right way!
-
I've mesuared the dimensions of the deck openings as 2,35X2,35 cm approximately, and I'm about to cut the strips to these lengths before assembling and gluing the gratings.
Hope to be in the right way...
-
Hi guys!
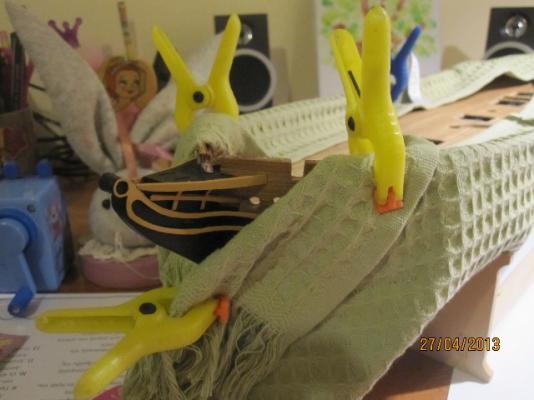
I'd like to ask you, how have you secured gratings assembly? Have you used watered pva browsing for all the strips?
Thank you
-
Small update, definitely getting a bit more comfortable working with some of the what I'm sure are basic skills to most! Started to tackle the tiller.
1 - found that the tiller arm is too long, and the plans seem to contradict each other from side to top elevation in determining the length. In the end I sort of averaged it, dry placed the wheel and adjusted for what I thought looked about right length. Side note, the more I work with the plans the more I keep reminding myself that they are more "guidelines" in a number of respects. After finding the right length, I shaped the end to the angel of the rudder and drilled a 1mm hole in the tiller arm and the rudder to accept some wire - this seemed a little more reliable (how you are supposed to work with the pre-cut square 'pin' I don't know).
SPOILER ALERT - You'll see there are two holes in the rudder, the top is a mistake which I'll explain
2 - Dry fitted tiller arm. I'l probably round this off a bit before final fitting.
3 - Dryfitted the aft platform and found that the tiller arm was too high as the arm did not clear the support beam (again, despite using the plans as guidance) - simple to fix, but another example of where I'm learning its important to be 3 steps ahead. It would have been a real pain to correct this after it was all rigged
4 - Threw some of the other in progress deck fittings together, looks like its going to be rather crowded back there even without the aft platform, and ladders still need to go in. Need to assemble these and plan for where these will go prior to fitting the tiller rope otherwise it could cause problems later.
Hi Jason,
do not say to me that I should buy rather two (than one) extra ships wheels....

-
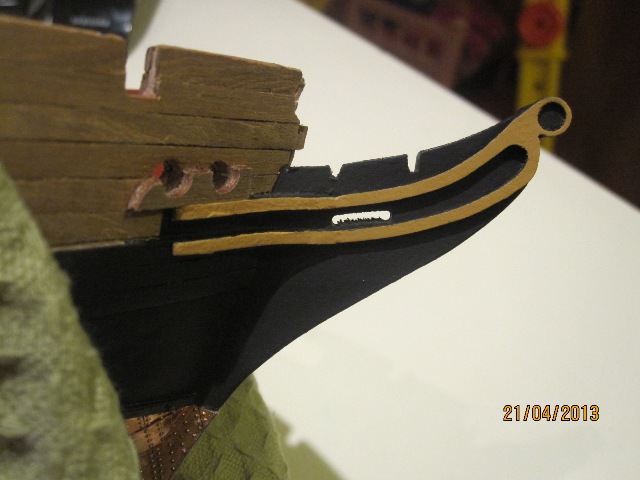
Thats a nice looking rudder Stergios, glad you're back in the shipyard.
I'm trying at least to follow your progress Jason, and Jim's too as I can.

-
-
So many days later....
After a lot of reflection I was lost in about the black painted hull and the relative varnish coverage....
As I was'nt happy using the somewhat "glossy" touch of caldercraft's black colors (dull & metallic), now I can say that using the matt varnish of vallejo following the acrylic matt black of the same company, is the best combination in my opinion.

-
-
Stergios,
Shellac is an old wood finish used for fine finishes that has been largely superseded by lacquer and varnishes. Its a resin secreted by a beetle that is dissolved in alcohol and dries very quickly. It comes in colors from white (clear) to dark orange (garnet) and is fairly transparent. It can be removed easily and entirely with more alcohol, but is quite durable when dry.
It comes as a powder, or premixed.
Use the translator in Google if you can get it up. I don't have any way to print the Greek characters.
Chazz
Copy that Chazz!
Many thanks.
-
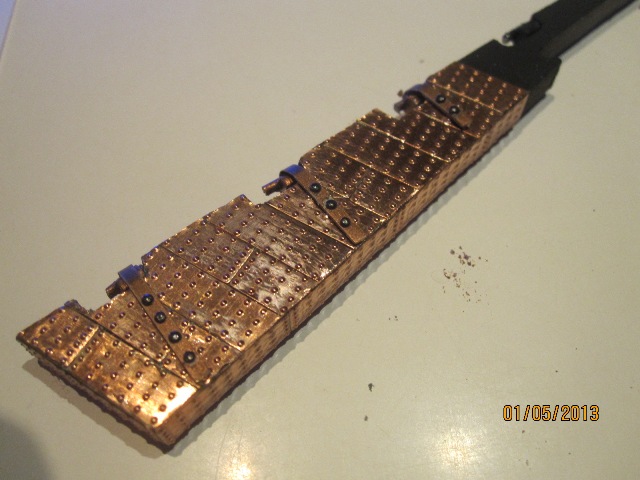
Ahoy Stergios

Beautiful build, I think it looks great
I am a fan of the "clean" copper look and would question that after plating, would the ship have not looked this way. I might tone it down just a bit with some compound but that is just my personal taste.
I am unaware of any painting or treatment to the copper plating when first applied, was there?. As for the weathered look I like that too but have seen the lower half of a build overly weathered and the top half looking like it just rolled off the dry-dock. Not too fond of that
Thanks JPet
The whole looking is already changed. Coppering finish is'nt so bright, in the other hand I've applied a matt varnish over the black hull...
-
The finish you got looks superb indeed, but you are building a ship model, aren't you, and this hull is so flashy that you don't even notice the beautiful work you did or are doing on the rest of the ship. As an example, you have a beautiful flat black finish for your ship sides in (too) sharp contra&st with the lower hull...
Just my grit of salt
Jean-Pierre
the shinning of copper is'nt the same, cause I've applied the coatings of varnish.
I've applied two coatings of matt varnish to the flat black hull...
Pics to follow later!


HMS Snake by jim_smits - Caldercraft - First Build
in - Kit build logs for subjects built from 1751 - 1800
Posted
We're waiting to see your rigging procedures, Jim!