HOLIDAY DONATION DRIVE - SUPPORT MSW - DO YOUR PART TO KEEP THIS GREAT FORUM GOING! (Only 69 donations so far out of 49,000 members - Can we at least get 100? C'mon guys!)
×


grayarea
-
Posts
101 -
Joined
-
Last visited
Content Type
Profiles
Forums
Gallery
Events
Everything posted by grayarea
-
 I have serious apprehension about getting the cannons onto the boat. I erred earlier by installing the rings on the bulwarks that will hokd the breech lines. I pulled those out and need to tough up that damage. Then I need to put the rings on the breech lines. I'm sure I'll be making my own fittings by then. I'm also concerned about messing up the deck while trying to get all the lines and Flemish coils to lay right. I'll muddle my way through it, and I haven't made any mistakes yet that I wasn't able to fix or cover up. But I'll be relieved when the cannons are done and I can move on.
 -
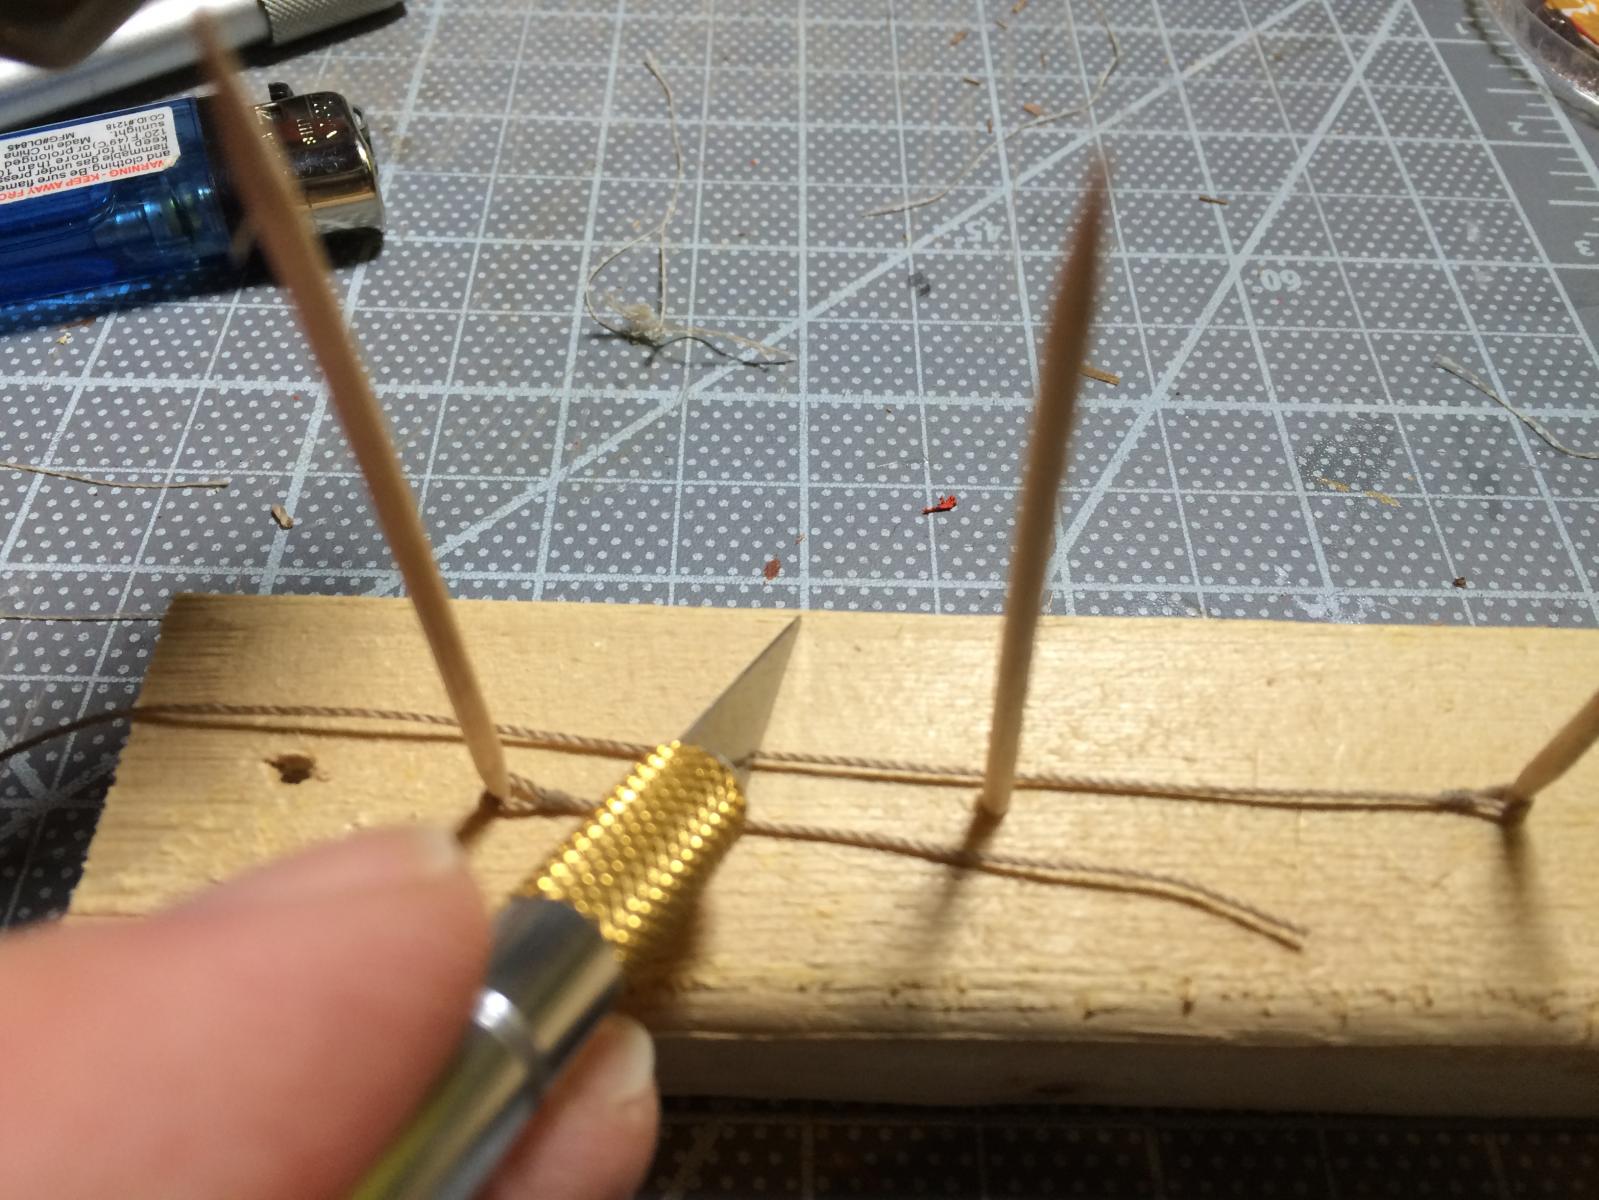
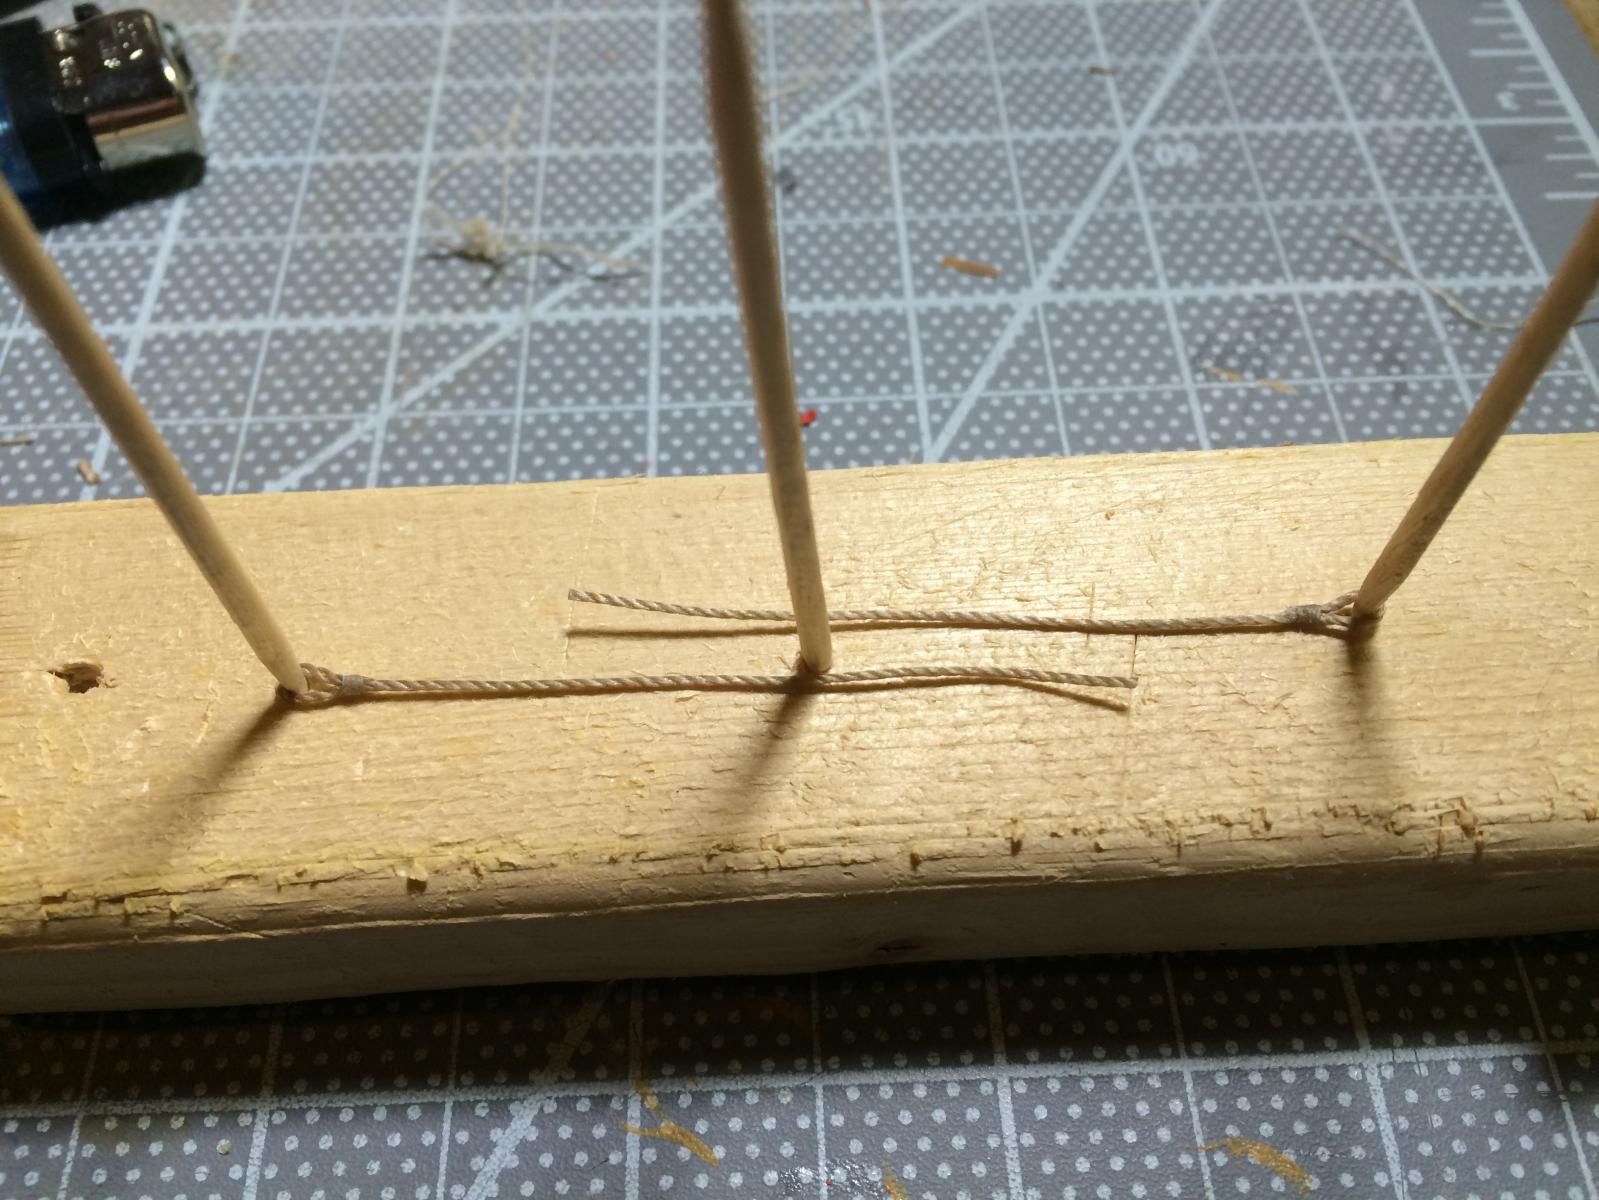
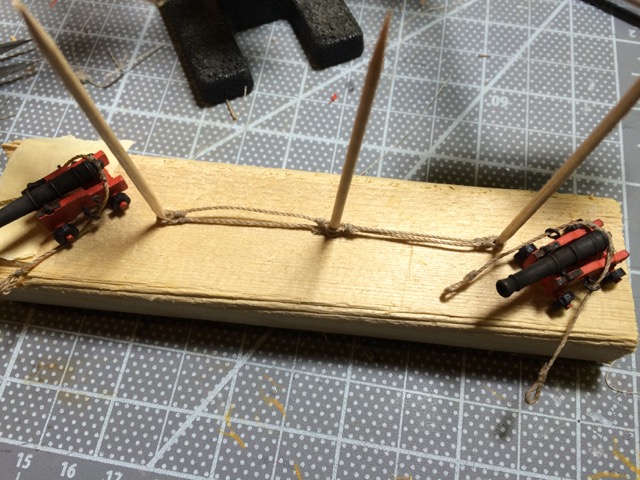
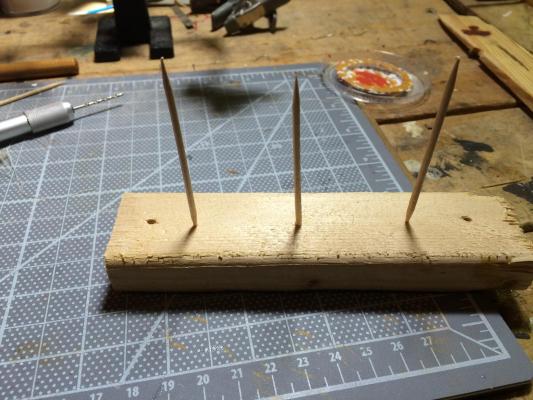
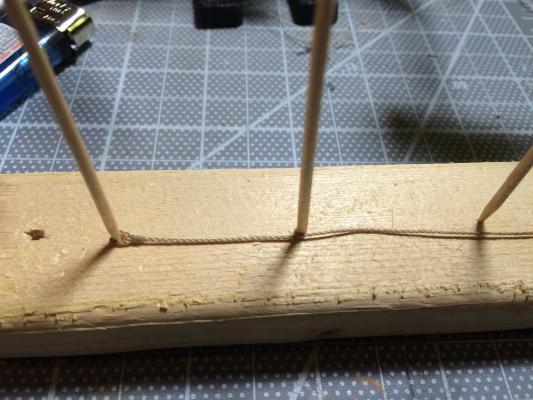
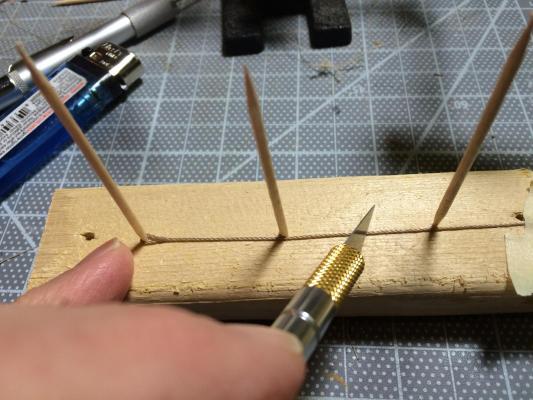
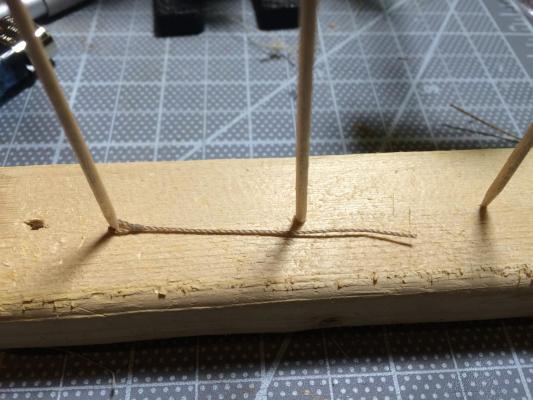
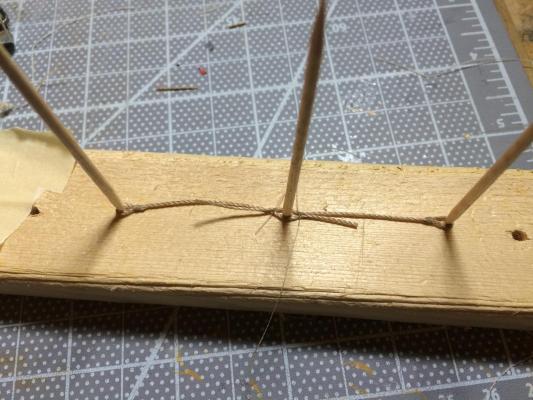
The cannon breech lines represent the first ropework, and it's taken me awhile to get comfortable with this skill at any level. It's completely different form the woodwork, which I've really come to enjoy. But I am getting comfortable, finally. The trick was making the breech lines uniform, and I spent a lot of time screwing up before I figured out an incredibly simple jig to help. The first complexity is that I decided to make the style that has an eye spliced into the center to fit over the cannon breech. I know it's also traditional to simply loop the line over the breech itself, which would have made this process easier. But I wasn't confident in my ability to get the line to run nicely when placing the cannons. I thought this style of breech line might be harder to create but easier to secure in place. After making a breech line that satisfied me, I spread it out on a small piece of scrap wood and "pinned" it down by drilling small holes into the wood at the location of each splice in the rope, and then holding it with toothpicks. So the jig ended up looking like this. Then I went about putting a splice into the end of prepped thread that would become the first half of the new breech line. I pinned down that part of the line as shown below and then cut it off at more than half-way beyond the center point of the jig. The I did the same with the other side of the new breech line. With both sides pinned to the jig, I temporarily tied off the next splice points at the center. Then I took it out of the jig and whipped each of the center splices. The result is a set of six uniform breech lines that, by the time I was done, took about 25 minutes apiece to make.


- 164 replies
-
- 5
-

-
- model shipways
- armed virginia sloop
- (and 2 more)
-
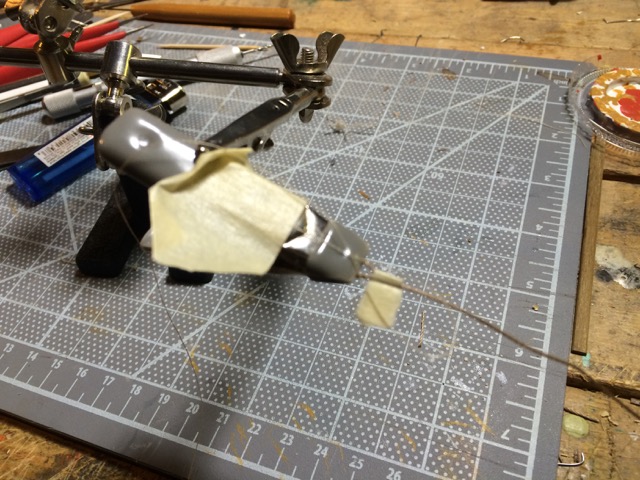
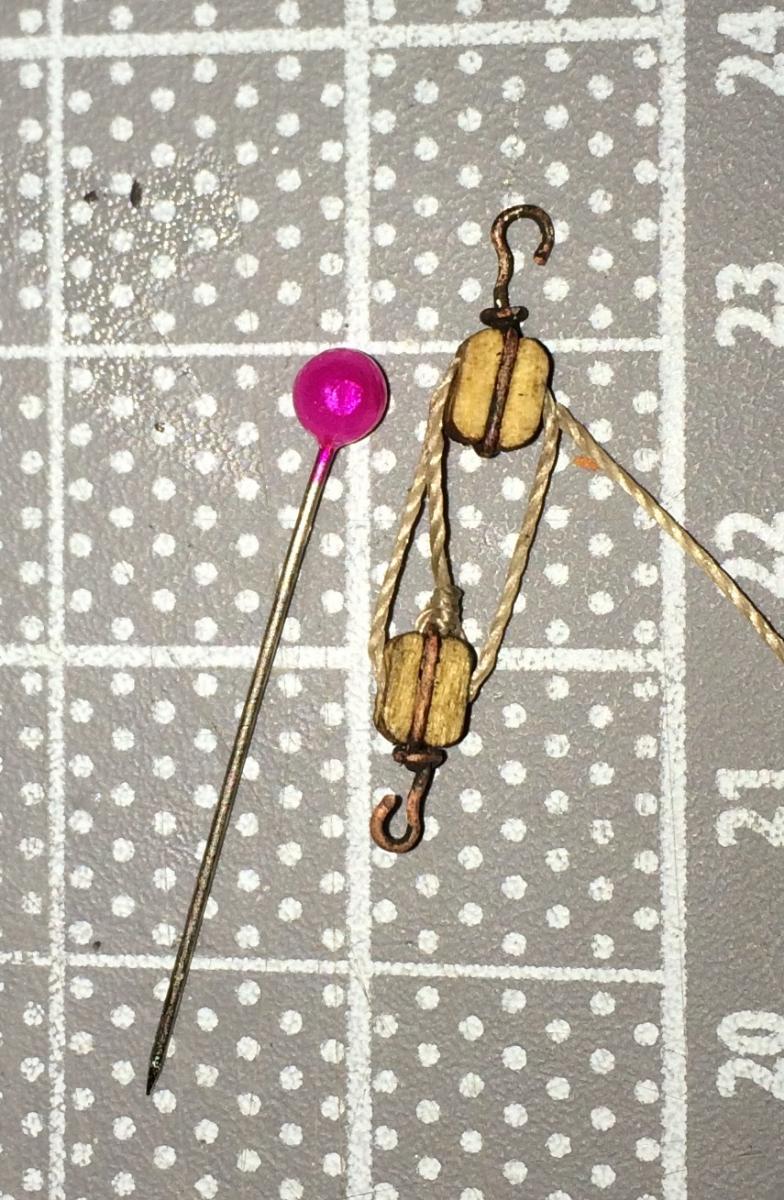
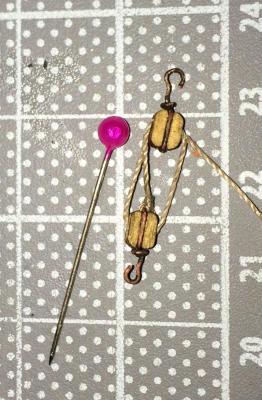
Self-employment and having one hobby too many has kept me largely out of the workshop. But I have been working on the block and tackle for the cannons. I'm pleased with the way the first set has come out. I put clear Danish Oil on the blocks, which yellowed them to just about the shade of the varnished blocks on the tall ship I got to crew on as a kid. I plan to use rope strops for the rigging blocks – having iron-stropped blocks flying around aloft wouldn't be so desirable. But I thought iron could logically be used for the cannon, so it gave me a chance to try working with wire. It's 22 gauge alloy - I don't know what base metal – from the craft store. I like the way it blackened and am pleased with the results. I bent the hooks with my new round-nose jewelry pliers. I was also happy with the first shot at the ropework. I'm struggling to imagine how I'm going to build flemish coils on the deck without making a mess of things. I've practiced some coils, twirling them on an index card, with acceptable results. Lot's of room to improve though. But I'm not sure how to coil them in this application - on the deck? Or in advance and hope I can get the placement right. I'm also not at all satisfied with the workability of the line. My process is to singe off any loose threads, then run it through mineral spirits, then give it a good coat of beeswax. It looks great, and is more workable than off-the-spool. But not as workable as I'd like. Do I just need to recalibrate my expectations, or does anyone have a suggestion for a different way to prep the line? The big disappointment came when I rigged the blocks. They are not the right scale; they're too big. I used the correct blocks from those supplied in the kit. But I'm now waiting to get some smaller ones by mail. I'm feeling in need of a success, so this weekend, I'll handle some of the other details from Page 3 of the plans. I still have to do the mounted guns, the anchors and all the cleats. That should keep me busy enough.

- 164 replies
-
- 3
-
-
- model shipways
- armed virginia sloop
- (and 2 more)
-
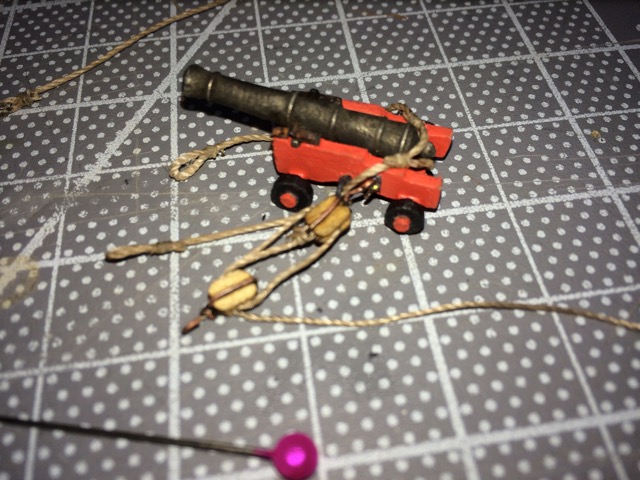
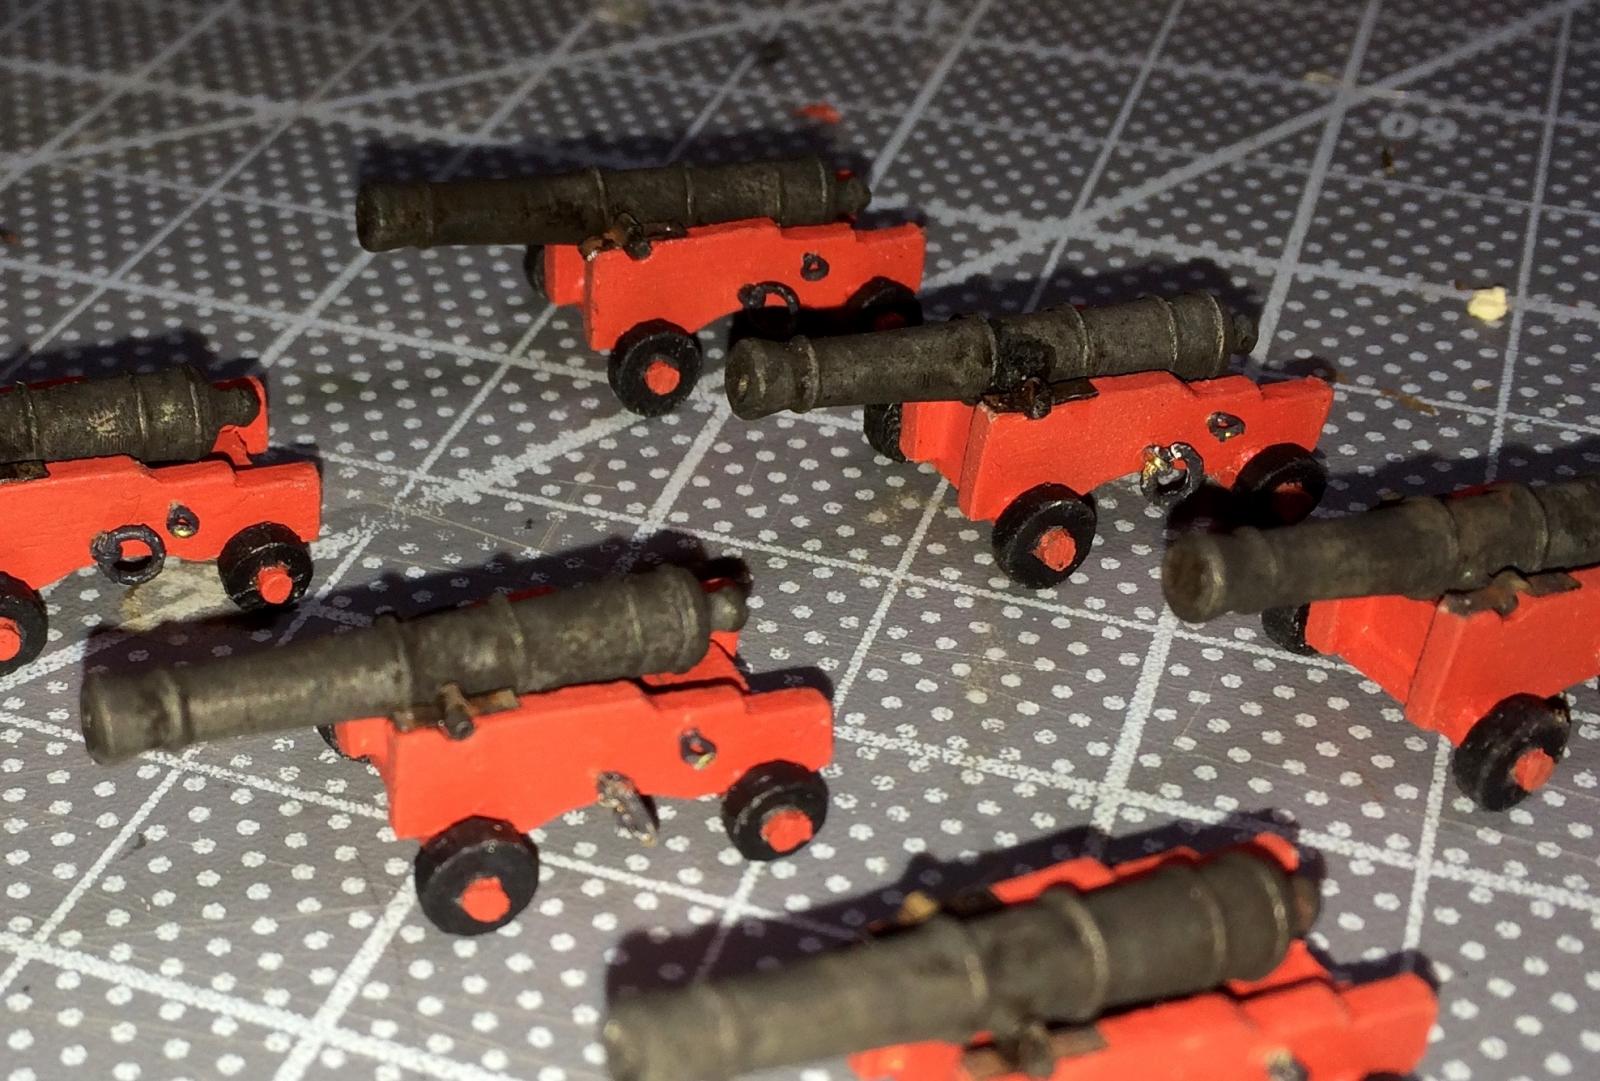
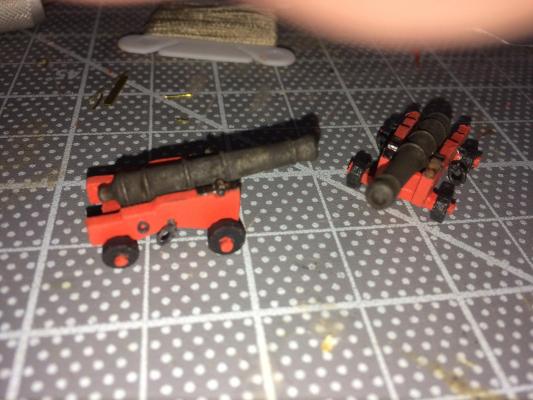
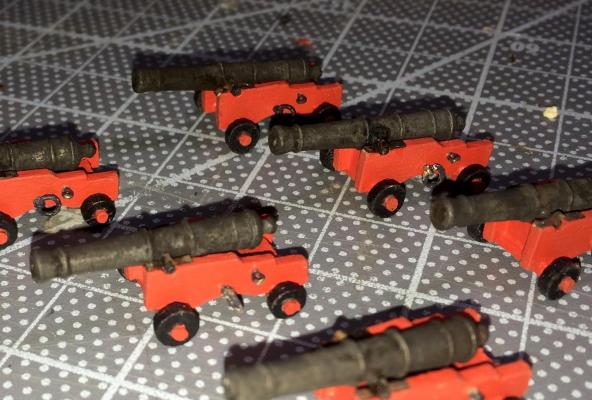
Here's a closeup of a couple cannons after final touchup. I'll start rigging them next.
- 164 replies
-
- 5
-
-
- model shipways
- armed virginia sloop
- (and 2 more)
-
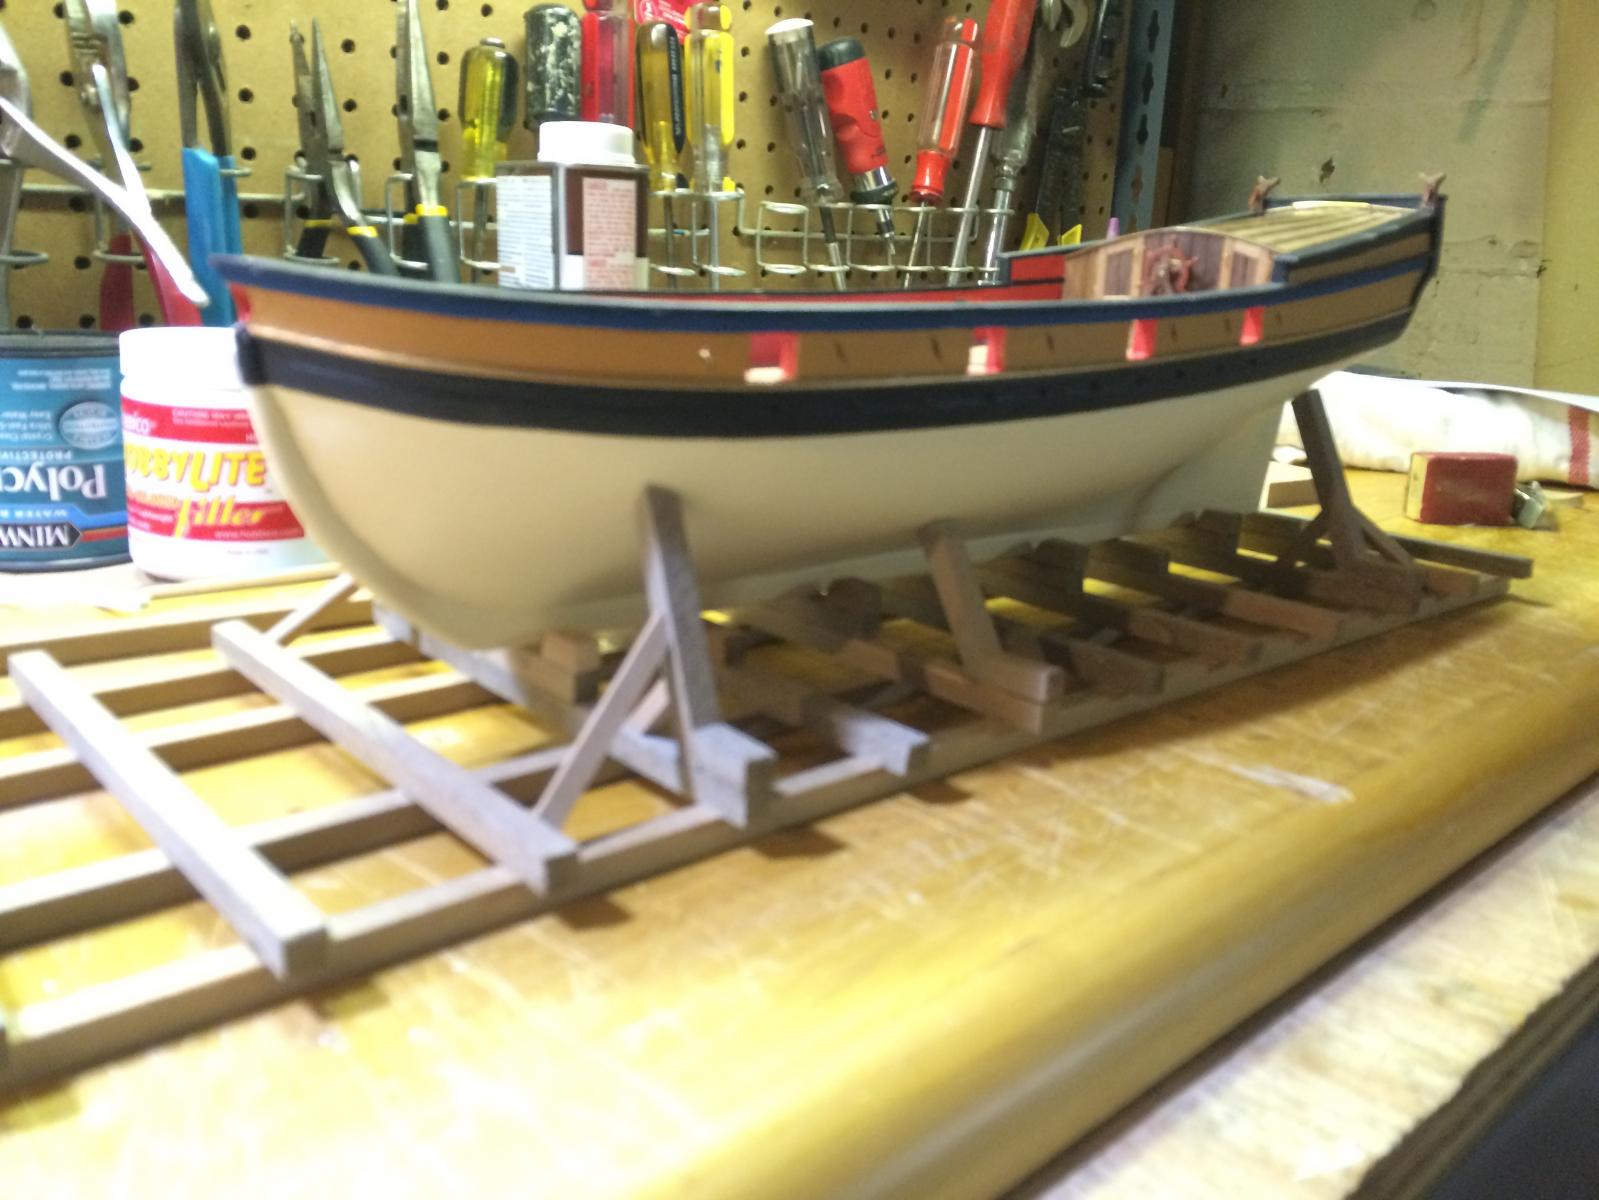
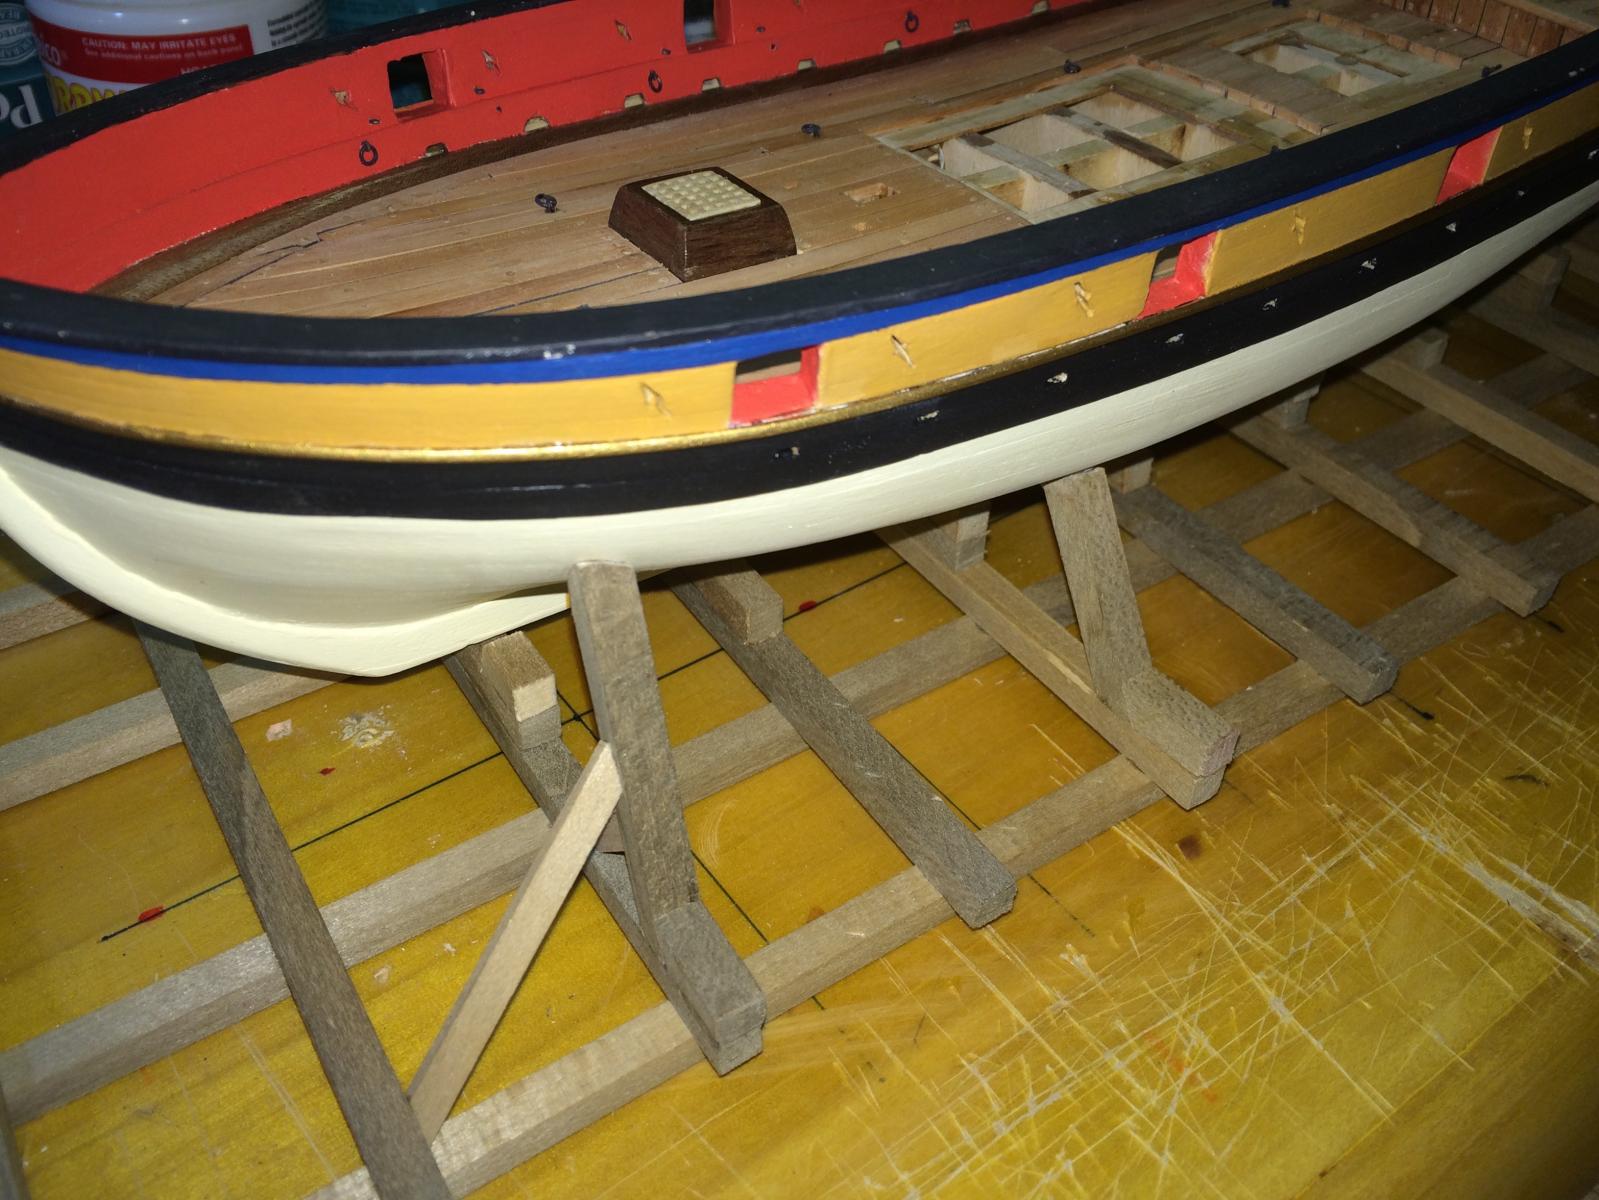
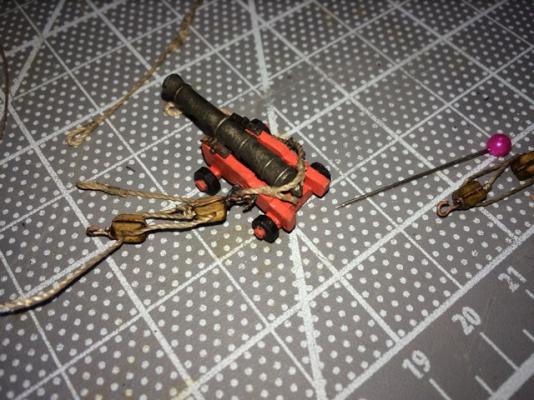
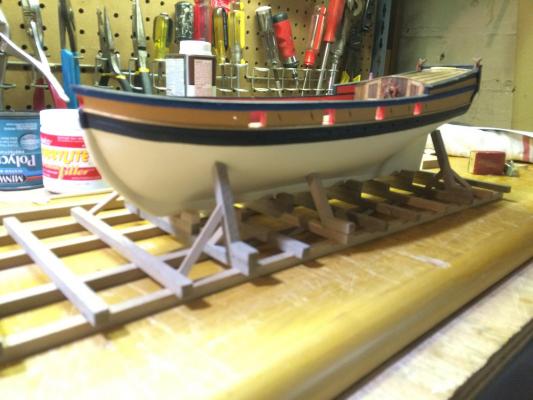
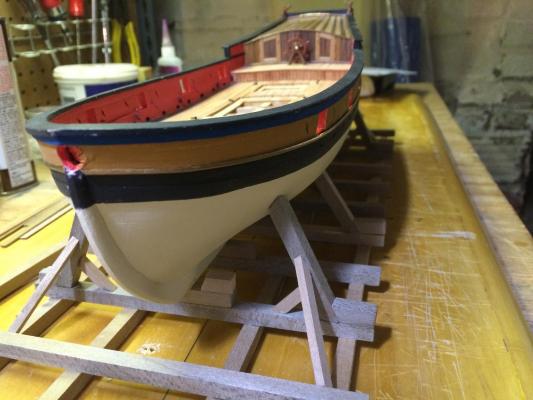
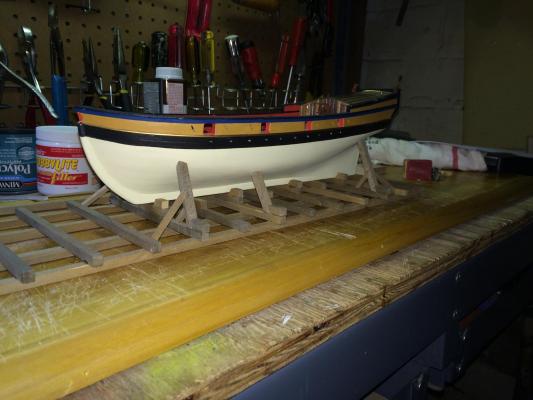
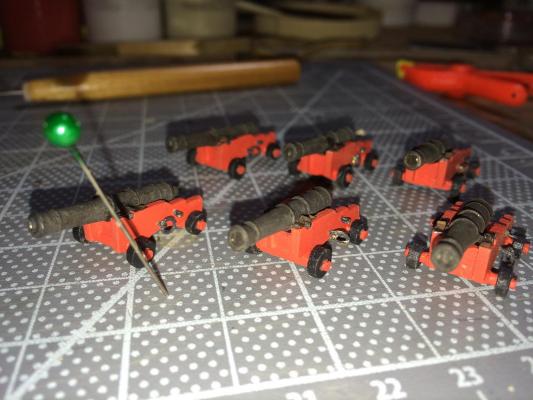
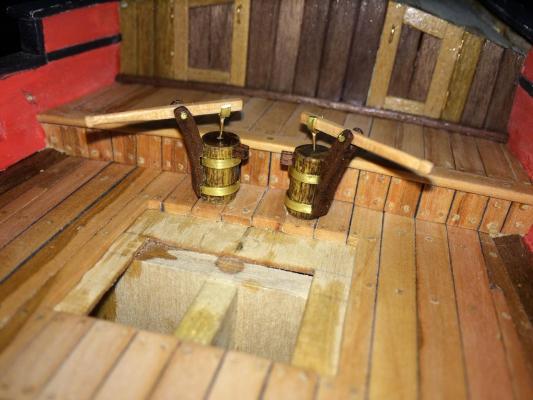
I've been working on 3 things simultaneously: 1) Painting the hull 2) The display stand 3) Cannons. The painting is finished except for some touchup on the main rail and other black portions, and one more coat on the bottom. I'm pleased with the result. The gold stripe was a separate piece of wood, which I left a gap for above the wale. I didn't use the gold that came with the standard paint set because it didn't pop enough from the ochre section above. Instead, I used some gold leaf paint that's been sitting on the shelf for years. It was so old I struggled to get it open, but when I did, the contents were just fine. I went with the ways-style stand. It's not quite finished here. I still have one hull support to add to each side, and then I'll need to ramp it to bring the waterline to level. But I'll take my time getting to that last step. I aged the wood for the ways with the vinegar/steel wool formula. I'll give it a coat or two of flat tung oil to protect it. The cannons took longer than I might have expected. I blackened them chemically rather than painting, but I'm not honestly sure it's better. The finish is more fragile than paint. I struggled most with the trunnion straps. I started with the brass strip provided in the model but it was both wider and thicker than necessary, and difficult to work with. I experimented with heavy paper and then aluminum foil. I finally settled on pewter foil meant for embossing - available at the art supply store. I used about 1 square inch of the stuff, so I have enough for a couple hundred builds. It worked nicely - easy to cut with a razor blade, easy to bend around the tube I used for a form, and considerably thicker than aluminum foil, so it doesn't wrinkle and looks good to scale. I aged it in the same pewter black used on the cannons and the result is just right to my eye. The photo below shows the straps and also the fact that I still had some touchup painting to do on the loops/rings (which resist chemical blackening) and wheels. I took my first stab at rope work with a breeching line. I've spliced full-size rope and whipped/seized hundreds of rope ends and splices. But I learned that I'm not at all set up yet for this work at such a small scale. My first attempt didn't get far. I'm headed back to Youtube to take a good look at how people manage to do the work of 3 hands in such a small space. I'll probably not think about it again for a few days.
- 164 replies
-
- 7
-
-
- model shipways
- armed virginia sloop
- (and 2 more)
-
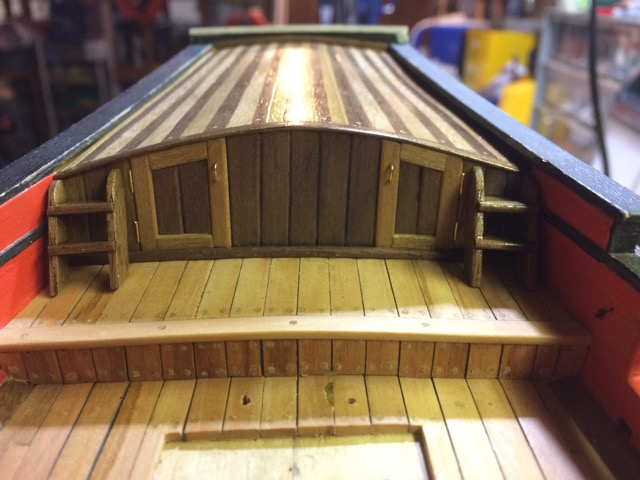
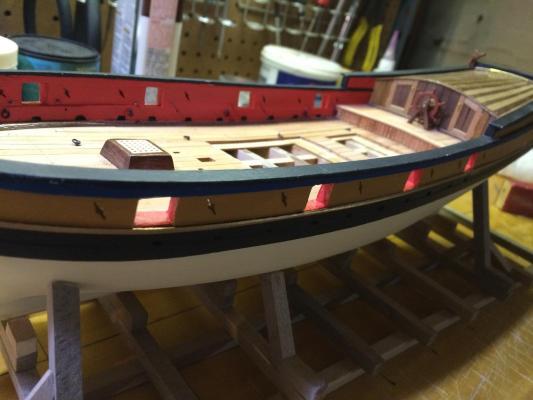
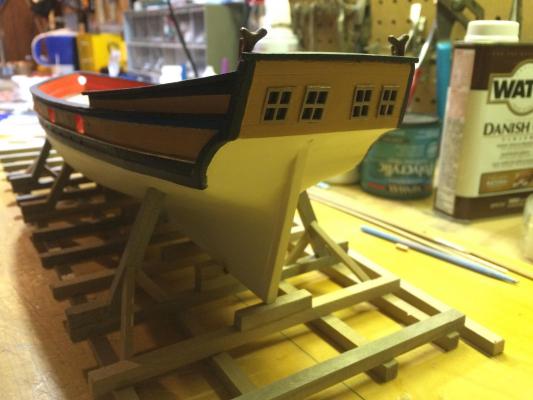
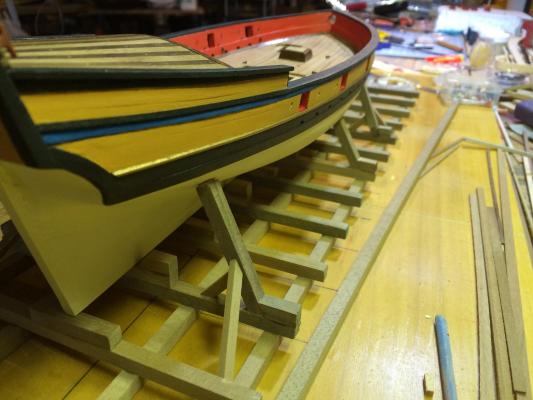
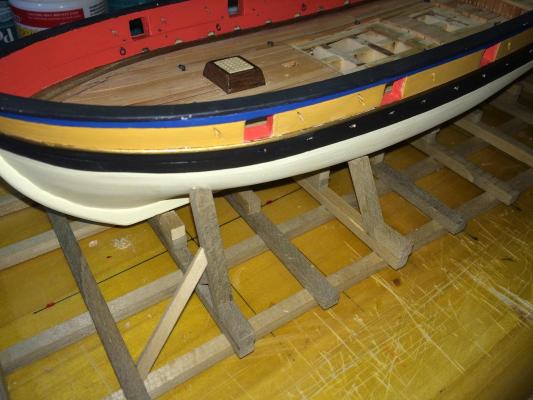
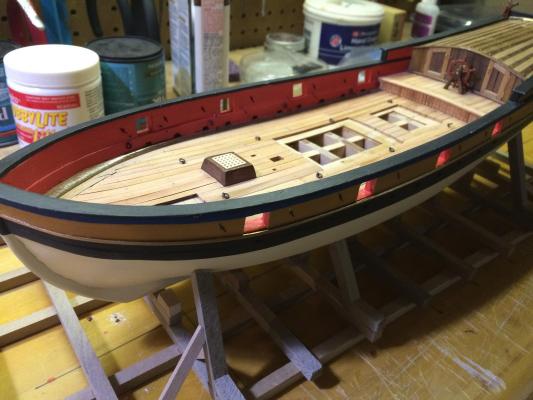
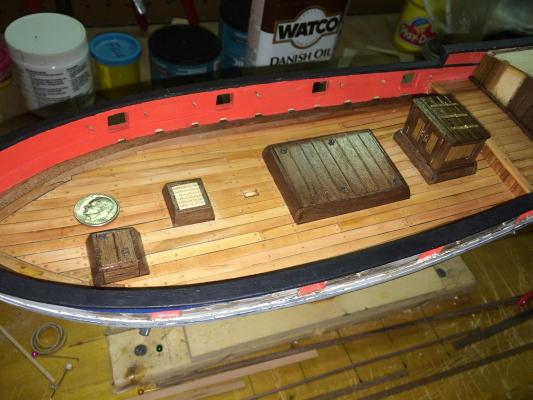
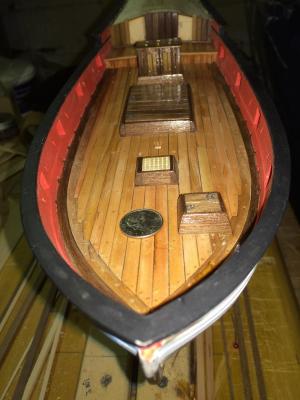
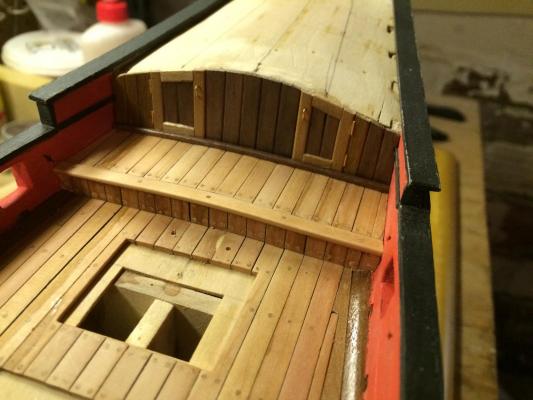
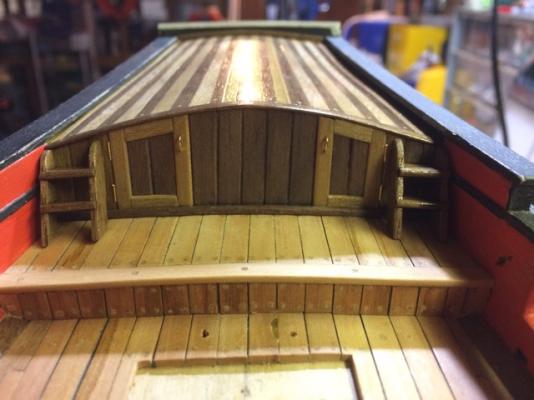
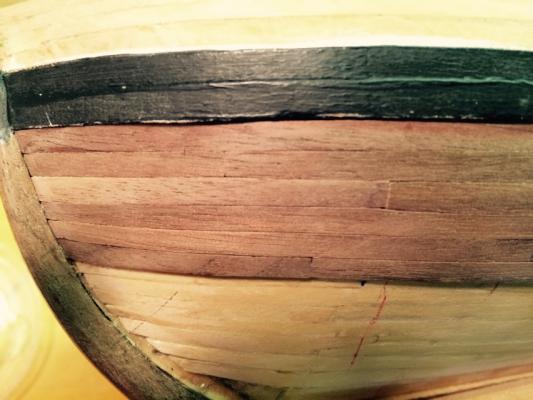
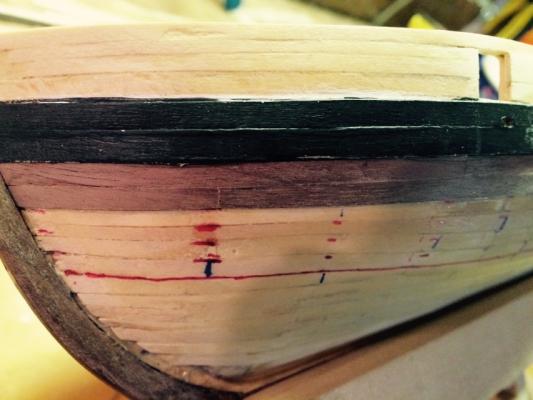
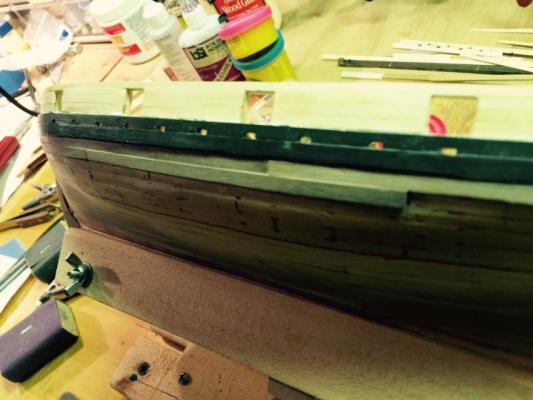
Finished with the deck and now working on the other details from Sheet 3 of the plans – binnacle, rudder, steering wheel, timberheads, etc. At the same time, I'm moving forward with painting the hull. Here's detail of the deck at the bow. I'm pleased with how it came out. The little dark piece at the forward edge of the scuttle hatch came from a different batch of pear wood than the rest of the deck. It's much less visible to the naked eye. The yellow spot just forward of that is I don't know what; can't even see it in real life. The deck is finished with Watco Danish Oil. I've never used it before but am looking for excuses to use it again. It's so easy and so pretty. Here are some other views of the deck. The galley hatch is glued into place, but all of the other items are just placed for the photo and aren't yet affixed. Some of my coamings are a bit larger than spec; it's going to be crowded back behind the companionway where the bilge pumps go. The bilge pumps are also just placed for the photo. (That's not glue on the deck planks; it's natural grain - exaggerated by the camera.) The cabin top is all walnut; my kit came with stock from 3 different batches – one dark, one yellow and one white. I intended to alternate the dark and yellow – starting from the center and working outboard. But I committed a rookie error; I didn't have enough yellow (which was really pulpy and unpleasant to work with anyway. So I switched to white. What I didn't realize until too late is that splitting the centerline with a yellow-and-dark pair (rather than placing a yellow plank on centerline) resulted in the pattern shifting to the right. So the whole thing looks off-center by one. It's going to bother me for eternity. And I mention it here only because I know what eagle eyes everyone has here. So yeah, I know. Otherwise, I'm calling it a win. My heart wanted to finish the cabin top with varnish; my paintbrushes convinced me to go with water-soluble polyurethane. The red bulwarks and black rails have taken a beating from the environment of my workshop and the deck work. I've started giving those a new coat, along with the paint job on the rest of the hull. And I've taken to covering her loosely with plastic wrap to keep the new paint fresh.


- 164 replies
-
- 5
-
-
- model shipways
- armed virginia sloop
- (and 2 more)
-
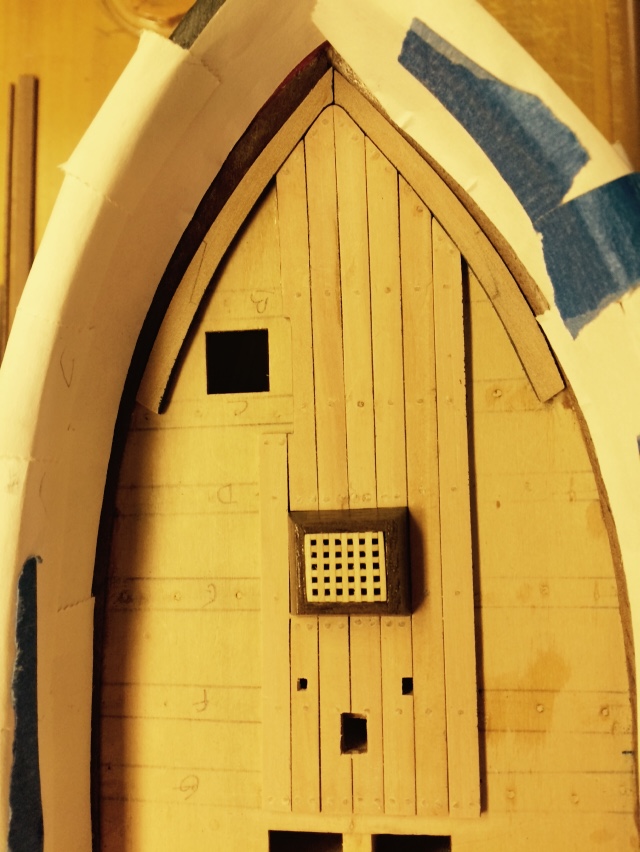
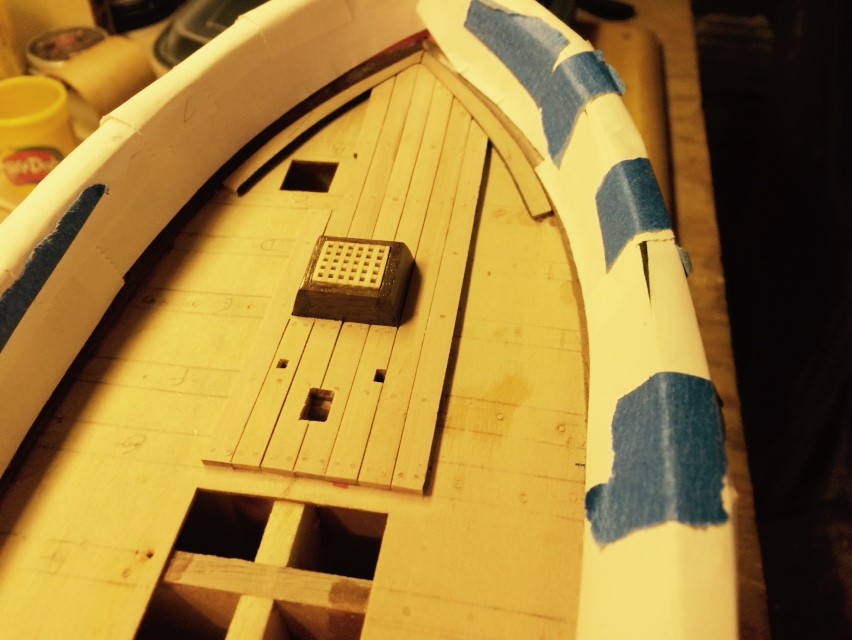
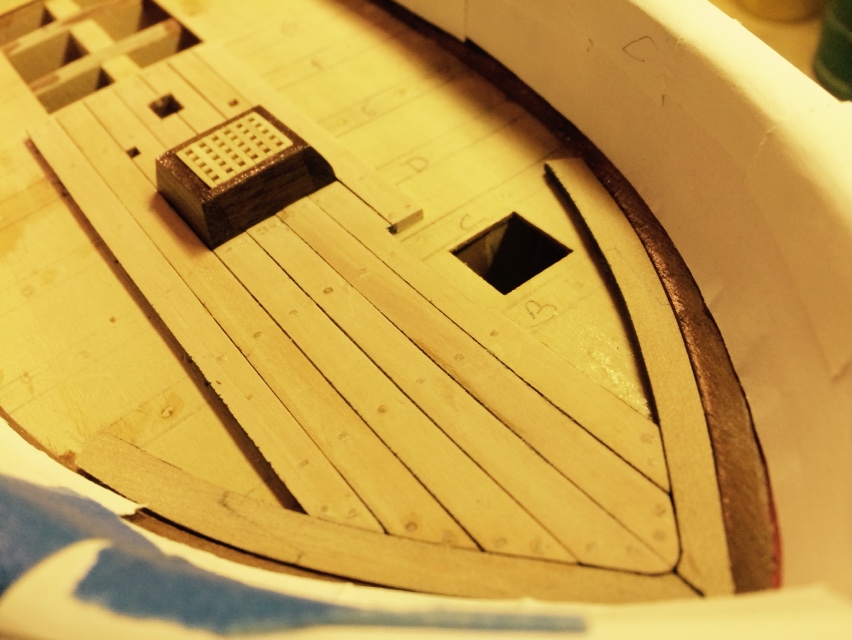
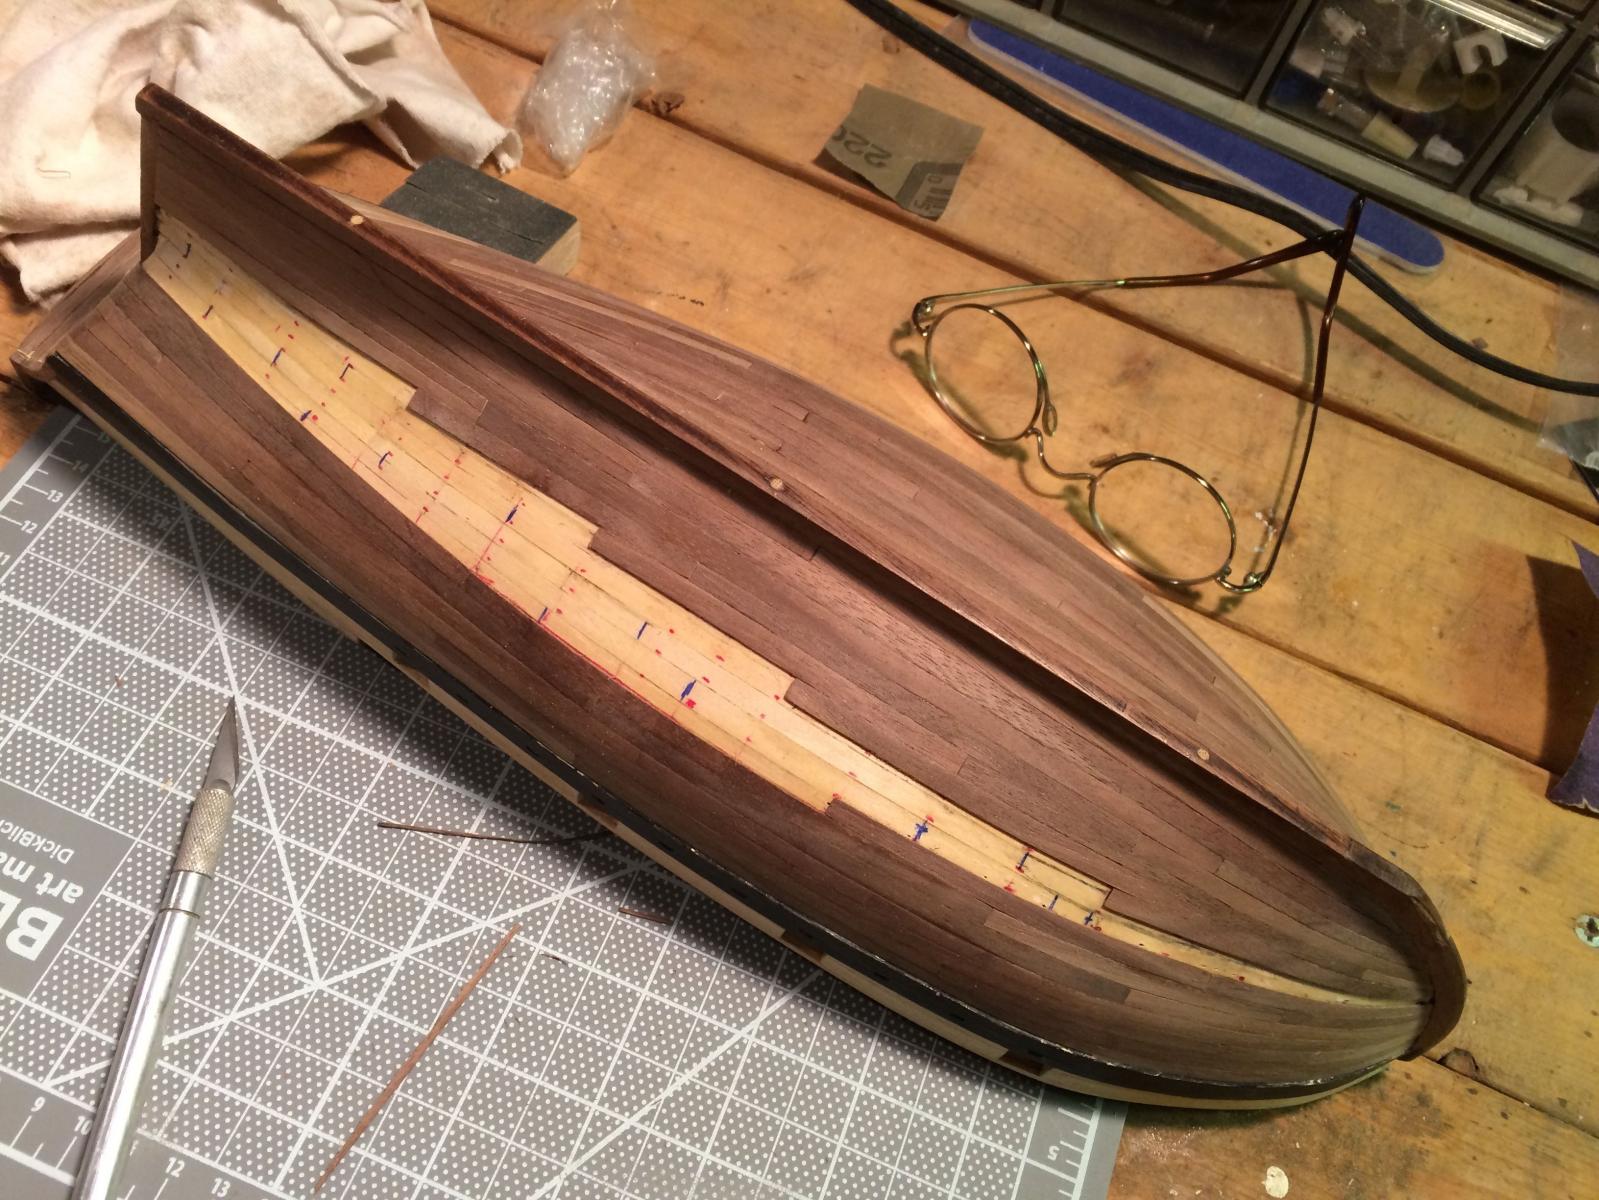
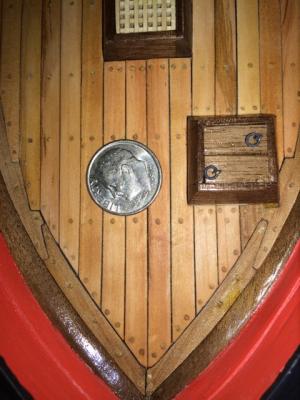
The piece of pear wood I had to order for the nibbing arrived, milled exactly to spec by the Lumberyard and costing just $6. I had ordered pear planking for the deck months ago, but forgot to get a piece wide enough for the nibbing at the bow. So I began planking this week. It's been slow going, but not logistically too difficult. For caulk, I'm going with the simplest method of painting one edge of each plank in black. It gives a bit of a pinstripe look, and I feel like the caulk lines should be a little wider. But that's a lesson I'll apply on my second build. I've got the nibbing fitted at the bow but it's not glued in. I'll cut in a nice joint and work on the next section of nibbing after putting in a couple more planks on each side. The plugs need to start going better. I'm having a hell of a time cutting them off without chiseling up the deck. After the first few planks, I started putting them in before gluing down the plank. That seems to be helping . If anybody is curious about pear wood, it's really nice to work with. It's hard and holds an edge beautifully. It also has a really tight grain so you don't get any of those cavities or splinters like walnut. But it also cuts pretty easily for hardwood. And its got a bit of a gray tone that makes it a pretty good facsimile for teak. (I realize they probably didn't use teak on boats of this era; they would have used something easily found in North America. But to me, a wood deck is a teak deck.)


- 164 replies
-
- 5
-
-
- model shipways
- armed virginia sloop
- (and 2 more)
-
Thanks Brian. Very helpful.
-
Brian, do you blacken the brass yourself or do you buy it? If you do it yourself, what do you use? Because the hardware that holds the cannons ought to be iron. I don't think brass would be strong enough.
-
You're too quick for me up there is Saskatoon. I was uploading the pictures as your wrote. But thanks for hanging on my every word.
- 164 replies
-
- 1
-
-
- model shipways
- armed virginia sloop
- (and 2 more)
-
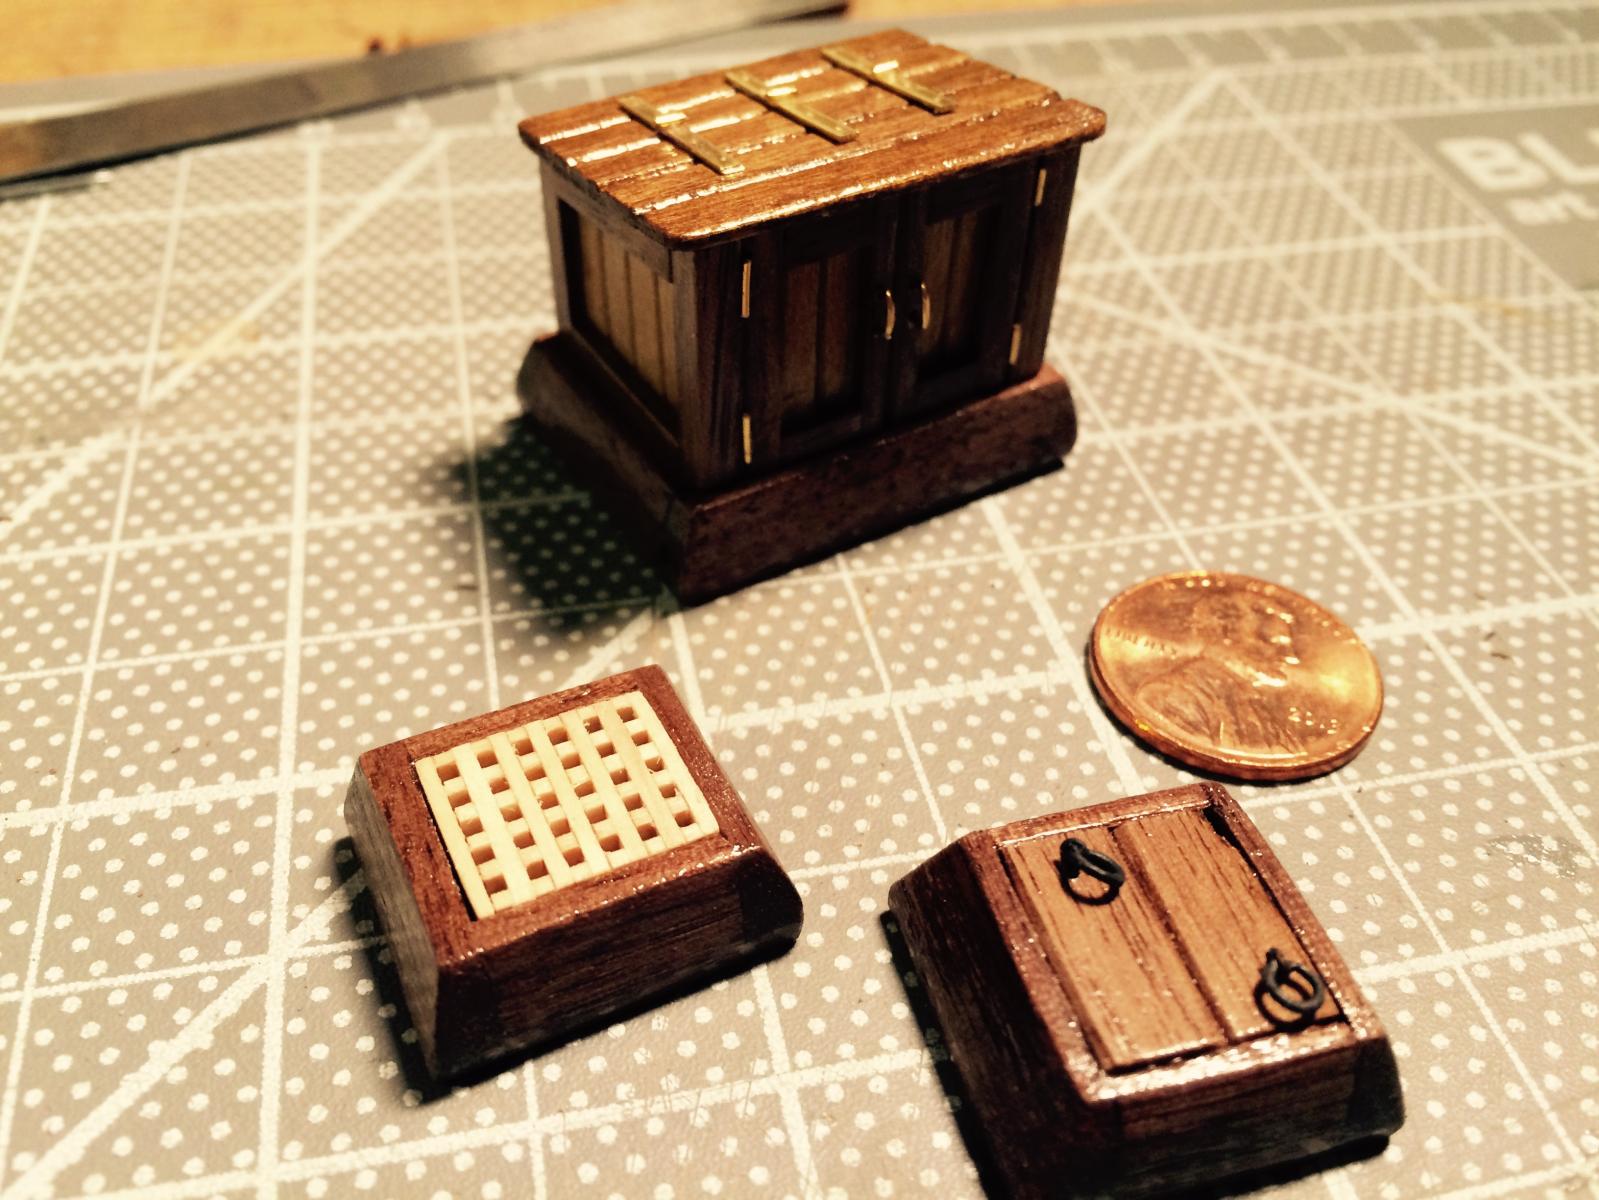
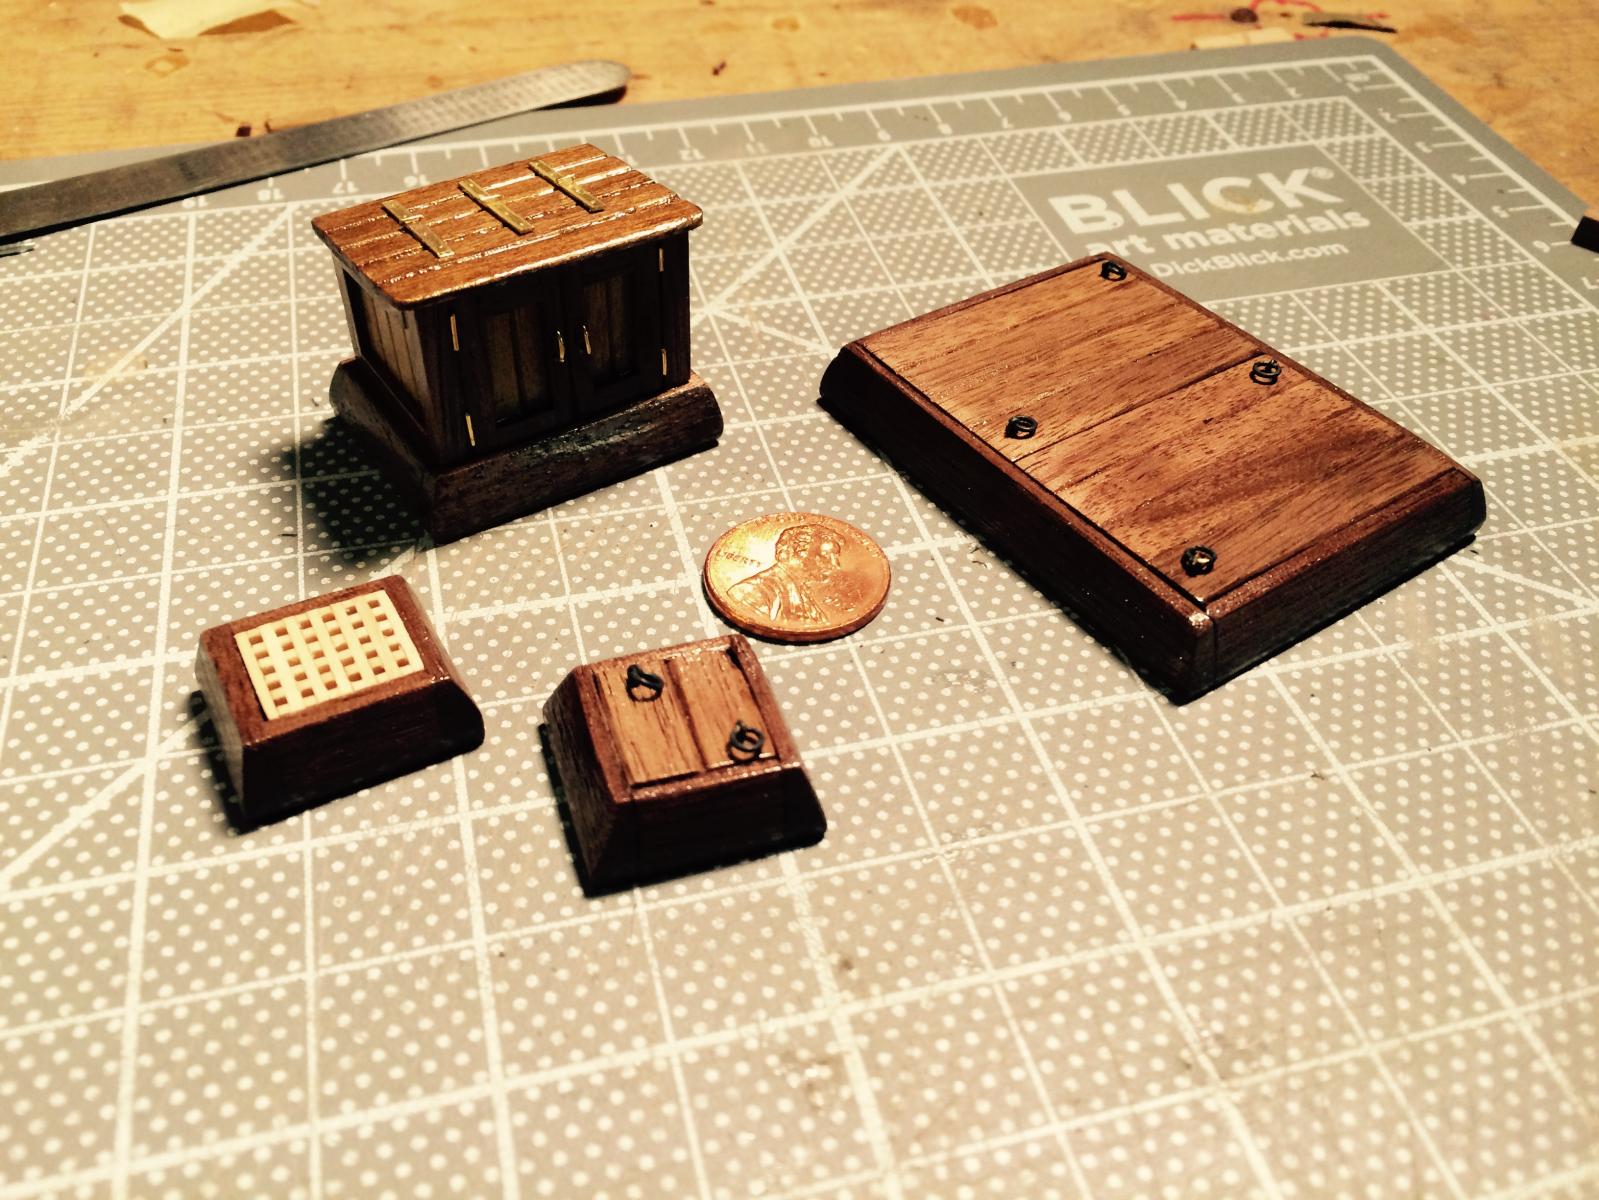
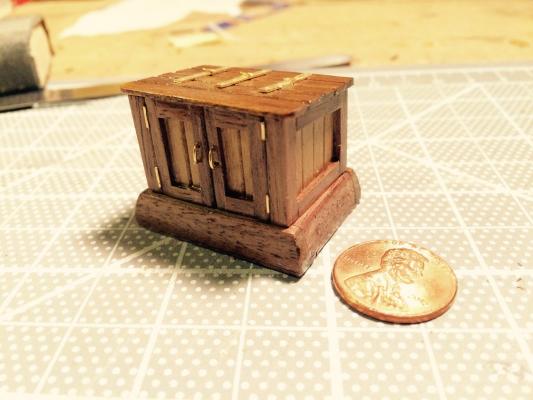
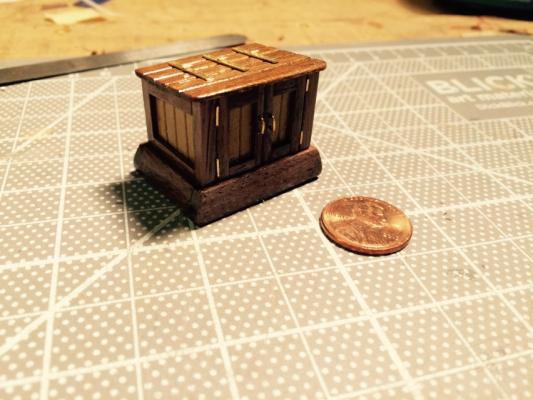
Here's the rest of my deck furniture. The main cabin hatch looks so simple in the drawings; but what a bugger. I had to rebuild various parts of it several times before I was happy with it. Of course I still see all the imperfections, but I'm proud of the way it came out. I had a bad piece of walnut, which I needed to use when I rebuilt the coaming (the original somehow came out a little too small). The grain is really large and rough – more so than on the other coamings – and it gave me fits. But I think it will be fine once installed. I followed the lead of a couple other folks here, and painted the brass handles for the cargo hatch and scuttle to look like iron. I like the effect, but I also really like the brass look. So I have mixed metals on the hardware. I wish I'd stuck with all brass, but I'm going to leave it like this. That chip in the corner of the scuttle was a bad piece of grain that decided to give up and fall off at the very end of my work. I'll probably go back and replace it before all is said and done. I've been going at this pretty heavily the last few weeks. I'm going to take a little bit of a break. I'm waiting for a piece of pear wood that I needed for the nibbing on the deck. When it arrives, I'll slowly make my way into planking the deck.


- 164 replies
-
- 3
-
-
- model shipways
- armed virginia sloop
- (and 2 more)
-
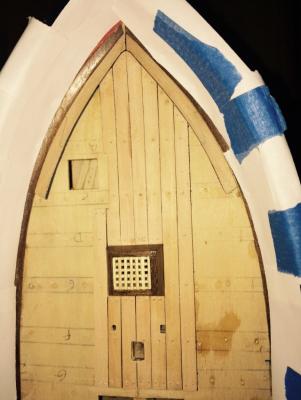
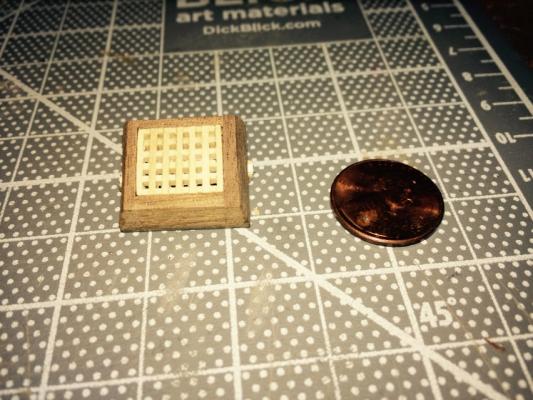
I consider myself fortunate only now for the experience when I was a kid of having to clean and oil several teak grates like this on an old wooden boat. It was not a fun job; each square hole had to be chemically cleaned using a bottle brush, and then oiled. It took most of a hot summer day, but it gave me ample time to get to know the construction - useful now for the first time. 40 years later.
- 164 replies
-
- 1
-
-
- model shipways
- armed virginia sloop
- (and 2 more)
-
It's been a long time since I've posted, but I'm still here and still making progress. I did get lazy with photos, so I don't have much to show. And the boat is pretty unphotogenic at the moment. I finished planking in March, and spent April/May on the ceiling work, main rails, etc. Then I took a cue from Gunther's beautiful build and did some painting - the red ceiling, black rails and ochre/black/blue hull details above the black strake. I regret having taken this step though; the paint is so fragile and the area were I work is in the basement – always dusty and damp at this time of year. So keeping the paint job clean became a full-time job. I should have just gone on to the deck before painting. Right now, it's all masked up to keep the paint safe, so there isn't much to see. The deck will be done with pear wood because of its characteristics – light in color, medium-hard, fine-grained and keeps a good edge. Unfortunately, I need to go back and order some wider strips for the nibbing so the deck is on hold for a couple more weeks. Meanwhile, I've started in on the deck furniture – and have exactly one photo to post: Galley hatch.
- 164 replies
-
- 4
-
-
- model shipways
- armed virginia sloop
- (and 2 more)
-
Very nice. No guns and no sweep holes.
-
She looks beautiful. Congratulations and well done. What's next?
-
Your build continues to look great - including the sweep ports. Nicely done.
- 831 replies
-
- 1
-
-
- Armed Virginia Sloop
- Model Shipways
- (and 1 more)
-
This is one of the longest; perhaps 6". Outside end of what all the literature says would have been realistic. I could be wrong.
- 164 replies
-
- 1
-
-
- model shipways
- armed virginia sloop
- (and 2 more)
-
This is the bugger I had to make 3 times. Cut the first one a little narrow in the middle; sanded the second one a little narrow at one end. Third one fought me all the way. Why? It's one of the easy ones. But it fits like a glove now. Onward.


- 164 replies
-
- 6
-
-
- model shipways
- armed virginia sloop
- (and 2 more)
-
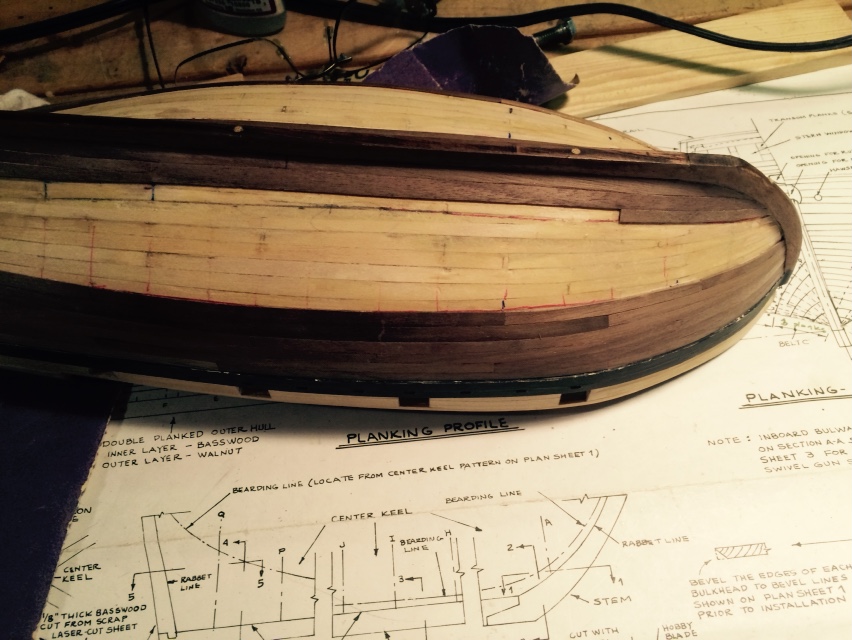
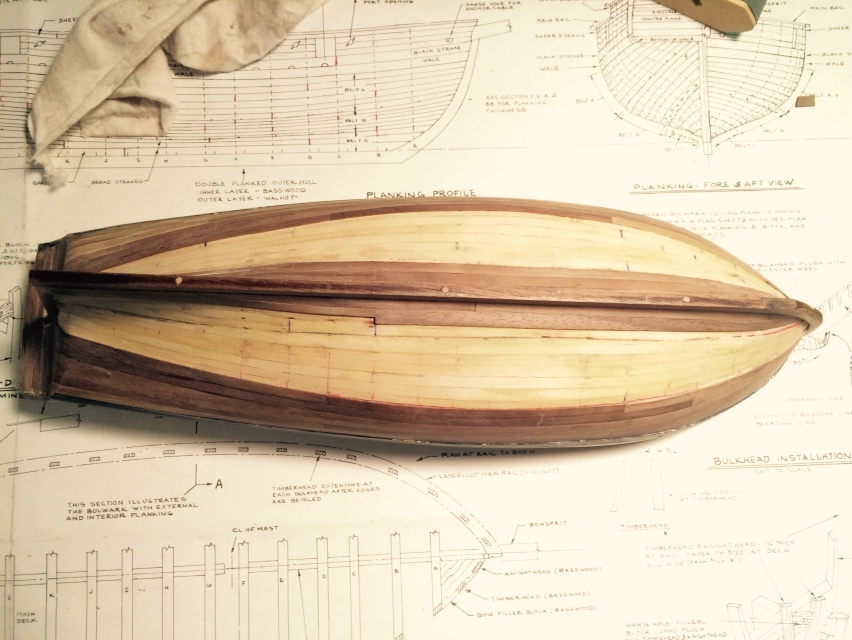
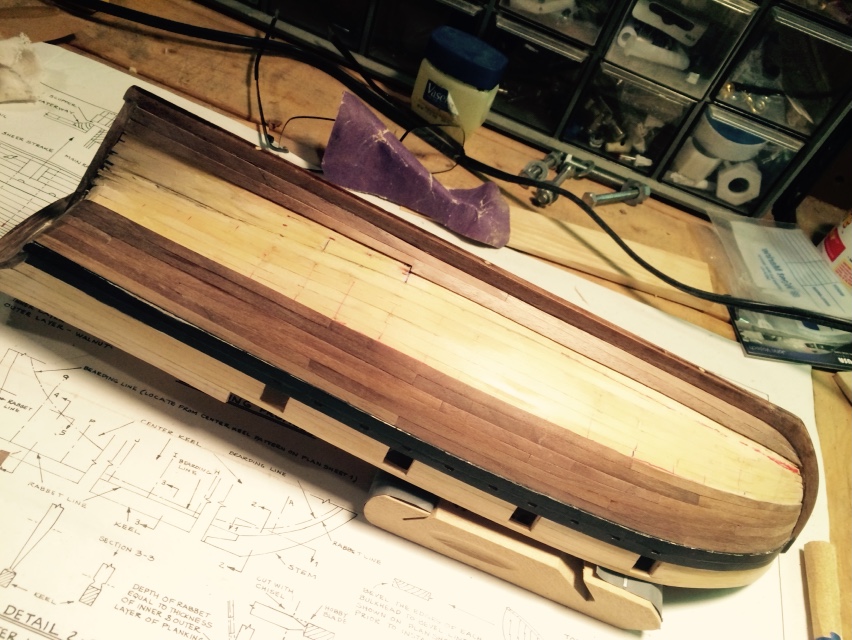
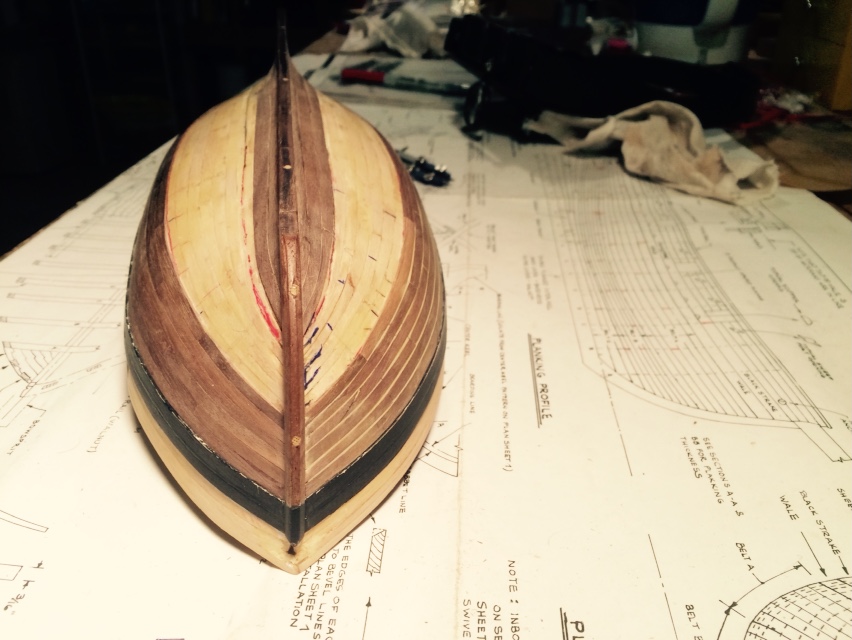
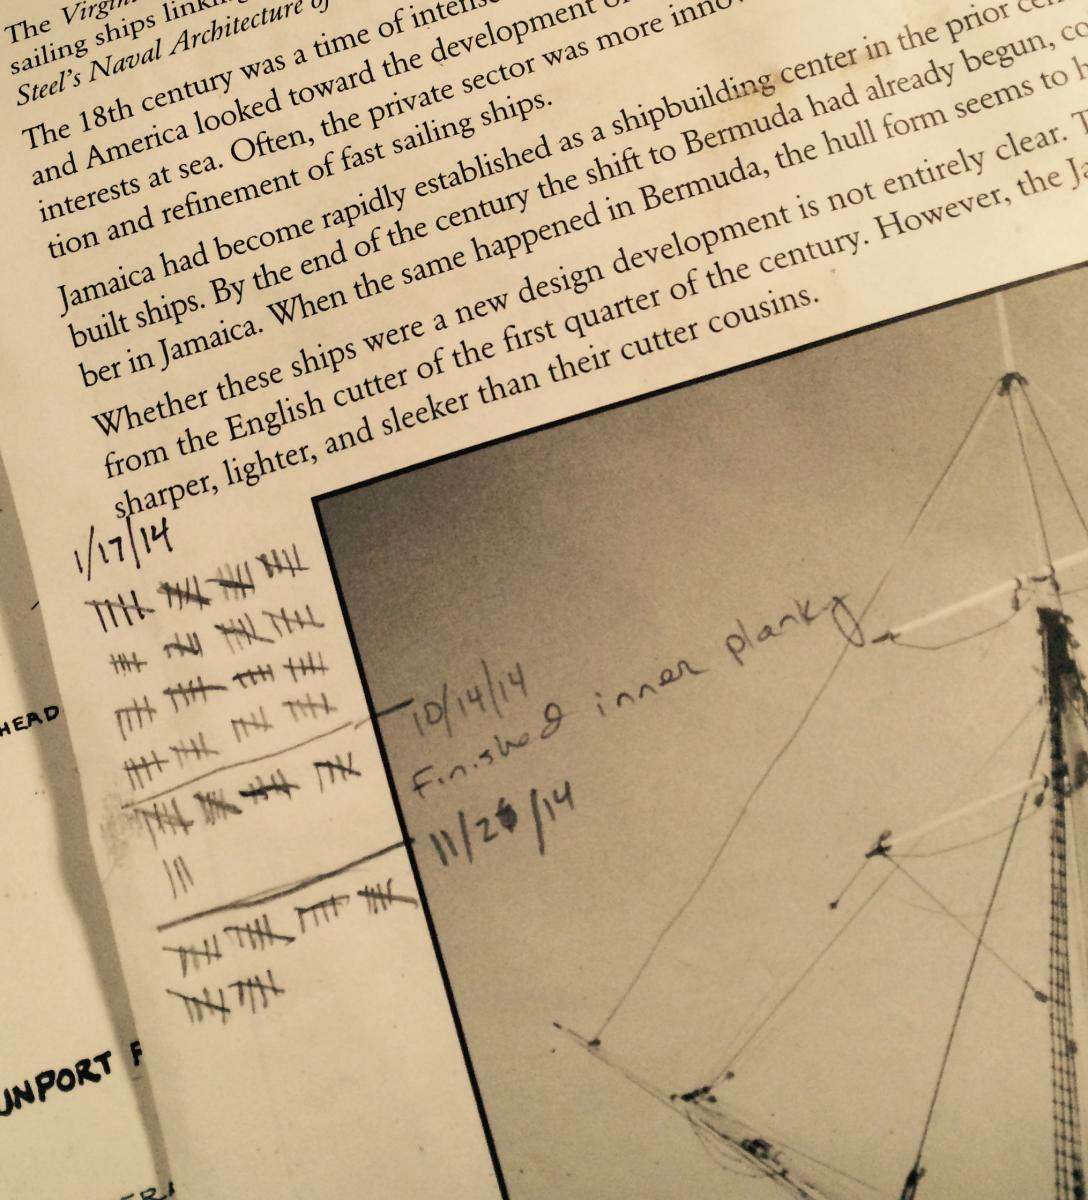
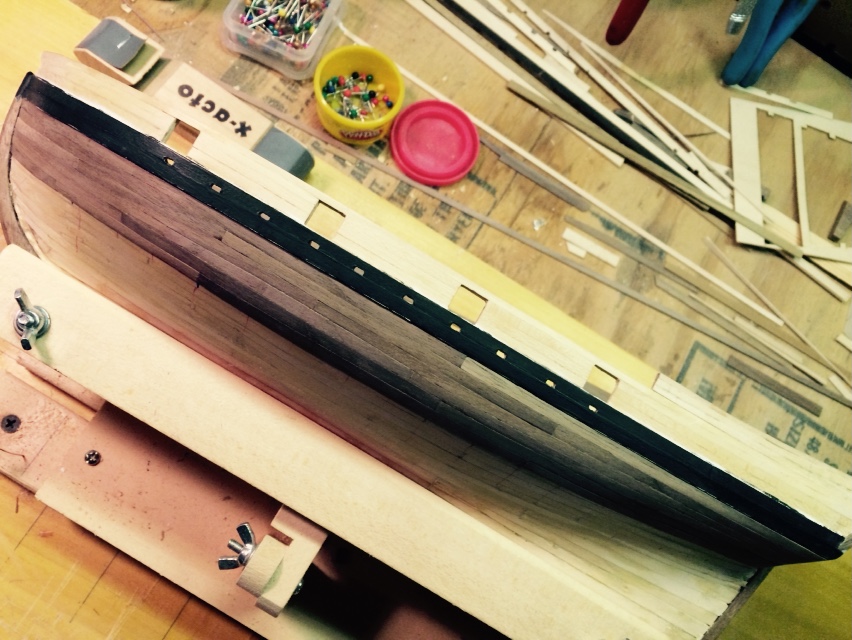
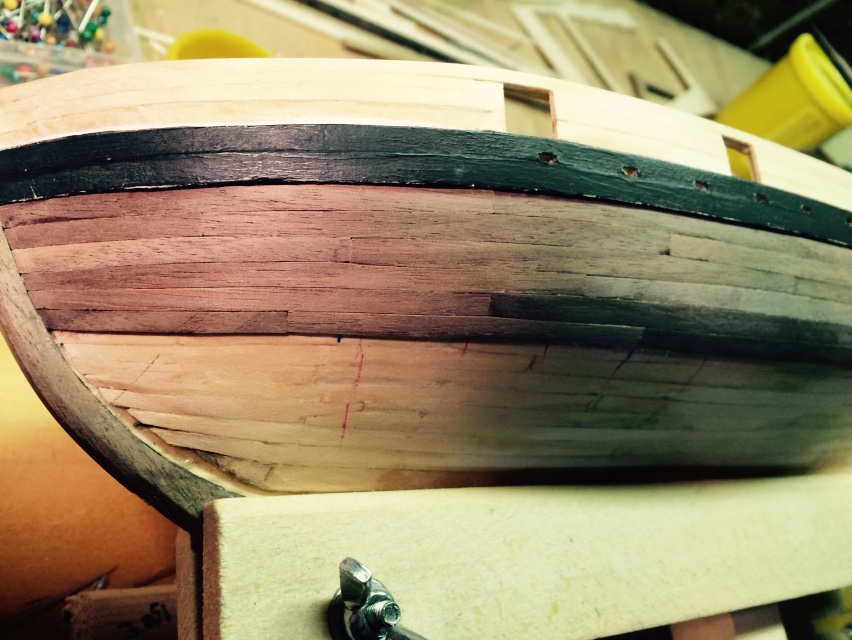
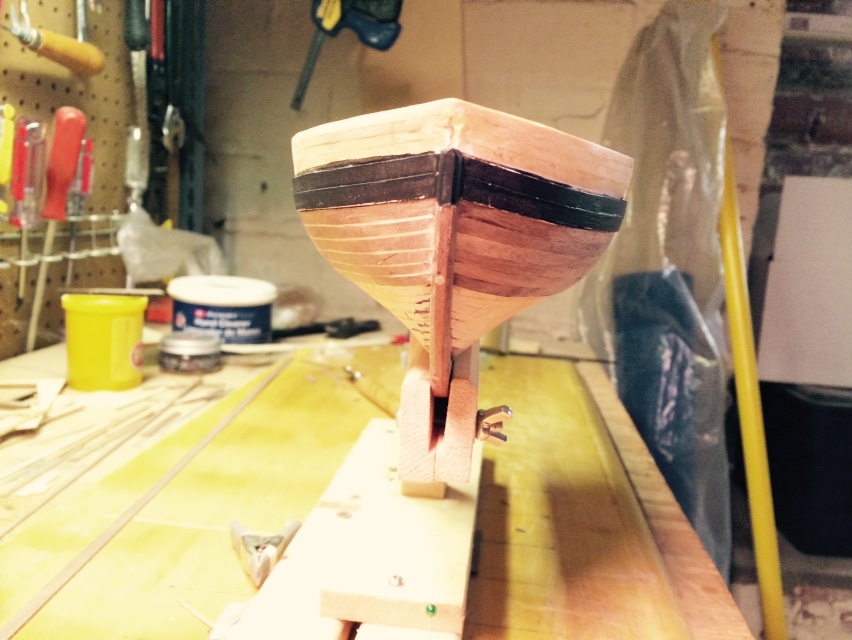
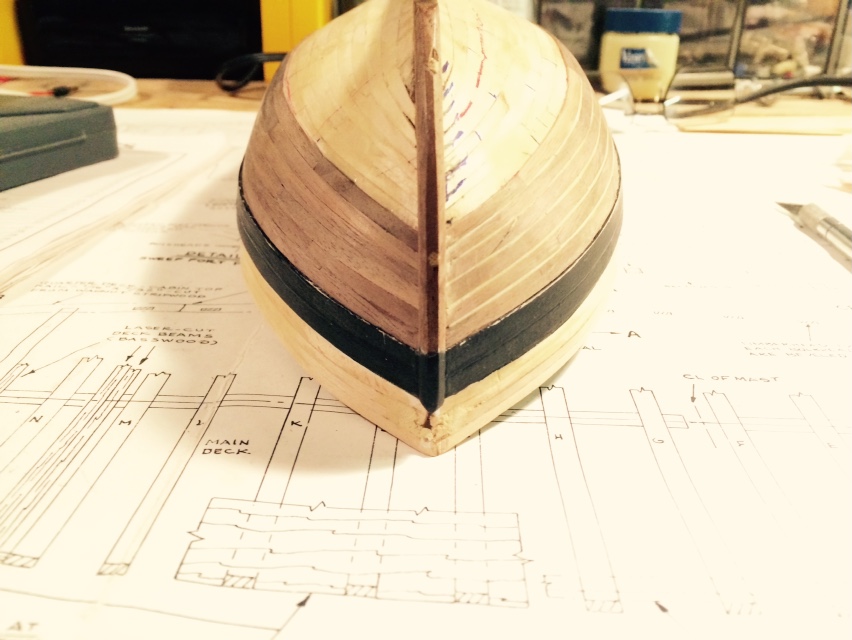
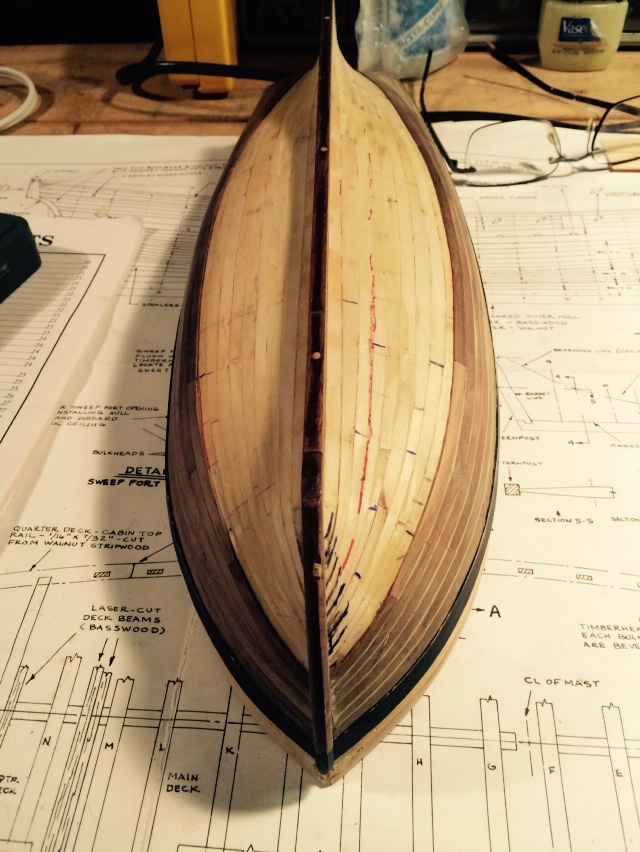
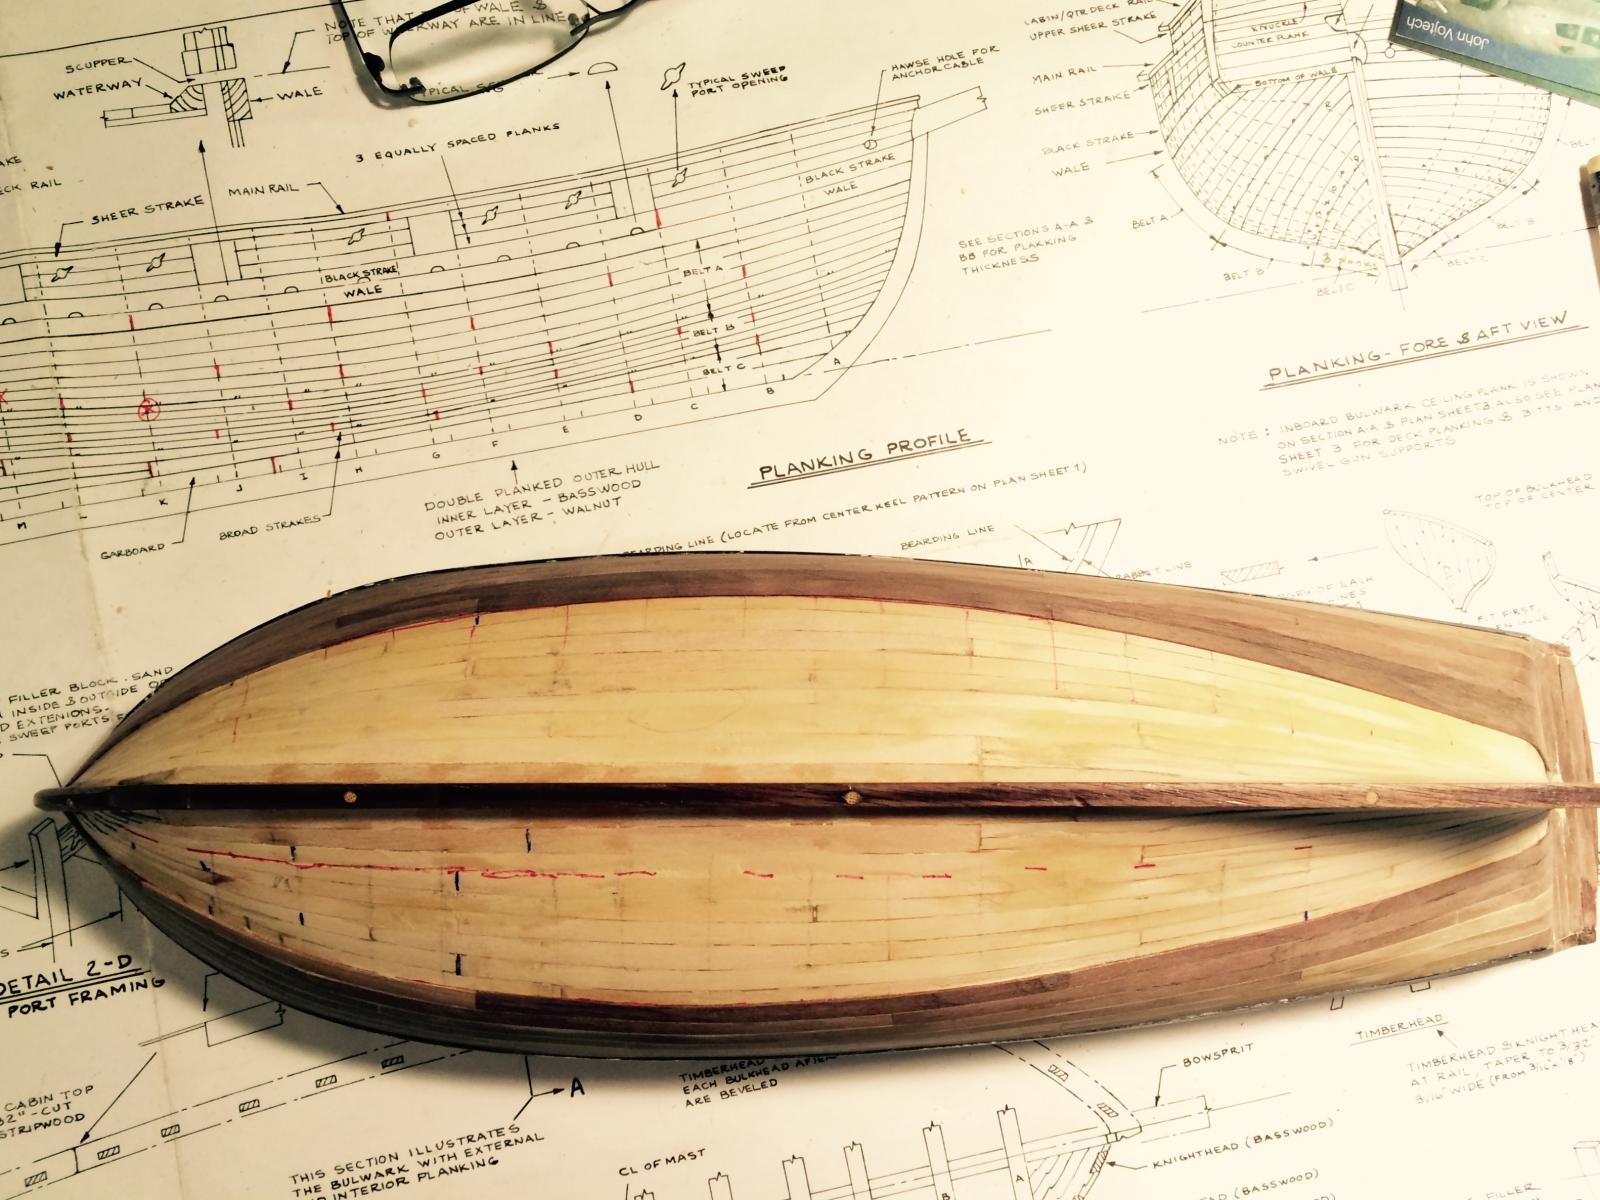
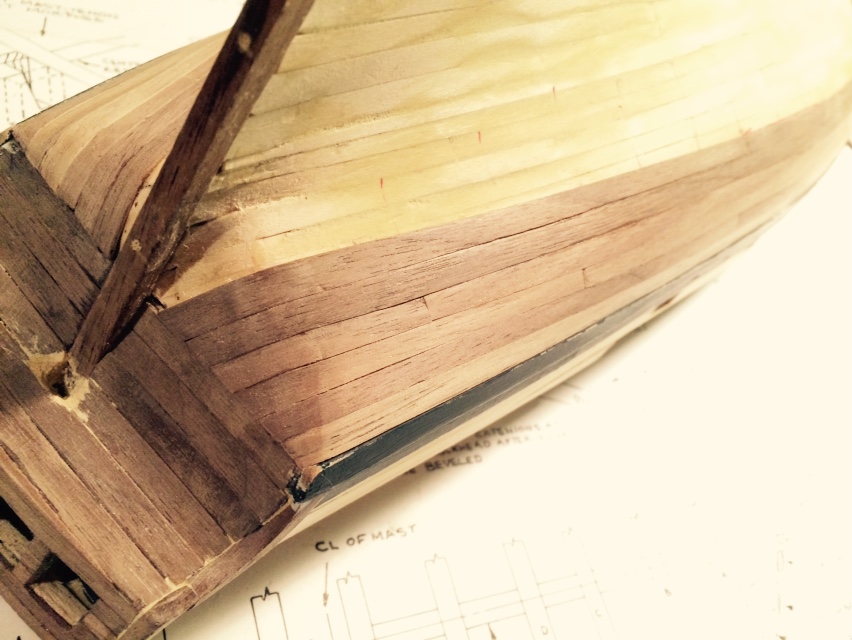
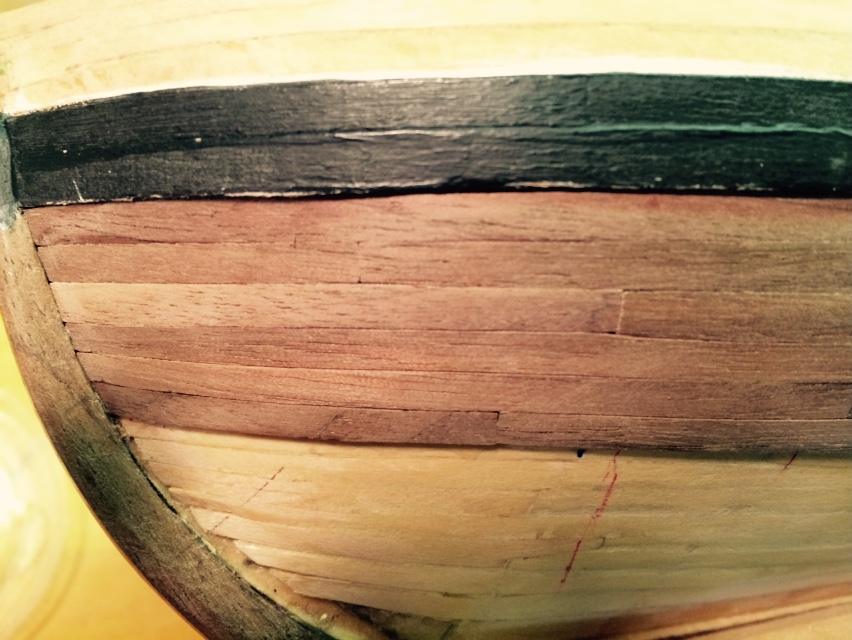
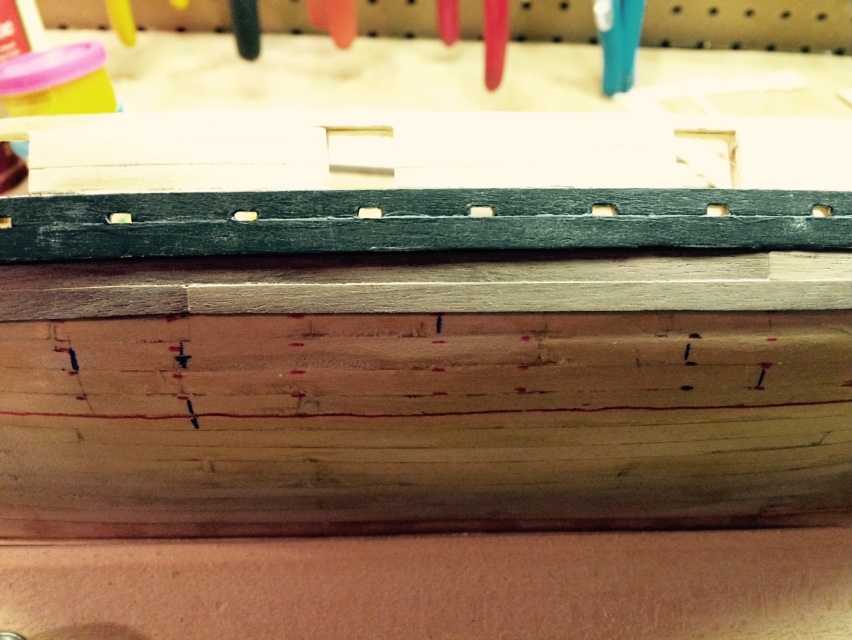
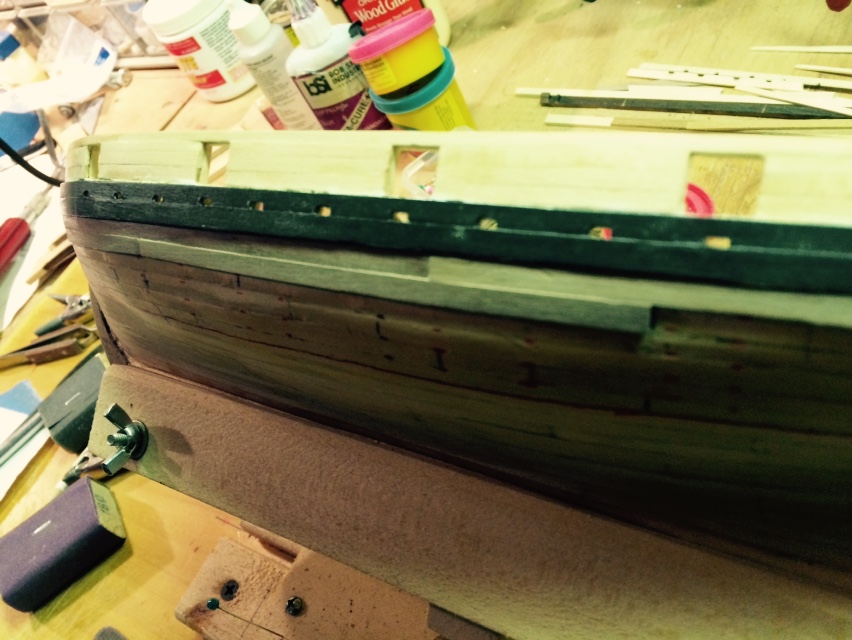
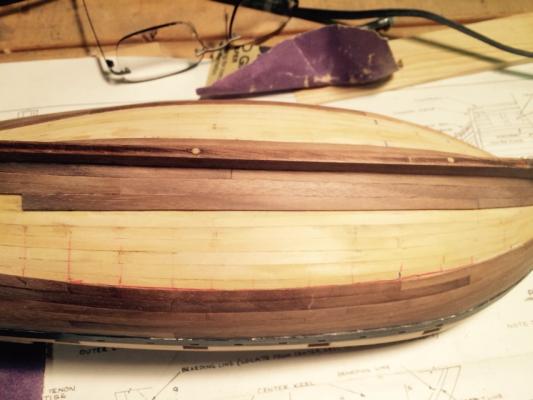
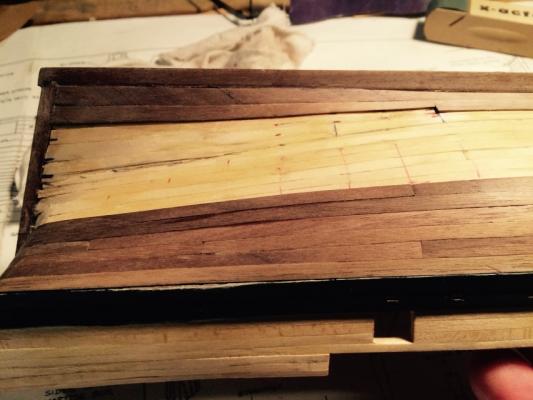
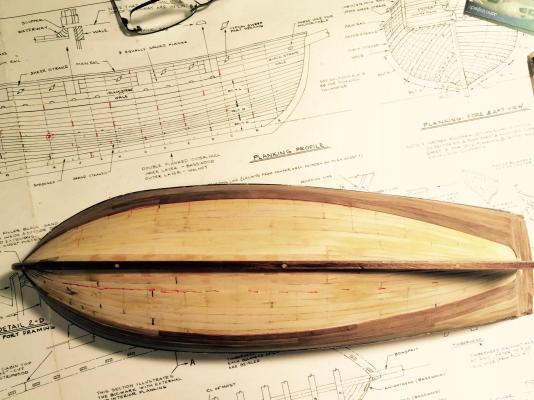
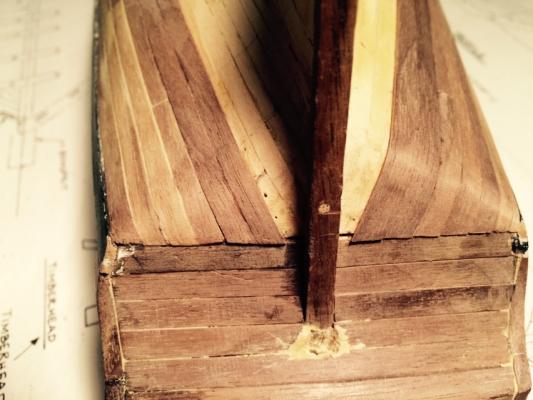
Finished with Belt C on the current wall side (starboard) and half-way through on the port side. (After a lifetime of sailing, I'm suddenly getting confused about port/starboard because I'm always looking at the boat upside down.) There've been a couple little blips here and there, like the strake I cracked while gluing it in – which I opted to keep and sand rather than recreate. But none of these have been of any major consequence since I plan to paint the bottom. I'm a little concerned the unfinished space at the bow will be just a little narrow for all six strakes of Belt B. But I'm confident enough in my improving woodworking that, if need be, I can just go with five strakes at the bow and sneak in a stealer as needed. It may not be necessary; I still have more room for Belt B than I did at this point on my first layer. It looks best from arm's length. Instead of battens or thread, as suggested in some of the literature, I've been drawing guidelines directly on the first layer of planking. In the photo below, the black line marks the extent of Belt C when I get in the last layer on the port side. I'm far enough along just now that I can look forward to being able to work on some aspect of the boat other than planking the hull. Let's see, another 30 hours or so for Belt B, then perhaps 15 hours for above the black strake, and then I have no idea how long for the ceiling planks. That should take me into March I think, when I begin worrying about the deck. I've been informally tracking my time after each build session on the inside cover of the manual, making a hash mark for each hour spent. I've rounded up and down and missed recording some, but since I don't have anyone to bill for this time it's certainly accurate enough. I began 10 days shy of a year ago, and have recorded 133 hours of productive build time (I don't count time spent on the forum, or reading over the plans, or drinking bourbon and just staring at stuff). At this time next year, I should be just about ready to begin building the ways.

- 164 replies
-
- 5
-
-
- model shipways
- armed virginia sloop
- (and 2 more)
-
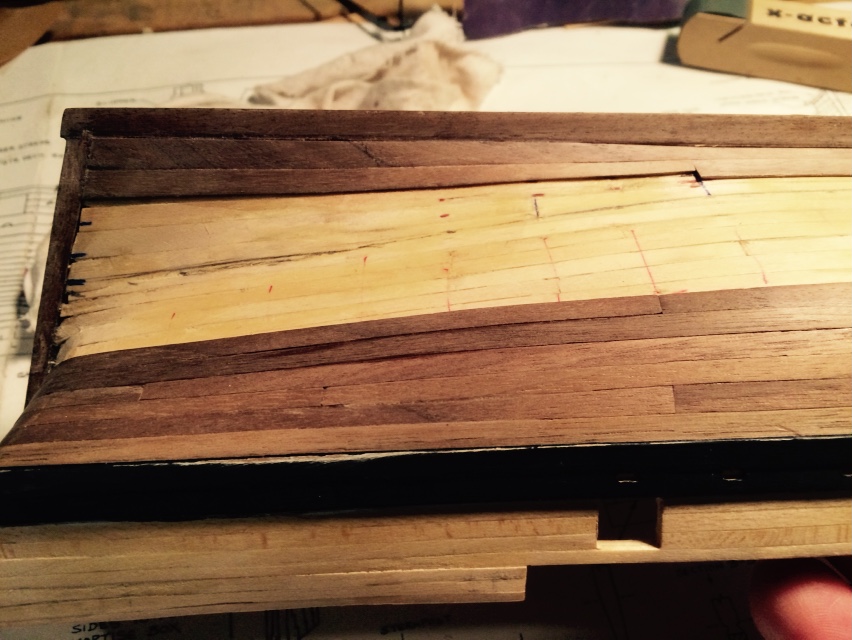
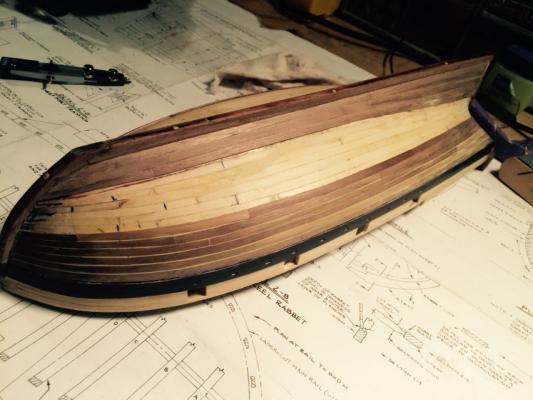
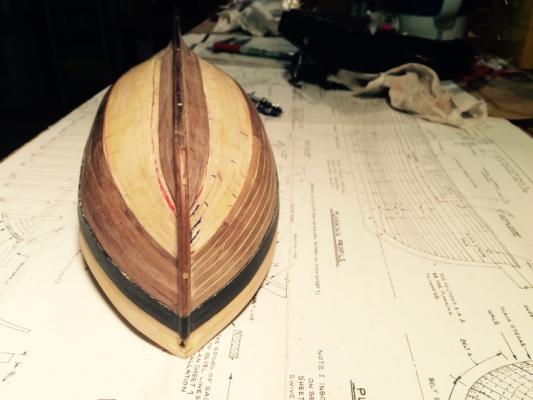
I wish I'd done the second side first. I finished Belt A on the port side. It went better than starboard. There are still some planks that don't have quite the right bend in them, but I'm getting better at adjusting for them on the next row and not letting them mulitply as I move farther down the hull. I'm happy with the symmetry, which is within about a millimeter at both bow and stern. There is still plenty of sanding and cleanup to do, but I'll take care of that when the entire hull is planked. I also haven't bothered smoothing out the joint at the stern where the hull strakes meet the transom.


- 164 replies
-
- 5
-
-
- model shipways
- armed virginia sloop
- (and 2 more)
-
Things are going a little better on the port side so far.

- 164 replies
-
- 5
-
-
- model shipways
- armed virginia sloop
- (and 2 more)
-
Thanks for the encouragement Alistair. That is my plan - now. I'm much happier with the few strakes I've placed since making the decision not to bevel. And I know you're right about doing all the filling at once - thought it's too late for the first 3/4 of Belt A. The good news is that if I already know one thing about woodworking, it's that it's hard to do too much sanding.
- 164 replies
-
- 1
-
-
- model shipways
- armed virginia sloop
- (and 2 more)
-
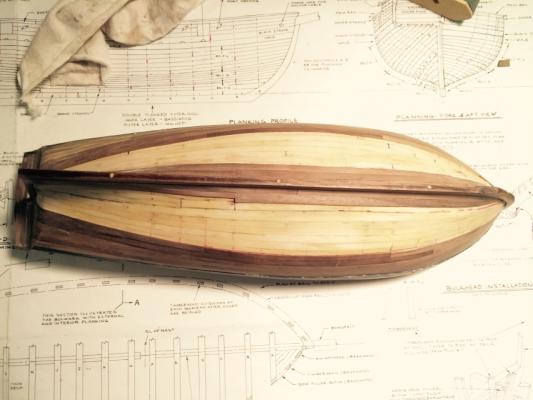
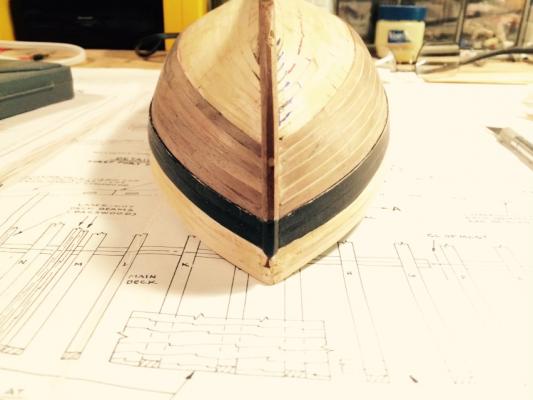
I got six strakes into the amount of space called for in the drawings - bow, midship and aft. I'm over by no more than 1-2 mm. I'm not putting any more thought into it than that.