HOLIDAY DONATION DRIVE - SUPPORT MSW - DO YOUR PART TO KEEP THIS GREAT FORUM GOING! (Only 13 donations so far - C'mon guys!)
×


Javlin
-
Posts
1,681 -
Joined
-
Last visited
Content Type
Profiles
Forums
Gallery
Events
Everything posted by Javlin
-
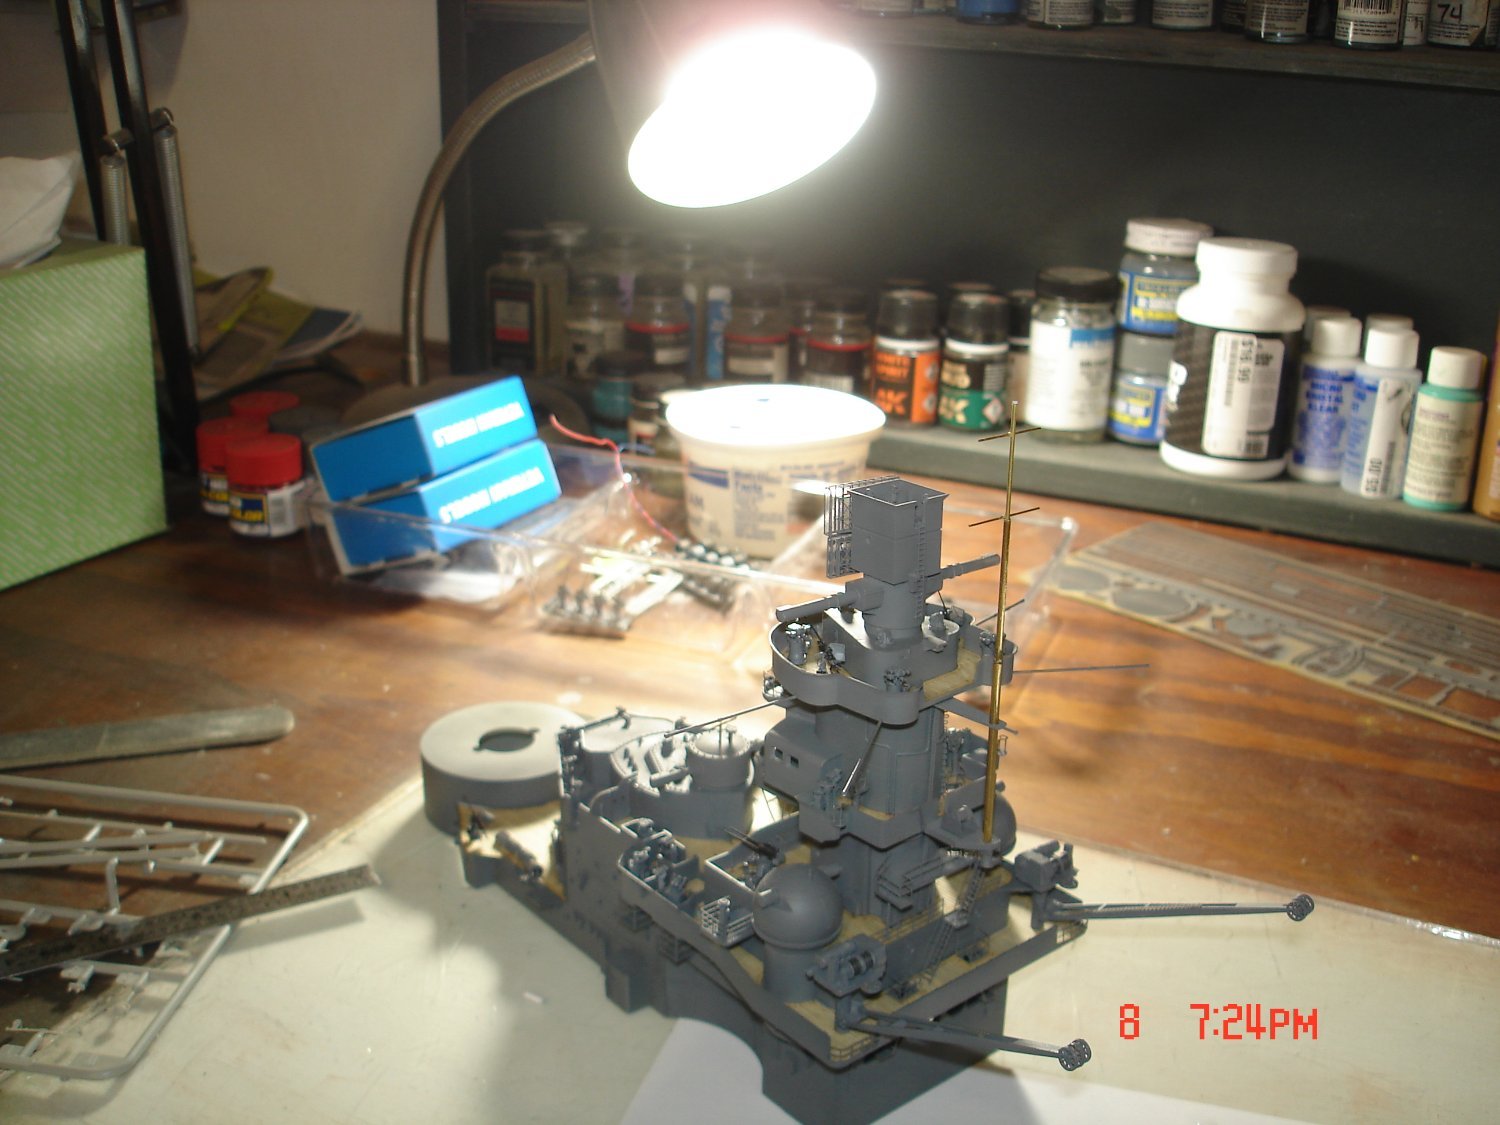
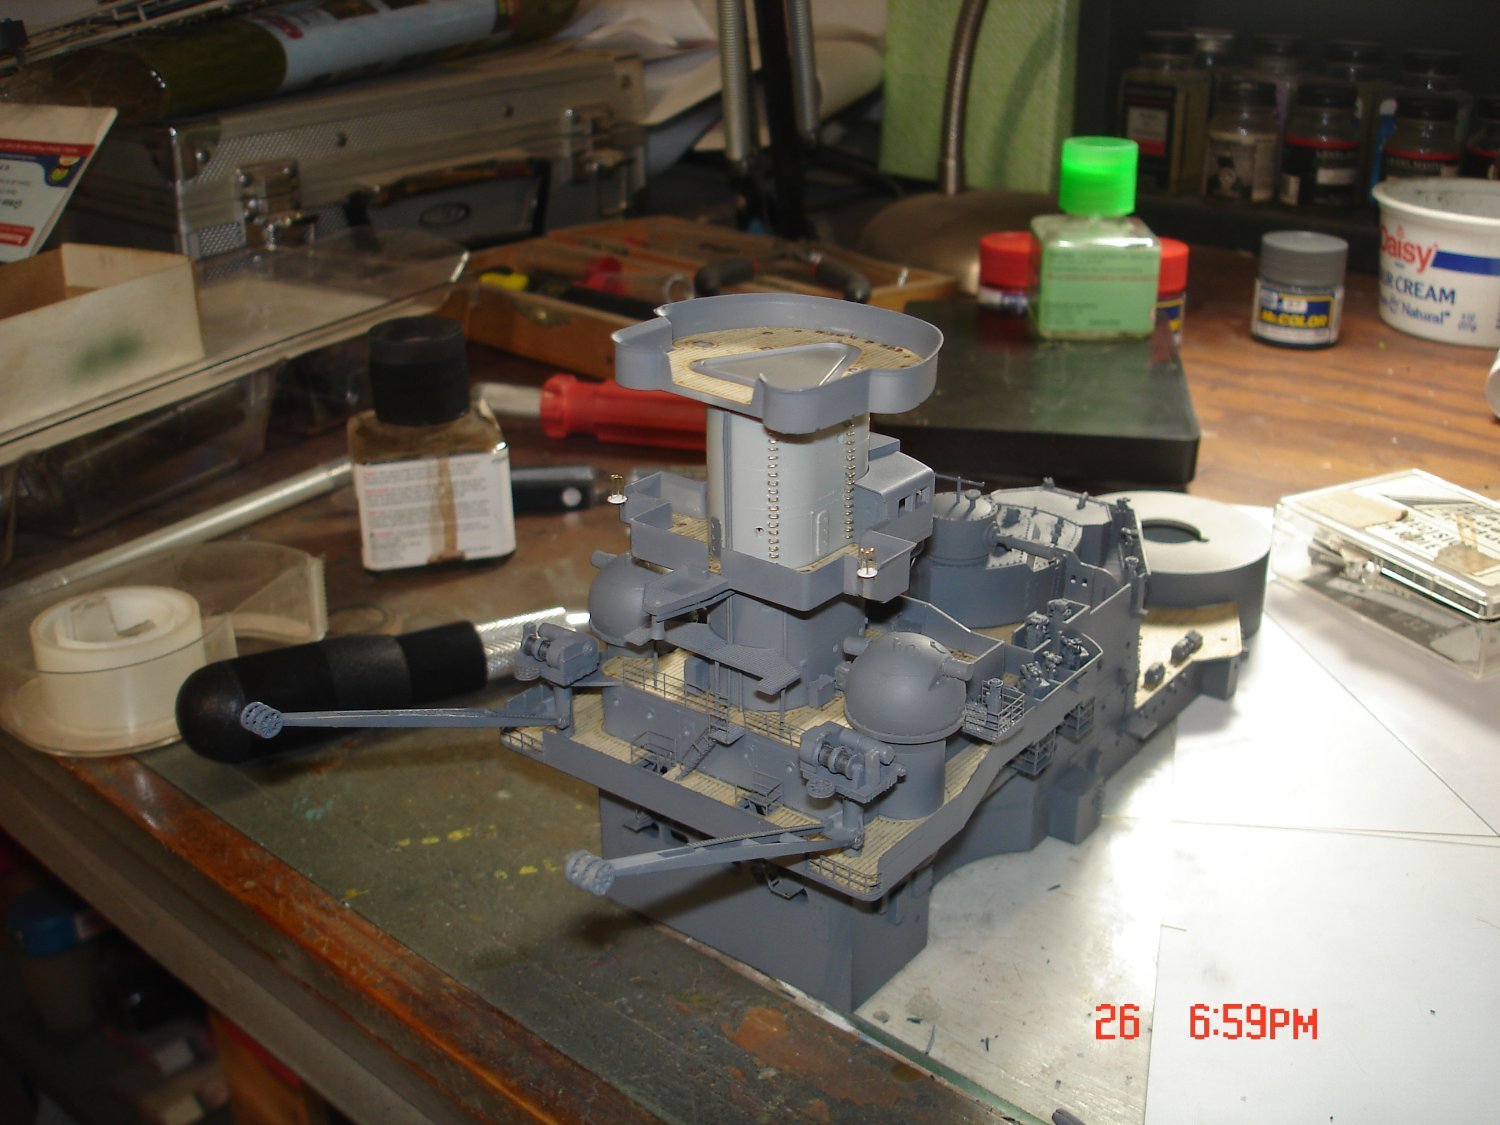
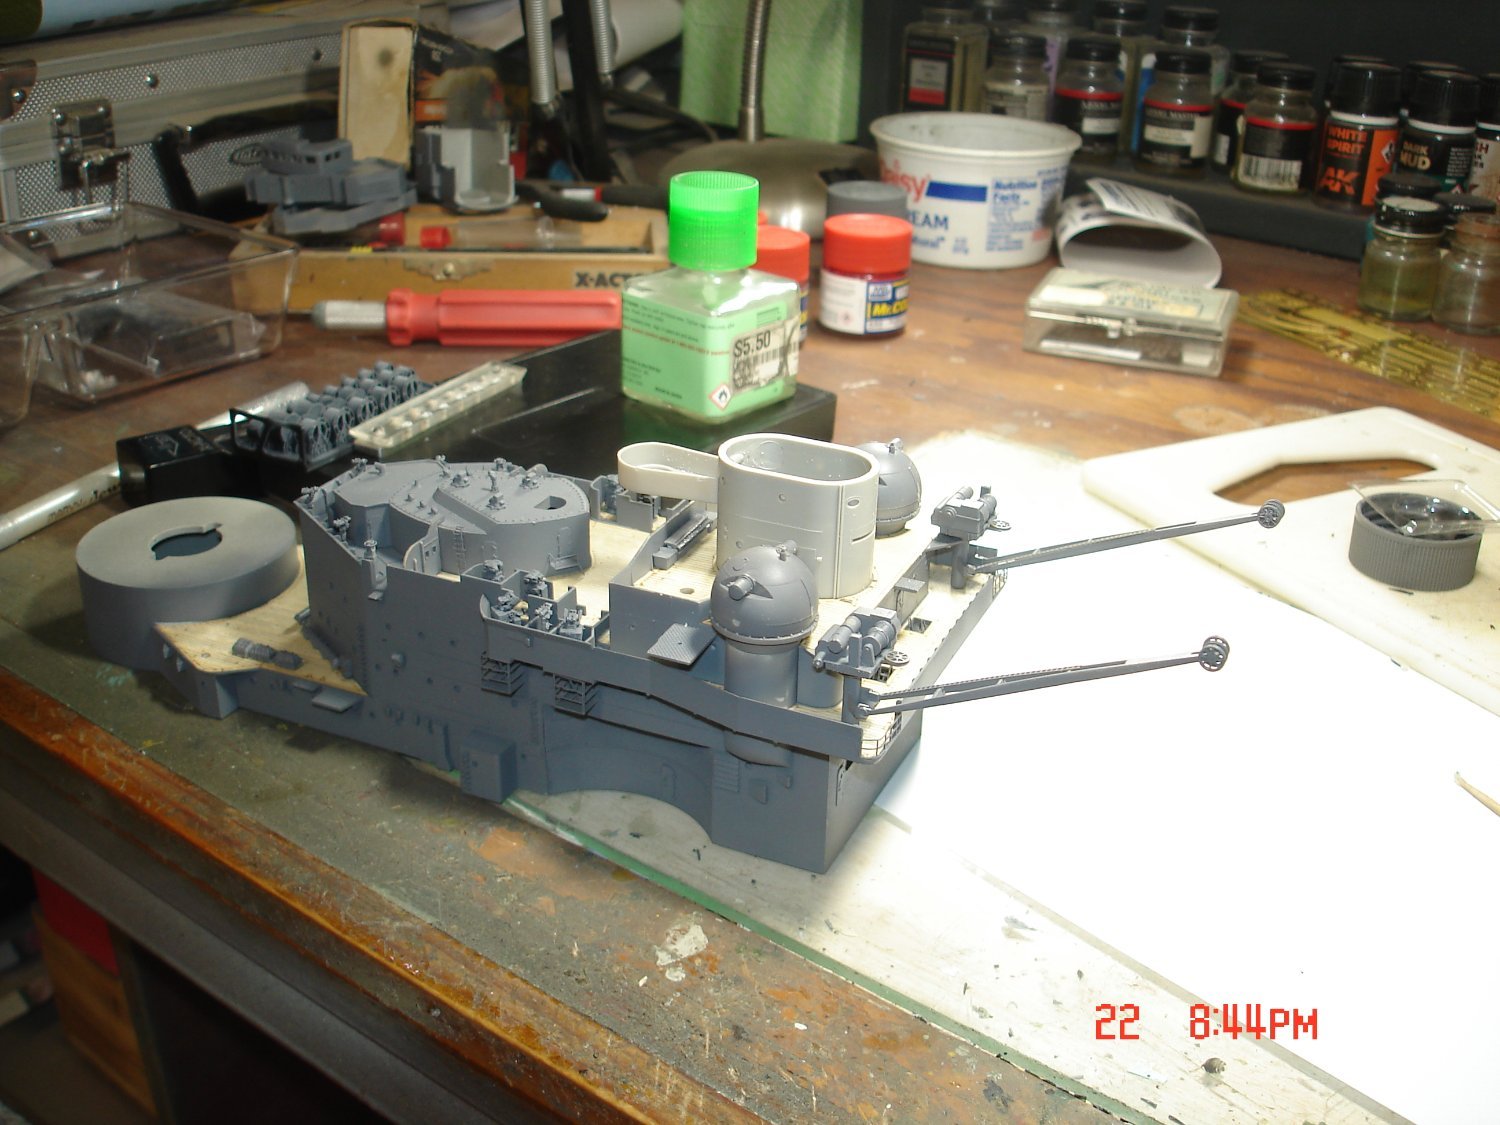
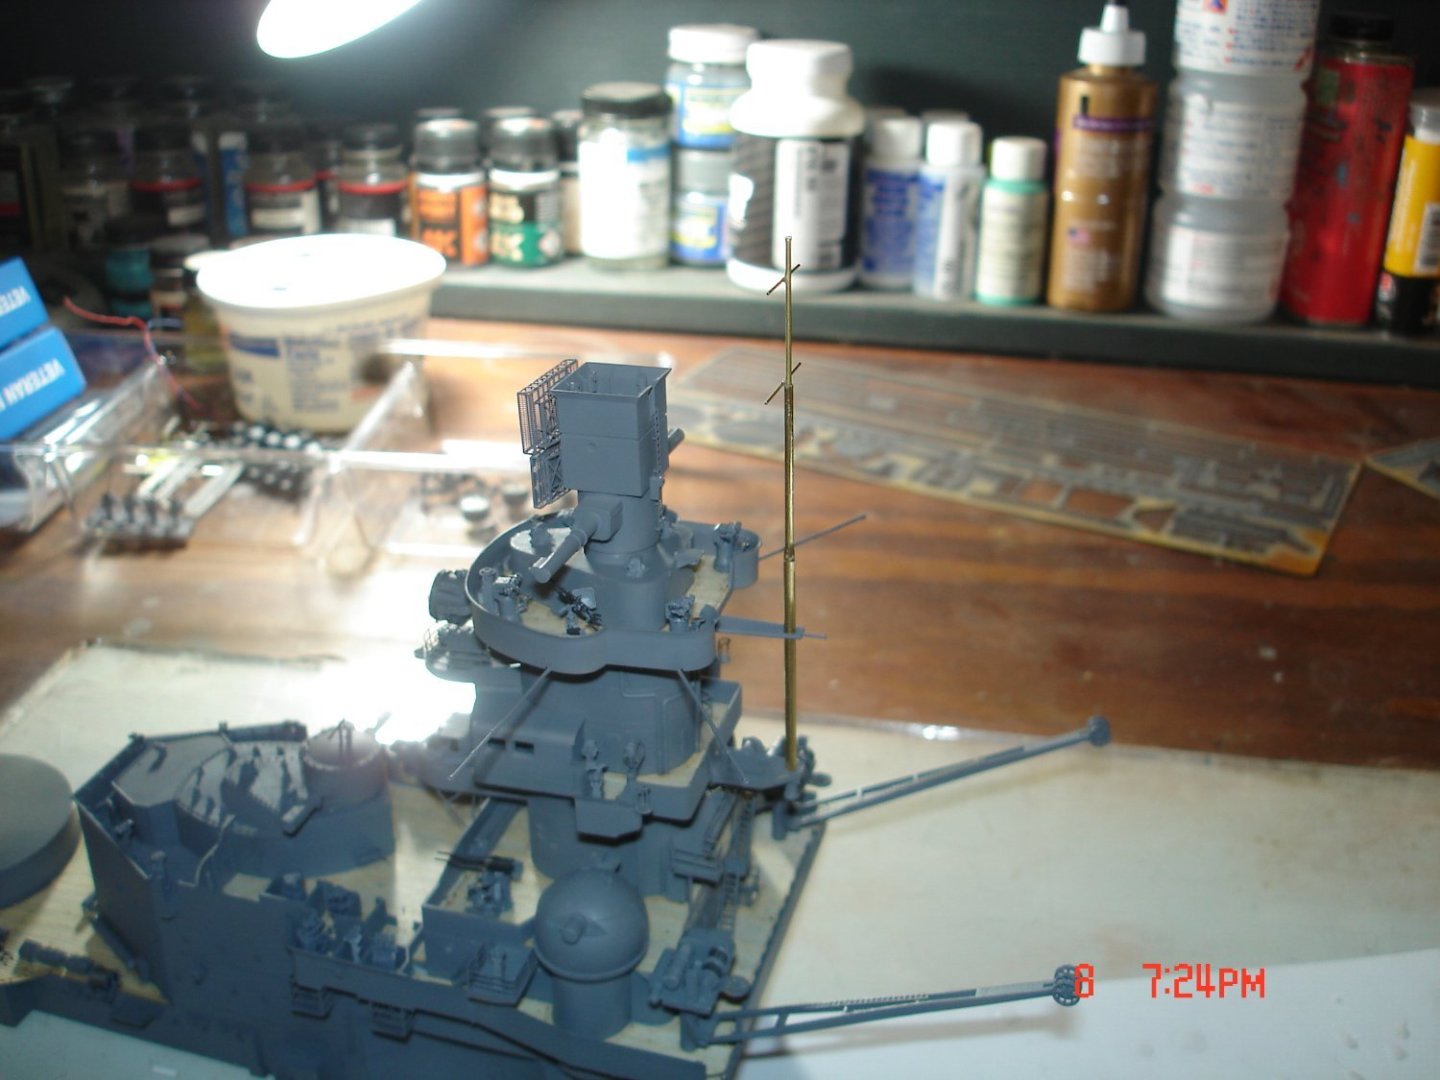
The Bridge is getting close to completion maybe 2/3 more weeks as you can see I have grafted on some brass rod off the upper part of the SS seeing how much rigging will be involved.The next part I reworked was the main radar platform cutting off the molded C38's and placing the aftermarket I will rework those not smooth or flat for my liking.Pics #4/5 show the new mast again made out of telescoping hollow rods to support the vast amount of rigging I will encounter later this was a first for me.I noticed from the instructions that the box behind the radar was filled with boxes and 2X binoculars when in reality for 1943 only for post not attached to the floor with hand wheels attached??I know not what for but had some 1/72 external gunsights I used for the wheels and some plastic rod semi-rounded off.Thanks for looking.

- 68 replies
-
- 11
-

-
- Scharnhorst
- Trumpeter
- (and 1 more)
-
This a very Nice Rendition you have going here!!3D printing is bring the world of modeling to a new level to those willing to play in that arena.
-
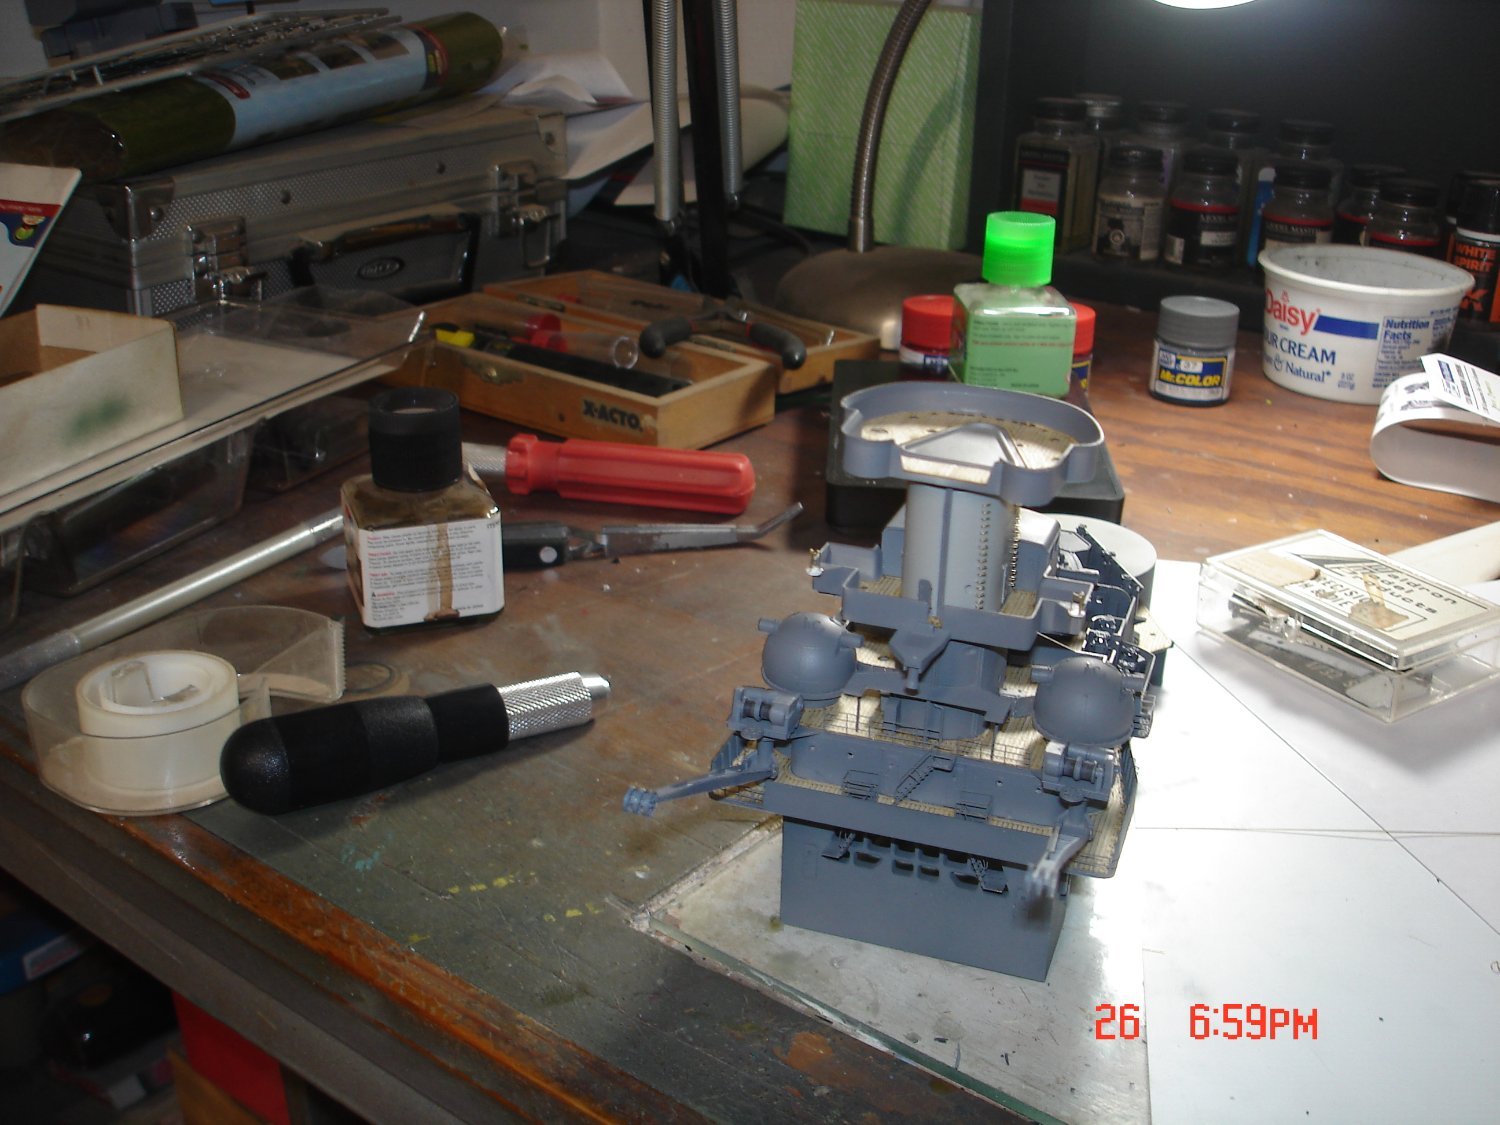
The desk is a mess but the Bridge continues to grow.The nest have been added quite easy to make rearrangement to Trumpter's idea compasses outside and three set of binoculars two lights still left to add.


- 68 replies
-
- 14
-
-
- Scharnhorst
- Trumpeter
- (and 1 more)
-
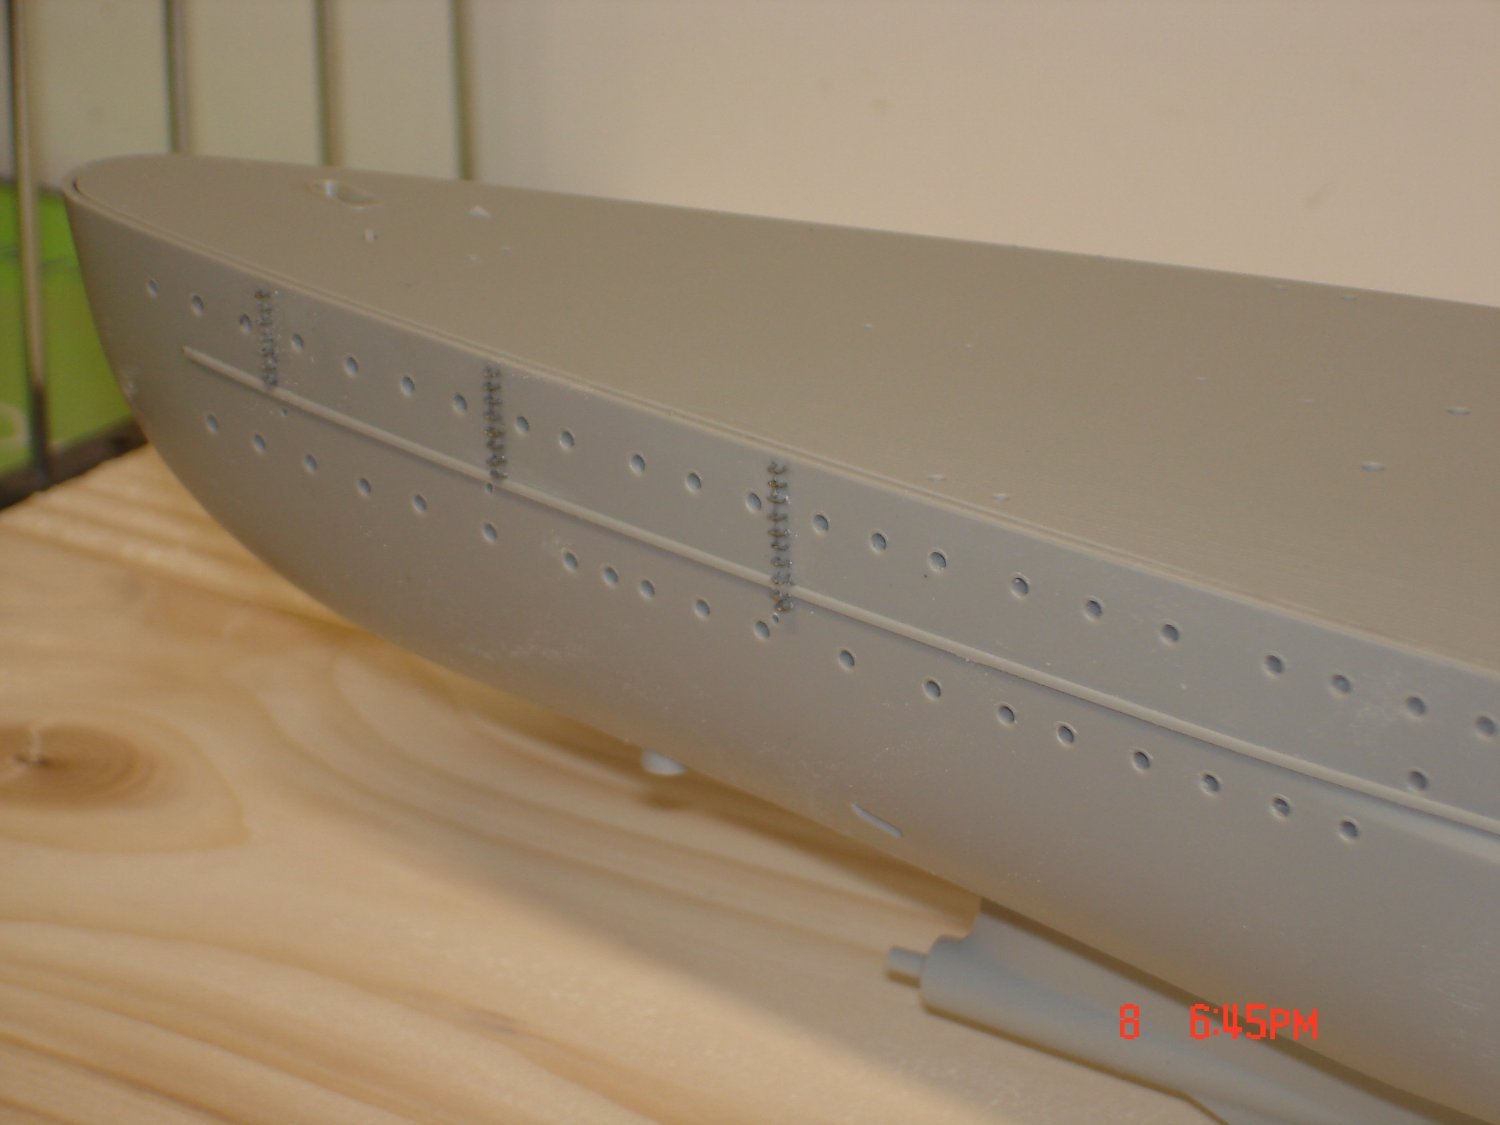
A little over an hours worth of effort making the grab bars and installing.This is not 100% in scale the width is roughly 16" about right the step distance is 11" I'm figuring more like 12/14"?The book shows four bars in a section I have five but they are there.I also added a hatch not represented and a portal.The tricky part if it can be pulled off is making the crows nest on the outside of level two with wire.

- 68 replies
-
- 11
-
-
- Scharnhorst
- Trumpeter
- (and 1 more)
-
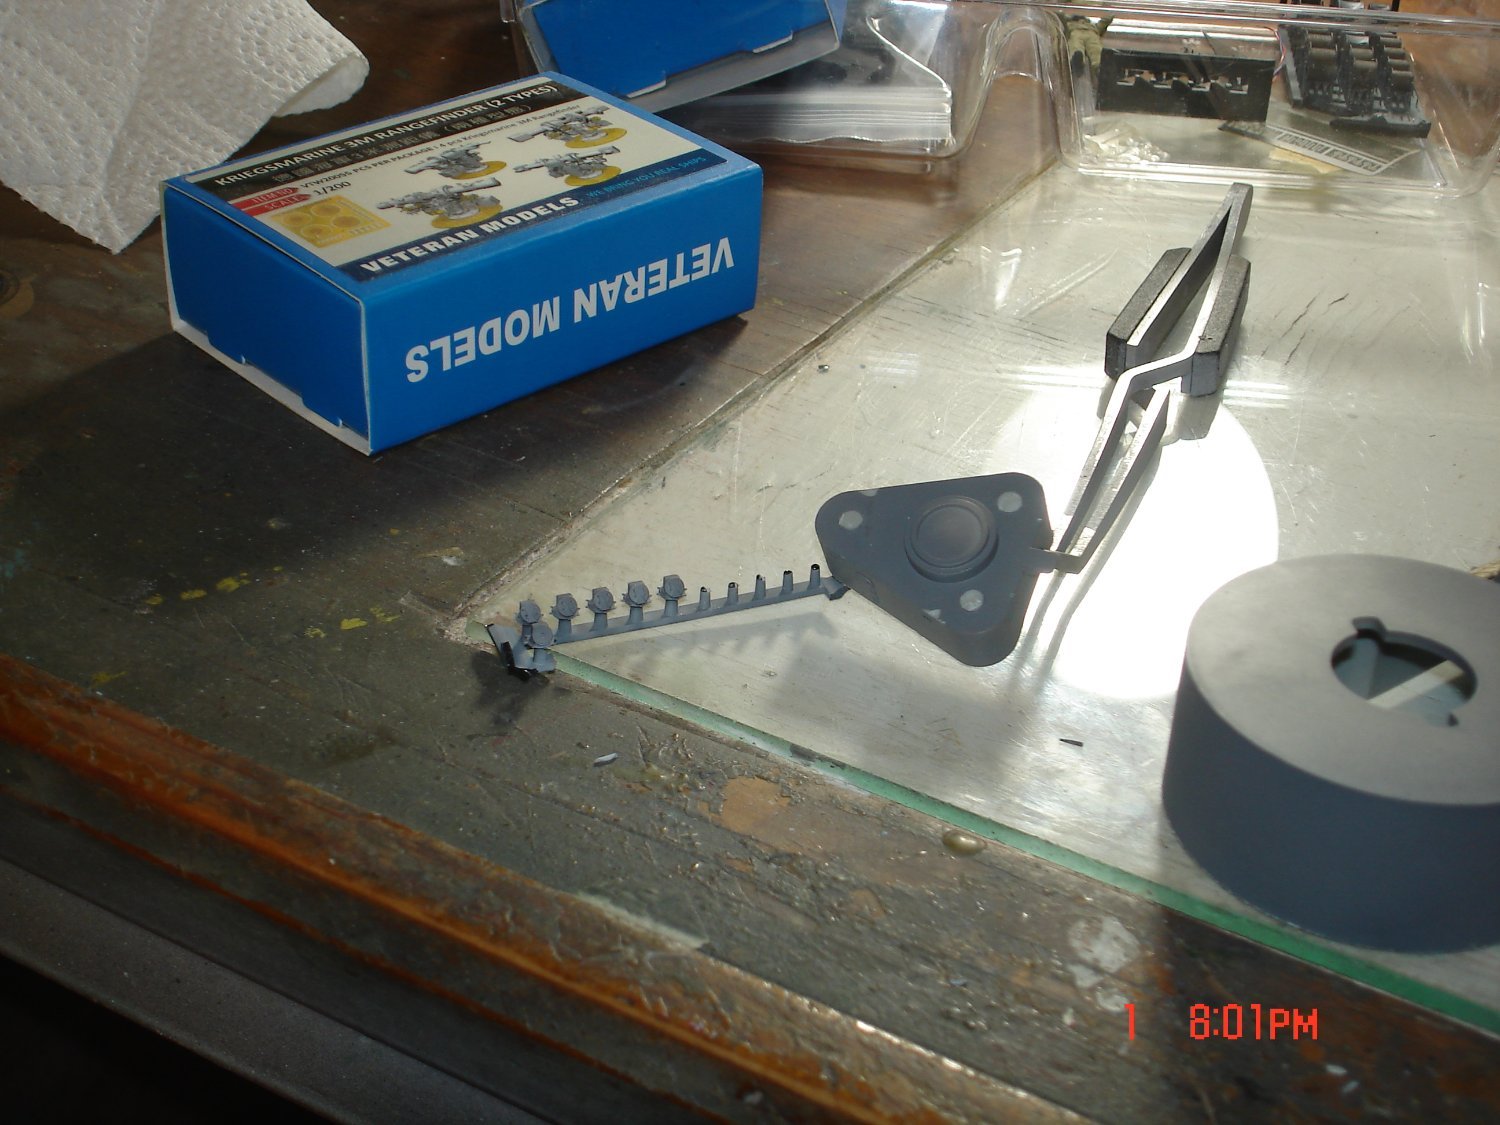
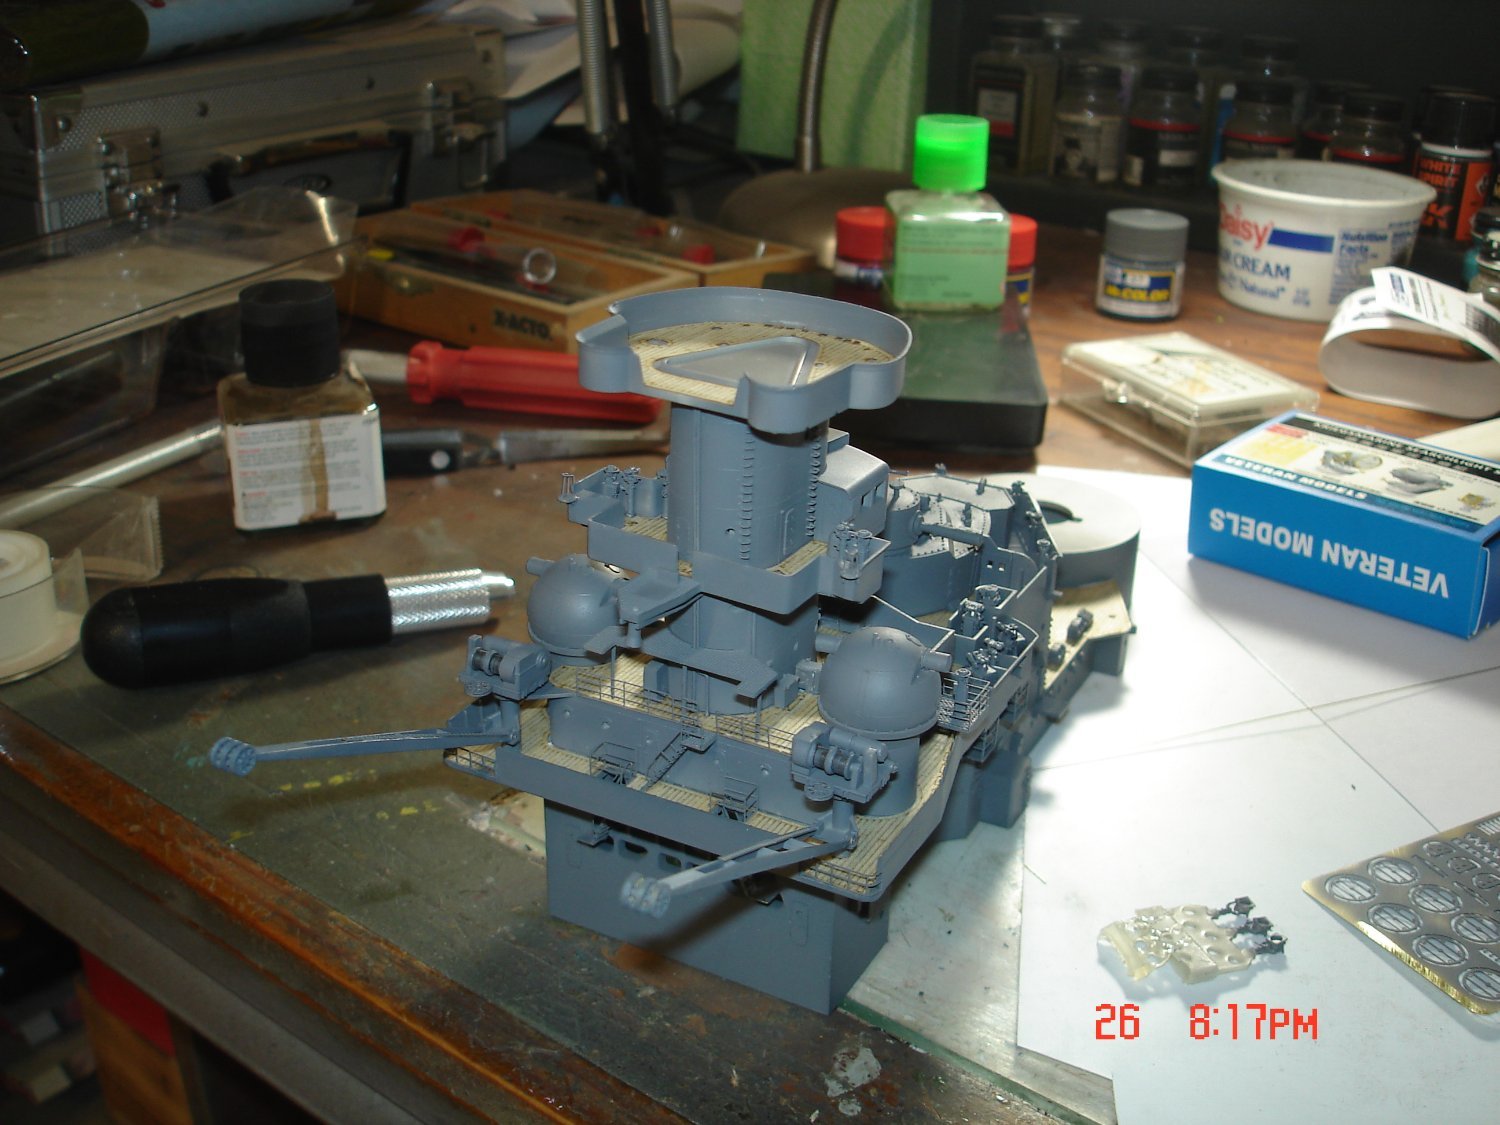
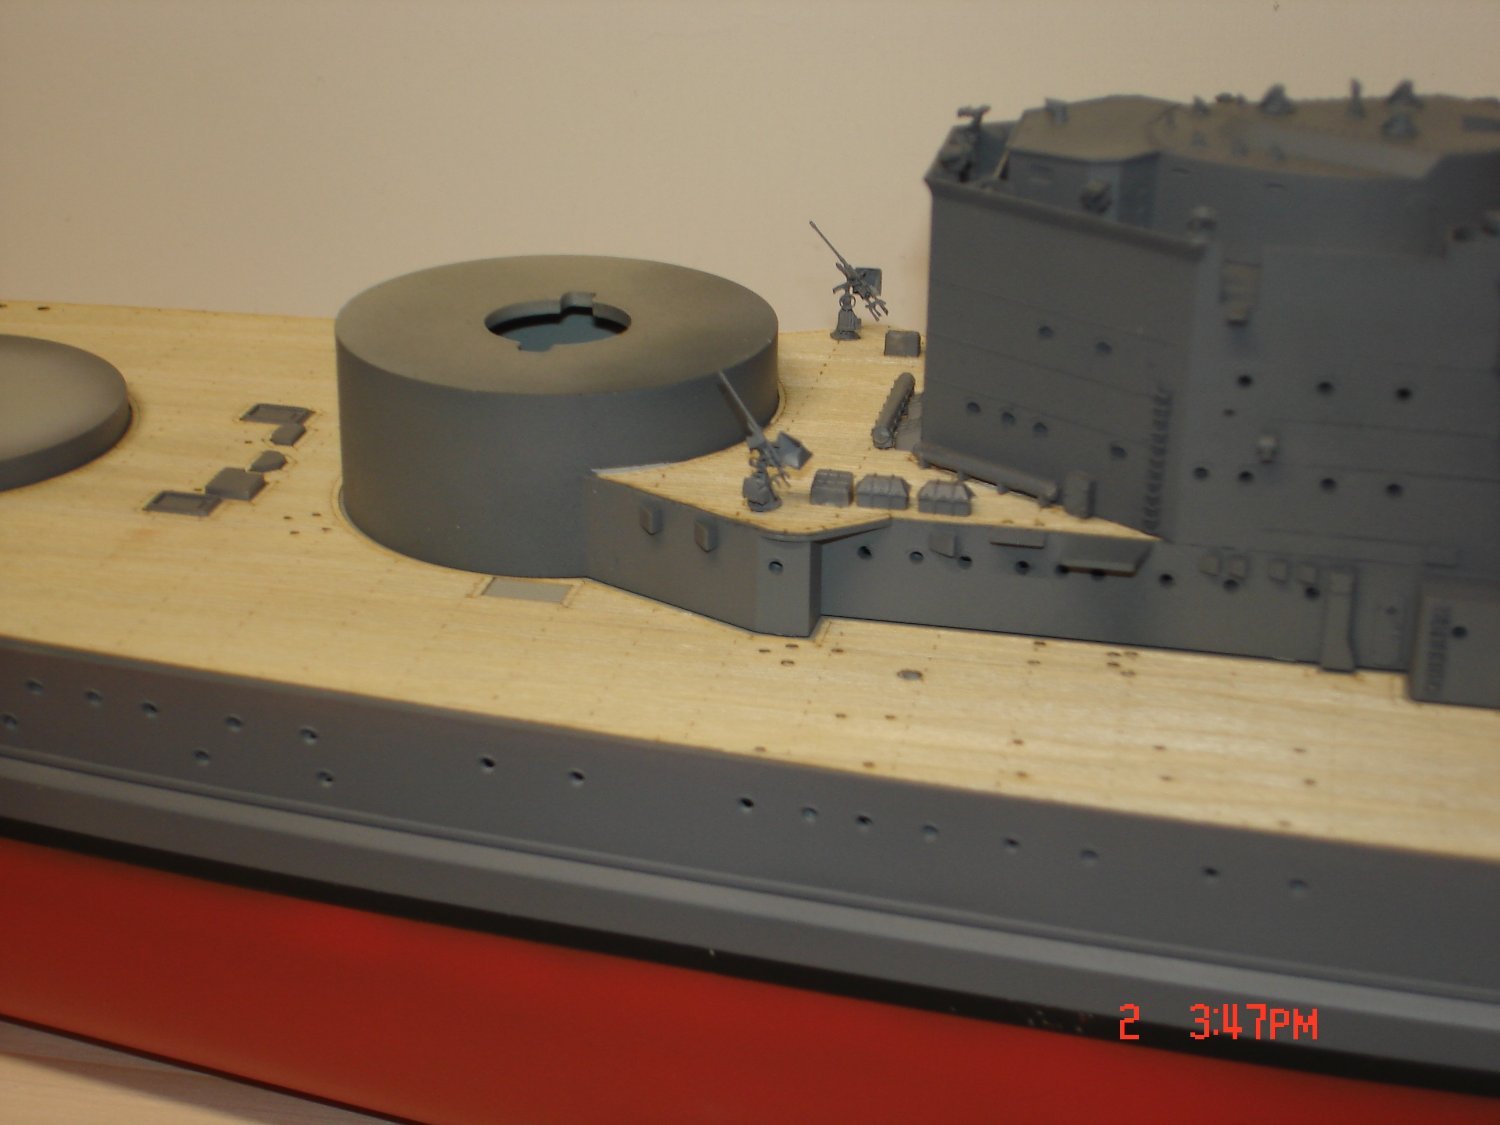
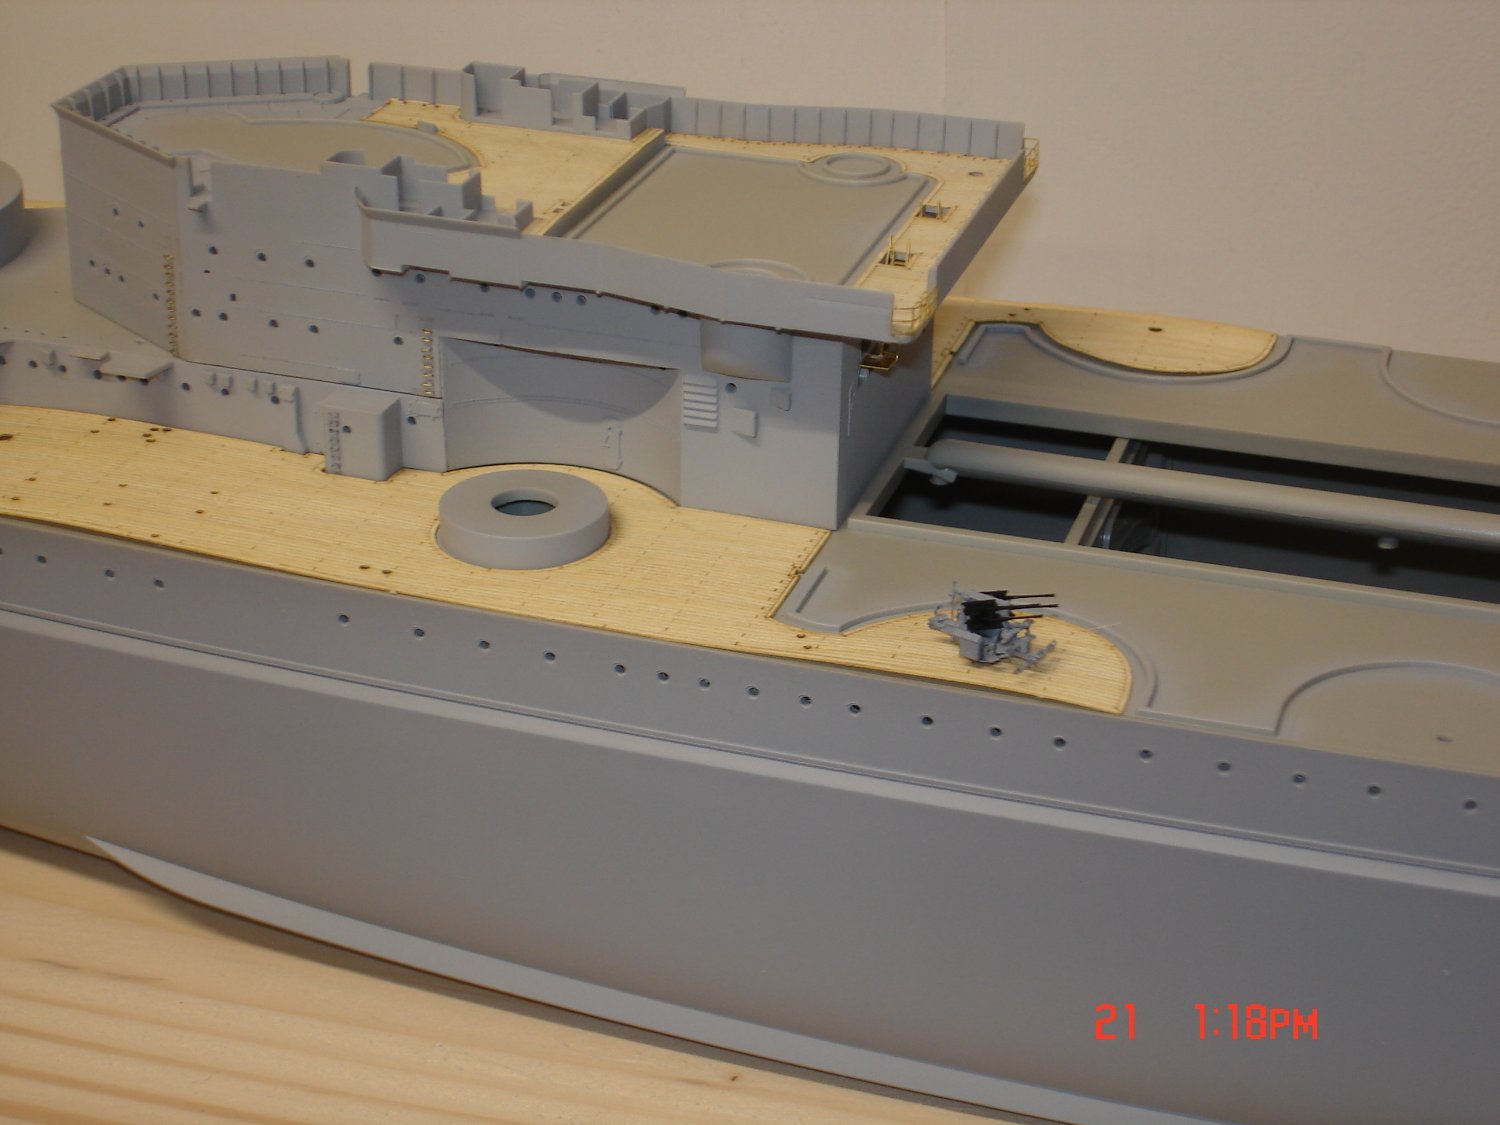
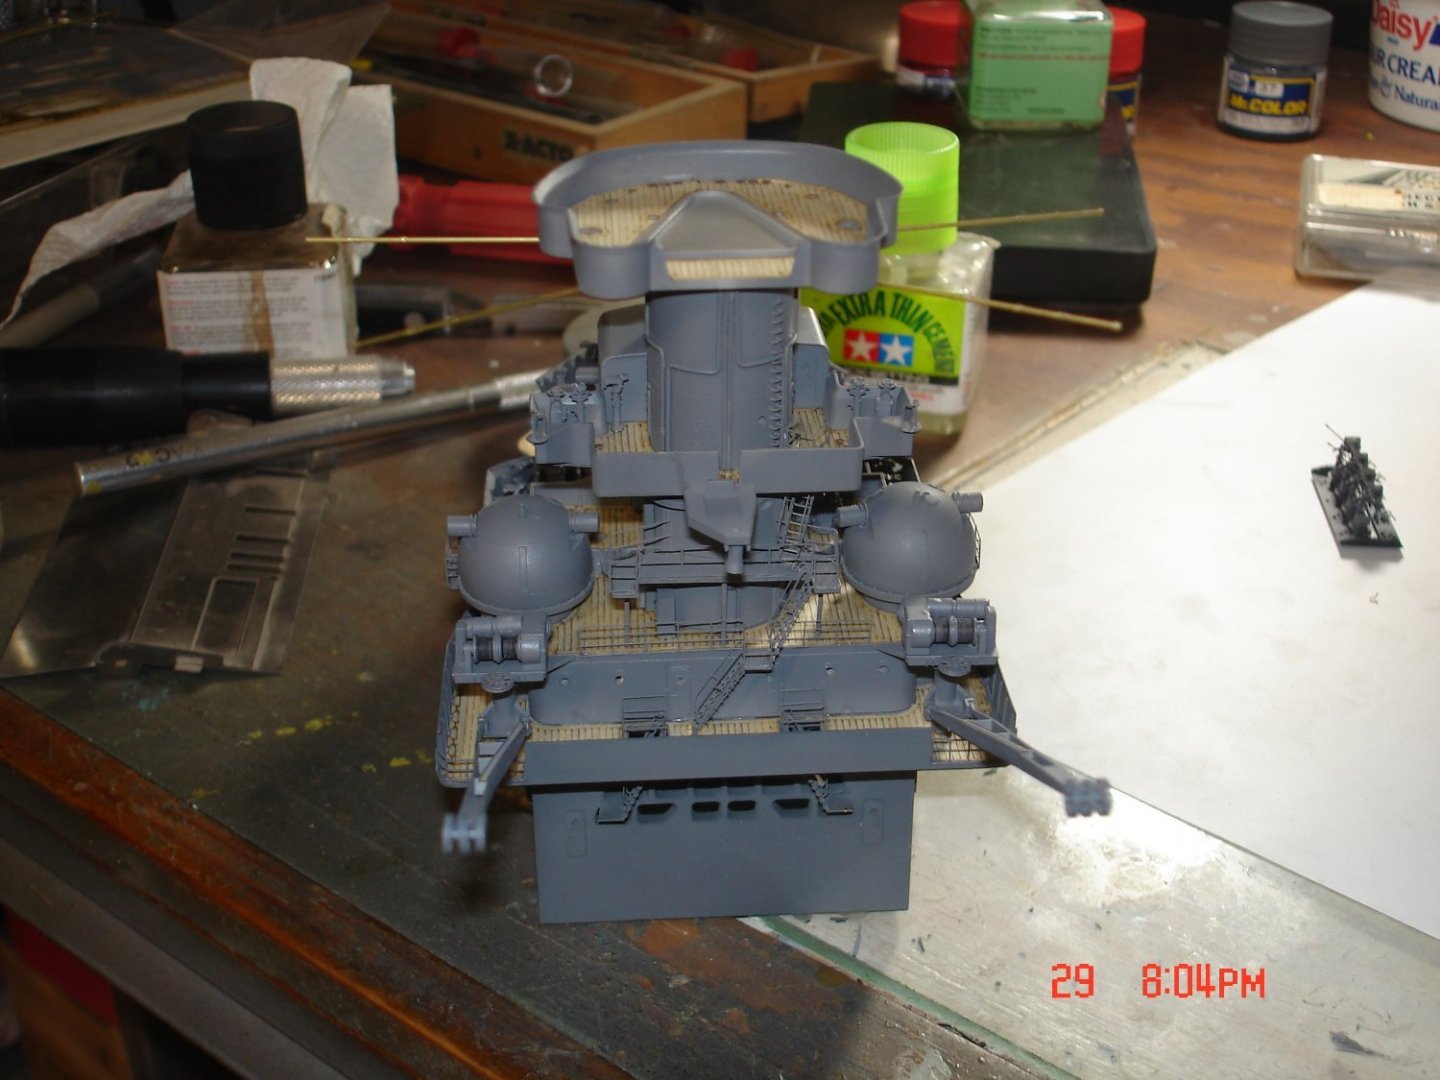
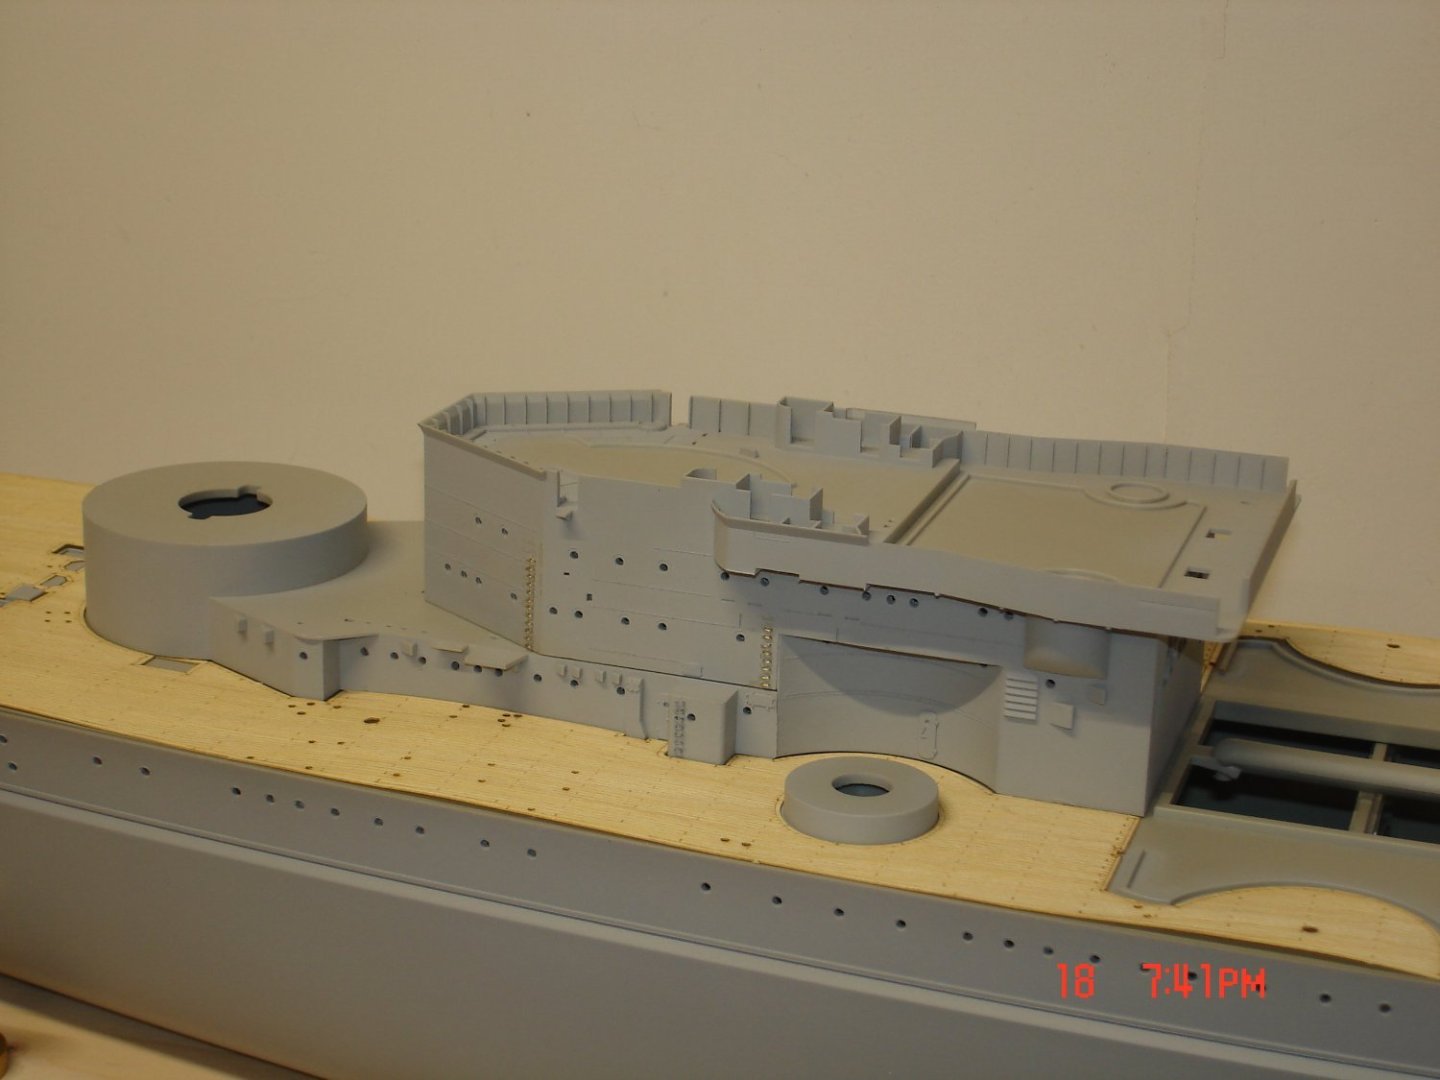
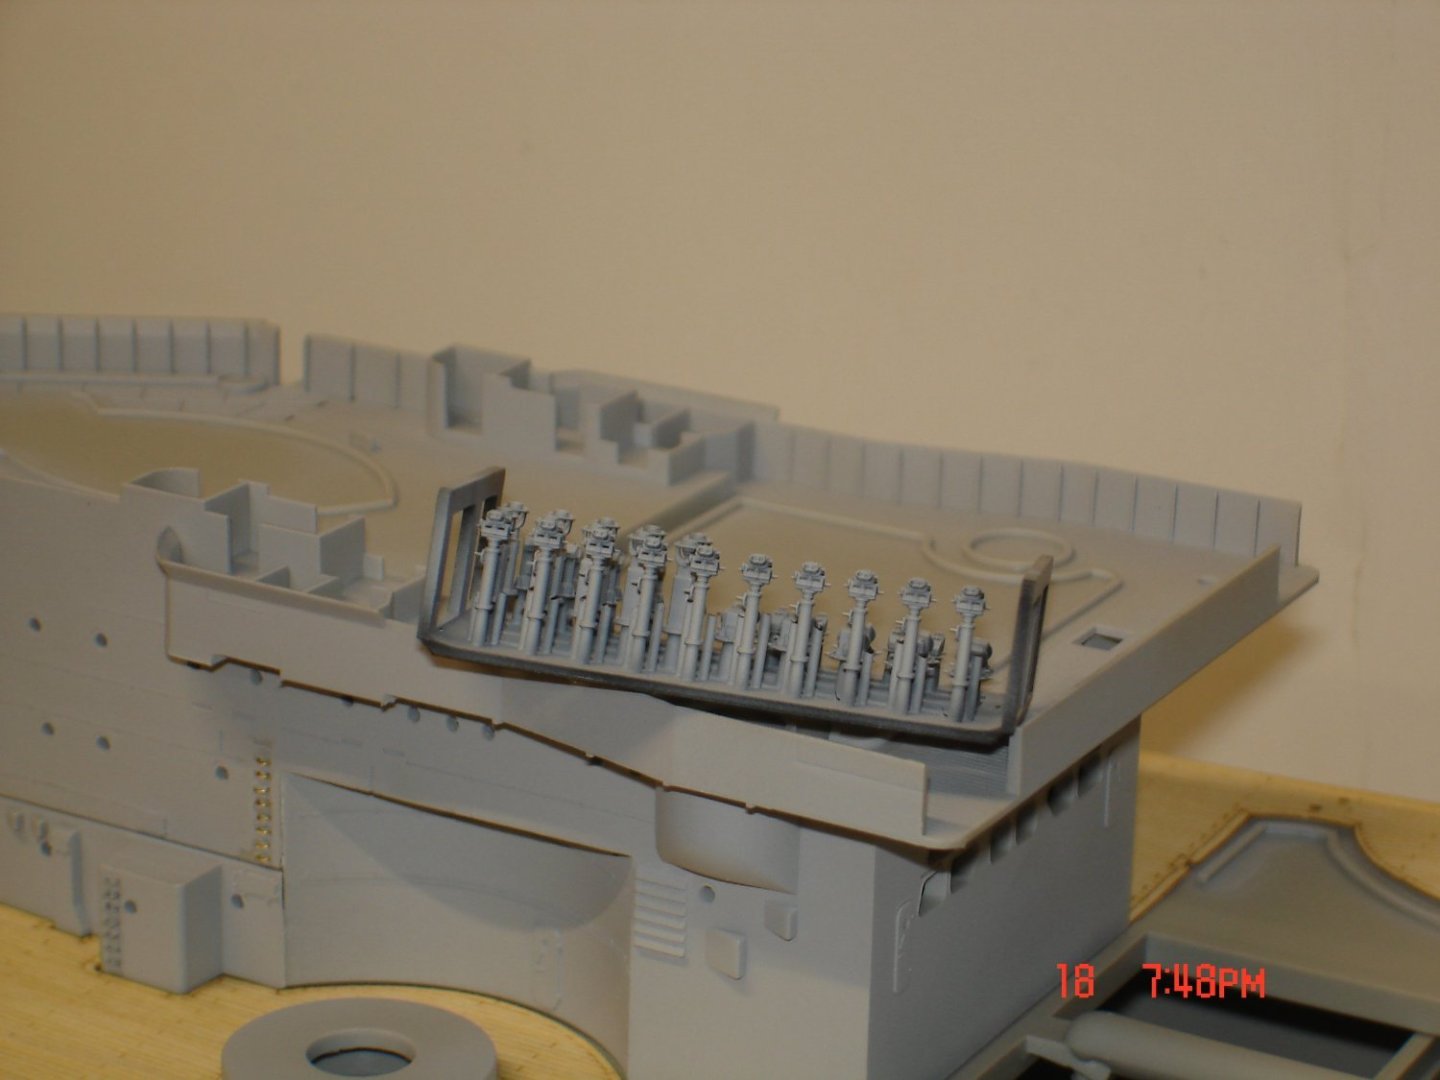
It's been slow going mainly building the double 40's(?) from Veteran Models they are very time consuming I have more coming from Bunker Studios will pick the best out of the litter let's say.I noticed another inaccuracy the wall behind the R/double ended up in the wrong spot had to remove the ammo box build the wall to that area and fold it...it's close.Then I noticed that a box existed in front inbetween the doubles between the ammo boxes it's a ventilation chamber for the lower deck.I fabricated something to scale and added two louver vents.The range finders are just in place ATTM nice fit.

- 68 replies
-
- 16
-
-
- Scharnhorst
- Trumpeter
- (and 1 more)
-
Looks like you overcame and persevered Chris looking mighty good from here!!
-
Shelby 427 S/C Cobra by CDW - FINISHED - Fujimi - 1:24 Scale
Javlin replied to CDW's topic in Non-ship/categorised builds
You go for it buddy "getting younger every day"I say! -
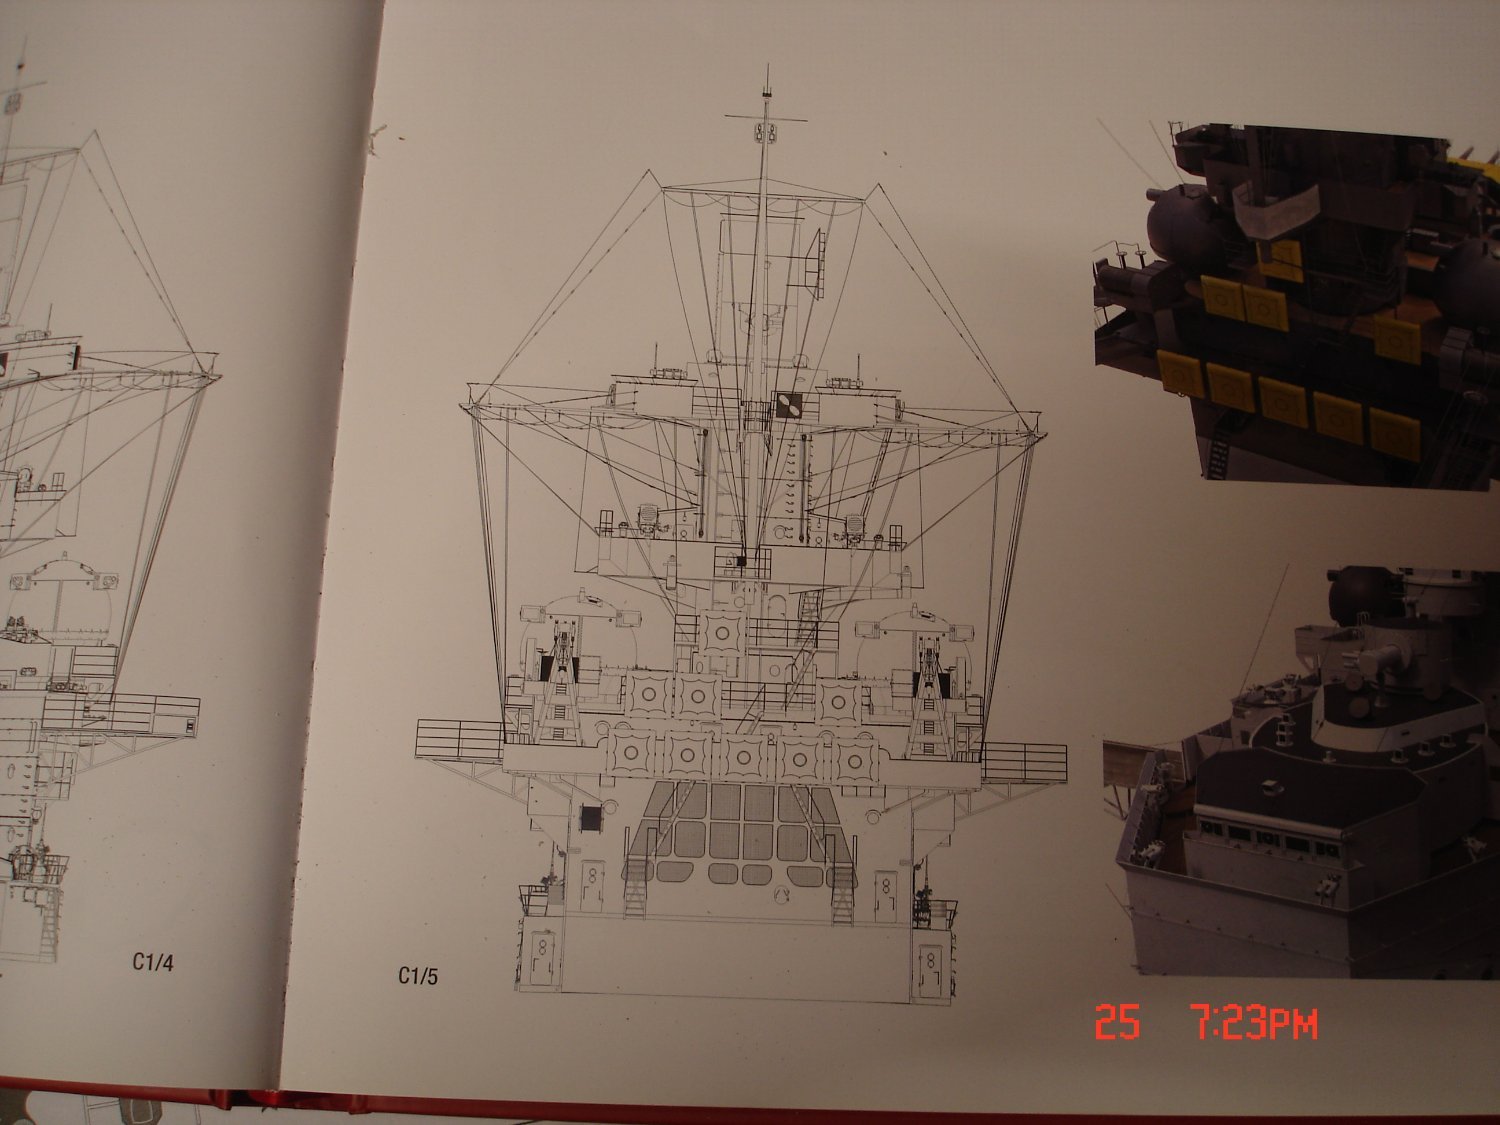
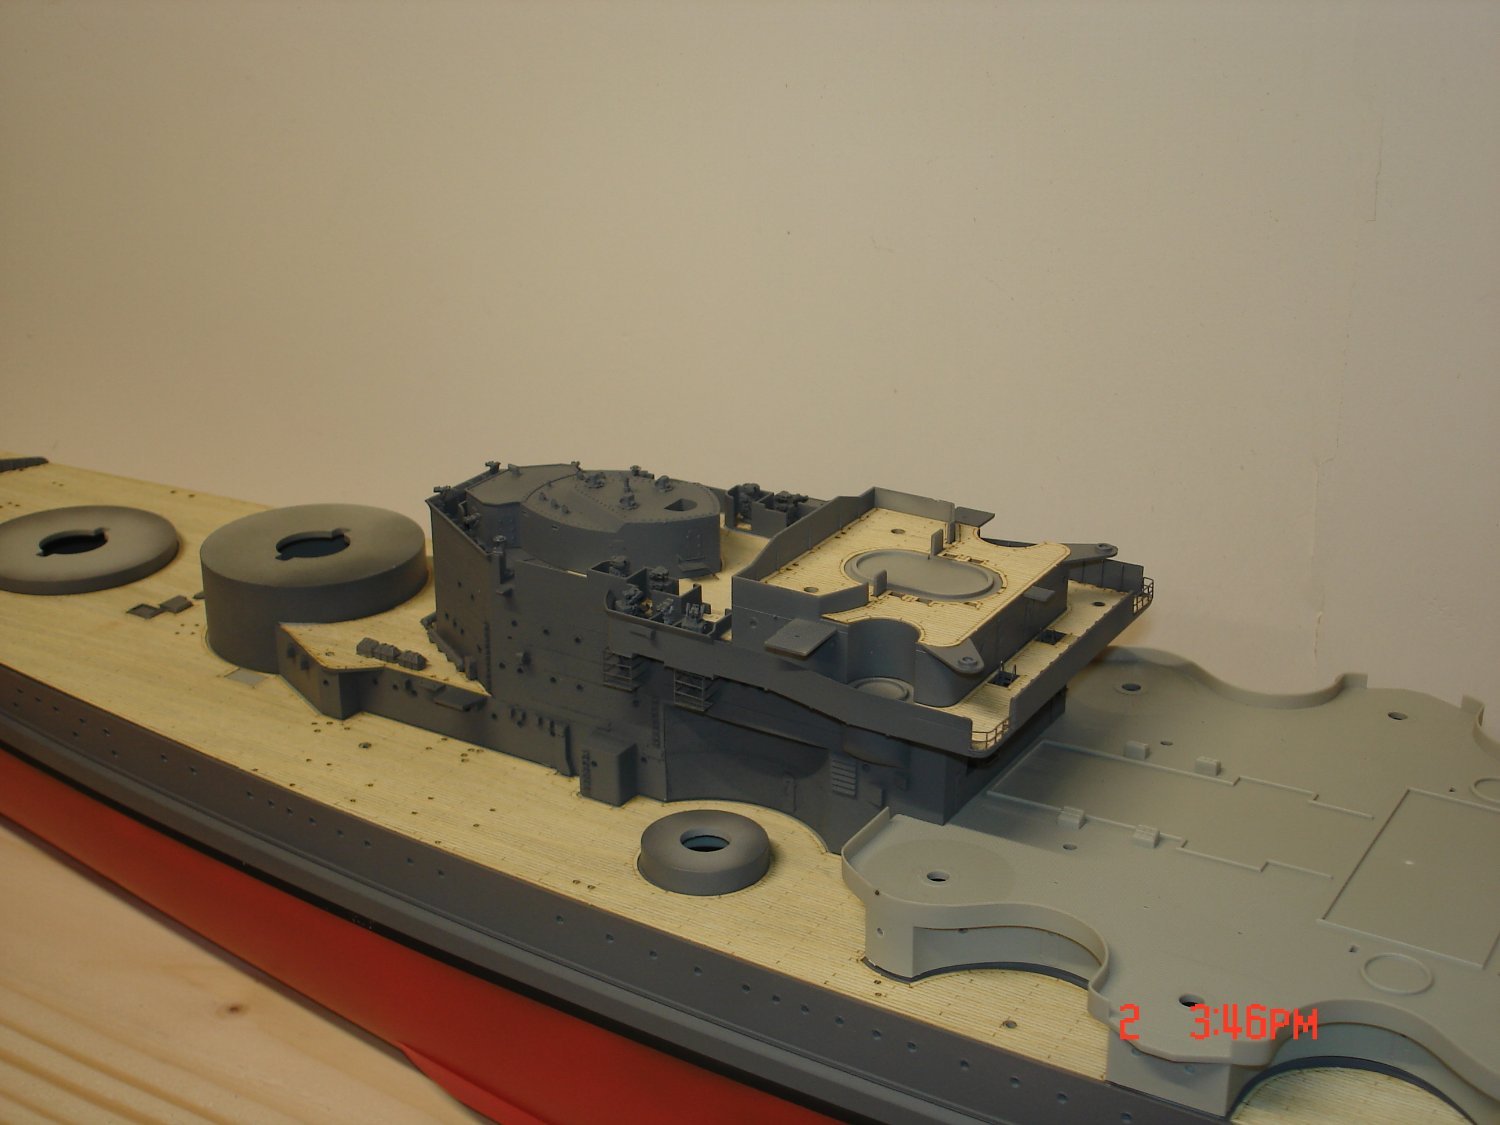
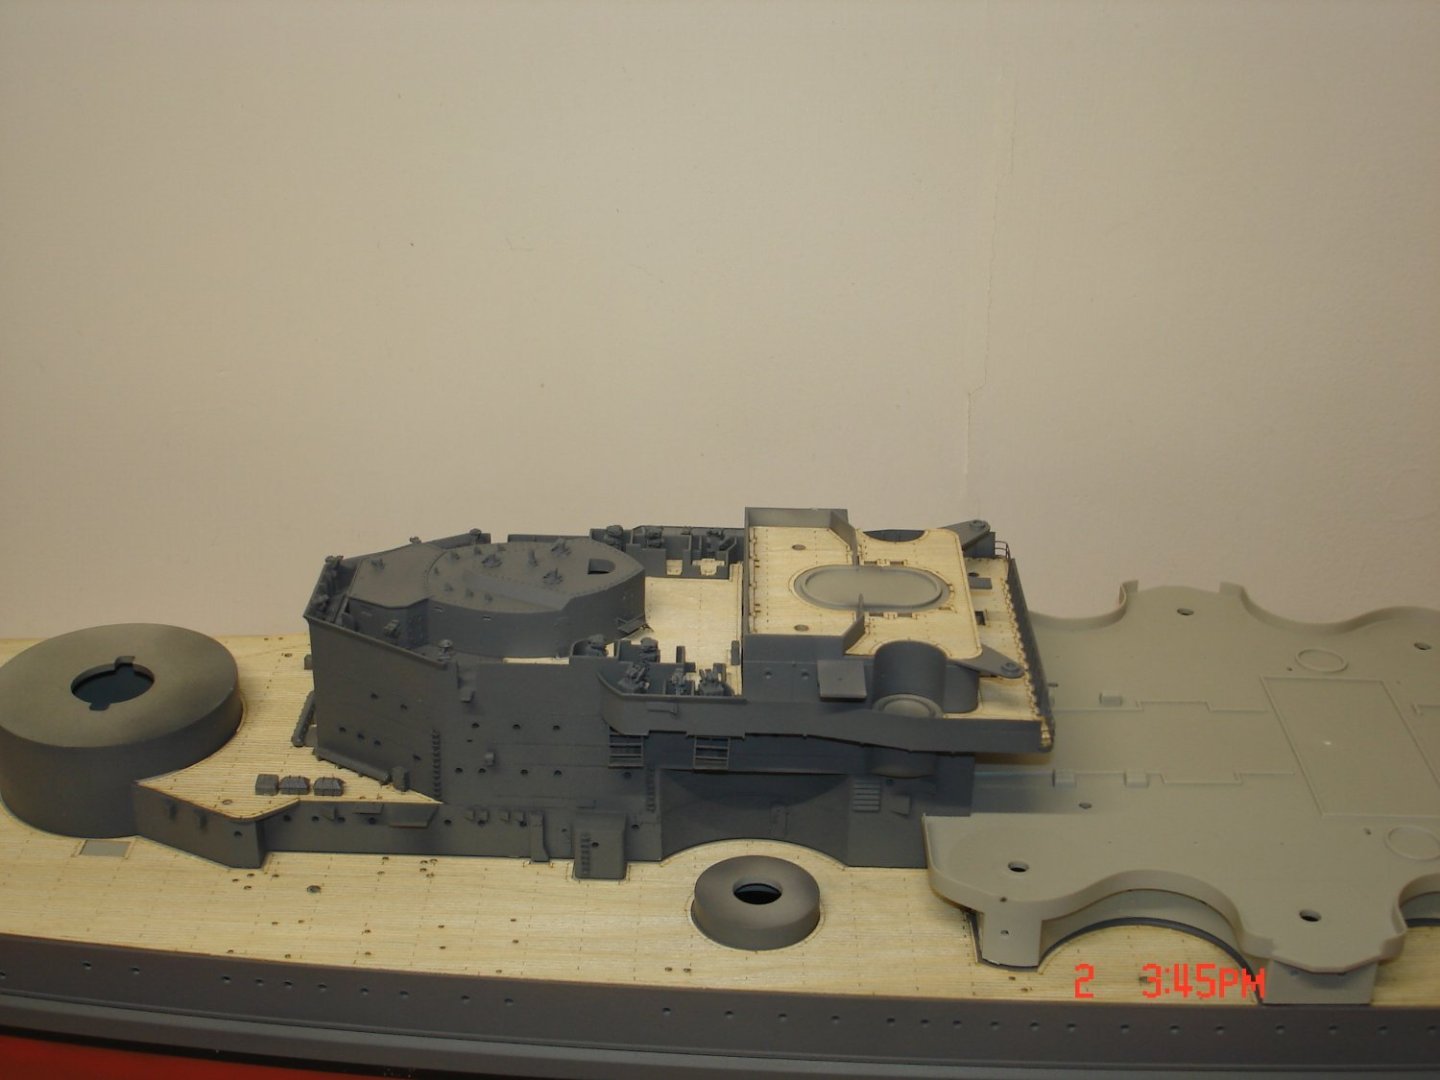
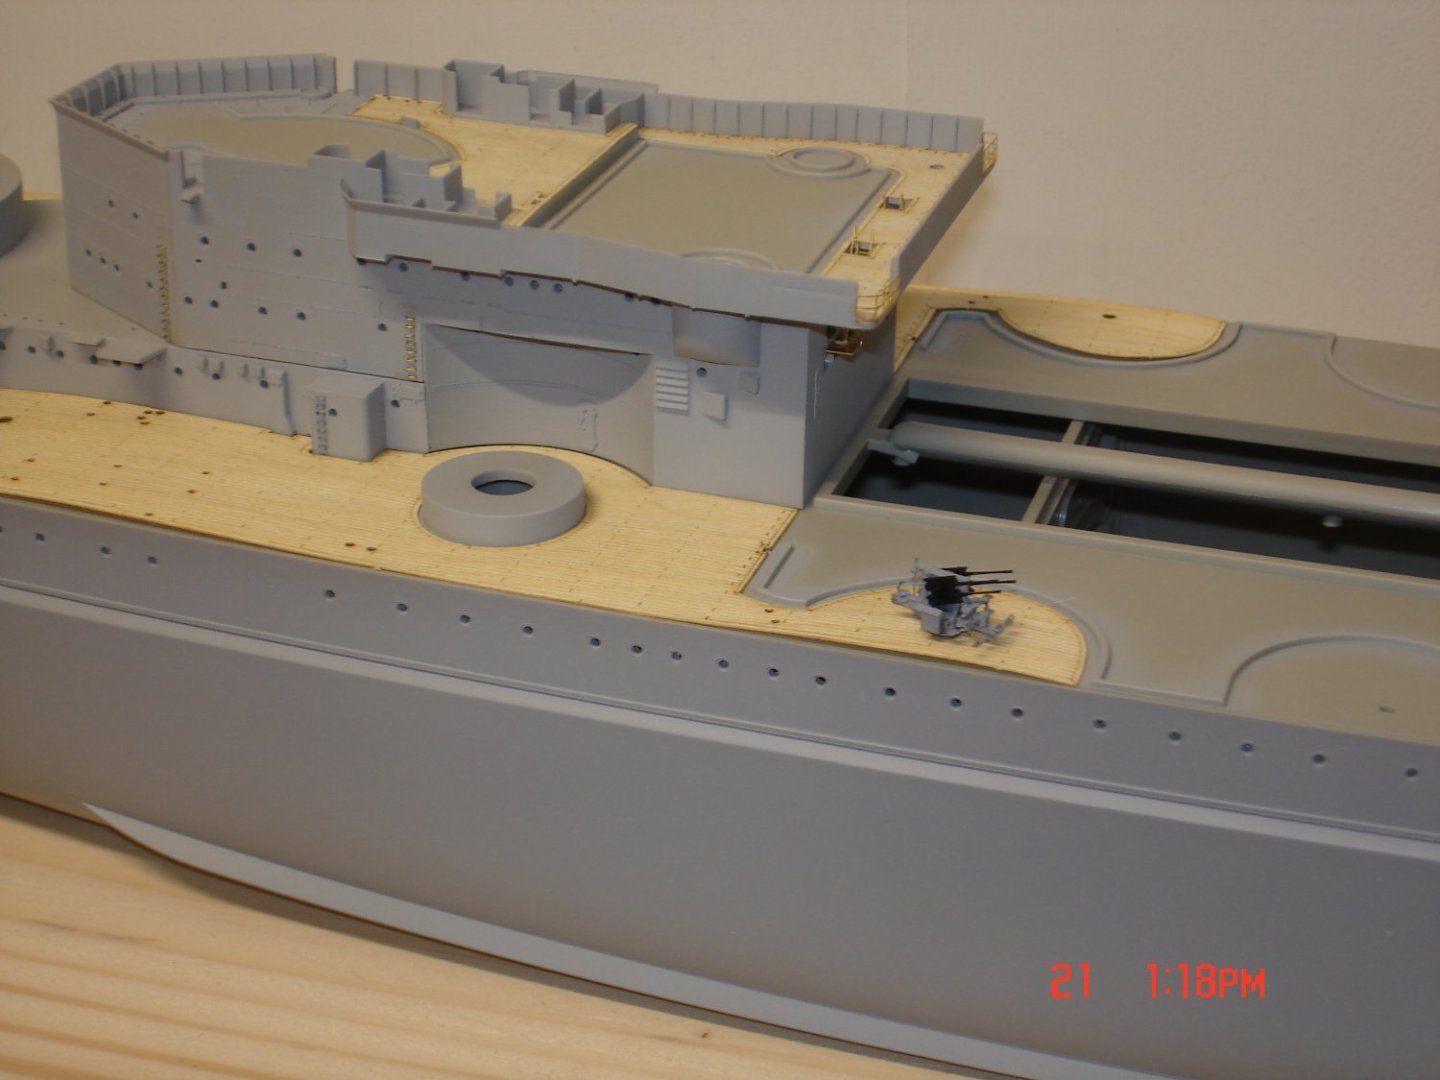
A slight dilemma ............a picture is worth a thousand words they say ......and a few curse words also.What you see portrayed by Trumpter is the deck of the Gneisenau!! They produced that kit first if not mistaken and just went willy nellie here I have the book from Kagero on the Gneisenau and that's her layout.The wood chip is stained now you see why she will not be stained at all.

- 68 replies
-
- 7
-
-
- Scharnhorst
- Trumpeter
- (and 1 more)
-
They are Alan need to do side by side with the kit parts.
- 68 replies
-
- 3
-
-
- Scharnhorst
- Trumpeter
- (and 1 more)
-
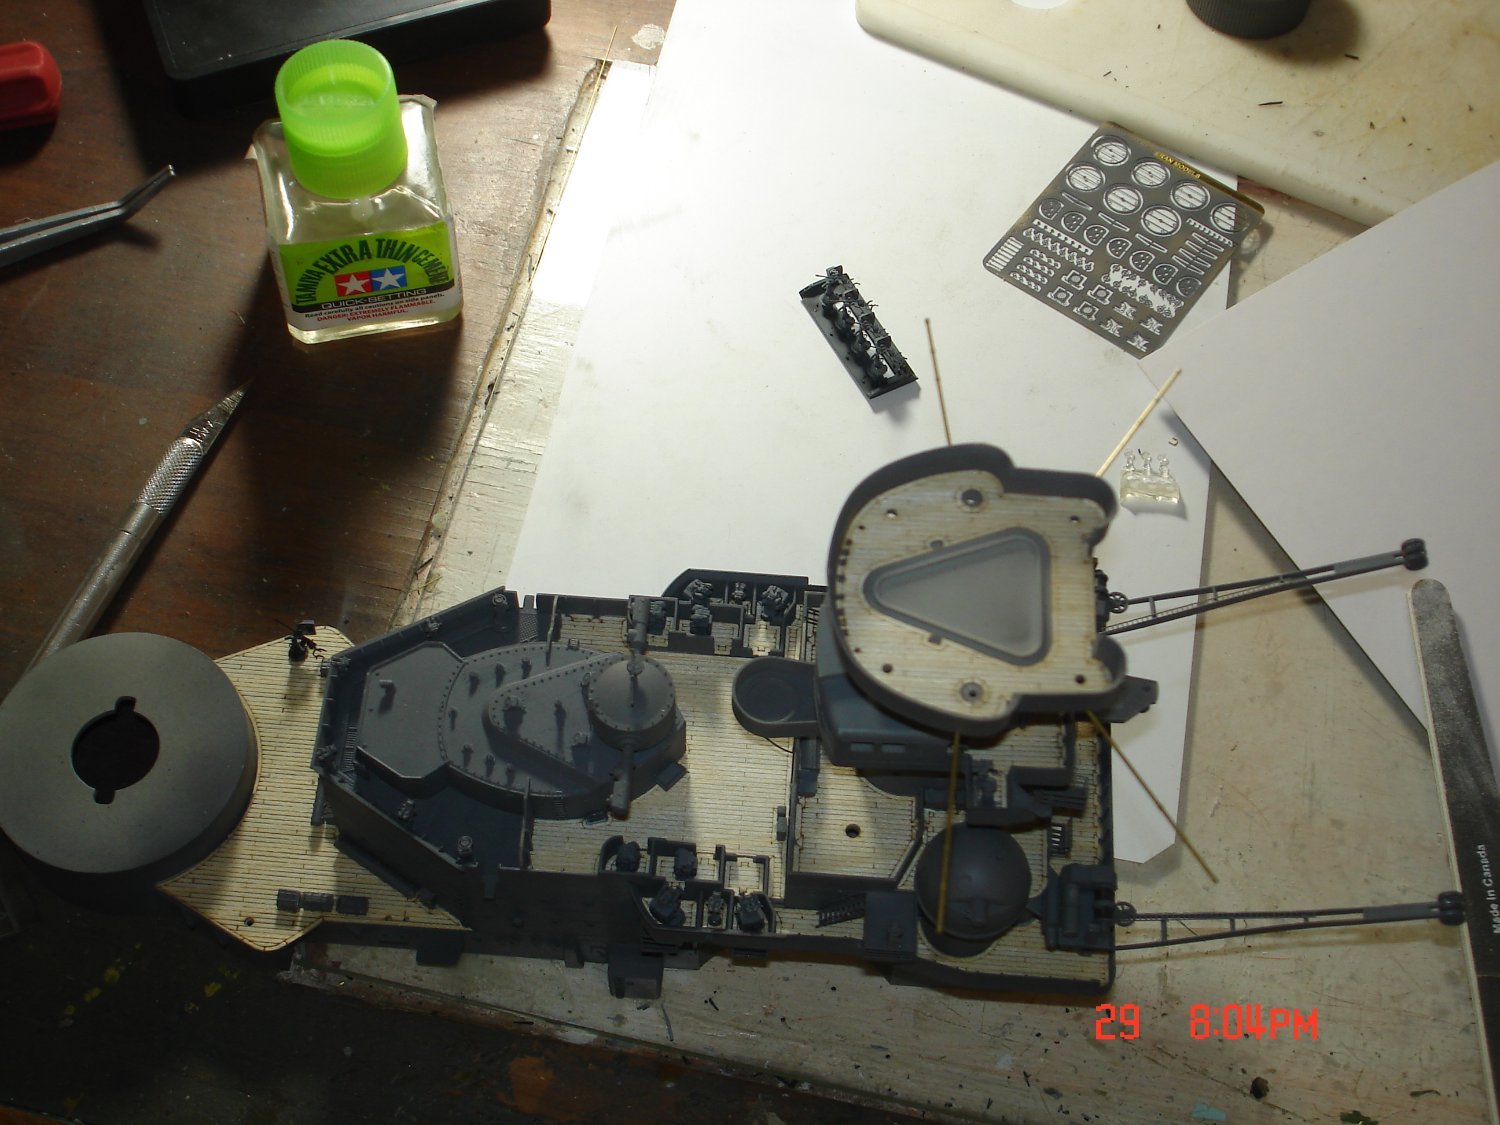
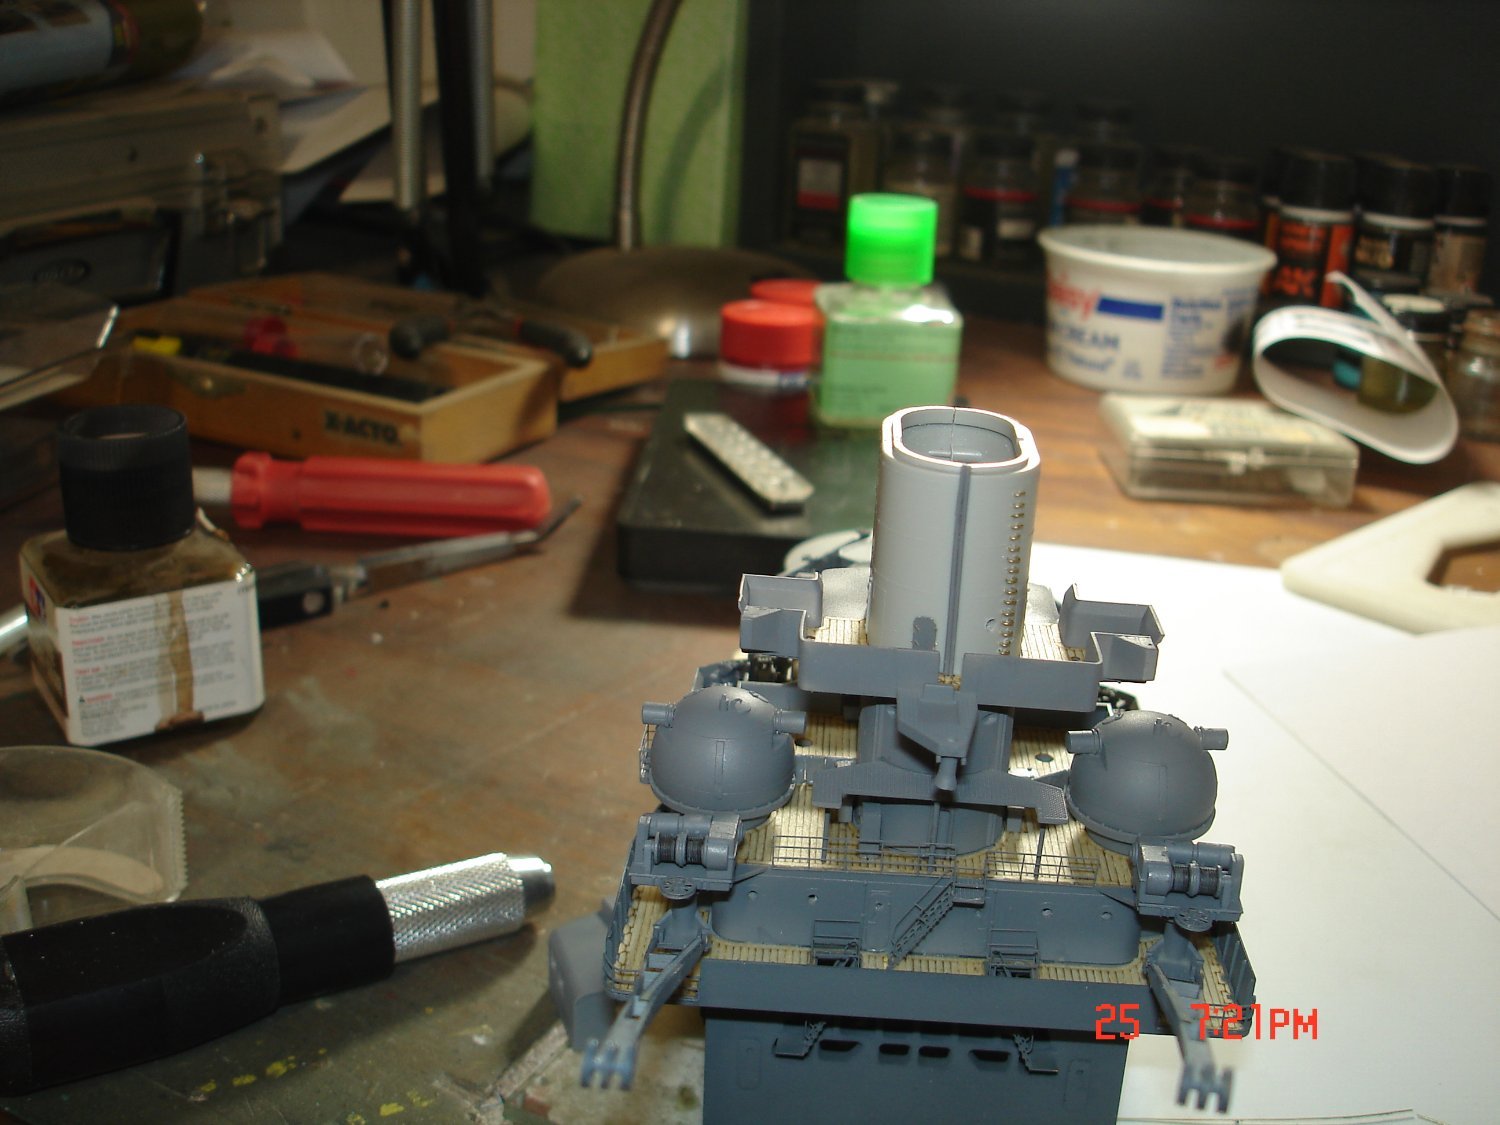
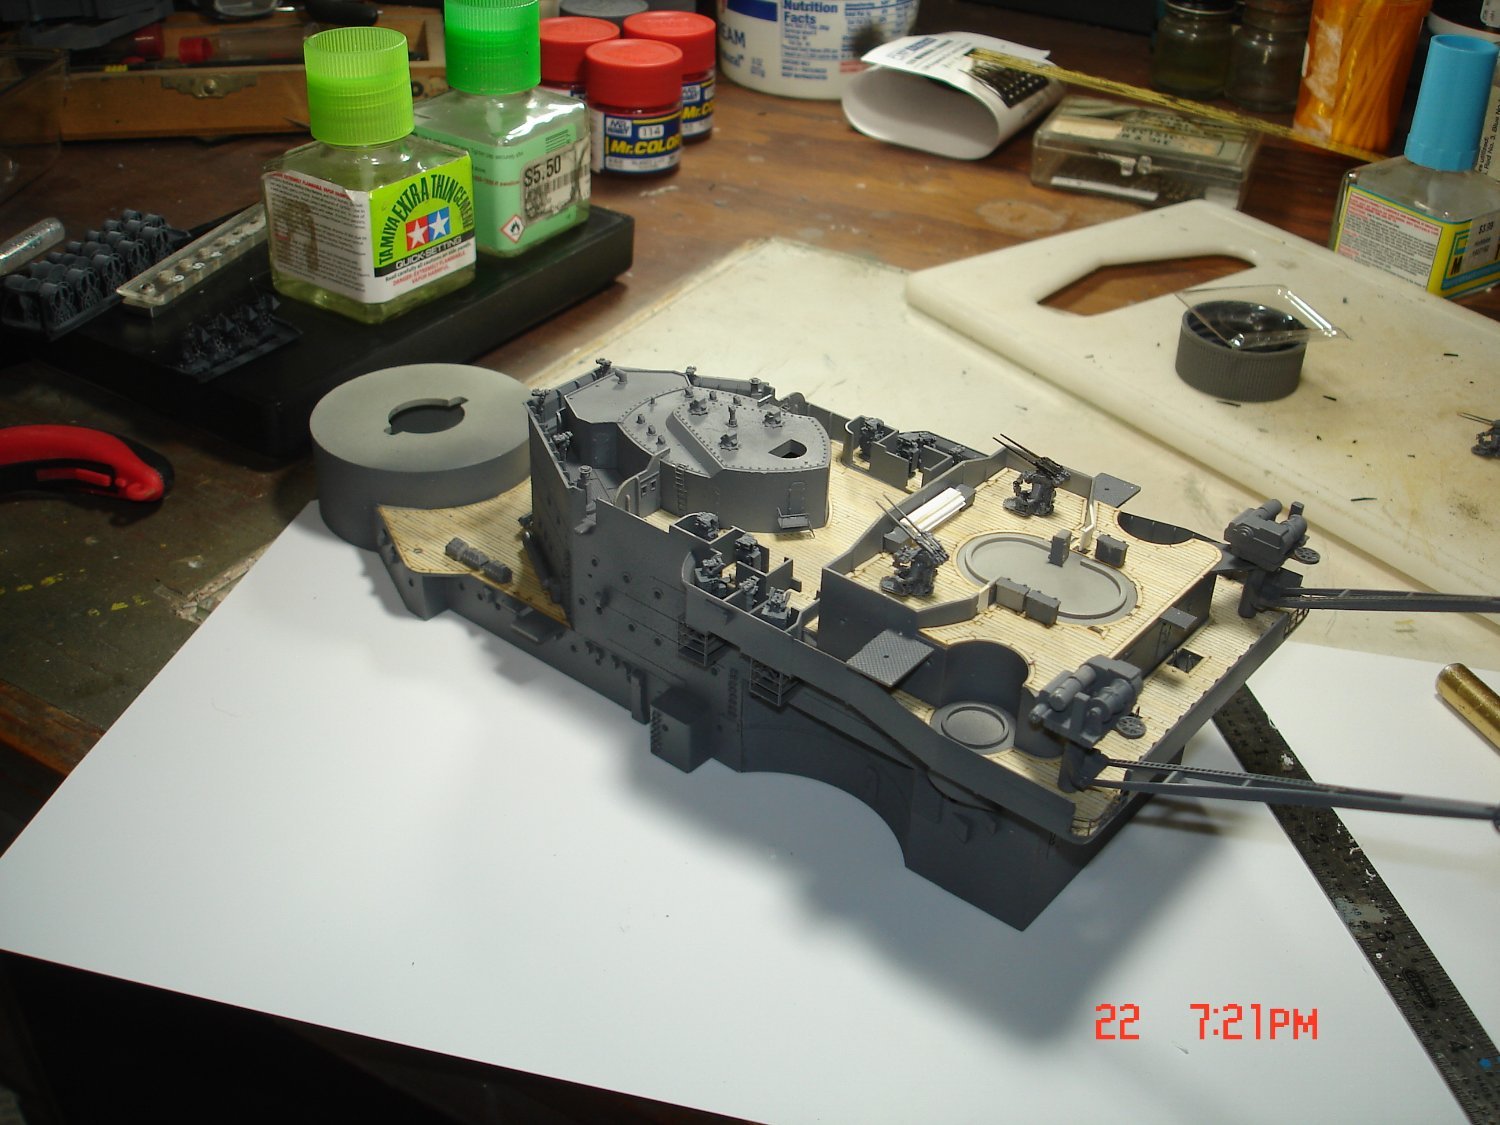
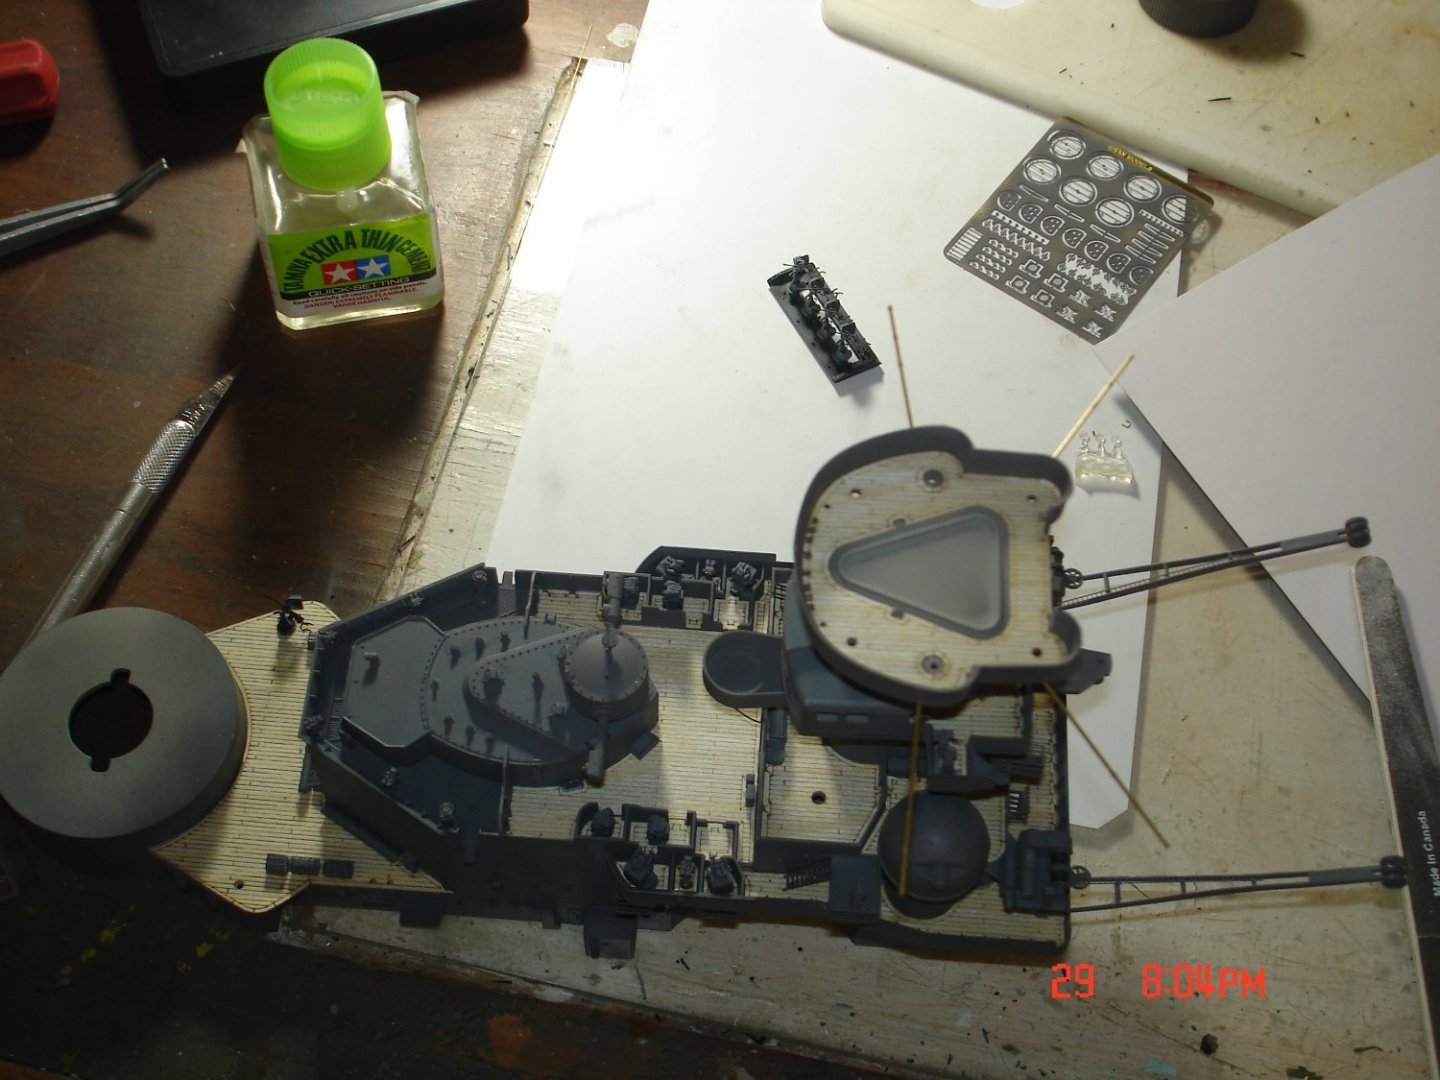
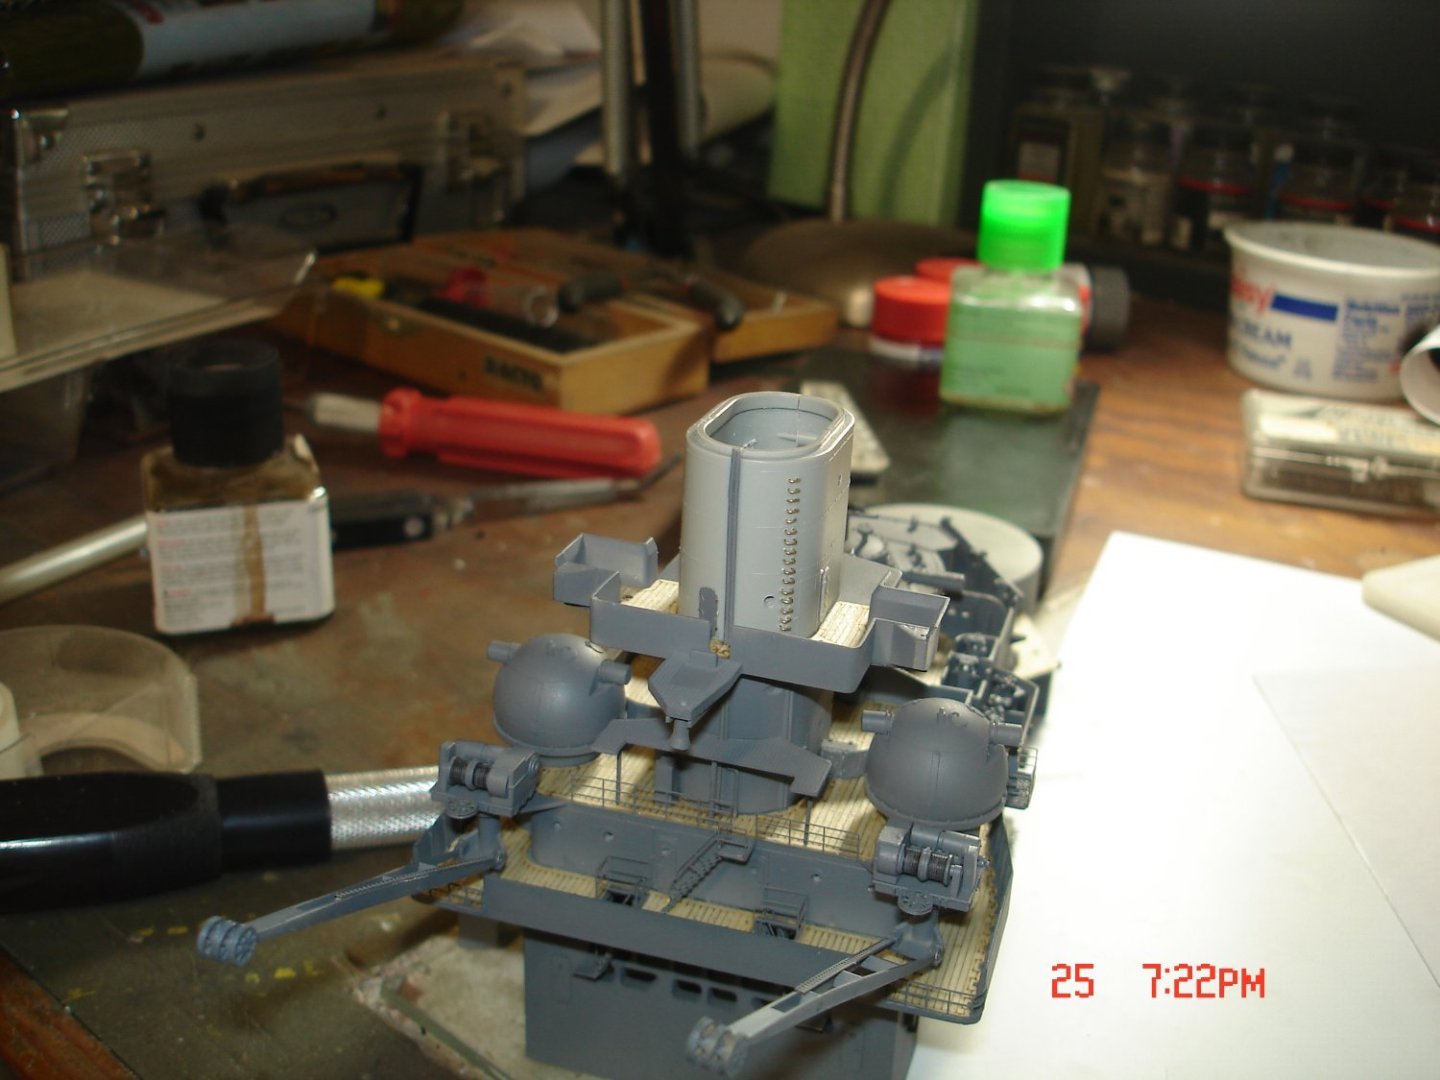
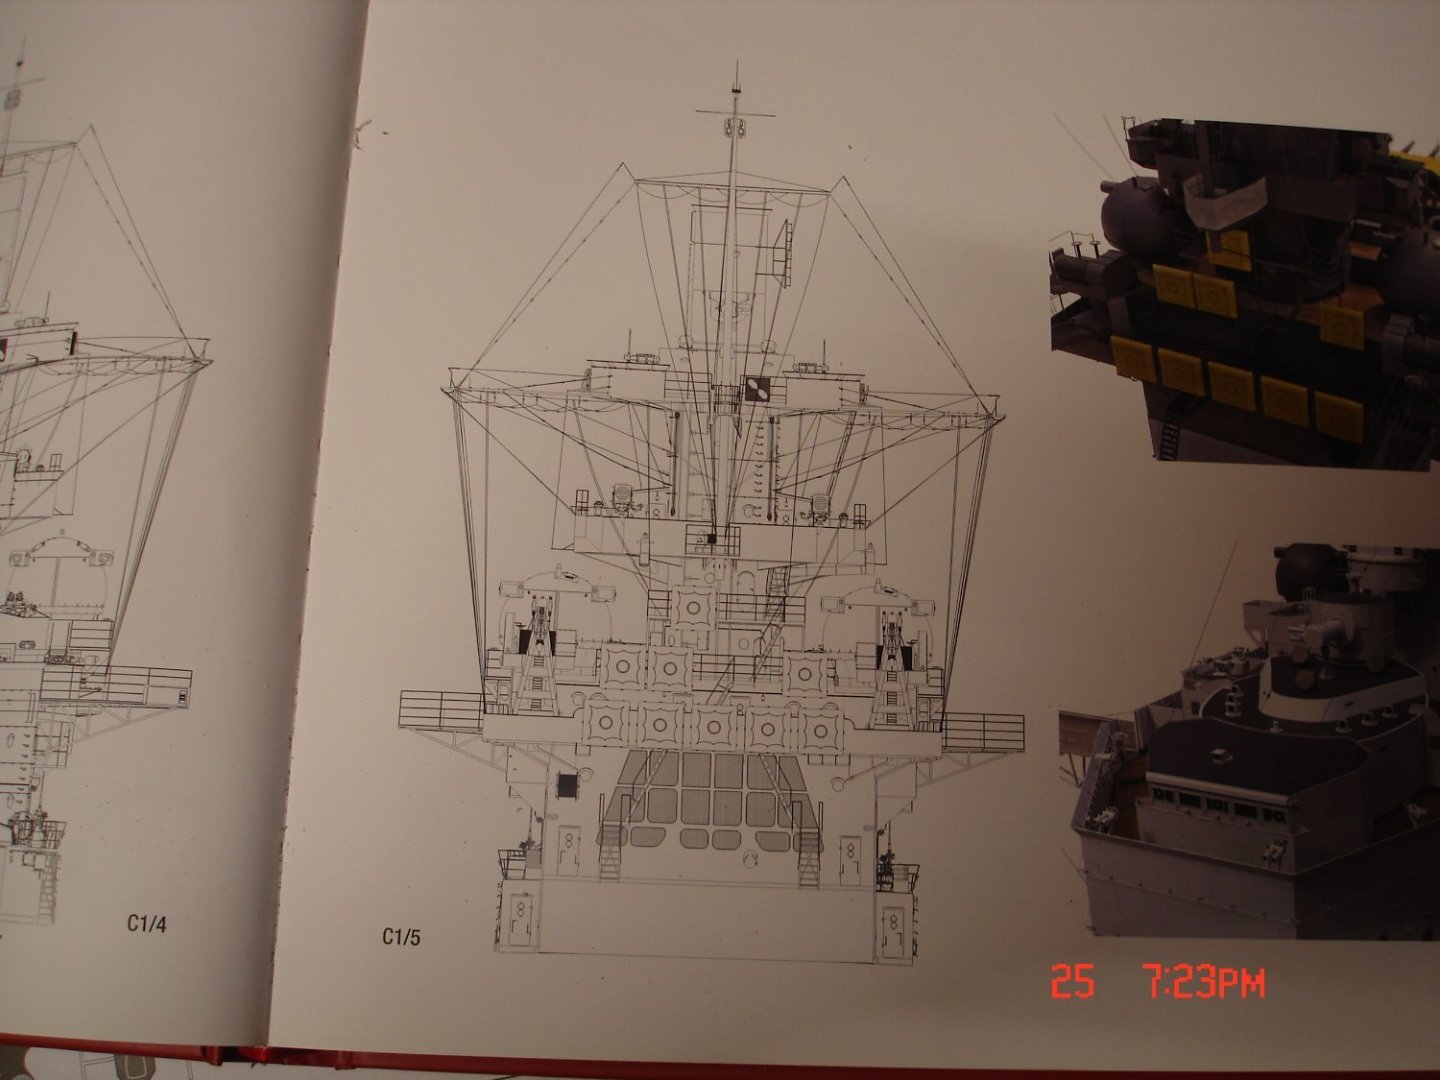
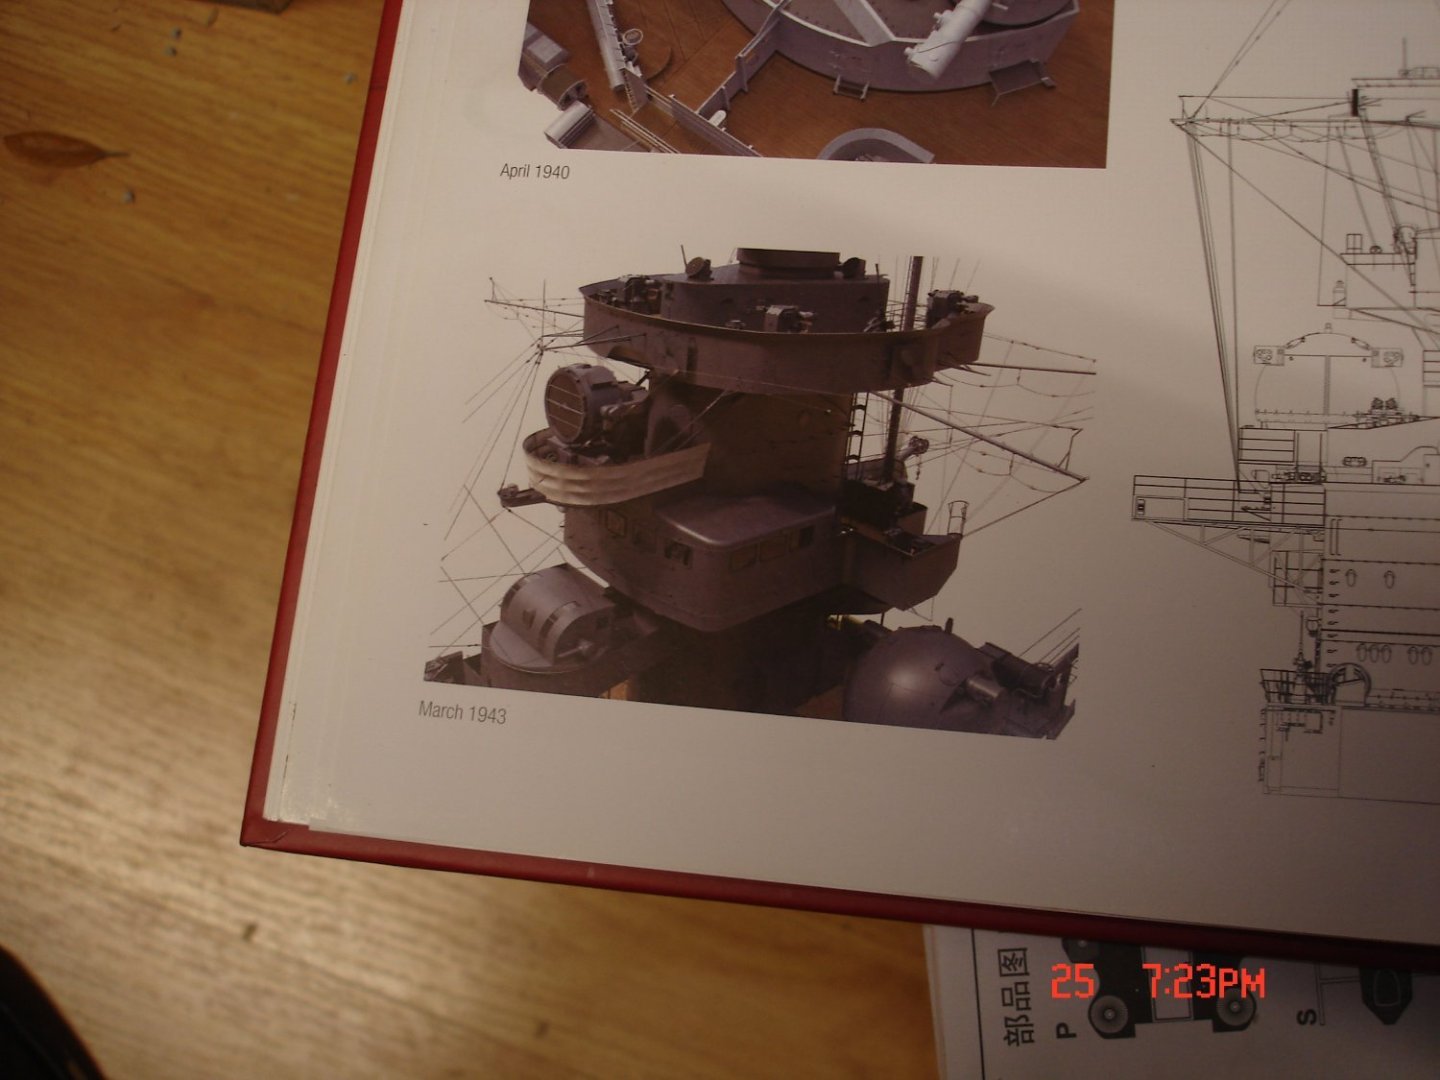
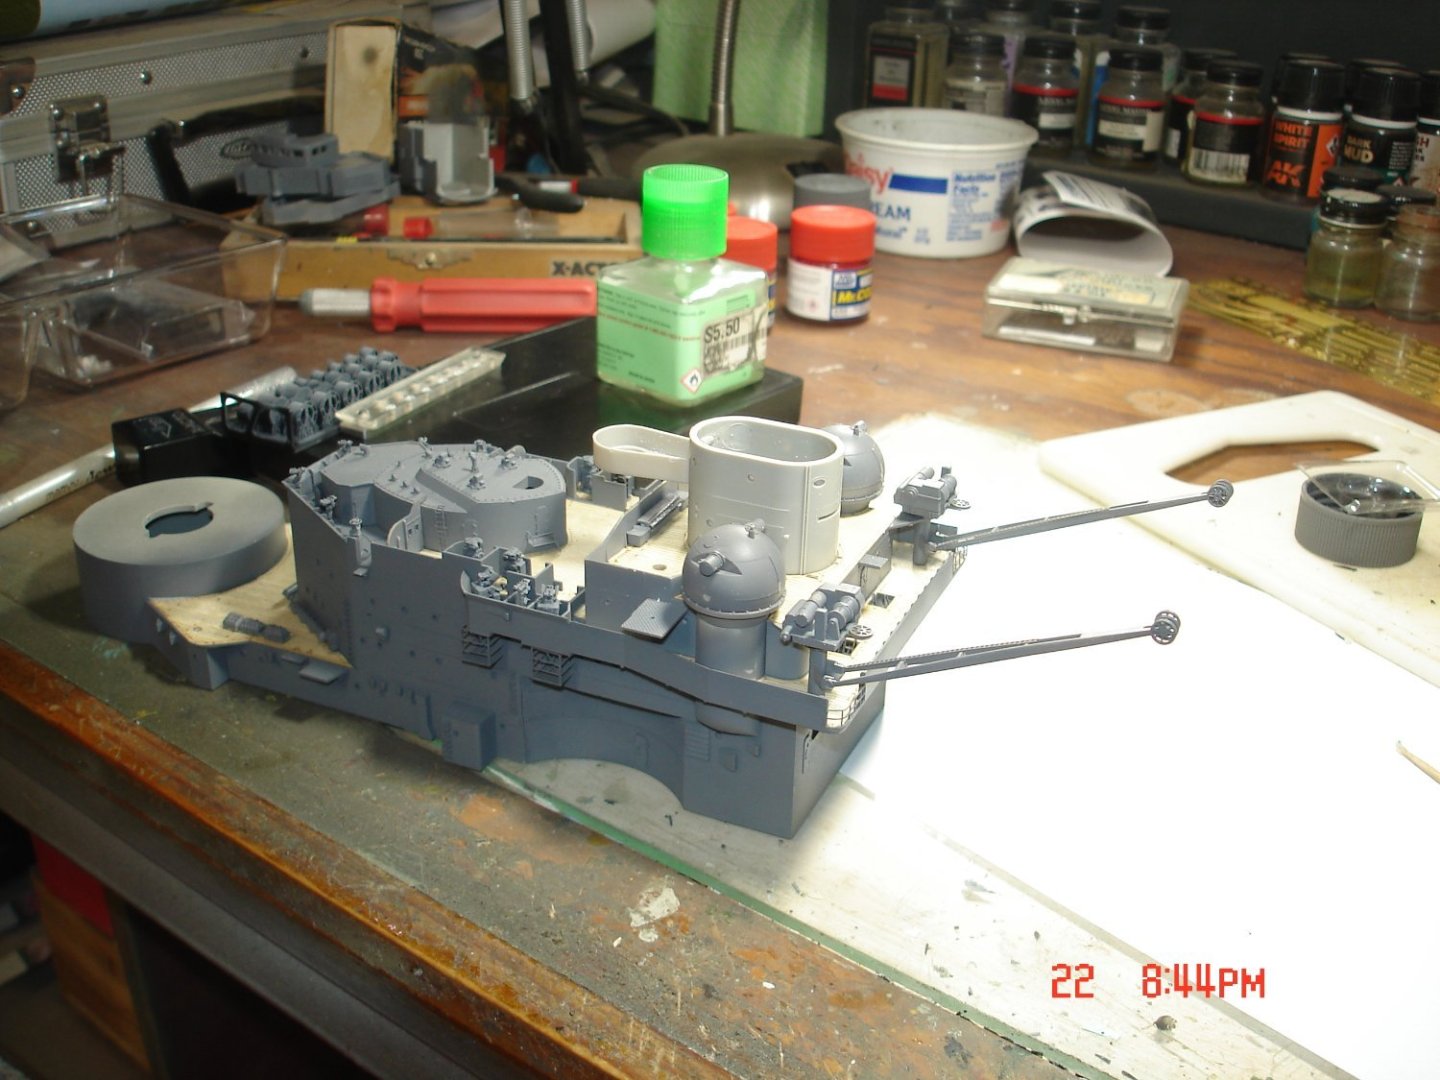
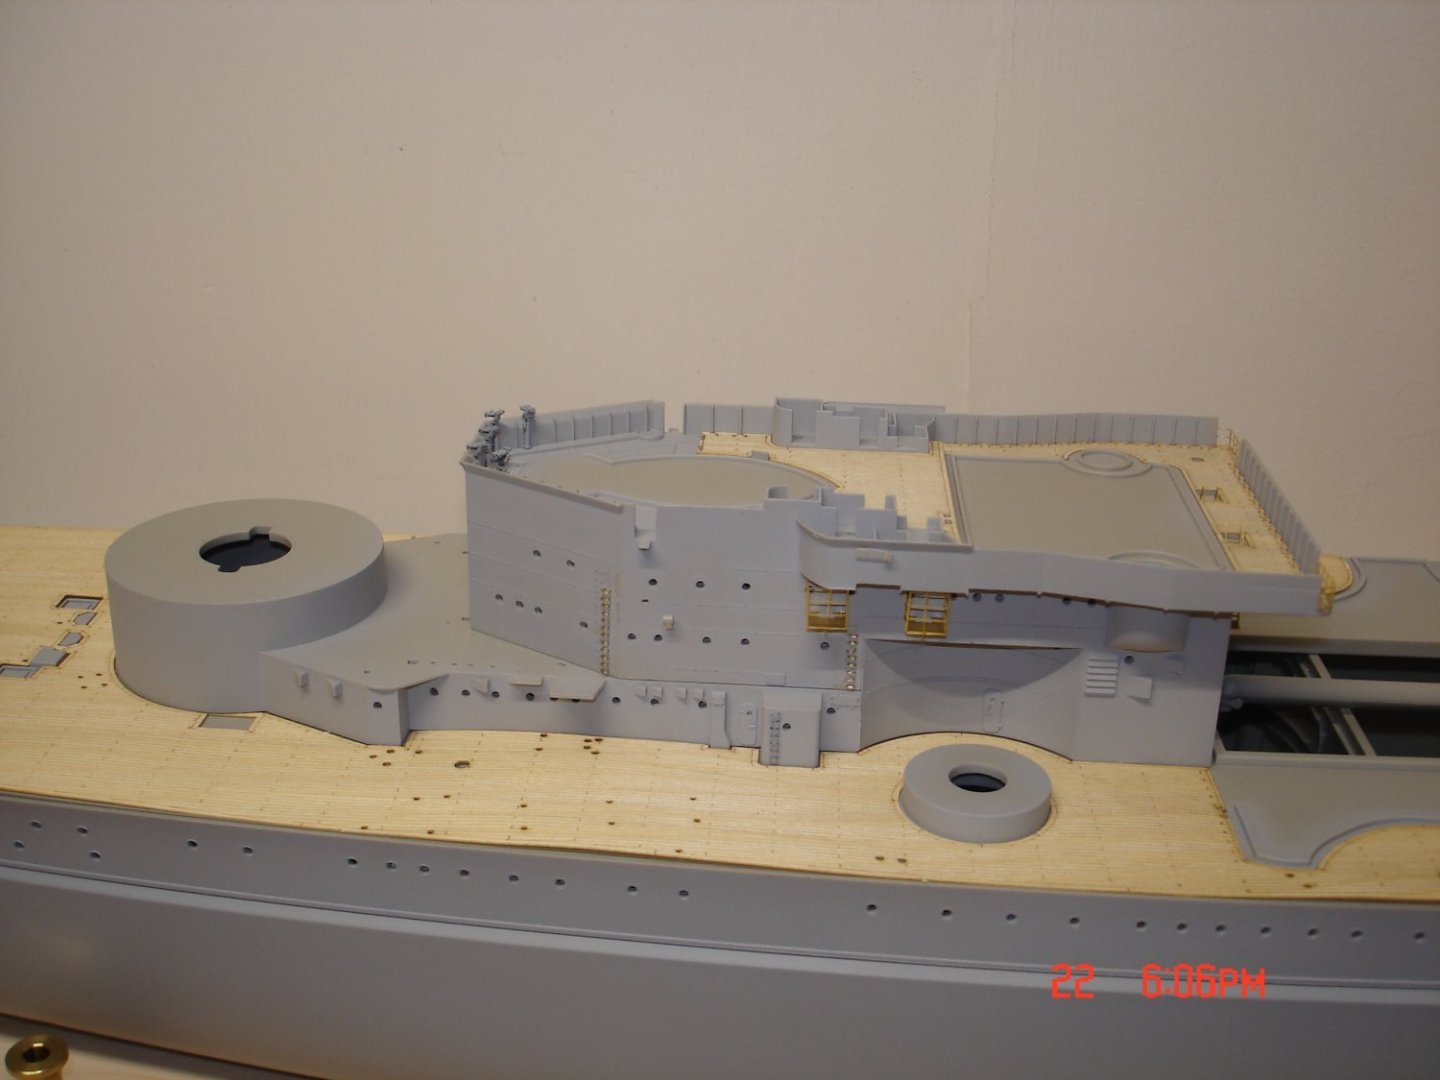
I have had some time to myself for a change and working to get it to pay off.I had to pull up three sets of Binoculars and reposition two of them further down the observation station and position two compasses.The book is becoming more and more a guide on the build this is the layout from March/43.I also cut off all the globes of plastic on top of the radar/rangefinder and replaced them with resin bits and made two features not present but so in 43.The 20mm Flak guns are really sasweeet but so fragile had to order three more sets just to be sure I have enough still more painting there.The rangefinder station is still not glued down yet and neither the tower to be built behind it sure/slow is the game plan.The book is awesome piece of reference material for this build a must.I have seen weras on other build people complaining about the fit of the rear SS to the deck?as you see I have left the moulded spruces in place from the factory giving it more rigidity across the deck.The rear SS will need a finger and 1/2 lbs of pressure till the glue sets slightly bowed upward it is.


- 68 replies
-
- 14
-
-
- Scharnhorst
- Trumpeter
- (and 1 more)
-
Amazing build Jolle I gleamed quite a few insights from the build for the Shcarnhorst which will not be to the statue of your build which was just amazing.
-
Shelby 427 S/C Cobra by CDW - FINISHED - Fujimi - 1:24 Scale
Javlin replied to CDW's topic in Non-ship/categorised builds
Now that's a motor!Back in the 80's when I worked in a machine shop I believe it's Big Daddy's in FL still had one of those in a crate -
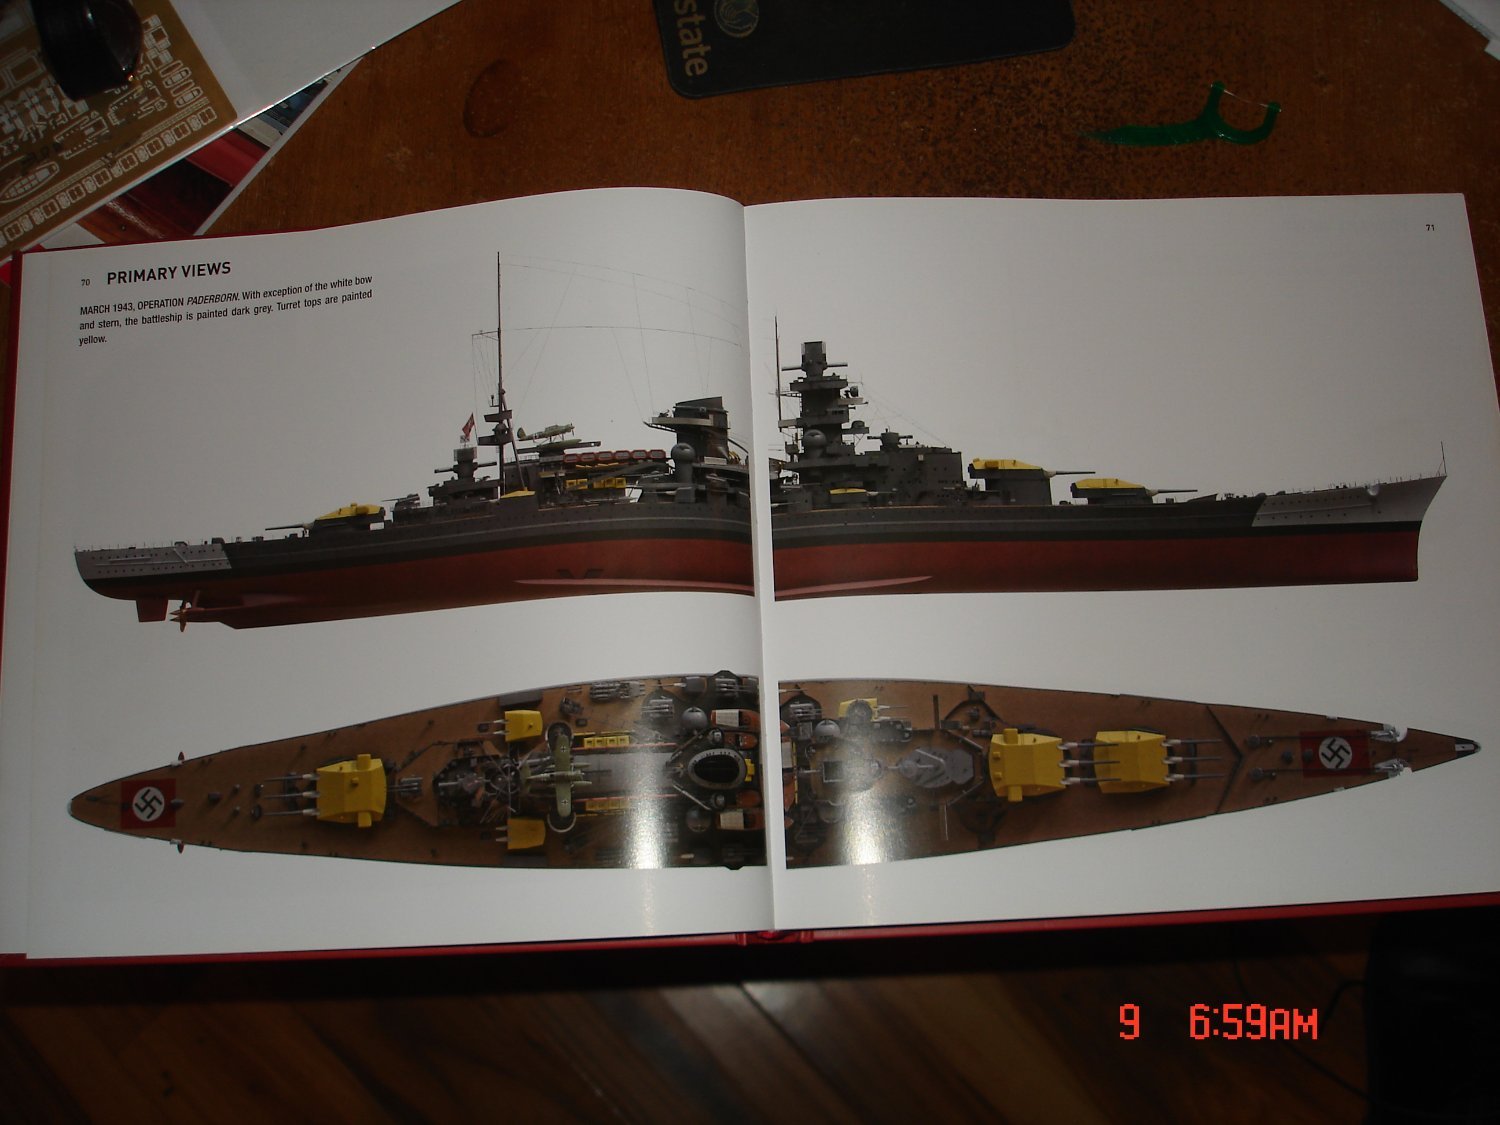
I am hoping to do it justice Alan it will not be as tight as the fella in France but it will be alot better than most I have seen on YT and other builds.The book "The Anatomy of a Ship" "Sharnhorst" is a must looks like lots of research went into that book I trust the colors and configurations presented.The first color I had for Dark Grey was really Black Grey about atleast 5shades darker than now that's when RLM75 looked close in my eyes and very possible.
- 68 replies
-
- 4
-
-
- Scharnhorst
- Trumpeter
- (and 1 more)
-
I do Hof I am actually using a 1/350 scale for IJN ships in 1/350 it's 24" and in 1/200 roughly 15/16" which using what they molded on and the pics in the book and actual pics they look pretty narrow 16' is about across the shoulders esp back then.I took a pair of old tweezers ground them down on the other side of the shop and used brass wire and folder over the square edges.The IJN ships are littered with those rails all up and down the hull they believed in them not so much for the Kreigsmarine.
- 68 replies
-
- 4
-
-
- Scharnhorst
- Trumpeter
- (and 1 more)
-
Thanks Yvesvidal I had seen that once before back searching the net when I got the kit a couple years ago he is Very Good at what he does/doing when I look he had only a couple three pages going.I am glad you brought it up stuff like the range finder and main guns are of interest for sure.
- 68 replies
-
- 5
-
-
- Scharnhorst
- Trumpeter
- (and 1 more)
-
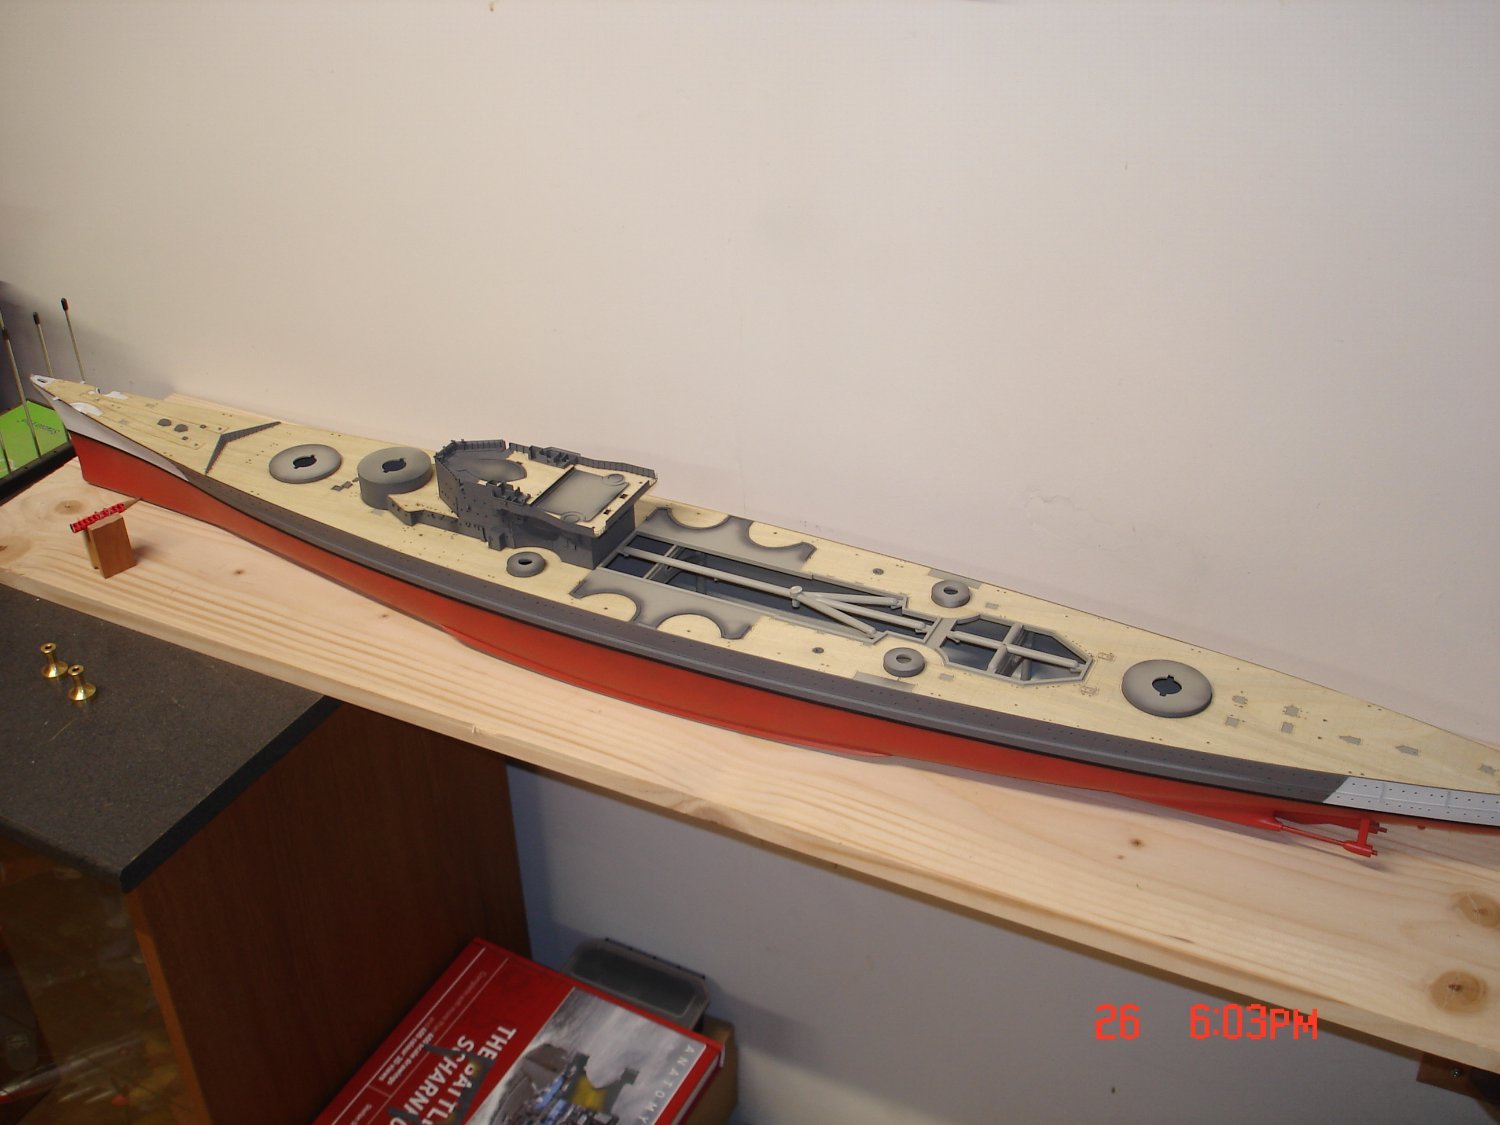
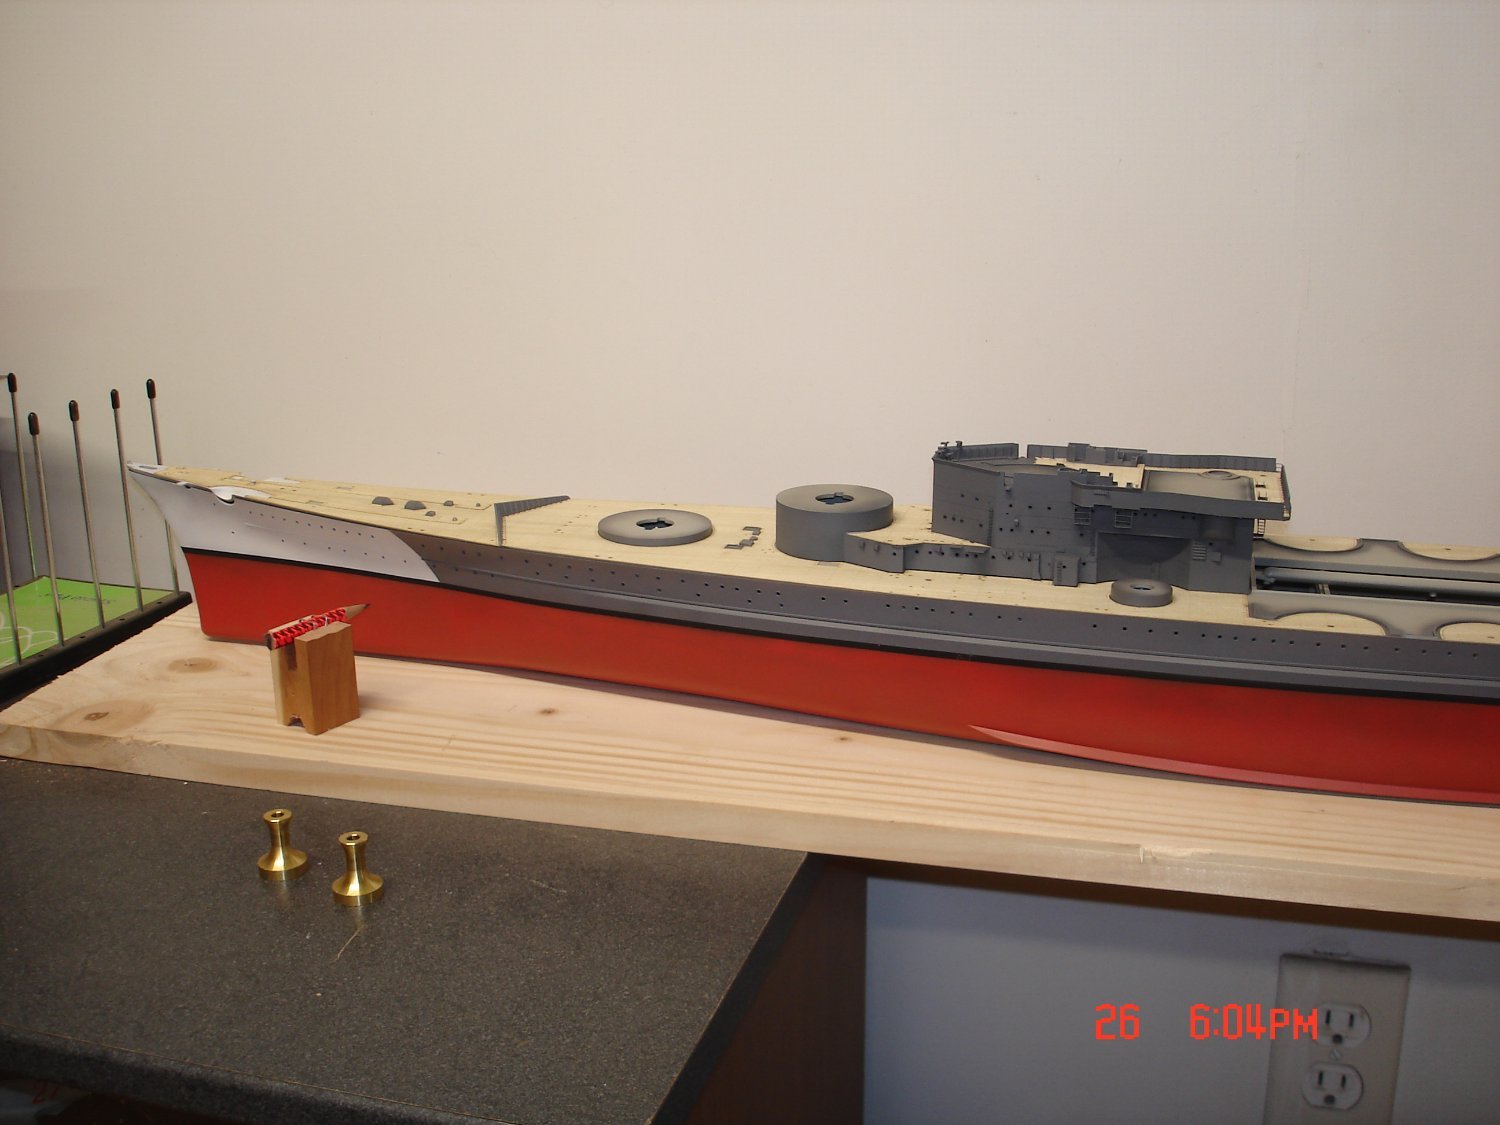
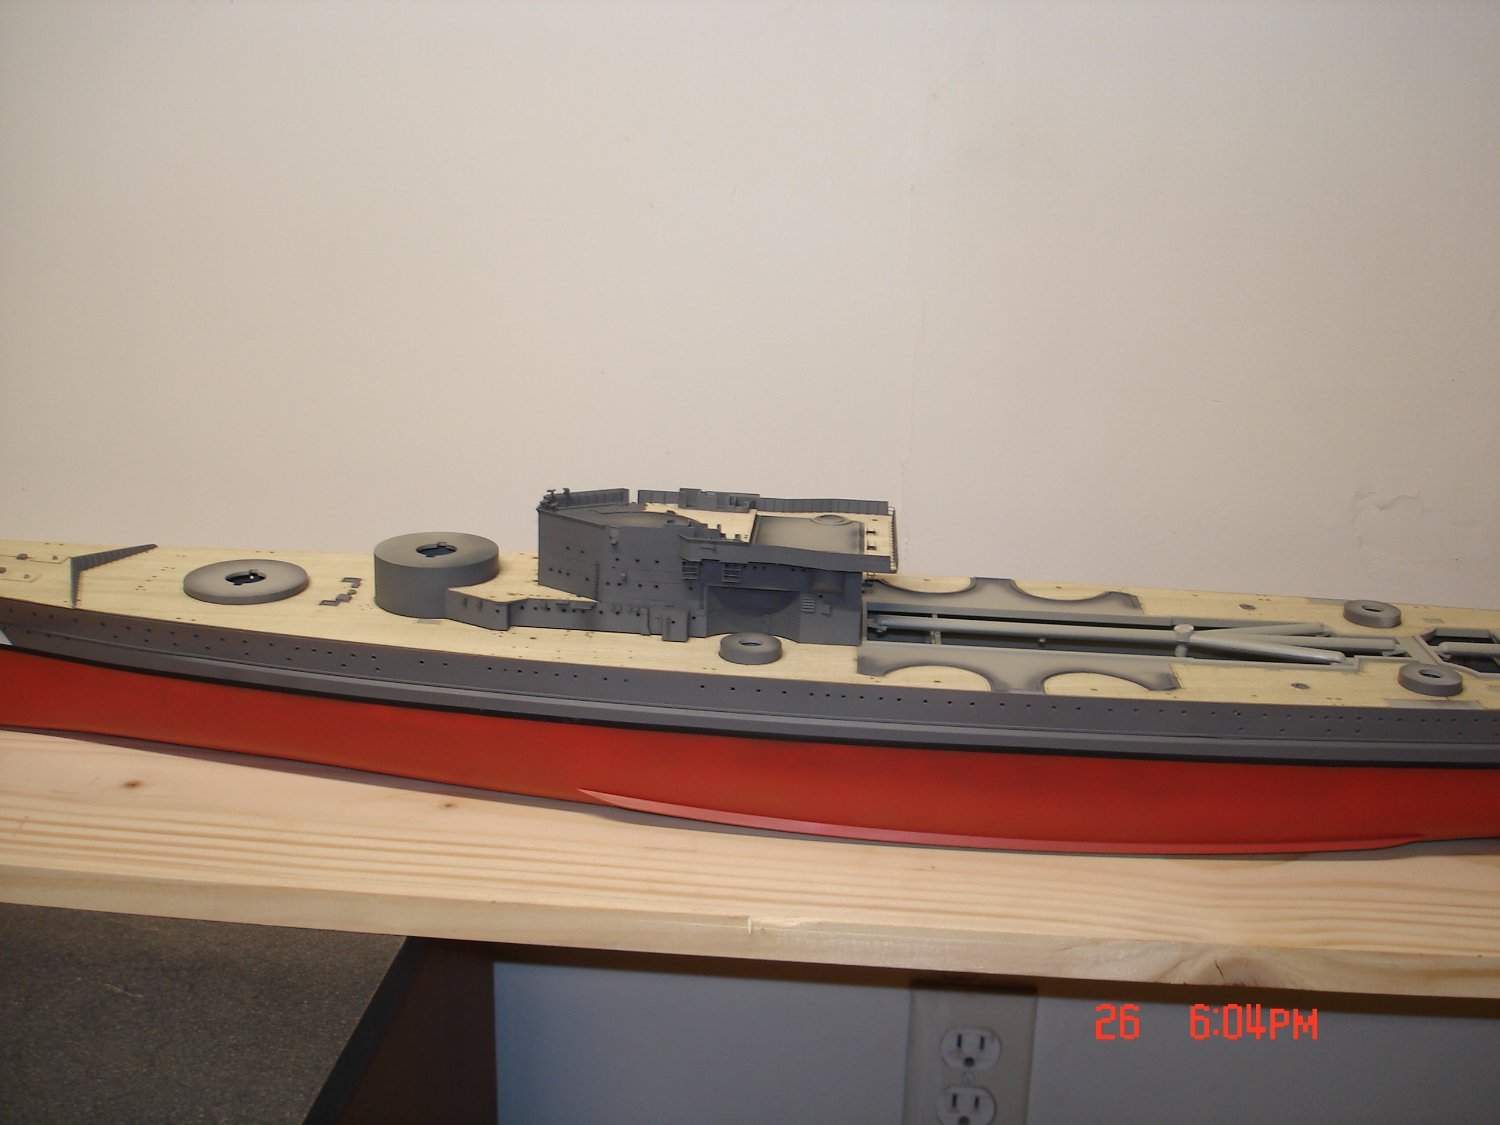
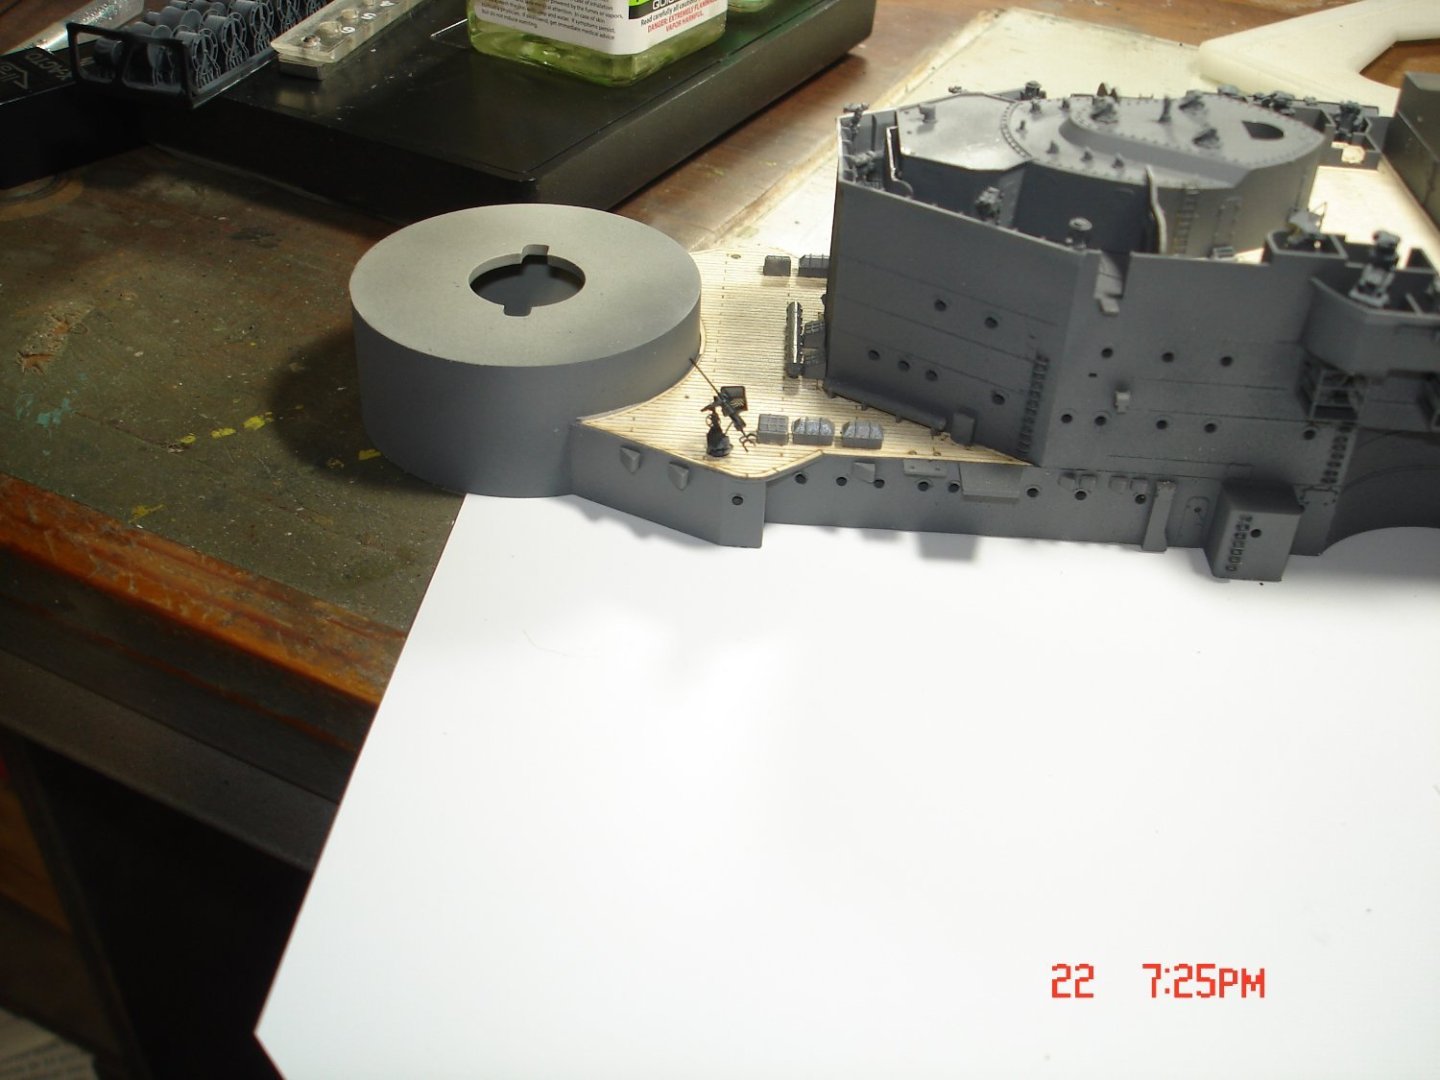
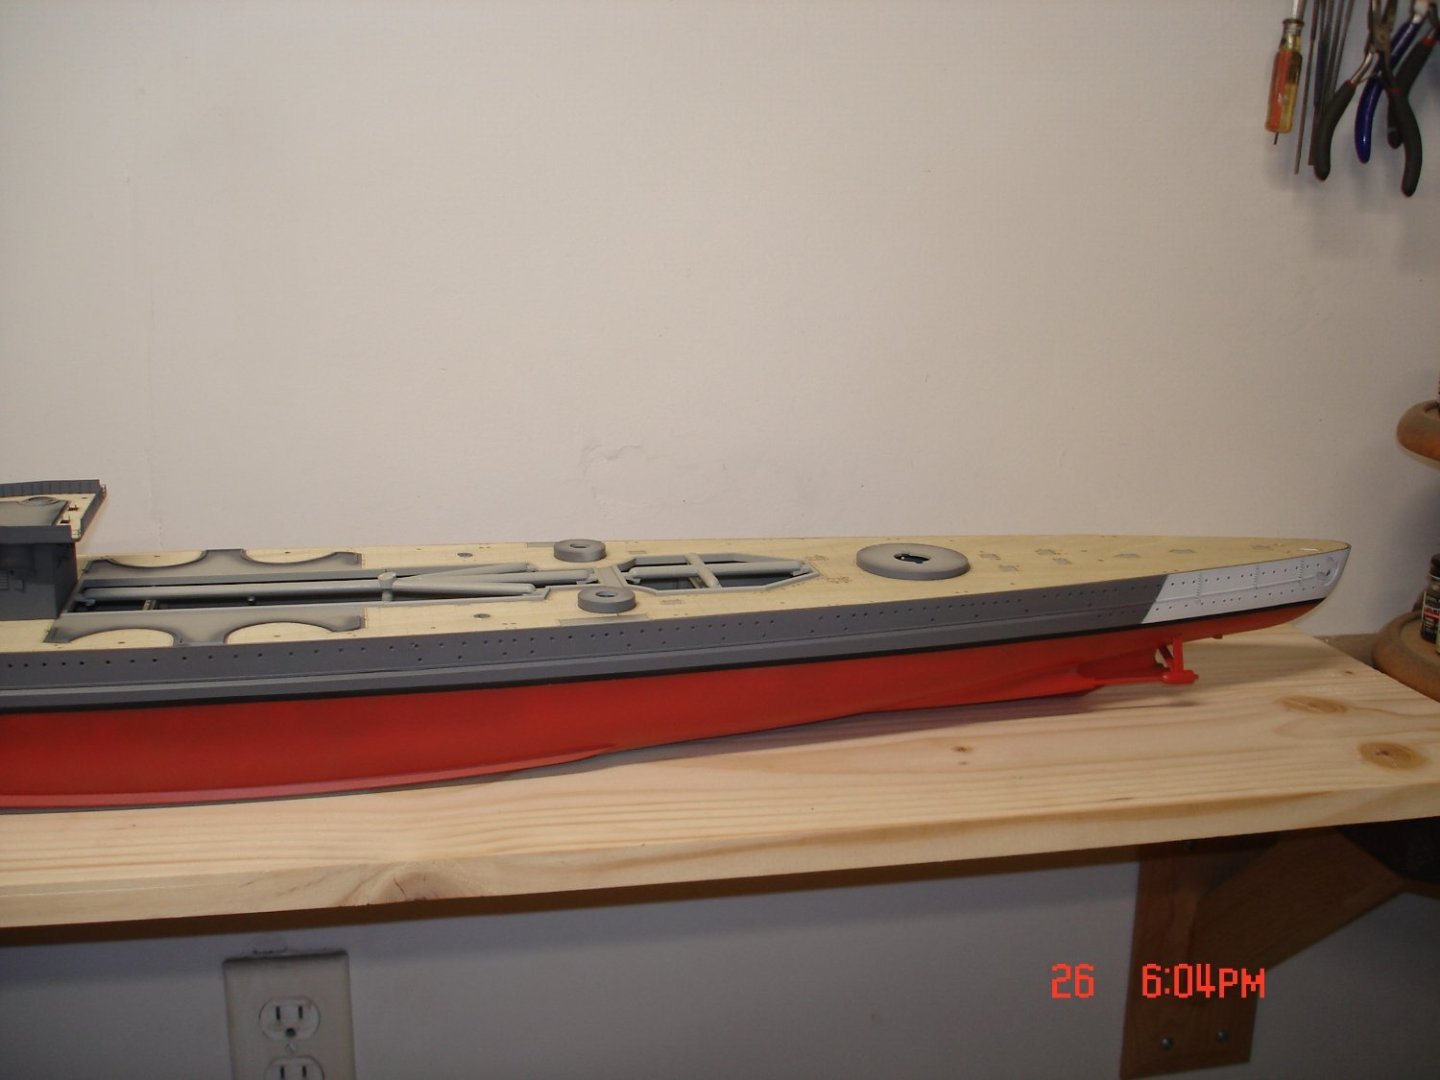
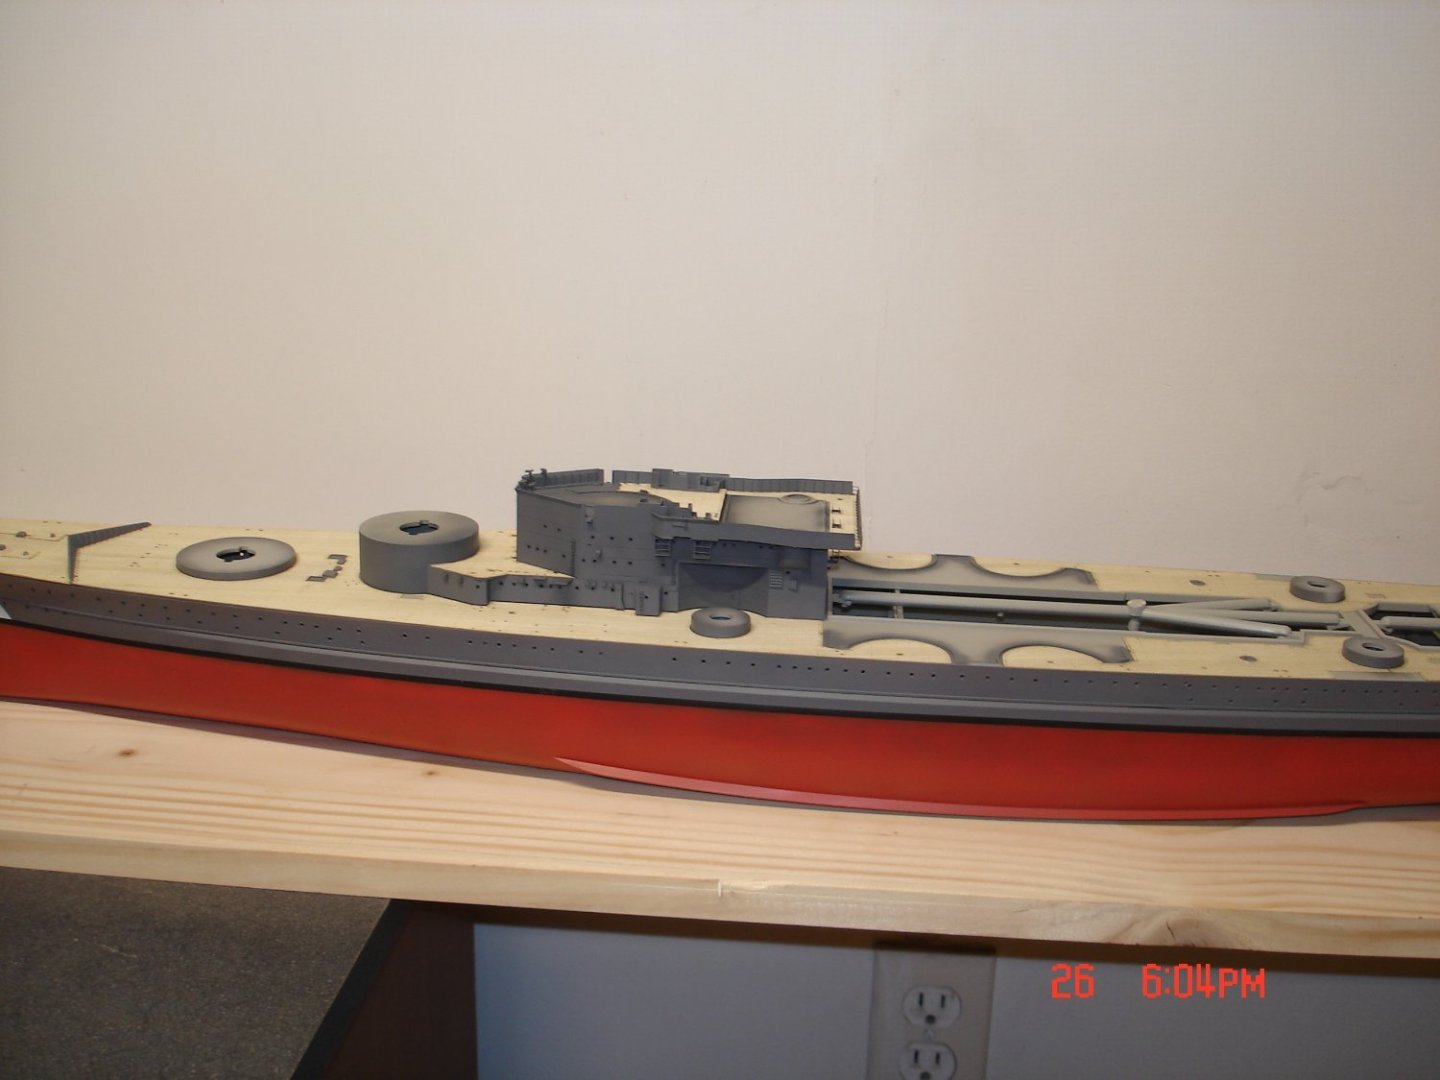
I finally got an extra day off and the hull is painted except the very bottom about a 1' long area what you see is a whole bottle of Mr.Color RLM23 I got 3x more coming makes a Nice hull red for anything but the IJN.The wood decks you see have been attached and I am do so on these when the backing is in place they look decent but after you peel the backing the grain shows to much methinks?I will say what I have on the SS looks like it fades with activity so will see.The decks and SS are not glued down yet the fore-deck needs a little more work and the base needs to be cut with pedestals and all mounted.I will continue to play with features and sub-assemblies of the SS. Colors call outs Mr.Color RLM23=Lower Hull Testors Semi-Black =Boot Mr.Color RLM75 =Upper Hull Testors Flat White =Upper Hull Camo The base will be like the Schnell Boat "Paduka" with a Roman around the edge got to get that part done to mount the decks afterwards.


- 68 replies
-
- 17
-
-
- Scharnhorst
- Trumpeter
- (and 1 more)
-
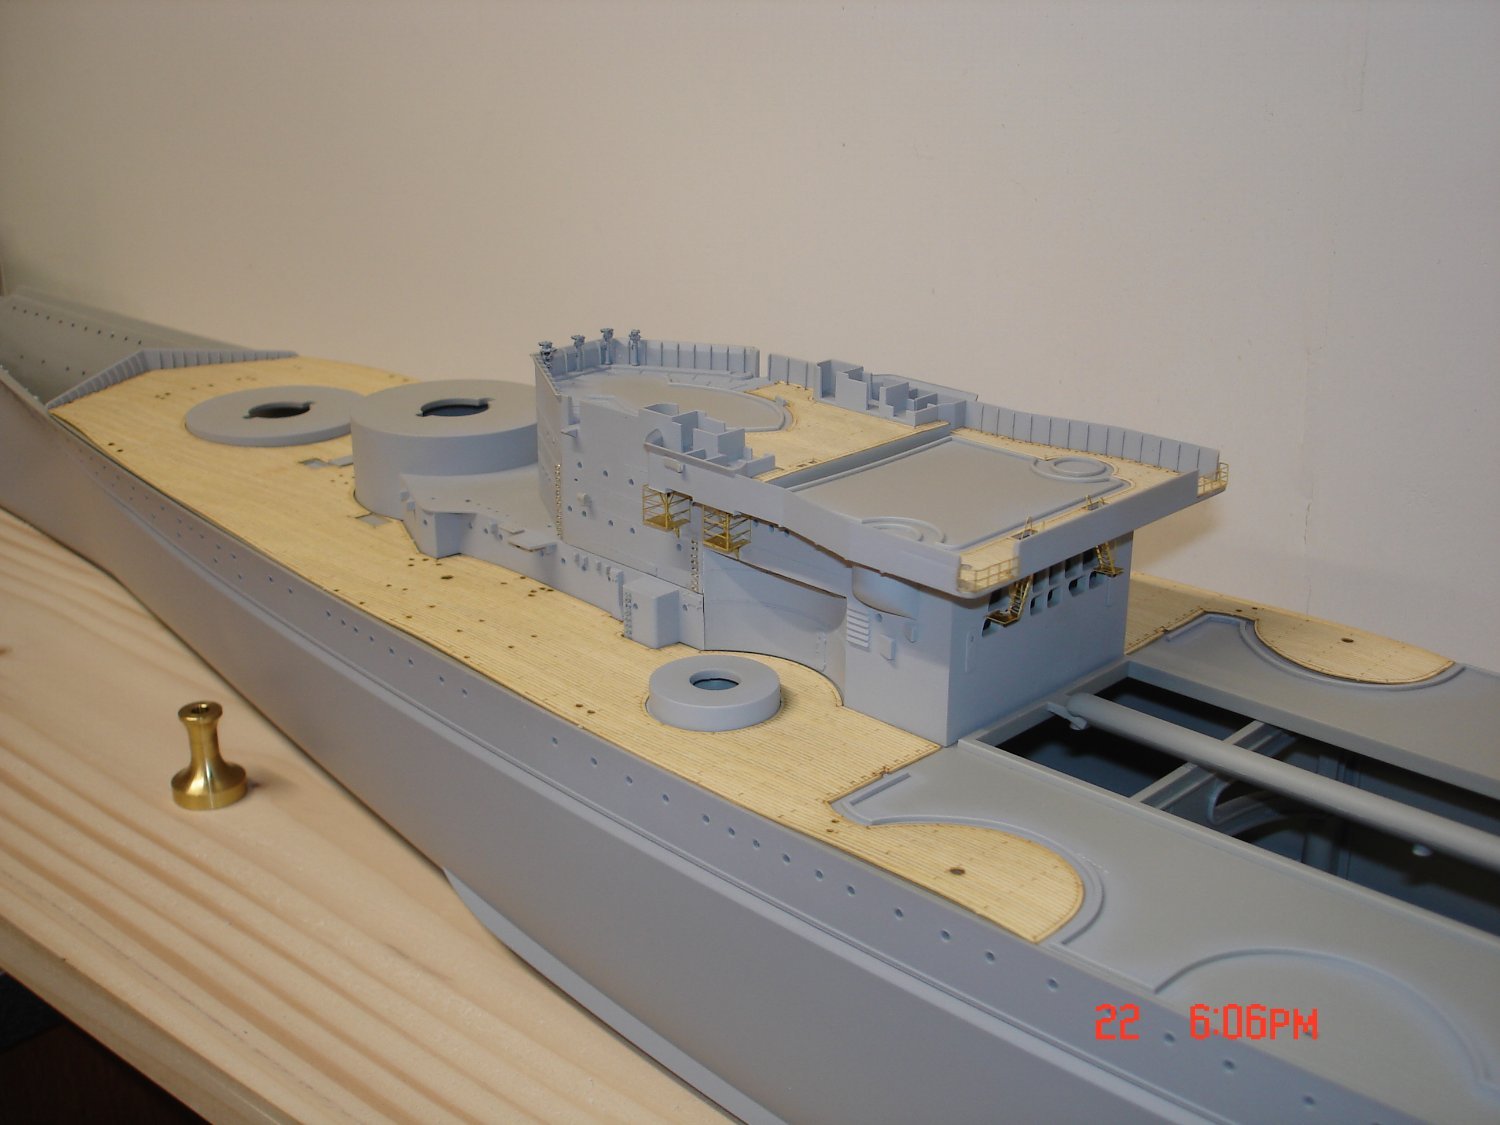
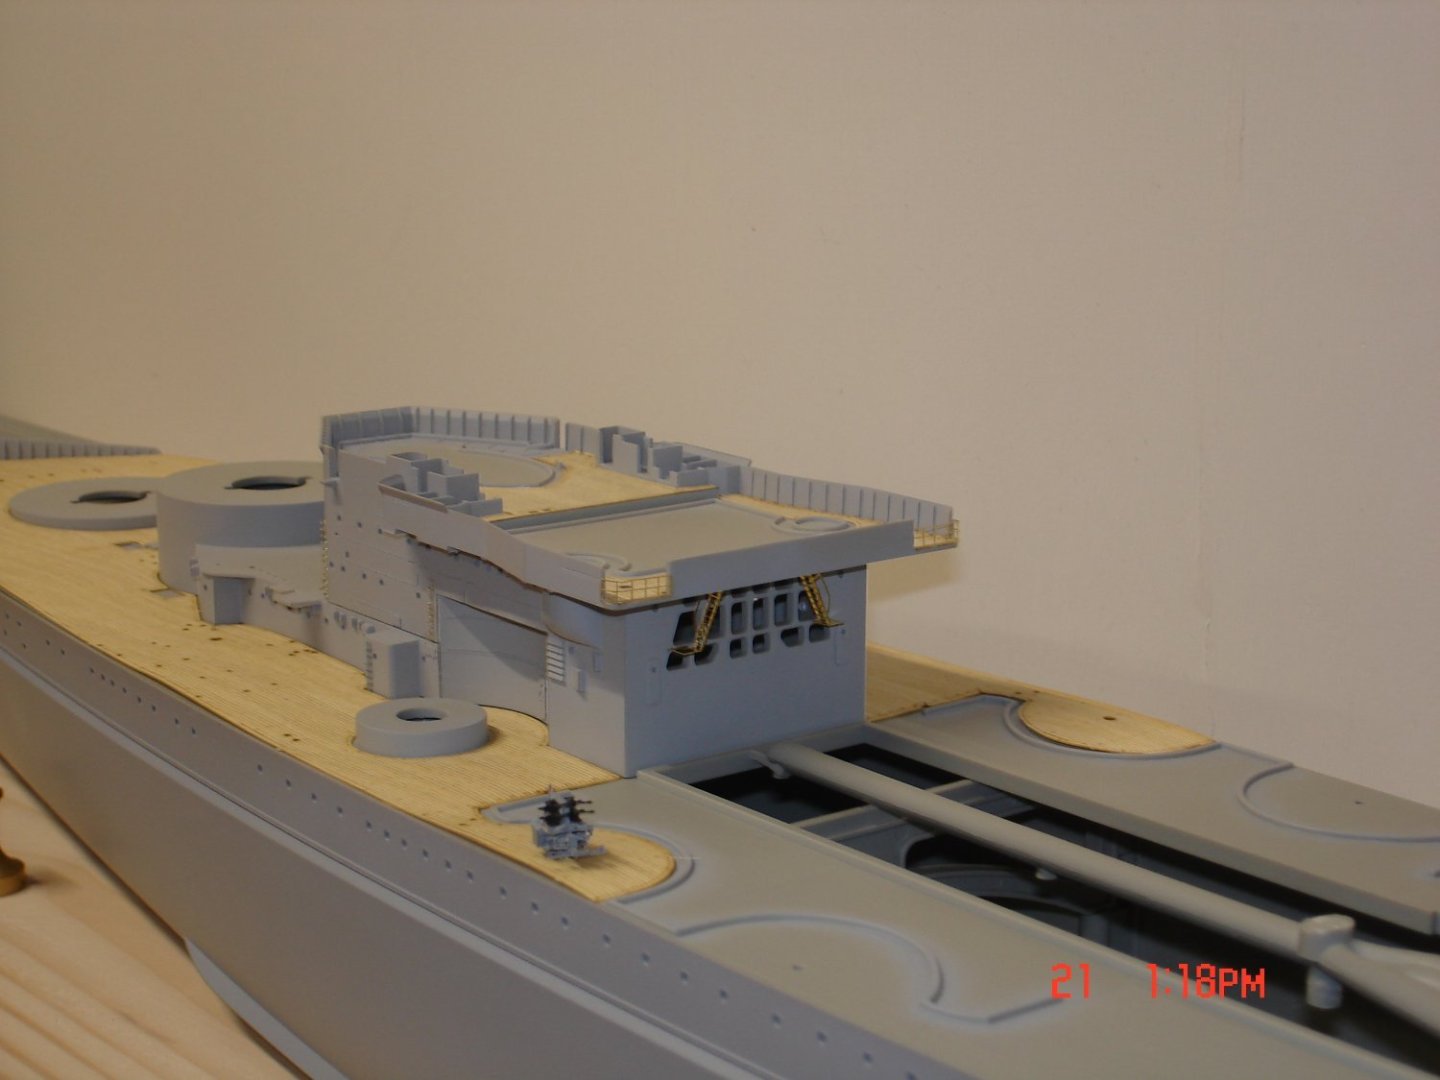
Getting closer to some paint on the SS more procedural than anything ATTM.The ladders on the back are a nice touch the bottom platform stuck out towards the SS and glued into a slot on the SS.I have mask for all the wooden deck areas came in the kit just that you want use it at the right time.The Quad's are Nice even have the seats in place. One of the Quads built Nice even has the seats!!

- 68 replies
-
- 15
-
-
- Scharnhorst
- Trumpeter
- (and 1 more)
-
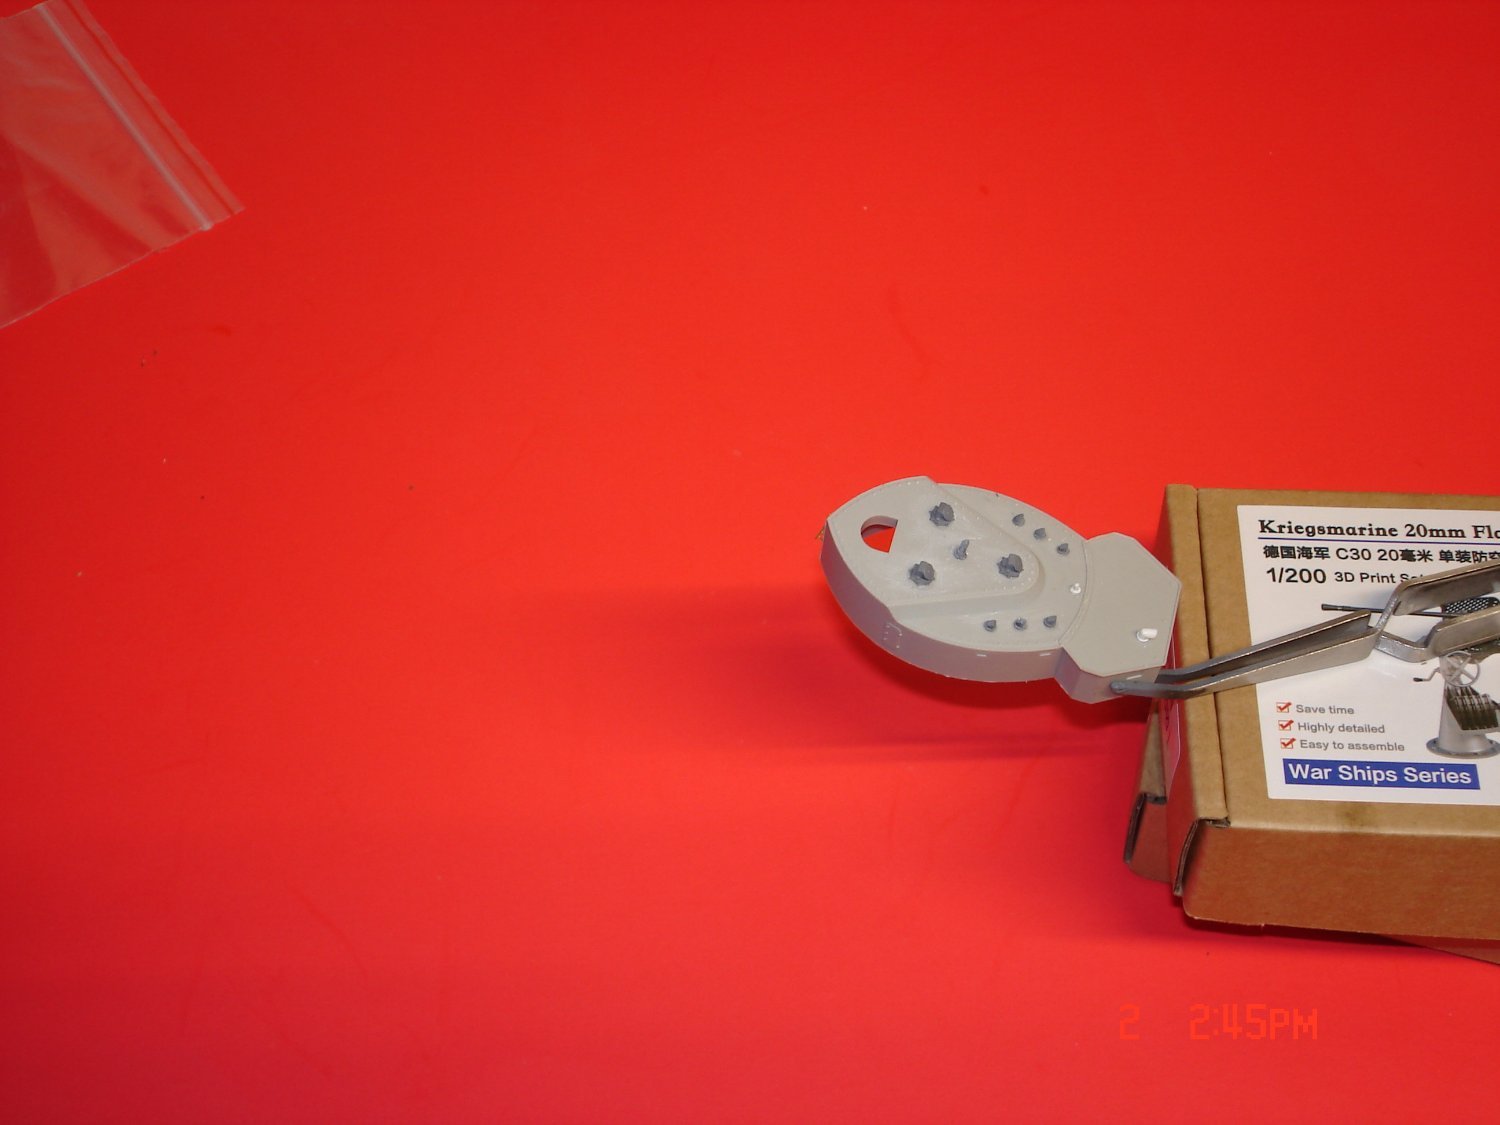
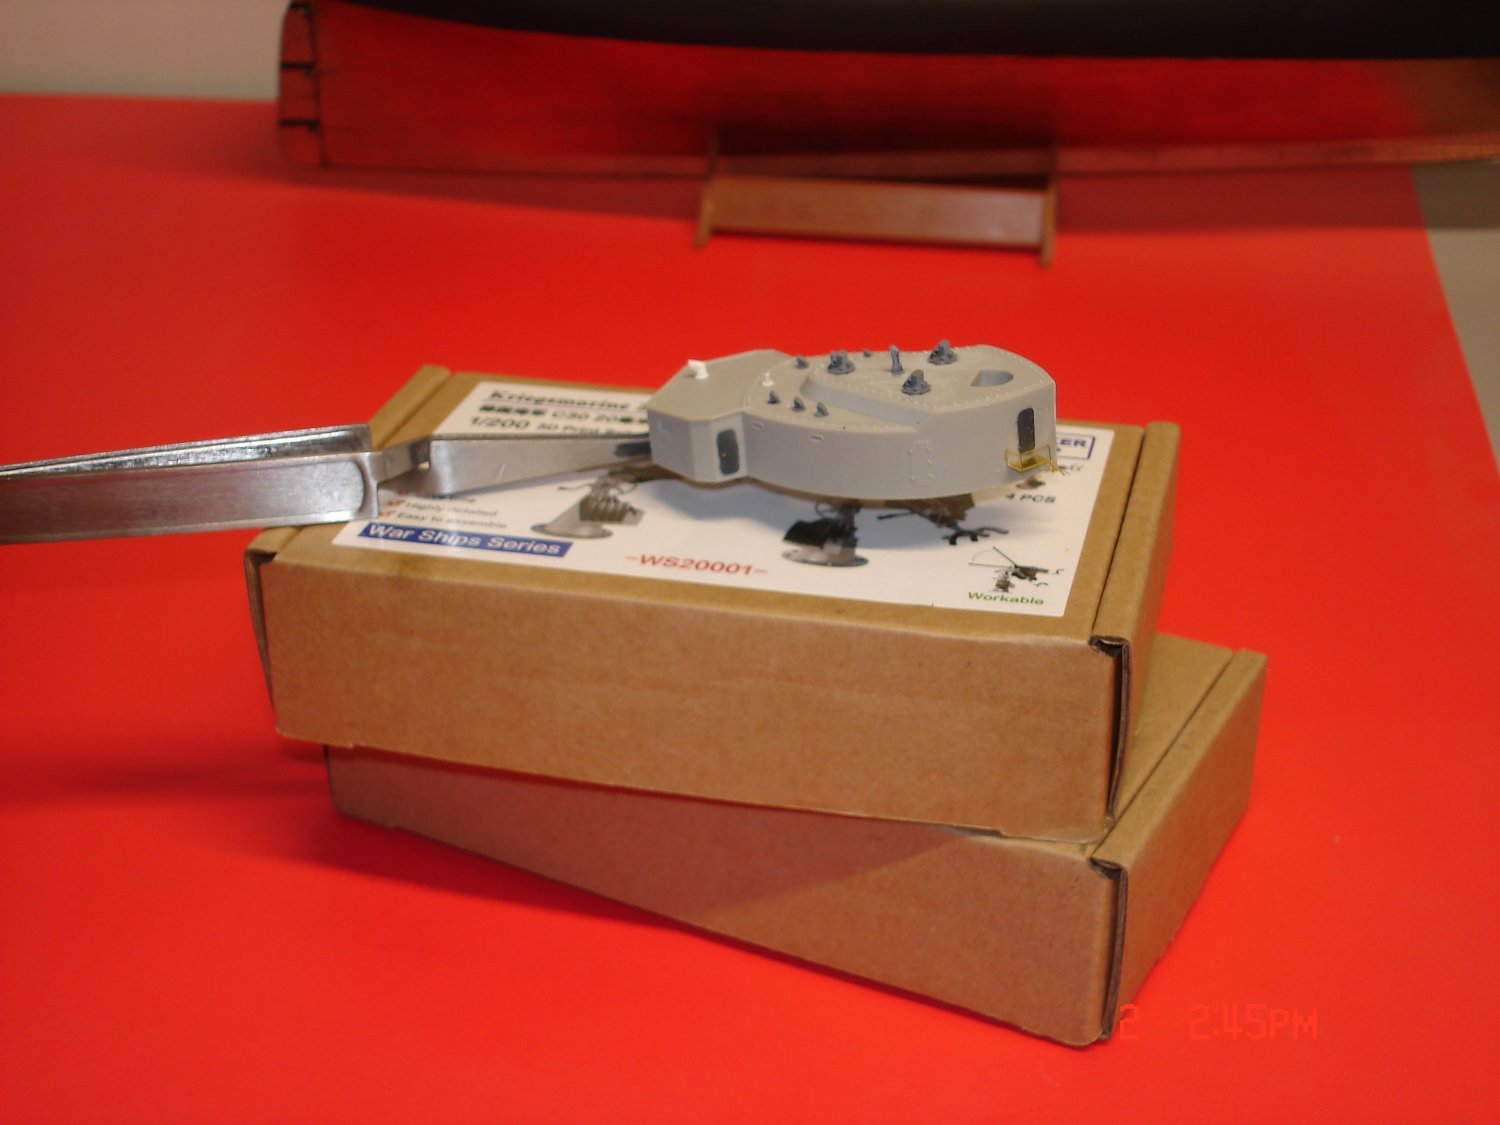
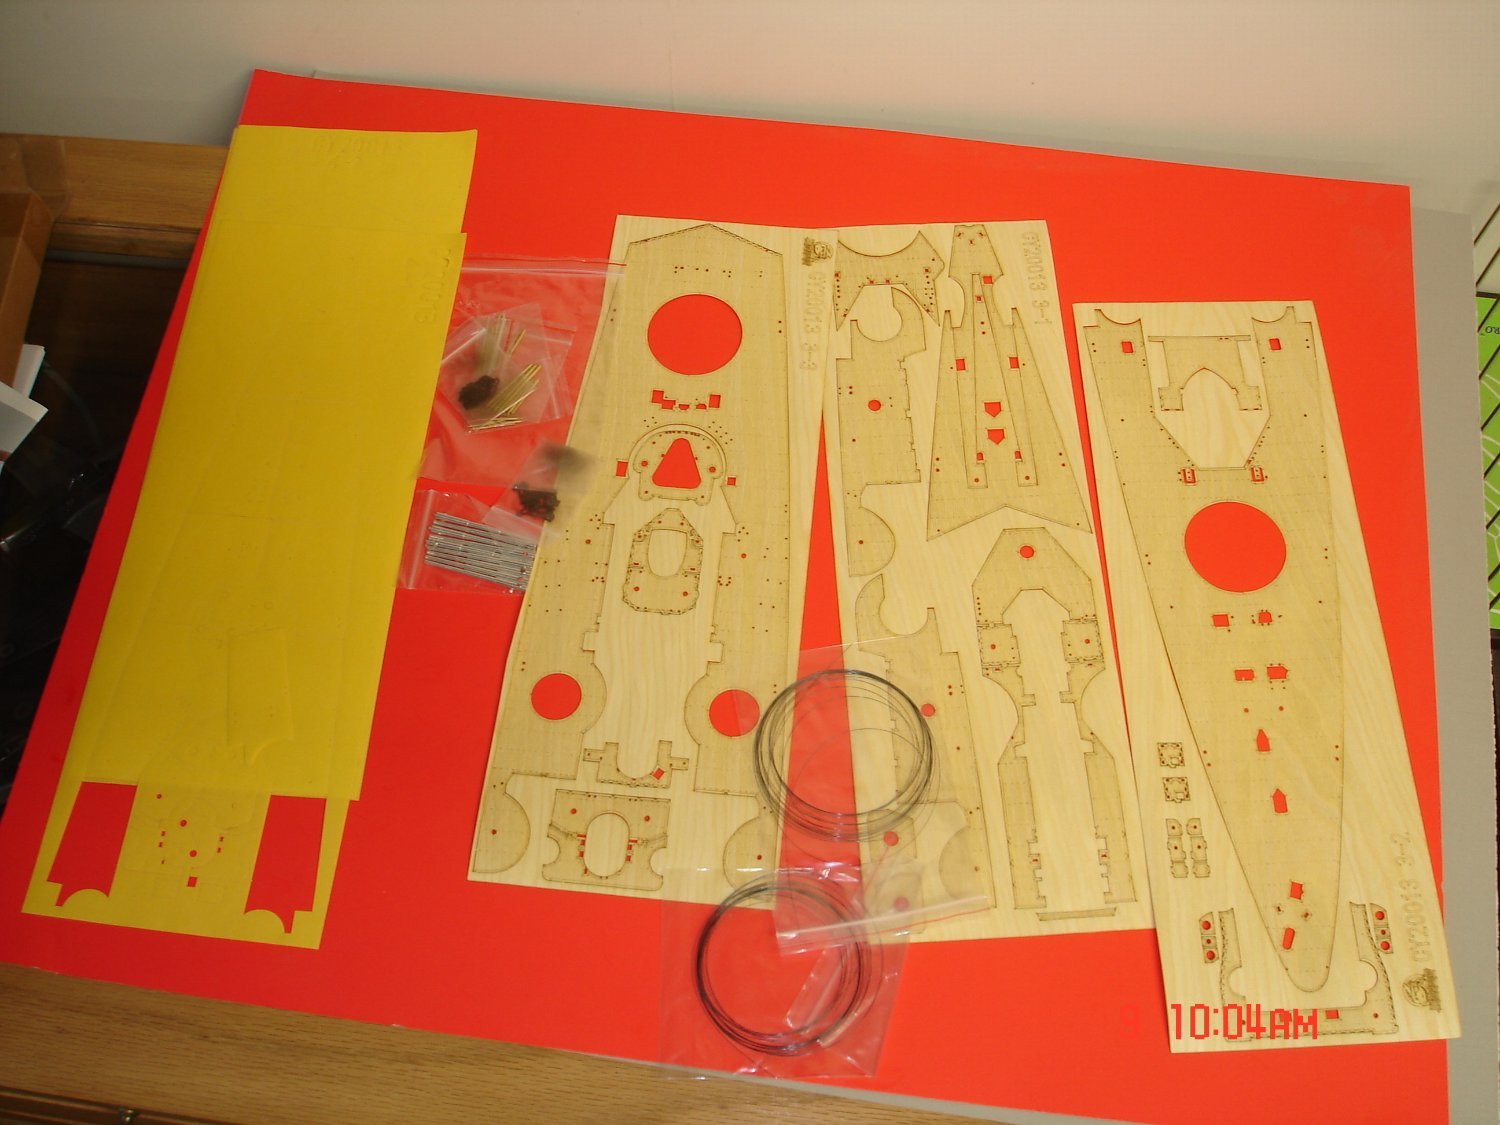
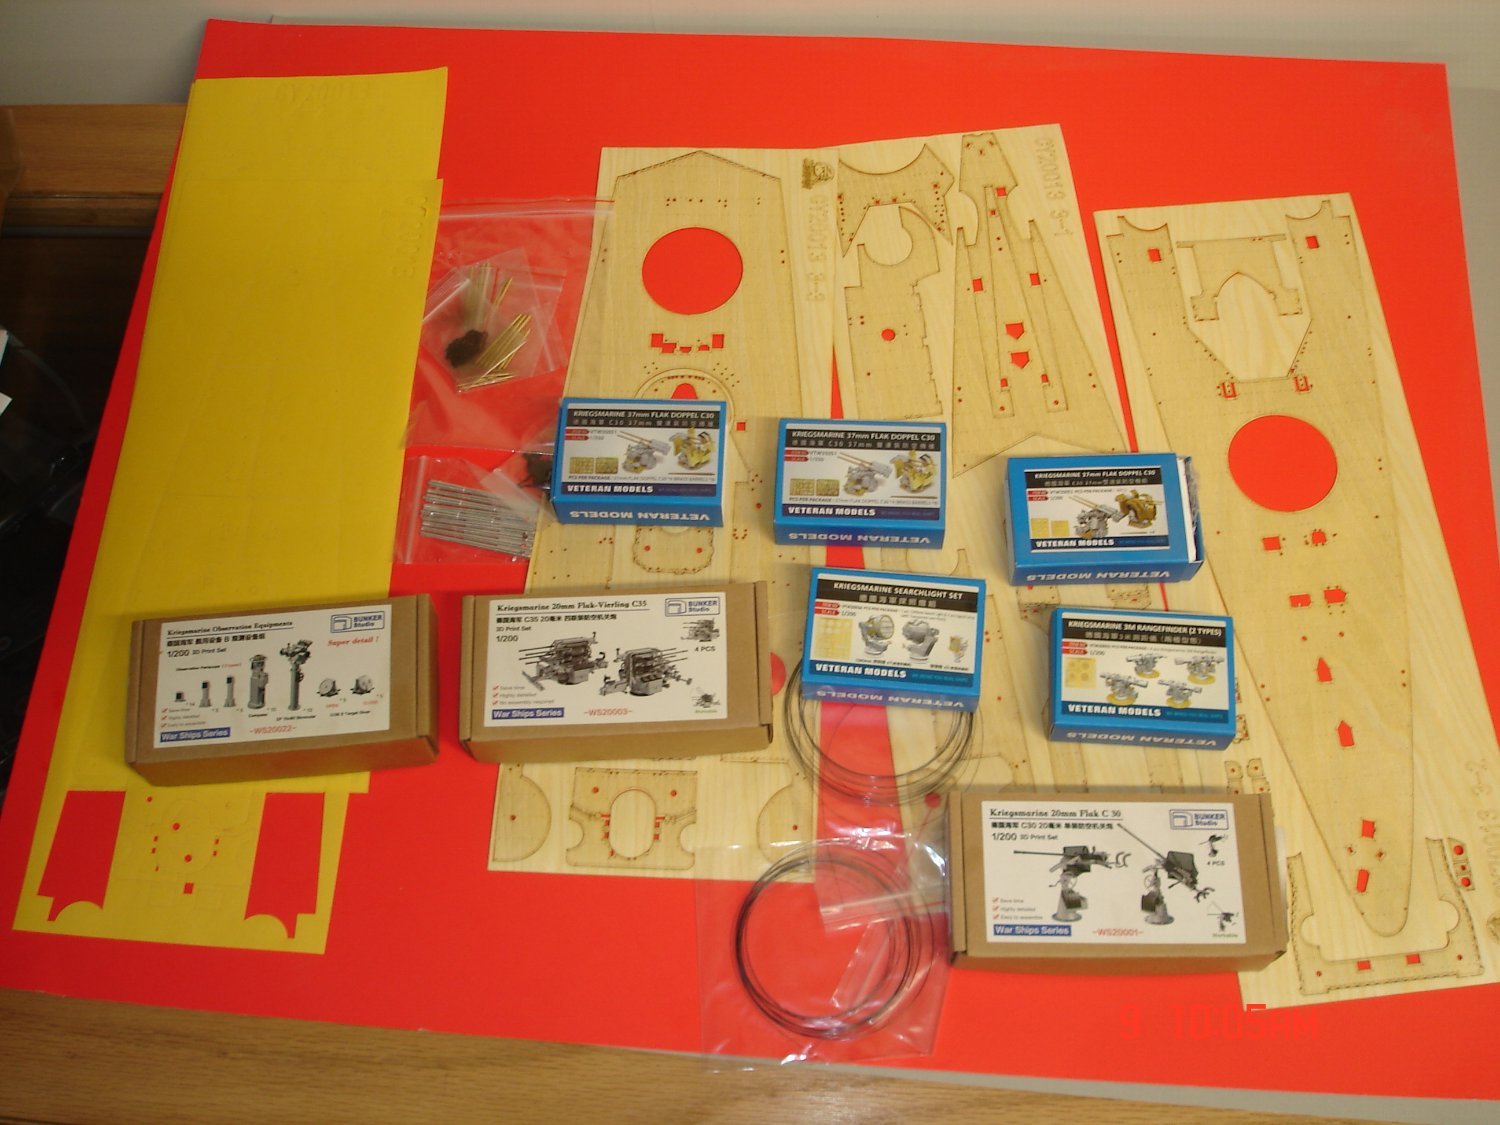
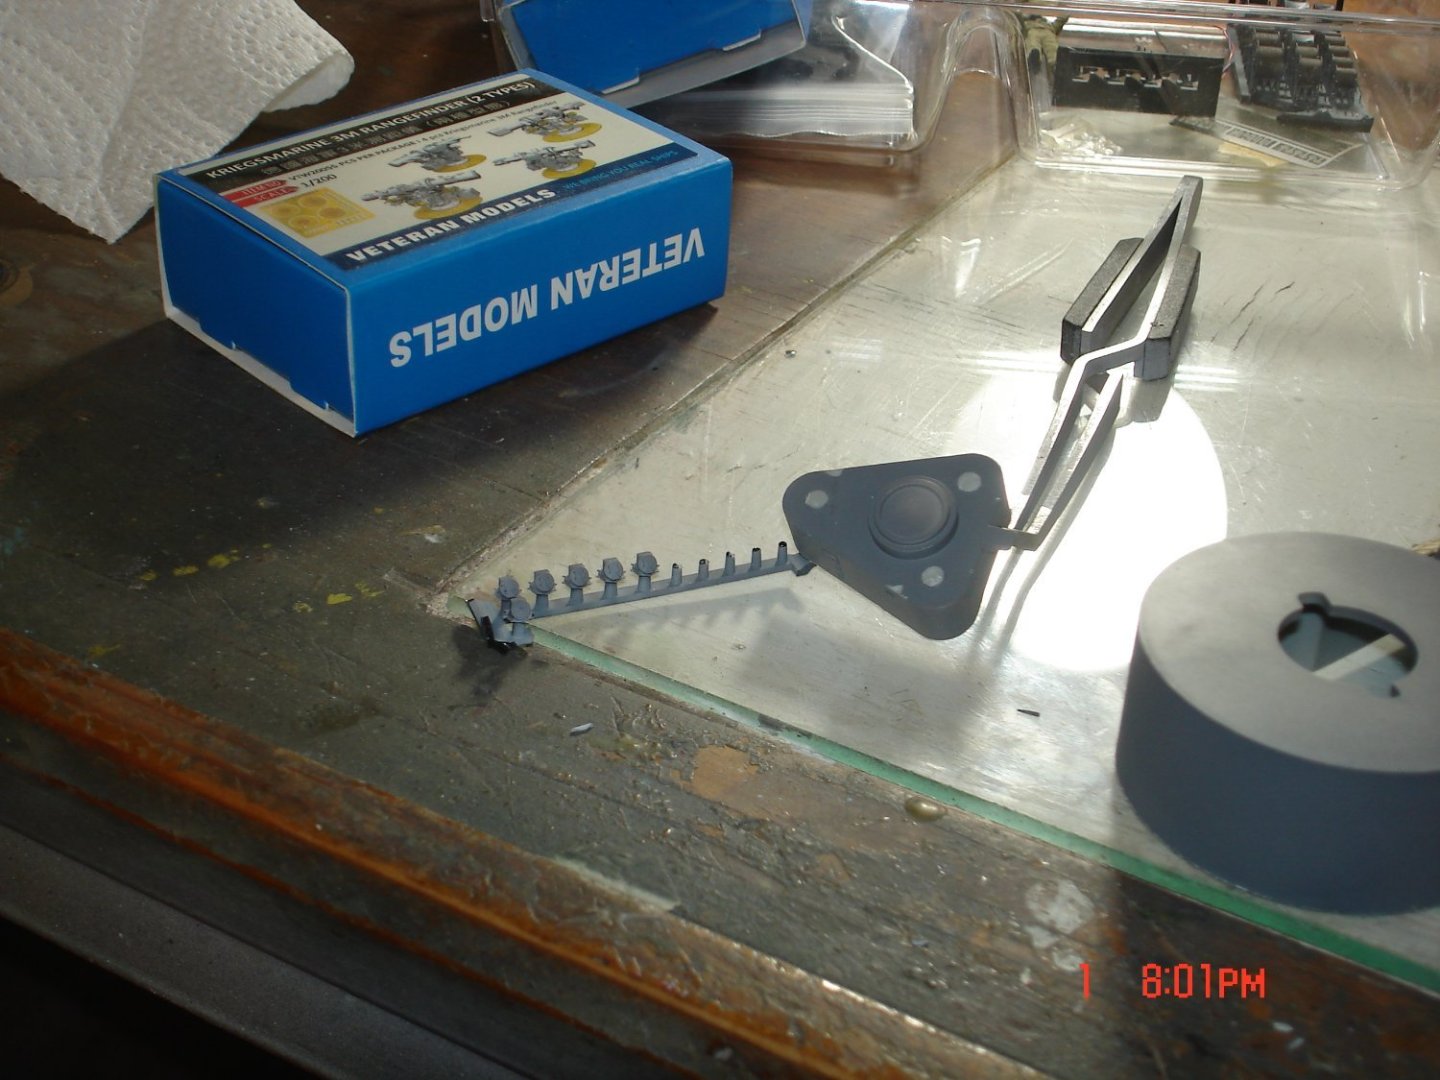
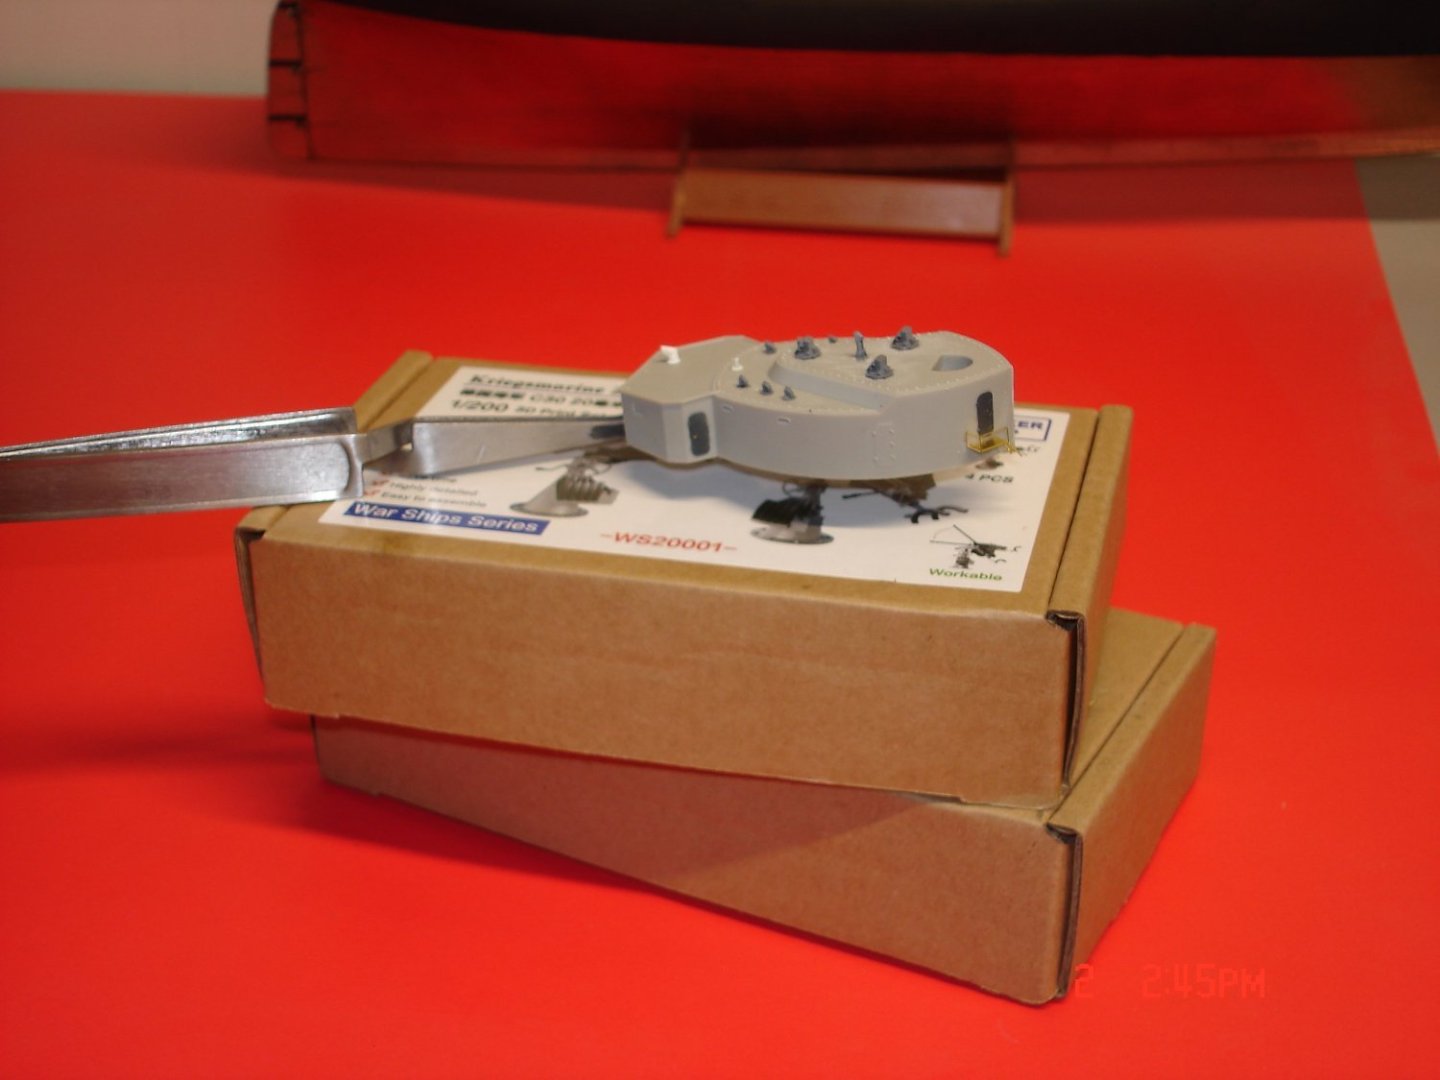
Work has been slow on this been on six day work week's for the last few weeks this week maybe five?Tonight started on the SS ladders ...yes more ladders ...The ones I was using from the 1/350 were about to run out so I had to come up with an alternative.I finally after few tries and variables came up and manipulated a pair of tweezers to accomplish the job using fine brass wire.I laid down two lines of ladders with the homemade stuff still not primered and feel they look better than the prefabbed ones?Paint will tell the story methinks.The paints finally arrived from Gundam in Cali took a week order some bullets three days after the paint and got them two days before the paint! Oh the second is the 3D printed Binoculars,compass and telescopic chutes for various range finders those binoculars are so much better than the kits!I had to order another $140 worth of 3D the other night and I thought the Border lanc was expensive I am probably at $7/800 thus far
- 68 replies
-
- 13
-
-
- Scharnhorst
- Trumpeter
- (and 1 more)
-
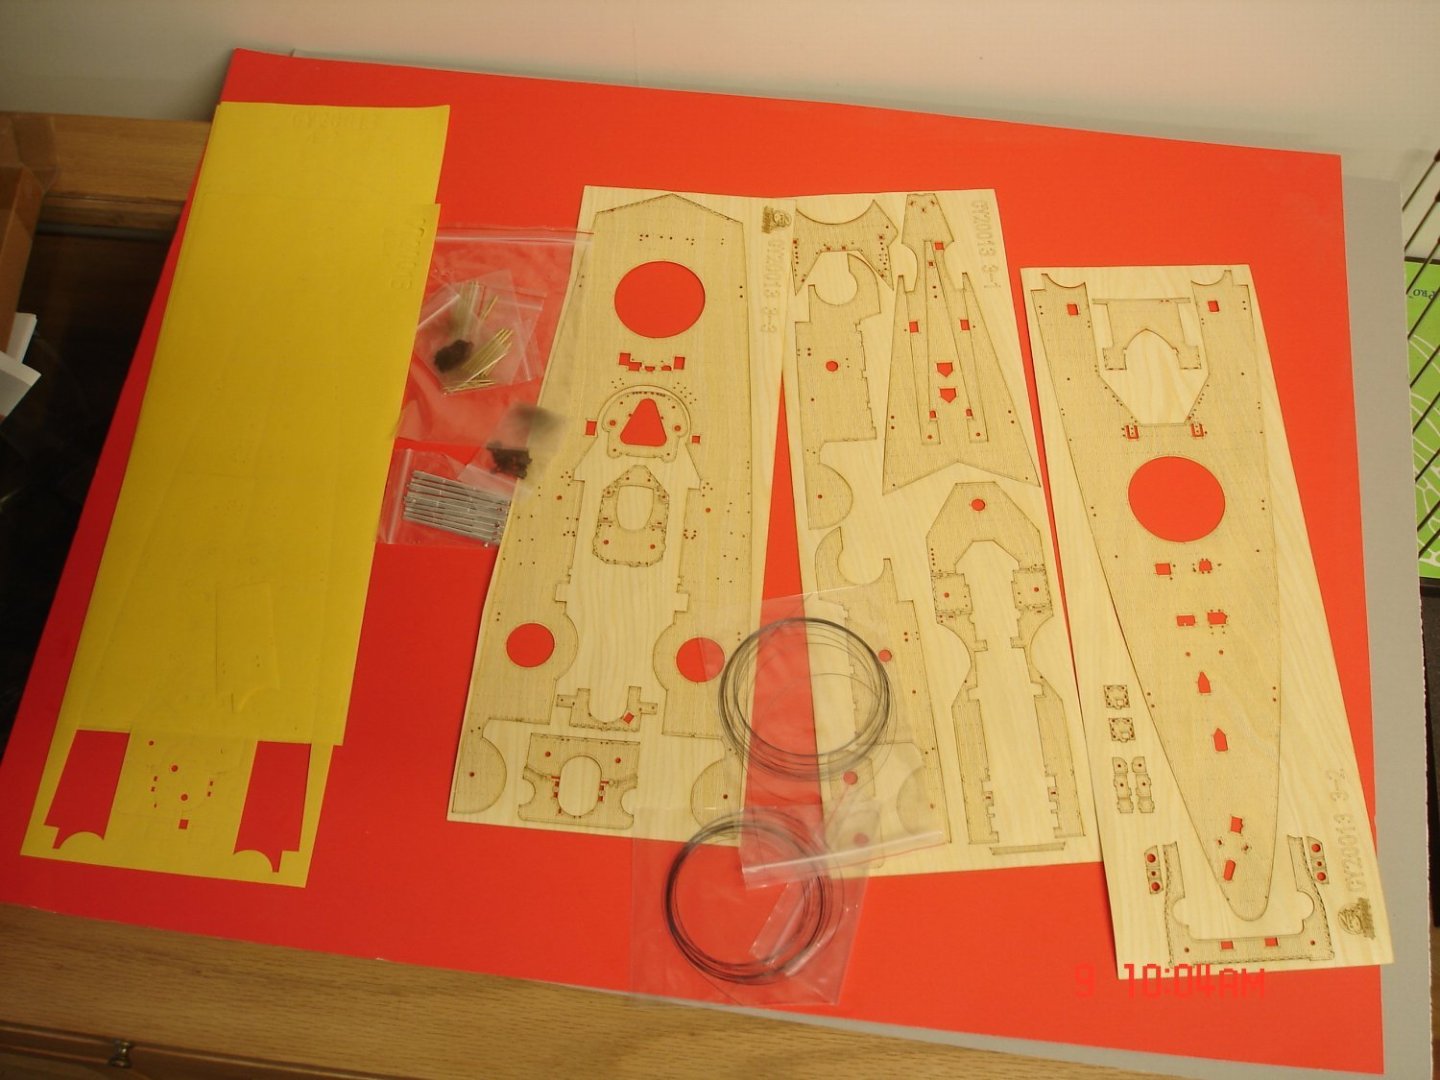
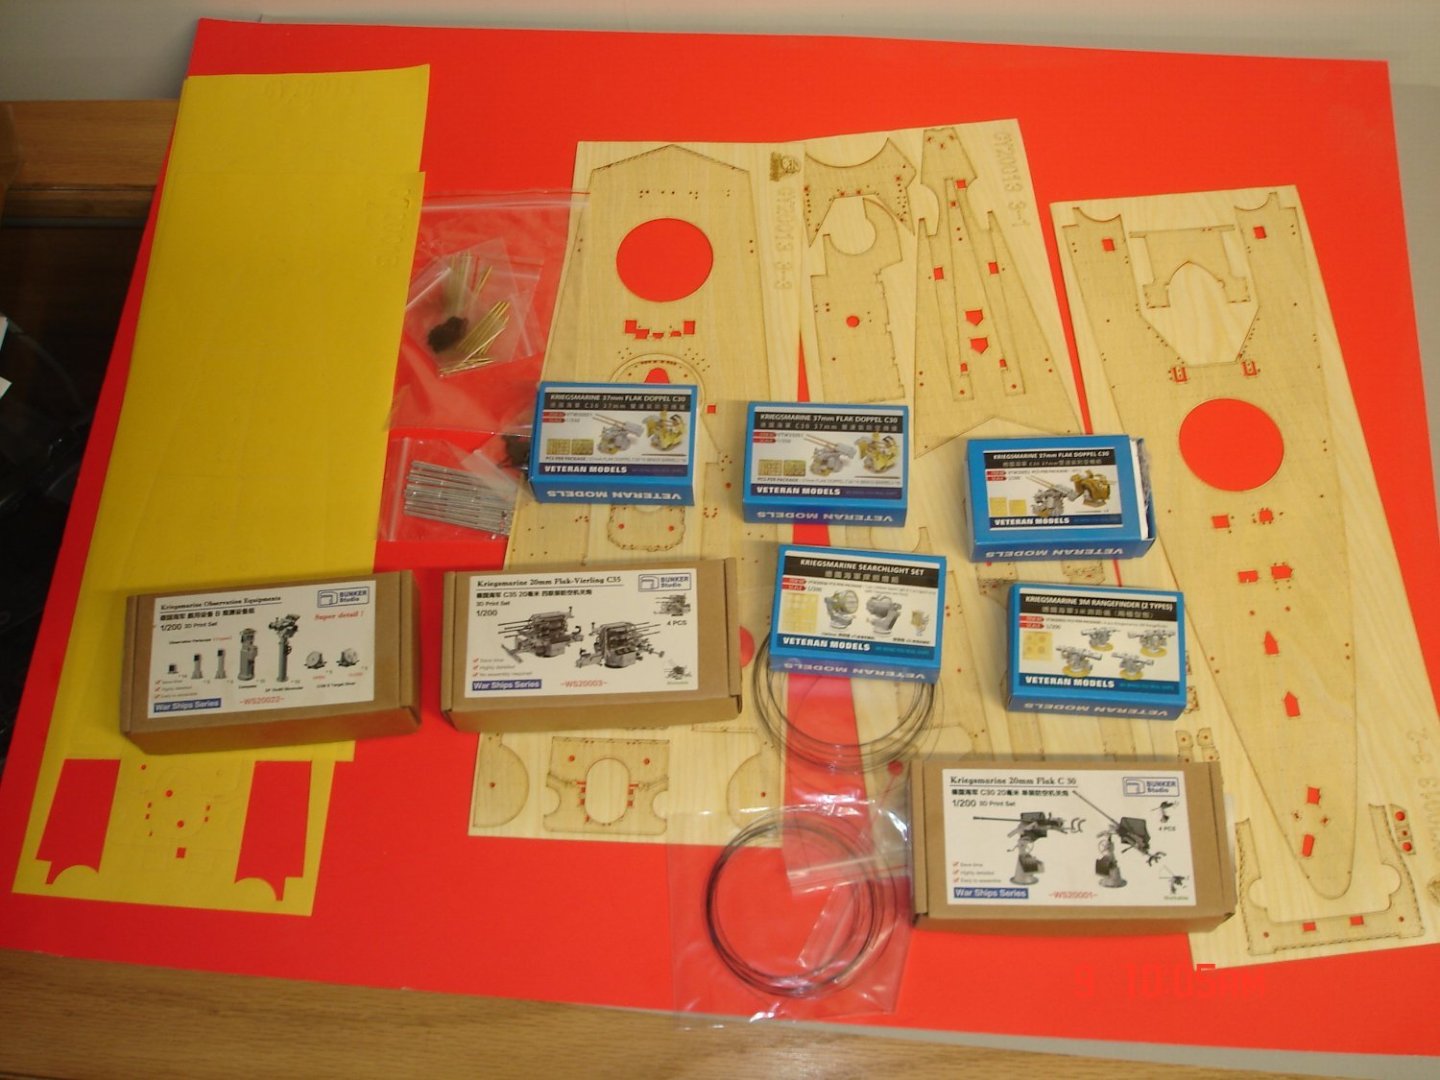
It comes with a fair amount of PE with the kit so it looks like it but I also p/u these over the last 1 1/2 yrs the 2cm flaks will be a big improvement over the kits(have 8).I have seen some guys stain the deck if I have something light enough might go there.


- 68 replies
-
- 11
-
-
- Scharnhorst
- Trumpeter
- (and 1 more)
-
1943 Operation Paderborn like the colors overall dark grey scheme white stern/bow yellow tops to main guns.Some ladders....


- 68 replies
-
- 12
-
-
- Scharnhorst
- Trumpeter
- (and 1 more)
-
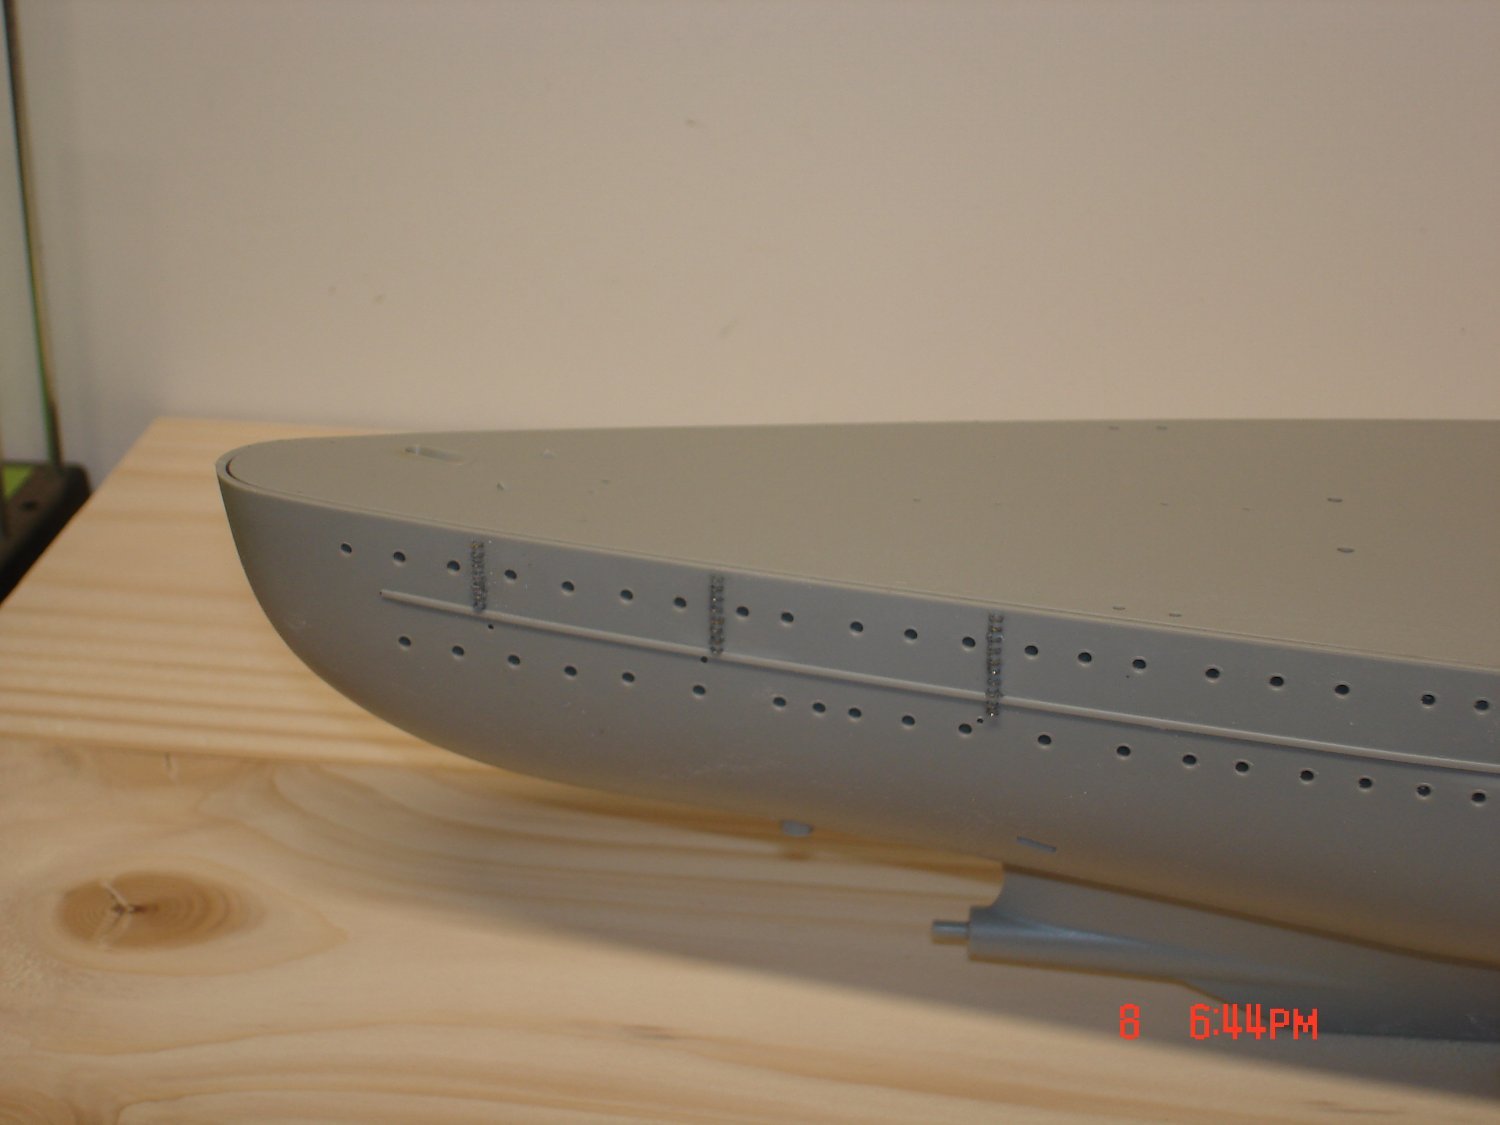
I have started on the hull of course and the first thing was to drill out the portals along the sides of the hull.The next step was to examine for ladders up and down the hull these were necessary for duties and maintenance to the hull.I found while doing the IJN Heavy Cruiser Chikuma that these ladder's add alot of detail to the hull giving it that 3D look.The problem is I have no 1/200 scale ladders but my 1/350 matched to the width that Trump put on the sides I am figuring they equal to about 18" width good enough for a man to work it took me 1 hr for the first set the longest set the rest with experience will be replicated quicker.The ones that Trumpter had embossed on the sides of the hull were so faint one would never of noticed them.I feel I am getting a bit long winded here all about ladders an portals but the IJN loved these ladders they could have 5/8 sets on the capital ships each side the Scharnhorst has three in the stern both sides which most ships have something there.This build I figure may take a year or better depending on time and the attention span.I leave now with a simple pic of the ship when the hull gets it's primer coat I will post a pick..
- 68 replies
-
- 8
-
-
- Scharnhorst
- Trumpeter
- (and 1 more)
-
Splendid Build the best of this kit I have seen thus far and the Dio
-
Well it sure came out purtty on the other side.