HOLIDAY DONATION DRIVE - SUPPORT MSW - DO YOUR PART TO KEEP THIS GREAT FORUM GOING! (89 donations so far out of 49,000 members - C'mon guys!)
×

juhu
-
Posts
267 -
Joined
-
Last visited
Content Type
Profiles
Forums
Gallery
Events
Everything posted by juhu
-
 Very inspiring, thanks for sharing. Will look here frequently once I start with mine.
 -
Neat layout. But do not you plan to divide the planks to appropriate length? Or is it better to do it at the end?
-
Hi Greg, stopped here after a while. Great looking deck planking. I believe, these boats had similar pattern as fishermen, i.e. straight planks with nibbling on main deck and curved planks following deck margins at quarter deck? When building my boat, I took safe approach and started planking from the deck margins. I knew there might be a challenge to make perfect spacing, when coming together in the middle, but the idea was, that any imperfections will be much less visible along the cL, than at the sides. Planking along the center is interrupted by many deck structures, planks are thus shorter and even if not perfect, will not show so much. Along the margins they run all the way without any obstructions.
-
Hi Greg, I consider myself a beginner, at least when it comes to wooden ship kits, and I express my support and thanks for the way you present your build. I am interested in ship construction and technical aspects of design, I would like to build kits that do resemble originals with my limited skills and honest build review like yours brings great additional value to me. Am eager to see the final outcome and am happy to learn even more through your progress. Regards Juraj
-
Looks good in my opinion. I wonder, how much material from the kit will you use at the end....
-
Hm, I thought of some natural colorization, fungus is definitely out of question 😕 Hopefully the next batch will be better As for the loco, I was wondering how would you paint it assembled together, now I see you mention it is still only dry-assembled and could be taken apart to paint separately? Then ok. I used to build plastic model kits, mostly planes in 1/48. While yes, in theory you should be able to get replacement if some part is broken etc., in reality it may not be so prompt and if you add shipping cost from around the world, you may well add half of the cost to the model kit. Also, in some cases it is not an option at all. If you ruin painting on almost finished model or realize the canopy glazing under paint mask suffered, it is too late for any replacement. Plastic model kits rely heavily on premade parts, full of beautiful but delicate details. Particularly painting is something I fear of - lots of opportunity to ruin the whole work , for sure in my case, not to speak of quite aggressive chemistry. Another funny aspect is how master plastic modelers achieve to simulate various surface effects, it is truly a sight to see the plastic looking like a linen, metal, wood. Yet, with wooden model kits there is no need to create such illusions, well, not to that extent Back to Phantom: I am looking forward to see the final wood appearance. Depending on chosen finish, it may look other way at the and. Do you plan to paint the hull and to oil the deck?
-
You are fighting bravely with kit's deficiencies. I am sure the final result will be a very fine maquette! I appreciate, that you not only post the progress diary, but also point out various traps to watch for. Anybody thinking about purchasing this kit should read your blog before doing so. And after purchase should study it even more.
-
From those shown I would pick the one at the bottom for planks. Definitely would avoid anything with prominent coloured structure....
-
Well, am also eager to hear other opinion. I also first thought of grating being some kind of prevention to stay out of the water, but this is simply hard to believe, at least to me. Water must go away, rather than to build some platforms in the cockpit to stand above it. I have checked for example BJ's America or cute Lively schooner kit or other ships of similar design. I somehow feel the grating would make sense if laid flush with the rest of the cockpit bottom deck. And water drainage is somehow made under the grating possibly? Also, to prevent helmsman from slippering, I see some simple battens are usually fixed to the deck as a feet support (I remember this nice detail from BJ's Smuggler kit). But yet I believe in rather small enclosed cockpit this might not be necessary at all. The cockpit side walls might well suit as needed support. From my limited charter yacht sailing experience, having such a stepped platform around the wheel, always to check I do not fall over that step would be pretty annoying :). But again just my guess too. I simply do not like the idea of stepped up grating as proposed in that photo, but will be happy to be corrected.
-
Thank you for the reference to scratch built Phantom, must go through it. The attached book picture brings to me one technical question. What was actually the purpose of that grating? I believed it was to drain the water out of the cockpit. But in that case it should be in cockpit floor level. But I might be wrong here, may be there was some special scupper for that? I believe there must be some way to get water out. But for sure the grating in the picture with noticeable step above the cockpit deck in quite a cramped space opens for me the question, what was it good for?
-
Difficult part of the build, at least it would be for me. Not sure of cockpit construction, was there supposed to be grating at the bottom, at least aft ? Could be a challange to do it now, after hull is planked and false deck ready too. I guess you plan to make a hole wide an deep enough, then make full cockpit, glue it to the reverse side od the false deck and only then put it atop together?
-
Hi, I was also scanning the pic from #46 post, not sure first what was meant, but I think the idea was that the size/shape is way off? I mean the copy of the plan, particularly in the aft part does not match the hull / transom / deck at all and is too short? If this is the case, that is pretty bad. As far as deck planking is concerned, very good point comes from #48 - would the cap rail fix the missing height? If yes, great, if not I would suggest to try to use less thick planks. Something like 1/2 or even smaller of the suggested strength with careful sanding then might do the job and even make deck planking easier. At least from my last build it helped me a lot. The other option would be to raise the bulwarks as you mentioned. Not sure how much it would hinder the hull appearance, but considering the shown mismatch and distortion compared to plans, the question is if it matters anymore... I mean, is it possible to build scale replica from this kit? I have it in my shopping cart already, order and delivery to Europe is by no means cheap, but am more and more reluctant and not sure if I will commit the purchase.... It seems to be like with plastic kits: while downscaling a kit is relatively(!) easy, you are omitting details, upscaling must not only consider additional details but also their effect on the proportions and build overall. I have several ME kits in my stash, they are beautiful, looking forward to building them, this new Phantom seems to me well, like some different approach. Will keep an eye on progress and wish all the best with it. Edit: One more question I forgot. From few pics on the web it seems to me that this ship also has the stepped up deck, i.e. thick beam (called grub beam?) divided main deck and quarter deck? If so, I wonder that there is actually no corresponding rail step, meaning that the rail height must be lower at quarter deck than at the main deck? But as said, this might be just my misunderstanding of the given ship design, I have never build smaller Phantom.
-
Great progress, will keep watching this thread for sure. Since I first noticed wooden static ship models and ME company I have admired their 1/96 Phantom kit and only wished it was available in 1:48. Yesterday I have found it just by accident. First I though there is just an error on the web with the scale From what I see I agree with the notes - to enlarge the kit from 1/96 to 1/48 should involve something more than just "enlarging", i.e. adding the detail appropriate for the scale and proper plans. . From the pics available I think the cockpit area just sitting on the deck looks strange. As you said I would also suggest to burry it little bit. I am just not sure, to achieve this, would not it be better to cut space in the bulkheads before assembly? Or maybe I just see it wrong from the web photos. Edit / added: I have been going through those few pictures from manufacturer website. If possible I would have one more question: how does the kit handle the whole anchor mechanism? I mean, I would expect this boat having anchor chain, but I see no windlass, no storage box for anchor on the deck, nothing. There are apparently some small winches directly at, I think called Samson post, but not sure this would be the answer for heavy anchors. Totally unfamiliar with pilot boats design, they still do resemble fishermen from Gloucester I have researched little bit, so am just wondering... Thanks a lot!
-
The look from above confirms again and again how good choice on which planks to omit you made. I would almost forgive the kit that it does not include proper individual frames plan. What a shame it is not available in Europe, I would go for one, but postage and duties sum for overseas order is too high. Splendid work, thanks for sharing.
-
Thanks a lot for responses. Probably I would not dare to go for this kit, but your build is impressive. I think the way you decided to left some parts of the deck planking off is very eye-catching.
-
Hi, I have been studying this and other America's build logs - have been considering as an option for me. Reading all the build logs, it seems that the frame alignment is the common issue due to rough, often asymmetrical shape. Do the kit plans show no 1:1 individual frame shape, so it would be possible to use them a s a template for exact shaping? I see each modeler takes its own approach how to cope with this challenge, but I would expect that proper profile drawing would be a must for POF model. Having not seen the actual plans, am not sure what to expect and whether I shall venture into this particular kit. Thanks for sharing any info on that in advance.
-
I really like the result - fore deck view from above with all those exposed frames is very interesting.
-
Absolute masterpiece. Would you leave in natural wood finish? - I really like the color of the used wood.
-
End of the year 2023, just for interest, I guess this project seems to be dead now? Or is there still any REAL hope?
-
Thank you all for kind words. I guess I will now have to take a small pause - new job, some plastic kits waiting to be finished... But got quite a stock of wooden model boxes too, so the plan is to be back for sure with another build.
- 104 replies
-
- 2
-

-
- Bluejacket Shipcrafters
- smuggler
- (and 1 more)
-
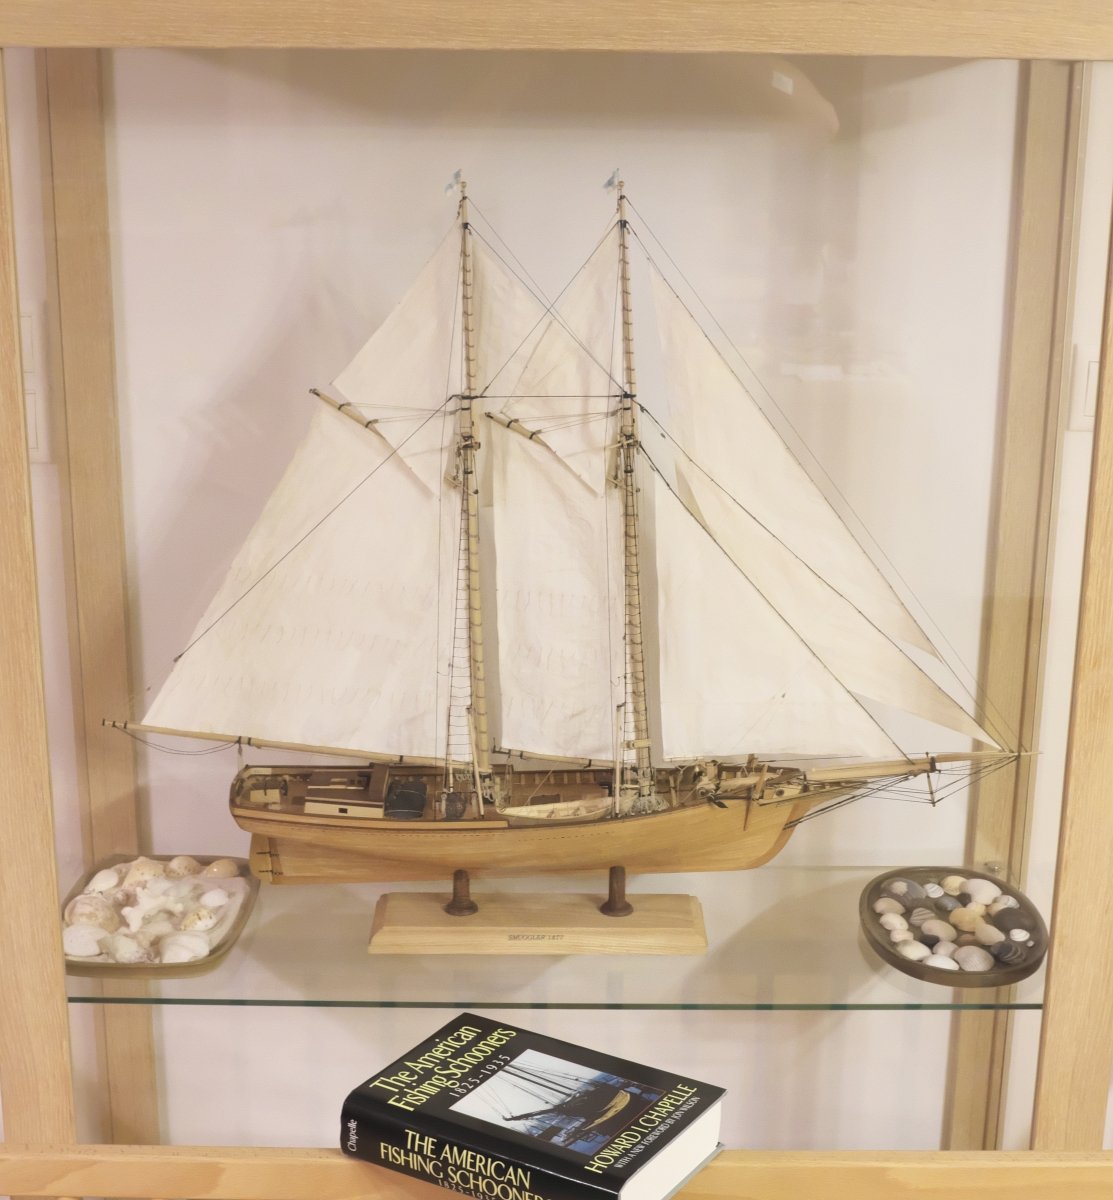
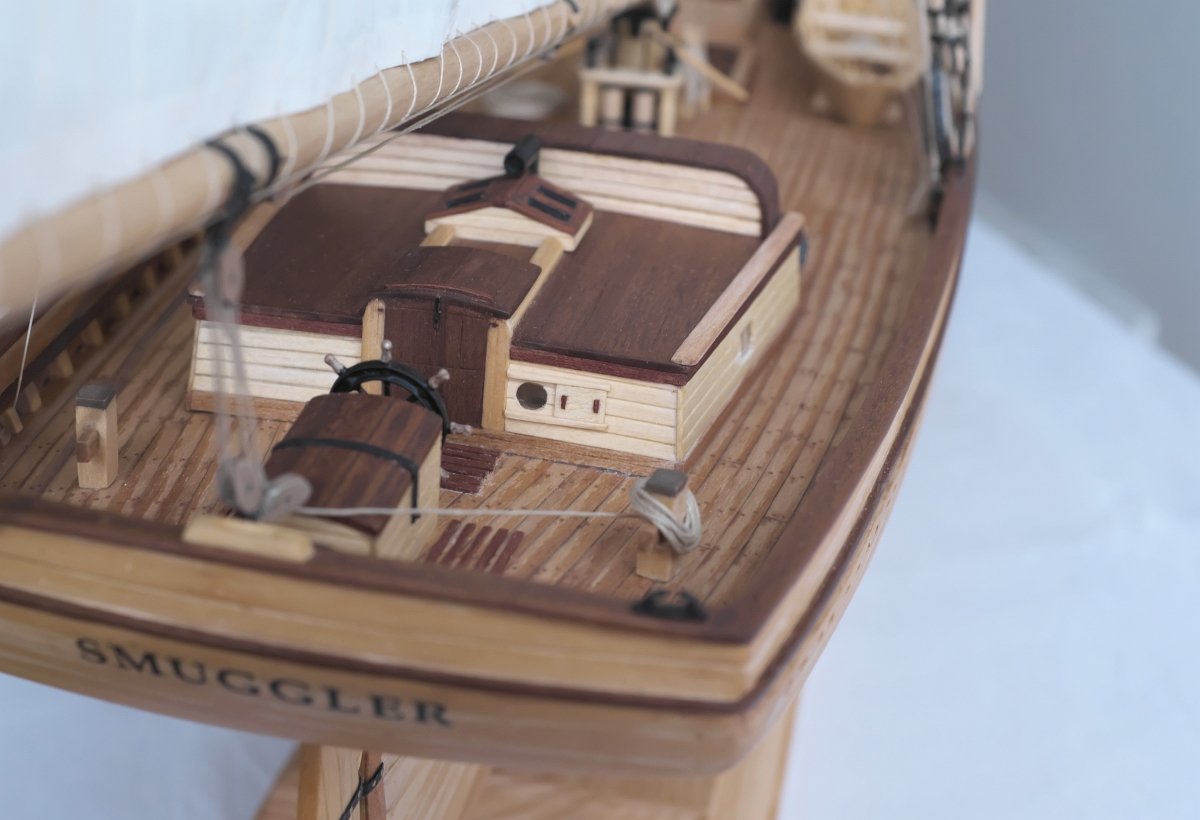
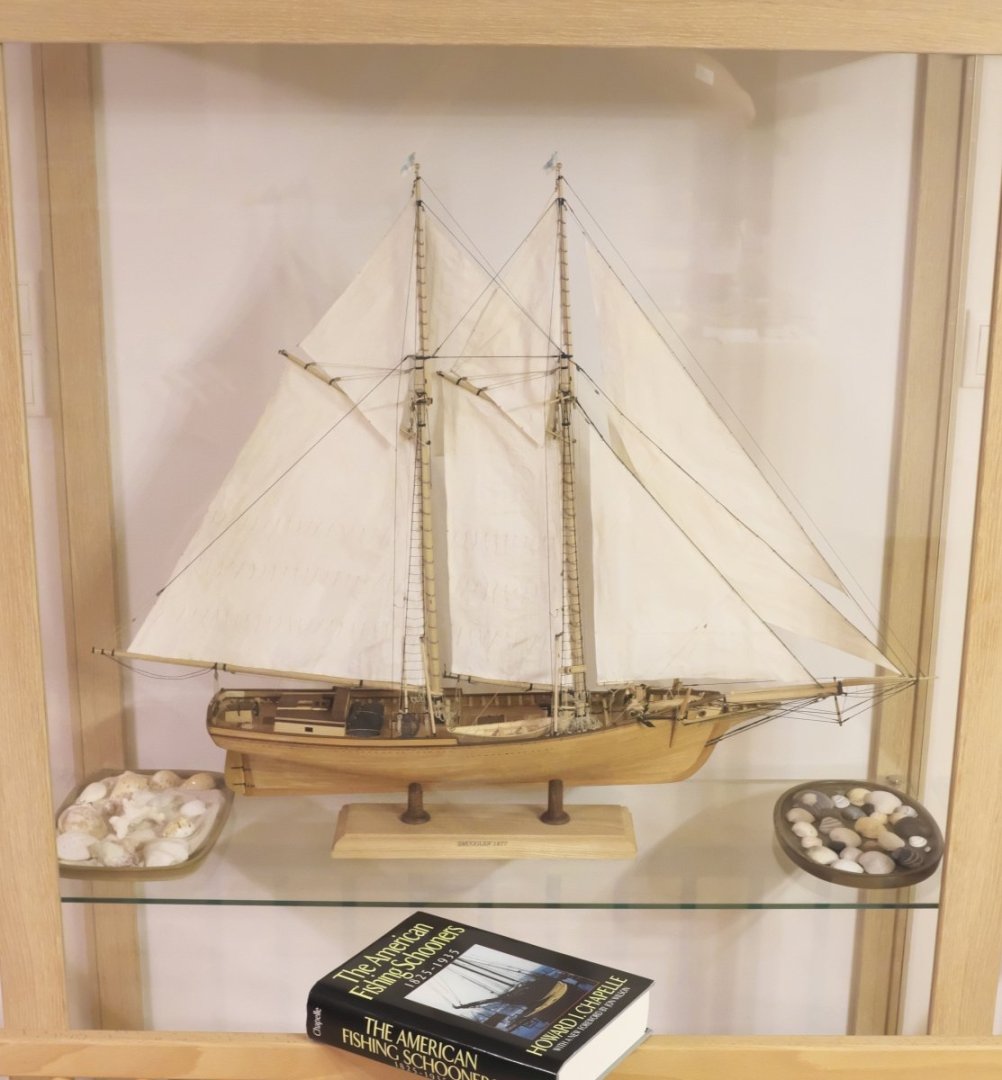
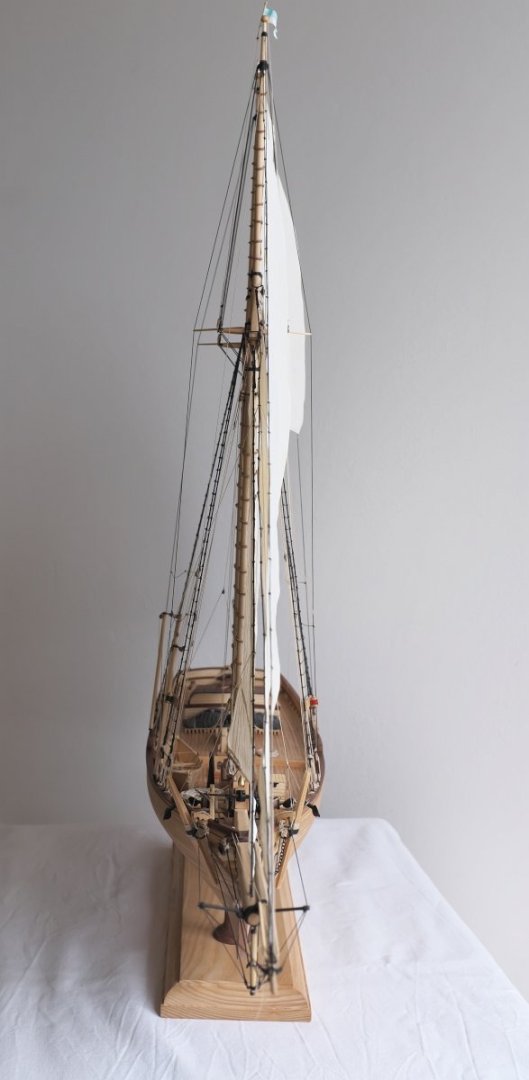
And the last one, anchored behind the glass
- 104 replies
-
- 8
-
-
- Bluejacket Shipcrafters
- smuggler
- (and 1 more)
-
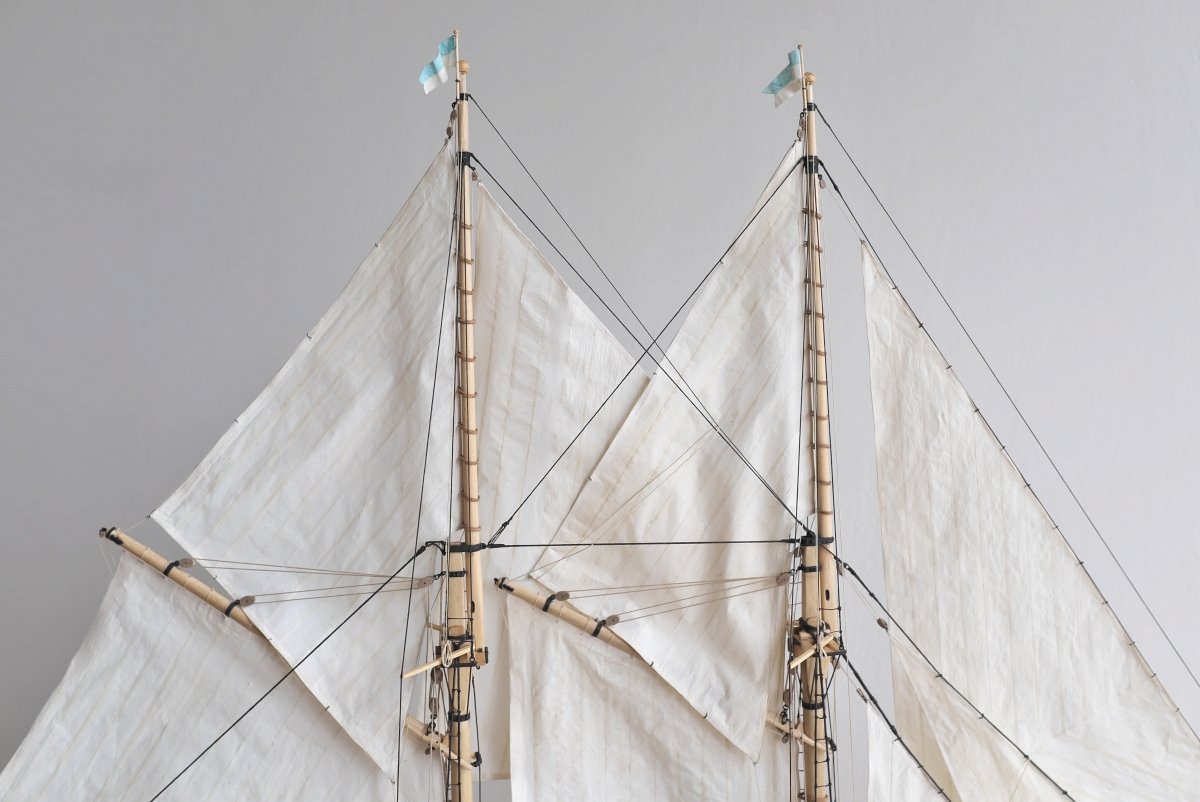
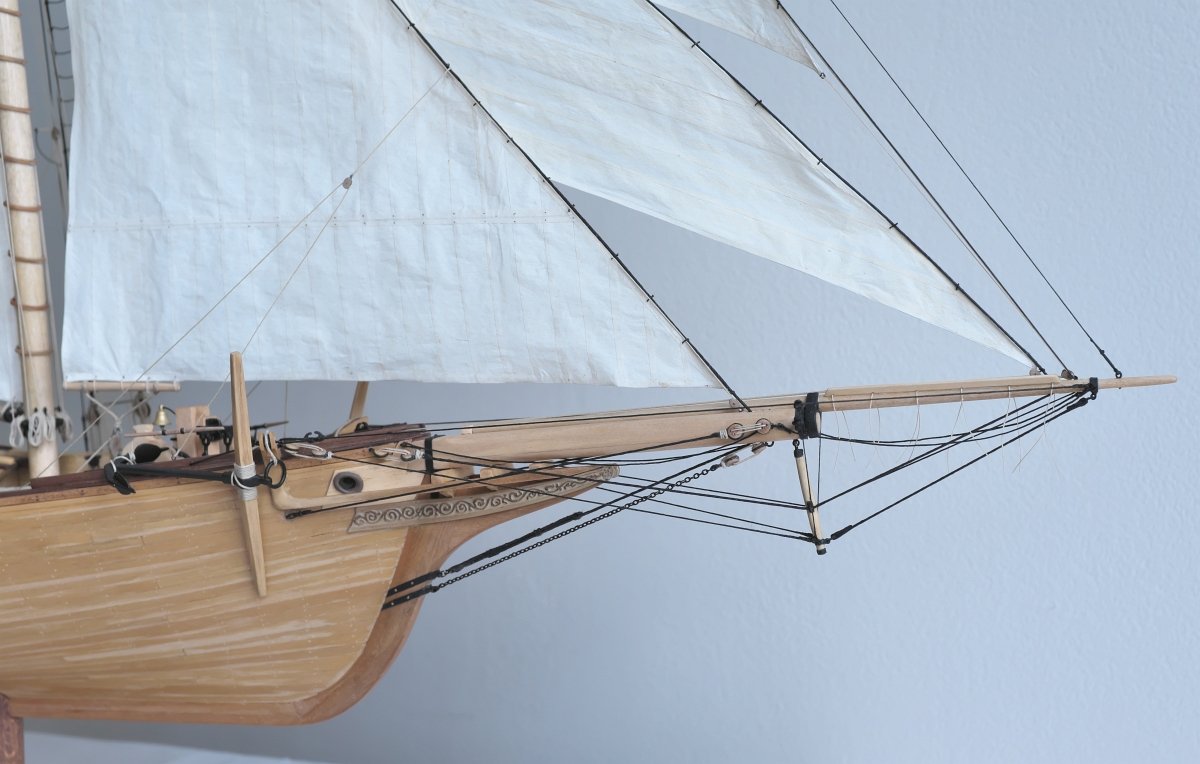
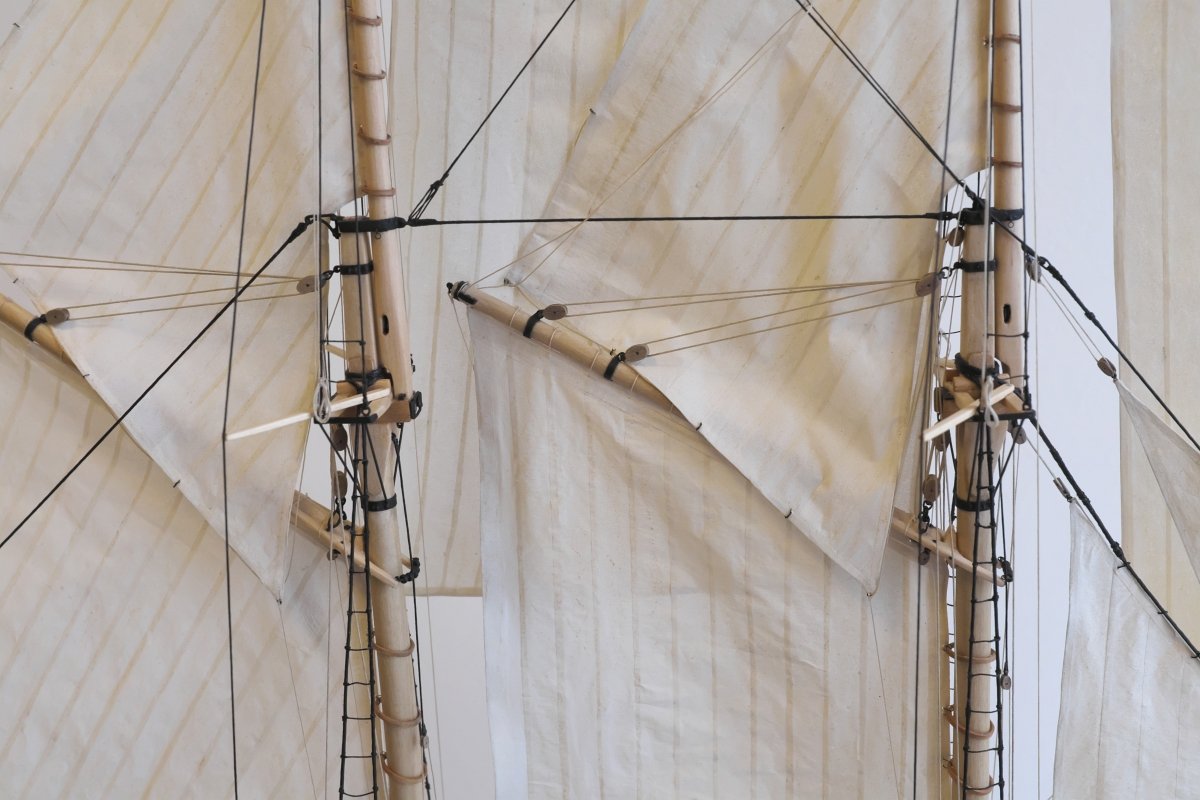
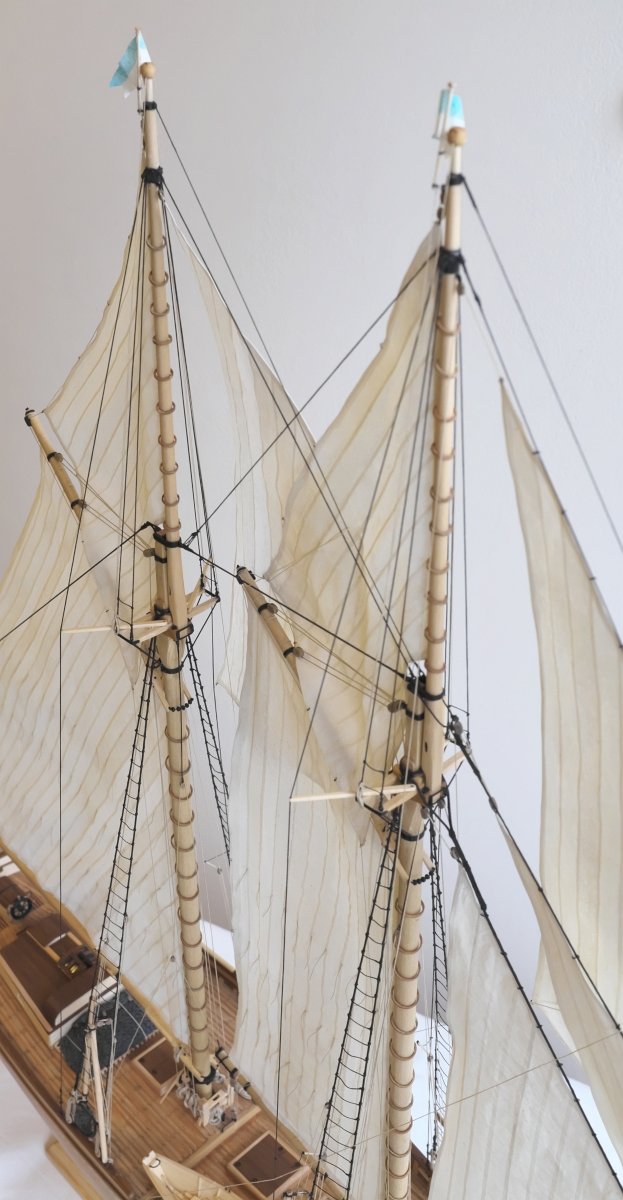
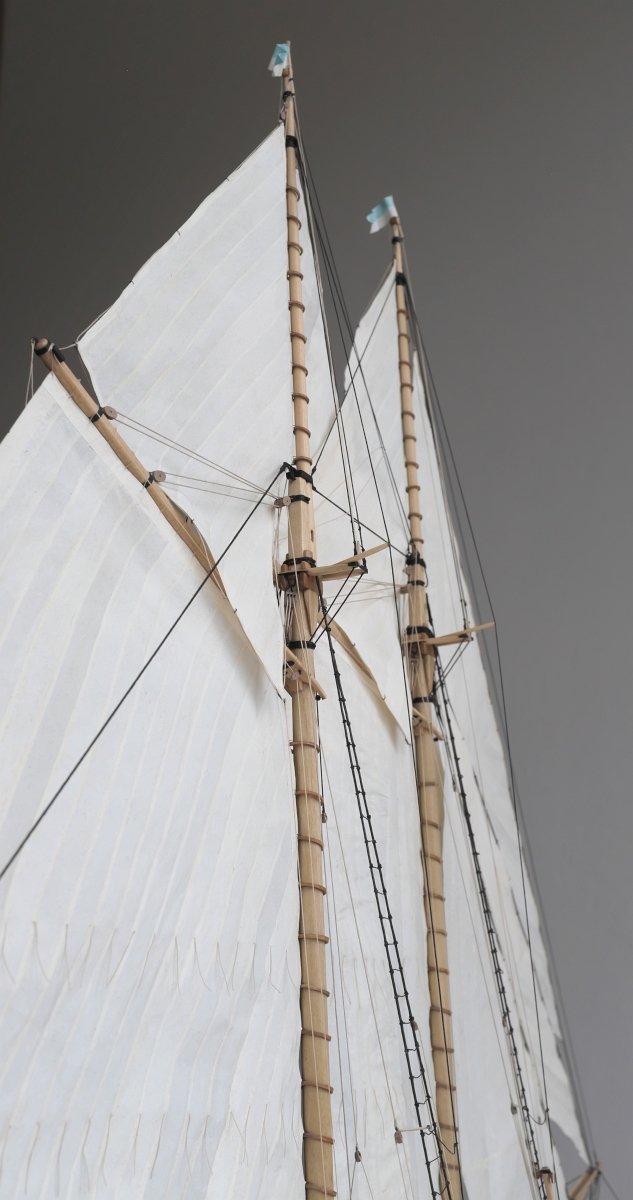
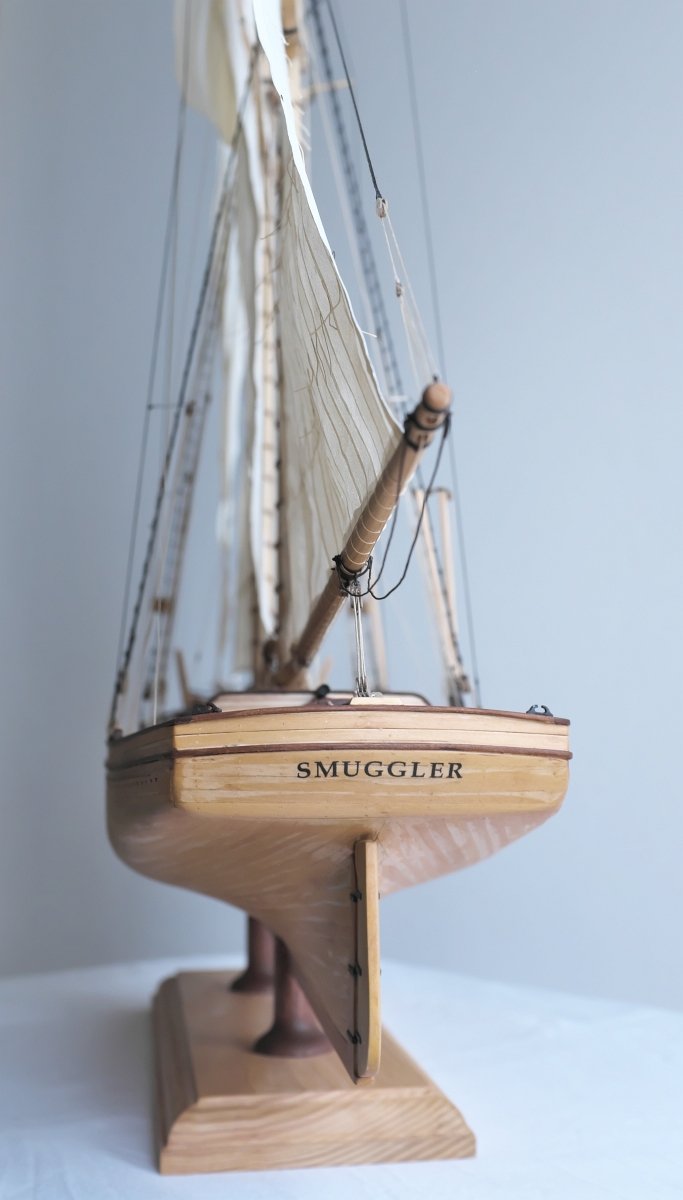
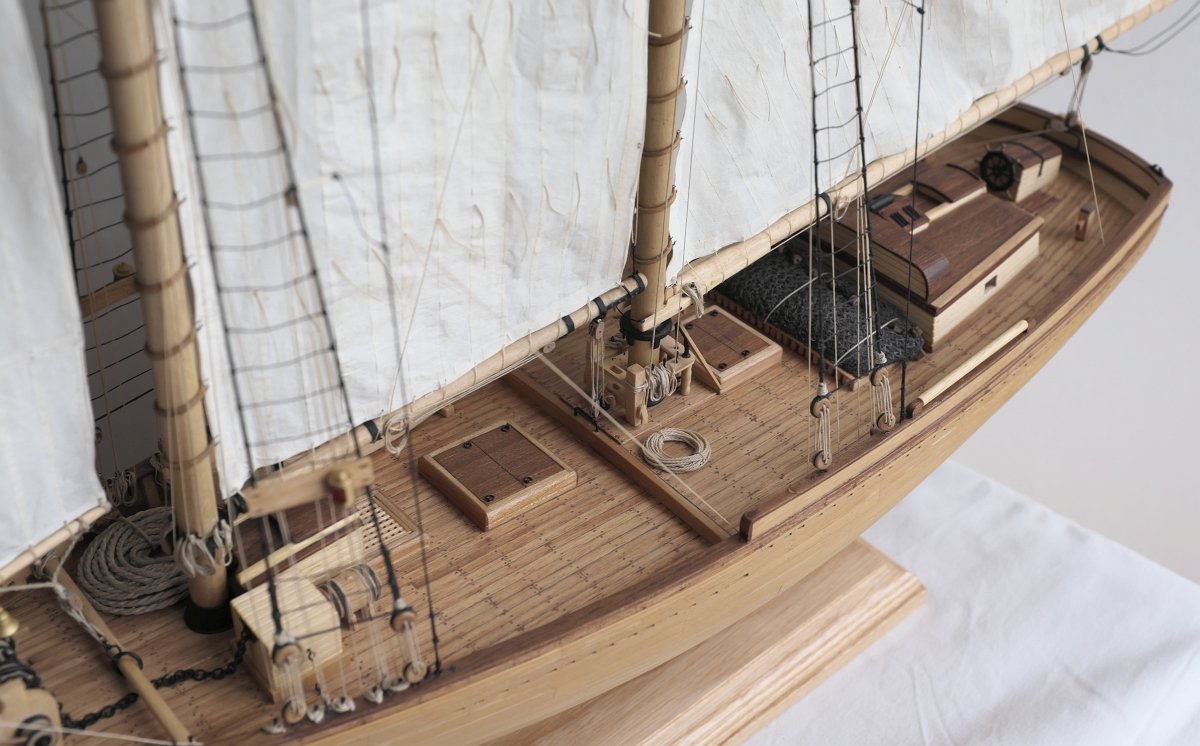
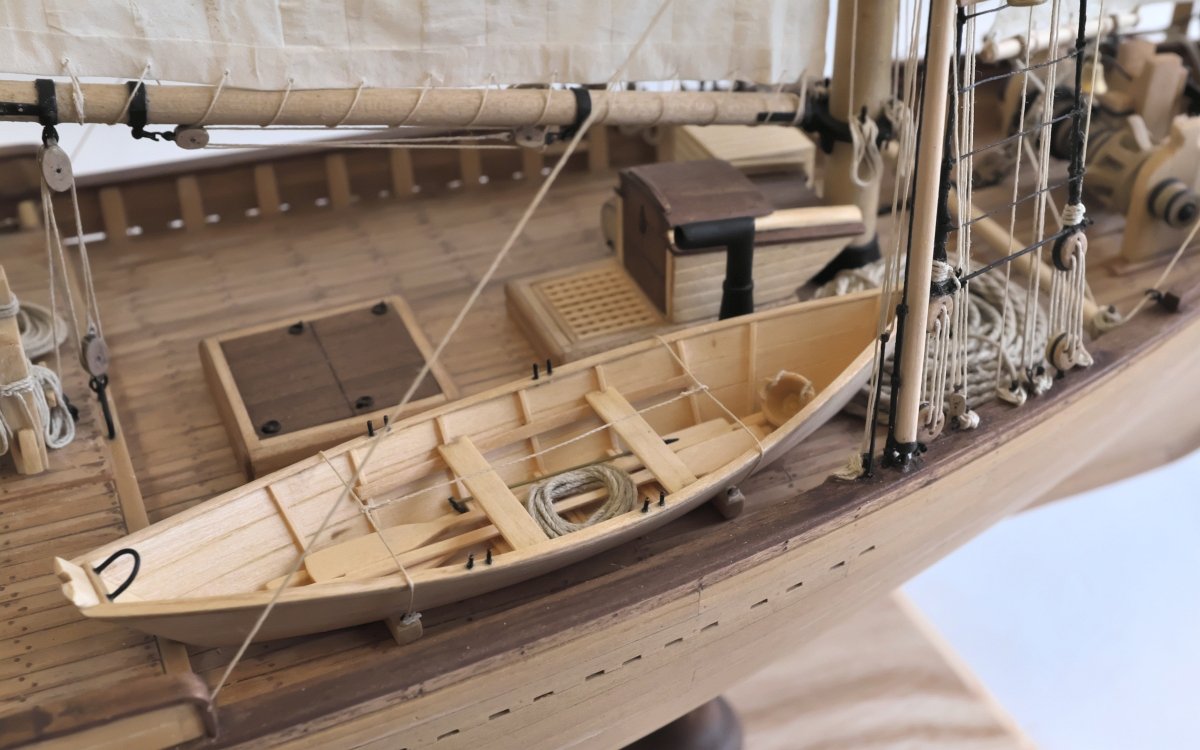
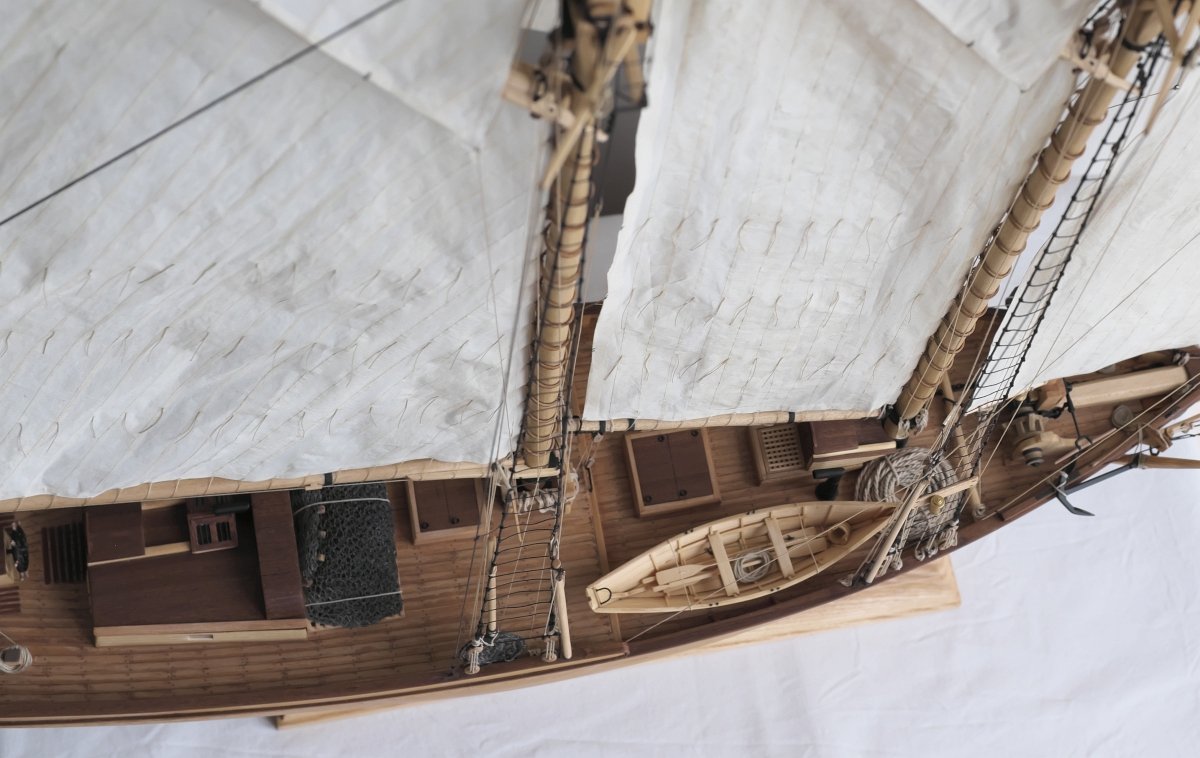
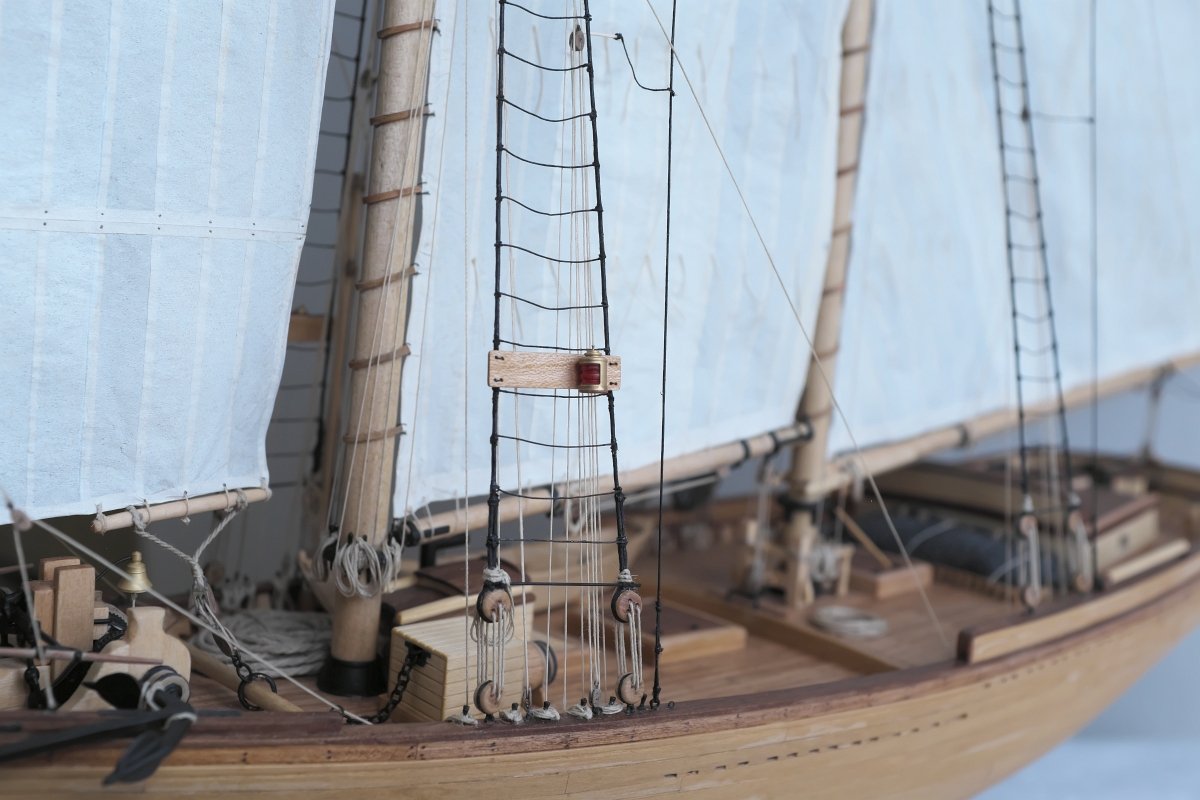
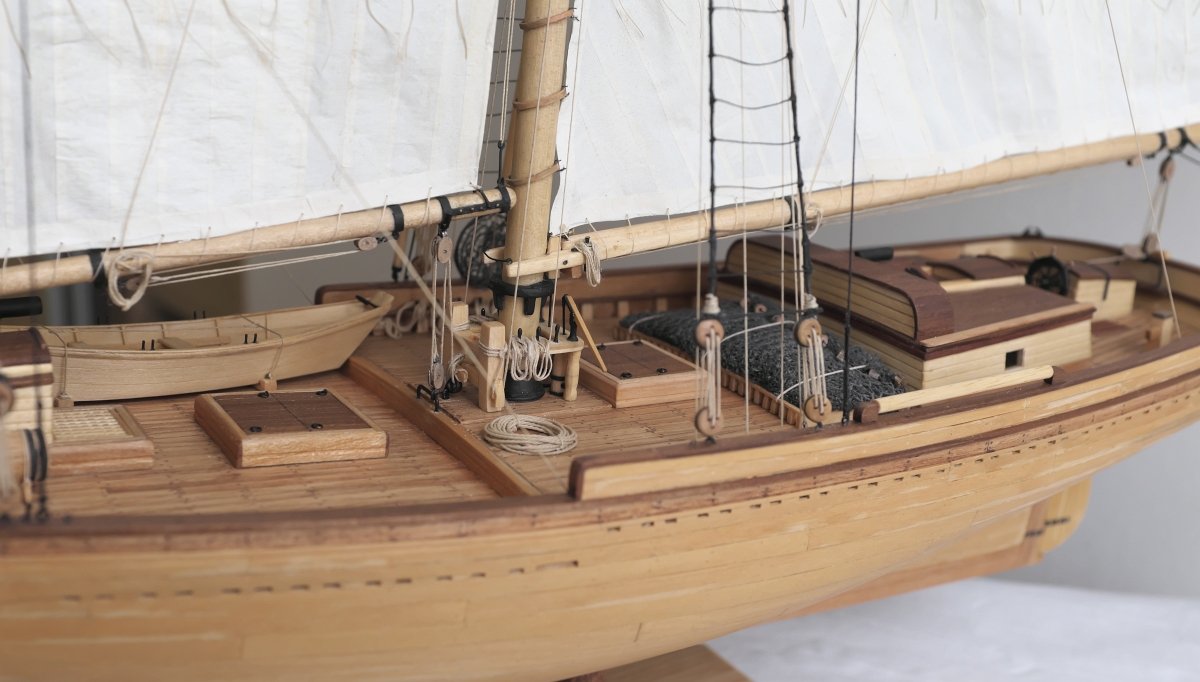
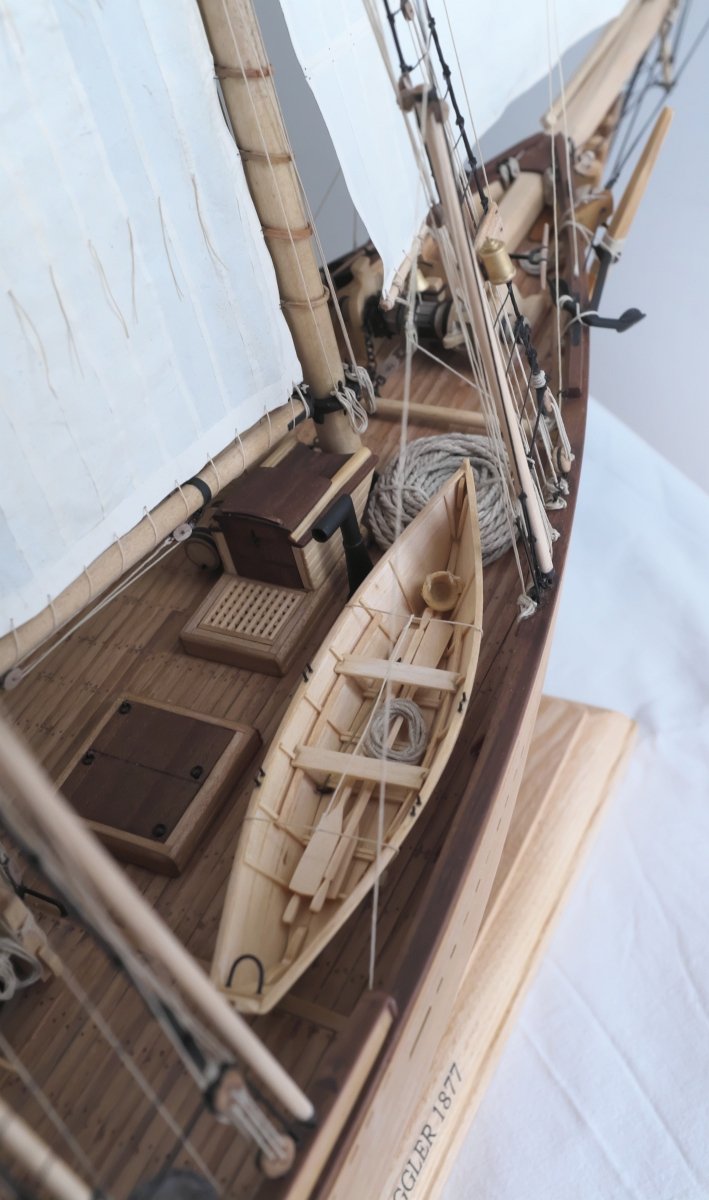
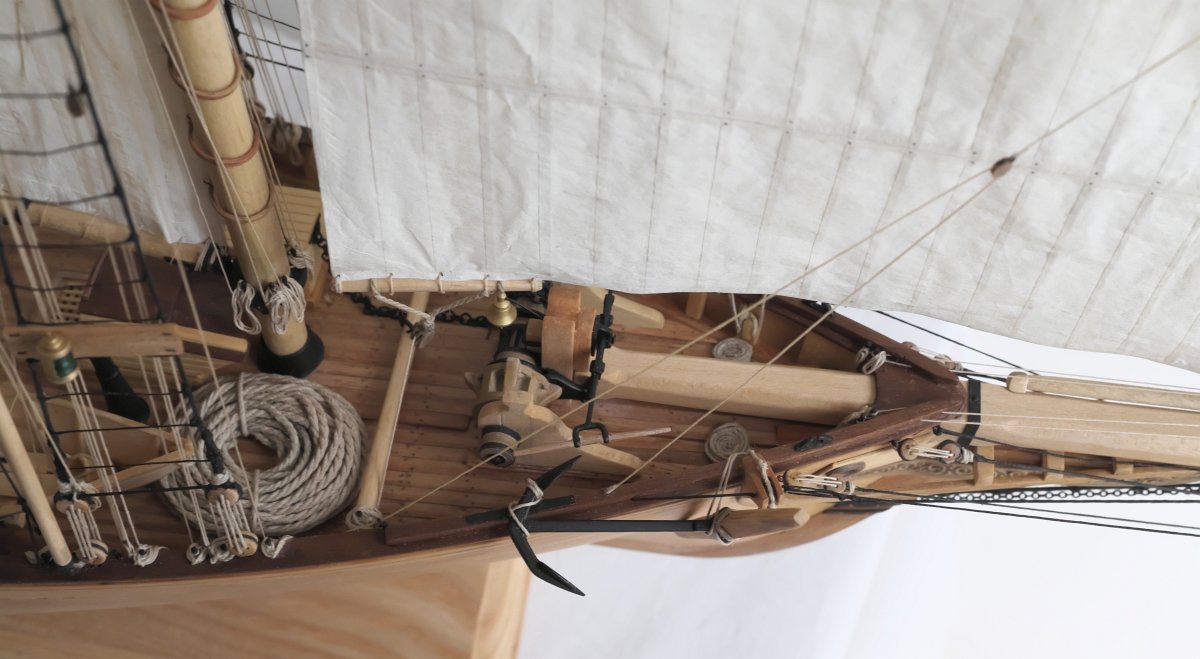
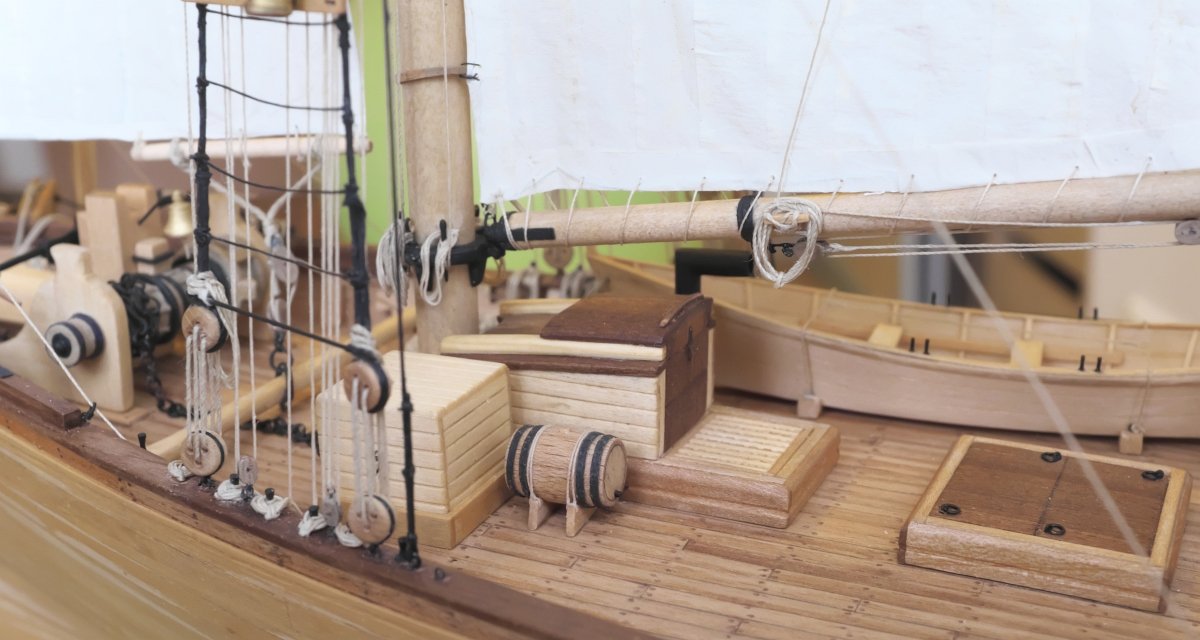
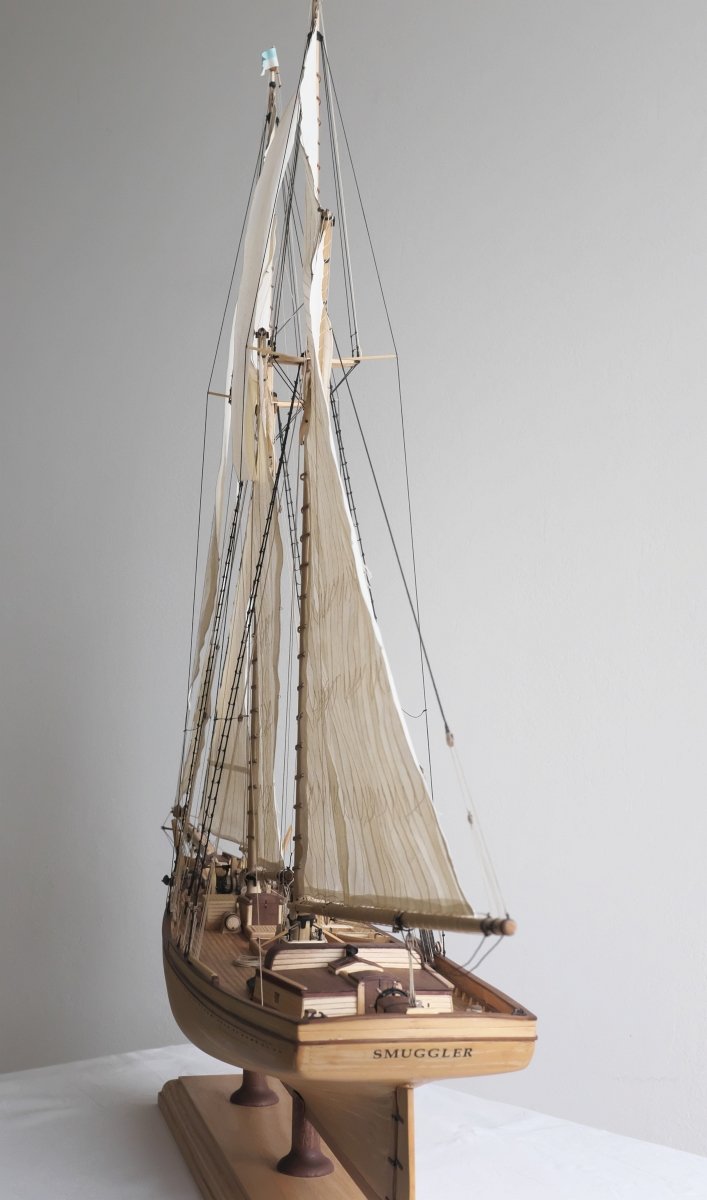
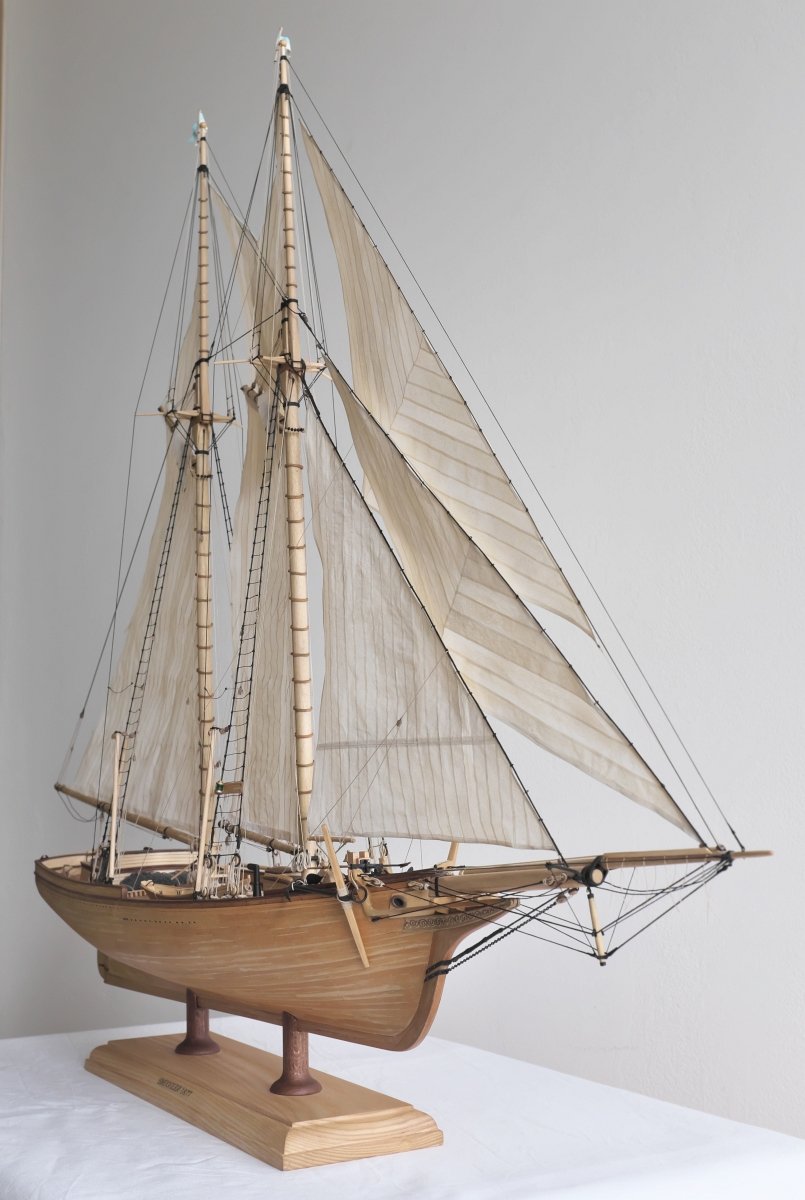
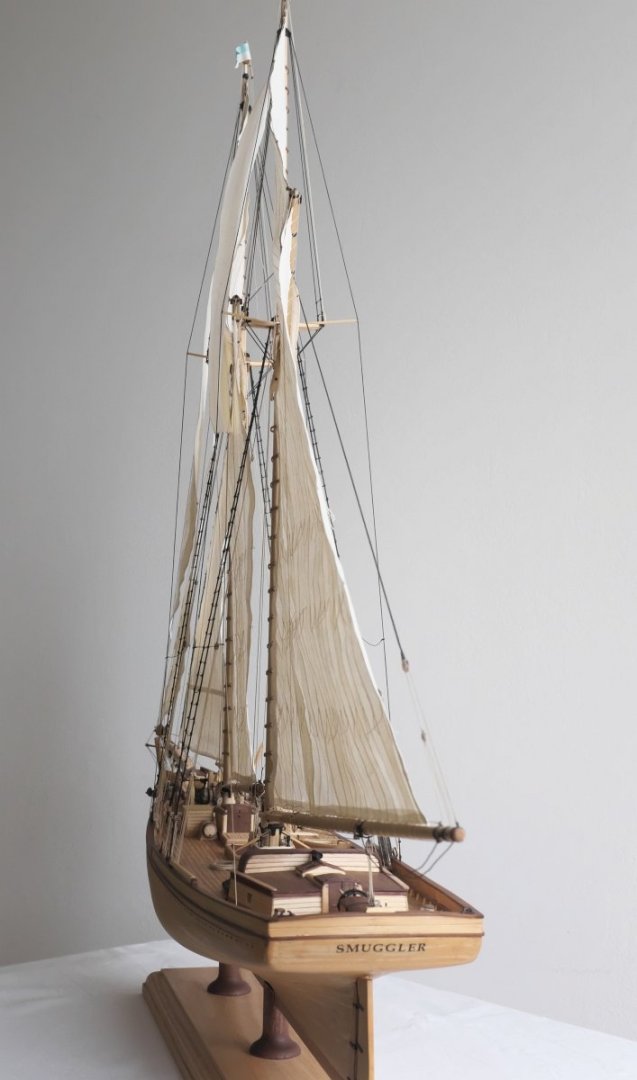
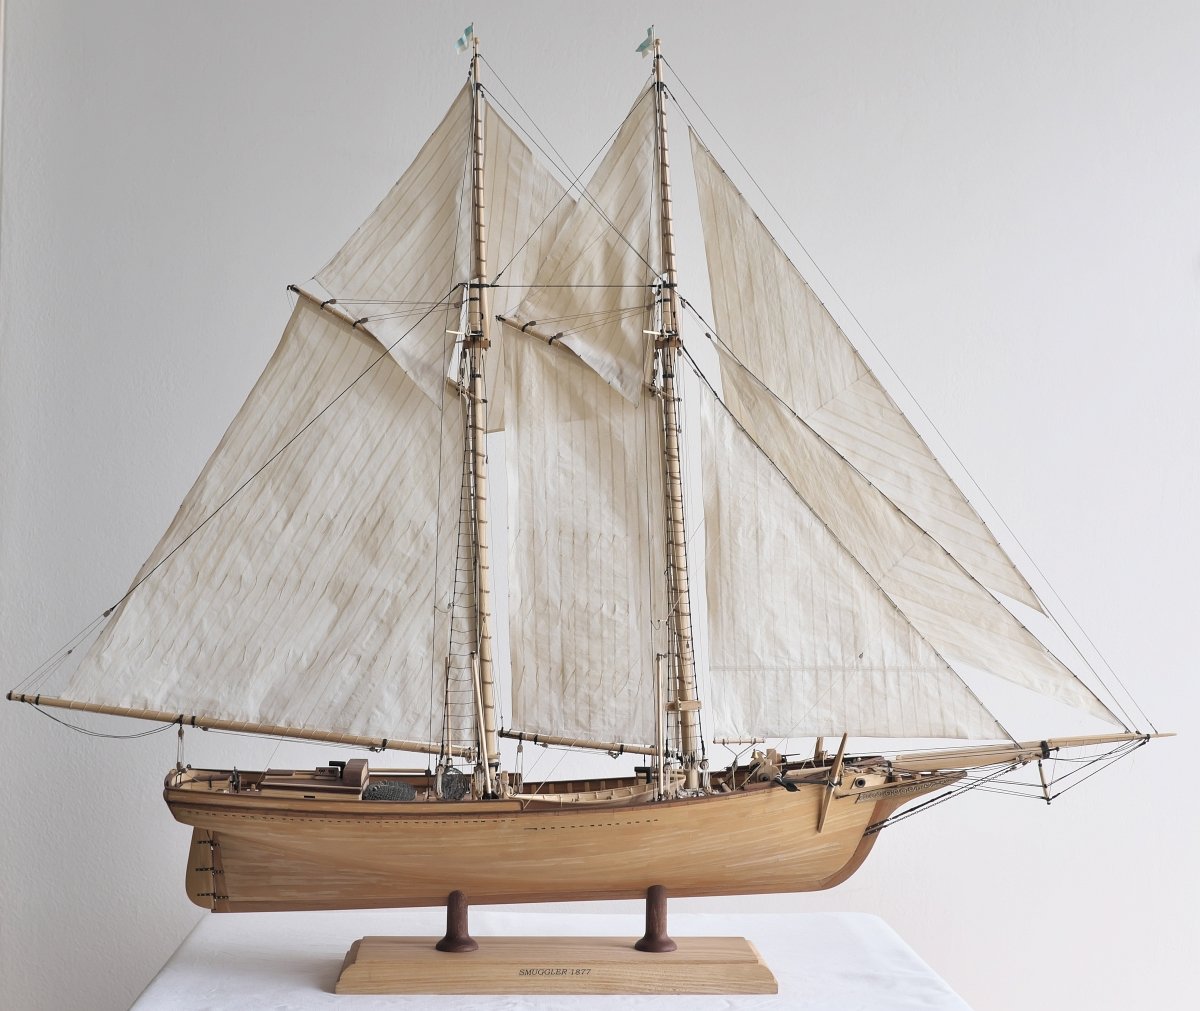
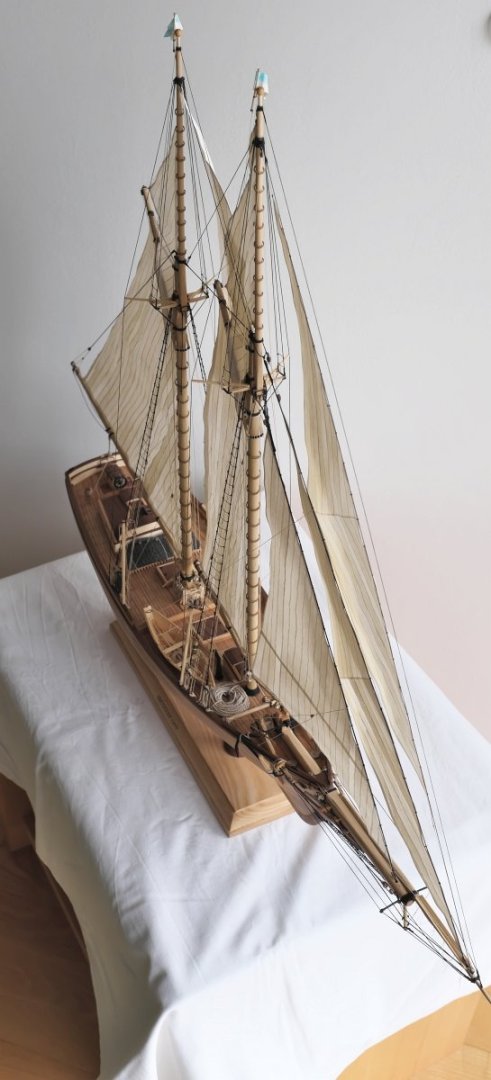
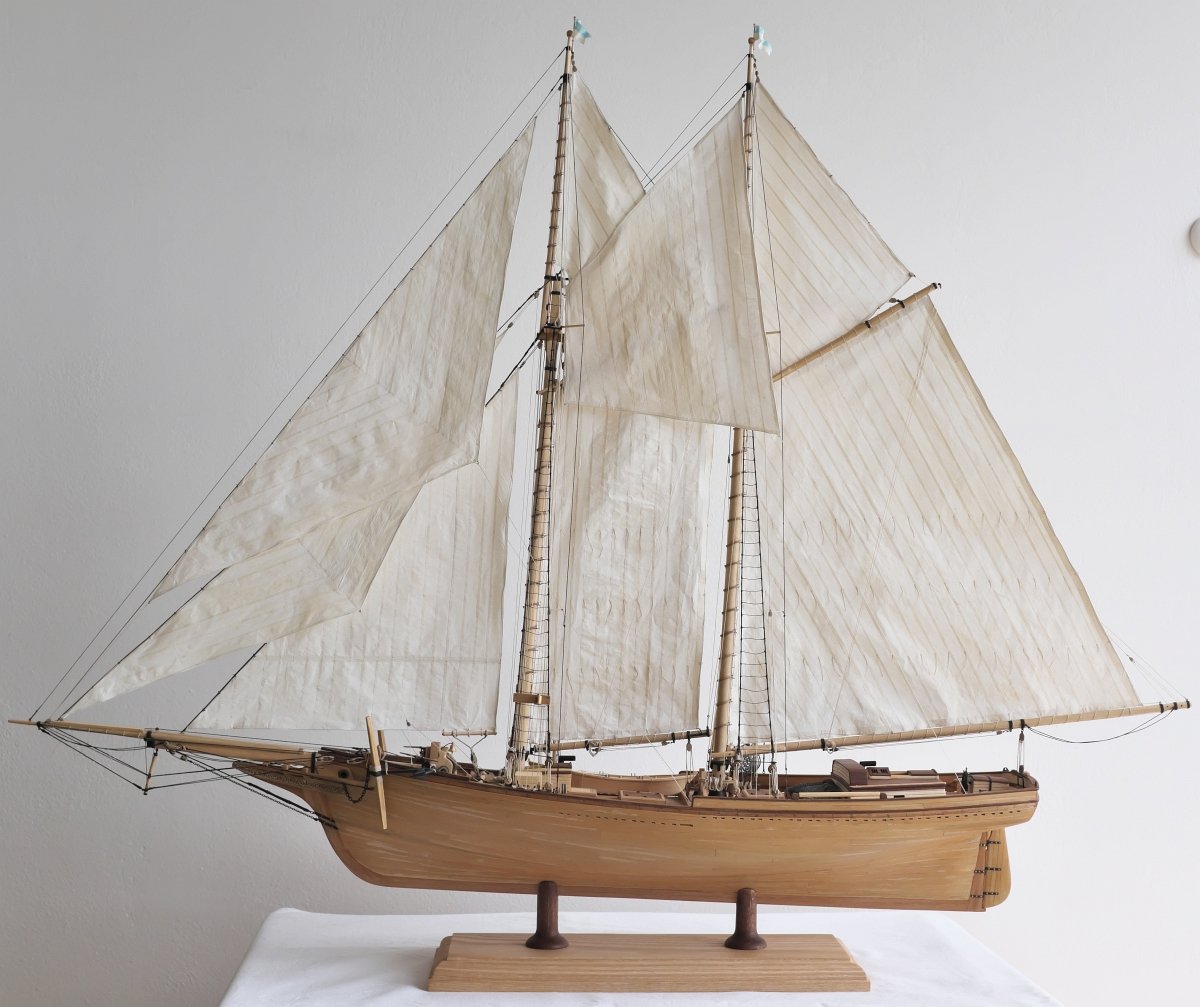
Hi all, The story has come to its end, Smuggler is finished. It has been a long, 2 years run, no doubts also because of my lack of experience. I had done many tiring reworks of my faults, right from the hull start to the rigging end and once the whole kit was literally sitting at the edge of a trash bin. Far from perfect result and with bunch of more or less visible errors, I know, but I admit I am very happy with my first finished wooden ship. Am glad I went on with sails. At least to me, heavy rigged ship like this looks much more dynamic and alive with all the sails set. Sure it added quite a lot of work atop and proved to be quite a temptation just to take easier path with, bare masts and gaffs. If nothing else, I can sure understand why these ships were so eye-catching from a distance, but also often so deadly to her crews, because of instability under sudden bad weather strikes and heavy seas. Decision to plank her instead of painting is a clear deviation from historical appearance, but I never could convince myself to hide the beauty of the wood under enamel coat. As for the kit, I am no expert builder and can provide only my personal feelings, rather than comprehensive professional review. Using the vocabulary from the world of plastic models, I would rate it as a good short-run kit. It portraits the subject out of the main stream for rather higher price. No fancy laser cut parts or 3D prints. The 1:1 plans are just great and if they do not cover some details, there comes MSW community and Chapelle’s book “The American Fishing Schooners 1825-1935” to help. Metal castings are of various qualities, I tried to replace them with wooden representation where possible, or at least to paint and weather them to a wooden look. Rigging threads: the “black ones” are OK, those white are …too white to my taste. The thing worth to mention is the dory boat sub-kit. This is a true little gem, I was so pleased with it I wanted to order one more but, alas, overseas postage and customs would multiple the purchase costs, so let it be. I wish the kit was provided as it is, only with a classic POB hull construction or at least the bulwarks were designed in that way. Overall I am very happy with my choice: I feel I have learnt a lot, much more than if everything was made of precut and laser ready-to-use cut parts. This is the greatest benefit for me, although I also only now see, how little craftsmanship I own, when compared to all those detailed and beautiful builds here on MSW – level I could probably never achieve. Overall: I would suggest the kit to a determined first time builder, with some model making experience, one just needs to understand what to expect in the box. Last but not least, I would like to thank for all the support and technical advises I received here on MSW and also to BlueJacket Shipcrafters Inc. for providing a kit of this very fine vessel. And great thanks to my wife. Without her never-ending support and patience I could have never spent so many hours in my workroomJ. I took out my Fuji mirror-less and tried to document the final stage of the project … .

- 104 replies
-
- 6
-

-
-
- Bluejacket Shipcrafters
- smuggler
- (and 1 more)
-
I really like the look of the deck. It was a good decision not to go with the kit's prescribed deck plate. I have ordered the kit too and am waiting for the box currently, wanted to ask for the historical accuracy: I saw this picture earlier in this thread: https://modelshipworld.com/uploads/monthly_2018_07/Arabia_5m.JPG.dc15dc9f03255c00ebcf94729823bf26.JPG Interesting for me is the planking run direction fore. Was this the special case or should this be a common practice instead of simple straight planks, parallel to keel, on these river steam boats? Thx
- 157 replies
-
- 1
-
-
- chaperon
- Model Shipways
- (and 1 more)