
HOLIDAY DONATION DRIVE - SUPPORT MSW - DO YOUR PART TO KEEP THIS GREAT FORUM GOING! (Only 13 donations so far - C'mon guys!)
×

juhu
-
Posts
267 -
Joined
-
Last visited
Content Type
Profiles
Forums
Gallery
Events
Everything posted by juhu
-
 Thanks a lot for kind words. Rigging is still a far future, hopefully will get there.... Here I started with the main rail. I have tried to implement the correct strip joints, although as will be seen later, they will not be seen at the end anyway.
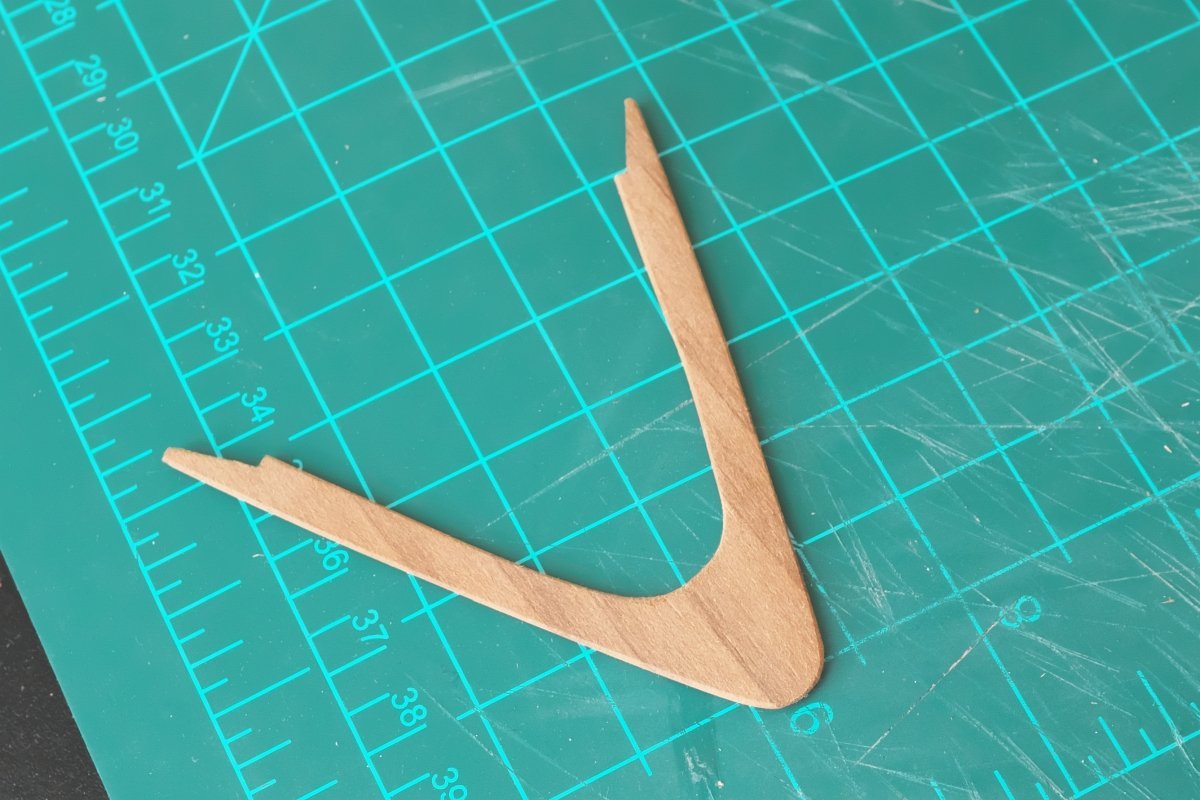
- 104 replies
-
- 2
-

-
- Bluejacket Shipcrafters
- smuggler
- (and 1 more)
-
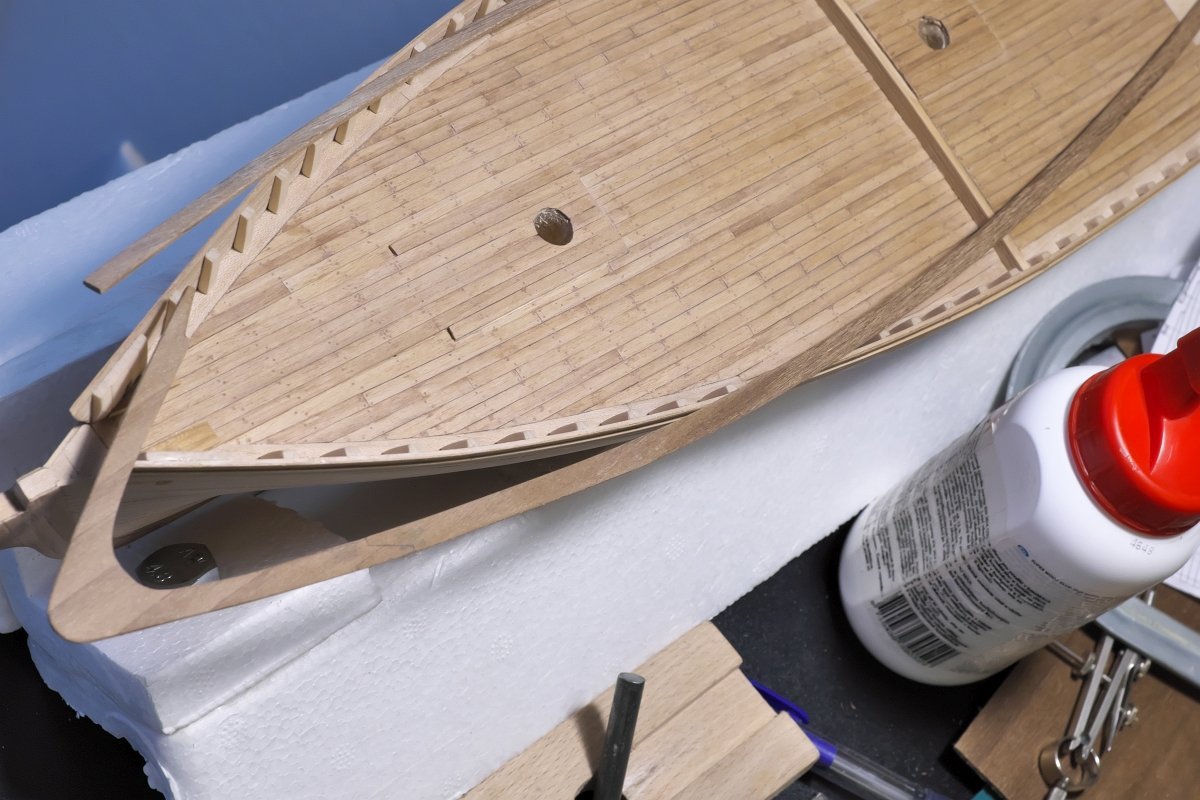
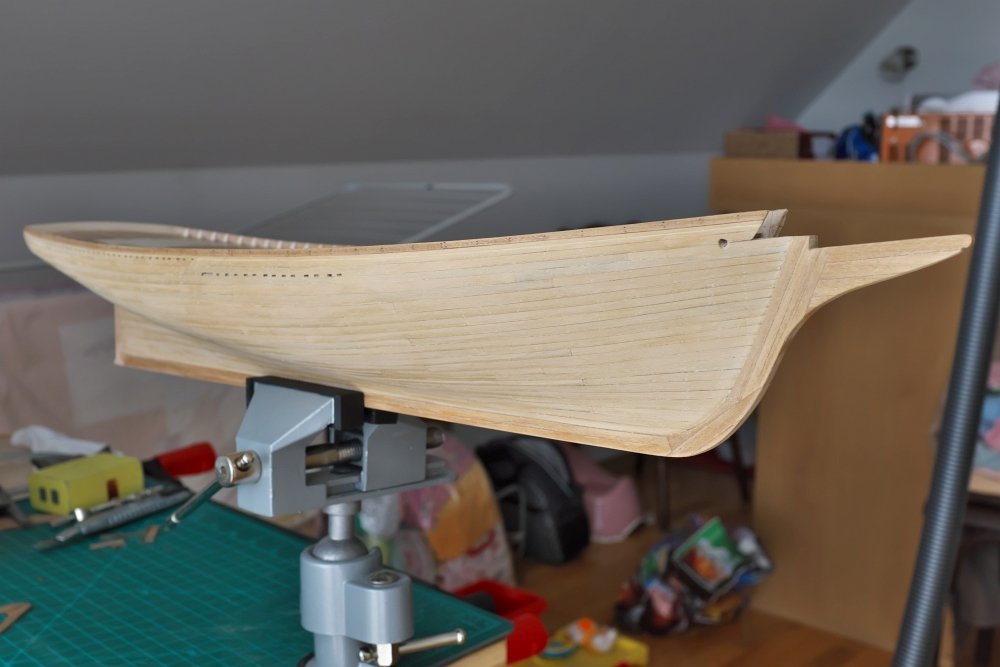
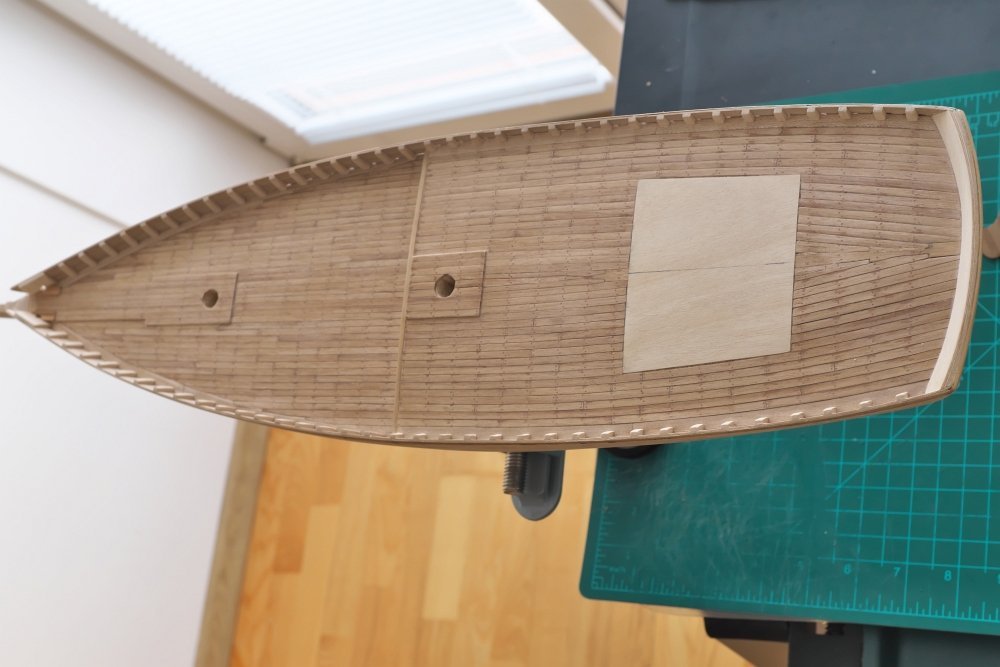
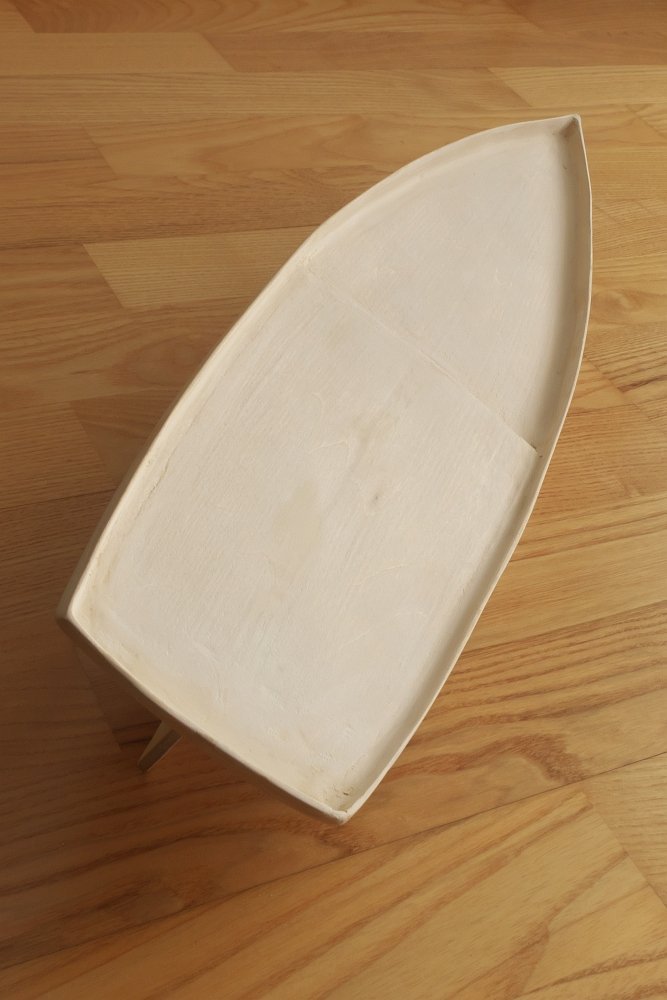
Hull planking done. I have also simulated tree nailing with drilling the small holes and filling them with light wood filler. Next time I may try to use toothpick ends. Still acceptable, Tree nails are there, just barely visible as they should be in scale I hope. The same approach applied for deck... ...and done!
- 104 replies
-
- 8
-
-
- Bluejacket Shipcrafters
- smuggler
- (and 1 more)
-
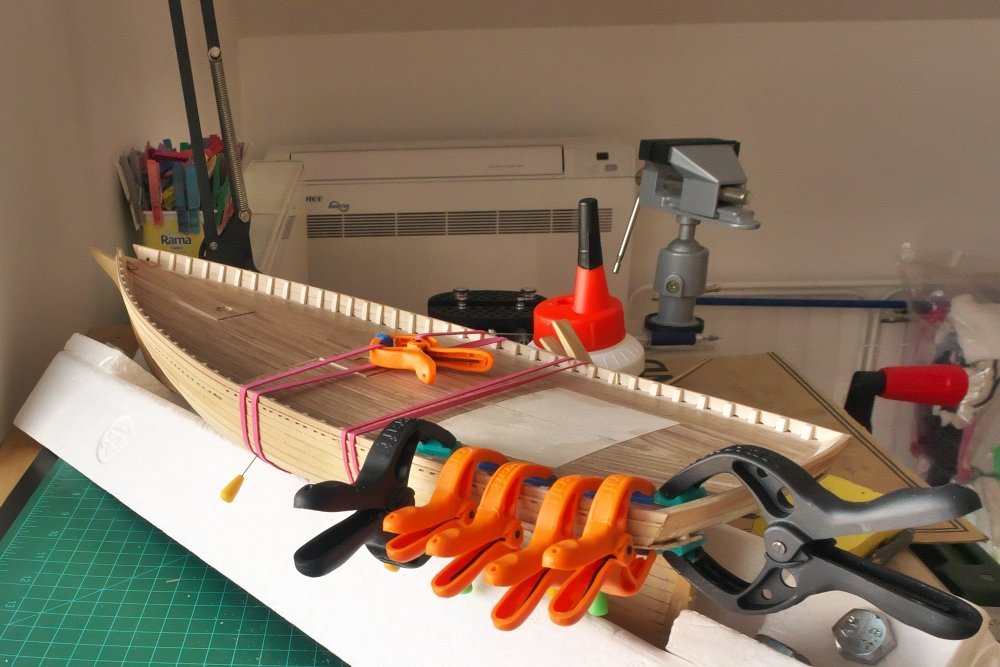
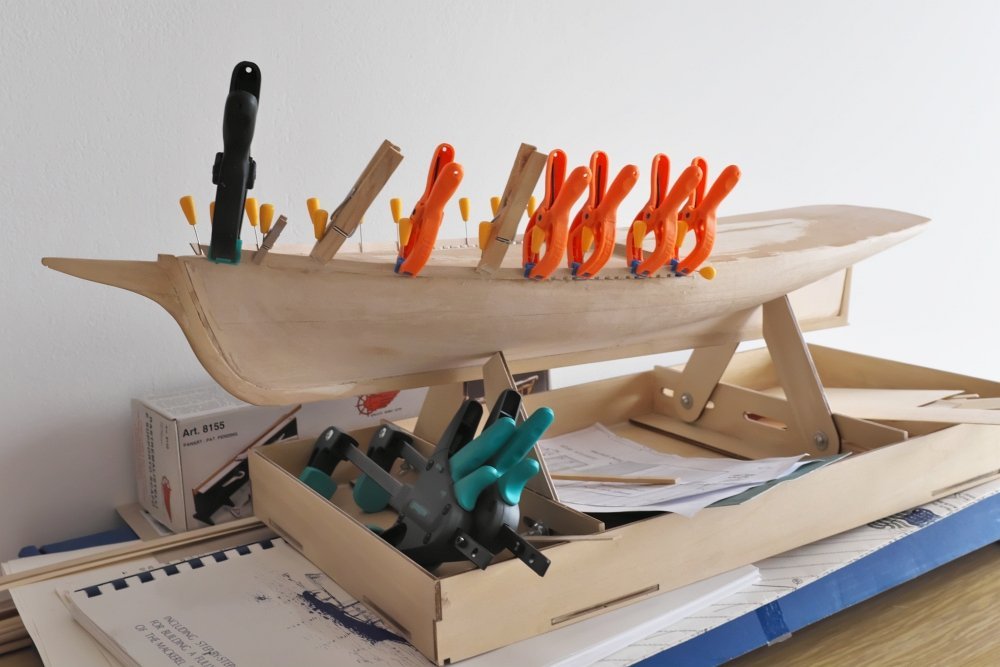
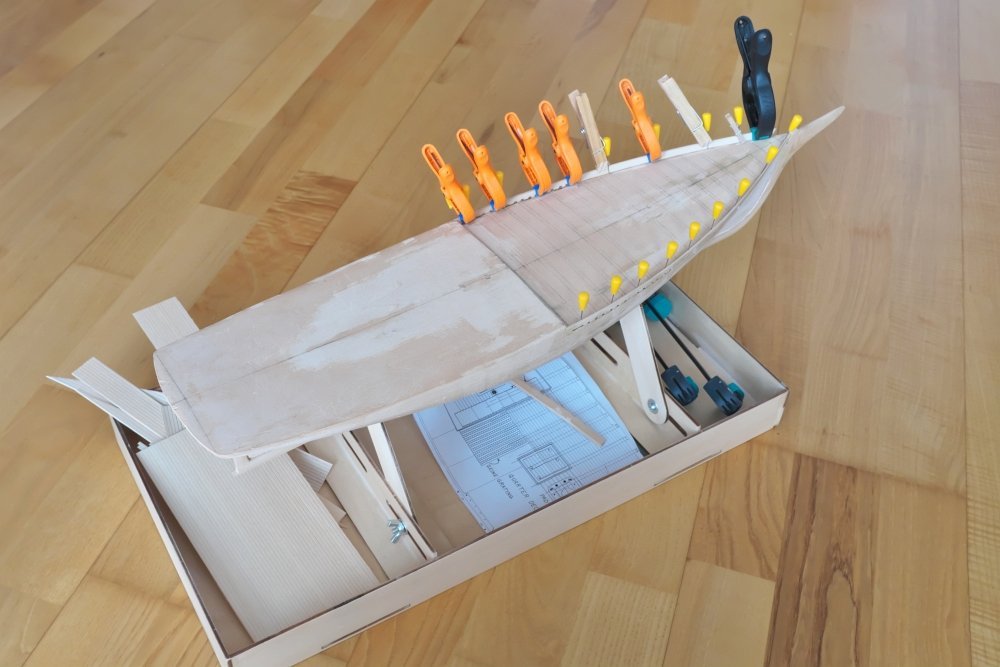
One after another, one after another.... Securing the plank strips was sometimes fun, sometimes not. The bulged hull shape can be quite "slippery" for any clamps that you want to use! But it did work at the end. I made myself a simple hull cradle from some package EPS as you might have noticed. Much more stable and secure than any commercial keel and hull holder I have tried.
- 104 replies
-
- 4
-
-
- Bluejacket Shipcrafters
- smuggler
- (and 1 more)
-
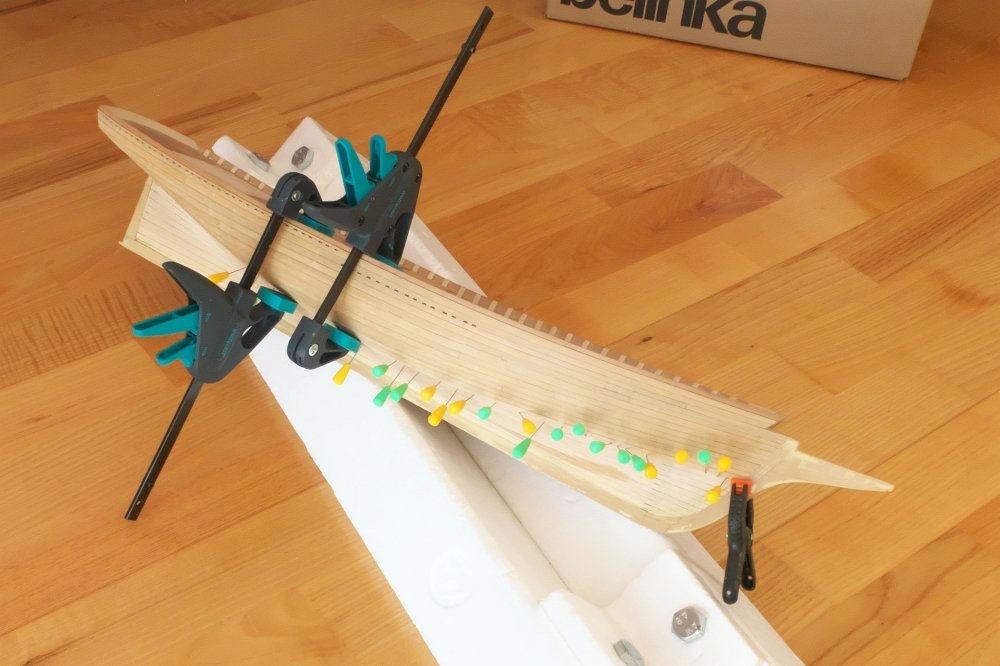
The hull planking slowly continues. Boy this was something! One narrow plank after another and it always seemed like there is no end and the unplanked part is only growing . The planking was made with boxwood strips. I have always like the yellowish look of this wood, got some stock while being in US years ago. Quite uncommon to get in Europe unfortunately! Each plank is precisely cut and shaped before gluing. Wanted to use no stealers at the bow, all the planks had to be trimmed. Lot of mark-cut-repeat steps. Sometimes I wondered if I did not taken too much for the first planking job Although I do have electrical plank bender, I found to use it not so often to my own surprise . Rather than waiting while the tool is heated, soaking the strip in warm water and let it dry twisted as needed for a while was more effective.

- 104 replies
-
- 4
-
-
- Bluejacket Shipcrafters
- smuggler
- (and 1 more)
-
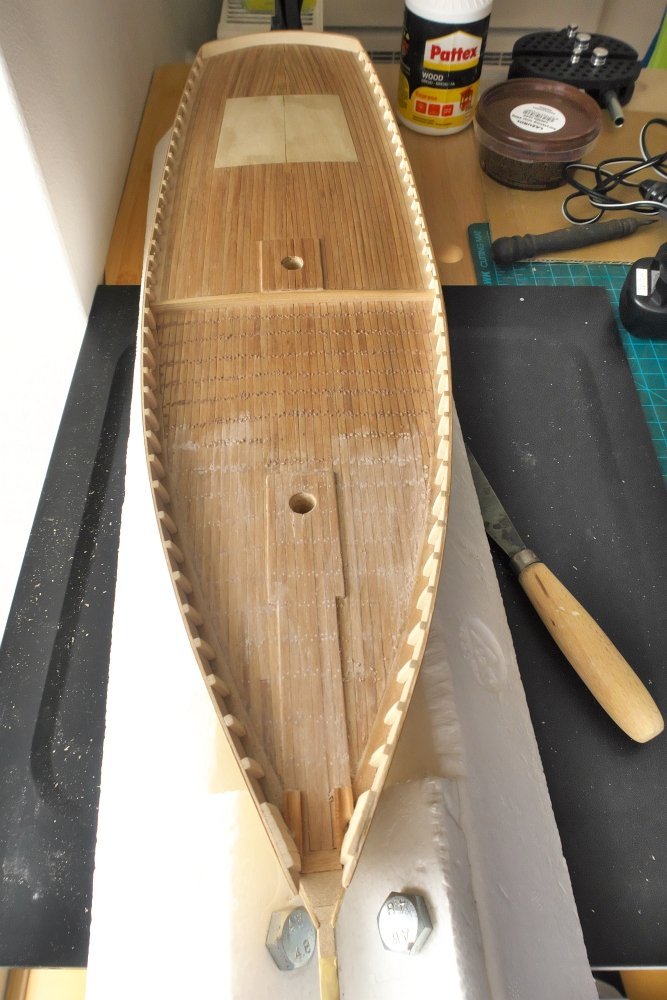
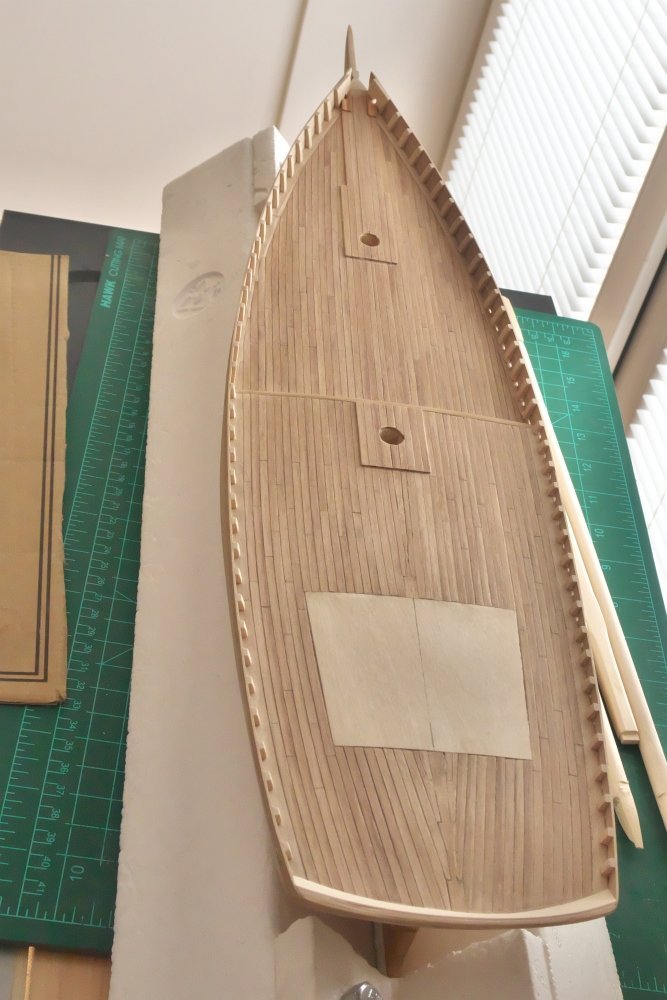
Deck fully planked with tanganika strips. Actually, when ordering the wood stock I supposed the "tanganika" wood is the pale wood I have used for the inner bulwarks as you see in pictures. To my surprise, the delivered tanganika is much darker, for sure another type of wood. What is actually the material I have used for bulwarks I do not know then 😒. But never mind, future will show it is as it should be Here is clearly seen that much of the kit wooden stock will be replaced by other wood. The reason is simple: not wanting to paint the ship, some better looking wood shall be used for finished surfaces. First deck planking in my life looks like this and am quite happy with that. A also marked with pencil the deck layout of the hull planks. Hope, this would help nice and even plank layout. It would be my first hull planking and there is no room for errors then. To my delight, the whole bulwark construction, supported with glued stanchions feels to be quite strong!
- 104 replies
-
- 7
-
-

-
- Bluejacket Shipcrafters
- smuggler
- (and 1 more)
-
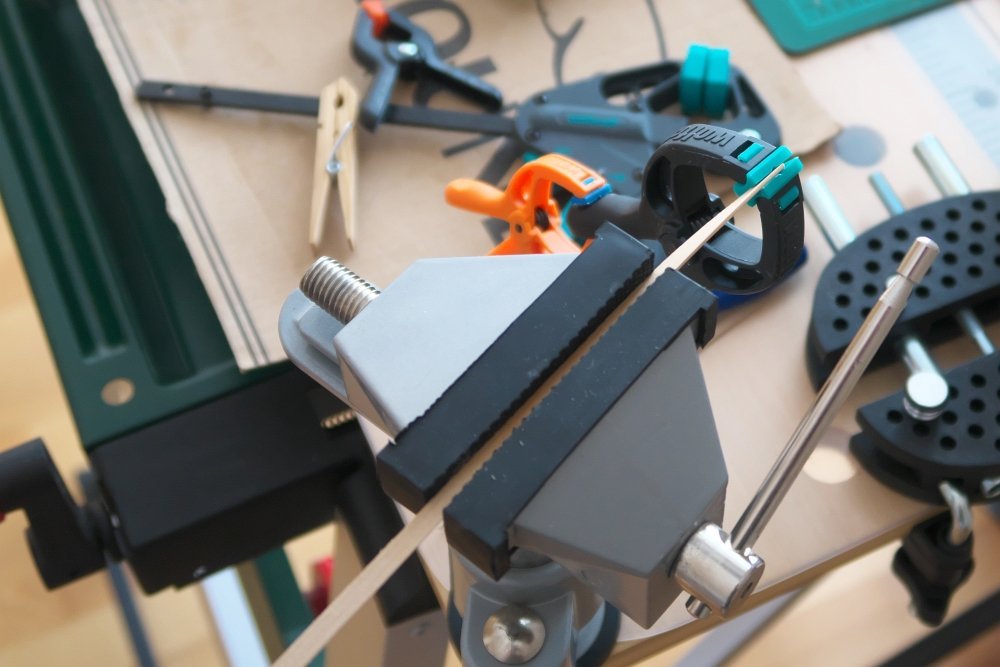
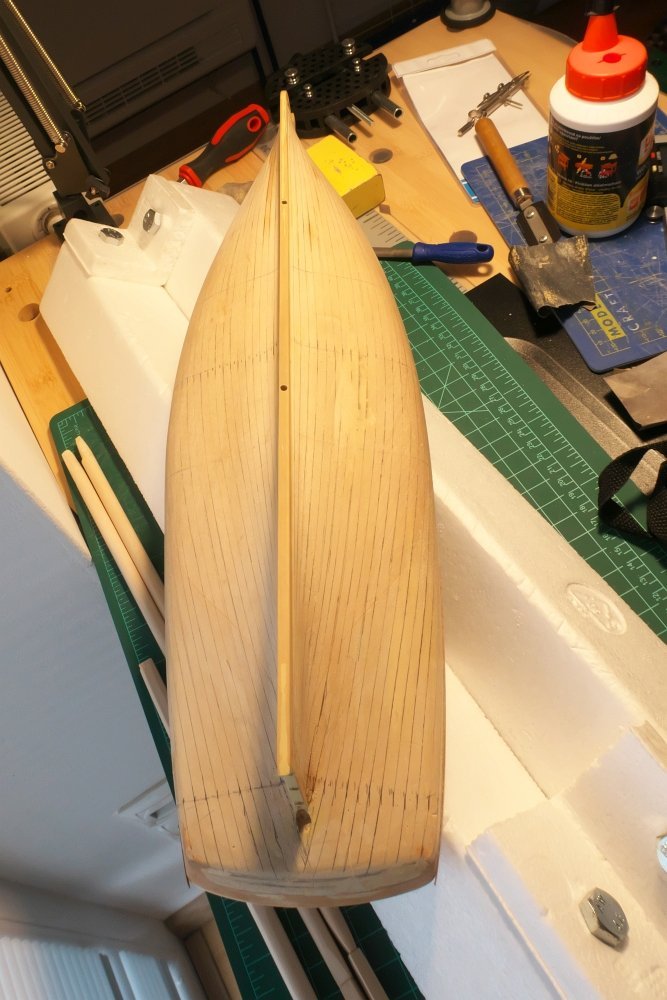
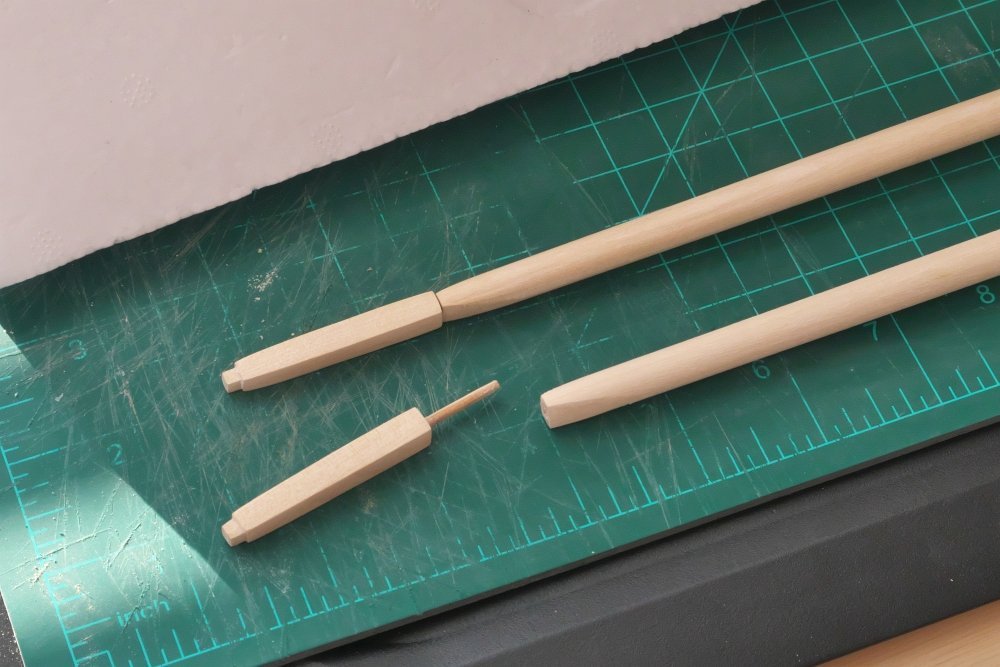
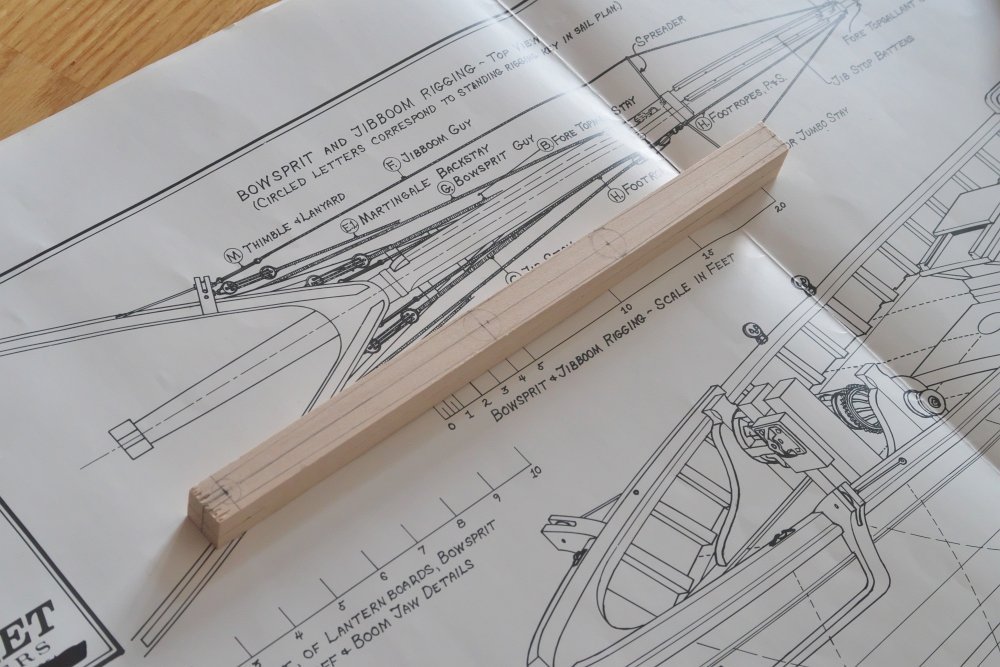
To make a short break from planking I have played a bit with masts and bowsprit. As said at the beginning, no precut parts, everything carved from scratch. The masts have quite a delicate shape variations - I have decided to make upper parts of the lower masts from square profile. The odd step between rounded and square profile will be covered by trestle trees later.
- 104 replies
-
- 3
-
-
- Bluejacket Shipcrafters
- smuggler
- (and 1 more)
-
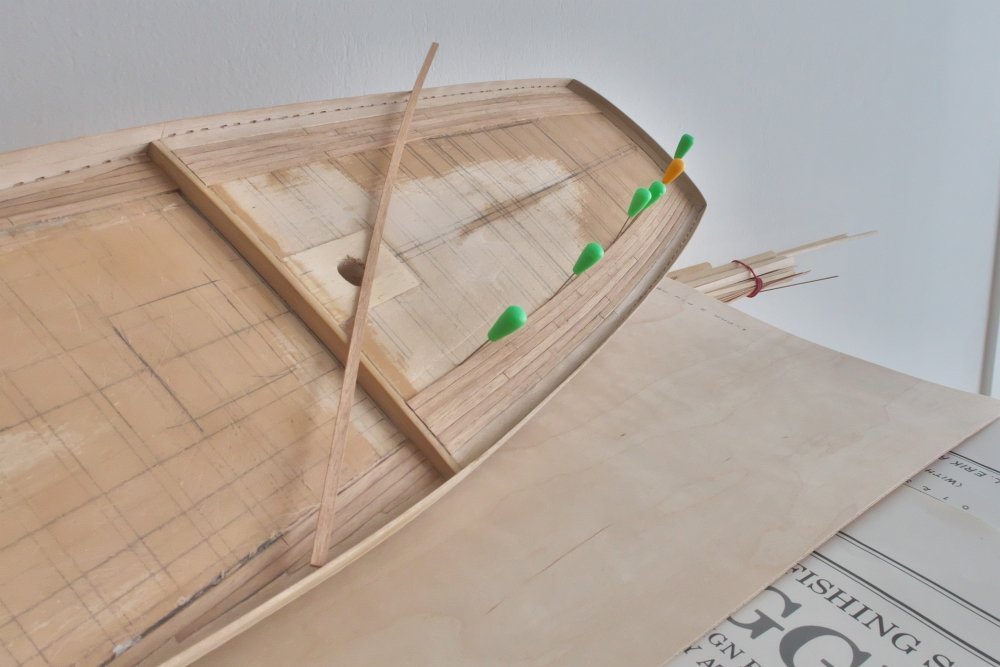
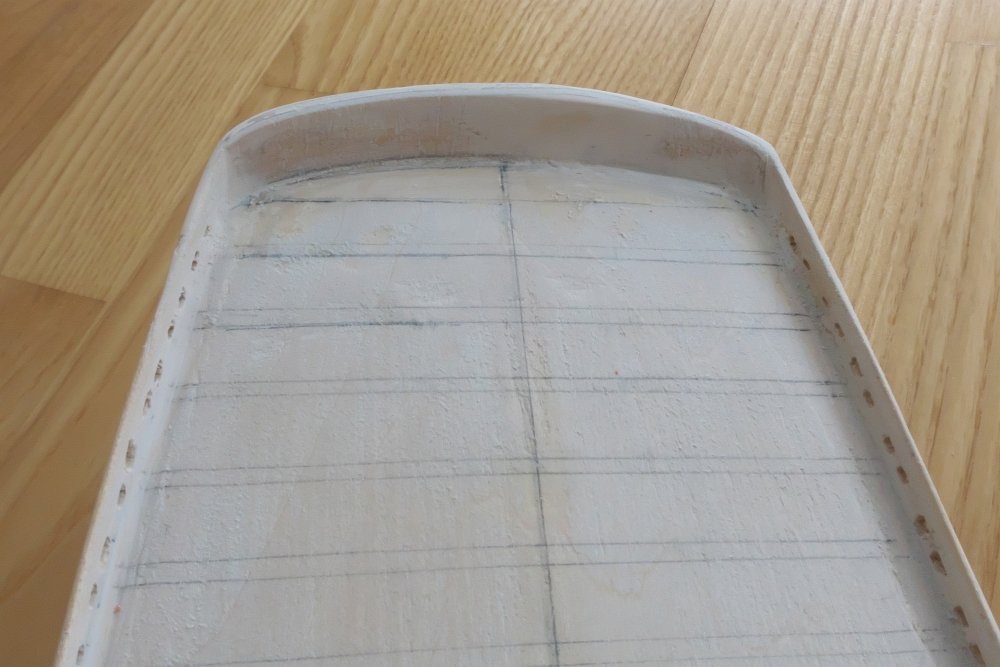
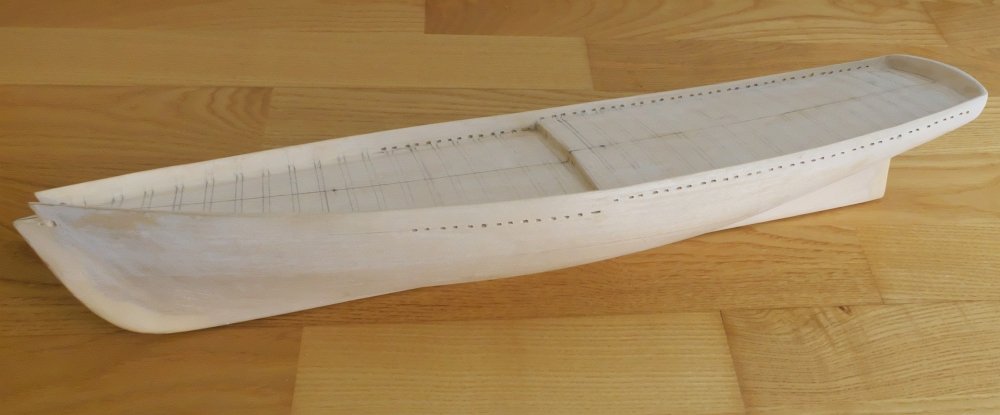
Here the parts are already attached and I have started the deck planking job itself. According to plans and Chapelle, main deck has straight planks with nibbed ends, quarter deck featured planks following the bulwarks curvature.

- 104 replies
-
- 4
-
-
- Bluejacket Shipcrafters
- smuggler
- (and 1 more)
-
I started to think about the deck planking. Following the plans but also Chapelle's "American fishing schooners" book I knew I would try to do deck plank nibbing (I only hope I use correct English terms). Being warned by my disaster earlier, this time I tried totally different approach. Instead of cutting the already glued deck planks, I have prepared the considered deck part first. It looked quite good and actually, this is the first part of the model that has got its final outer appearance.
- 104 replies
-
- 4
-
-
- Bluejacket Shipcrafters
- smuggler
- (and 1 more)
-
OK, let's go. Here I started the bulwarks attachment. All the time thinking: Would it hold? Would it be strong enough? The attachment surface is very narrow, only the edge of the plank actually, 1mm. Yet the curvature, at least fore, should help.
- 104 replies
-
- 3
-
-
- Bluejacket Shipcrafters
- smuggler
- (and 1 more)
-
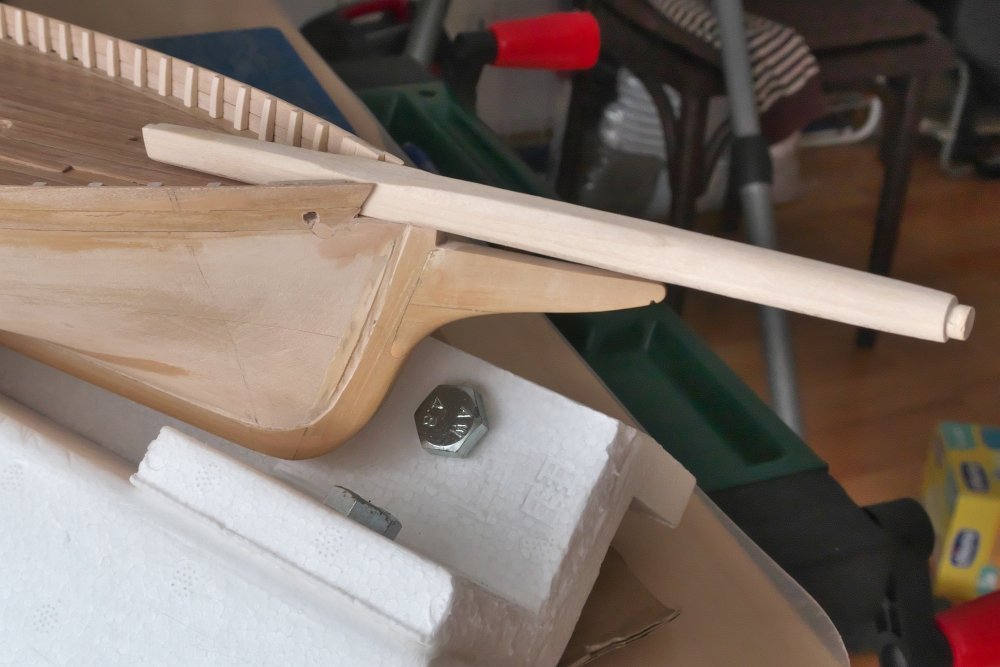
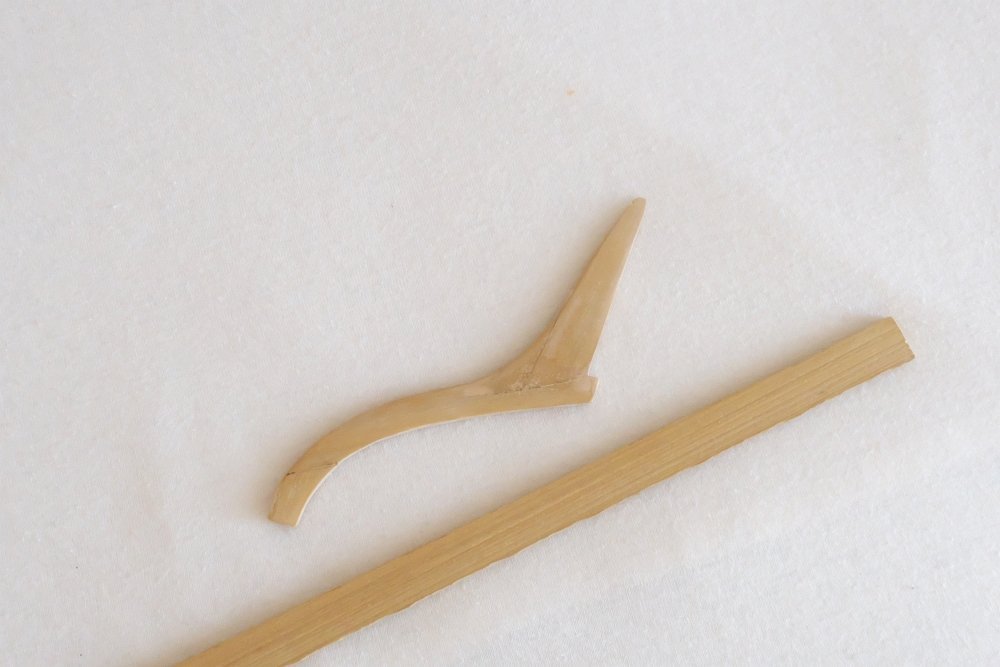
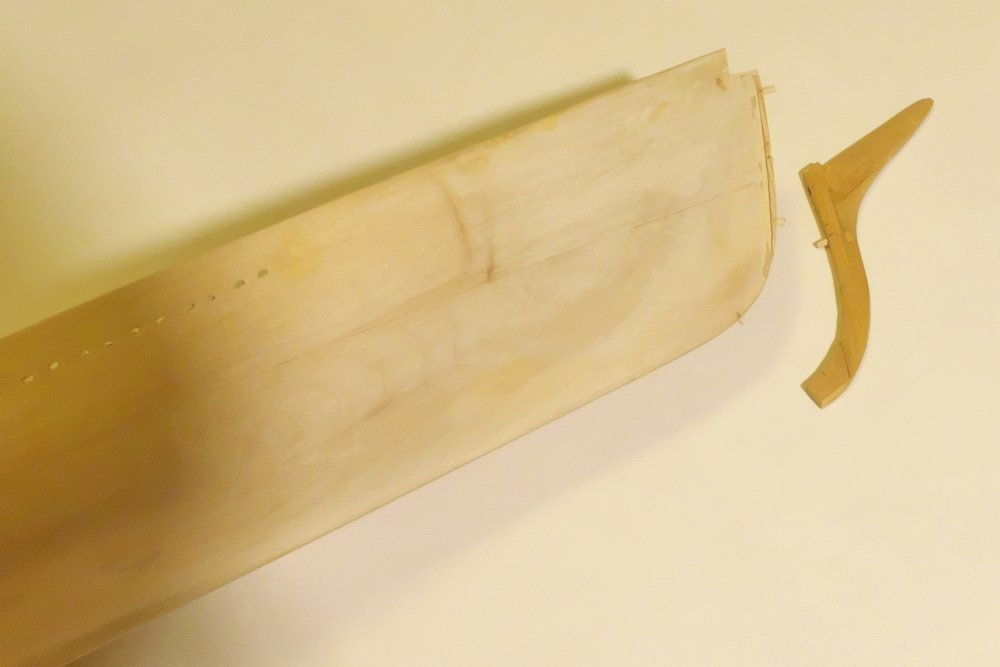
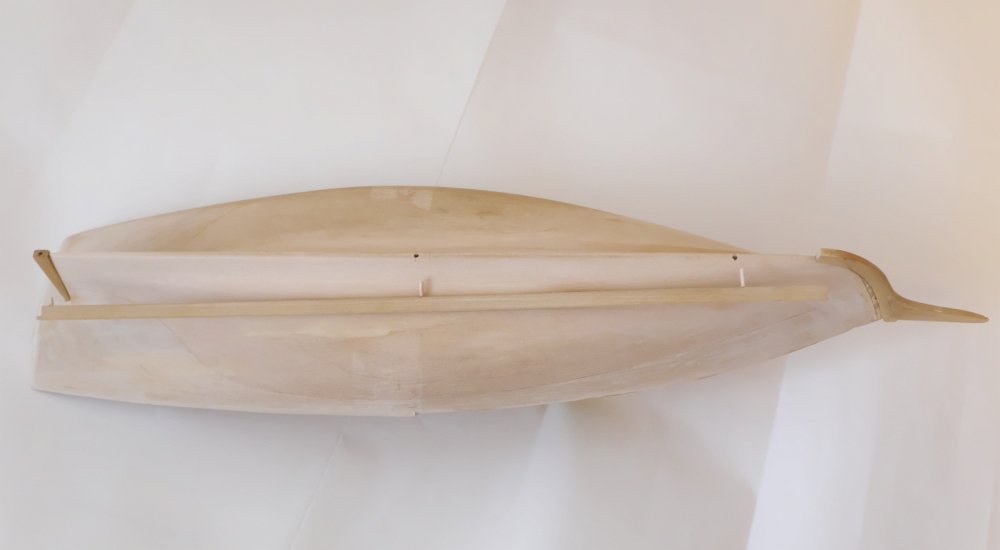
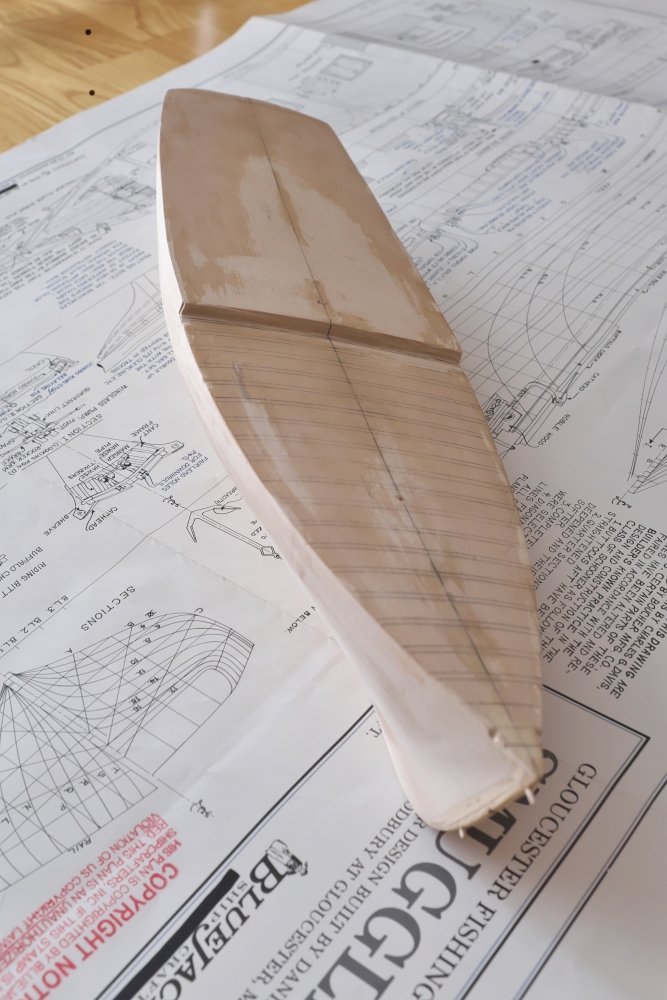
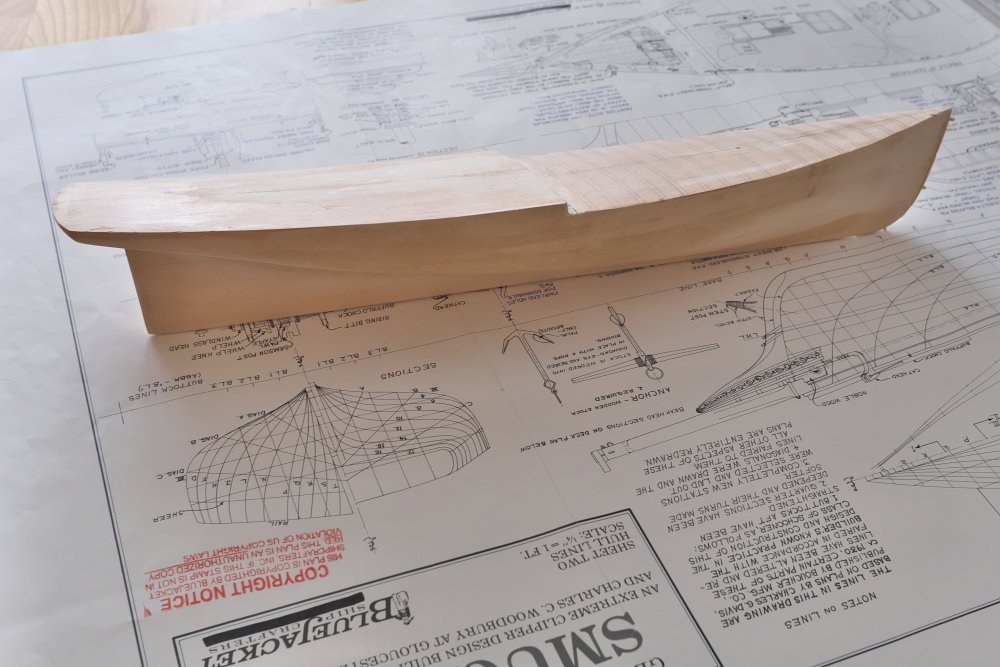
As seen also in previous pics, I have also done some preparation for keel attachment. I really did not like the idea of butt joint keel - nothing specific of how it shall be attached strongly enough was described. So I have made some locator pins (I guess my plastic model kit past will never leave me ) from the wood. The keel parts were carved out from my boxwood stock supply. I did not have sheet wide enough, just pretty narrow pieces as seen below, so more pieces were edge-glued together to get a base material platform. Then the thing was carved out of it: Locator pins should help to provide needed robustness of the construction:
- 104 replies
-
- 3
-
-
- Bluejacket Shipcrafters
- smuggler
- (and 1 more)
-
Thank you Chris. Indeed I pressed on and here is what I have done: After few days of pure depression from the project, I realized, that if restart should happen, something must be done with bulwarks. As said earlier, they went pretty bad. Also opening the scuppers as suggested by instructions had, well, raised my eyebrows. So, I have removed pre-carved bulwarks completely. I made new inner bulwarks from planking strips (I really wonder what type of wood this is, has been in my stock for a long while). Also, before attaching them to the hull, the scuppers were made using a small square file. The only thing I was worried was how strong would such a structure be...
- 104 replies
-
- 5
-
-
- Bluejacket Shipcrafters
- smuggler
- (and 1 more)
-
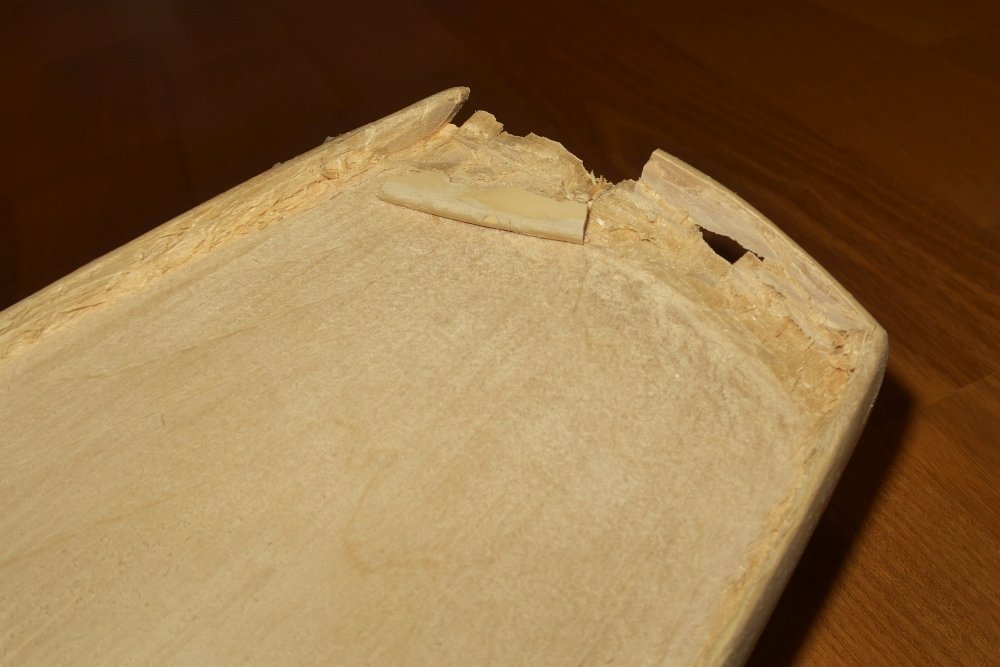
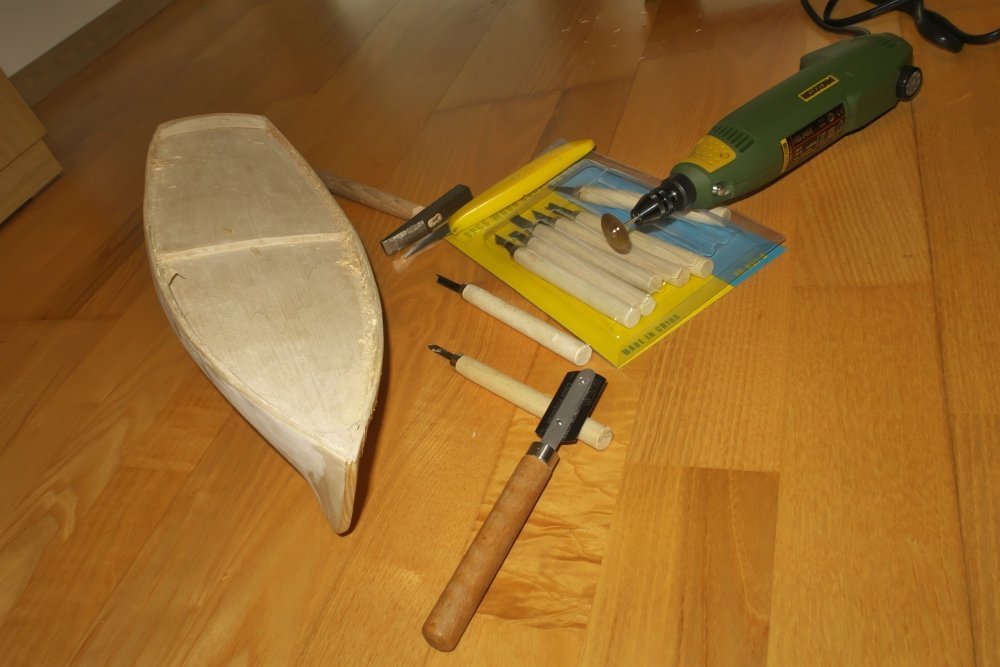
Well, here it happened. I followed with hull shaping, deck planking and then..... 💥 Strike from above or below? When doing the deck plank nibbling I realized too late how off my deck planking is angled from cL. In addition, the bulwarks proved a real trouble. I could not achieve even thickness; neither make them thinner enough, so they could adopt inner and outer planking, which was my intent from the beginning - no paint. Alas. Here I have no photos but the whole project was seriously sitting at the edge of scrap firewood box. As you predict, it did not happen, otherwise you would not be reading this blog. But it took me several days of deep breathing and even deeper thinking. Lessons learnt: as a pure beginner I would not say the solid hull kit is easier and better choice compared to POB. You may say you have solid base for painting or planking, but it is not true. The demands on accuracy, correct drawings of all the construction lines to achieve even hull shape, are much higher. If solid hull kit, then I would say, making the bulwarks a part of the carved hull is not the best design decision. Although any experienced builder can probably achieve good results in thinning them, I am tempted to say that to build the bulwarks separately is much better way. Also I guess, to machine-carve the hull with bulwarks would naturally increase the kit manufacturing complexity and eventually purchase costs.... End for today. Resurrection story comes tomorrow!
- 104 replies
-
- 2
-
-
- Bluejacket Shipcrafters
- smuggler
- (and 1 more)
-
Few thoughts on instructions: Very extensive, several levels above the typical European kits instructions. However, this is not a big task, because European producers are often known for virtually non existing instructions Still from my beginner's point of view, there are things to improve: For example, the manual will show you, how to thin the side bulwarks. Described, pics attached. But how to remove the mass of the wood from the bow and transom section, where it is much more difficult and the same approach simply cannot work, is fully left up to the builder. Oh, some furious mackerel-catch attack? No, just a chisel went through... Eventually, the success achieved: Frame and cL lines drawn - to mark the scupper openings
- 104 replies
-
- 5
-
-
-
- Bluejacket Shipcrafters
- smuggler
- (and 1 more)
-
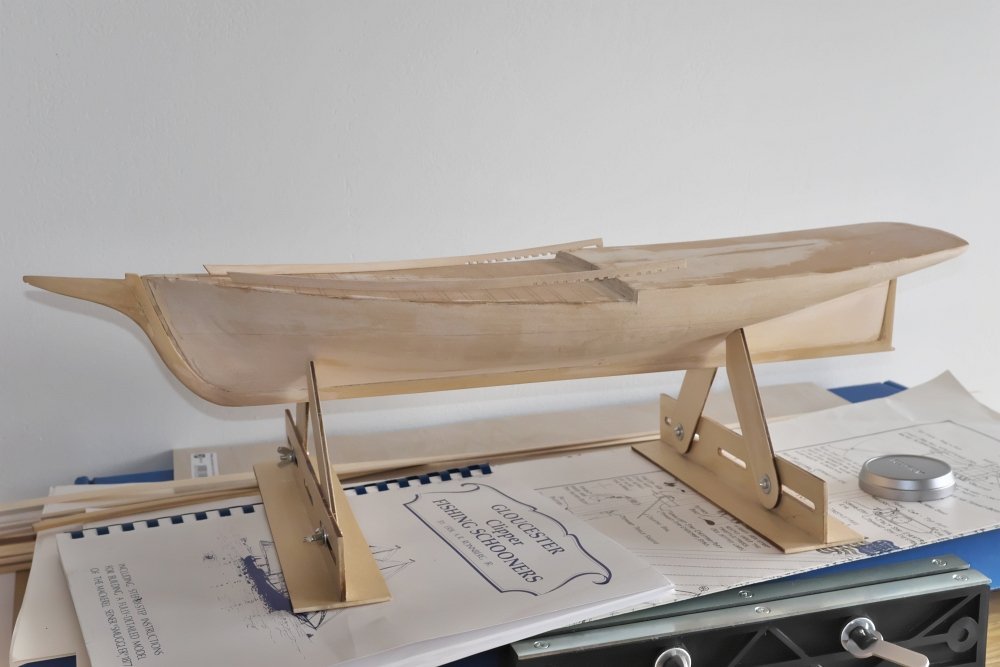
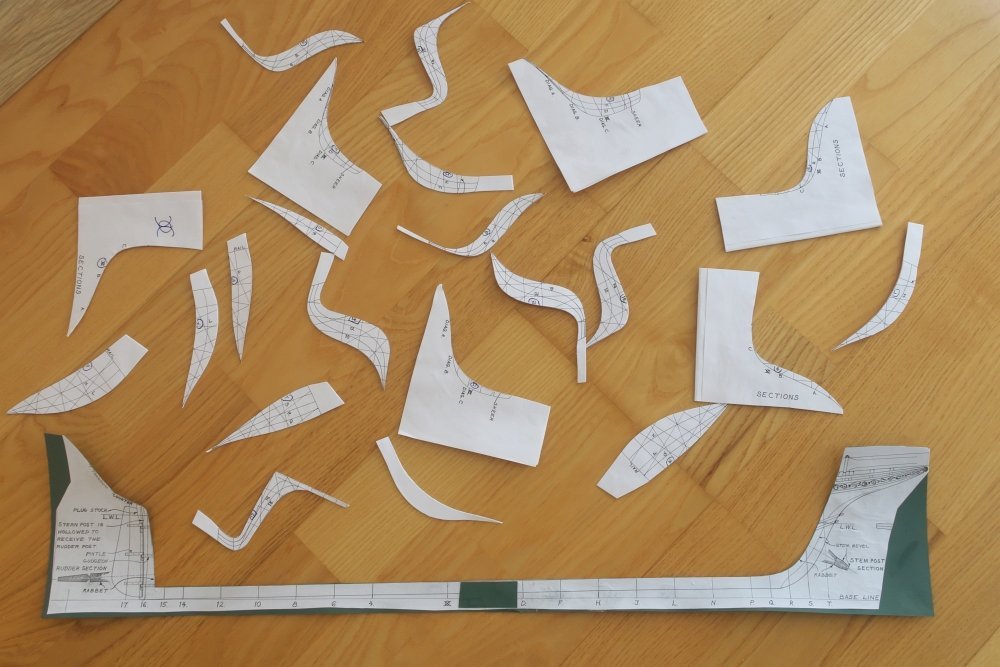
I started with preparing the card templates for hull shaping. Well, easier to be said than performed. Making the templates went fine, however how to use them? One problem I have encountered was the question: Where is my base? Starting point, hull centerline, whatever? The pre-carved hull is rough and needs to be trimmed. The hull of every ship is quite complicated shape itself. If you have no centerline, if everything is uneven, bulwarks not of the same thickness, material to be removed from here and there, how will you determine the point of symmetry? I expect, when building a classic POB kit, you have a keel, frames or bulkheads than would guide you to get a symmetrical shape. Here it was a bit of challenge.
- 104 replies
-
- 2
-
-
- Bluejacket Shipcrafters
- smuggler
- (and 1 more)
-
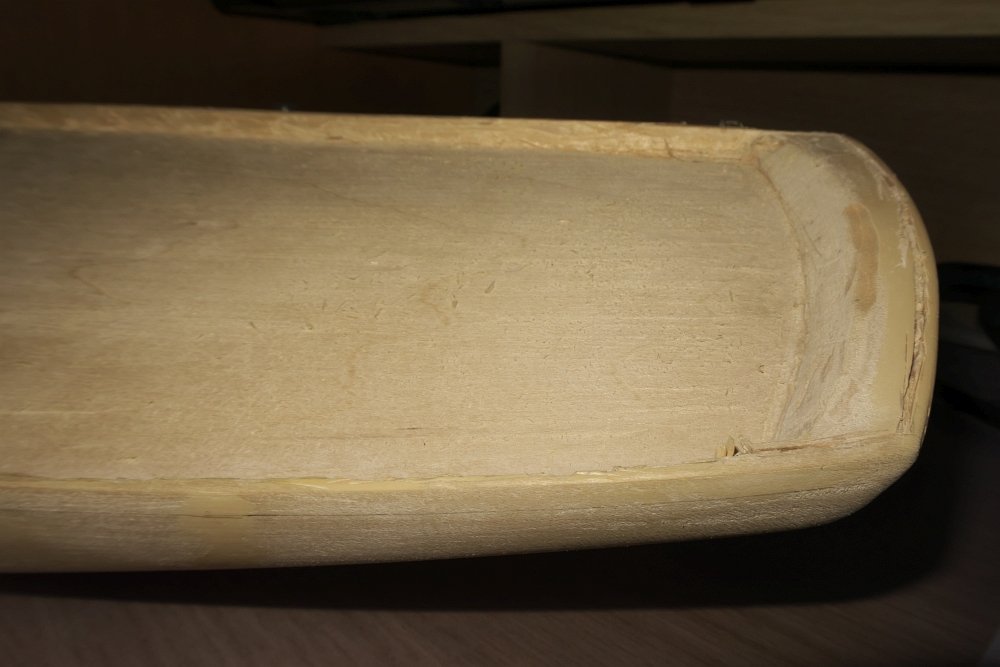
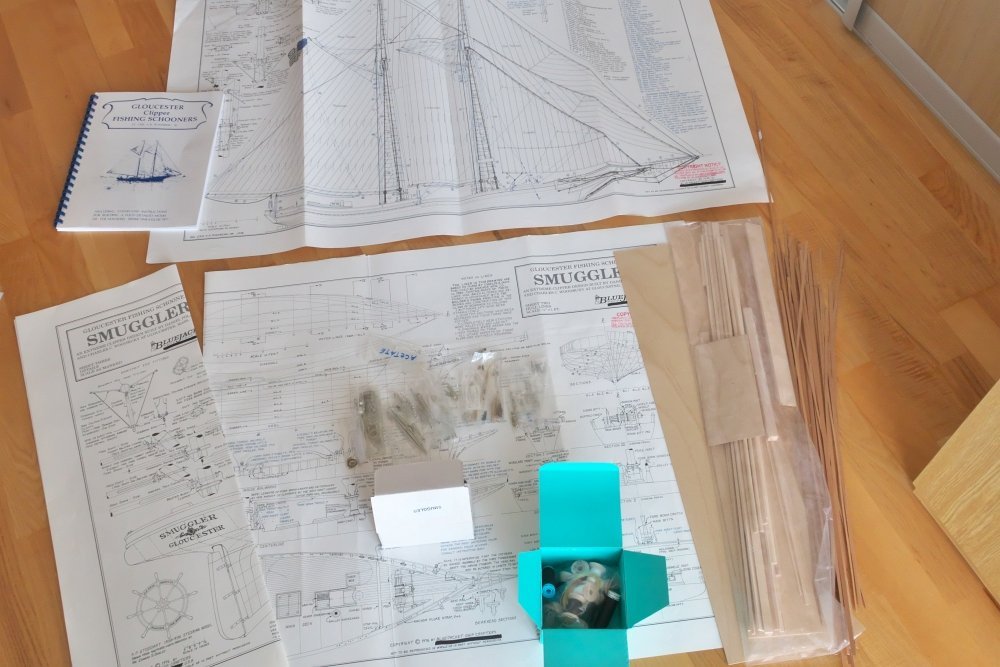
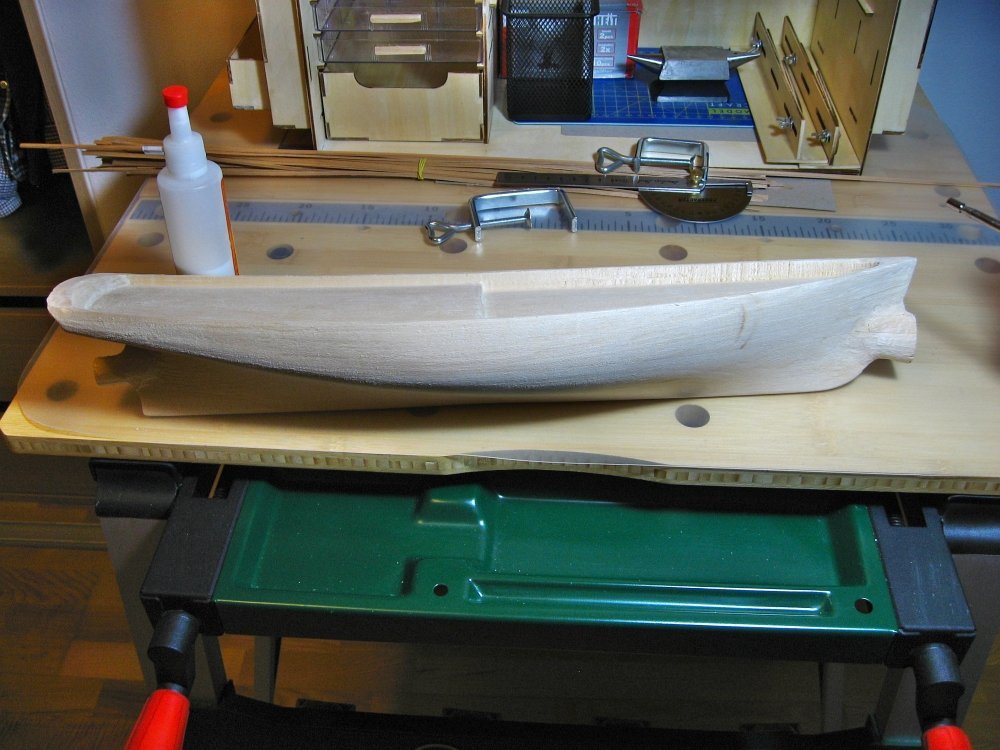
Obligatory box content. I think, thanks to the age of the kit, it lacks many fine tricks of the newer products. No laser cuts parts, just some timber, metal castings, paperwork and the eyecatcher: precarved machine-turned hull - as will be proved later, not such a big advantage as one may expect The hull has even thin carved line, presumably waterline, not very visible here. However after closer examination, it does not match the plan and I did not use it in any way.
- 104 replies
-
- 2
-
-
- Bluejacket Shipcrafters
- smuggler
- (and 1 more)
-
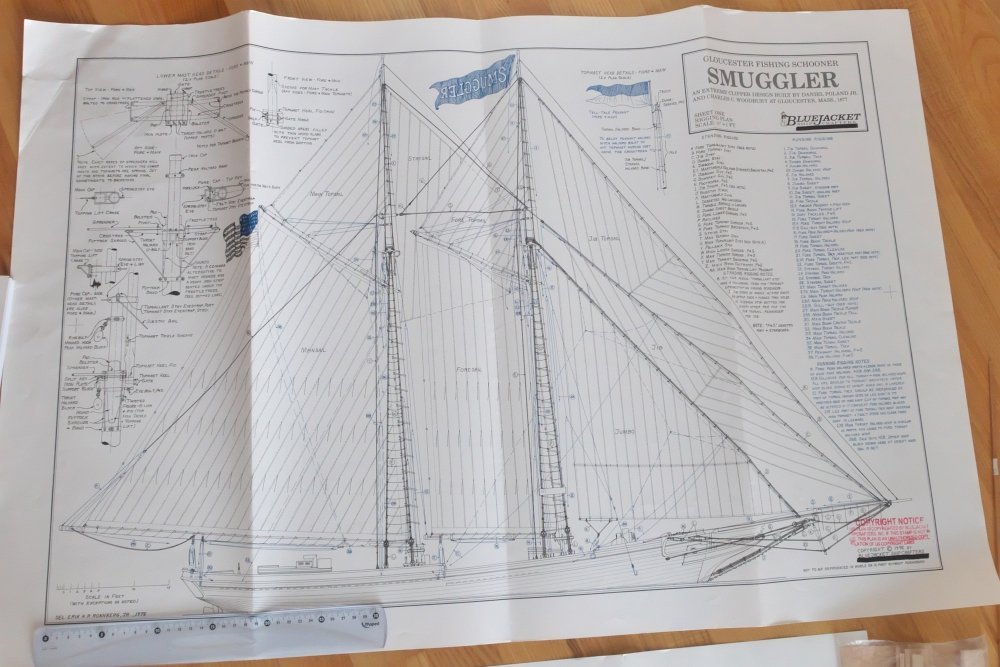
Smuggler (planked hull, natural wood finish) Gloucester fishing schooners belonged to the most beautiful sailing ships ever crafted. (Just in my humble opinion, from period ships only Baltimore clippers can compete here). They have paid very high tolls for that privilege though. Handsome and very fast, but not very stable, they often fell victims to dangerous waters of Grand Banks. According to Chapelle, more than 160 ships and over 1000 fishermen perished in 1860s and 1870s. The voices for safer ship designs grew and resulted eventually in construction alternations, but this is another story…. The Smuggler by BJ, although not a mainstream kit is quite well known here I would say. Switching from plastic kits after many years, I wanted to build the model ship in natural wood finish as much as possible. Again just my personal taste, also after searching through the MSW galleries, I prefer the pure beauty of the wood to any paint cover, although the latter might be closer to reality. This build log is my first build log here and I must confess a little “cheating” here: As a first time builder I simply did not want to eagerly start another log, that would eventually be never finished – I have learnt the risk is surely there for the firstimers. Now, after a year of slow progress, one terrible project restart and many reworks I say, let’s try to put her in the light! Maybe I believe the most feared steps are behind me already. Maybe I could then kindly ask you for some advice or moral boost when needed – there is still a long way to go…. I know my build is far from perfect, but personally am quite happy so far, crossed fingers! I will now post my build progress here chronologically. Thank you for watching, commenting or just stopping by in advance! Juraj
- 104 replies
-
- 1
-
-
- Bluejacket Shipcrafters
- smuggler
- (and 1 more)
-
Thanks a lot Allan, that really helps!
-
Hi all, may be very unimportant question, still: am building Bluejacket's Smuggler Gloucester schooner. Upon several other additions I wonder, was there any proper ship's bell located somewhere on the deck? Here is the shot of some renovated vessel I guess. Would be the bell's location on the samsons' post appropriate also for the period ship? Thanks a lot.

-
Very good looking indeed. I truly wonder, which Czech company is behind this project. I do have some tips though, let's see the answer , hopefully in May. Still, from commercial point of view, something like this is so unique, I would expect some promo, advanced news, maybe kit development posts etc. Just do not understand what is the purpose behind keeping it so secret.... But maybe am thinking just too much :)
-
Splendid case. So now it's turn to build a house around it - to have some nice display place for her!
- 108 replies
-
- 1
-
-
- armed virginia sloop
- model shipways
- (and 1 more)
-
Hallo Johann, thank you for both video links. Just magnificient, as all the posted pictures in this thread, which has been in my "follow list" for a long time. Pure joy to view your work, but I also must admit, it is always a little bit frustrating when I realise the fact I can never bring my ship model anywhere close to this :). Wish you all the best also for the upcoming year and looking forward to seeing the next posts of her! Juraj
-
Thank you Bob for your answer. Very good hints, particularly the "scale distance", I will try to take it into account as much as I can. Indeed, overdoing some details beyond the "scaled" visibility often makes model looking more detailed and more precisely build, disregarding how far it matches the reality. Something similar to be often seen in case of weathering plastic model kits for example
-
Hi Allan, Jon thank you very much for your time and posted info - very helpful. To sum it up - in 1/4 scale, probably leaving off the deck fasteners would not do any harm - due to the plugs covering them, they are barely visible. Yet I may find a way how to represent them in very gentle way. As for the hull, Trunnels are much more obvious being obviously from different kind of wood. Let's see.... Those pics are wondeful. Just by just if I may bother a bit more, would there be any complete view of deck margin plank? According to Chappele, there seems to be no strict rule when it comes to the deck patter, more it dependen on how much effort and money was there to be paid for the labor and how delicate the each vessel would be. I saw examples of margin plank being composed from butt joined pieces as well as more refine scarf join. But I could not find any info on how long would each piece of margin plank be. Also, margin plank joints are very seldom to be visible in available pics. Thank you Juraj
-
Just adding. I do have an original print of great book "The American fishing schooners" by Chapelle, yet was not able to find satisfying answers so far....
-
Splendid work and marvellous final result. Thanks for sharing. And of course, wish you all the best for your upcoming "family" projects!
- 108 replies
-
- 1
-
-
- armed virginia sloop
- model shipways
- (and 1 more)