HOLIDAY DONATION DRIVE - SUPPORT MSW - DO YOUR PART TO KEEP THIS GREAT FORUM GOING! (83 donations so far out of 49,000 members - C'mon guys!)
×

juhu
-
Posts
267 -
Joined
-
Last visited
Content Type
Profiles
Forums
Gallery
Events
Everything posted by juhu
-
 Nice work. You are fighting bravely with the solid hull design. It is to me like deja vu - I was struggling with sanding down the bulwarks just recently. But in my case at the end I cut them down completely, as could not get satisfying results.
- 14 replies
-
- 1
-

-
- Bluejacket Shipcrafters
- atlantic
- (and 1 more)
-
Thanks a lot! Now I know what is meant - I used to use it when I was a boy building flying simple planes....
-
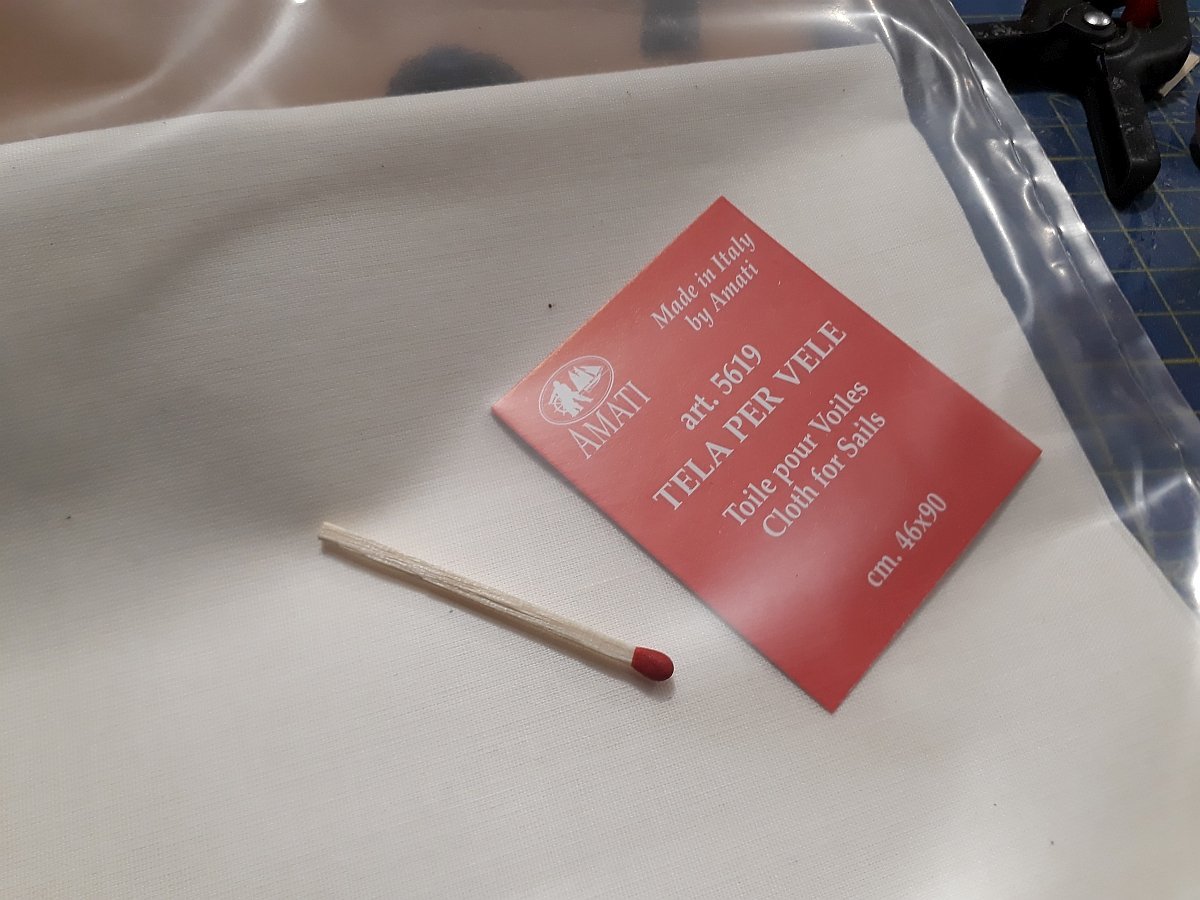
Hi Allan, thanks for useful hints. Smuggler being my first wooden ship model, it is good to have such an advice in advance. I purchased the cloth from Amati as the only available option - I have chosen the finer one from two they offer. Not sure if it is usable or not. I like the slightly "aged" color, the structure is visible, as seen in attachment, but it is quite a close-up photo, not what can be seen from normal viewing distance. What would you think of it? Maybe when time comes, I will need to have a look for alternatives. The problem is I could not detect anything like silk span, or what shall I look for in the shops in my country. Would you have any suggestion for a concrete thread here in the forum, where a good photos can be found? I will search on youtube for videos you mention. Thanks Regards Juraj
-
Hi Allan, thanks for the hint. Will need to check. Sail making is long way ahead, so I have not done yet any proper examination. I have purchased some dedicated "sail cloth" for ship modelling, I believe made by Amati (would need to check). Will see when I open it, it it qualifies. Juraj
-
Hi Allan, thank you! No, there is no material for sails provided, but the kit plans show the sails in full details. I have already purchased suitable material and for sure plan to display her with sails. I think these fore-aft rigged vessels really deserve to be displayed with sails. Hope it will work to my expectations.
-
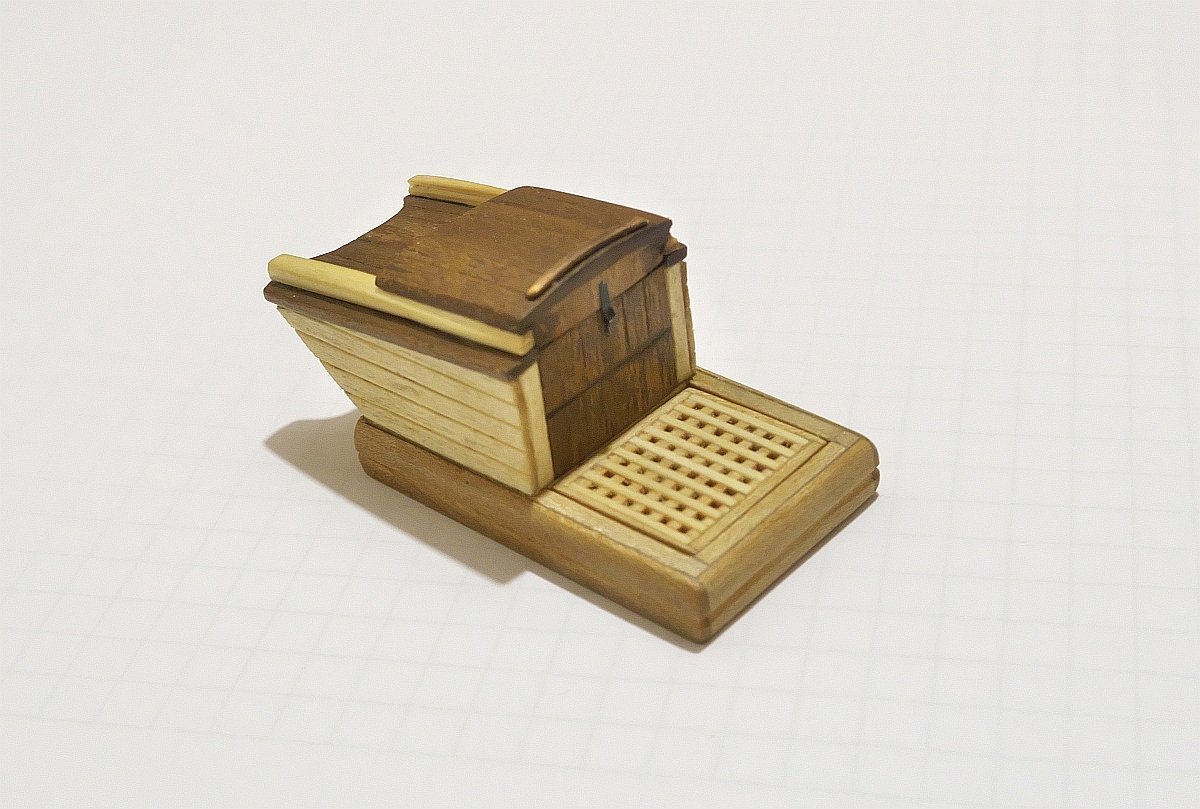
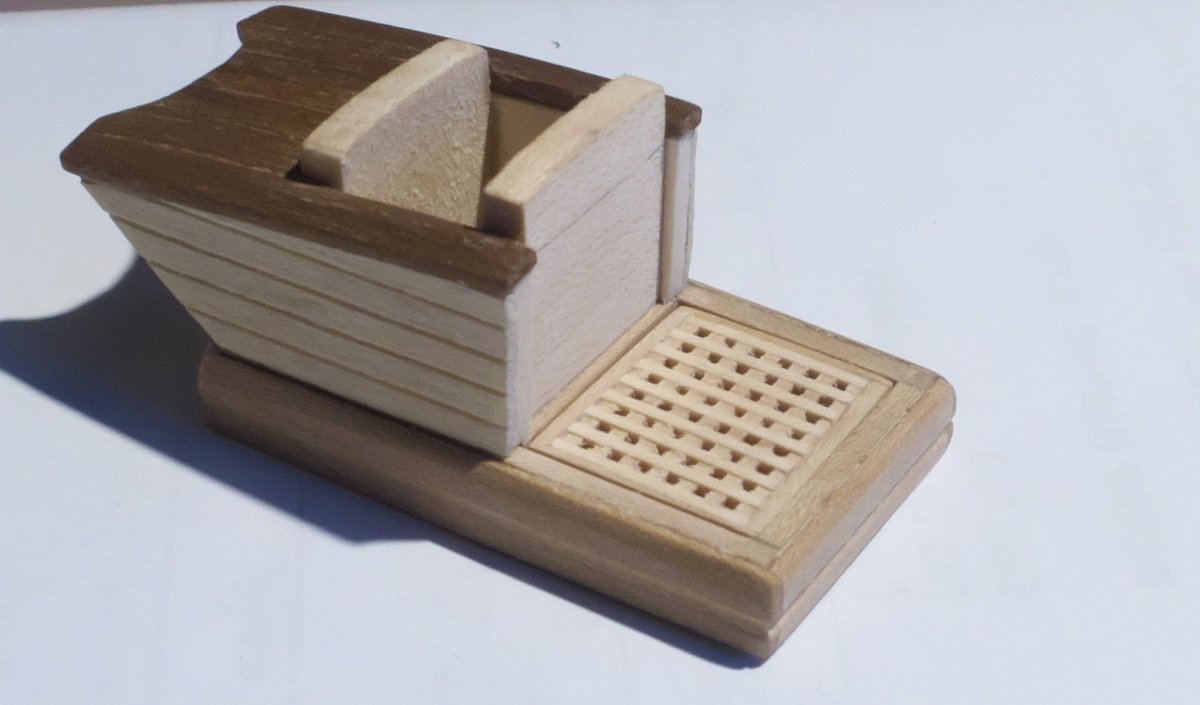
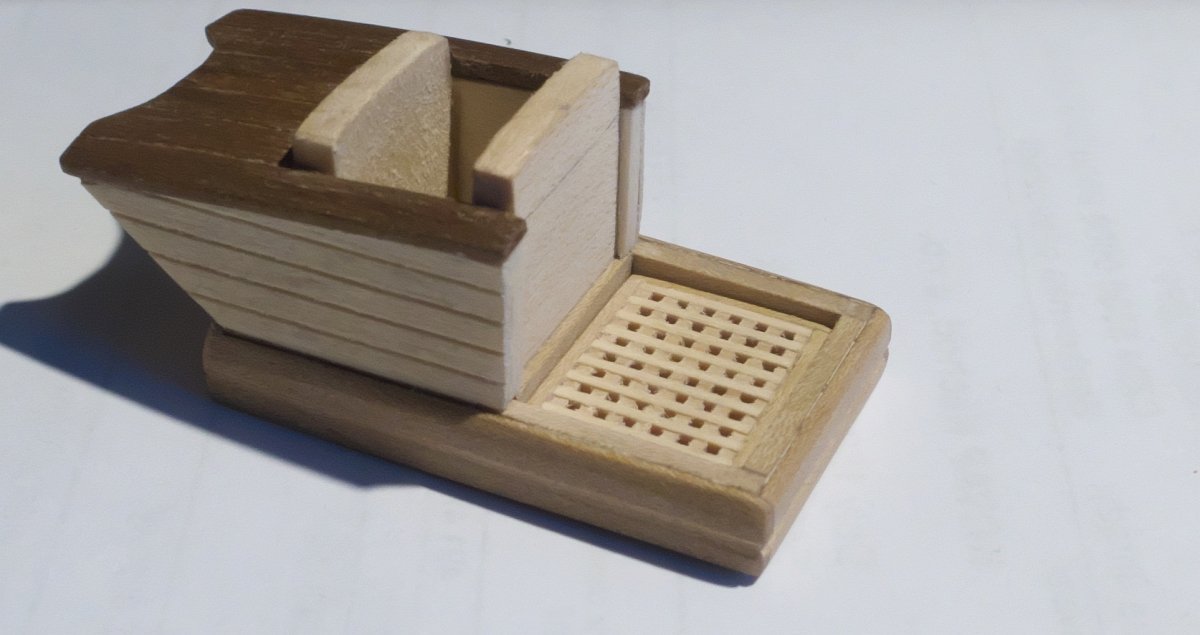
Forward companionways finished, ready to be placed on the deck

- 104 replies
-
- 5
-
-
- Bluejacket Shipcrafters
- smuggler
- (and 1 more)
-
Hi Allan thanks a lot for the hint. The idea of covering the grating with canvas or some cover with sides sounds very logical. I would go then for the second option, following the Chapelle's book. Regards Juraj
-
Greeting, I would like to kindly ask for technical help with resolving some details on companionways used on Gloucester mackerel seiners. Am building Smuggler by BJ and came across the question, how was exactly the grating aft the fwd companionway installed? Kit plans call for grating with possible solid covers placed OVER. This would I guess require to install grating little bit deeper, so only when covers are laid over, they would lay flush with the hatch frame. On the other hand, Chapelle suggests, the hatch was covered either with grating OR solid covers. This then implies the grating being laid flush with the hatch frame. One pic better than hundred words, I posted some photos in my build here. Second question: was there any handle installed on top sliding cover of the companionway? On nowadays yachts there is a handle to close the thing from outside, I assume it must have been also on old schooners, but cannot find any plan or drawing where this detail is captured. Was the handle then installed on the top of the sliding cover, or from the side, at the opening end? Thanks a lot in advance for help / ideas. Regards Juraj
-
Great progress. Like the complex and delicate look of all that framing!
-
Hi all, now I would like to kindly ask for an advice / opinion on one construction detail. I know it is totally small thing, maybe not worthy to discuss, but why not to learn something and possibly do it right? Fwd. castle gratings: AI know at the sea / under foul weather the hatch would be secured by a proper solid covers. Kit instructions call for hatch covers then to be placed OVER the grating. This to me implies the necessity to sink the grating little bit into the hatch frame, so there is a space to lay covers flush with the hatch top. Like here: BUT Chappele's American Fishing schooner calls for hatch to be covered be either grating or replaced by solid covers, when needed. This would mean that the grating shall be posed just flush with the hatch top edge: What would you suggest? Thanks.
-
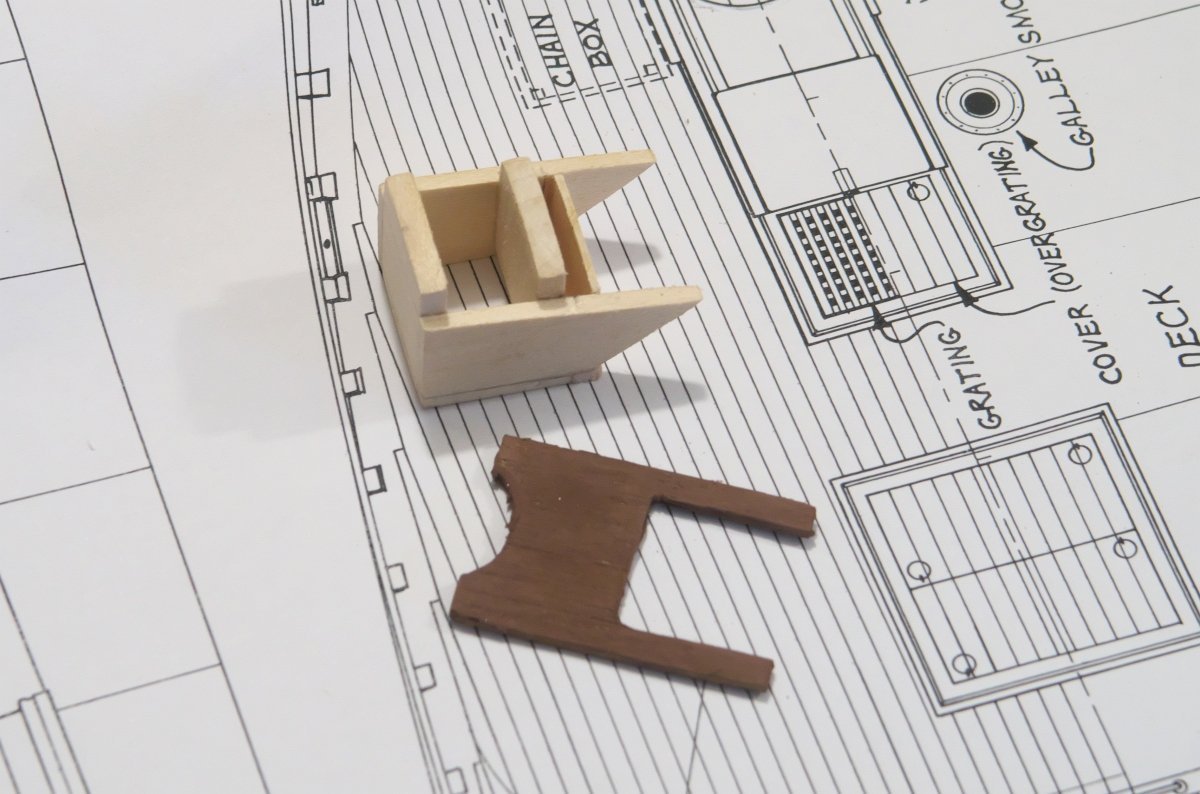
Ok, work on Smuggler is resumed now. I have started to build the fwd. companionway: Still little bit rough, but getting some shapes. I decided to replace cast grating from the kit with the wooden one. I also realized, that many commercially available gratings kits look like taken from the prison cell window, once assembled. Eventually found one, that I like much more than the metal piece. Will see, how it looks at the end.

- 104 replies
-
- 5
-
-
- Bluejacket Shipcrafters
- smuggler
- (and 1 more)
-
Seems like a tough work to get the things geometrically right. Know that from my project. Will follow, the ship is really beautiful.
-
Very nice build subject and another solid hull kit from BJ, Will follow, looking forward to seeing the progress.
- 14 replies
-
- 1
-
-
- Bluejacket Shipcrafters
- atlantic
- (and 1 more)
-
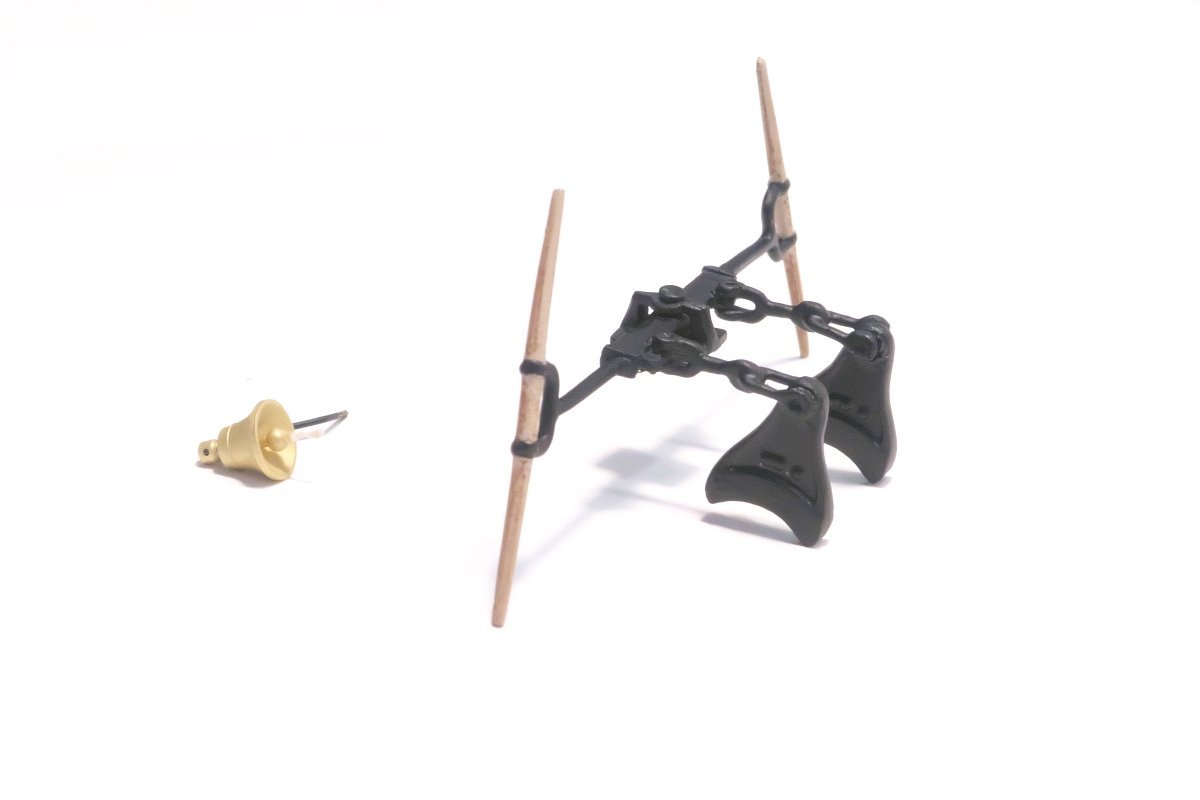
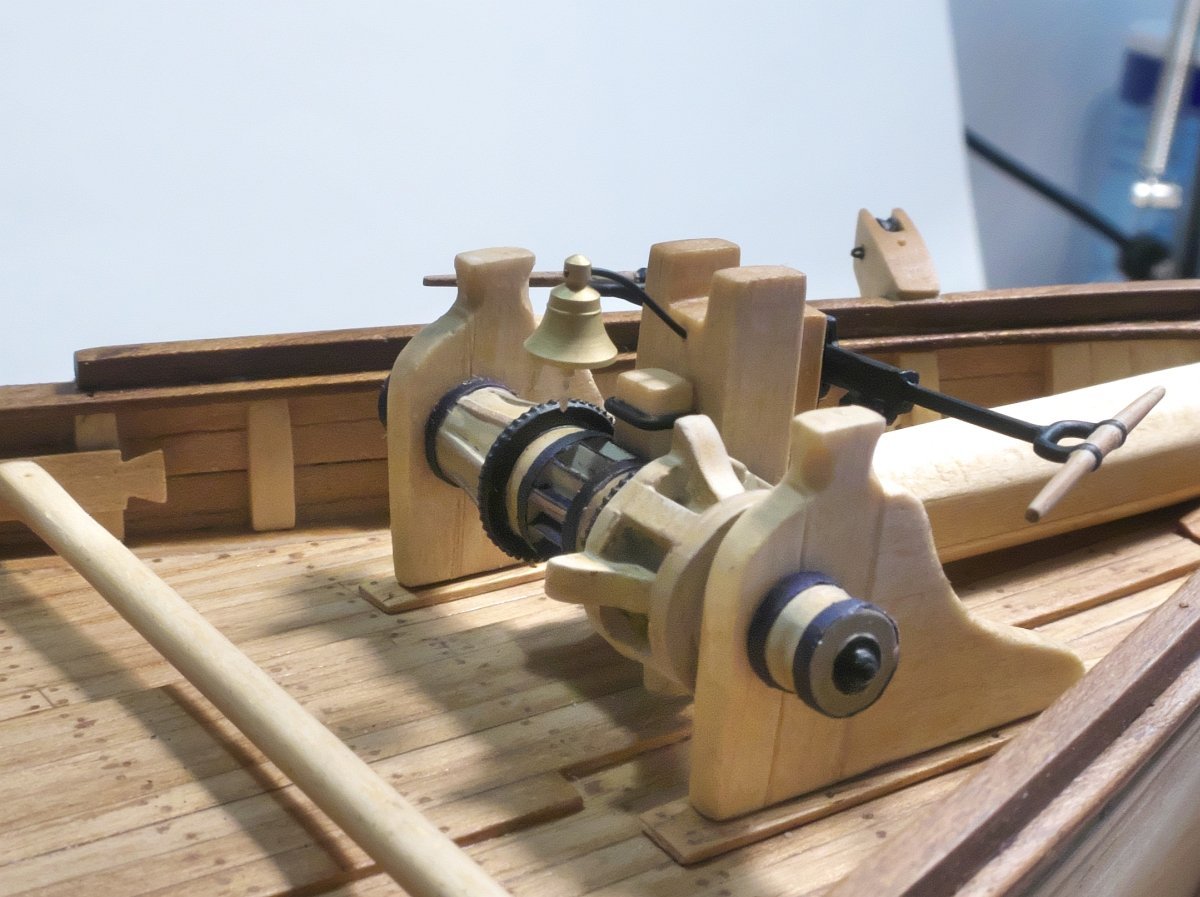
Another small step, ship's bell and all the windlass gear: Positioned on the deck, for now dry-fitted only to make a photo. Will be removed and glued later, to avoid damages, while working on deck structures: Now I will make a short pause - have to focus on completely different "project" - one diatonic accordion is waiting to be tuned, let's see how it goes... See you later.

- 104 replies
-
- 11
-
-

-
- Bluejacket Shipcrafters
- smuggler
- (and 1 more)
-
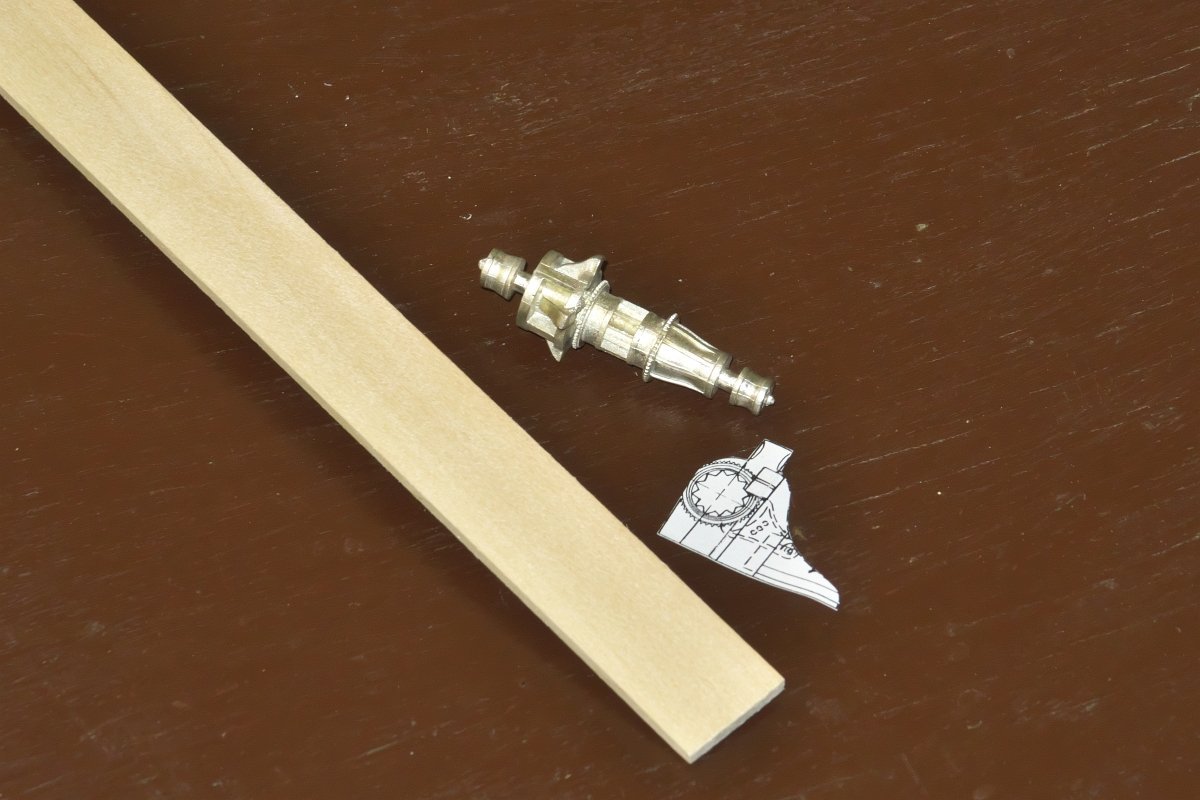
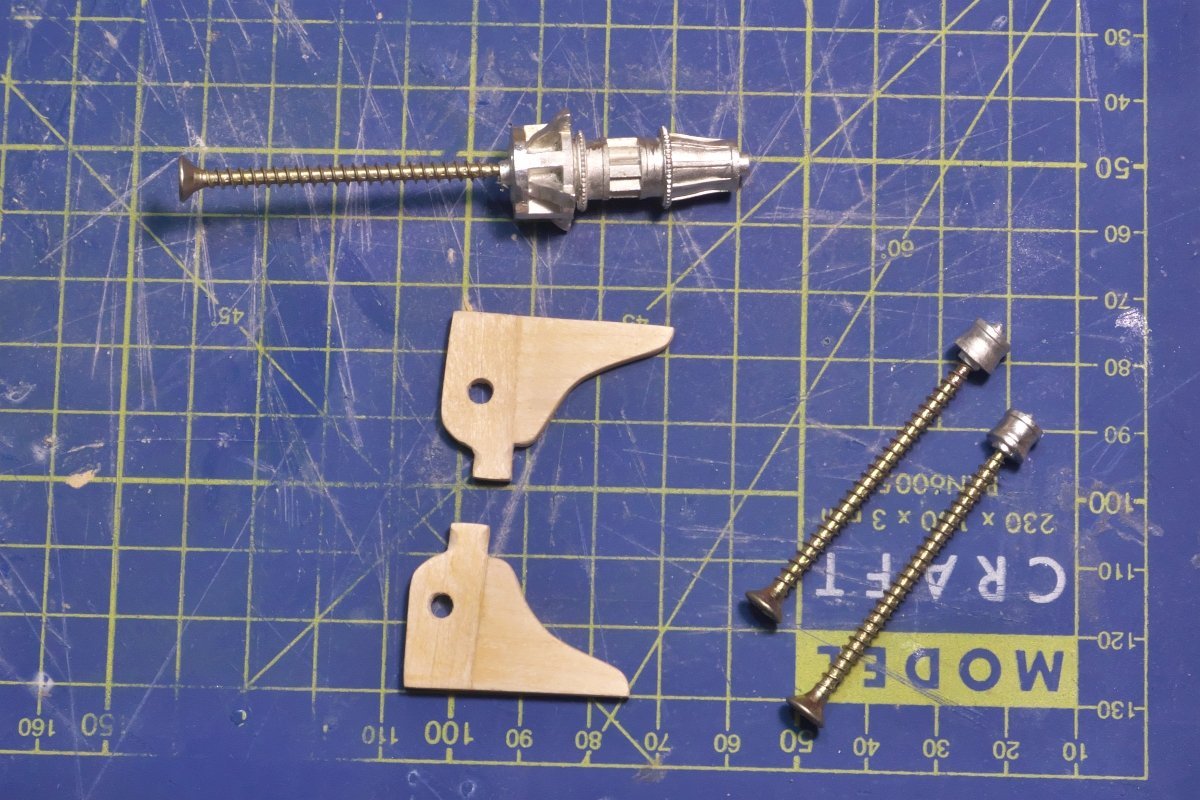
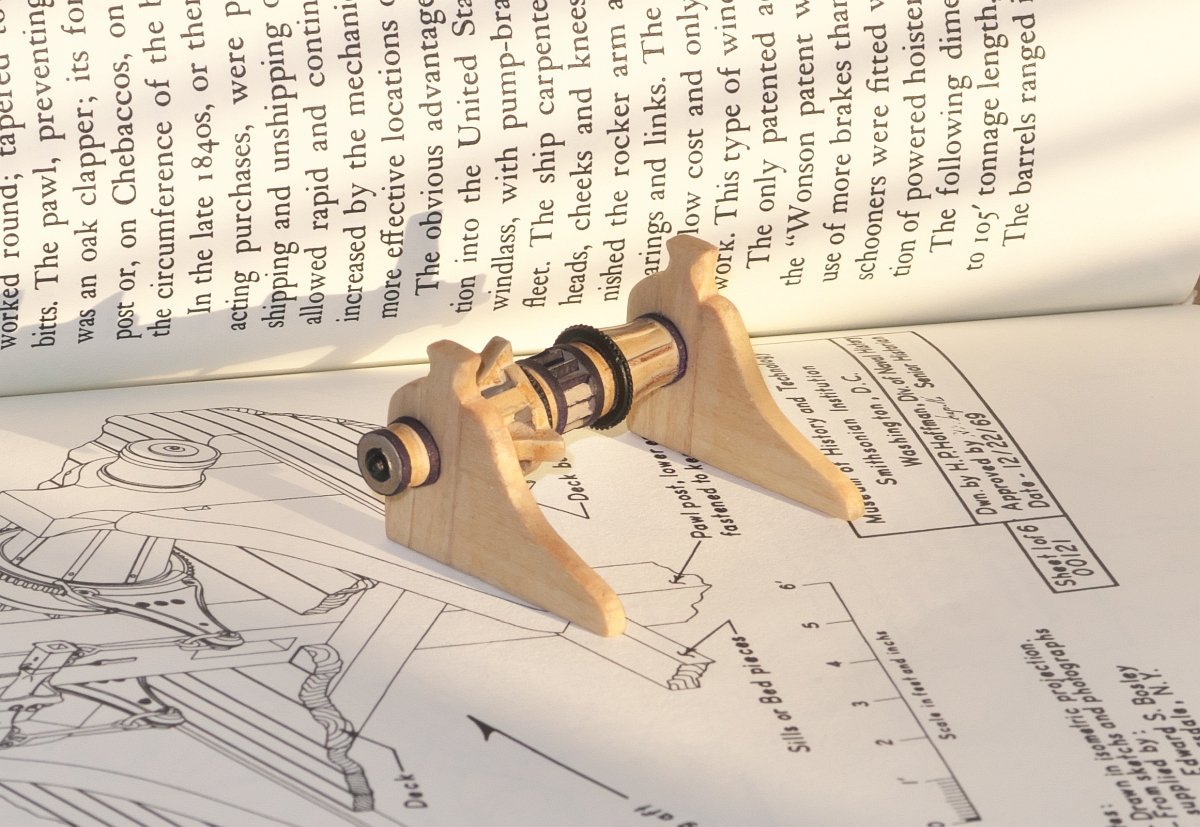
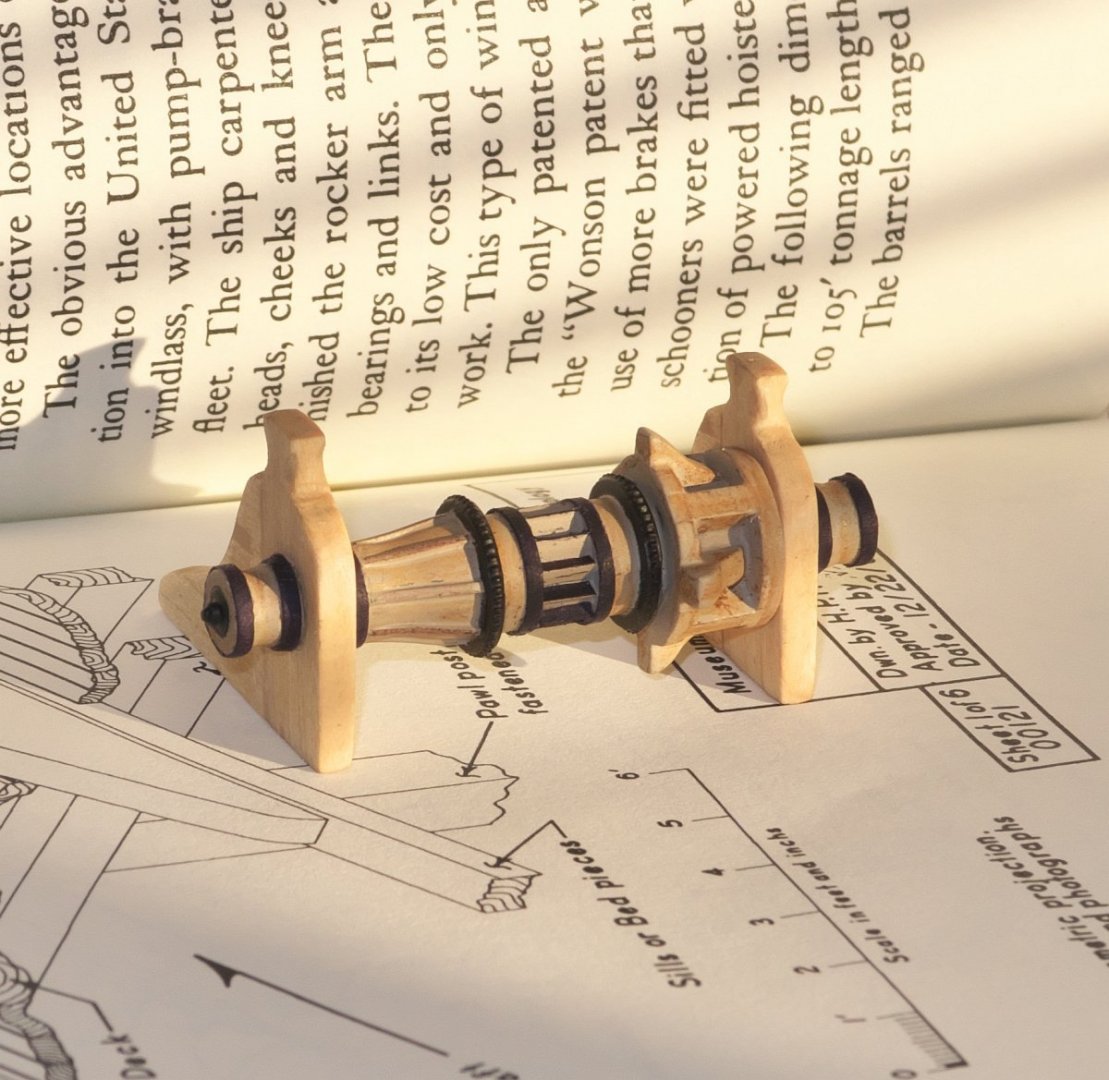
Hi all, as mentioned earlier, windlass work is in progress. Here is the starting line. The cast windlass barrel was a hot candidate for a scratch sub-project. But I have abandoned the idea: I probably could have done it, but it would be simply way too time consuming and there is still a long way to go... Little bit rough at the beginning... Getting shaped. I have cut off the barrel's heads to make paint work easier. And here it is. While the wooden parts are treated only with danish oil and matt lacquer, the body is color-sprayed and weathered.
- 104 replies
-
- 8
-
-
-
- Bluejacket Shipcrafters
- smuggler
- (and 1 more)
-
Thanks a lot Tim and all the others. Currently am working on some smaller details on the deck, then windlass comes and sure also more photos.
-
Oh I see the wood finish has been chosen very carefully with a great focus on detail. Thanks for sharing. Btw., what about that all fishing equipment? Was is all the part of the kit? It looks very detailed and if in the box, than the kit has even more value. Yes, I think E.C.B would be great next level step
-
Very eye catching, wood finish just to my taste. For interest, how did you treat the wood? Lacquer, oil? As for the next project, to keep the scale and focus, I think POF kit Emma C. Berry from Model Shipways would make a nice fishermen addition.
-
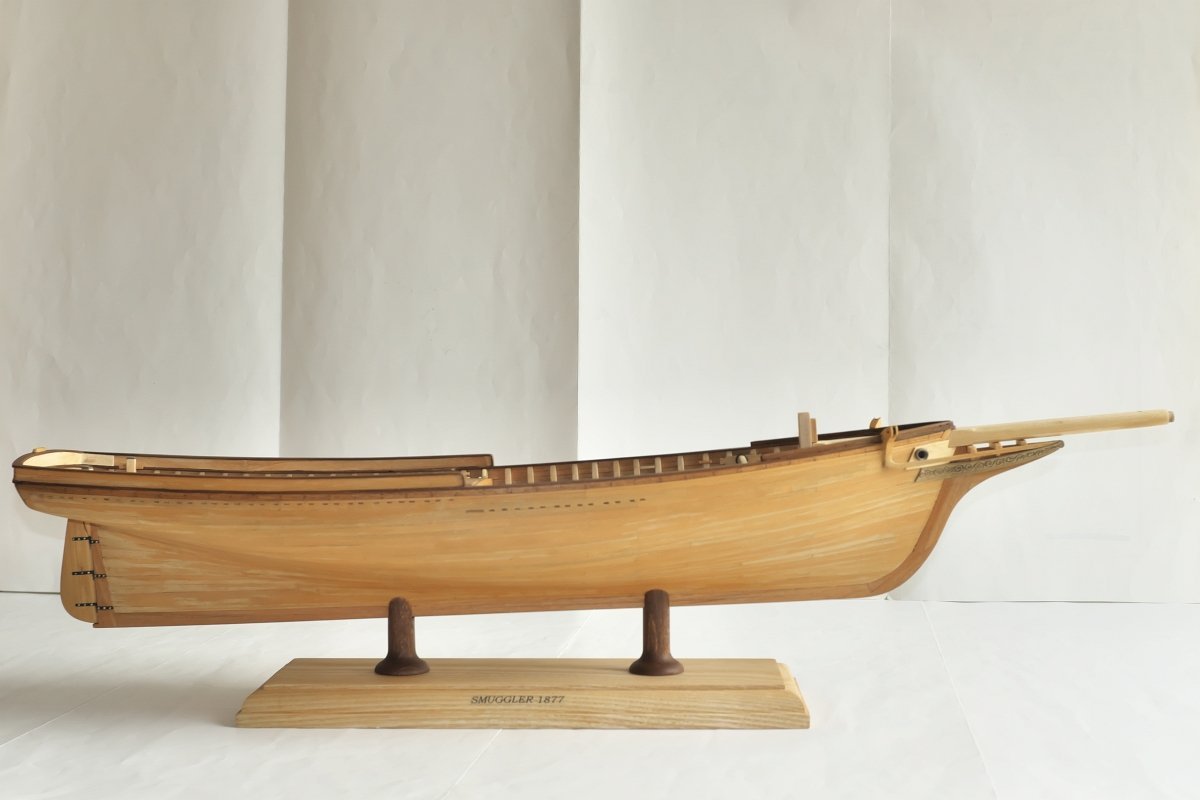
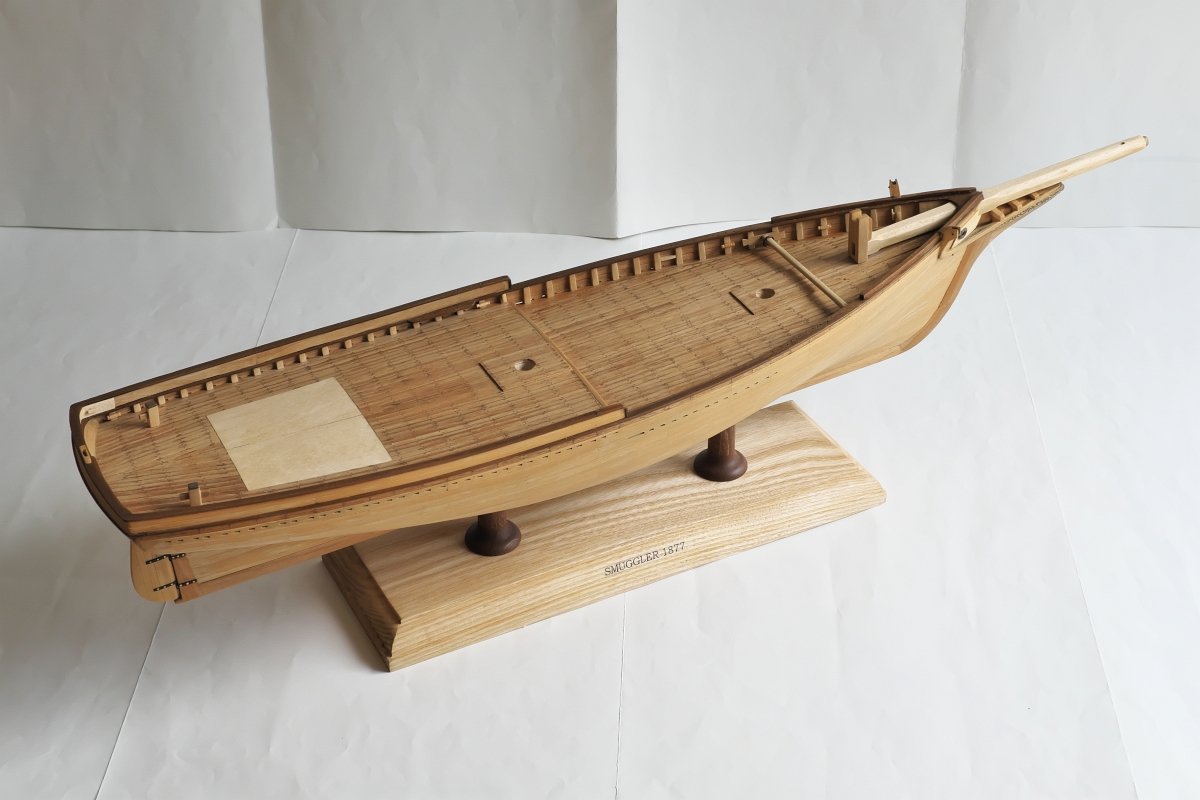
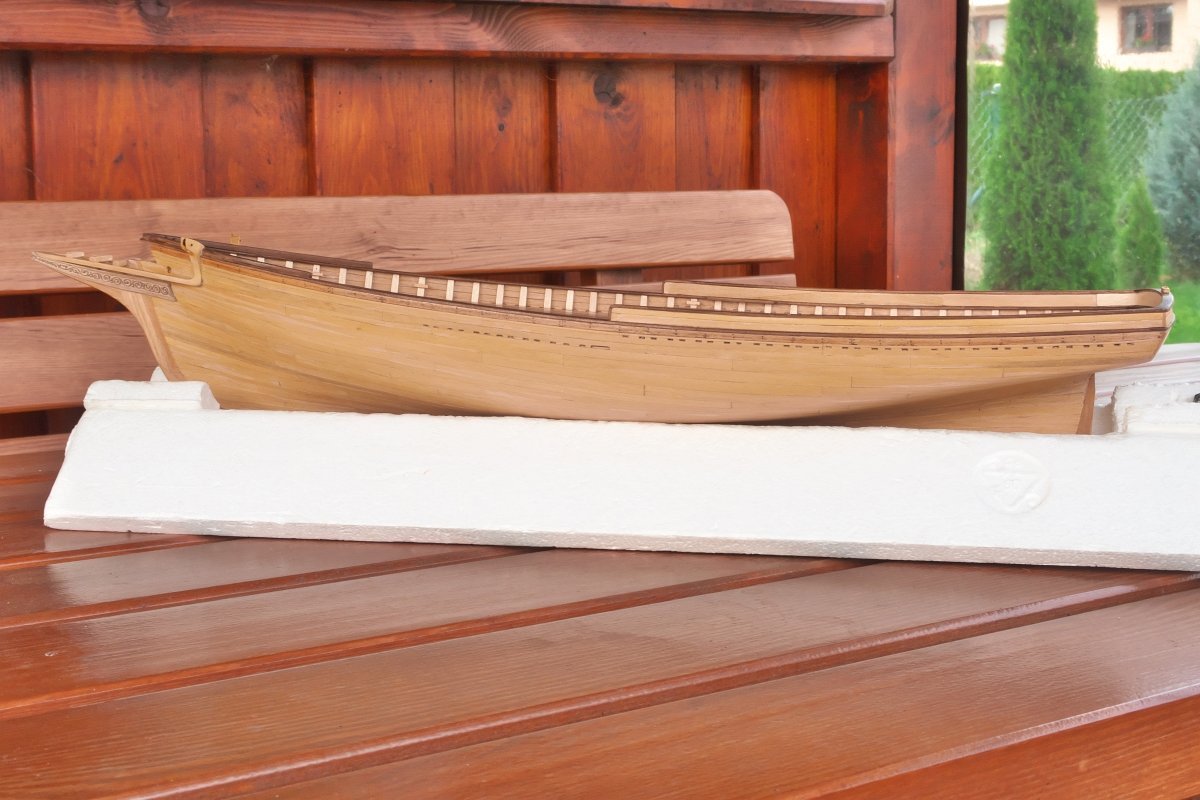
Full set of various bitts and cleats added, as well as samson post, bowsprit, hawse rims, rudder. The hull and the base were sprayed with matt Lord Nelson lacquer for wooden ship models. Via this I dimmed the glossy look of the danish oil that I have found somewhat disturbing. This shall be the final outer look of her. Well, this is the current status of the project. Lot of work still to do. I still must recall, whether I did not omitted something, that would be problematic to add. Hopefully not 🤔 (yes, I had to make the completely new bowsprit. In the first version I forgot to keep the square profile at the samson post and later totally screwed the piece by foolish varnishing attempt - happens). The project progress I have presented so far covers the whole year of activity. Not too much I know, and from now on the build log will be written in 'real-time' manner, thus even slower. Never mind, I believe it will eventually be finished also with the help from the community here. See you then.
- 104 replies
-
- 13
-
-
-
- Bluejacket Shipcrafters
- smuggler
- (and 1 more)
-
In the meantime, some bitts and cleats were made. Again, where possible, I try to secure the things with some locating pins to have stronger attachment.
- 104 replies
-
- 3
-
-
- Bluejacket Shipcrafters
- smuggler
- (and 1 more)
-
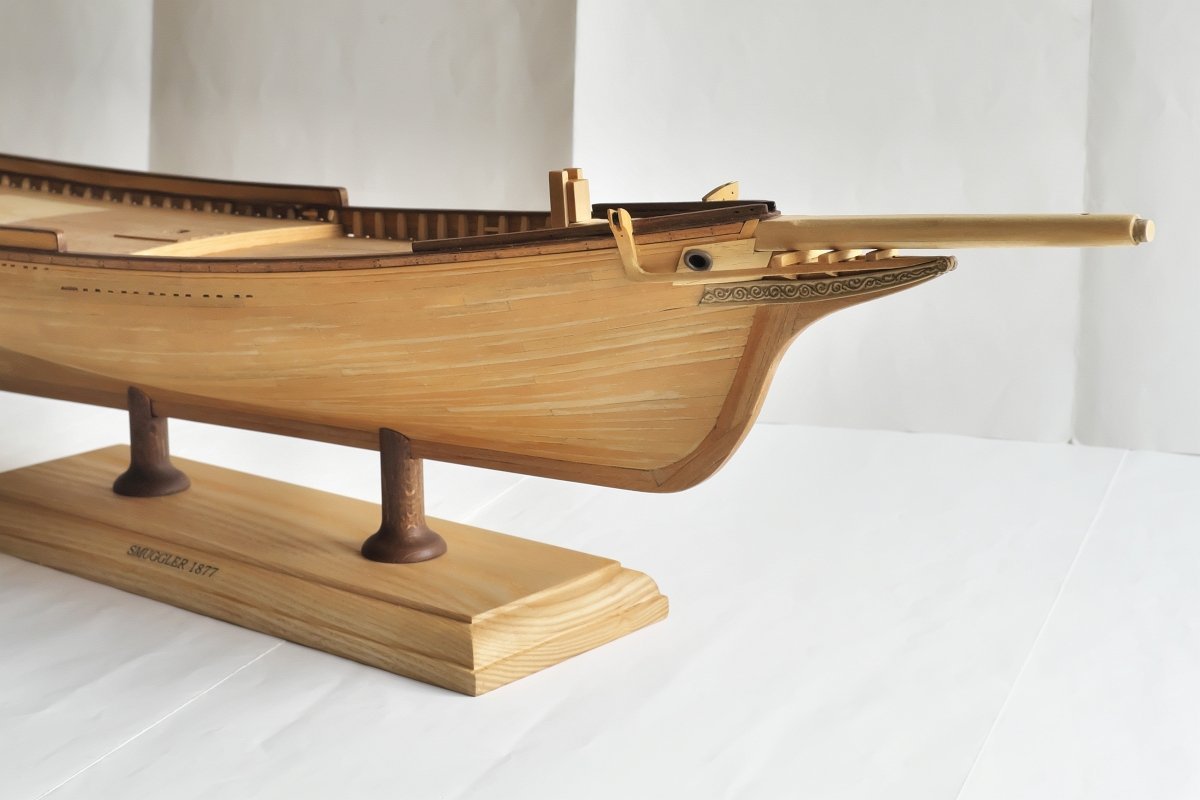
Here you see I have also attached those noble trailboards. In the kit, they are provided as metal castings. I was planning to replace them with the wood pieces (In general, I am not so impressed with metal castings from the kit). Trailboards in my case were not of the same thickness, neither length - aft protruding parts on one of them looked like not casted fully. But I abandoned this plan - to replicate faithfully nicely done decoration would be above my skills. Here I came back to plastic modelling world, took some Tamiya spray cans and AK weathering pencils.
- 104 replies
-
- 5
-
-
- Bluejacket Shipcrafters
- smuggler
- (and 1 more)
-
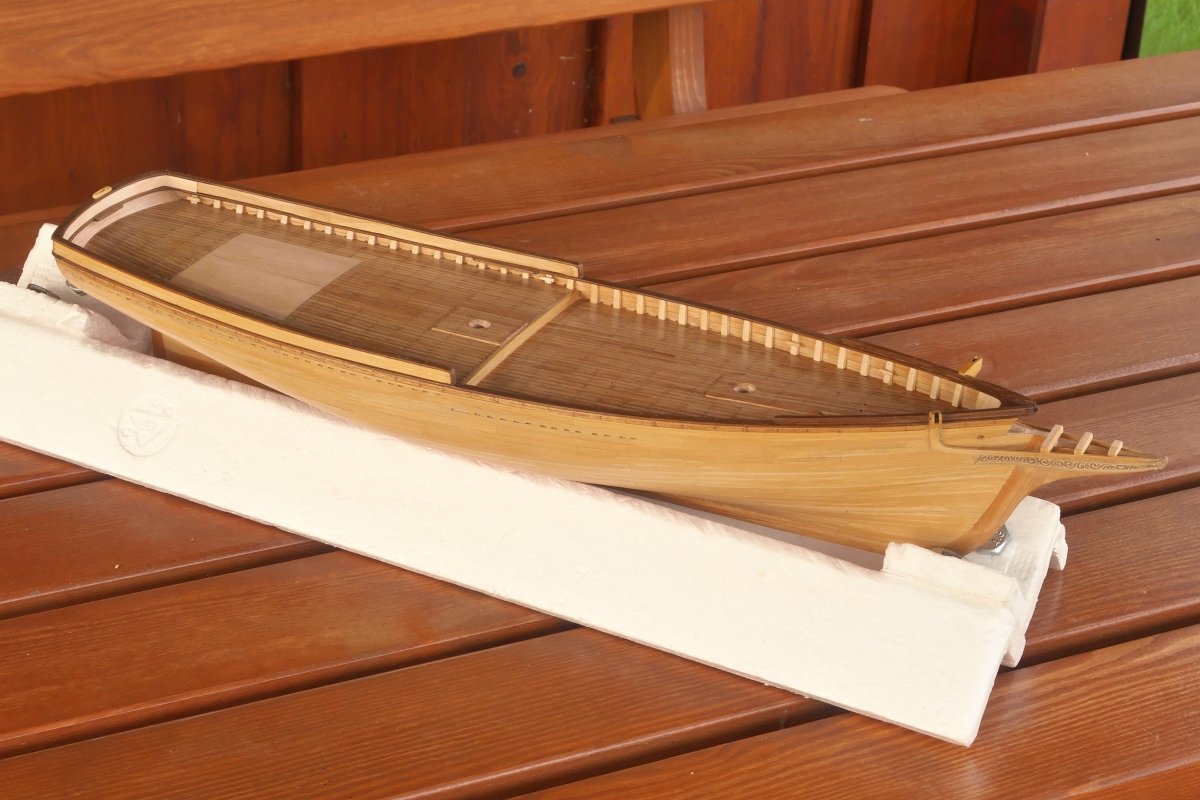
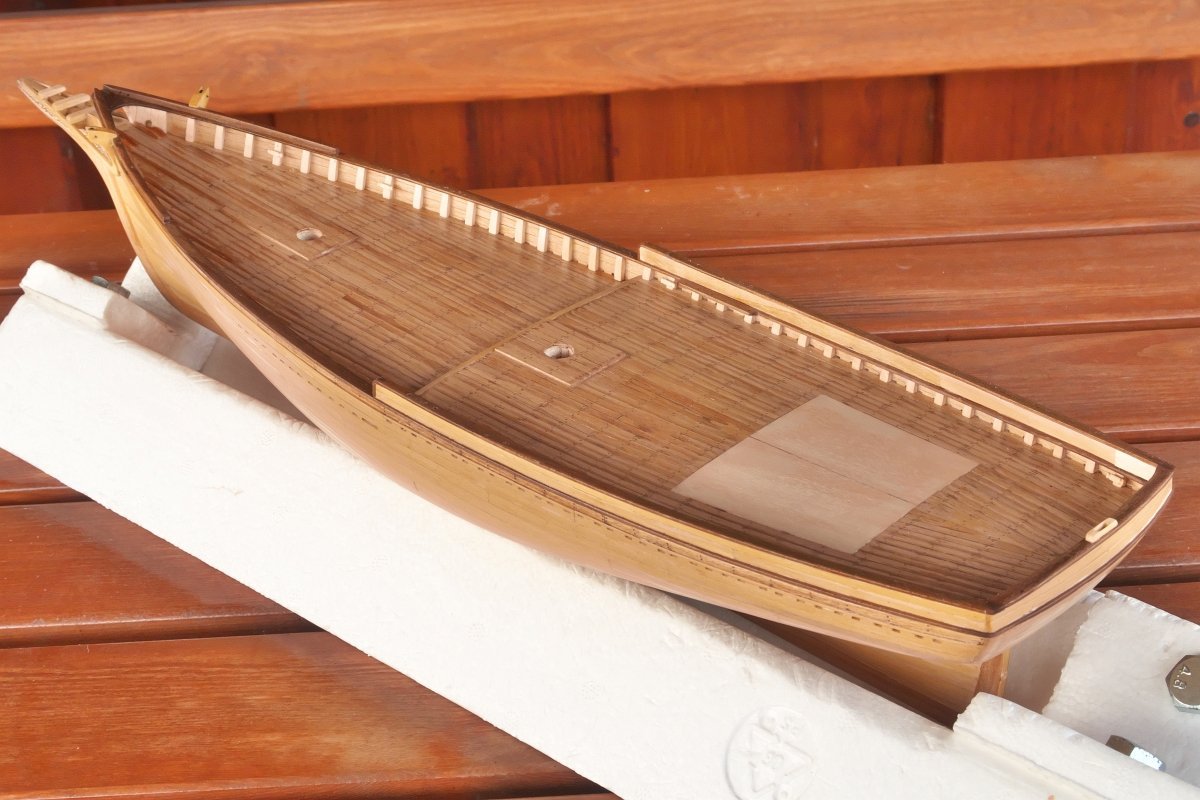
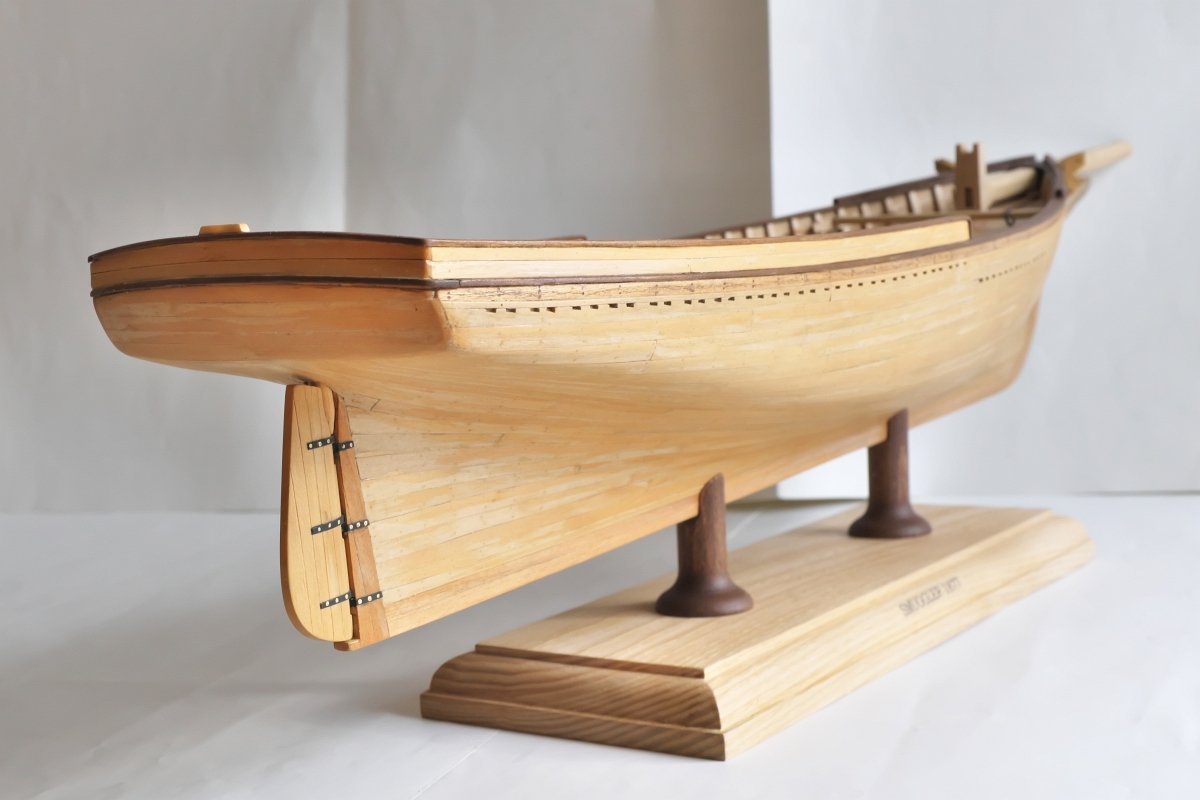
At this point I already somehow lost connection with kit's instruction manual. It is intended to provide a guide for the painted ship. As I wanted the natural wood finish, I had to alter the work step order. I still do use manual to check the drawings and overall approach, yet I found I am much more getting info directly from plans, which are excellent and Chapelles's book. Now my biggest fear is, that I would forget, overlook something among those zillion of various details. Nevertheless, show goes on. I tried to treat the hull with some pre-final layer - danish oil. The picture shows how dramatically it enhanced the wood appearance - oil on the left, no oil right. The only problem is too glossy look for my taste, but this I will handle later. The holes in the keel will accommodate two screws for base plate pedestals.

- 104 replies
-
- 4
-
-
- Bluejacket Shipcrafters
- smuggler
- (and 1 more)
-
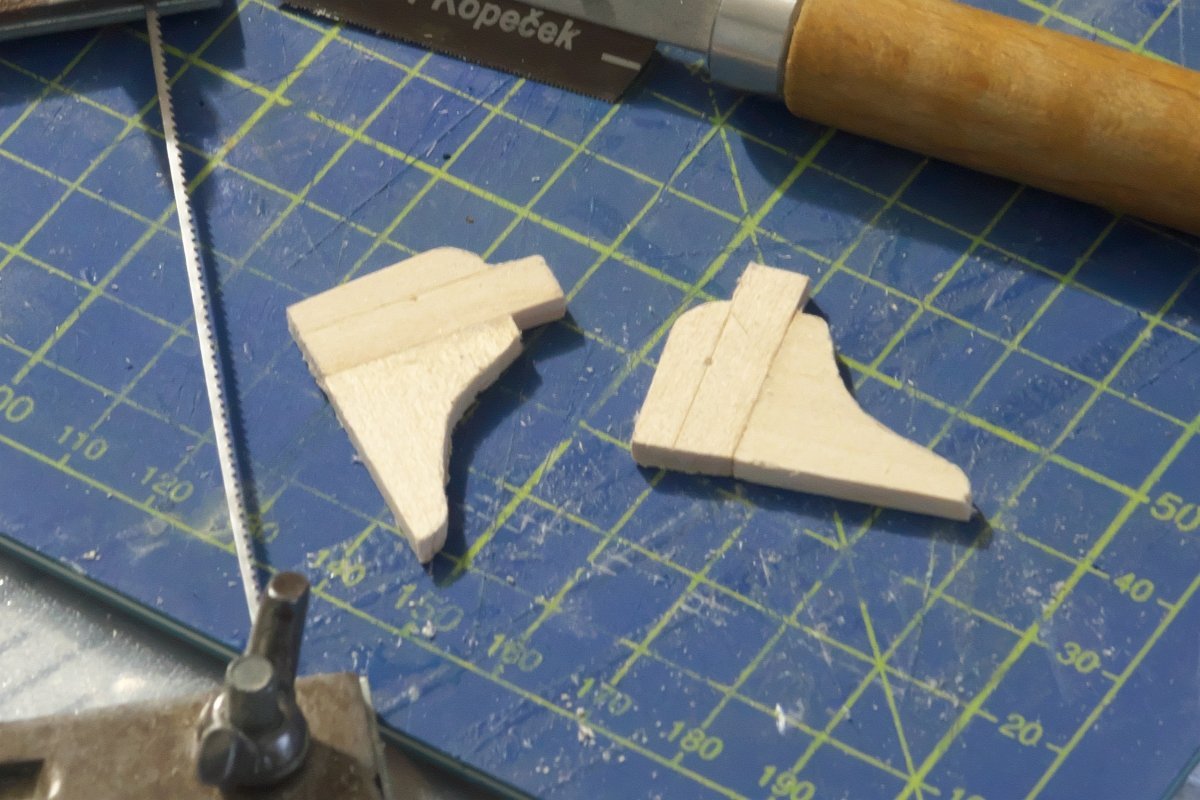
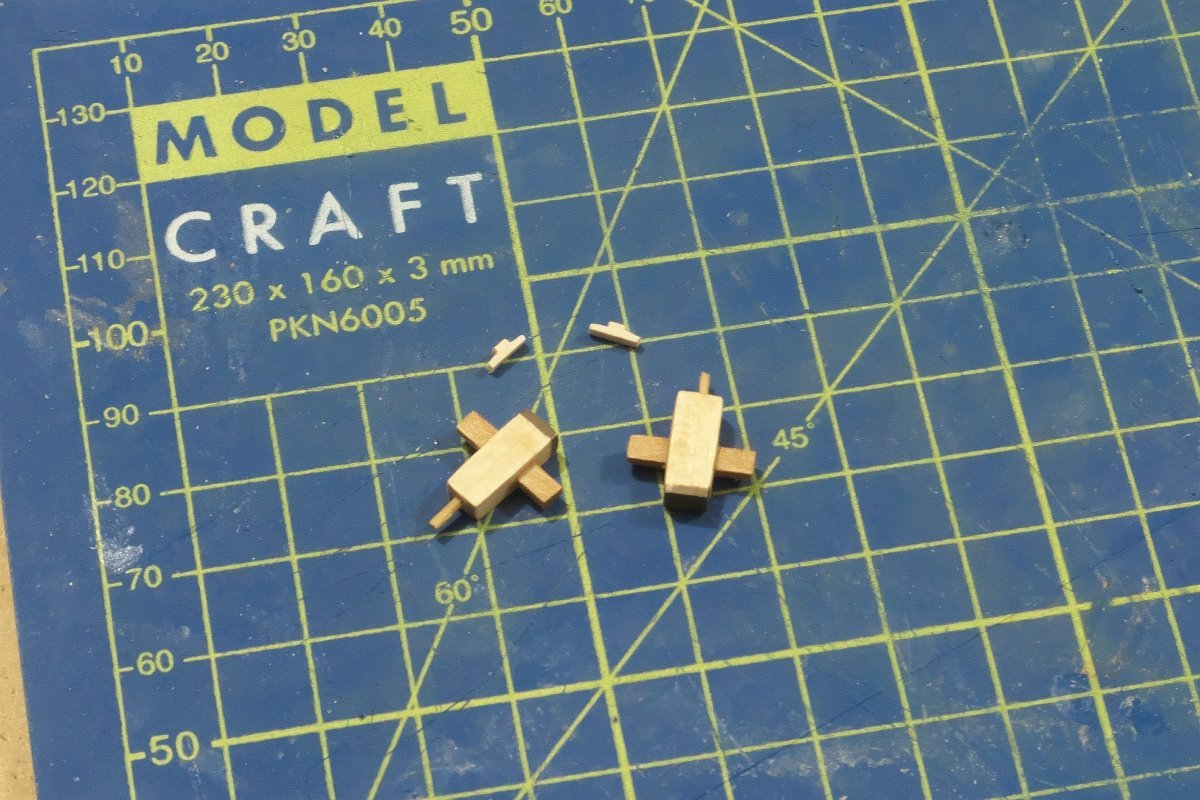
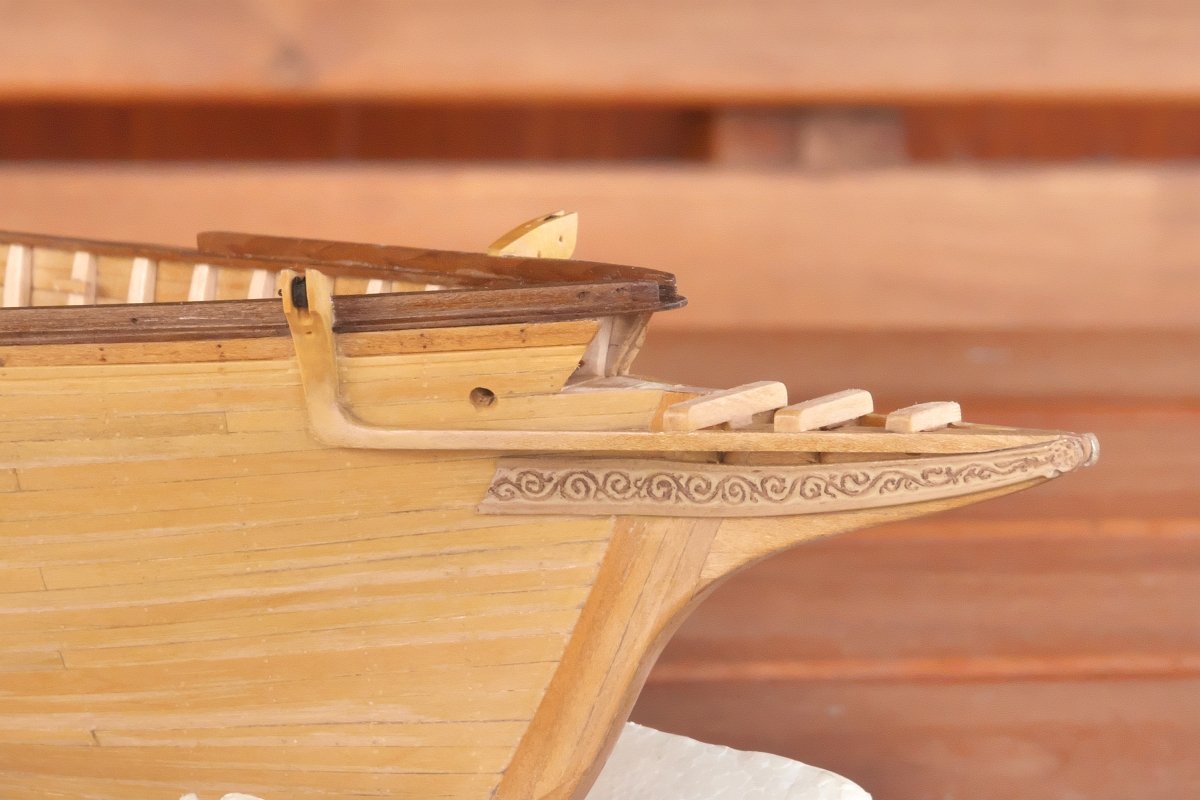
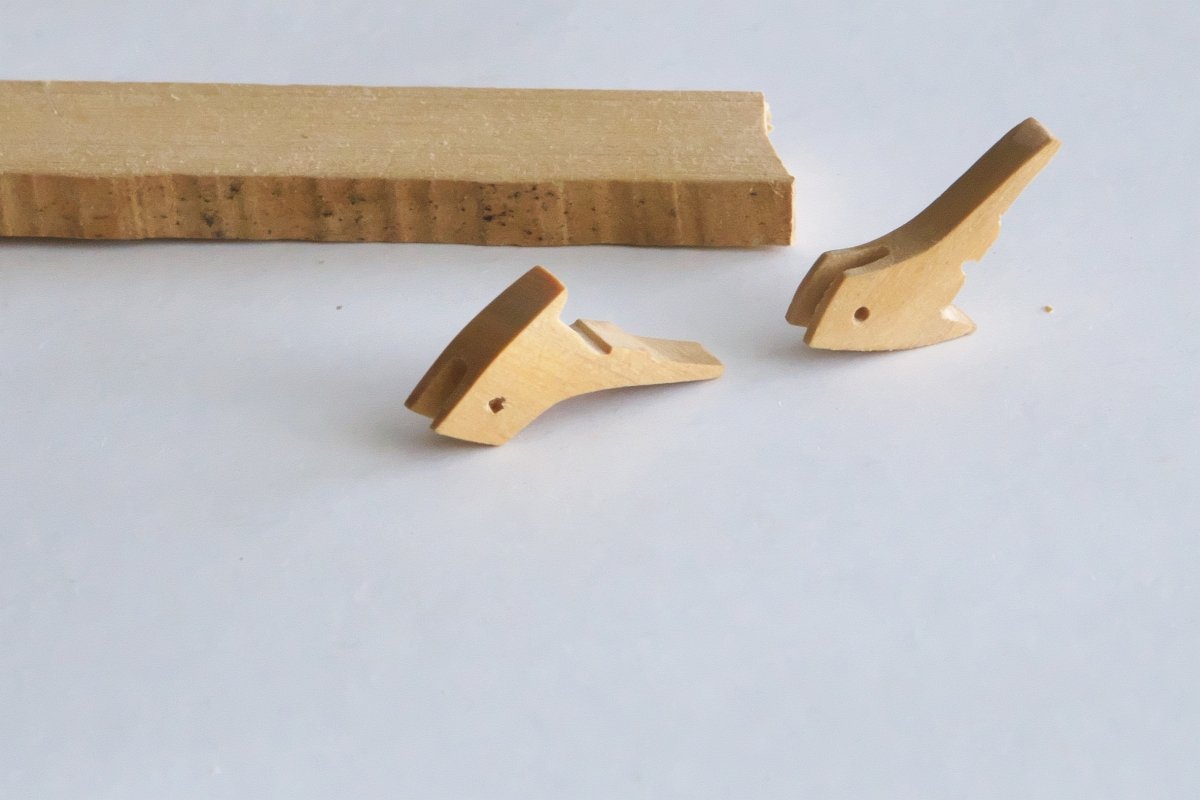
Catheads - after several attempts I was able to achieve satisfactory result carving them manually from one piece of boxwood
- 104 replies
-
- 4
-
-
-
- Bluejacket Shipcrafters
- smuggler
- (and 1 more)
-
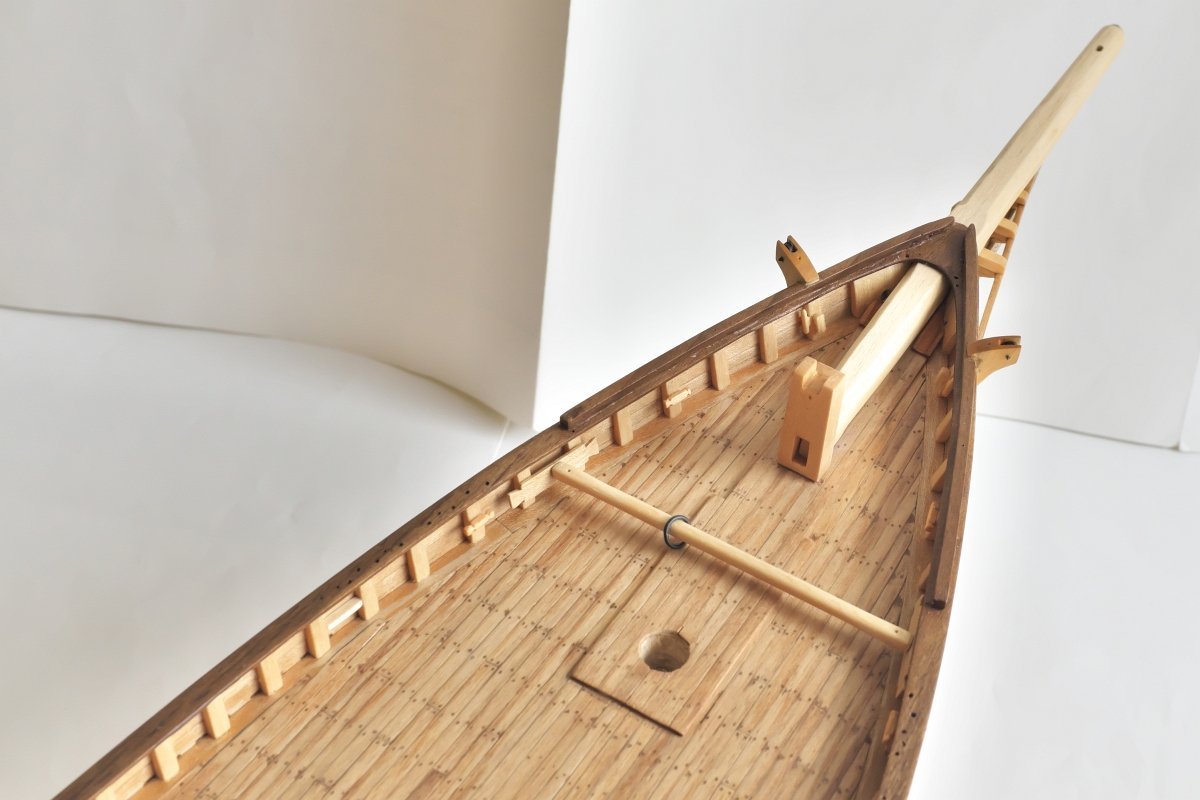
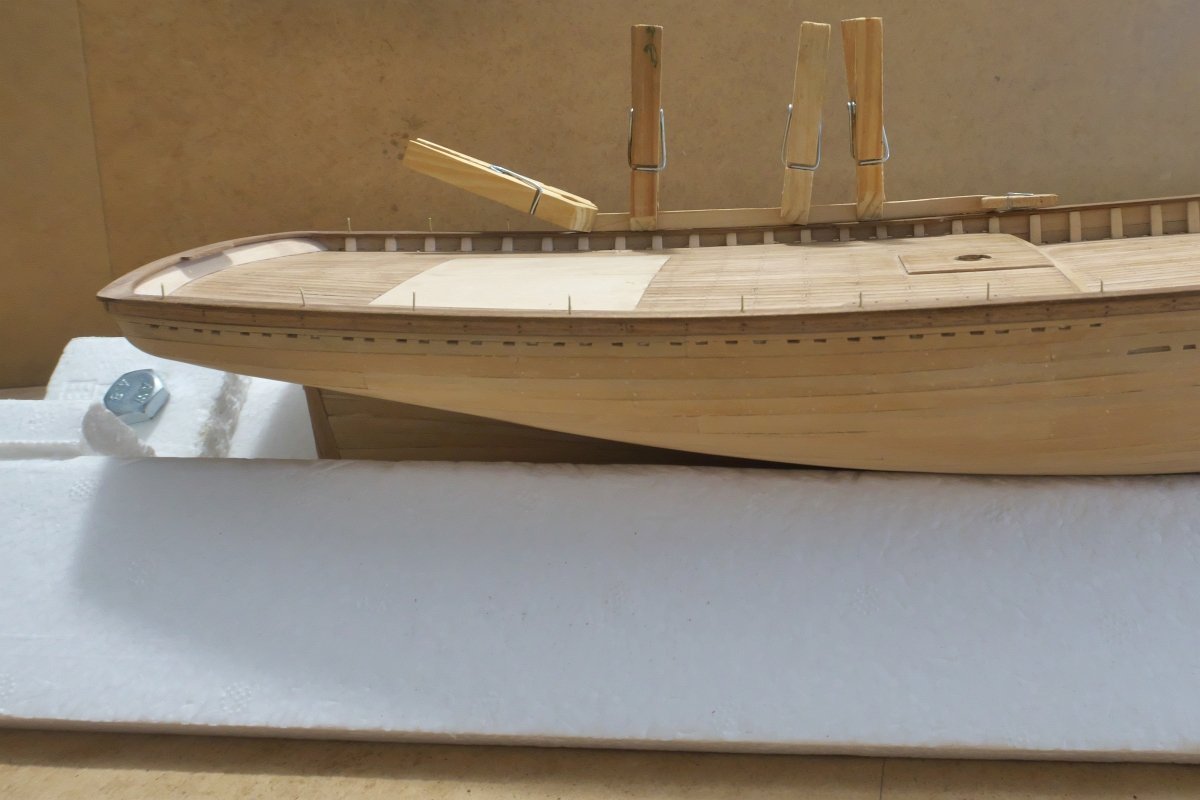
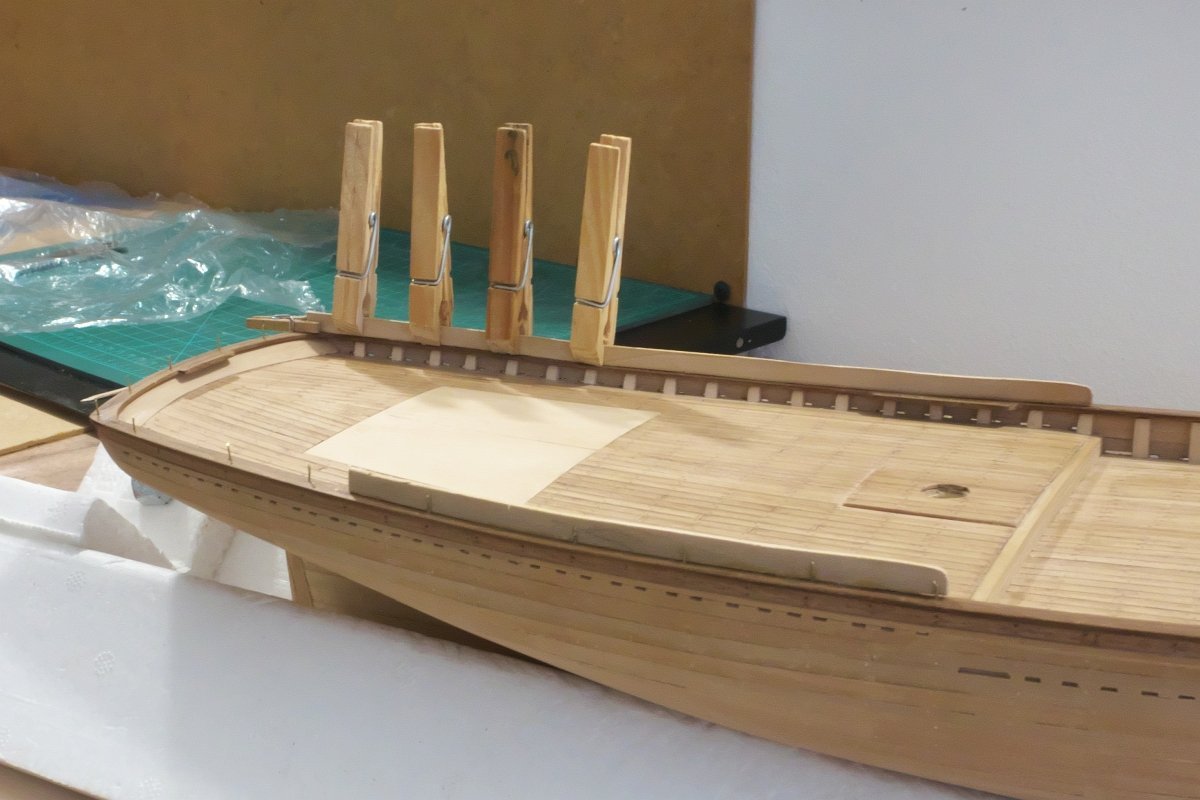
As I said earlier, my biggest worries were, how durable would be the whole structure of bulwarks I had introduced. I can now say, that with inner+outer bulwark planking, supported by stanchions and glued rails, the bulwarks are really strong, in spite the butt-joint technique used. They would not move or bend even under quite a pressure. It is good to see the idea worked. Then there was a time to attach quarter deck rail and monkey rail. Even more intriguing task due to even less support. Here I decided to use some thin metal pins located between inner and outer planking.
- 104 replies
-
- 3
-
-
- Bluejacket Shipcrafters
- smuggler
- (and 1 more)