Sumner
-
Posts
33 -
Joined
-
Last visited
-
 Waister reacted to a post in a topic:
HMC Sherbourne 1763 by Waister - Caldercraft - 1:64 Scale - First Build
Waister reacted to a post in a topic:
HMC Sherbourne 1763 by Waister - Caldercraft - 1:64 Scale - First Build
-
tkay11 reacted to a post in a topic:
HMC Sherbourne 1763 by tkay11 - FINISHED – Caldercraft – Scale 1:64 - A Novice’s Build
-
 Nice colors! Keep up the good work -- definitely the right call to redo the work you're not satisfied with.
 -
Always nice to follow another Sherbourne build -- looking really good!
- 18 replies
-
- 1
-
-
- sherbourne
- caldercraft
- (and 1 more)
-
Kurt Johnson reacted to a post in a topic:
HMC Sherbourne by Sumner - Caldercraft - Scale 1:64 - kitbashed to 1763 NMM plans - First wooden ship build
-
Timmo reacted to a post in a topic:
HMC Sherbourne by Sumner - Caldercraft - Scale 1:64 - kitbashed to 1763 NMM plans - First wooden ship build
-
The windlass looks great. Nice job! Sumner
-
Thanks for sharing the details of how you painted your hull, Daniel. I was thinking about trying a larger brush with multiple coats of thinned paint, but will give things a shot with a smaller brush. Glad to hear the Cruiser builds are still progressing. They are great little ships and will certainly build into a nice pair of models once you have the time to pay them more attention and your research is completed. The museum in Madrid sounds fascinating. A three-decker built in 1:24 would be massive -- that must've been a real sight to behold! Sumner
-
Daniel, next time around I will definitely try a different wood, like pear, with a closer grain and the ability to hold an edge better. Your idea for a diorama sounds great, can't wait to see you pull that together. Are you still working on your Cruiser builds? Also, how did you paint your Sherbourne? Did you paint the white using a brush and thinned paint or an airbrush? It looks great! Gregor, great to hear from you! I just saw the picture of your diving boat on Lake Lucerne. That's a pretty wild boat you've got there! Jay, I'm with you on not following the instructions for these models. Most of the fun and enjoyment I get comes from thinking about what I'd like to do and then trying to actually make it. The Caldercraft kits are a great base for kit bashing, I think. Sumner
-
Sumner reacted to a post in a topic:
HMC Sherbourne by Sumner - Caldercraft - Scale 1:64 - kitbashed to 1763 NMM plans - First wooden ship build
-
Stockholm tar reacted to a post in a topic:
HMC Sherbourne by Sumner - Caldercraft - Scale 1:64 - kitbashed to 1763 NMM plans - First wooden ship build
-
Dubz, ZyXux, Jay: Thanks very much. I'm pleased with how the clinker planking turned out, although things get tricky as the run of planks approach the wales. I've done the final starboard planks twice now, having re-done them after finding myself unsatisfied with how they came out. The current result is okay, but I wish it was better. I'm currently trying to decide if I can still do a better job and, if so, what exactly I would do over. I would really like to maintain the nice run of planks from this part of the build, as much as possible. Kester: Thanks! The views can certainly be stunning, especially as the sun goes down on a clear day. Really spectacular. Living on the 63/F of one building and working on the 69/F of another, I spend a good portion of my daily commute in elevators (3 of them, to be exact)! Sumner
- 57 replies
-
- 1
-
-
- caldercraft
- cutter
- (and 4 more)
-
Paddy reacted to a post in a topic:
HMC Sherbourne by Sumner - Caldercraft - Scale 1:64 - kitbashed to 1763 NMM plans - First wooden ship build
-
Paddy reacted to a post in a topic:
HMC Sherbourne by Sumner - Caldercraft - Scale 1:64 - kitbashed to 1763 NMM plans - First wooden ship build
-
CAd My Fingers reacted to a post in a topic:
HMC Sherbourne by Sumner - Caldercraft - Scale 1:64 - kitbashed to 1763 NMM plans - First wooden ship build
-
CAd My Fingers reacted to a post in a topic:
HMC Sherbourne by Sumner - Caldercraft - Scale 1:64 - kitbashed to 1763 NMM plans - First wooden ship build
-
tkay11 reacted to a post in a topic:
HMC Sherbourne by Sumner - Caldercraft - Scale 1:64 - kitbashed to 1763 NMM plans - First wooden ship build
-
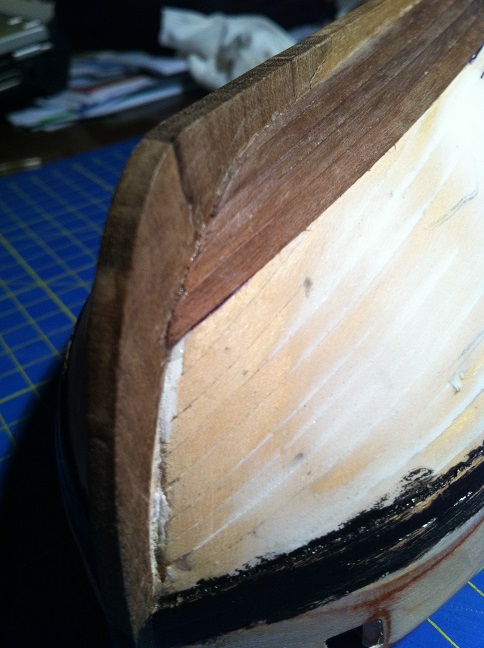
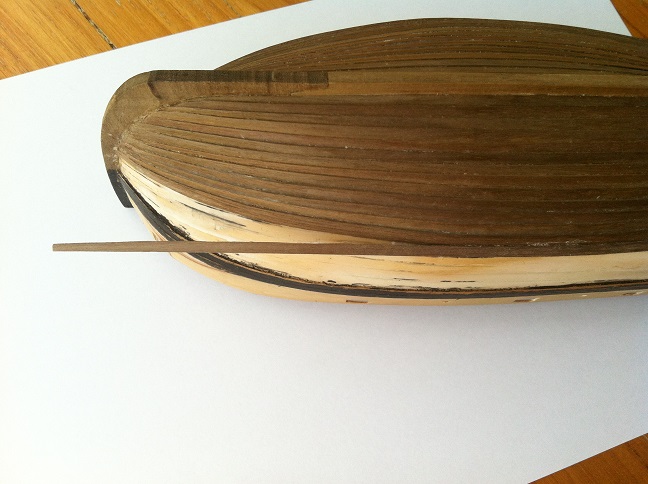
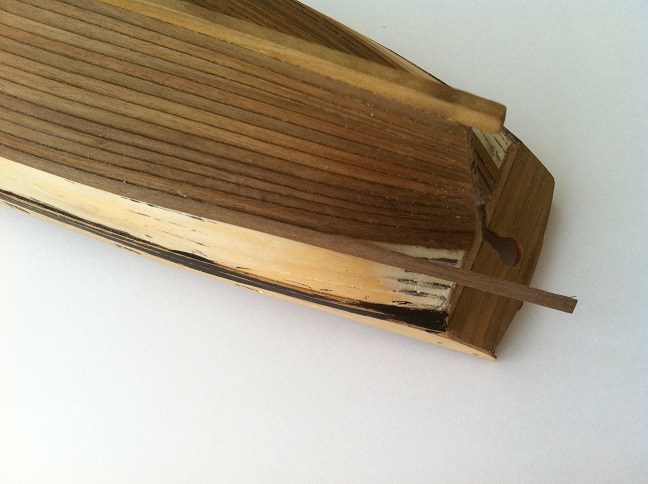
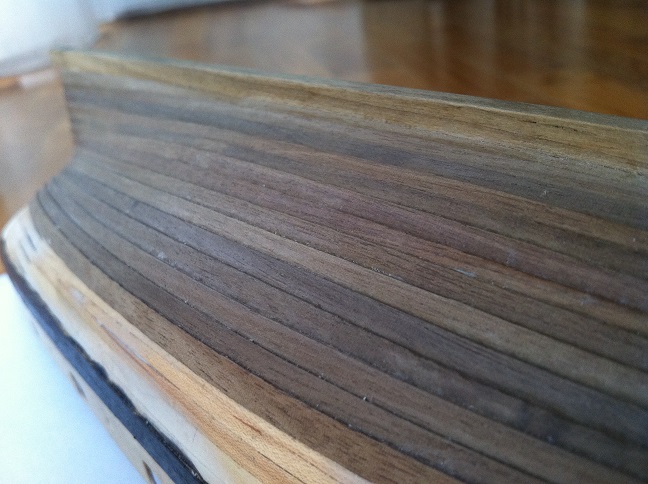
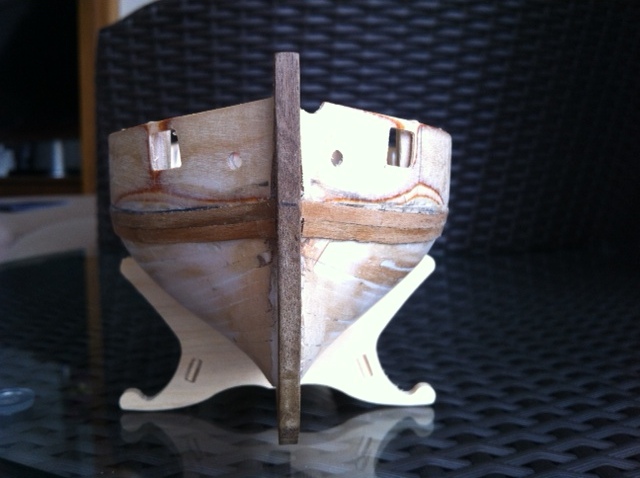
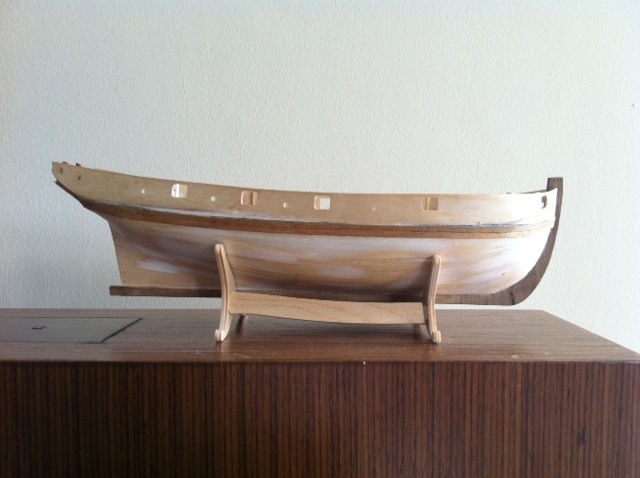
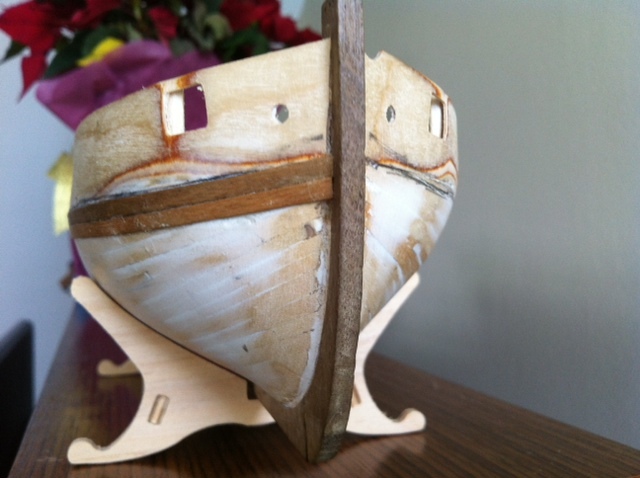
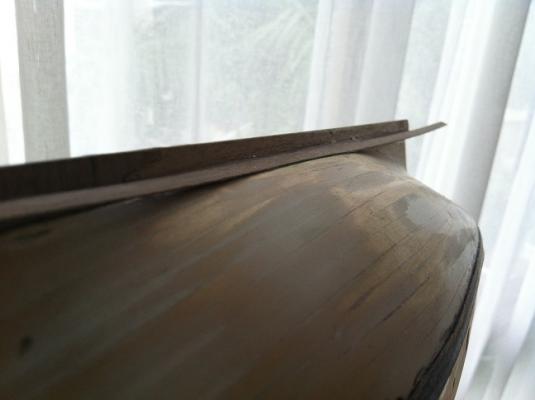
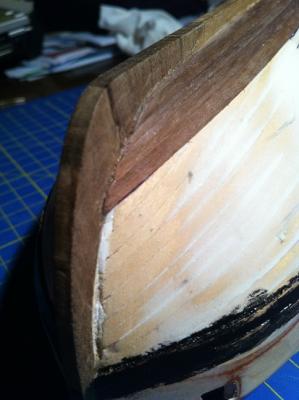
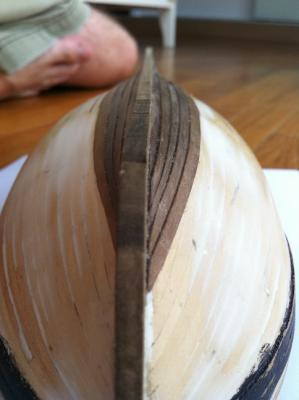
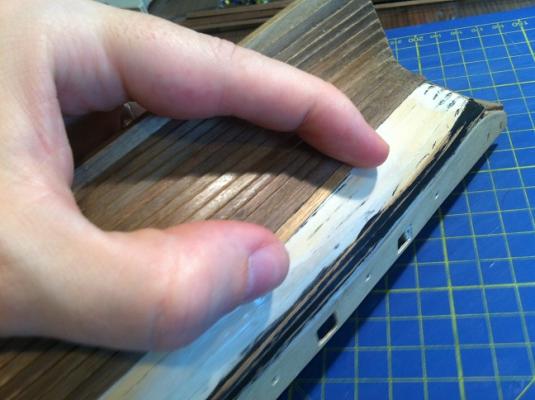
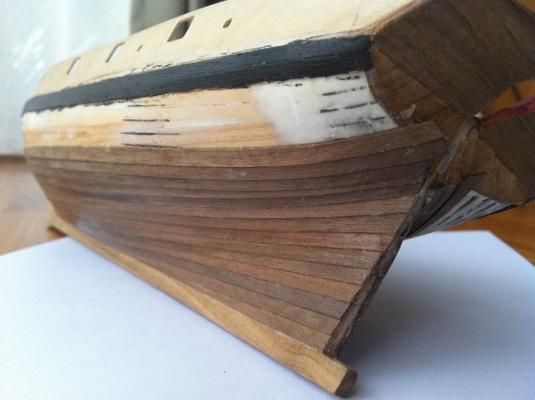
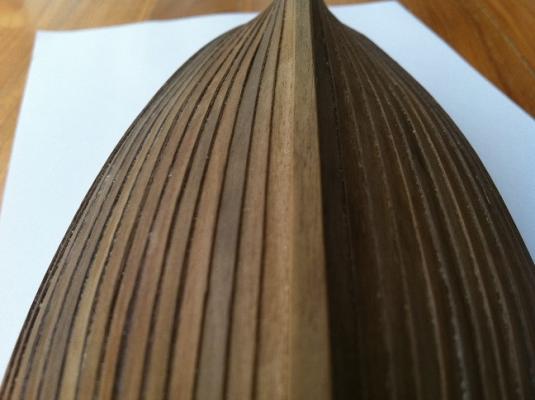
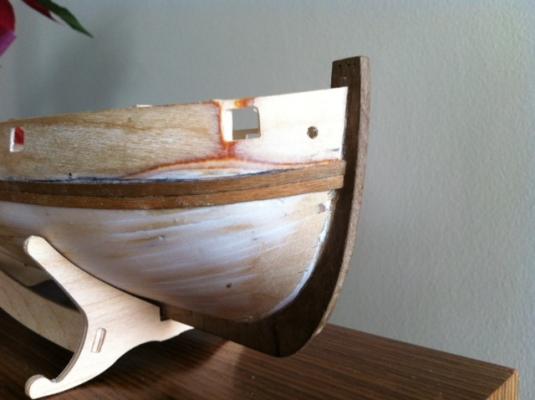
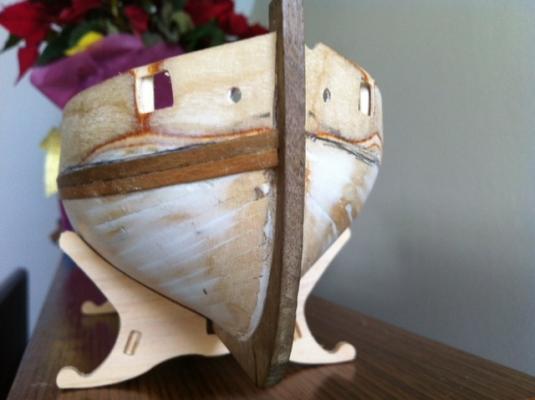
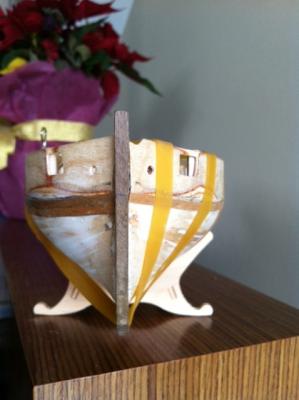
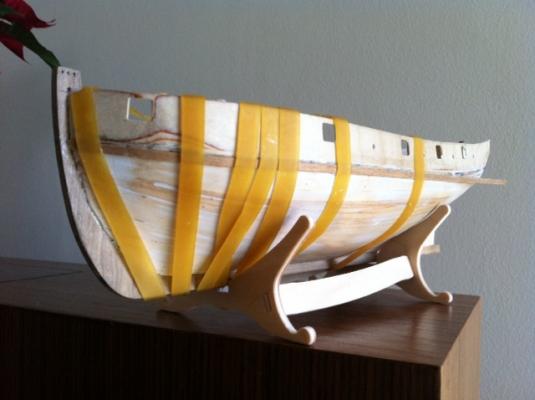
Clinker planking has to start from the garboard plank. As described above, I used 4mm x 0.5mm walnut strips. The plan was to have a 1mm overlap on each plank, with the top edge of each plank sanded to accommodate the one above it.. Things got off to a pretty smooth start. It's key to make sure the garboard plank does not rise too high, as that effect gets magnified as the planks rise along the bow. You want to keep the run of the planks as flat as possible. One step that I neglected in the first part of my build was to carve the rabbet. At the time, I didn't feel very confident that I could do this well and it seemed optional. As you can see in the picture below, the result is that the planks aren't entirely flush. This will require some sanding and the use of PVA/sawdust filler to fix. If I was to do the build again, I would absolutely carve a rabbet as I think it makes such a difference in the final results. These next three pictures show how I installed the planks. The first thing I did was to use a 3mm plank to mark where the top of the next plank should lie, thereby giving me a 1mm overlap. After that, I would place the plank and put the first drops of glue amidship, followed by gluing the fore and aft sections of the plank. This worked pretty well, although the positioning of the planks became significantly more complex as I moved up the hull. And this is where my build more or less came to a halt in mid-2012 with our move to Hong Kong. Over time, the walnut faded in color. As with the stern counter, I probably should have taken steps to protect the wood with varnish of some sort but the model nonetheless survived in relatively good shape. Sumner


- 57 replies
-
- 7
-
-
- caldercraft
- cutter
- (and 4 more)
-
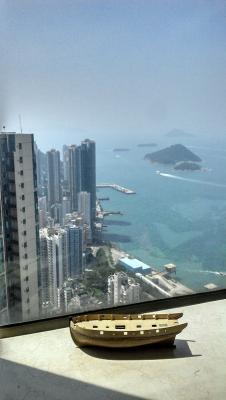
Interesting thoughts and perspective on the lids, Jay. I guess the advantage of having lids would be to offer a bit more weather protection, especially since the gunports went all the way to the cap rail. One of the aspects that I like about these plans is that they give us a hint of what the Sherbourne looked like, but still leave plenty of room for interpretation. Hong Kong is a pretty unique place. If it weren't for work, we wouldn't be here ... and we wouldn't be living quite so high up. There are days when it rains that we're literally living in the clouds and can't see the ground below. Pretty wild. Here's a picture that I took this afternoon to give you a sense of what it's like here in MSW's highest shipyard (if it weren't so hazy today, you'd be able to see Lantau island off in the distance): Sumner
- 57 replies
-
- 5
-
-
- caldercraft
- cutter
- (and 4 more)
-
Sumner reacted to a post in a topic:
HMC Sherbourne by Sumner - Caldercraft - Scale 1:64 - kitbashed to 1763 NMM plans - First wooden ship build
-
Sumner reacted to a post in a topic:
HMC Sherbourne by Sumner - Caldercraft - Scale 1:64 - kitbashed to 1763 NMM plans - First wooden ship build
-
Sumner reacted to a post in a topic:
HMC Sherbourne by Sumner - Caldercraft - Scale 1:64 - kitbashed to 1763 NMM plans - First wooden ship build
-
Sumner reacted to a post in a topic:
HMC Sherbourne by Sumner - Caldercraft - Scale 1:64 - kitbashed to 1763 NMM plans - First wooden ship build
-
Sumner reacted to a post in a topic:
HMC Sherbourne by Sumner - Caldercraft - Scale 1:64 - kitbashed to 1763 NMM plans - First wooden ship build
-
Sumner reacted to a post in a topic:
HMC Sherbourne by Sumner - Caldercraft - Scale 1:64 - kitbashed to 1763 NMM plans - First wooden ship build
-
Sumner reacted to a post in a topic:
HMC Sherbourne by Sumner - Caldercraft - Scale 1:64 - kitbashed to 1763 NMM plans - First wooden ship build
-
Hi Daniel, great to hear from you! I've been enjoying your Port Jackson schooner build and love the careful, precise work that you do. Thanks for recommending the 4mm planks. We had the same discussion on MSW 1.0 before I started the second planking and I followed your advice. This is definitely a good size to use, although I found the 4mm x 0.5mm walnut planks sometimes difficult to shape because they tend to splinter so easily. I wonder if a more closed-grain wood, such as pear, might produce better results? The discussion about the gunport lids is very interesting. I look forward to seeing how you will handle them. I've often wondered about how these would work in practice, and interested to see your interpretation. I plan to open my gunports to the rail but plan leave the gunport lids off my build -- but you may yet inspire me to give them a shot, too! Kester, Tony, Jay, Gregor: Thanks for stopping by and the insights and words of encouragement. It's great that we have such an active community of Sherbourne builders here on MSW. I finished the clinker section of the second planking last night, and another 2-3 posts should bring me up to the current state of my build. Will post some pictures of the second planking later today. One of the biggest challenges I've faced during this build has been space. Here in Hong Kong, we live in a small apartment on the 63/F (yes, you read that correctly ... the 63/F) and I don't have a dedicated workshop. Most of my work gets done on the dining table after the kids sleep. I'm able to get a couple of hours of work done and then must pack everything away until the next opportunity presents itself. One of these days I hope to have a proper shipyard! Sumner
- 57 replies
-
- 2
-
-
- caldercraft
- cutter
- (and 4 more)
-
Thanks for the likes and for checking in, guys! Paddy, glad you're enjoying this build log. The Sherbourne is a great little kit and has been a lot of fun to build. Perfect kit for a first timer with more imagination/ambition than woodworking skills. Jay, hope you're feeling better. I'm close to getting current on my buildlog and aim to get the outstanding pictures posted soon. About time, too. Last week or so, I've actually been back in the shipyard for the first time in a year and half. Getting close to finishing the clinker hull and have started to reconstruct the stern counter. Sumner
- 57 replies
-
- 1
-
-
- caldercraft
- cutter
- (and 4 more)
-
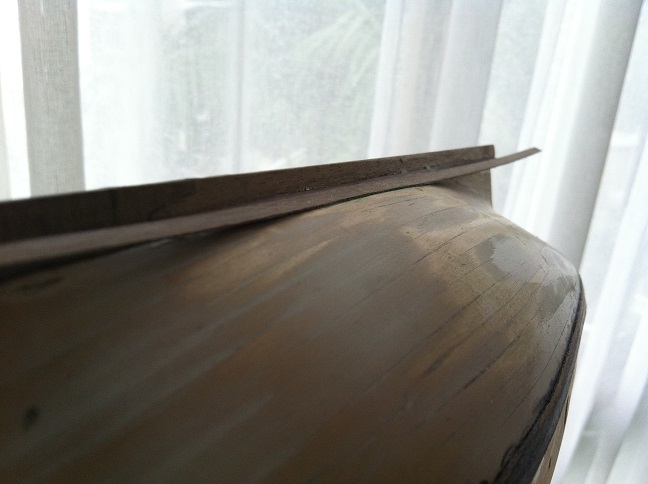
Thanks for the vote of confidence, Kester! I've still got a long ways to go, and a lot to learn. In hindsight, I should have protected the stern planking better. The above pictures are almost 2 years old now, and the stern doesn't look as good now as it did then. Lesson learned! Best, Sumner
- 57 replies
-
- 1
-
-
- caldercraft
- cutter
- (and 4 more)
-
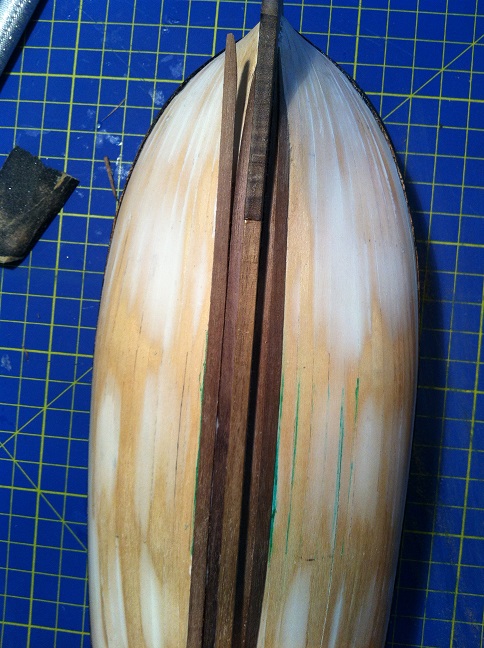
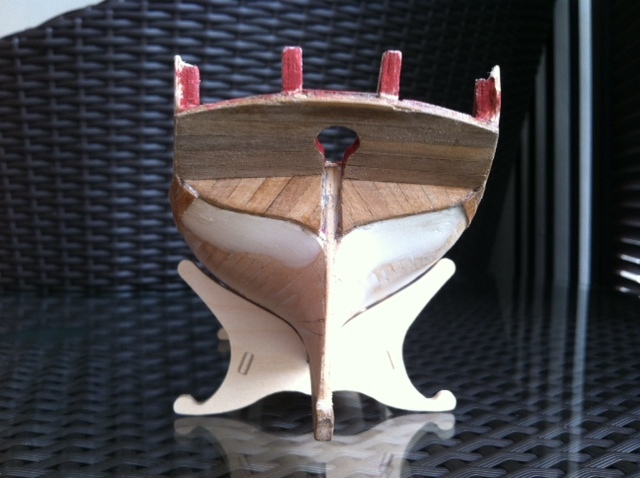
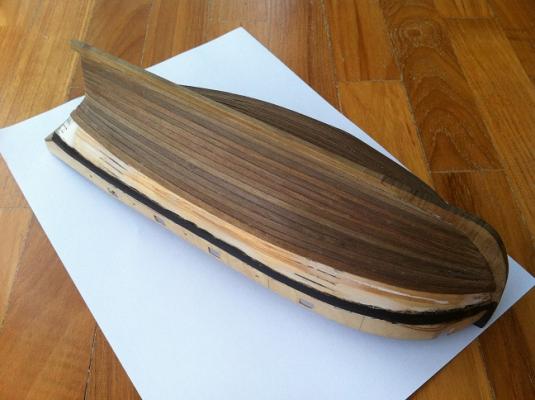
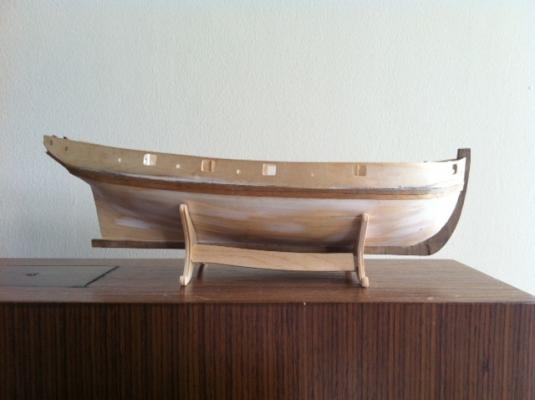
I started the second planking by marking the wales, using two 3mm X 0.5mm planks on each side. I marked the position by taking (rough) measurements off the NMM plans. I installed the these planks by gluing one section at a time with PVA glue, gradually making my way aft along the length of the model. Overall, I'm pretty happy with how they came out, both in terms of positioning and symmetry. After marking the wales, I installed the stern counter and planked over it using 4mm x 0.5 mm strips to mask the fact this is made from a single piece of walnut. I laid these planks diagonally because I thought it was visually interesting, even though I plan to paint the hull and this probably won't be visible when complete. Best, Sumner


- 57 replies
-
- 1
-
-
- caldercraft
- cutter
- (and 4 more)
-
That looks great, Kester. Nice job!
-
Sumner reacted to a post in a topic:
Charles W Morgan by texxn5 - FINISHED - Model Shipways - 1:64
-
Thanks for stopping by, David. I see you've lined up the Lady Nelson as your next build. Will be great to have another cutter model on the ways. Seeing the excellent and precise work you've done on your Sultana, I'm sure it will be an awesome build, too. Best, Sumner
- 57 replies
-
- 1
-
-
- caldercraft
- cutter
- (and 4 more)