


Don Quixote
-
Posts
1,689 -
Joined
-
Last visited
Content Type
Profiles
Forums
Gallery
Events
Posts posted by Don Quixote
-
-
GREAT job! I'm in the process of building an entertainment center where I'll have space to display several ships. I have a few store bought that will do for now and of course plan to replace them with models.
Interestingly, I have that same print of that ship in rough water too.
-
Cool, thanks. I couldn't find a good picture in your log. Probably there, just didn't see it.
What did you use for the pipe? I don't have any 1/8" ID anything. Did you drill a hole in the center of a dowel? I did that for the axels on the 2 cannon, but boy was it tough.
-
-
I don't understand the hawse pipe. Does it go all the way through? What's it used for?
-
-
Great ideas, thanks a LOT!
-
Using Model-Expo's paint? It chips off so easily. looks like you made that black plate on the front. That must have been a challenge.
Sorry if their are any typo's. I don't have my glasses on and I'm a pathetic typist. Somewhare around 60 seconds a word. Typing was not a big deal in the 70's. I just wanted to graduate:) bare minimum. LOL.
-
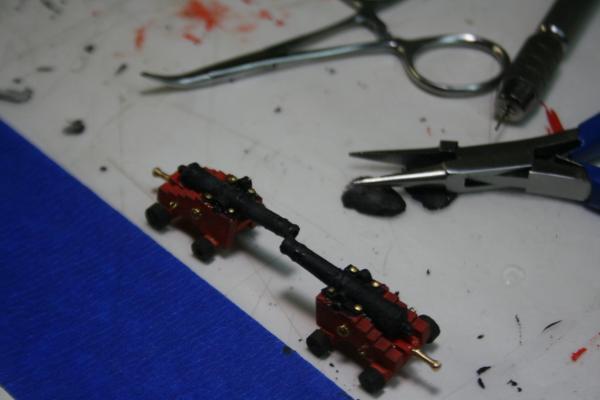
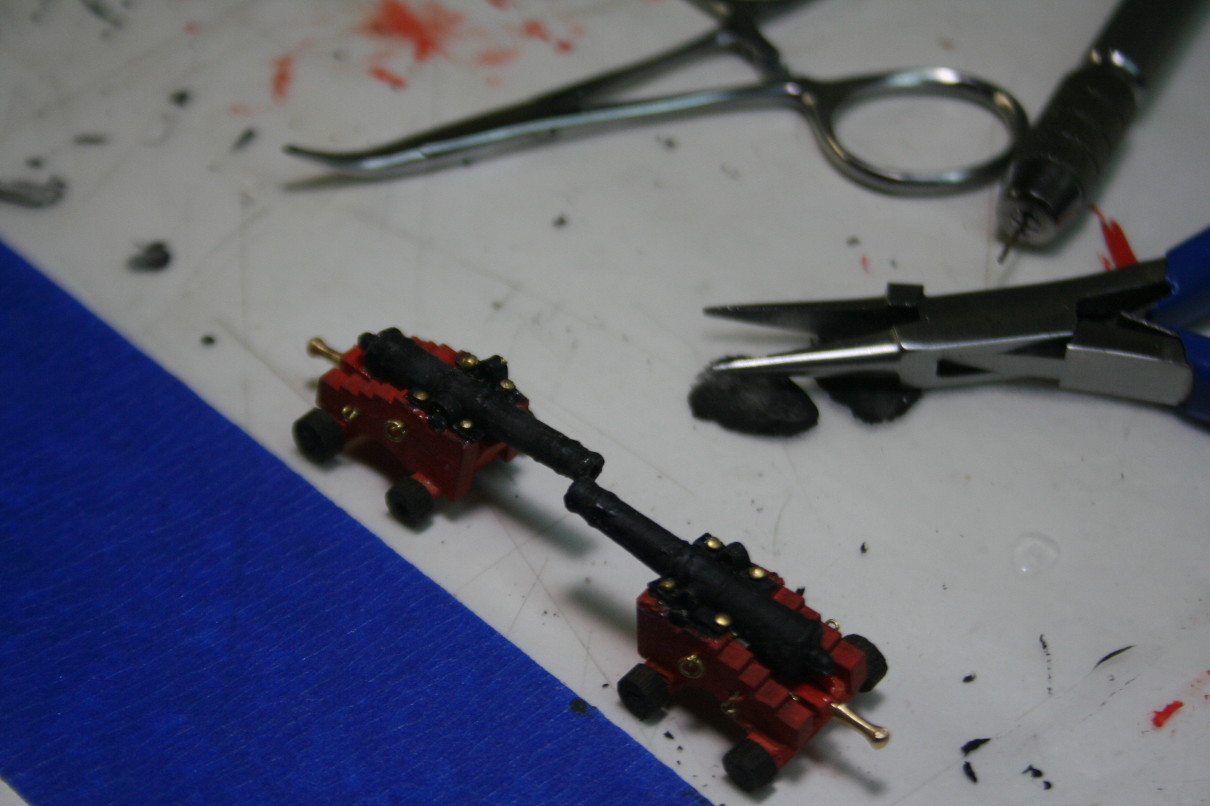
Carronade barrels. Does the brass black turn that black or do I have to paint all those pcs?
-
-
When I was a kid, My Dad said nothing was impossible, just improbable. I seem to be making his case. Onto the next improbable. I'm following Laxet's example and doing just the breech ropes.
I hope there are 10 x's more rings and eyes than I need. 4 out of 10 escape the pliers and go who knows where, 5 out of 10 are consumed by the floor devil and I get one out of 10 I can use

-
I'm getting ready to do the rigging for the cannons. I'm wondering about the seizing. How does one afix the seizing? I'm not ready to tie anything yet. Not confident of my skills at this point. I'm considering watering down some wood glue. I don't think it'll be shiny or hide the fine seizing that way. Ideas and opinions?
Also, I have a serving machine, Seams reasonable to use that to seize one of the ends, but after I run it through the eye and rings, I'm open to suggestions as well.
-
-
-
I'm working on the long guns. I see something about a transom in the front, but I don't see a pre-fabricated part. Is this something I have to make from scratch, or am I just not looking well enough.
Also, the manual shows the transom as going in at about a 30 degree angle, but I'm assuming it's actually supposed to be horizontal to the top of the cheeks just below where the pins will lay, under the trunion bands?
Am I to make the quoin, bed and block fron scratch?
-
Long time no talk at, much less had the time to work on mine. I'm working on the long guns. I see something about a transom in the front, but I don't see a pre-fabricated part. Is this something I have to make from scratch, or am I just not looking well enough.
Also, the manual shows the transom as going in at about a 30 degree angle, but I'm assuming it's actually supposed to be hosizontal to the top of the cheeks just below where the pins will lay, under the trunion bands?
Am I to make the quoin, bed and block fron scratch?
-
-
Yeah, mine went belly up a month ago. Tried replacing the light, but no go. Musta been the balast. I'll be getting a new one soon.
-
Excellent, thanks. Those things are SMALL. I'm going to need bigger glasses. To fit quad-foculs. These old tri's aren't getting it any more. Time for a new pair, I'm thinking.
-
Ahoy, Piet. 'Tis Brian from what have you cooked today. Thought I'd check out your current build and I'm not sure if I'm glad I did. INCREDIBLE! LOVE what I see... Just jealous! I'm on my first build. I've done the bulwarks and gun ports over 4 times and the planking was bloody hell. I can't imagine the skill, knowledge and intellect that goes into a project like this!
beautiful!
-
Thanks. Not ready to buy just yet. Won't need it for some time yet, but I saved the link to that site.
Next question. Looking at your cannons, I getting ready to try my hand at them. How it the **** did you get the rings onto the eyebolt? I take it you had to pry one or the other apart a little and pinch them back together? Which one, the eyebolt, or the ring? I'm guessing the ring would be easier? Any tricks?
-
Laxet, Which model double action did you get?
-
Modesto. I know why your father left. Nothing to see here, folks, keep moving along... Nothing but gangs these days. Oakdale's just 20 miles N.E. 20,000 people, 20 cops. Make for a nice ratio and a safe township. Most of the people here commute to the bay area. I'd retire before I drive for 4 hours a day. Oh, that's right, I AM retired! Woo hoo!
I bookmarked that link so I can check it out when the time comes. I really think I'd have more control with my thumb than my index finger.
-
I'll look into that, thanks. I want to get a different one before I start my next ship. I'll have to drive 90 minutes to get to a decent size city where there will be a decent selection and more than one store. You'd think in a town of 200,000 people (Modesto, California) there'd be more that 1 half way decent hobby store, but the best one I can find is more about planes and cars. They have only 2 wooden model ships for sale and they're solid hull, $50.00 models. And they carry only 2 air brush kits, both badger.
-
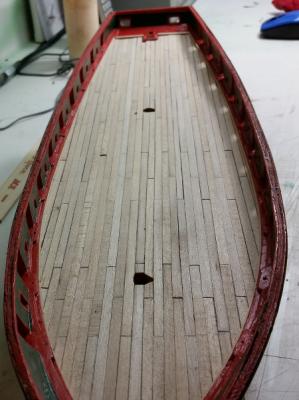
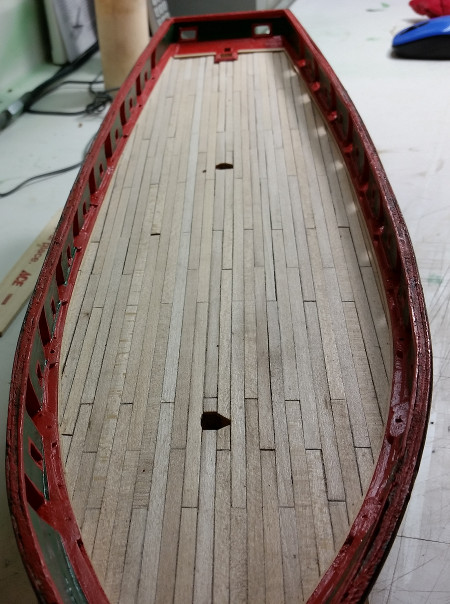
So that's exactly what I did. I marked the center of the keel, stem and stern, and ran a straight edge using those marks. The plank on the port side is 1/32" narrower than the other so I'm very happy with that... The trim along the edge is 1/32" square, so I'm happy with me on that too. Obviously my keel is bowed. Only thing I can think of is that at some point I must have leaned it at an angle instead of keeping it on a flat surface the whole time. Lesson learned there.
I used a Ranco Arts, soft lead black lead pencil on the edge and ends of the boards, just one edge, not both. It was a little darker but I decided to give the deck one last sanding with 400 grit and that seems to have removed a bit of the lead. Ah, well... Lot's to learn.
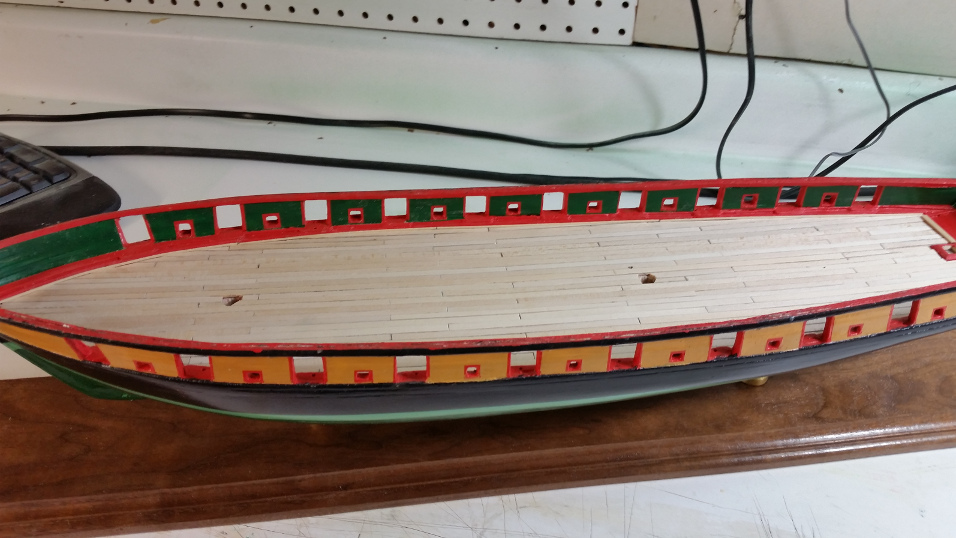
As you can see I'm choosing to put the hatches...etc. on top of the planking. I didn't want that worry in addition to the planking being straight. Plus, the ones I built before were not square.
I'm not sure why they're not square, I used a square and glued some scrap wood in an "L" shape on top of some wax paper that I taped to the bench and did it successfully with no wrinkles in the paper.
I'm open to suggestions on how to make them square. I used a plank cutter I got from micromark so the lengths would be the same size...
I don't think the holes for the masts will be a problem either. Once that's all installed the (I think they're called spanker mast steps and wedges?) should hide the poor cuts.


Niagara by lb0190 - Model Shipways - 1/64
in - Kit build logs for subjects built from 1801 - 1850
Posted
Perfect timing. I was debating on weather or not to even attempt them. Great work.