HOLIDAY DONATION DRIVE - SUPPORT MSW - DO YOUR PART TO KEEP THIS GREAT FORUM GOING!
×


Mike Dowling
-
Posts
1,234 -
Joined
-
Last visited
Content Type
Profiles
Forums
Gallery
Events
Everything posted by Mike Dowling
-
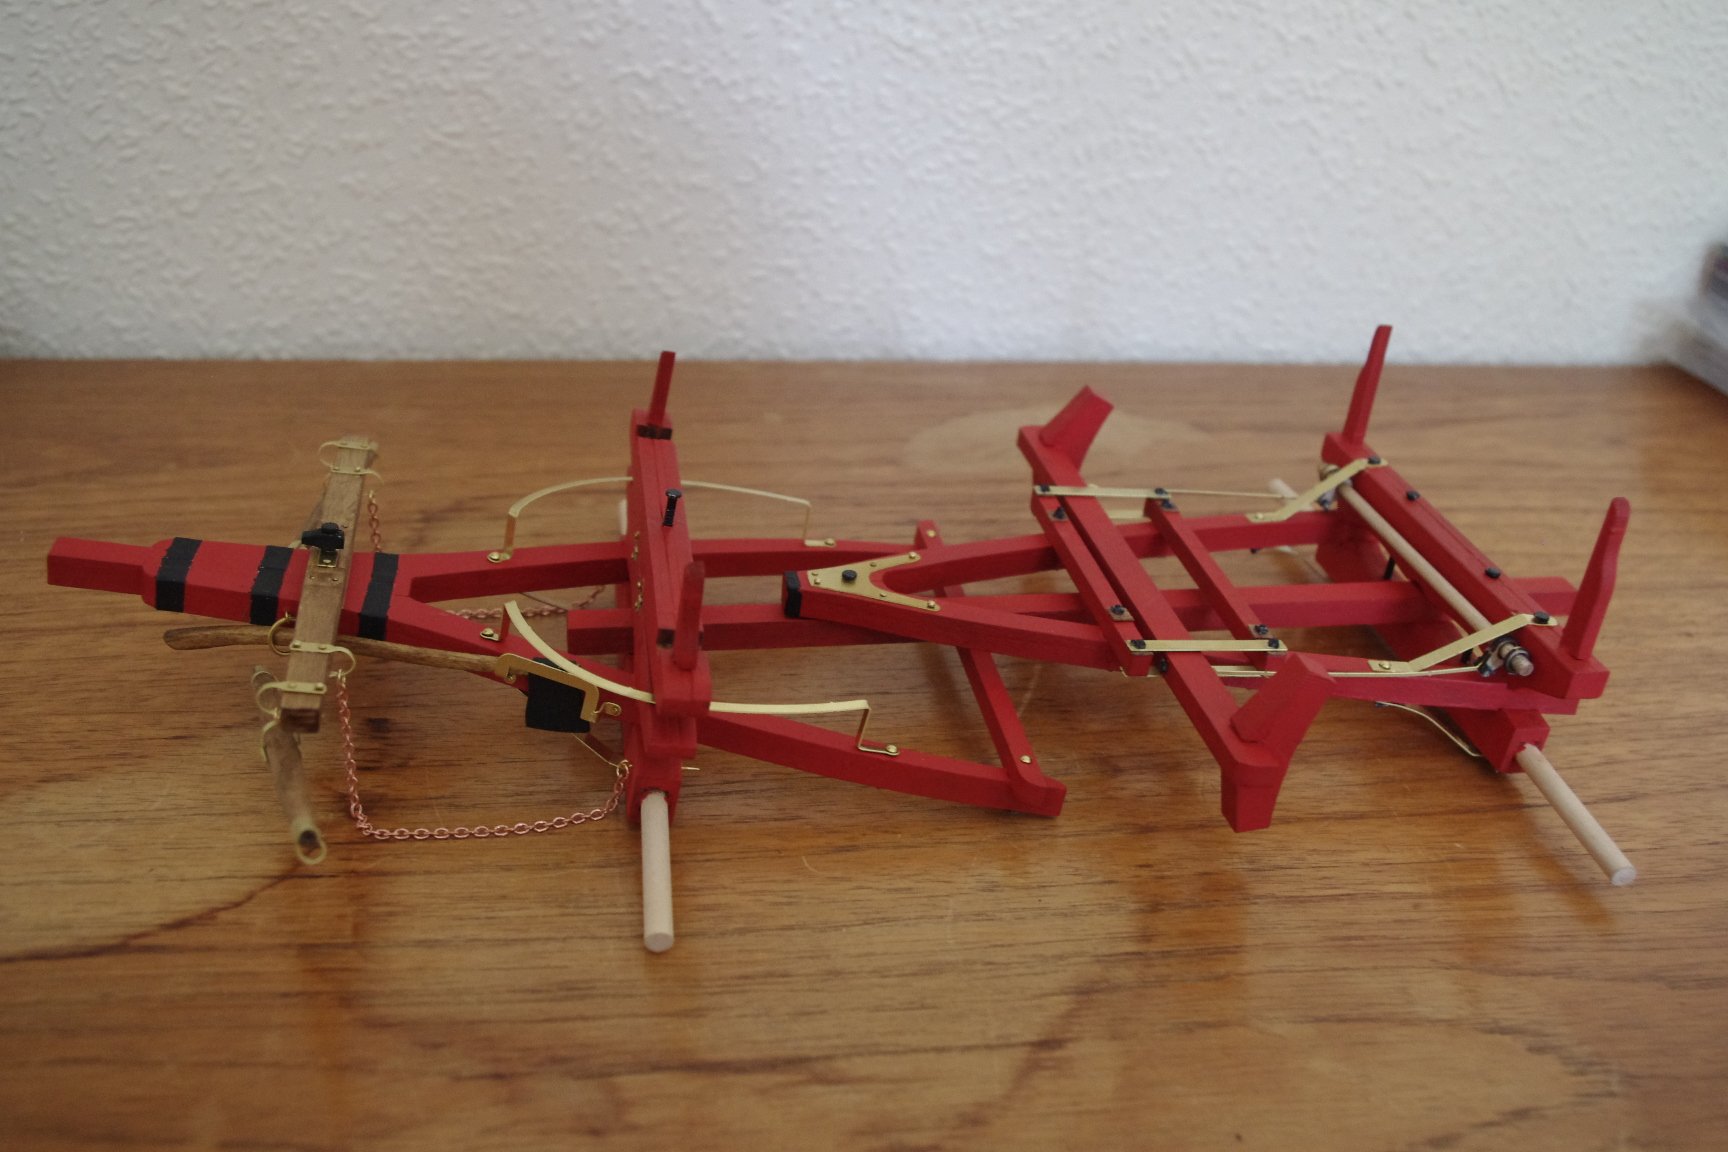
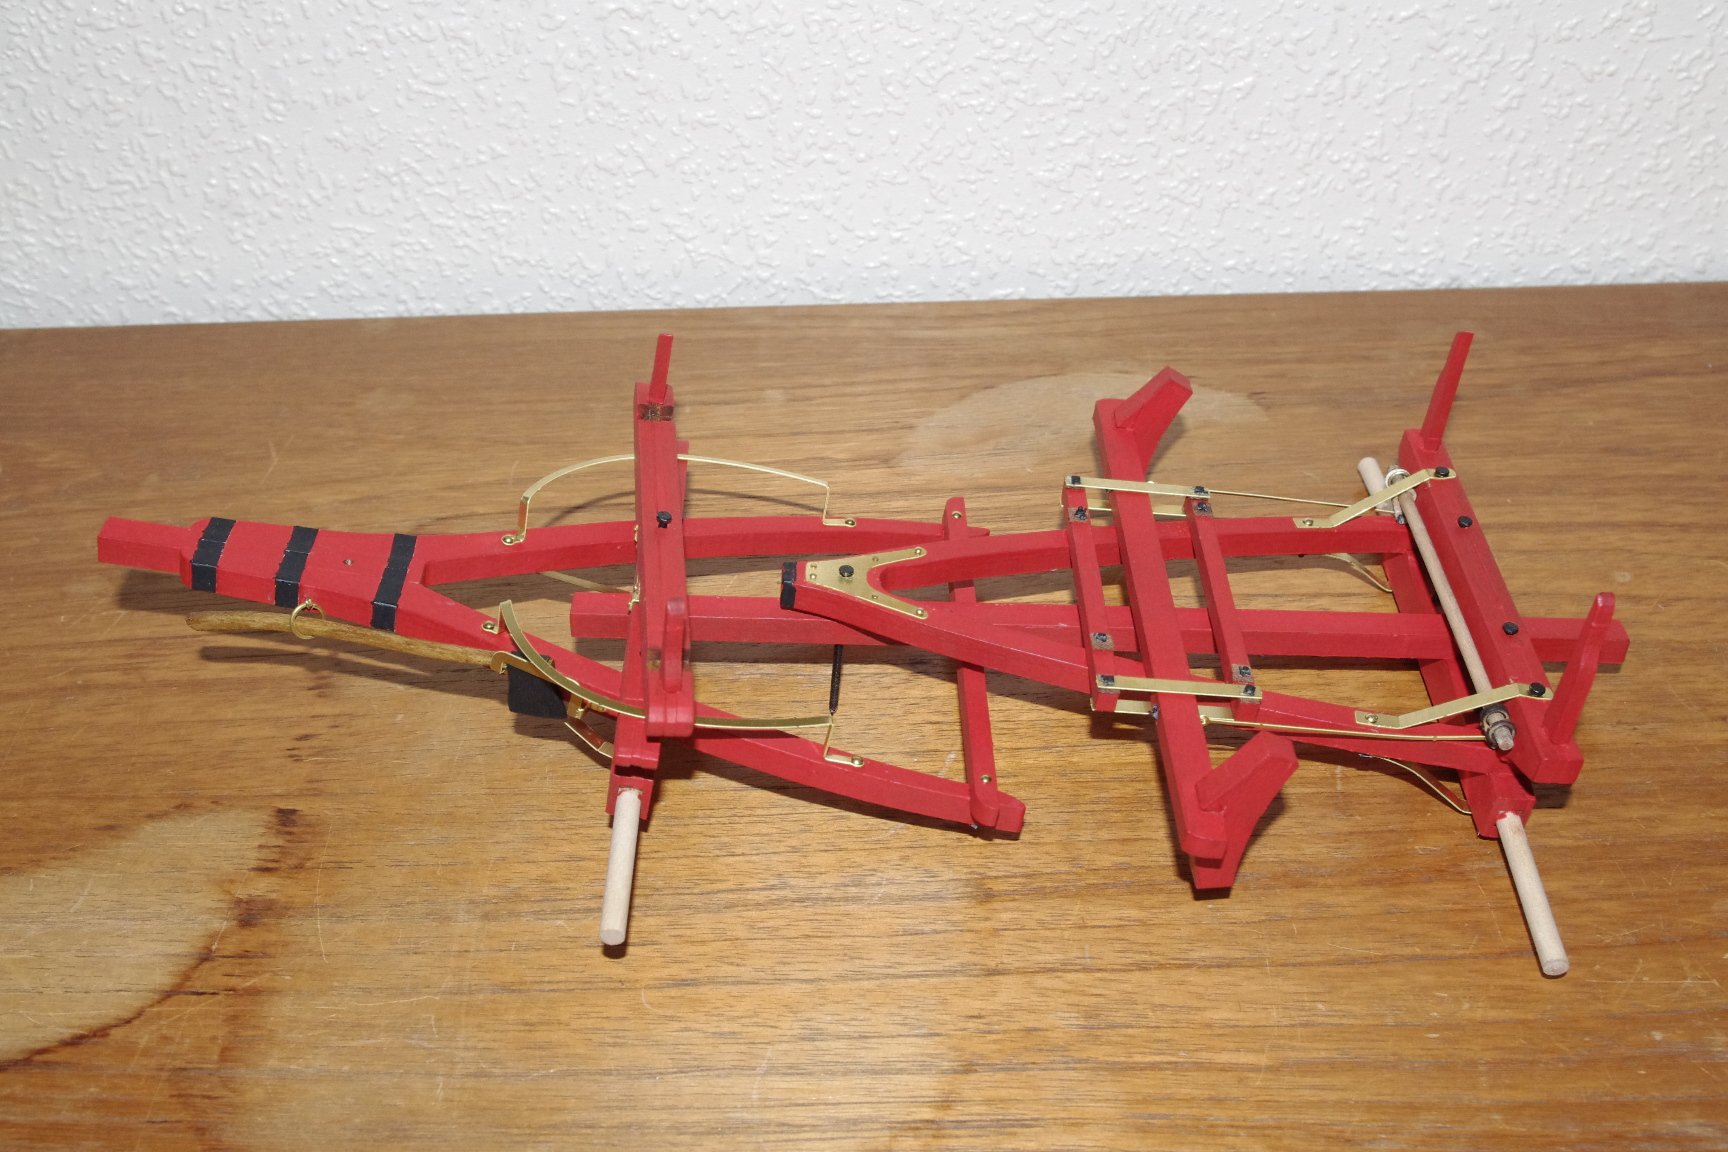
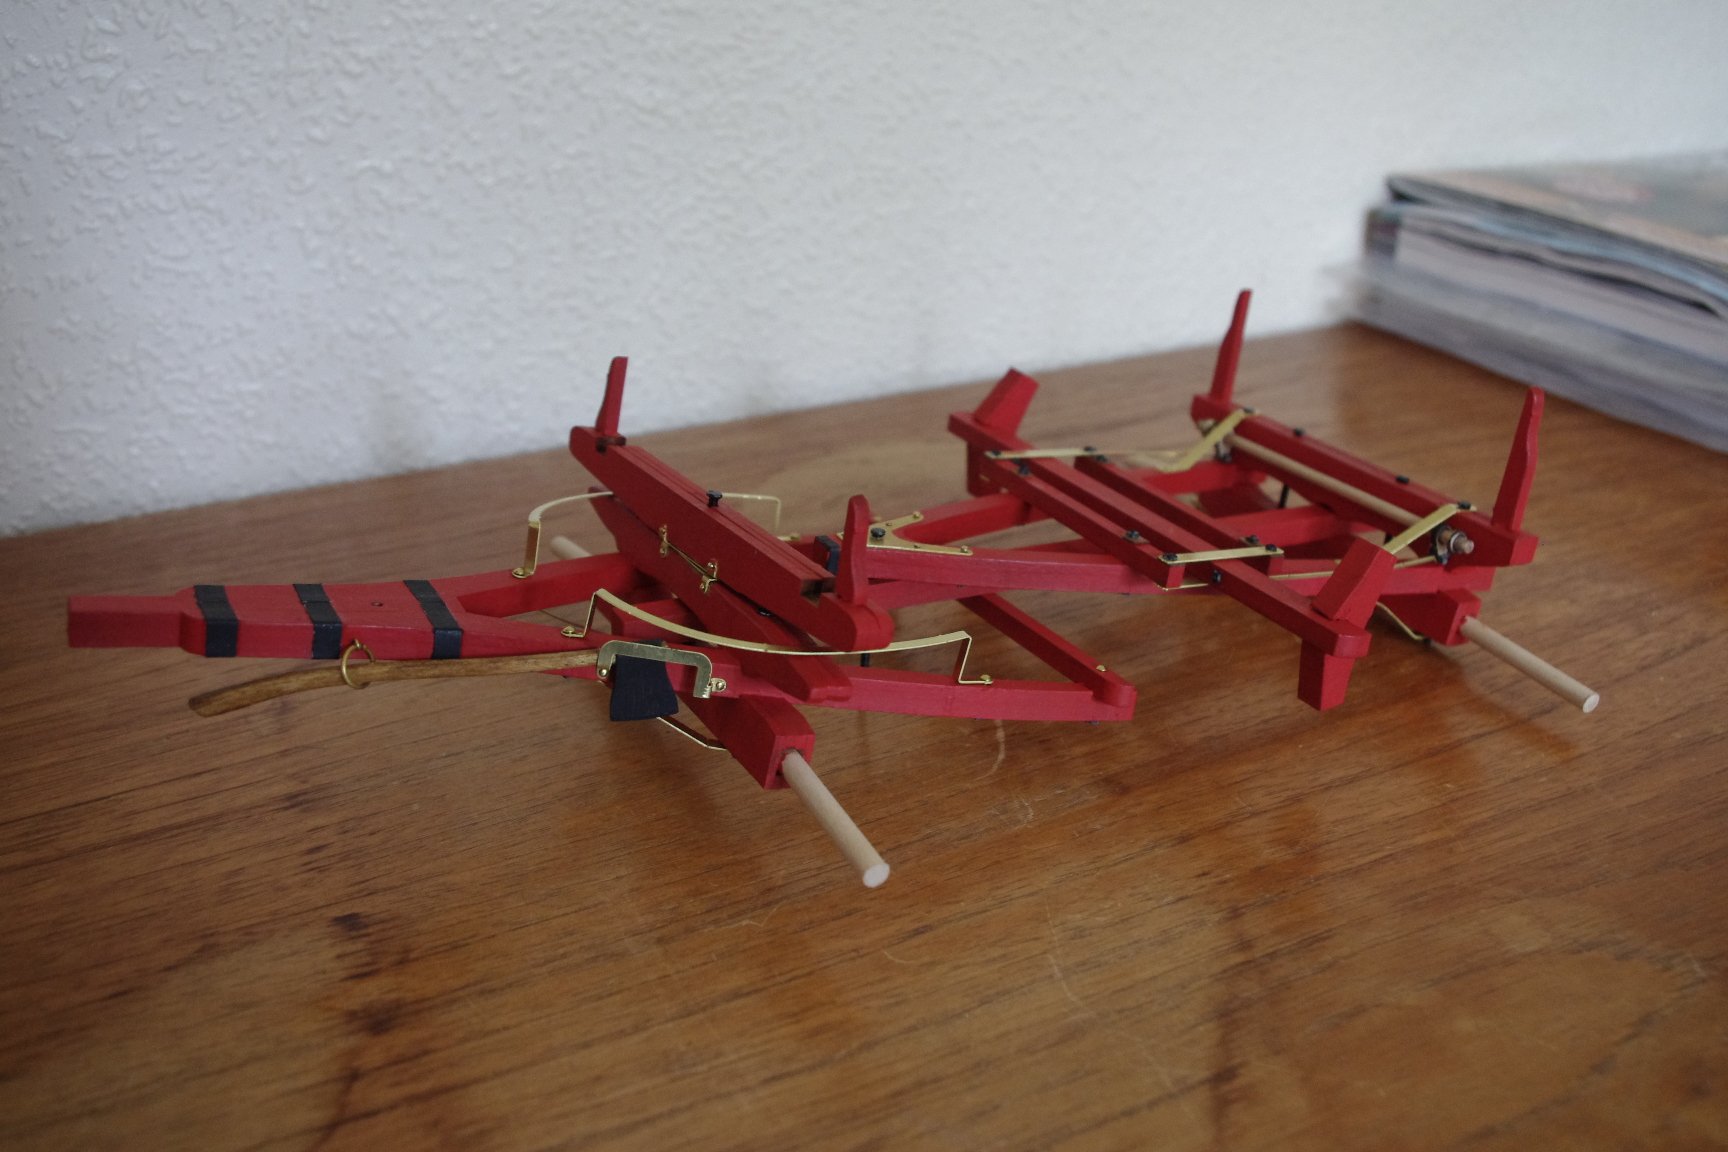
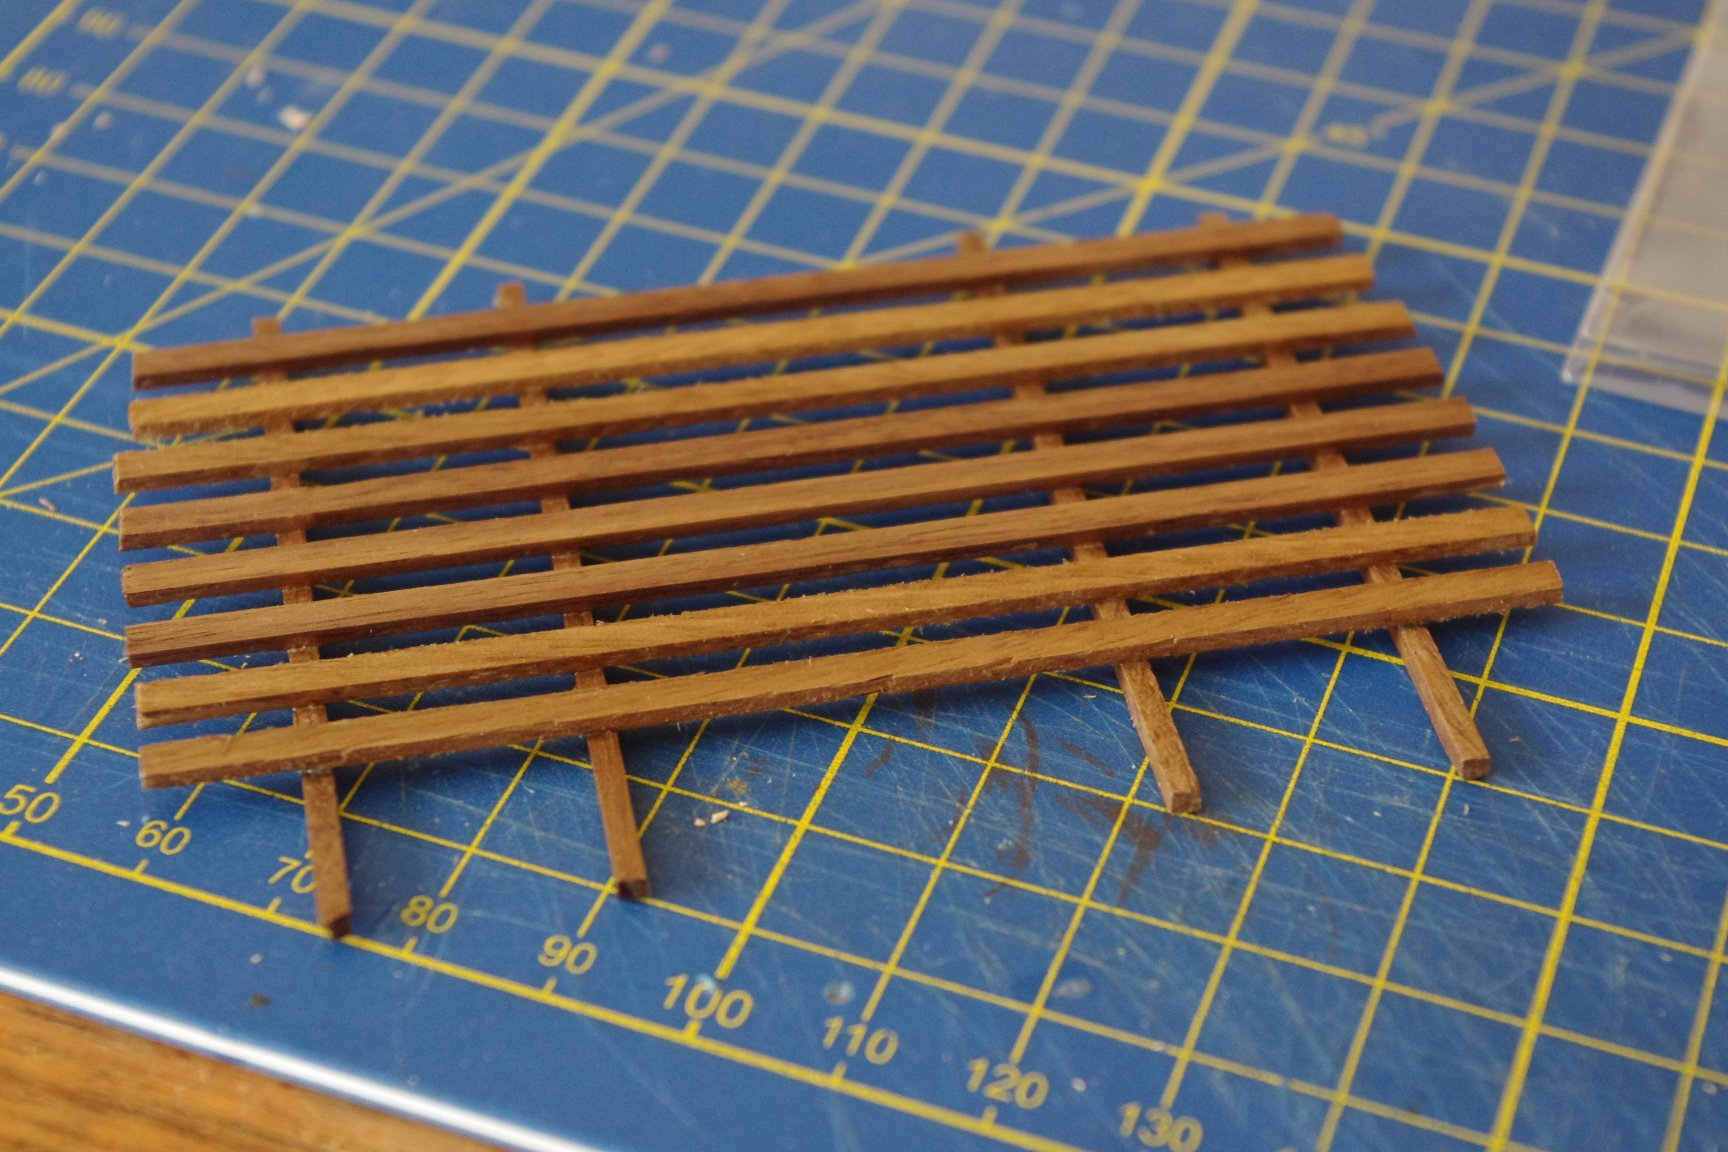
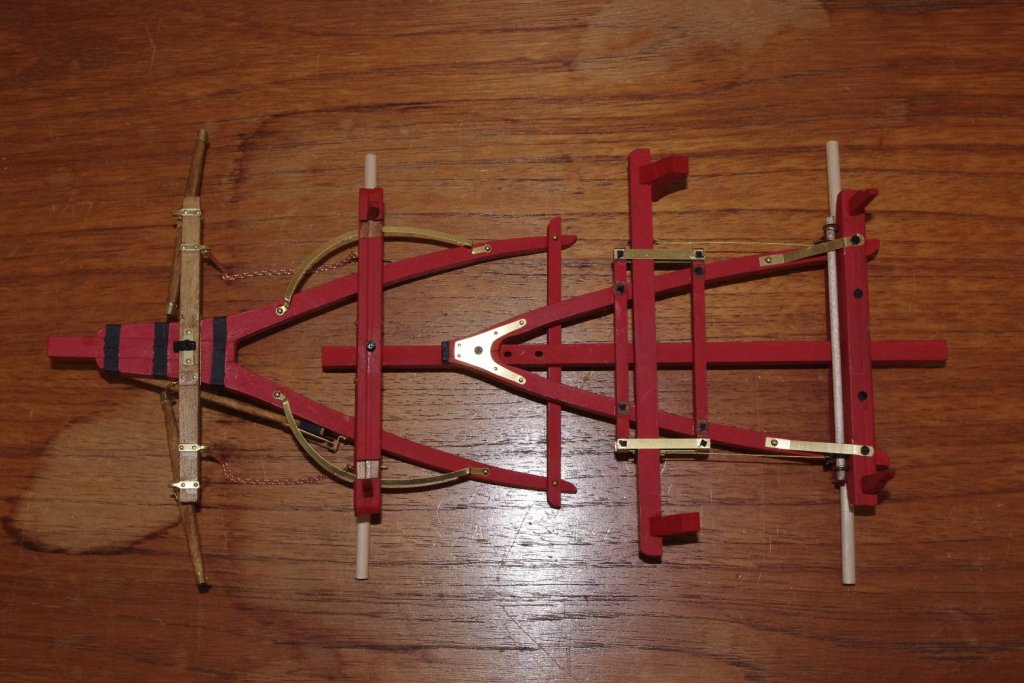
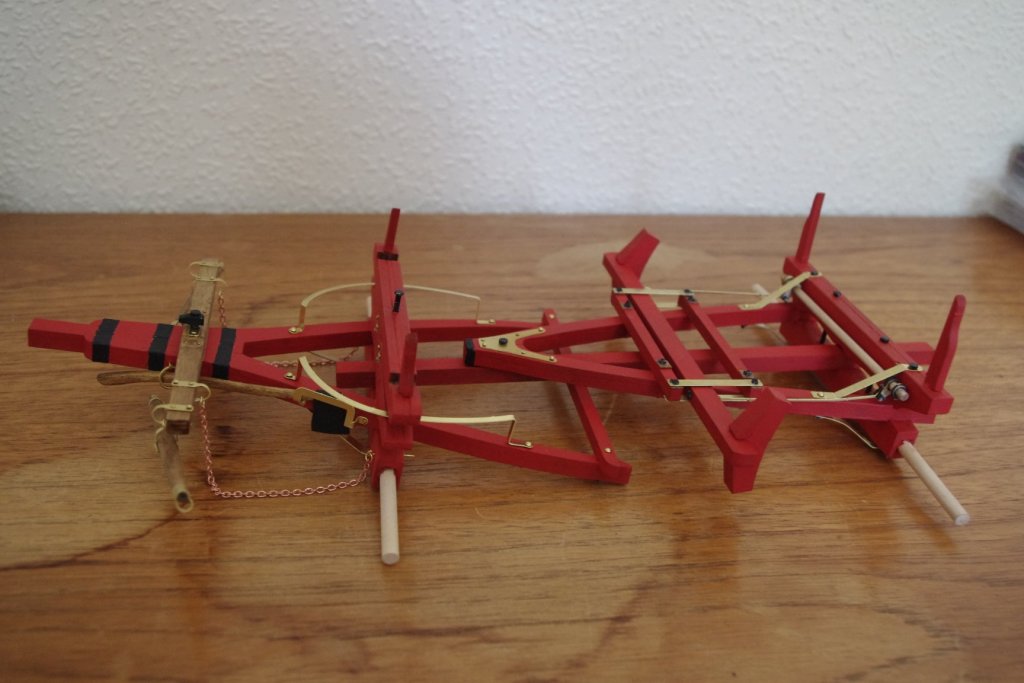
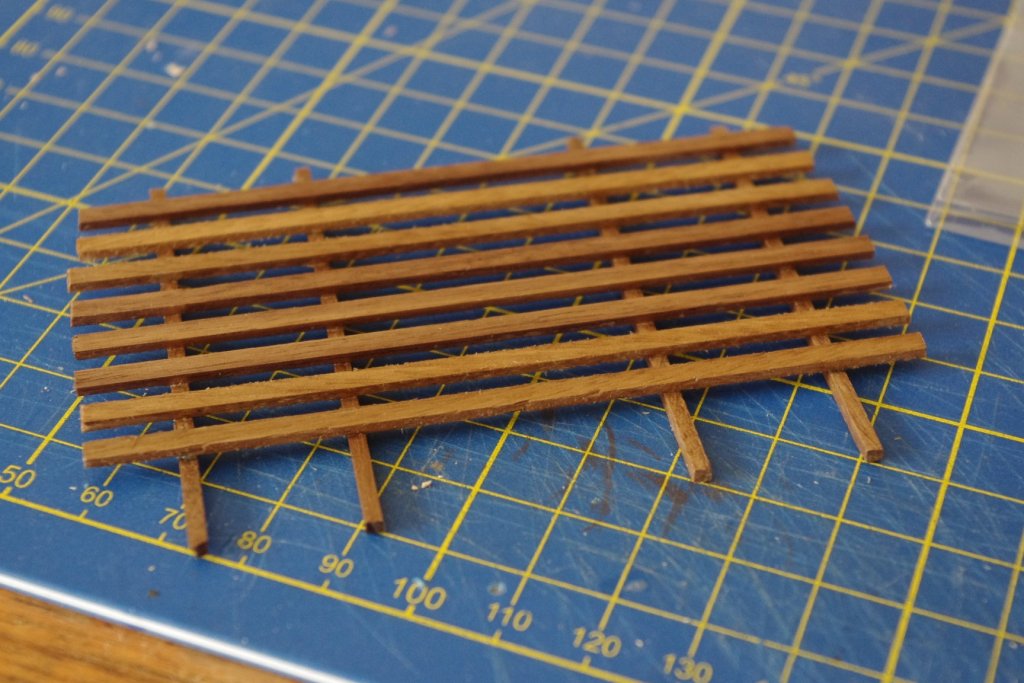
Danny, the wagon I am building is the Conestoga wagon from Model Trailways. It really is a very odd chassis, as they say in the instructions it is like two single axle chassis bolted together. I don't want to steal your log but just a couple of pictures of the finished chassis for your interest.
- 151 replies
-
- 11
-

-
I echo the sentiment Danny, good to see you back. You may know stagecoaches are a favourite of mine. I have done both the AL version and the Amati which looks more like yours. I didn't know we could do logs except for boats but I will follow yours with great interest.
-
Thank you all for your kind comments. Brian, I decided to do wooden ratlines mostly out of laziness as I thought I would make a hash of thread ones having only two knots. As to what is next I am not sure. Either a Chinese junk or a Roman bireme or I still have a wagon to do in my stash. Once I decide I will put a note on here before starting a new log.
-
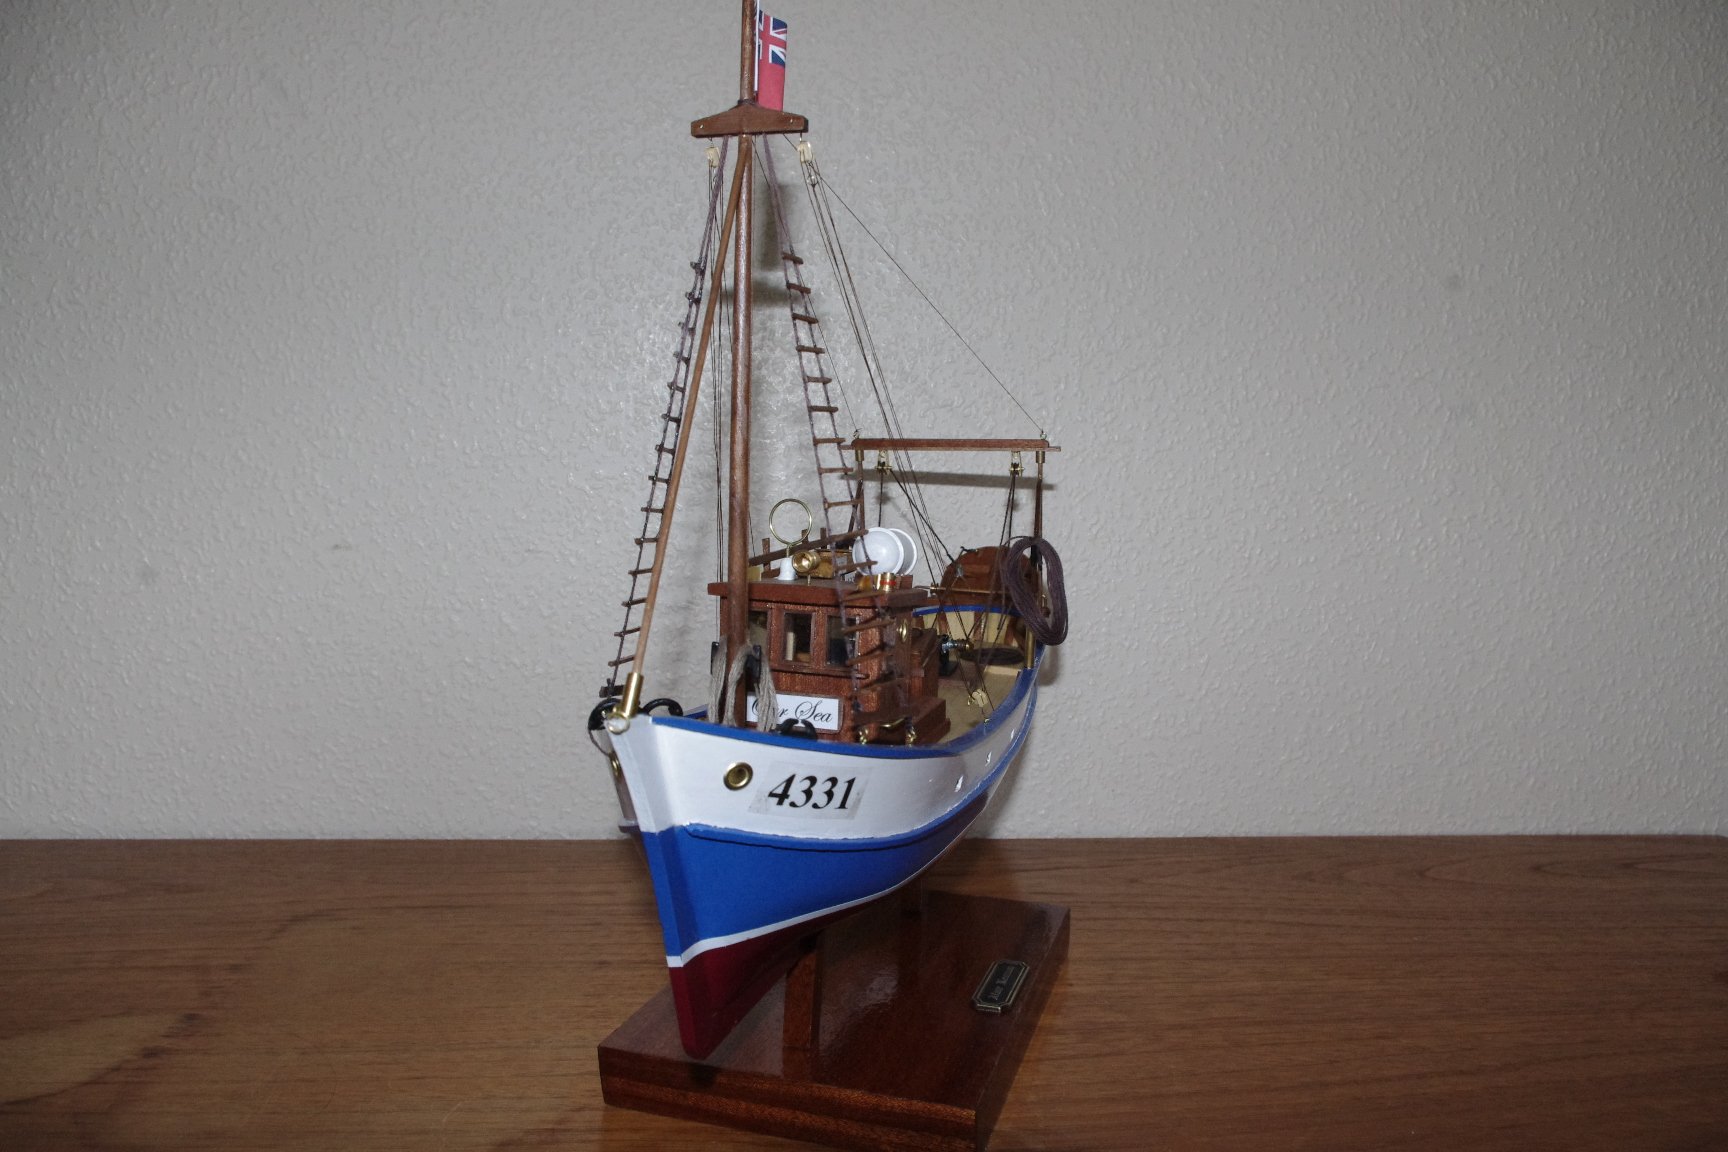
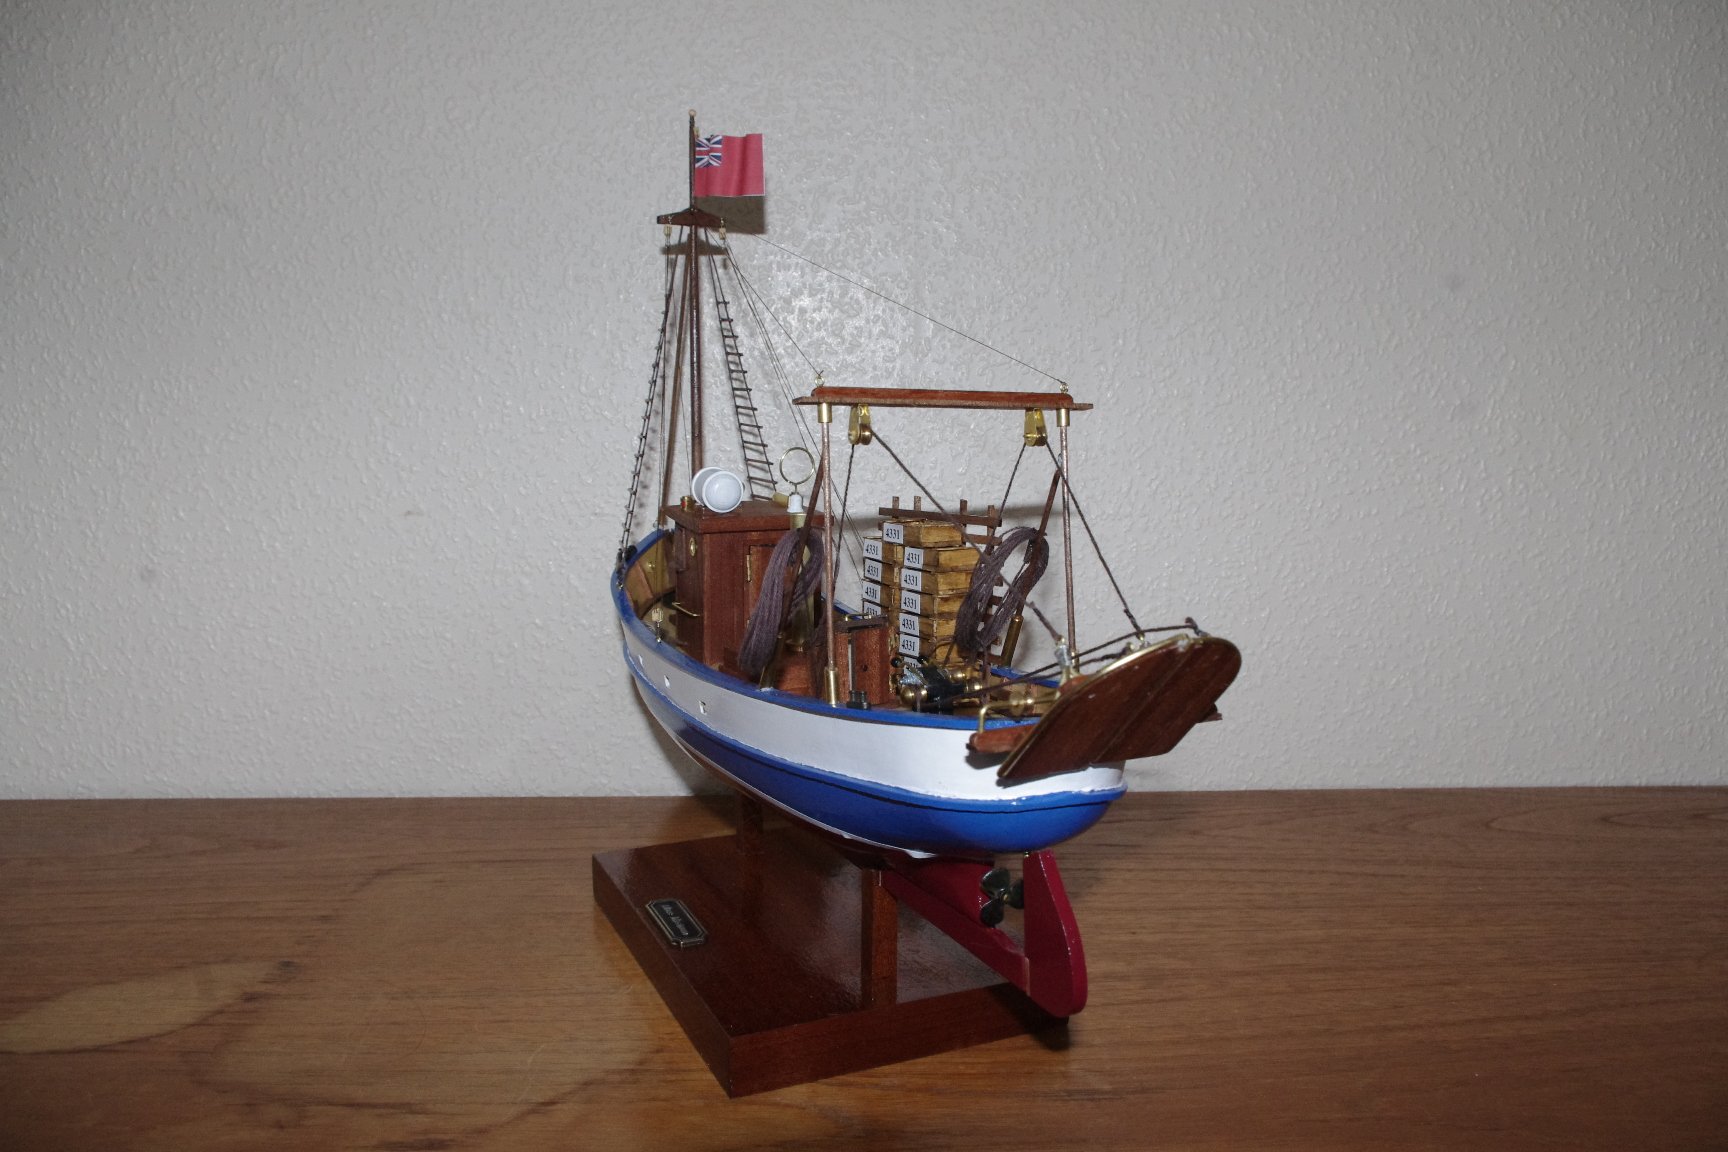
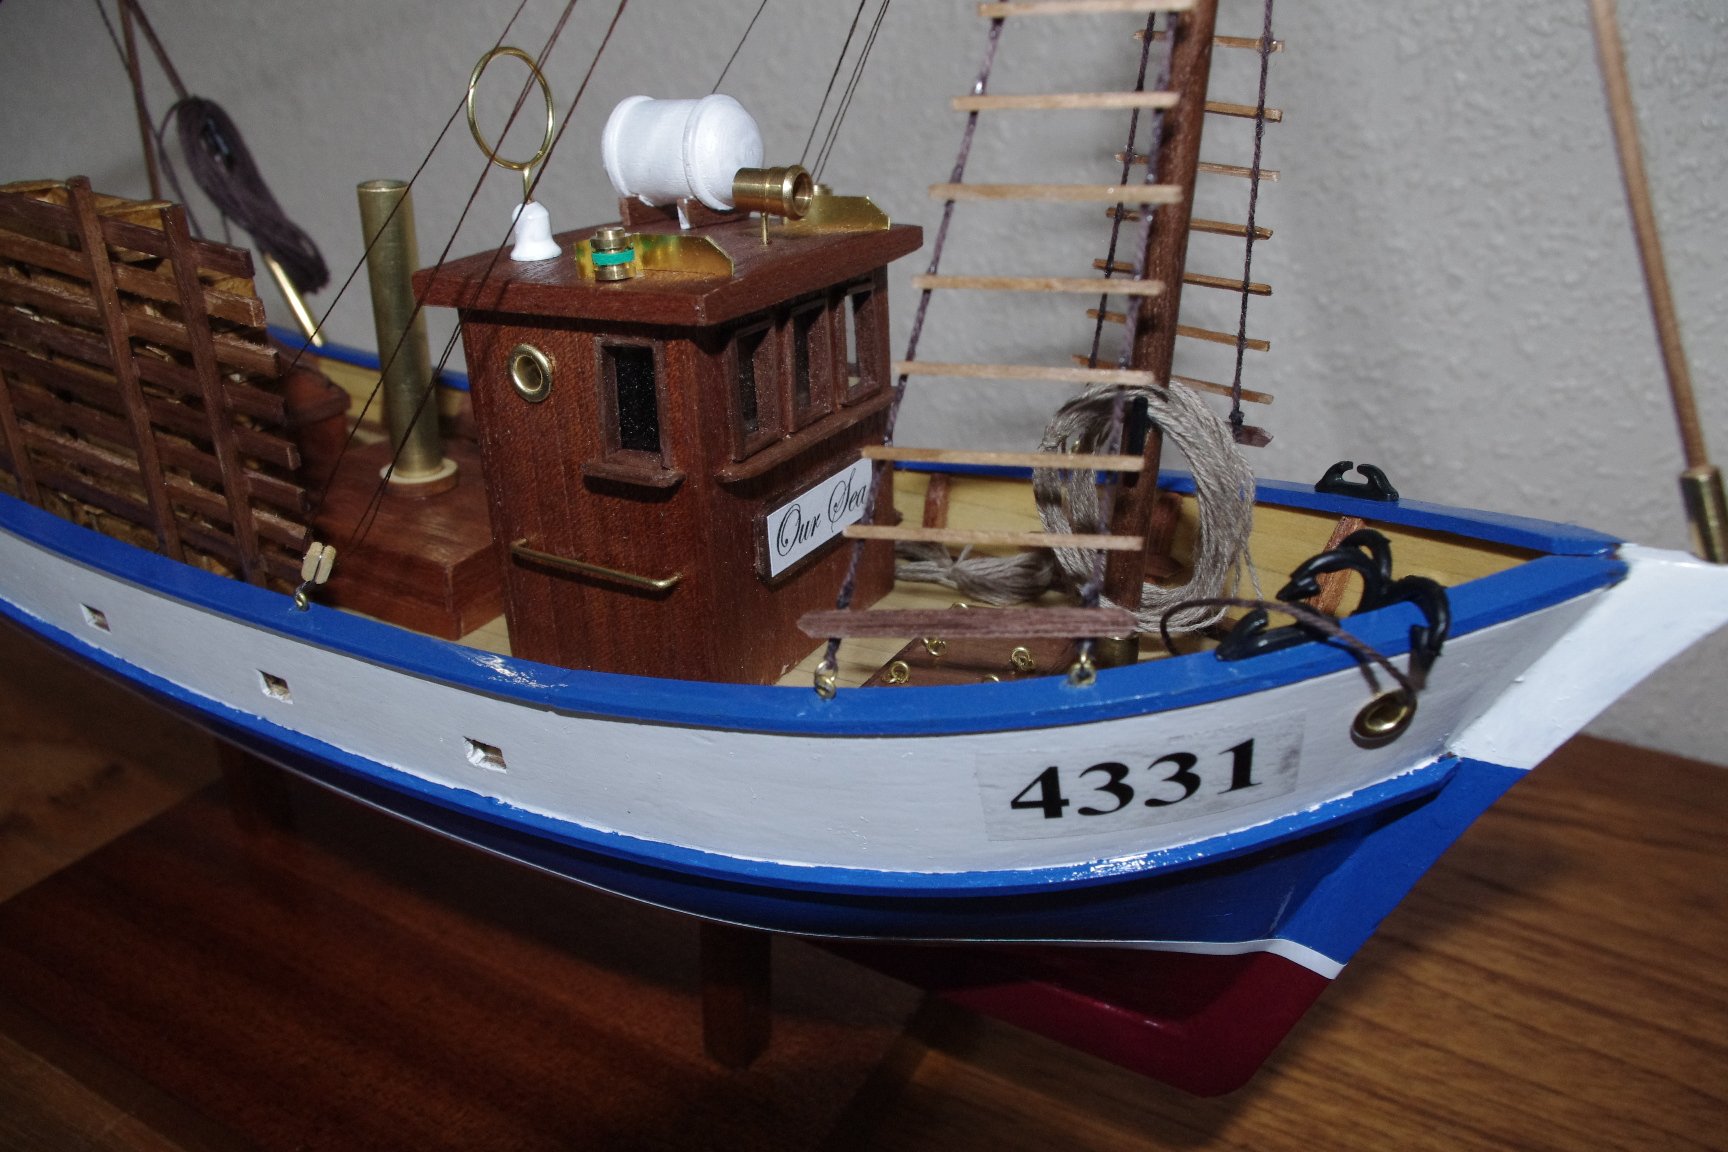
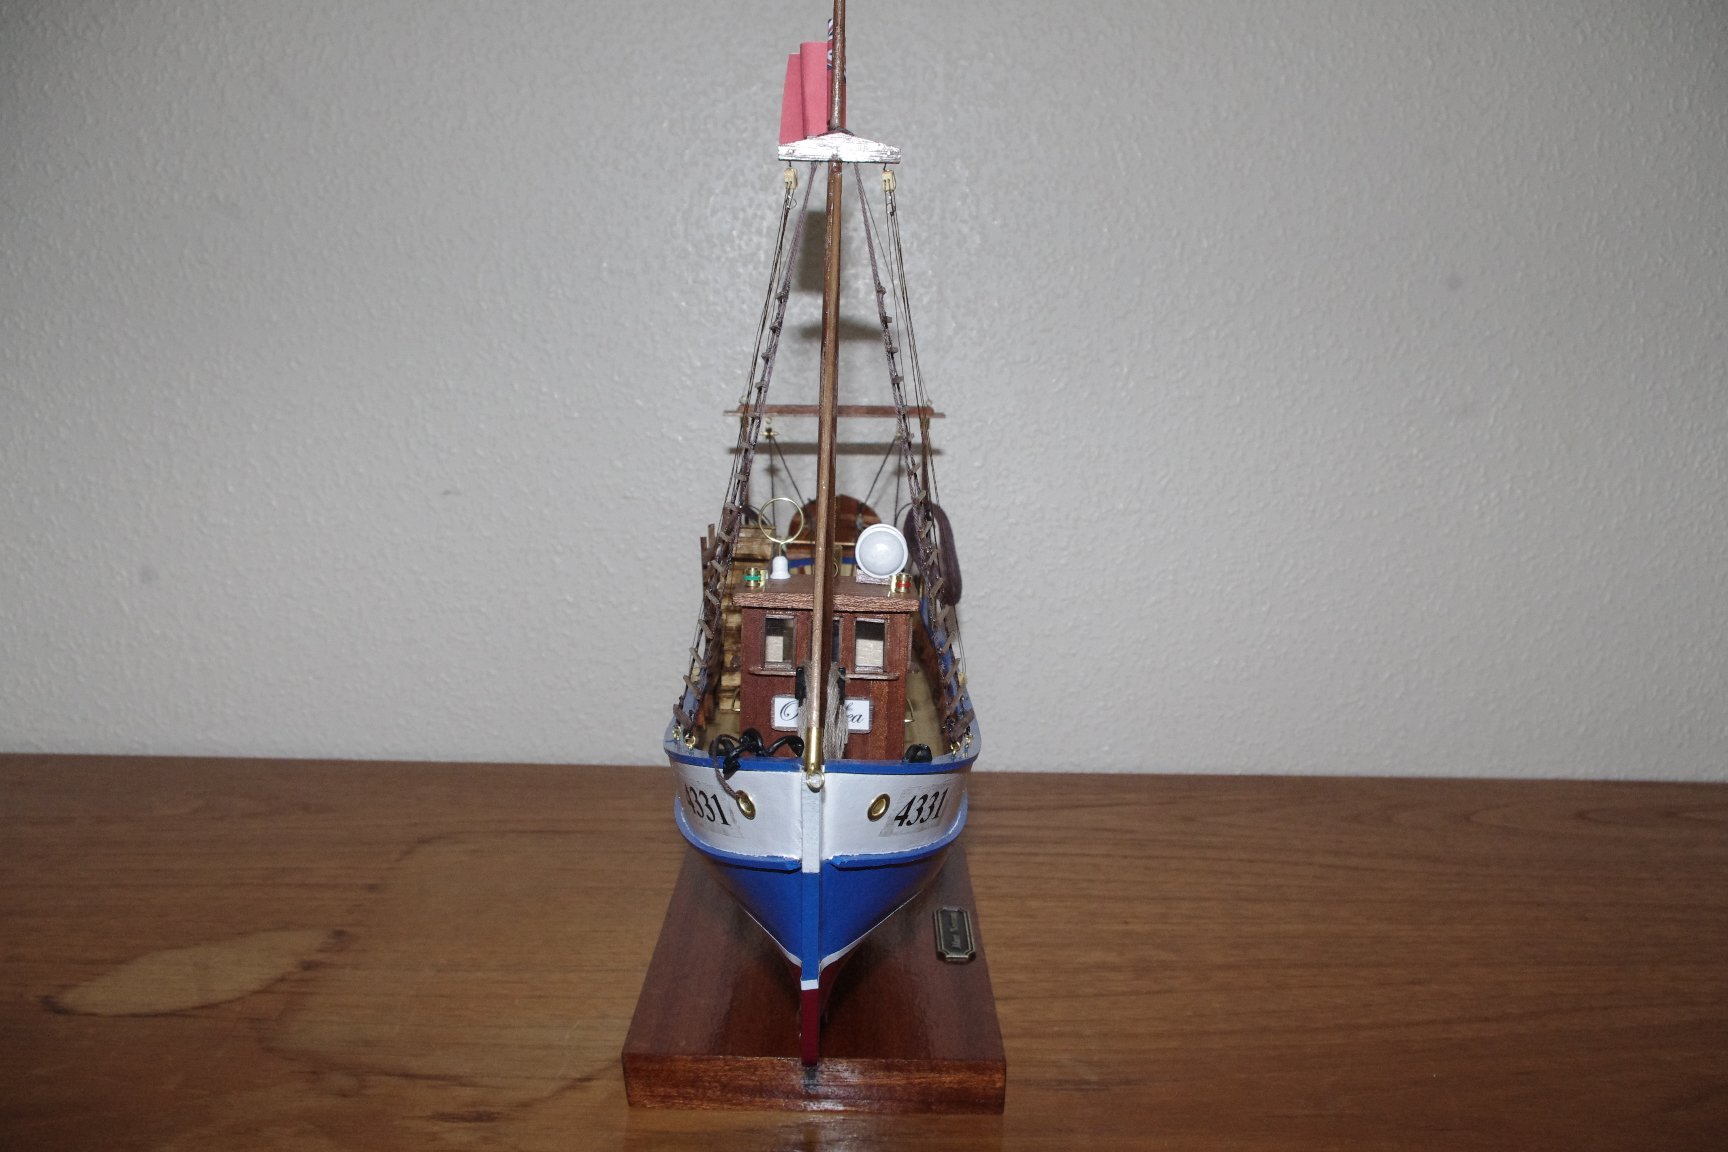
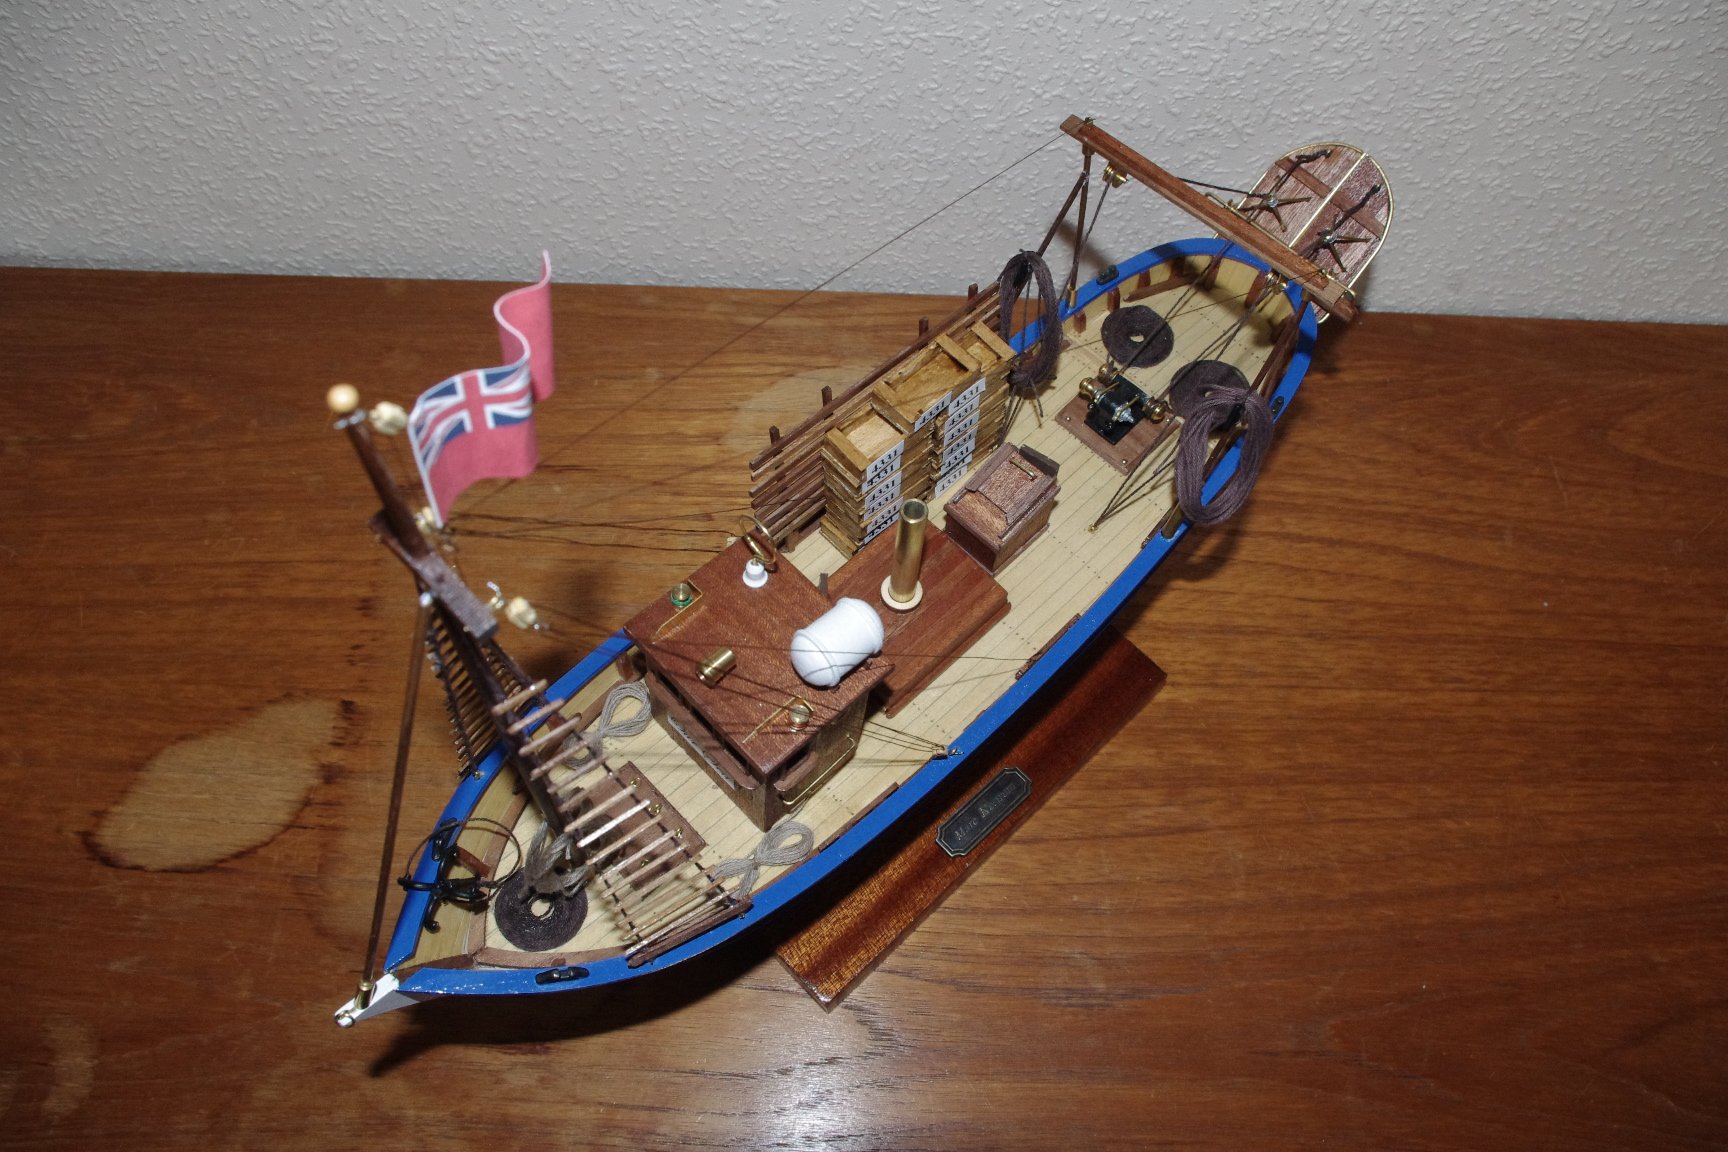
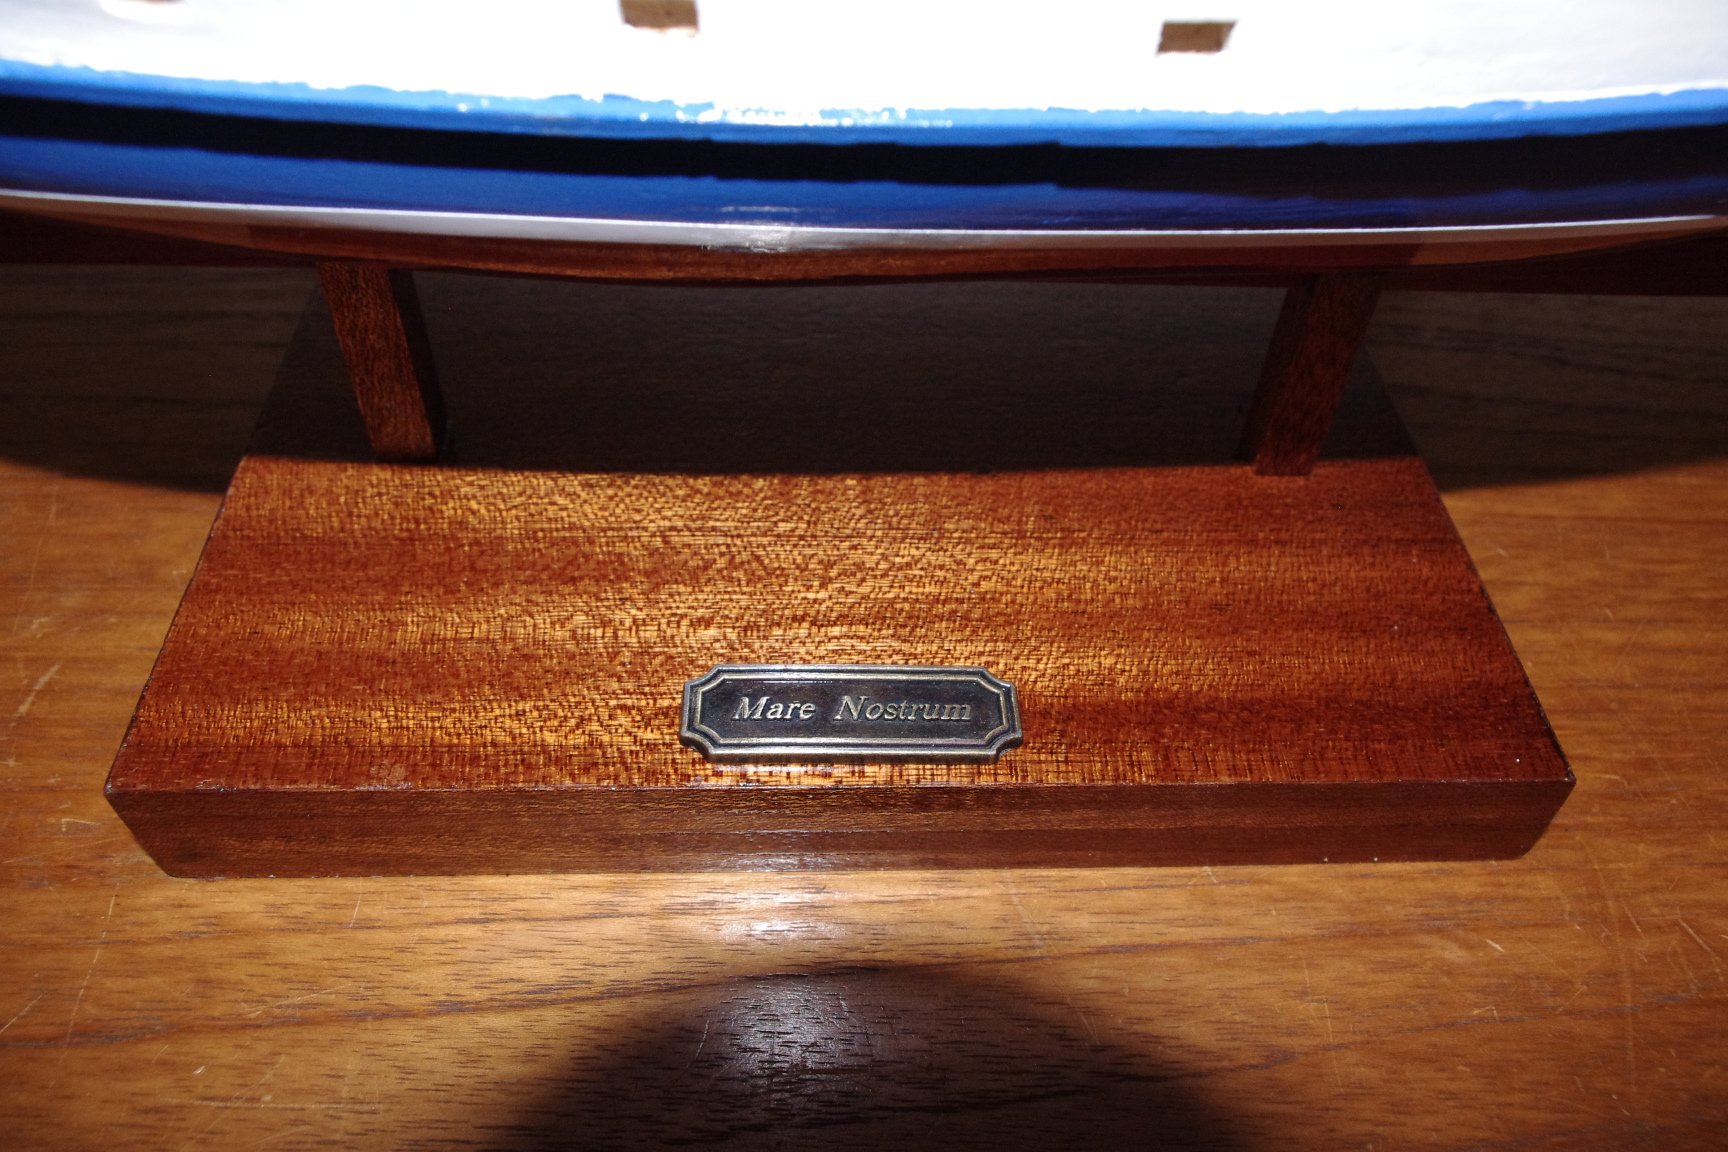
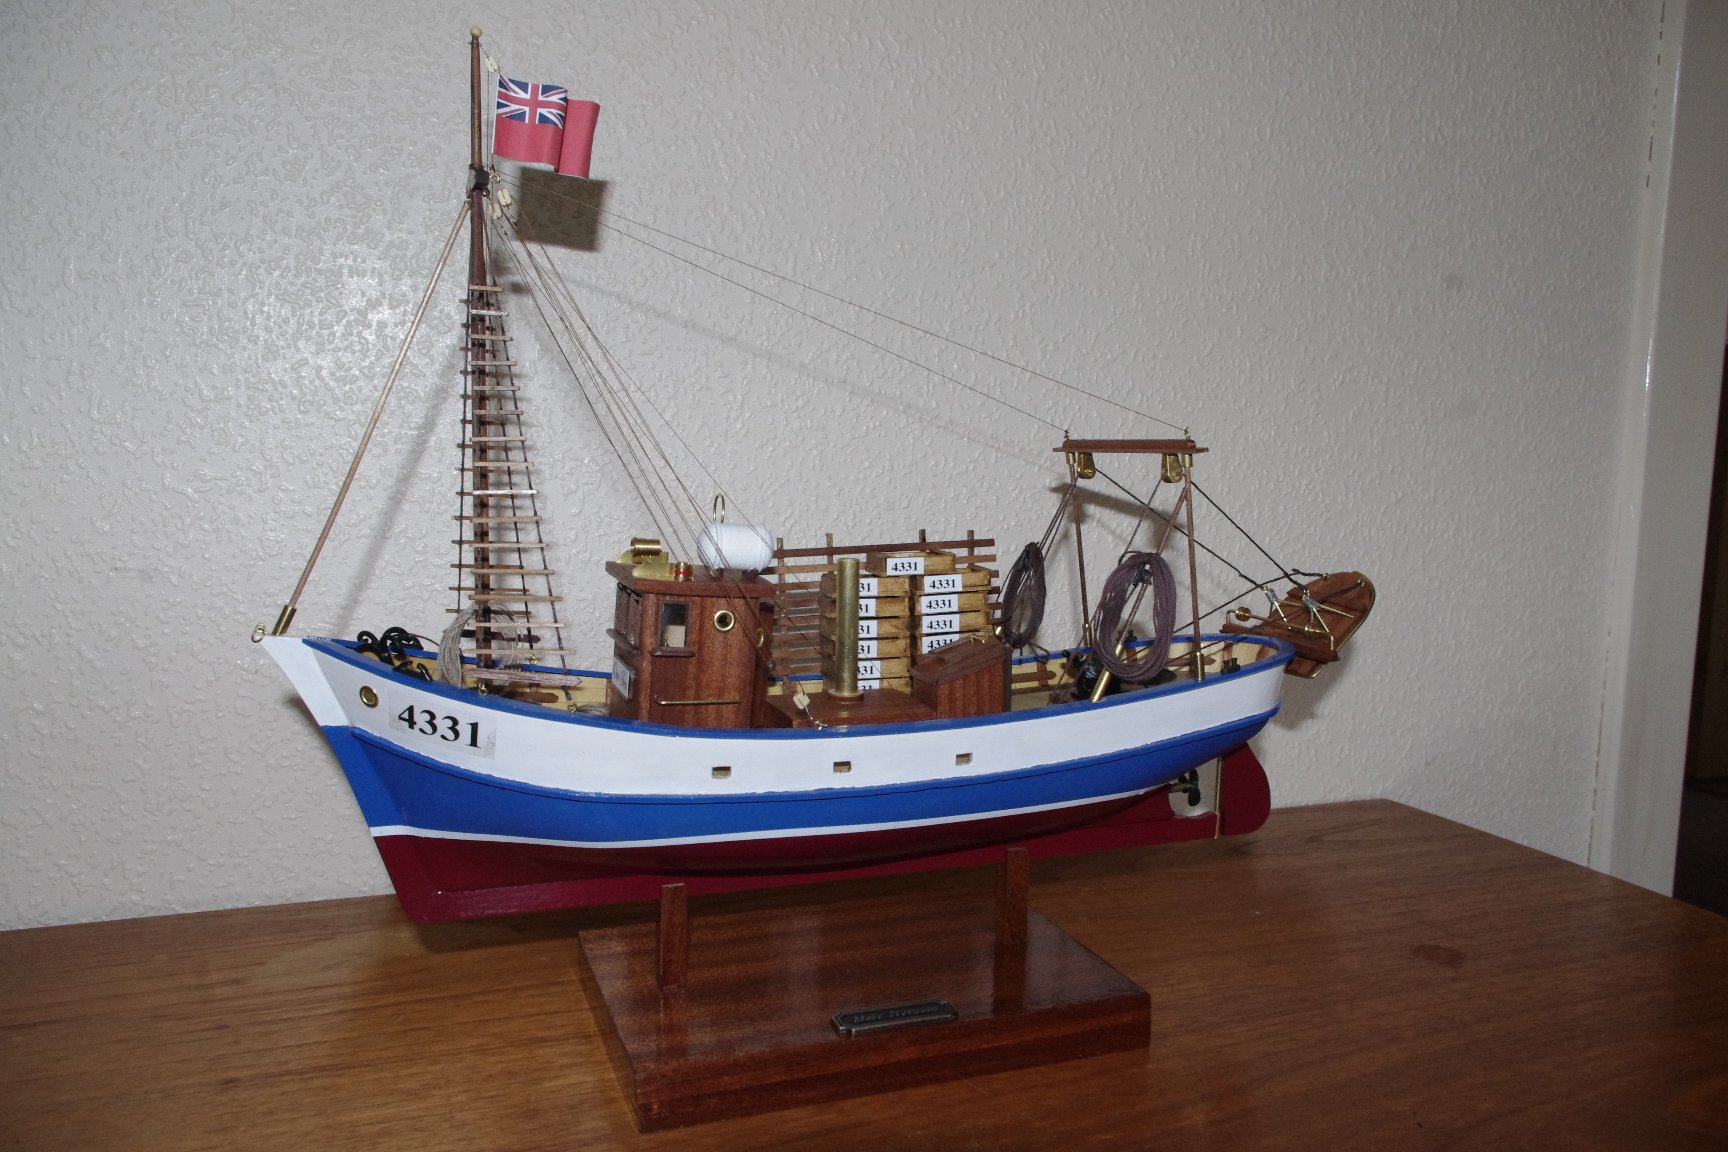
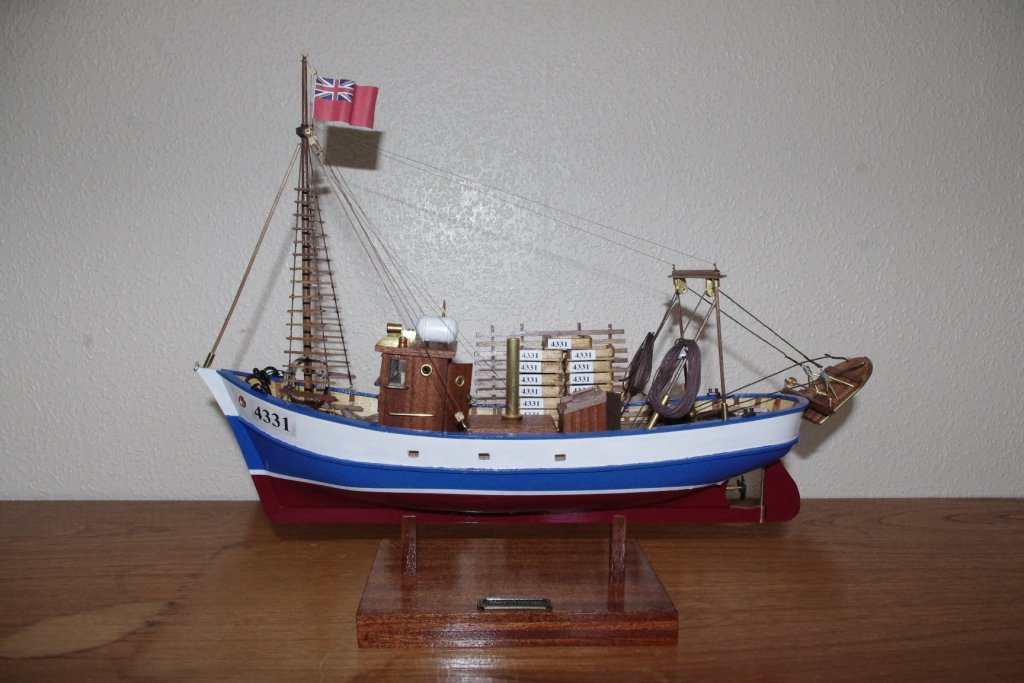
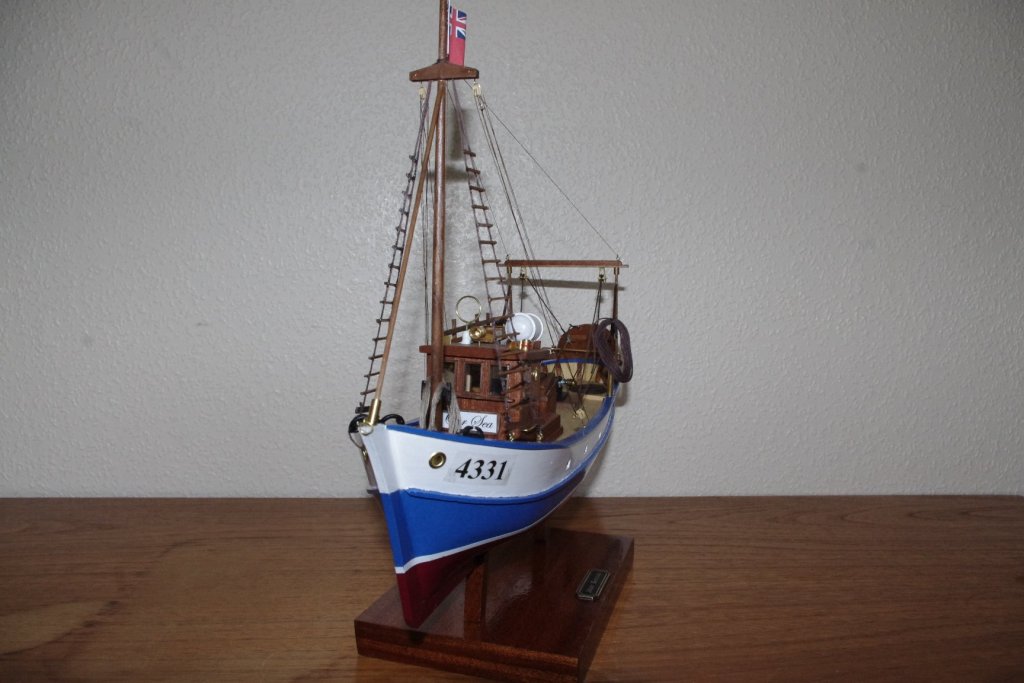
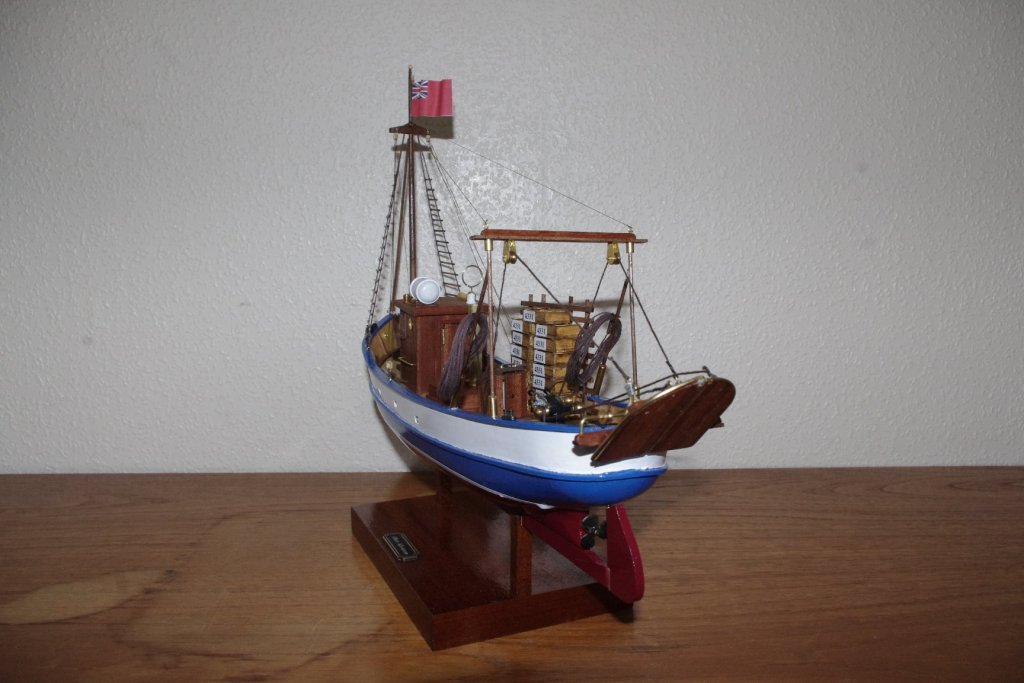
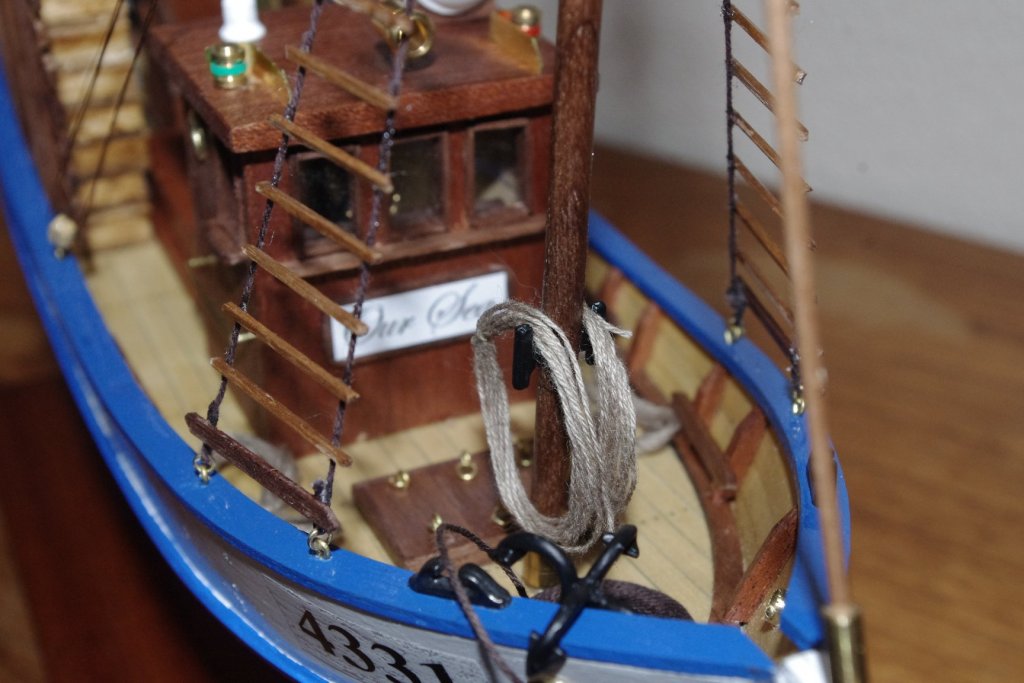
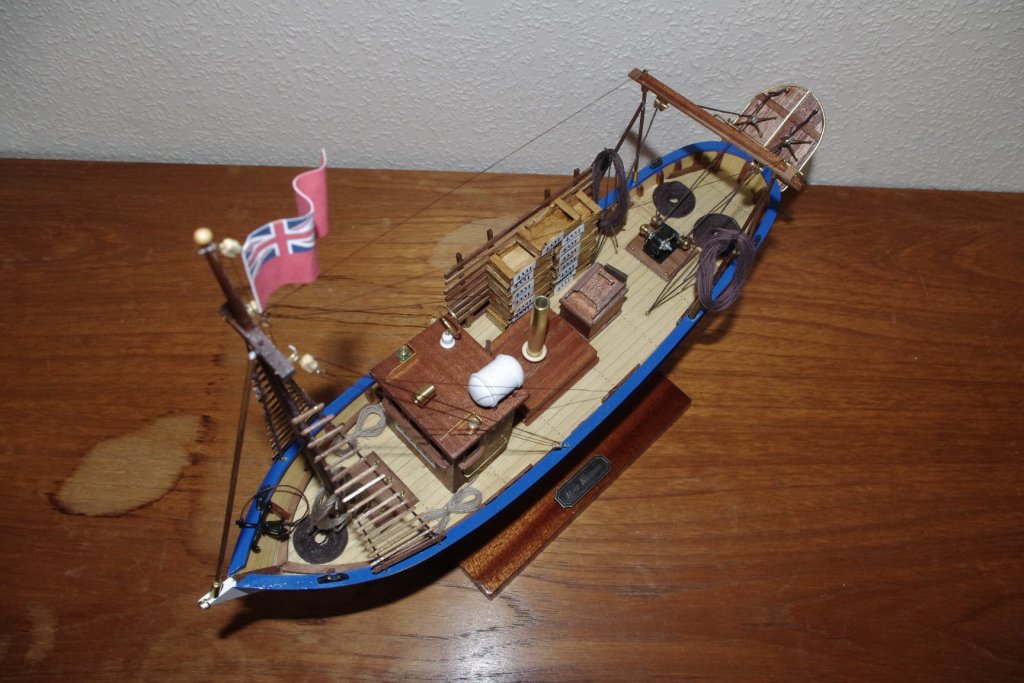
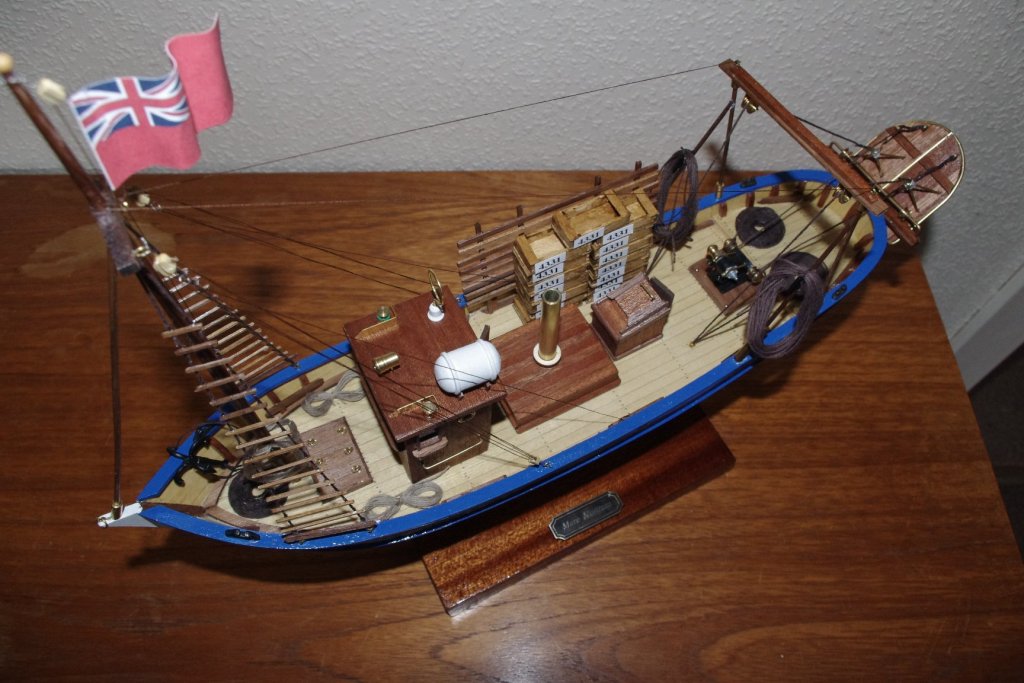
The paint had dried so it was time to put on all the bits and pieces and now she is finished. I am quite pleased with the end result and I am glad that although I painted the hull I left the superstructure wooden. I made a couple of concessions. Firstly the name on the boat is 'Our Sea' which is the translation of 'Mare Nostrum' from the Latin and the second was to commandeer the vessel and let her fly the Red Ensign. I hope you like her.


-
I assume from your note that you have tried it in the bath !! She looks brilliant, well done indeed Sir !
- 296 replies
-
- 2
-
-
- chaperon
- model shipways
- (and 1 more)
-
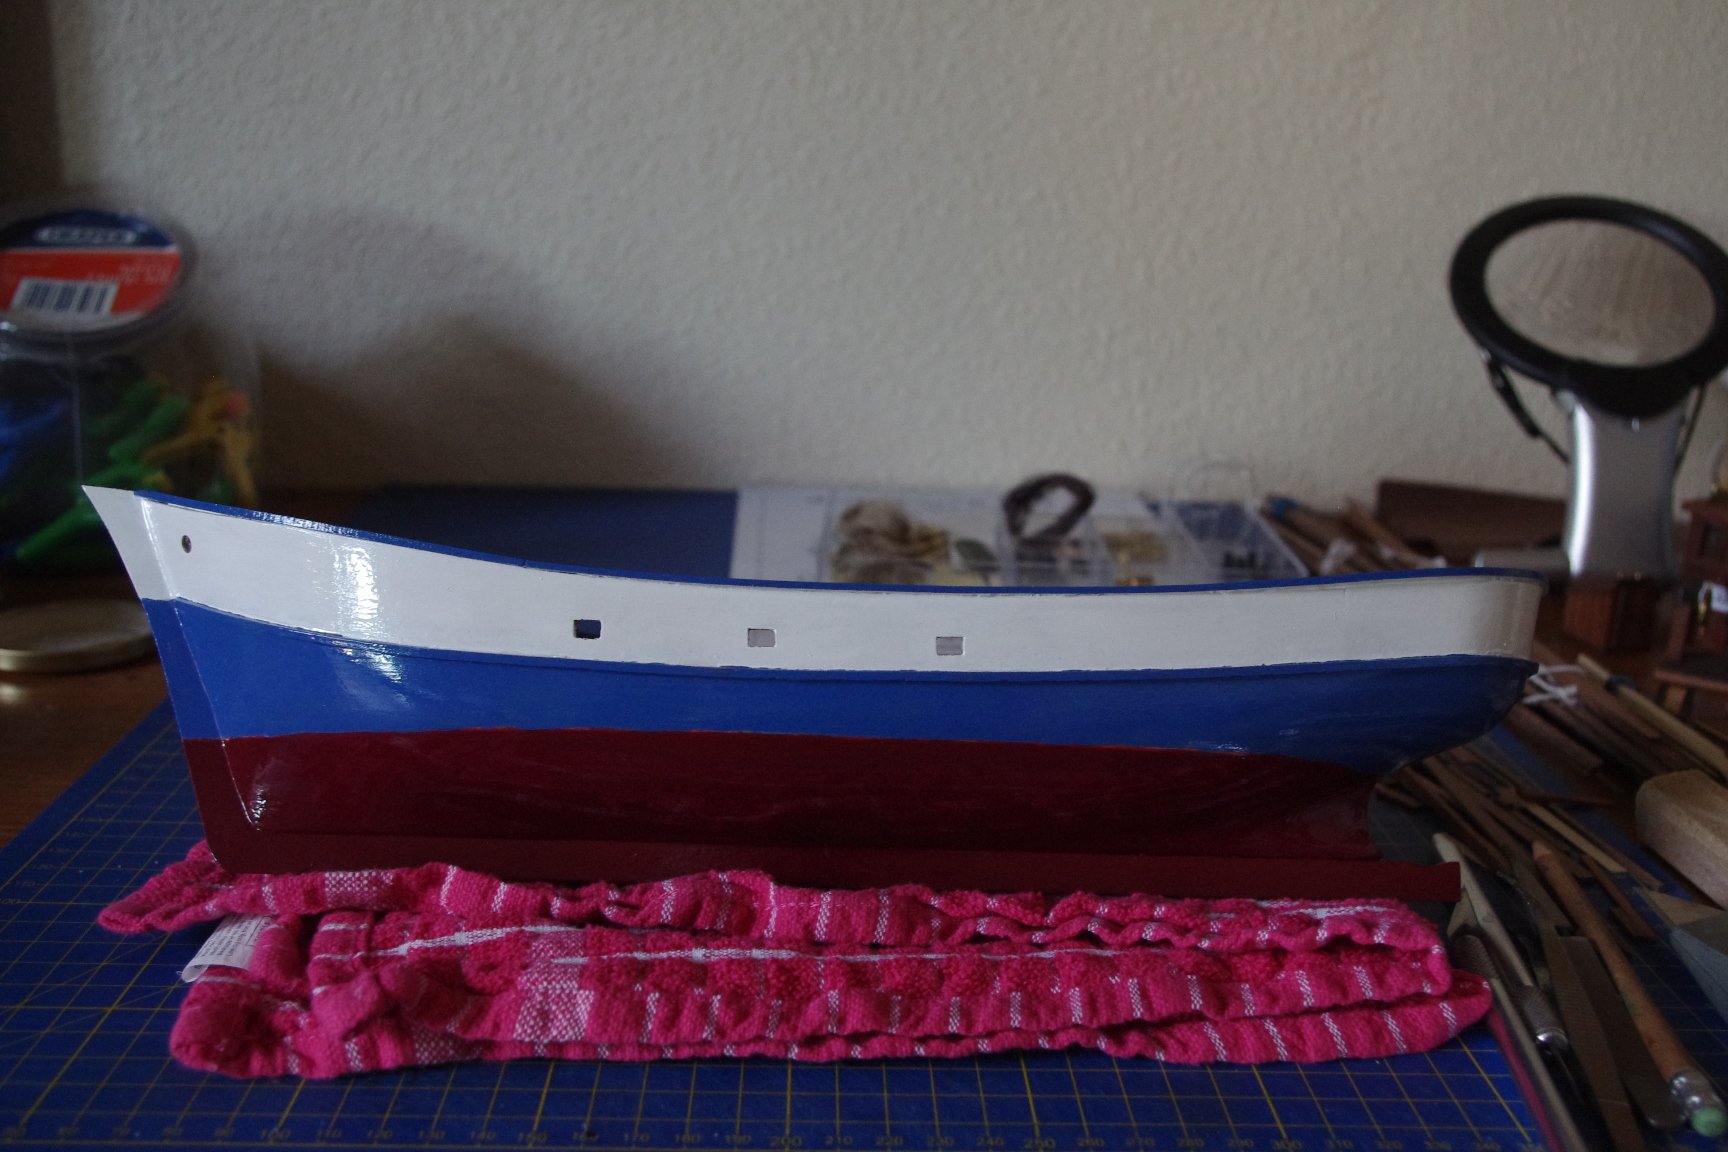
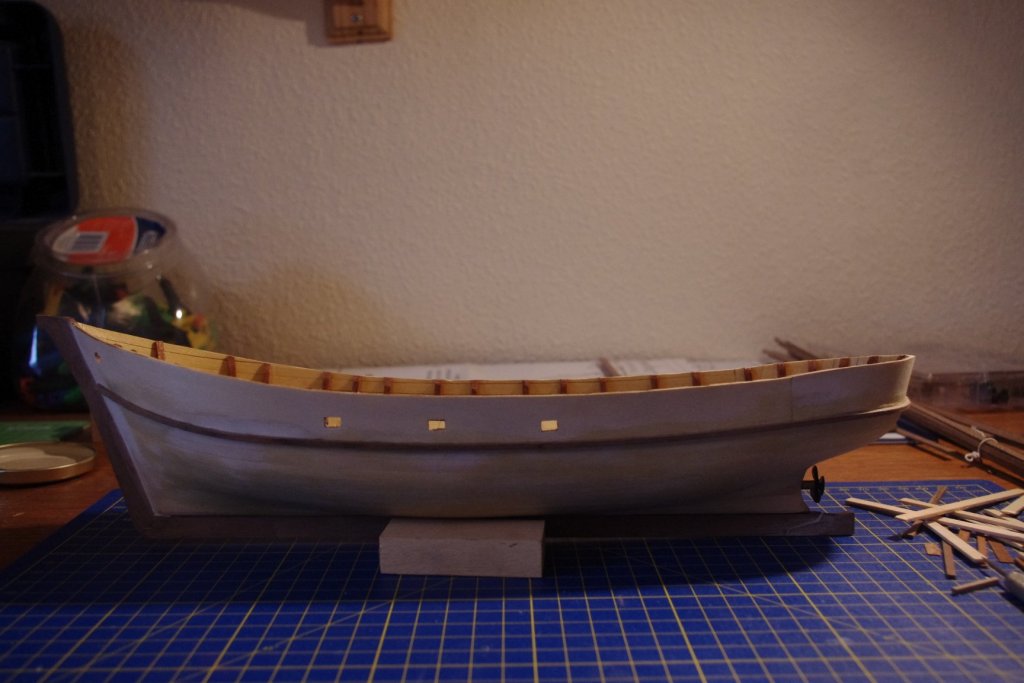
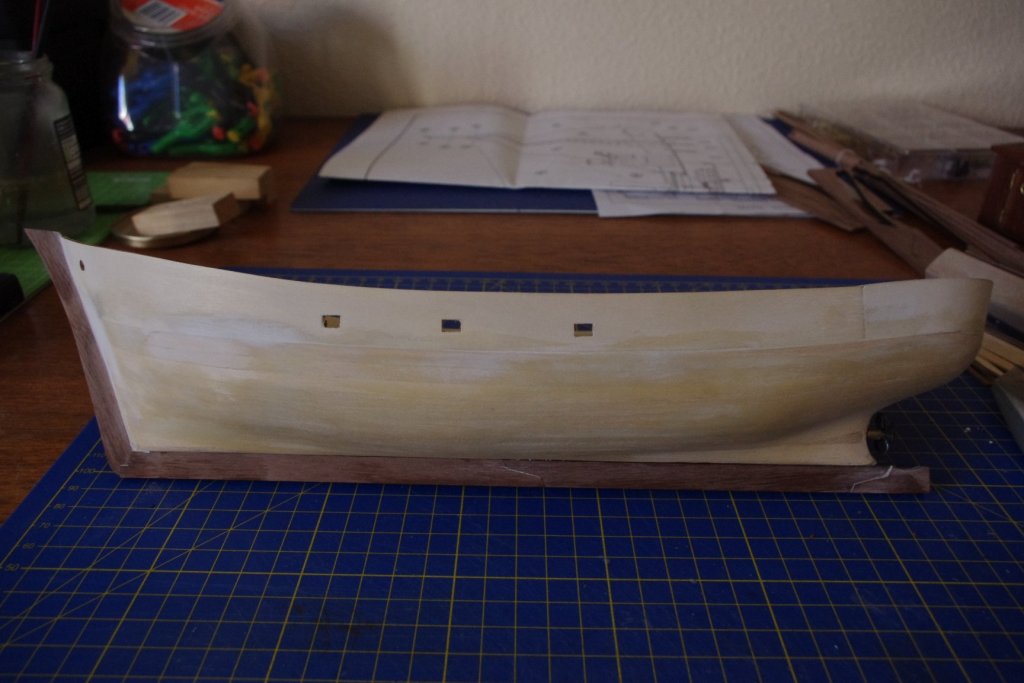
Pictures of the finished hull before and after painting. Just a white line to add between the red and the blue when it's dry and then I can put all the little bits and pieces on. I am finding it very hard not to fiddle with it before the paint is properly dry but I must resist !!


-
Oh yes, much, much better and I just love the lifeboats. Looking at the state of your Chaperon I can see them being needed!!!
- 296 replies
-
- 4
-
-
- chaperon
- model shipways
- (and 1 more)
-
I know the trials and tribulations that you have gone through with this build. For what it is worth I think you have done magnificently for a first build and you should be very proud of your labours. Well done Sir!!
- 265 replies
-
- 2
-
-
- finished
- artesania latina
- (and 1 more)
-
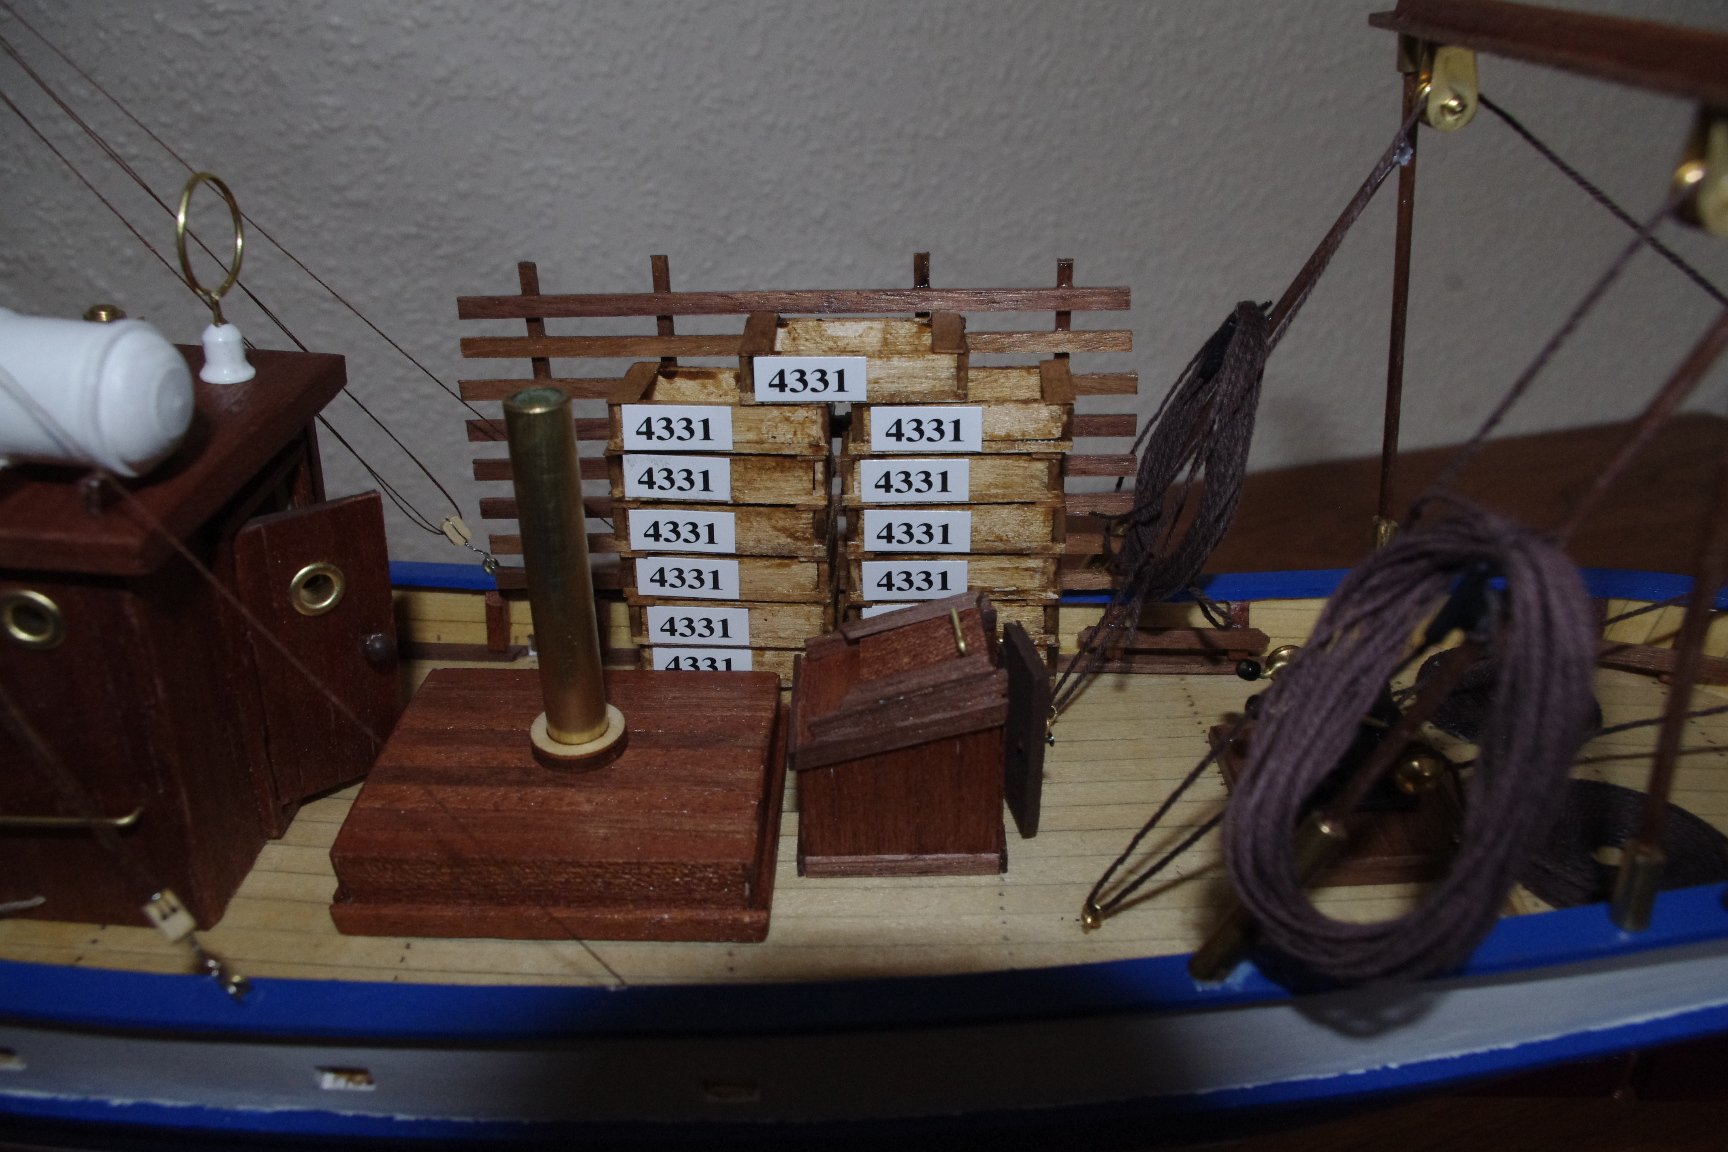
Oh goodness, it's so tidy!!! Stacks look much better from the distance shot.
- 296 replies
-
- 2
-
-
- chaperon
- model shipways
- (and 1 more)
-
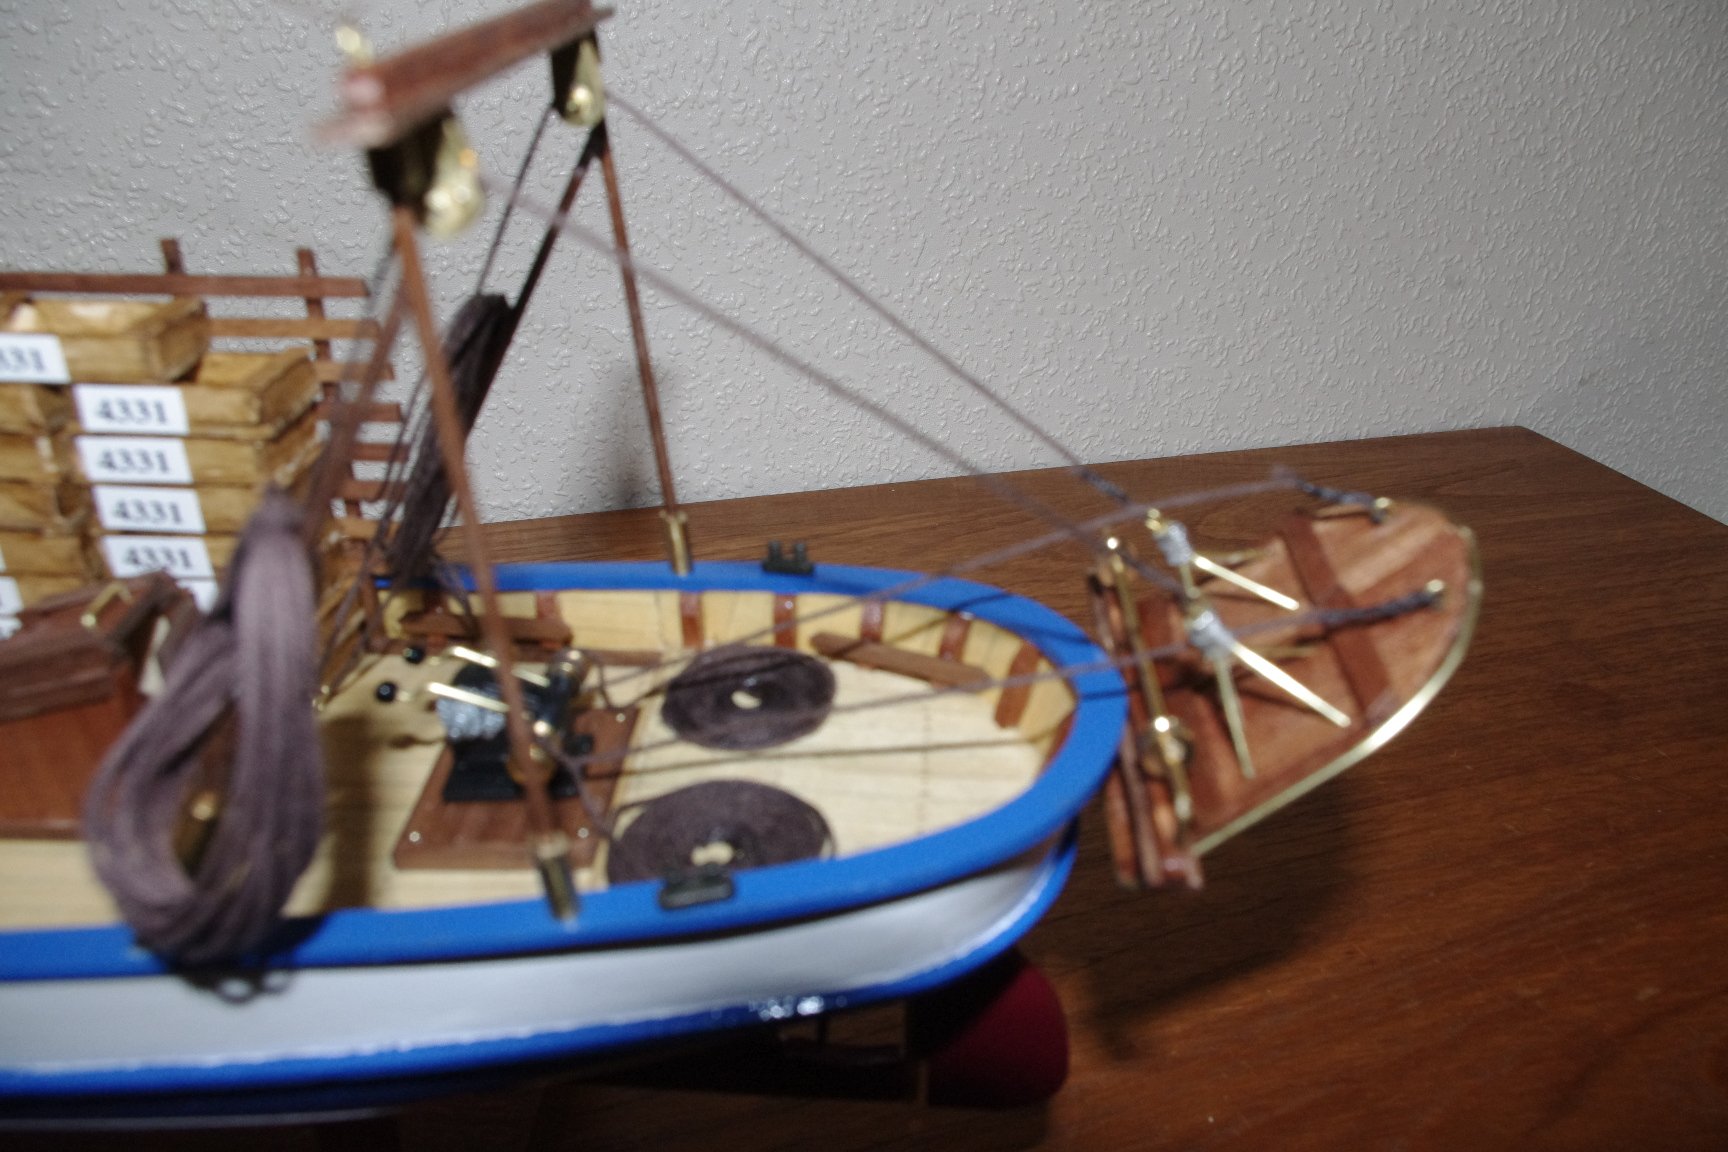
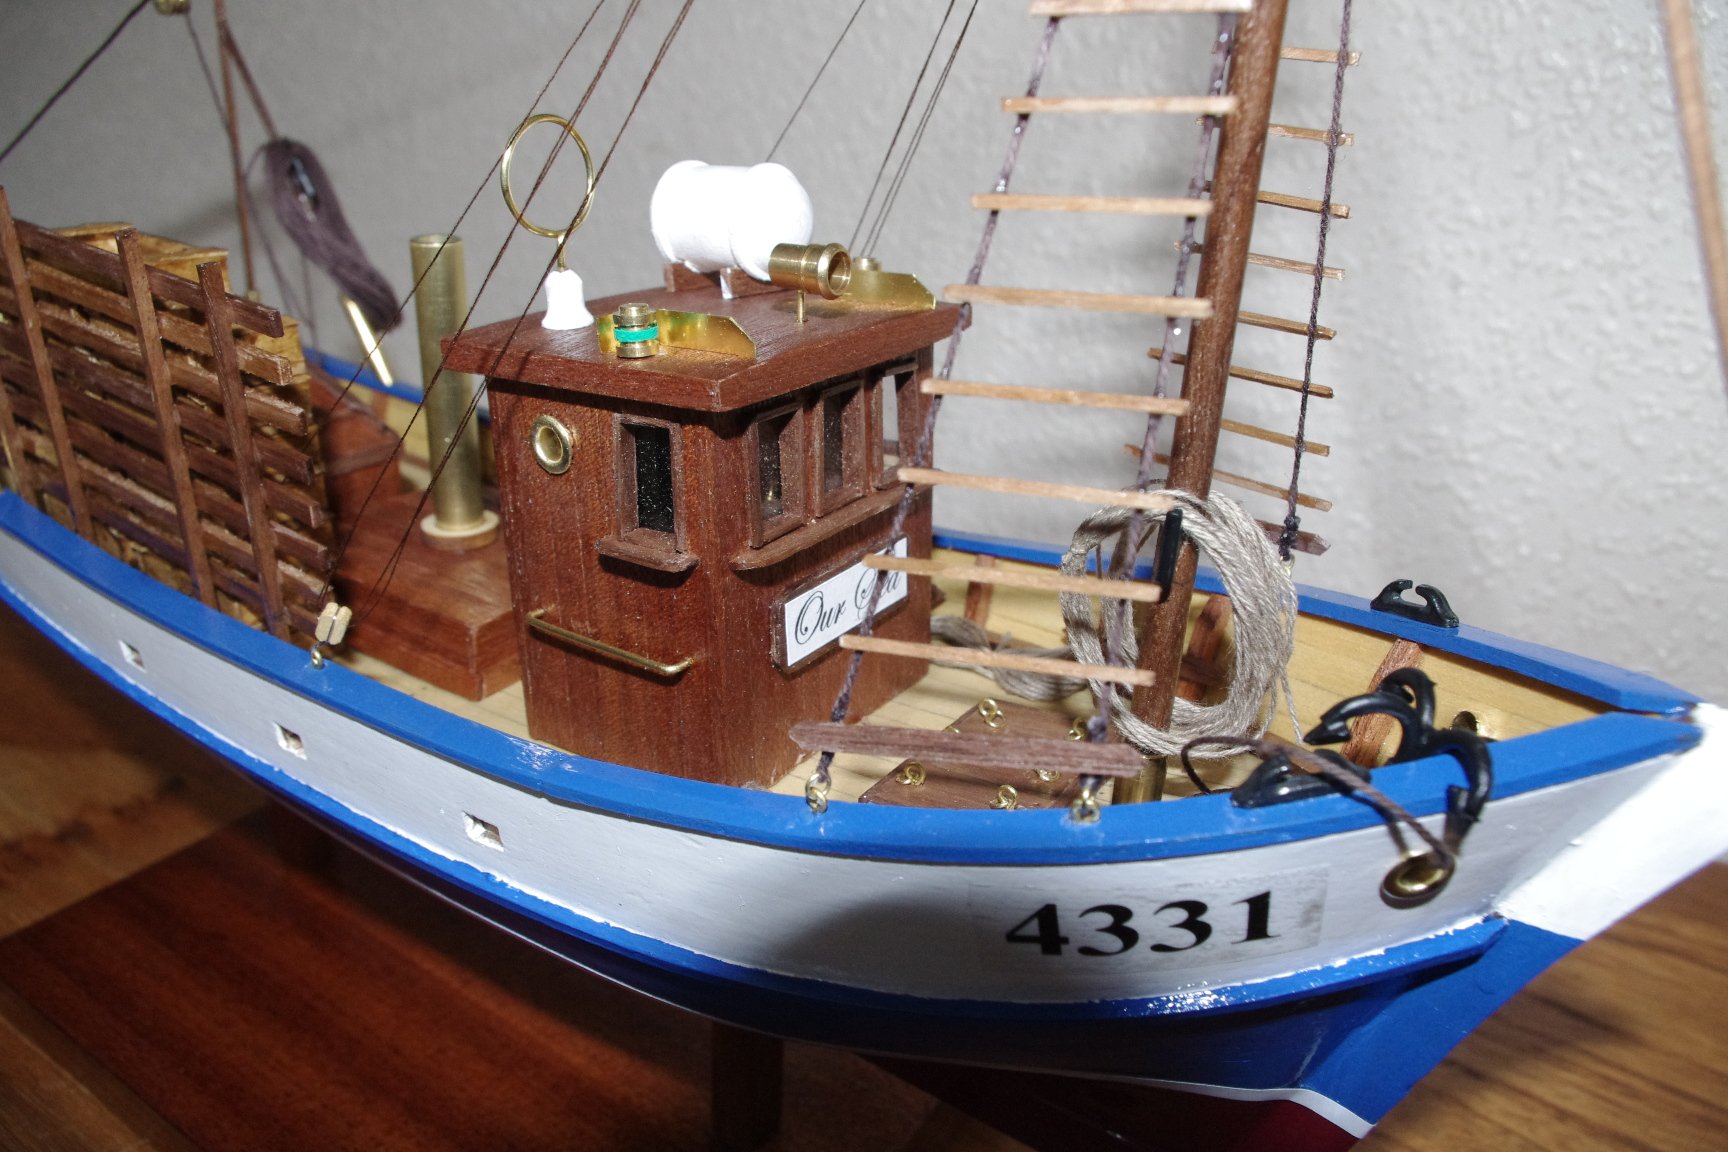
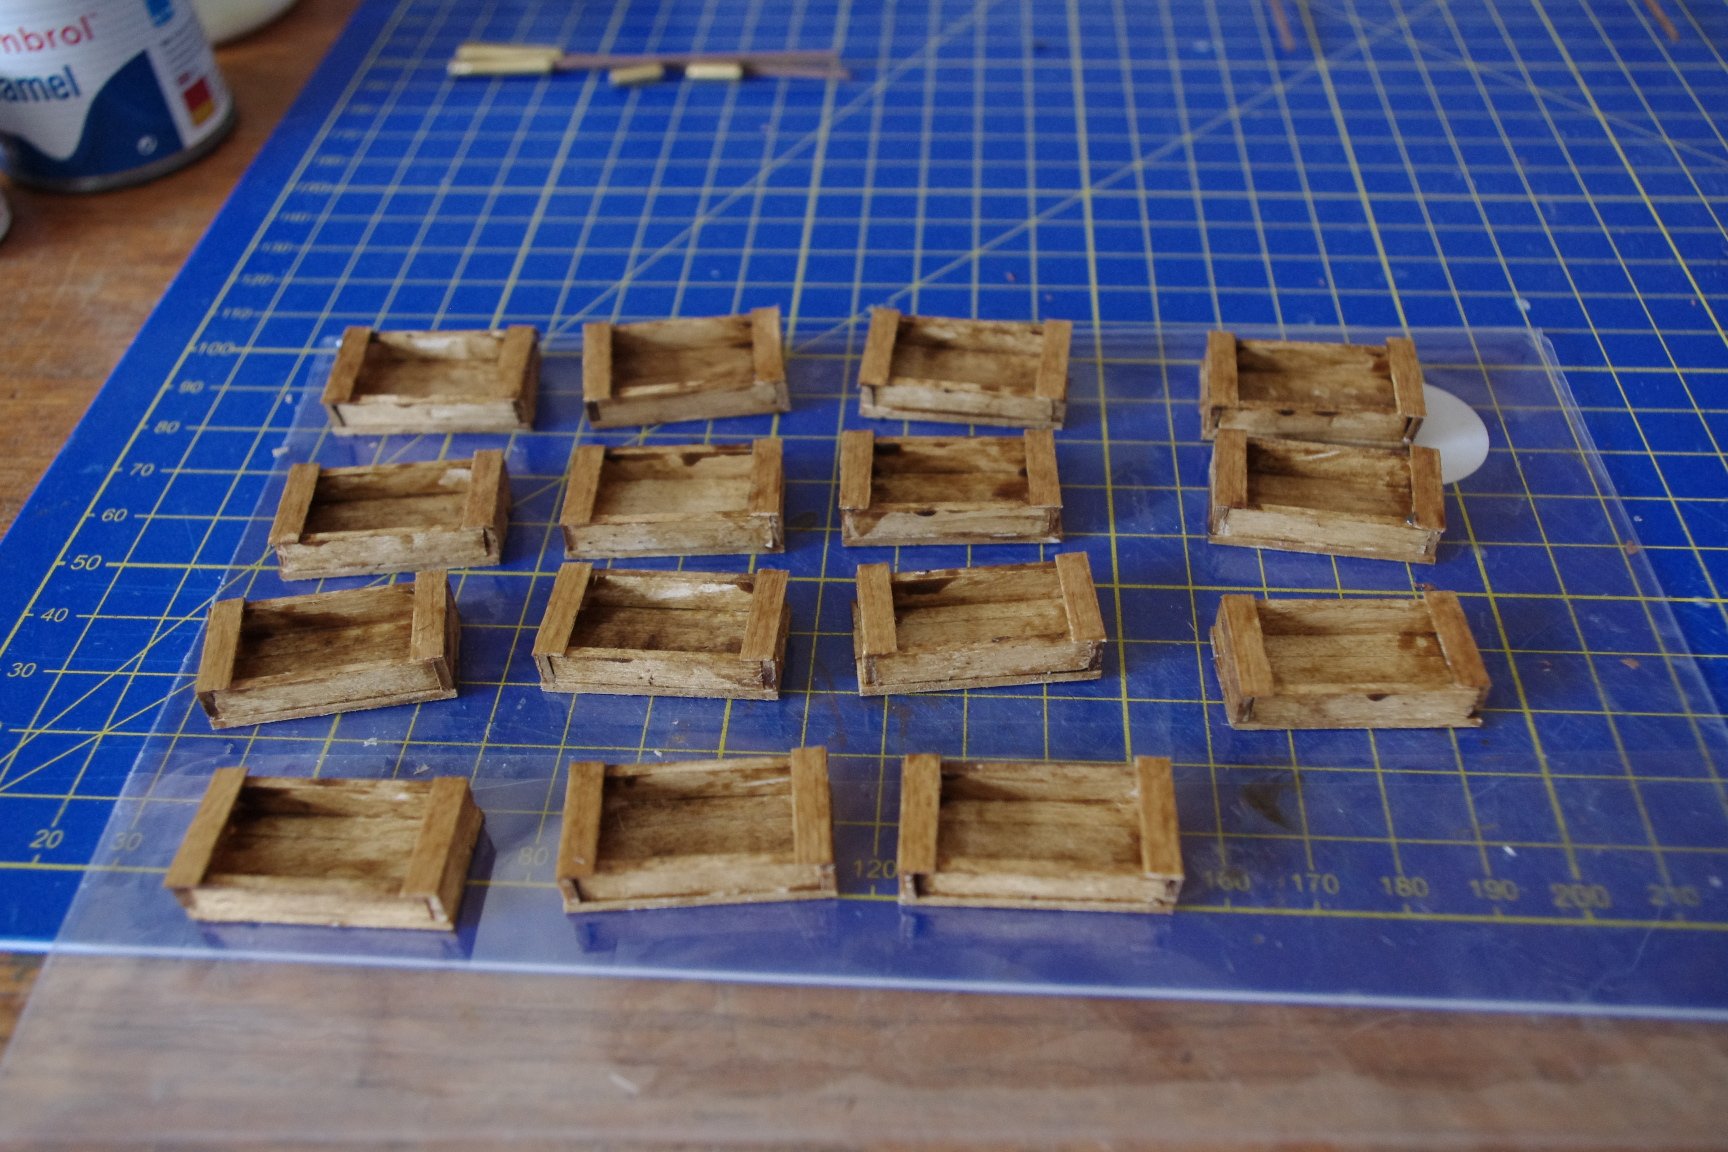
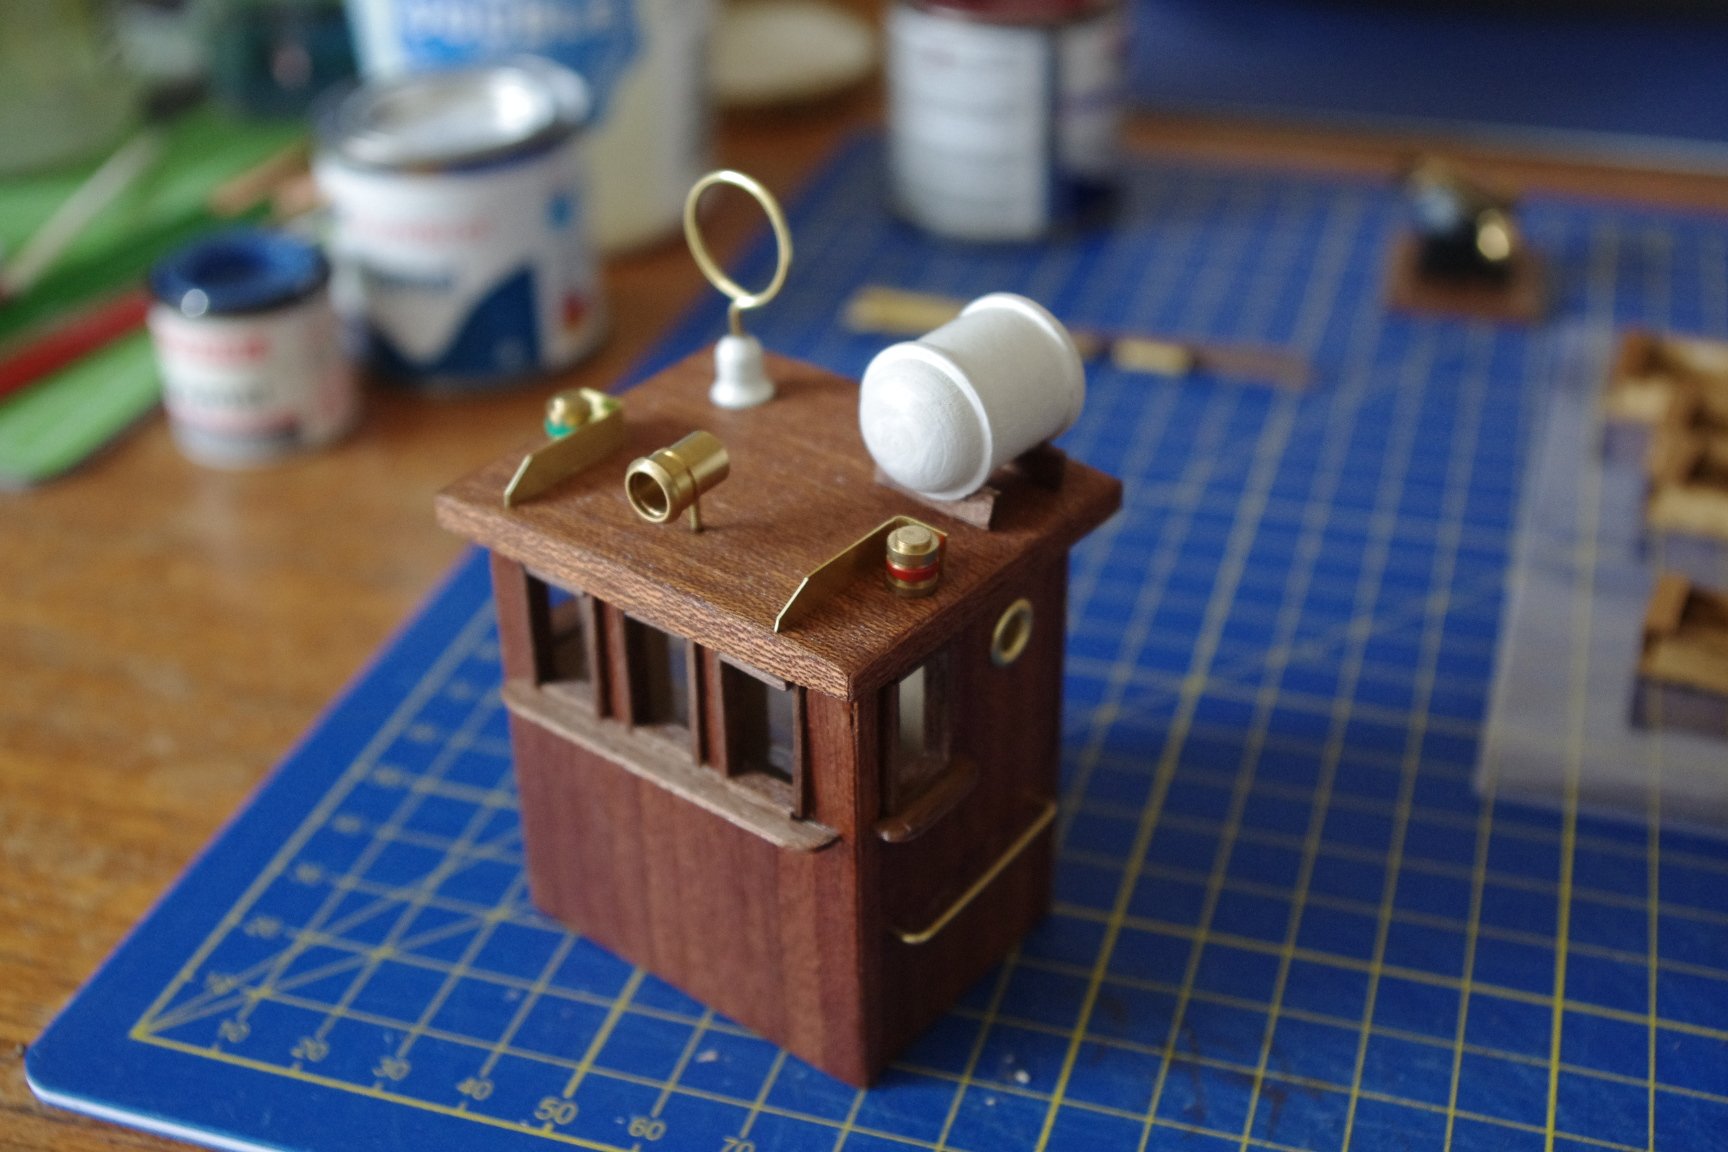
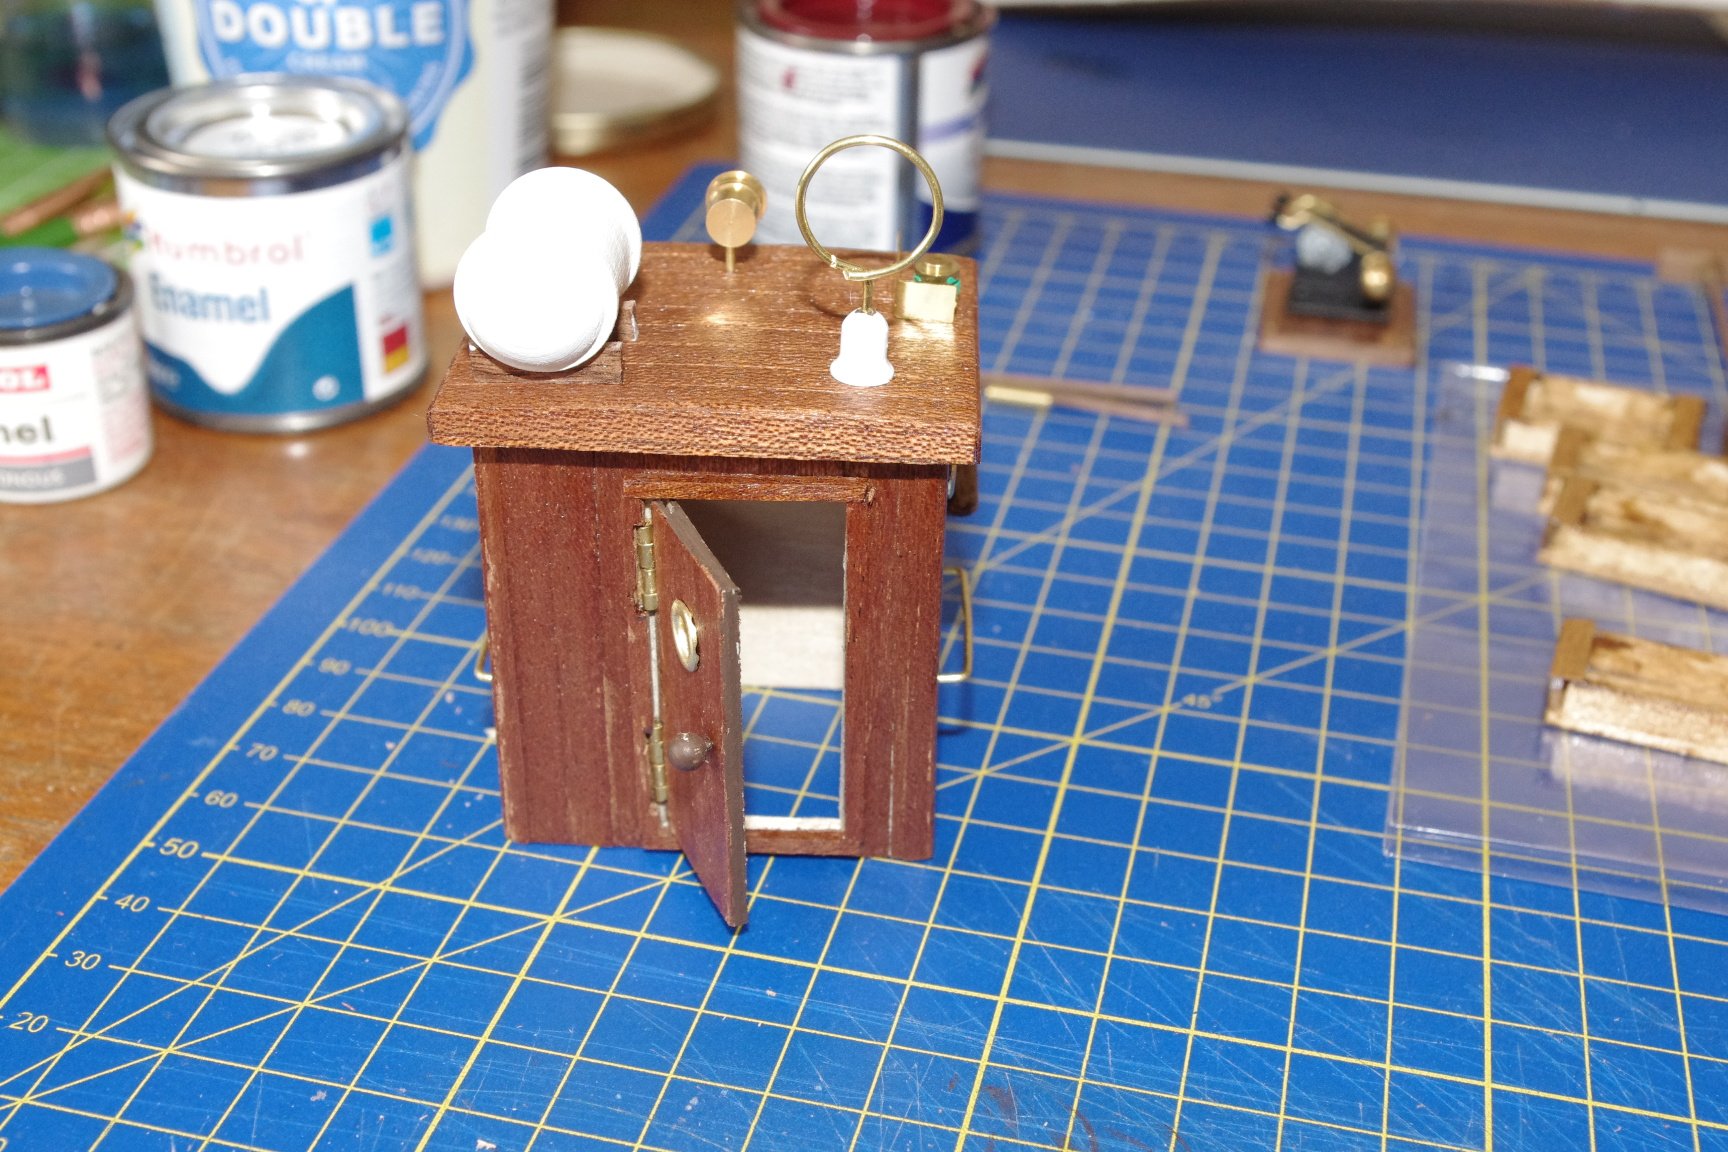
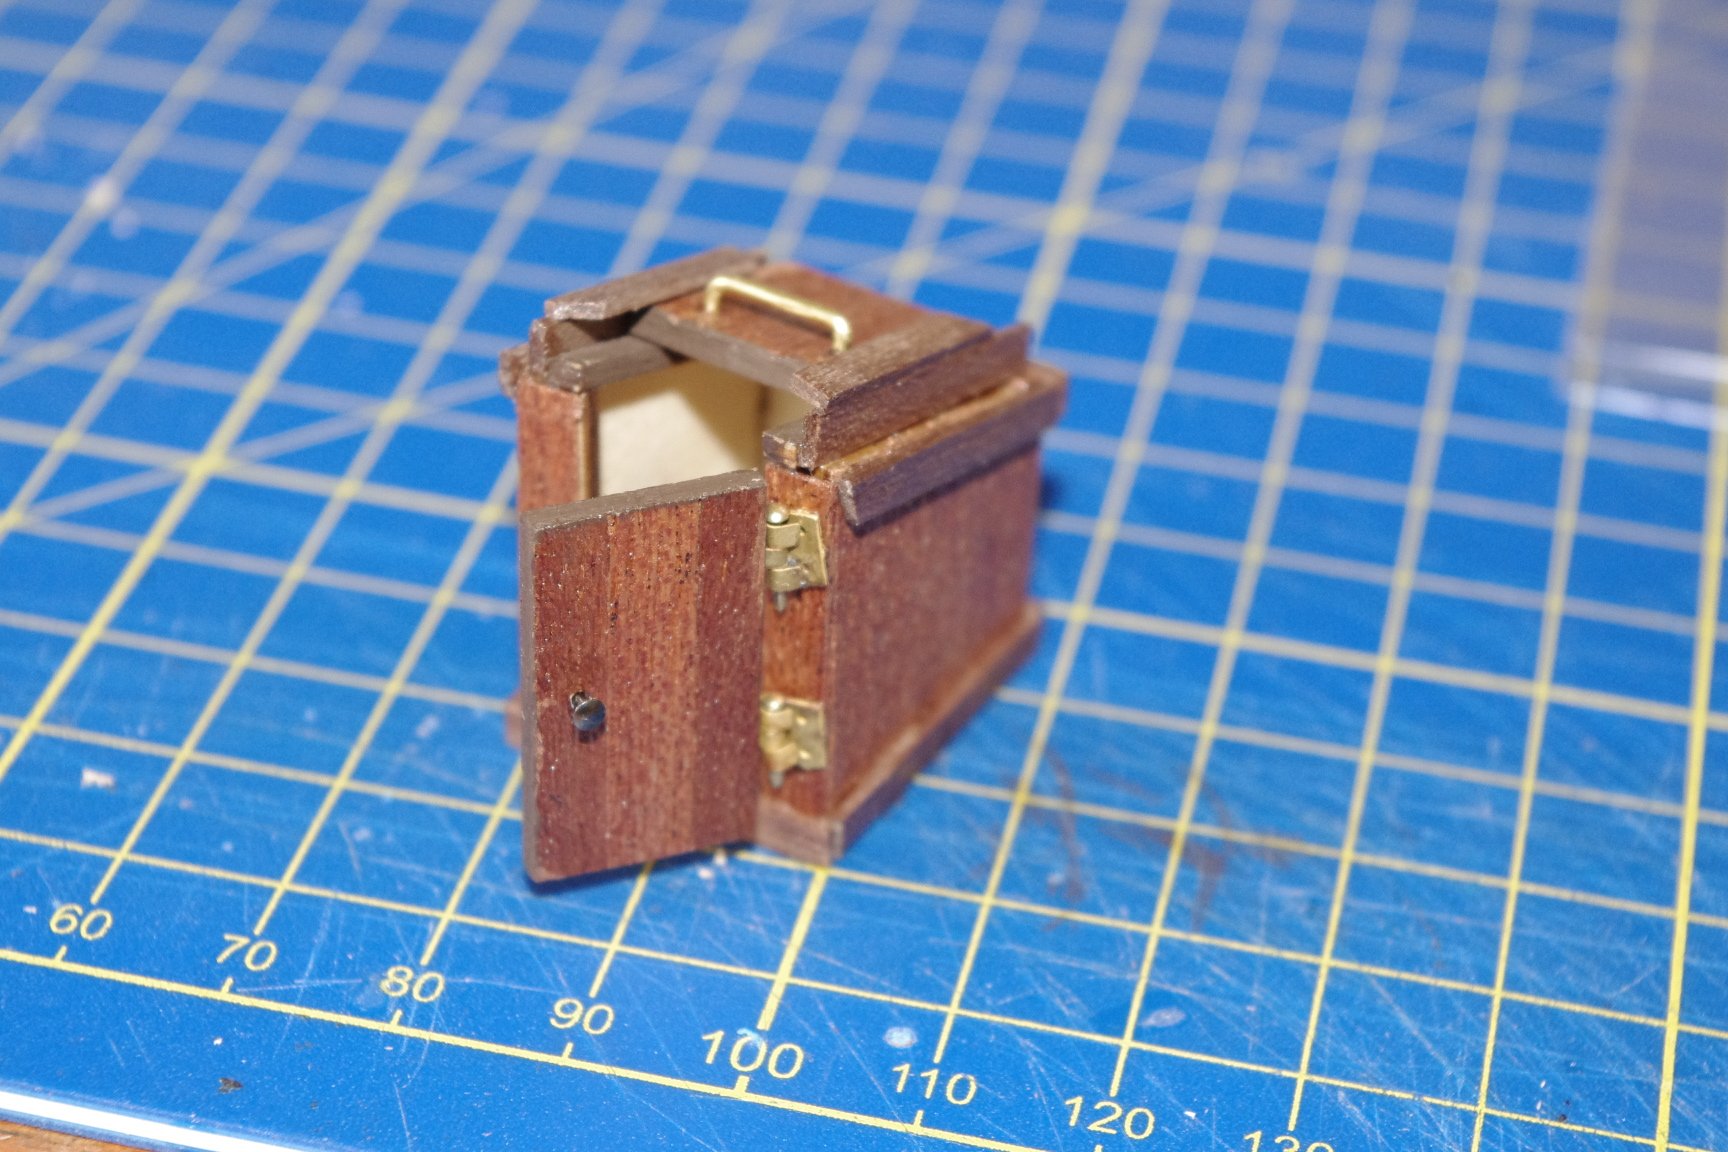
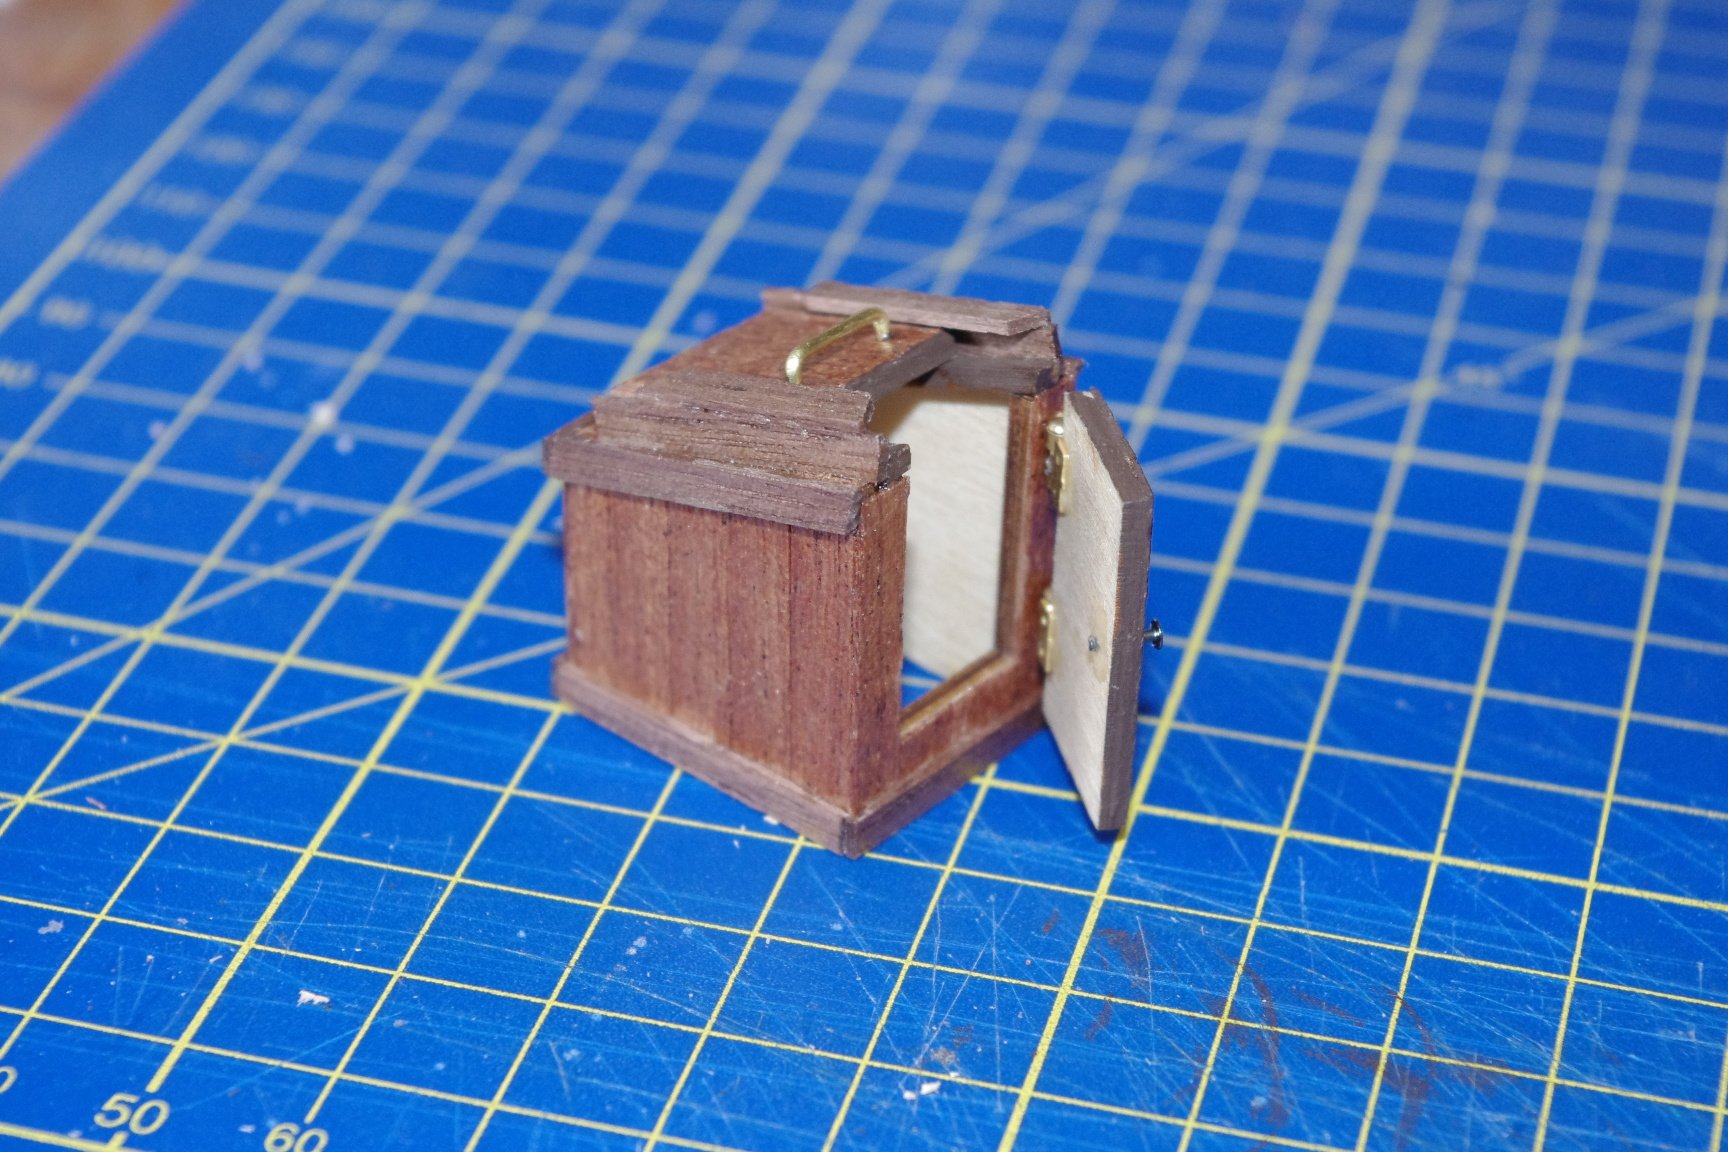
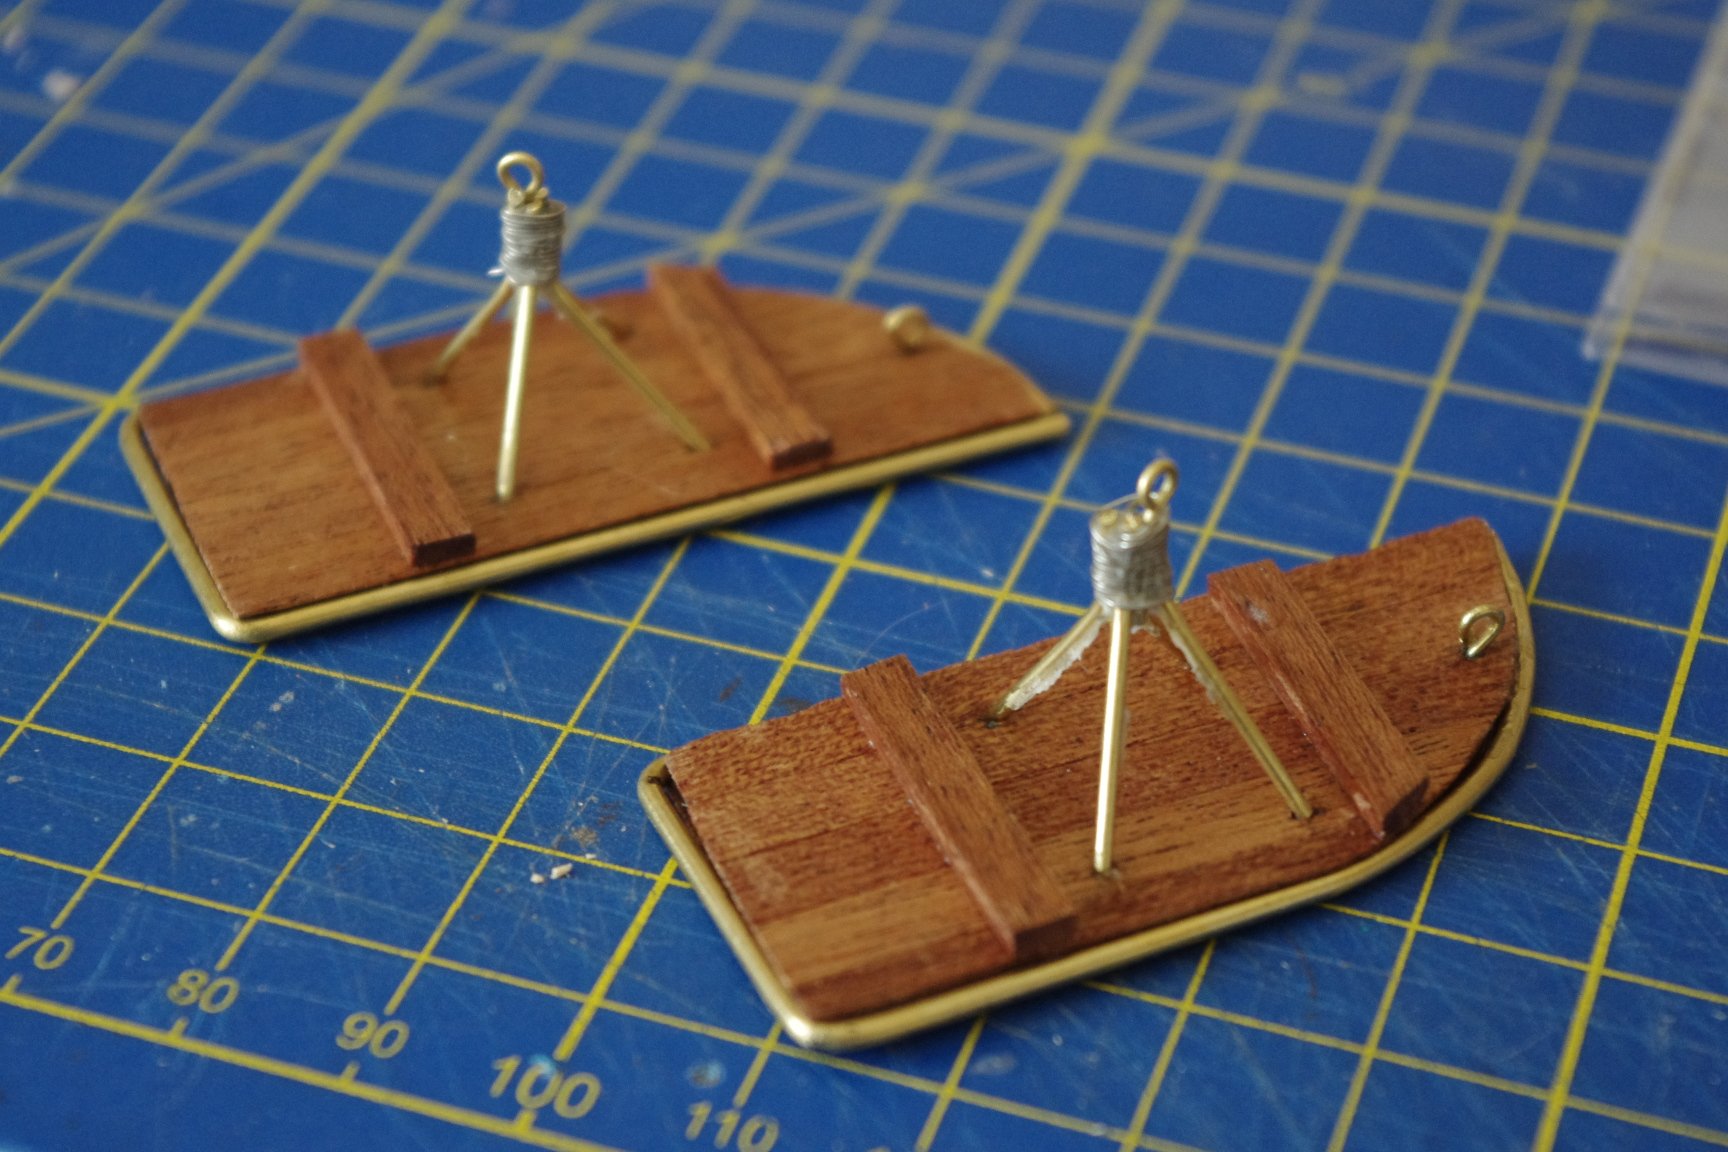
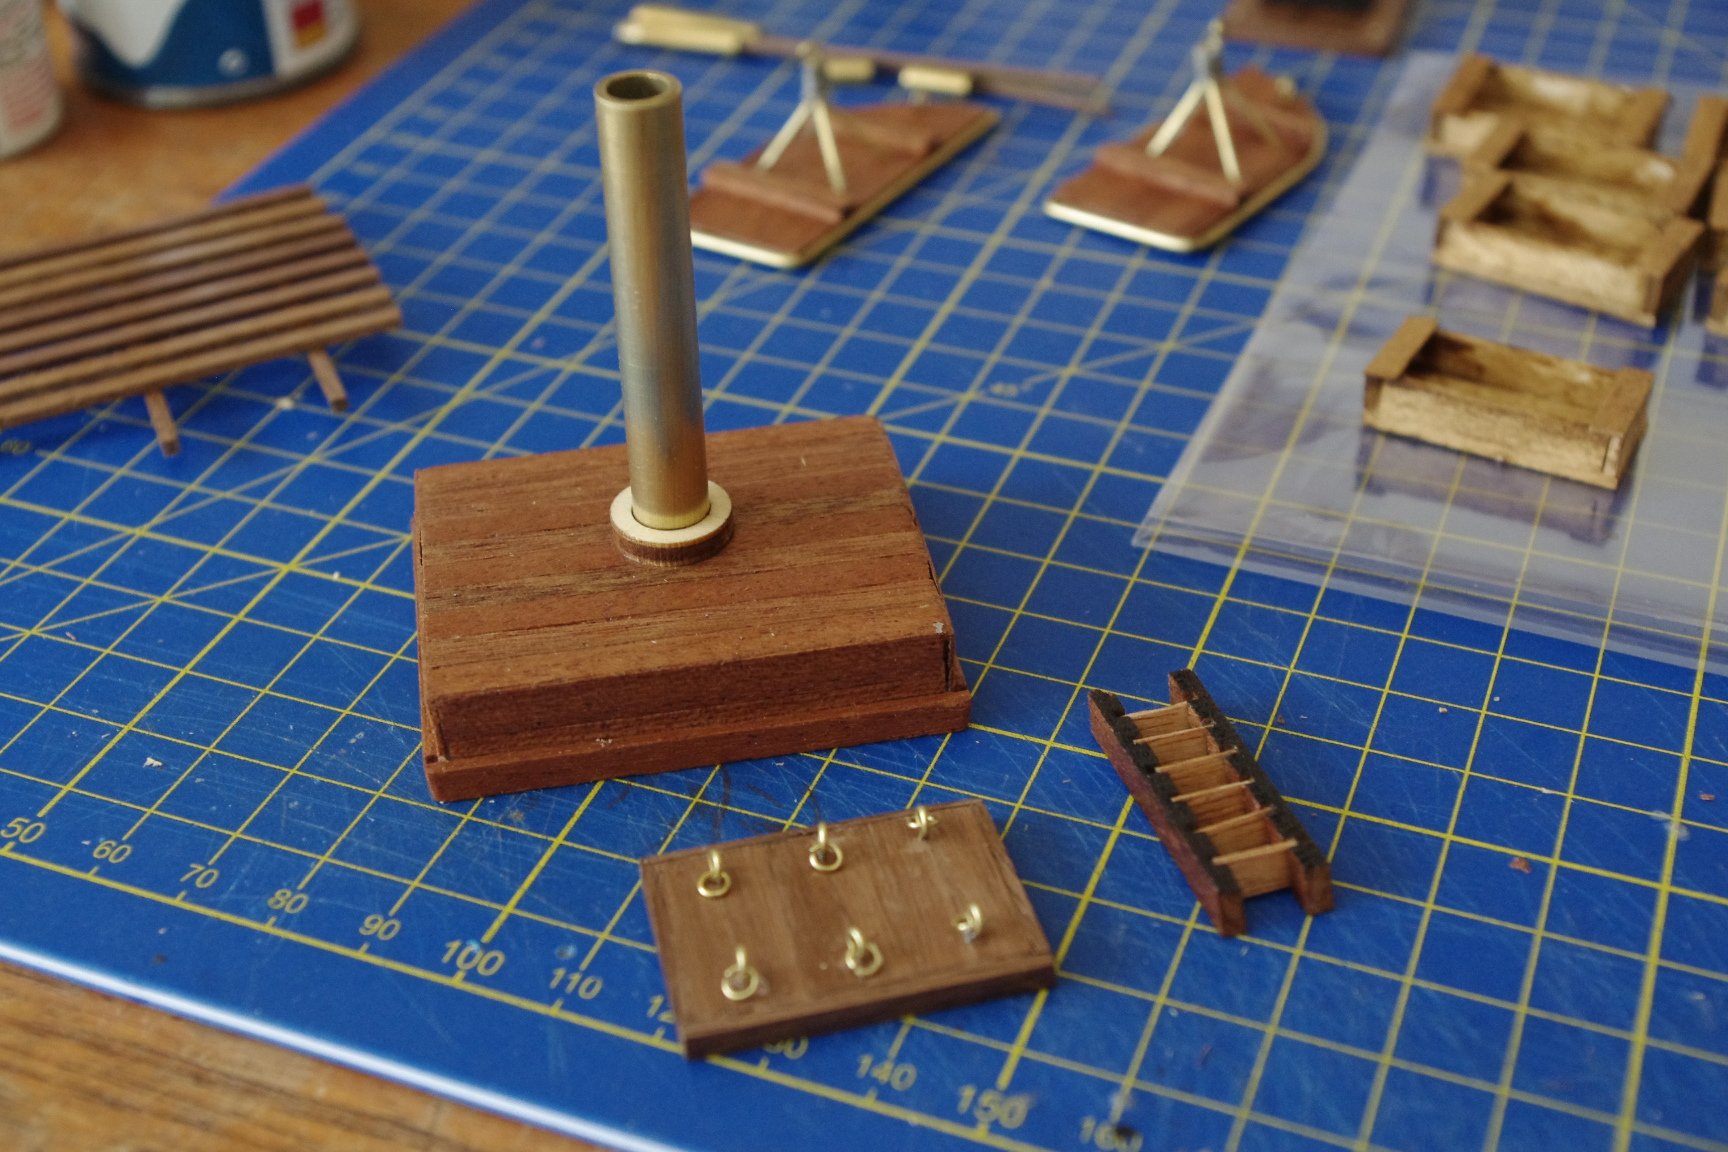
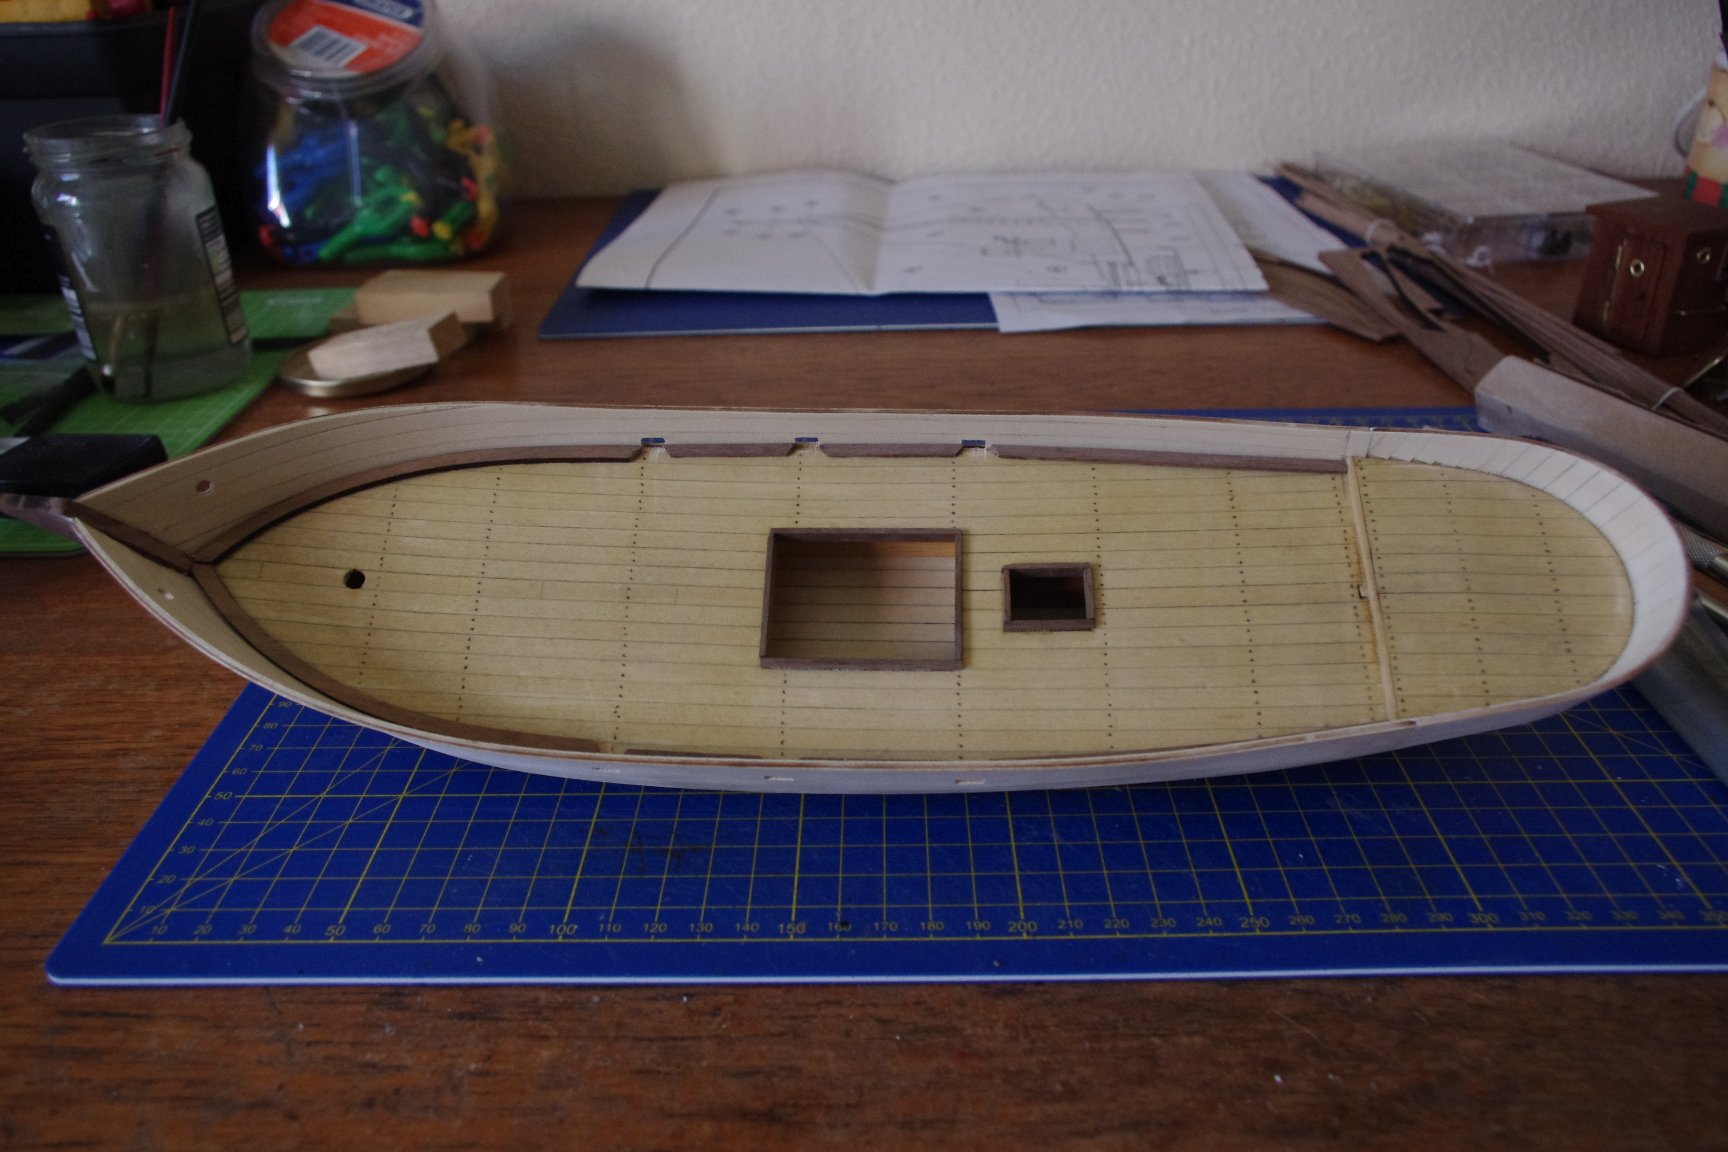
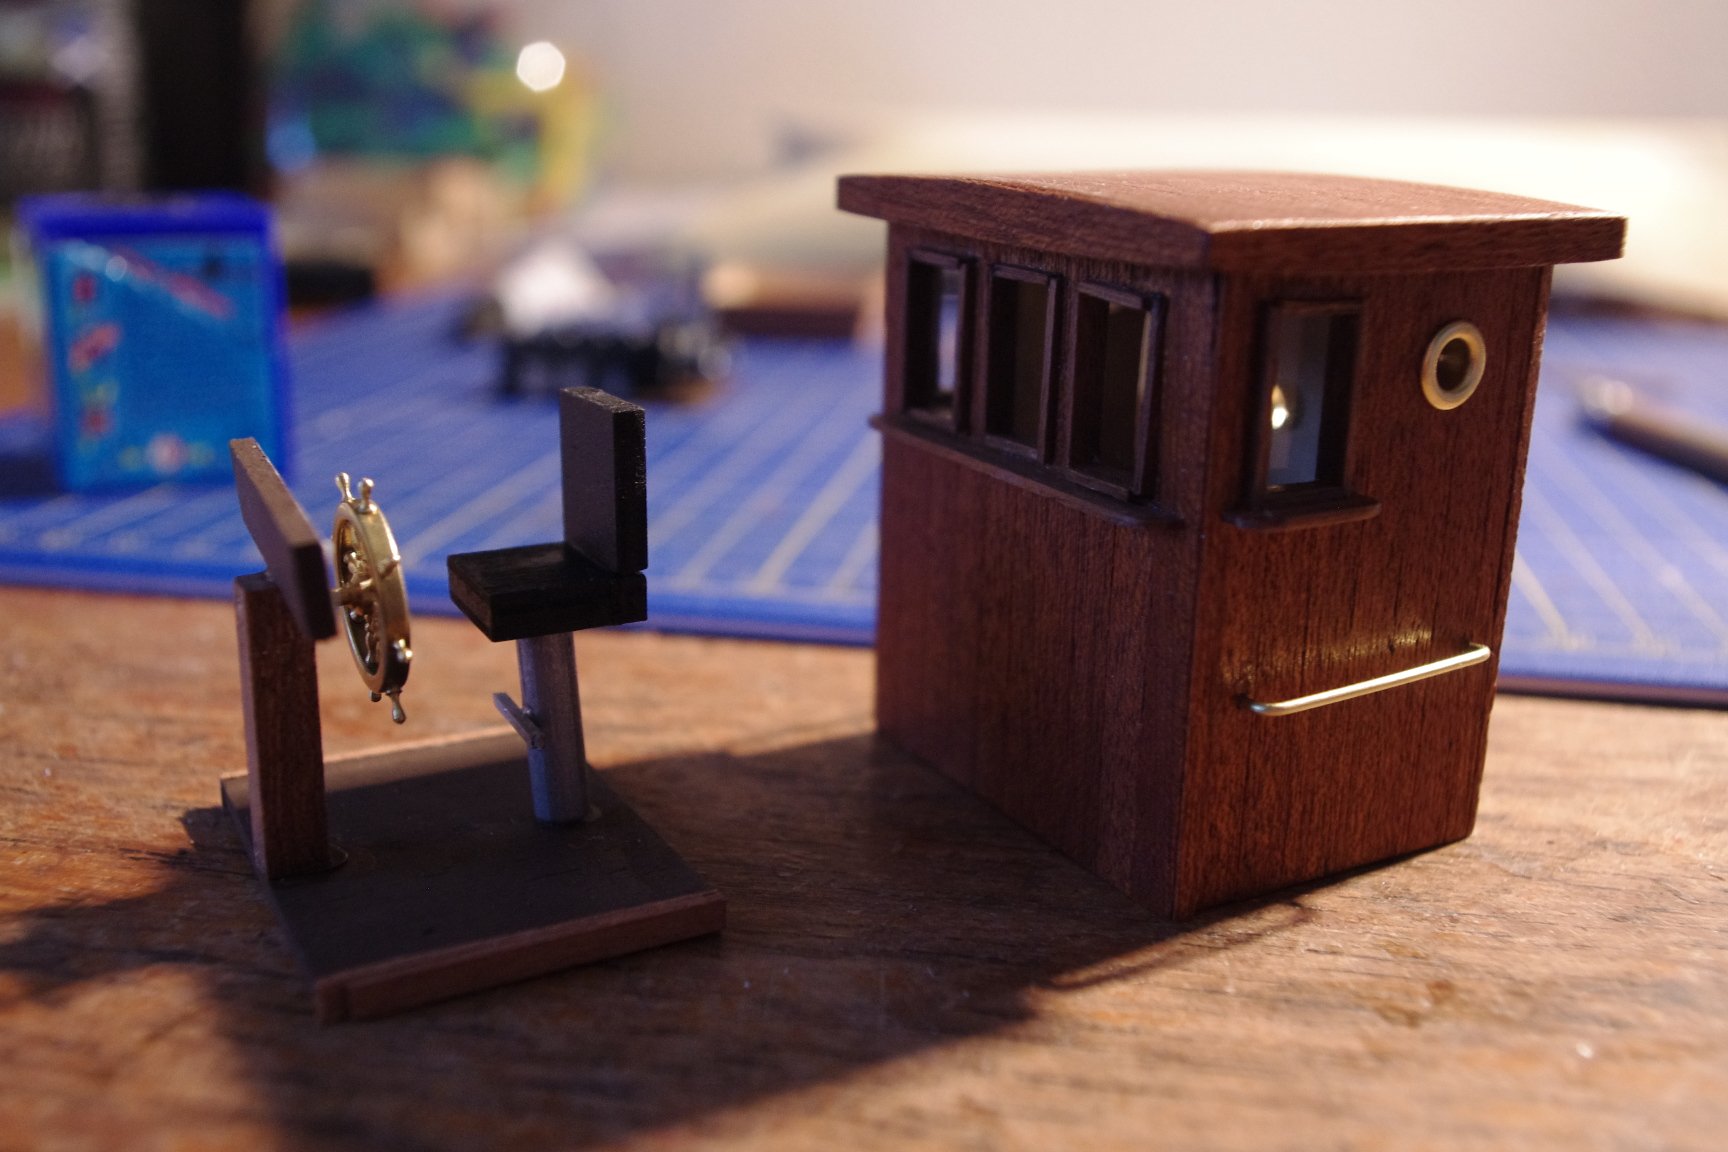
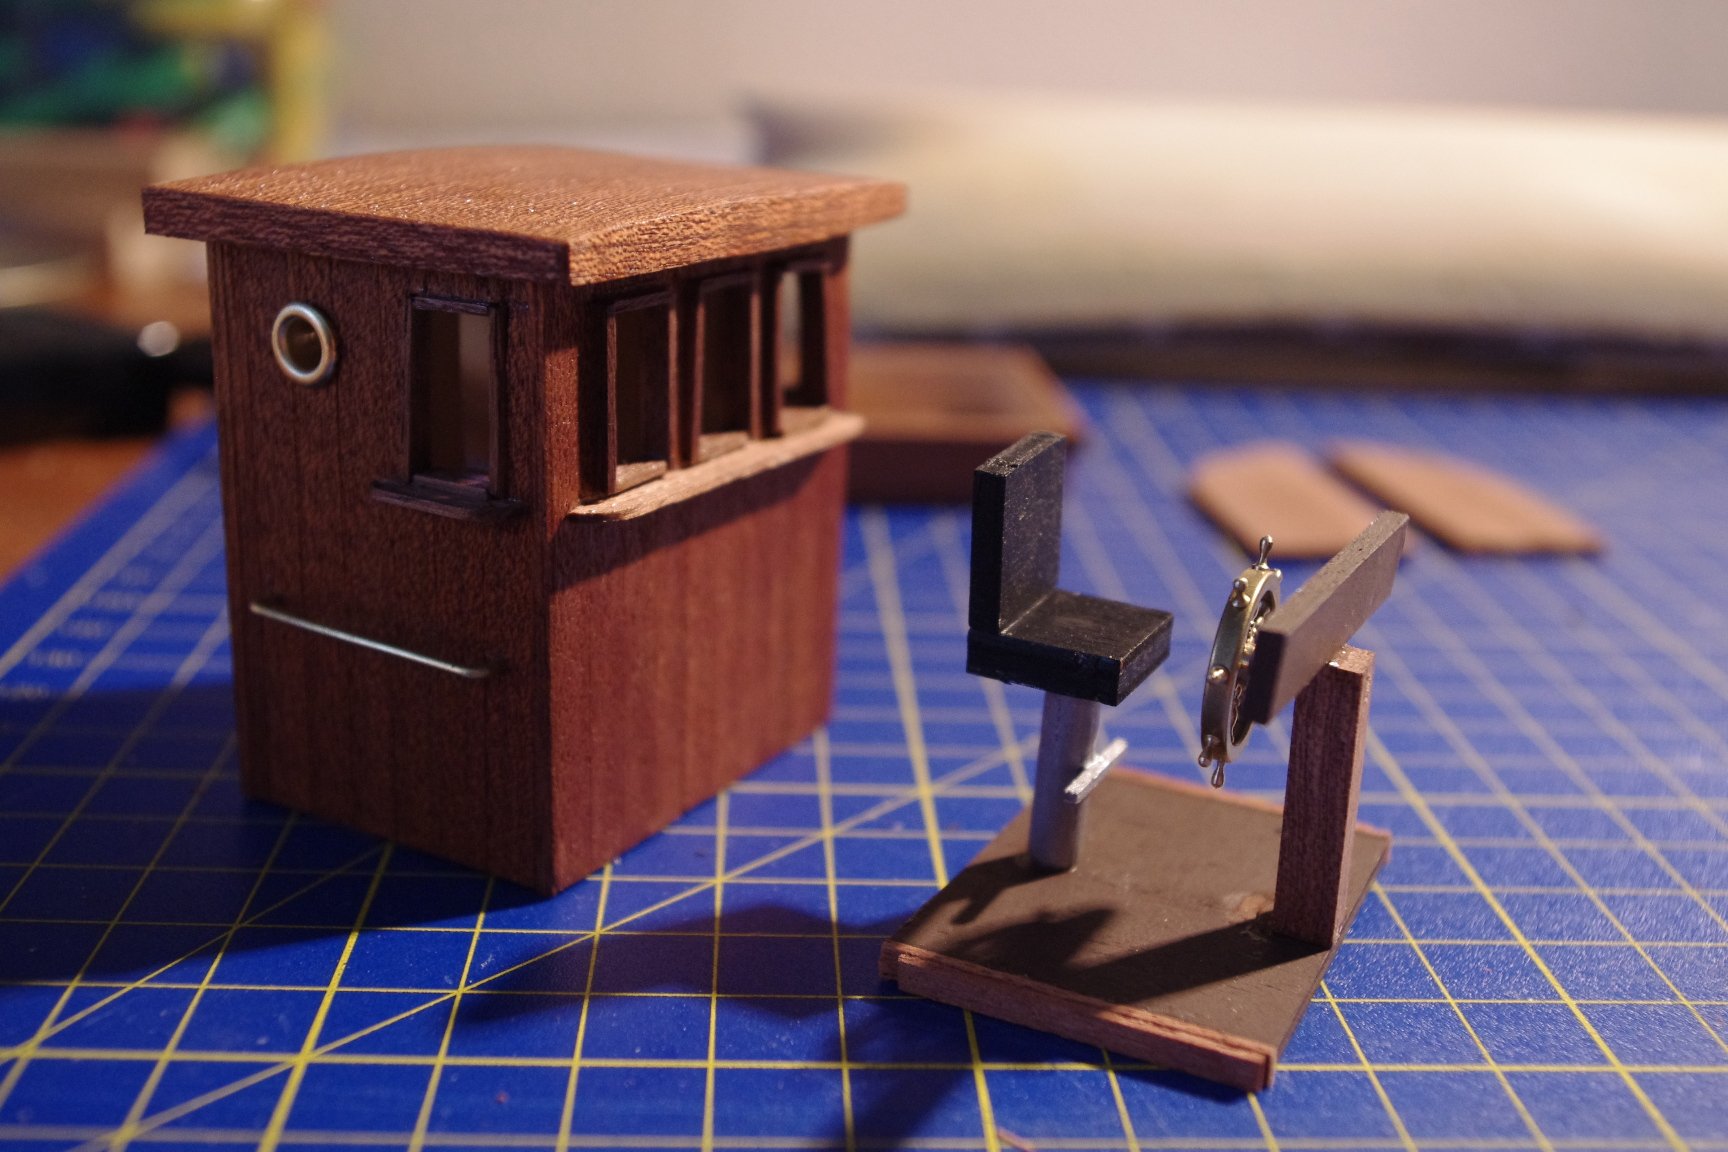
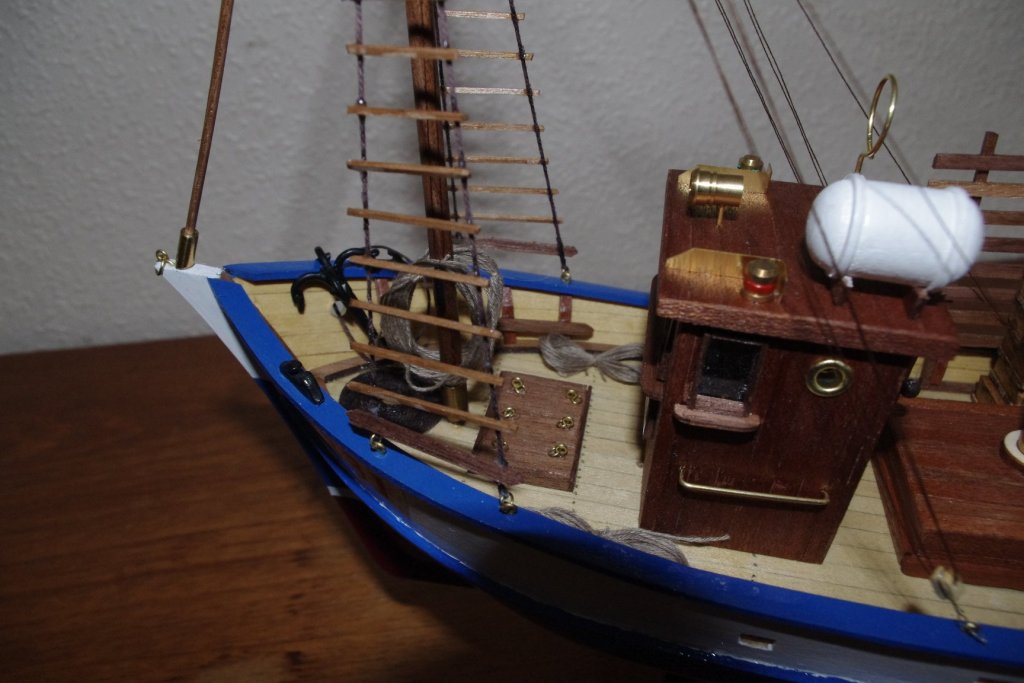
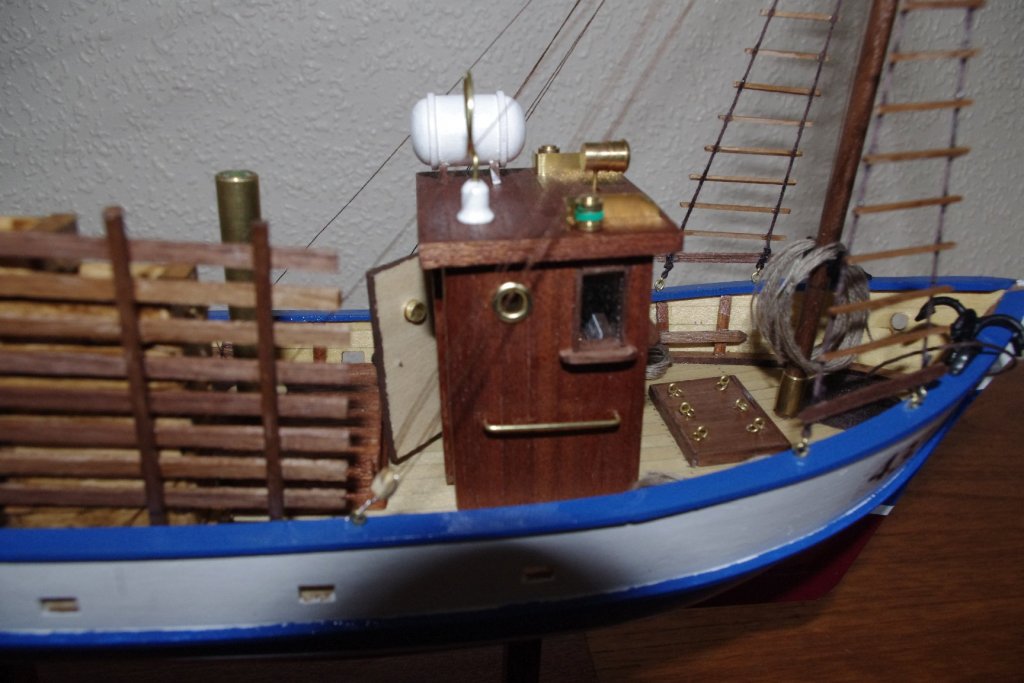
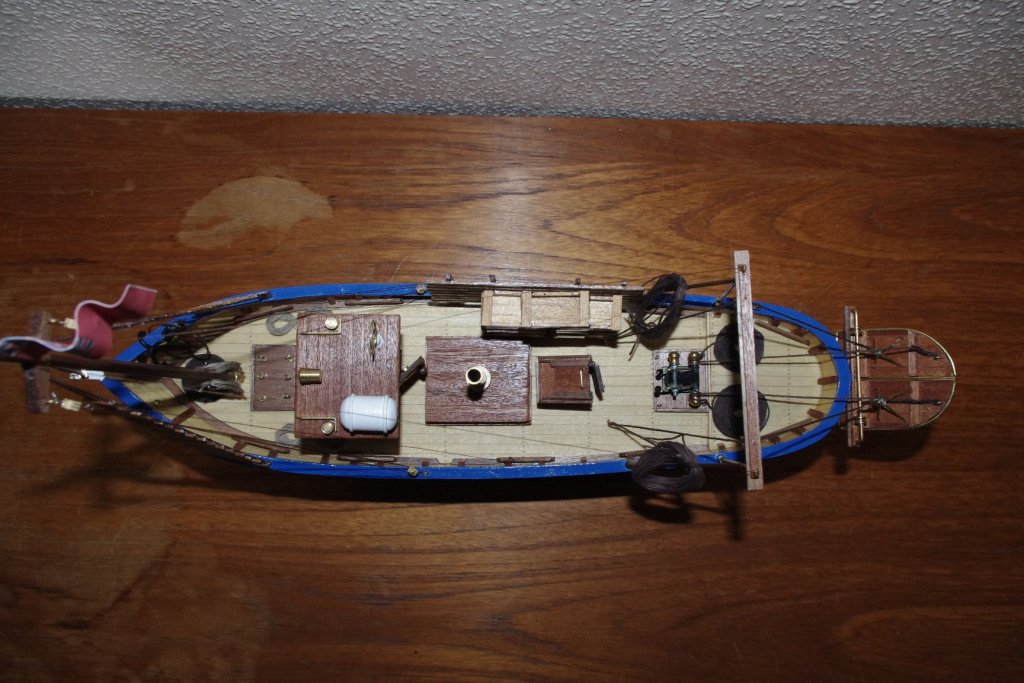
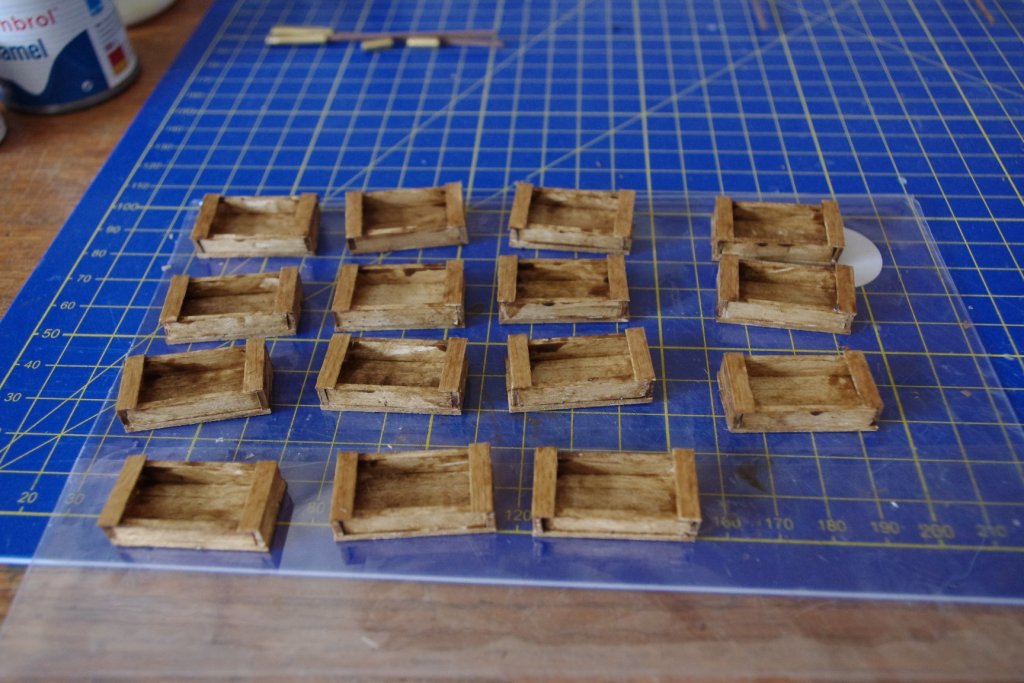
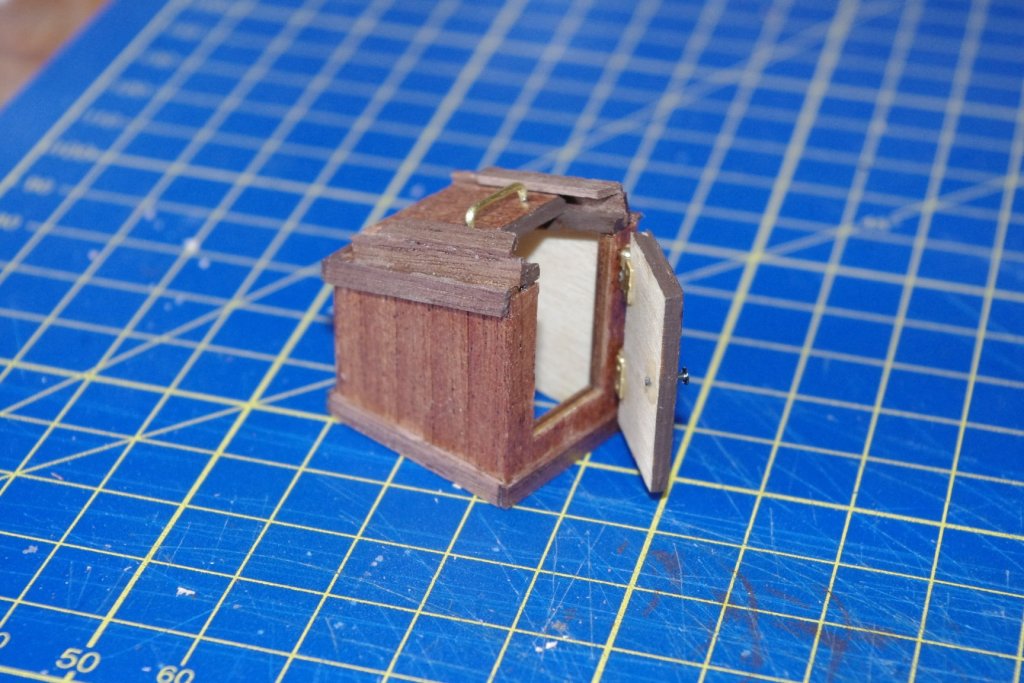
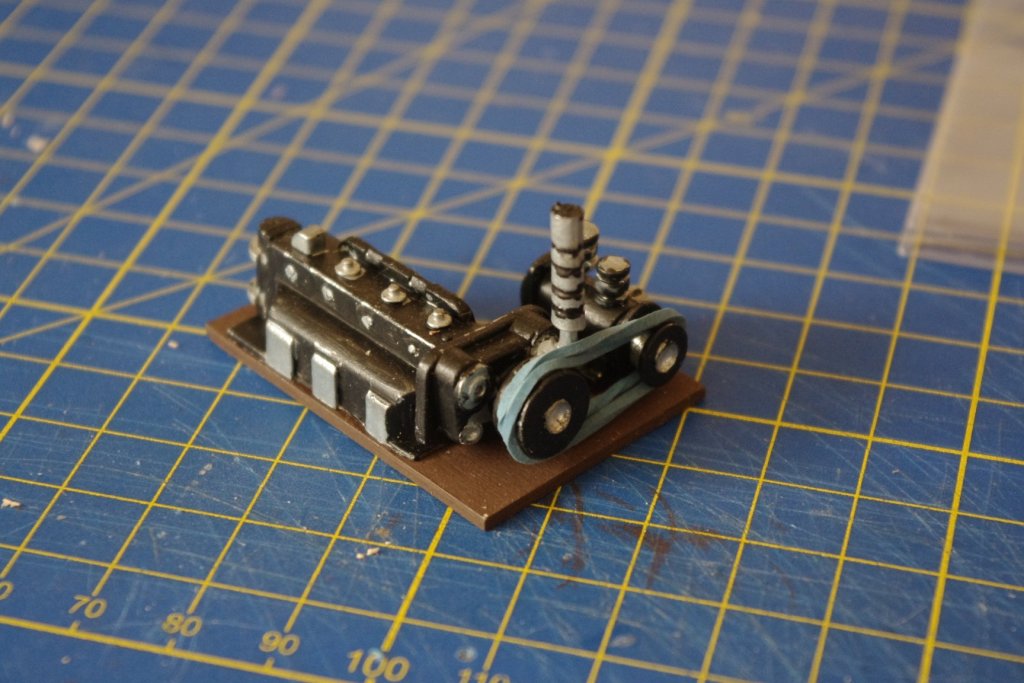
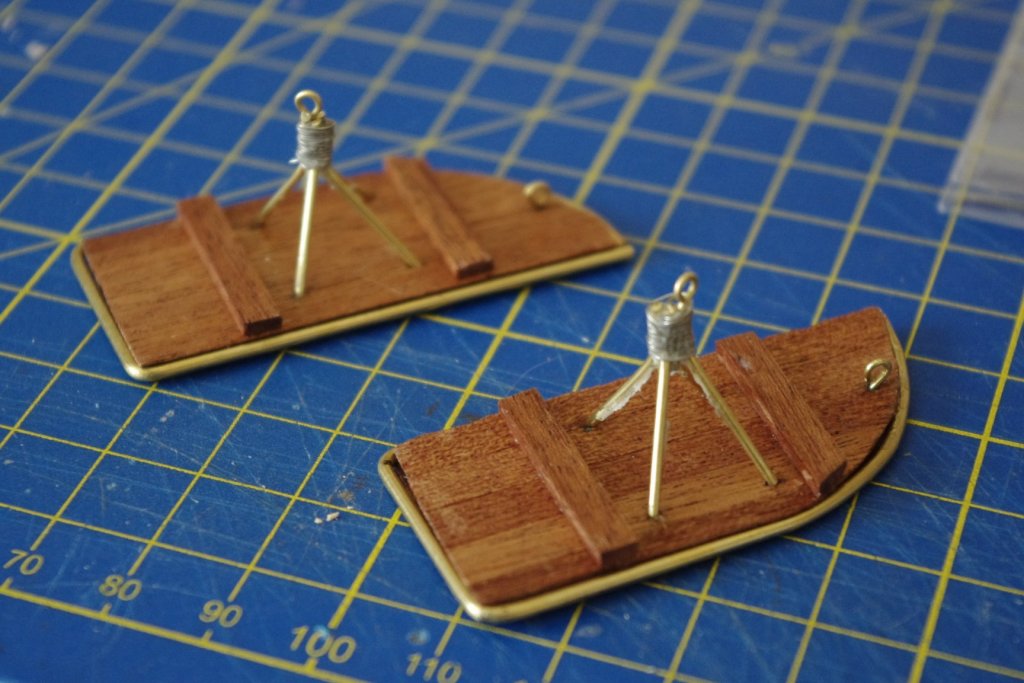
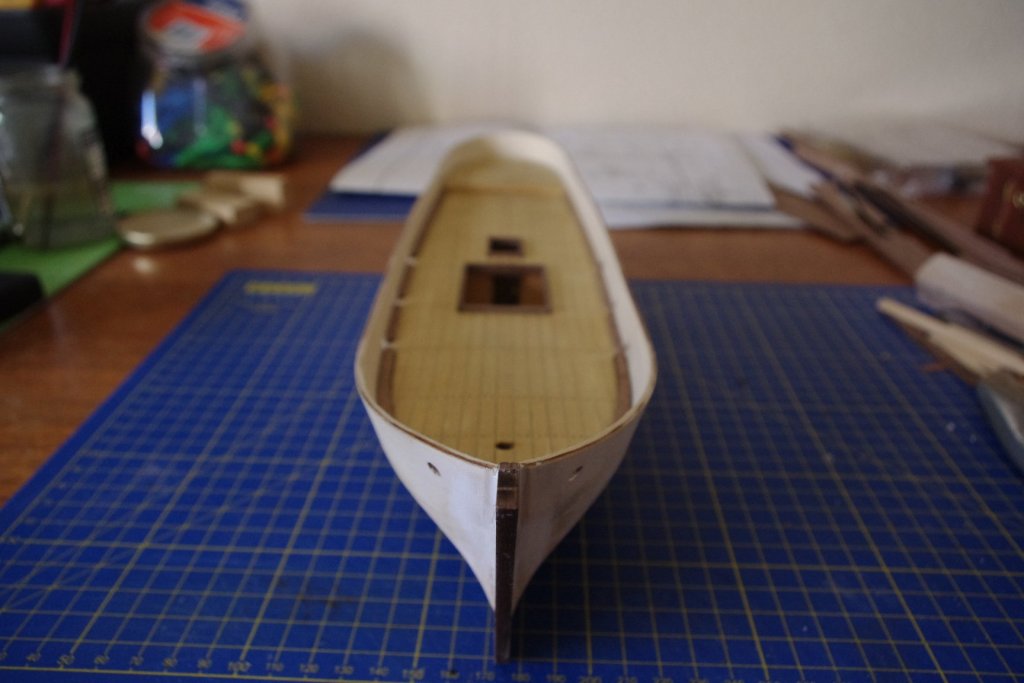
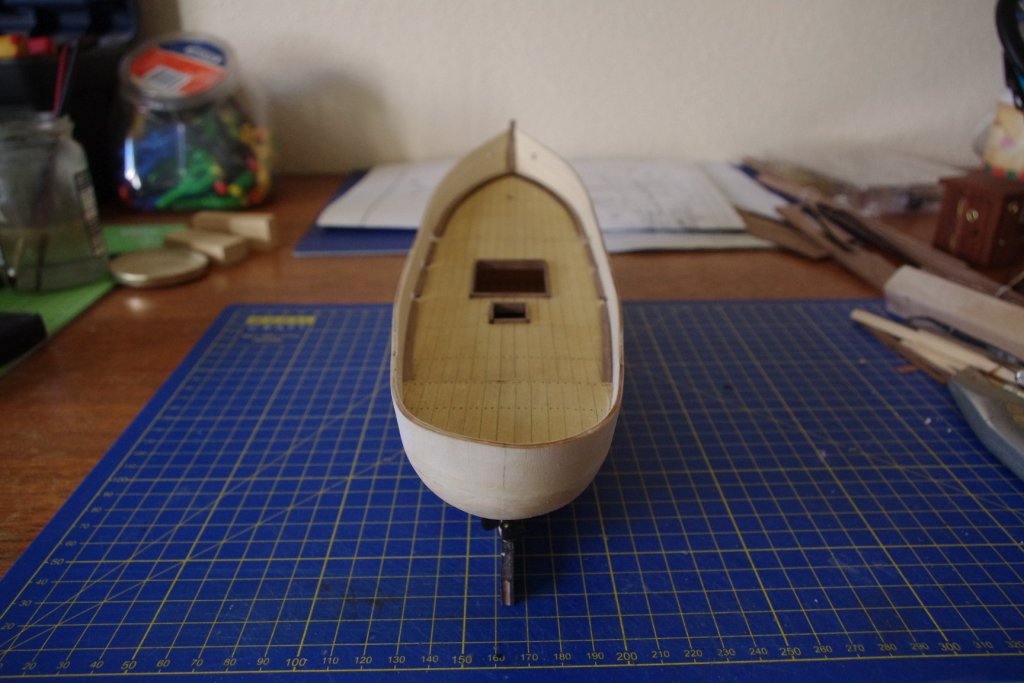
I am now in the process of painting the hull which has given me time in between drying to make all the bits and pieces for the deck. I modified the pilot house to have an opening door at the back so that the interior could be seen. I also added brass portholes instead of the horrid black things in the kit. The little companion way was an interesting challenge as the door was supposed to hinge with some very peculiar idea from AL who then forgot to put the bits in the kit so I made my own hinges !! Other pictures are of all the fish boxes and the guard thing they will rest against, the engine, winch, trawl doors, engine house cover, ladder and front hatch. Once the hull painting is finished they will all have somewhere to go. I can't quite understand some of the scaling on this model. Either the pilot house is too large or the companionway too small. If people could get into the companionway there is no way they could lift a full fish box!!


-
If it were me I would make the stacks a bit blacker, they look like weathered white which has had a nasty attack by seagulls!
- 296 replies
-
- 5
-
-
- chaperon
- model shipways
- (and 1 more)
-
Thanks for that Brian, Wales or rubbing strakes and stantions done !!

-
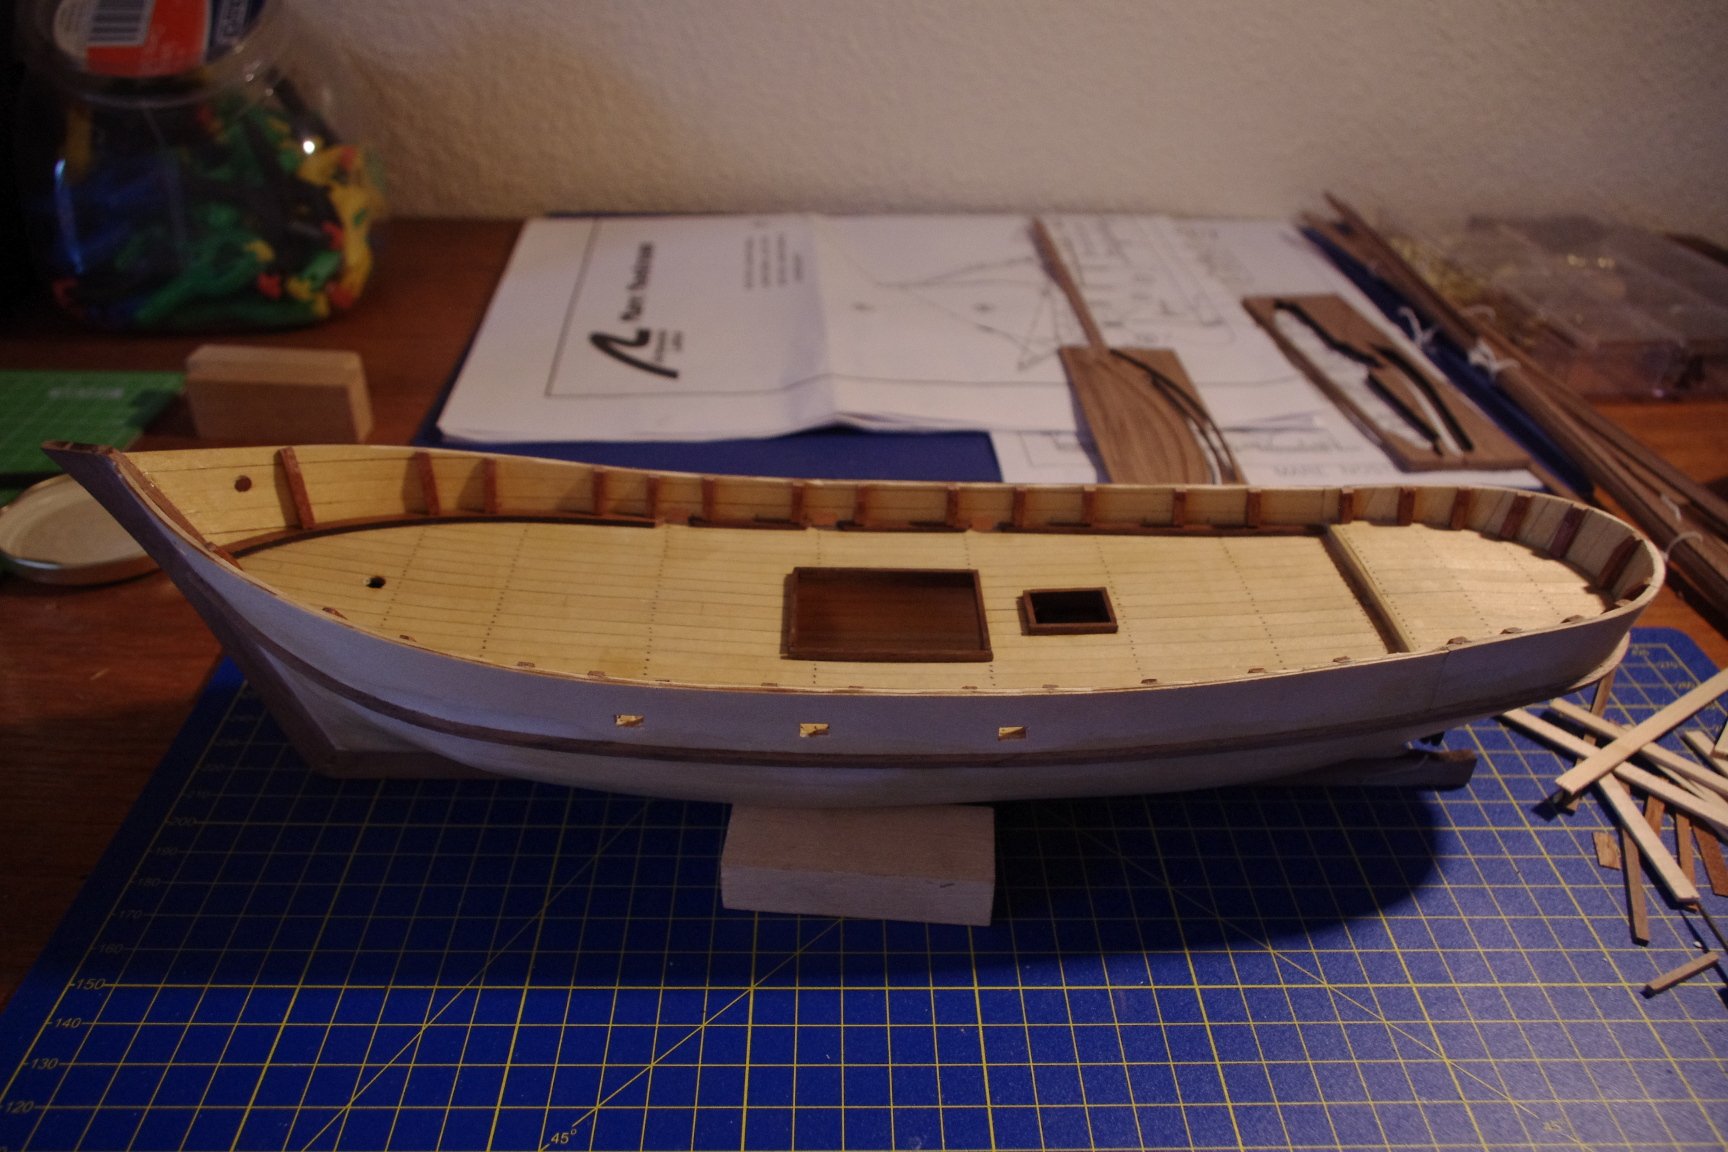
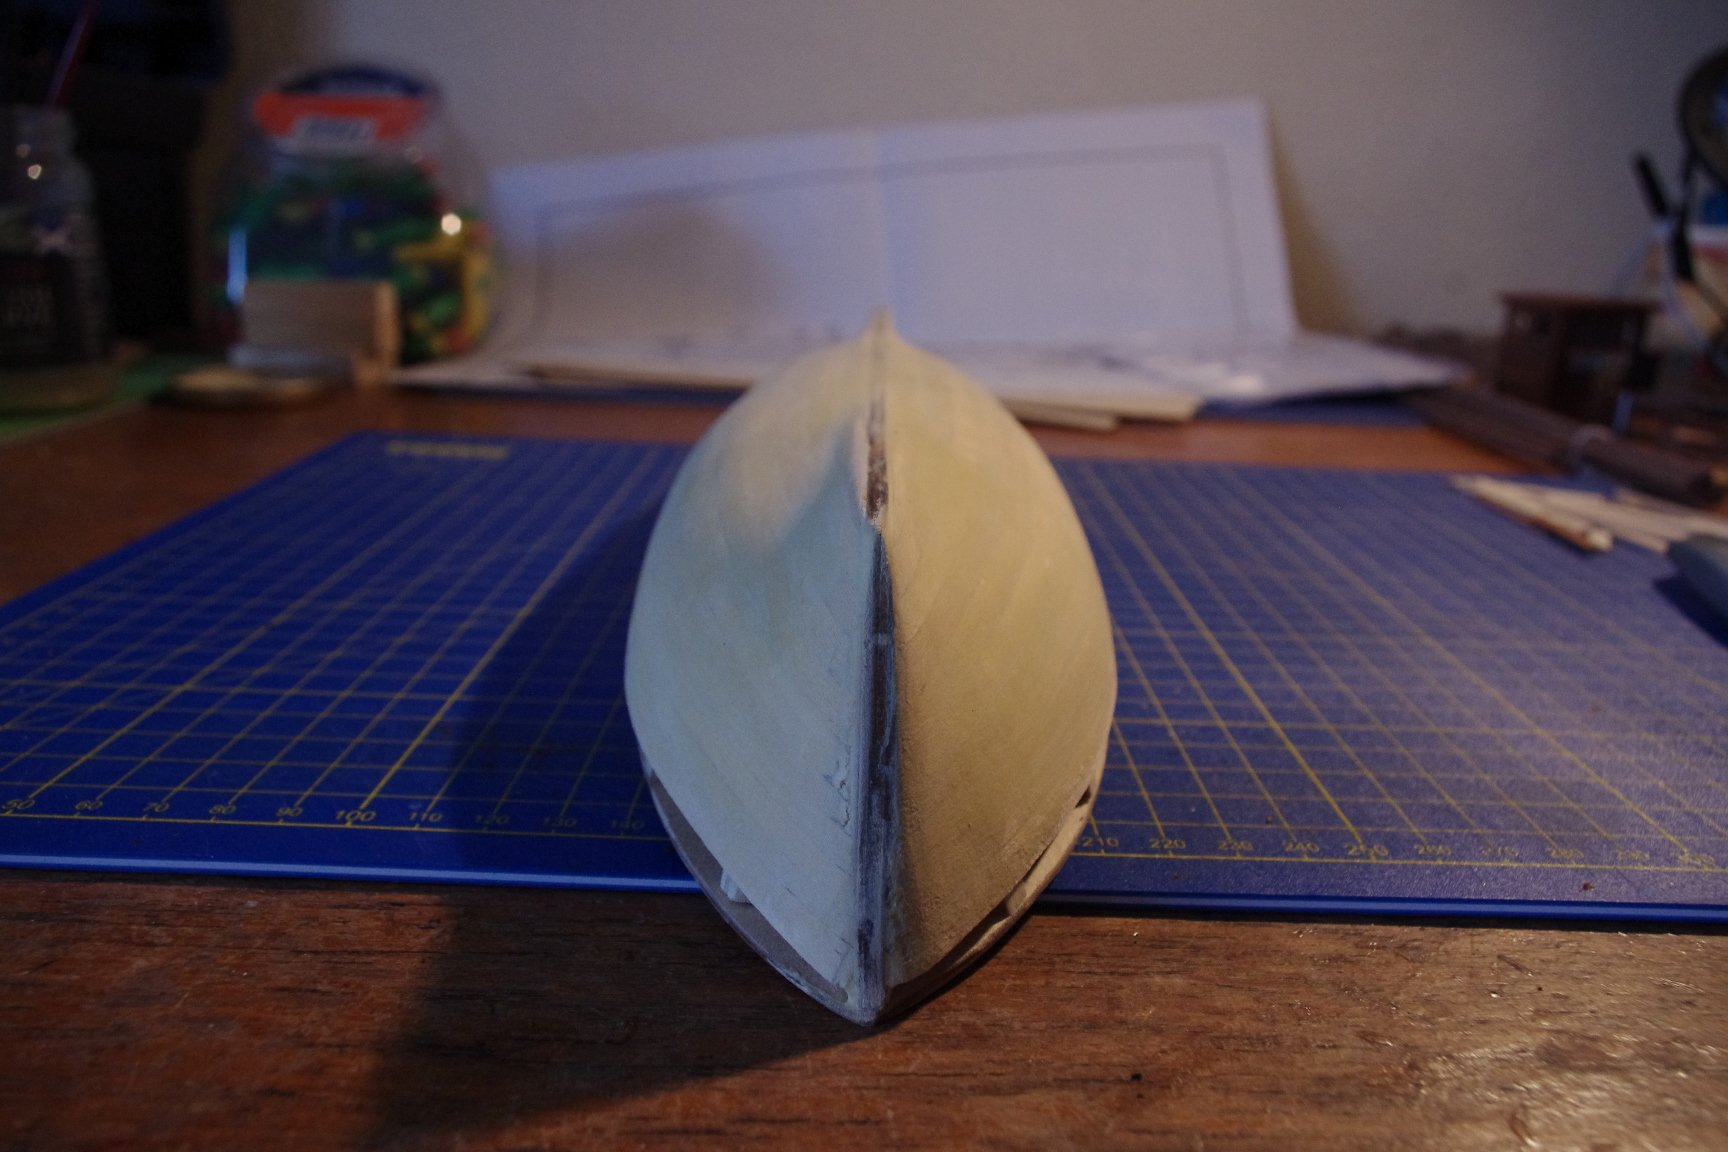
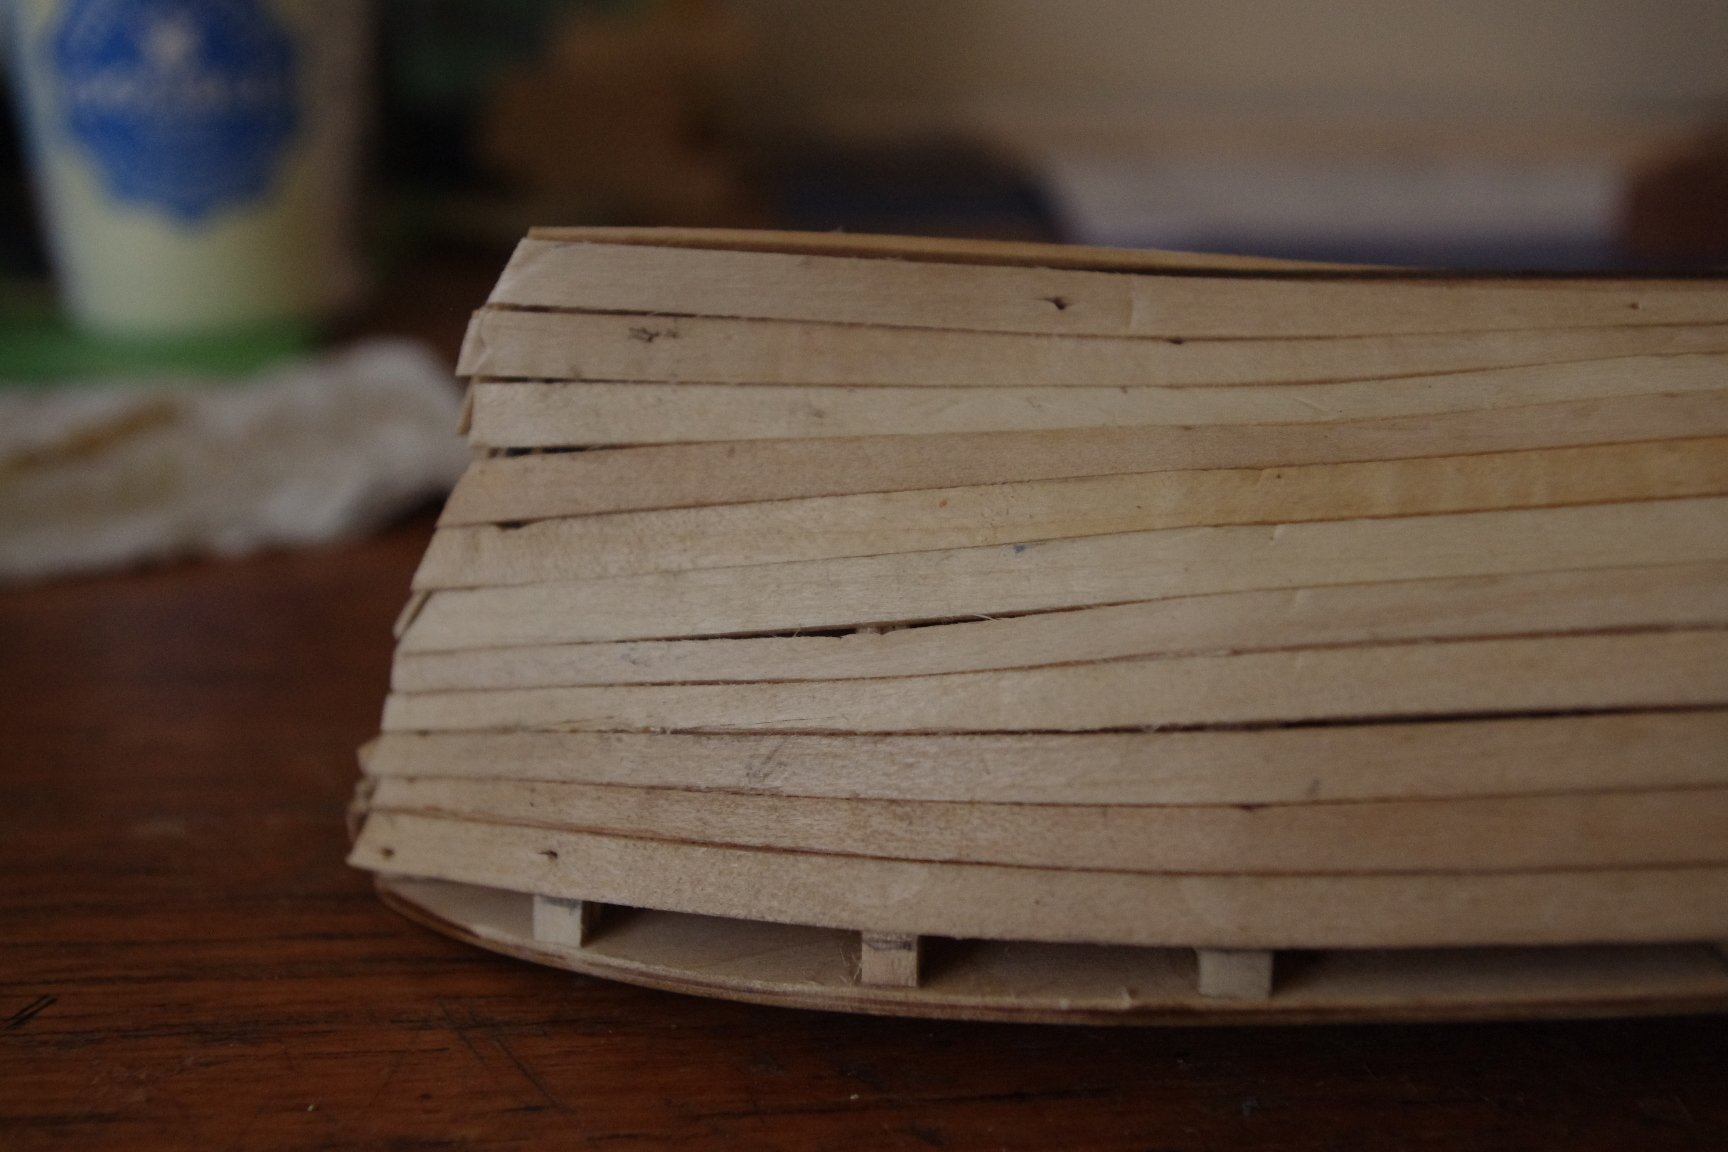
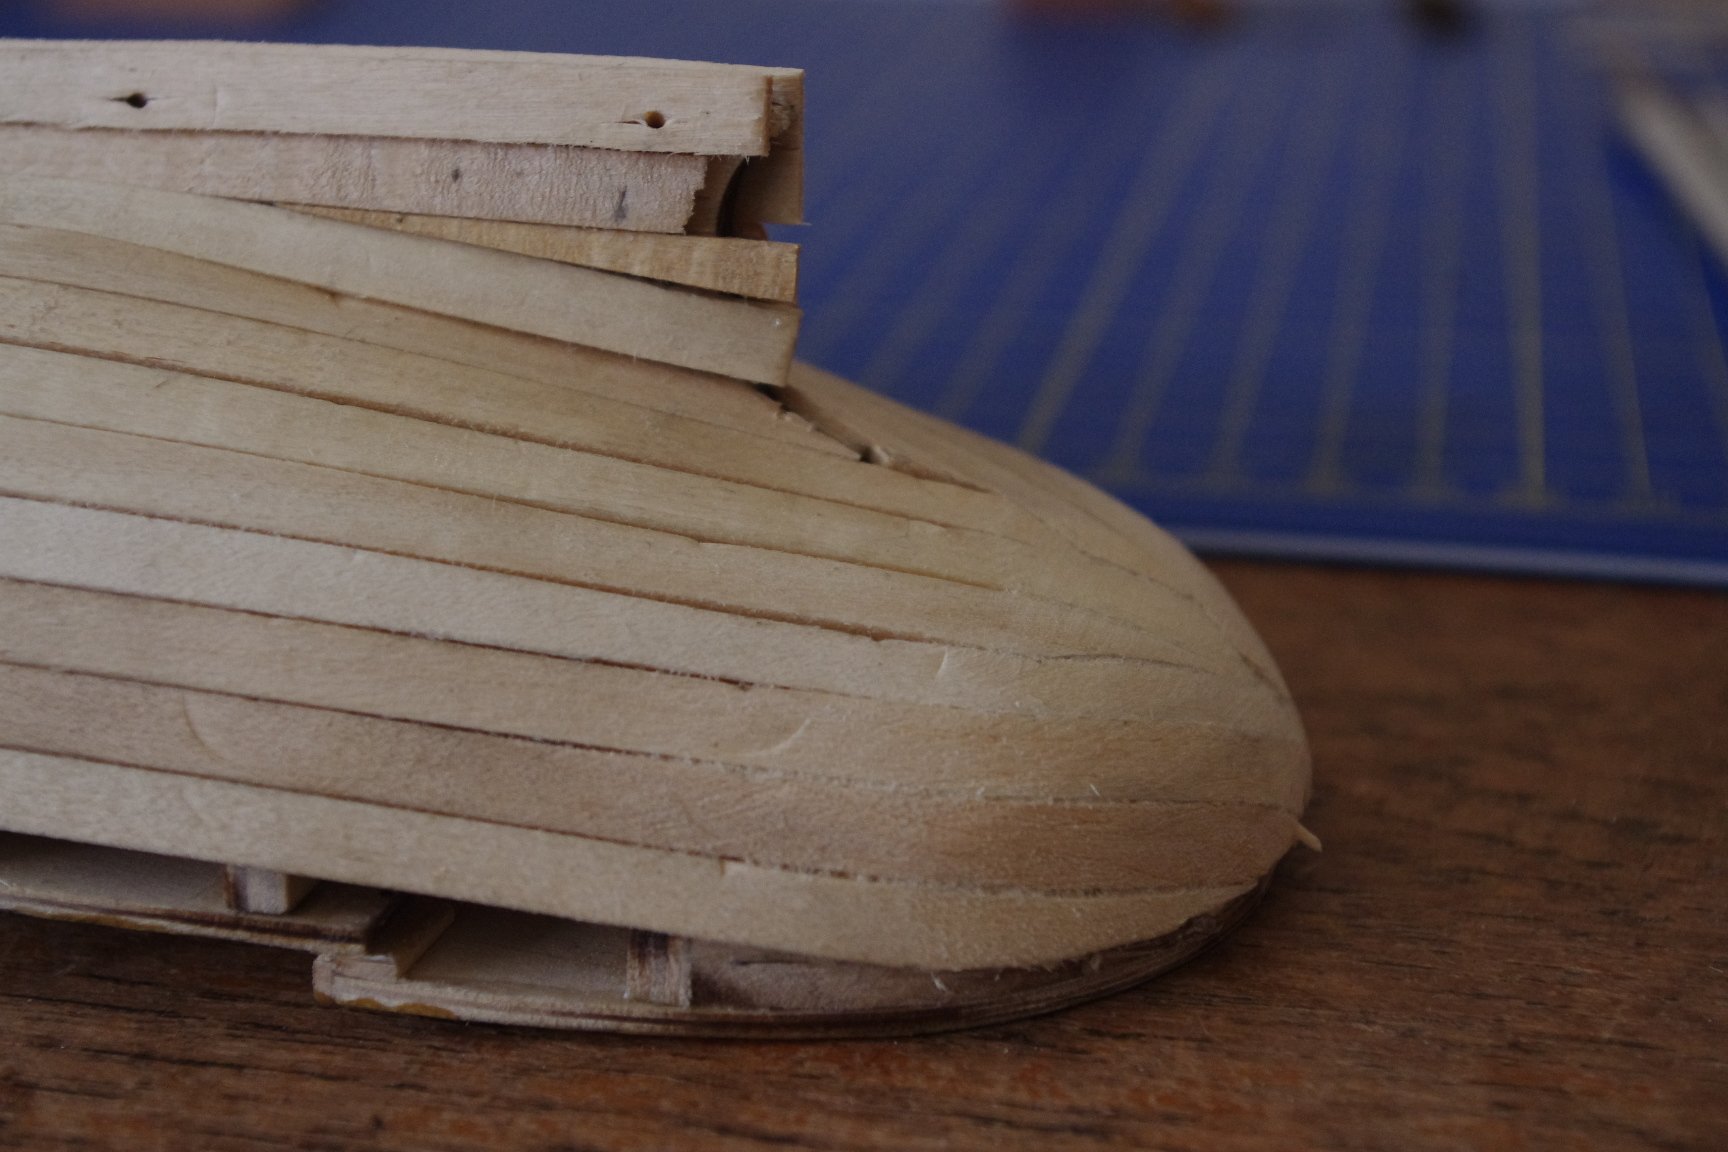
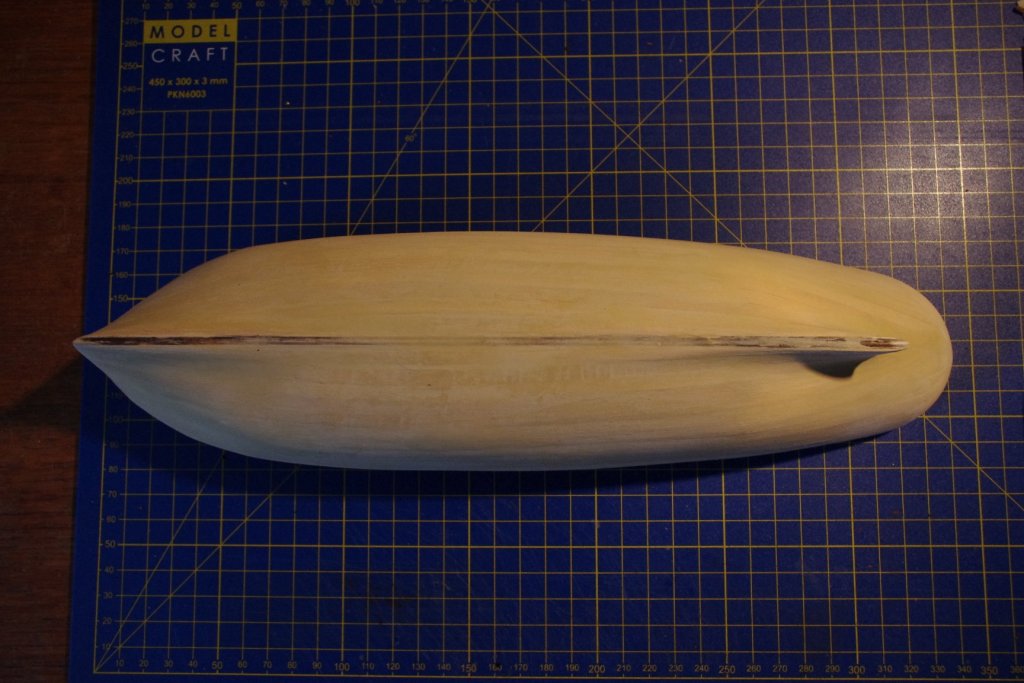
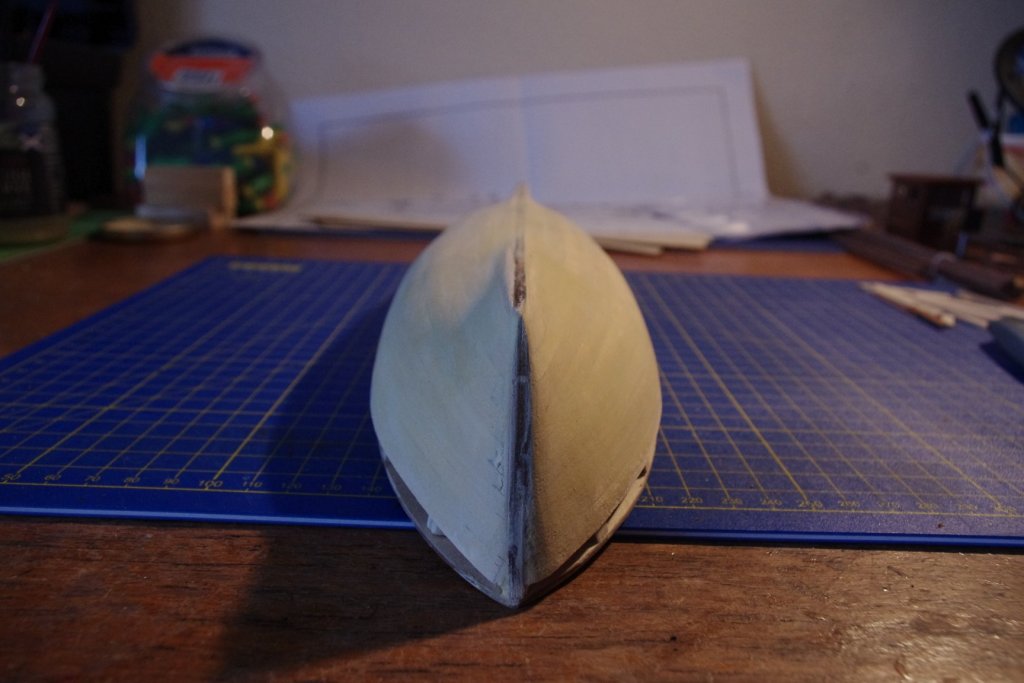
The bulwarks are now on. Quite a struggle to do those even after soaking but I won on the end. I put on the stem and keel but found I had sanded a bit too much off the bulwarks at the prow and had to put a small filler on the stem at the top but I don't think it shows. Also planked the insides of the bulwarks and put in the waterways. I put the propeller on, just a loose fit at the moment but I don't want to do the rudder yet - too easy to knock it off at the moment. I added a bit more filler to smooth the bulwarks and did a wee bit more sanding and I think the hull is just about done. Next step is the stantions. I still can't decide what colour scheme to paint the hull.

-
We are filled, sanded and smoothed and ready for the addition of the bulwarks. Fingers crossed!!

-
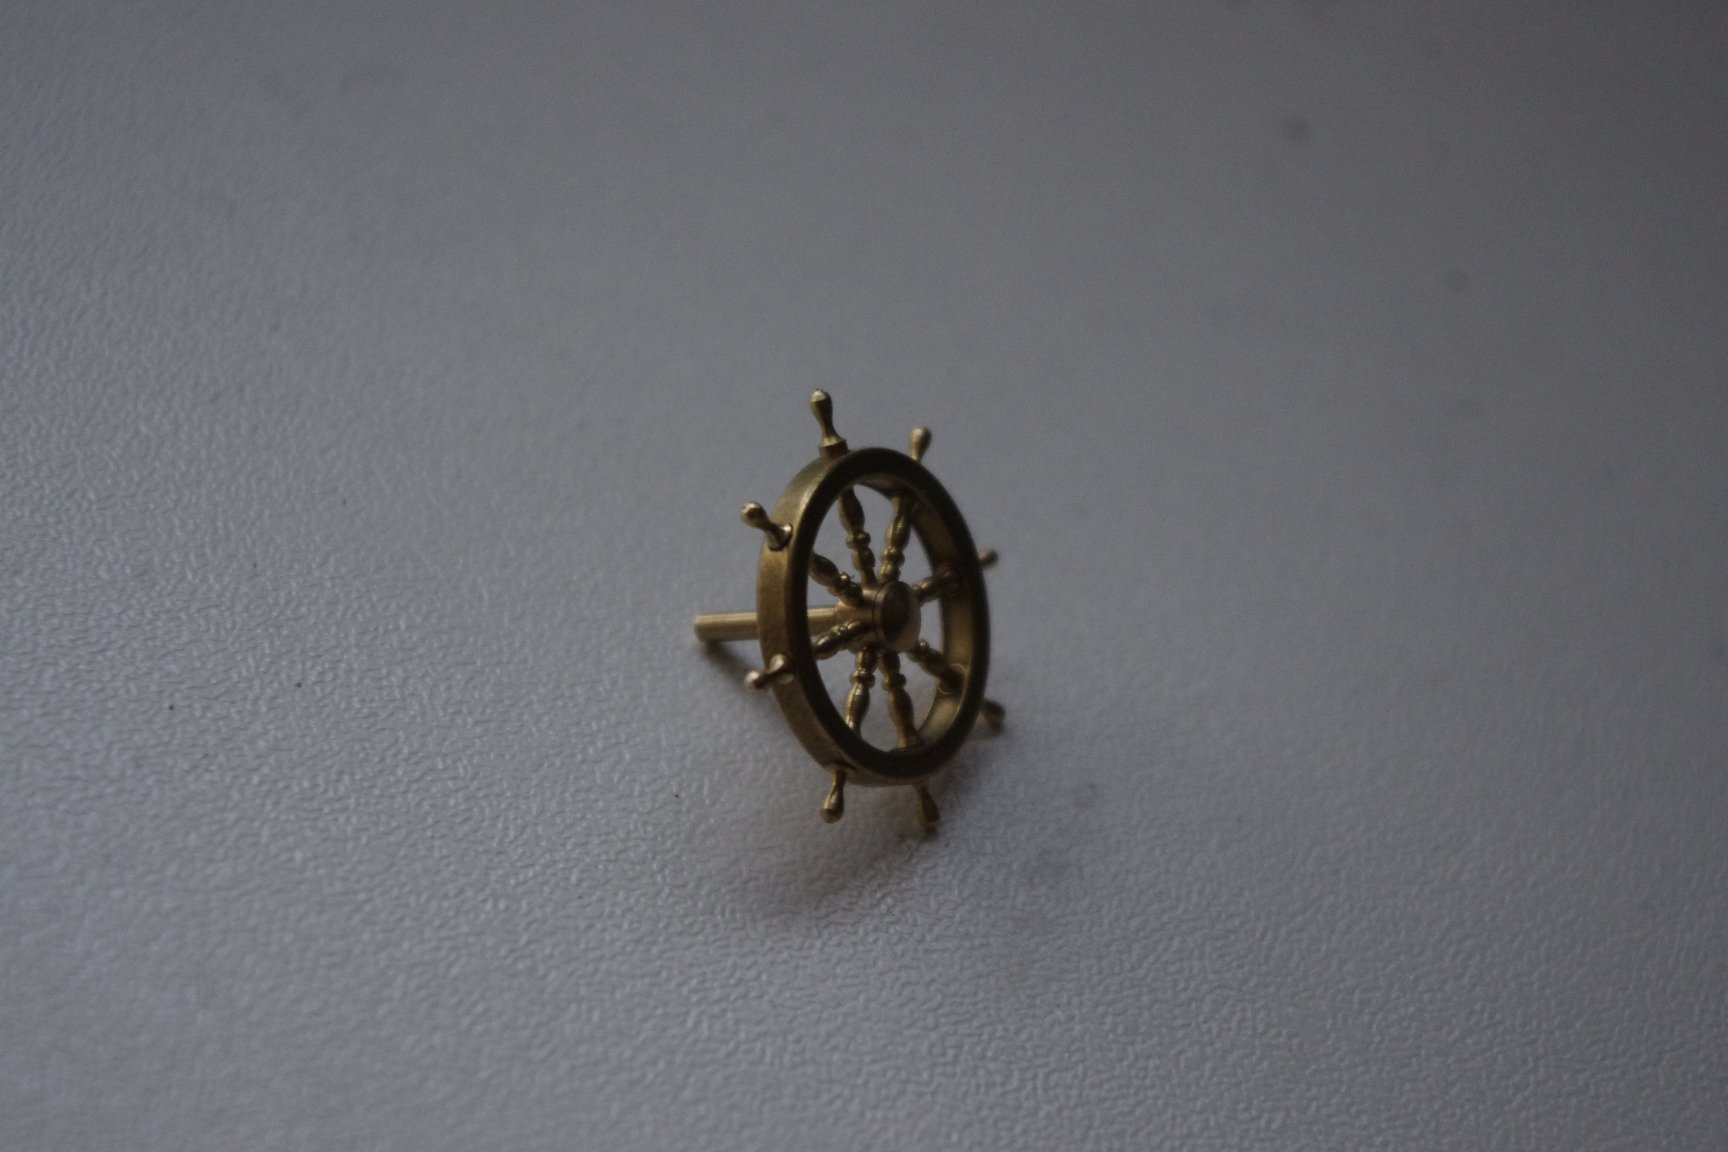
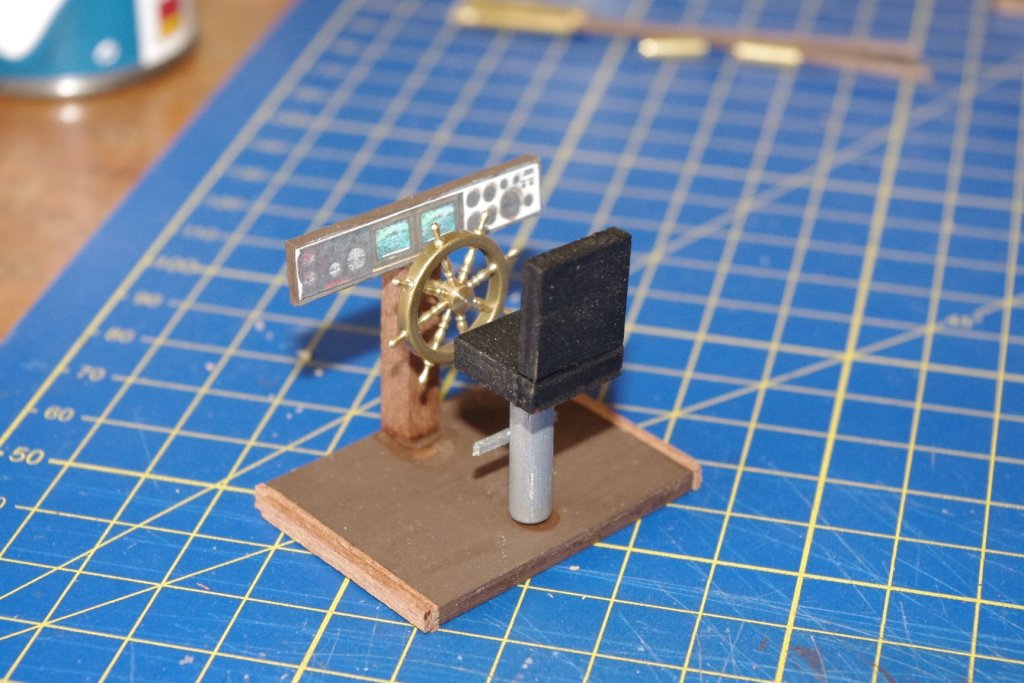
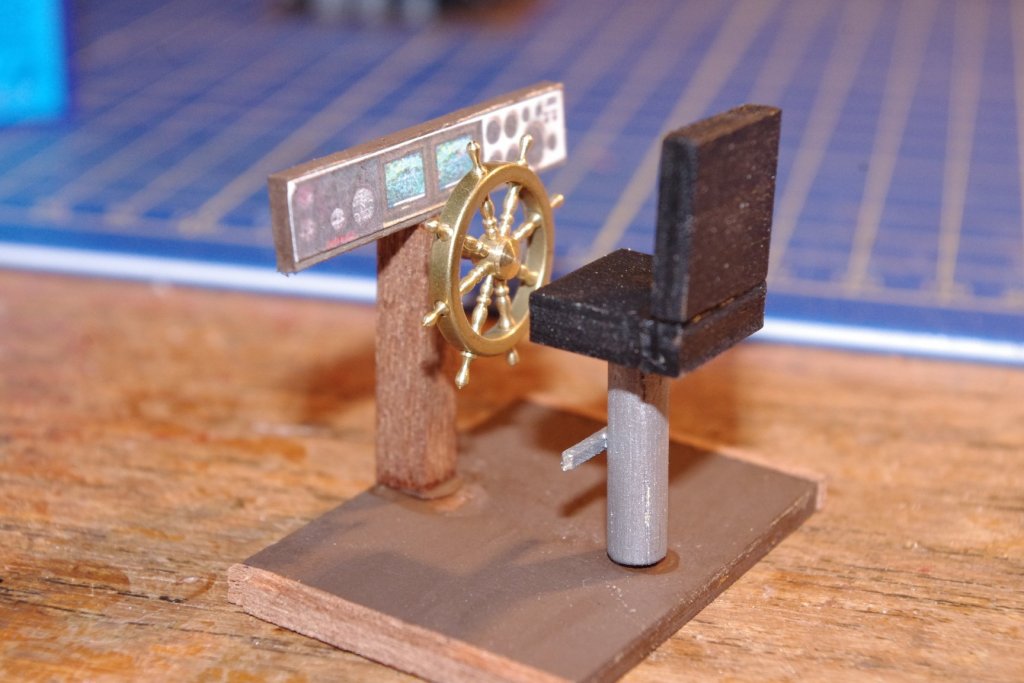
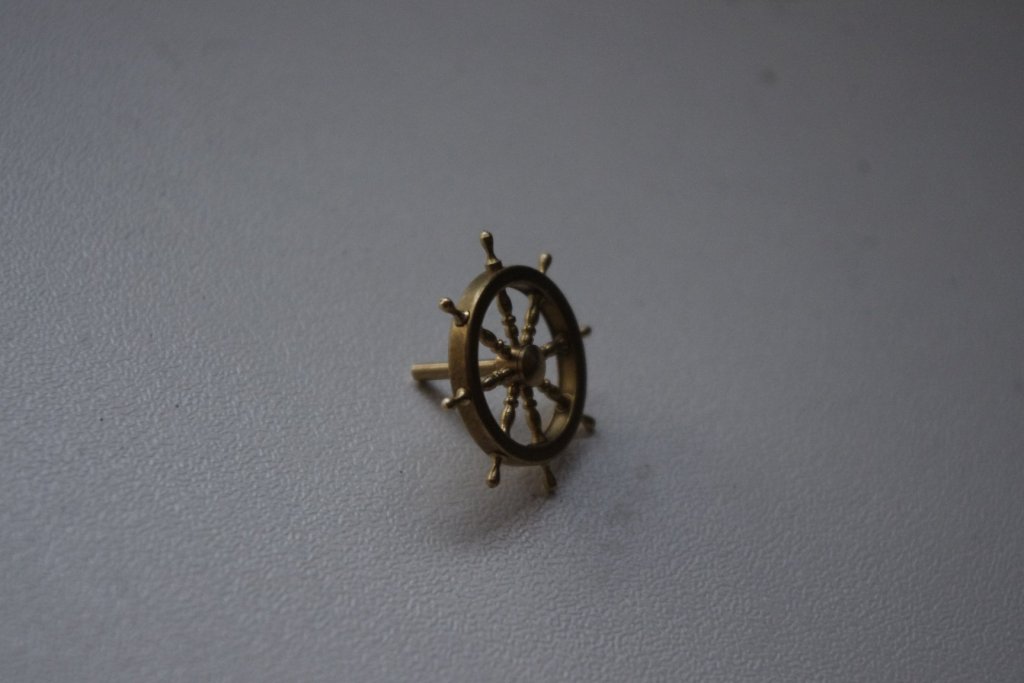
HOF, the wheel is 20mm, fiddly to put together but well worth it. It was from a company I think called Model's parts shop and they sell loads of equally brilliant brass bits and pieces including wonderful portholes and all manner of bits and bobs I could spend a fortune! Anyway, being a sad person (!!!!) here it is in situ. The idea is that the base with the seat, dashboard and wheel will go on the deck and the removeable (!!!!) pilot house will sit on top. Whilst I am here I will ask for some opinions. Would it be a good idea to put the stem on the hull before trying to put the bulwarks on rather than do it after as the destructions suggest?


-
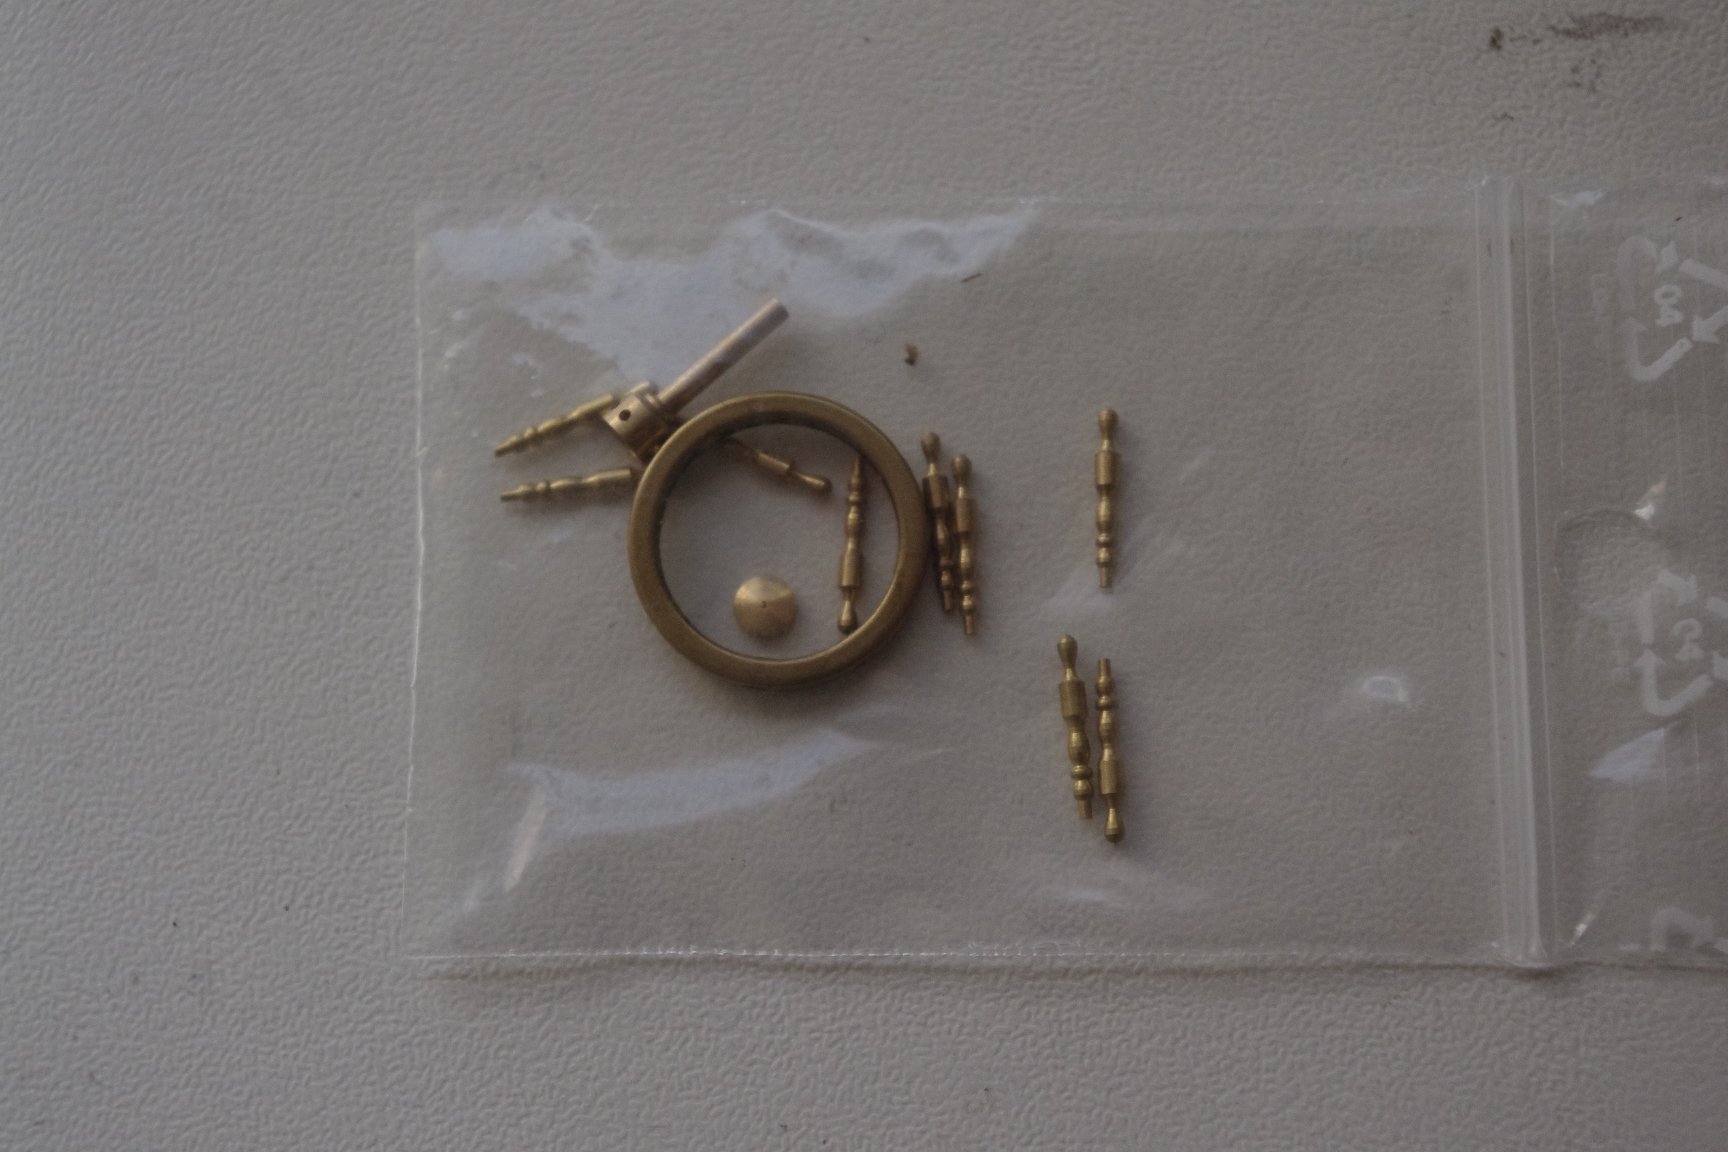
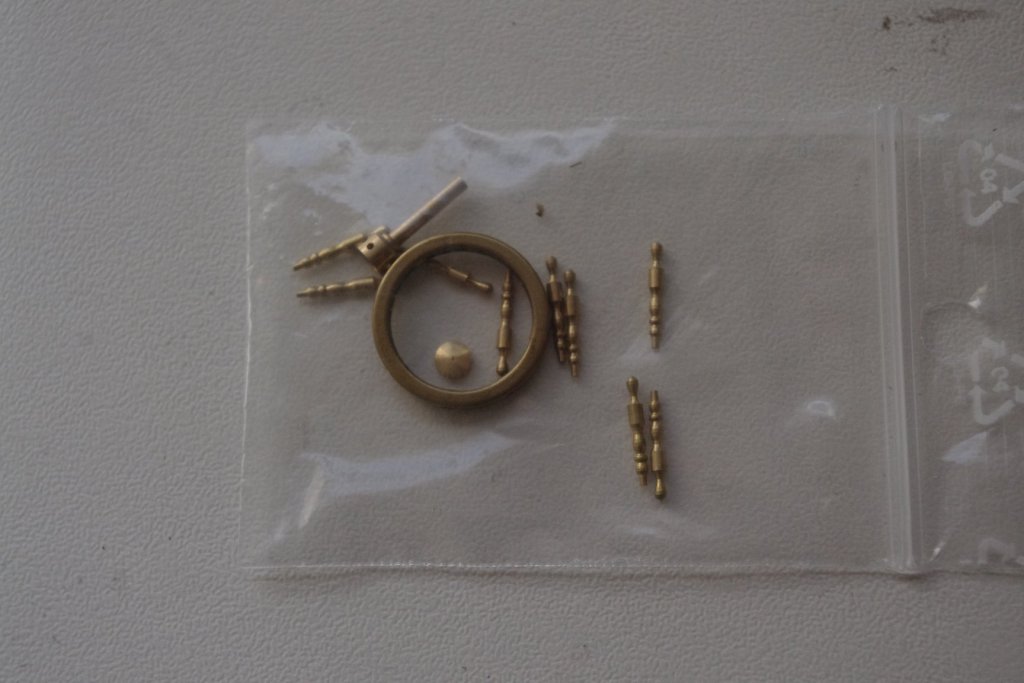
I really thought you should see this ! The kit does not come with any 'furniture' for the pilot house, not even a wheel. So I bought one from ebay and it is just a wonderful piece of engineering in my humble opinion. There is even an extra spoke is case of losing one which, having put it together would be easy to do. At £3.41 I am well pleased.

-
I didn't notice either about the wheel!! The problem is that whilst mine does indeed go round the crank arms or whatever they are called will not slide in and out of the engine room hence I have had to fix mine to stop those arms from repeatedly coming off.
- 296 replies
-
- 3
-
-
- chaperon
- model shipways
- (and 1 more)
-
Thank you for that, I suspected that might be the case. I reckon the scuppers should be fine. The destructions say to put the side bulwarks on first which seems like a good idea and I hope will make the fitting of the stern easier. I'm not sure that I am going to follow the rules about the planking of them though. I think I shall leave that until they are fitted or bending them will be a nightmare. Anyway I have a fair bit of sanding, filling and more sanding to do first.
-
Yes HOF I had thought about that Bulwark and I think it's going to be tricky. I didn't want to cut too much away to start with, I am not quite sure whether the gap should be the same as the sides? Anyway, thanks for the comment about the planking, I am blushing!!
-
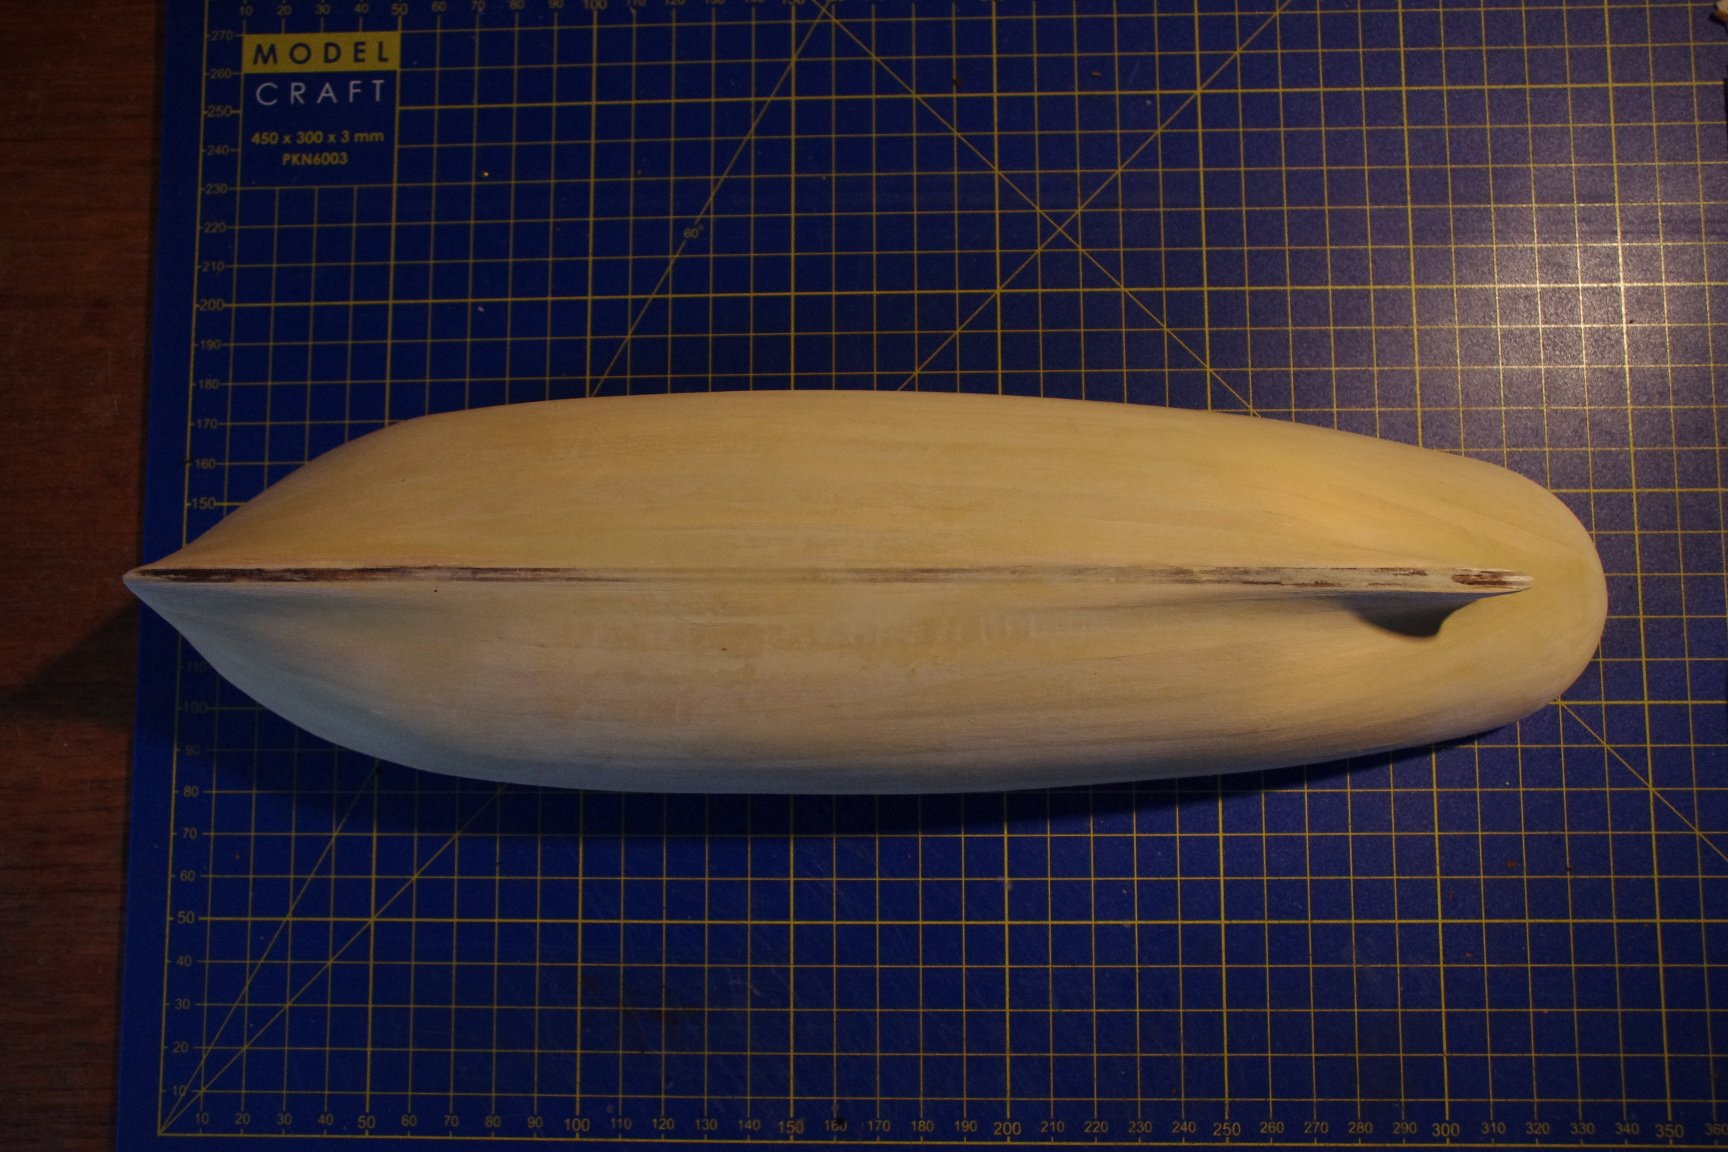
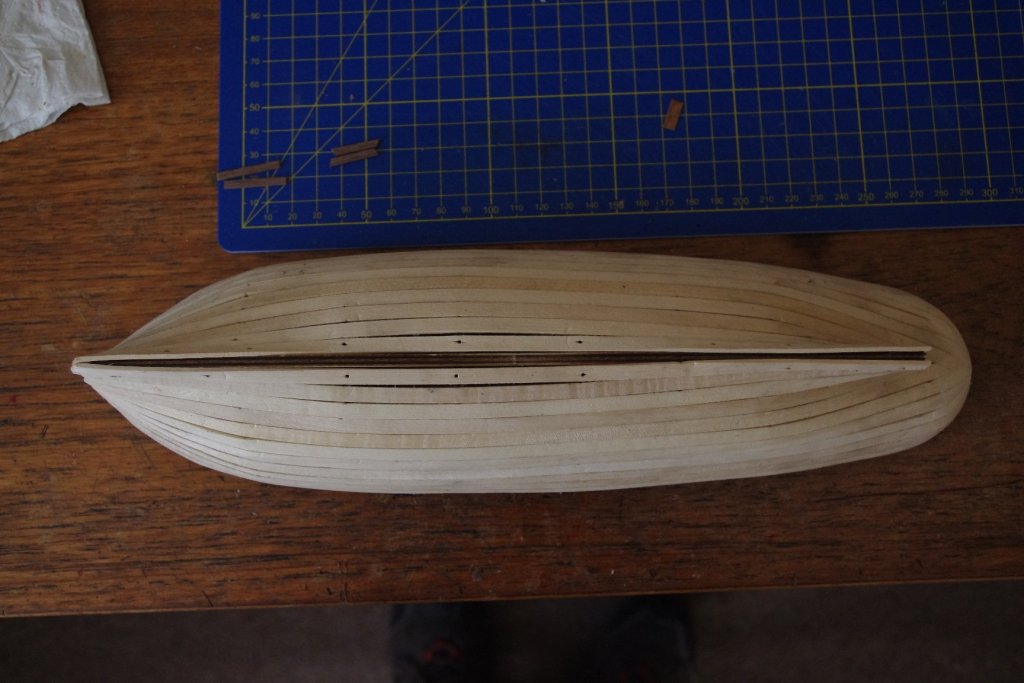
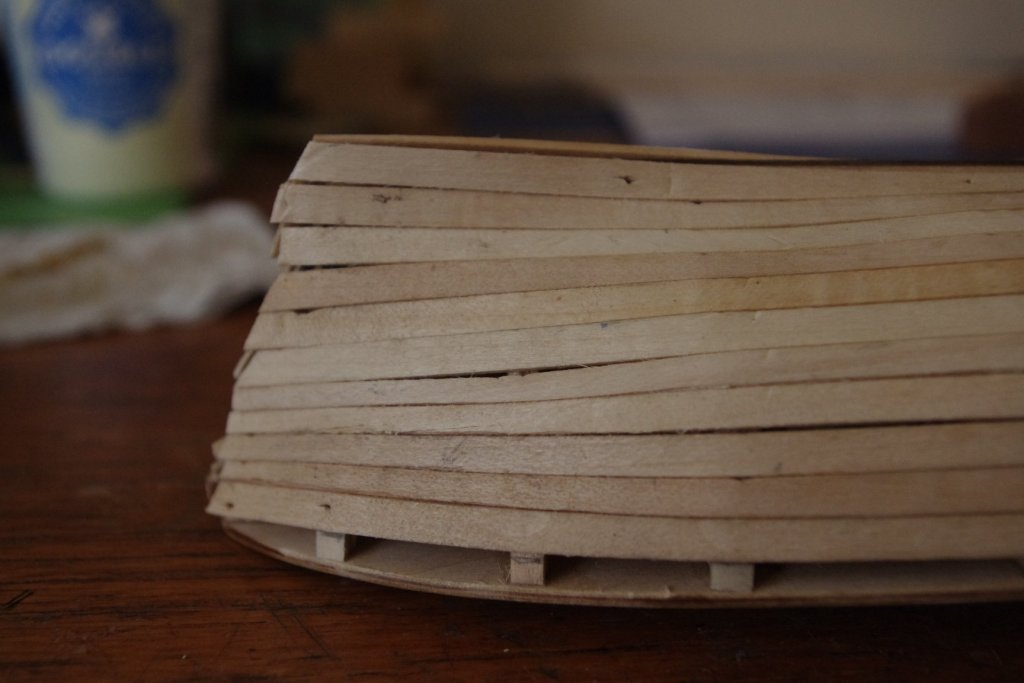
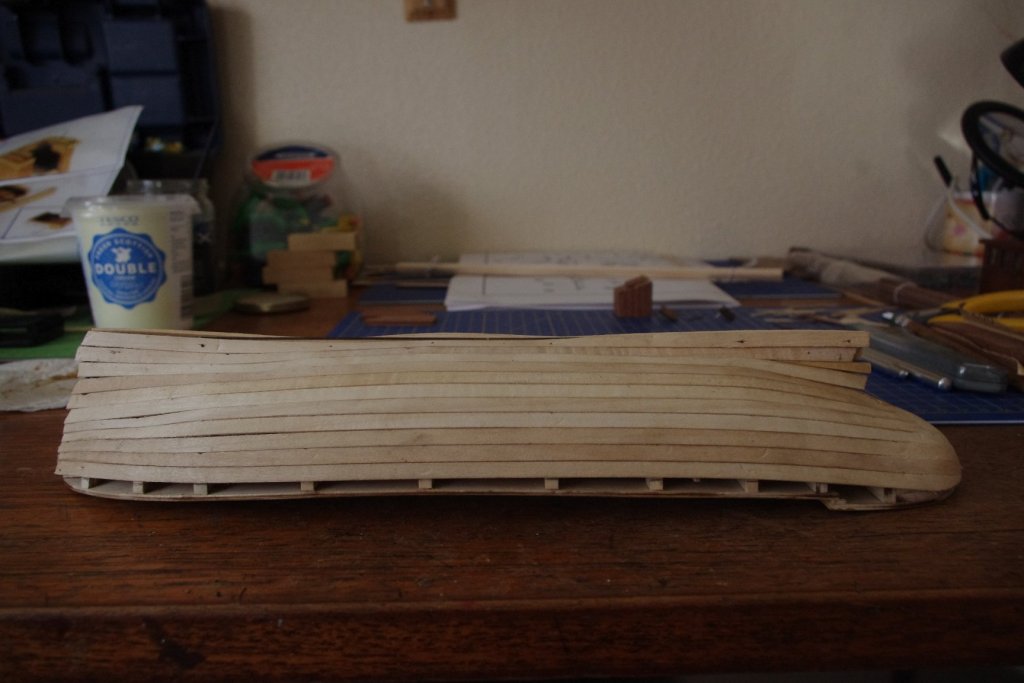
Those that have looked at my previous builds ill know that planking is not my best thing. So, for this boat and for reasons best know to myself I adopted a different process!! The first strake had to go on 3mm below the top of the bulkheads. Not too difficult. On the advice of others I started to work downwards from that for a few rows but I did decide to taper the bow end a bit. Glad I did. I continued downwards and the thought came to me - since this was working quite well why don't I just keep going. So I did all the way to the keel. The wood provided is really soft and easy to soak which made life a lot easier. I reckon that with a bit of filler and a lot of sanding this is going to look ok. What do you think?

-
Oh very useful, what nice kids you must have allowing you to steal their things!! I'll bet you pay for it in the end! What were you doing rummaging in their toy box anyway ?
- 296 replies
-
- 4
-
-
- chaperon
- model shipways
- (and 1 more)
-
There is one scheme on the box and another on the photo sheet that comes with the kit. I can't work out which one I prefer but I have a way to go before I need to choose. Thanks for the comment HOF.
-
Steve, it would be fun to light it but a bit of a fuss for one light I think. Derek I have loads of left over veneer that I can use but, as the boss wants me to paint this rather than leave it wood I might be able to get away with one layer and some filler. I know your version looked super but I do seem to have rather a lot of wood finish models and it might be a change to paint one. I would still leave the deck, pilot house and fitments natural.
-
I thought I had had enough planking experience with the Bounty I did Derek but it was a while ago and I seem to have forgotten everything I learnt!! I was rather hoping not to do two layers but I may well have to. The kit is very measly on wood and I would have to raid my 'spares' shelf. We shall see. Meanwhile, apart from a wheel what should I put in the peculiarly shaped pilot house ? Any ideas ?