HOLIDAY DONATION DRIVE - SUPPORT MSW - DO YOUR PART TO KEEP THIS GREAT FORUM GOING!
×


Mike Dowling
-
Posts
1,234 -
Joined
-
Last visited
Content Type
Profiles
Forums
Gallery
Events
Everything posted by Mike Dowling
-
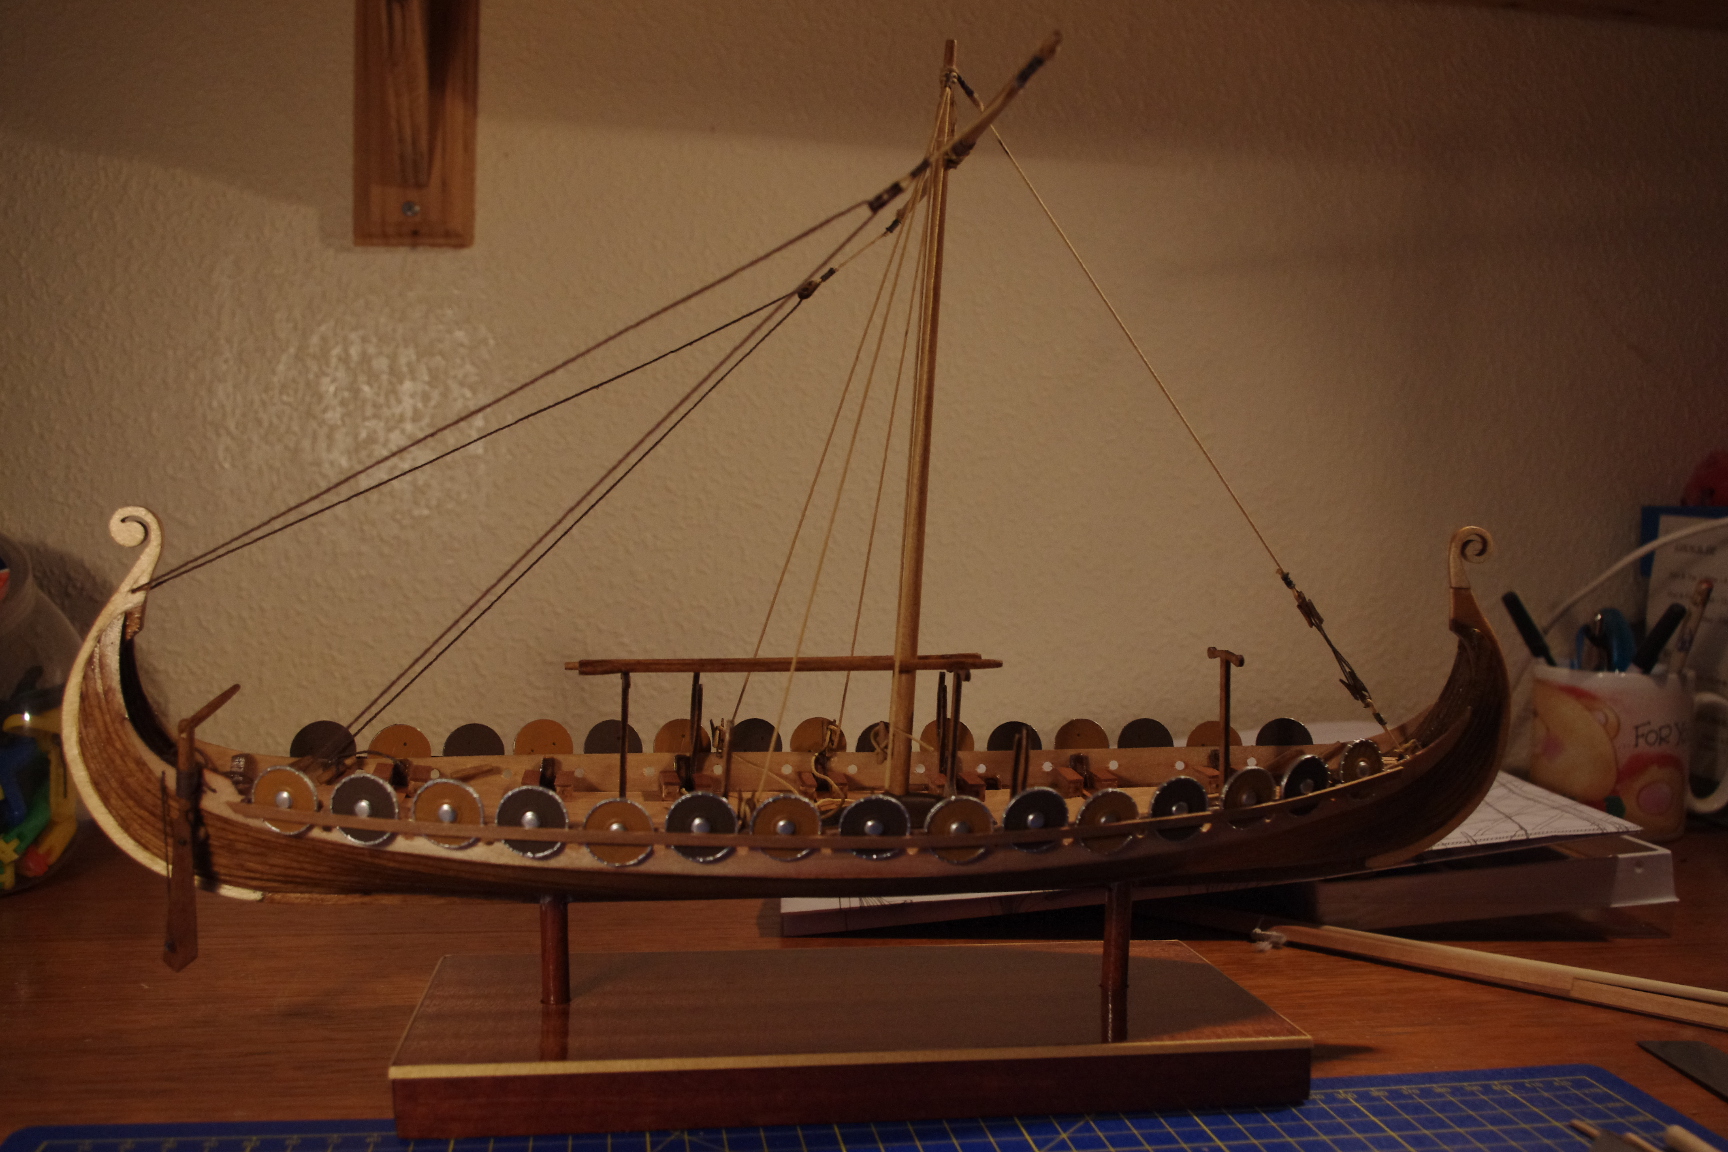
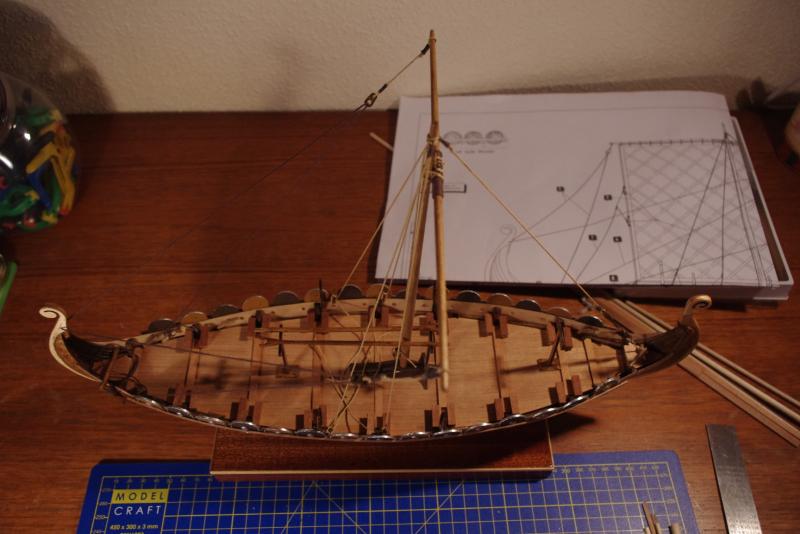
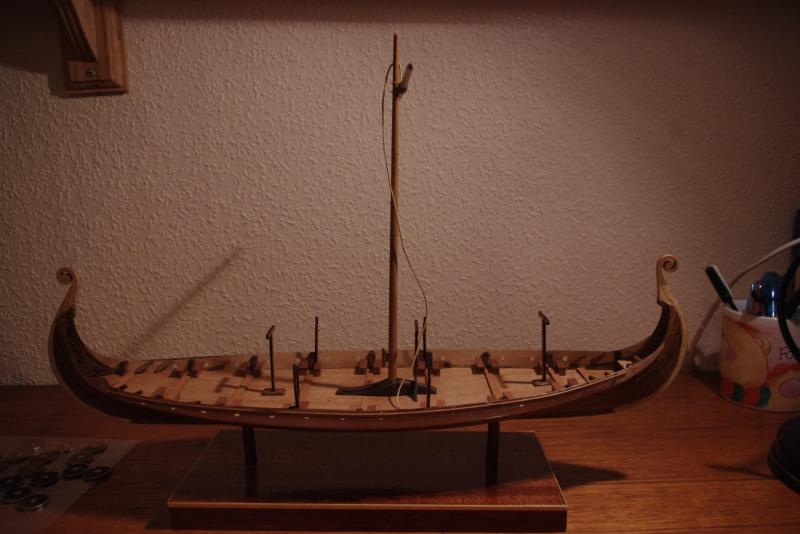
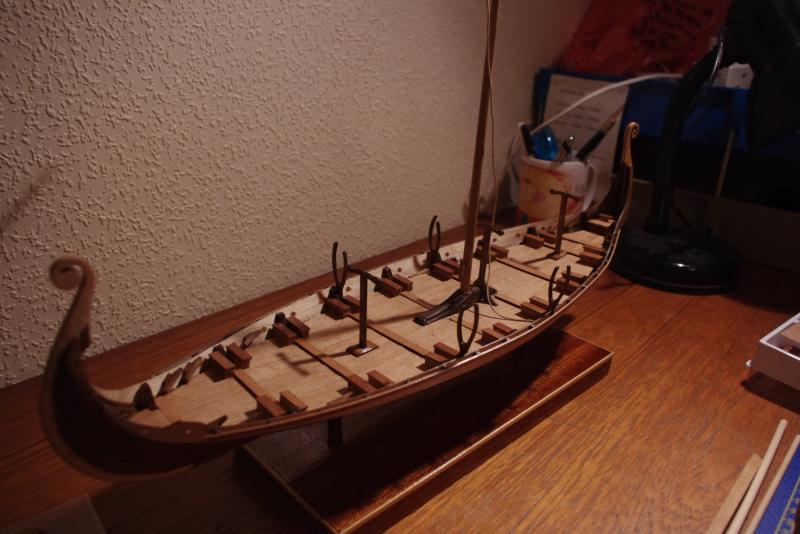
Chuck I saw that model too, it looked very smart. Width is not really a problem for me, I don't make display cases for my models as I don't have room for them and as the boss keeps telling me I have got too many of them! Anyway, I am nearly there. The standing rigging is done - if that's what you call it on a Viking boat. The shields are on. I had to make a couple of boom like thingies but I have no idea what they were for. I have to make the sail, rig it and then put it on. I am still not sure whether to do oars or sails or both. The oars will not look right if they are half in and half out although it seemed like a good idea. The rigging for the sail on this doesn't really allow it to be furled. Any bright ideas ?


-
Thanks for the comments all and thank you JL for the photo. It does indeed help, I had thought of putting a pin there and indeed I will.
-
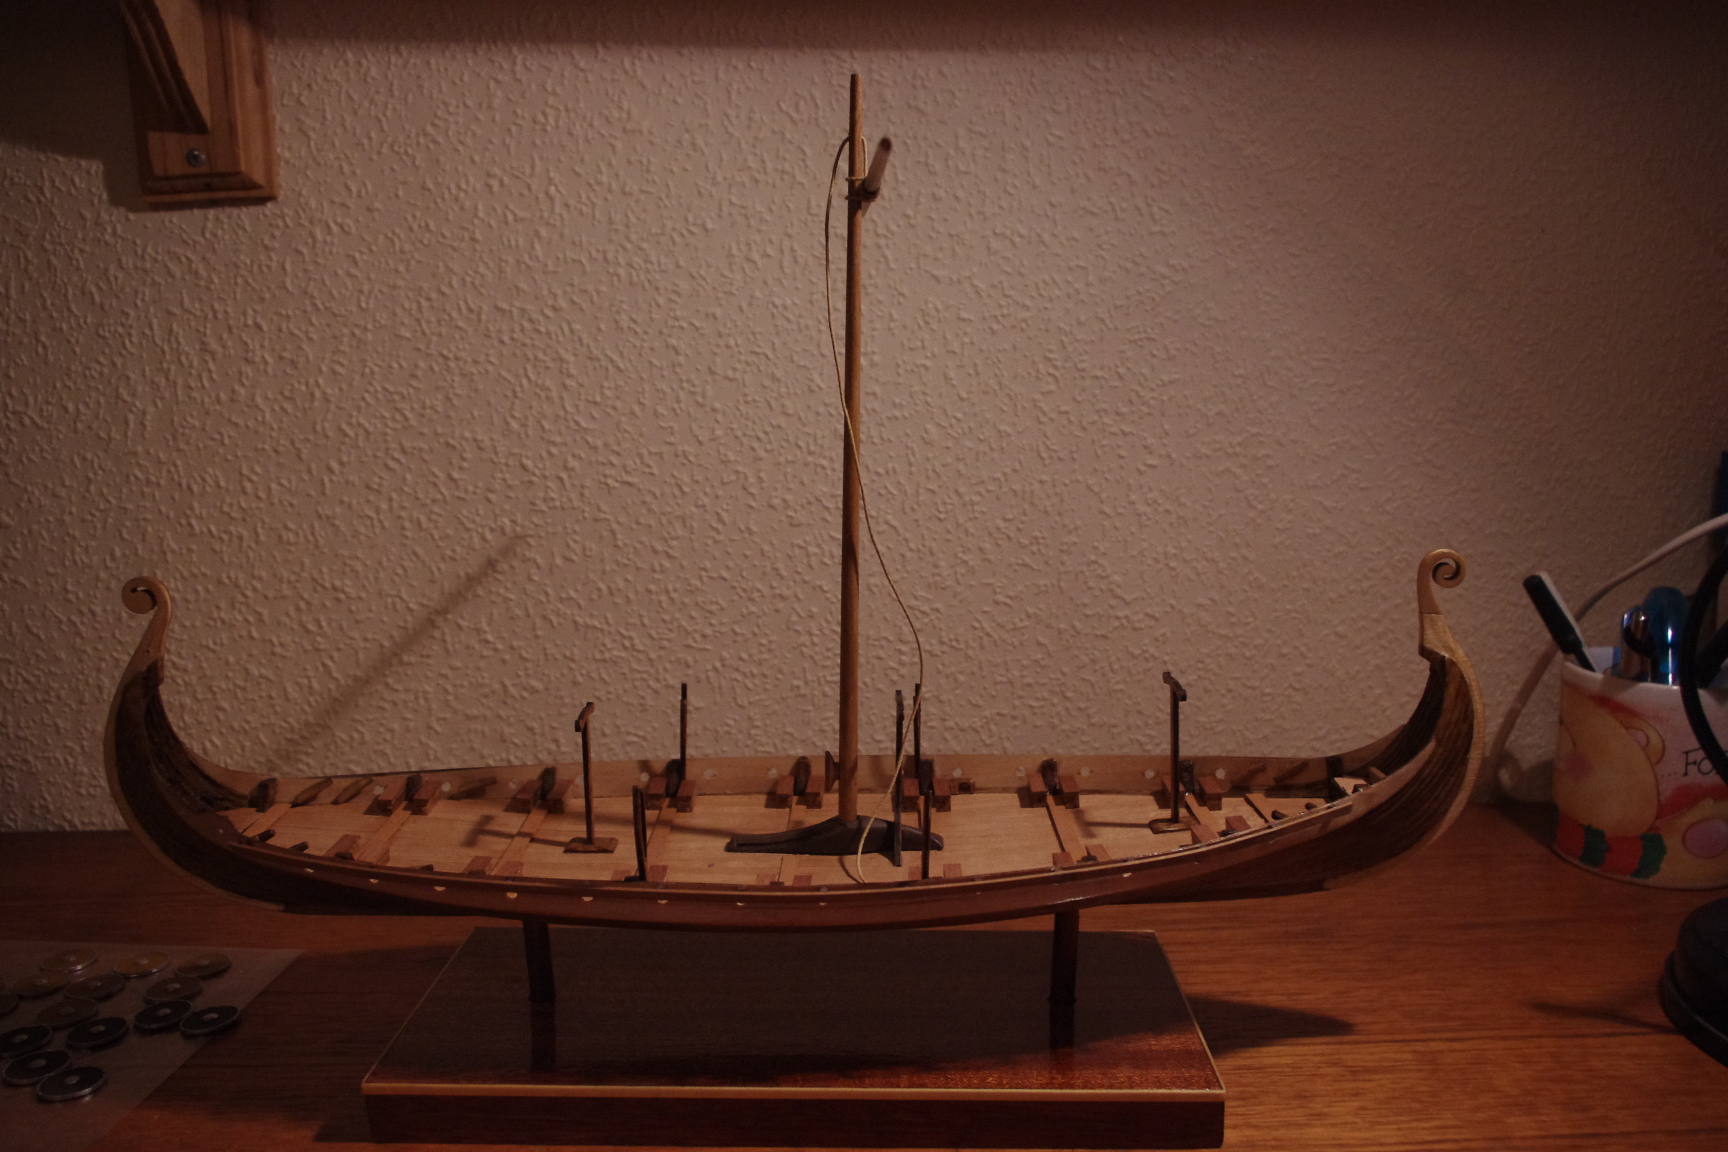
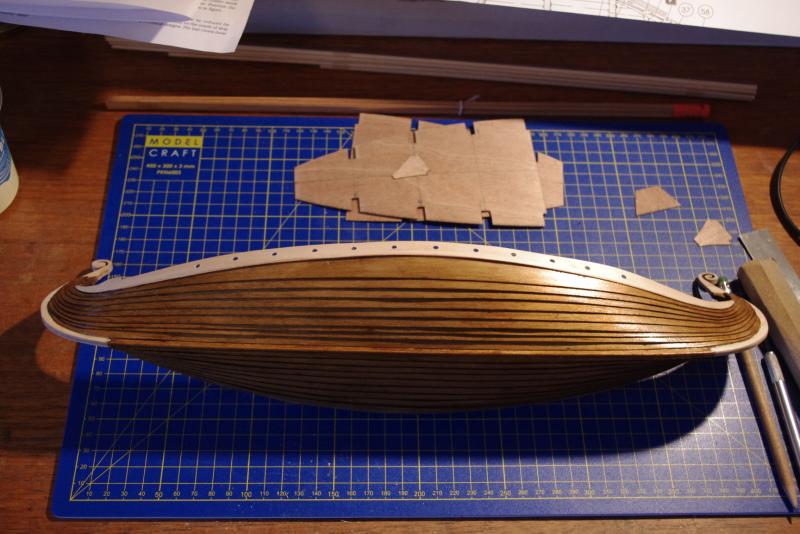
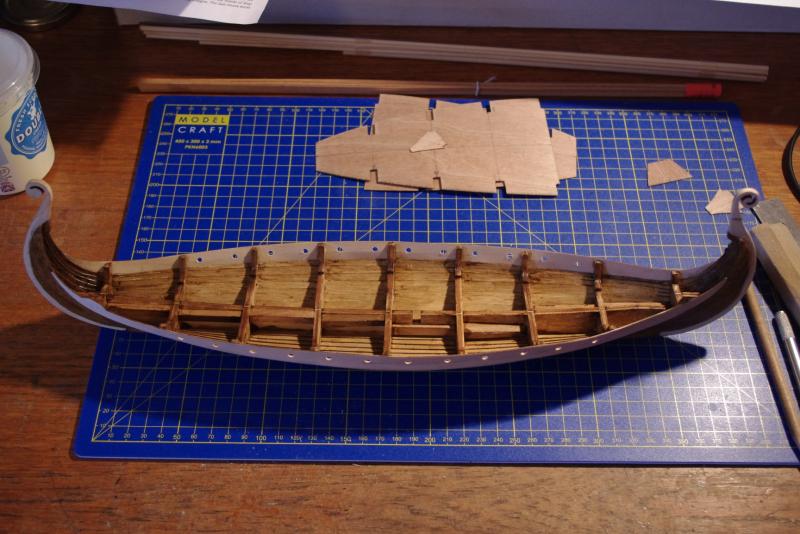
Well folks, I have added some 'deck furniture' as it were. The strange oar holders, benches that I made for the rowers to sit on, cleats, the mast and the external oar rack holders are on. Not too much to go now, the anchor is drying as is the rudder. By the way, and ideas as to how the middle hole in the rudder attaches to the hull ? And, do you think it will matter if I put the sail on in the sailing position and have the oars in the sides as well ? I know when it was afloat it would be one or the other. Every model Viking boat I have looked at is rigged differently, does it matter ?
-
So now you are cheating !! Leaving bits off is just not British !! I know it looks a wreck and I know it's supposed to but leaving bits off, oh dear oh dear!!
- 296 replies
-
- 3
-

-
- chaperon
- model shipways
- (and 1 more)
-
I know my resume about the Chaperon had some criticism but compared to this one Model shipways are brilliant !!!
-
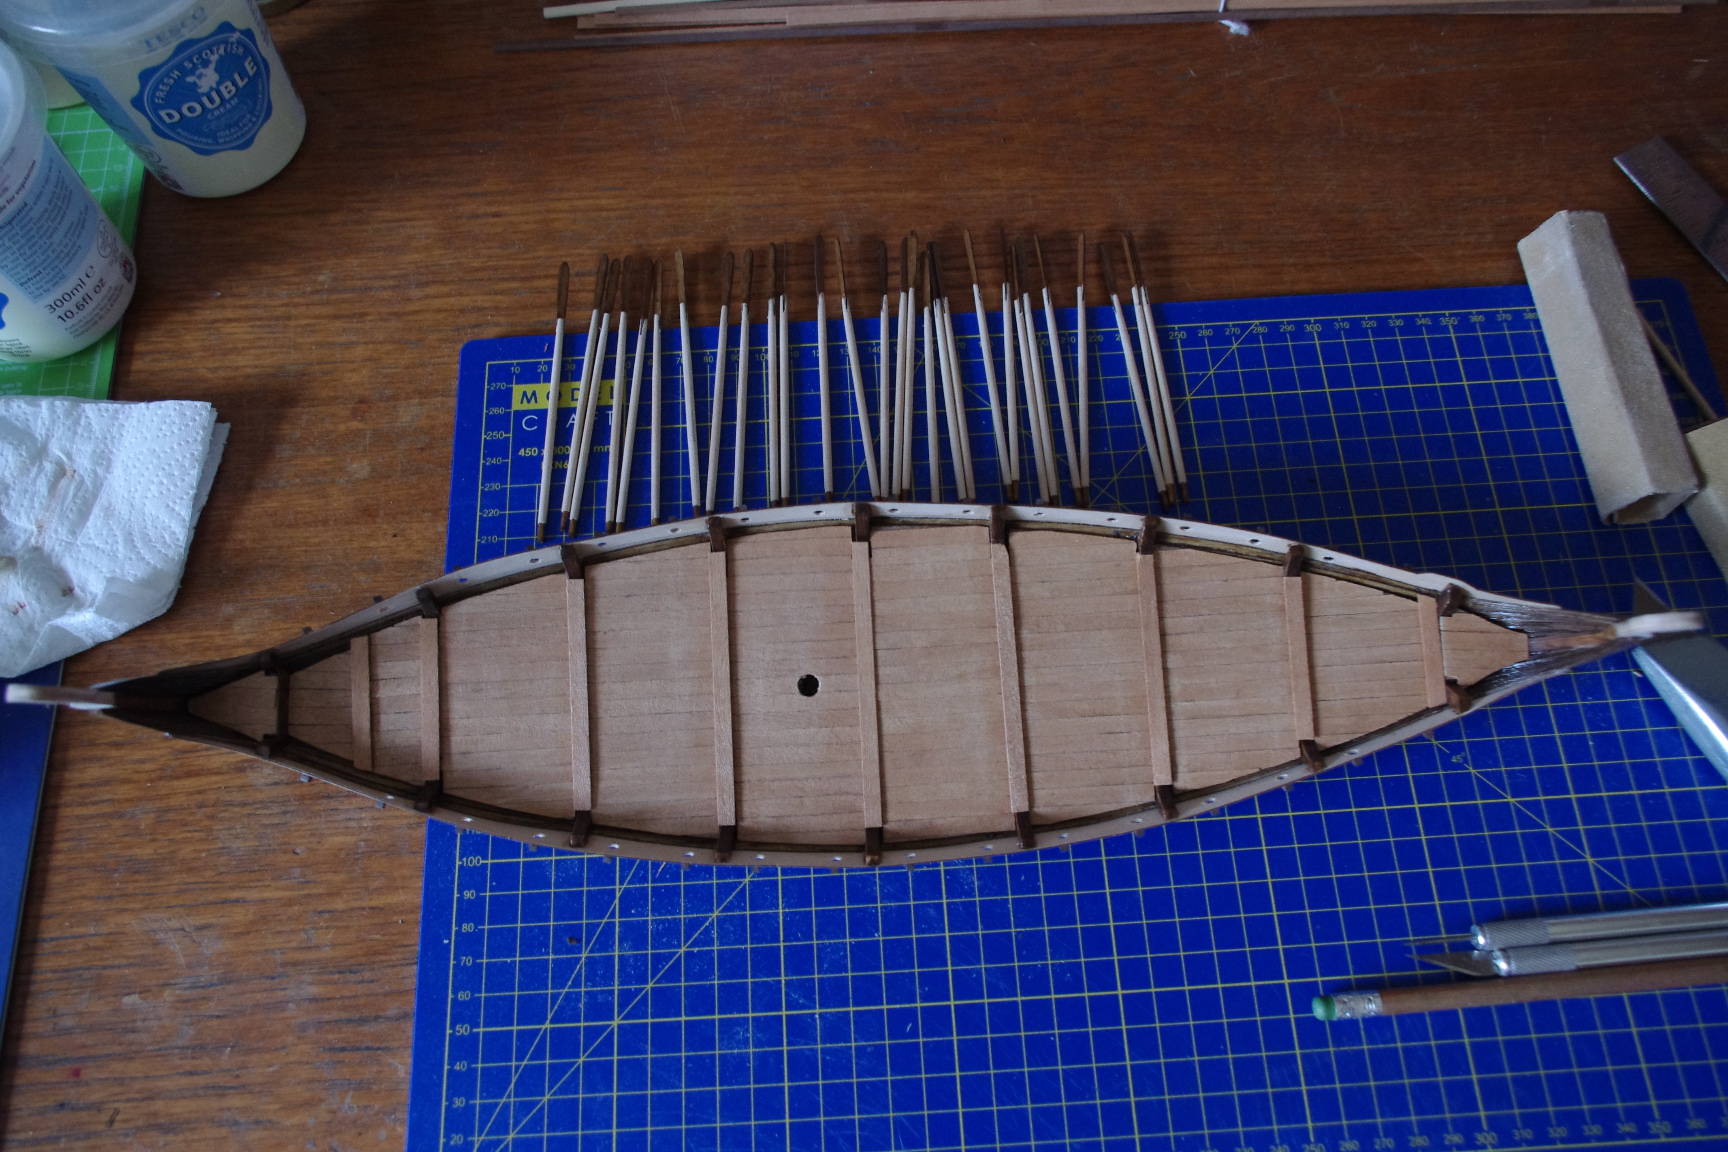
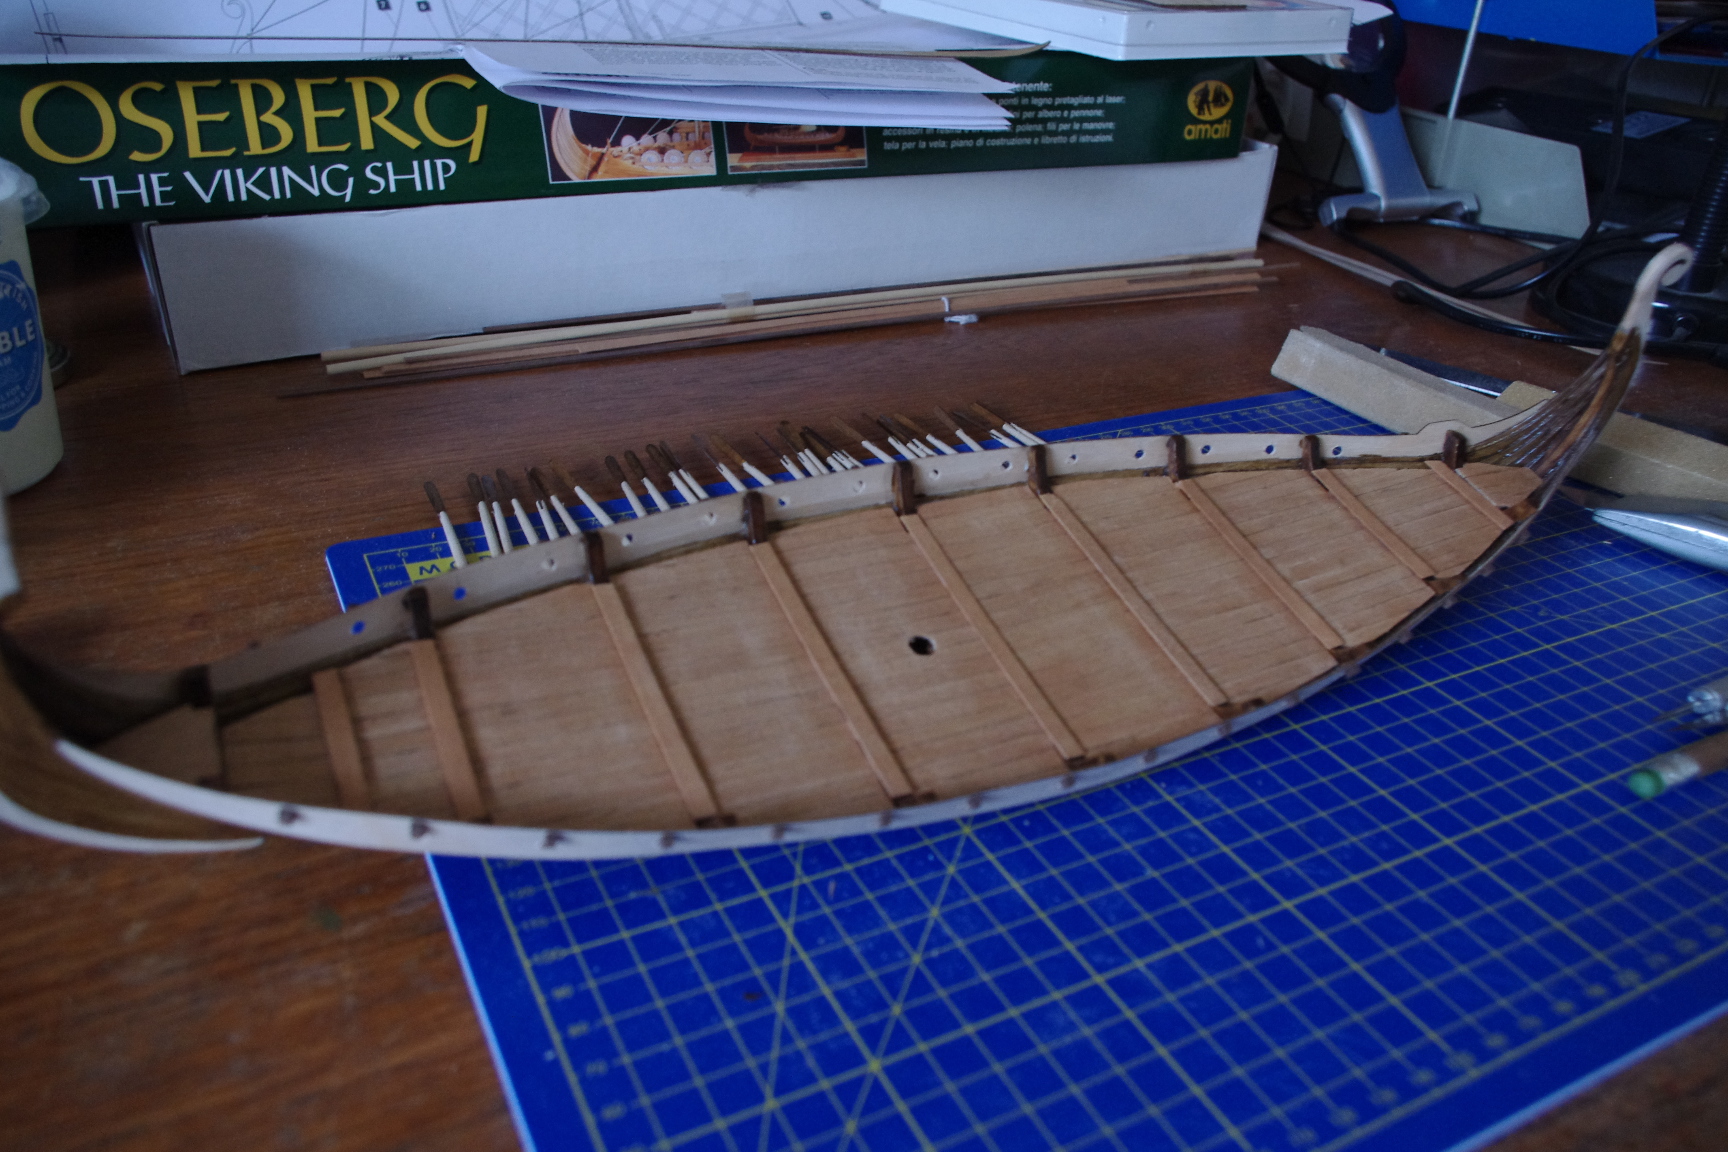
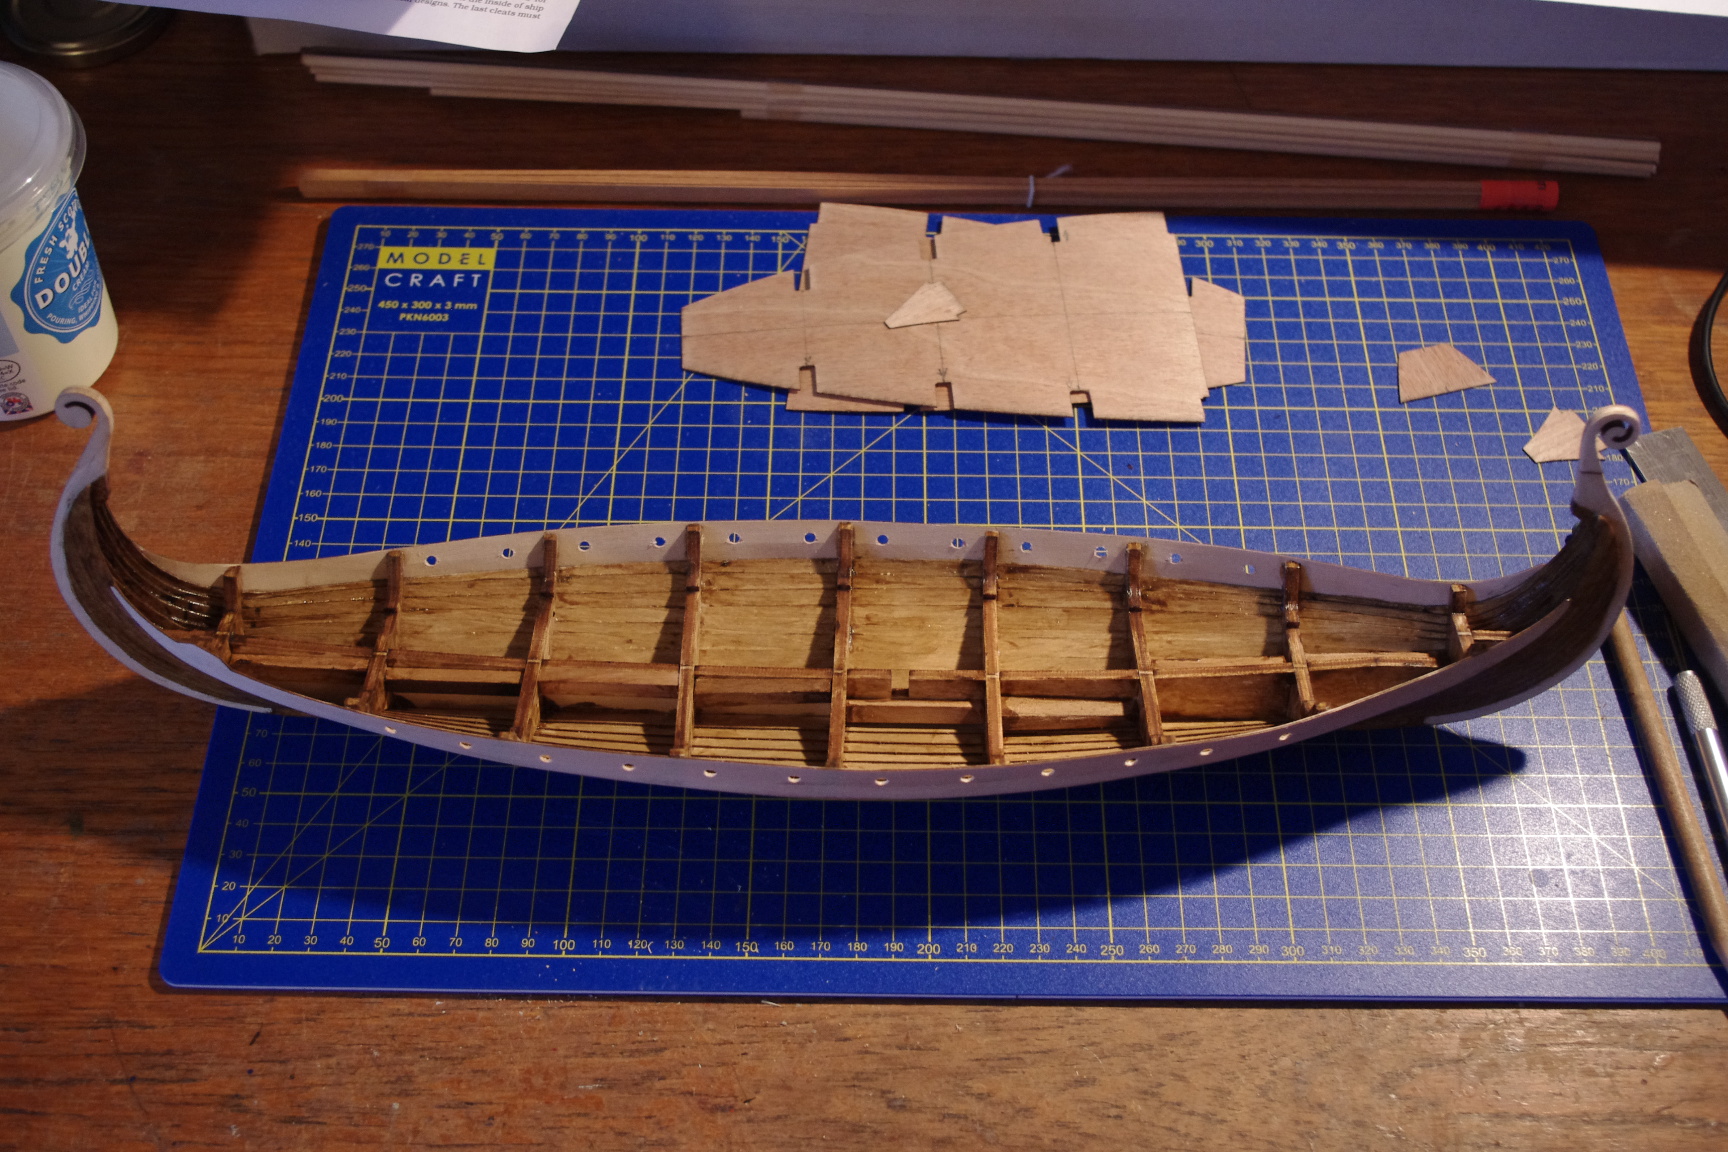
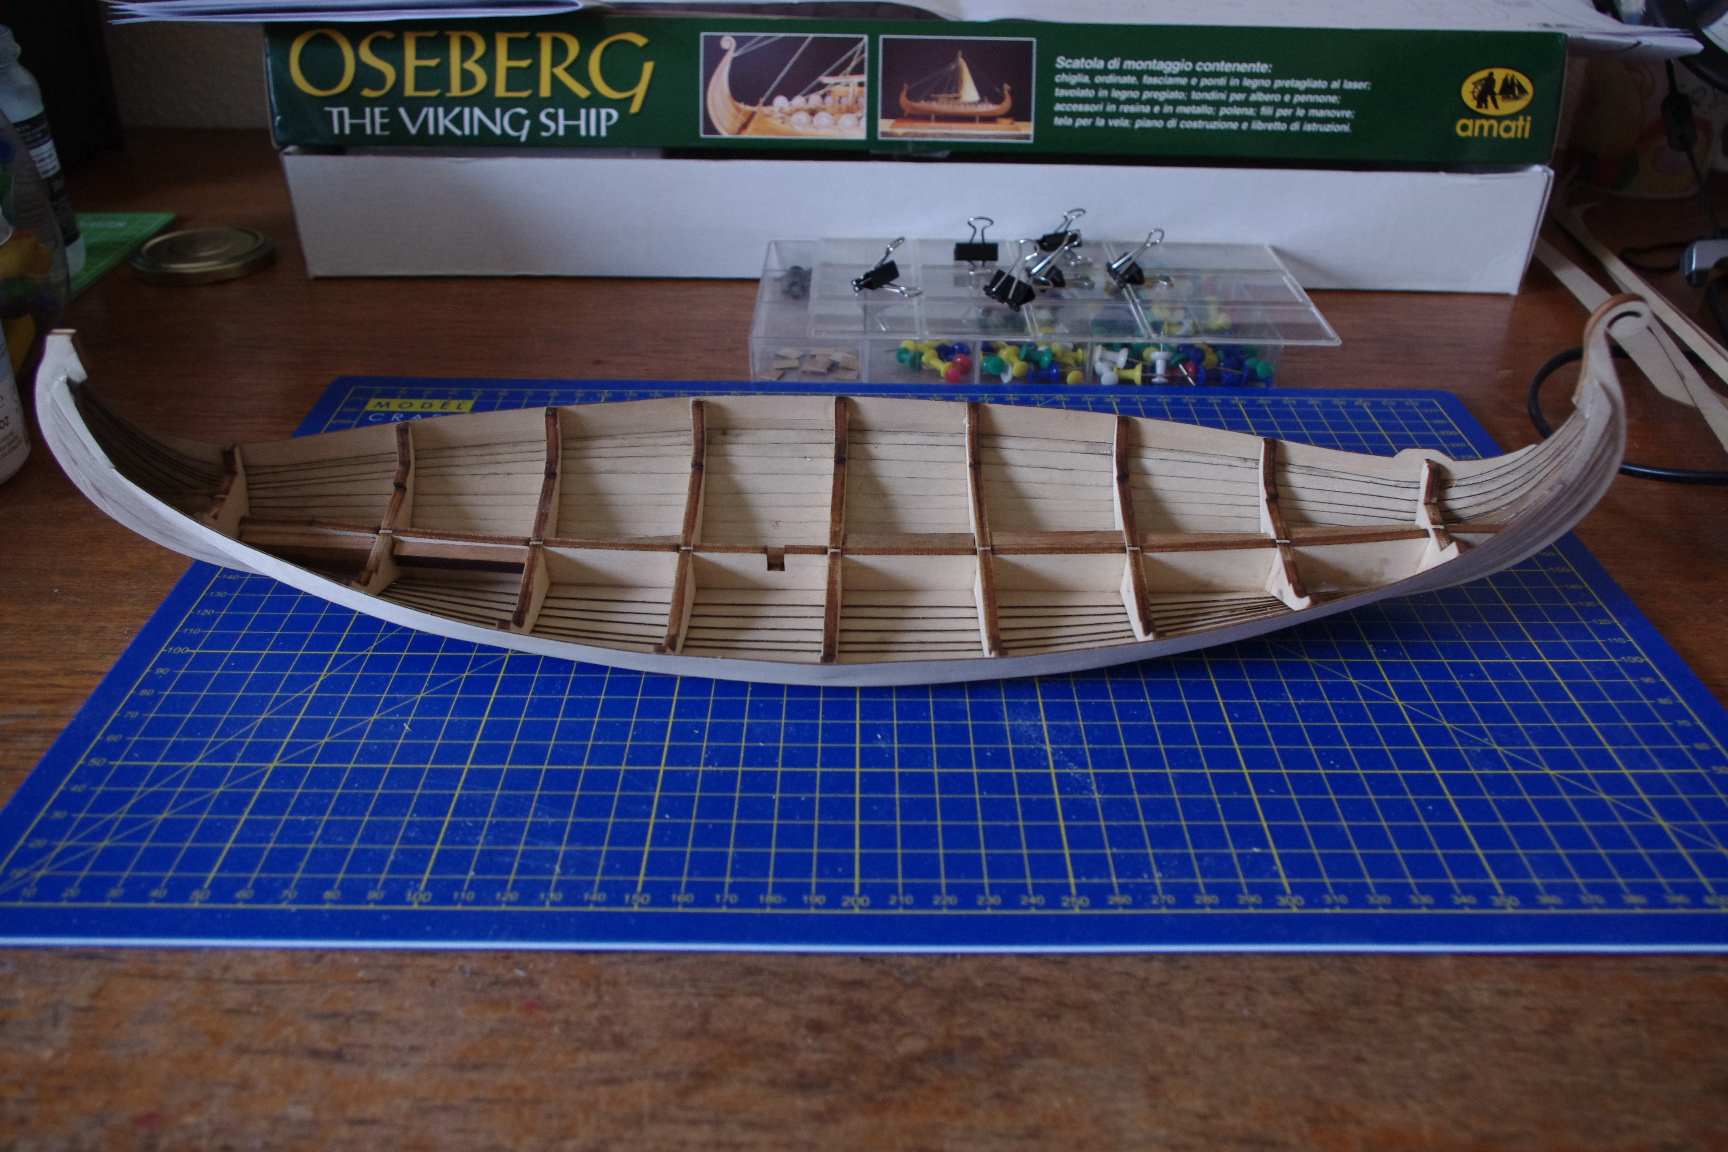
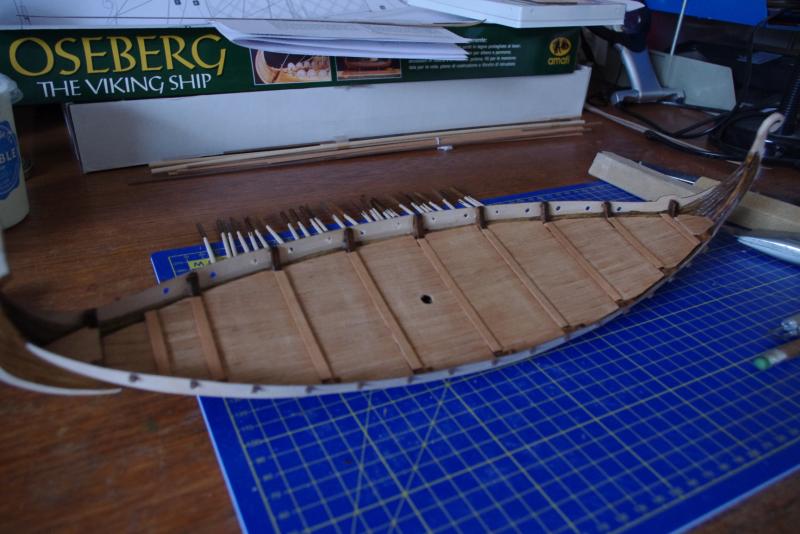
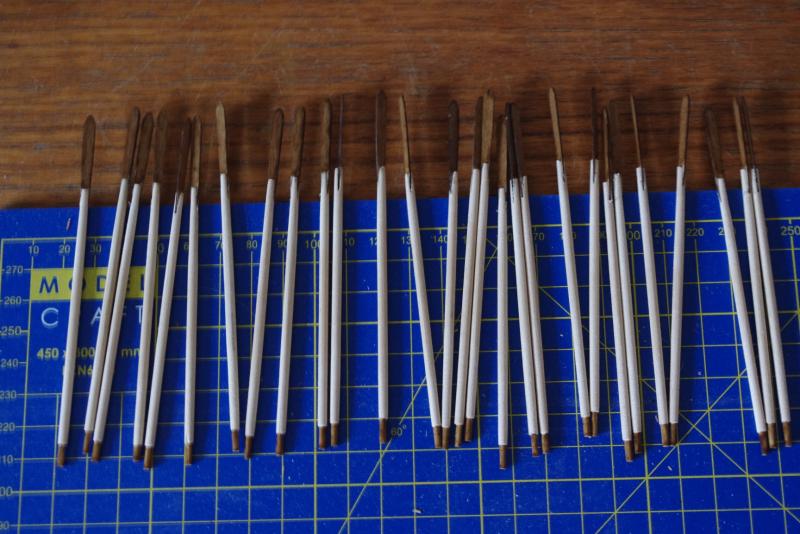
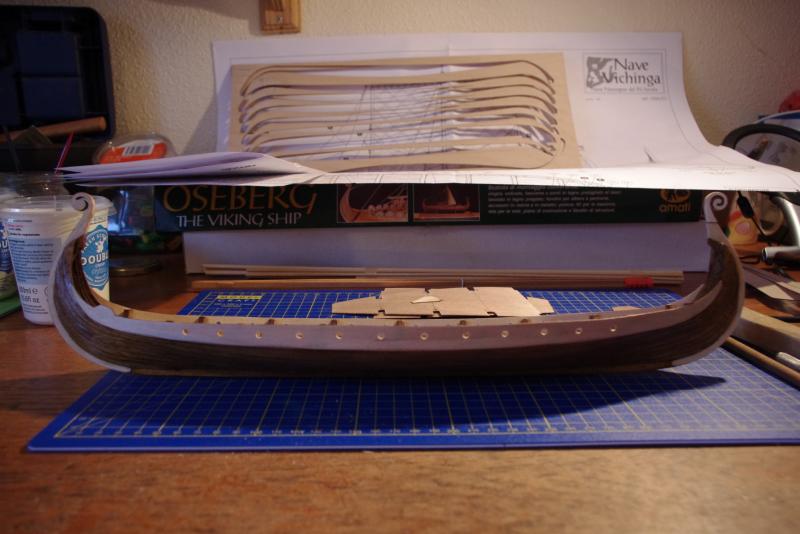
Some progress. The deck in on with some 'modified' planking. The concern about the exposed parts of the bulkheads except for one was solved with an extra layer or two of stain/varnish. A whole lot of oars constructed, bit more varnish to go on those and the spacers for the shield racks are done on both sides.

-
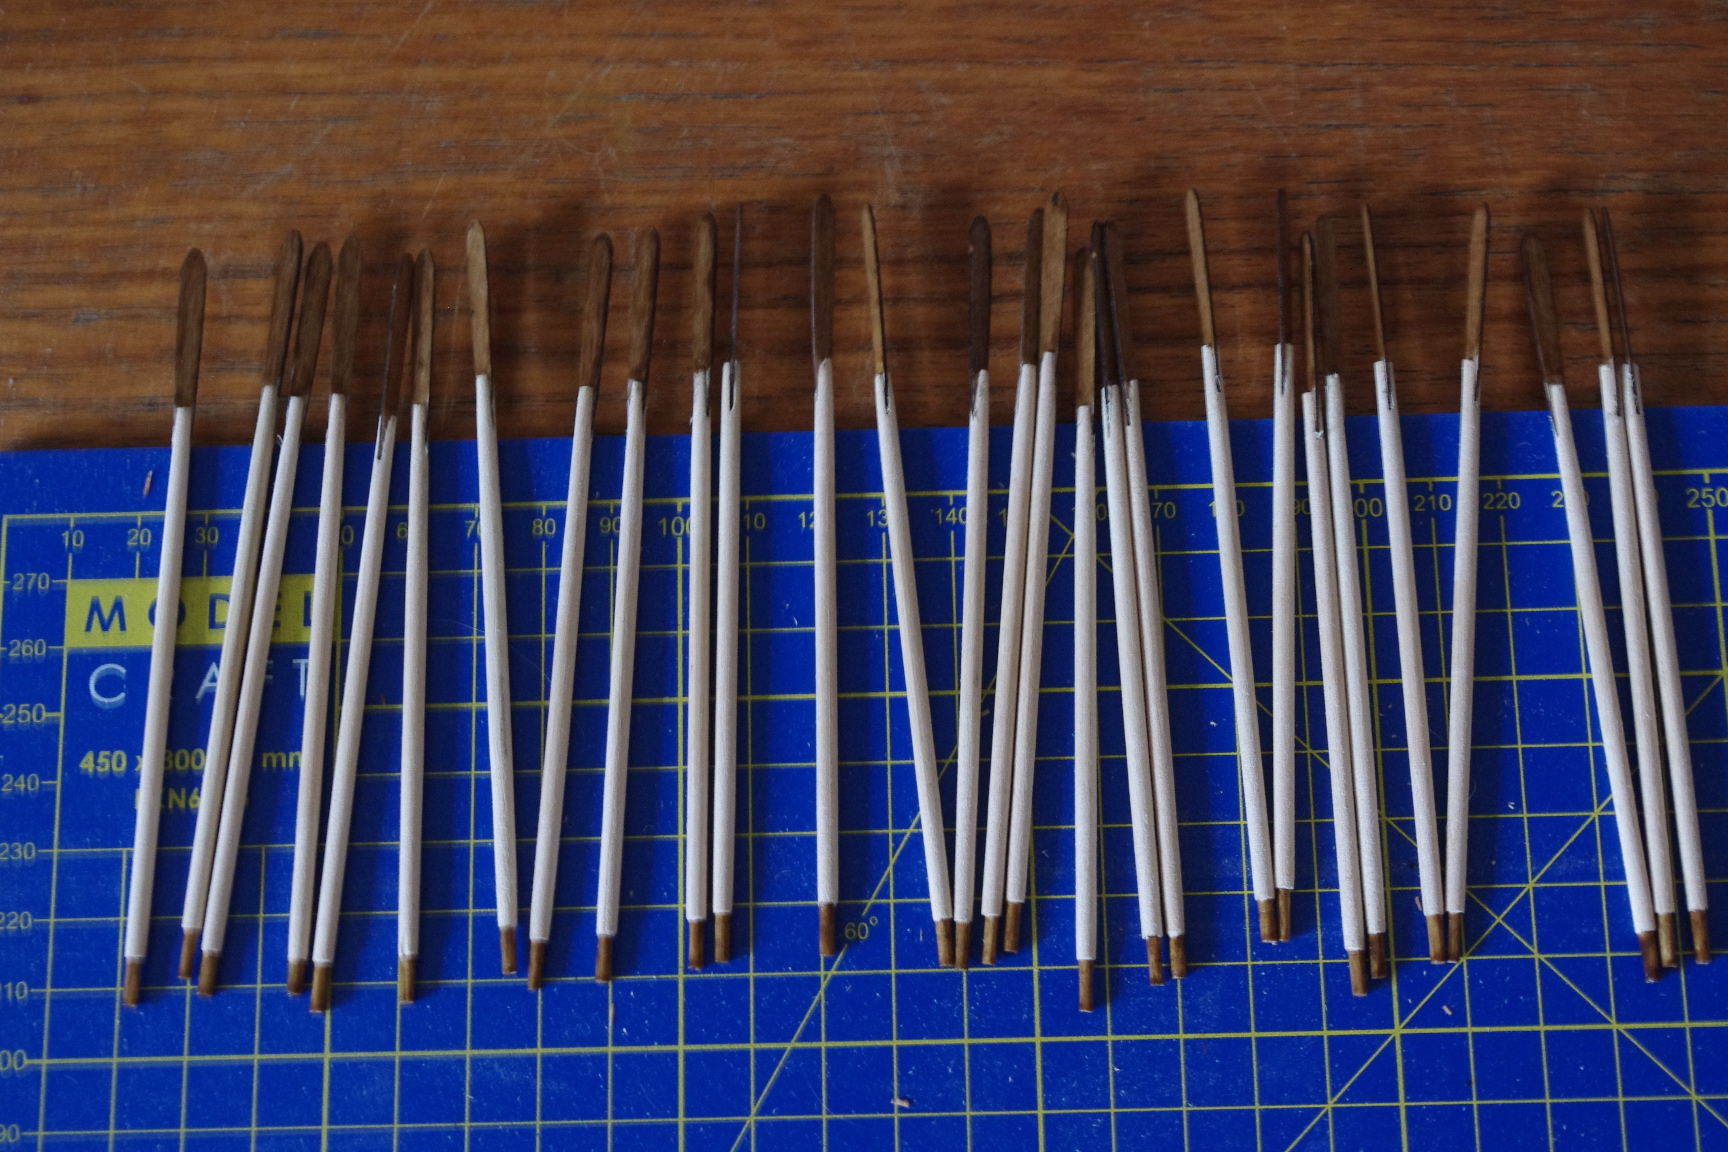
Does anybody know how the oars were attached for rowing and what did the rowers sit on in a Viking ship ?
-
I used good old Ronseal (does exactly what it says on the tin) satin dark oak varnish. I stained the inside because a bit of it will show and the varnish will also add more strength to the hull as if I didn't use enough glue - haha. Not sure about laminating the bulkheads etc yet, I will see how it looks with the planked deck on. Sorry you are confused Carl, the prow is the very curly bit and the stern less so - as if you care! Question, should I leave the rest of the woodwork really pale ie. just varnish it or, should I do it light oak?
-
If I had put lights in mine I would have opted for fibre optics. Less light sources and easier to hide. Just a thought!
- 296 replies
-
- 3
-
-
- chaperon
- model shipways
- (and 1 more)
-
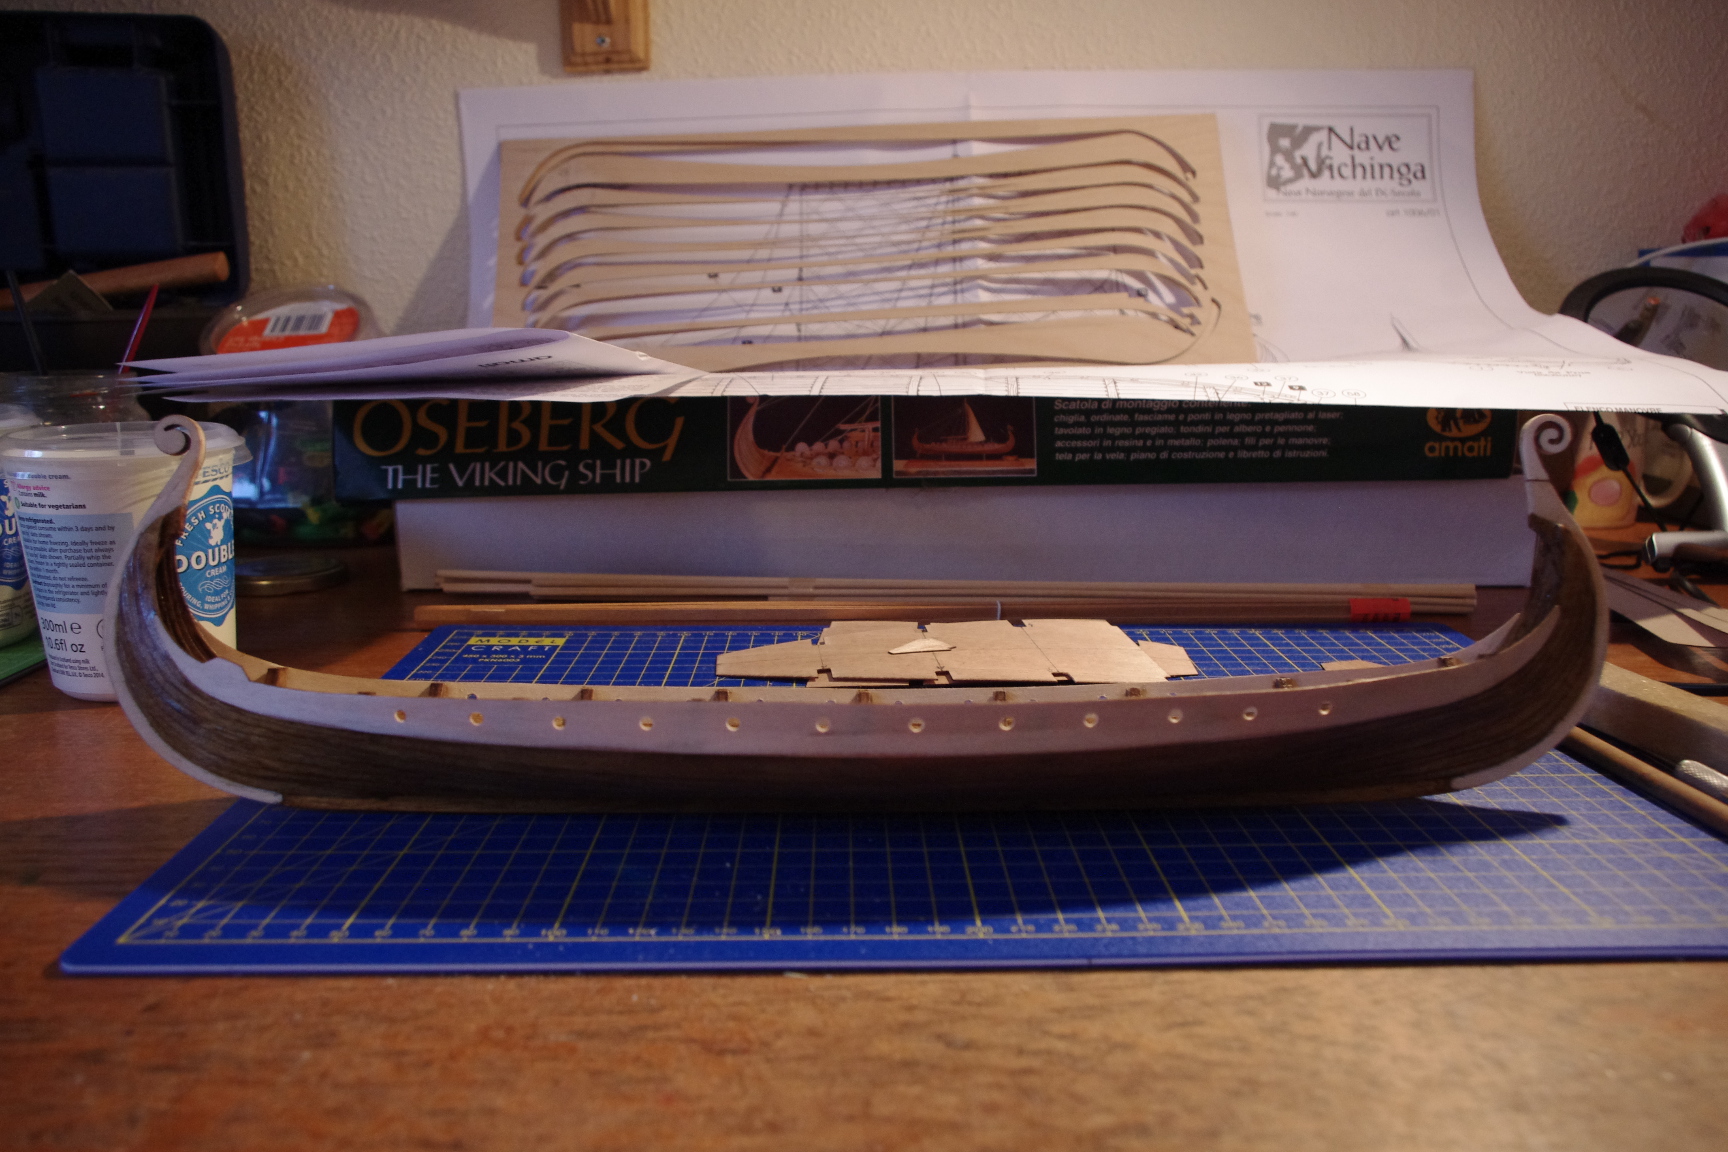
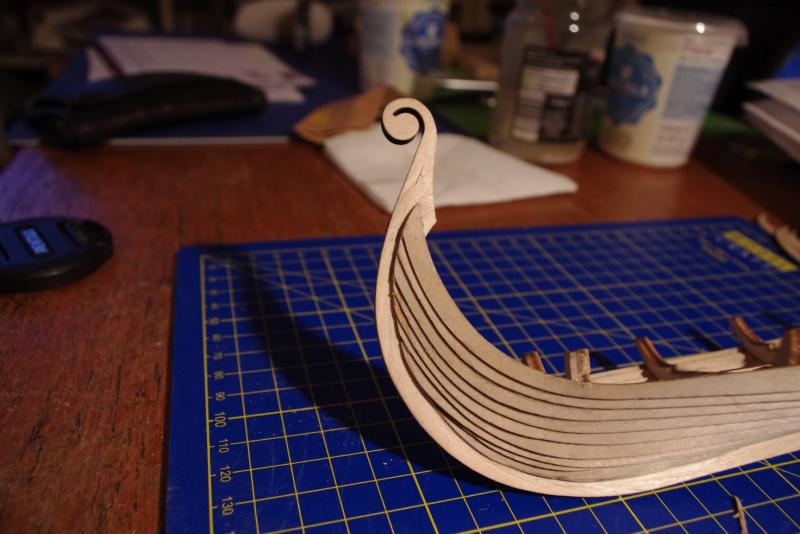
That's exactly what I thought my friend!! Anyway, thought you all might like to see a picture or two of the first staining. I'm quite pleased with it. I have also drilled the oar holes and decided not to put the rather cheap looking dragon head on the prow and opted for a scroll instead.
-
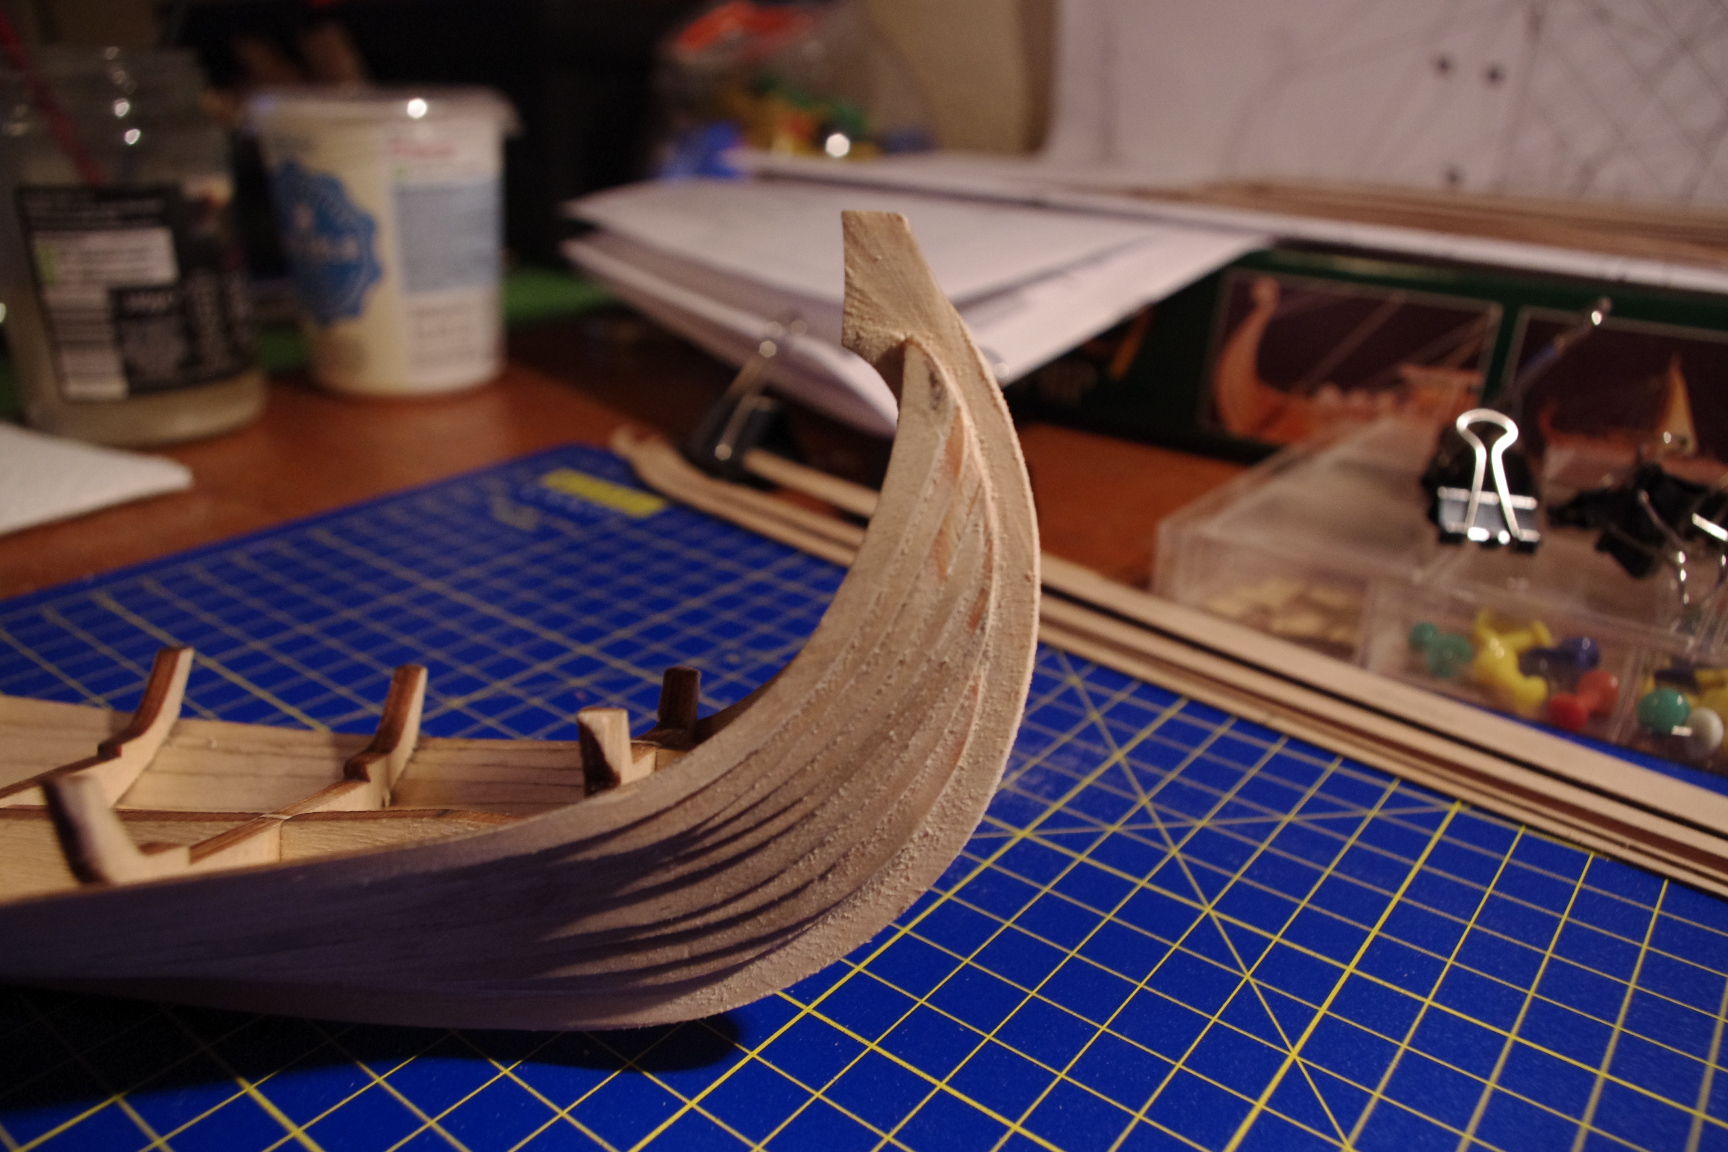
Thanks JL for your comments. I don't need holes in the keel for the stand but thank you for the suggestion. I am considering the lamination. I have stained the hull now and it took the colour much better than I expected, I will post some pictures later and I want to see how the ply stains first. Brian, I just love the expression - not heard that one before but definitely right!! It was easy to get the strakes right in the middle. The destructions suggest scribing the strakes along the middle to aid the bending. I tried it on one and split the strake. The longitudinal bending was easy because the strakes are so thin but from edge to edge not so. This for me made getting the strakes to sit right prow and stern very difficult and as JL said earlier the guides on the end bulkheads are useless. The overlap was different for each strake. It's funny really, we all spend ages trying very hard not to get a clinker effect on our boats and then when you are supposed to have one it's nearly impossible to get right !!
-
Great looking walls Len, really bad and grotty ! I thought long and hard about lighting mine but I think it was Kurt that pointed out that even with subdued lighting it would show up every crack and crevice even those you can't see. Maybe you still have the chance to seal everything but I left it too late.
- 296 replies
-
- 5
-
-
- chaperon
- model shipways
- (and 1 more)
-
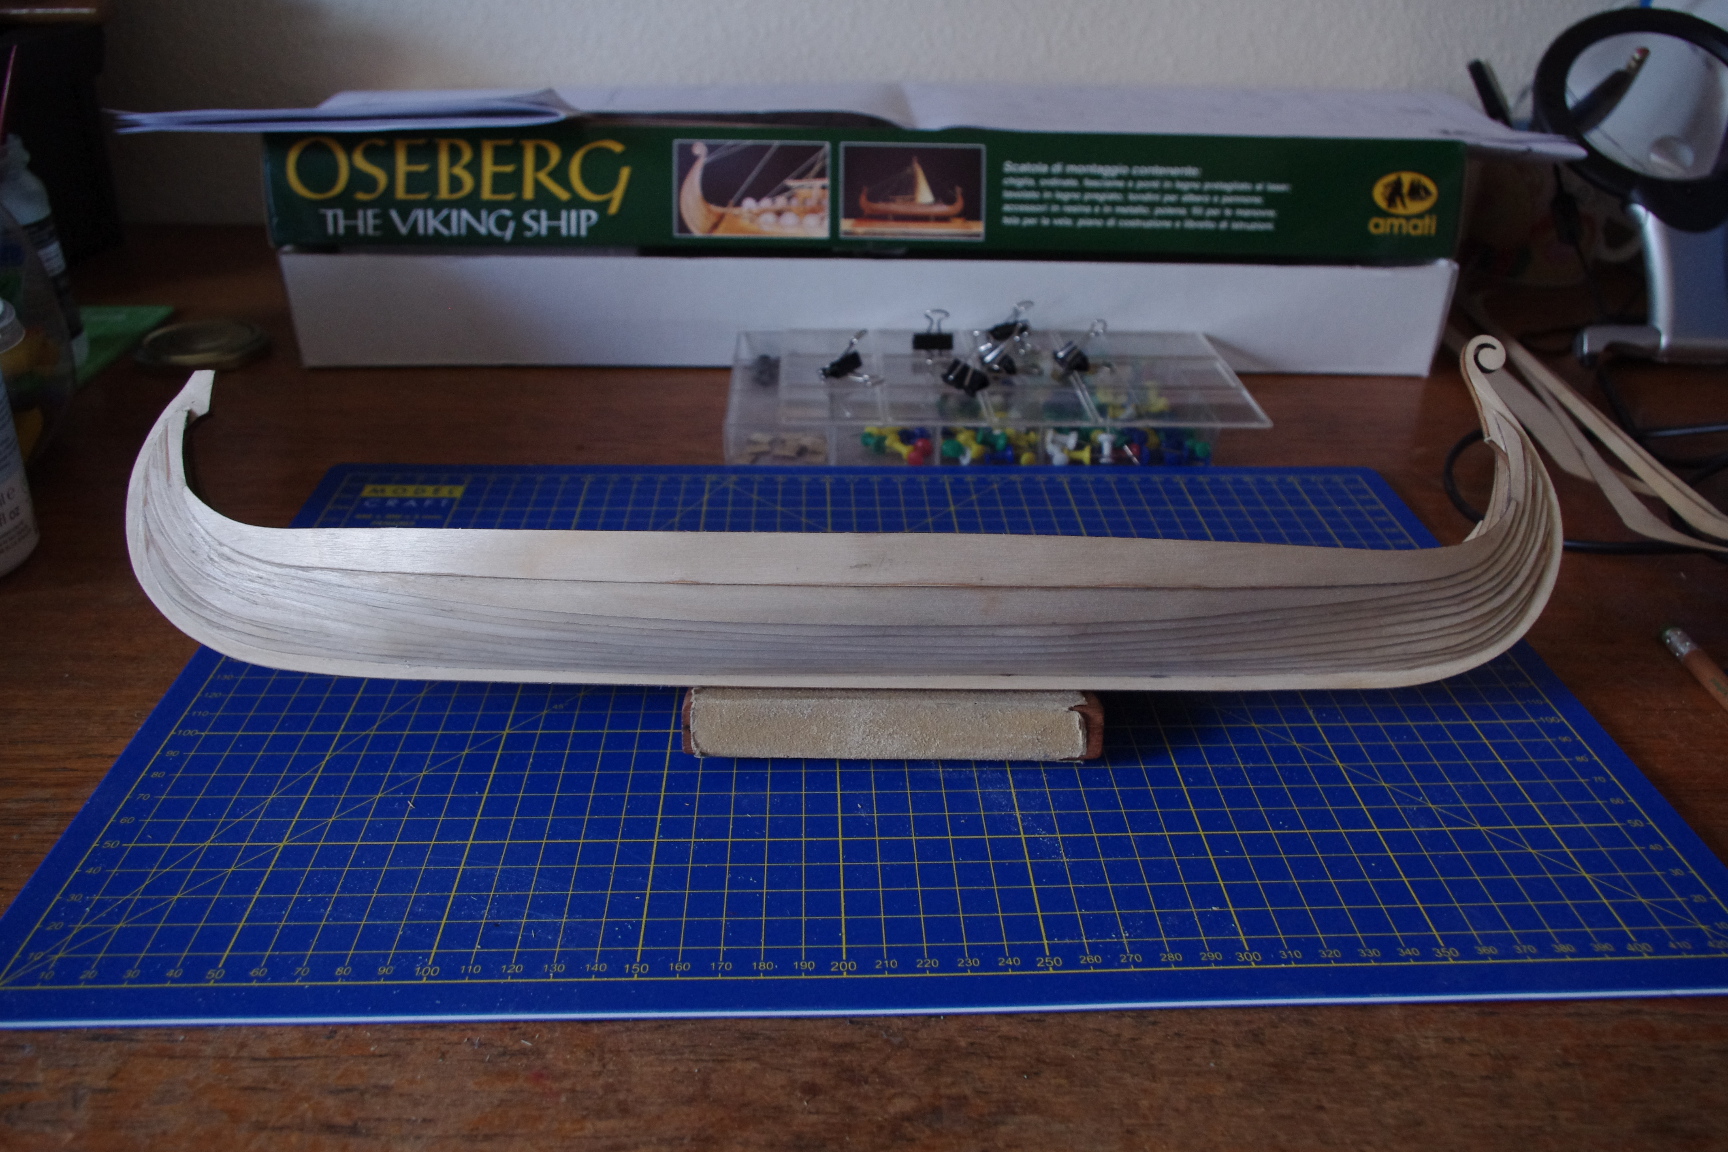
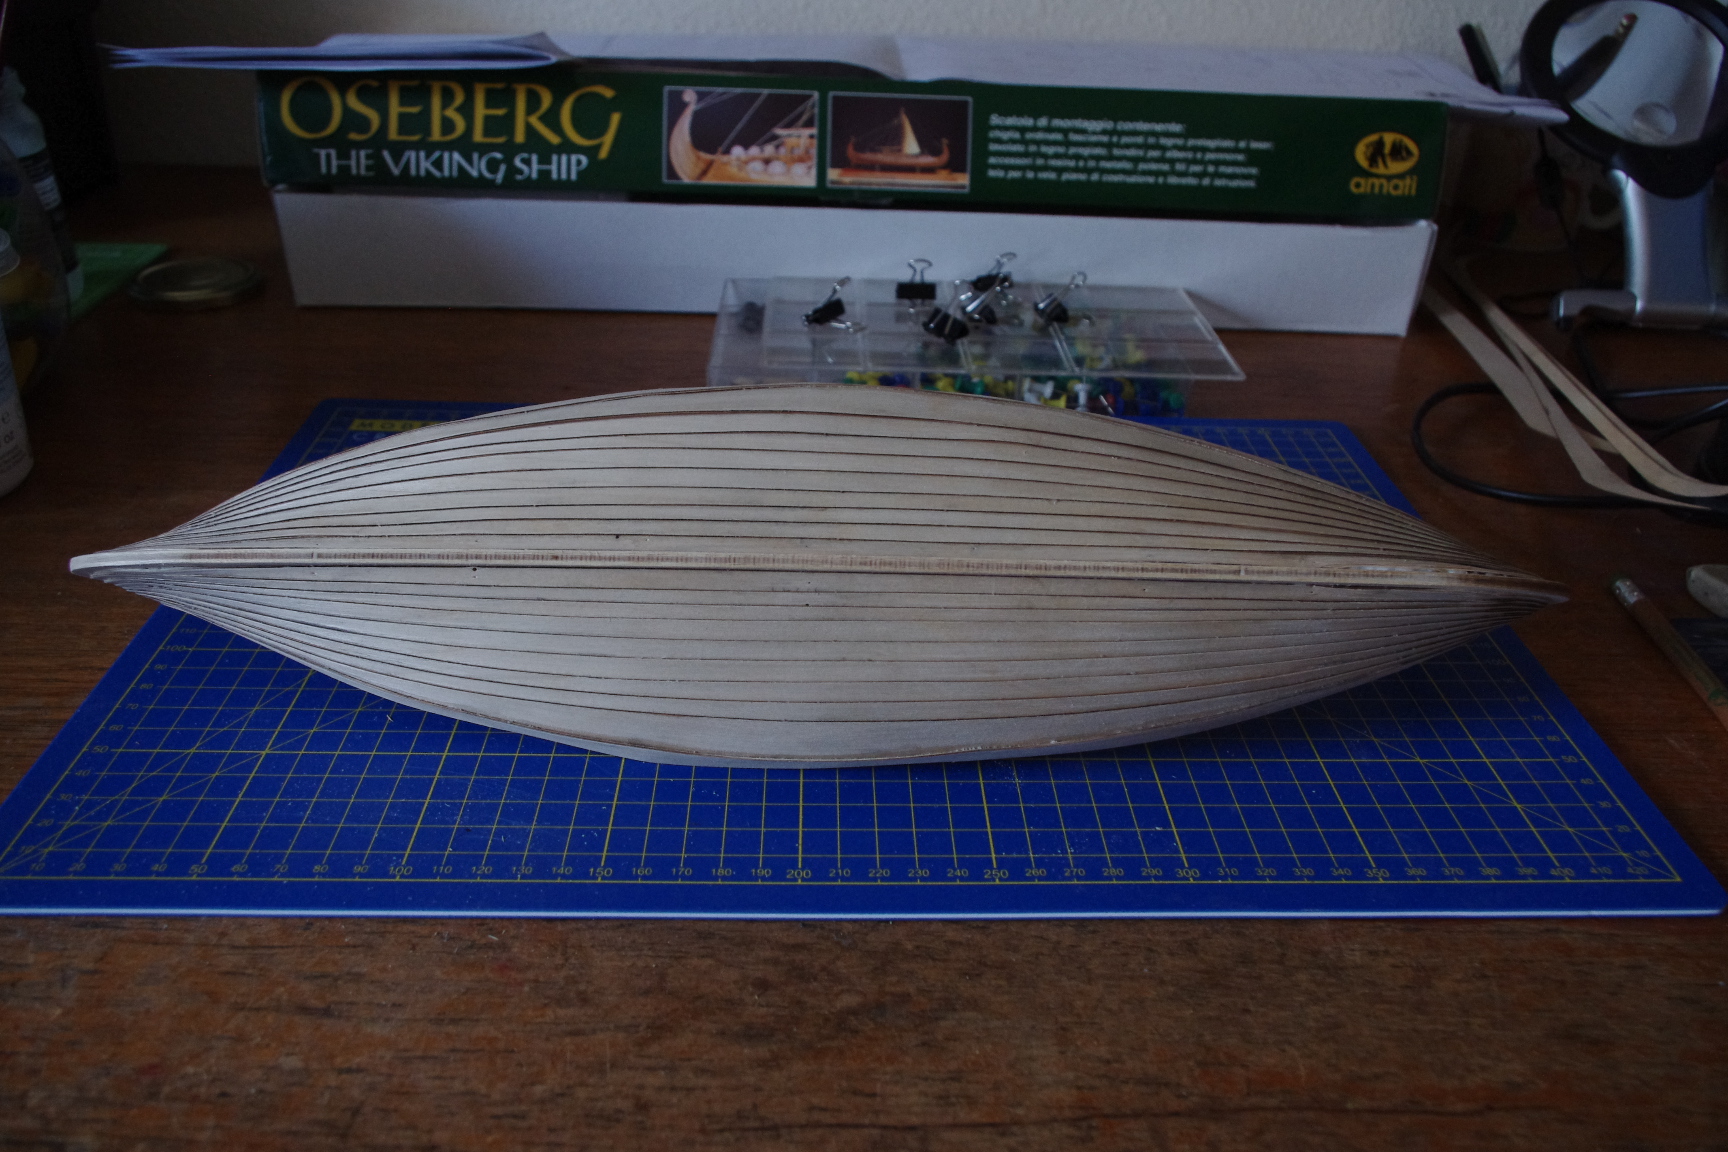
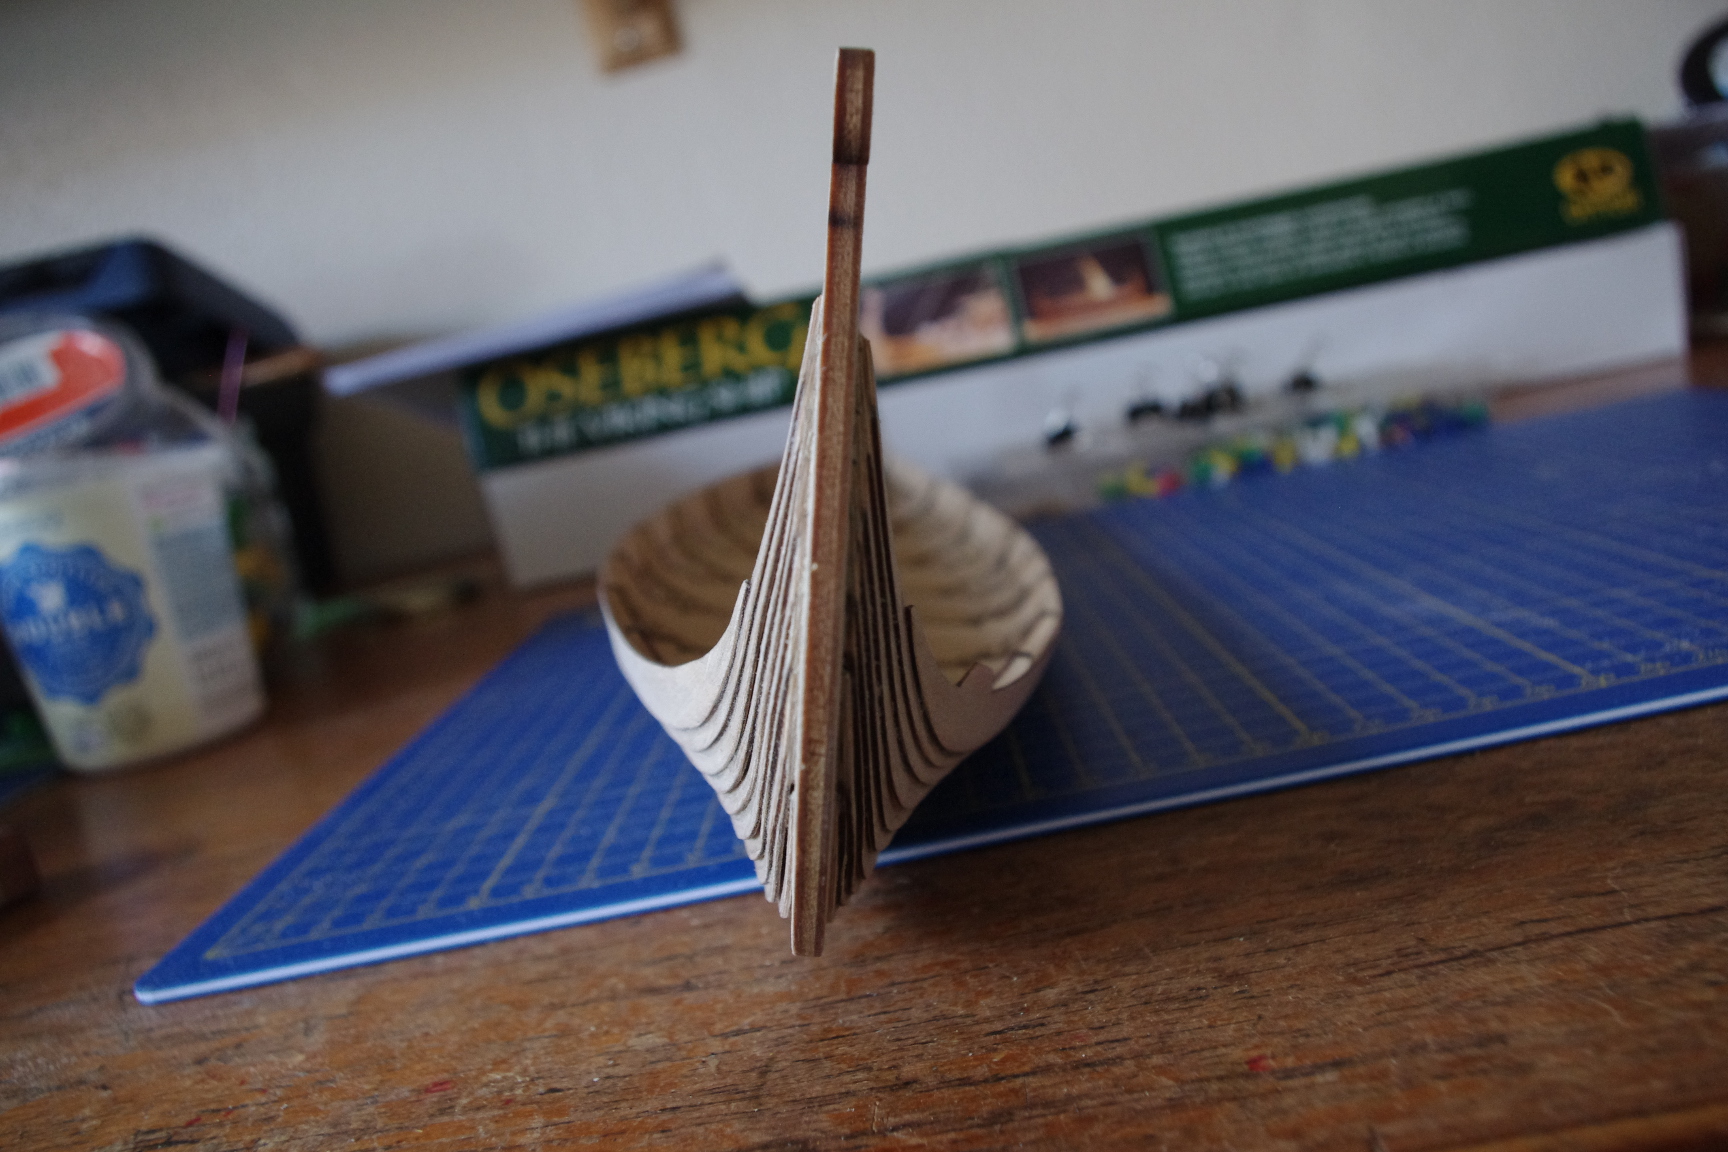
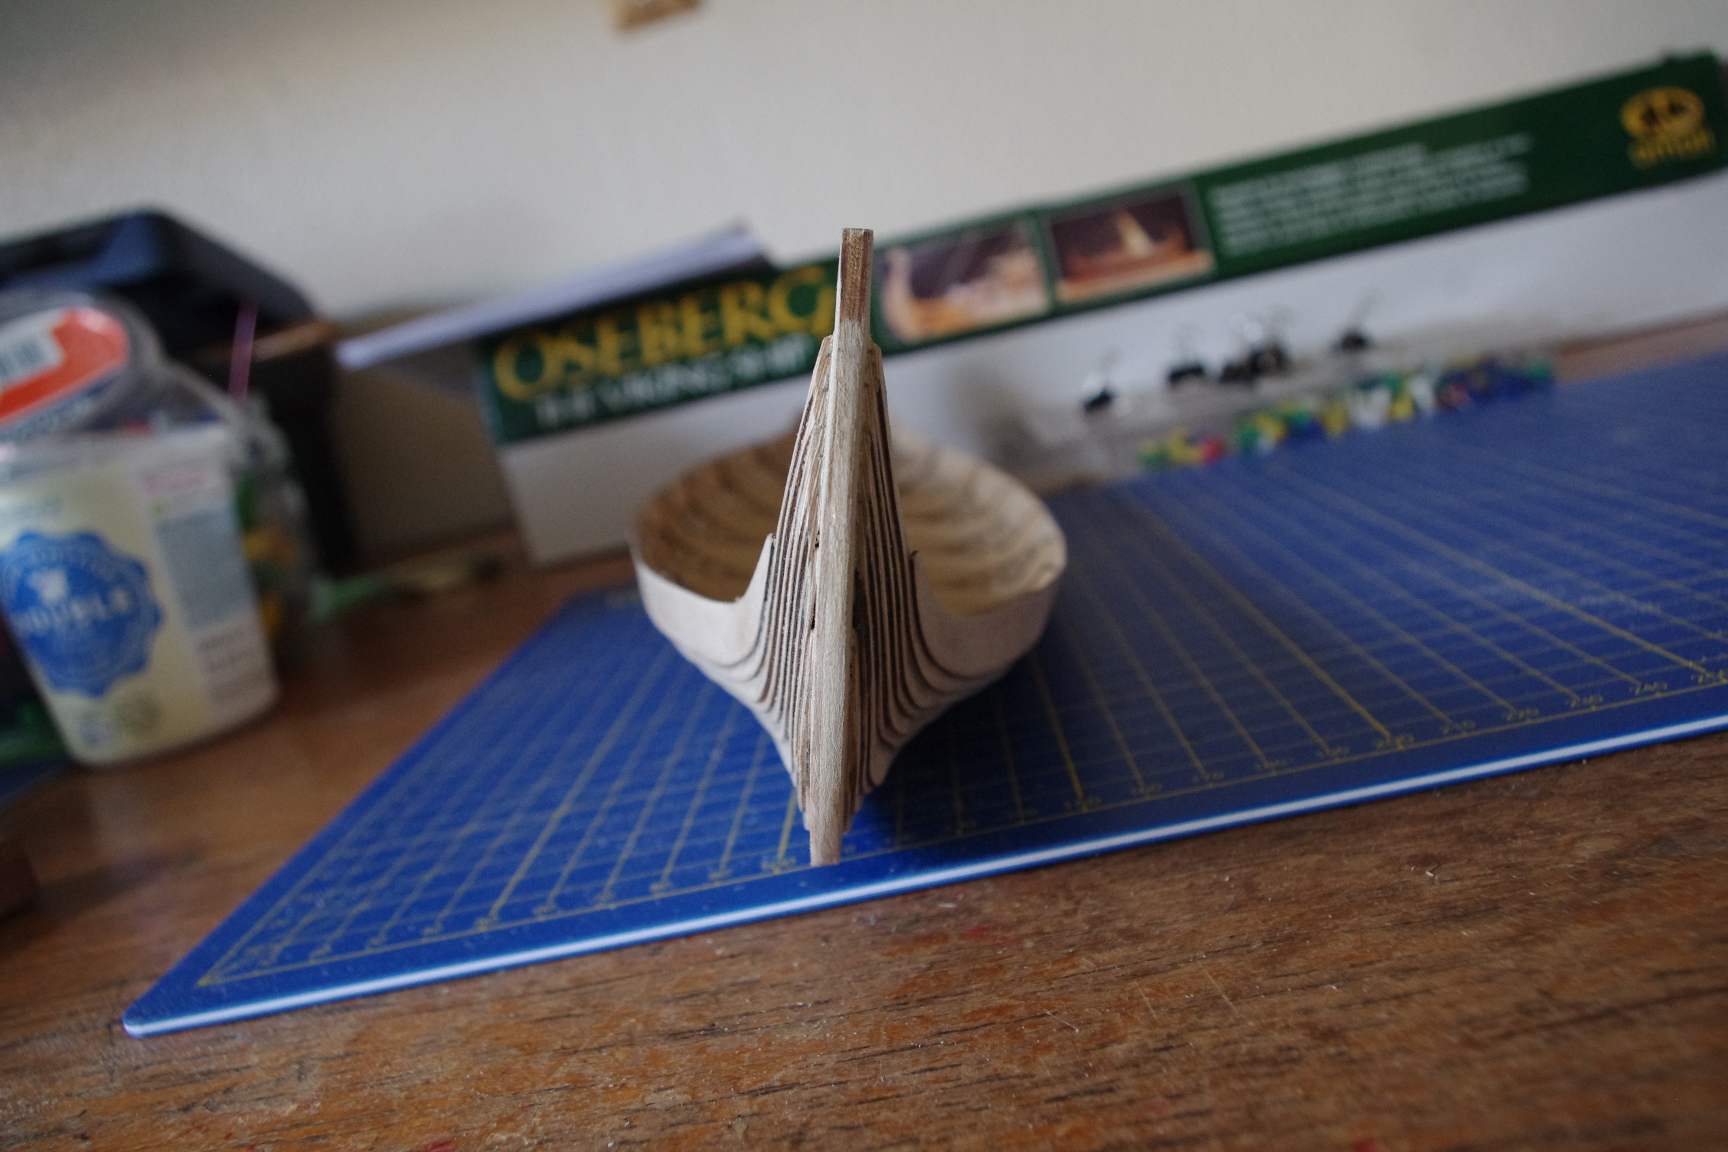
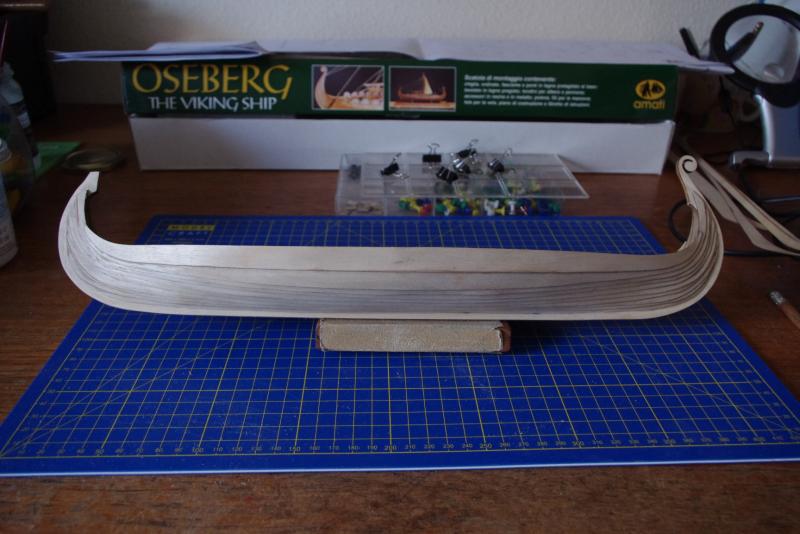
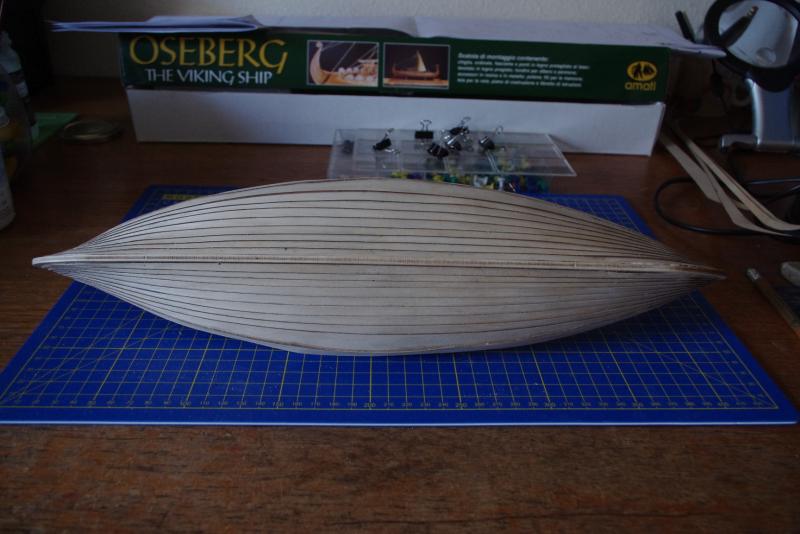
OK, progress!!! I am not sure how but somehow I seem to have achieved something like a hull ! I am not at all surprised if I confused folk with my top strake problem. I confused myself and tried three different approaches. To save boring everyone my last attempt involved re-soaking the upper strakes on the hull, using a lot of glue and more clamps than I thought I had and finally I got the top strake on top of the rest. A huge cheer has gone up in my workroom and I even made the effort to clean it up a bit so others could see. I think the next thing I will try is staining it. There may simply be too much dried glue still lying around and if so I will paint it black as previously suggested. One question, according to the destructions there are six different lengths of oars to do. Why? and does it matter if I make them all the same length ? Anyway, some photos for you.


-
Thank you very much. I can't agree with you more. To be perfectly honest I think this particular kit is rubbish. I don't think all my problems have been my fault. I know some have been but it all started with a warped keel and has gone from bad to worse. Never have I been so close to calling it a day and binning the boat!! However my intention now is just to build something that looks vaguely like a Viking boat partly because I have already made a stand for the thing!!. That is the best I can manage.
-
J.L I hadn't noticed your missing out holes, oars etc. Very crafty. If ever I get that far I may well do the same. Even so please could you be a real pal and measure the gap between your holes and the distance from the front of the top strake to your first hole. Carl and Chuck you only wish you had thought of reducing the numbers !! Let's face it neither J.L's not my boat are ever going to look much like the Oseberg but what the heck - it's a boat vaguely like a Viking one.
-
Oh no, certainly not perfect but thank you anyway. Could you do me yet another favour and measure the gaps you have between the oar holes and the distance between the first hole and the prow end of that strake. I am doing really badly with this top strake as well. I don't know if I can explain this but I am having to fit an 'interior' strake and then put the top strake on top. The reason really is that my strakes don't sit tight on the bulkheads at the top so I can fill it with an extra strake on the inside. If I try to put the top strake on without something on the inside ( I have tired this with a dry fit) there will be a huge step outwards on the hull. I will take some photos when done because I don't think it will matter from the inside of the boat. This certainly is going to be a modified kit !!
-
Thanks so much JL, I get it ! My fingers are really sore after a LOT of filing !! I really hope you guys think it makes a difference. Now for those two strakes !!!

-
OK I am being dense yet again !! I think I see what you mean but a few more photos would be really helpful.
-
JL, which was the extra strake you added ? Because I can't see how I can fix what should be the top strake to the rest without either gaps at the bottom or the strake being short of the tops of the bulkheads.
-
Thanks JL, very tempting - the black idea and I will give it serious thought as I was wondering how stain would cover up the visible ply after fairing. You are very welcome Brian especially as I have been watching the quality of your work. The warp also crept back despite my bracing. I don't understand but this build is just not being nice to me. However I am going to finish it one way or another!!!!
-
Looking at my model and your photo I would suggest that the radii doors are the entrance to the parlour. I don't mind keeping up with the good comments if you don't. I think it is magnificent for a first build.
- 296 replies
-
- 4
-
-
- chaperon
- model shipways
- (and 1 more)
-
I wish I was building another Chaperon !! I enjoyed that. My next build potentially is a Chinese Junk. I think that is going to be much more fun !!!