fnkershner
-
Posts
1,595 -
Joined
-
Last visited
Content Type
Profiles
Forums
Gallery
Events
Everything posted by fnkershner
-
Grant it looks like you do maybe 3 wraps then a space and another 3 wraps. Do I have it right?
-
I just found this Thread. I live in Seattle and I am retired. I am very interested. I don't know Rino. but I have lots of experience in Fusion 360, 3D printing, And recently started learning CNC. I have access to a CNC with a 4 foot X 4 foot table. It is my desire to create a wooden model from scratch using the CNC. I would very much like to join this group. Just tell me where and when.
-
Grant - I want to know about you seizings? I look closely at your photos, and they are very clean. and you have double seizing on each line. Very nice! I am right now finishing my main rigging and boom. I hope to finish the Gaff tomorrow. But I am trying to learn from others on the rigging. you photos are especially clean and very useful. thank you!
- 109 replies
-
- 1
-

-
- medway longboat
- Syren Ship Model Company
- (and 1 more)
-
Any have any advice on how you do your seizings? I now have all my eye bolts made and installed. I have also made all my hooks out of copper and painted them with flat black. So, it is string time. How many Blocks do I need with a hook stropped on it? I count 7.
-
Mark - where do you get your "Liver of Silver"?
-
All of the above is why I prefer paint. But there are just some situations where Blackening is the only solution.
-
I have been to Michaels, Hobby Lobby, Hobby Town, Searched Amazon & Google. I guess the key was to use the word annealed in my search. When I did this I immediately found 18 gauge wire for $3. But as you say It cost $8 shipping. So, if anyone needs some wire soon. I will have way more than I will ever use. I have had lots of challenges with Blackening in the past which is why I have avoided using it up till now. But it looks like it is the only solution for some of the parts for rigging. So let me ask - full strengh or 1:1 with water? and do you rinse after to stop the chemical process? and do you rince with Alcohol or water?
-
Thanks Ryland. did you have to Blacken It? All I have found is copper or Copper with a shinny black plastic coating.
-
So the horse does not serve as a traveler? I assumed the Block would slide from 1 side to the other when you let the sail out. This is very common today on similarly rigged Sailboats now. What you have is the Mainsheet also working as traveler. It certainly makes sense to get the blocks out of the way for the Tiller. Can someone please give me a source for 18 or 22 gauge wire? I thought I had a solution but it is not working very well.
-
Hi Ryland and thanks for the info. I bought a 12 inch long piece of copper tubing that is 1/16" in diameter. I am having a bit of a challenge when I cut it. I always get a lip which needs to be filed off. How long is your thimble? I am trying to get 1/16" long. You did not have a thimble on the horse? I figured that the block is going to be sliding back and forth so there would be a thimble, similarly on the Gaff. I don't like to have 2 back to back posts. So I will just edit this one. Along with working on my thimbles. I am also working on all the eye bolts needed. I count 7 required. 3 for the mast, 2 for the Gaff, 1 for the Boom, and 1 at the bow. My method is to take my 1/16" diameter tube and wrap the wire around it. Then twist the ends to create a shaft to insert into the wood. I was taught along time ago. this was better than the eyebolts you can buy. Since you can never get the right size and the twisted Shaft provides better grip for the glue. If anyone has any better ideas please share. also let me know if I have the count correct.
-
I now have completed my mast and all spars. And with the block tumbler mentioned above. I have removed the laser char and softened the edges of my Deadeyes and blocks. I am now moving on to giving a go at making copper thimbles before I do any rigging. So, my question is how many do I need? 2 for the blocks with hooks on the mast. where else do I need them. It looks like 1 for the Gaff. Anyone have ideas? After taking a close look at the rigging plans. Here is what I have. Please confirm or update. Starting from the Stern - - 1 Brass thimble that slides on the horse & 1 on the block on the boom for the tie off point for the Main sheet. - Also hook from the top block of the main sheet. - Next I see 1 each for the back stays. - Then there is a thimble for the Peak Halyard. - Now we have the 2 blocks mentioned above that hook to the top mast. - It also looks like I need a thimble for each of the hooks on the shrouds. - Continuing forward I see another needed for the Fore Sail Halyard. - Lastly there is the Jib Halyard. I count a total of 13. Am I right?
-
Ryland - I have all my spars completed. Can you tell me how many Thimbles you made? I have some copper tubing and I want to give it a try. Also how did you cut such a small diameter and not smash the tube.
-
There is a technique called CA Welding. Since CA is activated by moisture. If you combine CA with Titebond the CA will dry even faster. I use Titebond almost all the time. CA is too fast for me. But there are times, especially when hull planking, when I can't get a clamp where I need it. So I use this method to hold the plank while the PVA glue dries. But I only use a very tiny spot of CA. Similar to Spot welding.
- 217 replies
-
- 3
-
-
- medway longboat
- Syren Ship Model Company
- (and 1 more)
-
Can anyone point me to the download for the Frieze for this model? Unfortunately I got some paint on the stern.
-
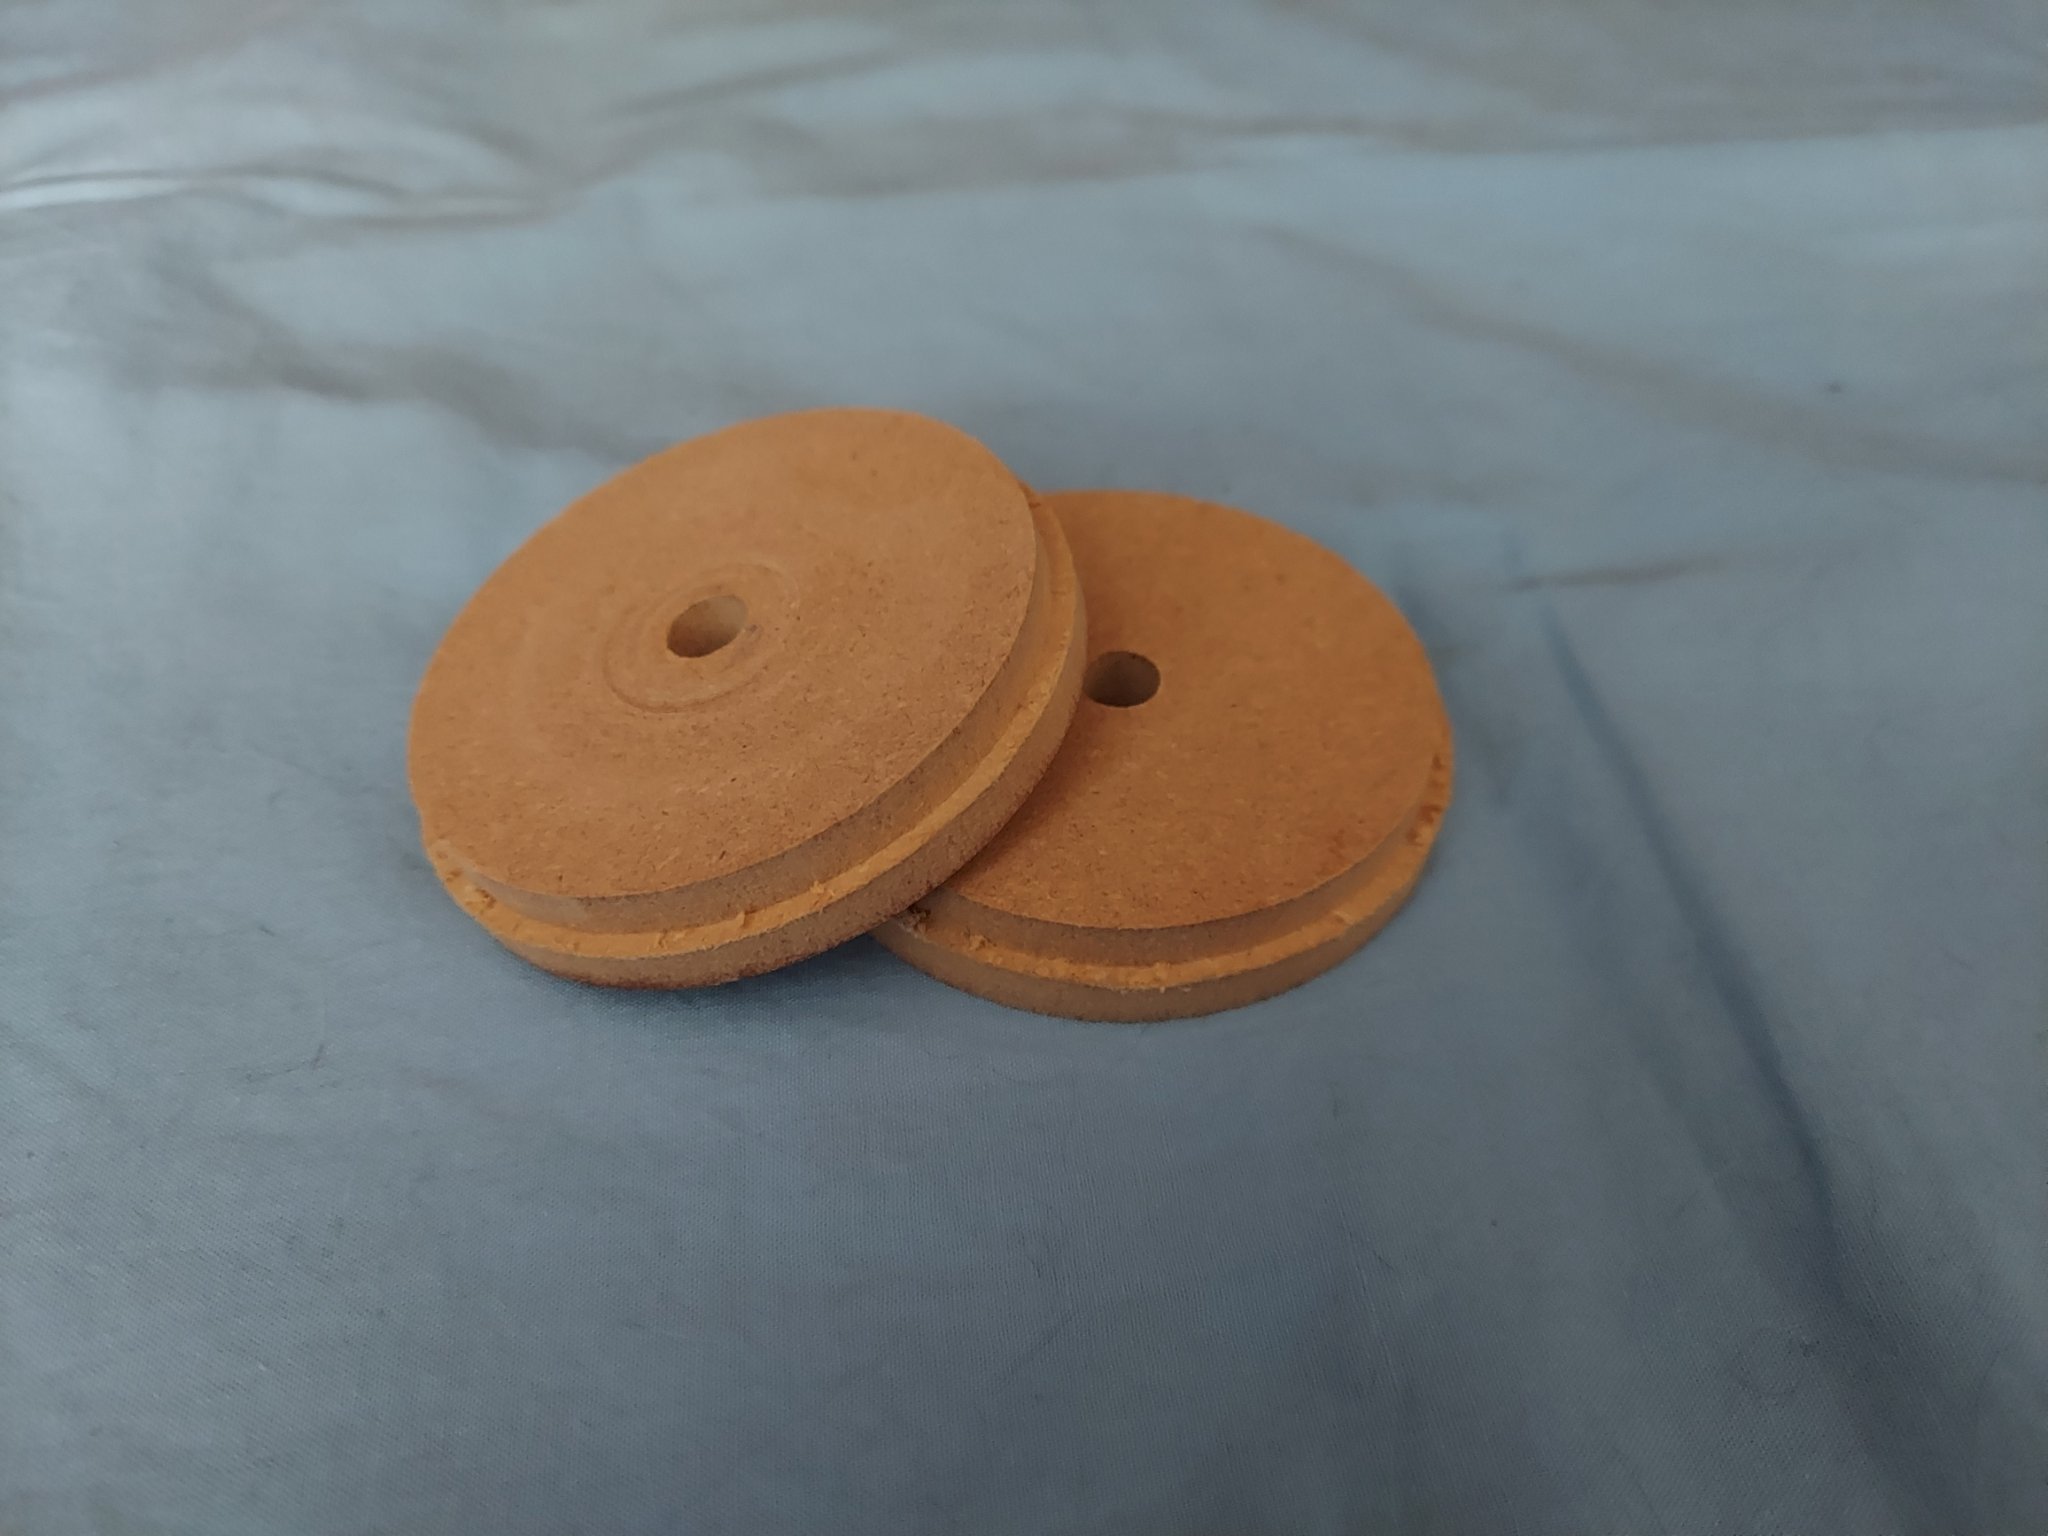
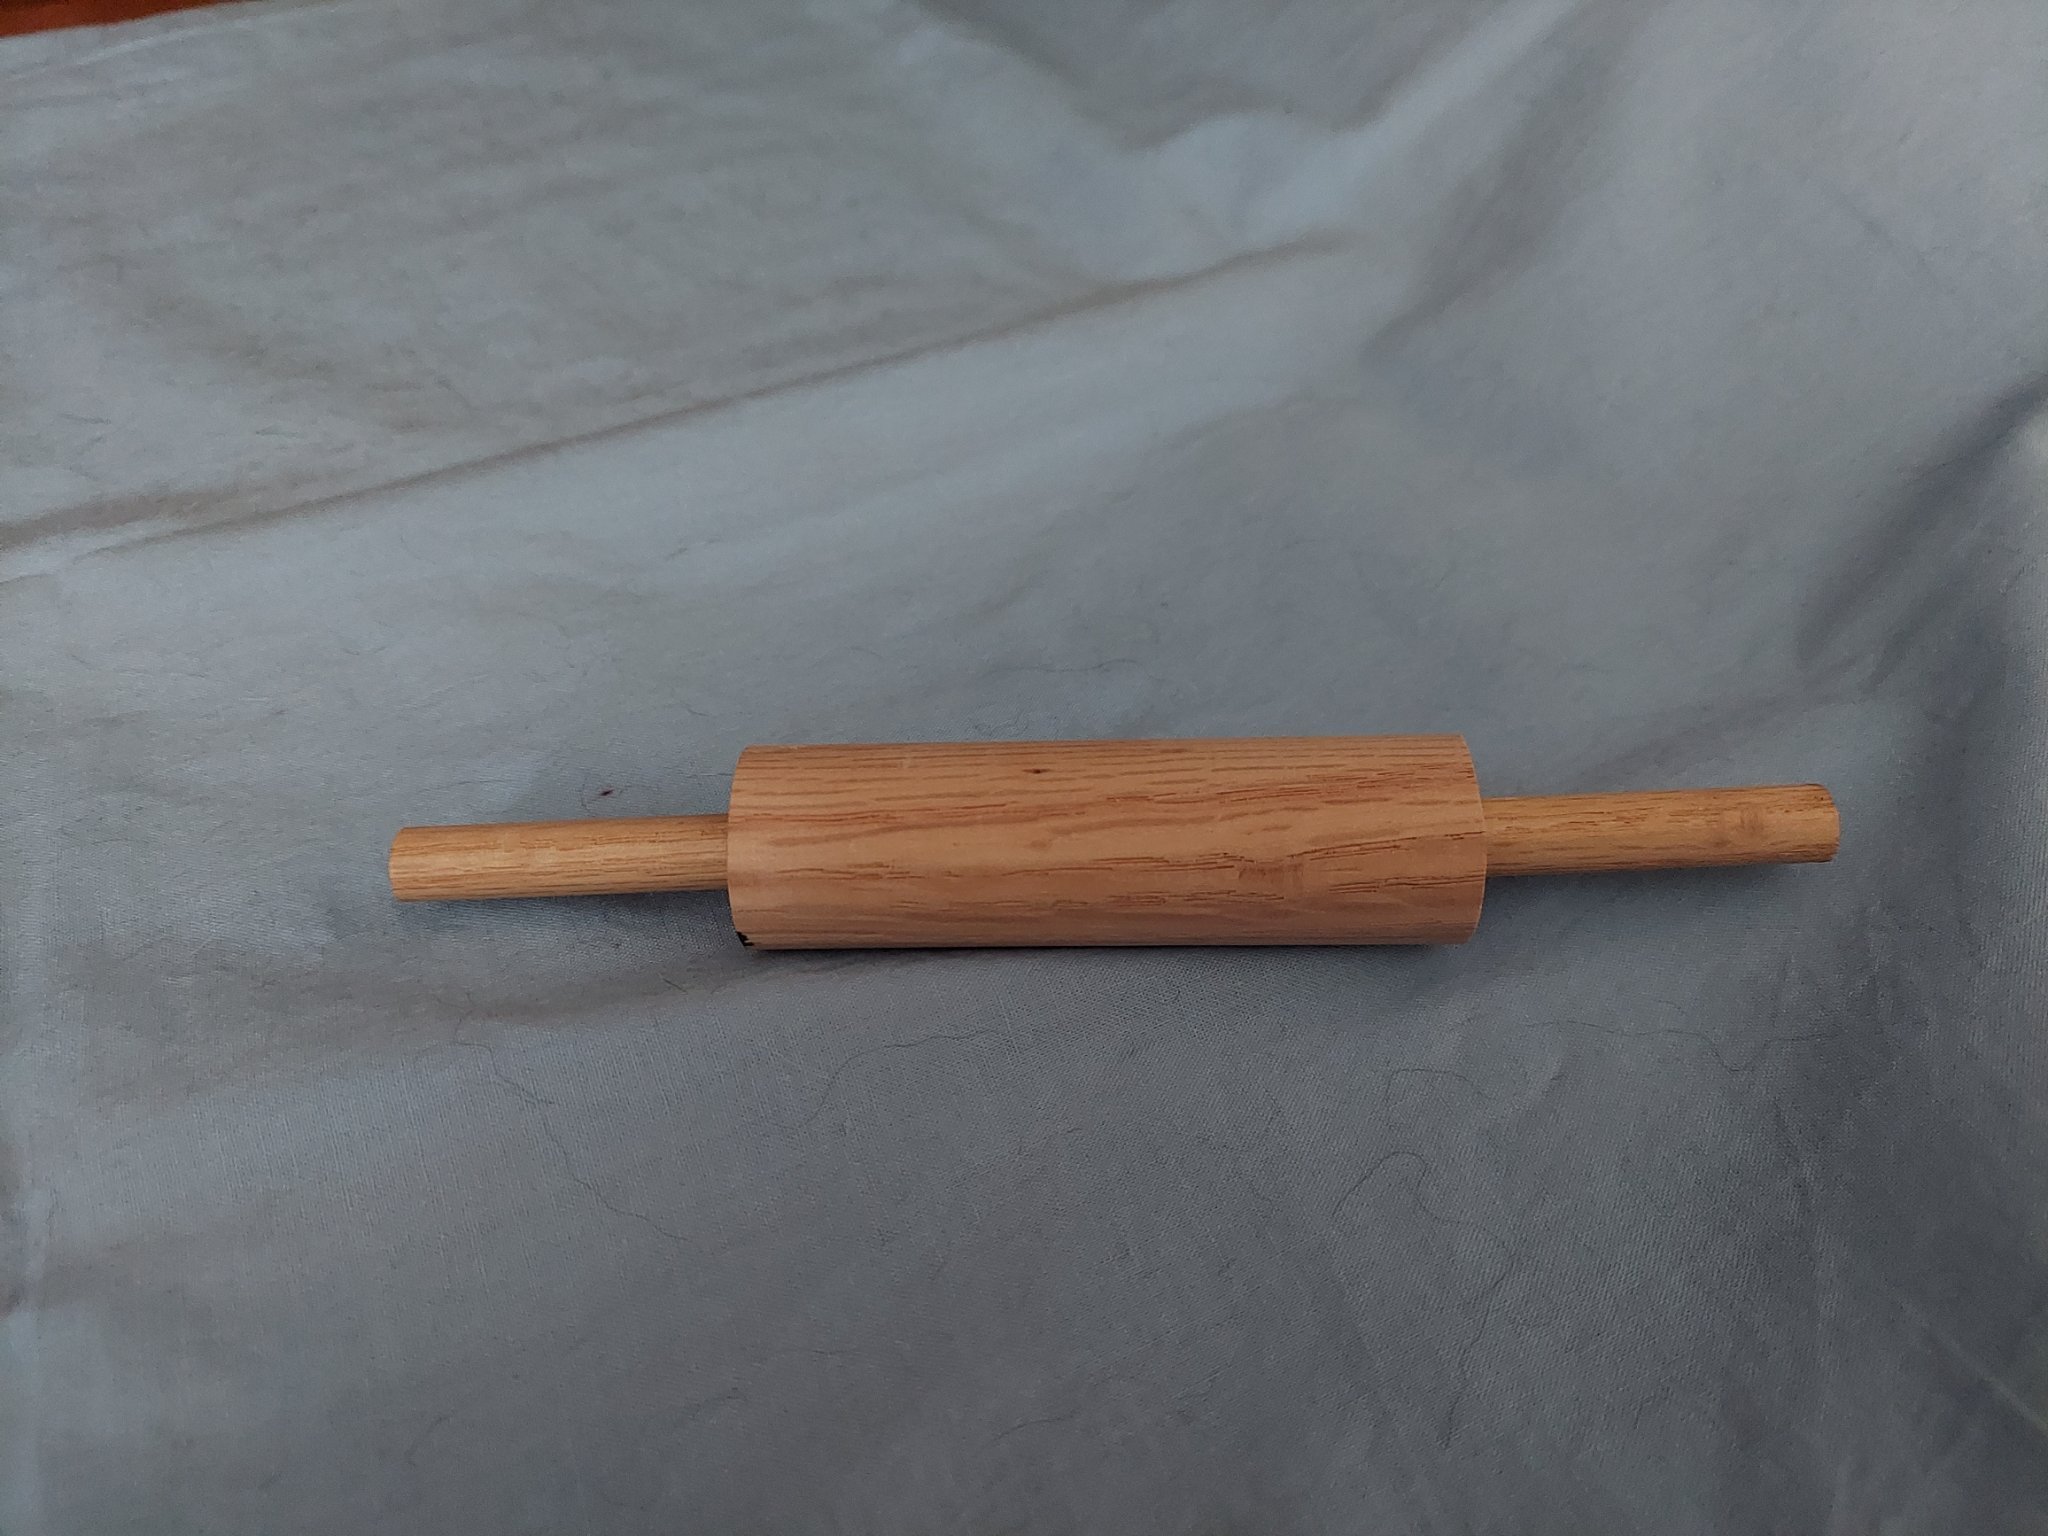
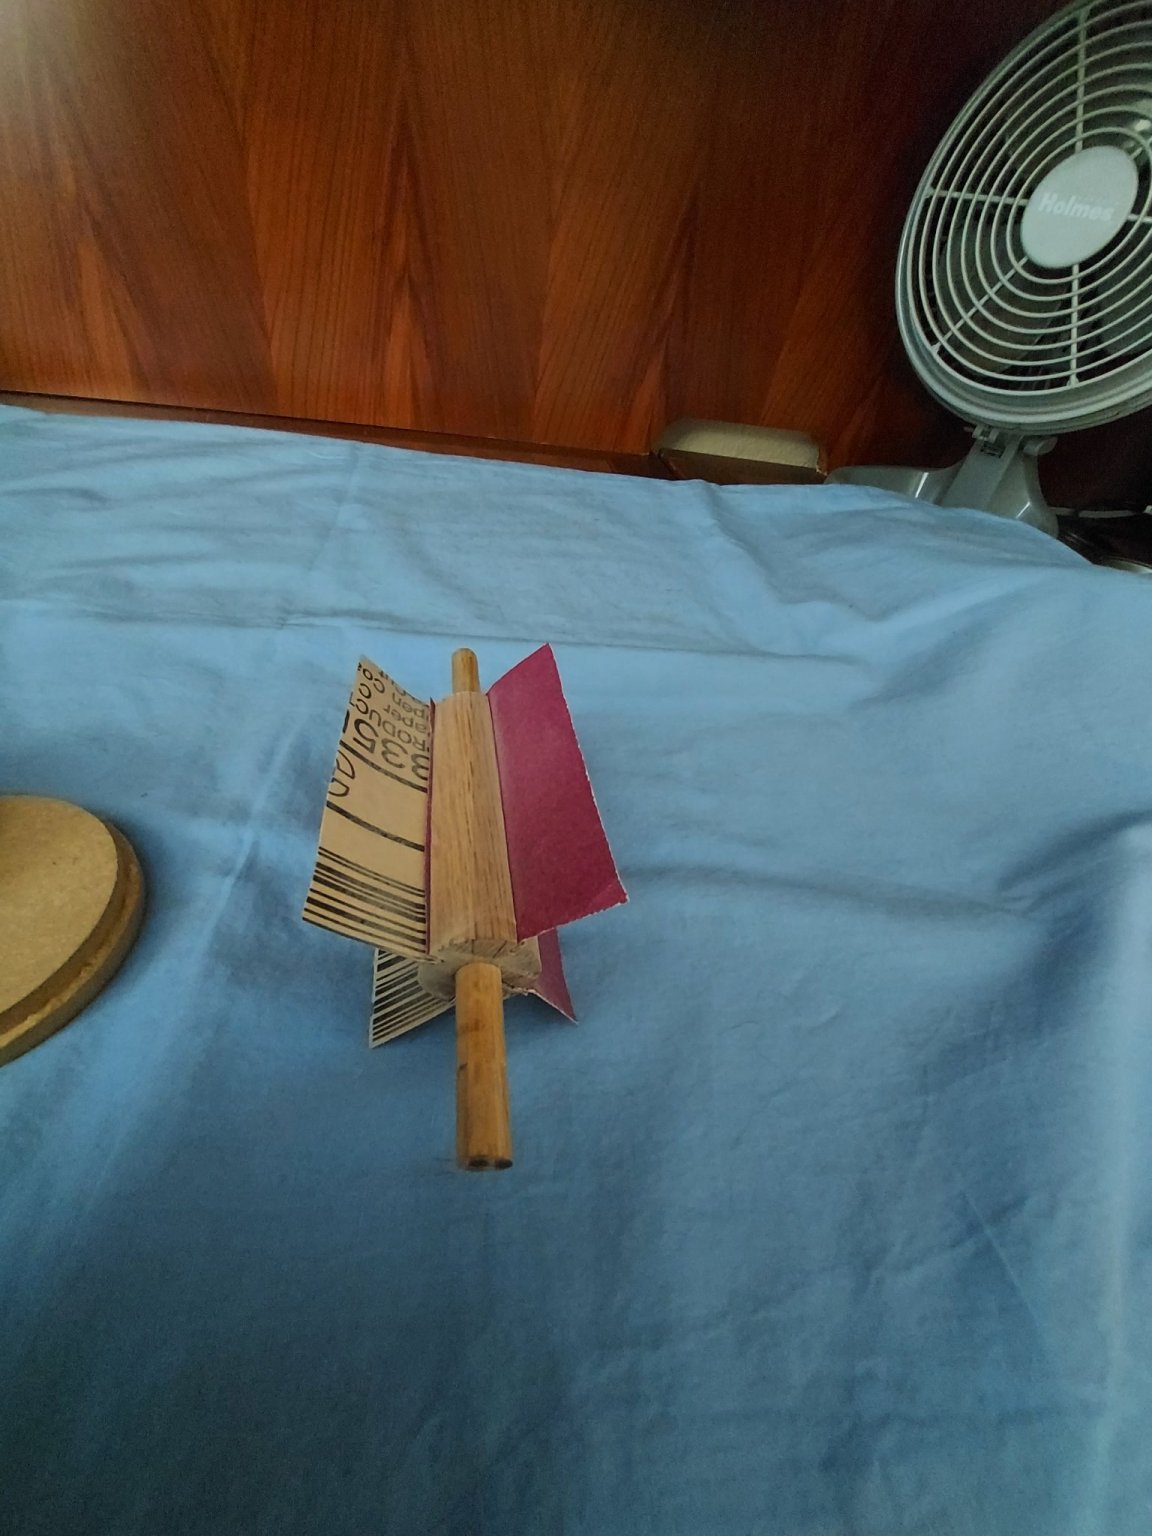
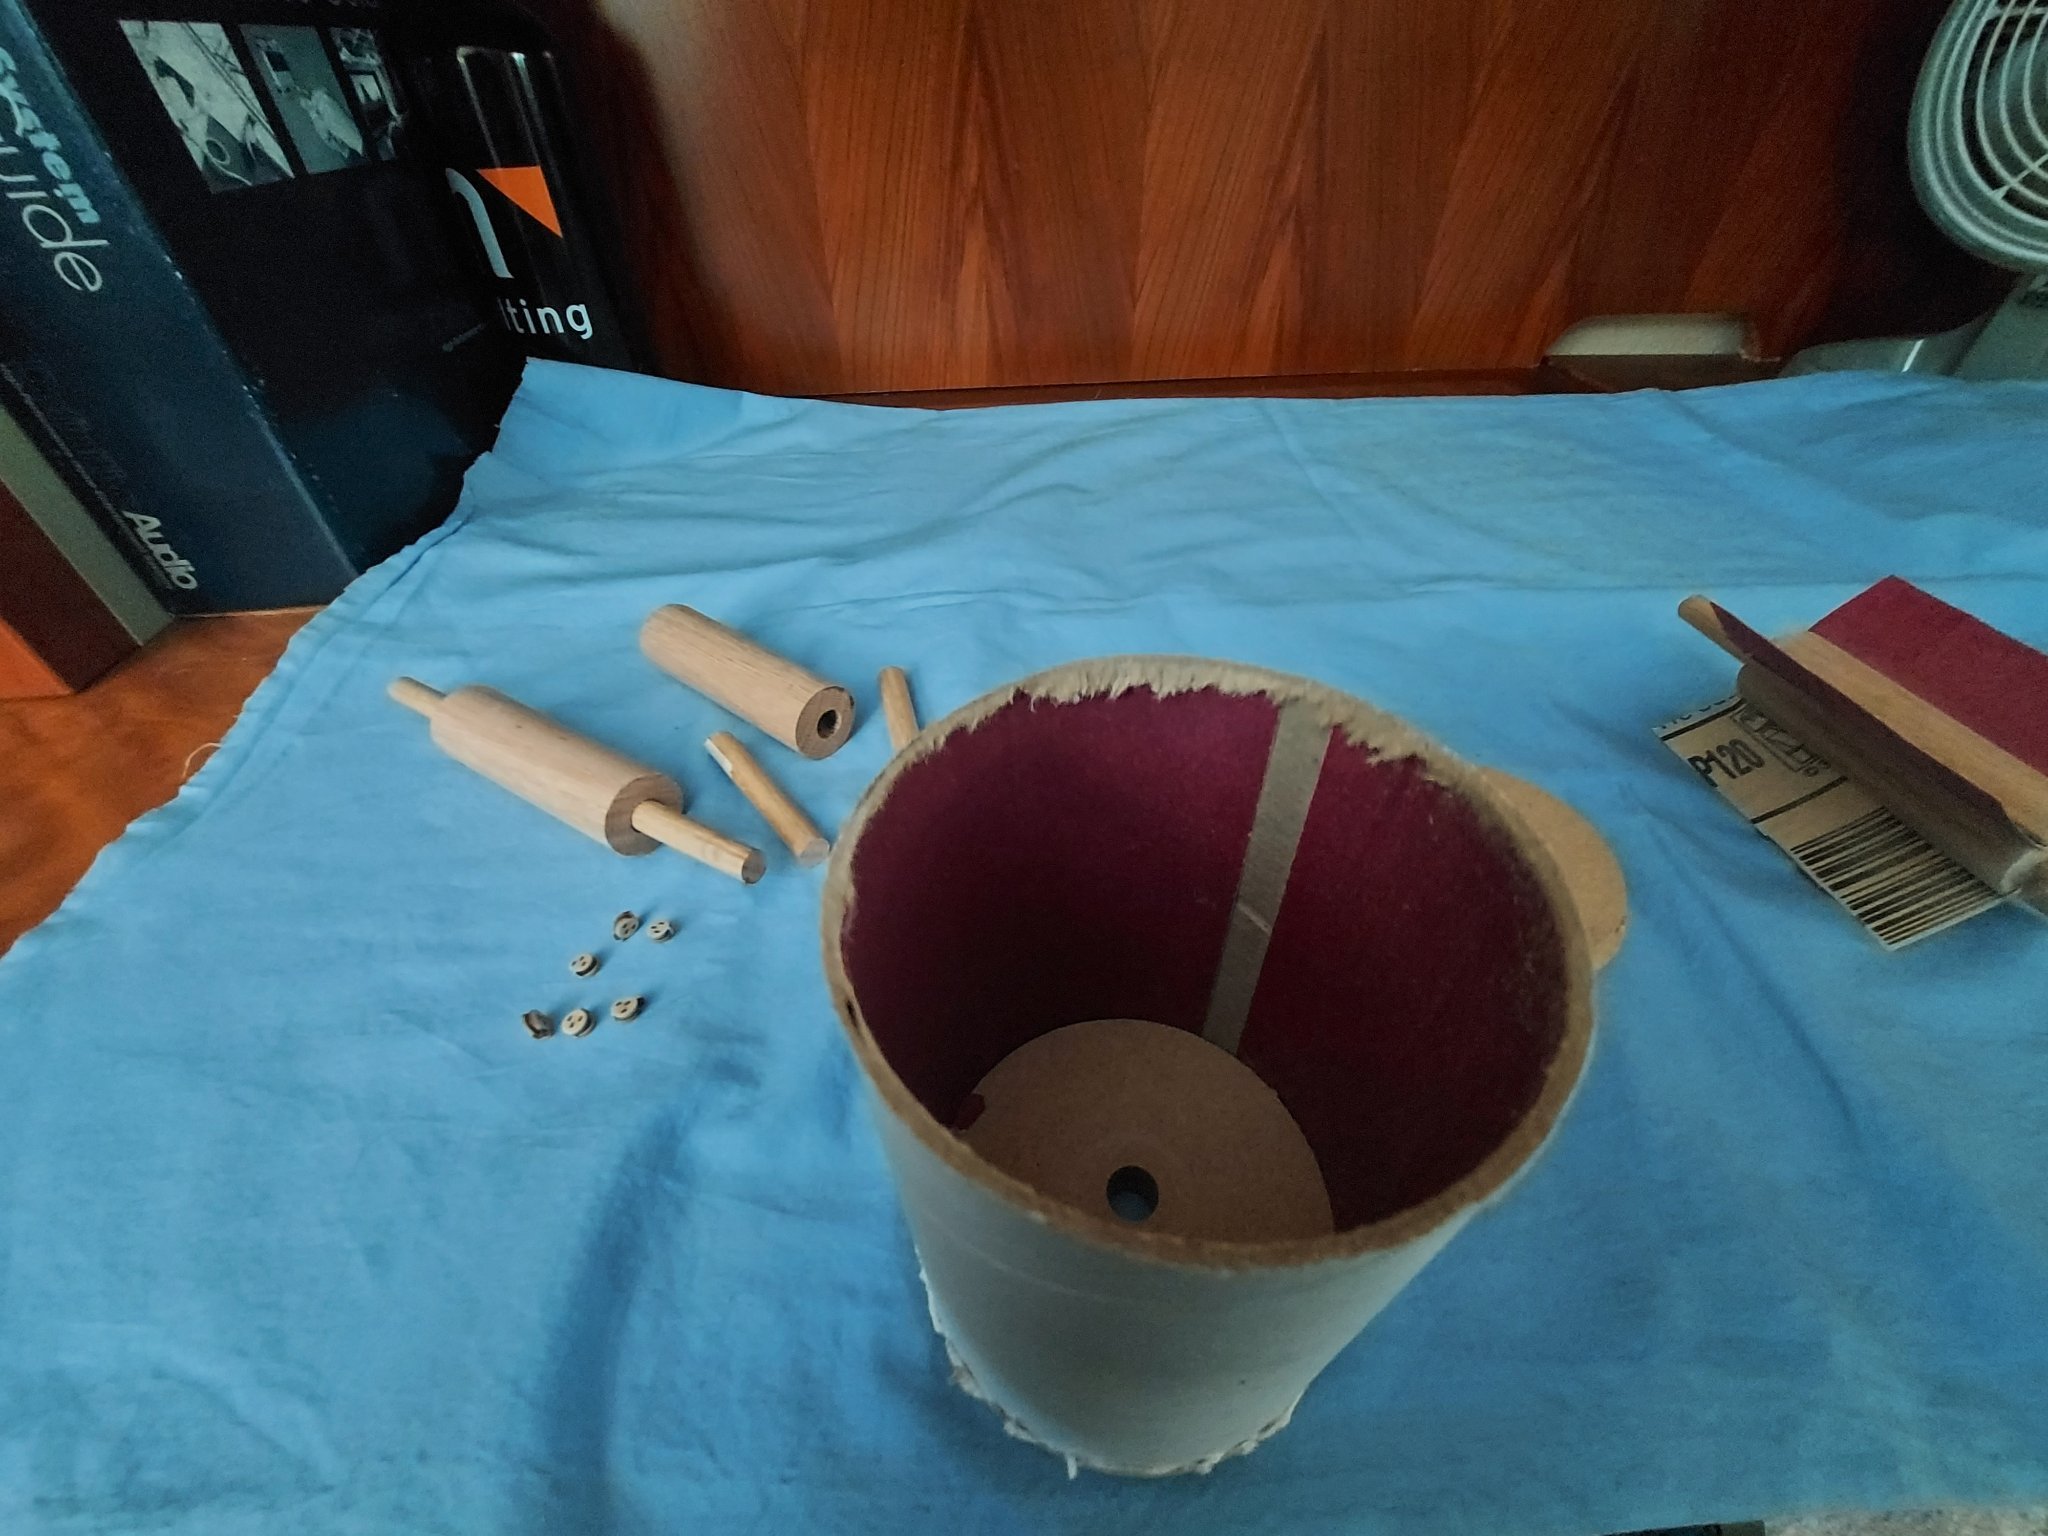
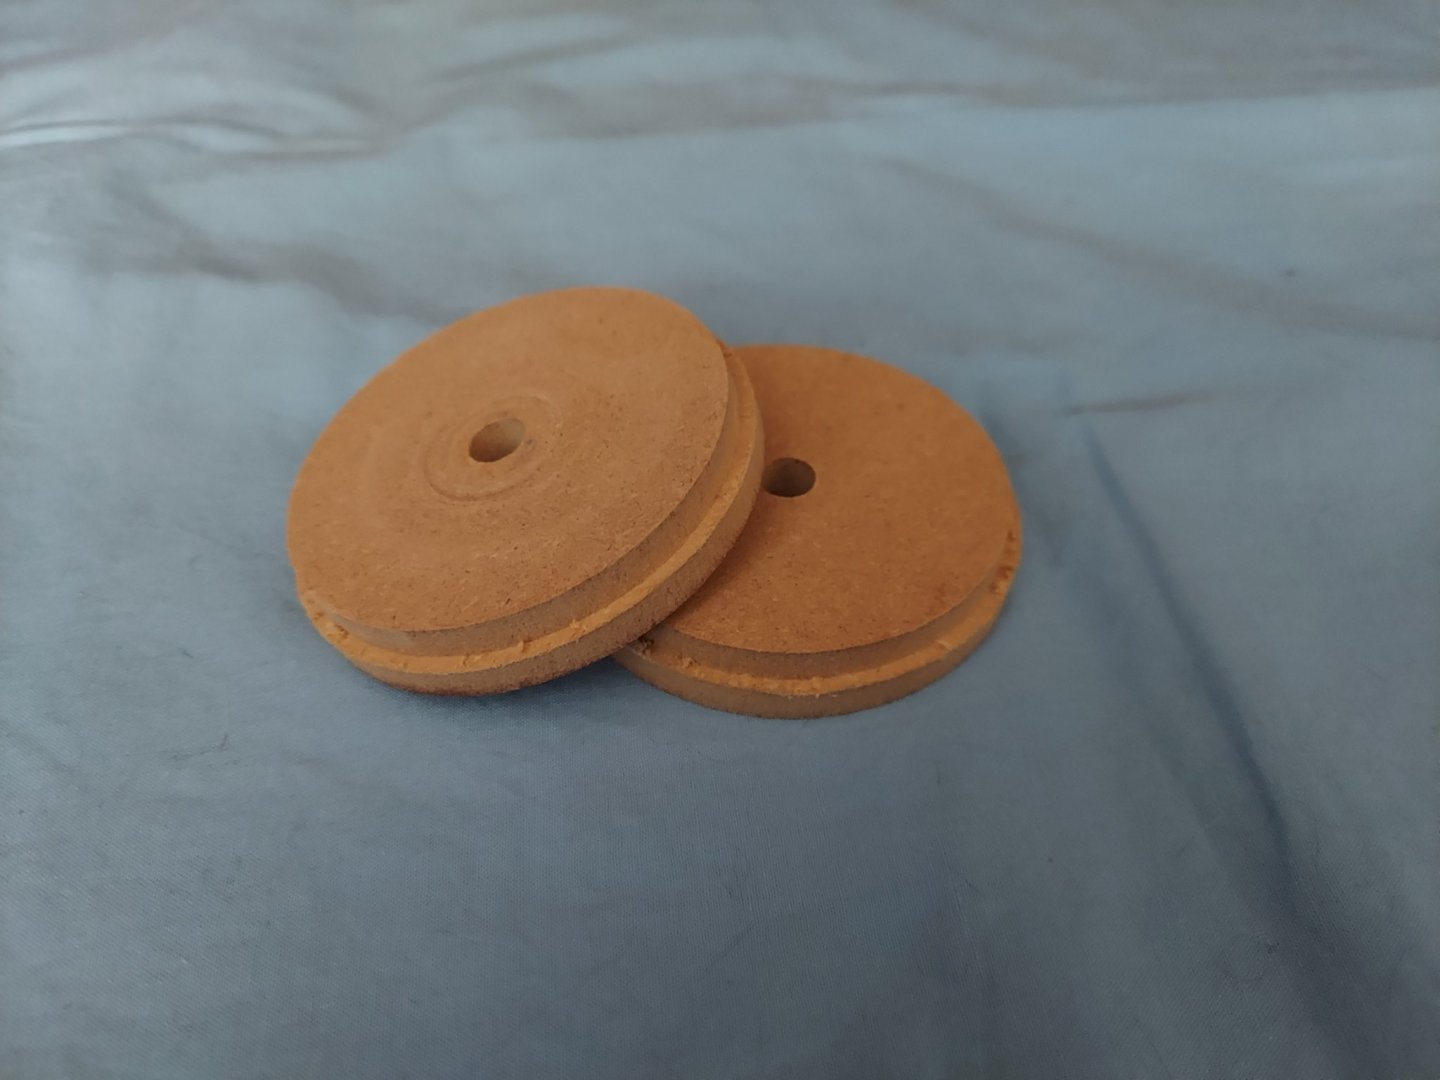
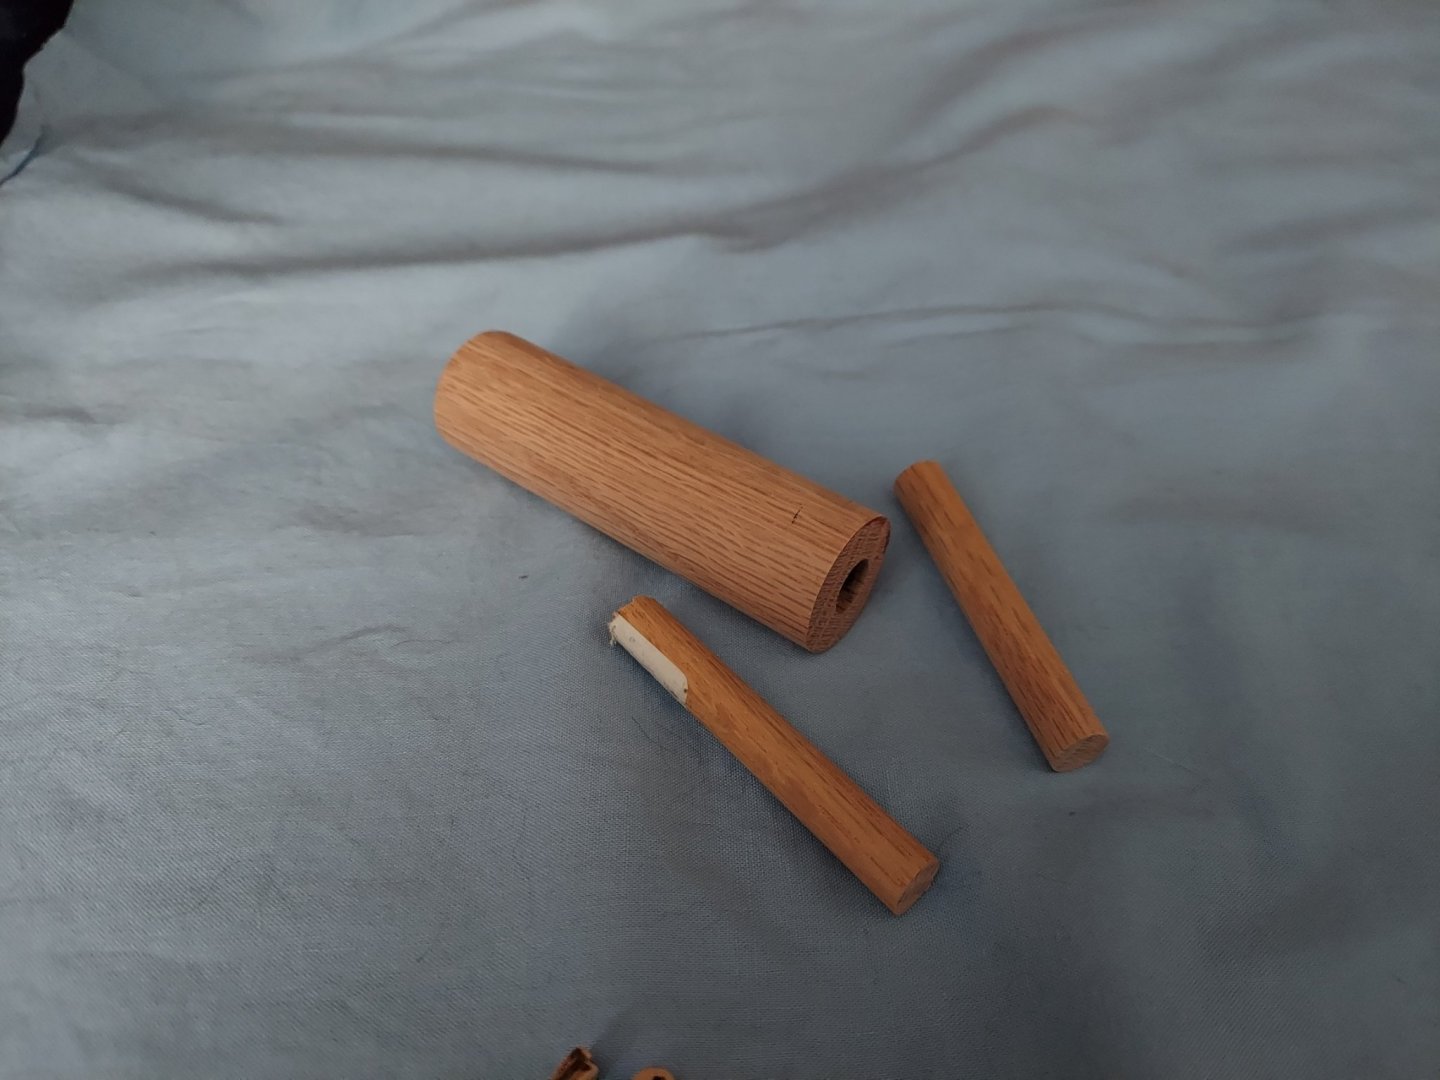
Here is another side project as I work on the longboat. Chuck mentions that you need to take the deadeyes and soften them up in a Block tumbler. I didn't have one. but I found a great article from Grant here on MSW. And below are the results. First, I started with a mailing tube that I cut to a length of 100 mm. It is 75 mm in diameter. I went to my local Maker space and used the Wood CNC to cut some MDF disks to a 75 mm inside diameter and 80 mm outside diameter. I then cut some doweling for the spindle. and as Grant suggest I used a Hacksaw to create the grooves in the spindle. I line the tube with 120 grit sandpaper. See all of this below. Grant suggests that you build 3, 1 for 120 grit, 1 for 400 grit & 1 for 600 grit. I completed the 120 grit first to test and will finish the other 2 this week.


-
Thanks Per for the link. I found a tool at that site that can measure the wire.
-
Can someone tell me how to determine the gauge of wire? I have reels of 28 & 24 gauge. but I also have left overs from various projects and I have no idea what the gauge is.
-
Thanks Bob. Did you use flat red on the mast?
-
I have almost finished my main mast. I have a couple of questions - I tried painting the top portion black. but it looks wrong to me. I am considering sanding it off and painting is flat black. Let me know what you did on your model. Also did you put a coat of Wipe on Poly over the top of the painted portions and the rest of the mast. i.e. did you cover the mast with a coat of WIP?
-
Chuck - Actually I am enjoying turning the wood from square to round. I was just trying understand how they used the Drawplate. I think I will continue the way I am going without the drawplate. I can taste the finish line!😀 Since my stand says 2021. It has always been my goal to actually finish this year. I am not sure if I can get all the rigging done this year. But at least the hull is going to be done this week.
-
I want to thank both Ryland & JP for their information regarding the thole pins. I have marked the locations of the holes in the cap rail with masking tape and made the wooden template to drill the holes. I have also cut the 3/64 X 3/64 strips to the 1/2 inch length as recommended by Chuck. So now I reach my question - I have a draw plate (unfortunately it is not from Jim Byrnes). How do you pull your pins thru the drawplate without damaging them or marring them with plyers. I find that 320 or 400 grit is all that is needed to get the strips rounded off. and then I go to the draw plate to ensure a common size. So in short, very soon I will be drilling the holes in the cap rail. But I am not sure how to get a consistent size for the pins without damaging them.
-
Grant thanks for the feedback. I was thinking of just sanding the edges so they are thinner. But you are suggesting a subtle curve from the center out to the edge. I will give that a try. I like the idea. Chuck - Just and FYI from my perspective. In many places you provided spare parts. For this I am grateful. I have used many of those extra pieces as I reached this point. The one place where there weren't any spares was the Gudgeons & Pintles. Respectfully please include a 2nd set of these pieces. I won't bore you with my struggles. let's just say it was challenging.
-
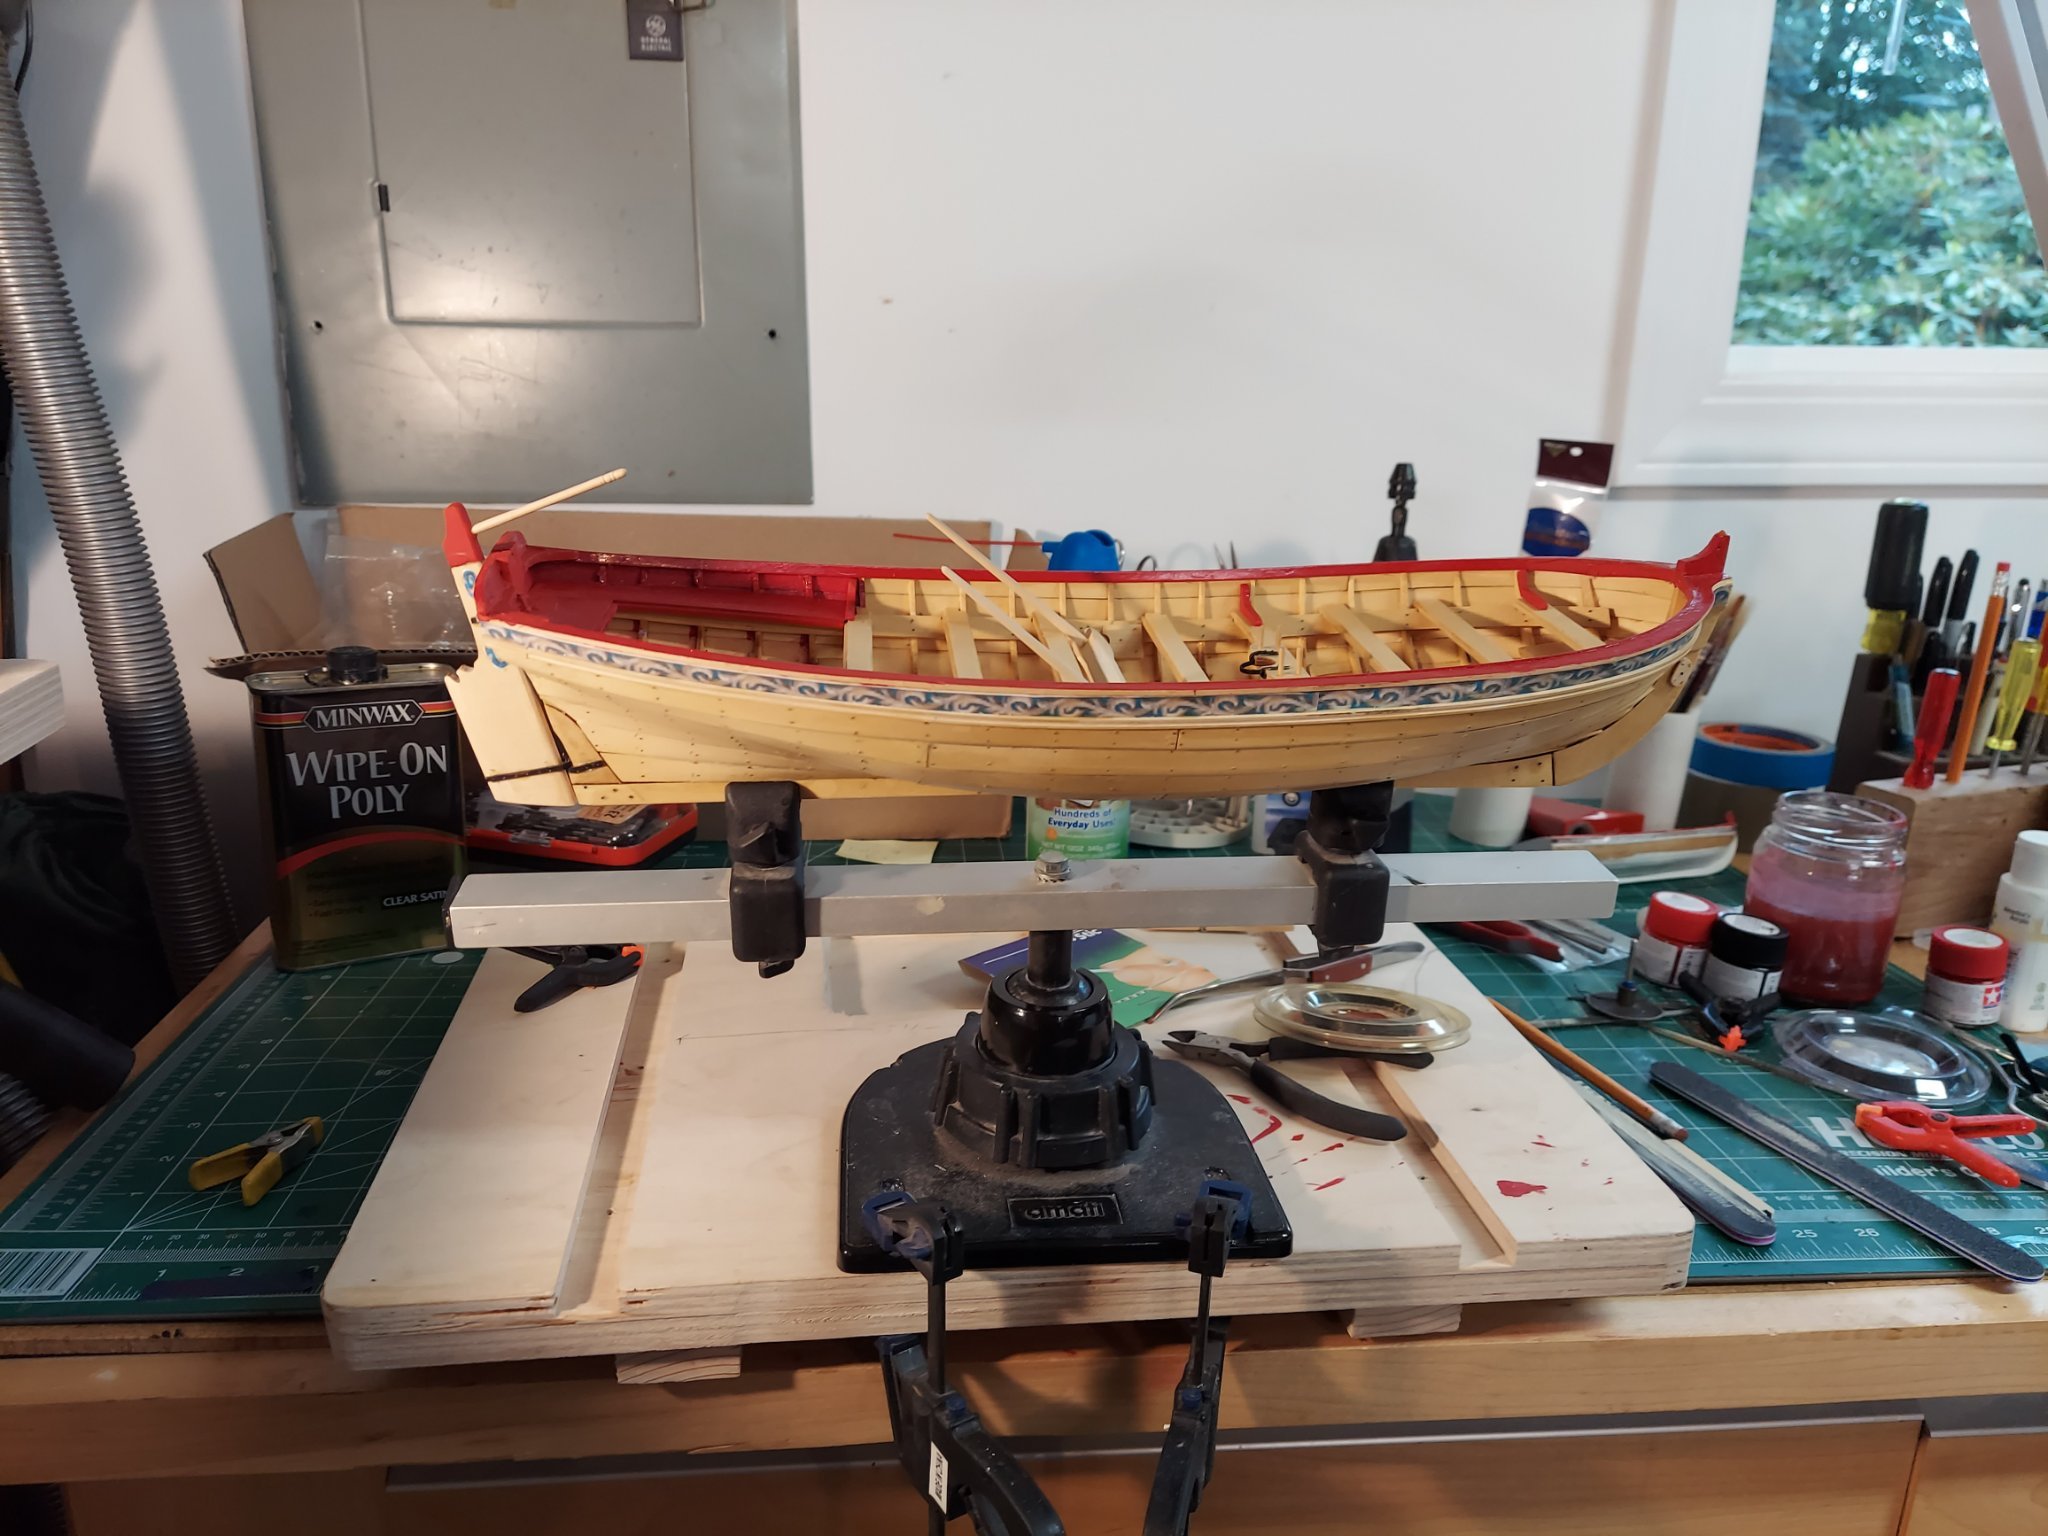
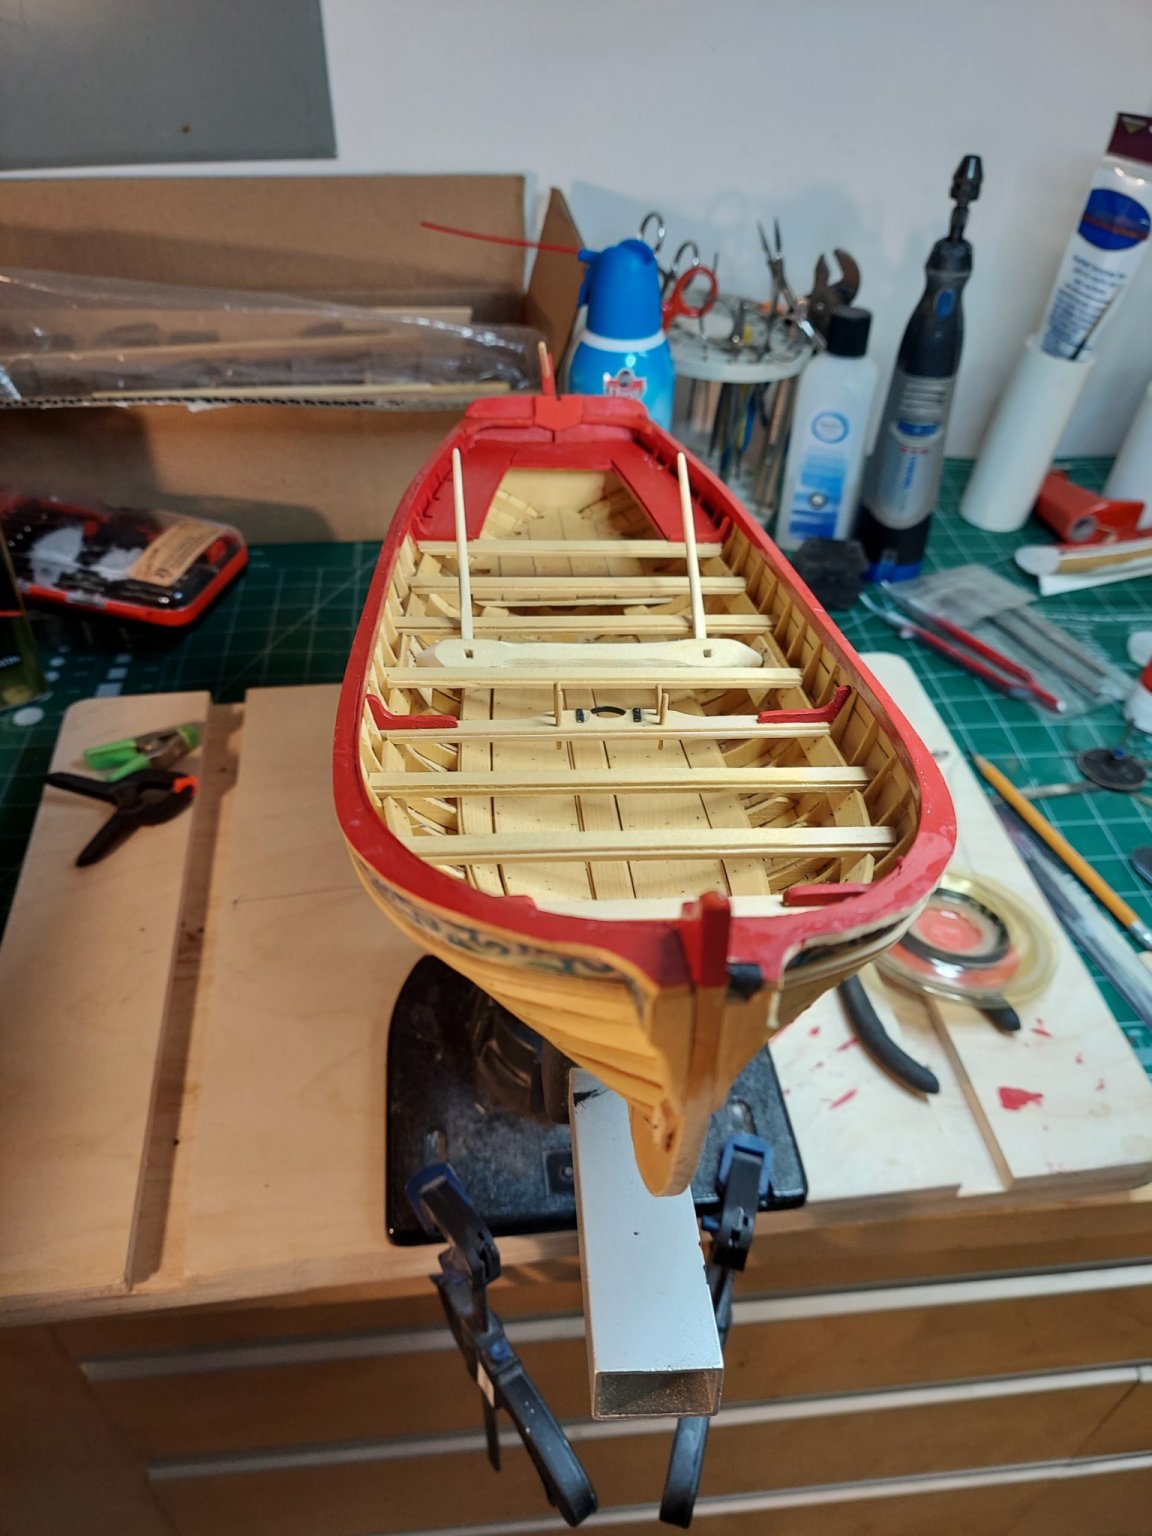
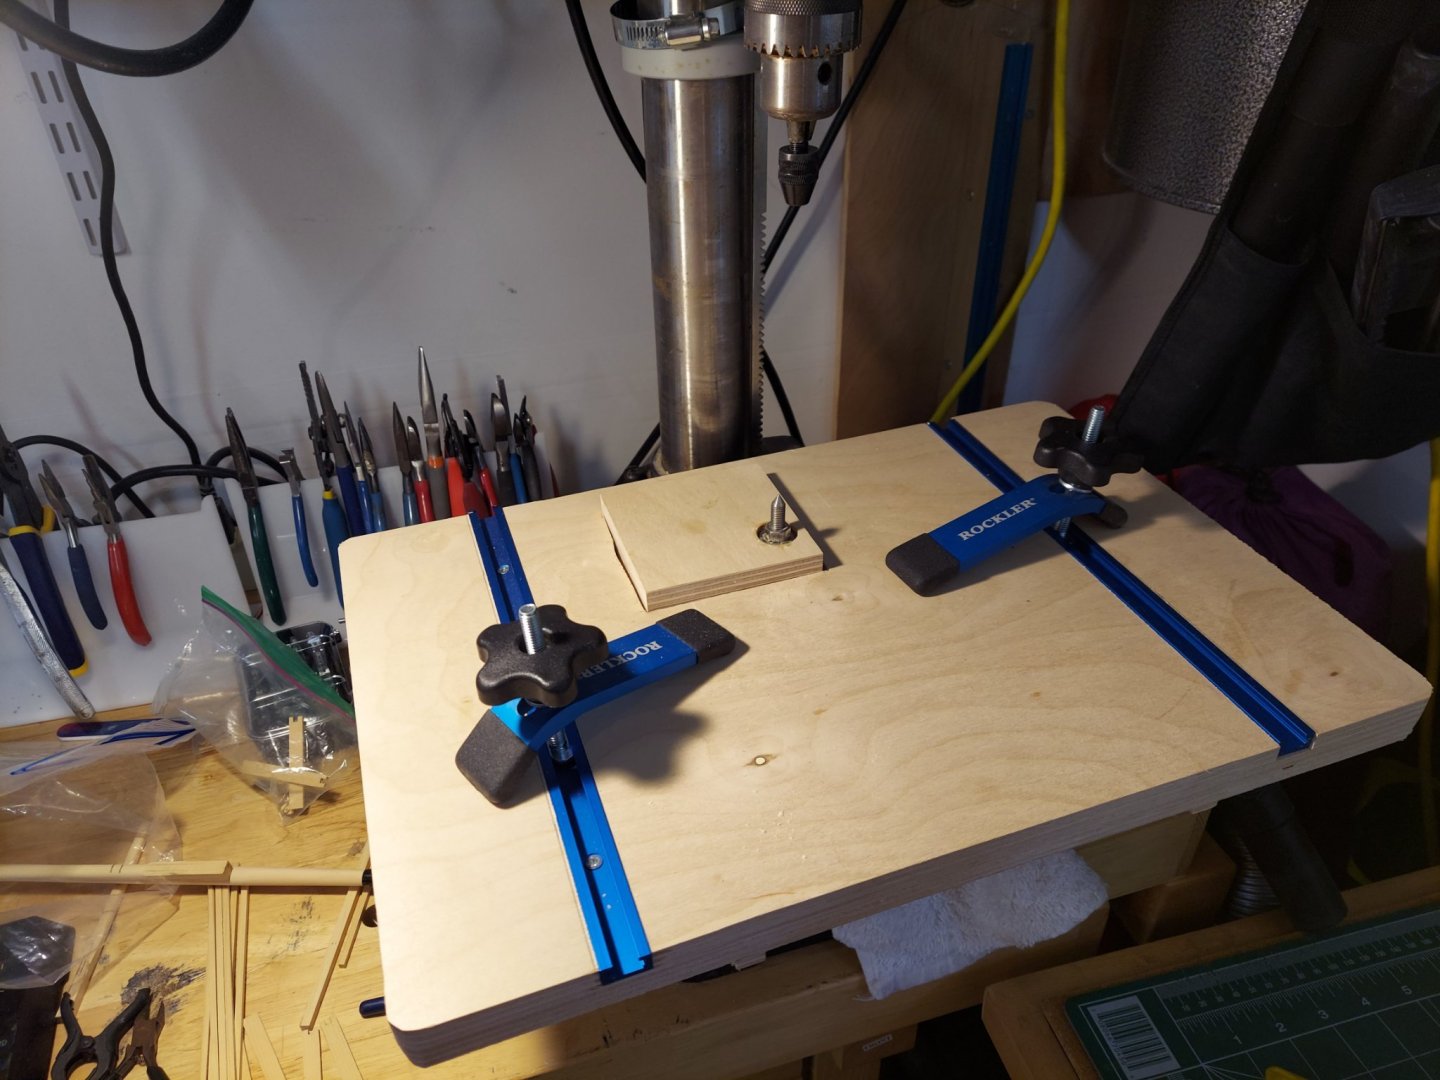
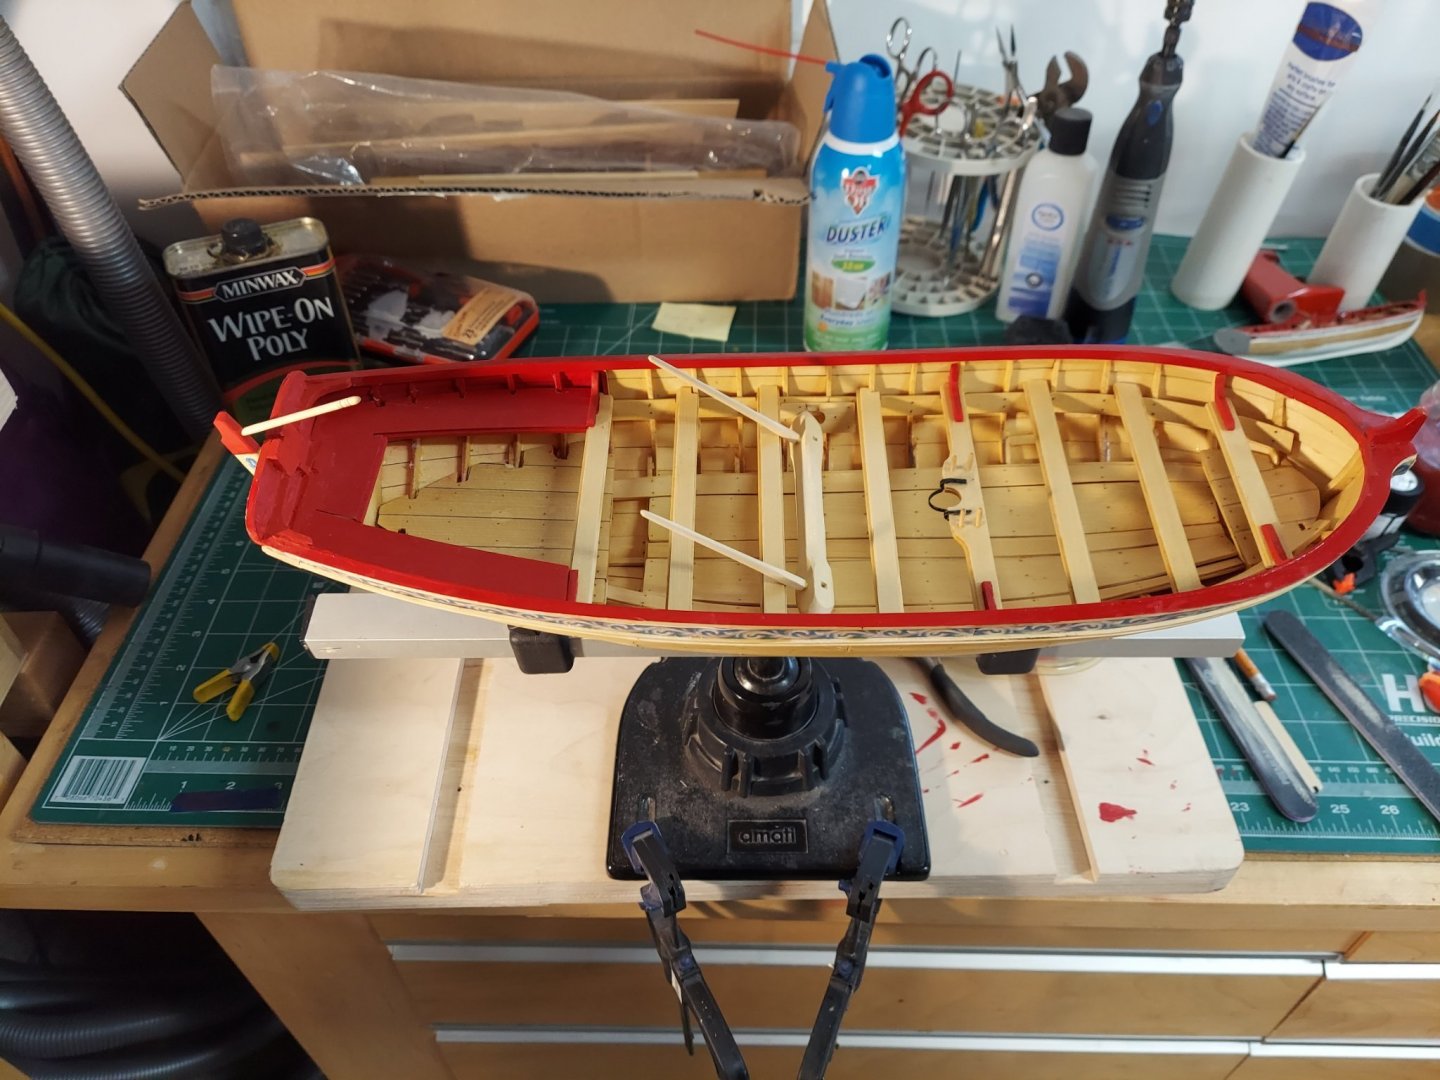
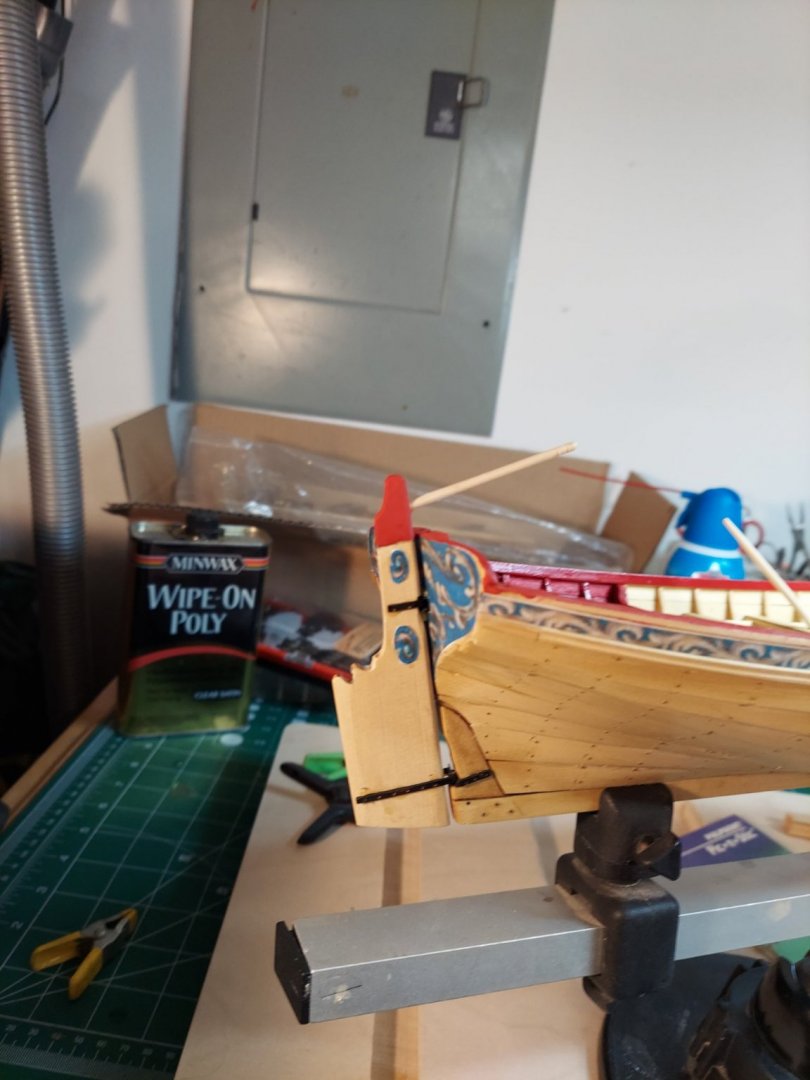
Well I am on the home stretch as you will see below. At times it has been fun and other times the source of much cursing. I am about to drill the holes for the thole pins. and I am working on the oars. So I have a couple questions - Can someone provide a closeup of the oar blade? I am curious how you shaped the blade. I also have struggled with the upper rudder hinge. It has ripped the Frieze twice on the transom. I need to add a coat of Wipe On Poly to the rudder and transom. I have also begun the work on the rigging. The Bowsprit has been shaped and tapered, As has the Gaff. The mast is now round and I am working on the tapering. The boom is almost complete. As promised above below you will see a picture of my new Drill Press Lathe. I did a lot of research on how to make a cheap lathe to turn square stock into round spars. As is often mentioned many ship builders are using a drill. But all of my drills are battery operated, and it is recommended that you a corded drill. So instead of buying yet another drill I decided to use my table top drill press. This bench can be used for many purposes as well as adding the live tailstock so that I can turn spars. The square of wood you see for the tailstock is intentionally off center. This way I can rotate the square of wood in the slot 4 times before I have to replace it. I also used a skate board bearing for the tailstock.


-
Ryland! You are too quick. As luck would have it. I decided to dig thru my parts 1 more time. I found the masting kit bag. So I am good and finally going back to modeling. This is in between playing Nurse to my dog. He has another 6 weeks of recovery which includes 3 time a day of physical therapy. But he is so attached to me he will be my modeling assistant in the garage.
-
I can see it is time for a quick update on my build. In late July we got a surprise from our landlord. He had decided to sell the house we were renting. And he wanted to sell quickly. So began the 2 week scramble to find a new home and get moved. In addition to this our dog required Surgery. In other words not much modeling for the past month. I have been spending most of my infrequent free time building a Drill press table that will also act as a cheap lathe. As soon as it is completed I will post a picture. During the move I seem to have lost the list of materials for the Masting kit. Can someone please post this list? I have the mast and the plans. I just want to make sure I have all the parts.