fnkershner
-
Posts
1,595 -
Joined
-
Last visited
Content Type
Profiles
Forums
Gallery
Events
Everything posted by fnkershner
-
Can anyone give me a pointer to some American flags? I had a web site for all kinds of flags but they are out of business. The tug definitely needs an American flag.
- 133 replies
-
- 1
-

-
- alert class
- tugboat
- (and 1 more)
-
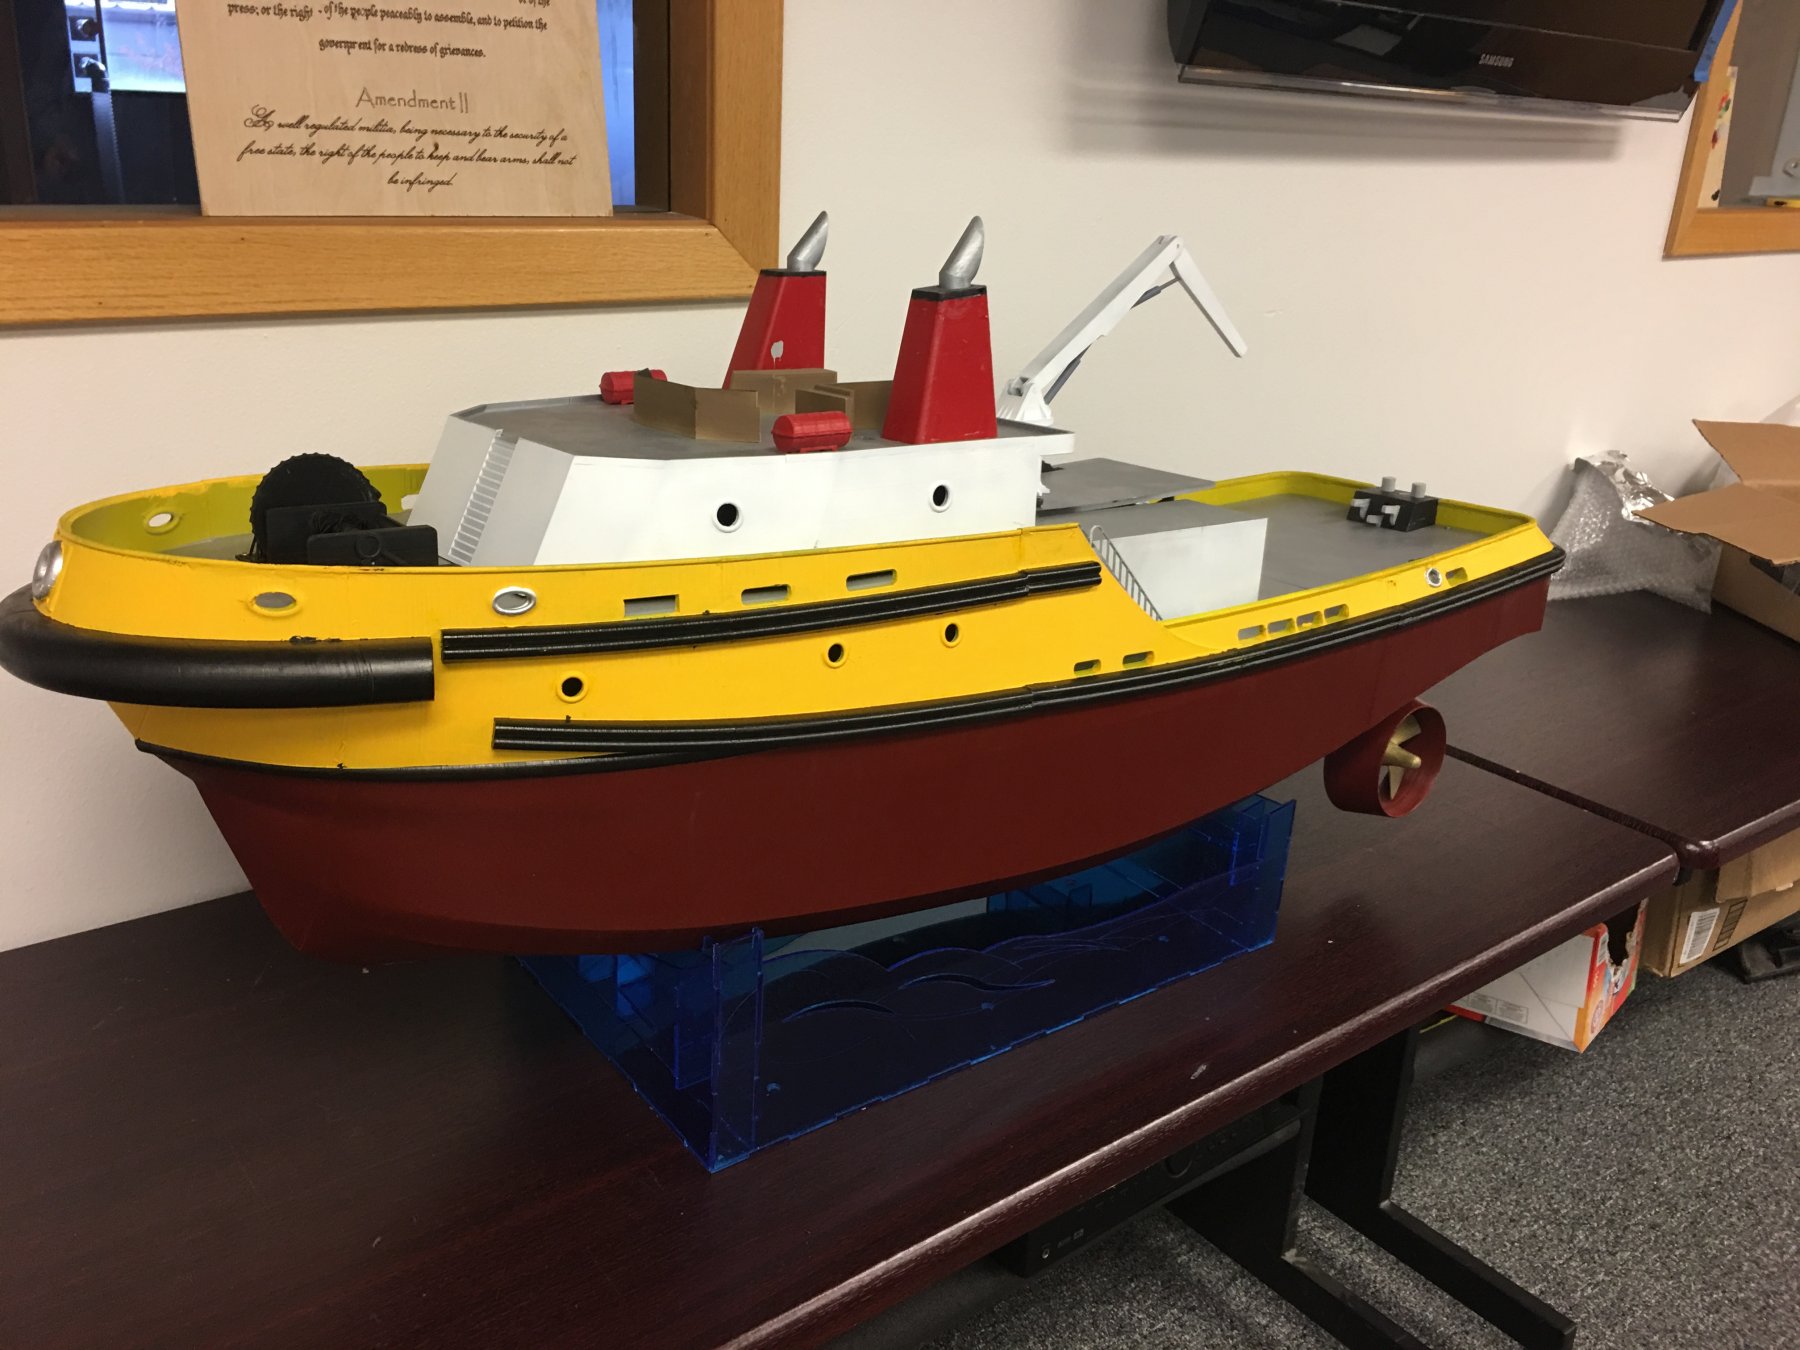
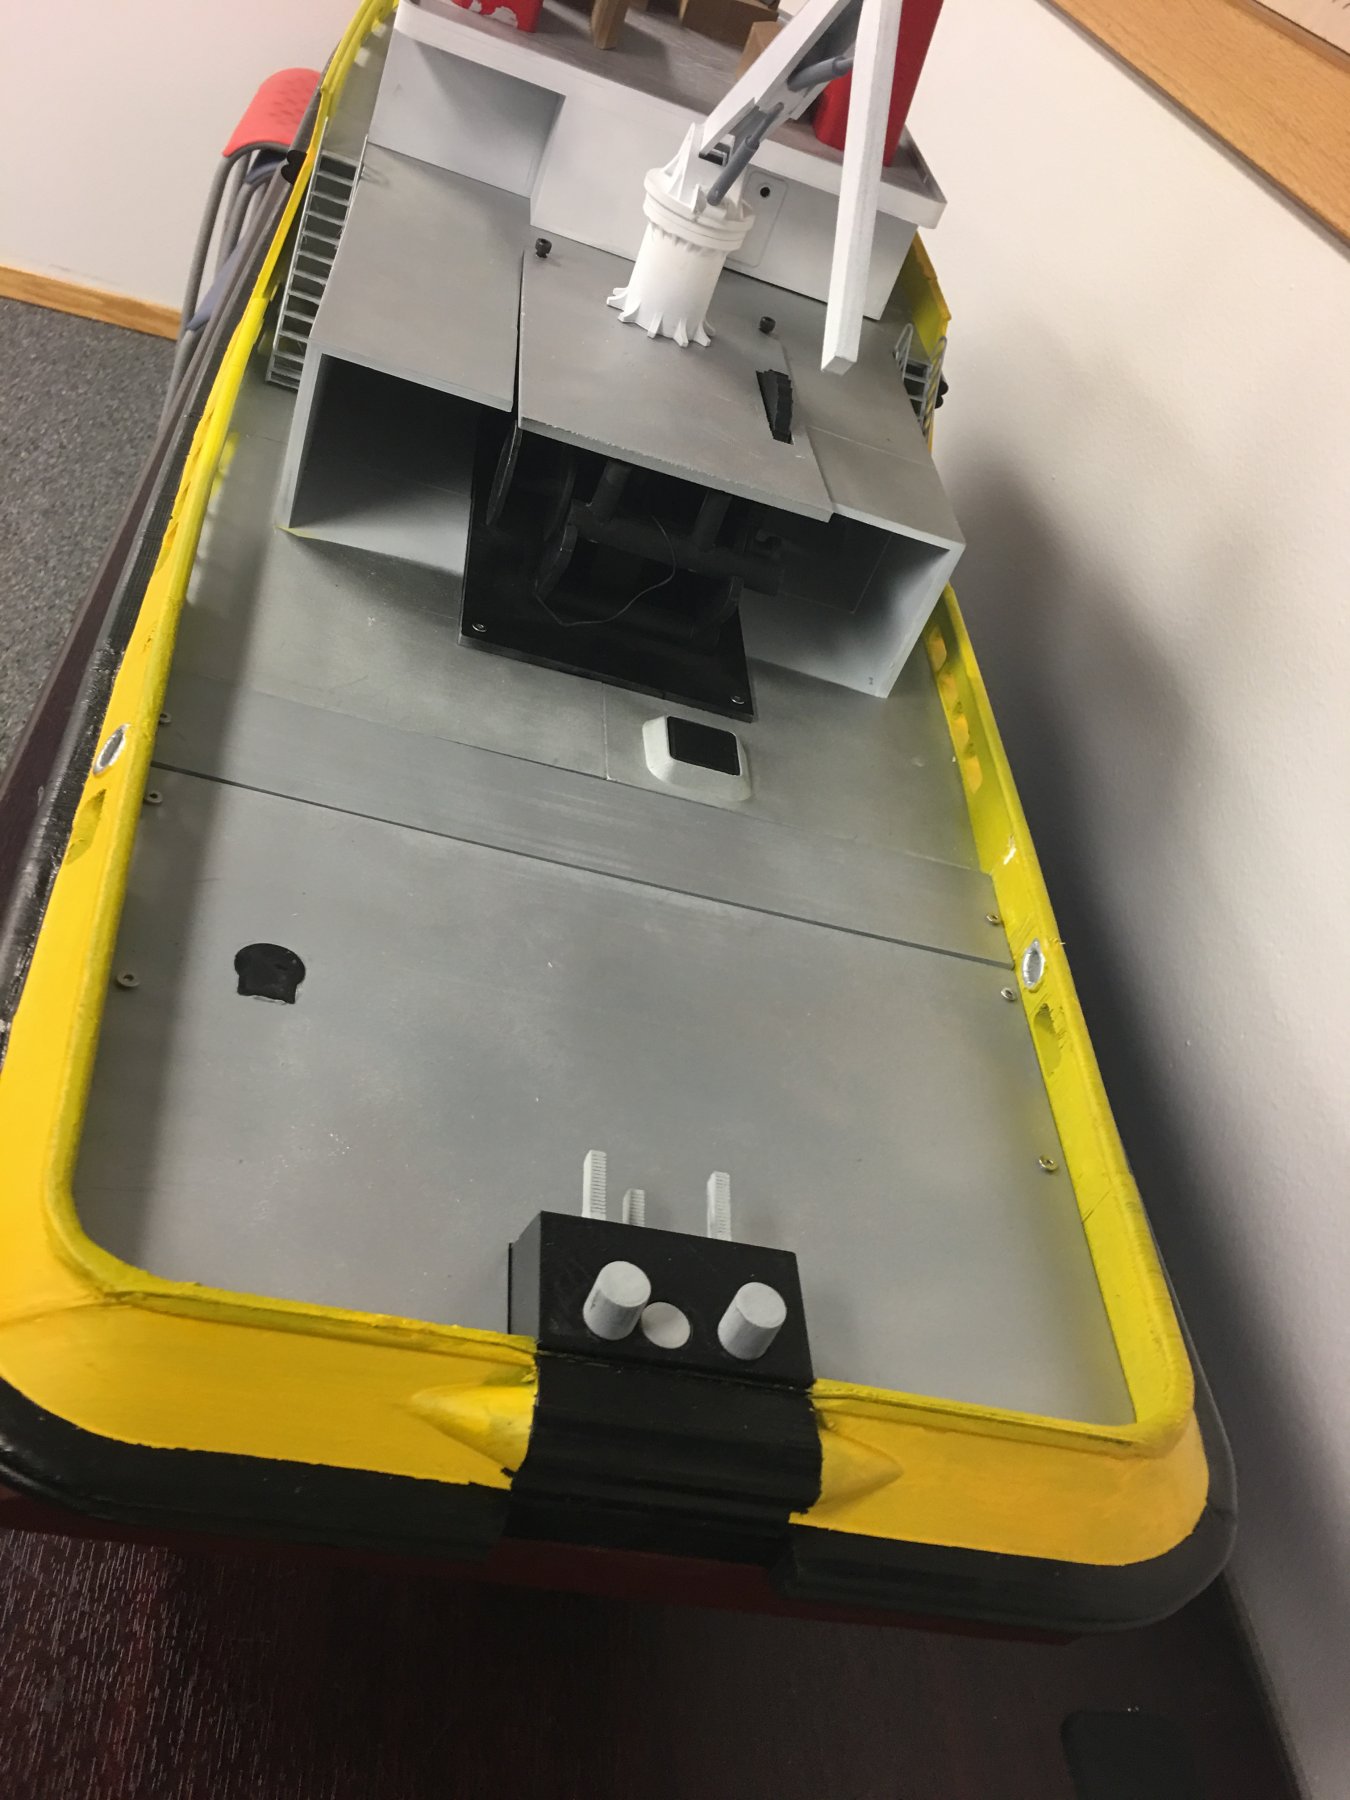
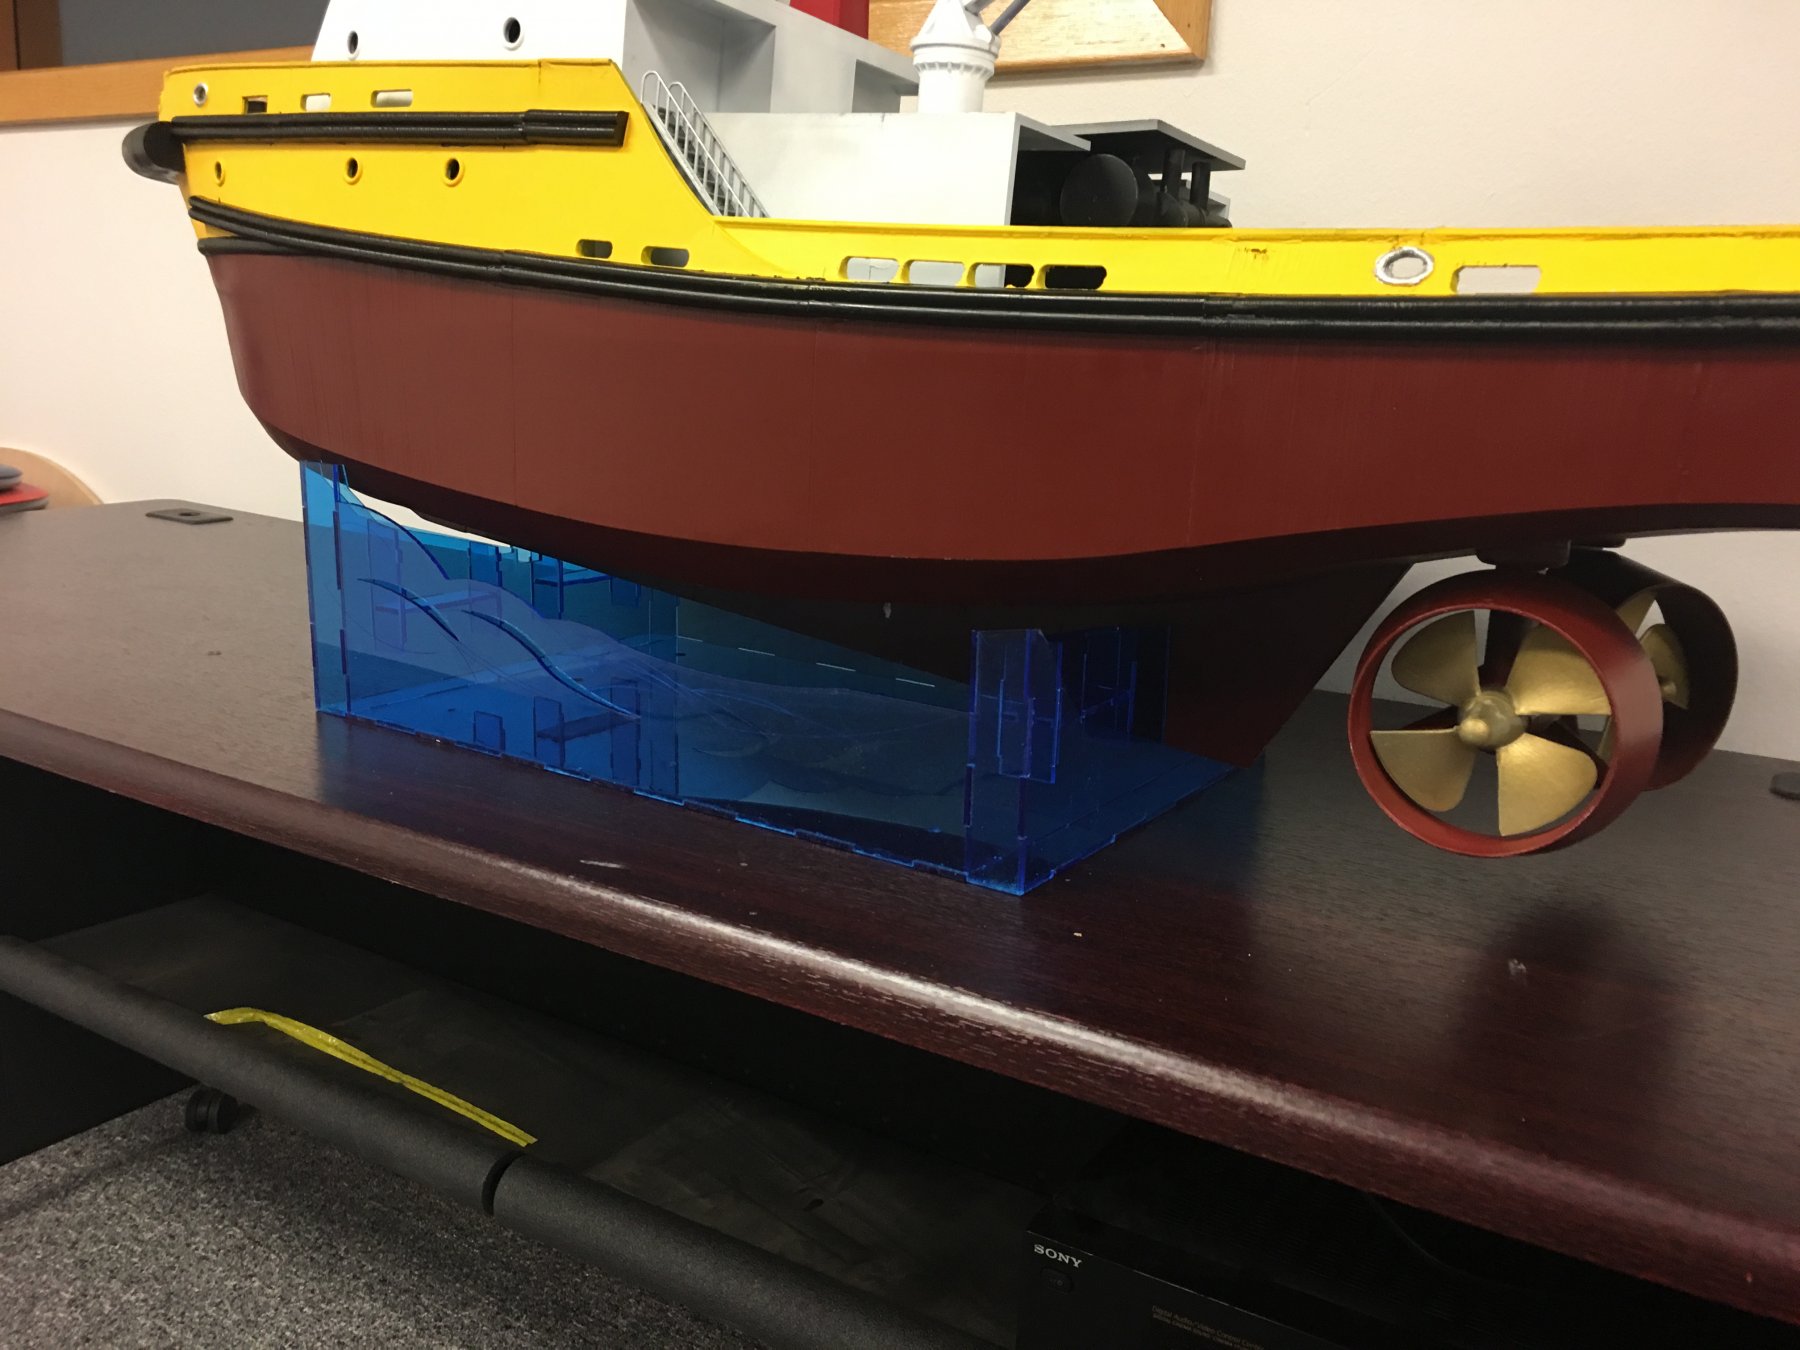
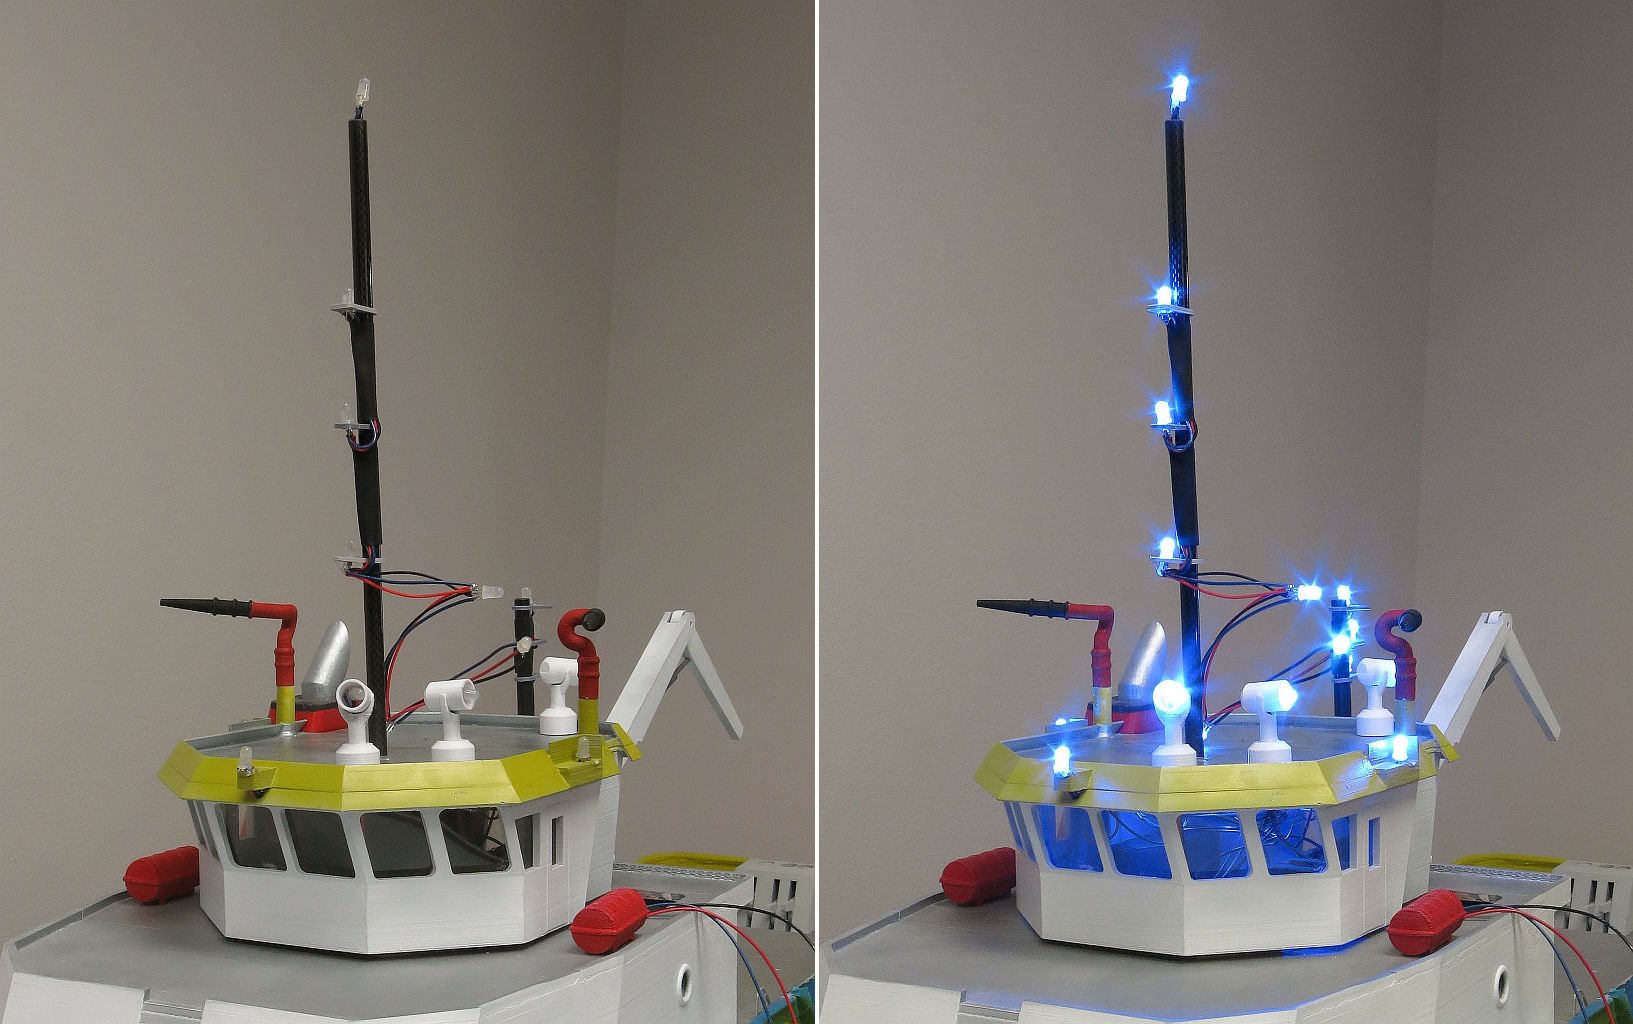
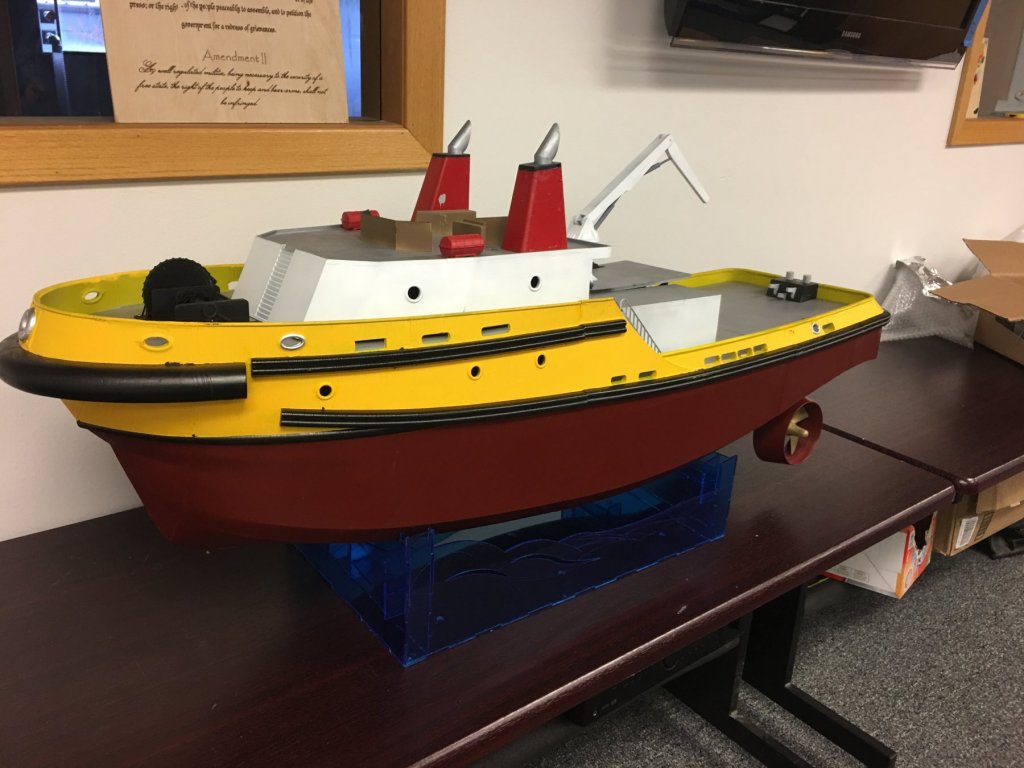
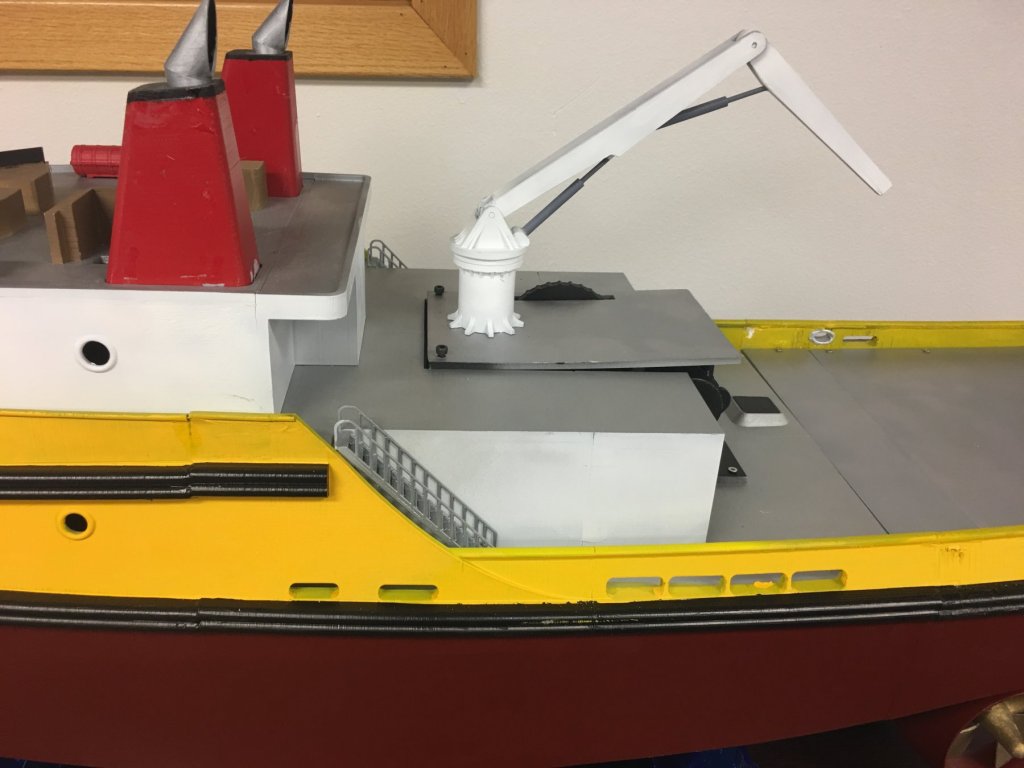
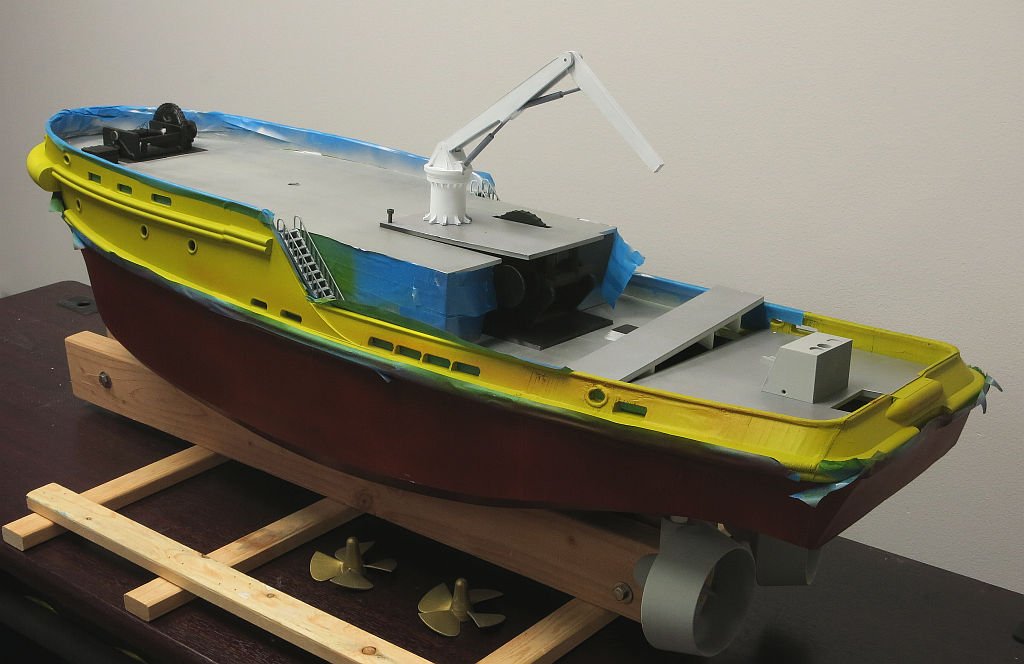
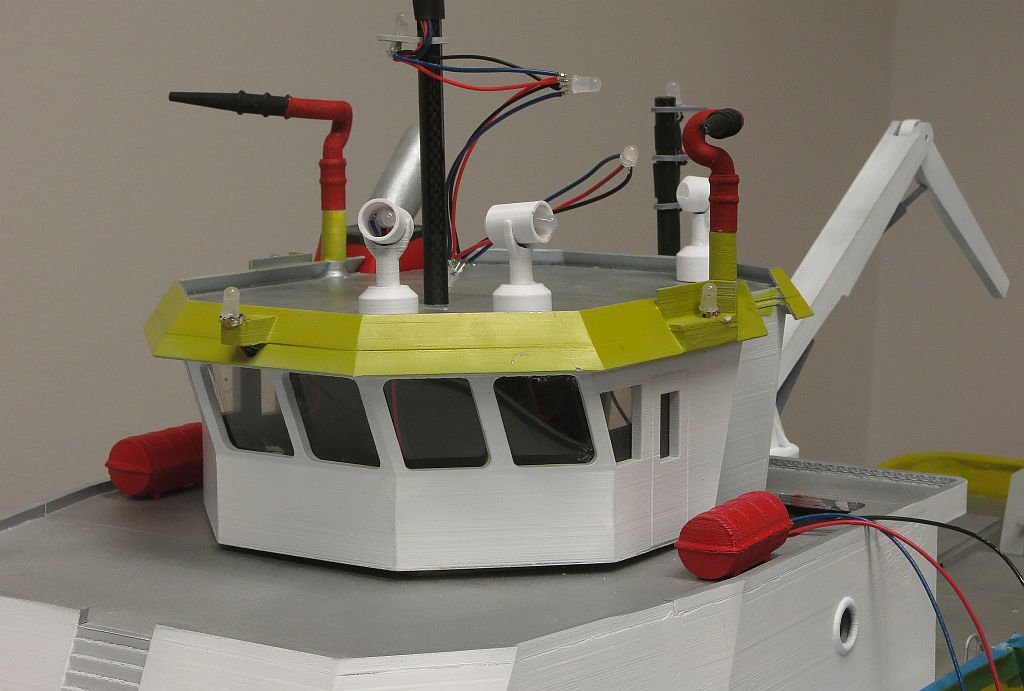
Ok so an update on the tug. Everything is completed except the wiring of the Lights. So in the pictures here you will see everything except the pilot house and the masts. All of the painting is complete and the decks have been installed. The thrusters are glued in place. All of the deck furniture is screwed down. Note - Since the students will be using some of these parts the design called for being able to replace some of the parts. On the stern you will see a block where the bollards can be raised to guide the tow line. Since this could break, the deck is removable so these bollards can be replaced. The story is the same with the thrusters. I expect the wiring to be completed this week. Please note the custom stand complete with waves. This was created on our laser. Once the Pilot house is completed, I will add railing to the main cabin top. The customer has asked that we create a scale model of a bottle of Champagne for the Christening.


- 133 replies
-
- 11
-
-
- alert class
- tugboat
- (and 1 more)
-
Per - Get busy! why isn't this finished yet? 😉
-
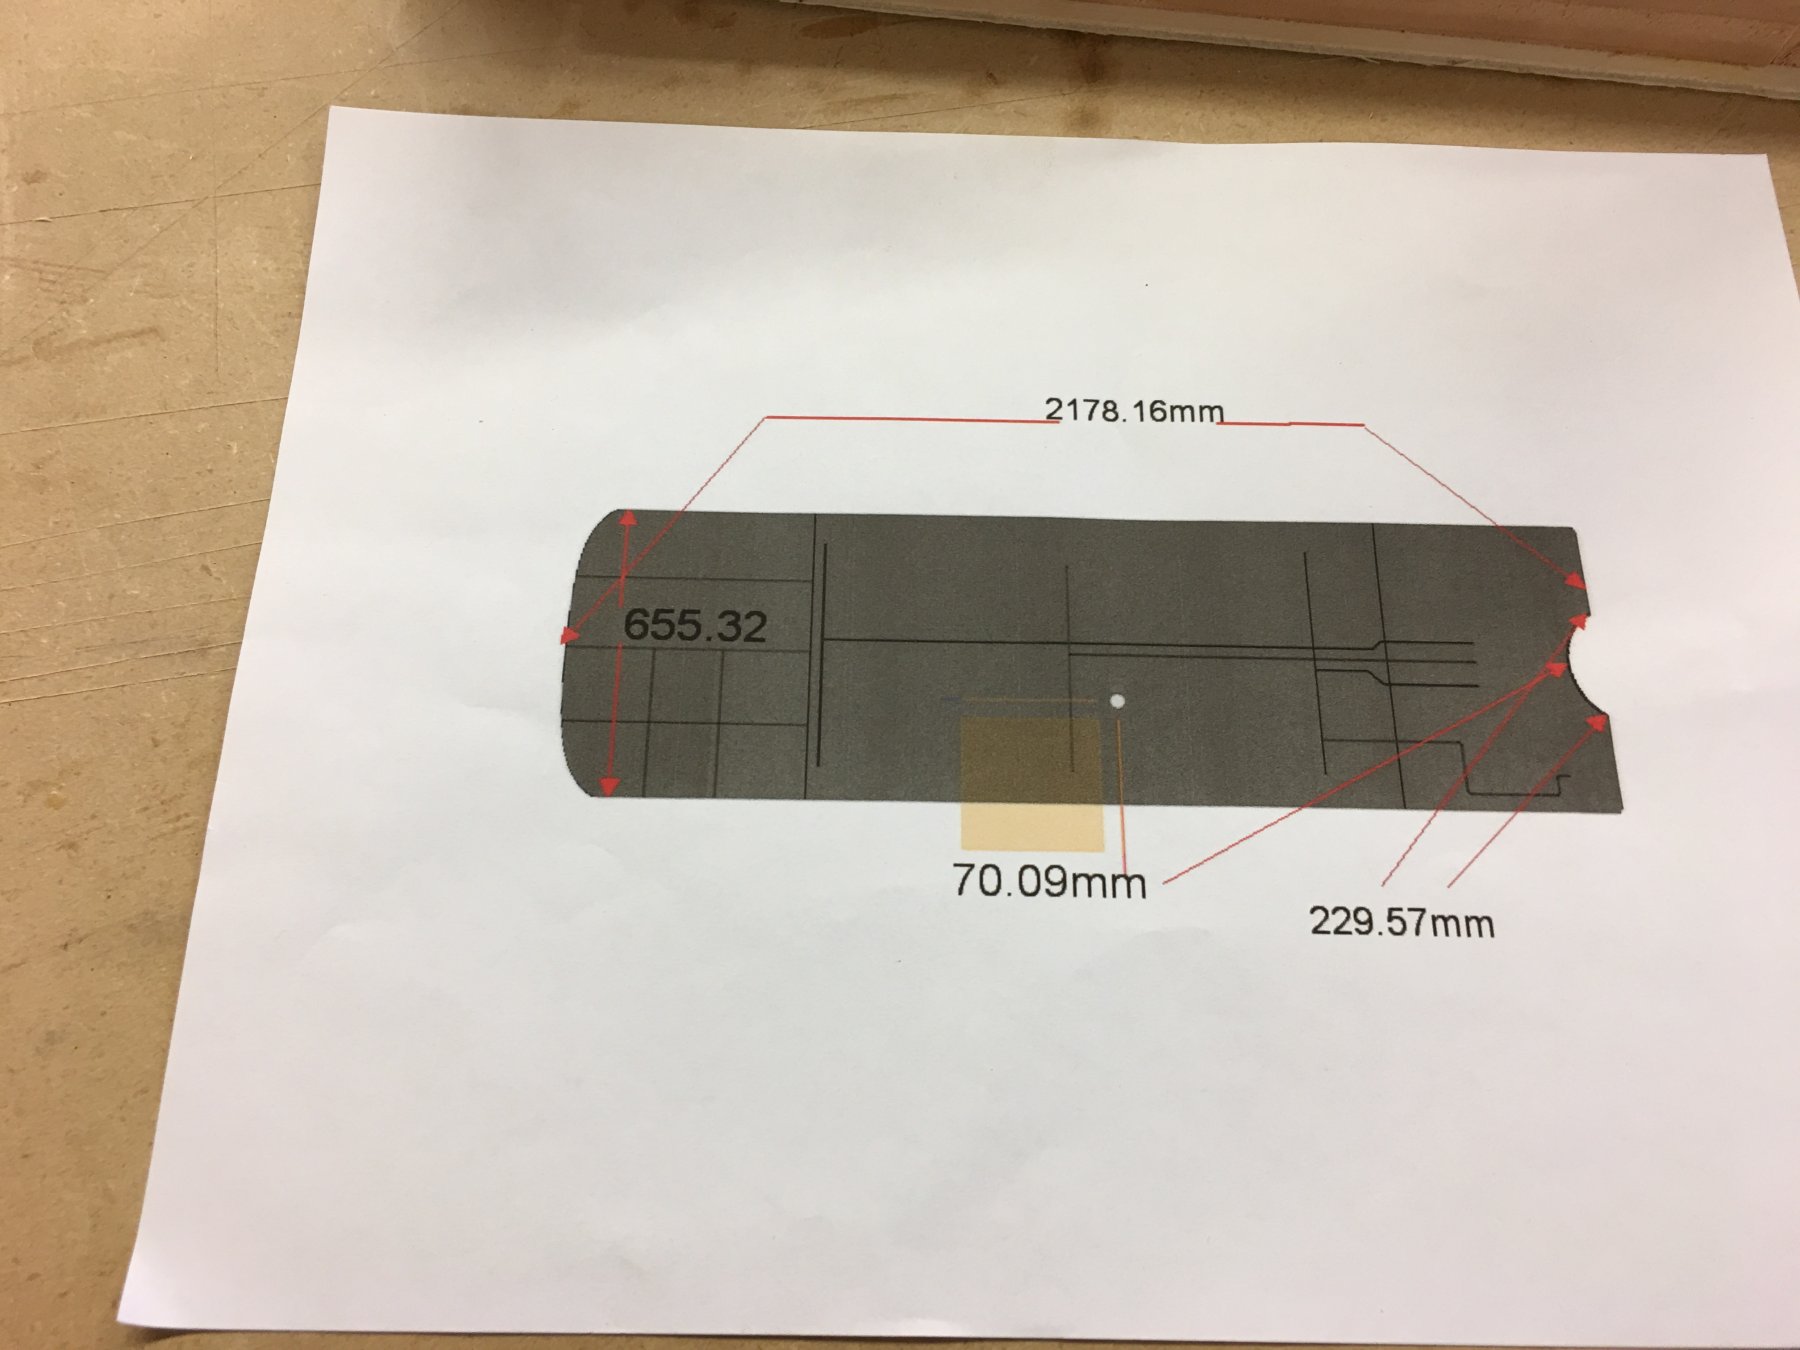
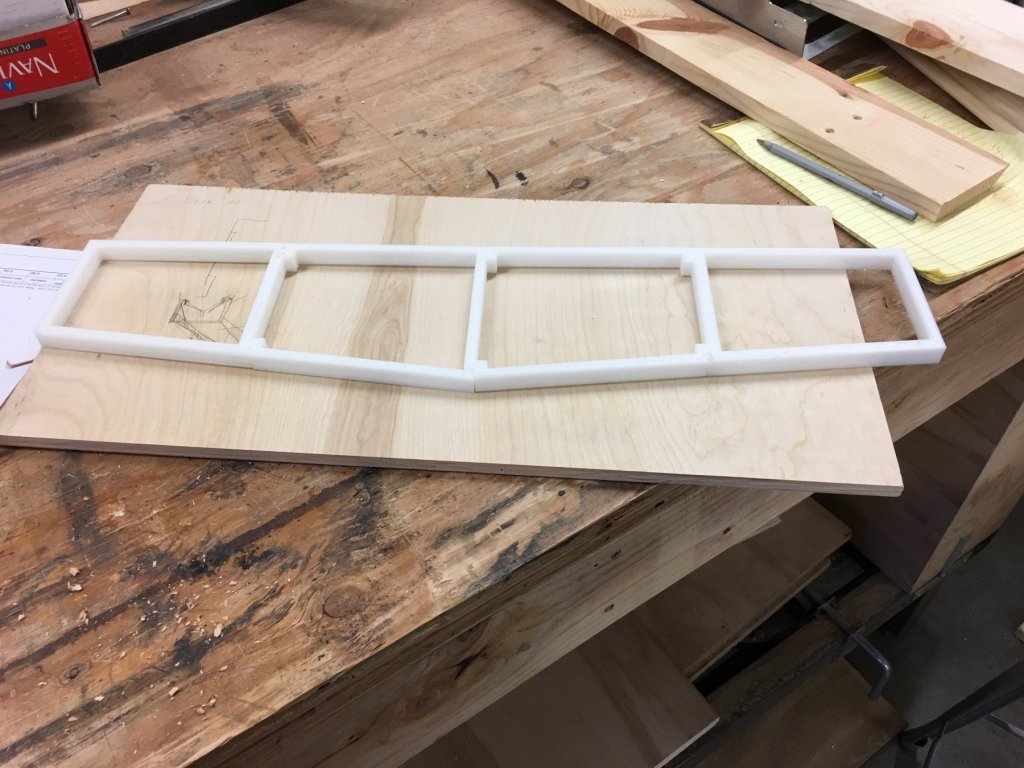
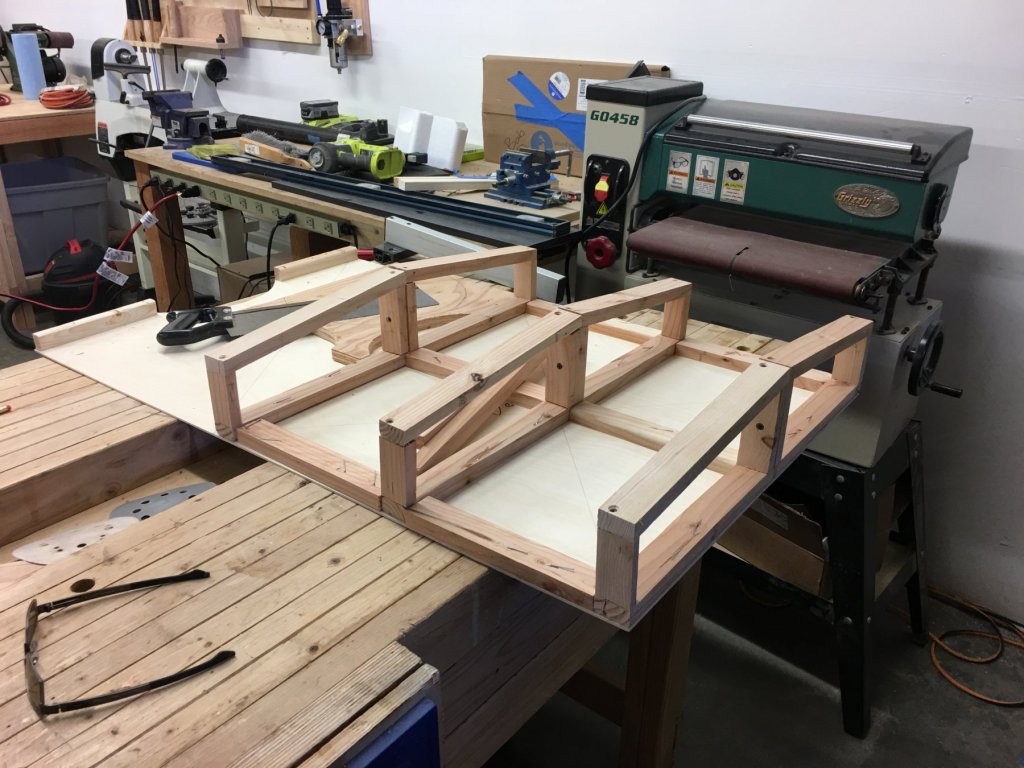
Ok time for yet another update on this project - The tug is in the paint shop for the final coat of paint & the Pilot house is in the electronics lab while we finish the wiring of the Navigation lighting. Today I will cut the acrylic for the stand. Final assembly should be this Saturday. The pictures you see below are for the barge. We started with a template of the frame, which was 3D printed. This was used to create 6 frames. 3 frames for the bow and 3 for the stern. These were then attached to 1/8" birch plywood, which will for the deck. From there we will be forming the bow and stern shapes. then final sheathing with more birch ply. Once the hull is done we will paint and attach various deck furniture which has been 3D printed. Total length is 7 ft 2 inches. and she is 26 inches wide.


- 133 replies
-
- 8
-
-
- alert class
- tugboat
- (and 1 more)
-
So Lou I must be dense RTV is Hot glue? We do use a lot of Hot glue in the lab.
- 133 replies
-
- 1
-
-
- alert class
- tugboat
- (and 1 more)
-
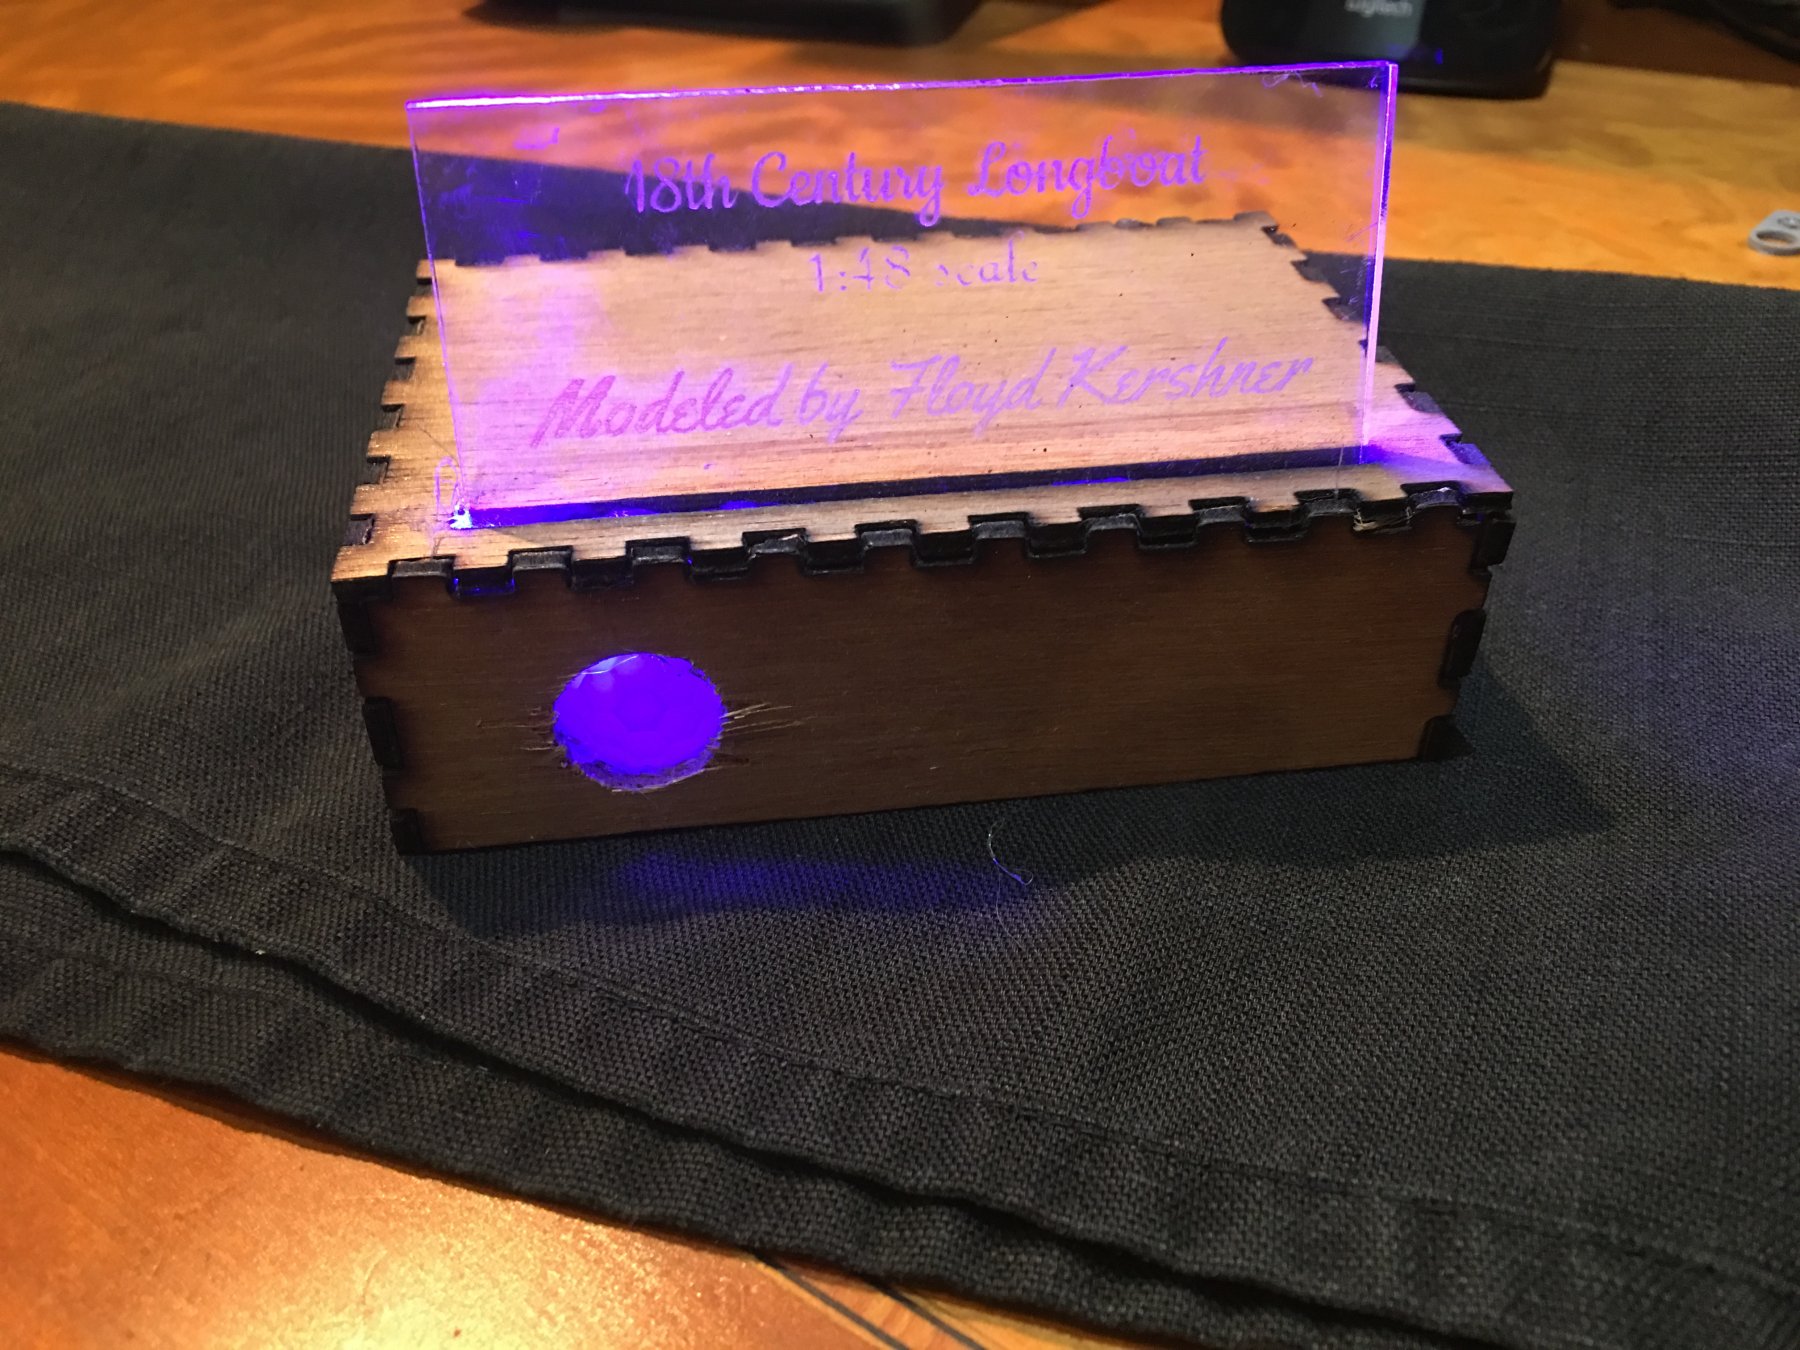
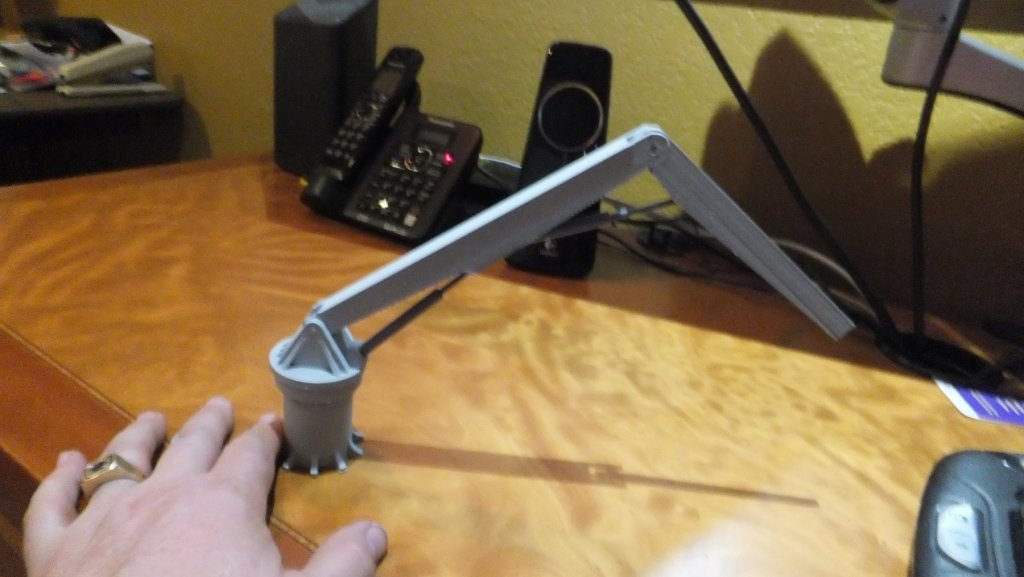
Ron - As mentioned this was just a Prototype. Essentially a throw away proof of concept. the idea is someone walks past your display case and the sign lights up. I would also suggest a different color of LED. We just used what we had handy.
- 133 replies
-
- 3
-
-
- alert class
- tugboat
- (and 1 more)
-
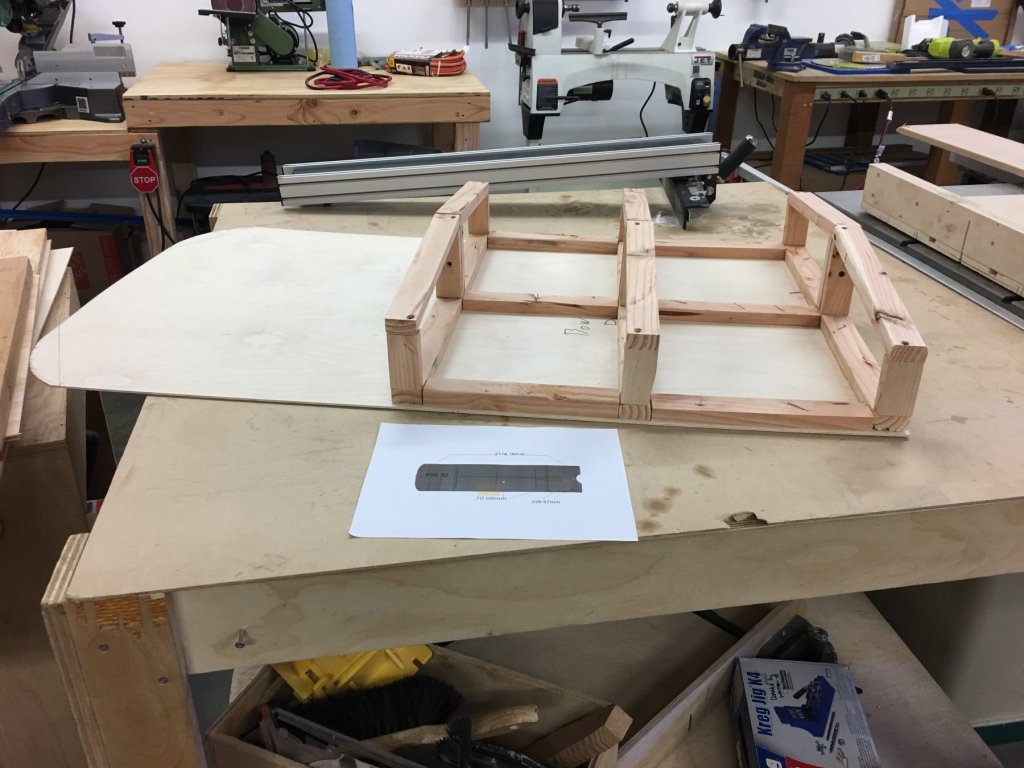
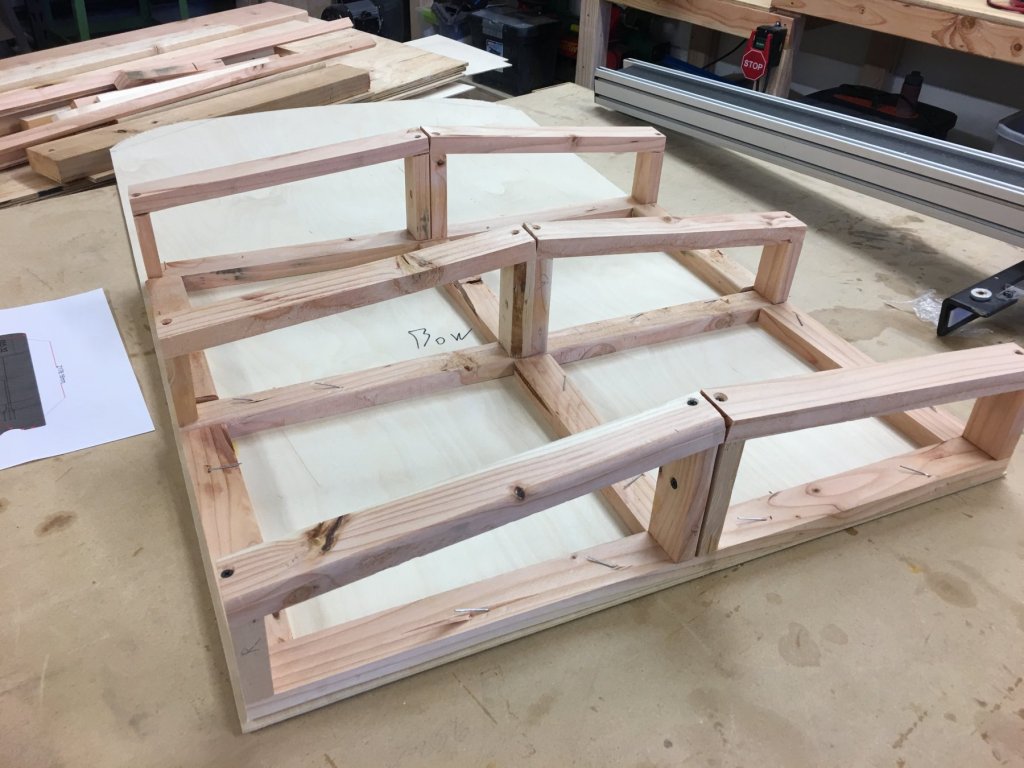
Update - For the barge I have almost completely abandoned 3D printing. And I am so much happier. In 3 Days we have accomplished more than we did in 6 weeks on the tug. We built 6 cross section frames. Cut out the deck from 1/8" Plywood, and attached the frames with glue and brads. We are now ready to skin the bottom and create the bulkheads for the stern & the bow. Today I will cut the sides but not attach them. We need to do some wiring first. All of the deck furniture will be 3D printed. For those who are familiar with Fusion 360. There is a free add-on called Slicer. It will slice any solid model to create bulkheads all you need to do is decide which way to slice, the thickness of your bulkheads, and the number of slices. It looks to me as it was custom made for Ship Modeling. You could take the plans for any vessel and create the keel former and bulkheads just as you would for any kit. The software will create the shapes and lay them out on a sheet for the laser or CNC including the slots for the bulkheads. As soon as I have them running on the laser I will have pictures. And just so I don't leave you hanging without pictures. The following pictures are for Kurt. Kurt - I promised you info on a model sign that lights up with motion. The pictures are of the prototype. I will write the article you requested once I have a nicer looking base. It is a very simple solution. You etch the Acrylic with a laser or CNC and then you install in a base. The base has the sensor you see on the front and is hollow. In this case it holds the battery, 1 LED, & the sensor. The cost for everything is about $4. this box was cut on a laser using the common box program.


- 133 replies
-
- 2
-
-
- alert class
- tugboat
- (and 1 more)
-
Ok I promised Pictures so here goes - PS I am finding a Gravity fed air brush a bit of a pain when you have as much painting to do as I do.


- 133 replies
-
- 8
-
-
- alert class
- tugboat
- (and 1 more)
-
Kurt - I hate it when you are right. I called Badger and got an answering machine. I left a message. So I am now a proud owner of an Iwata HP-CR. And now I understand what you guys are saying about gravity fed. that cup is pretty small for what I am doing. I also found a local supplier for the paint I am using, but not until after I had placed a $50 order with Amazon. At any rate the Yellow is done. There will be pictures today. Ron - This is a pretty good video. He covers all the important topics. Like him I have access to an Ender 3, but unlike him I can't use it. Most of my parts are too large. I also use a commercial slicer. I would like to get some of our instructors to view this just so they make sure they cover all the details.
- 133 replies
-
- 2
-
-
- alert class
- tugboat
- (and 1 more)
-
Ok small update. As mentioned I met today with 2 friends to help me with both of the airbrushes. We were able to get proper airflow from one. but nothing thru the siphon of either one. And when we used the metal cup to test we got bubbles without touching the needle. We also had a side air leek from one of the brushes. So the next step is to talk to Badger. Unfortunately their Help desk closes at 3:00 PM Central time. Lately I have not reached home before 2:00 PM Pacific time. I think I can make this happen on Friday. I had hoped to finish painting this week, but the paint I ordered has not arrived. So even if the airbrushes were working I still could not paint.
- 133 replies
-
- 3
-
-
- alert class
- tugboat
- (and 1 more)
-
Harvey! I am sorry that you are sick. I was hoping to see you at the PSSM meeting on Saturday. The tug will be there in all its glory. And the answer to your question is Yes and No. Yes one of the Badger 150s is yours and no I am not using your compressor. Your compressor has been donated for charity. I understand the comments about the 150 not intended for such a large project. And I will remember that in the future. Both 150s came to me at a wonderful price - Free! And as mentioned I am very close to done with this project. Hopefully I will get enough funds out of this to buy a gravity fed solution. On the Tug I have all of the yellow and white painted. I also have 1 coat of the bottom painted. All that remains is the 2nd coat and the black. And of course like many other parts of this project. I have never used an Air brush before. I have arranged to meet with someone who has today and walk thru all of this with them. I expect that by the end of today I will have at least 1 working air brush.
- 133 replies
-
- 3
-
-
- alert class
- tugboat
- (and 1 more)
-
Ok let me try to answer all of your questions - Paint - I am using 2 different paints. Air Vallejo, I usually don't thin this one. I also bought a kit thru Amazon from Createx. it is called Wicked Colors. This one comes with its own thinner and we do use that. And I have 2 Badger 150s. And I have had issues with both. I am just 2 colors away from completing the whole project. And I have used up most of my paint. I have the compressor set at 35 psi. This is what the booklet from badger suggests. Yes there is a water trap on the compressor, and I have cleared it.
- 133 replies
-
- 3
-
-
- alert class
- tugboat
- (and 1 more)
-
Kurt - I want to thank you for your detailed info. Both about airbrush and tape. So I want to ask your help again. We have hit an impasse with the Badger 150. No matter what we do we cannot get sufficient airflow. We have completely disassembled the nozzle, the needle and the air valve. We have soaked everything in Hot water, Rubbing Alcohol, Airbrush thinner, & Windex. I Have the brush set you have pictured and we have scrubbed everything. We have even swapped many of the parts. We get air but not enough thru the brush.
- 133 replies
-
- 4
-
-
- alert class
- tugboat
- (and 1 more)
-
I have a question - What do you use to mask off when painting? I find that painter's tape does not leave a clean line. Update - The problem above is resolved and Conor (my grandson) spent a day sanding & priming. We have now finished painting one color. And today begins masking and the rest of the painting. The goal is to complete the painting this week. Tomorrow I will be in the lab wiring the pilot house.
- 133 replies
-
- 5
-
-
- alert class
- tugboat
- (and 1 more)
-
So here is where I stand on the delamination problem. As mentioned we tried injecting thin CA. This worked partially but was a big headache. So We shifted to a different solution. The Solvent used to join the hull sections is a very thin liquid and he has a great wicking property. And I have a squirt bottle that has a very tiny metal tip, almost like a needle. So with careful application this has helped with the lamination. We also used Q-tips with the solvent on it. So now the surface is not flexing. The next issue is to cover the cracks. The spackle did not work. In fact it seemed to enhance the cracks as it dried. So I think it is time for Epoxy. We can brush this on and sand a flat surface. My Grandson wants to cover the whole hull this way. He has never worked with West Systems Epoxy.
- 133 replies
-
- 4
-
-
- alert class
- tugboat
- (and 1 more)
-
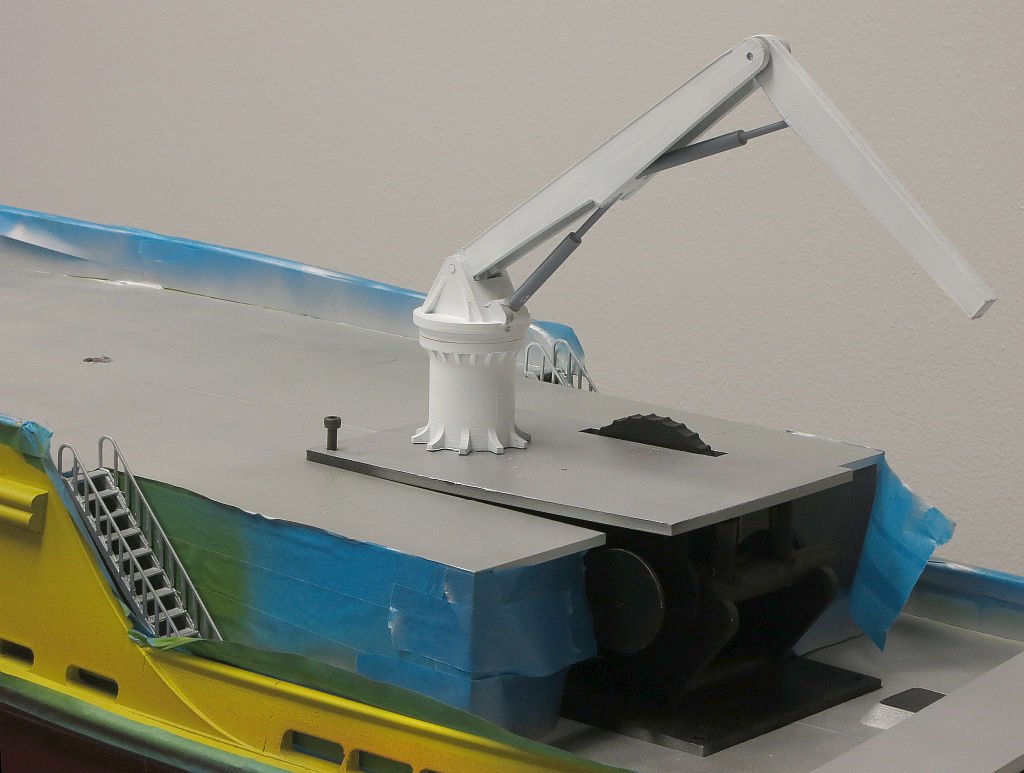
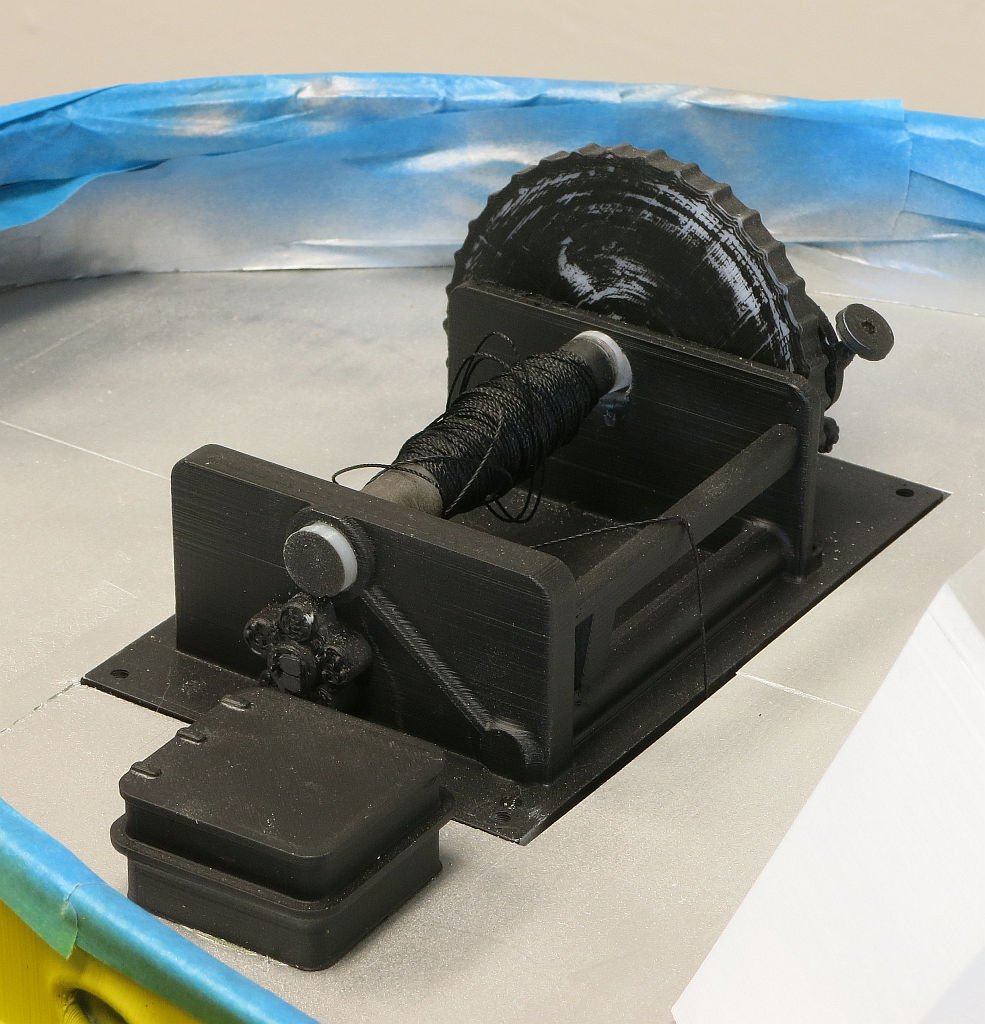
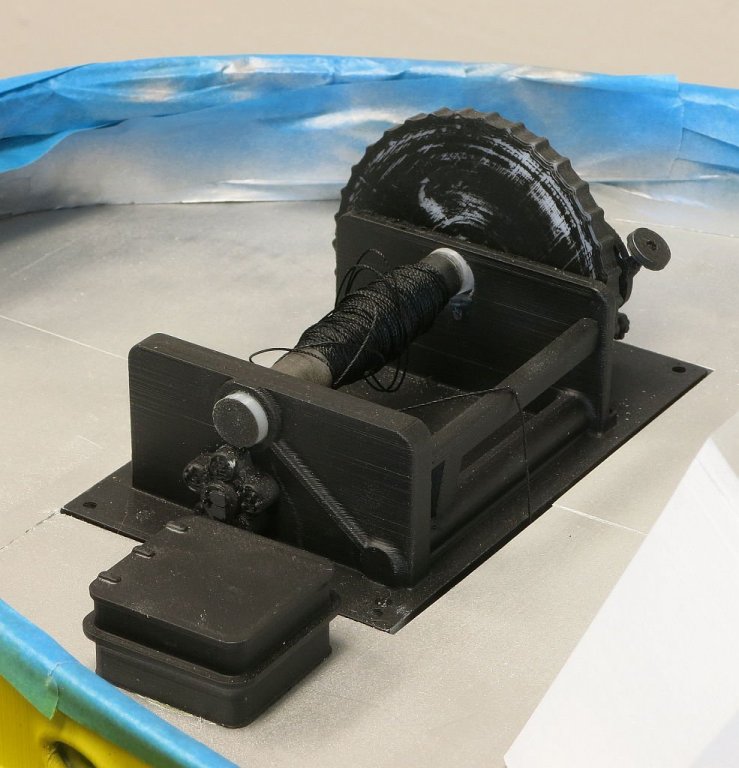
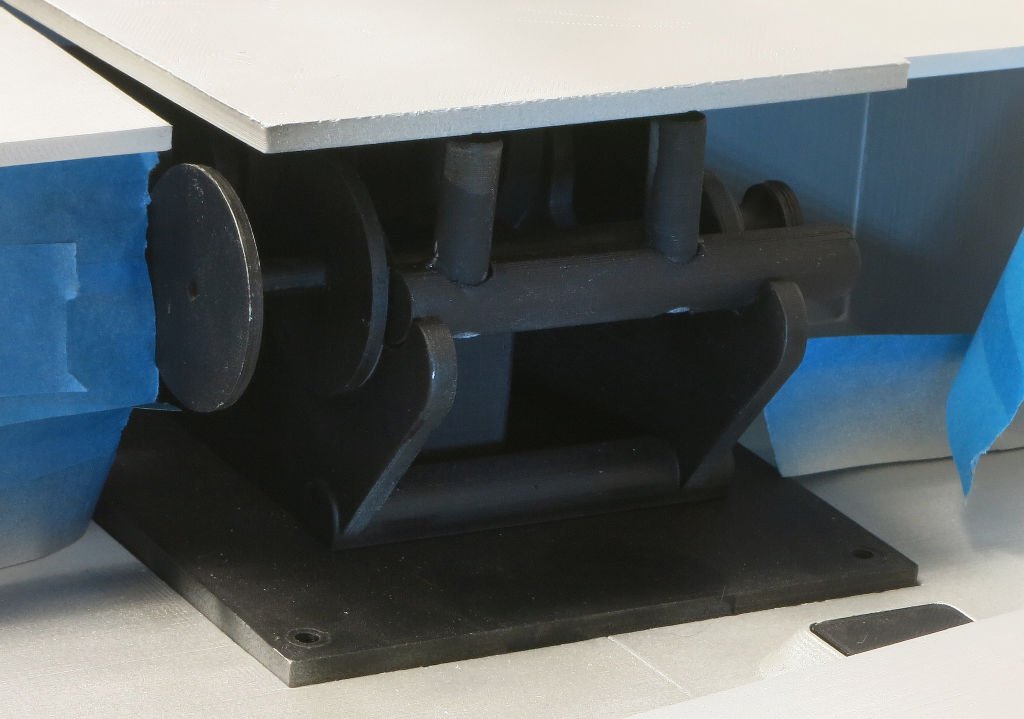
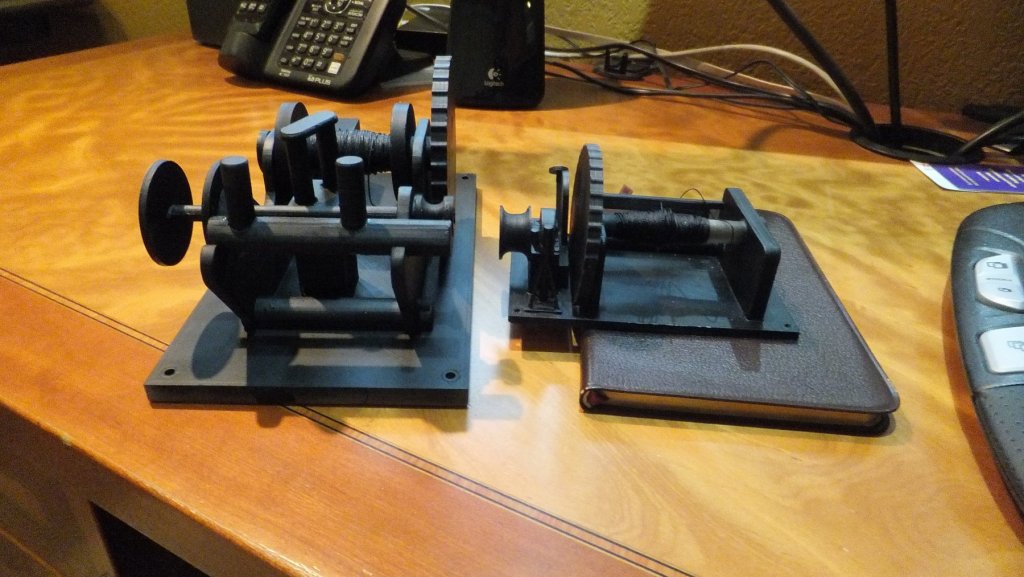
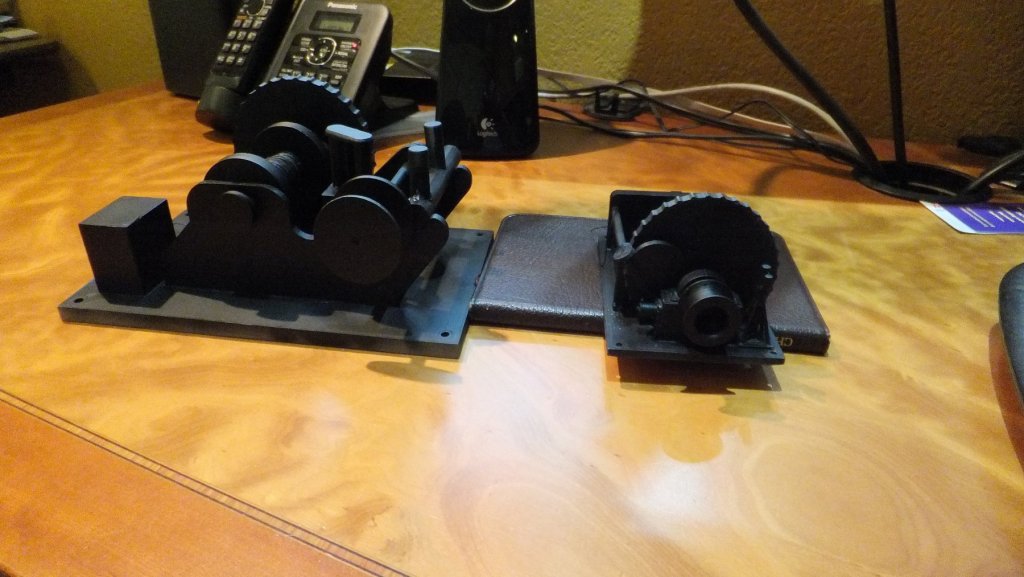
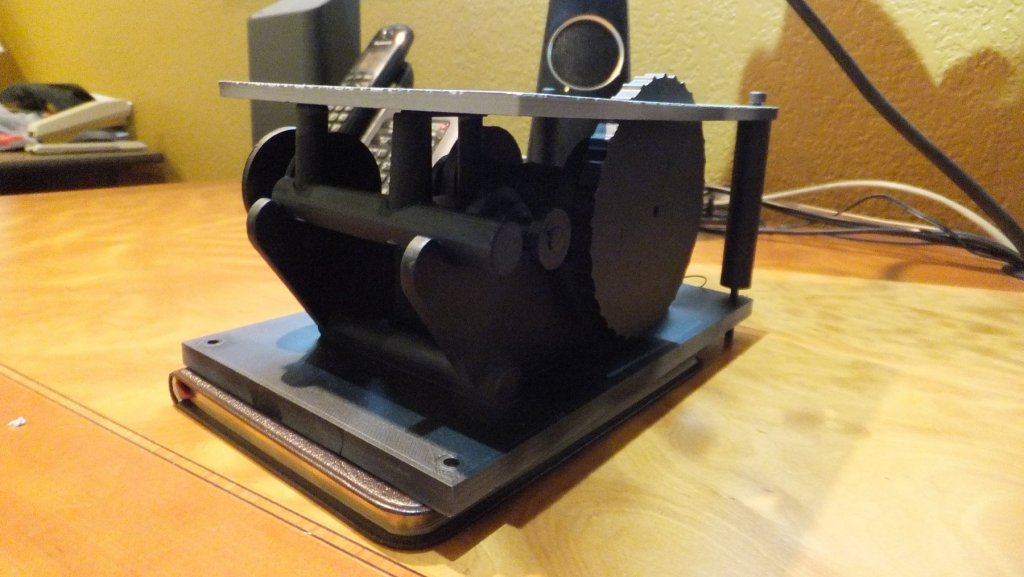
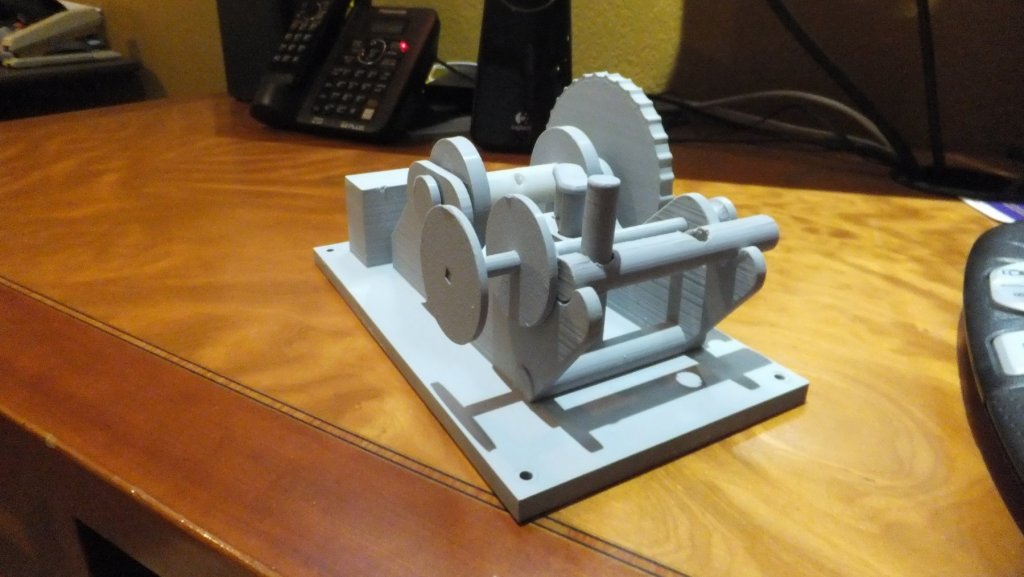
Ok, time for yet another update. The pictures you see below are of both winches for the tug. They are now complete and painted. The 3rd picture is of the main winch with the upper deck in place. The thumb wheels are for the students to operate them. Each one has approx. 30 ft of line attached. and each winch can be unscrewed from the tug for repair or replacement. We plan to take the forward winch and scale it down a bit and use the design for the capstan on the barge. I am experimenting with this too.
- 133 replies
-
- 11
-
-
- alert class
- tugboat
- (and 1 more)
-
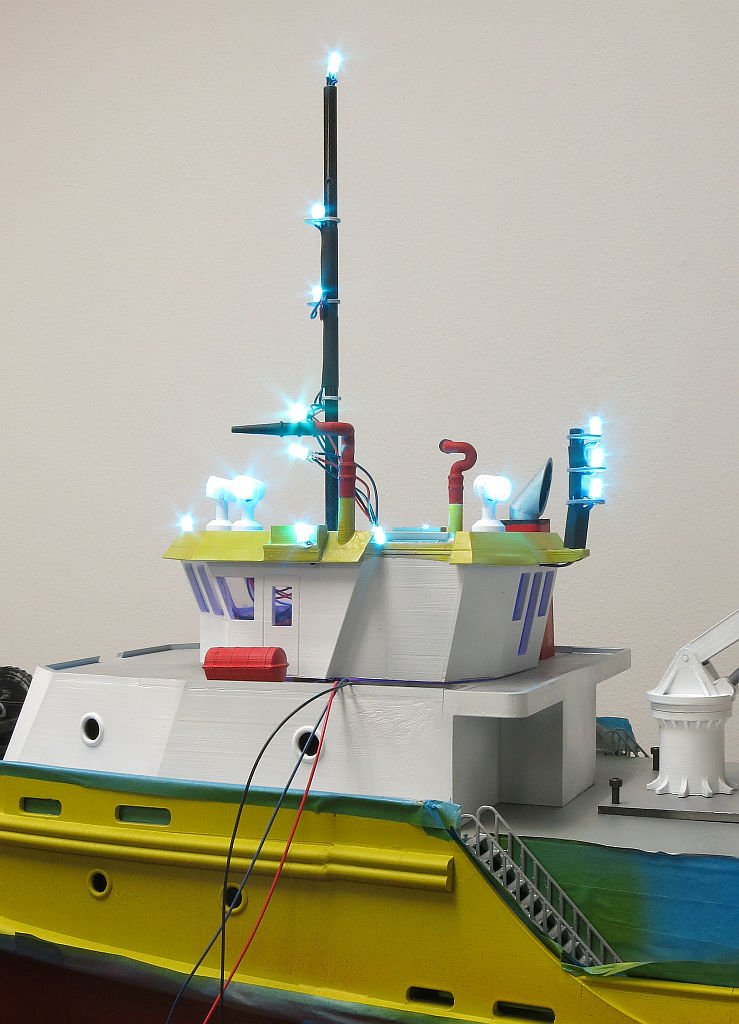
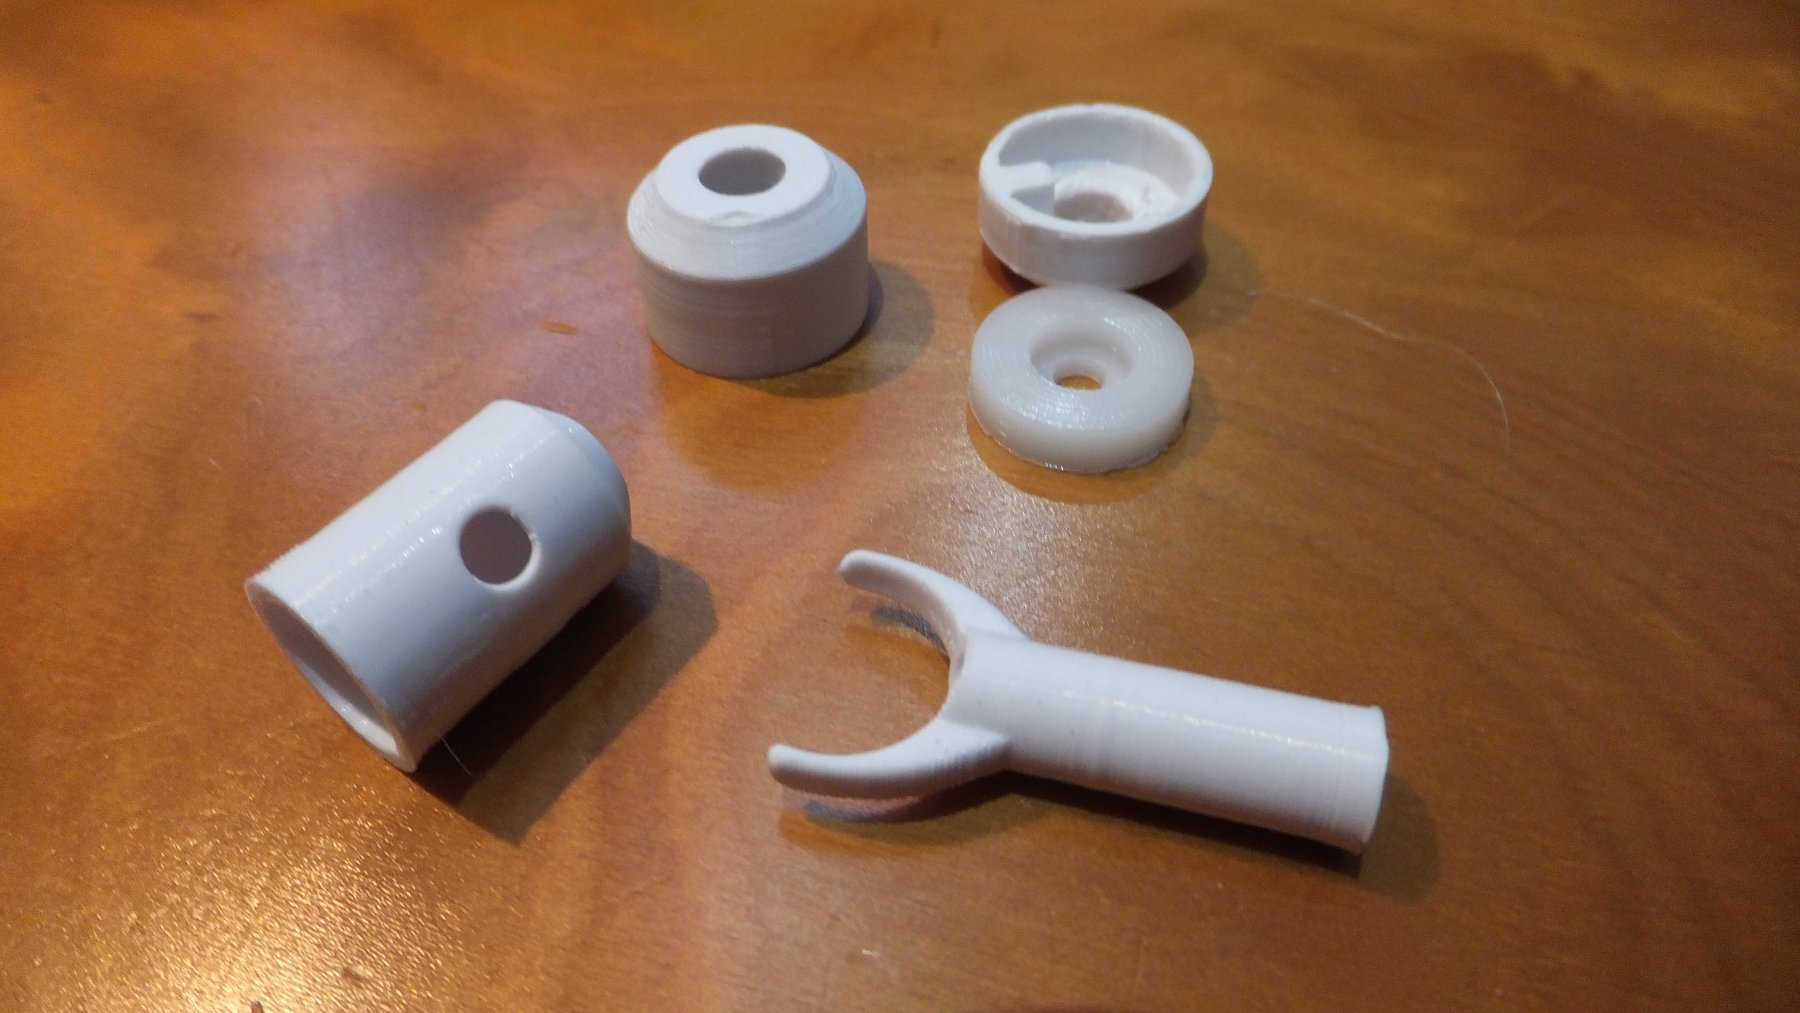
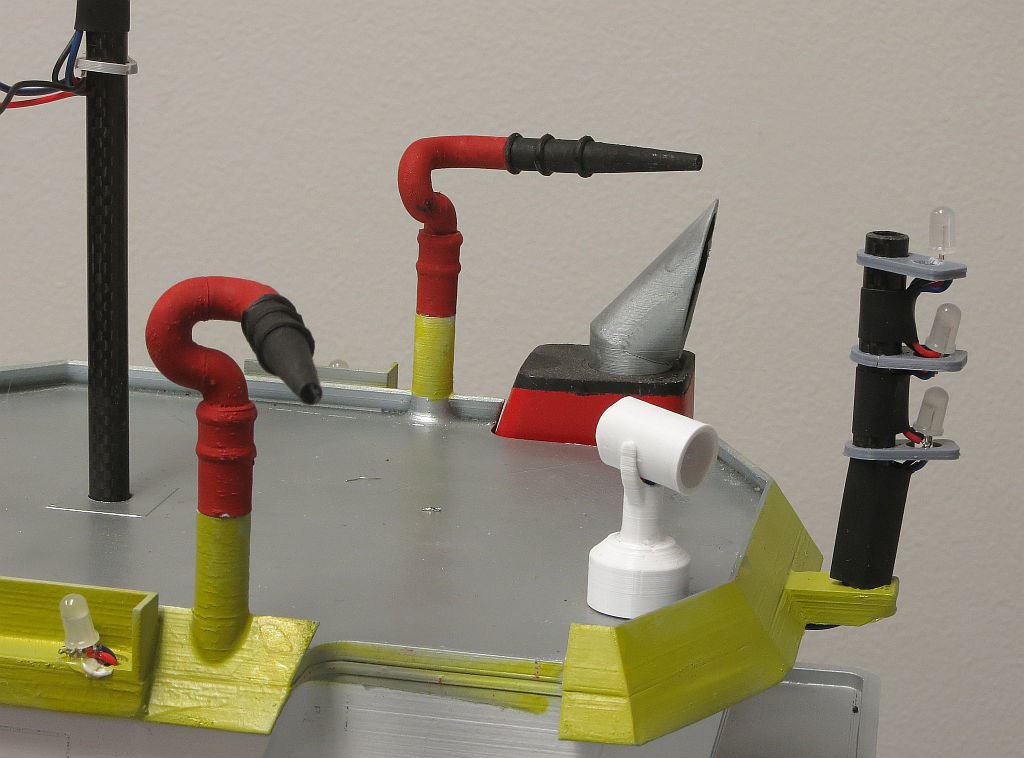
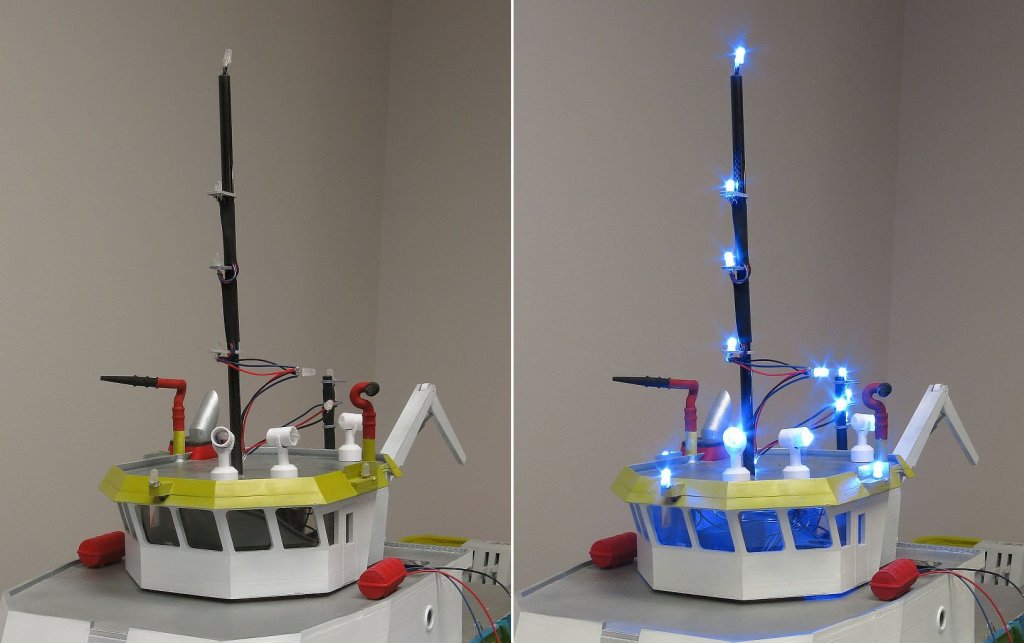
I mentioned that I would create a post about the search lights. so here goes. On top of the Pilot house are 3 search lights. The customer has requested that they rotate and the lights work. So Neal has created the design you see in the pictures below. There is the light hood which will hold the LED and there is the shaft thru which the wires will travel. There is also a foot and a cowling. The picture show 2 cowlings. One is upside down so you can see inside. You will notice there is a key inside the cowling. You will also notice that on the roof of the pilot house there is a small copper rod next to the hole in the roof that will hold the search light. So I will place the cowling over the shaft and insert the shaft in the roof. then glue the foot to the shaft and glue the cowling in place. This will ensure that the light does not get removed and the student does not rotate the light until he breaks a wire.

- 133 replies
-
- 11
-
-
- alert class
- tugboat
- (and 1 more)
-
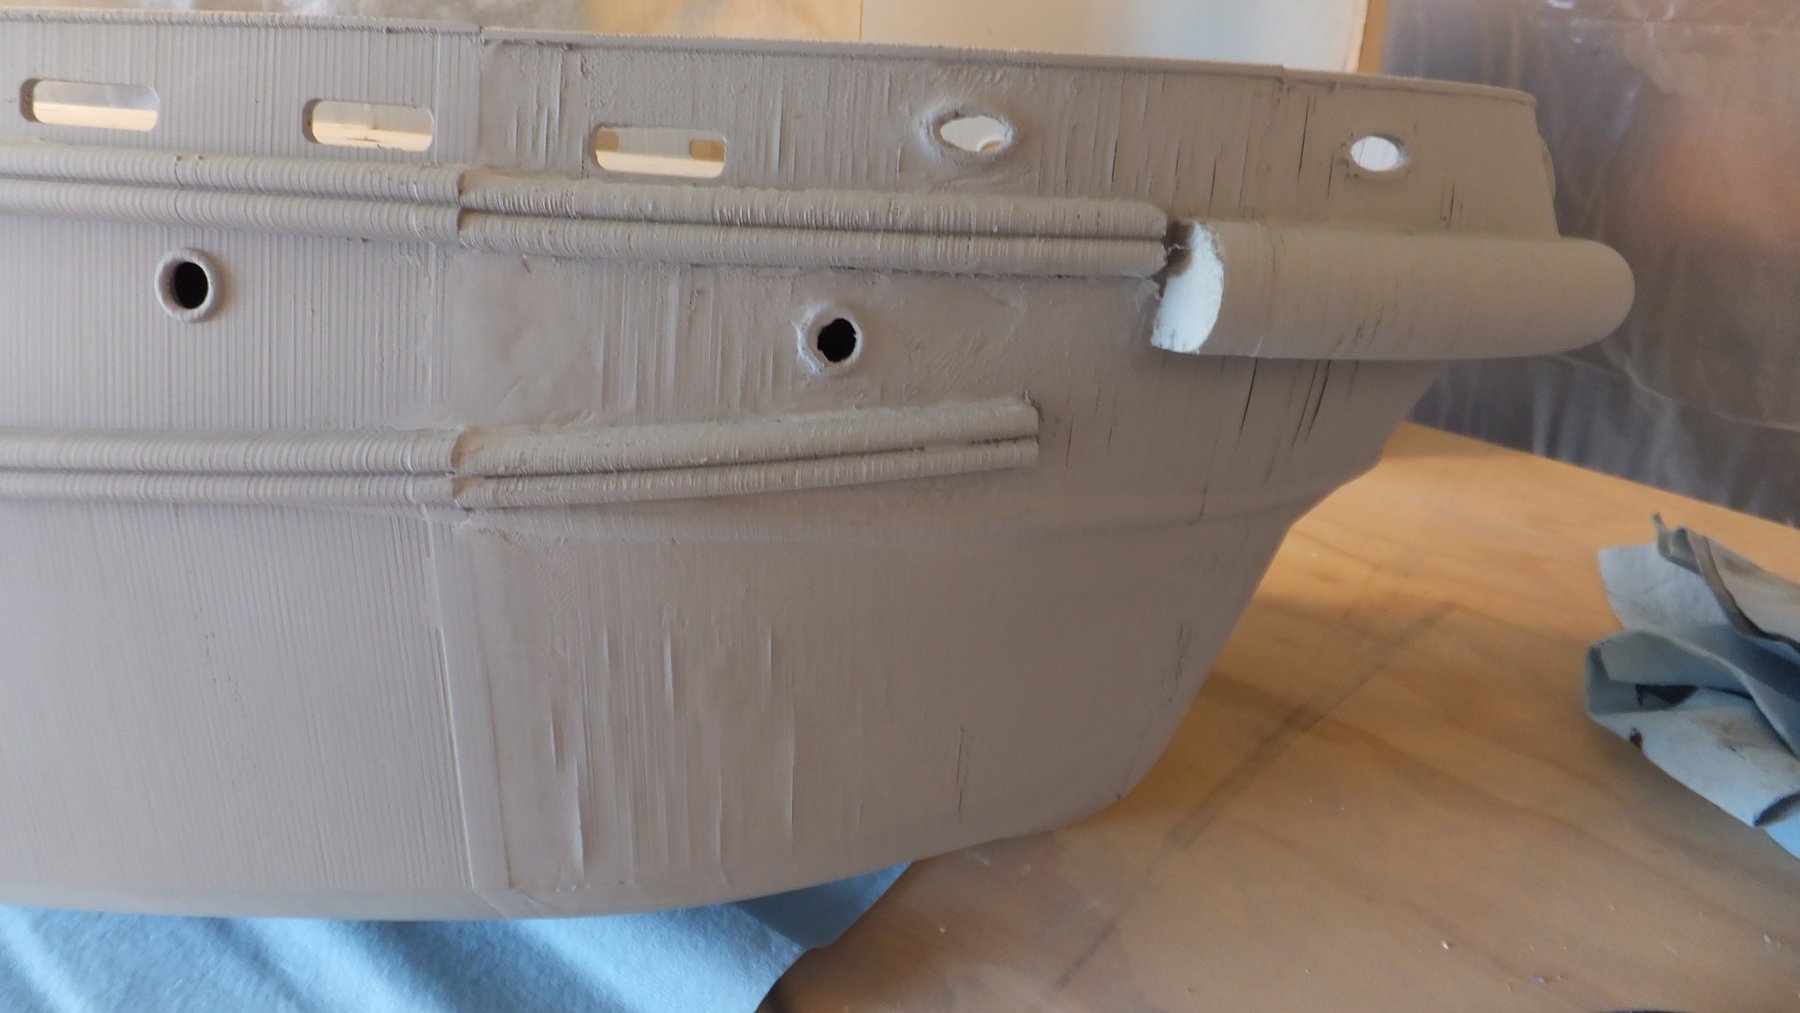
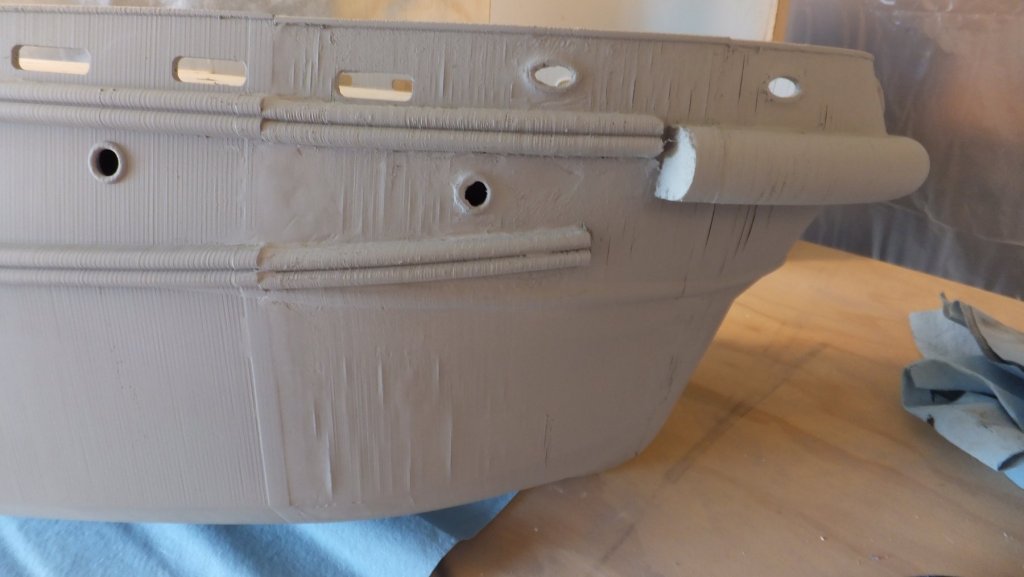
Ok Per you asked for it - here you go. I knew I had a problem but until it was painted with primer. I didn't know it was this bad. the problem is caused by delamination of the outer layer of PLA. I have since learned how to avoid it. But I thought I had reprinted all the parts with this issue. I have tried using a hypo needle and injecting CA. That was partially successful. All that is left is to 1. dry paint and hope the dark colors cover it, or 2. putty over it and paint.
- 133 replies
-
- 8
-
-
- alert class
- tugboat
- (and 1 more)
-
Don't you just love the challenges of Ship modeling? As the primer has dried we have found a few locations on the outside of the hull where the outer layer did not laminate. This is a common problem in 3D printing that I have no learned to solve. But apparently did not catch on this model. The solution is to slow down or increase temp or both. But now I need to try to insert some glue beneath the outer layer. Unless someone has a better idea.
- 133 replies
-
- 3
-
-
- alert class
- tugboat
- (and 1 more)
-
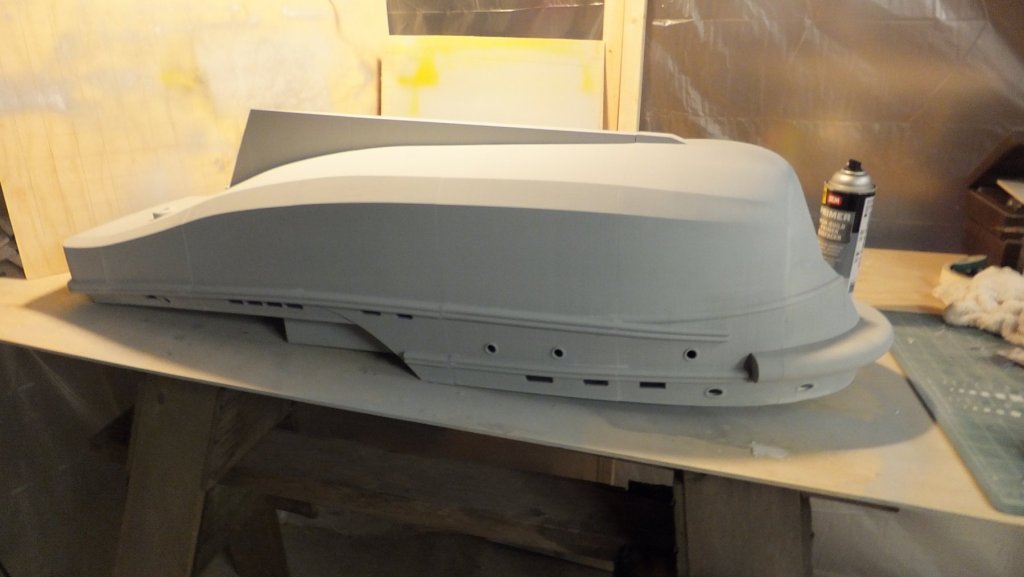
Thanks for the feedback. I have 2 sets of the brushes pictured here. I also keep a siphon bottle filled with Windex. And when I finish with a color or at the end of the day I spray the Windex until it comes clean. But you are correct I have not disassembled the sprayer or cleaned the siphon tube in the paint bottle. I also bought 10 siphon bottles with the plastic nipple to store paint. I am guessing that I need to rinse all these bottles and start fresh. Progress report - The hull has been completely painted with primer. As mentioned above the Crane is complete and ready for paint. The rear winch is also ready to paint. I made a mistake on the forward winch which will require 4 hrs of 3D printing. So that print is underway. I have also started to assemble the Searchlights on the top of the Pilot house. Just a note about the Searchlights - the customer requested that they rotate and shine. We were concerned that the students would rotate them until the wires broke. So Neal designed a pin system that will prevent a full 360 degree rotation. I will take some pictures and post them tomorrow.
- 133 replies
-
- 5
-
-
- alert class
- tugboat
- (and 1 more)
-
And here it is! a picture of the exterior of the hull with Primer applied. There is still a bit of sanding on the interior and primer to go but we can really see progress. So I have a question. When cleaning your air brush what do you do? Mine is a badger 150 with siphon feed. It appears that after a week of not painting I can't get the paint to feed. I am thinking that the siphon tube is blocked. So tell me what the procedure is to change paint colors?
- 133 replies
-
- 9
-
-
- alert class
- tugboat
- (and 1 more)
-
Ok time for an update! After a day and 1/2 of sanding, filling and more sanding. I think we will be spraying primer later today! Yahoo! With some help from my grandson. We spent much of yesterday sanding the hull, filling cracks etc. and sanding again. I also got a chance to assemble the crane and winches and get some primer on them. And of course I broke some parts. So Today its back to the lab to reprint the missing parts. Note to self - In the future when you need a heavy primer, don't buy the most expensive kind. I went to an auto body supply and asked for the best thick primer that would fill cracks etc. They gave me a rattle can that comes in black and grey. It works great but at $25 a can I am now $100 poorer. The pictures you see are of the Aft winch and Crane with a primer coat.
- 133 replies
-
- 12
-
-
- alert class
- tugboat
- (and 1 more)