
Marcus.K.
-
Posts
322 -
Joined
-
Last visited
Reputation Activity
-

 Marcus.K. reacted to wefalck in Pomeranian Rahschlup 1846 by wefalck – 1/160 scale – single-masted Baltic trading vessel
In spite of a week's travel for business, I managed to get done a part:
*********************
The Main Hatch
The main hatch will be shown closed, so I could revert to my usual technique of milling it from a solid piece of acrylic glass. In fact, the piece forms a core and as sharp corners for the recess into which the hatch covers fit is needed, around it strips of 1 mm acrylic glass were cemented. This arrangement was milled to size and shape as shown previously. To make it visually more interesting a quarter-round cove was milled into the outer edge with a 0.5 mm ball-burr. In real life, this would also prevent the wood from splintering, when hit by something during loading.
Milling a quarter-round cove into the coaming of the main-hatch
The cover was assumed to be in three parts, each planked with short lengths of plank. The cover is made from a tight-fitting piece of bakelite paper into which the planks were engraved, as was done for the deck-planks. Making hatch and cover in separate pieces allows to paint it with sharp edges. The cover will be simulated to be natural wood.
The main-hatch with the cover inserted
Eventually, the hatch will be fitted with clamps for the battens to tie-down the canvas cover. That will be done at a later stage to avoid damage during fitting the part into the deck.
To be continued …
-
Marcus.K. reacted to Force9 in National- and command flags and officiers seniority of the early US Navy
Ahoy again…
Apologies to @Chapman and @Marcus.K. for the confusion…
I did make a post yesterday in response to Chapman’s important point that Isaac Hull was NOT a commodore during the Guerriere fight depicted in the Cornè painting(s).
But as I was banging away at the keyboard and eloquently laying out my perspective on the various jacks/pennants/ensigns depicted on the Constitution, I began to realize something... I’ve been operating from a flawed perspective for many years. I was thinking all along that the jack shown hoisted at the top of the fore topmast was, in fact, a commodore broad pendant that Isaac Hull chose to display during the battle.
Many years ago, there was an exchange on this forum where this was pointed out by someone who had compared this jack to the broad pennant depicted in another painting showing Bainbridge in the Constitution defeating the Java. He noted the similarities with the arrangement of the stars and ever since I’ve thought Isaac Hull had flown a commodore broad pennant during the Guerriere battle.
I pulled down my initial post while I tried to find that exchange of ideas from years ago… I think that it was prior to the infamous MSW crash (sorry Chuck) and has been lost forever. No matter, the reality is that Marcus and Chapman are right – no broad pennant is shown.
In the purest sense, a jack is ANY thirteen stars against a rectangular blue field. The “normal” rectangular jack of thirteen stars arranged in rows (used to signify a ship at anchor) is shown hoisted at the Mizzen topmast. The circle of stars set against a RECTANGULAR blue field hoisted at the fore topmast is also a jack – just a bit fancier.
During the Java battle, Bainbridge appears to have flown a similar circle of stars on a blue field, but on a TRIANGULAR pennant - meeting the criteria of a Broad Pennant laid out by Marcus in his terrific overview.
In Hull’s longer battle report, he states: “I ordered the Ensign hoisted at the Mizen Peak, and the jack at the fore and MizentopGallant mast head, and a jack bent ready for hoisting at the main…” This aligns exactly with what is shown in the paintings – we see a “fancier” jack at the fore topmast, a commission pendant at the main topmast, and a traditional jack at the mizzen topmast.
The National Ensign shown hoisted at the gaff also aligns to Hull's report, but the one hoisted in the mizzen shrouds does not…
Hull’s report also describes the Guerriere’s hoists: “As we bore up she hoisted an English Ensign at the Mizen Gaff, another in the Mizen Shrouds, and a jack at the fore, and mizentopGallant mast heads.”
I’m wondering if Cornè made a mistake and mixed this up with the Constitution…The ensign hoisted on the mizen shrouds should’ve been shown on the Guerriere instead? Maybe it was too cumbersome (or expensive) to correct once Hull saw the paintings?
More likely, after seeing the National Ensign hoisted on Guerriere’s mizzen shrouds, Captain Hull decided to match it on the Constitution. The good bet is that the paintings are accurate.
All of this is my speculation and has no anchor in authoritative confirmation… But it feels right given all the clues and variables in play.
Thoughts?
Also – my cursory research suggests that Isaac Hull was first officially titled a “commodore” late in the war. The very competent Secretary of the Navy William Jones decided to form a navy board of three senior Captains to serve as an advisory panel and to handle some of the bureaucratic overhead needed to run a professional naval service. Hardly the equivalent of the British Admiralty, but a positive step forward. Isaac Hull was one of the original commissioners. While serving on the panel, each was entitled to the post of Commodore.
Cheers
Evan
-
 Marcus.K. got a reaction from Force9 in National- and command flags and officiers seniority of the early US Navy
I tried to present you a table with the captains, their nomination as captains and commodores and their birth dates from beginning to about 1815 - and hoped I can manage to make it "sortable" as for example in an excel table. Unfortunatly I am not capable to do so.
But even with that table you see that some younger captains where higher in rank depending on the captain or maybe the commordore nomination. That of course might have (and did) cause hurt feelings sometimes 😄 .. those gentlemen usually had a strong will 😉
-
Marcus.K. reacted to Chapman in National- and command flags and officiers seniority of the early US Navy
I have the following from Eriksen: CONSTITUTION All SAILS UP AND FLYING.
Chapter on Flags and Pennants 1812-1815. Pages 142-145
From Captain Hull's log:
"...then hoisted our Ensigns and Jack, at the Fore and Main Top Gallant Mastheads."
Eriksen supplements this information with his interpretation for the flags flying on Constitution under Captain Hull.
Stars and Stripes from the peak and a second flag with canton even high with the main topgallant masthead. The U.S. Union Jack from the foremast (same height), and the Commission Pennant from the main mast-truck.
My addition:
Hull was not a commodore in this case, so it is quite likely that no broad pennant is displayed at the time of the engagement with the Guerriere.
-
 Marcus.K. reacted to Force9 in National- and command flags and officiers seniority of the early US Navy
Ahoy Markus -
I think Rodgers did have more seniority than Isaac Hull - your table seems to confirm that.
Here is a wider look at the hoists during the Guerriere battle per the Cornè painting of the close action (commissioned by Captain Hull):
It looks like a fancier version of a Jack is at the fore topmast and the traditional Jack is at the Mizzen topmast. The Jack appears to have bumped the secondary National ensign to a mizzen shroud.
Note the detail on the fore topmast with the circle of stars against the rectangular blue field:
We see a sailor fiddling with the jack in the heat of the battle... This is the plucky Irishman Dan Hogan. Captain Hull called him out by name in his after battle report to emphasize his courage. During the most intense exchange with Guerriere, Hogan noticed the jack flapping loose and threatening to flutter down into the sea. Thinking this a bad omen, Hogan clambered up to the tippy top and secured it before working his way back down to the deck to continue at his gun. The Secretary of the Navy authorized an extra months' pay in recognition of his deed (along with another sailor who had lost a leg).
Hogan continued with the Constitution under Bainbridge and was severely wounded in the Java fight - losing some fingers on both hands.
His story doesn't end there... In 1919 the navy named a Wickes class destroyer the USS Daniel Hogan. During World War II the ship provided valuable service in the Pacific as a converted minesweeper - including support of the invasion of Iwo Jima. She was later used as target practice and sunk off the coast of San Diego. Apparently the wreck is a popular spot for recreational divers.
Cheers
Evan
-
 Marcus.K. reacted to Dr PR in National- and command flags and officiers seniority of the early US Navy
I found these discussions about seniority and rank in the early U.S. navy very interesting.
Today in the U.S. Navy (well, at least in the 1970s) seniority within a rank was determined by the date of an officer's commissioning. And that leads to a sea story.
The USS Oklahoma City CLG-5 (my ship) was operating in the Gulf of Tonkin at Yankee Station off North Vietnam where the aircraft carriers hung out. The OK City was 7th Fleet flagship, and the current COMSEVENTH Admiral was an airdale (aviator) and liked to hang out with his flyboy buddies. So we sometimes drove the admiral over to the carriers and hung around while he visited.
One morning I went up on deck for Officer's Call at 0800. As I poked my head up through the scuttle I was looking at the bow of an aircraft carrier bearing down on us on our starboard side! Constant bearing and decreasing range - collision course. That is NOT a place any OOD would put his ship! Any vessel crossing on your starboard bow has the right of way (Rules of the Road).
I remembered that we lost a destroyer just a couple years earlier because the OOD turned the wrong way and crossed the carrier's bow. The front of the destroyer forward of the bridge was sliced off and immediately sank, taking all hands (Officer's Quarters) in the bow with it. The stern was saved but was towed to Portland, Oregon, and scrapped. I remember seeing it there in the scrapping yard a few years later. The carrier would have sliced the Okie Boat in half like a knife through butter.
Afterward I asked the fellow on watch as OOD what happened.
Our Captain was greatly impressed with his personal importance (sound familiar?). However, his command of the 7th Fleet flagship was only the second time he had been at sea. Most of his career had been the command of an LMD (Large Mahogany Desk) in Washington, DC. He never drove the ship, and I'm not sure he really knew the pointed end from the blunt end (bow and stern). Even the senior officers in the crew were unimpressed.
When the carrier came along crossing our bow the OOD wanted to turn astern and allow the carrier to pass ahead, which is the normal thing to do. But the Captain stopped him, and told the Quartermaster on watch to get the Seniority List for Captains in the U.S. Navy. All this time the carrier was approaching on a collision course. The Captain told the Quartermaster to determine the carrier Captain's date of rank. Old LMD had the earliest date of rank, so he ordered the signalmen to send a message telling the carrier to give way because he was the senior officer!
The carrier did make a turn to pass behind us and passed dangerously close! We could have all been killed because of that megalomaniac's conceit!
-
 Marcus.K. got a reaction from cotrecerf in National- and command flags and officiers seniority of the early US Navy
This is what I found in one of my most liked sources: Cmdr. Tyrone Martins collection.
Its in his "lucky bag" section of his "The Captains Clerk" homepage.
That is at least the order of colors defined in 1817 and 1818 as it seems.
But of course it is not clear how that may have used in previous years.. As I was writing: the habits were still developing and not yet fixed ..
-
Marcus.K. reacted to Kenchington in National- and command flags and officiers seniority of the early US Navy
Try Rodger's "The Wooden World" for an authoritative explanation. He is explicit that his book deals with the RN of the mid-18th Century, and the social structure of the navy had certainly changed by the time of the Revolutionary and Napoleonic wars, but the seniority of captains and admirals had not.
Another complication, which may account for your cases of individuals "skipping colours", was that the number of admirals in each rank and colour increased over time. In the 17th Century, with three colours and three ranks (full, vice and rear), there were only nine admirals in all. By the mid-18th, there were 30: one Admiral of the Fleet, six Admirals (three each White and Blue), eight Vice (not sure why that wasn't nine!) and 15 Rear (five of each colour). By the end of the long wars, in 1815, there were, by one claim, 219! With everyone stepping up according to seniority, each expansion of the total number will have meant a lot of officers skipping steps in the hierarchy.
I can't immediately find any source that says when the RN changed to merit-based promotion of Rear, Vice and full Admirals. The final advance to Admiral of the Fleet (which very few achieved, of course) was mostly by seniority as late as 1914, though there were individual cases of exceptions from the 1890s.
Trevor
-
Marcus.K. reacted to Force9 in National- and command flags and officiers seniority of the early US Navy
Ahoy Trevor...
I have a different understanding.
Although RN officers were commonly ratcheted up in rank by seniority as slots opened above them, there were many instances where promotions skipped "colors" as merit warranted. In fact this was reasonably common in the RN. Cuthbert Collingwood, as one example, was promoted from Captain (actually I think he was a posted Commodore) directly to Rear Admiral of the White - skipping the Blue step.
Nelson was promoted from Rear Admiral of the Blue, to Rear Admiral of the Red - skipping the White squadron.
Captains in the RN were rigidly held to seniority, but the commodore post was specifically utilized to allow a meritorious officer to command more senior officers under specific circumstances. (Source: Mark Adkin - The Trafalgar Companion) As noted, the US Navy was aligned to your outline. A USN Commodore could only command officers more junior.
Cheers
Evan
-
Marcus.K. reacted to Kenchington in National- and command flags and officiers seniority of the early US Navy
Not so in the Royal Navy through to Nelson's time and beyond.
The last promotion any commissioned sea officer could have was to Post Captain. Thereafter, everyone moved up by strict seniority, based on the date of being Made Post. Hence, a Rear Admiral of the Red was always senior to a Rear Admiral of the Blue because the former had been Made Post earlier. Likewise, any Vice Admiral was senior to any Rear Admiral, by date of being Made Post, besides the difference in their ranks.
Commodore was certainly a temporary appointment but it did not give the individual authority over more senior officers. Instead, Admiralty had to go to some trouble to ensure that all other officers in a fleet or squadron were junior (in the date of their having been Made Post) to the chosen commander. If the latter had already achieved his flag, he served as Admiral. If insufficient vacancies had emerged at the top, the Captain chosen to command was appointed Commodore.
It was a cumbersome system, that only worked because pragmatic adjustments were made to get around a rigid tradition. But it did work, more often than not!
Trevor
-
Marcus.K. reacted to uss frolick in National- and command flags and officiers seniority of the early US Navy
Congress had not yet authorized the rank of 'Admiral', so 'Commodore was the highest honor the navy could legally bestow upon a senior officer. The highest seniority belonged to John Rogers, a man ironically with no notable naval victories to his name.
-
Marcus.K. reacted to Force9 in National- and command flags and officiers seniority of the early US Navy
Hallo Markus…
I think you may want to revisit the overview of the “commodore” title within the early US Navy.
I’m not sure of your sources regarding the Blue, White, and Red distinctions within the commodore hierarchy. That does not seem familiar for the early American navy.
The Royal Navy maintained the colored squadrons as a carryover from ancient days as it allowed flexibility to move deserving officers up and around more senior, but less able peers. Generally, the progression of seniority moved from Blue, to White, to Red. A Rear-Admiral of the Red outranked a Rear Admiral of the Blue regardless of the date of his commission.
“Commodore” was not a rank in the RN – it was a “post” and was not based on seniority. A less senior captain could be posted to a squadron as the commodore even if some subordinates held more seniority. This might have been the case for Horatio Nelson when he was promoted commodore while commanding Agammemnon in the Mediterranean under Vice Admiral Hood.
Interestingly, Nelson maintained the post of commodore at the battle of Cape St. Vincent with a flag captain beneath him to command his ship. This entitled him to draw Rear Admiral pay (and wear a similar uniform). Unbeknownst to Nelson, based on seniority he had been promoted to Rear Admiral of the Blue prior to the battle, but official word did not arrive until weeks later. This meant that he became the first RN flag officer in over two hundred years to lead his crew in a boarding action when both San Nicolàs and San Josef were captured.
The US Navy adopted many practices from the RN, but the colored squadrons was not one of them… They maintained a generally strict adherence to seniority based on the date of each commission without regard to ability. Less capable captains were simply kept ashore and not given active commands. When multiple ships were formed into a squadron, the most senior captain was designated “commodore” and entitled to fly the broad pendant from the main mast. You were either the most senior captain, or you were not. I don’t think there were any gradations within the commodore title. The three broad pendants noted in the inventory were probably just to allow for wear and tear.
Isaac Hull is an interesting case. He was not put in command of a squadron until later in his career – years after the War of 1812. However, he seems to have styled himself “Commodore” during his only war cruise in command of the Constitution in the victory over Guerriere. There were no other ships assigned to him and he sailed from Boston without direct orders to act independently before he could be blockaded in port. The Cornè paintings that he commissioned after the battle clearly show a commodore broad pendant hoisted during the fight. When Guerriere appeared defeated, Hull sent a boat over to verify her surrender, and the American lieutenant is quoted as saying “Commodore Hull sends his respects and desires to know if you have surrendered…”
When Isaac Hull donated the model of the Constitution (gifted to him by his crew) to the East India Marine Society in Salem, he had “Gift of Commodore Hull” emblazoned on the side.
As one of the most senior captains in the navy and in command of one of the three most powerful ships, Hull appears to have titled himself “commodore” without a squadron to command. It may be that he justified this as the most senior ship commander on his station.
The paintings do suggest, however, that in deference to the practice of “true” commodores flying the broad pendant from the main topmast, Hull instead flew his broad pendant from the mizzen topmast, leaving the commission pennant flying from the main. This seems to have displaced the backup American Ensign from the mizzen topmast to a mizzen halyard.
It was not unusual for an officer who had been designated a commodore at any point (keep in mind that the designation could be applied to a senior lieutenant in command of a flotilla of gunboats), to continue to have peers/subordinates refer to them as “commodore” thence forward. So, it was years later that a much junior captain flew a broad pendant on his ship while anchored in Boston, despite the more senior Isaac Hull commanding the navy yard. Hull was pissed off and intermediaries had to be called to Boston to mediate and eventually define stricter rules around the use of the broad pendant.
These are musing based on my general understanding of common practices – I may be wrong on some particulars. I would be interested to know if you have more specific sources regarding American Navy practices.
Interesting stuff and thanks again for the stimulating post.
Cheers
Evan
-
Marcus.K. got a reaction from Force9 in National- and command flags and officiers seniority of the early US Navy
This is what I found in one of my most liked sources: Cmdr. Tyrone Martins collection.
Its in his "lucky bag" section of his "The Captains Clerk" homepage.
That is at least the order of colors defined in 1817 and 1818 as it seems.
But of course it is not clear how that may have used in previous years.. As I was writing: the habits were still developing and not yet fixed ..
-
 Marcus.K. got a reaction from thibaultron in National- and command flags and officiers seniority of the early US Navy
Ah - that´s interesting !! Sure!! I did not realize this salute process! THANKS @Chapman
-
Marcus.K. got a reaction from thibaultron in National- and command flags and officiers seniority of the early US Navy
1. Overview
In the early years of the U.S. Navy, there were no formally codified regulations for identifying naval vessels. The processes and traditions of the fledgling service were still in the making. Standardization was not yet the primary concern—rather, the focus lay on establishing procedures and organizational structures.
Undoubtedly, there existed unwritten customs rooted in British naval practice and those of other maritime nations, though concrete documentation is scarce. Nevertheless, some sense of what was common practice can be gleaned from period illustrations—particularly the many works of American maritime painter Felice Cornè, among others—as well as from occasional primary sources, such as a 1803 inventory recorded by Midshipman Henry Wadsworth aboard the U.S. frigate New York (Langley, 2003–2004).
Wadsworth records the following items:
· 4 american Ensigns
· 4 commission pennants and 1 Jack
· 2 american Burgees
· 3 american Broad Pendants
The Ensign was the national flag, typically flown from the flagstaff at the stern. In battle, it was often hoisted on additional masts or spars to ensure it always remained visible — since lowering the flag during combat was interpreted as a sign of surrender. To avoid any such misunderstanding in the event the main flagstaff was shot away, it was both common and critically important to display at least one additional, redundant flag.
The Jack was a smaller flag used to indicate a ship’s nationality. It was flown at the bow—typically from a short staff mounted on the bowsprit or foredeck, known as the ‘jackstaff’—but only while the ship was at anchor or moored..
Commission Pennants (historically also spelled 'pendants') are long, narrow, triangular flags that were to be flown from the highest mast of every officially commissioned warship. Their purpose was to distinguish naval vessels from merchant shipping.
American Burgees were smaller flags bearing national symbols—such as the ‘Don’t Tread on Me’ flag or various designs featuring stars and/or stripes. In modern usage, burgees are typically triangular pennants, most commonly recognized in the sailing world as flags denoting membership in a yacht club.
Broad Pennants — also referred to as command pennants — were used to indicate the rank of a squadron commander aboard a particular vessel. Importantly, when a squadron leader or higher authority was present on board, the broad pennant would replace the long, narrow commissioning pennant at the masthead.
2. The Ensign
In its early years, the American national flag was not yet standardized as it is today. Since the United States was still in a formative and expansionist phase, and new territories continued to join the Union, both the number and the arrangement of stars and stripes on the flag varied over time. What remained consistent, however, was the general layout: a blue canton (the upper hoist-side quarter) bearing white stars, and horizontal red and white stripes—varying in number—filling the remaining three quarters of the flag.
In those early years, as is still the case today, each state was represented by a star in the canton. However, at the time, each state was also symbolized by a stripe—distributed across the rest of the flag. Only in 1818 was the number of stripes officially limited to thirteen, in honor of the original thirteen founding states, as it had become increasingly difficult to distinguish the red and white colors clearly when the number of stripes exceeded fifteen.
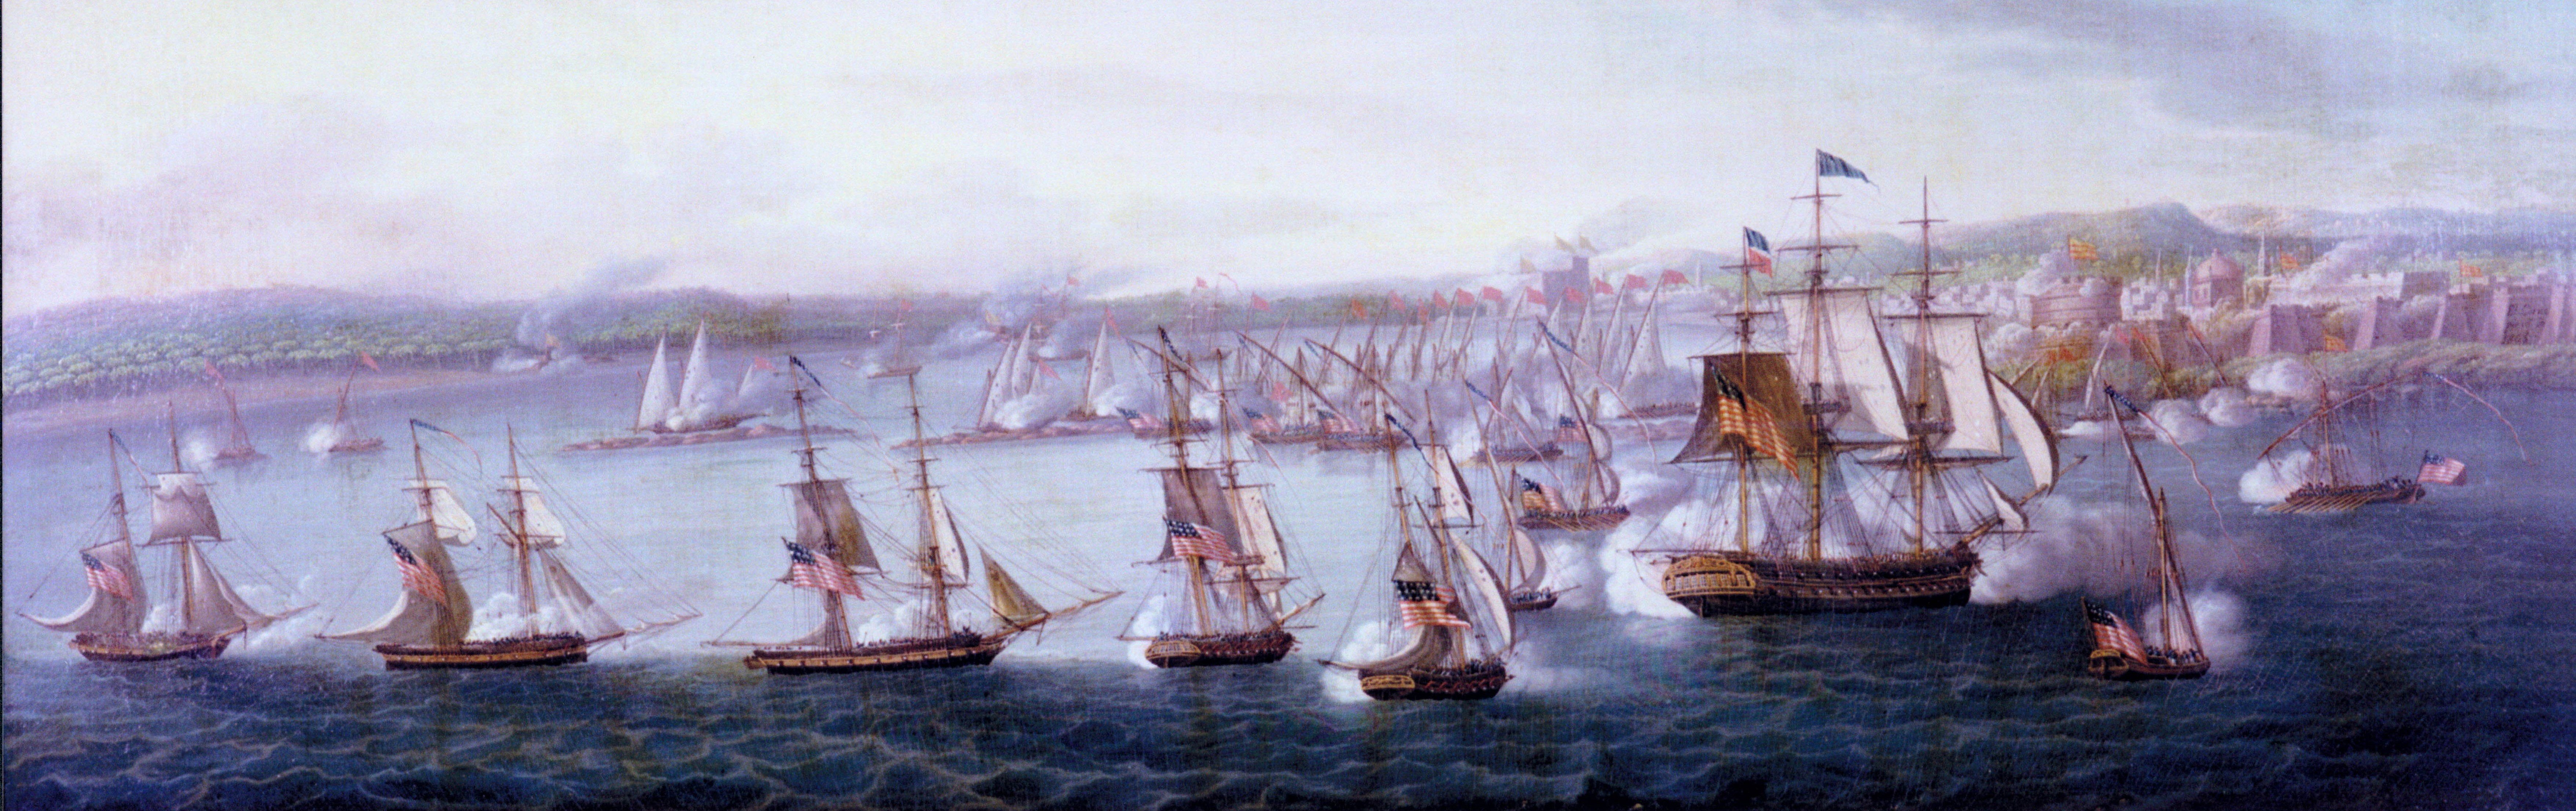
Above section illustrates that, at least in 1804/05, ships in active service could still be seen flying different versions of the national ensign side by side. With the admission of Vermont and Kentucky, the flag at that time displayed 15 stars and 15 stripes. In the following section, we will take a closer look at these flags:
In this view the U.S. frigate Constitution displays the classic '15-state flag' variant, with the 15 stars arranged in three rows of five.
To the left of USF Constitution the U.S. schooner Enterprise is shown flying a different variant, the so-called 'Maryland pattern,' which typically featured white border stripes and 14 stars arranged in a circle with one central star. However, it seems that Felice Cornè simplified the design somewhat, as we can only count 12 stars and 14 stripes. While the missing stars might be explained by a possible fold in the flag, the complete absence of the lower white stripe appears rather peculiar.
That Cornè was capable of greater precision becomes evident in the following illustration, which is in fact even older.
Here in above picture, we can clearly see all 15 stars and 15 stripes—just as they appear on the original shown in the next photo. However, even at this stage, it becomes apparent that having 15 stripes makes it increasingly difficult to distinguish them individually from a distance, and the red and white begin to blur into a washed-out pink hue.
This photo shows an original national flag in the Maryland pattern: 14 stars arranged in a circle around a central 15th star—and 15 red and white stripes, with a white stripe at both the top and bottom.
Felice Cornè’s well-known side view of the U.S. frigate Constitution from 1803, the earliest known depiction of the ship, shows a version with apparently 17 stars. This may indicate Ohio and Tennessee, which had already joined the Union at that time but were not yet officially represented on the flag. The number of stripes is somewhat puzzling again—there are only 16—and the top stripe is white while the bottom one is red.
Cornè’s effort to depict such a large number of stars can certainly be seen as an attempt at accuracy. Had he been merely imprecise, the more logical outcome would have been to show fewer stars rather than striving to cram more stars into such a small space!
It was not until 1818 that it was legally mandated: one star per state, and 13 stripes representing the founding states. This rule remains in effect to this day. However, this also shows that flags in the early years of the new nation still allowed for certain liberties—a topic that alone could easily fill an entire book.
3. The Commissioning Pennant
British, American (and likely other nations’) warships flew a long, narrow, triangular pennant at their main mast—the so-called commissioning pennant—as a symbol of their active (military) service status.
The American version displayed at the hoist a blue field with vertical red and white stripes. Today it bears seven stars - in earlier times, thirteen, symbolizing the founding states.
The origin of this flag and tradition can be traced back to ancient Egypt and has been in continuous use through the Middle Ages to the present day. The commissioning pennant was only replaced by the flag of an admiral or high-ranking civilian official when such a person was aboard.
However, it was both possible and customary to fly another flag beneath the commissioning pennant—for example, as a salute or for signaling purposes.
This image possibly depicts the early Old Ironsides. However, Cornè may have intended it merely as a ‘typical’ frigate, since the entire painting centers on the theme of the East India Marine Hall, and the frigate serves only as the central focal point. What can be observed, however, is that beneath the long commissioning pennant another rectangular flag is flown. Could this be a salute to the honorable East India Marine Society?
4. The Jack
The so-called 'Jack' is also a national flag, displayed only when the ship is at anchor or moored, flown on a short staff at the bow. This allowed for identification of the ship’s nationality when approached from the bow. Such identification was often necessary when the ship was at anchor and the stern had turned into the wind, rendering the ensign at the stern invisible.
Typically, the Jack is a simplified version of the national flag, displaying only the ‘canton’ — that is, the upper left field of the U.S. national flag: a blue field adorned with the appropriate number of stars.
The so-called "First Navy Jack" featured the rattlesnake and stripes motif, inspired by the 1775 Continental Army flag—a symbol of resistance and independence from the British Crown. However, this flag was only officially used between 1975 and 1976 (in preparation for the Bicentennial celebrations) and again from 2002 to 2019. There is no evidence that it was flown during the early years of the still young U.S. Navy.
5. American Burgees
There is little information available today about the "American Burgees." Burgees—typically smaller, triangular flags—have historically served and continue to serve as identifiers and communication signals between vessels. In addition to the ensign, these “American burgees” were evidently intended to mark a ship as distinctly American.
Flags bearing inscriptions such as “Don’t give up the ship” might also be understood as burgees—a powerful symbol directed at both friend and foe. Captain Perry referenced the last words of his friend, Captain James Lawrence, during Lawrence’s engagement aboard the USS Chesapeake against HMS Shannon in late May 1813, and successfully used the motto to rally his own squadron during the Battle of Lake Erie in late summer 1813.
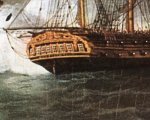
This representation again depicts national flags on the foremast and mizzenmast of the USS Constitution, as Cornè portrayed them in one of his paintings of the battle against HMS Guerriere. Once more, it is evident that the arrangement of stars in the blue field had not yet been standardized, and different patterns could even be flown simultaneously on the same ship.
6. The Broad Pennant
Up until shortly before the Civil War, "Captain" was the highest permanent rank in the U.S. Navy. Captains commanding a squadron were honorarily titled "Commodore" and flew a broad pennant. These pennants came in blue, red, or white depending on seniority and displayed stars representing each state:
· Blue with white stars for the senior-most commodore
· Red with white stars for the second-ranking commodore
· White with blue stars for all others
Therefore, Wadsworth likely recorded “3 broad pennants” in his midshipman’s logbook.
The large U.S. frigates such as the Constitution, United States, and President were the biggest ships in the Navy until the War of 1812 and often served as squadron flagships. With the arrival of a senior (in service) commodore aboard his flagship, it was clearly necessary to adjust one’s own squadron rank by changing the color of the broad pennant. Hence, all three colors were surely needed on board.
.
Commodore Preble, for example, flew a blue broad pennant with 13 stars—symbolizing the founding states—during his operations off Tripoli in 1804. The shape of this pennant was a wide, truncated triangle. It was only years later that the now-standard swallowtail design became common. Signal flags are also displayed on the mizzenmast in above´s picture.
In Cornè’s 1803 depiction, a broad pennant is being hoisted that appears to show the American ensign instead of stars. This again indicates that flag usage in the early U.S. Navy was not yet strictly standardized.
7. Other depictions done by other artists
The rigging and flag display of American frigates can, of course, also be observed in other paintings. The already mentioned exquisite French artists lead the way, of course! But other depictions naturally also show the common practices already in use.
In the storm, only the broad pennant remains hoisted on the main mast. All other flags were likely taken down for safety.
This is a magnificent painting by Antoine Roux that reveals an incredible number of details about the large American frigates.
Studying this work — as well as the painting of the President in the harbor of Toulon — comes highly recommended for anyone interested in the American 44-gun frigates.
Here, we again see the commissioning pennant and the national ensign at the stern. The jack is not yet hoisted, indicating the ship is not at anchor.
A very fine example of the long commissioning pennant, still showing clearly more than the seven stars commonly seen today at its hoist.
8. Conclusion
It is important to keep in mind that, in addition to the lack of standardization of flags at the time, there were also inaccuracies in the artists’ depictions. However—despite all criticism regarding precision and the contradictions found, for example, in Cornè’s works—a closer examination reveals remarkable accuracy and attention to detail. Even the apparent contradictions can be explained, and the accusations of “errors” or “simplifications” often seem exaggerated when considering how many intricate details he managed to depict in the tiniest areas of his paintings. Compared to his French contemporaries like Roux or Baugean, Cornè may have lacked a bit of precision. Yet he was capable of rendering minute details and indeed did so. Therefore, when he chose to depict small details deviating from today’s expected “norms,” such as adding a miniature national flag to the broad pennant instead of the often used 13 white stars only, it is unlikely that this was done on a whim. Rather, it can be attributed to the still undefined rules concerning the exact design of official flags.
Based on the many beautiful illustrations and some scarce written records, the early national and command flags and their usage can be fairly well reconstructed. As with any historical research, one must carefully study the customs and practices of the era to achieve a more realistic representation of the original. The lack of standardization complicates this somewhat—but nevertheless, certain rules can be identified that allow for an accurate depiction of an early US frigate.
-
Marcus.K. reacted to Force9 in National- and command flags and officiers seniority of the early US Navy
Ahoy Marcus!
Wonderful and important overview of the Naval customs surrounding the use of various ensigns/pennants, etc. Thank you for this effort.
I should point out that the 1803 Corné painting commissioned by Commodore Preble is understood to show Constitution in the Mediterranean - note the felucca rigged vessel off her bow. It does seem to show a salute - cannon discharge and dipping the broad pennant. I'm unsure of the 1803 naval practice depicted, but modern US Navy ships only salute other vessels - and only after the other ship first salutes. I think it is the only instance where a national ensign is dipped... Otherwise the American flag is never dipped to any thing or person. Not even in the Olympic Games parade of nations. (it is flown on ships at half-mast under various circumstances - sometimes only during a ceremony and then raised again to full hoist)
Commodore Bainbridge noted in his journal that Constitution hoisted the following in her battle with Java:
- American Jack forward
- Broad Pendant at main
- American Ensign at mizzen topgallant
- And American Ensign at the end of the Gaff
Thanks again for the detailed overview.
Cheers
Evan
-
 Marcus.K. got a reaction from Harvey Golden in National- and command flags and officiers seniority of the early US Navy
1. Overview
In the early years of the U.S. Navy, there were no formally codified regulations for identifying naval vessels. The processes and traditions of the fledgling service were still in the making. Standardization was not yet the primary concern—rather, the focus lay on establishing procedures and organizational structures.
Undoubtedly, there existed unwritten customs rooted in British naval practice and those of other maritime nations, though concrete documentation is scarce. Nevertheless, some sense of what was common practice can be gleaned from period illustrations—particularly the many works of American maritime painter Felice Cornè, among others—as well as from occasional primary sources, such as a 1803 inventory recorded by Midshipman Henry Wadsworth aboard the U.S. frigate New York (Langley, 2003–2004).
Wadsworth records the following items:
· 4 american Ensigns
· 4 commission pennants and 1 Jack
· 2 american Burgees
· 3 american Broad Pendants
The Ensign was the national flag, typically flown from the flagstaff at the stern. In battle, it was often hoisted on additional masts or spars to ensure it always remained visible — since lowering the flag during combat was interpreted as a sign of surrender. To avoid any such misunderstanding in the event the main flagstaff was shot away, it was both common and critically important to display at least one additional, redundant flag.
The Jack was a smaller flag used to indicate a ship’s nationality. It was flown at the bow—typically from a short staff mounted on the bowsprit or foredeck, known as the ‘jackstaff’—but only while the ship was at anchor or moored..
Commission Pennants (historically also spelled 'pendants') are long, narrow, triangular flags that were to be flown from the highest mast of every officially commissioned warship. Their purpose was to distinguish naval vessels from merchant shipping.
American Burgees were smaller flags bearing national symbols—such as the ‘Don’t Tread on Me’ flag or various designs featuring stars and/or stripes. In modern usage, burgees are typically triangular pennants, most commonly recognized in the sailing world as flags denoting membership in a yacht club.
Broad Pennants — also referred to as command pennants — were used to indicate the rank of a squadron commander aboard a particular vessel. Importantly, when a squadron leader or higher authority was present on board, the broad pennant would replace the long, narrow commissioning pennant at the masthead.
2. The Ensign
In its early years, the American national flag was not yet standardized as it is today. Since the United States was still in a formative and expansionist phase, and new territories continued to join the Union, both the number and the arrangement of stars and stripes on the flag varied over time. What remained consistent, however, was the general layout: a blue canton (the upper hoist-side quarter) bearing white stars, and horizontal red and white stripes—varying in number—filling the remaining three quarters of the flag.
In those early years, as is still the case today, each state was represented by a star in the canton. However, at the time, each state was also symbolized by a stripe—distributed across the rest of the flag. Only in 1818 was the number of stripes officially limited to thirteen, in honor of the original thirteen founding states, as it had become increasingly difficult to distinguish the red and white colors clearly when the number of stripes exceeded fifteen.
Above section illustrates that, at least in 1804/05, ships in active service could still be seen flying different versions of the national ensign side by side. With the admission of Vermont and Kentucky, the flag at that time displayed 15 stars and 15 stripes. In the following section, we will take a closer look at these flags:
In this view the U.S. frigate Constitution displays the classic '15-state flag' variant, with the 15 stars arranged in three rows of five.
To the left of USF Constitution the U.S. schooner Enterprise is shown flying a different variant, the so-called 'Maryland pattern,' which typically featured white border stripes and 14 stars arranged in a circle with one central star. However, it seems that Felice Cornè simplified the design somewhat, as we can only count 12 stars and 14 stripes. While the missing stars might be explained by a possible fold in the flag, the complete absence of the lower white stripe appears rather peculiar.
That Cornè was capable of greater precision becomes evident in the following illustration, which is in fact even older.
Here in above picture, we can clearly see all 15 stars and 15 stripes—just as they appear on the original shown in the next photo. However, even at this stage, it becomes apparent that having 15 stripes makes it increasingly difficult to distinguish them individually from a distance, and the red and white begin to blur into a washed-out pink hue.
This photo shows an original national flag in the Maryland pattern: 14 stars arranged in a circle around a central 15th star—and 15 red and white stripes, with a white stripe at both the top and bottom.
Felice Cornè’s well-known side view of the U.S. frigate Constitution from 1803, the earliest known depiction of the ship, shows a version with apparently 17 stars. This may indicate Ohio and Tennessee, which had already joined the Union at that time but were not yet officially represented on the flag. The number of stripes is somewhat puzzling again—there are only 16—and the top stripe is white while the bottom one is red.
Cornè’s effort to depict such a large number of stars can certainly be seen as an attempt at accuracy. Had he been merely imprecise, the more logical outcome would have been to show fewer stars rather than striving to cram more stars into such a small space!
It was not until 1818 that it was legally mandated: one star per state, and 13 stripes representing the founding states. This rule remains in effect to this day. However, this also shows that flags in the early years of the new nation still allowed for certain liberties—a topic that alone could easily fill an entire book.
3. The Commissioning Pennant
British, American (and likely other nations’) warships flew a long, narrow, triangular pennant at their main mast—the so-called commissioning pennant—as a symbol of their active (military) service status.
The American version displayed at the hoist a blue field with vertical red and white stripes. Today it bears seven stars - in earlier times, thirteen, symbolizing the founding states.
The origin of this flag and tradition can be traced back to ancient Egypt and has been in continuous use through the Middle Ages to the present day. The commissioning pennant was only replaced by the flag of an admiral or high-ranking civilian official when such a person was aboard.
However, it was both possible and customary to fly another flag beneath the commissioning pennant—for example, as a salute or for signaling purposes.
This image possibly depicts the early Old Ironsides. However, Cornè may have intended it merely as a ‘typical’ frigate, since the entire painting centers on the theme of the East India Marine Hall, and the frigate serves only as the central focal point. What can be observed, however, is that beneath the long commissioning pennant another rectangular flag is flown. Could this be a salute to the honorable East India Marine Society?
4. The Jack
The so-called 'Jack' is also a national flag, displayed only when the ship is at anchor or moored, flown on a short staff at the bow. This allowed for identification of the ship’s nationality when approached from the bow. Such identification was often necessary when the ship was at anchor and the stern had turned into the wind, rendering the ensign at the stern invisible.
Typically, the Jack is a simplified version of the national flag, displaying only the ‘canton’ — that is, the upper left field of the U.S. national flag: a blue field adorned with the appropriate number of stars.
The so-called "First Navy Jack" featured the rattlesnake and stripes motif, inspired by the 1775 Continental Army flag—a symbol of resistance and independence from the British Crown. However, this flag was only officially used between 1975 and 1976 (in preparation for the Bicentennial celebrations) and again from 2002 to 2019. There is no evidence that it was flown during the early years of the still young U.S. Navy.
5. American Burgees
There is little information available today about the "American Burgees." Burgees—typically smaller, triangular flags—have historically served and continue to serve as identifiers and communication signals between vessels. In addition to the ensign, these “American burgees” were evidently intended to mark a ship as distinctly American.
Flags bearing inscriptions such as “Don’t give up the ship” might also be understood as burgees—a powerful symbol directed at both friend and foe. Captain Perry referenced the last words of his friend, Captain James Lawrence, during Lawrence’s engagement aboard the USS Chesapeake against HMS Shannon in late May 1813, and successfully used the motto to rally his own squadron during the Battle of Lake Erie in late summer 1813.
This representation again depicts national flags on the foremast and mizzenmast of the USS Constitution, as Cornè portrayed them in one of his paintings of the battle against HMS Guerriere. Once more, it is evident that the arrangement of stars in the blue field had not yet been standardized, and different patterns could even be flown simultaneously on the same ship.
6. The Broad Pennant
Up until shortly before the Civil War, "Captain" was the highest permanent rank in the U.S. Navy. Captains commanding a squadron were honorarily titled "Commodore" and flew a broad pennant. These pennants came in blue, red, or white depending on seniority and displayed stars representing each state:
· Blue with white stars for the senior-most commodore
· Red with white stars for the second-ranking commodore
· White with blue stars for all others
Therefore, Wadsworth likely recorded “3 broad pennants” in his midshipman’s logbook.
The large U.S. frigates such as the Constitution, United States, and President were the biggest ships in the Navy until the War of 1812 and often served as squadron flagships. With the arrival of a senior (in service) commodore aboard his flagship, it was clearly necessary to adjust one’s own squadron rank by changing the color of the broad pennant. Hence, all three colors were surely needed on board.
.
Commodore Preble, for example, flew a blue broad pennant with 13 stars—symbolizing the founding states—during his operations off Tripoli in 1804. The shape of this pennant was a wide, truncated triangle. It was only years later that the now-standard swallowtail design became common. Signal flags are also displayed on the mizzenmast in above´s picture.
In Cornè’s 1803 depiction, a broad pennant is being hoisted that appears to show the American ensign instead of stars. This again indicates that flag usage in the early U.S. Navy was not yet strictly standardized.
7. Other depictions done by other artists
The rigging and flag display of American frigates can, of course, also be observed in other paintings. The already mentioned exquisite French artists lead the way, of course! But other depictions naturally also show the common practices already in use.
In the storm, only the broad pennant remains hoisted on the main mast. All other flags were likely taken down for safety.
This is a magnificent painting by Antoine Roux that reveals an incredible number of details about the large American frigates.
Studying this work — as well as the painting of the President in the harbor of Toulon — comes highly recommended for anyone interested in the American 44-gun frigates.
Here, we again see the commissioning pennant and the national ensign at the stern. The jack is not yet hoisted, indicating the ship is not at anchor.
A very fine example of the long commissioning pennant, still showing clearly more than the seven stars commonly seen today at its hoist.
8. Conclusion
It is important to keep in mind that, in addition to the lack of standardization of flags at the time, there were also inaccuracies in the artists’ depictions. However—despite all criticism regarding precision and the contradictions found, for example, in Cornè’s works—a closer examination reveals remarkable accuracy and attention to detail. Even the apparent contradictions can be explained, and the accusations of “errors” or “simplifications” often seem exaggerated when considering how many intricate details he managed to depict in the tiniest areas of his paintings. Compared to his French contemporaries like Roux or Baugean, Cornè may have lacked a bit of precision. Yet he was capable of rendering minute details and indeed did so. Therefore, when he chose to depict small details deviating from today’s expected “norms,” such as adding a miniature national flag to the broad pennant instead of the often used 13 white stars only, it is unlikely that this was done on a whim. Rather, it can be attributed to the still undefined rules concerning the exact design of official flags.
Based on the many beautiful illustrations and some scarce written records, the early national and command flags and their usage can be fairly well reconstructed. As with any historical research, one must carefully study the customs and practices of the era to achieve a more realistic representation of the original. The lack of standardization complicates this somewhat—but nevertheless, certain rules can be identified that allow for an accurate depiction of an early US frigate.
-
 Marcus.K. reacted to druxey in Pomeranian Rahschlup 1846 by wefalck – 1/160 scale – single-masted Baltic trading vessel
Thank you for the photo of your Frankenmill, Eberhard! You made me smile.
-
Marcus.K. reacted to wefalck in Pomeranian Rahschlup 1846 by wefalck – 1/160 scale – single-masted Baltic trading vessel
Well, I did not contemplate to etch the bars, but rather to etch notches into the back of the frames to allow to glue in the wires at correct and equal spacing, as I had done for the engine-room skylight of SMS WESPE.
-
 Marcus.K. got a reaction from Keith Black in Pomeranian Rahschlup 1846 by wefalck – 1/160 scale – single-masted Baltic trading vessel
I am of course not sure as I never were able to compare PE bars with the ones you showed here, but I believe that the round shape of these bars is a better looking solution than usually not round etched ones. Even if spacing might be worse. I am curious for the painted result and it would be interesting to see a close up comparison of both variants.
In any way: impressive and beautiful!
-
Marcus.K. reacted to wefalck in Pomeranian Rahschlup 1846 by wefalck – 1/160 scale – single-masted Baltic trading vessel
Well, it's a vintage milling machine that never was: https://www.maritima-et-mechanika.org/tools/micromill/micromill.html. The key mechanical parts came from antique watchmaking lathes.
https://www.maritima-et-mechanika.org/tools/micromill/MF-V1.mp4
The miniature vice is shop-made: https://www.maritima-et-mechanika.org/tools/attachments/attachments.html#Micro_vice
-
Marcus.K. reacted to wefalck in Pomeranian Rahschlup 1846 by wefalck – 1/160 scale – single-masted Baltic trading vessel
Thanks to all for your continued encouragement ! Slow progress due to business travel-related absence from the workshop ...
*************
Planking the bulwarks
The planking of the bulwarks follows the same procedure as that for the hull, but had to be handled much more careful, as the inside will be visible and there will by no adjustments possible by sanding or scraping. The main reason for the latter is, that the planks are of scale thickness (0.25 mm) and profiled.
Section through a bulwark drawn by Friis-Pedersen (1980).
As can be seen from the two images above and below, it was not uncommon to give the edges of the planks a decorative profile by using an appropriate profile plane.
Bulwark of a Swedish jagt, photographed in November 2023 in Stockholm
I had been exploring various ideas for creating these profiles on tiny 1 mm x 0.25 mm styrene ‘planks’ uniformly and consistently close to the edges. In the end I decided on a simple and rather makeshift solution: a steel ruler was taped to a small cutting-mat to serve as guide for the very flexible strips. The chosen tool is an old-style ruling pen, of which I have several knocking about in my drawer of draughting utensils. This was set so that it creates a groove close to the opposite edge, when run along the edge of the strip. This works only for strips of uniform width.
It was important to prevent the styrene strips from softening too much during gluing, therefore only tiny drops of liquid styrene cement were applied to each stanchion.
Somehow the alignment of the bulkheads was not as perfect as I was hoping for, resulting in some bulges. I hope I will be able to correct/hide this somehow.
Another problem is that the styrene strips of scale thickness are rather floppy, so that edge-alignment is rather difficult. I hope that I can also sort this out.
Once the planks were on, I installed the hawse-timbers between the stem and the cant-frames in the bow.
Next on will be the rails.
To be continued …
-
 Marcus.K. got a reaction from The Bitter End in National- and command flags and officiers seniority of the early US Navy
1. Overview
In the early years of the U.S. Navy, there were no formally codified regulations for identifying naval vessels. The processes and traditions of the fledgling service were still in the making. Standardization was not yet the primary concern—rather, the focus lay on establishing procedures and organizational structures.
Undoubtedly, there existed unwritten customs rooted in British naval practice and those of other maritime nations, though concrete documentation is scarce. Nevertheless, some sense of what was common practice can be gleaned from period illustrations—particularly the many works of American maritime painter Felice Cornè, among others—as well as from occasional primary sources, such as a 1803 inventory recorded by Midshipman Henry Wadsworth aboard the U.S. frigate New York (Langley, 2003–2004).
Wadsworth records the following items:
· 4 american Ensigns
· 4 commission pennants and 1 Jack
· 2 american Burgees
· 3 american Broad Pendants
The Ensign was the national flag, typically flown from the flagstaff at the stern. In battle, it was often hoisted on additional masts or spars to ensure it always remained visible — since lowering the flag during combat was interpreted as a sign of surrender. To avoid any such misunderstanding in the event the main flagstaff was shot away, it was both common and critically important to display at least one additional, redundant flag.
The Jack was a smaller flag used to indicate a ship’s nationality. It was flown at the bow—typically from a short staff mounted on the bowsprit or foredeck, known as the ‘jackstaff’—but only while the ship was at anchor or moored..
Commission Pennants (historically also spelled 'pendants') are long, narrow, triangular flags that were to be flown from the highest mast of every officially commissioned warship. Their purpose was to distinguish naval vessels from merchant shipping.
American Burgees were smaller flags bearing national symbols—such as the ‘Don’t Tread on Me’ flag or various designs featuring stars and/or stripes. In modern usage, burgees are typically triangular pennants, most commonly recognized in the sailing world as flags denoting membership in a yacht club.
Broad Pennants — also referred to as command pennants — were used to indicate the rank of a squadron commander aboard a particular vessel. Importantly, when a squadron leader or higher authority was present on board, the broad pennant would replace the long, narrow commissioning pennant at the masthead.
2. The Ensign
In its early years, the American national flag was not yet standardized as it is today. Since the United States was still in a formative and expansionist phase, and new territories continued to join the Union, both the number and the arrangement of stars and stripes on the flag varied over time. What remained consistent, however, was the general layout: a blue canton (the upper hoist-side quarter) bearing white stars, and horizontal red and white stripes—varying in number—filling the remaining three quarters of the flag.
In those early years, as is still the case today, each state was represented by a star in the canton. However, at the time, each state was also symbolized by a stripe—distributed across the rest of the flag. Only in 1818 was the number of stripes officially limited to thirteen, in honor of the original thirteen founding states, as it had become increasingly difficult to distinguish the red and white colors clearly when the number of stripes exceeded fifteen.
Above section illustrates that, at least in 1804/05, ships in active service could still be seen flying different versions of the national ensign side by side. With the admission of Vermont and Kentucky, the flag at that time displayed 15 stars and 15 stripes. In the following section, we will take a closer look at these flags:
In this view the U.S. frigate Constitution displays the classic '15-state flag' variant, with the 15 stars arranged in three rows of five.
To the left of USF Constitution the U.S. schooner Enterprise is shown flying a different variant, the so-called 'Maryland pattern,' which typically featured white border stripes and 14 stars arranged in a circle with one central star. However, it seems that Felice Cornè simplified the design somewhat, as we can only count 12 stars and 14 stripes. While the missing stars might be explained by a possible fold in the flag, the complete absence of the lower white stripe appears rather peculiar.
That Cornè was capable of greater precision becomes evident in the following illustration, which is in fact even older.
Here in above picture, we can clearly see all 15 stars and 15 stripes—just as they appear on the original shown in the next photo. However, even at this stage, it becomes apparent that having 15 stripes makes it increasingly difficult to distinguish them individually from a distance, and the red and white begin to blur into a washed-out pink hue.
This photo shows an original national flag in the Maryland pattern: 14 stars arranged in a circle around a central 15th star—and 15 red and white stripes, with a white stripe at both the top and bottom.
Felice Cornè’s well-known side view of the U.S. frigate Constitution from 1803, the earliest known depiction of the ship, shows a version with apparently 17 stars. This may indicate Ohio and Tennessee, which had already joined the Union at that time but were not yet officially represented on the flag. The number of stripes is somewhat puzzling again—there are only 16—and the top stripe is white while the bottom one is red.
Cornè’s effort to depict such a large number of stars can certainly be seen as an attempt at accuracy. Had he been merely imprecise, the more logical outcome would have been to show fewer stars rather than striving to cram more stars into such a small space!
It was not until 1818 that it was legally mandated: one star per state, and 13 stripes representing the founding states. This rule remains in effect to this day. However, this also shows that flags in the early years of the new nation still allowed for certain liberties—a topic that alone could easily fill an entire book.
3. The Commissioning Pennant
British, American (and likely other nations’) warships flew a long, narrow, triangular pennant at their main mast—the so-called commissioning pennant—as a symbol of their active (military) service status.
The American version displayed at the hoist a blue field with vertical red and white stripes. Today it bears seven stars - in earlier times, thirteen, symbolizing the founding states.
The origin of this flag and tradition can be traced back to ancient Egypt and has been in continuous use through the Middle Ages to the present day. The commissioning pennant was only replaced by the flag of an admiral or high-ranking civilian official when such a person was aboard.
However, it was both possible and customary to fly another flag beneath the commissioning pennant—for example, as a salute or for signaling purposes.
This image possibly depicts the early Old Ironsides. However, Cornè may have intended it merely as a ‘typical’ frigate, since the entire painting centers on the theme of the East India Marine Hall, and the frigate serves only as the central focal point. What can be observed, however, is that beneath the long commissioning pennant another rectangular flag is flown. Could this be a salute to the honorable East India Marine Society?
4. The Jack
The so-called 'Jack' is also a national flag, displayed only when the ship is at anchor or moored, flown on a short staff at the bow. This allowed for identification of the ship’s nationality when approached from the bow. Such identification was often necessary when the ship was at anchor and the stern had turned into the wind, rendering the ensign at the stern invisible.
Typically, the Jack is a simplified version of the national flag, displaying only the ‘canton’ — that is, the upper left field of the U.S. national flag: a blue field adorned with the appropriate number of stars.
The so-called "First Navy Jack" featured the rattlesnake and stripes motif, inspired by the 1775 Continental Army flag—a symbol of resistance and independence from the British Crown. However, this flag was only officially used between 1975 and 1976 (in preparation for the Bicentennial celebrations) and again from 2002 to 2019. There is no evidence that it was flown during the early years of the still young U.S. Navy.
5. American Burgees
There is little information available today about the "American Burgees." Burgees—typically smaller, triangular flags—have historically served and continue to serve as identifiers and communication signals between vessels. In addition to the ensign, these “American burgees” were evidently intended to mark a ship as distinctly American.
Flags bearing inscriptions such as “Don’t give up the ship” might also be understood as burgees—a powerful symbol directed at both friend and foe. Captain Perry referenced the last words of his friend, Captain James Lawrence, during Lawrence’s engagement aboard the USS Chesapeake against HMS Shannon in late May 1813, and successfully used the motto to rally his own squadron during the Battle of Lake Erie in late summer 1813.
This representation again depicts national flags on the foremast and mizzenmast of the USS Constitution, as Cornè portrayed them in one of his paintings of the battle against HMS Guerriere. Once more, it is evident that the arrangement of stars in the blue field had not yet been standardized, and different patterns could even be flown simultaneously on the same ship.
6. The Broad Pennant
Up until shortly before the Civil War, "Captain" was the highest permanent rank in the U.S. Navy. Captains commanding a squadron were honorarily titled "Commodore" and flew a broad pennant. These pennants came in blue, red, or white depending on seniority and displayed stars representing each state:
· Blue with white stars for the senior-most commodore
· Red with white stars for the second-ranking commodore
· White with blue stars for all others
Therefore, Wadsworth likely recorded “3 broad pennants” in his midshipman’s logbook.
The large U.S. frigates such as the Constitution, United States, and President were the biggest ships in the Navy until the War of 1812 and often served as squadron flagships. With the arrival of a senior (in service) commodore aboard his flagship, it was clearly necessary to adjust one’s own squadron rank by changing the color of the broad pennant. Hence, all three colors were surely needed on board.
.
Commodore Preble, for example, flew a blue broad pennant with 13 stars—symbolizing the founding states—during his operations off Tripoli in 1804. The shape of this pennant was a wide, truncated triangle. It was only years later that the now-standard swallowtail design became common. Signal flags are also displayed on the mizzenmast in above´s picture.
In Cornè’s 1803 depiction, a broad pennant is being hoisted that appears to show the American ensign instead of stars. This again indicates that flag usage in the early U.S. Navy was not yet strictly standardized.
7. Other depictions done by other artists
The rigging and flag display of American frigates can, of course, also be observed in other paintings. The already mentioned exquisite French artists lead the way, of course! But other depictions naturally also show the common practices already in use.
In the storm, only the broad pennant remains hoisted on the main mast. All other flags were likely taken down for safety.
This is a magnificent painting by Antoine Roux that reveals an incredible number of details about the large American frigates.
Studying this work — as well as the painting of the President in the harbor of Toulon — comes highly recommended for anyone interested in the American 44-gun frigates.
Here, we again see the commissioning pennant and the national ensign at the stern. The jack is not yet hoisted, indicating the ship is not at anchor.
A very fine example of the long commissioning pennant, still showing clearly more than the seven stars commonly seen today at its hoist.
8. Conclusion
It is important to keep in mind that, in addition to the lack of standardization of flags at the time, there were also inaccuracies in the artists’ depictions. However—despite all criticism regarding precision and the contradictions found, for example, in Cornè’s works—a closer examination reveals remarkable accuracy and attention to detail. Even the apparent contradictions can be explained, and the accusations of “errors” or “simplifications” often seem exaggerated when considering how many intricate details he managed to depict in the tiniest areas of his paintings. Compared to his French contemporaries like Roux or Baugean, Cornè may have lacked a bit of precision. Yet he was capable of rendering minute details and indeed did so. Therefore, when he chose to depict small details deviating from today’s expected “norms,” such as adding a miniature national flag to the broad pennant instead of the often used 13 white stars only, it is unlikely that this was done on a whim. Rather, it can be attributed to the still undefined rules concerning the exact design of official flags.
Based on the many beautiful illustrations and some scarce written records, the early national and command flags and their usage can be fairly well reconstructed. As with any historical research, one must carefully study the customs and practices of the era to achieve a more realistic representation of the original. The lack of standardization complicates this somewhat—but nevertheless, certain rules can be identified that allow for an accurate depiction of an early US frigate.
-
Marcus.K. reacted to Chapman in National- and command flags and officiers seniority of the early US Navy
Hi Markus,
Flags with the slogan "Don't tread on me" or "Catch me if you can" are very common on contemporary depictions of US privateer ships from the War of 1812. "Catch me if you can" is pretty cheeky.😀
-
 Marcus.K. got a reaction from J11 in National- and command flags and officiers seniority of the early US Navy
1. Overview
In the early years of the U.S. Navy, there were no formally codified regulations for identifying naval vessels. The processes and traditions of the fledgling service were still in the making. Standardization was not yet the primary concern—rather, the focus lay on establishing procedures and organizational structures.
Undoubtedly, there existed unwritten customs rooted in British naval practice and those of other maritime nations, though concrete documentation is scarce. Nevertheless, some sense of what was common practice can be gleaned from period illustrations—particularly the many works of American maritime painter Felice Cornè, among others—as well as from occasional primary sources, such as a 1803 inventory recorded by Midshipman Henry Wadsworth aboard the U.S. frigate New York (Langley, 2003–2004).
Wadsworth records the following items:
· 4 american Ensigns
· 4 commission pennants and 1 Jack
· 2 american Burgees
· 3 american Broad Pendants
The Ensign was the national flag, typically flown from the flagstaff at the stern. In battle, it was often hoisted on additional masts or spars to ensure it always remained visible — since lowering the flag during combat was interpreted as a sign of surrender. To avoid any such misunderstanding in the event the main flagstaff was shot away, it was both common and critically important to display at least one additional, redundant flag.
The Jack was a smaller flag used to indicate a ship’s nationality. It was flown at the bow—typically from a short staff mounted on the bowsprit or foredeck, known as the ‘jackstaff’—but only while the ship was at anchor or moored..
Commission Pennants (historically also spelled 'pendants') are long, narrow, triangular flags that were to be flown from the highest mast of every officially commissioned warship. Their purpose was to distinguish naval vessels from merchant shipping.
American Burgees were smaller flags bearing national symbols—such as the ‘Don’t Tread on Me’ flag or various designs featuring stars and/or stripes. In modern usage, burgees are typically triangular pennants, most commonly recognized in the sailing world as flags denoting membership in a yacht club.
Broad Pennants — also referred to as command pennants — were used to indicate the rank of a squadron commander aboard a particular vessel. Importantly, when a squadron leader or higher authority was present on board, the broad pennant would replace the long, narrow commissioning pennant at the masthead.
2. The Ensign
In its early years, the American national flag was not yet standardized as it is today. Since the United States was still in a formative and expansionist phase, and new territories continued to join the Union, both the number and the arrangement of stars and stripes on the flag varied over time. What remained consistent, however, was the general layout: a blue canton (the upper hoist-side quarter) bearing white stars, and horizontal red and white stripes—varying in number—filling the remaining three quarters of the flag.
In those early years, as is still the case today, each state was represented by a star in the canton. However, at the time, each state was also symbolized by a stripe—distributed across the rest of the flag. Only in 1818 was the number of stripes officially limited to thirteen, in honor of the original thirteen founding states, as it had become increasingly difficult to distinguish the red and white colors clearly when the number of stripes exceeded fifteen.
Above section illustrates that, at least in 1804/05, ships in active service could still be seen flying different versions of the national ensign side by side. With the admission of Vermont and Kentucky, the flag at that time displayed 15 stars and 15 stripes. In the following section, we will take a closer look at these flags:
In this view the U.S. frigate Constitution displays the classic '15-state flag' variant, with the 15 stars arranged in three rows of five.
To the left of USF Constitution the U.S. schooner Enterprise is shown flying a different variant, the so-called 'Maryland pattern,' which typically featured white border stripes and 14 stars arranged in a circle with one central star. However, it seems that Felice Cornè simplified the design somewhat, as we can only count 12 stars and 14 stripes. While the missing stars might be explained by a possible fold in the flag, the complete absence of the lower white stripe appears rather peculiar.
That Cornè was capable of greater precision becomes evident in the following illustration, which is in fact even older.
Here in above picture, we can clearly see all 15 stars and 15 stripes—just as they appear on the original shown in the next photo. However, even at this stage, it becomes apparent that having 15 stripes makes it increasingly difficult to distinguish them individually from a distance, and the red and white begin to blur into a washed-out pink hue.
This photo shows an original national flag in the Maryland pattern: 14 stars arranged in a circle around a central 15th star—and 15 red and white stripes, with a white stripe at both the top and bottom.
Felice Cornè’s well-known side view of the U.S. frigate Constitution from 1803, the earliest known depiction of the ship, shows a version with apparently 17 stars. This may indicate Ohio and Tennessee, which had already joined the Union at that time but were not yet officially represented on the flag. The number of stripes is somewhat puzzling again—there are only 16—and the top stripe is white while the bottom one is red.
Cornè’s effort to depict such a large number of stars can certainly be seen as an attempt at accuracy. Had he been merely imprecise, the more logical outcome would have been to show fewer stars rather than striving to cram more stars into such a small space!
It was not until 1818 that it was legally mandated: one star per state, and 13 stripes representing the founding states. This rule remains in effect to this day. However, this also shows that flags in the early years of the new nation still allowed for certain liberties—a topic that alone could easily fill an entire book.
3. The Commissioning Pennant
British, American (and likely other nations’) warships flew a long, narrow, triangular pennant at their main mast—the so-called commissioning pennant—as a symbol of their active (military) service status.
The American version displayed at the hoist a blue field with vertical red and white stripes. Today it bears seven stars - in earlier times, thirteen, symbolizing the founding states.
The origin of this flag and tradition can be traced back to ancient Egypt and has been in continuous use through the Middle Ages to the present day. The commissioning pennant was only replaced by the flag of an admiral or high-ranking civilian official when such a person was aboard.
However, it was both possible and customary to fly another flag beneath the commissioning pennant—for example, as a salute or for signaling purposes.
This image possibly depicts the early Old Ironsides. However, Cornè may have intended it merely as a ‘typical’ frigate, since the entire painting centers on the theme of the East India Marine Hall, and the frigate serves only as the central focal point. What can be observed, however, is that beneath the long commissioning pennant another rectangular flag is flown. Could this be a salute to the honorable East India Marine Society?
4. The Jack
The so-called 'Jack' is also a national flag, displayed only when the ship is at anchor or moored, flown on a short staff at the bow. This allowed for identification of the ship’s nationality when approached from the bow. Such identification was often necessary when the ship was at anchor and the stern had turned into the wind, rendering the ensign at the stern invisible.
Typically, the Jack is a simplified version of the national flag, displaying only the ‘canton’ — that is, the upper left field of the U.S. national flag: a blue field adorned with the appropriate number of stars.
The so-called "First Navy Jack" featured the rattlesnake and stripes motif, inspired by the 1775 Continental Army flag—a symbol of resistance and independence from the British Crown. However, this flag was only officially used between 1975 and 1976 (in preparation for the Bicentennial celebrations) and again from 2002 to 2019. There is no evidence that it was flown during the early years of the still young U.S. Navy.
5. American Burgees
There is little information available today about the "American Burgees." Burgees—typically smaller, triangular flags—have historically served and continue to serve as identifiers and communication signals between vessels. In addition to the ensign, these “American burgees” were evidently intended to mark a ship as distinctly American.
Flags bearing inscriptions such as “Don’t give up the ship” might also be understood as burgees—a powerful symbol directed at both friend and foe. Captain Perry referenced the last words of his friend, Captain James Lawrence, during Lawrence’s engagement aboard the USS Chesapeake against HMS Shannon in late May 1813, and successfully used the motto to rally his own squadron during the Battle of Lake Erie in late summer 1813.
This representation again depicts national flags on the foremast and mizzenmast of the USS Constitution, as Cornè portrayed them in one of his paintings of the battle against HMS Guerriere. Once more, it is evident that the arrangement of stars in the blue field had not yet been standardized, and different patterns could even be flown simultaneously on the same ship.
6. The Broad Pennant
Up until shortly before the Civil War, "Captain" was the highest permanent rank in the U.S. Navy. Captains commanding a squadron were honorarily titled "Commodore" and flew a broad pennant. These pennants came in blue, red, or white depending on seniority and displayed stars representing each state:
· Blue with white stars for the senior-most commodore
· Red with white stars for the second-ranking commodore
· White with blue stars for all others
Therefore, Wadsworth likely recorded “3 broad pennants” in his midshipman’s logbook.
The large U.S. frigates such as the Constitution, United States, and President were the biggest ships in the Navy until the War of 1812 and often served as squadron flagships. With the arrival of a senior (in service) commodore aboard his flagship, it was clearly necessary to adjust one’s own squadron rank by changing the color of the broad pennant. Hence, all three colors were surely needed on board.
.
Commodore Preble, for example, flew a blue broad pennant with 13 stars—symbolizing the founding states—during his operations off Tripoli in 1804. The shape of this pennant was a wide, truncated triangle. It was only years later that the now-standard swallowtail design became common. Signal flags are also displayed on the mizzenmast in above´s picture.
In Cornè’s 1803 depiction, a broad pennant is being hoisted that appears to show the American ensign instead of stars. This again indicates that flag usage in the early U.S. Navy was not yet strictly standardized.
7. Other depictions done by other artists
The rigging and flag display of American frigates can, of course, also be observed in other paintings. The already mentioned exquisite French artists lead the way, of course! But other depictions naturally also show the common practices already in use.
In the storm, only the broad pennant remains hoisted on the main mast. All other flags were likely taken down for safety.
This is a magnificent painting by Antoine Roux that reveals an incredible number of details about the large American frigates.
Studying this work — as well as the painting of the President in the harbor of Toulon — comes highly recommended for anyone interested in the American 44-gun frigates.
Here, we again see the commissioning pennant and the national ensign at the stern. The jack is not yet hoisted, indicating the ship is not at anchor.
A very fine example of the long commissioning pennant, still showing clearly more than the seven stars commonly seen today at its hoist.
8. Conclusion
It is important to keep in mind that, in addition to the lack of standardization of flags at the time, there were also inaccuracies in the artists’ depictions. However—despite all criticism regarding precision and the contradictions found, for example, in Cornè’s works—a closer examination reveals remarkable accuracy and attention to detail. Even the apparent contradictions can be explained, and the accusations of “errors” or “simplifications” often seem exaggerated when considering how many intricate details he managed to depict in the tiniest areas of his paintings. Compared to his French contemporaries like Roux or Baugean, Cornè may have lacked a bit of precision. Yet he was capable of rendering minute details and indeed did so. Therefore, when he chose to depict small details deviating from today’s expected “norms,” such as adding a miniature national flag to the broad pennant instead of the often used 13 white stars only, it is unlikely that this was done on a whim. Rather, it can be attributed to the still undefined rules concerning the exact design of official flags.
Based on the many beautiful illustrations and some scarce written records, the early national and command flags and their usage can be fairly well reconstructed. As with any historical research, one must carefully study the customs and practices of the era to achieve a more realistic representation of the original. The lack of standardization complicates this somewhat—but nevertheless, certain rules can be identified that allow for an accurate depiction of an early US frigate.