Laxet
-
Posts
391 -
Joined
-
Last visited
Content Type
Profiles
Forums
Gallery
Events
Everything posted by Laxet
-
 I'm looking at the lashing of the jib boom & flying jib. The plans call out .006" line (kit comes with .008"). I tried some test wraps & the stuff seems so small. It looks like it could take 20 or more wraps to make a seizing. Is this right or did you guys use larger line? Speaking of line, I just discovered today (after 16 years) that I received two .008" spools of black line & no .028" spools. Earlier on (a couple of months ago) I found that I had 102 belaying pins instead of 120 & an extra package of 1/8" single blocks. I guess I did a lousy job of inventorying everything when I got it. So far, Model Expo has been great at replacing everything without question. Today I also asked for another two sets of quarter boat lifts. I attempted to carve mine probably at least 10 years ago when I knew absolutely nothing about what I was doing. Today, thanks to this group, I have an inkling about what's going on. Thanks to all for the clue.
 -
If I am reading your problem correctly, then your analog calipers are actually right on. The 10mm mark cannot line up at the same time as the 1mm mark. As you slide them open, whichever line lines up is your actual measurement. That is how you get your increments between mm's. If the ten lined up then it would be a whole mm longer than when the 1mm mark lines up. Of course if I read your concern wrong, then never mind. In any case, I doubt (& please don't take this the wrong way) that you are good enough to work with 1/64" tolerances. I know I'm barely good enough to use 1/32" tolerances, & then only some times. Don't forget, also, that as you go around the curvature of the hull, the planks will separate slightly at the top, unless you trim the edges of every plank. It's just not that critical in my mind.
-
I bought a set of fairly inexpensive digital calipers from Model Expo. Eventually I discovered the sloppiness you describe. In the electronics field, we call it hysteresis. It is an inability to achieve the same reading when moving the dial in different directions. I still found the calipers adequate for this work. The planking width is not so critical. You could plank with 1/8" planks if you want. It will all sort itself out at the end. The sizes they recommend are just the scale sizes based on the period. He even says somewhere in the book you can vary the sizeof the planks.
-
For some reason, that picture came out upside down. Hmm.
-
And for good measure I'll put this on the stand to distract them! They'll think I'm a genius.
- 468 replies
-
- 1
-

-
- niagara
- model shipways
- (and 1 more)
-
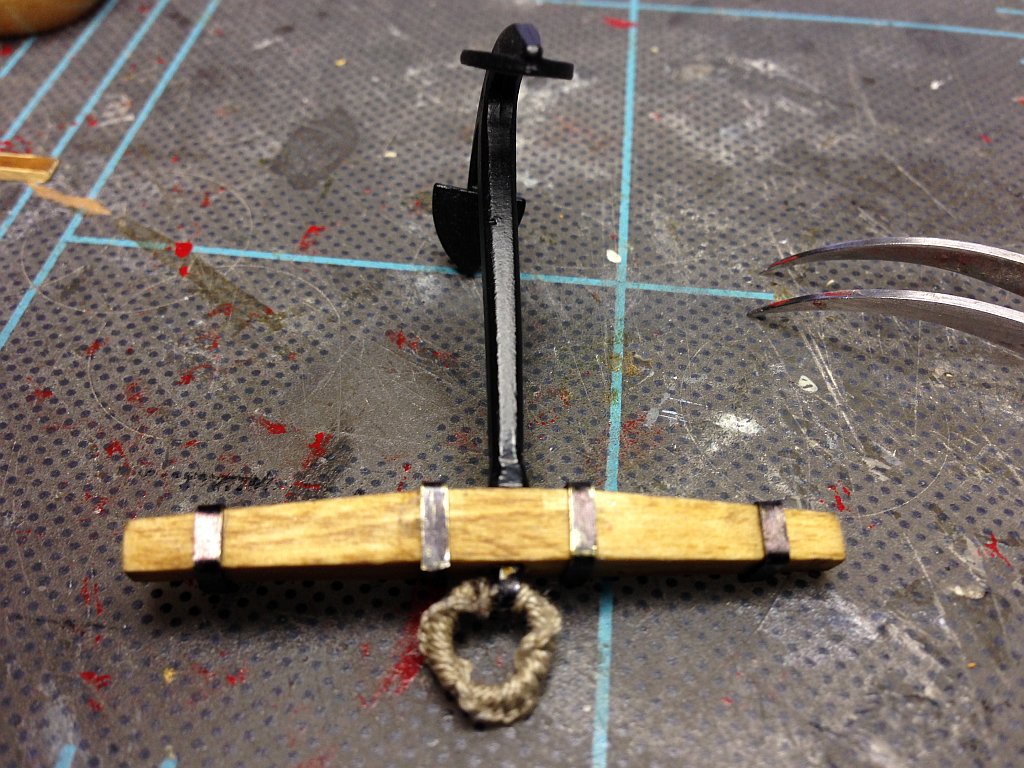
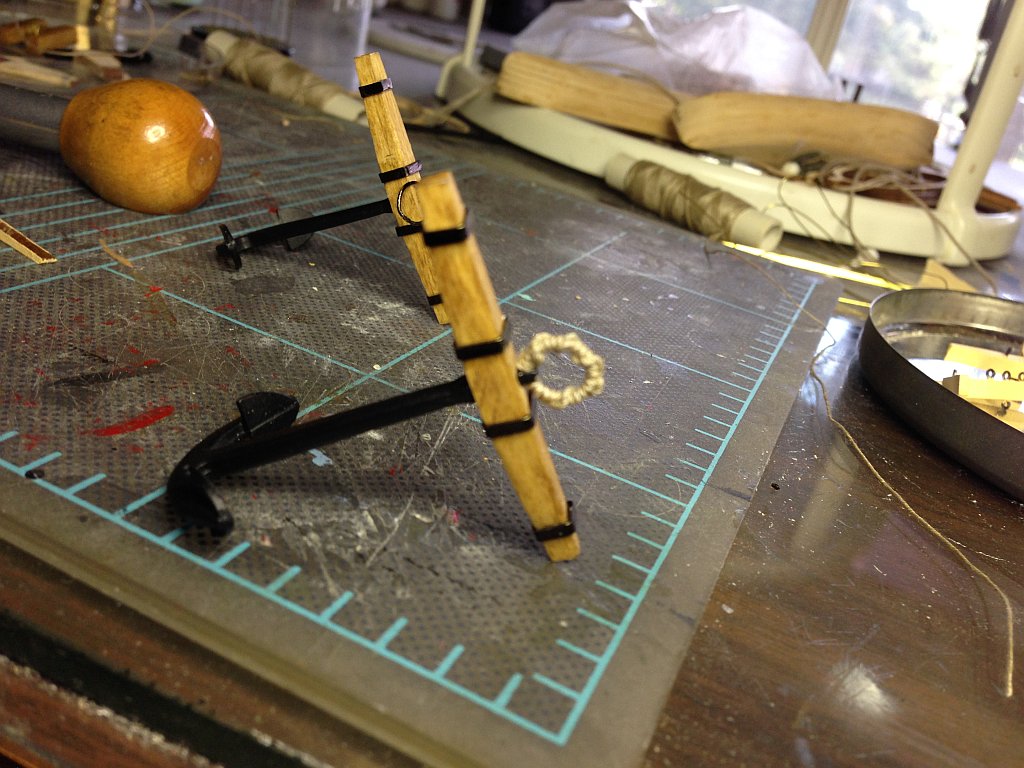
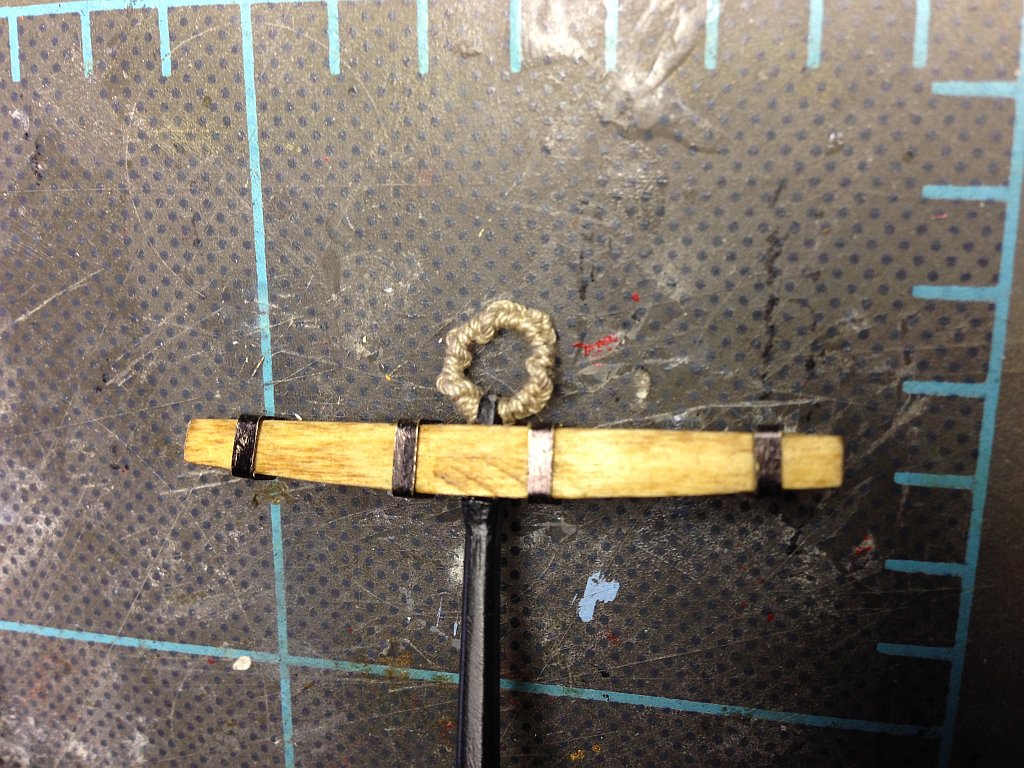
The other anchor came out even better, although you can't tell by the crappy picture. I'll be darned if I can focus my phone. People are going to say, "Boy, that's a crappy ship, but wow, look at at them anchors!"
- 468 replies
-
- 1
-
-
- niagara
- model shipways
- (and 1 more)
-
Thanks Bill & Russ. Russ, the method you suggest sounds like what I have used in the past for mast wooldings. Bill, I actually knew this method, but it didn't look like anybody used it on their Niagaras. I guess I should go back & have a closer look. Did you seize the gammoning separately on each side or wrap it between the bowsprit & the stem? Hope that is a clear question. Also, how about the jib boom? Is it done the same way or some way different?
-
The nice thing the shark is it sits right on my desk.
-
All right, it's time to give up some secrets (you guys, not me). I need to know how to tie off the gammoning lashings after I finish tying down the bowsprit. Do i just tie the ends together or something fancier? Any special knot?
-
Thanks Tim. I'm pretty pleased the way they came out. If nothing else, I'll have nice anchors.
-
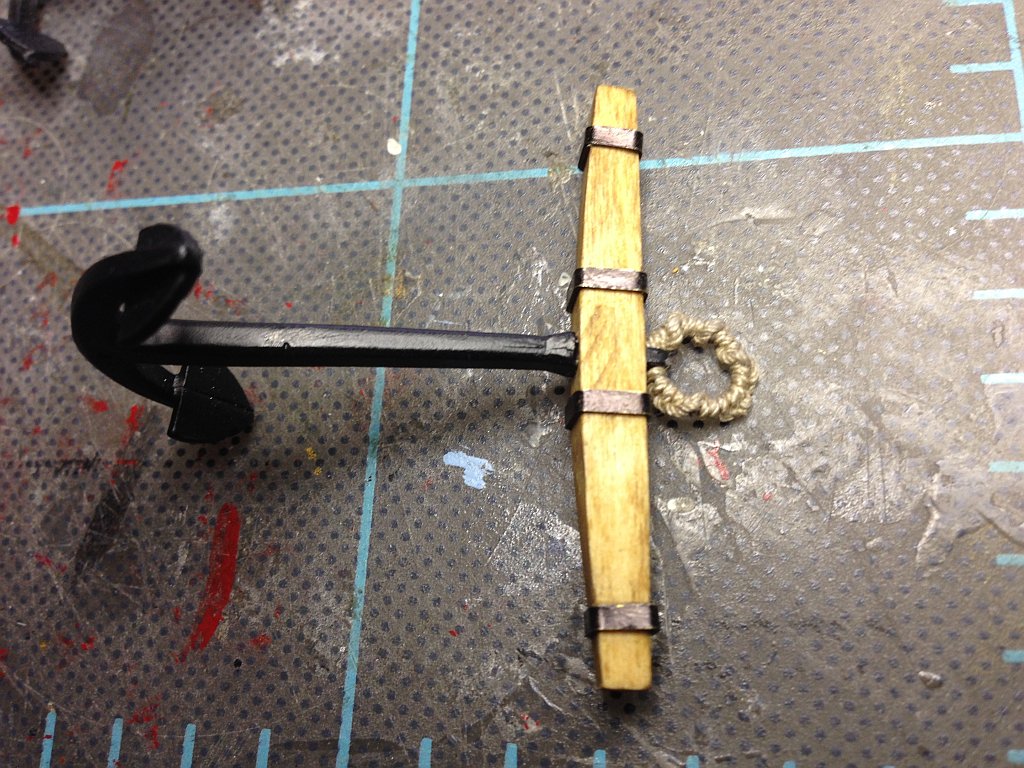
BTW, the anchor stock isn't really as lopsided as it looks. It is a trick of the lens.
-
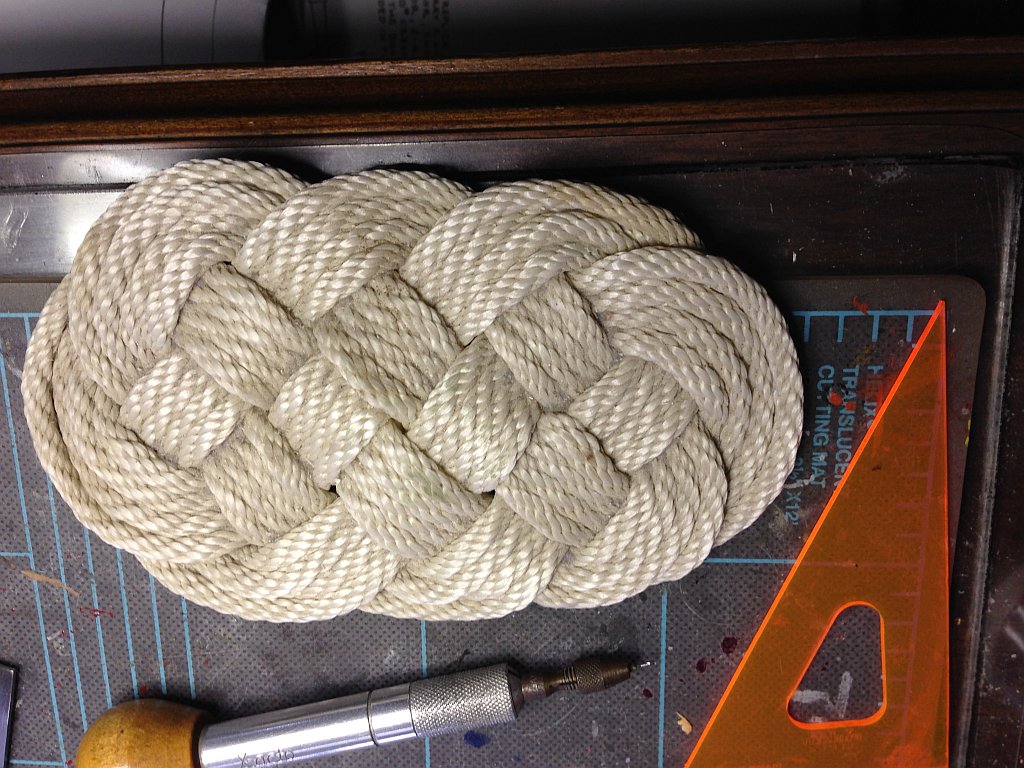
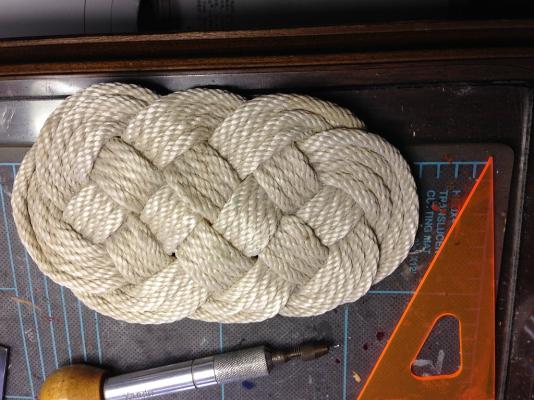
A bit of marlinspike seamanship here. I have never tried this at such a small scale before. It looks pretty good, even if I twisted a stitch or two. This is very difficult at this scale. Sorry for the out of focus picture. Can you believe I'm also a photographer?


- 468 replies
-
- 6
-
-
- niagara
- model shipways
- (and 1 more)
-
Just be careful not to burn your finger tips. I did that a lot. When you move it back & forth in front of this, apply pressure to create the bend while steaming. The effect dissipates quickly after you remove it from the steam.
-
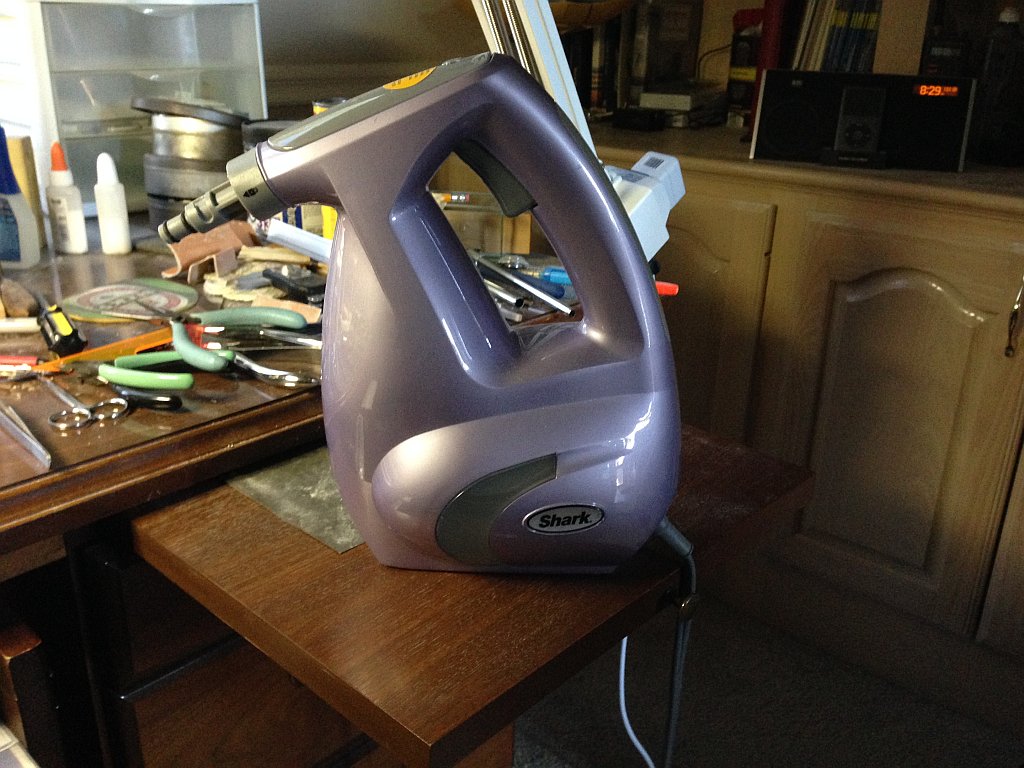
I referenced early on the device I used to steam & bend planks. It is called the Shark. Here is a picture of it. thought somebody might be interested. After steaming with this baby, you can tie a plank in a knot.

-
Thanks Ken. That seems to be the general consensus. I built two anyway, just in case.
-
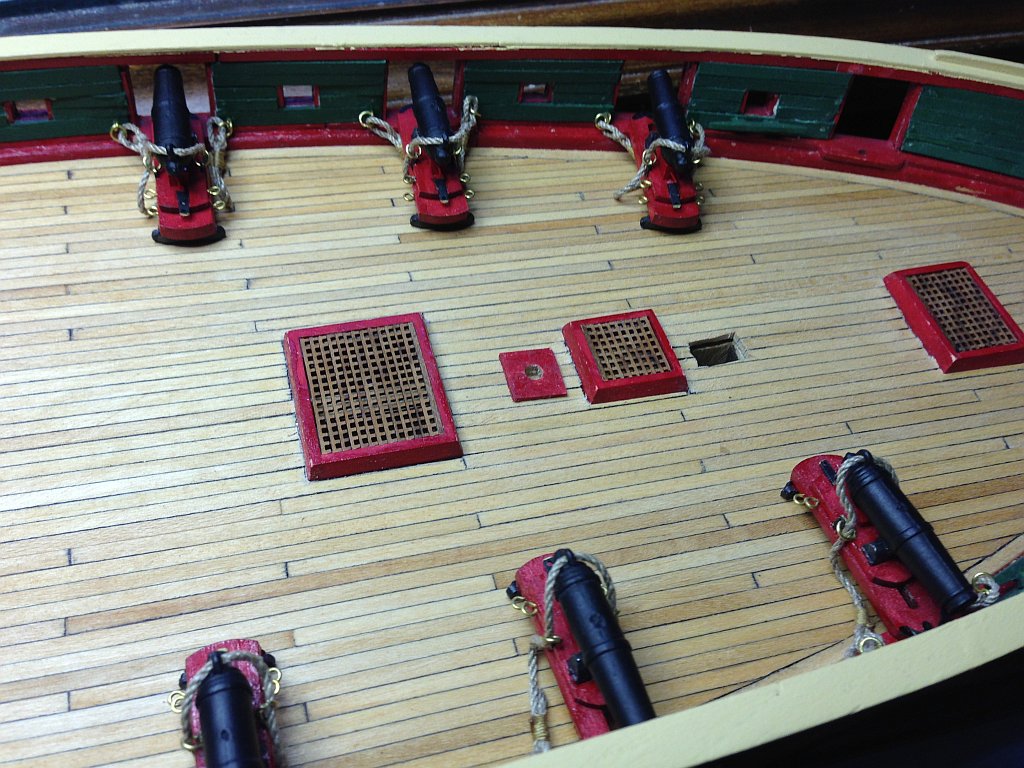
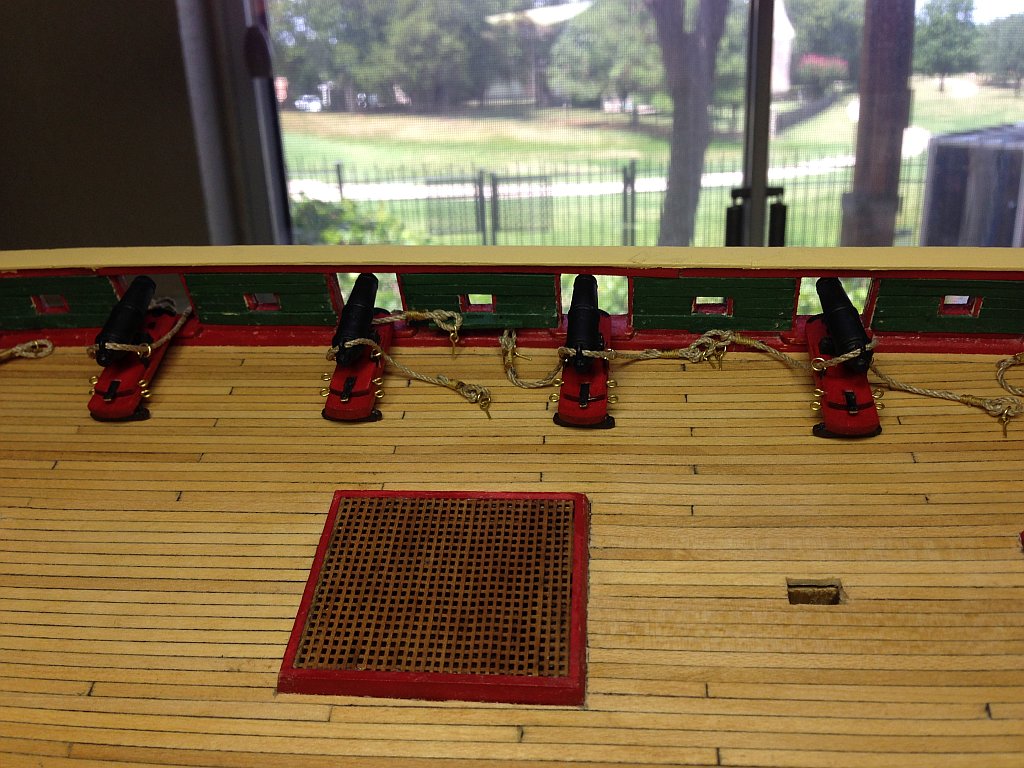
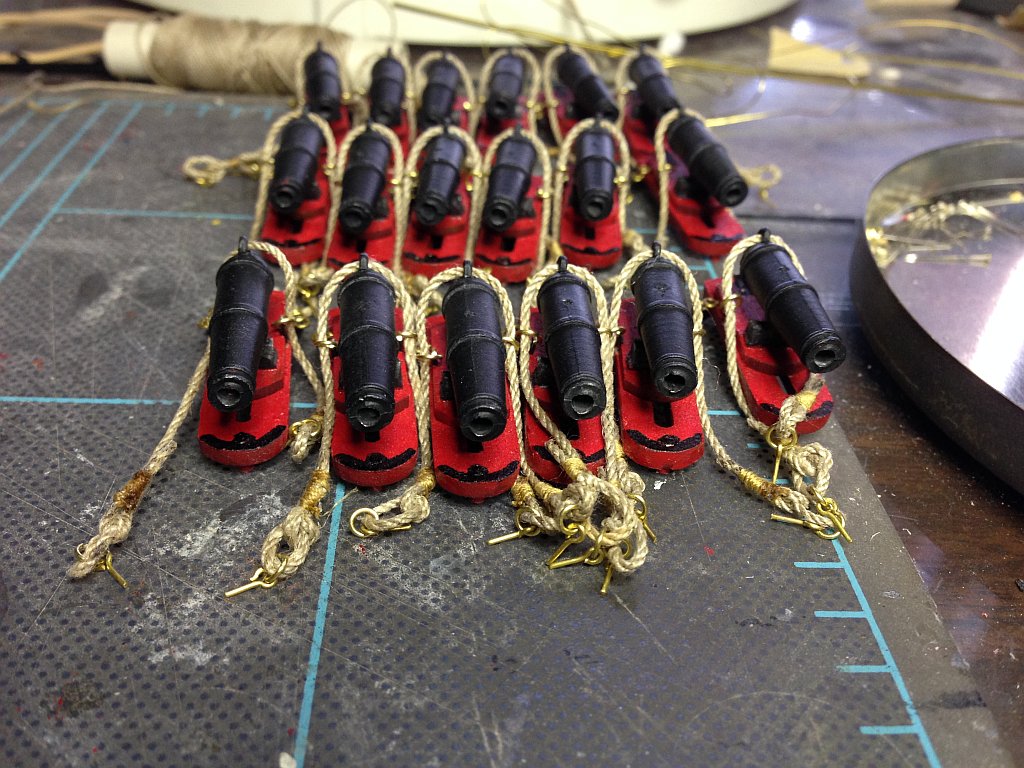
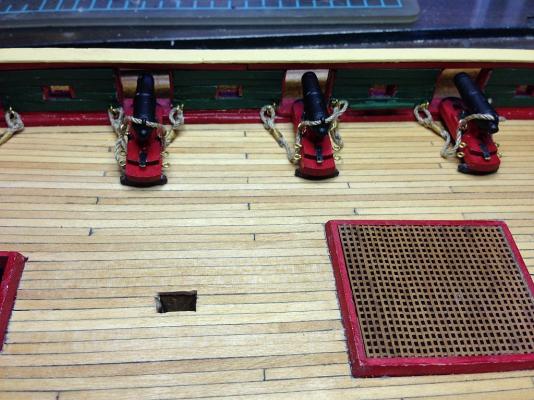
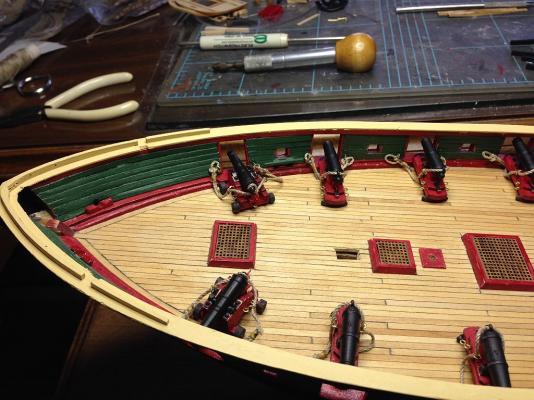
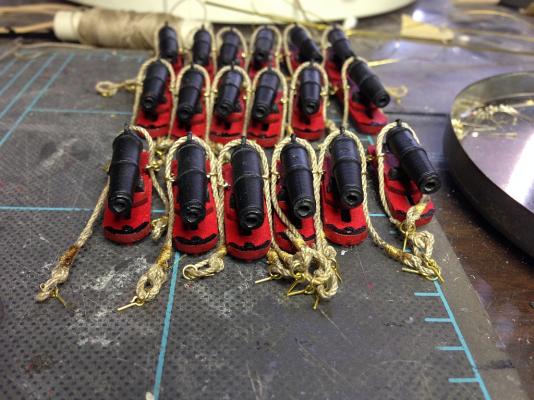
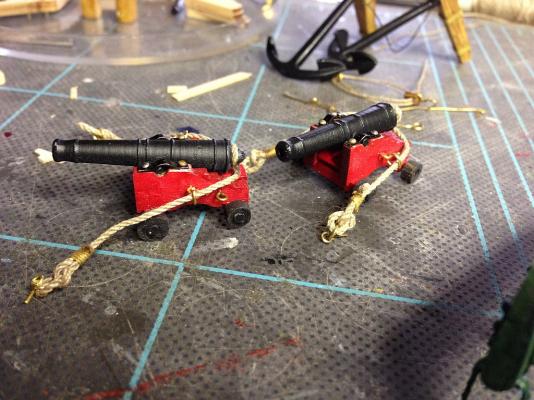
Holy moly! What a frustrating two days. I installed the armament. I think I bent 75% of all the eyebolts I tried to install. I even dropped one down into the nether world of the bilges. I didn't realize just how fat my fingers were until I tried this little joyous task. It's done. It's obvious I'll never be a master shipbuilder. I think the ropes are still a little too long, but I'm not making them a third time. Only you guys & I will ever know the difference. (SHH, don't tell anyone).


- 468 replies
-
- 3
-
-
- niagara
- model shipways
- (and 1 more)
-
Hey, look! I've got a base board now! That's almost like launching a ship (to me). A milestone of sorts. I'm a proud papa.

- 468 replies
-
- 4
-
-
- niagara
- model shipways
- (and 1 more)
-
Yep. That's what I need. Some sort of a wood rack. I get tired of digging through piles of wood trying to find the right sizes.
-
Does anybody know how many ladders go on deck? The plan shows only one on the starboard side. Can this be right? That would mean they could only moor starboard side to the dock. Sometimes the plans omit the other side for clarity, but the usually tell you when they do. It isn't mentioned here.
-
Thanks Russ. I probably should stop being so critical of my own work. Of course everything looks better from a distance:)
-
The rudder isn't the best I've seen here, but it'll do.
-
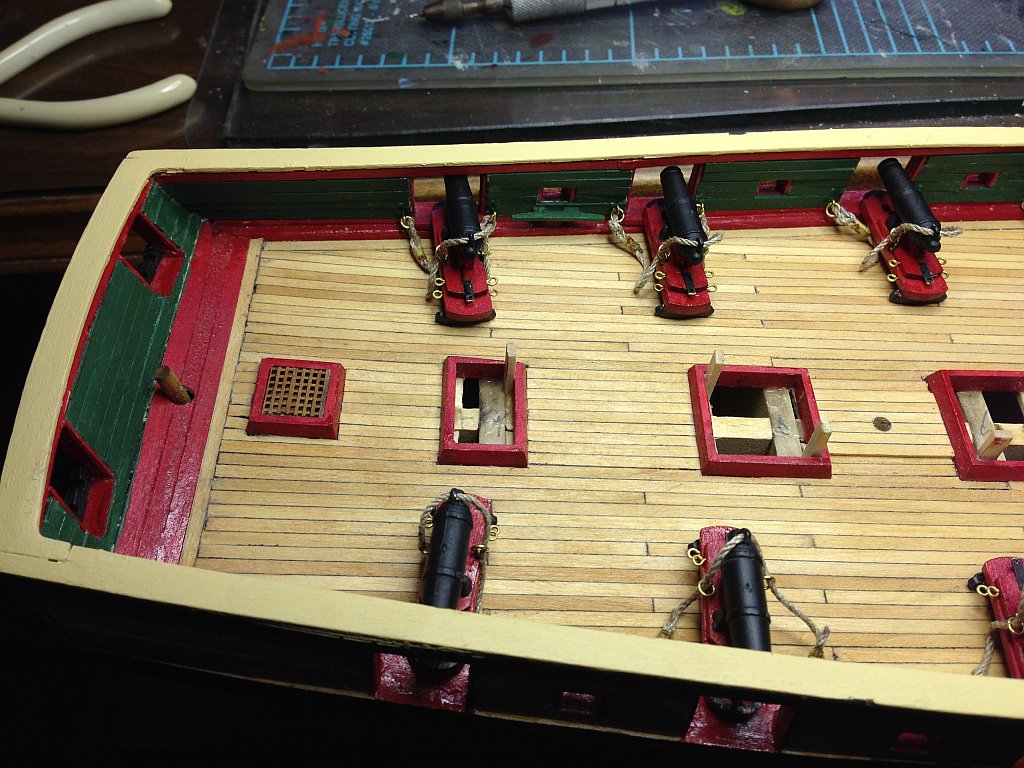
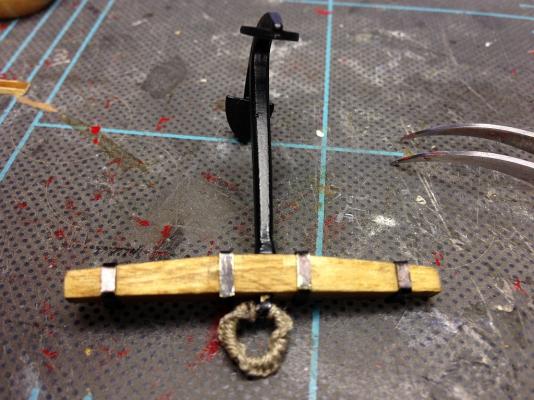
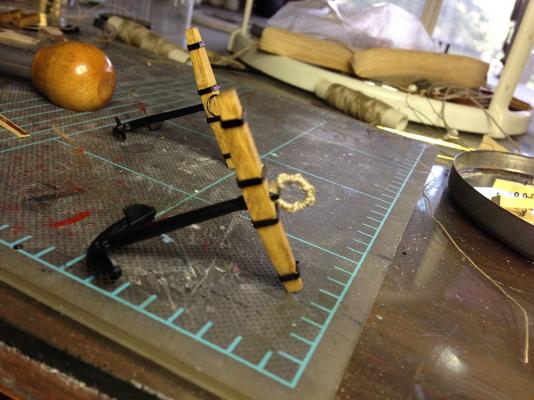
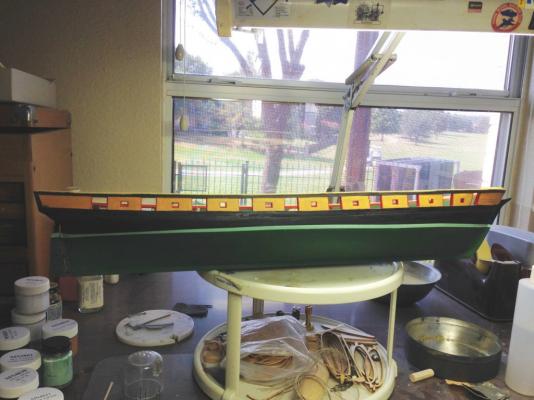
She finally has a rudder. It's been one of those procrastination parts. Started the quoins for the guns. Another major procrastination project that I can't put off any longer. I need to mount the guns.
- 468 replies
-
- 1
-
-
- niagara
- model shipways
- (and 1 more)
-
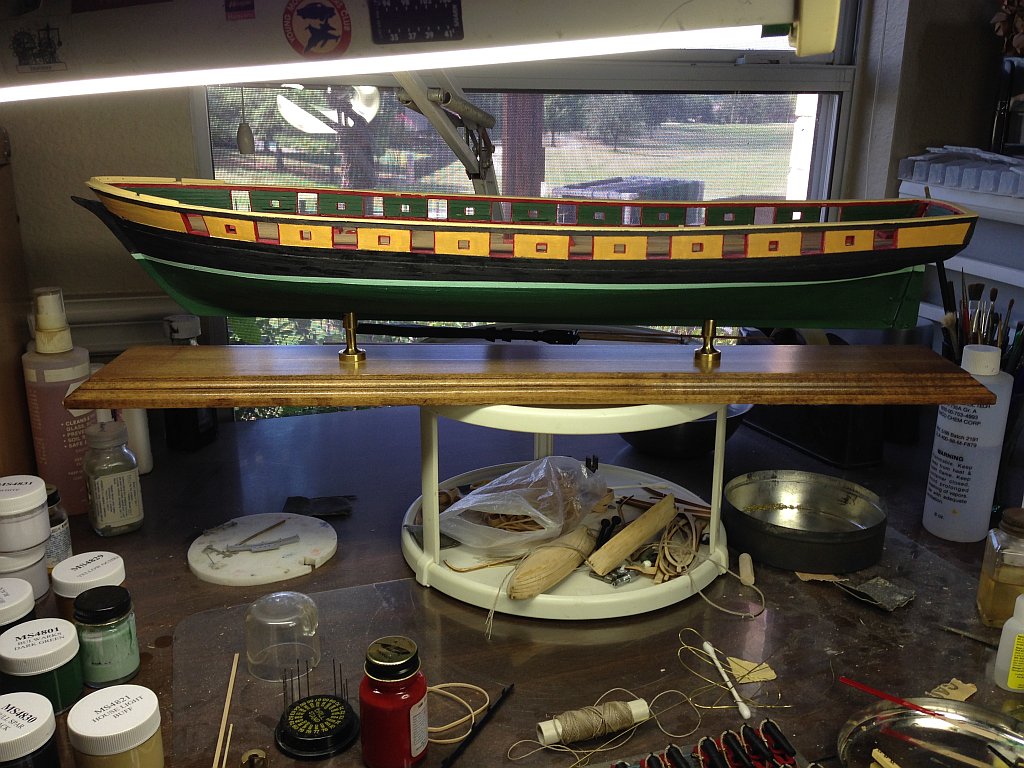
Also finished rebuilding the bowsprit bitts. Seems I spend half my time rebuilding stuff. It's starting to irritate me. I even got the rudder painted today. I will mount it tomorrow. I think I'm about ready to mount her on the pedestal, unless anybody can give me a good reason not to do it yet. This is the kind of thing that experience helps with, & why I do so much rework. There is probably a really good reason not to mount it yet, but I haven't the foresight to know why. It just seems it will be easier to do the rest of the work with it held fast.
- 468 replies
-
- 1
-
-
- niagara
- model shipways
- (and 1 more)
-
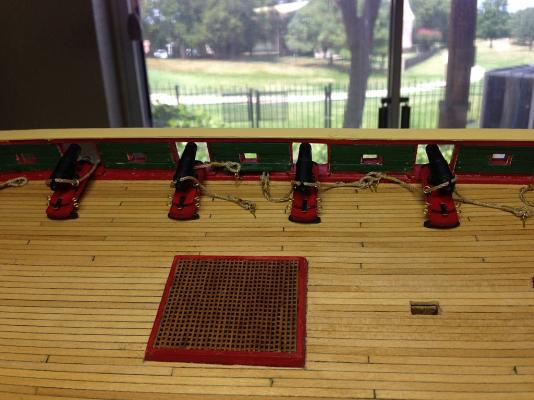
Here are pictures of the reworked breech ropes. New (but not necessarily improved). At least more historically accurate.
- 468 replies
-
- 2
-
-
- niagara
- model shipways
- (and 1 more)
-
What a pain in the patute to serve the ends of the breech ropes. I just finished again today, three days wasted because I wasn't paying attention. They have to be served while attached to the gun, & it's back breaking work, especially doing it with the condition shown in the above picture. I'm glad it's done again. I will post pics tomorrow.