Laxet
-
Posts
391 -
Joined
-
Last visited
Content Type
Profiles
Forums
Gallery
Events
Everything posted by Laxet
-
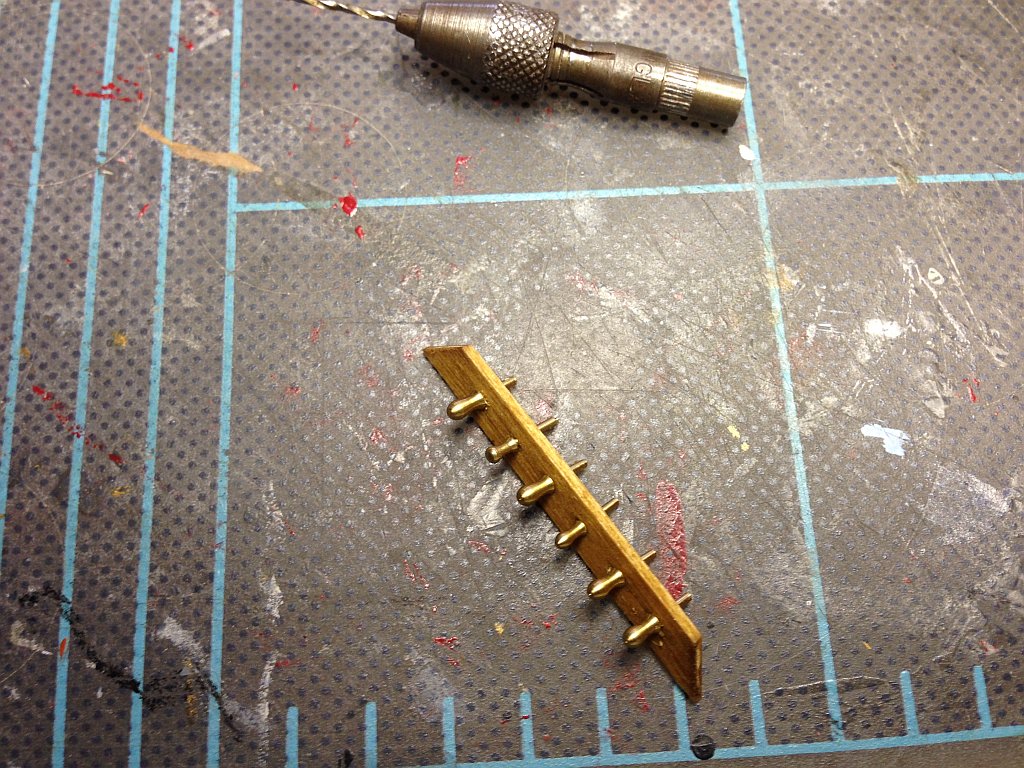
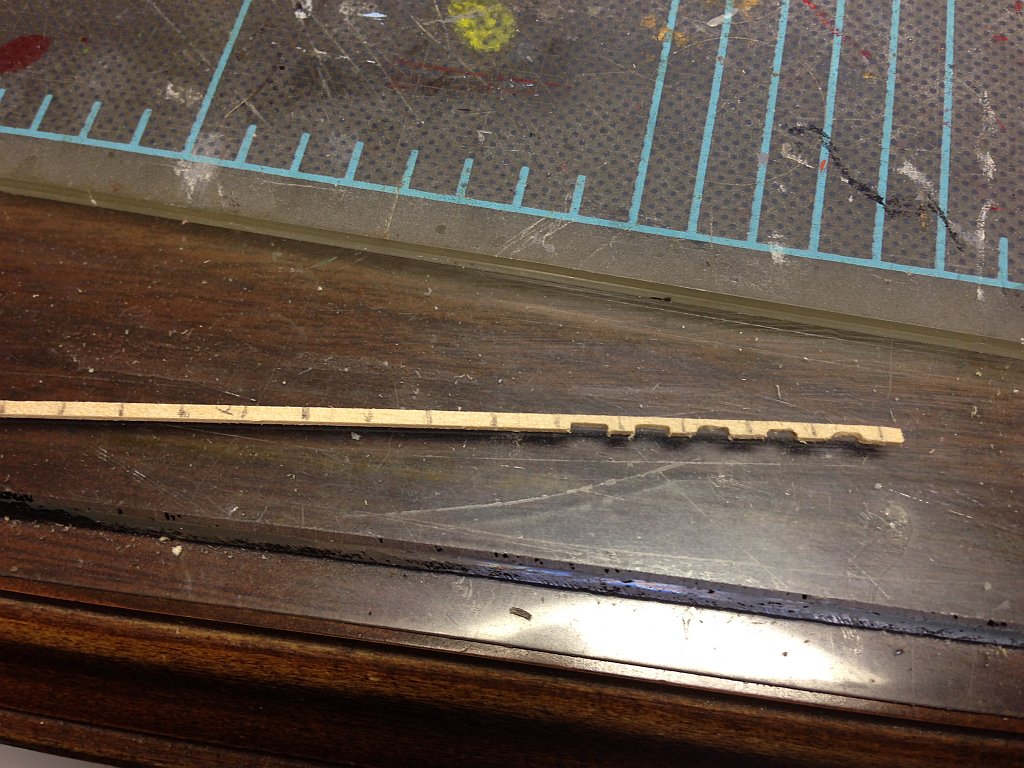
 I installed a couple of these "joggle" strips on my ship. I tried not to but sometimes you just gotta do what you gotta do. I also installed a couple of stealers on each side, too.
 -
I agree that the colors should be more muted. This is probably a combination of scale effect & fading as well as duller paint. I was too lazy to do anything about it, though. I've said all along I wasn't happy about the colors provided by ME for this kit, either in the past or now.
-
Better too much info than too too little, which is where I was for years & years. At least you have the option to select which info you want to glean, a little at a time to suit your skill building. It's an enviable dilemma.
-
Model Expo came through again. I received my 40 cleats & 30 yds of .051 black line. I still say 40 cleats are not enough. I will have to use some home made ones to finish the masts & other stuff. Spent all day installing cleats. Wish I had them sooner when they would have been easier to install.
-
I didn't even do mine in pairs because they were so different. Says a lot about my skill, huh? One at a time. I just held the plank, but not exactly where I was filing. Back a little. And the files I used were jewelers files in case I didn't mention that before. I found the plank to be quite rigid.
-
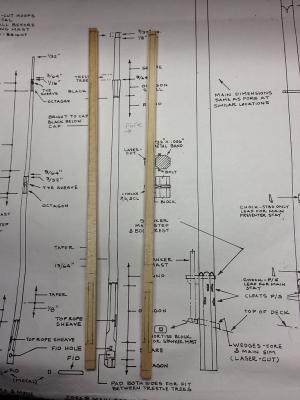
Let's talk top rope sheaves. Both the fore & main topmast & topgallant masts have them, but they don't appear to be used. I am having a hard time visualizing how they look. Are they actually cut into the mast? Do they run fore & aft, athwartships, or at a diagonal? I'm just not getting it. It appears there is one right below the royal yard running fore/aft that is used.
-
But in their defense, they can't stock all sizes. It would be nice if they supplied something other than nylon. The do sell a ropewalk. I have made some lines that I needed. They do give a table of line sizes & equivalents.
-
Thanks, Bill, for the link to the pictures. There was a very clear picture of it. It is nothing like what I did or where I did it. Oh well, I'm not going to change it. Yours is closer to the real thing, I think.
-
Yeah, especially on the hull planking they sort of leave it to your preference. They do call out a lot of dimensions on the plans, but a lot of times it takes a measurement from the print. You have to be careful, though. Often, if there are multiple views of a piece, there will be multiple dimensions also. You have to guess which one is right. Luckily, they give you a lot of extra wood.
-
Hi Ken, Just curious, did you mount it to a block? The plan seems to show one.
-
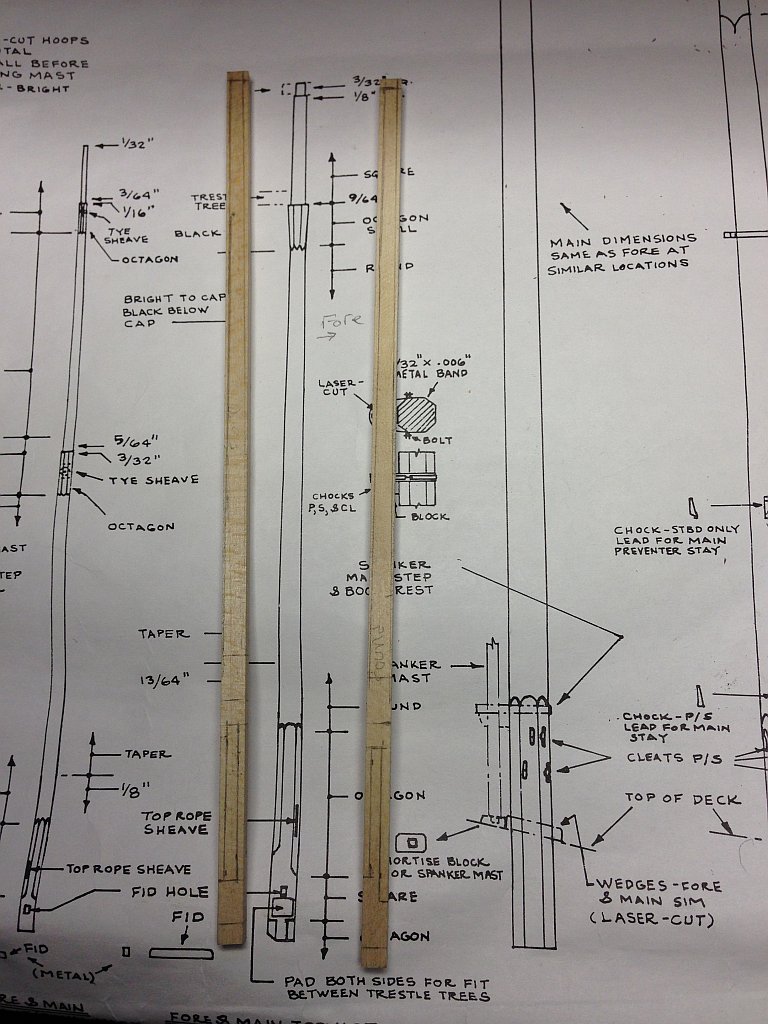
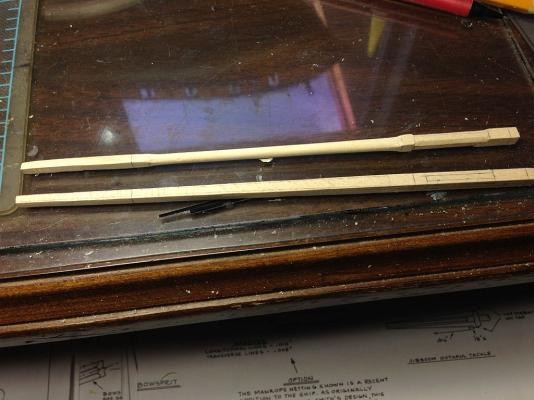
Today I worked on the top masts. Here they are laid out & with one almost finished.
- 468 replies
-
- 1
-

-
- niagara
- model shipways
- (and 1 more)
-
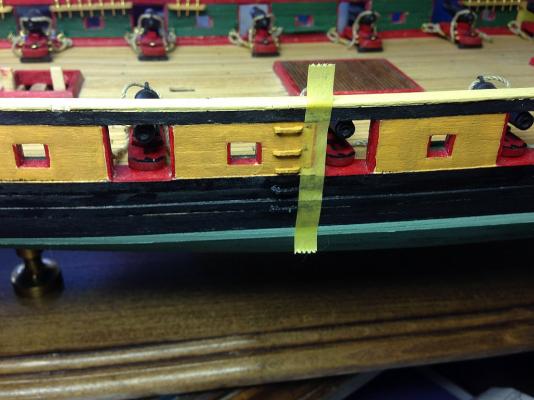
Am I the only one installing the spanker sheet horse? I've only seen one other build that included it, & he did it different than I did. Not even sure if it"s used, but it is called out on the print.

- 468 replies
-
- 1
-
-
- niagara
- model shipways
- (and 1 more)
-
Welcome to the Niagara club. Looking forward to watching your build. I'm just finishing the hull & working on masting. If I can help, just ask.
-
I will reiterate I did not taper the plank top to bottom, but it would have just taken a swipe of the file to finish.
-
I'll tell you how I did this. I drew the line on the plank. Then I carved/shaved the plank with an Xacto knife. When it was close, I used a file to smooth it out & bring it to the line. I did all of this under a 5 diopter Luxo magnifier light. I tried doing just what you're doing, but it was just way to hard to do so I gave up & went back to my way, which isn't really so bad. It took me five minutes to ten minutes (depending on the plank) to lay out, carve, finish & attach a plank. I averaged two complete strakes a day working about two hours.
-
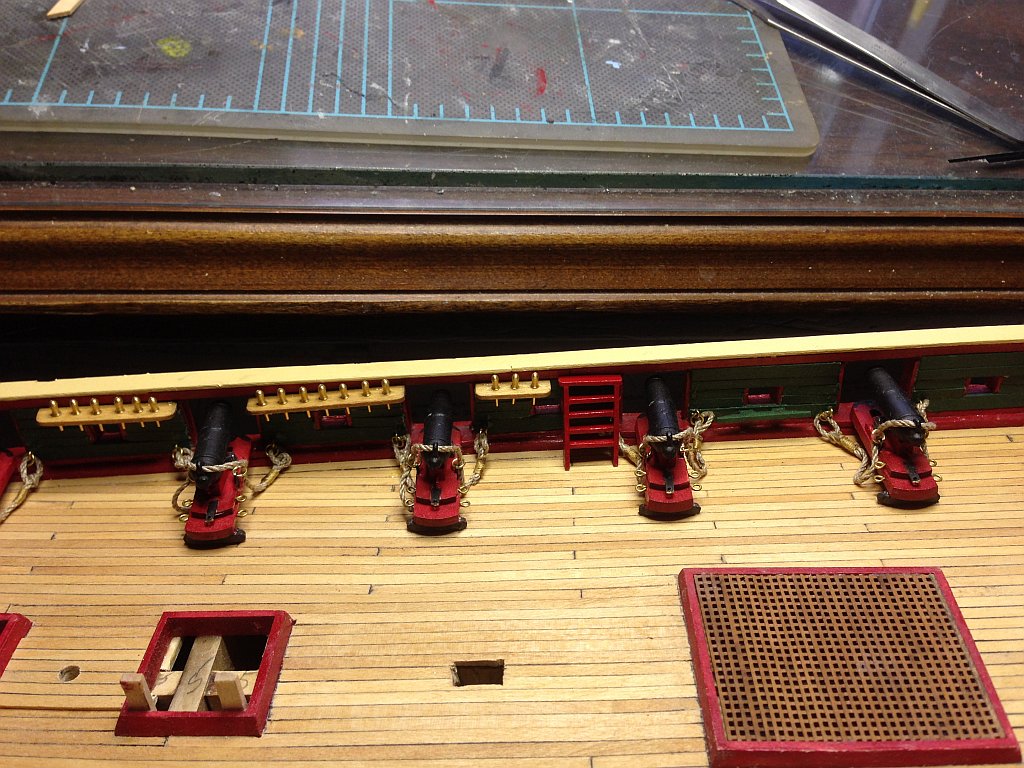
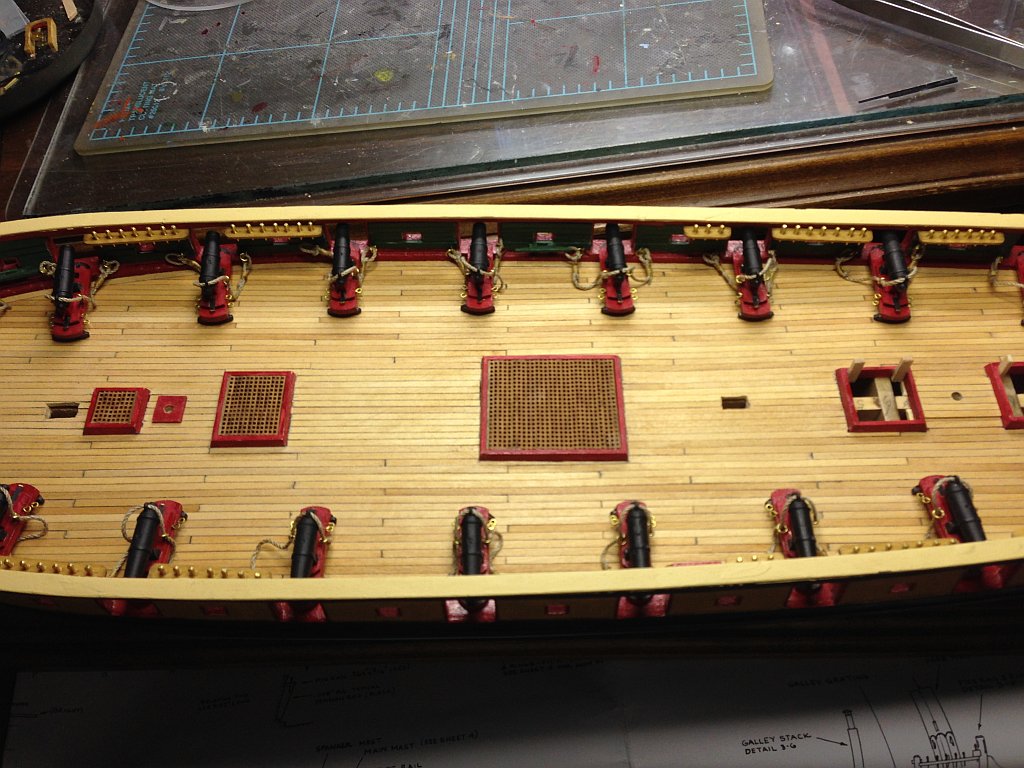
Happy to help, Ken. Today all I did was install eyebolts all over the hull. Not much to show, so I won"t. Question: How does one replicate sheaves in the bulwarks? Seems to me about all you can do is poke a hole & pass a line through. What am I missing? Any help would be appreciated.
-
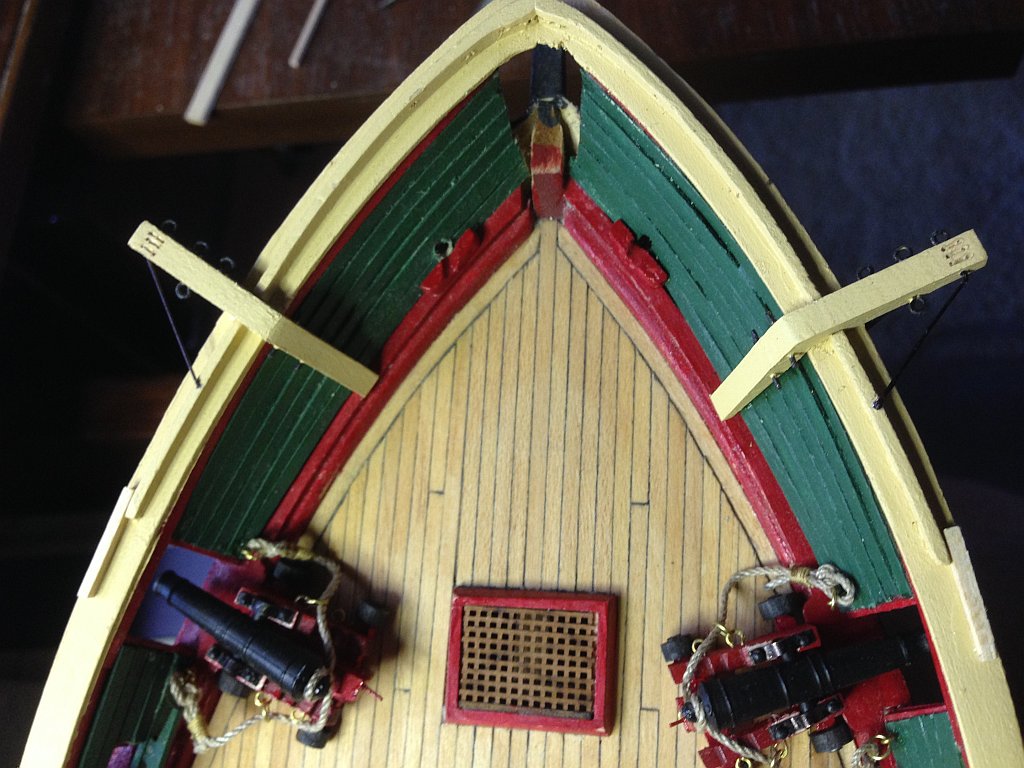
Here is the bow after I added the cathead rods & the anchor chafing blocks. Still have to paint those.

- 468 replies
-
- 1
-
-
- niagara
- model shipways
- (and 1 more)
-
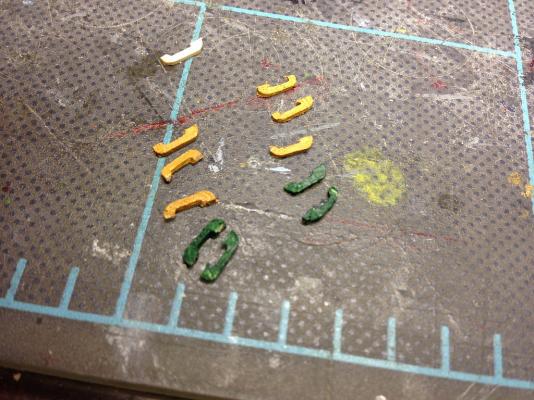
Built the bow pin rail. This is the fourth one I've built. Here you can see the last two as well as the finished product. ME didn't supply the proper number of belaying pins. They sent me more, but as you can see in the picture, they aren't exactly the same. Oh well, I'll chalk it up to some bos'n.


-
Finished adding the sea stairs. Installed the boarding ladders.

- 468 replies
-
- 1
-
-
- niagara
- model shipways
- (and 1 more)
-
Here they are attached. I used a piece of tape for alignment. Try not to notice the short step. That is actually the second one I glued there, but the second one was just as short as the first one. SIGH. Tomorrow I'll glue on the other side. Boy. Things really look worse under high magnification. I'm going to start shooting my pictures from six feet away. Then everything will look *REAL* good.
- 468 replies
-
- 2
-
-
- niagara
- model shipways
- (and 1 more)
-
Sea stairs. They took me all afternoon. What a pain. Here they are after carving. Notice how I accidentally painted some green. They should have been black. Luckily, it became obvious as I went to attach them.
- 468 replies
-
- 1
-
-
- niagara
- model shipways
- (and 1 more)
-
That'll certainly do it.
-
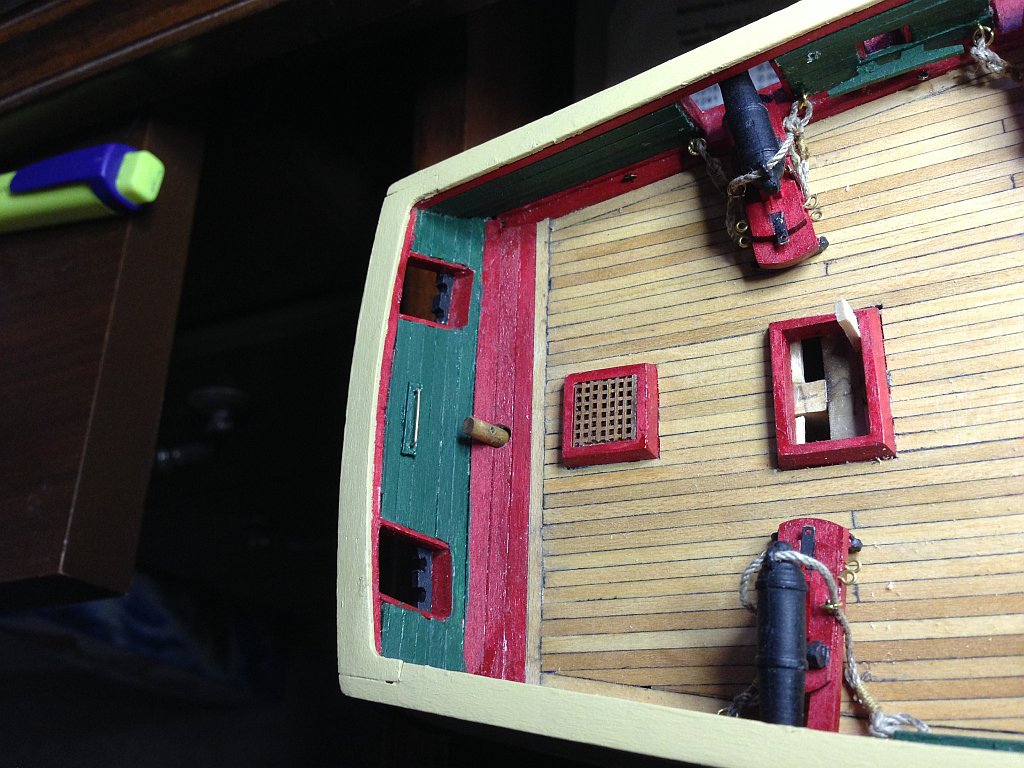
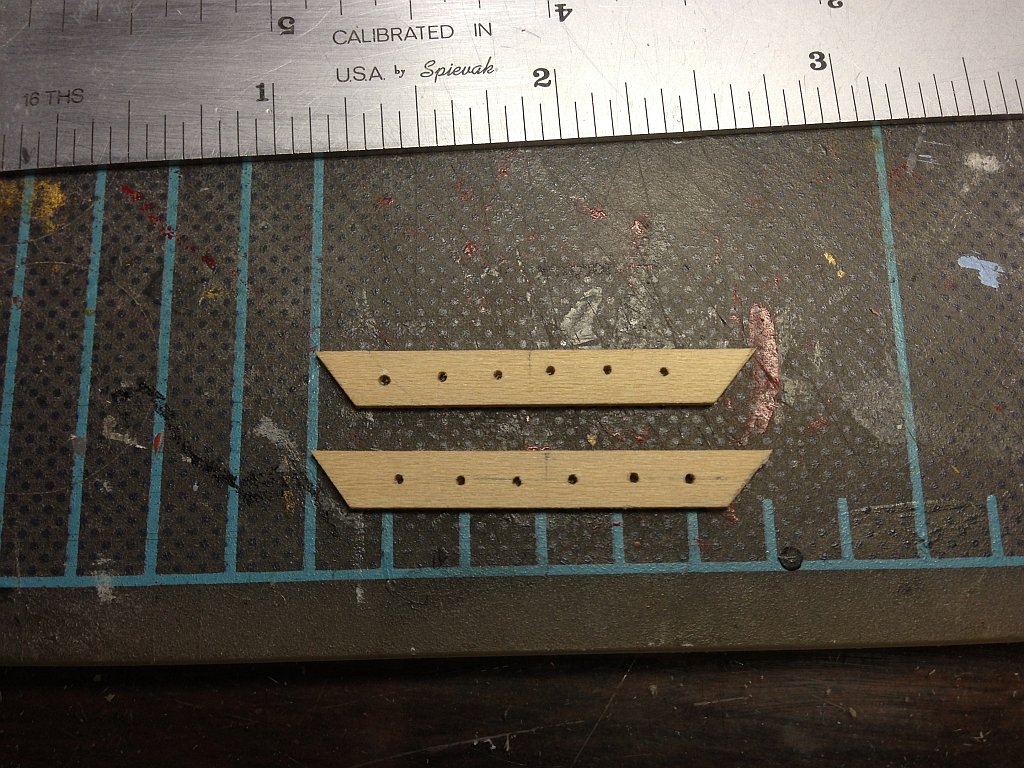
Did a bunch of little cleanup things on the hull today. Added eyebolts, brace rods for the catheads, drilled holes on the stem for the bobstays, etc. started making the sea stairs. This is how I decided to do them. I am filing the slot in each. Then I will cut them & round the outside corners. Each is 1/4".

- 468 replies
-
- 1
-
-
- niagara
- model shipways
- (and 1 more)
-
The plans say red pin rails, but the real (replica) has natural ones, & I like the looks of natural better.
- 468 replies
-
- 1
-
-
- niagara
- model shipways
- (and 1 more)
-
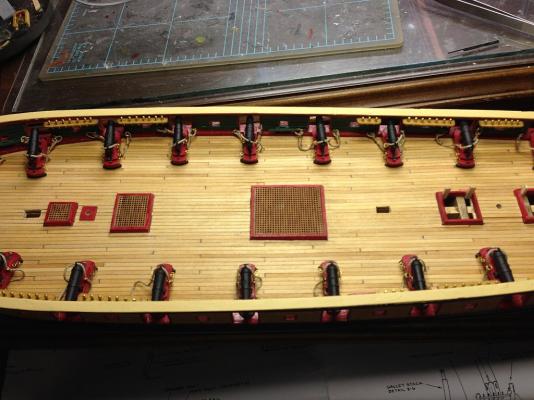
Well, I've asked ME for some also. We'll see what happens. I still say 40 isn't enough. Counting all the ones on the mast & boat davits & bowsprit, I count way more than 40. I guess I'll still have to carve some. And now for something completely different. Today I attached the pin rails. I guess it seems sort of random, but I've got to get this hull done so I can start rigging. Cleats are holding me up big time. Another crappy picture attached.
- 468 replies
-
- 1
-
-
- niagara
- model shipways
- (and 1 more)