Laxet
-
Posts
391 -
Joined
-
Last visited
Content Type
Profiles
Forums
Gallery
Events
Everything posted by Laxet
-
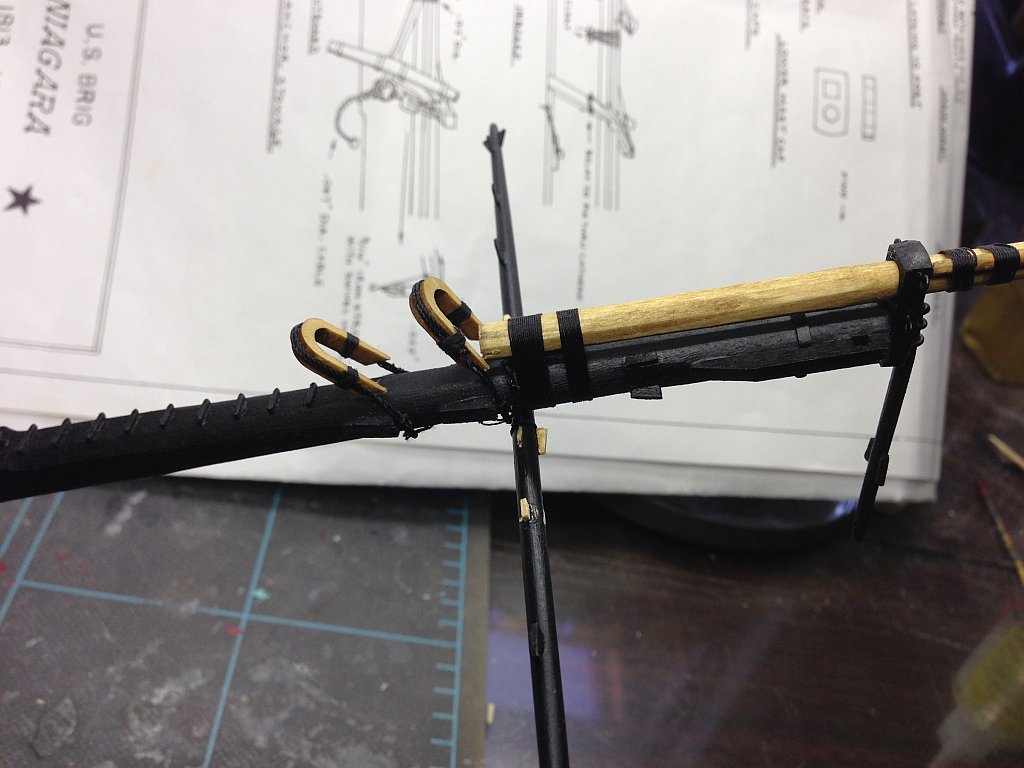
 Working on the shroud collar now. It would have been nice if they would have put a note ON THE PRINT somewhere that said to use a drilled out deadeye for the bullseye. After fifteen minutes of trying to figure out what to use, I found a small footnote on the PARTS LIST of all places. Why, that's the first place I'd of thought to look for it! I don't want to go off on a rant here but it would have made this kit easier to build for us beginners if they would provide a list of lines & referenced them on the prints. For that matter, a list of tie points (cleats, eyebolts, etc) as well. Then I would know if I missed any. It might make it easier to tell what I could do off ship, too. I'm still trying to figure out how I'm going to attach the jibboom martingale. Looks like it will have to be seized in place. Some day this will all be second nature, but I ain't there yet. I know this kit is supposed to intermediate, but with the right instructions, it needn't be. The actual work is rather straight forward. What I need is guidance. But that's just my opinion.
 -
And here is the final result. Not too shabby. Notice how I've jumped right on touching up the paint from repairing the previous screw-ups.
-
These are the little things that I guess the old pros assume everybody knowns how to do. That is why I will highlight these things for us neophytes, so others won't have to go searching for how to do this stuff. Call it a public service.
- 468 replies
-
- 2
-

-
- niagara
- model shipways
- (and 1 more)
-
Now I need to work on lighting.
-
And how 'bout that focus, huh?! I actually got something in focus today.
-
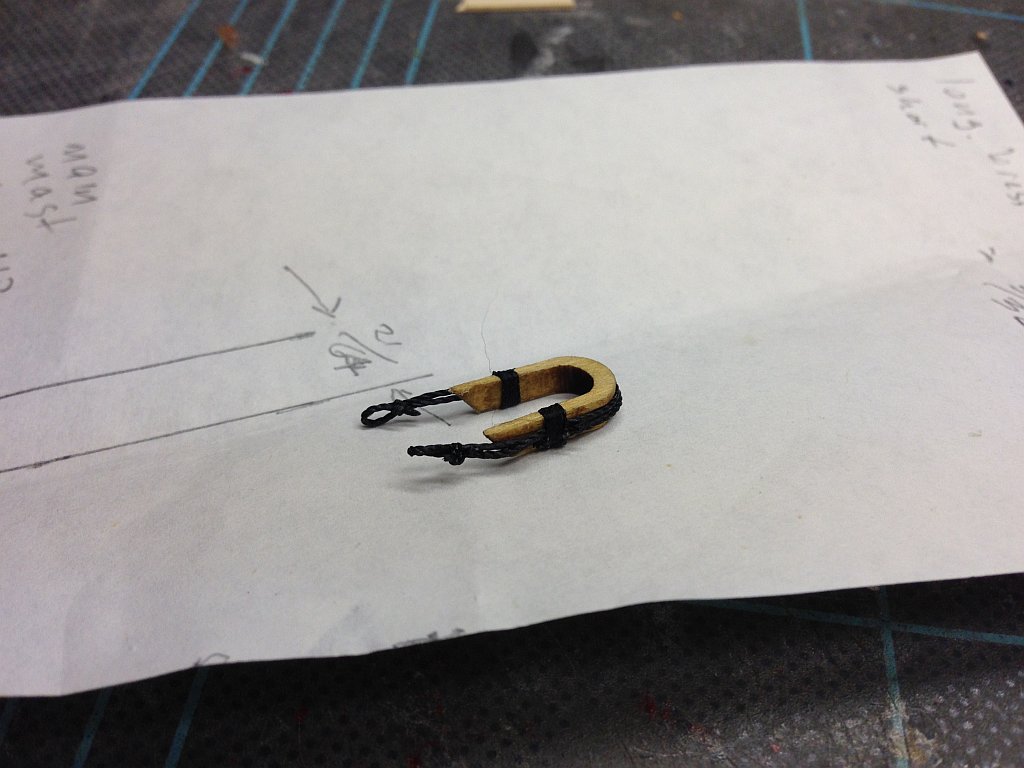
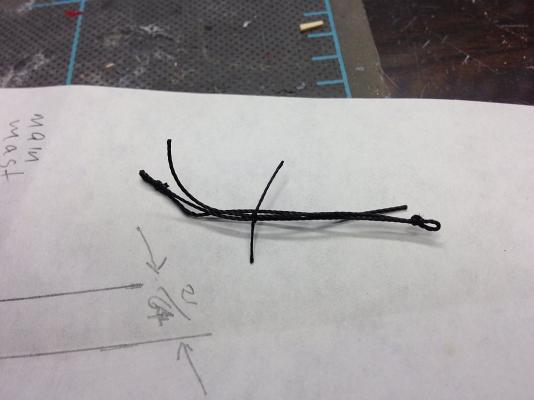
The point where the two bights come together is moveable. I then seized the other end to the heart, adjusted the knot, then seized over it so it is barely noticeable. It looks something like this. This is both of them.


- 468 replies
-
- 2
-
-
- niagara
- model shipways
- (and 1 more)
-
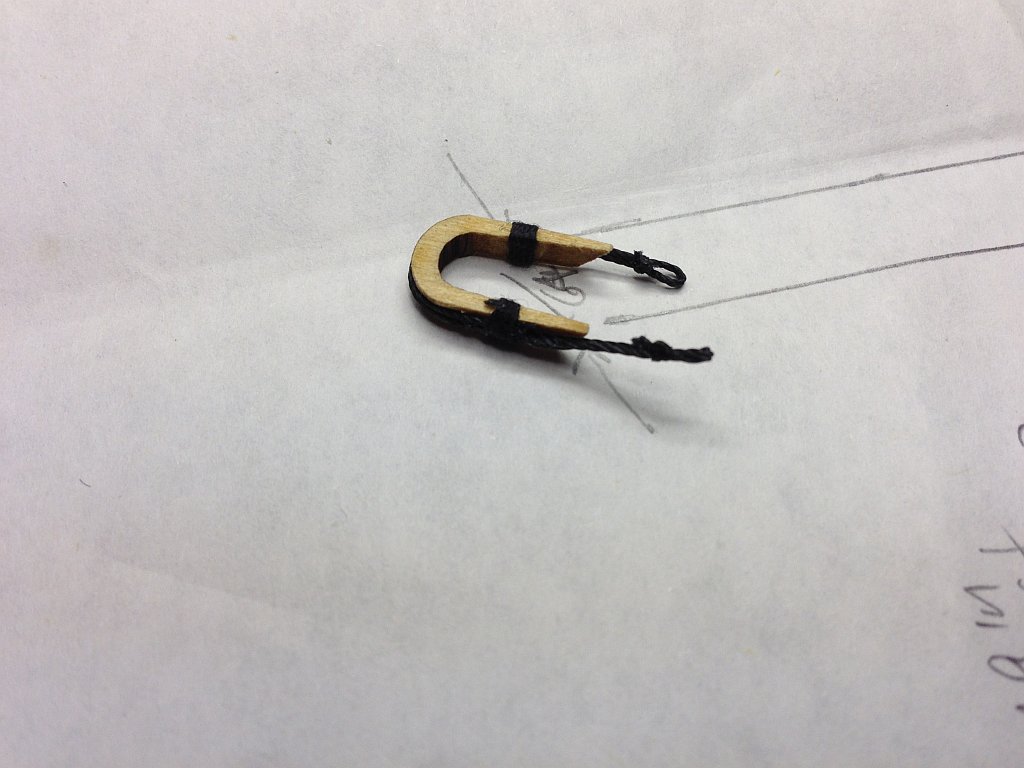
Obviously, at this scale, this would be impossible. This was my solution. I see others had way different ideas on how to accomplish this. I think mine fairly closely approximates the original.
-
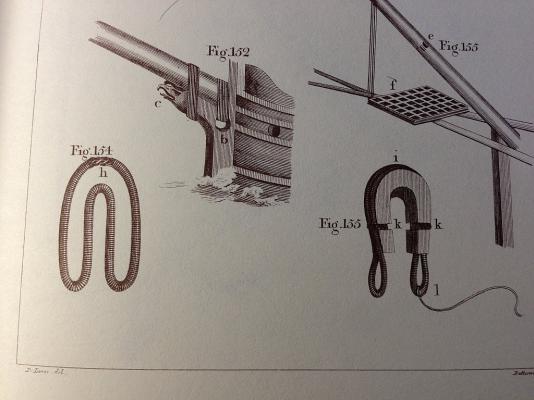
Started working on the open hearts for the bowsprit. According to Lever the heart is bound with a rope loop.
- 468 replies
-
- 1
-
-
- niagara
- model shipways
- (and 1 more)
-
We moved here a year ago from Orange County, Calif (Cypress). 3 miles from Knotts Berry Farm & 7 miles from Disneyland. We even have a mound the flowers grow on here, that gave the town its name. Wifey picked it. We are just outside of Dallas. We live on a golf course called Bridlewood. And we don't even golf! Yeehaw!
-
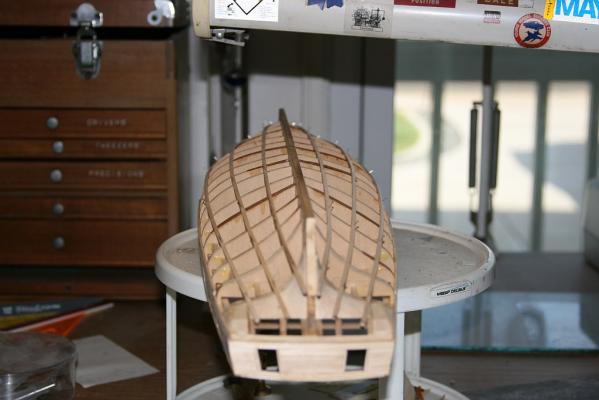
Beautiful job on the battens! They look perfect now.that should make your planking much easier now.
-
Since you are doing the planksheer, something to watch out for. Several people have noted here, & I can confirm, that the planksheer does not go flush with the outboard edge of the frames. This will require filling with strips or else the gap will be noticeable in the gun-ports. It's not all frames, just a few, but watch for it.
-
Thanks Steve. I'll give it a try & see if it helps. I'll check out your build log.
-
Thanks John. It's actually not so bad. Once I overcame the obstacle of physically bending planks (without breaking them) the rest is pretty straight forward. I'm rooting for you to start soon. I'll give you all the help I can (keeping in mind that this is still my first wooden ship build). Just remember, free help is worth exactly what you pay for it!
-
Yeah, it's an iPhone. It wants to focus on the largest thing in the viewfinder, which in my case is always the background. I ought to go back to the DSLR, but the little guy is just so darned handy. All it needs is a competent operator.
-
Thanks Russ. I appreciate the encouragement. I guess I'm trying to turn this build log into one that shows the things nobody else's does. Especially the ways things can go wrong. There are a lot of questions I have that other build logs don't answer, so those are the things I want to show. If I could master this stupid phone camera.
-
It is already corrected. That's what the new wood you see is. It wasn't that tough to fix & it needed to be done. Now I have to touch up the paint. It's just frustrating to find a bunch of mistakes so long after building the part. I must have picked the wrong week to quit sniffing glue!
-
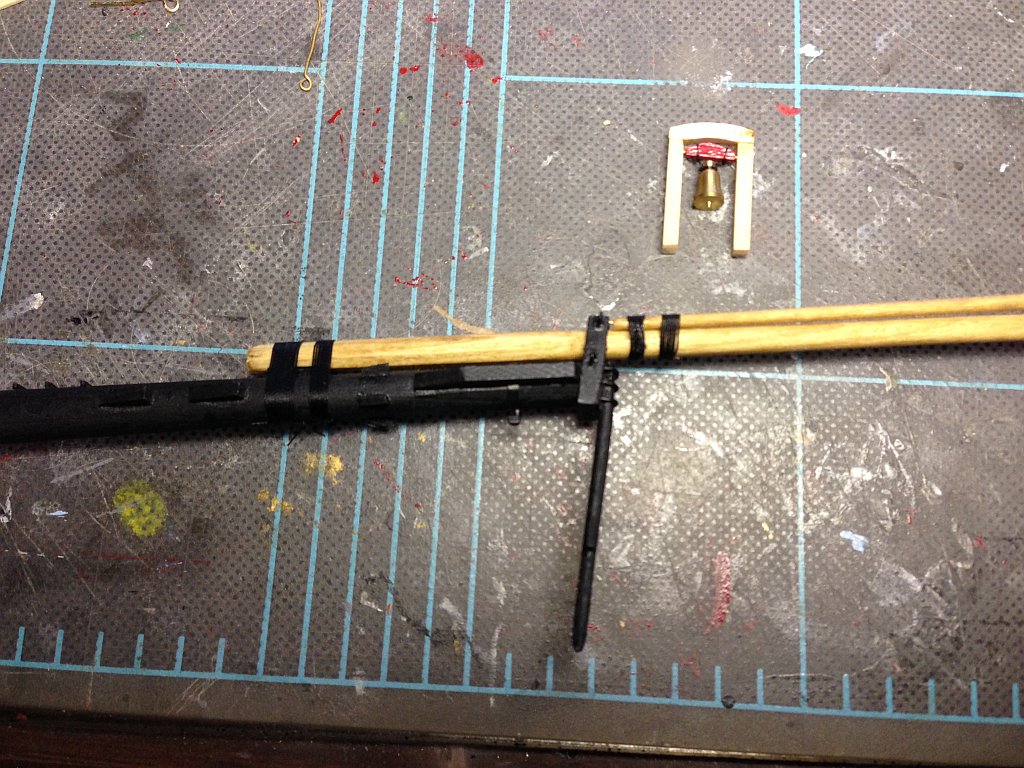
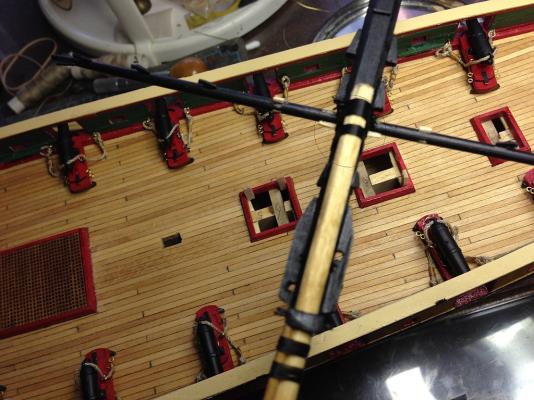
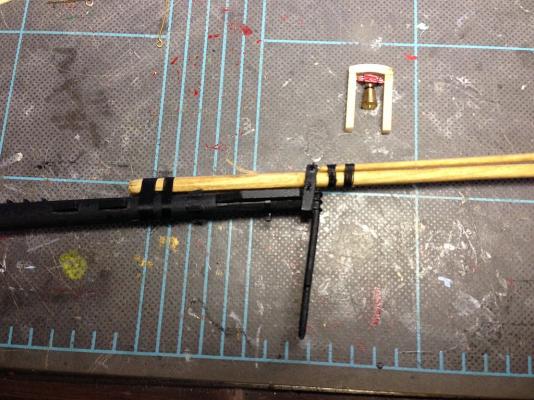
Unbelievable. I did it again. I must have been having a real bad day when I built the spritsail yard You can see the mistake (barely, since I still can't focus this stupid phone camera) inside the circle. This time I had to correct it attached to the bowsprit. AAaarrgggg! It looks like I swapped the positions of the two sets of chocks.
-
The reason I used battens was since this was my first ship, I figured I would use them as a guide I could follow to keep me from straying too far from the plan. It's basically breaking a big project & breaking it down into smaller tasks. It's not so overwhelming that way.
-
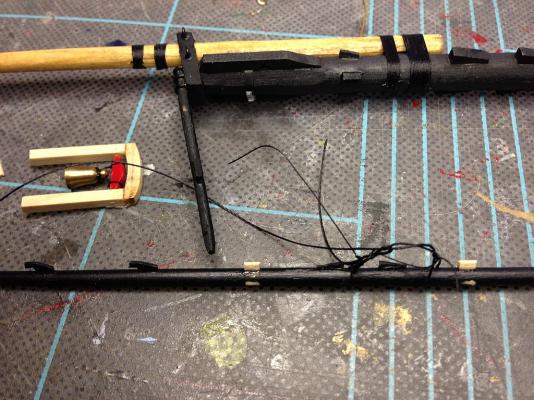
Well, here is my latest screw up. Minor in the grand scheme of things but it's something I did a couple of months ago & just caught it. You can see where the stops were & where they go. Didn't discover this until trying to attach the spritsail yard. At least I caught it before I tried to rig the bow.
-
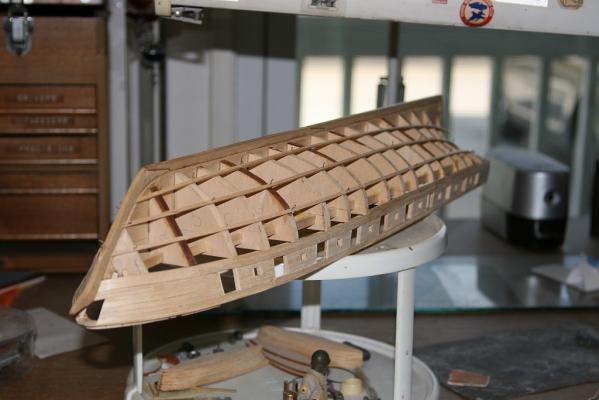
Here are pictures of my ship at the same stage you are at.

- 287 replies
-
- 2
-
-
- niagara
- Model Shipways
- (and 1 more)
-
The battens should be placed so that there are an approximately equal number of strakes in each section. That means they should be roughly the same distance apart at each frame.
-
Well, here it is so far, using .008 line. I've really gotten rusty rigging over all these years. I think the .008 does look about right now that I see it done.
- 468 replies
-
- 2
-
-
- niagara
- model shipways
- (and 1 more)
-
You will have to divide that .57 by 8. That will tell you how wide the plank must be on that frame. In fact, you are supposed to do that at every frame. If the plank gets too narrow, then you will need to go from two planks to one plank before the last frame. For what it's worth, I didn't bevel the edges of any of my planks. If I recall, I don't think I used hardly any 1/8" planks. I think the majority of mine were 3/32" planks.