Laxet
-
Posts
391 -
Joined
-
Last visited
Content Type
Profiles
Forums
Gallery
Events
Everything posted by Laxet
-
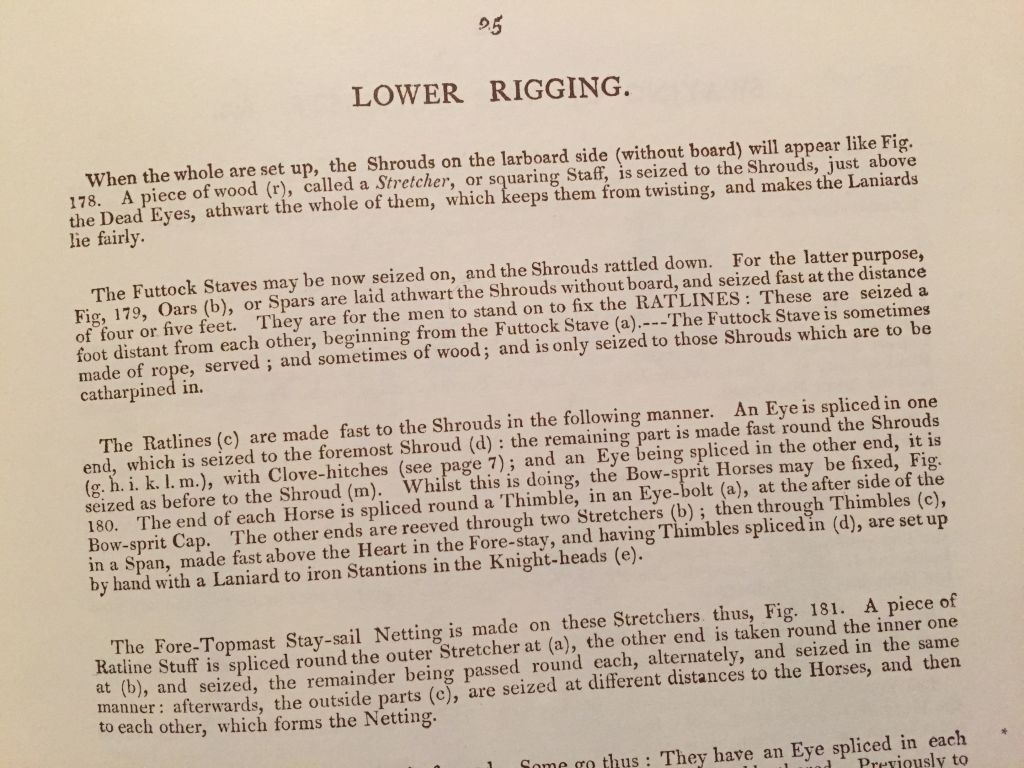
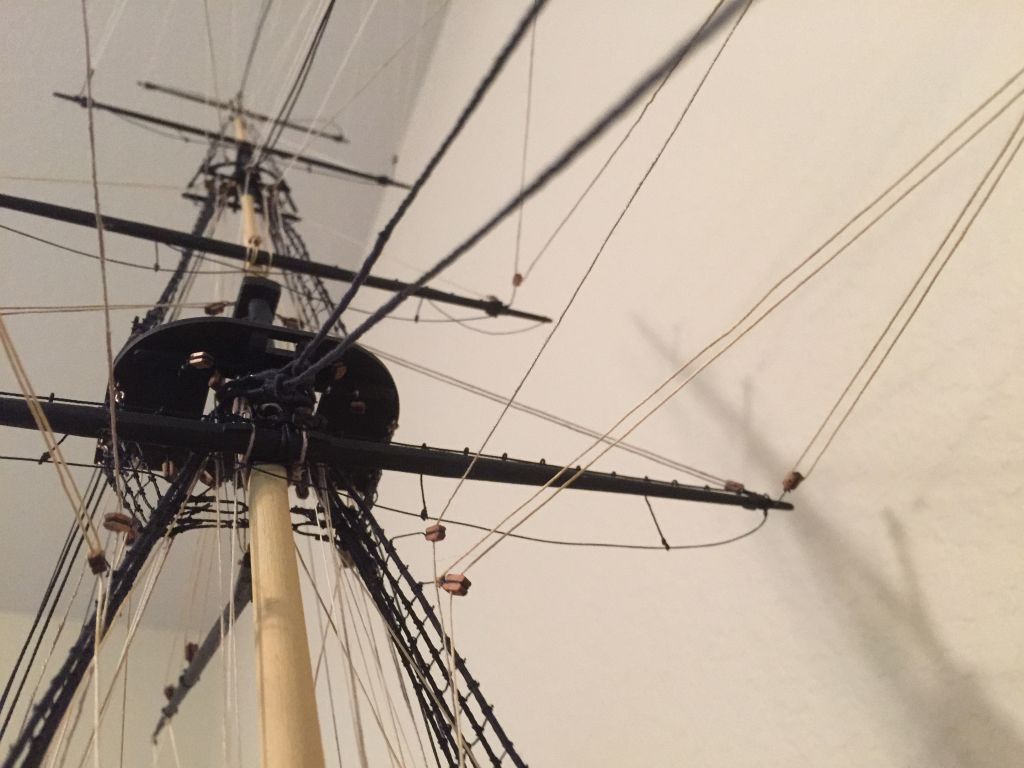
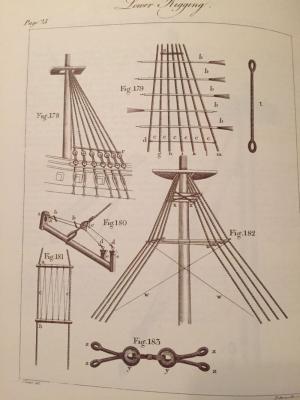
 Hope you don't mind me barging in on this discussion. According to Darcy Lever's Young Sea Officers Sheet Anchor, the ratlines start at the futtock stave & go down. The futtock stave is only secured to the shrouds that will have cat-harpins. See the attached photos from the book. Of course this book was written later than this period but I could imagine the setups were the same.
-
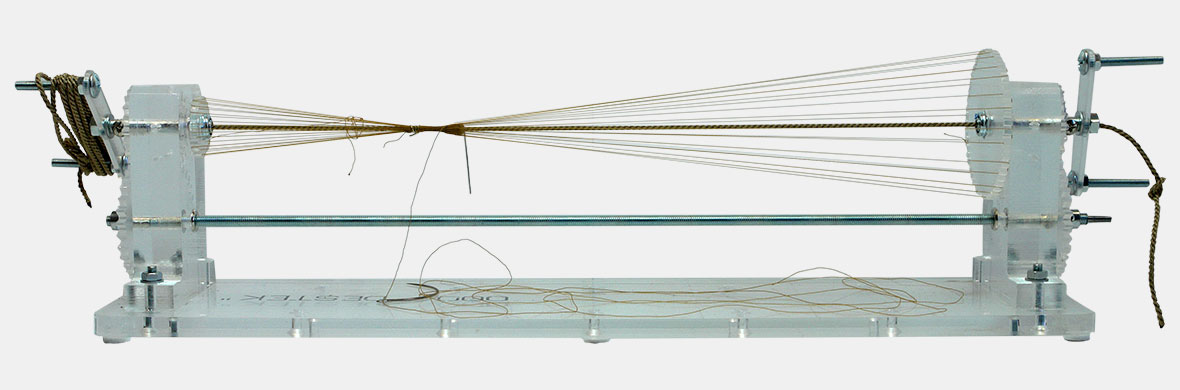
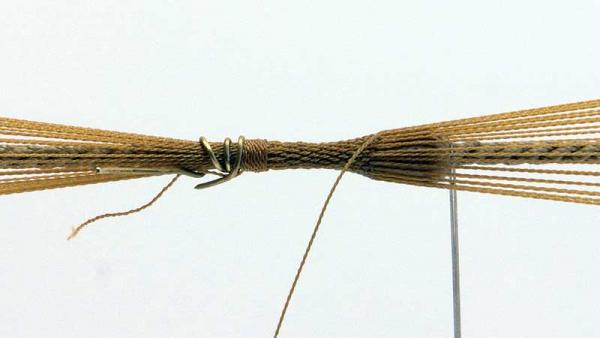
I don't know what scale it is. It is a picture from the website of the guy who sells the machine. It is a serving machine & he sells an attachment to make the mice. I tried it, but was unable to get it to work properly. Here is the full picture of the machine.

- 440 replies
-
- 5
-

-
- niagara
- model shipways
- (and 1 more)
-
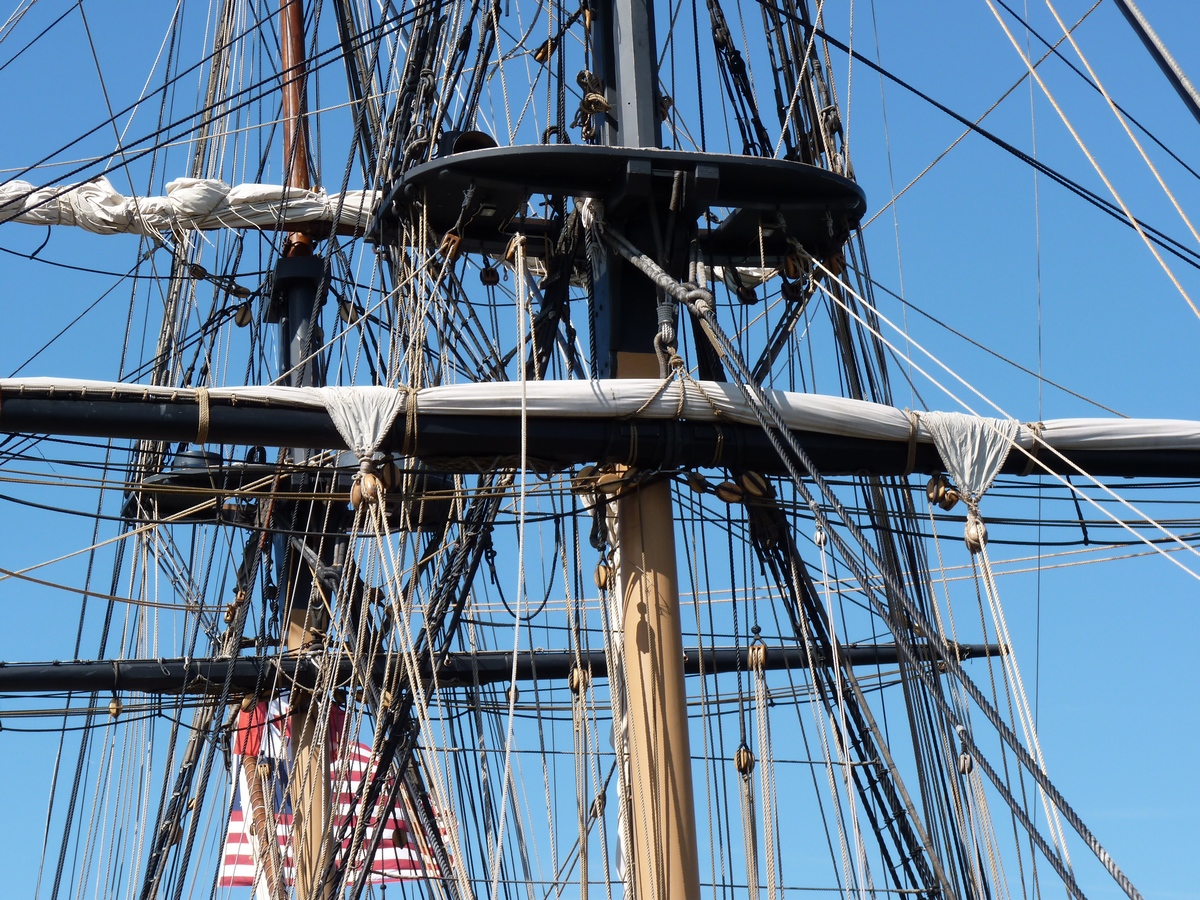
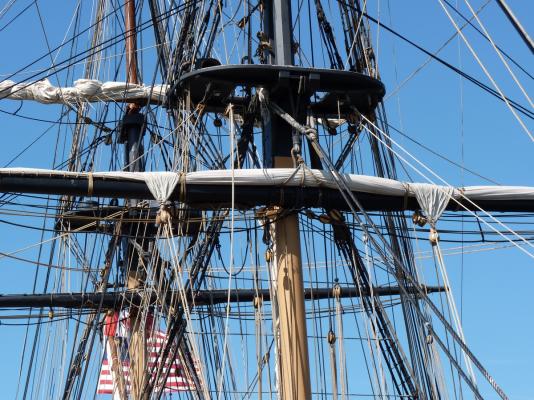
The stop in the line is called a "mouse". Here is a picture of one on the Niagara & a picture of a machine used to "raise a mouse".
- 440 replies
-
- 6
-
-
- niagara
- model shipways
- (and 1 more)
-
My mistake. I thought you were talking about the tackles on some of the pendants that belay to pins, not the deadeye lines. I actually did those black.
- 440 replies
-
- 2
-
-
- niagara
- model shipways
- (and 1 more)
-
I did my tackle in brown & I'll give you my rationale. Typically, lines are black because they have been tarred & are permanently attached. I couldn't imagine belaying a tarred line to a pin so I went brown. I assumed that a line on a pin was meant to be adjusted/moved on occasion. Perhaps the replica ship used black rope. I could be all wrong on this, but I had to make an educated guess & this made sense to me.
- 440 replies
-
- 3
-
-
- niagara
- model shipways
- (and 1 more)
-
She's looking good, Brian. I could be wrong (because I did it wrong on my ship) but verify with the prints the orientation of the main grating (forward of the main mast). I believe it should run fore/aft & not athwartship. I don't have my prints handy.
-
I don't recall having to do anything special for the capstan. It was a little tight, but I don't know the size dowel I used.
-
Thanks for the kind words. I was pretty pleased myself considering (as I've said a hundred times here) it's my first wood ship ever. Next one will be even better. I've learned a ton here.
-
It's not painted. I took a small circle cutter & cut it out of thin sheet plastic. The bolt heads are glue. They didn't come out as good as I would have hoped. I never got around to making the star in the middle & eventually just forgot about it.
-
I don't have my prints handy any more (I've packed them away), so I'm not sure which sheaves (pronounced "shivs") you are talking about, but I suspect you are referring to the ones in the sides. Sheave is another name for a block. In this case, they are built into the sides. Lines traverse through the holes & the sheaves facilitate the hauling of them. One person suggested cutting a square hole & inserting a wire ring to simulate the pulley. Or you could probably just drill a hole & pass the line through it. Not many people would call you out on that. Do you need them? I cut them into the sides & then never used them. I rigged with the yards down & no sails. If you are putting in sails, you probably do need them.
-
If you look at pages 4, 11, & 20 of my log, you will see some pics of the hawse hole, some without a rope & some with.
-
I didn't actually put in a pipe. I just drilled the holes. With a rope in it you can't tell the difference anyway.
-
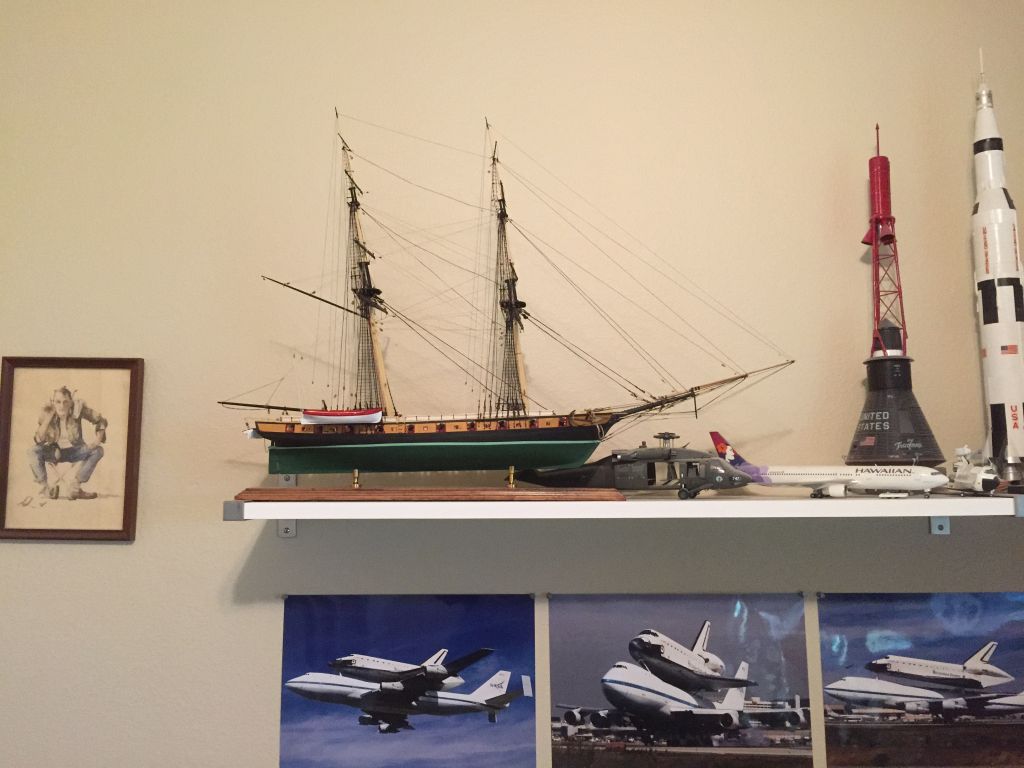
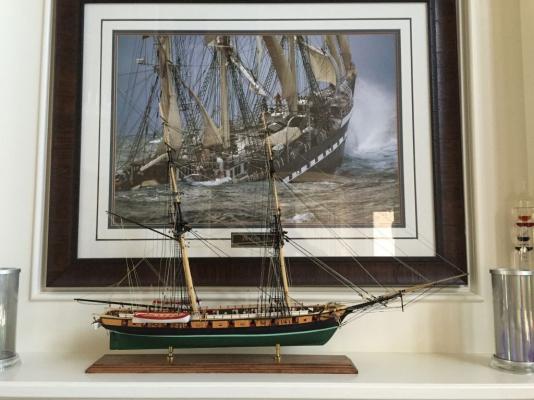
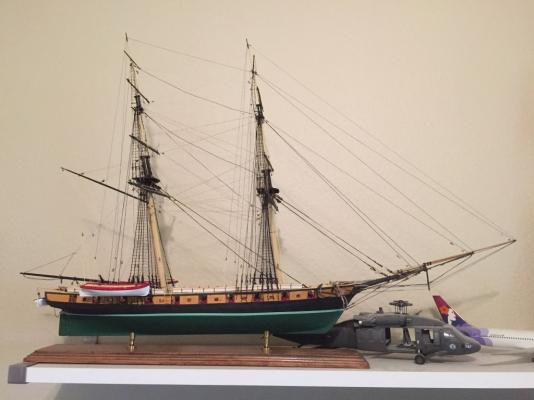
And here is her final resting place. It is my belief that all fireplace mantels should have a sailing ship on them. I finally got one. All I have to do now is build a case.
- 468 replies
-
- 7
-
-
- niagara
- model shipways
- (and 1 more)
-
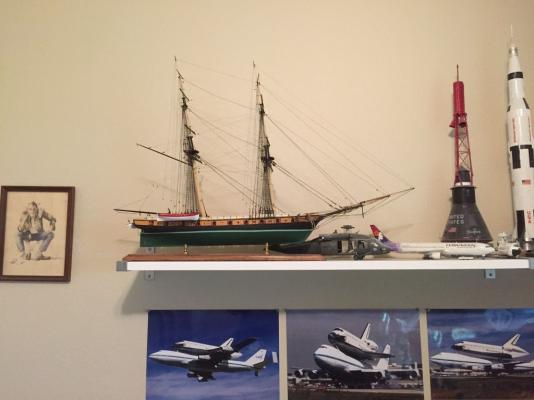
Thanks Larry. I shot those shuttle pictures when it landed at LAX a couple of years ago. That was the first time I had ever seen it. And thanks to everybody else for their kind words. It's been fun exchanging ideas & learning so much about ship building. I already miss not seeing her on my desk anymore after so much time.
- 468 replies
-
- 2
-
-
- niagara
- model shipways
- (and 1 more)
-
The hawse pipe is for the anchor cable to penetrate the bulkhead. The other end goes into a chain locker, & they pull it up with the capstan. But it has to be able to go outboard of the ship, thus the hawse pipe. In answer to your question, yes, it goes all the way through.
-
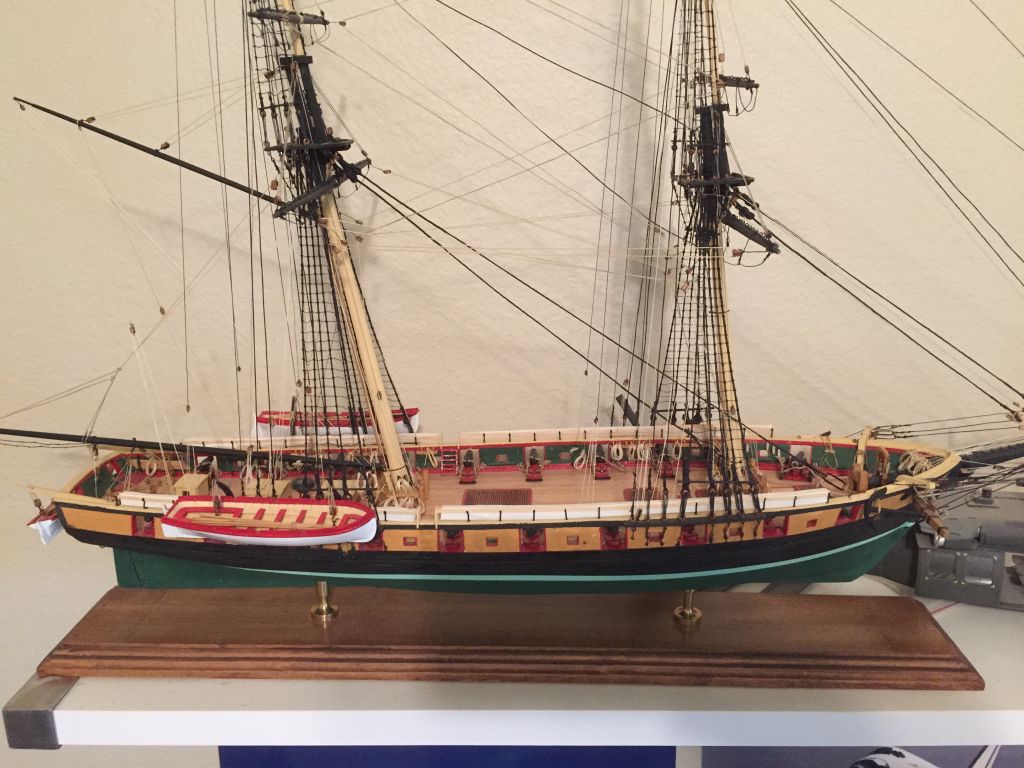
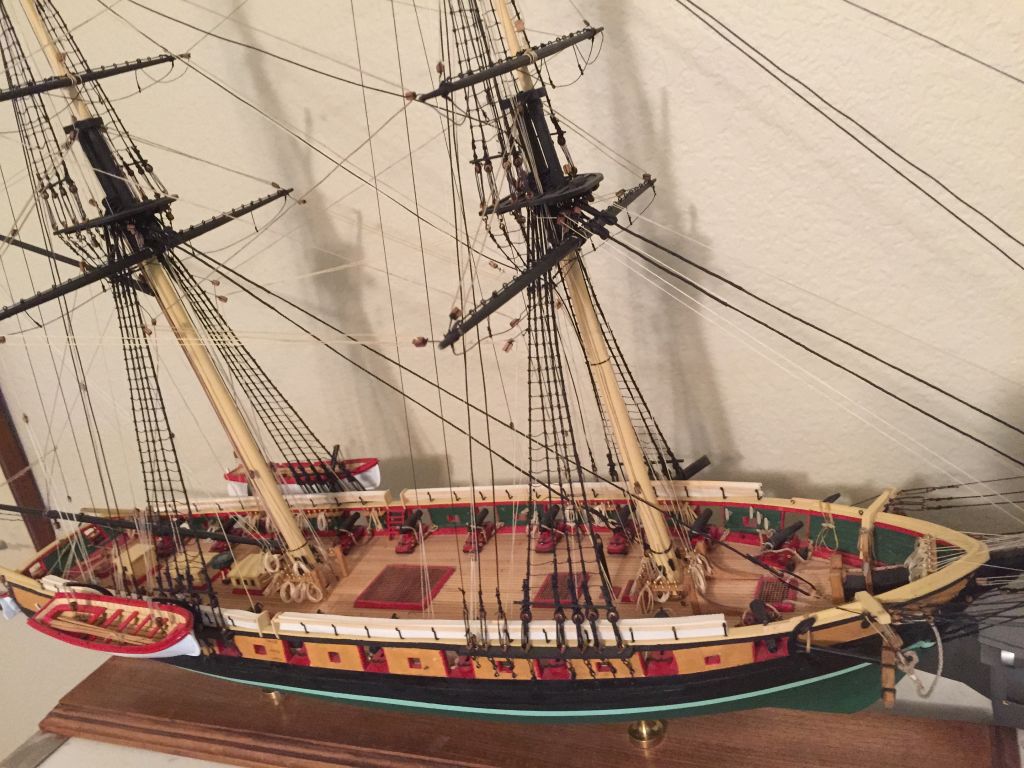
Well, this is it. As far as I'm concerned, she is done. Here are some more final pics. It's been fun. I'll be monitoring this forum in case anybody wants to discuss anything.


- 468 replies
-
- 11
-
-
- niagara
- model shipways
- (and 1 more)
-
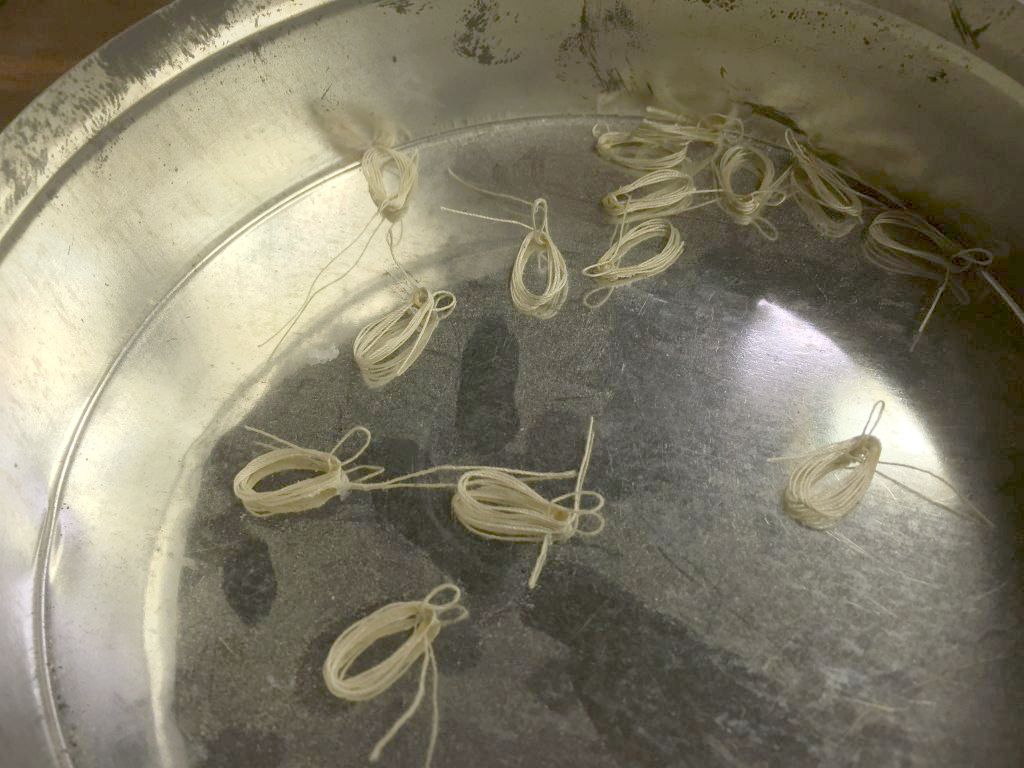
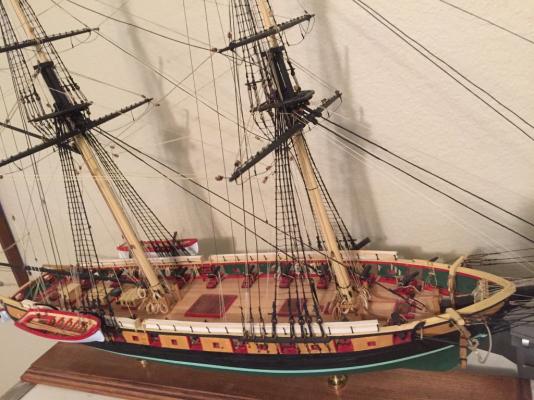
Here I am, reworking the rope coils. In the picture below, you can see how they came out initially (on the right). The two on the left have been reworked. I put too many coils on each one & the top loop was too long, causing the coil to hang too low & look unnatural. The reworked ones are not great, but they are better than the initial ones.
- 468 replies
-
- 4
-
-
- niagara
- model shipways
- (and 1 more)
-
Not sure which black plate you're talking about, but if you are referring to the horseshoe shaped one at the front of the sled, that was drawn on with a Sharpie. Always looking for the easy way out.
-
Actually, I used Krylon spray paint, available at many hardware stores. I used their sandable primer first then shot with semi-gloss black. It lays down real thin. In fact, that is what I used on the black part of the hull. I use Krylon blacks (flat, semi-gloss & gloss), white, silver & clear coats for all models. It can be hot on some plastics, so be sure to use primer on them. It's a heck of a lot cheaper than model paints.
-
I painted mine. I only tried to blacken parts that paint would have been over scale on.
-
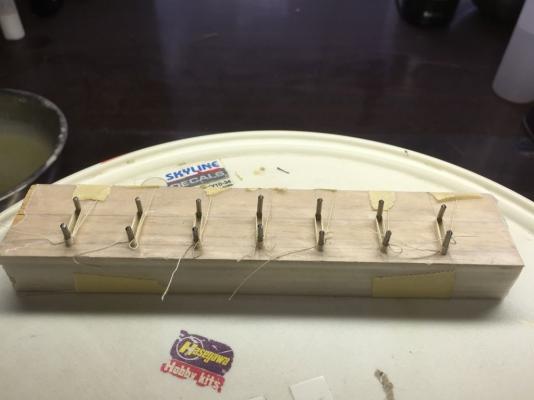
Thanks George. No, I take them off as soon as I do a batch. They will probably take some adjustments to make them look just right. I should have mentioned that I dab them with white glue once I make one. By the time I'm done with the batch, the first one is dry enough to remove.
- 468 replies
-
- 3
-
-
- niagara
- model shipways
- (and 1 more)
-
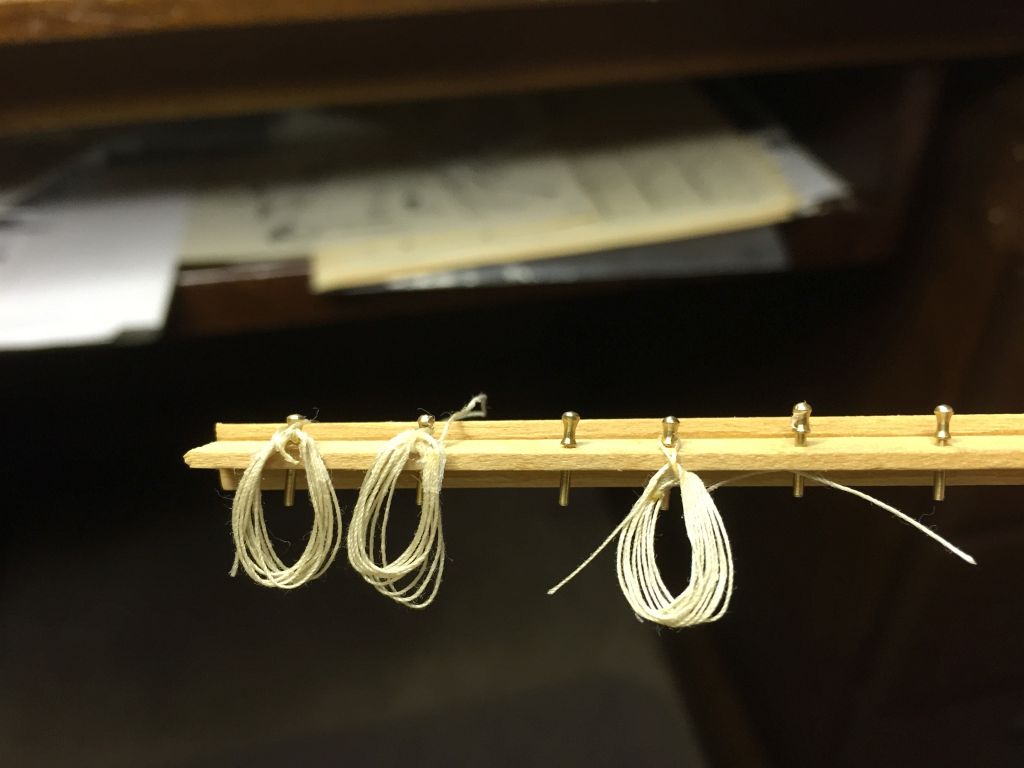
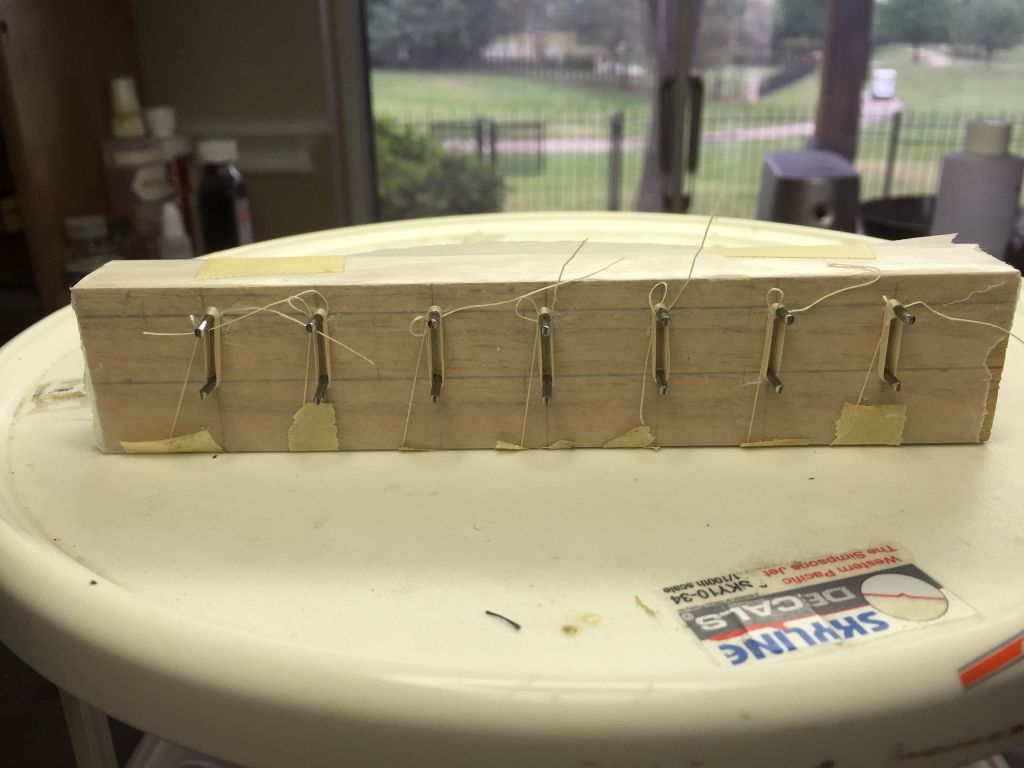
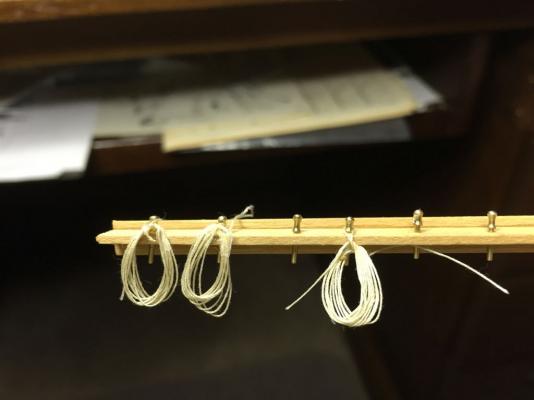
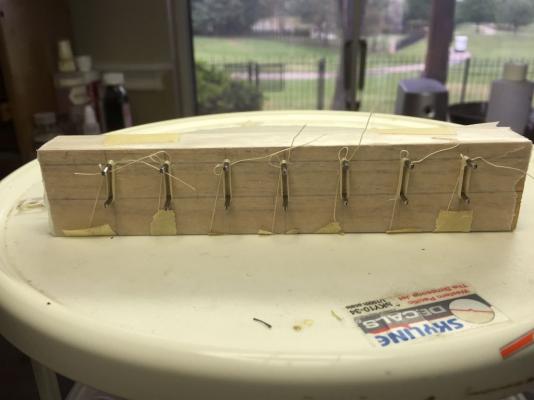
Here are a few pics showing my method for making rope coils. Just some cutoff 3d nails driven into a scrap block of wood. This will take a while since there are somewhere near 100 of these to make, 7 at a time.

- 468 replies
-
- 4
-
-
- niagara
- model shipways
- (and 1 more)
-
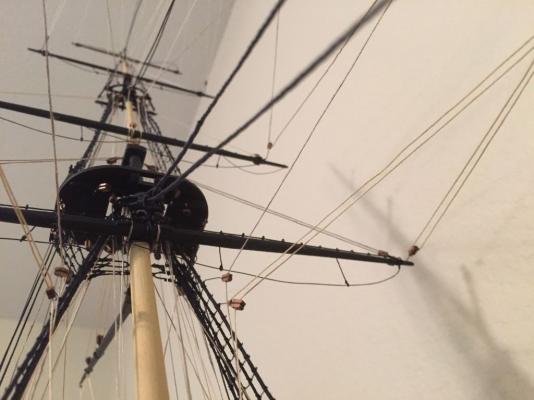
One thing that bugged me about other builds was that they never said much about the running rigging. Now I know why. There just isn't much to say. I've pretty much finished the rigging. All that is left is to make rope coils to hang over all of the pins, so I'm winding down now. I will post pics soon.
- 468 replies
-
- 1
-
-
- niagara
- model shipways
- (and 1 more)
-
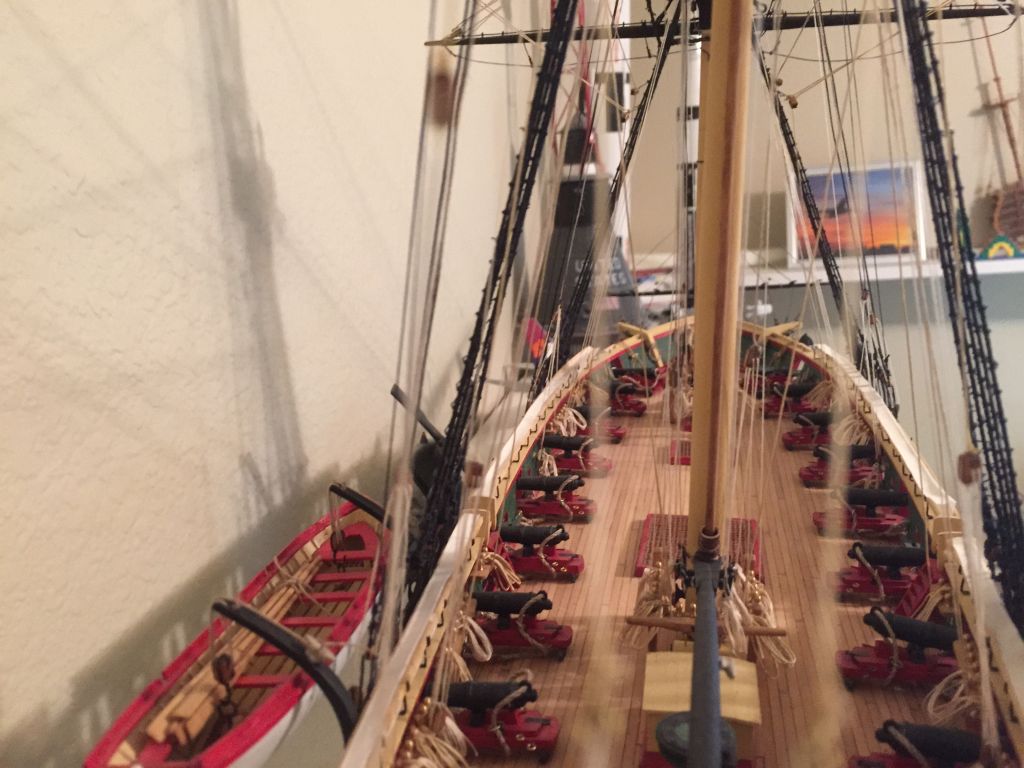
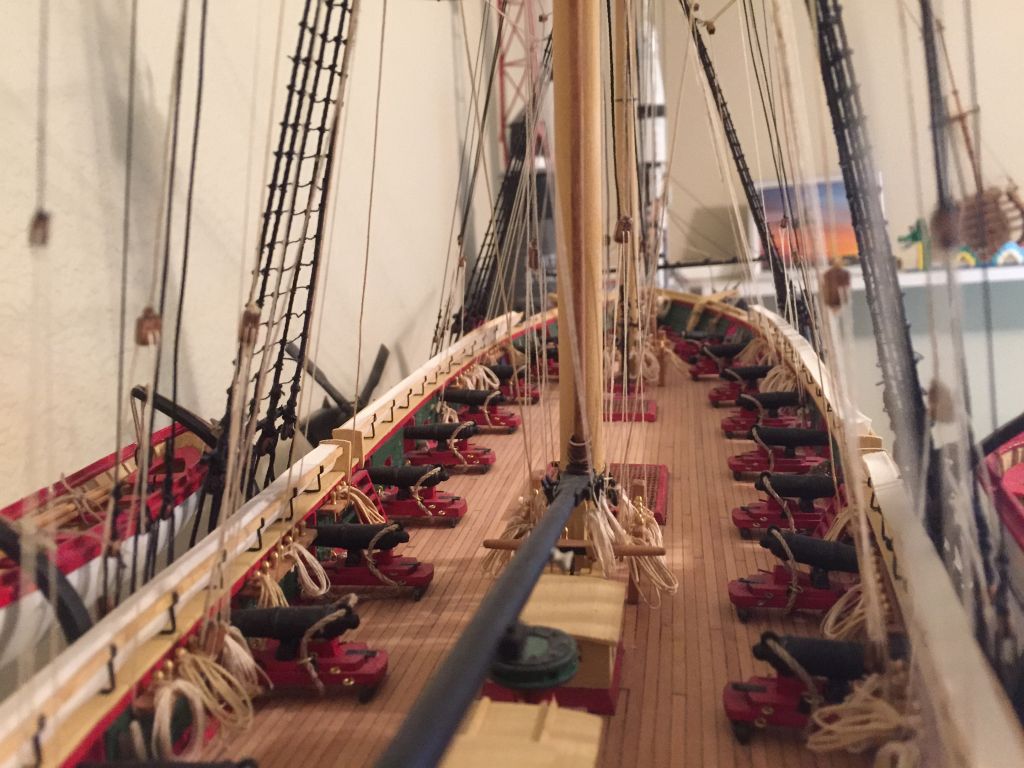
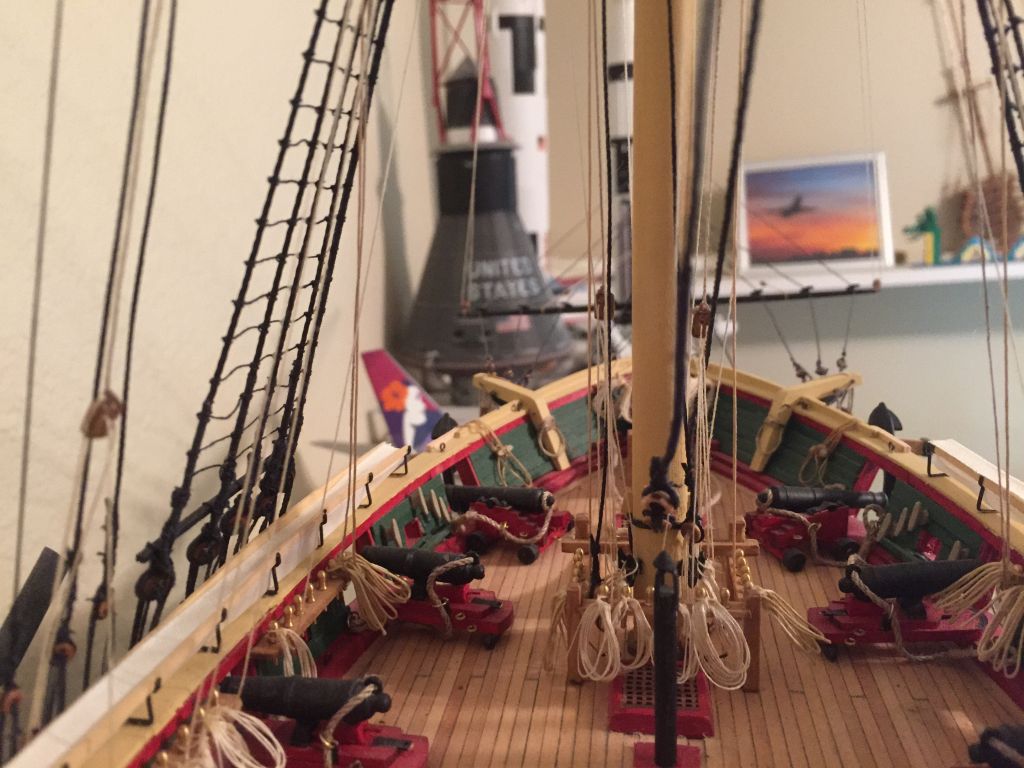
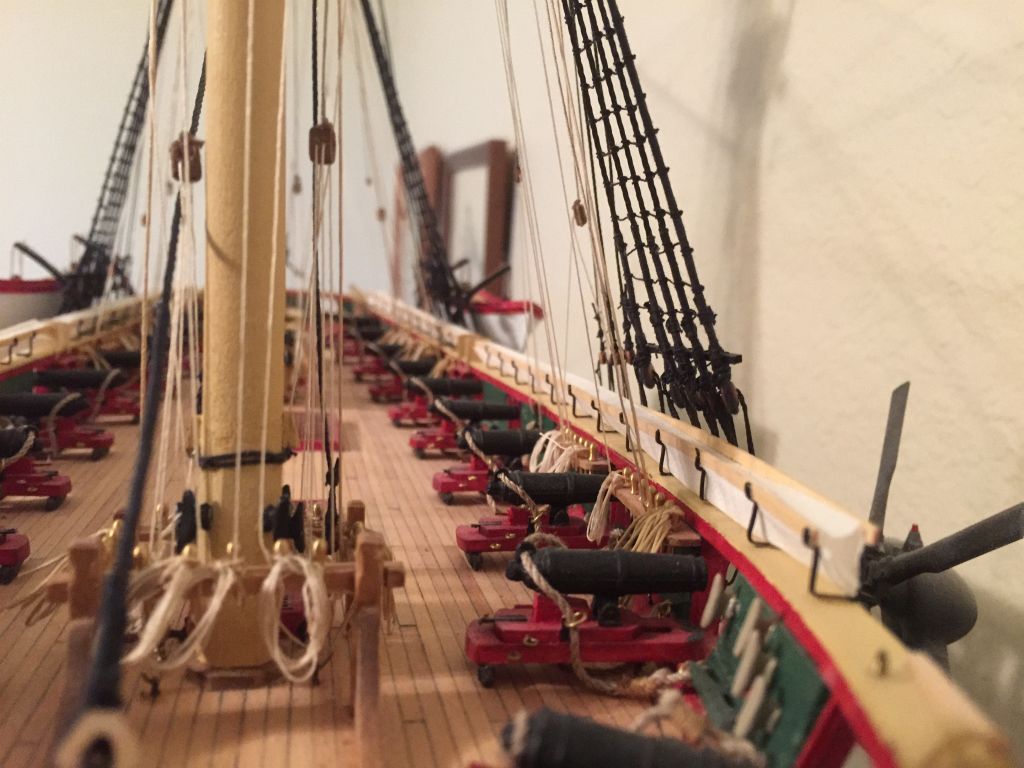
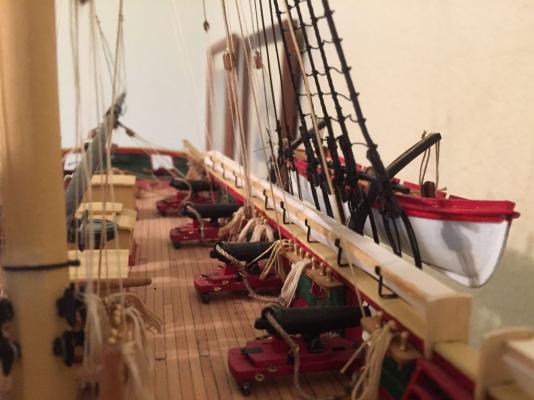
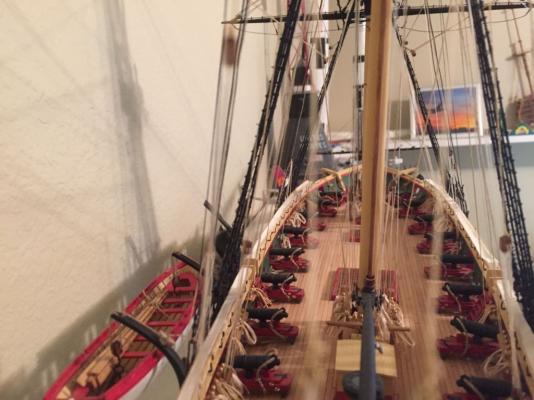
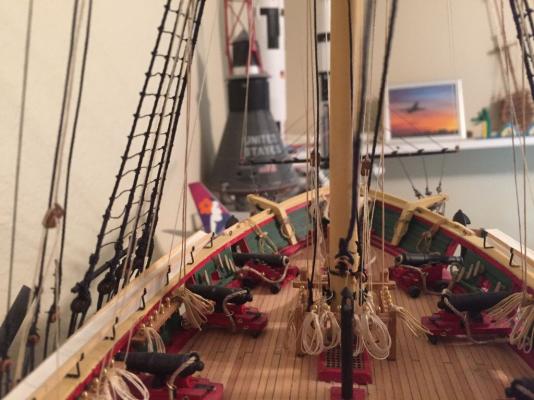
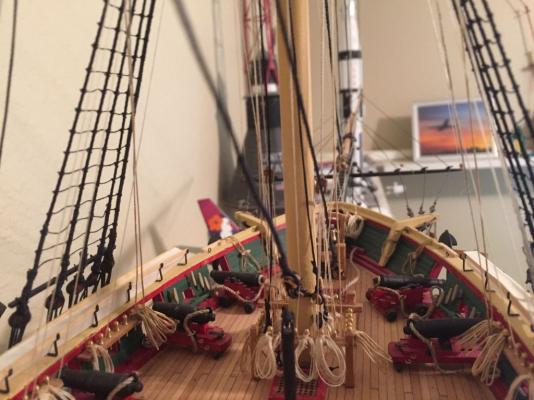
I ended up mounting the canon almost first thing. A lot of this was because I didn't have cleats yet. If I were doing it again, I would attach all of the eyebolts, cleats & other accoutrements first. It gets difficult to work around the guns after a while. I installed the deck furniture way far into the build, when I almost had no choice. I'm just finishing the rigging & I still haven't installed the pump or stove pipe.
- 468 replies
-
- 1
-
-
- niagara
- model shipways
- (and 1 more)