Laxet
-
Posts
391 -
Joined
-
Last visited
Content Type
Profiles
Forums
Gallery
Events
Everything posted by Laxet
-
 I seized one end of each rope, threaded it through the eyebolts then seized the other end. All seizing was done by hand. It's not so hard after you've done a few, & the skill will really help later on once you start rigging for real. You should make your own rings. I used (I think) .020 brass wire & wrapped it around a 5/64" drill bit 10 or 15 times. The just cut the rings one at a time & squeeze closed. Every bit as good as the store bought & way cheaper, plus you can make any size you want.
 -
Everything is hand made except the carriage sides as far as I remember. The transom is indeed at an angle.
-
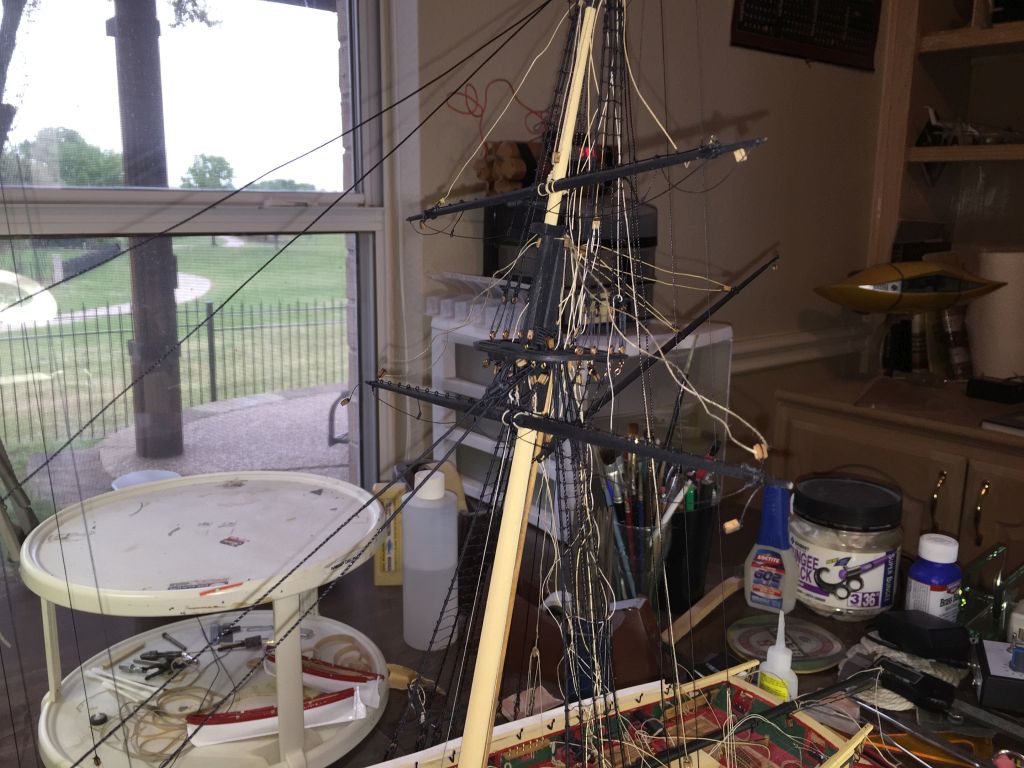
Oh yeah, I've done all of that & then some. Today I've decided to just attach all loose lines from when I built the masts & added a bunch of rigging for the yards. That will clean things up a bit, & I will get a feeling of progress even though they will be attached slightly out of order from the plans.
-
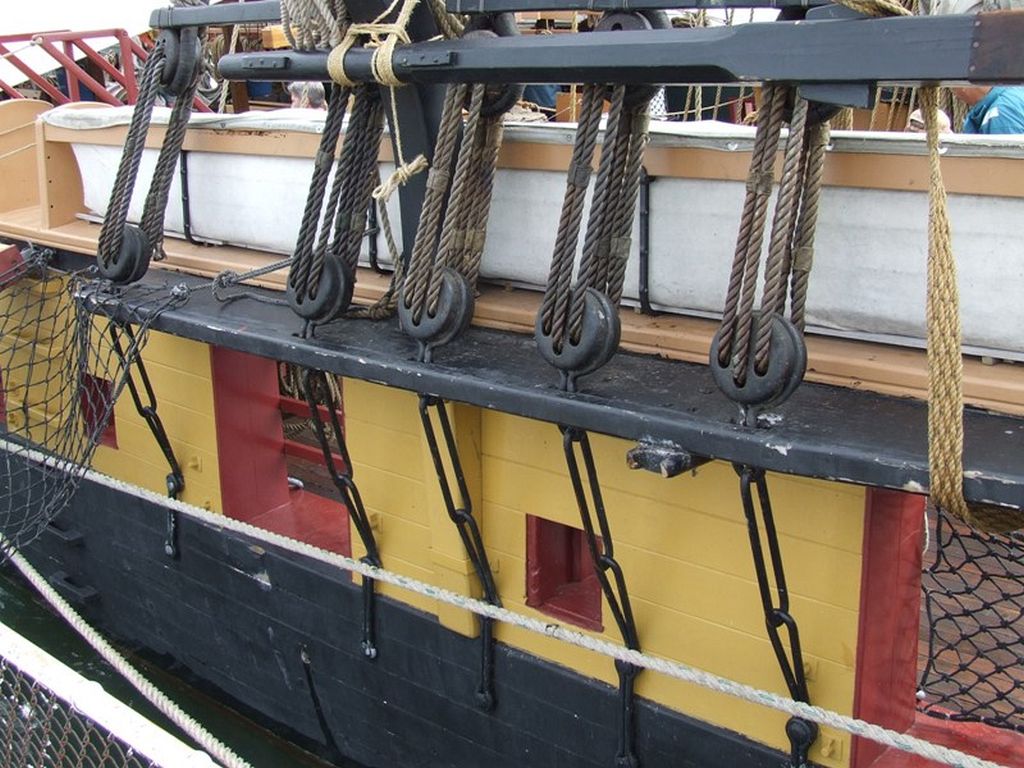
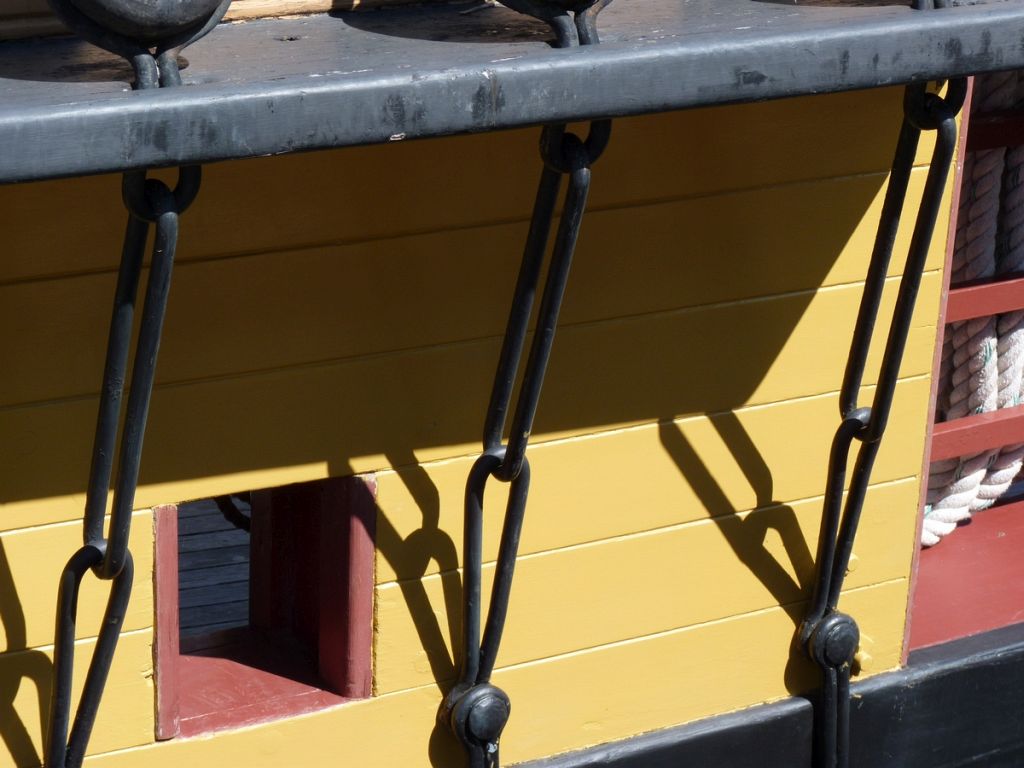
You can see it varies a bit under different light, but you should be able to come close. It's not just yellow, though. I think the Model Expo yellow ochre is not a bad choice, there are a lot of people here who will disagree.
-
Here are a couple of pics showing the stripe up close.

- 440 replies
-
- 1
-

-
- niagara
- model shipways
- (and 1 more)
-
Another TERRIFIC day. Snagged a line with a tool while installing a block under the top (one of the ones I was complaining about in my rant) & snapped off the top of the main mast. That's just great! I knew it was just a matter of time.
-
Since I didn't know any better at the time & it never occurred to me to paint before all was assembled I did it the hard way. I installed them, then planked the bulkheads. I didn't paint anything until I finished planking the whole hull. Knowing now what I didn't know then, here is what I would do differently. I would add the 1/32" strips now, then paint all the red. Then it is a simple matter to plank the bulkheads & ceilings to fit in between these strips. You could even paint the planks before installing them. I've seen a build or two that did this & it looks pretty good.
- 440 replies
-
- 1
-
-
- niagara
- model shipways
- (and 1 more)
-
Yeah. I did as much as I could before mounting the masts, which turned out to be quite a bit. I suppose I ought to tie them off, but the instructions recommend doing fore/aft stuff first, which is what I am doing now.
- 468 replies
-
- 1
-
-
- niagara
- model shipways
- (and 1 more)
-
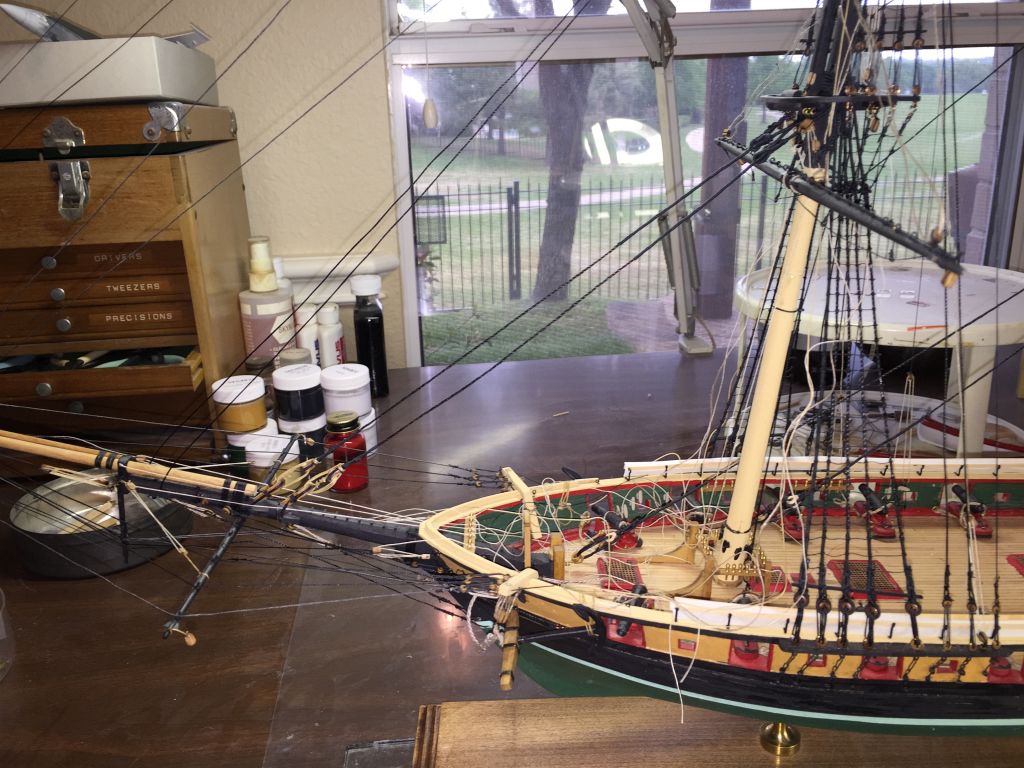
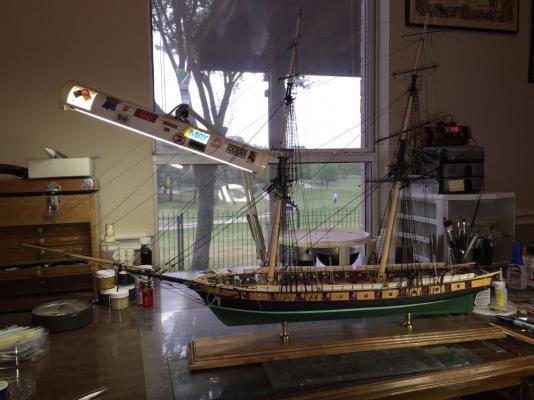
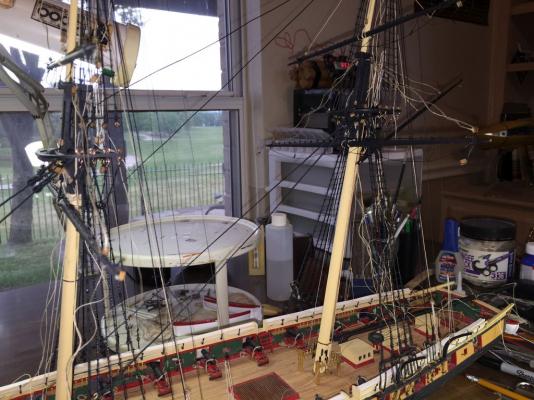
As promised yesterday, here are pics of the completed standing rigging. They (the pics) are not terrific, but you get an idea.


- 468 replies
-
- 8
-
-
- niagara
- model shipways
- (and 1 more)
-
I could see that with belaying pins, but these are eyebolts that have blocks attached. Much more difficult to double up. I suppose if it is standing rigging, it doesn't matter much. Still, the prints should still point these out. I'm a newbie & don't know what is right.
- 468 replies
-
- 1
-
-
- niagara
- model shipways
- (and 1 more)
-
I've pointed out several discrepancies in the plans on my build log. You may be interested in my latest rant.
- 440 replies
-
- 1
-
-
- niagara
- model shipways
- (and 1 more)
-
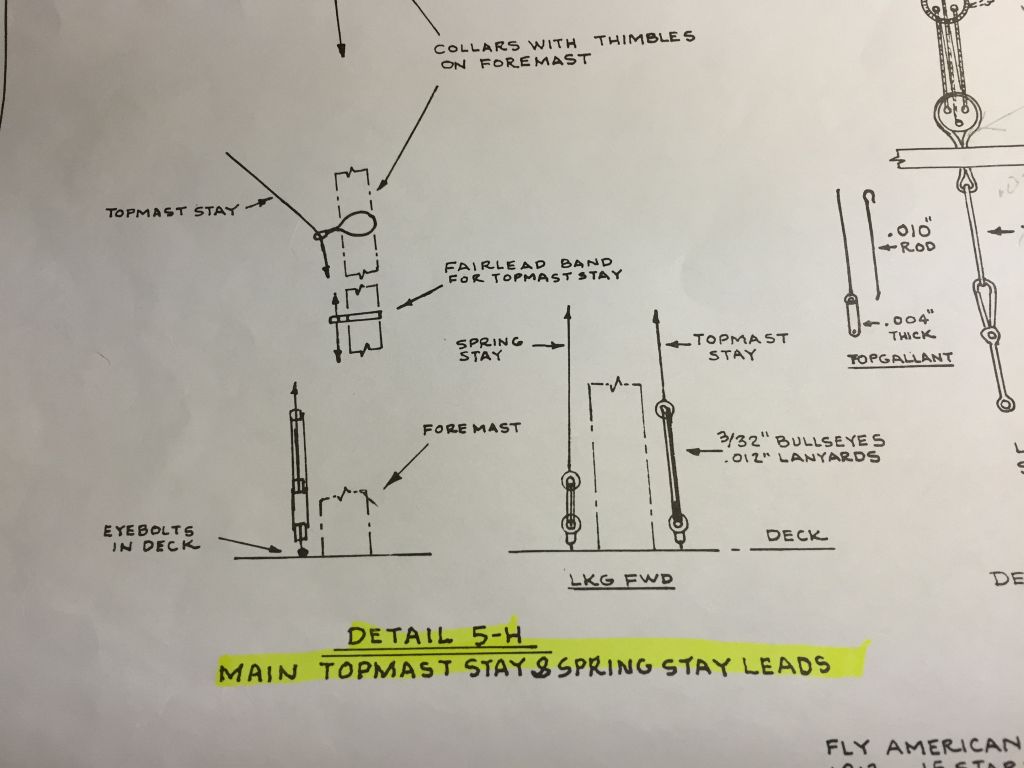
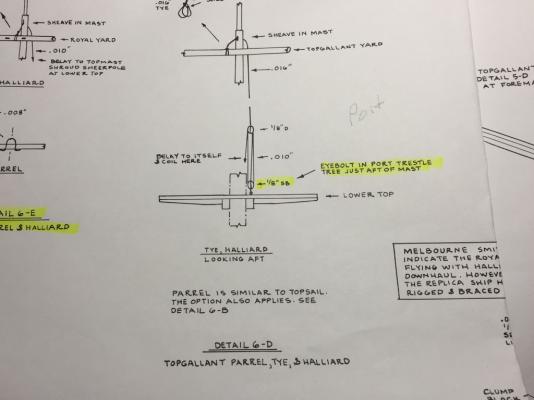
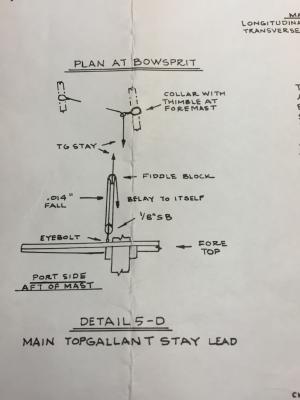
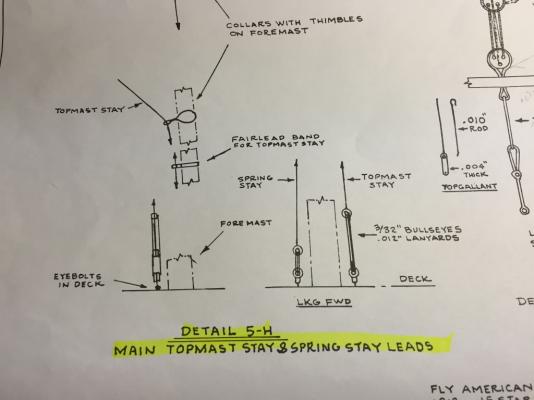
Now for the rant. Once again, I went to attach lines only to find other lines already attached at the same points. In this case, on the lower fore top. After perusing what I had left to do, I found I will have the same problem with eyebolts at the base of the mast. The deck plan only shows two at each mast, one on either side of the aft side of the mast. Now I find I need at least two more in the same spots according to the rigging plans. Why would the deck plan only show some tie points? Why don't kit designers actually show all tie points on one drawing so we may install them at once before the masts are installed & rigged? It is very difficult to drill & insert eyebolts through existing rigging & it pi..es me off to no end having to do this. If I was good at this & knew what I was doing, it might be different, but I'm not & I don't, so I just get po'd. It takes some of the enjoyment out of this. That's just my opinion. I may be wrong.

- 468 replies
-
- 3
-
-
- niagara
- model shipways
- (and 1 more)
-
Here are a couple of pics of what I have done so far. She was "jumboized". I will probably rebuild the entire bridge structure.


- 468 replies
-
- 3
-
-
- niagara
- model shipways
- (and 1 more)
-
Today I more or less finished the standing rigging. I will post pictures tomorrow. Also tomorrow, I will post a rant about something that has me really po'd. This is the sort of thing a beginner (me) gets so frustrated over. I hope if there are any designers out there, they take note. I have mentioned this before but now I'm just pi..ed. Anyway, I've already done a fair amount of running rigging so the light is at the end of the tunnel. I won't have anything to post anymore unless I can post about the T2 tanker I am building & heavily modifying. It is one i sailed on as a youth. I don't know if it is appropriate for this forum.
- 468 replies
-
- 1
-
-
- niagara
- model shipways
- (and 1 more)
-
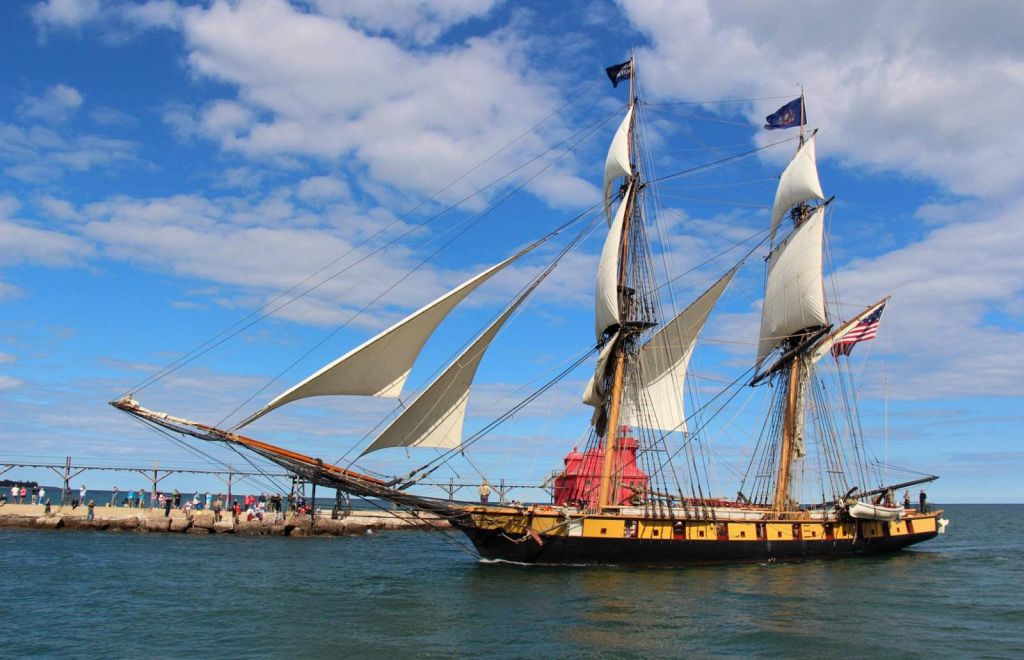
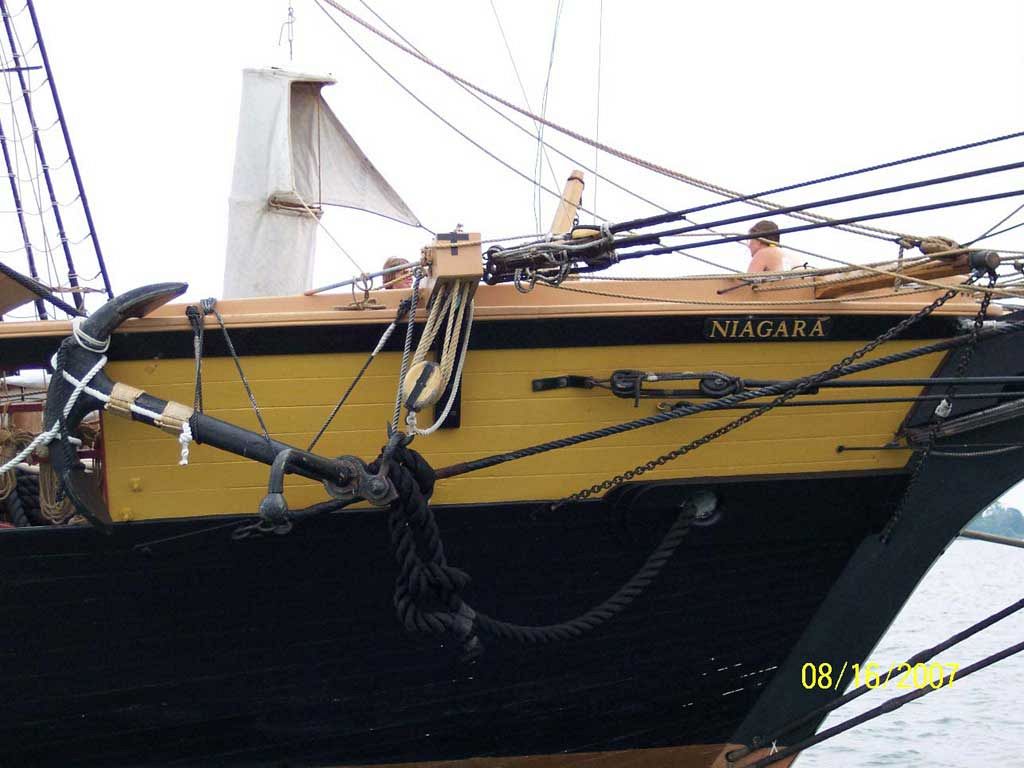
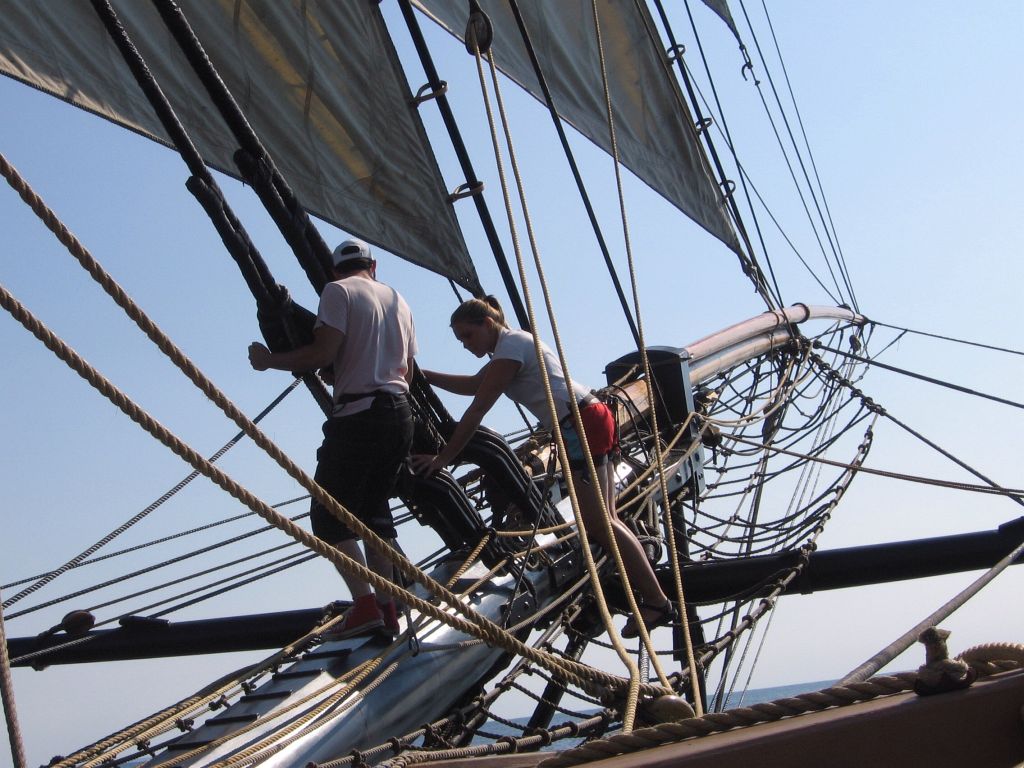
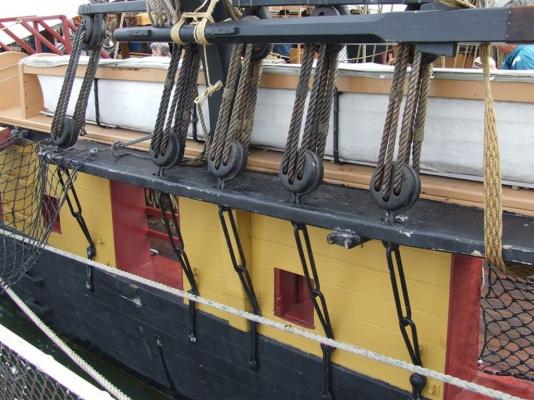
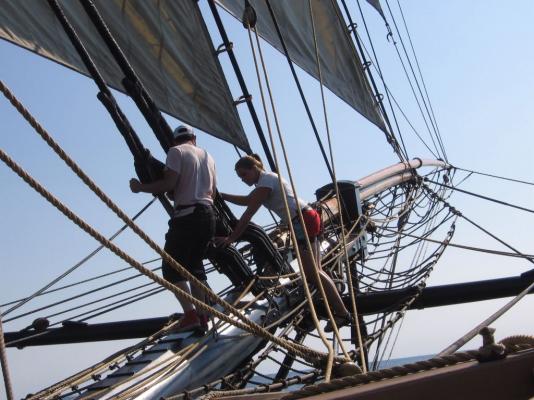
I thought this was an interesting picture. Look at how the bowsprit is bent downward. I think that is pretty severe. I had no idea they flexed that much.
- 468 replies
-
- 5
-
-
- niagara
- model shipways
- (and 1 more)
-
Hi Ken, It's good to see another active Niagara builder. I am building her myself right now, & am in the middle of the standing rigging. You can see it here if you are interested. http://modelshipworld.com/index.php/topic/7452-us-brig-niagara-by-laxet-model-shipways/ This is my first wooden sailing ship, so I have fashioned my build log to be through the eyes of a beginner, showing obstacles & solutions to problems that maybe more experienced builders take for granted. I will follow your build with interest.
- 440 replies
-
- 1
-
-
- niagara
- model shipways
- (and 1 more)
-
I see the Niagara is on sale again for $170 at Model Expo. Offer code is MARCH. Now's your chance to get it cheap.
- 468 replies
-
- 1
-
-
- niagara
- model shipways
- (and 1 more)
-
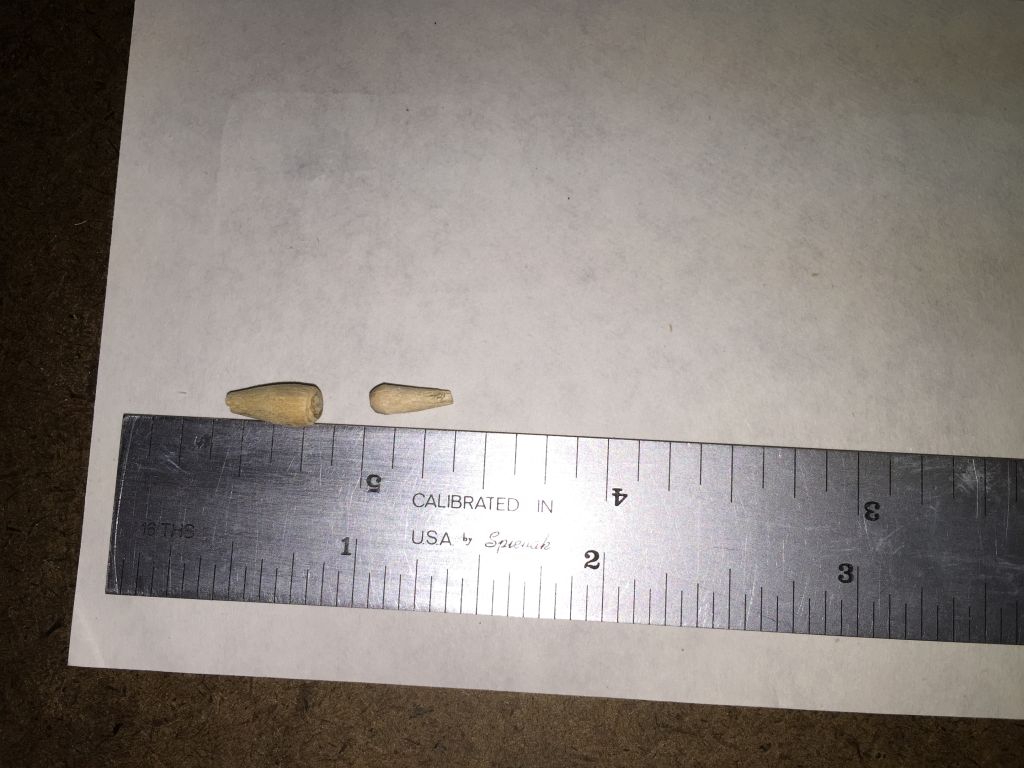
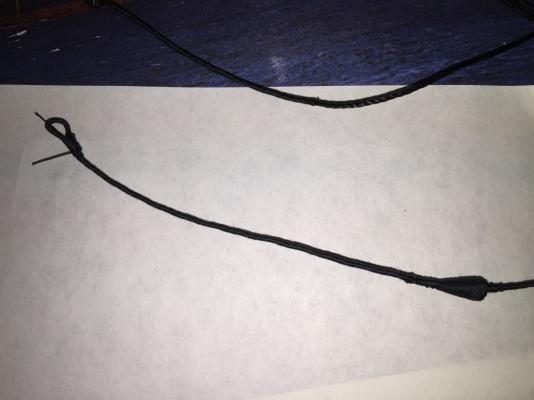
Boy, I really screwed the pooch this time. I spent the last three days building the fore & main stays & preventer stays. I was thinking the mouse was a little big, but I decided to go on anyway. Well fate, being the female dog she is had other plans for me. I ended up gluing the mouses on backwards. Now I *have* to remake all of the stays. You can see the comparison below. This time I used a 3/8" dowel. The first ones were pretty shoddy anyway so I guess this is for the best (also in a picture below). MAN, I hate doing things twice. I bought the mouse making attachment for my serving machine, but I'll be darned if I can work it. So I'll try something else.
- 468 replies
-
- 2
-
-
- niagara
- model shipways
- (and 1 more)
-
Here is what I use exclusively. It is 5 diopter (power?), & I can see germs on a bugs butt with it. Again, not the cheapest option but I couldn't be without it.

- 287 replies
-
- 2
-
-
- niagara
- Model Shipways
- (and 1 more)
-
It's fairly easy. You are right. I opened the rings using two pairs of smooth jawed needlenose pliers. Just twist the ends sideways away from each other. If you pull the ends apart, you'll never get them fully closed. In that case, you would twist them slightly, close them so the ends overlap slightly, then twist closed.
-
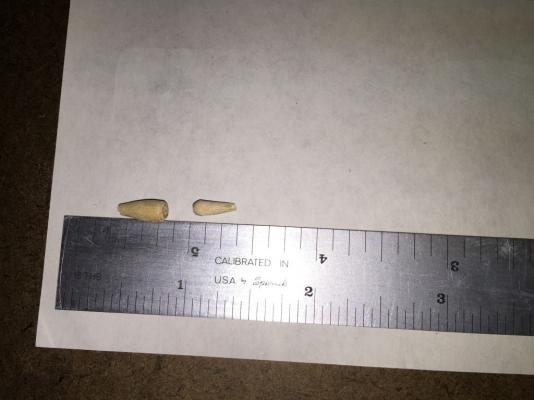
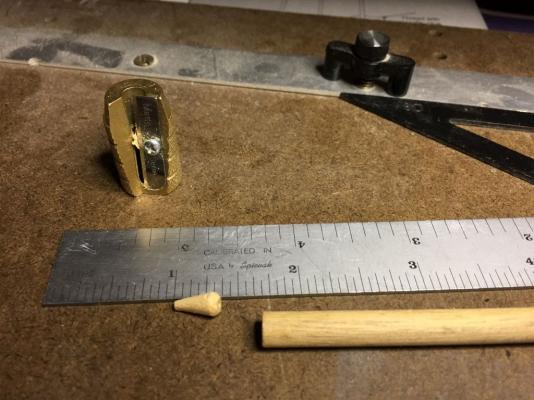
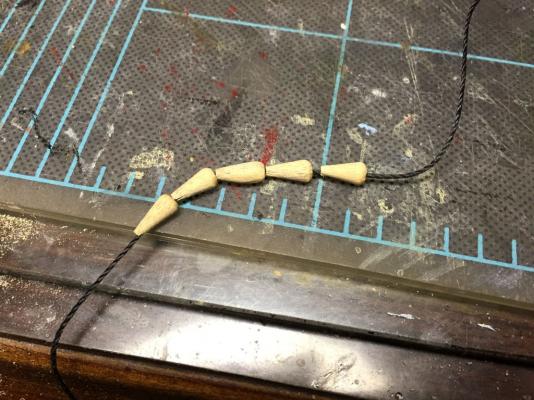
All right, gather 'round. I'm going to divulge what is apparently some sort of trade secret involving mouse making. You won't find this precise of information anywhere on the entire internet. If anyone thinks these look too big or not right, I am sure they will let me know (please). First, know this is not my technique. I stole it from someone right here on this website. His moniker is AEW, & here is a link to his posting: http://modelshipworld.com/index.php/topic/201-hms-vanguard-by-aew-victory-models-scale-172/?p=129898 I started with a 1/4" dowel. I drilled a #56 hole in the middle. Then I put it in my pencil sharpener & sharpened it. Then I cut it 3/8" long & filed it. There it is. Put this info in your pocket where you won't lose it. I guess now I'll be banned from the Shipbuilder's Castle in Hollywood. Model Expo must think they're slick. They included .040" line with the original kit. I found out later that they were now supplying .051" line, so I asked them for some. They sent me what they called .051" but it is exactly the same size as the .040 line I already had, The main stay is supposed to be .047" & I have nothing very close. You gotta watch those guys! In the 2nd picture, the middle mouse is the first one. It seemed a big bigger than the rest so I made another to replace it.
- 468 replies
-
- 5
-
-
- niagara
- model shipways
- (and 1 more)
-
All are double action except one Badger. They are as follows: Badger 150 (mine is so old it looks little like the current one) Iwata Eclipse BCS Iwata HP-CS To me, the Iwatas are very comfortable to hold.
-
I have two Badgers (a single action & a double action) & used them both for many years, but once I tried an Iwata, I never looked back. One of the best places to buy them is Dixie Art at http://www.dixieart.com/. I also got a decent deal on an Iwata gravity feed last year at Hobby Lobby, although I know they aren't in Calif. Modesto. That's where my father was born. I've never been there myself though.