Laxet
-
Posts
391 -
Joined
-
Last visited
Content Type
Profiles
Forums
Gallery
Events
Everything posted by Laxet
-
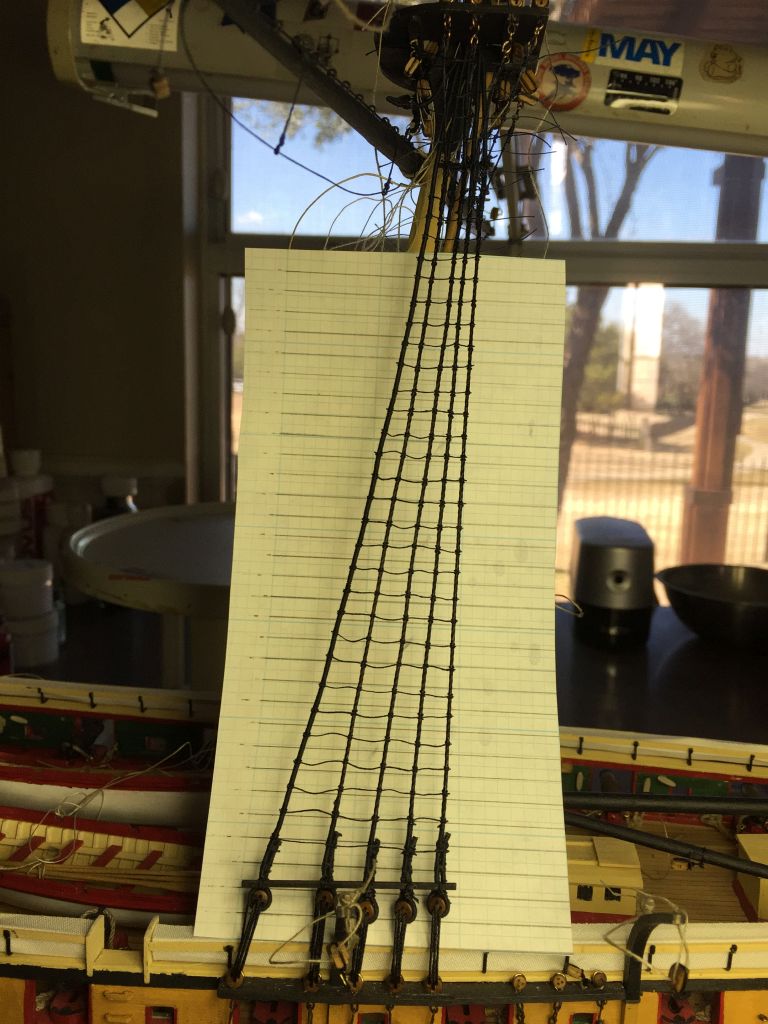
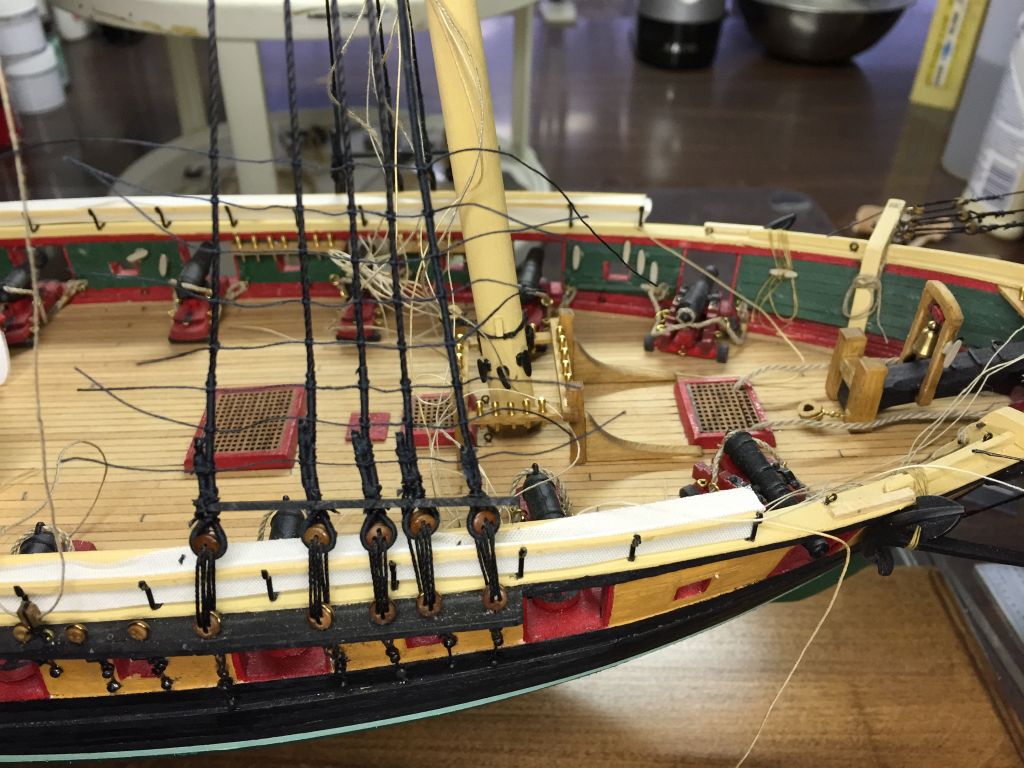
 Well, I see don't nobody know nuttin' 'bout no mouses, so I'll have to figure it out all by my lonesome. Finished the first set of ratlines. You can see how I aligned them with a lined piece of paper. They are spaced 7/32" apart per the plans & after aligning the ratlines, I had to add 6 more. That shows how well eyeballing it works. This part actually looks pretty good to me. Not perfect, but not bad considering it's been over 30 years since my last ratline. I just started on the second set & I was amazed at how slanted the whole set of ratlines was. Couldn't tell by just looking. I highly encourage the use of a guide of some sort, even as simple as mine.

- 468 replies
-
- 3
-

-
- niagara
- model shipways
- (and 1 more)
-
I am contemplating the construction of the mouse on the forestays. I have seen several techniques. & have pretty much decided how to do it, but I don't know how big to make it. Does anybody know how big a mouse is in real life or how big of a bead I need to be scale size?
- 468 replies
-
- 1
-
-
- niagara
- model shipways
- (and 1 more)
-
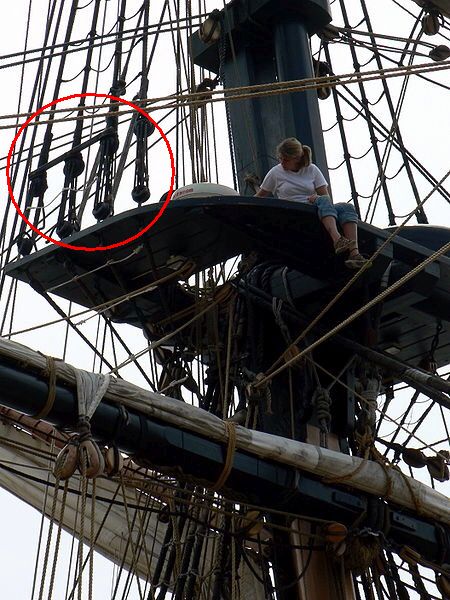
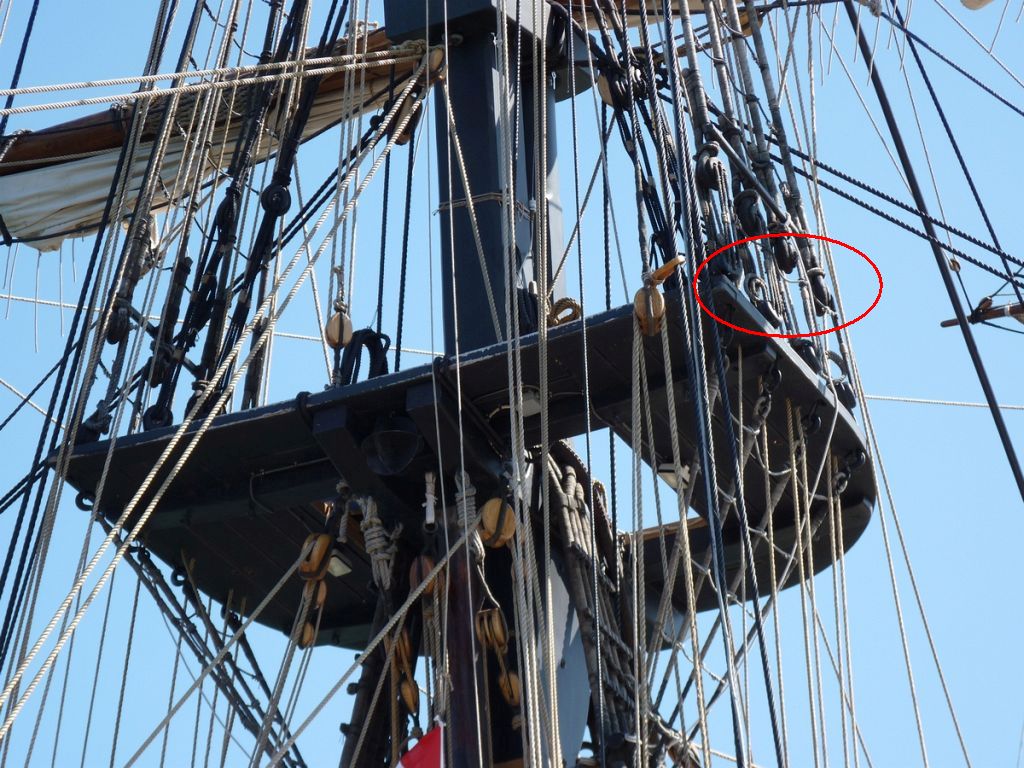
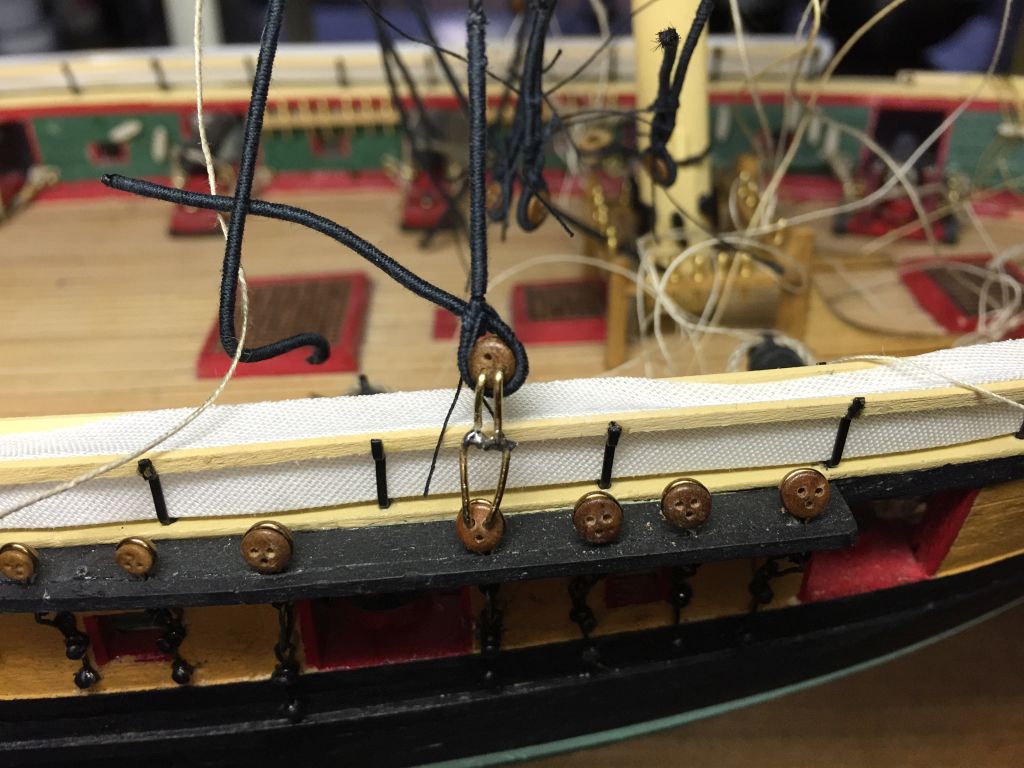
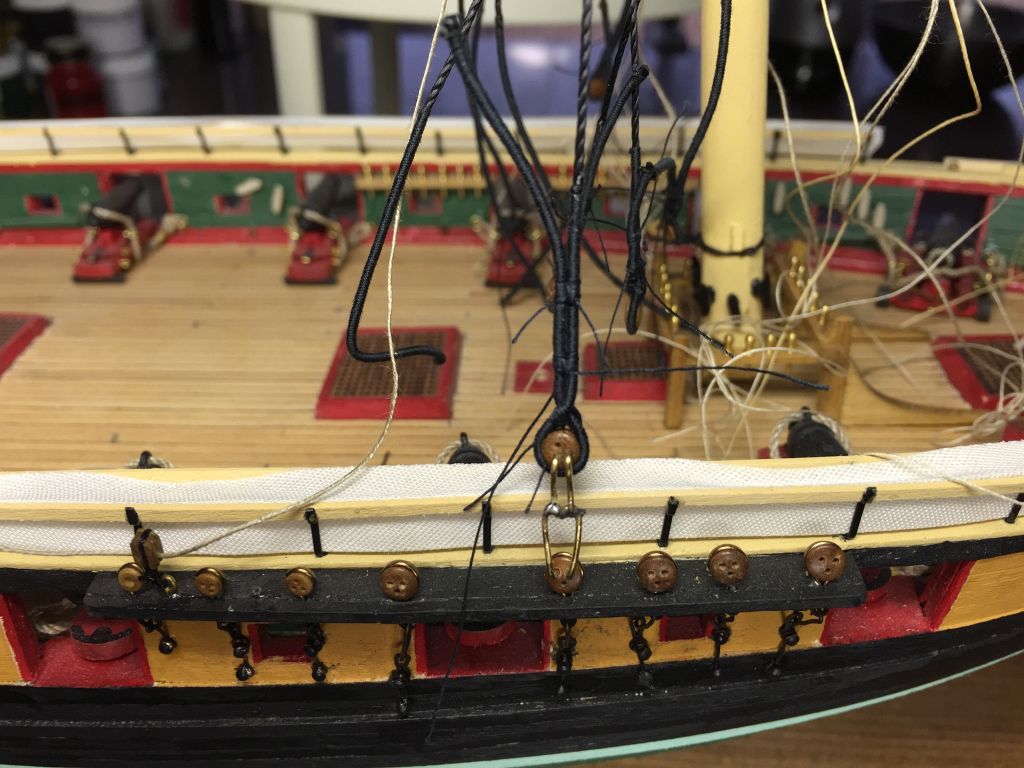
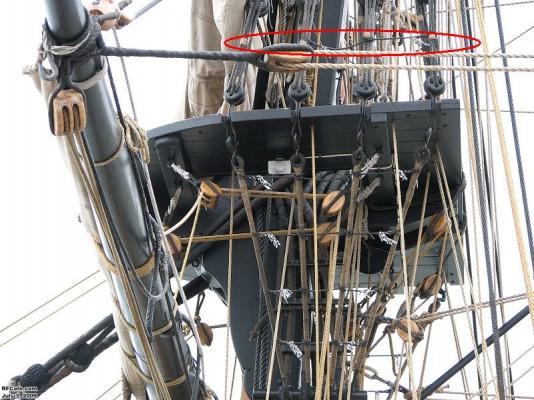
Wow. All of this & valuable info too! I saw something that I had never noticed before. They actually seized a ratline to the deadeye lanyards on the lower tops. Here are three pictures with circles & arrows & a paragraph on the... sorry. Just got through listening to Alice's Restaurant. Anyway, check this out. I might just have to add this little detail. Man, where does he come up with this minutiae?


- 468 replies
-
- 3
-
-
- niagara
- model shipways
- (and 1 more)
-
My thoughts are these: if you barely compensate at the beginning it will not be noticeable. If you wait, it might not be noticeable, but it might. It will very easy to compensate now. So I would adjust now. Using larger planks like you are might also be enough to not draw notice.
- 287 replies
-
- 1
-
-
- niagara
- Model Shipways
- (and 1 more)
-
Finished installing the futtock shrouds & rattling the stbd side forward mast (except for the futtock shrouds). When I first built the main shrouds, I thought they looked too big. They've since grown on me & I'm thinking they look about right now. It also gives a sense of realism having so many different line sizes. I think that's one thing that really makes a ship model pop. For my next ship, I think I will attempt to use all line as close to actual scale size as possible. I've already added several sizes to this build & serving lines is icing on the cake, even though they are very difficult to work with.
- 468 replies
-
- 4
-
-
- niagara
- model shipways
- (and 1 more)
-
I'm 3/4 finished with the futtock shrouds & all finished with the catharpins. Pics to follow tomorrow once all done. I've been thinking what a lot of work this has been. I will have spent almost six days making catharpins & futtock shrouds. The thing is, the catharpins are barely visible. By the time the futtock shrouds are attached & the ratlines are in, along with miscellaneous rigging, you won't even know they are there. If I wasn't building my first ship & learning how to do this stuff, I might not have even bothered with them. It goes back to the question I posed early in my build log, how much detail is enough?
- 468 replies
-
- 1
-
-
- niagara
- model shipways
- (and 1 more)
-
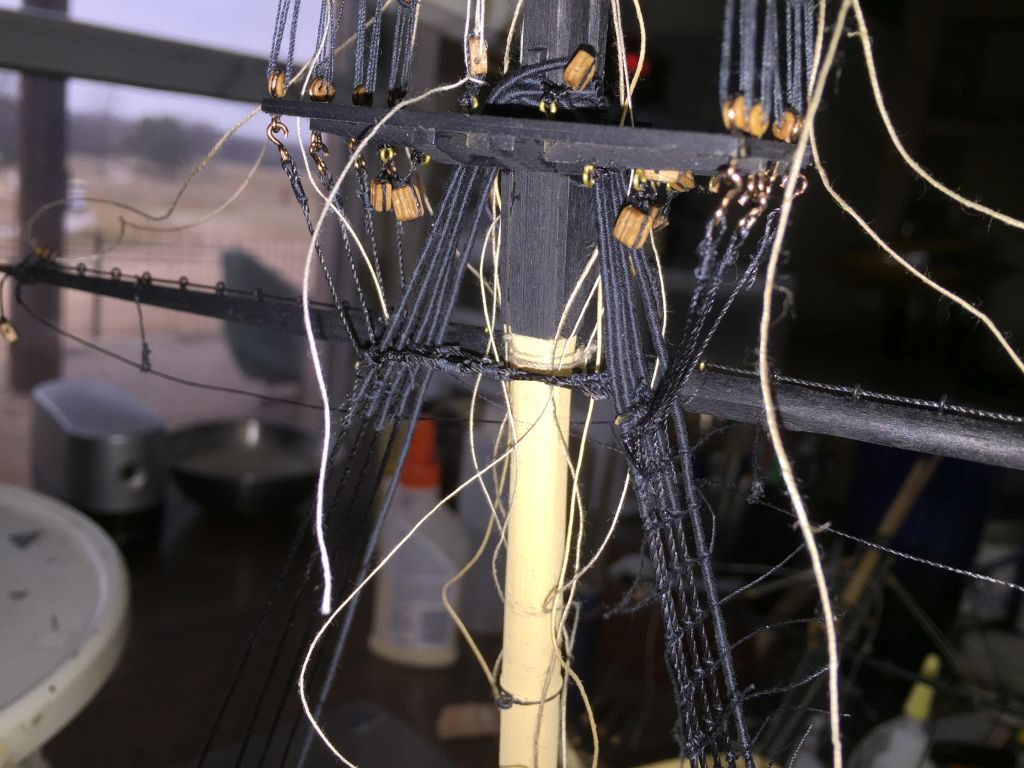
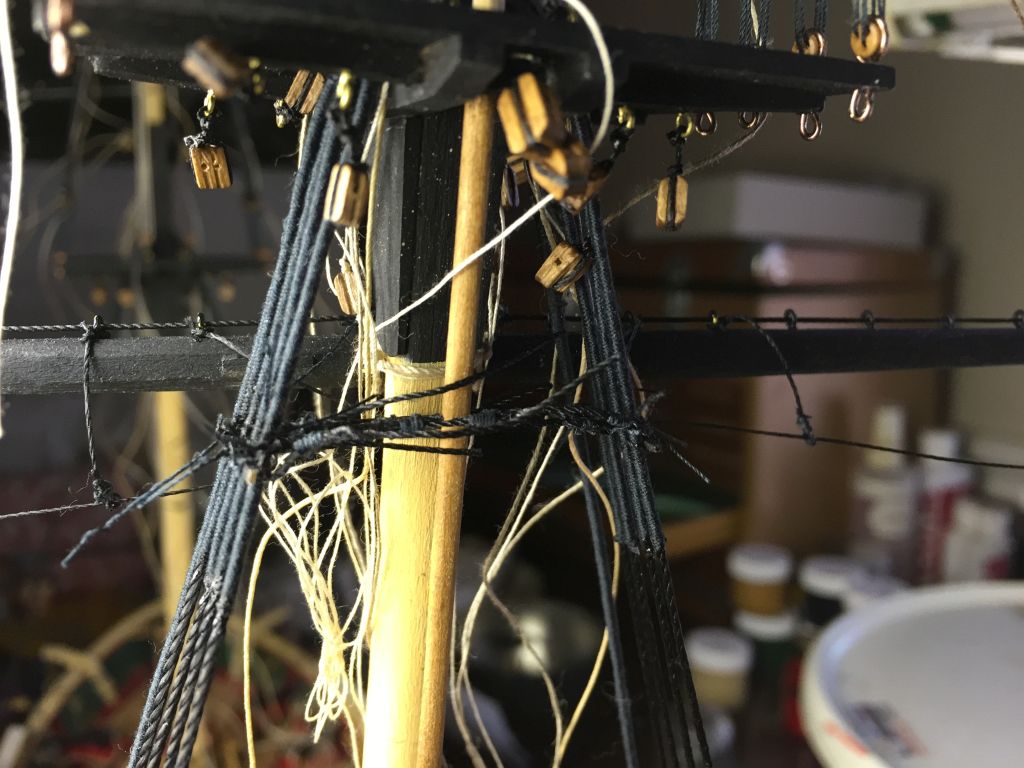
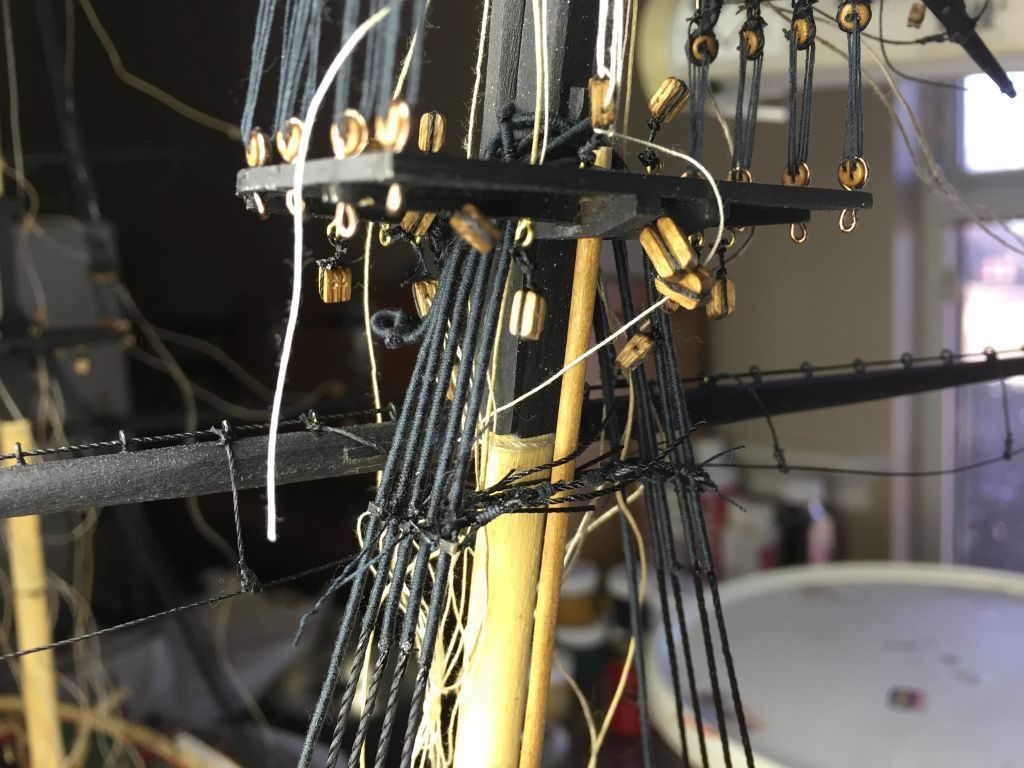
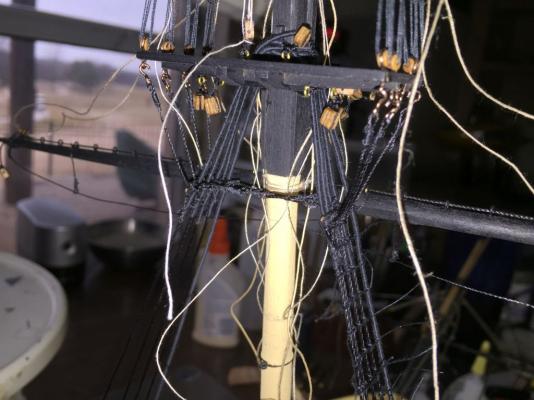
Installed 3/4 of the catharpins today. Didn't get one side attached. I finished the main mast & tightened them but haven't cut the excess yet. You can see them in the attached pictures. I had to run one in front of the spanker mast & one behind. I could find no references to tell me one way or another whether this is correct or not. Otherwise it would rub against the spanker mast & that doesn't seem right. The spanker boom can't go above this point anyway so it seems okay. This whole operation wasn't nearly as difficult as I expected it to be. It was just time consuming.


- 468 replies
-
- 6
-
-
- niagara
- model shipways
- (and 1 more)
-
Thanks George. Should have pics tomorrow & a whole sob story.
- 468 replies
-
- 2
-
-
- niagara
- model shipways
- (and 1 more)
-
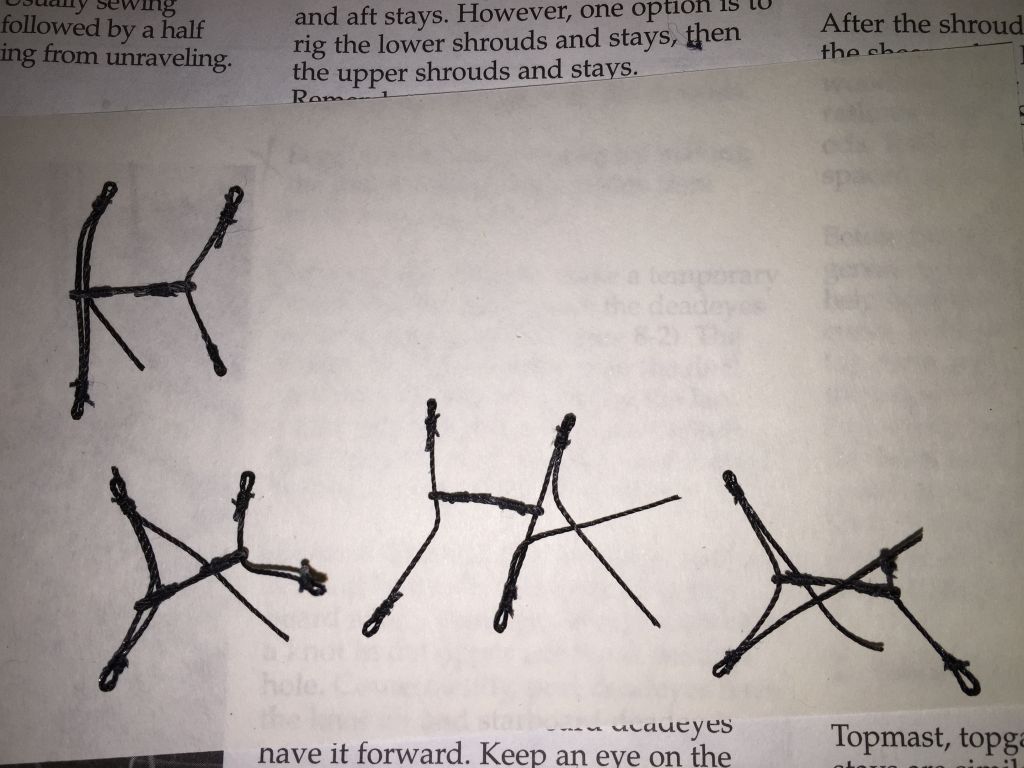
I've been working on these catharpins (cat-harpins) for two days. I finished them today & will install them tomorrow. That will be difficult, working inside the shrouds under the magnifier. My hands are so big I anticipate damage. I'll keep my fingers crossed. I purposely left the lines long on one side so I could fine tune the lengths once installed. I don't know how else to do this, but it sort of replicates actual practice & what more could you ask for. Then I can attach the futtock shrouds. Seems everything is dependent upon something else & it all snowballs.
- 468 replies
-
- 6
-
-
- niagara
- model shipways
- (and 1 more)
-
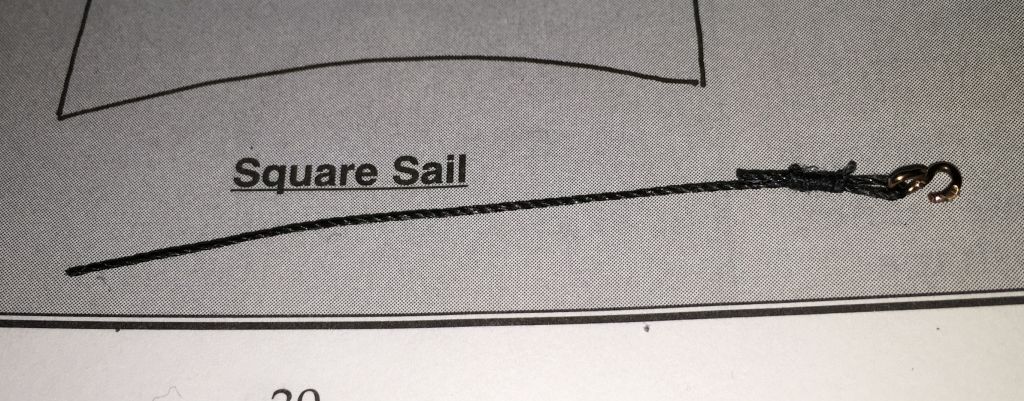
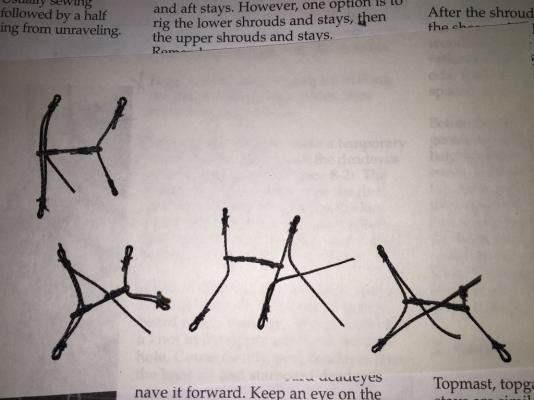
Shoot! I started rattling the shrouds then I realized I forgot to do the futtock shrouds. This is going to be a bit difficult, with all of the yards & rigging in place. I'm keeping my fingers crossed I break something. Here is a picture of one of my futtock shrouds. I finished all 16 of them today plus an extra because you just never know what's gonna happen. I don't know exactly how far down to attach them so I measured down from the top 1" and will attach them there. That looks about right unless anybody else has better info.

- 468 replies
-
- 3
-
-
- niagara
- model shipways
- (and 1 more)
-
After doing a little tidying up of the shrouds, I started doing ratlines. I got about 1/2 of one side of one mast done. This will go faster than I expected. I'm going to sick of clove hitches by the time I'm done. It is a good thing that I take these pictures & post them. It allows me to see mistakes that I probably would have missed otherwise. I see some stuff that needs to be attended to before I continue. Once again, the picture is slightly out of focus on the parts I was trying to show.

- 468 replies
-
- 5
-
-
- niagara
- model shipways
- (and 1 more)
-
I tried & tried, but I just can't seem to get the shrouds equal lengths. I don't know know what the secret is, but next time, I will build them one at a time, install it & then use it to measure the next one. And I just noticed looking at this picture, I got the #2 shroud run backward around the top deadeye. Sheesh. I can't believe it took three days to install the lanyards on the shrouds. I ended up having to drill all of the deadeye holes again (meaning I ended up doing it twice) because the line they called out was just ever so slightly larger than the holes I had already drilled. And here is another lesson learnt. Don't install the boat davits until the shrouds are in place & rigged. I broke one off with my large hands, as well as one of the metal brackets that holds them in place. Now to install the ratlines. This ought to be good (heavy sarcasm).
- 468 replies
-
- 5
-
-
- niagara
- model shipways
- (and 1 more)
-
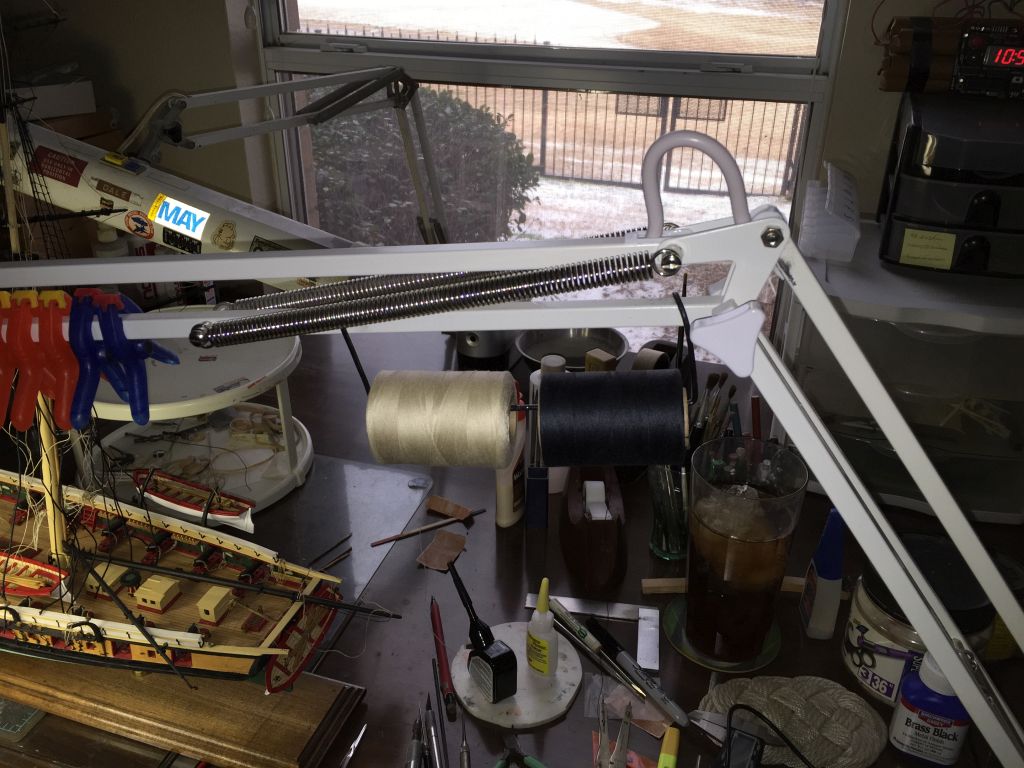
I got tired of pulling the spools of thread onto the floor, so today I rigged this up. It's just a piece of wire from some Romex. Now they are out of the way & easy to pull. It is attached to my magnifier lamp.

- 468 replies
-
- 4
-
-
- niagara
- model shipways
- (and 1 more)
-
I like the jack-screw look. Way too much work for me even once, let alone 18 times. I took the lazy out but yours will look very nice.
-
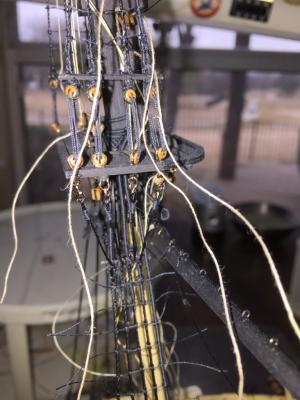
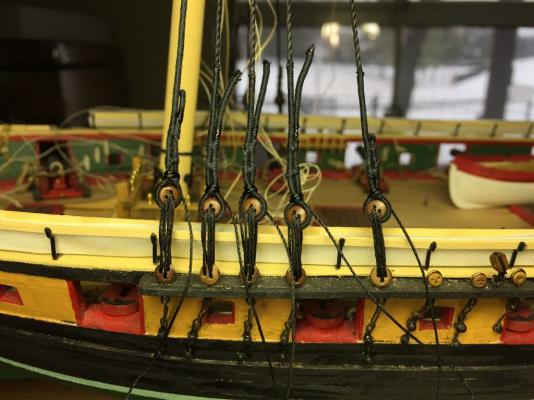
And yet another funny story from yesterday. It's been pretty dry here this week with lots of static electricity in the air. I was trying to serve the shrouds with some very fine thread. Every time I moved the tweezers near the thread, it moved away. I felt like a snake charmer. Boy was that annoying. I guess I need to ground my chair, tools, supplies, everything. Here are two pictures showing the shroud deadeye attachment in progress & finished. You can see the makeshift spacer I cobbled together to space the deadeyes. It doesn't look like much but it works like a champ & it is very strong, which it needs to be considering the size of the shrouds.


- 468 replies
-
- 2
-
-
- niagara
- model shipways
- (and 1 more)
-
Here's another funny story of something old Dale did wrong (sort of). I attached the spanker gaff & boom to the main mast & then realized I couldn't rig them because then I wouldn't be able to install the main shrouds, since I had already seized the top of them & they needed to slip over the top of the lower mast. So the booms sit on the railing as you can see in the picture.
- 468 replies
-
- 1
-
-
- niagara
- model shipways
- (and 1 more)
-
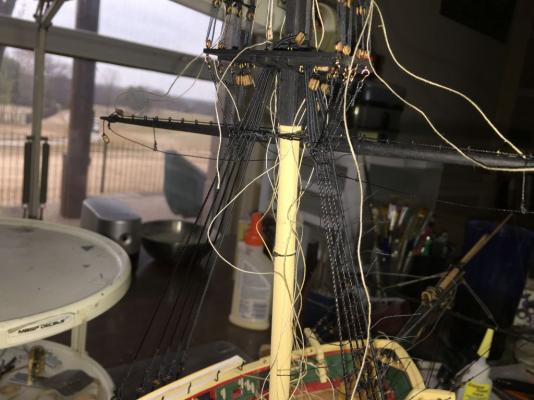
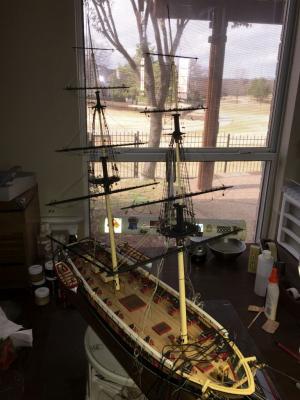
Thanks Tim. I try to keep it entertaining. I'm thinking of renaming it "What did Dale screw up today?" I know what you mean about losing interest. I have some kits I started over 15 years ago & I'll probably never get to finish them. I imagine all of the great mods I will do, & then once I start them I realize it's way beyond my capabilities, so they sit. Here is a crappy picture of my masts placed in the hull the final time (I hope). You can almost make out some of the pre-installed rigging. I started attaching the deadeyes to the lower shrouds today. This will be tedious & time consuming. It looks like I will get a pair a day done, so 10 days if nothing goes wrong (yeah, that never happens).
- 468 replies
-
- 5
-
-
- niagara
- model shipways
- (and 1 more)
-
Since I'm now retired, I have lots of time. I am amazed at how many I have finished in the last two years. I am going to try to have one big project & one little project going at the same time so I can keep this moving along. The problem is, there are always more I want. There are two on my want list now: a Beech Starship and a Piaggio avante.
- 468 replies
-
- 1
-
-
- niagara
- model shipways
- (and 1 more)
-
It was the USB drive that caused my problems (actually the program used for backing up). So now I must find a new one. I have already purchased my next (intended) project, unless something else simpler comes along first. I do have my eye on the Syren, but that almost seems redundant after Niagara. Anyway, I have the Caldercraft HMS Victory sitting in the corner calling me. The problem is I have so many other models waiting, it may a couple of years before I get to it. Wow. I just counted (for the first time ever) & I have 46 other kits in front of the Victory, including a Hasegawa 1/16 Wright Flyer & an almost scratch built T2 tanker that I sailed on for a summer in my youth. I have already "jumboized" it, & if it is appropriate, I will do a build log on this forum.
- 468 replies
-
- 1
-
-
- niagara
- model shipways
- (and 1 more)
-
It's been a rough two weeks, but I finally got my computer back to normal. Replaced the hard drive. It weighs a lot less now with less than half of the 1's & more than twice the 0's as before. After I installed the new drive & installed some software, it started crashing again. This time it was fairly easy to narrow down the problem, which was the Seagate Dashboard backup program. But I digress. Let's talk ship shop. Today I cleaned up all of the rigging installed on the masts so far (lifts, halliards, etc). Tomorrow I will install the spanker gaff & boom. Then the masts will be permanently mounted & the main shrouds will be installed. Then some stays & some running rigging & ...voila! I'm done. Sounds easy but I'm sure it won't be. Don't care. I'm just glad to be working on her again.
- 468 replies
-
- 3
-
-
- niagara
- model shipways
- (and 1 more)
-
The Badger should be fine. I did not use any primer. Distilled water for thinning is good. I have always used rubbing alcohol without problem until the ME buff. Just make sure the needle is pulling back far as you pull the trigger back. With a large area, I often pull the needle back from the nozzle with the trigger all the way forward & tighten the nut there.
-
No, not normal. What are you thinning with? I thought I thinned mine with alcohol, but when I thinned my tan with alcohol it turned to sludge. I would test it first, but the rule of thumb for airbrushes is thin to the consistency of 2% milk. If you drag a stick with paint up the side of the jar, you should not quite be able to see through it. I generally shoot at between 10 & 20 psi. I don't know what brand airbrush you are using, but any name brand single action should be good. Maybe you should completely disassemble it & clean the snot out of it.
-
You can't get a good finish in one coat. It takes several. Just have patience. Paint should be fairly thin.
-
I just temporarily attached mine to the pedestals, held it firm & drew the pencil around the hull. It doesn't have to be perfect & I was able to straighten it up with tape.
-
I just can't win. I'm having a real bad day. I was trying to restore my computer & failed twice. While waiting for the image to load, I started doing a little cleanup work on the foremast. I put it under the magnifier & noticed that the topgallant yard was installed backwards (frontside back). It was fully rigged. I had to cut it off & re-rig the whole thing. Man I hate doing things twice. Stupid, stupid, stupid. At least I caught it before the mast was installed.
- 468 replies
-
- 1
-
-
- niagara
- model shipways
- (and 1 more)