Laxet
-
Posts
391 -
Joined
-
Last visited
Content Type
Profiles
Forums
Gallery
Events
Everything posted by Laxet
-
 I don't mind being the rest of those things, but I don't want to be a plumber. I'm a rotten plumber. That's what I like about this forum. You just learn all kinds of stuff. It never would have occurred to me that they would be left intentionally slack. I figgered they'd want them as tight as could be.
 -
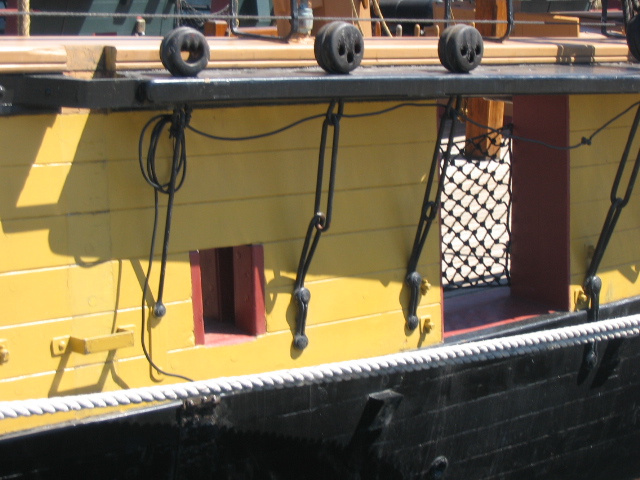
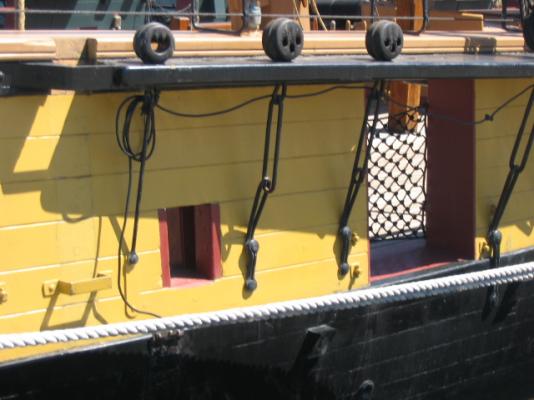
Unfortunately, I'm at that place.now. I can't rig until they are in place. I'll let you have all my spares. But they won't fit this kit. Maybe a 1/4 scale Victory or something. I debated soldering them, but I figured there won't be much tension on them & I can get them to look better with just a butt joint. So that is what I am doing. Besides, I think soldering them around the deadeye strops would be a nightmare. I saw some pictures closeup of the chain plates on the real ship & they even had some slack in them. Of course, that could be because the rigging had been removed. If that is the case, then there must be tremendous flex in the channels to account for the slack I see. Then again, now that I look again, maybe there is some give in the deadeyes themselves.
- 468 replies
-
- 1
-

-
- niagara
- model shipways
- (and 1 more)
-
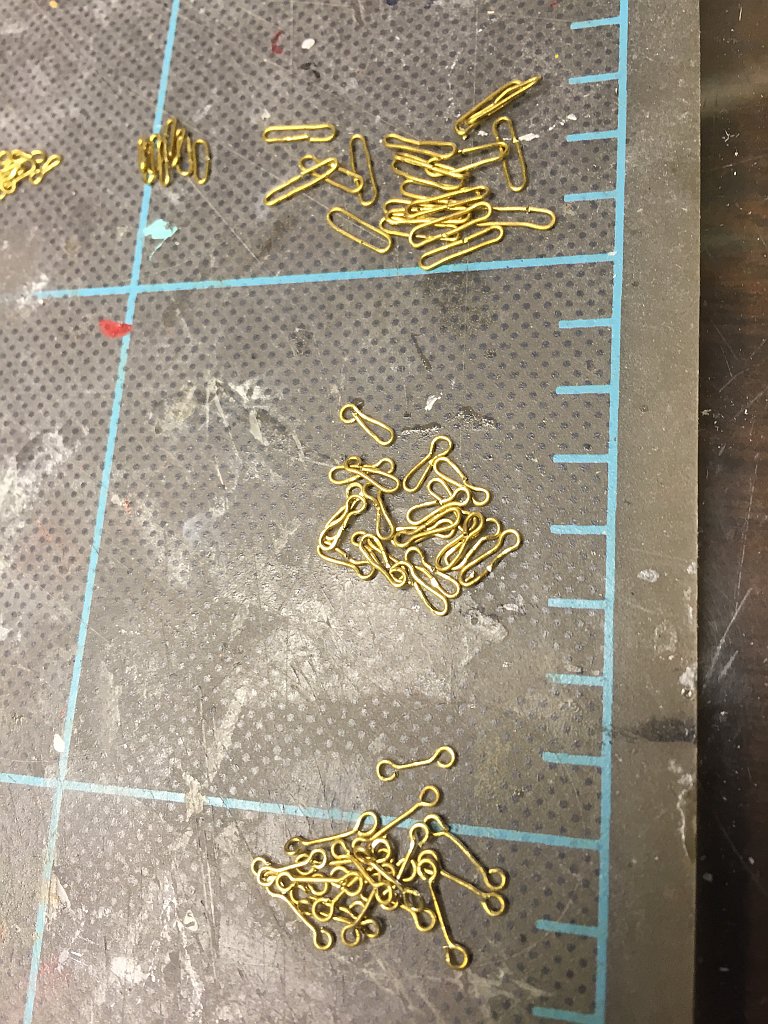
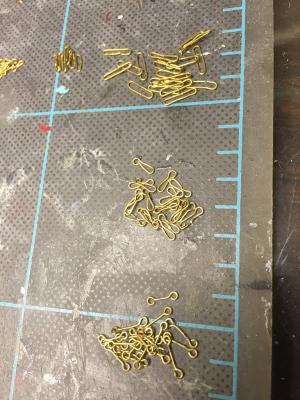
Chain plates...wow. They are at the very edge of my skill. They are so small. I cannot make them consistently the same size. I've made twice as many as I need to get the right amount of same sized parts, not to mention a few sacrificed to the floor monster. I think my dog is wearing three or four of them. Next I have to blacken them & then attach them.
- 468 replies
-
- 4
-
-
- niagara
- model shipways
- (and 1 more)
-
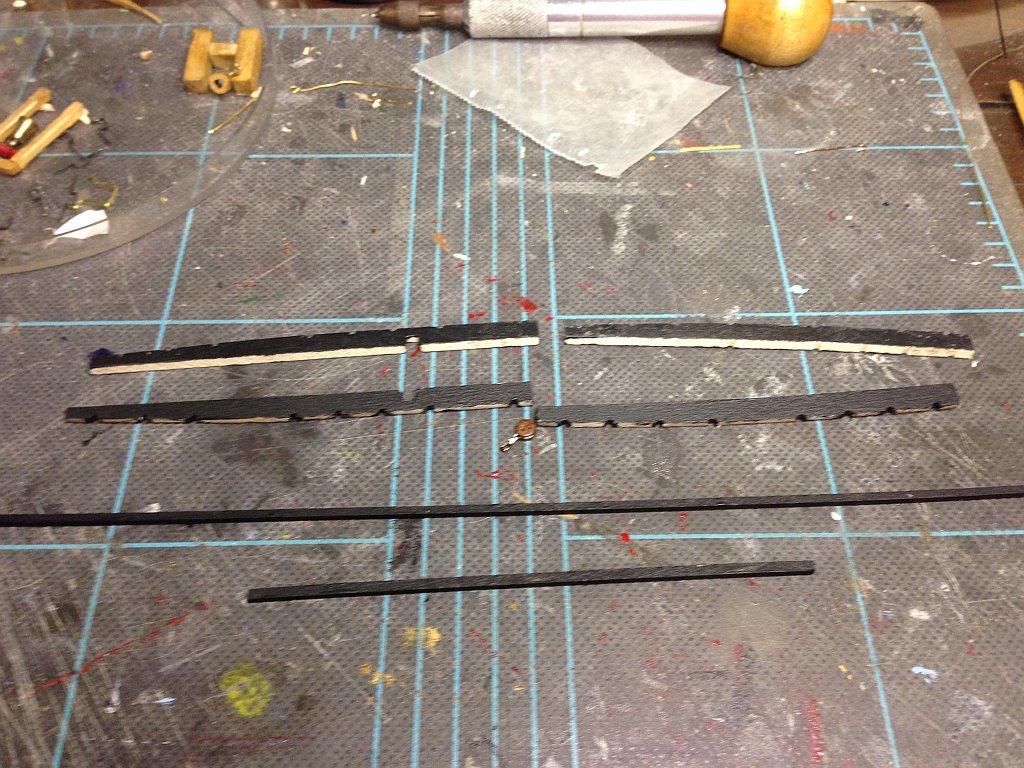
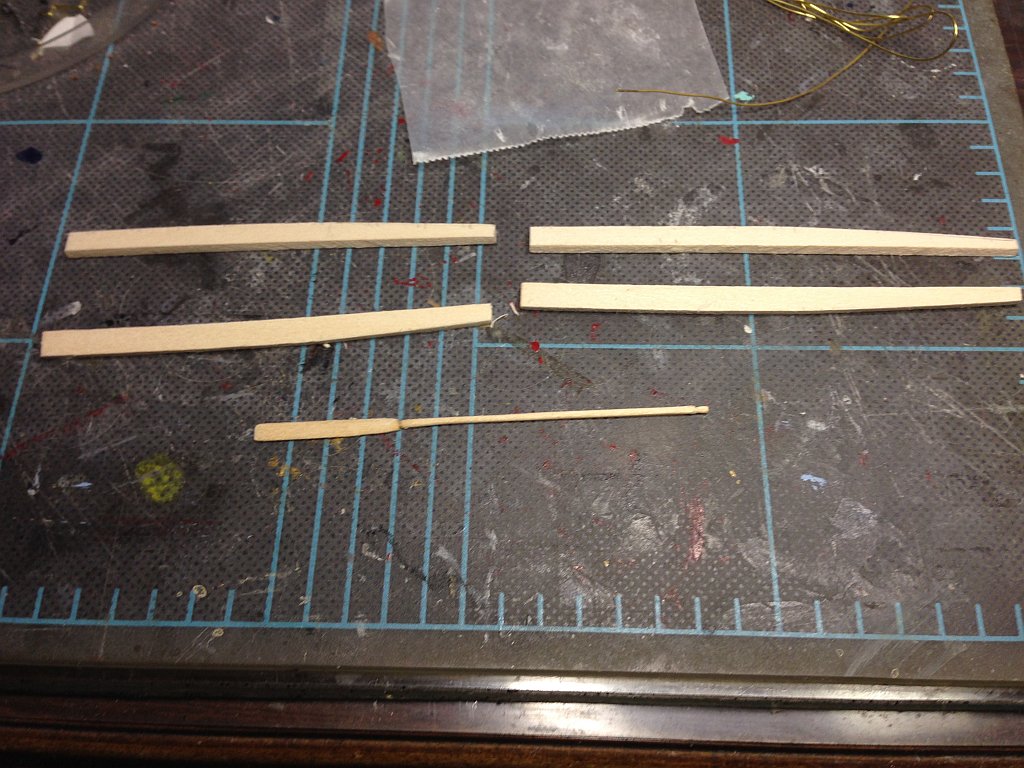
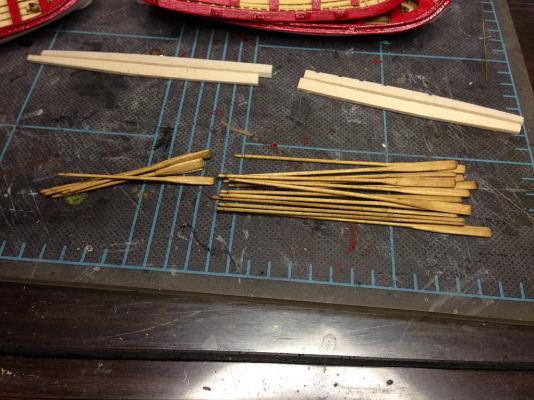
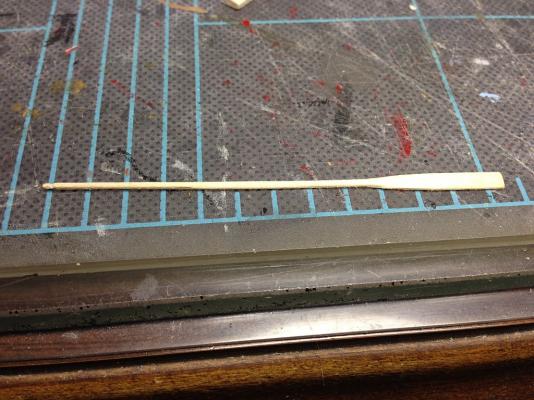
I'm not Larry, but I will tell how I made my oars. I started with kit supplied 3/64 x 1/8 strips. I cut them to length & marked where the tapers are. Then I filed the blade shape & filed the edges thin. This only took a couple of minutes. I used a knife & straight edge & cut the handle. You can see these steps above. Then I sat in front of the tv & filed the handle corners off making them somewhat round. The next night I sat in front of the tv & sanded the handles round. The next morning, i filed the hand grips & stained them. All that was left after that was lashing them into the boats. It would probably take 10 minutes to complete one oar. I used no power tools on them. I think they might be too fragile for that. At this small size, mistakes & inconsistencies are mostly undetectable. I even broke the handle of one oar at the top, but buried the oar at the bottom so you can't tell.
-
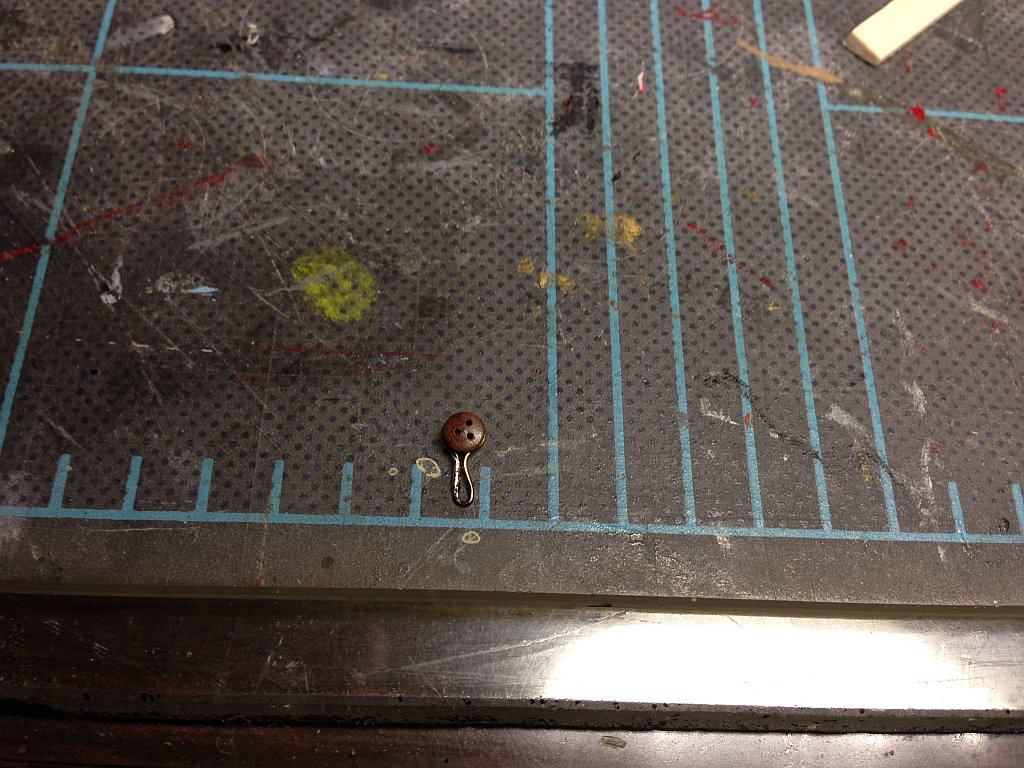
Here is how I have decided to make the chain plates. Just wrap & cut. It is also how I will make the hammock brackets when I get to them. I'm not sure how these look, so I will look at some others & compare to see if I need to modify anything.
- 468 replies
-
- 1
-
-
- niagara
- model shipways
- (and 1 more)
-
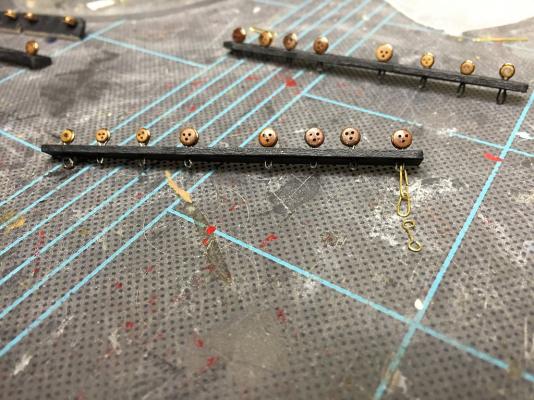
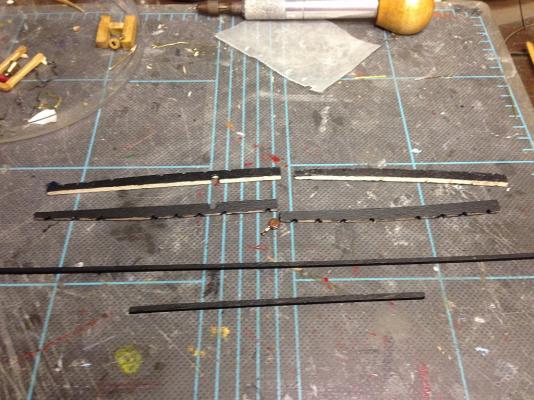
And voila! Oars. I spent probably 3 hours the first night & 2 hours the second night in front of the tv making these. Plus another half hour today filing the hand grips & staining them. 14 long oars & 6 short ones. Pretty time consuming. Now I have to secure them in each boat & I will finally be finished with the boats. Here is also a picture (again out of focus) of the channels. Pretty tough to edge bend these to conform to the hull, but thank goodness for my Shark!
- 468 replies
-
- 4
-
-
- niagara
- model shipways
- (and 1 more)
-
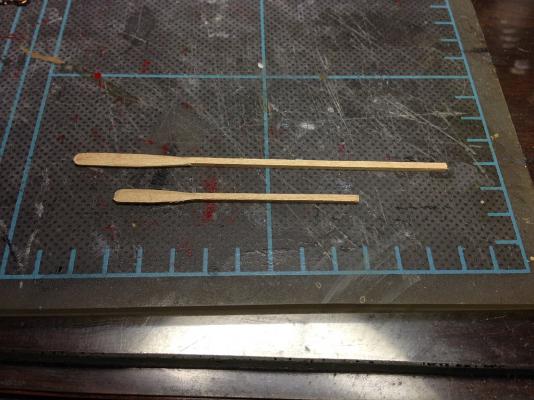
These two pictures show the intermediate steps I took to carve the oars.
- 468 replies
-
- 3
-
-
- niagara
- model shipways
- (and 1 more)
-
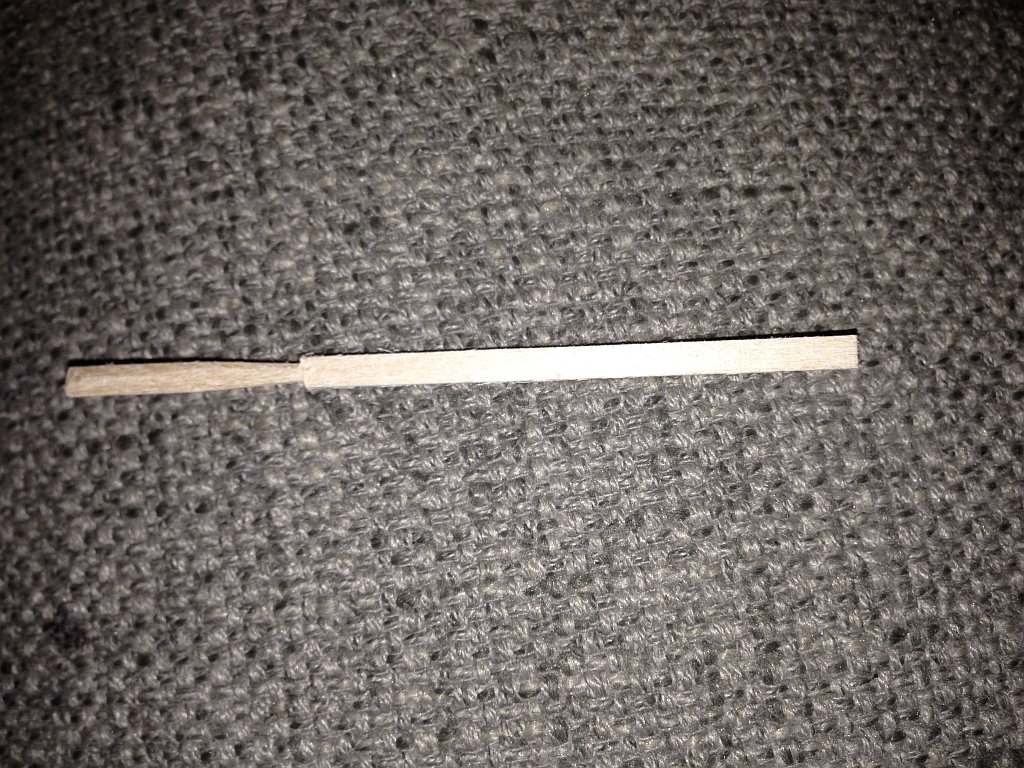
This is my second try at carving an oar from a strip. Also much better. So I will carve the rest this way. Only takes a few minutes to do one. I will do some while watching tv.
- 468 replies
-
- 3
-
-
- niagara
- model shipways
- (and 1 more)
-
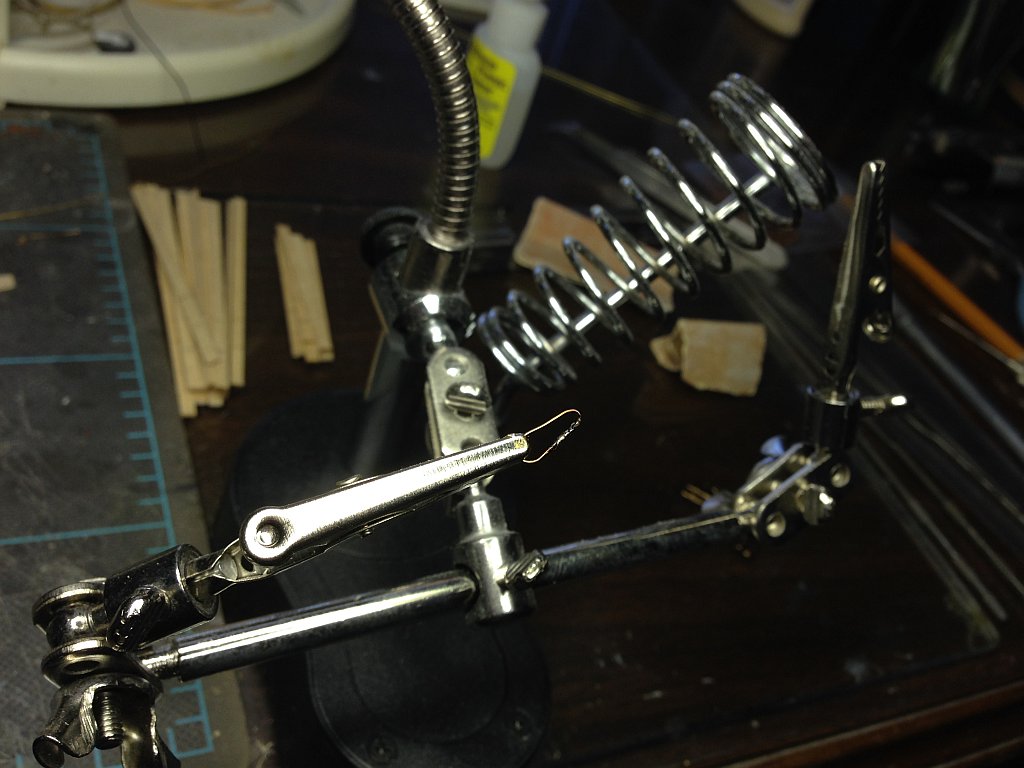
I went to Hobby Lobby & bought a boatload of different wires today. Some were colored, some were not. I decided to try the antique bronze first. this is the result. I might just continue using it. I tried stropping the deadeyes without soldering the strop, but it was too difficult to get the ends to line up, so I soldered them into a loop. Much easier.


- 468 replies
-
- 3
-
-
- niagara
- model shipways
- (and 1 more)
-
That's what I read too (about the enamel). That's what made me wonder. I guess I'm back to brass wire. Thanks for the tip, though. It might come in handy later.
-
Brian, I was just getting ready to order & got to thinking. Can you solder this Zebra Wire? It kind of looks like you can't, which makes it a deal breaker. I need to be able to solder it.
-
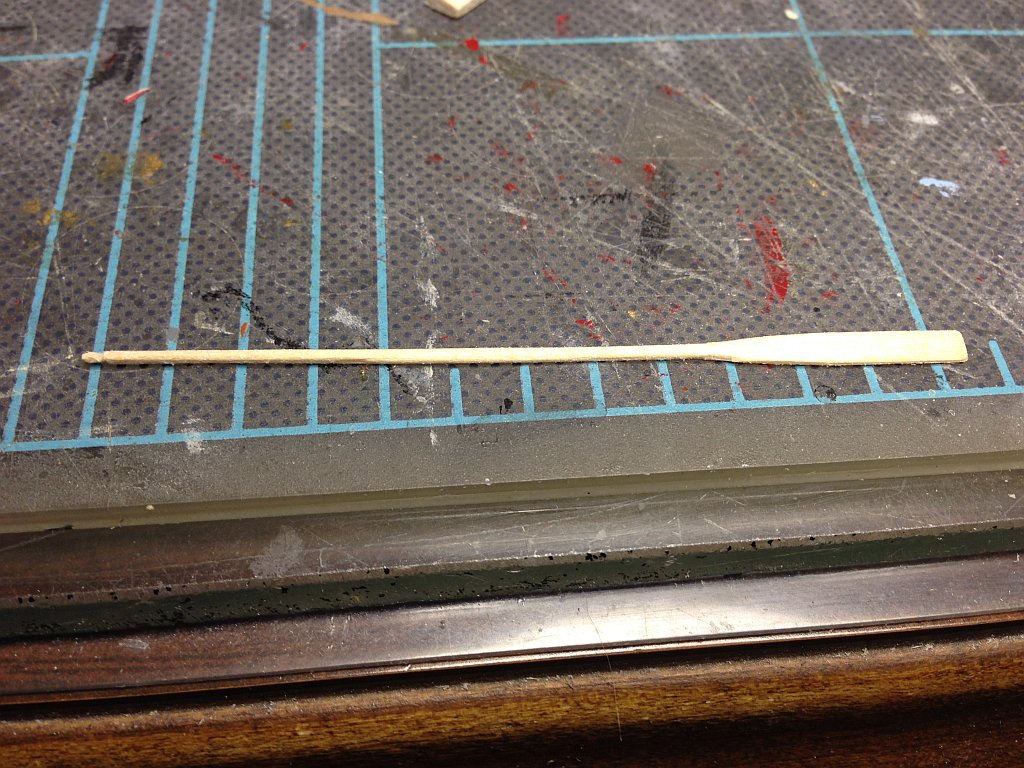
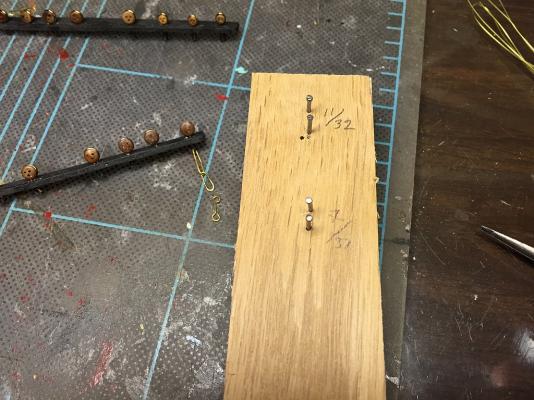
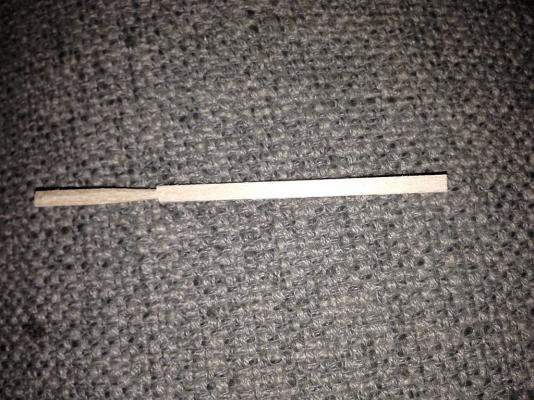
Here is a proof of concept picture that I can indeed carve oars from a single strip of wood, in this case 3/64 x 1/8. I know this one is broken, but if I refine my technique, this will work out well. Also, in the background, you can see my channels. I happen to have some .025 wire, & ME supplied some (a very small amount of) .020 wire. I think somewhere in between these two sizes is the right size for chain plates, closer to the .020 size. The .025 looks too large.

-
Brian, I had a look at that web site. I think I will order a bunch from them myself. I like that the wire is already black.
-
According to my chart, 28 gauge wire is .0126" , which is smaller than my .016".
-
BTW, I managed to take a clump of the buff paint, thin it with distilled water & squeeze enough juice out of it to paint the inside of the yawl. I was worried, but I did it. I will just have to throw the rest away because it's all but unusable. Just in case you were wondering.
-
The prints call out .016" for material to make the chain plates. I have plenty of this, but it looks really small. Does anybody have an opinion as to what size wire to use?
-
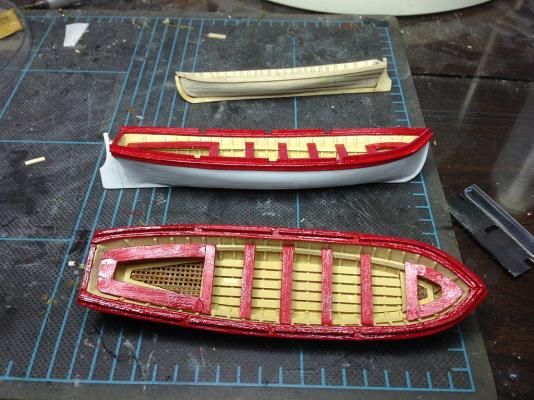
Except for some minor touch up stuff, I'm calling these done. Moving on to the channels & hammock thingies.
- 468 replies
-
- 1
-
-
- niagara
- model shipways
- (and 1 more)
-
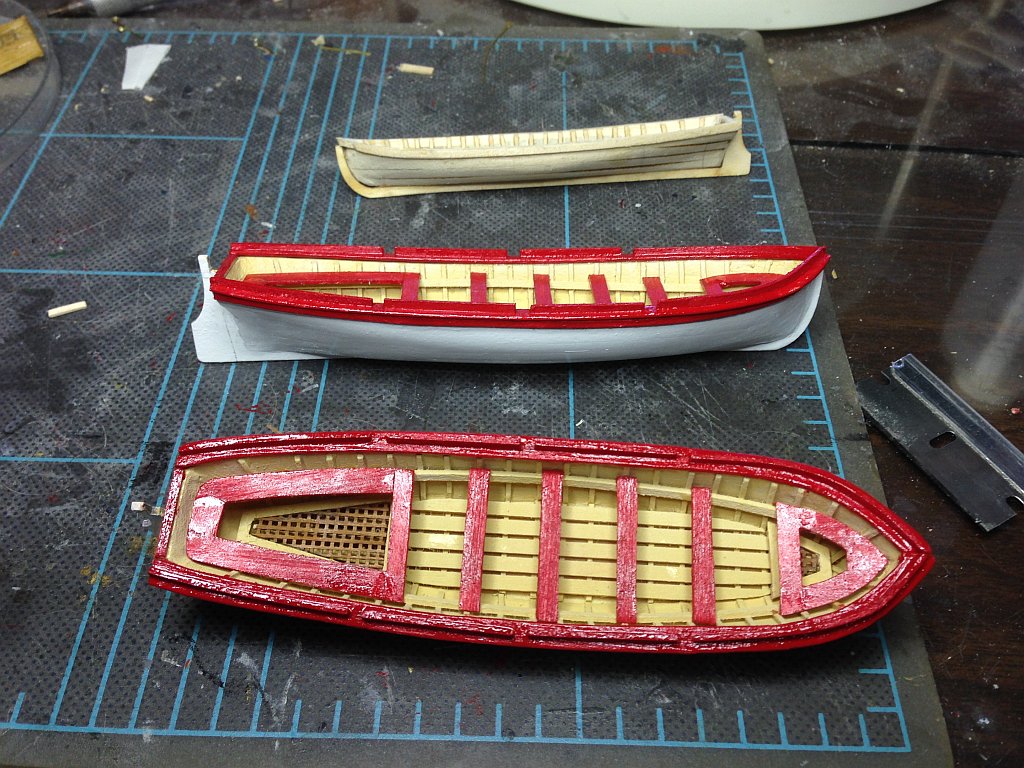
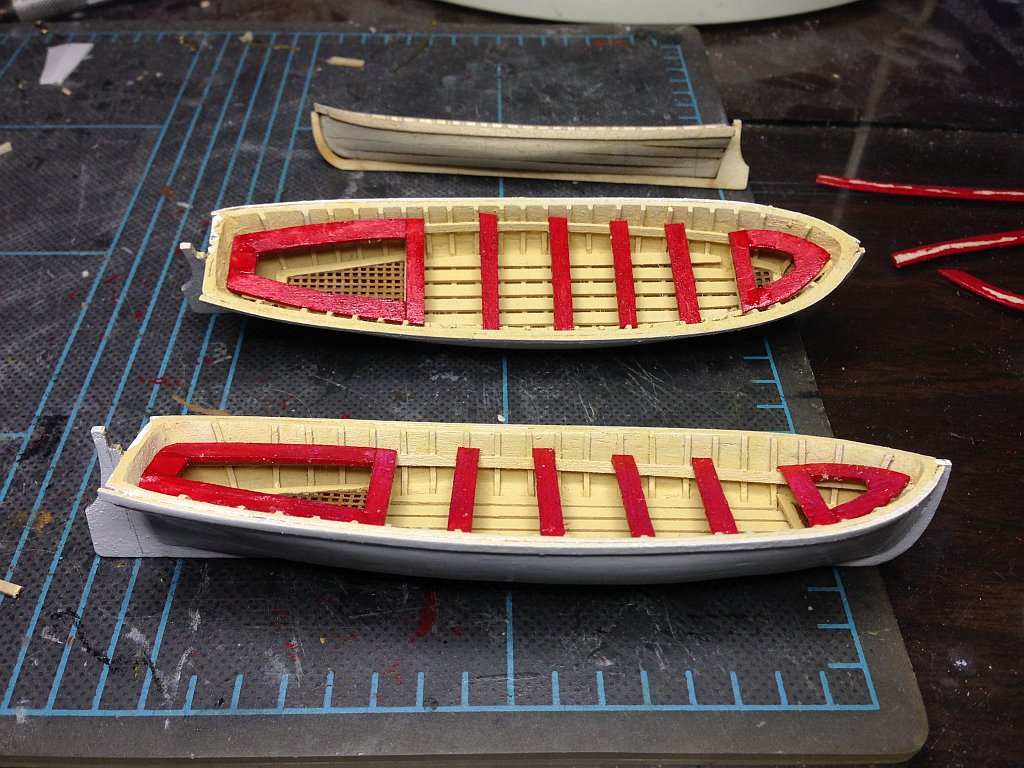
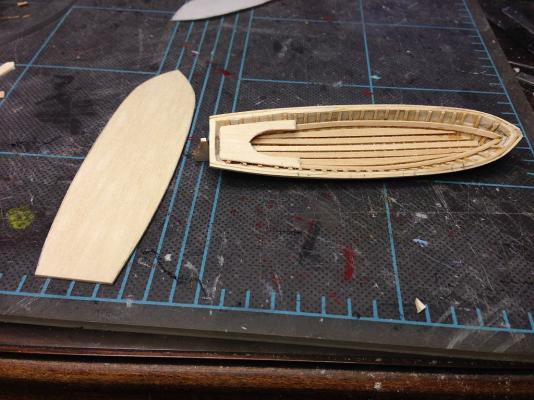
Here is what I am NOT going to do: 1. build knees - every time I try, the wood splits. This is beyond my skill. 2. build breasthooks - same reason. 3. lapstrake my yawl - I just can't figure out how to do it using these bread & butter hulls. Most of the builds I see did not do it either & it looks okay. It would look really good if I could do it, but again, it is beyond my skill level. So based on the previous statements, I am considering the cutters finished. Still working on the yawl. Here are a couple of pictures. You can see the raw top rail beside it in the first picture. Have not attempted the oars yet.

-
Believe it or not, I was contemplating carving them in one piece from strip wood. I don't know if it is feasible or not, or even the best way, but I thought I'd give it a try once & evaluate the result. One way or another, I'll know something this week.
-
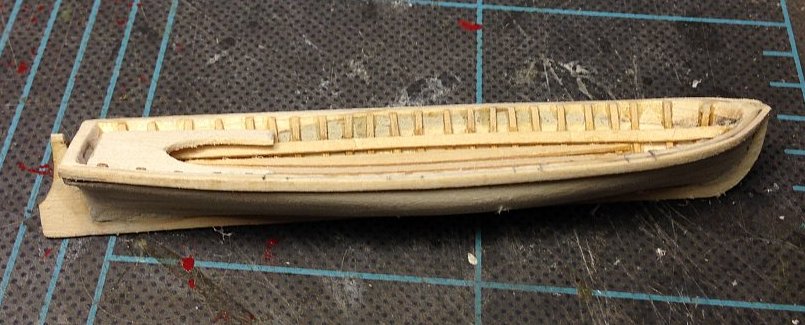
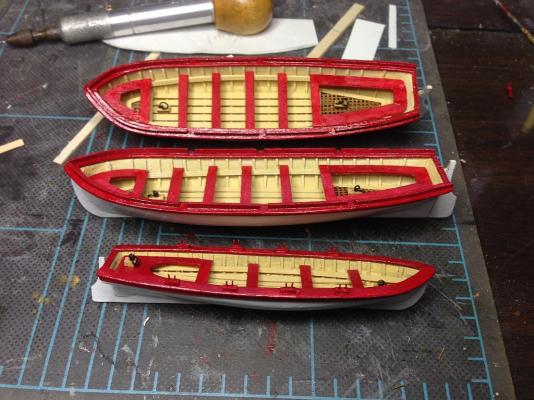
Okay kiddies. Here they are again. All they need now is (are) some knees & breast hooks & they'll be done-arino. I still have to make a (ahem) boatload of oars & other accoutrements. I've been building these things for over a month. Aaaarrrrgggghhhh! Have I mentioned how much I dislike building these things?
- 468 replies
-
- 2
-
-
- niagara
- model shipways
- (and 1 more)
-
Looking forward to it.
-
Thanks guys. I appreciate it. Today I made some corrections to the bow sheers which made them look a lot better. It took out that steep slant. I also attached the top rails & got into such a hurry that I painted one before attaching the oar lock boardy thingys on top. (You like that terminology? Them's technical words!) There is a light at the end of the tunnel finally. I'm just hoping the buff paint is usable enough to paint the yawl, else I'll have to buy another jar for just one boat.
-
These boats are just so time consuming, mostly because I don't know what I'm doing. Progress is really slow. Here they are so far. I have to figure out how to plank the yawl now.

- 468 replies
-
- 5
-
-
- niagara
- model shipways
- (and 1 more)
-
Now that I think about it, the way I made them was to wind brass wire around a 5/64 drill bit into a coil 10 or 20 times. Then I nipped the rings one at a time & flattened them closed them with needlenose pliers. This is how I made rings for the cannons. For eye bolts, just wrap once around the bit & make a tail.
-
You should make your own eyebolts. Thats what I am doing. It's pretty easy with a pair of round nose pliers & a spool of wire. Looks really good so far.