HOLIDAY DONATION DRIVE - SUPPORT MSW - DO YOUR PART TO KEEP THIS GREAT FORUM GOING! (Only 36 donations so far out of 49,000 members - C'mon guys!)
×


Laxet
-
Posts
391 -
Joined
-
Last visited
Content Type
Profiles
Forums
Gallery
Events
Everything posted by Laxet
-
 Suffered a catastrophic computer failure last week, so I haven't been able to work on the ship. Hopefully, I can have it repaired by next week. I will still monitor goings on with my ipad.
- 468 replies
-
- 3
-

-
- niagara
- model shipways
- (and 1 more)
-
If you are going to serve shrouds & long lines, Alexey's machine will make life so much easier. With the other one, you will be continuously moving your line down.
-
Carl, Thanks for that. I think I will be able to find at least one empty pin to tie (tye?) to. That is probably what I will do. David, Thanks for all the nice comments. I *am* having fun, & learning SO much. I've always wanted a ship model, & I figured I would never have one, but this little honey is going to change all of that. I can't wait until it's done. You know, the funny thing is, before you know any better, looking at a ship everything just looks so random. After you build one, you can see how there is a place for everything & you start thinking "Those were some pretty smart fellers."
- 468 replies
-
- 3
-
-
- niagara
- model shipways
- (and 1 more)
-
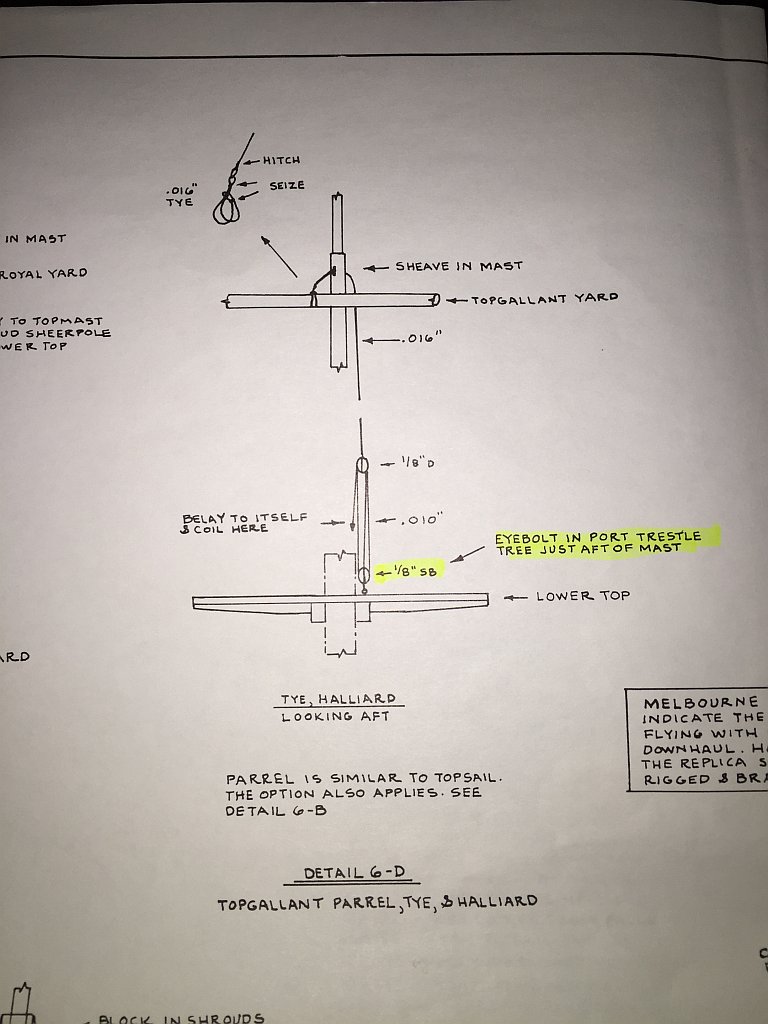
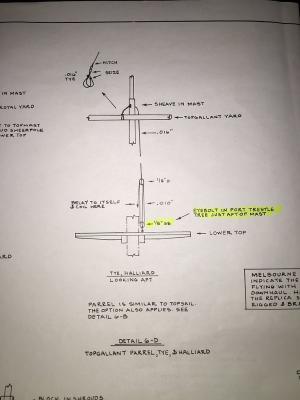
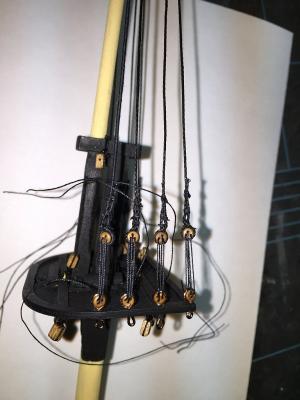
I'm working on the topgallant halliard. The fall has a double block at its end which rigs to a single becket block at the main top. The plan says for the fall of this block & tackle to belay to itself & coil there. Does anybody know what this actually looks like? I don't understand what they are saying to do here.
-
I just mixed the dark green with white until it "looked about right". I have no idea what color it should really be, so I defy anybody to tell me it's wrong.
- 287 replies
-
- 1
-
-
- niagara
- Model Shipways
- (and 1 more)
-
Thanks for looking. I appreciate it. I hope you'll find it informative & entertaining.
- 468 replies
-
- 1
-
-
- niagara
- model shipways
- (and 1 more)
-
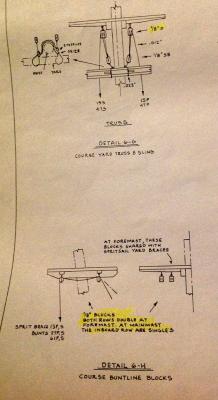
Well, I got got again. I was installing the course trusses. When I went to do the main truss, the block I was running the fall through was a single block. The plan requires a double. Checked the plan & yep, there is a double block there. Checked the plan for the course buntline blocks & it says use a single block. It didn't occur to me at the time, but there are actually three blocks under the forward part of the top. So I had to install these blocks & re-rig the fore trusses. Just another something to watch out for.
- 468 replies
-
- 3
-
-
- niagara
- model shipways
- (and 1 more)
-
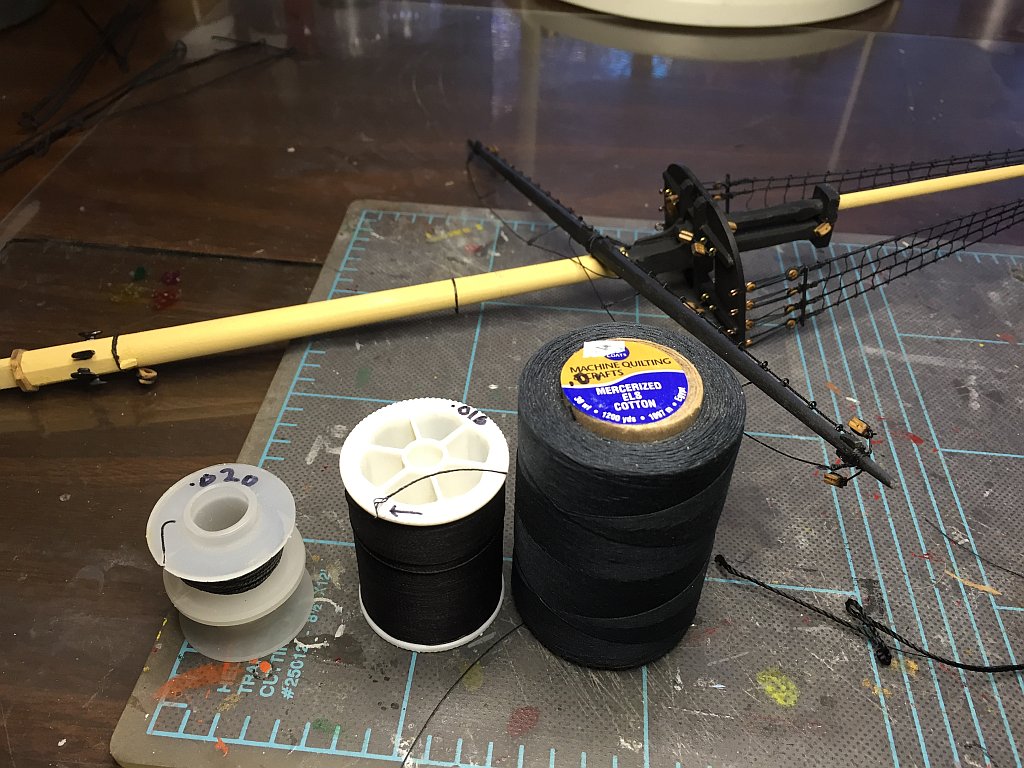
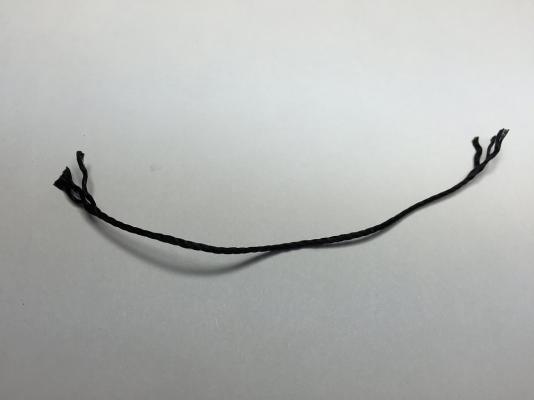
Thanks for looking in, Hipexec. I appreciate it. As promised yesterday, here is a sample of threads that I use for rigging.The large spool is what I use for serving. I also used it for rattling the shrouds & lanyards for the deadeyes, etc. I have another one just like it that is tan. The one in the middle, the "carpet thread", I've had for years & years, when I was doing plastic ships. I'm not even sure where to get it now, because I sure haven't seen it in any in stores recently.

- 468 replies
-
- 4
-
-
- niagara
- model shipways
- (and 1 more)
-
Help yourself George. I stole the idea from here also. I will caution you though...I built the lower shrouds already. I left the mast caps loose so that I could slip the shrouds over the masts. When done I may (or may not) attach the caps. Jerry, thanks for the comments. I have line from all over the place. I don't even know where I got it all from. The smallest line I'm using is about .010". I bought it at Hobby Lobby in the sewing section. It is on a very large spool & not too fuzzy & not too stiff. It is what I use to serve all of my lines. Most of the kit line is very stiff. It straightens very well with a heat gun, but I haven't found the stiffness a disadvantage yet. I'm sure there is a place it will be, though. My second smallest line is .016". It is "carpet thread" & made of nylon. It is very difficult to work with but it fills a need. I only use it when I have to. I'll post some pictures tomorrow.
- 468 replies
-
- 1
-
-
- niagara
- model shipways
- (and 1 more)
-
Just finished rattling the topmast & topgallant shrouds. I thought it was actually kind of fun. They're not perfect, but they look okay. Now to attach the yards & mount the masts. Then the real fun stuff begins... the main shrouds. Here is some more useless trivia. Catharpins: I always thought it was pronounced with the th as in the. It's not. It is pronounced cat-harpin. In fact, according to Lever, they actually changed the spelling to cat-harpin to get people to pronounce the word properly. Now aren't you glad you read this?

- 468 replies
-
- 4
-
-
- niagara
- model shipways
- (and 1 more)
-
Yes, black above the waterline. You know, I painted mine bass-ackwards. I painted the upper part & lower part first. Then I painted the waterline. Waterline should have been done first. That being said, I used blue painters tape for the upper/lower hull & tamiya tape for when I did the waterline. Glad my pictures were helpful. I was hoping someone would get some benefit from them
-
Here is what came in my set: 2 ea MS4801 bulwarks dark green 2 ea MS4830 hull spar black 2 ea MS4839 primer 1 ea MS4828 iron cannon black 1 ea MS4829 yellow ochre 1 ea MS4831 white 1 ea MS4821 house light buff 1 ea MS4802 bulwarks gun red There are no blues in the set, nor are any listed as belonging there. I didn't use the red because it looked too orange & the buff just isn't right. I have knowledge of the green since I have never seen a photo of the lower hull. I did use the ochre, green, light buff & blacks, but only three colors are really useful, the green, buff & ochre.
-
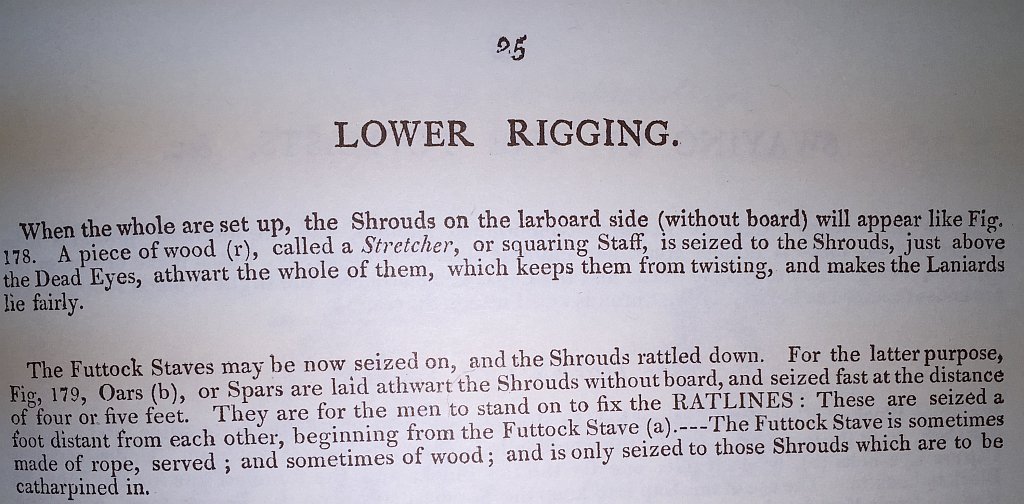
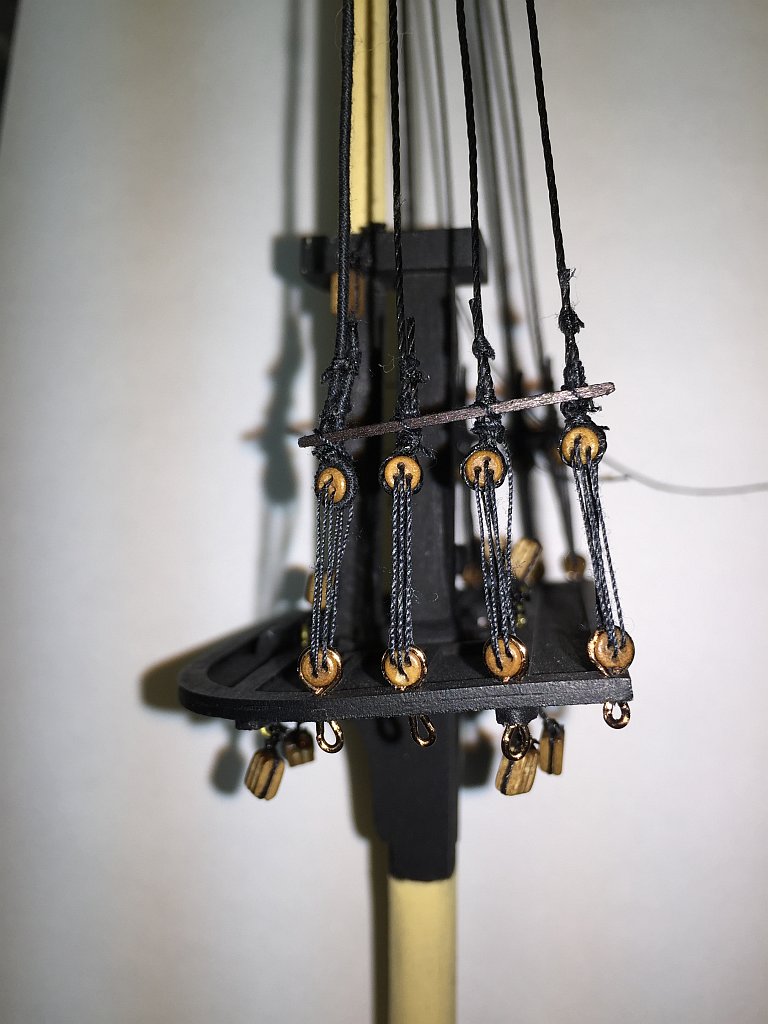
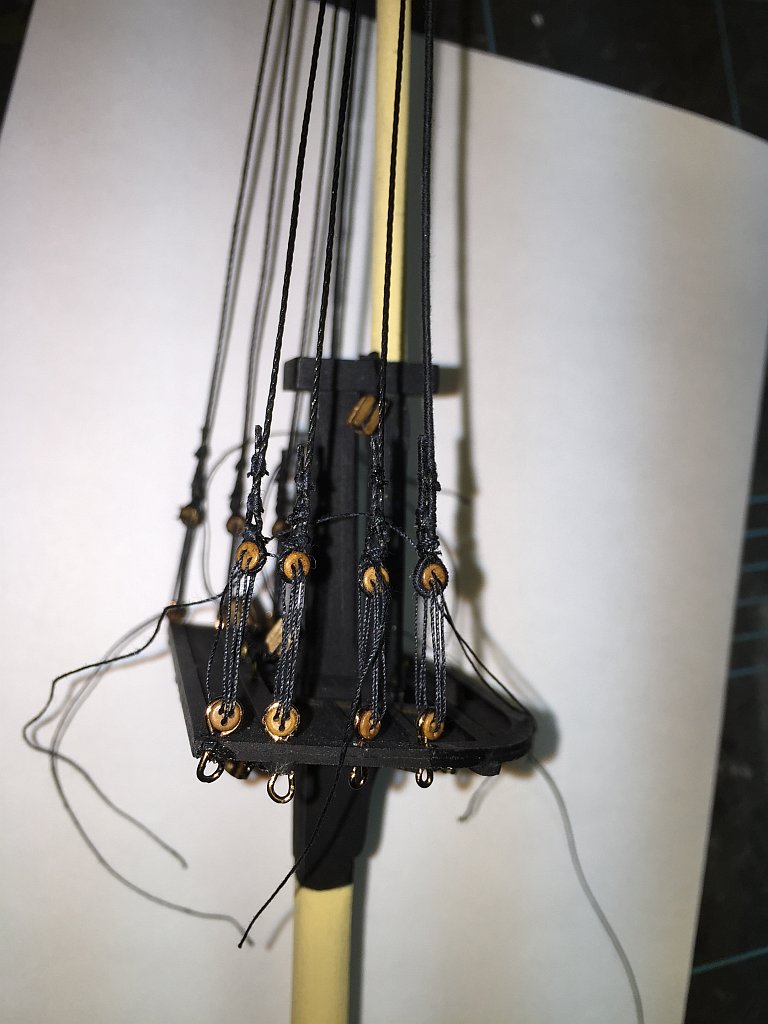
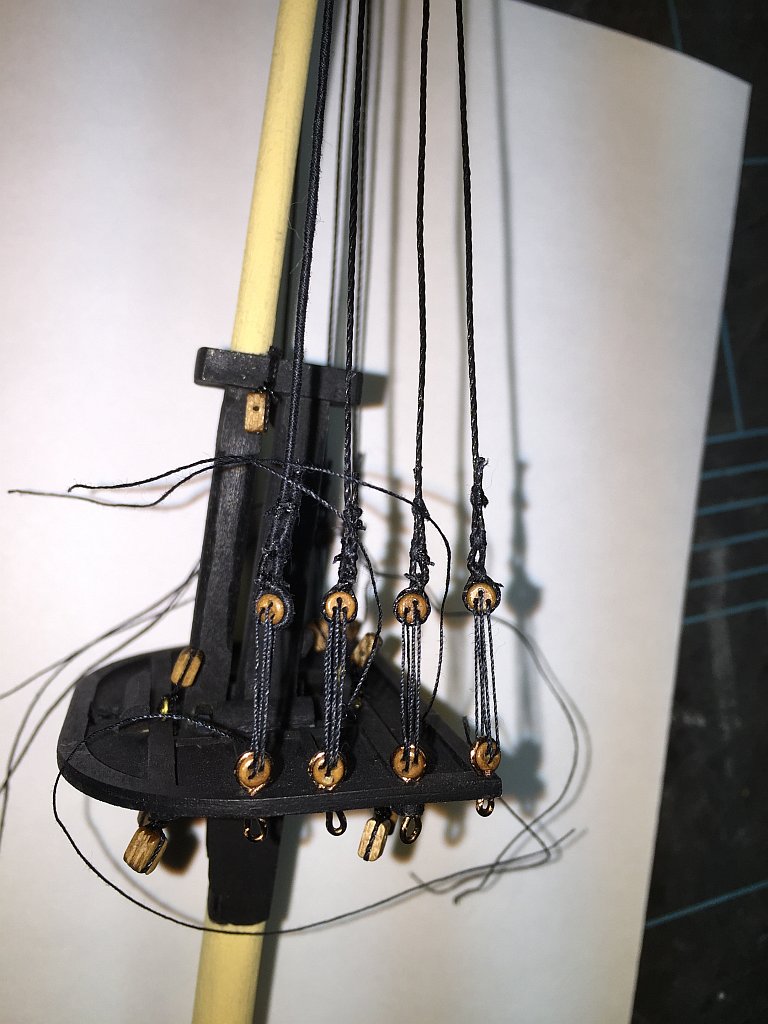
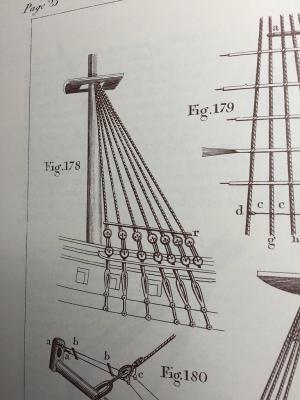
Time for another lesson if you can stand it. The ME prints call the wooden slat atop the deadeyes a sheer pole. Lever calls it a stretcher, or squaring staff. This is the answer to the problem I said I was having earlier with the shrouds twisting. Attached is a picture & description. Those guys thought of everything.
- 468 replies
-
- 2
-
-
- niagara
- model shipways
- (and 1 more)
-
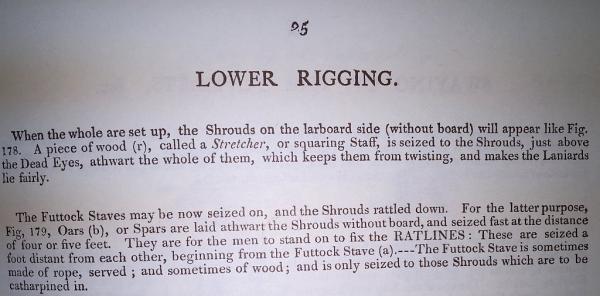
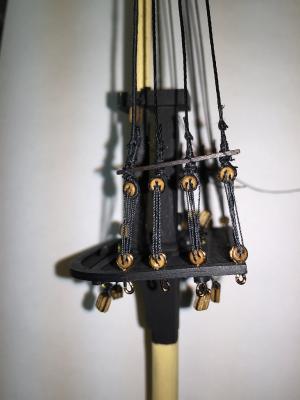
Finished the topmast shrouds & added the stretcher bars & futtock staves. It looks like my deadeyes are a little far apart, but they are the same as the print.
- 468 replies
-
- 3
-
-
- niagara
- model shipways
- (and 1 more)
-
Welcome back. I'm no ship expert, but I did not put any coating over my paint. But then, I didn't put anything on the deck, either. Not sure why it's needed as the deck is supposed to be dead flat (finish wise). I airbrushed the hull, so I only put on one coat of paint. It covered very well. I used the ME paint. As for the waterline, it actually is on the print. Page 3, bottom hull profile. Look below the forward channels. I taped a pencil to a scrap block of wood to mark mine.
-
Round two of the great mast match (foremast division). They are not perfect, but they are a whole lot better than they were. Tomorrow I start the main topmast shrouds. Maybe they'll be even better. In fact, I know they will because I reused the two fore shroud pairs on this mast & they were off a little bit.
- 468 replies
-
- 4
-
-
- niagara
- model shipways
- (and 1 more)
-
Been working on my topmast shrouds. Wow, the tweaked machine now works like a dream. I have noted that it is VERY sensitive to not being kept perfectly flat. Aside from that, I was able to seize two fore shrouds & three aft shrouds in one sitting, and still had some time left over. While I was seizing these lines (under a 5 diopter magnifier), I got to wondering,.. if I scaled up a dog hair 64x, I wonder how big it would be & how much it would weigh. I've got so much of this hair wrapped in my seizings, I wonder what it would look like full scale. My mind tends to wander when doing tedious tasks.
- 468 replies
-
- 2
-
-
- niagara
- model shipways
- (and 1 more)
-
Another hard learnt lesson. I started rebuilding the topmast shrouds by serving them. It would appear that when I took everything apart on the serving machine & tweaked it, I neglected to tighten the nut on the gear that is driven by the motor. It started slipping as soon as I started. I removed the motor (& bracket) to tighten the nut. When I reassembled it all, it just wouldn't turn very well. It always turned better the opposite way. After playing with it I realized that if you install the motor bracket with too much downward tension, the motor binds. I loosened the bracket so that the motor spun free & re-tightened it. Now all is right with the world. The machine works as advertised. I could probably make it a little better but I'm at the point of diminishing returns. It's probably not worth the extra work for a tiny bit of improvement.
- 468 replies
-
- 1
-
-
- niagara
- model shipways
- (and 1 more)
-
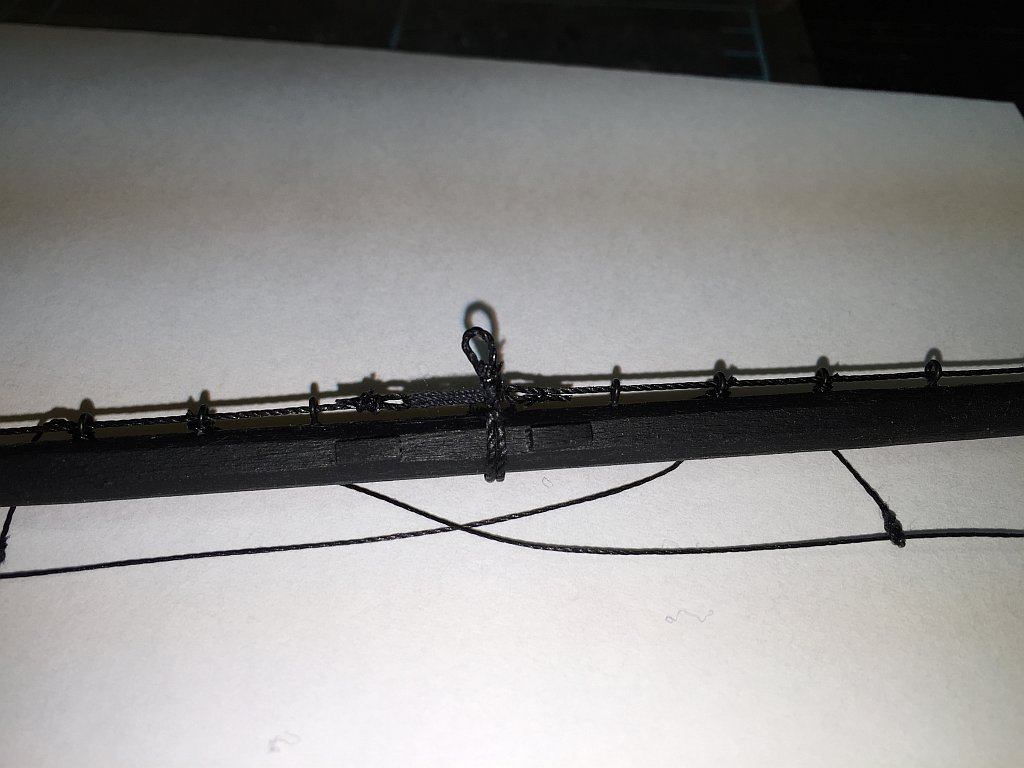
So I went to plan B. First I went to the smaller line (.028). It's easier to work with & looks a lot better. Then I just made a loop & seized it. Once in place, it was easy to draw it down to the proper size. And it looks pretty good.

- 468 replies
-
- 3
-
-
- niagara
- model shipways
- (and 1 more)
-
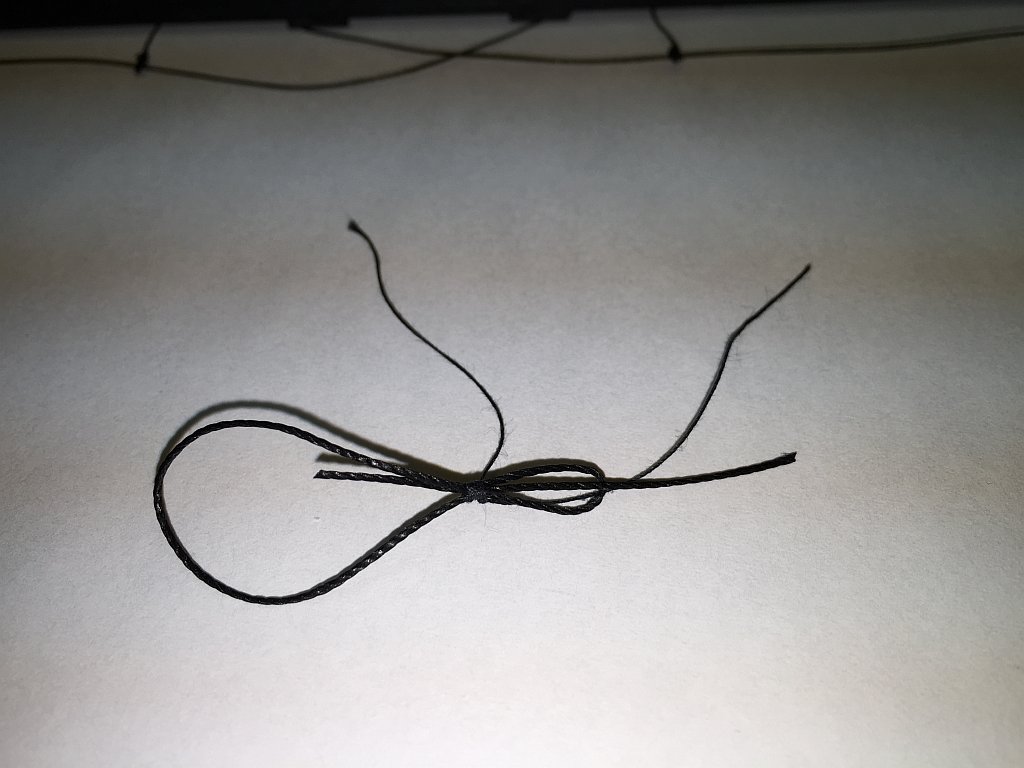
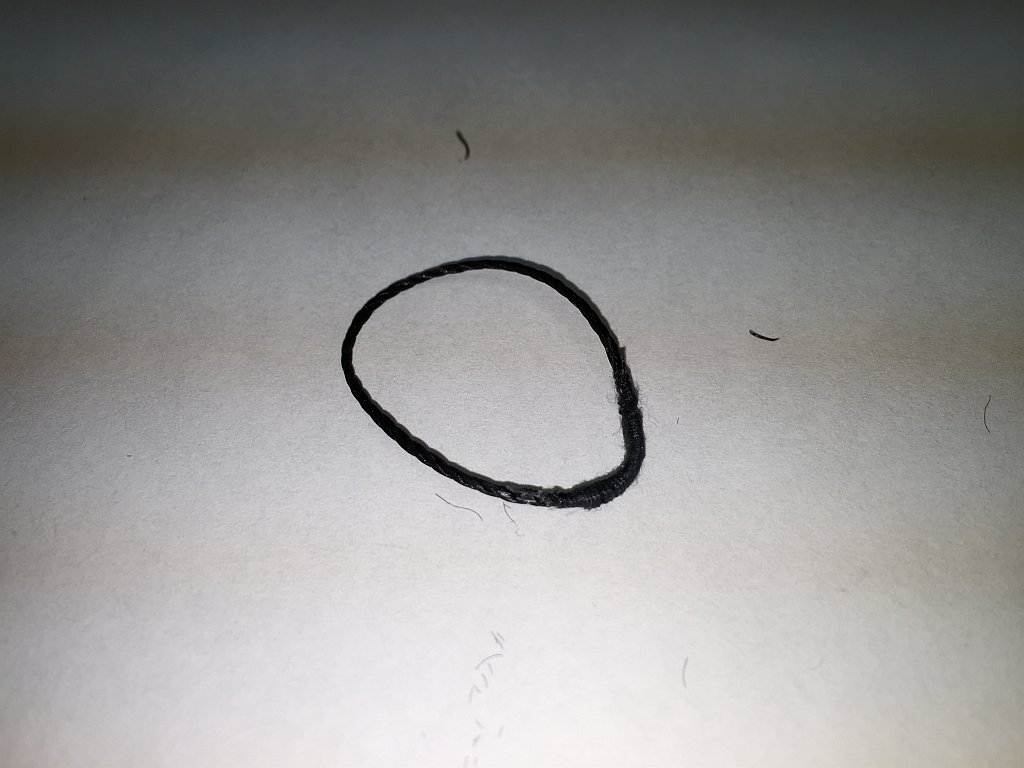
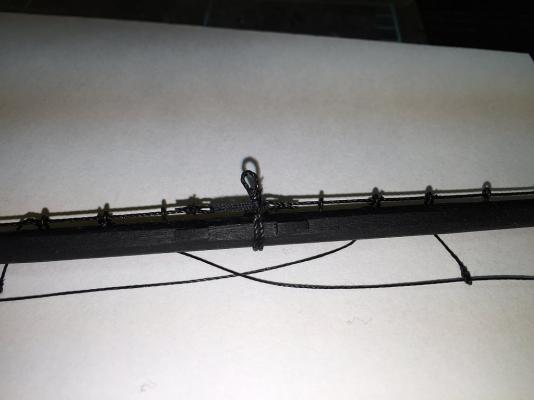
I made the slings for the course yards today. The plan calls for .035 line. Kit is supplied with .028 & .040. I decided to go .005 up rather than .007 down. The first method I attempted was to make a ring. I splayed the ends to simulate a butt splice & then served it . Looked like hell & I made it too big. It is really hard to control the size doing this.

- 468 replies
-
- 1
-
-
- niagara
- model shipways
- (and 1 more)
-
I've already used it quite a bit & it works pretty well, but tended to stall a lot for the reasons I outlined above. I think it will work really well now. I will be remaking some shrouds within the next couple of days so I will know soon. I'm all a-jitter with anticipation.
- 468 replies
-
- 1
-
-
- niagara
- model shipways
- (and 1 more)
-
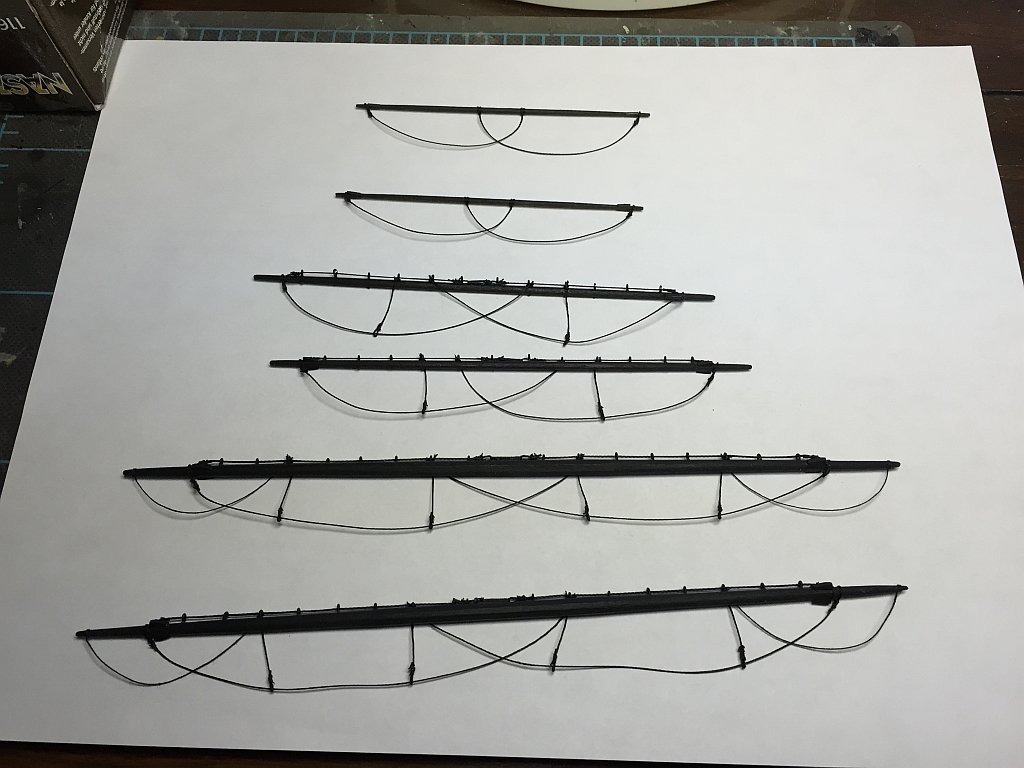
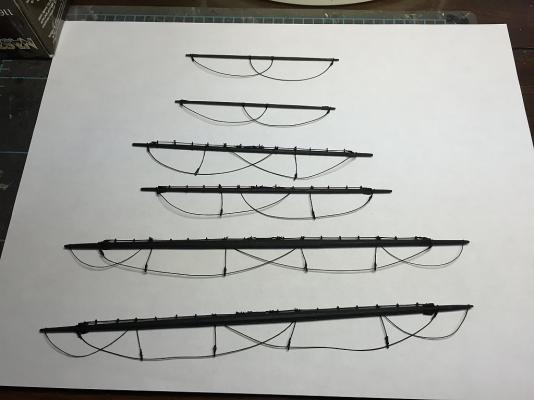
Finished the rest of the yards (except for trusses, slings & blocks).
- 468 replies
-
- 5
-
-
- niagara
- model shipways
- (and 1 more)
-
Last night I spent some time tweaking my serving machine. The first thing I did was take all the gears of & file the burrs off of the faces. That made a lot of difference. While checking it I found what seemed to be a high or tight spot between one pair of gears. I hand cranked the machine & held a jewelers file to the outside edges of the teeth. It was as though the hole was drilled not quite exactly in the center so when the gear spun, it tightened at the high spot. This made all the difference in the world. Now it spins at a constant speed & doesn't slow down on every revolution. I haven't put a line on it yet, but I'm expecting good things. I also notice that the machine spins much better & with higher torque in one direction (of course, it is the direction I don't use). So I may rethink how I use this. It will just take a little getting used to going the opposite direction. Also, I find that the minimum speed that I can use this reliably without stalling it is about 3 on the dial. Carry on.
- 468 replies
-
- 1
-
-
- niagara
- model shipways
- (and 1 more)
-
Heat shrink sounds like a great idea. I soldered brass strips & that was quite a chore that took a couple of days.
-
I'm having the very same problem with my base. Mine didn't happen until after I attached the boat, & I attributed it to that. I used the cheap pine base that came with the boat when I should have used a piece of walnut I am saving for just such an occasion. I haven't bothered to measure the discrepancy, but I figured I'd just shim it after I apply the felt bottom & hope for the best..