Laxet
-
Posts
391 -
Joined
-
Last visited
Content Type
Profiles
Forums
Gallery
Events
Everything posted by Laxet
-
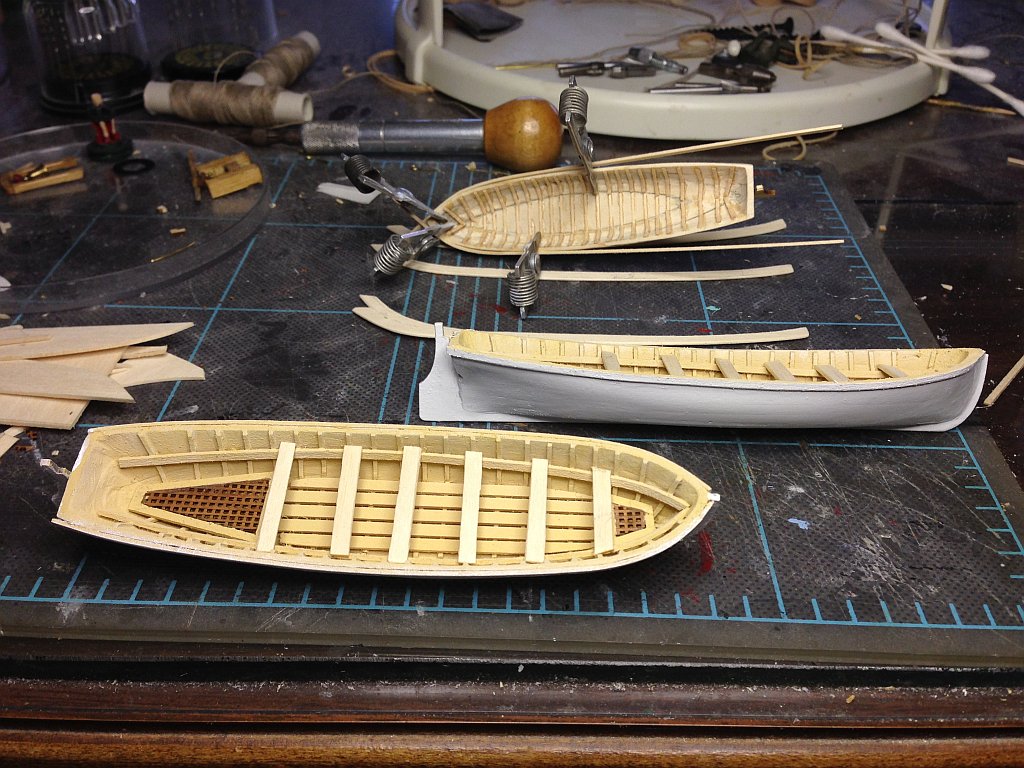
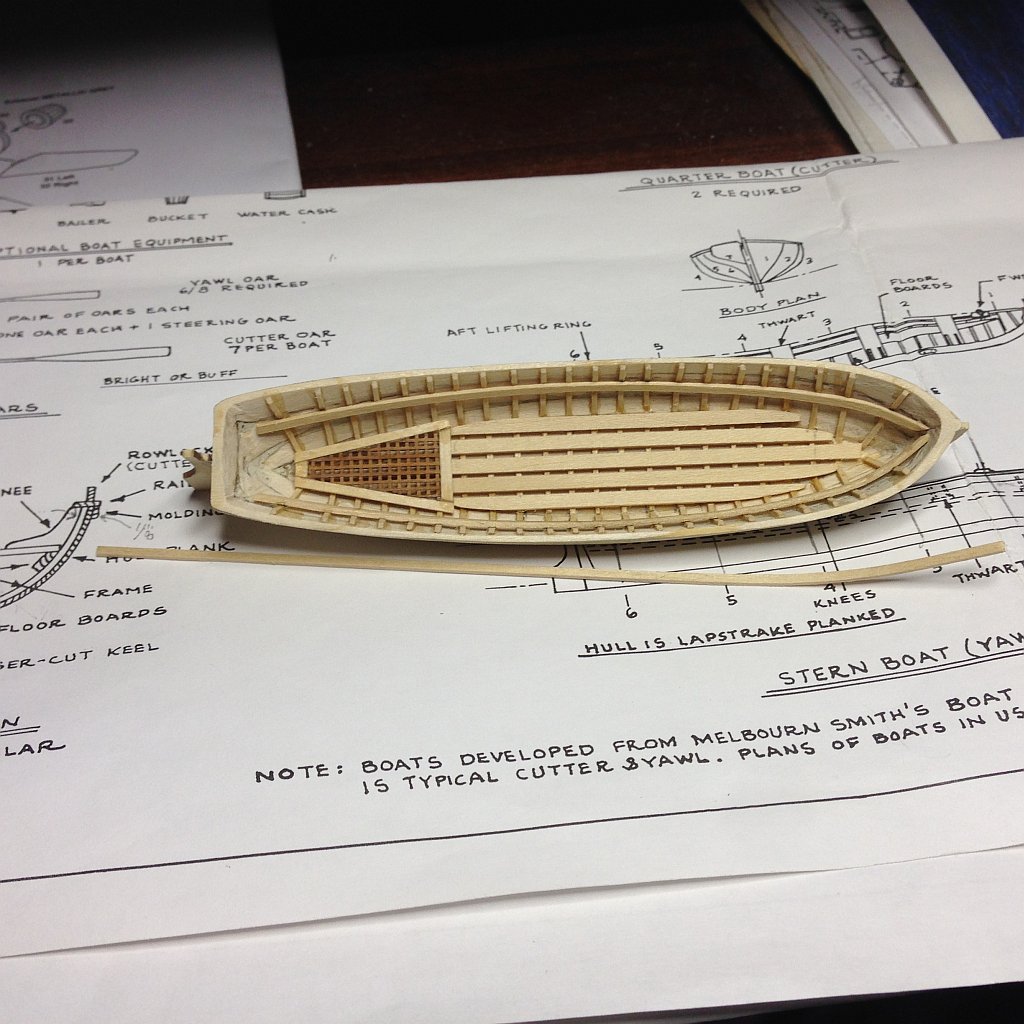
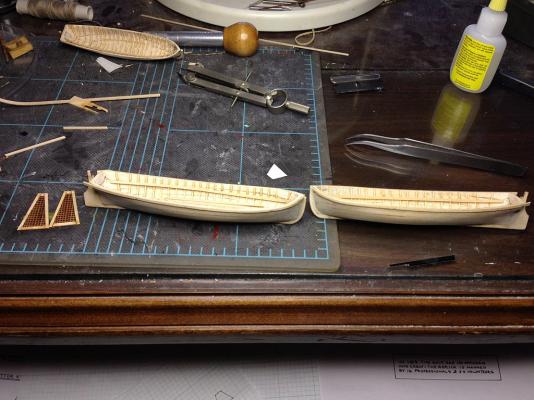
 Yeah, I can't even imagine doing these boats PoF. I'll stick with this as it actually seems to be coming out a little better the I thought it would. Here is the latest progress picture. Inside painted, outside painted, internal parts fitted (but not painted (well the gratings are painted)). Used Krylon to paint the white, but it's too shiny. Will have to coat with some Dullcoat or something. I think I have some Krylon acrylic dull finish. You can see the yawl in the background getting fitted with curved parts. Here's another note to self: DO NOT THIN MODEL EXPO'S MODEL SHIPWAYS PAINTS WITH RUBBING ALCOHOL. It turns everything into a gelatinous mess. It actually worked in the airbrush jar, but when I poured it back into the main jar, (I know, that was REALLY stupid & I never do that) it turned everything to poo poo. I hope I can salvage this because I still have to paint the yawl.
-
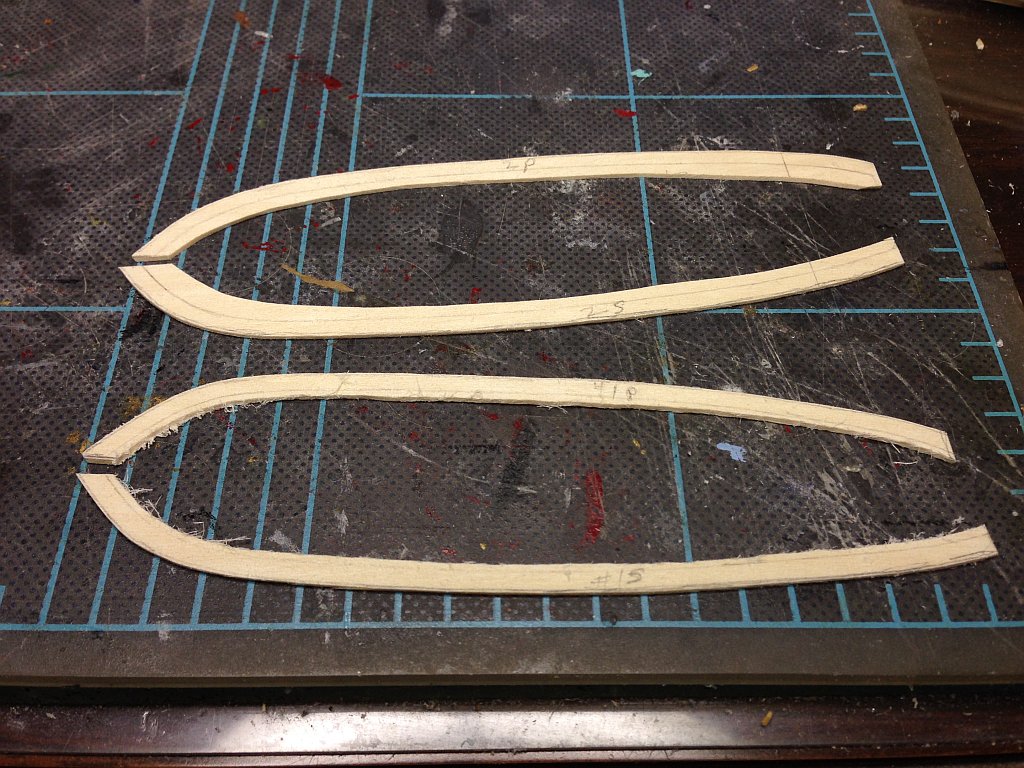
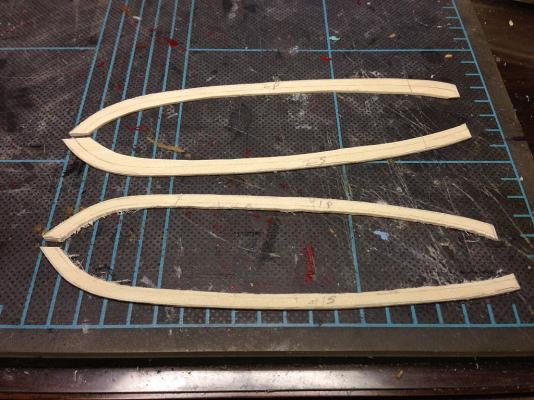
This shows the the roughing out of the top rails for the cutters. A Dremel sure makes quick work of this task.
-
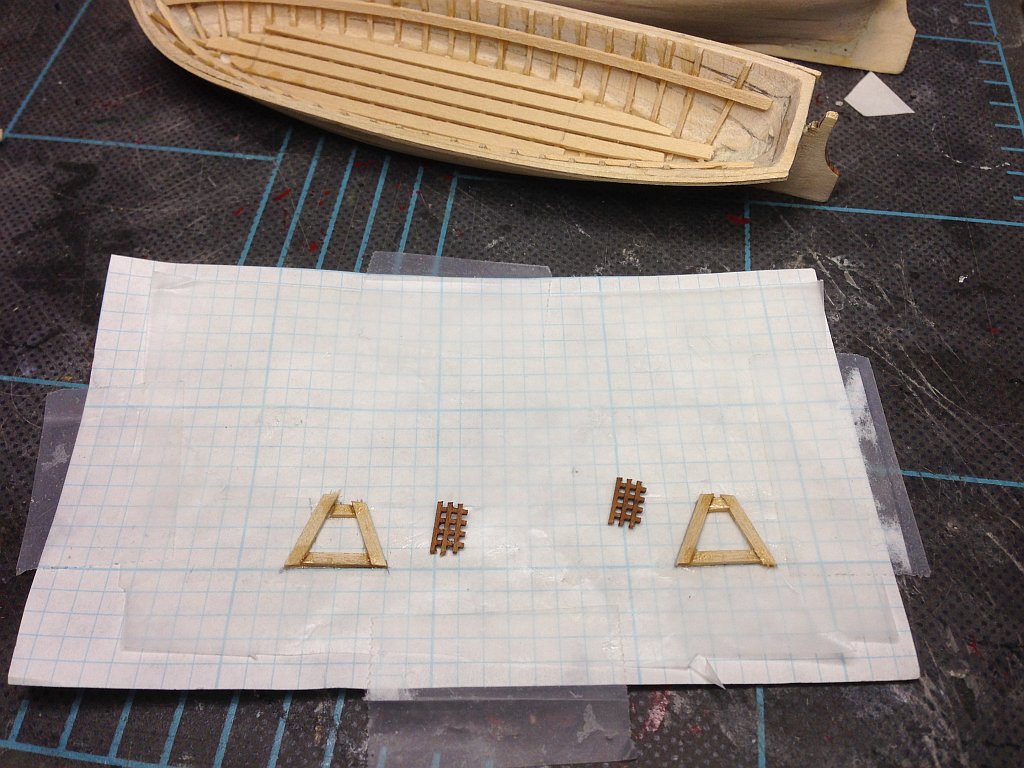
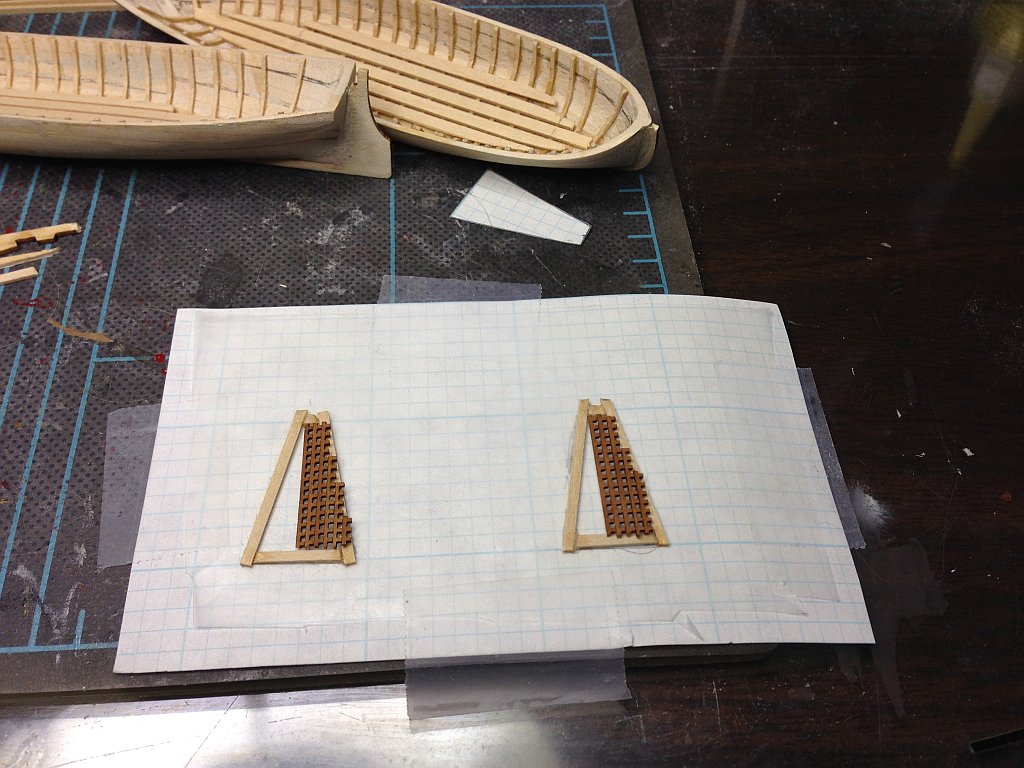
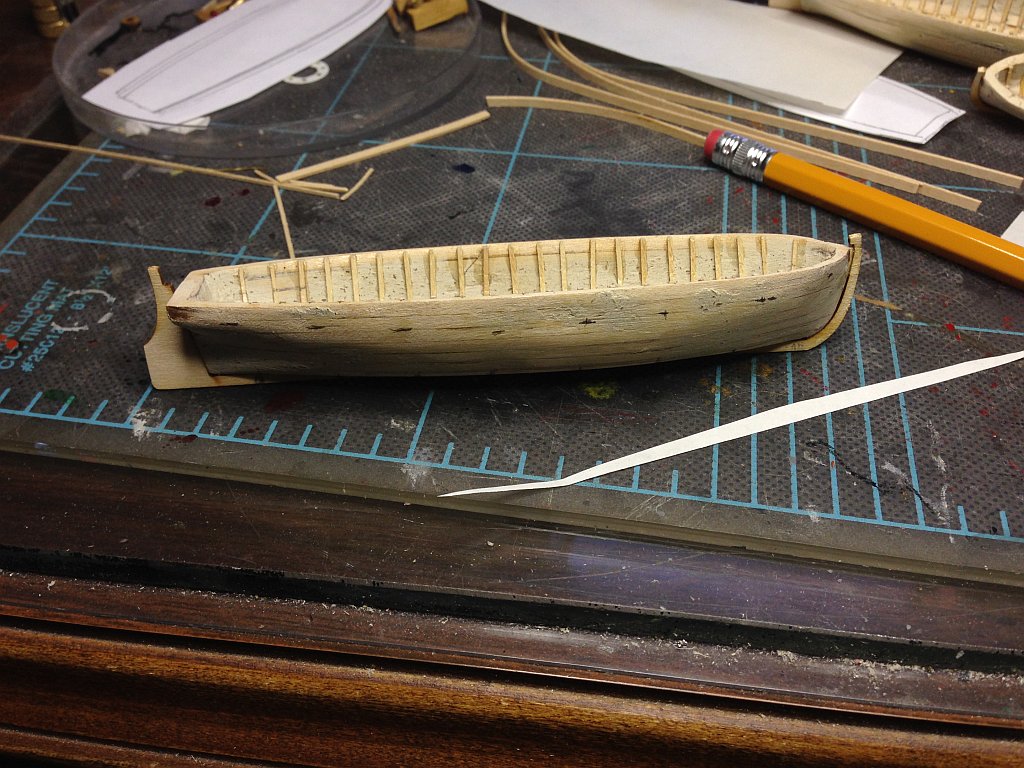
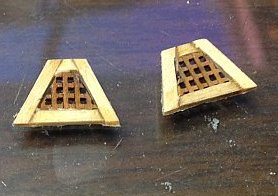
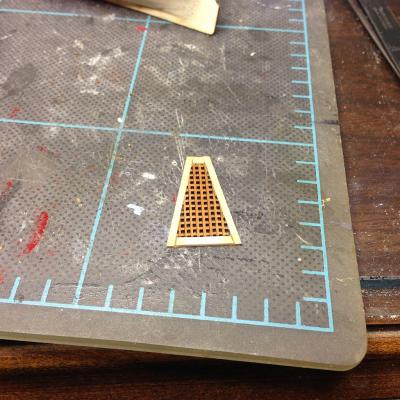
Here are the more or less completed forward grates. They still need a little sanding.
-
Started on the forward grates. Also started on the top rails.
-
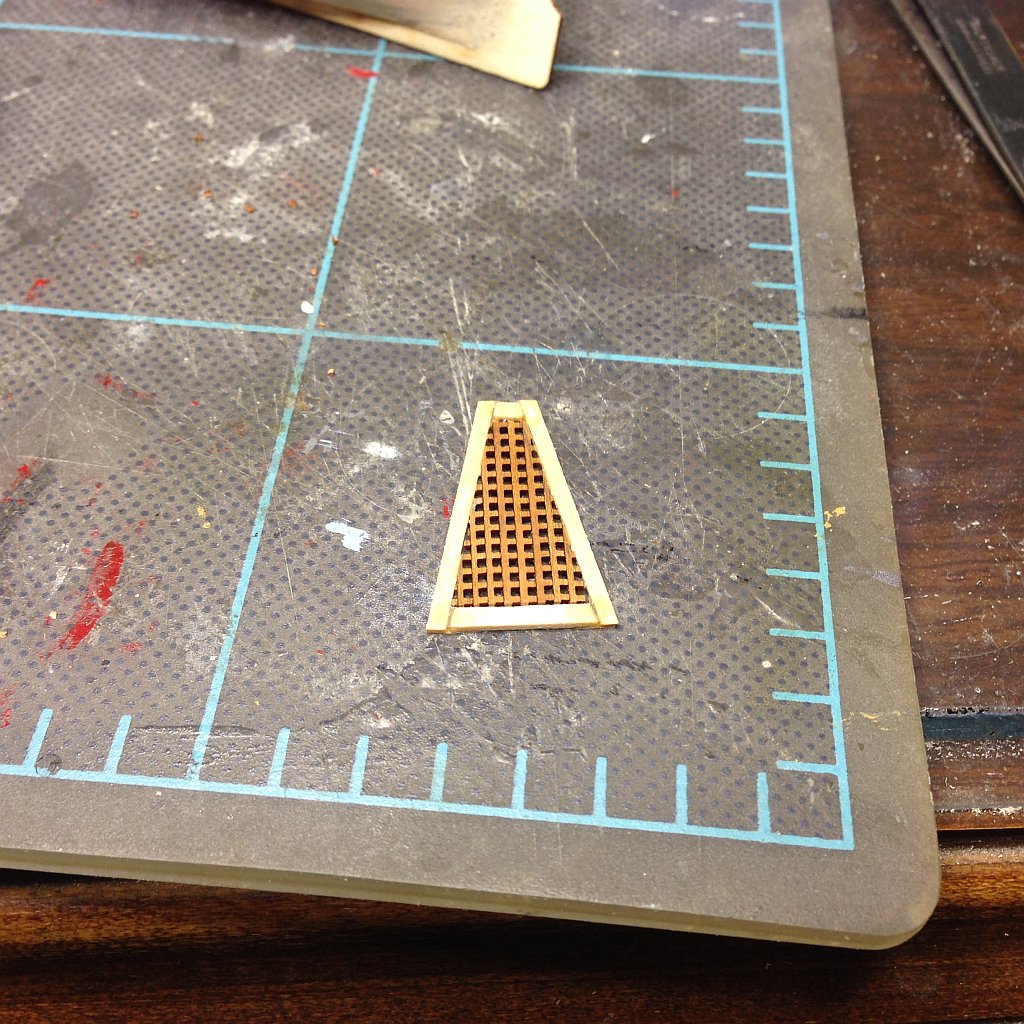
Finished the gratings & true to form, it fought me the whole way. I'm waiting for it to disassemble itself tonight while I sleep. I also installed the bumper rails on the cutters. Now I have to build the top rails. That should be a snap (famous last words). I have to think about painting before I install those, though.
- 468 replies
-
- 1
-

-
- niagara
- model shipways
- (and 1 more)
-
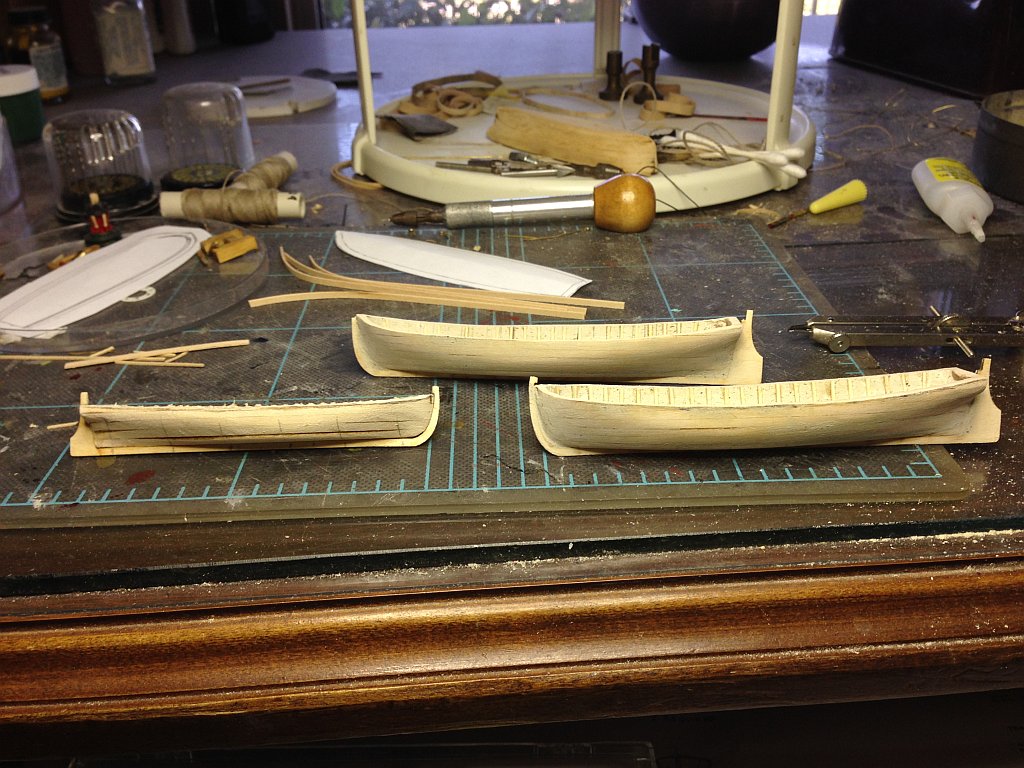
I was thinking that there were way too many ribs (frames) in these boats & they looked cluttered, but it's by the print. Since then I've found some pictures of these boats, & you know what? They look just like this. They have just as many ribs as mine does, so now I don't feel so bad. It still looks cluttered, but it"s accurate clutter. Whoo hoo. That's one for the good guys.
- 468 replies
-
- 1
-
-
- niagara
- model shipways
- (and 1 more)
-
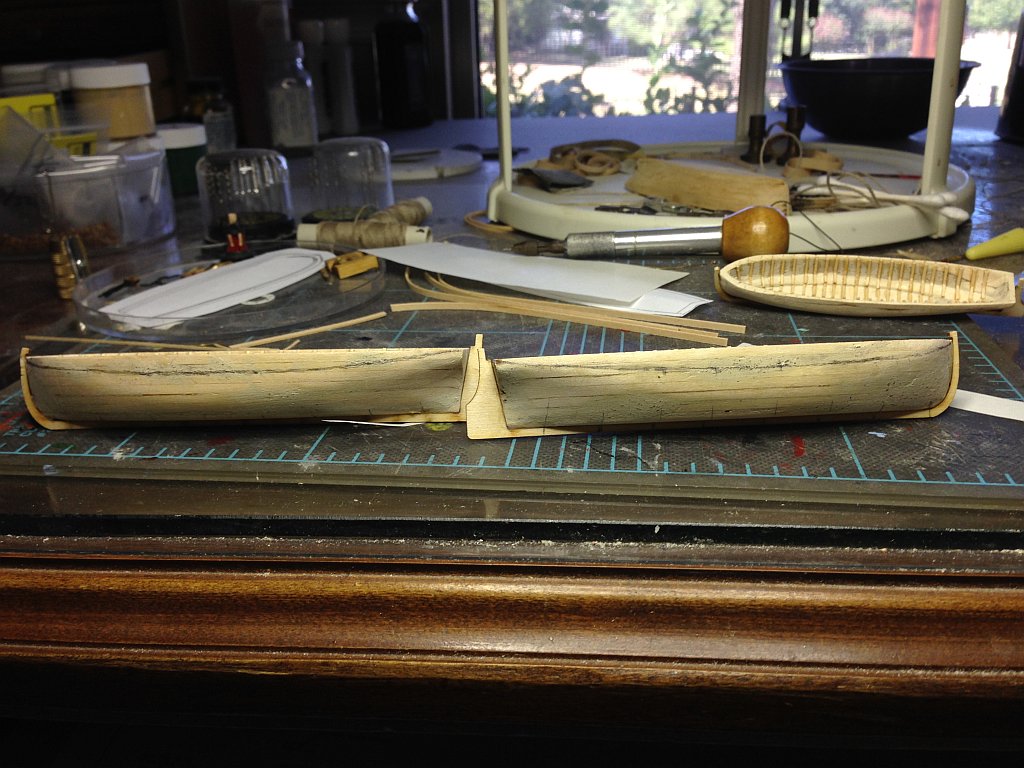
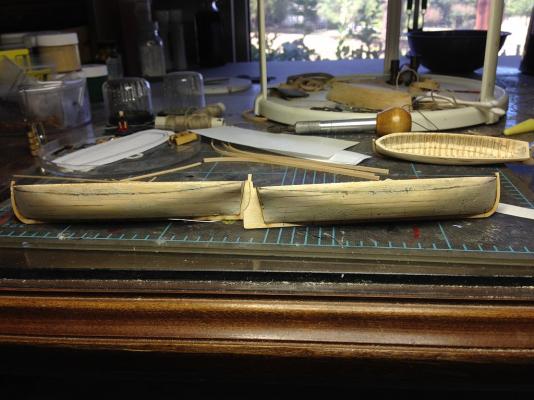
This always happens. One of these went together like a dream. The other like a nightmare. Still haven't finished the second one. Installed the thwart rails & fitted a bumper rail while waiting for the glue to dry on #2 for the 20th time. These boats are really slow going for me. I'll be glad when they're done & I can get back to the ship. I still have to build the channels. That should be the last woodworking I have to do on this ship.

- 468 replies
-
- 1
-
-
- niagara
- model shipways
- (and 1 more)
-
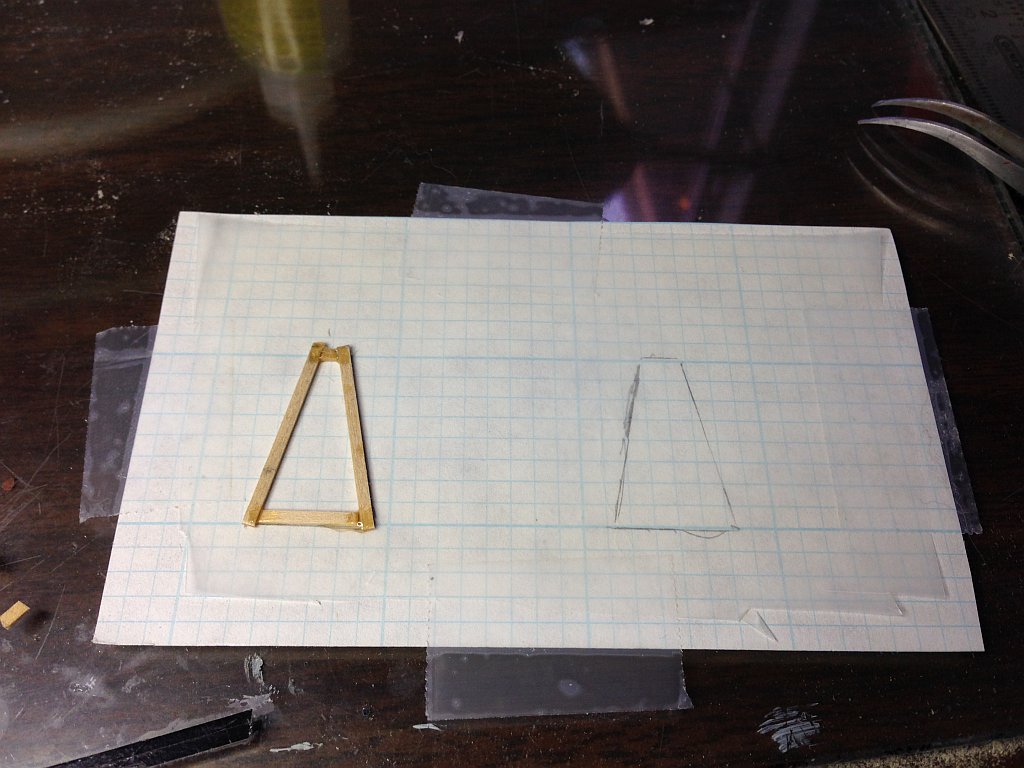
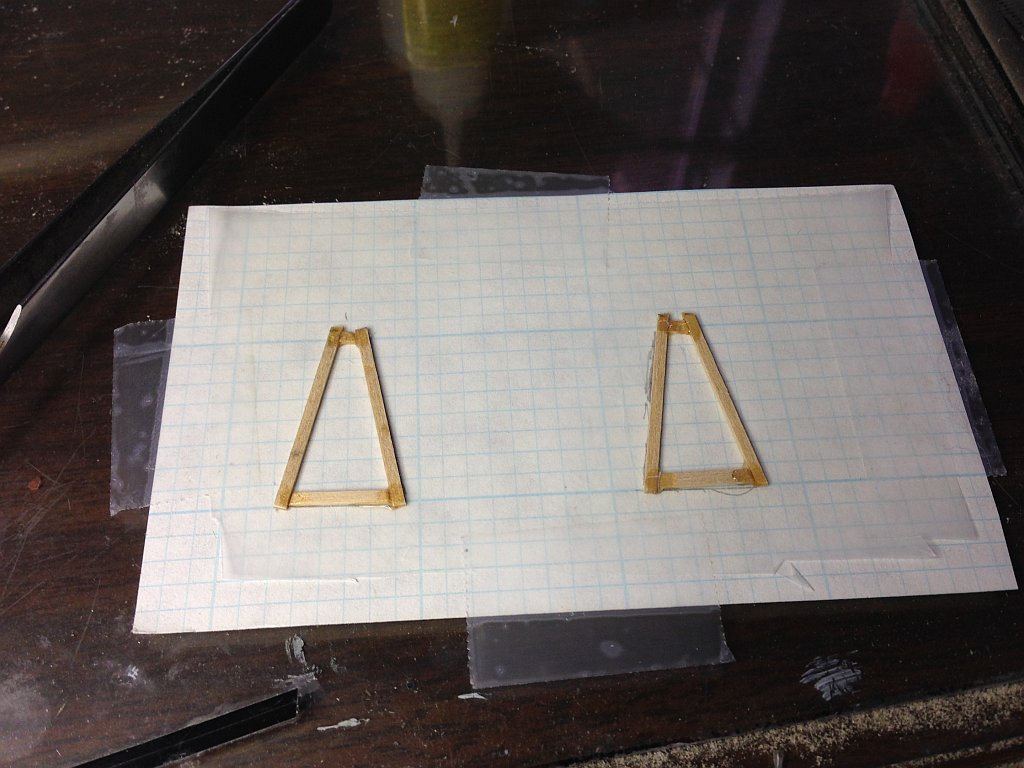
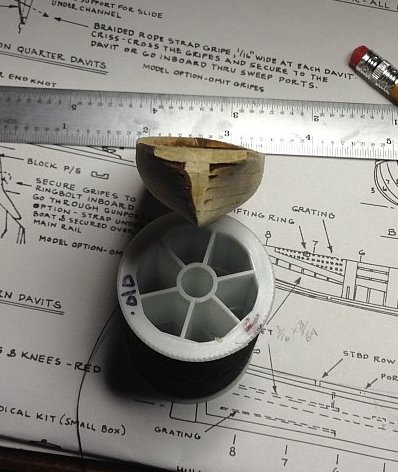
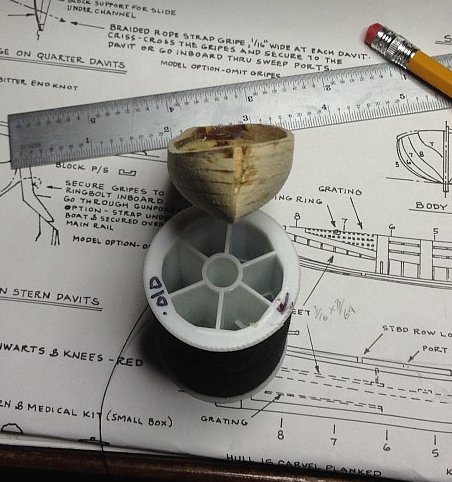
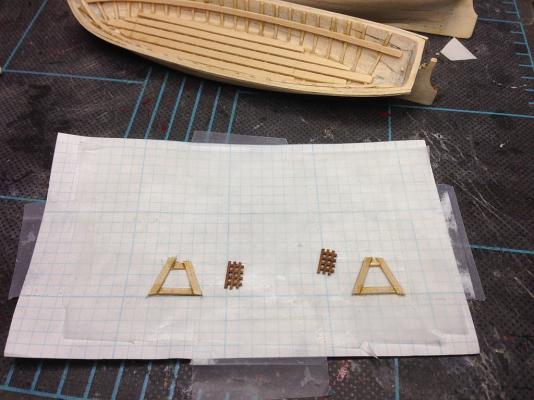
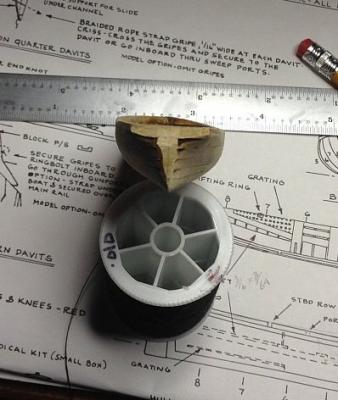
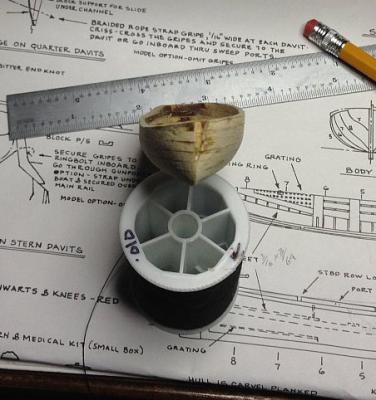
I will put a pool of CA on a sheet of glass & dip parts in it to attach them. I set my tweezers on the glass to keep from scratching my desk. Well, I unknowingly knocked the tweezers into the CA. Then I picked them up. Problem is, I couldn't put them down. Had to peel them off of my finger. Ouch. I hate it when I do that. Here I am working on the gratings for the boats. Slow progress.


-
Look at you go, Bob! I hadn't realized you even started her. Looks really good so far. I will continue to follow your build with bated breath.
-
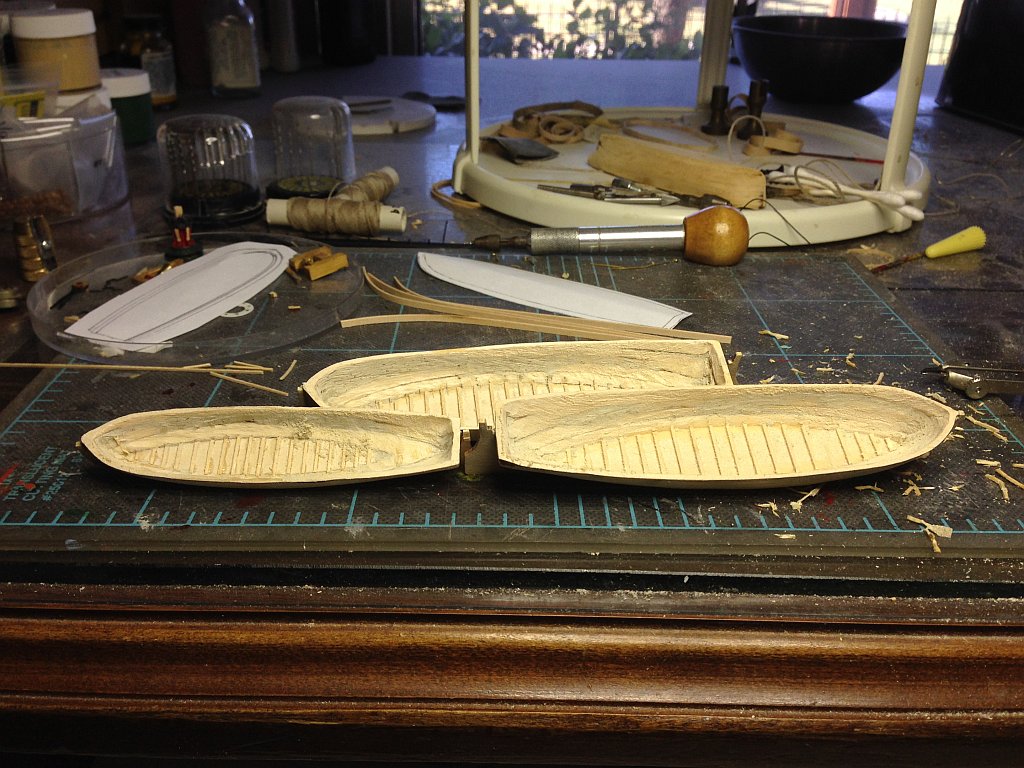
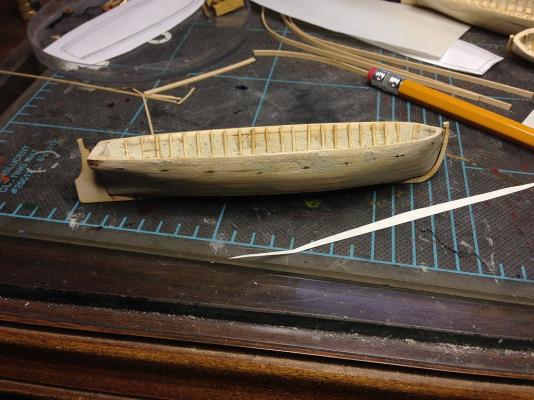
I finally caught up to where I was before I ripped out all the insides & re-sanded the interior. I've started on the floor. The gratings are going to be very difficult, trying to fit them in the bottom of the boats.

-
You did that fast. It took me a couple of weeks to plank my deck. You'll be past me in no time
-
I'm pretty much in the same boat as you. I've built plastic for about 50 years now. I've gotten fairly good at them but a ship is a whole 'nother beast. I've even built plastic sailing ships. Not the same. I've followed Greatgalleons build also. He is leaps & bounds beyond me, but by golly, I'll show you all of the stumbling blocks (at least the ones that tripped me up). I love serving as a horrible example.
-
You're a braver man than I am. I didn't even attempt a nibbing strake. Maybe on the next one. It all looks really good.
-
You know, I really hate doing things twice. As many times as I've done things over on this ship, I ought to have two of them when I'm done. But it was my choice to cut my teeth on this intermediate level ship, so I have only myself to blame. With all due respect to Jerry above, there would be too much I don't know about vac forming to attempt that. I'm too deep into this & since this is my second try on these, it"s personal now! I found a sanding drum that works like I originally wanted & knocked out the interior & reformed it. Bulkheads are thinner & the overall shape is much better. I know what you are all saying, "We didn't want to say anything, but your last interior really looked like poo poo". Really now, I can take it. Just lay the cards out on the table. I'll never get better if you tell me my crap smells like roses. Anyway, here is a pic of the rough grinding. After sanding I think it will look WAY better than it did, & it will have the proper lines now.

-
Well, the damage is done. I think they look pretty good. I am debating whether to strip the insides & redo them. After carving the bulwarks down, they are too thick & need to be re-formed. Here are before & after pictures. Notice the broken stem posts. I may just redo those & the rudders also, & remove the rudders. As for paint, I found a few (not very good) pictures online showing the current boats. I don't know how historically accurate they are, but they are white with red rails & interior parts. I don't especially like those colors, but I am more interested in accuracy, such as it is.

-
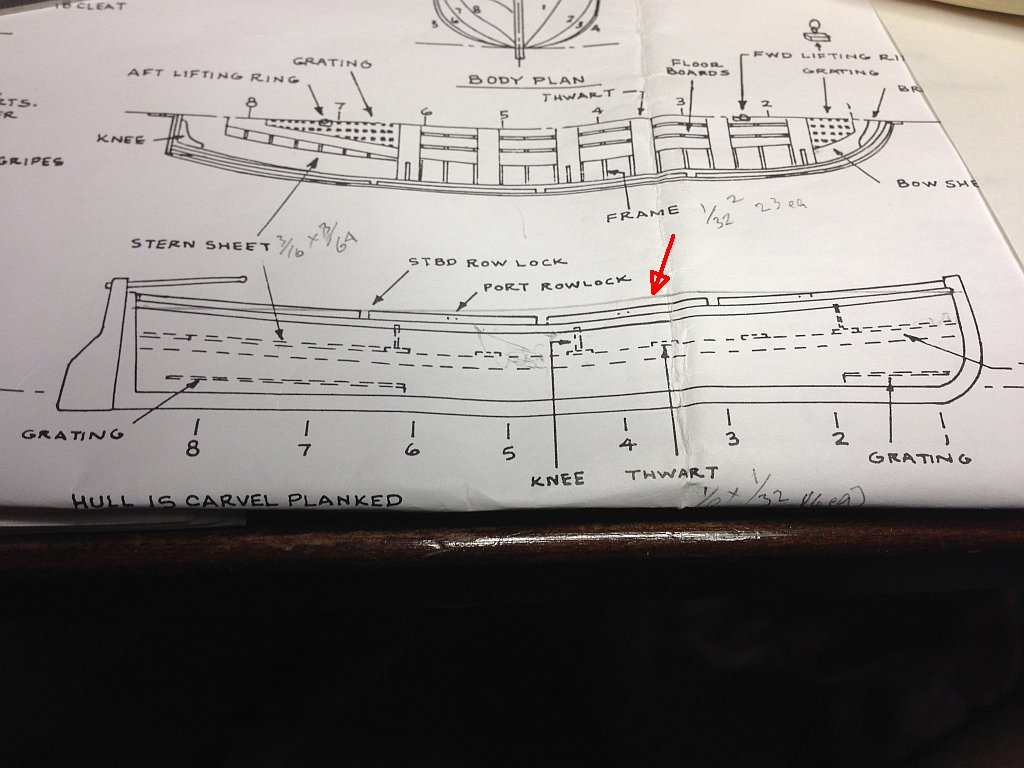
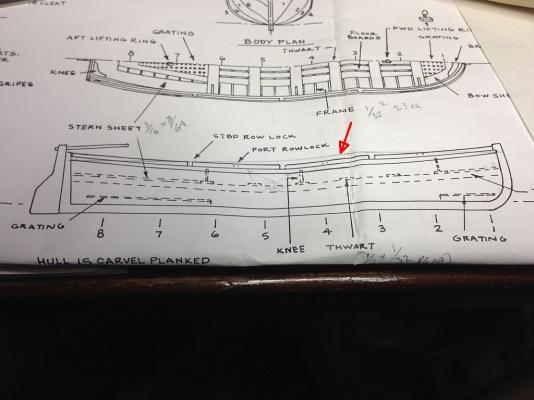
This shows, based on the bulkheads shown on the print (1-8) where the hull should be cut (as near as I can figure it. I don't know how to actually figure this part out.
-
Forgot one.
-
I can hear you all now, "Why you idiot, we knew that. It goes without saying! " Unfortunately, everything has to be said to me. Here I carved a bit on one side of my spare boat so you can see the difference (right & left). I must admit, it looks a whole lot better swept. I just wish I had realized it sooner.
- 468 replies
-
- 1
-
-
- niagara
- model shipways
- (and 1 more)
-
Now the bad news. It seems I can't get a break on the boats. Right after I finished framing all of them & trying to figure out where the thwart support goes, I realized (after looking at the prints for the umpteenth time) the the bulwarks have a sweep in them. I drew an arrow showing the area I'm talking about. The pencil line is the existing height of the bulwark.
-
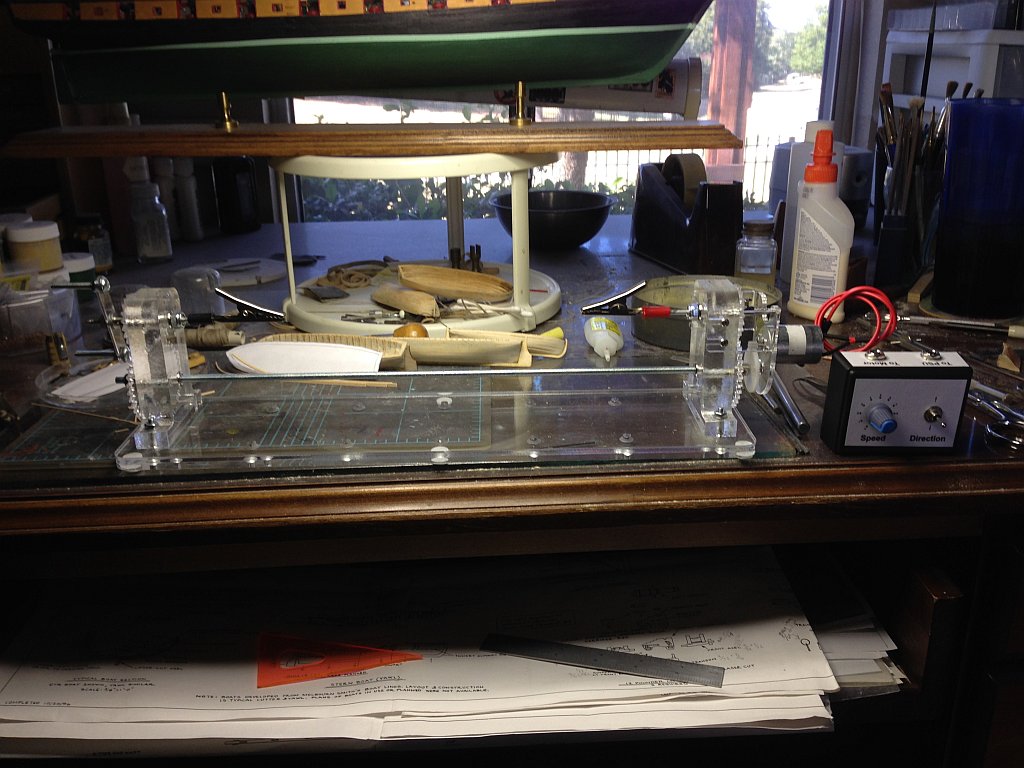
First, I'll start with the good news. I received my serving machine & speed controller yesterday from Russia. Looks really nice. Still waiting for the power supply unit, which is coming from China. At least I can use this manually in the mean time.

- 468 replies
-
- 1
-
-
- niagara
- model shipways
- (and 1 more)
-
Looks darned good to me. You made quick work of that.
-
Any suggestions on colors for the cutters? Is there any history to say what they may have looked like? How do I determine the waterline? Or is it all "that looks about right"?
-
Here you can see the thwart supports I bent yesterday. Also, here is another picture of the magic of the shark steamer. This time in focus.


-
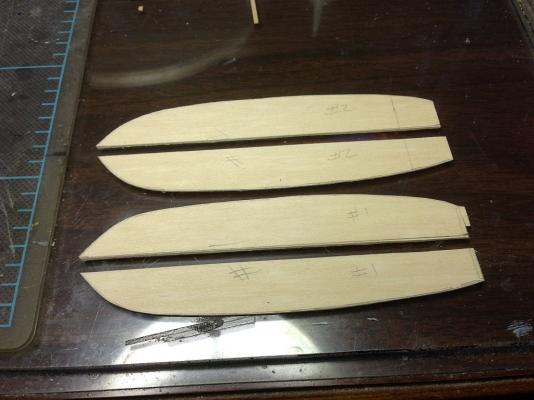
So it turns out I still had the scraps from the yawl. Even better, I have two old cutters that I had abandoned when I got ME to send me some more. They made tracing very easy. I also found a sheet of 1/32 basswood that I will use to make these rails. The heavens have aligned & shone down on me. All of this during a fierce thunder storm that just hit. Not sure if it did roof damage yet but all of the chairs & a towel rack I built out of pvc ended up in the pool. Luckily, the table got caught on a chair & didn't blow in. We got about .9" of rain in 15 minutes. Wow!

-
It's amazing how different it looks without deck furniture. Nice work so far.