Moonbug
-
Posts
1,028 -
Joined
-
Last visited
Content Type
Profiles
Forums
Gallery
Events
Everything posted by Moonbug
-
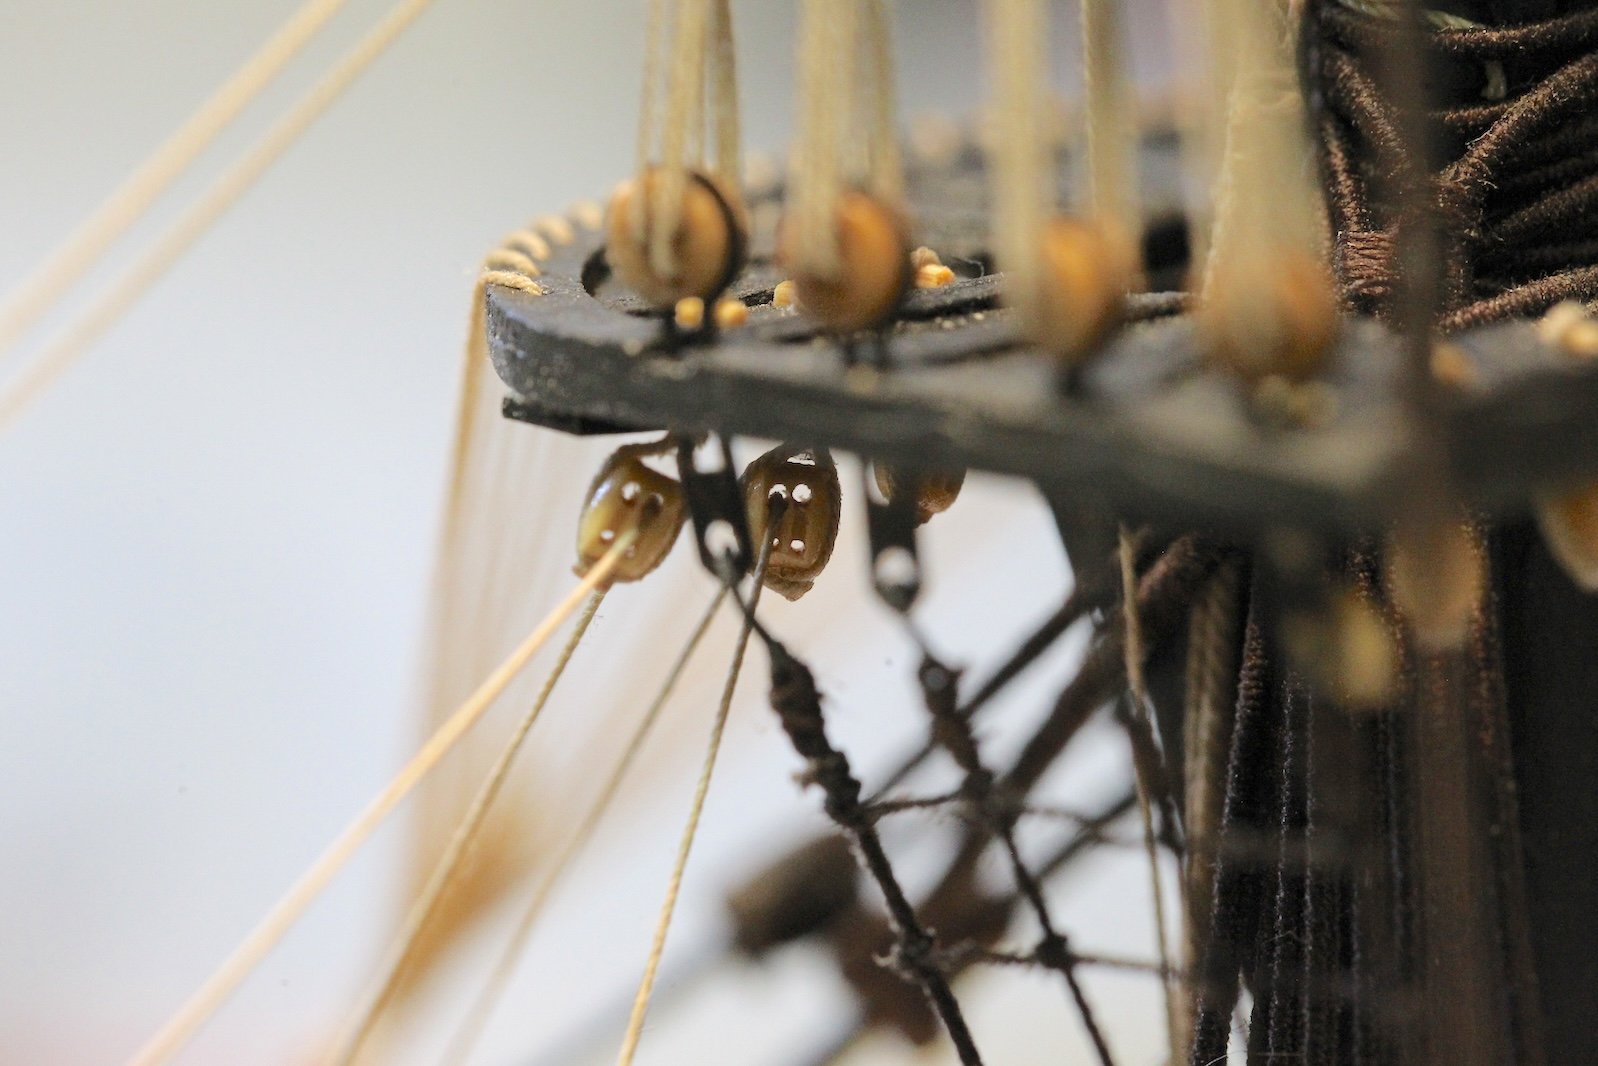
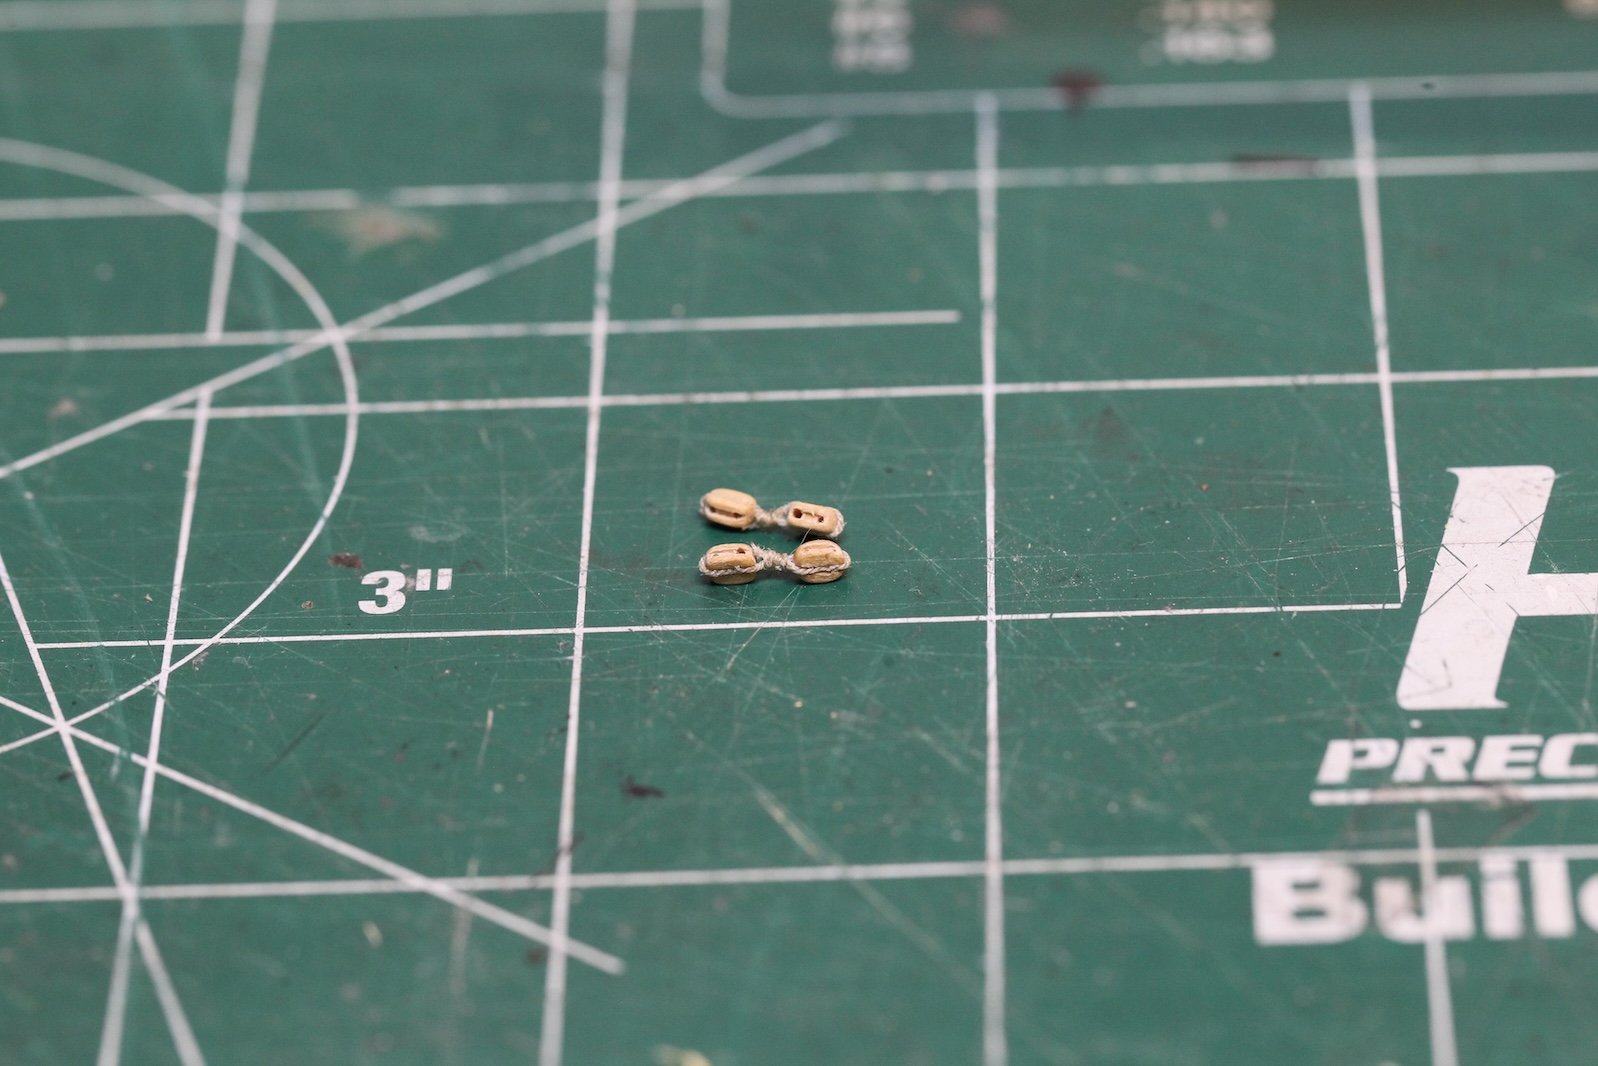
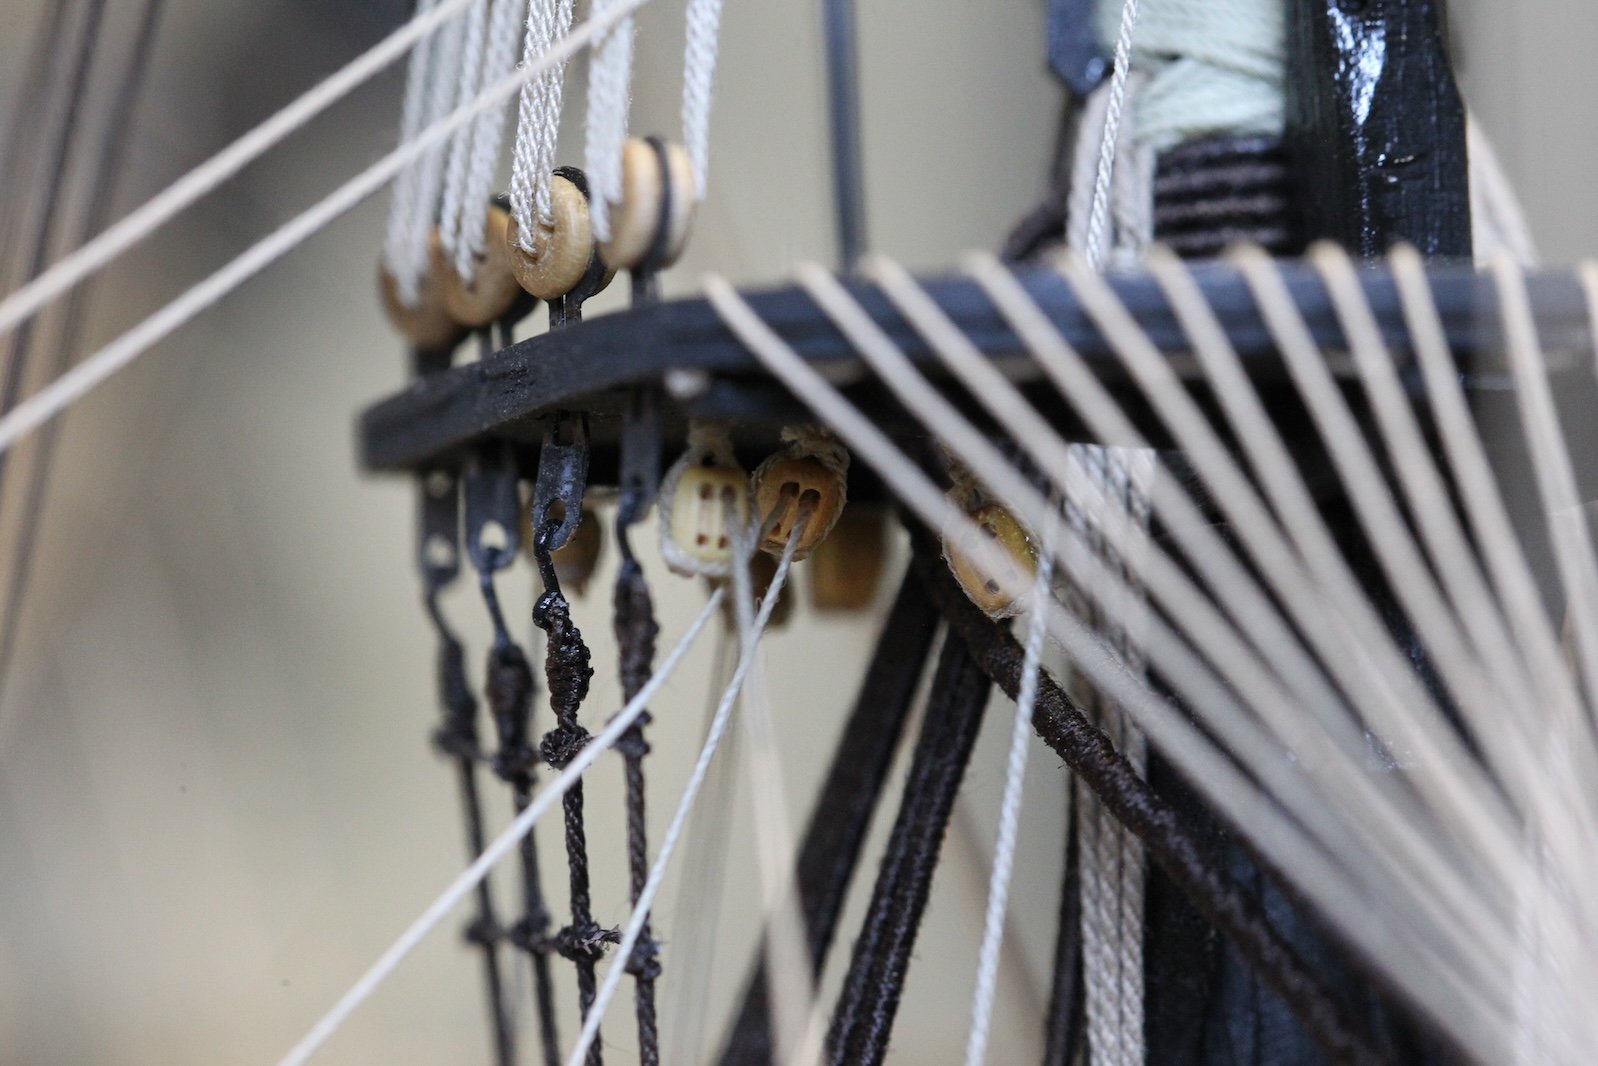
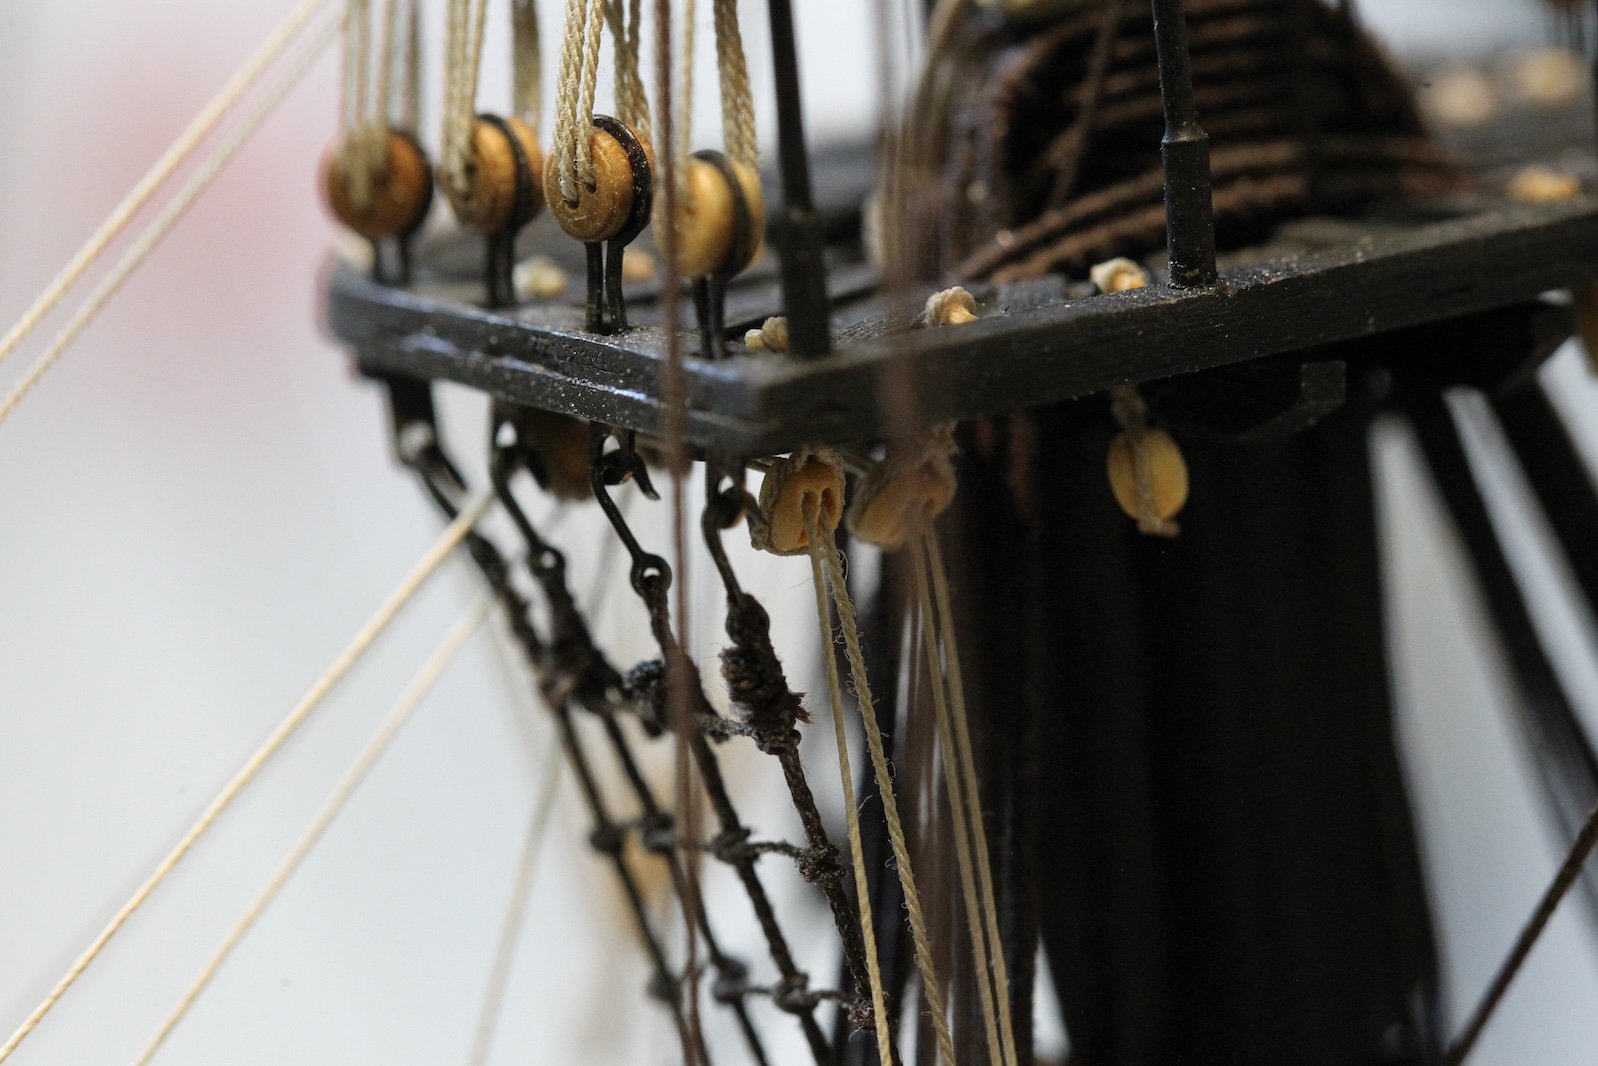
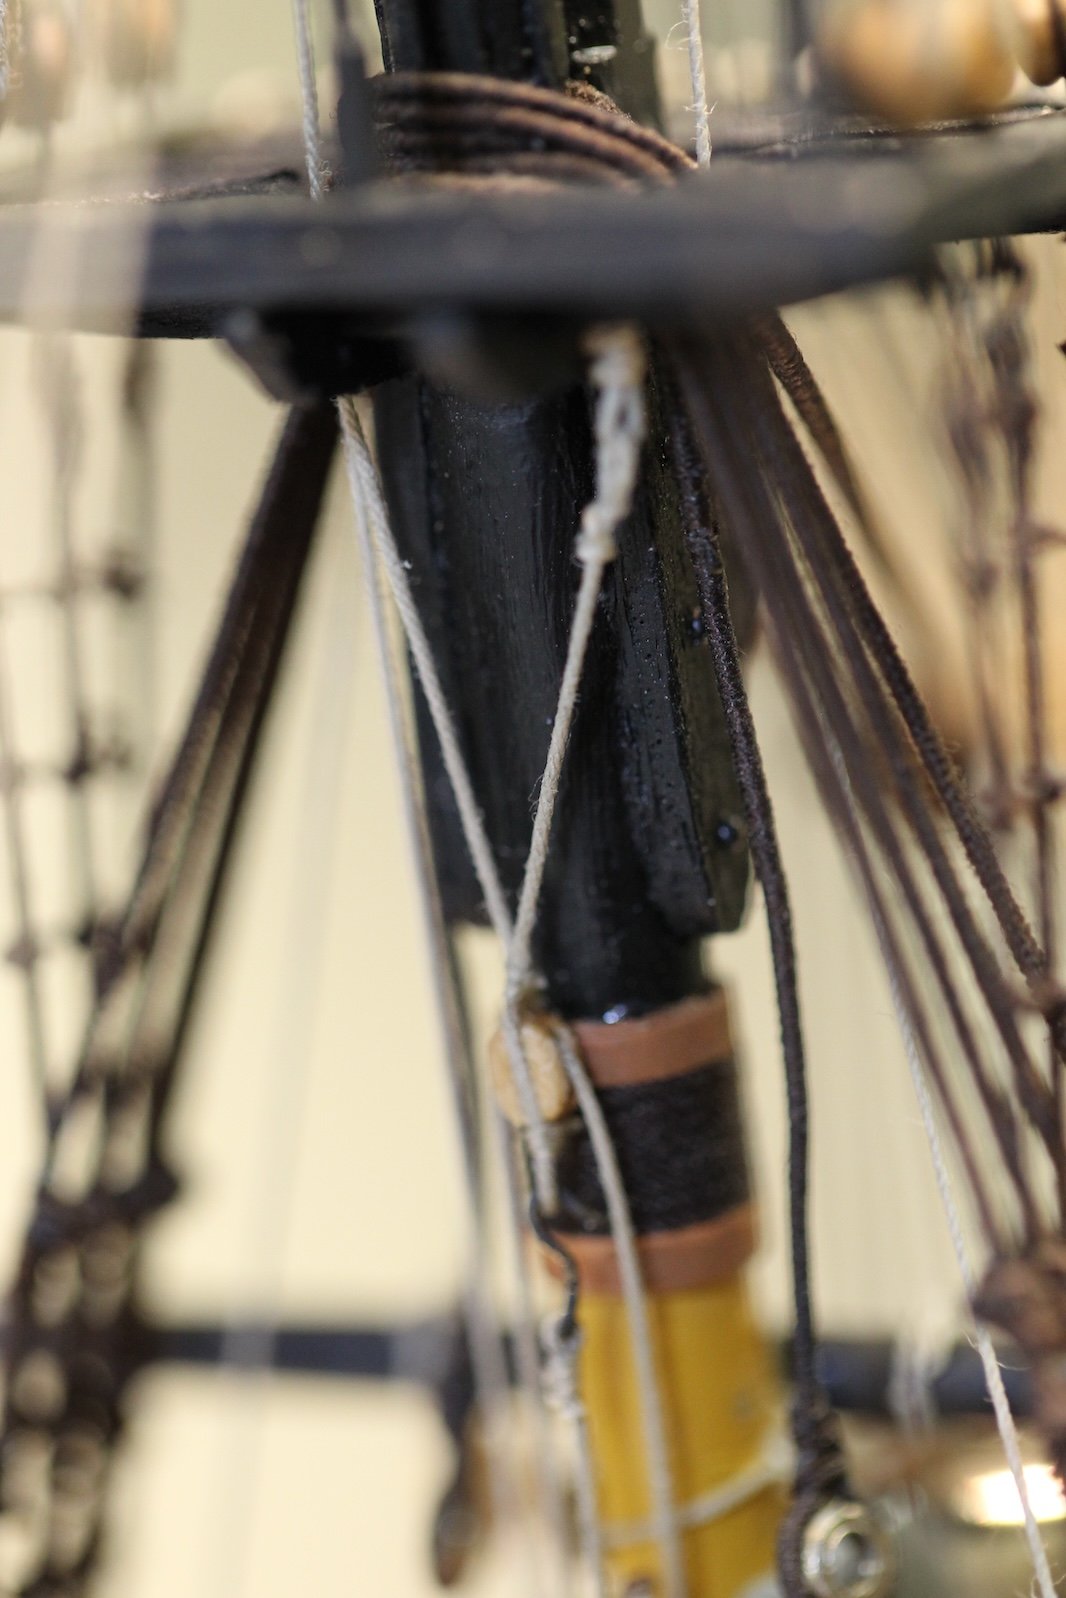
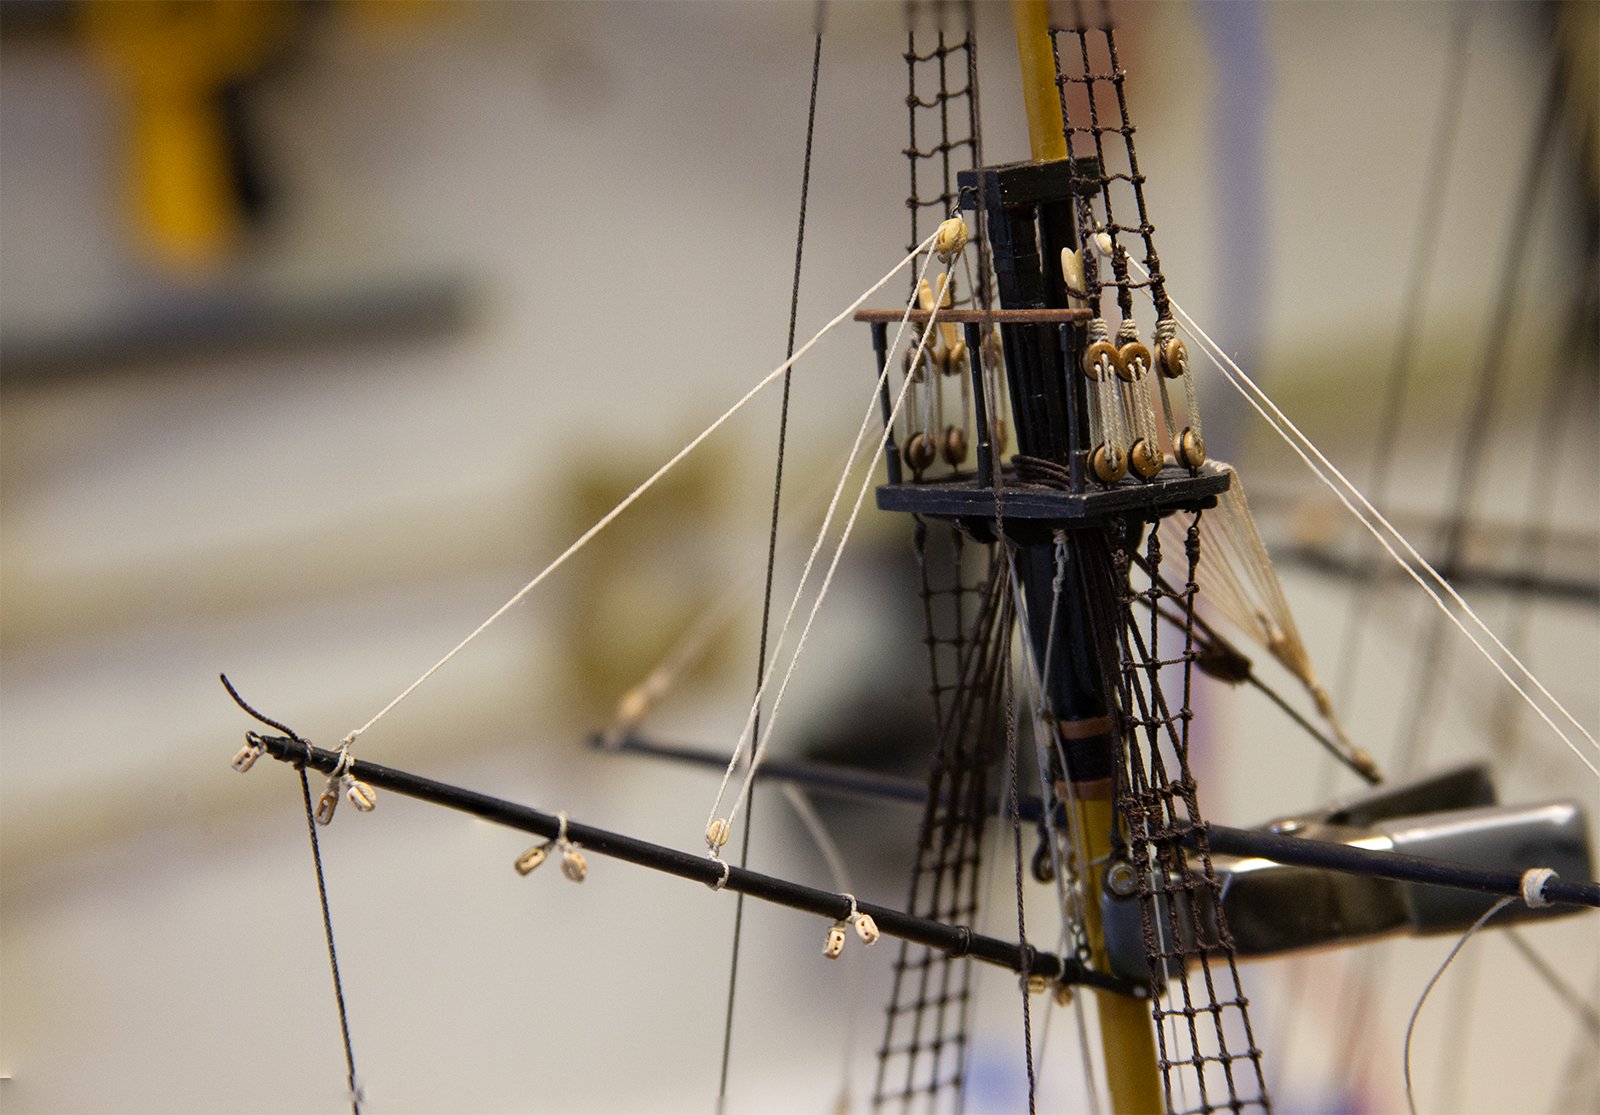
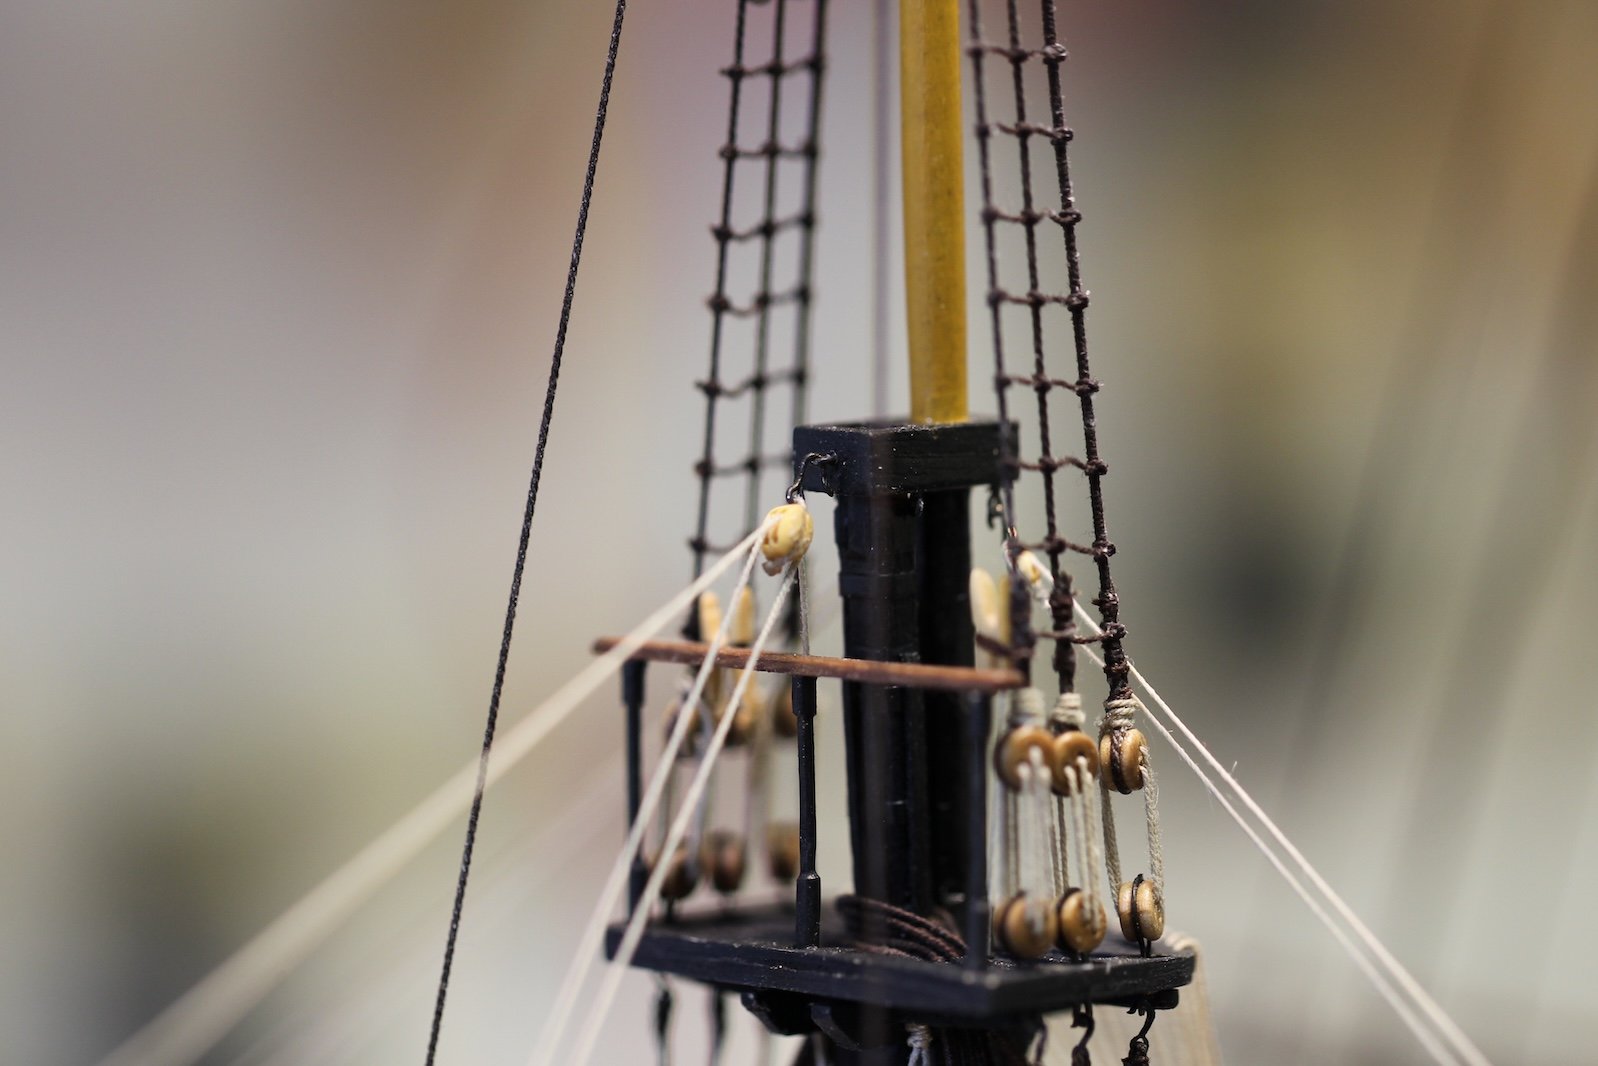
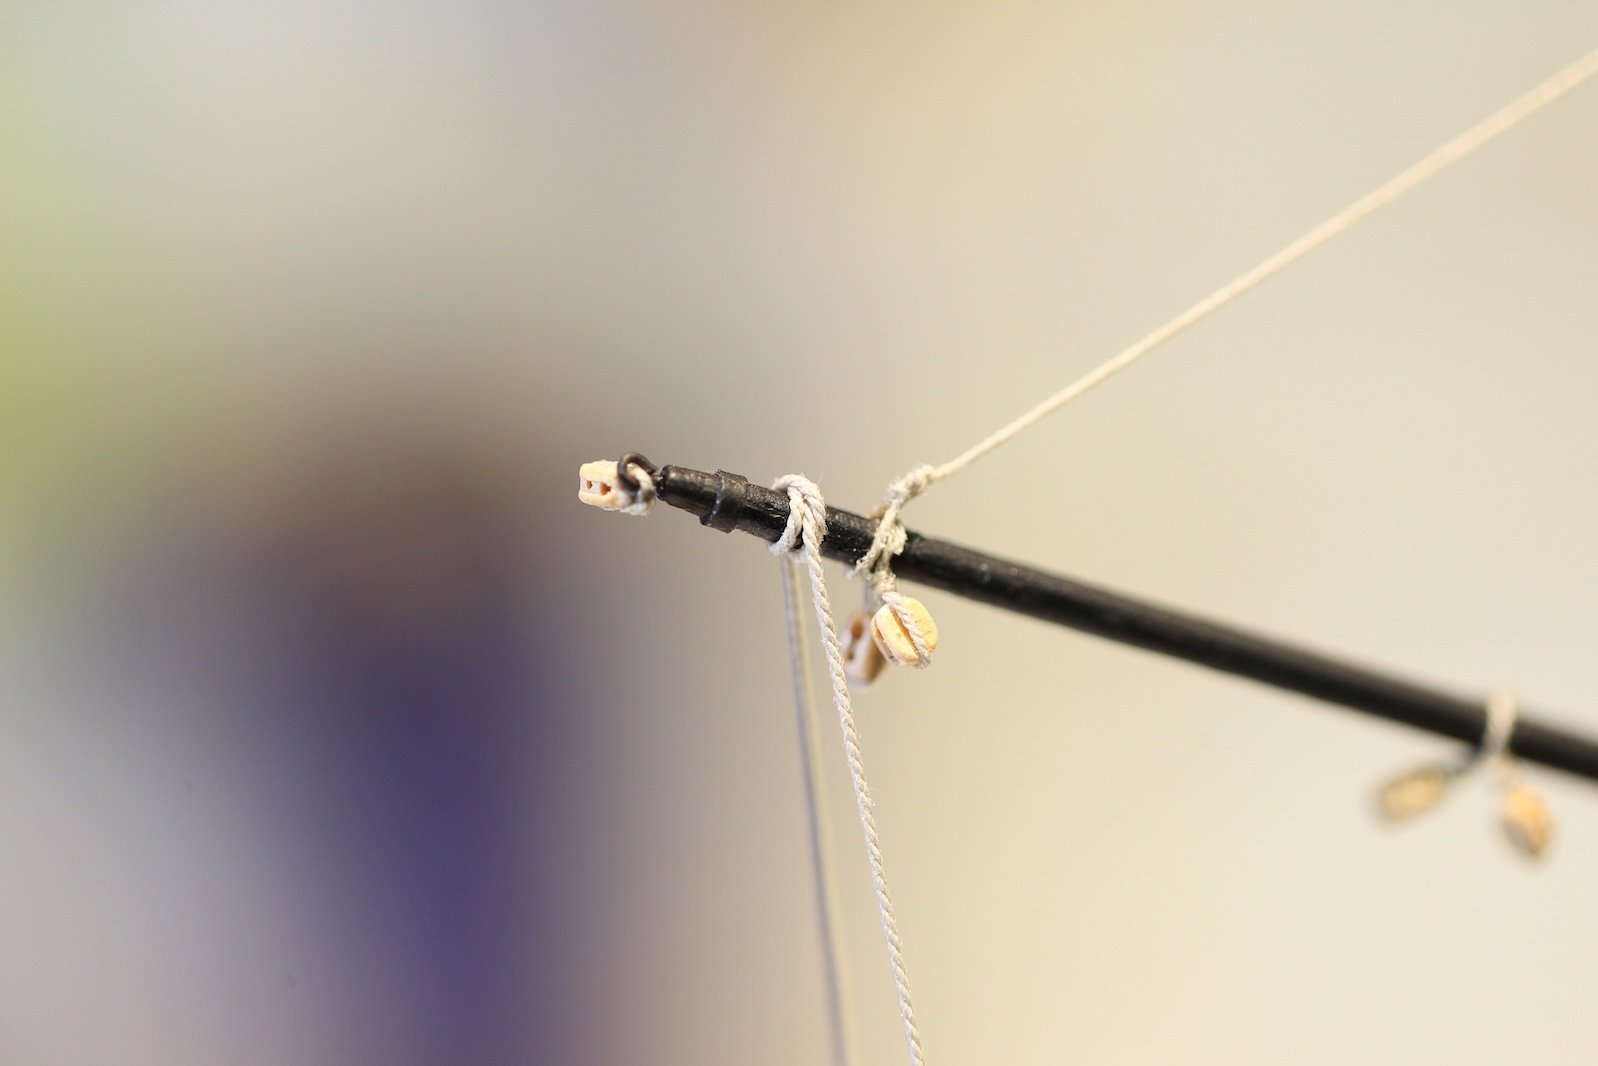
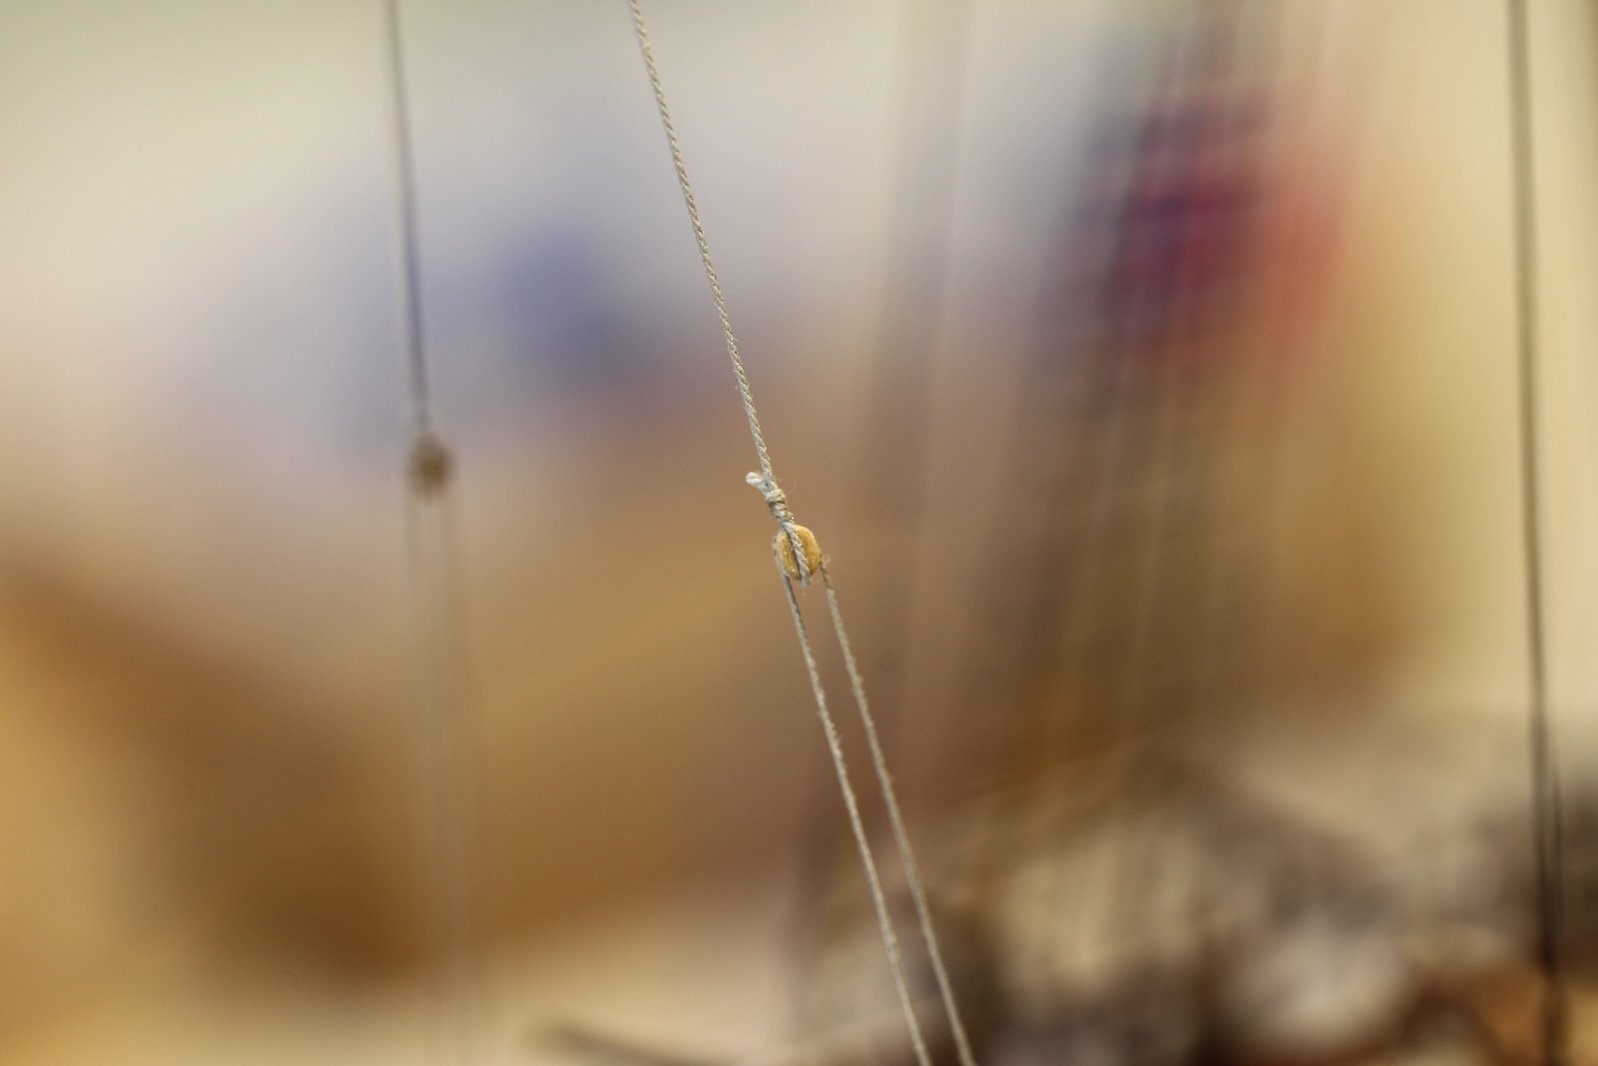
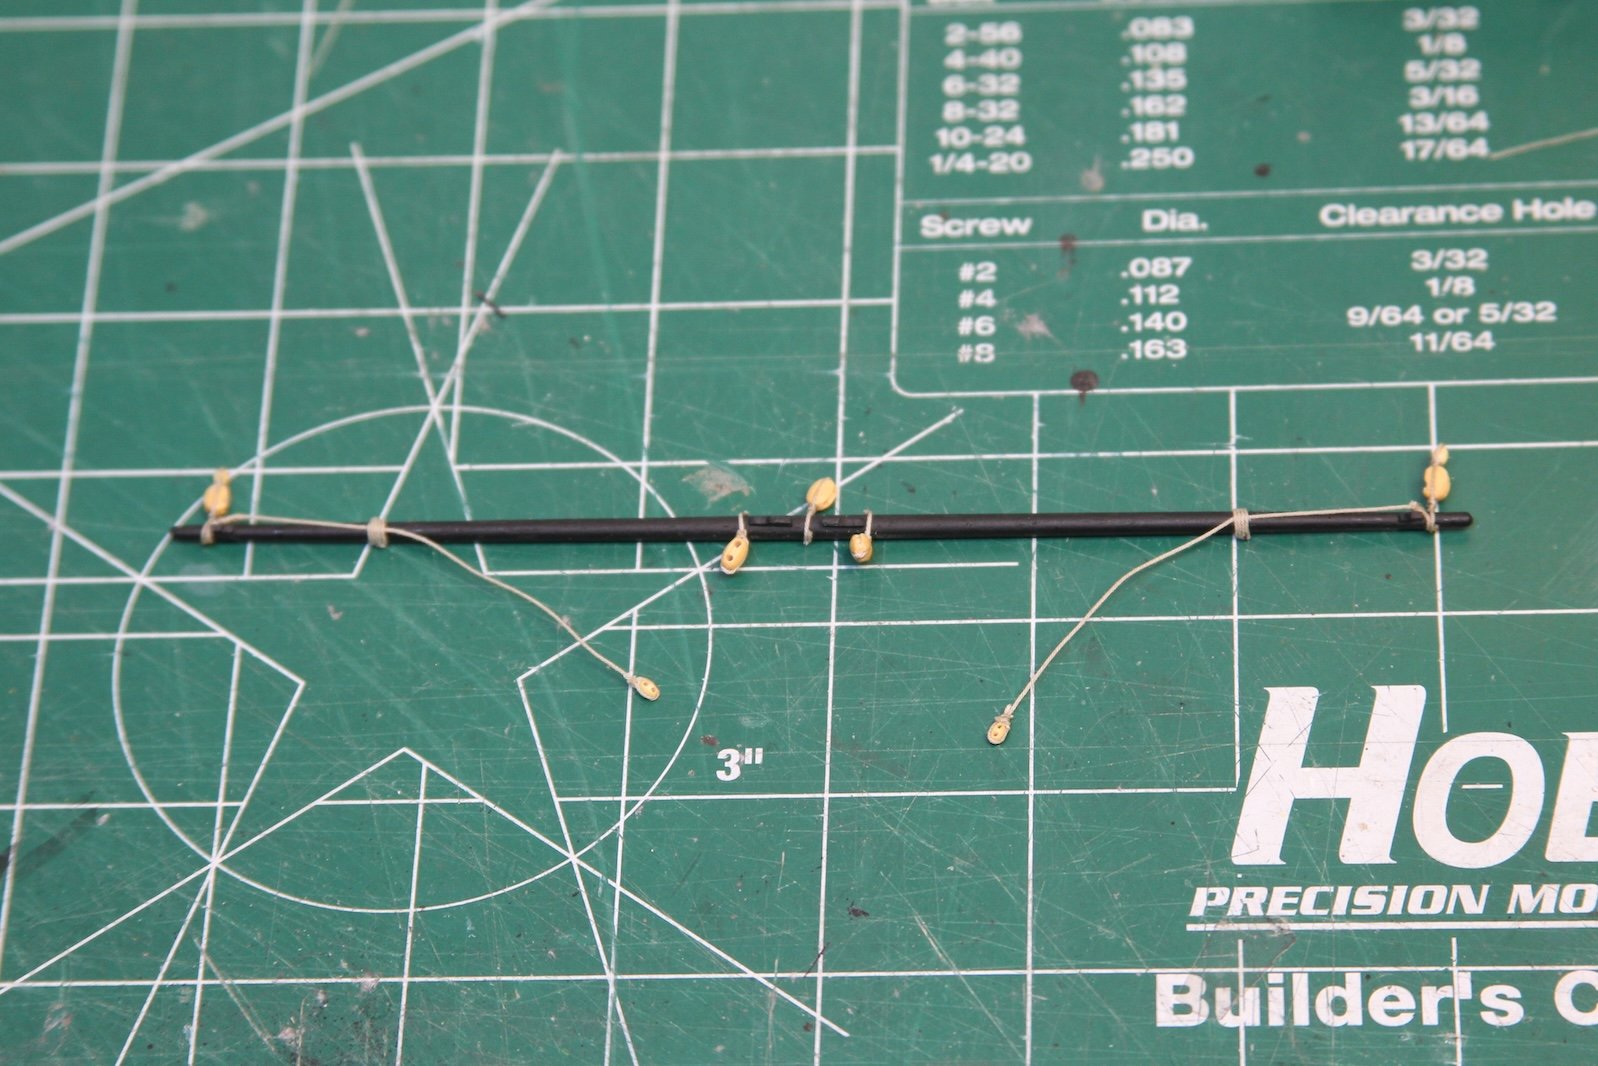
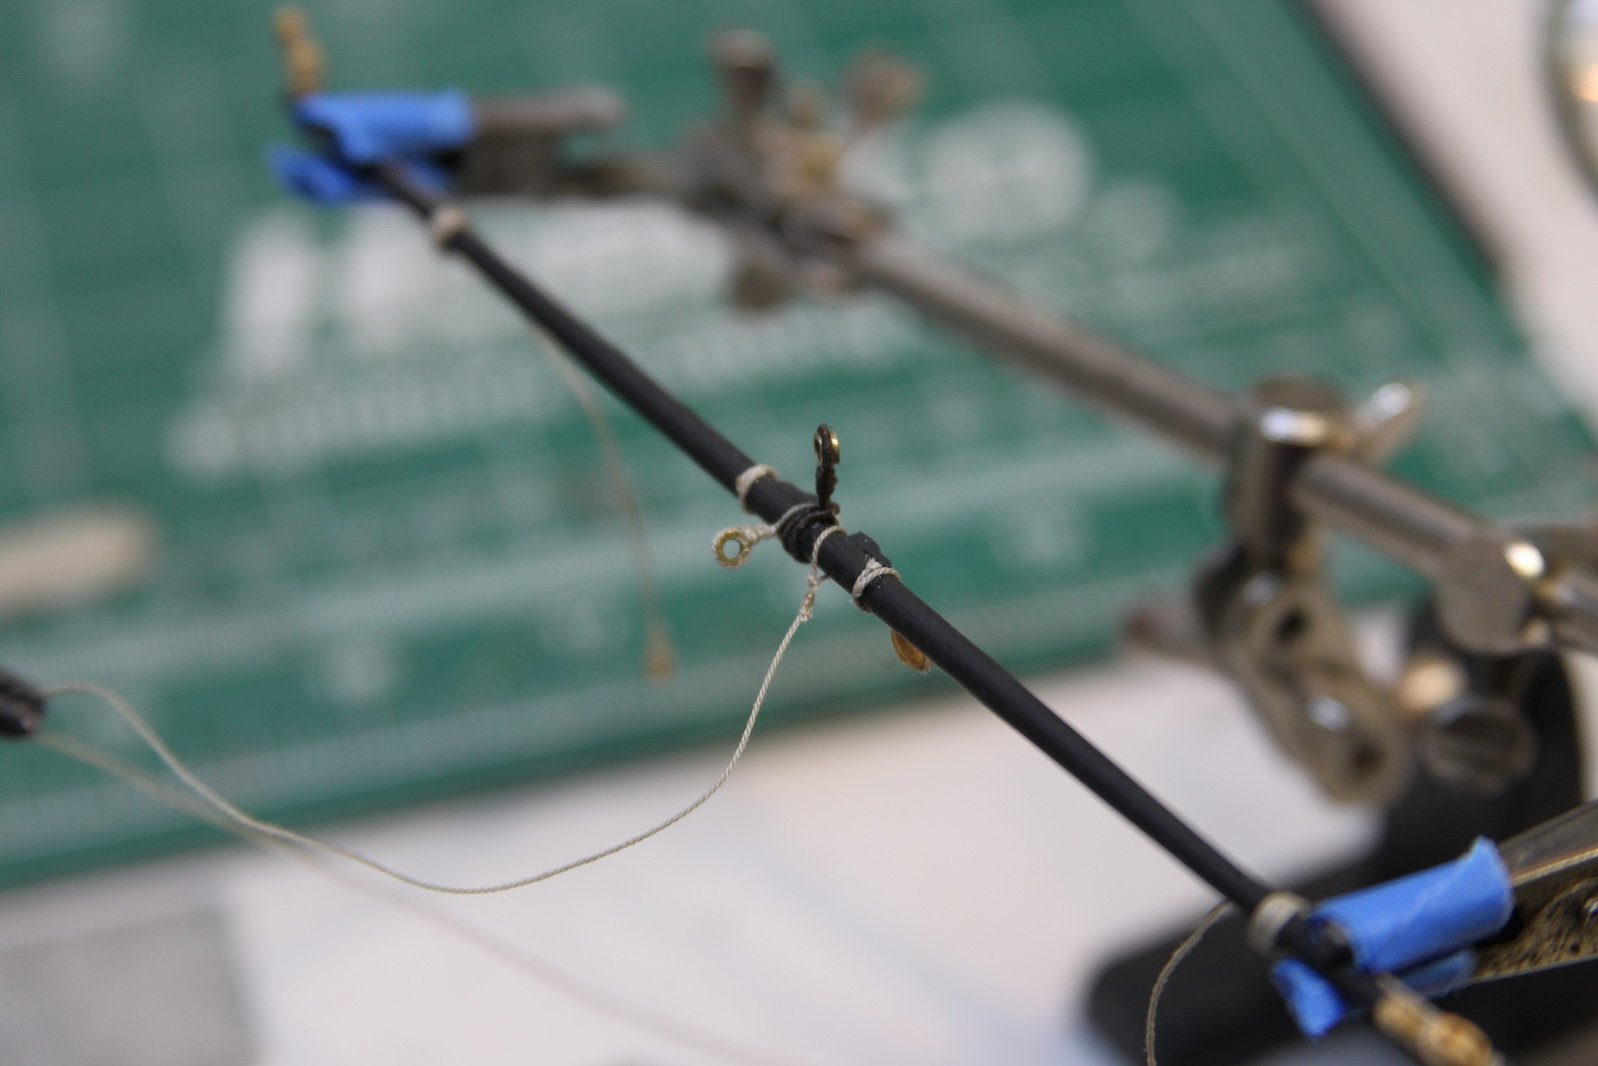
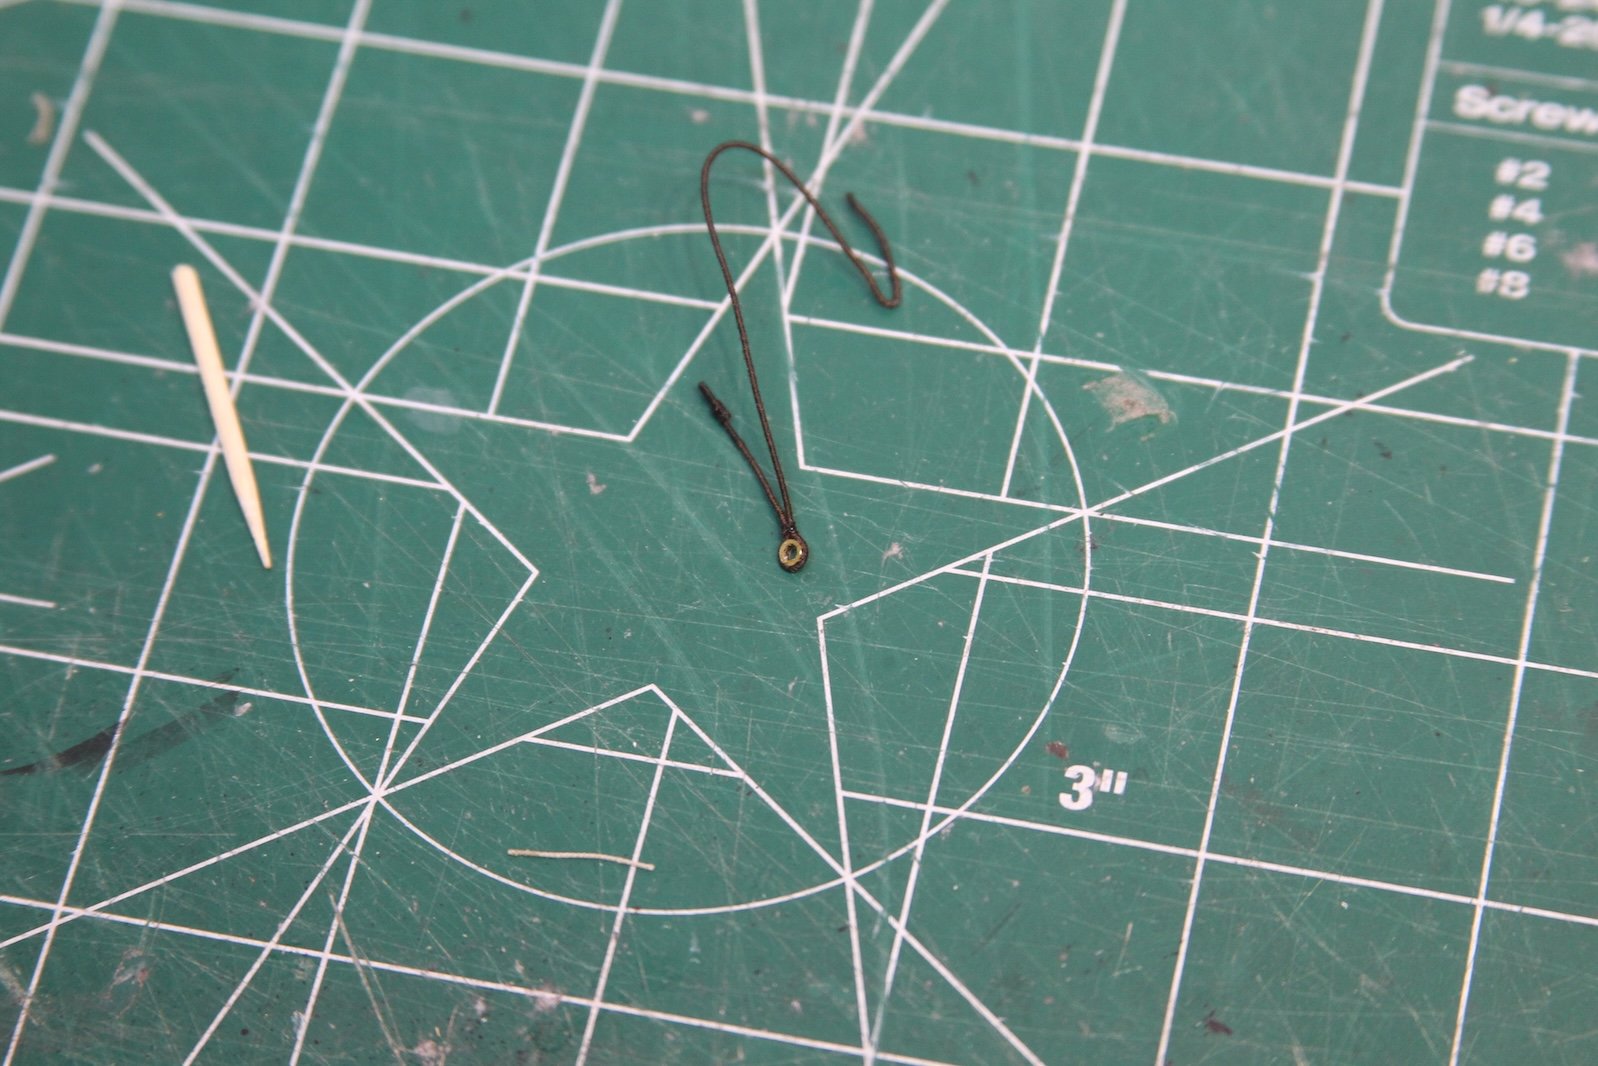
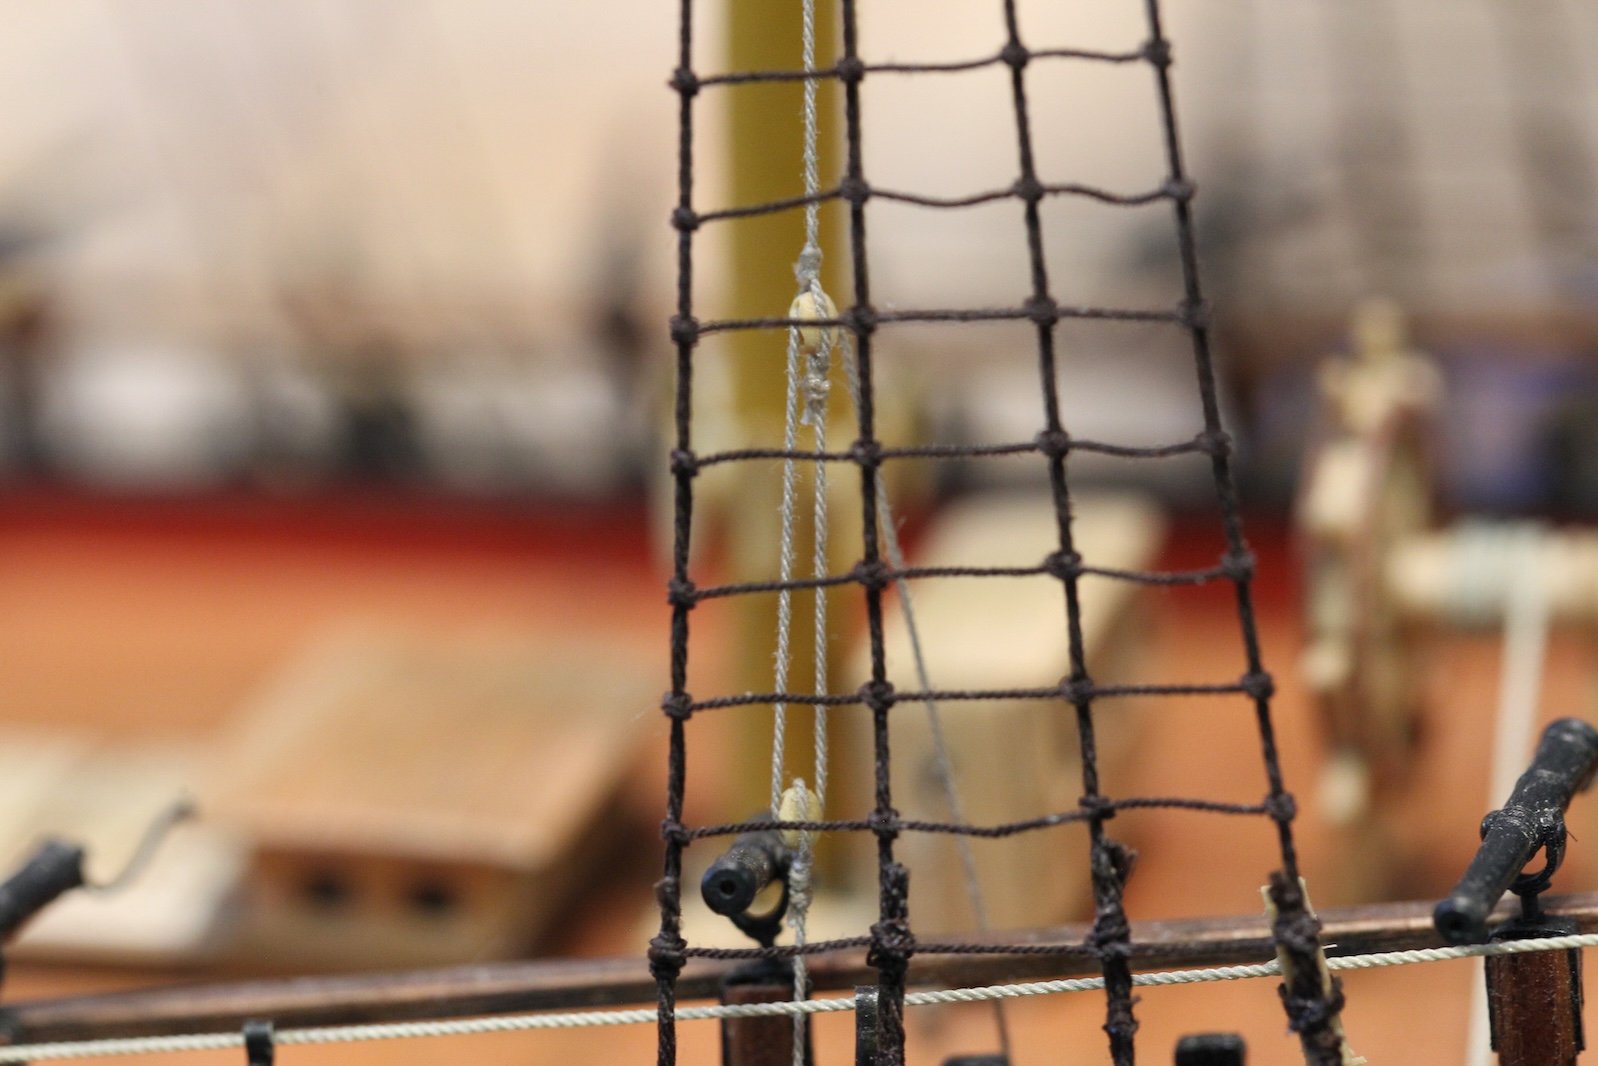
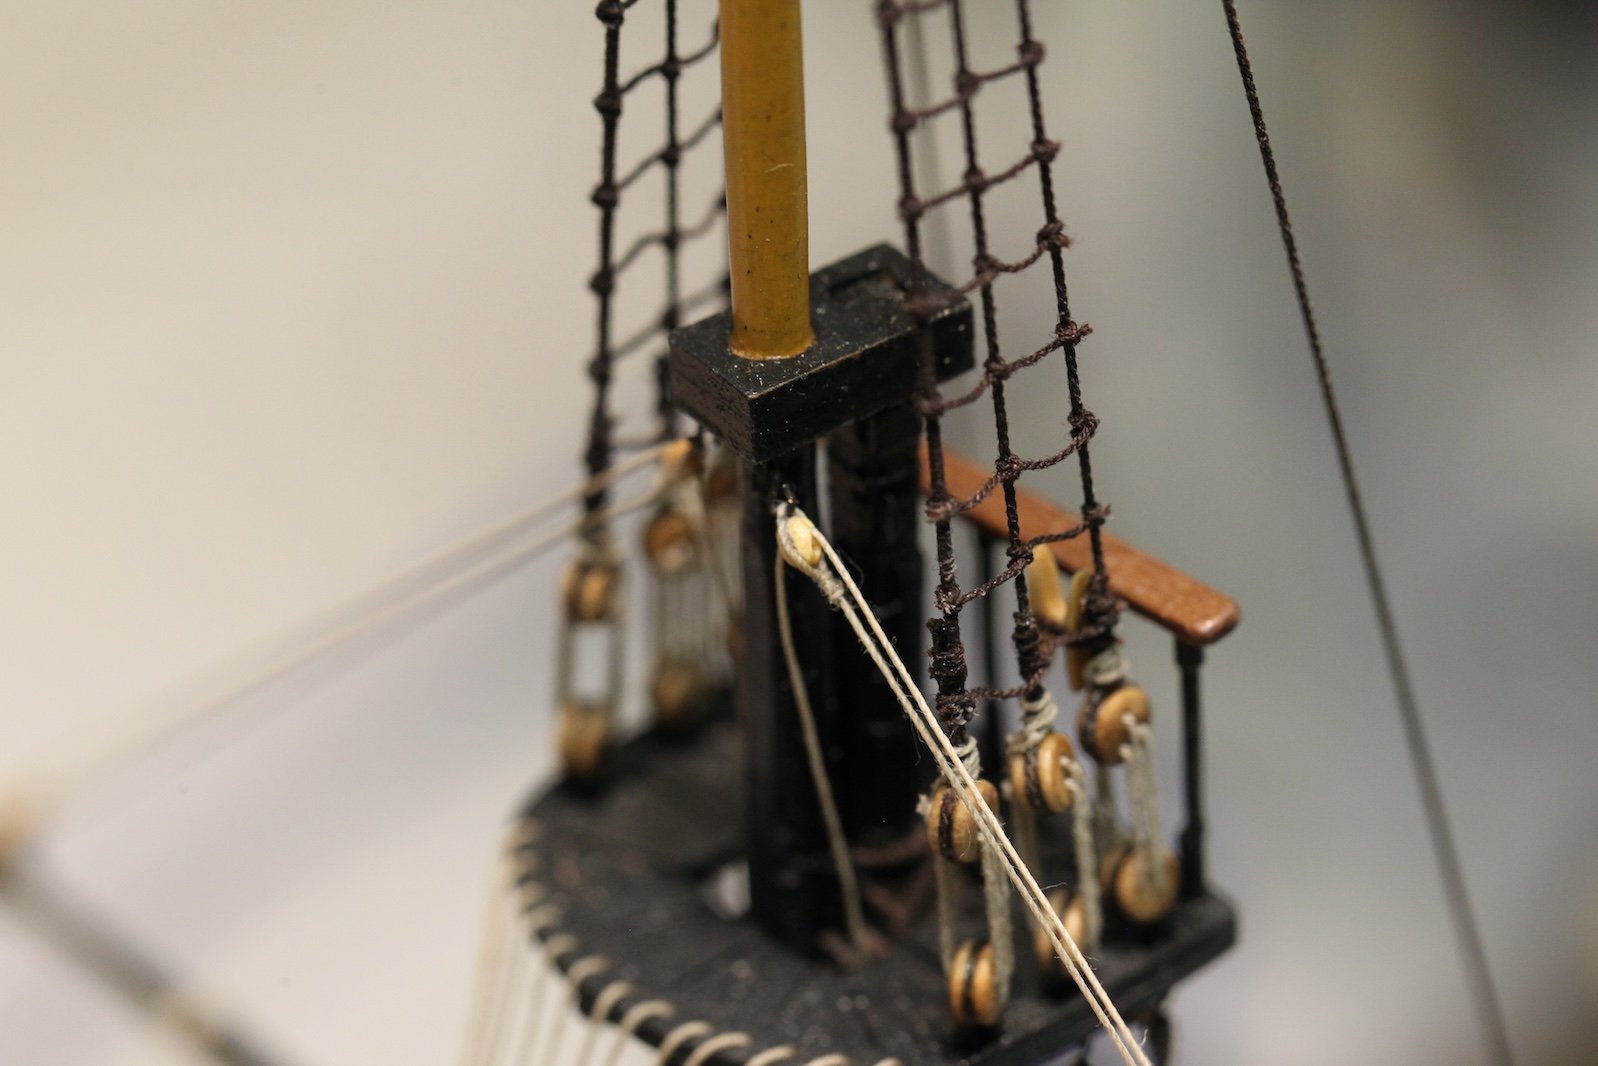
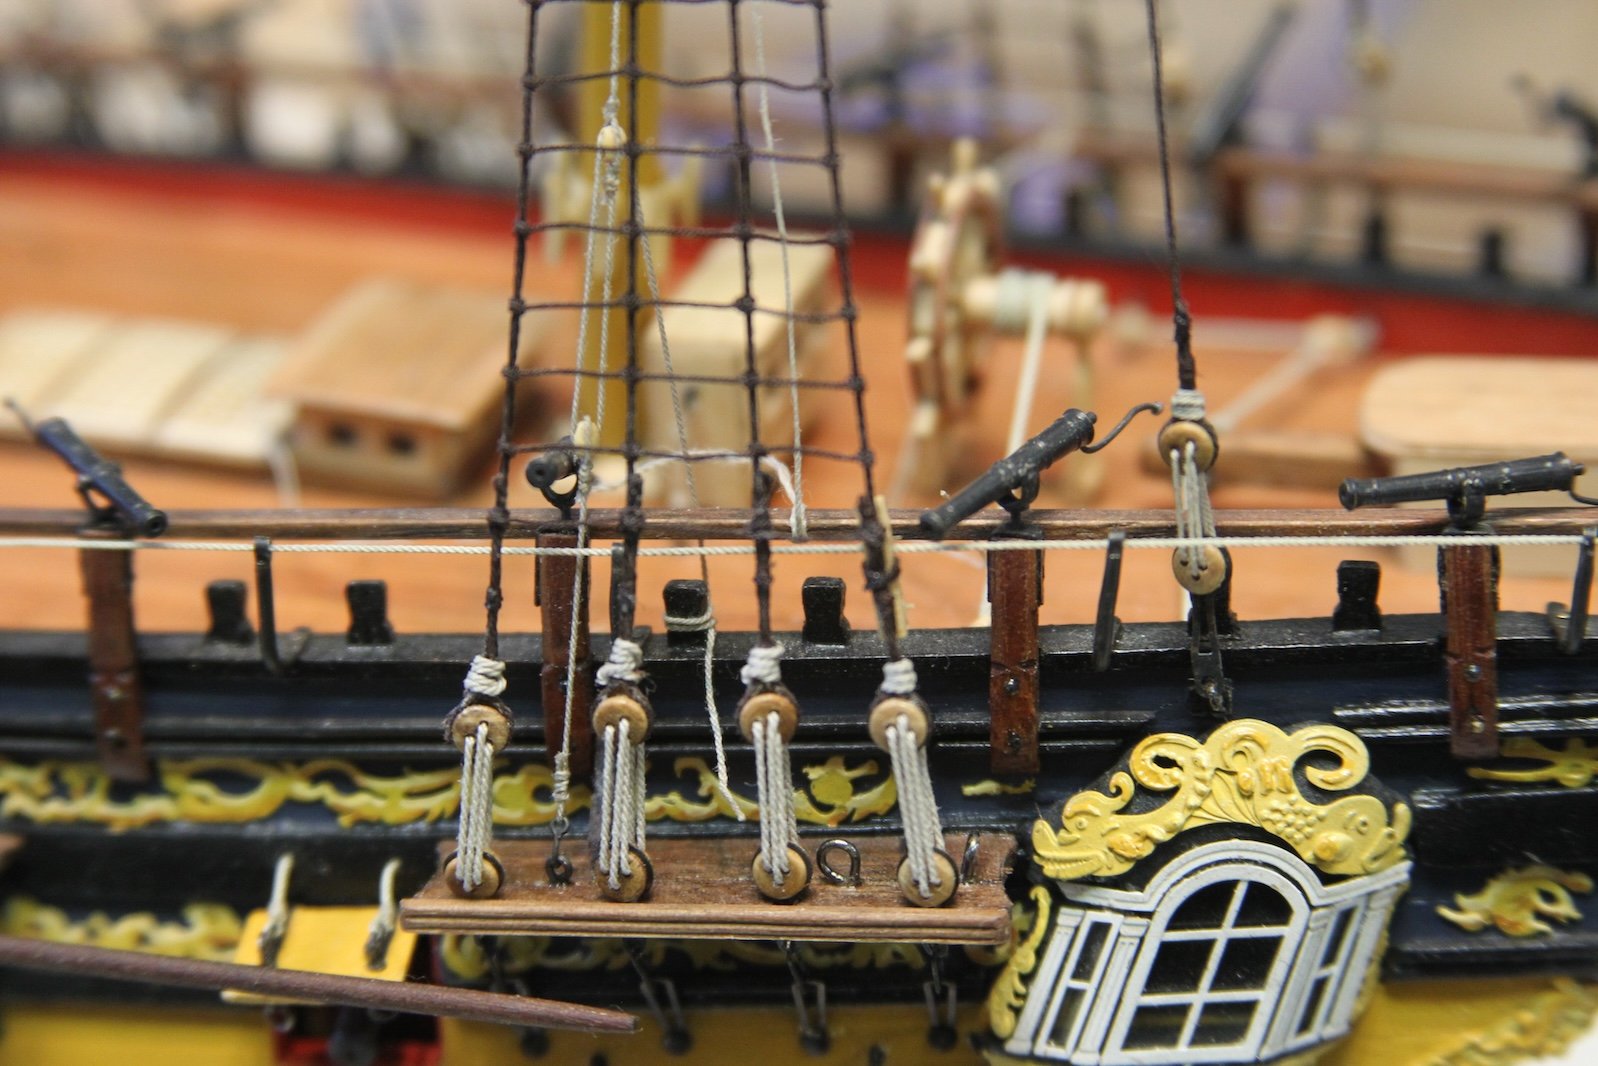
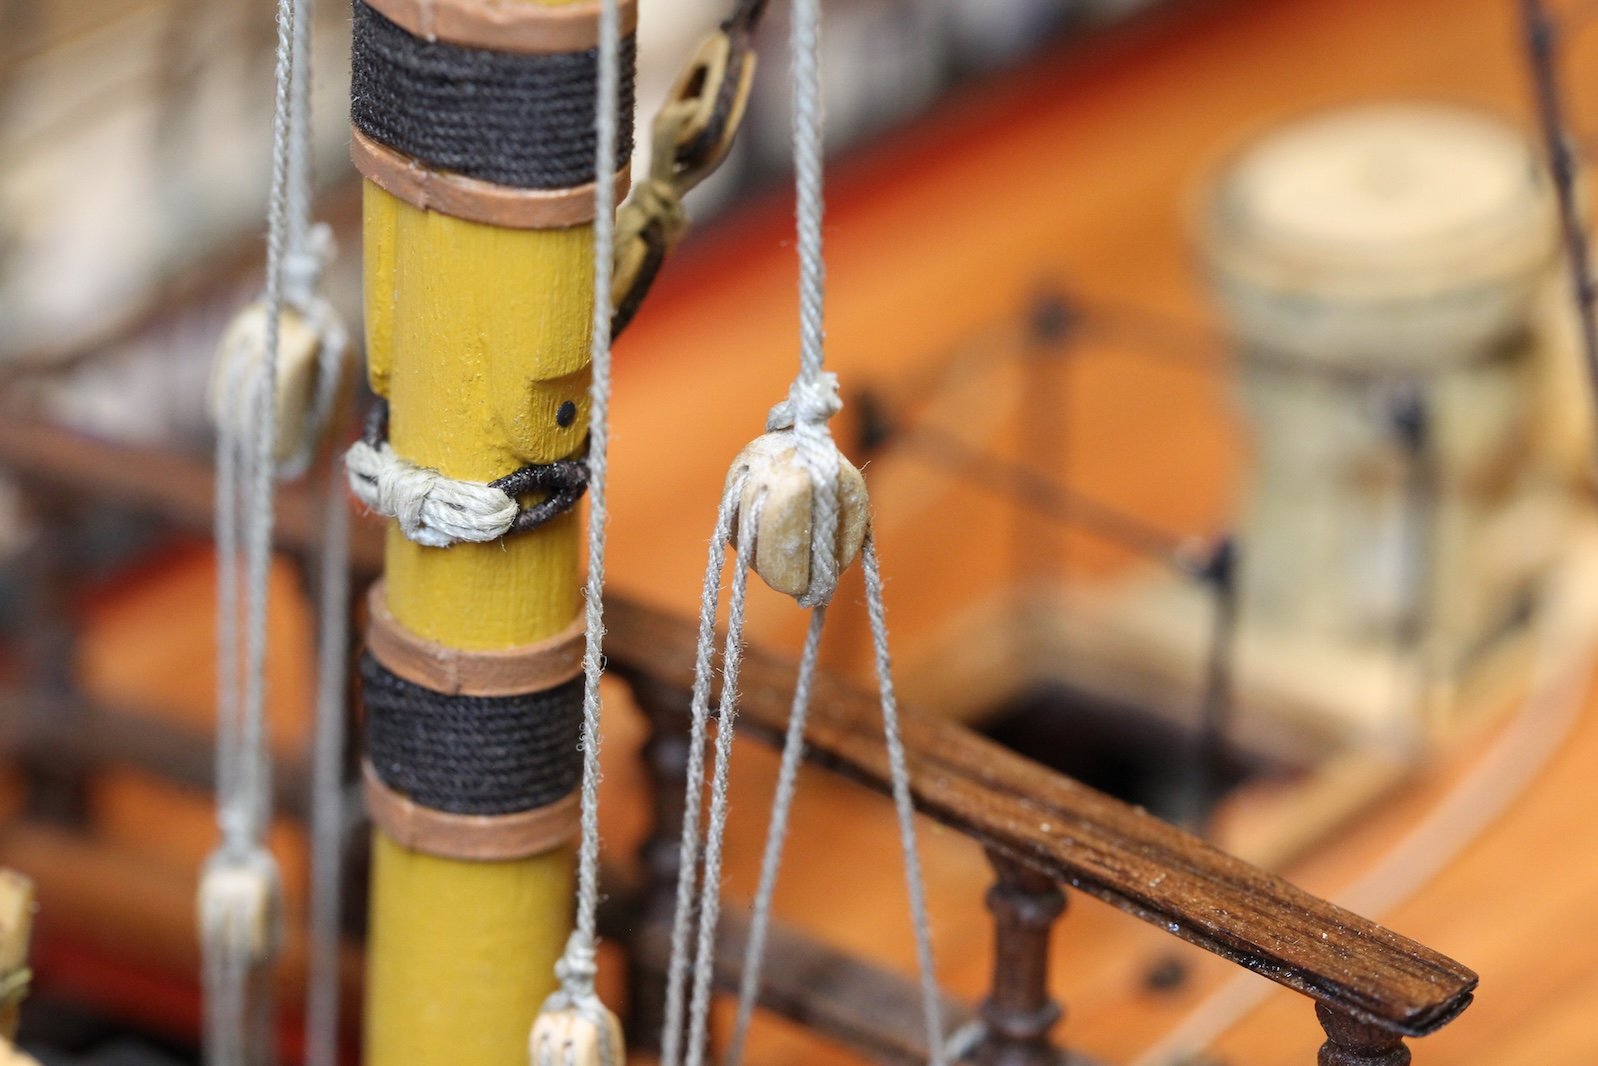
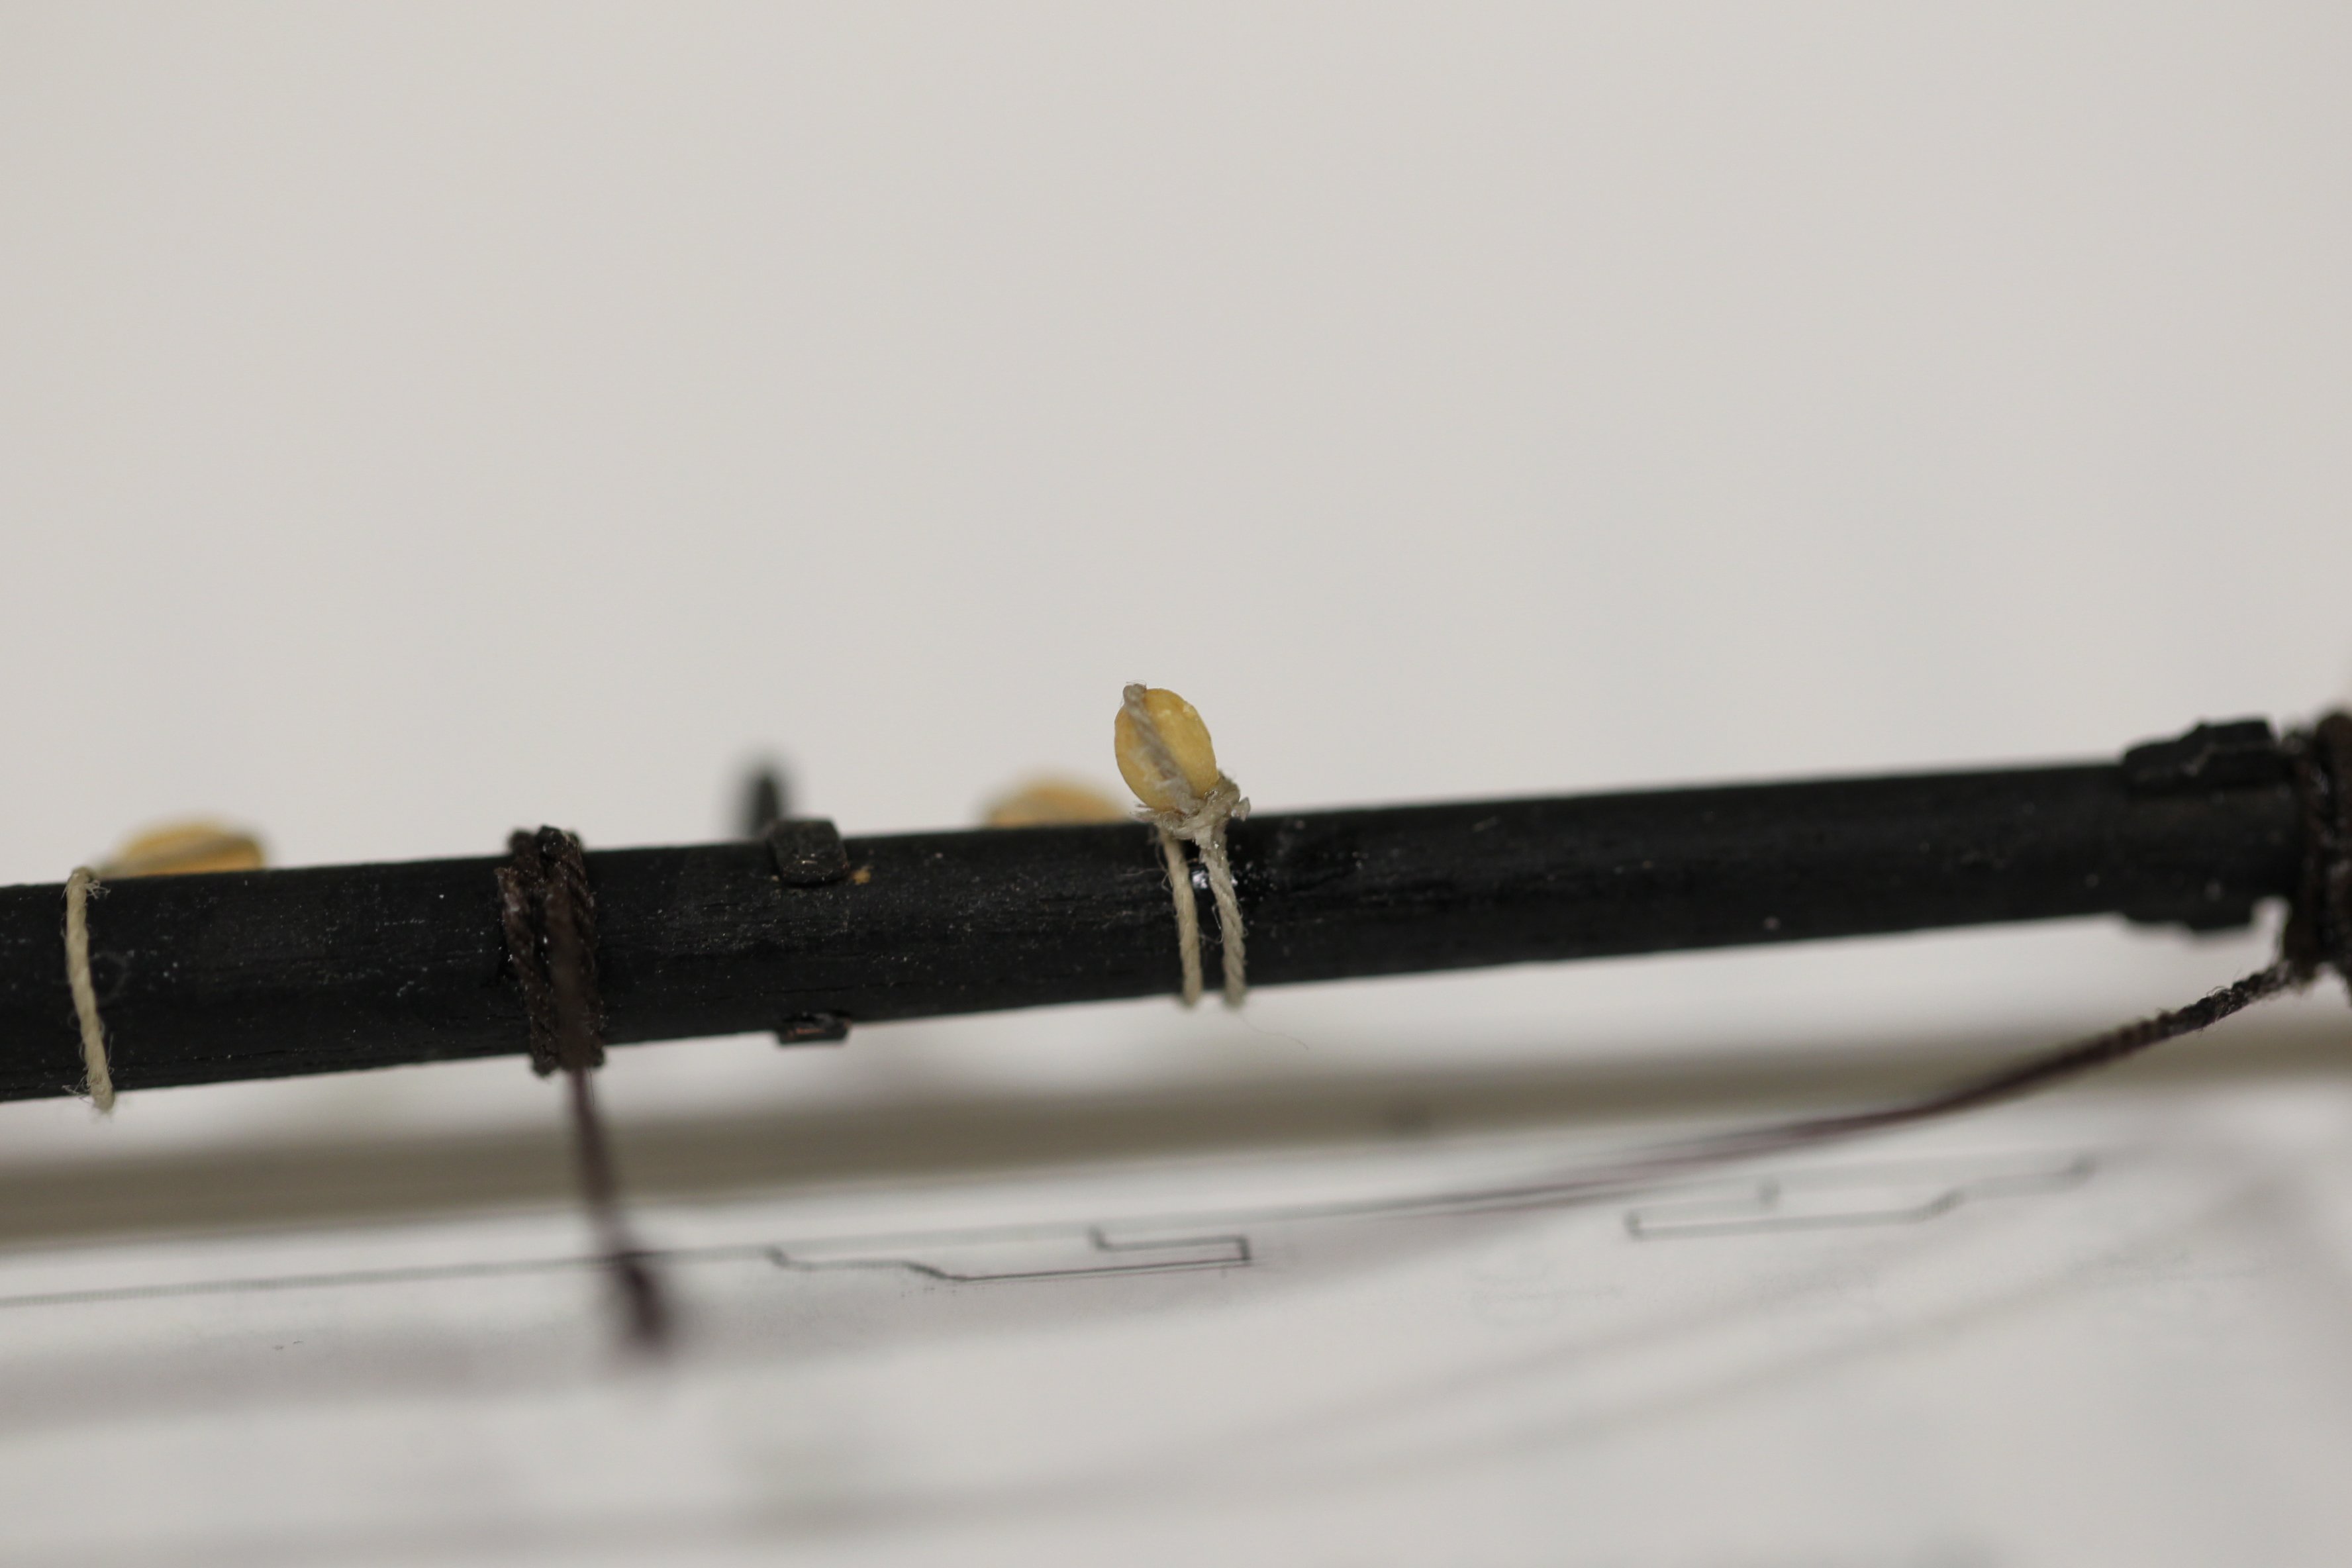
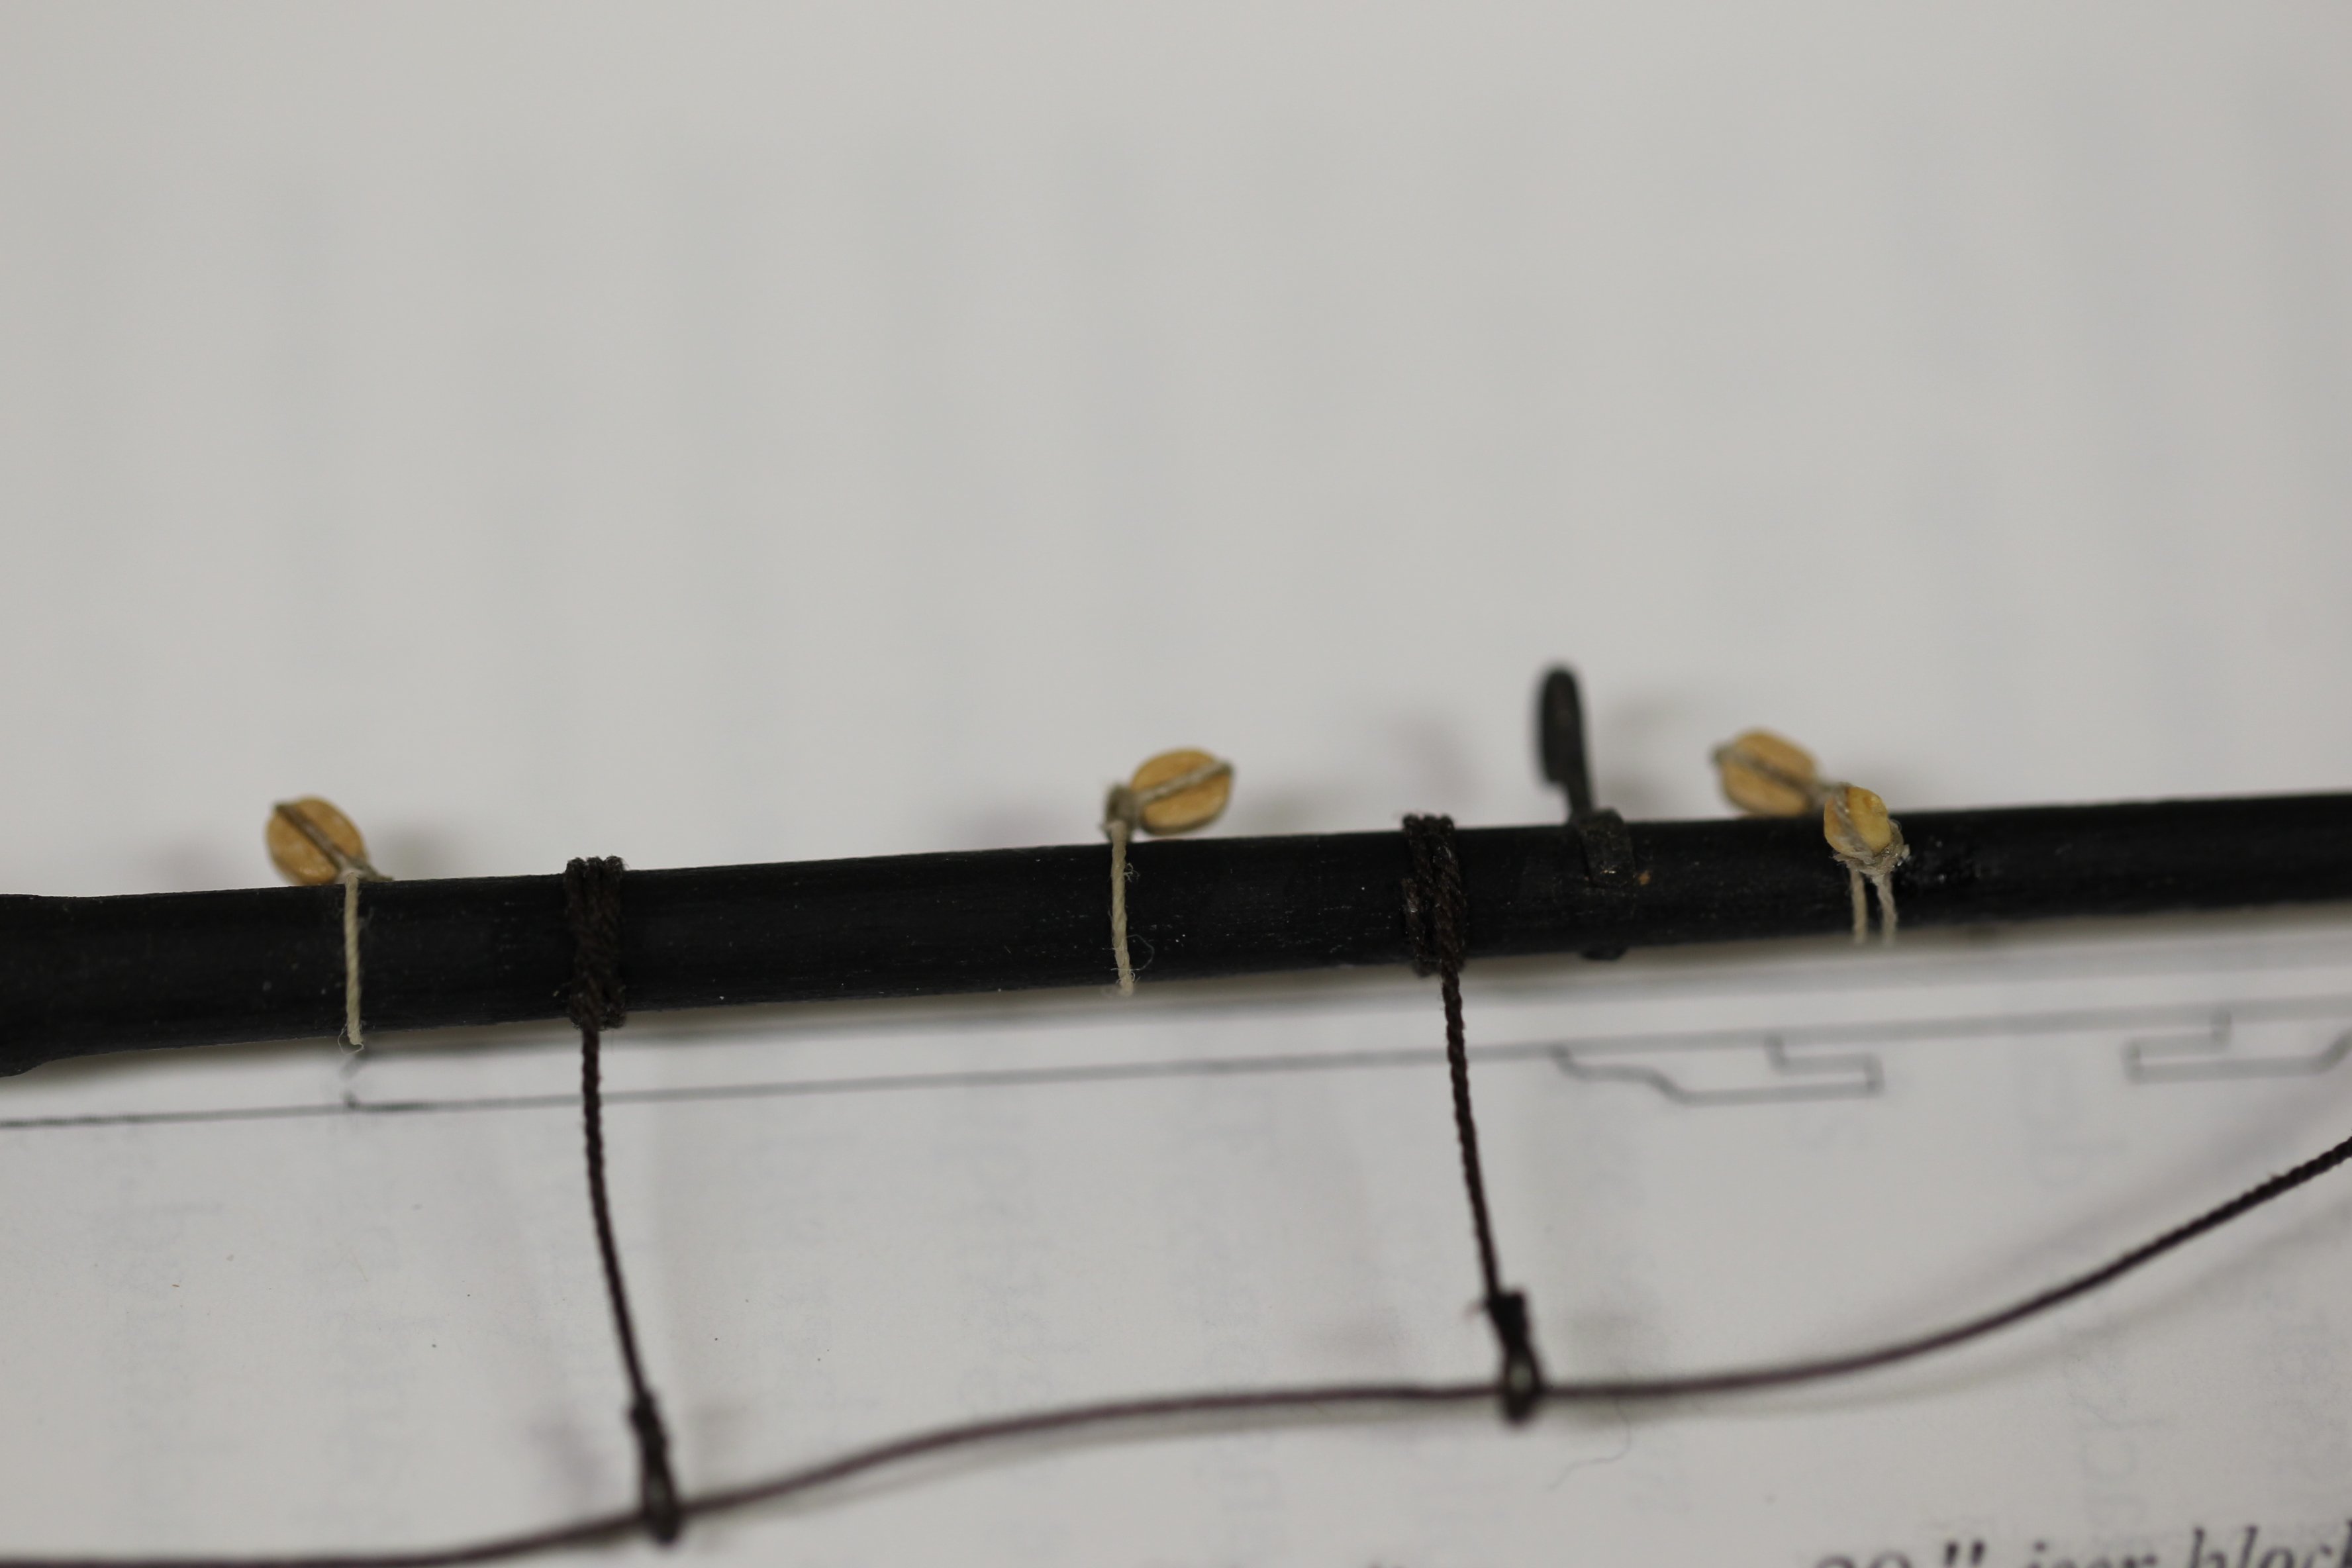
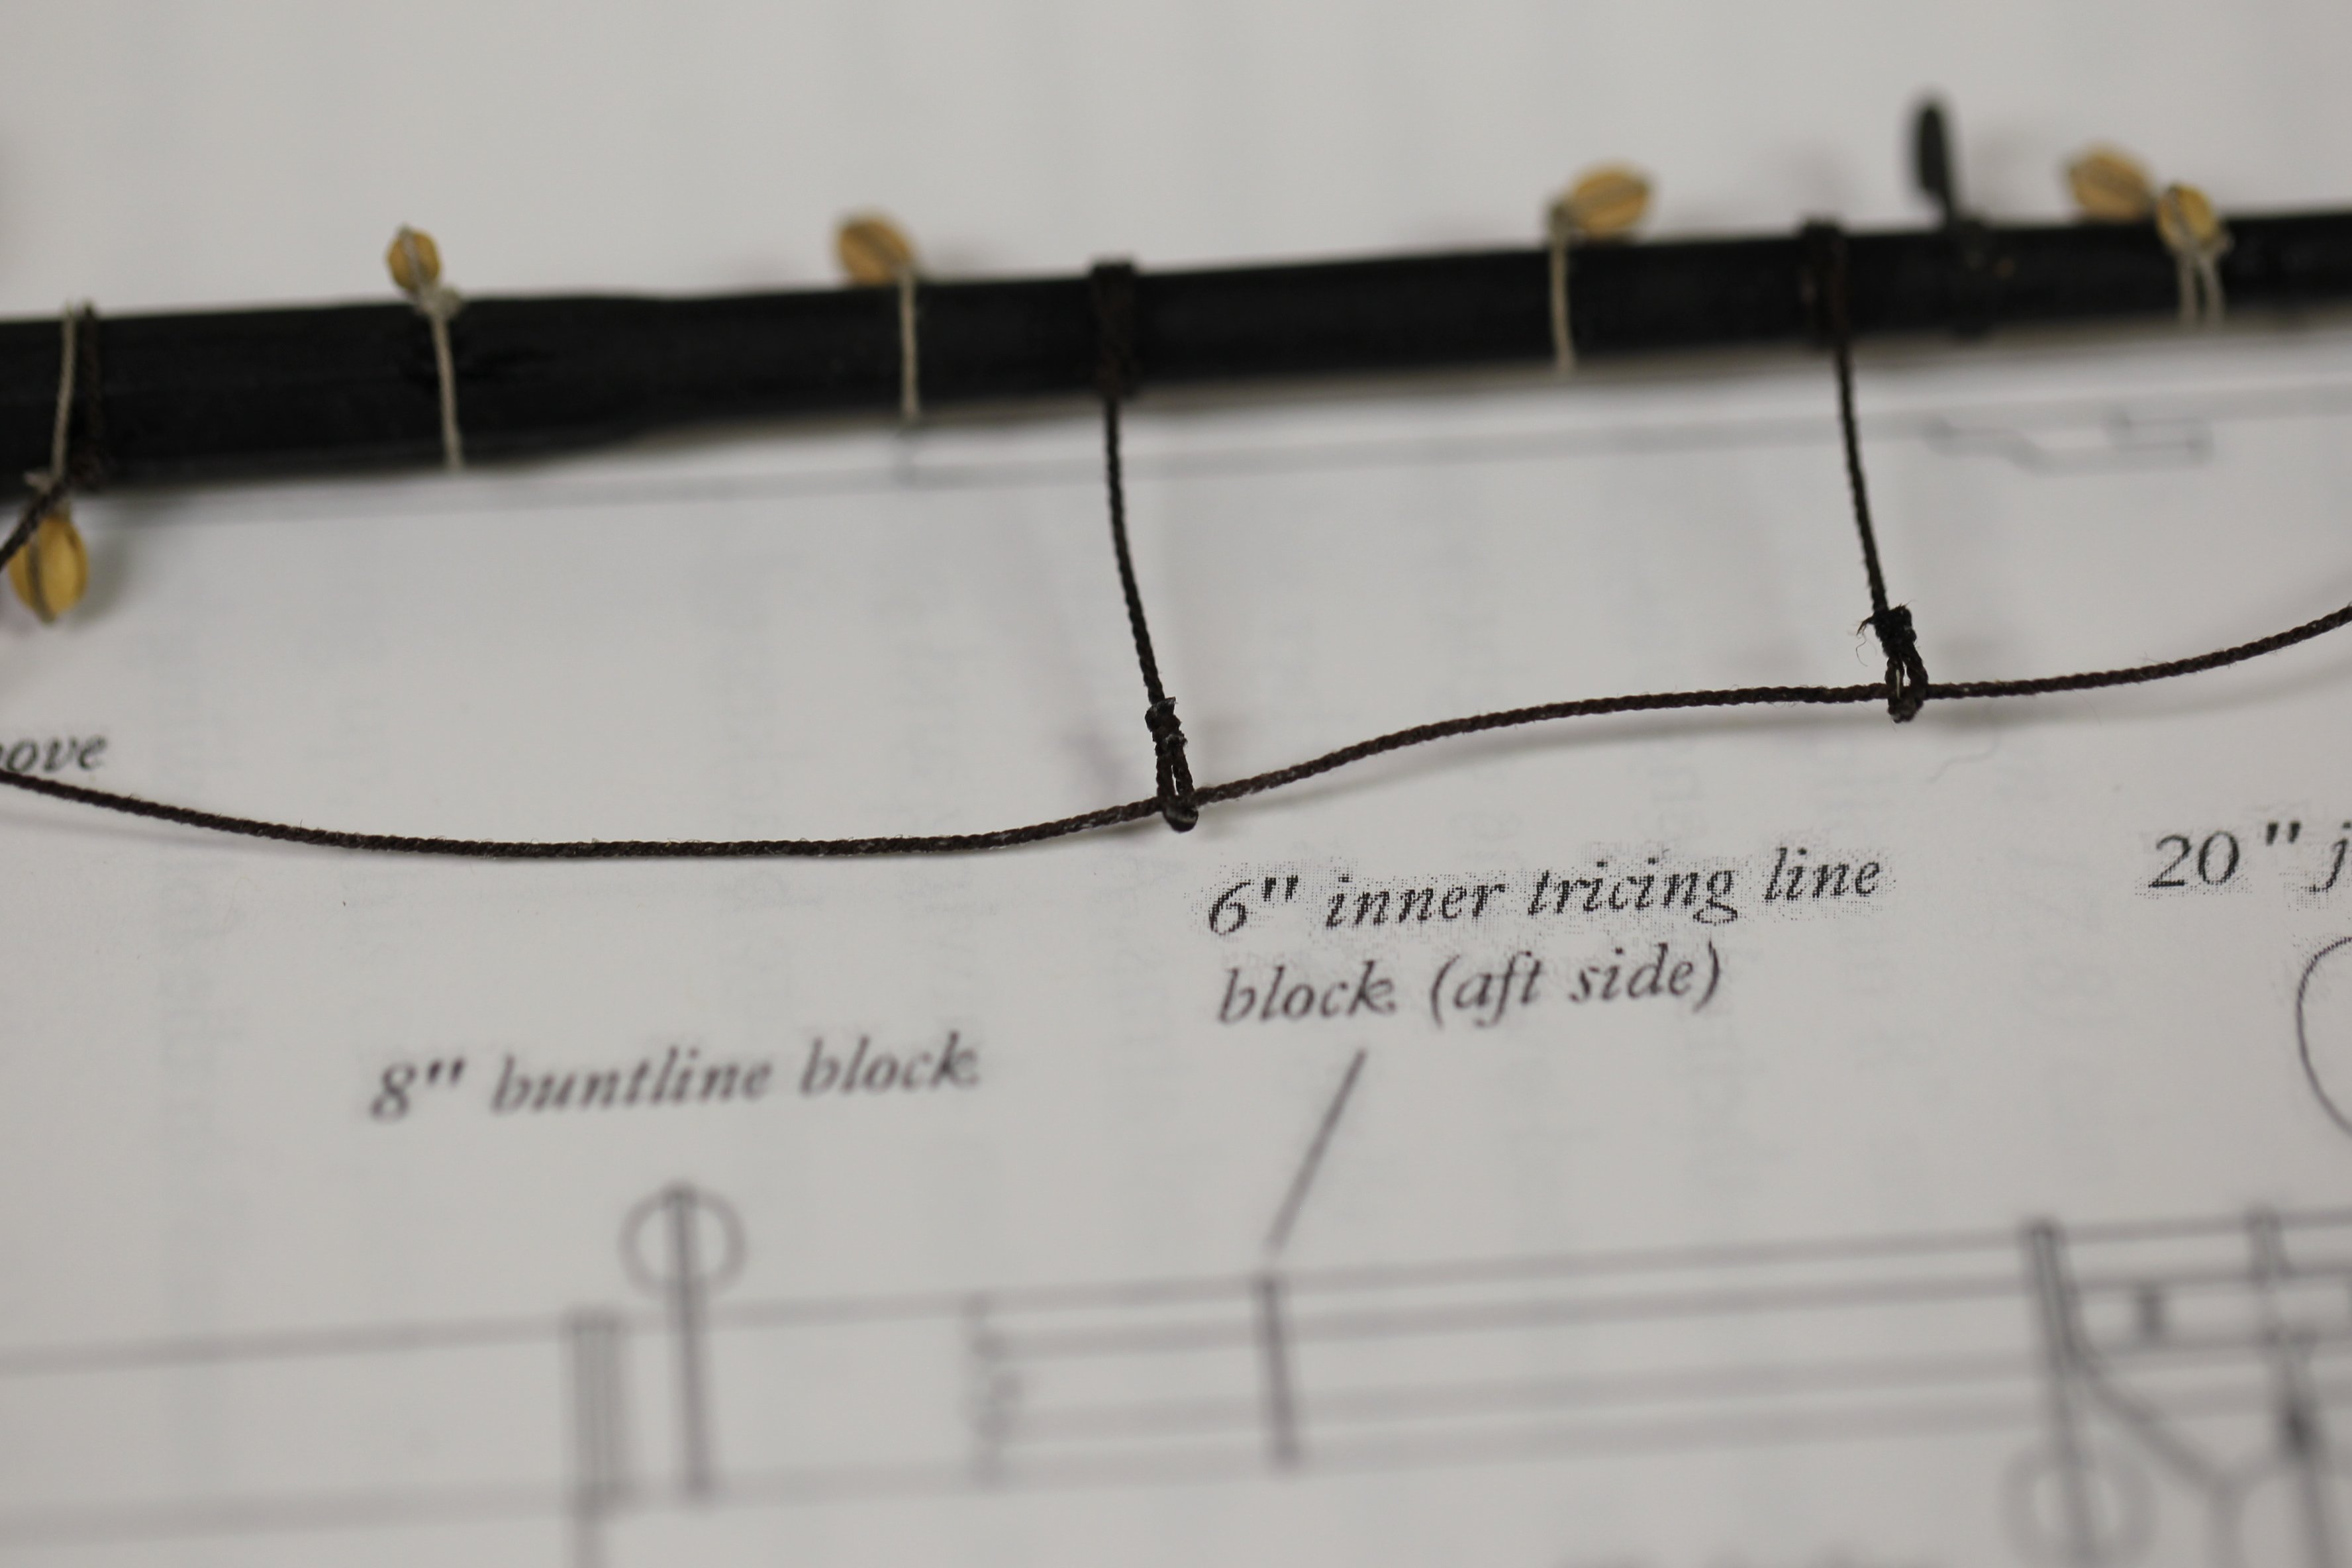
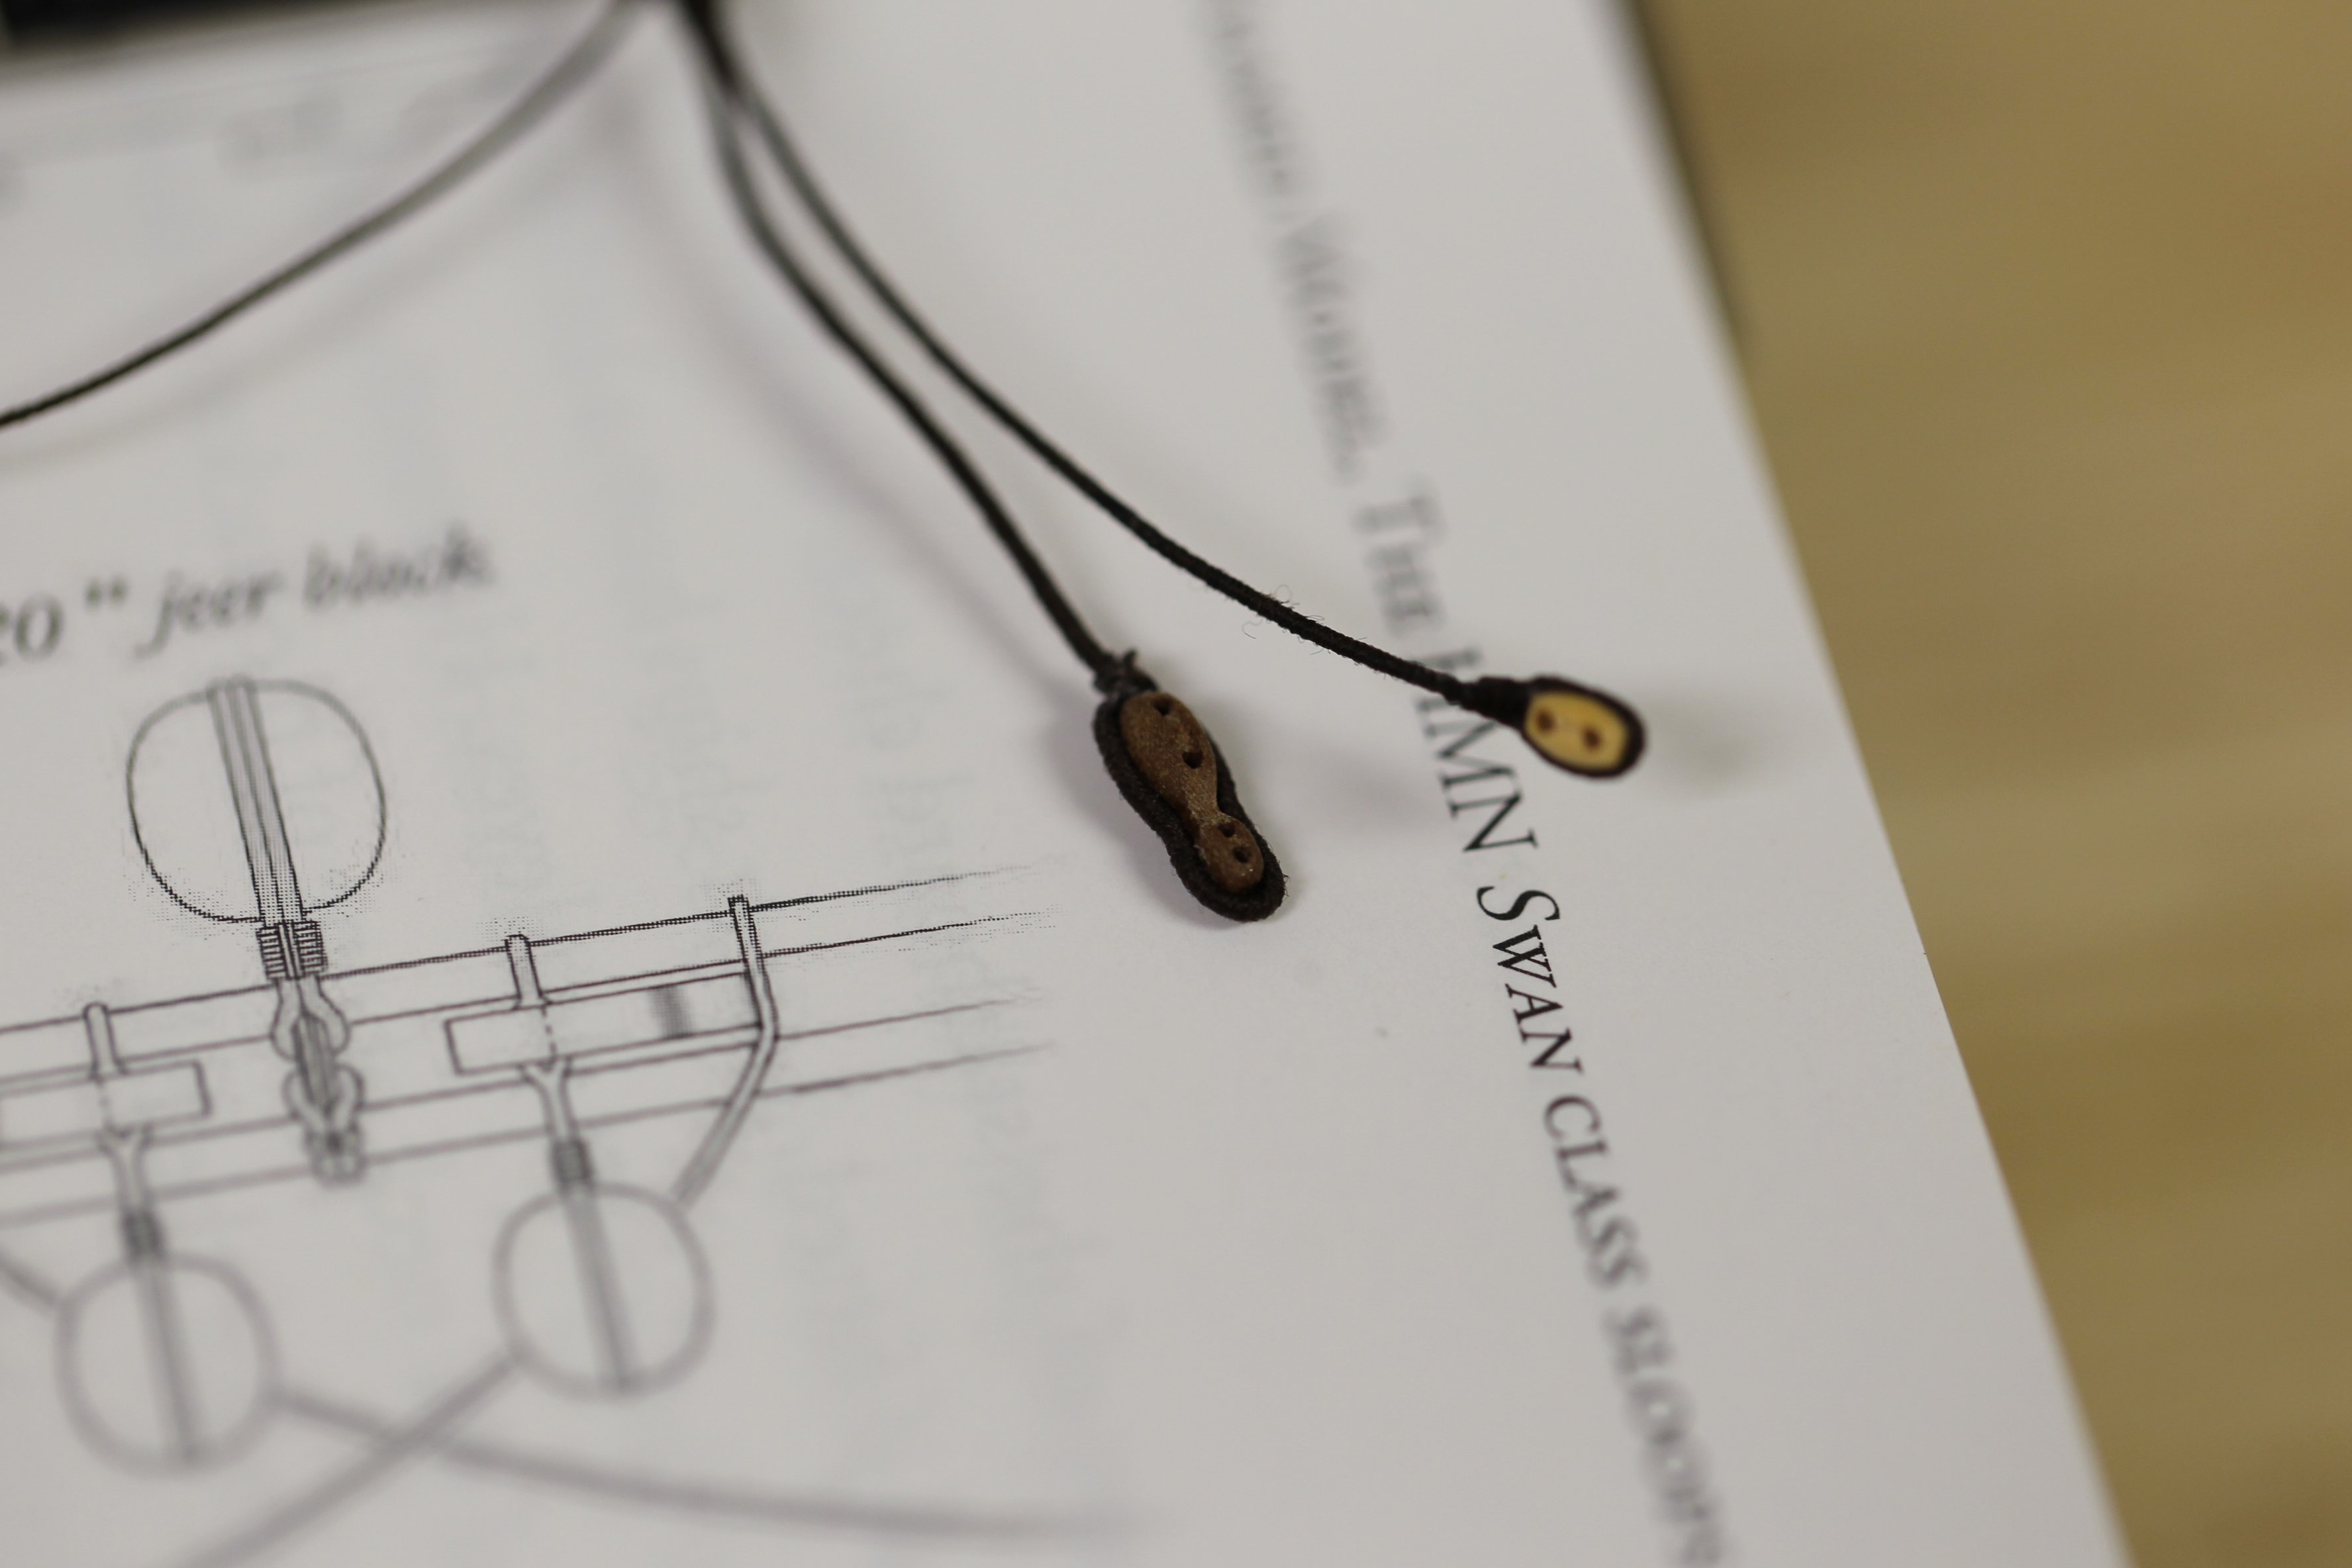
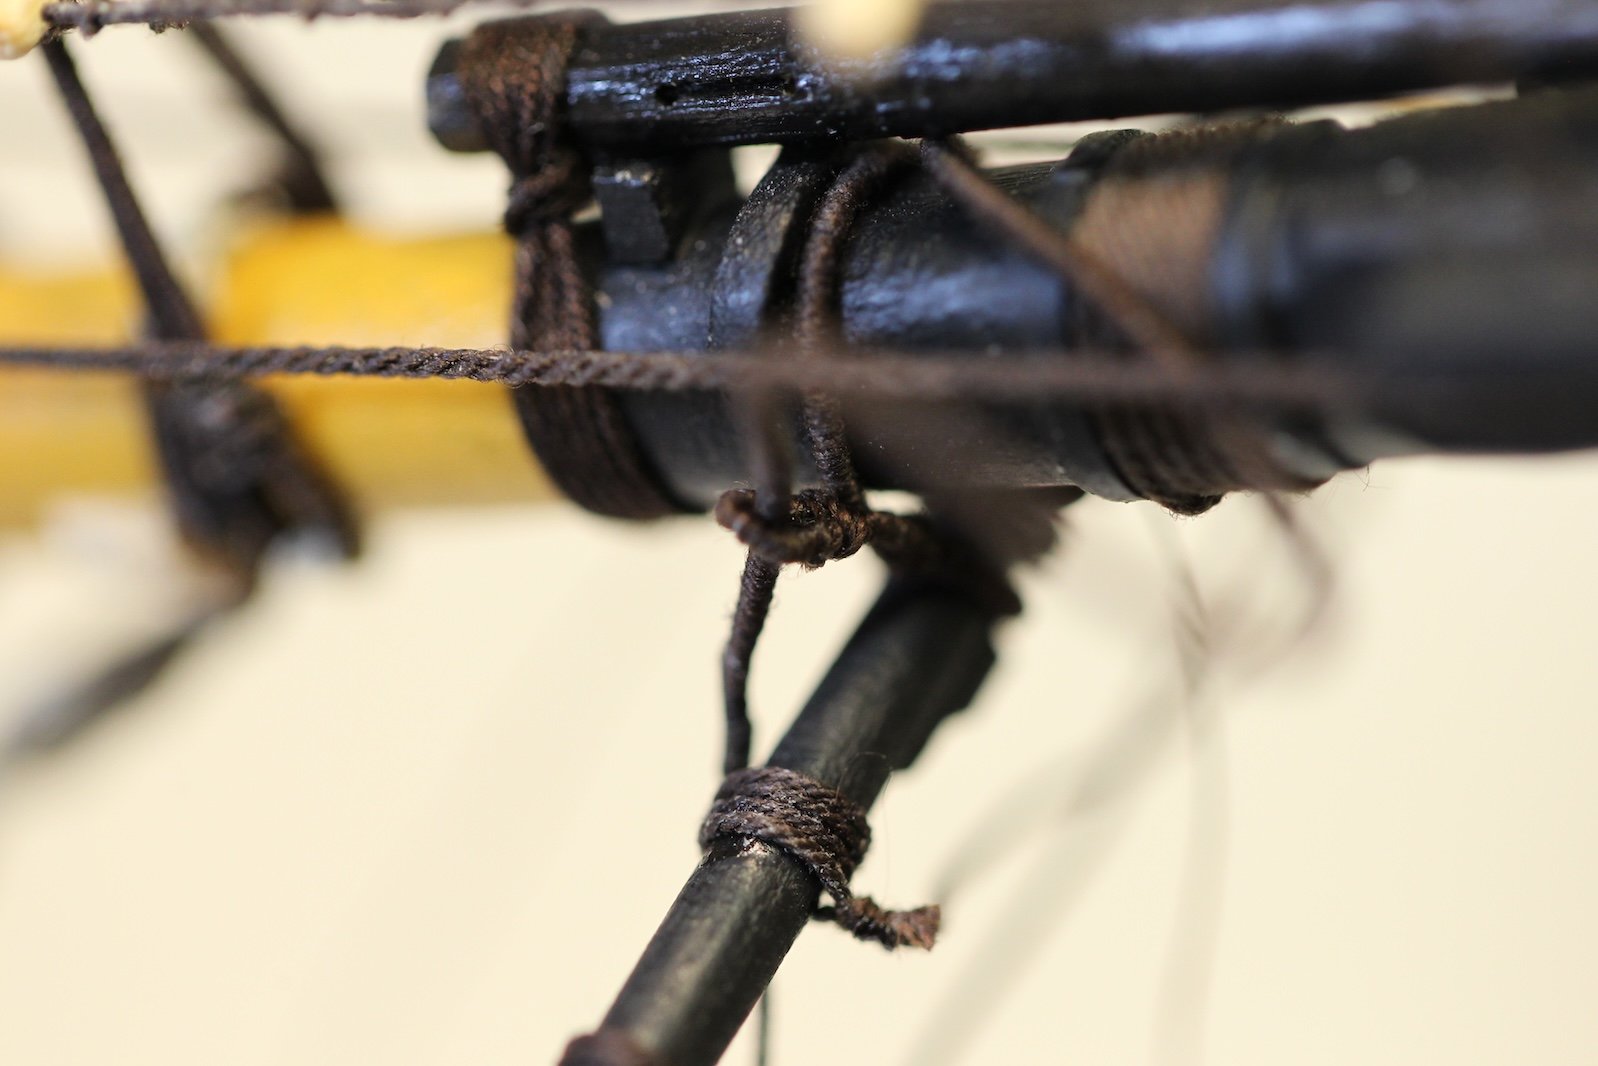
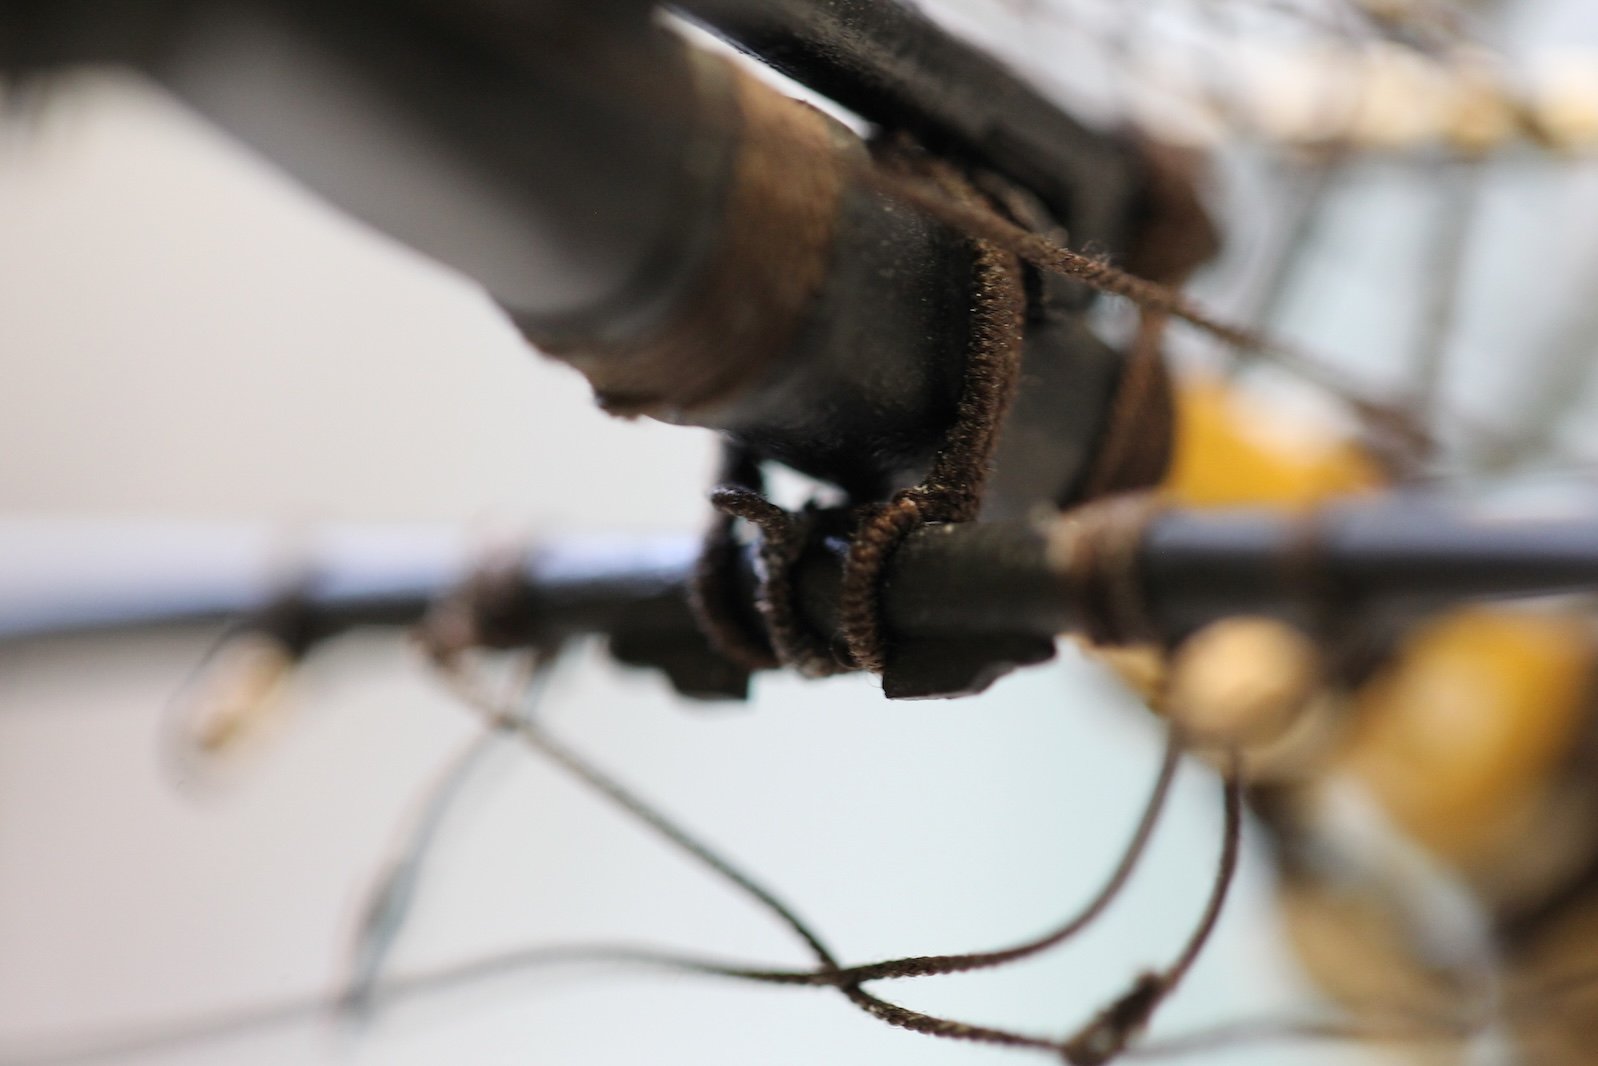
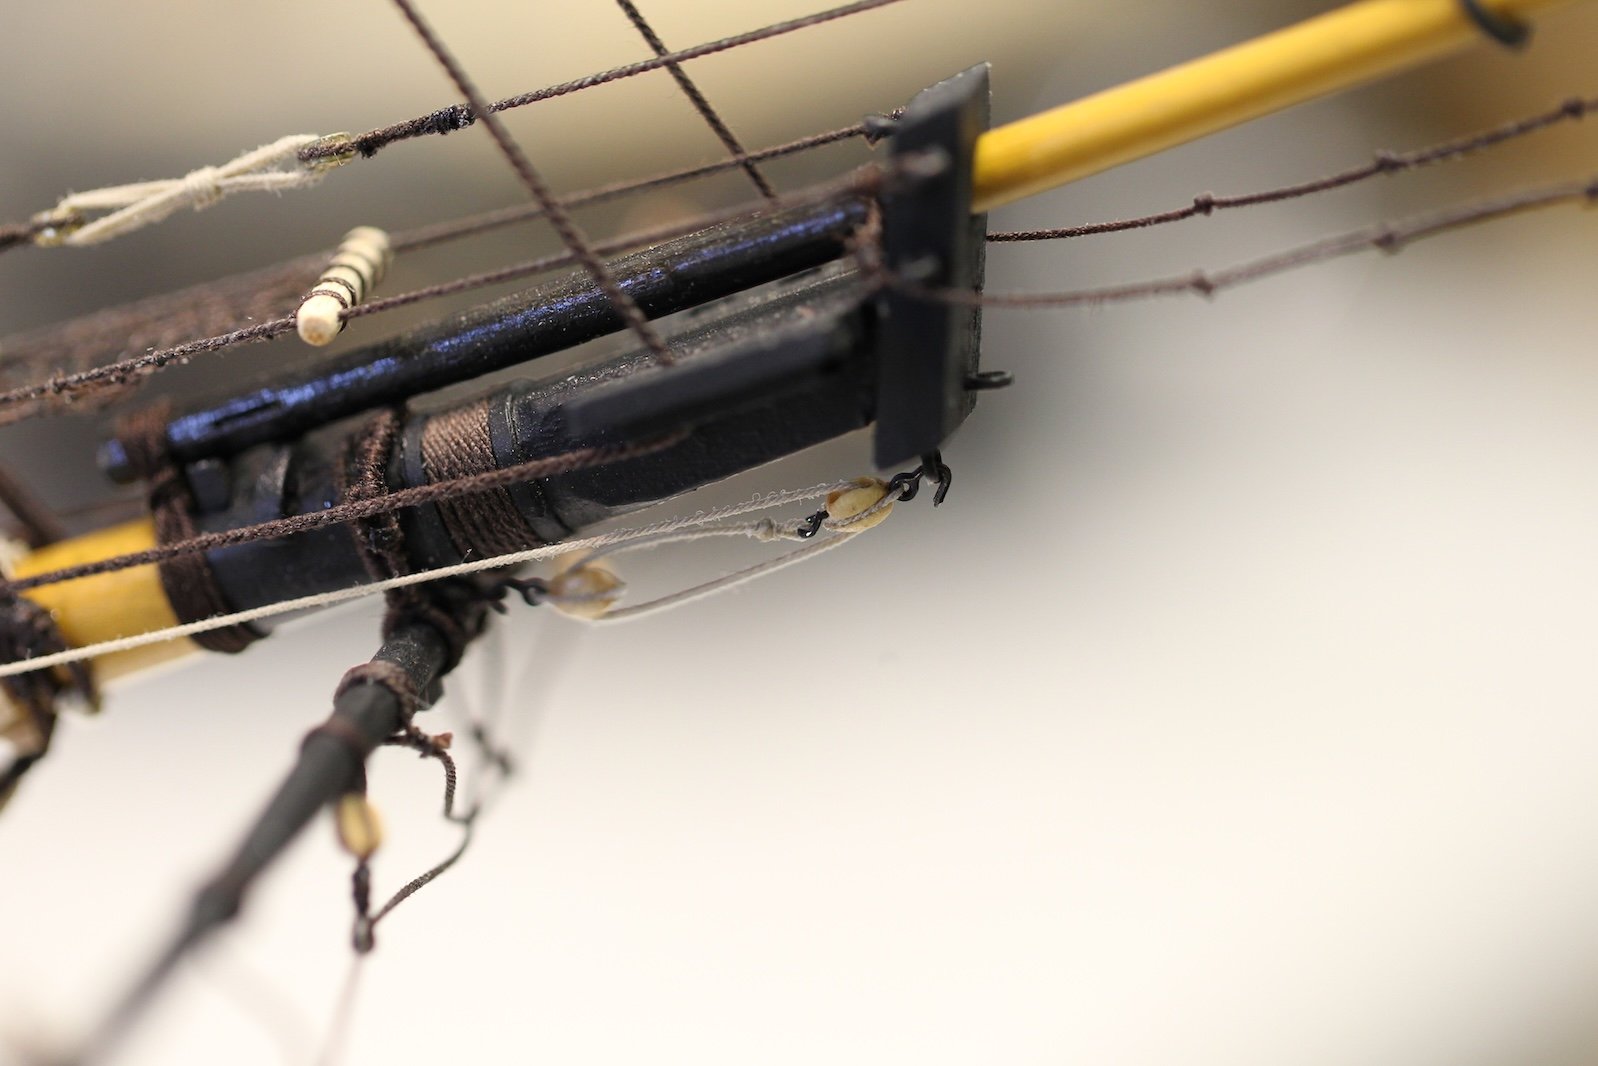
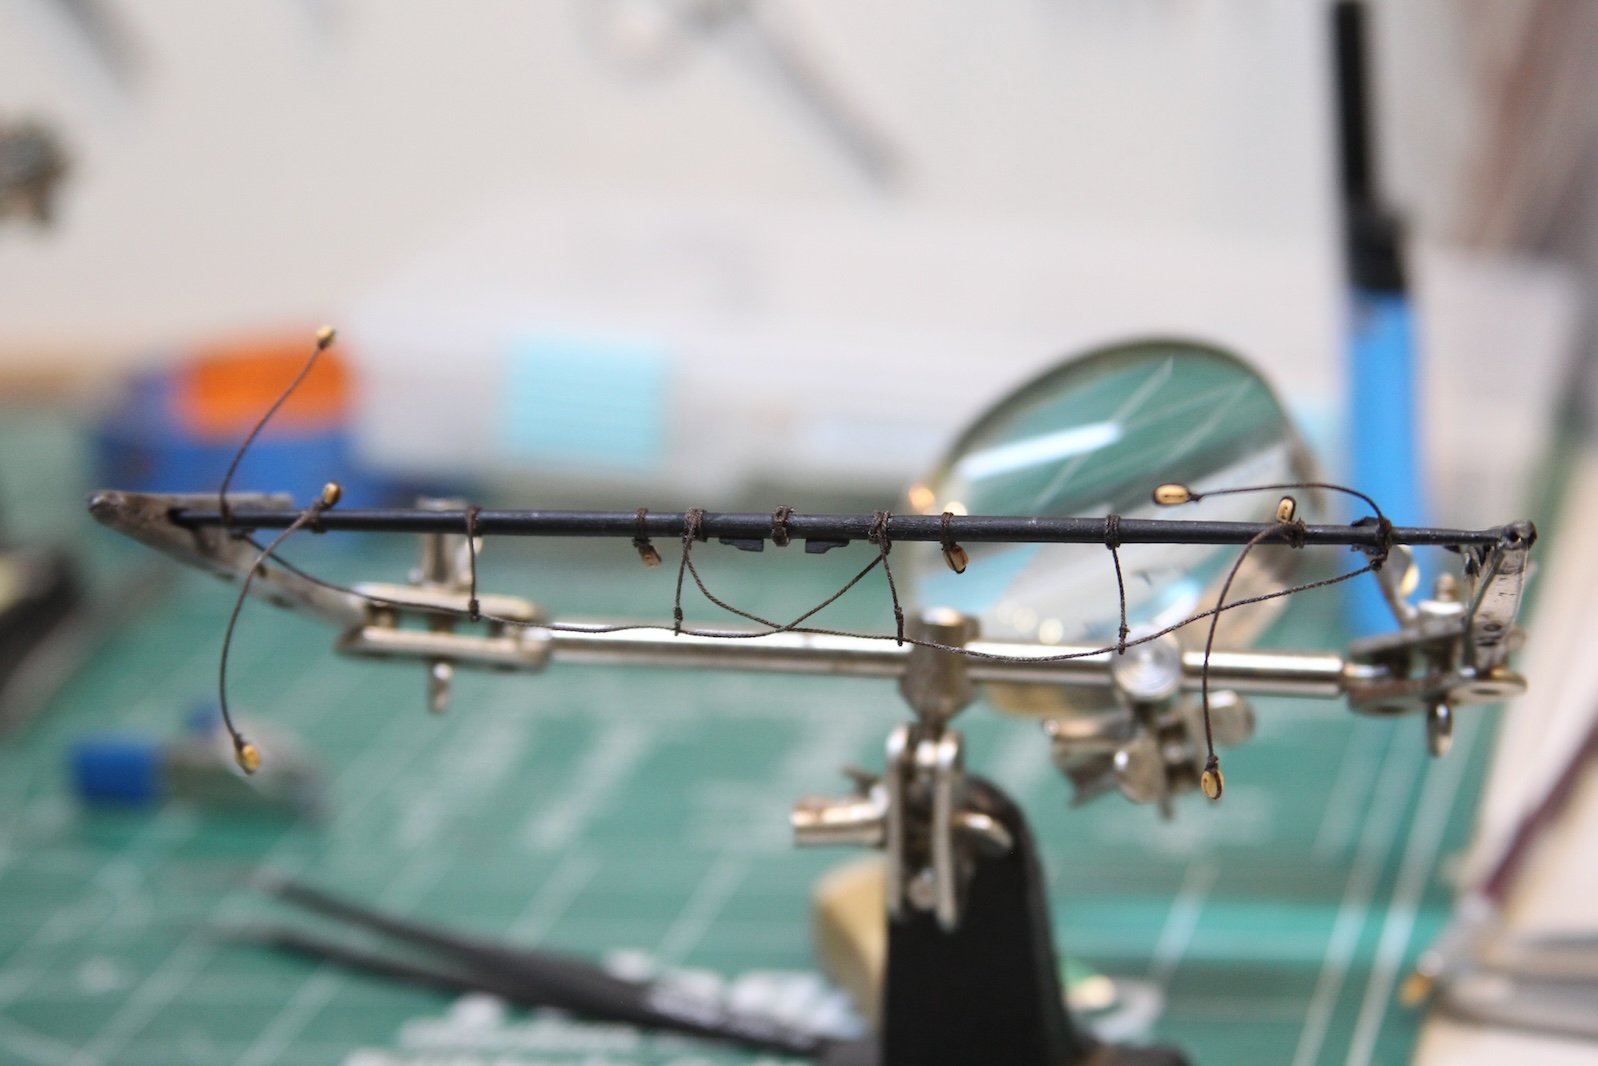
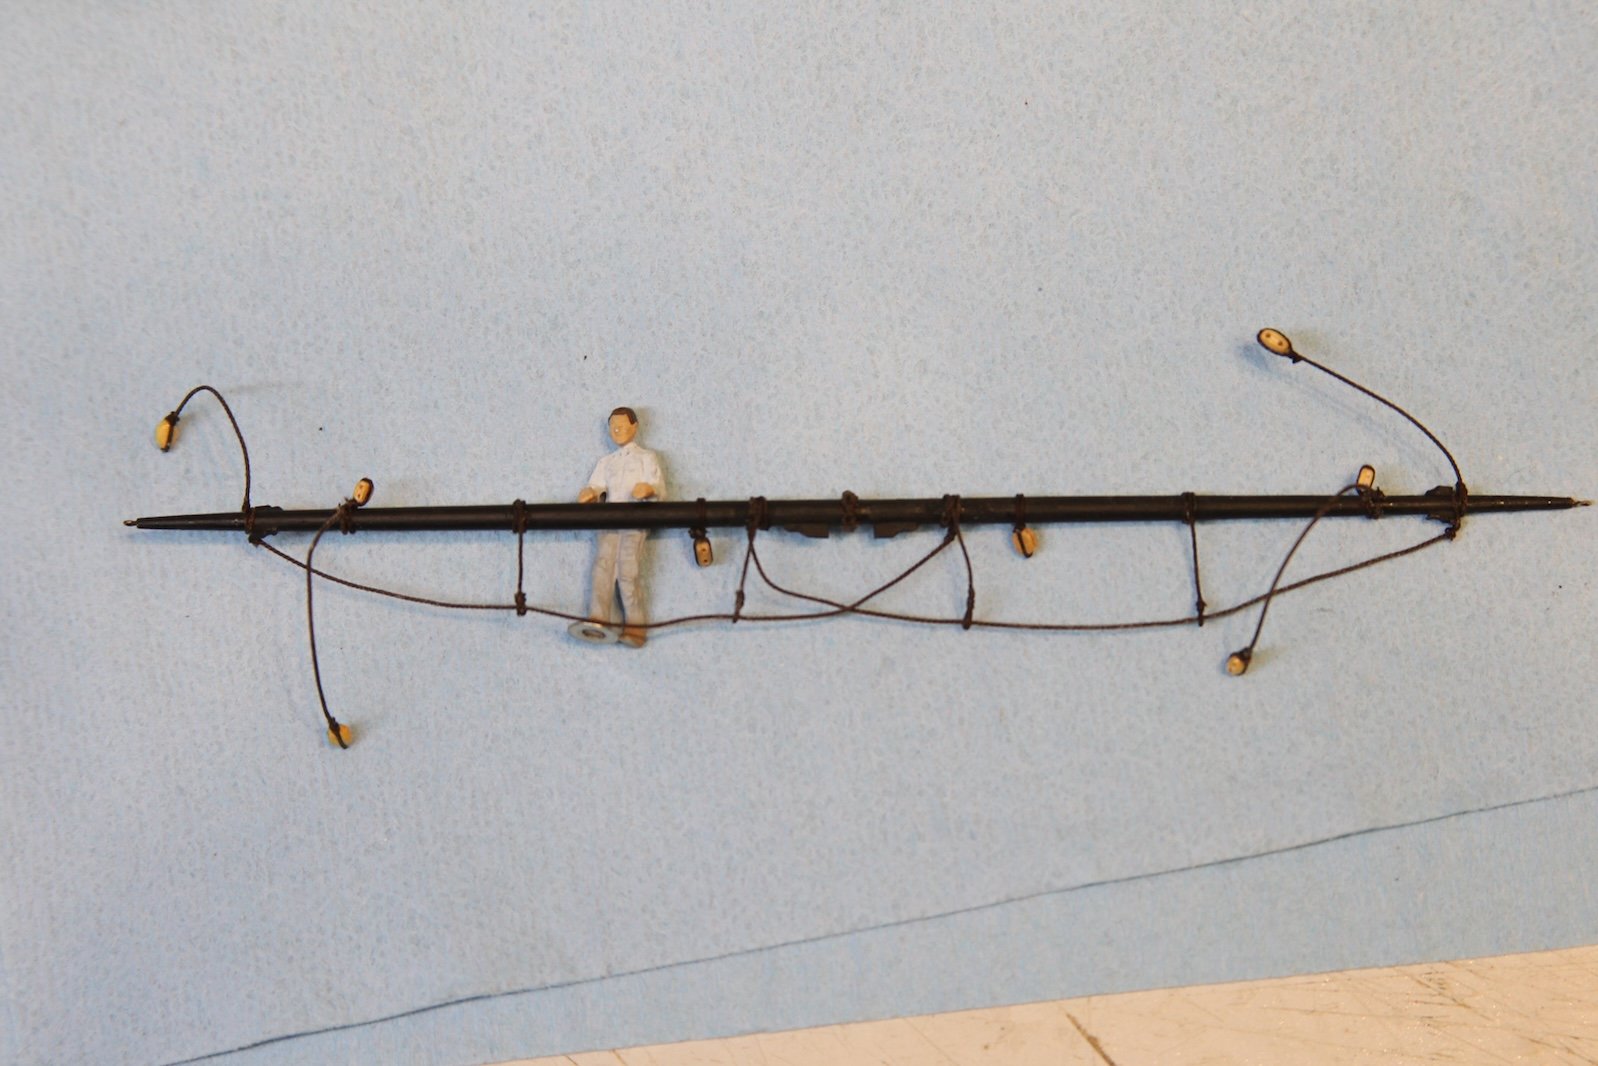
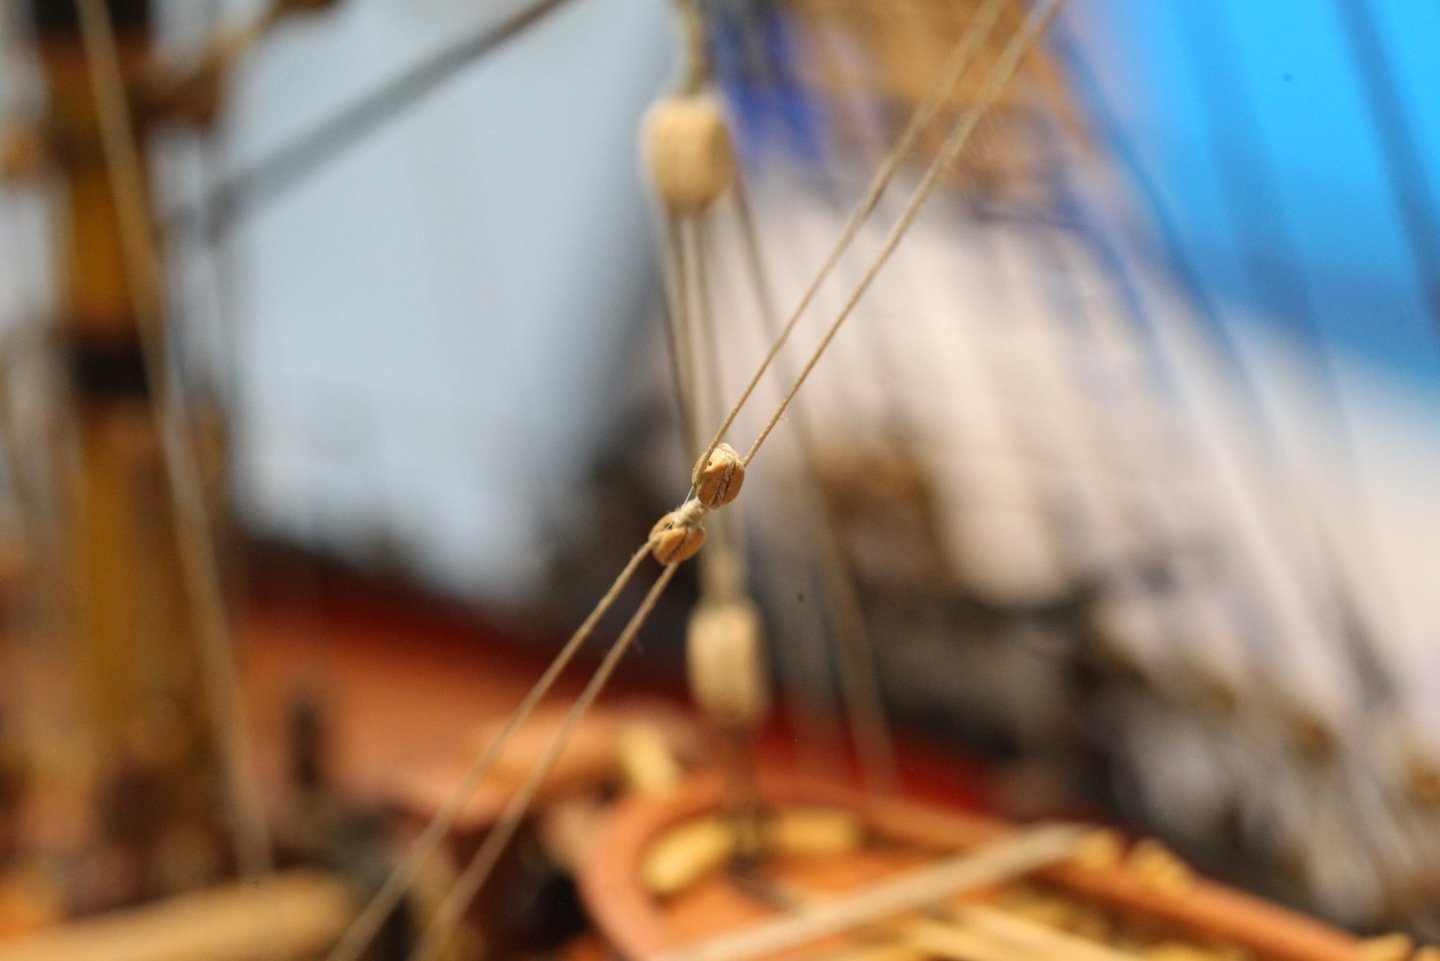
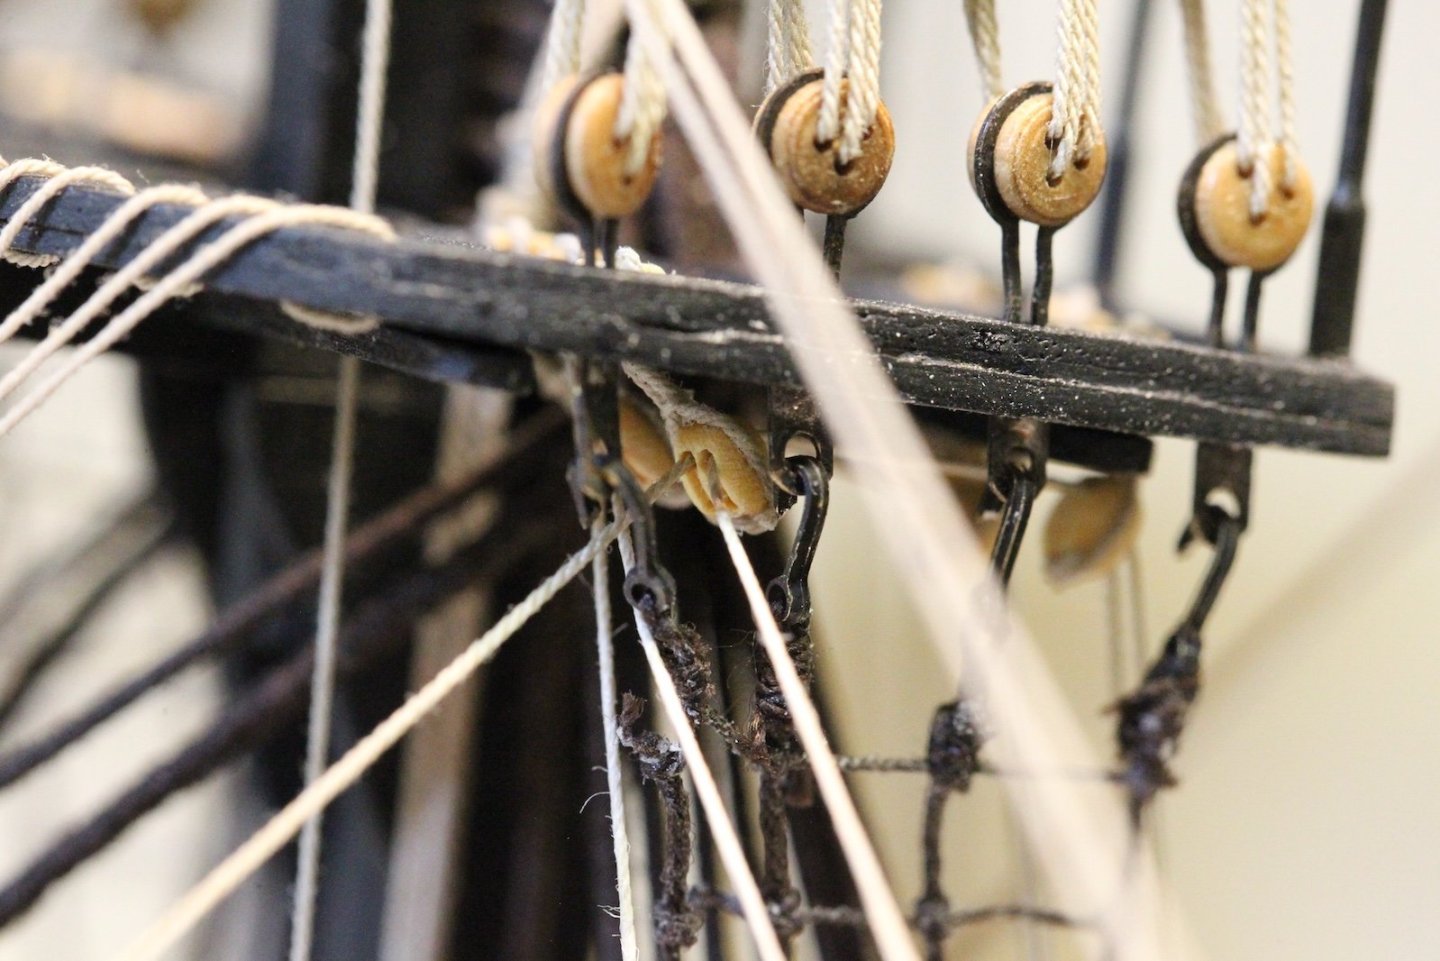
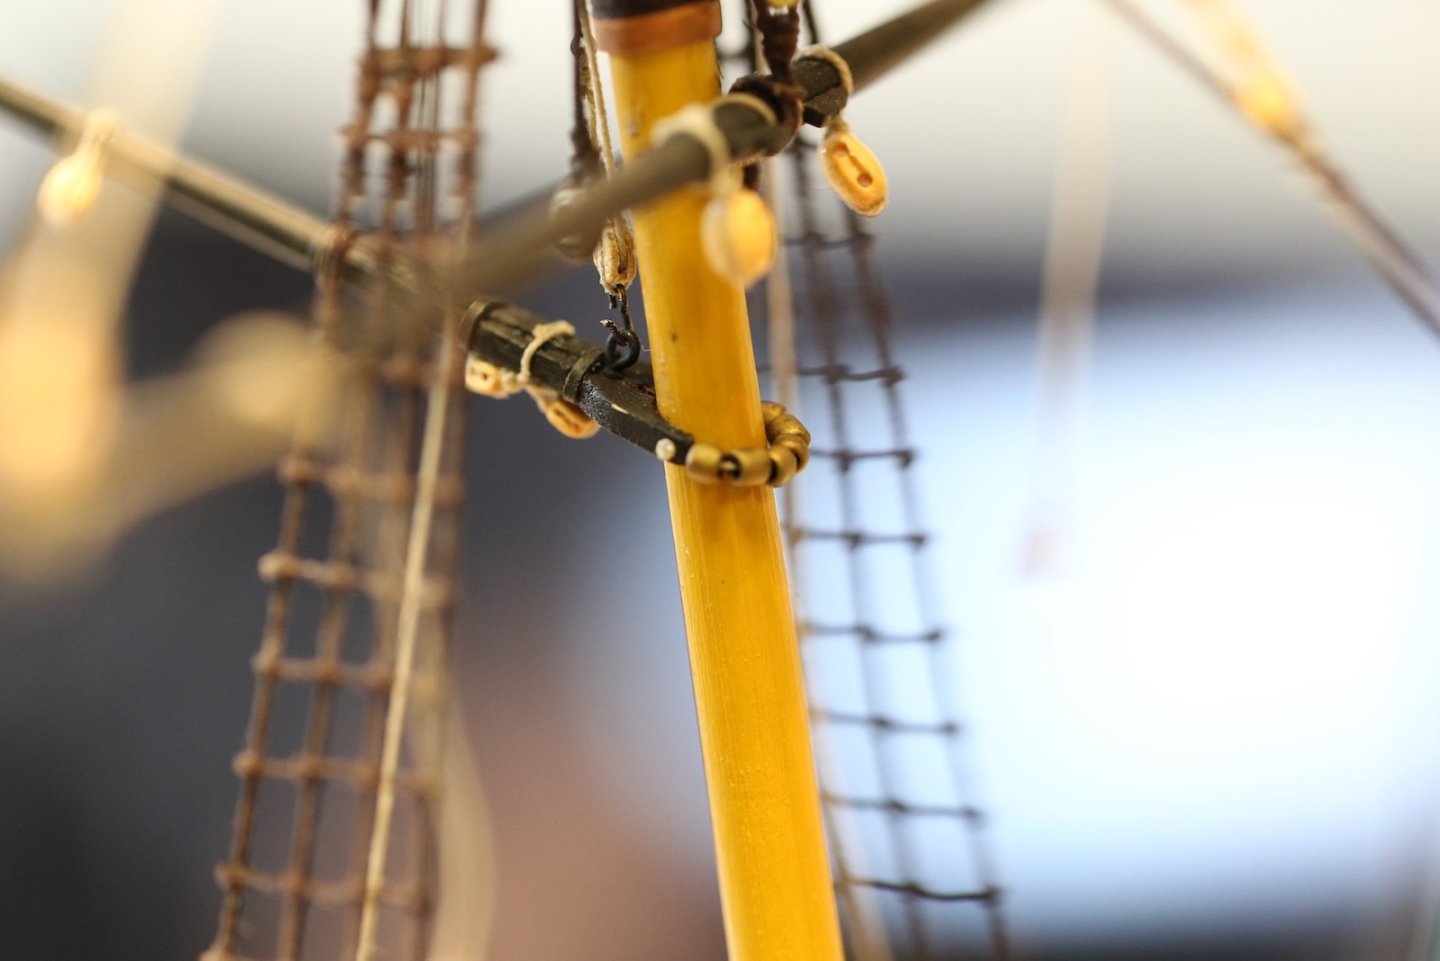
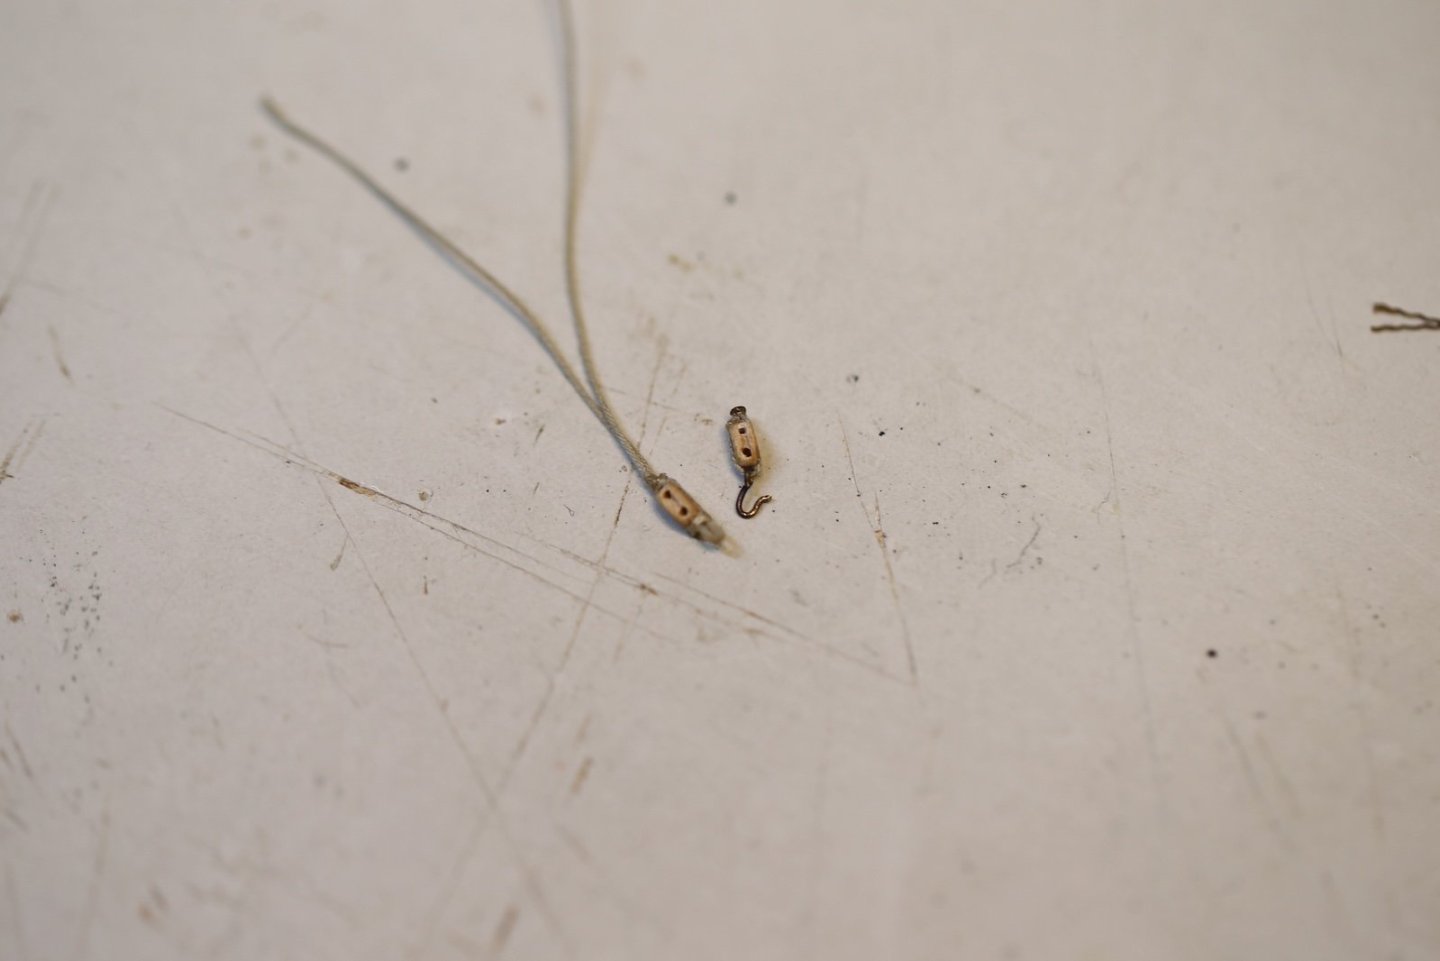
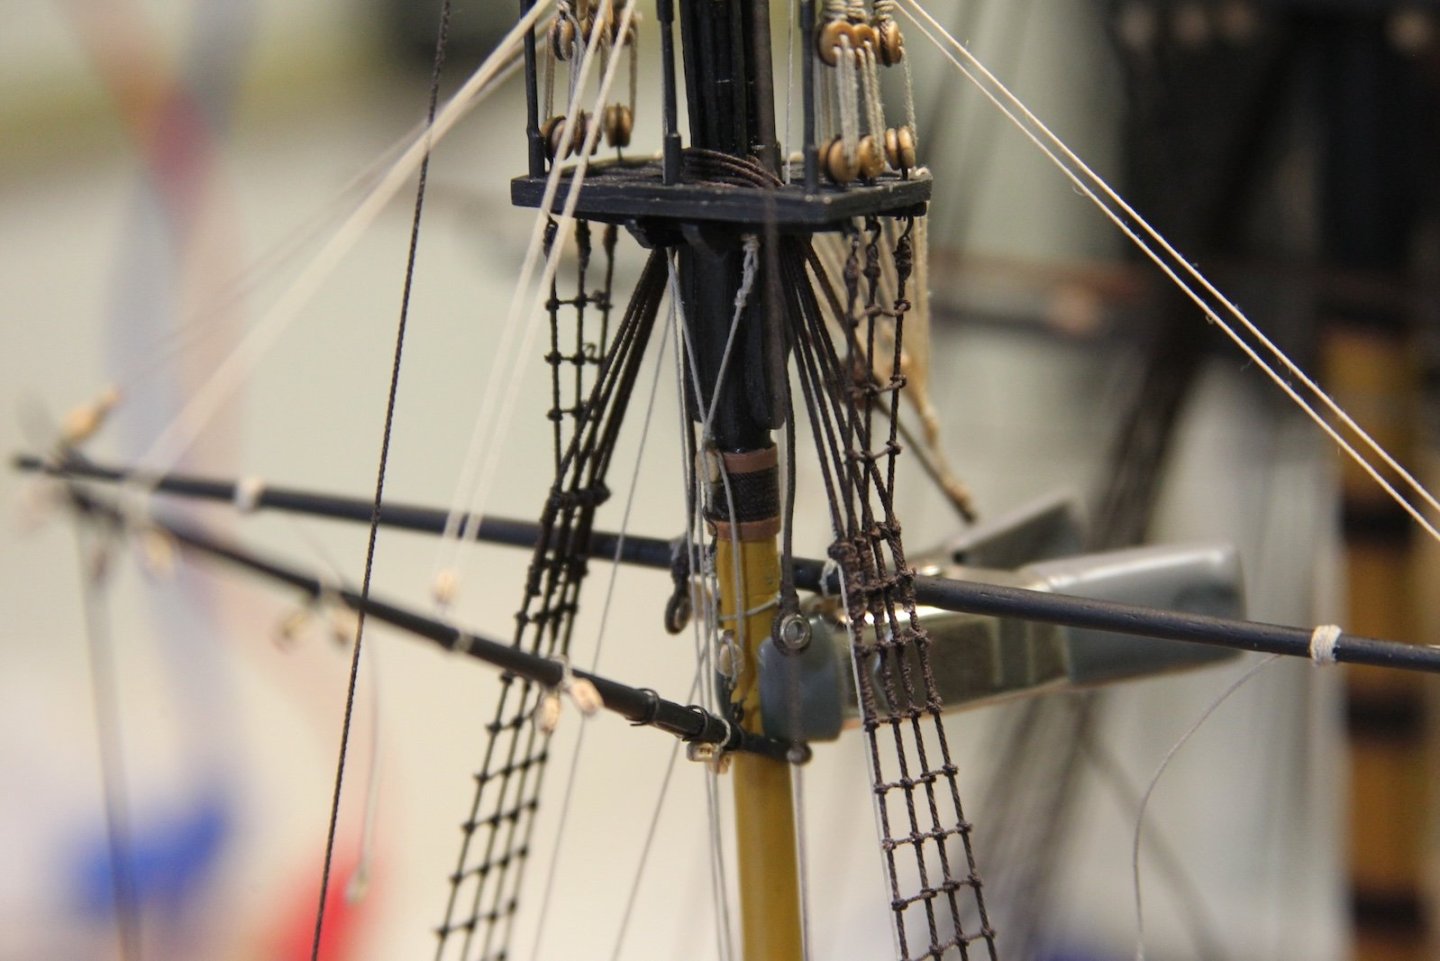
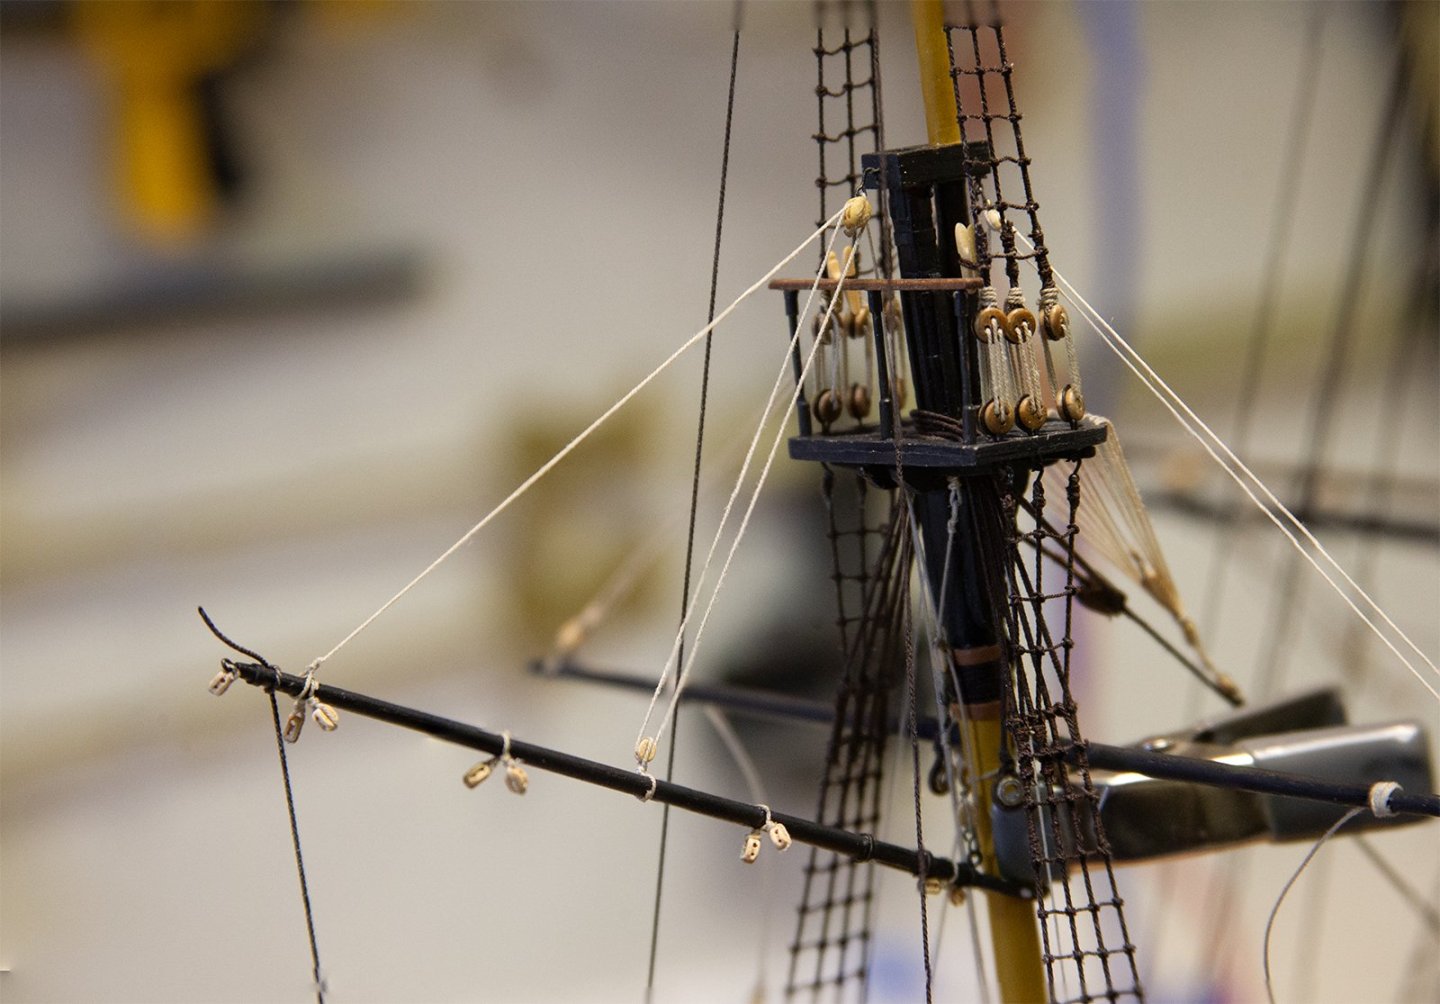
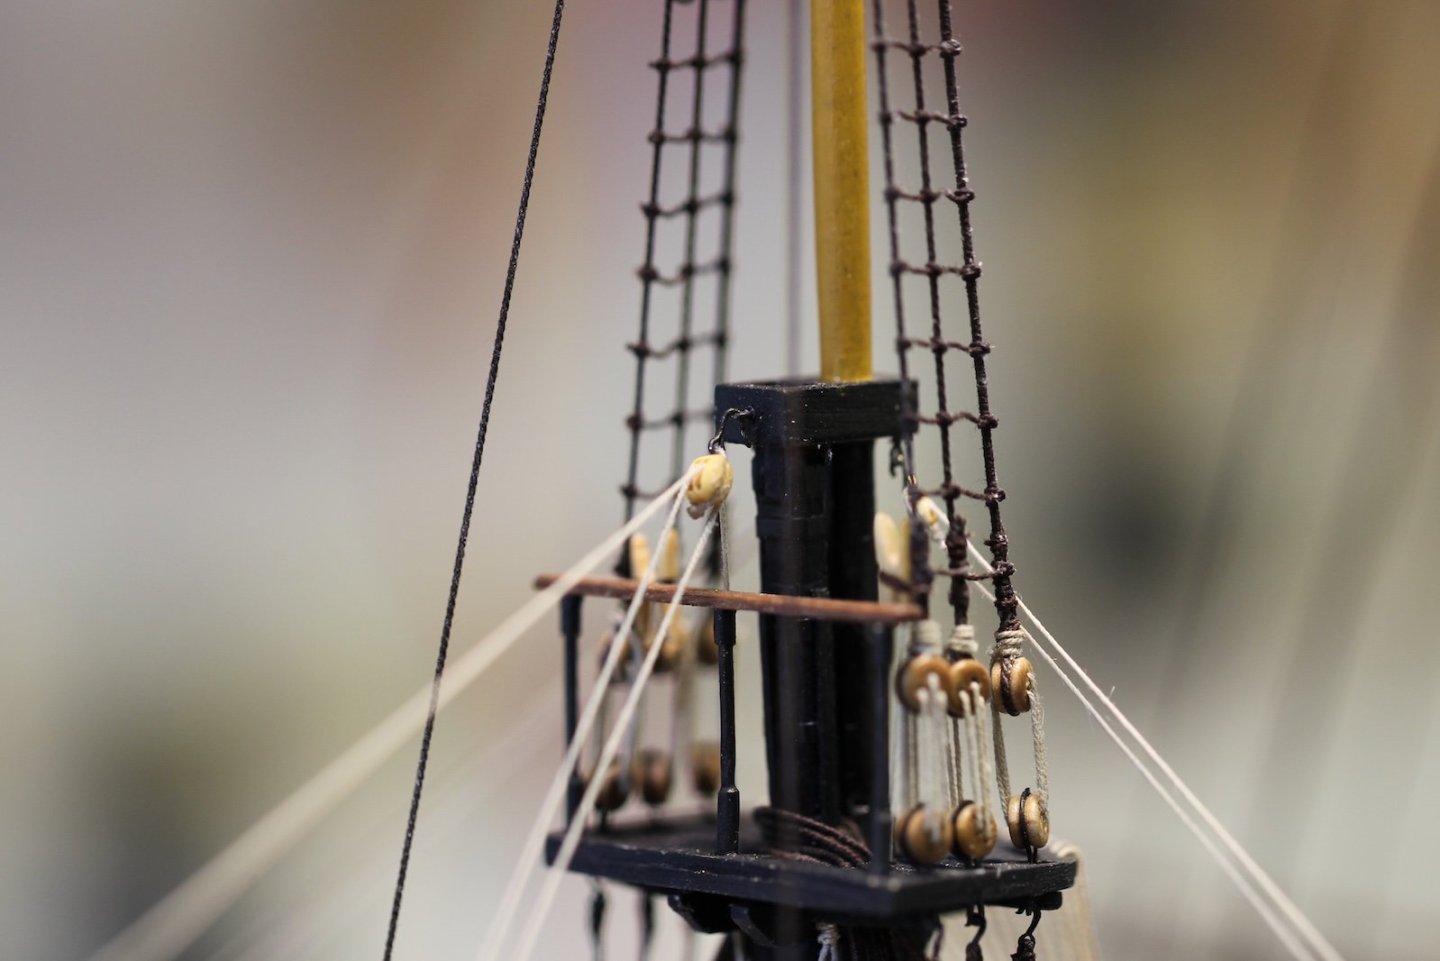
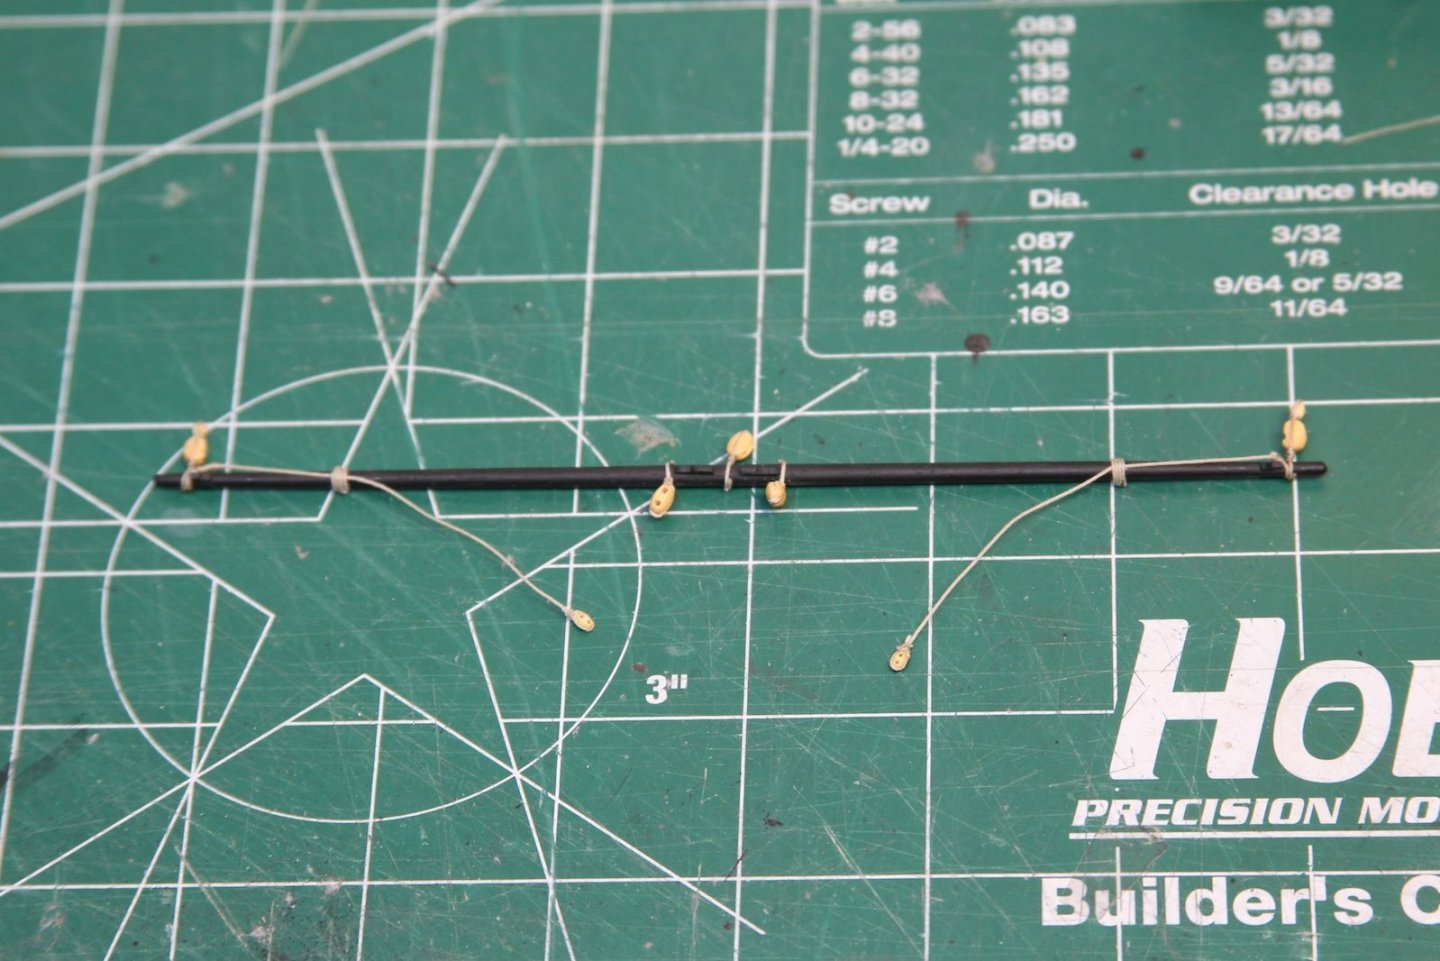
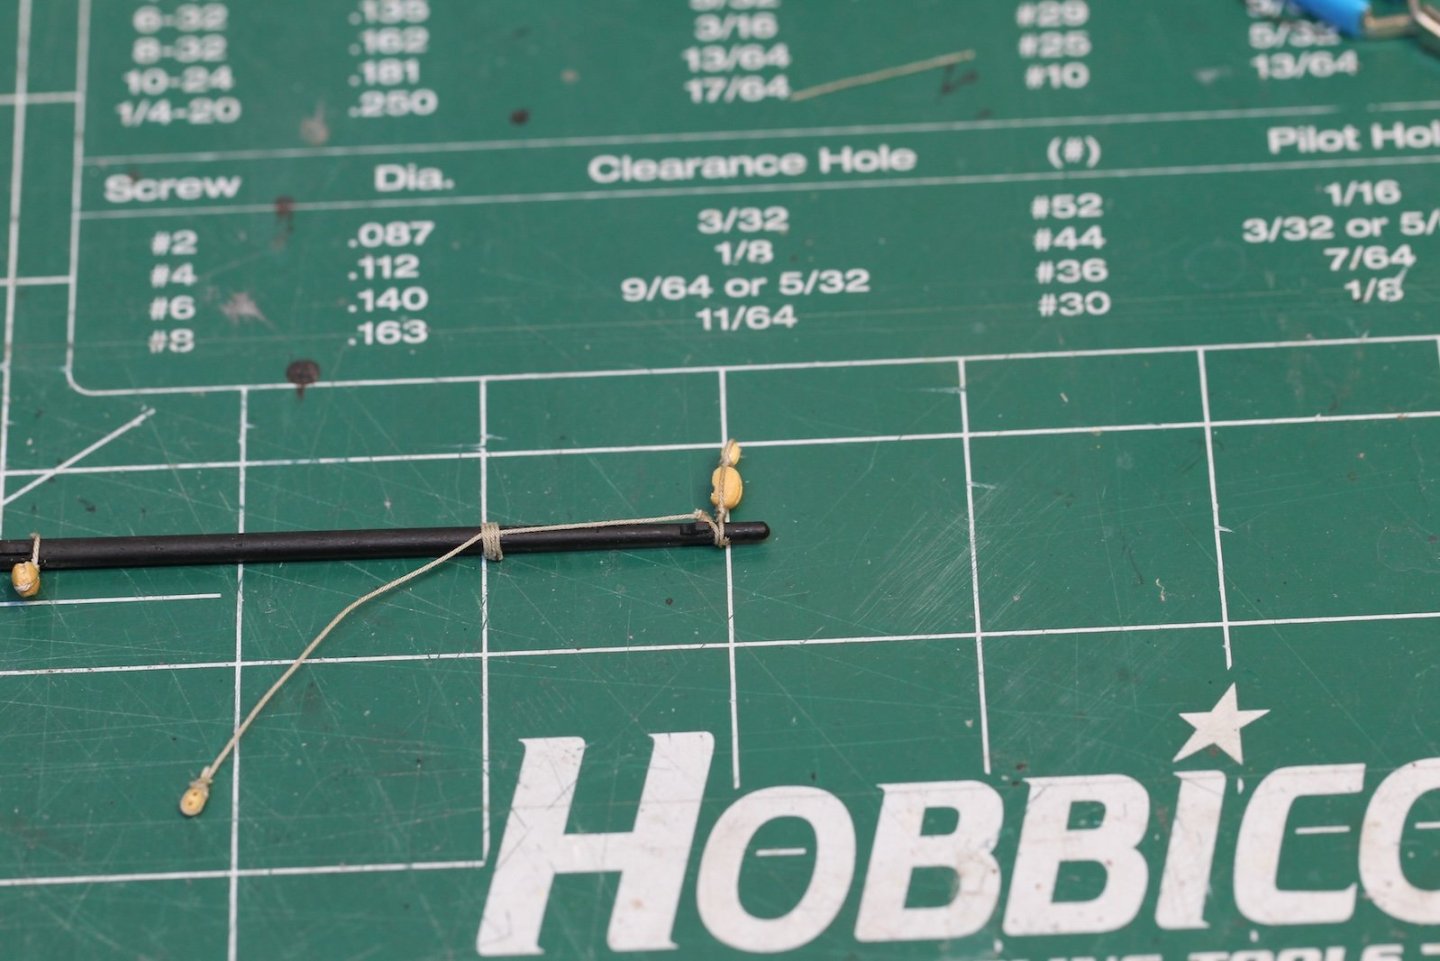
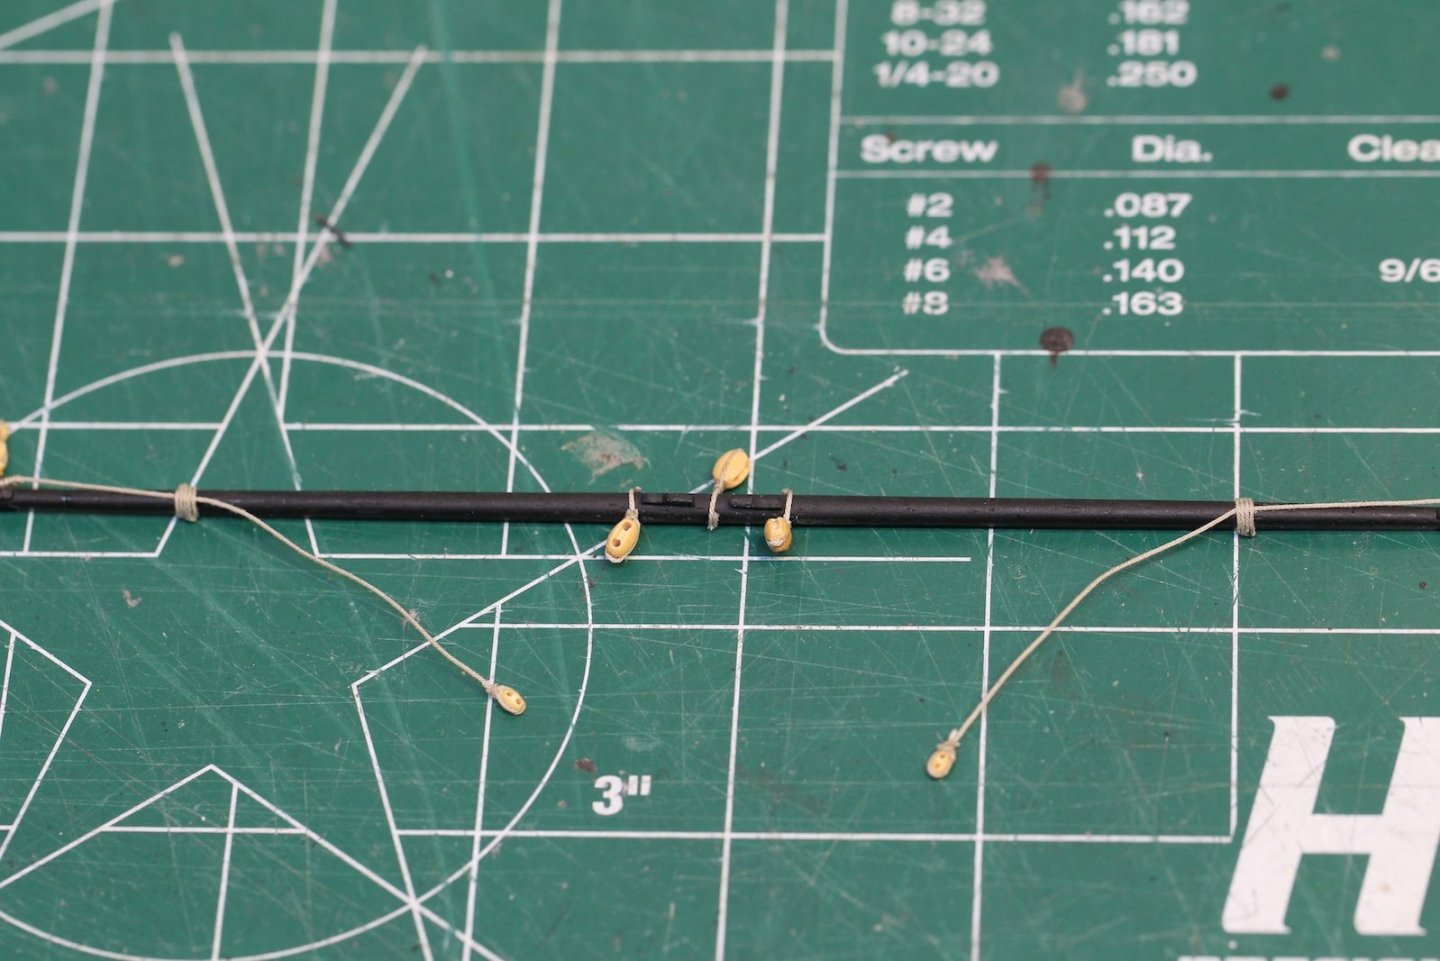
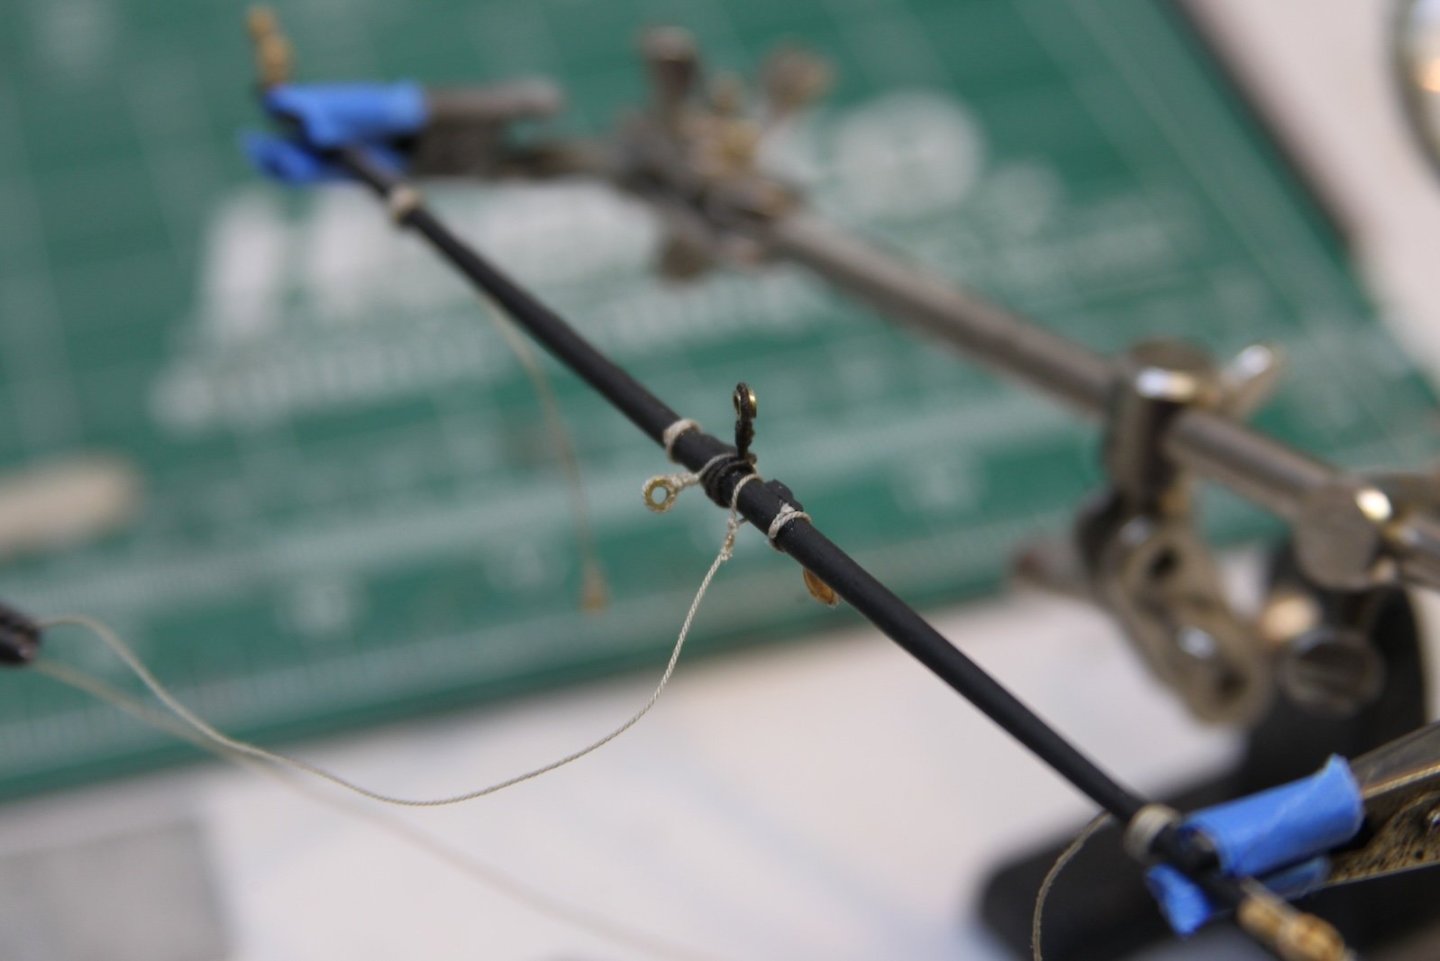
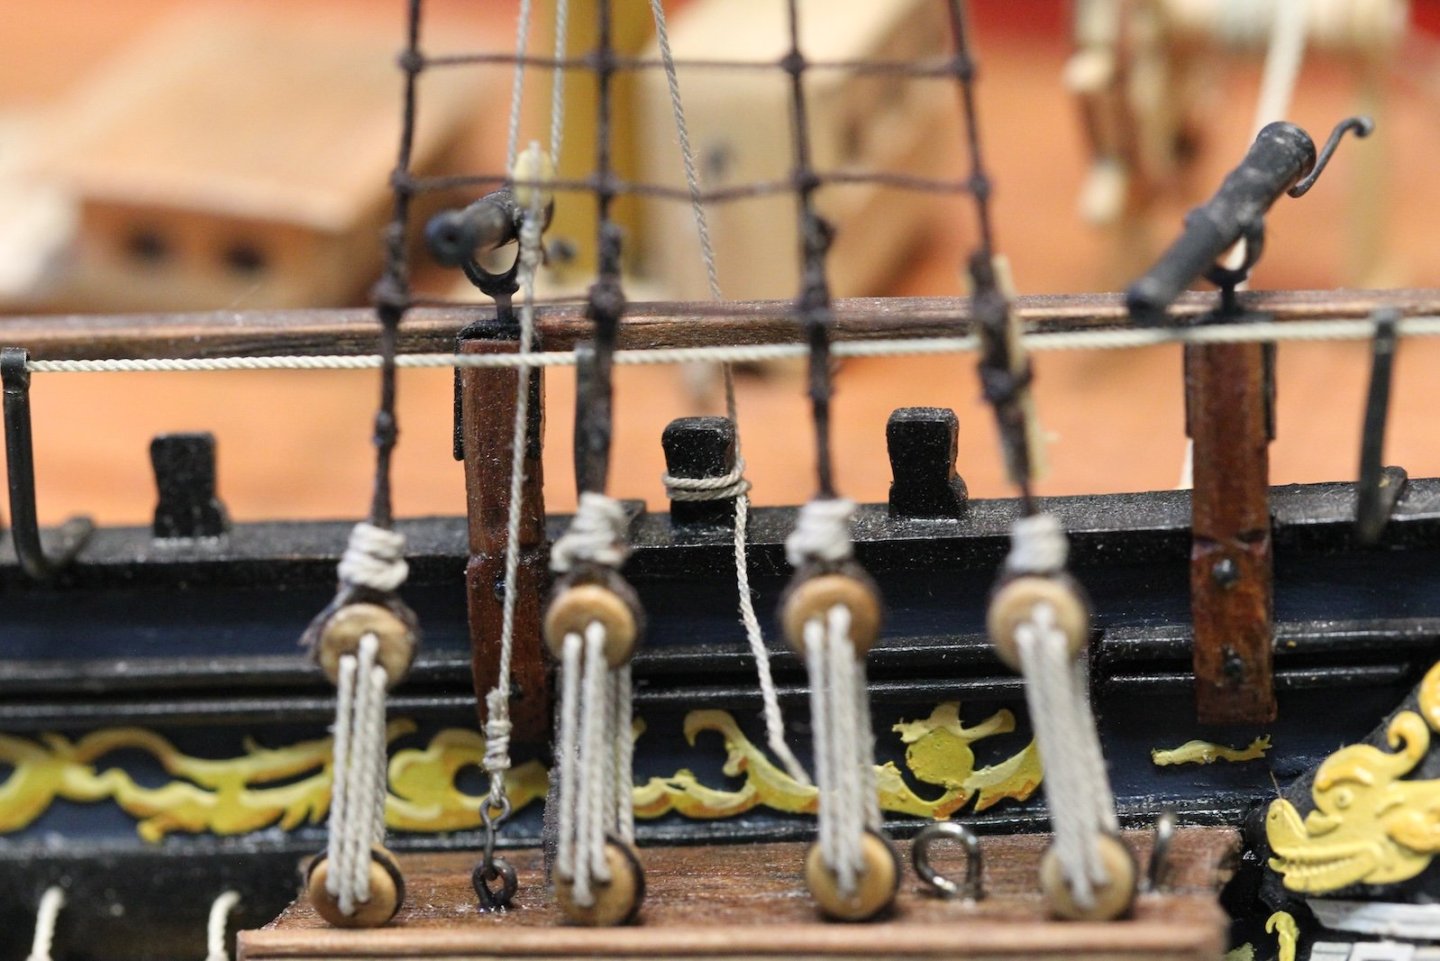
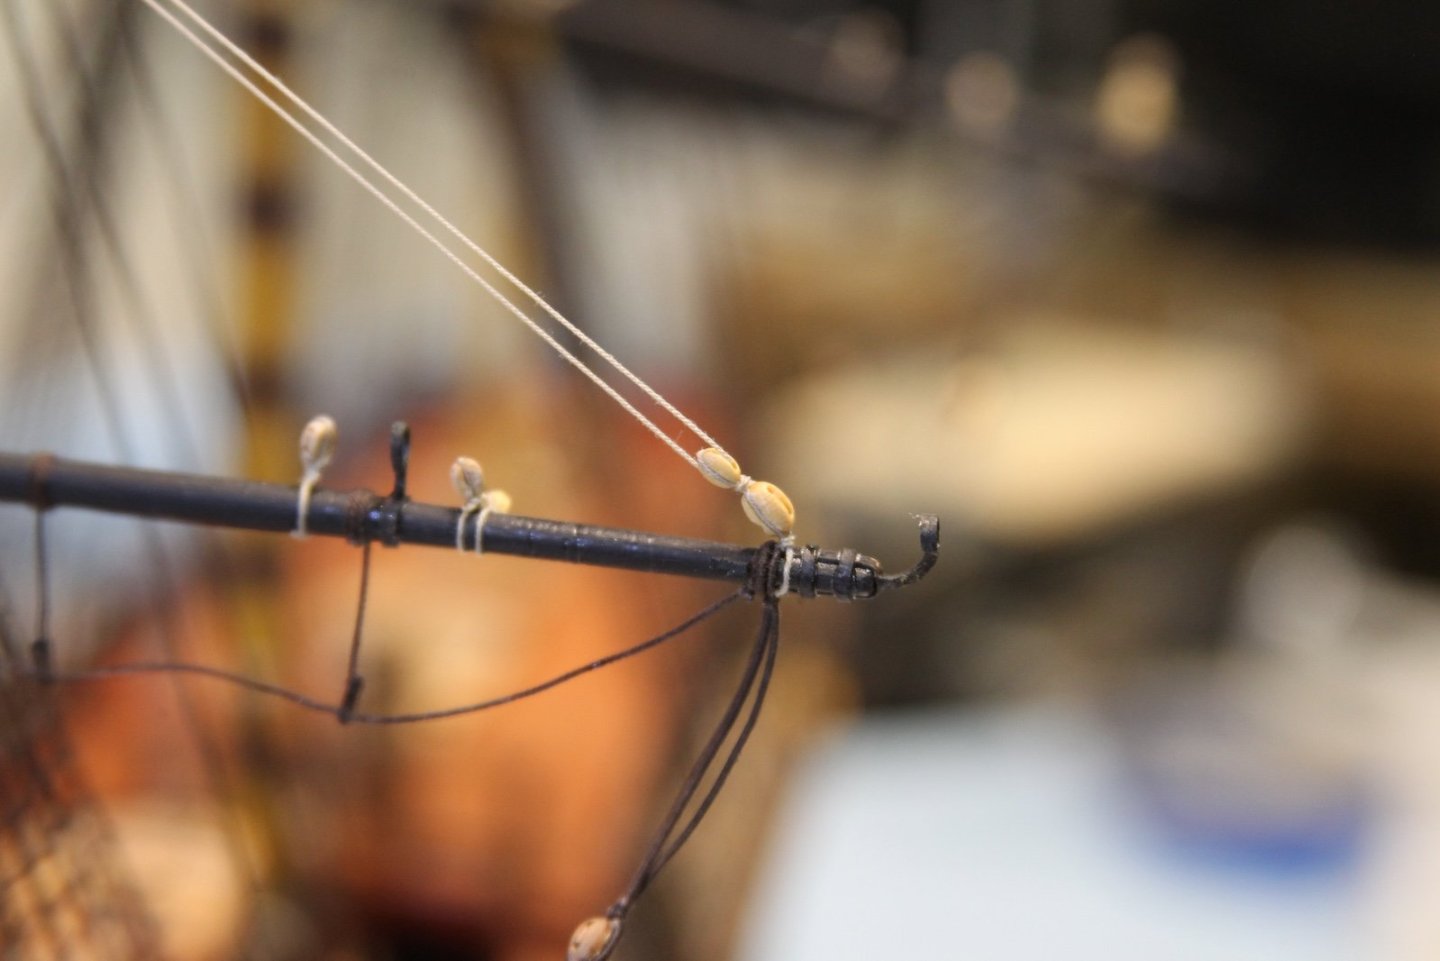
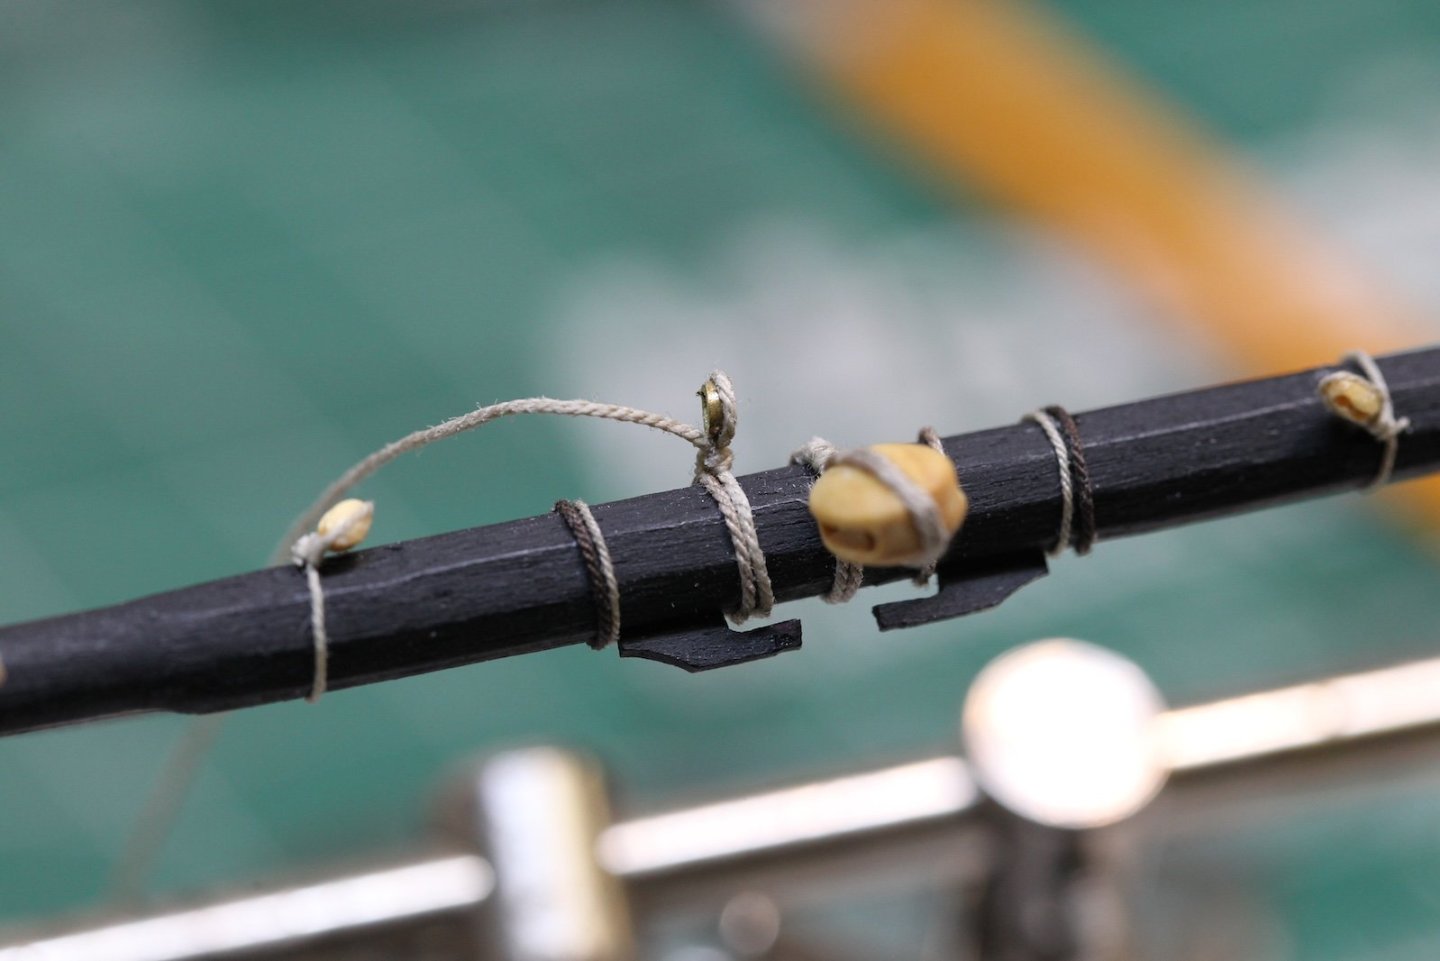
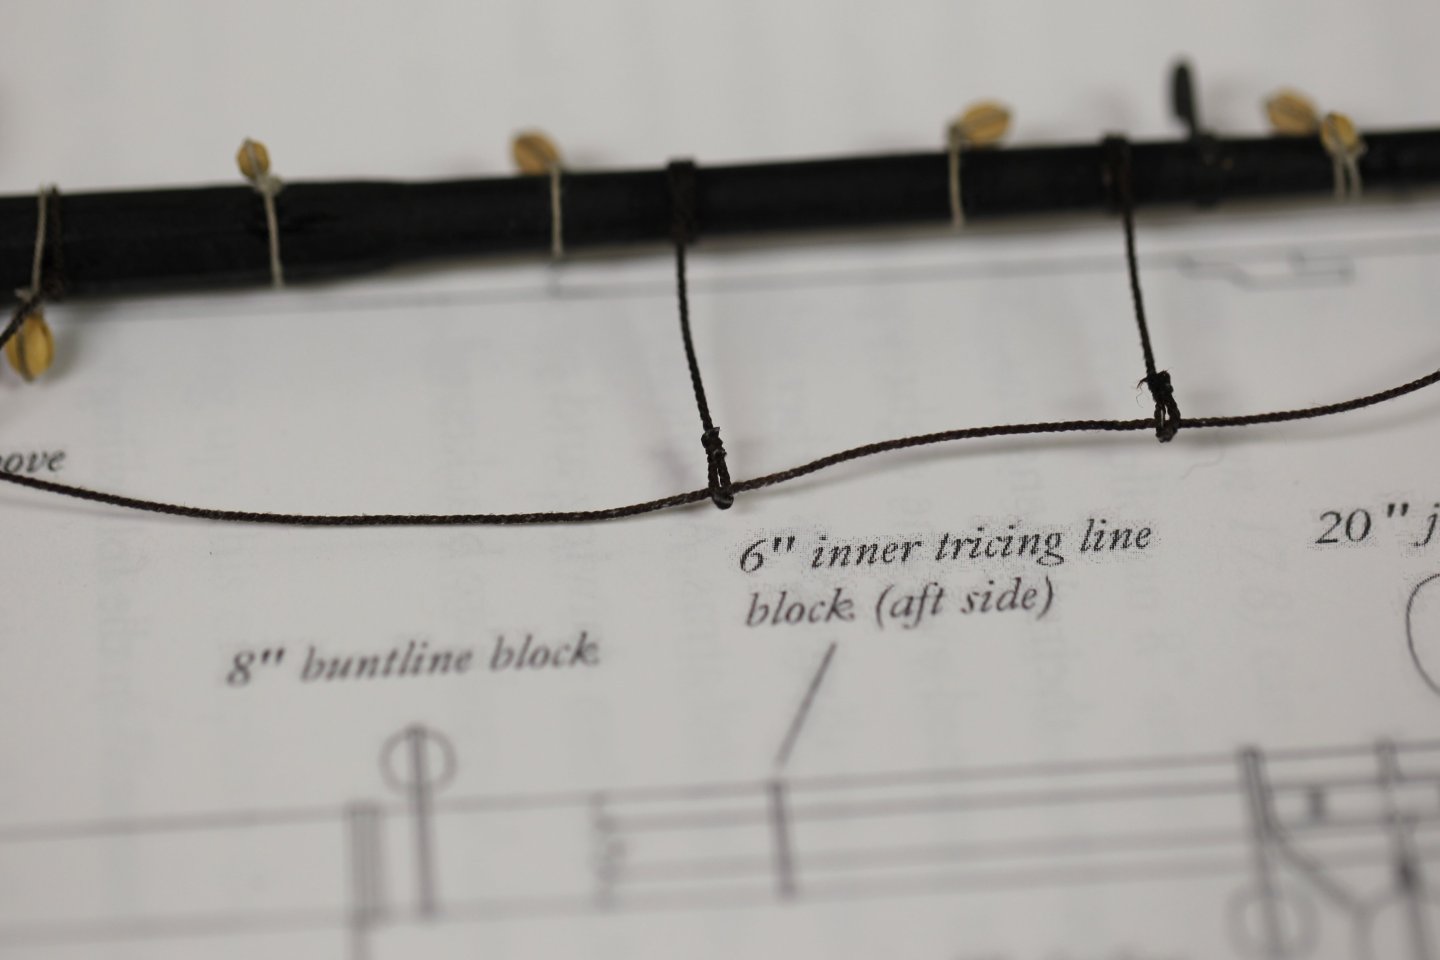
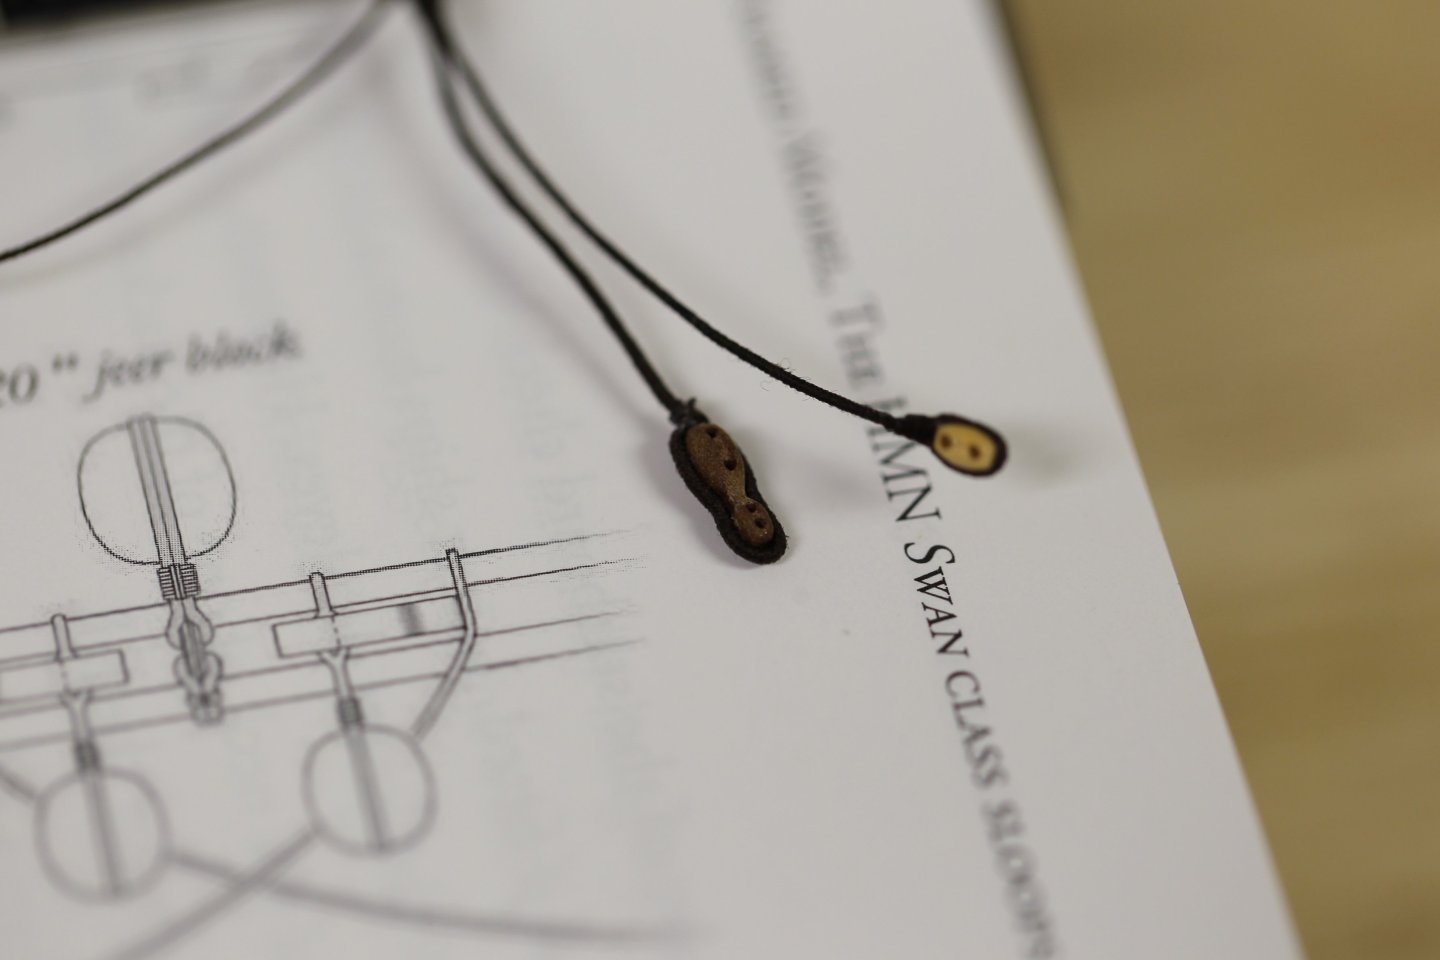
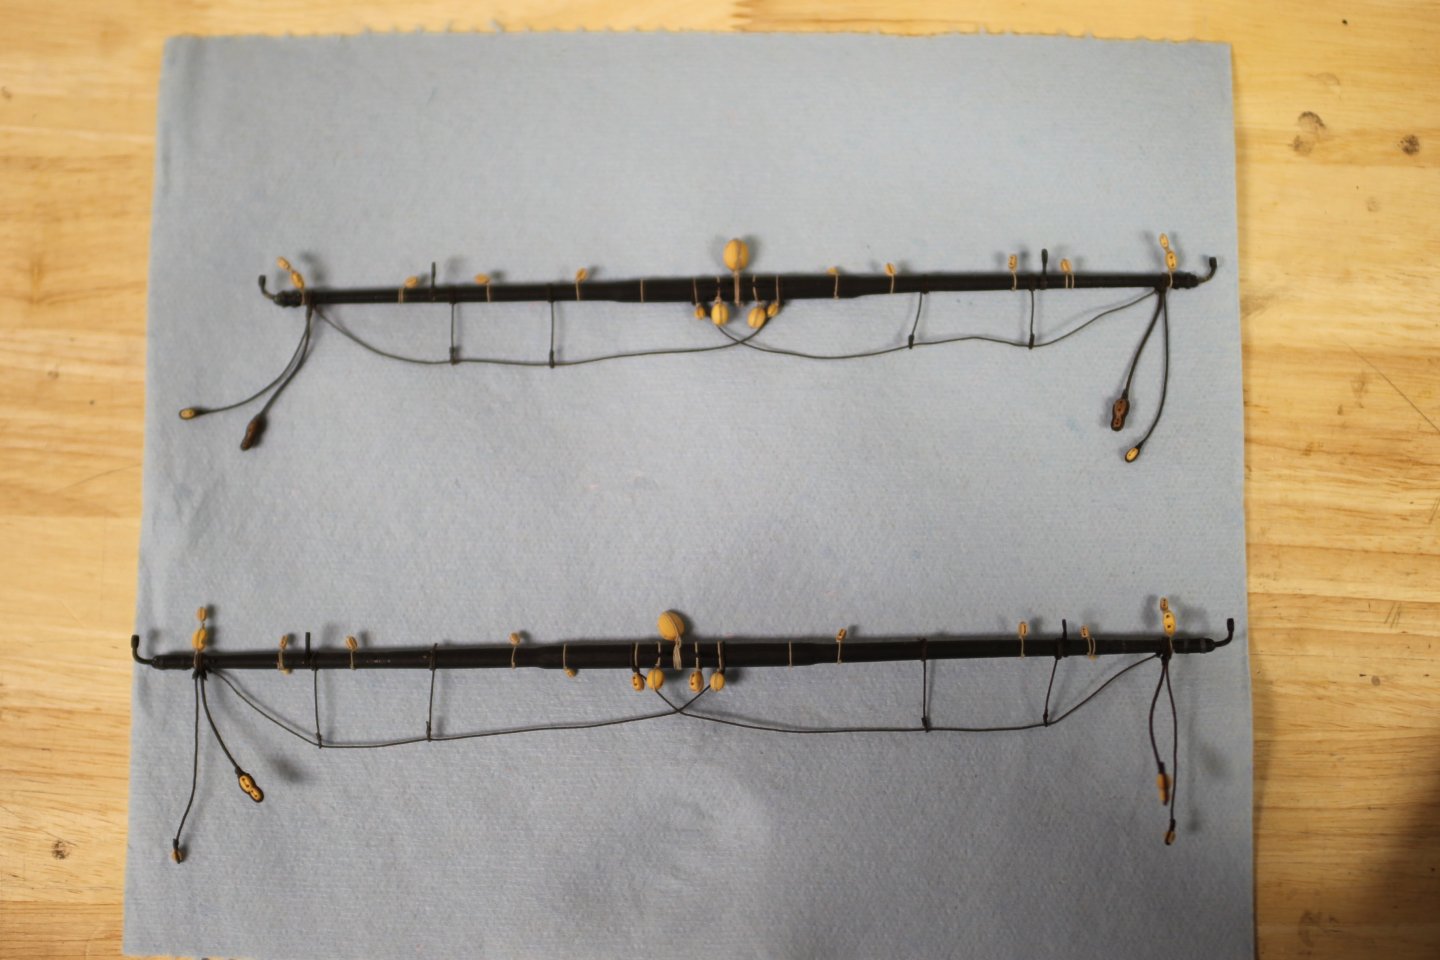
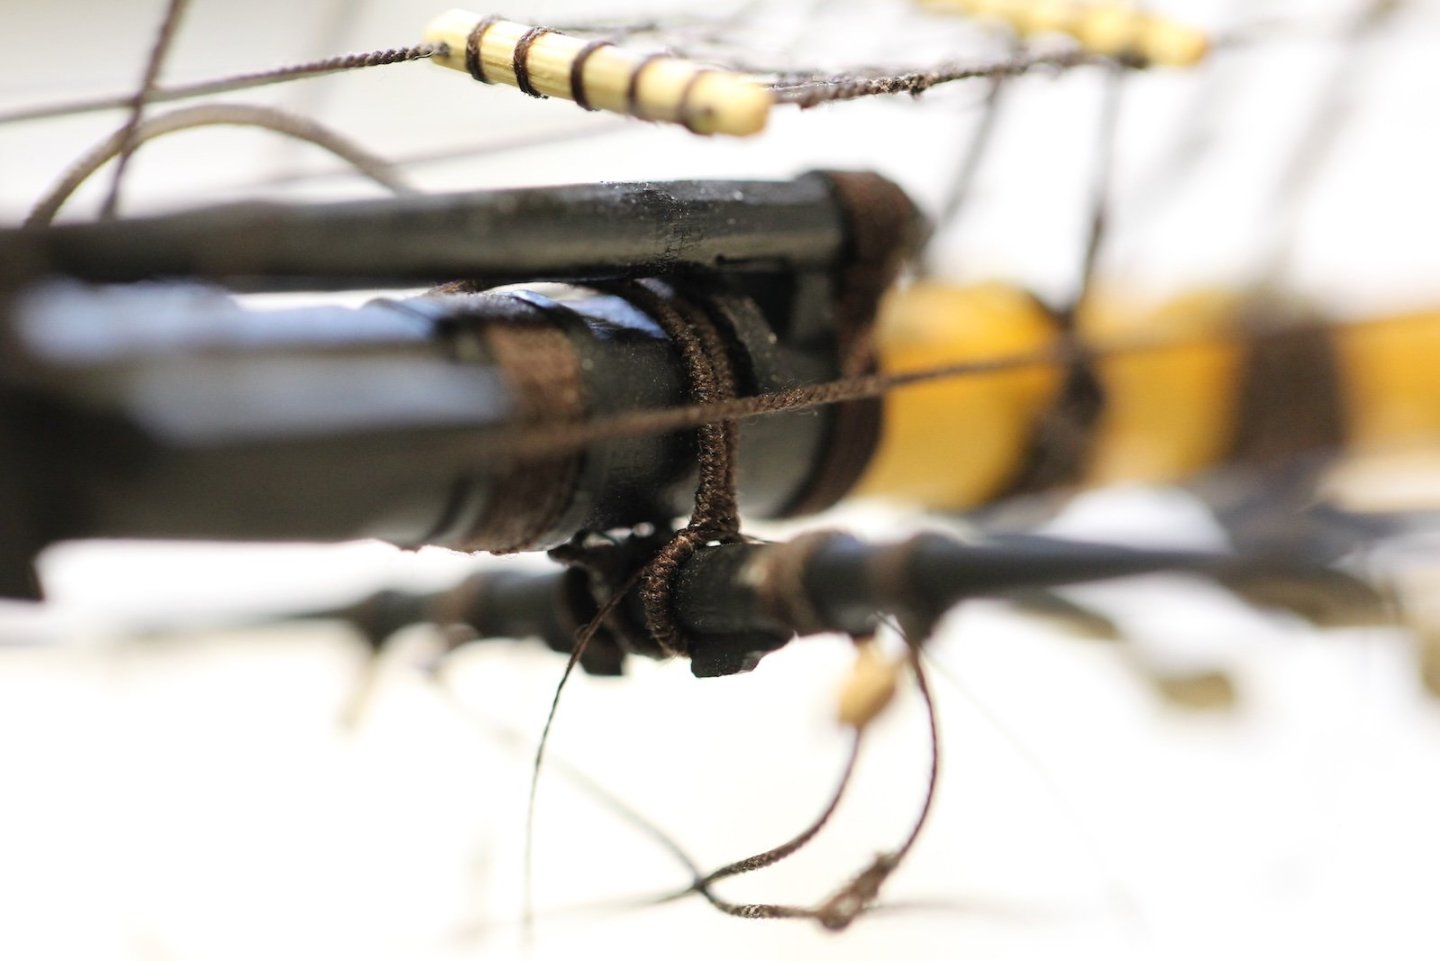
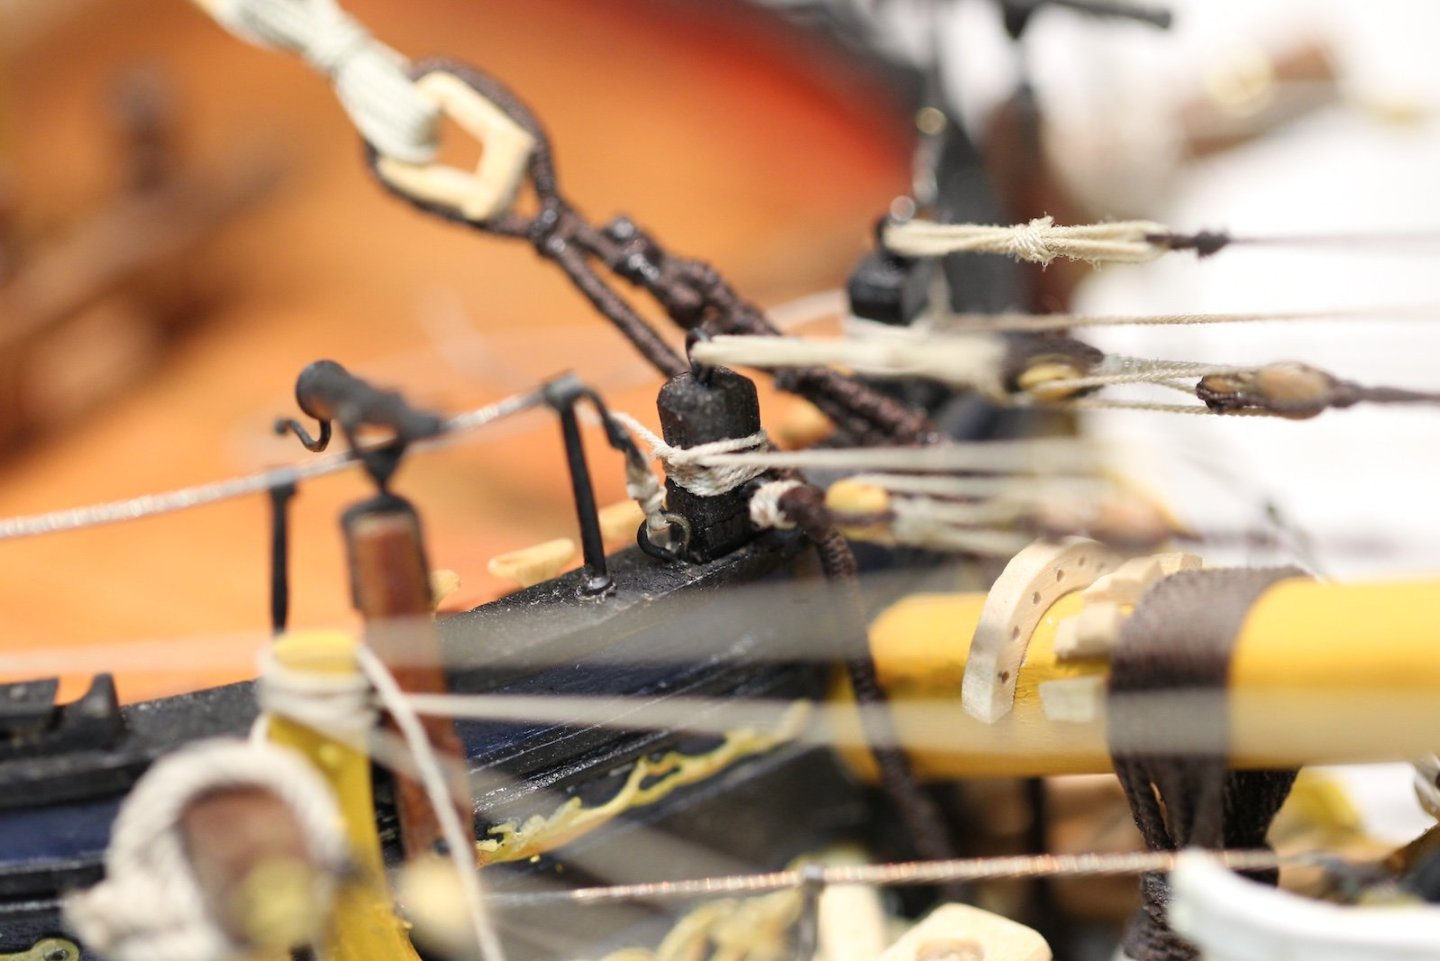
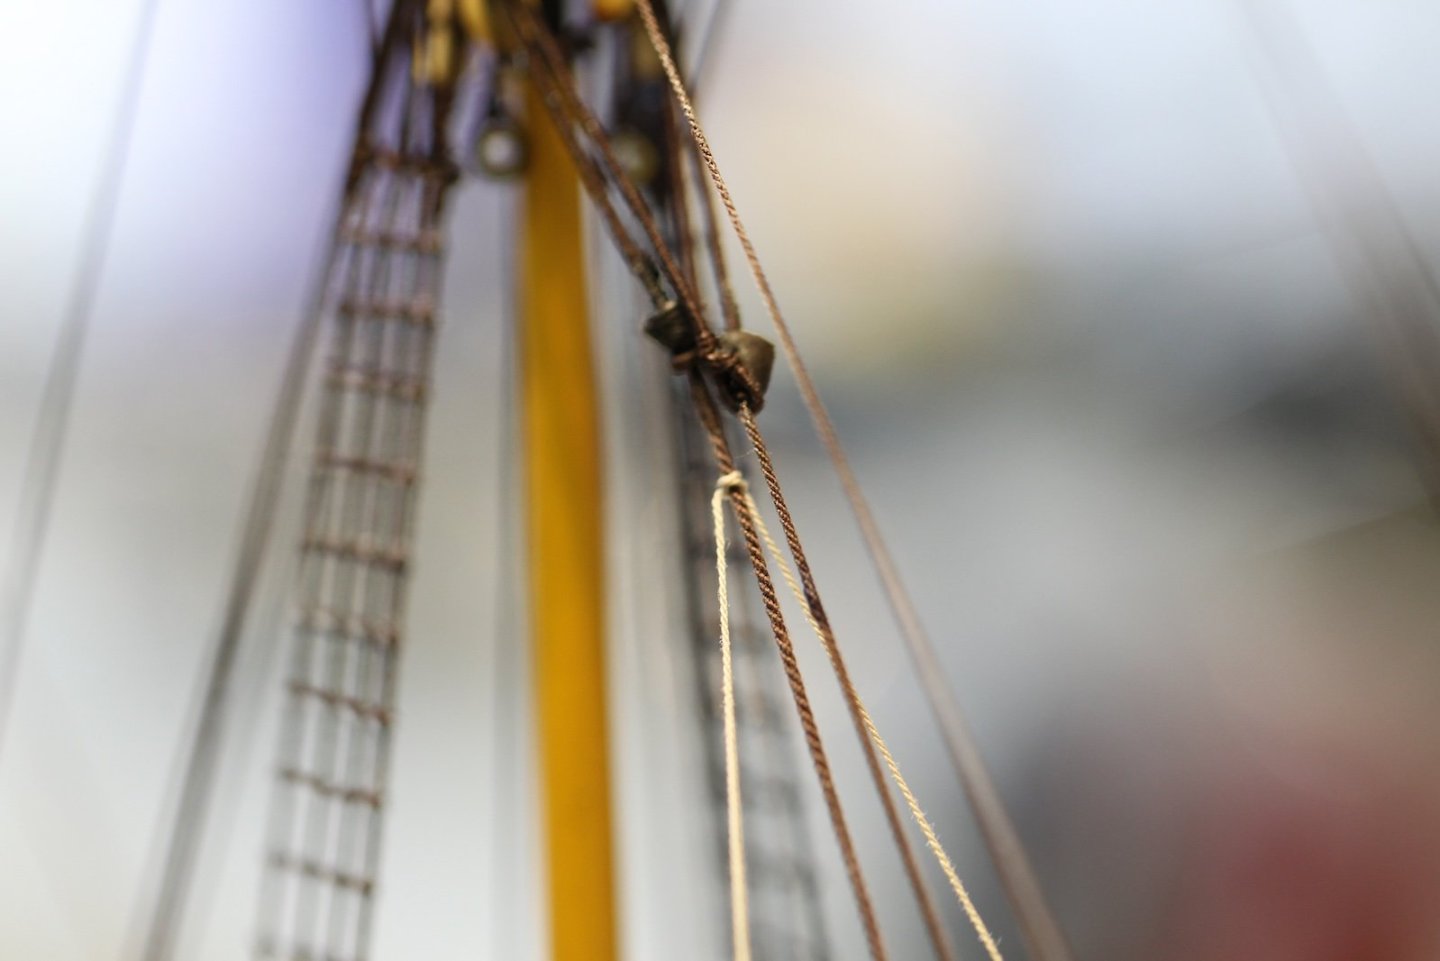
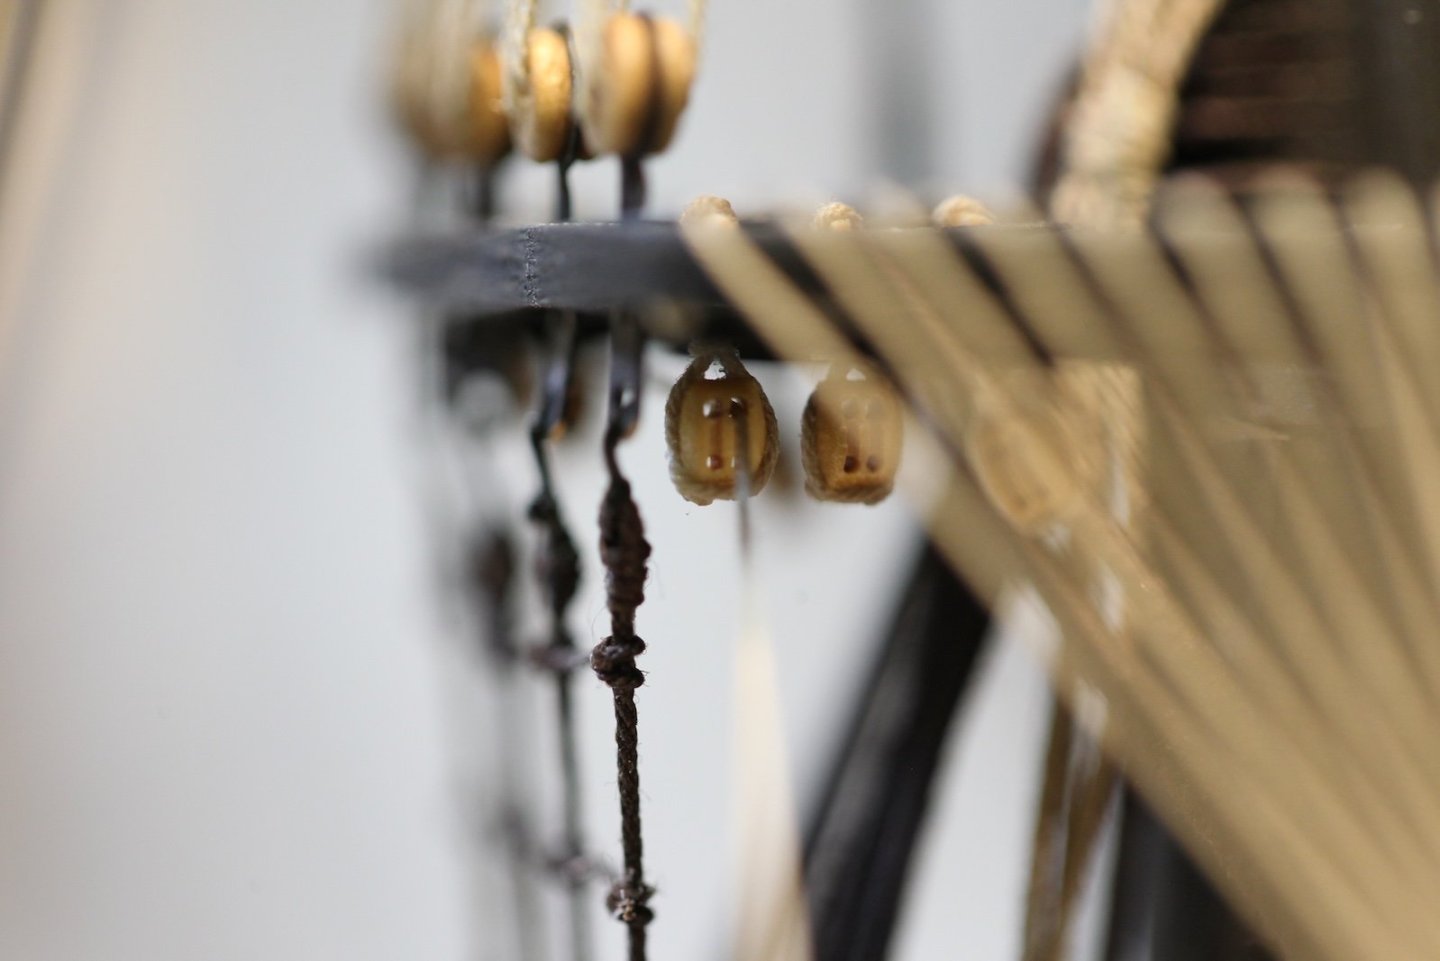
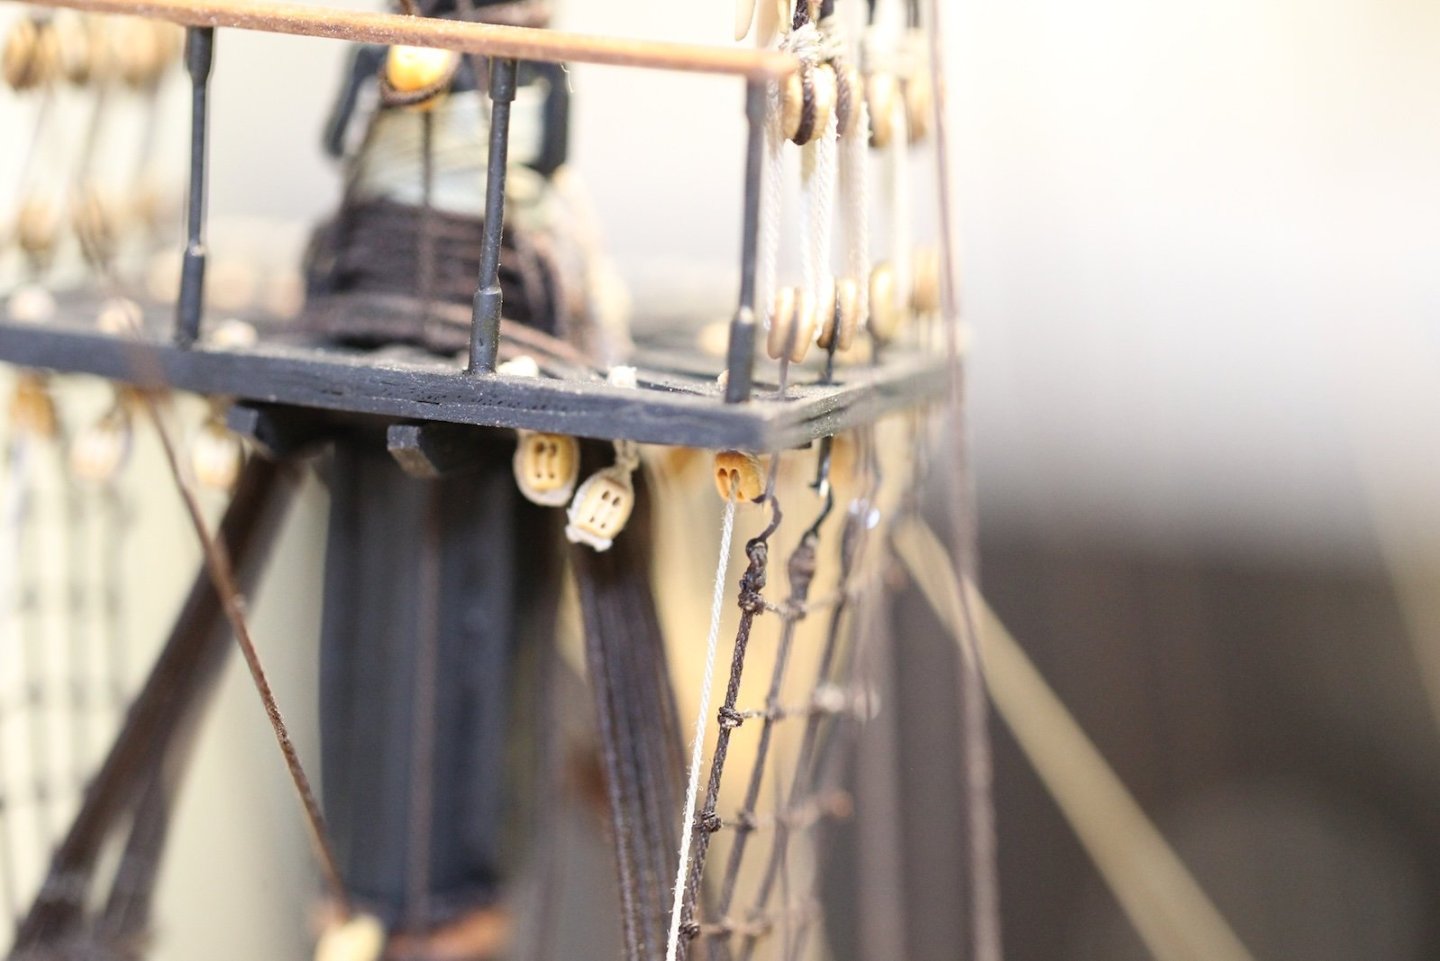
 I'm waiting on san inventory re-fill on blocks before I can fit out the upper yards properly, so in the meantime I decided to take on the buntlines and leech lines on the lower yards. Yes, there is a pretty good argument for leaving these lines off (as Dan Vadas does with his beautiful Vulture build) if there are no sails. However, I have this thing about seeing 'empty' blocks on my yards, so I'm going to rig them regardless and do my best to position them in a way that at least makes sense for the period. In short - what do I think the crew would do with them while awaiting sails. This turned out to be much less straightfoward than I anticipated as there are conflicting representations from source to source. After a fair amount of back and forth between books and references, I referred back to B.E.'s Peg build as he was very through with his research on this (and many other) rigging subjects. Starting with the buntlines - the FFM and Steele agree that the buntlines start by being knotted and pulled up taught against the yard blocks. Then they feed through the yard blocks under the main top. Some references have them being pulled through the fore then aft blocks before belaying. Then, where they belay is definitely a varied opinion with some indicating either a Leg and fall block or shoe blocks. All of this of course also date dependent with many rigging changes apparently occurring around 1773. Without belaboring the point, After going back and forth several times, I decided to match B.E.'s interpretation (linked above) from Lees' The Masting and Rigging of English Ships of War which indicates the buntlines running through two single blocks stropped together with both the main and fore versions belaying on the Foc'sle belfry rail. Here we go with the main first. Using a .20mm line I've run it through the outer buntline block, up through the inboard hole of the outer double block (the outer hole will be for the leechline) from aft to fore, then down to the stropped single blocks. After looping through the upper single block it travels back up to the outer hole of the next double block and down to the inner buntline block on the yard. Note: I've posted the same picture of the double blocks twice just to make it easier to follow the path. The bottom of the two stropped blocks holds the fall where the inboard end feeds through the sheave of the belfry rail then belays to the rail and the outboard line belays to the rail next to it with a timber hitch. Care must be taken when stropping the two single blocks so they don't twist too much otherwise it's very difficult to prevent the lines from twisting as well. It's also important to think ahead when determining where the double blocks will end up or you run the risk of interfering with future rigging in this area. The fore lower mast buntlines follow a very similar arrangement - however, the lines run up through BOTH the fore and aft double blocks under the mast top to drop down and belay at the same rail. Also the actual blocks used are different because one of them is already taken by the spritsail's rigging. With the fore, the buntline originates with the outer block as with the main then runs up through the outboard hole of the FOREMOST second double block, back to the matching aft doubleblock then down to the stropped singles. After looping through it comes back up into the inner hole of the same set of blocks before heading back down to the inner buntline block. Similar arrangement at the bottom with both lines belaying to the rail. There seems be even fewer references to the where and how the leechlines belay, but I made the assumption that they would follow the same pattern as the buntlines since they are similar in nature in most other ways. Only showing the fore here, but the leechline is knotted at the block (as with the bunts), runs up through the set of outer double blocks (fore then aft) and down to a single block that falls to belay on the rail. Once again the outer fall goes through the sheave before belaying with the inner line belaying on the railing next to it. Worth noting above that I needed to feed the leechline inside the futtock shroud to avoid fouling. Once again, I can't guarantee the complete accuracy of this arrangement given the limited (and sometimes contradictory references), but it seems eminently practical and reasonable so I'm comfortable with it.
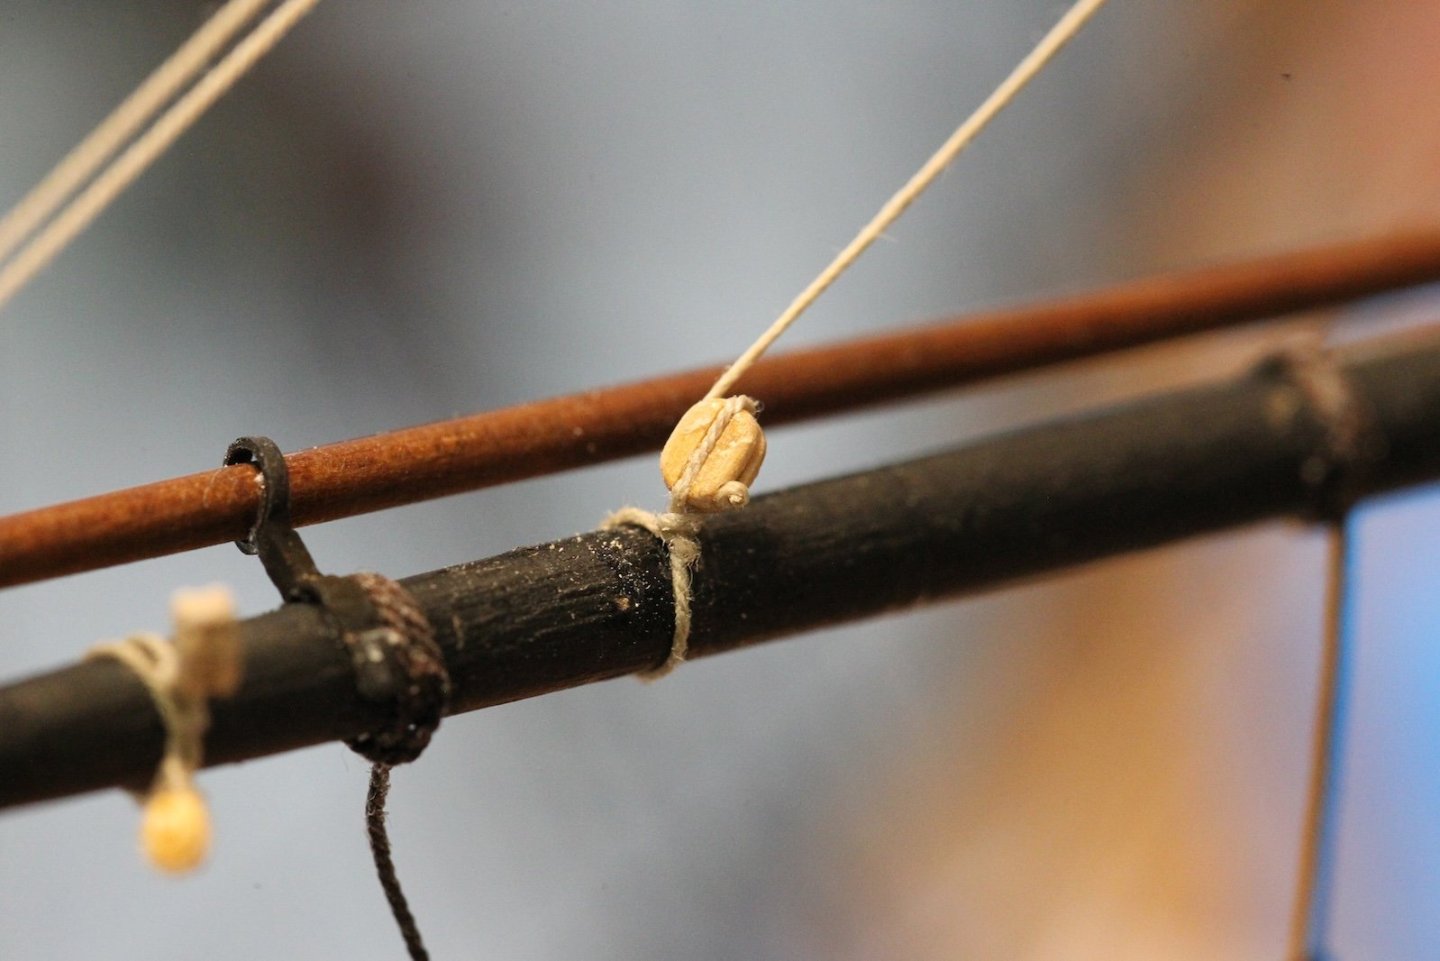


- 419 replies
-
- 10
-

-
- Victory Models
- Pegasus
- (and 2 more)
-
Looking great @Knocklouder - always fun when you get close to the finish line. I was just perusing stand options this morning and I hadn't considered clear; I like the way it looks. Thanks for the shout out, that's very kind of you!
- 207 replies
-
- 2
-
-

-
- vanguard models
- Duchess of Kingston
- (and 1 more)
-
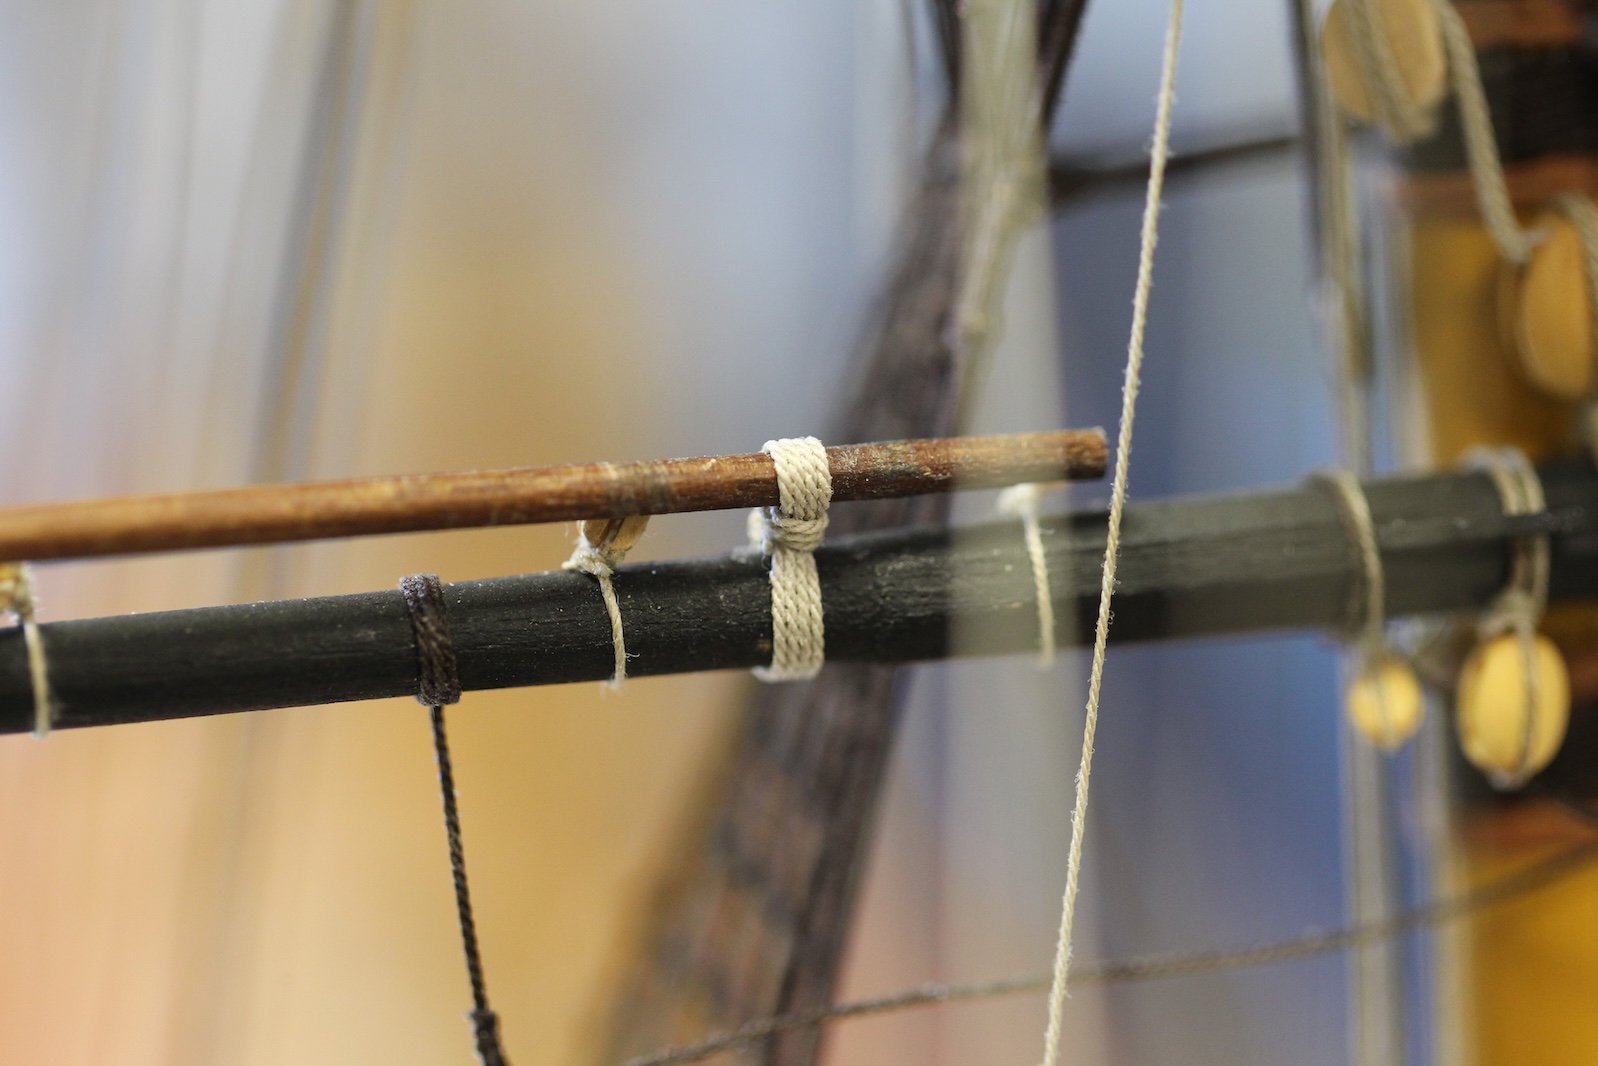
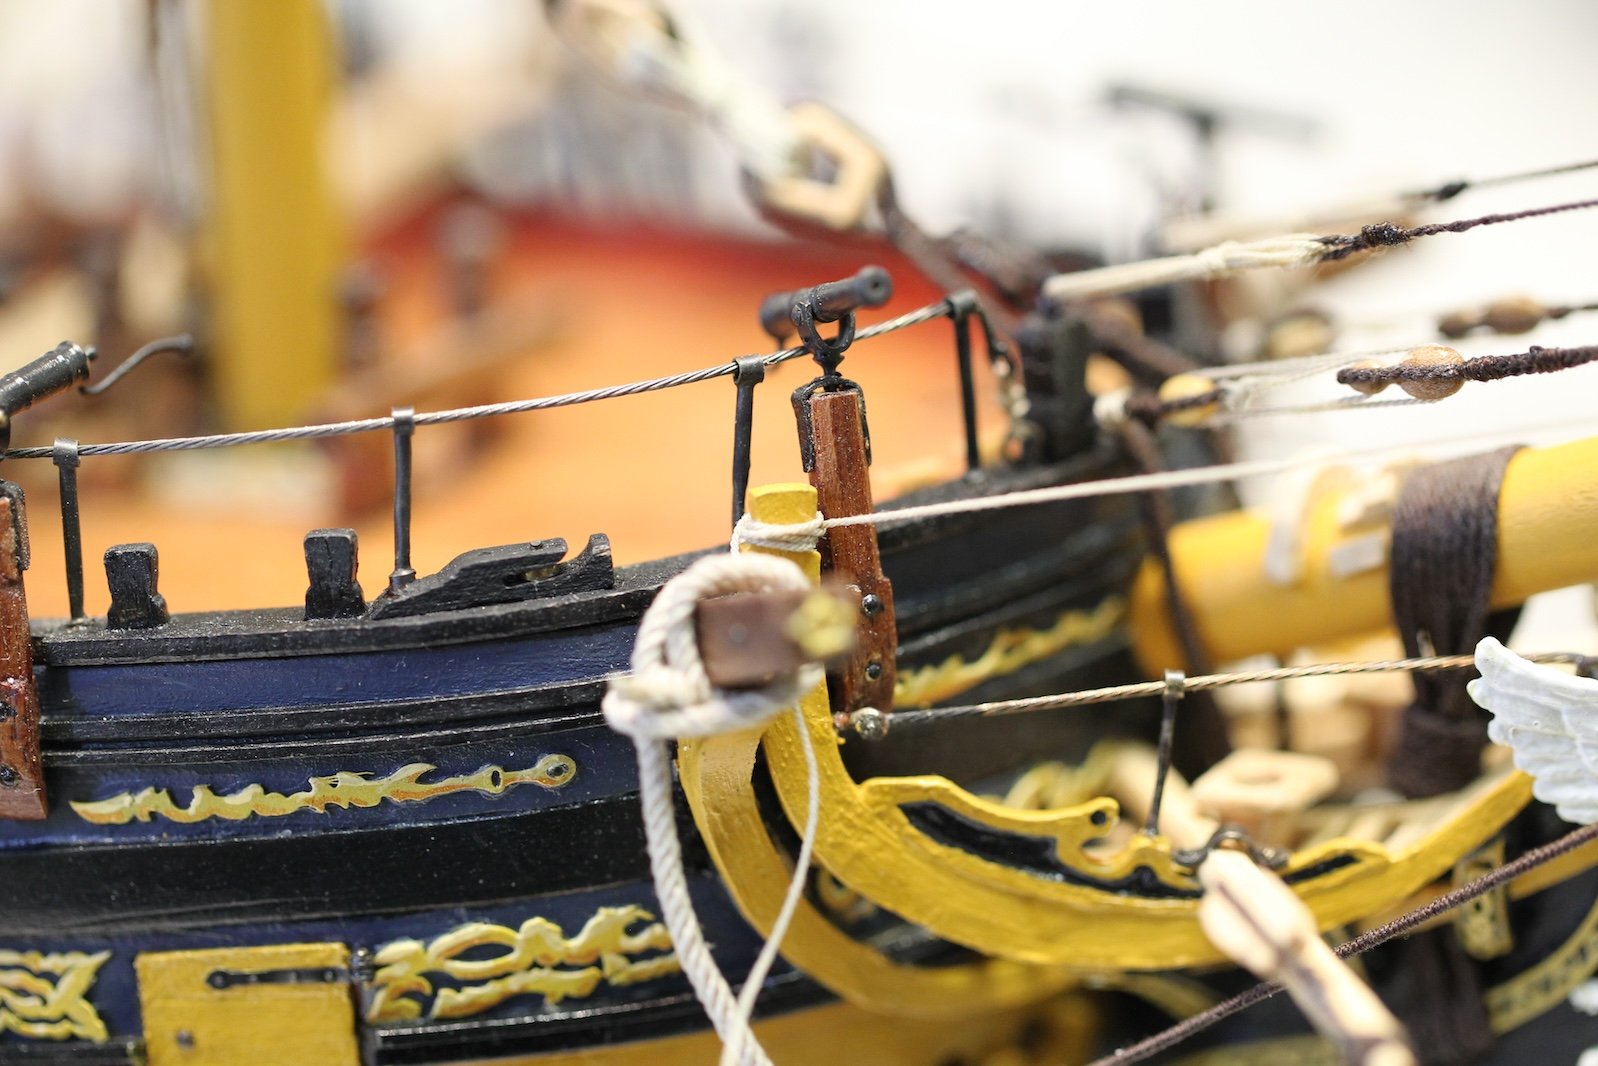
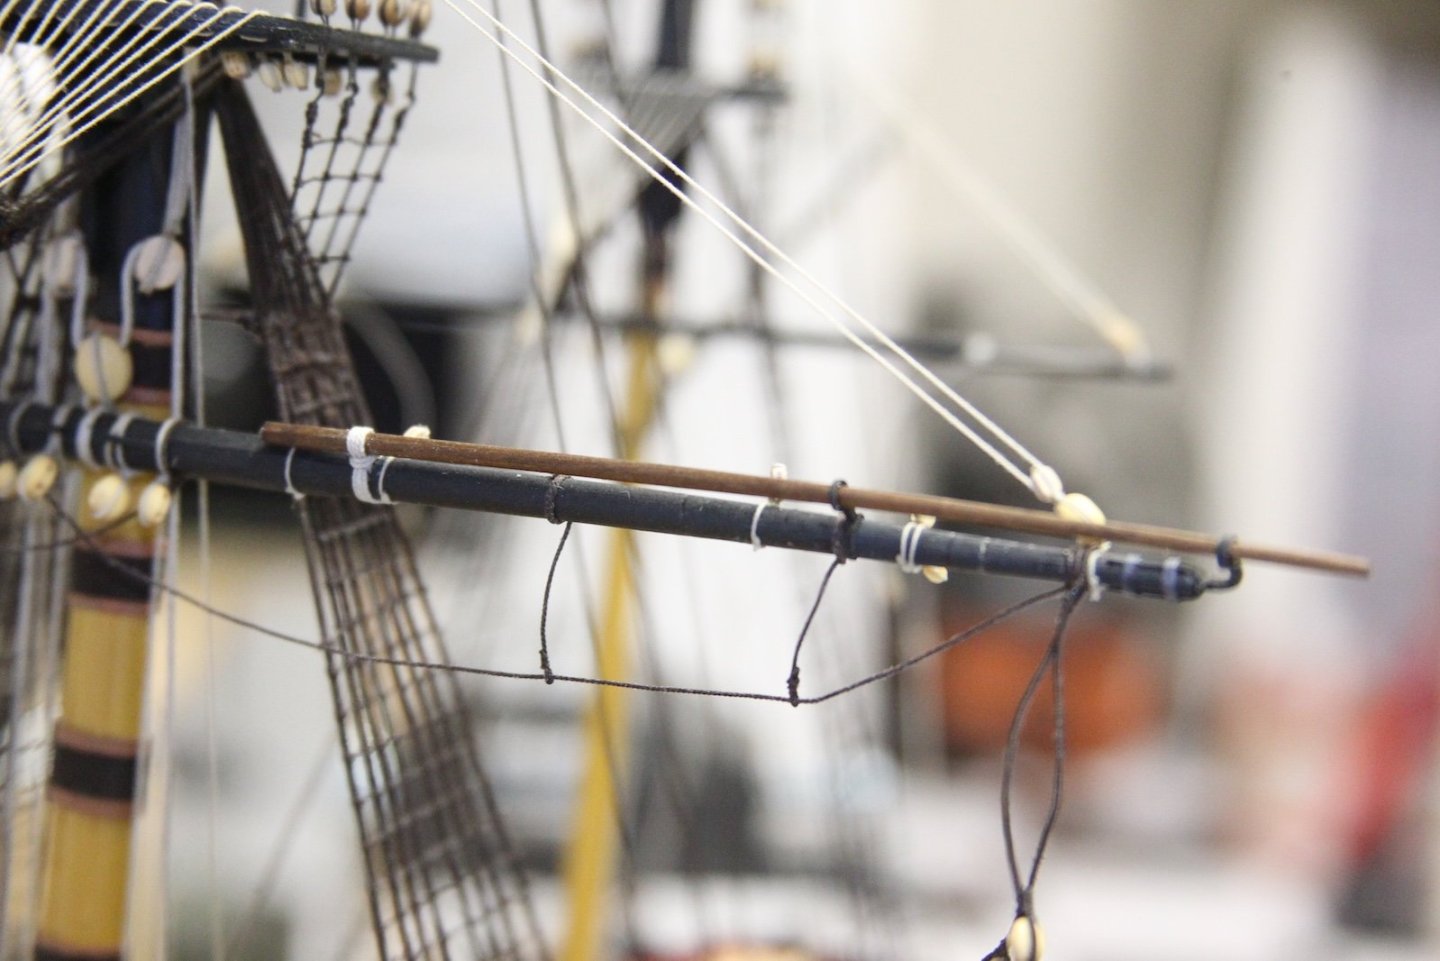
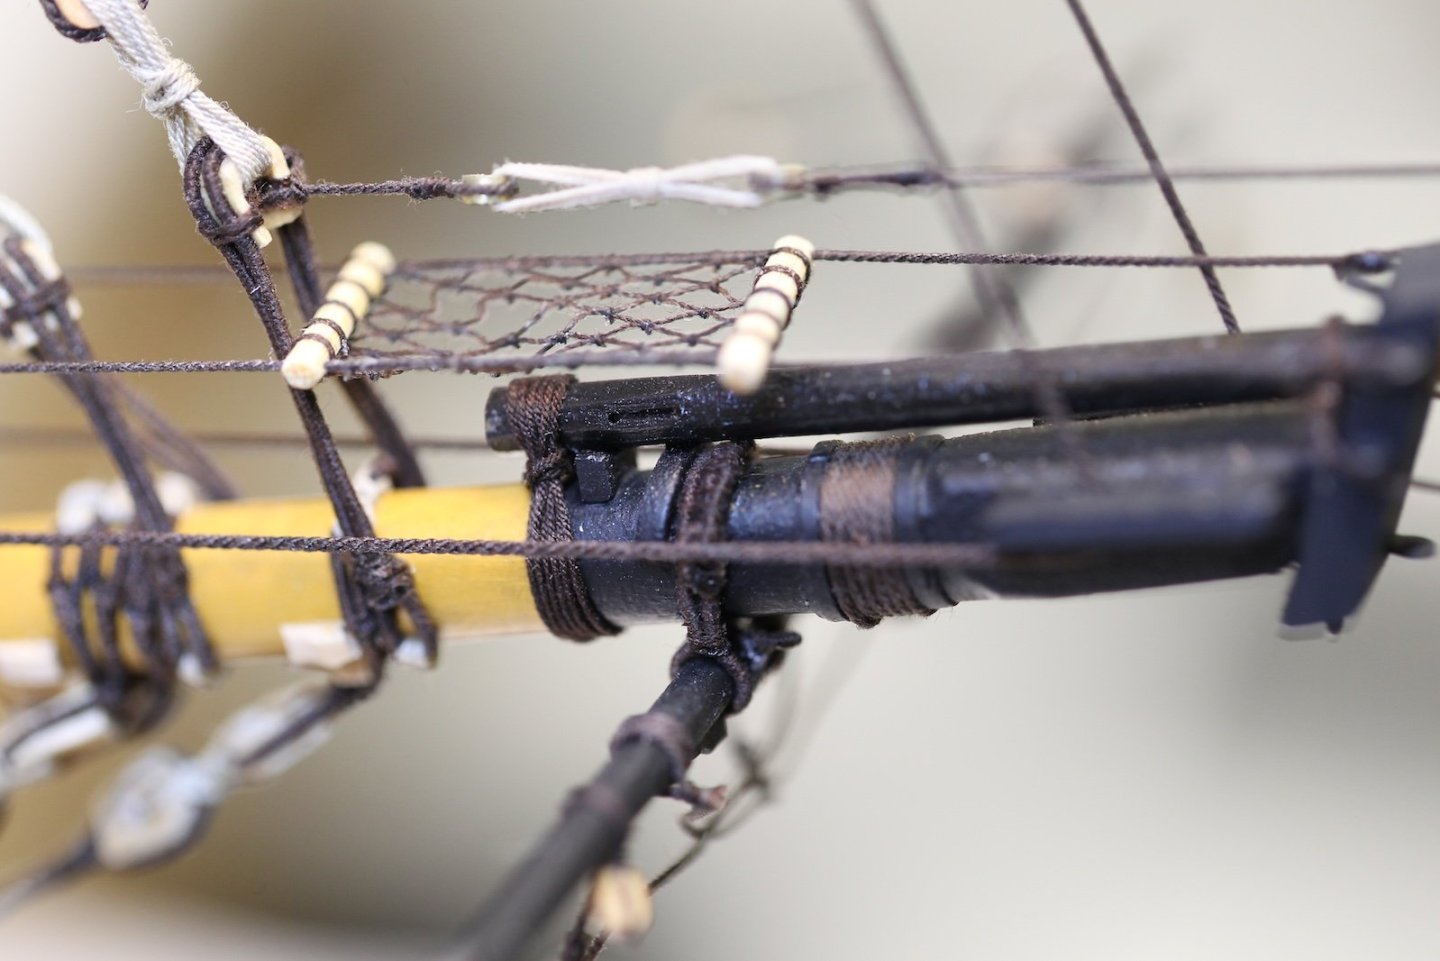
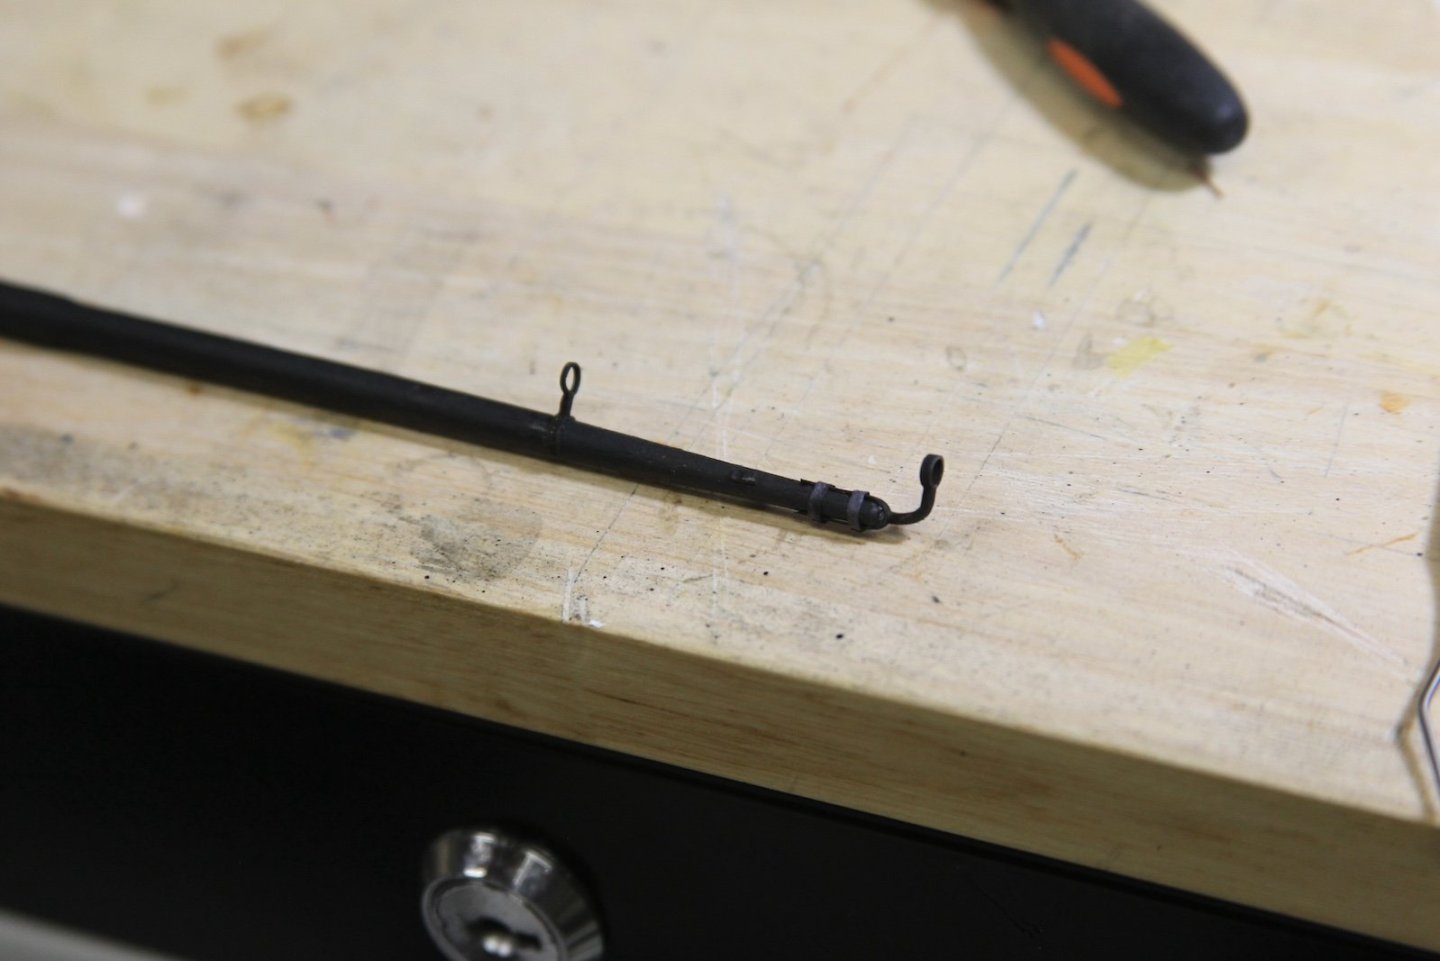
Short update: Before I got too deep into the lower yard rigging, etc, I mounted the studdingsail booms. I fed them into their irons, measured them inboard as far as feasible and held them in place with a tiny spot of CA on the inner iron. Then I wrapped them with .60mm line very similar (but obviously smaller) to the gammoning on the bowsprit.


- 419 replies
-
- 9
-
-

-
- Victory Models
- Pegasus
- (and 2 more)
-
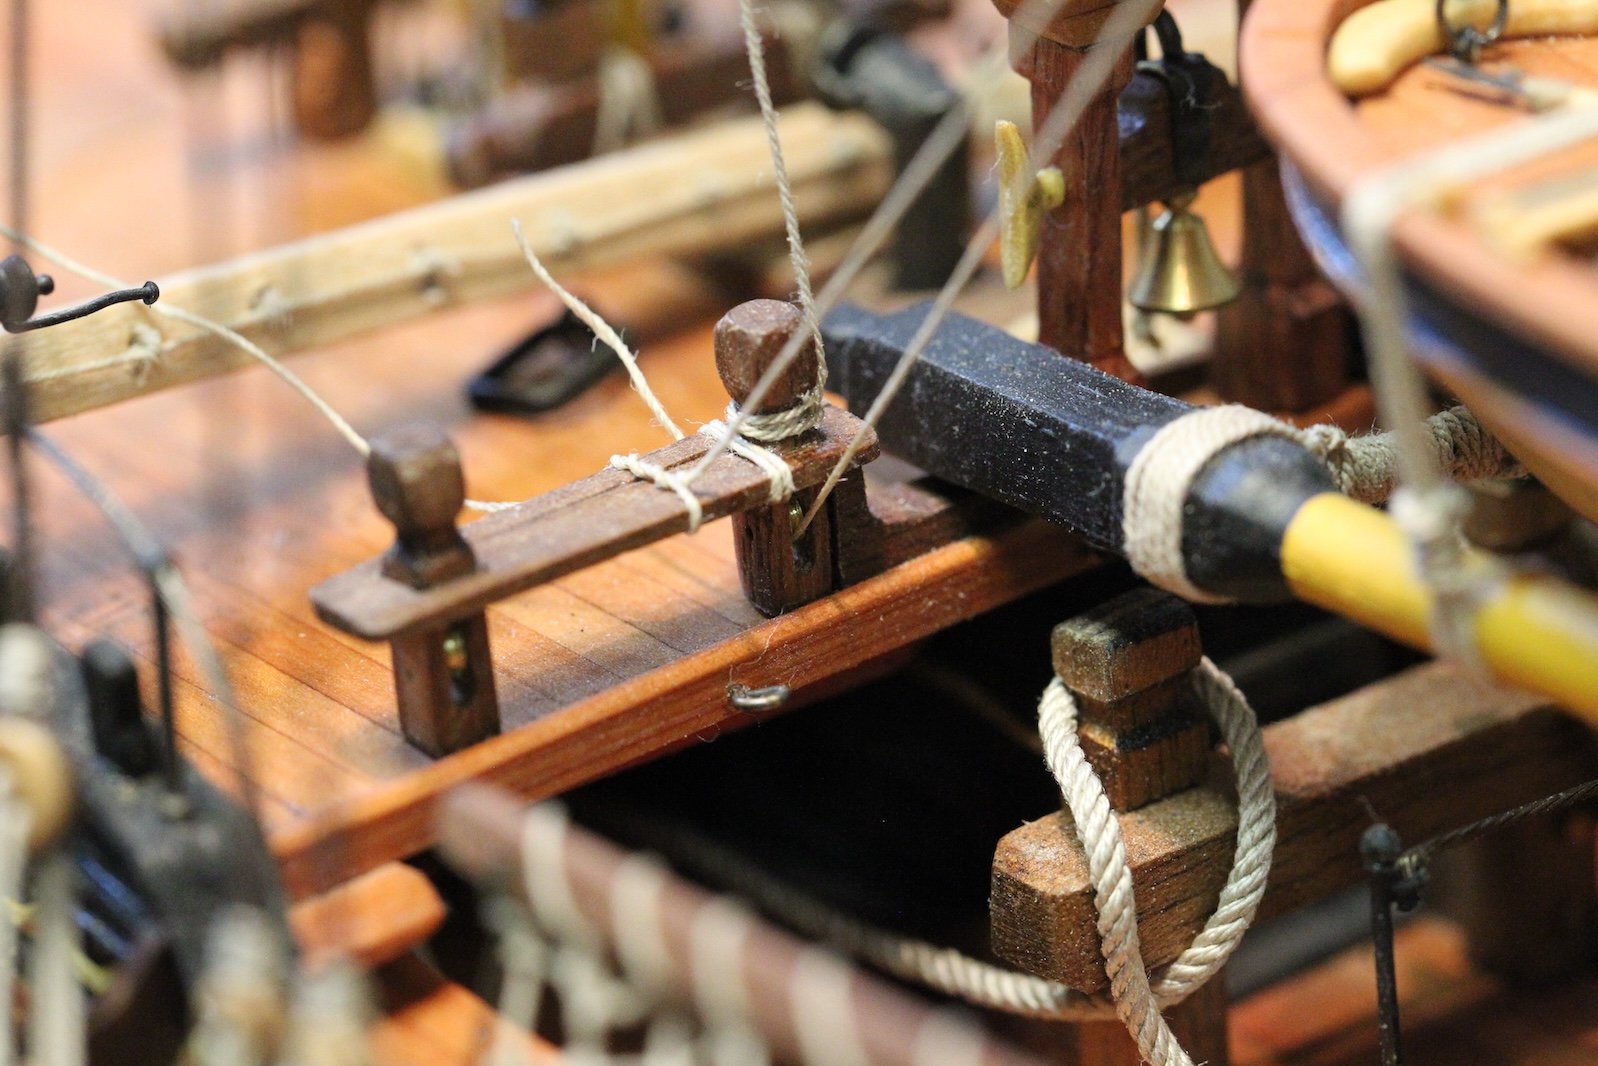
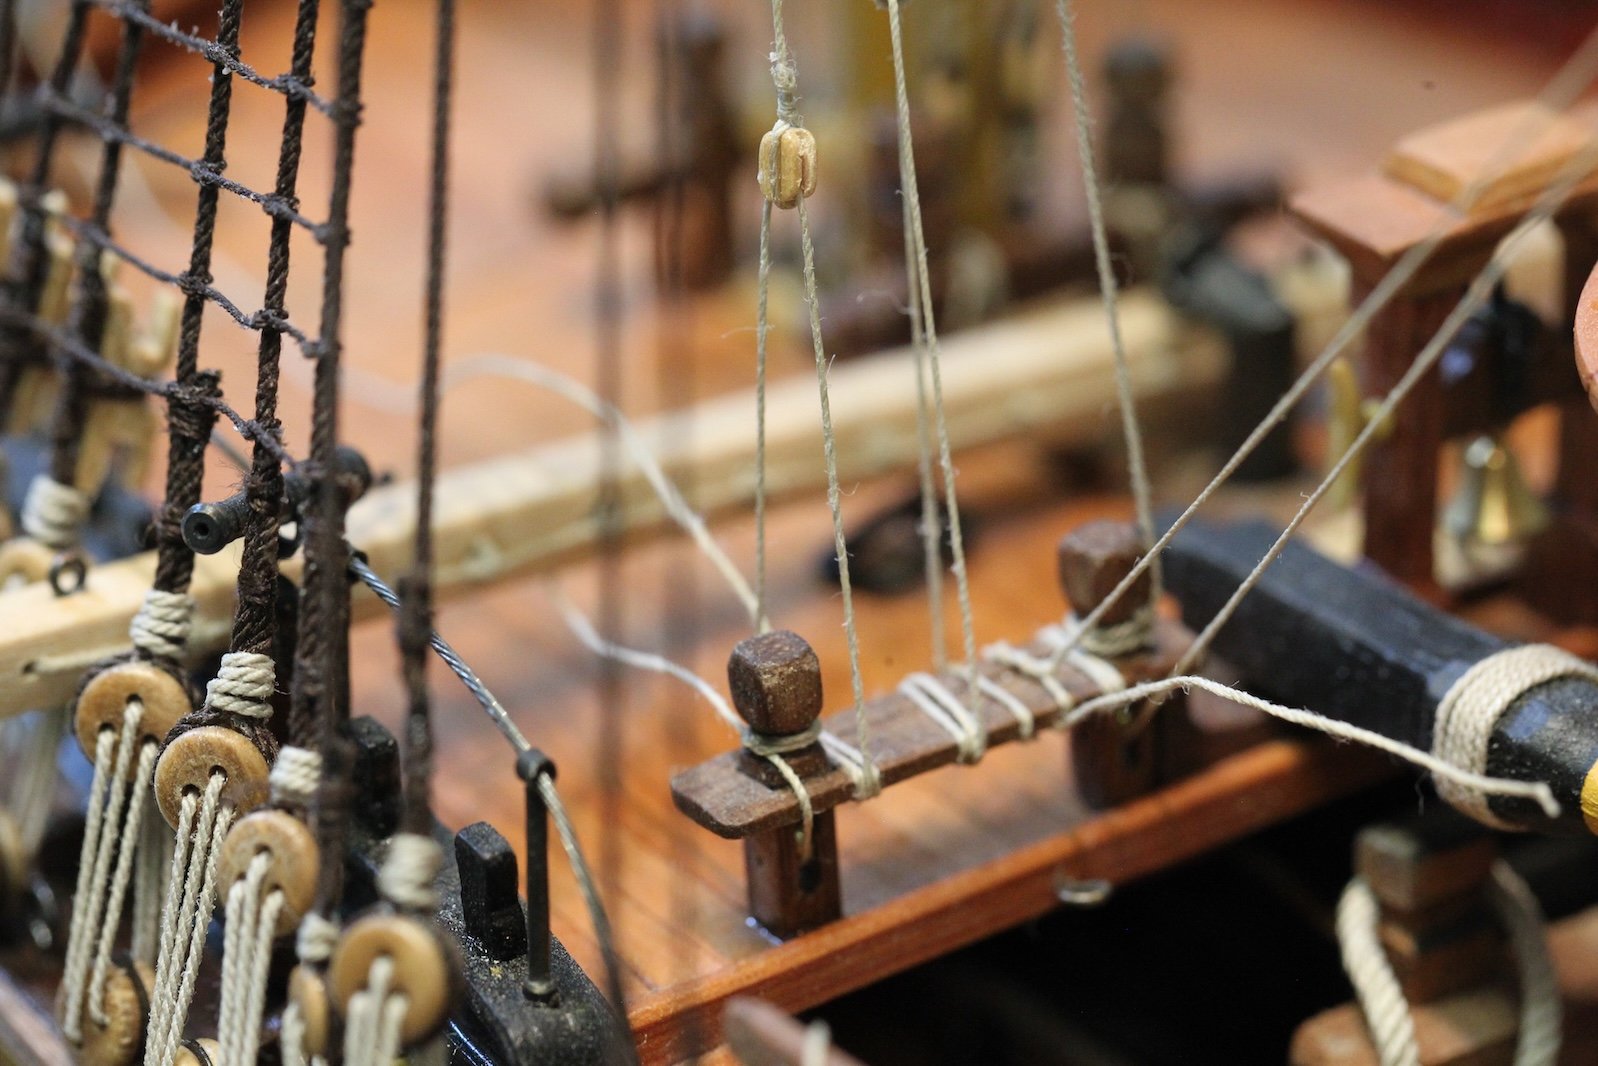
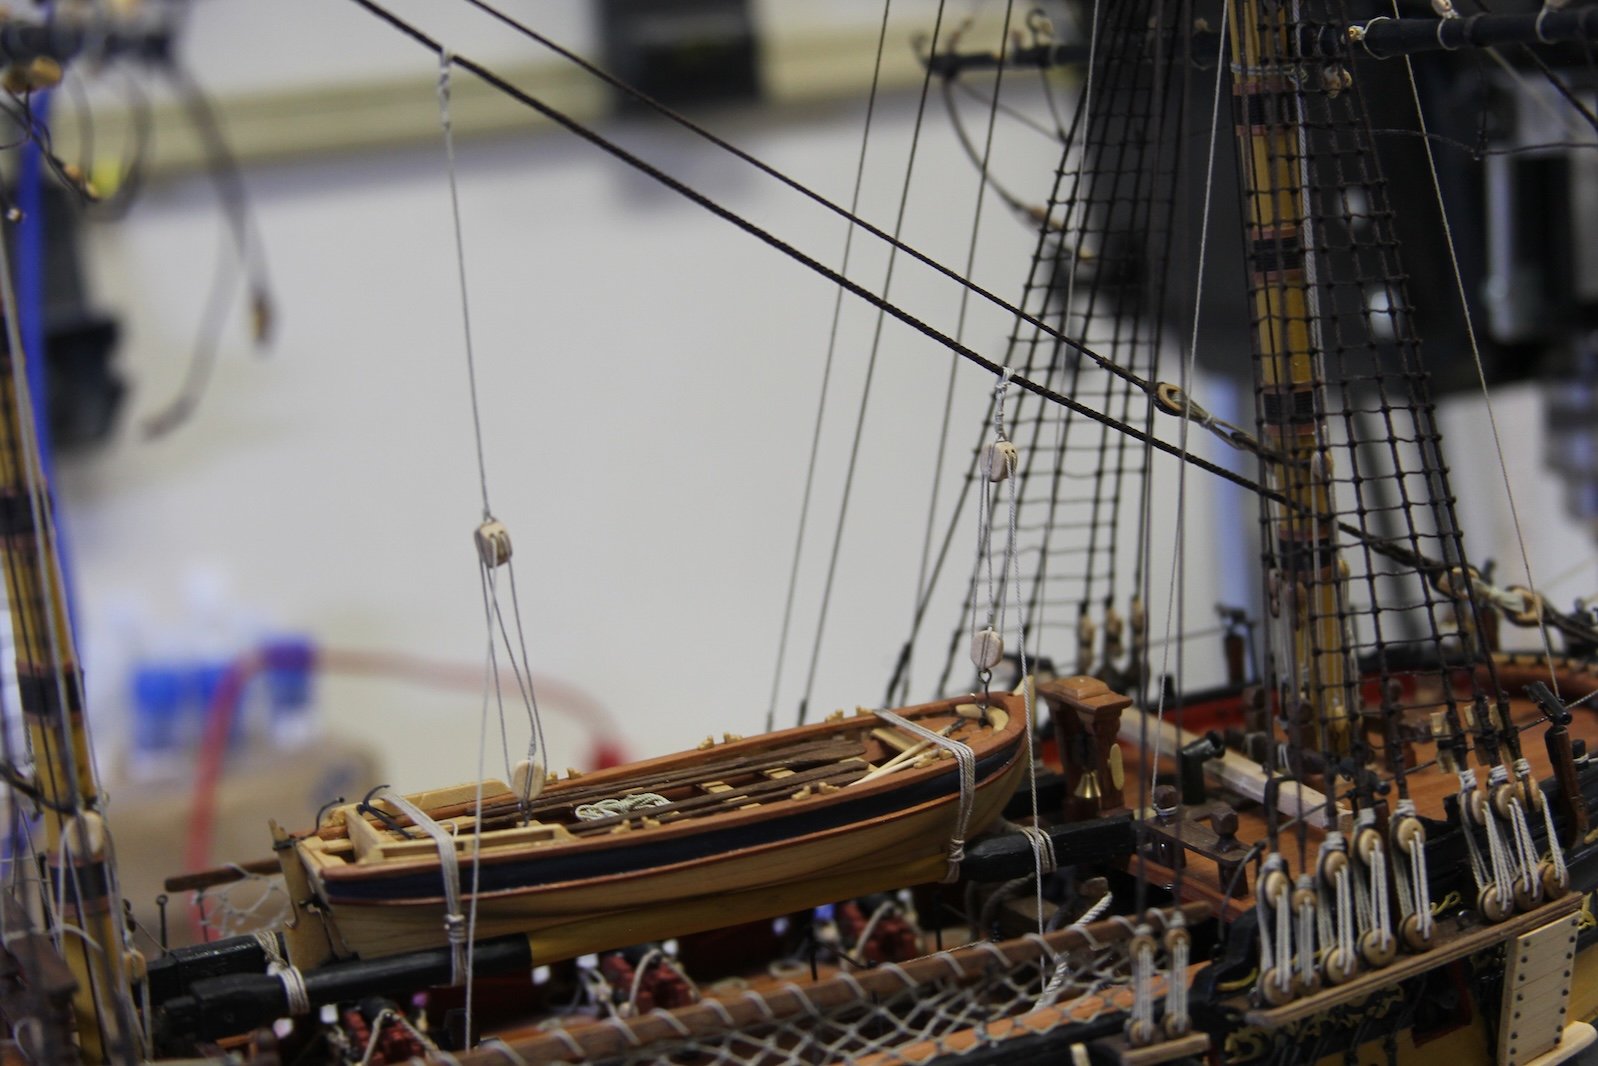
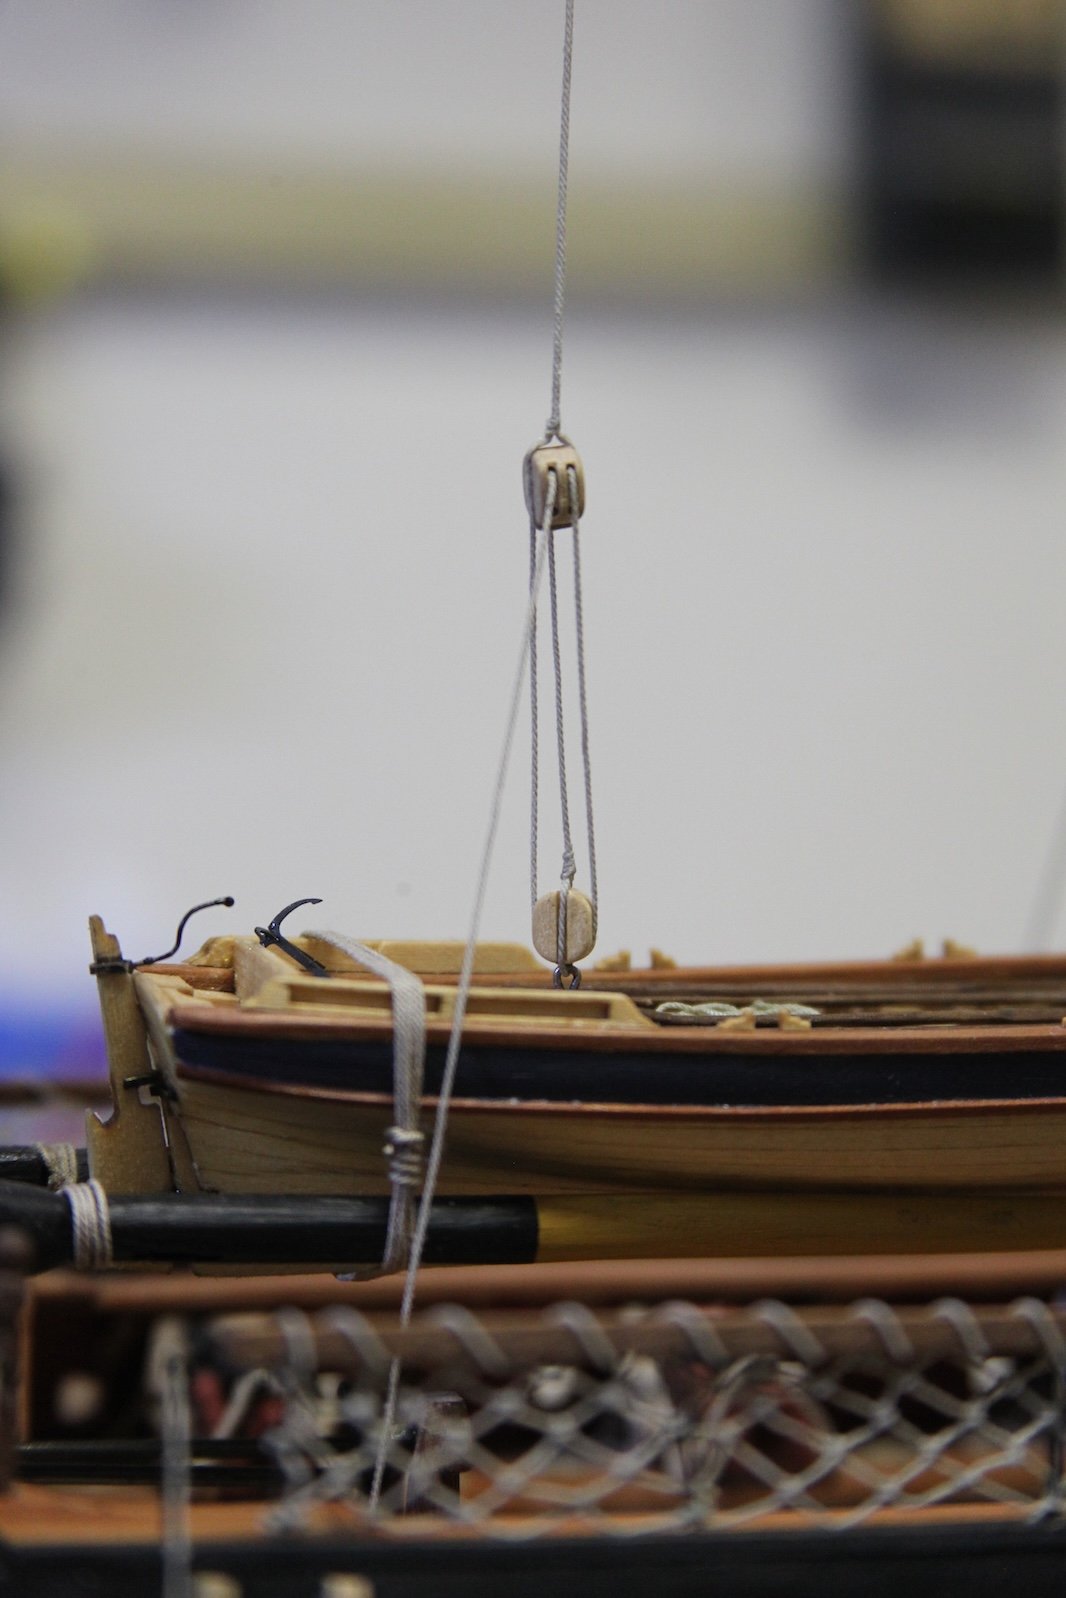
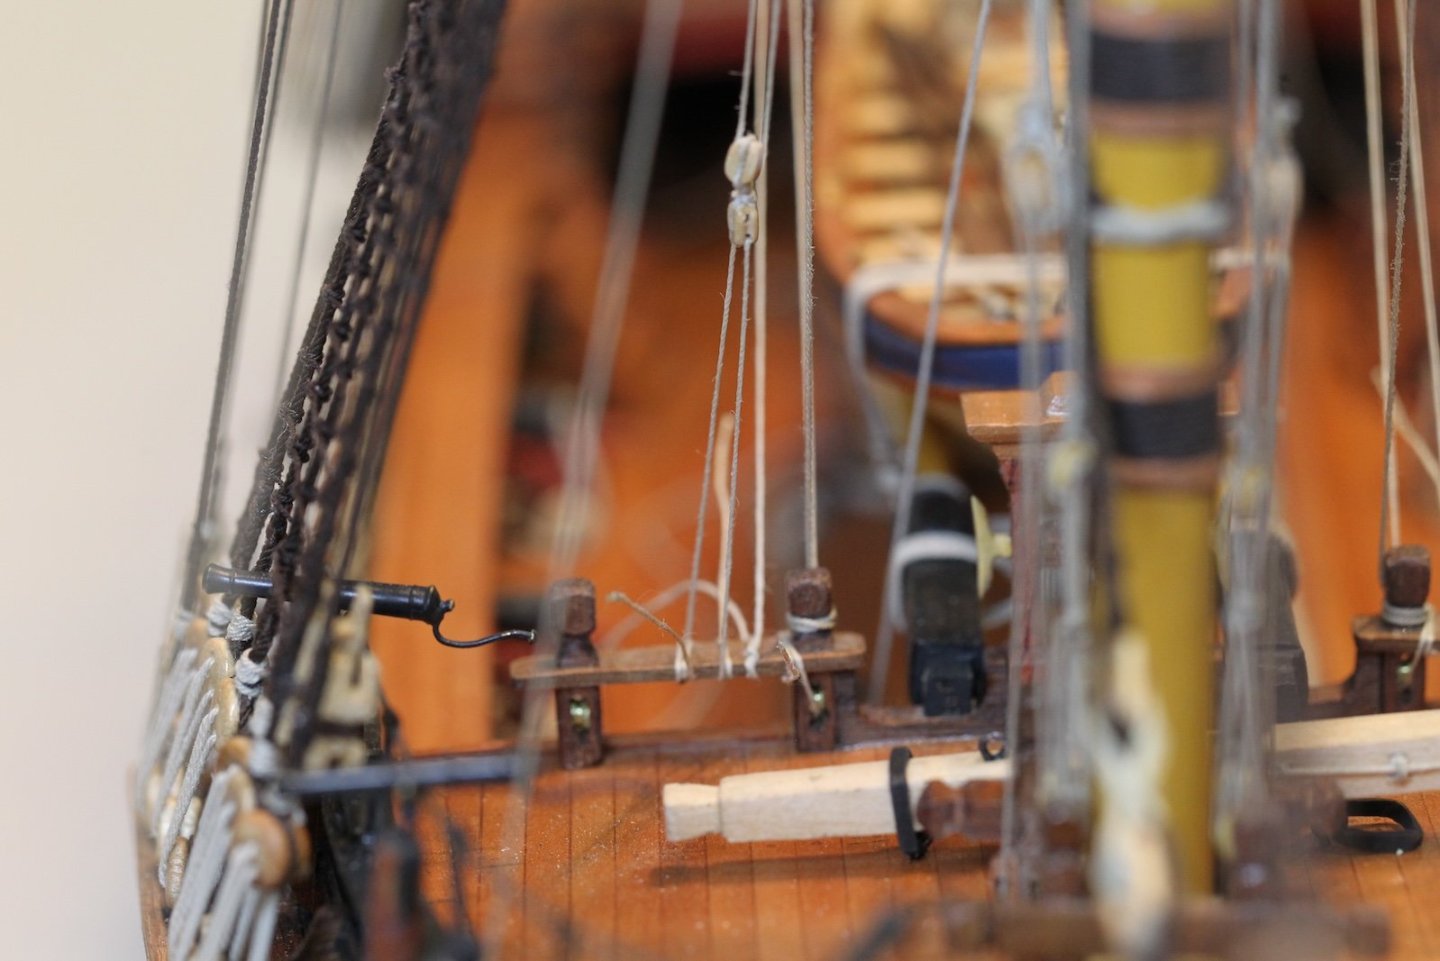
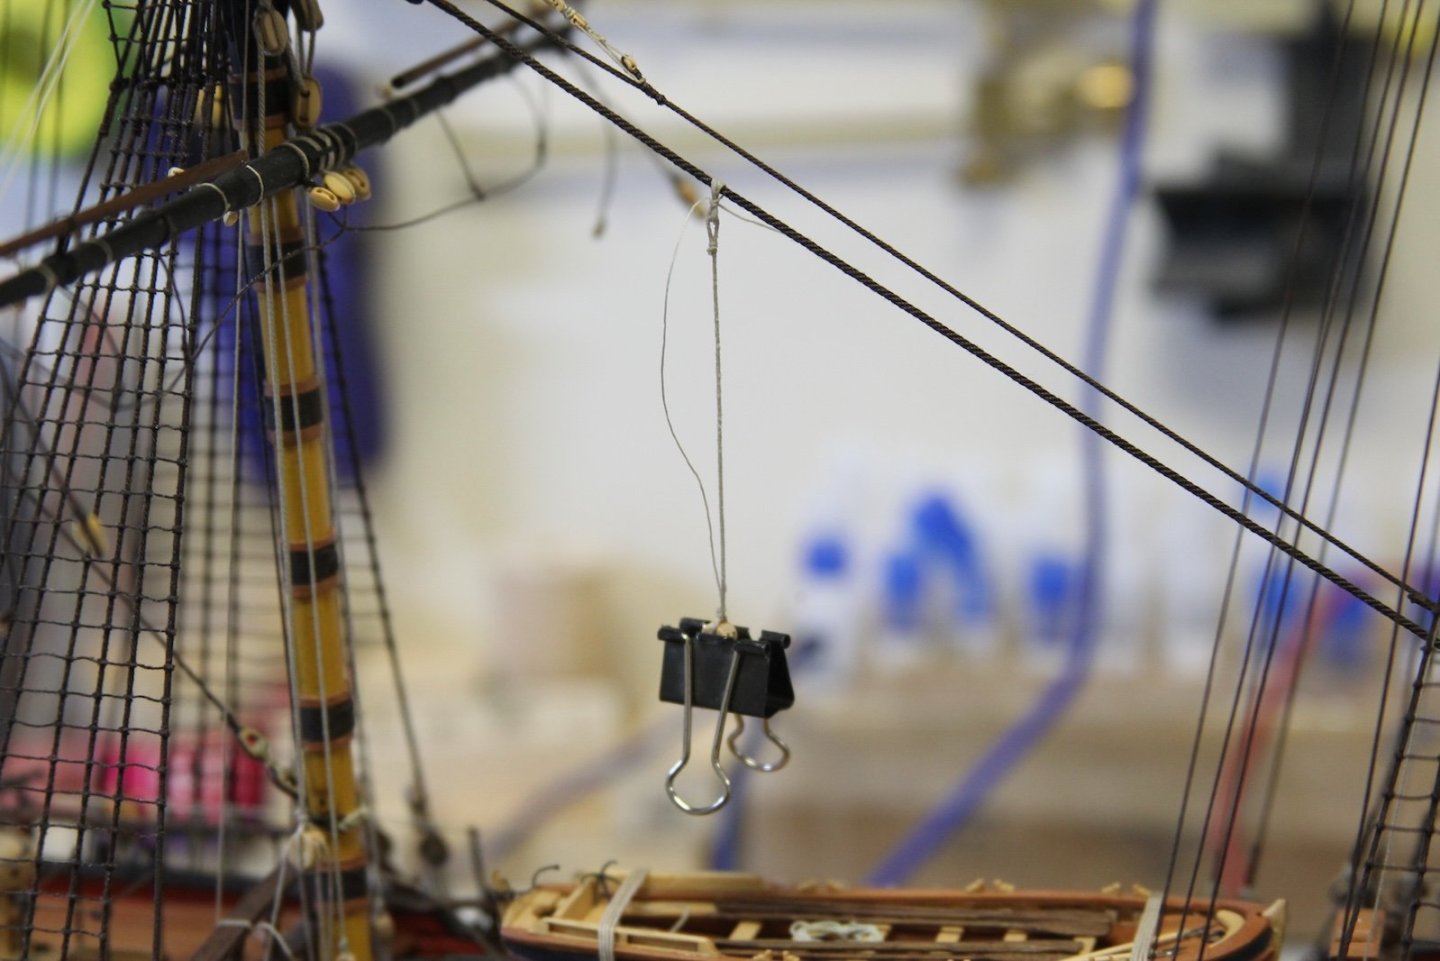
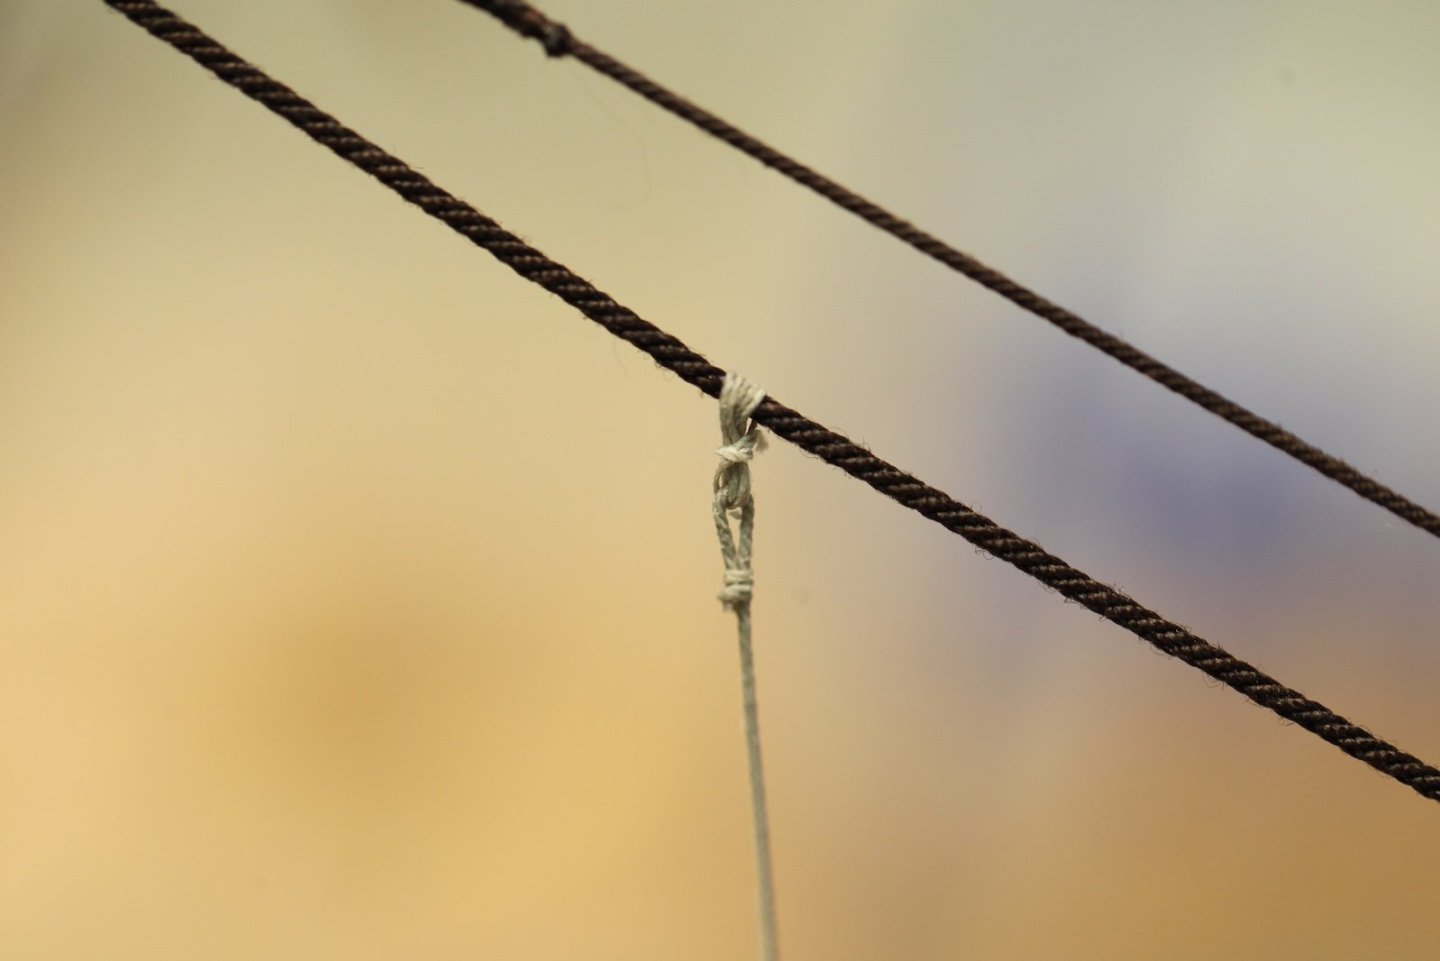
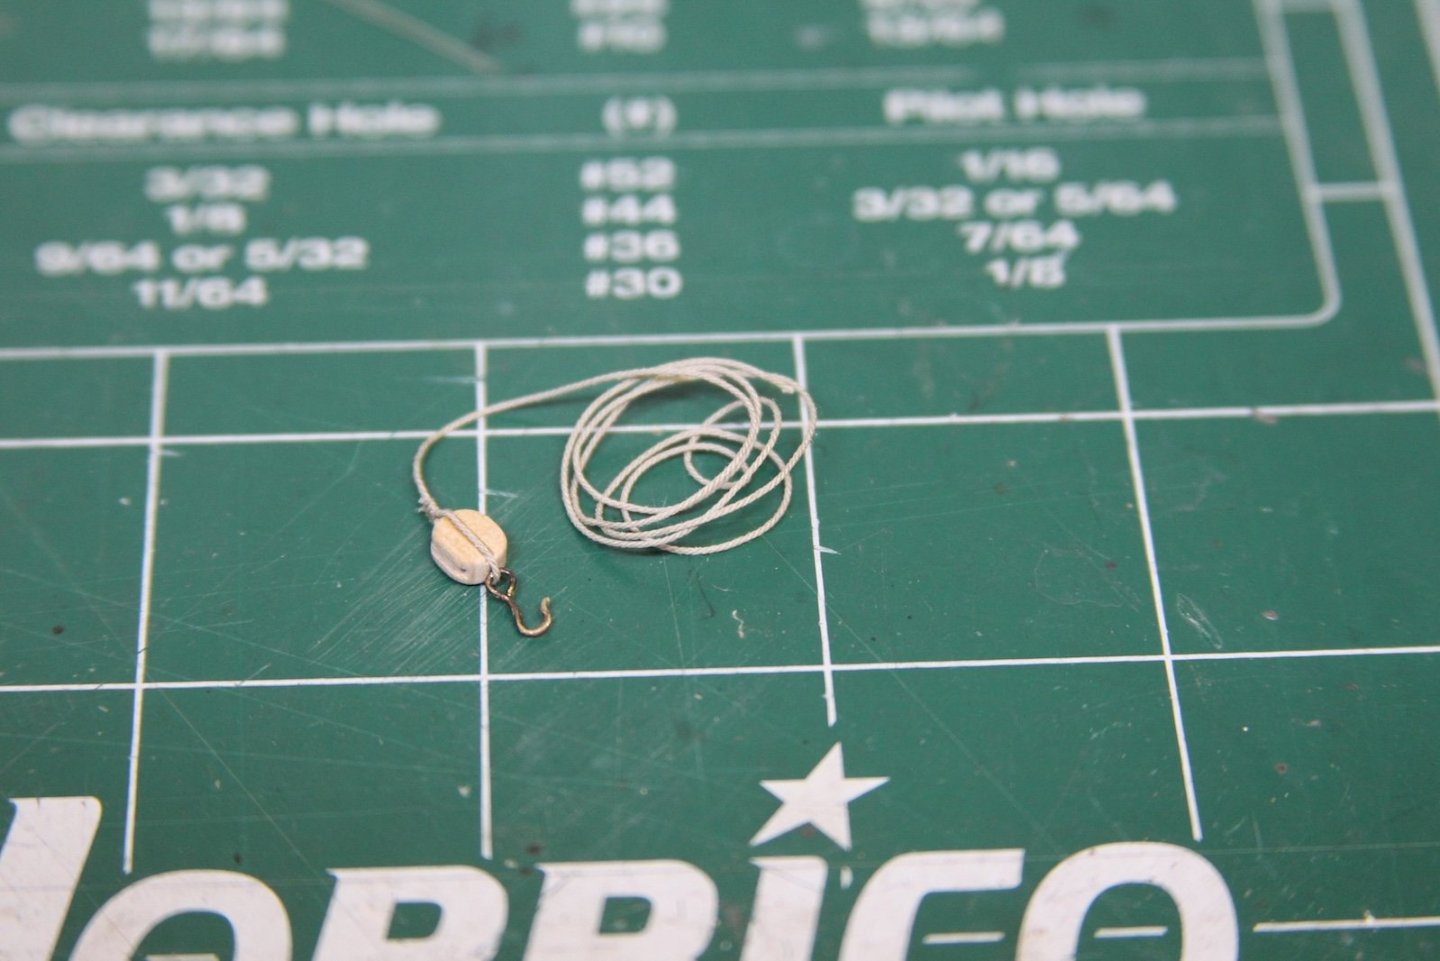
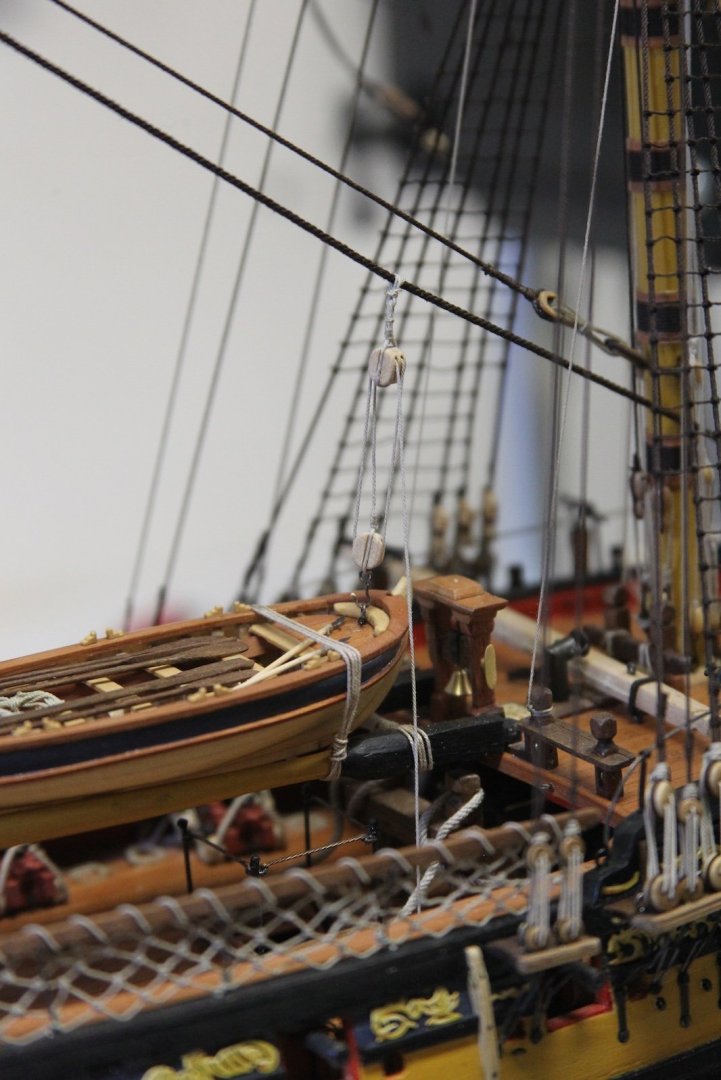
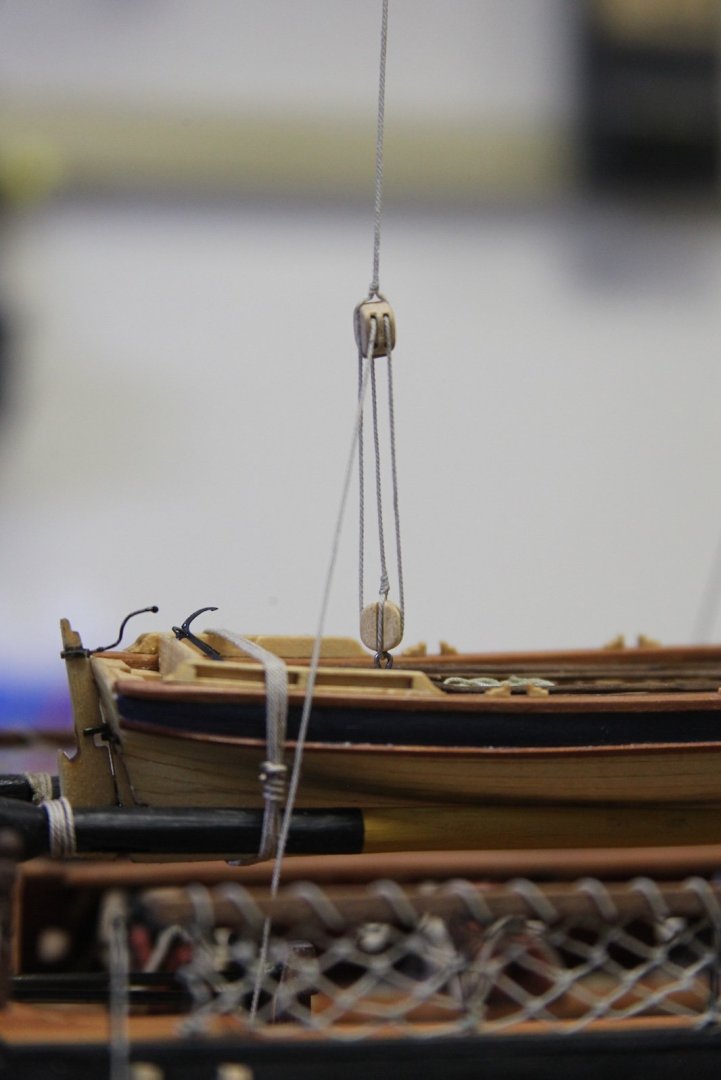
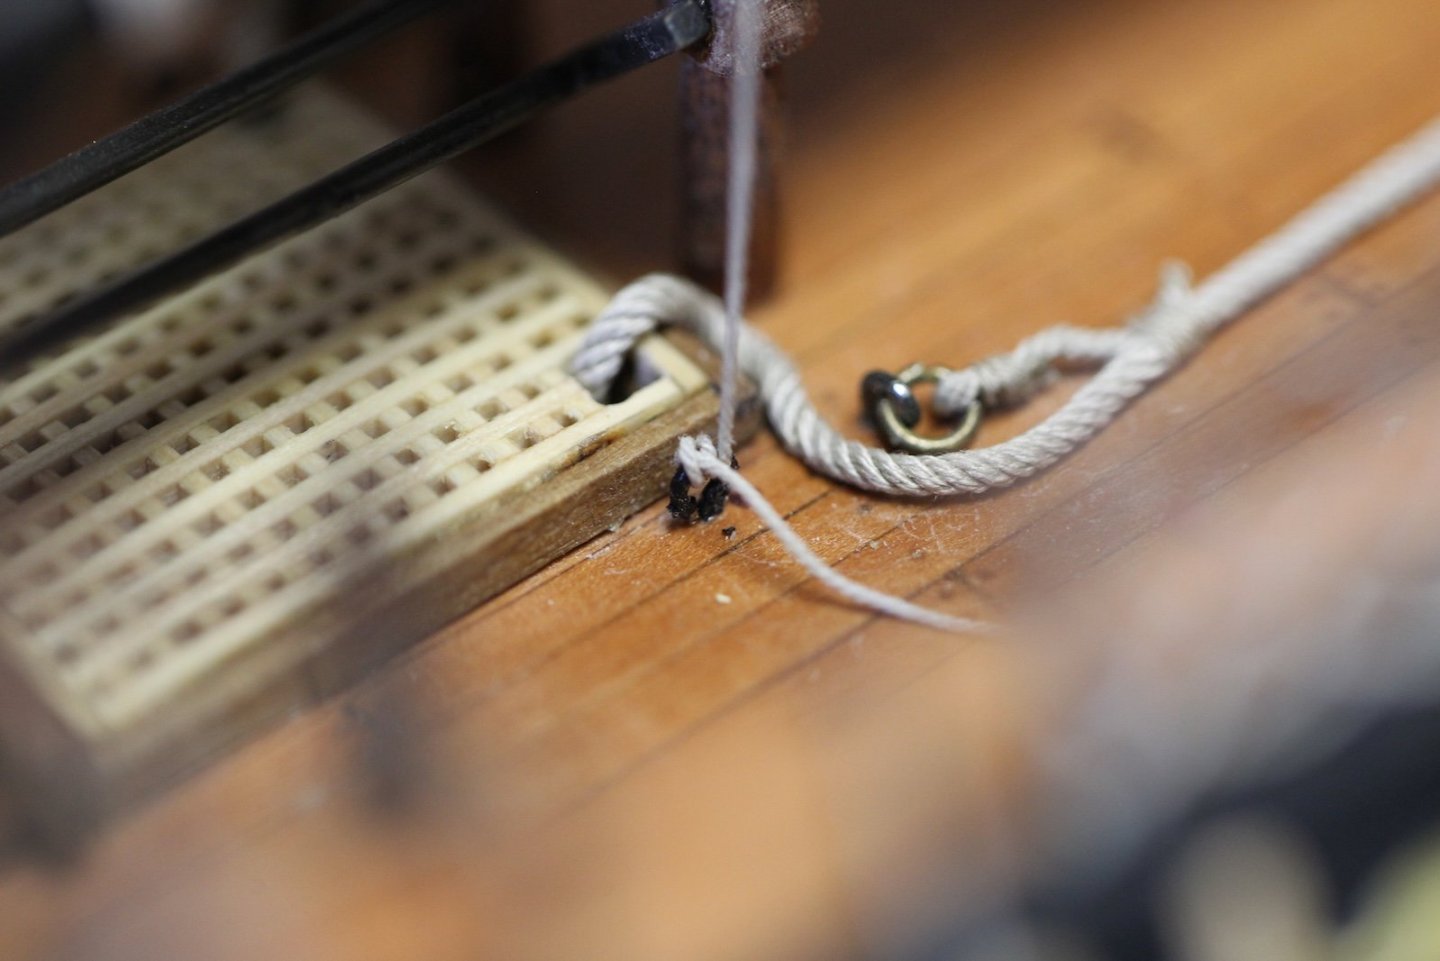
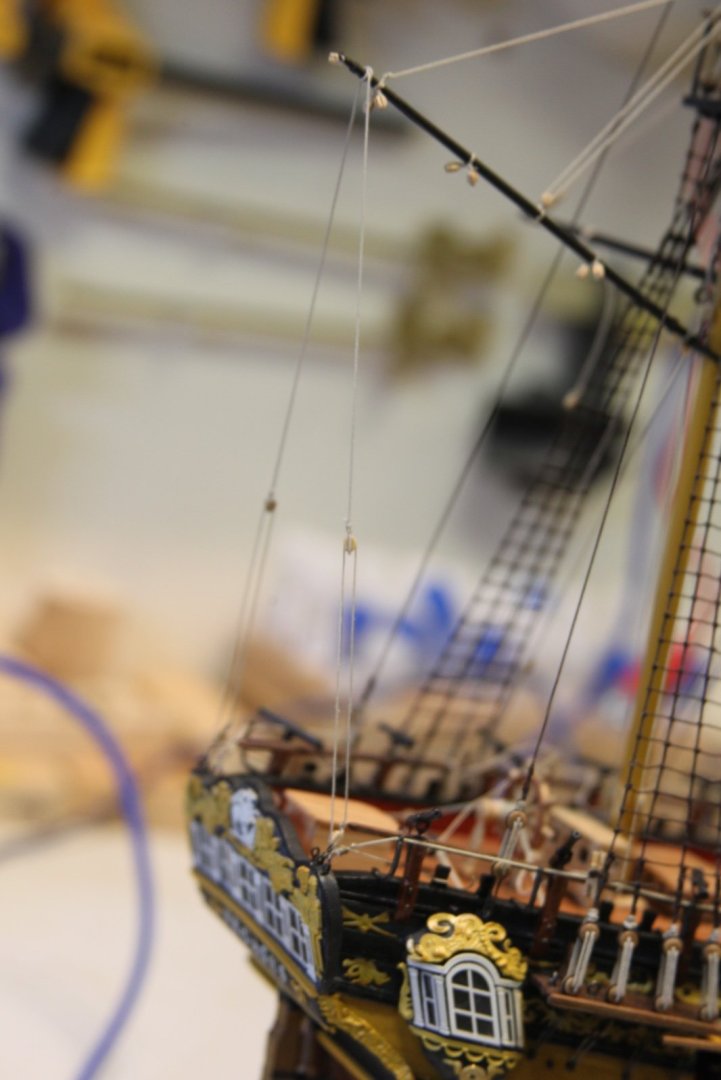
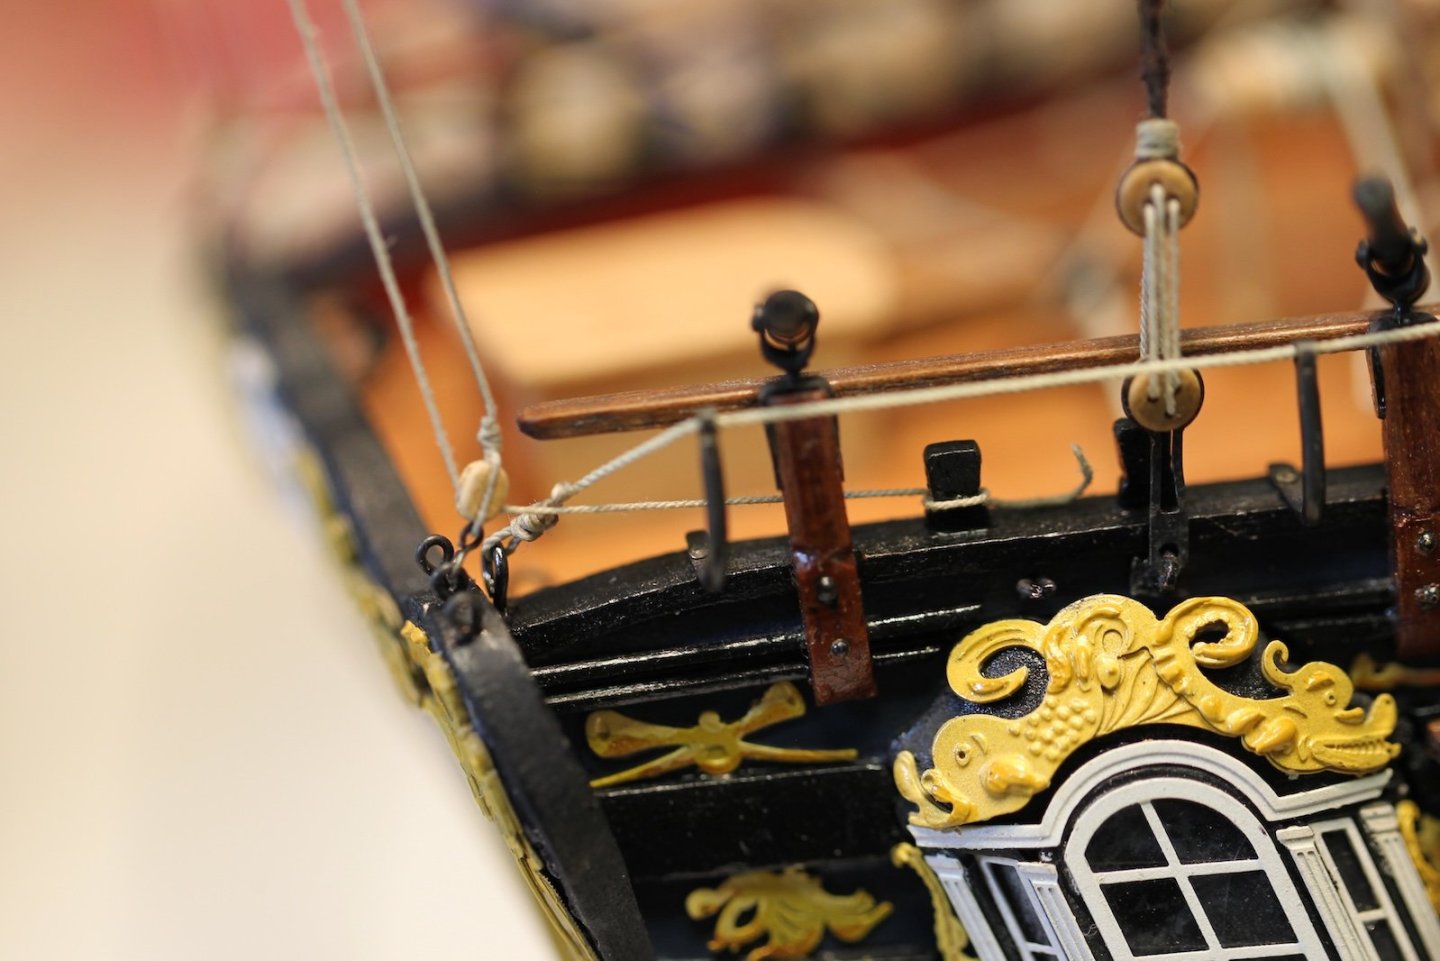
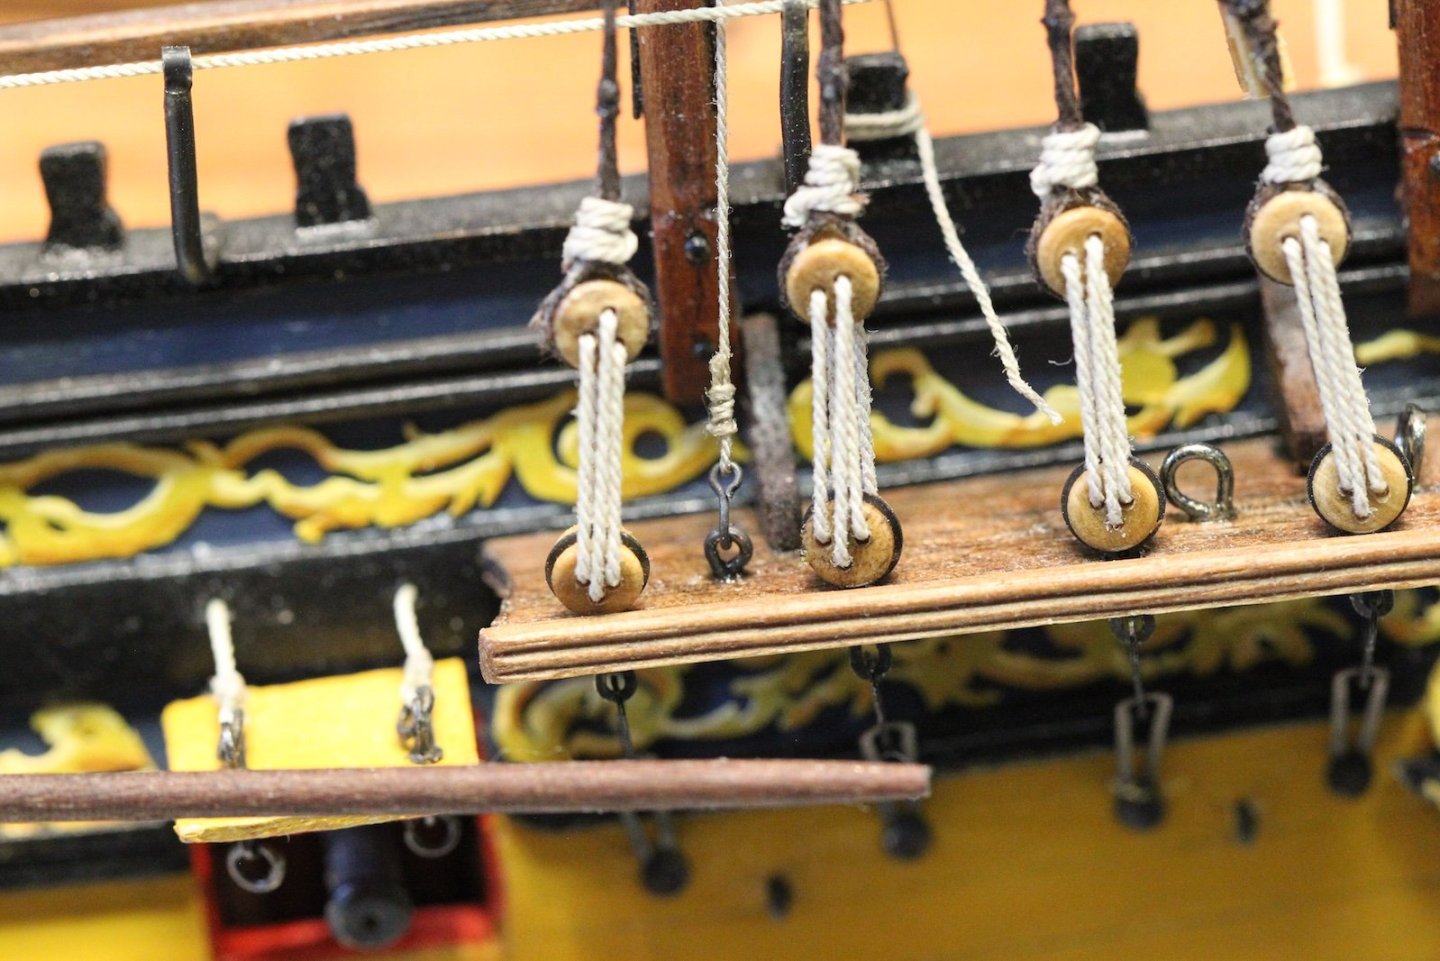
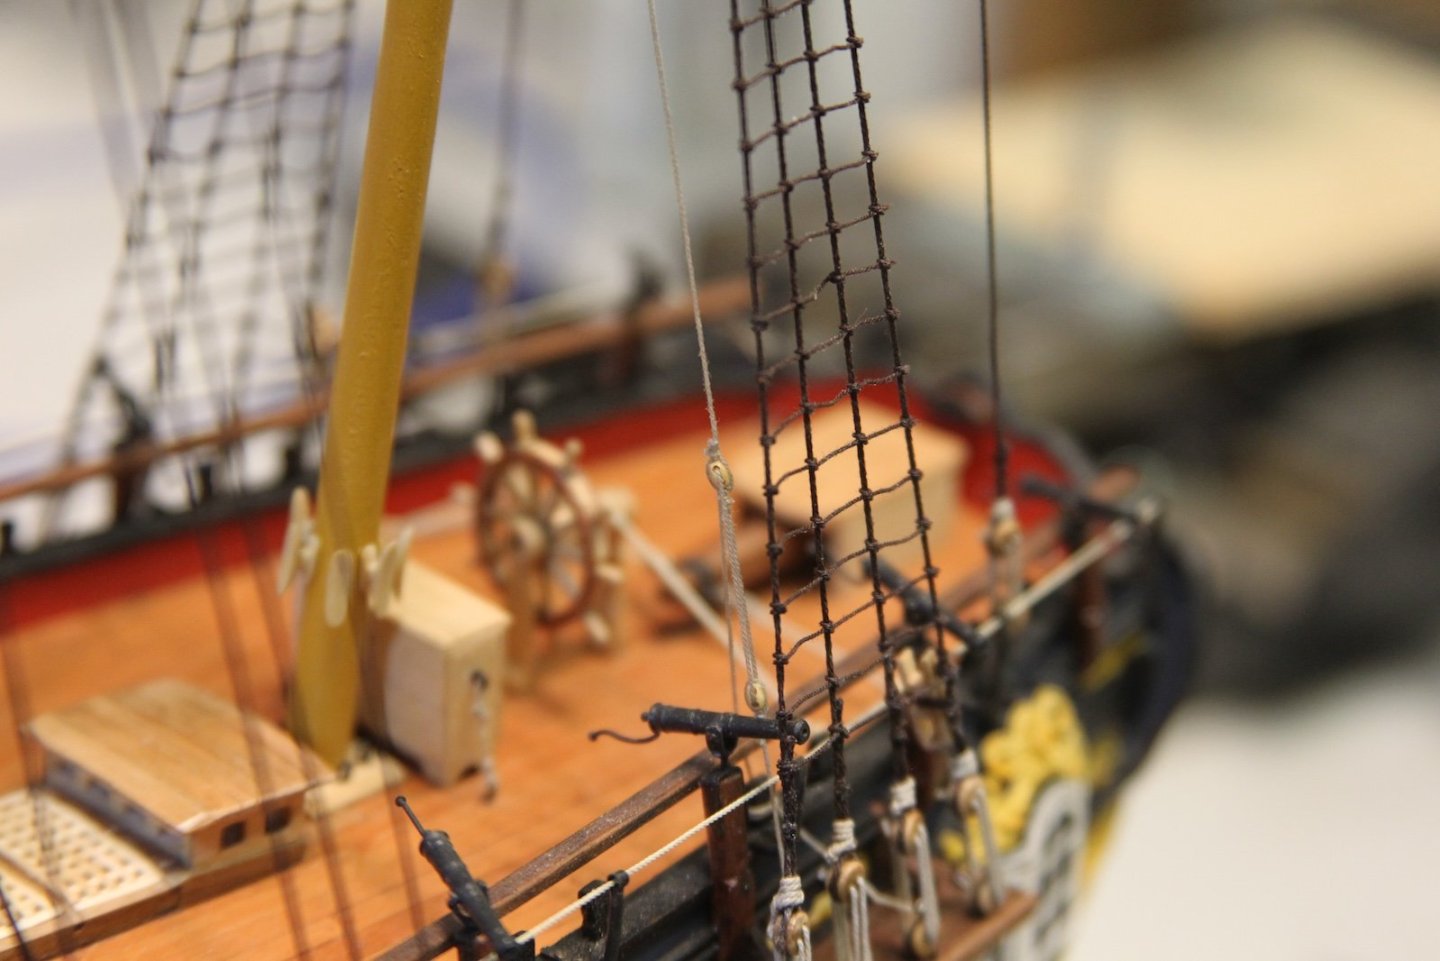
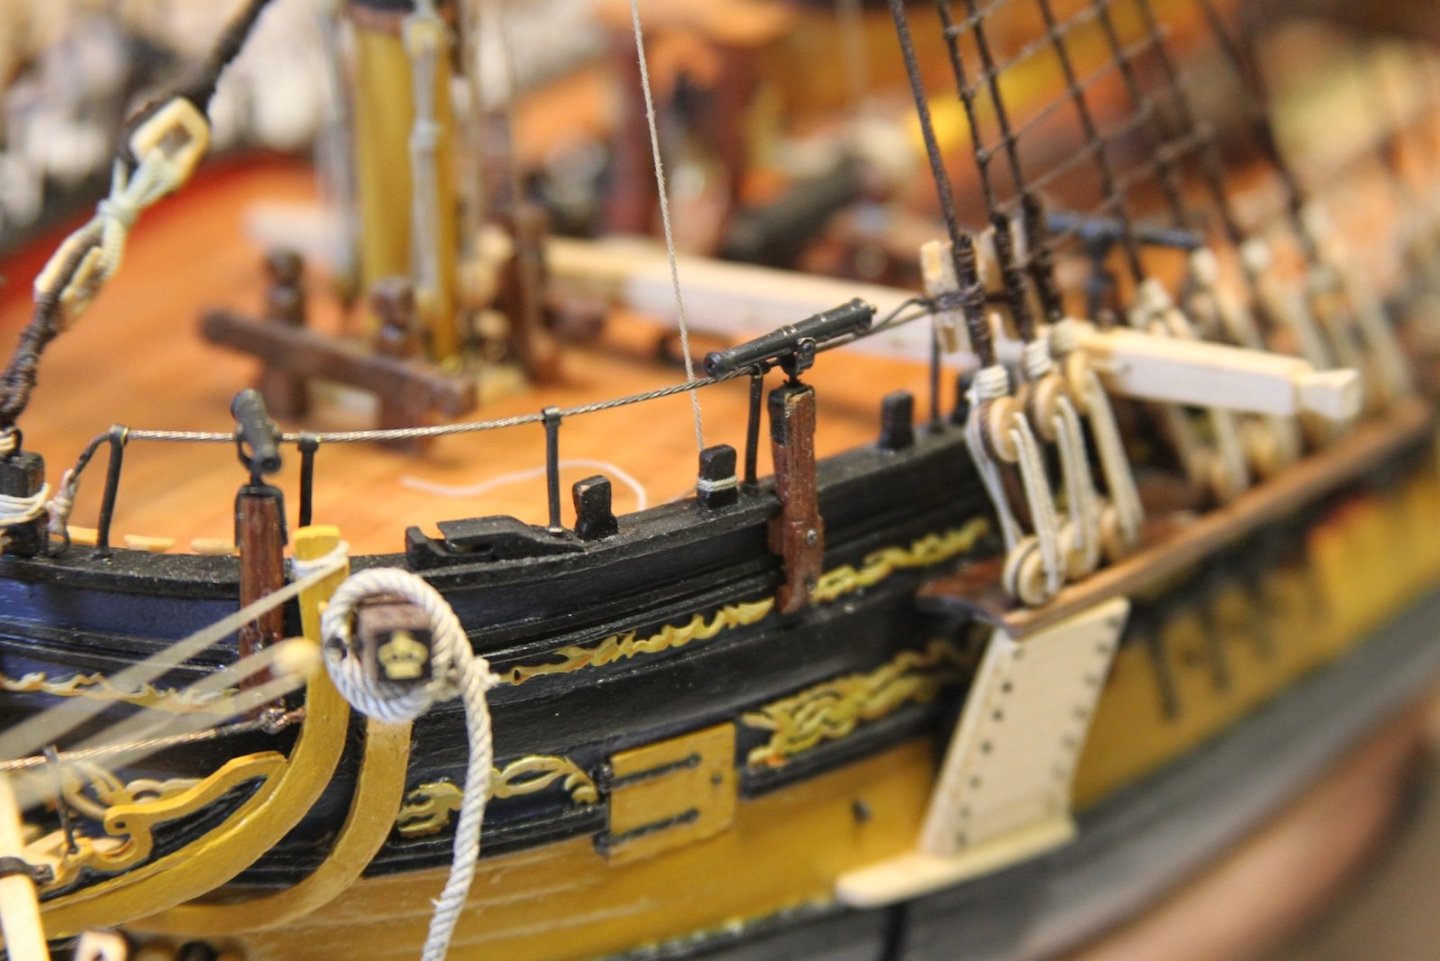
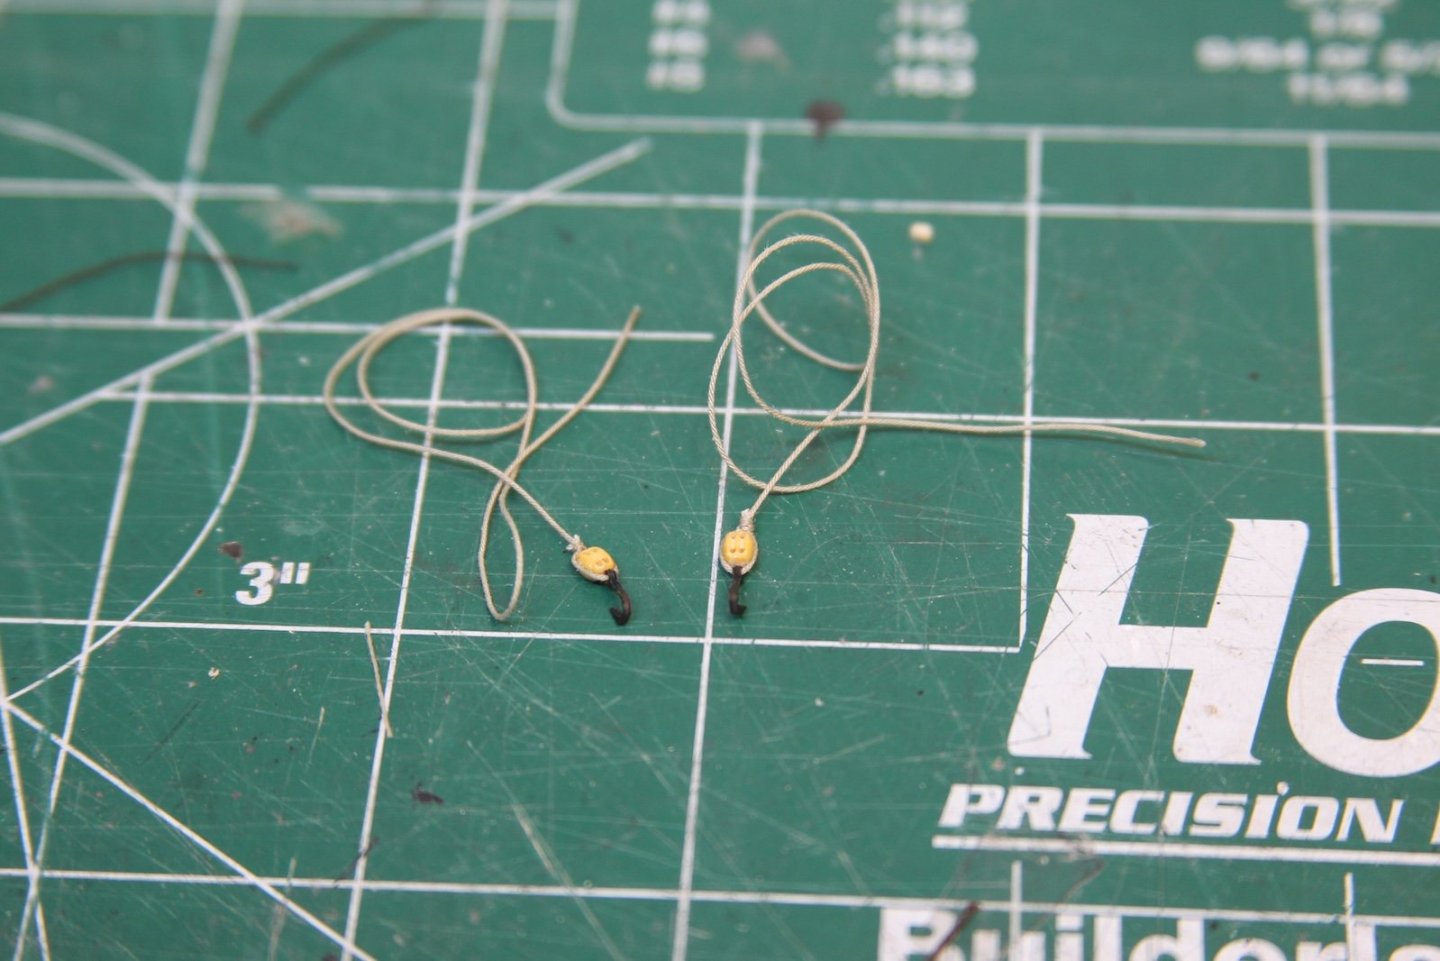
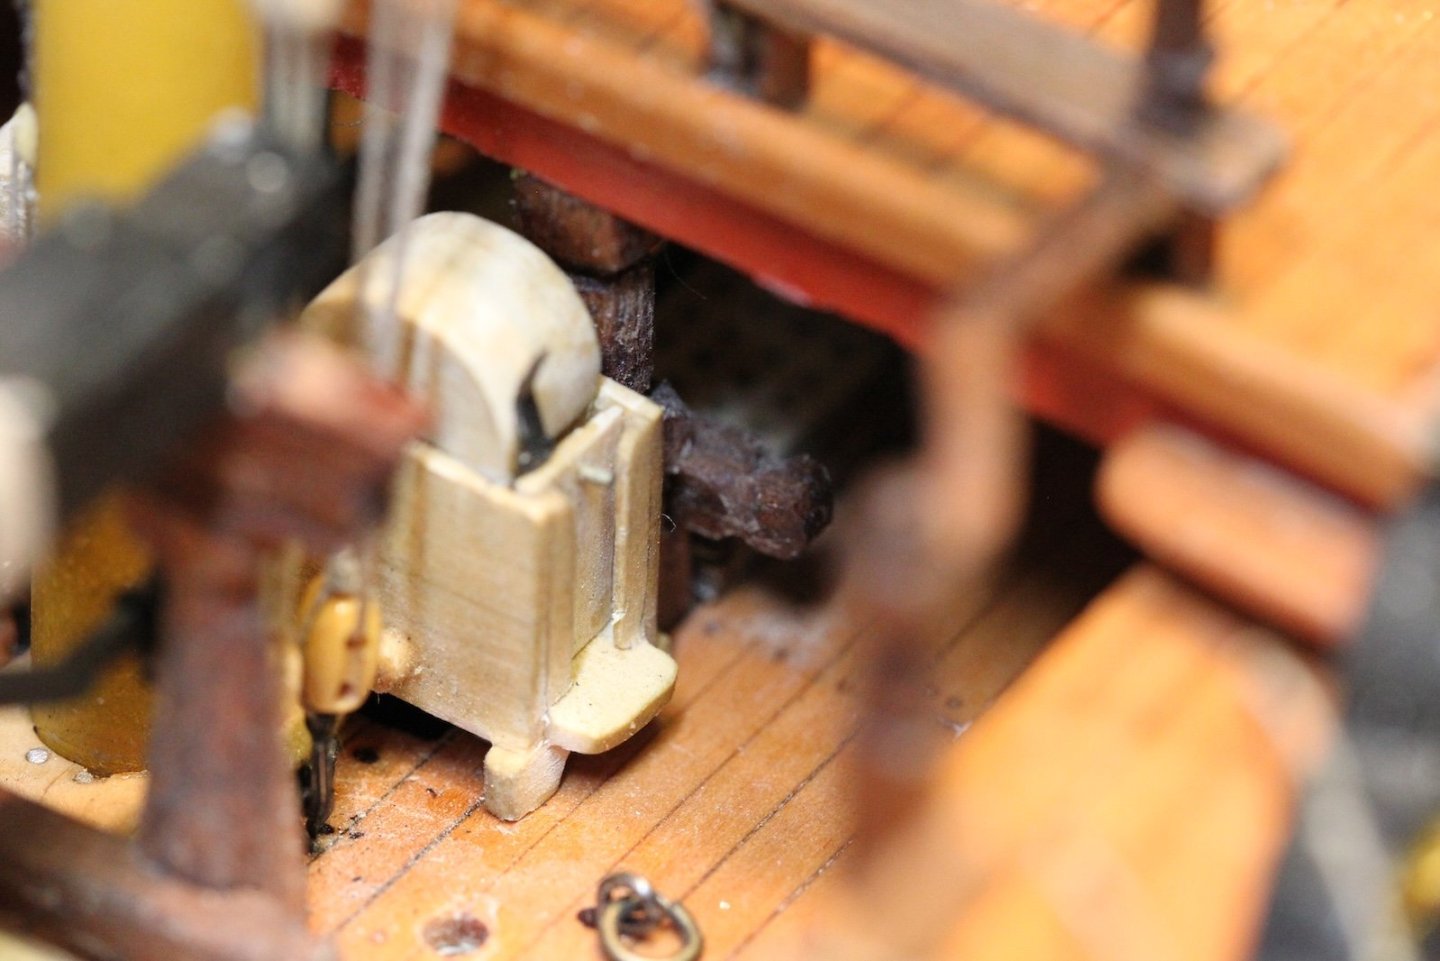
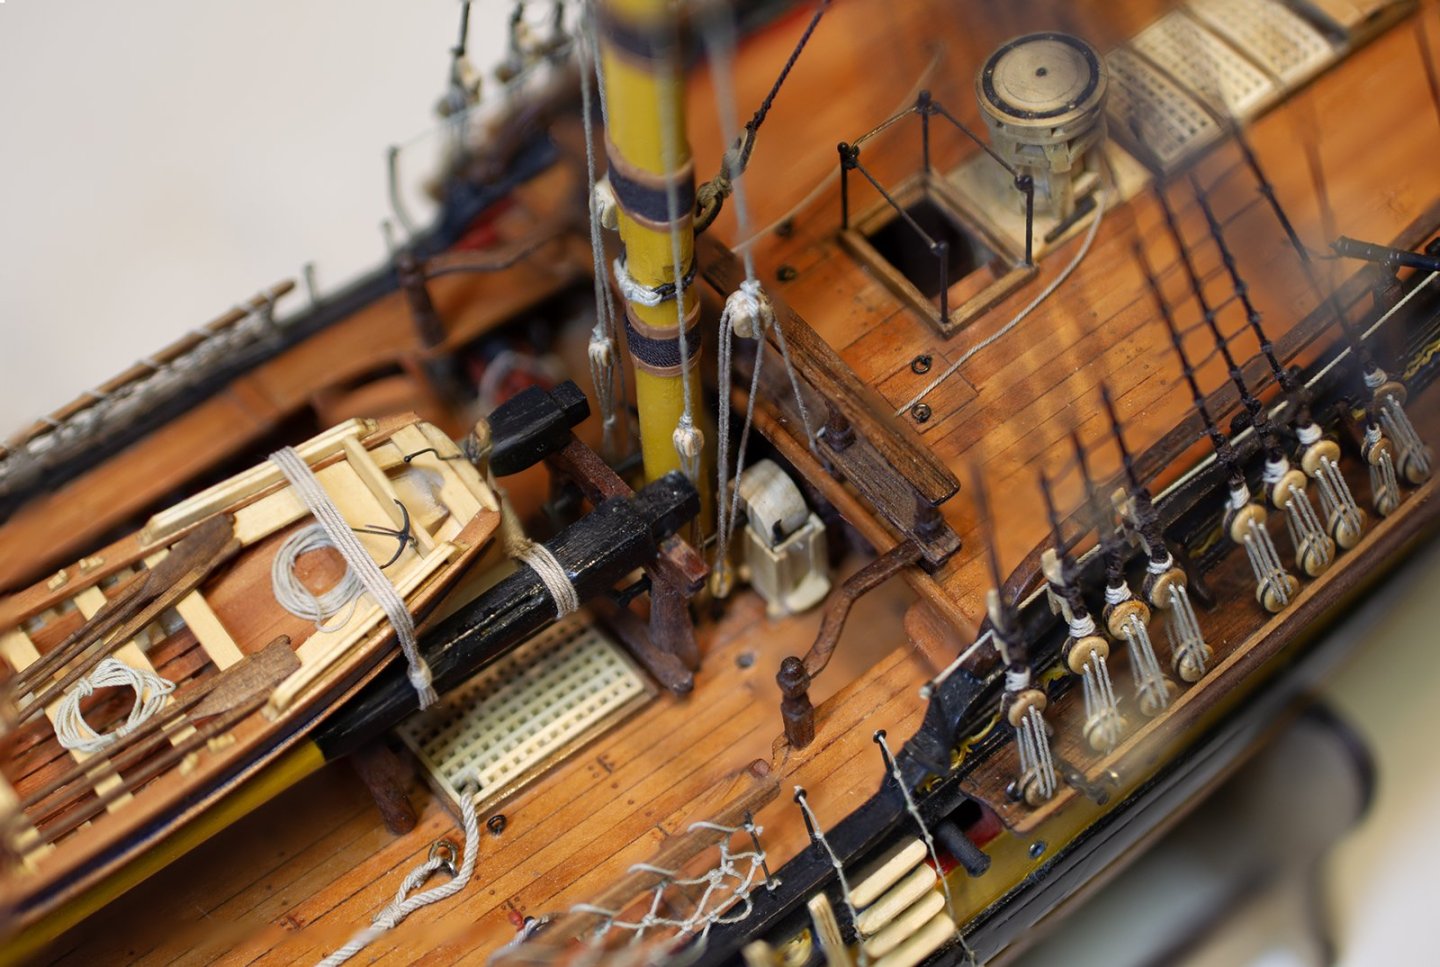
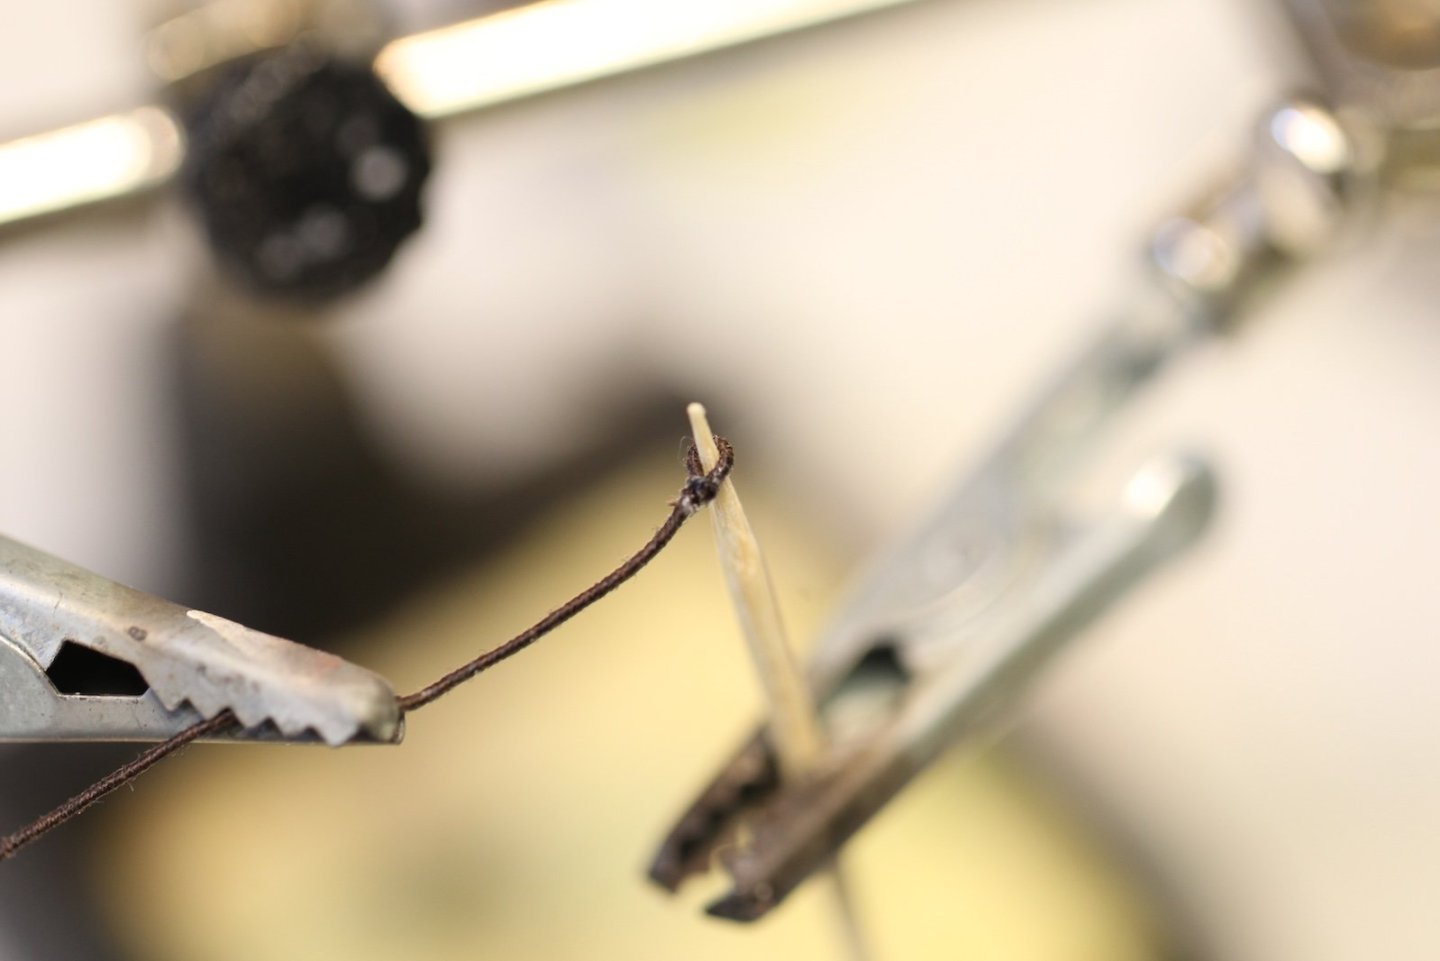
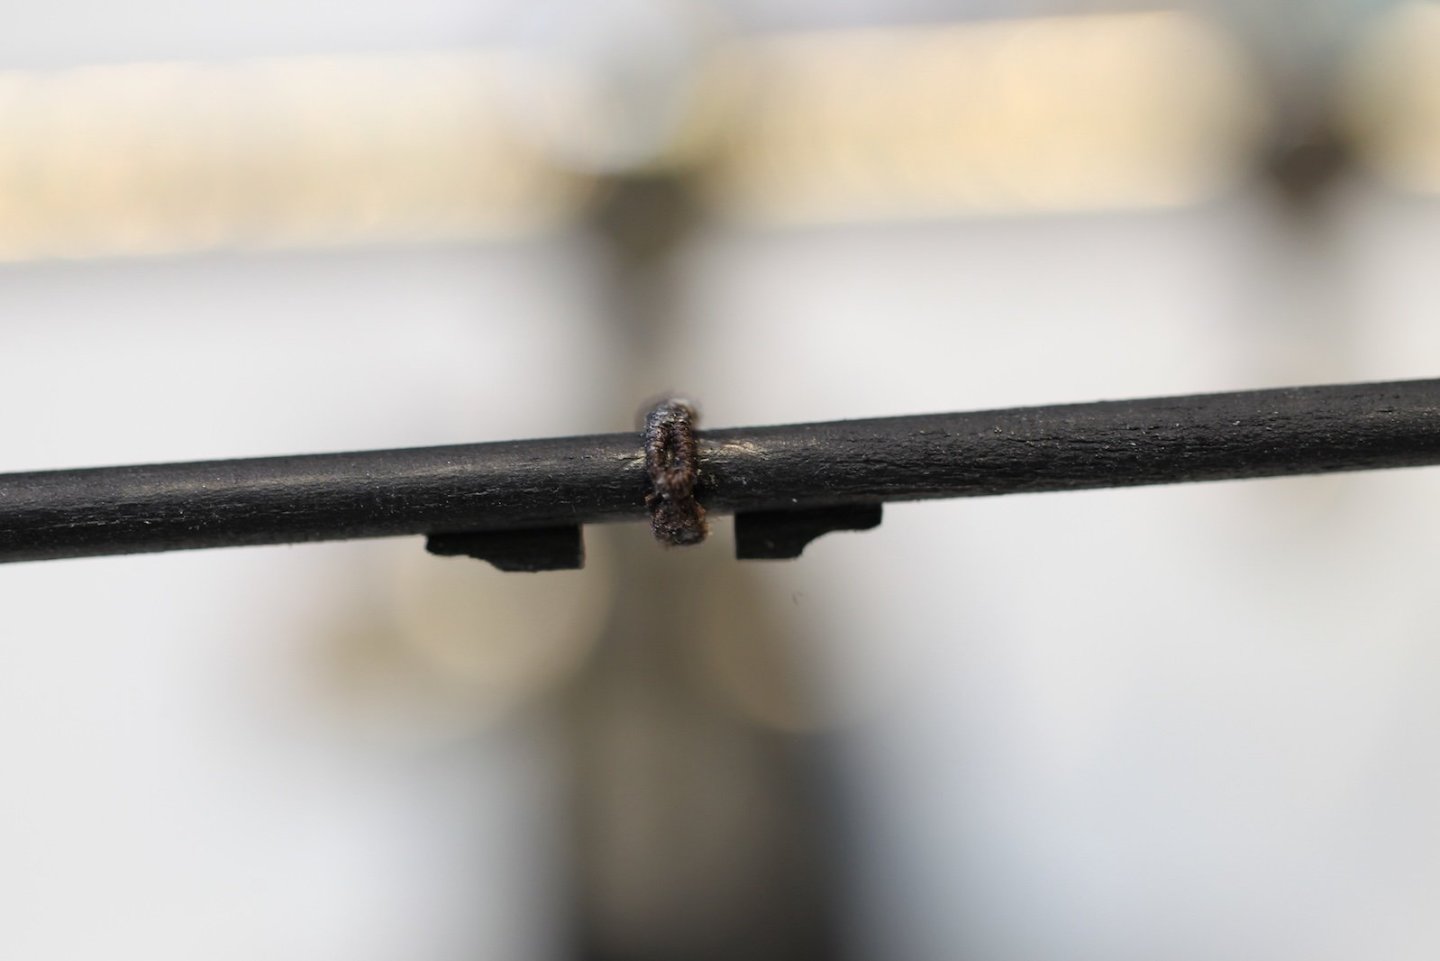
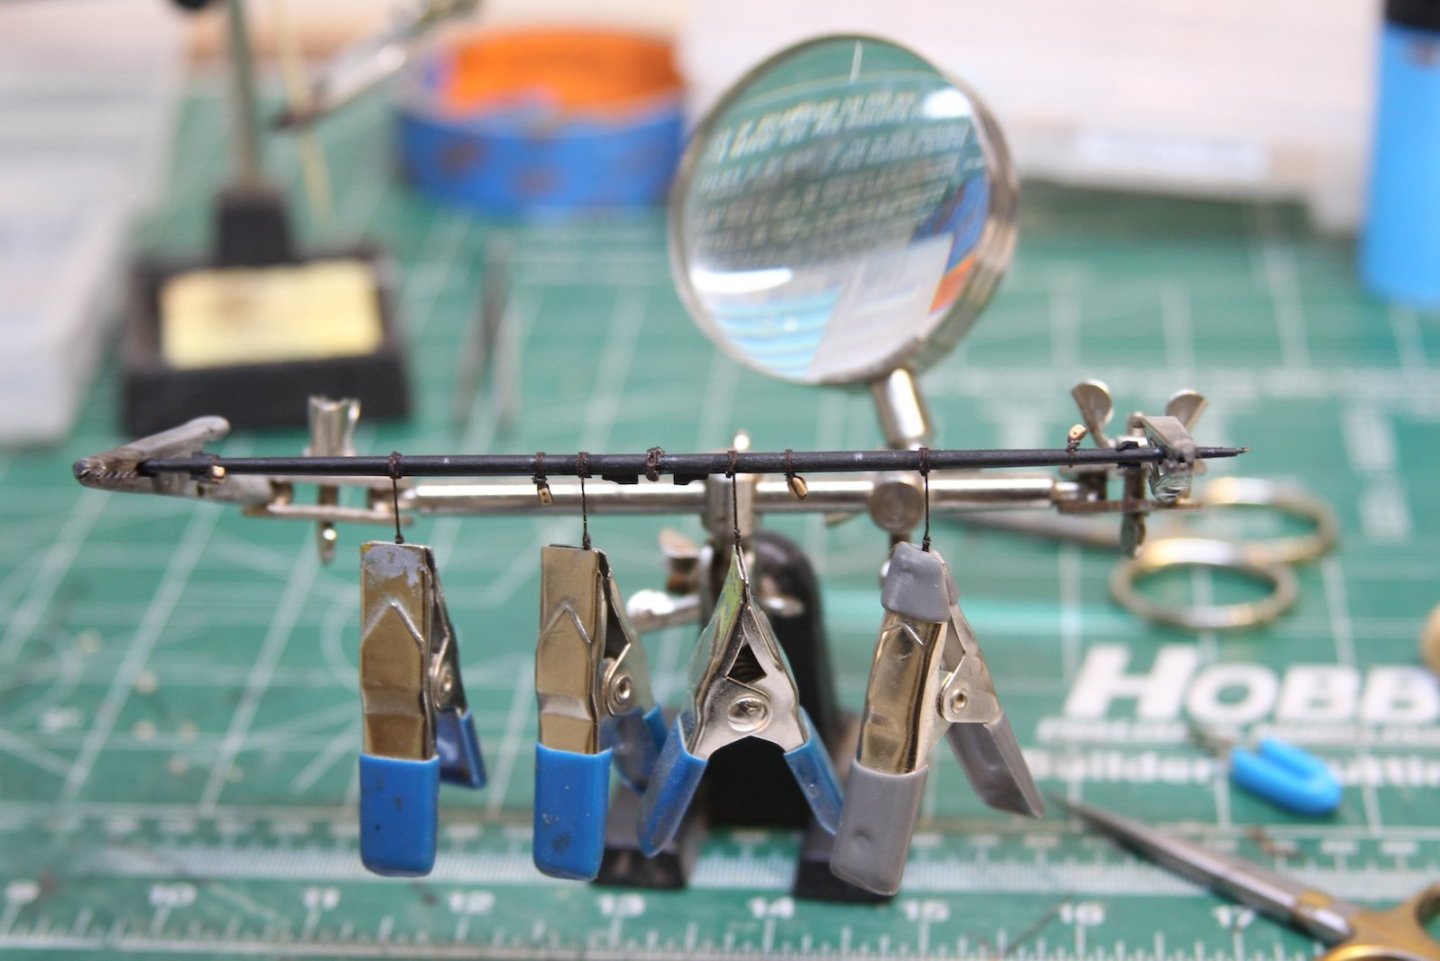
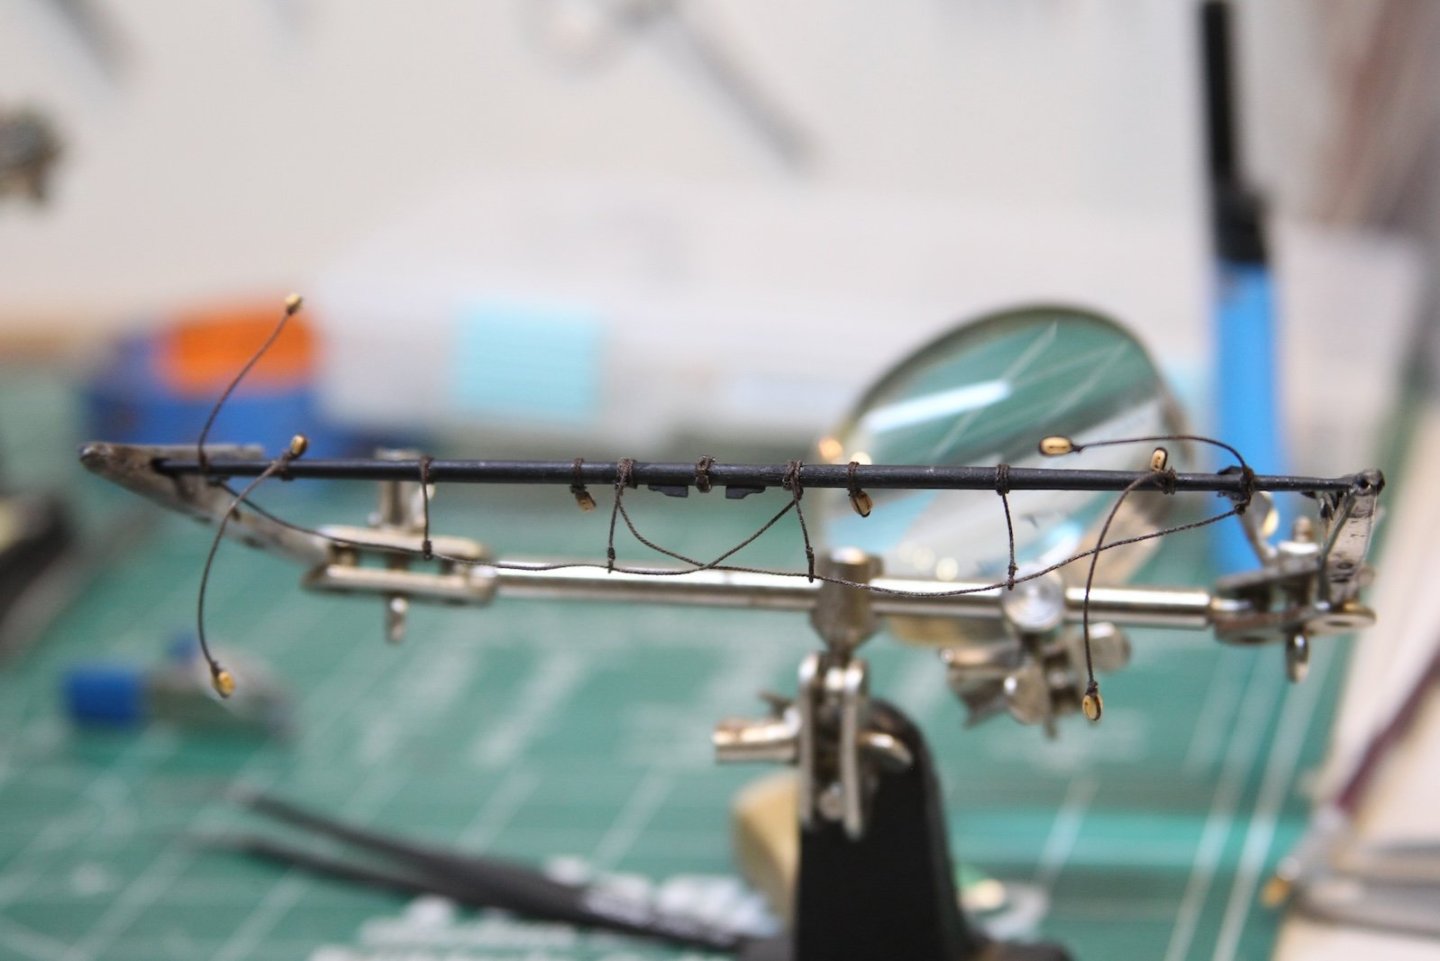
Thanks @Desertanimal - appreciate the kind words. The mainstay tackle is used to load and offload materials (and the launch) and so there are two - one located above the foremost hatch on the main deck and one over the aft hatch. The FFM calls for a 12" double block hanging from the main stay - the more aft block from a longer 3.5" inch pendant and the fore block stropped directly to the stay. Each is then tackled to a 12" single block stropped with a decent sized hook with a 3.5" line that's then belayed on the deck. I actually made a couple minor changes here. The 12" blocks this scale are 4.75- to 5mm, but I beefed those up slightly to 6 mm. I did this for two reasons - one, I believe the 3.5 line (abut .45mm) overwhelms smaller block and balances better with the 6mm block. I also really like this very visible part of the ship's tackle (much like the anchor rope) and wanted the blocks and rigging to be large enough to make out the details without too much effort. As I said, the aft block is attached to a pendant - which is about 21' feet, which is about 100mm at scale. I positioned this block / pendant directly over the aft eyebolt in my launch and lashed the standing end to the mainstay. I then coated it generously in diluted pva and hung a clip to it to let it dry and stiffen. The lashing itself is an eye seized in the .45mm line then wrapped to the mainstay and half-hitched. This is where the stiffened line, still held with a pretty heavy clip, came in handy as I wrapped the lashing and tied it off. I did put a spot of CA glue on the mainstay to hold the pendant in place. The tackle is a 1.5" (.20mm) line stropped to a block with a hook made from a long eyebolt. The line starts with the single block, runs up through the double block, down to the single, back up through the double, then back down to belay near the deck. The companion block to the fore of the deck is the same process without the pendant, lashed the same to the main stay. There are a variety of options to where this may belay - each book / person seems to have their own spot. The convenient location(s) for me were the eyebolts along the anchor rope since the cannon aren't attached to them. It's important to adjust the tension of the tackle so it is taught, but doesn't drag down the mainstay.


- 419 replies
-
- 8
-
-
- Victory Models
- Pegasus
- (and 2 more)
-
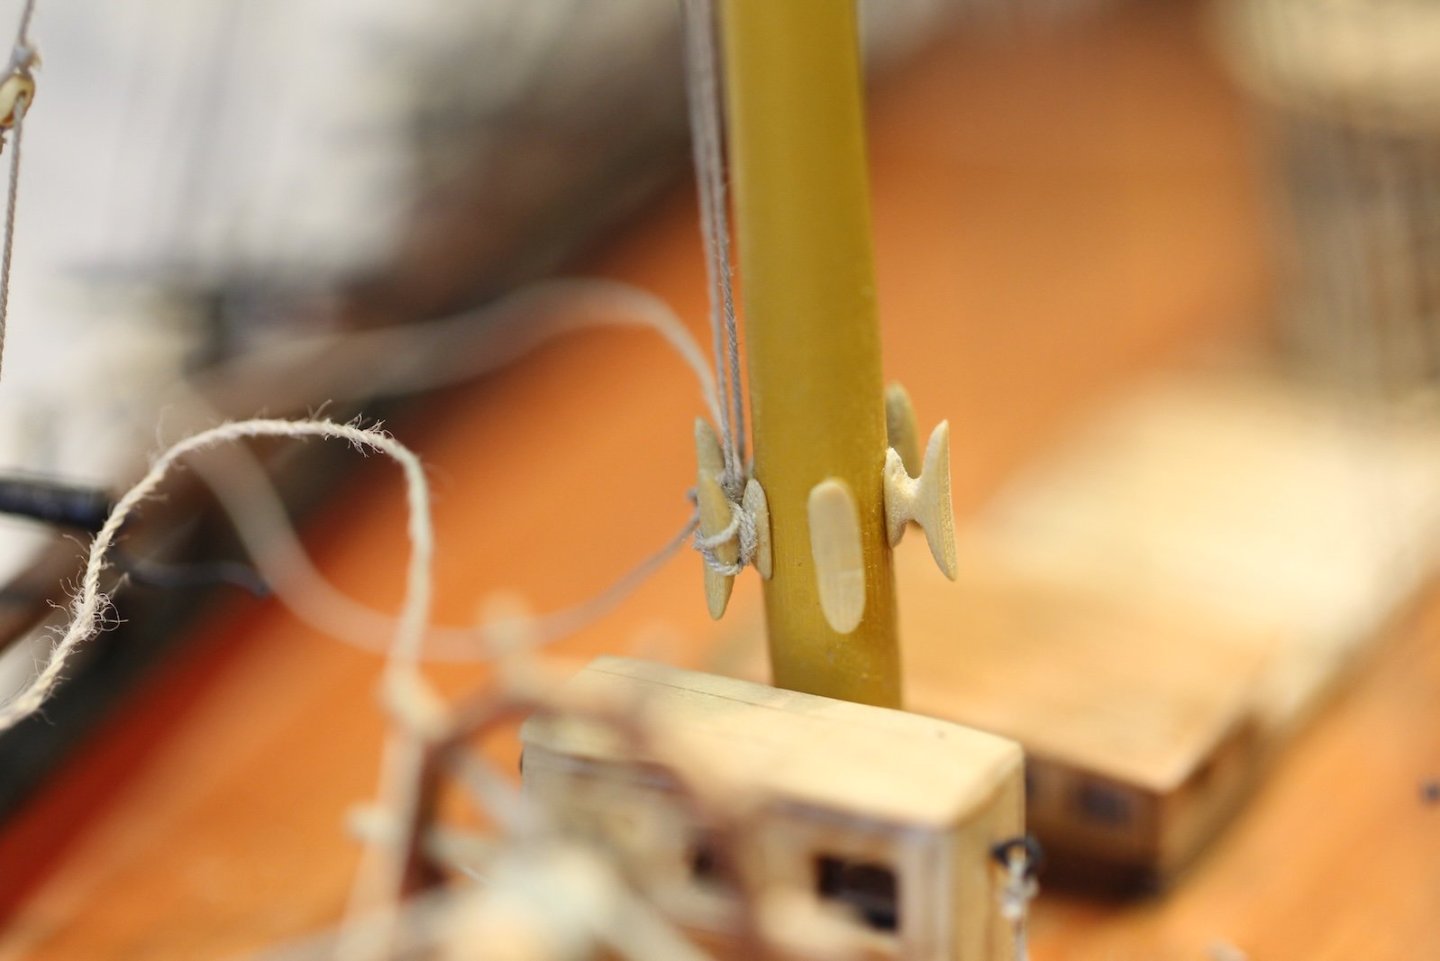
As with the bow (i.e. the Spritsail yard) the aft of the ship has a significant difference between the kit directions and the Fully Framed Model. The kit shows both a driver gaff and a driver boom. However, the FFM only shows a driver gaff - this is the option I'm going to employ. Before raising the gaff it has to be adorned with blocks just like the other yards. In this case there are 11 total. Despite the slight difference in sizes (4", 5" & 6"), I'm choosing to use 2.5 mm for all the blocks except the throat halliard block - which is 7" (3.5mm) and should be noticeably larger. The difference between the smaller blocks is a half mm or less at this scale (not easily differentiated by the naked eye), and I'm running low on the smaller blocks. Aside from the throat halliard block, there are three pair of brail blocks spaced along the gaff, a pair of mizzen topsail brace blocks near the end, a peak halliard block facing up in the middle, and an ensign halliard block attached to an eye bolt on the very end. Before raising the gaff, the parrel must be addressed. Like most folks, I scoured my local craft store to find slightly oblong beads that were the right color and the right size. One end of the parrel is knotted through a hole in the jaws, the beads are added, and the line is wrapped around the mizzen and fed back through a hole in the other side of the jaws to secure. The throat halliard is a version of the jeers with a 3.5mm single block stropped to a hook. This hooks to the eyebolt on top of the gaff. A second 3.5mm block is stropped to a line with an eye on one end that wraps up through the masthead over the trestle trees and back down to seize to itself through the eye. The fall runs through these two single blocks then down the port side of the mast to belay on one of the mizzen cleats. The peak halliard on the top of the gaff starts spliced at the aft end of the gaff then runs up through a double block stropped to a hook at the mizzen mast cap. From there it runs back down through the single peak halliard block, back up to the double block, then down through the port side of the lubber's hole to a cleat at the mizzen. The above photo shows both the peak and throat halliard falls on cleats. It's worth noting that I attached a temporary line and clipped it to the rudder to serve as a vang while I rigged the halliards. The vangs control the swing of the gaff and also pull the gaff down and create tension. There is a 3" (.40mm) pendant on each side of the gaff peak that ends in a 6" (3mm) block. The entire pendant is 42' (about 200mm at scale) and attaches to the gaff via a clove hitch creating two evenly lengthened 20 foot pendants. The falls of the vangs are 1.5" (.15mm) line that end in a single block stropped with a hook attached to an eyebolt on the quarter piece. The falls run from that block, up to the pendant, back down through the single block, and then through a sheave at the aft of the rail before belaying. As you'll see - I don't have a sheave at the end of my rail because there simply wasn't enough room there based on the kit & build. So instead, I simply belayed the fall on a nearby timberhead.


- 419 replies
-
- 10
-
-
- Victory Models
- Pegasus
- (and 2 more)
-
Hey B.E. Beautiful planking job. I love Pear wood, so my first thought was that it'd be a shame to cover it with copper. Then, I started thinking about how striking it would be with the copper and pear, and how complimentary those colors will be together. As always, looking forward to seeing your work.
- 332 replies
-
- 1
-
-
- Harpy
- Vanguard Models
- (and 1 more)
-
The Crossjack (pronounced "crow-jack") is the lower yard on the mizzen, but unlike the other yards it did not carry a sail. As a result there are far fewer blocks associated. Otherwise, it's mounted similar to the other yards in terms of a truss. However, during the mid to late 1700s it was fitted to the mast using a sling rather than jeers. This is where a little bit of research kicked in for me. Most sources have the crossjack sling as a single served 3" sling that had an eye spliced into one end, then was reeved through the single Sling Tye Block in the center of the crossjack then back up and seized through the eye. This is also in the illustrations for the FFM, the kit, and most of the builds's you'll find on this forum. As such - this is the way I originally added the blocks to the cross jack below. However - most sources show that after 1773 the sling was a little more complicated using a pair of thimbles that connect a two part sling. This is illustrated in The Fully Framed Model (pg 105) and also verified in Marquardt's Eighteenth-Century Rigs & Rigging (pg 78, figure 42). So, this later version is what I ended up doing. The problem is - I started by adding the blocks before I figured all this out. SO - although you see a center block in the following images - I removed that later when I added the post-1773 sling. Back to the blocks. As I said, fewer than the other yards. The Sling tye block in the middle (which I removed), paired by two 10" quarter blocks (4mm at scale) stropped with 3" (.35mm) line. The brace pendants are 12' long which is 57mm at scale and secured to the yard 4' (19mm) inboard from the cleats. The pendant ends in a 6" (2.5mm) single block. Seized outboard of the pendant is a shoulder block at 10" (4mm) topped by a 6" (2.5mm) single block. The truss is similar to those of the main and fore yard, however slightly more simple. There is a single thimble at the end of a .30mm line that is wrapped around the yard and seized just inside the port side cleat. A longer line is then seized around the yard inside the other cleat. This line will wrap around the mast to be inserted into the thimble then drop down to end in a block and tackle that will end with a hook and eyebolt on the port side mizzen channel. But - like the other yards, the truss and the sling really need to be done in tandem (at least for me) to hold the yard in place during the rigging. Notice above the first part of the sling which is a thimble in a .40mm served line which is wrapped around the yard, up the other side, around itself, then seized together at the thimble. Obviously the previously attached sling block has been removed at this point. The second half of the sling is a thimble seized in the same size served line with an eyelet on one end and open on the other. The open end will run up through the lower masthead then back down and seized to itself after passing through it's own eye. The two thimbles are then seized together with a series of wraps. The above photo also has a little better view of how the bottom thimble is wrapped around the yard. Back to the truss - as I said, the longer line is wrapped around the mast, back through the thimble, then down to the falls. A single block at the bottom has a longer line hooked to the mizzen channel. A .20mm line is used for the tackle to connect the two blocks in the usual way then belay at a convenient timberhead. Finally, the yard lifts are essentially mirrors to the other masts. A .20mm line runs from the lift blocks on each end of the yard, up through a single block hooked to the mast cap, then down through the lubbers' hole to belay on the rail just inside the ratlines.


- 419 replies
-
- 9
-
-
- Victory Models
- Pegasus
- (and 2 more)
-
Very diligent work. I like the innovative method for painting the deadeyes.
-
Thanks Bob, always appreciate the kind words. I enjoy the photography part as well; I have a little background in that area so it’s nice to still be able to use the tools. Looking forward to when you get your Peg back in the bench.
- 419 replies
-
- 2
-
-
-
- Victory Models
- Pegasus
- (and 2 more)
-
Hey @RossR - Thanks for the kind words - much appreciated. Sort of card stock - after trying a few things for the hoops, I settled on slicing a Manila file folder into strips with a razor. It had just the right thickness for my scale.
- 419 replies
-
- 2
-
-
-
- Victory Models
- Pegasus
- (and 2 more)
-
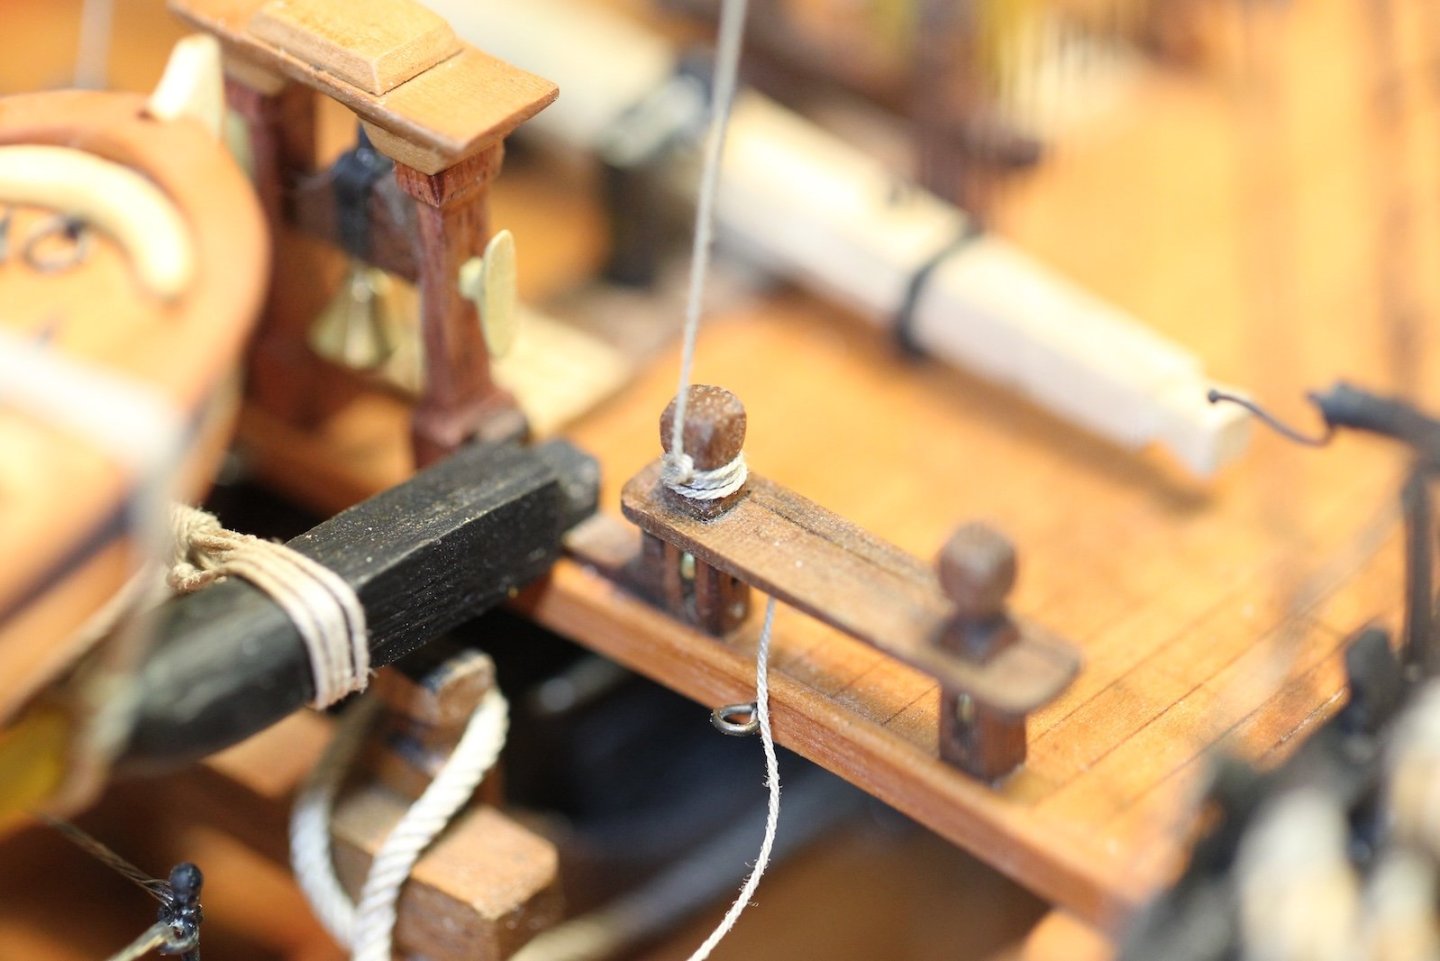
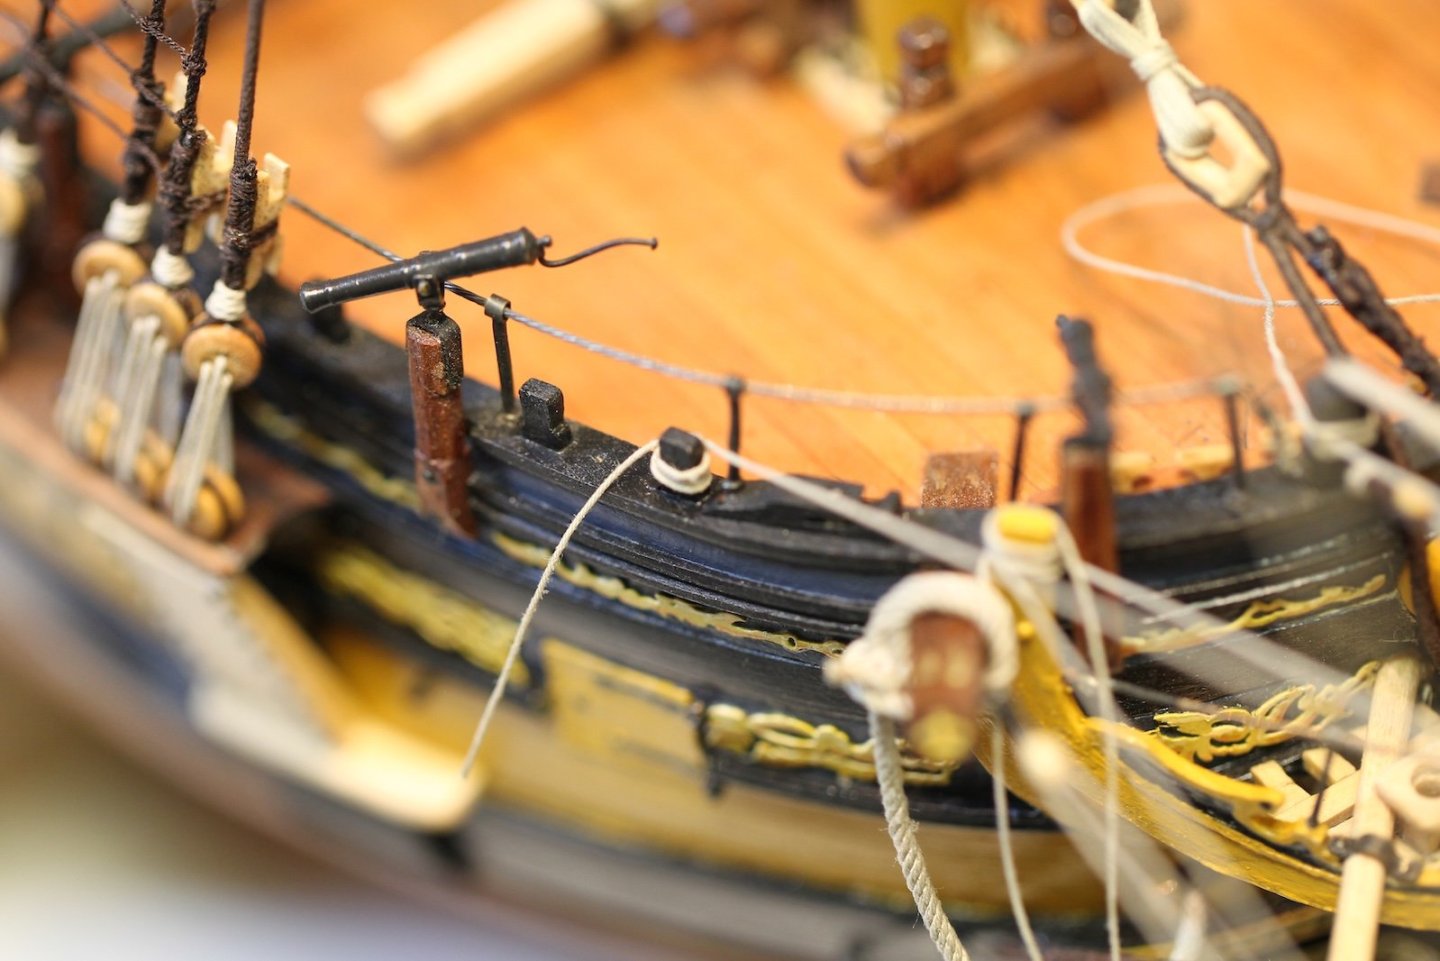
The yard lifts are pretty simple affairs. Although the weight of the yards is endured by the large rope and blocks of the jeers, the much more lightweight lifts are used to square the yards perpendicular to the masts. The yard lifts for both the fore and main yards are 3" lines (.35mm at scale) that originate at 9" (3.5mm) blocks secured with hooks to the eyebolts at the fore of each mast cap. The lines run from this block, down through the lift block on the end of the yard arm (attached to the sheet block), back up through the block at the mast cap, then down through the lubbers' hole to secure on either a timberhead or rail. The fore yard lifts are secured on a forecastle timberhead next to the mast & swivel gun. The main yard lifts are secured on the quarterdeck rail.

- 419 replies
-
- 12
-
-
-
- Victory Models
- Pegasus
- (and 2 more)
-
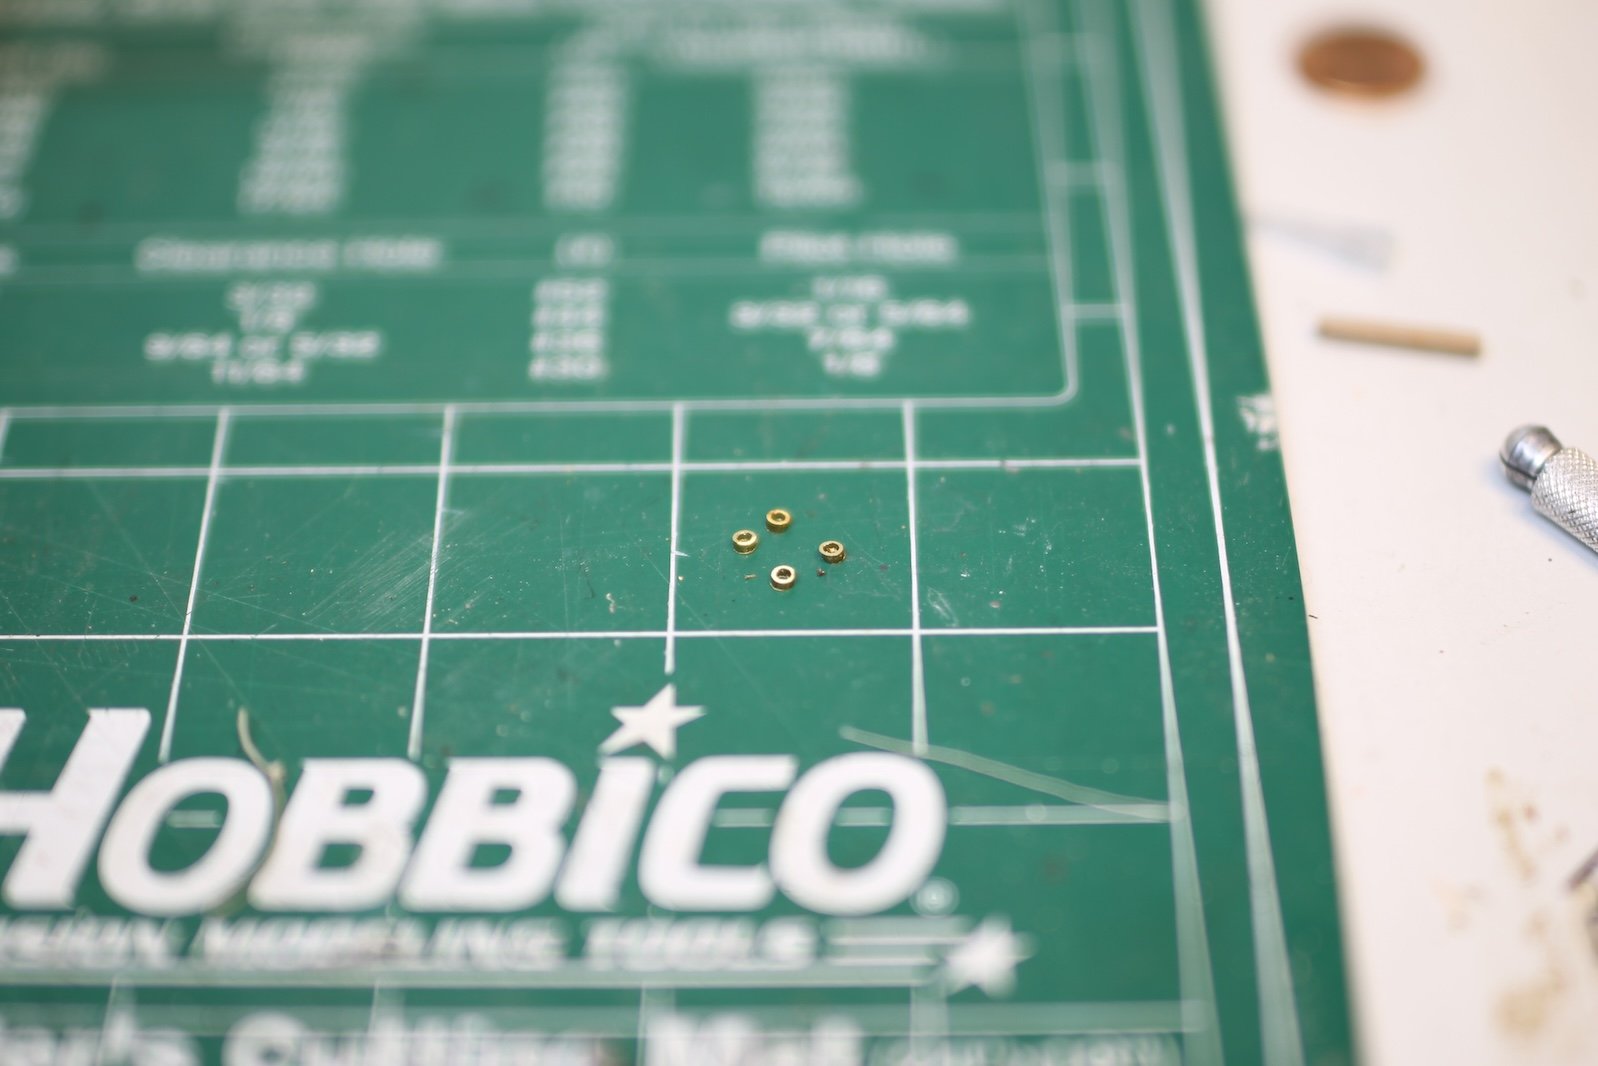
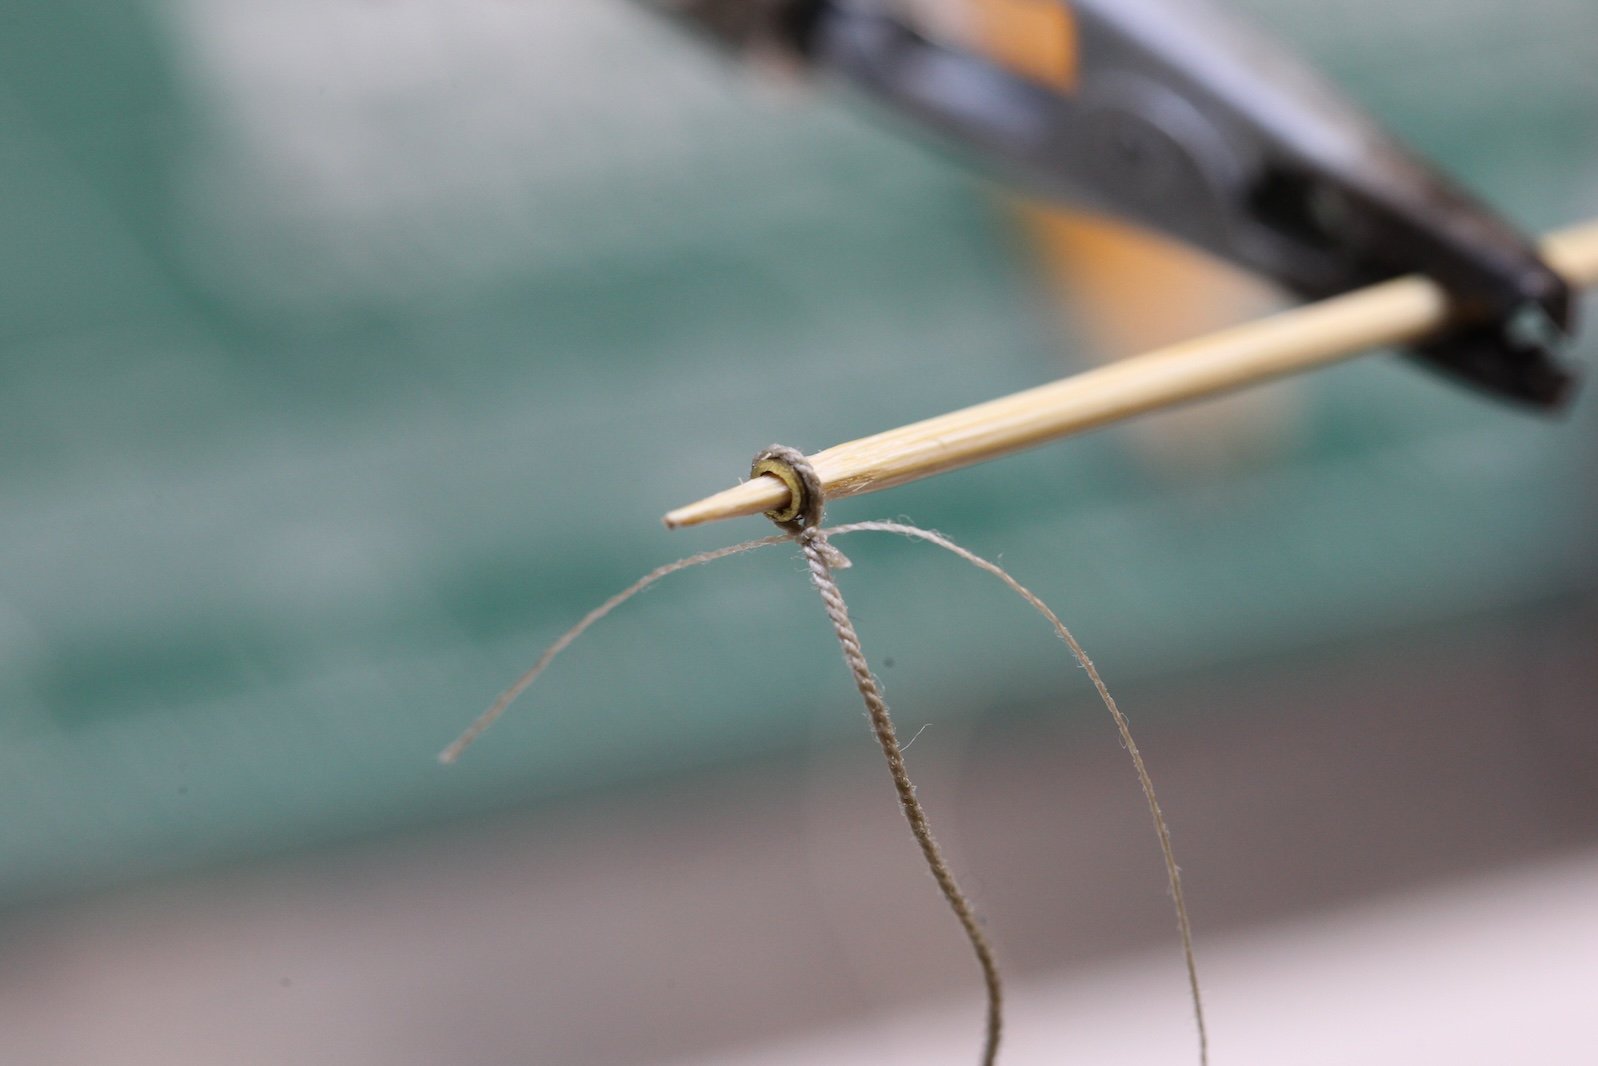
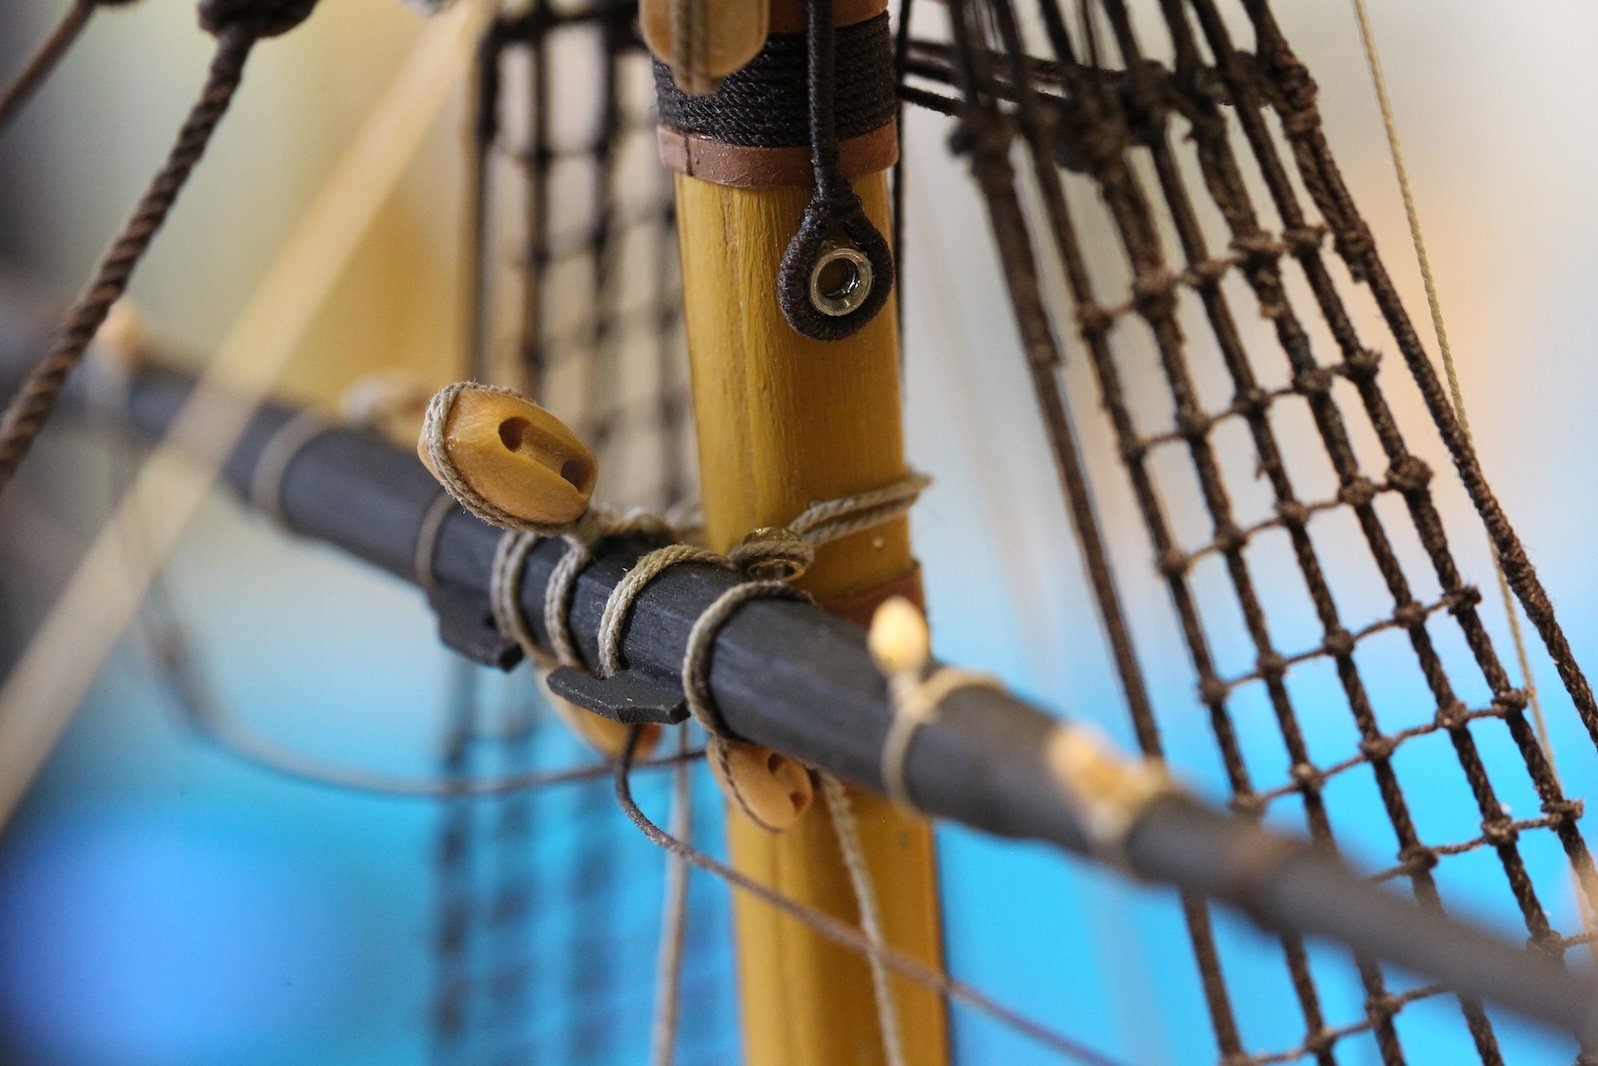
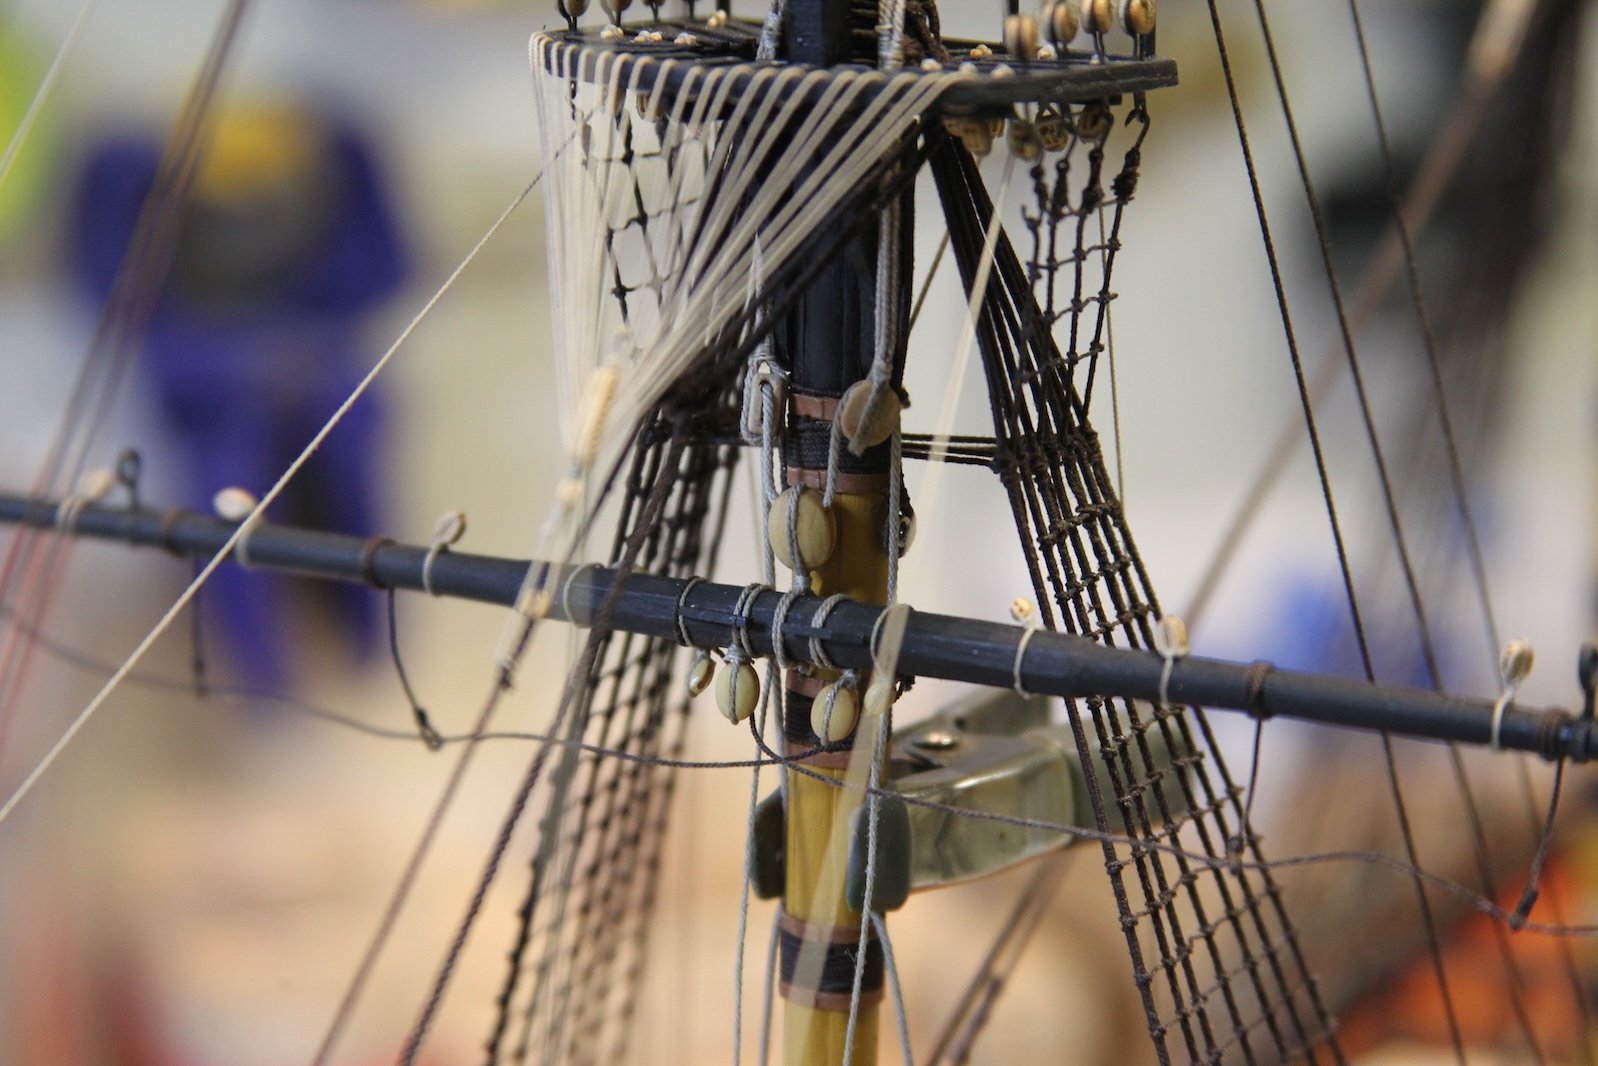
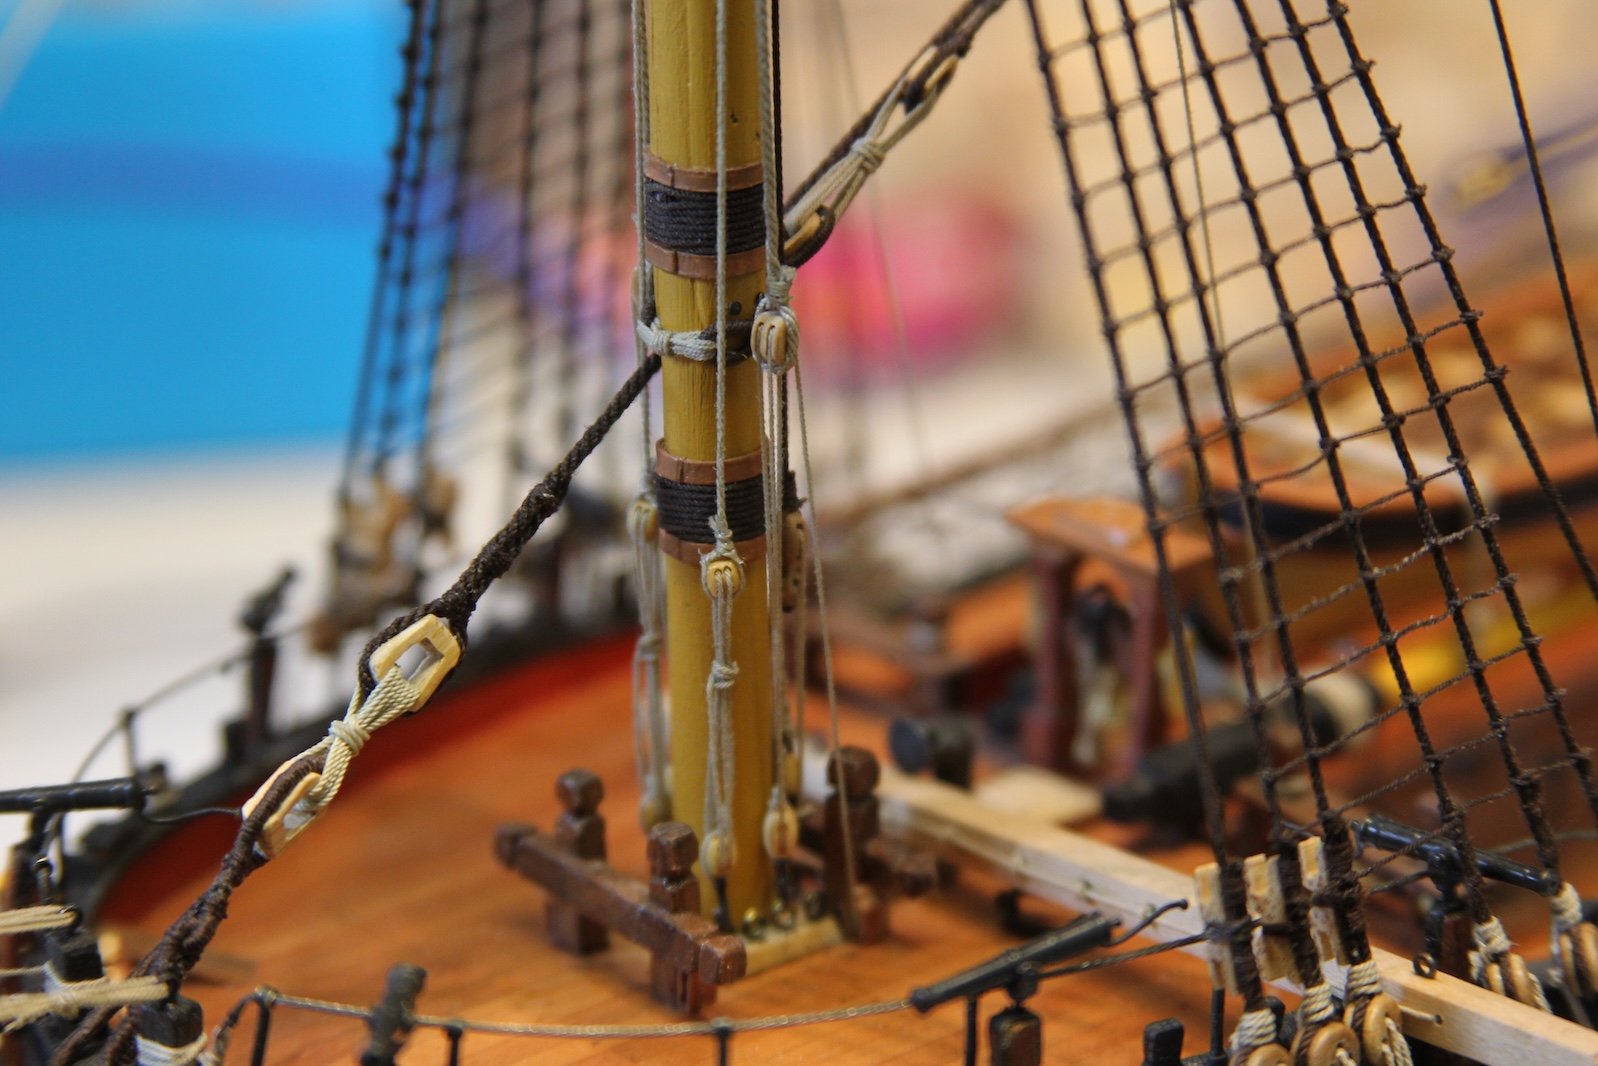
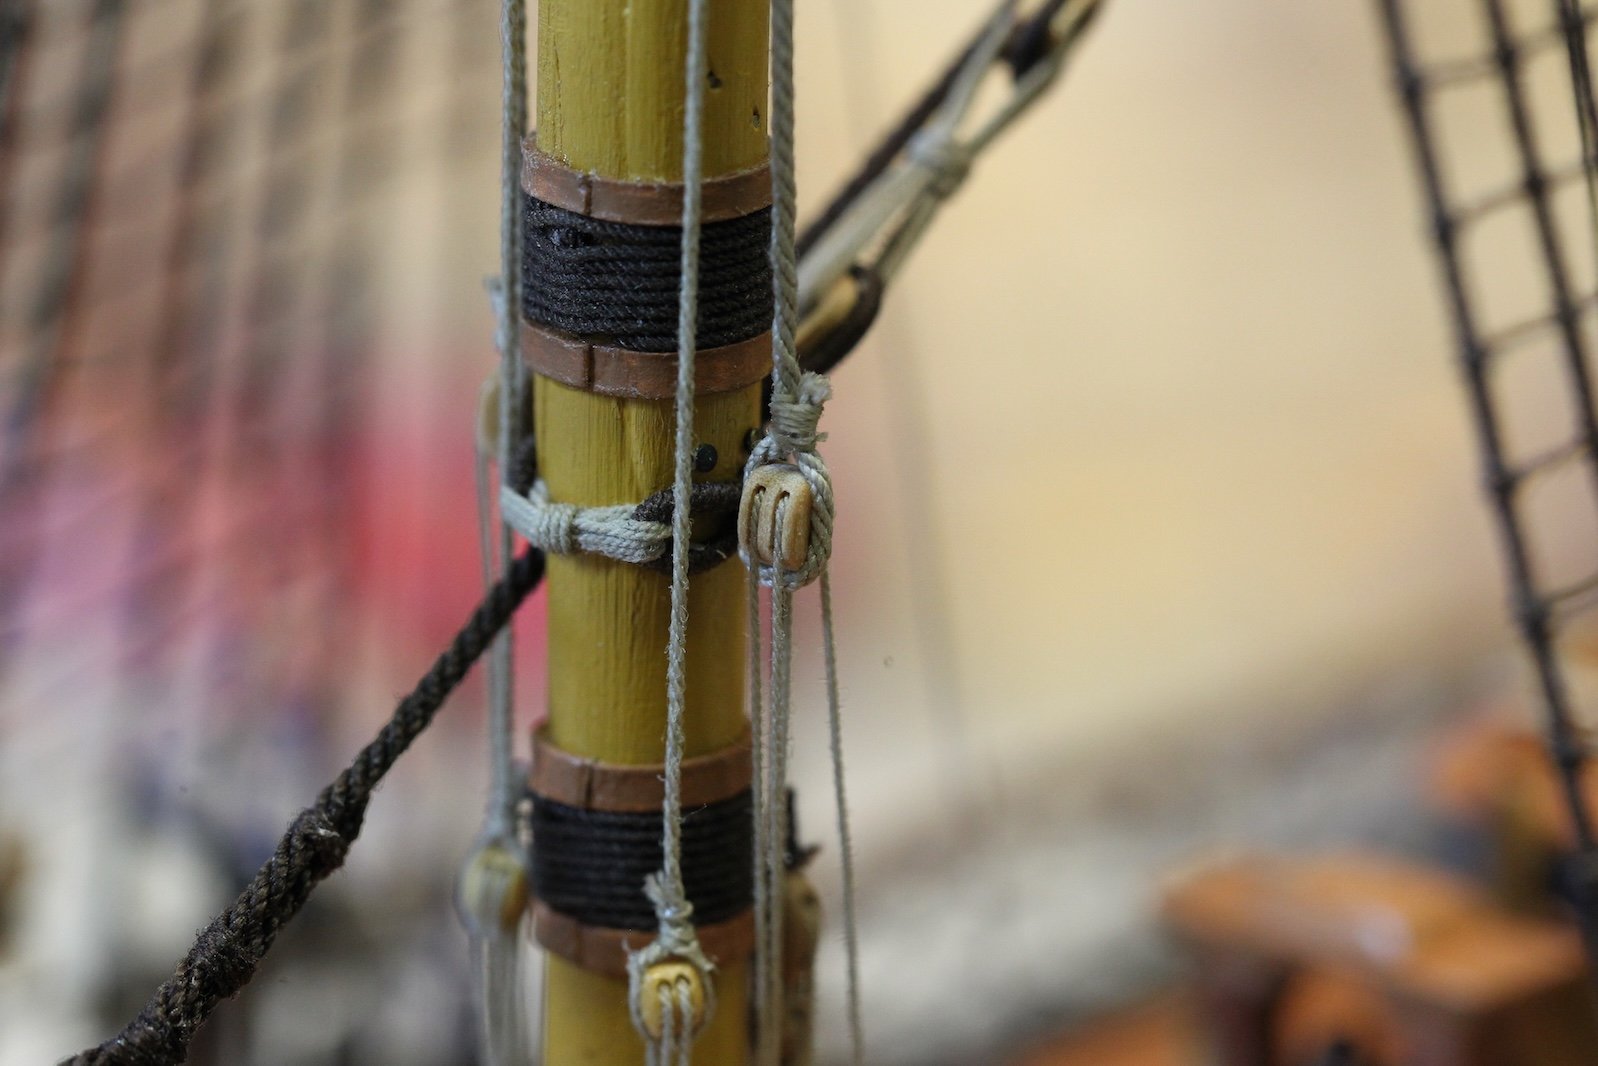
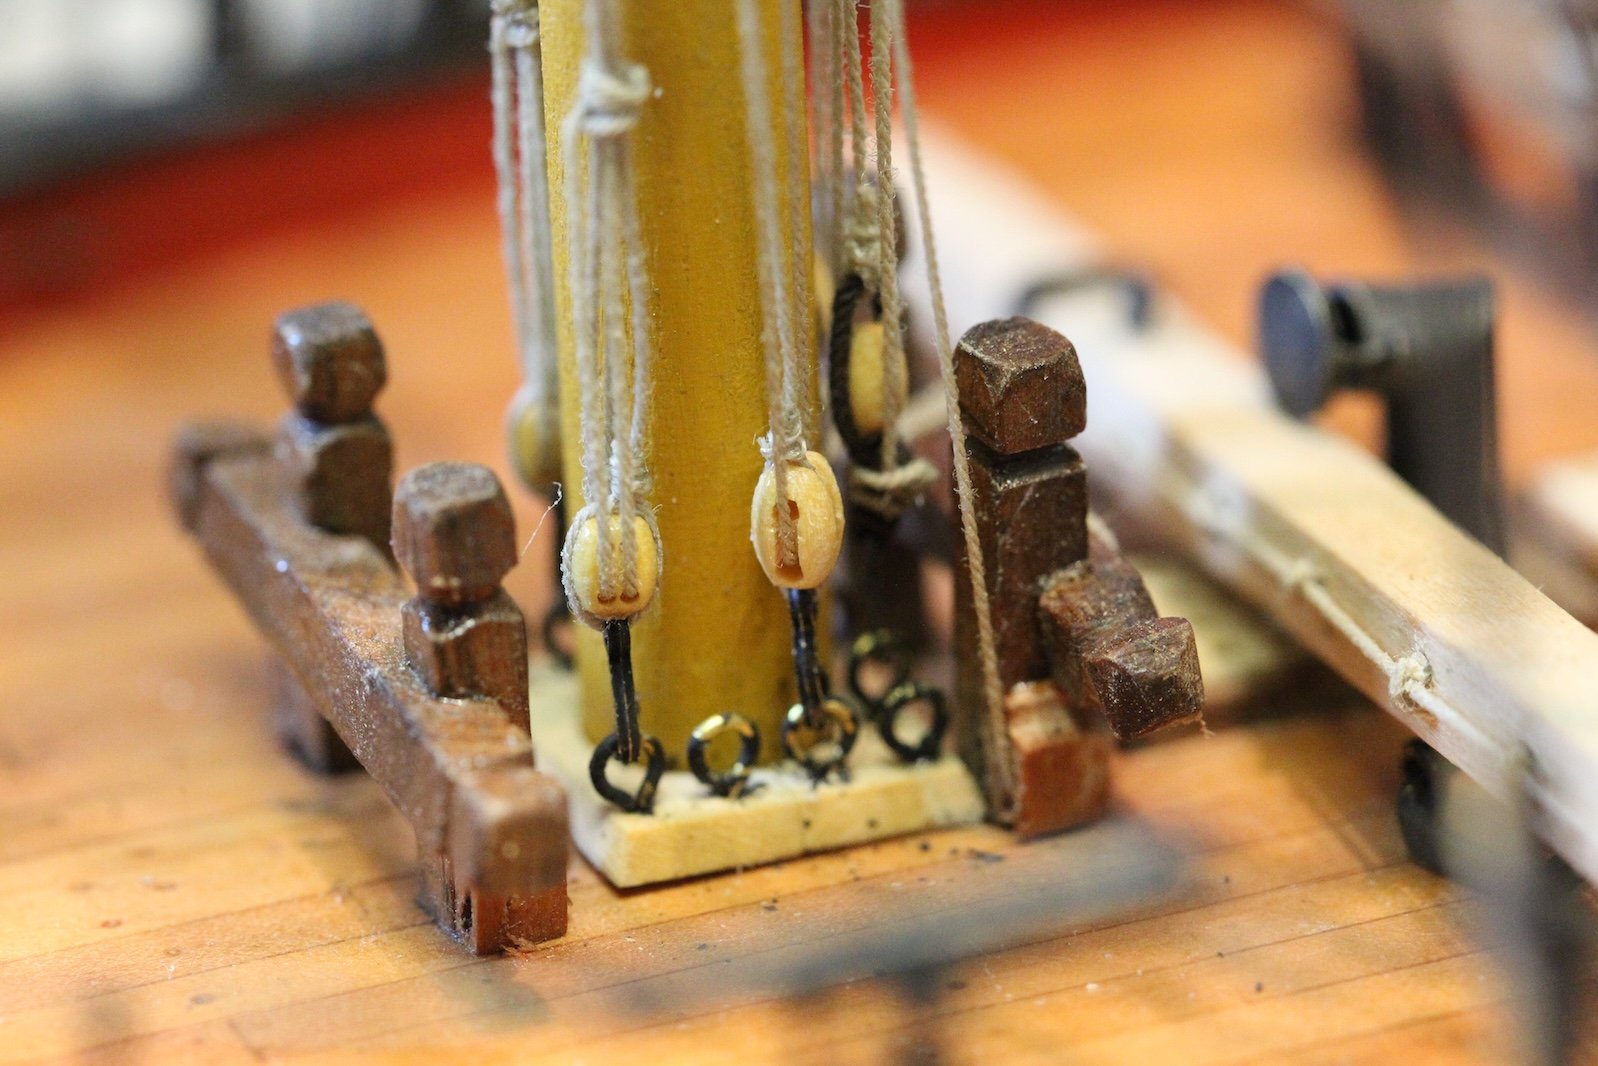
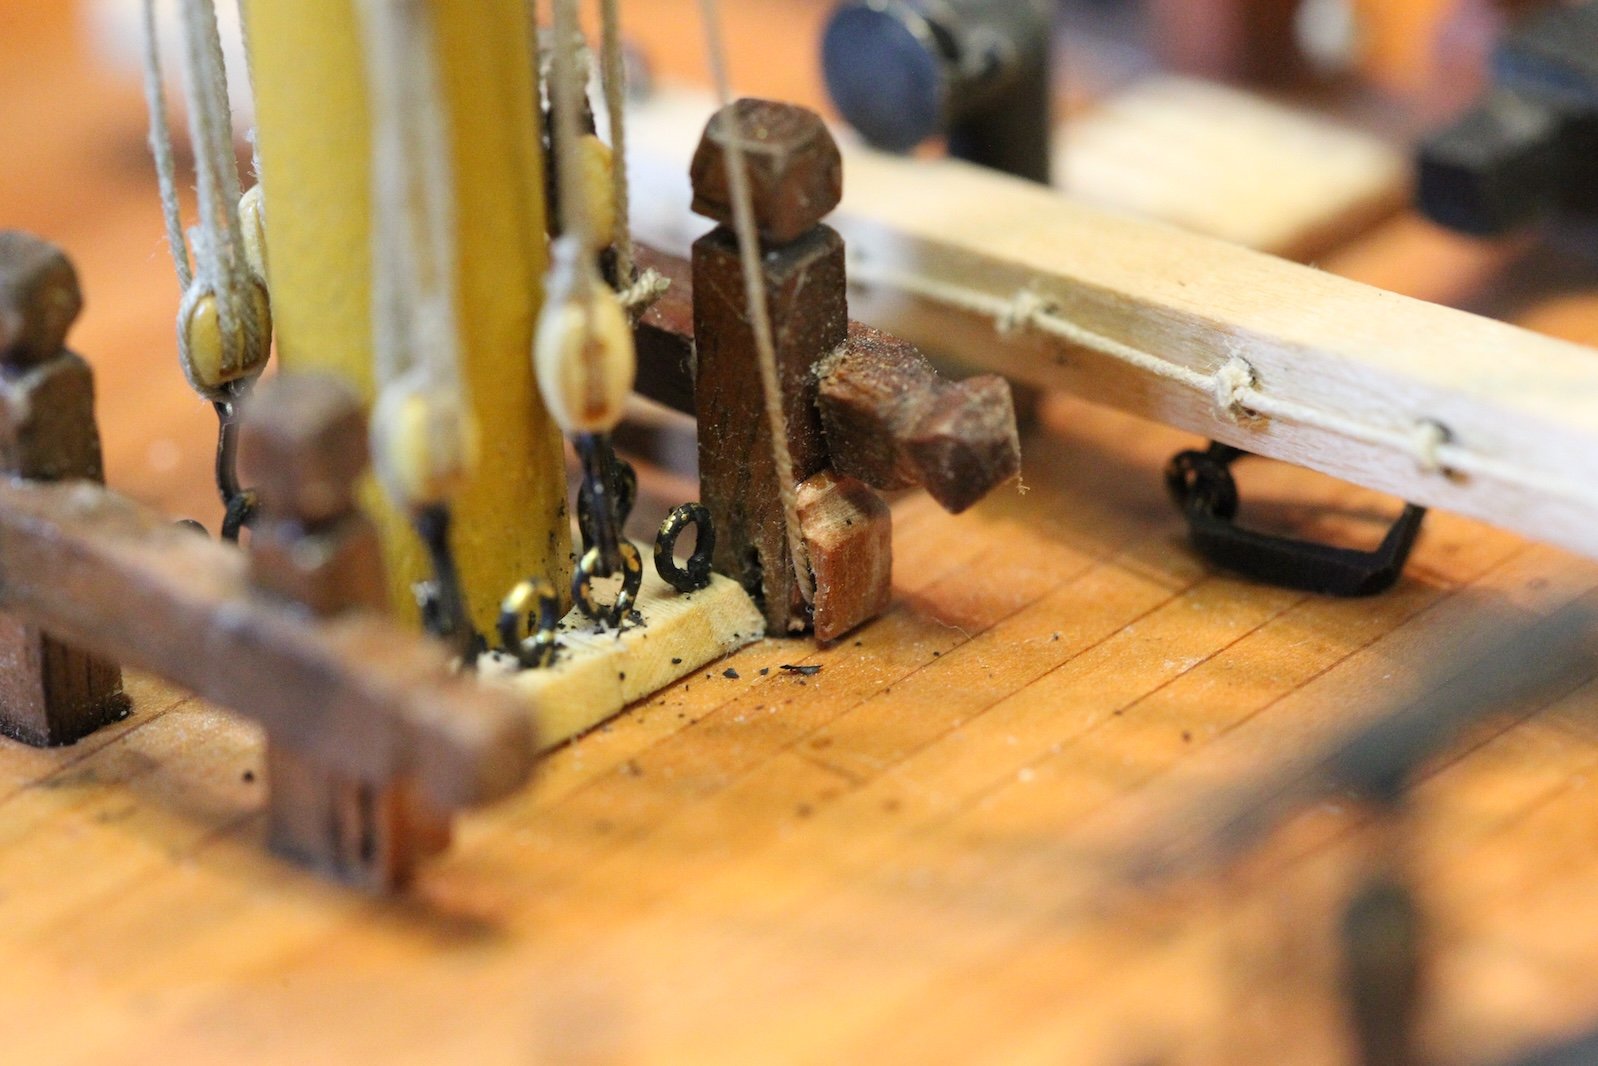
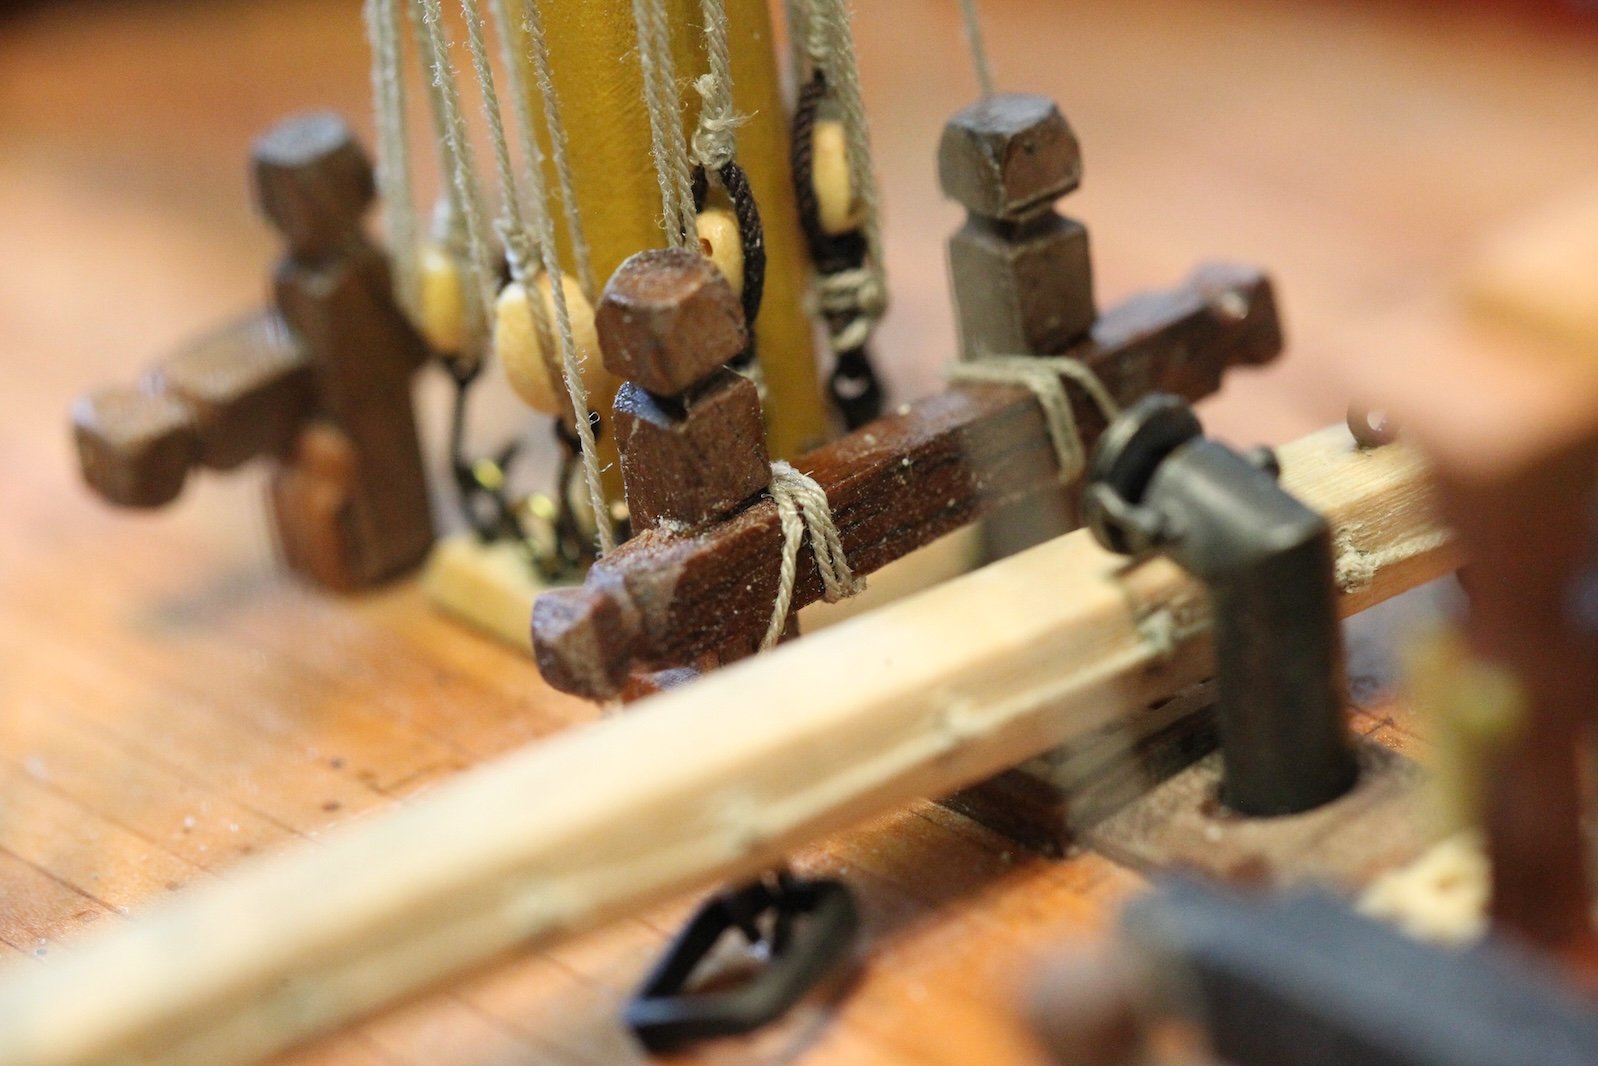
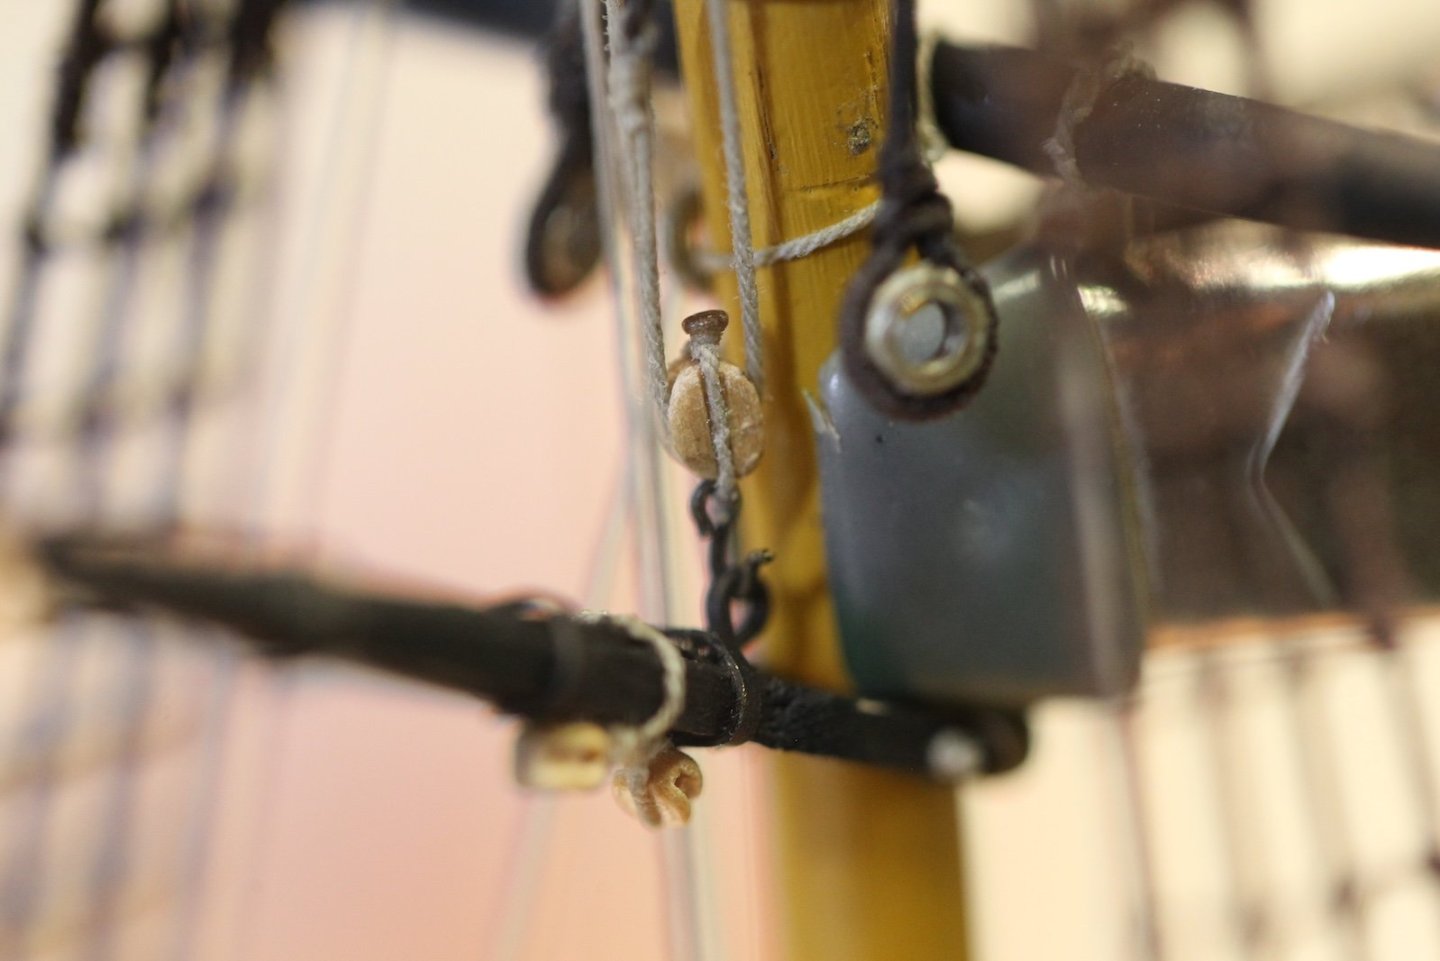
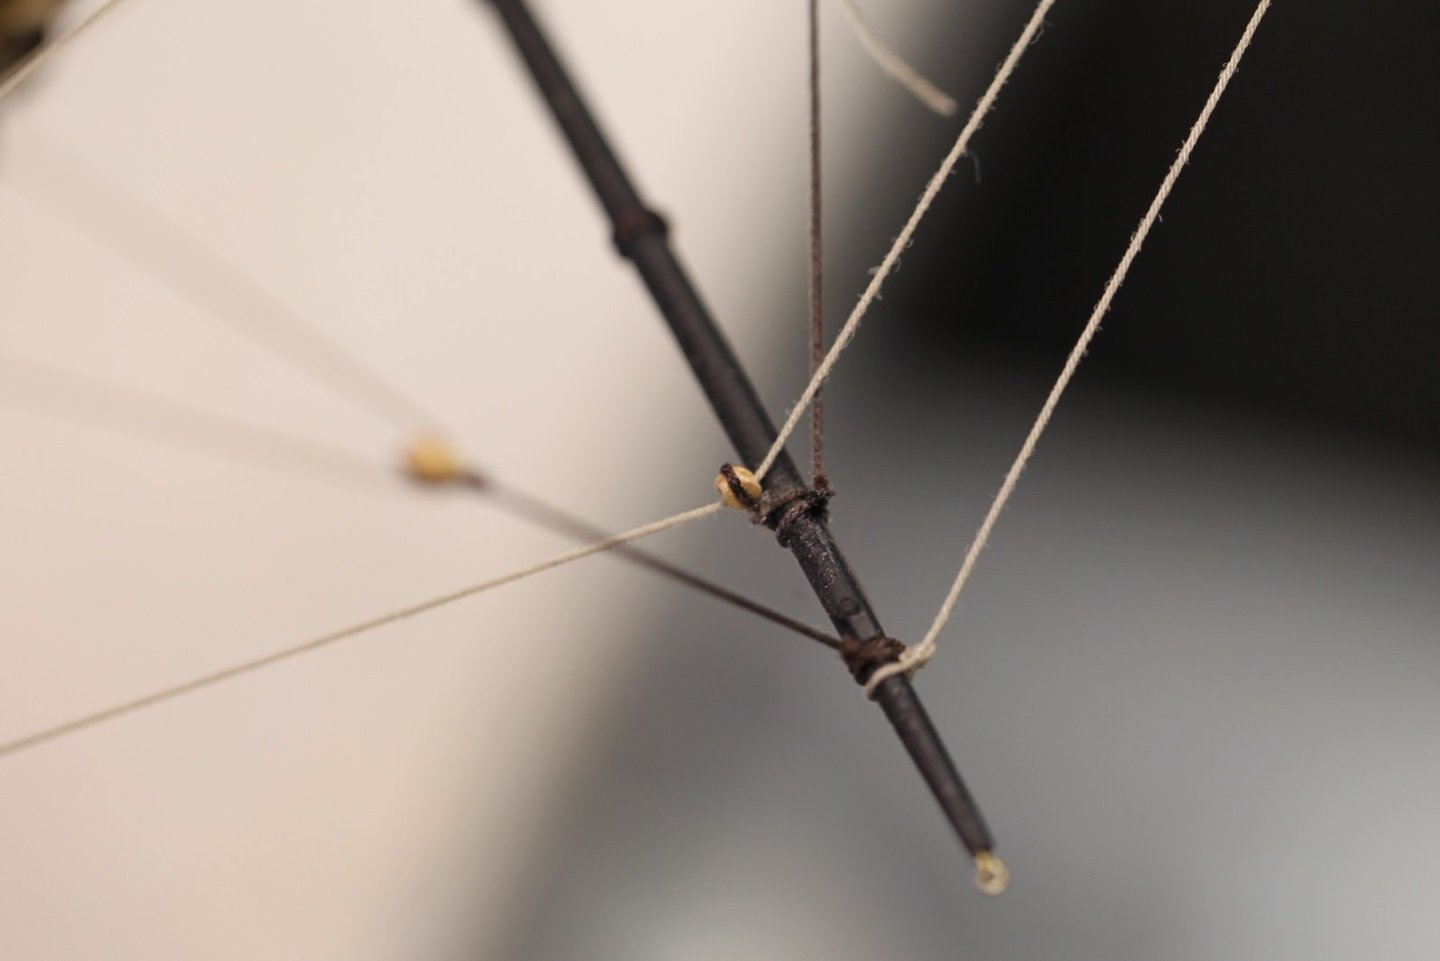
As is well documented - rigging both the main and fore lower yards is essentially the same process and starts with the truss pendants and tackles. The truss pendants partially attach the yard, but their primary role is to prevent the yards from pulling away from the mast in the forward direction. There is a pair of pendants on each yard that run down each side of the mast. They start with a stropping a thimble to each pendant and wrapping it just inside the cleat against the quarter block. I realize I opted to forgo some thimbles at this scale, but these are too important to accuracy (and functionality) to settle for eyelets. The thimbles are as I've done in the past - using brass tubing cut, then sanded down to size. Start by stropping the thimble using 4" (.50mm at scale) line. I used CA glue to hold the line in place around the thimble and tied a half knot with 120 thread leaving a long tail. Then I wrapped the line around the mast and seize it back onto itself using that tail of thread. Each line is then passed around the mast and through the thimble of its mate. I did this very loosely , then I temporarily fed the Jeer line through the jeer blocks and fastened the lines to the mast with a clip to hold the yard in place. Essentially, rigging the truss pendants and jeer tackles were done in tandem as that was the only way for me to hold the yard in place while I worked. The truss pendant falls end with 8" (3.5mm at scale) double blocks. Those blocks make up the truss pendant tackle along with another 8" double block that is stropped to a hook attached to one of the eye bolts at the base of the mast. To rig this tackle I started by measuring the length of the tackle which should be a 2" rope (.25mm) with a length of about 24' or 115mm at scale. Obviously I gave myself a little extra wiggle room. I rigged the double blocks on both sides first, giving me the ability to adjust the tension of each side as needed after I hook them in place. Adjusting the tension of each truss pendant tackle allows you to straighten the yard. After adjusting, the fall is secured with several turns around itself and held with a half hitch. Now I can turn my attention back to the jeer tyes and tackle. The jeer tyres are pretty hefty lines at 7" - or .89mm at scale and also end with a double block - this one being 12" or about 5mm at scale. I started by measuring the approximate length of the line, which for me was about 280mm, attaching one double block to an end. The line feeds up through one jeer block on the mast, down through the jeer block in the center of the yard, back up through the second mast jeer block, then down again to another double block - the whole thing looks like a nice "M". Make sure the yard is the proper height - for me it was just below the uppermost woolding wrap - then measure the distance of the second fall as equal to the first and attach the second double block. It actually took me a little bit to noodle out the tackle at the jeer tye falls. There were some sources, including the FFM, that indicate that it replicates the truss fall pendants with two double blocks at the bottom of the tackle. However, looking at the images and diagrams from the FFM - only one of the sheaves in the bottom double block ends up being used. So I went with a 4.5mm single block on the bottom tackle which allows for the line to be secured through the sheave on the jeer bitts and belay around the rail. This is the same method that Dan Vadas shows in his Vulture Build. And yes - for those of you wondering - I did notice my early blackening job on the eyebolts flaking terribly, so I've since redone / touched those eyebolts up. As mentioned, the main yard is nearly an identical process to the fore yard. That said, I chose to use slightly larger (6.5mm) double blocks for the jeers. I just felt they balanced better with the large .89mm line used. Also, similar to the fore yard, the FFM calls for these lines to run through the jeer bitts at the base of the mast, just aft of the bilge pumps. I couldn't make this happen without the lines fouling, so I opted to run them through the sheaves on the railing and then belay them to the railing. Notice also that I needed to remove the hand pumps to gain access to the eyebolts and other areas at the base of the mast. As with the truss pendants, the jeer tackles are adjusted to even out the falls. Then all of the lines are wrapped and held in place with a touch of ca glue until I finalize everything later with rope coils.


- 419 replies
-
- 7
-
-
-
- Victory Models
- Pegasus
- (and 2 more)
-
Great work! She's a beauty. And I totally concur that sometimes just staring at them is a wonderful, accomplished feeling.
-
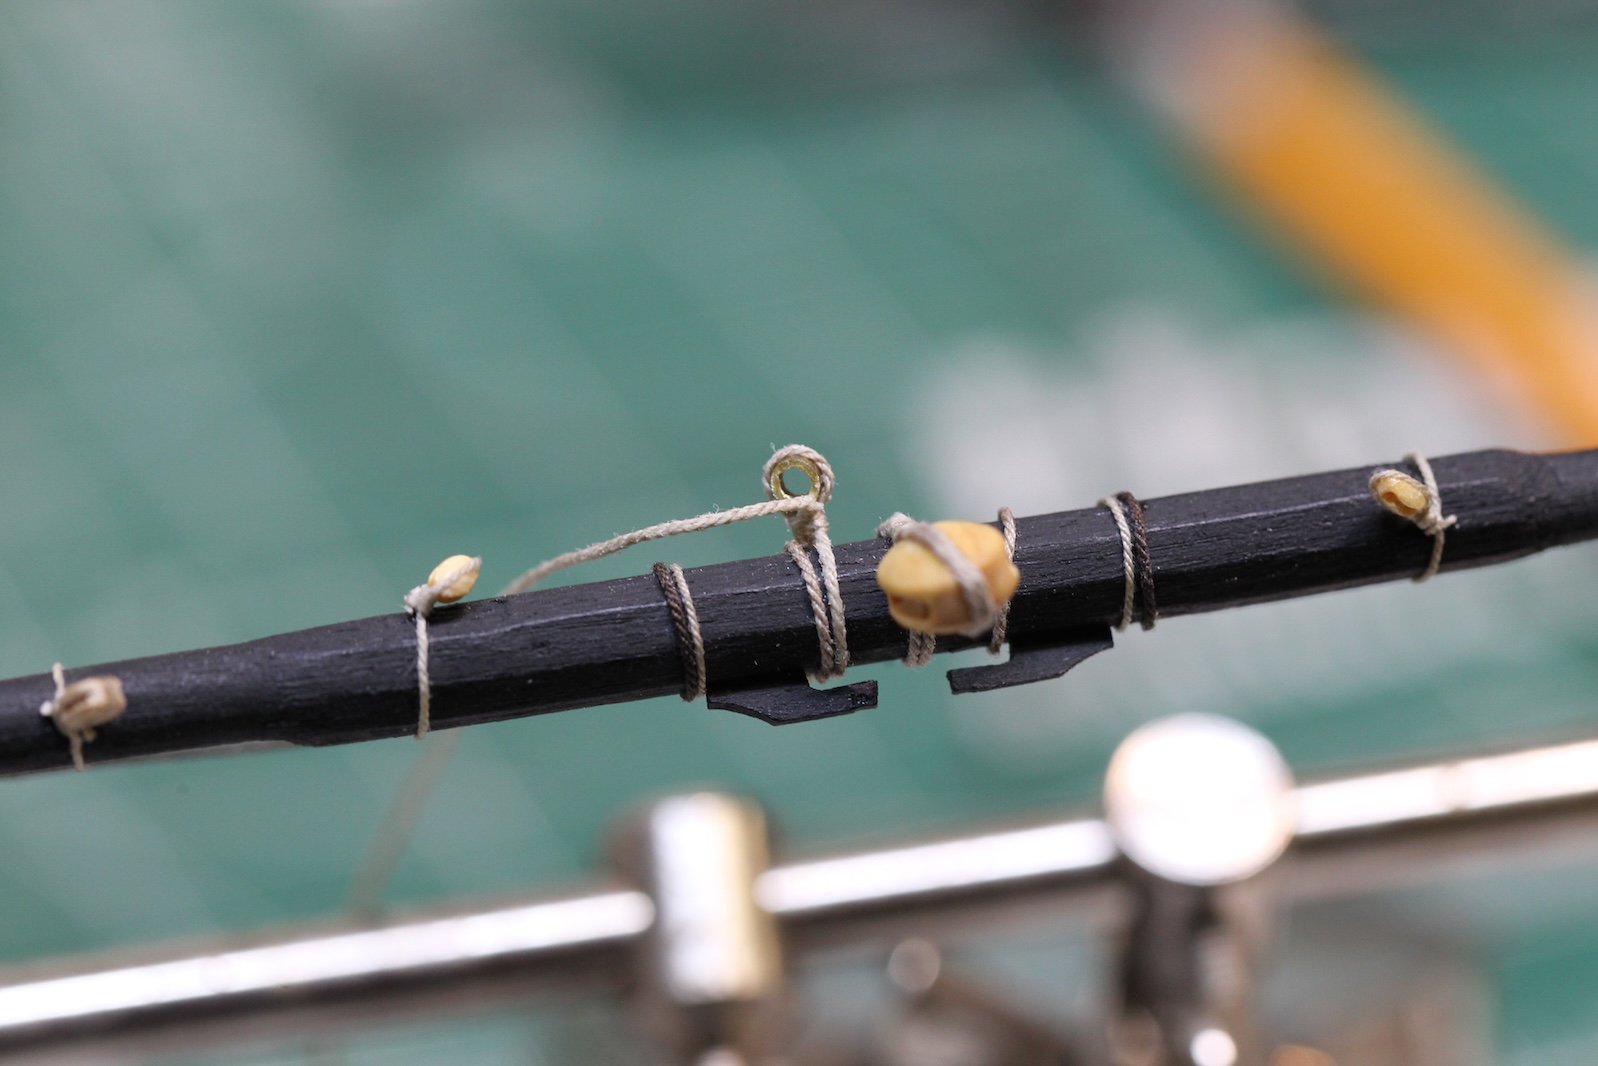
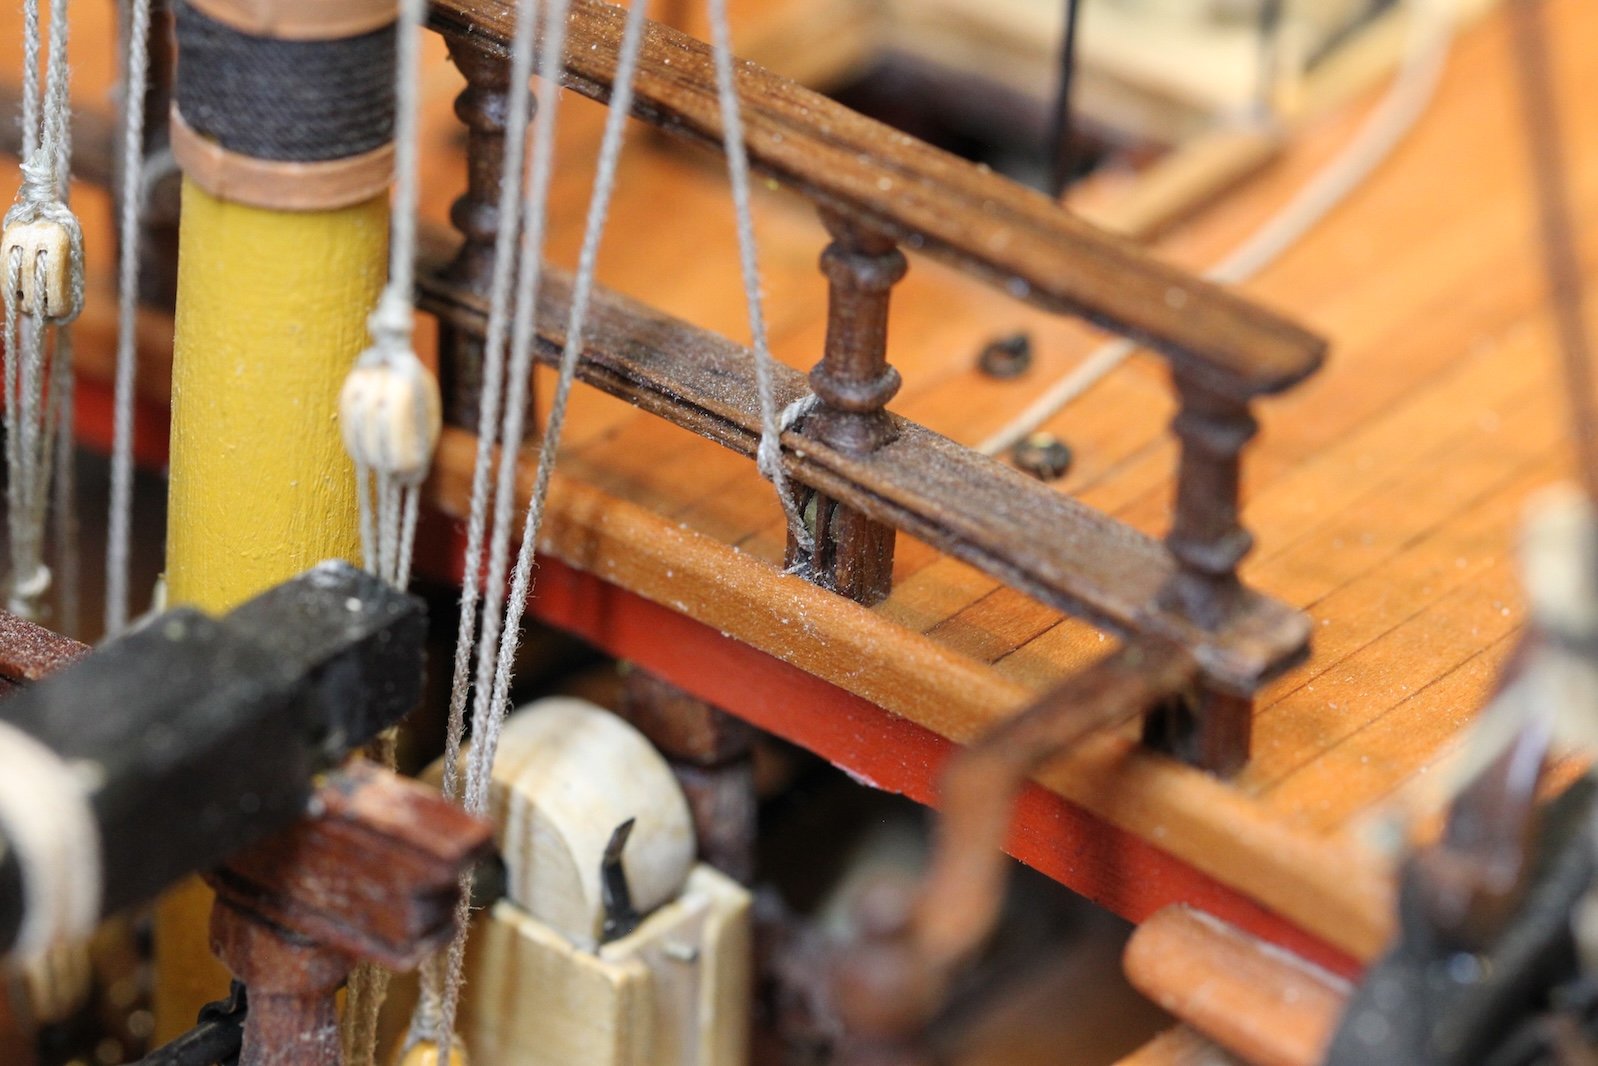
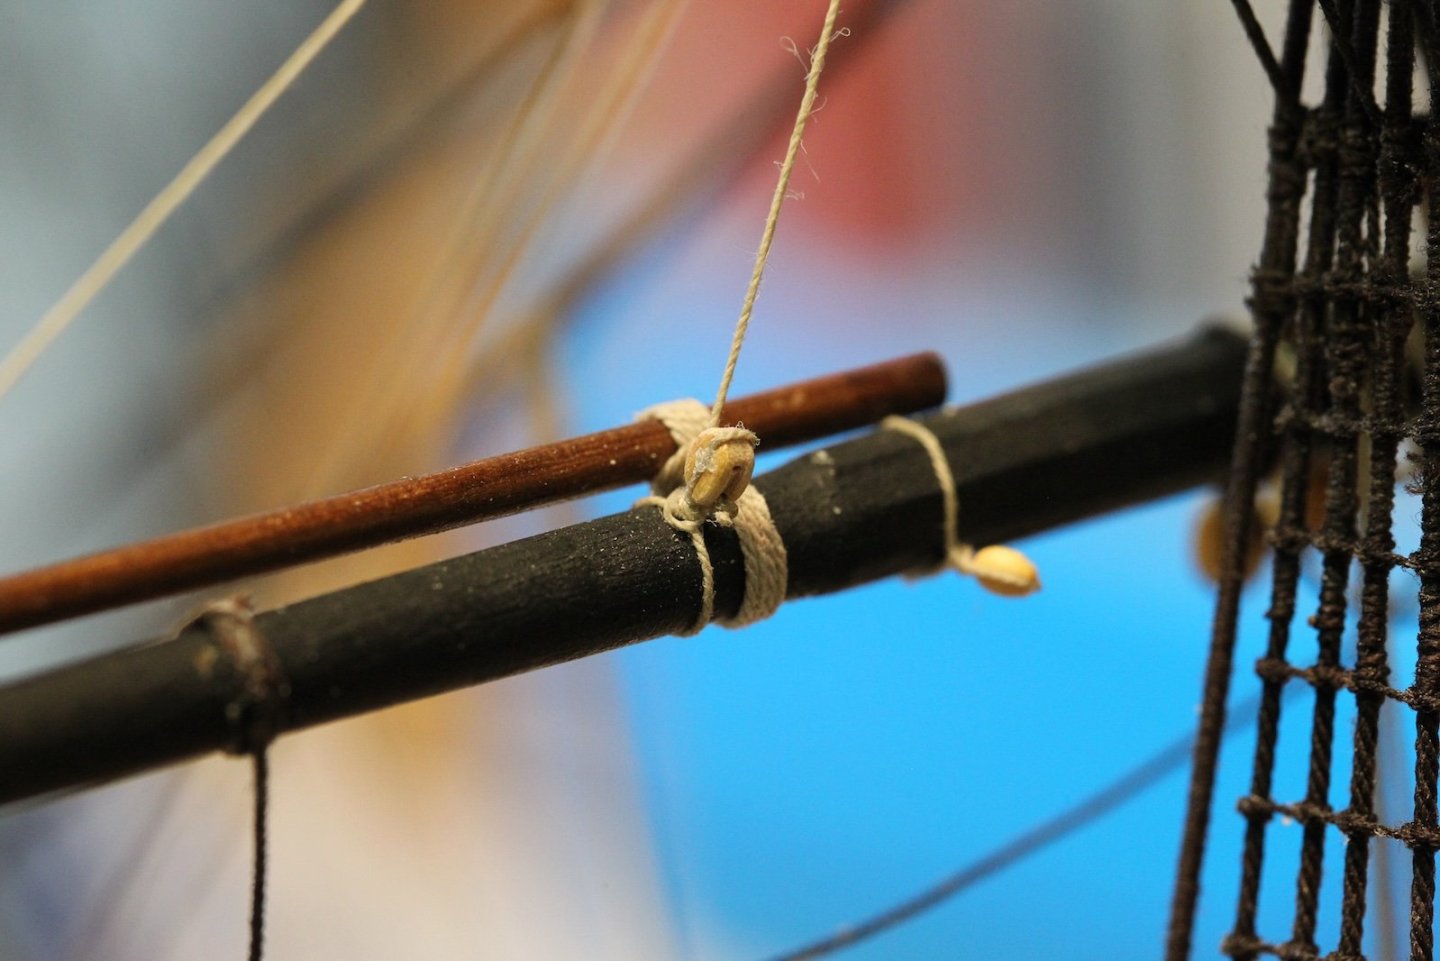
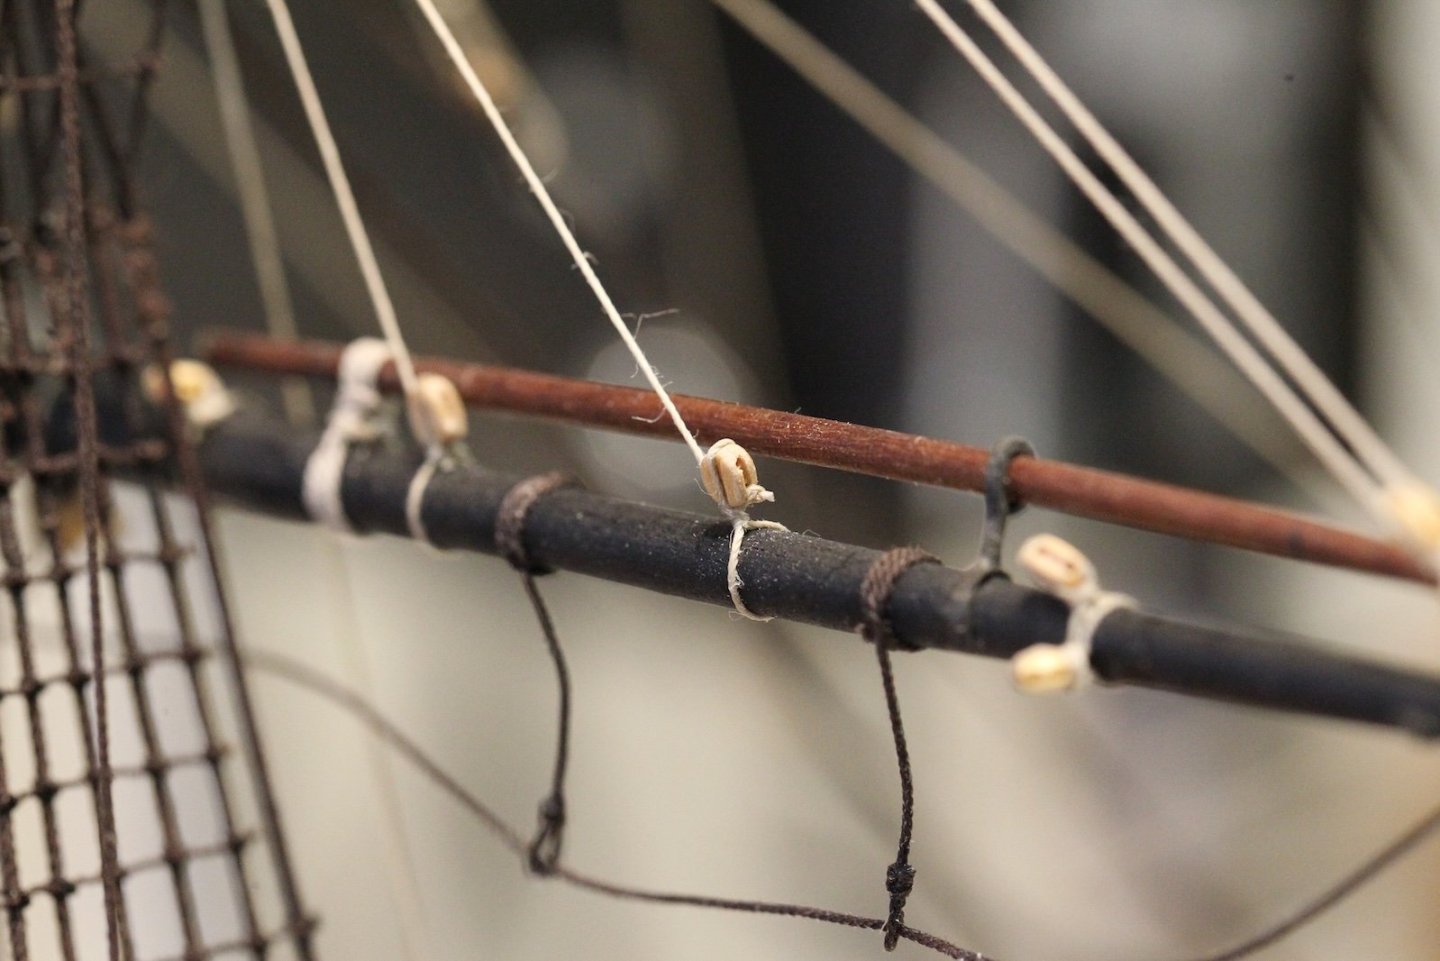
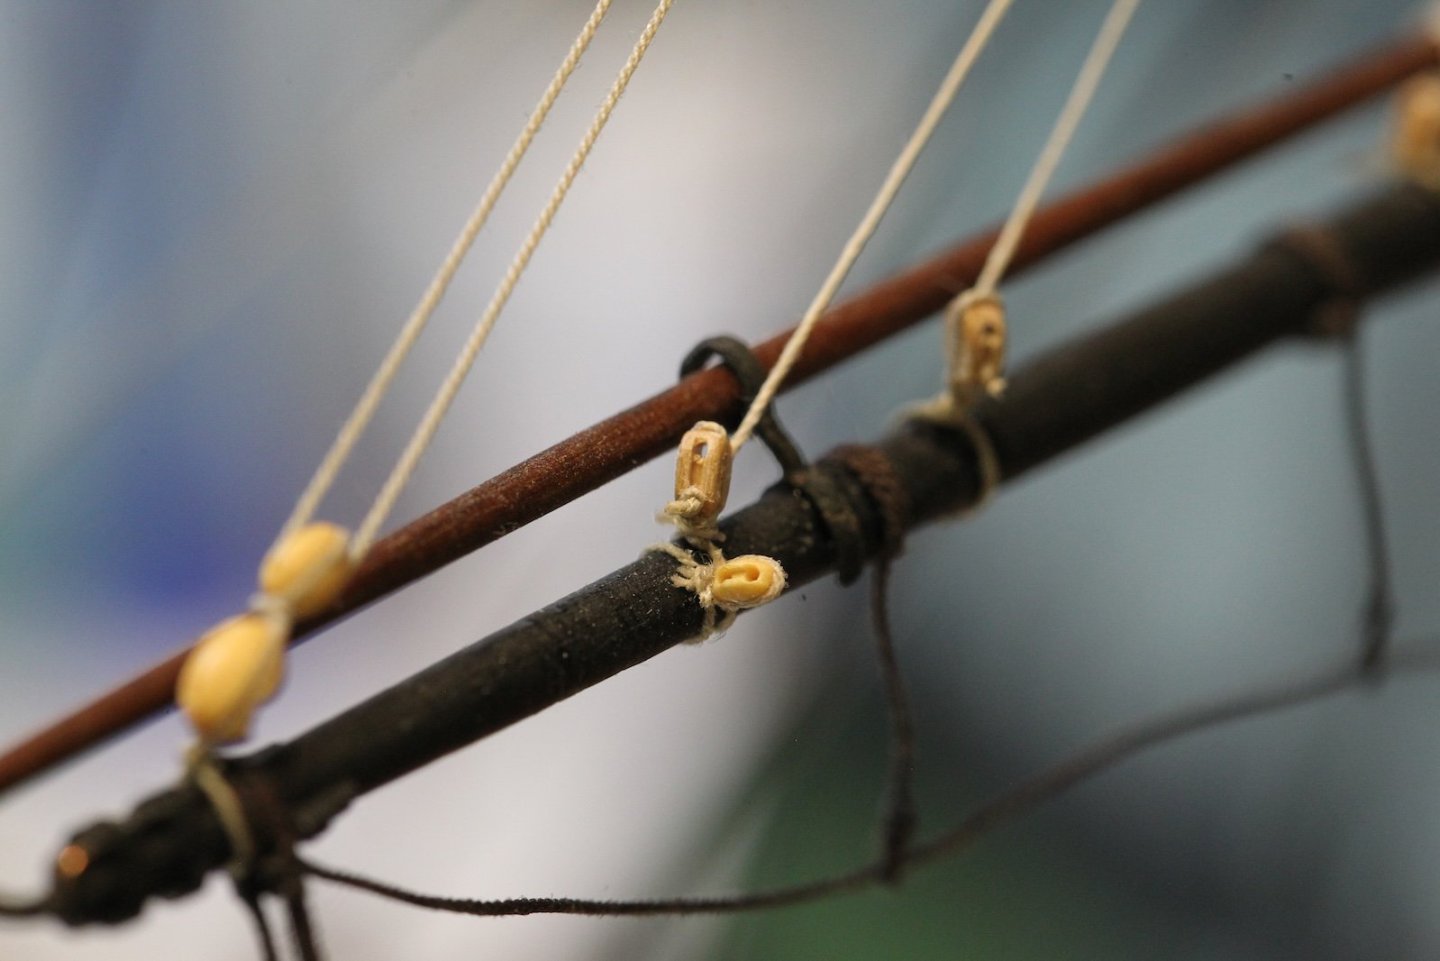
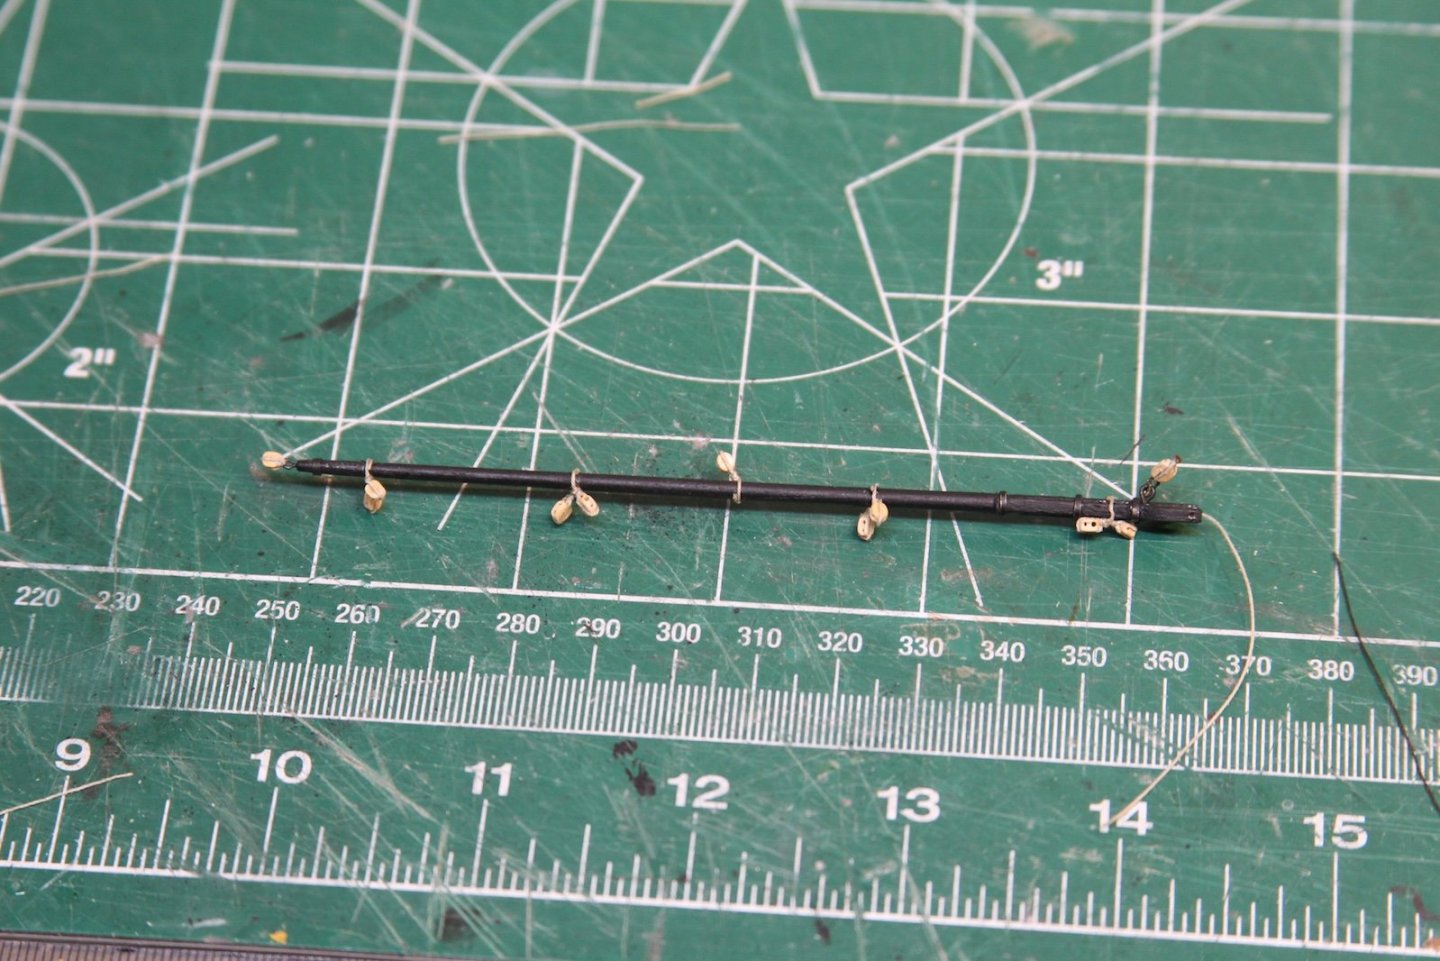
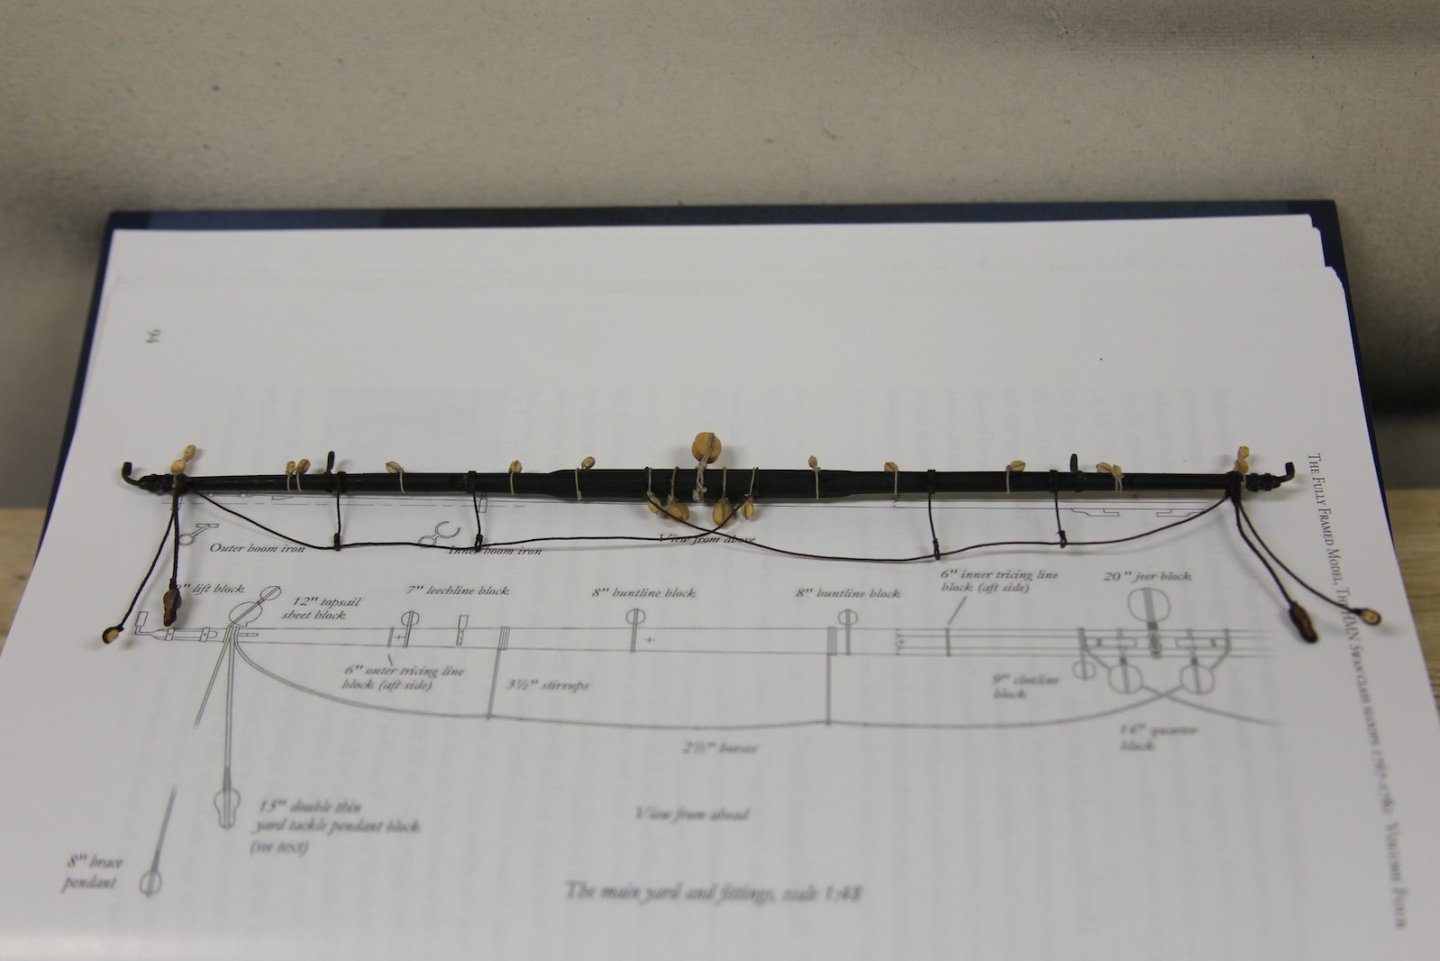
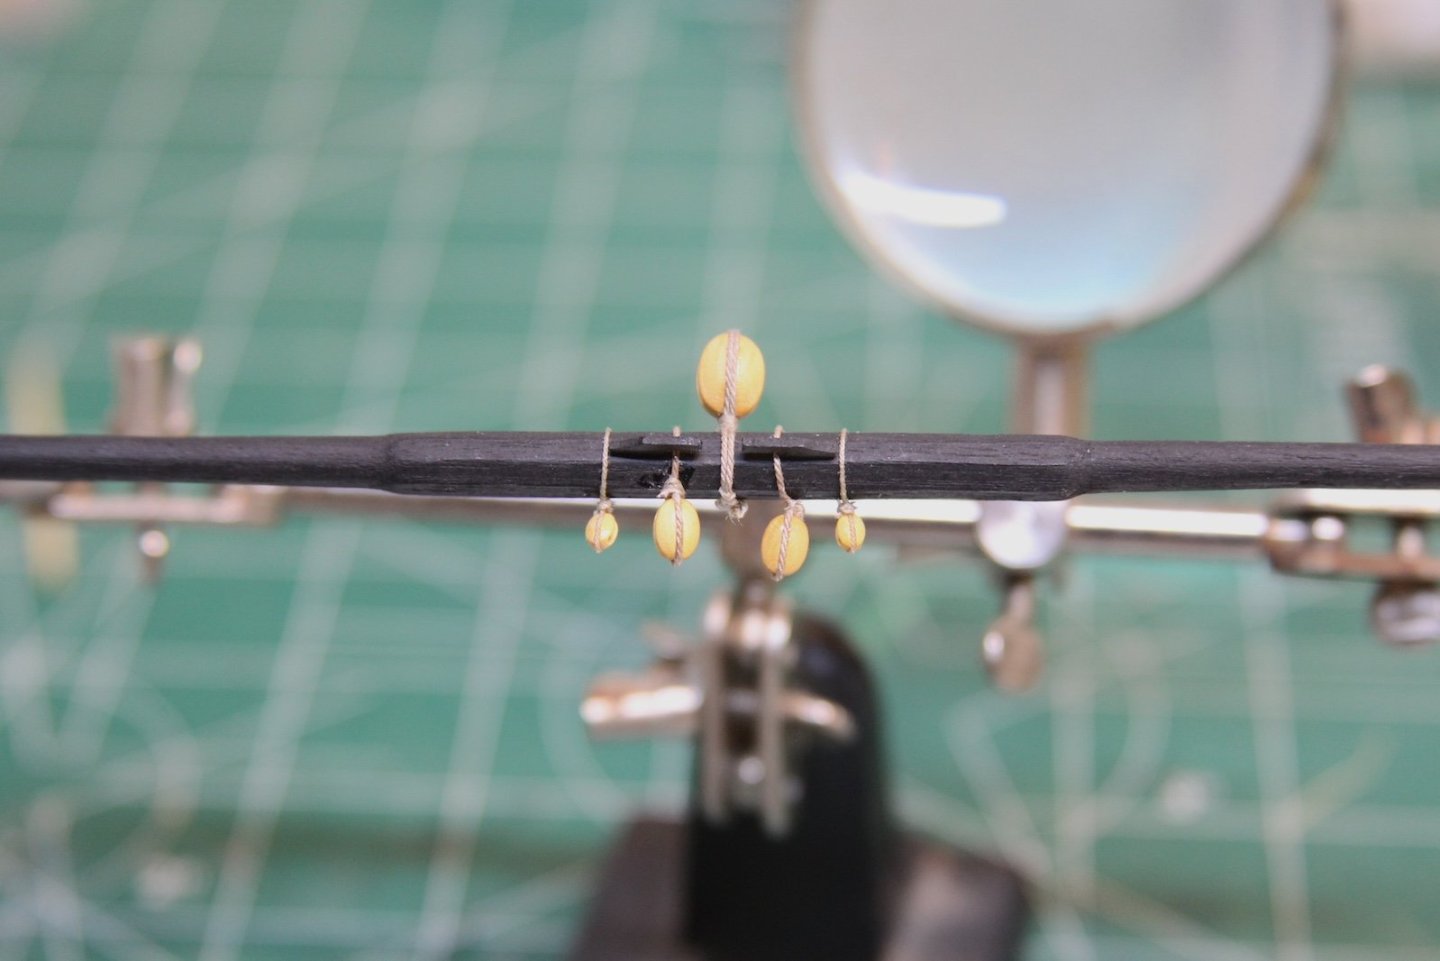
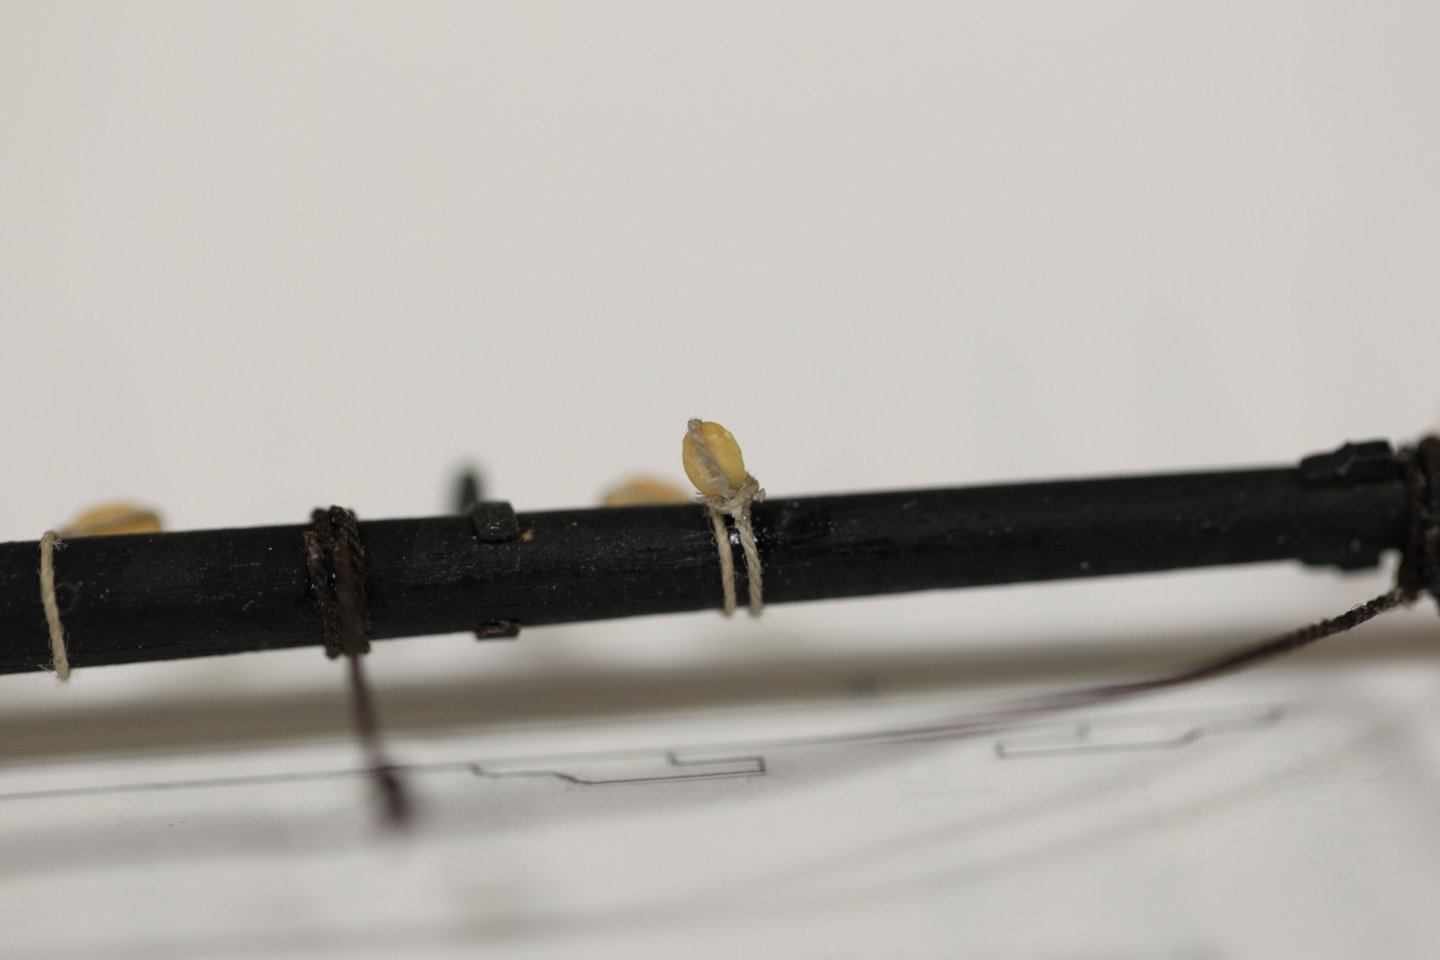
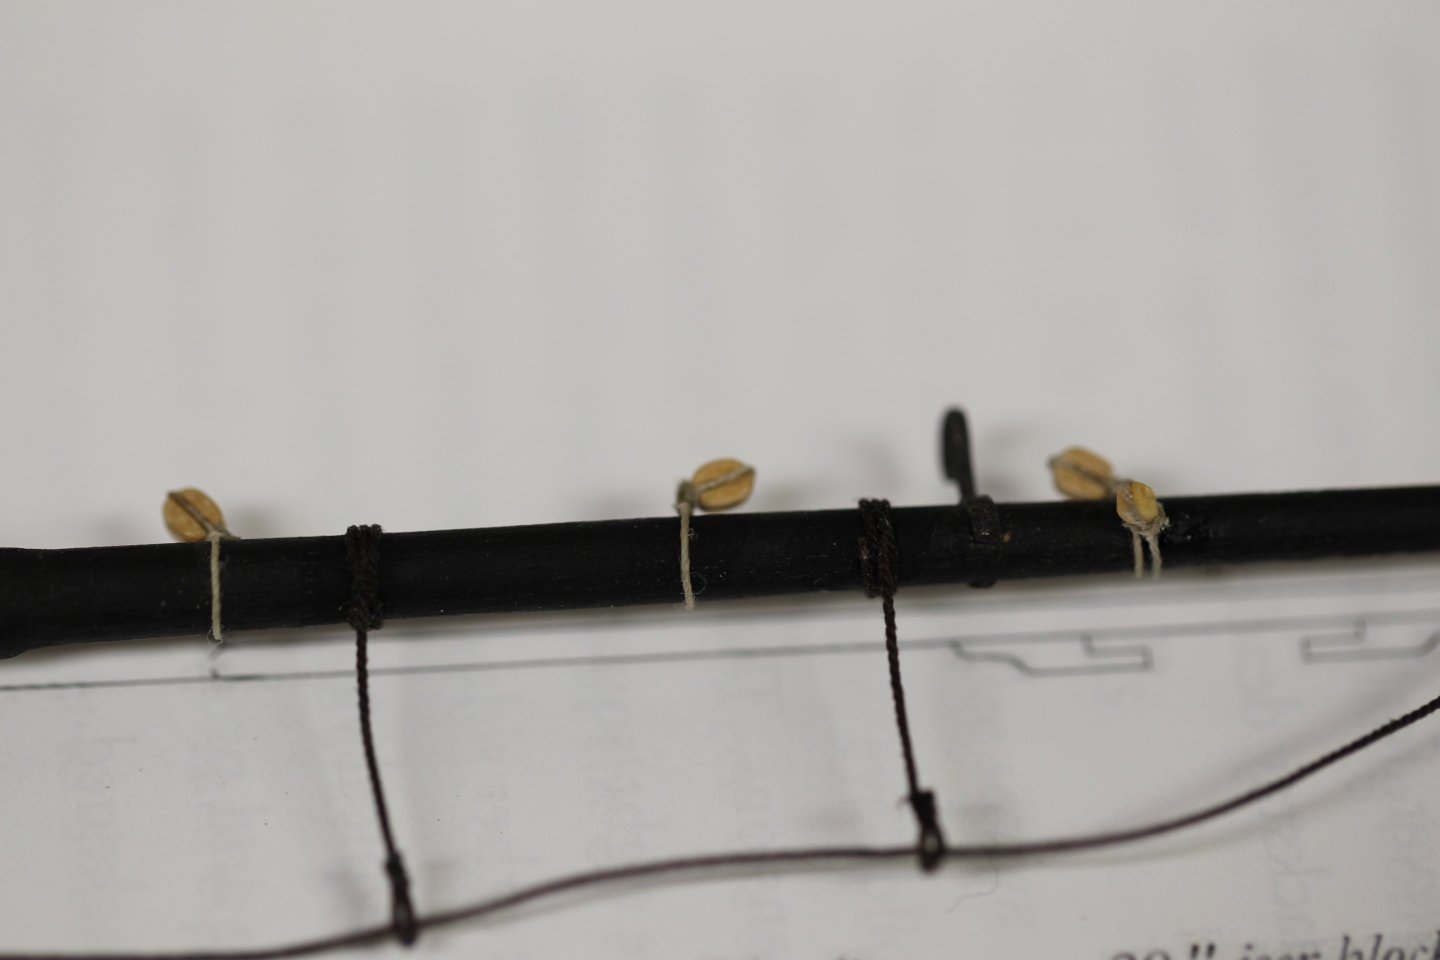
Adding all of the accouterments to the lower yards is another classic example of "not very many photos for quite a bit of work." It's well documented in a number of places, but the fore and main lower yards are the same and are both affixed with the following blocks according to the FFM. Jeer Block - 1 x 20" (8 mm) single block double stropped Quarter Blocks - 2 x 14" (5.5mm) single Clueline Blocks - 2 x 9" (3.5mm) single Tricing Line Blocks - 4 x 6" (2.5mm) single Buntline Blocks - 4 x 8" (3mm) single Leechline Blocks - 2 x 7" (2.8 - I went with 3mm) single Yard Tackle Blocks - 2 x 15" (6mm) Violin blocks Brace Blocks - 2 x 8" (3mm) single Topsail Sheet Blocks & Lift blocks - 2 x 12" (4.5mm) Shoulder blocks with 2 x 9" (3.5mm) seized to them I'll note here that I did permit myself a couple of "shortcuts" as I did with the spritsail - in that I did not use served line for the inner blocks only the yard tackles and brace pendants. As I both read and discovered on my own, order ends up being pretty important here. I started in the middle with the Jeer, quarter, and inside clueline blocks. I'll also say that getting the ties and knots clean at this scale is a little challenging as well. The Jeers are .50mm line, the quarters are .40mm line and the inside cluelines are .30mm. As show the quarter blocks are snug inside the cleats and the cluelines are just outside. Next up for me were the smaller inside and outside tricing lines, for which I used .15mm line. I did these next so that they would give me a good frame of reference in terms of distance. Buntline blocks were up next using .25mm line - same for the leechline blocks. As noted above, these should be slightly smaller than the buntline blocks, but to such a small degree that it wouldn't be noticeable at this scale - so I used the same size. Note that the tricing lines face aftward while the bunt and leech blocks face up. The stirrups and horses are up next these need to be placed as they fit against the outer cleats inboard of the yards, braces, and topsail sheets. The stirrups are 3.5" (.45mm) and the horses are 2.5" (.35mm) both rigged the same as the spritsail yard with the stirrups wrapped three times around the yard and the horses seized at the ends and running through the stirrups. As with the spritsail, I did not use eyes here only seized loops. I forgot to take a picture of it - but after mounting the stirrups and horses I lathered them with diluted white glue, hung clips on them, then let them dry the same way I did with the spritsail yard. Yard tackles are .50mm served line that end in the violin blocks. I had premade violin blocks for the fore yard, but connected and sanded to single blocks to create a violin for the main yard. Lees suggests that the Yard pendants are about 13' while the brace pendants (ending in a single block) are about 14-18'. I have to be honest here - I basically eyeballed them just making sure that the brace pendant was a bit longer. Both pendants are seized around the yard at the end cleats with the yard tackle inboard of the brace pendant. Outboard of those are the topsail sheet block and lift block combo. The topsail is a shoulder block, which is a typical single but carefully sanded with a pin file to create this 'notch' shape. The Lift block is then seized above it. As mentioned, the main yard is rigged the same as the fore yard. Both now ready for rigging to the Peg.

- 419 replies
-
- 9
-
-
- Victory Models
- Pegasus
- (and 2 more)
-
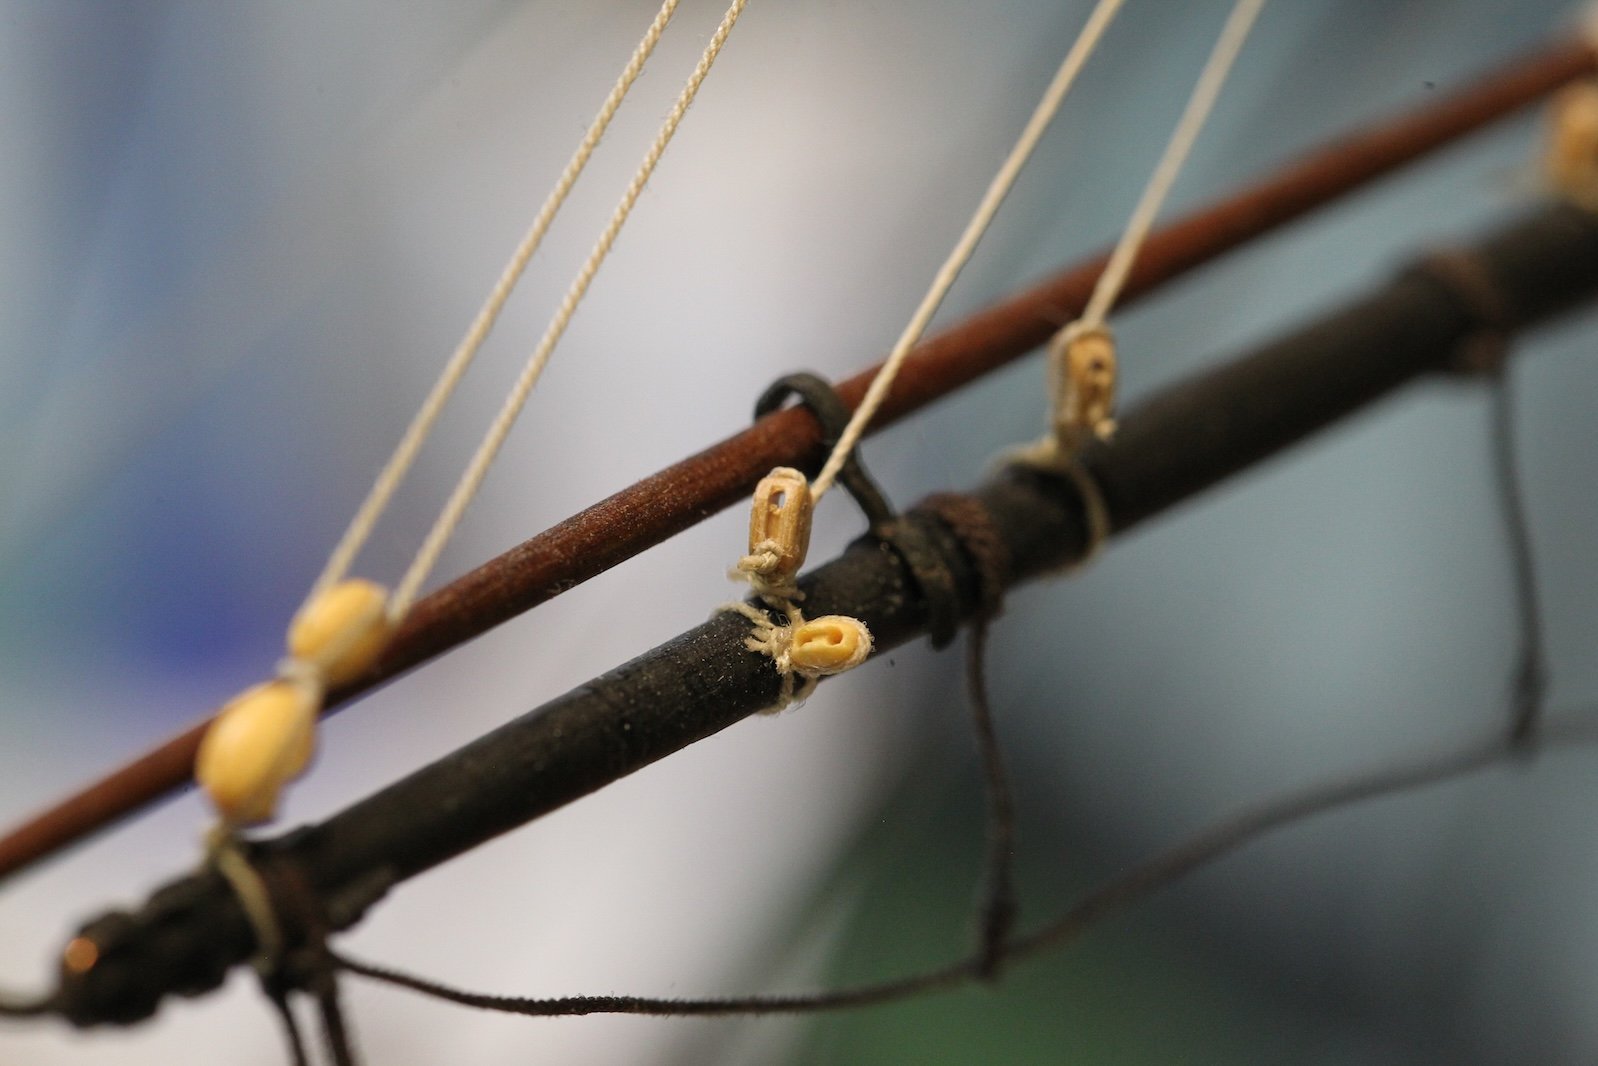
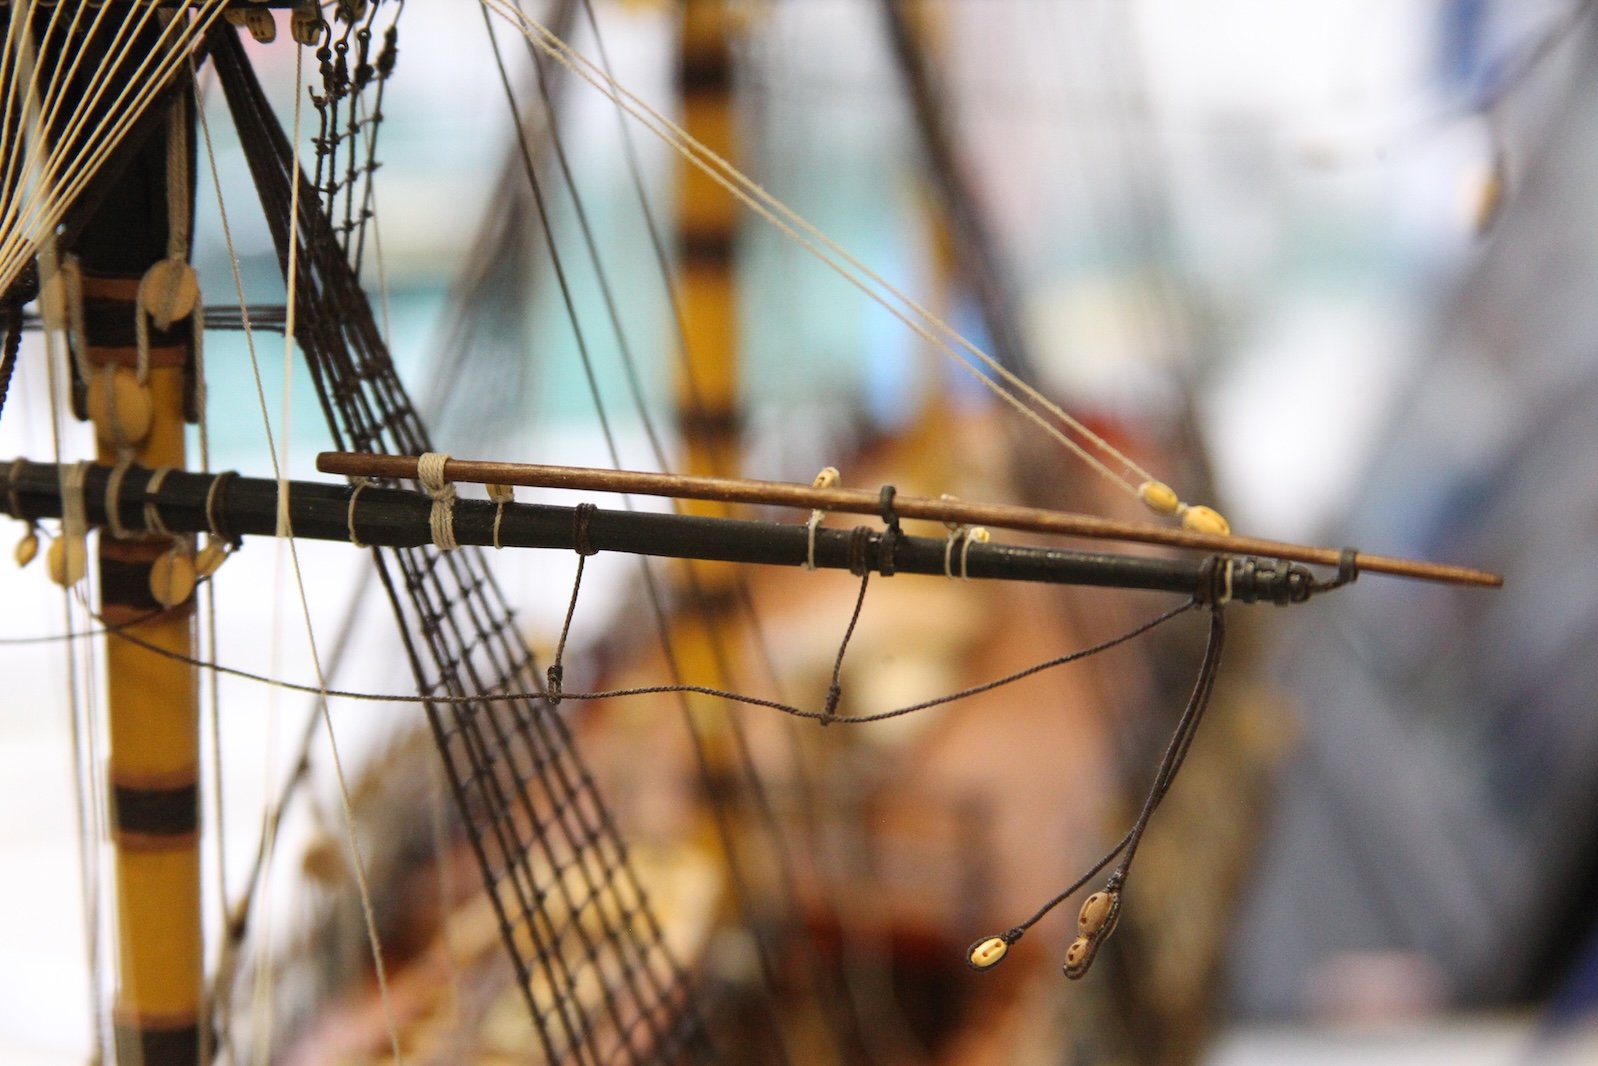
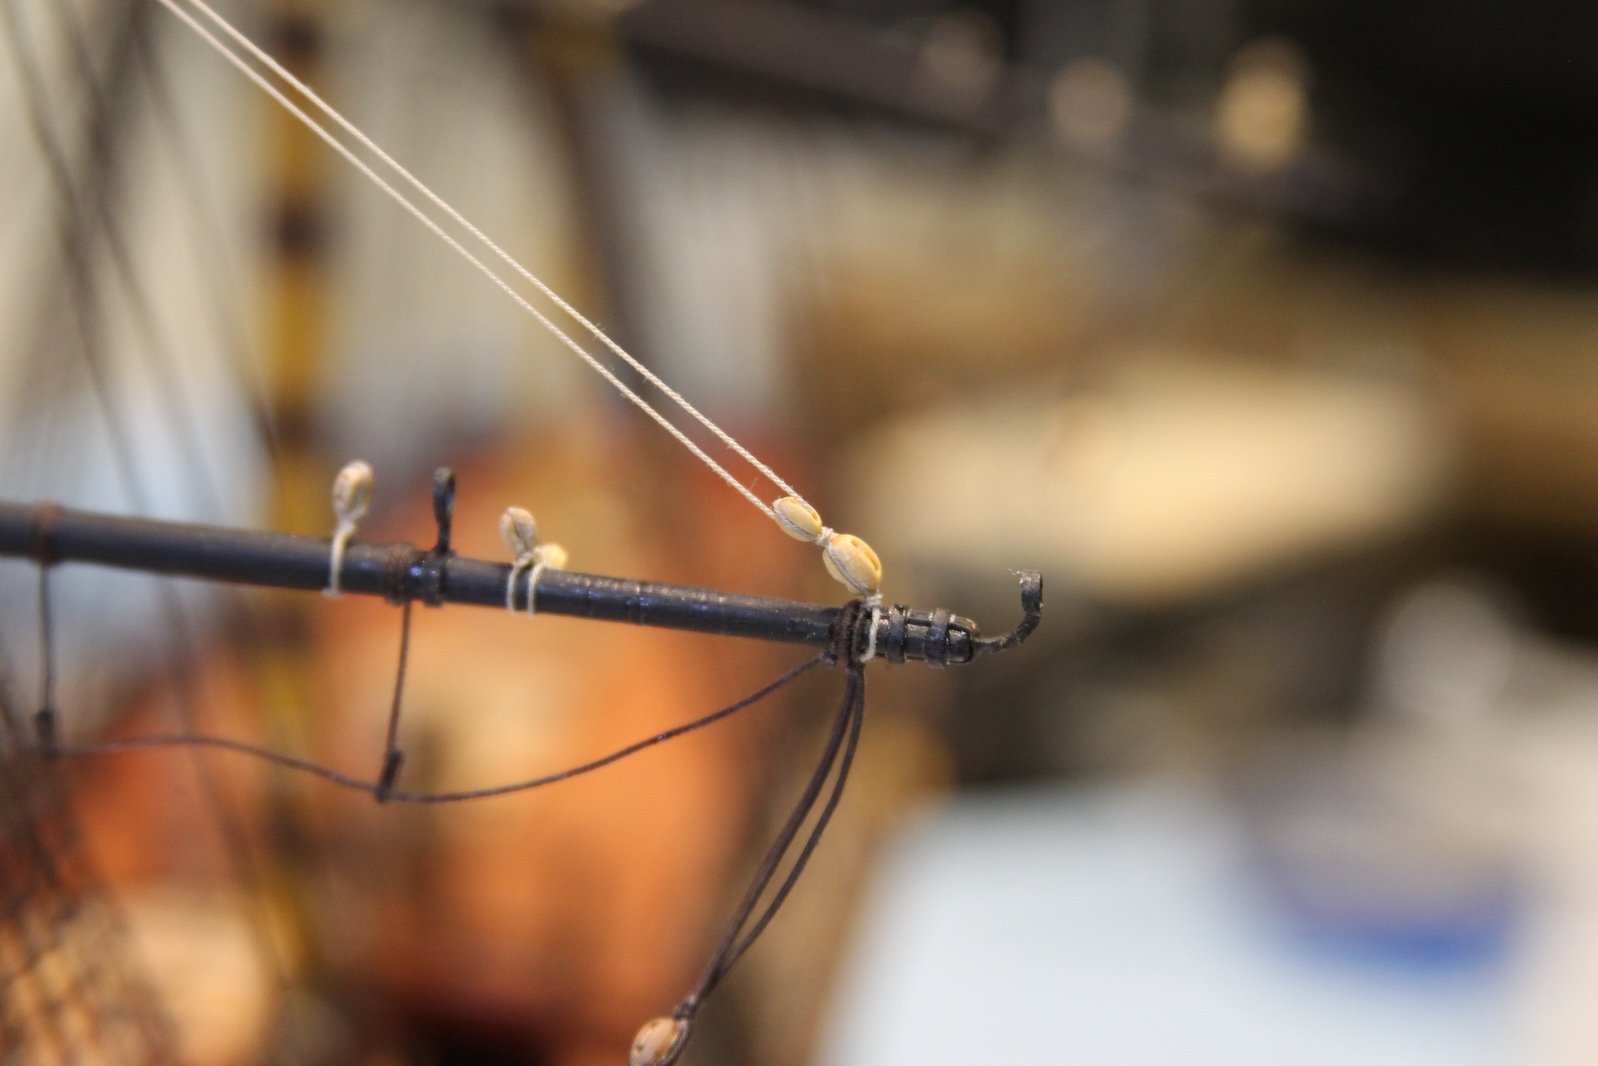
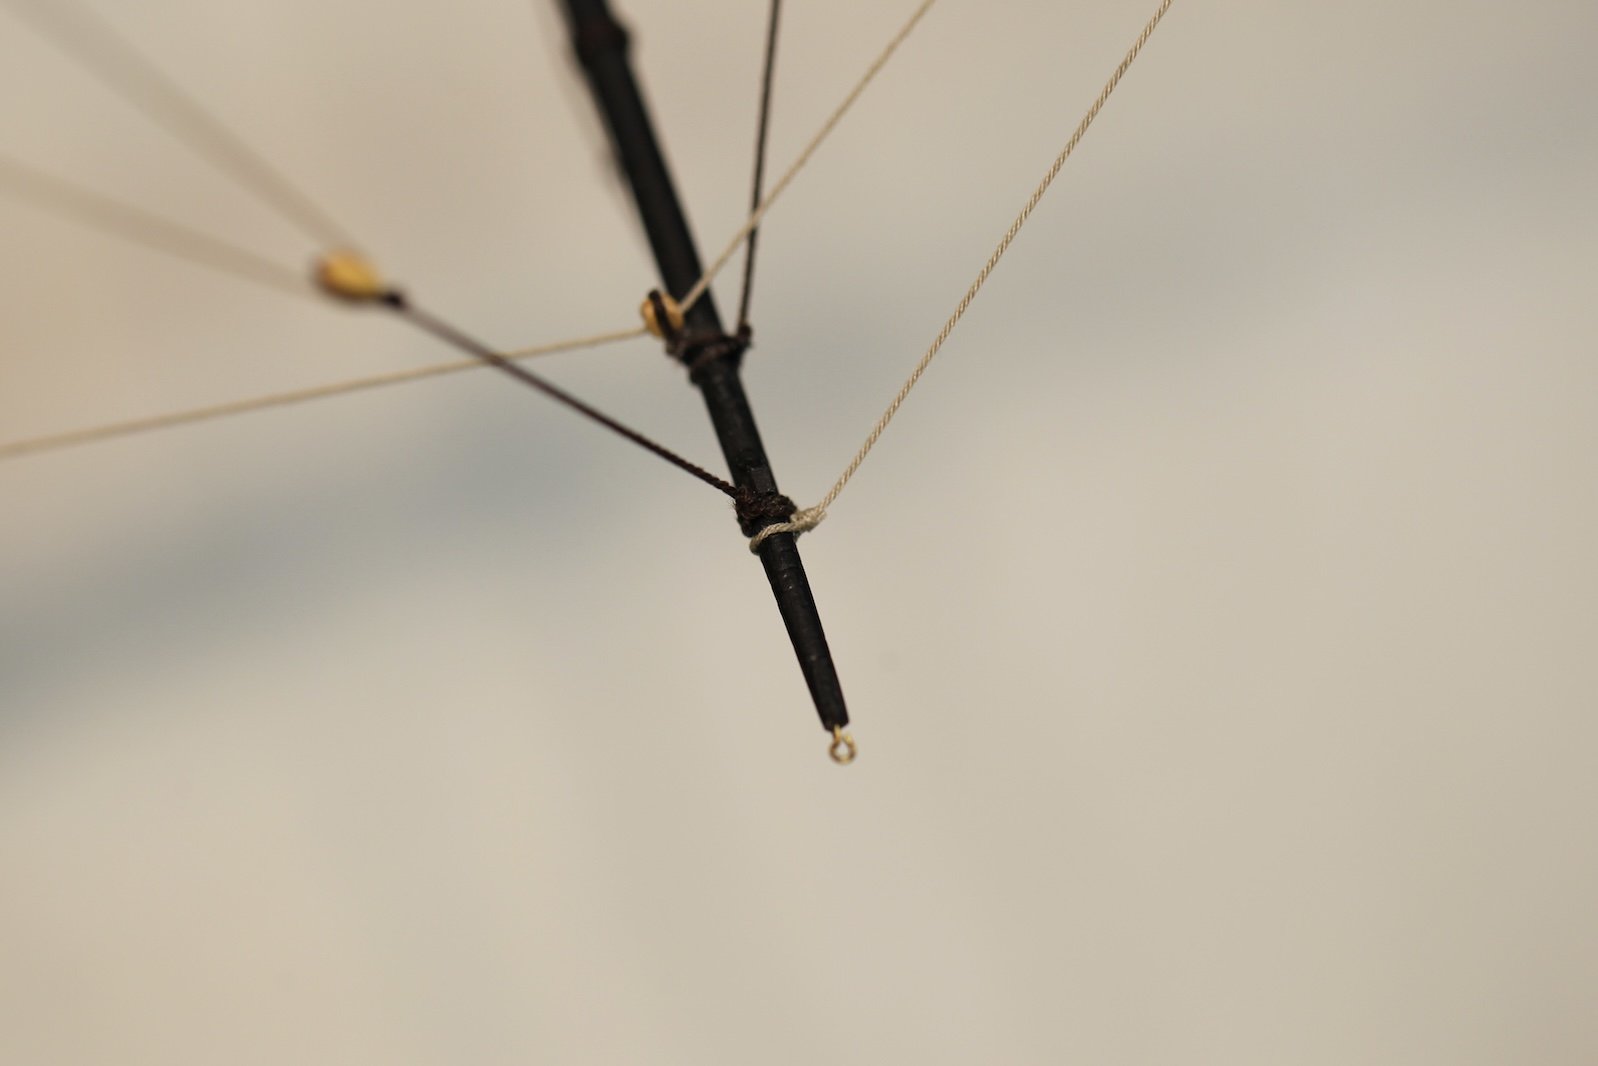
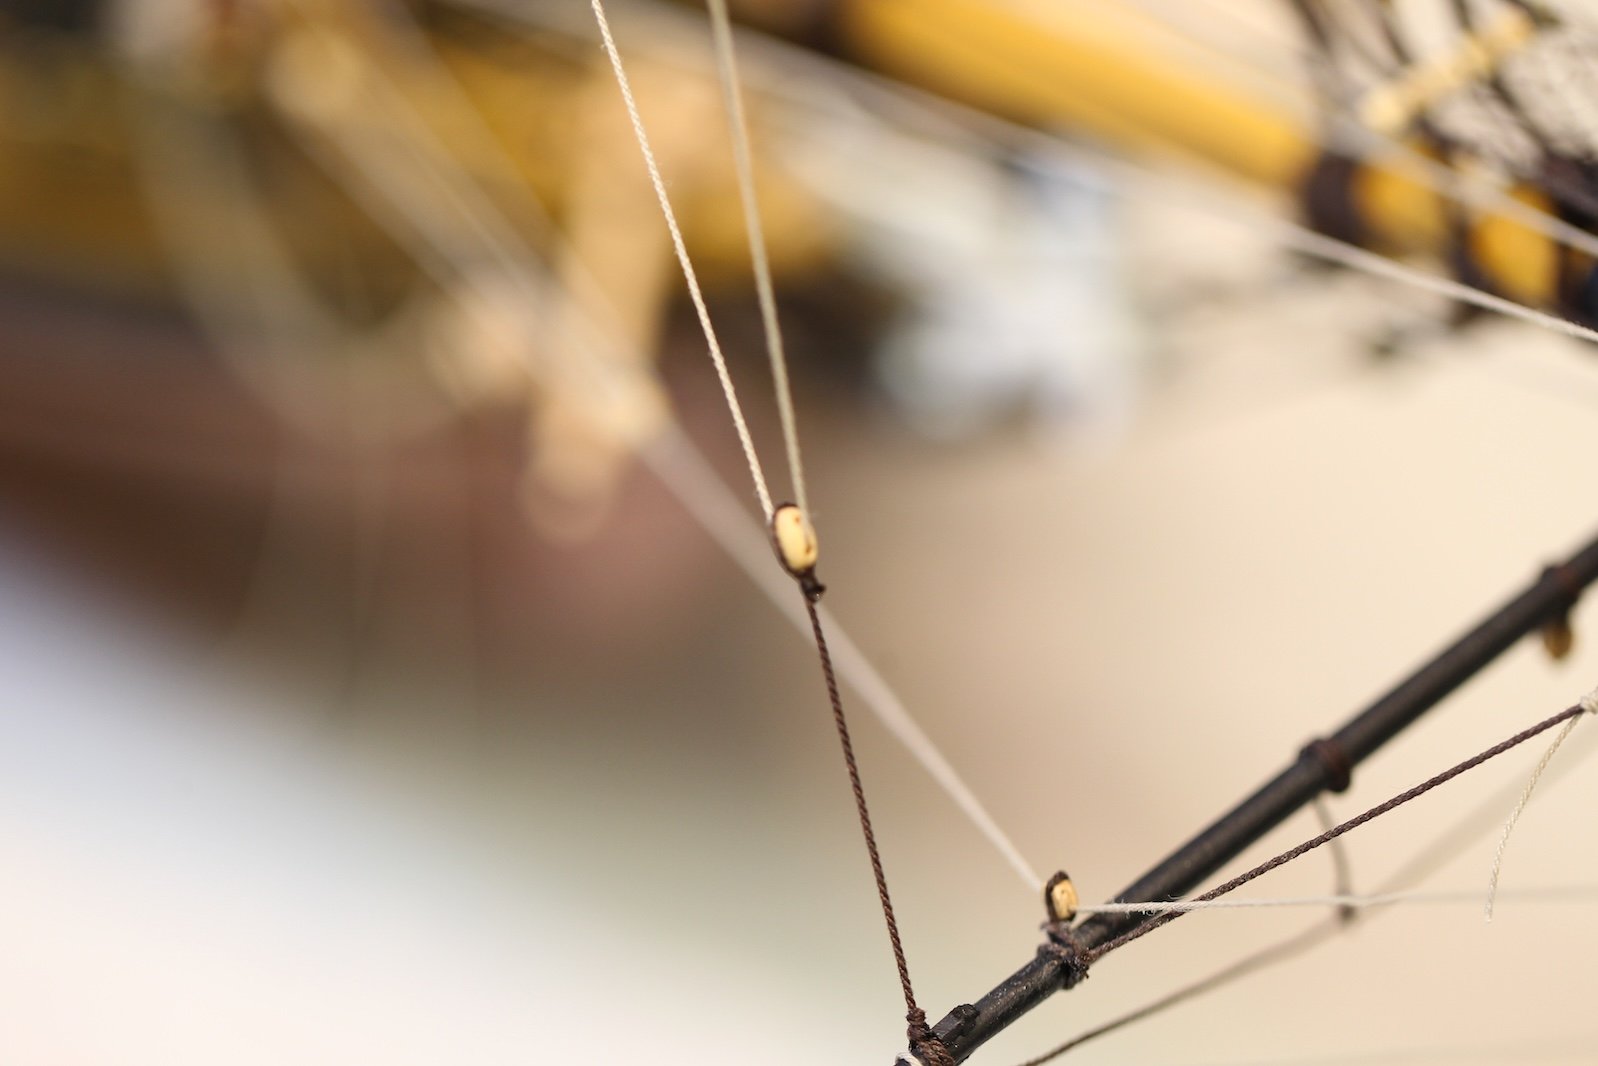
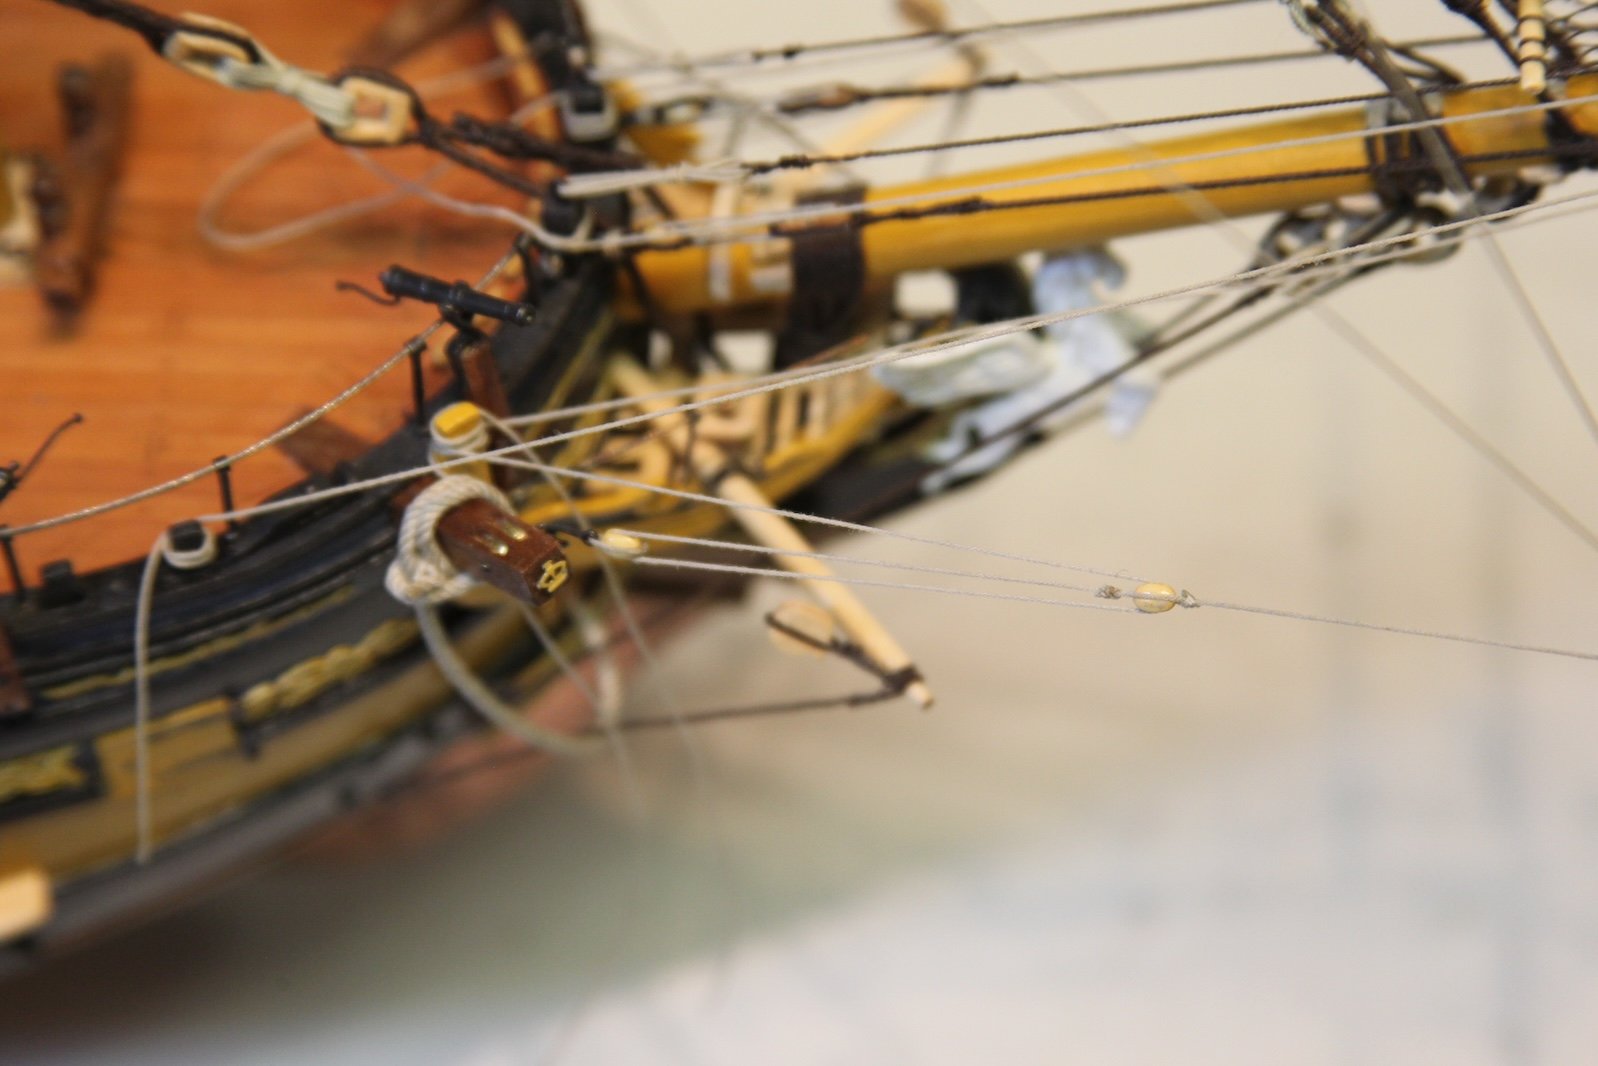
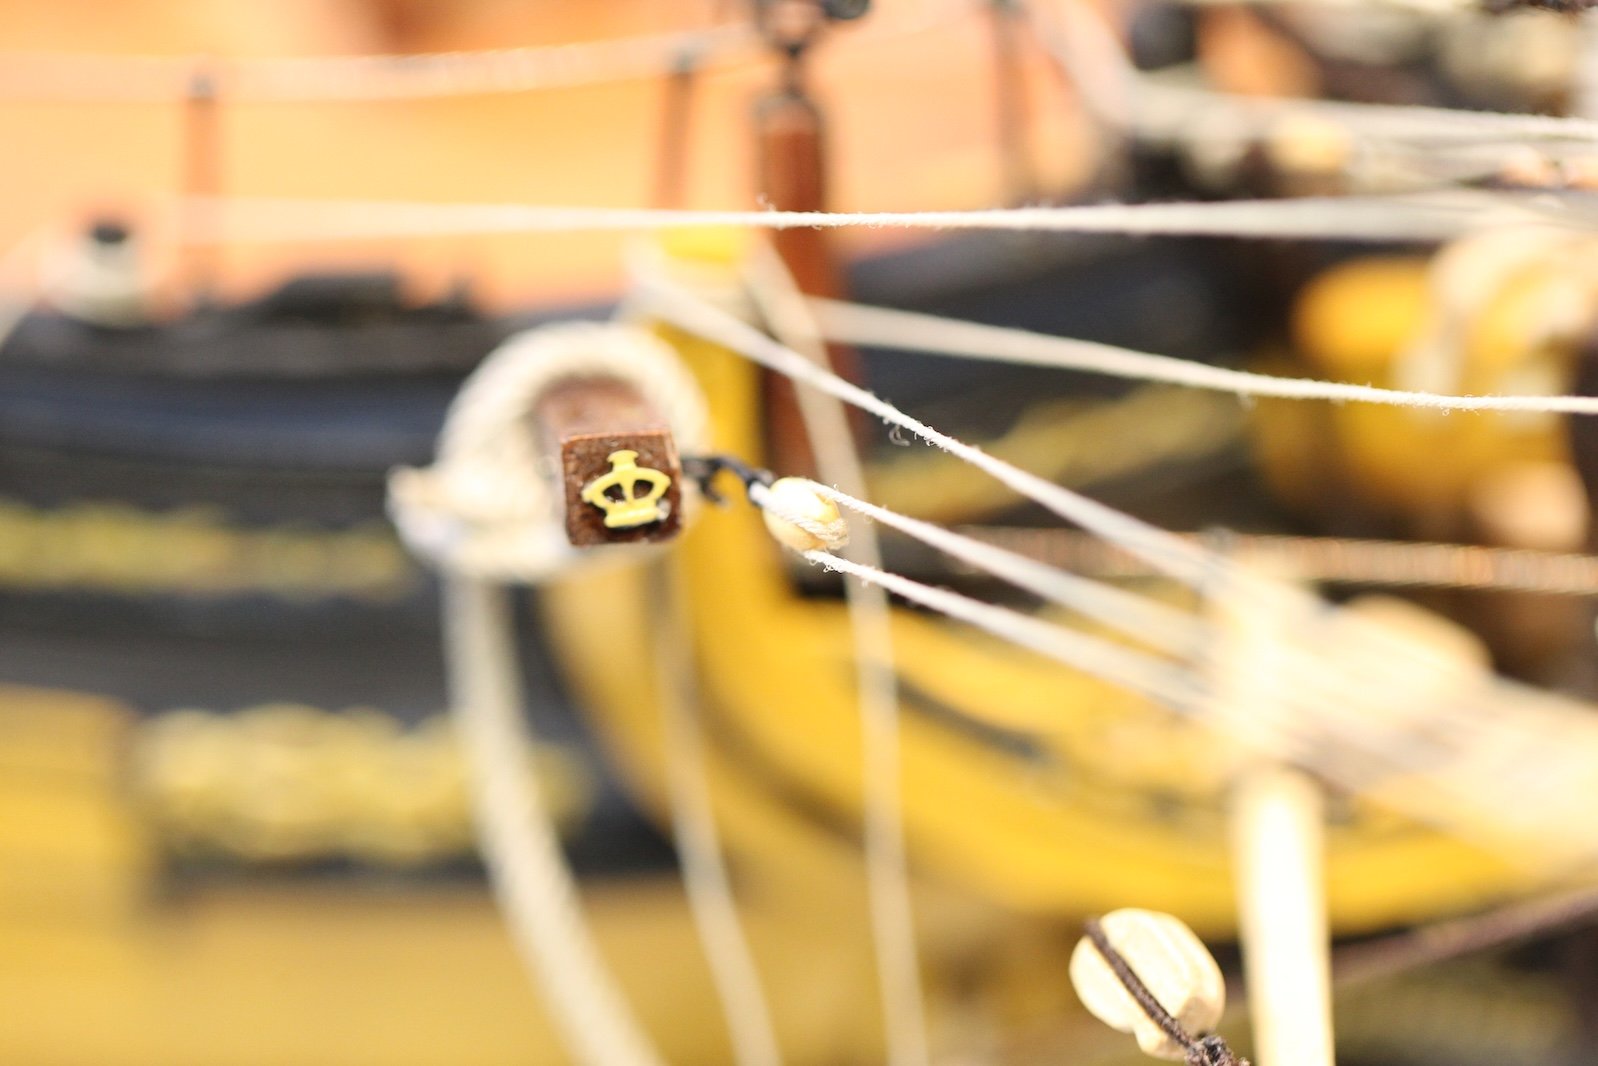
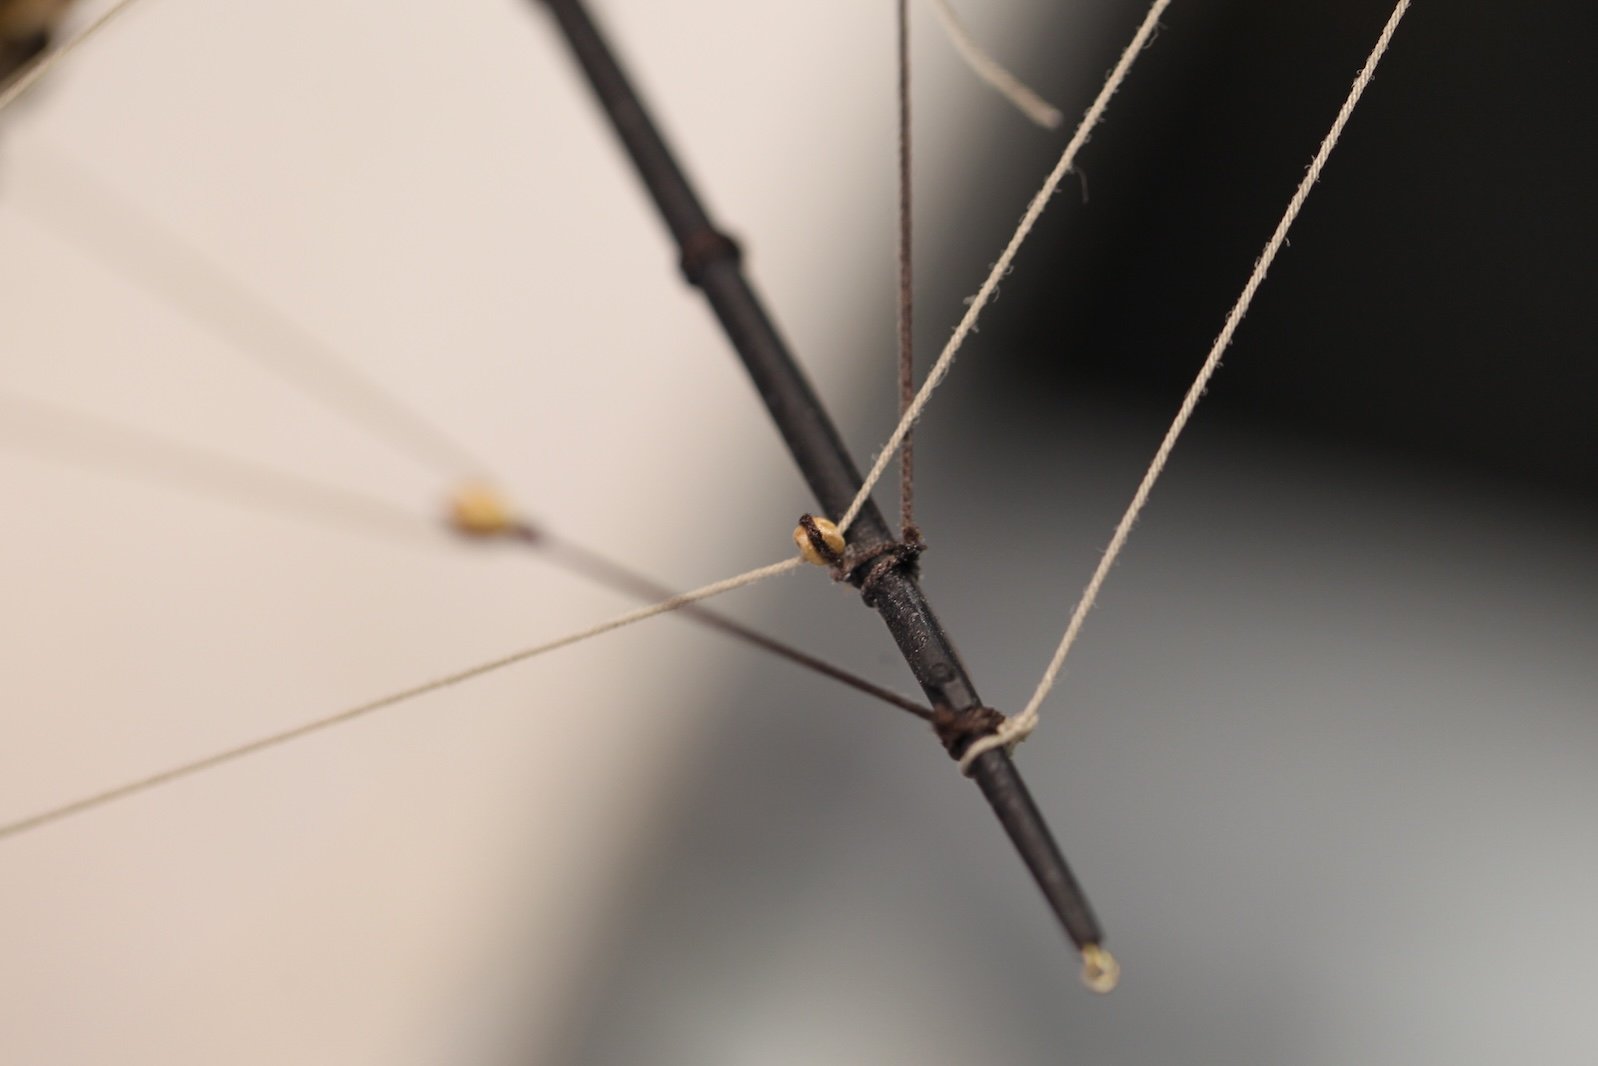
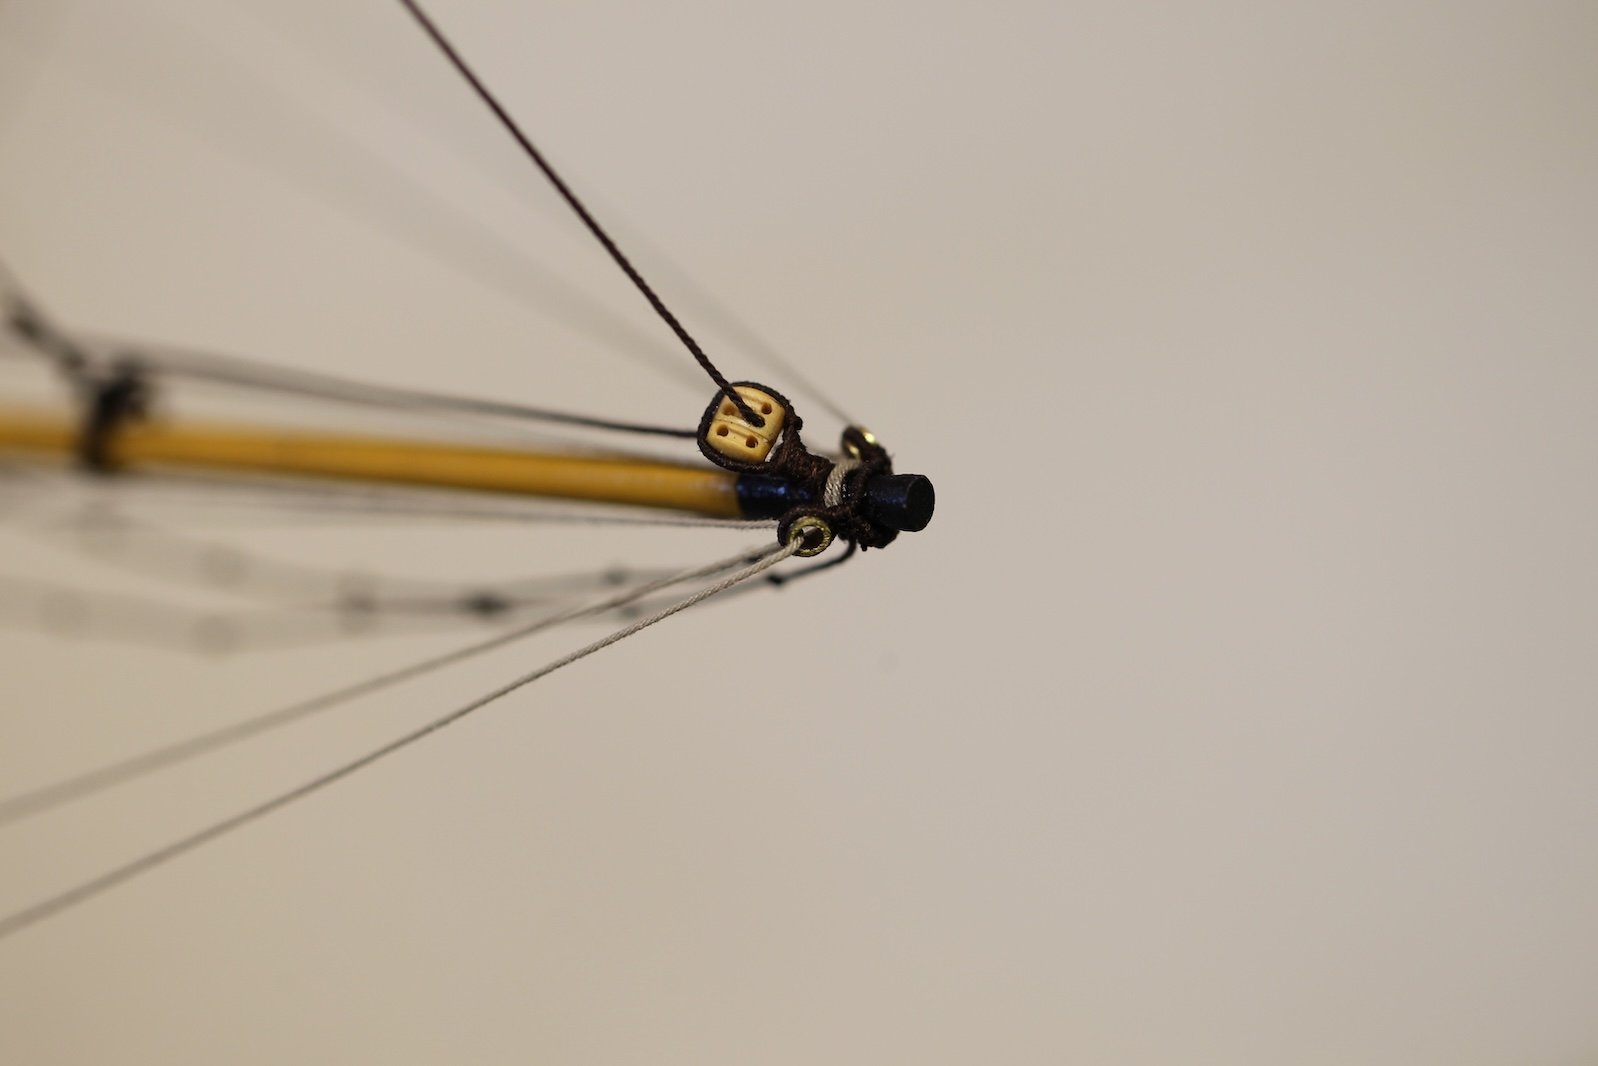
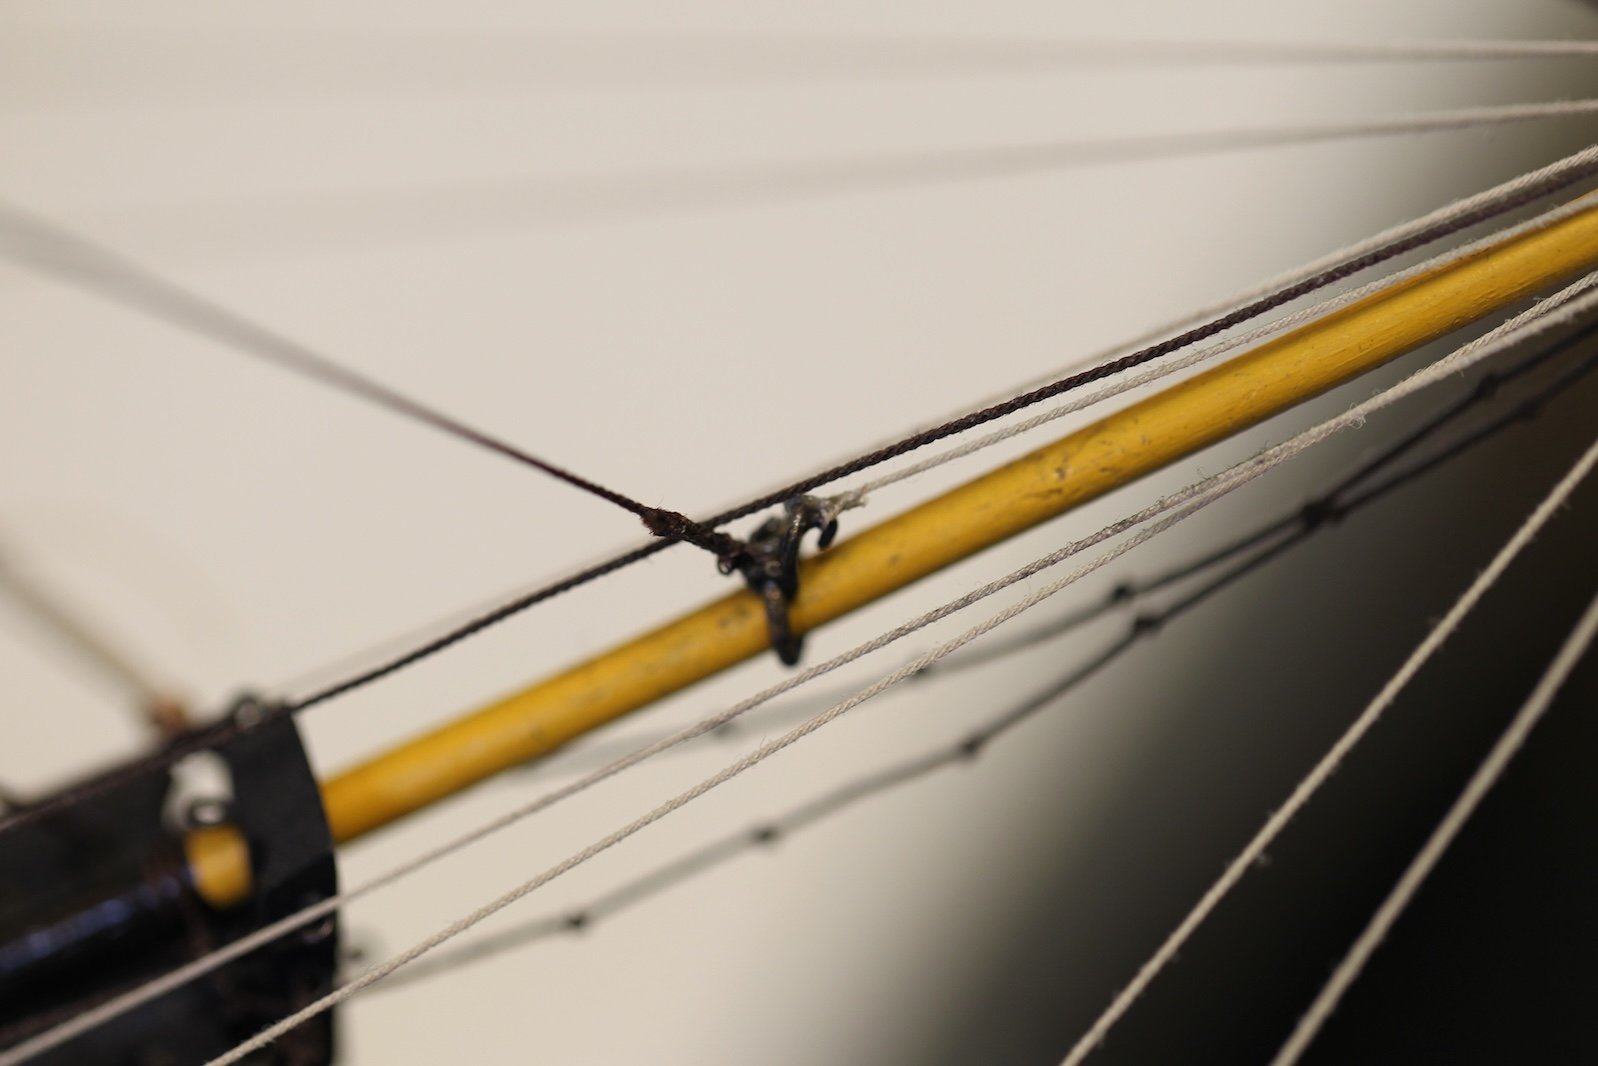
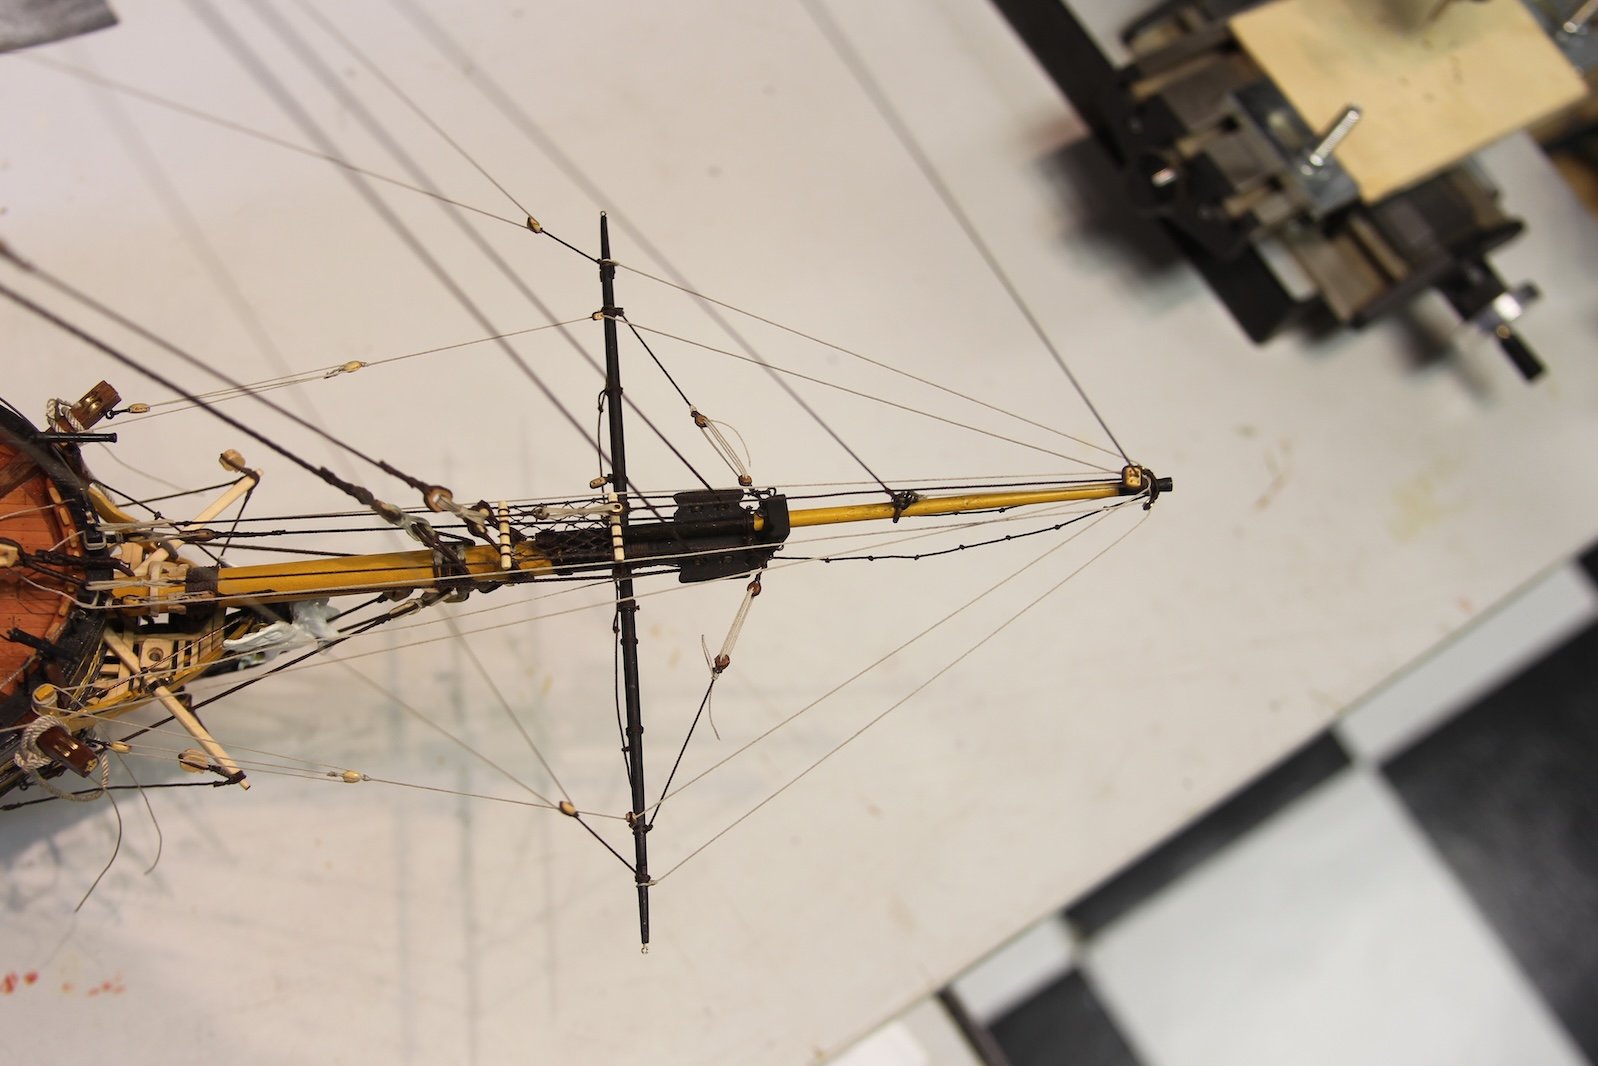
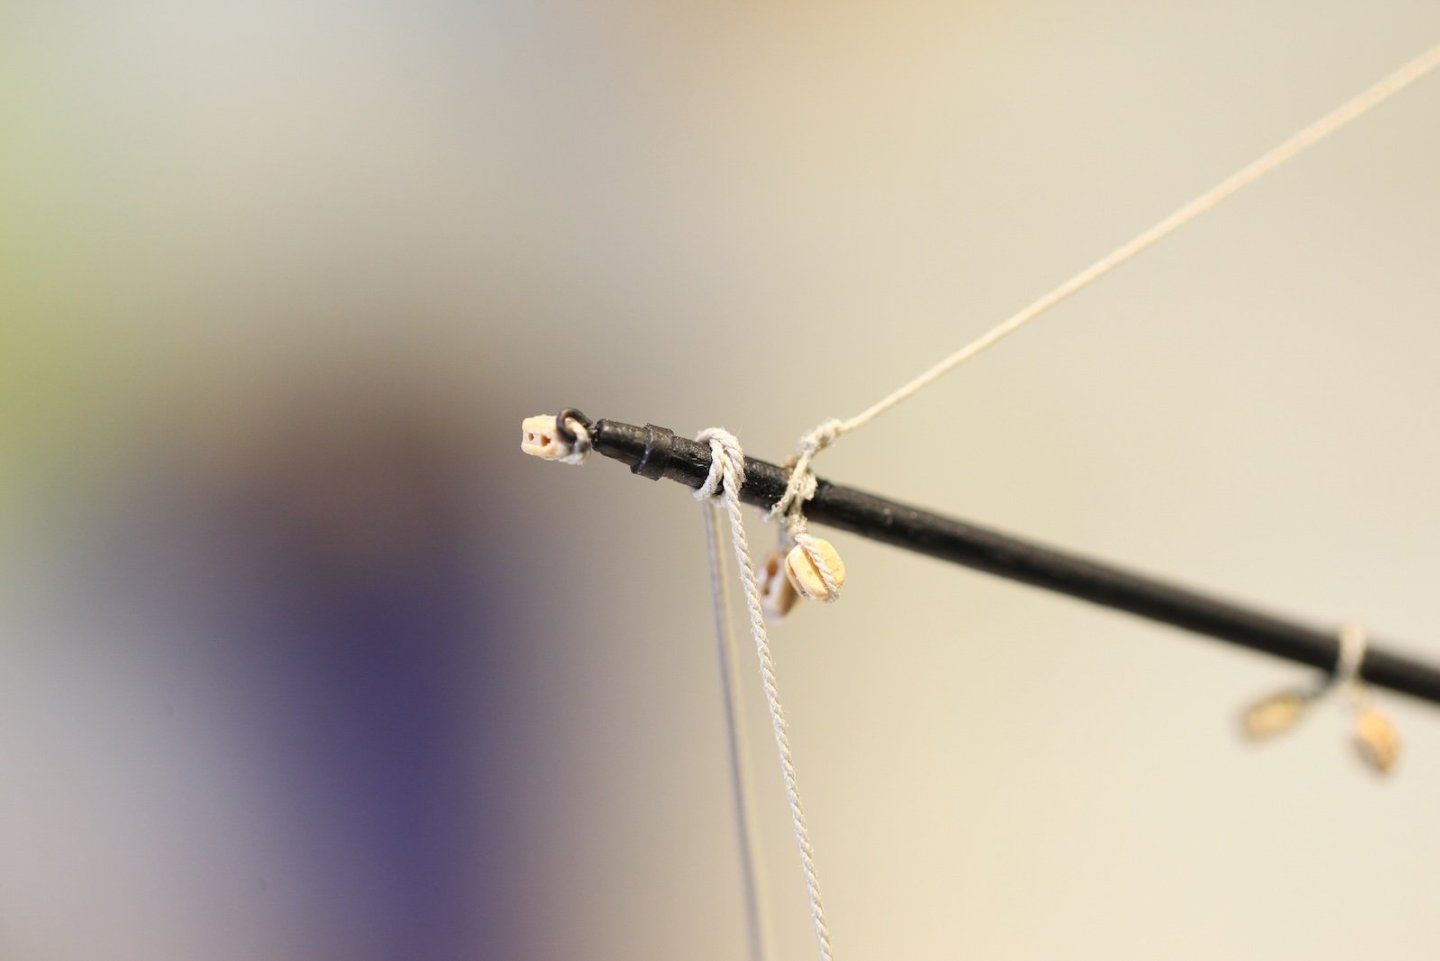
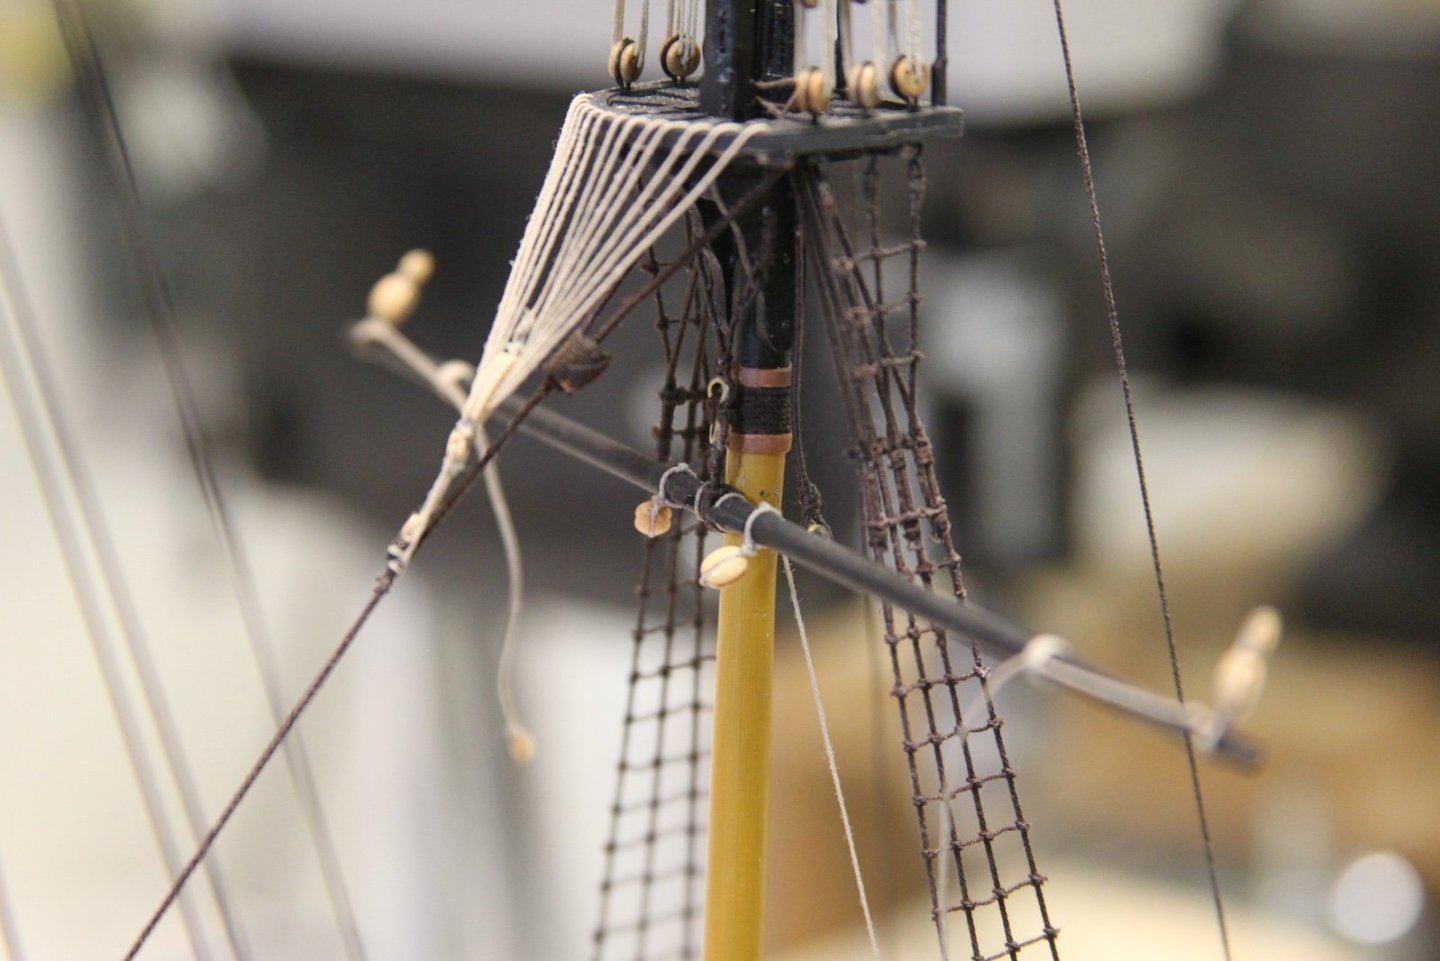
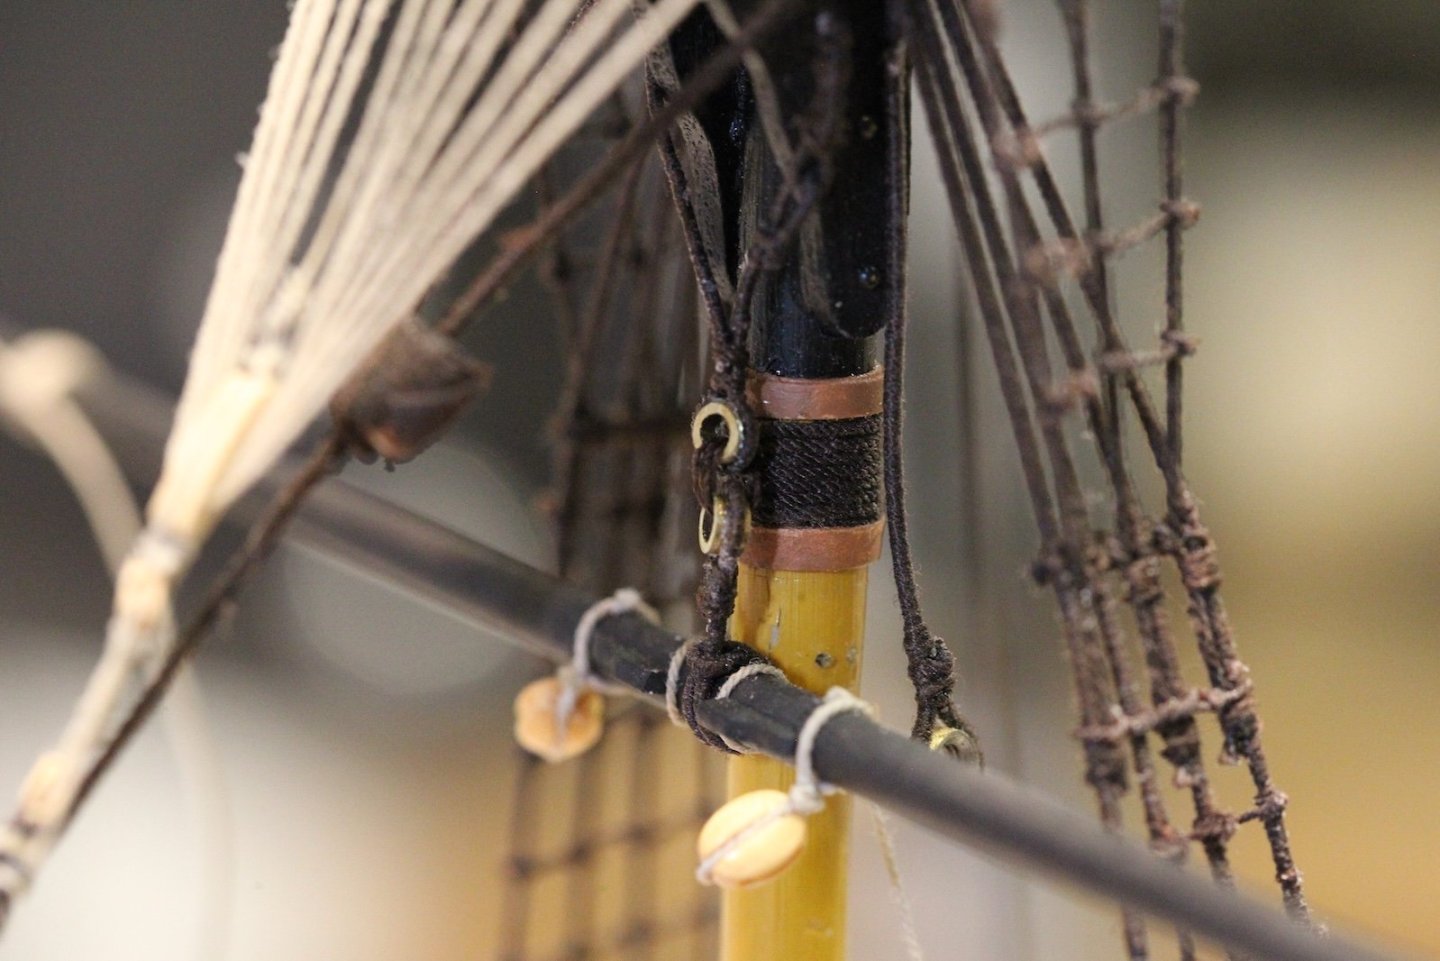
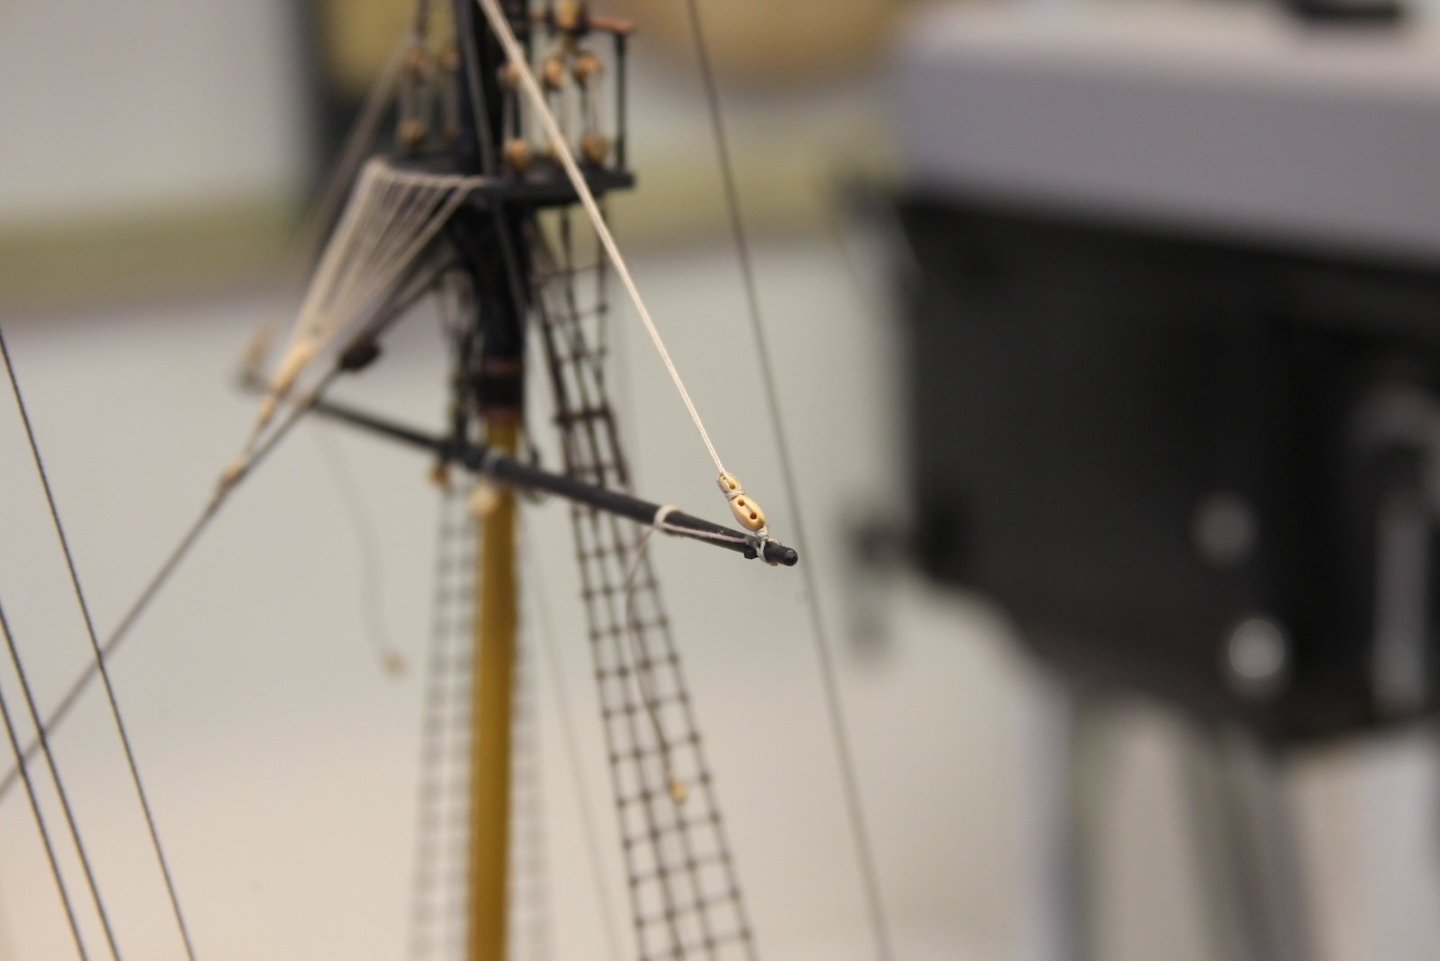
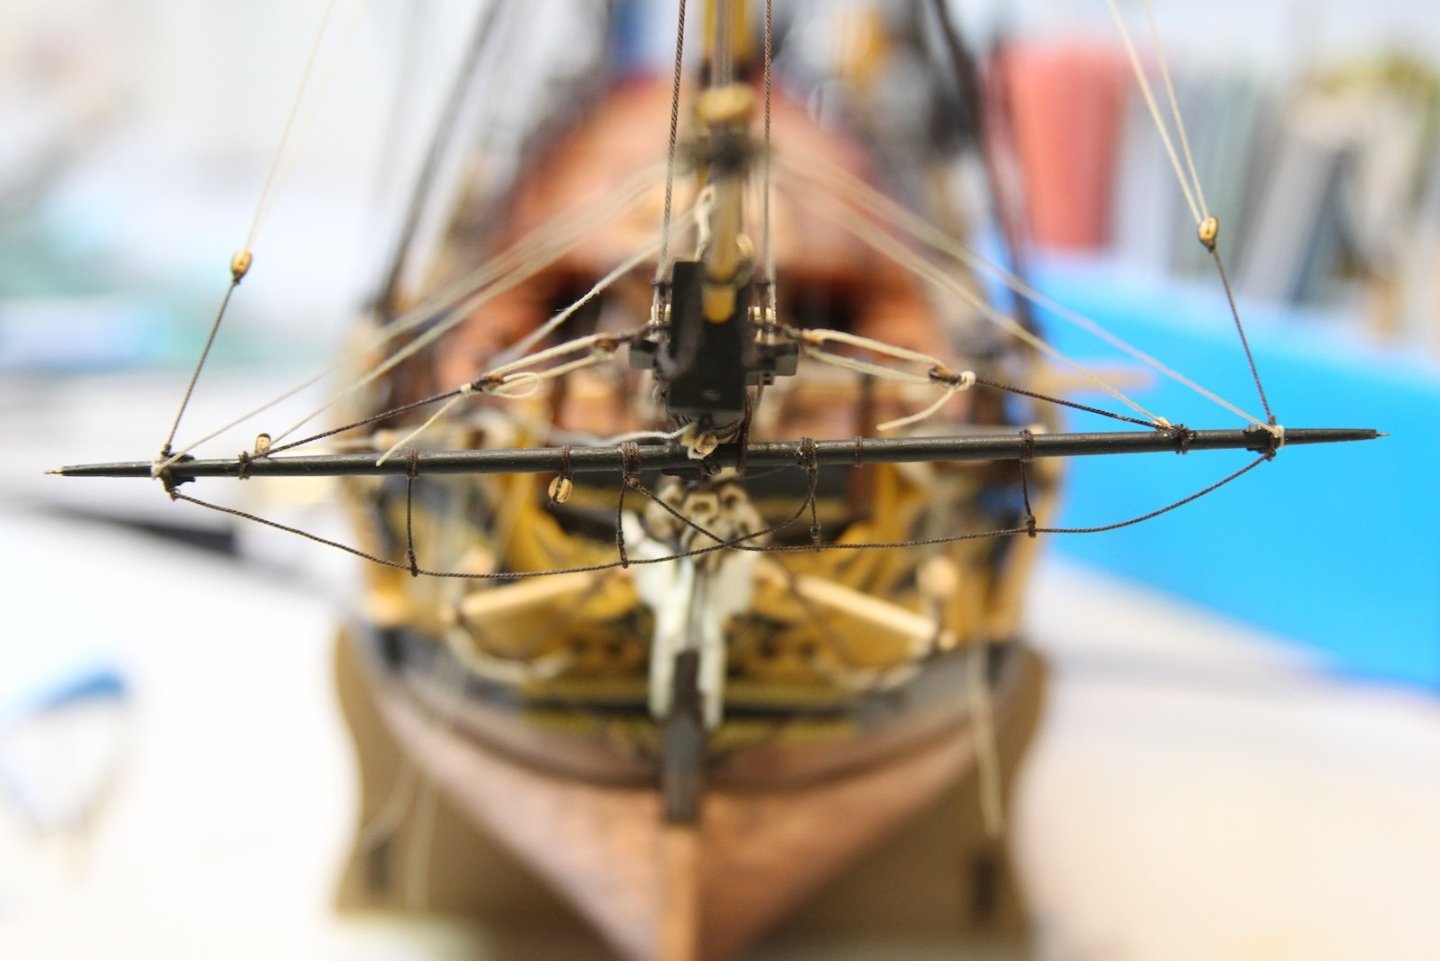
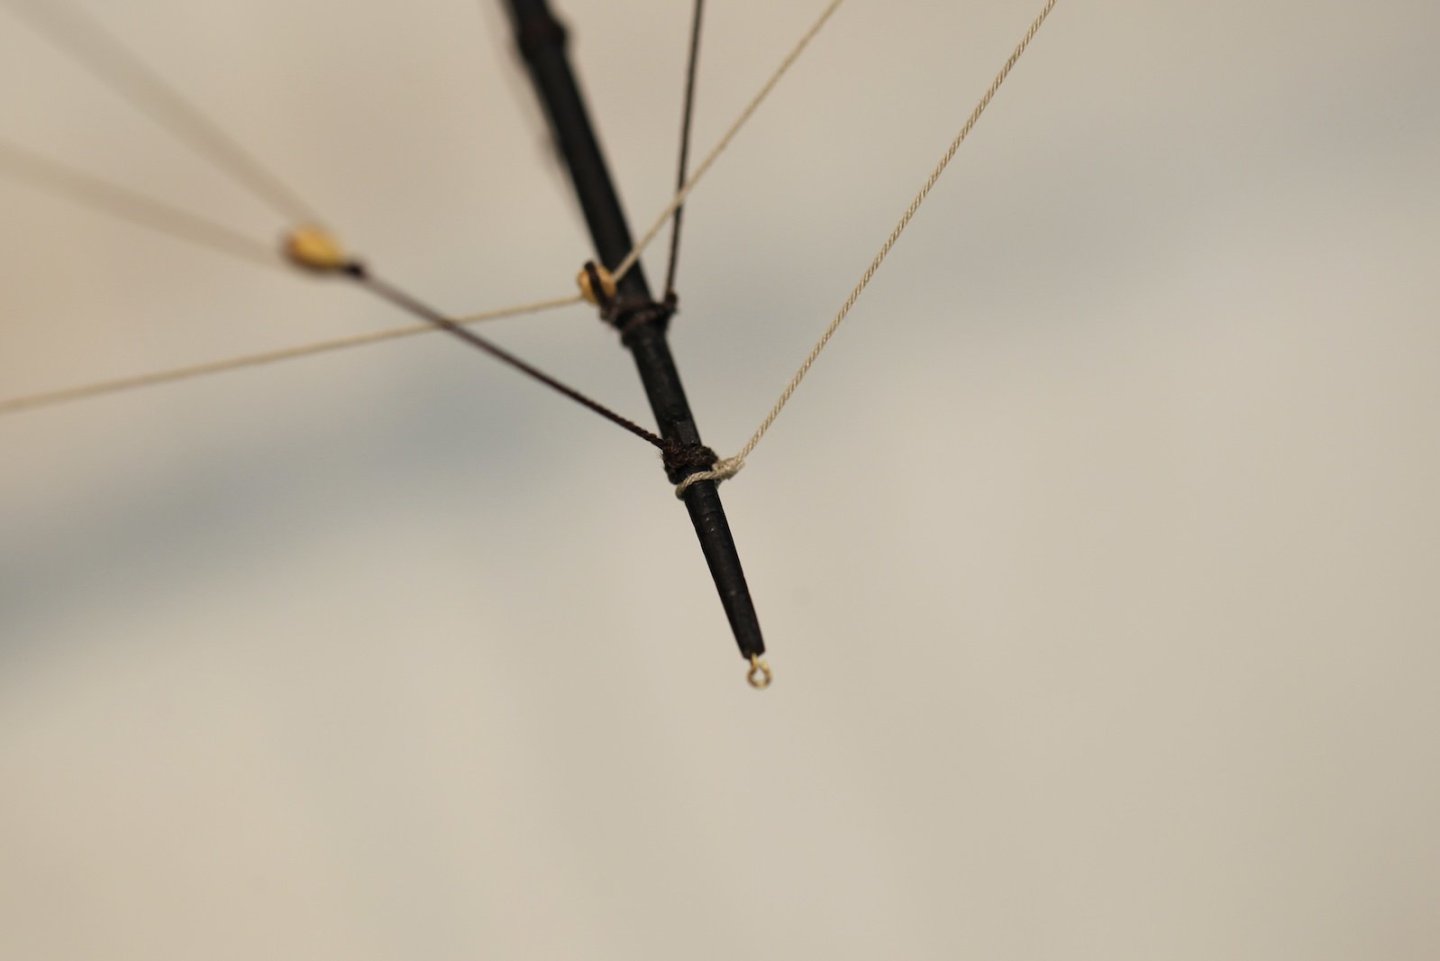
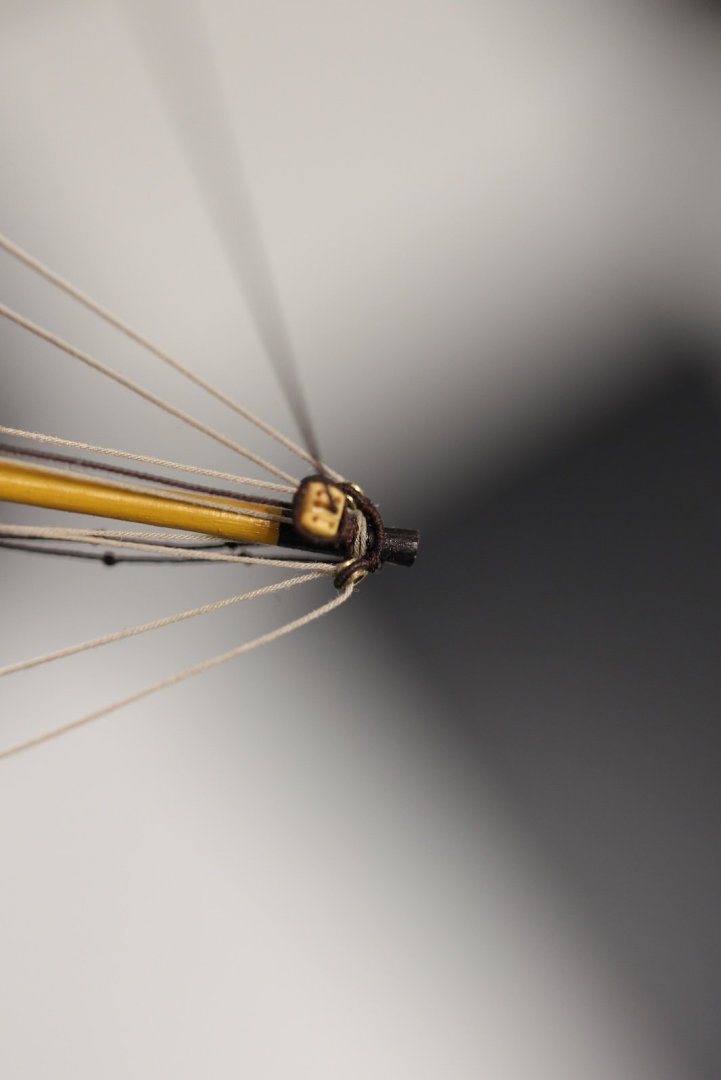
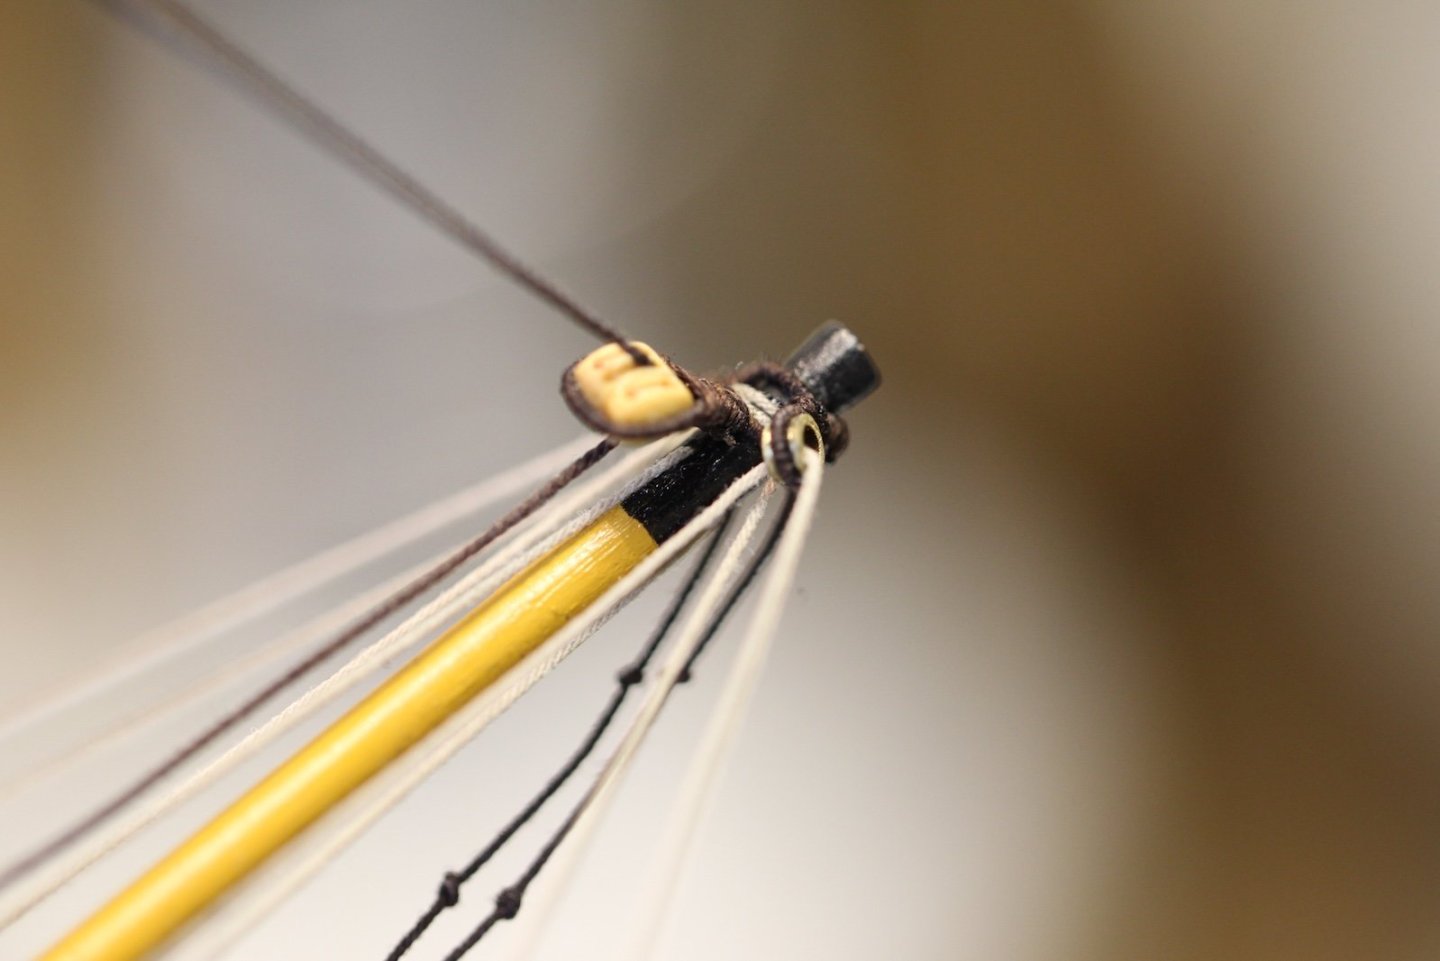
IMPORTANT NOTE: The first time filling out this log I overlooked mentioning a major difference between the kit plans and my build which could be very confusing for those following along may also be building the Vanguard's Pegasus. Chris Walton's kit shows two yards on the bowsprit - the Spritsail yard, and the Sprit Topsail Yard. However, my build primarily follows the Fully Framed Model's version of a Swan Class ship. As such, I'll only be rigging a single yard on the bowsprit. Rigging the Spritsail yard begins with the sling. The sling is about an18' length of 3.5 inch served line, which translates at 1:64 to a .45mm diameter line and I used about 70mm for the full length. In this case it is important for authenticity to keep the eyes and wraps as they are imminently visible on the ship. I started with the eye on one end, looped the length under the yard inside the two sling cleats, over the bowsprit, down under the yard on the opposite side (once again staying inside the cleats, then back over the bowsprit to pass through the eye and seize to itself. Both ends are again seized together to tighten the grip on the yard. Also, obviously important to orient the spritsail yard with the halliard eye facing forward. The yard is still pretty loose at this point, which is necessary to allow for movement during the rest of the rigging process. The next step is the rigging the sling with the halliard blocks and strops. The two blocks are 7" (3mm) of which one contains an eye and both contain hooks. One end attaches to the eyebolt under the bowsprit cap and the other to the halliard on the yard. The standard rigging setup attaches the blocks then reaches back to the first starboard timber head. From here, I rigged the spritsail yard fully then went back to and took images of each of the steps in the process. The spritsail standing lifts are 2.5" (3 mm scaled) lines that run from about the third quarter of the yard to the bowsprit cap. According to the FFM, the majority of the time these are attached to the cap with two sets of eyes/thimbles that are strapped together with a laniard providing flexibility. However, because of my issues with thimbles, I'm using an alternate method and instead pulling them together with small deadeyes. There is some evidence of this method in Lees' The Masting and Rigging of English Ships of War on page 100, so I don't feel as though I'm completely abandoning accuracy altogether. Note here (as with all the rest of this rigging) that I'm leaving all of the lashings and ends loose until later when I'll properly situate the yard, tighten all the rigging, and tie off all the loose ends. The yard lifts are 2" (.25 mm scaled) lines that begin with eye splices that are looped over the end of the yard to the horses then run forward through the thimbles at the end of the jib boom and back down aft and belay to the bollard timber heads. The brace pendants are long strops that are eye spliced around the yards at the stop cleats then fitted with 9" blocks (3.5 mm at scale) at their ends. The pendants help secure the yard braces which are quite long and run up the fore mast and back down to the ship and help control the turning of the yard. The center of the braces hitch around the fore stay just below the most. Each end runs down through the pendant, then back up through the inner sheeves of the outer most double block just under the fore top. They then travel down toward the deck and belay at the timber head near the belfry. The Jib Guy Falls start with two 8" blocks (I'm sticking with 3.5 mm here because they're easier to manipulate) on of which is hooked into an eyebolt on the cathead. The 1.5" (.15 mm) fall line is belayed to a timberhead at the fo'csle and runs through the two blocks in the usual way securing them. Another .25 mm line then runs from the outer block up through the jib guy (remember I'm using single block instead of a thimble) to loop around the end of the jib boom then back down the other side of the ship mirroring the blocks and fall line on the other side. Finally, the jib traveler outhaul is spliced to the ring of the jib traveler and runs up into the sheeve at the end of the jib boom just under the triple block (or triple thimble if you rigged that) and down back aft to belay to a suitable timberhead on the starboard side. It's worth noting here than when I installed the jib traveler, I put the dang ring on the inside of the jib stay and hook, so I had to remove it, realign it, and re-rig the jib boom. Something to avoid for others. I'll make an edit note of this in my previous post (#340) regarding the traveler. And with that, the Spritsail Yard is rigged to the Peg. As I mentioned, all the ends are still loose so they can be adjusted. This will also come in handy if I need to make any adjustments when the fore main yards go in and I need to avoid any potential fouling of lines.


- 419 replies
-
- 11
-
-
- Victory Models
- Pegasus
- (and 2 more)
-
Thanks very much Christian and Daniel, I appreciate the look in and comments. That's quite a compliment Christian, thank you. Daniel - The smaller served eyes are a challenge indeed. I like to whisk by them quickly with a lighter to clean up any frays. The Gutermann poly thread I use to make my rope doesn't produce much in the way of frays, but a few. The down side is that if you don't perfect your method and timing with the lighter, the whole thing will go up in a ball of flame very quickly - ruining the time spent before you know it! Happy 2025 to you both as well!
- 419 replies
-
- 3
-
-
- Victory Models
- Pegasus
- (and 2 more)
-
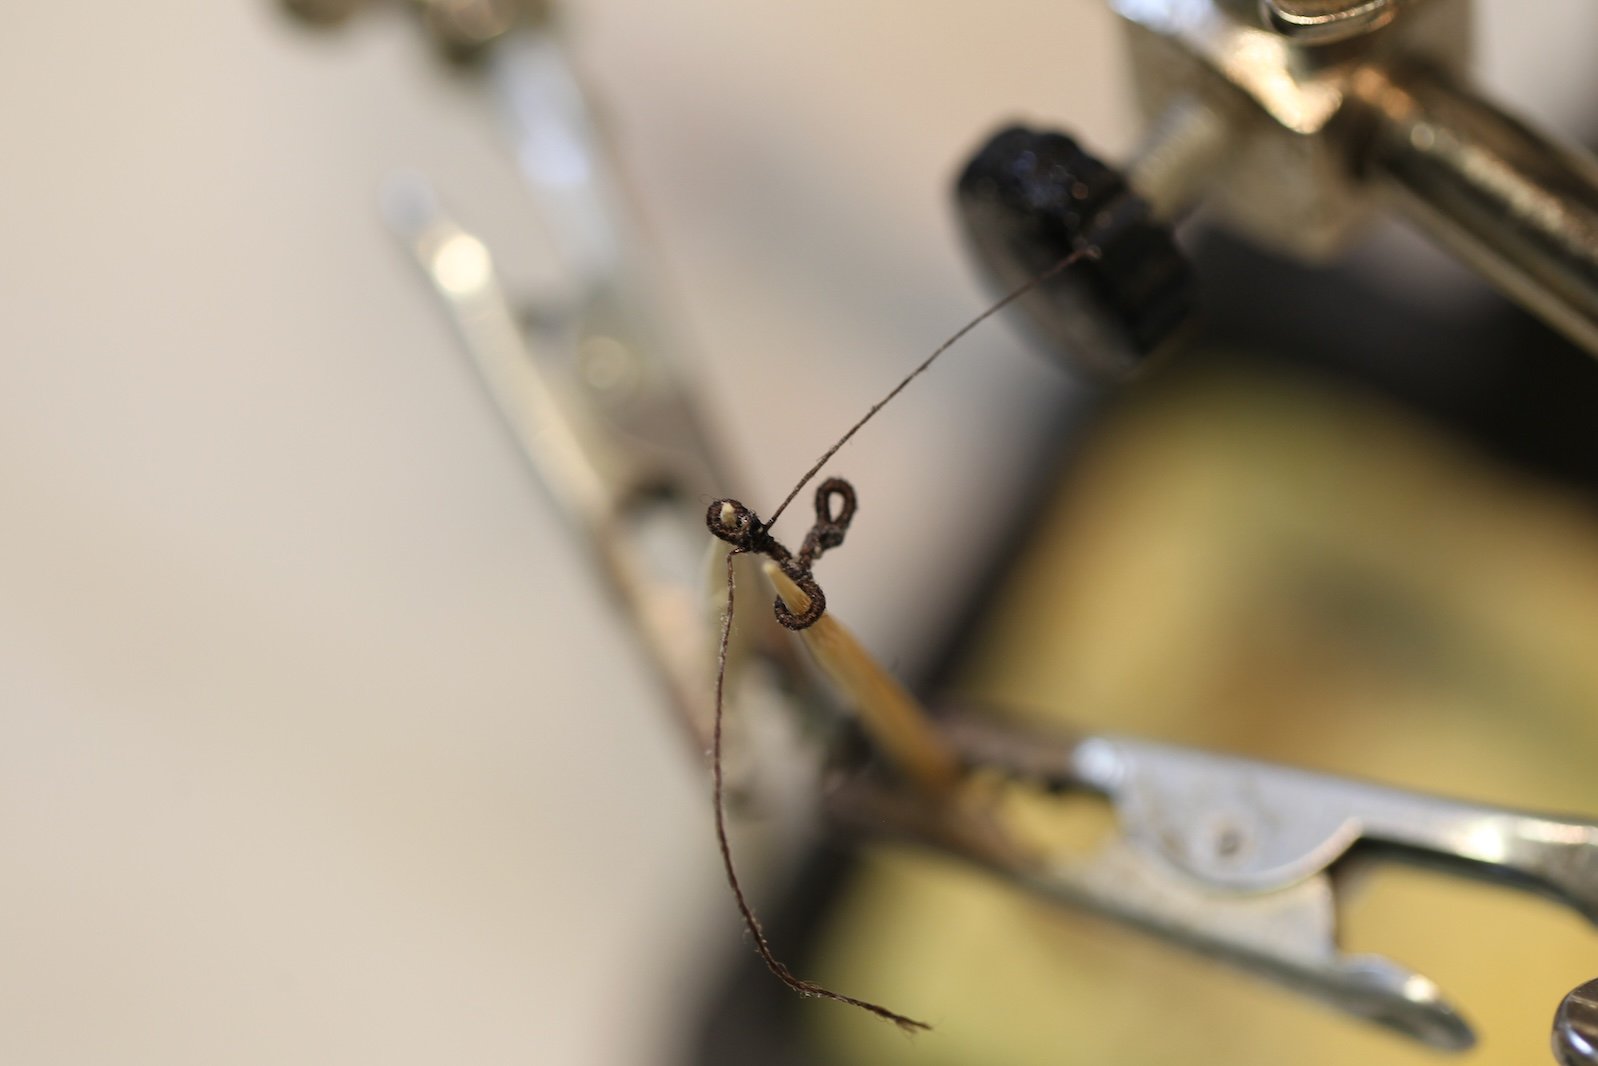
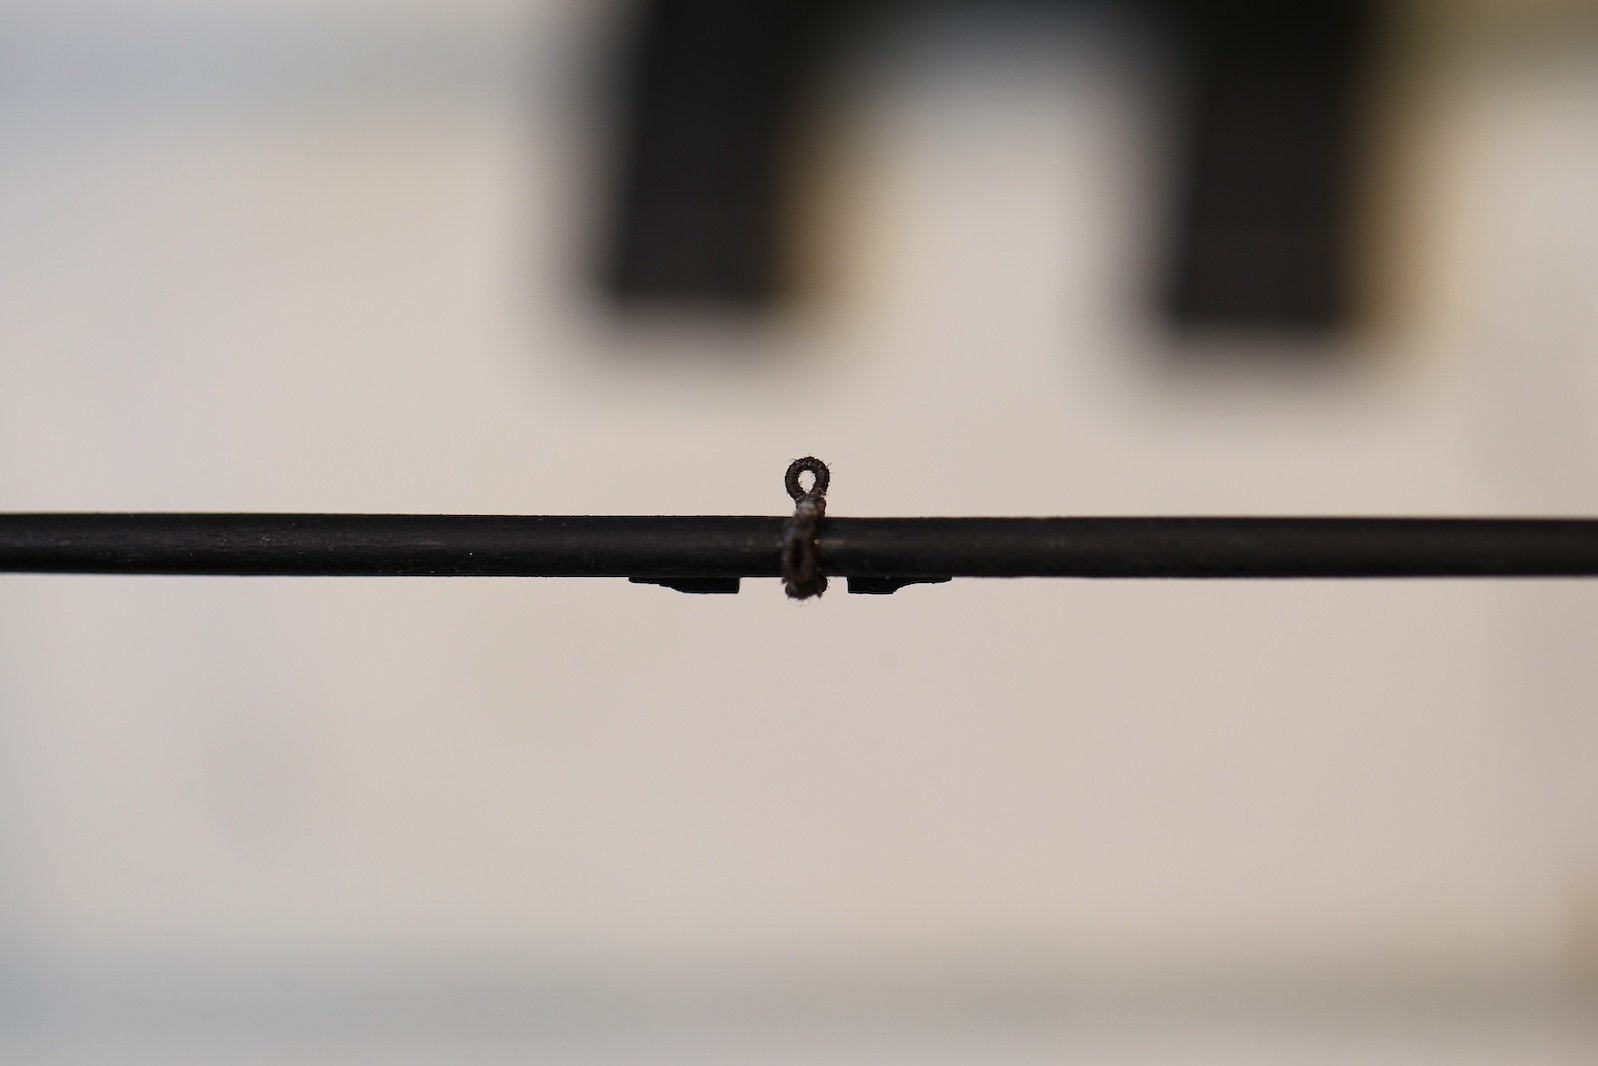
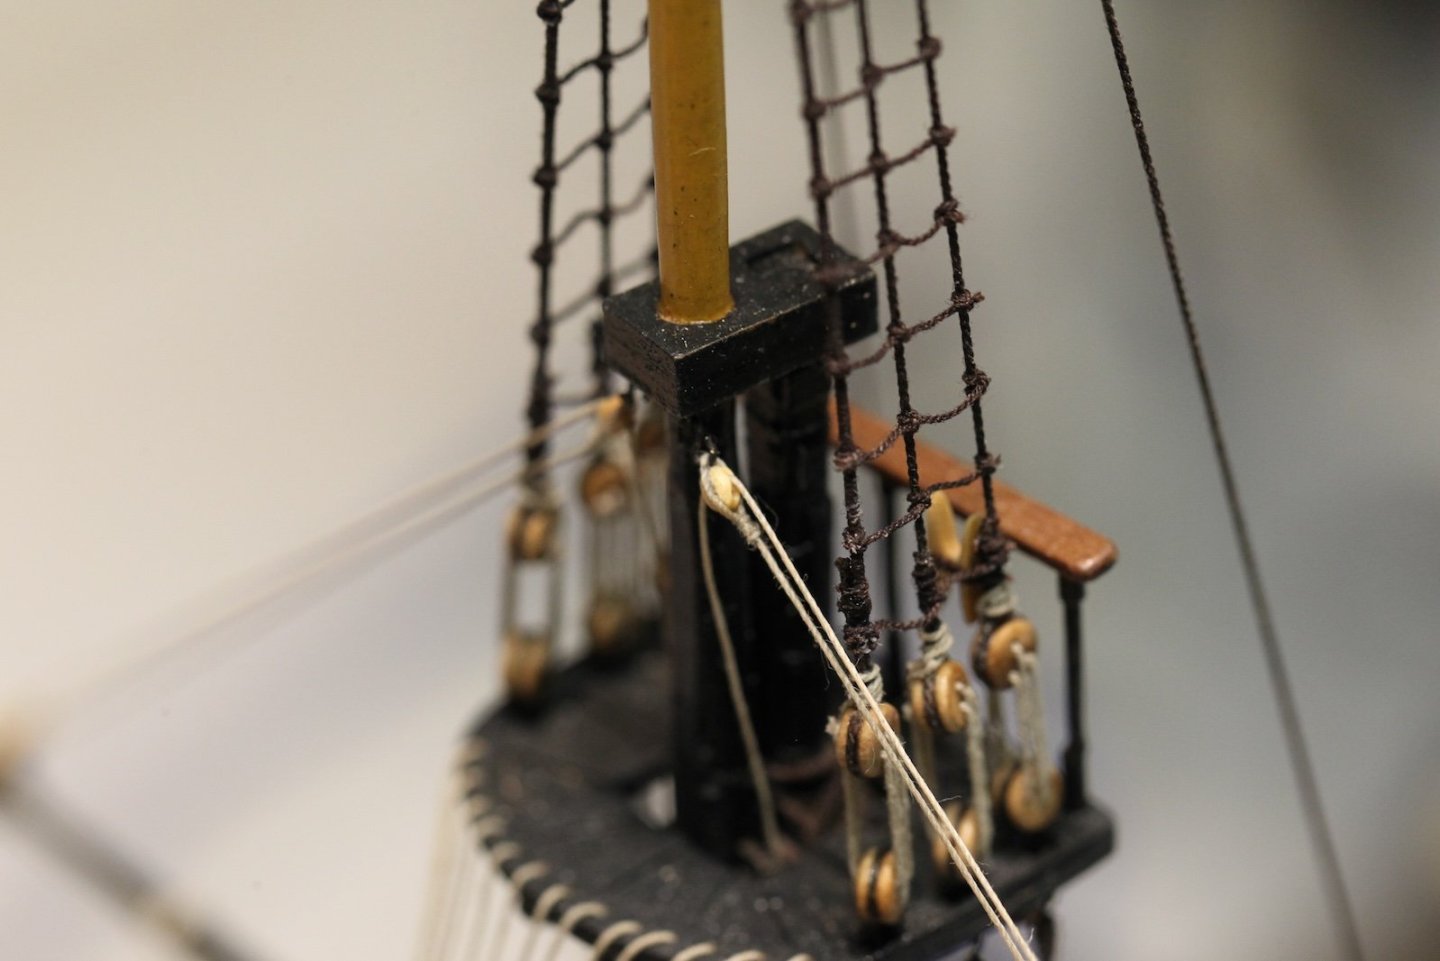
I flirted with the idea of fitting out all the blocks on all the yards before moving on to the running rigging - but after doing that with the irons etc, I found it a little too tedious. I enjoy the running rigging a lot, so I've decided to fit each yard that I intend to mount starting fore and working my way aft, then from bottom to top. This is essentially the order of the FFM. I will say preemptively that I am taking a couple of (what some might consider) shortcuts primarily due to the scale. I'm replacing some of the "eyes" with single blocks. For example, the jib guys. I simply cannot find a material or way to make thimbles that small and they end up looking sloppy. Similarly, these as well as the clueline blocks are supposed to be stropped with served line and a eye on each end that are lashed together. At this scale, trying to use eyes lashed together looks like a clumpy mess, so instead I'm just strapping them to the yard, as (in my opinion) the cleaner appearance is a fine tradeoff of the bit of lost accuracy. But I wanted to note those changes for those who may be working off this build looking for accuracy. I did try to maintain as much accuracy as possible throughout the rest of the spritsail however. I started fitting out the Spritsail yard with the halliard where I did keep the served line eye (no thimble) using .30mm line. I started by looping the eye, measuring out the length of the strop then two more eyes that are lashed together. As I mentioned above, the clueline blocks and strops as well as the jib guy pendant blocks (all shown in place below) are all strapped to the yard without using eyes. The clue line blocks are 3.5mm blocks and the jib guy blocks are 3mm. From there I hung the stirrups which are 2" tarred lines that scale out to .25mm. They stirrups are wrapped around the yard 3 times with an eye at the bottom to hold the horses. Once again, I'm using an eye but no thimble. Once the stirrups are hung, I coated them with diluted white glue and let them hang to dry and stiffen a bit. Yard lifts, yard standing lifts, and yard brace pendants are added as well. There is a change here as well - though the yard sling shows a block here, I ended up switching to a deadeye - which I'll explain a bit later. Meanwhile, the horses are added - 2.5" lines which translate to .30mm - using an eye splice at each end that slips over the ends of the yard braced on the stop cleats. The inside of the horses are wrapped agains the inside stirrup. I measured everything using one of my crew members as a guide. Next up - spritsail yard installation.


- 419 replies
-
- 9
-
-
- Victory Models
- Pegasus
- (and 2 more)
-
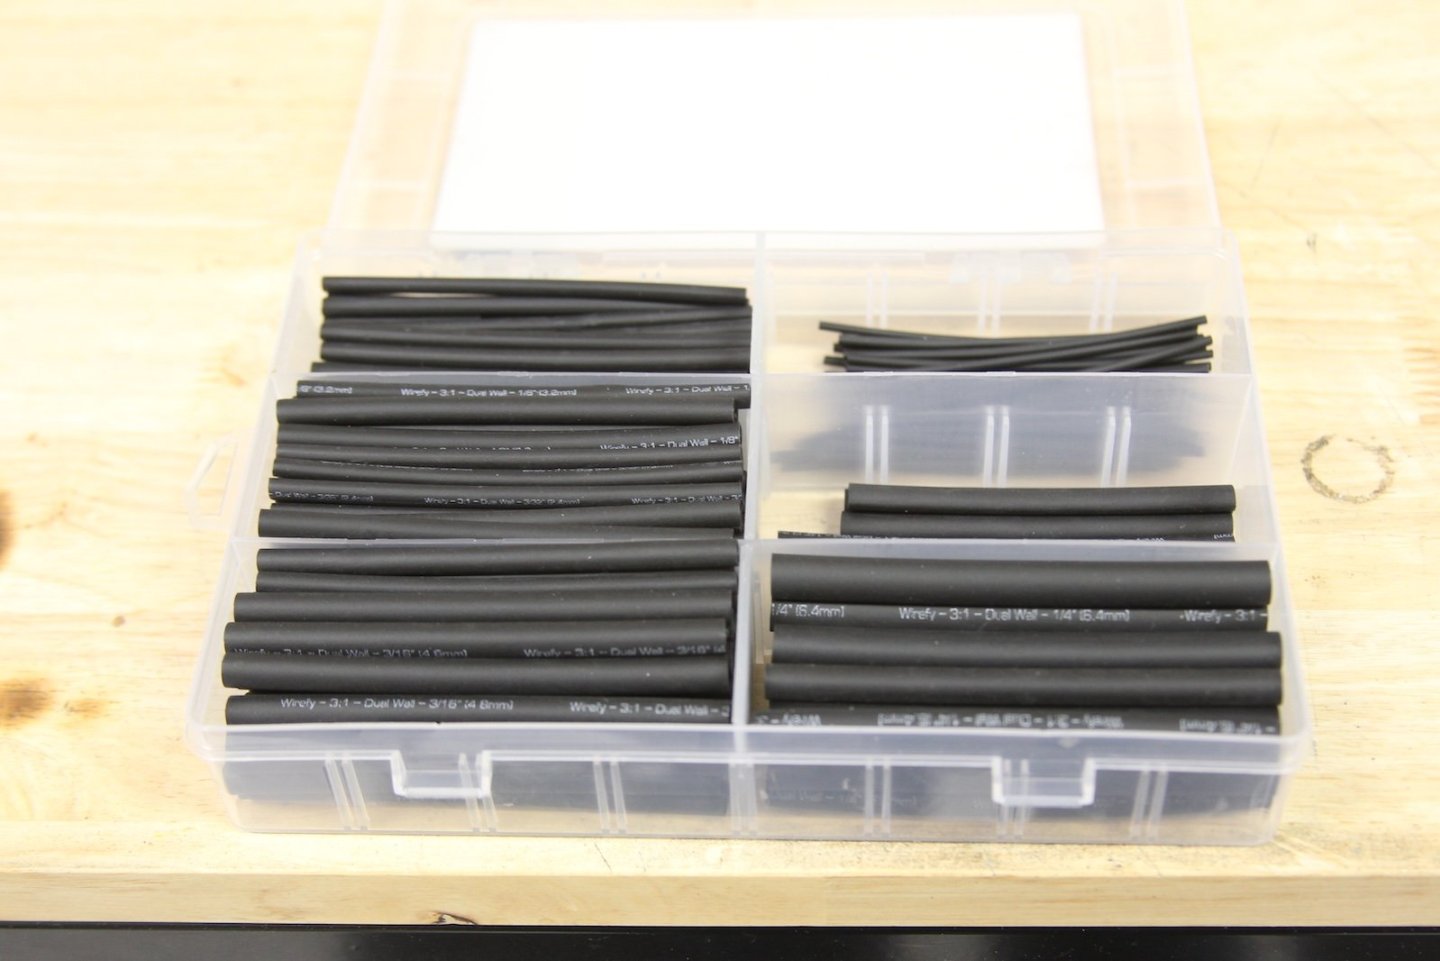
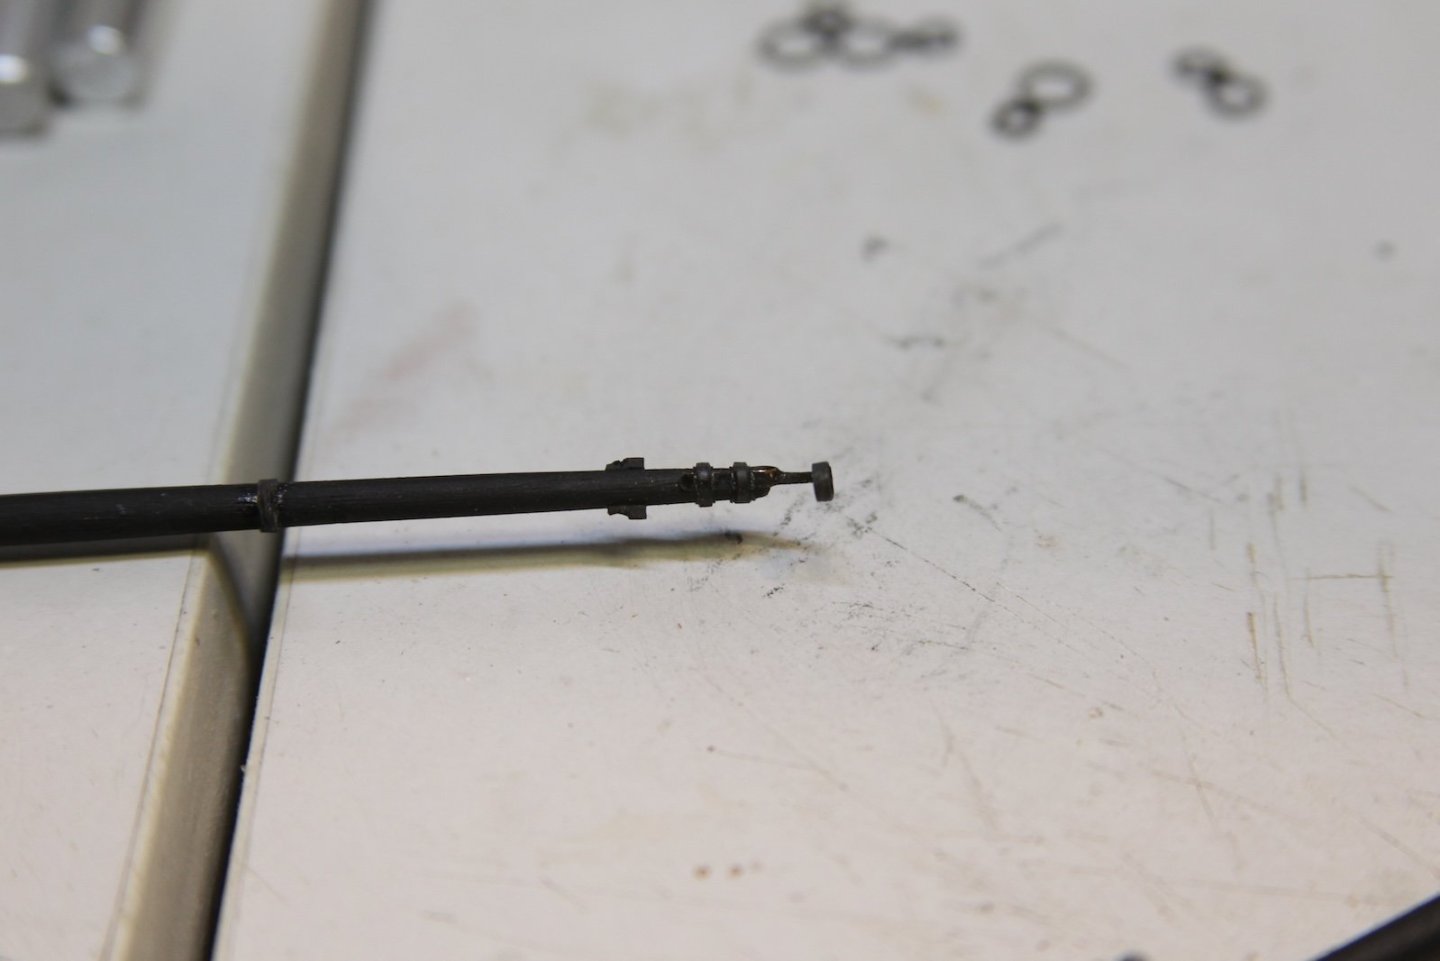
Still plugging away on the yard irons and other accouterments. I decided I didn't like the look of the black card stock for the stunsail irons. After trying a few different things, I finally settled on a unique solution. I pulled out some of my electrician stuff, and found shrink wrap. I picked out a size that was a slightly larger diameter than my stunsail, then sliced off thing pieces. The cool thing about shrink wrap of course, is that it shrinks. So after fitting it loosely over the irons, you just run a lighter across it lightly a few times and it shrinks tightly to size. And with that, I wrapped up the yards. Next up, adding the blocks and starting the running rigging in earnest.


- 419 replies
-
- 12
-
-
- Victory Models
- Pegasus
- (and 2 more)
-
Hey everyone, remember me? It’s been a heck of a year, but I’m finally able to get back in the ship yard. Updates will be forthcoming.
- 419 replies
-
- 8
-
-
- Victory Models
- Pegasus
- (and 2 more)
-
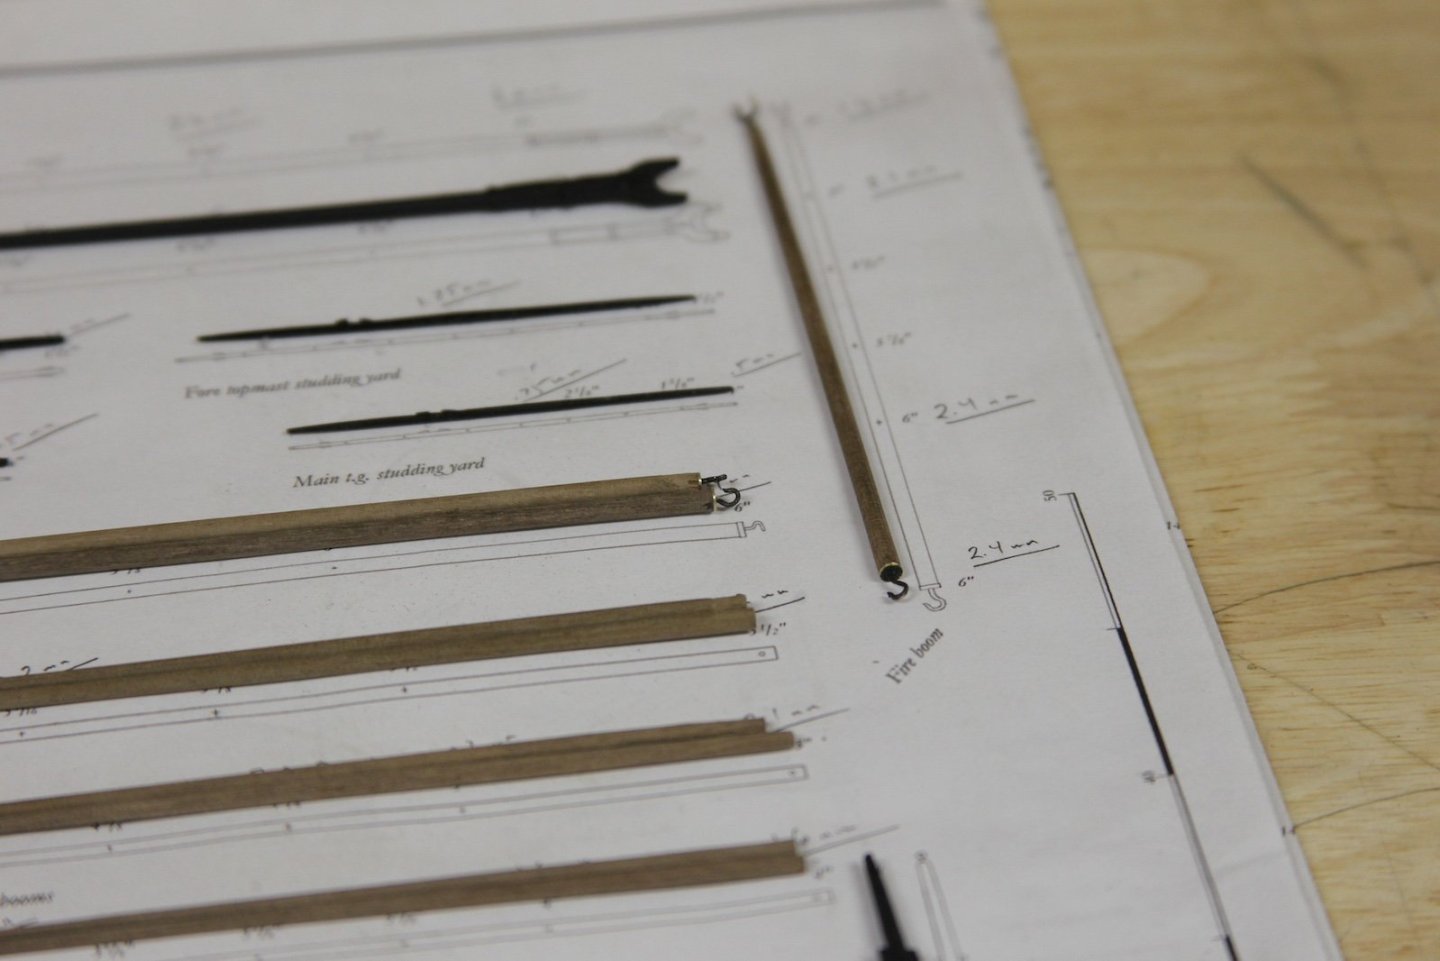
Hello all. As I progress on the Pegasus, I created a fire boom as it's listed among the needs in the Fully Framed Model plans - however, I can't seem to find where that would be located or stowed on the ship. Any information or thoughts would be much appreciated. @dvm27 - Any ideas? Thanks, as always, for the community support.

-
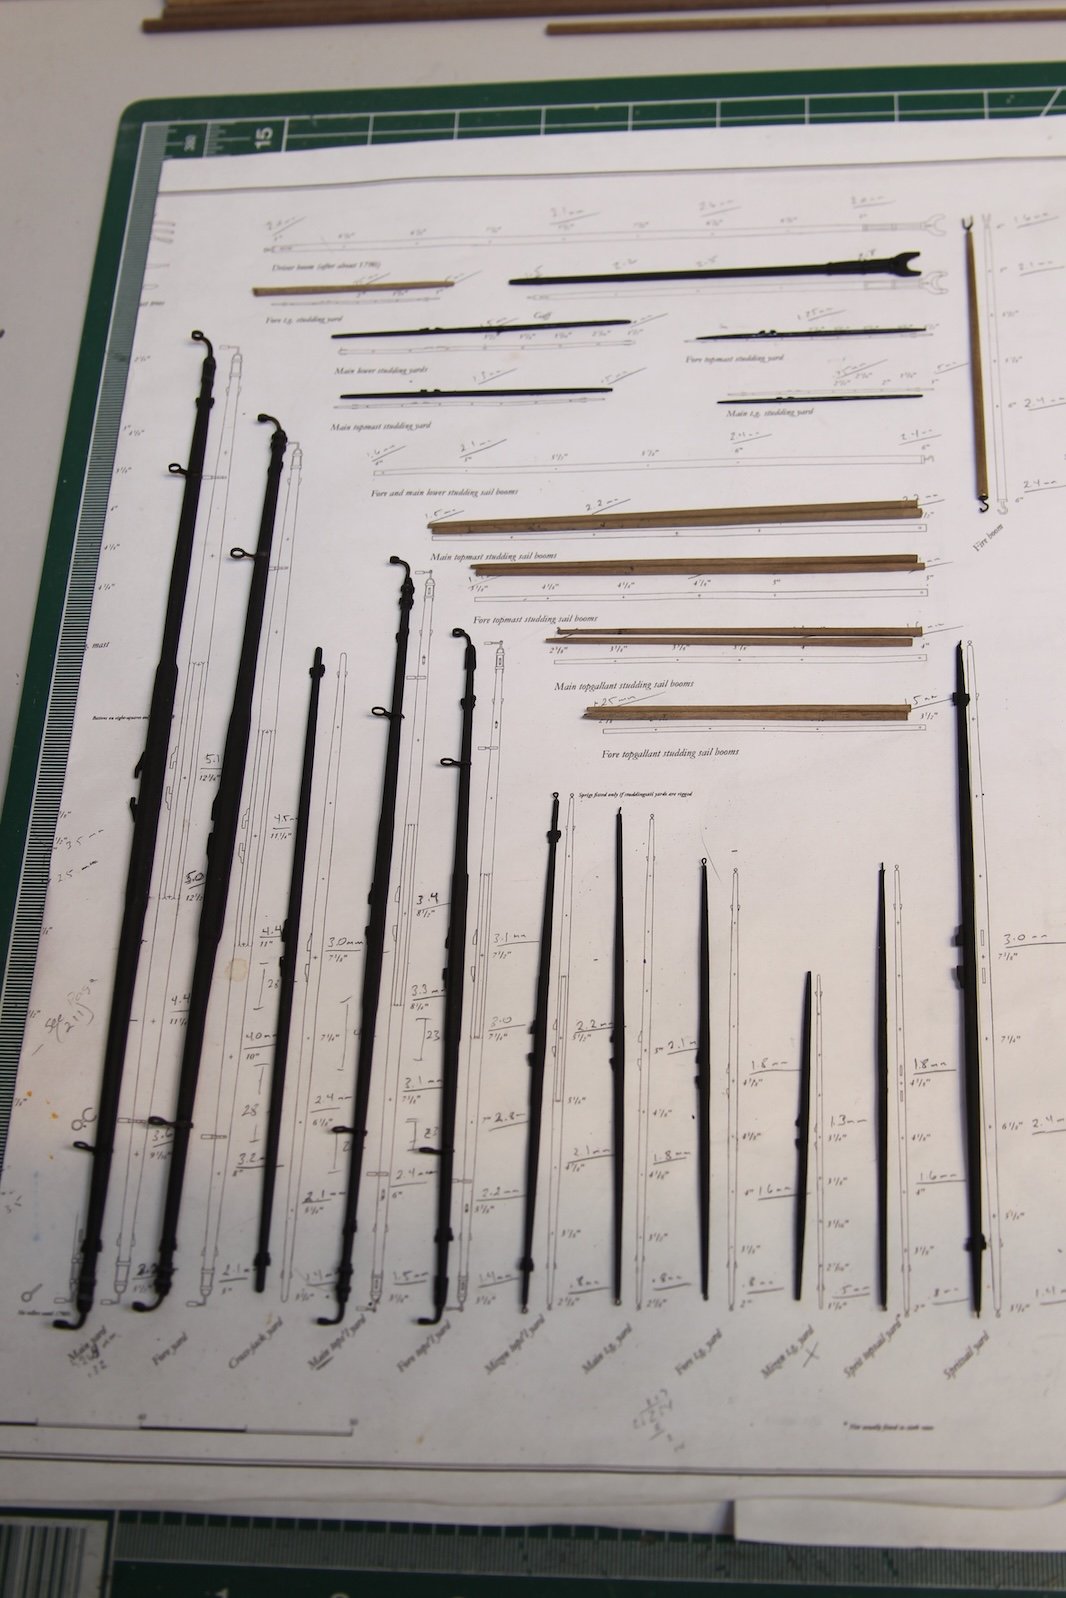
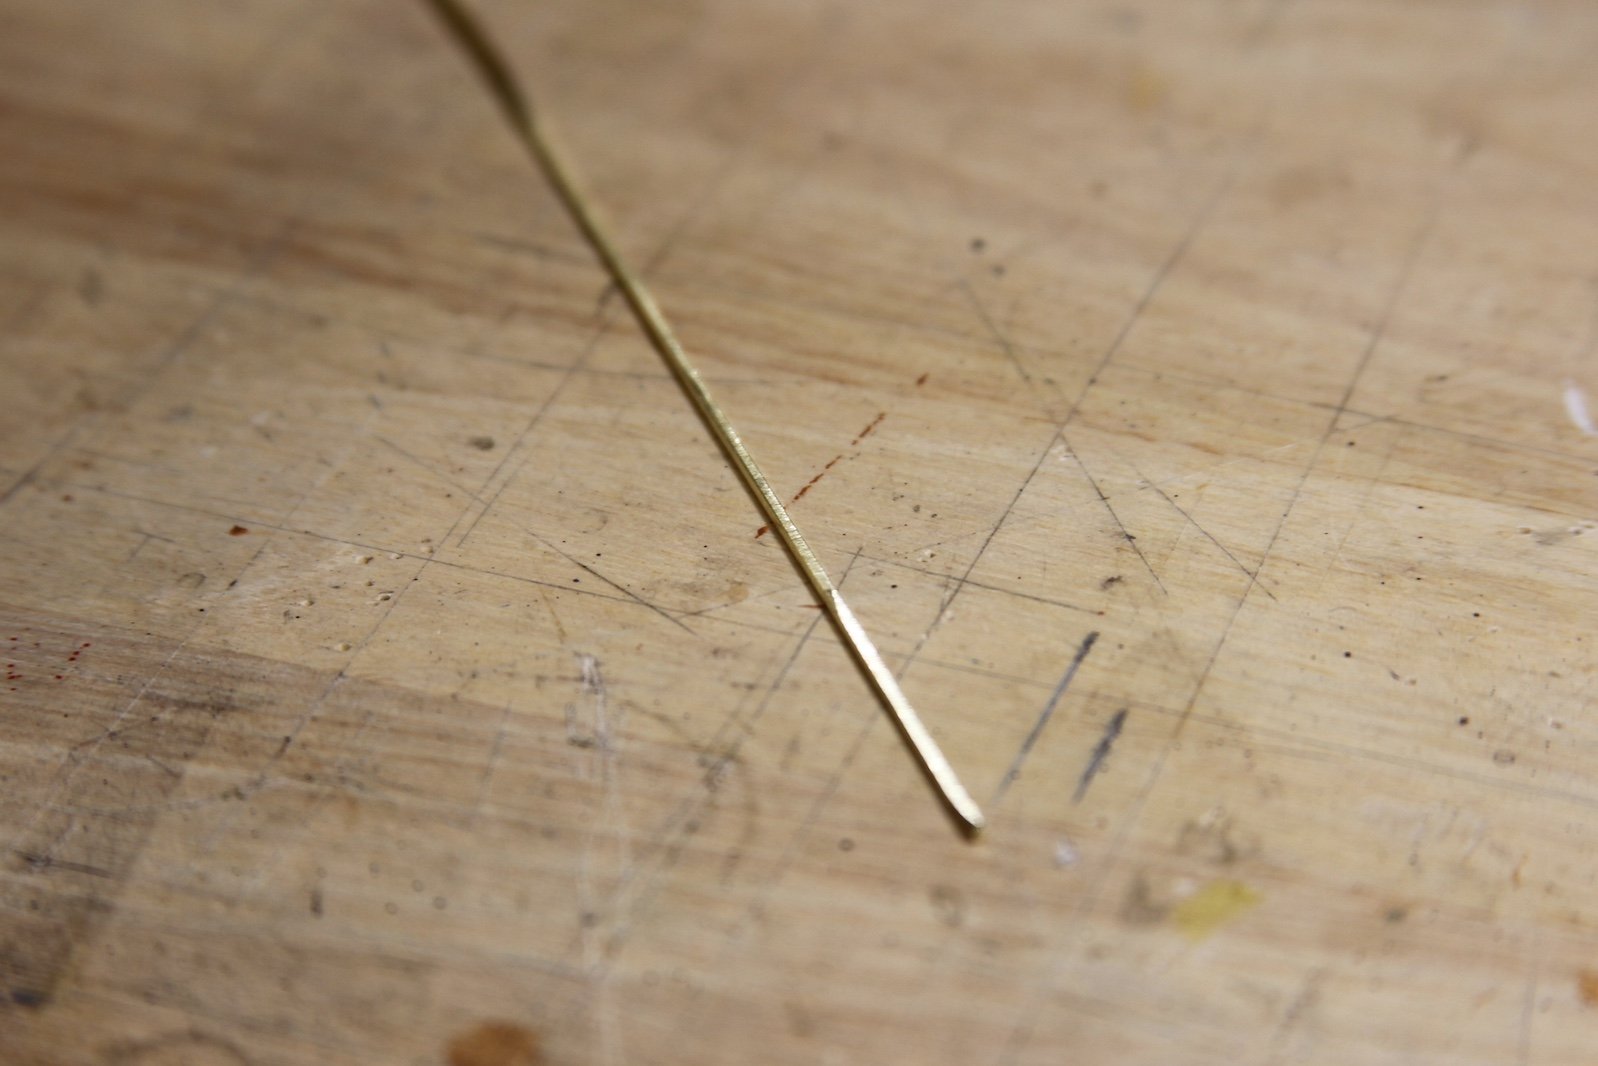
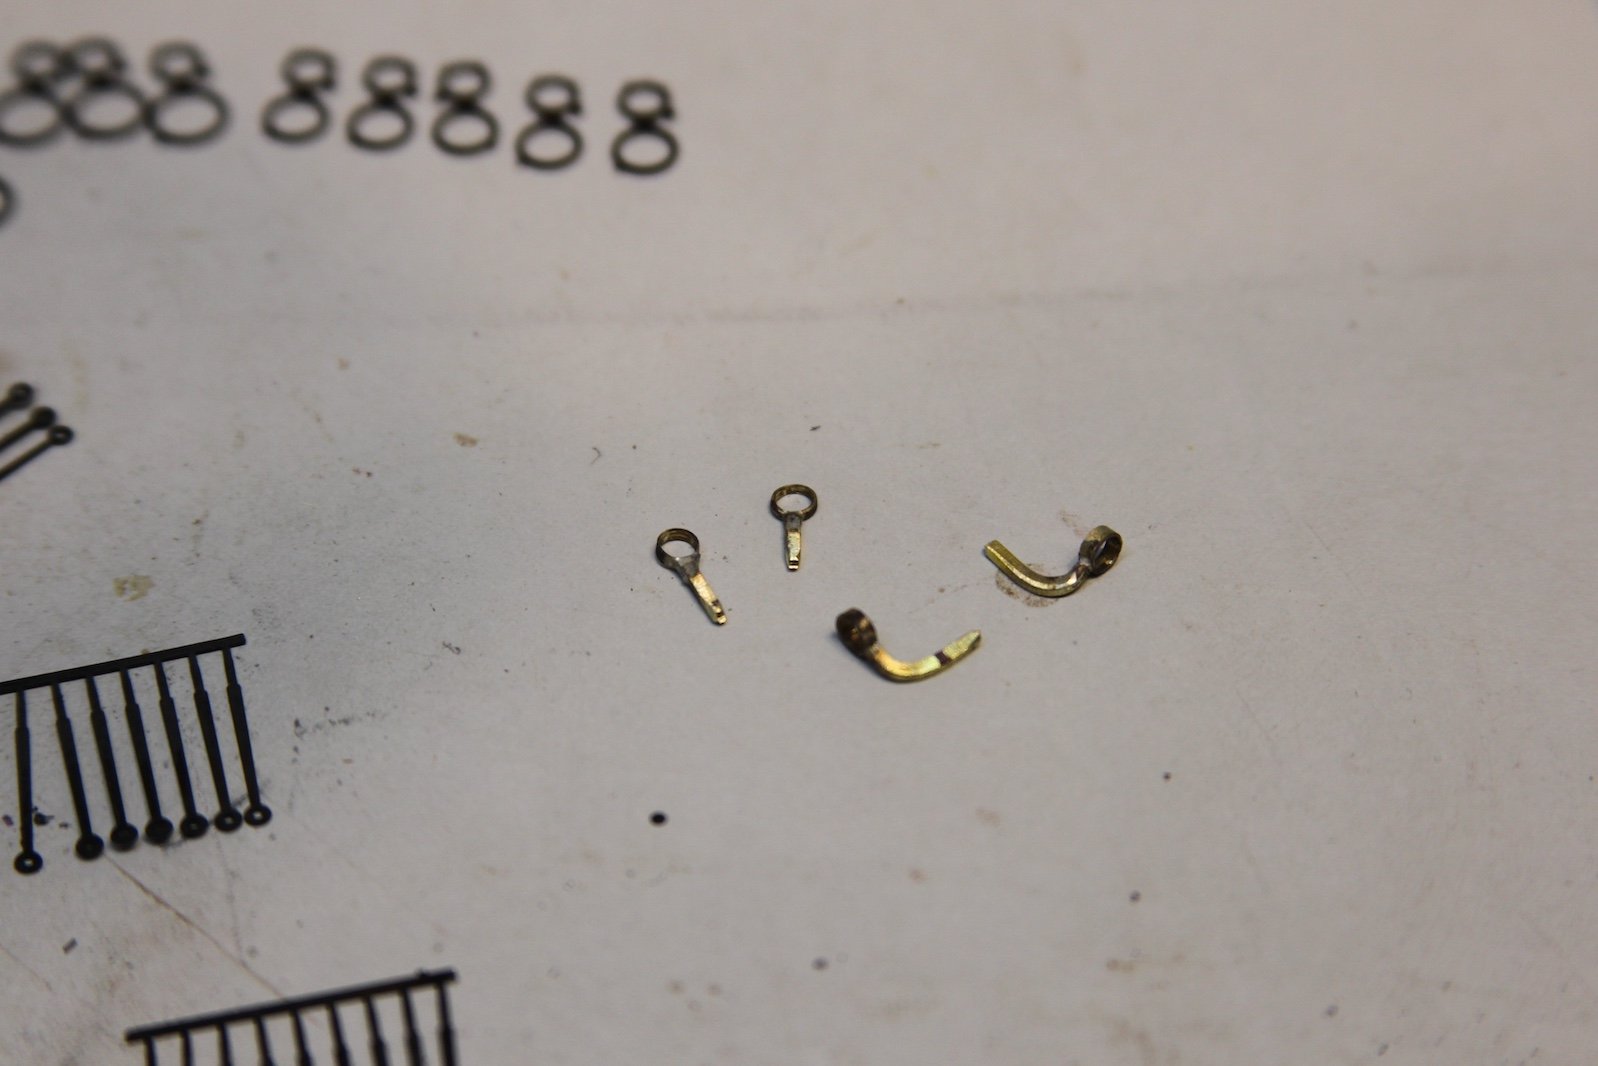
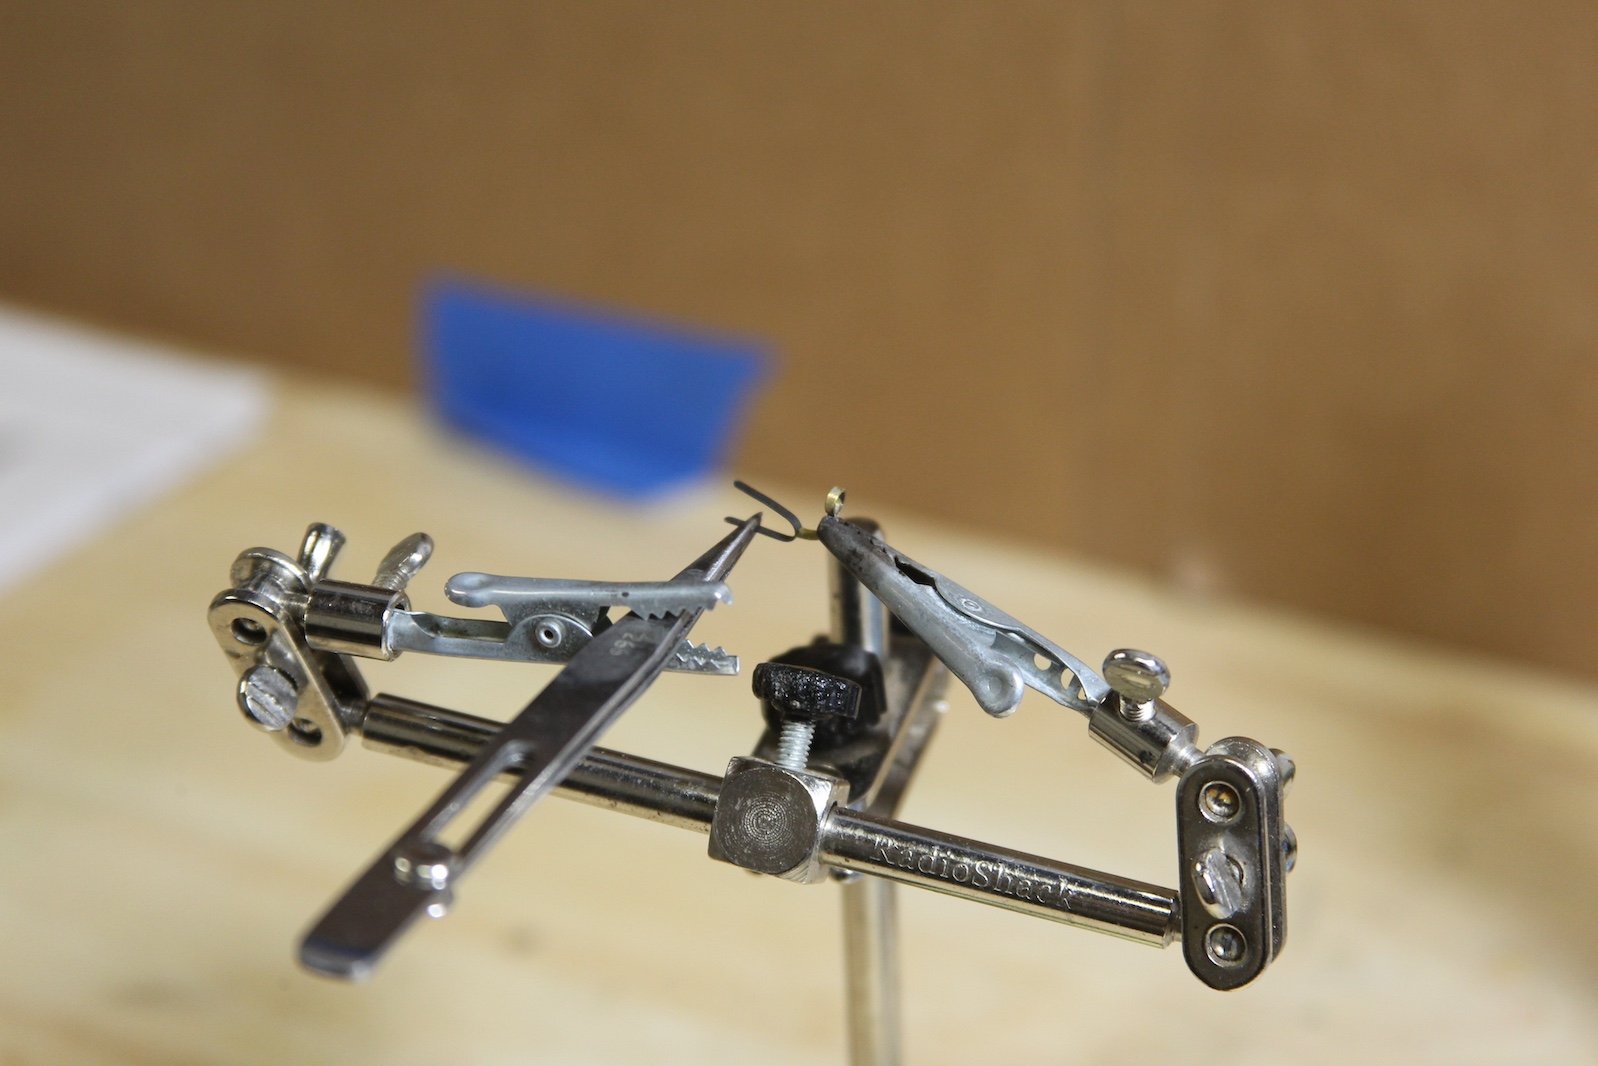
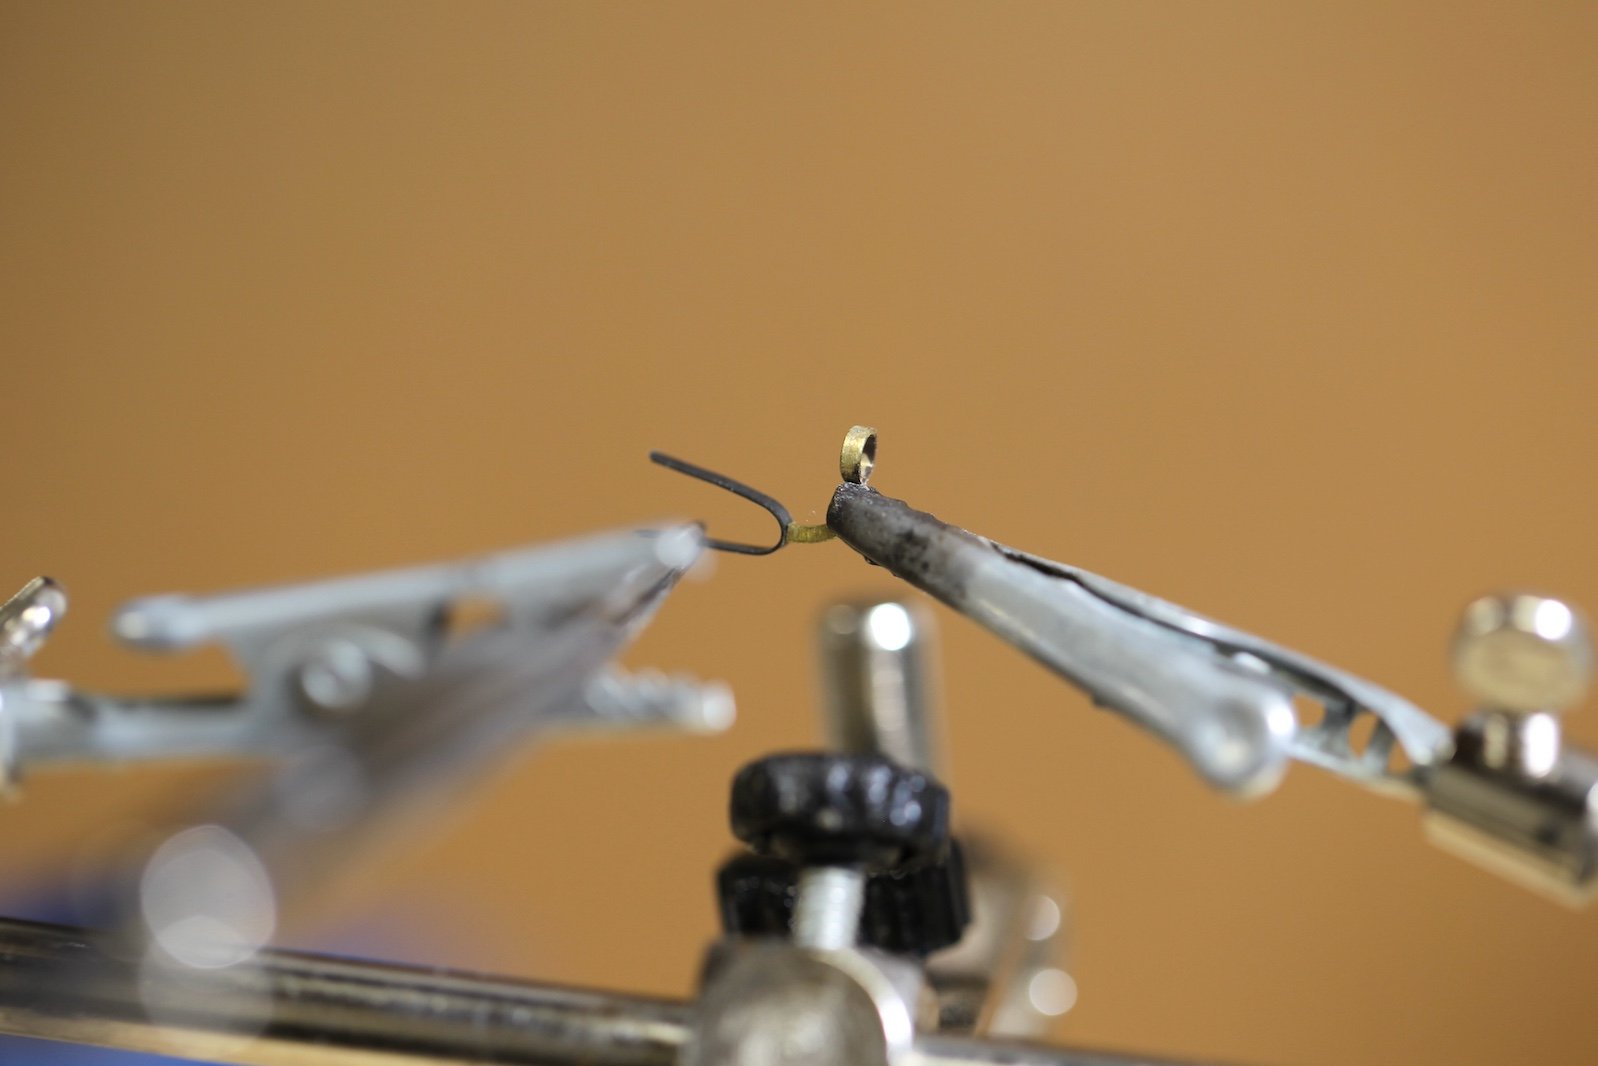
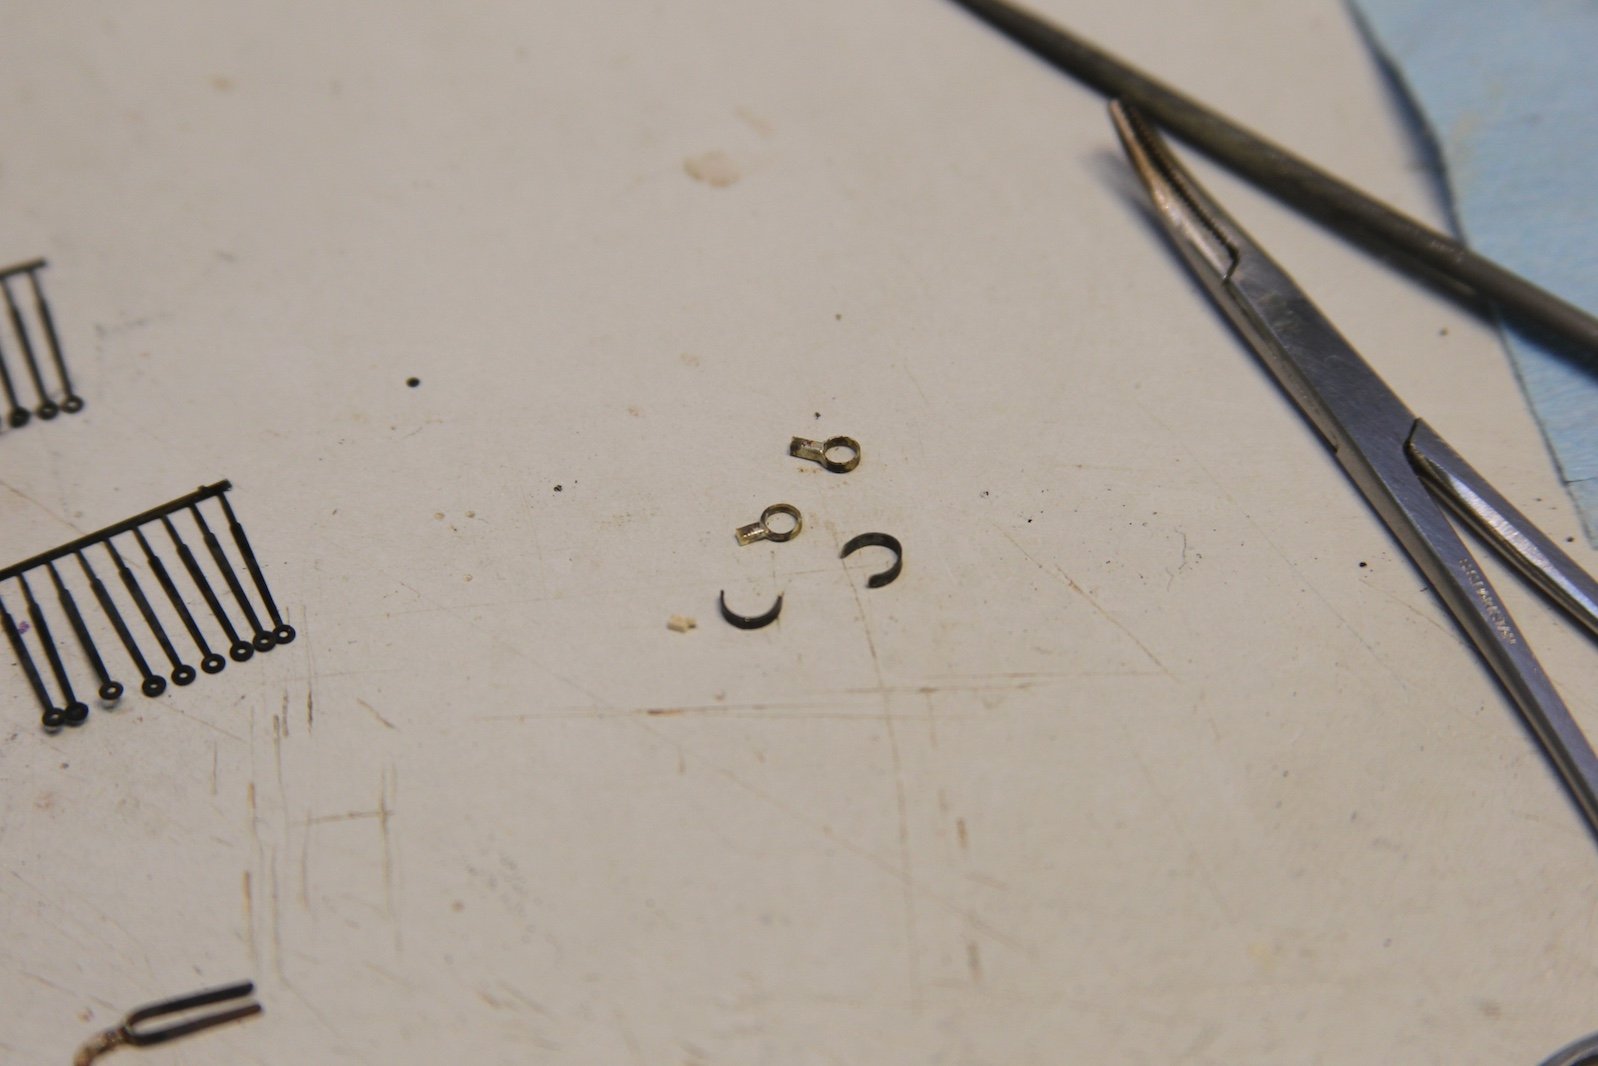
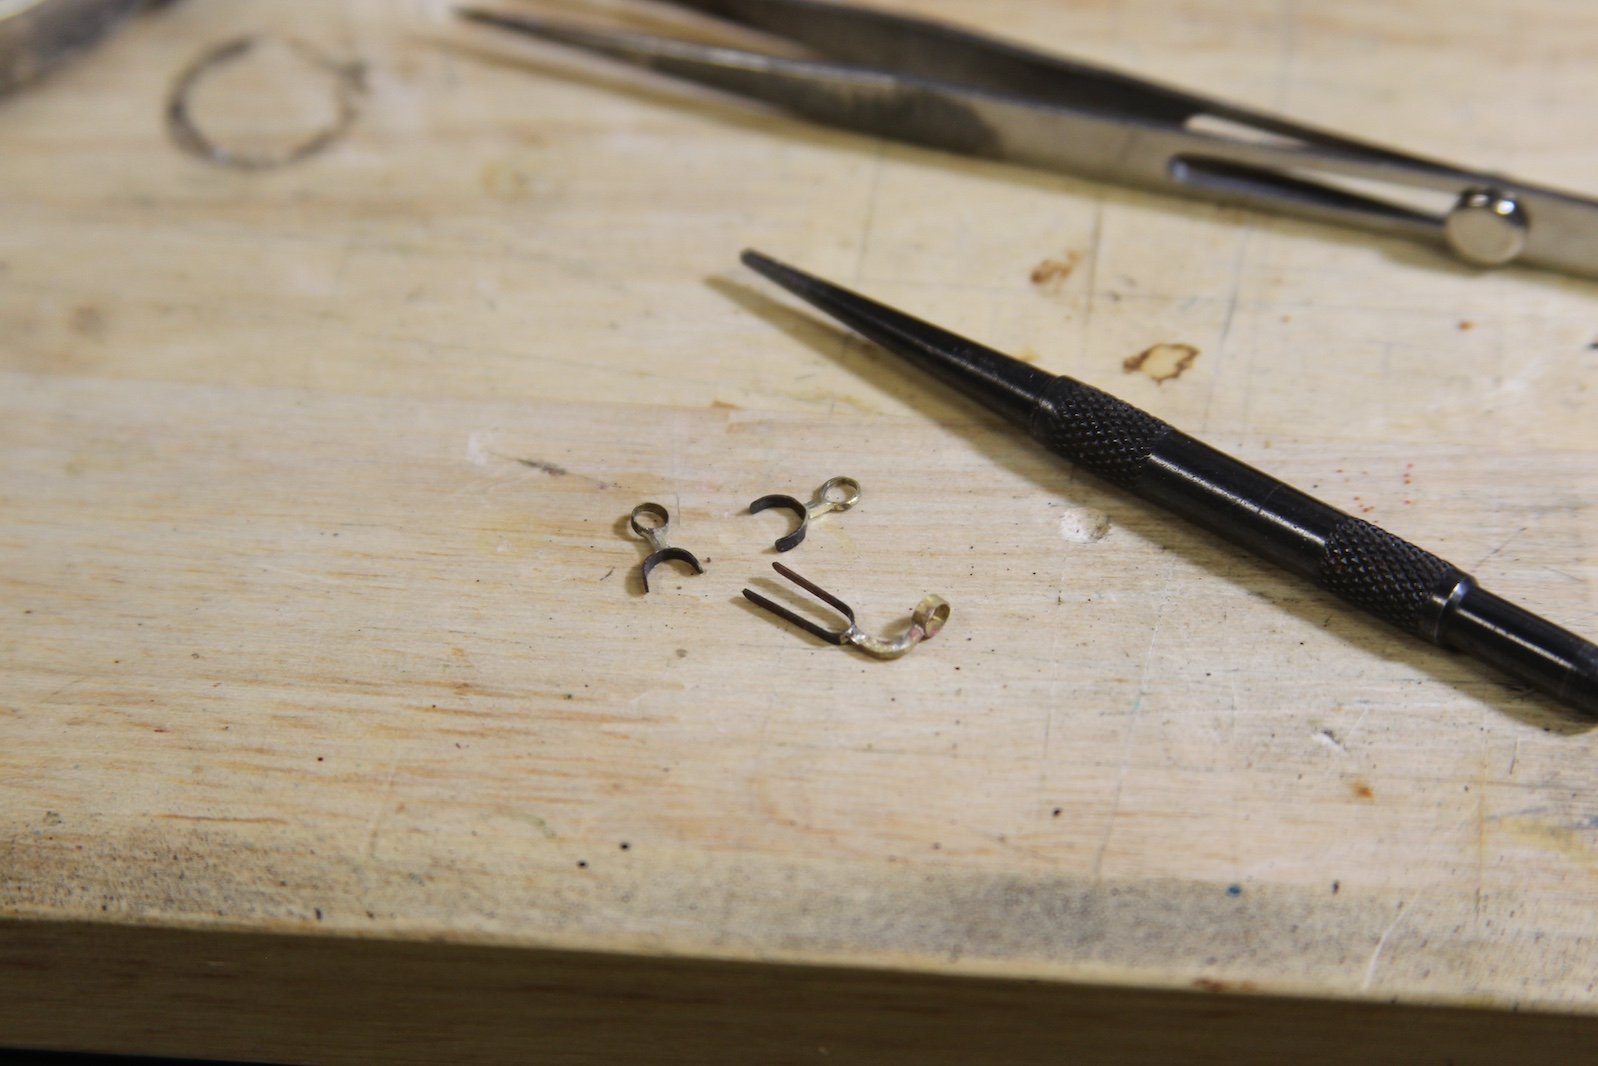
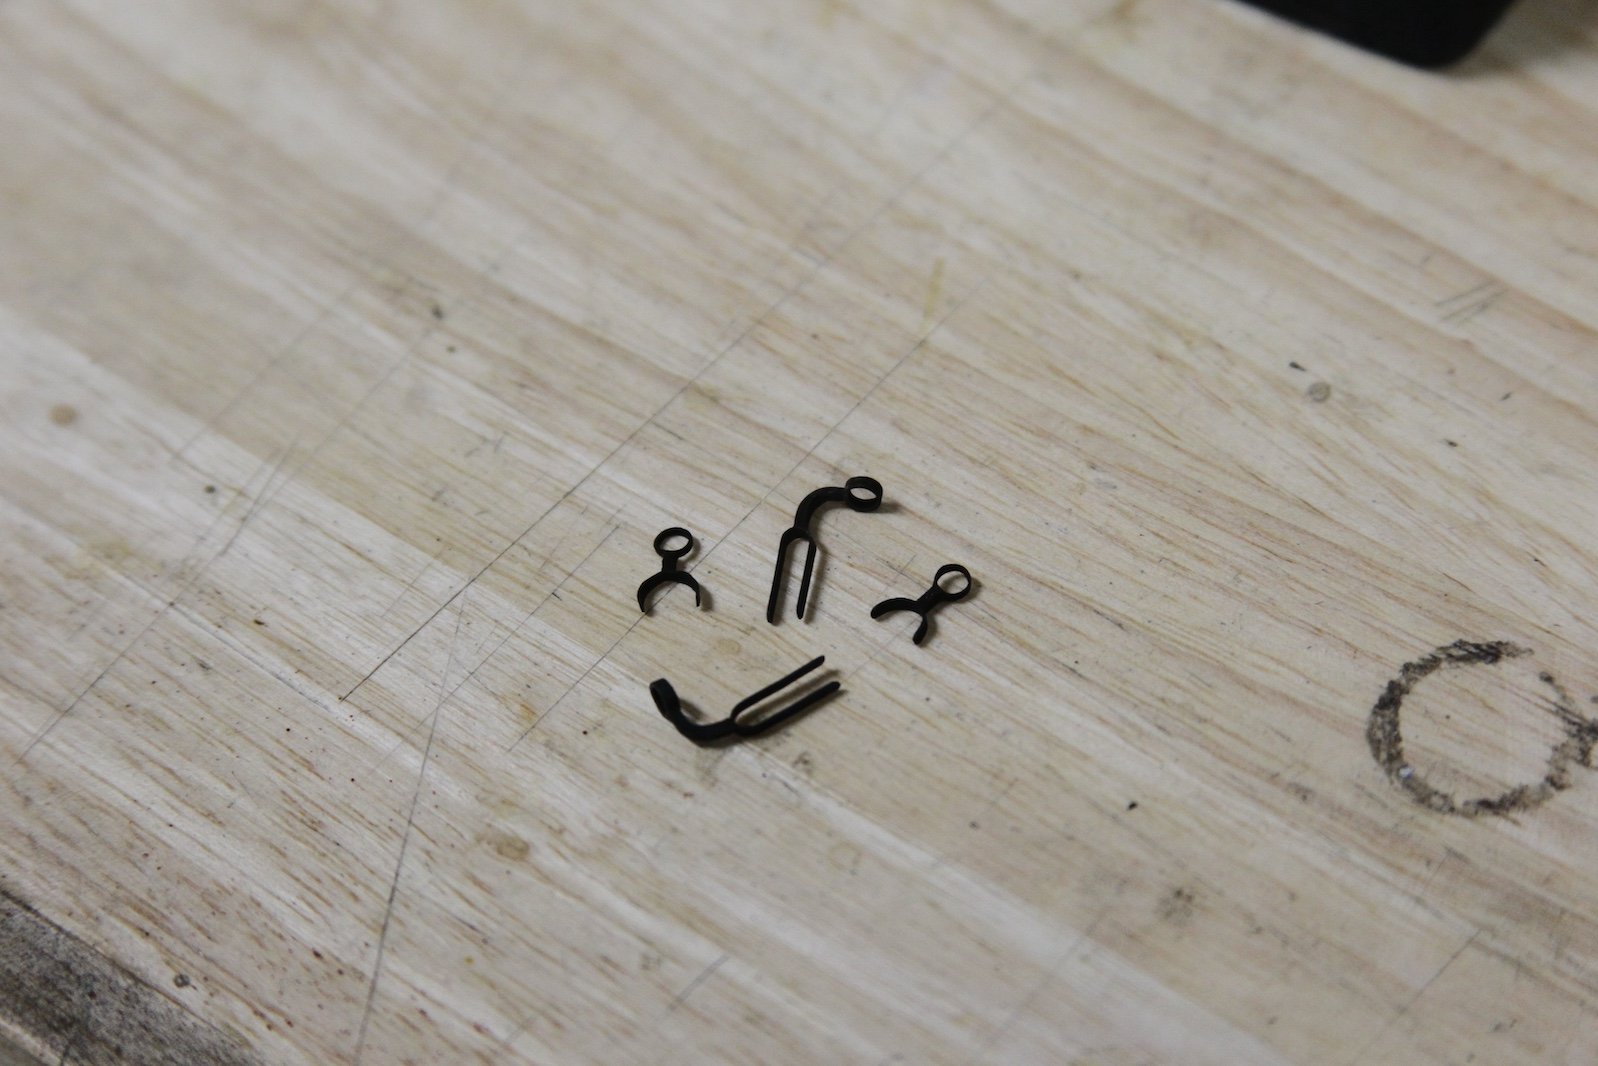
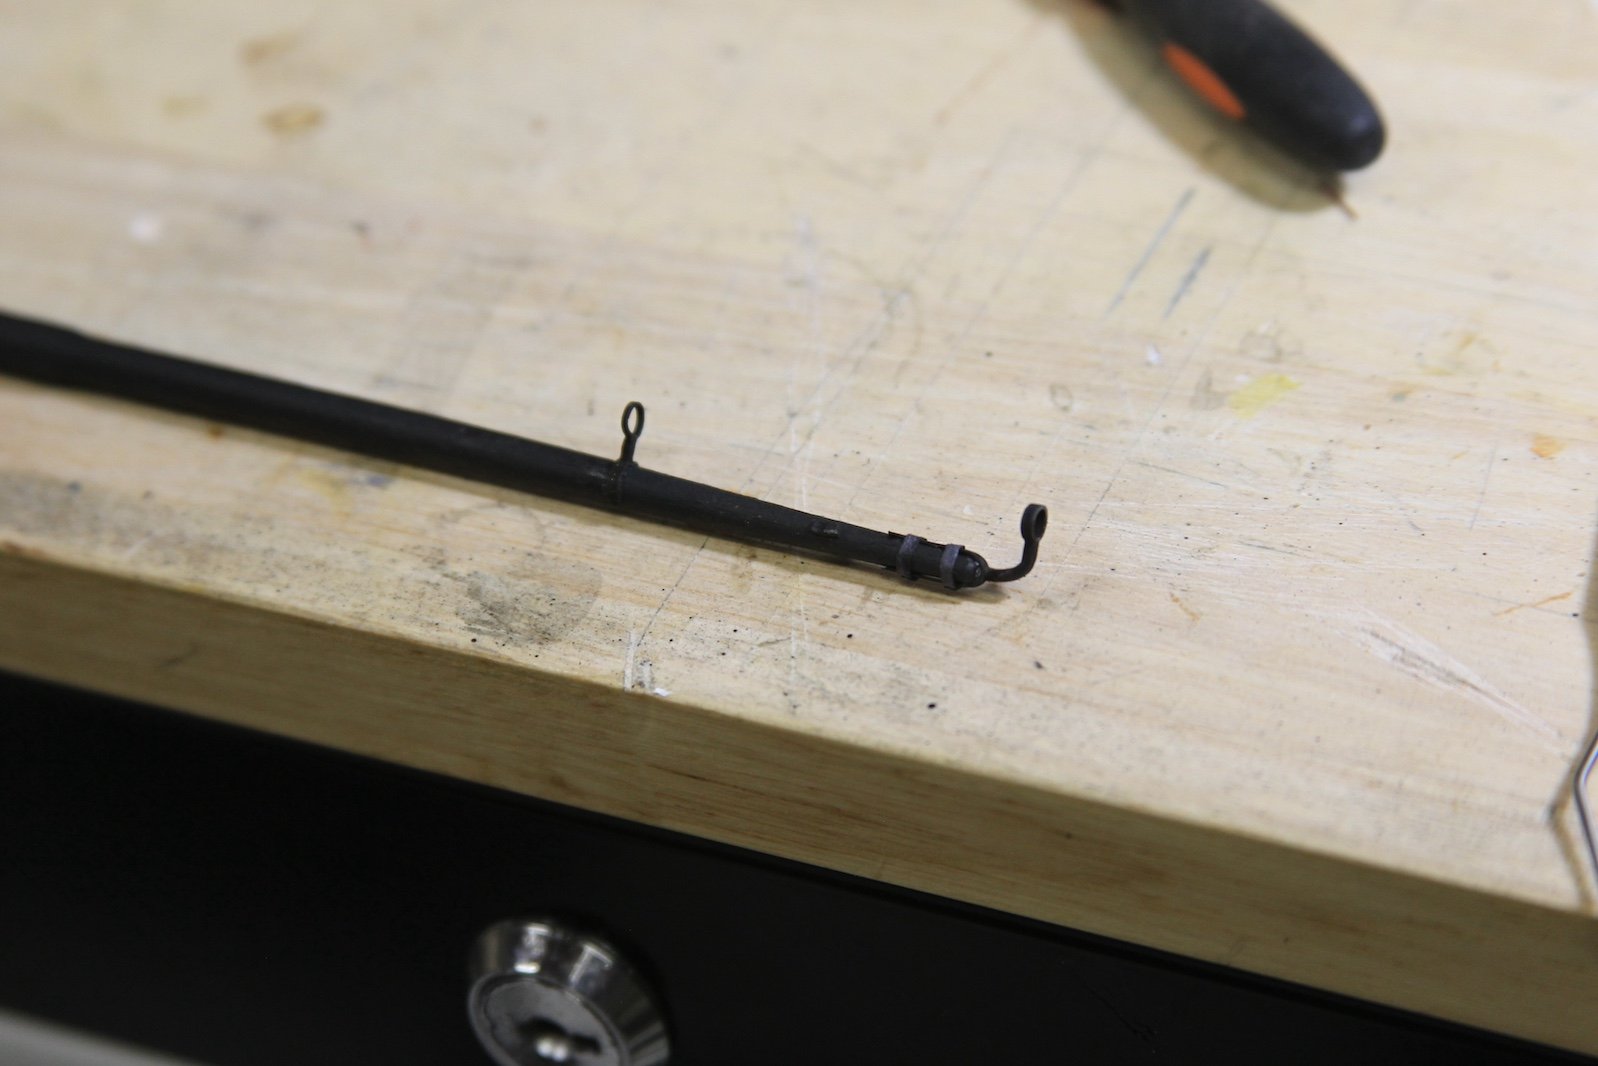
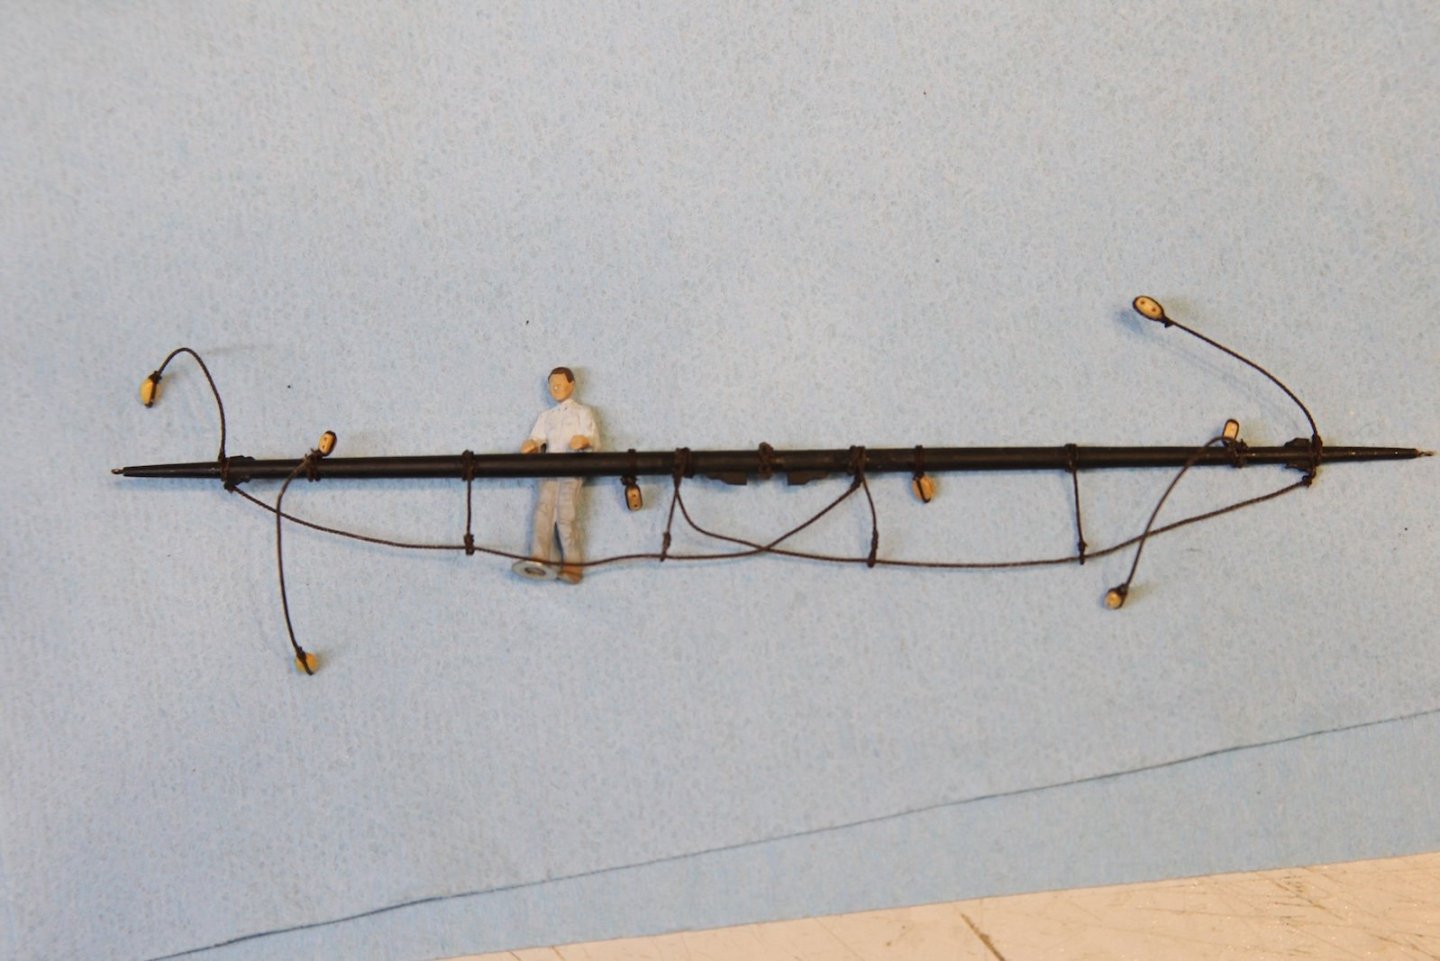
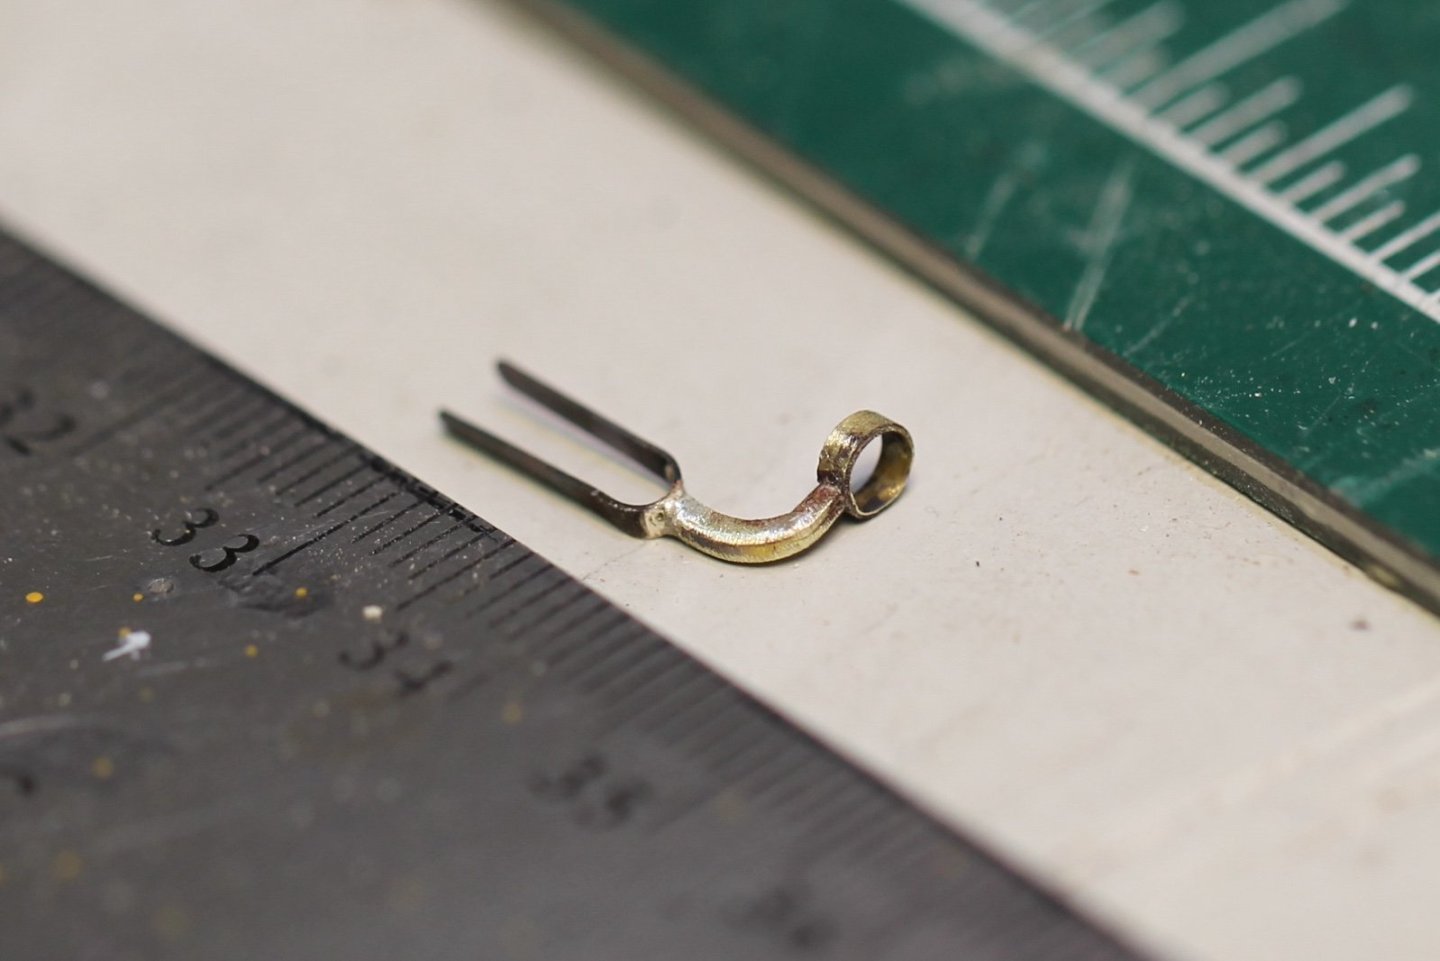
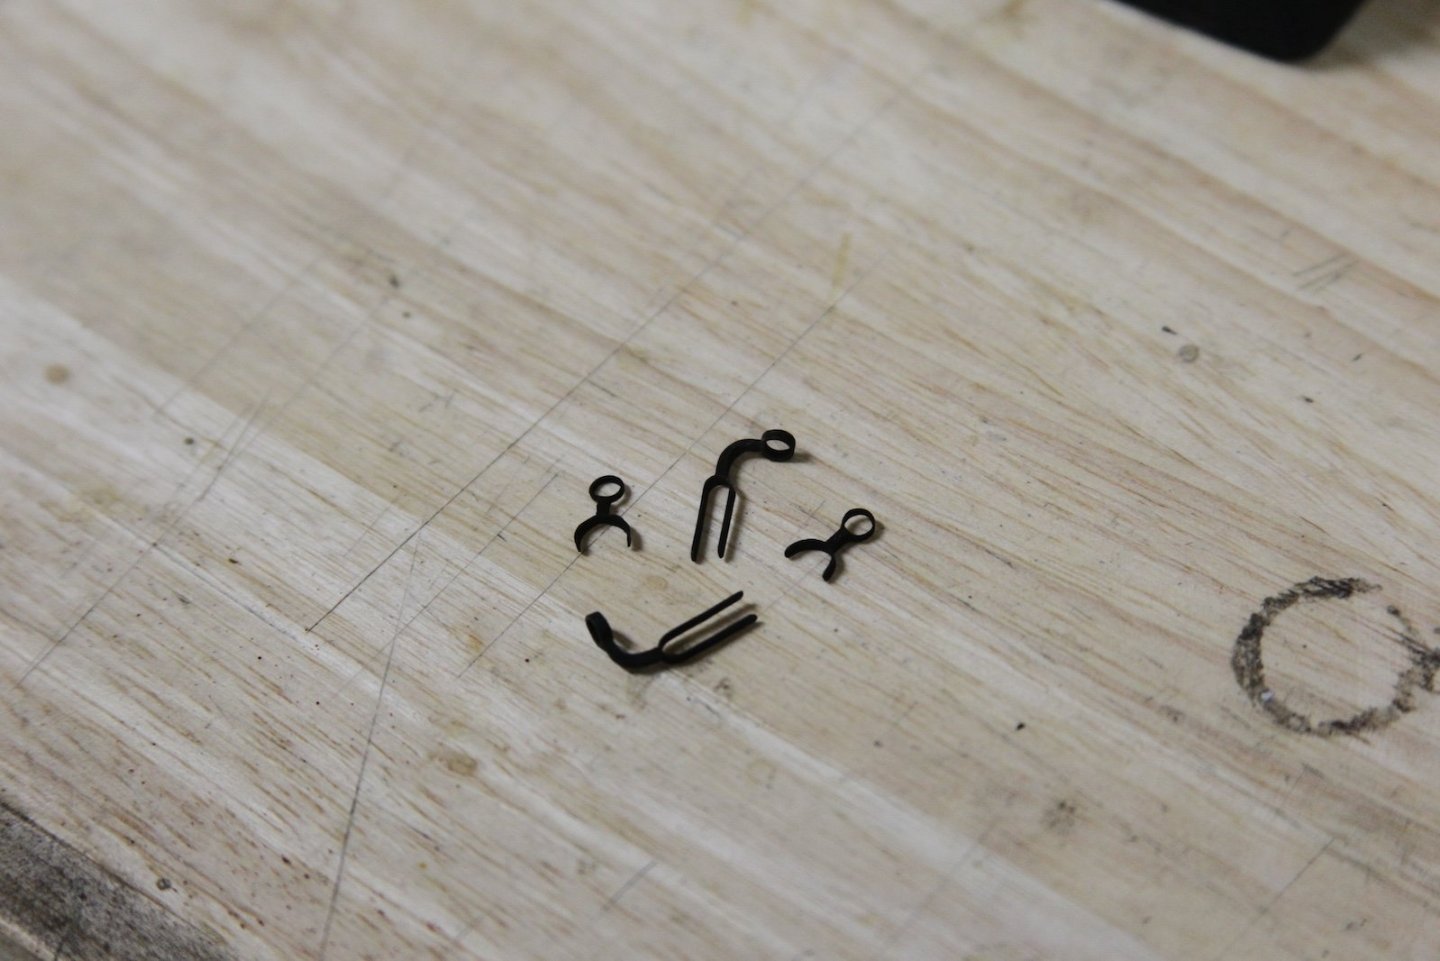
Working on the hardware for the yards. The stunsail irons support the stunsail booms on the yards and sit at a 45 degree angle forward. There is an iron on the end of the yard then another support a few feet inboard on the yard. I started by squaring off a brass piece. The circular part of the support comes from small relatively thick brass washers that I filed down. To change the diameter of the circle, I snip the washer, tighten the diameter, then silver solder it to the square support. The pieces are trimmed after soldering, but left a bit long until I get the necessary specs. The straps are made from extra flat strips of brass lengthened and shaped. I filed the ends of the support squares to round them slightly so they'd fit flush against the straps. It was actually quite difficult to line them up properly to solder. Similar process for the other braces along the yard. Flat brass pieces are shaped and soldered to the circles. Everything is sanded and smoothed then all the pieces are blackened. Finally, the stunsail irons are mounted on the yards with PVA glue. The strips are black card stock also glued with PVA. Also - an interesting milestone. The yard picture above marks my 1,000th photo for this log / build.


- 419 replies
-
- 11
-
-
- Victory Models
- Pegasus
- (and 2 more)
-
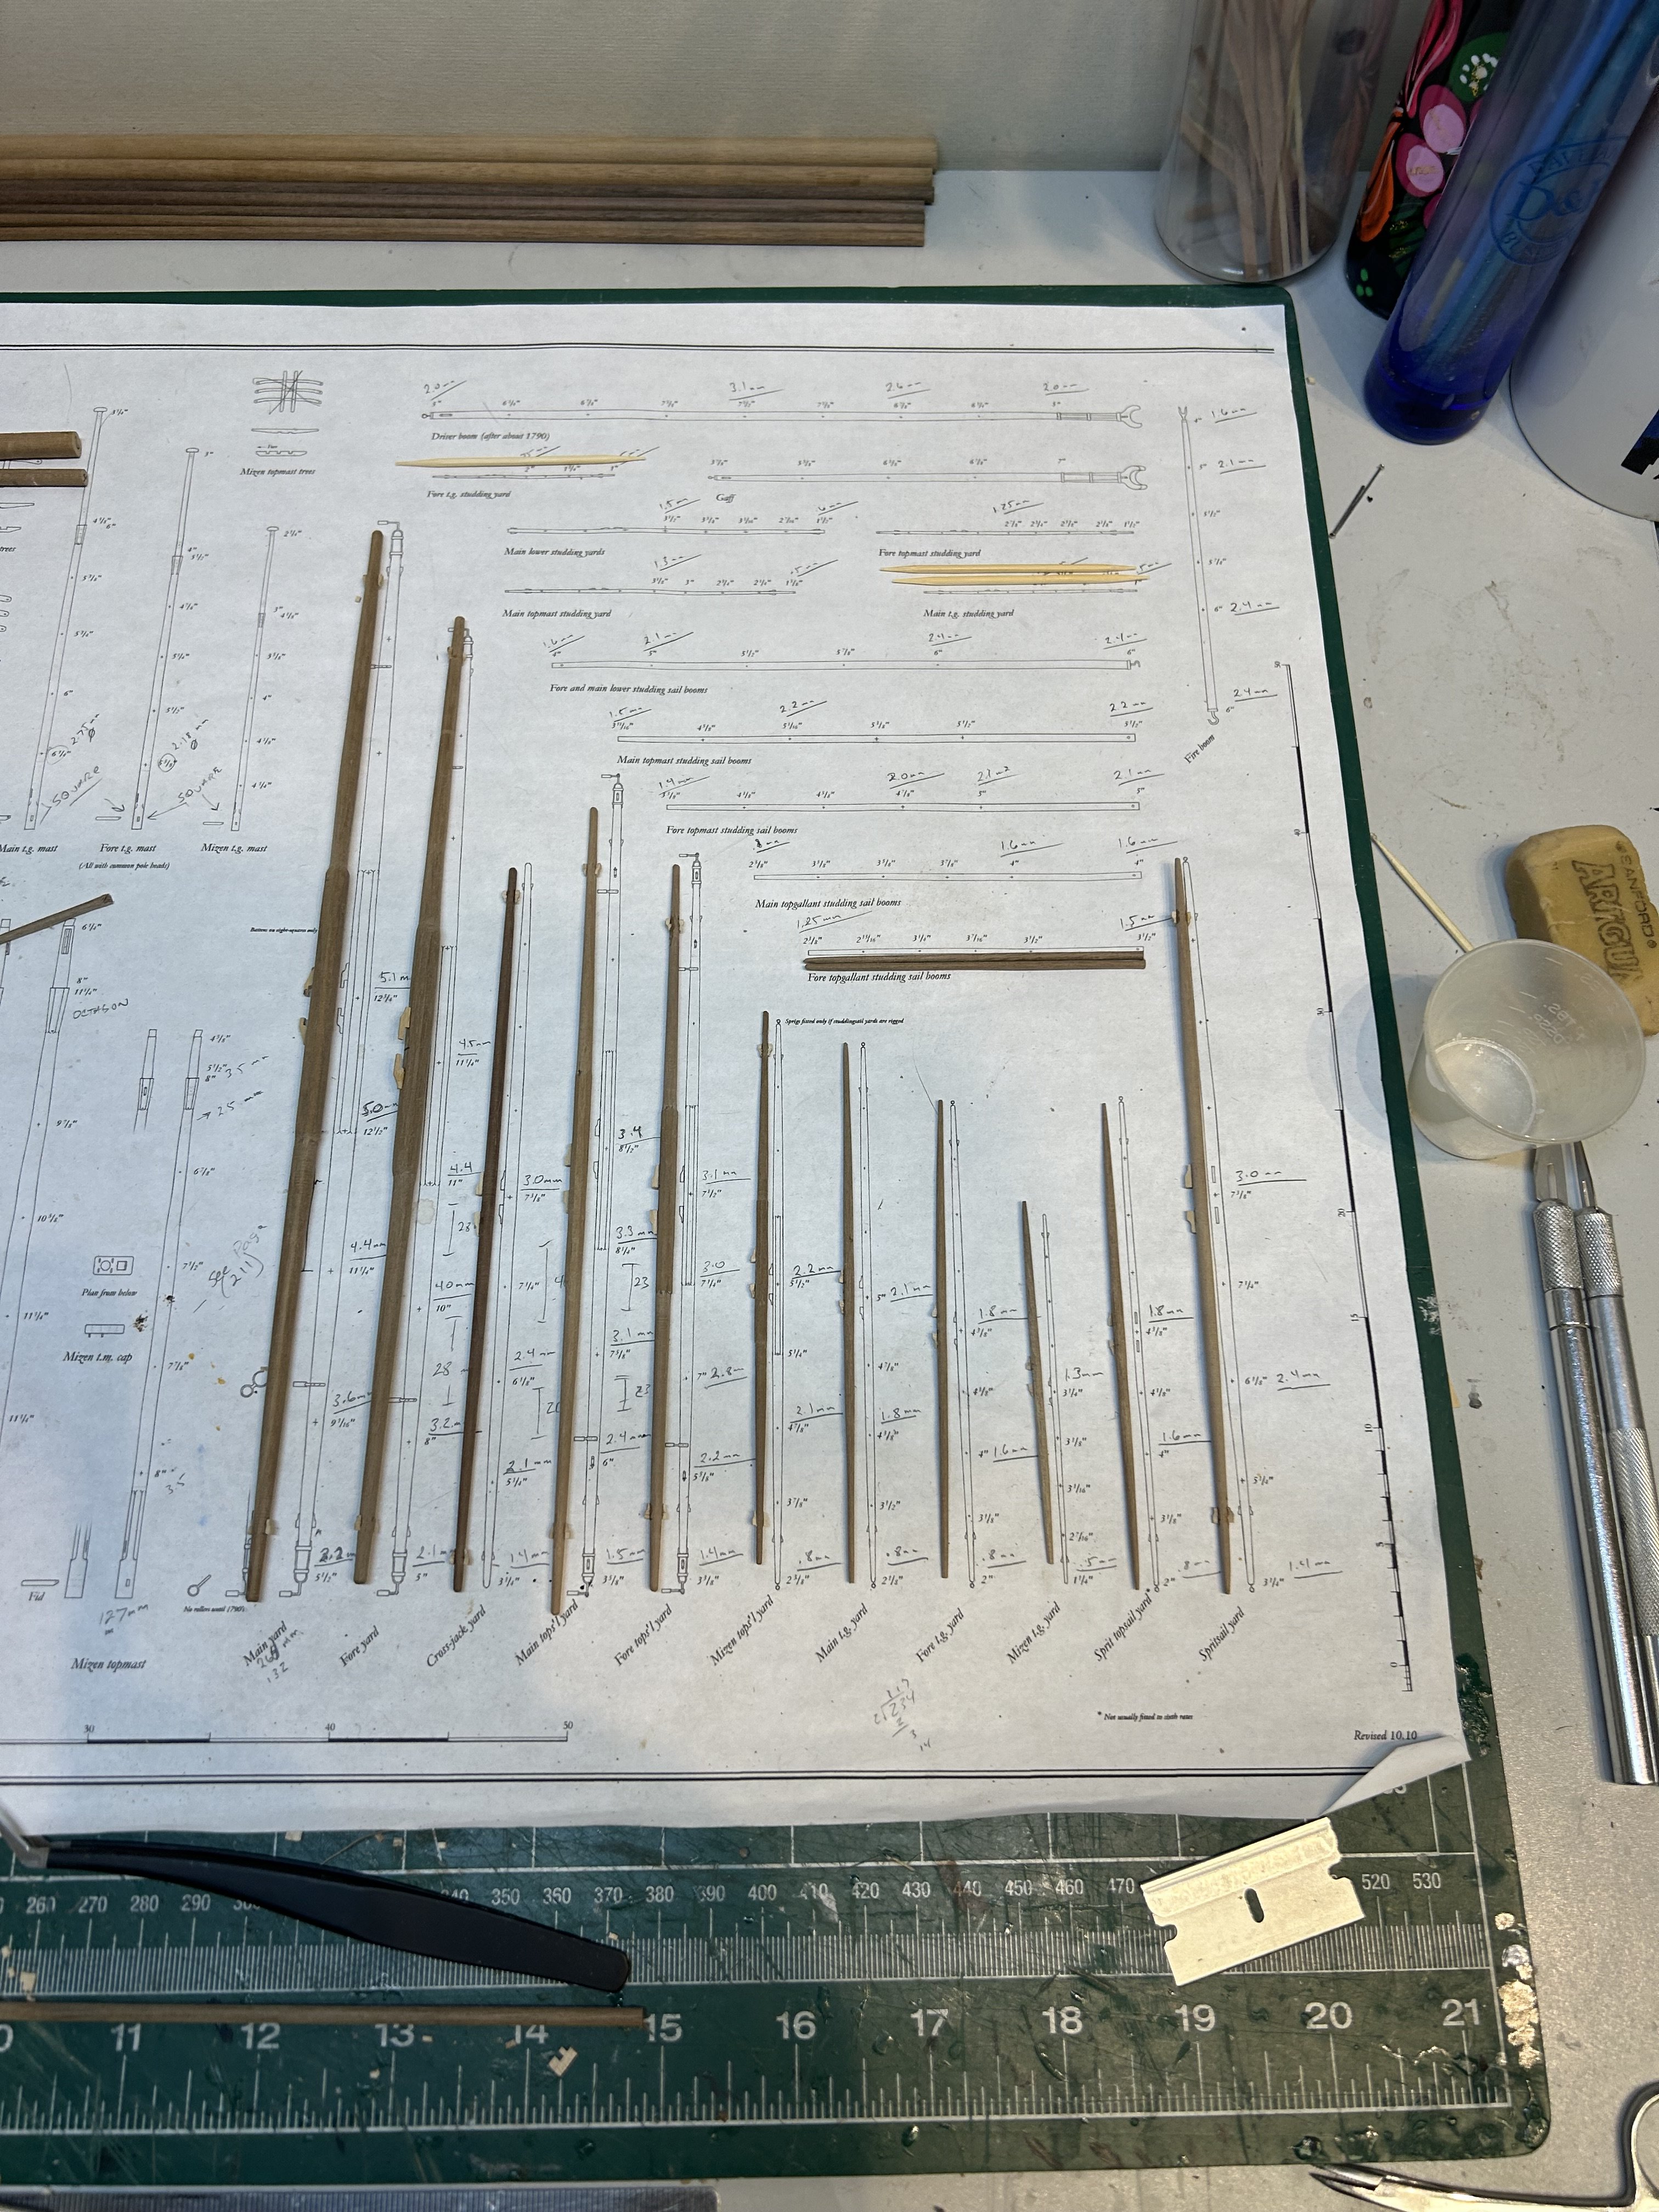
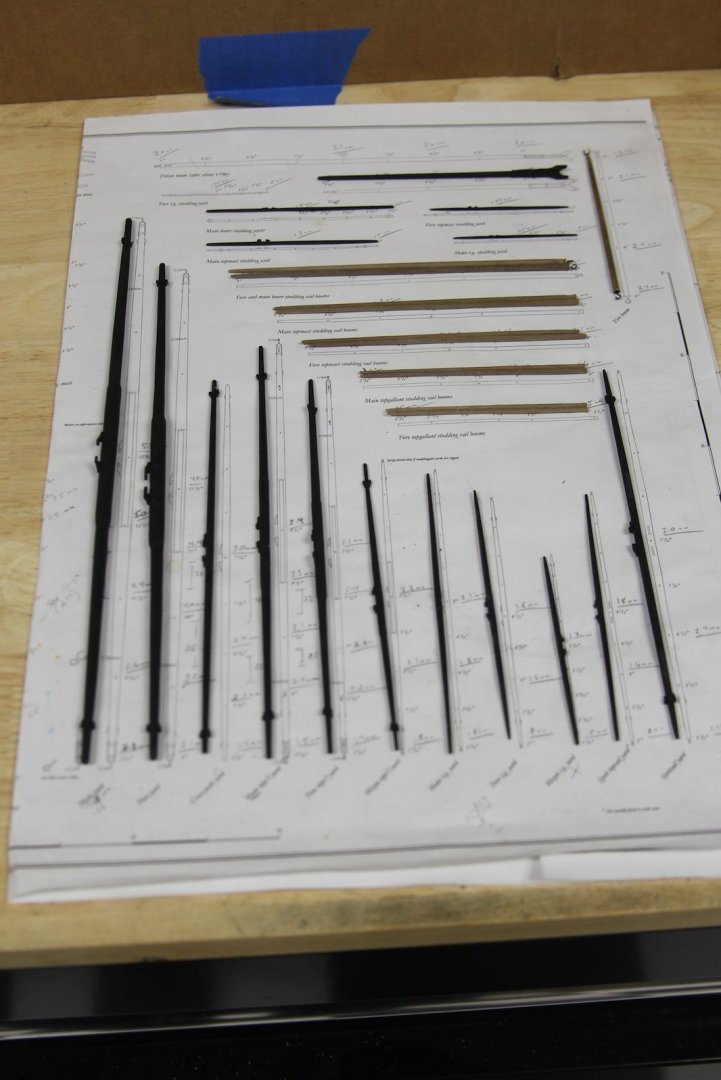
I realize it's been quite some time since I've been active on here. I've had a handful of business trips and a couple of not-business trips, so limited opportunities to work in the shipyard for the last month or so. That said, I've still been plugging away at the yards. All the yards have been created and I'm not working on the metal bits (hooks & hoops, etc) before I move on to the blocks and fittings.
- 419 replies
-
- 9
-
-
- Victory Models
- Pegasus
- (and 2 more)
-
Hey Bob - my lathe is their most basic, the Proxxon DB250 - pretty common in these parts I think. It’s relatively inexpensive and works well for the basic stuff. I do have the three jaw chuck adapter which is super handy. I also have the Proxxon Jig saw which is pretty good.
- 419 replies
-
- 4
-
-
-
- Victory Models
- Pegasus
- (and 2 more)
-
Thanks a lot Cisco, Isaiah, and Ross - really appreciate the kind comments and looking in. @Isaiah - My camera is definitely overkill. Truth be told, I was a combat journalist for quite a few years, so I have an older model Canon EOS-1 Mark IV. Most of the shots are taken with a 28-135 utilitarian zoom lens, but most of the closer shots are with an L series 100mm macro lens. Sometimes I'll focus stack the shots in Photoshop as well. (It's probably worth noting that the last shot of the yards is just a quick update snap with my iPhone though) @RossR - Thanks - this jib net turned out much better than my first couple of attempts! I try not to be too afraid of spending some time getting it wrong. 😛
- 419 replies
-
- 3
-
-
- Victory Models
- Pegasus
- (and 2 more)
-
Still plugging away and making yards and their cleats…

- 419 replies
-
- 8
-
-
- Victory Models
- Pegasus
- (and 2 more)