HOLIDAY DONATION DRIVE - SUPPORT MSW - DO YOUR PART TO KEEP THIS GREAT FORUM GOING! (Only 13 donations so far - C'mon guys!)
×
Paul0367
-
Posts
512 -
Joined
-
Last visited
Content Type
Profiles
Forums
Gallery
Events
Everything posted by Paul0367
-
 Welcome back, having time is one thing but having the will is another, I refer to framing if the gun ports and windows, painfully taxing on the brain. Repetitively painful, but so necessary, will keep an eye out on your build as always
 -
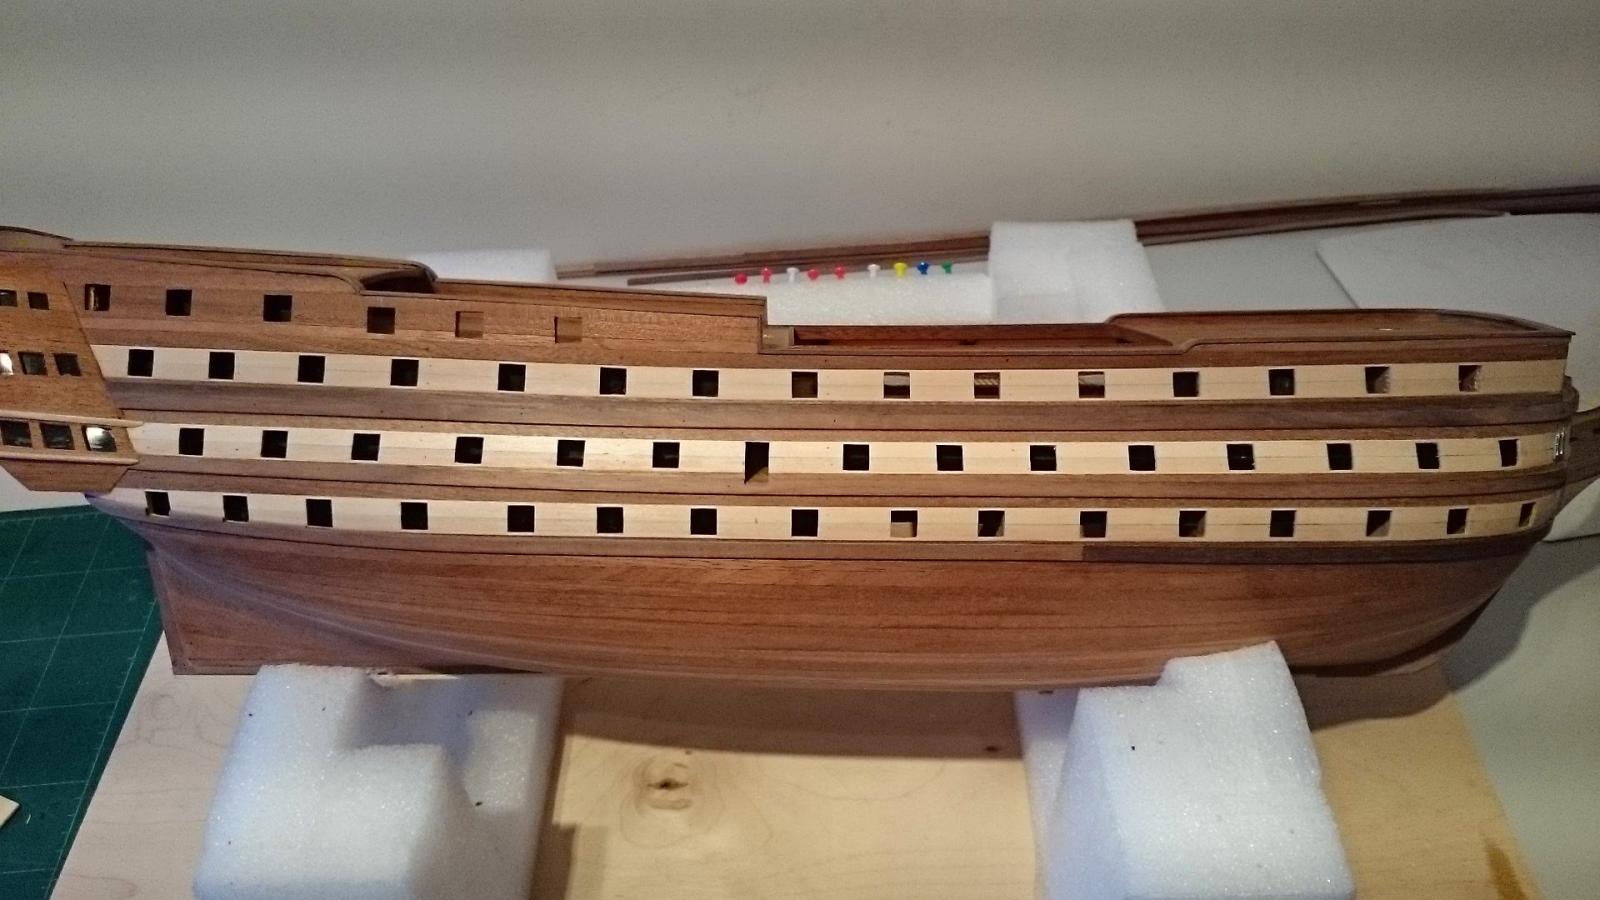
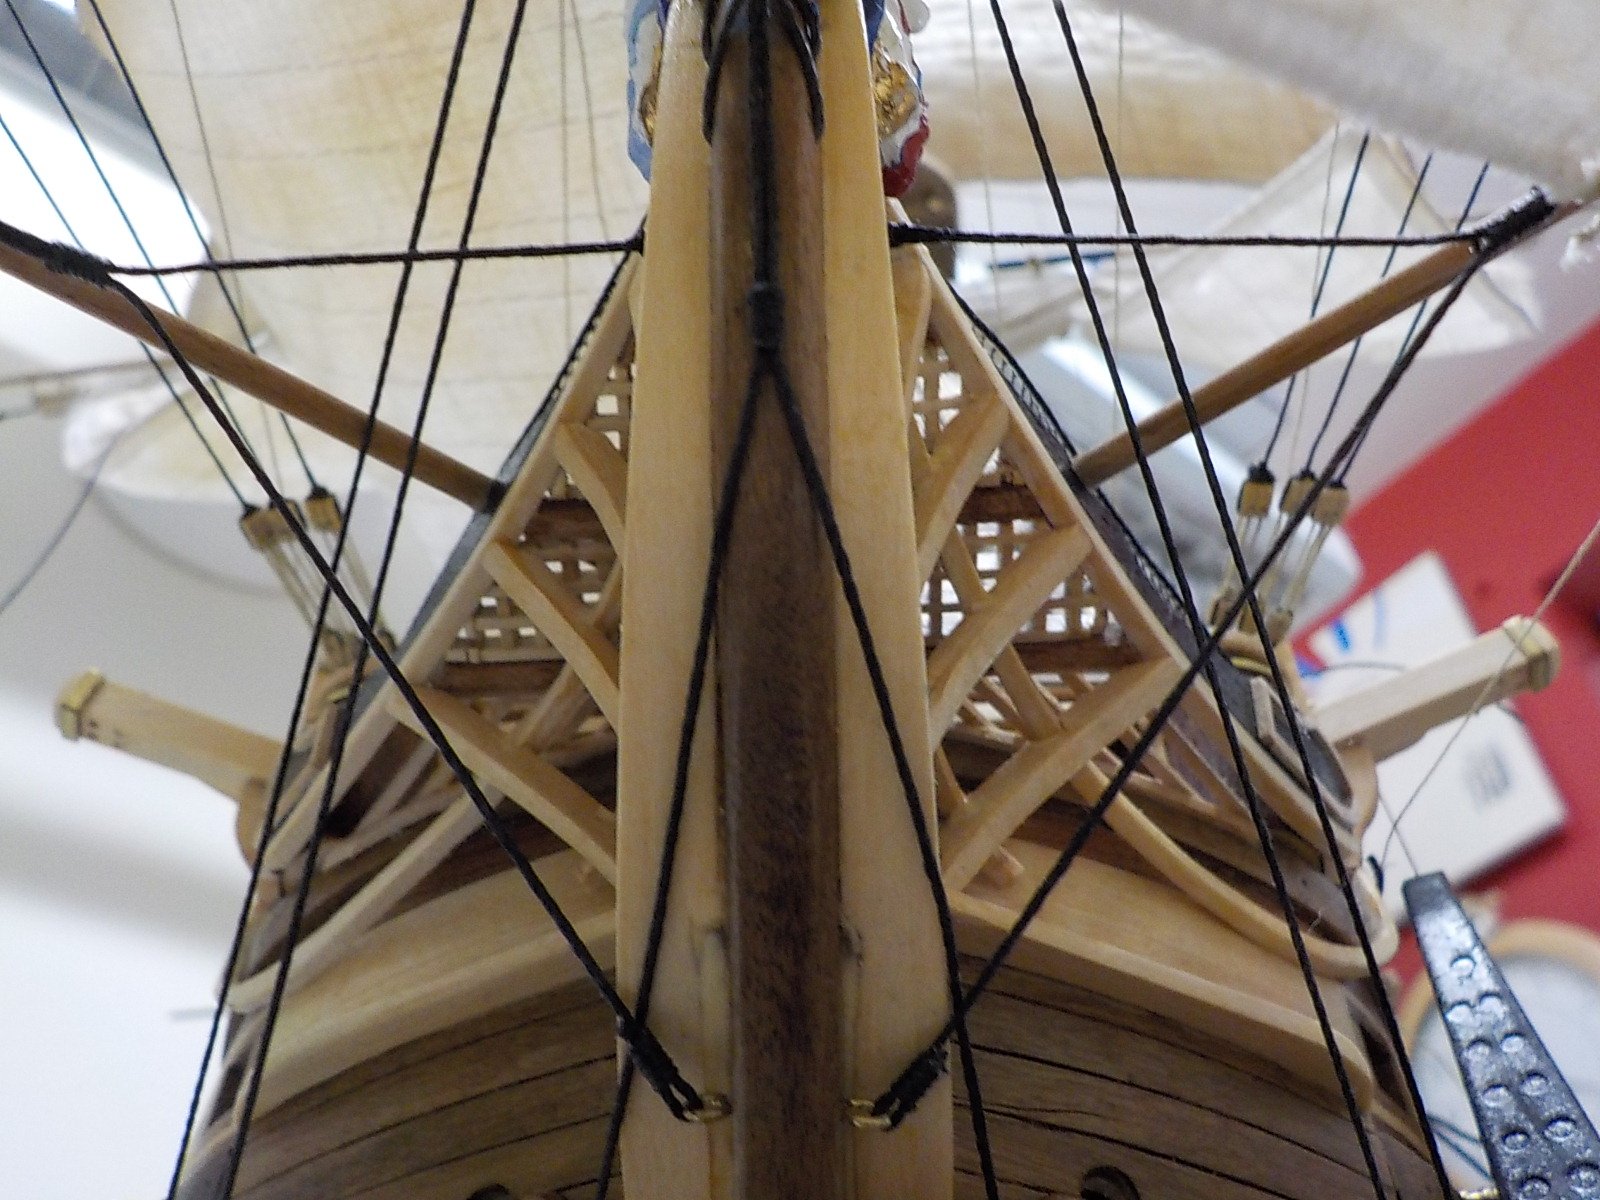
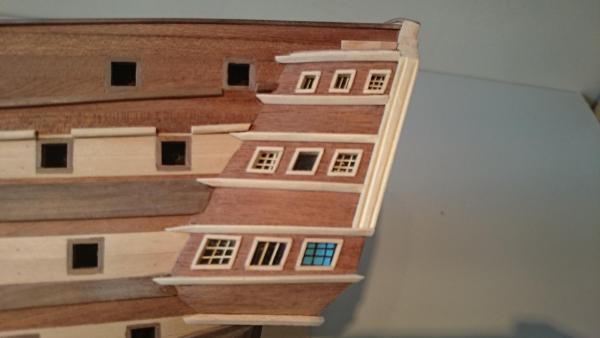
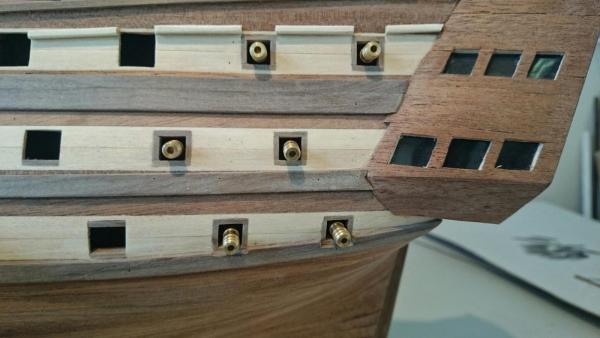
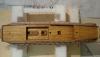
I have moved on to the captains quarters now detail and frames going in, the picture shows my additional frames part installed in the windows, this takes so much time and is so fiddily but I hope it's seen as a better addition by fellow modellers. I also put in a blue window and framed it as the kit intended. I personally felt this was a let down by Constructo and a bit of a cop out. I'm
- 708 replies
-
- 3
-

-
- victory
- constructo
- (and 1 more)
-
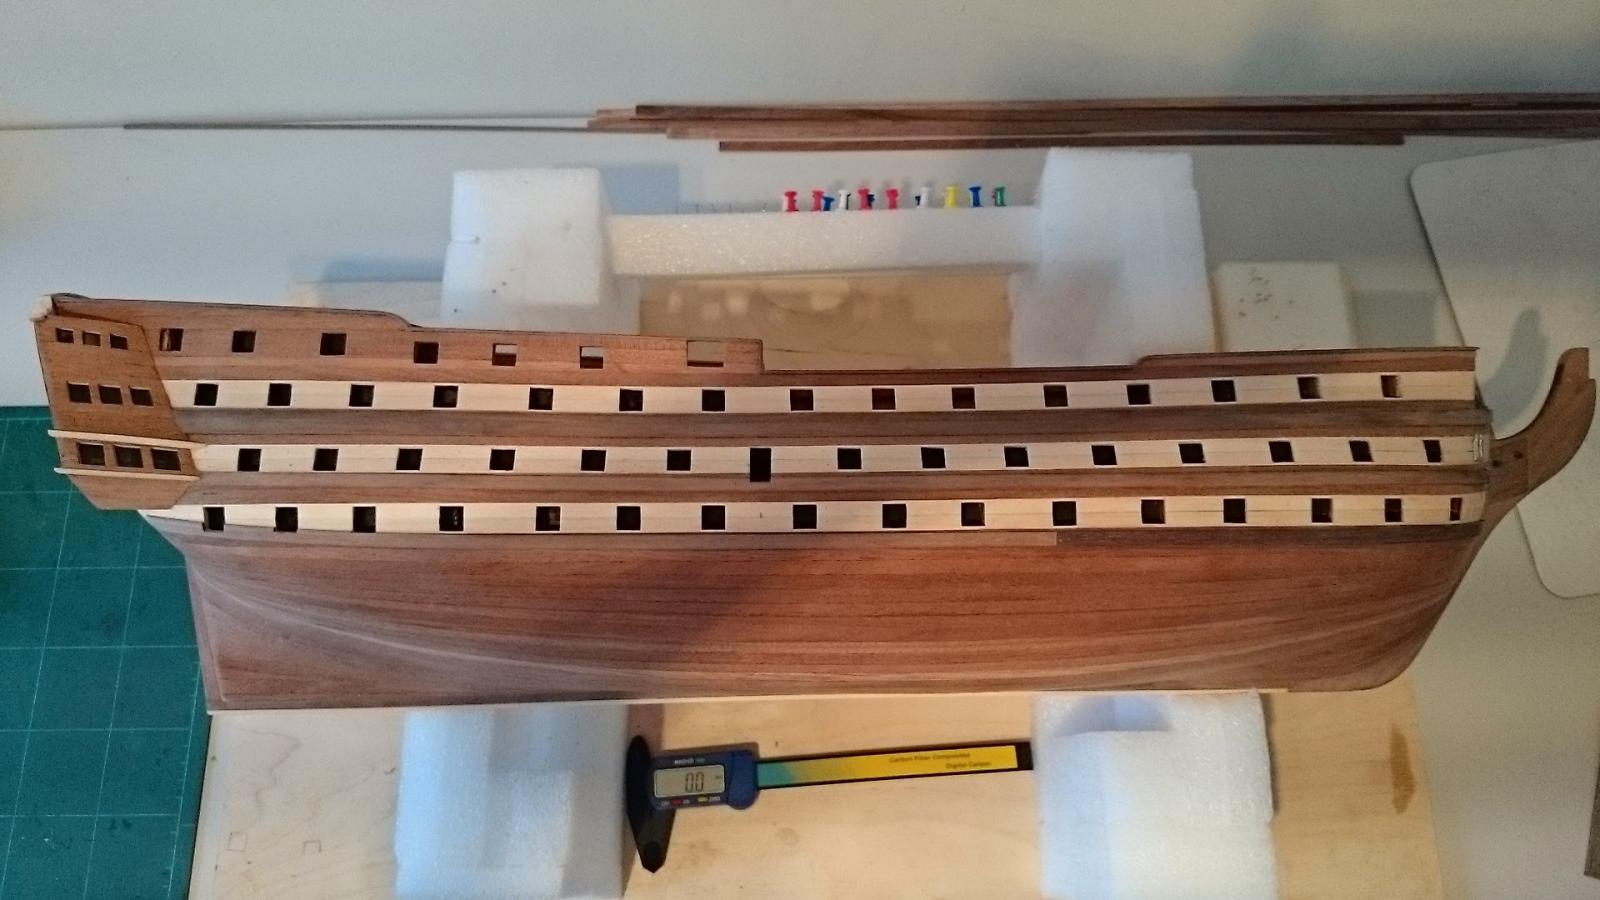
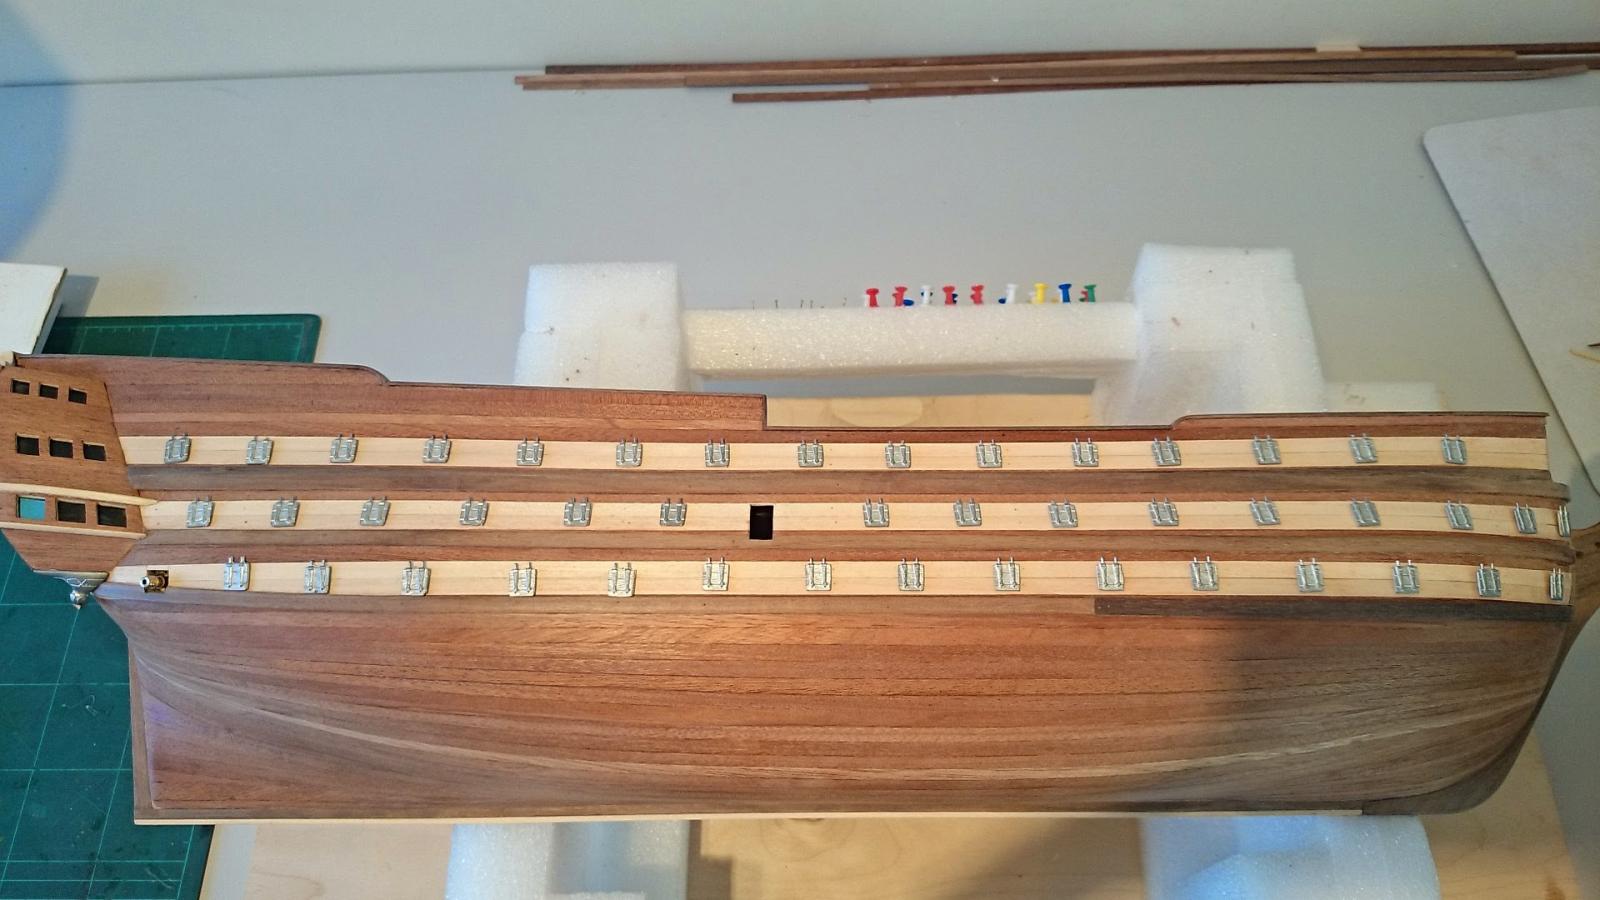
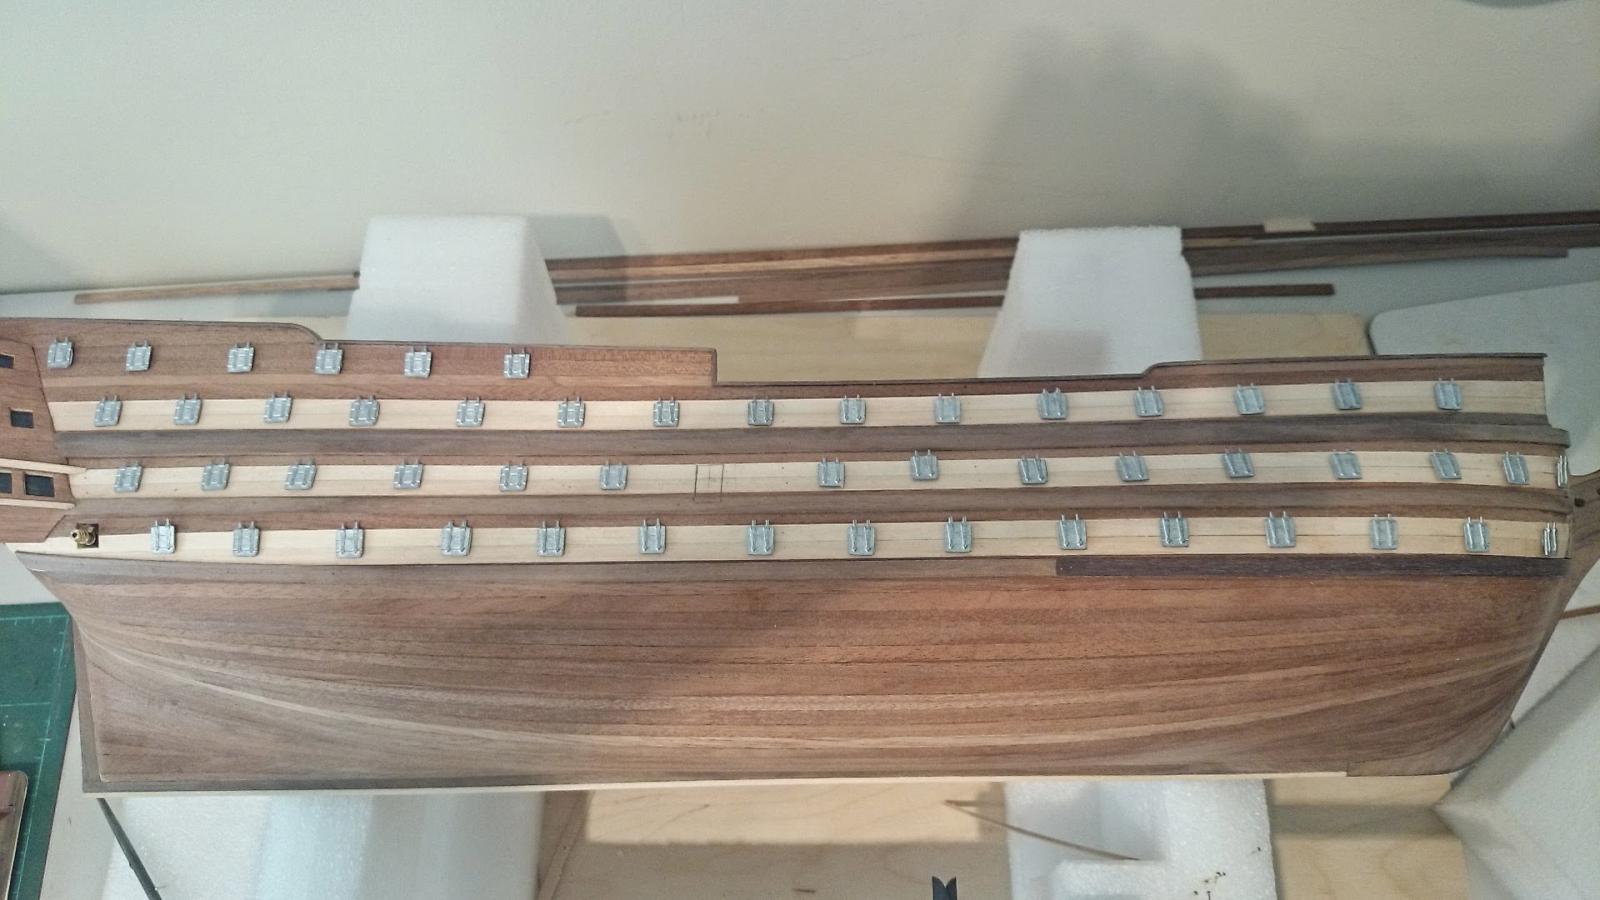
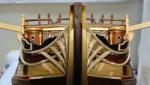
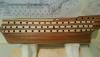
Finally finished canon port hole framing, I have also done a dry instal of the canons and some of the backplates didnt line up, despite being prefabricated. I had to make sections small enough to fit the canon holes, pre drill them and instal, this works but really should be unnecessary. you can see them in the images. Anyone building this kit i would recommend adding to the depth of the cannon mount board before planking as its a pain to sort through a port hole

- 708 replies
-
- 3
-
-
- victory
- constructo
- (and 1 more)
-
Some verticala are now going in but this is a huge undertaking with very little reward. Those whom see it think I've stopped working on it despite the silly hours spent on this framing the
- 708 replies
-
- 3
-
-
- victory
- constructo
- (and 1 more)
-
All my horizontal frames are complete, vertical next, well on the canons they are ive got the rear quarters to start
- 708 replies
-
- 2
-
-
- victory
- constructo
- (and 1 more)
-
Yeah Mike, thanks, really need reminding about the quantity involved. ha, ha, 104 ports so that 416 individual pieces to cut/size and glue. 416, oh 416,416,416. Ahhh less now, I've done a few.
-
Am I looking at hull using Manzonia, if so that's a lot of tight curves and a lot of pain. I'm playimg with the same timber but no bends.
- 708 replies
-
- 3
-
-
- victory
- constructo
- (and 1 more)
-
Yeh Manzonia the doesn't want to bend or comply timber, some brown some grey/brown. Look at my lower starboard Wale and it's two parts and there is a huge colour difference. I didn't mind as I was painting her until Mike changed my mind again but hey its now called a battle repair. Artistic licence some one once posted. Ply parts, this kit so far and looking ahead has no visible ply, intrigued Kevin, why did you close the gunport lids. Difficulty found on this contrasting timber is the Manzonia (pain) tries it's best to bleed into the light Ayous when sanding. Progress now has hit a crawl pace as the messy not really noticeable (to others) framing is being done, when I find I'm in the mood that is.
-
Think I've come cross model ship buildings worse job, framing canon ports. Only manage a few and get fed up
- 708 replies
-
- 1
-
-
- victory
- constructo
- (and 1 more)
-
Cheers guys it's nice to know I'm on the right track with this, slow stuff on the way. Frames
-
Artesiana Latina HMS Victory 1:84 scale kit (REVIEW)
Paul0367 replied to mtdoramike's topic in Wood ship model kits
Hey I've been routing around and checked out what your upto, nice (fighting) build. I do like the plank intervals on this kit, just shy of three per canon port, more scale than the constructo version and similar to the Caldercraft approach -
I was messing with the camera on my phone when taking the picture through the cannon cut. I find the timber very good quality, ok Manzonia is a swine to bend also the Ayous is tough but I have no past experience in model ships to compare there quality. You on the other hand with your back catalogue will know the kits well. Take a look at the image above of the plan view of the victory, you will notice the timber used at the very rear is not the light Ayous, therefore does not match the decorative pieces that drop down towards the cabin. (Ayous would not conform) and as I was painting her it wasnt a problem. ? can she stay natural
-
Portside canons also cut, which completes the hull, just so much framing to do
- 708 replies
-
- 1
-
-
- victory
- constructo
- (and 1 more)
-
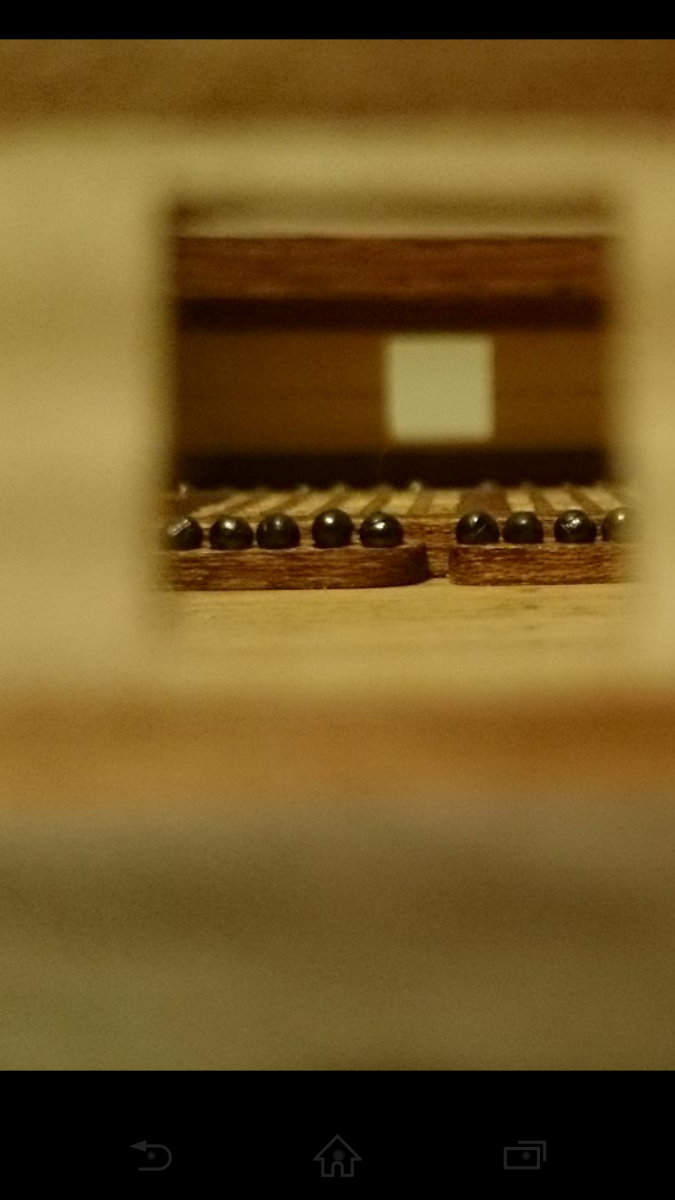
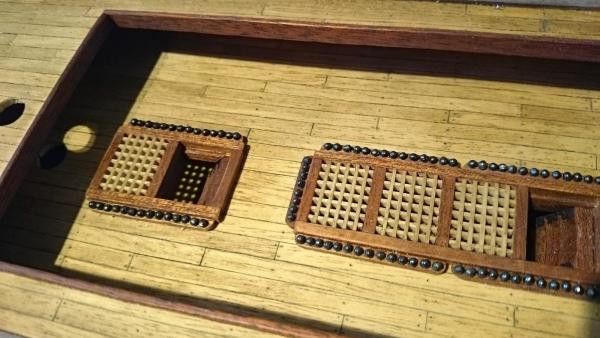
Back to ships, random picture from Canon port of munitions
- 708 replies
-
- 2
-
-
- victory
- constructo
- (and 1 more)
-
Back to ships, random picture from Canon port of munitions
-
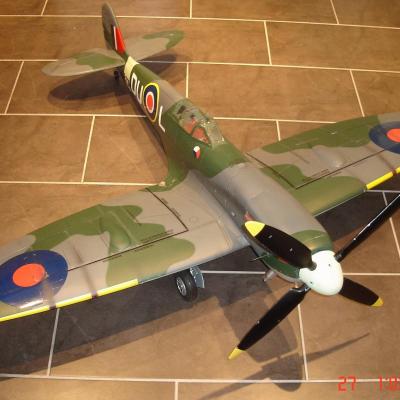
Oh Mike, Mike, Mike your killing me. I pondered for a while on the to paint or not to paint issue and I chose to paint, that said ive not painted any yet but now you have thrown a curved ball into the mix again and now im podering. I do like the wood effect as its very classy and can sit in any room and look ok, in a glass case of course. HEY ! whats a Spitfire doing on a model ship site, well thats my other hobby, she houses a 0.91 4 stroke engine and has split flaps with glass fibre covering and full rivit detail curtesey of dots of clear wood glue prior to topcoat, also panel lines and battle scars. She also has retractable under carriage controlled by air and valves for slow scale rise and fall. I built her in 2002 and she has flown twice, yep I know twice but she was a dream to fly and still lives with me today. Sorry I went off on planes, just ive not done that for quite a while and got carried away. You do planes and as i'm a brit it had to be our girl, I am sure you would have gone for a P51 Mustang.
-
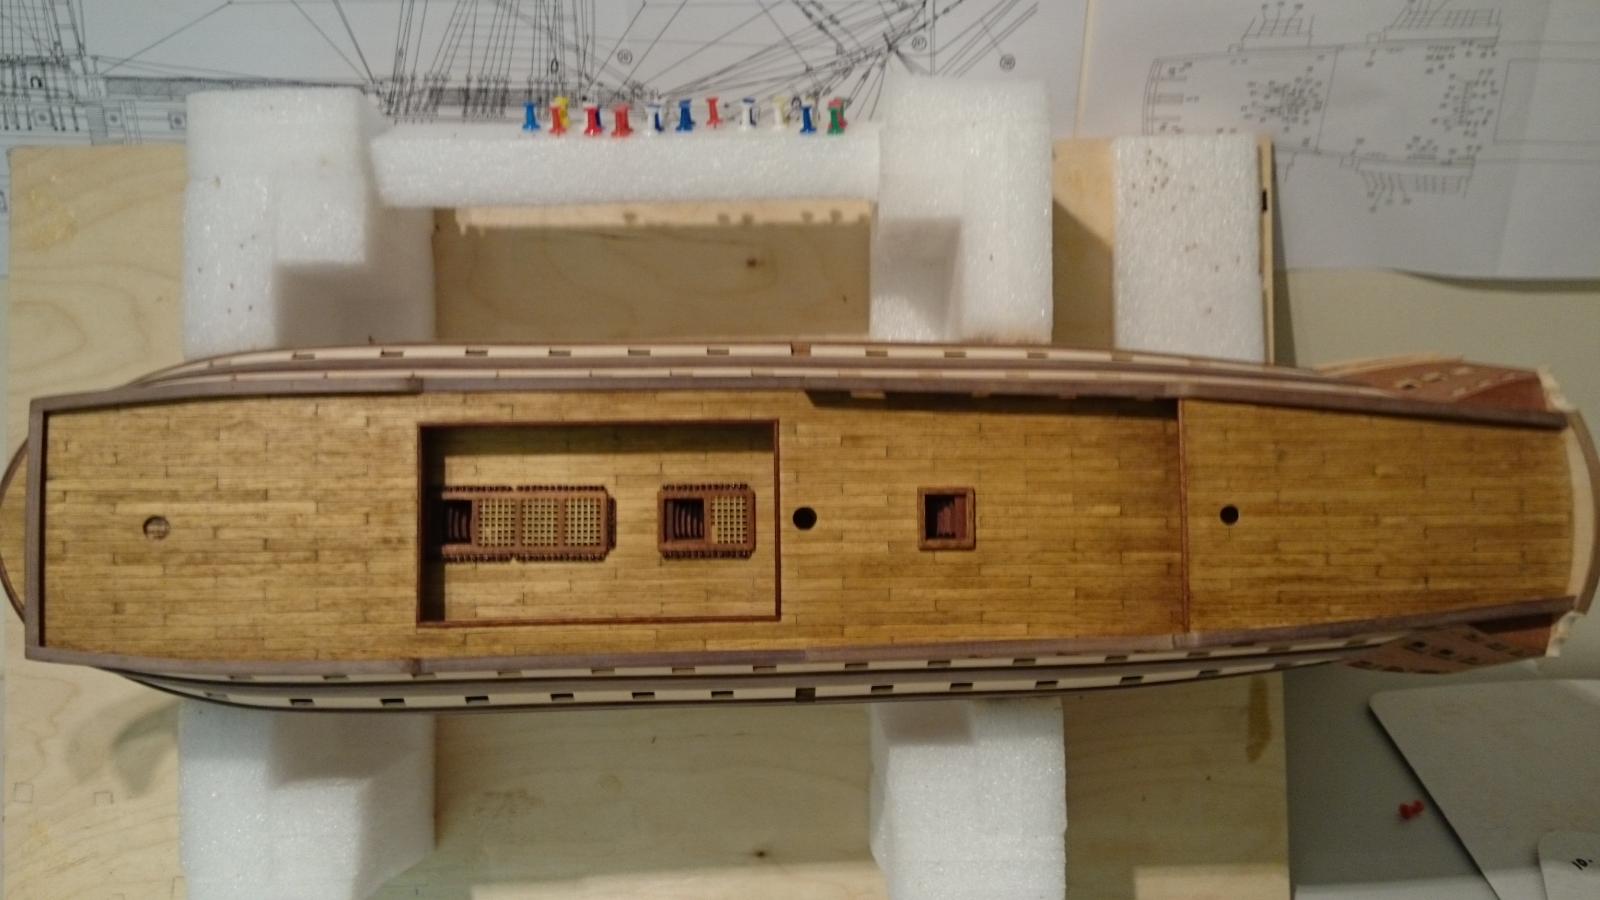
All Canons cut ready for the framing to start, well I said all there is a little matter of the other side to do. The larger square section on the top centre deck which ive yet to cut, what is its purpose. ? I ask as it appears to be hidden in the rigging / ratlines
- 708 replies
-
- 3
-
-
- victory
- constructo
- (and 1 more)
-
Cheers for the compliments, Mike the more I progress the more I wish I had gone the Caldercraft route. I selected the Contructo due to price and didnt want to shell out the Caldercraft sort of money and the fact I had no idea if I could even build a ship. In comparison with the mentioned kit the contructo has far inferior castings but hey you get what you pay for. A few more pictures of the canon being cut


- 708 replies
-
- 3
-
-
- victory
- constructo
- (and 1 more)
-
I have agonised over the paint or not but if you lookat my log a fellow member sent a painted image of the ship and she is beautiful. hate the thought of painting wood after the effort to make her varnishable but I set off to build her as she sits in dry dock, I will be adding sails though
-
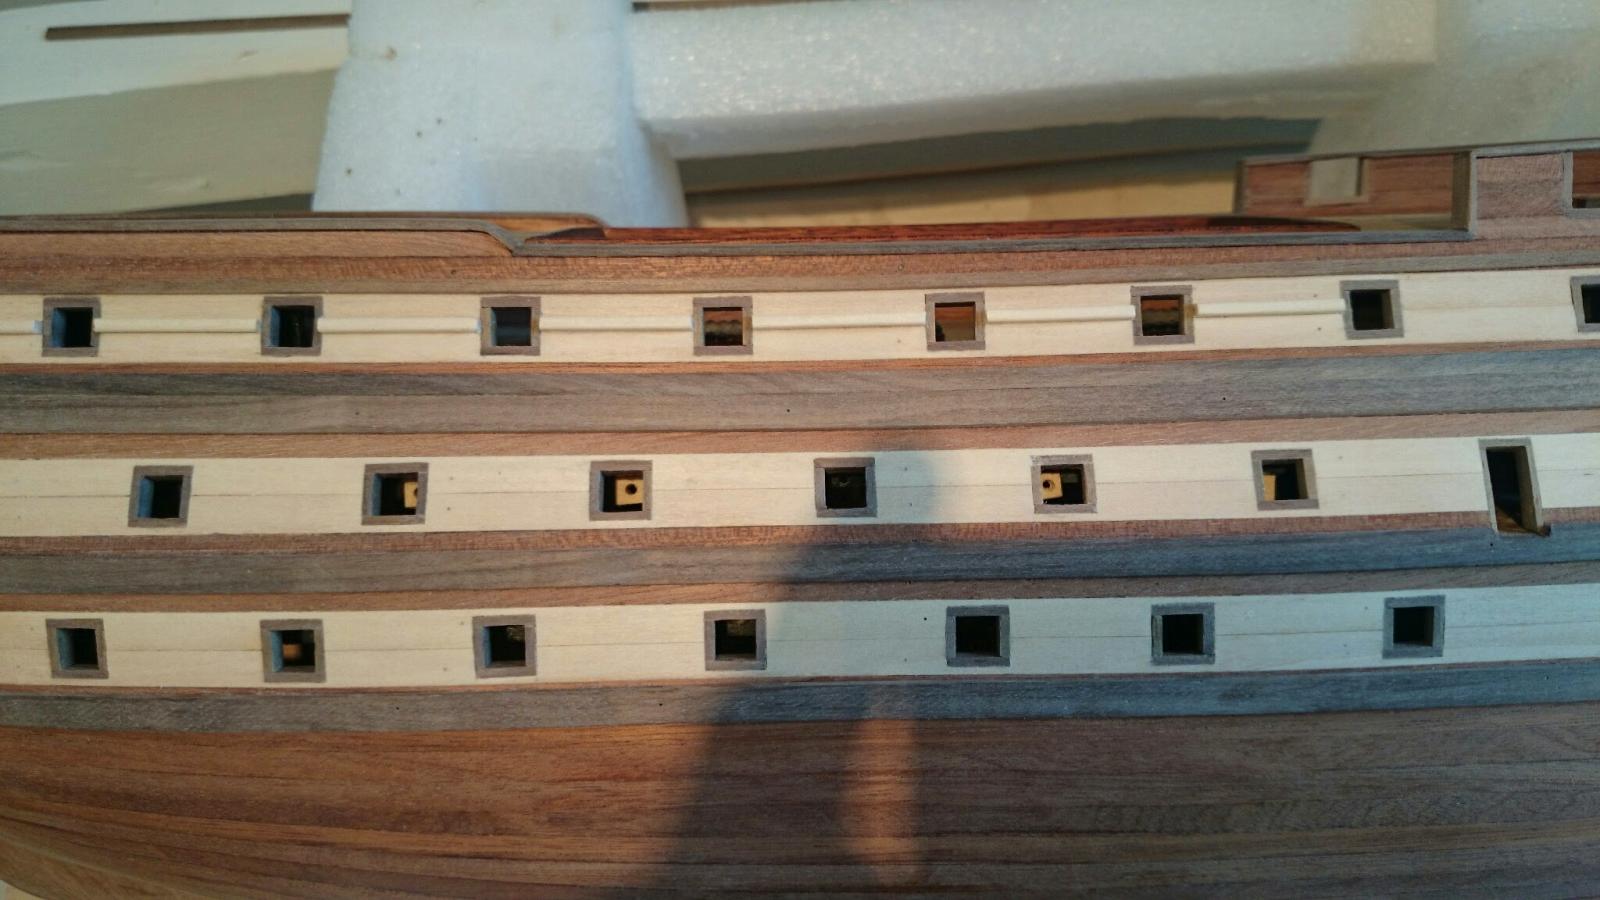
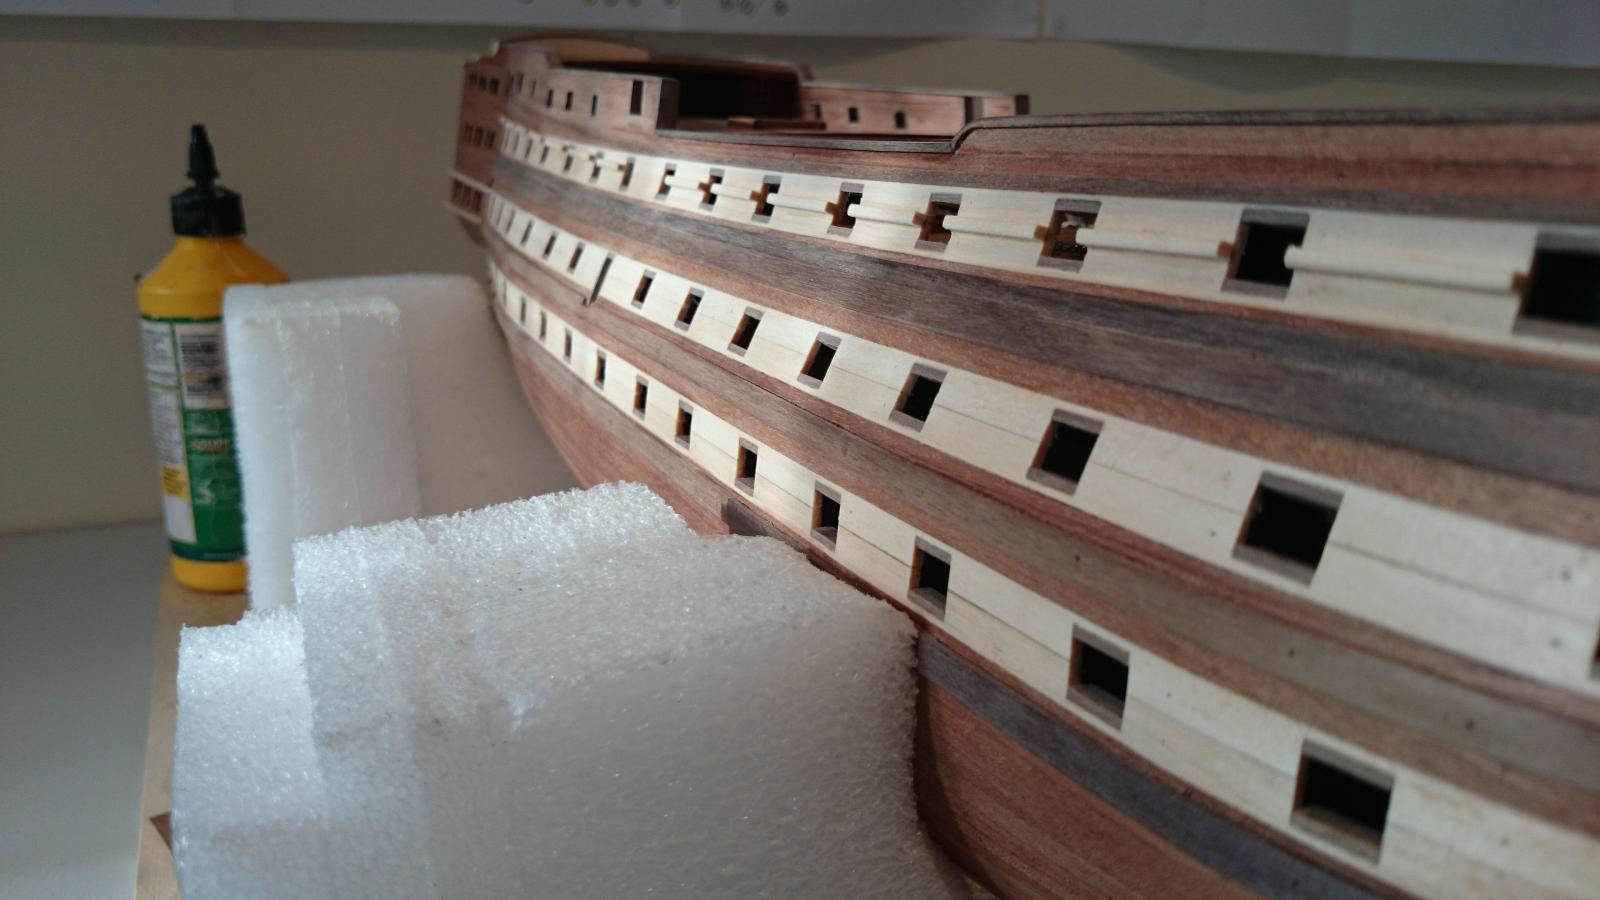
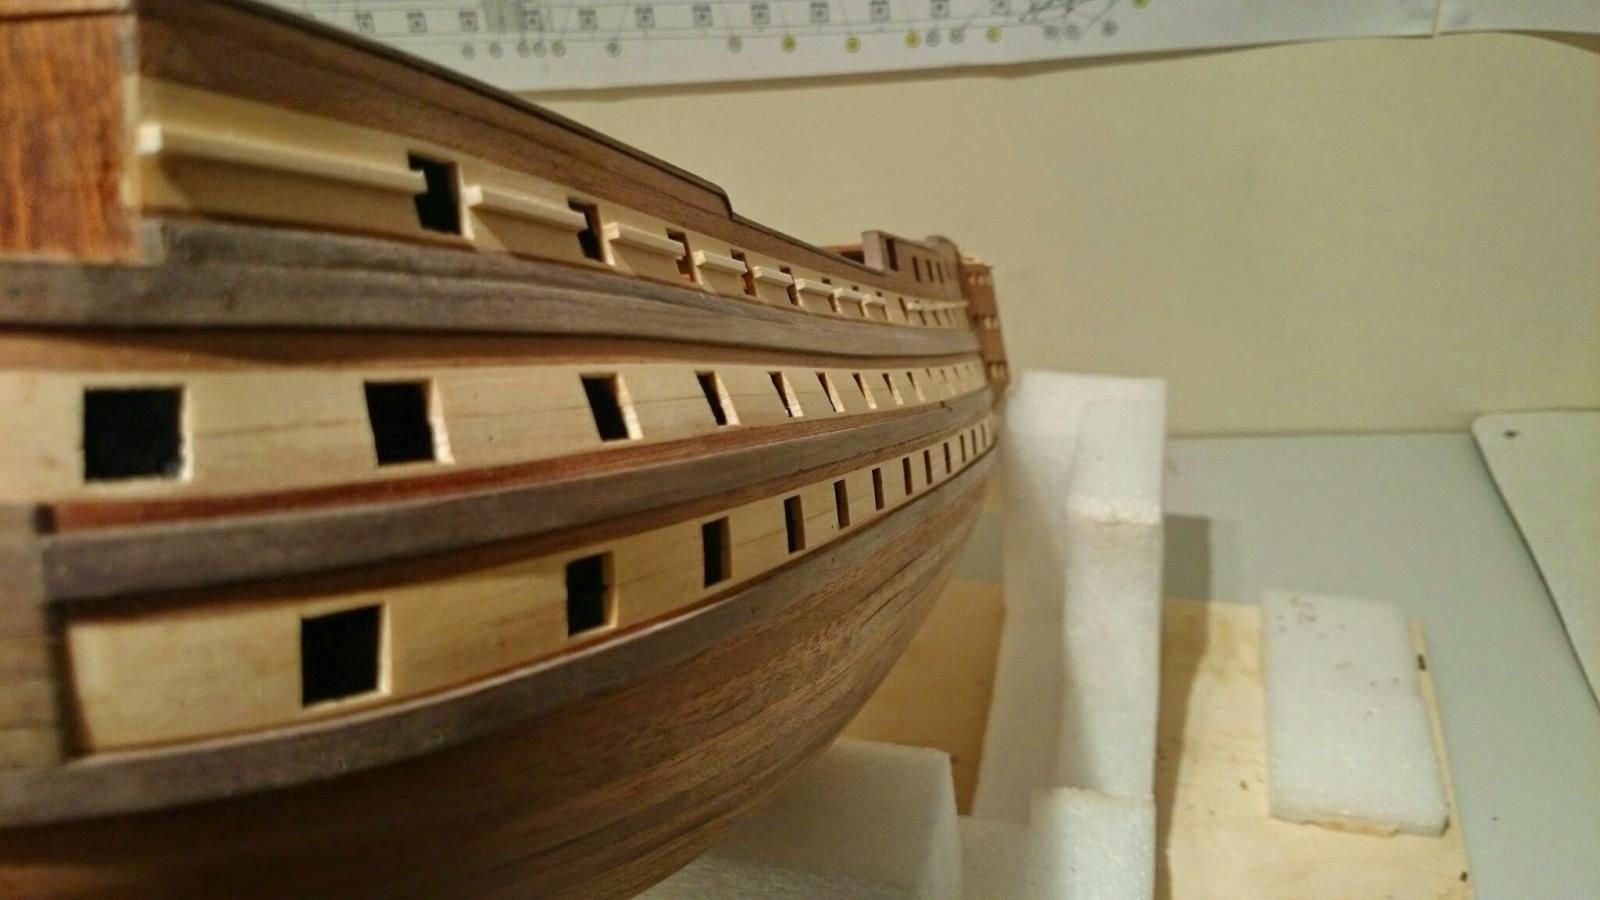
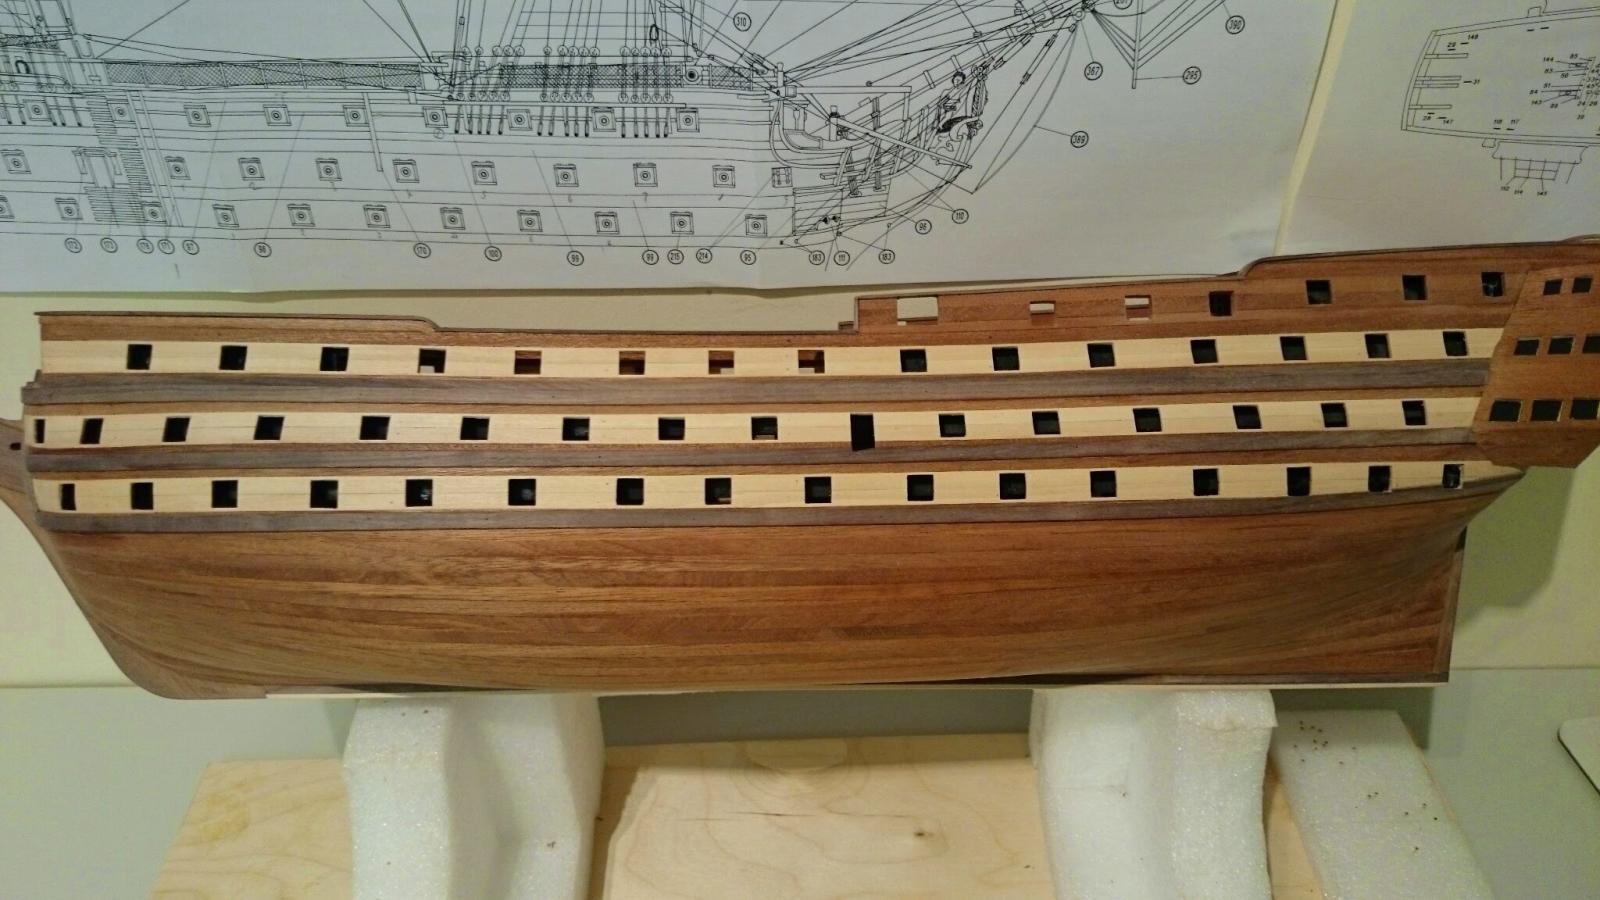
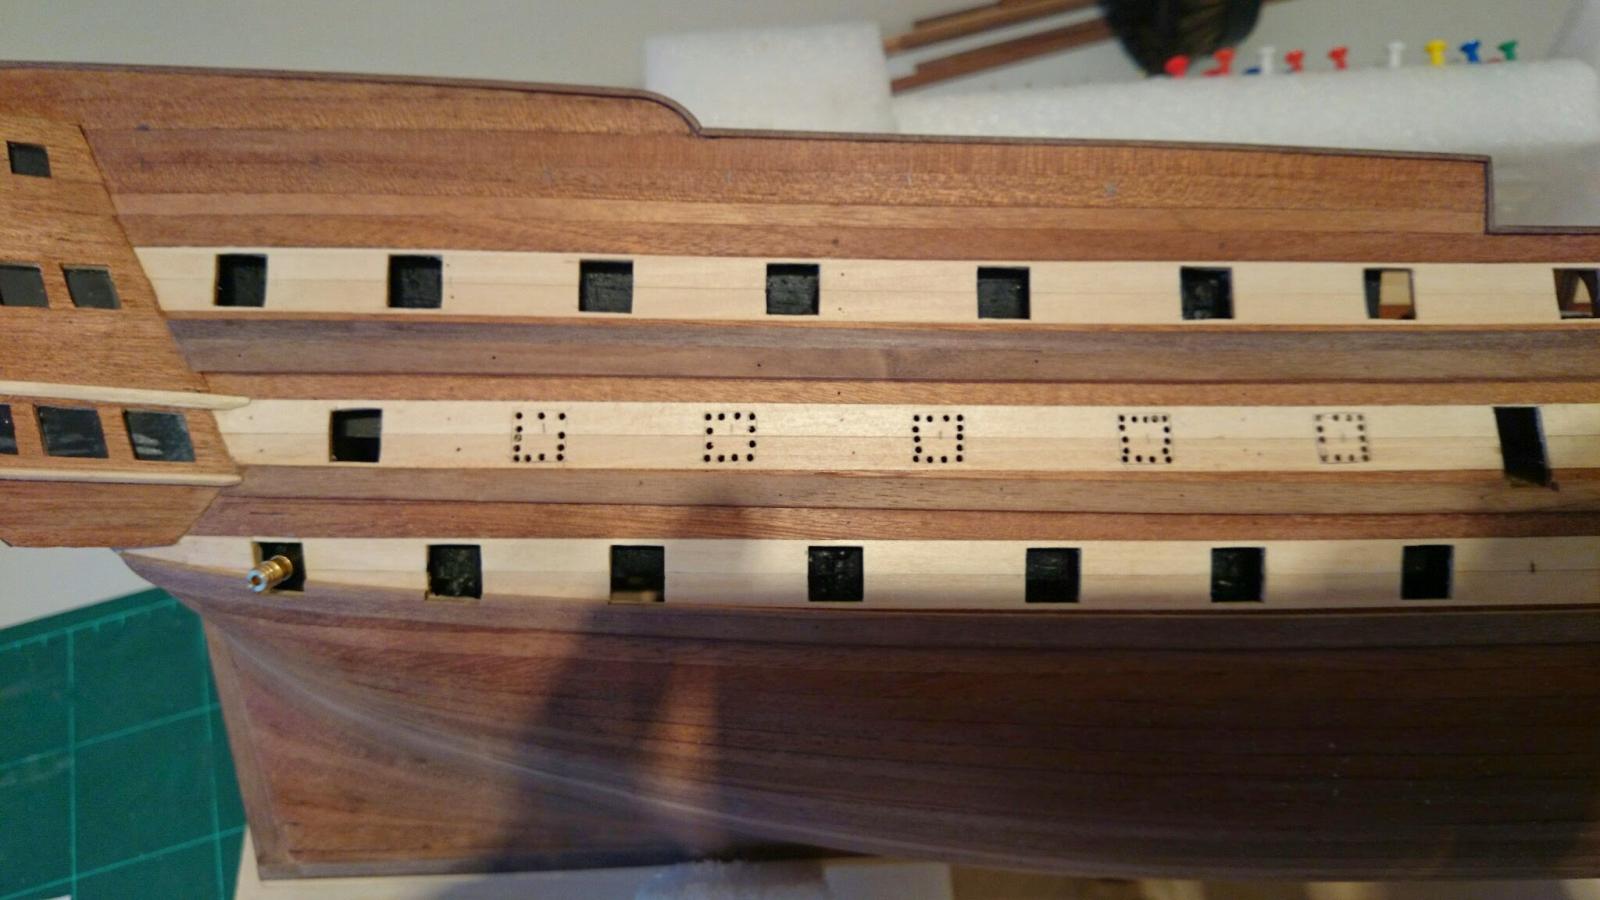
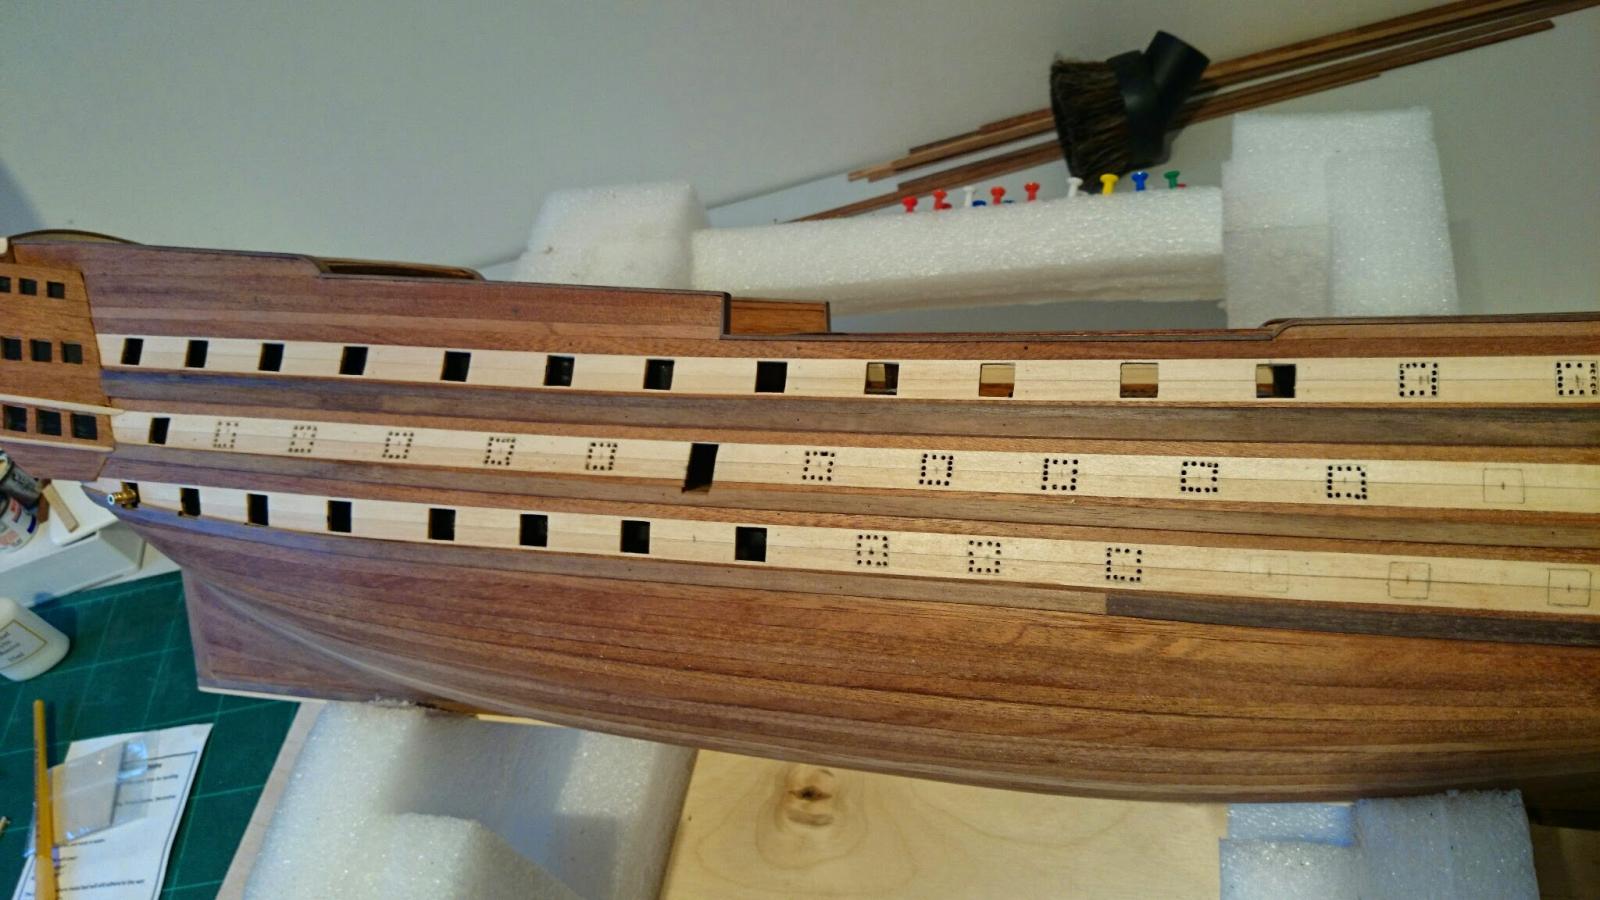
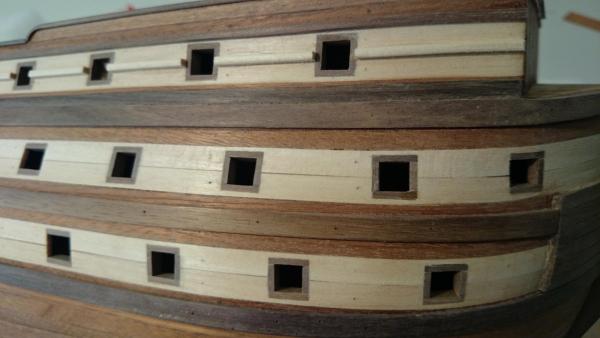
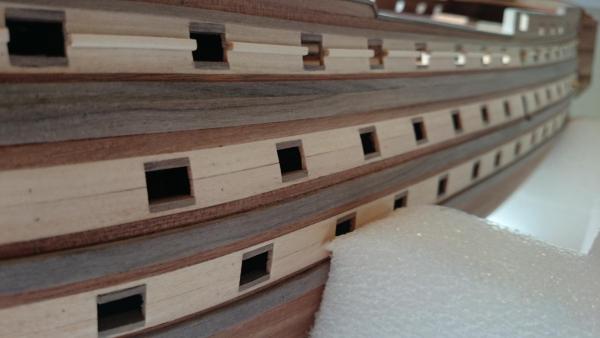
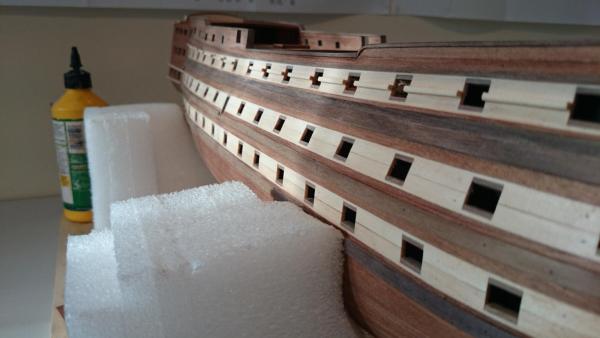
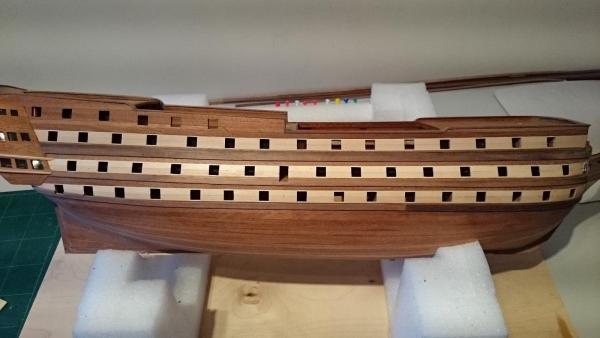
Planning for the canon cuts has been an eye opener, someone on here once said he had a few on another contructo kit but different ship, that hit the ribs. My reply was that manufactures go to great lengths to ensure the kits are corectly lined up and this should not really happen,,,, whoops sorry I hold my hands up, they don't, or at least on this model they didnt. I have used a vernier guage and measured every canon port on the plans (twice) transfering to my hull and mine strike 8 ribs,, the first one you can see I have cut also hit a rib, yes the very first one. Please if your building this kit check before hand because the lower canons although inconvenient is not a real problem, just shave the ribs away but what would be a huge problem is the canons on the top deck which can not afford to hit the ribs, these can be seen from behind and would ruin the model. see picture, look at the rib in the distance behind the hatch, if you followed the plan you would strike this and worse its neighbouring rib also. Whist im ranting let me take the time to whine about the figurehead casting. I was happy with mine at first I then researched the colour scheme and came accross the Caldercraft version ( ok expensive kit ) but the figurehead is beautifully made / cast. these are available to purchase and think is a no brainer. Oh rant over. The picture of the hull has the top row of hatches ommited, honestly I forgot to place them on prior to the picture but you may be able to pick out the marked positions. next post should be all cut holes, I am skipping and returning to previous jobs just to take the repetitiveness out of the work. thanks for looking.

- 708 replies
-
- 7
-
-
- victory
- constructo
- (and 1 more)
-
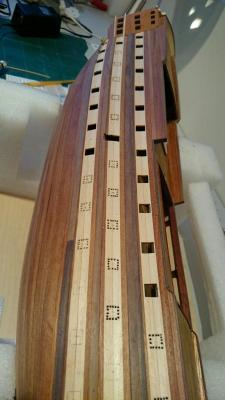
hi, I know building is the last thing your thinking about at the moment but keep this for the future, no matter how much you measure the hull plans and transfer to your model some hatches hit the main ribs in the hull. I used a vernier quage and measured the plan exactly and hit ribs. The lower ribs to be fair are not a problem only three hit the ribs but I had to adjust the four hatches which are on the deck, centre of the ship because the plan would have hit two of the deck ribs and that's on full view from just under the deck above. You can not actually tell I've moved them from the image but just bear I'm mind, measure twice cut once. My problem started from the very first cannon which, yes, hit a rib, so the allarm bells rang making me check all of them. Take care Oh you may notice the bottom two Wales curve up, the very bottom one actually cuts into the light Ayous timber, this is because the Wales on the real ship don't follow the cannons and running them straight makes the hull appear flat, well I thought so

-
hi, I know building is the last thing your thinking about at the moment but keep this for the future, no matter how much you measure the hull plans and transfer to your model some hatches hit the main ribs in the hull. I used a vernier quage and measured the plan exactly and hit ribs. The lower ribs to be fair are not a problem only three hit the ribs but I had to adjust the four hatches which are on the deck, centre of the ship because the plan would have hit two of the deck ribs and that's on full view from just under the deck above. You can not actually tell I've moved them from the image but just bear I'm mind, measure twice cut once. My problem started from the very first cannon which, yes, hit a rib, so the allarm bells rang making me check all of them. Take care Oh you may notice the bottom two Wales curve up, the very bottom one actually cuts into the light Ayous timber, this is because the Wales on the real ship don't follow the cannons and running them straight makes the hull appear flat, well I thought so
-
Another question is when to actually start the painting process. My guess is to paint her main sections i.e captains quarters black and paint the trims prior to fitting and just fit the trim and touch up the required areas where these are cut / sanded to size and assume the window frames are cut and fitted and painted afterwards. as this is my first ever attempt the help is much appreciated.....These are the things im sure most dont even consider when they think about building a wooden ship, I know i havnt until crunch time