HOLIDAY DONATION DRIVE - SUPPORT MSW - DO YOUR PART TO KEEP THIS GREAT FORUM GOING! (Only 13 donations so far - C'mon guys!)
×
Paul0367
-
Posts
512 -
Joined
-
Last visited
Content Type
Profiles
Forums
Gallery
Events
Everything posted by Paul0367
-
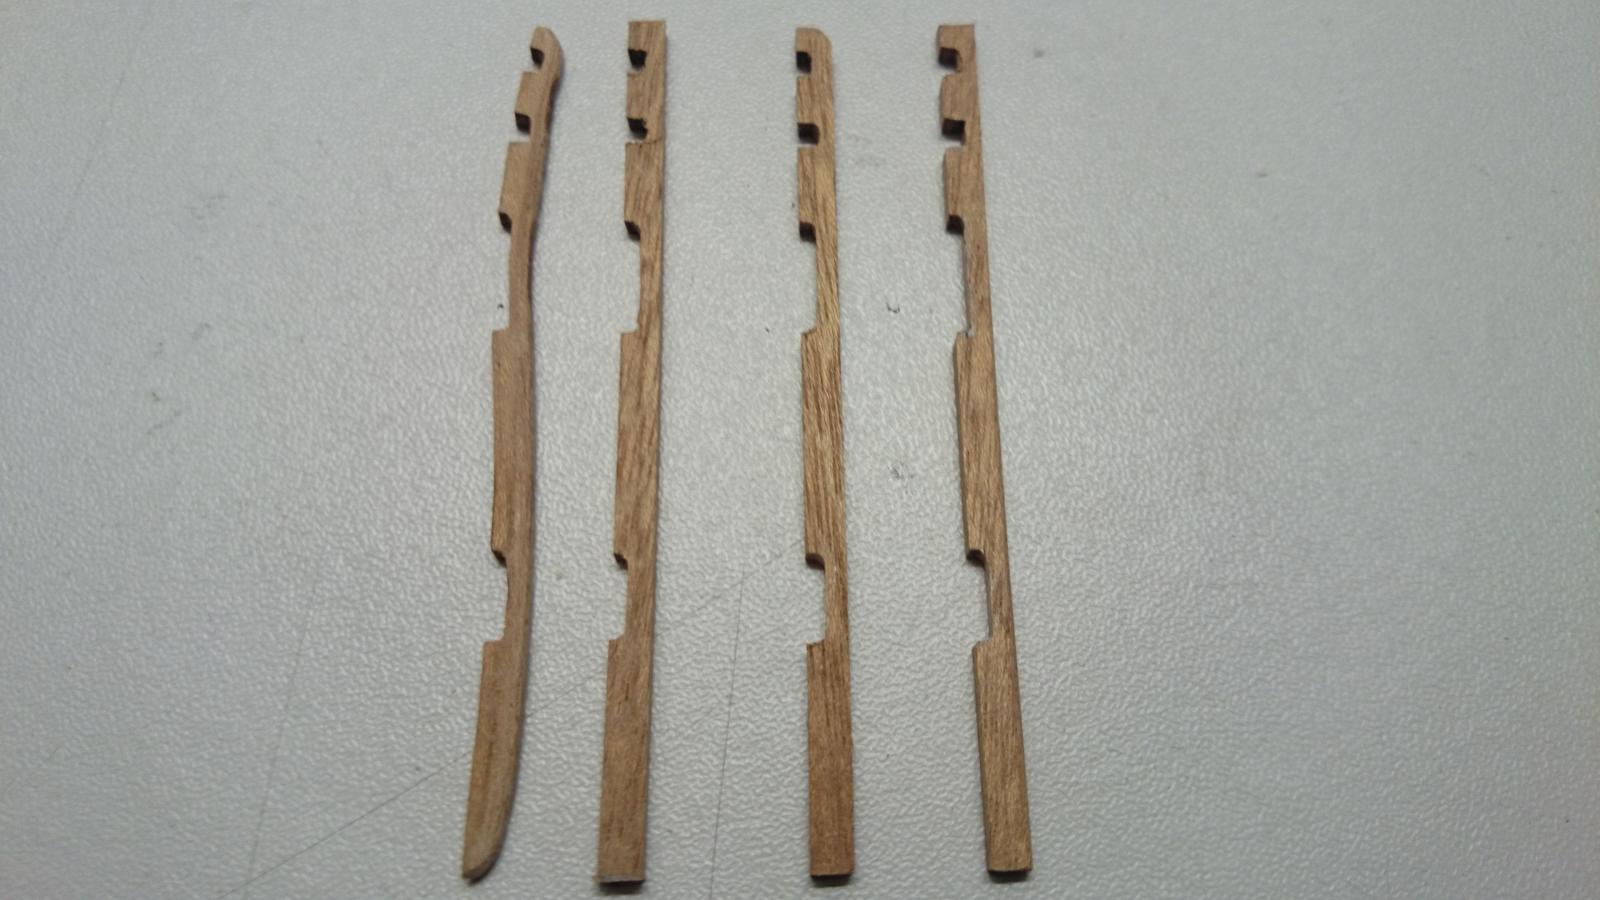
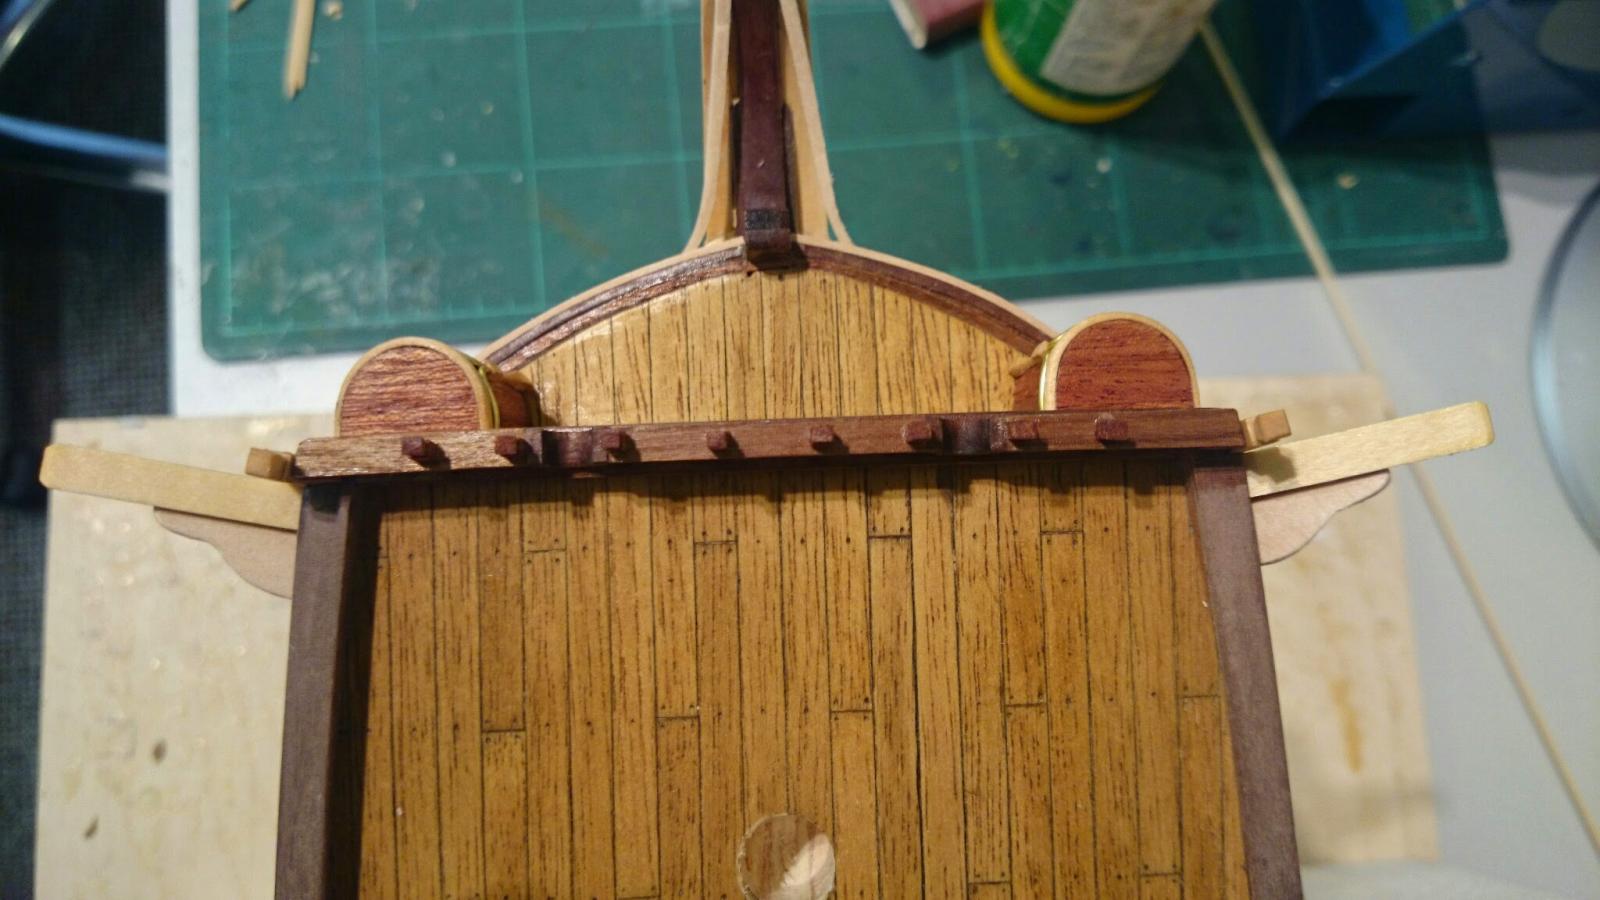
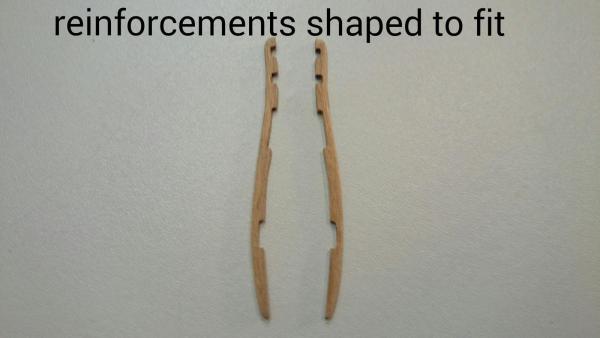
 Well I thought I would make the side reinforces, well how long could it possibly take. Most of the day is my answer, 1 st one was spot on but wrong timber, Manzonia instead of Sapley as for the rest just a time eater. Then there is the glueing, seriously why did the instructions not have these fitted when the Wales were fitted, this would save us knocking off the delicate handrail post as we lie her in the side to work on. Trust me guys do these before and rails go on.
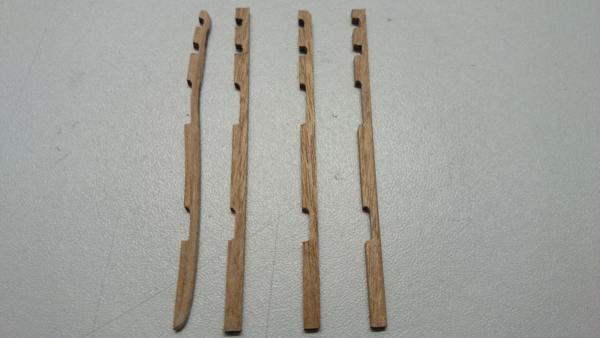

- 708 replies
-
- 4
-

-
- victory
- constructo
- (and 1 more)
-
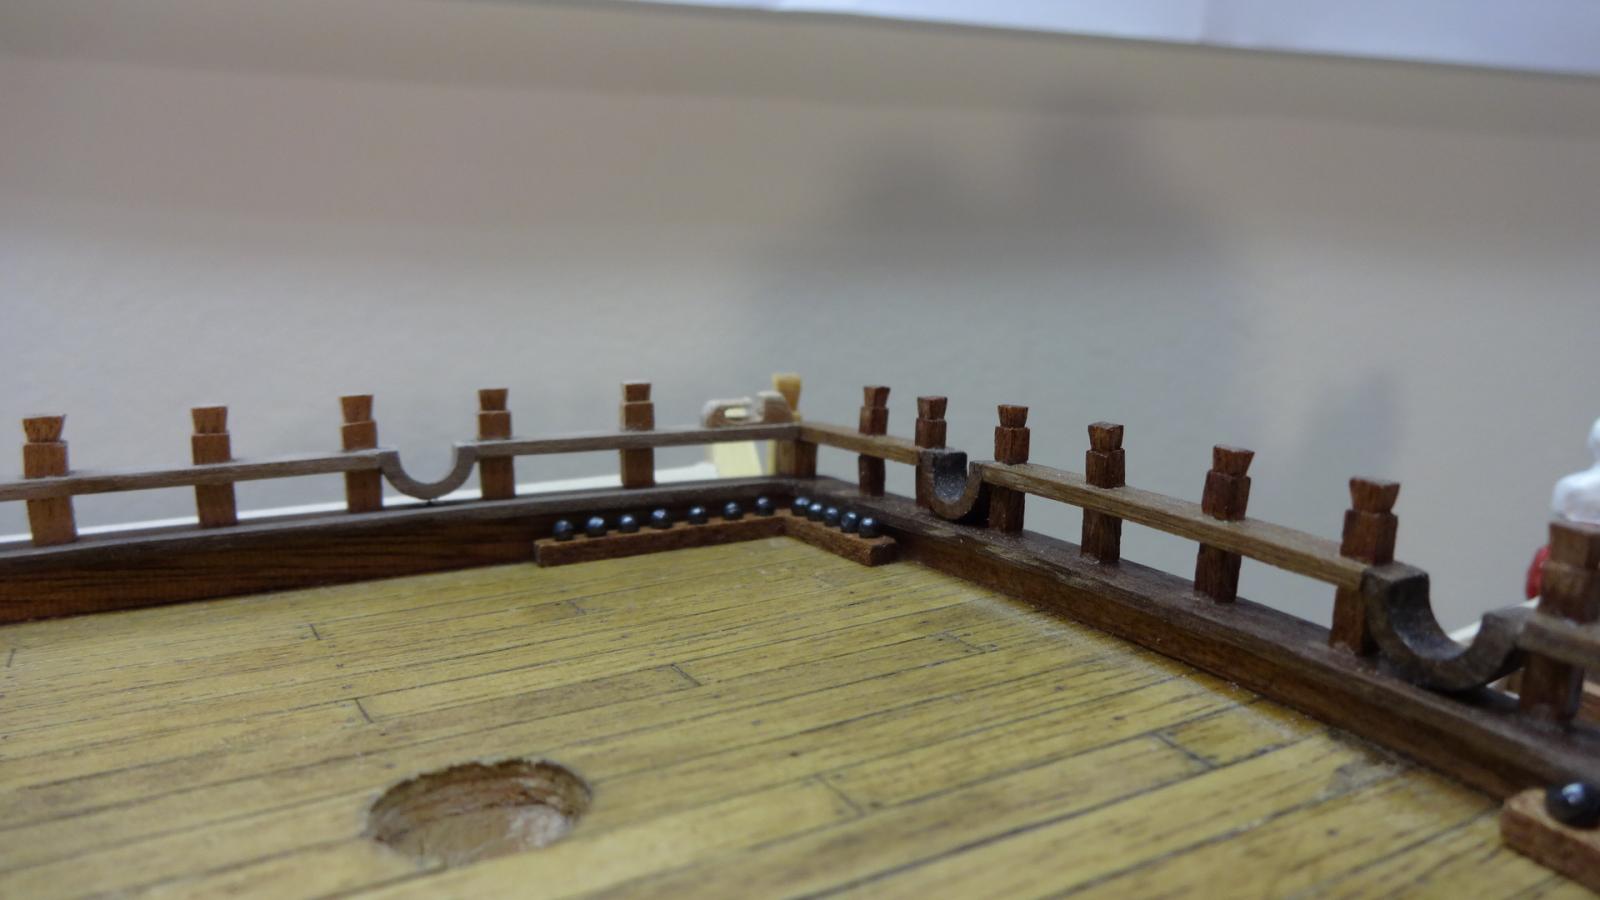
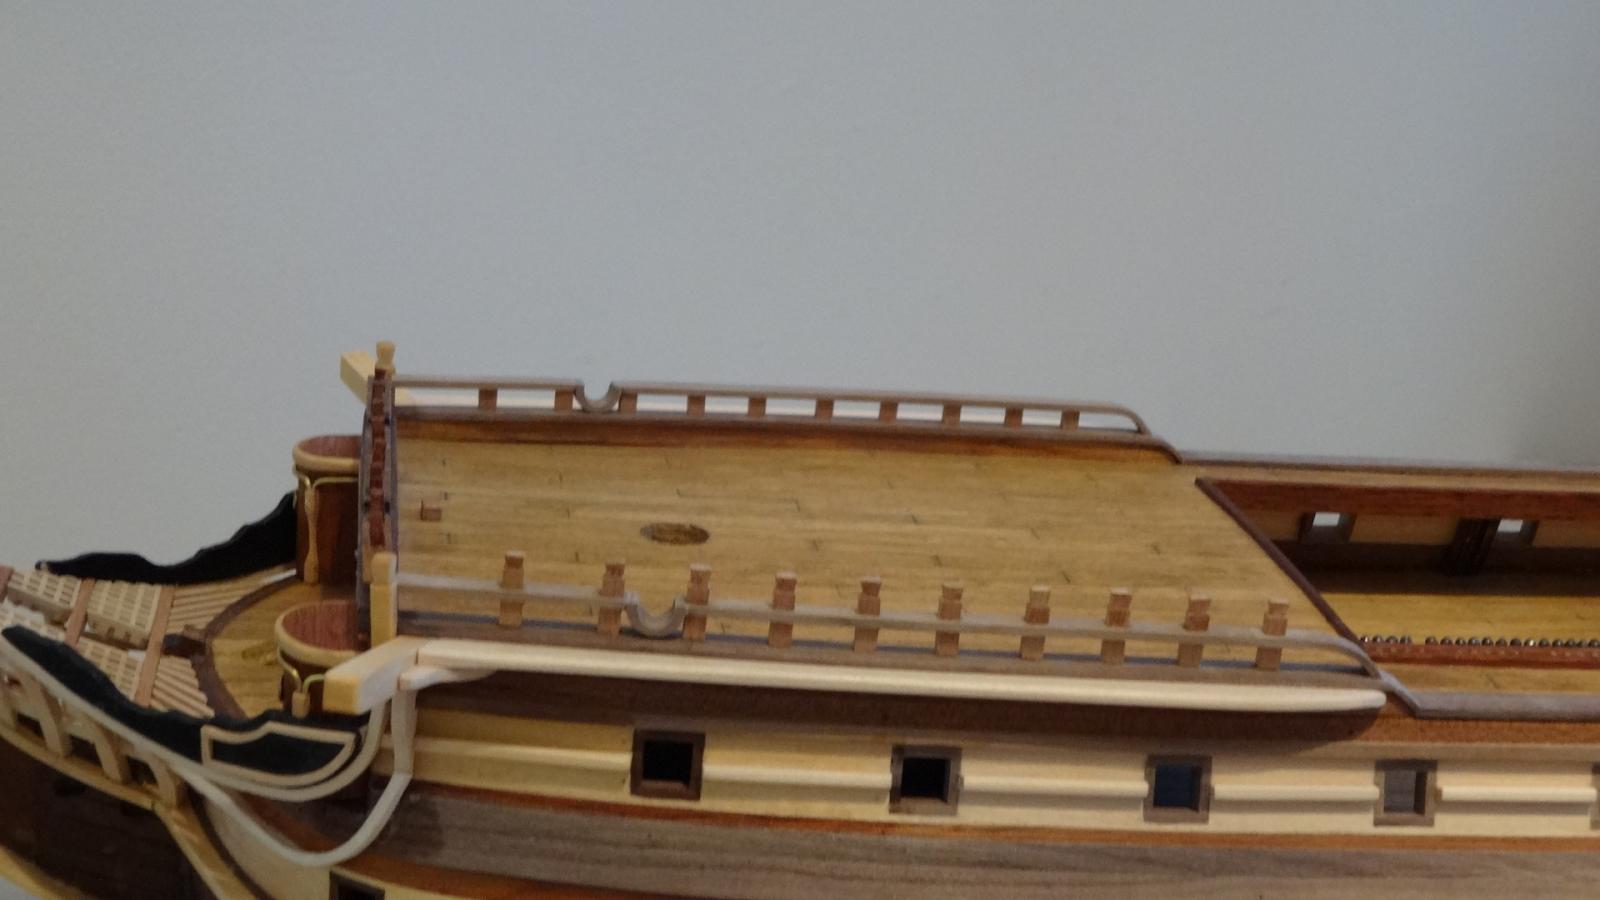
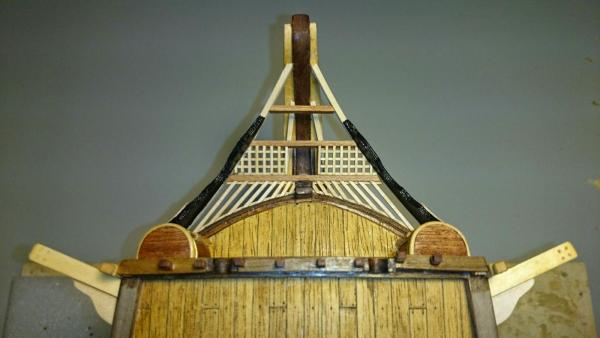
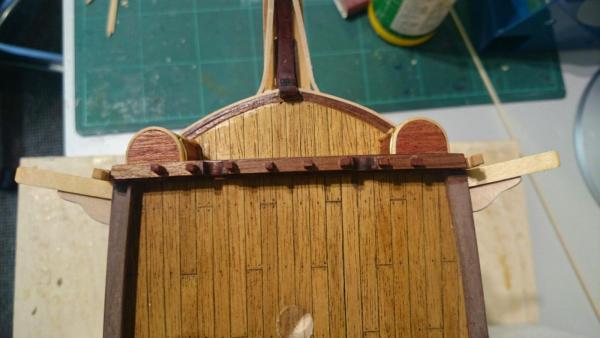
Dec ornaments going on, really, how many spindles and hand rails did the guy whom designed this ship really need to put on
- 708 replies
-
- 9
-
-
- victory
- constructo
- (and 1 more)
-
Small update, lots of work and time but little to show for it. I have decided to open one of the bow doors and as a result the rear of the door required cutting out, again this would have been far easier earlier in the build.


- 708 replies
-
- 5
-
-
- victory
- constructo
- (and 1 more)
-
Thank you for the encouraging comments, I have had a nosey at your Victory and it looks stunning. Looking at it though reminds me how far I have to go. I have gone back to the stage I skipped to do the bow. The tedious hand rail.

- 708 replies
-
- 5
-
-
- victory
- constructo
- (and 1 more)
-
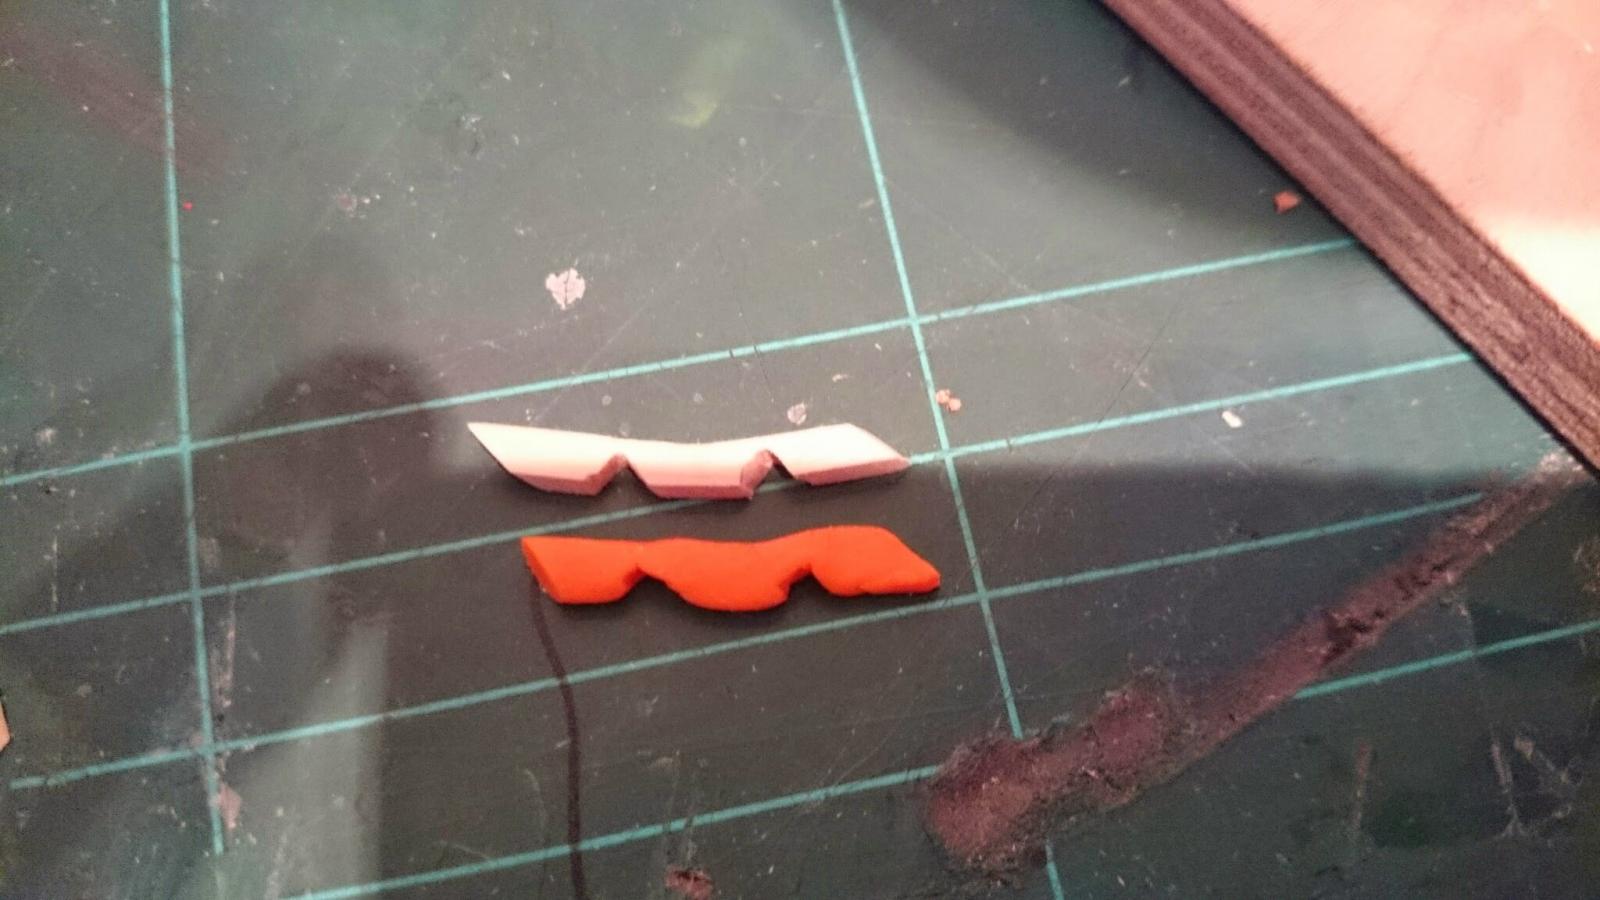
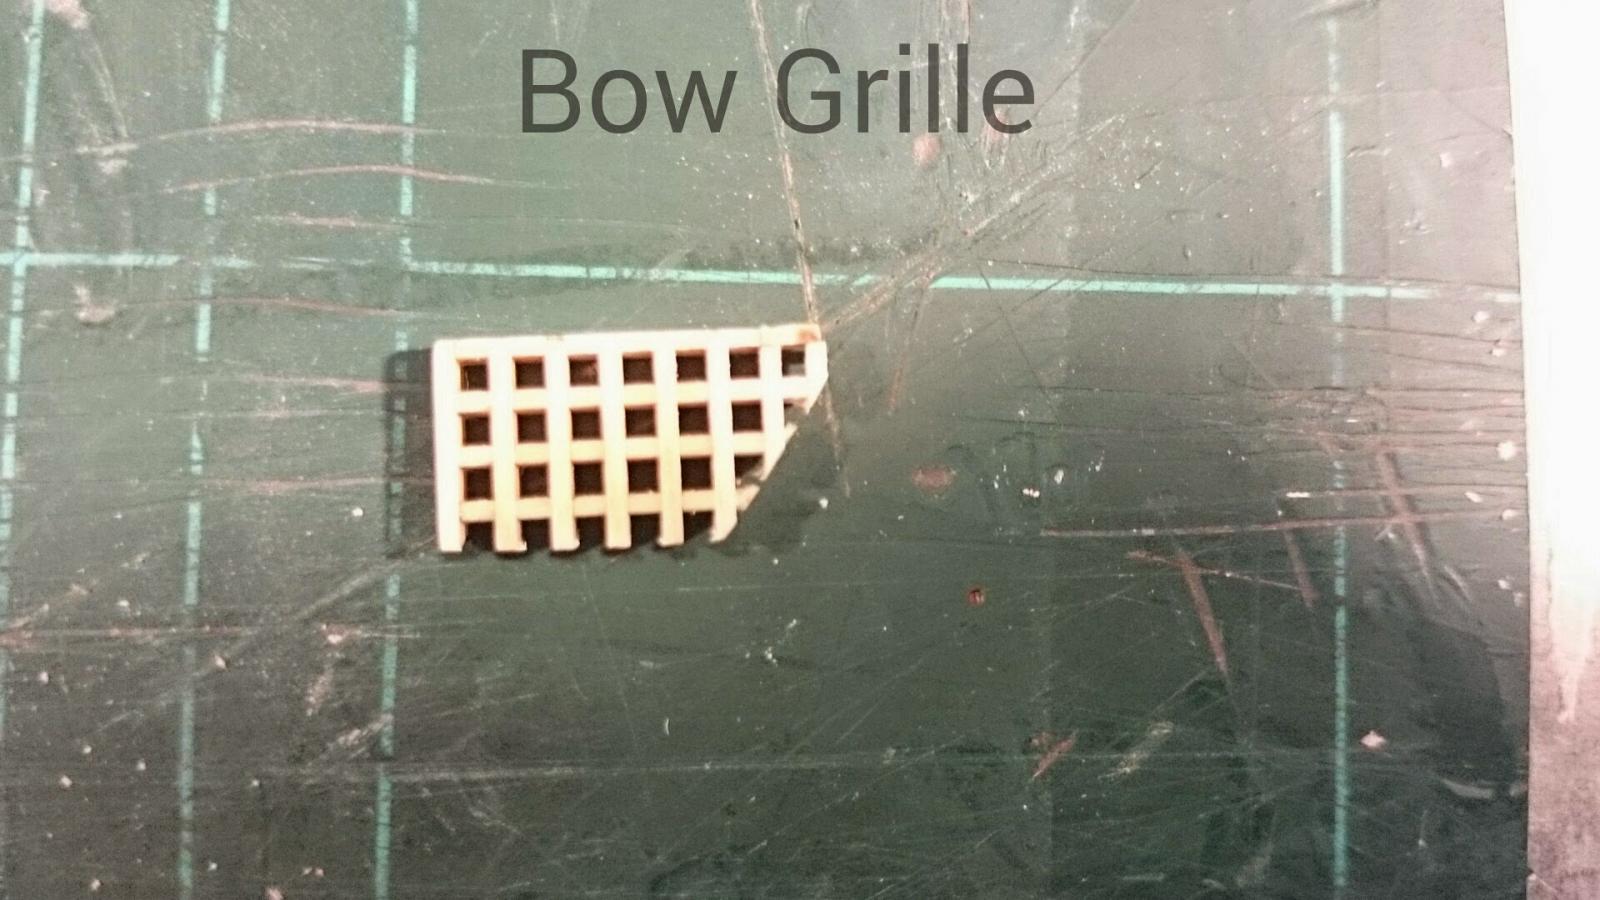
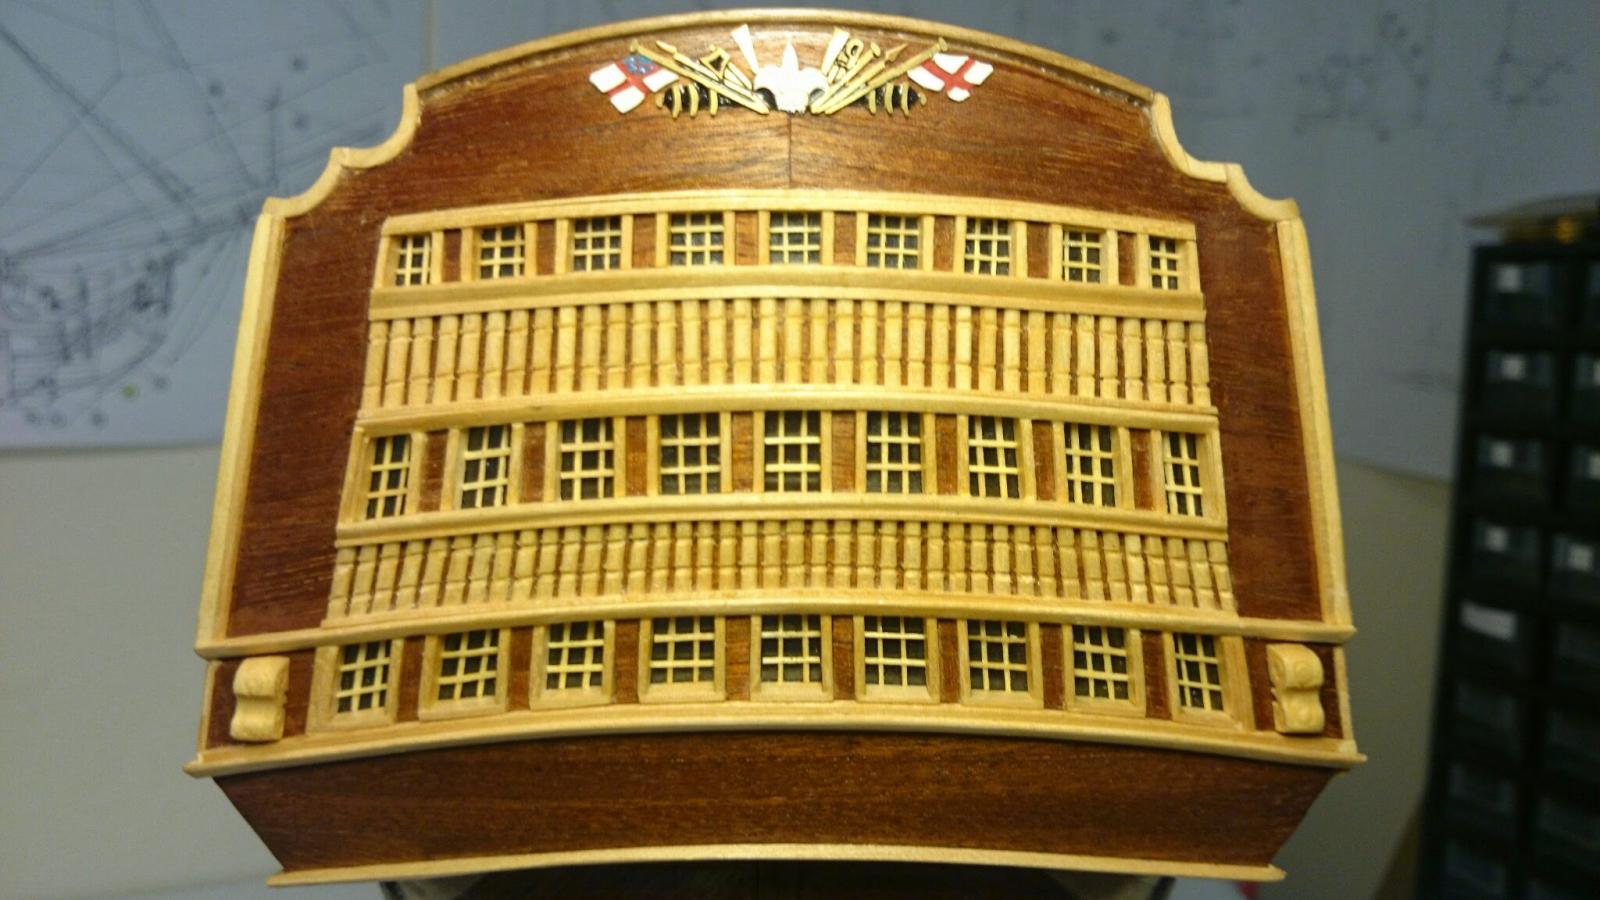
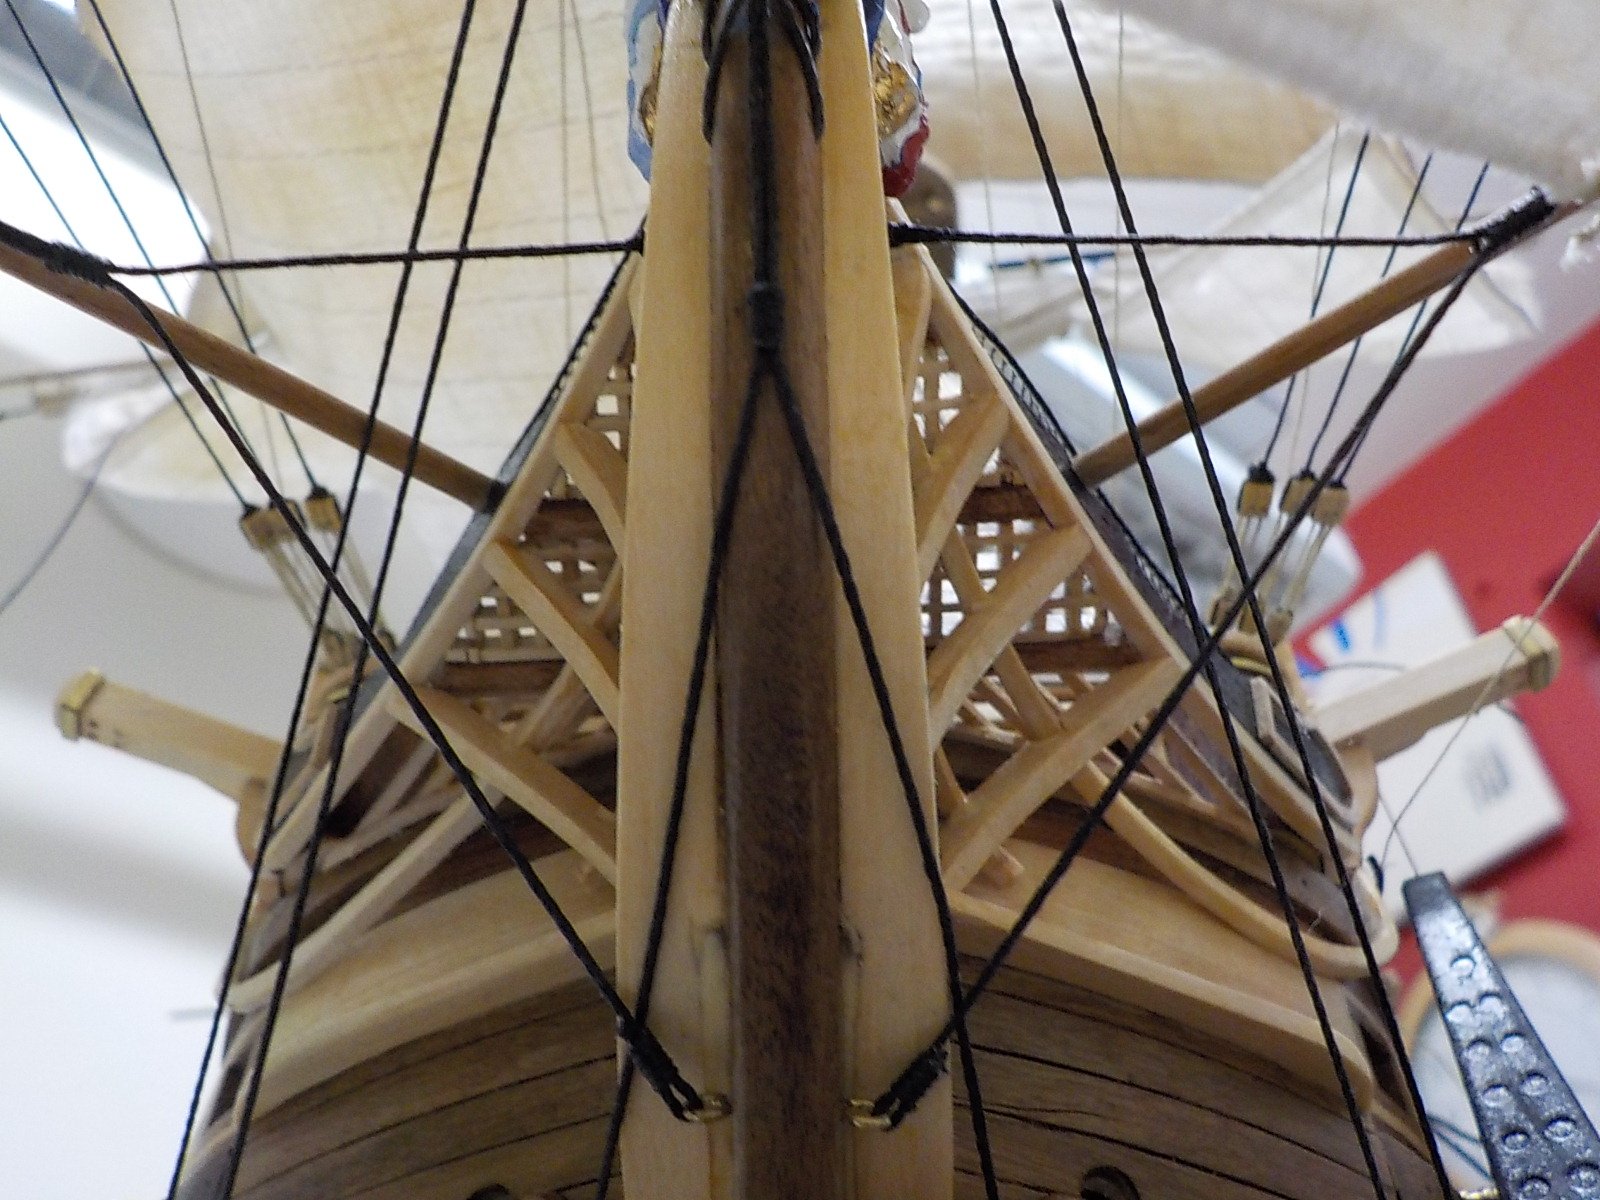
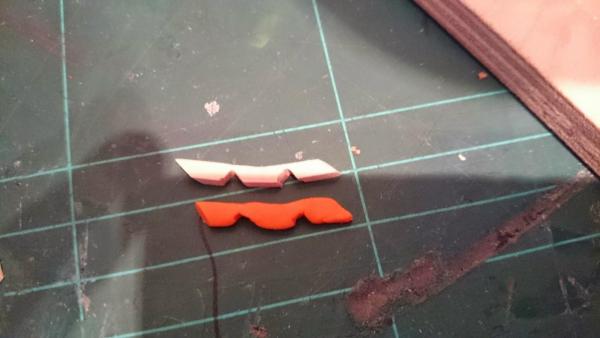
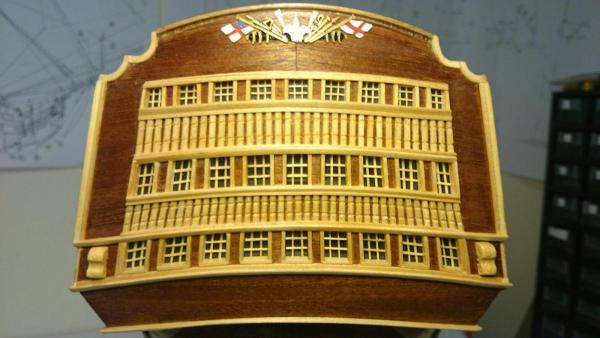
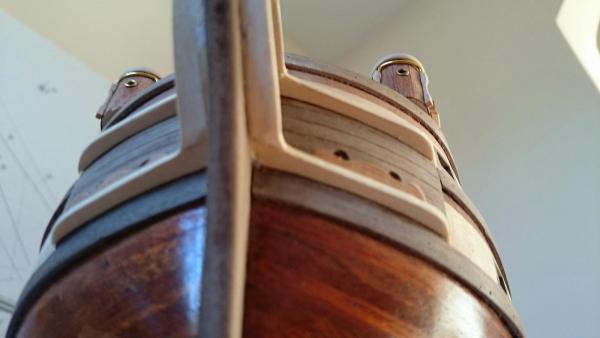
I have been busy on the bow decoration and now my ship looks like she wears the Victory's face. I have a nice pile of scale bonfire wood to show for the difficulty though, bending the 2mm x 2mm Ayous is frustrating beyond belief. Soak this wood and it becomes fibrous and stringy, not wet enough it will snap, not wet at all and yes it snaps but also burns on the soldering iron used to bend. For those painting the ship the burns are not an issue but for me, big problem.


- 708 replies
-
- 4
-
-
- victory
- constructo
- (and 1 more)
-
Hey that's looking great, whilst you were fitting four planks a day I would have expected the 1000 piece jigsaw to be almost finished by now, whilst waiting for the glue to dry.
-
Artesiana Latina HMS Victory 1:84 scale kit (REVIEW)
Paul0367 replied to mtdoramike's topic in Wood ship model kits
Hi Mike Its looking very nice , the build approach is so different to the Constructo version, closer to the Caldercraft. So pleased the parts are being supplied, I'm not sure if it would be the same for Contructo but I have not tried. I would have like a stock list at the begining of the build to ensure I had enough wood , I knew I was going to run short due to using extra for decorating the rear quarters. the little decorative trims above your canon ports are not even mentioned in this kit. Whoops there is a stock list at the back of the parts manual, I didn't push past the english section enough to see it. -
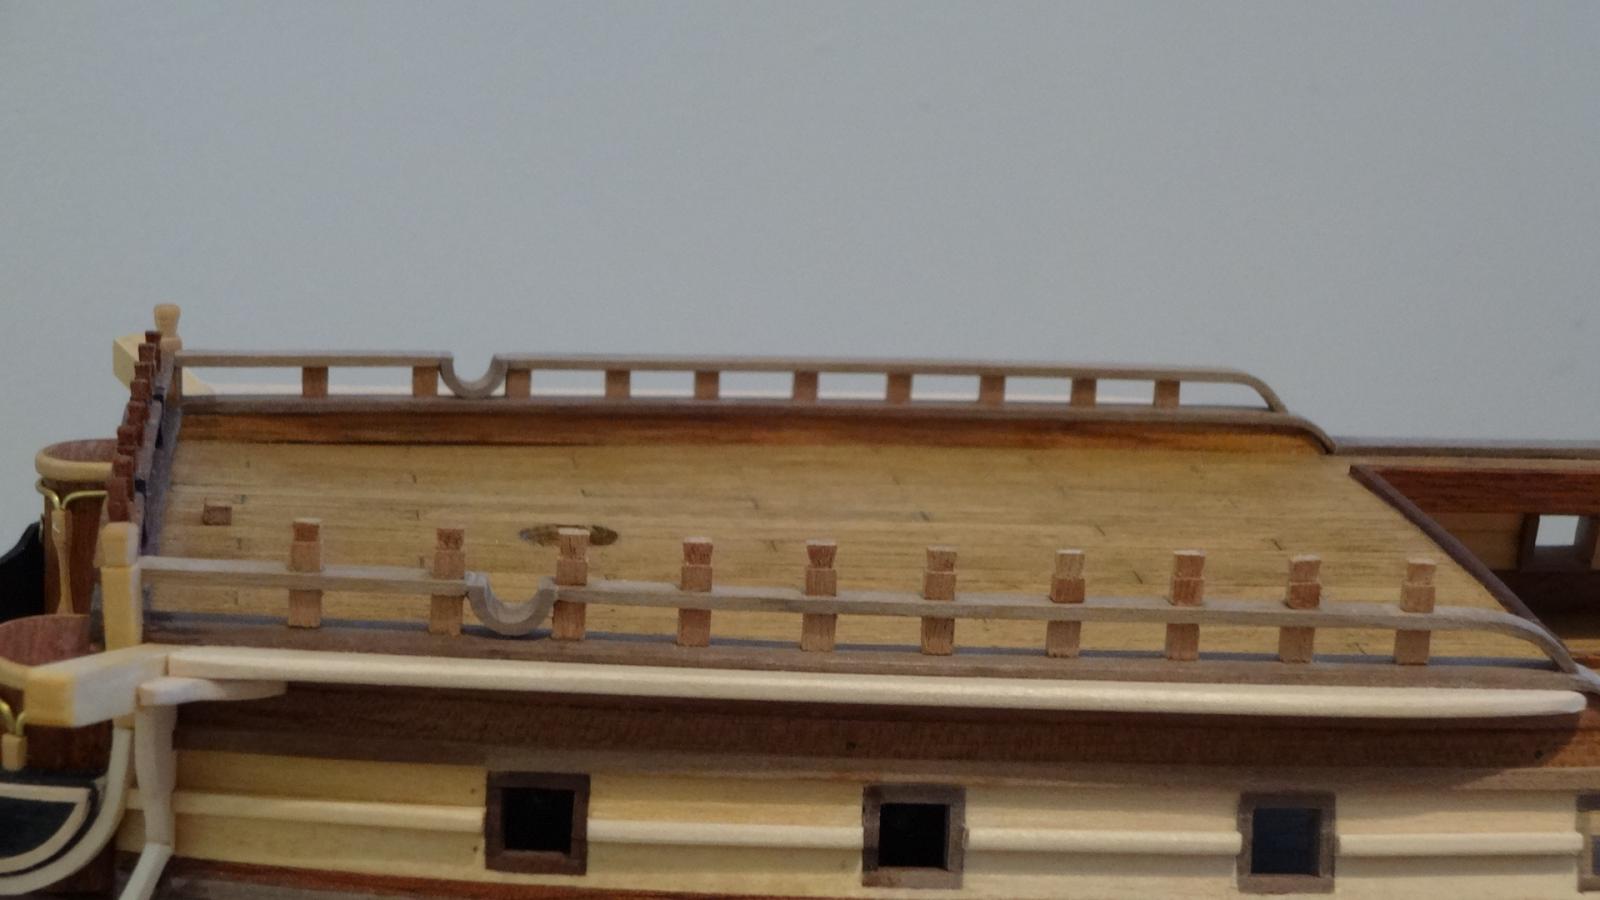
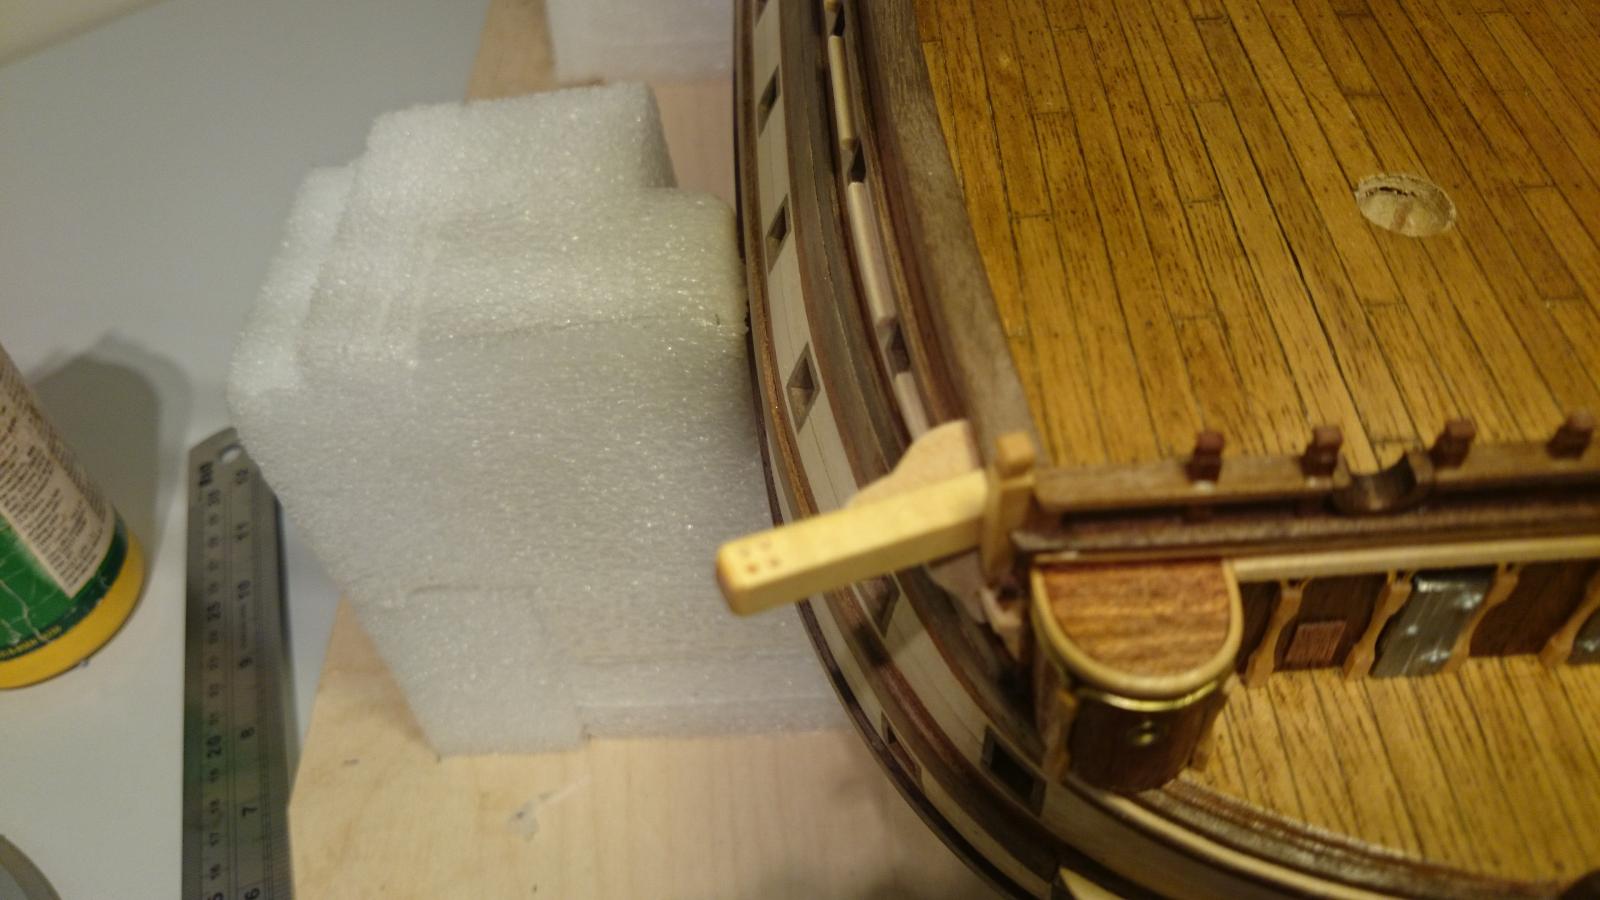
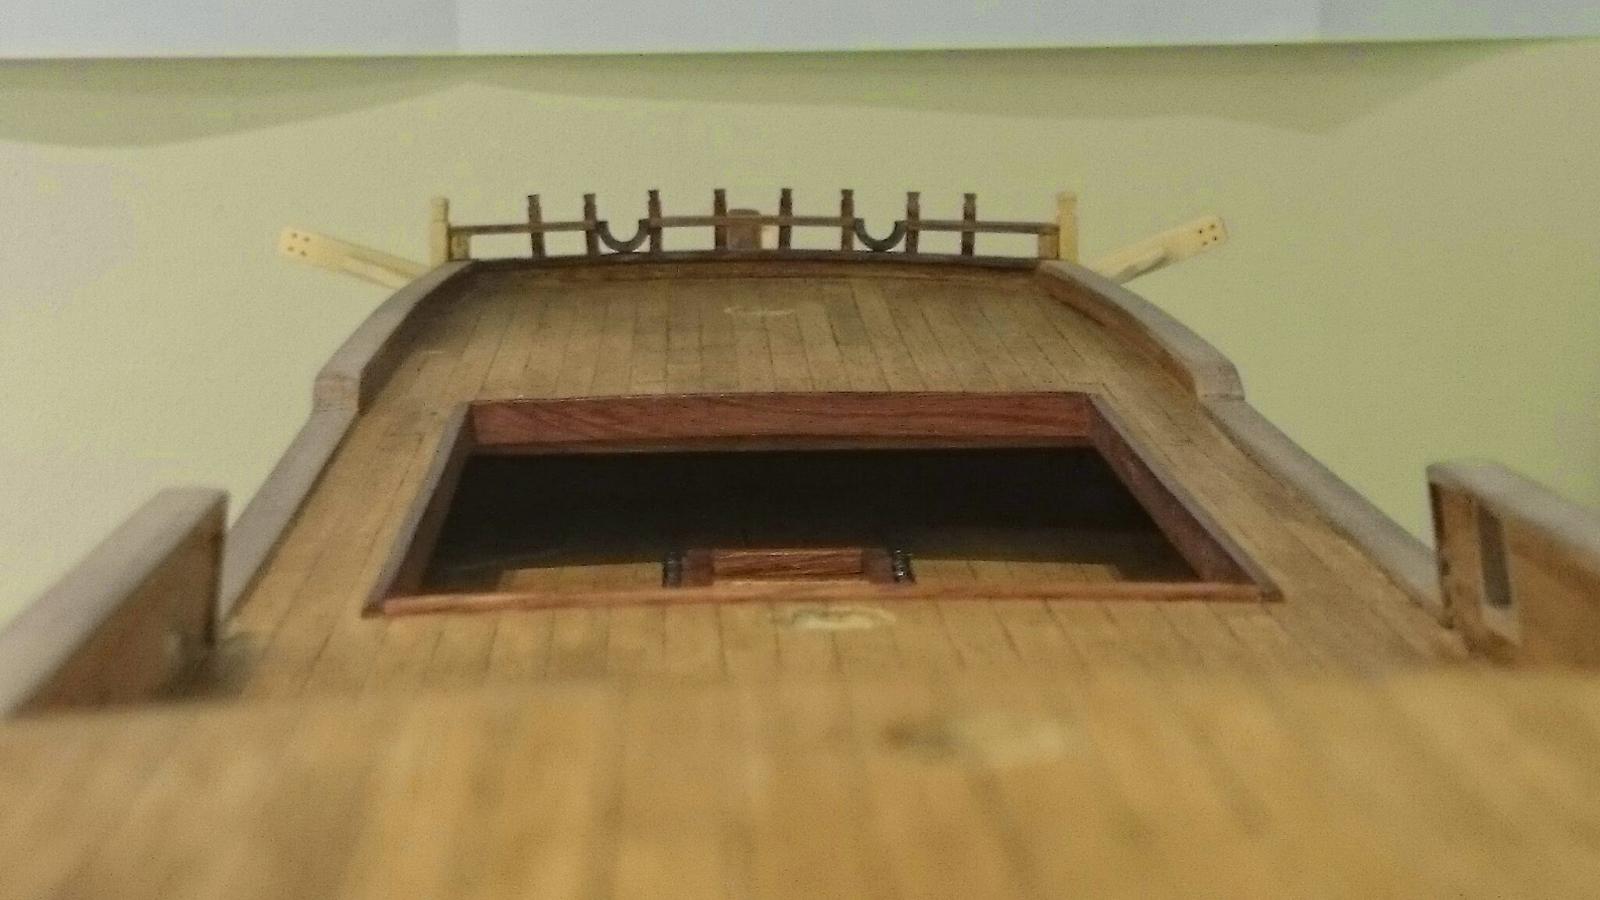
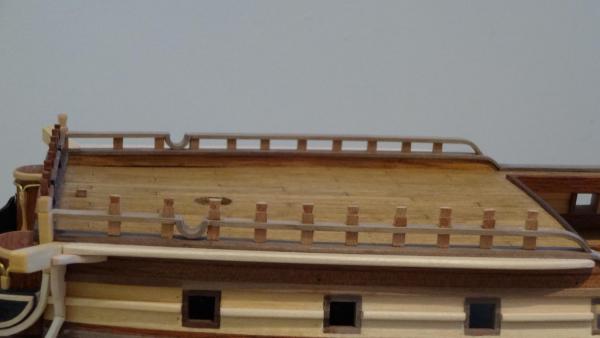
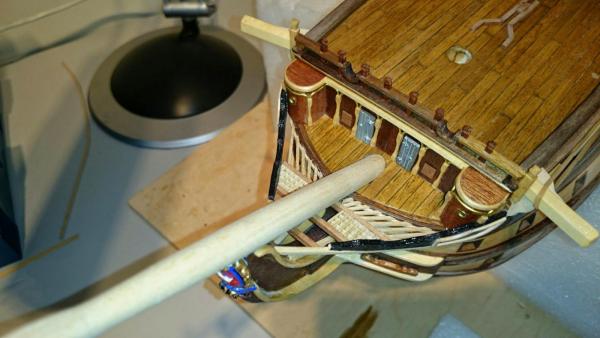
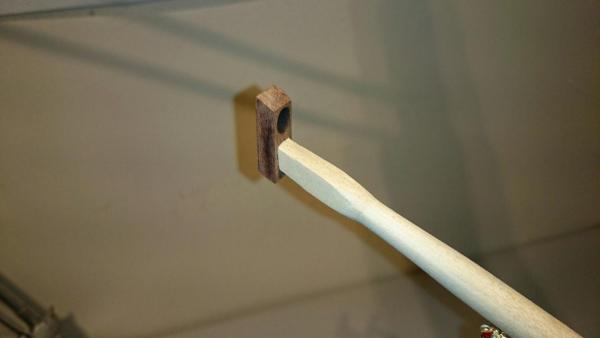
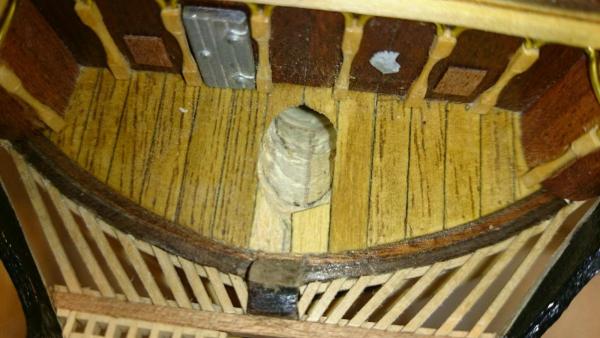
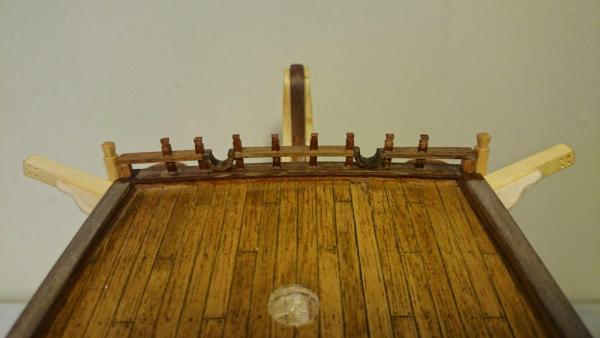
I have avoided this part of the build until now but despite this the instructions really need to have this step addressed much sooner in the build, possibly before planks are fitted on this deck, like the main and poop decks (just plank around the the hole). Problem I knew was coming, is splitting the deck due to a drill going in at an angle, even small drill bits never prevented my deck tearing up as you can see. 10mm final hole, I ended up making the bow spits first section to acheive the correct angle, not to mention repair the torn decks, this is a scary part of the build being in such a visual place on the ship. The picture shown is not the full damage, I had replaced the rear curved sections and started on the front prior to stopping to grab the picture. If your building this kit drill before you lay the deck.
- 708 replies
-
- 1
-
-
- victory
- constructo
- (and 1 more)
-
Still working on the bow trims, new wood received from Cornwall Model Boats will certainly help, Ayous and it unwilling bending wasted a lot of of strips

- 708 replies
-
- 3
-
-
- victory
- constructo
- (and 1 more)
-
Progress is slow on the planking but always worth the time, remember to take some off the inside top and bottom edge of the planks when on the curved sections this will enable the planks to sit close closing the gap a curve would cause. This is not quite as important if painting as filla will cover any gaps not to mention copper bottom if your going down that route
-
Ha Ha Dave, As long as I'm putting correct pictures on you mean.
-
John your a star Thank you, your spot on. I read this at 0020 UK time changed them immediately

- 708 replies
-
- 1
-
-
- victory
- constructo
- (and 1 more)
-
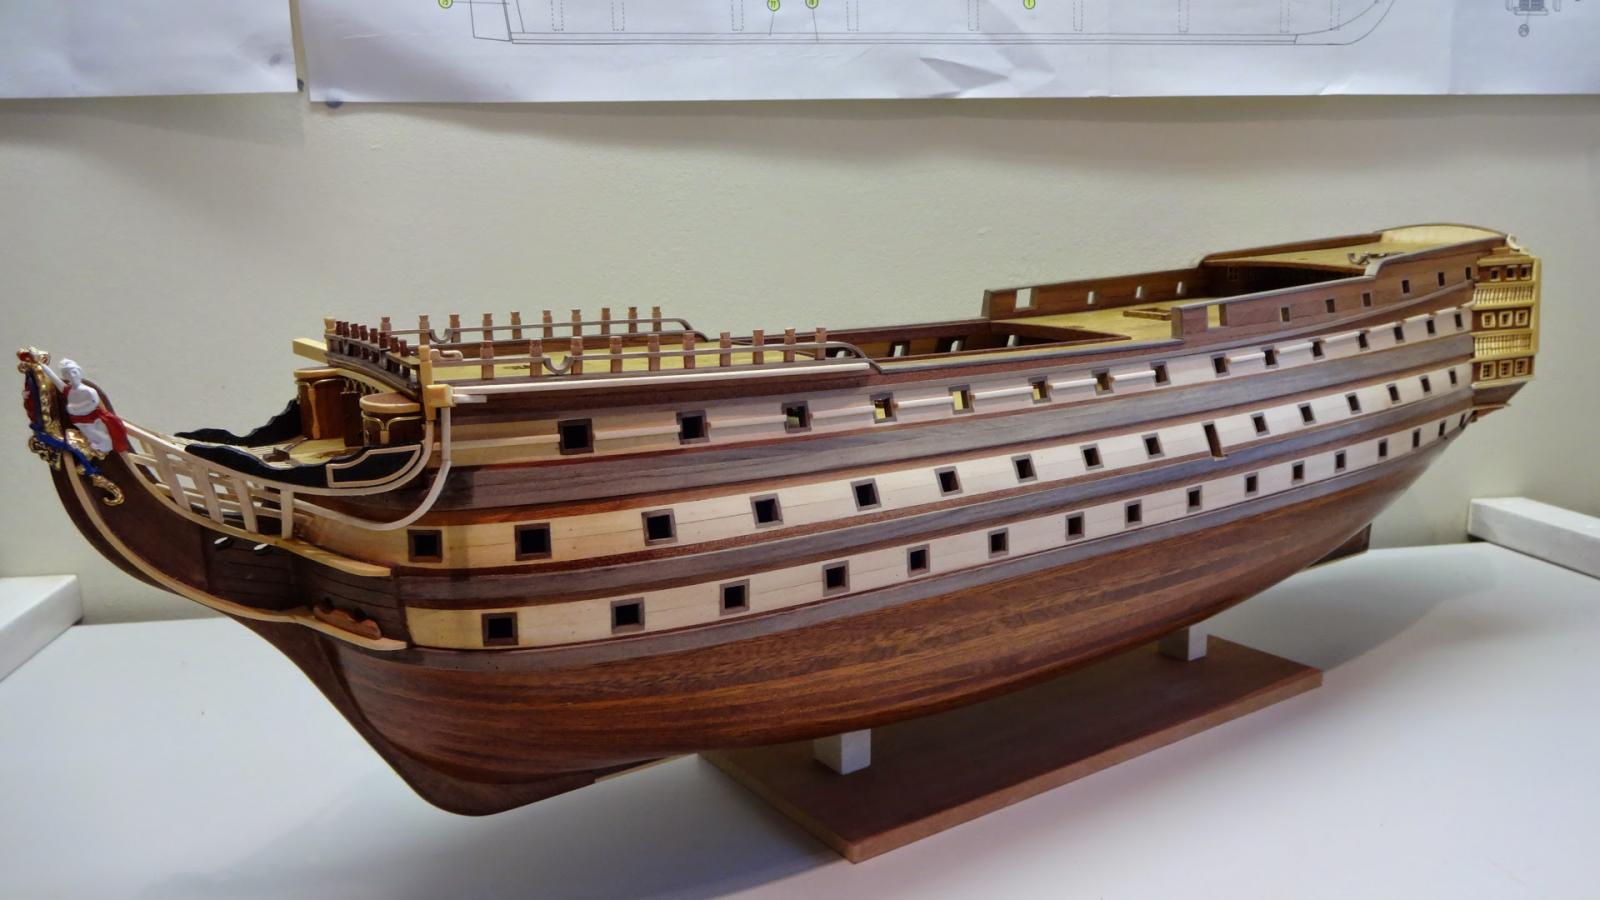
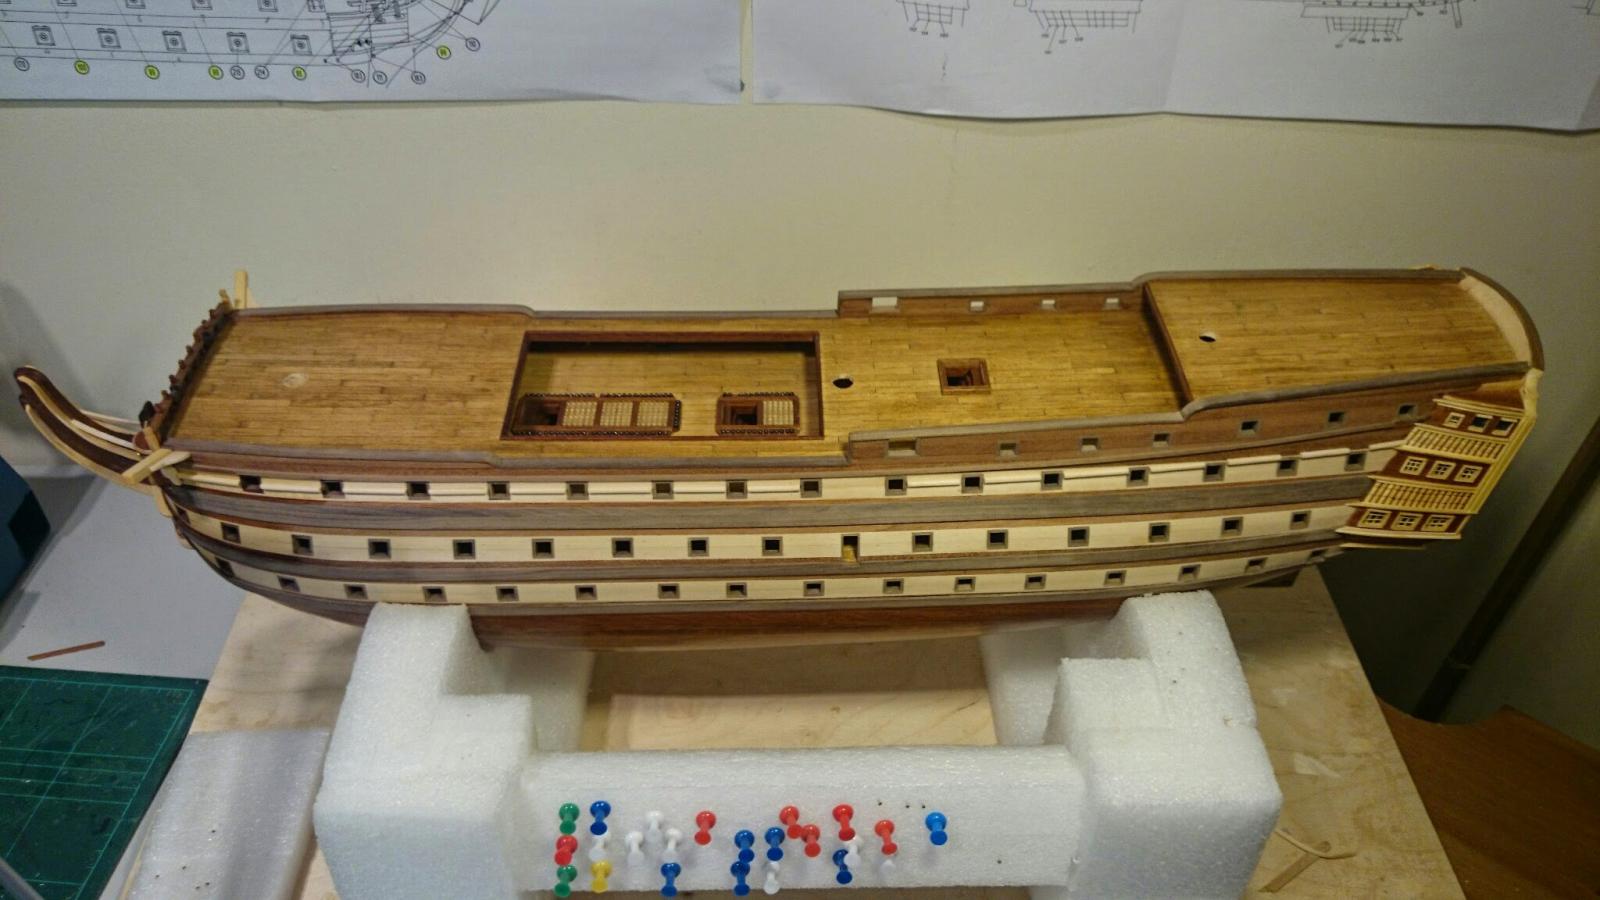
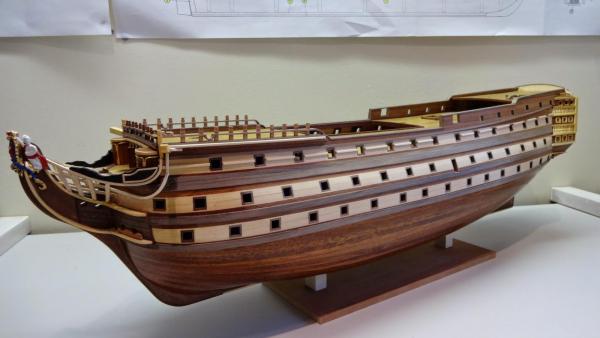
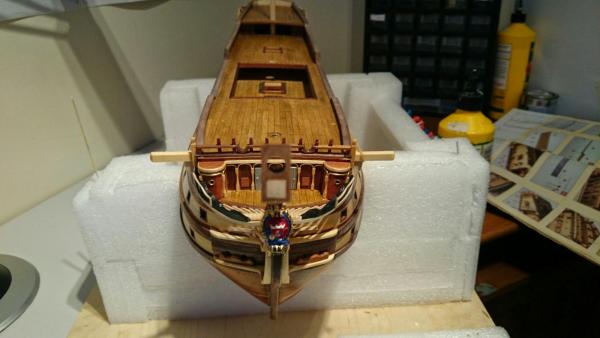
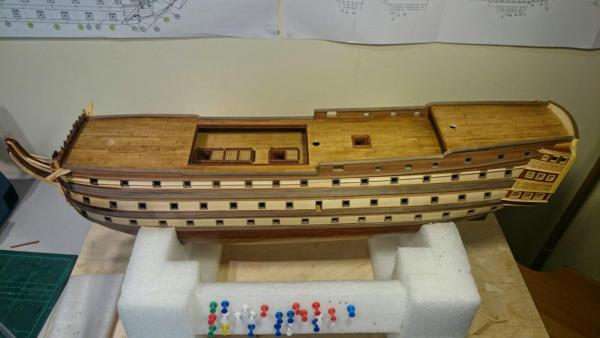
I have took a little time out to reflect on whats been done and the time taken to get this far, I started on 01/04/14 that's right April fools. My build log states I have so far put in 351 1/4 Hours into her and a long way yet to go. Plus a few pictures of where i'm at todate


- 708 replies
-
- 5
-
-
- victory
- constructo
- (and 1 more)
-
They look the part, and remember they are additions to the kit and make it more accurate. I say that look at my page re the pillars, appears were short on those too, we would'nt be able to squeeze 8 in
-
Interesting, that's one to look out for, is there a predicted release date.
-
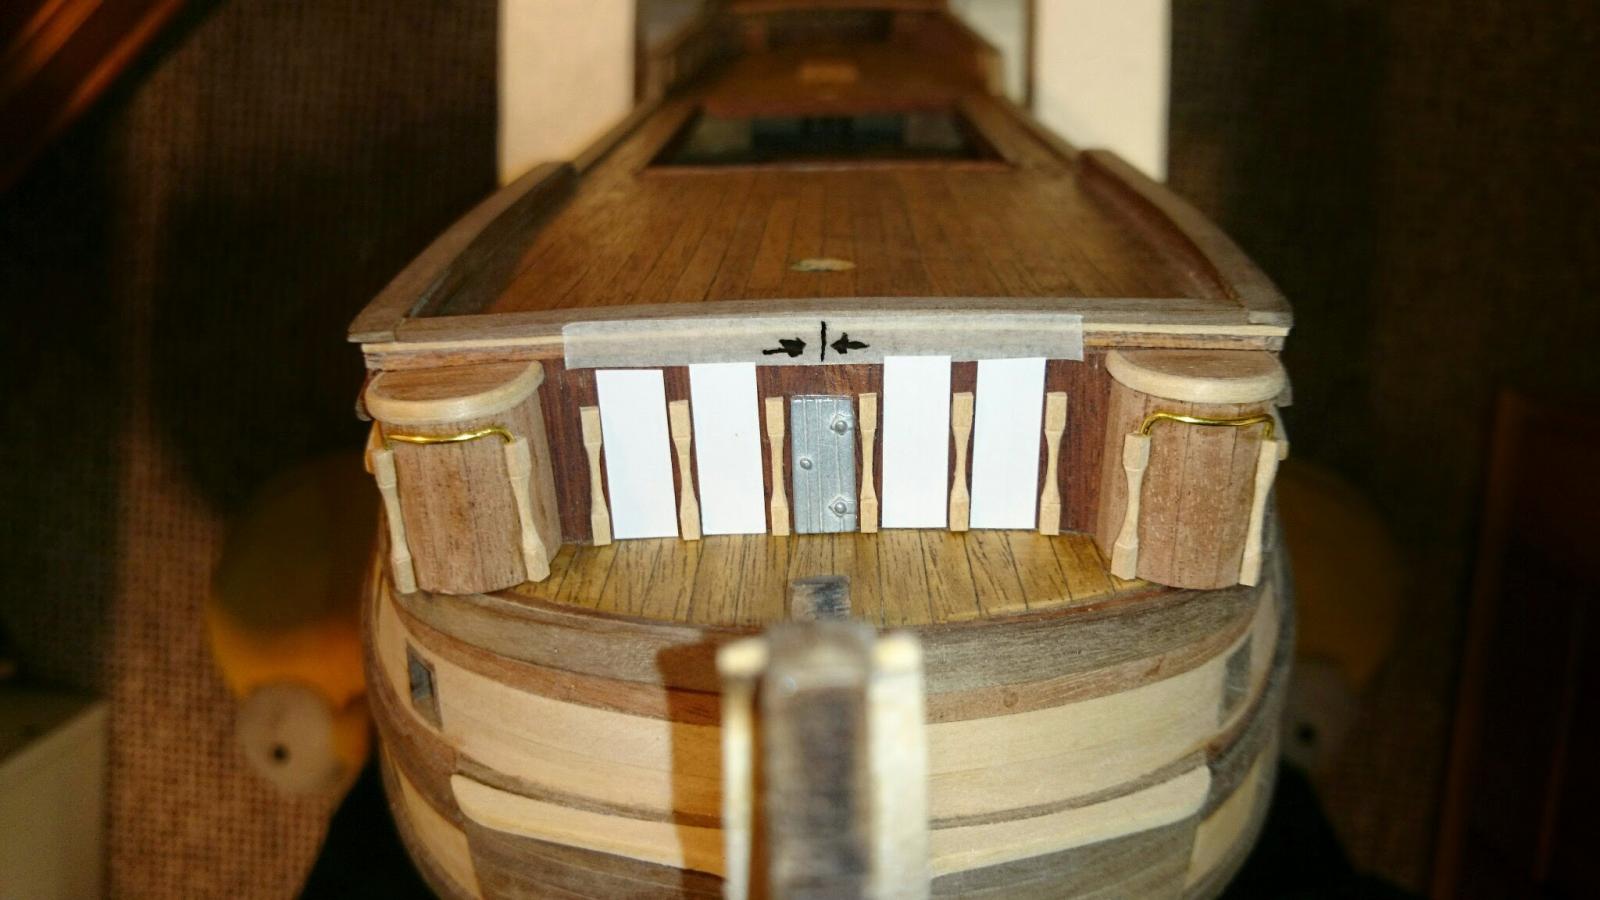
Looking at your image of the kit, Yours has 8 pillars between the quarter galleries my kit only has 6. Oh nooooo it gets worse. I will scratch build the missing hatches, thankyou for the picture Kevin. I should have bought the beautiful Caldercraft version but as a newbie I had no idea I could even build a ship and its a lot of cash to cut my teeth with..... future for sure
-
I noticed they have done this to put a gap between the pillars and the doors but I will have to compromise this as the gap of 14mm on the rail is so narrow to fit the 5 brass no 183 eye bolts shown on the plan
-
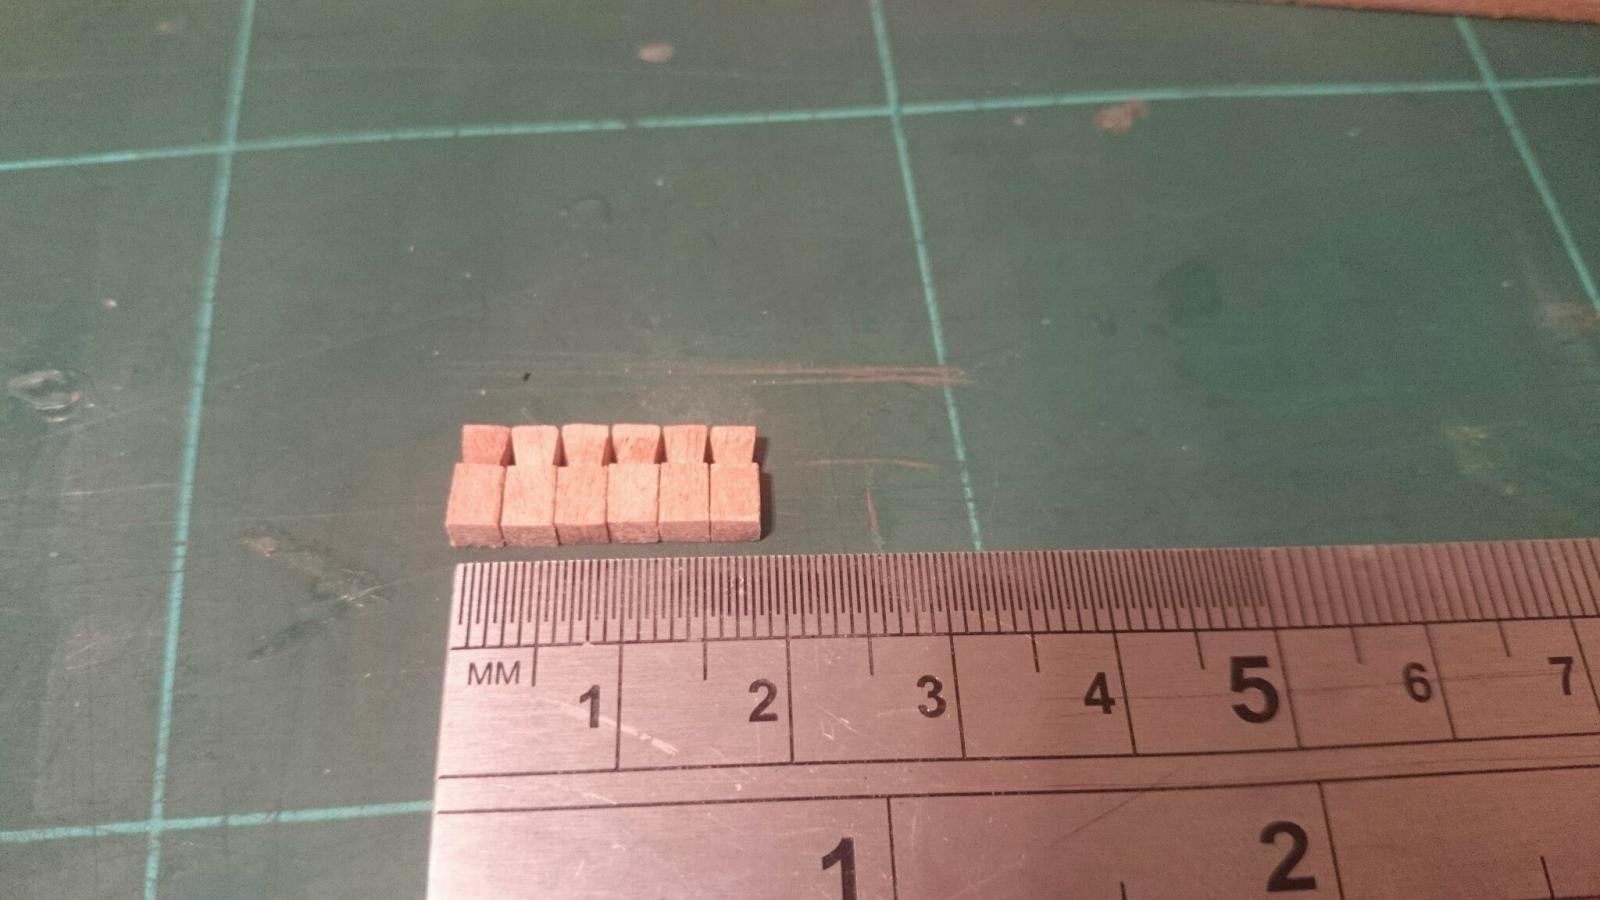
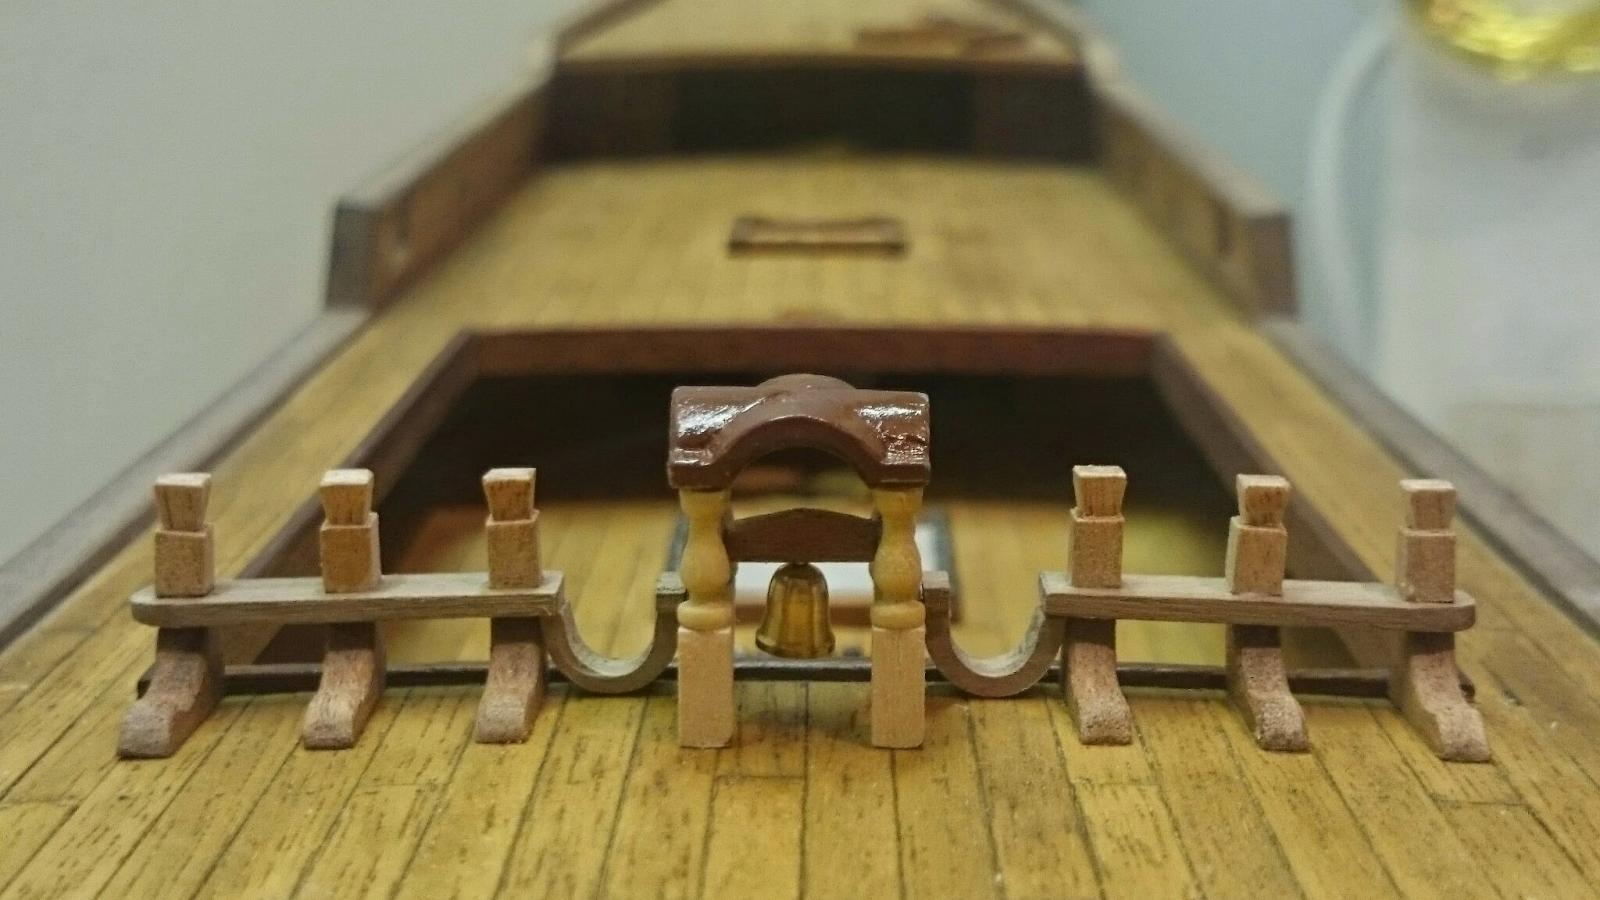
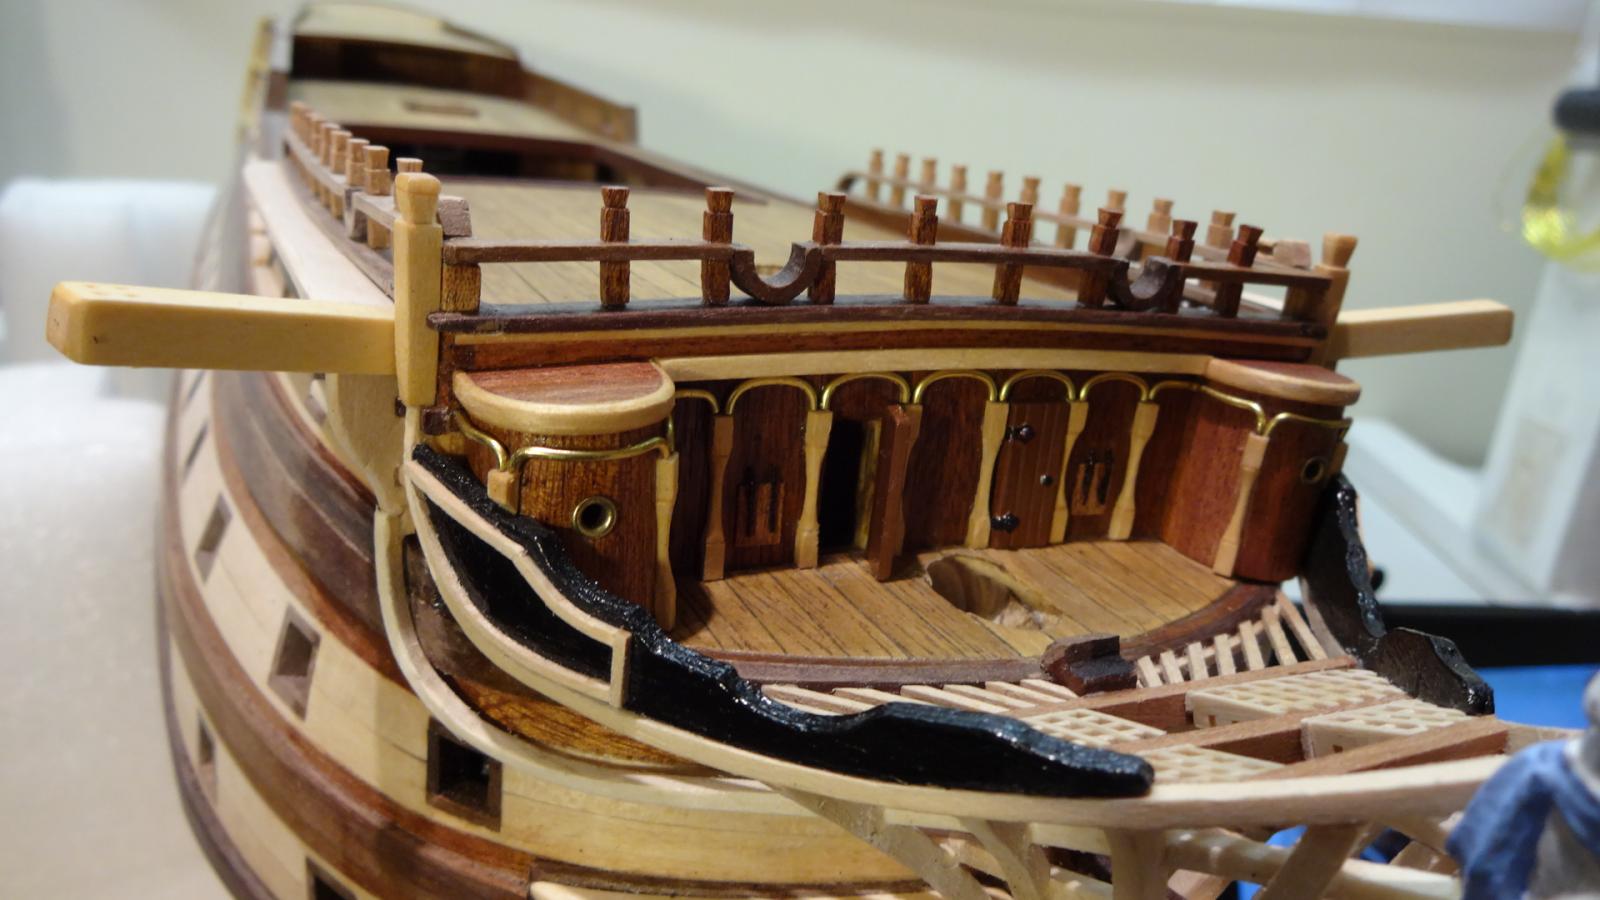
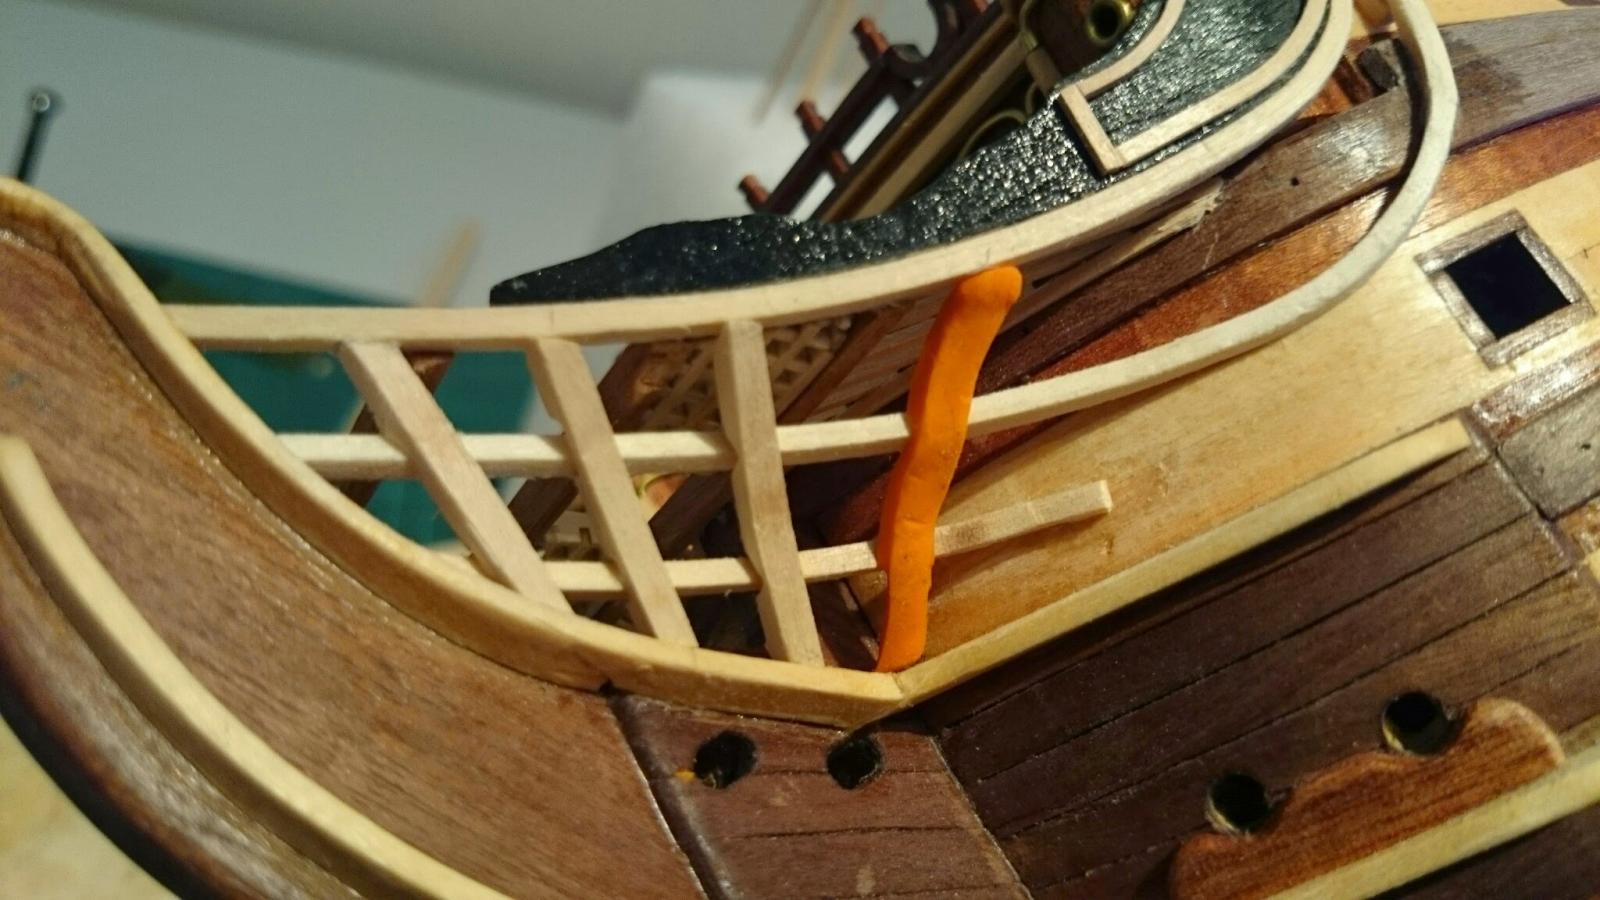
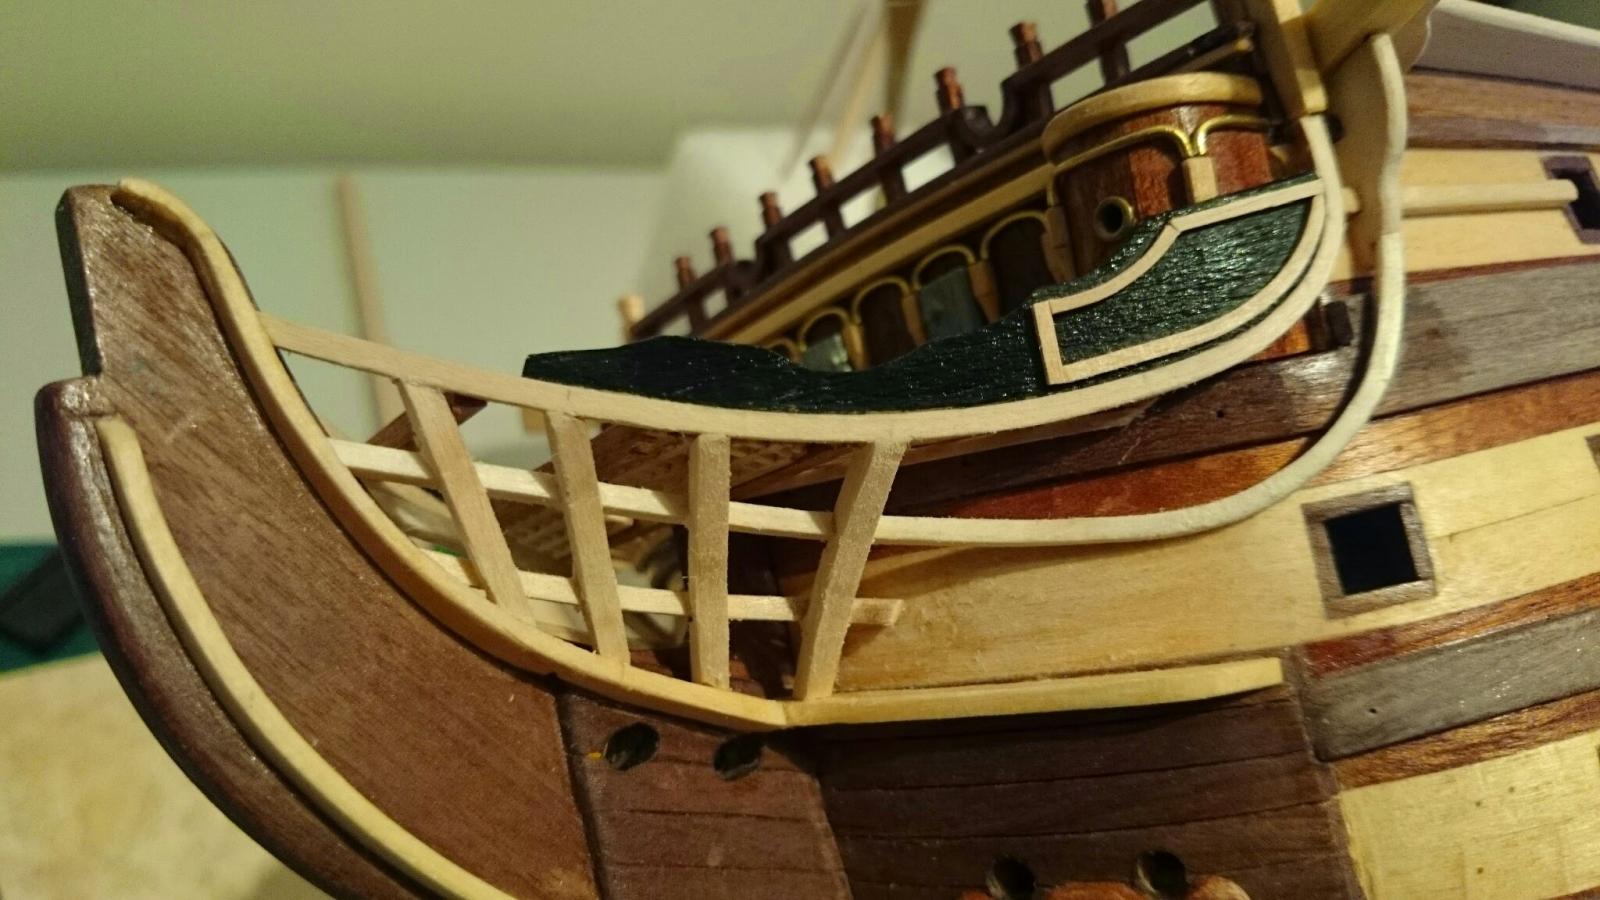
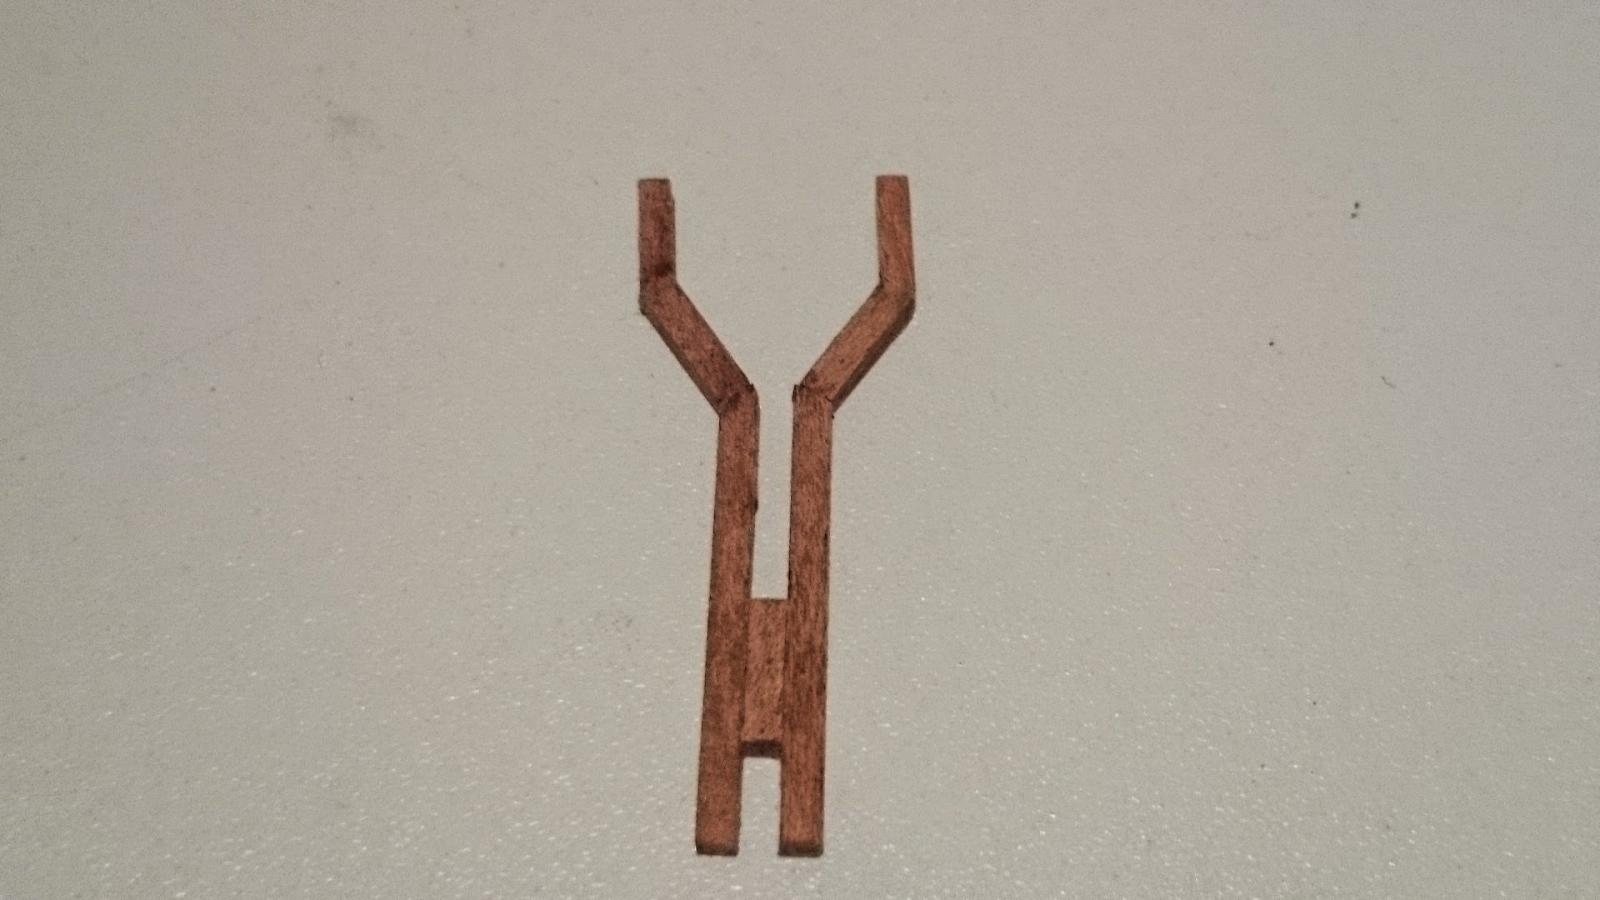
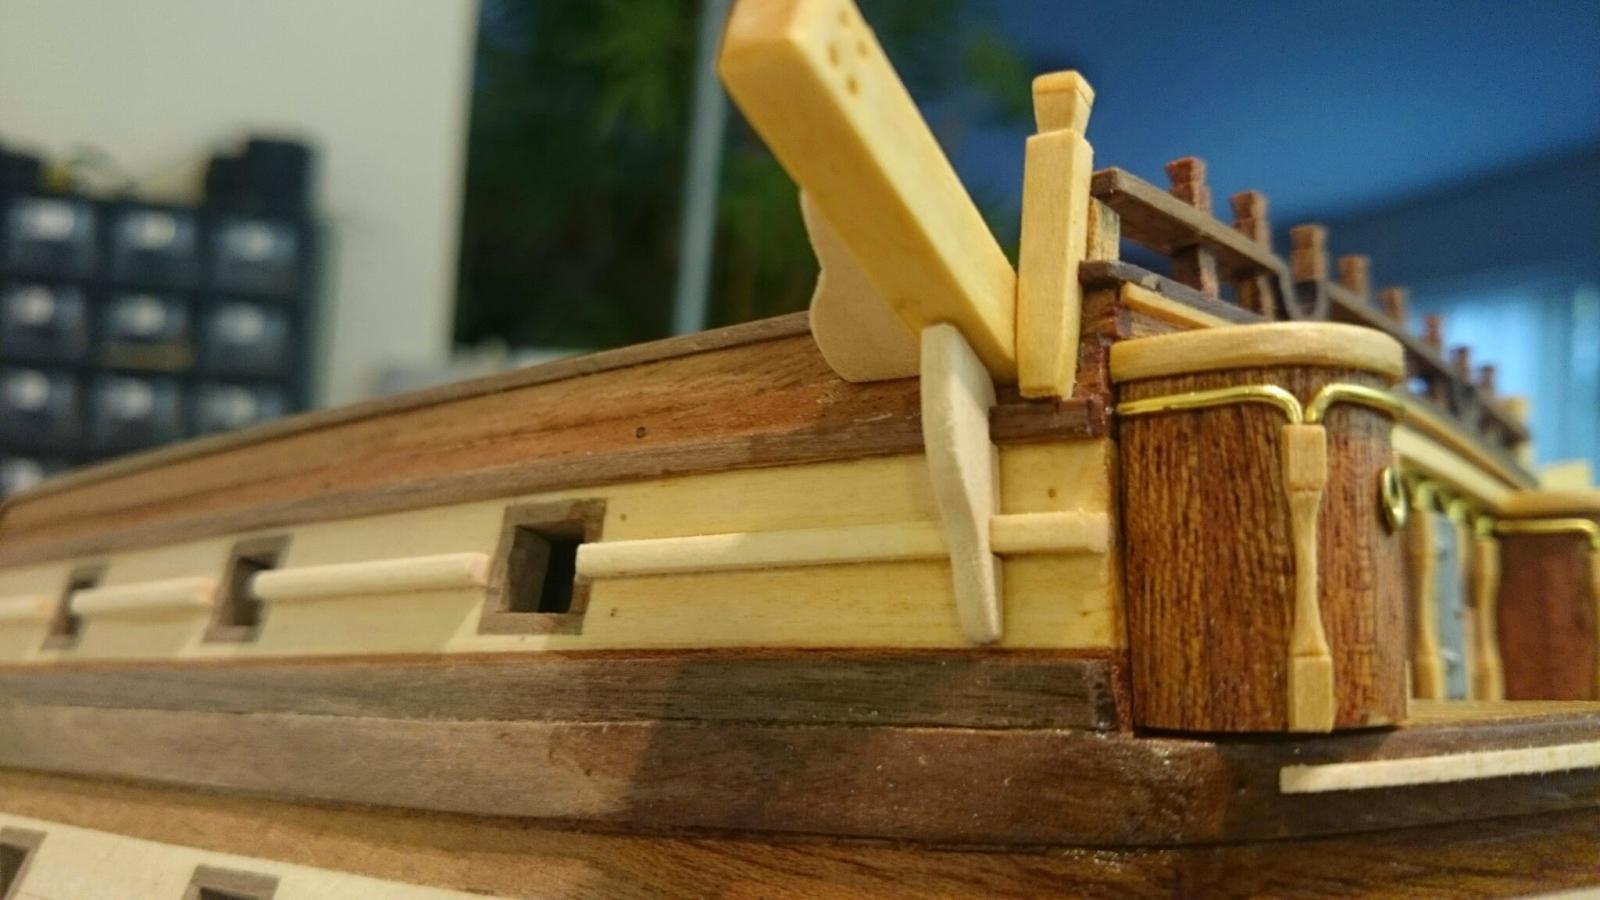
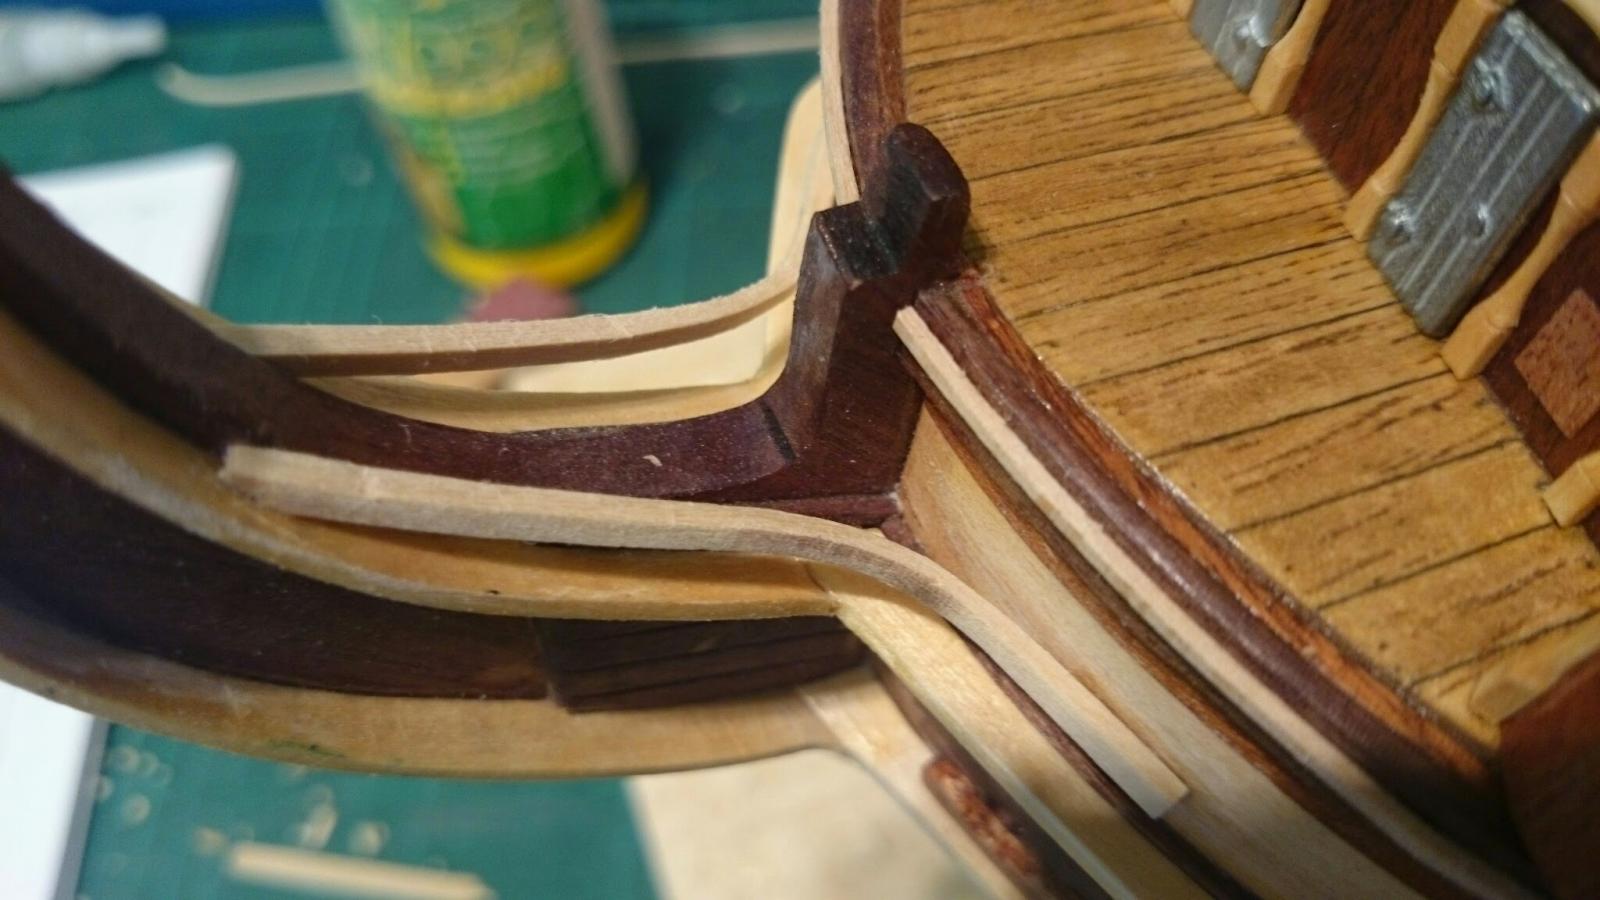
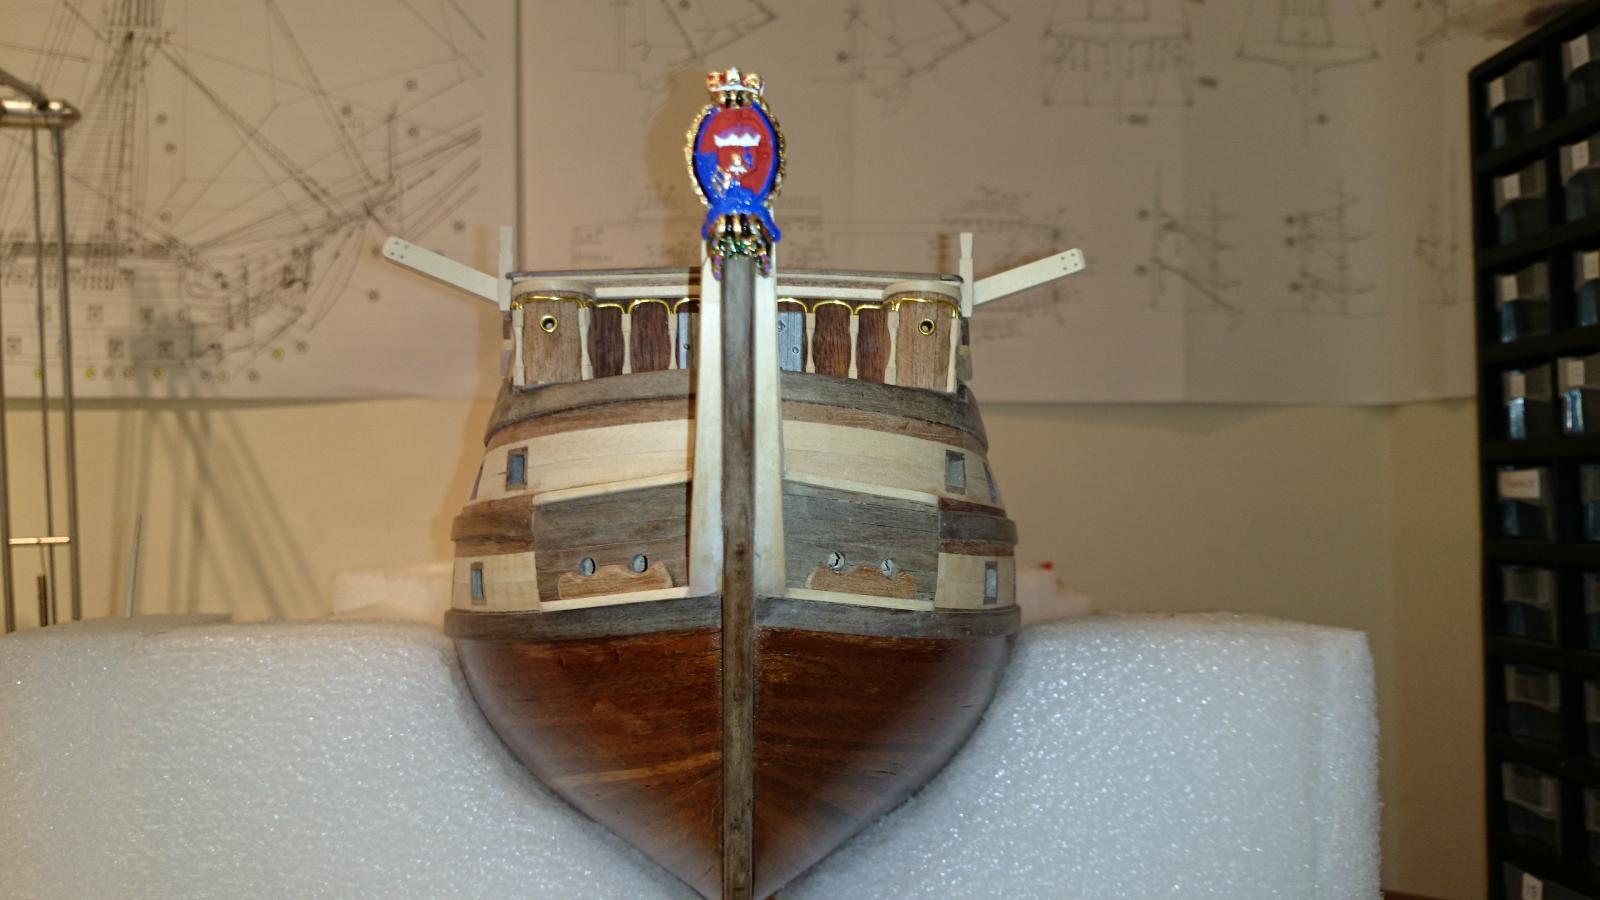
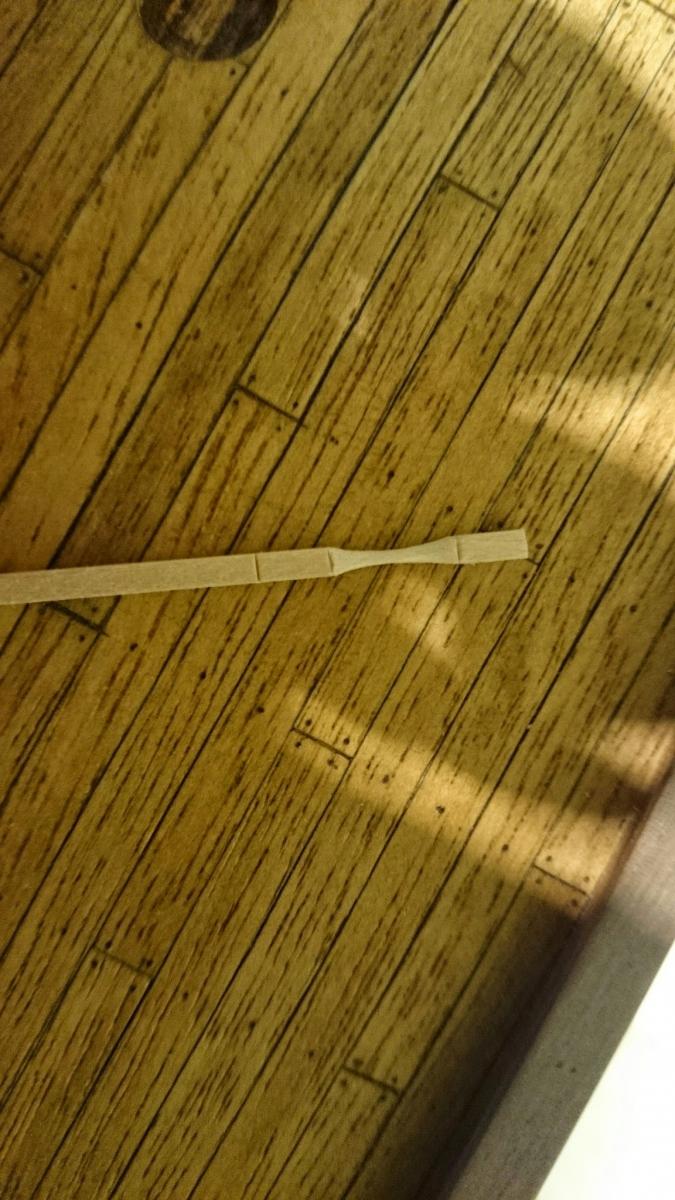
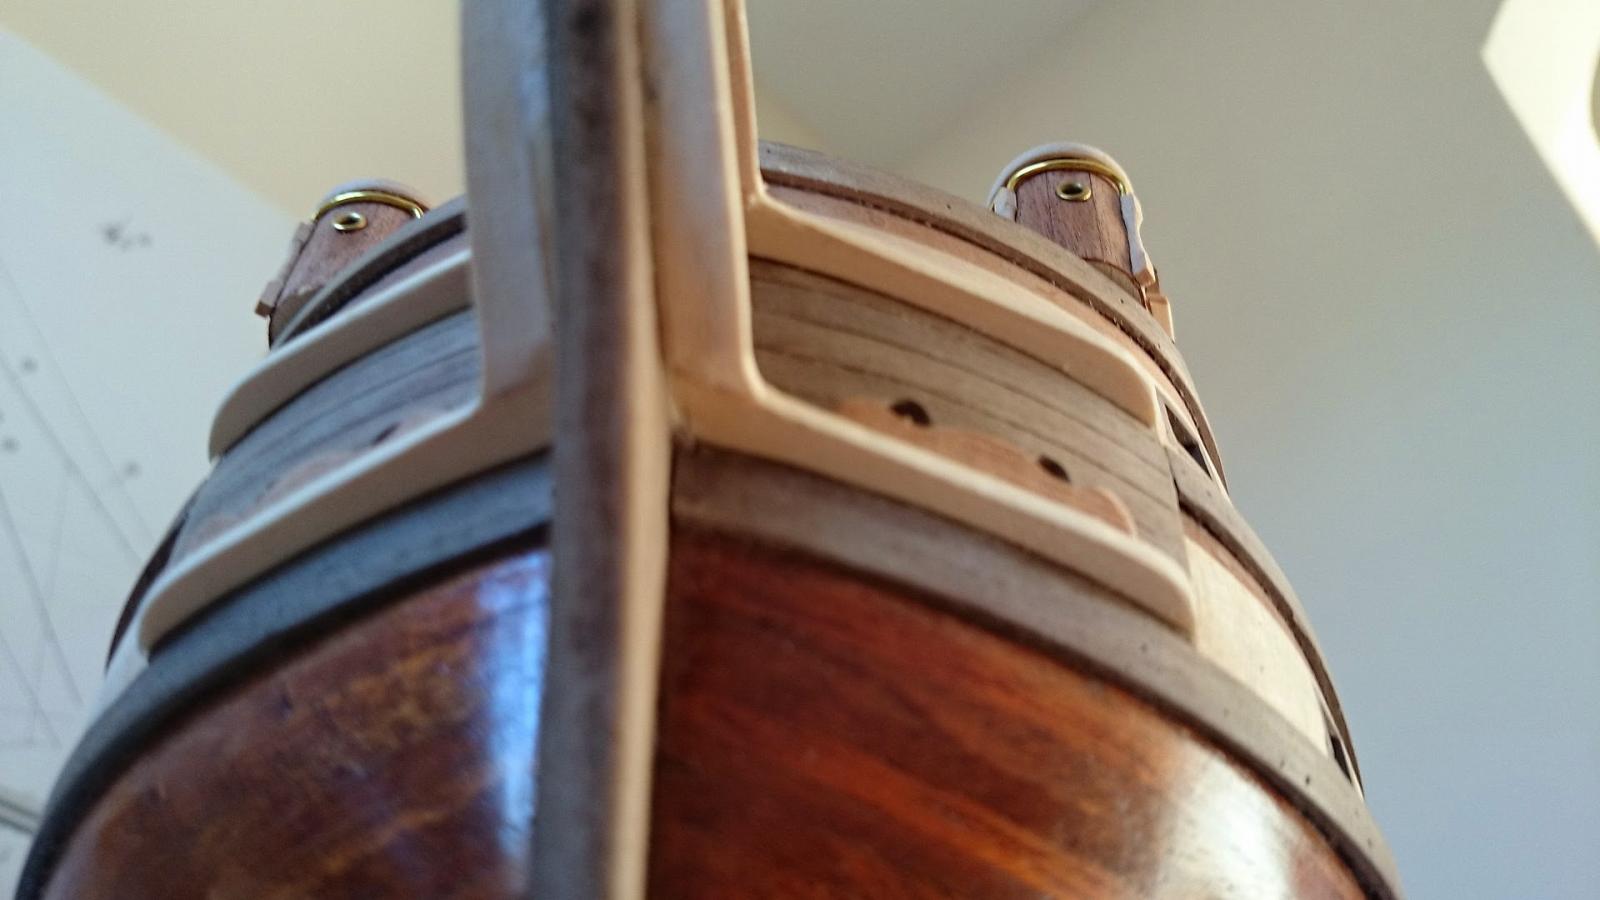
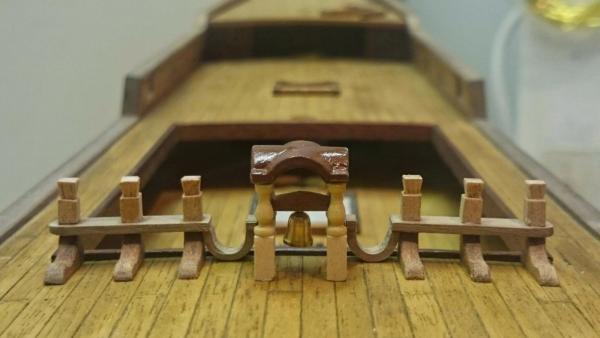
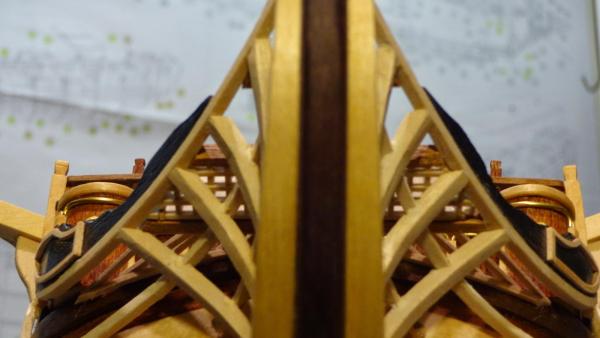
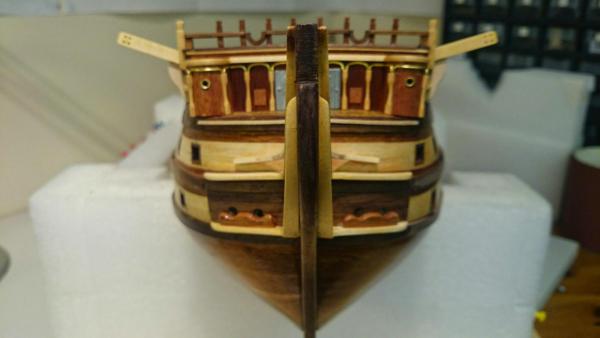
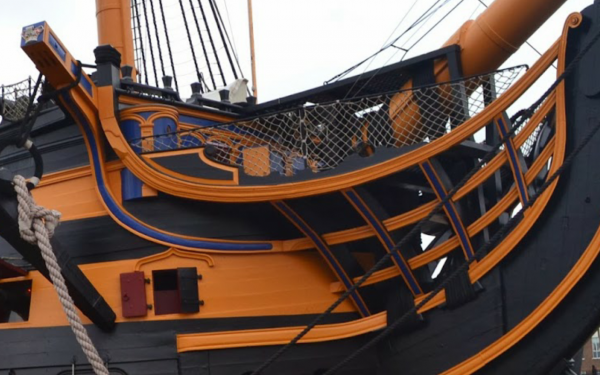
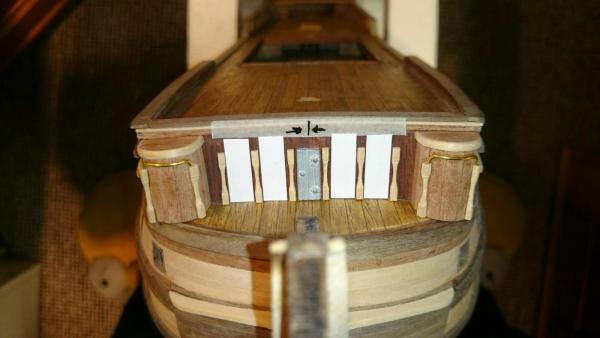
I have been busy this weekend throwing a lot of hours in. The two posts either side ( Riding bits ) had to be removed and re-made, anyone building this kit, please save time and wood doing a dry fit first, the instructions just tell you to make them 20 mm long with a taper at the top and bottom, ok ! how deep should the top taper actually be, well that would be a little to much info to give us. My first attempt was to deep and ended up below the rail I fitted later ( tried to fit) If your wood diameter is the same as the instructions a 4mm drop on the taper will see you good. Ok thats sorted upwards and onwards. No sorry, another error. I have come to the conclusion our Spanish designers of this kit did'nt bother to buy a plane ticket and study the real ship in Portsmouth. Why! Look at the curved sections of the bow handrail where the canons are to protrude, the real ship has them more central / inside the gap between the quater galleries, Contructo has them part over the galleries, I have matched the real ship but to do this the rails needed to be 22mm long (outside the curves) funny thing is the kit says there 22mm long. Have Constucto not followed there own plans, plans are 16.3mm,,,, mmmmm maybe. I have put pictures on which I hope clears up what im trying to point out.... ok I, like many are not building a museum piece but come on lets get some basics correct , oh look at the real ship in the snap shot and its got a post near the riding bits which the kit seams to have forgot to fit or even ilustrate...
- 708 replies
-
- 1
-
-
- victory
- constructo
- (and 1 more)
-
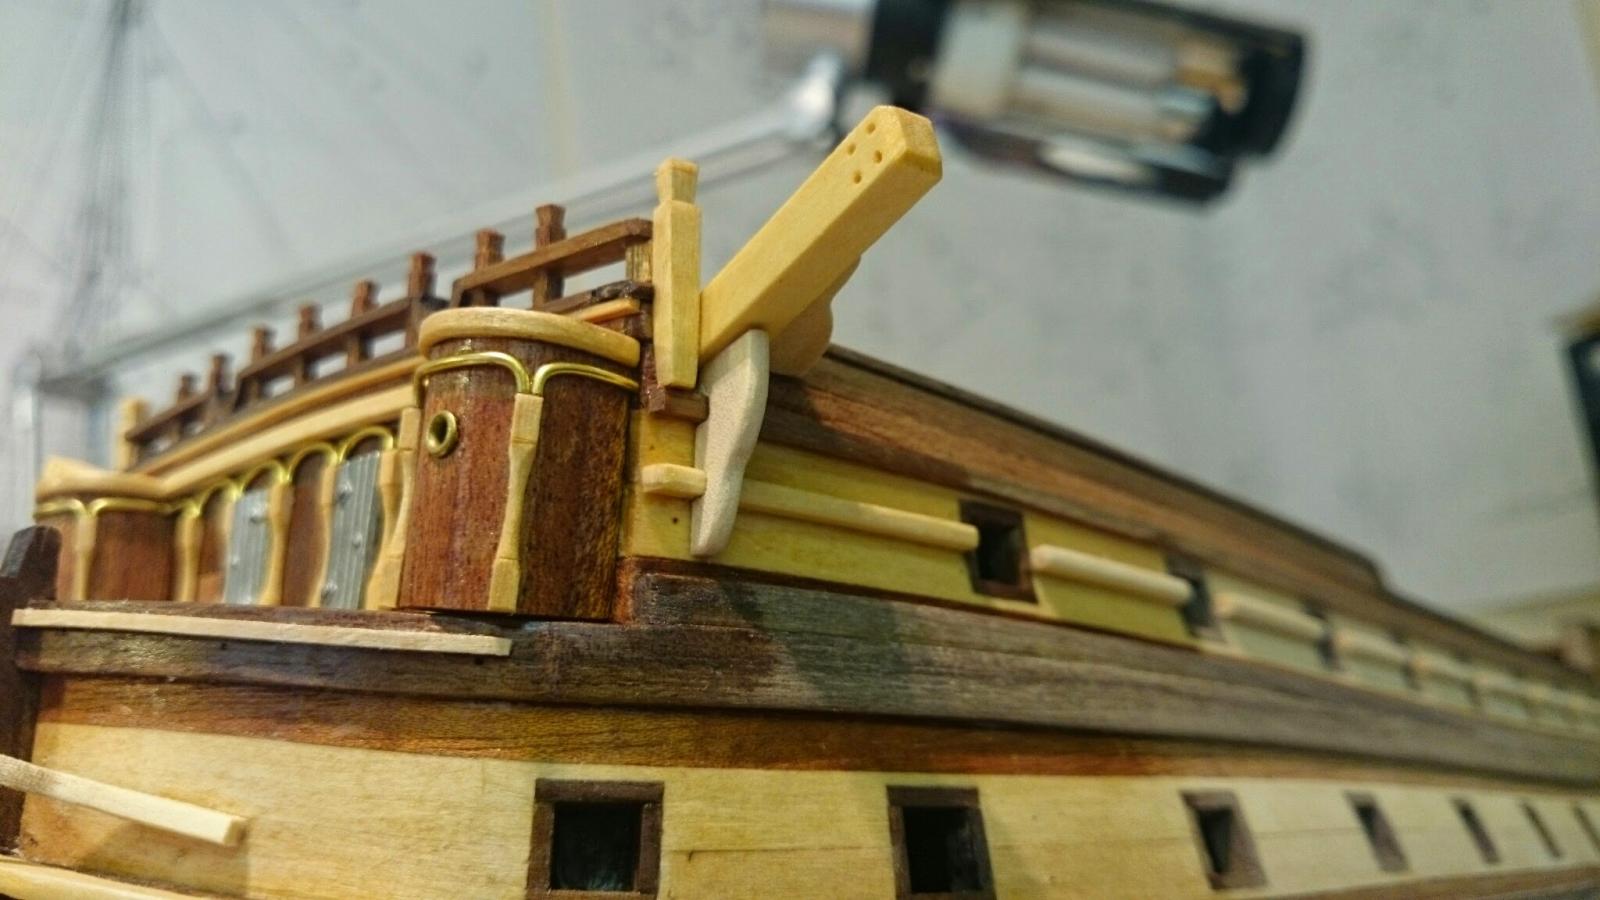
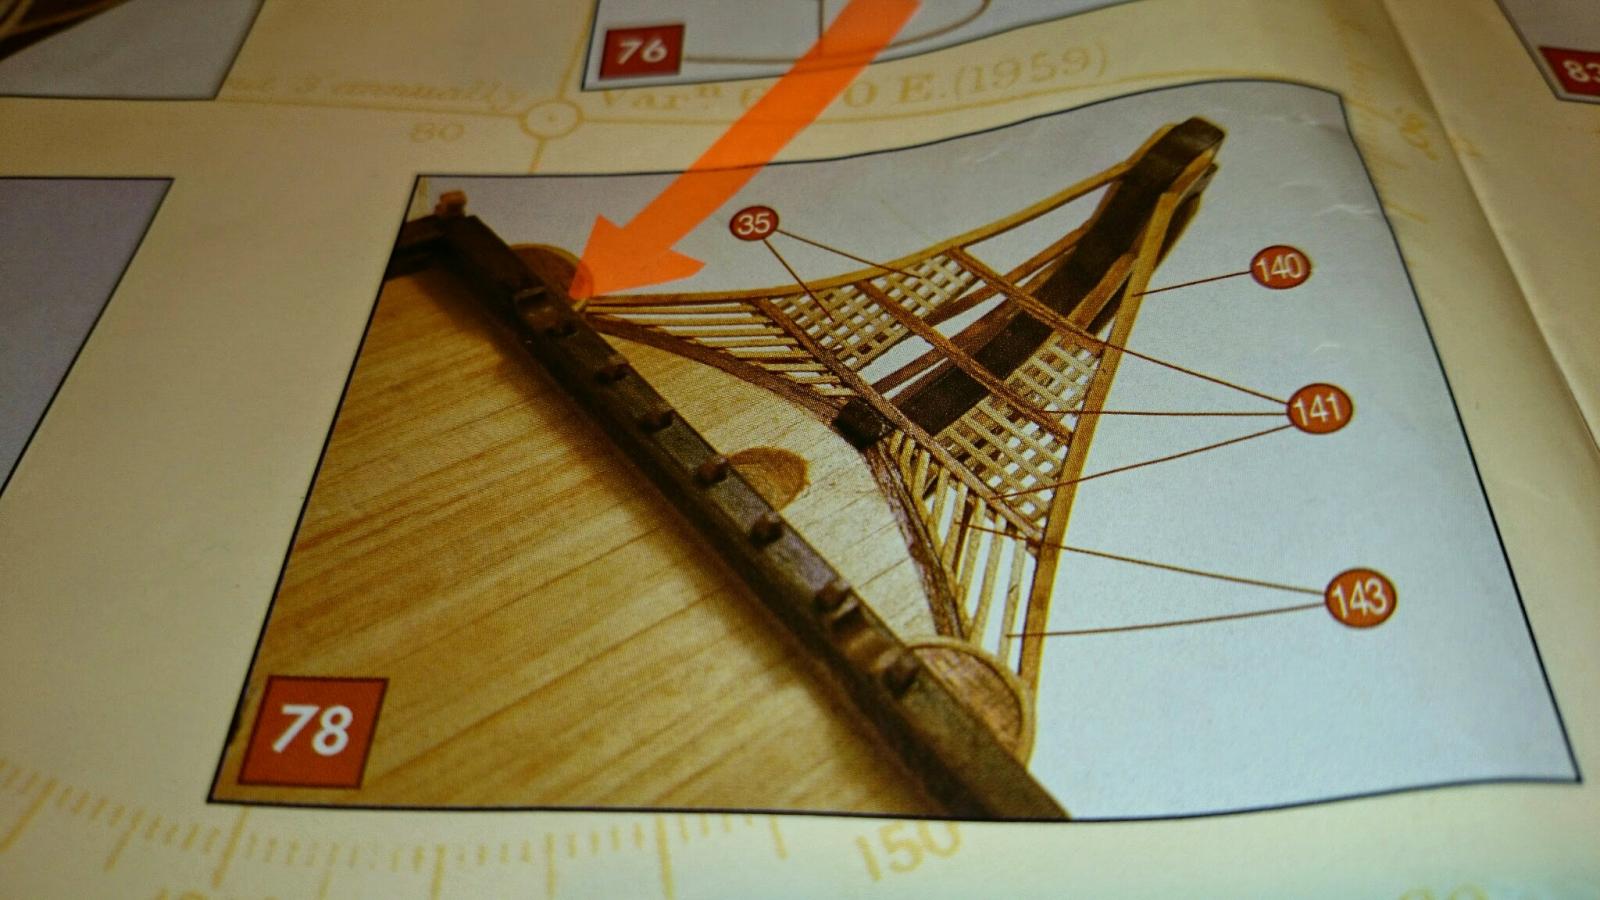
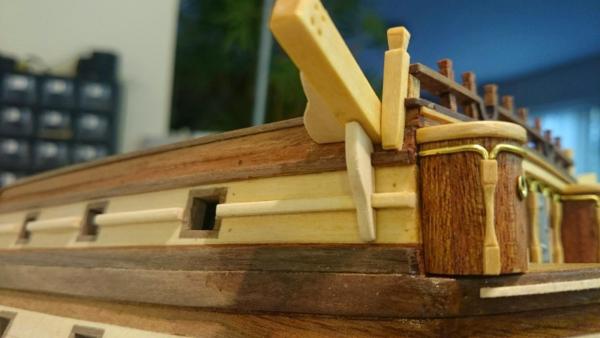
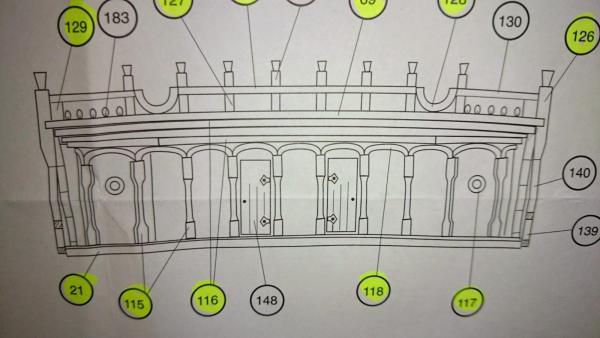
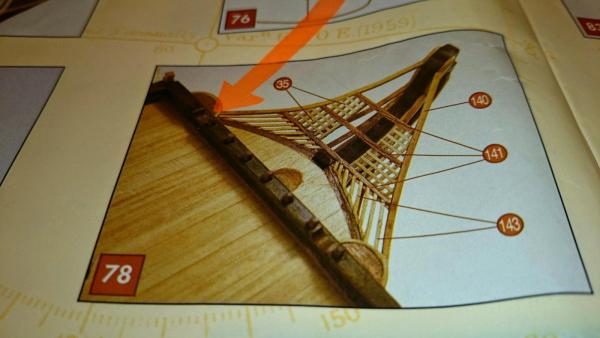
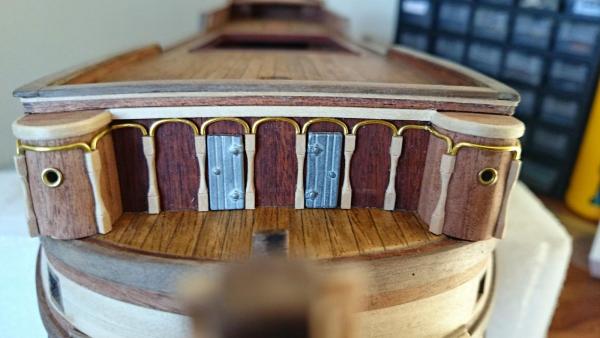
Looking good mate, I'm going to pass on a few problems in a bid to prevent you suffering the same and like me wasting wood and time making parts due to bad ilustrations / manual. I have come to the conclusion that Constructo never actually sent anyone to the uk to study the real ship before they made this kit and thought that will do, close enough. First the image posted shows the position of the curved rail (128) for the canons to protude, these are to be 22mm from the sides, per instructions but doing this puts them in the right position of the real ship but the diagram in the manual shows them far further out from the centre (pic 70) clearly they never followed there own instructions. Other issue so far - Pic 69 item 126.... ok, they tell us the measurement for this which is 20mm long, they also show it shaped on the top and a slight taper to the bottom, Please fit the rail post 127 (pic 70) before you make these, then dry fit the rail 130 (pic 71) and then cut the shaped top to be just above the rail. I didnt have the right info and did it as per manual and...... you guessed the post needed taking off as mine ended up to low / below the rail. I have sent picture 78 which shows where they want us to fit the curved rail which is half over the quarter galleries, this is not correct on the real ship, they are further to the centre of the deck.

-
Artesiana Latina HMS Victory 1:84 scale kit (REVIEW)
Paul0367 replied to mtdoramike's topic in Wood ship model kits
All gone quiet here, they say no news is good news and with that kit you sure need some of the latter. Hope alls well -
Days, weeks, months and looking like years are going to be eaten up on the build, beauty about it you do it at your pace when in the right mood. Hey looking fantastic by the way.
-
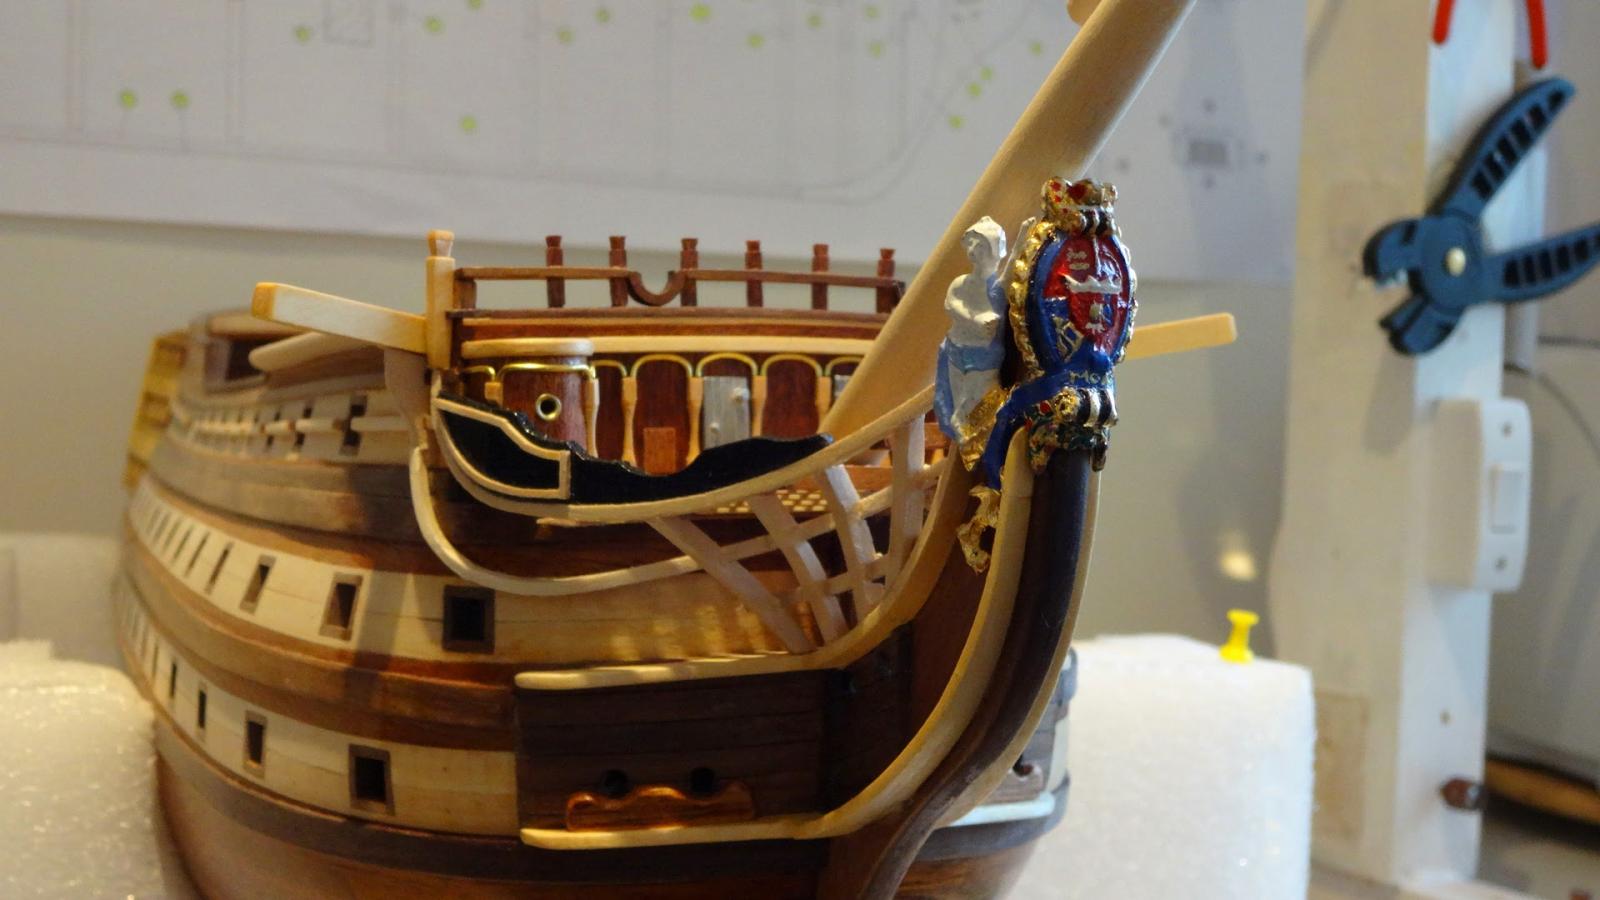
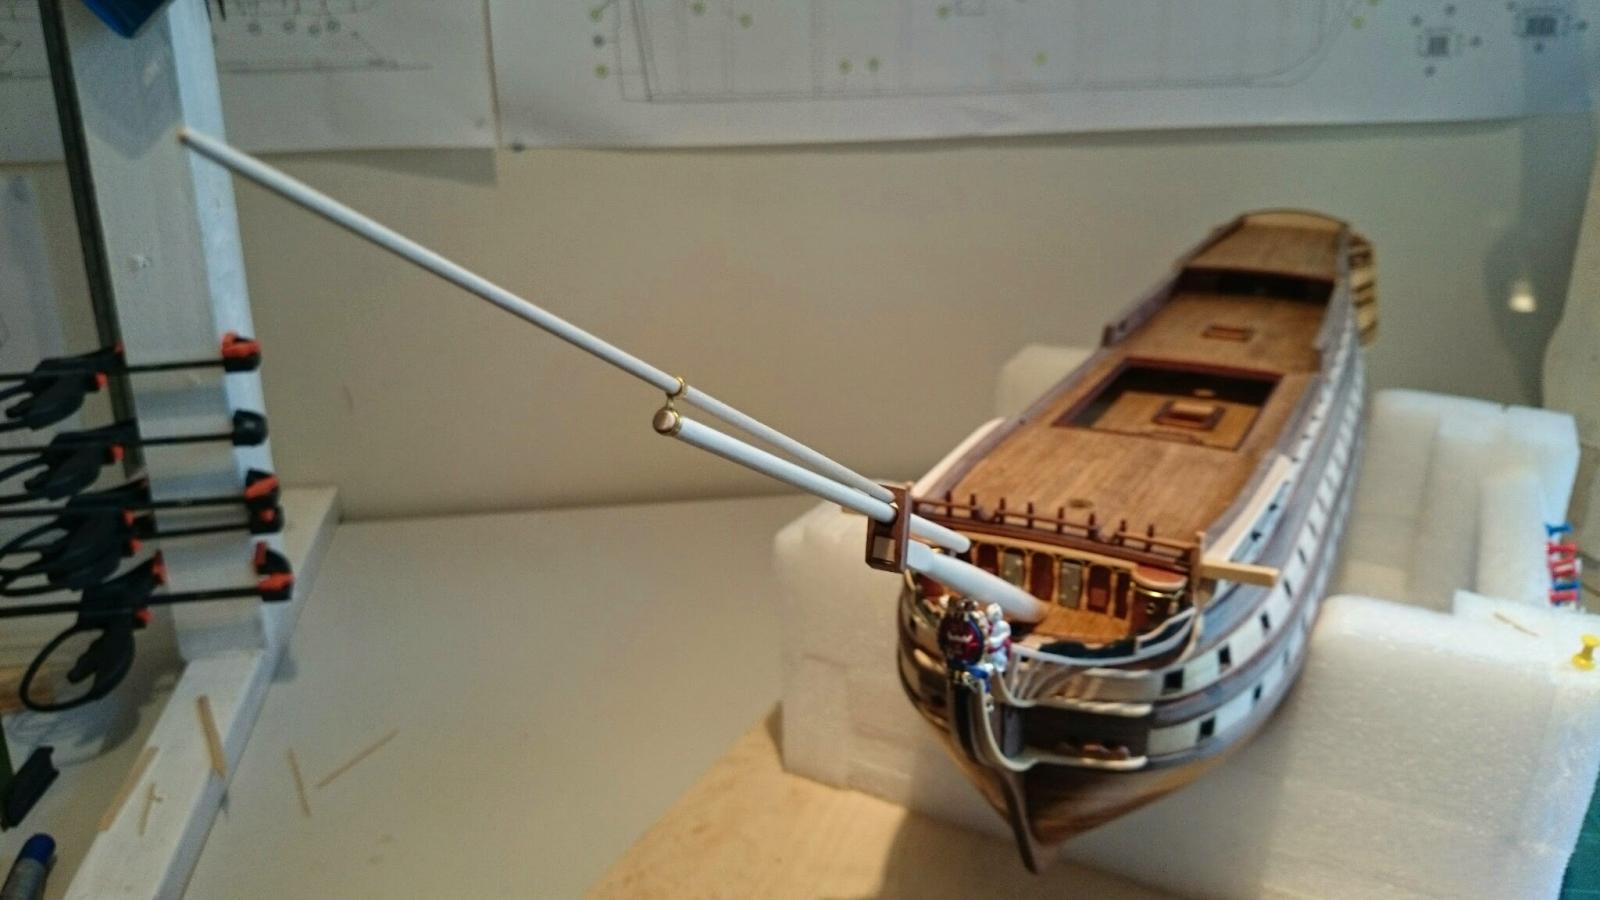
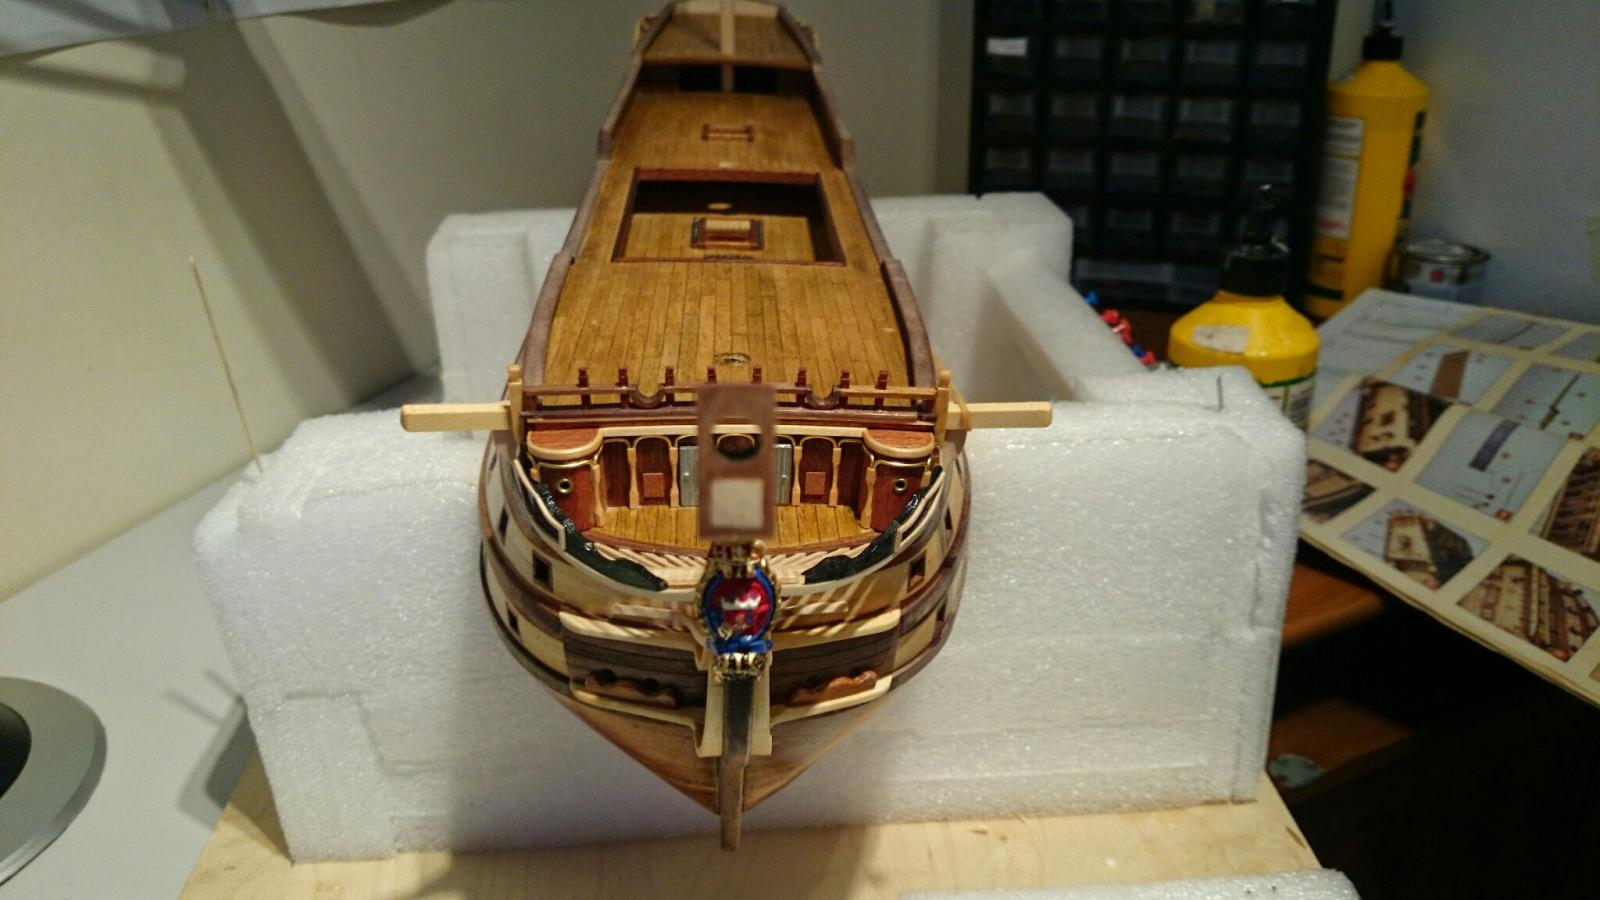
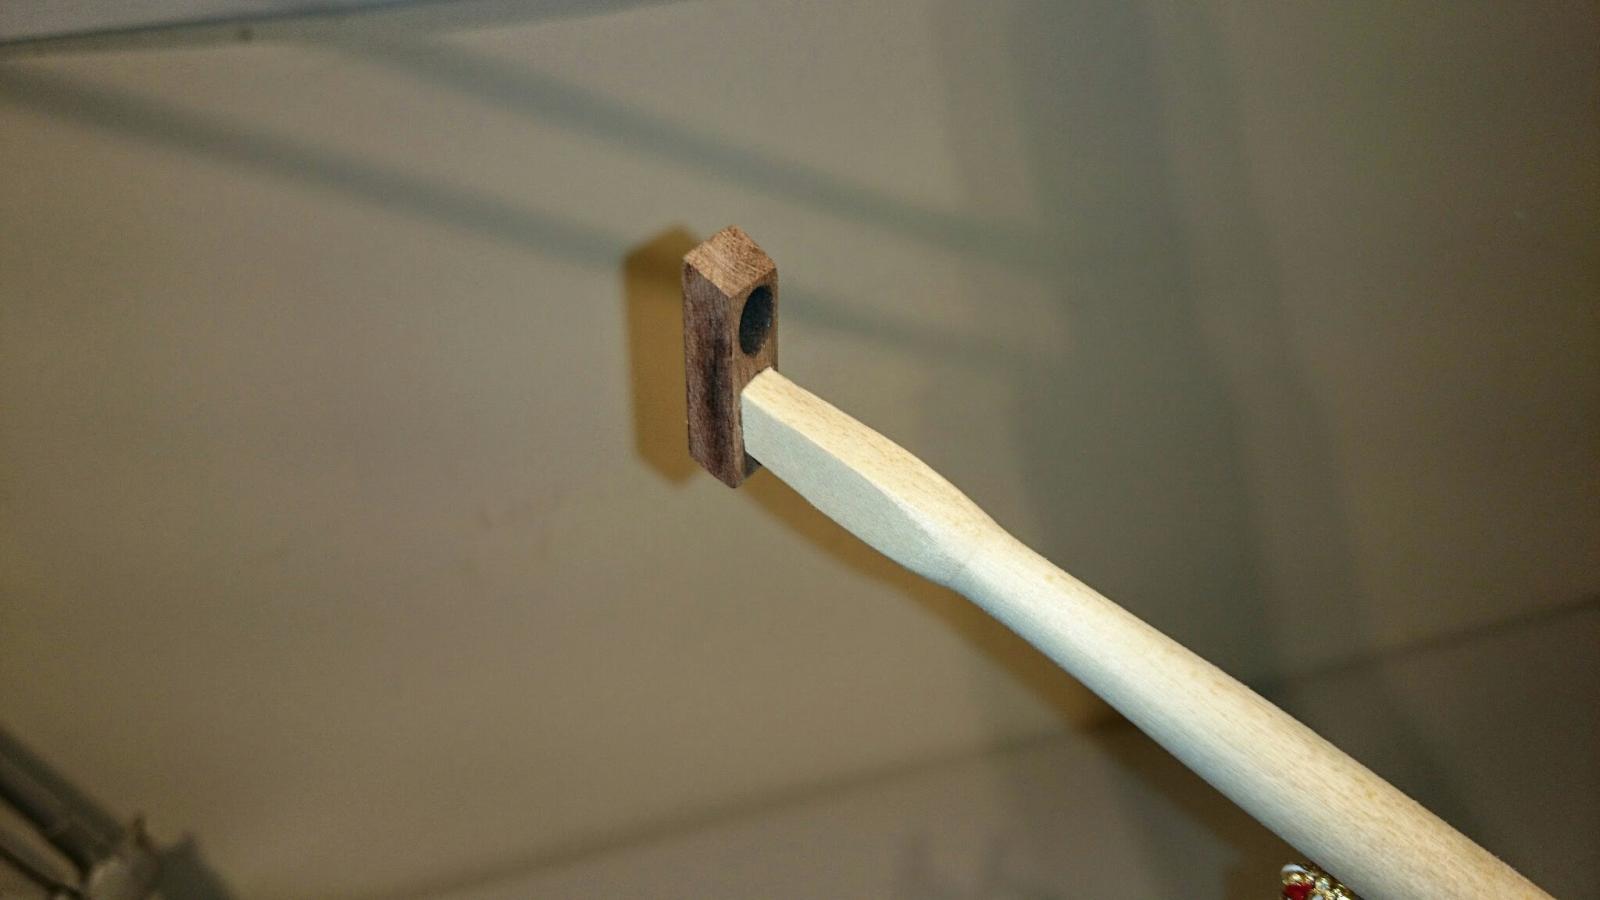
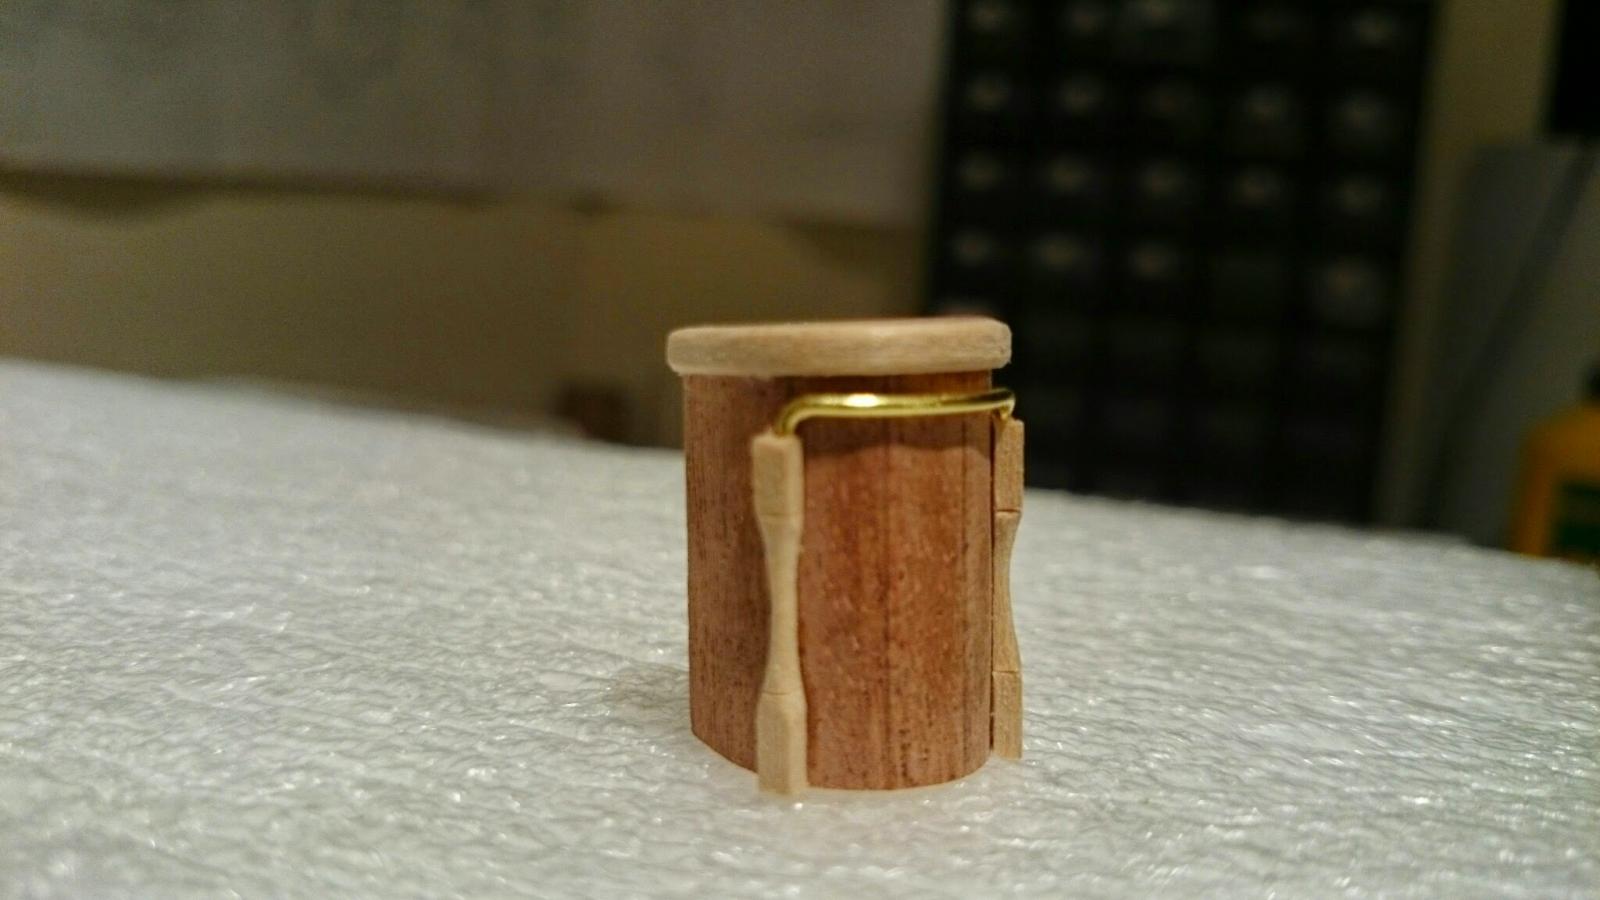
Anchor davits and some trims fitted, oh and ive started on the figurehead

- 708 replies
-
- 1
-
-
- victory
- constructo
- (and 1 more)
-
Ha Ha, my brother said the same thing after seeing these images first then the ship. The bow section is quite tricky ( whilst were talking small), its a focal point of the vessel and has a lot of repetitive parts which all have to be identical width / hight. Wait until you bend the brass colour wire, oh you will love it, not
-
I have the contructo kit so if you need any lengths and diameters let me know
-
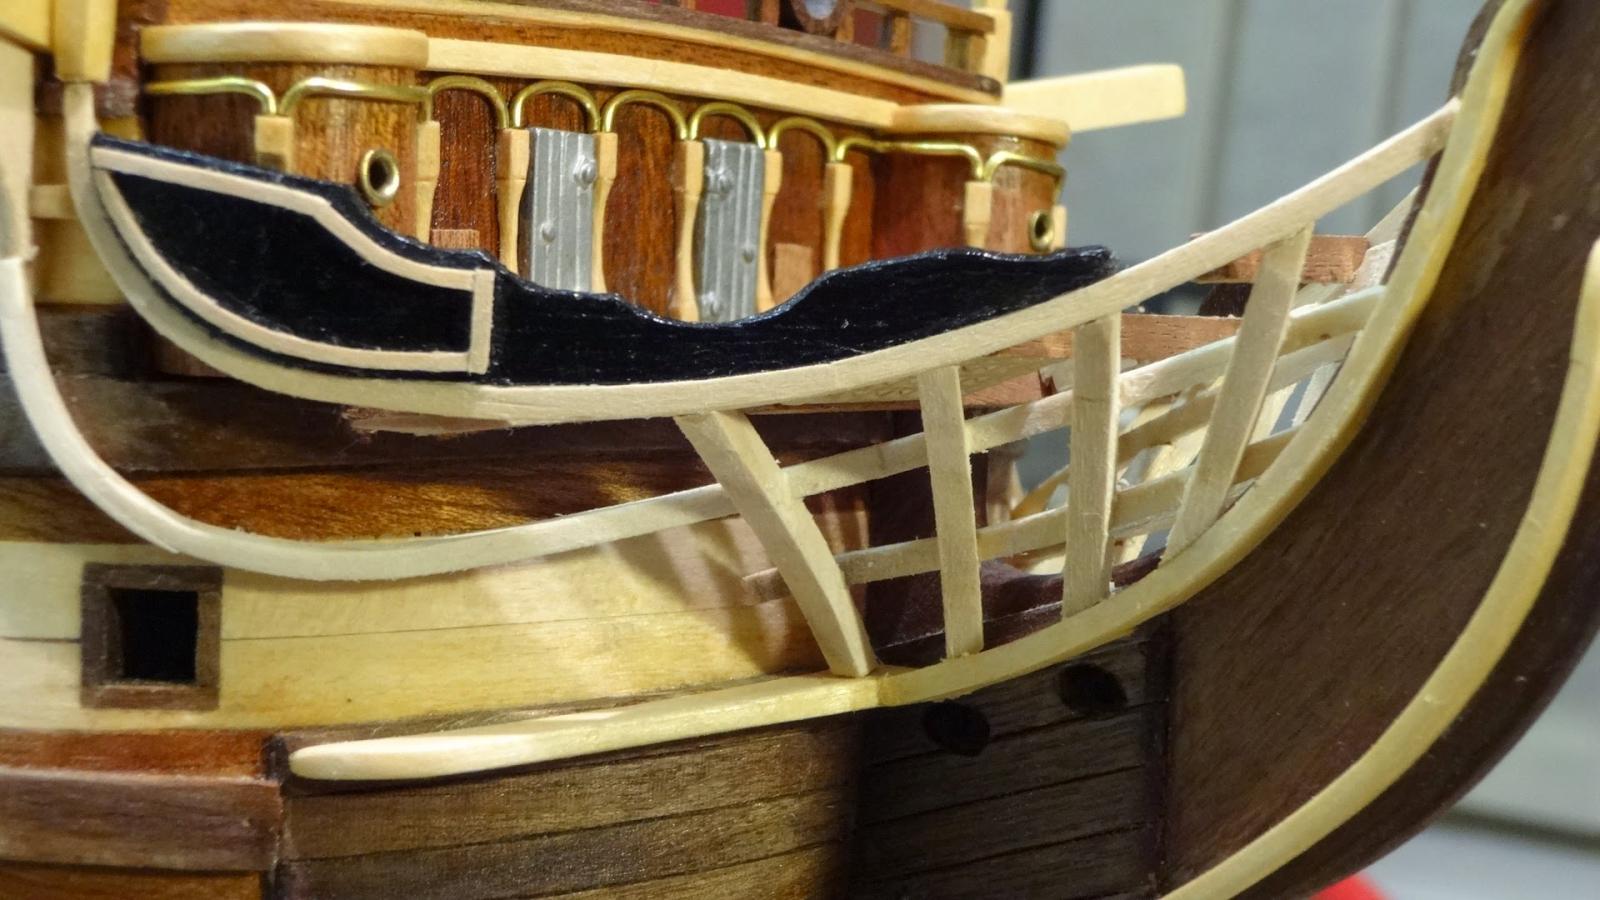
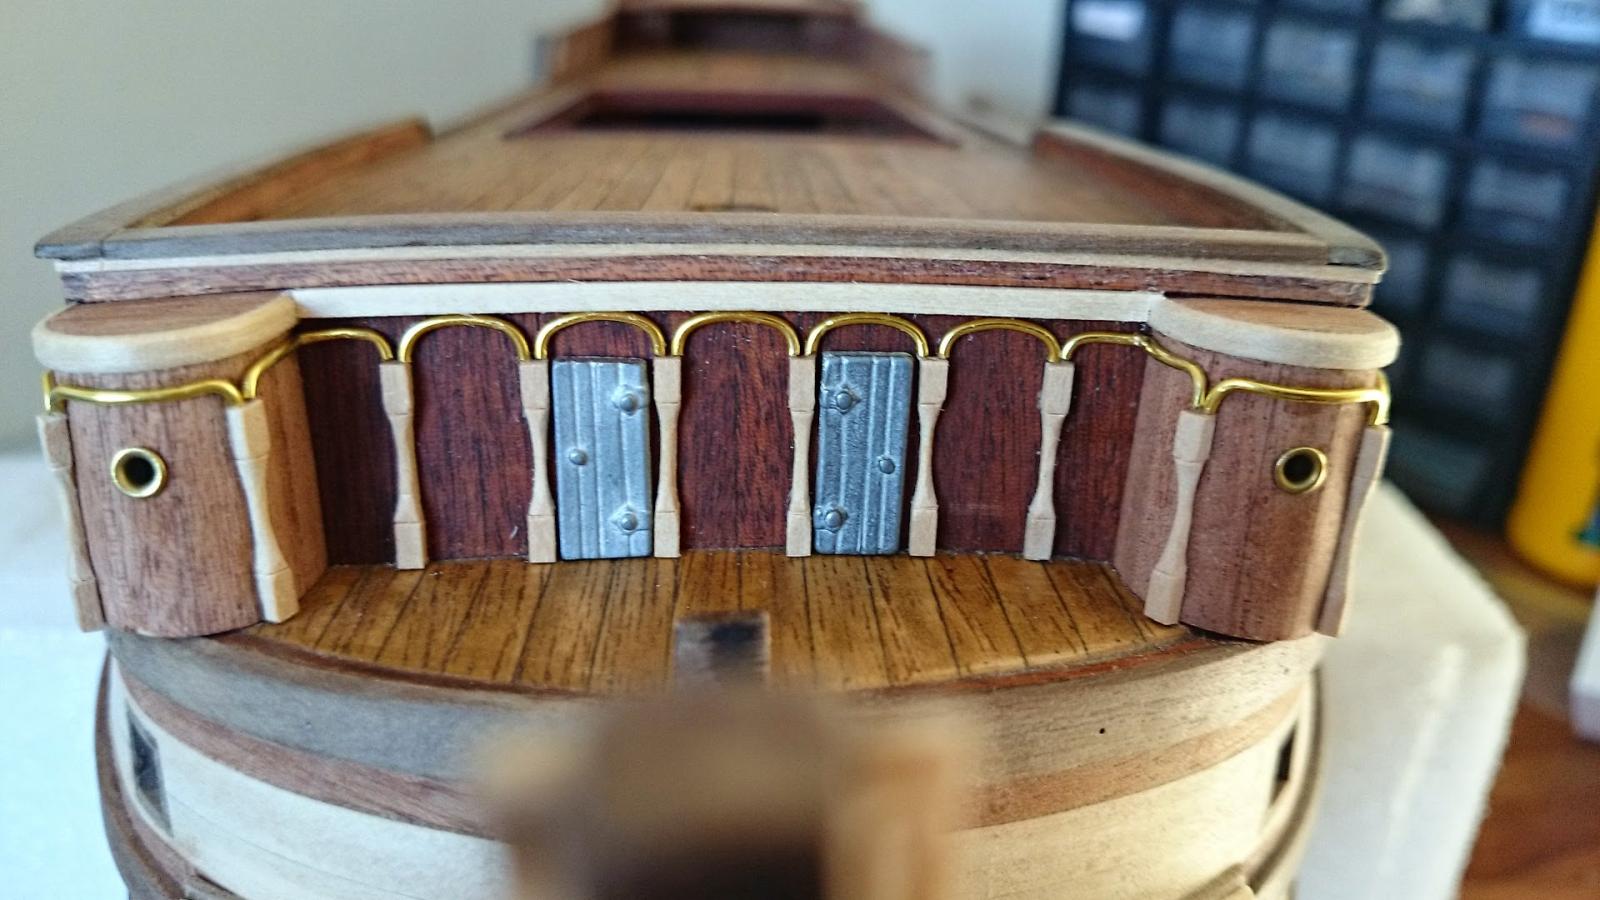
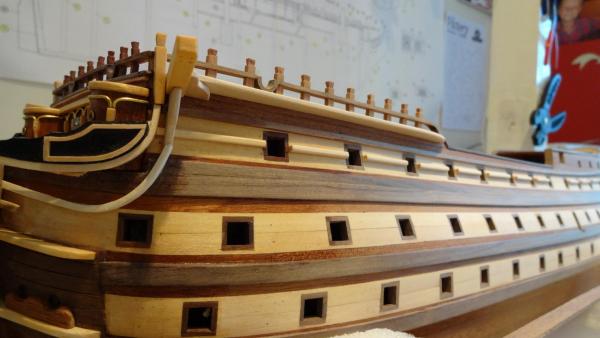
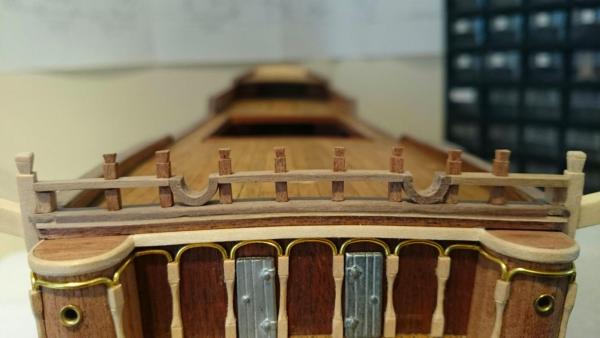
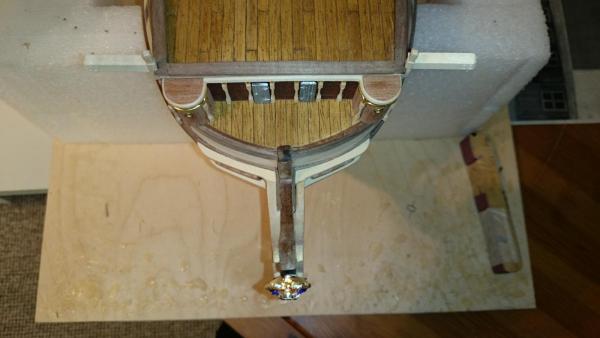
I have put the rebuild of the rear windows on hold whilst I continue with the bow section, really I actually thought this would be an easy stage but should know better, unlike some kits the pillars have to be made from stock and the wire is tough to bend so small and getting them all even is a nightmare. The kit shows the curved galleries level wih the deck but the real ship has them over the the edge of the deck, this is what I have done and will worry about the implications of doing this later in the build ( The last two picture are an attempt to shows this ).

- 708 replies
-
- 7
-
-
- victory
- constructo
- (and 1 more)