HOLIDAY DONATION DRIVE - SUPPORT MSW - DO YOUR PART TO KEEP THIS GREAT FORUM GOING! (Only 13 donations so far - C'mon guys!)
×
Paul0367
-
Posts
512 -
Joined
-
Last visited
Content Type
Profiles
Forums
Gallery
Events
Everything posted by Paul0367
-
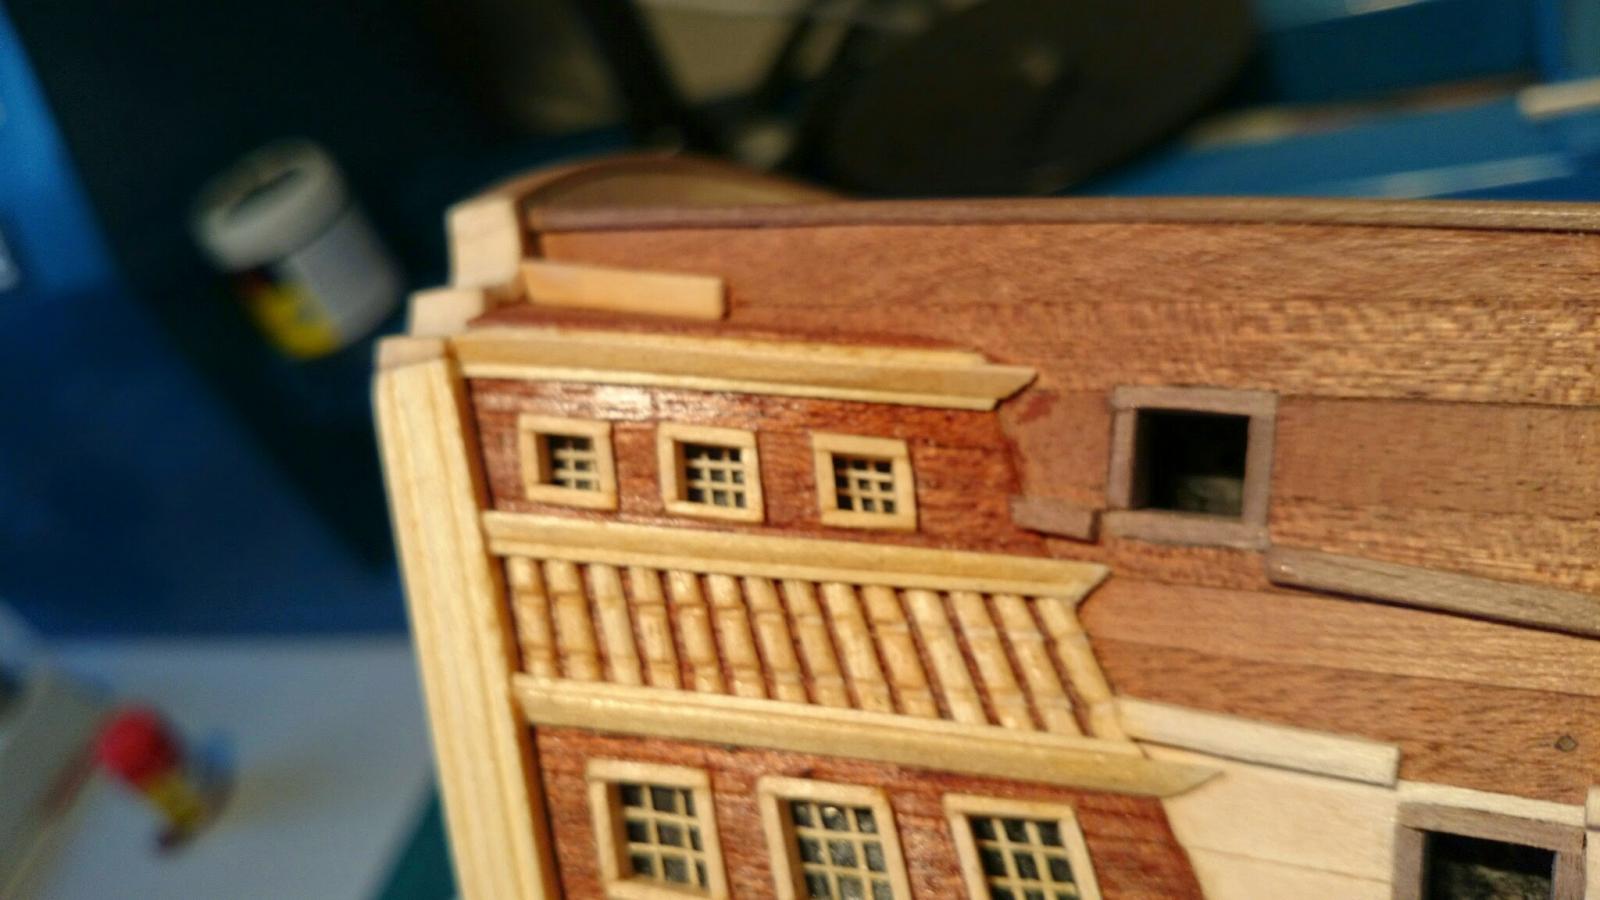
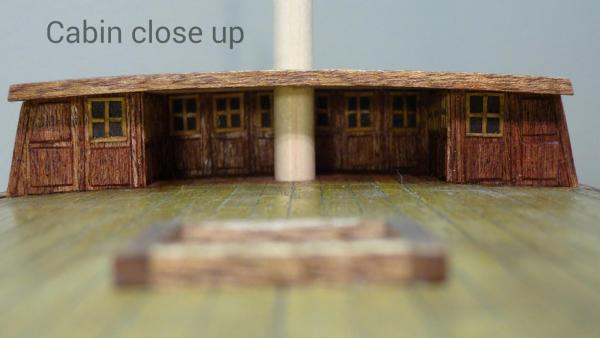
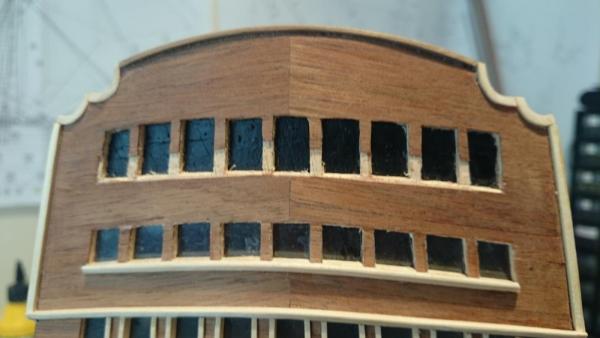
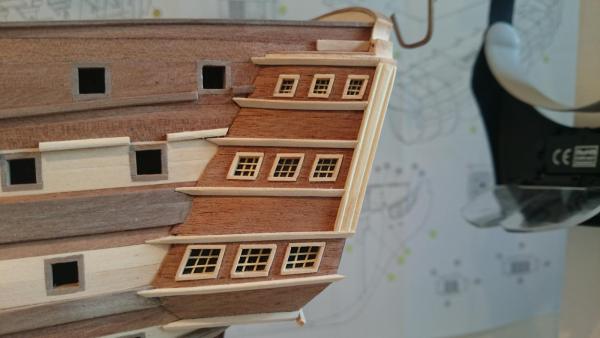
 Should I, shouldn't I, well I should / have to,, tearing away at previous work seams to be common place for me at the moment. Looking at pictures of her in Portsmouth its clear the upper side windows ain't little boxes floating between the trims, there far larger and mine need to be a little closer to her. That said strip a strip down/chop and rebuild is requiredrequired but the way its going they will all be ripped out

- 708 replies
-
- 3
-

-
- victory
- constructo
- (and 1 more)
-
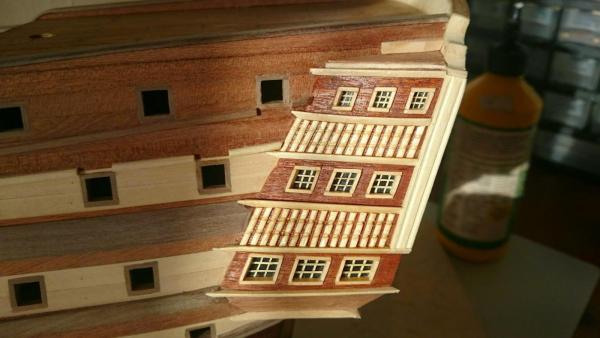
Hi , in reply to your message, I used paper for the back with black marker and put the frames on. If you look close the wood below is also raised using the supplied vaneer strips, I just shanferred the edges, amd added a little trim between. Oh and don't do what I did, that's instal the poop deck first and then decide to put in windows, then spend hours squeezing throught the gap between both decks.
- 78 replies
-
- 4
-
-
- victory
- constructo
- (and 1 more)
-
I have found your build and I will for sure be popping back every time I post to see your progress. Enjoy her. Looking excellent
-
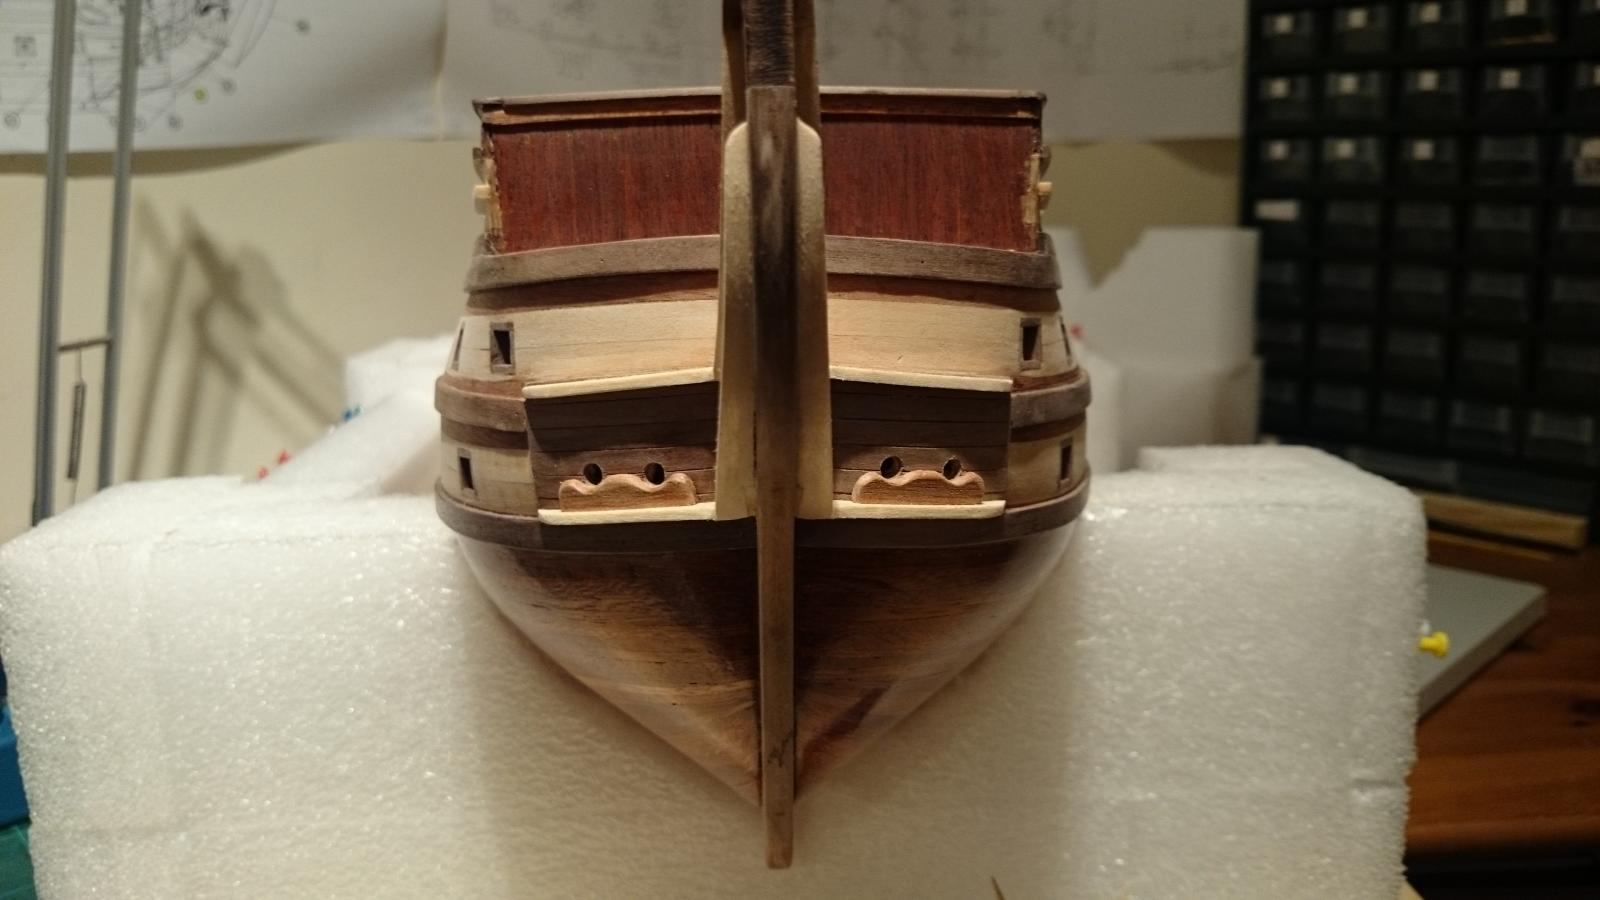
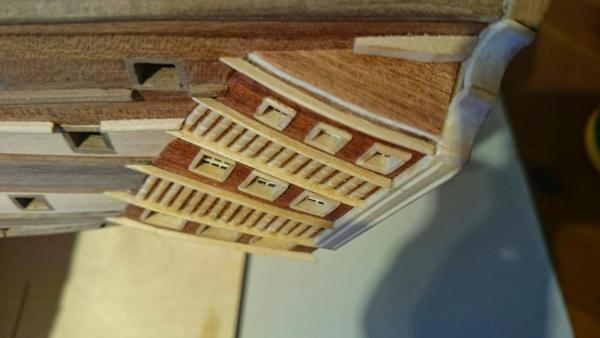
Cheers guys I have moved upfront to the bow decoration, this is a crucial part as it is quite a focal point of the whole ship and has to be spot on. Lots of paper templates to get the shape and then back to bending wood that's constantly battling to stay straight.

- 708 replies
-
- 4
-
-
- victory
- constructo
- (and 1 more)
-
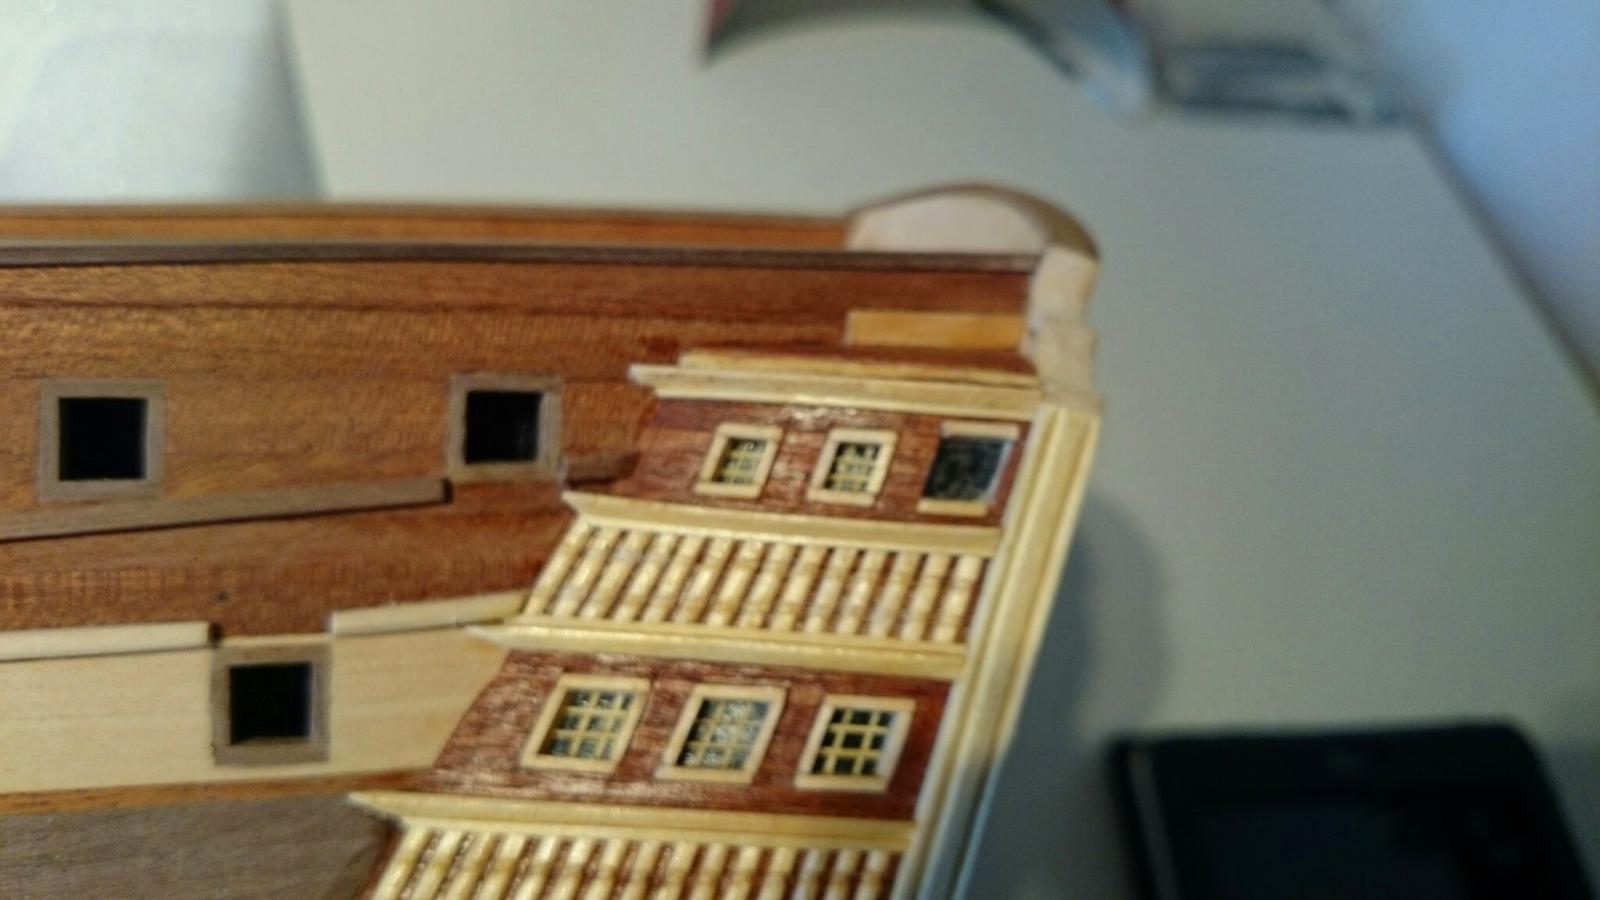
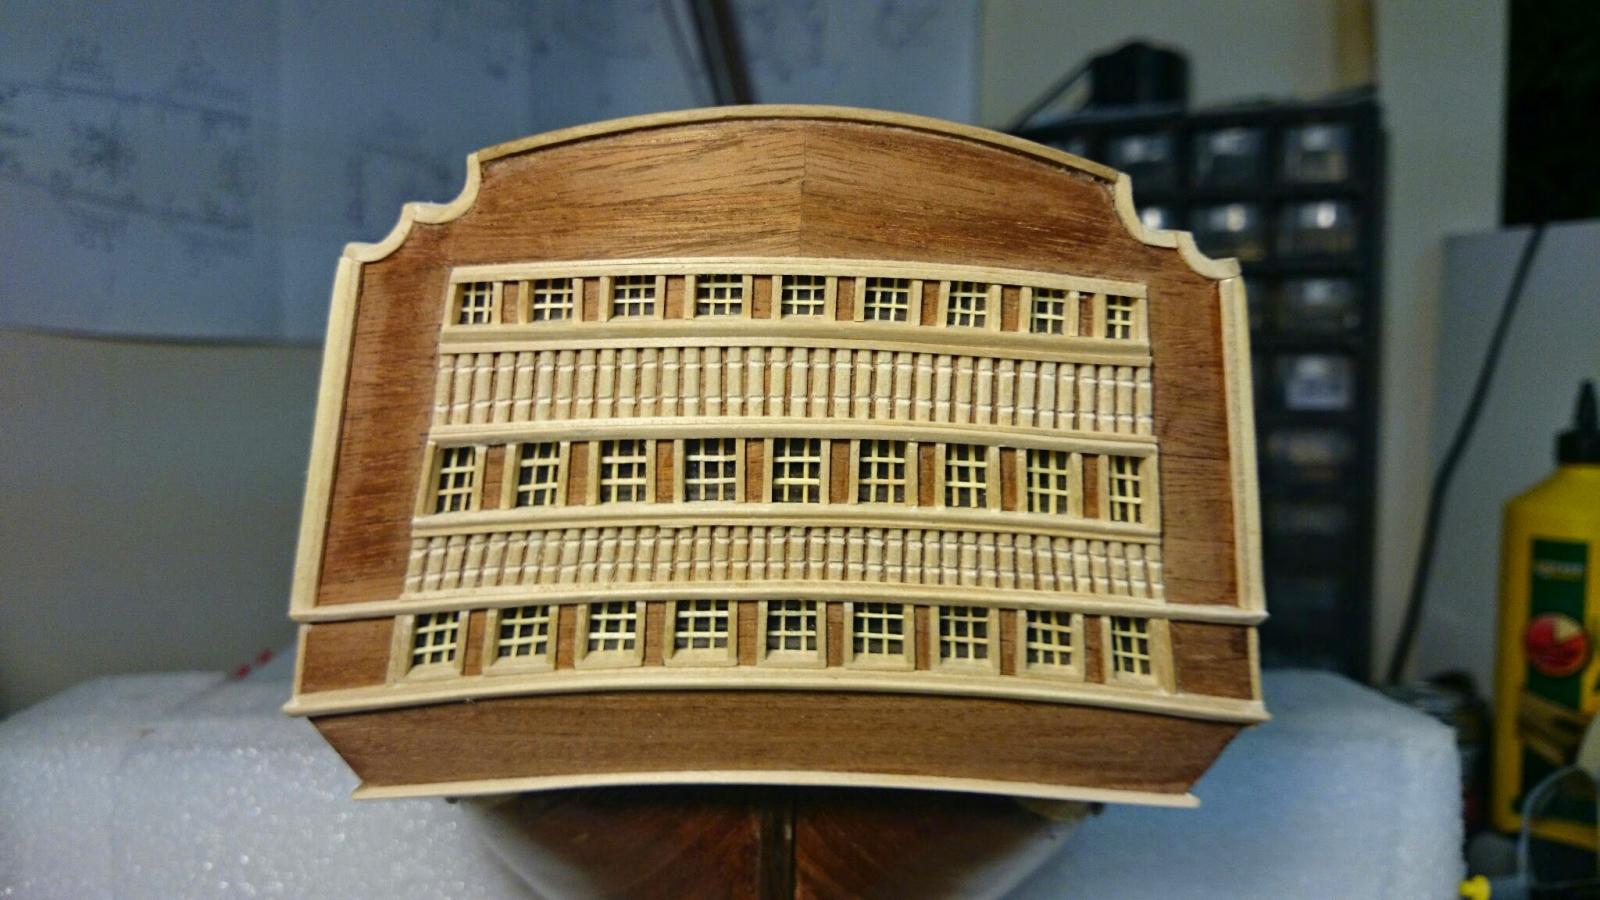
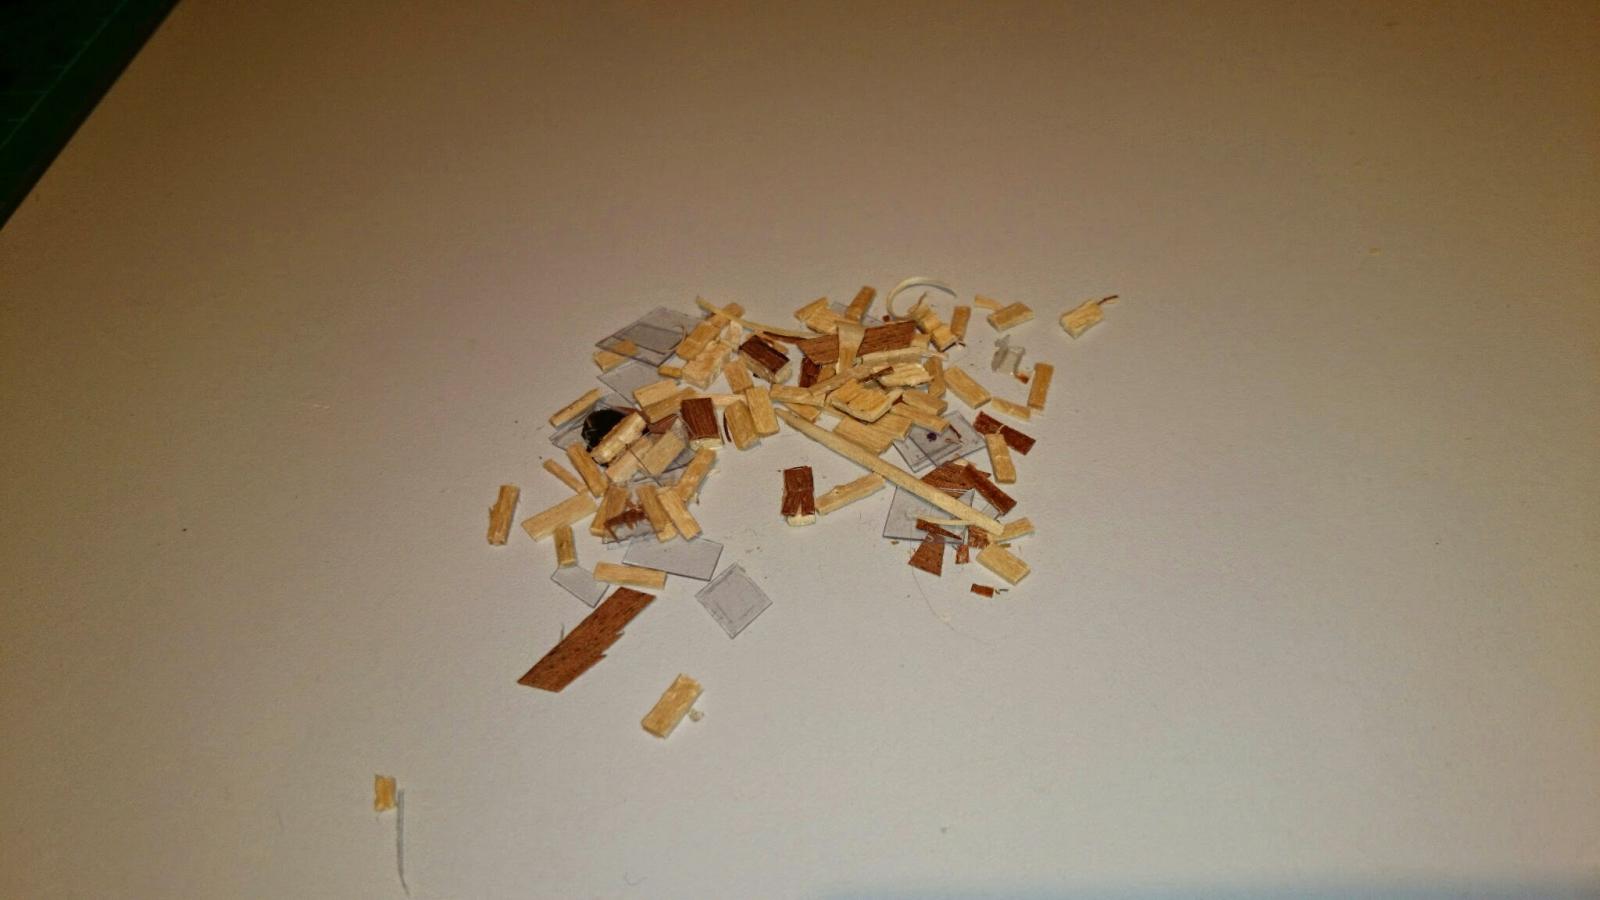
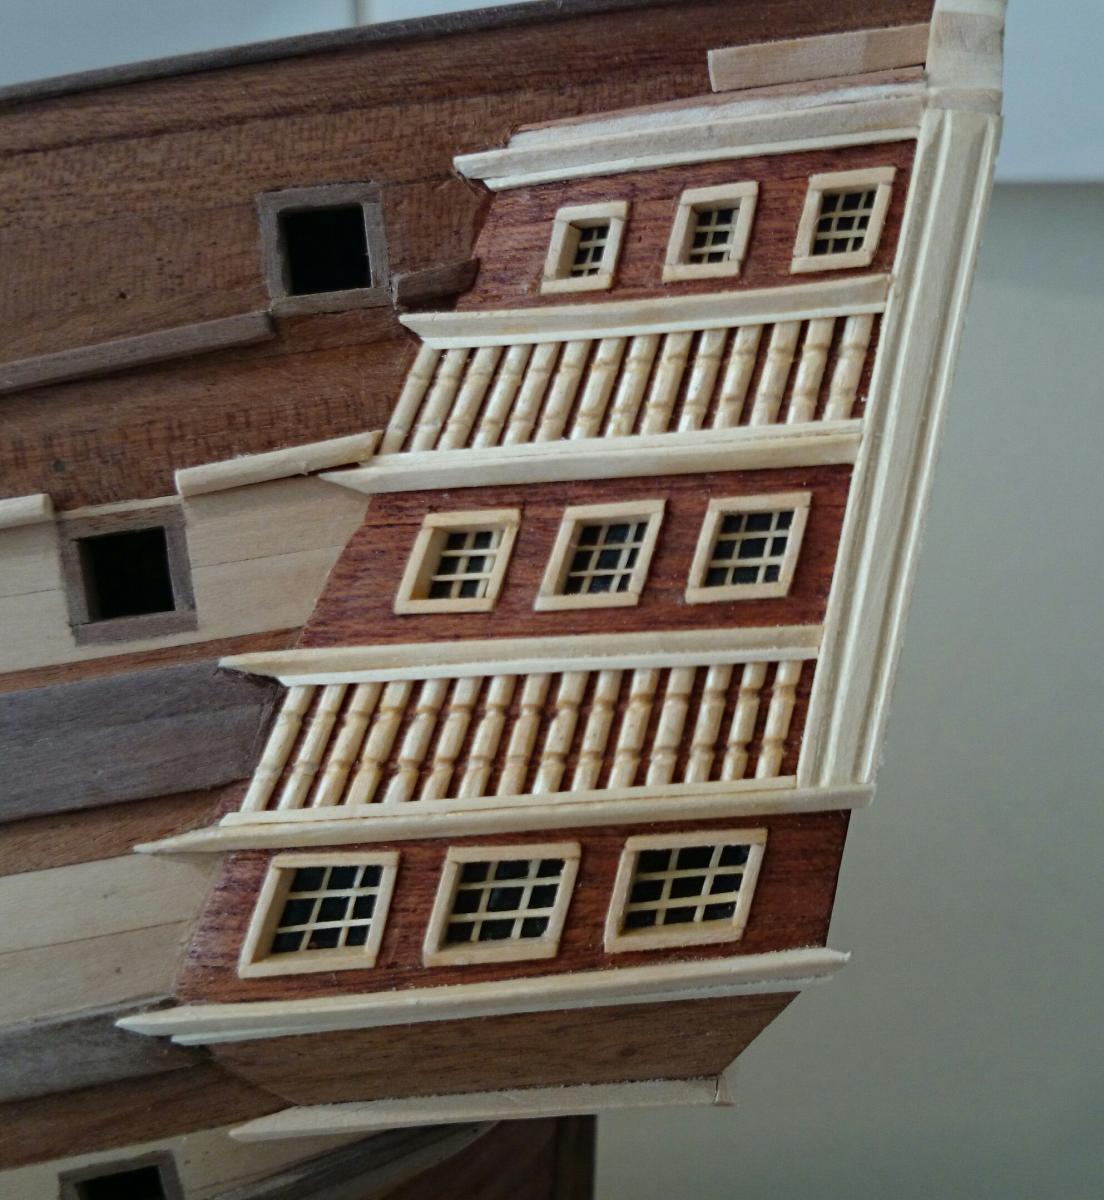
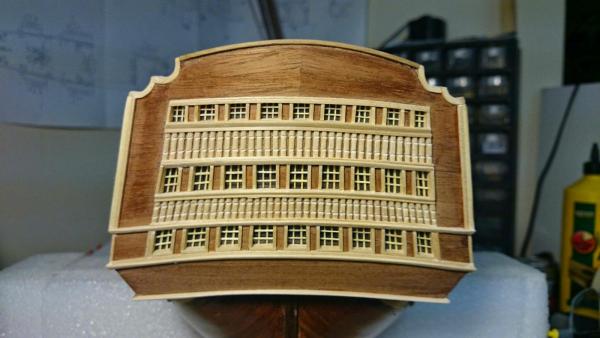
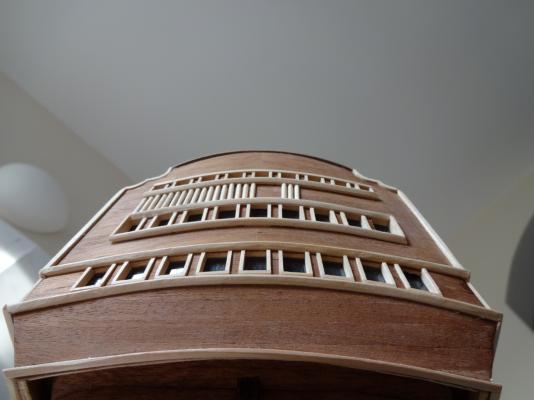
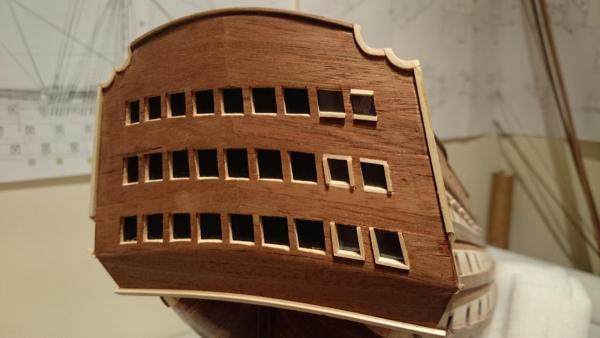
Well 34 1\4 hours over 28 days and I have finally got my rear section windows / frames and trims completed. This took so long due to being so repetitive and not something I can sit doing for long periods, not to mention tearing off all the previously installed frames and vaneer.
- 708 replies
-
- 7
-
-
- victory
- constructo
- (and 1 more)
-
That's not good at all, I have a few issues with possible shortfalls but that is because I add extra trim with wood from the kit to look as close as possible to the real ship. the kit doesn't allow for this not to mention losses due to snapping when trying a bend but having fittings missing is very annoying. Try Cornwall model boats site, OK in the UK but very good. I do hope you get sorted, especially as she is for your local libray .
-
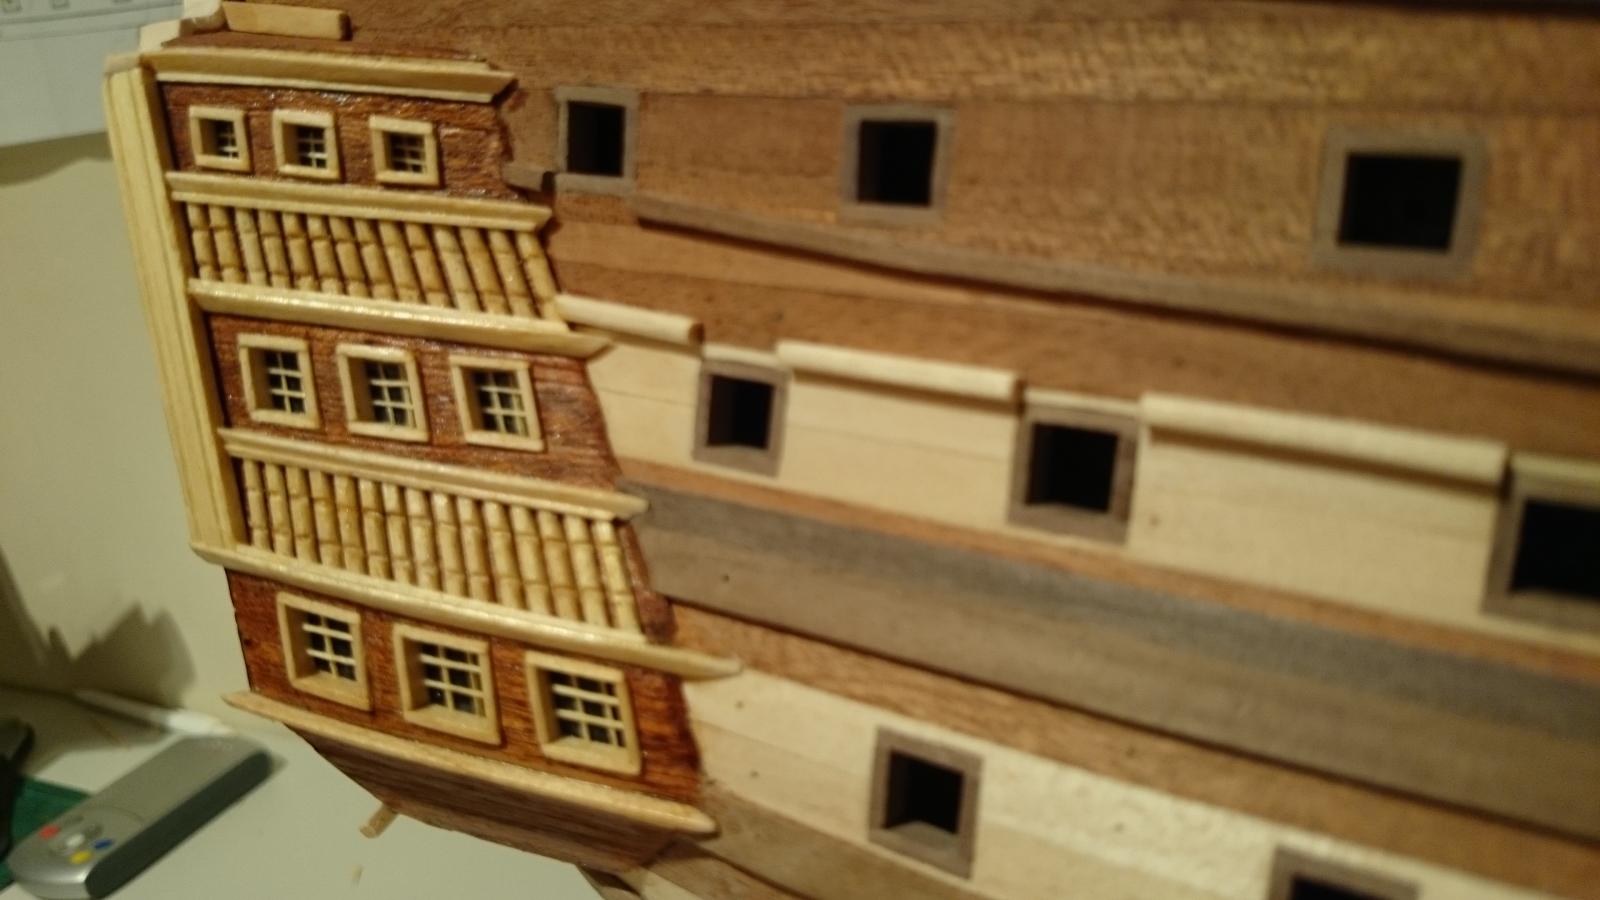
Hey thanks for the compliments Mike, the beautiful wood your refering to, would that be the cocktail sticks i'm using for my turnings. As for me doing it all again, I just had to, I couldn't leave it knowing it was all off line, I guess most people would probably never have noticed and I could have let it be but I just had to correct it. This just adds to the time but i'm in no rush, there was a point as I was hacking chunks out of the rear that I may be making a mistake but in the end its veneered wood so I just had to gently peel the vaneer and rematch the new, Oh and re do all the windows and surrounds. The progress is slow now due to all the big dramatic stuff being done, decking / planking etc. It appears that i'm a trail blazer on Model Ship Worlds site and that i'm the only Contructo kit Victory builder thats at this stage of build( that I can find) so I have no one to bounce off. I have been salavating over the topics of the Caldercraft version, the rear detailing is sublime and one day she will be a future venture after ive cut my teeth in this new hobby.
-
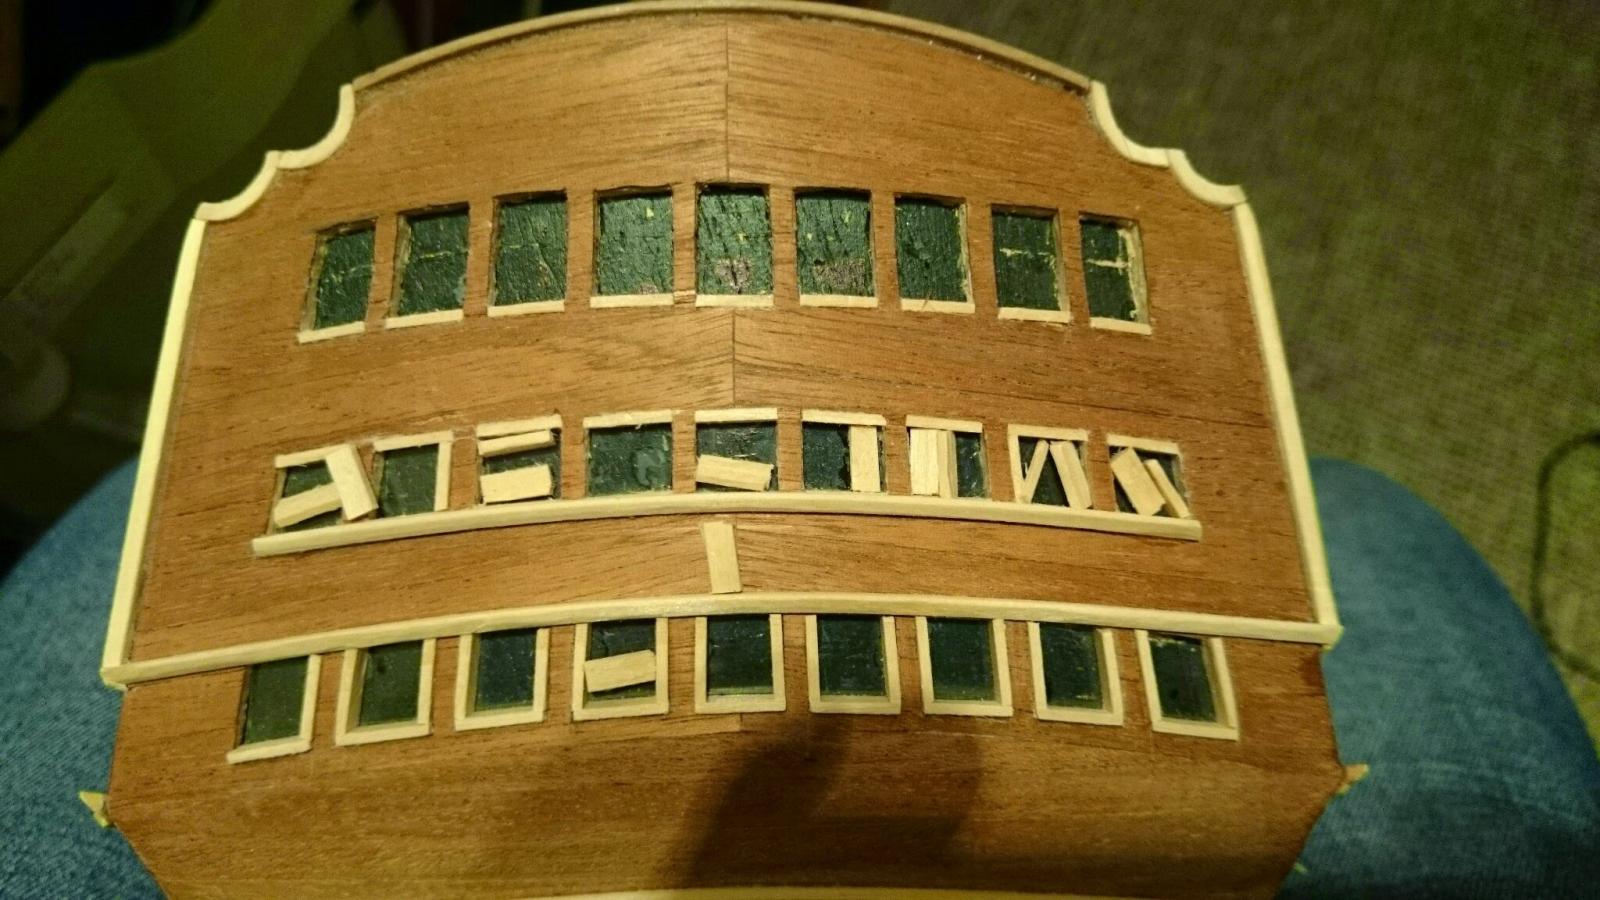
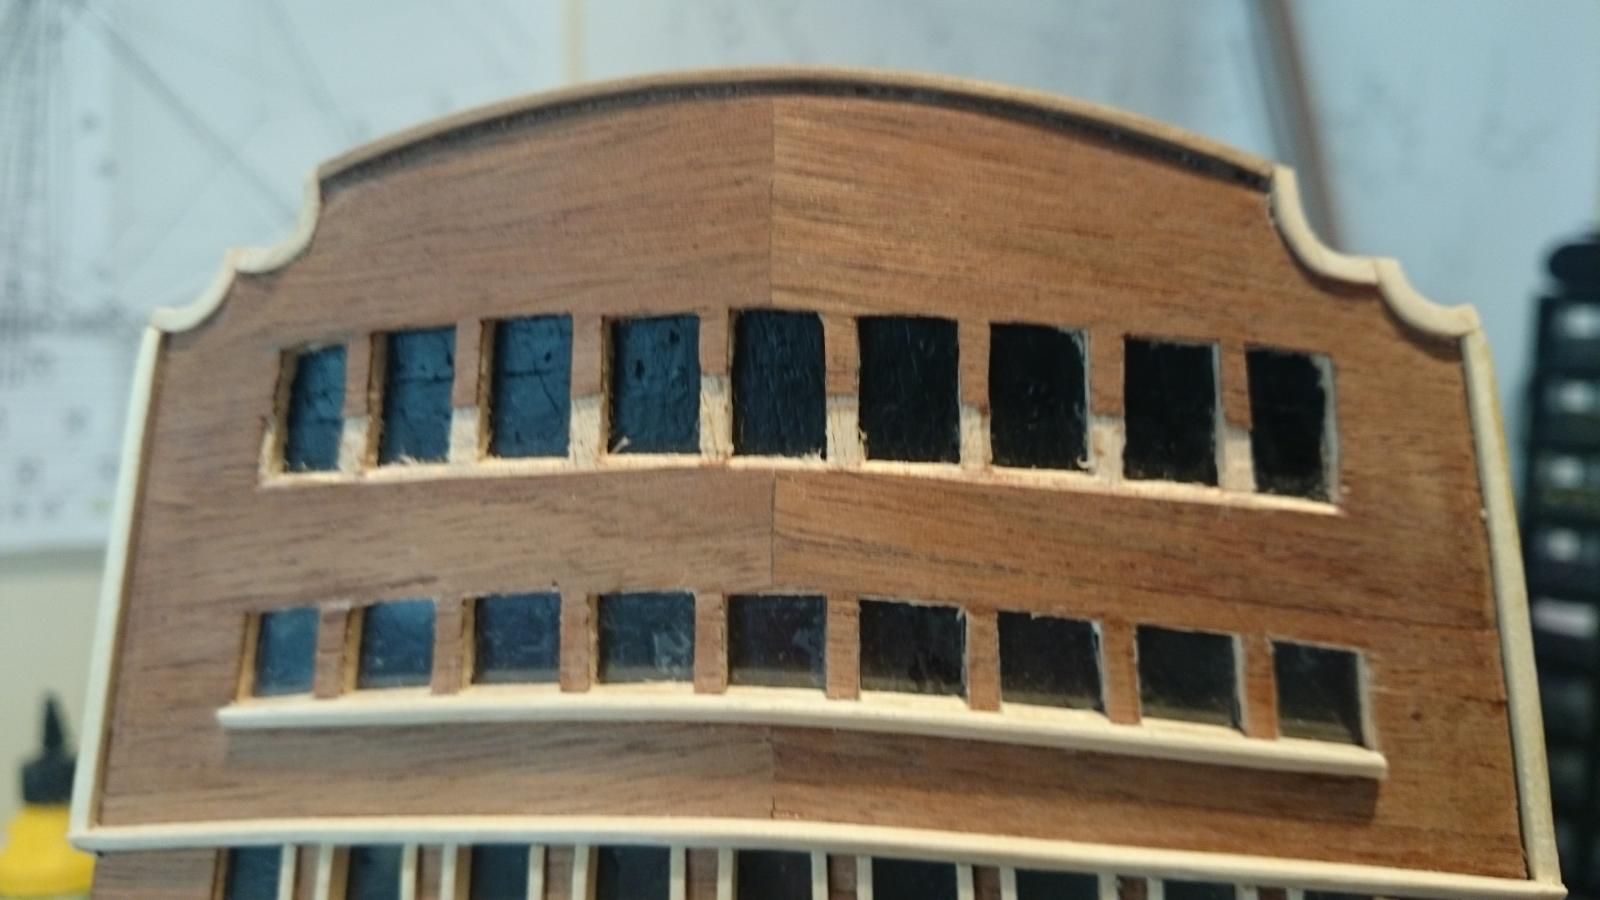
All windows repositioned now, trims refitted and turnings being fitted prior to final shaping, then I can finally move on from this section, anyone building this kit please check, check and recheck your side windows will be level with the rear before committing to the sticky stuff. Please don't get as far as I did before realising the problem, its a nightmare to correct and really time consuming. Well hope my mistake saves you from one

- 708 replies
-
- 4
-
-
- victory
- constructo
- (and 1 more)
-
I am still tearing the rear section to pieces to re position the windows to match the trims to be installed, not fun doing the framing once but twice.
- 708 replies
-
- 1
-
-
- victory
- constructo
- (and 1 more)
-
Hi david Please when fitting the canon back boards push them to there lowest point, there is some up and down movement, push them down, this prevented you having to add pieces through a canon port as I had to, see pics. And pay particular ATTN to the rear quarters and the lining up of the windows, I'm rectifying my issue, bottom windows no problem, its the two above. Enjoy your build and so glad I'm assisting especially as instructions are vauge at times.
-
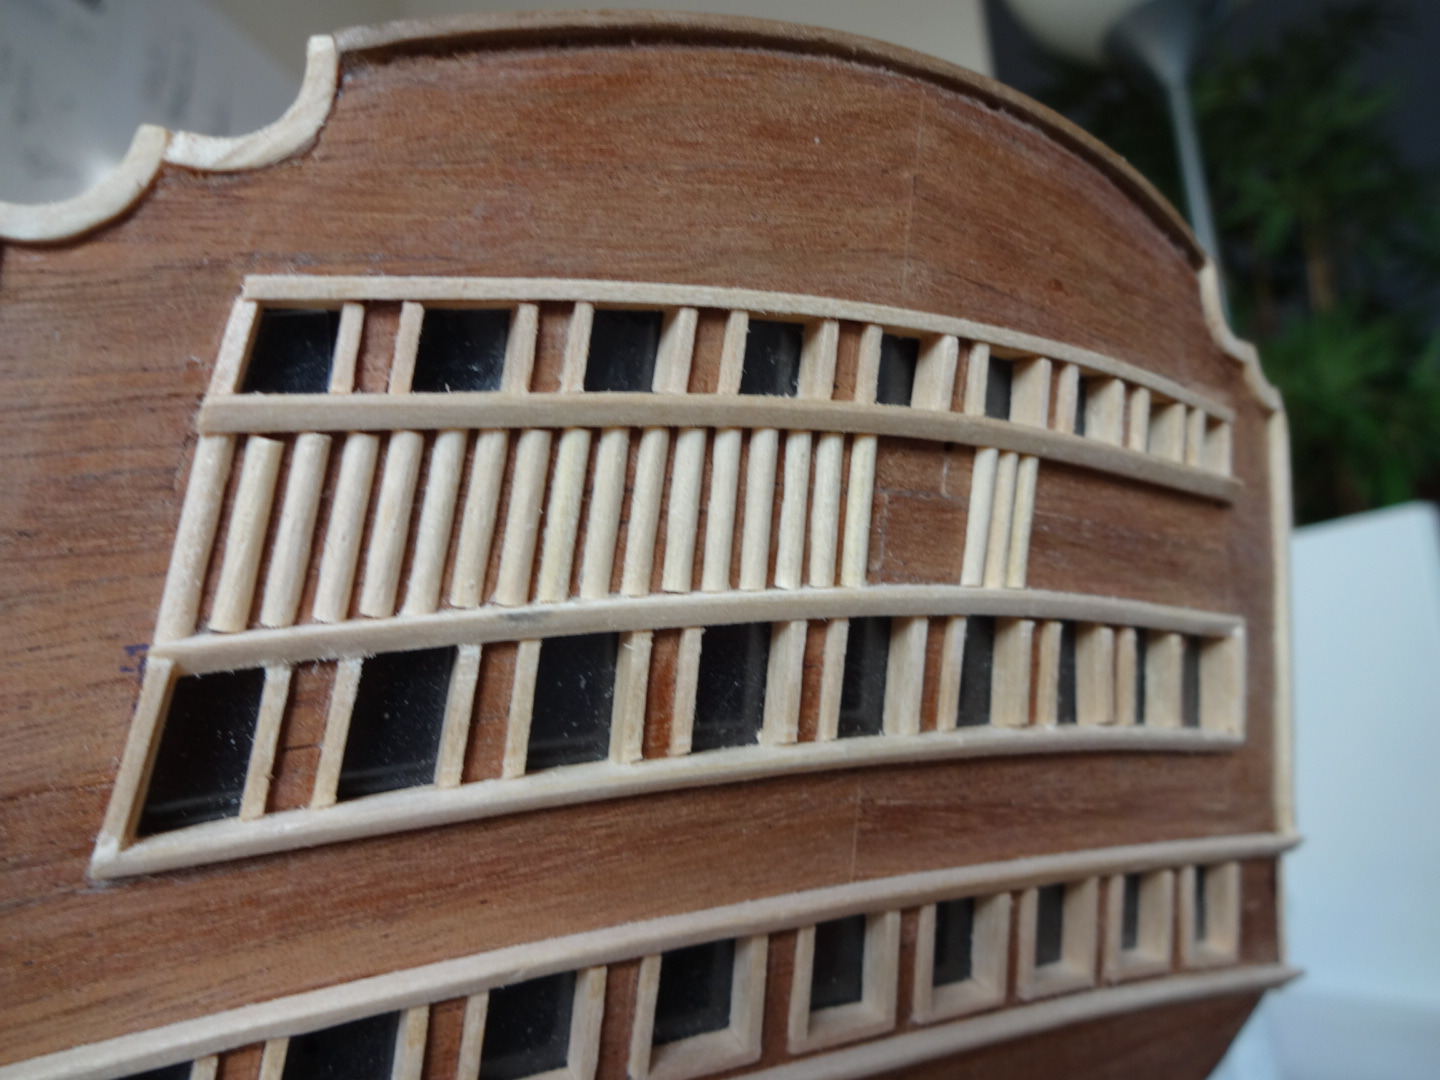
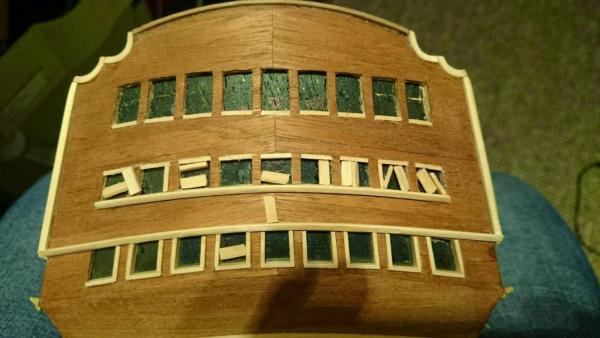
So near, all framed just trim to add, so far all the top two layers frames removed all glazing scrapped and windows recut. Why, when trimmimg was being fitted it became apparent that the trims were not going to meet, actually well off despite the bottom windows being perfect and the upper were pre fabricated. How I did not see this prior to all the glazing and framing is beyond me. Well im having to raise both the middle later and the top layer to line it all up. Oh and then re glaze and frame... OH JOY. Tinyelle be extra careful not to suffer the same fate
- 708 replies
-
- 2
-
-
- victory
- constructo
- (and 1 more)
-
Thank you David, although thinking about it, im sure ive called you Sid in the past.
-
I decided to have a week off due to DIY project for the wife, just made a re start on rear frames. This will take a while especially making the decorative turnings.
-
Would email breech copy rights
-
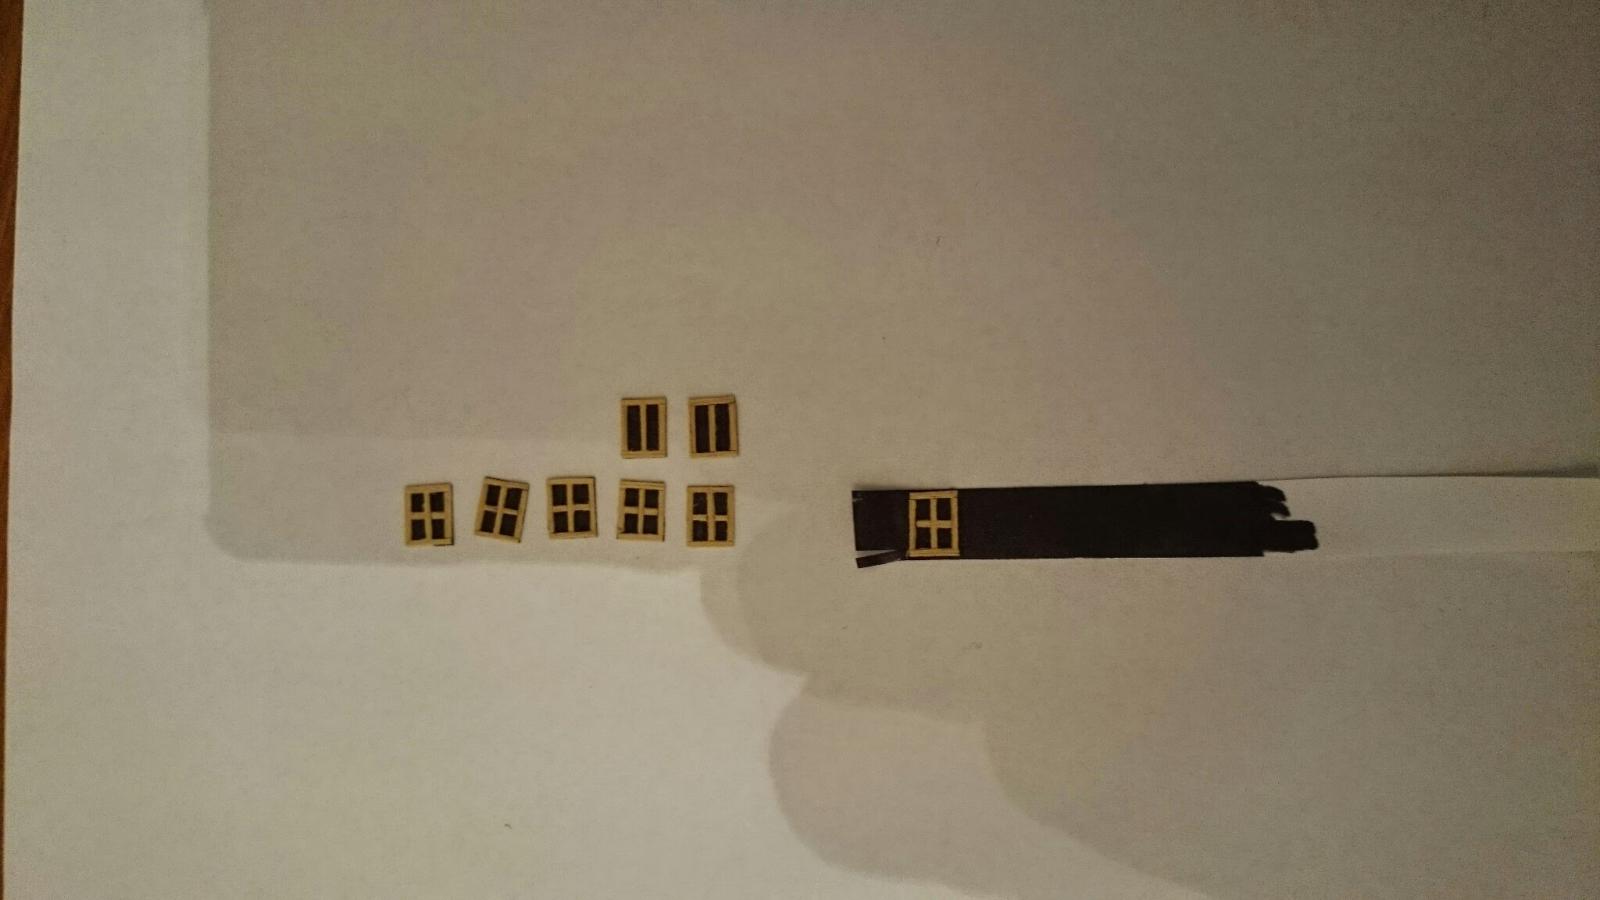
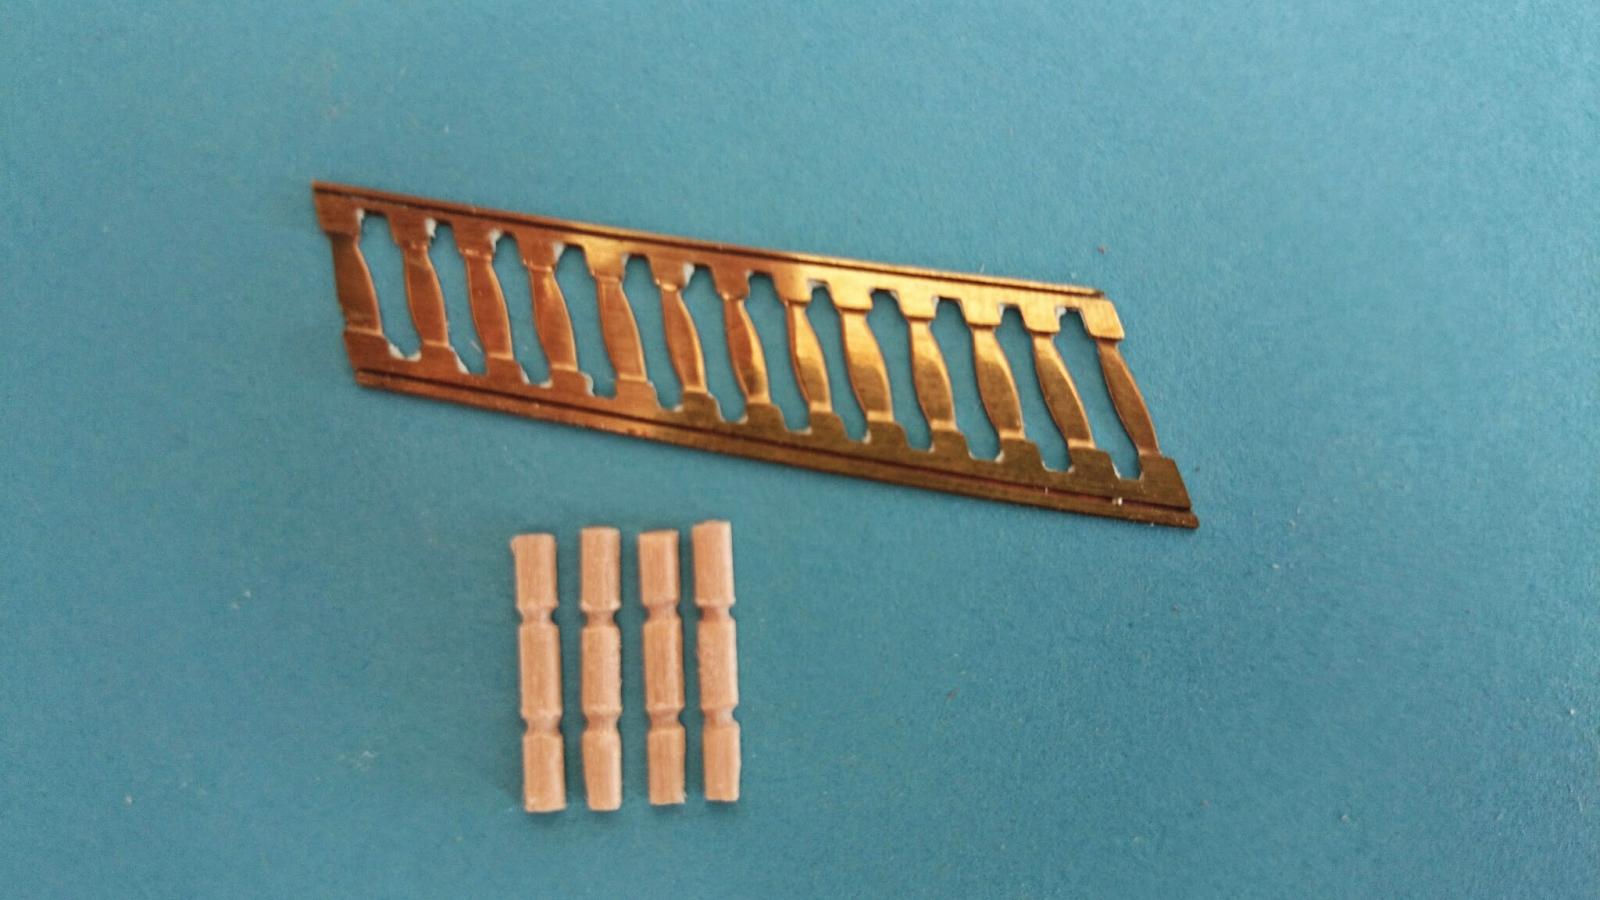
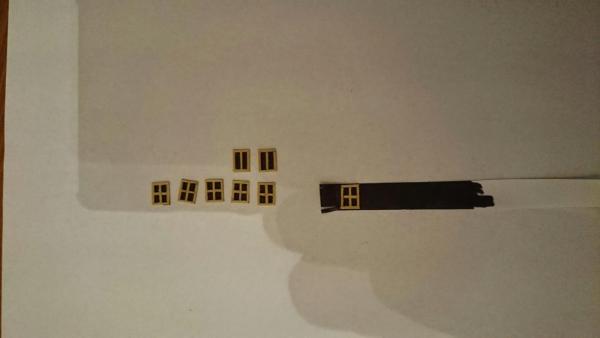
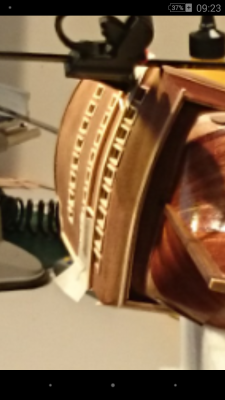
Well I ditched the brass etched detail of the captains quarters and decided to produce my own, I actually found the brass ones fell short of the full length and looked odd. I think I've made a rod for my own back with the amount I need to make to complete the sides and rear
- 708 replies
-
- 6
-
-
- victory
- constructo
- (and 1 more)
-
Hi The very start I pinned her with the pins supplied which snap on removal and found it very slow and tedious also I broke two tiny drill bits, as they need pre drilling to prevent splitting the wood. I never thought of the idea to use them large pins, fitted next to the wood not actually through it, I pinched the idea but it worked really well for me. Ok back to the question, I use Everbuild 502 wood adhesive it handles high loading/stress areas. Ideal for a peice of timber fighting to be straight again. Really its strong stuff and initially bonds in ten mins but solid in 4 hours. Just like PVA in its use and dries clear.
-
Ha, ha, the pondering about cutting a beautiful hull where hours has poured in. Possible tip, ditch the dremil and get a drill used by the fairer sex during there nail visits. These drills don't pulse like a dremil at slower revs and also you can get your fingers very close to the tip for accuracy.
- 1,756 replies
-
- 1
-
-
- constitution
- constructo
- (and 1 more)
-
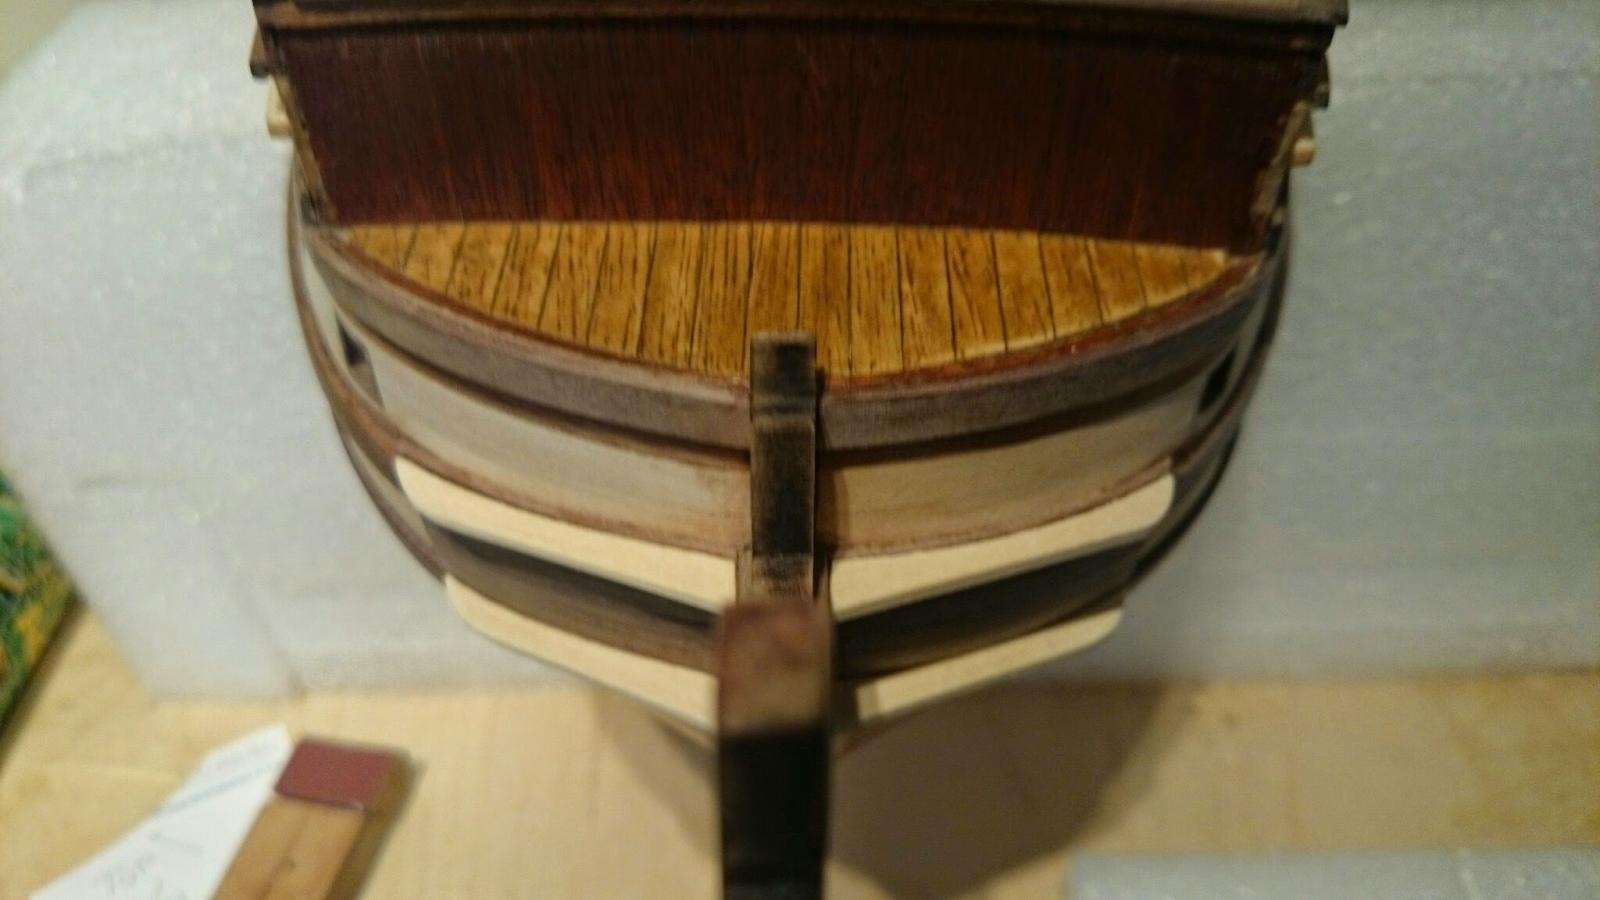
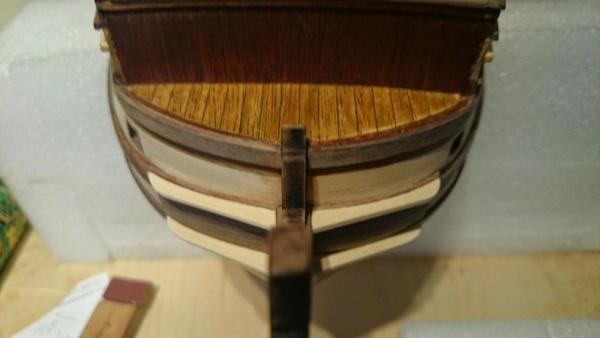
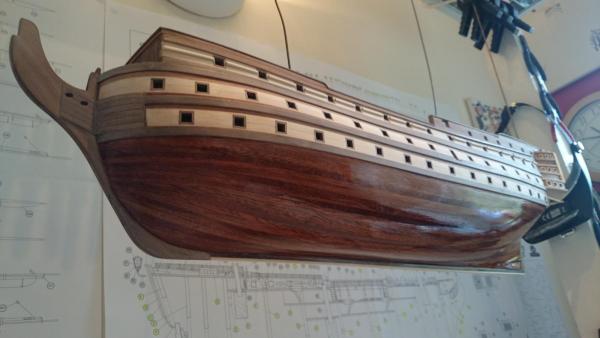
I must admit I was a bit shocked how the colour of the wood just burst through when the varnish was applied, deep colour, looks nothing like prior to varnish (see Pic) Contructo supply some beautiful wood. I will be adding satin after sanding for the second coat just to tone down the shine.

- 708 replies
-
- 2
-
-
- victory
- constructo
- (and 1 more)
-
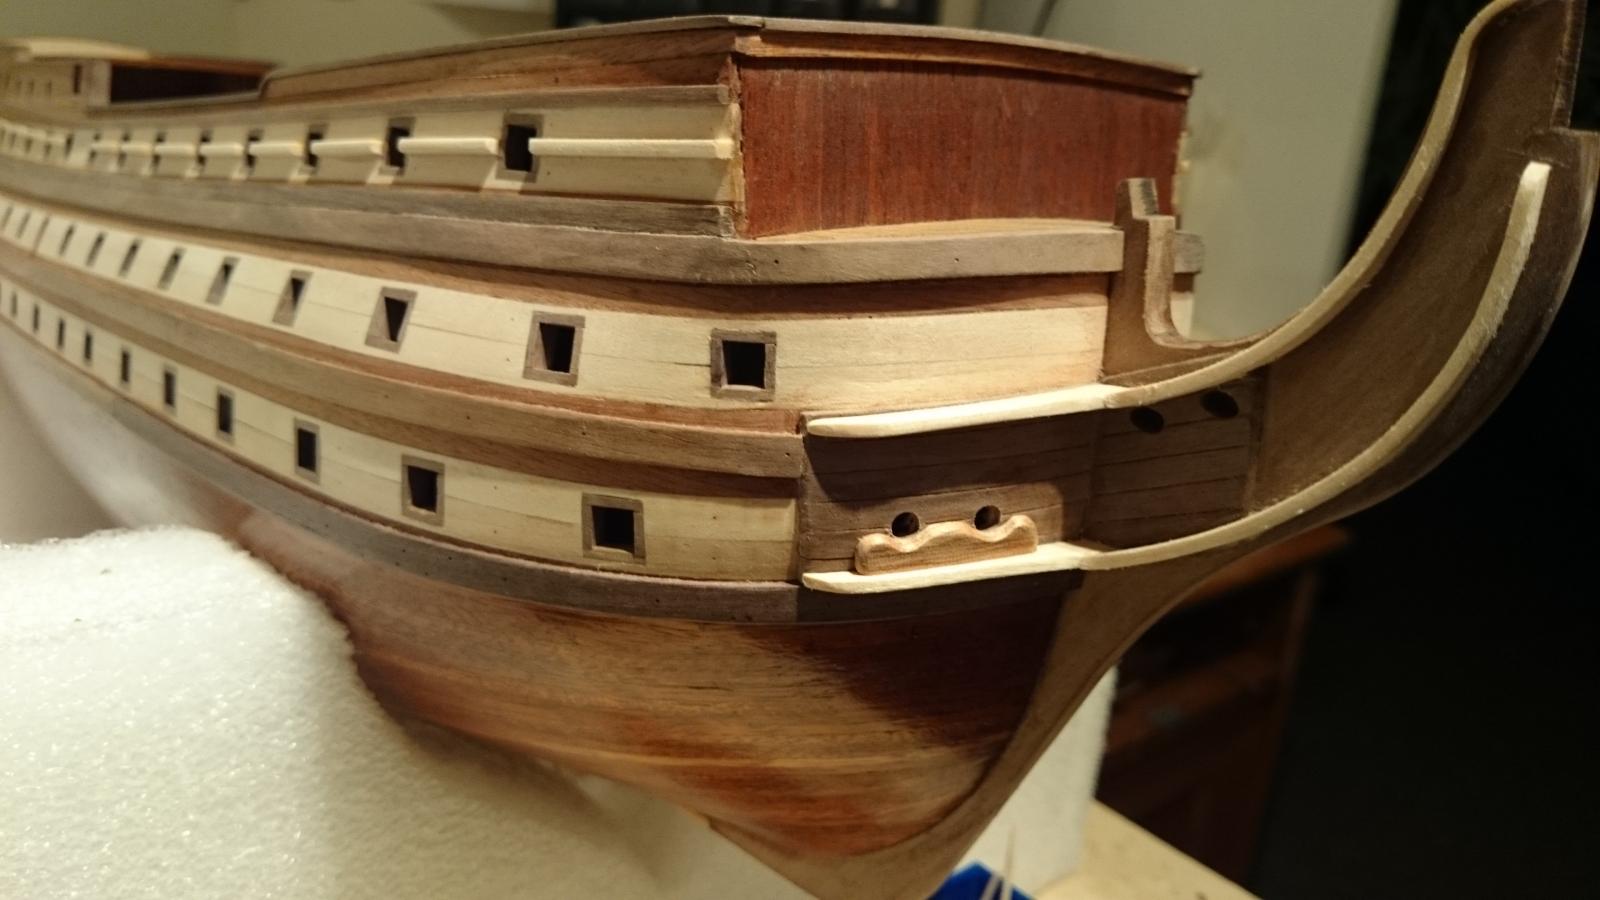
You should be fine with the planking, really. there is more fear spread about the job than actually it is. The only problem about it is that its our first ever so we don't have any idea what can be acceptable prior to sanding. My tip for you is just shave some off the contact area of the plank especially on the curved sections to prevent a gap, the planks are thick, good for sanding back, hell to bend... and lots of cursing to come, before planking I would add 5mm to all the canon back plates because look back over my pictures and you will see some are not inline enough... If you go by the plans you will hit ribs, I hit my first, this if a pain and takes a while to cut out but ok below deck just more work but please, please, please plan your top deck where the ribs are seen from behind, these have to be right and not touched / cut even if it means cheating and moving them a little. I have made a few spindles which I am replacing the brass etchings with. see pic, I plan on making a stupid amount to replace all the brass.

-
Thank you, hey welcome back, we were almost at the same stage of the build last time I heard from you. I have used International yacht varnish from B and Q, I'm not sure wether the next coat should be satin rather than super shiny gloss, Jury is out. I have now decided to make my own spindles for the cabin decoration and ditch the copper ( short Length) ones also, it will take a while to make them all but I'm not in a race. Oh just incase your wondering I'm keeping her wood colour, shows all the effort more than paint. I may build another in the future and paint her.
-
I've finished the portside windows and due to fingers adding grease to the hull I've varnished her today so all works stopped whilst she dries awaiting a re sand and further coats. Mike do you prefer blue to yellow or blue overall, ie blue under framed in wood as as opposed to black. I went black as that's all I see on the real girl sat in Portsmouth
-
Making sails for HMS Victory
Paul0367 replied to rafterrat_2005's topic in Masting, rigging and sails
Mike, would it be possible to run a fan behind the sails (cloth) and as they bellow spray starch on them and allow to dry. Just a thought, I've not tried this.