HOLIDAY DONATION DRIVE - SUPPORT MSW - DO YOUR PART TO KEEP THIS GREAT FORUM GOING!
×
Paul0367
-
Posts
512 -
Joined
-
Last visited
Content Type
Profiles
Forums
Gallery
Events
Everything posted by Paul0367
-
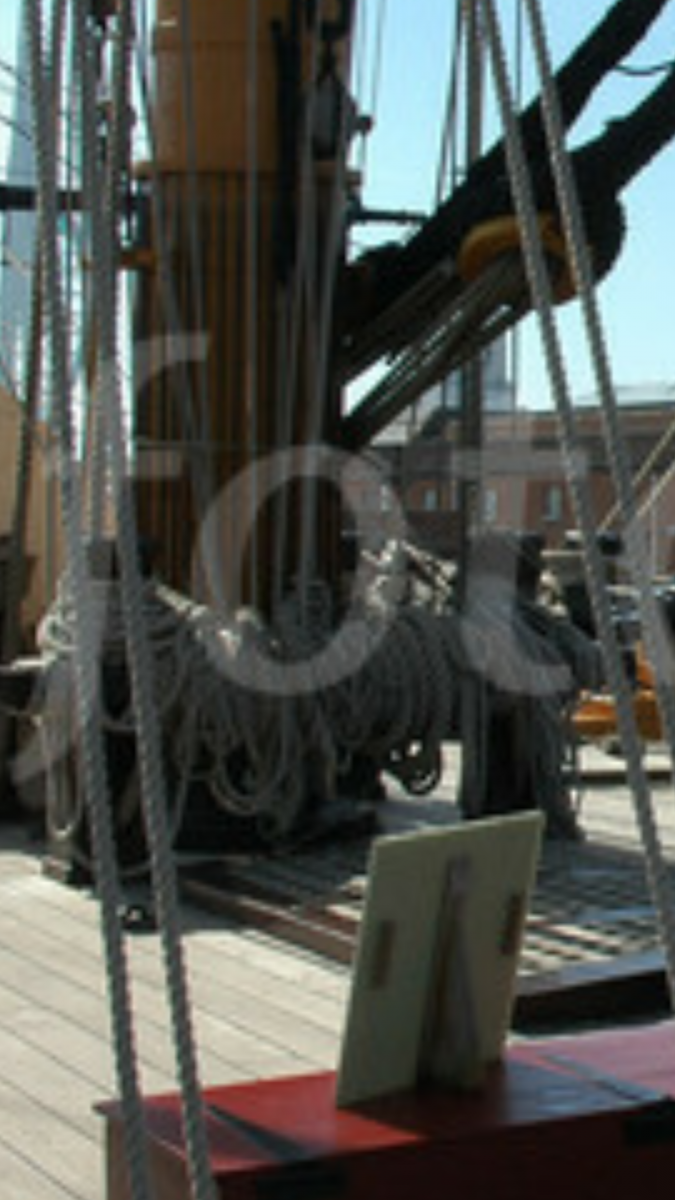
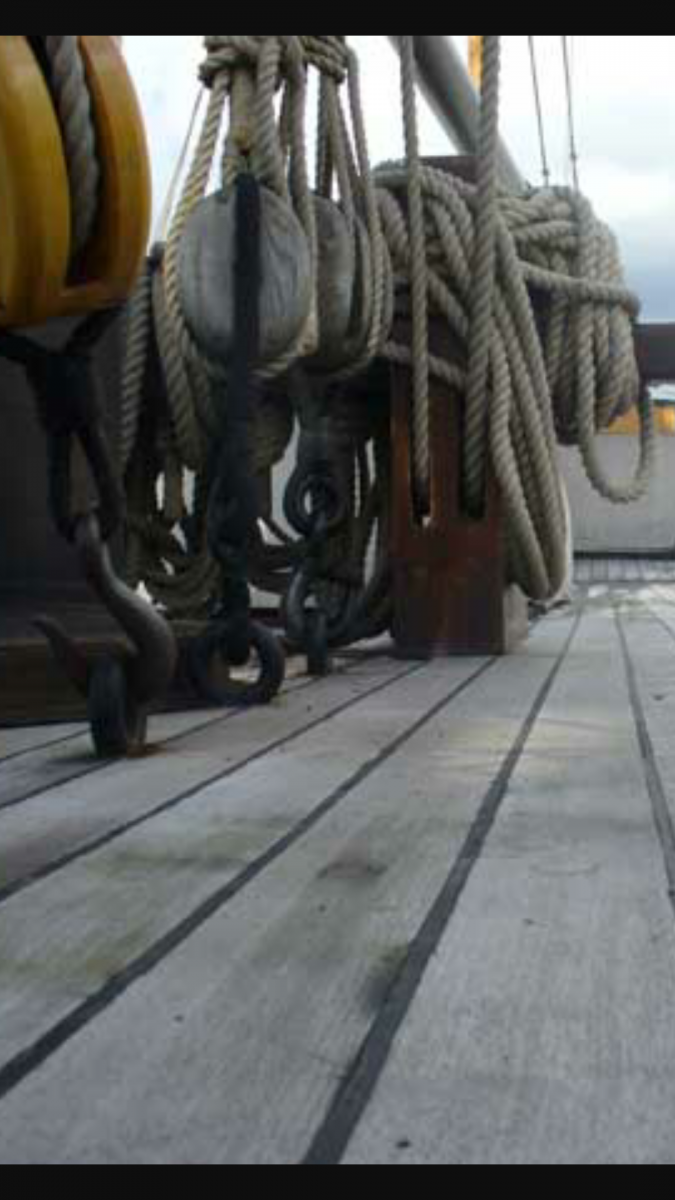
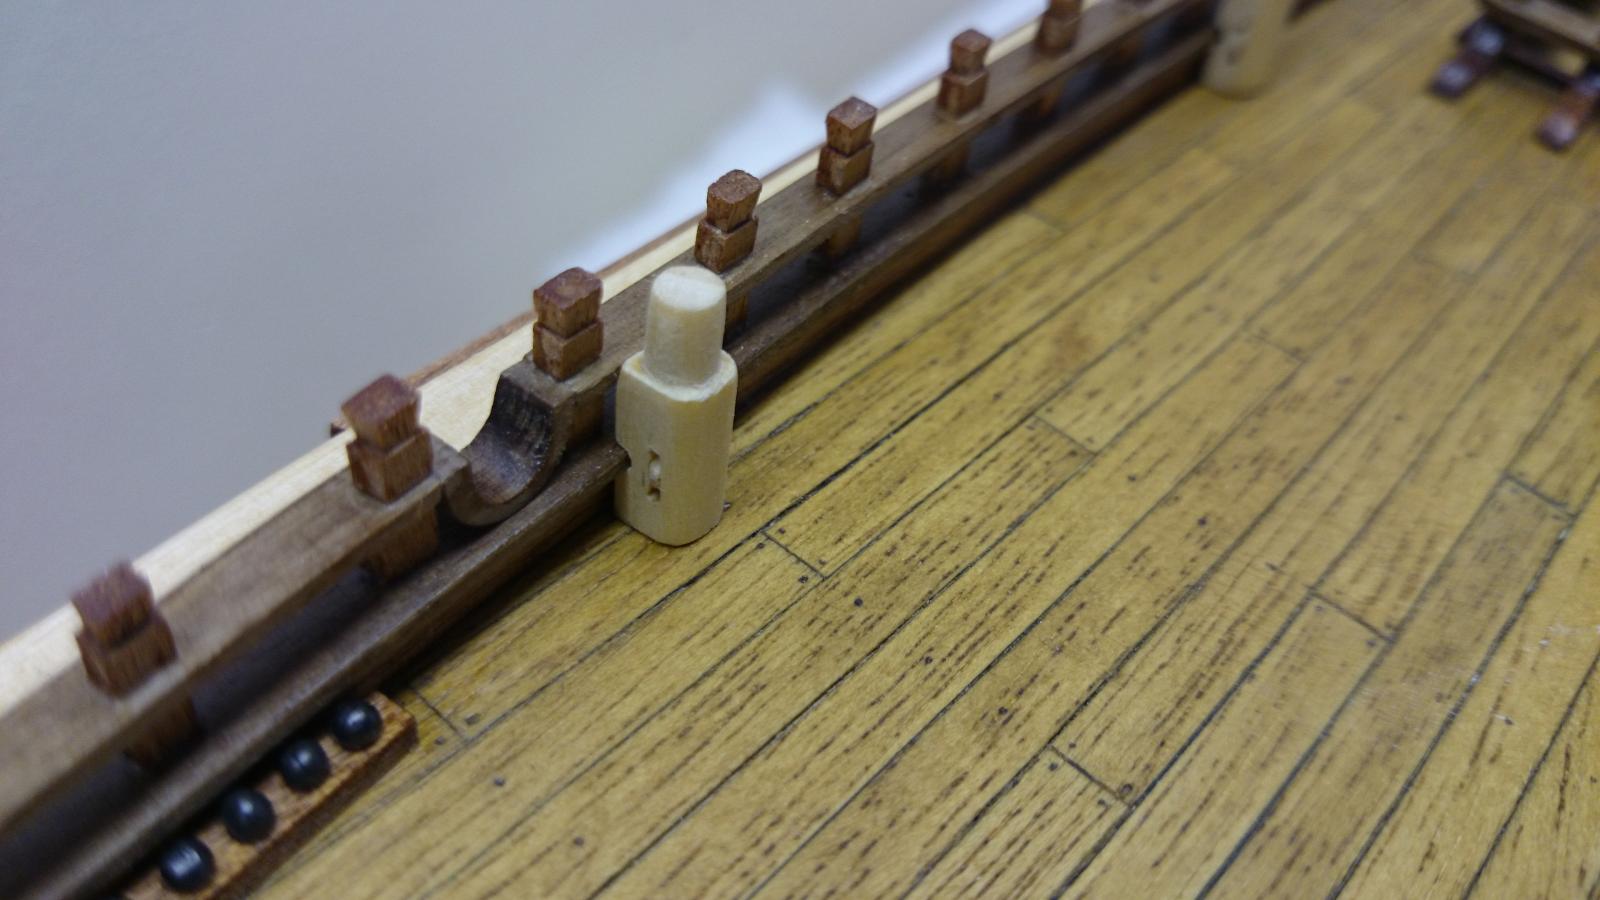
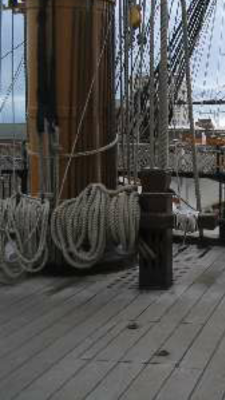
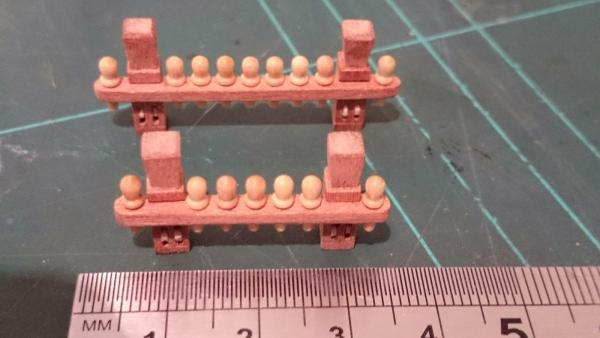
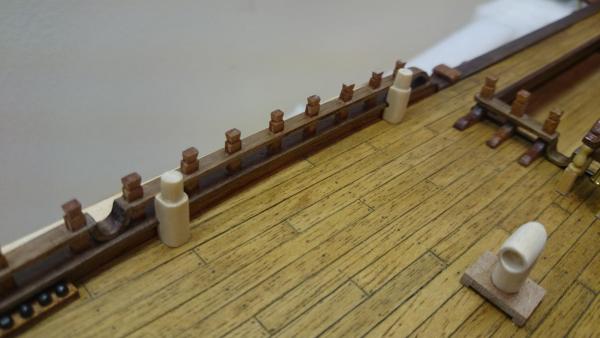
 These rope trestles / belay pins became swamped in ropes, quite messy to be honest, pins will need to diet to get ropes to actuall wrap around. I am assuming ( not ever being on a sailing ship) this mess is due to the sails being up, well off in victory case, but still ropes in the sails up position. I'm considering using the sails in the kit so therefore the pins will have less wrapped on them.?
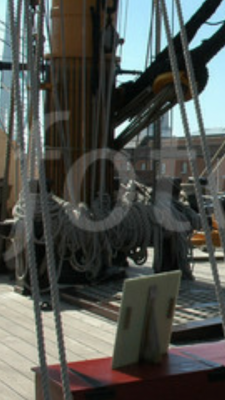

- 708 replies
-
- 2
-

-
- victory
- constructo
- (and 1 more)
-
Thanks John, That's a pinched way, That's the way I'm going. I may be reworking each pin as there very much over scale to the real ship, the real ones appear to be very thin, these look like swollen thumbs.
-
Ahhh I'm with you now, it's the spongy package foam sipplied by some manufacturers, not polystyrene but a sponge type. I just saved it and cut it to suit then used a hot melt gun to attach to the board, sorry I assumed you were referring to the picture above your question.
-
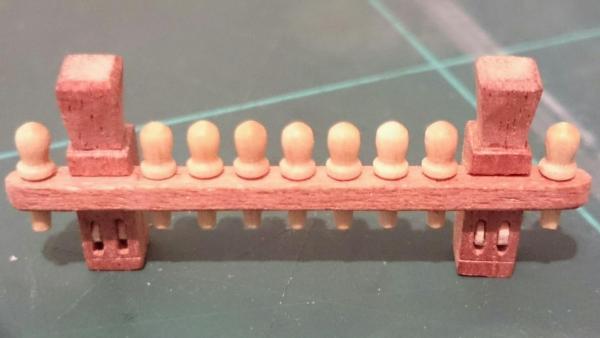
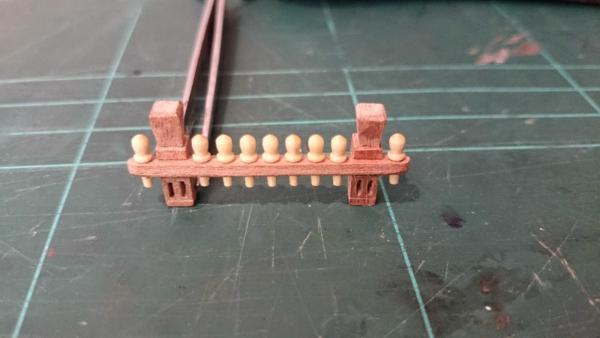
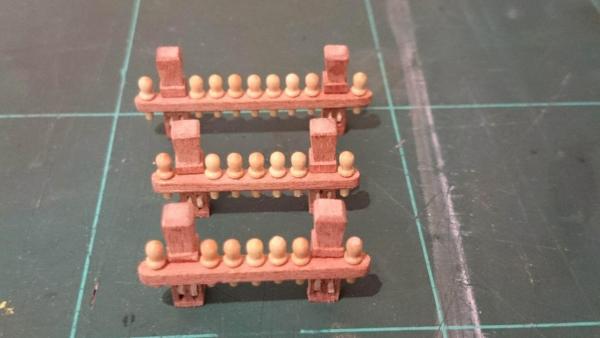
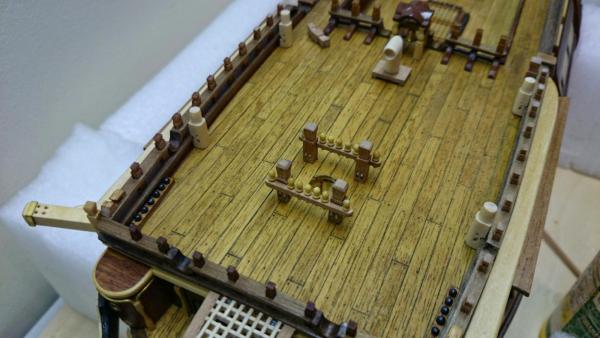
Some more for you Dave, with additions on the Kits spec, there only positioned on the deck at the moment as I've read we should pin them on, I'm just wondering what to use as a pin. Cocktail stick is looking likely, the decks stain may make it difficult to adhere to, last thing we want is them springing off when the riggings attached.

- 708 replies
-
- 5
-
-
- victory
- constructo
- (and 1 more)
-
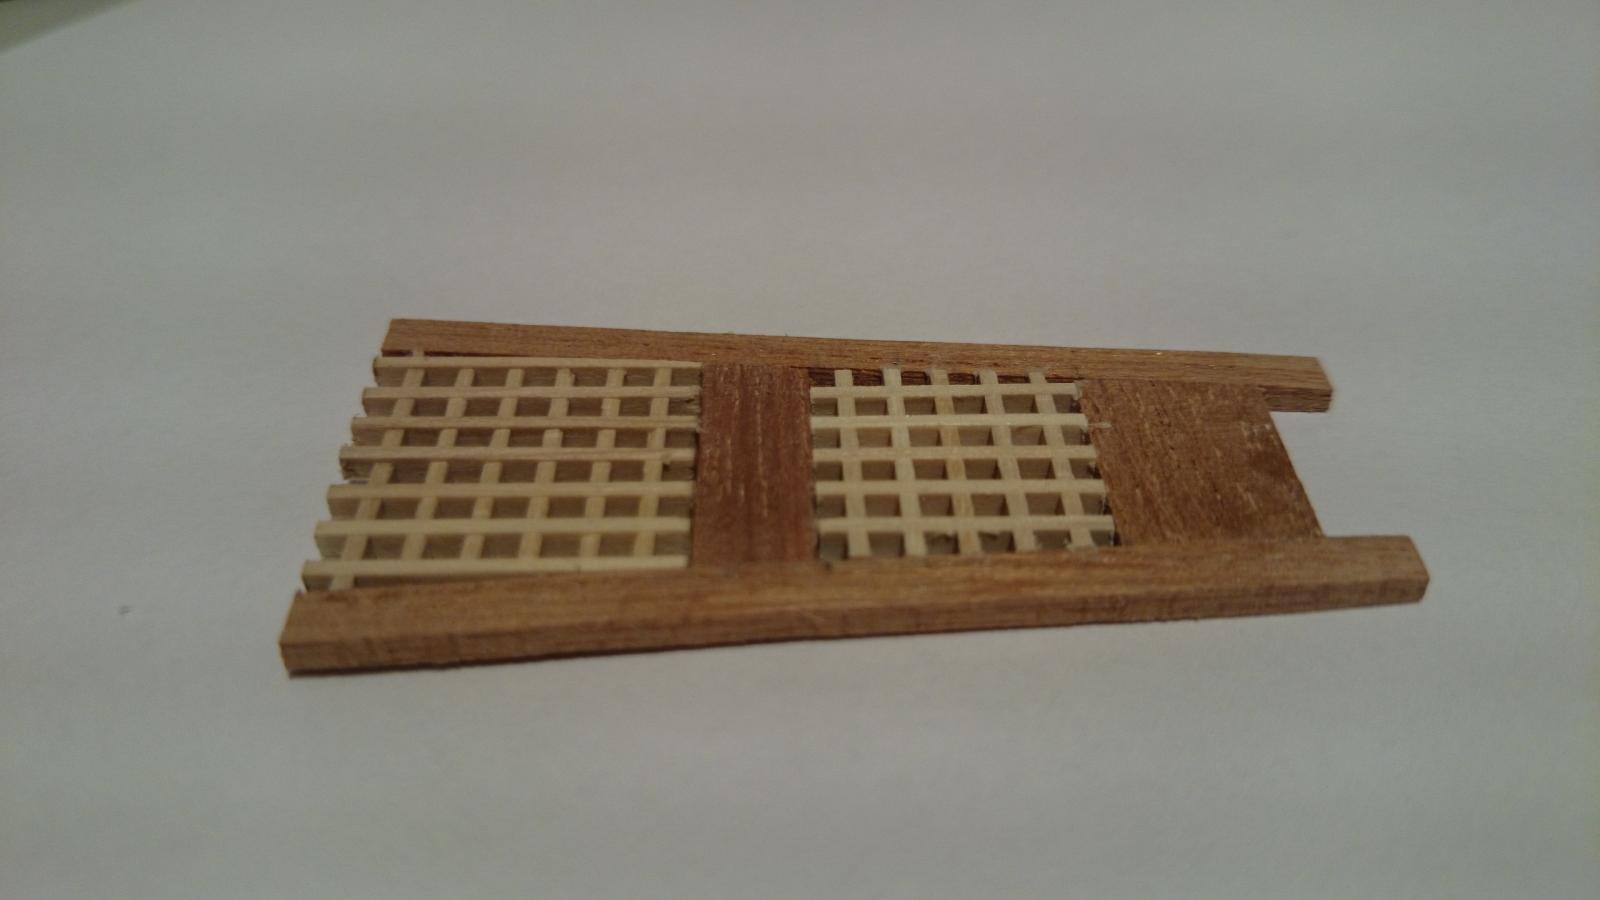
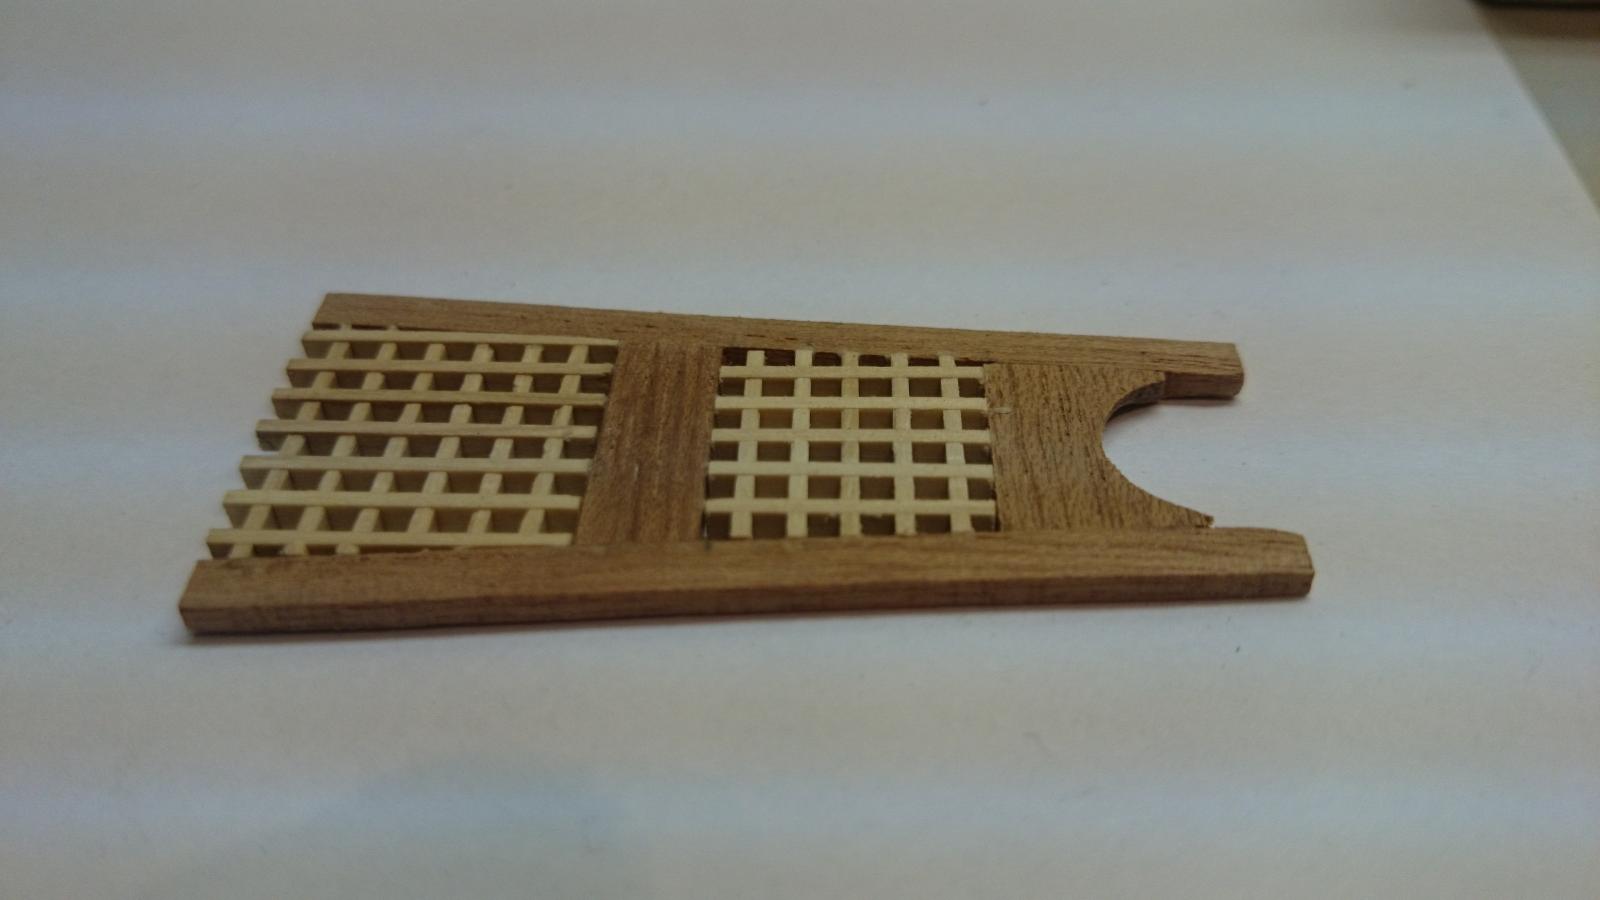
The white wood is Ayous, I've tried to purchase it the UK and unable to find it, I think its a Contructo kit special. That said its a nice wood to work with
-
Oh theres magical stuff going on here. Beautiful, beautiful, beautiful.
-
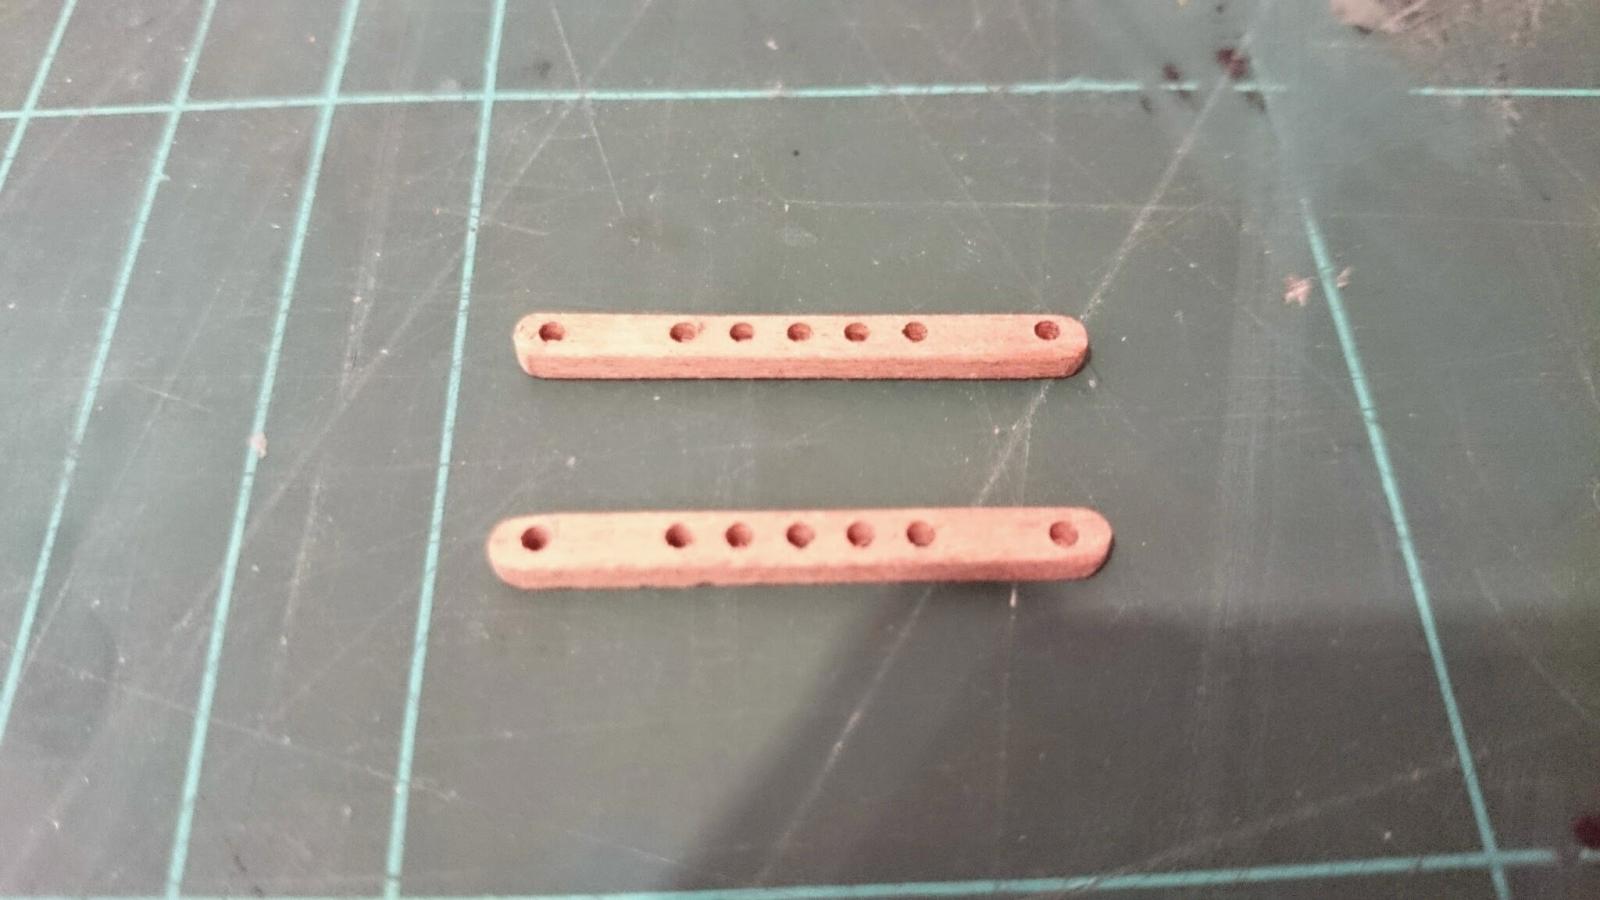
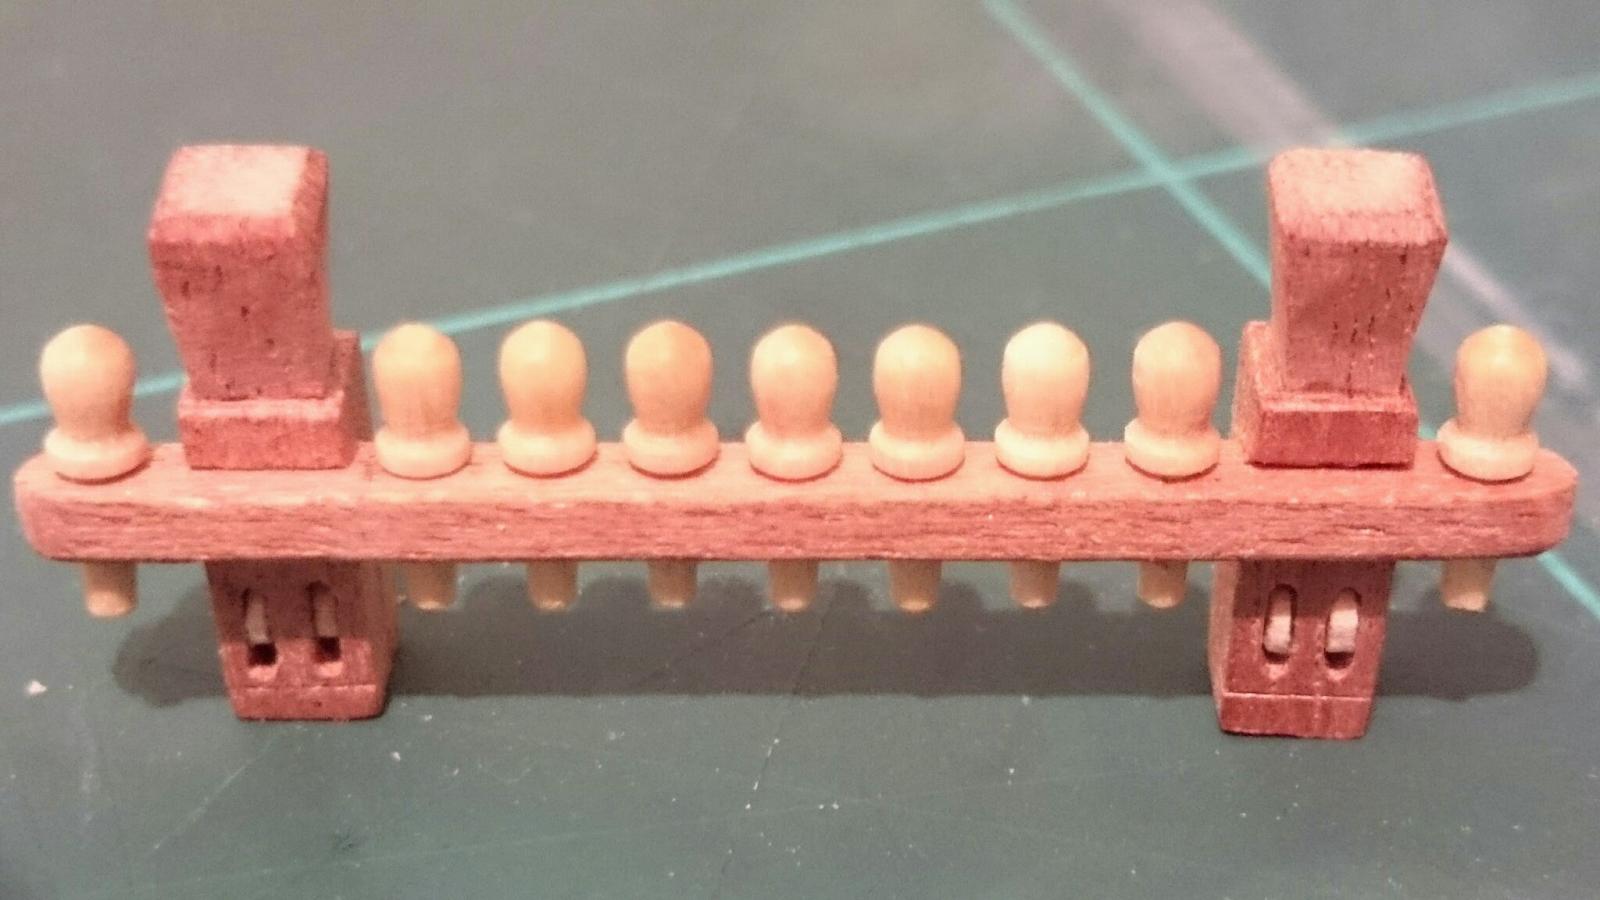
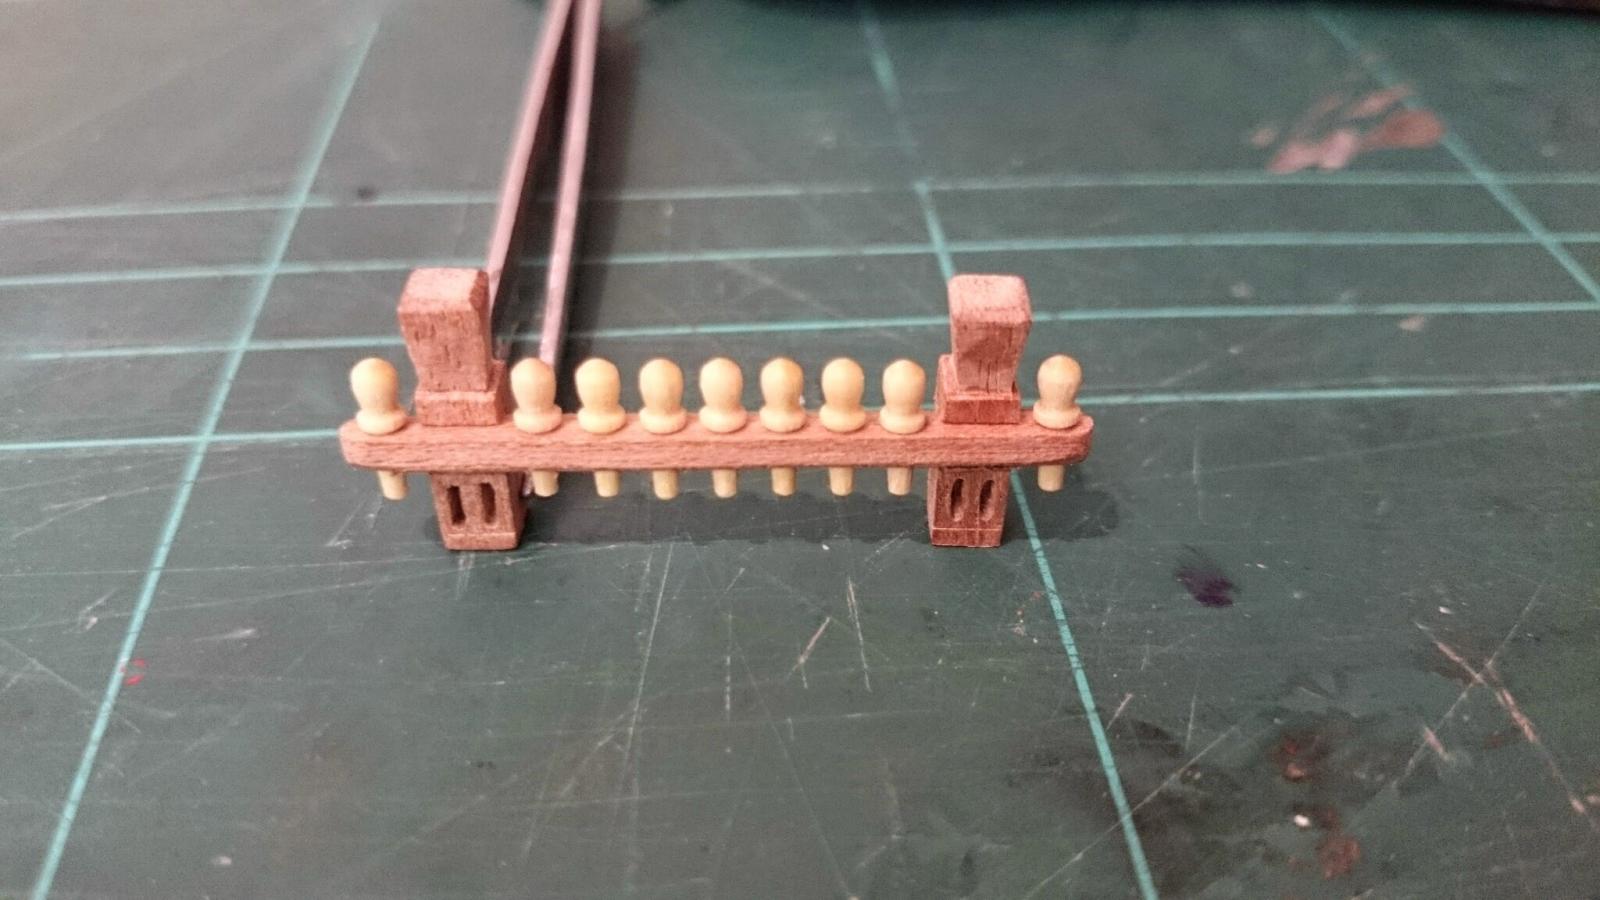
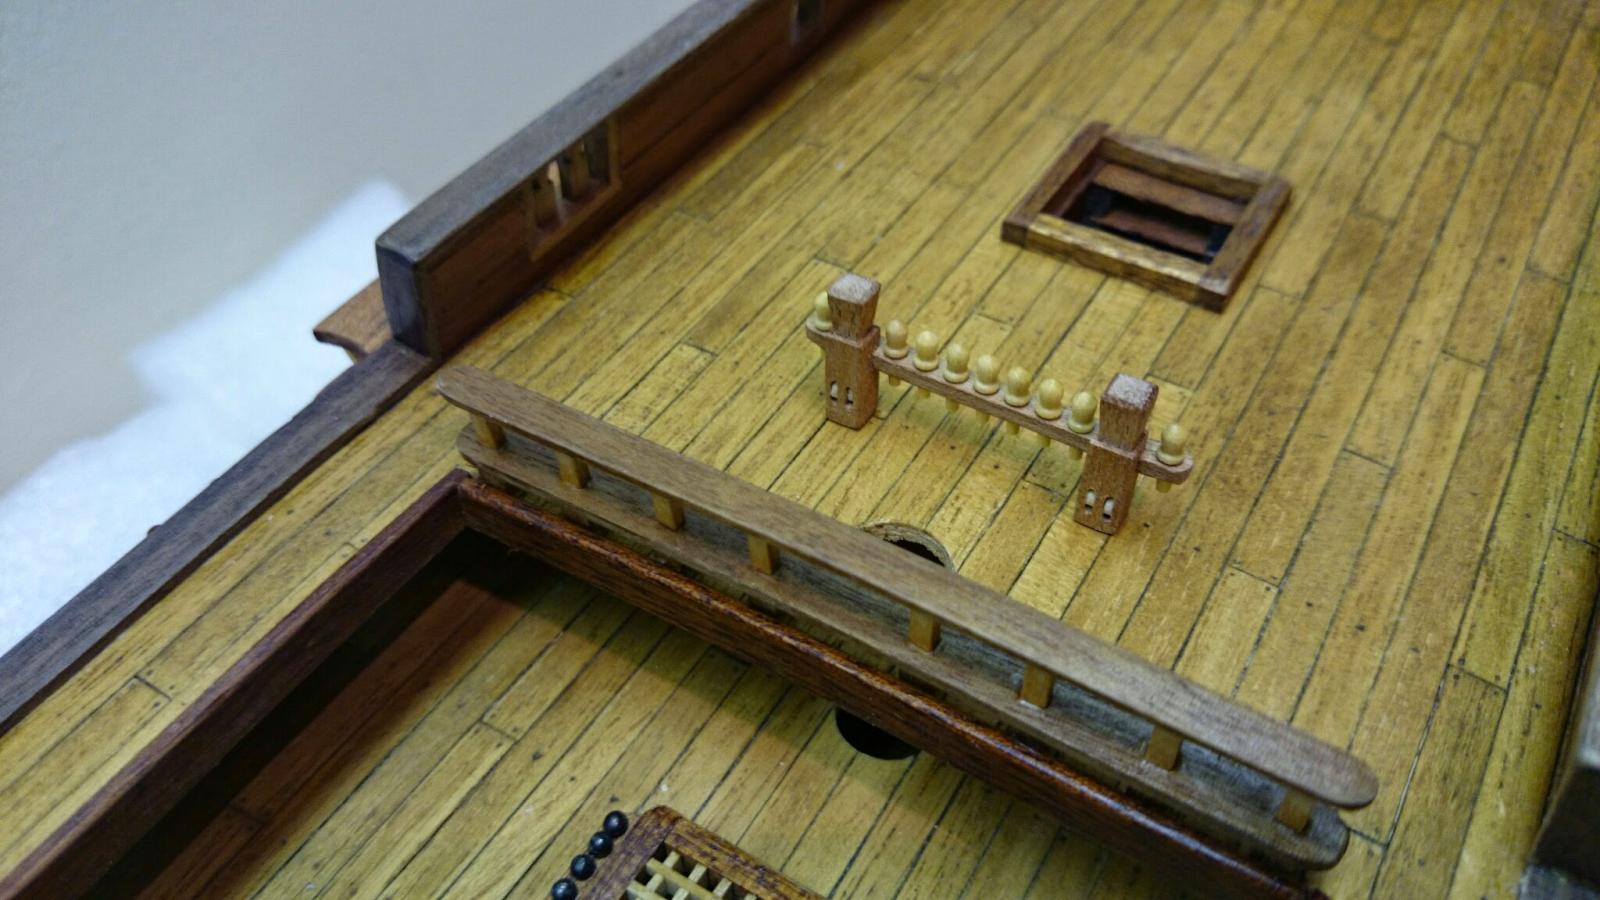
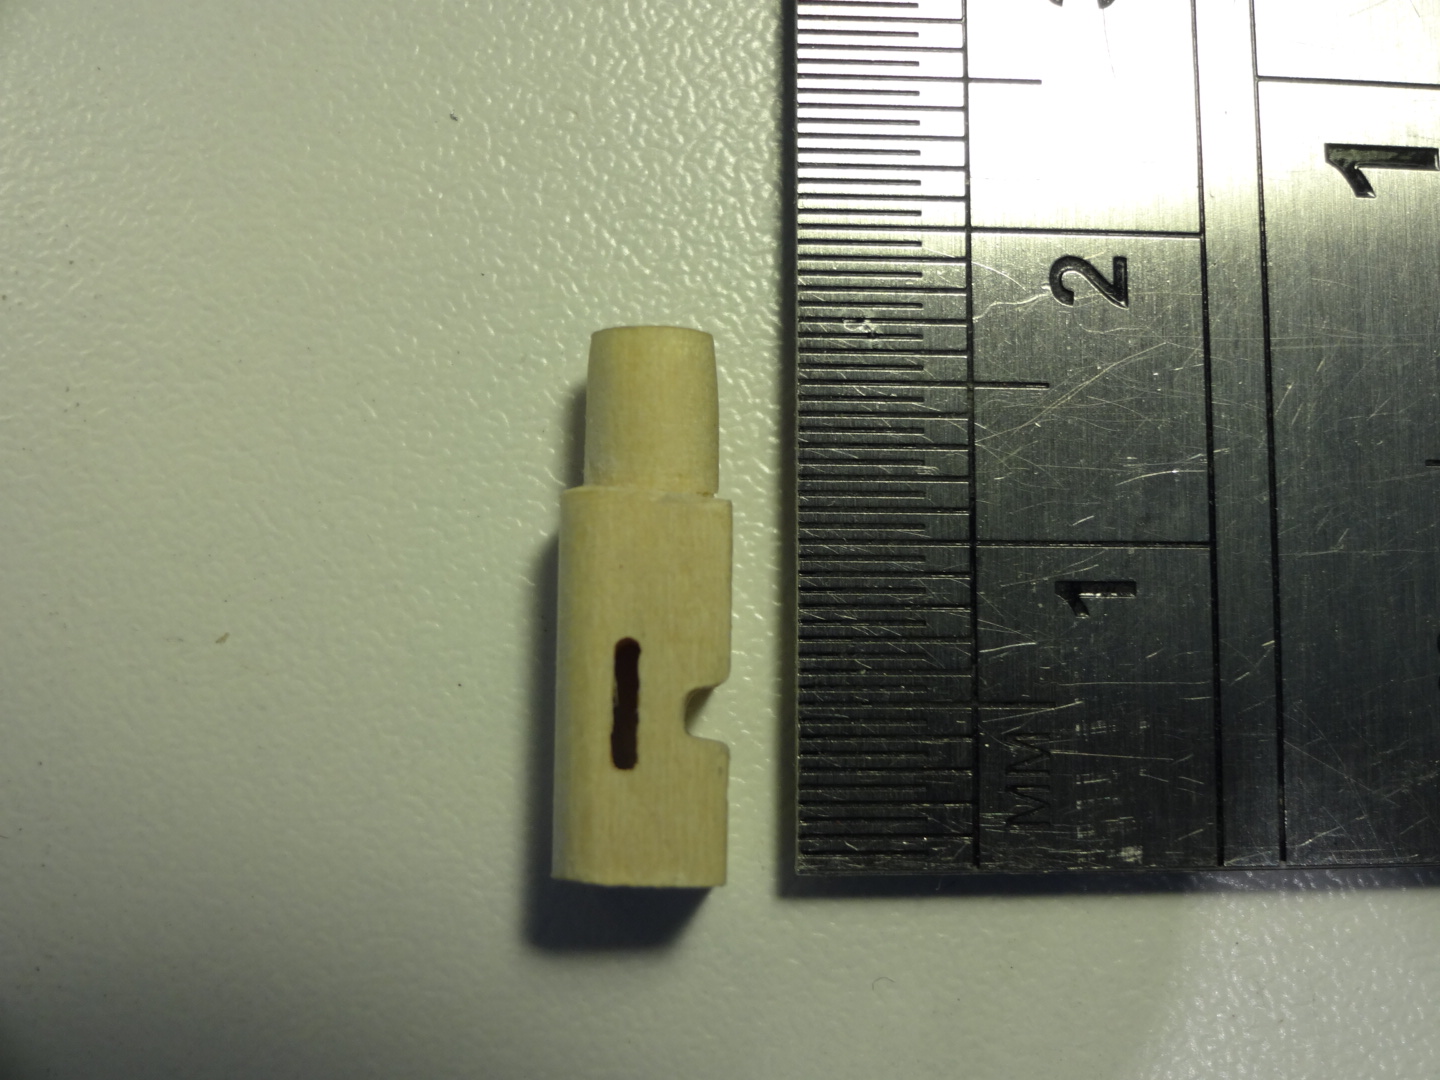
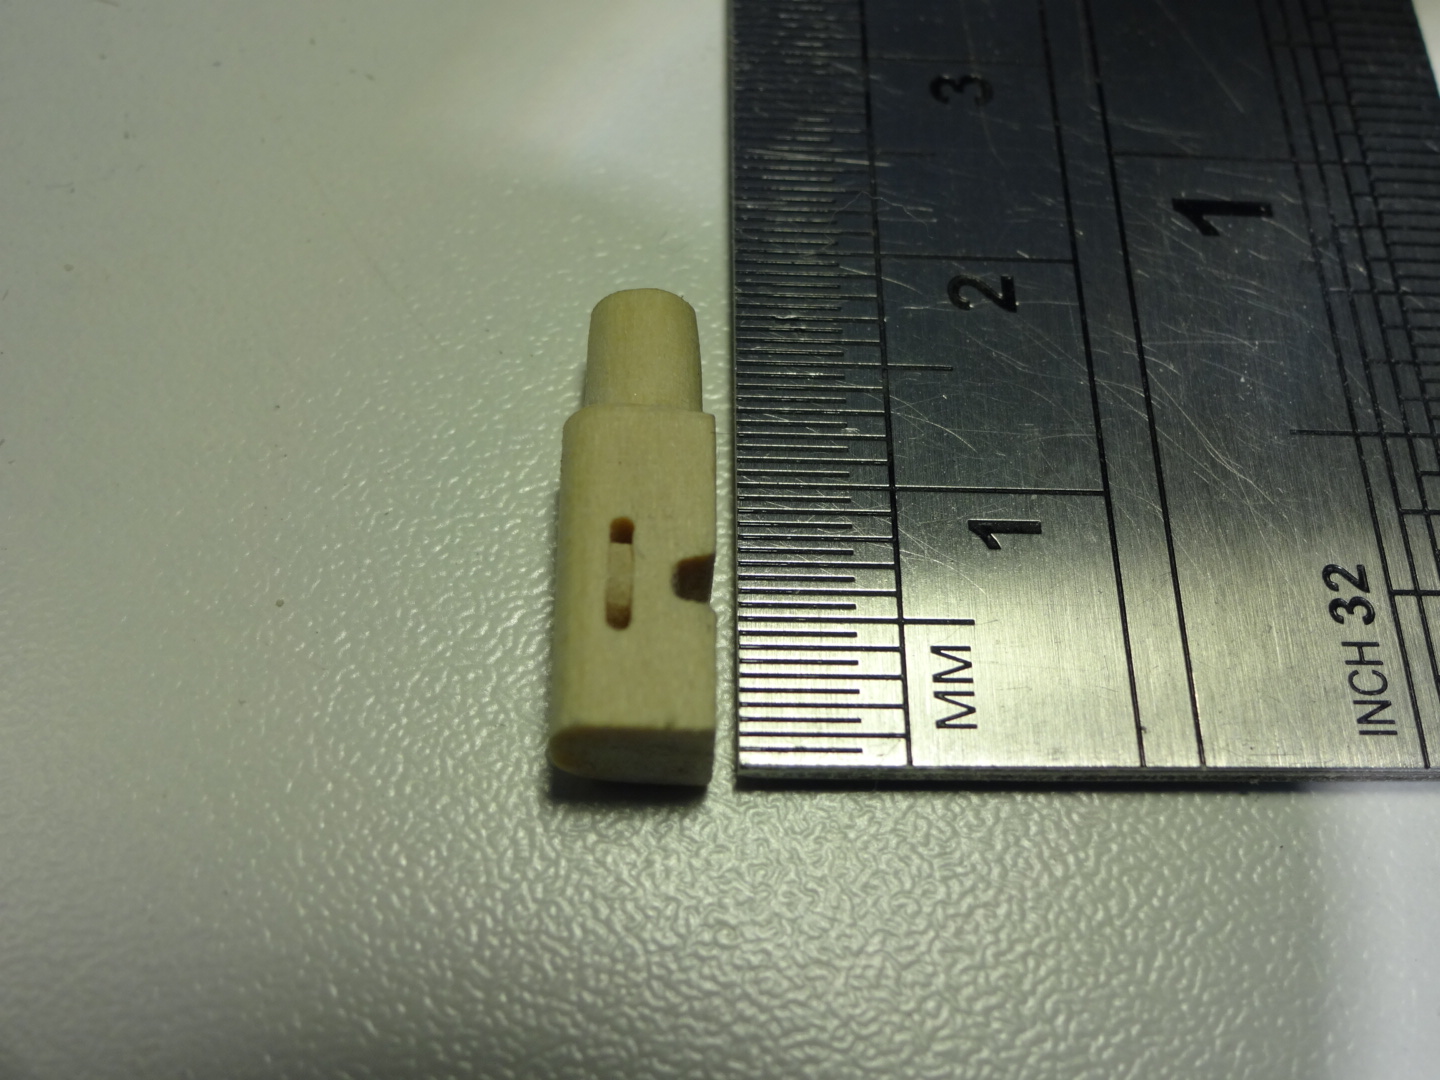
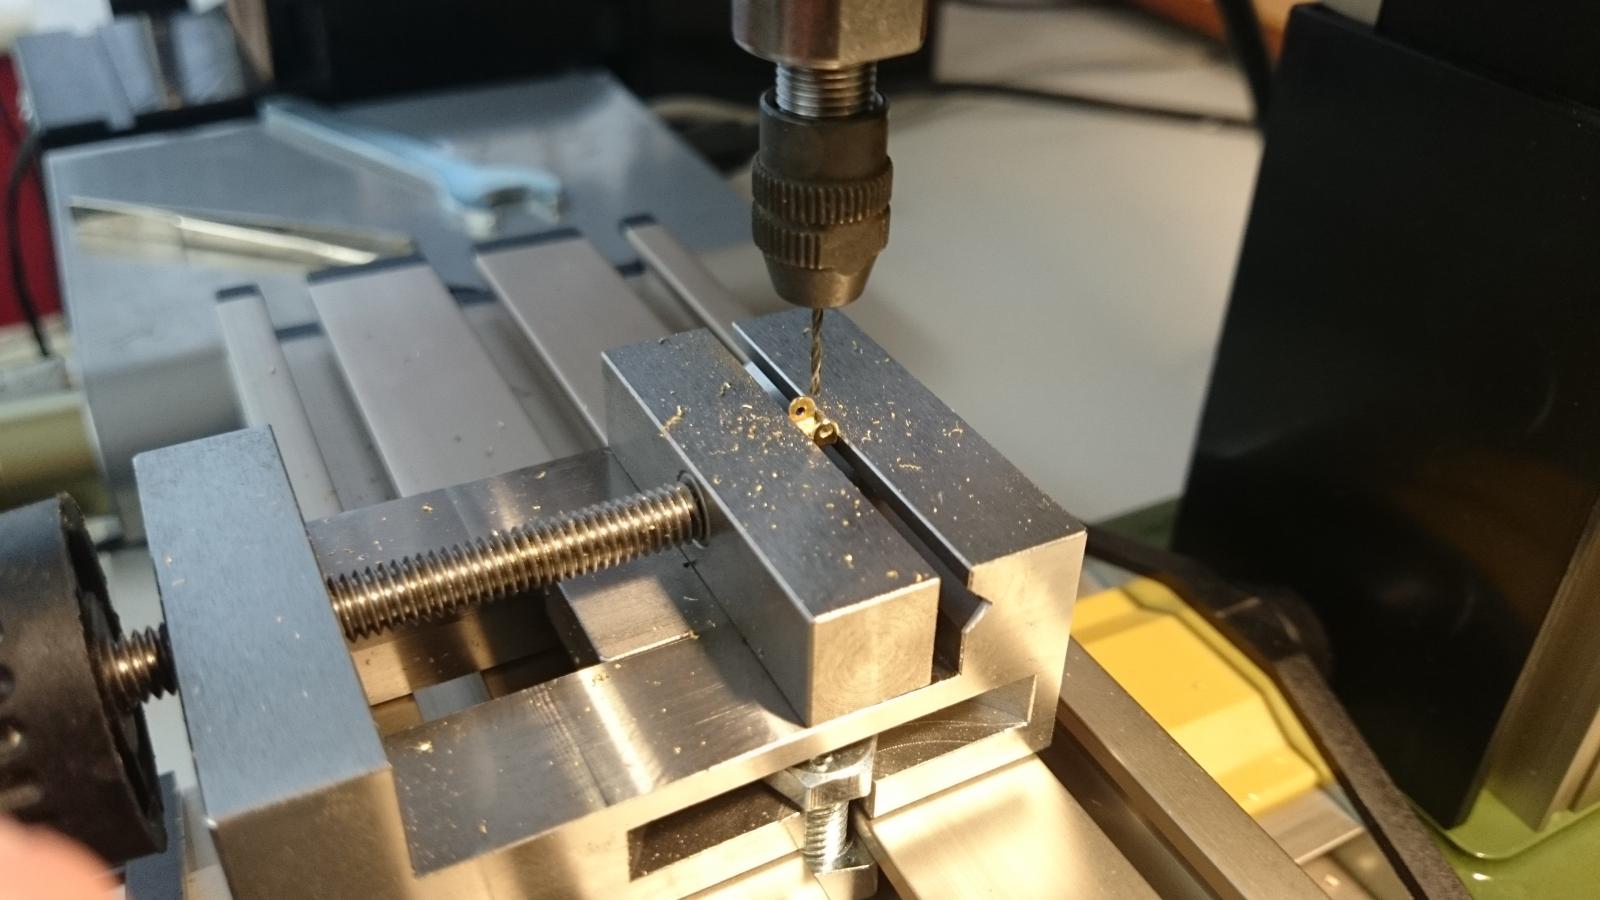
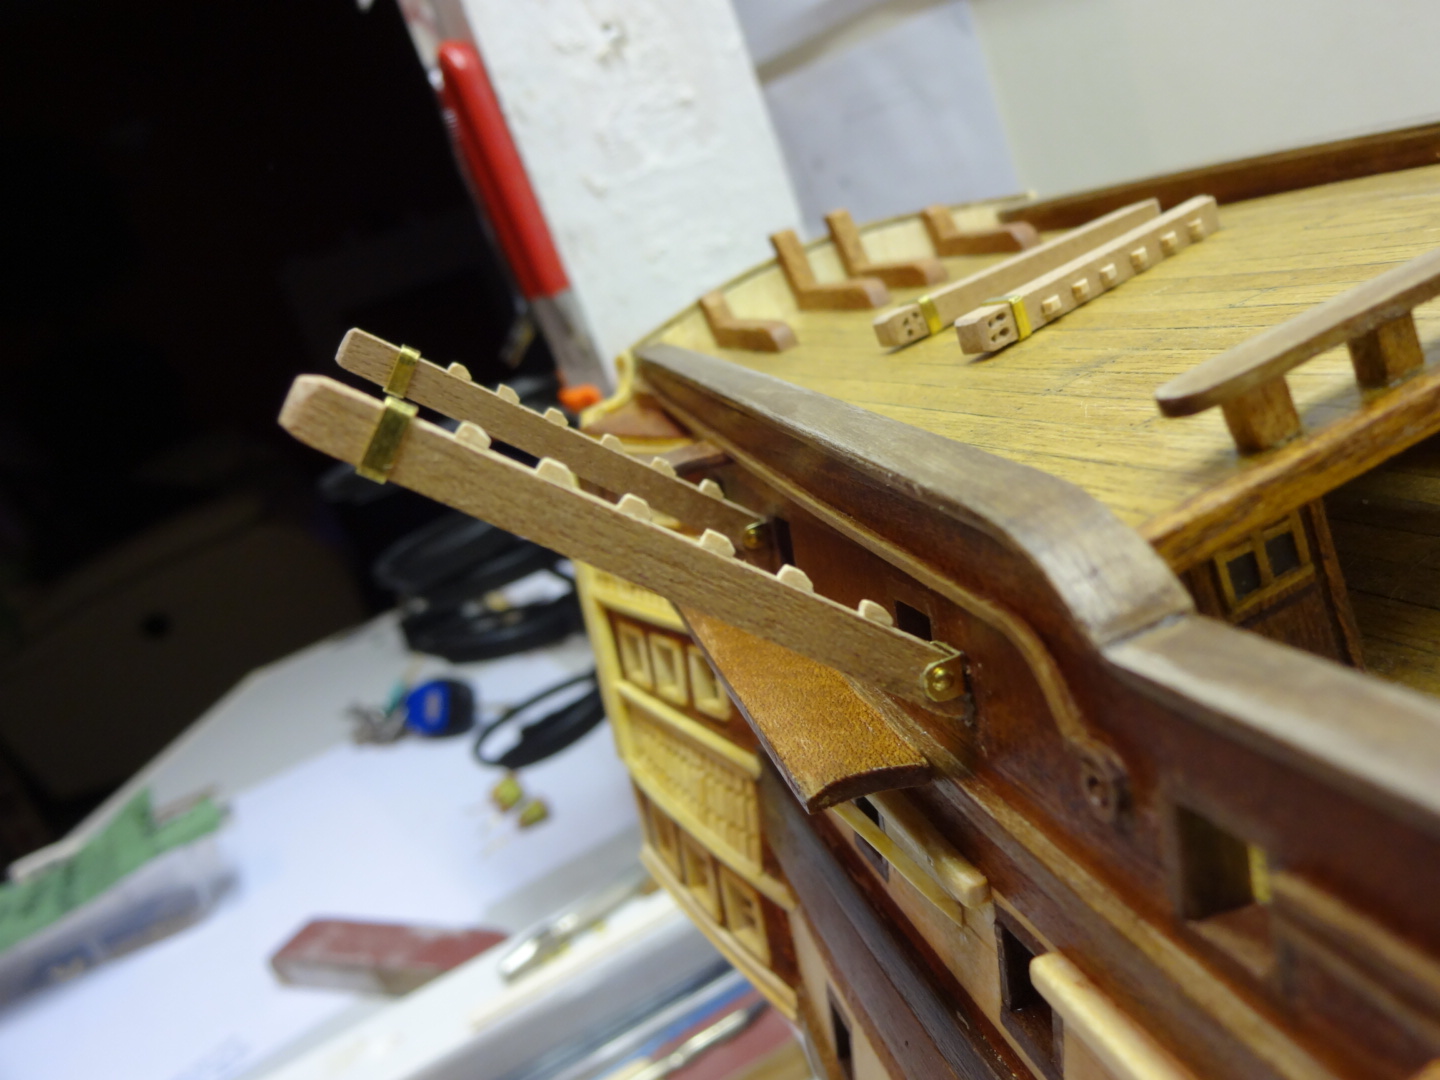
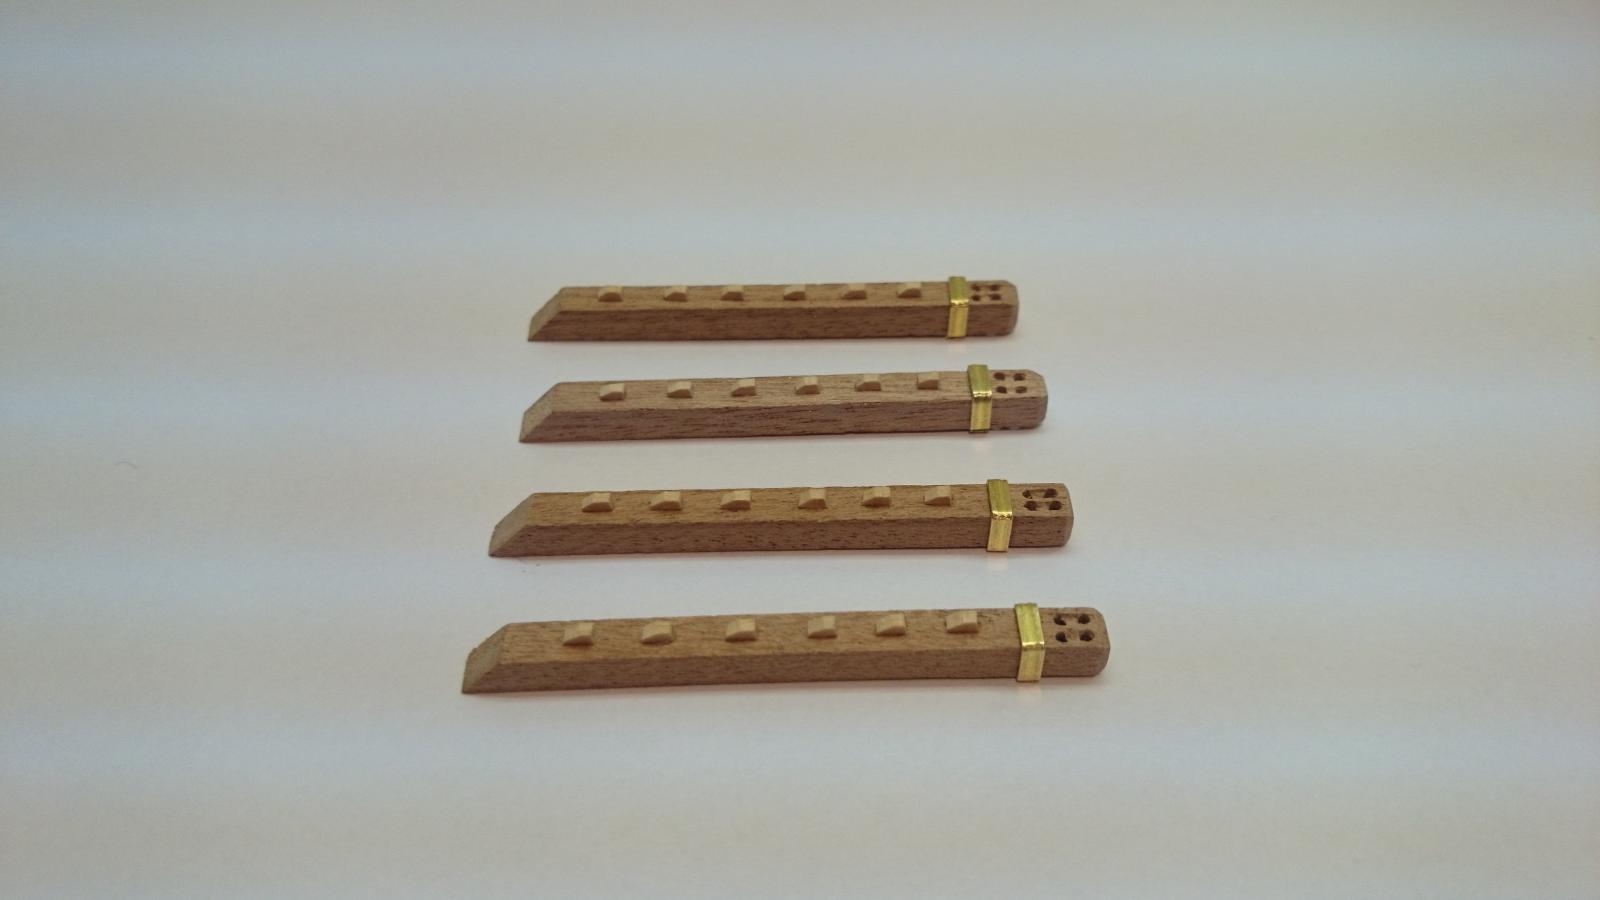
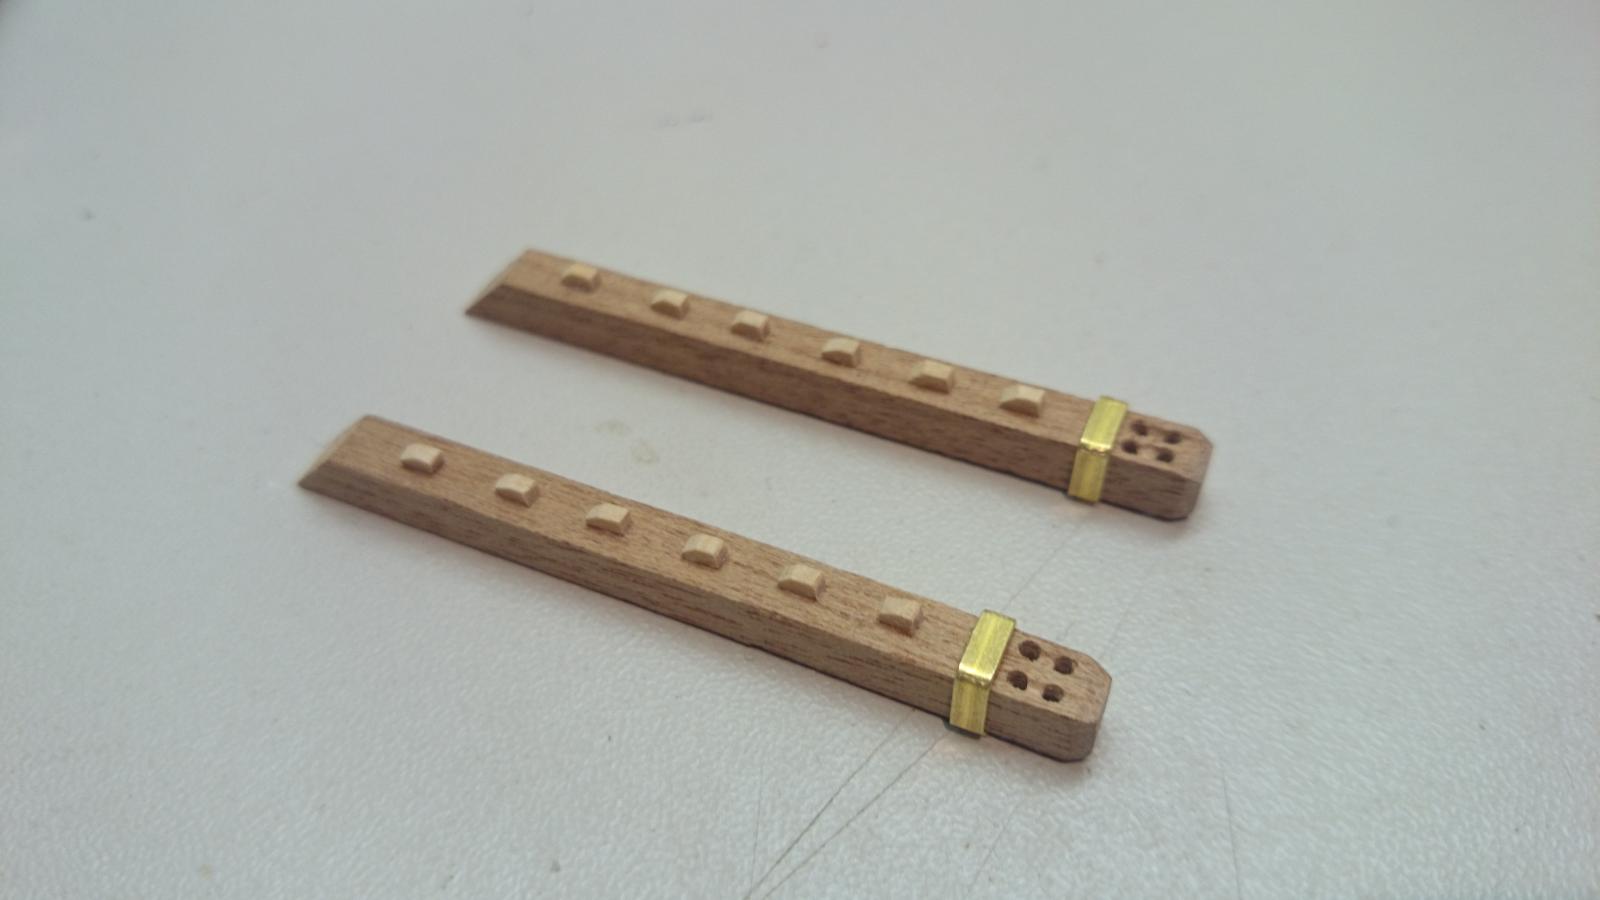
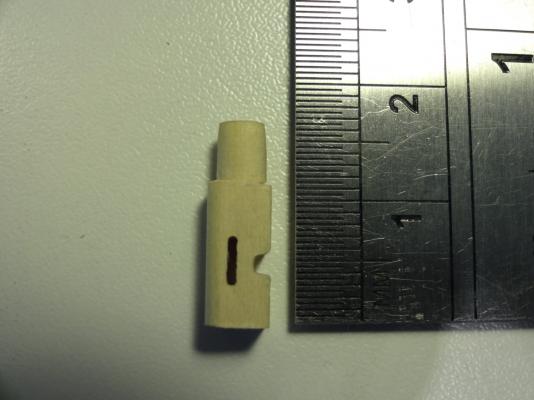
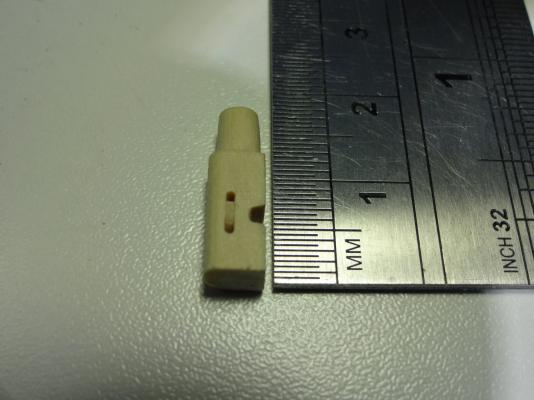
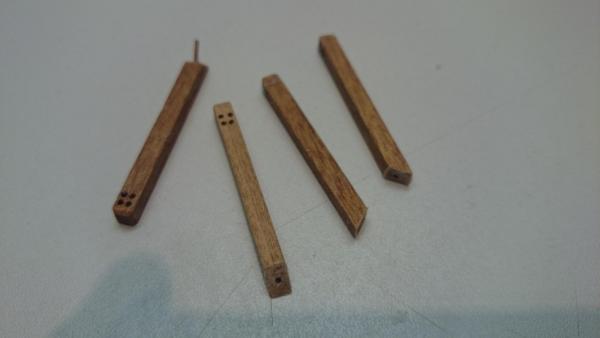
Made my riding bits and was about to drill the hole in them as the kit instructs but after research found they actually have a sheave in them, A sheave /ʃiːv/ is a wheel or roller with a groove along its edge for holding a belt, rope, or cable. When hung between ... Just incase like myself you didn't know whats known as a sheave. When I was chatting to my brother he recommended a mill, what can I use it for, I asked, your imagination is your limit, well Bro, your spot on. Just the tops of the riding bits to slim down and there ready

- 708 replies
-
- 5
-
-
- victory
- constructo
- (and 1 more)
-
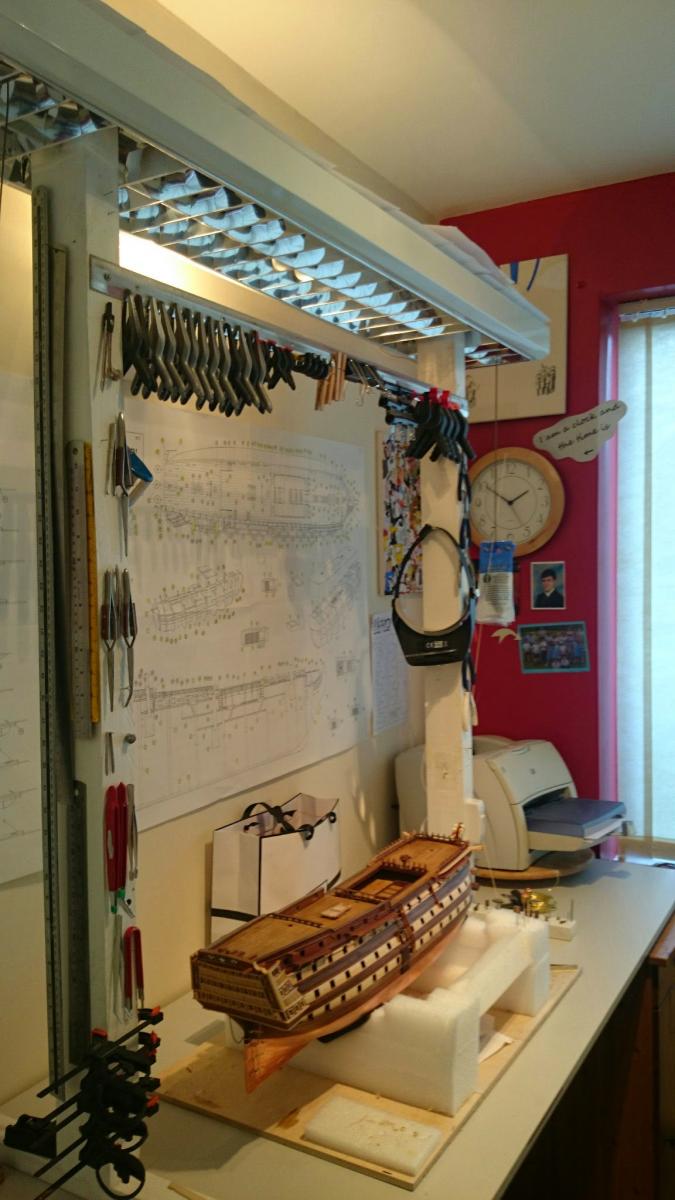
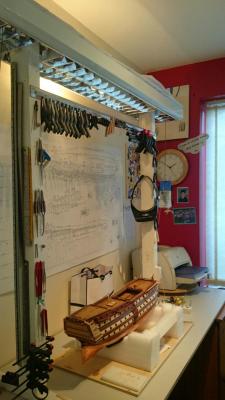
Build table is taking over, all my pictures are taken on my phone (Cell) Sony Experia Z1. I have just gone on my laptop and actually understand what you mean about them being large, I had no idea they were so big.There larger than the actual ship, I only load them via the phone which is where I view them and only go on the laptop rarely. Sometimes the images are over 2 meg and an app called reduce photo size,does just that.... Hope all is ok with you
-
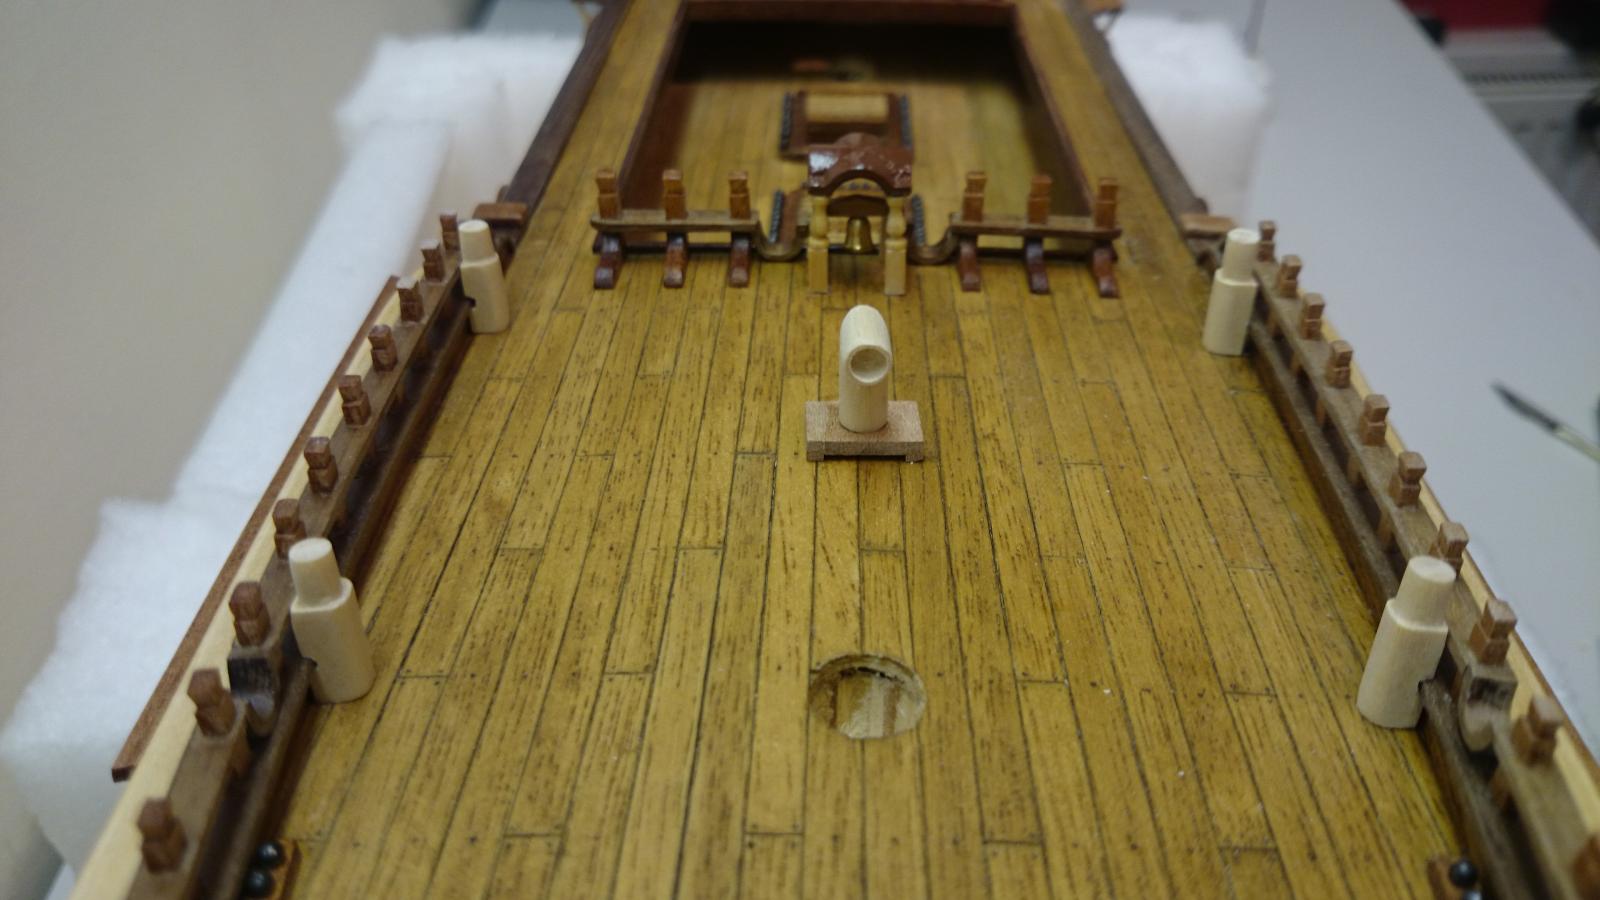
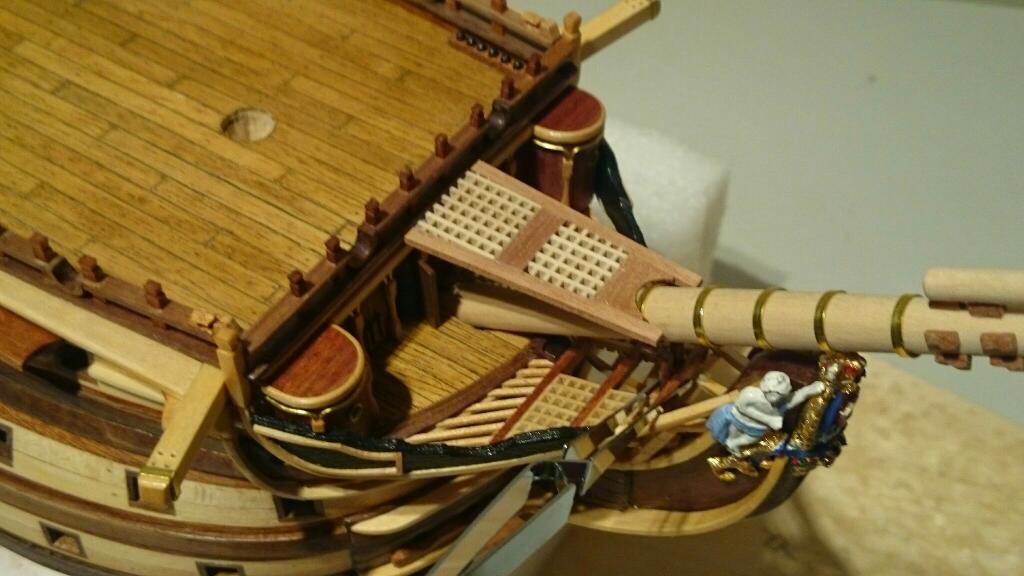
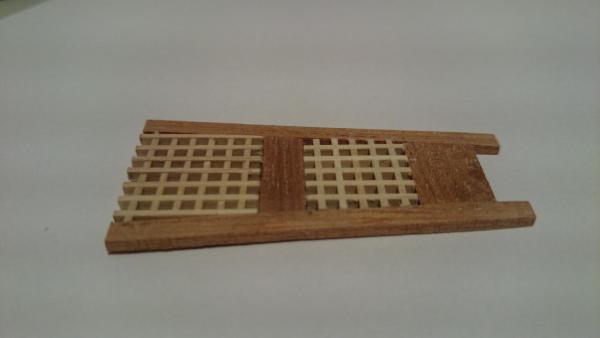
Been making the four riding bits ( books call them Kevels) I'm sure the laters correct, for the quarter deck also the galley stove chimney which will nestle between my to be made gratings after the holes are cut.

- 708 replies
-
- 3
-
-
- victory
- constructo
- (and 1 more)
-
Hi Hope all is OK, looking at your site the ship I s on hold, look forward to seeing you start again. Take care Paul
-
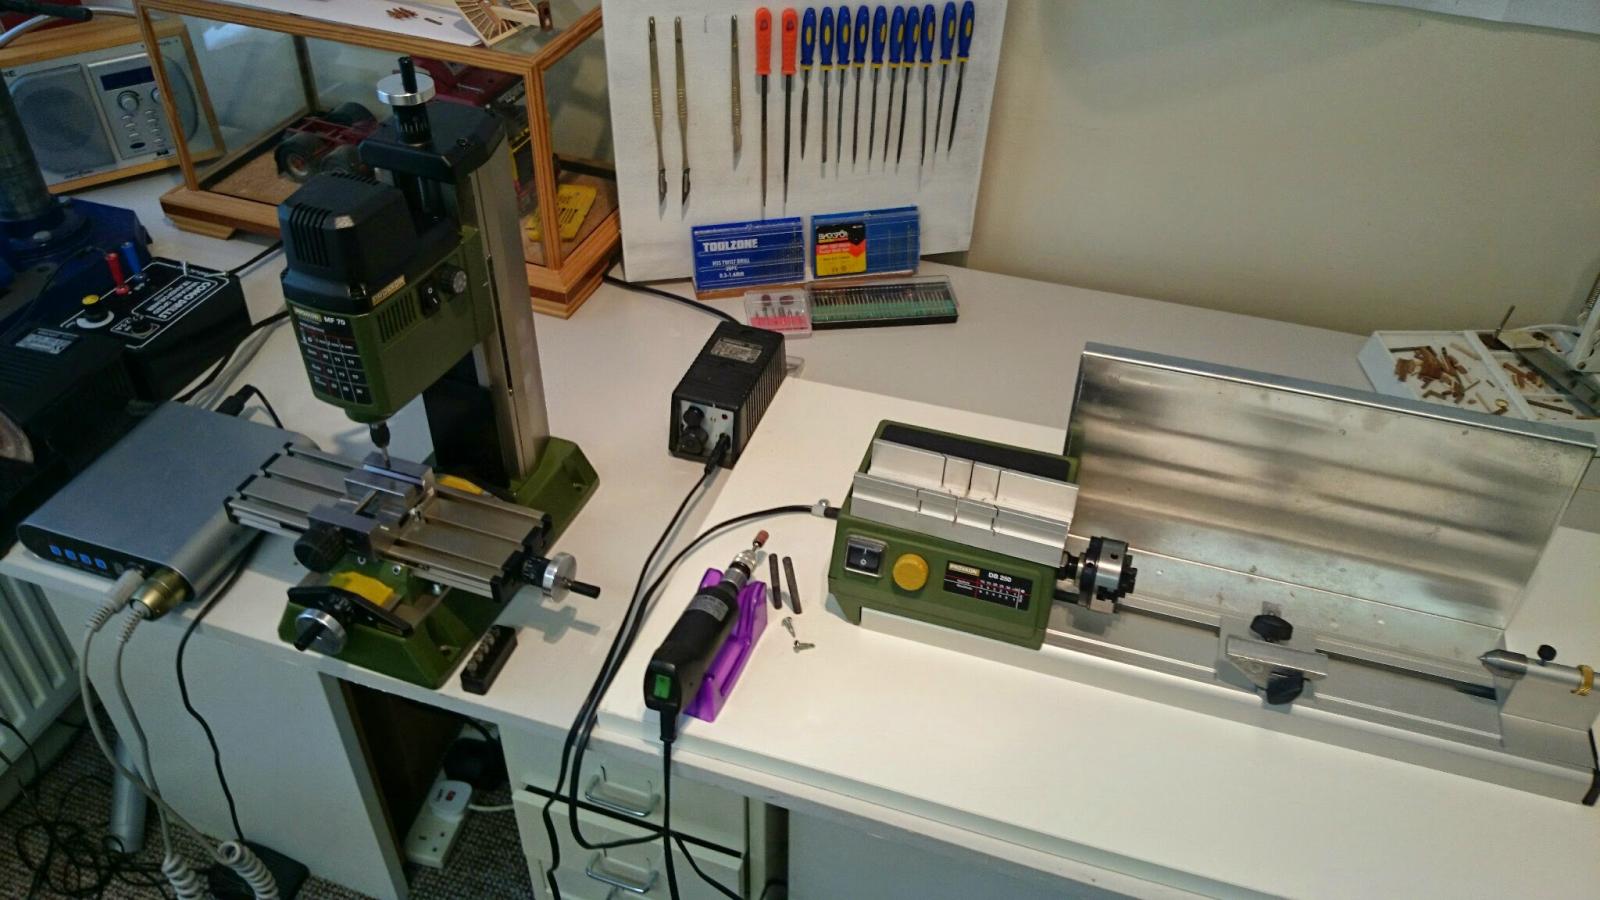
The tools to hand are brilliant for this hobby, lathes for masts and my new toy which arrived today in the shape of a Proxxon MF70 milling machine which was put straight to work. This was an extravagance really and could quite easily survive without one but my it makes life easy. Used in the making of my lifeboat davit brackets.


- 708 replies
-
- 4
-
-
- victory
- constructo
- (and 1 more)
-
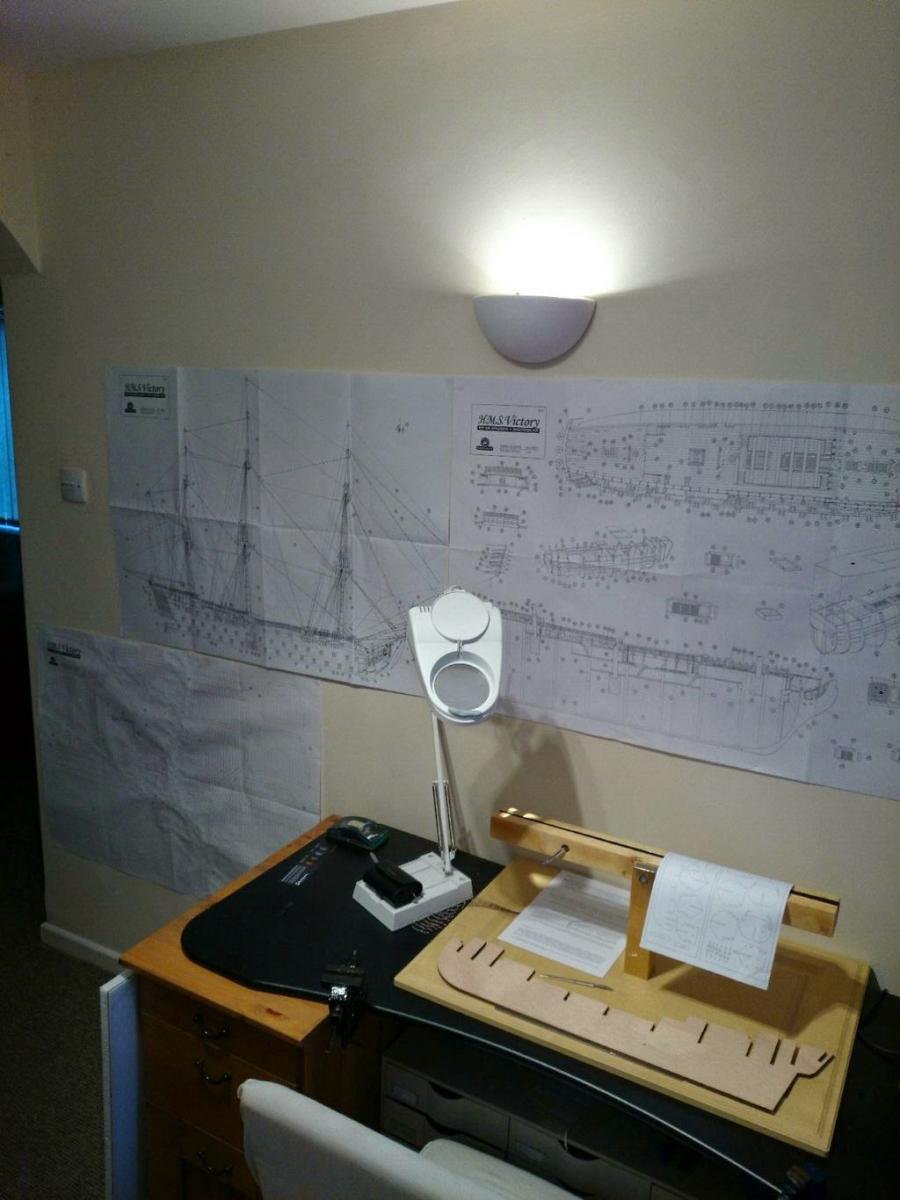
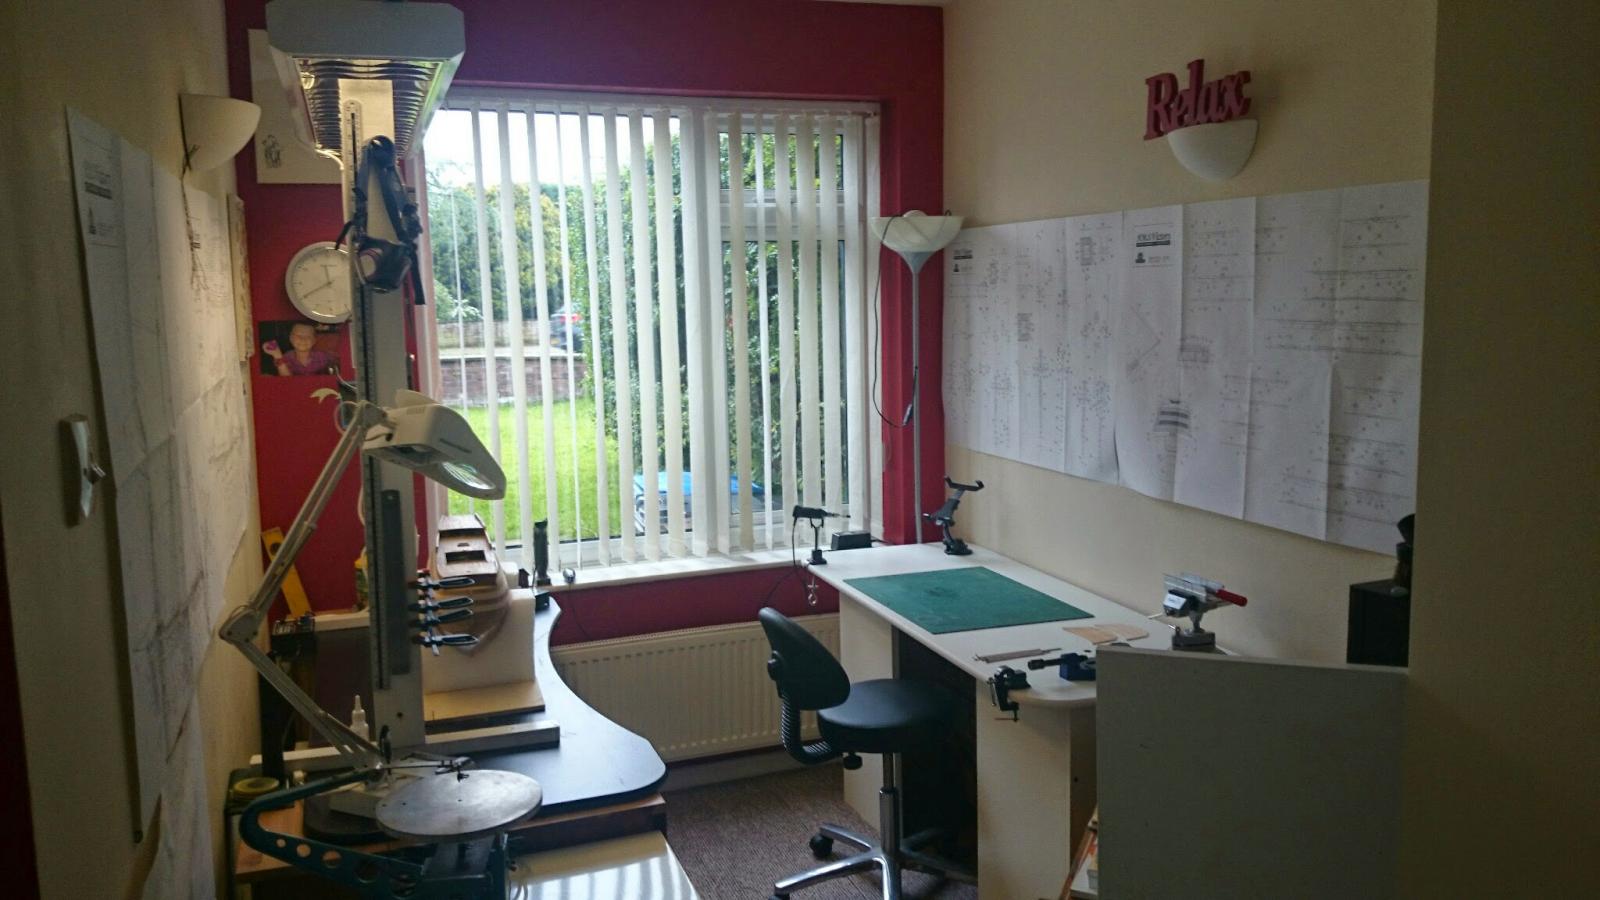
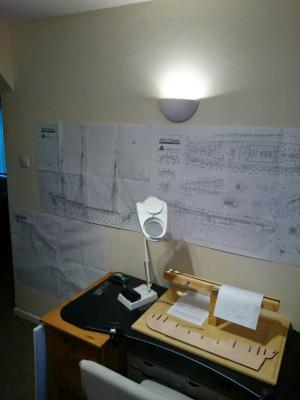
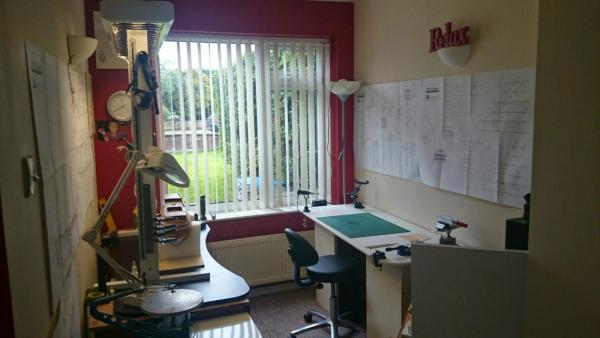
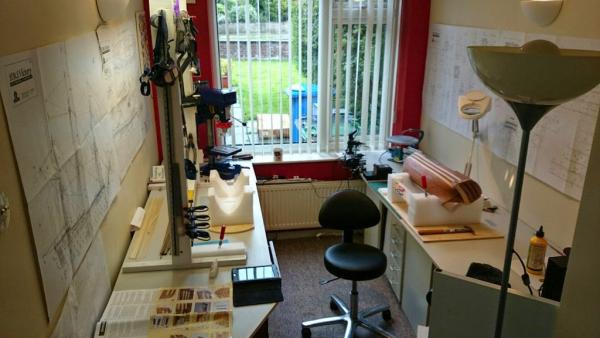
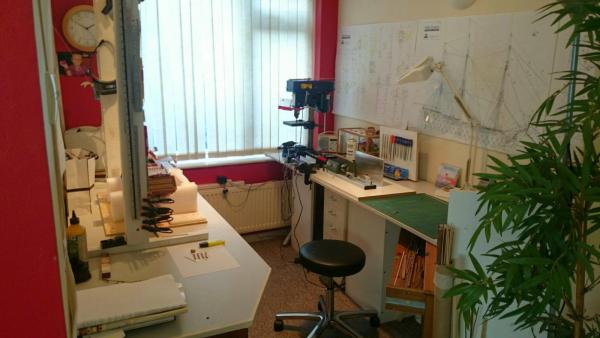
Just for Fun I thought I would post my building table from the start of the model arriving, March 31st 2014 until present da. When the Mrs said what do I want to fill in the gaps when she is working some evenings, ship was it, never built one and to be honest didn't know I coul.


- 708 replies
-
- 2
-
-
- victory
- constructo
- (and 1 more)
-
Just for Fun I thought I would post my building table from the start of the model arriving, March 31st 2014 until present day. When the Mrs said what do I want to fill in the gaps when she is working some evenings, ship was it, never built one and to be honest didn't know I could. I have got quite deep into this hobby now and committed myself regards some gear I've upgraded to help along the way. Unnecessary, maybe, to the wife, much NEEDED, you understand.
- 708 replies
-
- 1
-
-
- victory
- constructo
- (and 1 more)
-
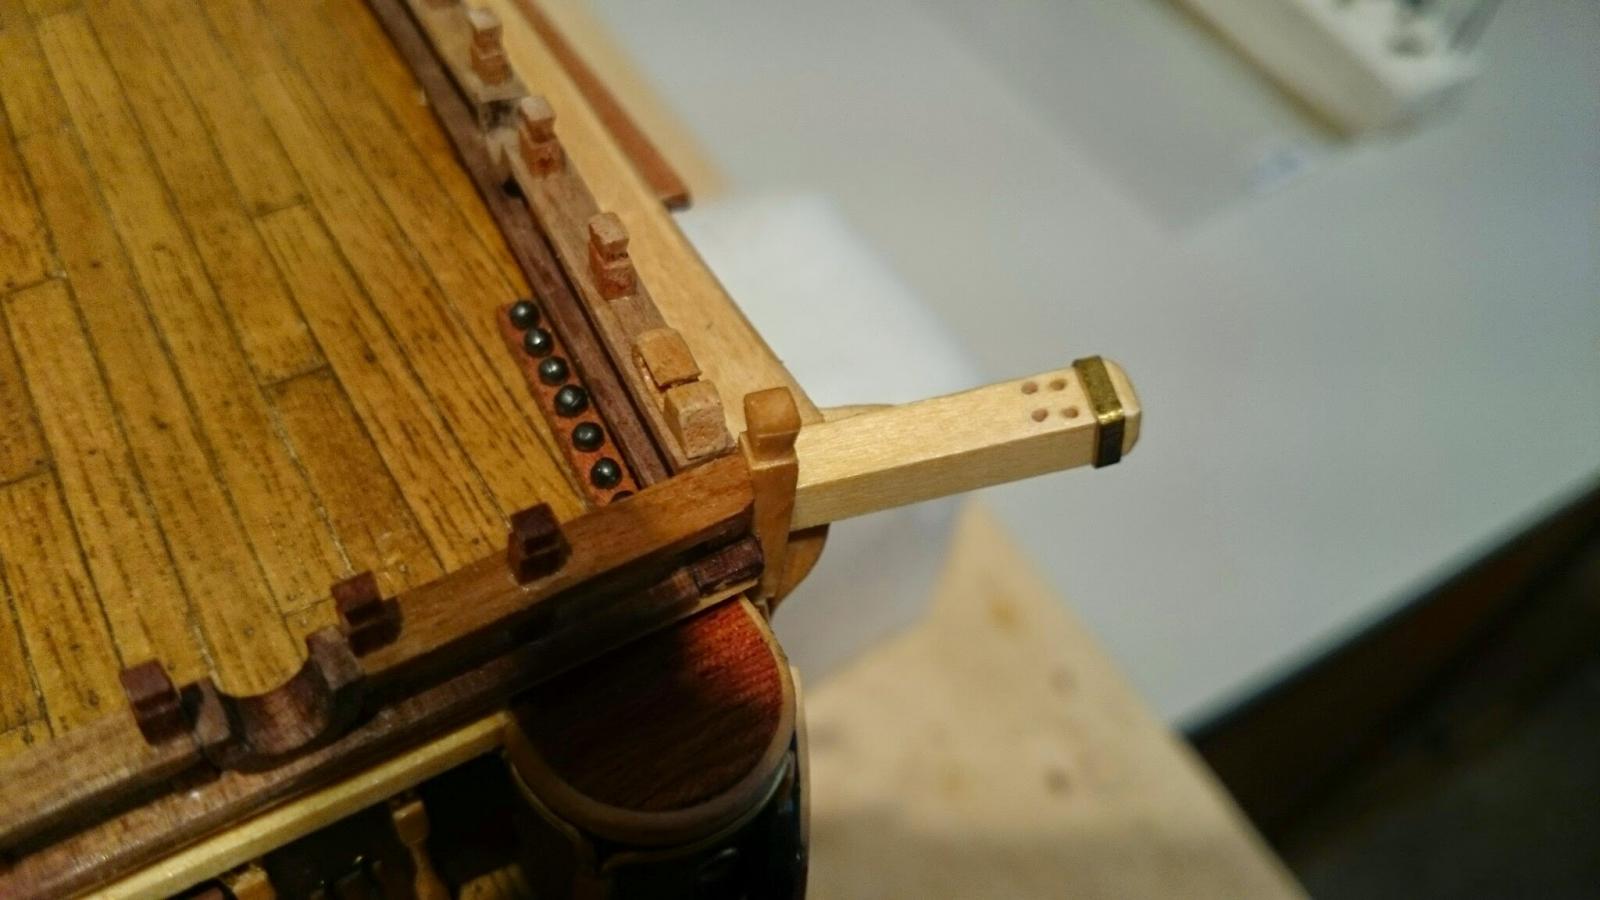
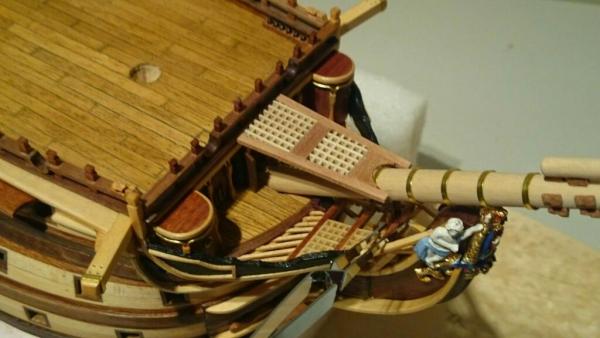
Completed all four davits, just the hinges to make prior to refitting (kit just instructs to glue but the real ship has hinges to swing in the boats), also made the gangway for the bow, just the holes to cut for the rigging to pass through, talking rigging, the bowsprit has ropes which secure it in place, do you seasoned builders instal the bowspit and subsequent ropes prior to the gangway as building her and then adding such rope would be very difficult to access with the gangway in place.

- 708 replies
-
- 4
-
-
- victory
- constructo
- (and 1 more)
-
Cheers Dave, hope your getting sorted, privately, thoes gun ports are very repetitive and time consuming especially the frames and there's 104 of the things but I'm sure you know this. Oh and there is the hand rails to come.
-
Well, I've done it again, pulled off previously thought to be finished work, the life boat davits are a little more detailed than I had anticipated and a quick look in my reference book had me changing them. I had seen them before but completely forgot, I'll learn.

- 708 replies
-
- 2
-
-
- victory
- constructo
- (and 1 more)
-
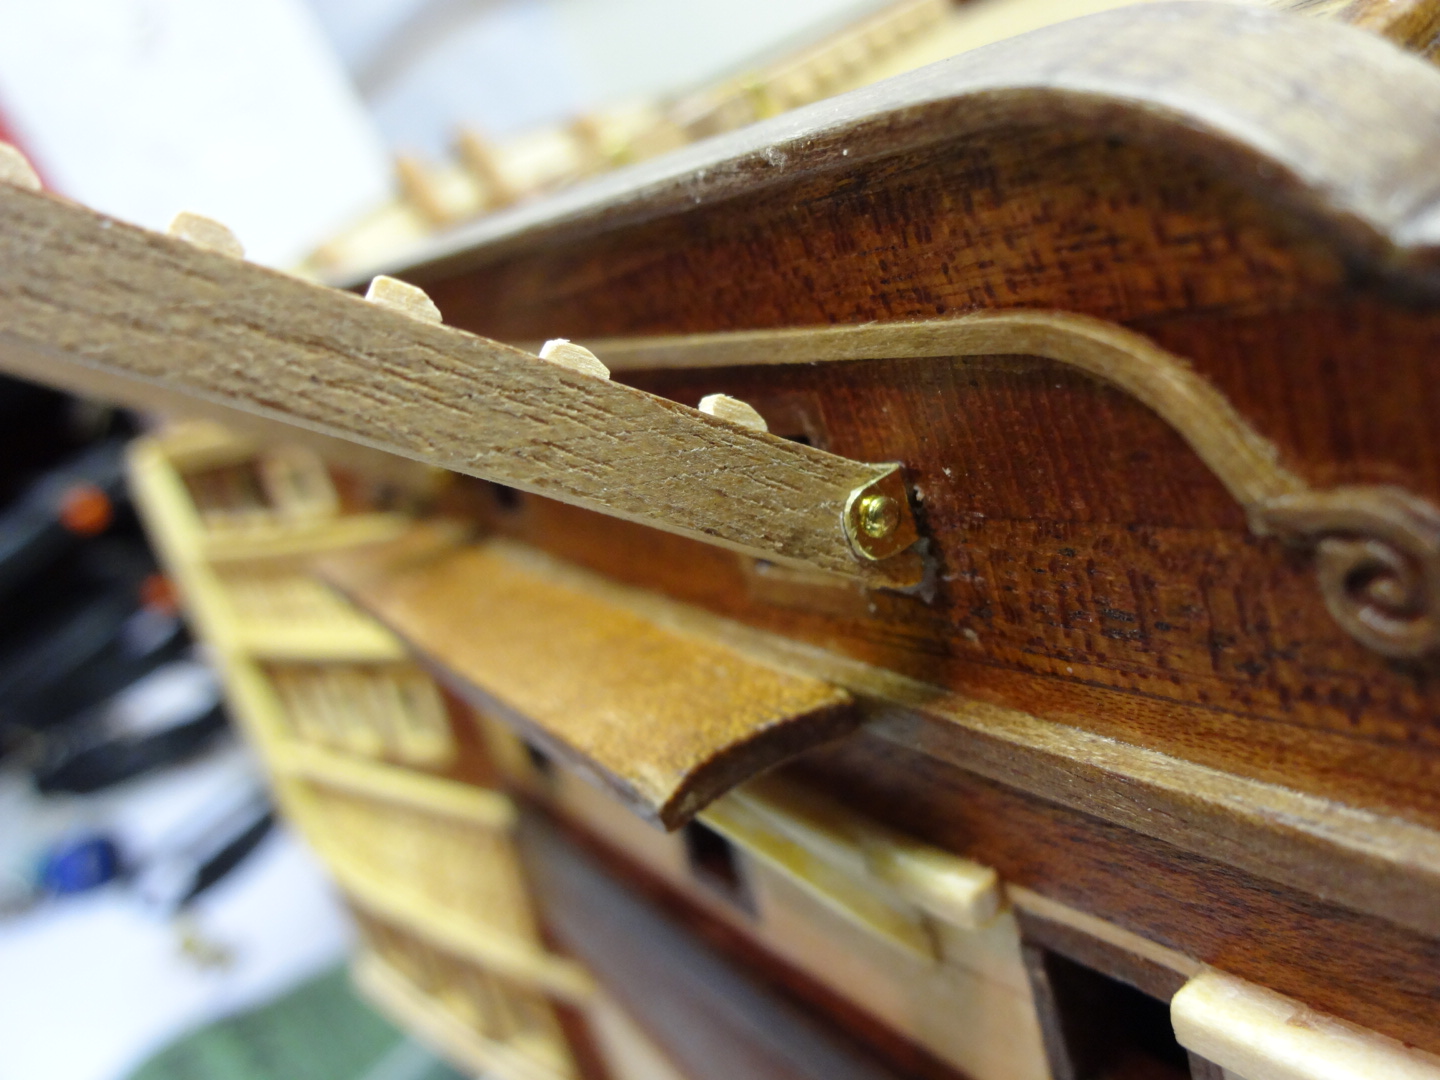
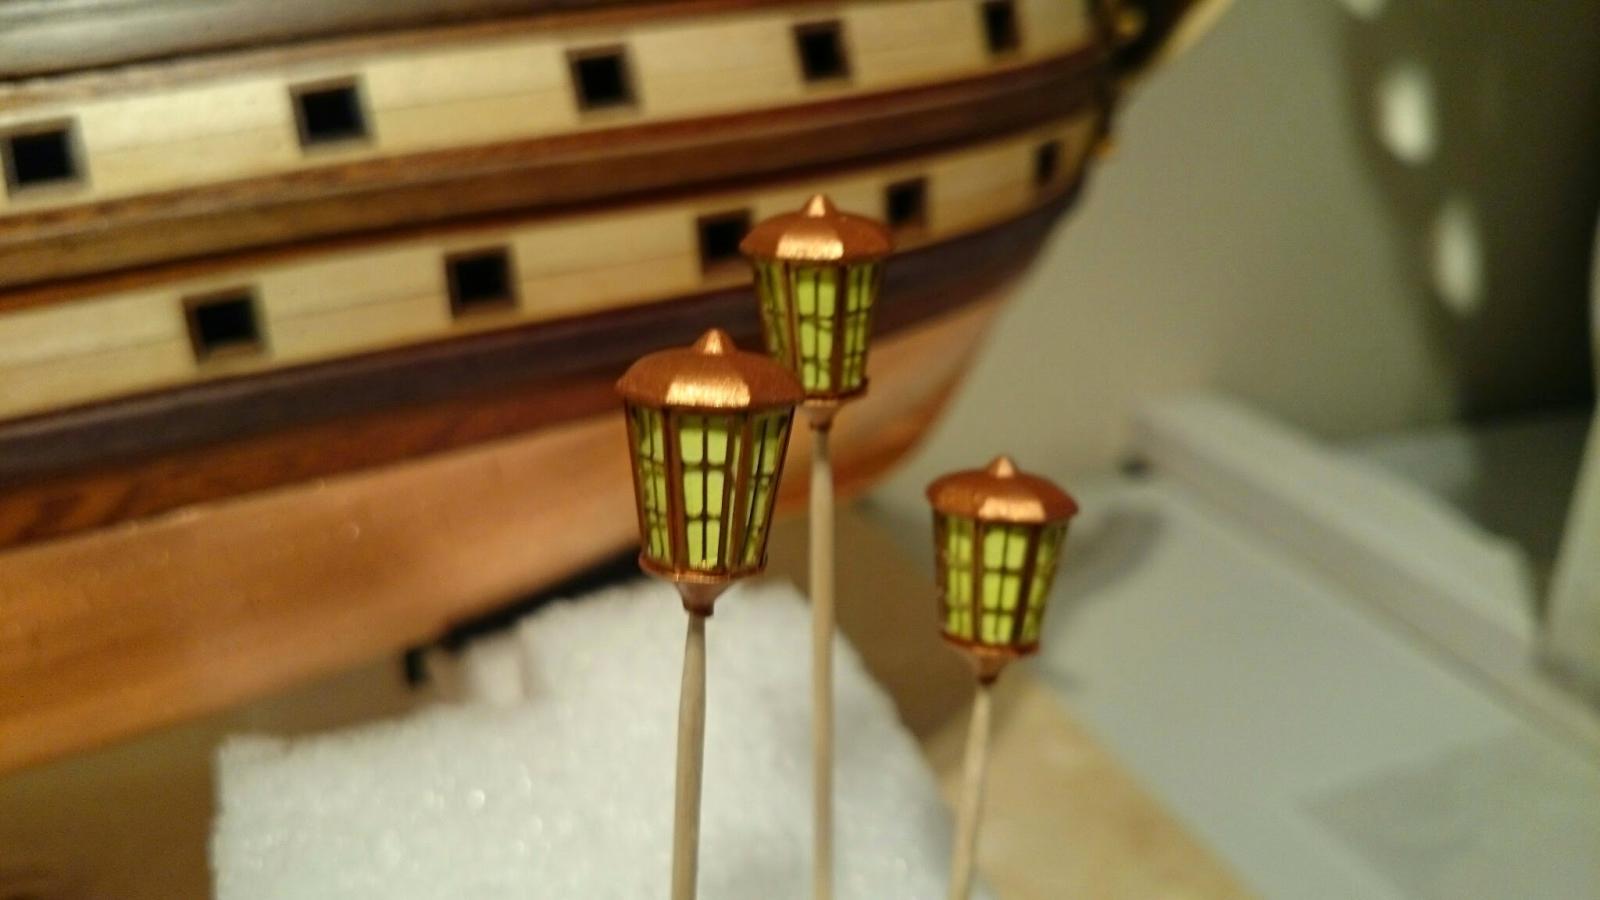
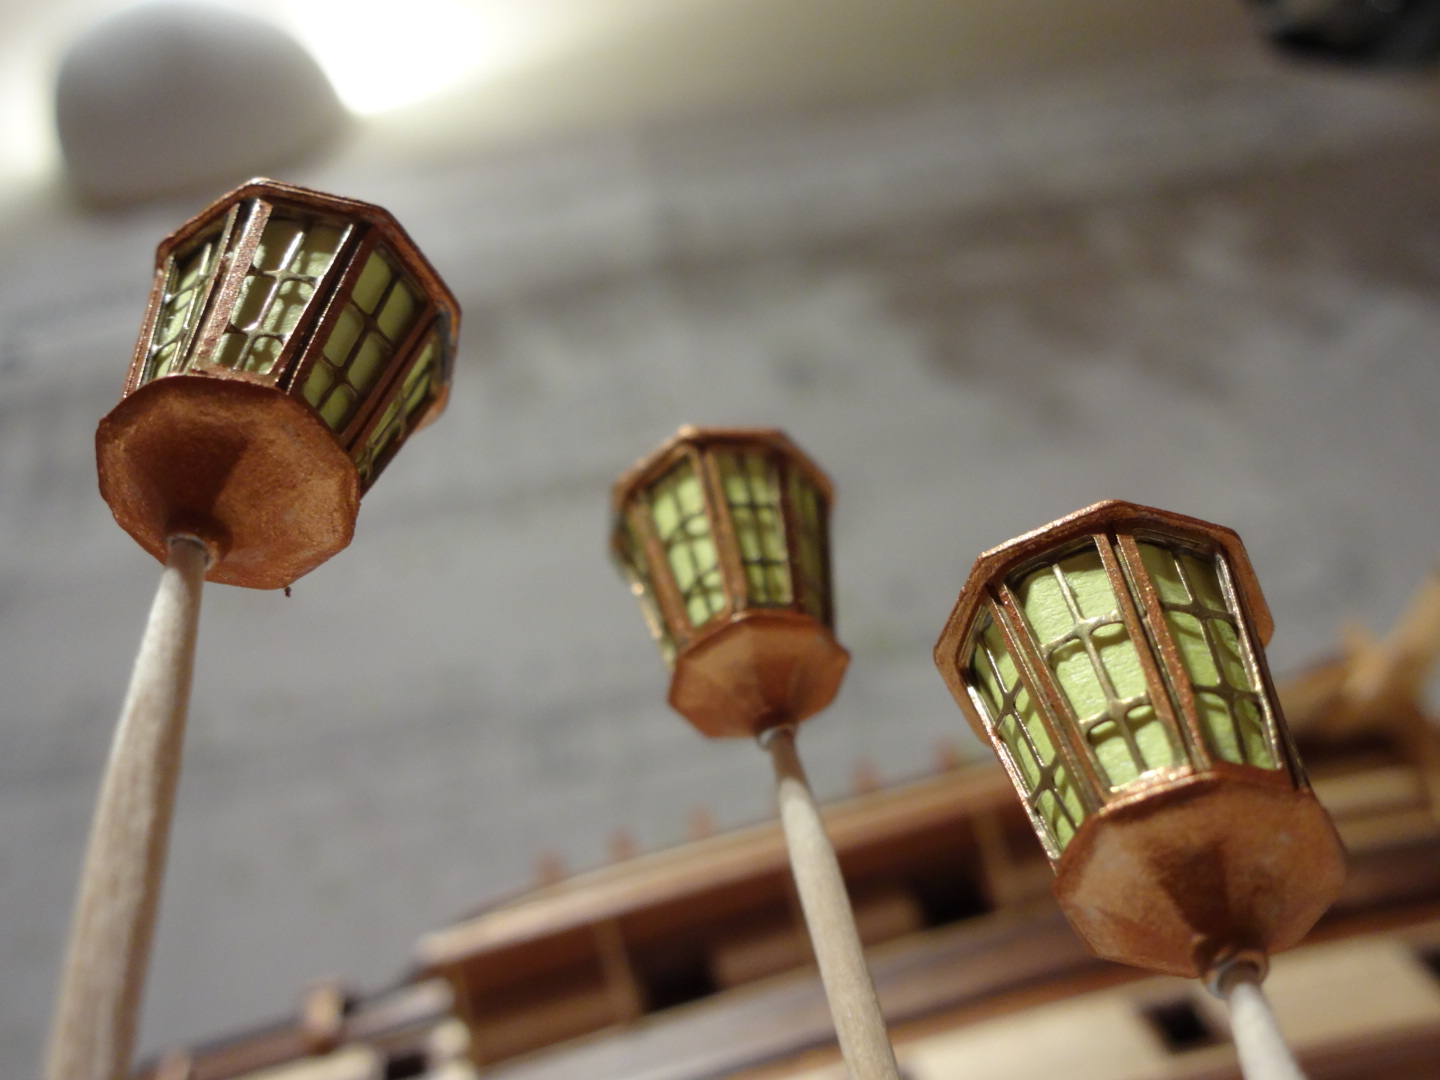
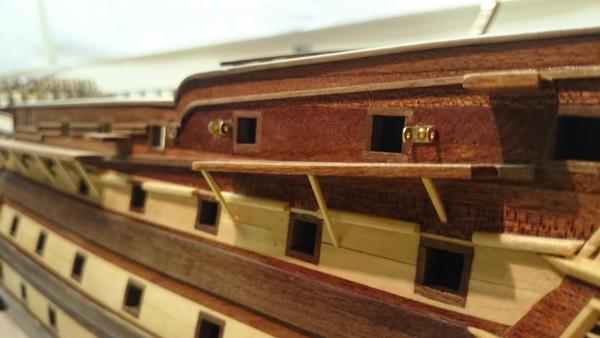
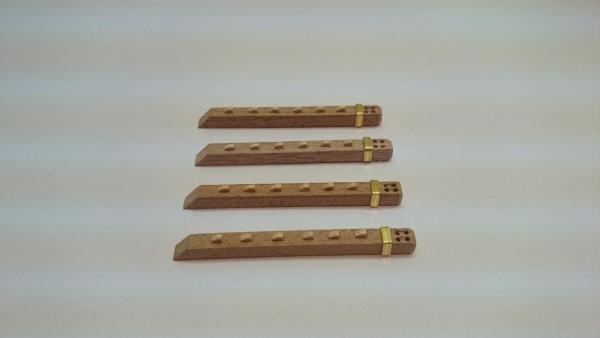
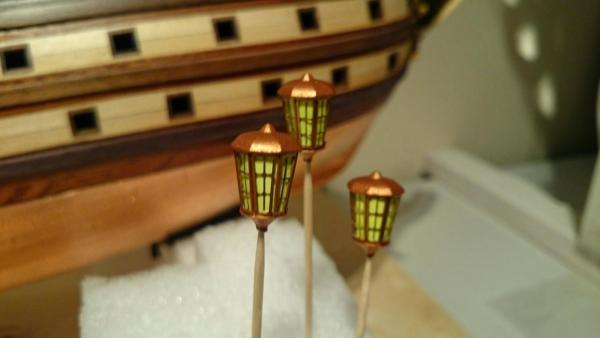
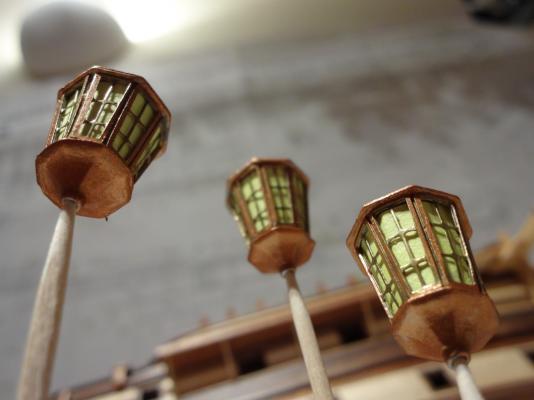
Well after my sails, I have spent a bit of time adding some extra detail to some already completed work, the victory has bands around the davits for extra support and prevention from splitting but the kit didn't. I added these as it looks better ( I think) and being a natural wood kit I opted for brass. I have also been prepairing the 3 lanterns which hang around at the stern, having tried the blue inserts I actually prefered home made yellow, so yellow it is. I have finally sealed the hull from my fingerprint attack and finally got the effect I needed. Oh! anyone whom is following my build and building this kit, do not think the lifeboat davits in section 108, item 209 which are 44 mm long and only have a 4 x 4mm footprint will stay there because you are told to glue them on. Yes initially they will happily sit there alone for years on end, but for us that's not the case, we have to swing a lifeboat below them and the rigging this involves, thats without the odd hit with our hands. My solution was to drill a 1mm hole through the bottom and through into the hull and insert a pin, I used the kit supplied 1mm wire for this as its stiff enough, counter sink it and bingo its not noticeable and far stronger than glue alone.


- 708 replies
-
- 4
-
-
- victory
- constructo
- (and 1 more)
-
Yeh I should have painted scrap first but thought, varnish, how difficult can a clear varnish be, don't get me wrong I've varnished many things but not mixed woods. The satin should really dry satin, hence the name, what ever applied to otherwise we may as we be glossing, matt seams to be ok whatever applied to but a huge difference between the absorption of the two types. I'm finding now to get a deep colour I'm going satin base (oil) followed by the matt (Water) based. I was considering oil based matt but I'm sure I would be adding even more issues. The water based varnish is not easy to apply as it has a tendency to froth like soap. My advice, go oil
- 708 replies
-
- 1
-
-
- victory
- constructo
- (and 1 more)
-
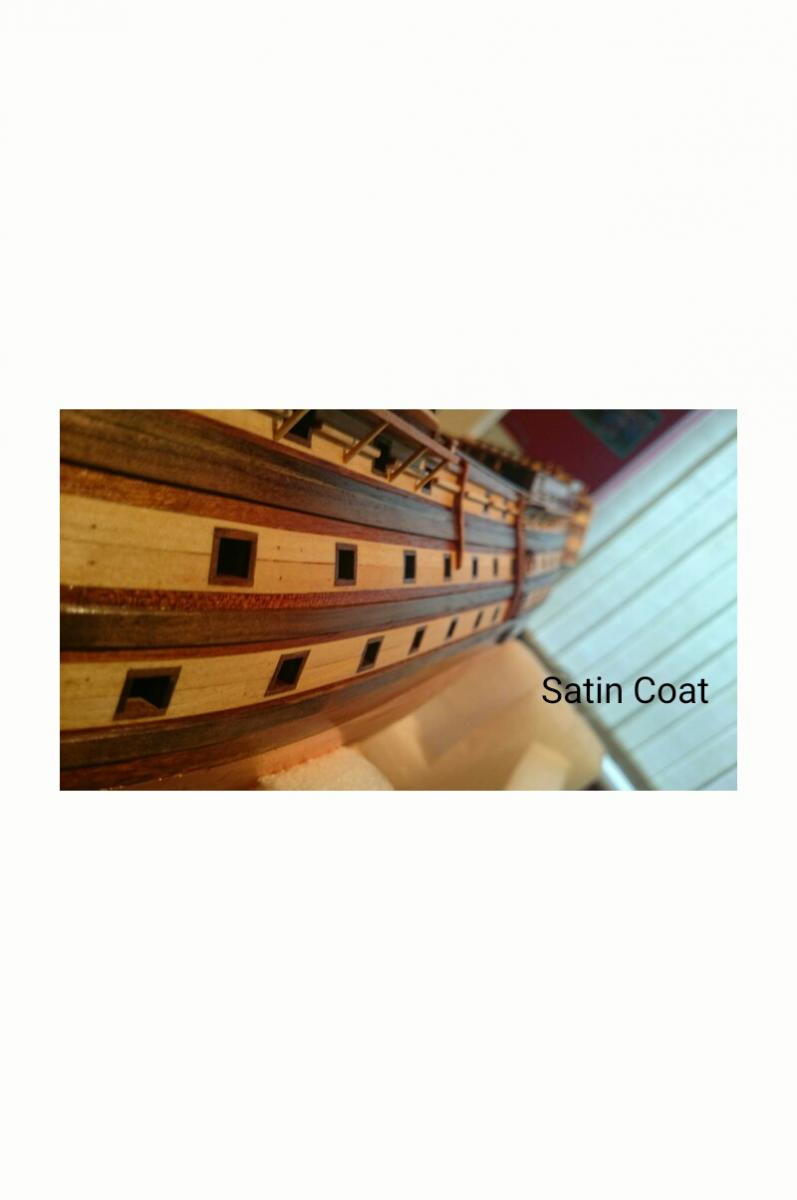
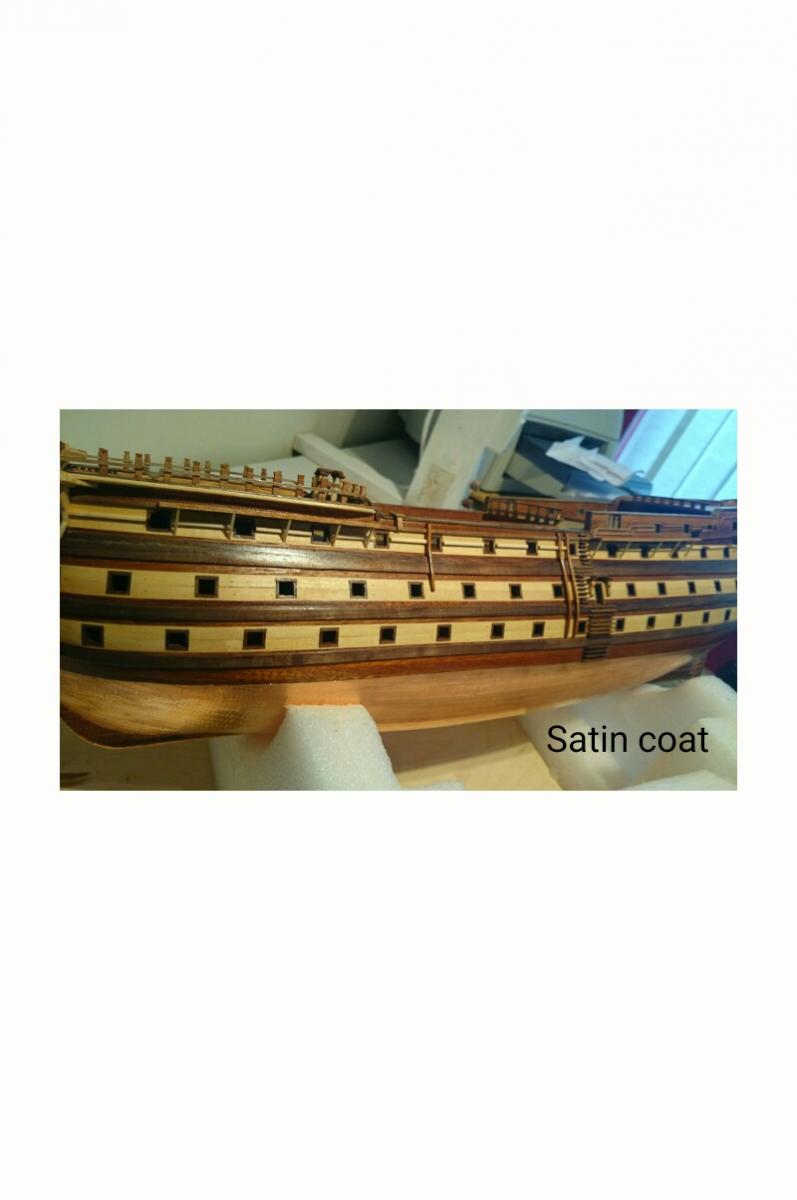
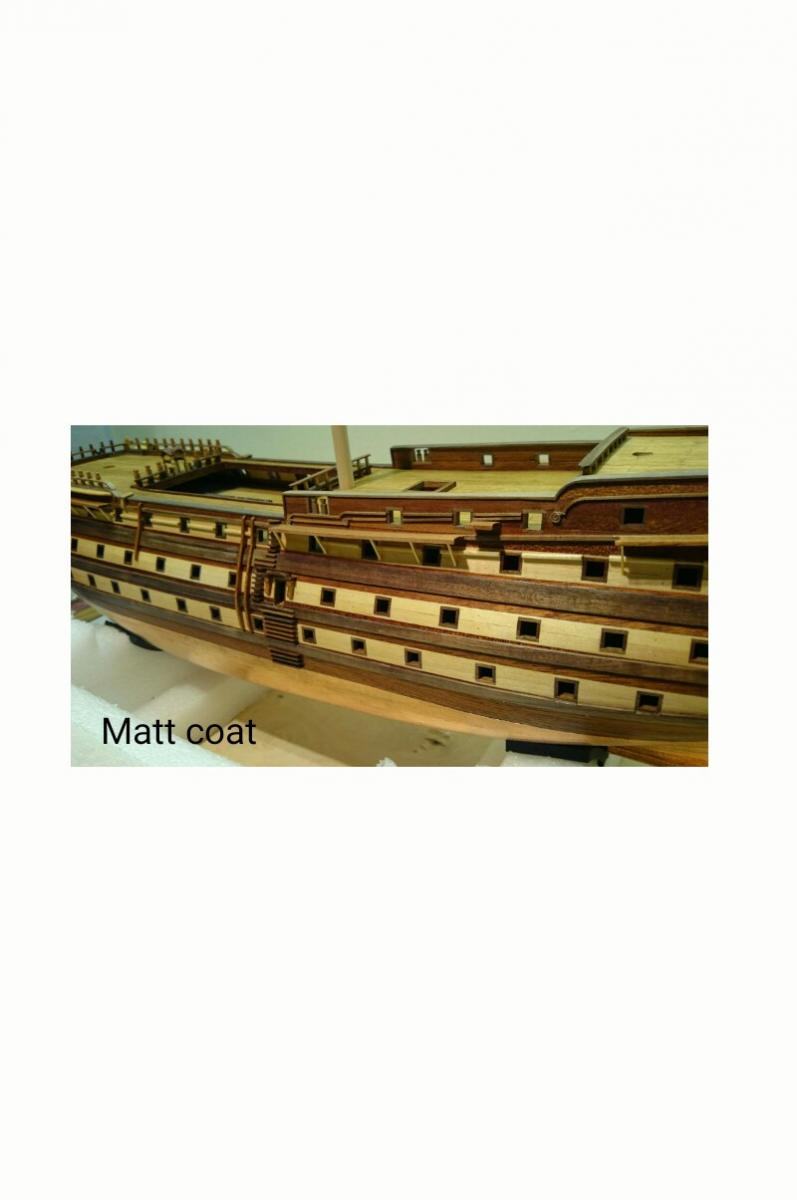
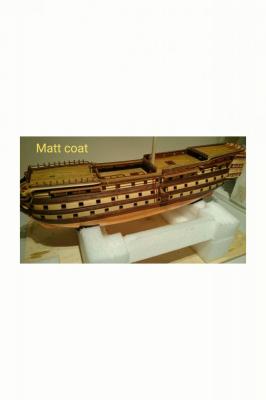
Wow! no post for a while, varnish, yep that time as come to lay some protection on. I went satin, middle of the road rather than gloss or matt, OK so I went oil based, not by choice, I just arrived home with satin and I got oil based. Mixed thoroughly and I Painted her ( one side initially ) and she was initially shiny but after the allotted drying time she was part gloss, part satin, yes a mix, I'm guessing due two different wood types absorb differently. Nightmare see pictures, I then purchased matt and again not really looking I got water based sanded her and painted it on as a second coat and great all was looking good. I then used the same water based matt on the other side, great, well not so great. It became apparent that the oil based satin absorbs into the wood different, well ( better deep colour really ) than the water based matt did, so I stopped, this then meant I had to satin ( oil base ) her again to get the depth, sand and then matt water based over the top, the pictures I hope show this. Newbies go matt not satin and try oil based if available, save yourself the worry off the ship looking, well, horrible, all this is why post ceased, the ship in a satin coat looked terrible, the pictures make it look an even shine but it was far from it.


- 708 replies
-
- 2
-
-
- victory
- constructo
- (and 1 more)
-
Dave, sorry to hear about your mum, no doubt stressful times and decisions your going through. Ship takes a back step at times like these.
-
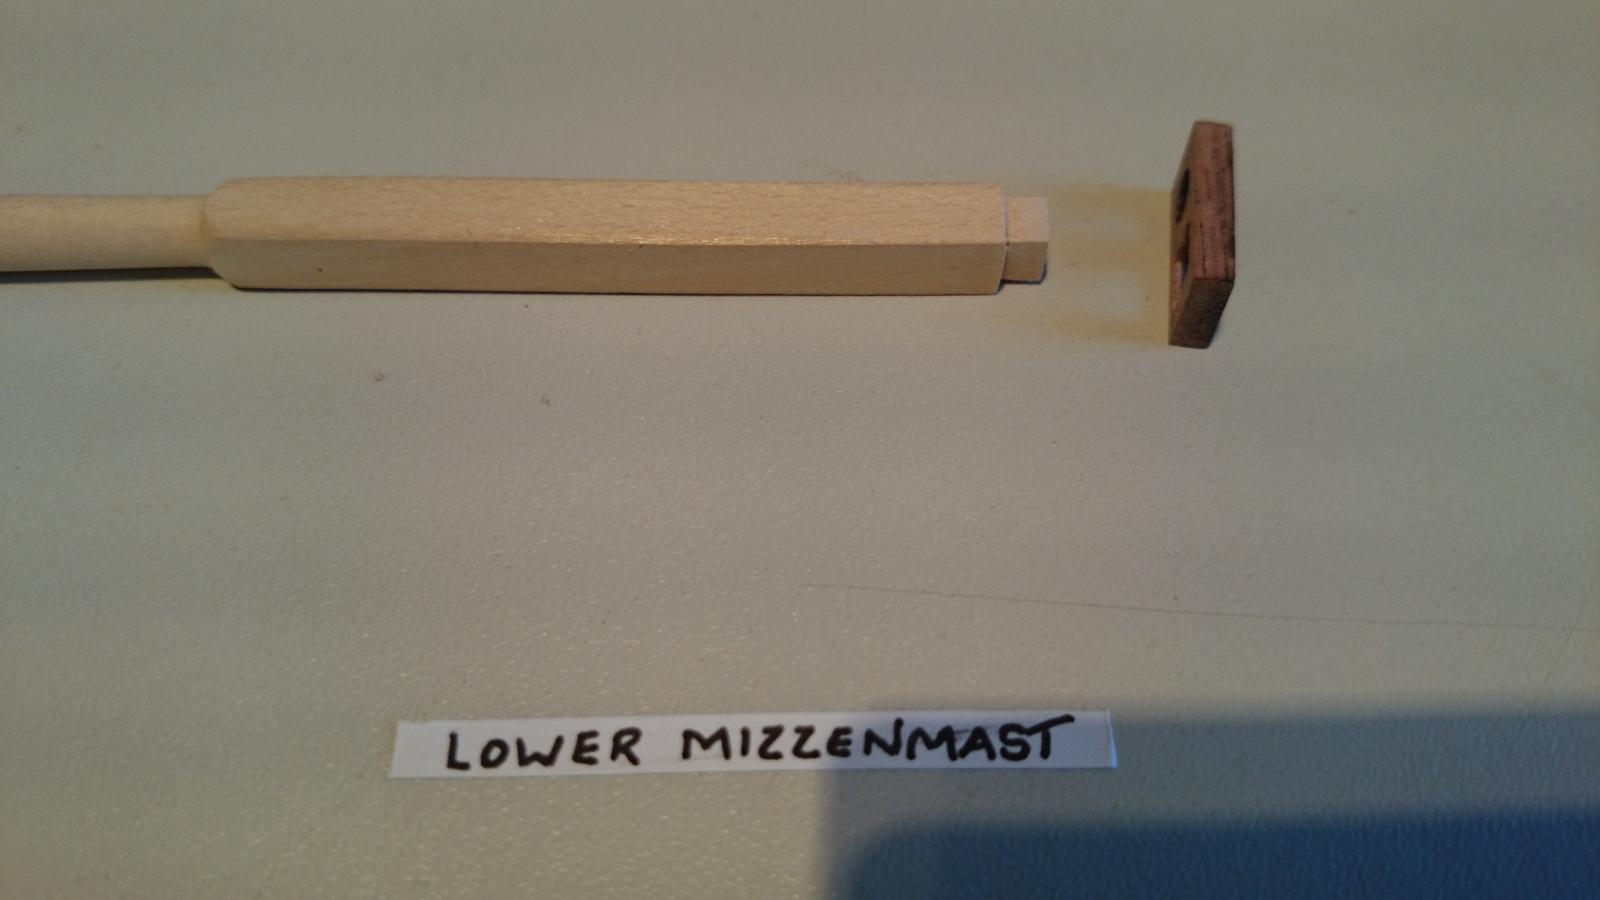
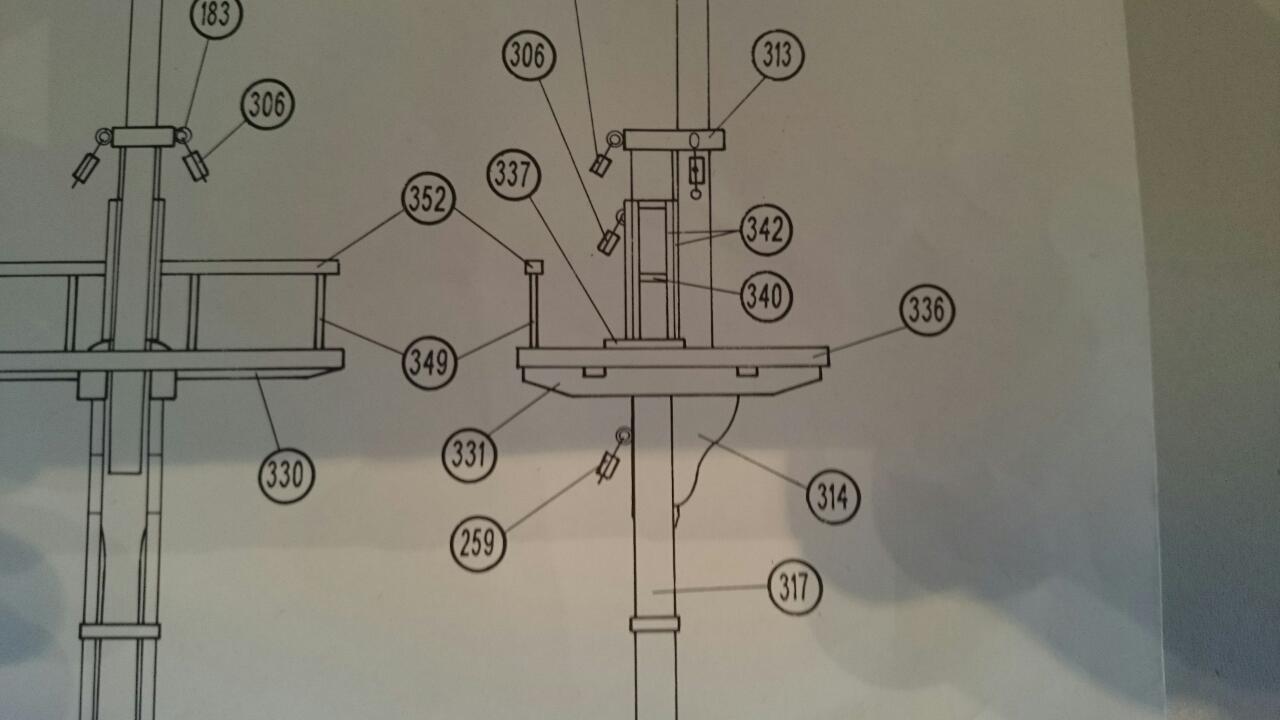
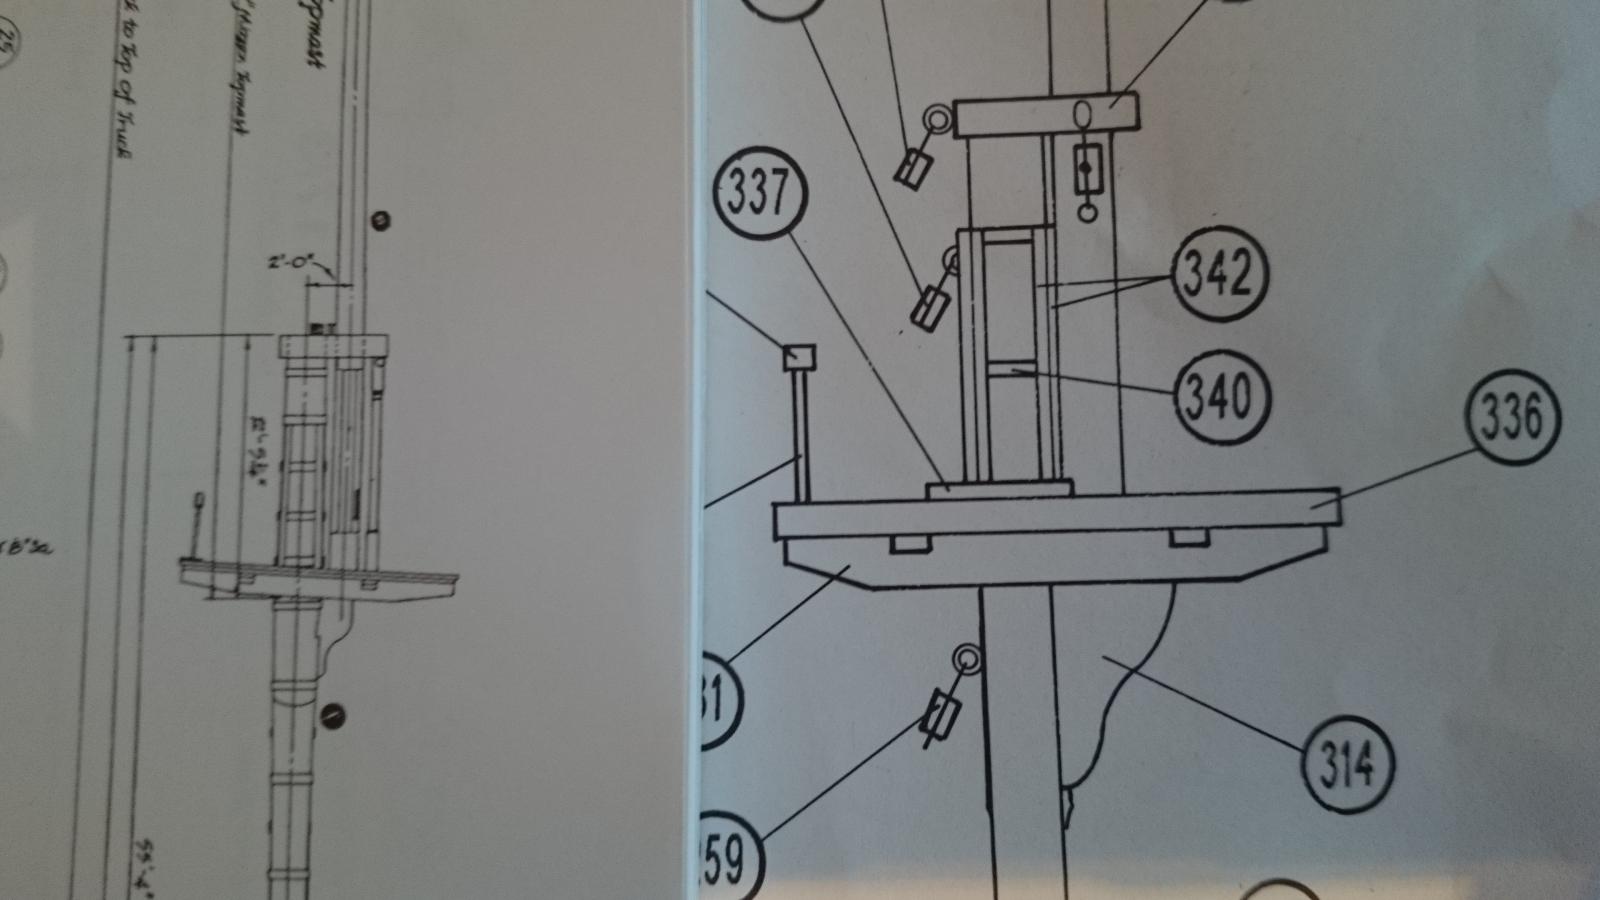
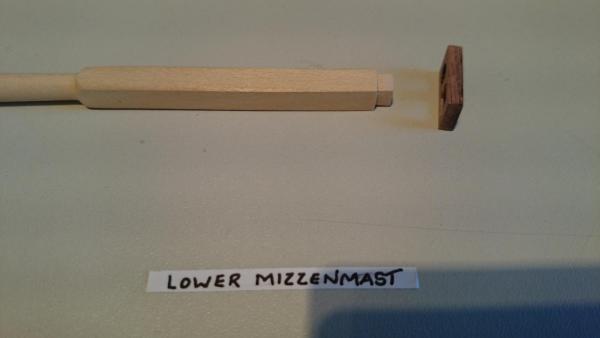
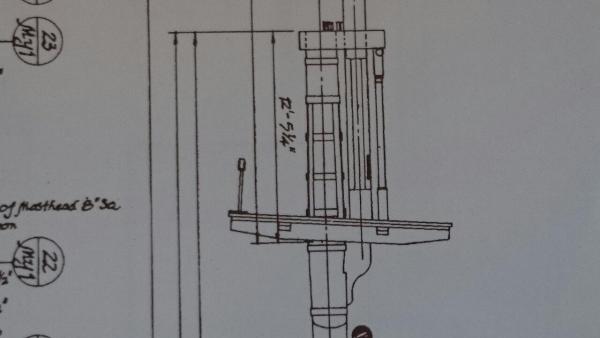
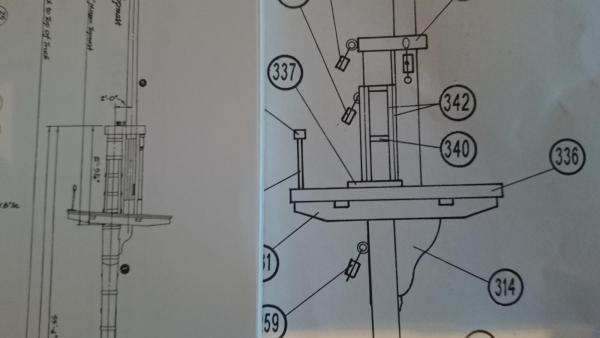
All three lower masts complete, I have noticed that the fores on the plans run perpendicular to the masts but on the real ship these run perpendicular to the decks, the latter makes sence as crew stand on these. See plan of the kit and the real ship. If I was to make the mast as per plans all nice and straight with the fores level, when the time comes to fit them to the hull / deck the fores would have tilted up, as the mast have a lean back when fitted.


- 708 replies
-
- 4
-
-
- victory
- constructo
- (and 1 more)
-
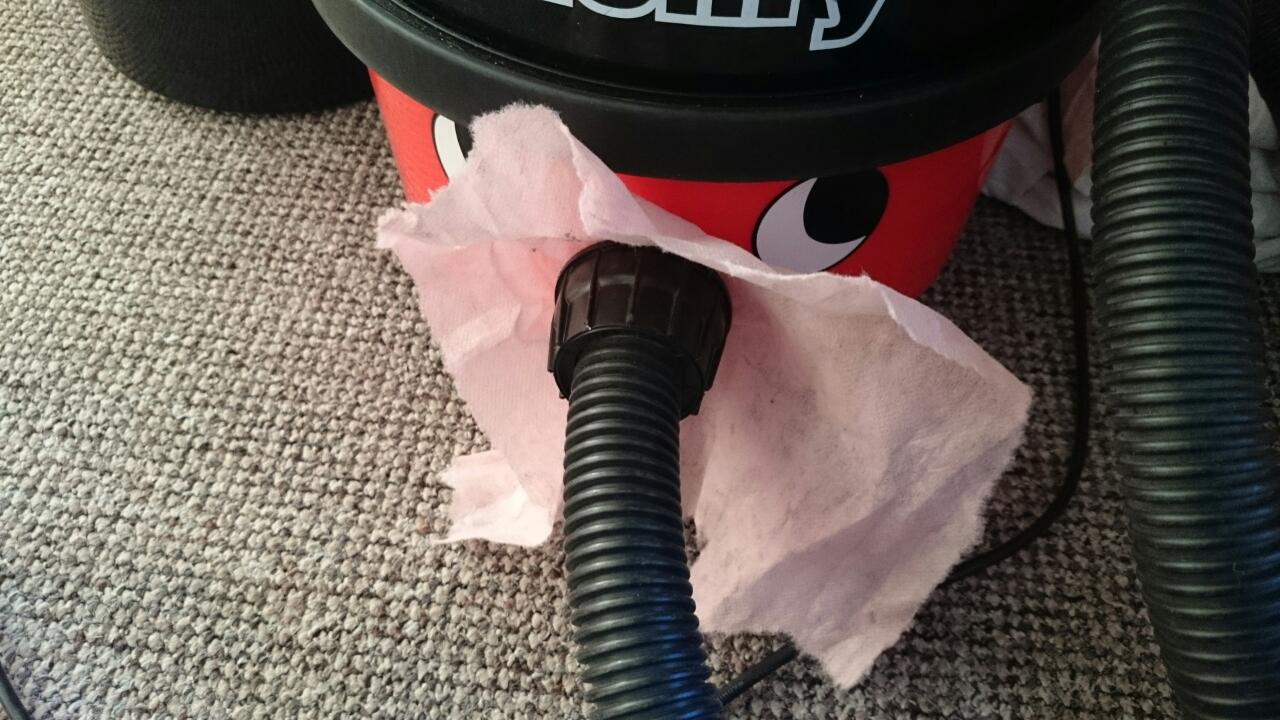
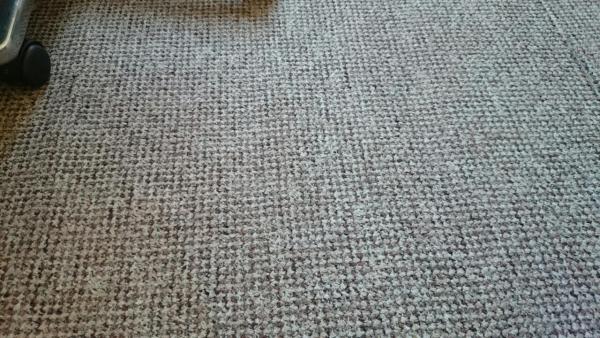
This is the carpet that resides beneath my feet as I build my model, probably the worst blend of wood colours I could have, I dont exaggerate when I say I've lost easily an hour looking for tiny parts I've prepped to fit. Well my solution, maybe others, get a hoover preferably Henry type ( best) and put a breathable thin cloth over the entrance to the hoover, make a well in the cloth and fasten the hose back on, hoover away and bingo you will find the part, without ( and we all have) cutting a full bag open. Hope this helps

- 708 replies
-
- 4
-
-
- victory
- constructo
- (and 1 more)
-
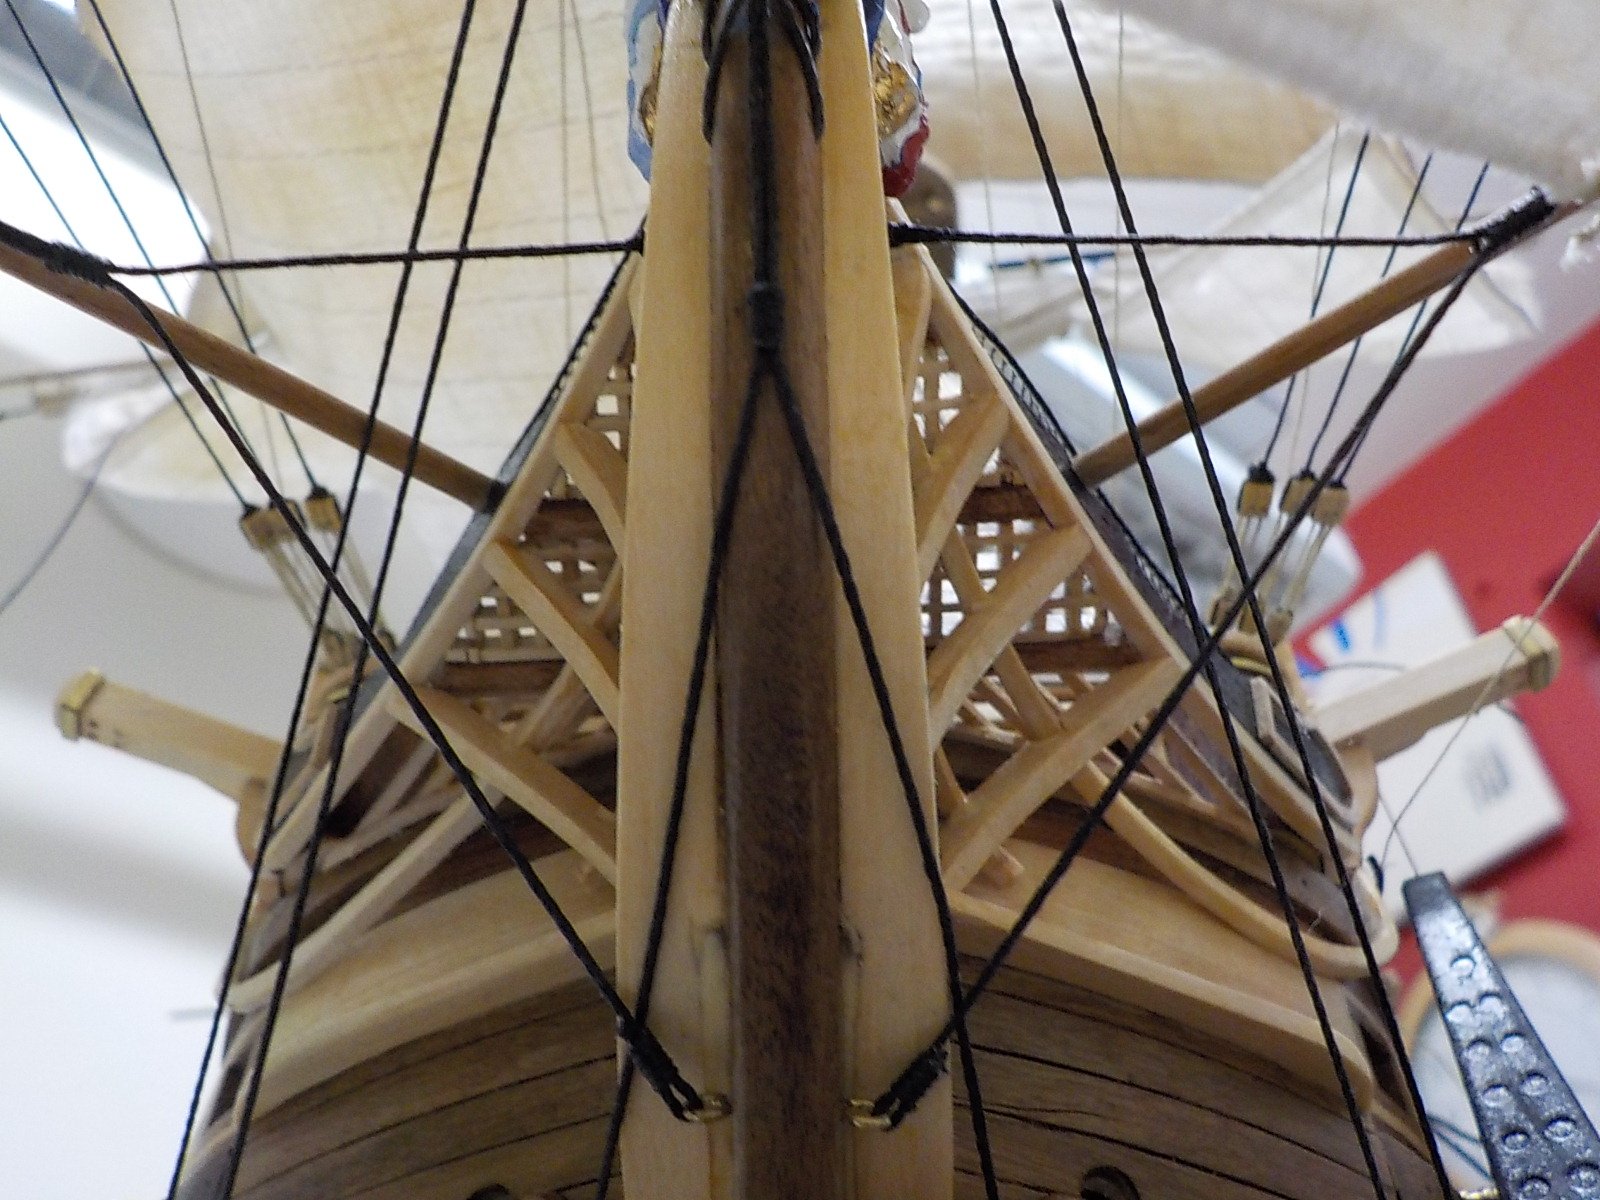
Fitted the trims around the egde, the wood behaved itself, all the inner trims need to be fitted, although I must get back to the hull soon and catch up to this point, just I find the masts an interesting part of the build. Not to mention I get to play with the lathe. I do find the laser cut (Sapelly) parts are a nightmare though, they have a black soot on them from the laser process which has to be cleaned off and it gets everywhere.

- 708 replies
-
- 3
-
-
- victory
- constructo
- (and 1 more)
-
Chuck to back stop 250mm which is adequate for us, also the job goes through the back of the chuck and out the side of the lathe. 10mm Max through the back which again is adequate. http://www.conrad-electronic.co.uk. these guys are the right price and service is great, the chuck is an extra cost, although the kit does come with collets. The self centering Chuck makes life really easy. My best buy for a long time.