HOLIDAY DONATION DRIVE - SUPPORT MSW - DO YOUR PART TO KEEP THIS GREAT FORUM GOING!
×

yancovitch
-
Posts
813 -
Joined
-
Last visited
Content Type
Profiles
Forums
Gallery
Events
Everything posted by yancovitch
-
 i'd make the colums....maybe make a mold of the white metal one, and cast in acrylic or whatever....i don't remember, but i think i painted them gold .....i always found that much of the cast metal was a pain in the a---.............wait till you get to the rails ...the stuff i got in my kit many years ago, wouldn't bend a smidgen ..........i got the acrylic liquid and powder from my wife who worked in a dental office...i used that a lot..................cheers................
 -
wow...talk about innovative!....................
-
appreciate it mike............thanks......through for now.......may post a couple shots when completed...cheers....
-
thanks rusty, not easy trying to live up to modelers like you .......
-
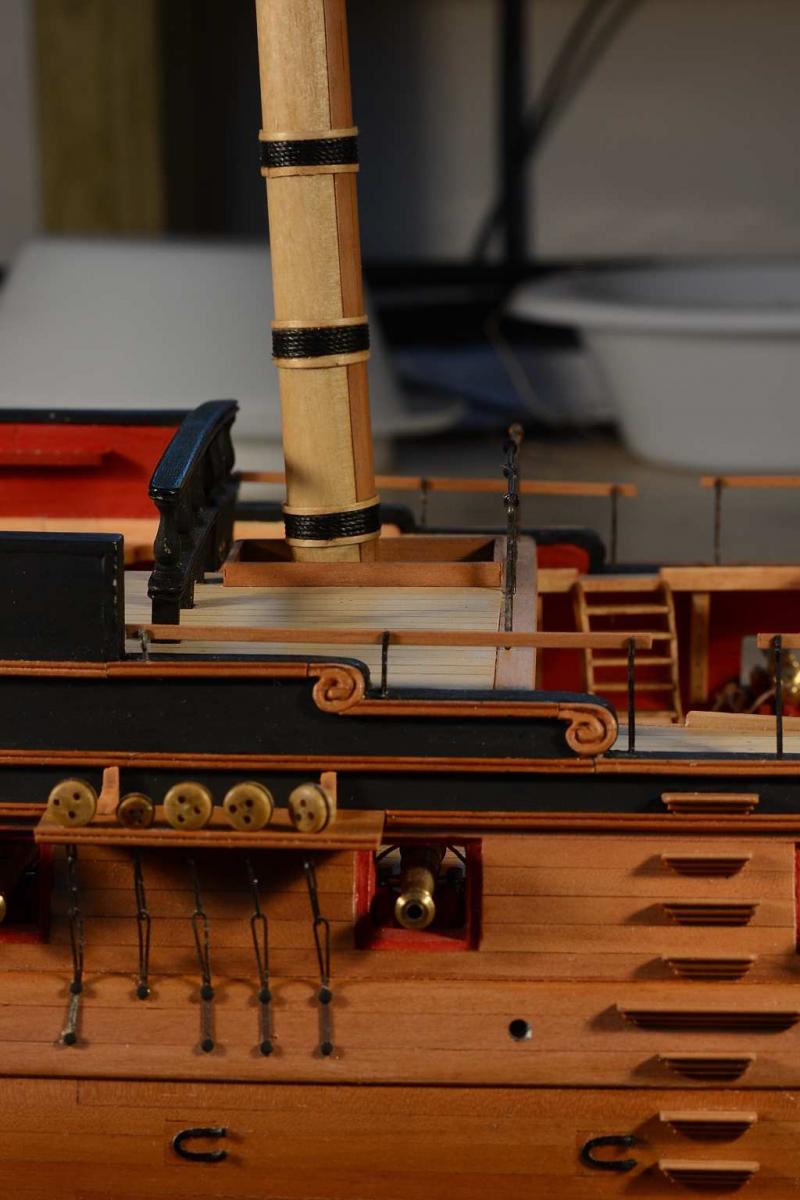
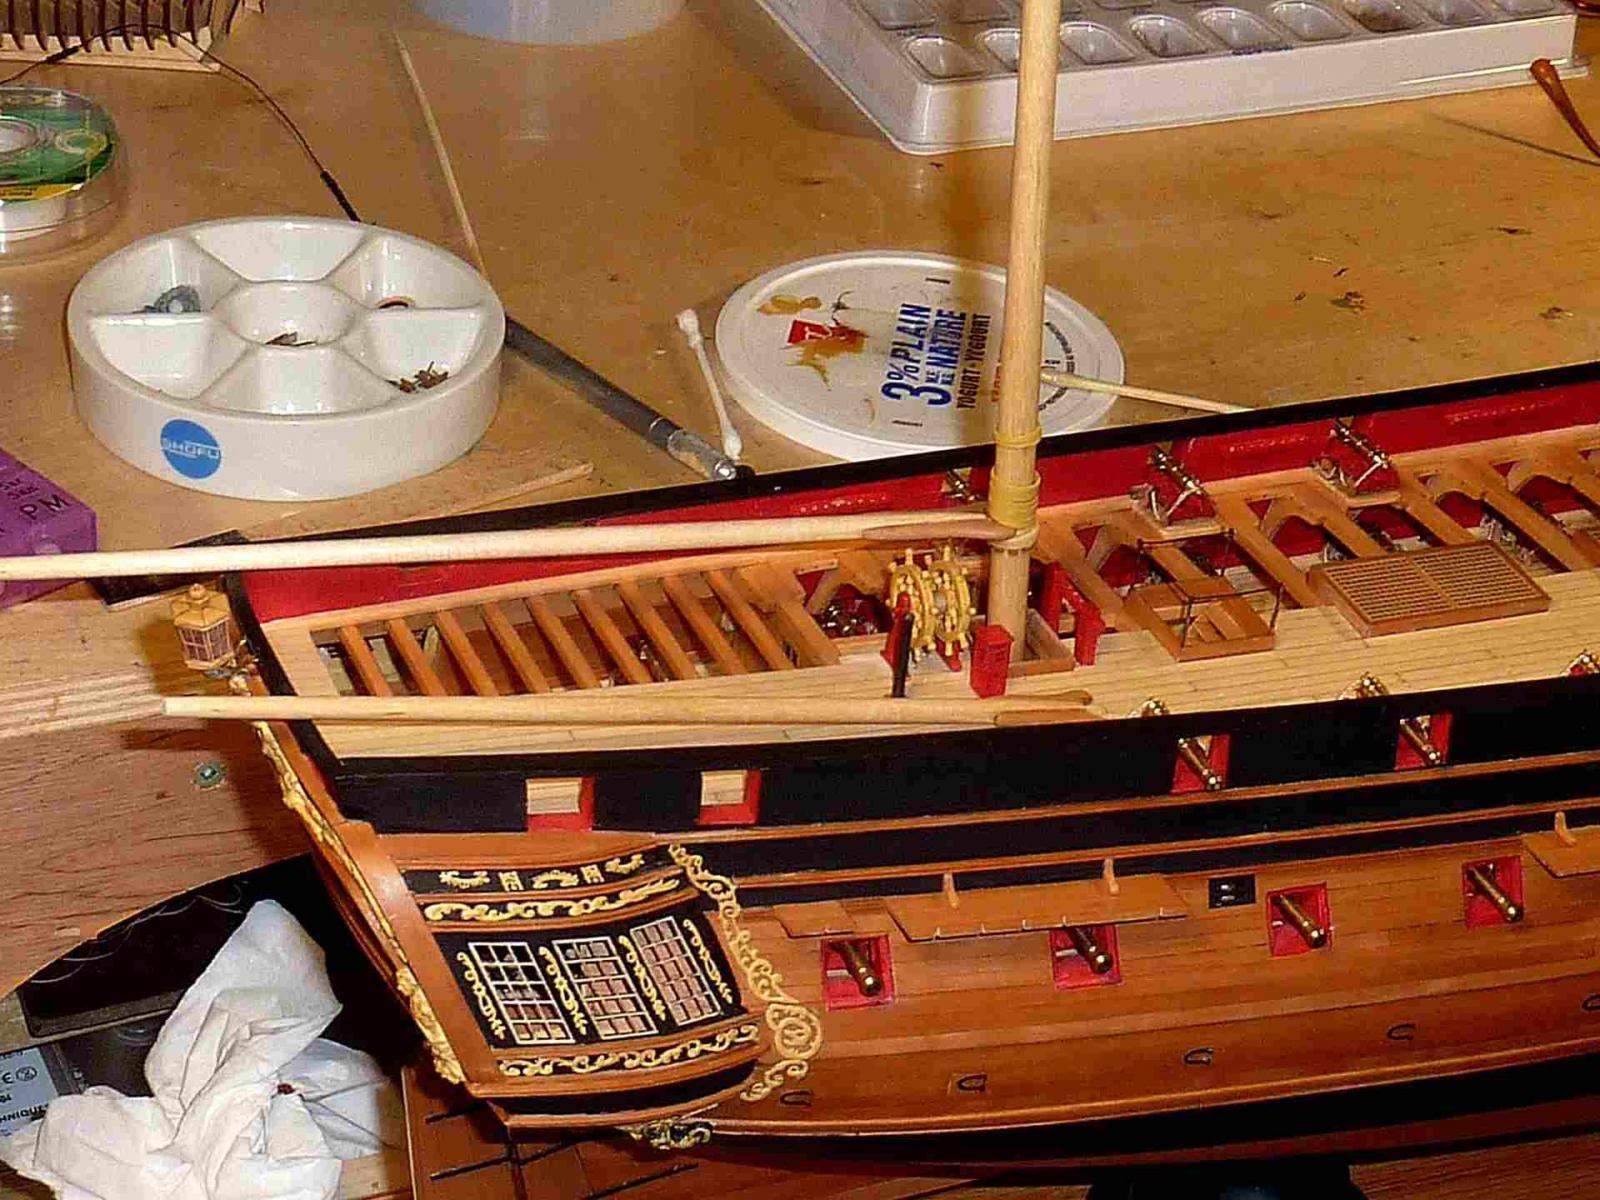
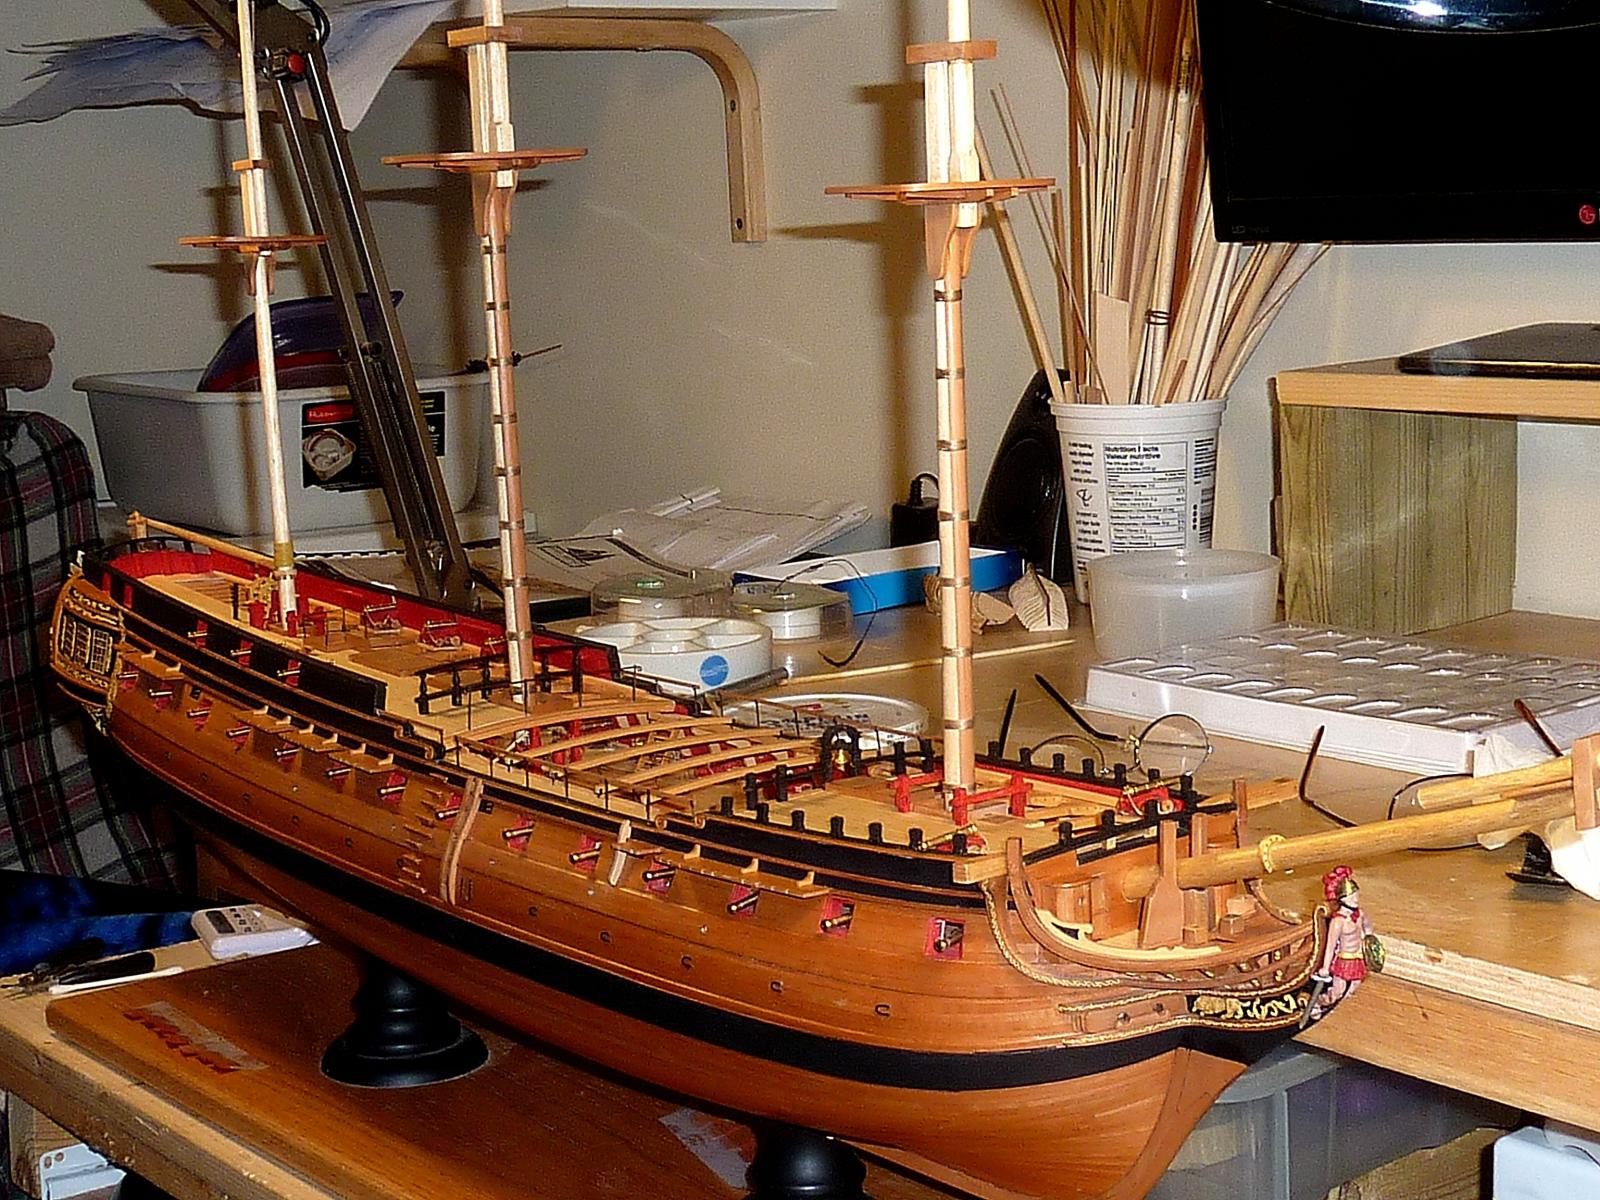
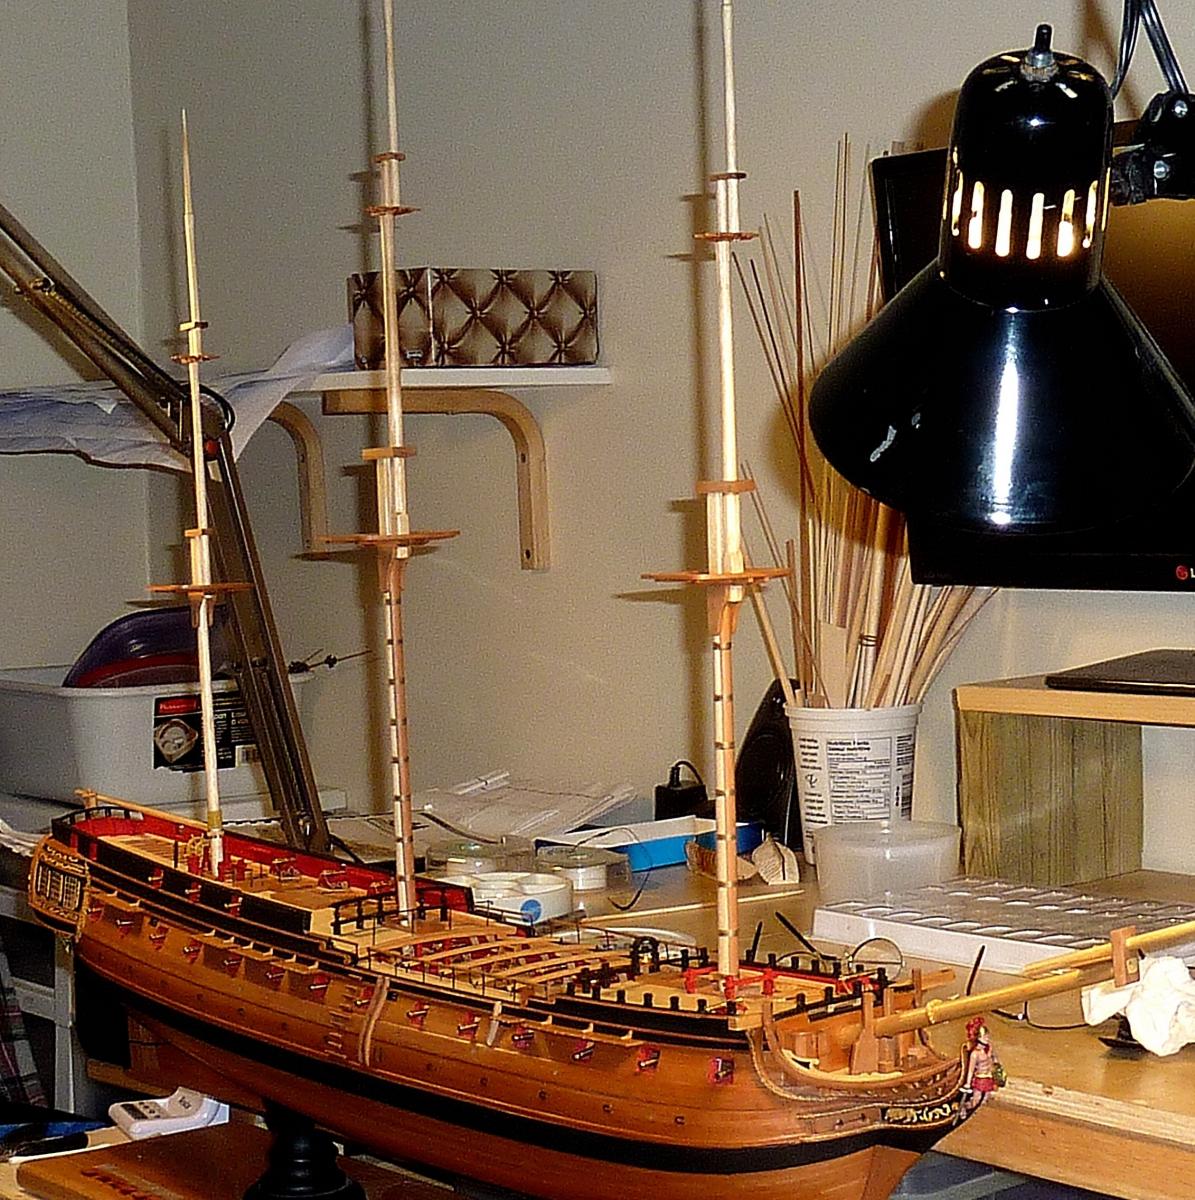
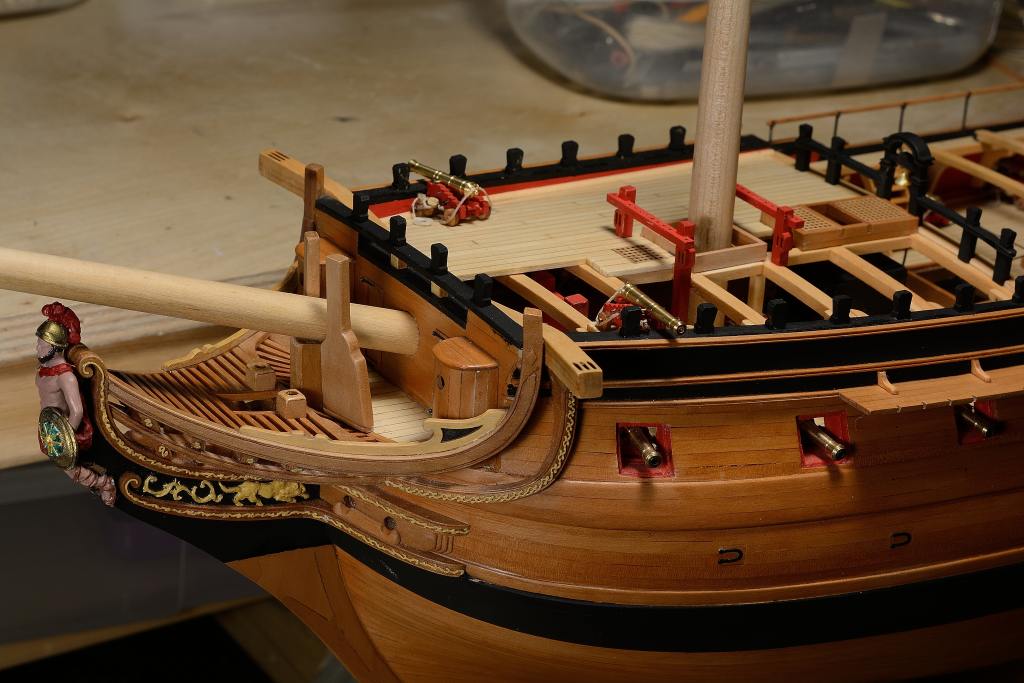
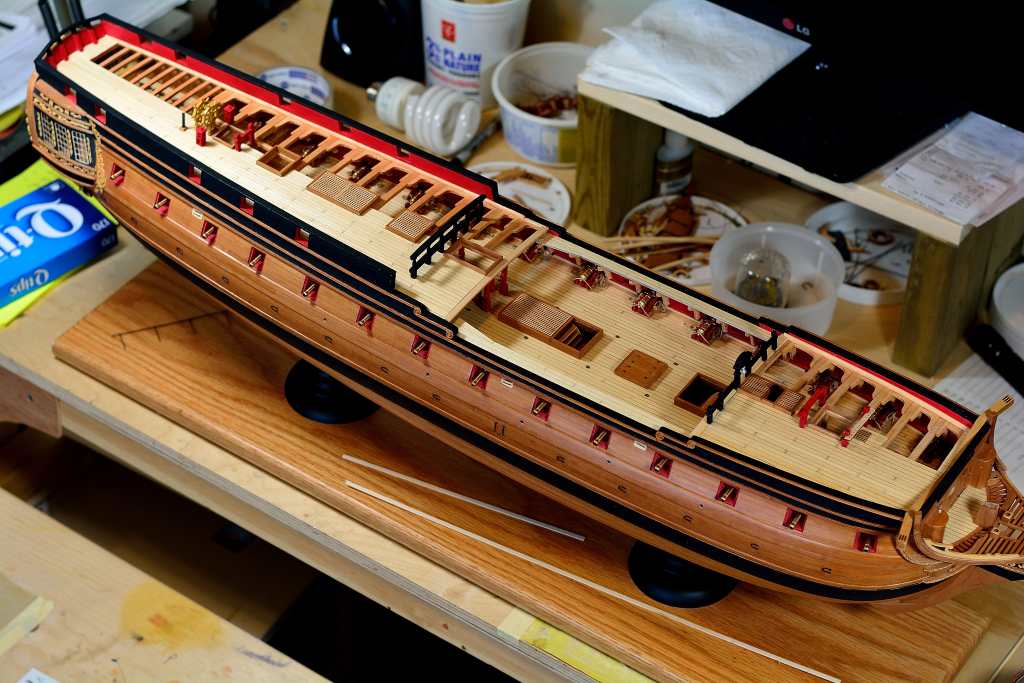
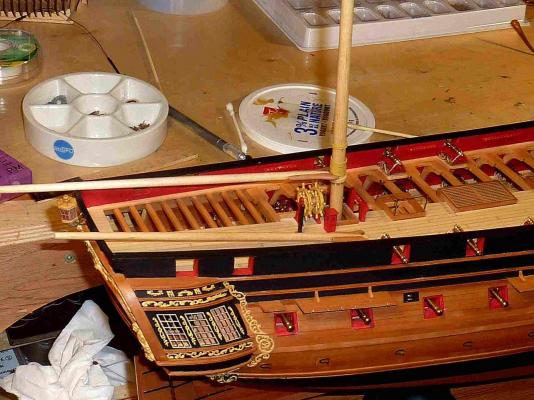
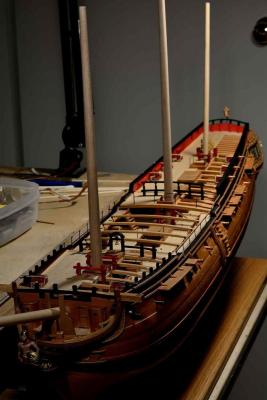
oh well.....thought i'd show improved wooldings with railwood added....rewound with black rope....used wire instead of middle links on the chainplates, as the sizes provided wouldn't fit...........yards basically finished and painted.....next the dread threads ............will still have a lot of fine finishing to do of course.sanding painting...cleaning up the moldings etc.......i'll know when it's the right time and i'll really enjoy it...............got the confed...glued to the stern...yuk....quite frustrating....three efforts......

-
hey...super.....glad all's ok with you, as augie seems to be having a bit of a rough time.....gee...ya got me wishing i had done the treenails ..........stern looks lovely........
-
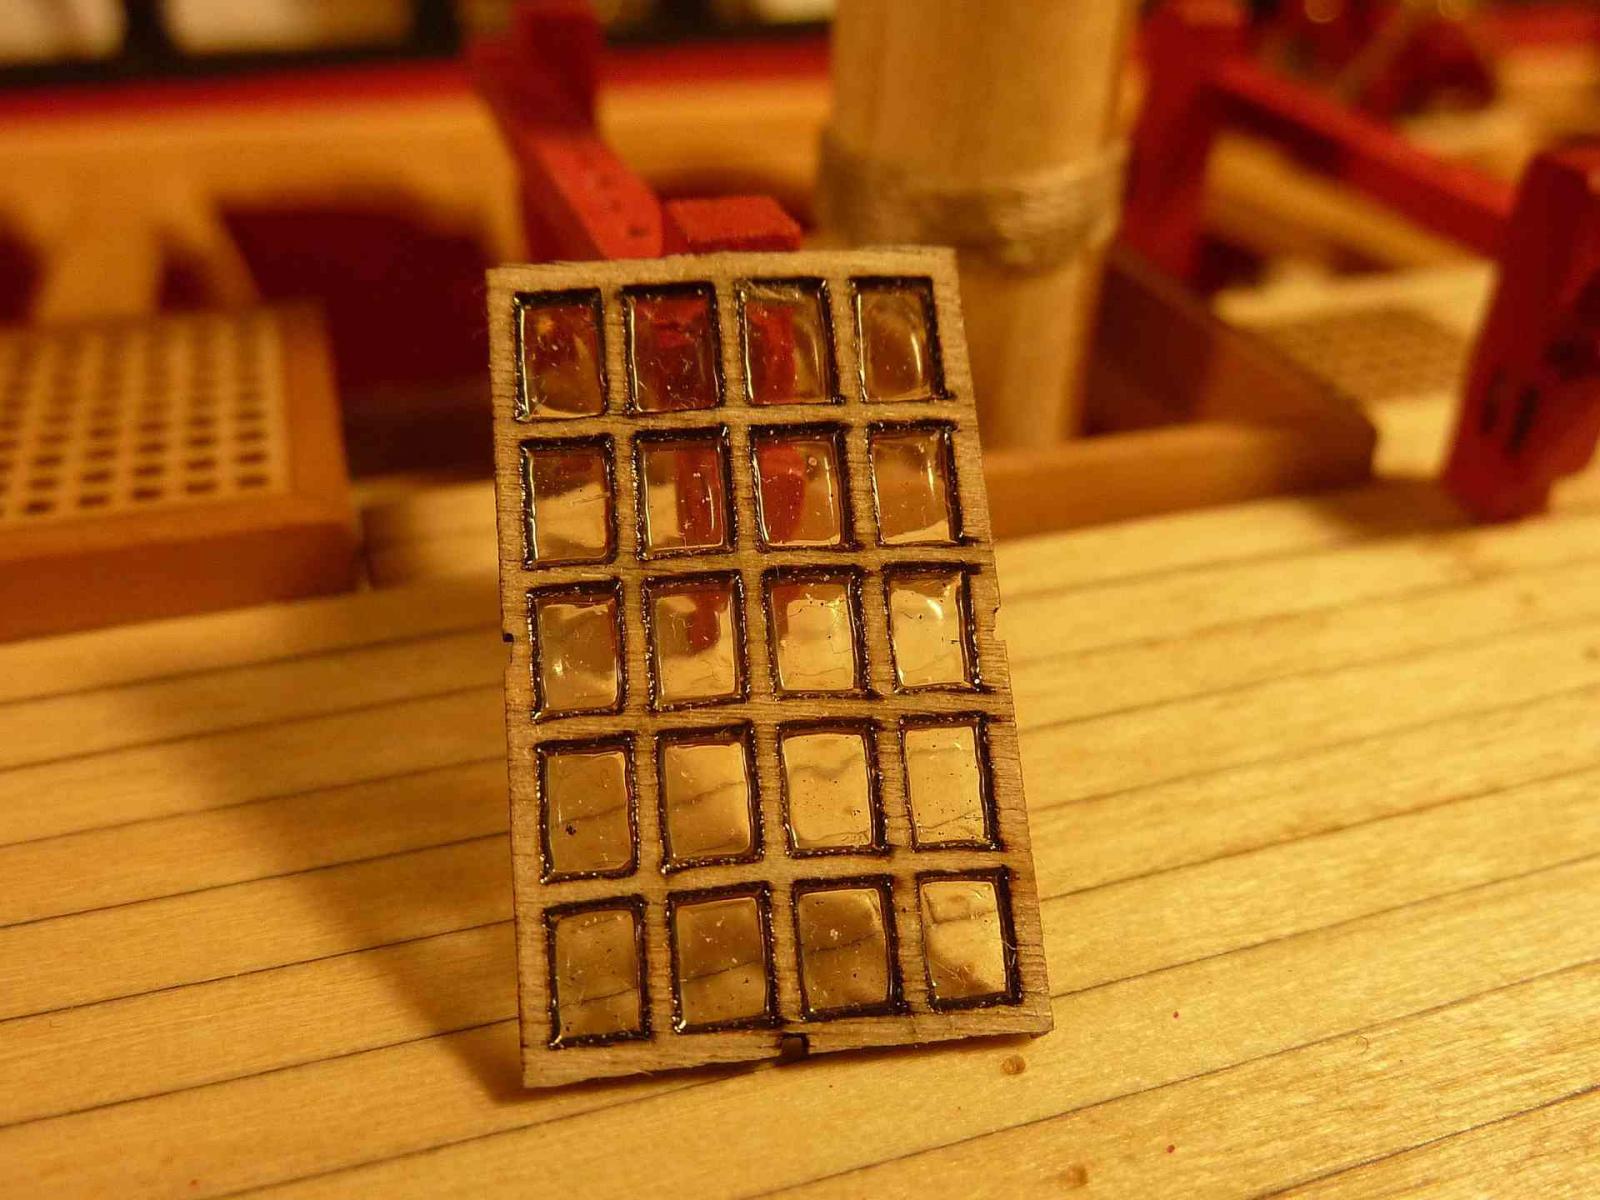
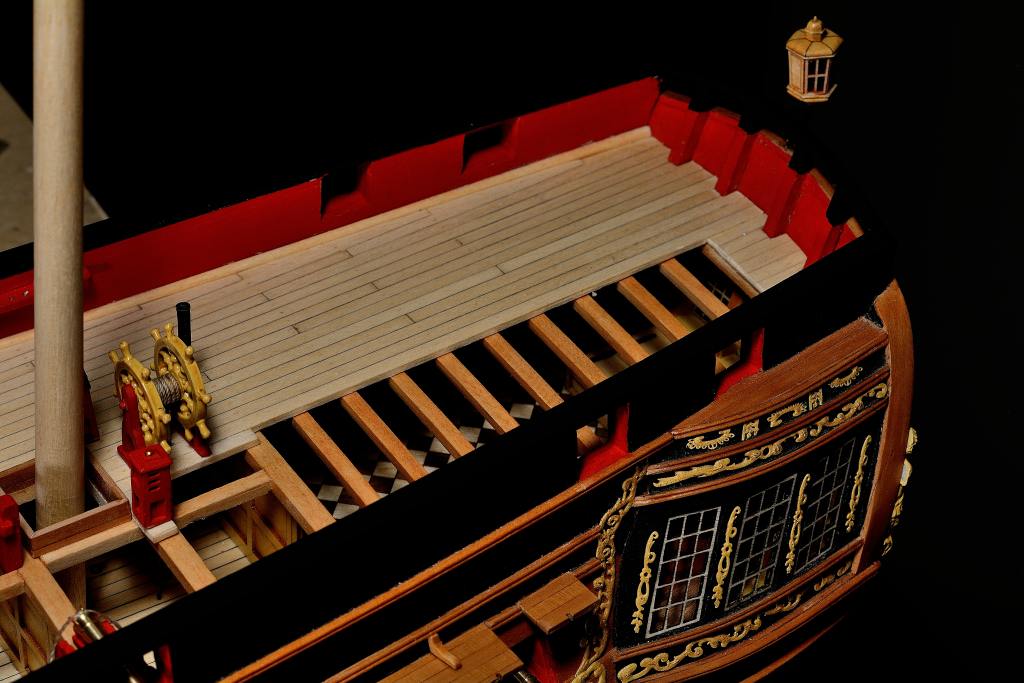
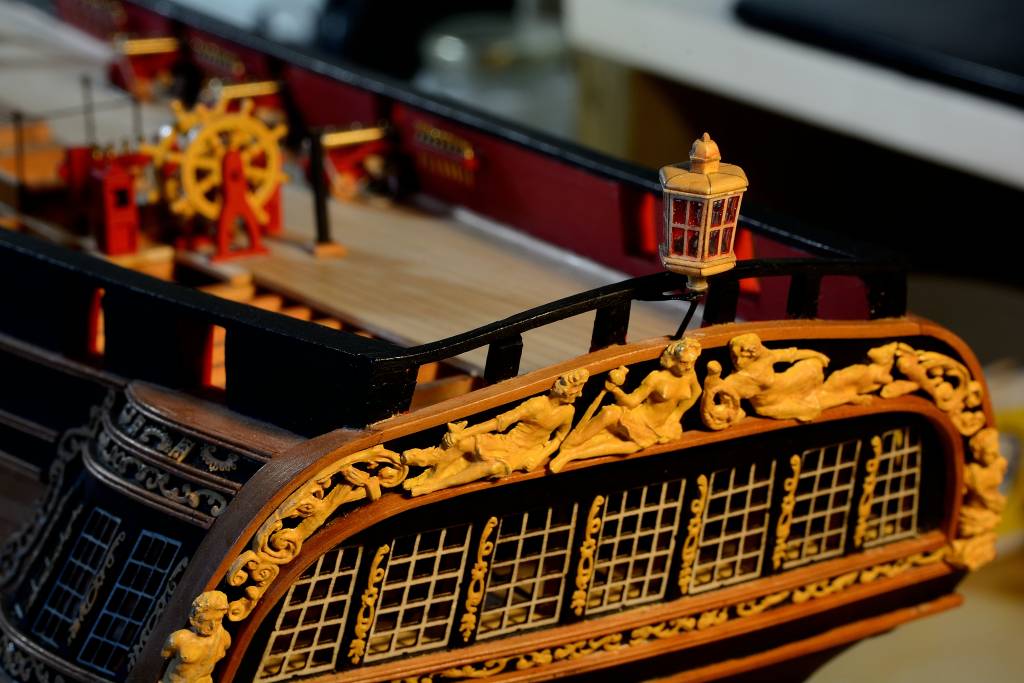
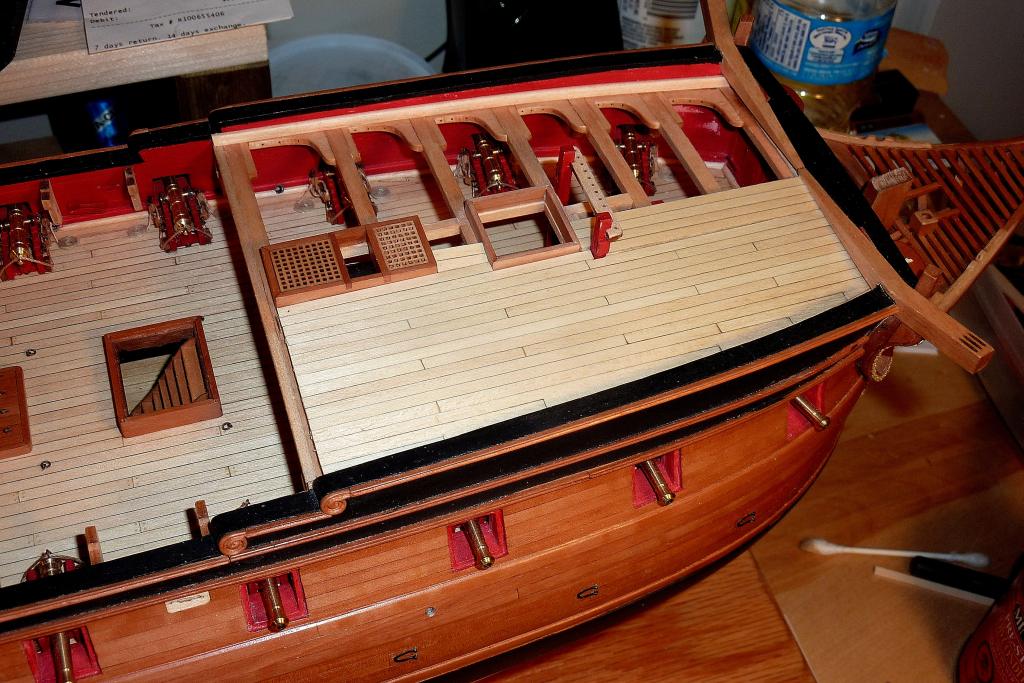
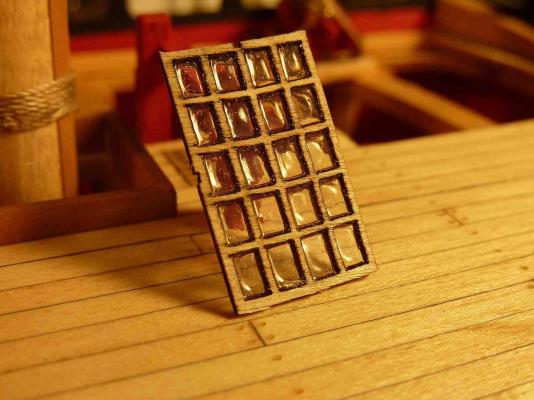
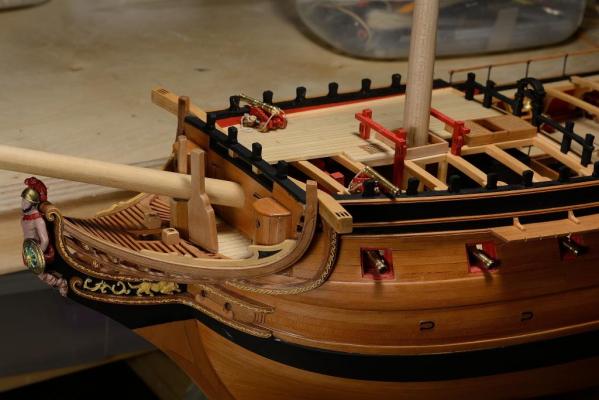
ok.....best i show some progress........oh.......had to lower the lantern, because of the boom....... used micro kristal klear for window sample.....not sure if i will use, although it looks ok..... bindings on the mast not finished, but came out too shiny......will have to do something with them, althought i like the fact that the sythetic line doesn't have hairs, althought a little beeswax help there........c'est tout for now, until i get well into the rigging....cheers.............


-
very kind burroak
-
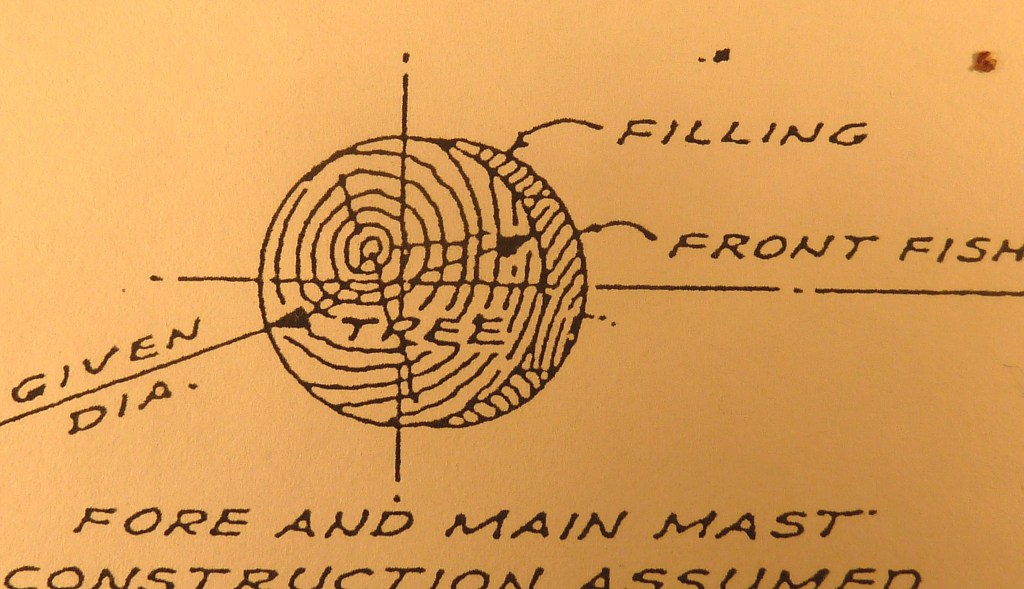
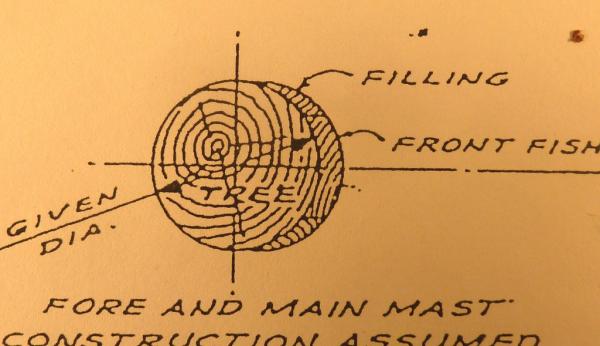
oh...i thought i should add the fact that i always felt the main and foremast were too fat, but i didn't want to embarrassing myself by complaining ...then i discovered this, which, if correct, explains everything...(taubman plans)..so this is an option for future builders....even though it's only a stubby mast......again, i say, if correct......cheers....
-
thanks gratefully........i'll post an occasional where i'm at, but it will probably take a longer time in between....they should call ALL these sailing ships dreadnoughts, like i dread tying noughts on all those ratlines, as i'd rather nought...but i can't cheat and glue of course..... oh....another thing....i noticed too late that the inverted knees on the channels are tapered at the bottom....didn't think one could laser cut on an angle.....may put a tiny bit of fill there....if i sanded them down i thought they would be too thin....but of course, that's what i should have done .....like i said i reveal my errors to help a new builder.......and embarrass myself in the process ha ha...
-
ok......still much touching up to do...which i like doing......so i start the rigging now......guess i won't bother posting much anymore....much tedious rigging stuff to do.......at least tedious for me:)...............grateful to have seen some of the wonderful builds here, which were inspiring me to try and make a better effort......but we all have our limitations ...anyways, cheers..................

-
hope you'll get well and have many more of them............
- 2,191 replies
-
- 4
-

-
- confederacy
- Model Shipways
- (and 1 more)
-
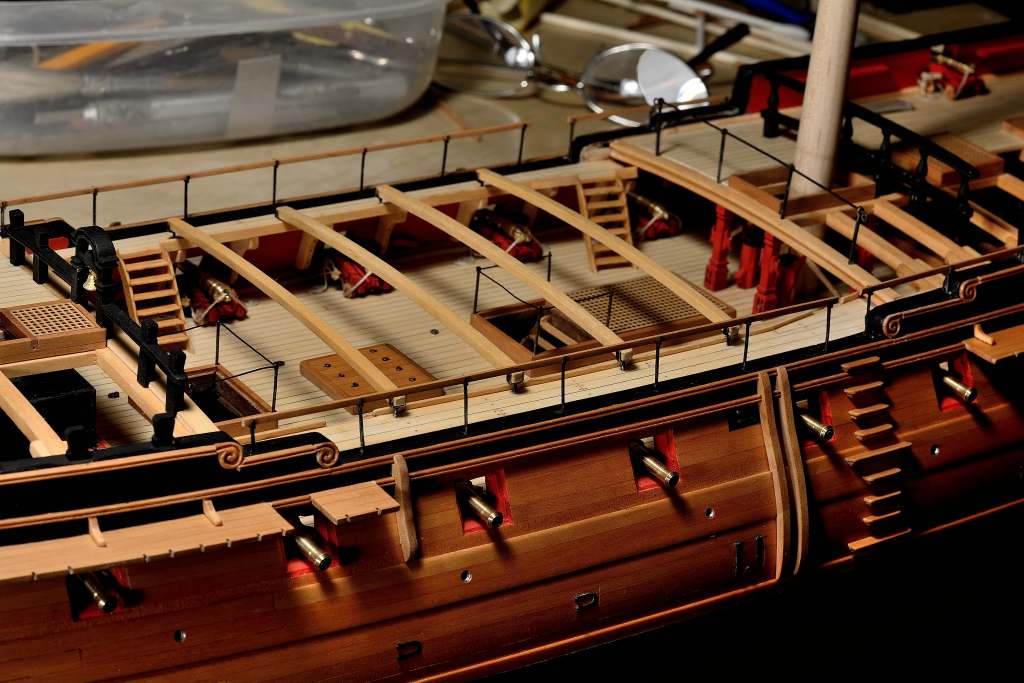
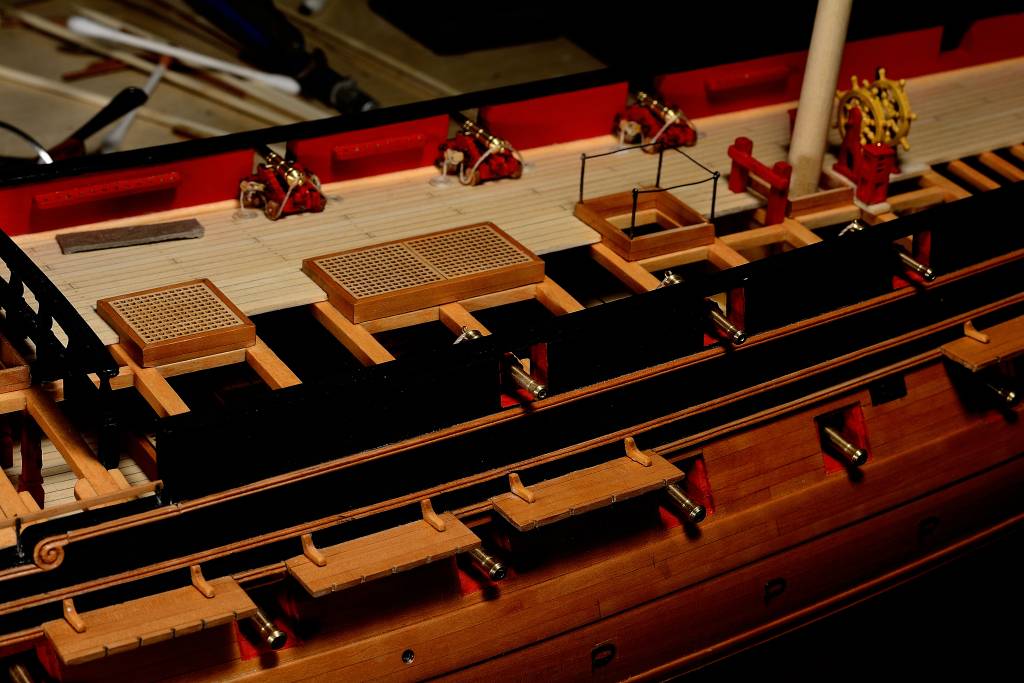
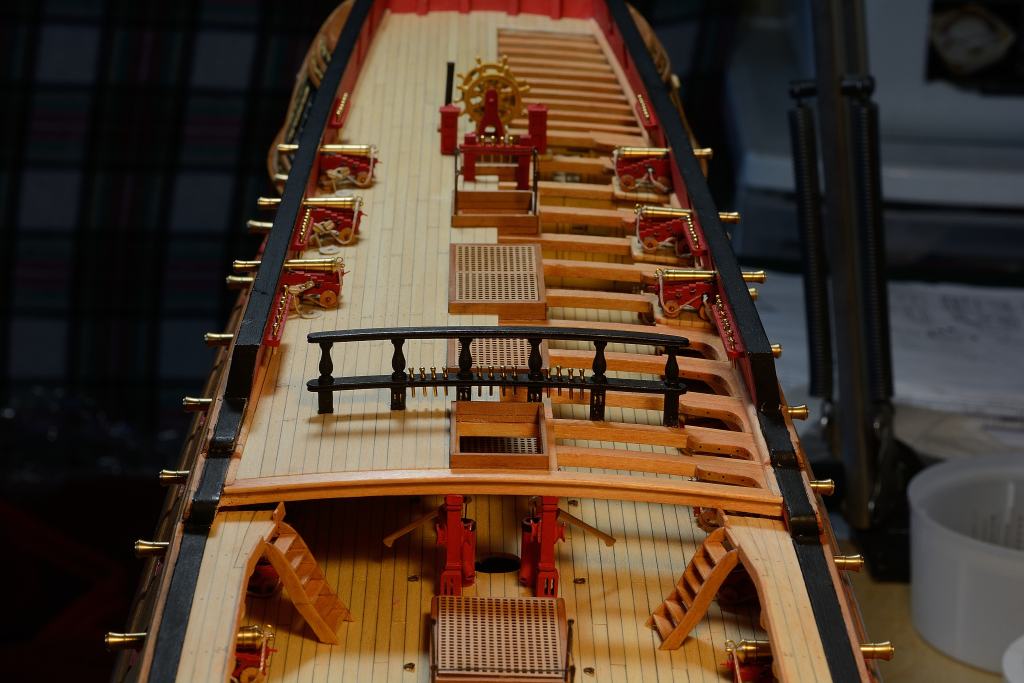
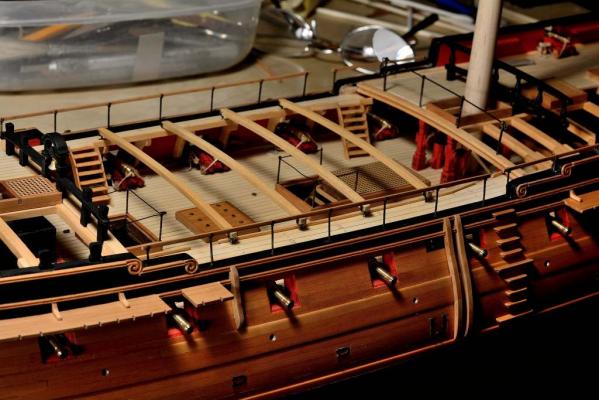
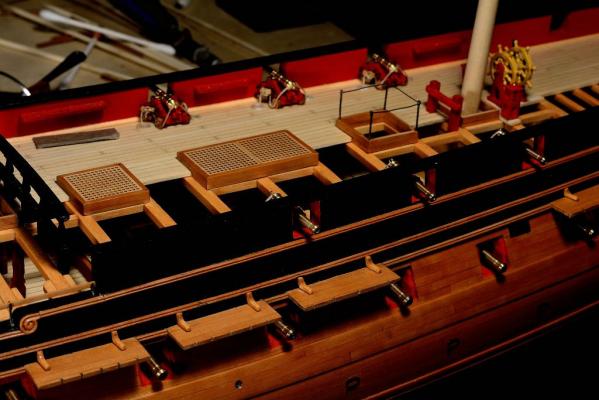
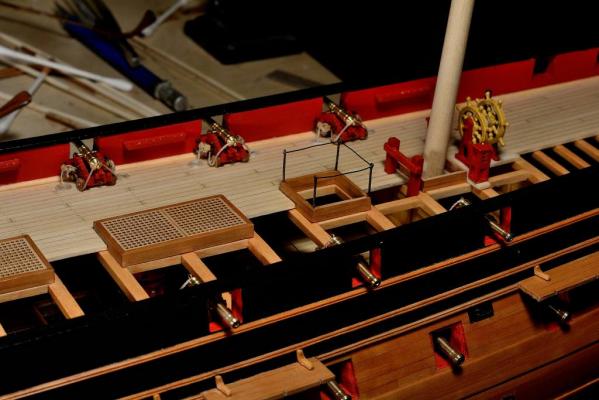
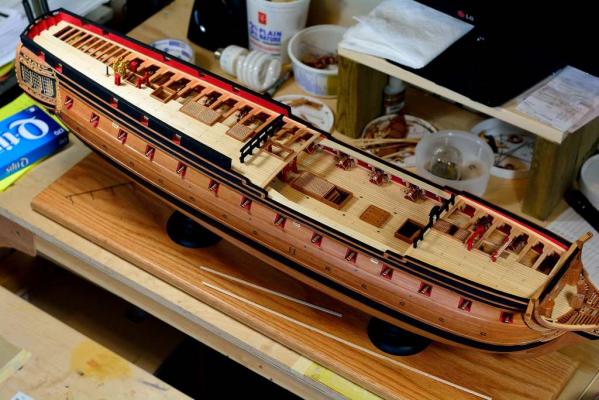
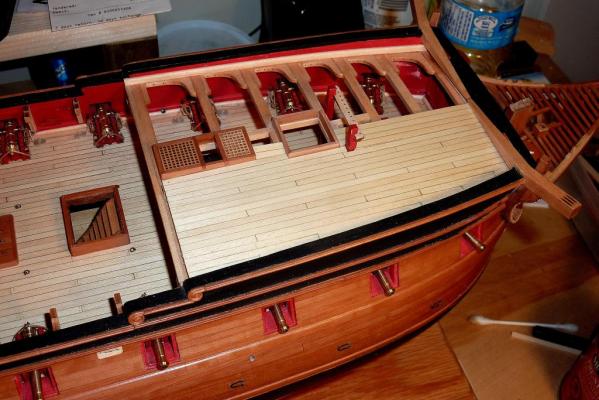
belaying pins temporarily on ship so i don't loose them....put a little ledge on gangways....can remove if it's a real no no .............decided to put guns on the port side..........slowly getting there.....ordered the taubman plans for basic rigging.....will still have to check about belaying points etc.....got one of chuck's lanterns....no shaky hands allowed ......micro crystal clear for the windows.......he very thoughtfully included two lanterns in the kit, so if you screw up one, which i did a little bit on this one, didn't sand off the burnt edges, ya got another to make good....can'[t believe all the extra considerations chuck puts into his work.................anyways, will have much touching up to do..... i glued two of the waist rail stanchions together to make them thicker......many of the sprues attached to the bottom, broke off as they were very thin.....i will probably embed the stanchions i tiny bit lower to give them more purchase..............used blacken it, but will sand and paint..............


-
okee dokee......will go for the tamiya grey primer........what the heck..... ya can't beat the tried and true.........but i may also try augie's idea of using the blackening as a primer at the same time.....love experimenting.............
-
blackening as a primer....now that's something i never thought of!!...........i'll give it a try augie thanks.......
-
thanks........hmmmmm.....i'll try the tiny bit of blackening them a bit trick first, maybe just enough to dull the brass....................chris...isn't tamiya waterbased?....thought it would be too thick and scrape off easily...?...but you had success, and they look good, so if i can't get the blackening to work well, i'll order some of that paint online....gets kind of expensive for a few belaying pins:).....especially if i rig the ship, where most of them will be covered up........well i got something to work on now............cheers........vc
-
pondering........how does one paint the belaying pins without the paint coming off when installing.......i re-drilled the holes so it's not as tight a fit......which paint to use?
-
couldn't have been said more eloquently...........
- 2,191 replies
-
- 4
-
-
- confederacy
- Model Shipways
- (and 1 more)
-
ha...just caught this log....what an intriguing ship...and what a neat clean job!....
- 270 replies
-
- 3
-
-
- red dragon
- artesania latina
- (and 1 more)
-
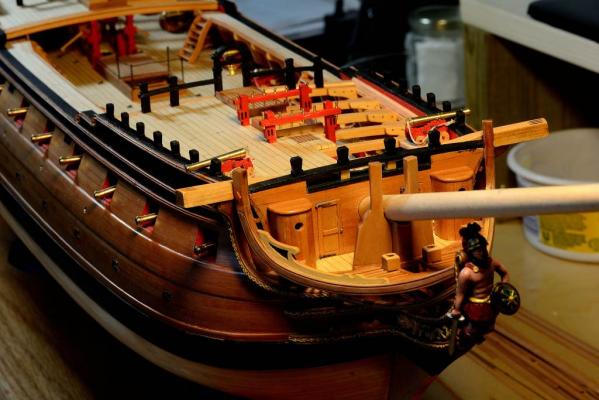
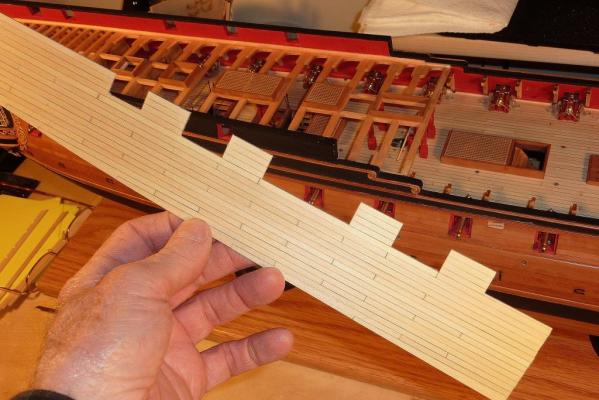
nothing glued on yet.......just positioned......including the deck......................noticed one of my errors....the center line on deck doesn't quite match the center line on the transom....doesn't show up too much though...happened by finishing the deck separate from the ship...... just noticed that there may be enough stanchions for the waist rail do double them up to make them thicker.....
-
ha...yeh..........
-
thanks augie, i often tend to do things backwards .............
-
well ....you guys put pressure on me to try harder ......and in spite of my fight with rushy impatience, i'll continue to try.....will not glue the decks down until i do the nails, adjust the stain a bit, and get all the parts fitting and ready to install.......
-
thanks chris, was considering opening the deck like you did especially since i may rig her...but ....her knees were to sexy to cover up:)
-
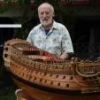
hiya...check http://www.modelexpo-online.com/under model shipways kits...plank-on-bulkhead....confederacy.....one of the best kits i've seen.....which can be built nicely with the basswood provided, but i used a hard wood cause i'm just toooo clutsy....i tend to attack rather than caress ....