HOLIDAY DONATION DRIVE - SUPPORT MSW - DO YOUR PART TO KEEP THIS GREAT FORUM GOING!
×


yancovitch
-
Posts
813 -
Joined
-
Last visited
Content Type
Profiles
Forums
Gallery
Events
Everything posted by yancovitch
-
 gee i never thought i'd ever say thanks to anyone called beef gosh, i thought i could place them backwards on a clear low adhesion tape, add glue, and place on transom....but i guess that would be cheating .....but of course, i have never heard of a clear low adhesion tape..., and what kind of glue to use that wouldn't squish out......hmmmmmmm......
 -
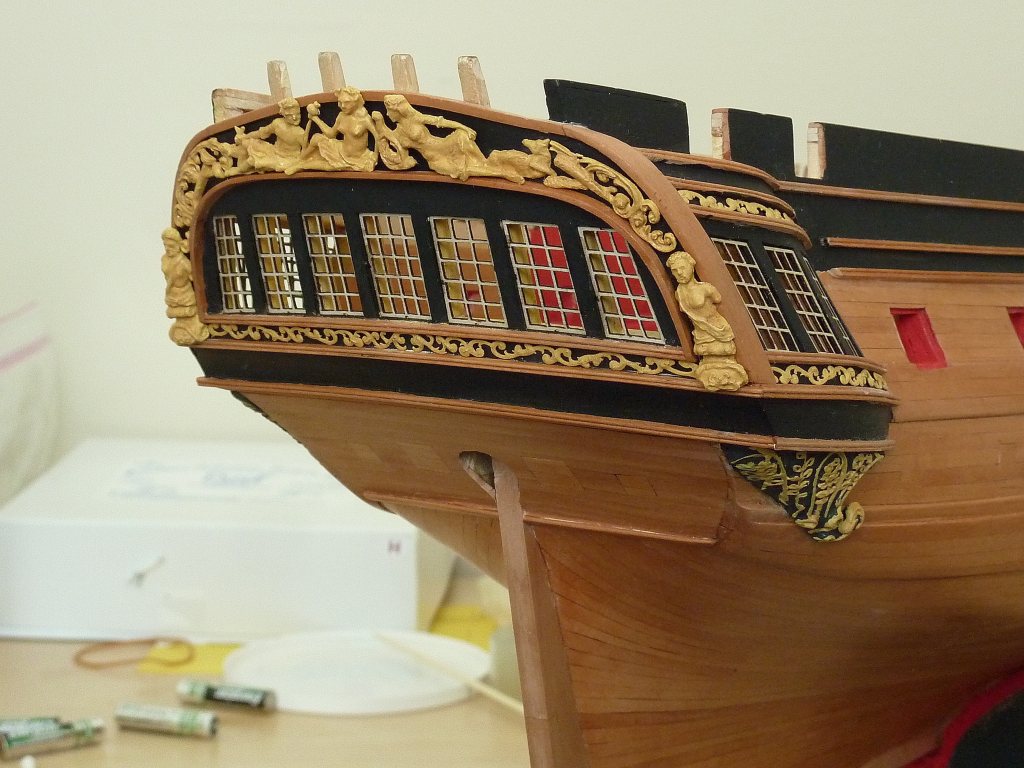
thanks for the encouragement.... oh....if using this method of planking, i definitely would not glue on the margin planks ahead of time and, of course i have to make more trouble for me by not having filled and painted the windows ahead of time........but what the heck, it will probably be a good excercise in control ...... one good thing though...i recessed them a bit, which looks much better than flush with the transom....hmmm maybe that's what i was supposed to do although i didn't remeber that being mentioned..... another oh........how do i glue on the letters evenly? one more oh.....i used a tripod this time with natural lighting from the window which came out better....

-
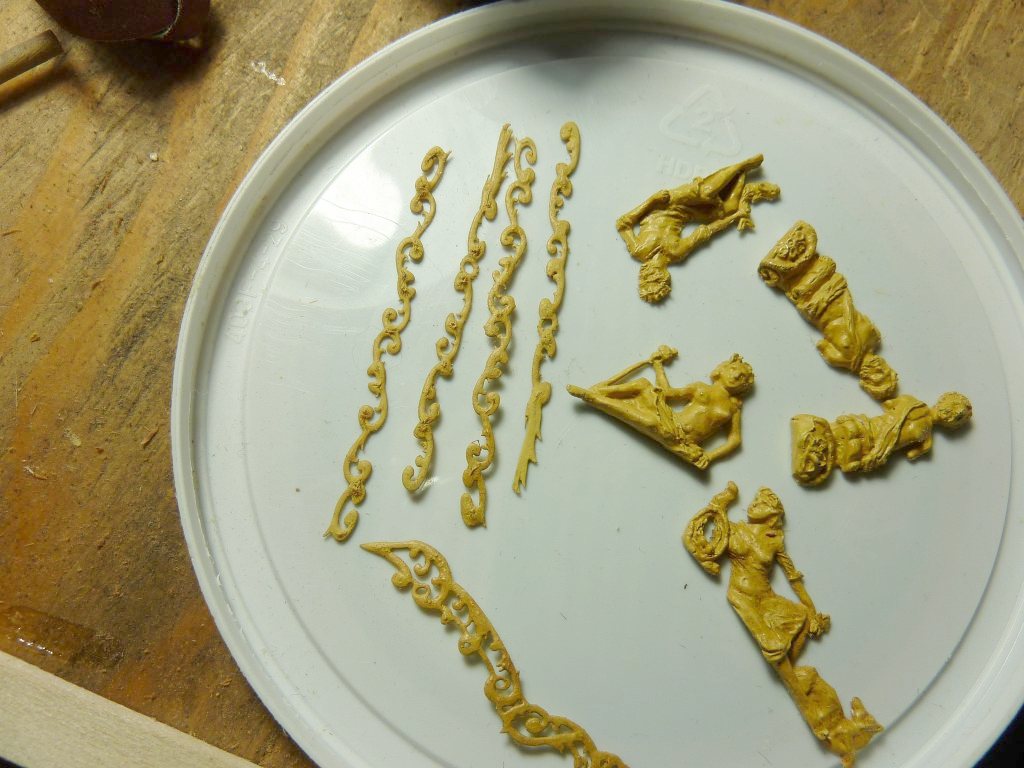
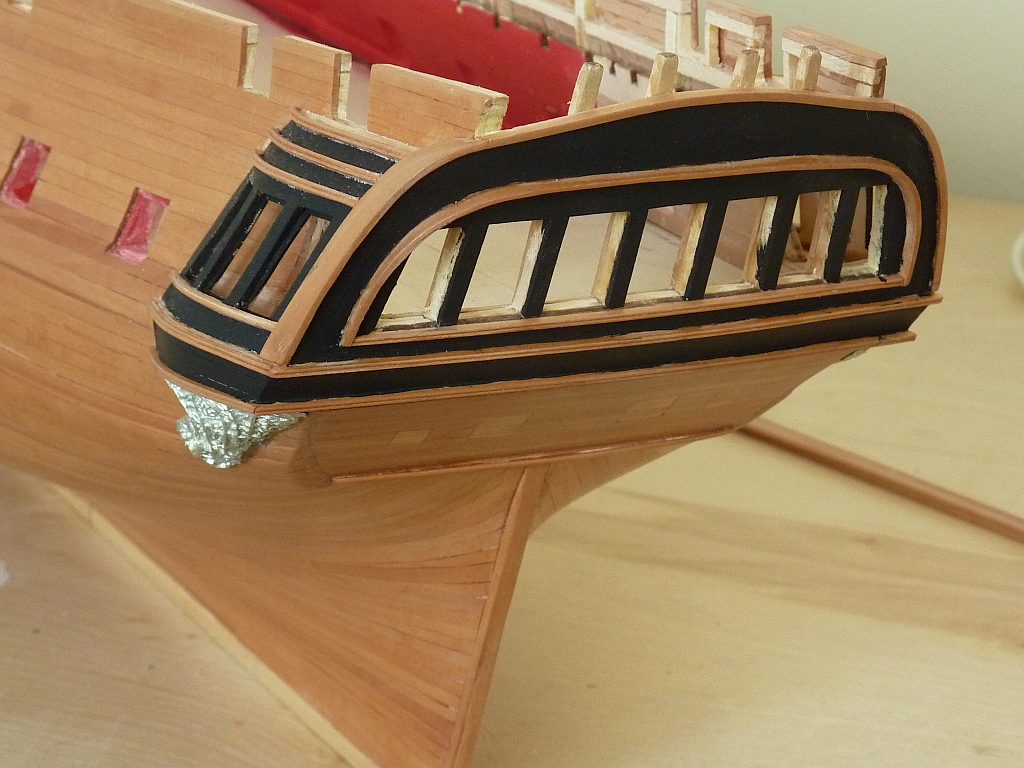
still more finishing to do of course, but most of the stuff's in place.......used oil based primer on metal sculptures and it helped somewhat, but paint still can rub off if not careful...i dry brushed some stain on them, but i may have to do more........ i don't really know why i put them on now.... to me, they should be one of the last things that should go on......didn't use the plastic windows...removed them with difficulty after i saw how everything stuck to them....actually, i should have known better, but not too much damage done....................kind of late now, but i may paint them, since sanding them a bit with 400 grit went through a layer of laminate in some areas, which of course shows up.............i may order another set of windows, and experiment with filling them with some clear non yellowing resin, but then i may just leave them airey.... stern galleries noticeably are a bit higher....and planking is done................
-
will an acrylic primer work...or should it be oil based?....thanks....
-
hmmmmmm....i find that acrylic paint doesn't stick to the lead sculptures....will oil base work...?...if so....which can i use.....?.....
-
haha....i was thinking the same thing just yesterday.....also would the passage ways need to be hatched over.....and wondered how long the armsor levers were, or whatever they were called...
- 2,191 replies
-
- 1
-

-
- confederacy
- Model Shipways
- (and 1 more)
-
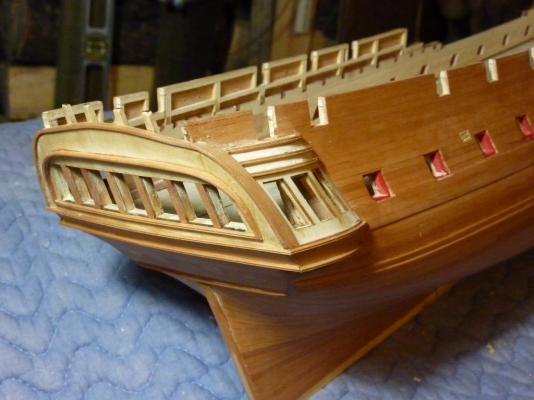
looks fine....thanks for reminding me about the treenails ......oh.....i wish i had temporarily reinforced the tops of the stern framing...even wrapping some masking tape around them....they're easy to damage and as i'm not as neat a worker, the tops on mine are somewhat rounded and will have to be built up when the time comes....
-
another shot of inspiration....thanks........
- 2,191 replies
-
- 2
-
-
- confederacy
- Model Shipways
- (and 1 more)
-
wow....thanks for that!.........saved me from having to take out the apples, oranges and bananas.......the level of my math ...looks like i was right.... they should be larger.....now to figure out how to do it without wrecking the cannon.....guess i'll hold the cannon in a rubber vise, and drill, increasing the size in small increments....should be safe enough, and remain relatively centered.........
-
hmmmm....i picked up a few cannons from the syrene ship model co....and the nozzle hole is about 1mm in dia......is that about right, or should it be enlarged?.............
-
well it came out better than i thought it would
-
very kind ....
-
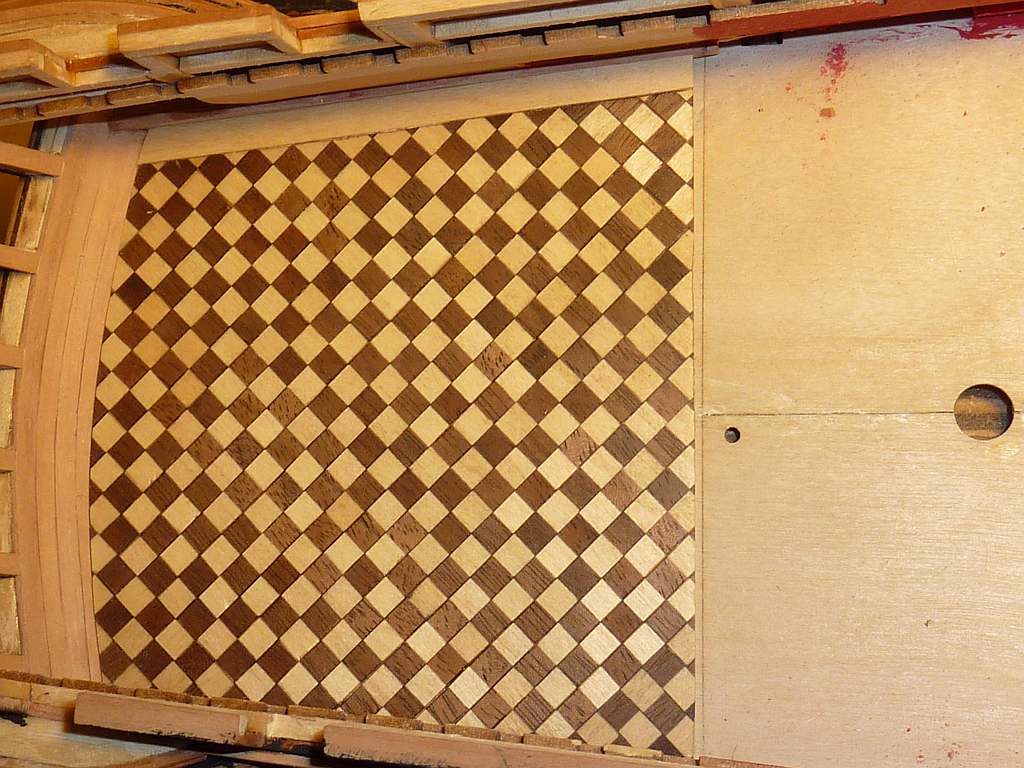
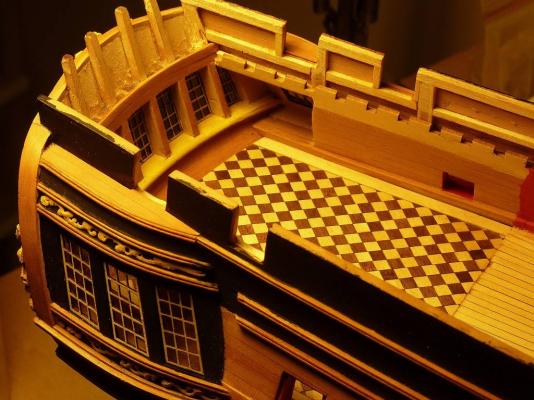
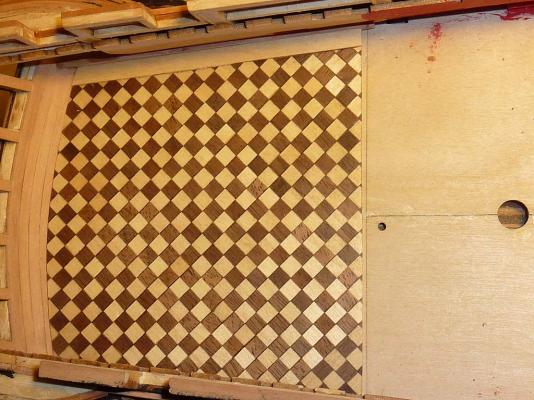
omg....haha, i guess it was worth posting my fumblings here after all, if it even helped one person....oh, i think you could just use a piece of the nylon tubing that comes with the ca, or purchase it separately.....as long as it has a tiny opening......my wife just happens to work in a dental office..............just used vallejo model color yellow ochre, covered with a light coat of minwax ipswich pine stain......still have some finishing work to do on them, like opening some blocked holes.....i may loose a bit of detail, but not much.... how about another flub....first effort on tiled floor.....made them horizontal instead of 45 degrees......second effort....didn't notice that the bass strips i used, were a bit too fat...i scrapped that................... so i cut off the triangular ends of the first effort and used them to build up the main section in the right locations....somehow it worked ok, but if you look in a certain light, you'll see that the four corners reflect differently........but of course only i will know that

-
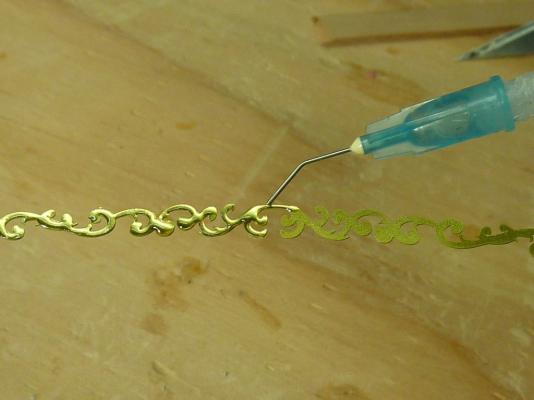
ok we'll see if this works....applies gap ca via a dental etch syringe to give more depth.....will shrink, and will give another coat, mainly on the larger areas......maybe it will flake off ....we shall see......
-
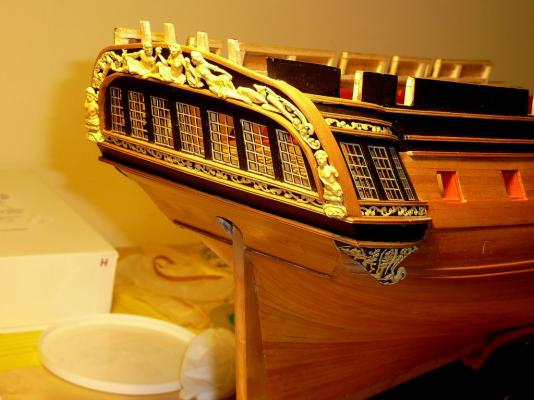
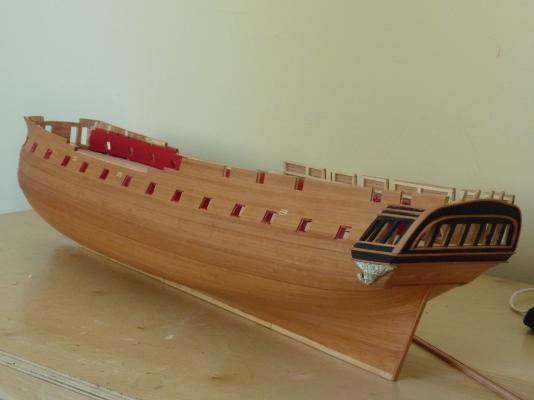
well i figure i'll just end up painting it traditional....otherwise it just wouldn't look like the confed.....still waiting for some swiss pear from the lumberyard for the stem and rudder etc......they said it was too cold to go out to the shed to cut the logs.........amazing....way up here in burns lake bc, it's only hovering around 0,,,,,,hope i wasn't too dynamic with the red......and i hope the slightly raised stern isn't too offensive to chuck, and those highly qualified here, and hope it won't void the warranty......i hadn't planned to do it

-
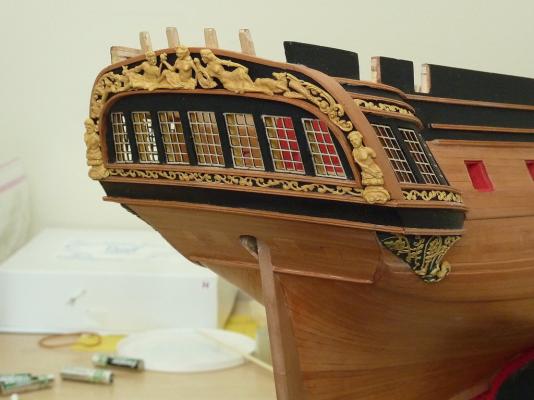
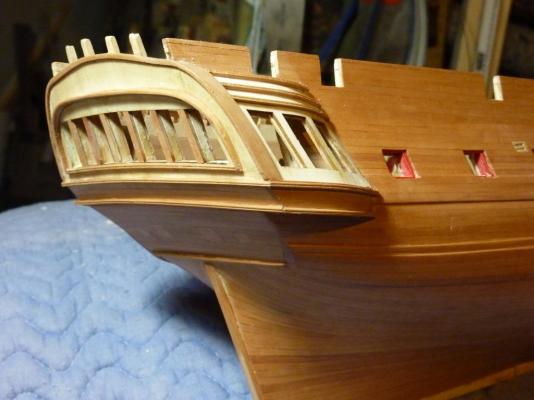
ok......still deciding whether or not to keep it natural, aside from the stern galleries........... lucked out on the inner bulwarks....everything fit reasonably well, aside from the fact i had to raise the quarter deck clamp near the stern too accommodate the slightly higher galleries used four pieces of thin laminated pearwood to make the cove oh....i made a scraper for the double cove out of a xacto blade...for the 1/16th square strips....but....on the roof of the quarter galleries, i think i will sand them down and re-scrape the shape......cause i think they're too deep in contrast with the etched brass.... i may try to apply some ca with a pin or whatever to the small flat ornaments and try to give them some dimension, or find some other way.......will see what happens.....cheers...
-
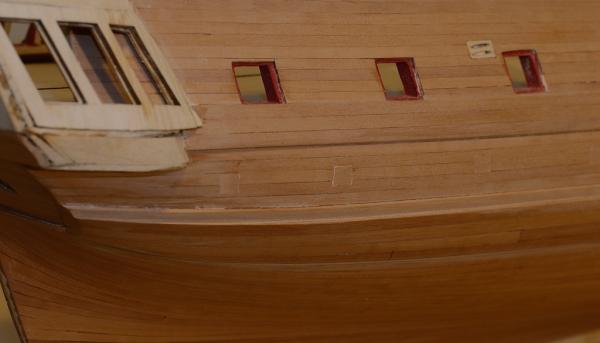
i agree with augie......i ended up placing the sills on the stern, in not quite the right place.......good show......
-
looked up the byrnes table saw, and it looks fantastic....never heard of it......good for you!...
-
thanks trussben......it's starting to take shape in spite of my flubs ...feeling much more positive now......
-
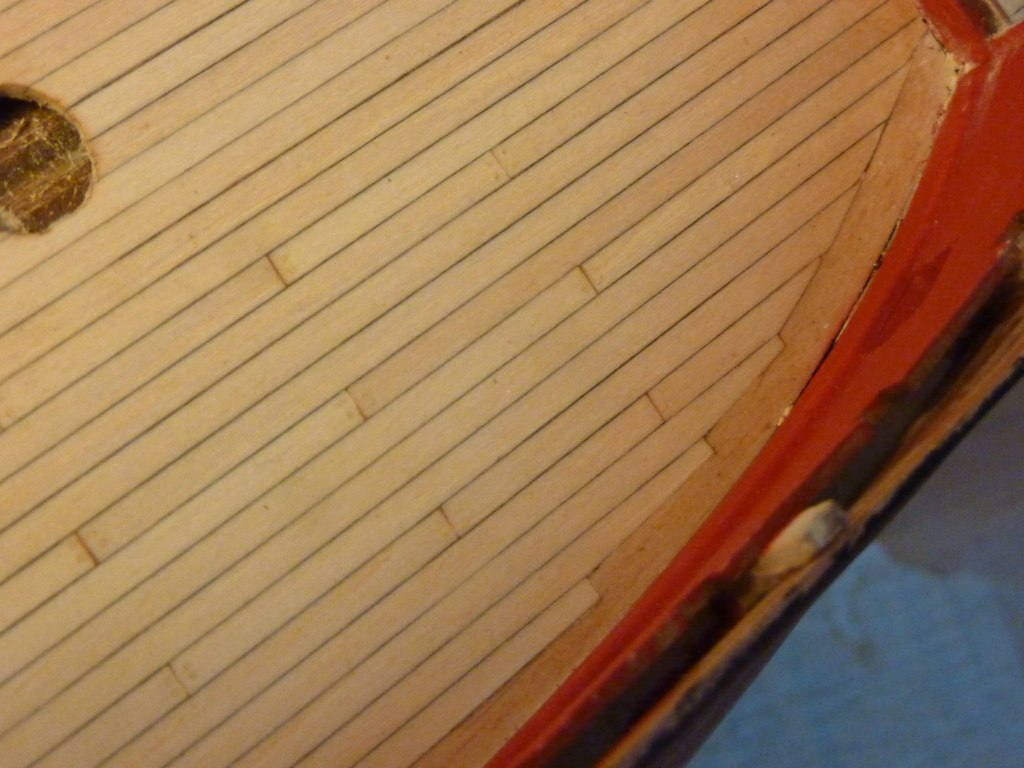
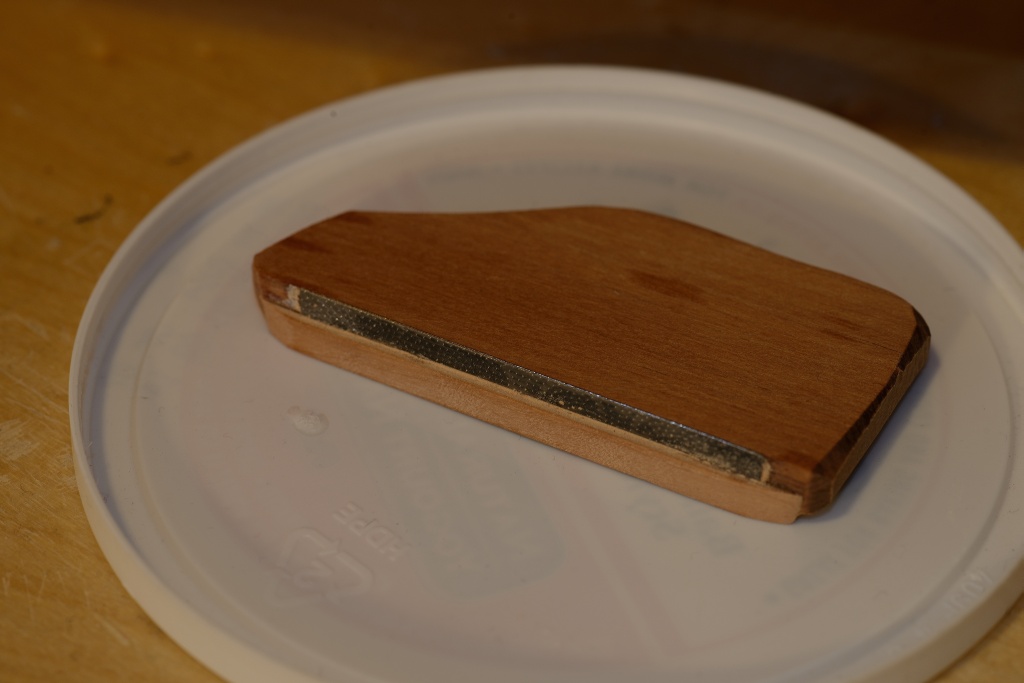
ha!...another boo boo.....realized i used 1/16 instead of 1/32 plank for the black strake, so i made a little tool to sand it down to 1/32.......had to cut the sanding sheet on the tool, a little narrower than the plank i was sanding, so i wouldn't sand into the wales............ by the way, mabe 20 or more years ago i purchased 1/2 doz. metal carbide sanding sheets from sandvik, which were unbelievable helpful....haven't seen them since, and i'm still using them.....didn't sell enough i guess............ hmmm....am amazed how well chuck designed the pieces for the stern galleries....considering the multitude of angles and shapes........somehow, i ended up building them a little higher than on the plans, another fubb.....guess i didn't get the sills in just the right place..an error yes, but in a way, it feels better visually......forgive me chuck:) really enjoying this kit fumbles or not........

-
hmmmm....didn't know about the alcohol....thanks...
-
oh, i just thought i'd add that what i wanted to do and didn't, is to epoxy or whatever the inside of the hull before sanding the planking, to avoid sanding too much where the ribs are, which in this case might not have been as important, since the ribs were quite close together. but if i had used the basswood, it might have been more effective.....is why i waited for installing the deck till after the planking............. also, i just had an idea after the fact..........before starting, since i noticed the pearwood had some variation in color and grain....i think now that it would have been a good idea to lay out all the planking, and applied a thin coat of rub on polyurethane, which would have shown all the variation in color etc, and made it easy to choose which planks to use where..........after planking, being so thin, it would be easily sanded off...and this is mainly for hardwood planking..i don't know how absorbent basswood would be.......................anyways....food for though for the next modeler who starts this project.......then again, maybe everyone does this
-
oh augie..me thinks i'll be sticking with the urethane satin, so i can't stain now, unless it's a stained urethane....i didn't oil because it would have come out too dark and all the grain would have been more exaggerated, which i was trying to avoid...on the wales etc i was thinking of a darker stained urethane instead of black but i don't know yet.....