HOLIDAY DONATION DRIVE - SUPPORT MSW - DO YOUR PART TO KEEP THIS GREAT FORUM GOING! (Only 36 donations so far out of 49,000 members - C'mon guys!)
×


Foremast
-
Posts
262 -
Joined
-
Last visited
Content Type
Profiles
Forums
Gallery
Events
Everything posted by Foremast
-
 hi Paul, great work, as usual! If I remember right, a bear is Berlin's emblem. Even in some ancient German ships, a bear is represented in the coat-of-arms. Alex
 -
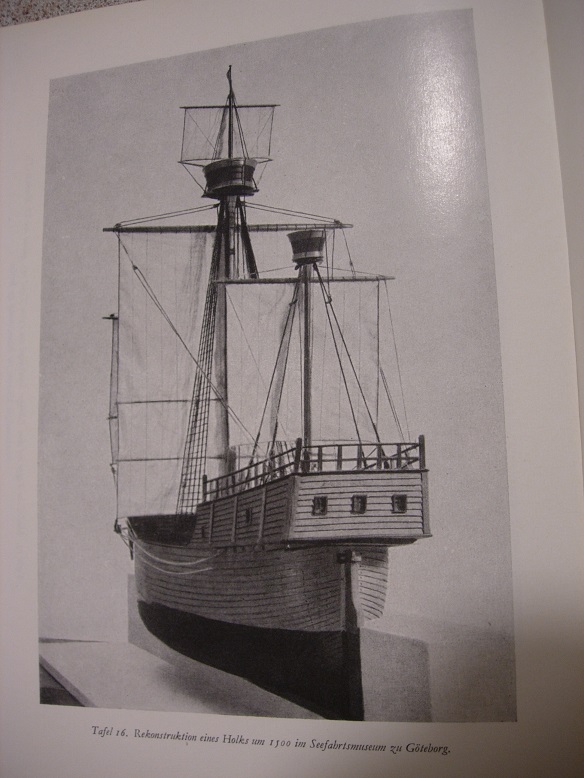
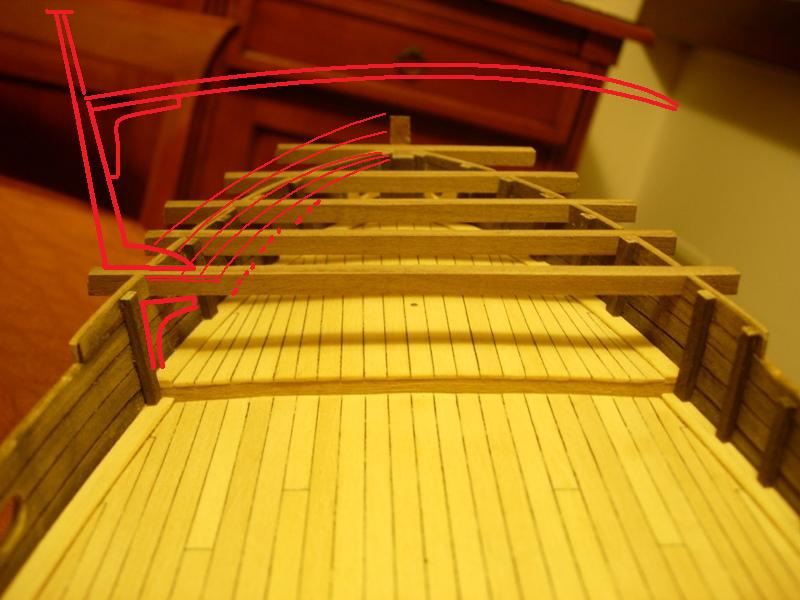
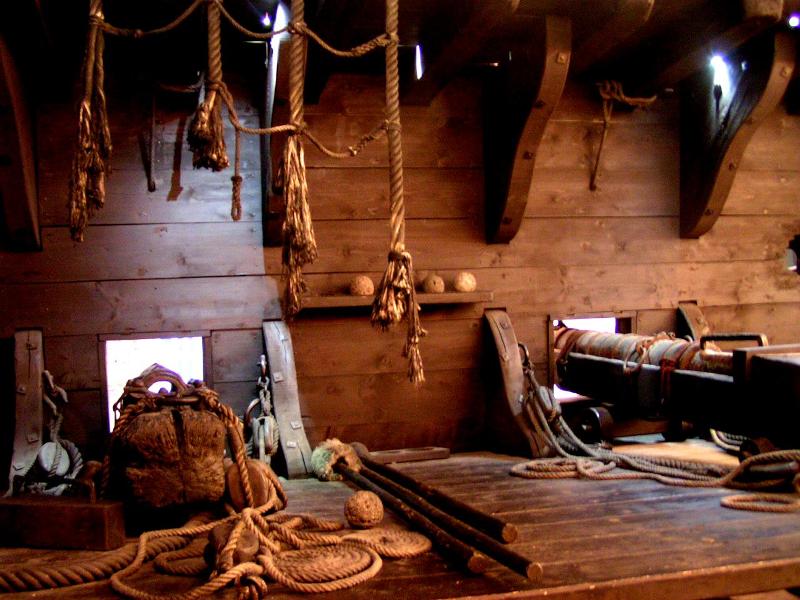
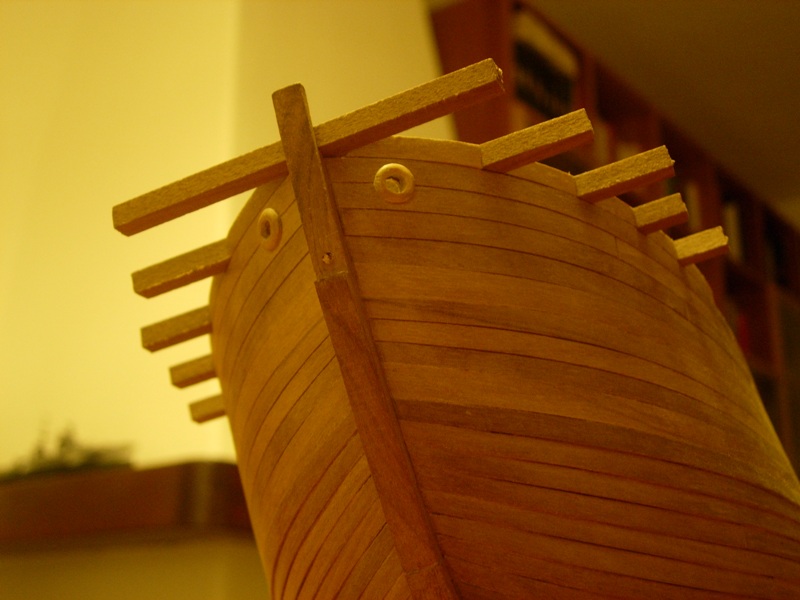
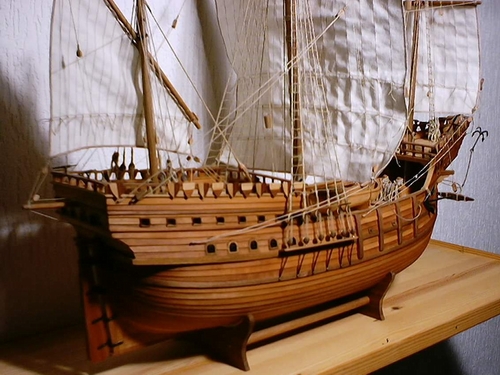
I've found a couple of images that show the way for the fore castle assembly (as well, will be the poodeck). The project, first picture, was inspired by the second picture: the arrangement of a hanseatic ship replica, internal view, "Lisa von Lubeck" (middle deck and supports of the upperdeck); whose tonnage and shape are similar to my shipmodel. Regards Alex
-
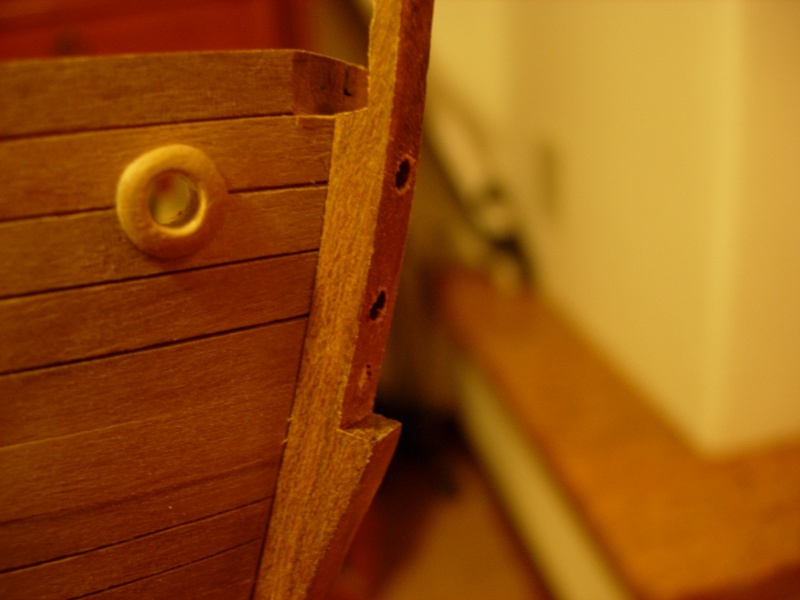
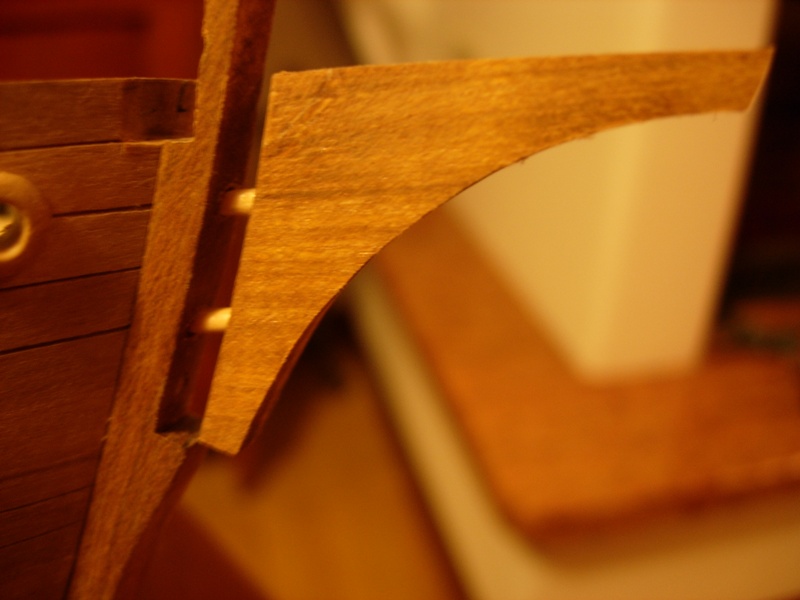
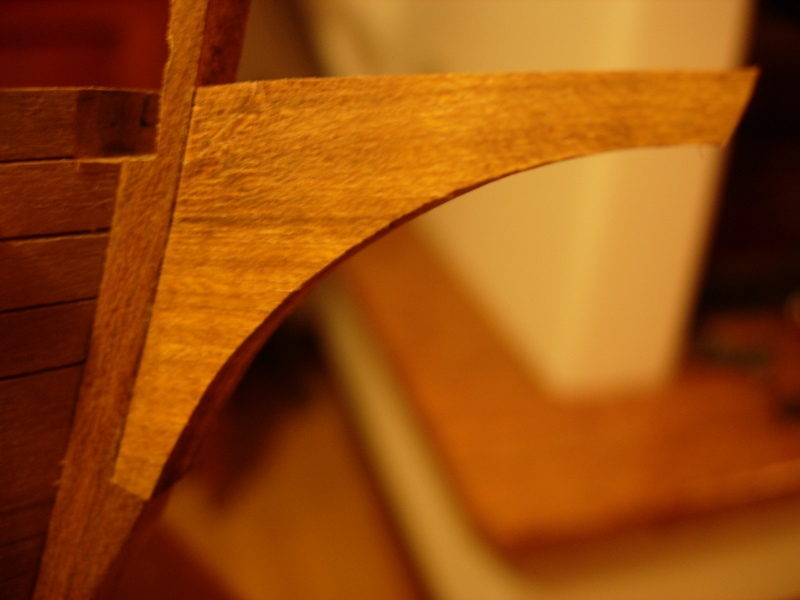
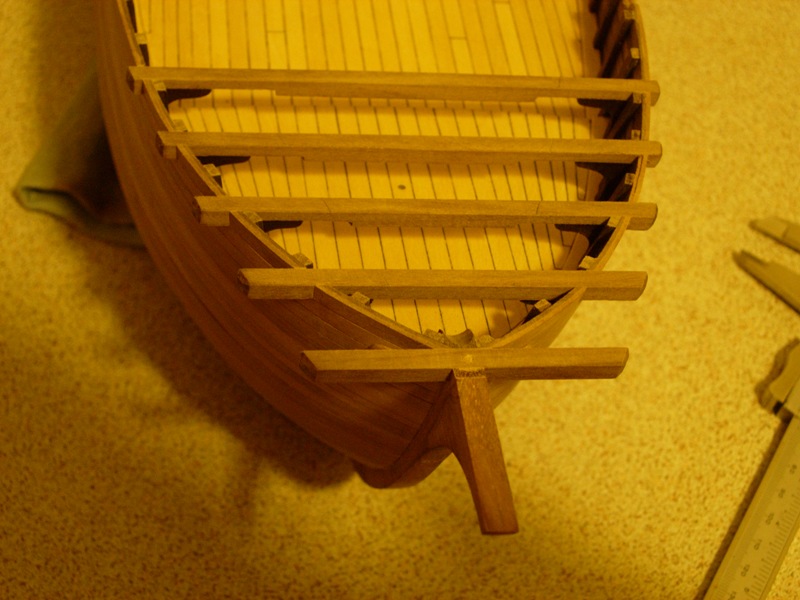
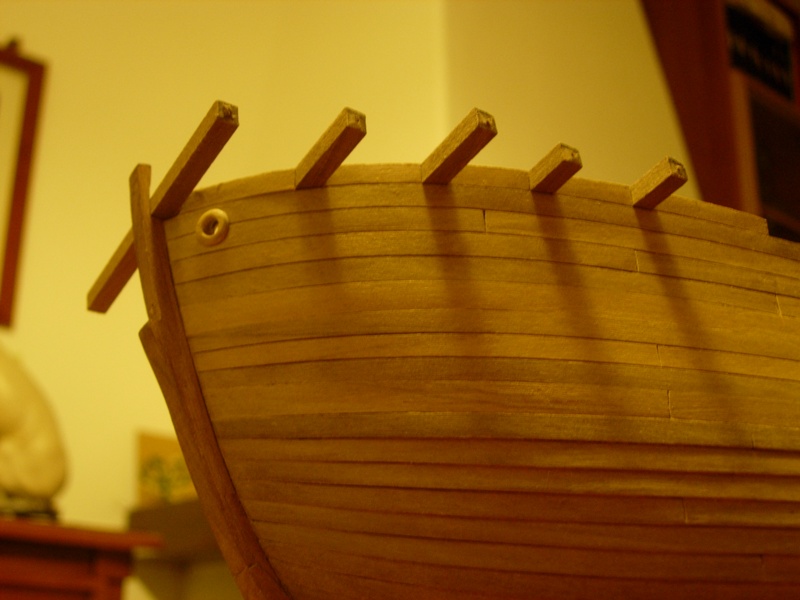
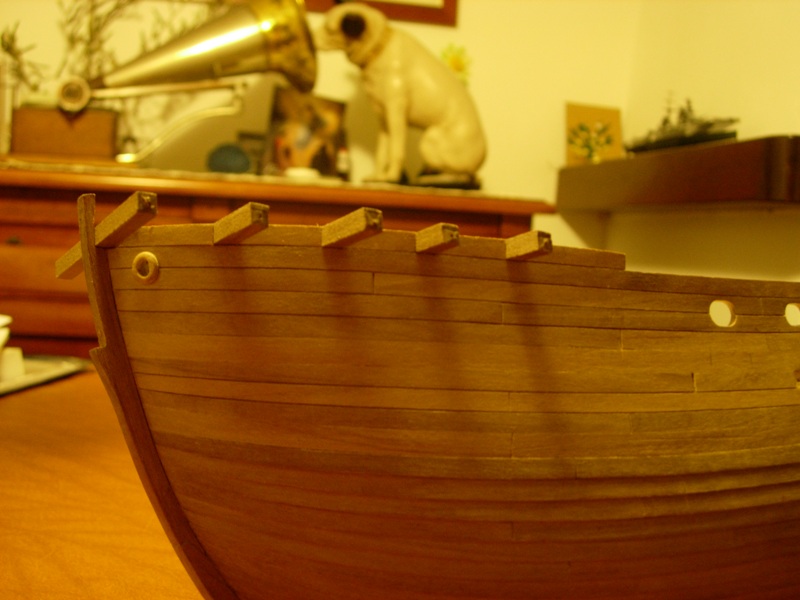
(continue) completing of the bow - knee of the head.
-
Hello, Popeye! Thanks. The forecastle assembly? A trouble ... really a trouble ... These are the situations in which I would have wanted to continue my engineering studies. But, in the town that hosts the most ancient university in the western world (in Bologna, my town, the university was founded in 1089) could I perhaps love something different from the most ancient teaching that was teached there? Cheers Alex
-
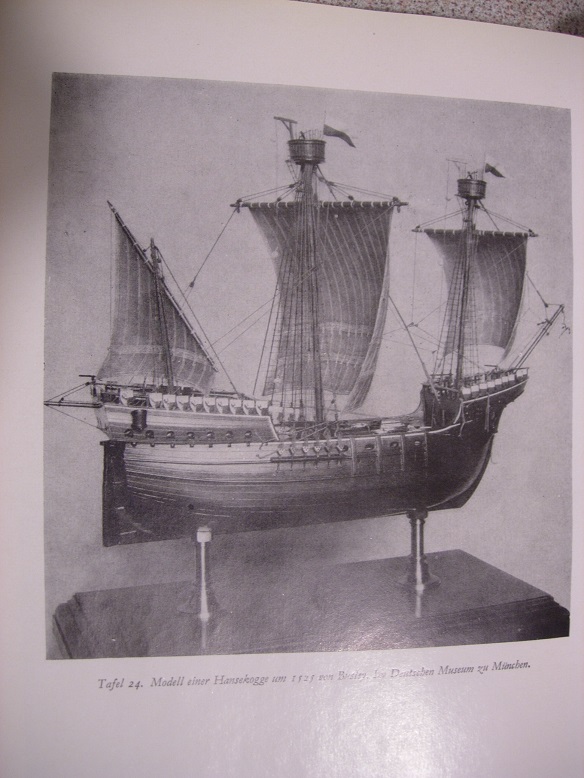
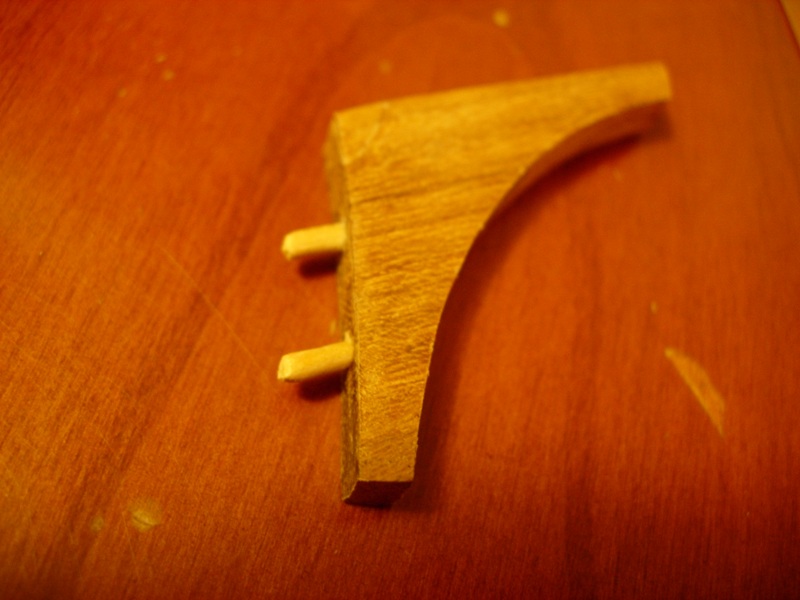
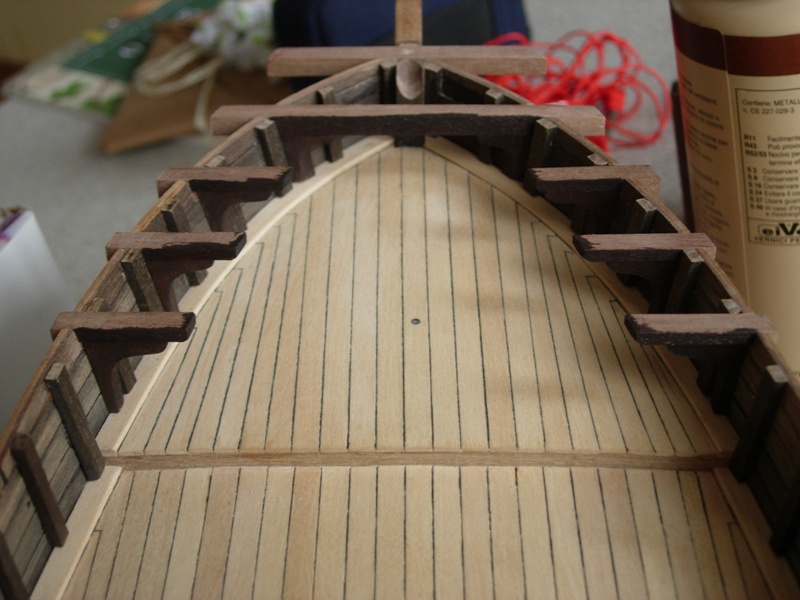
Thanks Augie and thanks, JP JP, you are raising very interesting themes! When I started this building I trusted two sets of drawings: Heinrich Winter's and Franco Gay's ones. Franco Gay is an Italian Admiral who - in the second part of 20th century - reinterpreted a few projects of "Delius Klasing" editions (the same editor of Winter), even this ship; eg. as support for upper decks, instead of beams he preferred brackets as shown in pictures # 2 and 4, above. I have also Euromodel's drawings (... to be correct, I have the whole kit, still packed...) and you're right: they are more or less Winter's ones. Plus "less" than "more": Euromodel has designed a square-stern, that I don't agree. But all this documentation was too old to be reliable. When I understood it, was too late. During my work, I had lots of doubts. Not only about timber beams and brackets: decks (curve or horizontal?), railings (curve or horizontal?), windlasses (one, two or none?), pin-rails (yes or not?) ... and so on ... You'll see - if you'll be interested to follow this log - that this model will be (as actually is) full of mistakes. I recognized them only after new evaluations and news, but I couldn't destroy the model, hoping to do not it again. So, I have been trying to do my best, as possibile, at least in planking, painting and carving; hoping that my fantasy wasn't too much to make consider this ship as absolutely foolish. I'm posting step by step my work to encourage opinions, criticism and comparisons. I have discovered that I like a lot medieval ships, so every contribute is an important "brick" of next "wall": another medieval ship, why not? Regards Alex
-
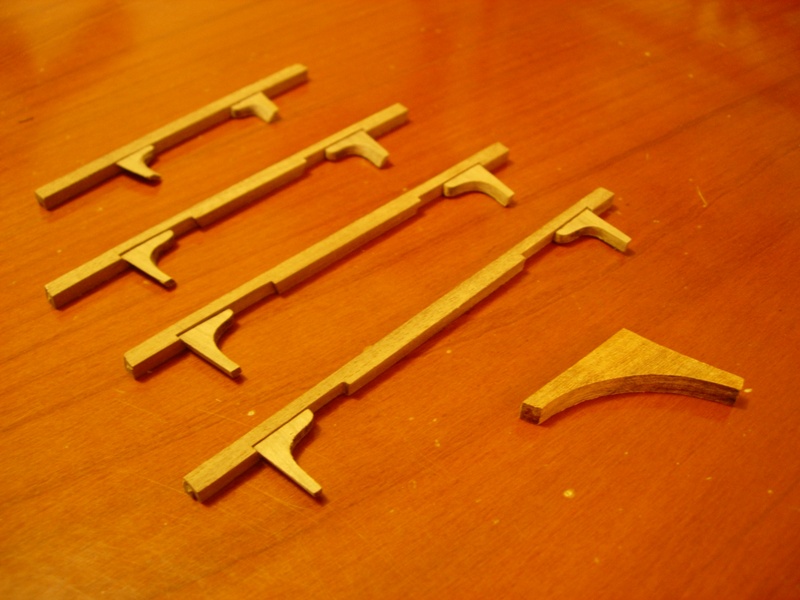
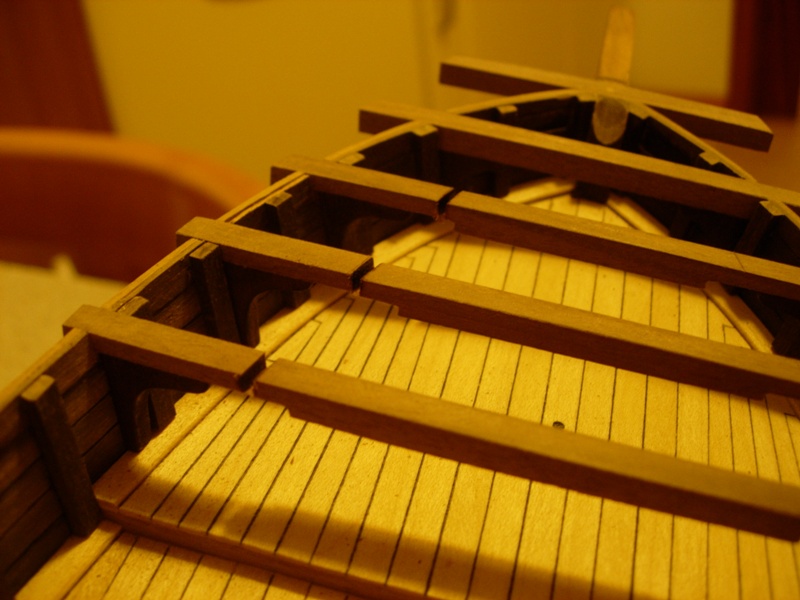
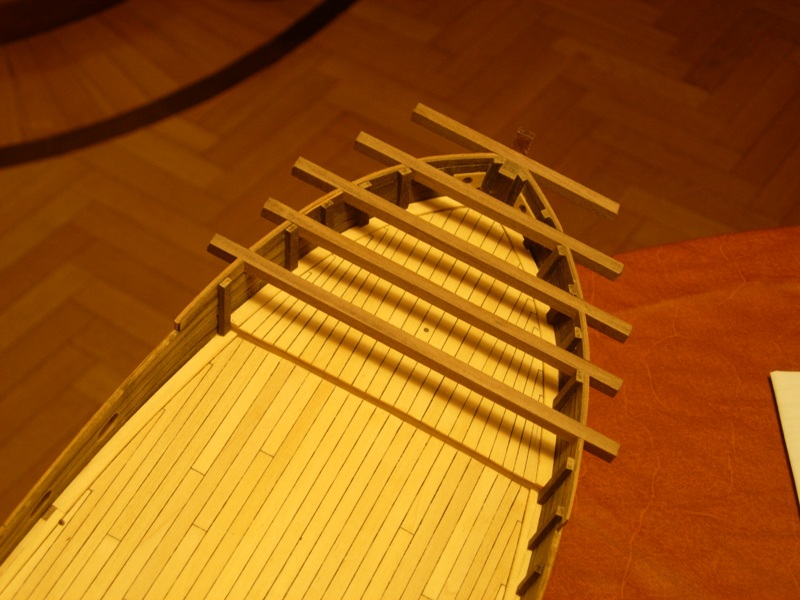
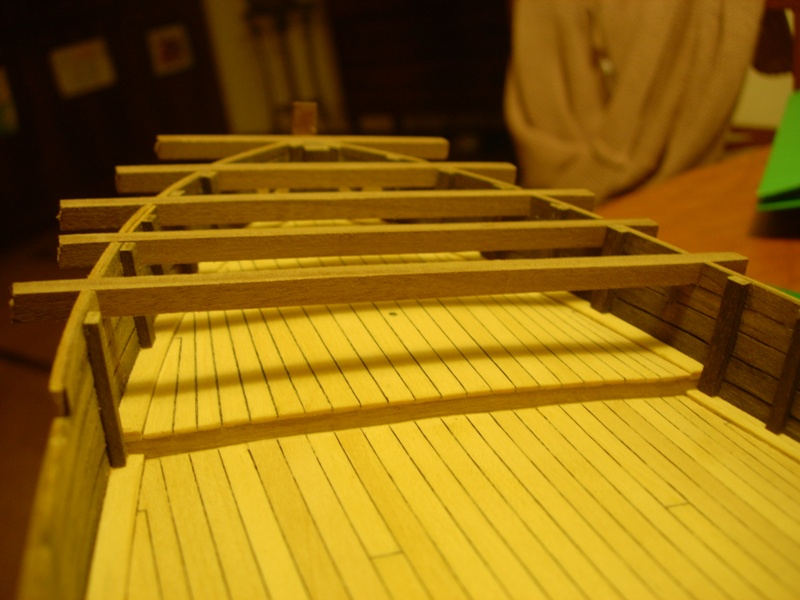
(continue) carving of brackets, cutting of beams, shaping of beams' edges.

-
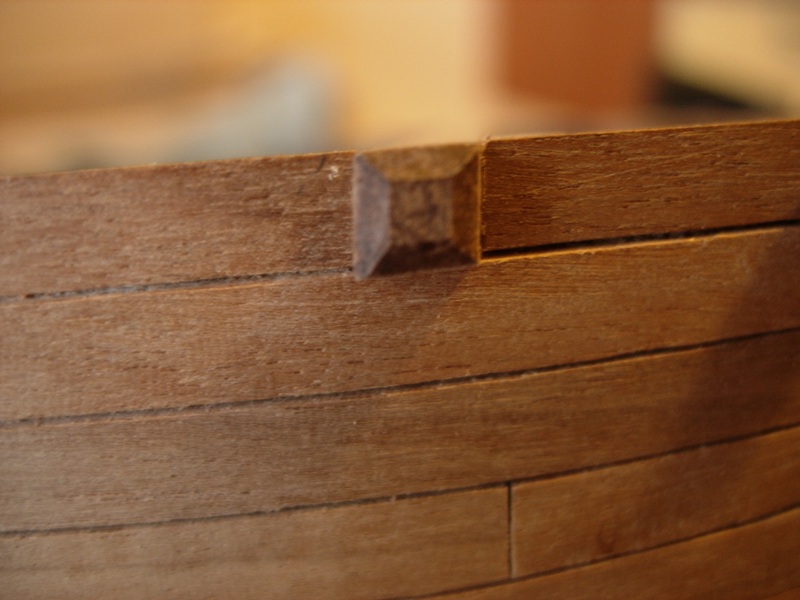
First step: shaping and laying test of fore beams. They were not squared, but rhomboidal-section made, to mantain the verticality of their sides.
-
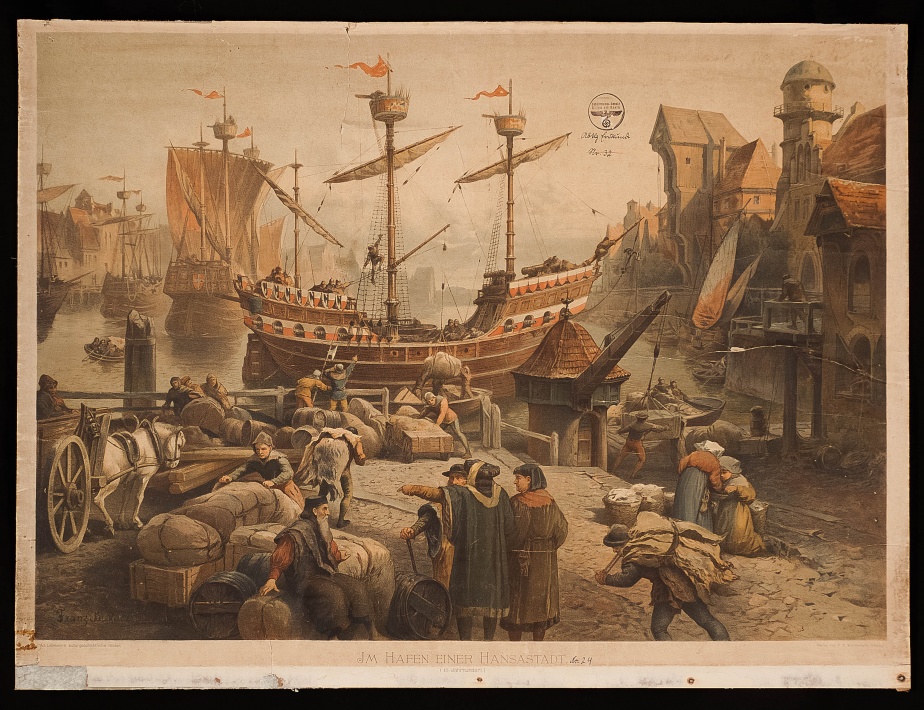
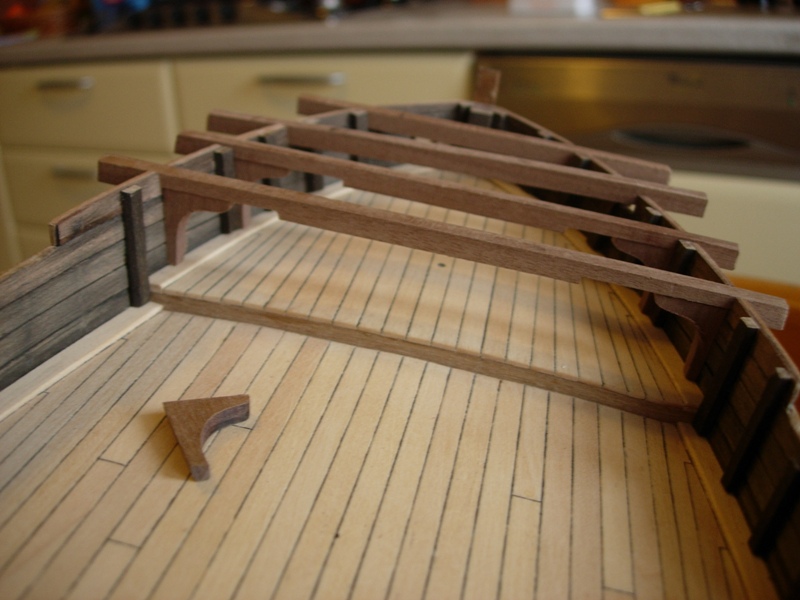
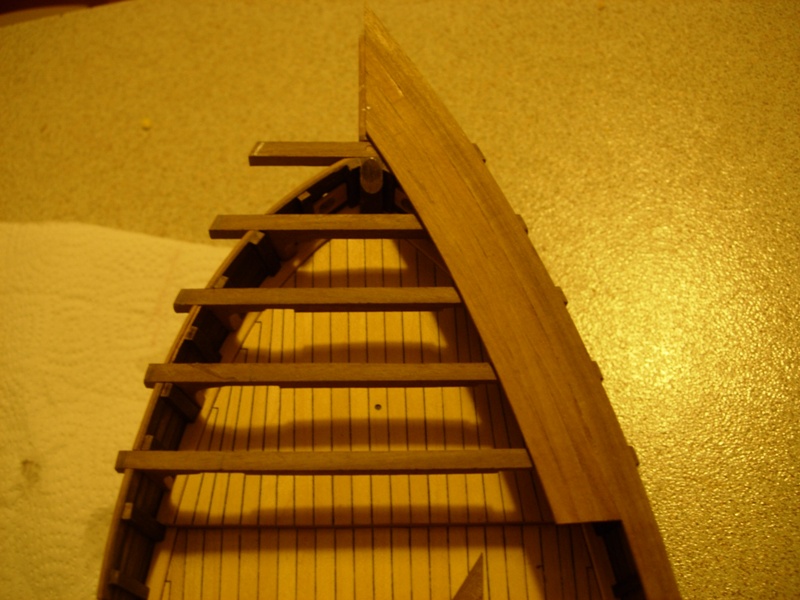
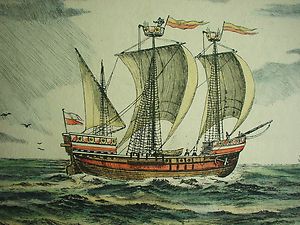
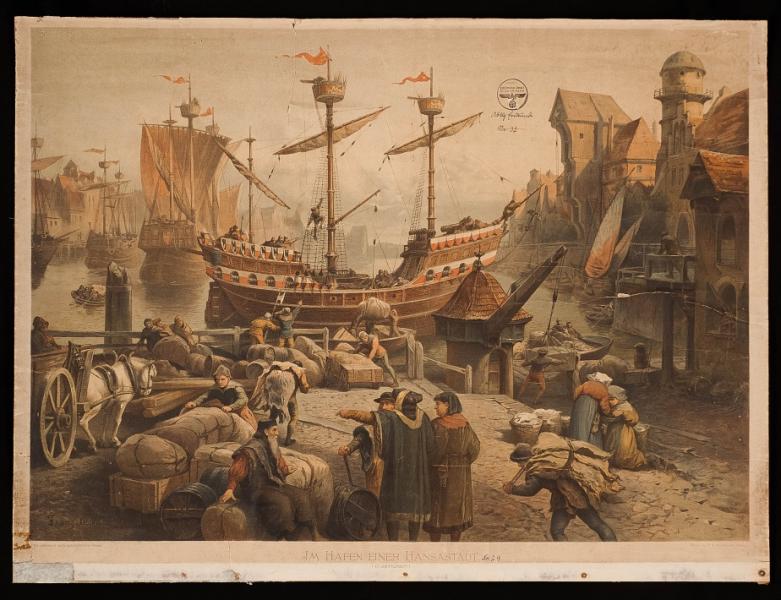
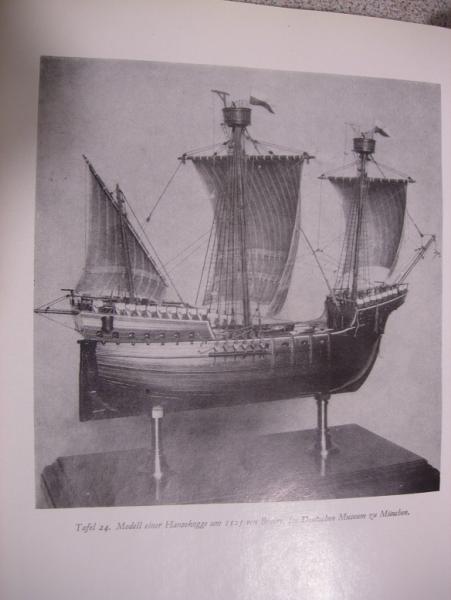
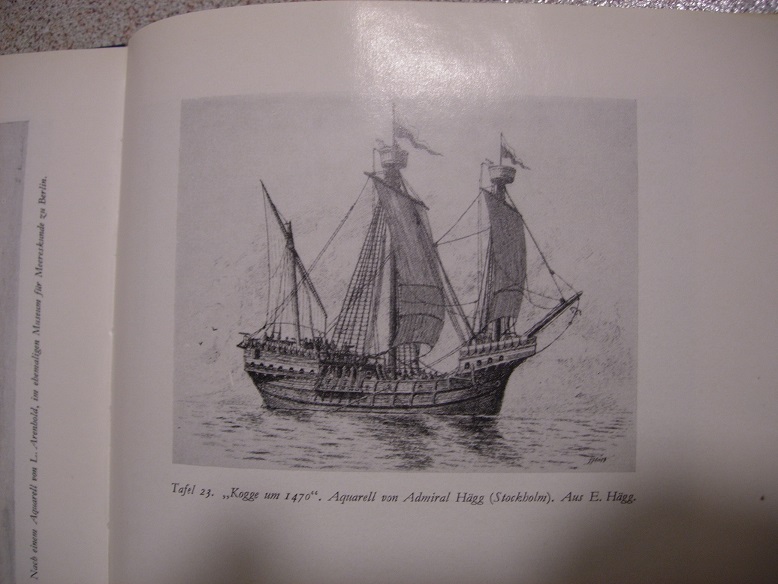
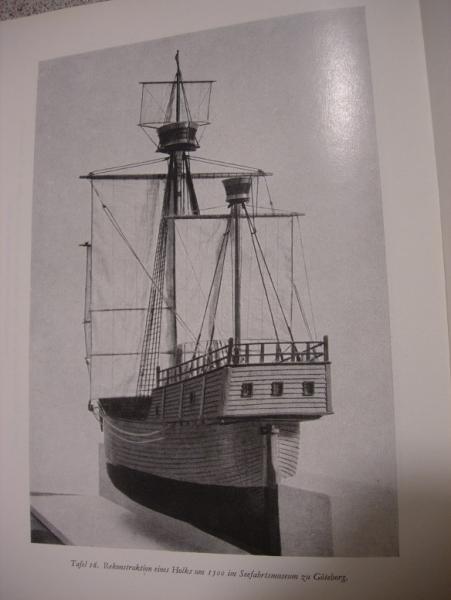
Hi all, the following series of photos will show my interpretation of a particular structure. I was fascinated by some Hanseatic ships' pictures that show a system of beams supporting the quarterdeck and the foredeck. In the foredeck, sometimes the beams were high, just under the upper deck; sometimes they were a bit lower than the upper deck, at a middle-height between the two decks, and they supported a middle deck (gun deck, because at the same height were situated the guns). I followed this second option, more interesting, but more difficult to interpretate. At the poop deck, as well they were at a middle height, to support guns; but because of: 1) the round shaped hull at the stern, 2) the quite large protruding part of the squared upper deck, the beams had to be necessarily placed in both directions. A main direction (from side to side) to support the largest part of the upper deck; a secondary direction, (compared to the main one) to support the protruding part of the quarterdeck. Here are some of the pictures that I used for my evaluations. Alex

-
La Couronne by majq - Mantua - 1:98
Foremast replied to majq's topic in - Kit build logs for subjects built from 1501 - 1750
You're doing a truely good model (now I can see here much more details), and you've done a beautiful child. Regards Alex -
Thanks, Popeye. I tried to do a different planking and I'm glad it's appreciated. Regards Alex
-
I'll reach, soon or later, even that little size ...!!!!! But, at the moment, it's better I stay on ordinary strips. Cheers Alex
-
Thanks Michael, welcome on board of the Hansa ship! Every strip is 1,5x5 mm, not 1,5x0,5 mm. I have seen someone, in this forum, to do amazing things with very tiny stuff. I'm not able to work with so little measures, not yet!!!. I choose a width of 1,5 mm because 1 mm was too thin to realize a correct matching between the strips and 2 mm was too large and difficult to bend, in particular in stern area. Regards Alex
-
Thanks, Blue Ensign and thanks, Augie! I'm proud that you're interested in this ship building adventure. The building of a model ... is just as a little adventure, a little voyage isn't it? There is a target, a program, a camera, there are some tools, obstacles, problems to solve, things to see .... but, above all, there are lots of new people, travel mates and friends! Cheers Alex
-
Thanks, Ron. I've seen something similar in a brico shop, I'll try it! Cheers Alex
-
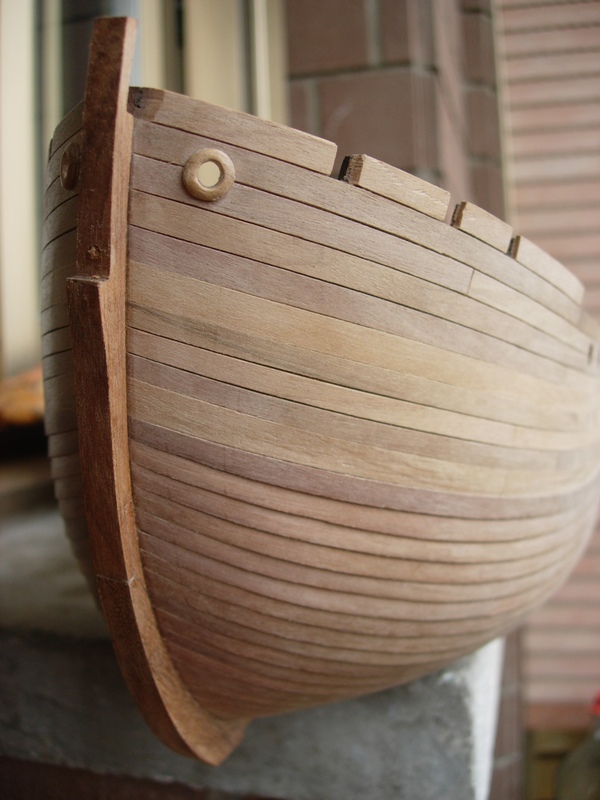
Augie, when I started this model I didn't know the project was full of author's interpretations to fill hystorical lacks. So, in the web, I looked for paintings, drawings, images of votive ships of that era and a bit before. I supposed that in hundred years it couldn't be changed all what was made in the previous century and I tried to be - as possible - in line. I imagined this ship as a great Cog with a not greatly evolved superstructure (foredeck and upper deck) ... and in this perspective a clinker planking could be done, as we can see in XIV century's Cogs and after, in some paintings of other ships. Reasonably, only in the lower part of the hull: it would have been truely harsh, for Hansa carpenters, make clinker between a so close whales and totally unuseful to make it as bulwarks. Not only: having seen this solution in another similar model, shown in the attachment, I felt the desire to replicate it ... Cheers Alex
-
Hi, Augie! In this ship you'll find them both. The hull is clinker-made only in the lower part, behind the lower whale, which will be applied where you can see a bit larger strip about in the middle of the planking. The higher part will be the usual hull, smooth finished (and half painted) even in the forecastle and upperdeck. I like to see junctions, so every strip will be a bit sanded on its external corner to remark every joining Cheers Alex
-
Hello, Anja I'm happy to hear the good news. "In bocca al lupo" (typical italian way to say "good luck") for the next interview !!! Alex
-
Good morning, Paul! Thanks for your visit and the good appreciation. Thanks also for the new word you've teached me ("overlapping") Alex
-
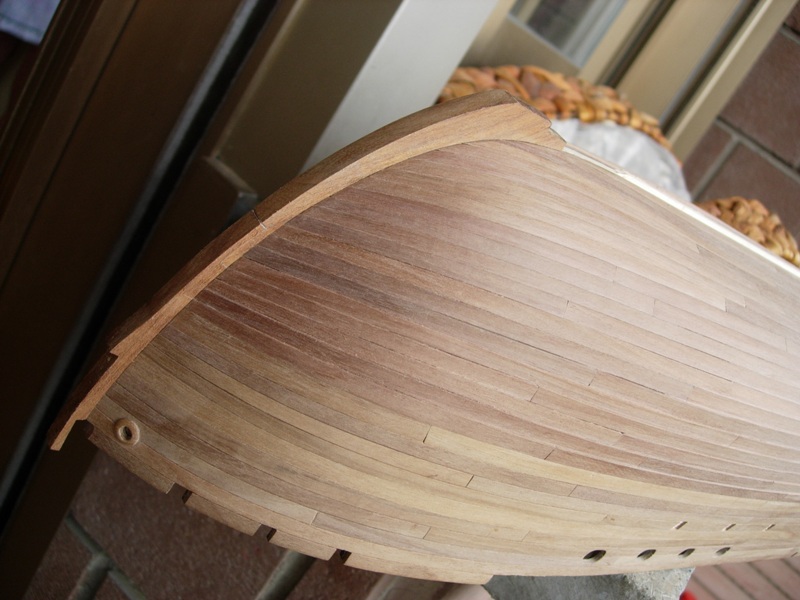
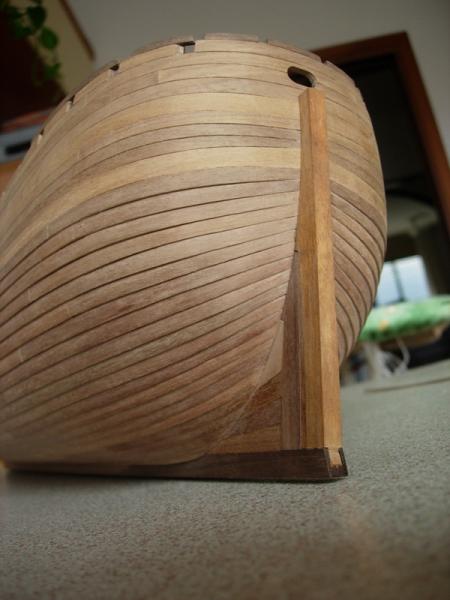
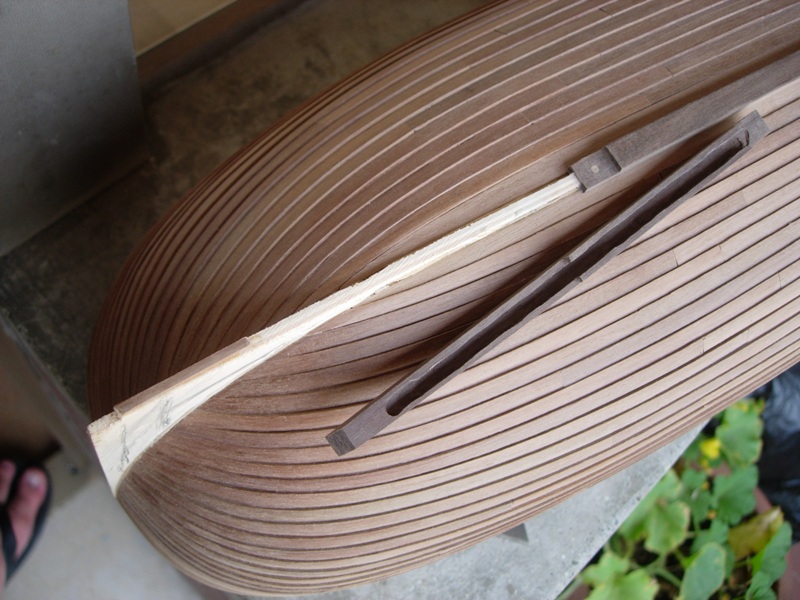
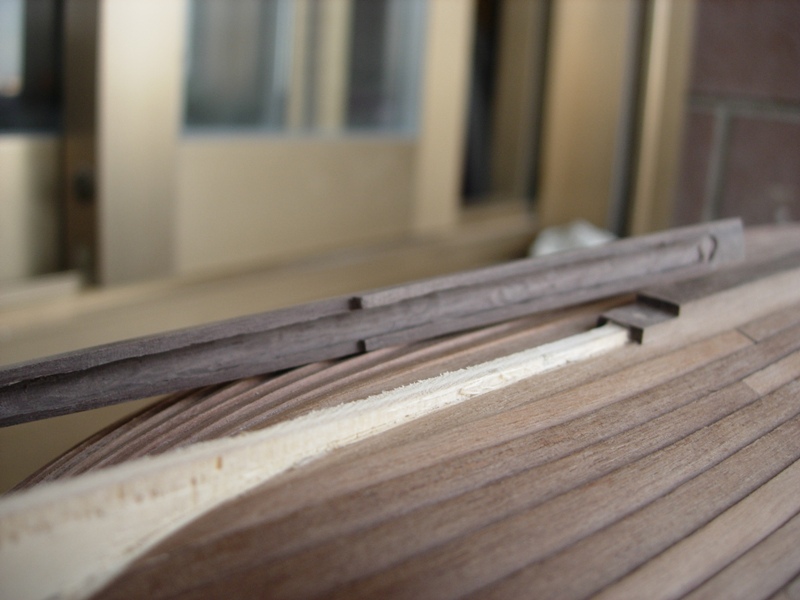
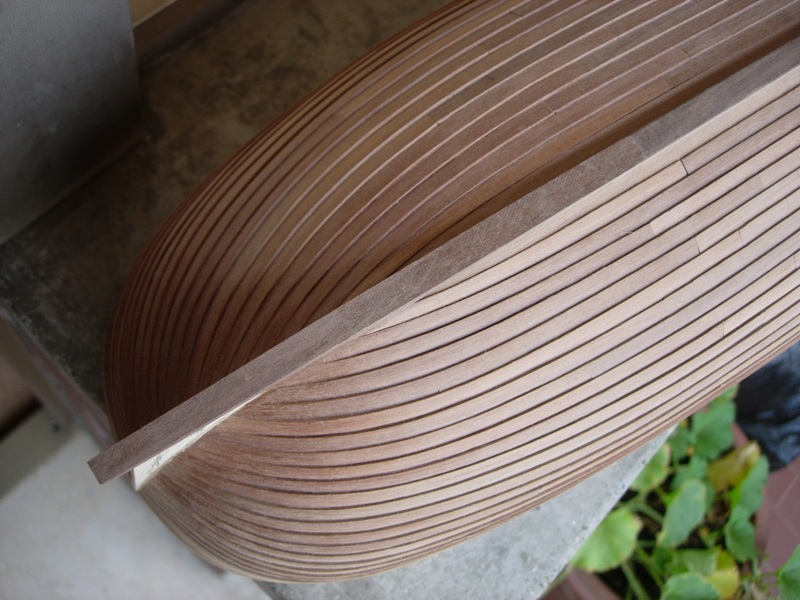
The cutwater and the sternpost were made, carving a thin lath of walnut (true national walnut), the lower part of the keel was made with mansonia walnut. The cutwater was realized in 2 parts, and as well the lower keel, to simulate junctions. Cheers Alex
-
Hello all, some other pictures: construction of cutwater and sternpost, by simulating the final part of keel's filling timbers

-
Thanks, Harry! That carpet was the result of a long bargaining with a clever and expert Iranian shopkeeper. I went into his shop for curiosity and, after a long afternoon, I came out with that carpet. The trade began just when I asked for a Nain carpet, pointing a pile of carpets of his ... and he, smiling, replied that they were Qum. The difference between Nain and Qum, he told me (apart the city of manufacturing), is in the external area: they both have floreal drawings and are light-colored in the centre, but the frame is as well light-colored in Nain carpets, whereas is reddish and blue in Qum ones. The amount of words that he told about Nain, Qum and others and his fluent speech made me as drunk. In the end, I had in my hands that carpet ... at a reasonable price. I don't know if it's really a Qum or a Nain, but I still like it Alex
-
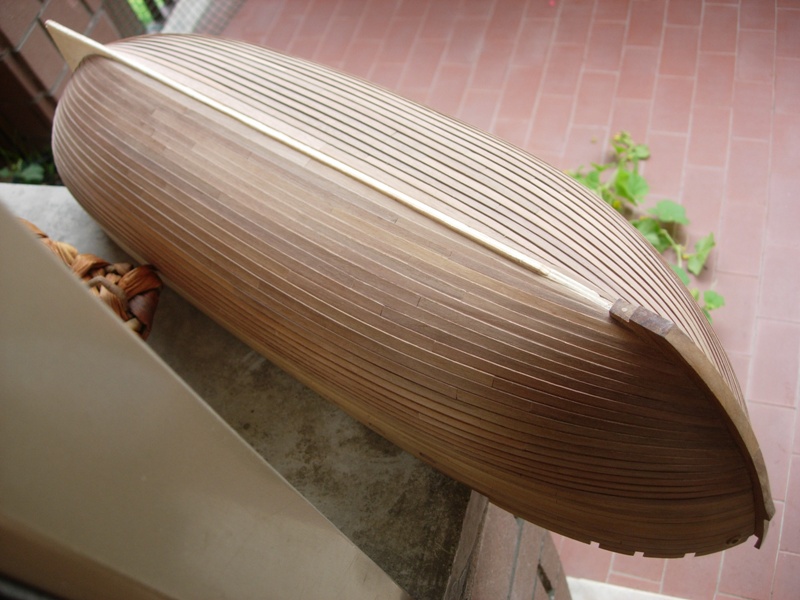
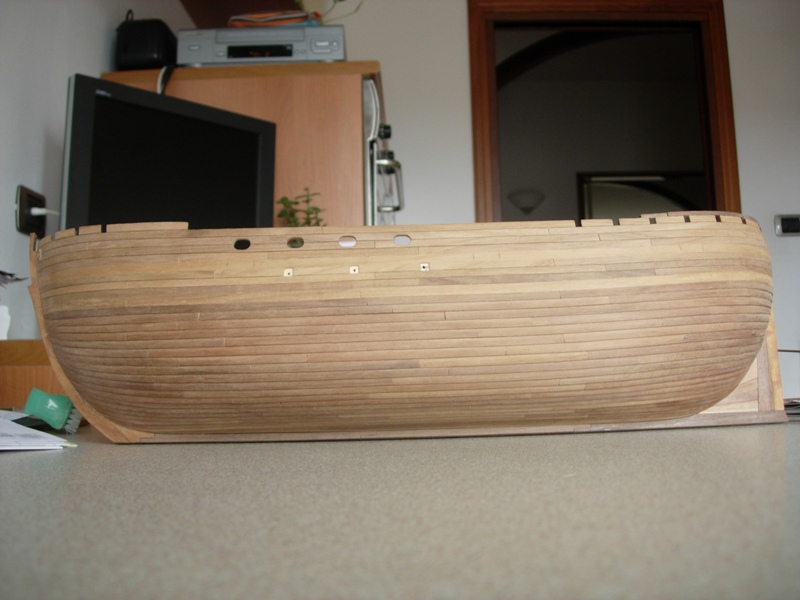
Thanks, David. When I started this kind of covering I had some doubt, and not only for historycal reasons, as correctly observed by Christian. I thought it wasn't easy to mantain the same measures and the simmetry of every single strip and all strips together. But the challenge was interesting, so step by step I succeeded in completing all the planking, with several working hours and some imprecations all the times that I had to remove a too large/thin/wrong-shaped strip. It can seem strange, but a single strip that was a bit different from the close one, made a terrible effect on the whole planking. And I had often to change and change again something. Alex
-
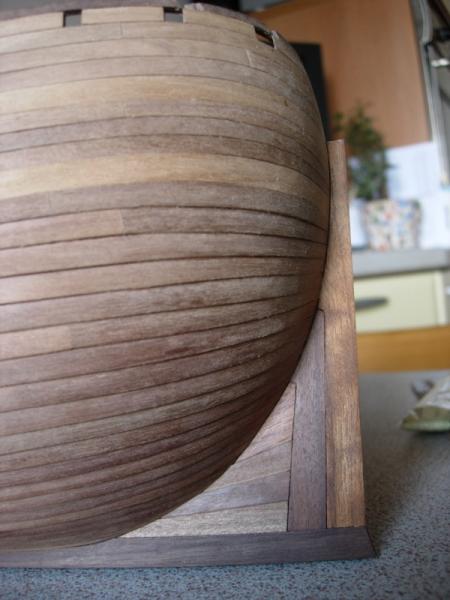
Hello all, here are a few photos of keel covering. I didn't remove the false keel, but covered it with walnut squared carved listels. I choose a very dark wood to contrast the color of planking. Alex

-
The radar is amazing, Paul! Alex
-
Thanks, Ron. I'm not far from finishing treatment of my model, so I'm looking around for inspiration ... and I like a lot yours, with its beautiful satin effect! A few Italian modellers adviced me to try with linseed oil (a mixture: 50% oil and 50% turpentine, or white spirit) and part of them preferred raw oil (most of them painters), whereas another part uses cooked oil. I tried both oils and the final finish appears the same; only, raw oil dries in a longer time. Which of them have you used? Cheers Alex