HOLIDAY DONATION DRIVE - SUPPORT MSW - DO YOUR PART TO KEEP THIS GREAT FORUM GOING! (Only 13 donations so far - C'mon guys!)
×


Foremast
-
Posts
262 -
Joined
-
Last visited
Content Type
Profiles
Forums
Gallery
Events
Everything posted by Foremast
-

La Couronne by majq - Mantua - 1:98
Foremast replied to majq's topic in - Kit build logs for subjects built from 1501 - 1750
Hello Majq! What's the name of that wonderful child I have seen looking at your log? Glad to see you and your building in MSW Alex -
Christian, Thanks for the link. About Cogs you're right. There's a lapse of time of about hundred years between Bremenkogge and this ship, made by the fantasy of its author and a few paintings that inspired him. It's a long period, but I think tecnical evolution wasn't as speed as now, so - in the darkness due to lack of other informations - I can choose some solutions typical of the previous century. Even great Cogs or other ships, often shown in ancient paintings, drawings or votive offerings, are made with clinker planking ... so I decided to do it, that is - anyway - a fascinating covering. I only hope my fantasy isn't more than ship author's one.
-
Thanks, you're doing a very interesting work Alex
-
All right, then! You've the same problems of mine. I love the Dutch ancient navy and books, drawings, instructions are written in Dutch or (when I'm lucky) in English. Until now I had heard lots of fellow citizens of mine complaining about translations from various languages to Italian. But I had never heard anyone from Italian to English. If you need help I'll be glad to be helpful. Cheers Alex
-
Hi, RDL I think you're doing a good work. For language issues ... there are some Italians, here .... maybe can solve them. Alex
-
Great work, Augie! Will you place also all sails? In case, open or bridled to the yards? Alex
-
Hello, Ron great work! How did you do your finishing treatment? Alex
-
Thanks Mark, thanks Christian. Clinker planking isn't part of the plans. Looking at Hanseatic paintings and retrieved shipwrecks (eg Bremenkogge), it seems that was common for Hanseatic ships of that era. Perhaps it was due to periodic needs of make them come out from water . When I saw it, immediately had a great feeling and - being it anyway realistic - I have tried to replicate the clinker planking. Alex
-
Thanks Augie, I'll give a look. I think, If a re-application of finishing product will be needed, it will be a problem of Hansa Ship's crew!!! With the delivery of the ship, every shipwright's obligations cease and begin captain's ones !!!! To have a sailboat is a wonderful thing. Many years ago I often went by sea with friends on a sailboat up and down along Croatian and Greek coast and their isles during my holidays. Now you have made me remember just all restoration works, night shifts at the helm, and the countless times I had to go underwater to disengage the anchor in the port!!!! But .... what a joyful holiday was every holiday. A period by sailboat is one of the most beautiful things that one can do during his life; everyone should live this experience at least once. Alex
-
Augie, I'm thinking to use cooked linseed oil as finishing. I've read it penetrates into wood fibers and in a few days it oxidizes becoming a kind of satined and waterproof finishing. Have you ever so finished a model? Advices are veeery welcome!!! The previous straw-oil treatment only makes darker the planking and dries quickly Alex
-
Thanks, Augie! "Fantastic"? I hope it so... but "something interesting" is surely enough!!! I haven't still decided the finish treatment. I'm used to paint the planking: first, with pore filler, then with satin varnish. In this case I'd like to try a different method... first, blackening with colored straw oil, then finishing with linseed oil. In this way, I'd succeed in making stand out wooden fibers . Alex
-
Some other pictures ....

-
You're really a shipwright! Great realization. How did you make a so perfect carving, as shown in the last picture of post #78? Alex
-
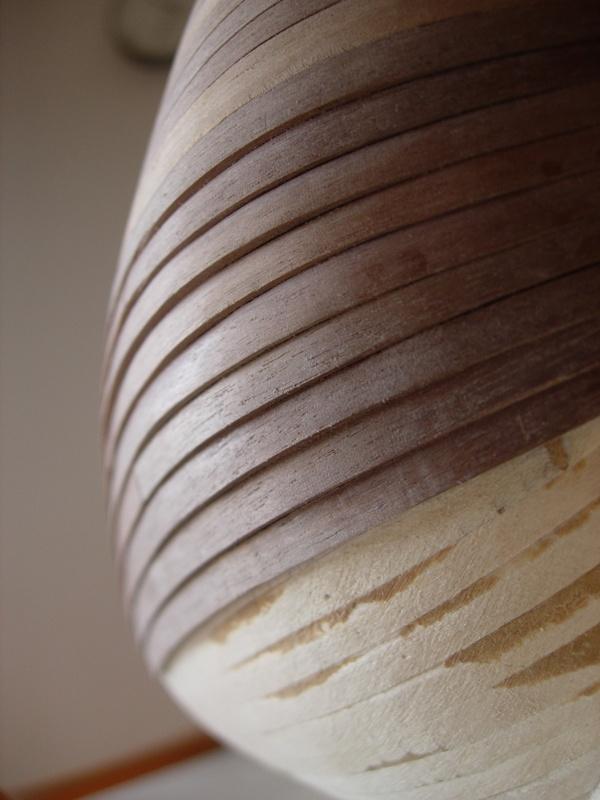
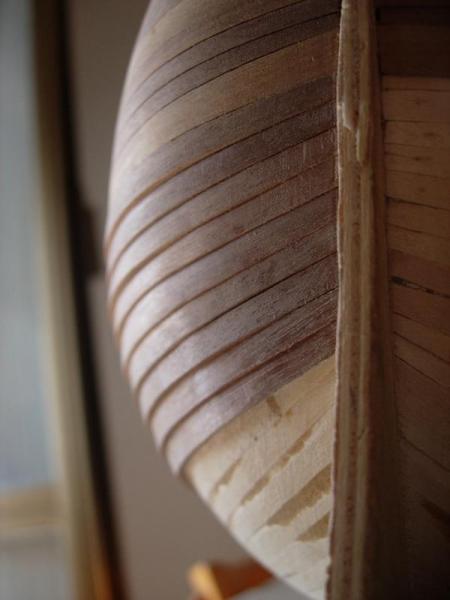
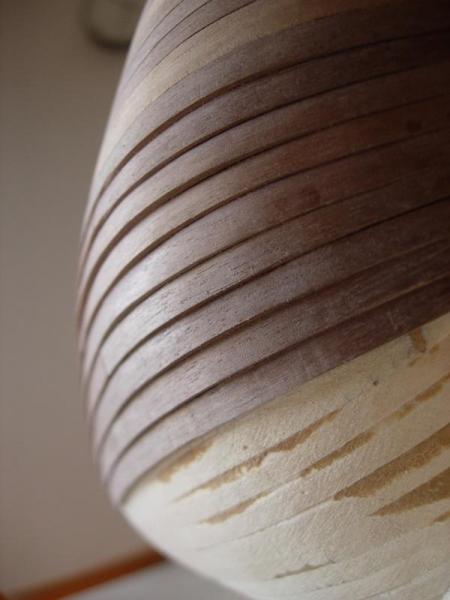
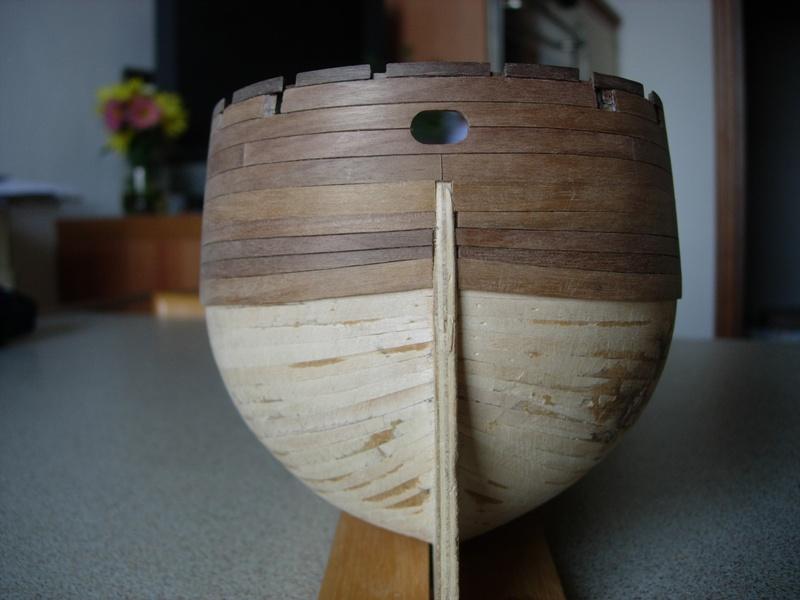
Using strips 12-14 cm long, I tried also to simulate an hypotetic original planking (in scale 1:50, about 6-7 meters) and the light/dark effect helps to see better the junctions.
-
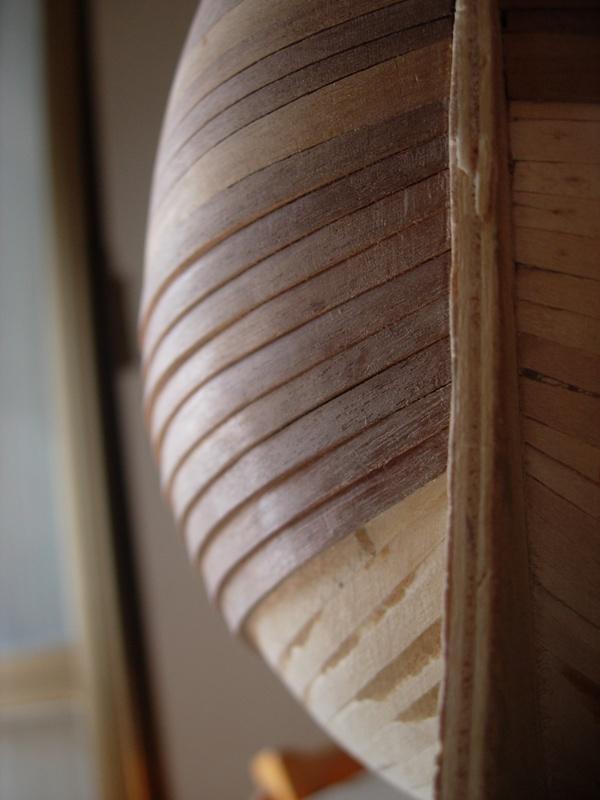
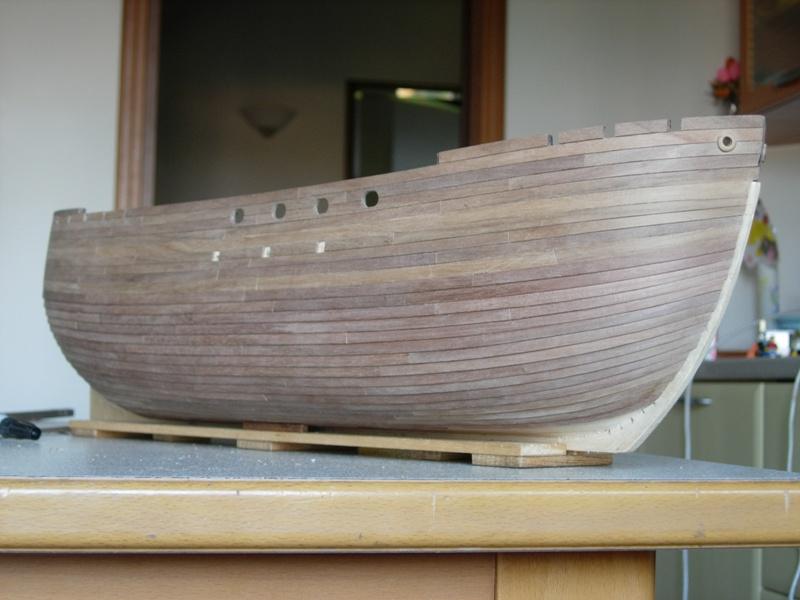
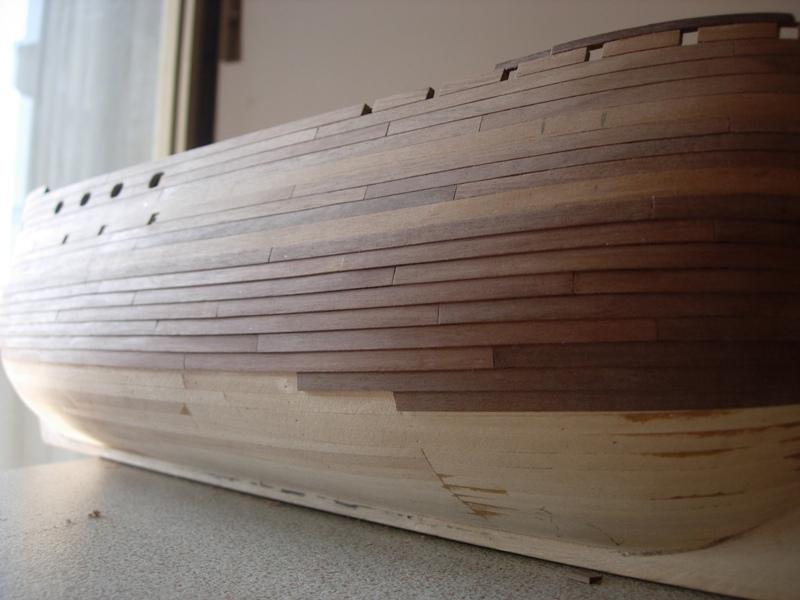
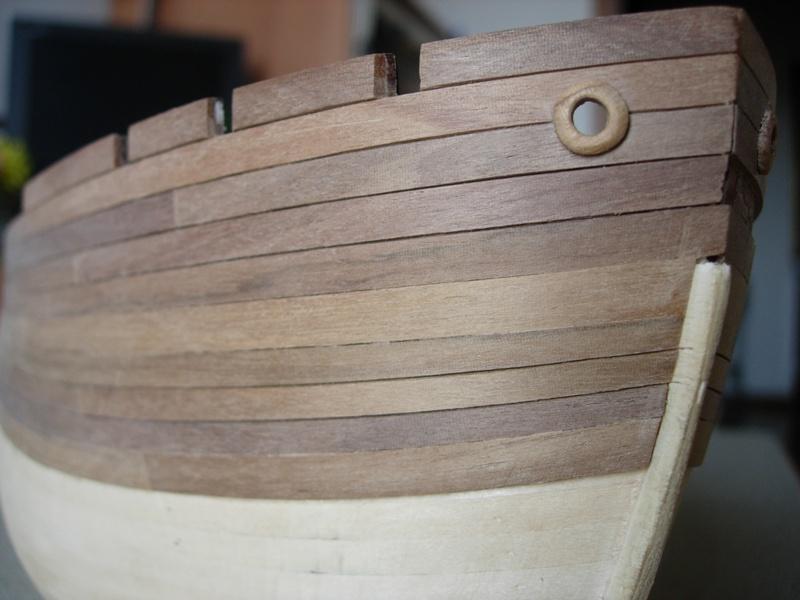
Now, lower part of the ultimate planking. It was made using a different mansonia walnut wood (size: 1,5x5 mm), darker than upper part. Every strip was trapezoidal-shaped, bended and shrinked at the top. Every strip was also cut and portions of different strips were mixed before their laying to create a little clear/dark effect in the planking. In bow and stern area, the planking was sanded to eliminate - gradually - the level difference. Alex

-
You both, then! Alex
-
Thanks, Augie. I'm used to choose every single strip in the shop. The shopkeeper is a quite patient girl, so I can select what she has for sale. The walnut shown in previous pictures has "Amati" brand
-
You deserve a monument, Jan! Alex
-
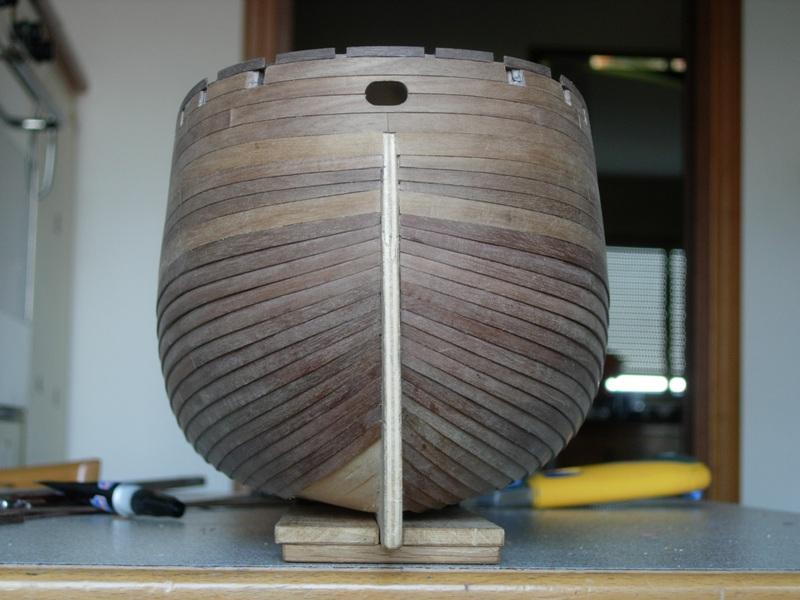
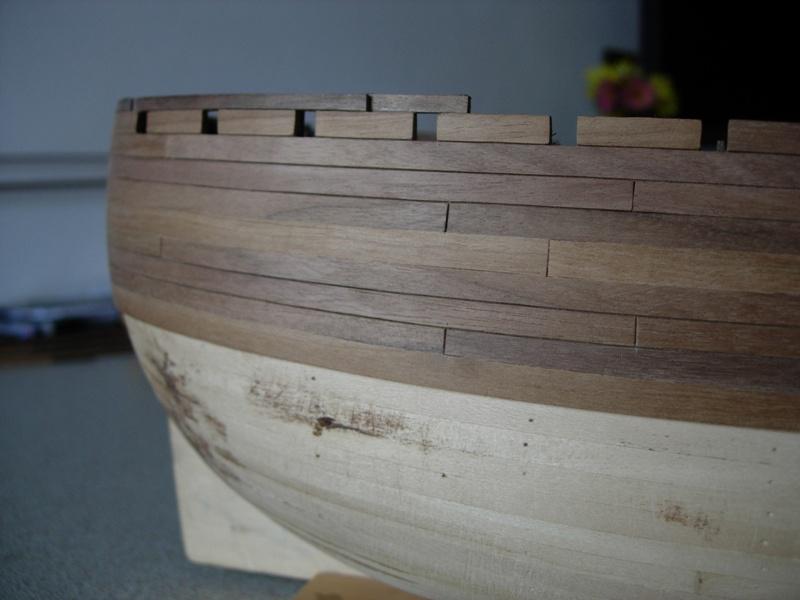
Thanks Mark, even if my English isn't so good, I hope images speak by themselves. Now, some pictures of the second planking, highest hull's part. These strips (mansonia-walnut wood) weren't reduced at their extremity because of the regularity of the top bow and the top stern. You can see why I made - in these areas - the first planking with the same mansonia-walnut wood (I used the same purchasing batch): so made, the internal part of every hole in the bulwark is totally identical to the external. Alex
-
Hi Drazen! You're doing a very good and interesting work, I'll have been following your steps. The drawings attached to this book show a Pinnace (another amazing typical Dutch ship) but every single word in the text is useful for several Dutch ship of the XVII century. Alex
-
we talked about the Sea Hag and she sent a bad spell ... You did a good restoration, Augie! Alex
-
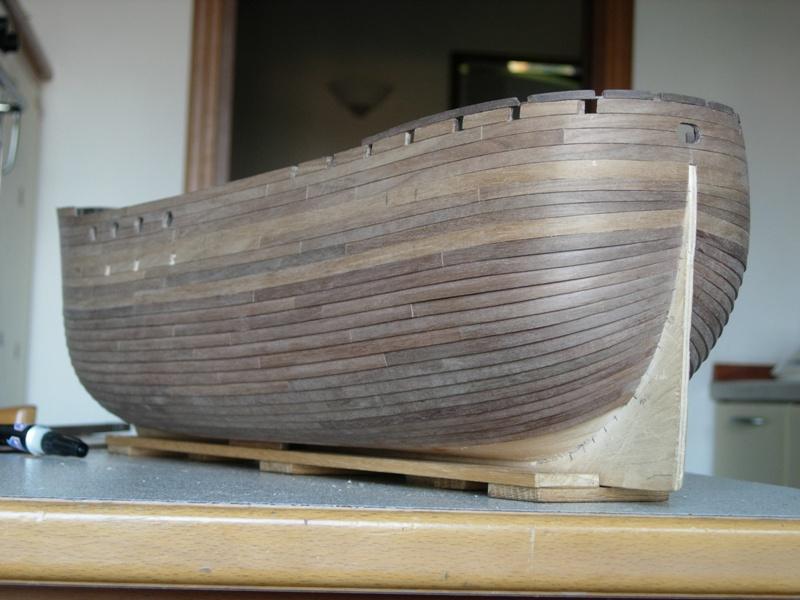
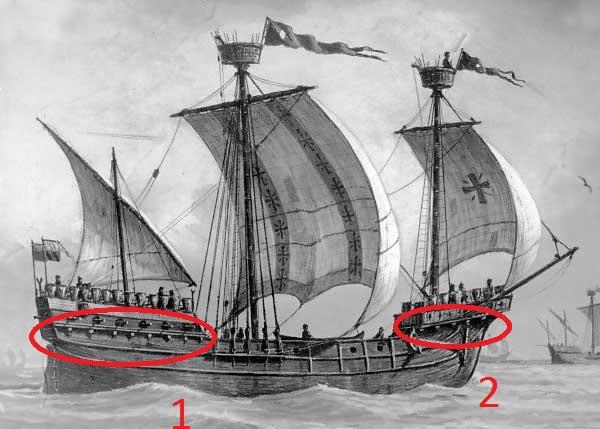
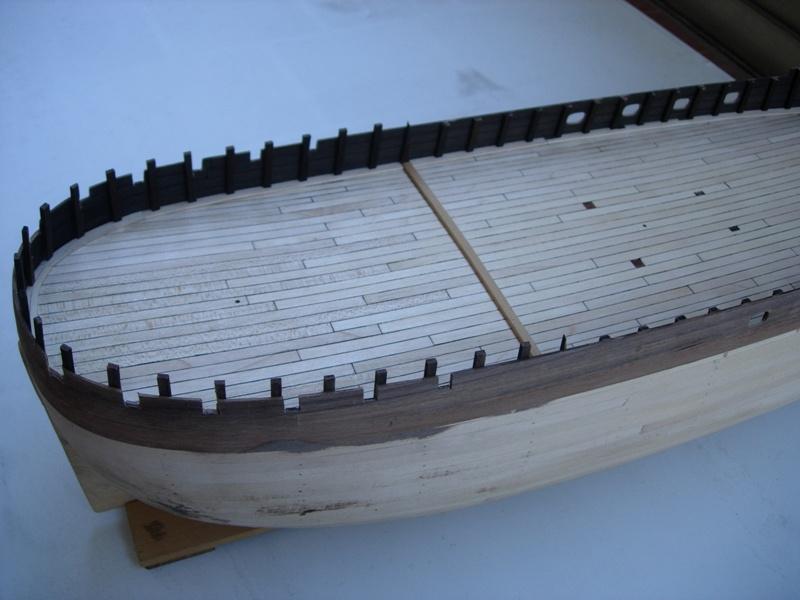
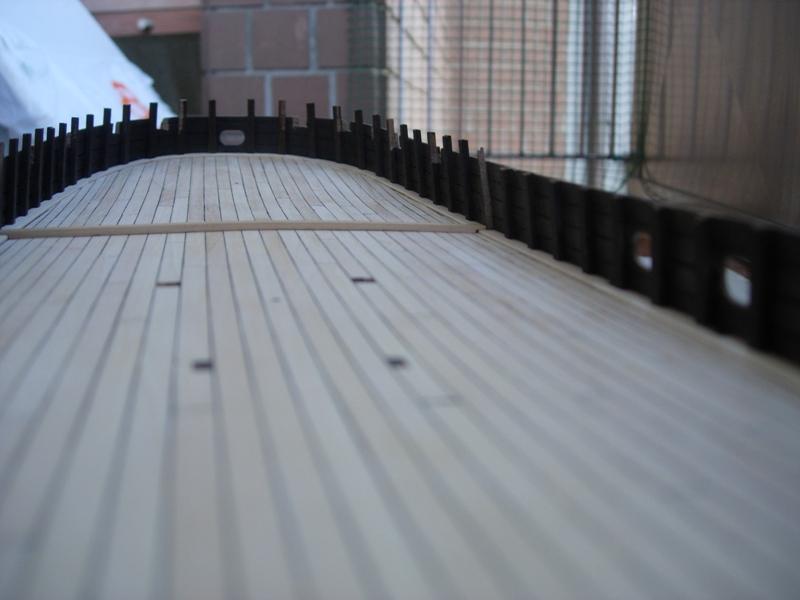
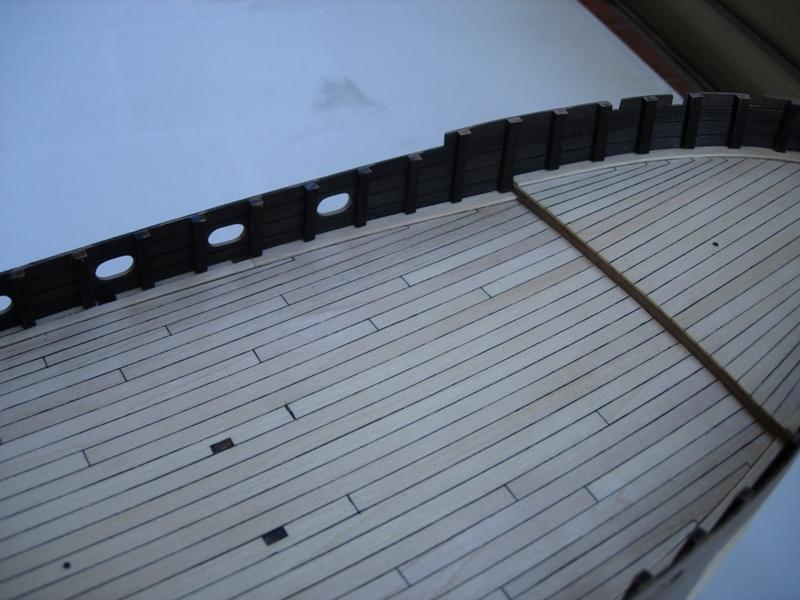
The thin wooden strip that crosses the deck delimitates the covered area under the quarterdeck. In that area, the deck planking isn't as good as other and I used it for my caulking tests!The s quare carvings at the top edge of the bulwark (quarterdeck and foredeck area), were the result of another long meditation period!!!!! The question was: how can I realize the beams shown in the picture? Pay attention: they're in different position. In quarterdeck area (1) they are situated a bit under the middle-height between main deck and quarterdeck, and weapons are a bit over them. Conclusion: there was a middle-deck that held up weapons. Conclusion #2: I had to find how build something with a method that made sense !!! In foredeck area (2) the conclusion is the same, a bit more simple for the protruding foredeck, because the supports are locked on the knee of the head. You'll see the full solution forward, but those square carvings you see in the pictures are the coupling points of the beams. I hope you understand what I have just written ... I'm not used to write a so long sentence in technical English ... if not, post me some questions! Alex
-
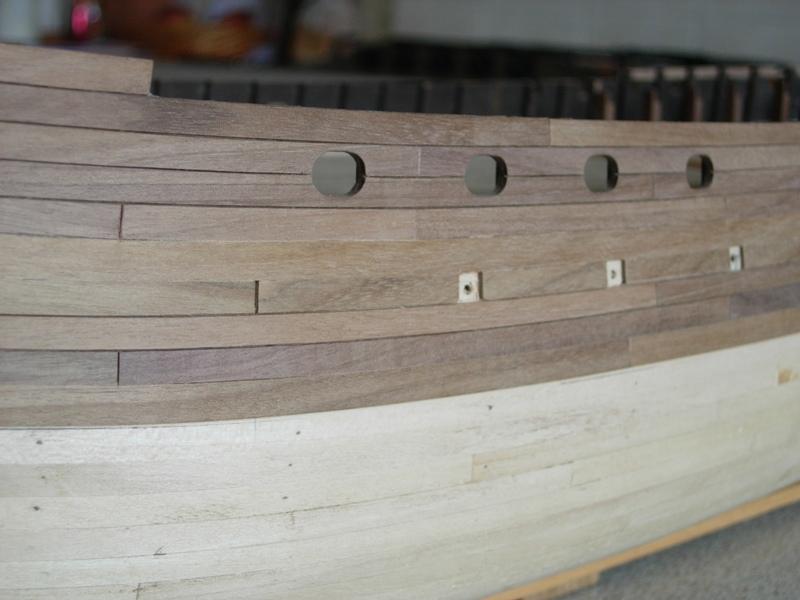
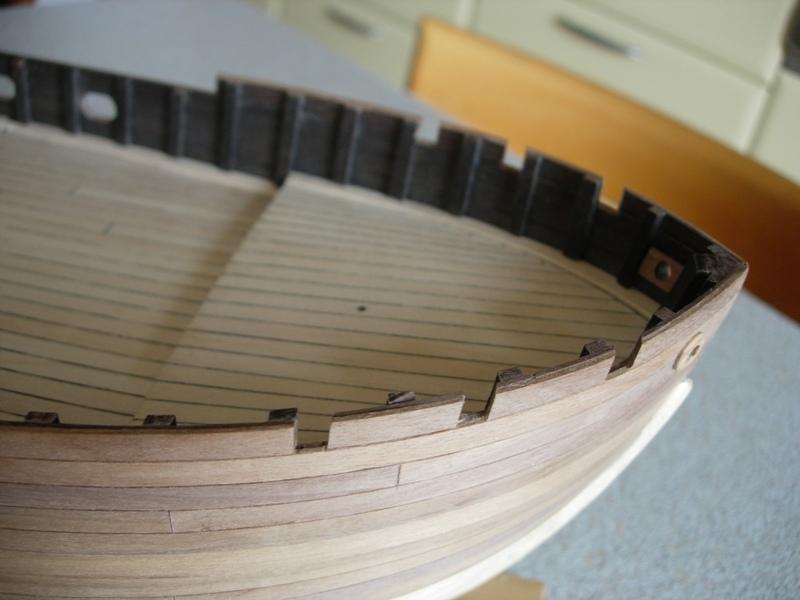
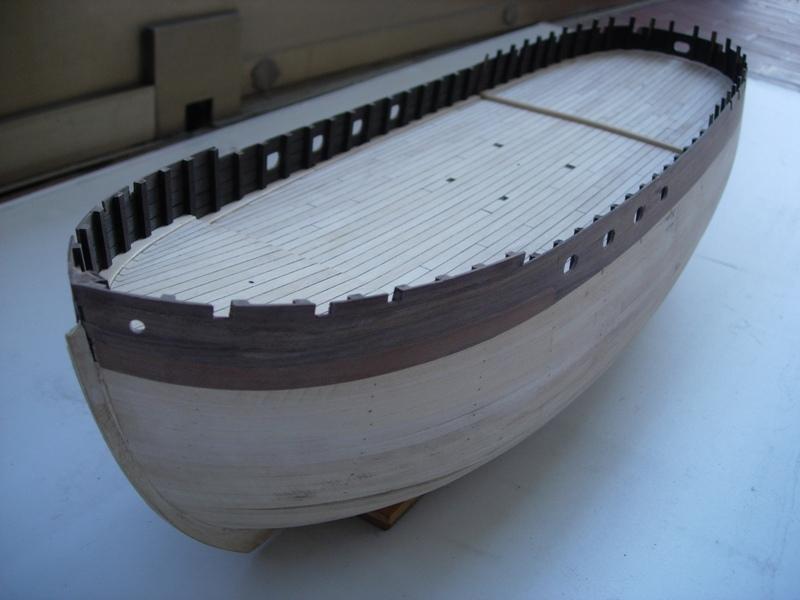
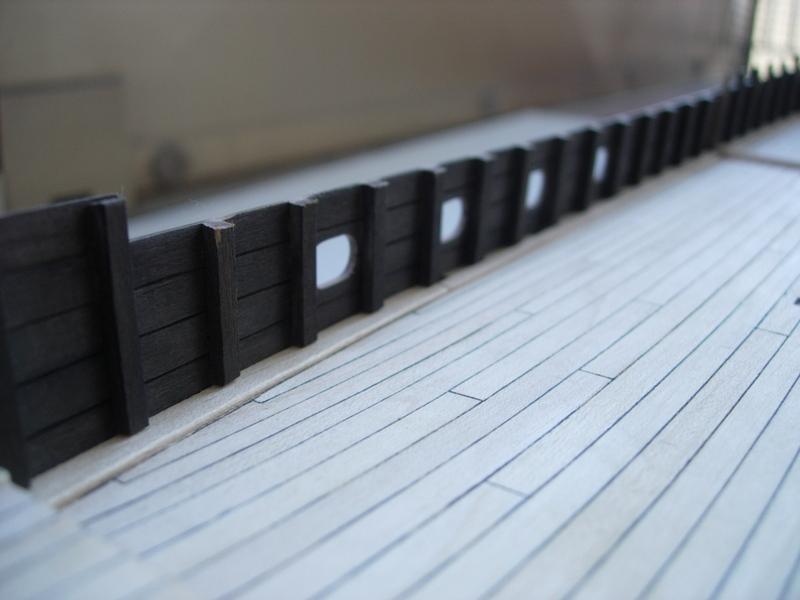
well, a new step: bulwark stanchions and various holes (hawse, rudder and bulwark)

-
Thanks for explanations, Michiel. The final effect of your work is really good. Alex
-
When I was child, Popeye's cartoons were broadcasted a lot, together with Hanna-Barbera's ones and I was a fan of them. I remember - after eating spinach - even planes, tanks, h-bombs in Popeye's biceps. Some characters were truely interesting: the bad (Bluto - I always hoped he finally wins, at least once!), a hotdog eater (in italian "Poldo") and .... just his father, a bit like me! I hope that Augie won't get angry for this digression ..... in case, my apologies. Alex