HOLIDAY DONATION DRIVE - SUPPORT MSW - DO YOUR PART TO KEEP THIS GREAT FORUM GOING! (Only 51 donations so far out of 49,000 members - C'mon guys!)
×


Rich.F
-
Posts
381 -
Joined
-
Last visited
Content Type
Profiles
Forums
Gallery
Events
Everything posted by Rich.F
-
 HI Sam, Great Pictures. Hope you get better real soon Rich
 -
HI Ryland, Thought i would take a moment to come see your build as you took the time to come see mine, Looks great, Love the detail, Rich
-
HI Chuck, Welcome and thanks for the comments. Look forward to seeing your build. But Sam Sam Said try contacting supplier. boatsupport@greatplanes.com From what i know they seem help full, I's sure there was an another member building the Enterprise (Shawn) I think They emailed him a PDFcant remember now that was on MSW 1.0 ( Dark Days lol) Hope this helps.. But Build related I hoping to get back on with some work on her this week. Rich
-
Hi all sorry work has kept me from getting to the post board or ship work. Just going for a Starbucks when i finally get home ill reply but as Sam said chuck. Don't mind scanning. Your tried looking for pdf
-
HI Sam More or less made the same mistake, Work around it. How you have the work around looks pretty good I realized very soon after taping the lower wales on and making the other parts, so could change it....but do what ever you feel happy about, . Re-looking at the picture. you could always get a few strips of 1x1 (part 62) and put it on both side of the lower wales blend it it i think that's what i would do. .Darn it... ""work around"" always works for me Rich
-
Hi Sam, Whats the Boo Boo?? Hey Robbyn, Have to agree with Sam, Each end every build is you own, I try to follow advice other build and at times instructions but if i like it then im happy. BUt im going to use the pre made gun ports. two reasons, TBH, really cant be bothered to try and make something at my skill level. 2nd, it was in the kit LOL Looking forward to pictures Sam Rich
-
Hi Shawn, Spring In Ideho? Well we bloody have Snow here!! You Catch Anything? Look forward to seeing the build Log,and you getting back on with planking. Rich
-
HI Sam, Look good, I don't think i have parts to make gun ports just the pre made ones. But build looking great Rich
-
Hi Sam, Yeah took a few attempts but got it in the end.
-
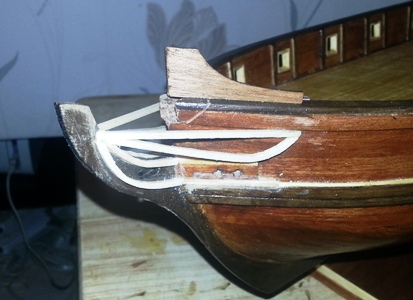
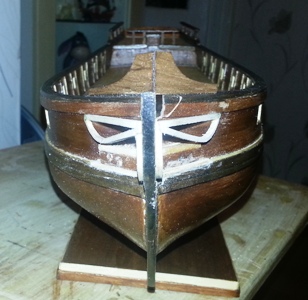
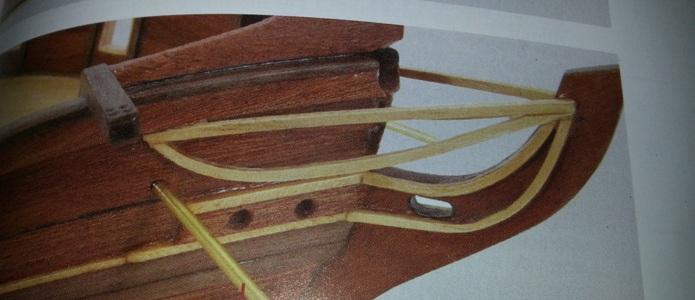
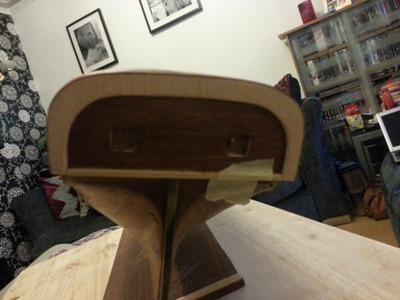
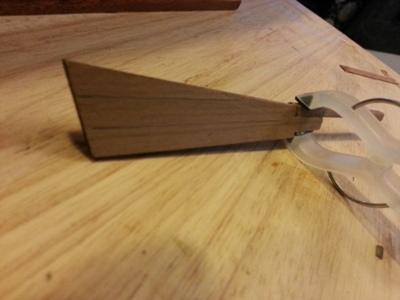
After a lot of online reading and searching I have made the 3rd attempt at the head rails bits. Used the wife hair straighteners, dipped the wood in water for a minute or two, repeated until the curves matched the drawing. I don't think that came out to bad at all, condescending. after looking at these pictures im going to spend the next few days cleaning up the paint work. (somehow) looks good the light i have
- 85 replies
-
- 1
-

-
- enterprise
- constructo
- (and 1 more)
-
Question for all, Need a little advice / Help As per the Manual-(picture) How to I Bend form the Head Rails and the Braces. I have tried to soak the wood and slowly bend the wood, cut and shape the wood but nothing came out right.
-
Very nice work. Like it.
-
Very Nice work so far will indeed like to see how she comes along as the Victory is possibly next on my build list,depending on how my currant build goes. Best of luck Rich
-
HI Sam, Well I sure do hope you get build time soon, I do get a lot more spare time with my new job. drill bits are for the " pin rails" cant make them as the drill bits have not arrived. Rich
-
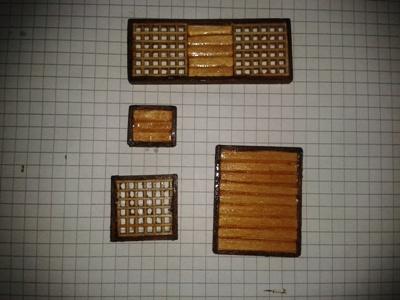
Well busy day in the dry doc today the team and me, Well more Me! managed to get the Hatch Coamings done. In the parts department a few damaged items so have been unable to build the Head Rails and the Braces, Well in the contraction they got damaged, so waiting on the delivery of new stock and some new 0.6, 0.8, 1.0 mm drill bits. so really cant to much more till it arrives. ((does anyone know if 0.6mm Drill bit is small enough or do i need smaller?))
-
very nice, work. how long did she take as she is next to do. rich
-
Hi Sam, Some times it can be a challenge just to sit there all day or night, only if the wife is at work really, but then again at times even if she is here, Although it costing me a small fortune in 1000pc Jigsaws, to occupy her, we also have a 9month old beagle pup. and he is hyper most of the time.. just like a young child, So know what you mean.. Hows the build,?? Rich
-
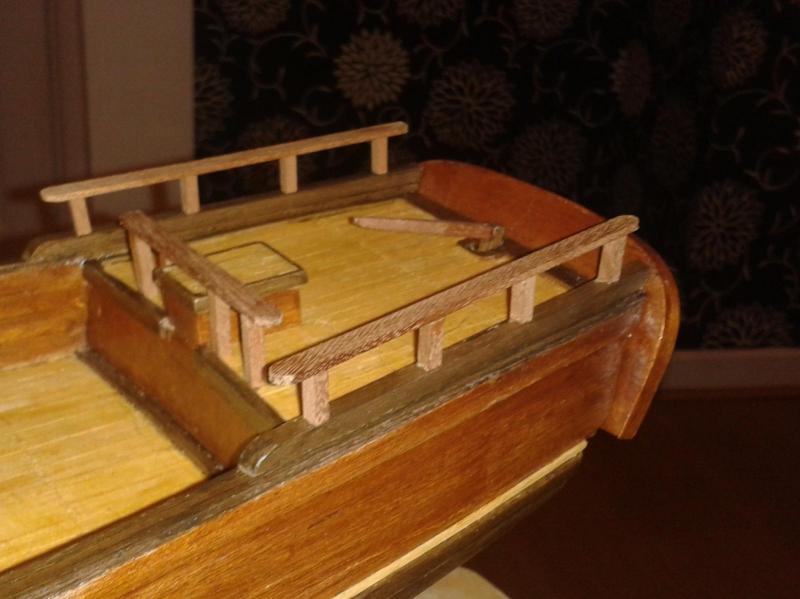
Well sat down last night watched Avengers Assemble and made the poop deck hand rails. Sam, I found the rudder a little fiddley, as I needed to cut the pins down in size to pin the hinges in place, but they kept on disappearing. LOL
- 85 replies
-
- 1
-
-
- enterprise
- constructo
- (and 1 more)
-
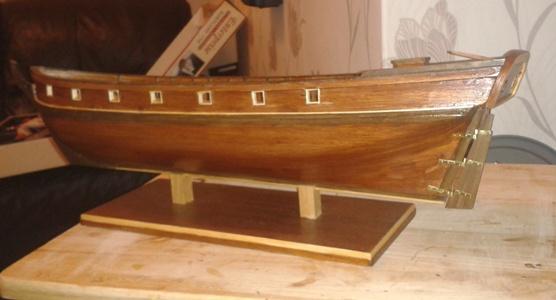
Finished the rudder, its ok but found it very hard and fiddlery.
-
Hey Shawn, Nice to see you back, I did reply before the big crash. Yes i use the 0.4mm x 6mm strips for the second layer, If I remember you asked about the stem. I did place this before i planked the first layer but then removed it filled it with the same side wood i use on the first layer, then put it back on, sanded the hull to fit to a good point, (sanded the entire hull to a smooth finish, then layered the second layer up to the stem, to keep the nice cut shape. hope this makes sense, if not let me know Regards Rich
-
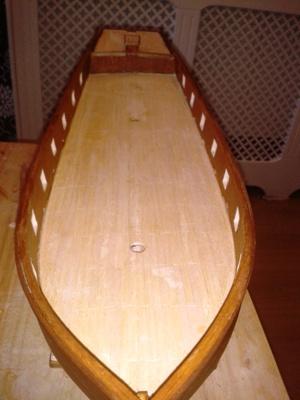
Hi Sam, It was the little water holes,, I have filled them, can't really see them they did not look right any way. ill up load a picture tomorrow. Rich
-
Used a few small tacks on the tansom stern, just to stop it sliding. Started working on the rudder, but just too tied after a long working day, just got enough in me to post.
-
Last few days been playing with the lower wales, and when i mean playing, getting a little stressed. placed them, taped them, got up Friday before work about 0630, tea in hand, stopped looked at the box, back at the box realized, that i had not placed it in the right place, Darn it!!. Stripped it off before work using my caliper Micrometer, measured of the drawing and i was out in the middle by a few mm. did make a difference. I did notice that the water way would be covered before i moved the Lower wales, But now they show again, Whats best to try and hide them?
-
Well this week Im on call, so just have to sit down do a little bit as I might get called out, I have managed to start the gallant rails. All though i had to take them off again as the 2x2mm strips x3 each side needed to cover rough tree timbers, but was not that level to the edge the upper wales. Ill sand that and re paint. once the glue drys tomorrow ill up load a picture or two. before i sand it.
-
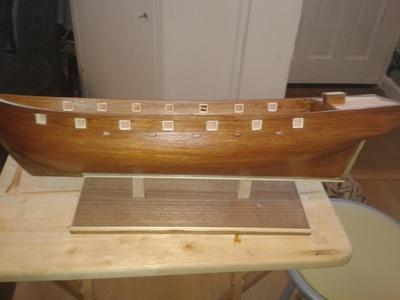
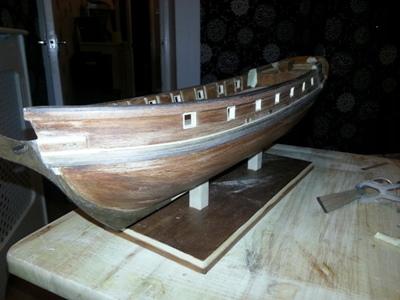
Well the hull in sanded and now painted, I think it look great. Spent last night and a few hours today making the gun port frames and re sanded and painted the hull with a second coat