HOLIDAY DONATION DRIVE - SUPPORT MSW - DO YOUR PART TO KEEP THIS GREAT FORUM GOING!
×


rjones726
-
Posts
55 -
Joined
-
Last visited
Content Type
Profiles
Forums
Gallery
Events
Everything posted by rjones726
-
 My Byrnes thickness sander arrived yesterday. It's a well-built quality piece of machinery! I used it to bring the thickness of my cherry frame material down to 3/16". It comes with two different grits of sandpaper but the wood I had was too wide so the first thing I did was to remove the two sheets and install a single sheet of 100 grit paper that spans the entire width. There is a bit of a learning curve. The wood needs to be fed evenly or the surface can be gouged. Also you don't want to try to take off too much in a single pass or it bogs down- which is pointed out in the operating instructions (for once I read them before I started). I was able to get the job done and used rubber cement to attach a frame pattern . Tonight I'm going to try my hand at cutting it out with the scroll saw. Any suggestions on how much material to leave around the edges would be appreciated. I'll try to get some photos as well. v/r, Rob
 -
Hi Richard, I'm at the same stage in my build as you. My measurement of the frames is 3/16". Have fun! v/r, Rob
-
Thanks for looking in guys. Not much progress. Real life has a way of doing that. Anyway, I've got a Byrnes thickness sander coming so I should be back at it by the weekend. Meanwhile I've been downloading and printing all the plans and studying them along with all the great build logs on here. Once I get the thickness sander, I can get the cherry sized and start cutting frames. v/r, Rob
-
Nice work Lextin!
-
She's a beaut Mick. I'm just getting started and builds like yours sure do inspire! v/r, Rob
-
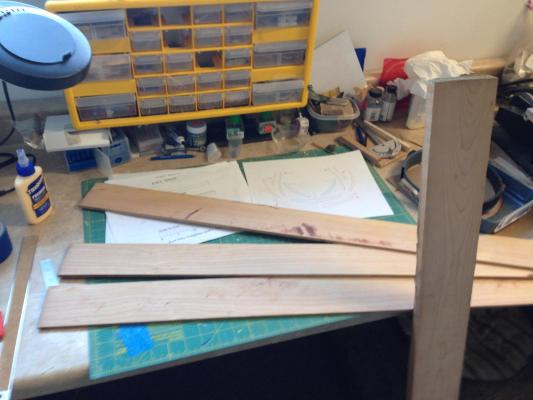
OK, I requested and was granted access to the files. Thanks Chuck ! After taking a quick look I saw that the frames were 3/16" thick. I took a drive to a local woodworking shop and picked up a couple of pieces of cherry that are 1x4x40. Cost me $21.00. Next I used the ripping blade on my table saw to make a couple of 1/4" blanks. I also ended up with a 3/16" blank but I'll use that for something else. The next step will be to use my thickness sander to finish the 1/4" blanks to 3/16. I can't do that until it shows up at my door (but it's on order ). I still have an uncut stick of cherry which I'm sure will be used later. At this point I plan on leaving one side open. Not sure yet what I'll use for planking the hull Rob
-
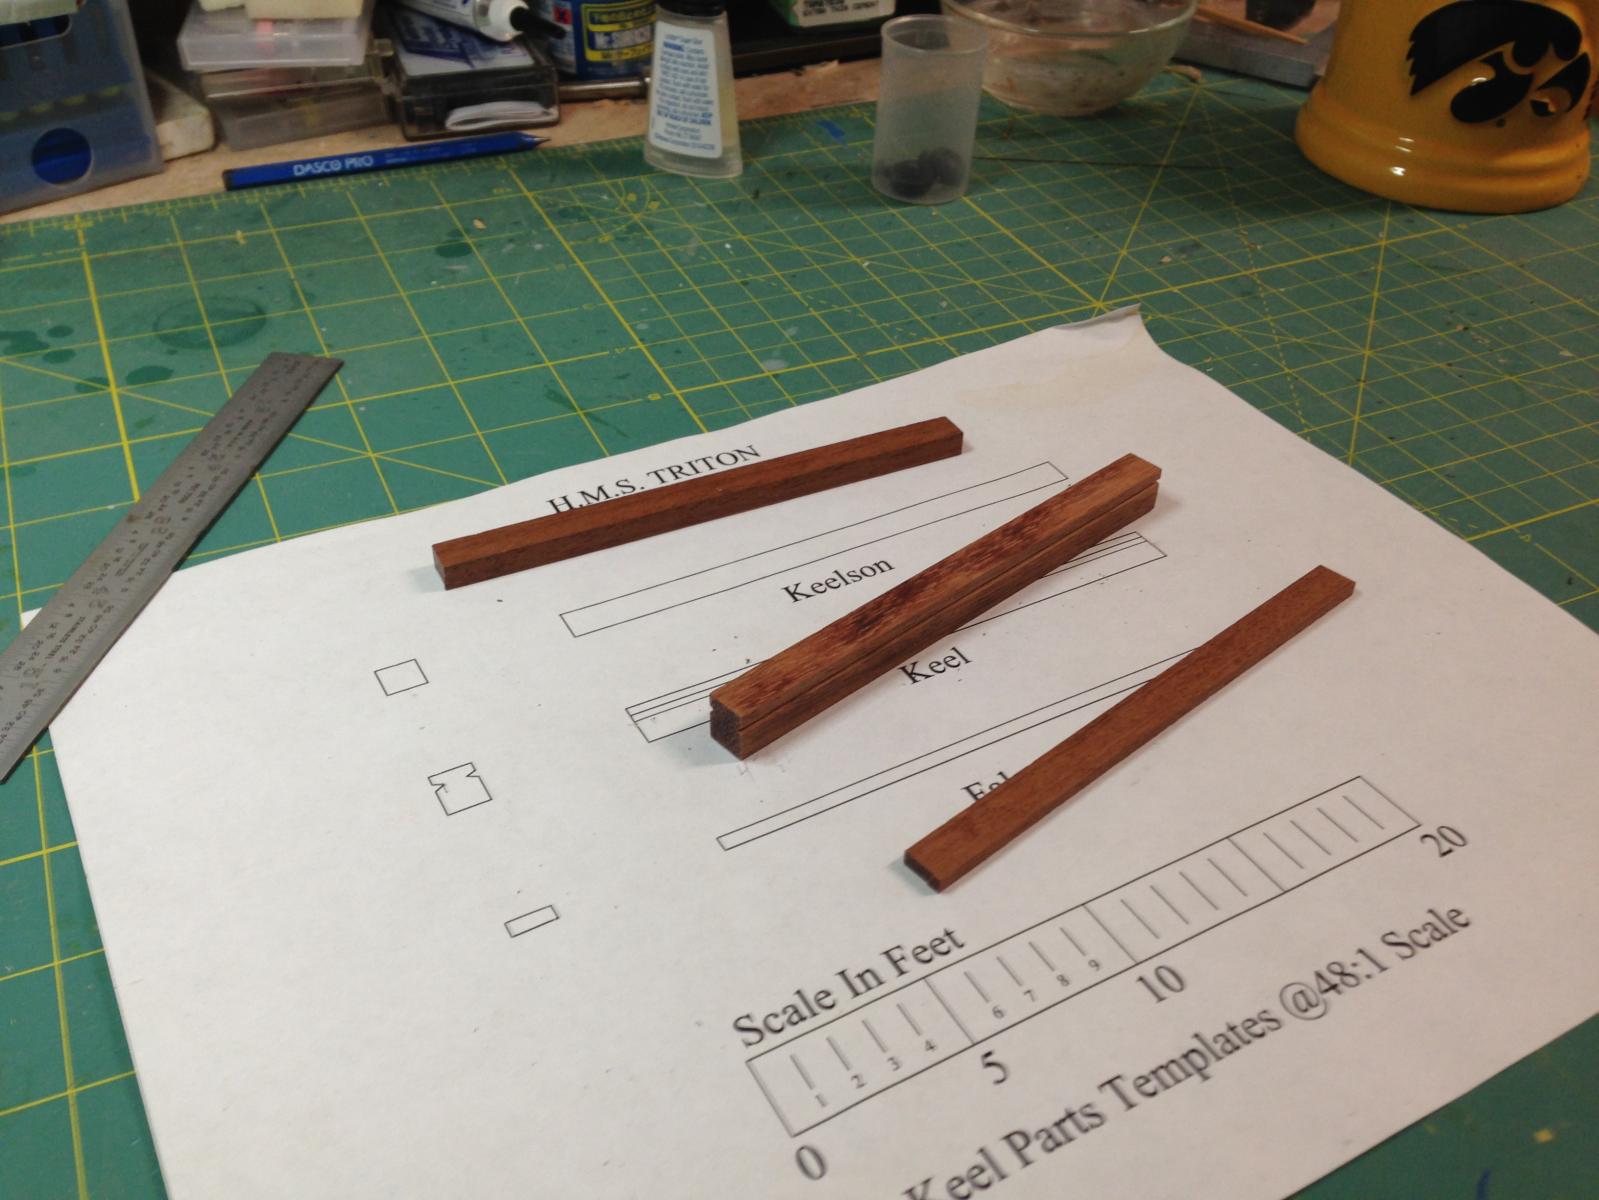
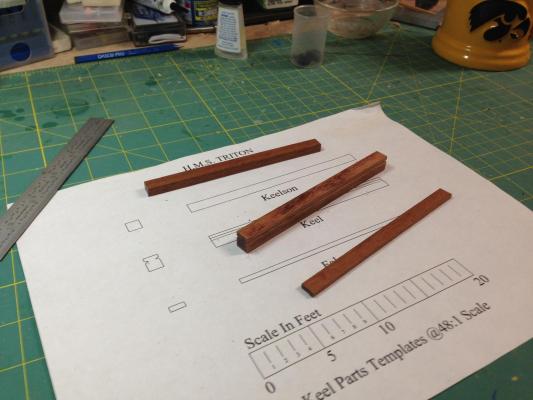
I've decided to dip my feet into the world of scratchbuilding and I think this is a great place to start. I had a piece of Brazilian Cherry lying around and thought it would make a fine keel. I think I'll choose something a little lighter for the frames. Rob
-
Thanks Duff, I plan on picking some up in the next week or so at a nearby woodworking store. I appreciate the information v/r, Rob
-
Hi Ken, I plan on painting the hull. I have also thought about replacing the deck with holly or maybe maple. We'll see. v/r, Rob
-
It's been a few days since my last update. Life has intruded on the shipyard with visits from my mother-in-law and sister-in-law and various other distractions. I manage to get in a little time here and there - good thing I don't have a schedule to keep. I have no pictures. Maybe later this weekend I'll find time. Progress has been very slow. I continue to shape the stern and bow fillers, fair the hull and get the bulkhead tops sanded for the false deck. I've broken off several bulwark extensions and despite being very annoying they're not that hard to repair. I've taken much longer than I thought I would to get to this point but I think it's time well spent. I've been thinking as I sand away about single planking or double planking. Double planking can be more forgiving but I'm really drawn to the idea of single planking just for the challenge. I have a little more time to ponder that before I need to make a decision. Next update I'll include some pictures of the progress I've made. v/r, Rob
-
Alistair - Thanks for looking in. I've been dry fitting the cabin deck while shaping the stern extensions to help me get the right shape. It 's funny you mention that because I spent last night sanding the cabin and main deck bulkheads so I could install the false decks. I've begun roughing out the bow fillers using the templates on the plans. I'll take your advice and install the false deck then the bow fillers and then complete the hull fairing. Shawn - Thanks for the list of things to look for. I've already taken care of 1, I'm in the process of completing 2 and I'll file the rest away for later in the build. One thing I'm learning -there is a lot of preparation required to ensure things look good later. No shortcuts - I just put some music on, get some sandpaper out and go to town
-
Hi Walt, I'm not Hank but I can answer your question. PE stands for photoetch. Usually brass sometimes stainless steel. Used to produce tiny, delicate details such as railings, ladders, antennae, etc. v/r, Rob
-
I've been busy building up the stern. Thanks to the advice I received here, I used the window frames to set the stern extensions. I added two filler pieces below the extensions and one on each side of the outer extension. Then I got busy sanding. It's not quite there but I'm getting close. Like I said earlier, the advice I received was invaluable. If you're reading this and you can't decide to start a build log or not, Go for it ! v/r, Rob
-
Too late Ken, I broke one off this weekend. It's glued back on. Hopefully I can be more careful in the future. You are absolutely correct in that the stern lights are going to be fun to align correctly. I'm taking my time and will checking the plans frequently as you suggest. v/r, Rob
-
Alistair- I appreciate the advice. I haven't really started fairing yet. I thought I'd wait until I got the stern built up and the two bow pieces in place. Thanks for looking in on my build, Rob
-
The Thanksgiving holiday has given me a four day weekend and a great opportunity to spend some time in the shipyard. I completed attaching the bulkheads and the bracing in between. The braces really do stiffen it up which will help during the fairing process. Many of the bulkheads fell short of the rabbet. I cut some strips 1/32" thick and glued them on the offenders. Much of the strip will be sanded away but it will pay big dividends when I get to the planking stage. I also began taking a look at the stern. There are four lights (windows) across the stern. They are not perpendicular to the keel for some reason (that would be too easy ) The vertical strips of the window frames are angled. To ensure the rough opening is correct, I sanded an angle on the innermost frame. I don't need to sand the angle on the other 2, I'll just glue them on parallel to the inner frame. In an attempt to avoid screwing this up I'm taking the time to lay this out on the bulkhead. I still need to mark the outermost frame. Once I get the starboard side done, I'll repeat it on the port side. That's my plan anyway. We'll see how it goes.
-
I've been making a little progress. Bulkheads are going on and bracing added between them. I am trying hard to get them square. Once they are on I can already see that I will need to add some shims and do a lot of sanding. From looking at other build logs I will be spending quite some time getting the hull faired. Thanksgiving is coming with a 4 day weekend and I aim to spent a good portion of it in the shipyard
-
Thanks Lou, That was just what I wanted to know. It is carried by a woodworking store near me. I think I'll pick some up and see what I can do with it. v/r, Rob
-
Ken, I hadn't planned on using a practicum. Something to think about. OK just took a look at the link you provided. Wow. This will help answer a lot of questions! Thanks. Alistair, I'd begun fairing the first two bulkheads and have came to the same conclusion. I don't think it will be any harder to do once they are in place. In dry-fiting the others, many fall short of the bearding line which means I'll need to add shims only a couple are too big.
-
Hello, This is the initial entry in my build log of the Armed Virginia Sloop. My #1 goal is to complete the ship. I've got a few secondary ideas floating around in my head such as quality, craftsmanship, scratchbuilding and upgrading materials but I really want to finish this thing. For those not familiar with the kit, It is a 1:48 scale model sloop of the type built in and around the Chesapeake bay around 1800. As such I don't believe it represents a specific ship. I began by reading the instructions, going over the plans and perusing various build logs here at MSW. I took the plans to a local office supply store and had them make copies that I could cut up and use as patterns etc. keeping the original set intact. First step was to transfer the bearding line from the plans to the false keel. I then cut, carved and sanded the rabbet. I have begun to attach the keel. While waiting for the keel to dry, I removed all the bulkheads from their sheet and cleaned up the edges. Next I used my extra plan sheet to cut out each bulkhead and transfer the bevel line onto the front side. I'm going to leave myself some wiggle room to adjust the angle once the bulkheads are glued to the false keel. I welcome any and all comments even if they seem critical (I spent several decades on submarines - those guys have no problem telling you what they think ) I won't be offended at all.
-
I did a search on this forum for "yellowheart" with no success. I'm curious if anyone has experience working with this wood. If so where and how did you use it. Thanks, Rob
-
I thought it looked like holly. I really like the way it looks. The edges are so much sharper than basswood and the color is great too. I sent a PM with my email address for the build reference docs. I'll take any help I can get!
-
Ken, Great job. I've got this kit on order so your build log has been a great motivator. Your tips and advice will come in handy. I do have a question. Did you use the deck plank material that was supplied or did you replace it? Thanks, Rob