HOLIDAY DONATION DRIVE - SUPPORT MSW - DO YOUR PART TO KEEP THIS GREAT FORUM GOING! (Only 68 donations so far out of 49,000 members - Can we at least get 100? C'mon guys!)
×


mrcc
-
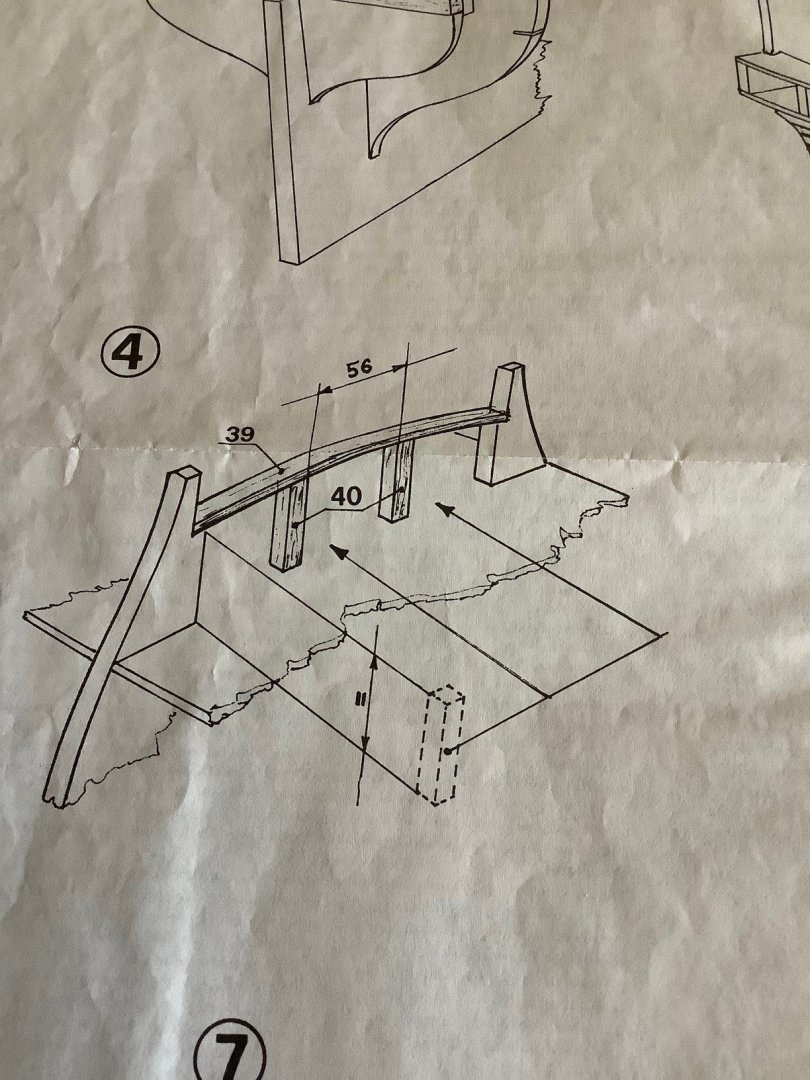
Posts
553 -
Joined
-
Last visited
Content Type
Profiles
Forums
Gallery
Events
Everything posted by mrcc
-
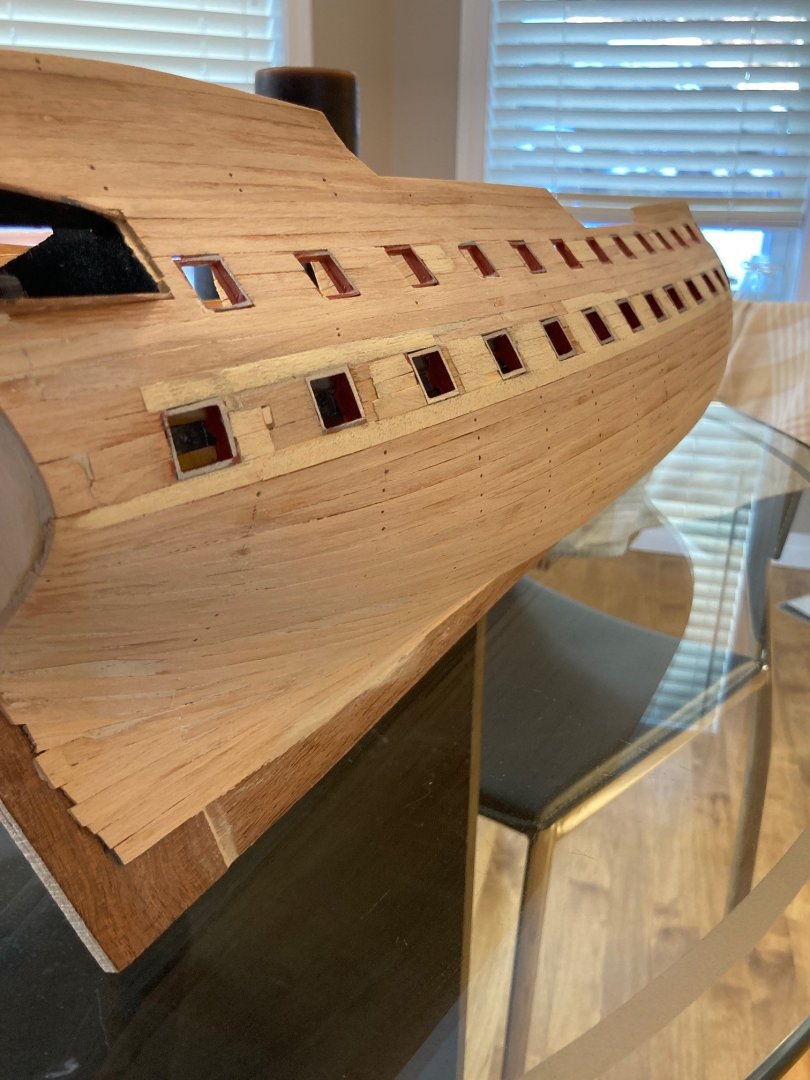
 Creating a panel of windows and noted lots of varying opinions in the build logs on glue for acetate to wood (and definitely not CA glue due to clouding of acetate) and needed a definitive answer. I am sure that epoxy would work but want about contact cement? Thanks!
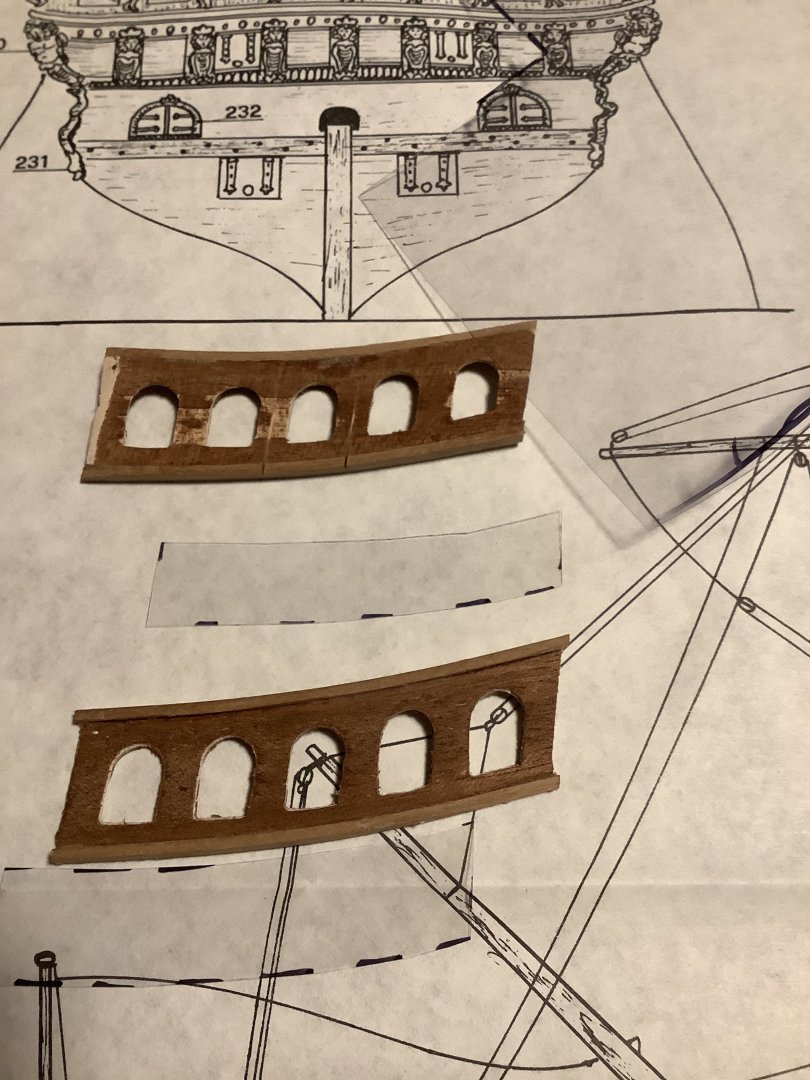
-
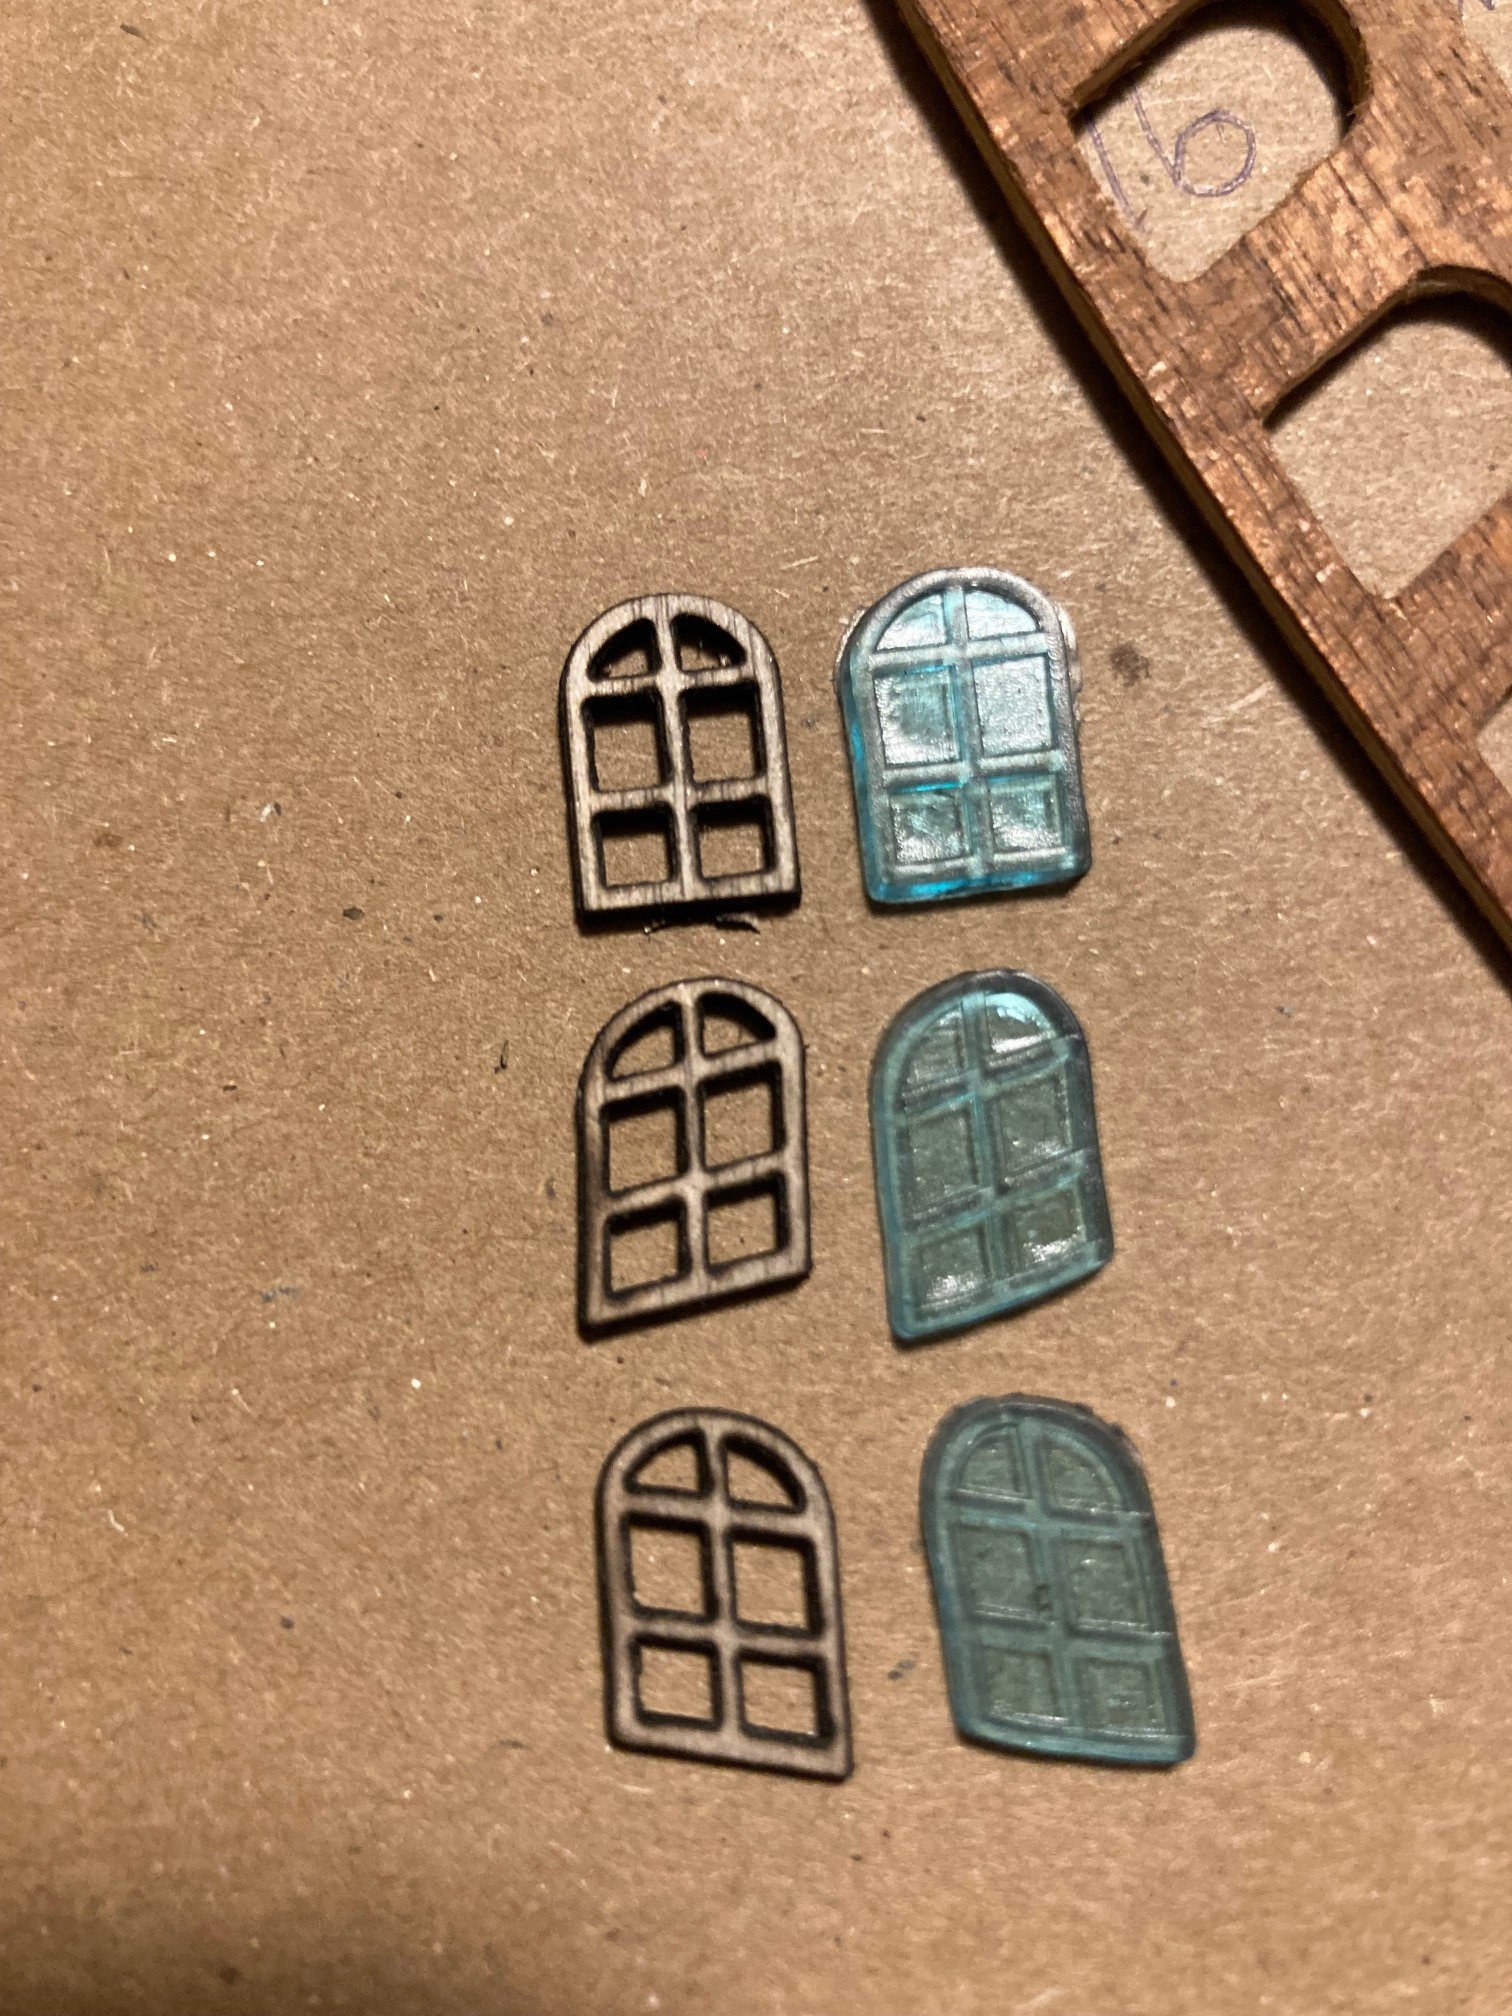
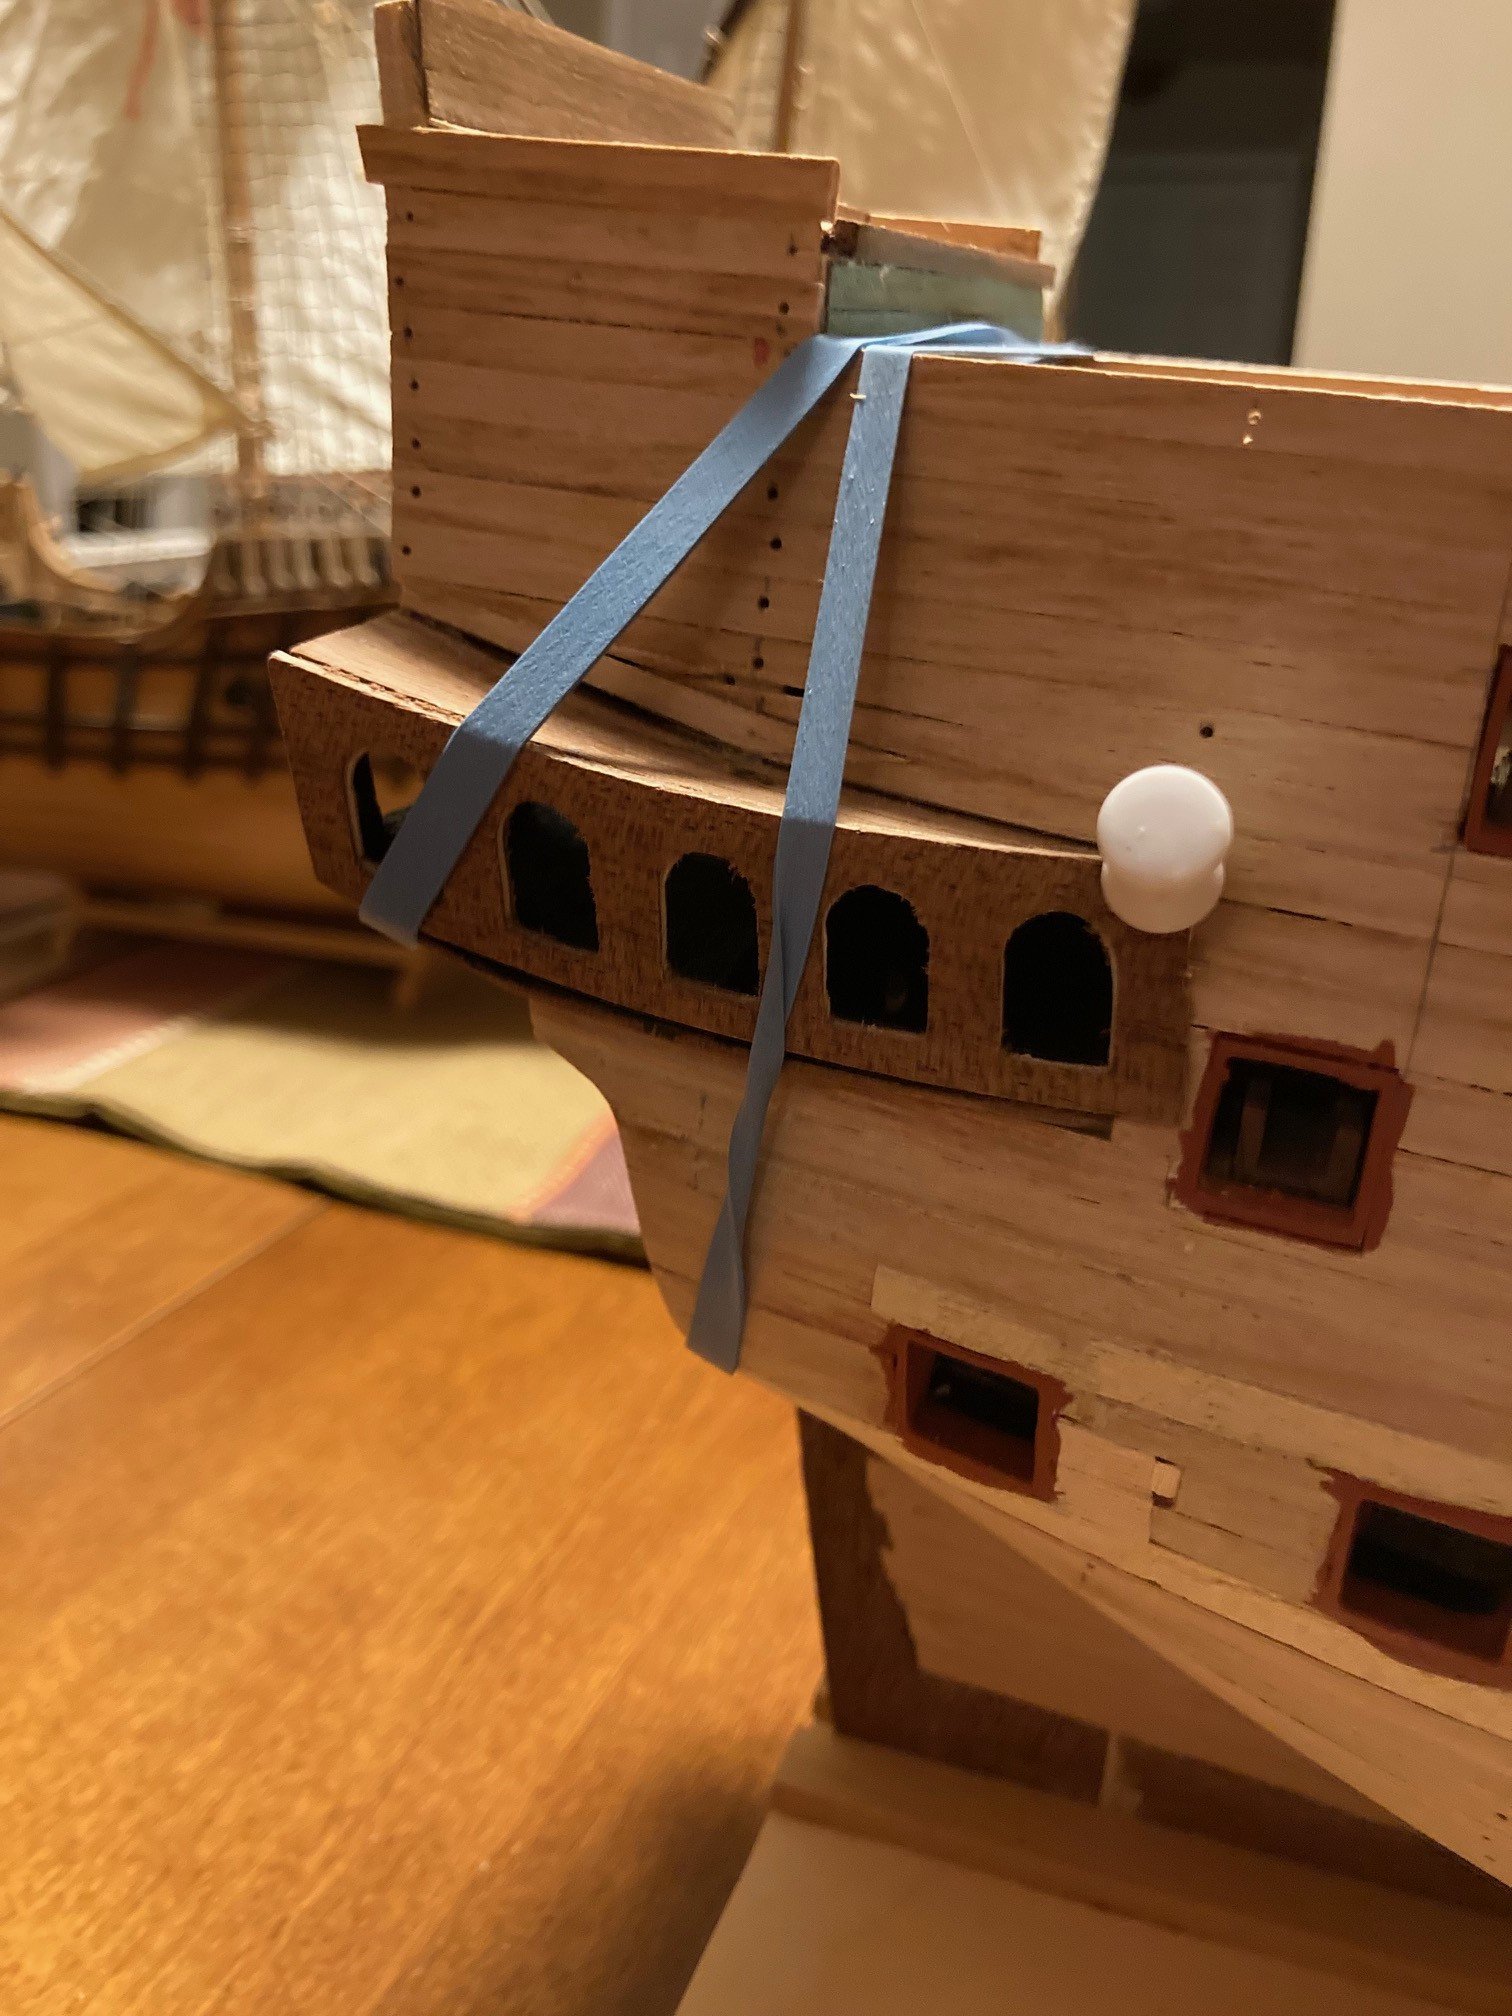
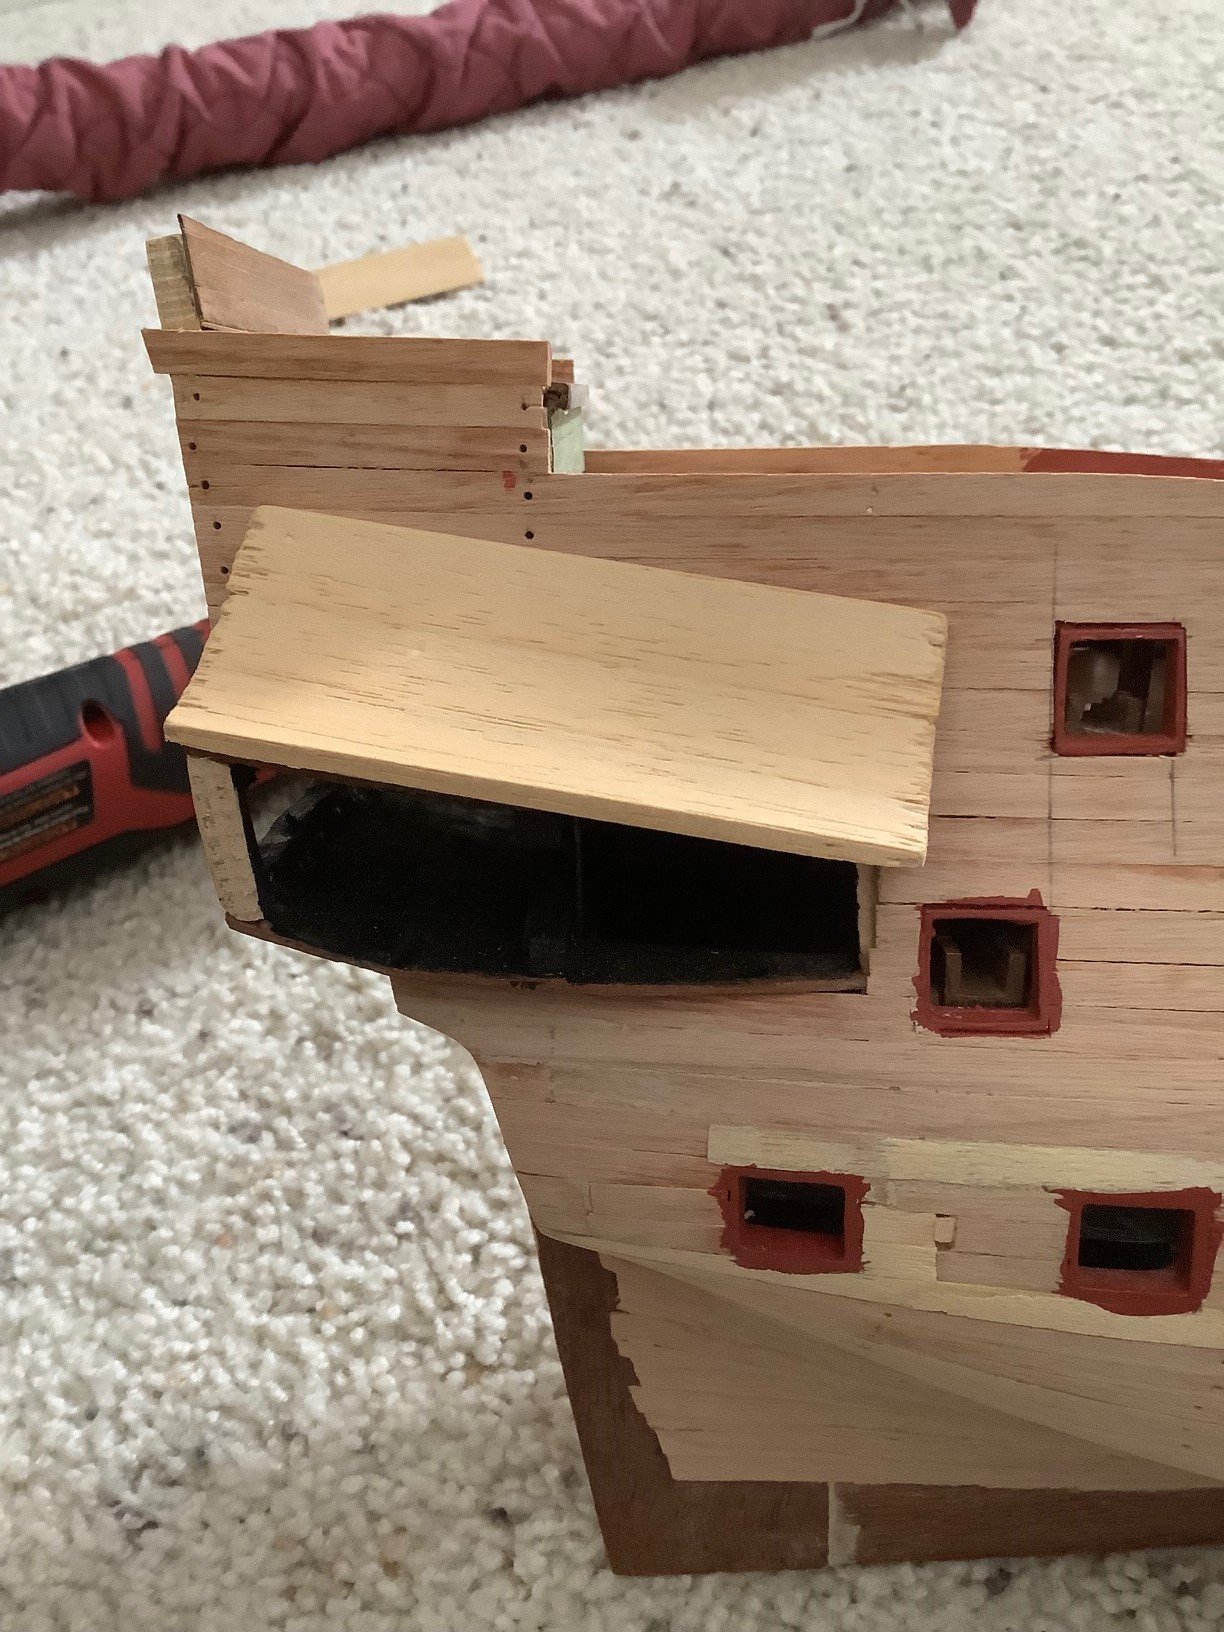
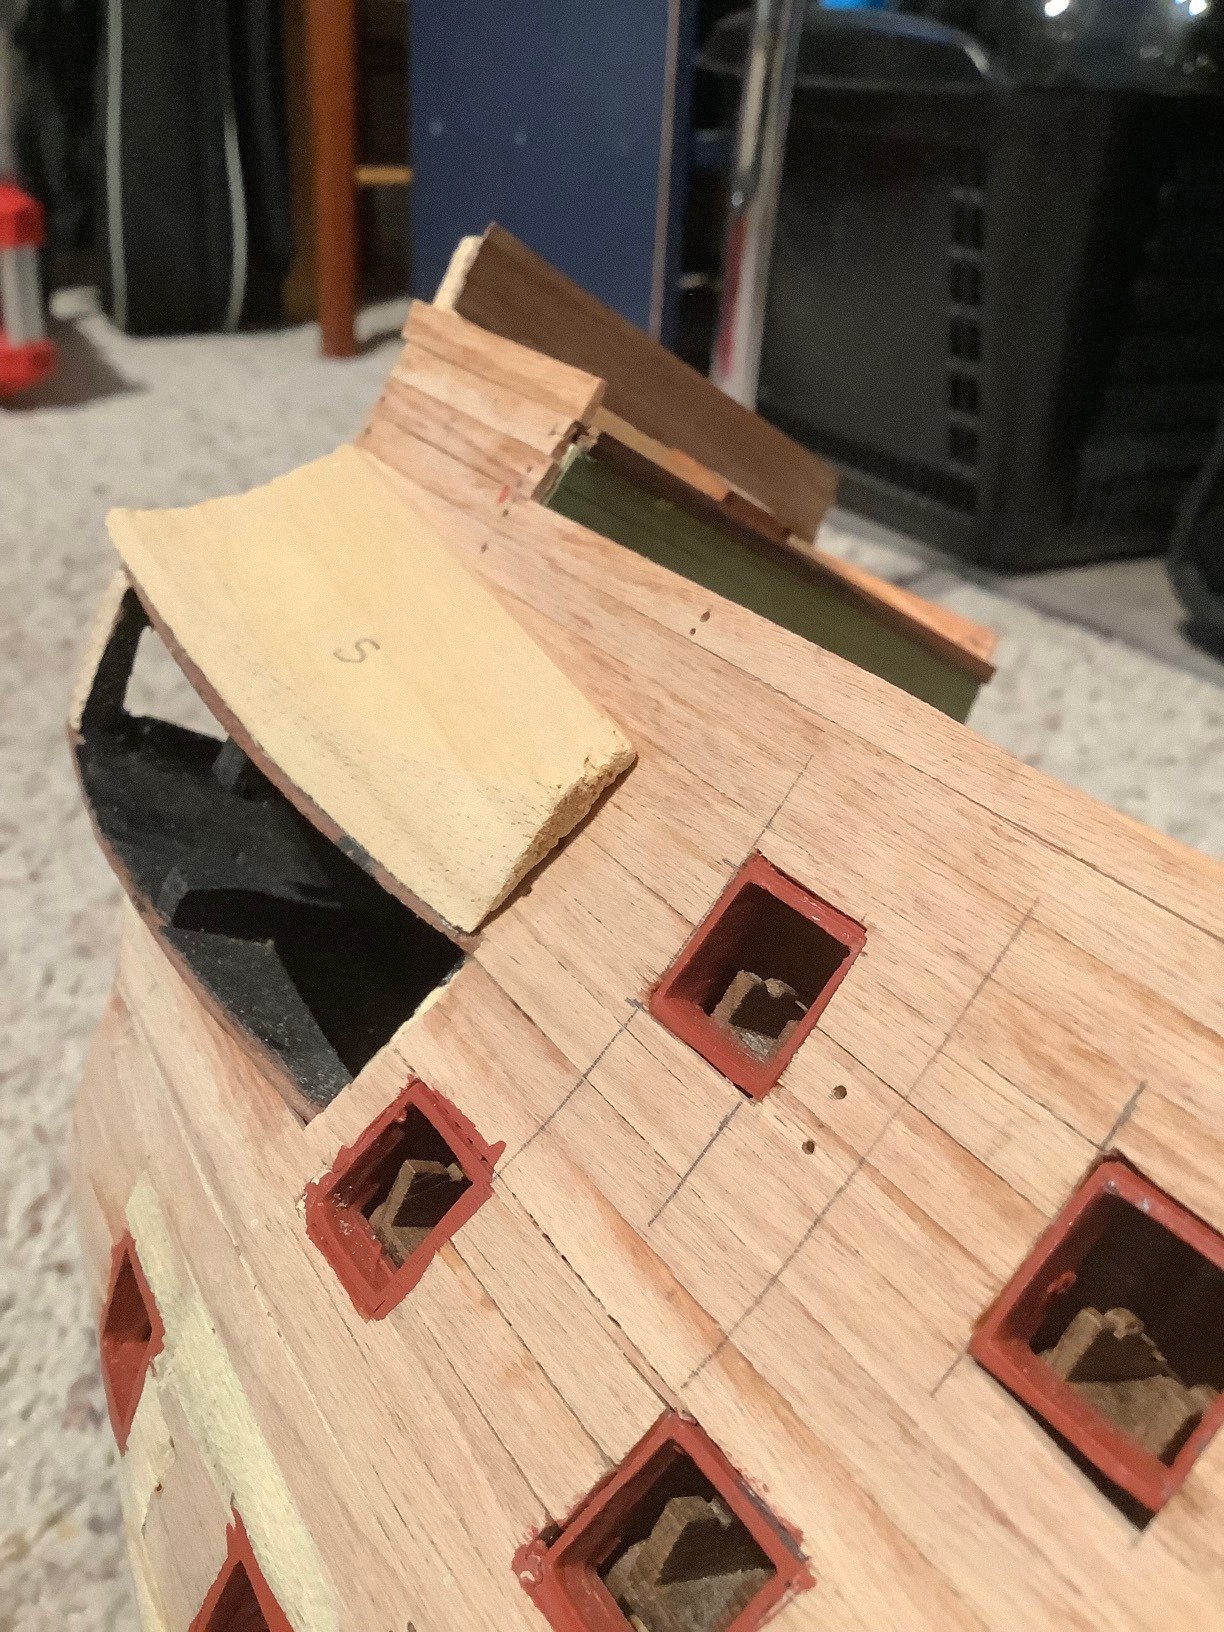
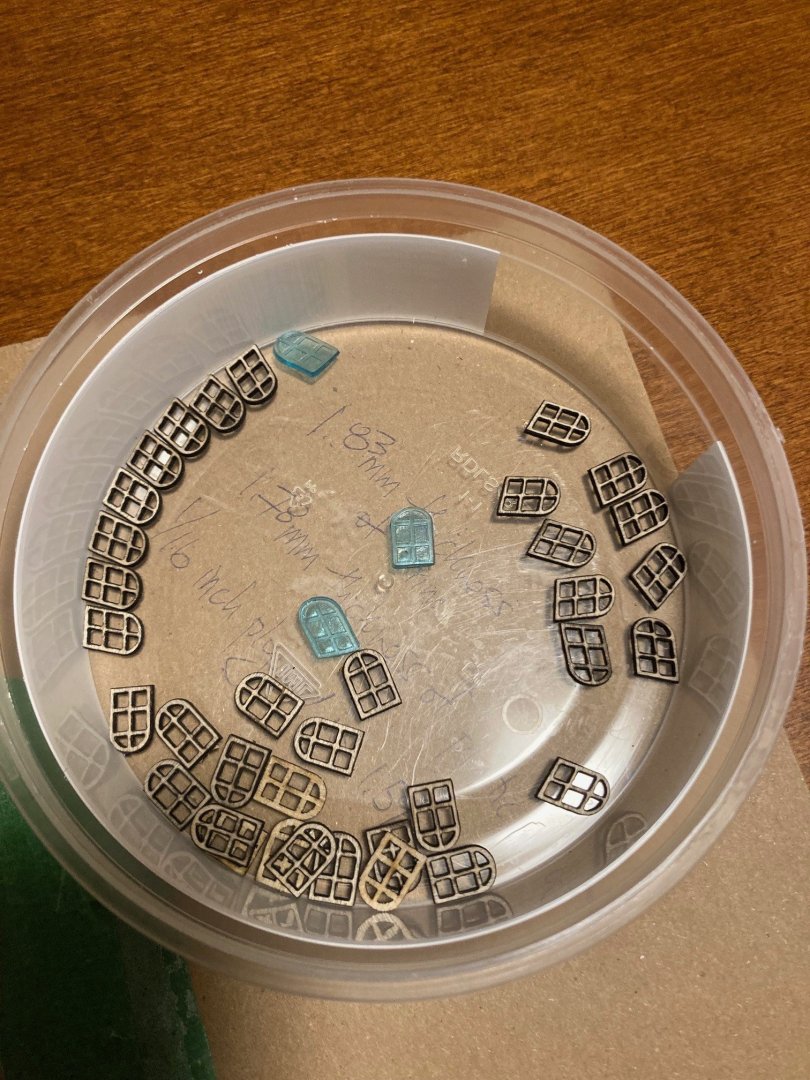
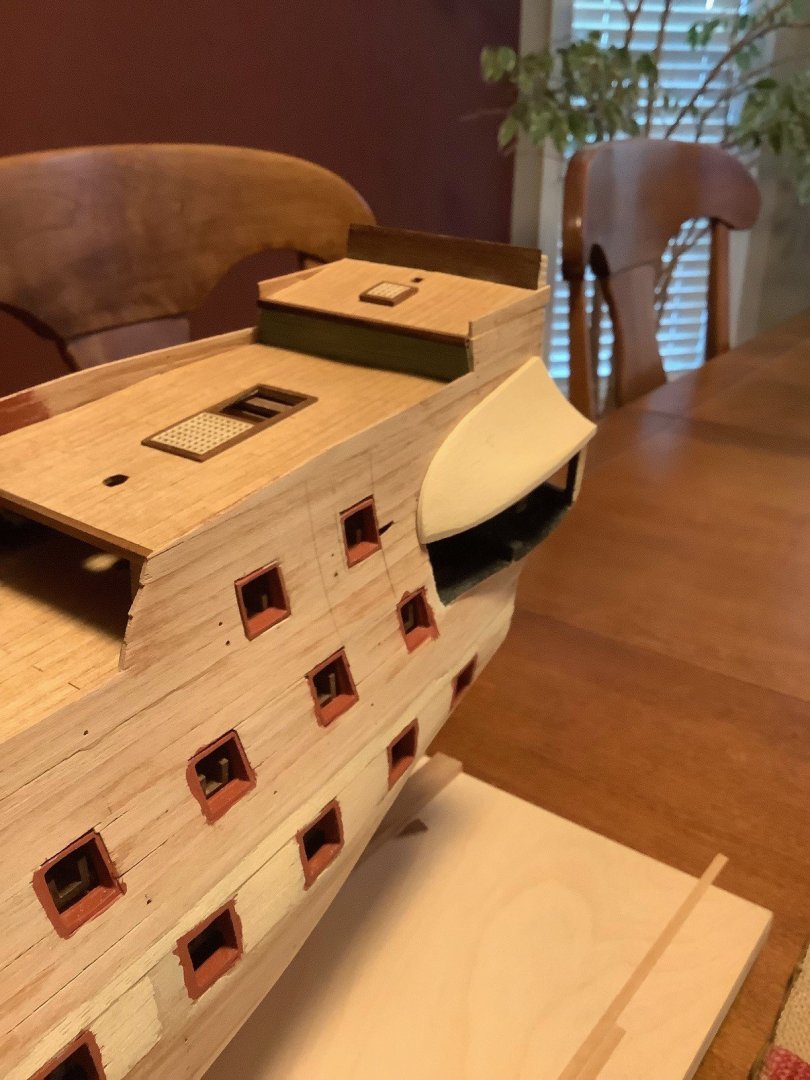
More work done on the quarterdeck galleries... After rough cuttting out the material for the windows, I was able to get a tight and clean margin for the windows to pop in with a simple file. I received the new windows from a friend's friend that had a laser cutter at home. Very well done in my opinion! The green ones are plastic and came with the kit, allowing for only one per side gallery. It seems as all the build logs on MSW added the full compliment of windows to their builds. Additionally, I soaked the fascia boards in hot water for just a few minutes, and then with an electric plank blender, bent the parts to follow the frame on the hull in a bending and twisted fashion, and then pinned them to the hull in order to fully dry. Very different from how Mamoli advised to do it...


-
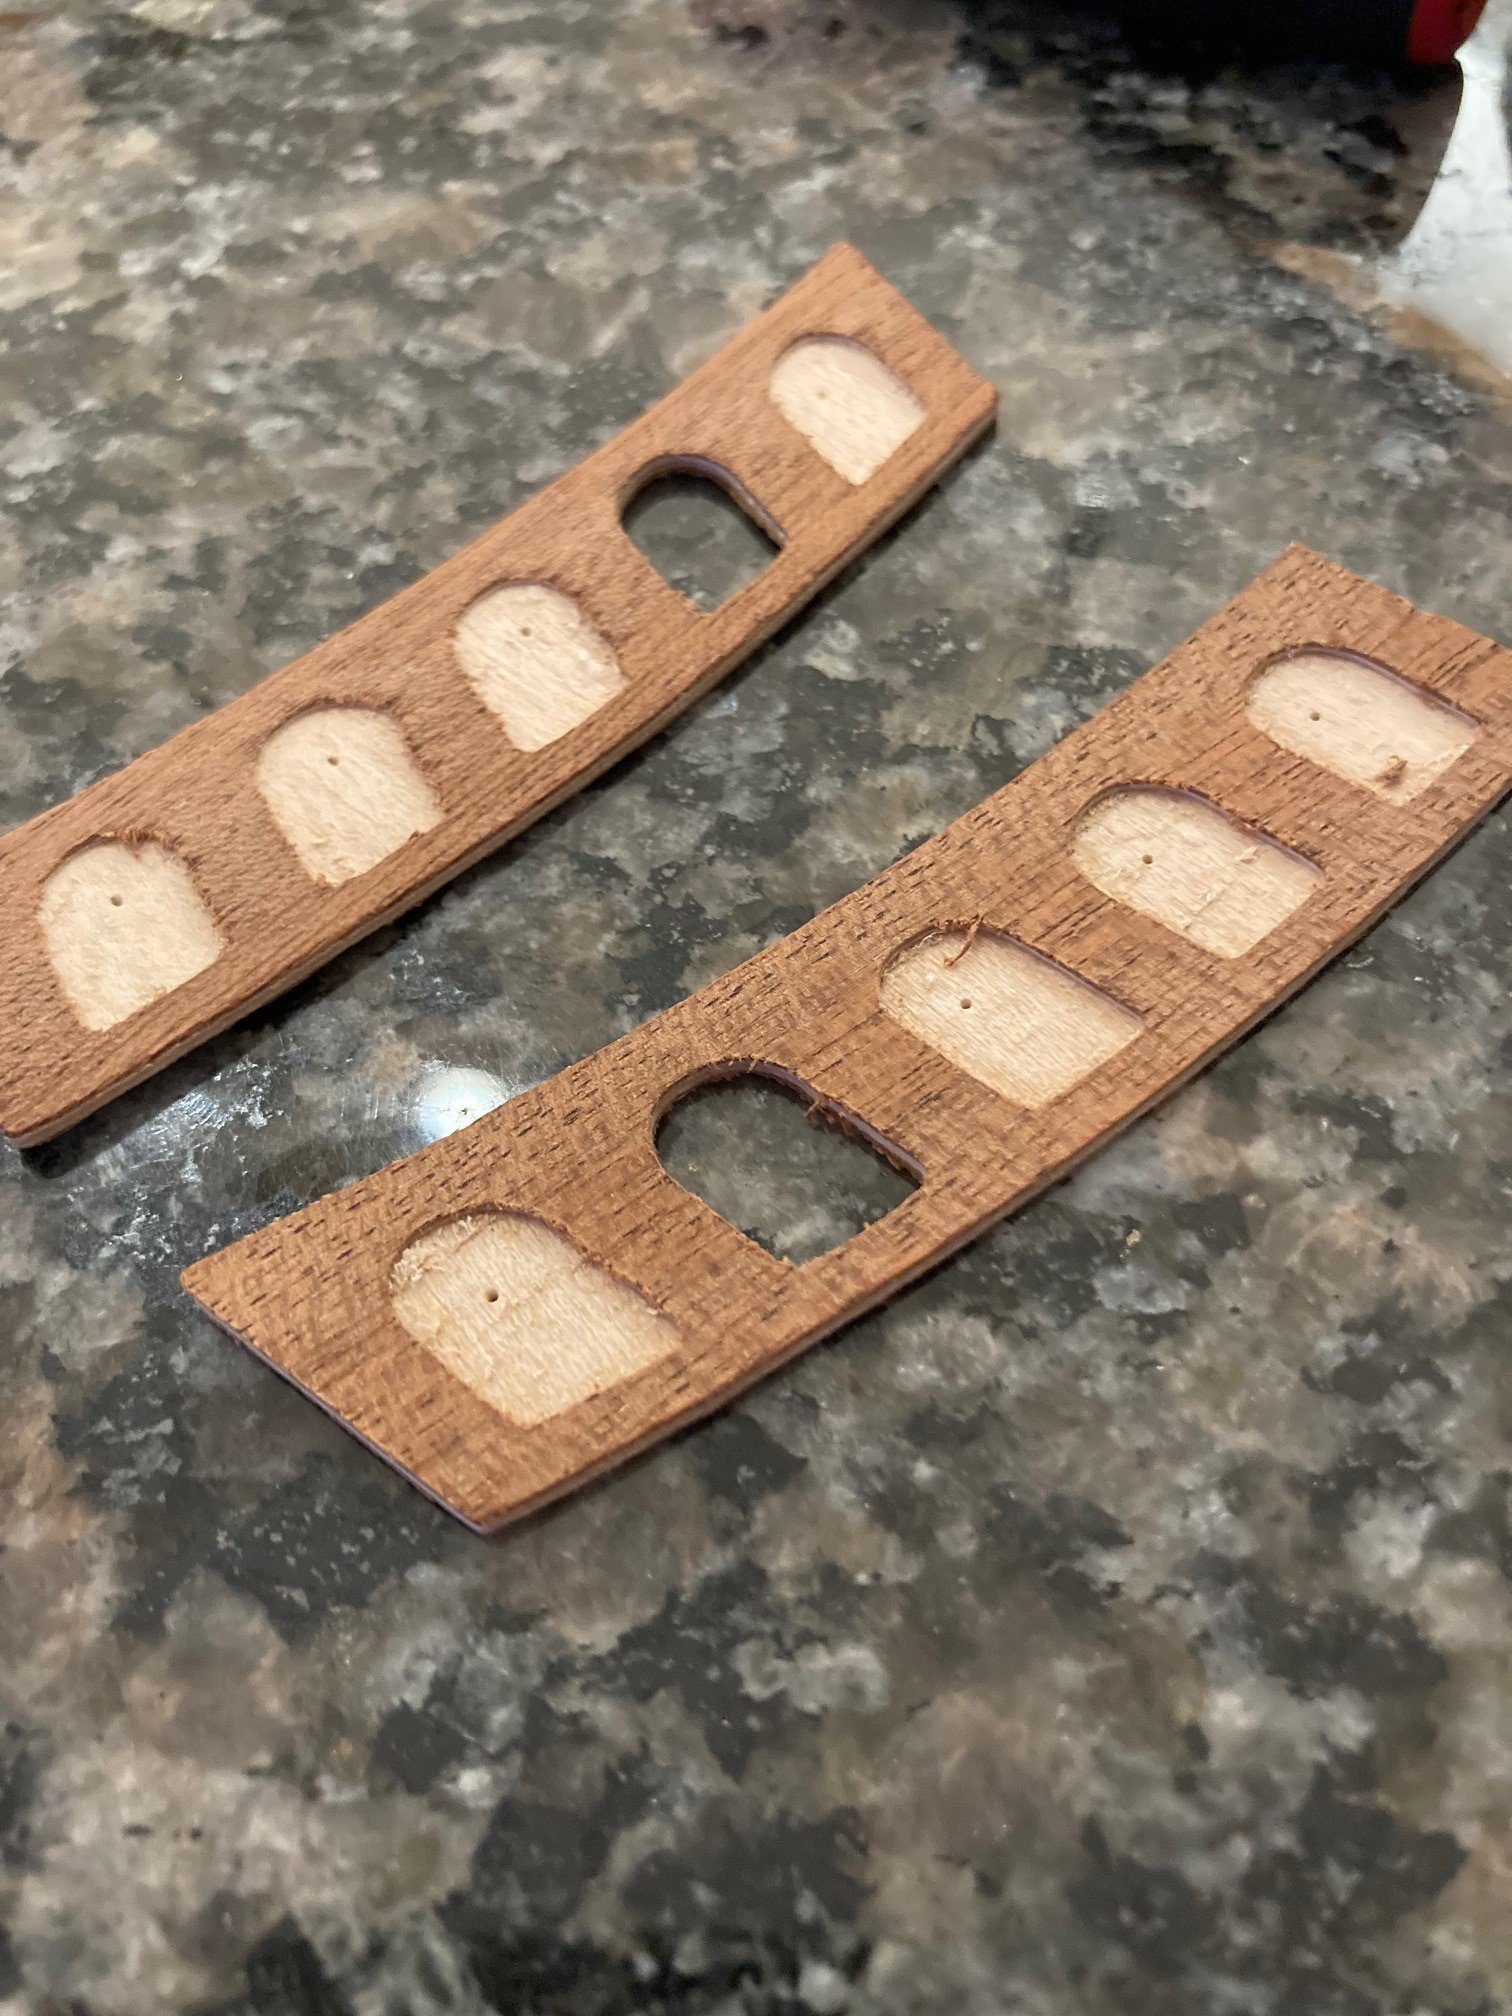
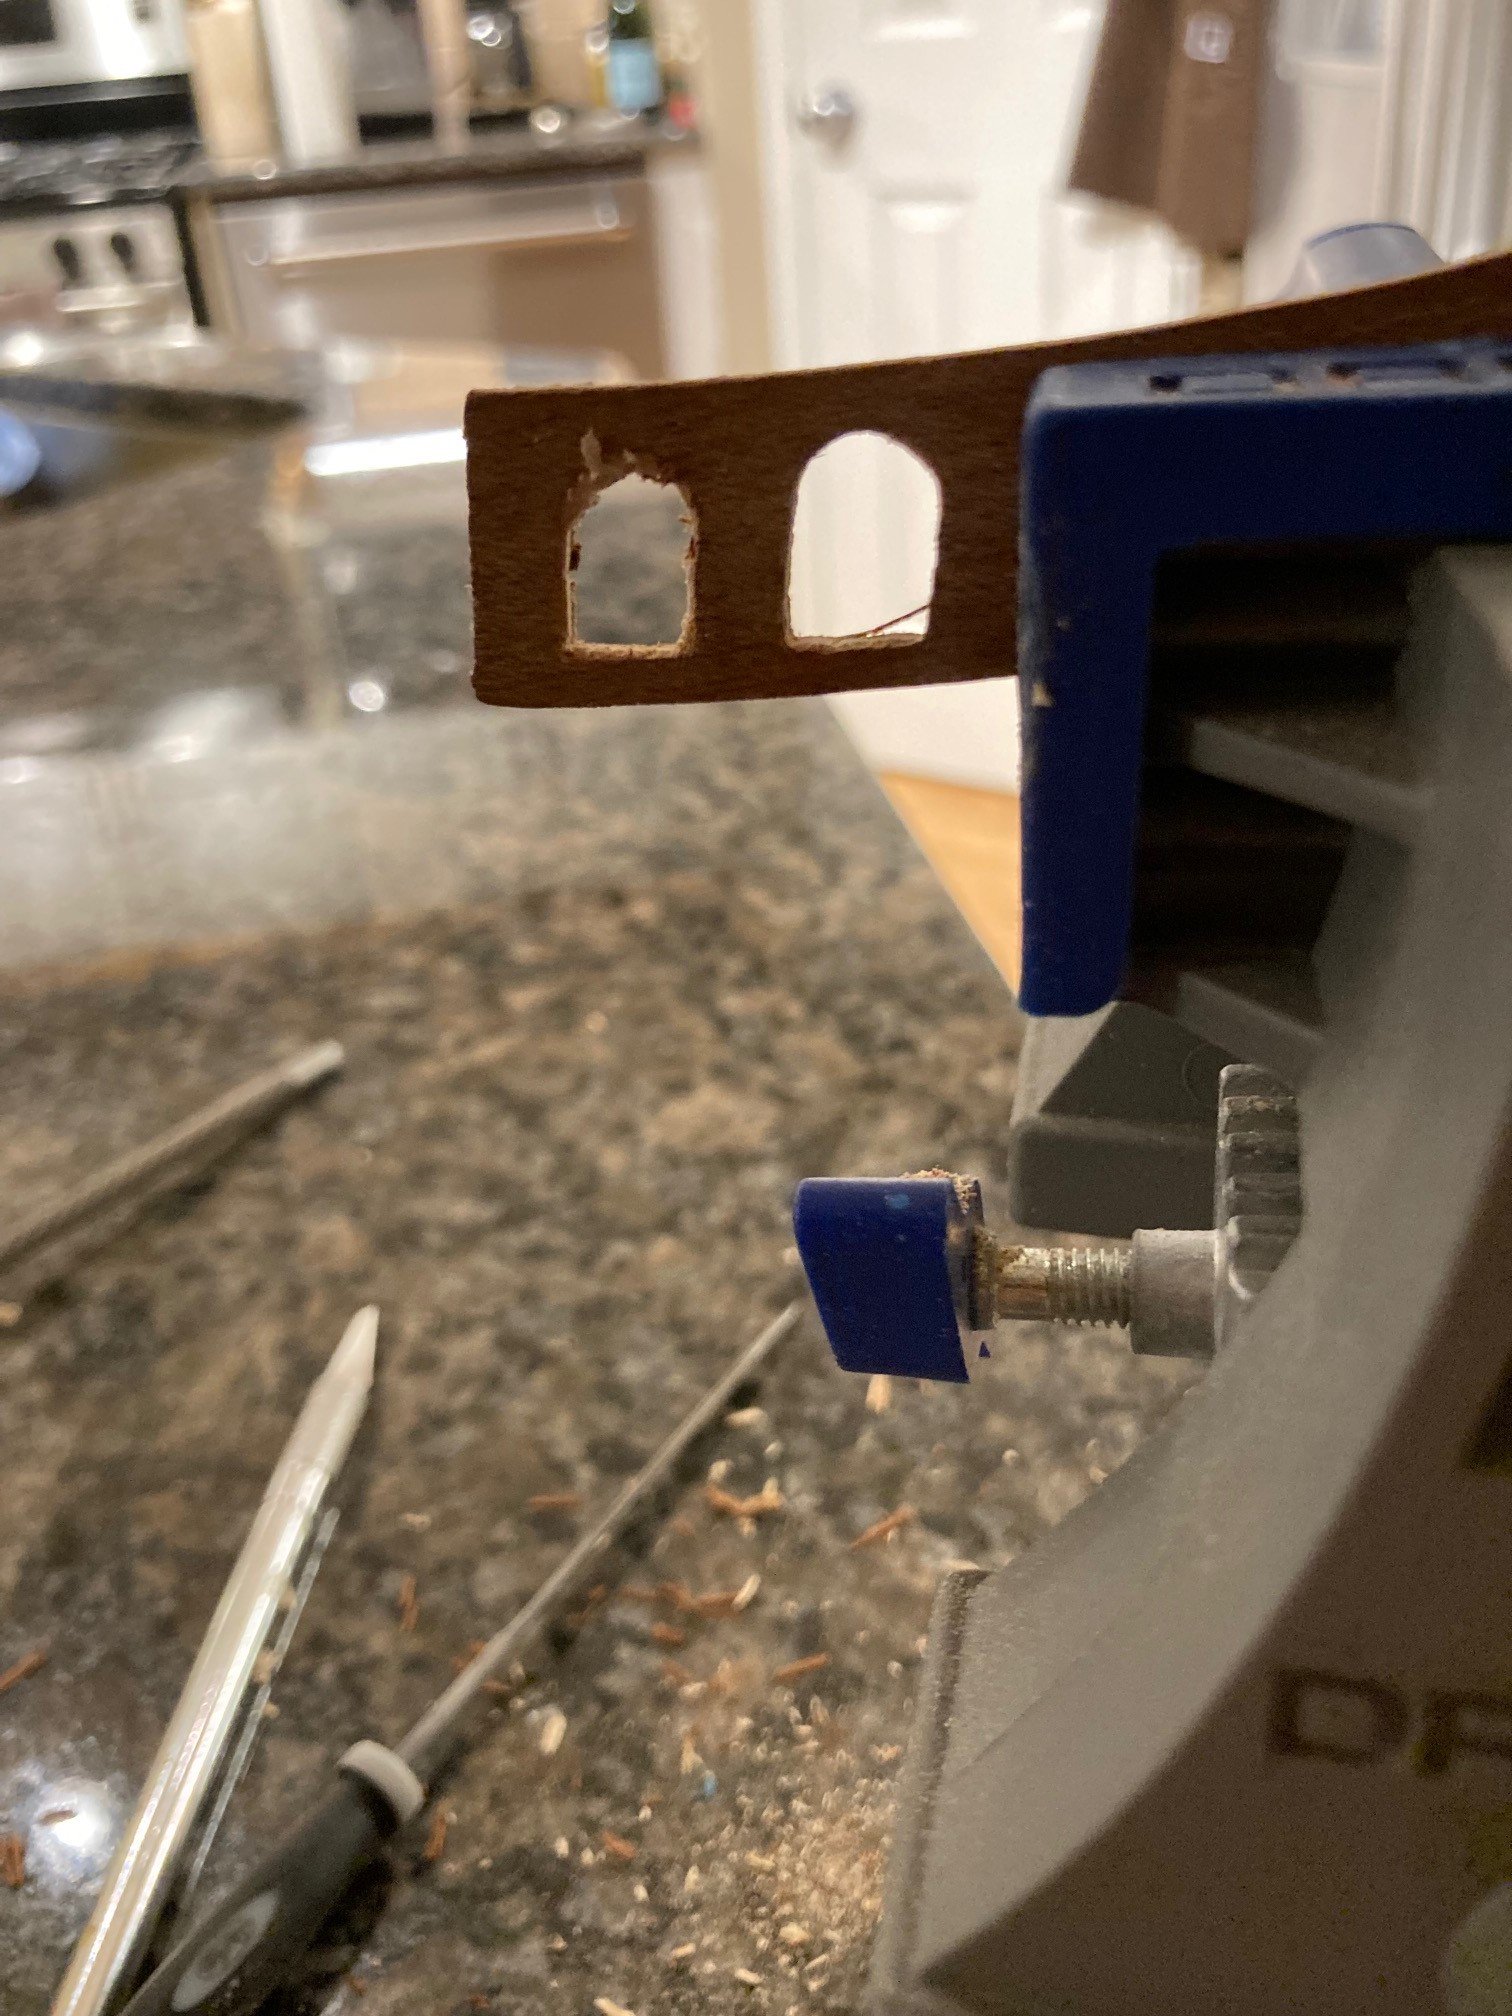
Very tricky work filing the window profiles out to accommodate the laser cut windows (that I am picking up tonight). The thin plywood openings were so fragile to file and prepare (in this estimated 45 year old kit)... I just took it very slowly with a fine file in order to minimize the destruction of the ply. The last picture references the completed part for use.


-
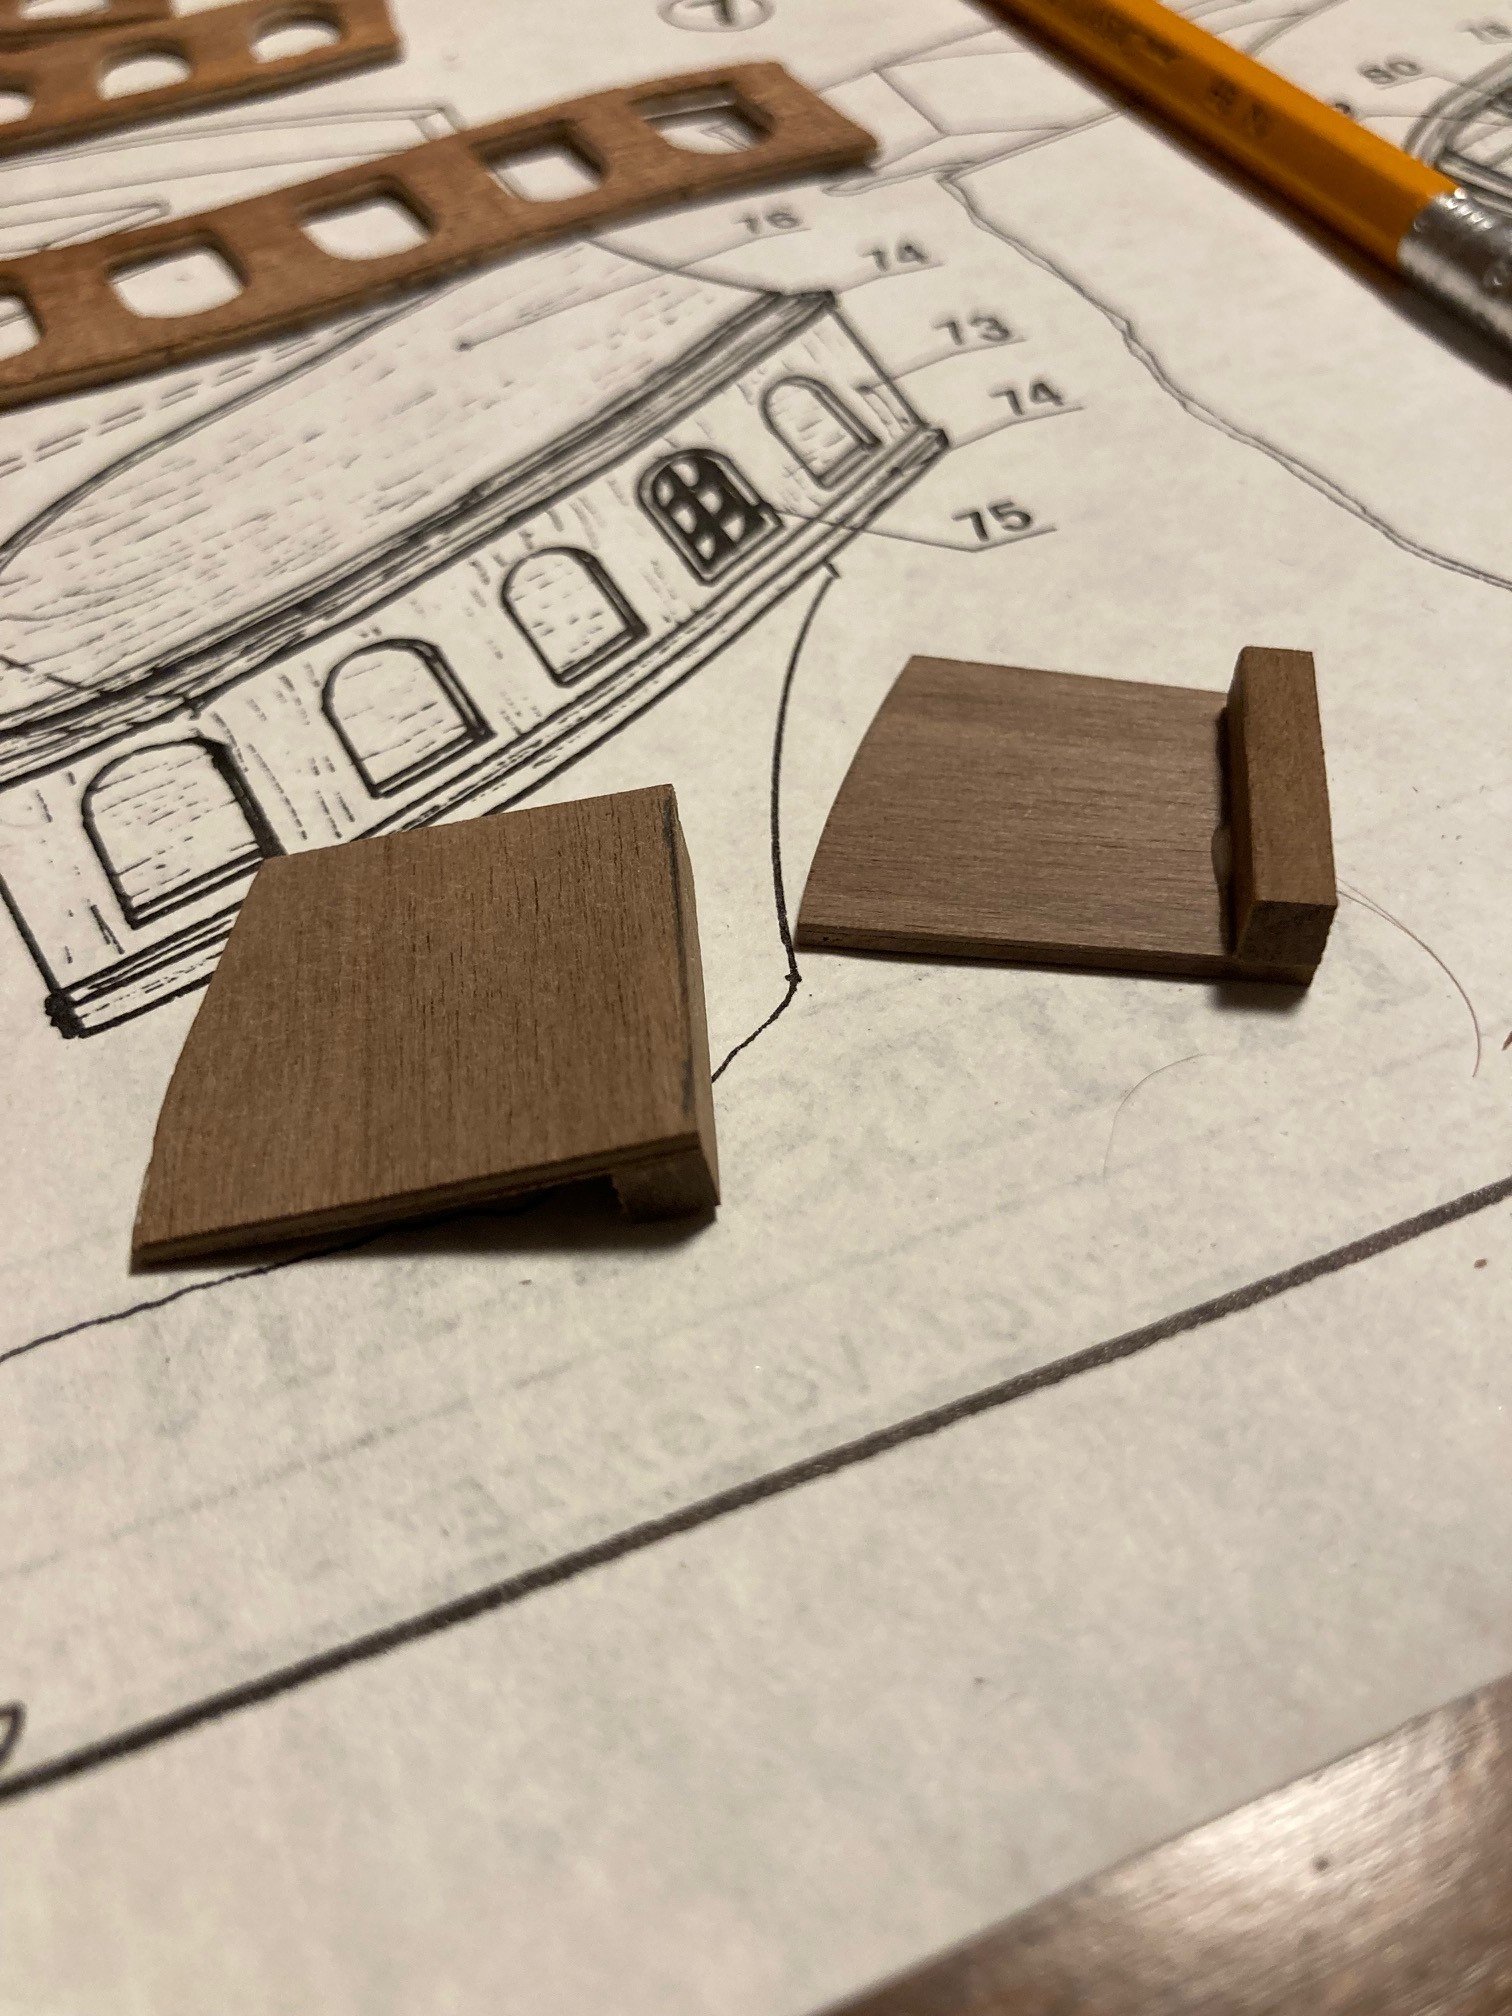
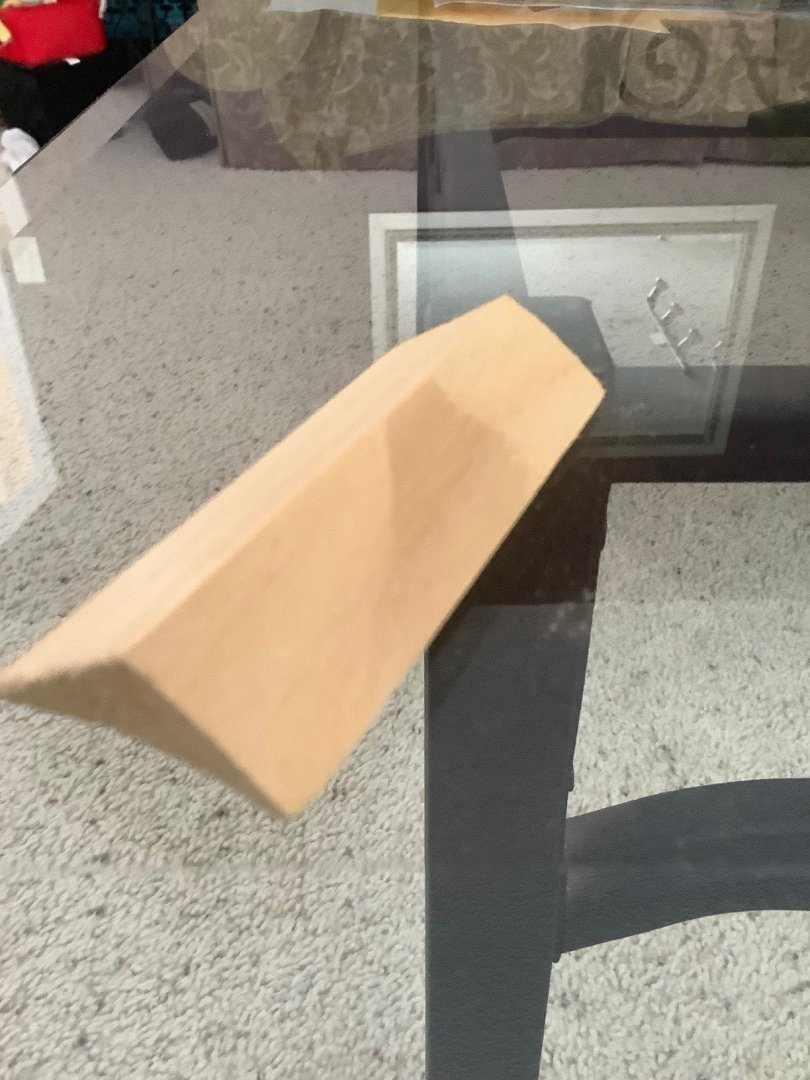
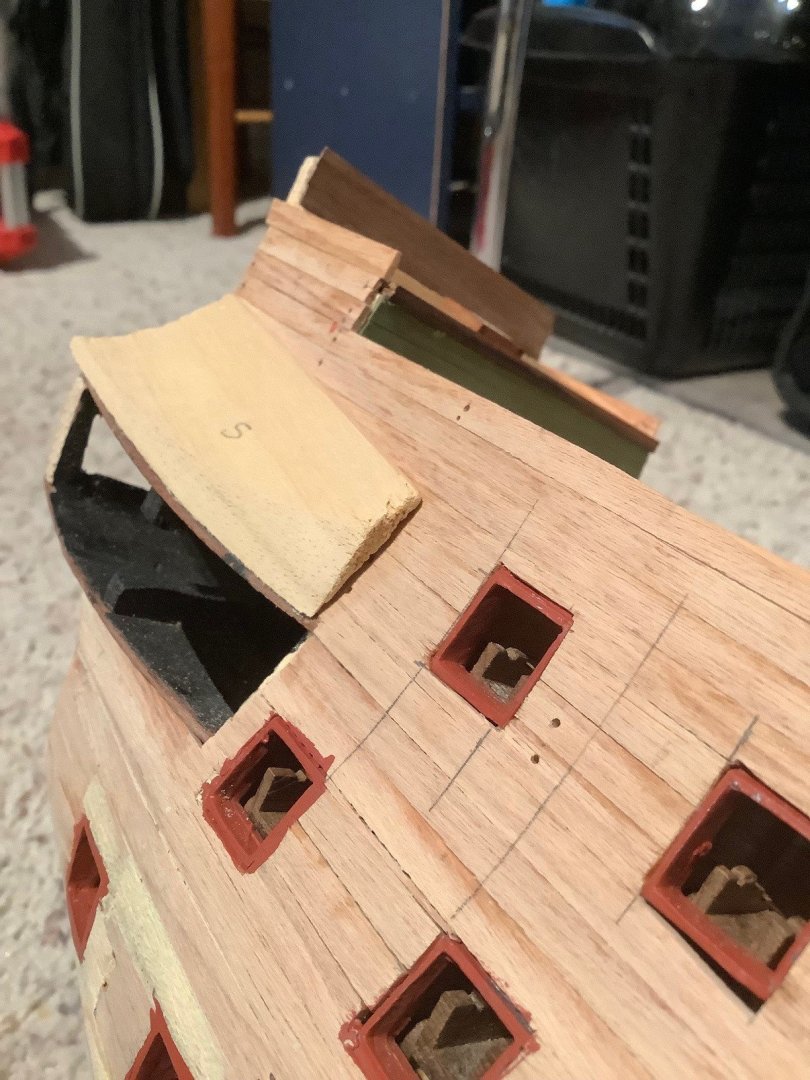
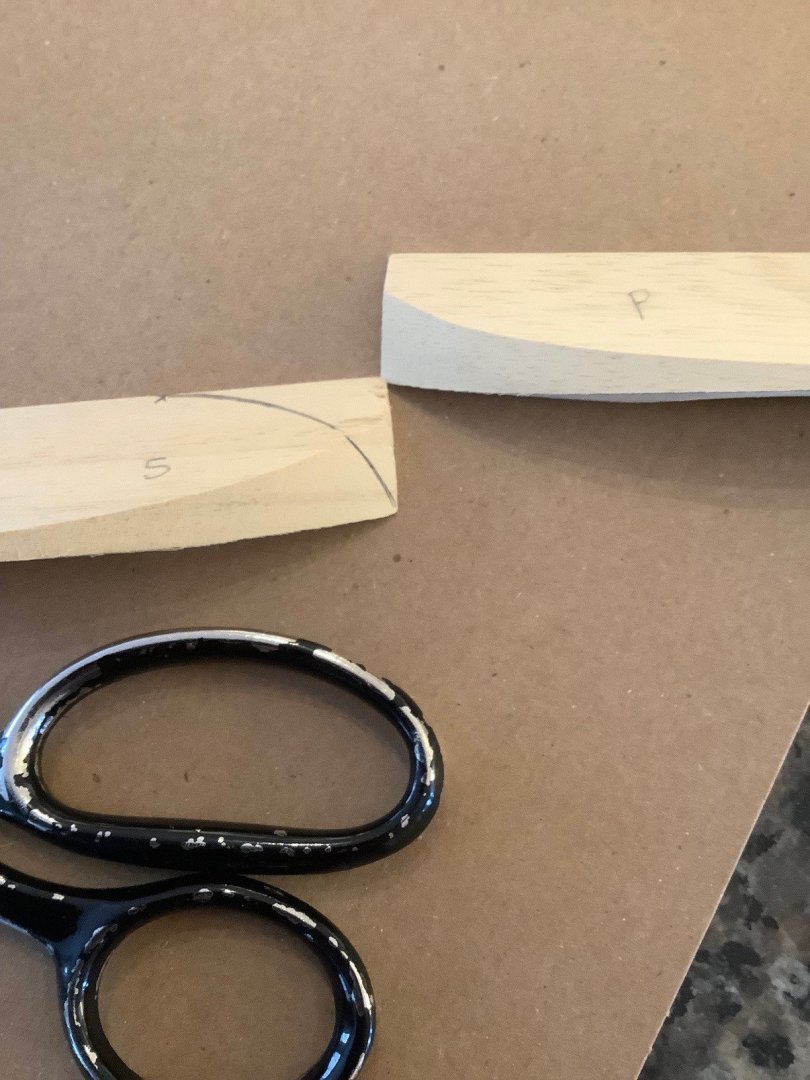
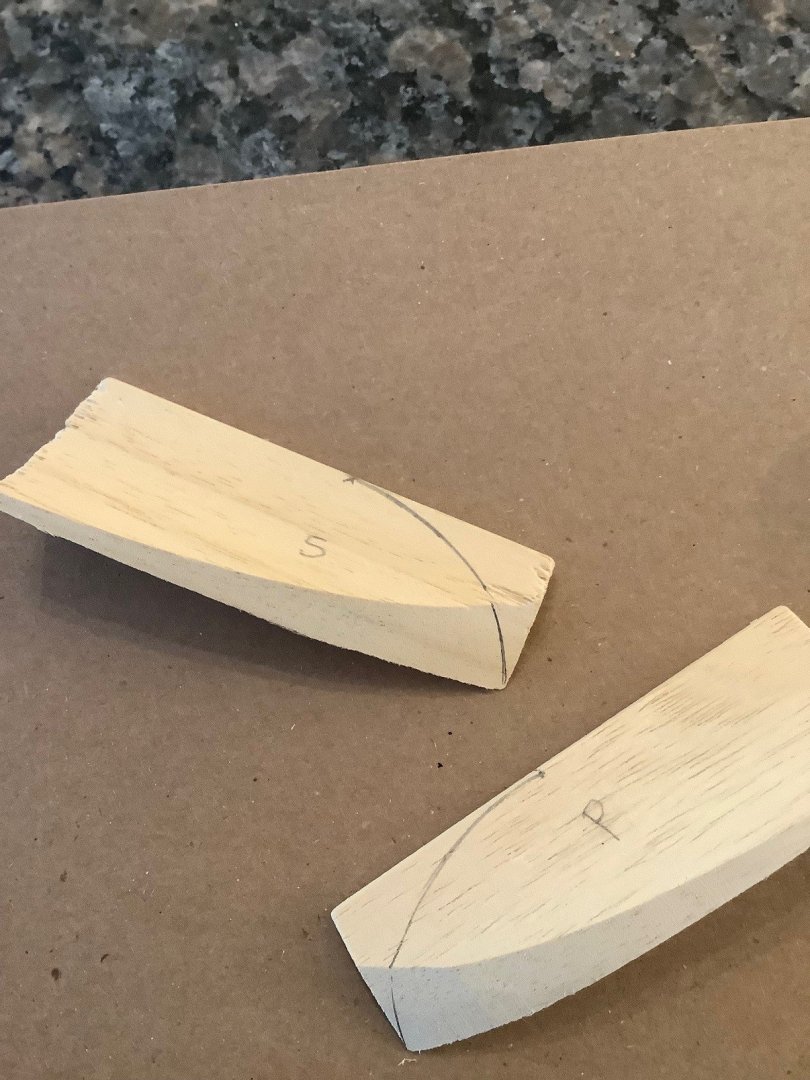
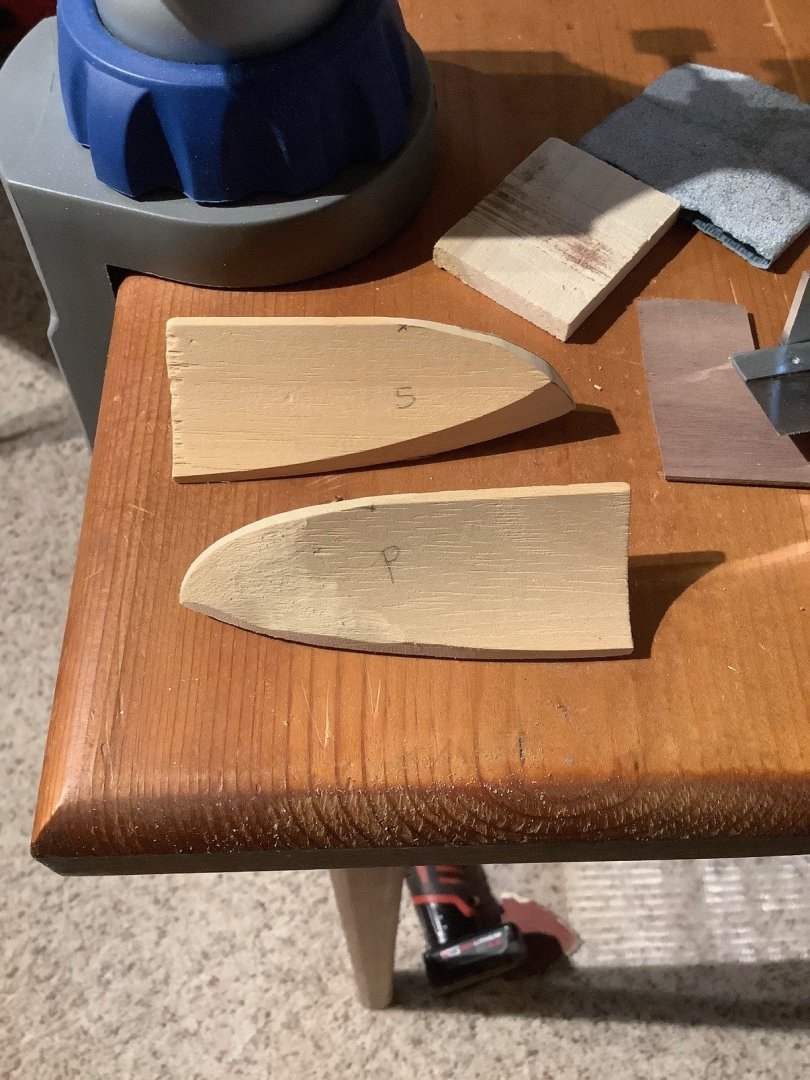
Thanks Peter for your suggestion... PS that's a beautiful Cutty Sark you have there! A few pictures at this time referencing the rear cabin dormers. I sanded back the undersides at each end of the wooden part in order to create a slight convex surface in order for the part to sit with more contact to the curved roof below. Once I got a good "seat", I traced the bottom side profile to follow the side contour of the roof line and then traced a gentle curve to the fore edging, sanding back with the disc sander, then with a file and then hand sanding with sandpaper in order to get the dormer shaped for initial fitting. I need more concavity in the fore 1/3 of the dormer on each side...


-
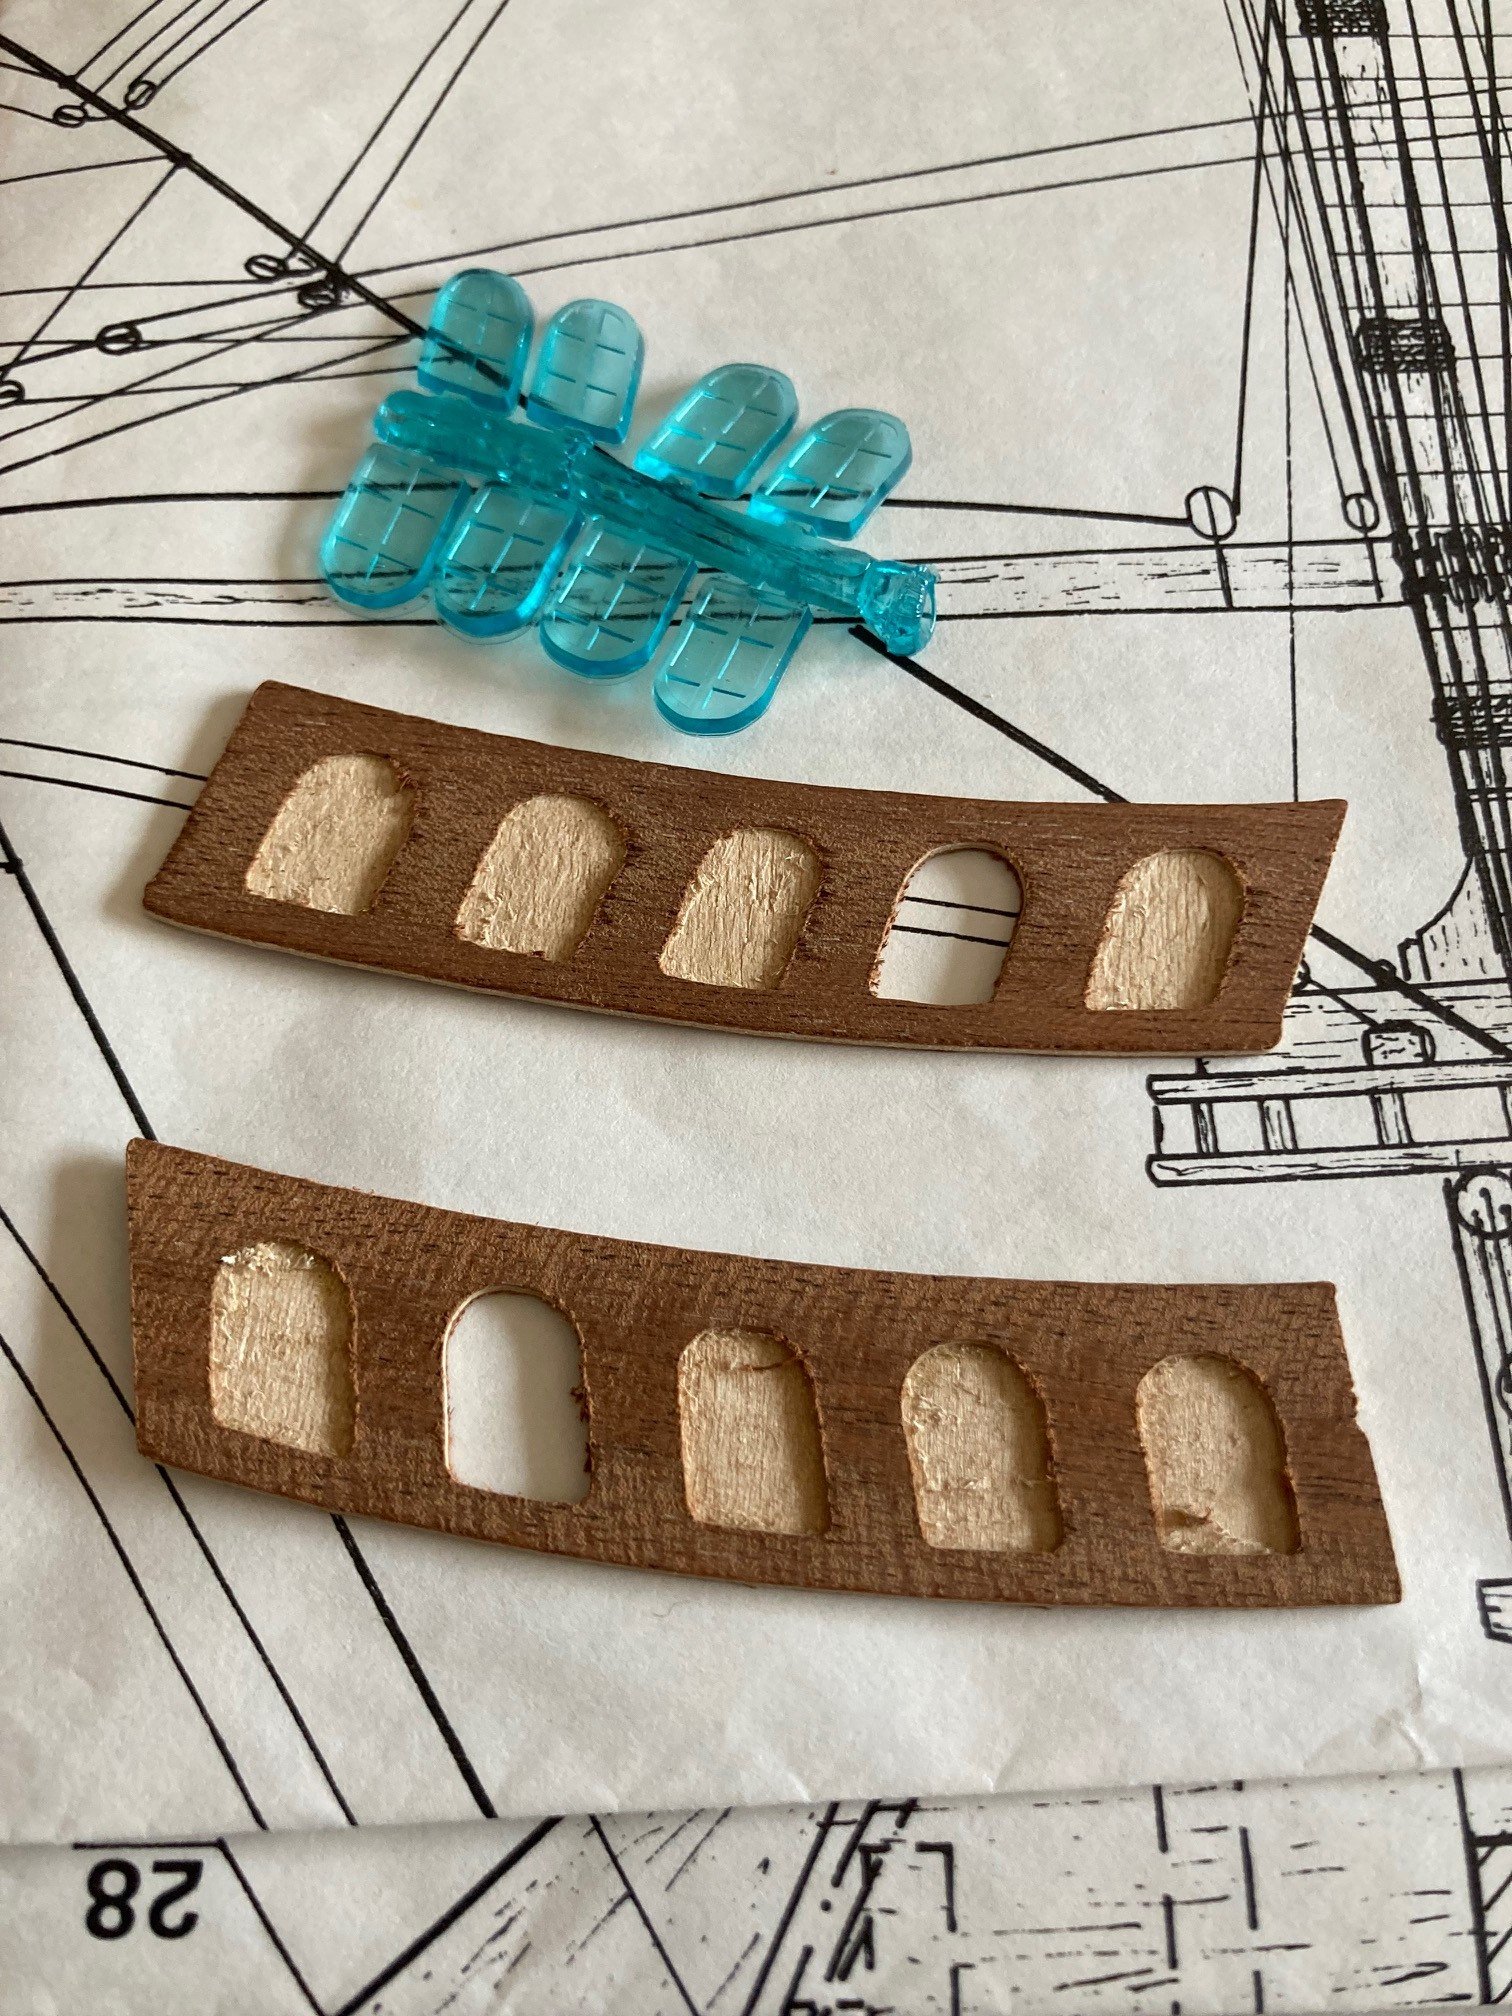
Thanks Peter for your reply... I think my concern is more getting the frame of the window and panes to look right. Definitely will not put those plastic aberrations in!
-
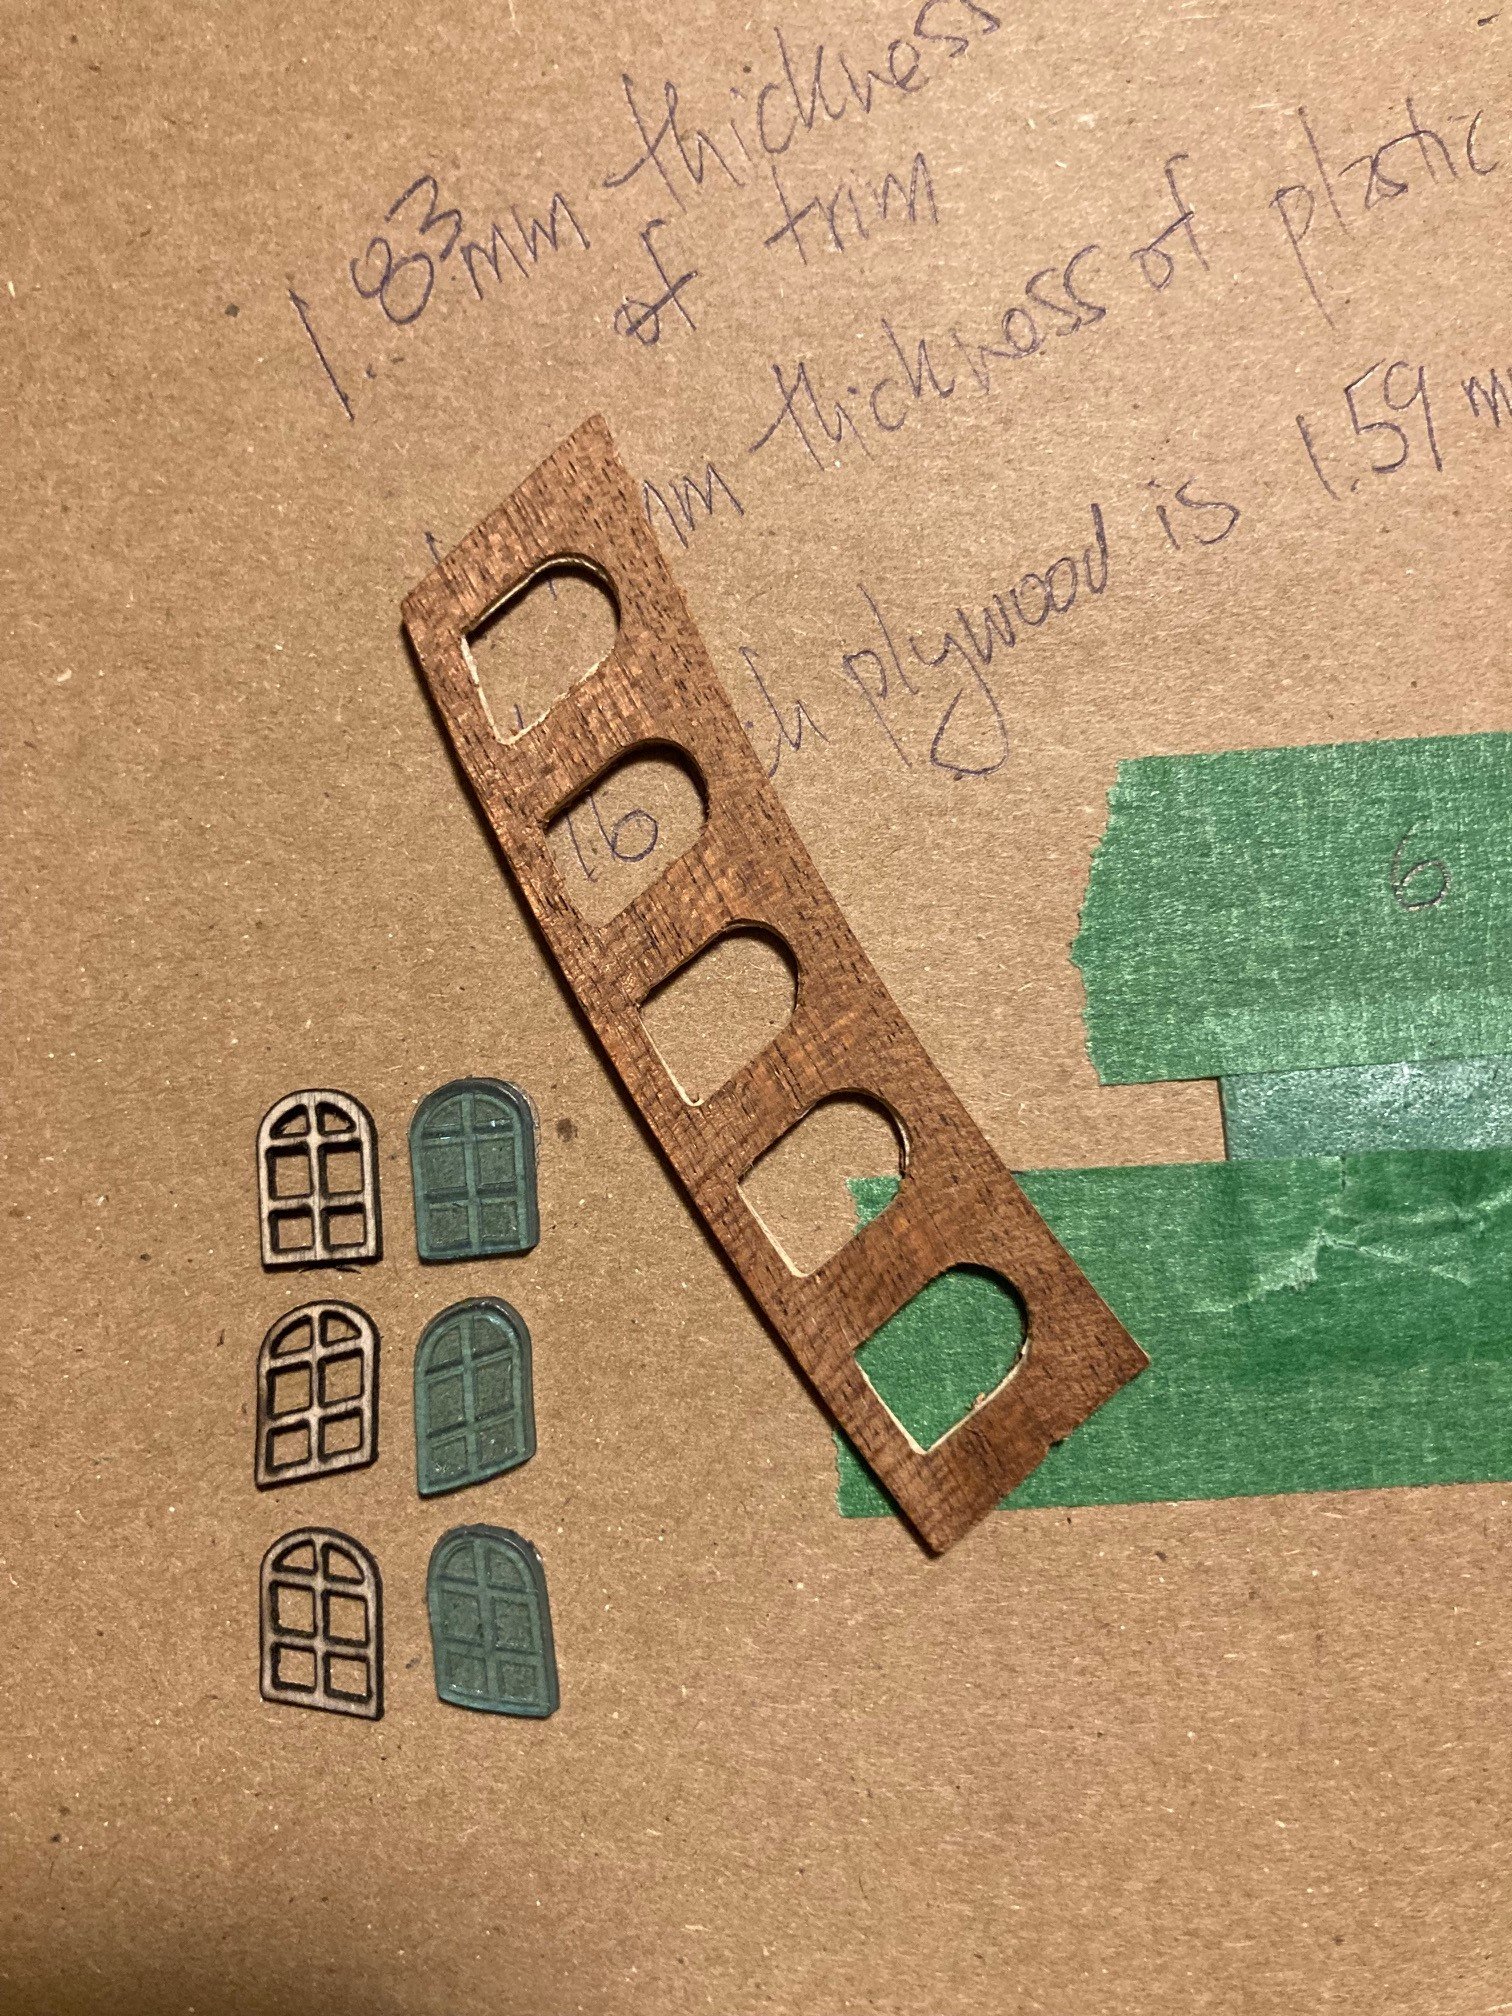
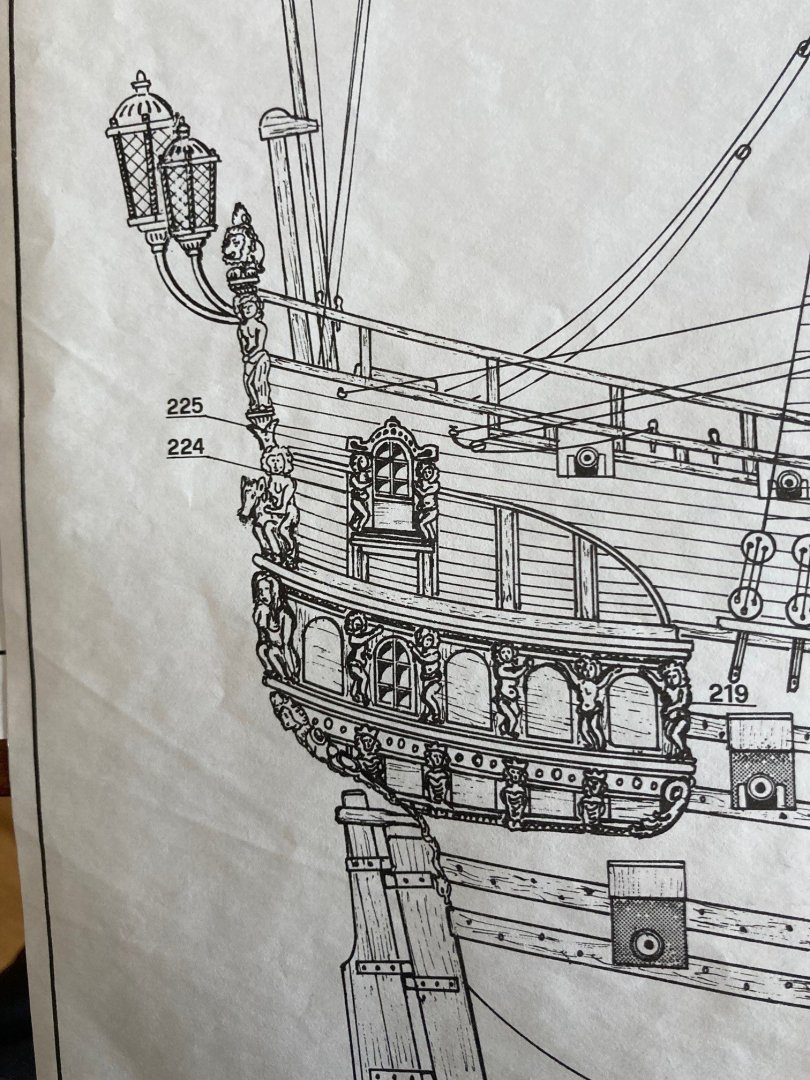
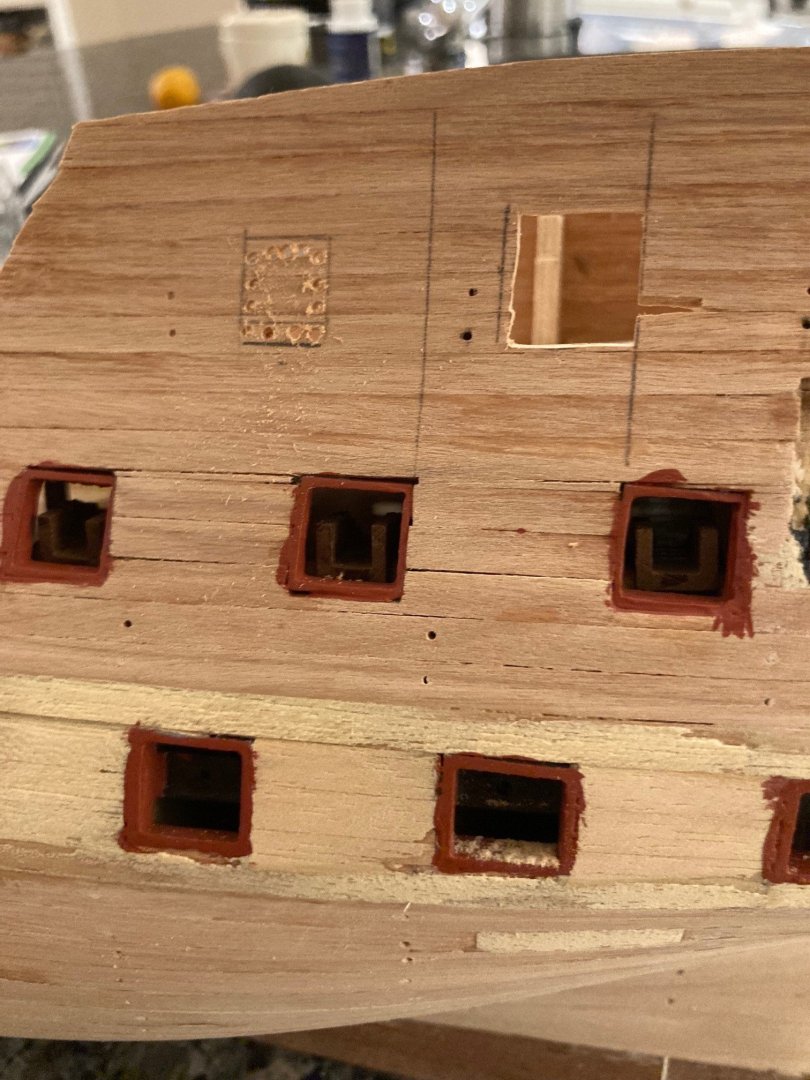
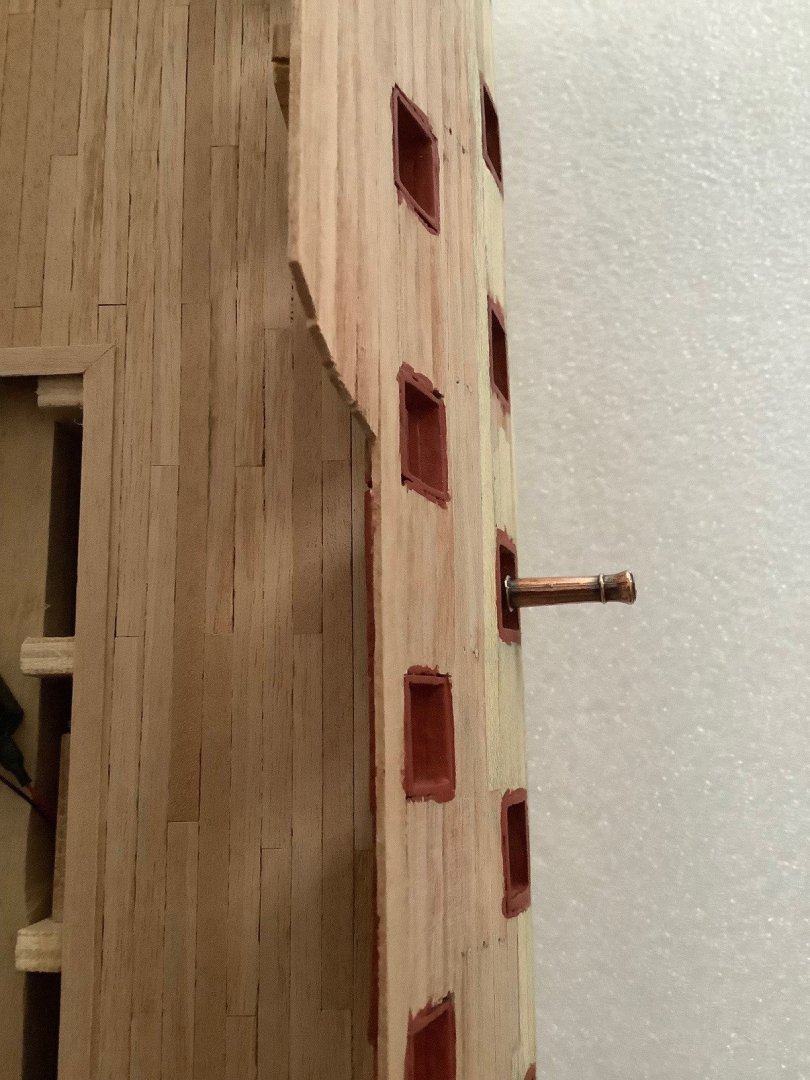
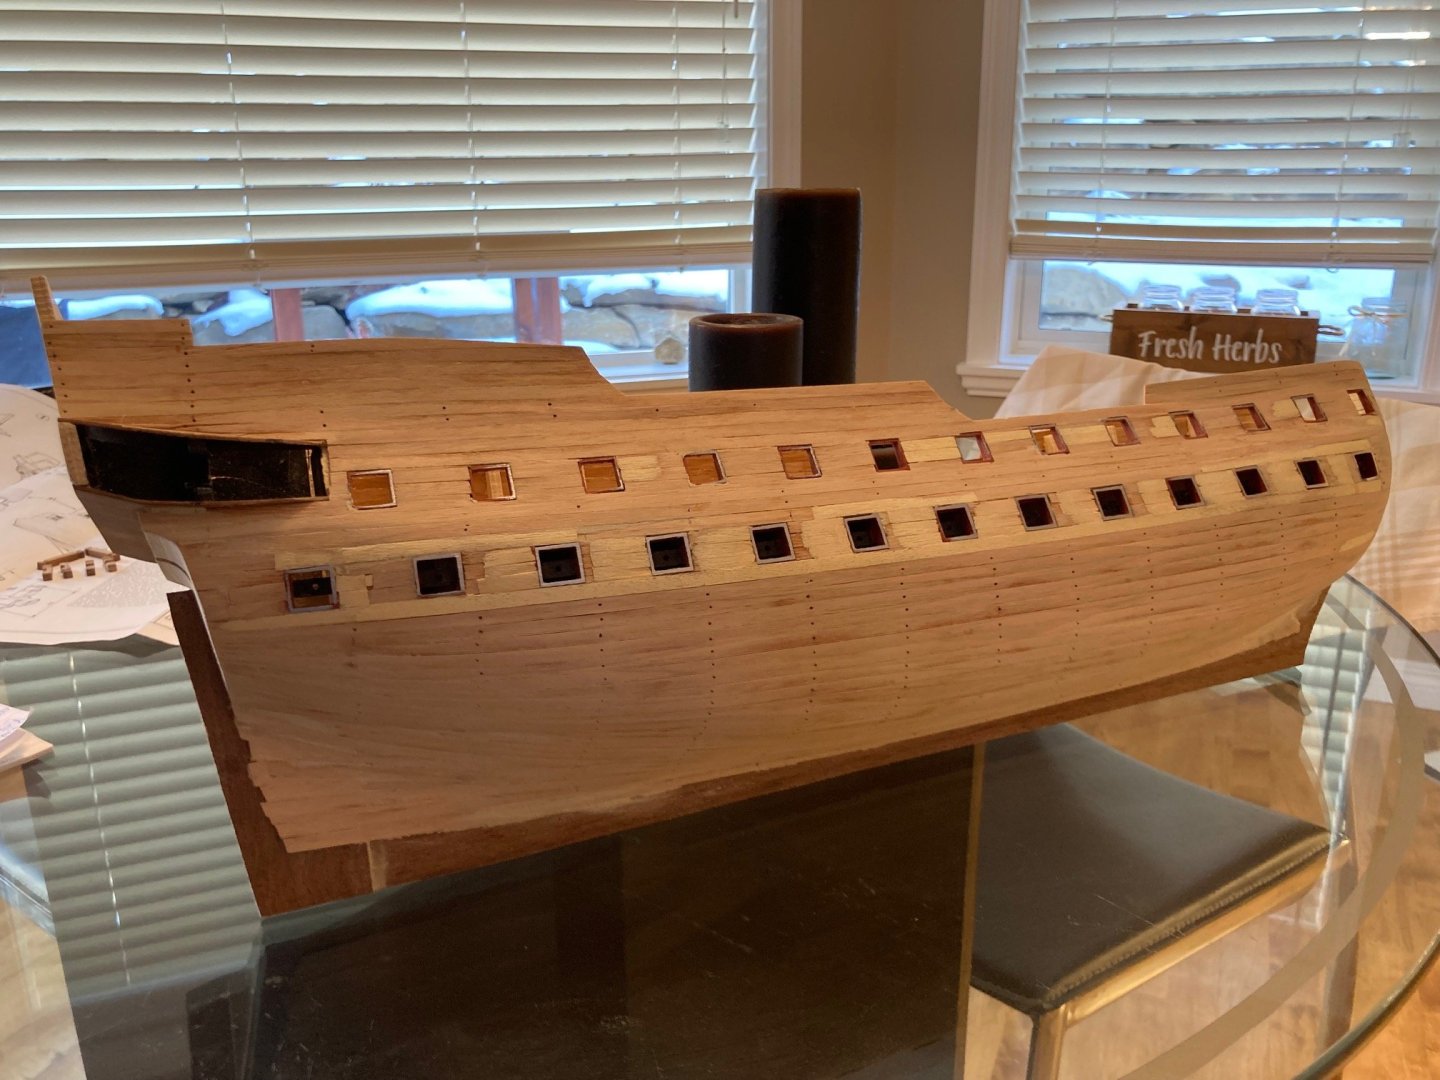
I am hoping to source a laser cutter from a friend of a friend... in order to cut a number of windows for this kit. The kit has some cheap plastic windows that I wish to definitely replace. The kit supplied plastic windows only have enough for 8 windows but I wish to replace all of them as evident on the plans. The side stern windows are inclined in one way and then the other side has a slight inclination the other way. And the rear stern windows are straight up and down without an inclination.. The windows are roughly 8mm x 13mm. Not sure if to cut from wood stock or from a sheet of photoetch brass?


-
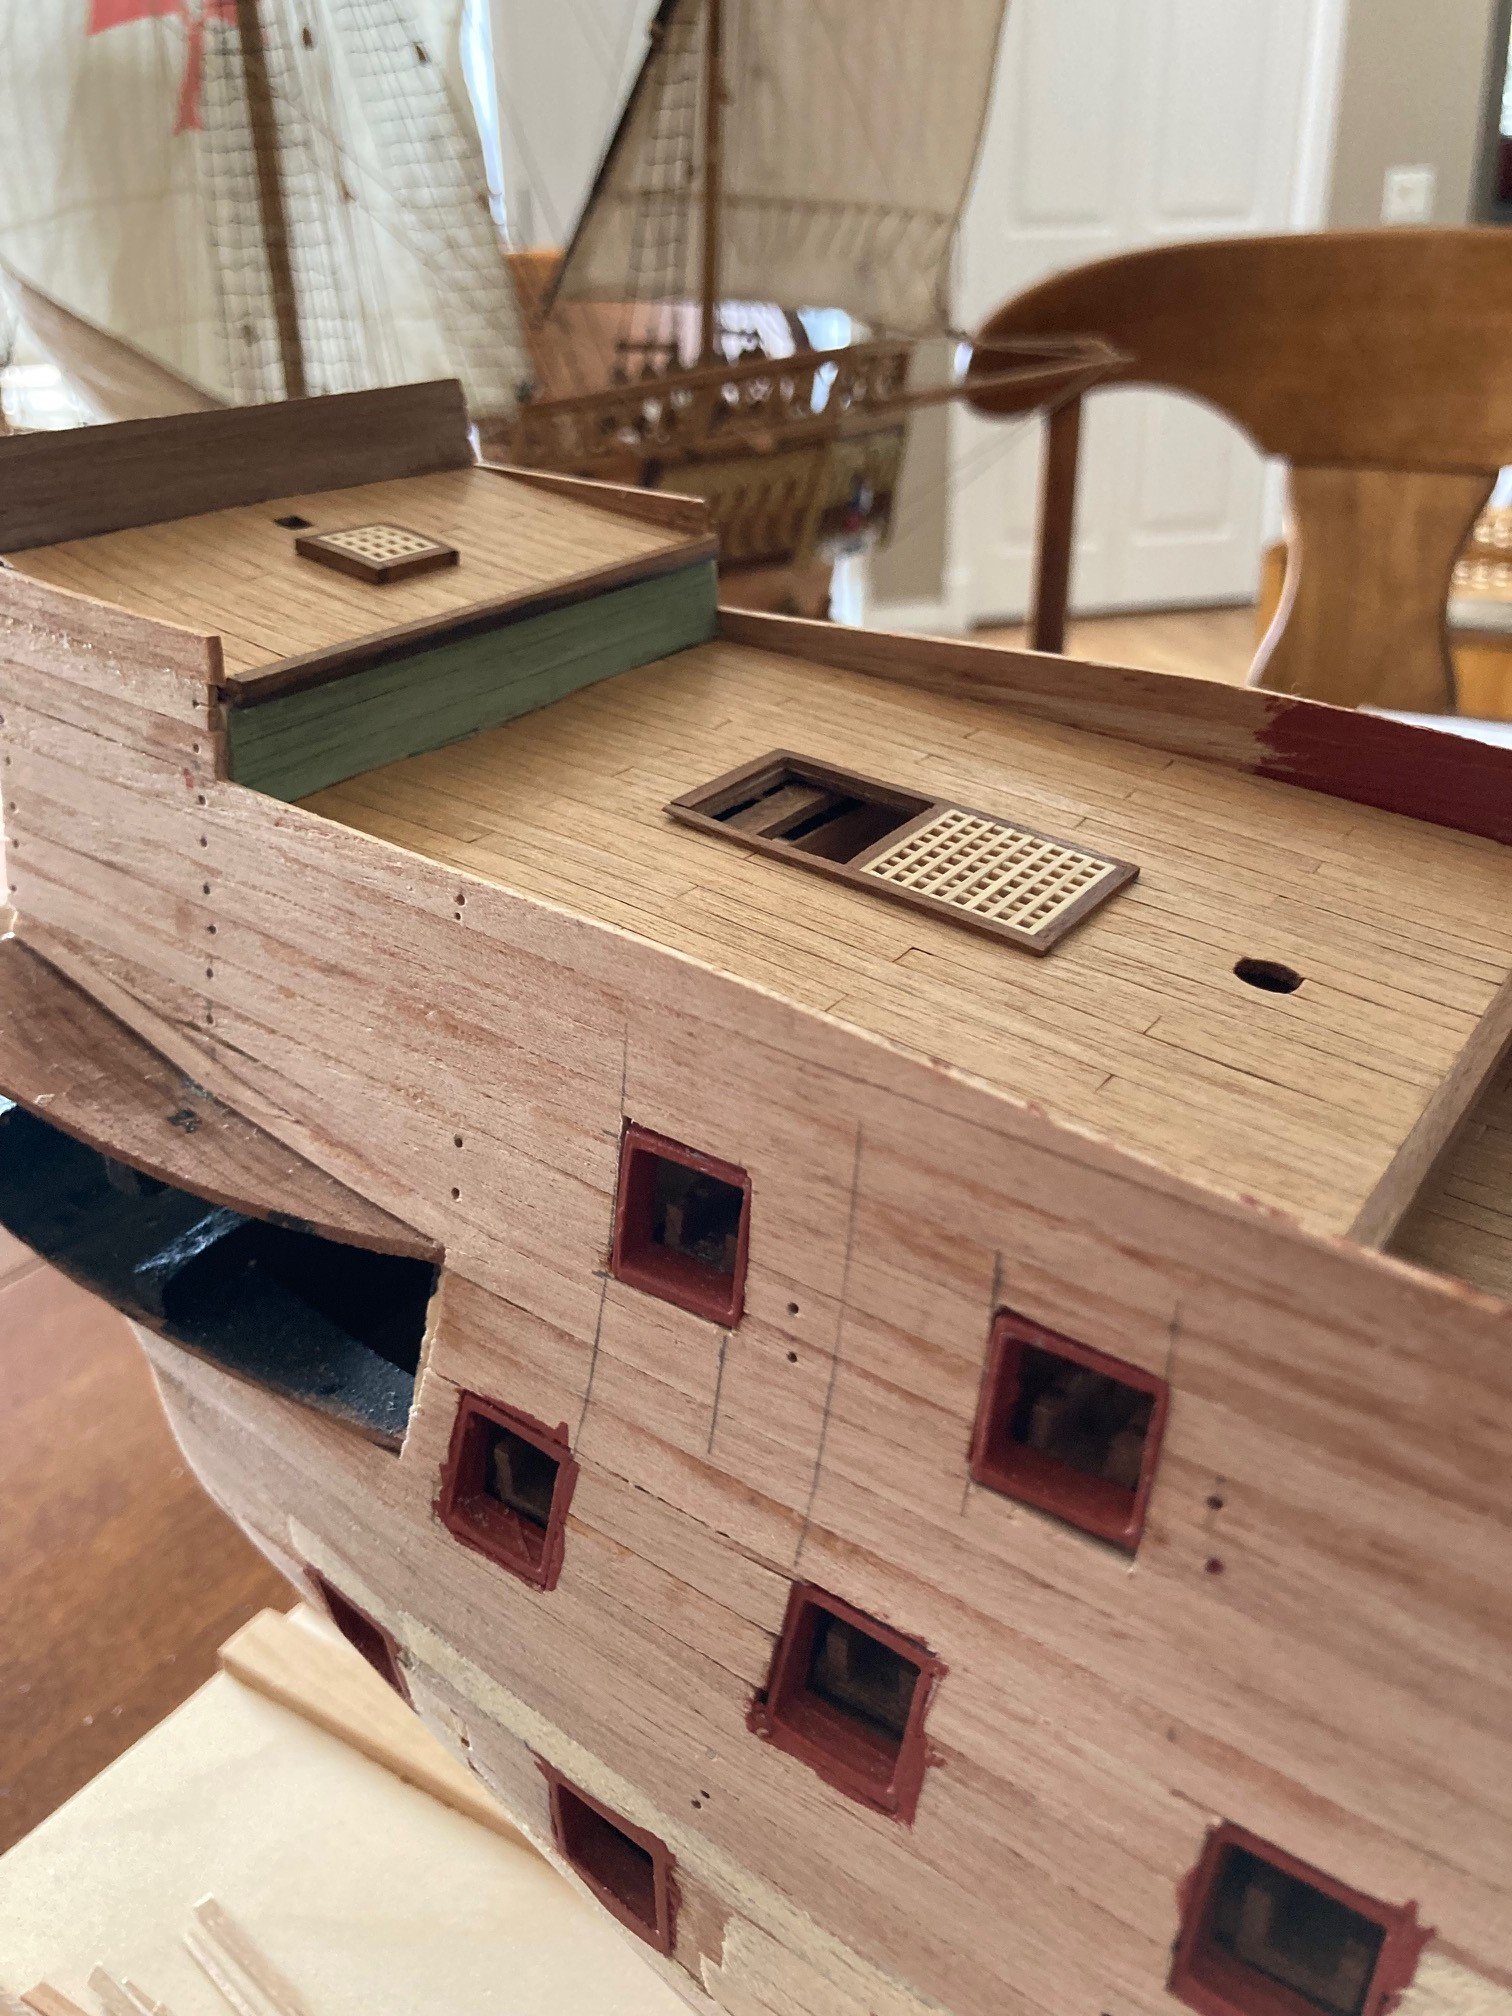
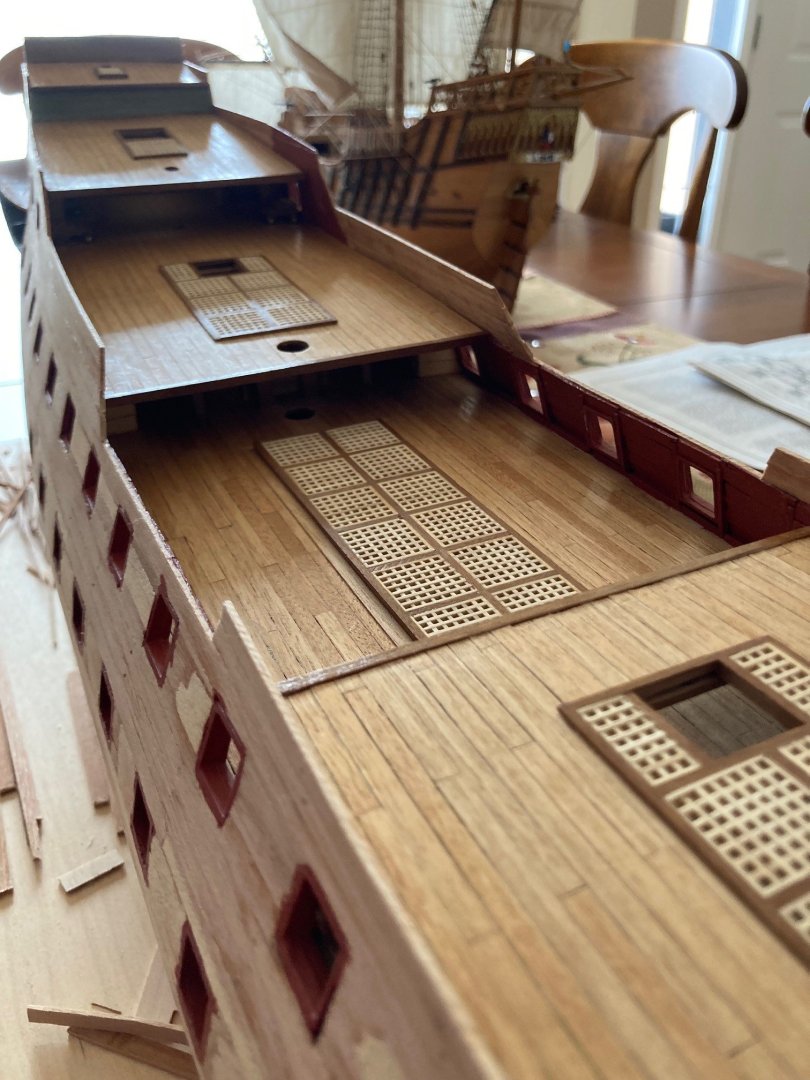
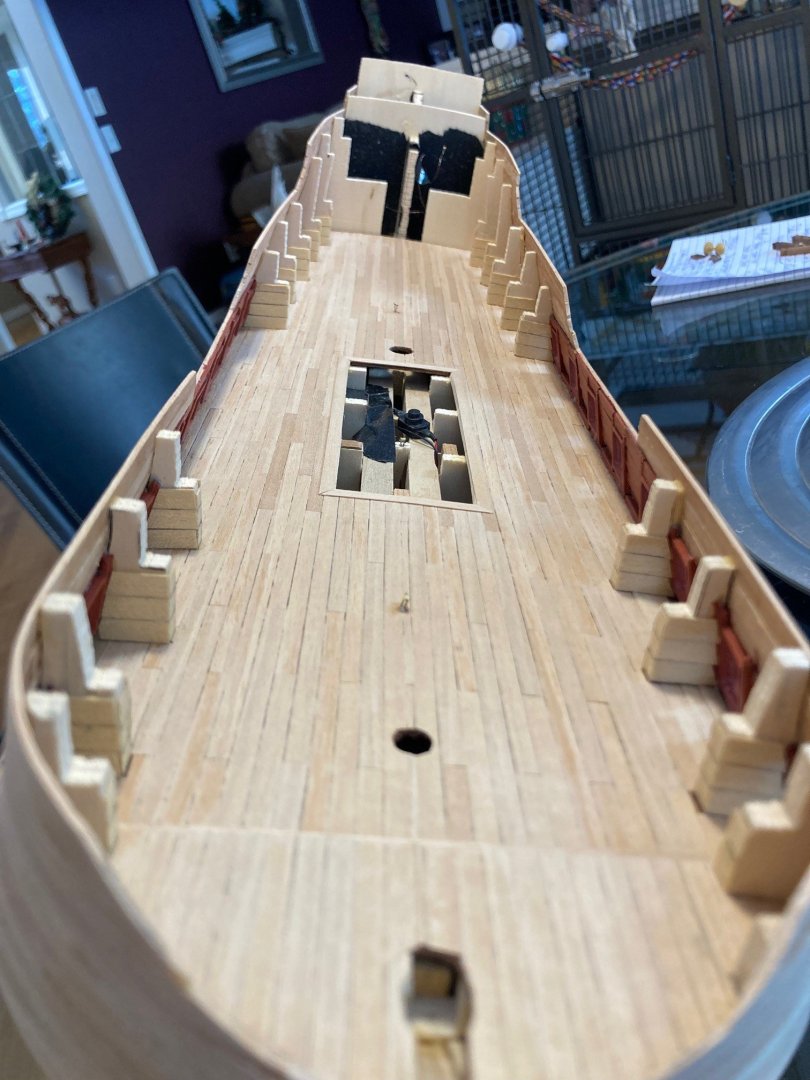
Finally finished the deck planking on all the deck levels... With three coats of wipe on poly. I made the mistake of sanding the green lath on the rear deck wall... not sure why I even did it... I have now lost the lustre and brightness of the green stain and will likely have to do a new wash or stain on it.

-
Thanks Patrick for the wise words… you are so right!
-
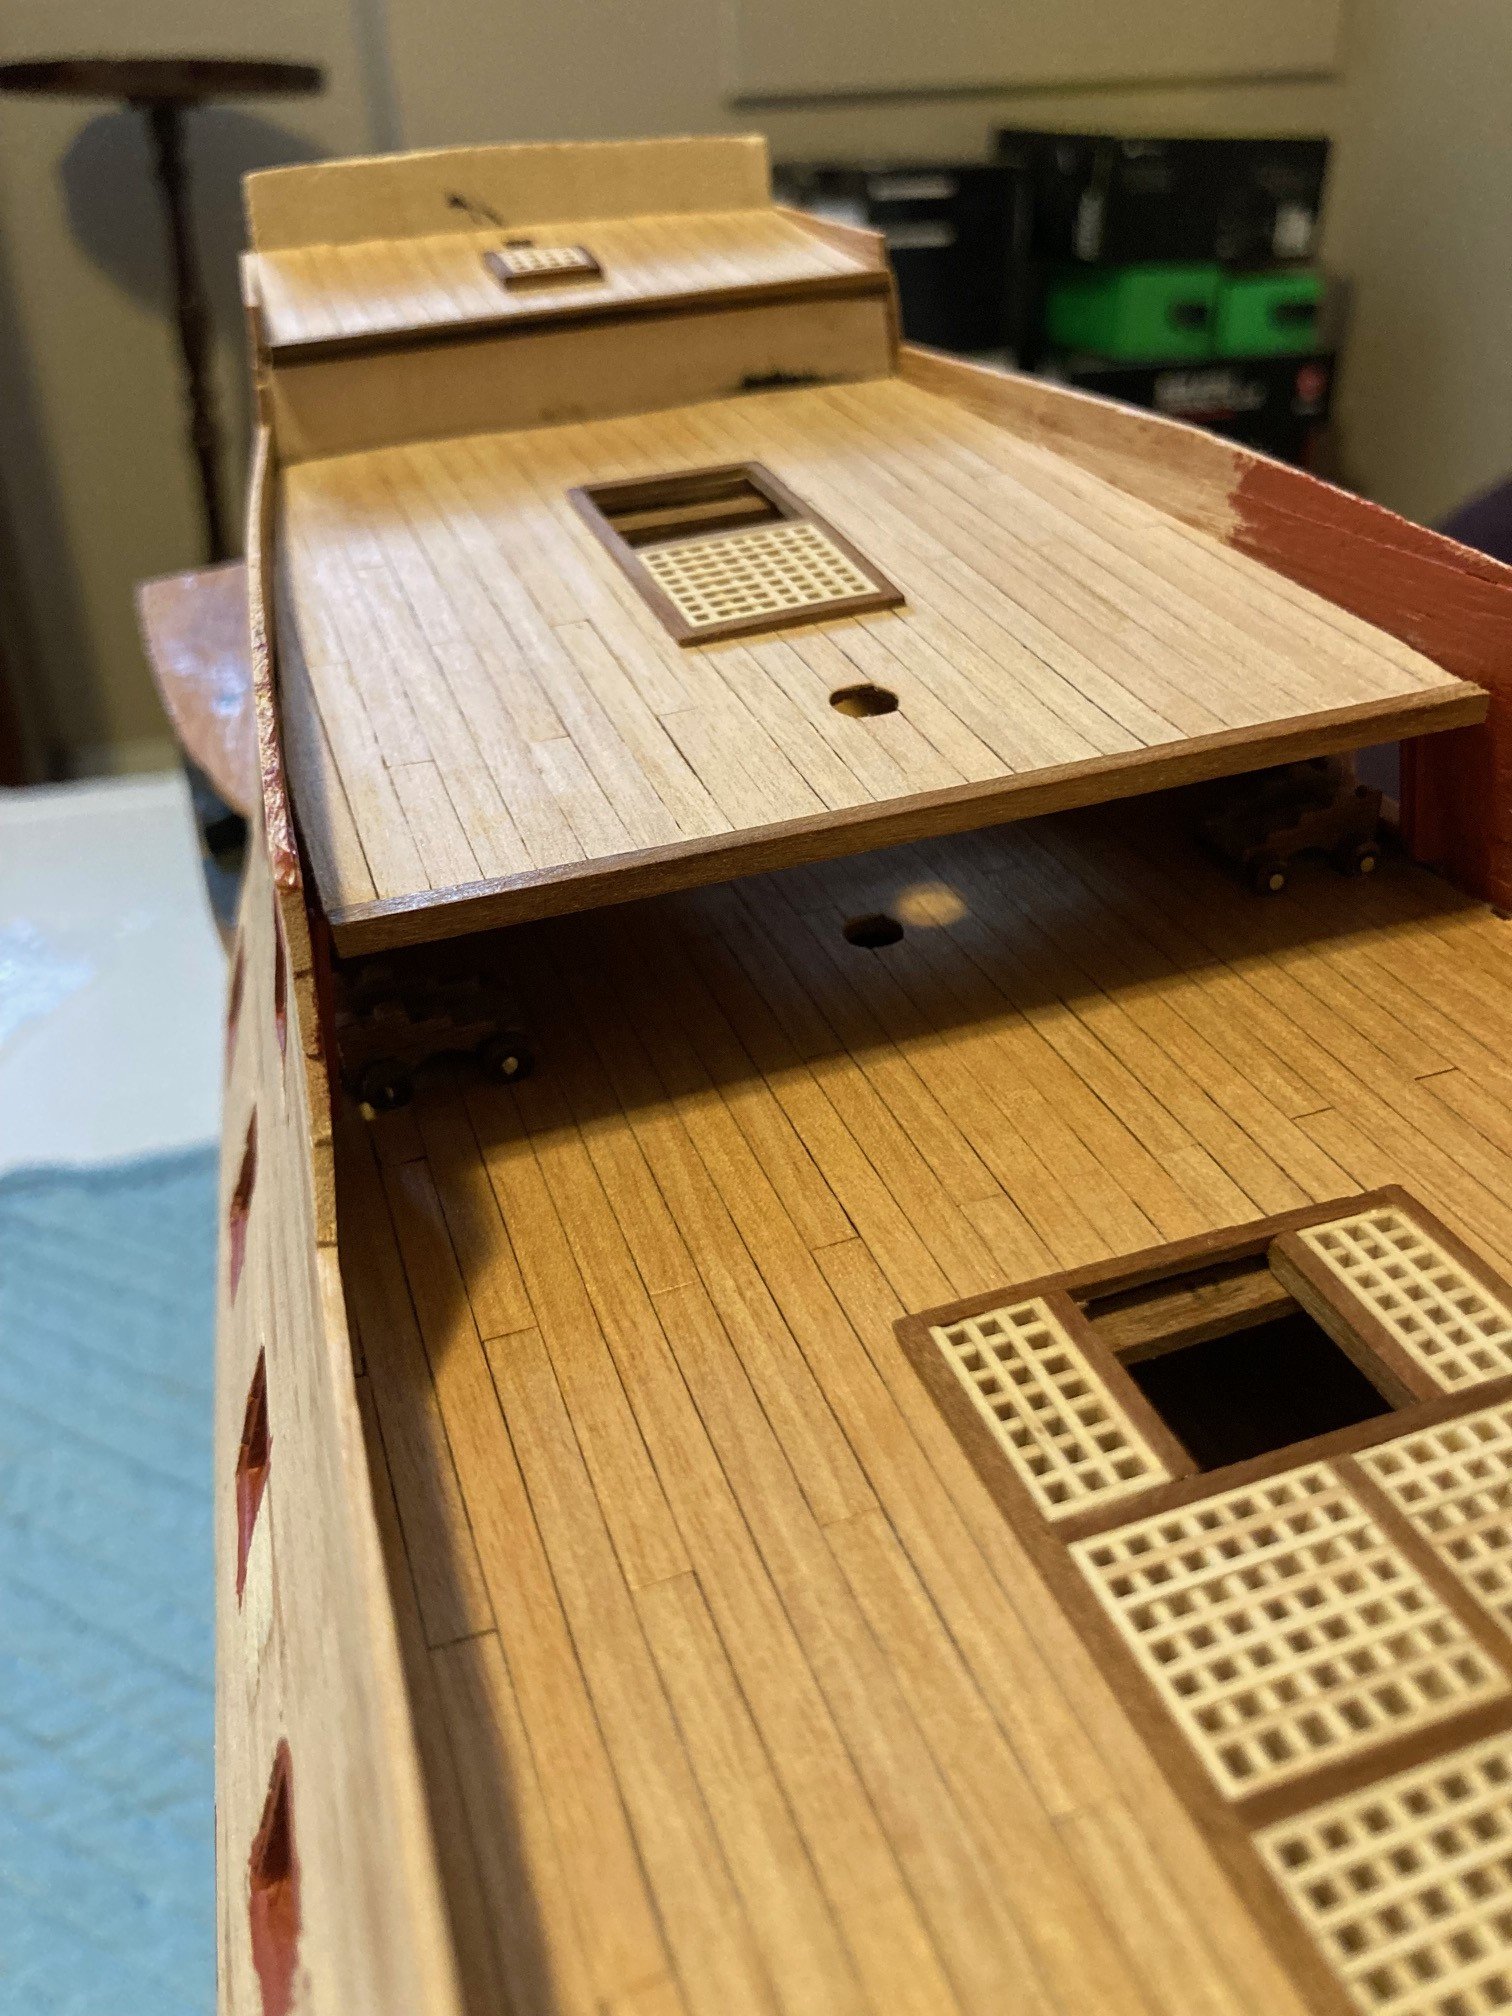
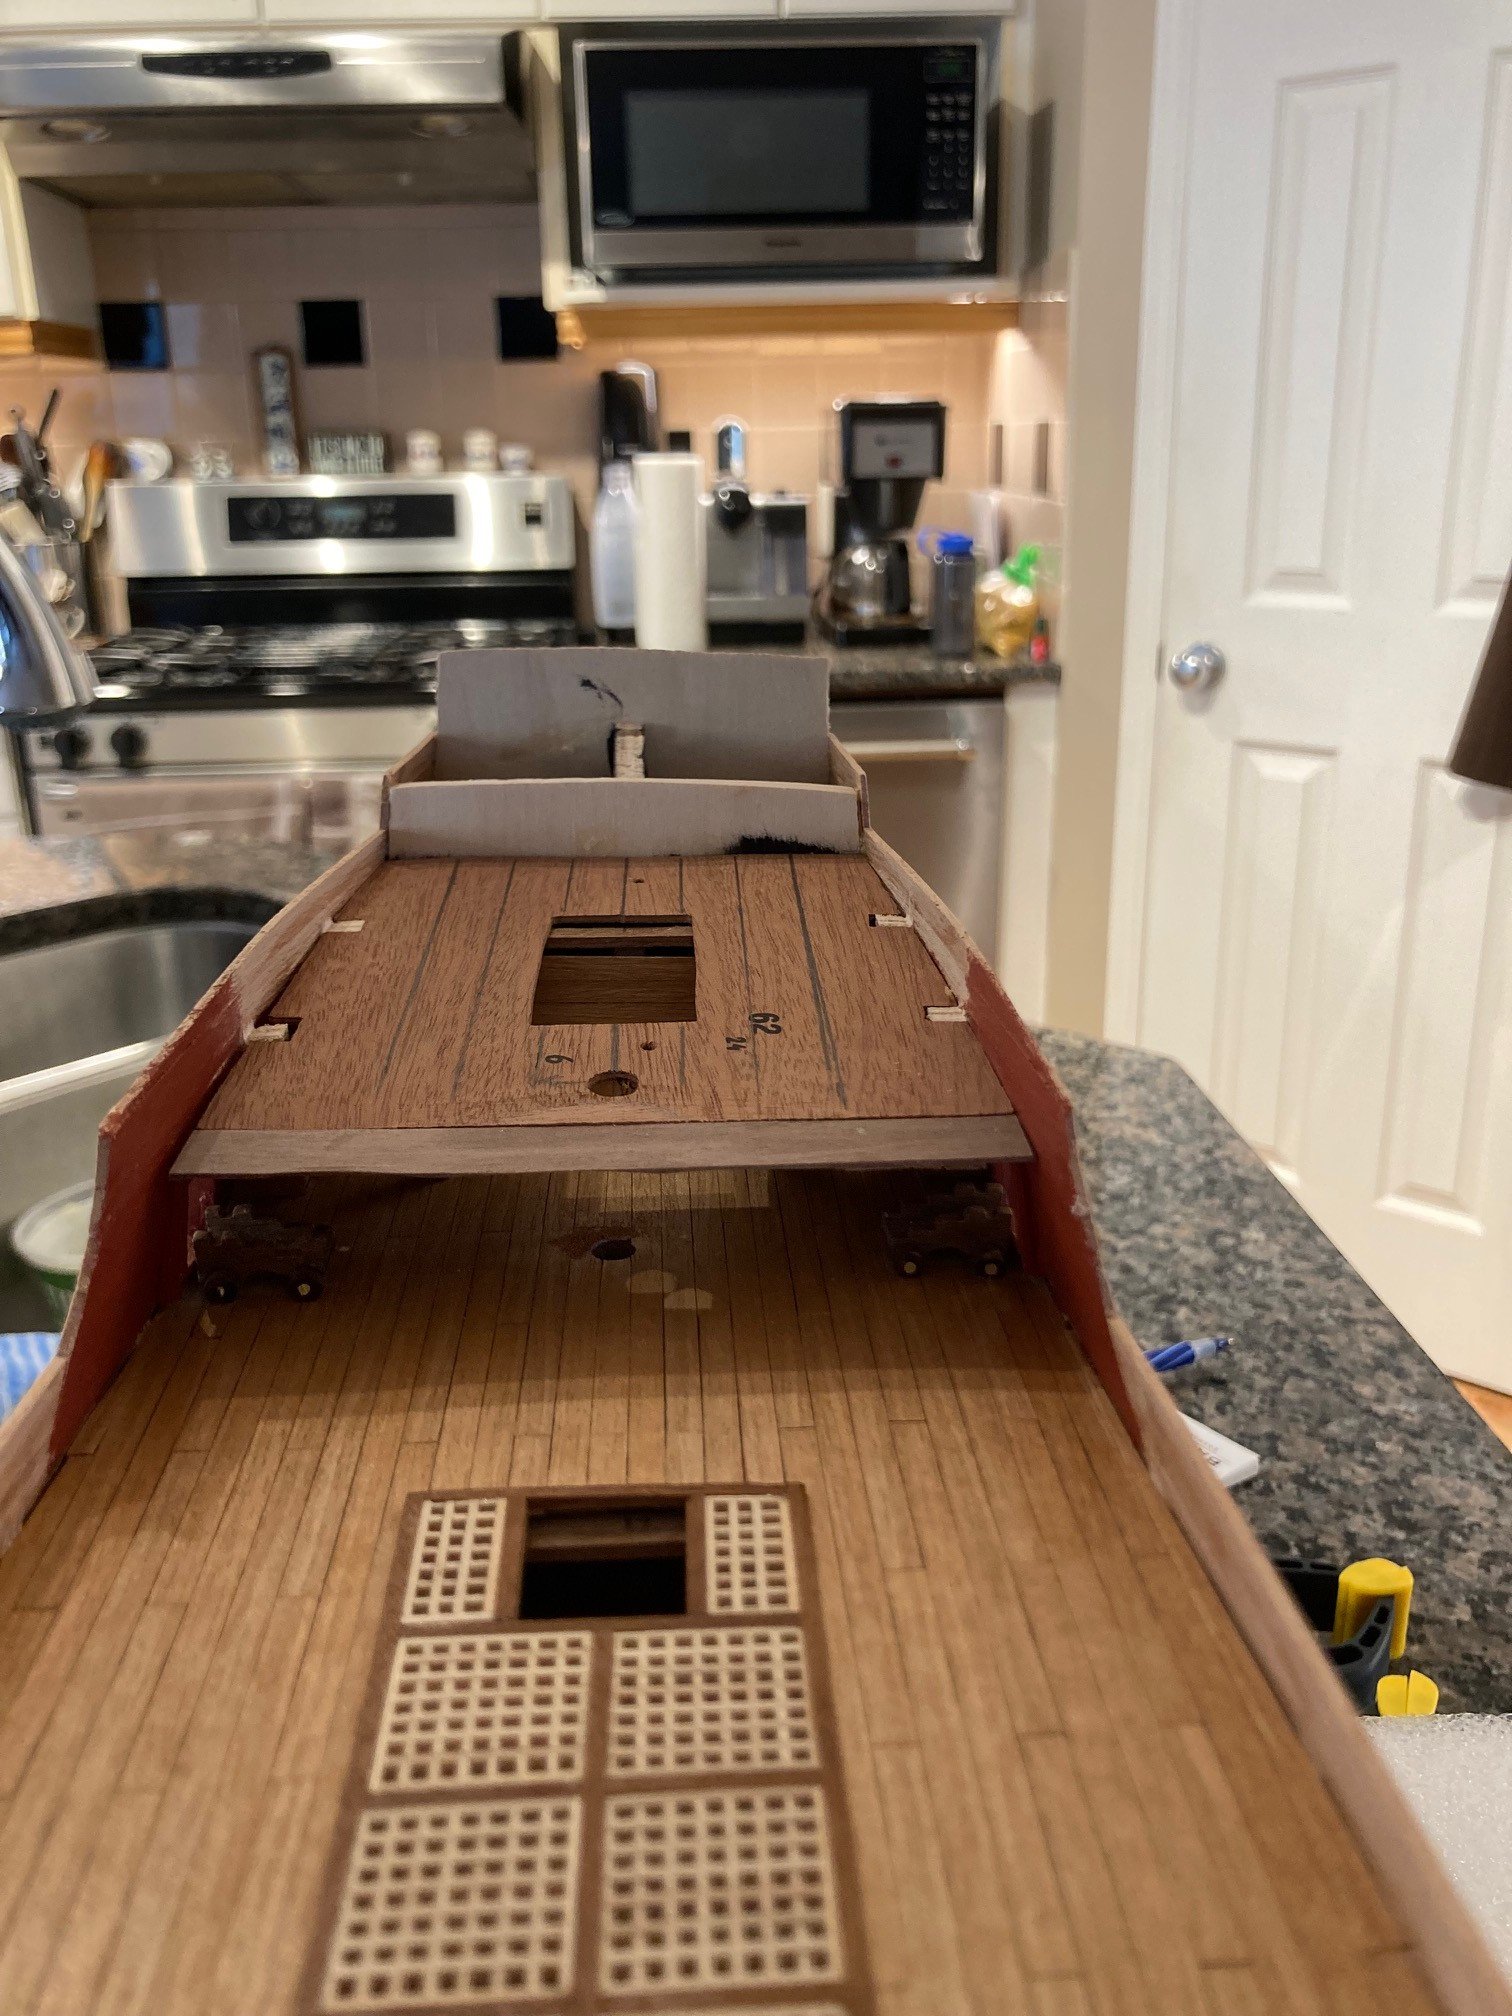
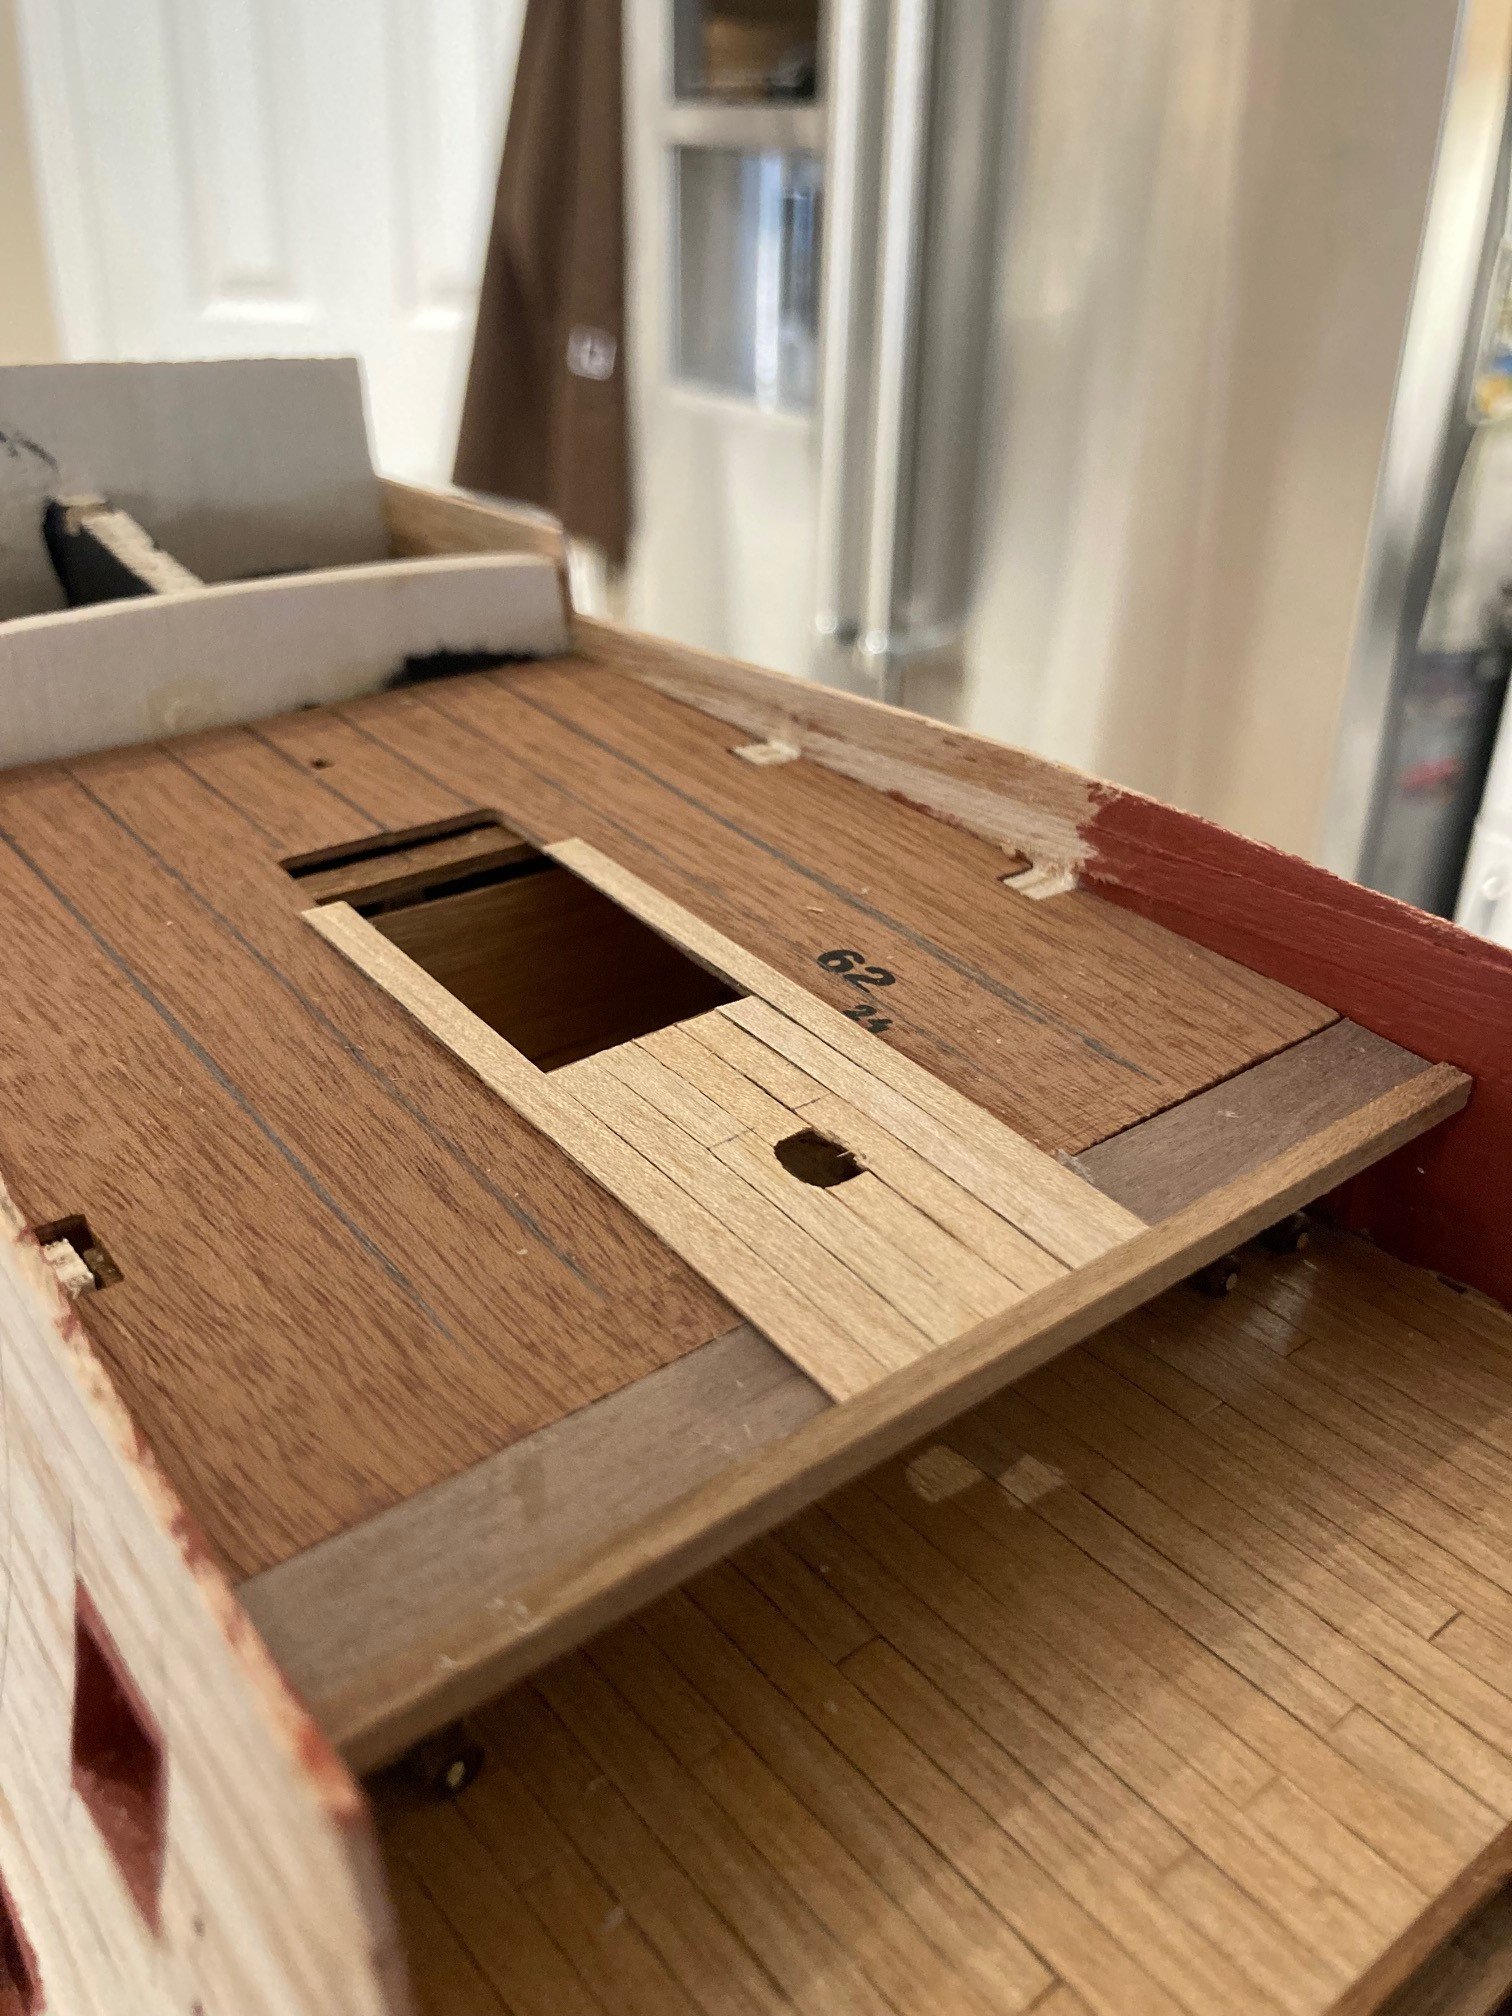
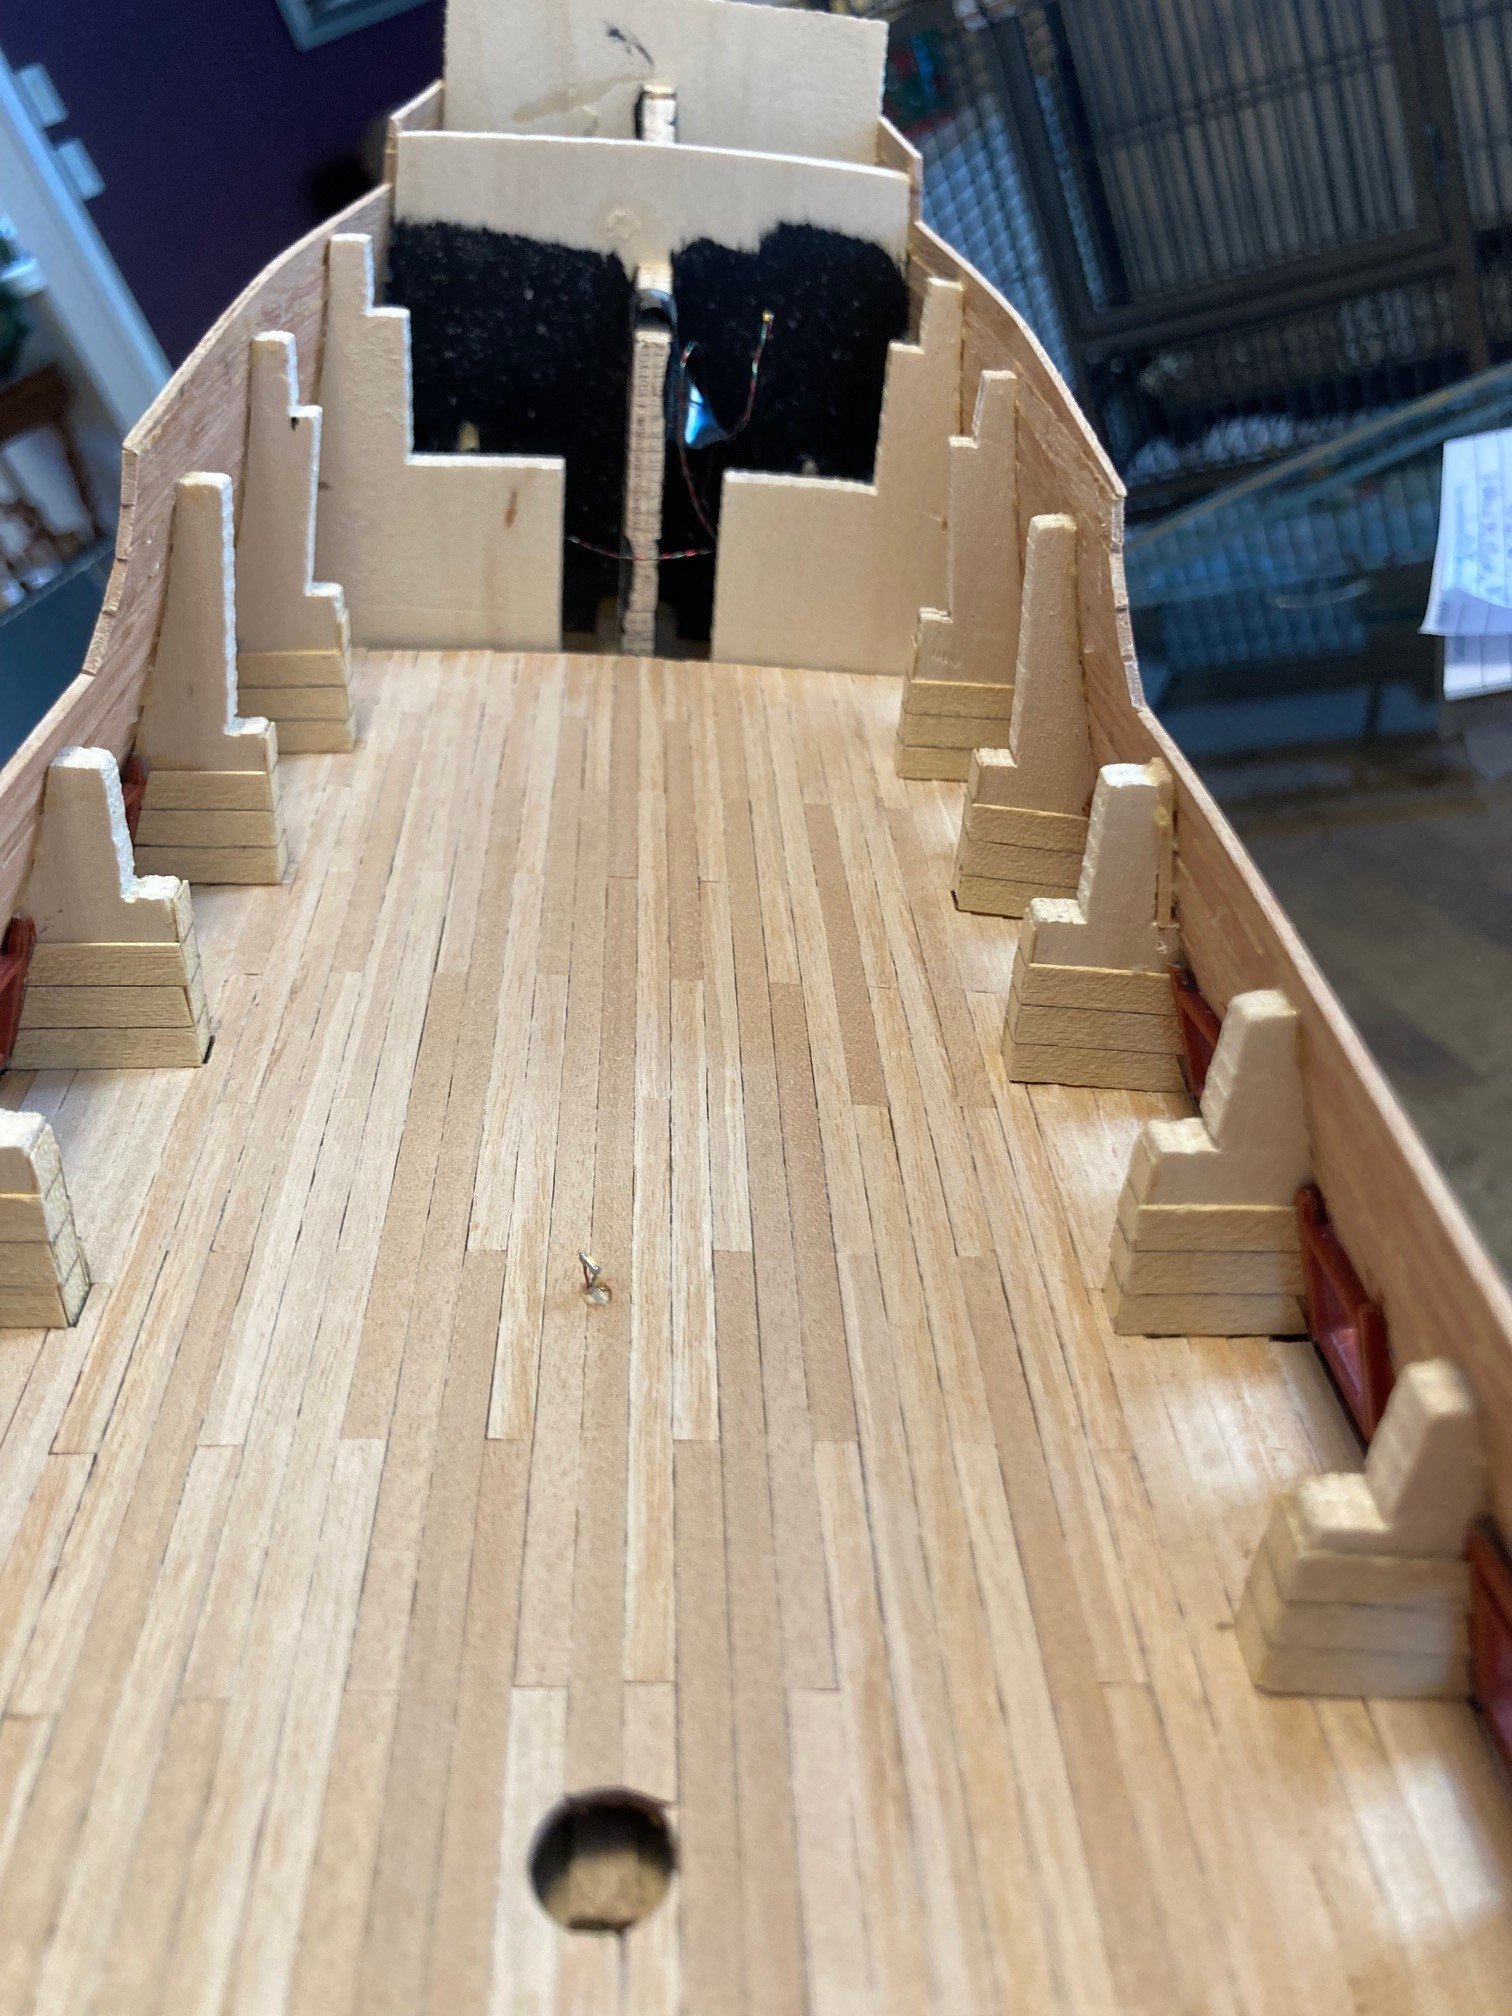
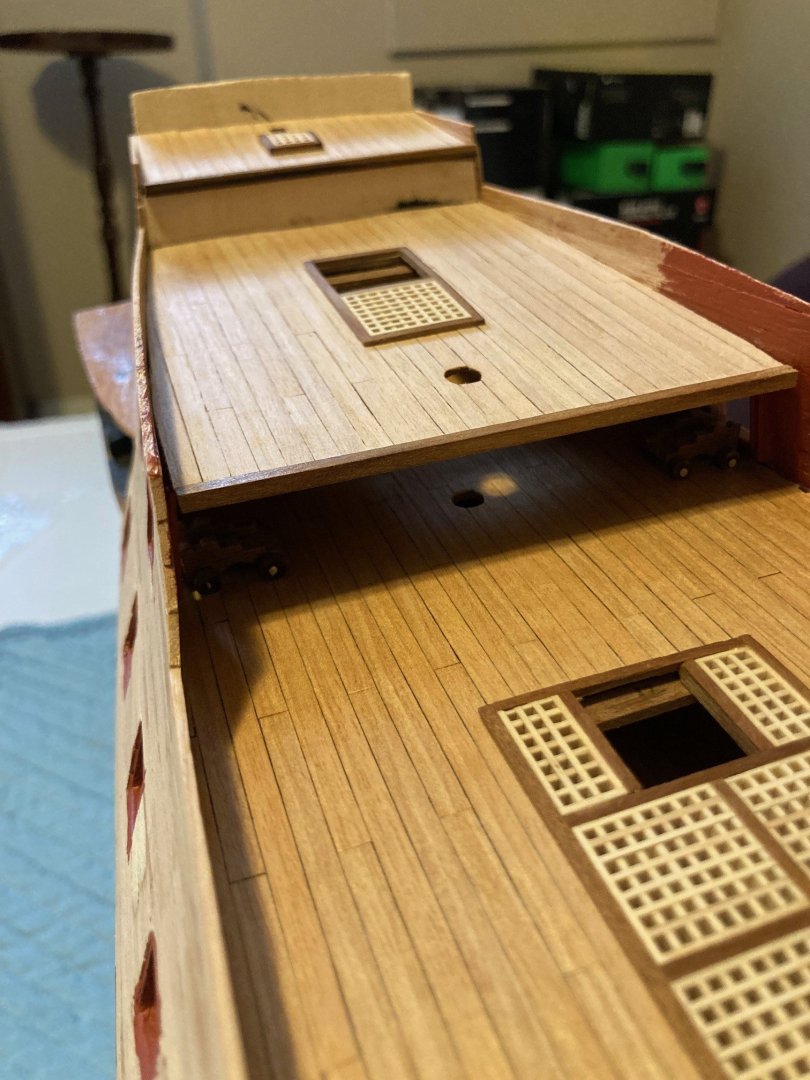
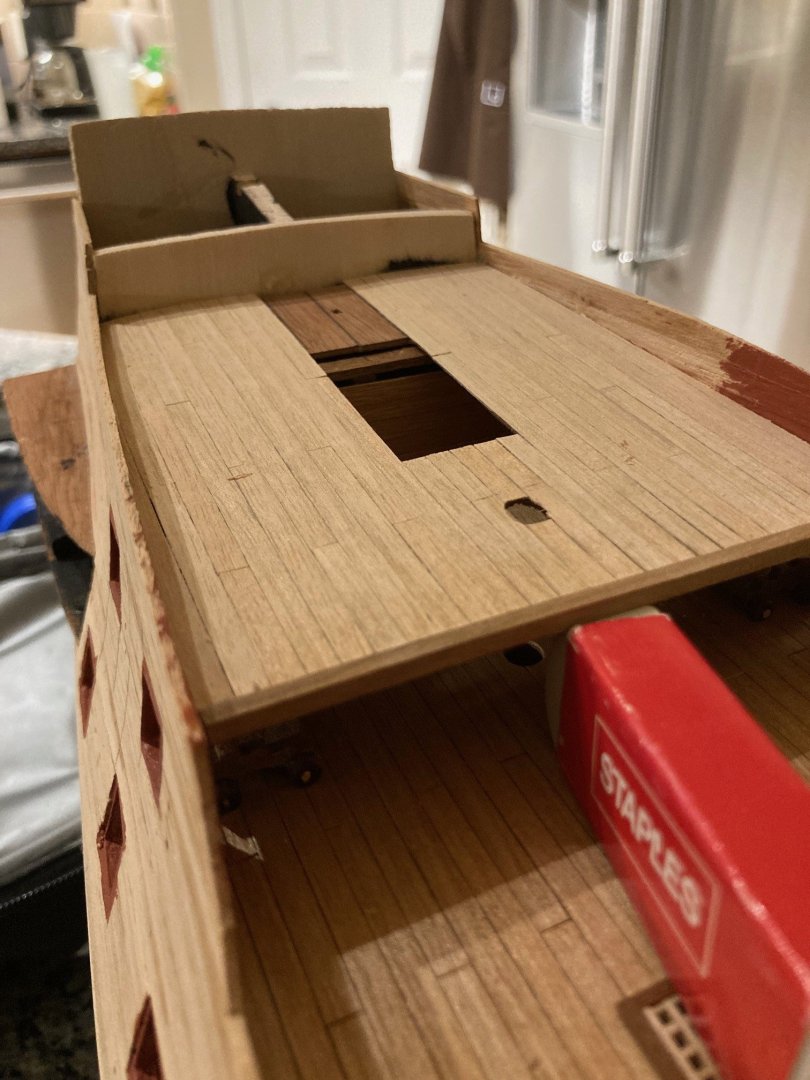
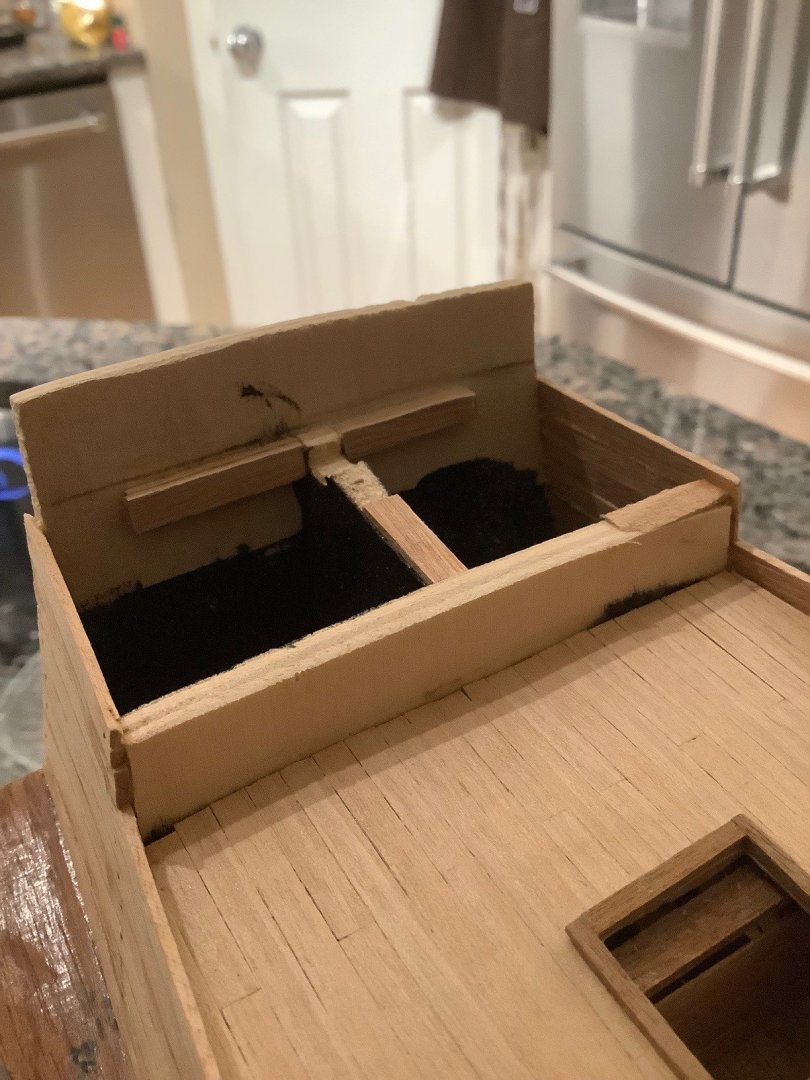
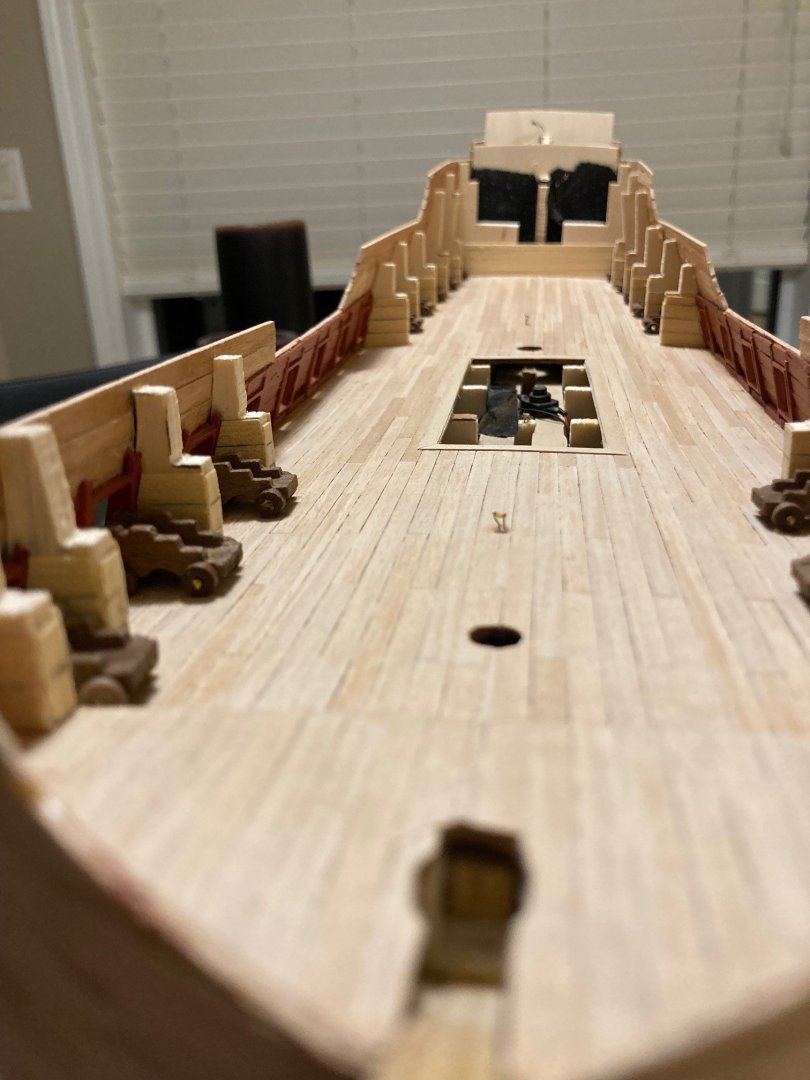
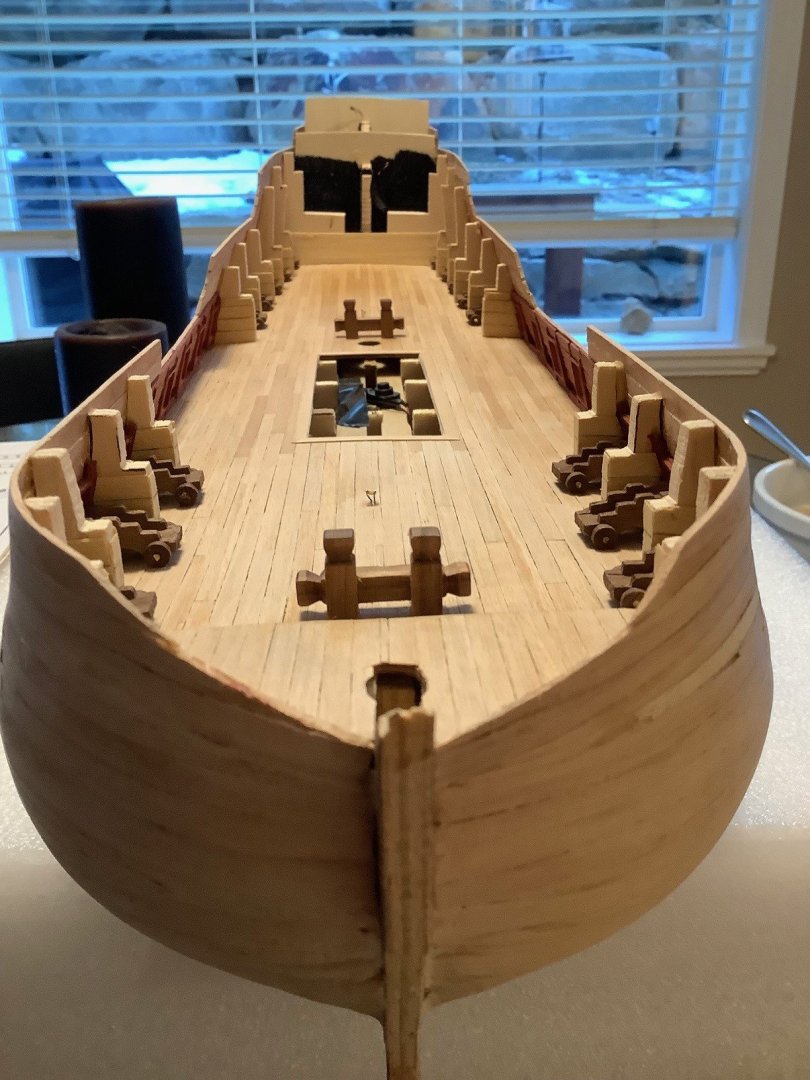
Upper deck complete but also working on the very top rear deck... Instructions are not clear... Nothing fits properly - and finding myself shimming this or that corner at every step. I had to add a ledge for the rear deck lip to sit on - not in the manual. I also had to shift the hole (in the deck prior to planking) for the mast by 3 mm and then braced the hole from underneath. I will later refine with a file. I might just take a break here as I am starting to get frustrated with this vintage kit!
-
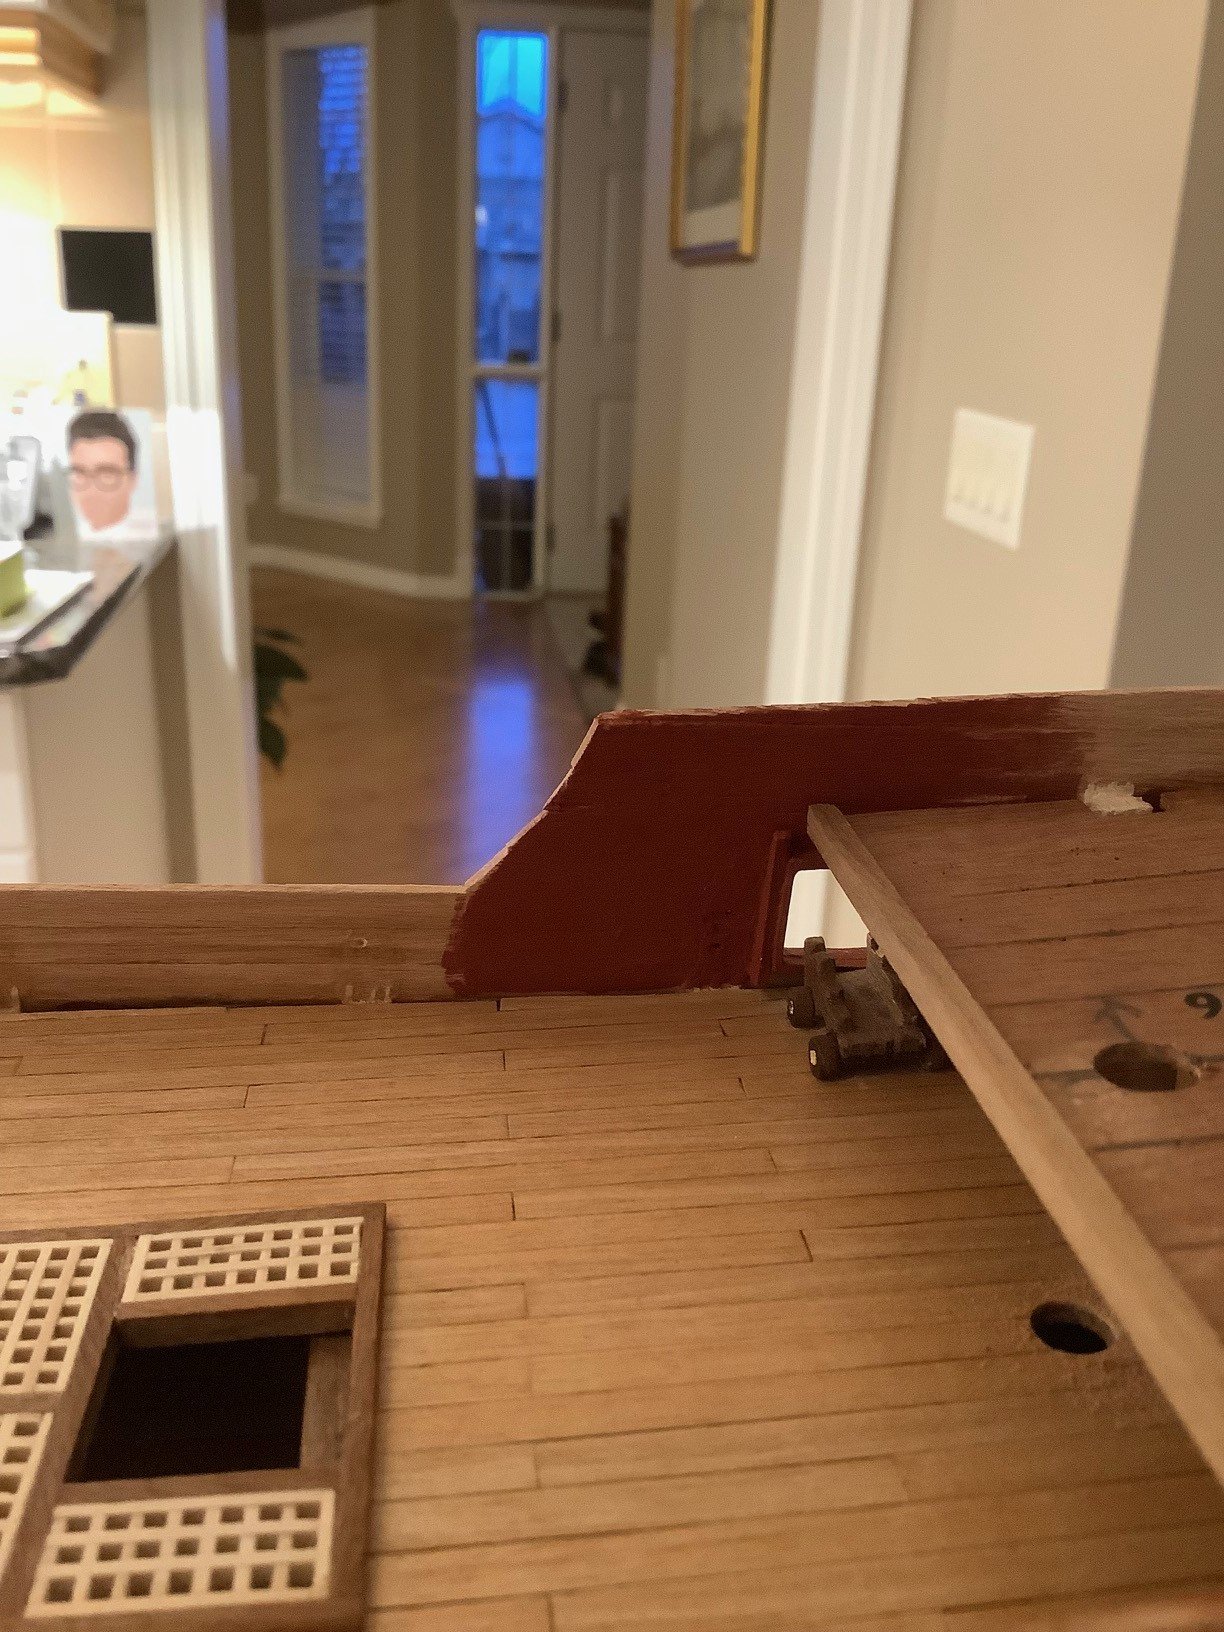
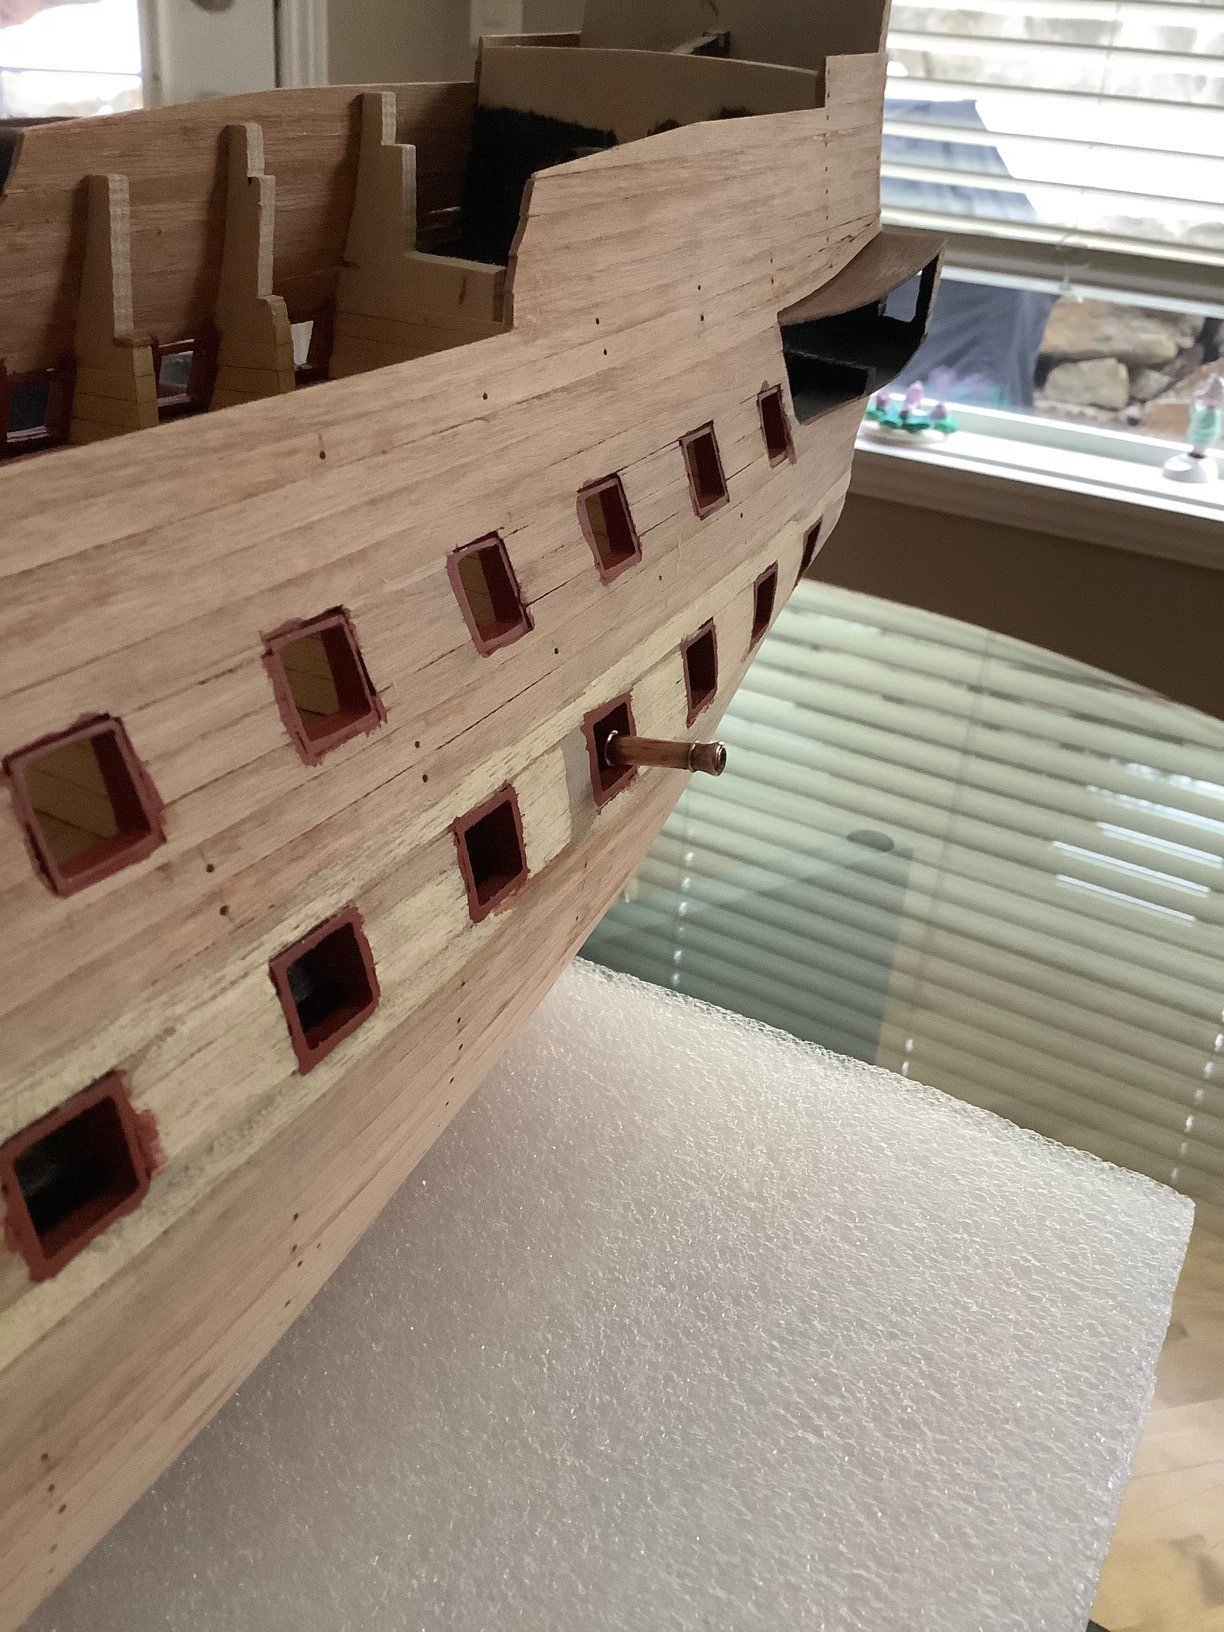
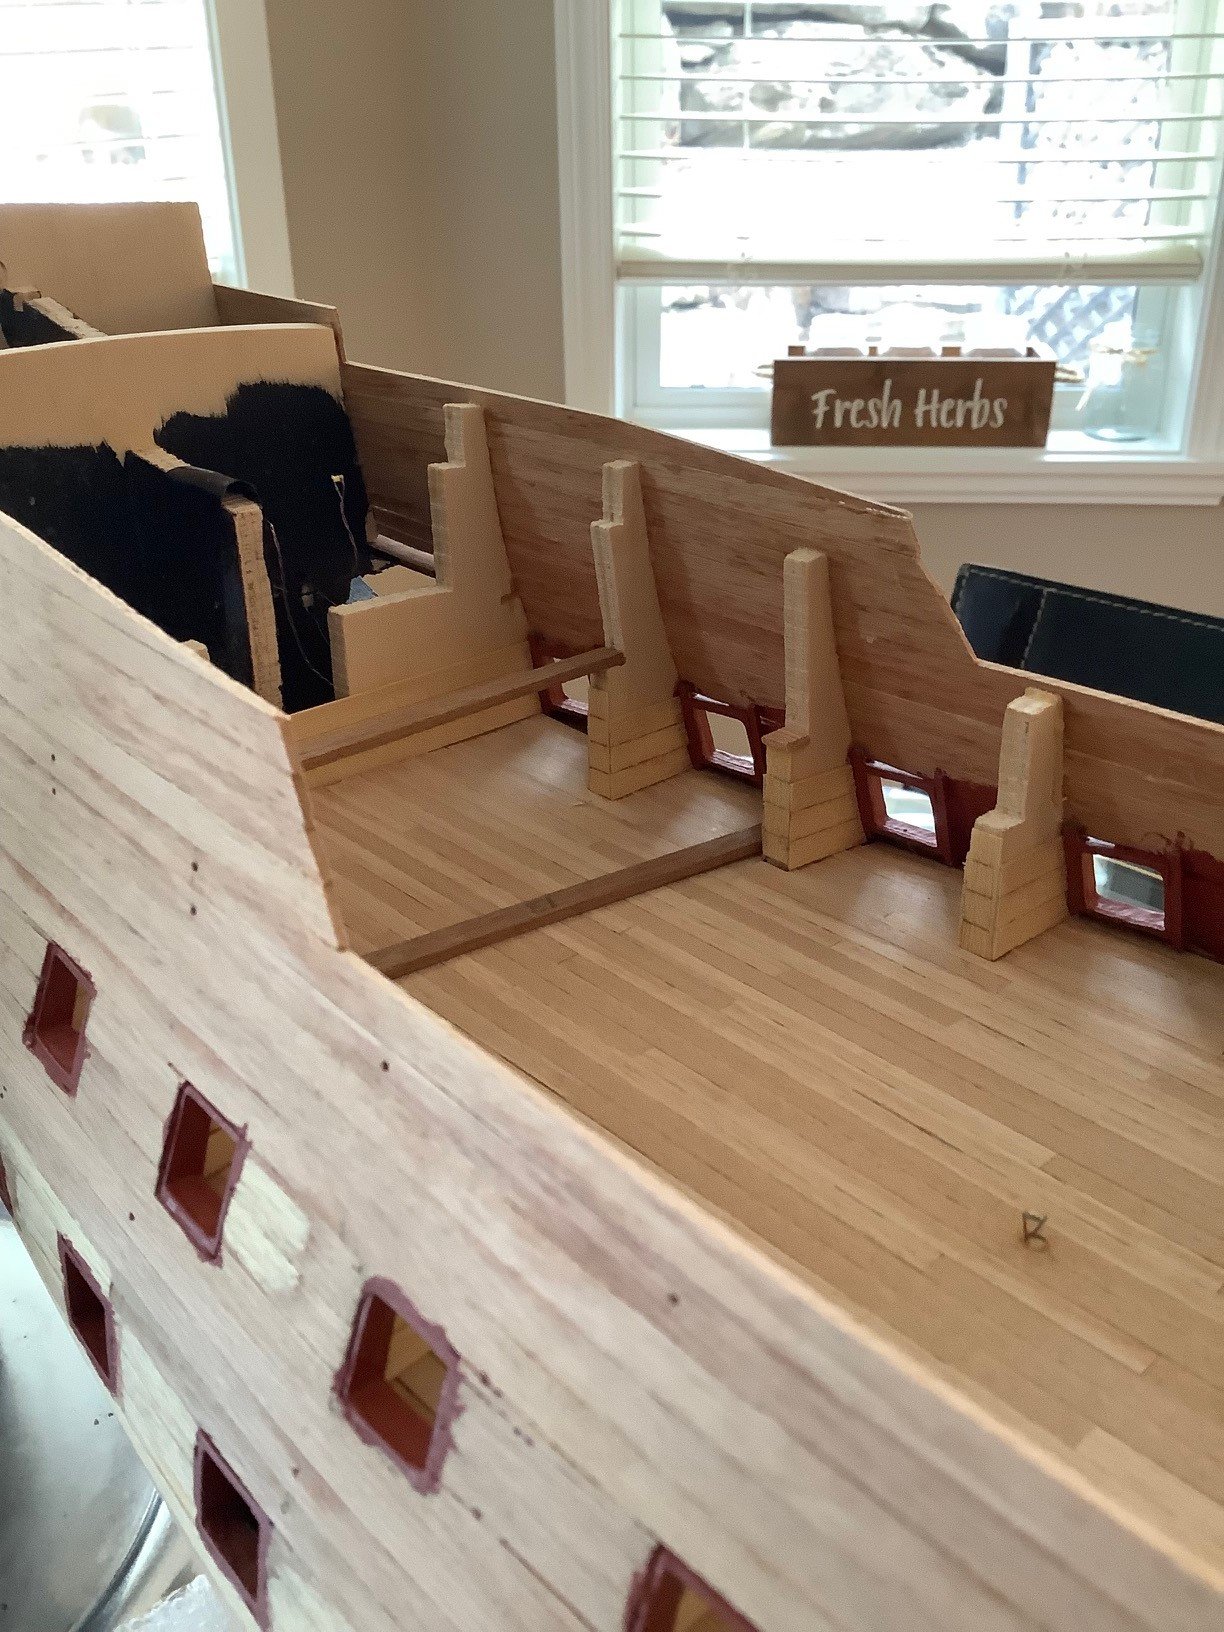
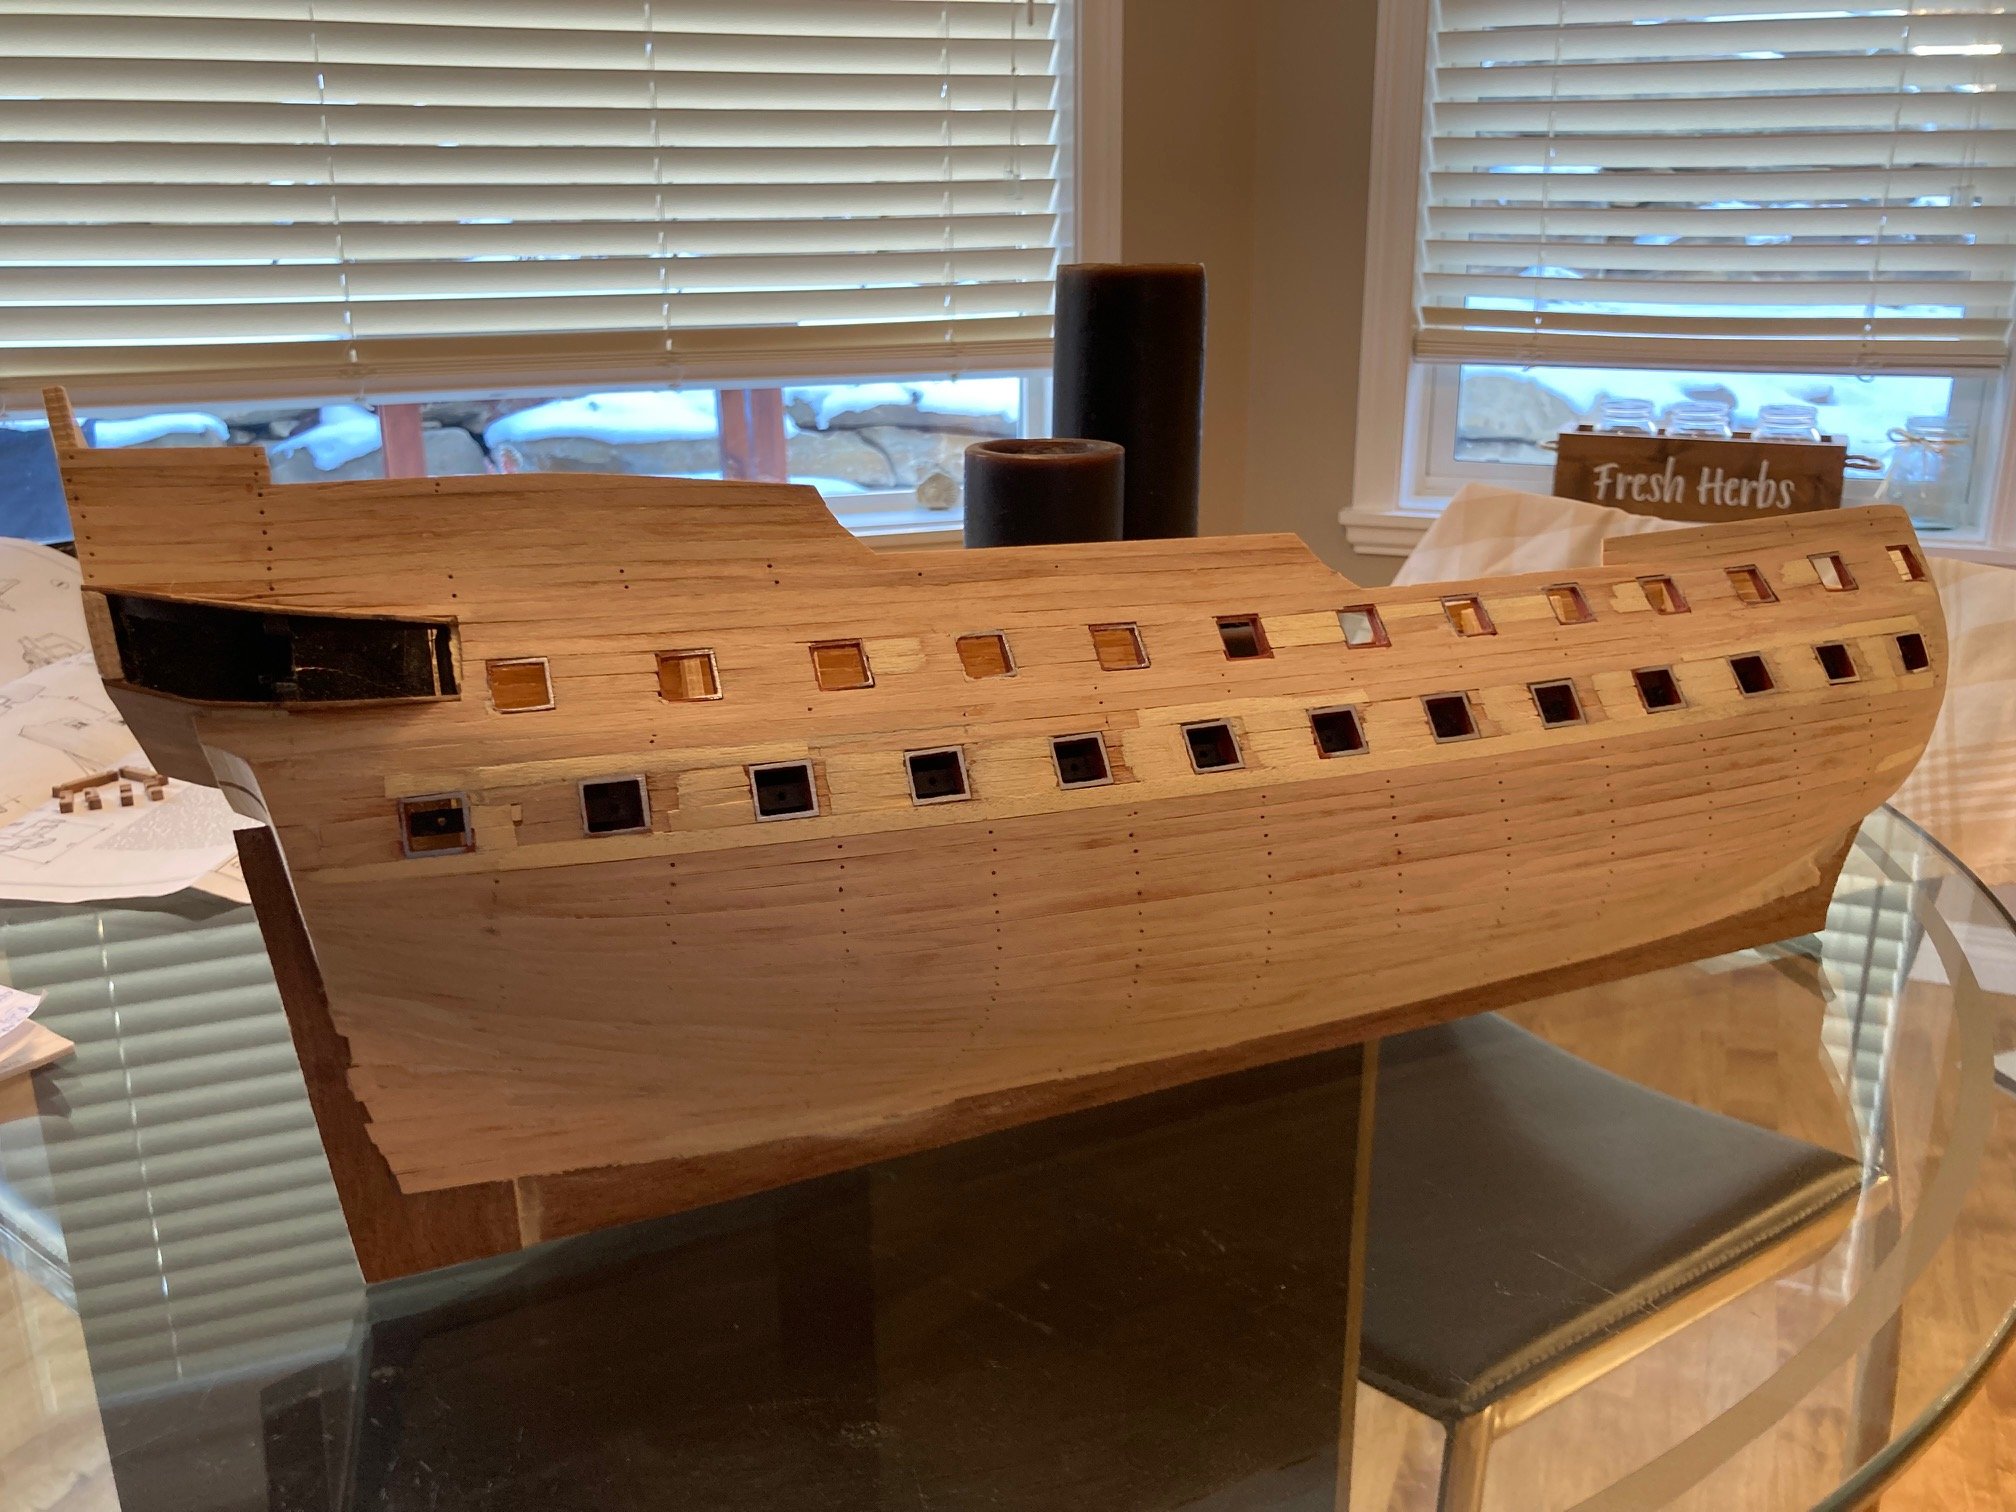
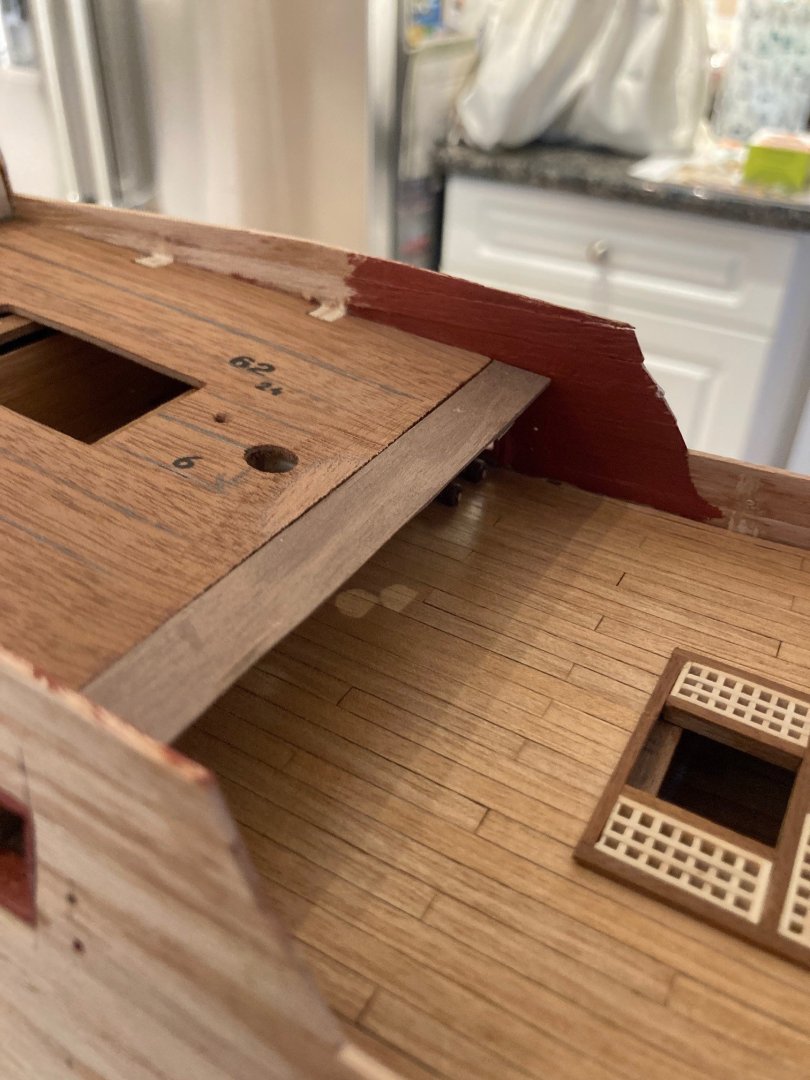
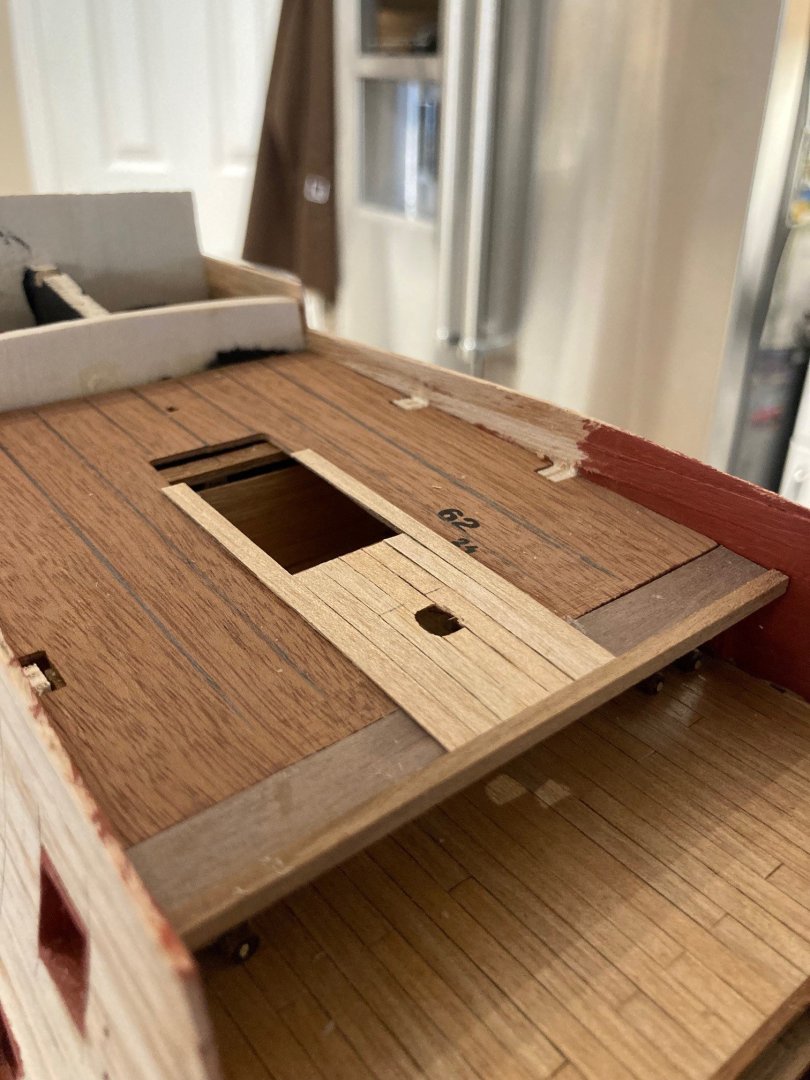
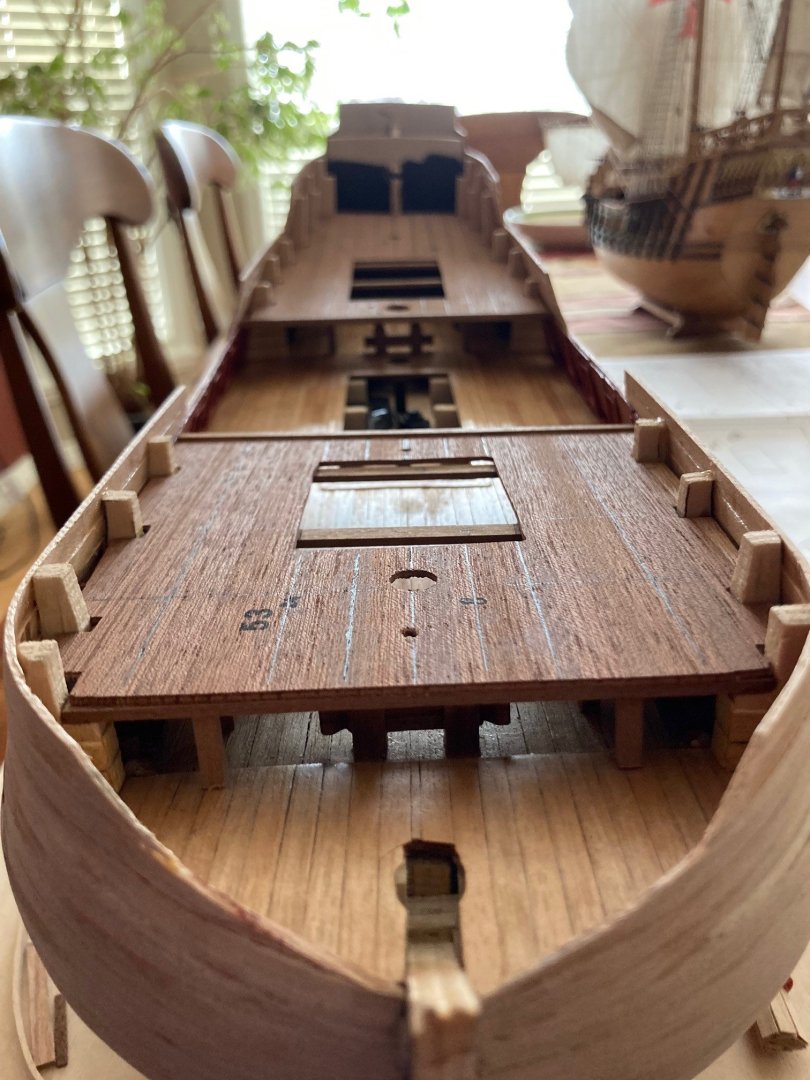
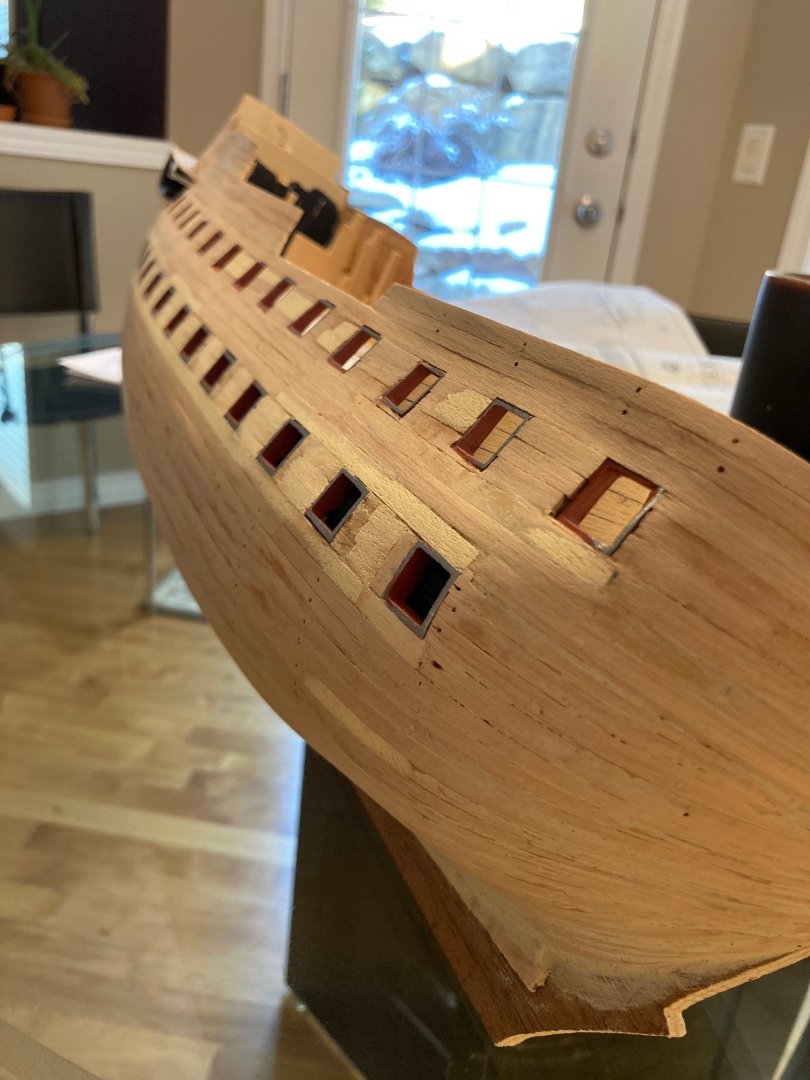
Now dealing with a dilemma, I followed the side profile on the plans in adding the top line of gun ports and thought they were accurate but in the first picture (once placing the top deck), the deck does not extend far enough. I referenced a couple other build logs on MSW and it seems I am the only one that placed them as forward as I did but yet I seem to have taken an accurate approach to the plans. As evident in the following pictures, I extended the deck, having felt that there would be no subsequent problems in the future by doing so. Aesthetically, I extended it by 11 mm and should have only done 5-6 mm. There is some bulwark details (under the deck lip) that need to be added and they only needed that 5-6 mm extension.


-
Quick check to make sure the holes for the masts (on the upper deck) line up catching the second hole below. All good there but did have to file 1 mm one side or the other, prior to planking, in order to get that direct line. Planked tight to the revised hole and filing with a round file in order to get a tight friction fit of the dowel.


-
Hi David... yes, the old Dutch ships are beautiful! The ship in the background is the Mamoli Santa Maria... very happy with the end result and appearance compared to the other Santa Maria kits on the market. Thanks for checking out my build log!
-
Working through the instructions, basically following the outline as dictated by Mamoli on their plans. I find them easy to follow and there is always pictorials to guide you. I find that is how I learn best and it seems my log follows the "a picture tells a 1000 words" principle. But you have to watch as you need to think 2-3 steps ahead and the instructions are not always clear or comprehensive. It also helps with MSW and the 3 specific logs that I follow... lots of guidance there as well! Anyways... working through the second deck planking and preparing the last 4 ports, 2 to port and 2 to starboard. Cheers,


-
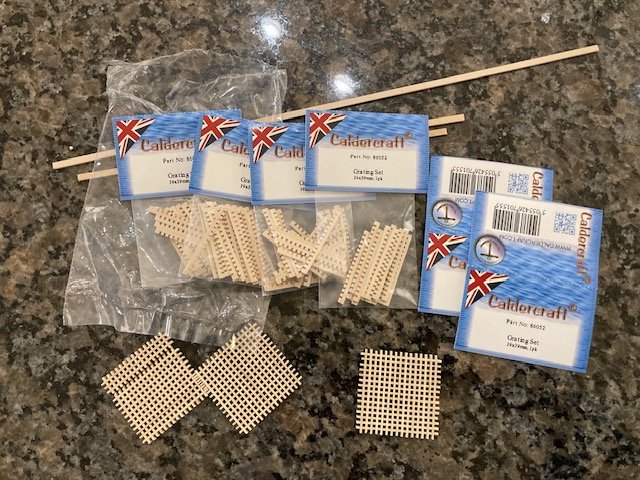
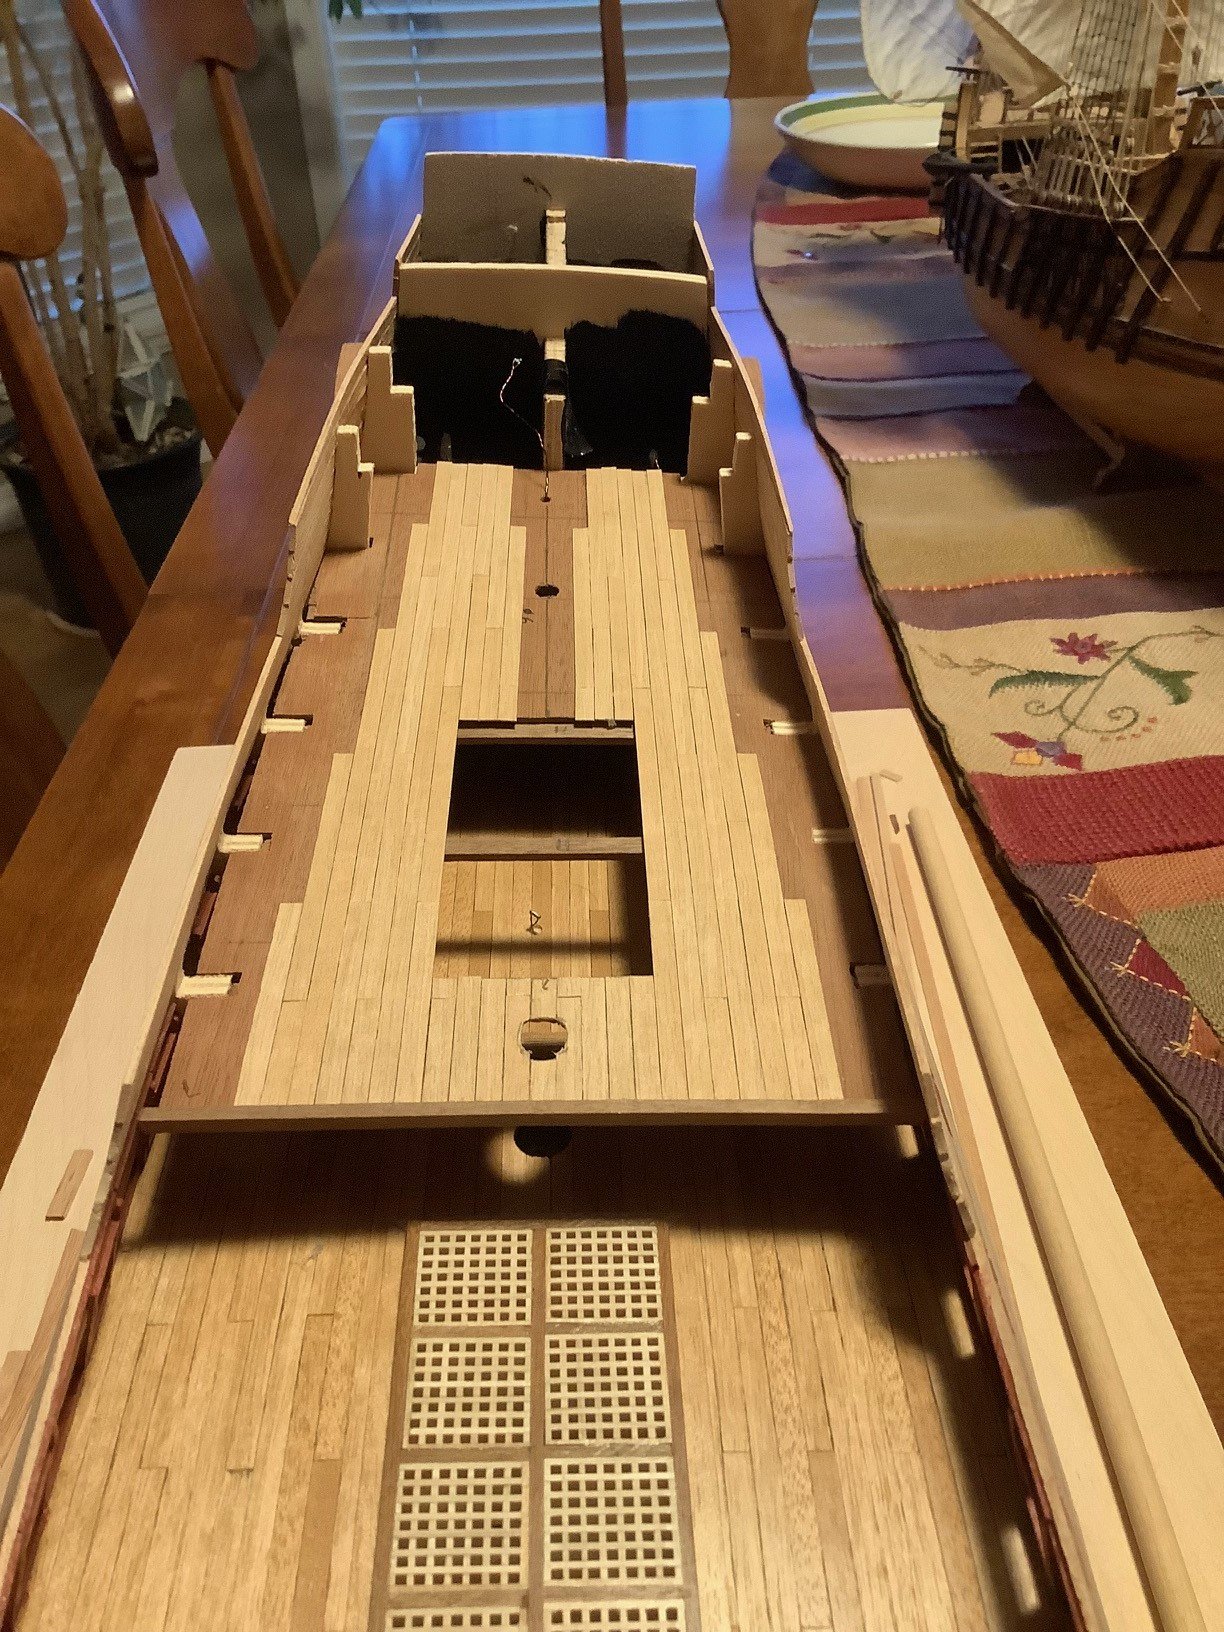
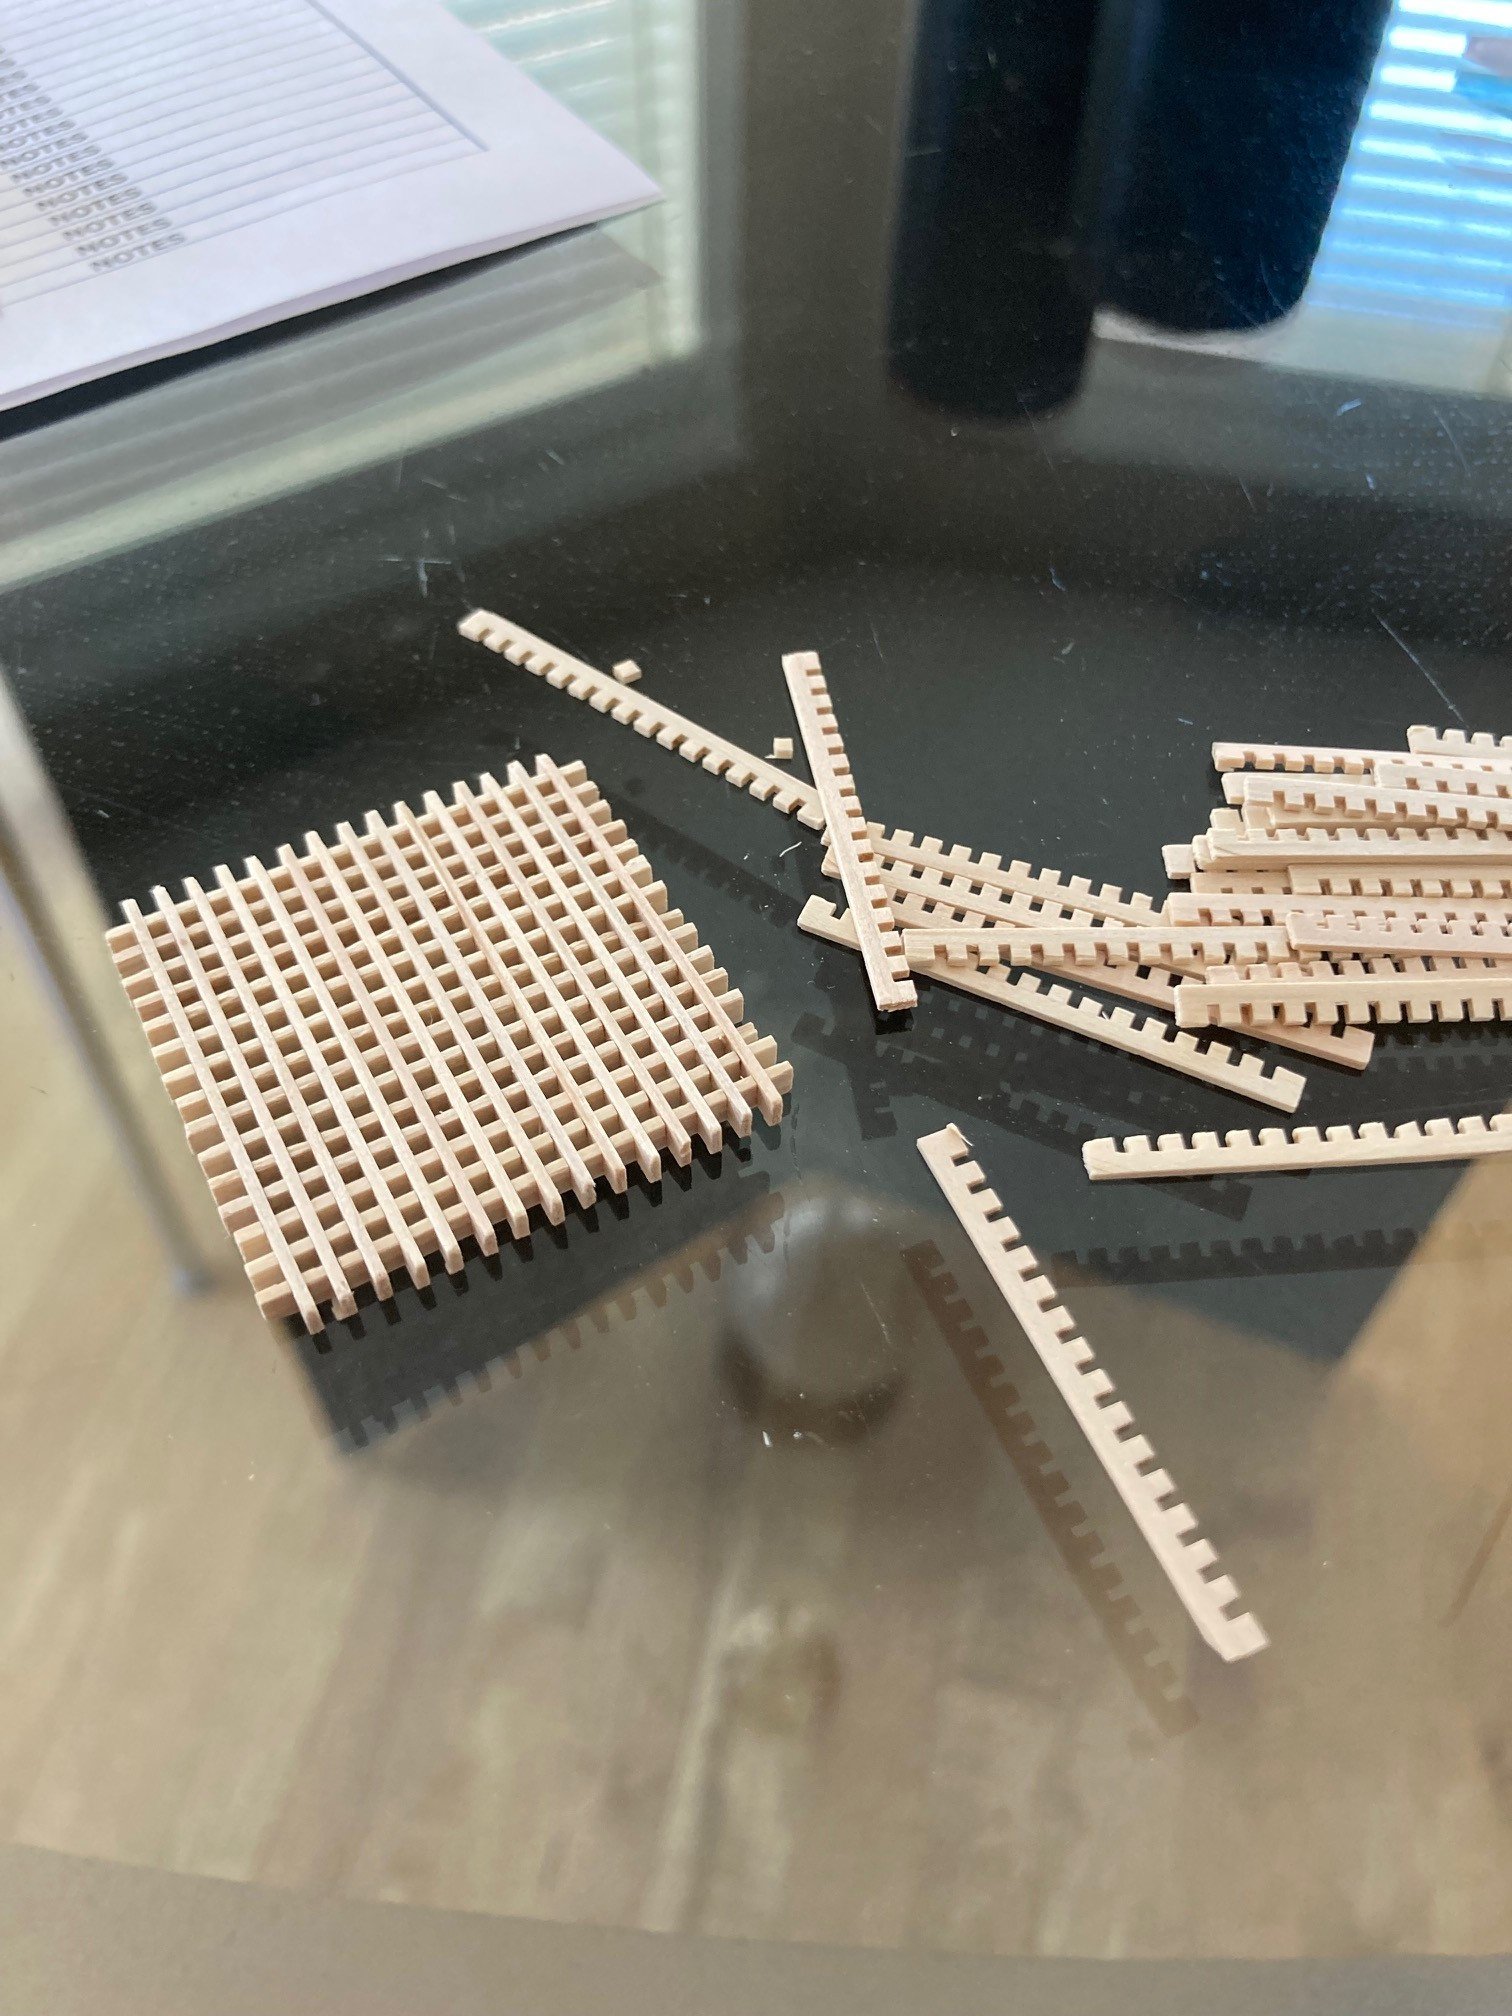
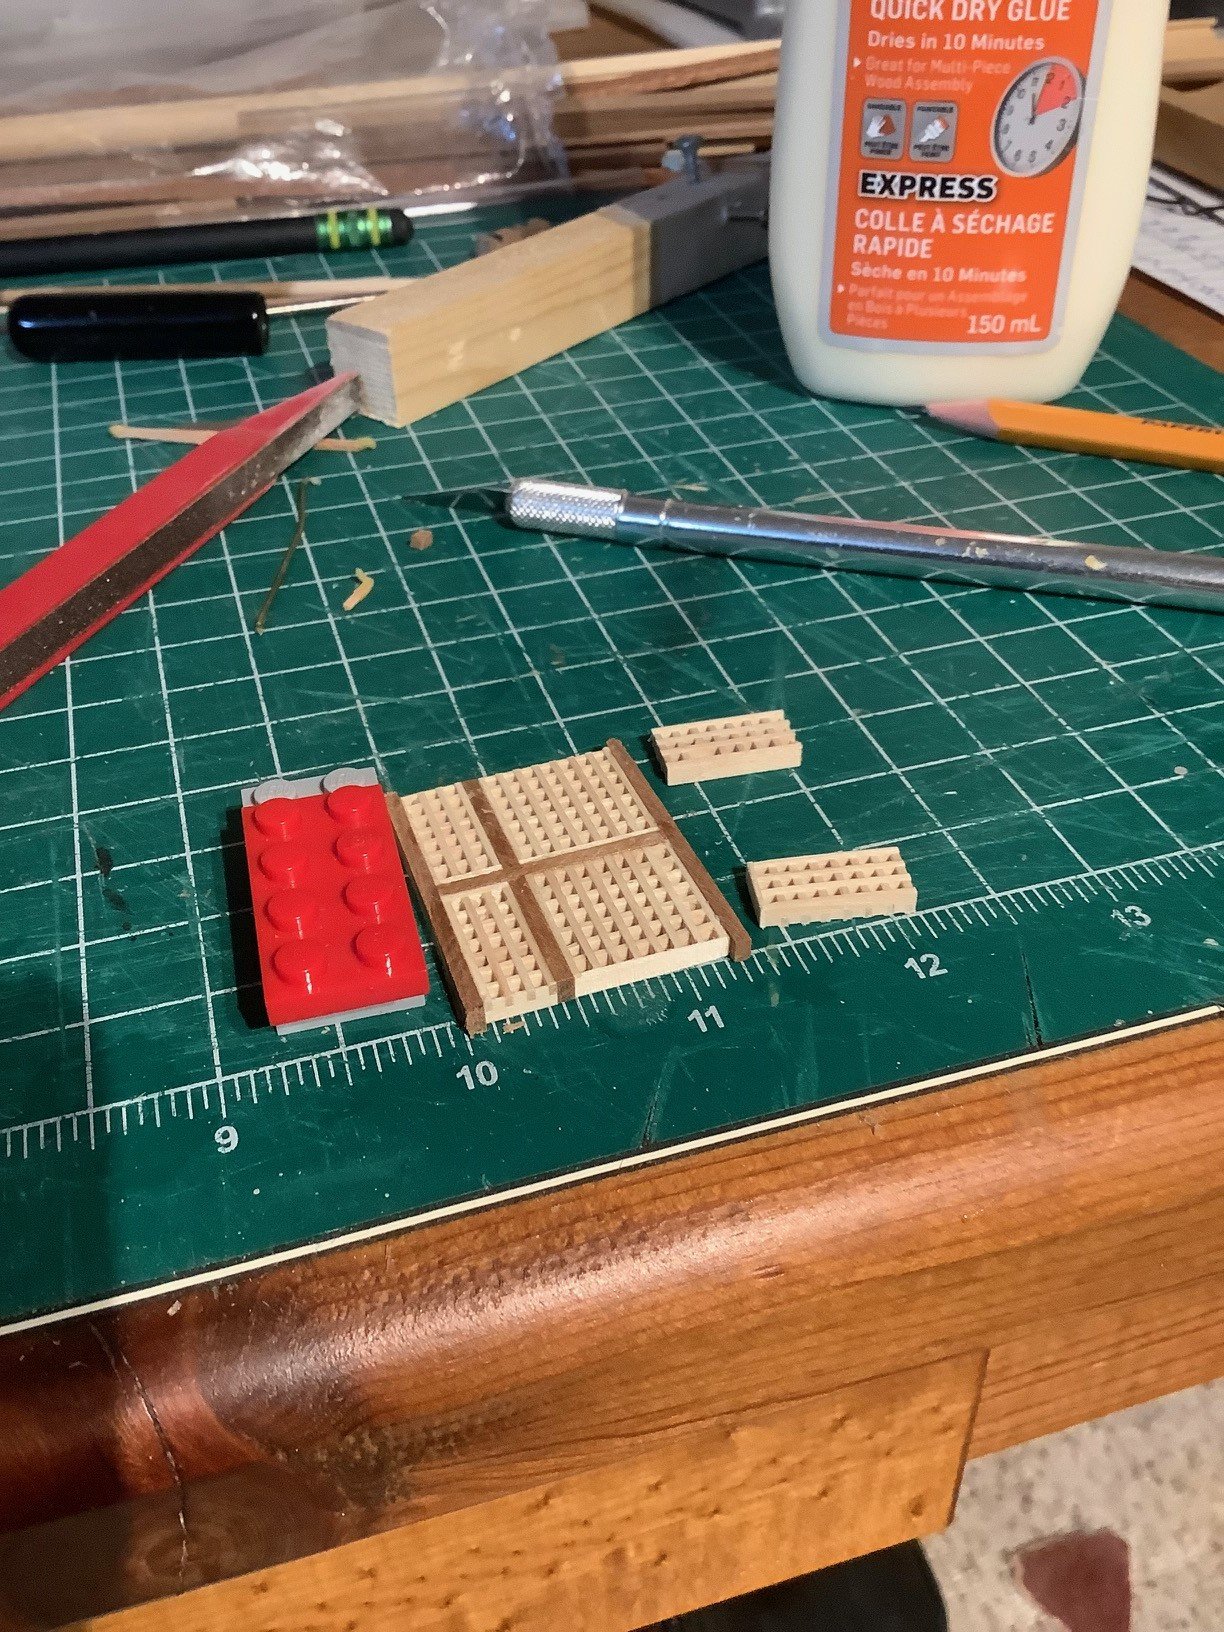
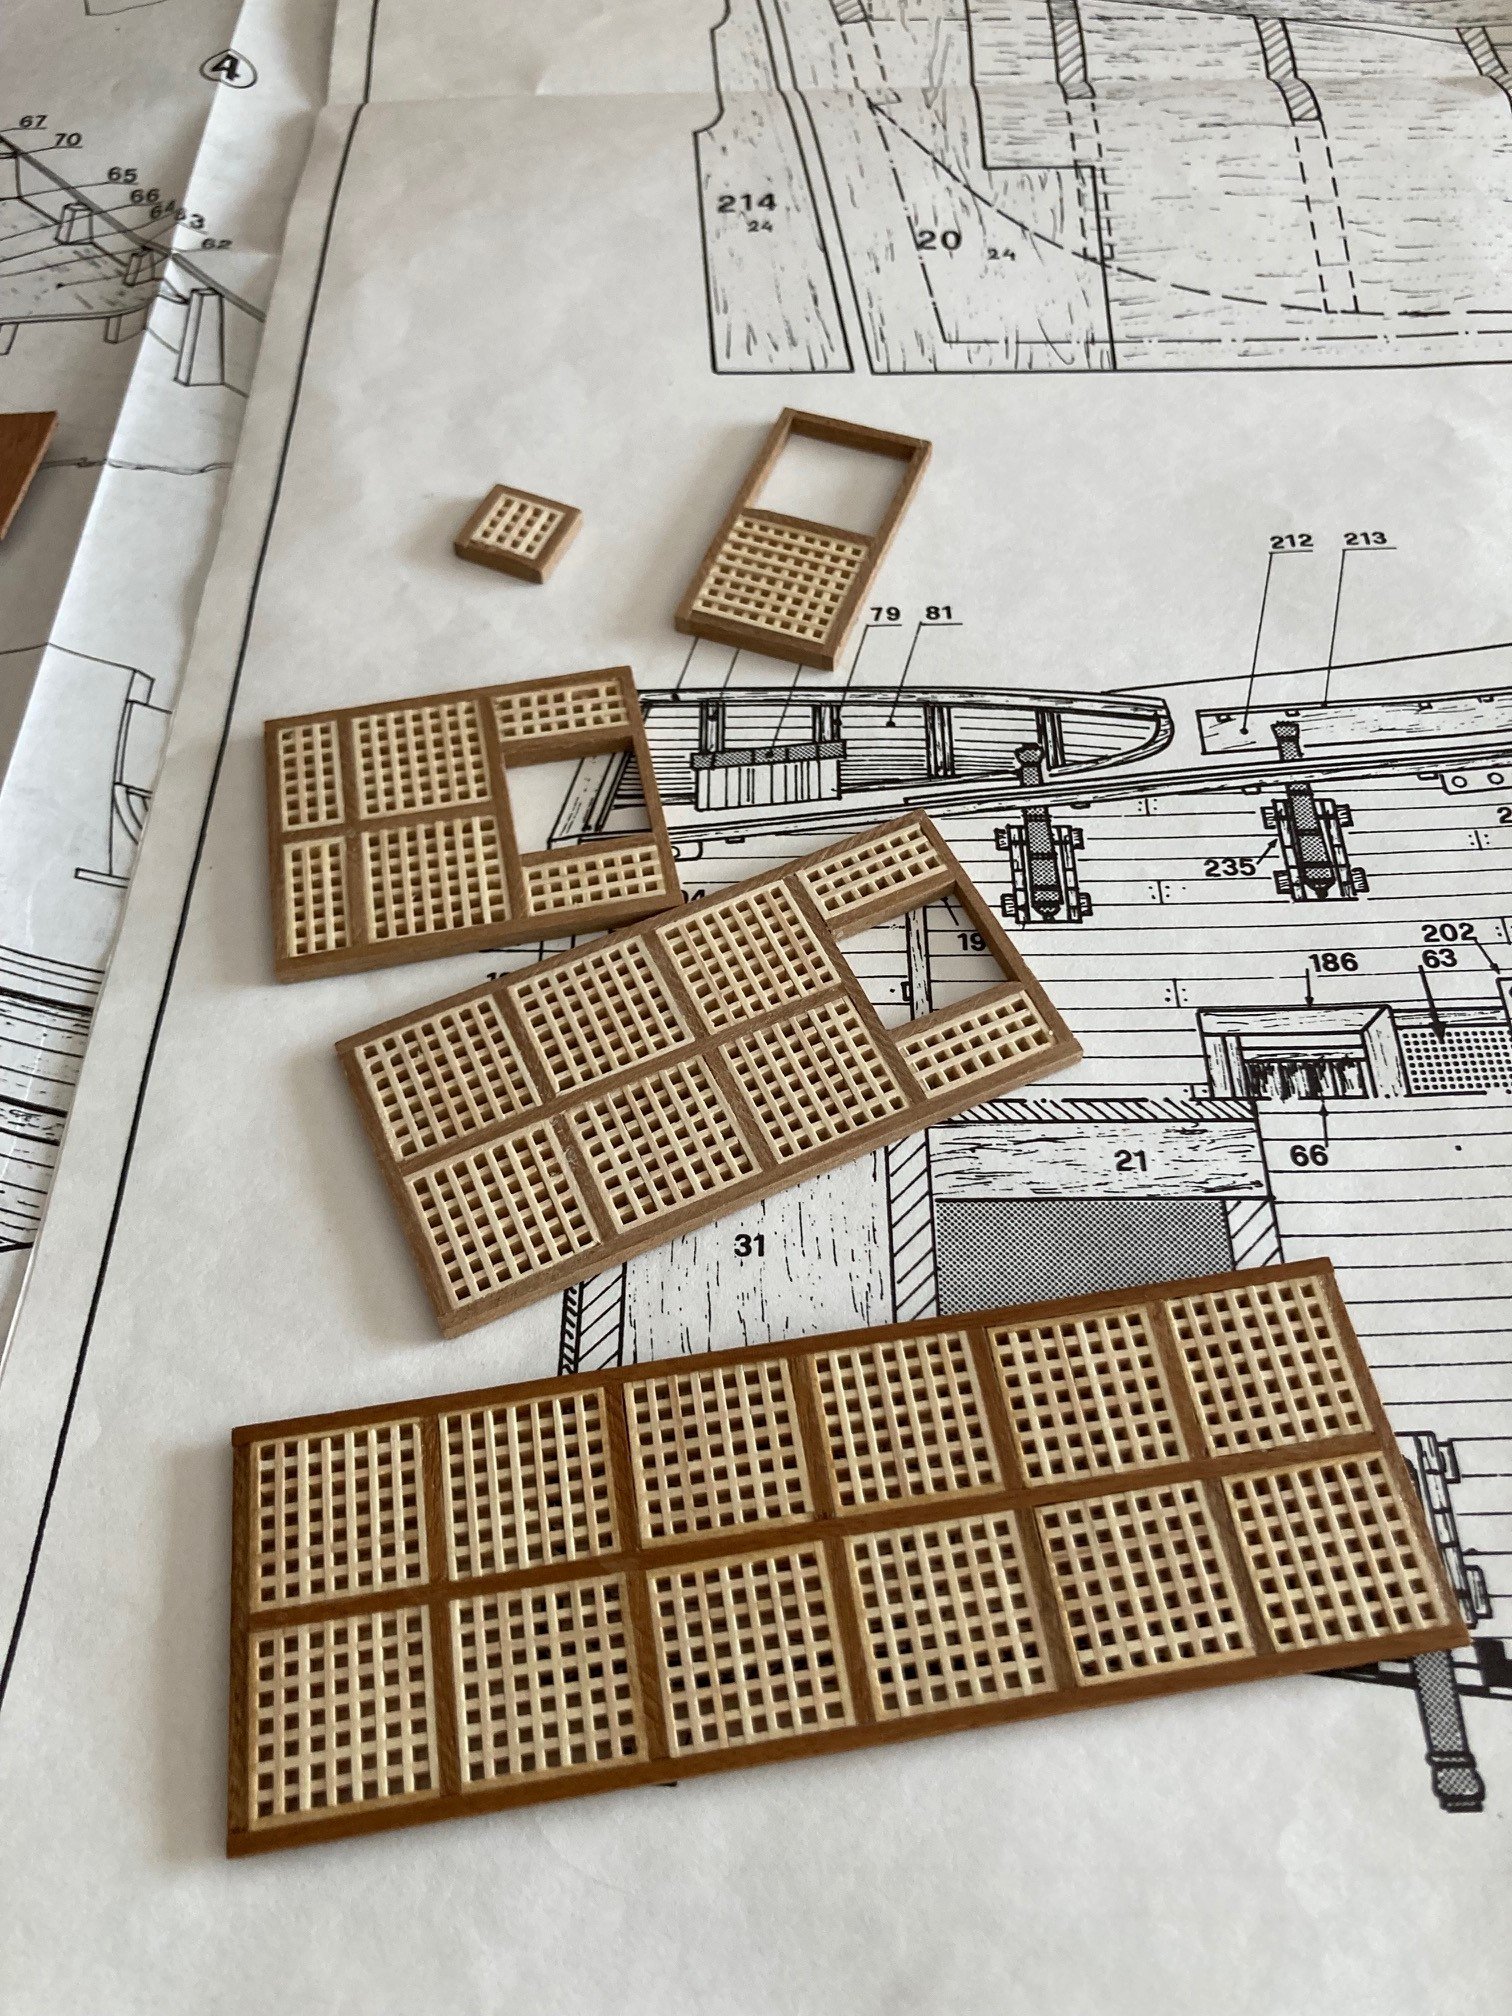
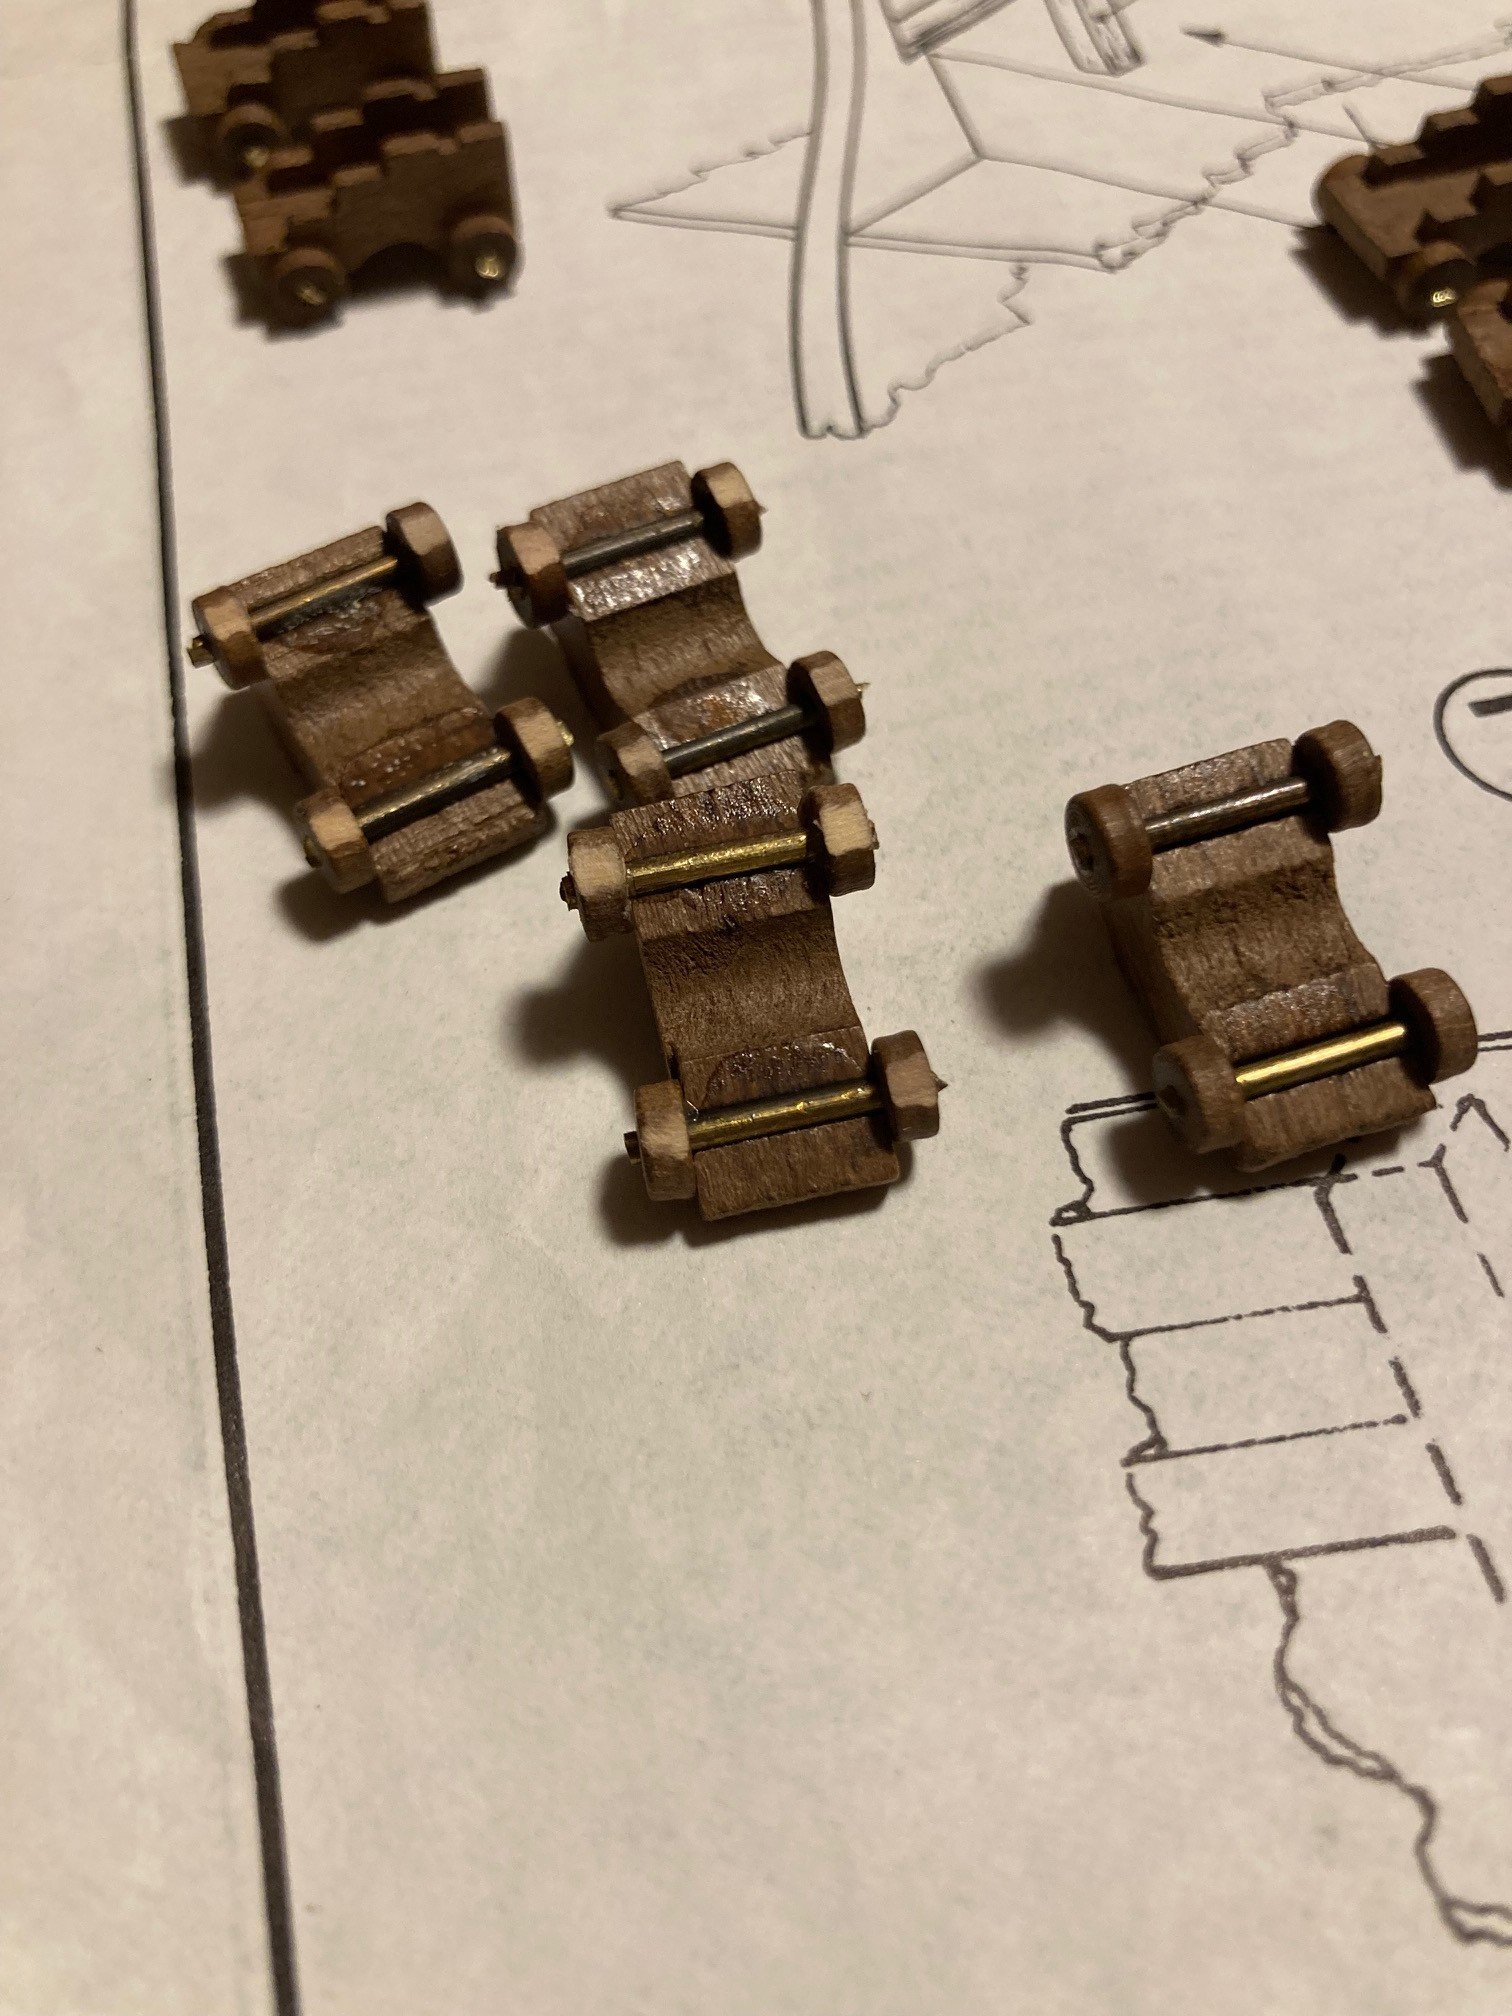
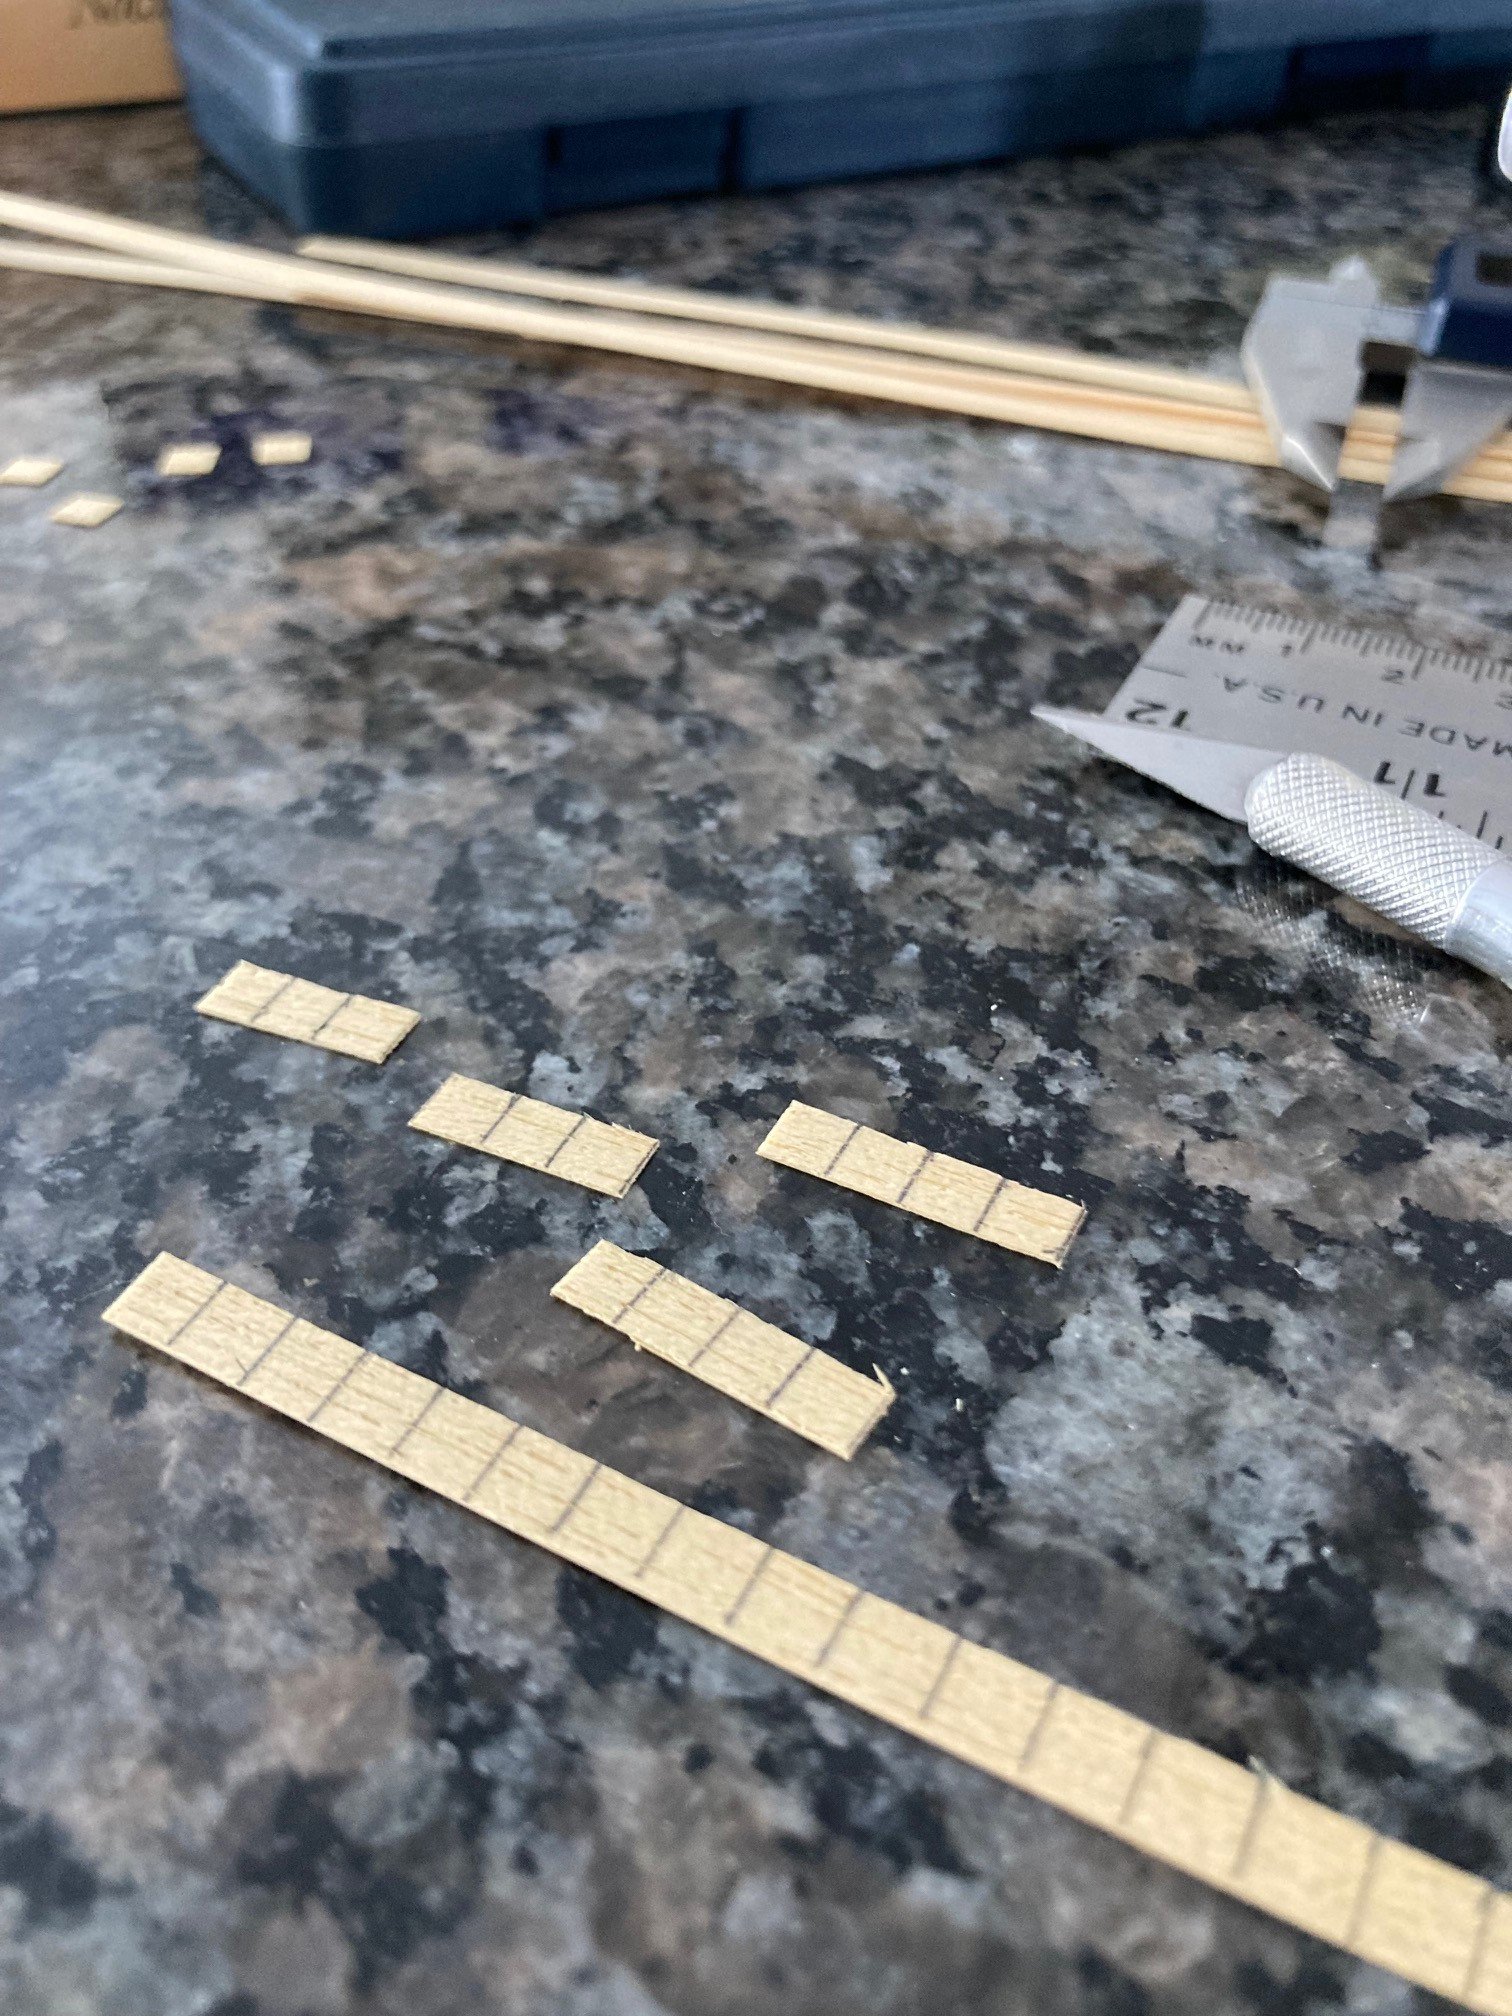
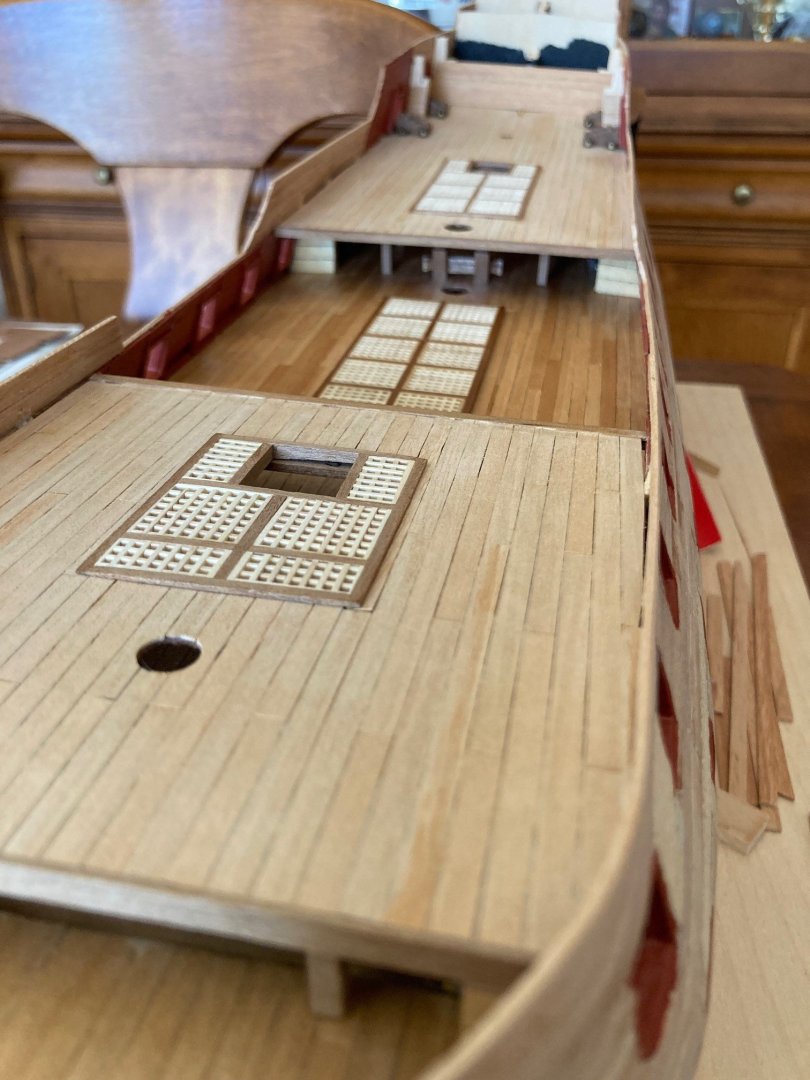
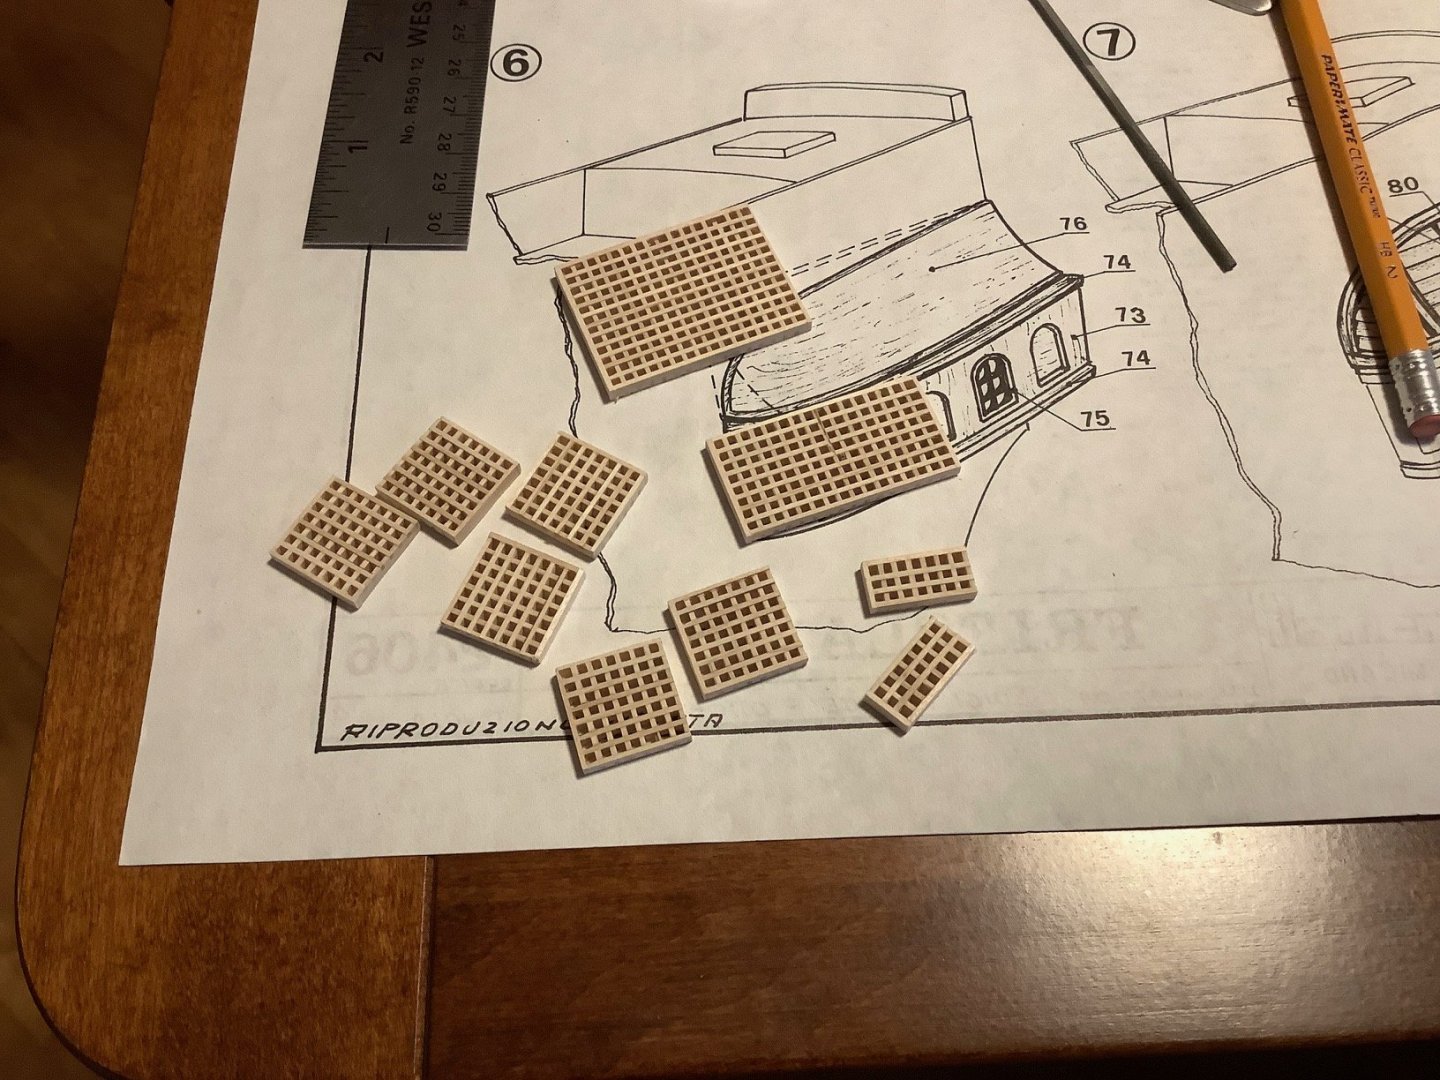
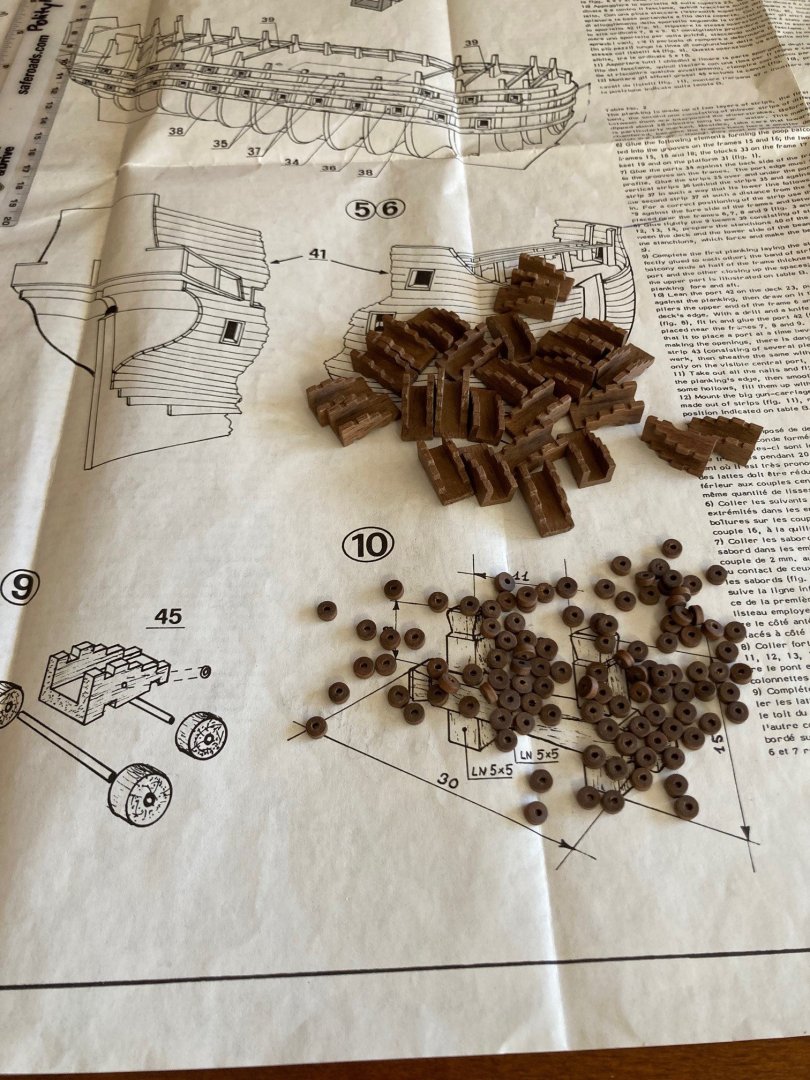
Just doing my best Bob... thanks! Some photos of the grating kits and their assembly. The original wooden gratings that came with this vintage kit were extremely soft and crumbly and I just had to source them from elsewhere - Jotika, but unfortunately one package was short 10 out of the 30 laths and fortunately for me, I was able to use that last grating and the remnants of such to make the tiny grating in the last photo.


-
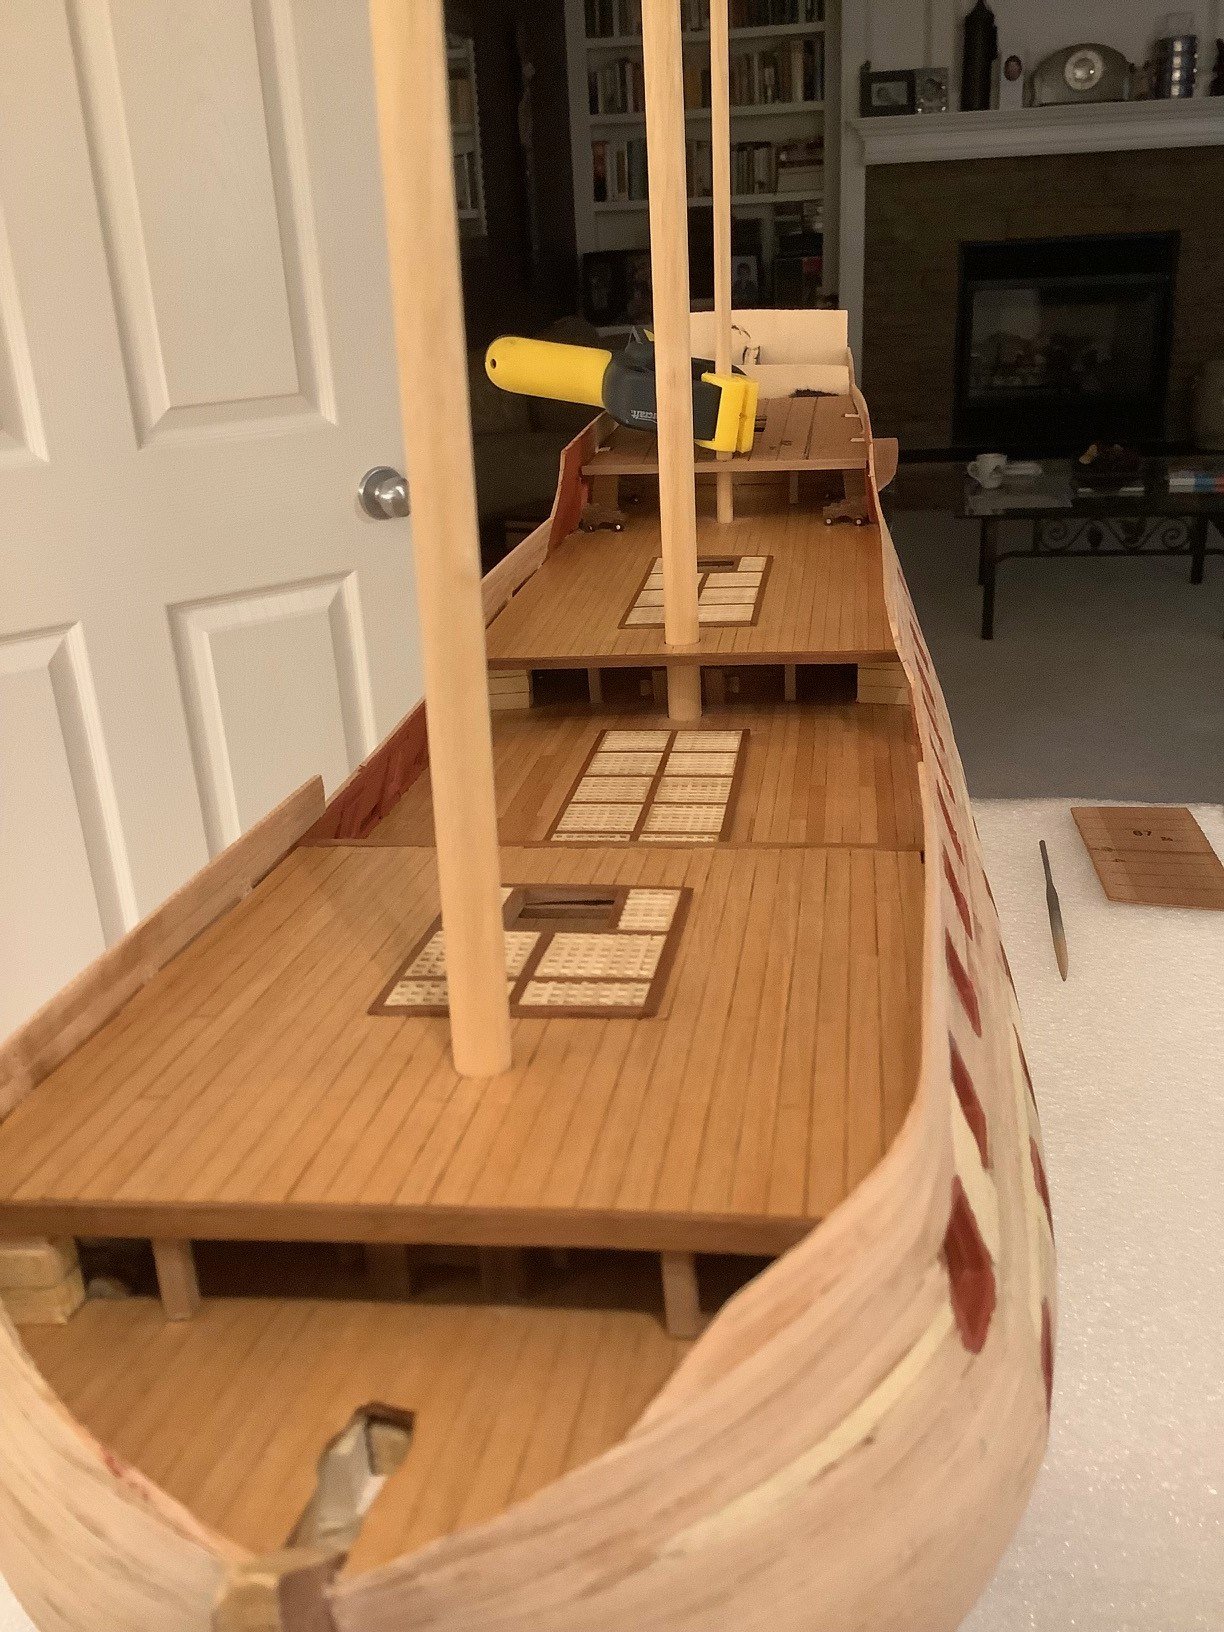
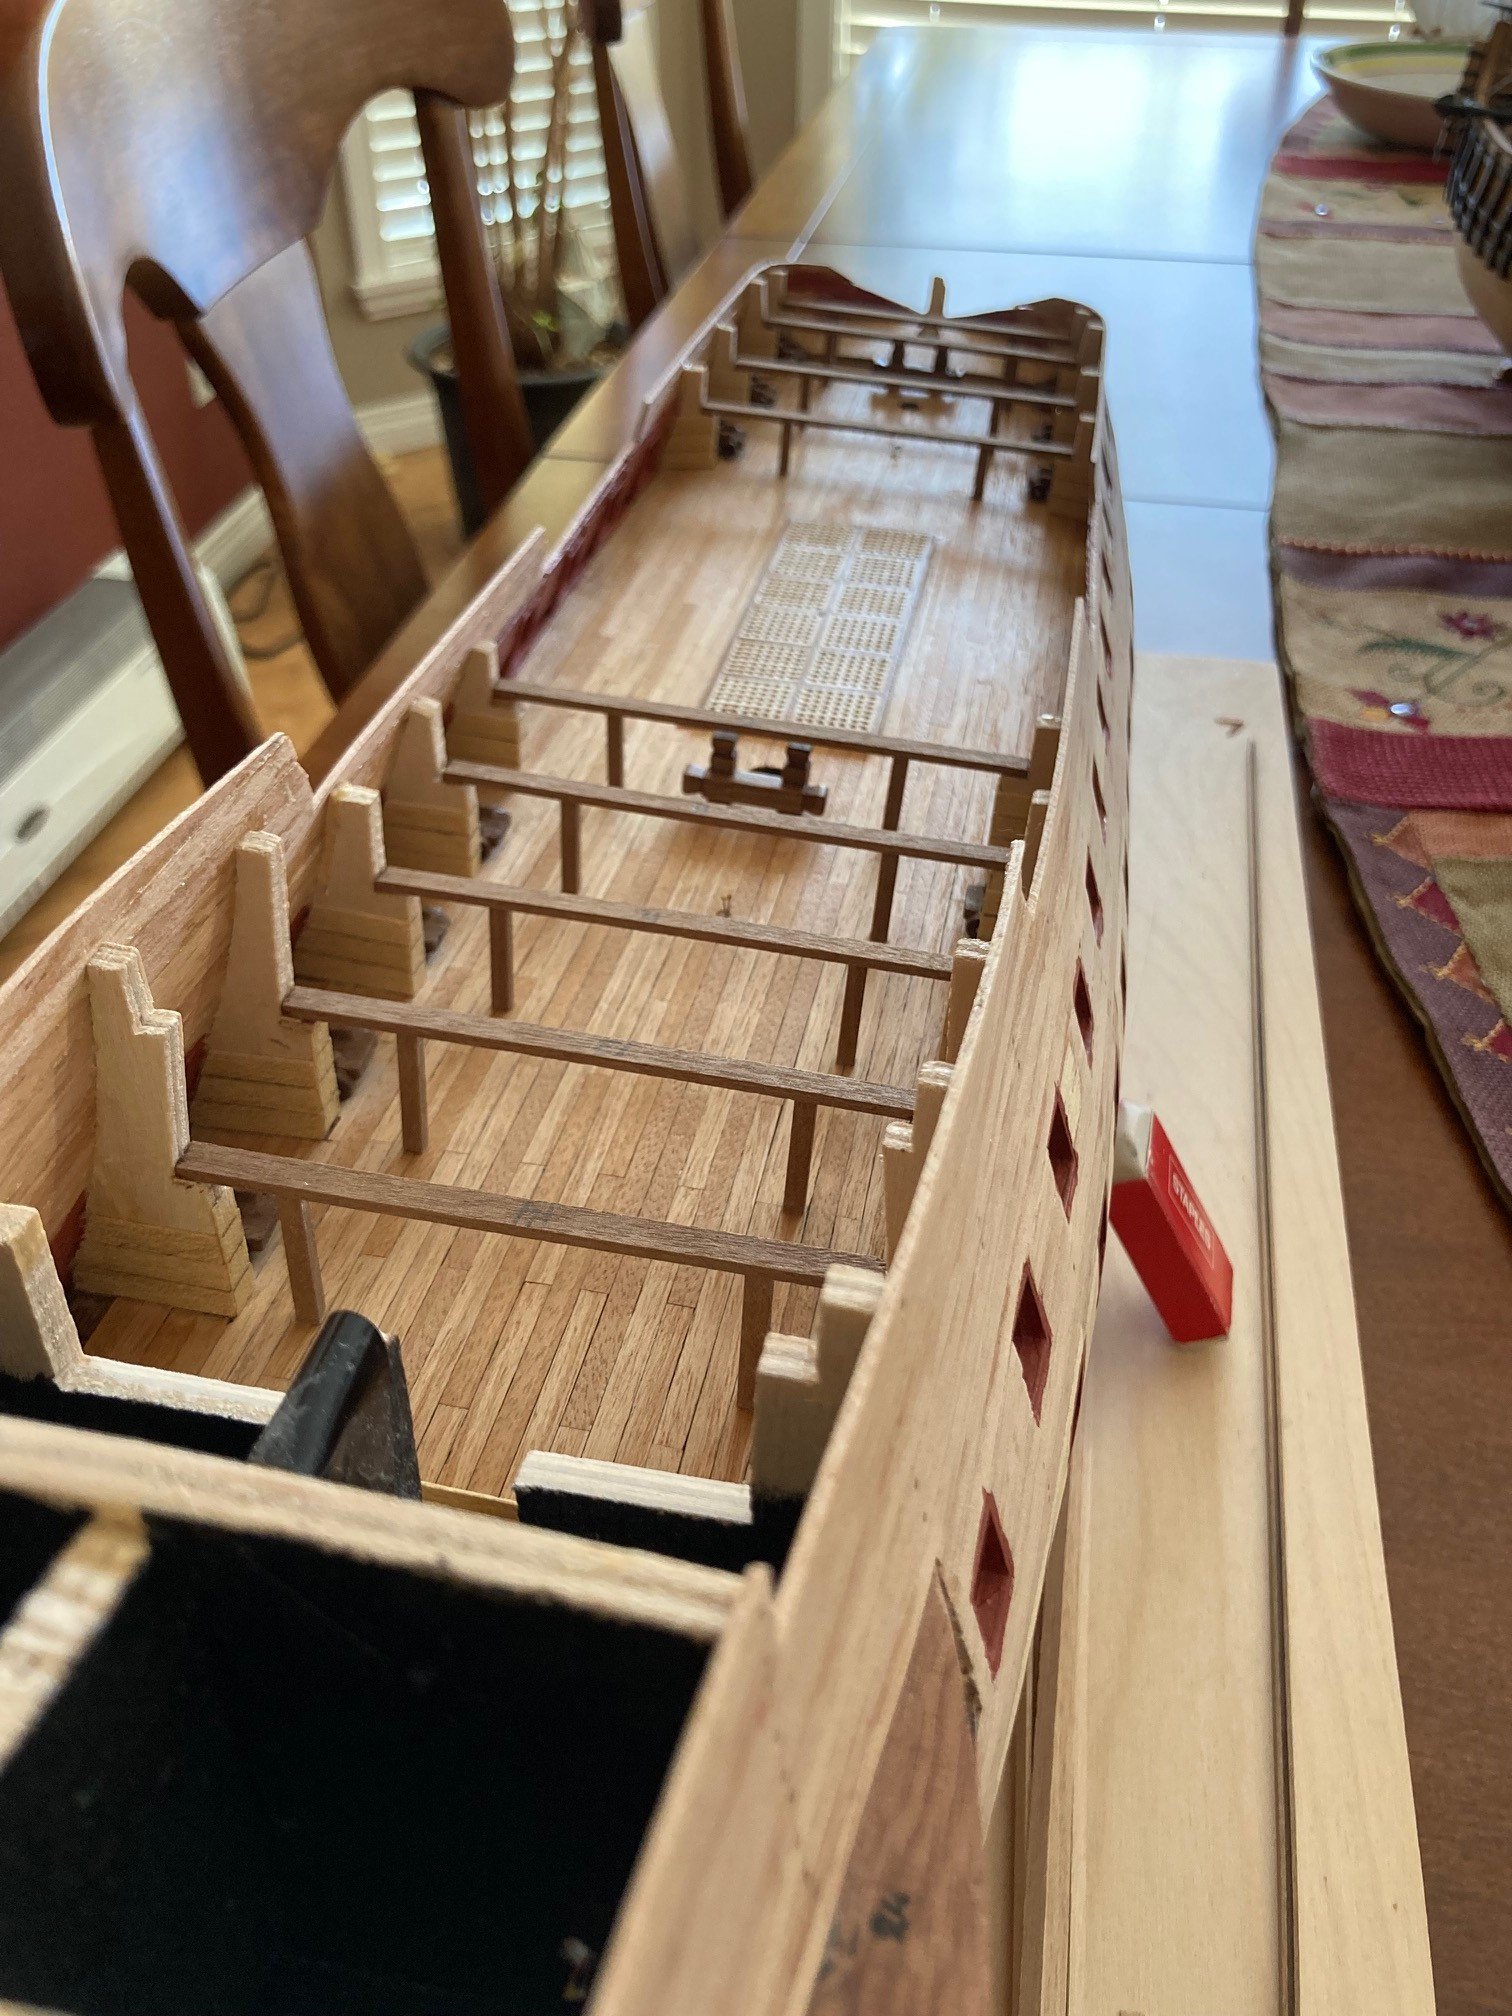
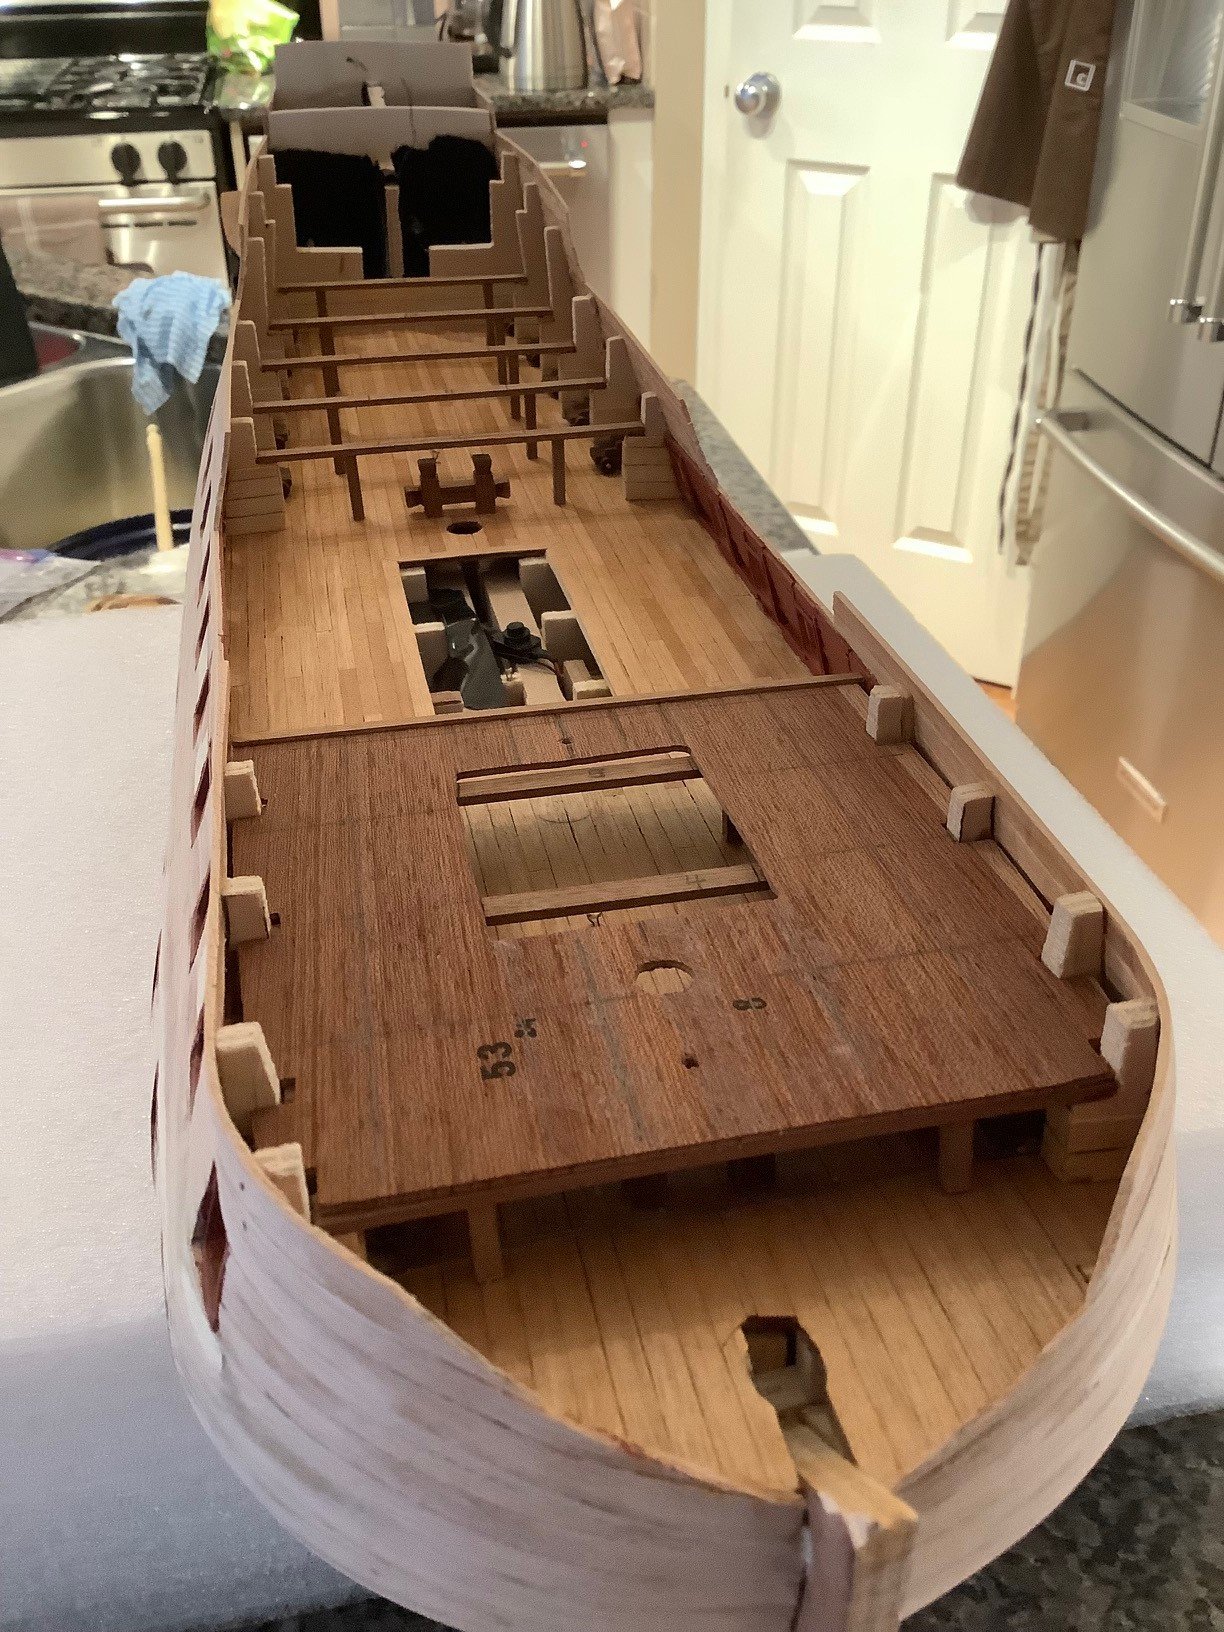
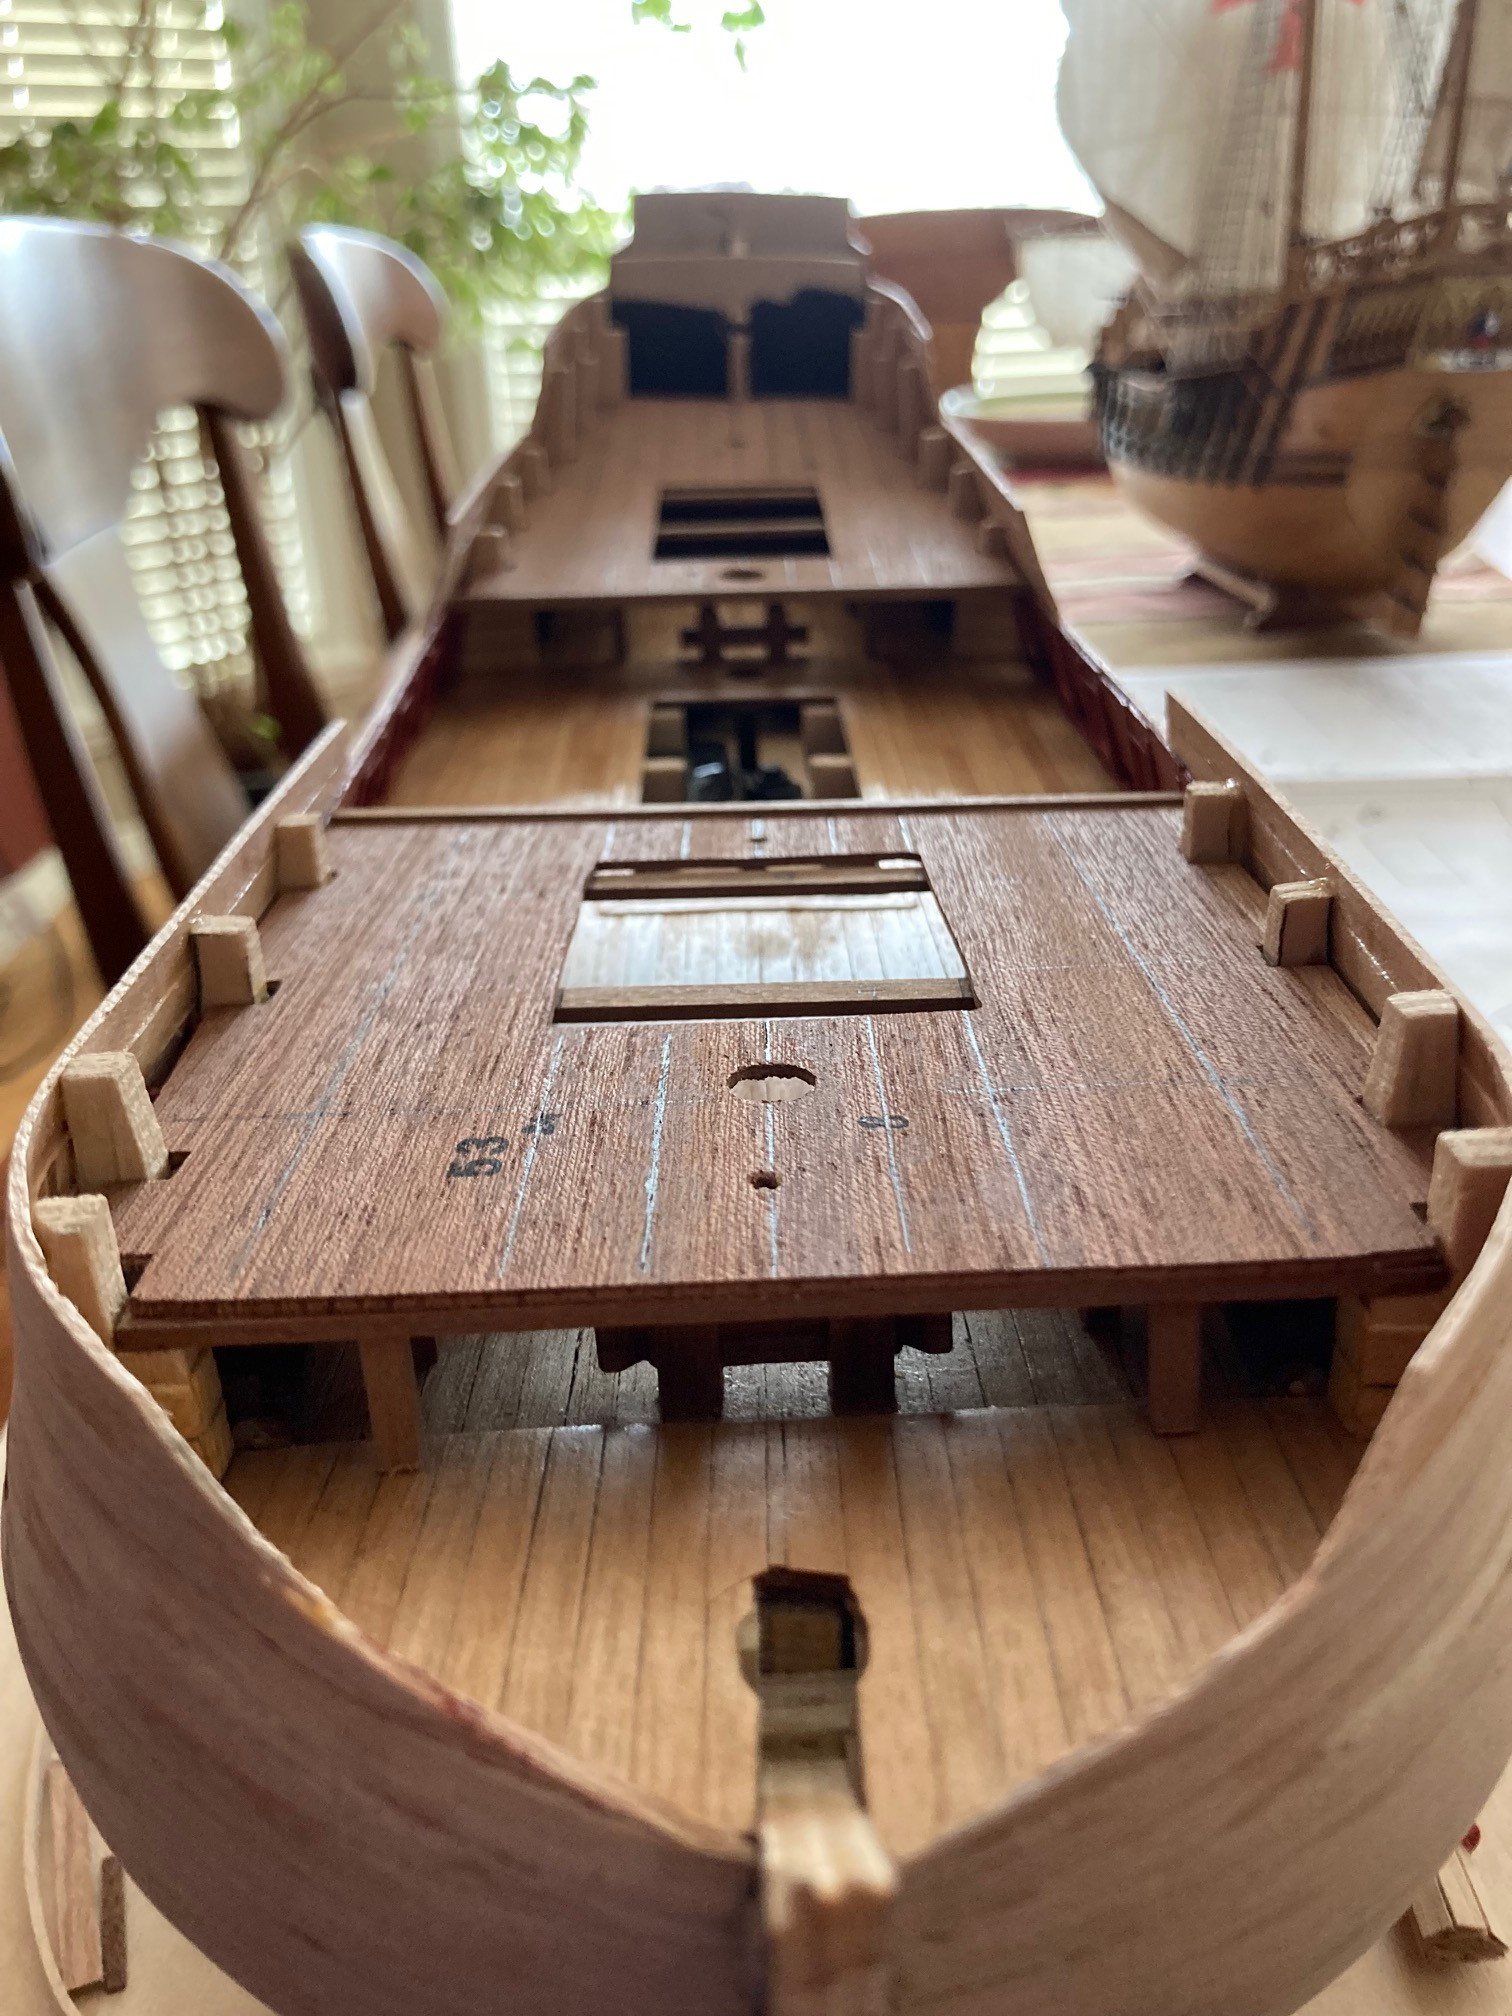
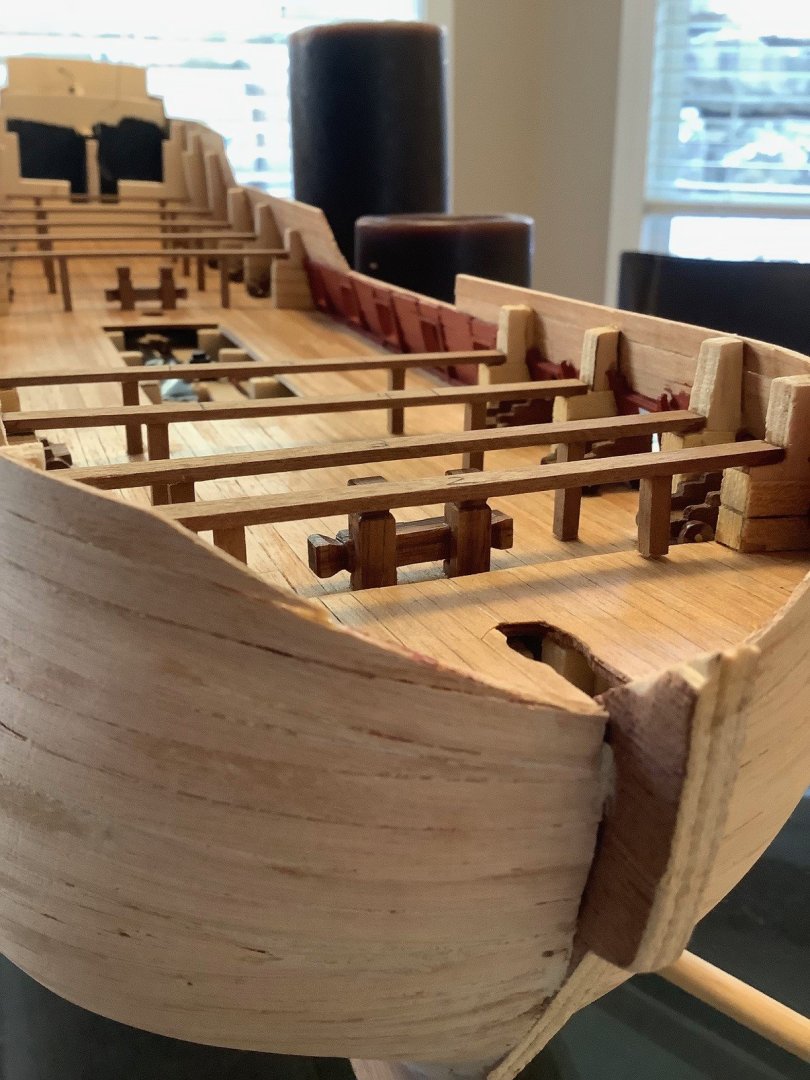
An update following some weekend work. I put three coats of wipe on poly on the main deck with just a very slight sanding with a grey 3M pad just after the second coat and prior to the third and last. I think it looks great! The beams were installed with some fiddling of the beam and the ledge it sits on in order to get that perfect level aspect of the deck from side to side. Just a few 1 mm shims here and there... and I have a nice sweep of the upper deck upwards as the deck approaches the stern.


-
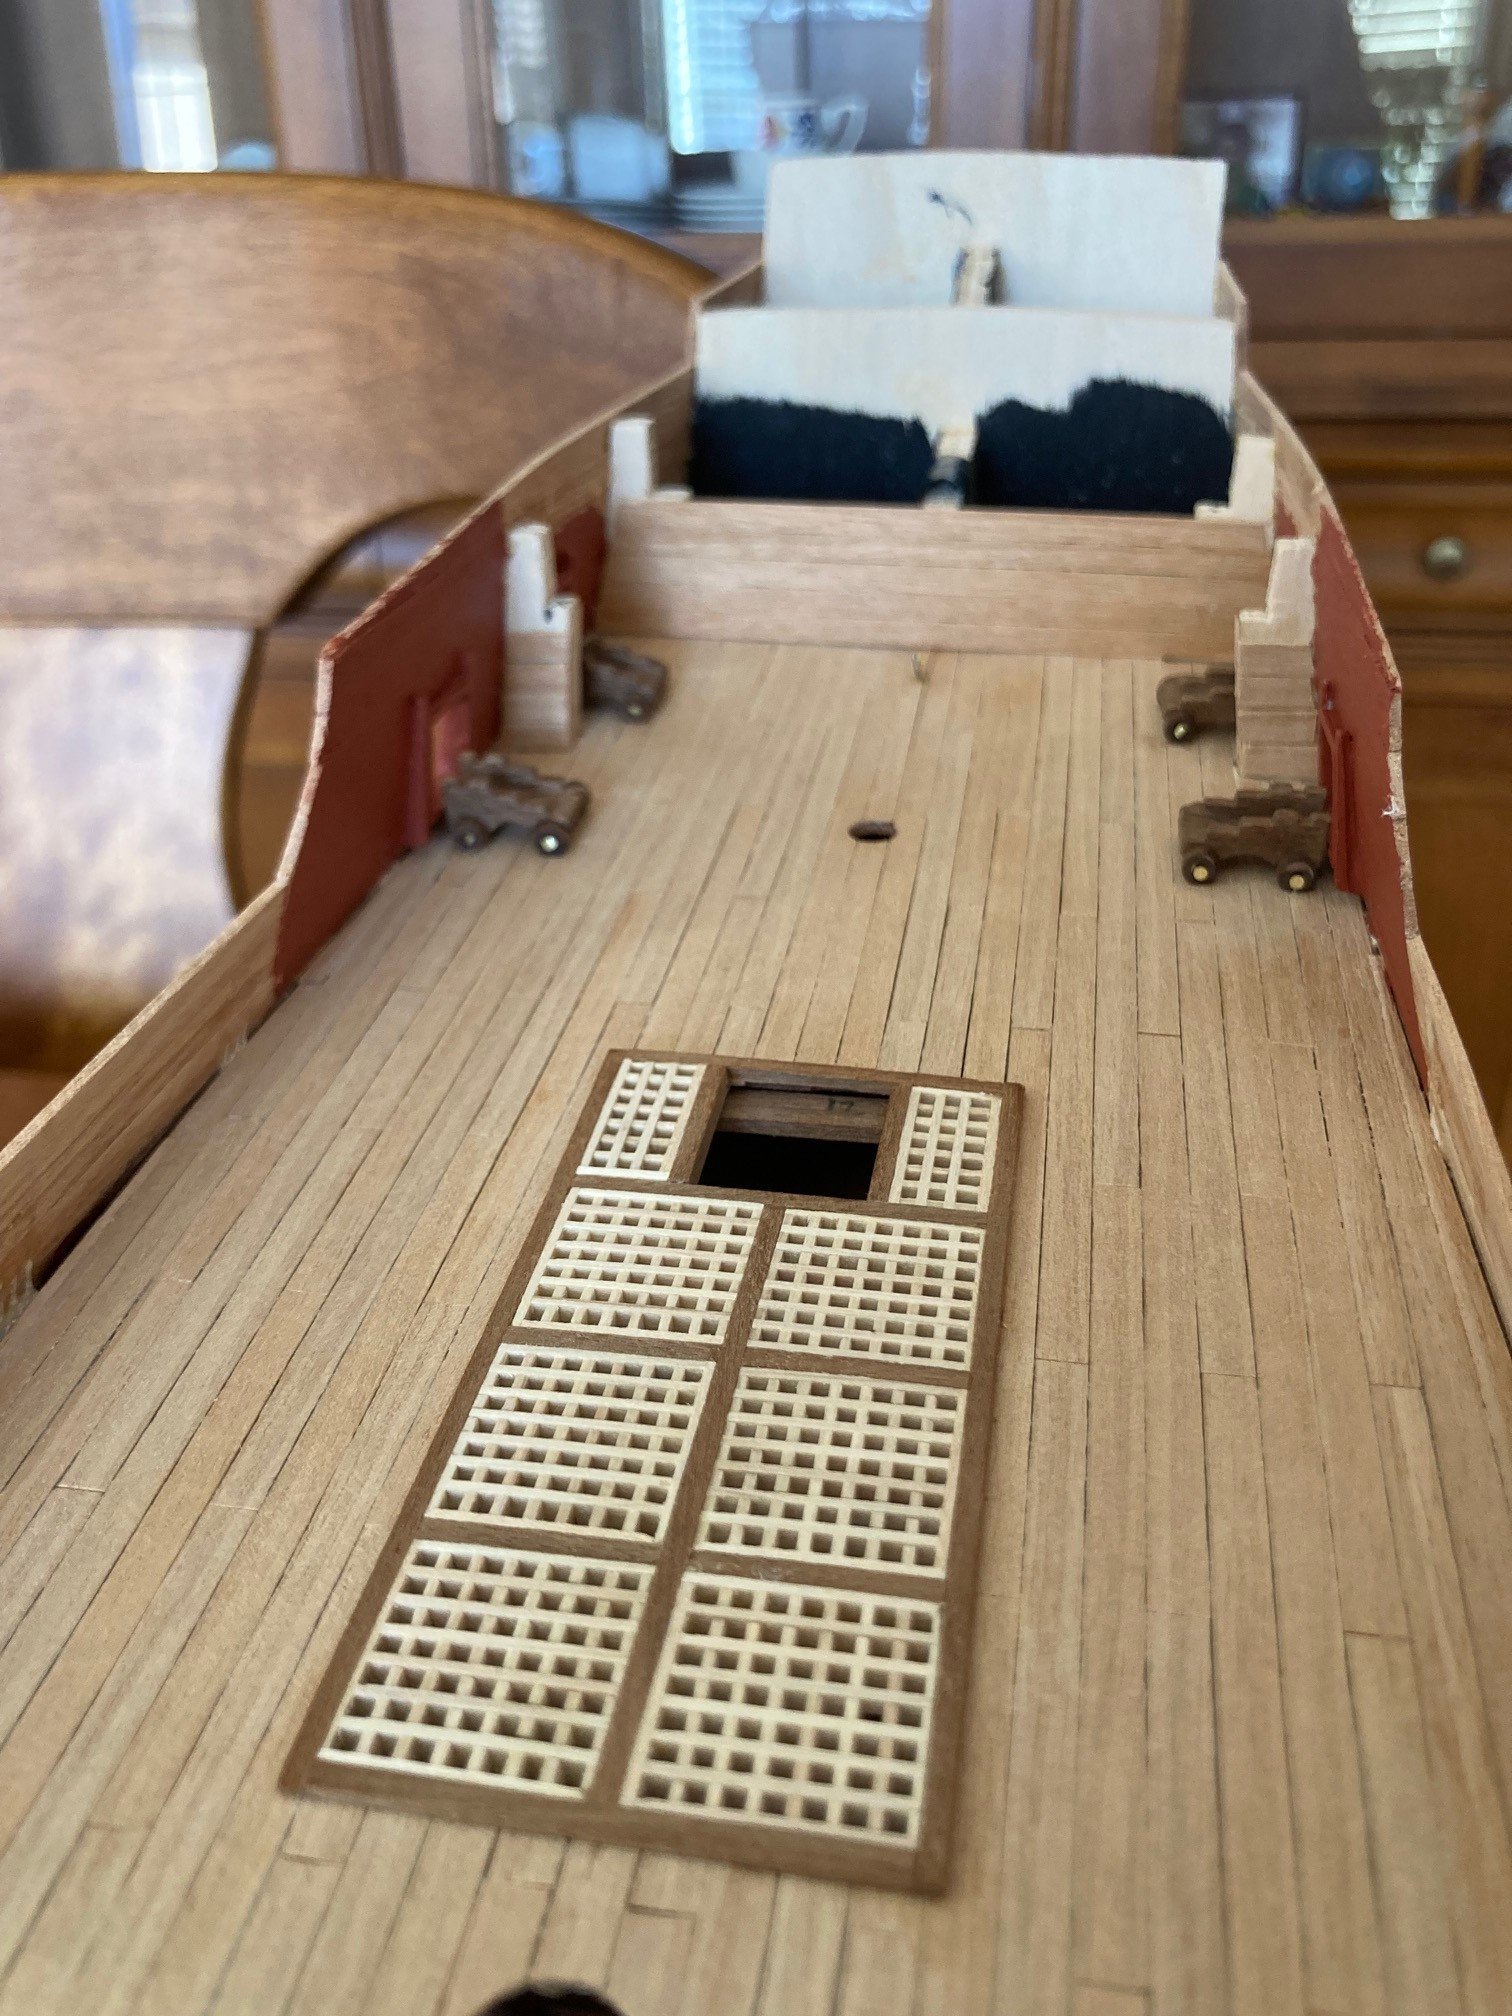
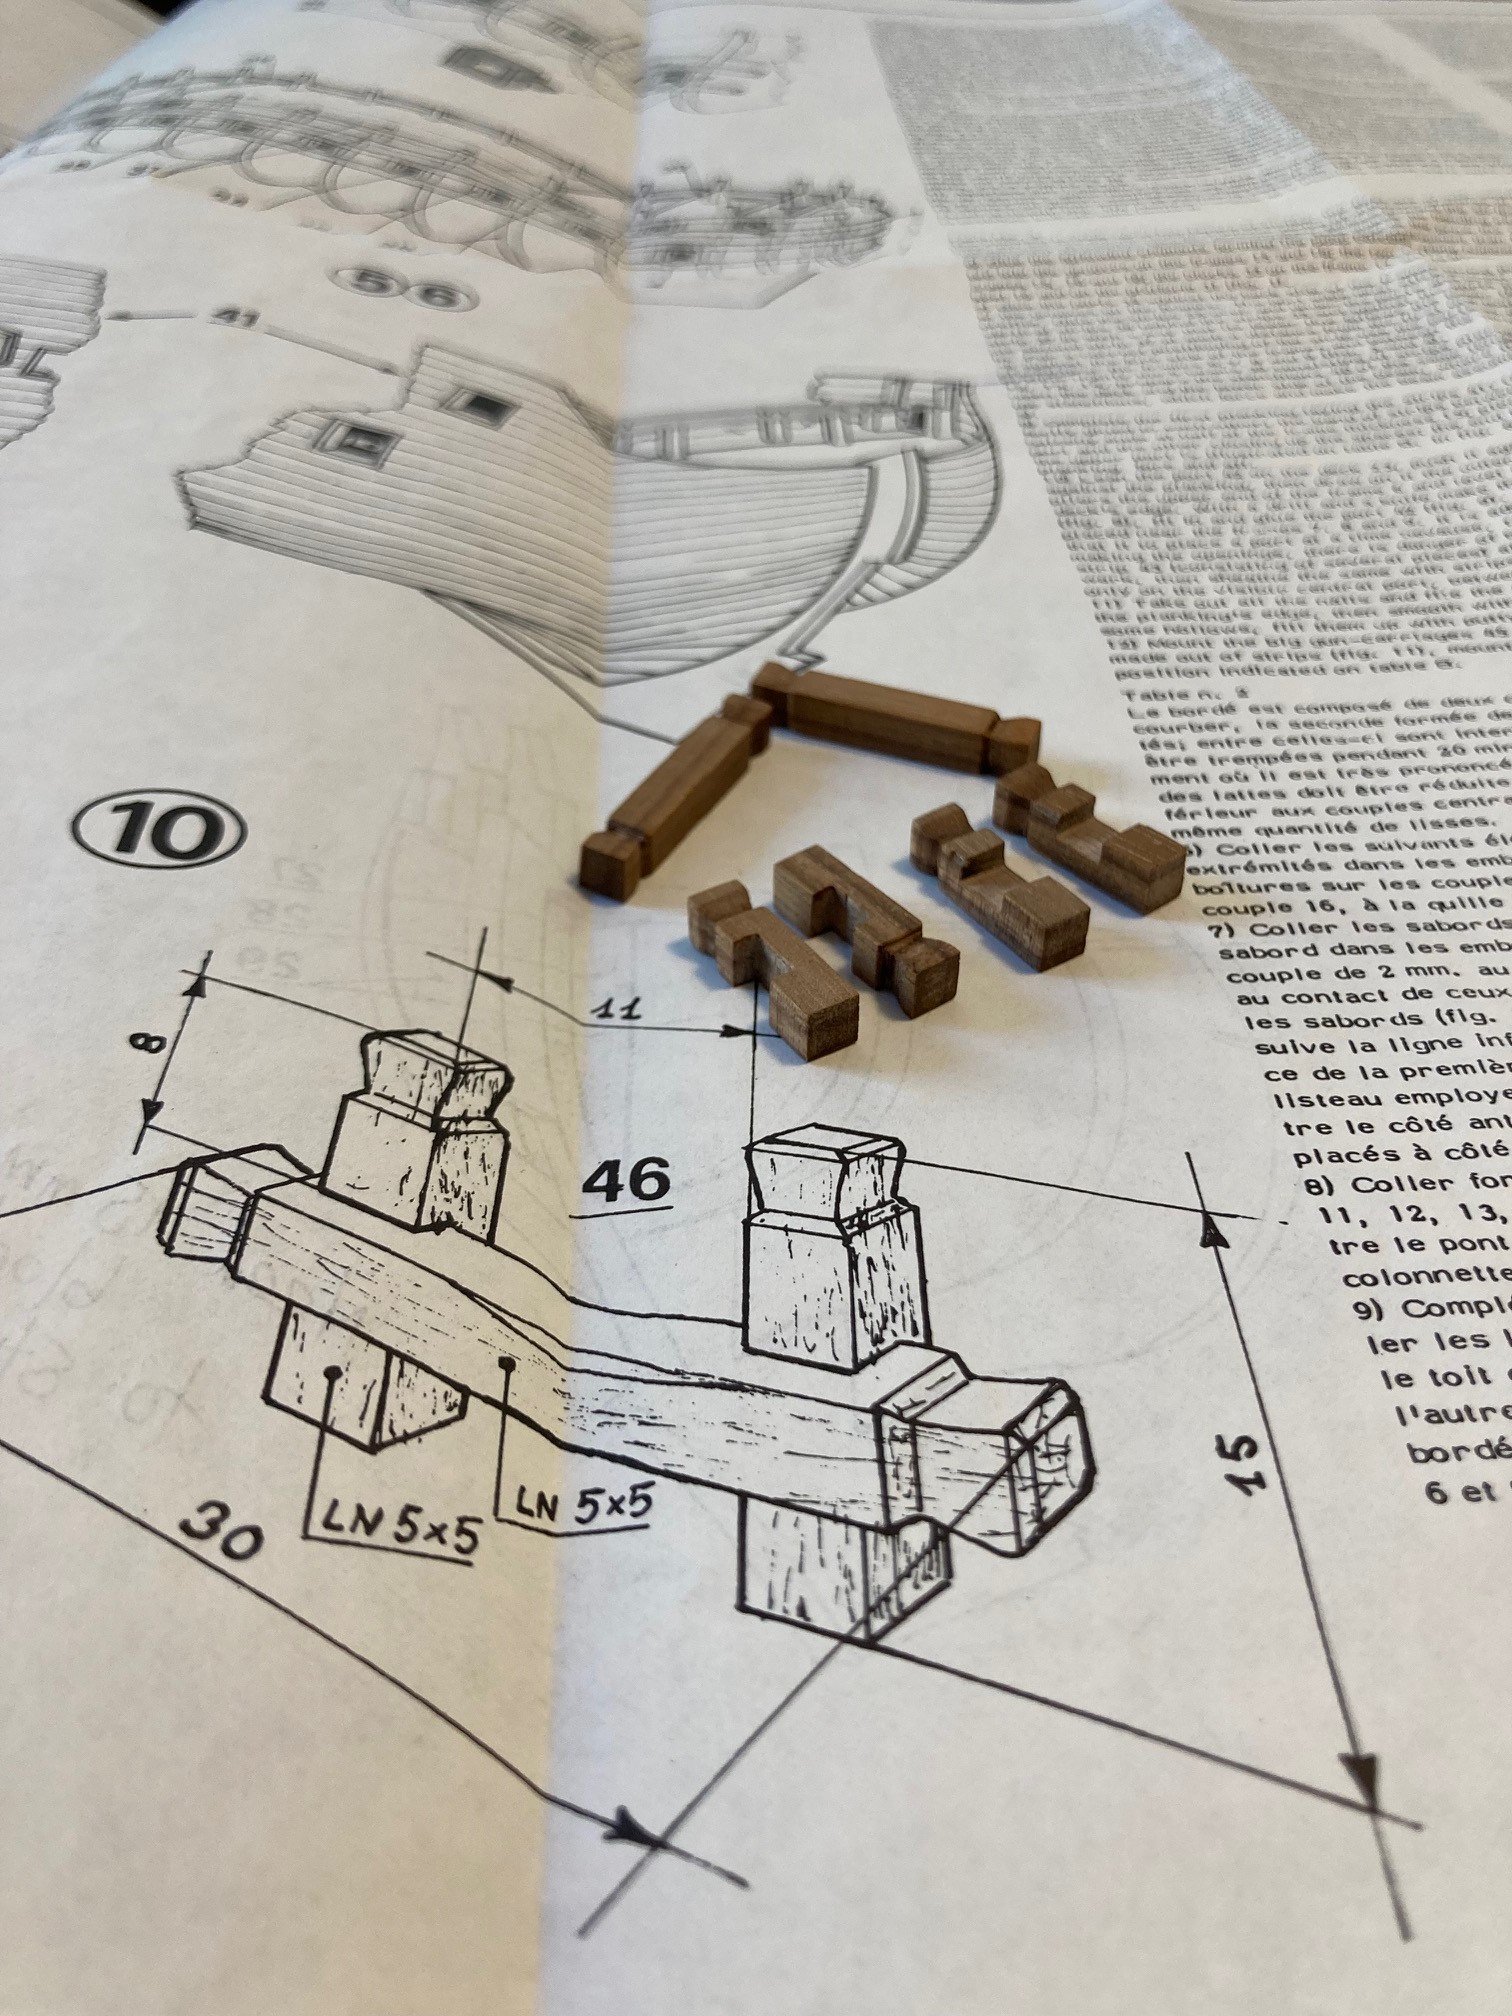
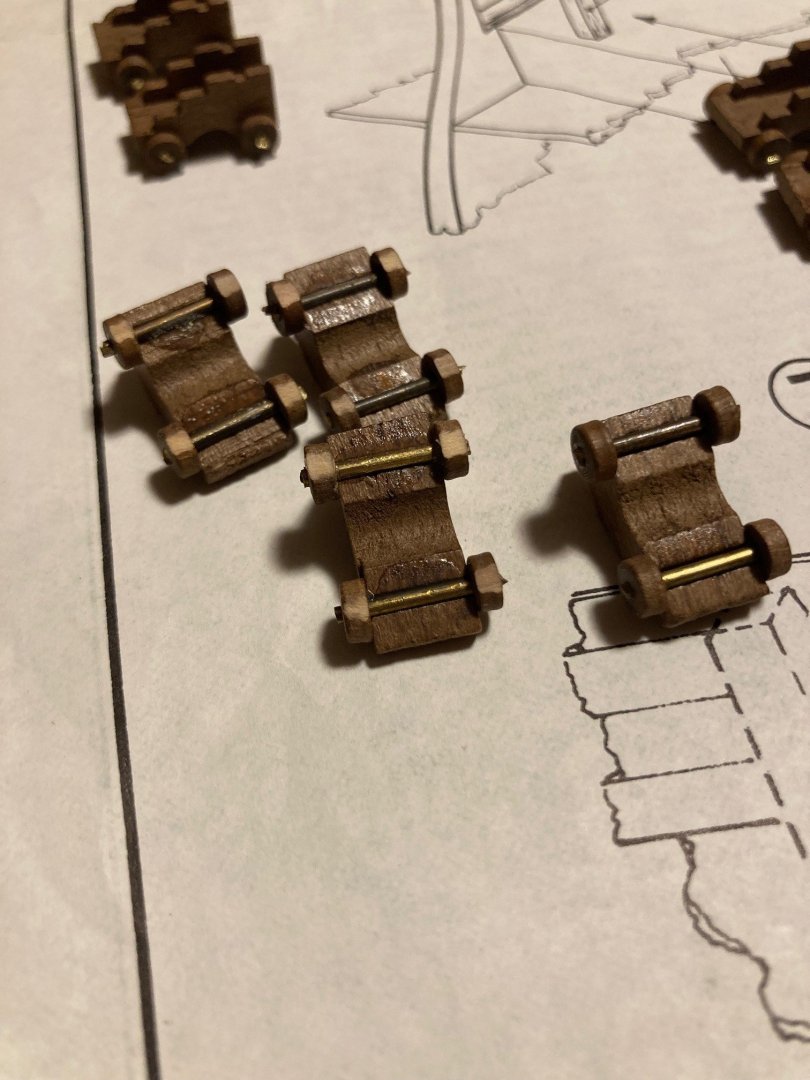
More details done this week... I sanded down the wheels on the gun carriages in order to get a firm contact for gluing the carriages down prior to them getting hidden from the deck above. I have to now varnish the deck and put the beams in in order to lay down the upper decks... going to use wipe on poly. All fun so far!
-
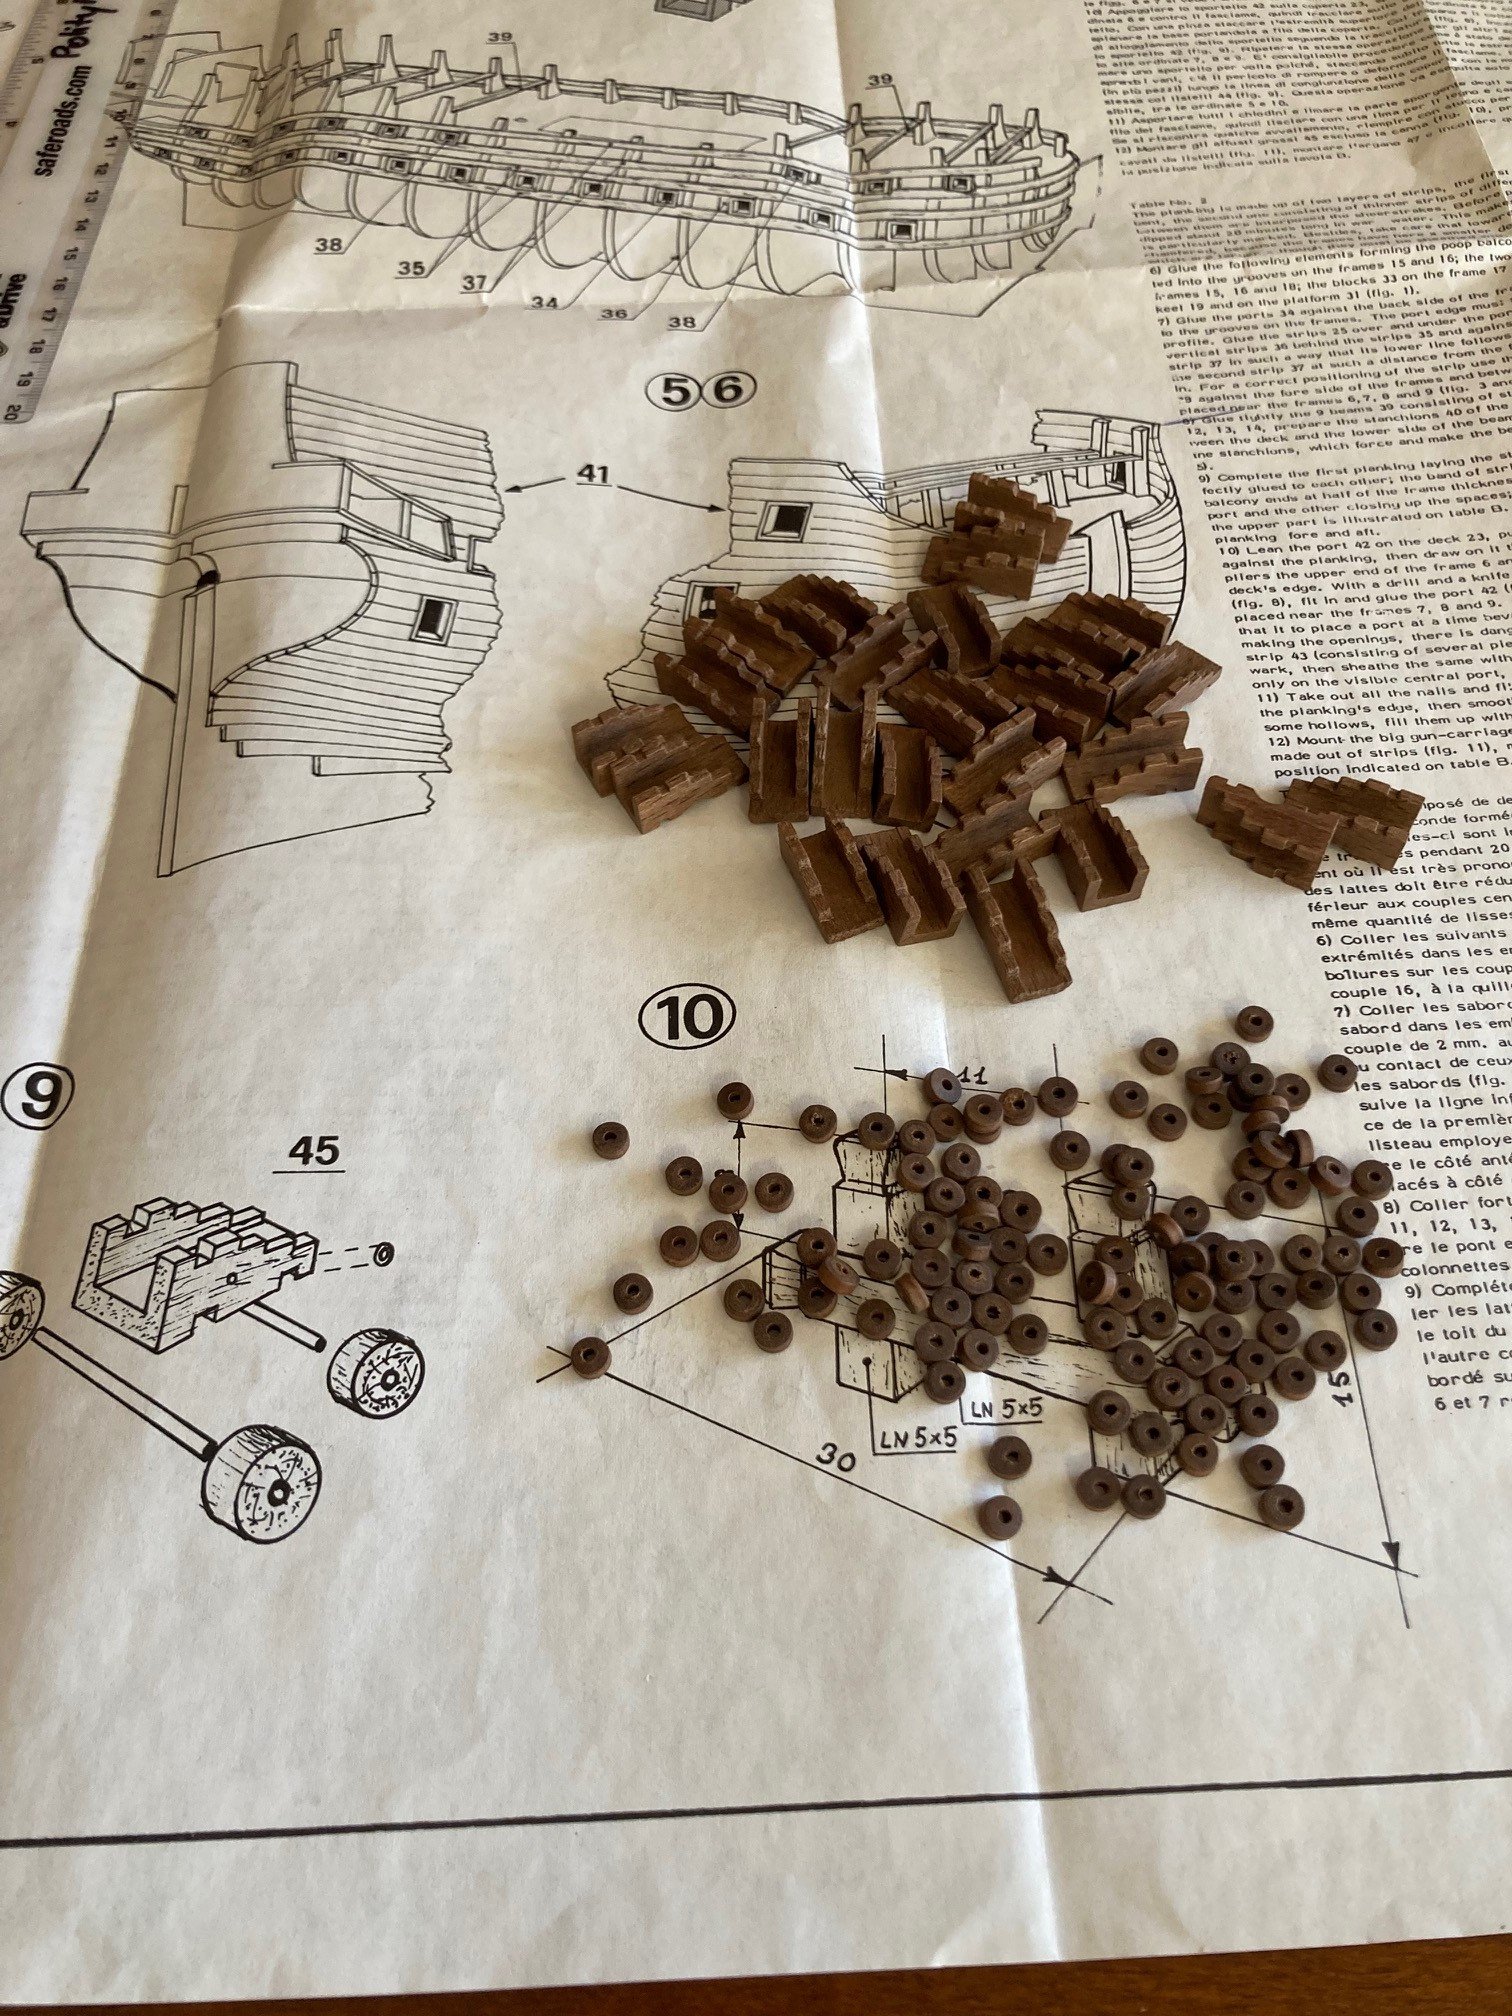
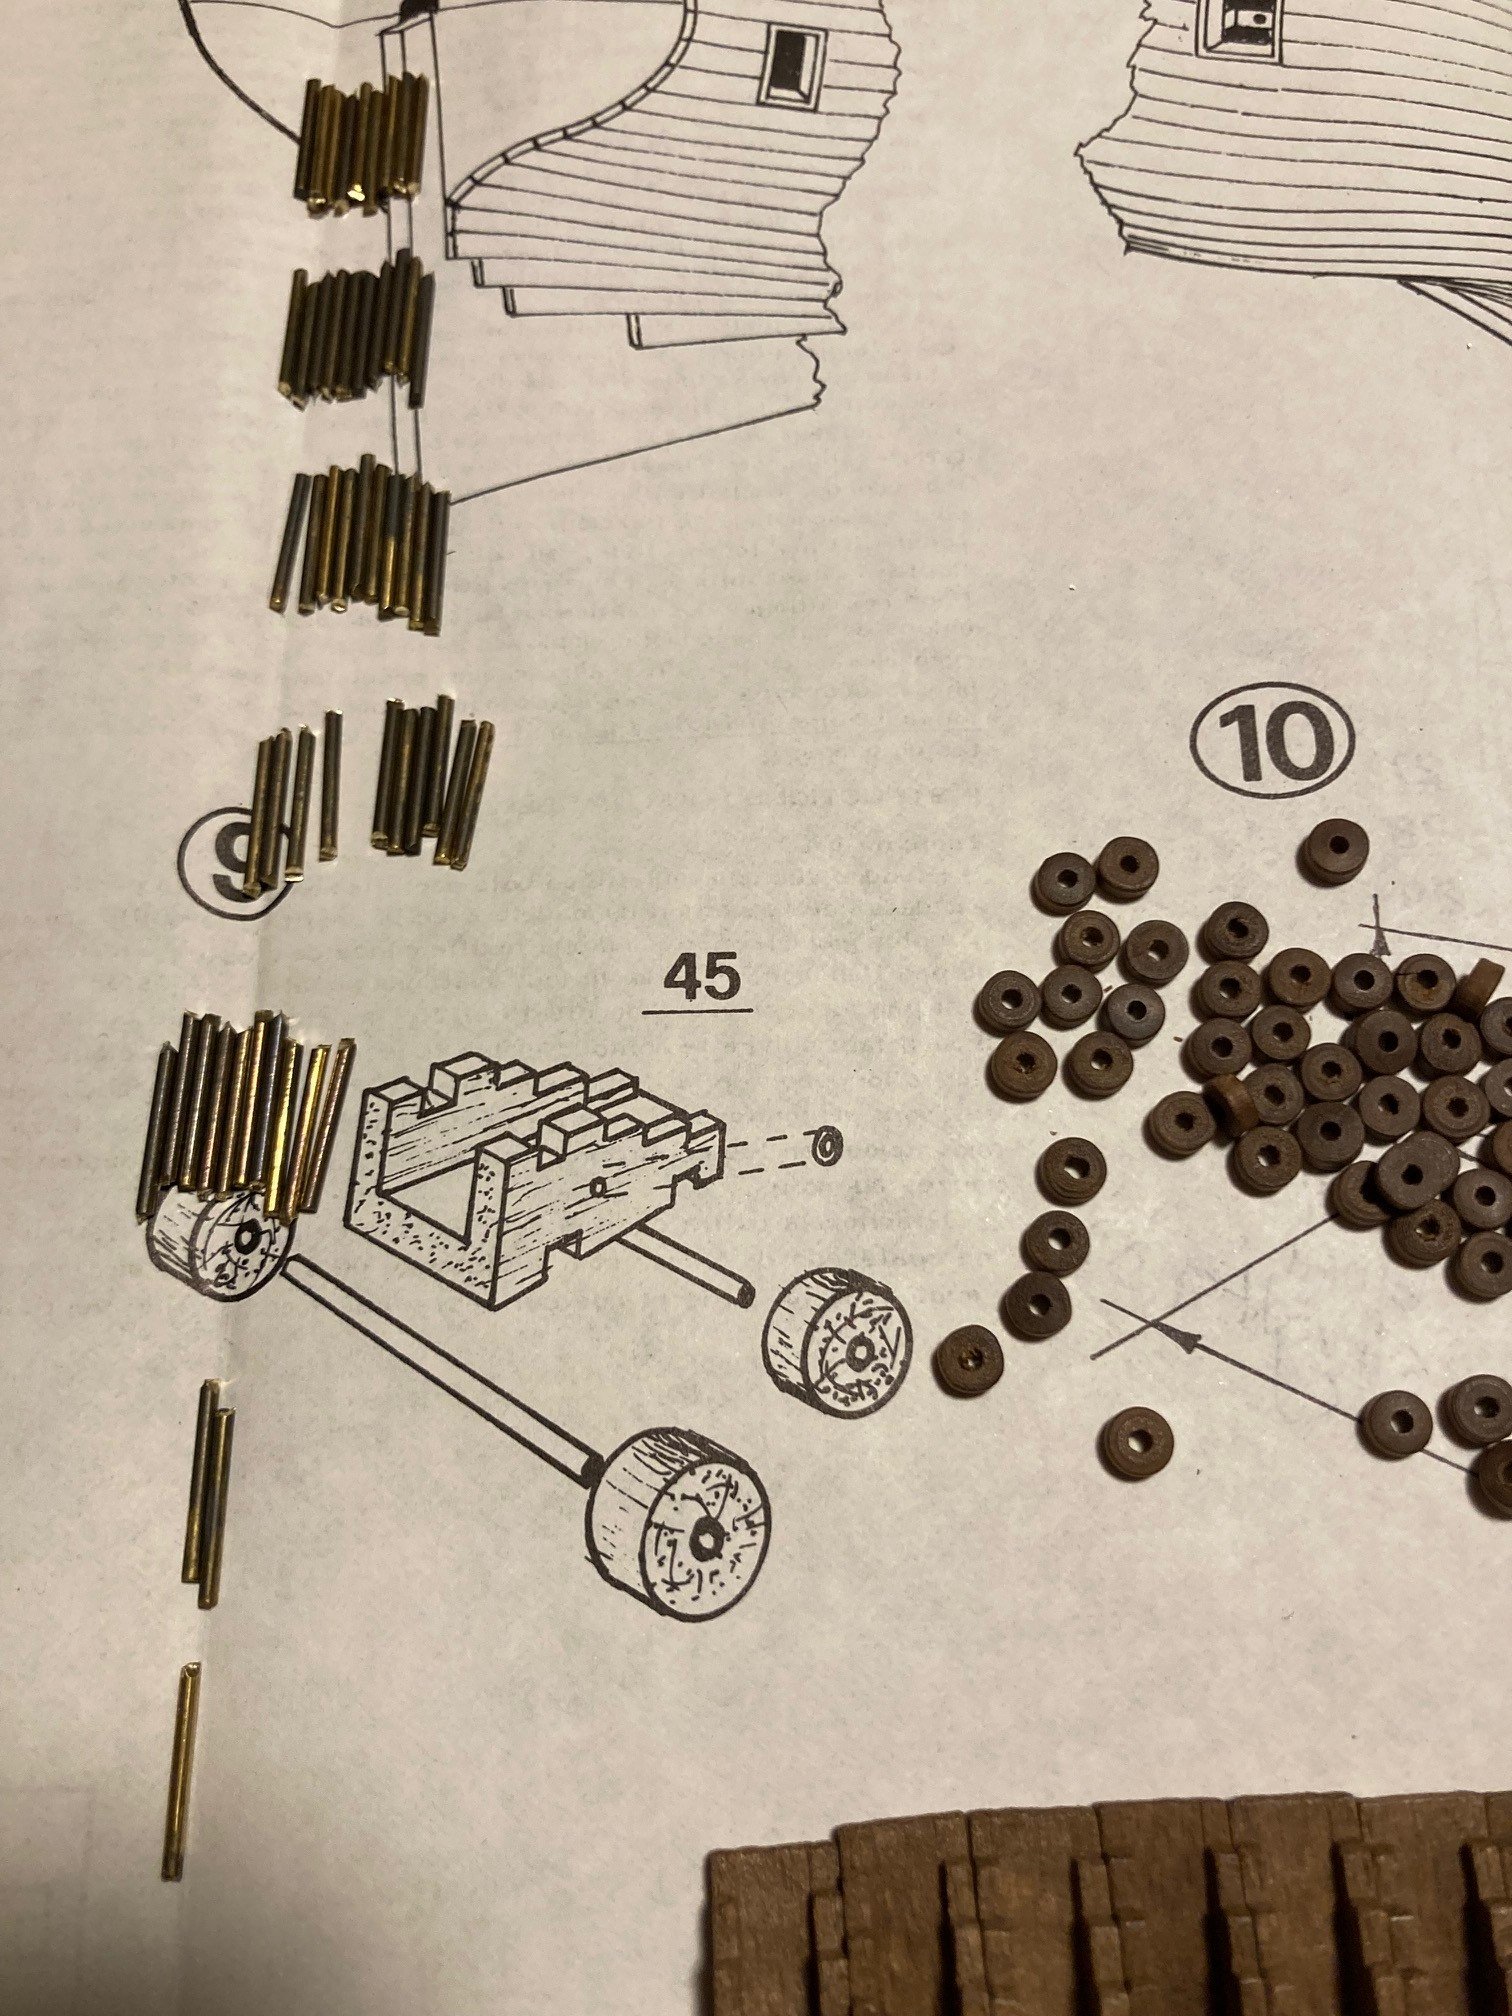
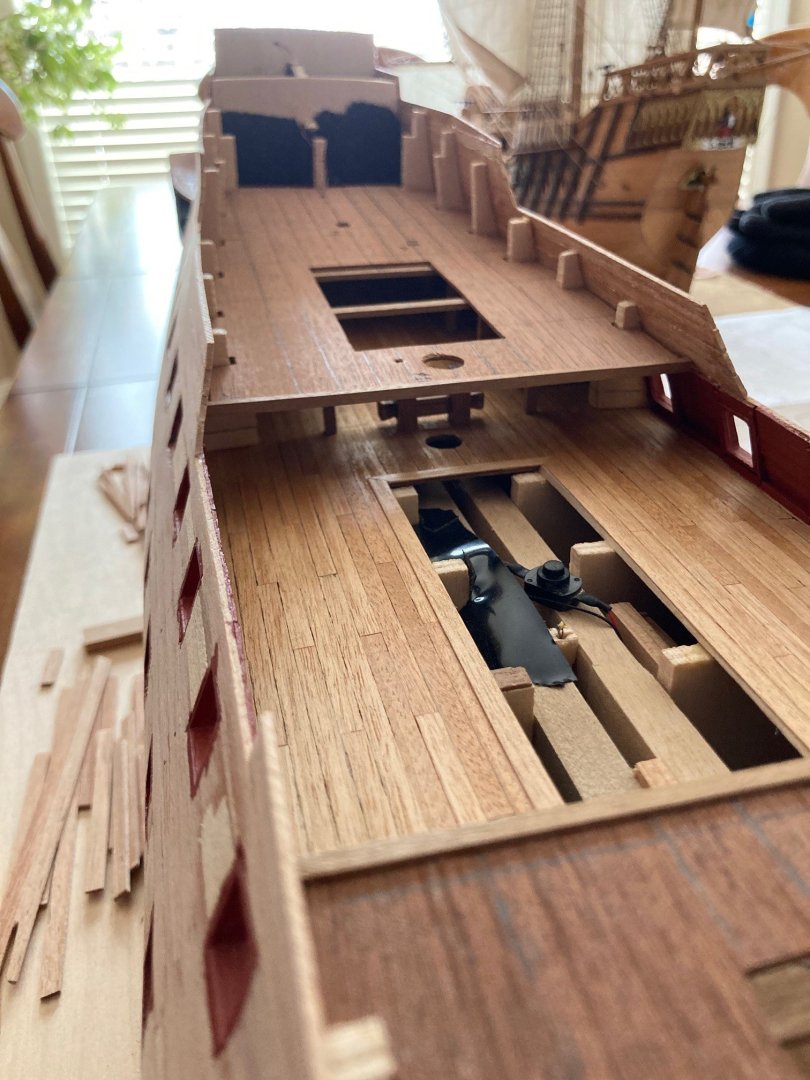
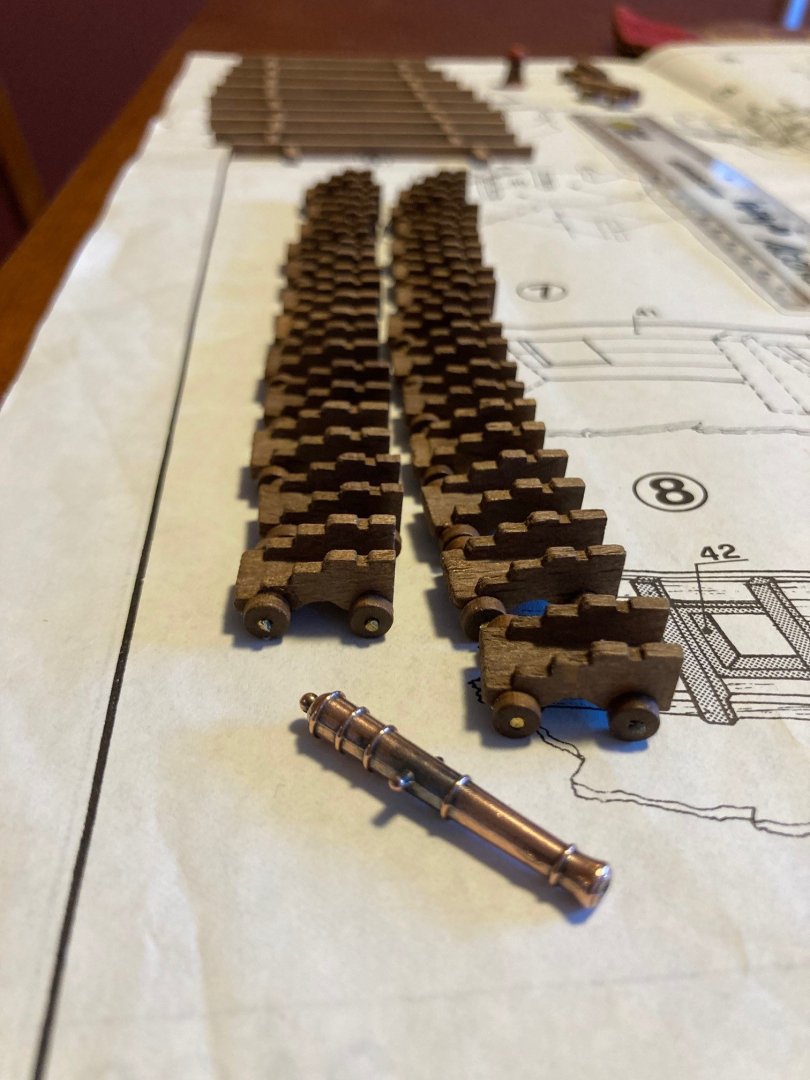
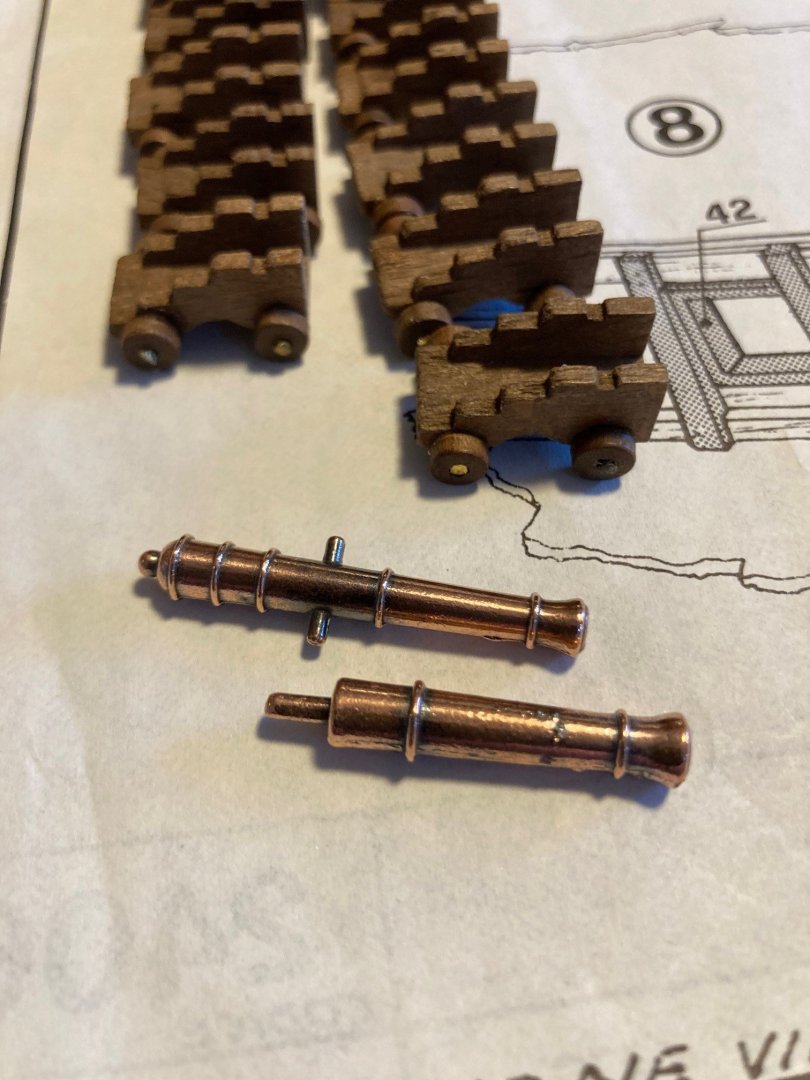
Should have provided a picture of the built gun carriages. The second picture roughly portrays the difference in the cannon extension from the port referencing the top cannon to be placed inboard and recessed a bit on its carriage and the bottom picture, referencing the dummy cannon and its placement in the lower row of gun ports.
-
Then of course, getting the cannons built and placed before the upper decks are fixed down. The carriages are glued down first on to the deck and later are the cannons placed through the port onto the carriage for display purposes. Much talk in the other Friesland build logs about the length of the dummy cannons that are to be placed in the deck below the main deck. Some kits of a particular era had cannons that were way out of scale with regards to length and... alas, I have one of those kits that are at least 5-7 mm too long compared to the cannons on the deck above.


-
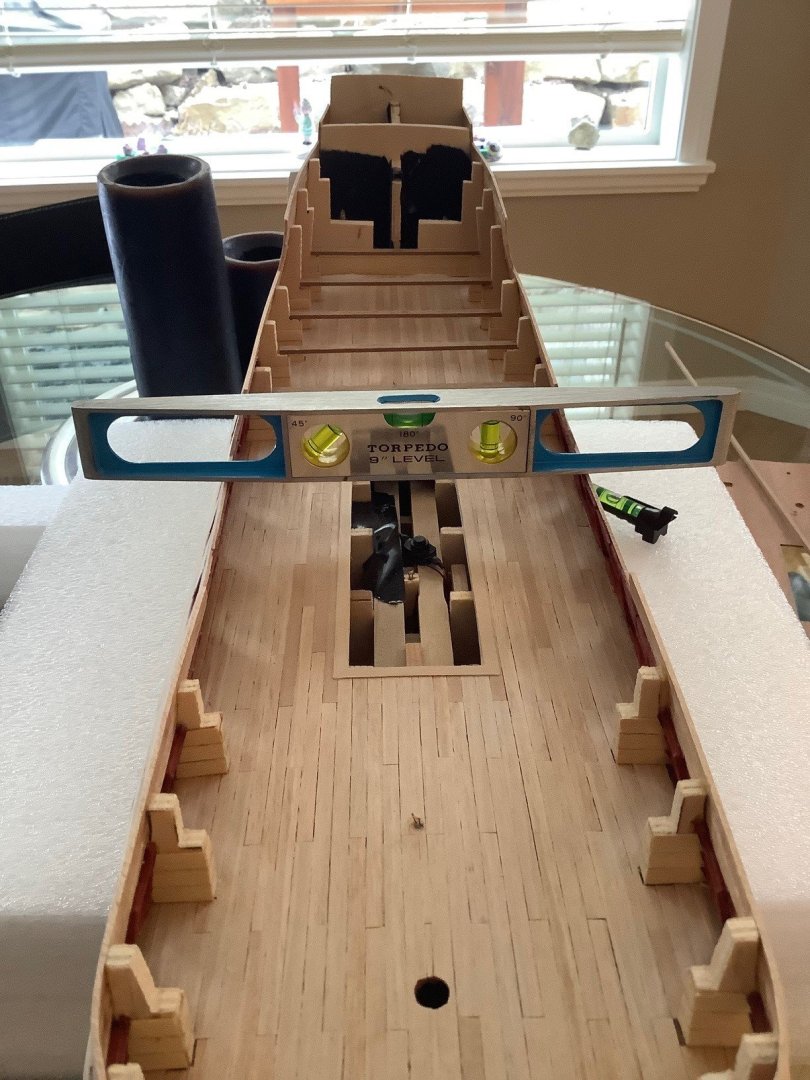
Got some work done on the Friesland this past weekend. Every step requires double checking and shimming where necessary. These vintage kits (pre laser cut) require lots of double checking as nothing is ideal with regards to fitment and further with regards to level and square. The bulkhead frames in the kit were not ideal and thus the builder always has to be thinking about future steps and how things will look. I leveled the hull and then worked forward in terms of shimming the deck support beams in order to make sure they are all level relevant to the hull and each other as evident in the pictures below.

-
Thanks Patrick for your reply… went through your linked build log of your Golden Hind and found lots and lots of great information. Cheers!
-
Lastly, spent a few hours this past weekend in sanding the hull, and it is now pretty close to being ready for the second (finish) planking layer. I added some fill at the bow and even less at the stern, but through the majority of the hull, added 0.5 mm to 1.0 mm strips to fill slight hollows (especially on the margins of the gun ports) and then sanded back to flush, and though it make not look great, this hull is very nice and smooth (at this time).
-
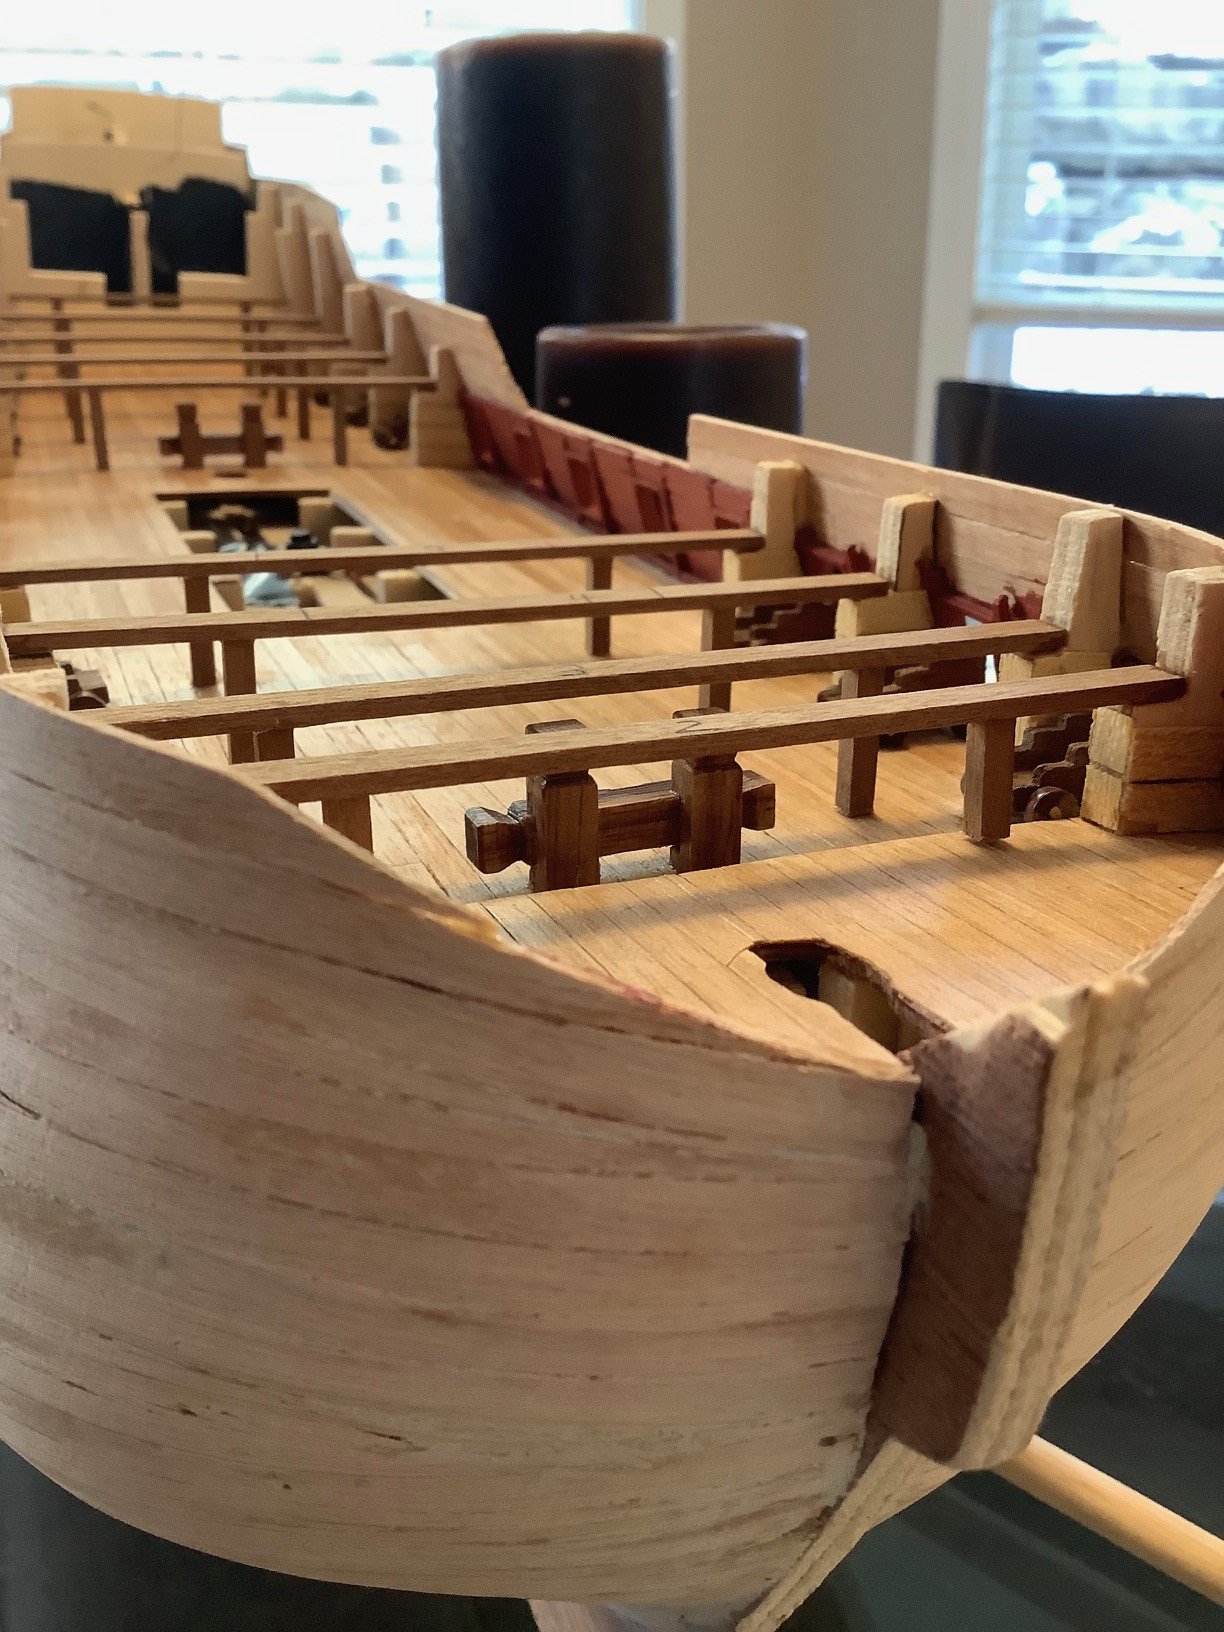
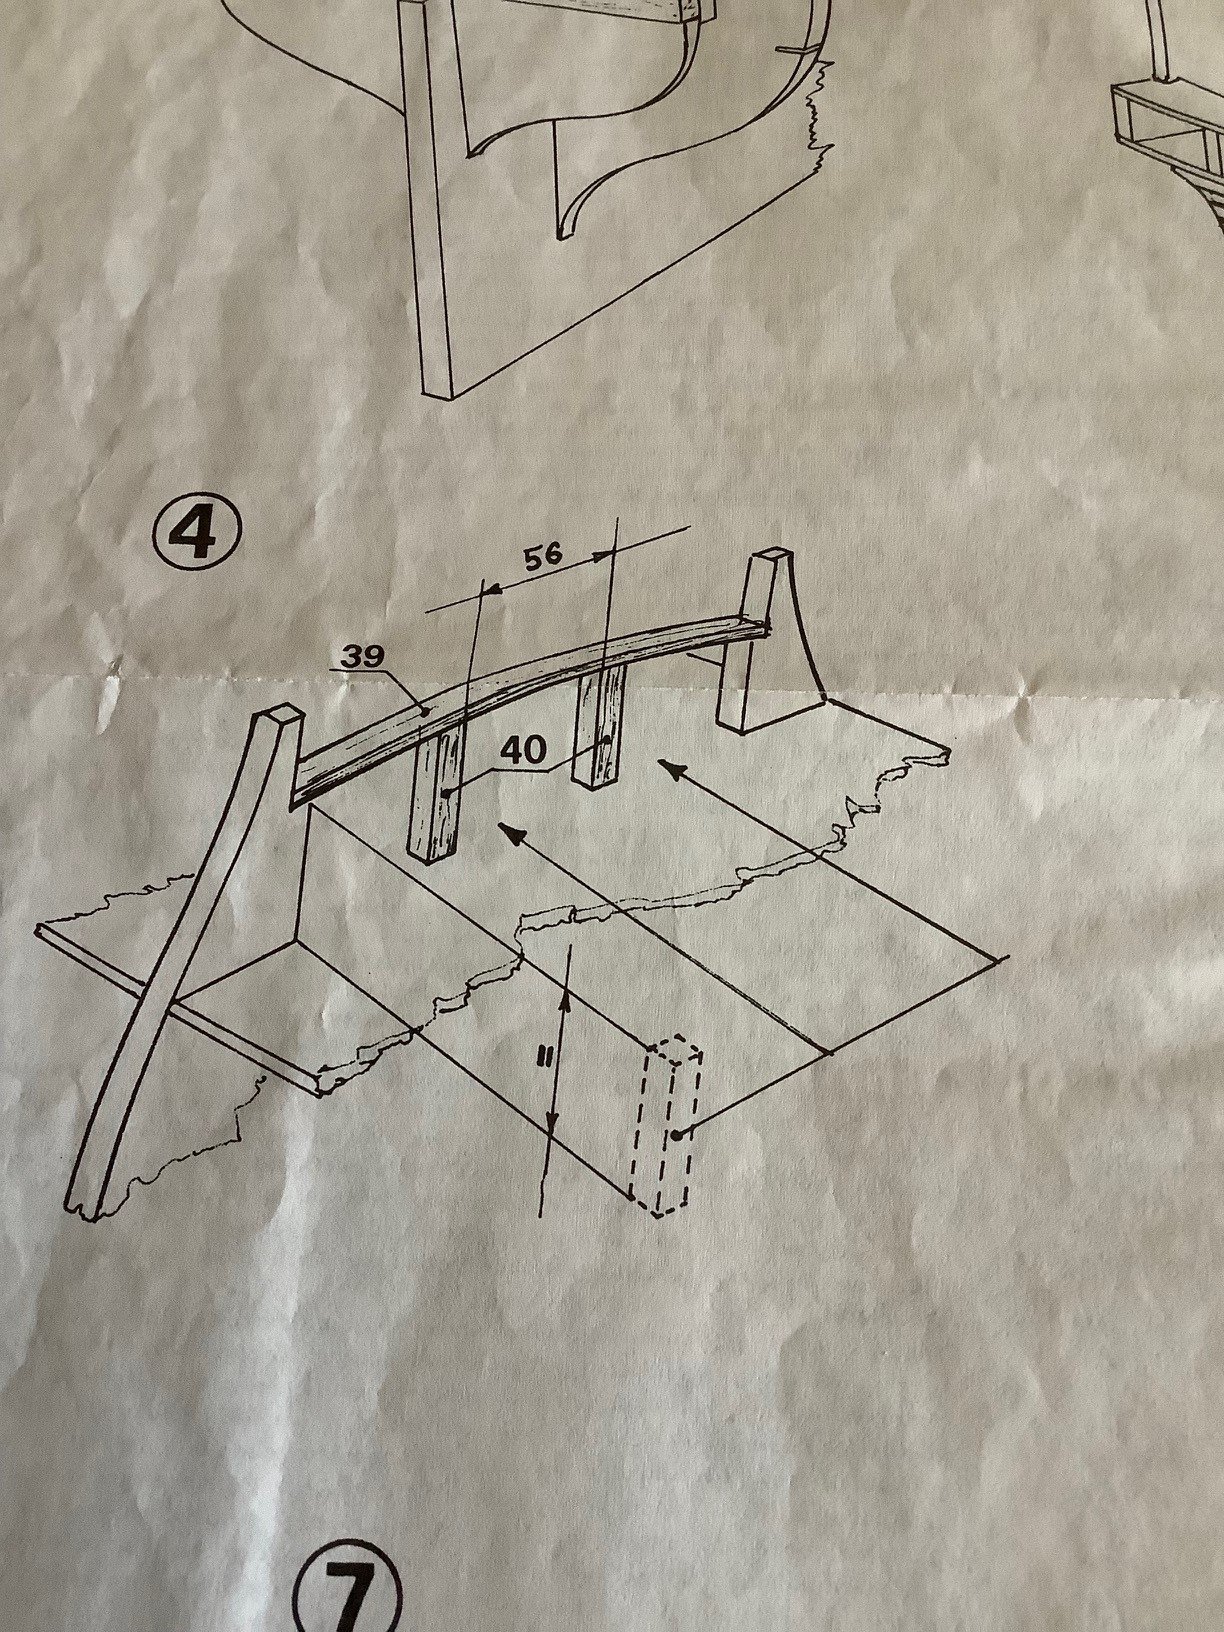
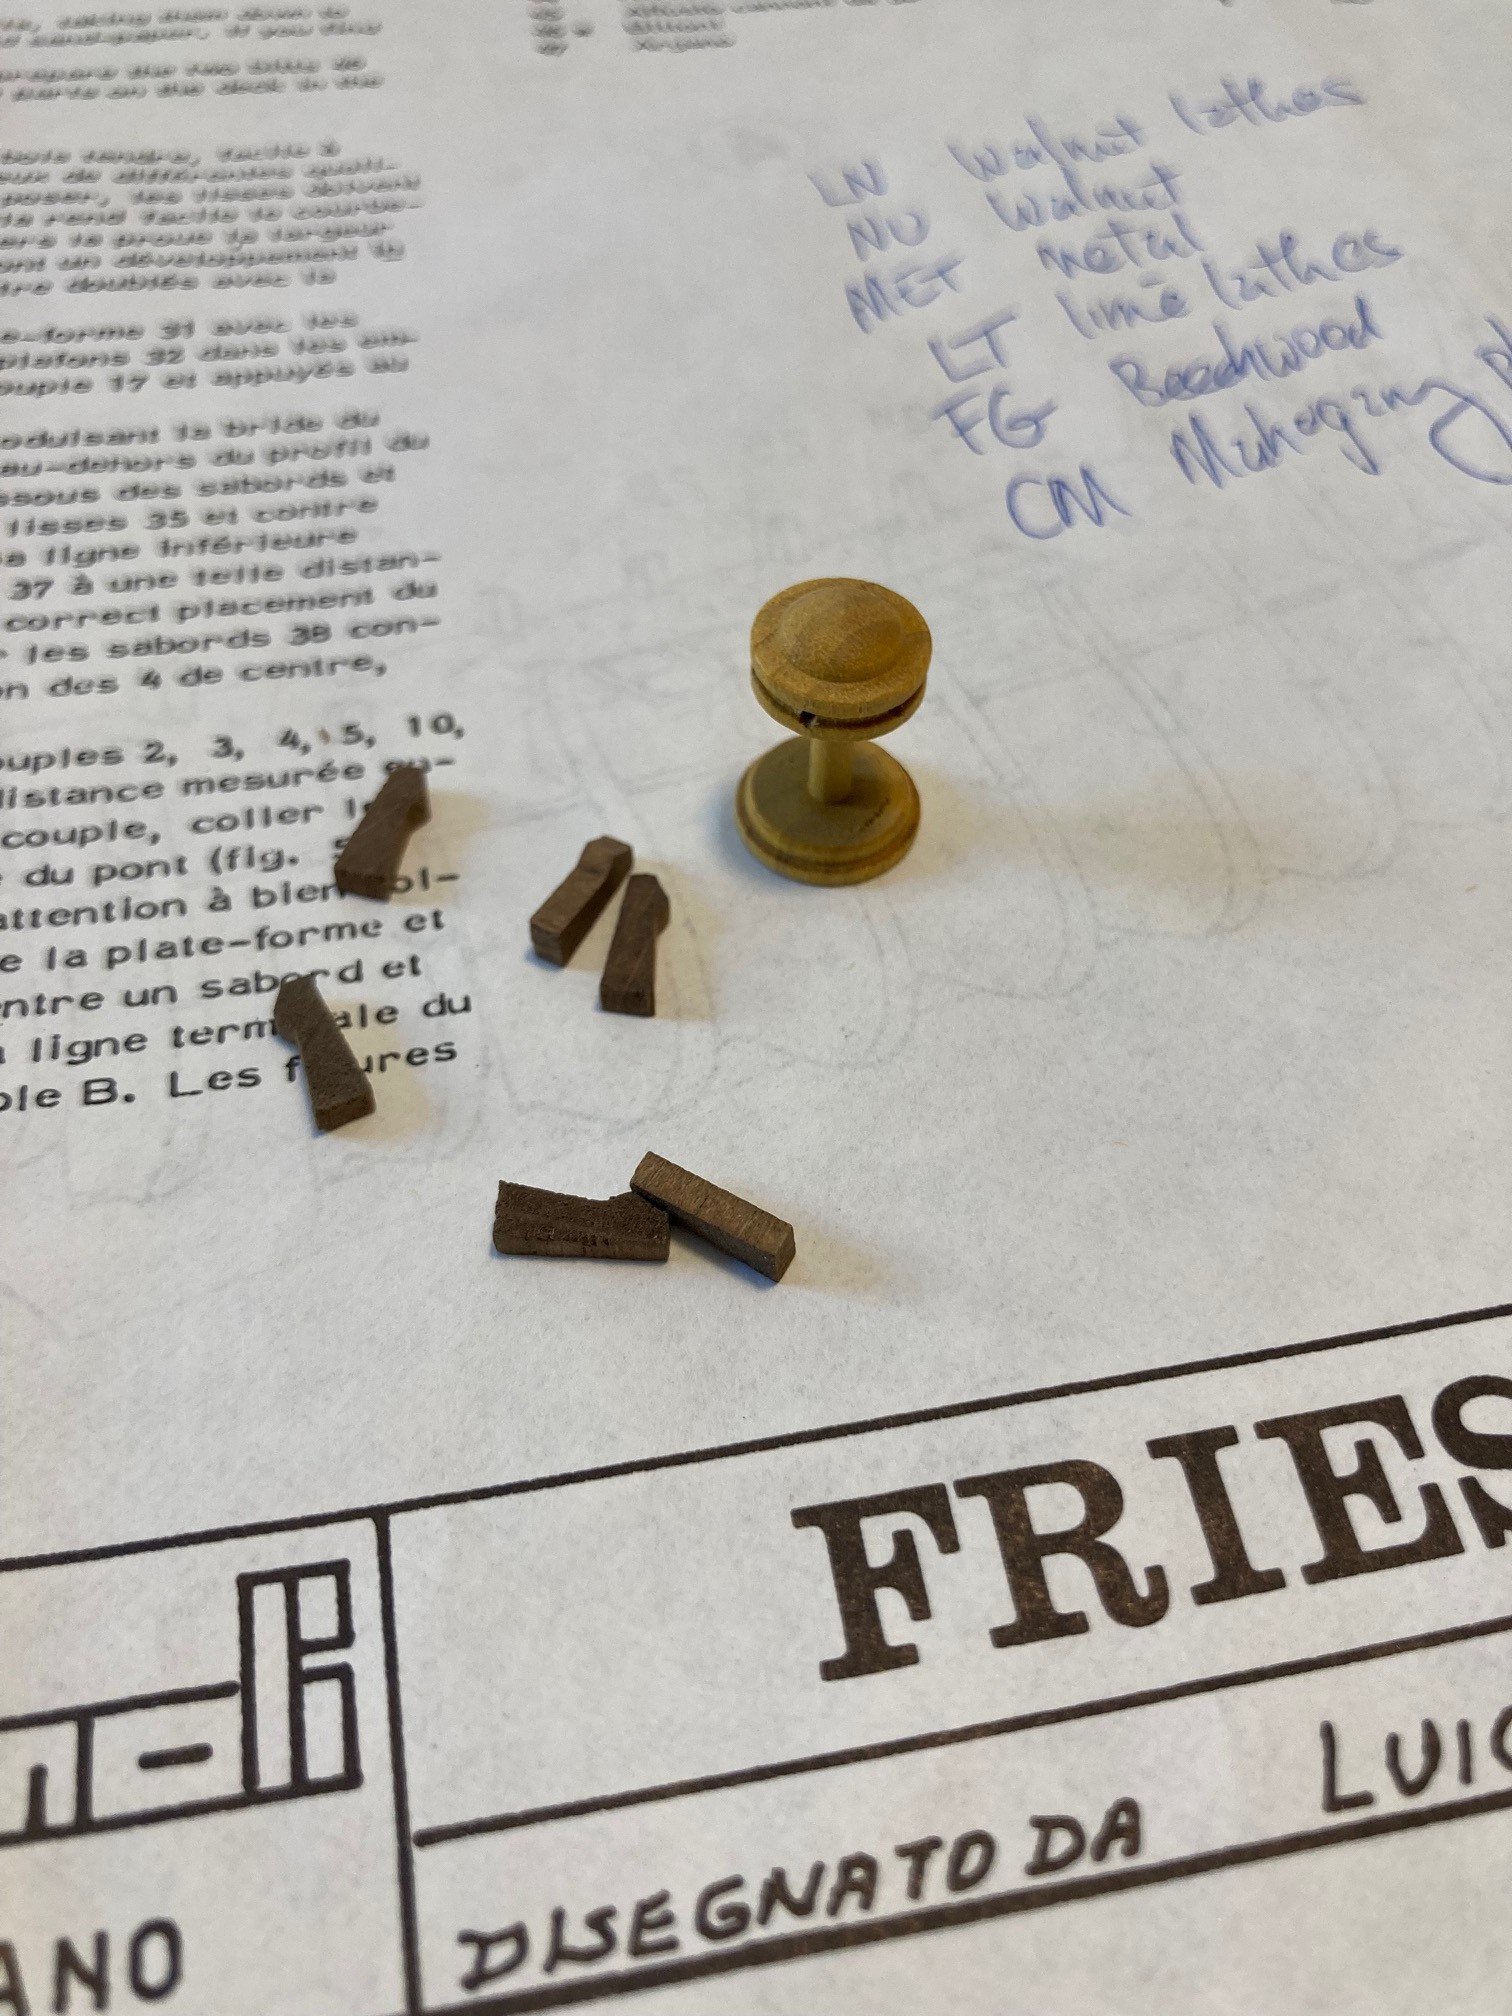
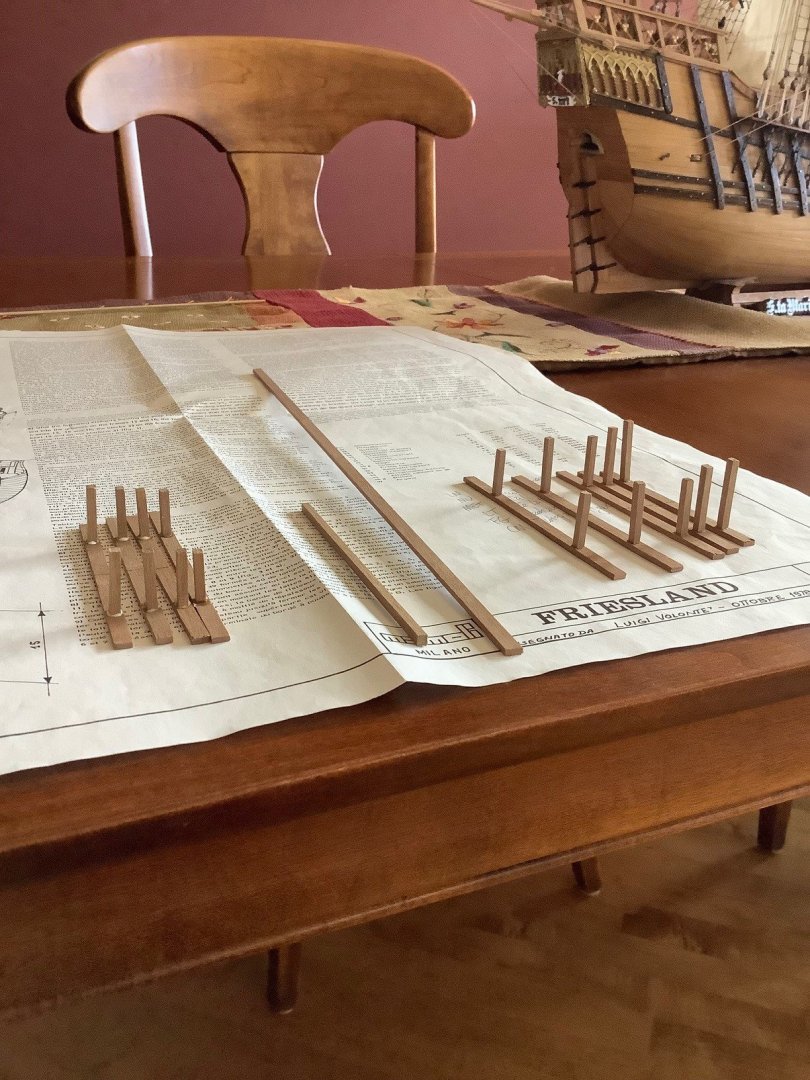
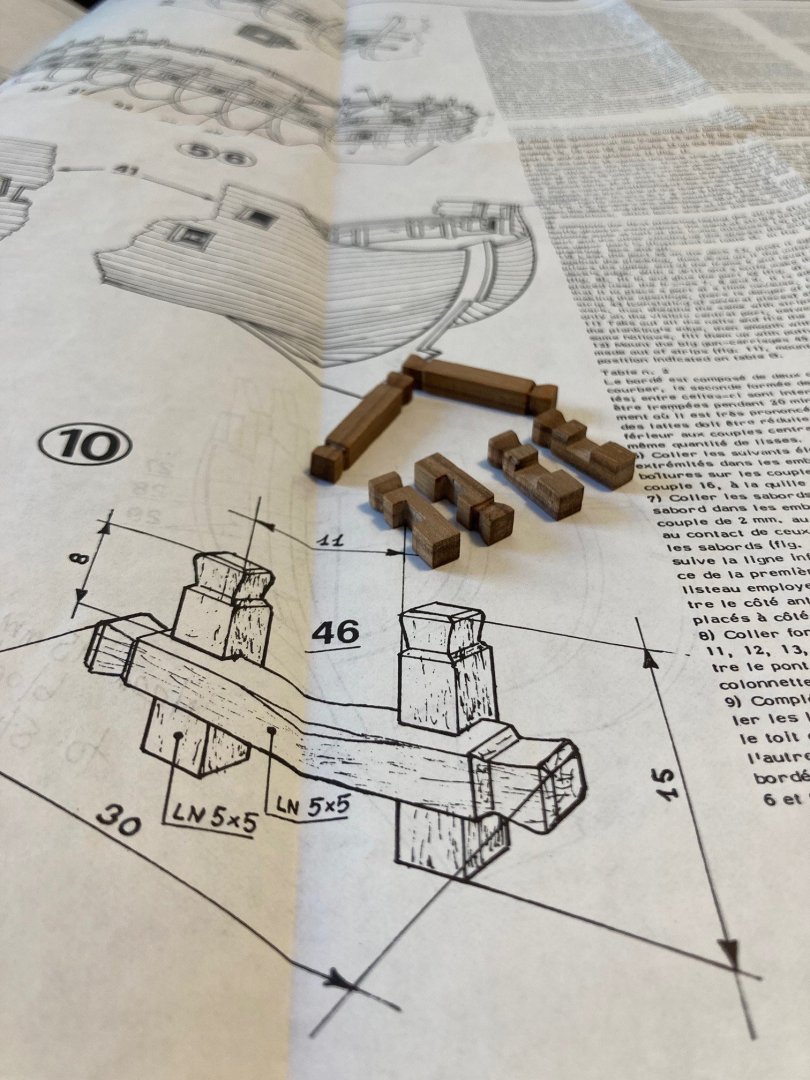
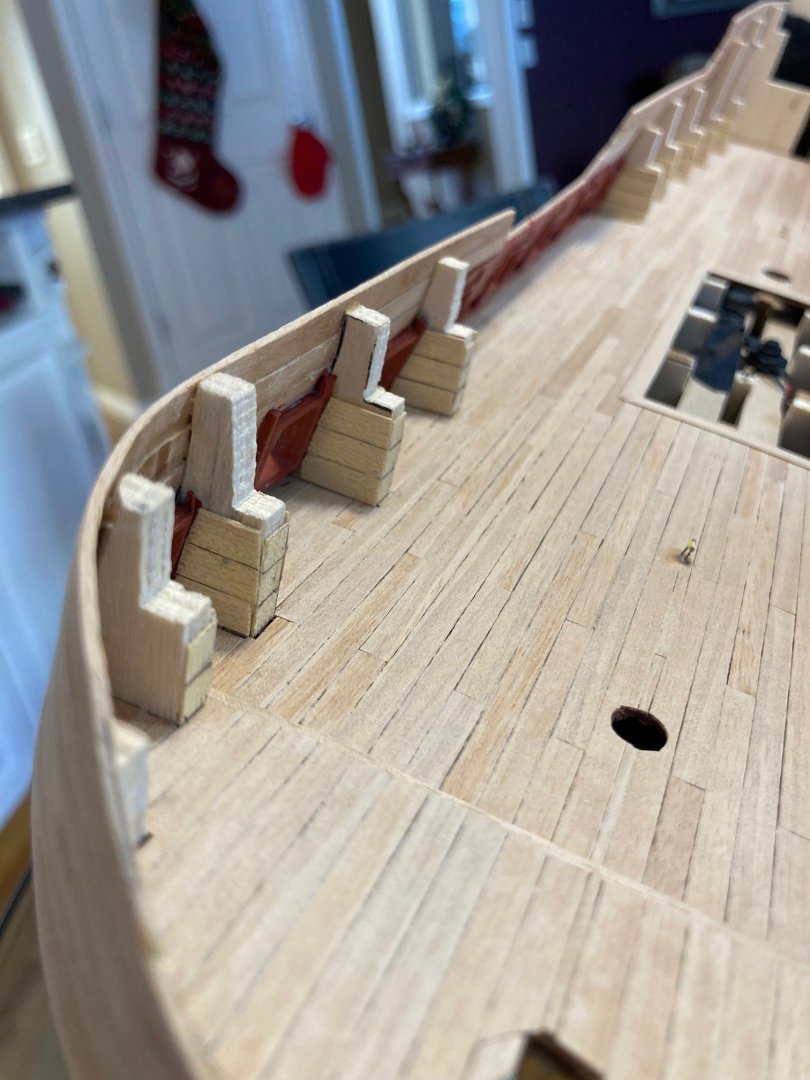
Started to work on the deck fittings... per the plans. Happy with my cuts on the bitts... used the table saw to cut slits in 3 passes half way through the material to 5 mm width in the uprights to accommodate the horizontal bit. Used the saw at an angle of 40 degrees and ever so slightly scored the tops of the bits on all 4 sides of the end and fine tuned with a file for a satisfactory result. The capstan is as pictured and easy enough to figure out but absolutely no guidance in the instruction manual. The instructions only say "glue to the deck". Not sure if I should research a color scheme that is period specific and may do some research on this tonight.

-
The Mamoli plans do not call for this step in the instructions but thought I would add this detail should anyone wish to peek through the gunports. The edge of the bulwark is a simple strip of 5 mm with lines drawn through them (to simulate ends of the sides) and the side strips are regular strips that are 5 mm in width.


-
Thanks Jan for all the information!
-
This is the grating kits from Jotika/Caldercraft. I am missing some laths from 2 of the 6 packages I ordered and have an email out to Jotika for a replacement package.