
HOLIDAY DONATION DRIVE - SUPPORT MSW - DO YOUR PART TO KEEP THIS GREAT FORUM GOING!
×


mrcc
-
Posts
549 -
Joined
-
Last visited
Content Type
Profiles
Forums
Gallery
Events
Everything posted by mrcc
-
 Having trouble getting ahold of Radimir of HisModels… I confirmed a custom sail order in early June and was told via email that he was on holidays for the month. I emailed HisModels at 5 weeks without a reply and emailed again last week at 6 weeks without a reply. Anyone else having trouble with HisModel? Want to give everyone the benefit of doubt, but starting to get frustrated.
 -
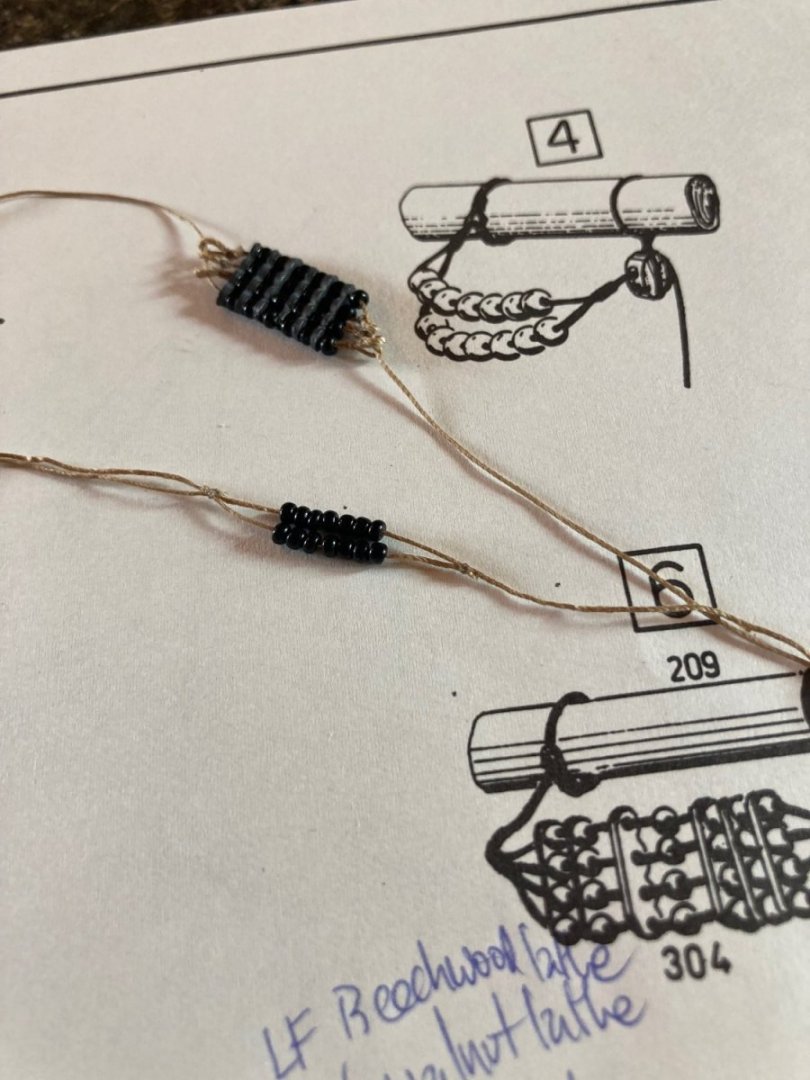
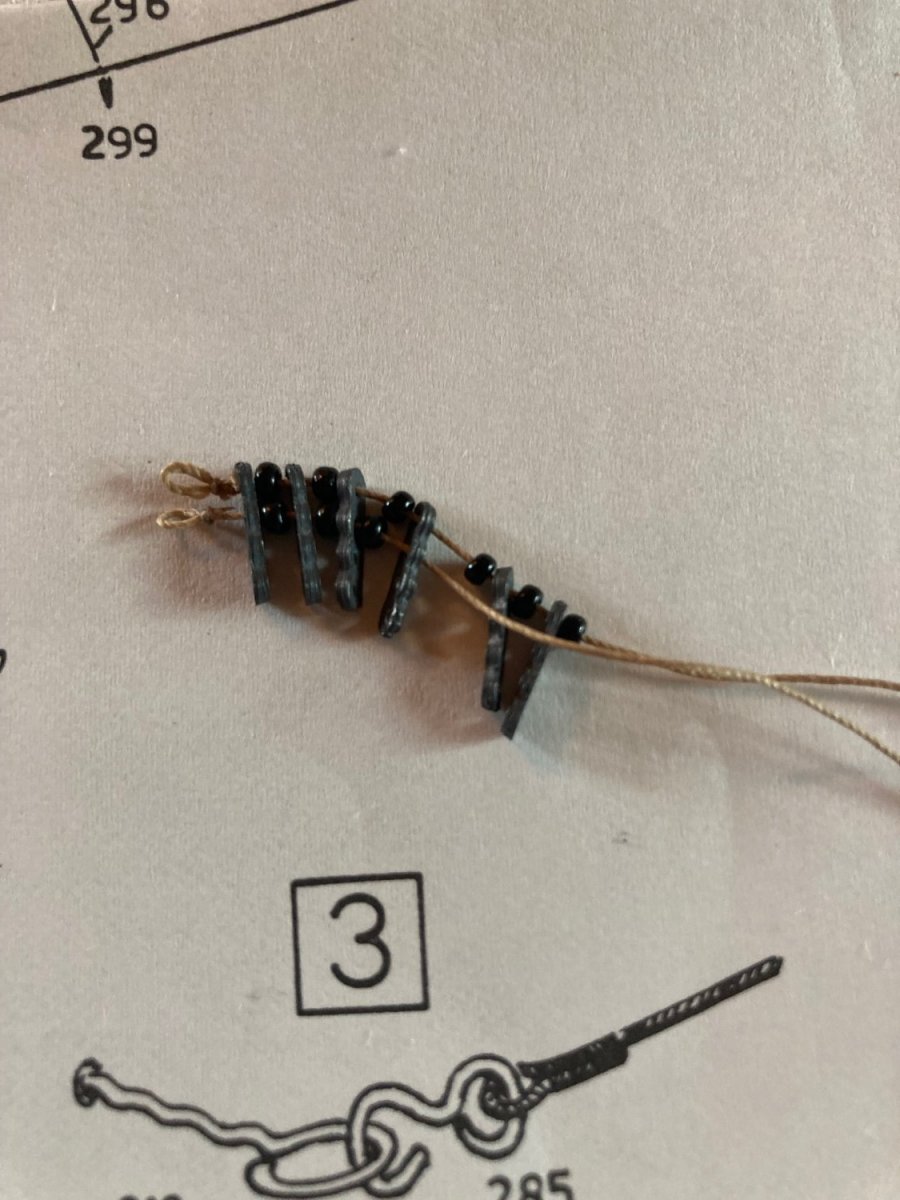
A small update as I am awaiting the sails that I have asked hismodels to do for me... I have done 2 out of 3 mast parrels.

- 179 replies
-
- 3
-

-
- santa maria
- mamoli
- (and 1 more)
-
USF Essex by mtbediz - FINISHED - 1:50
mrcc replied to mtbediz's topic in - Build logs for subjects built 1801 - 1850
She’s a beauty! -
Well, I must say… Just back from a wonderful trip to England and toured the historic dockyard in Portsmouth and boarded the HMS Victory. Also given we had a night in Windsor, decided to step into the Mantua retail / distributor store and having looked and held the sails made for the Mantua Santa Maria with my own hands, I must say they are top top quality and I would not hesitate to purchase them but sadly on measuring them, they just would not work for my Mamoli scale version of the Santa Maria.
-
USF Essex by mtbediz - FINISHED - 1:50
mrcc replied to mtbediz's topic in - Build logs for subjects built 1801 - 1850
Hi Mustafa, Beautiful work and model… Very impressive!! Julian -
Thanks JJ for your reply... The sails look very good to me... the ship as well!
-
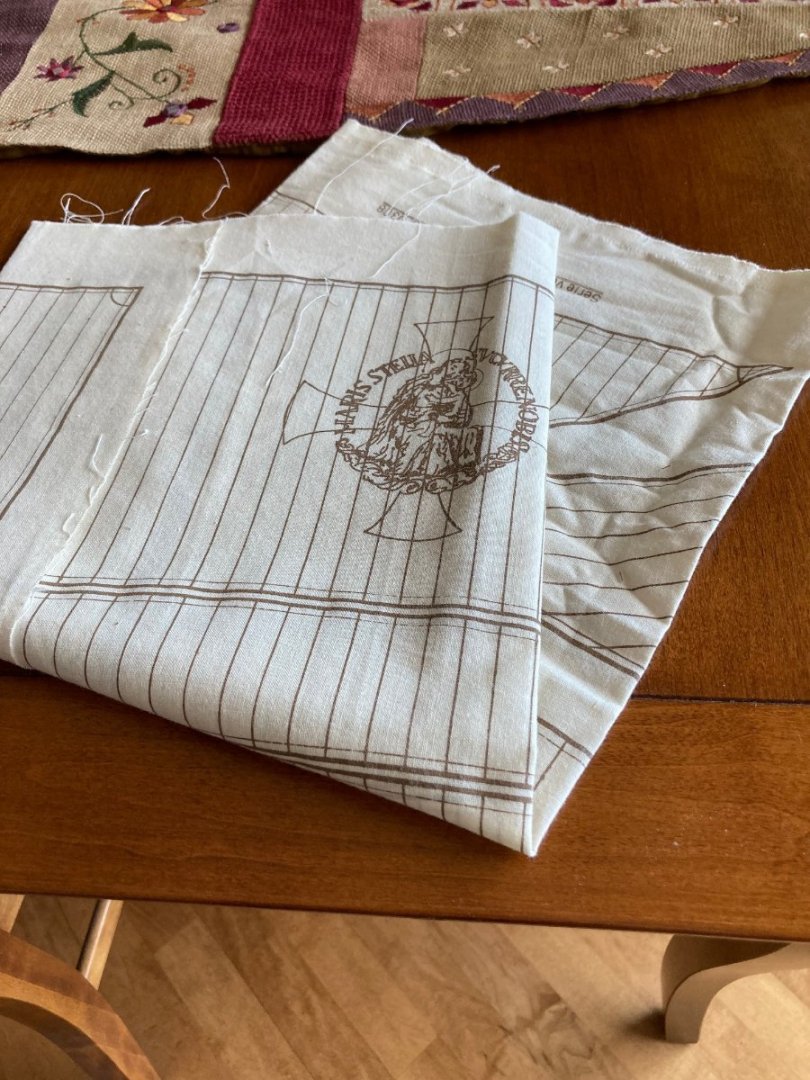
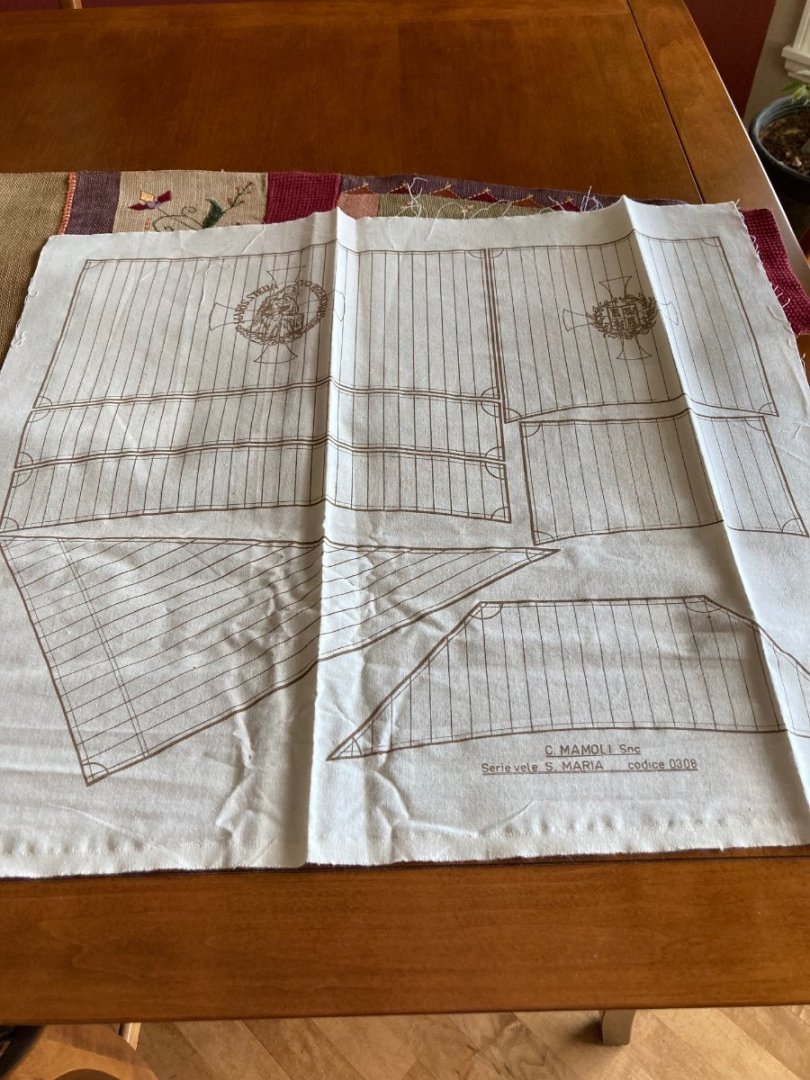
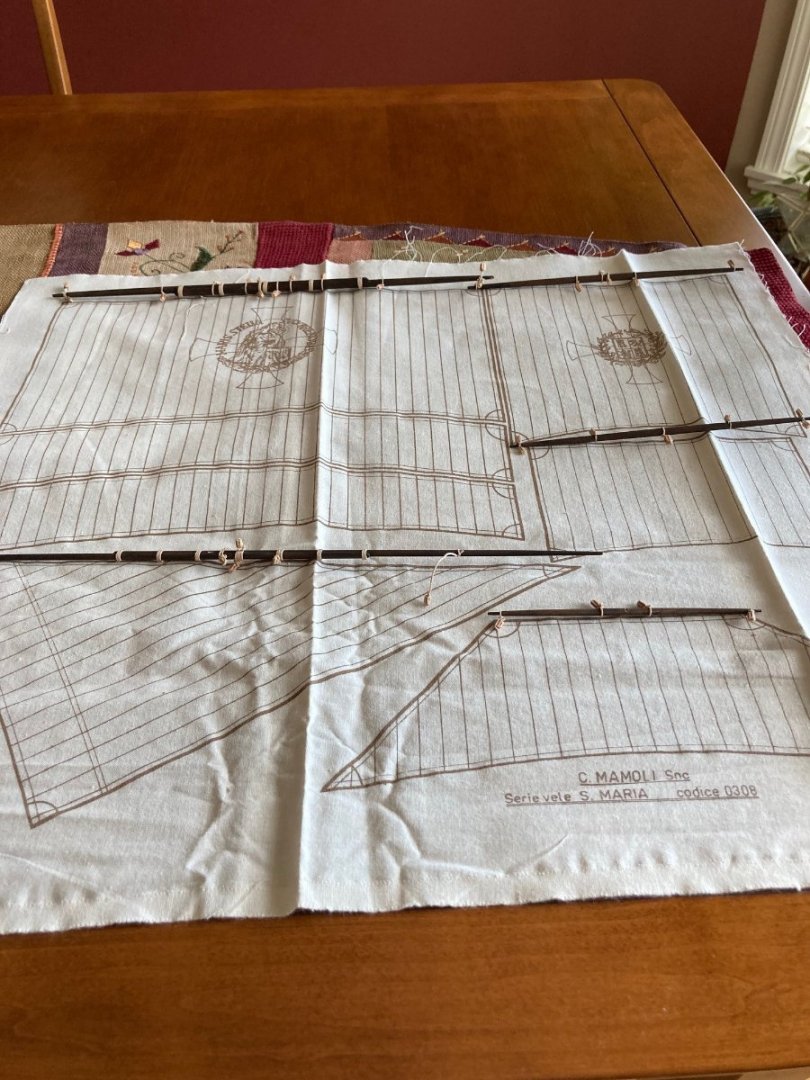
This is the sail material for the Mamoli kit... Definitely going to upgrade!
- 179 replies
-
- 2
-
-
- santa maria
- mamoli
- (and 1 more)
-
Thanks Allan for your reply... These pictures are what the Mamoli kit supplied for cloth - stiff and rigid, feels like a thick linen material... I thought I should inquire though on the forum if anyone has had experience with Mantua premade sails and whether they are at least a step up?


-
I am building the Mamoli Santa Maria and given the Mantua kit is the same scale, the premade sails should work for me, especially as I am not interested in sewing them from scratch. Anyone have any input with regards to quality of material and sewing? Thanks,
-
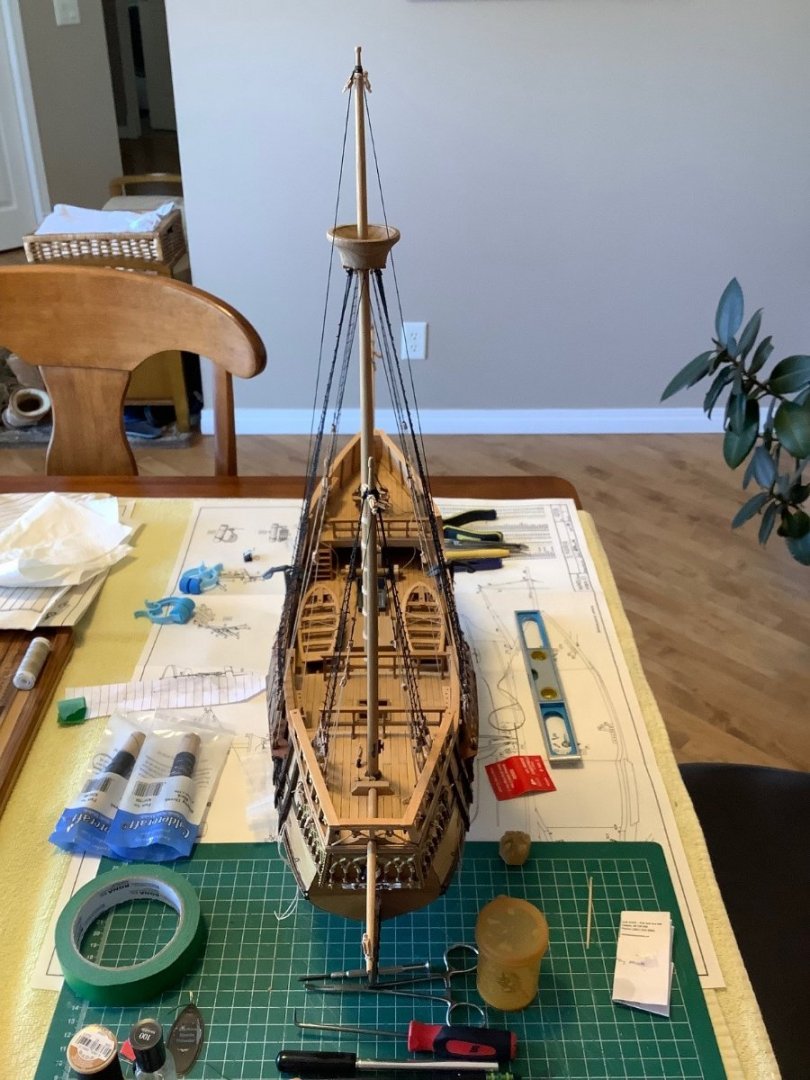
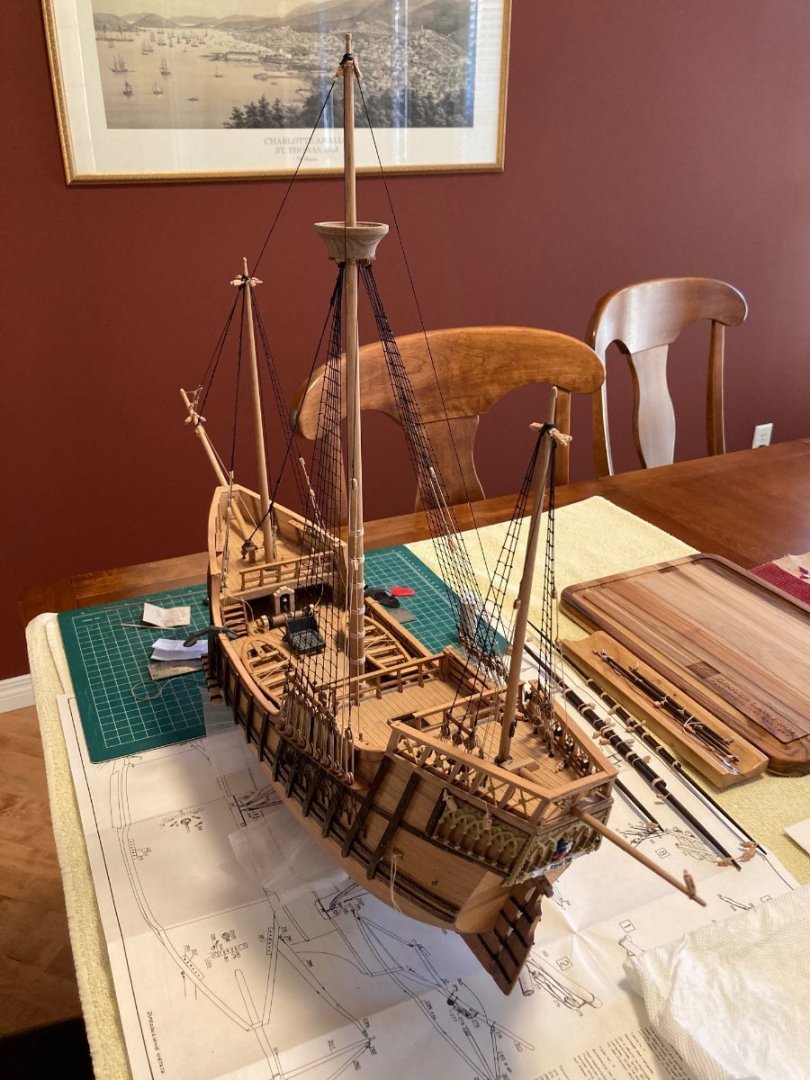
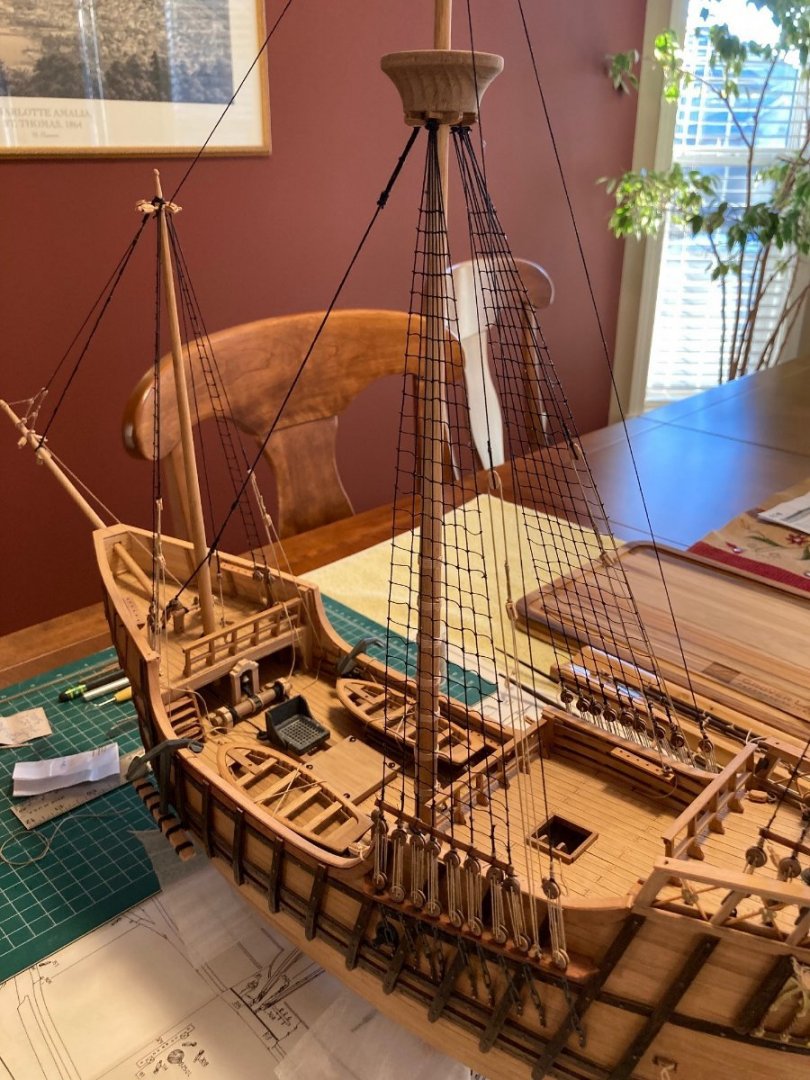
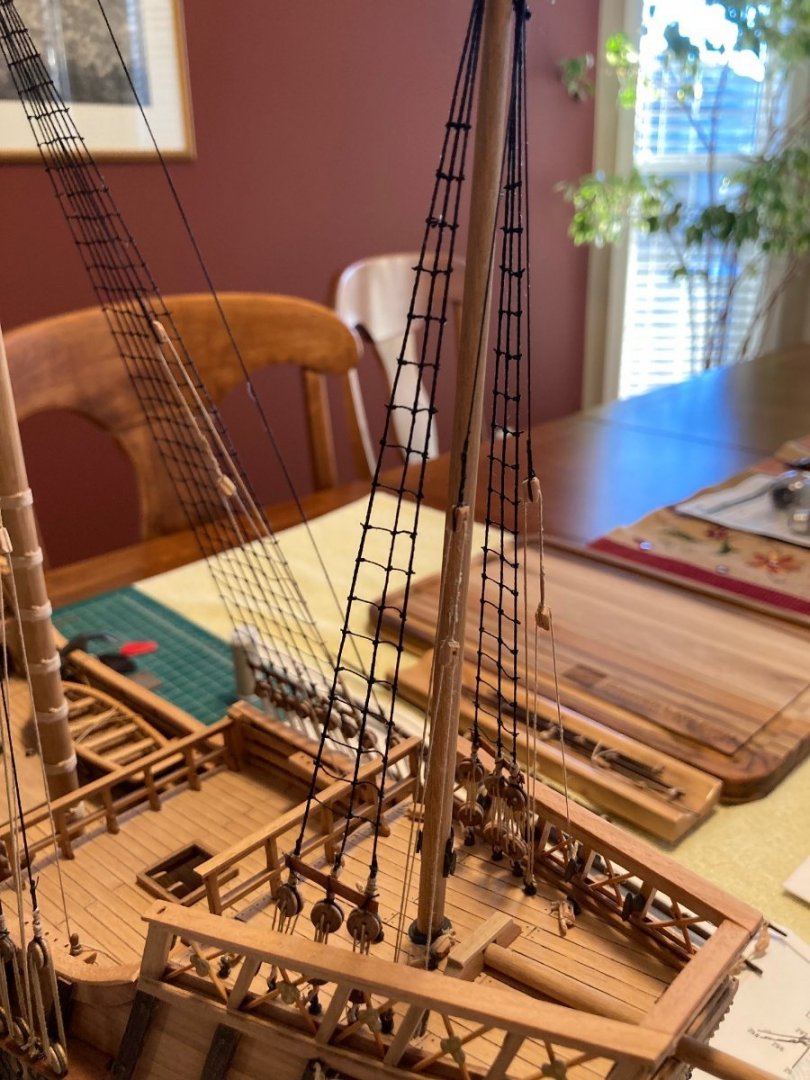
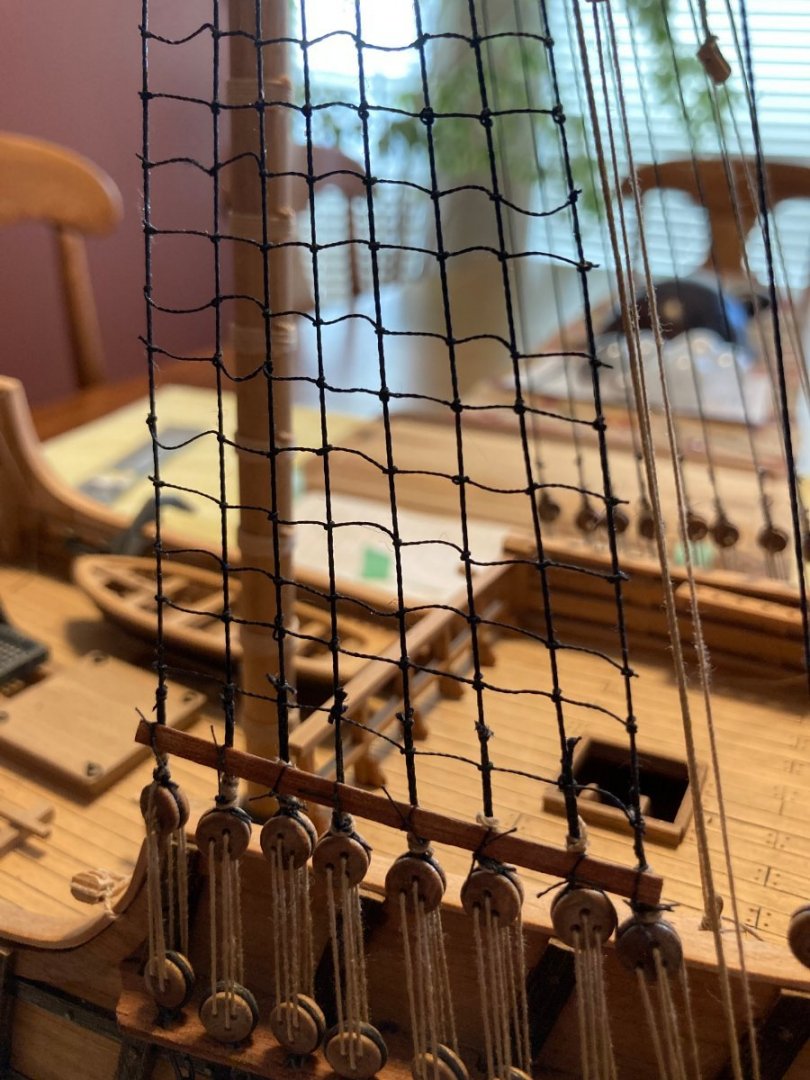
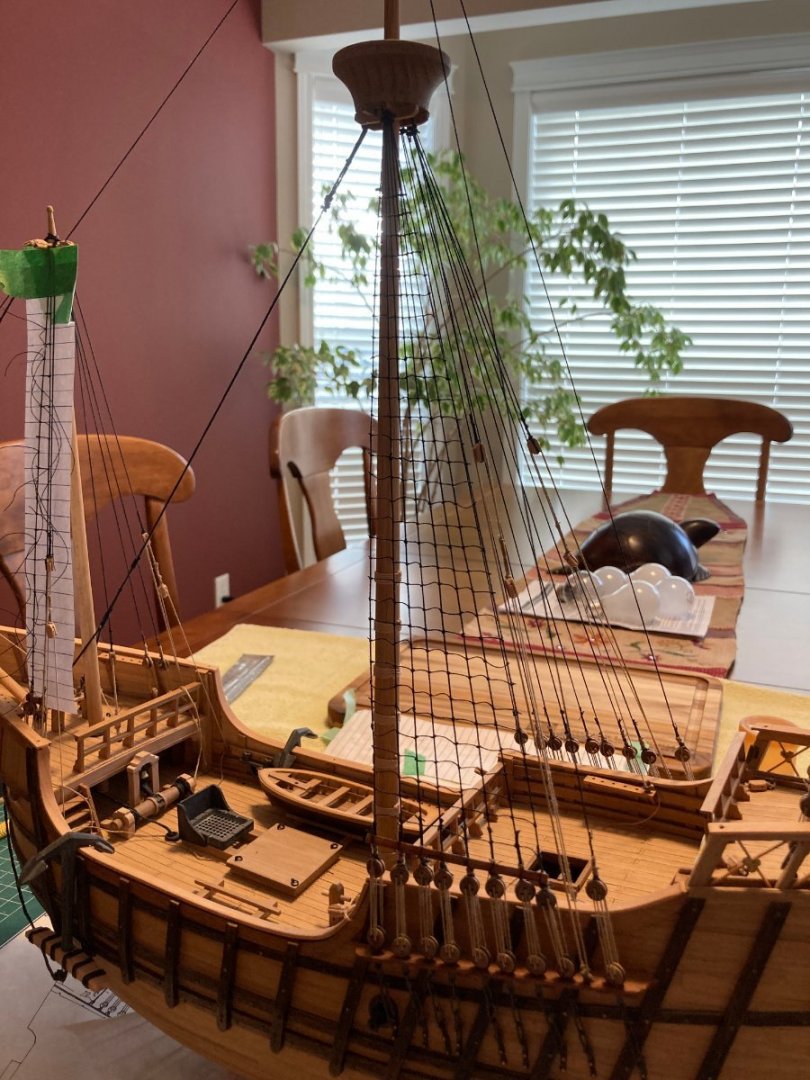
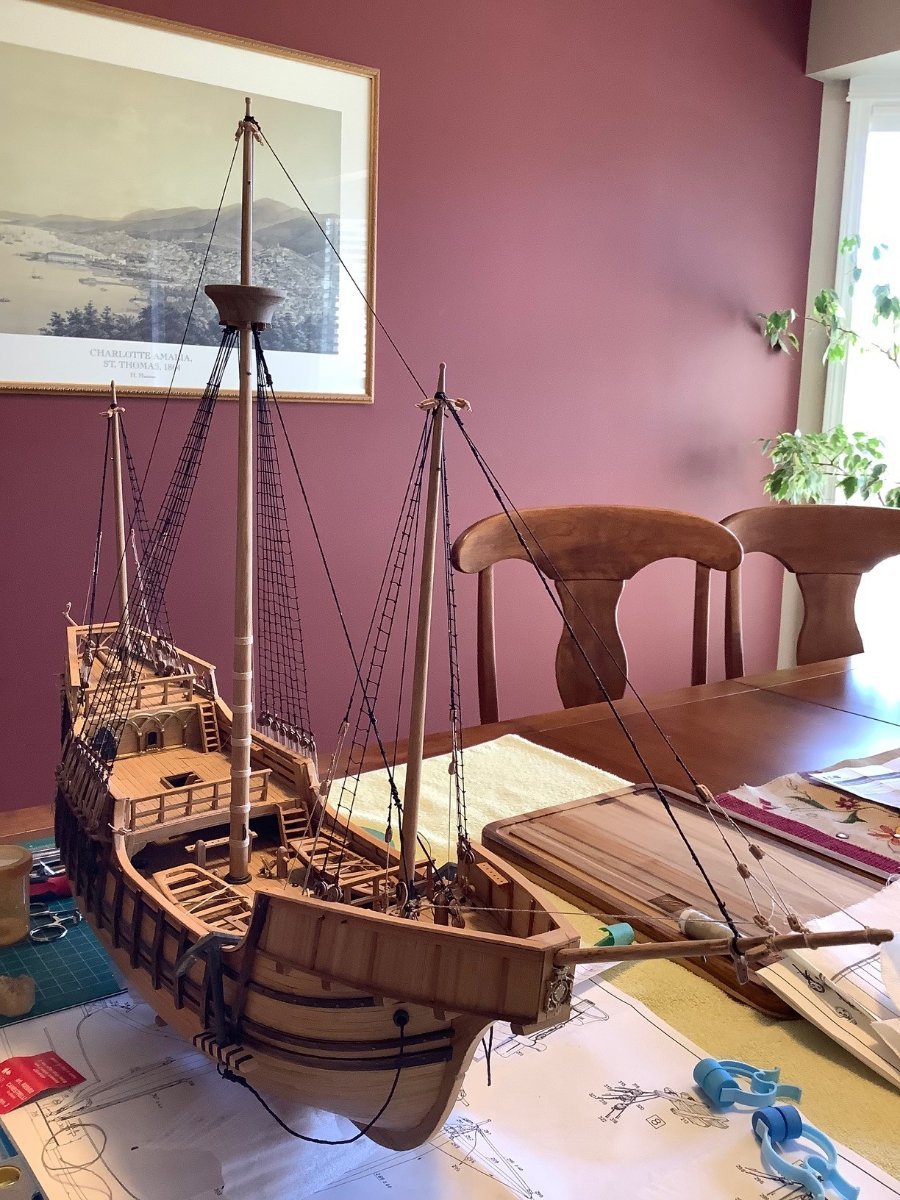
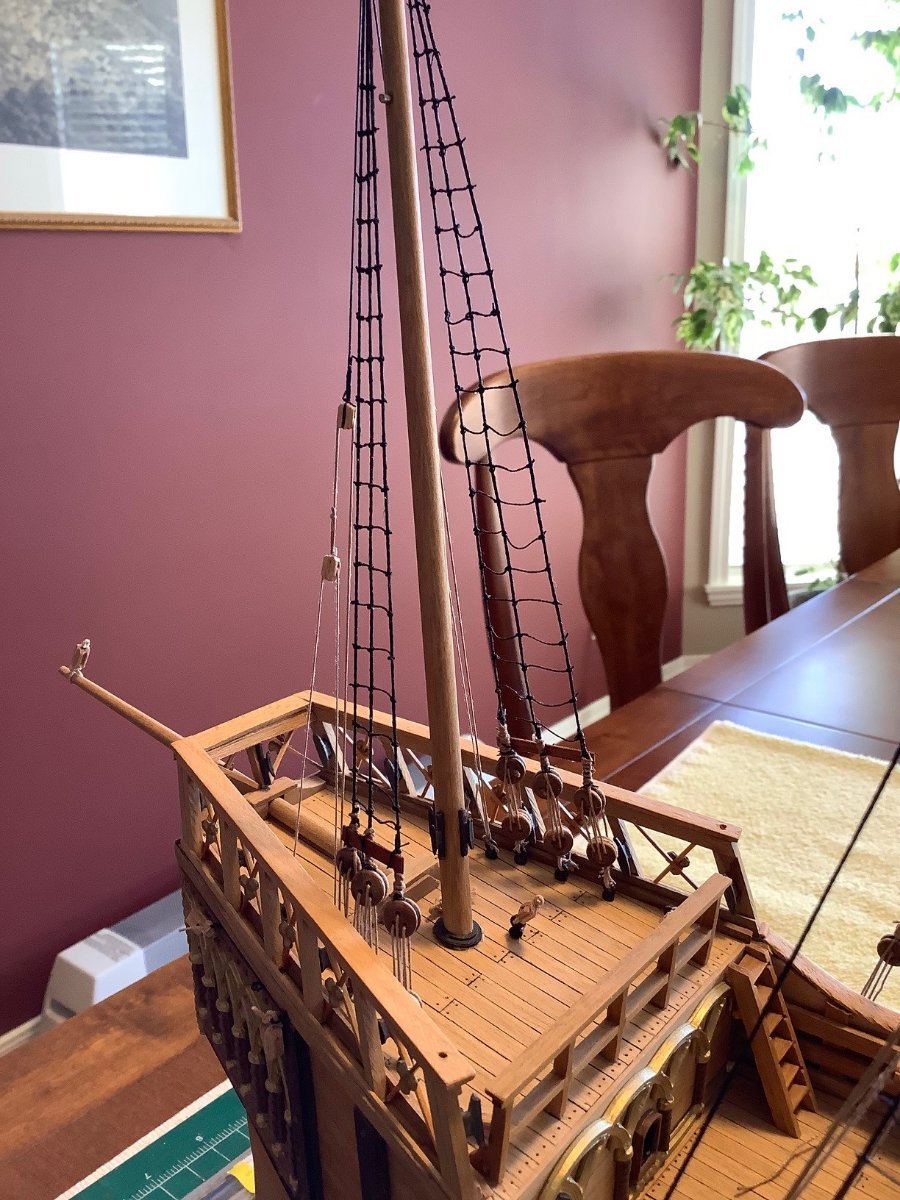
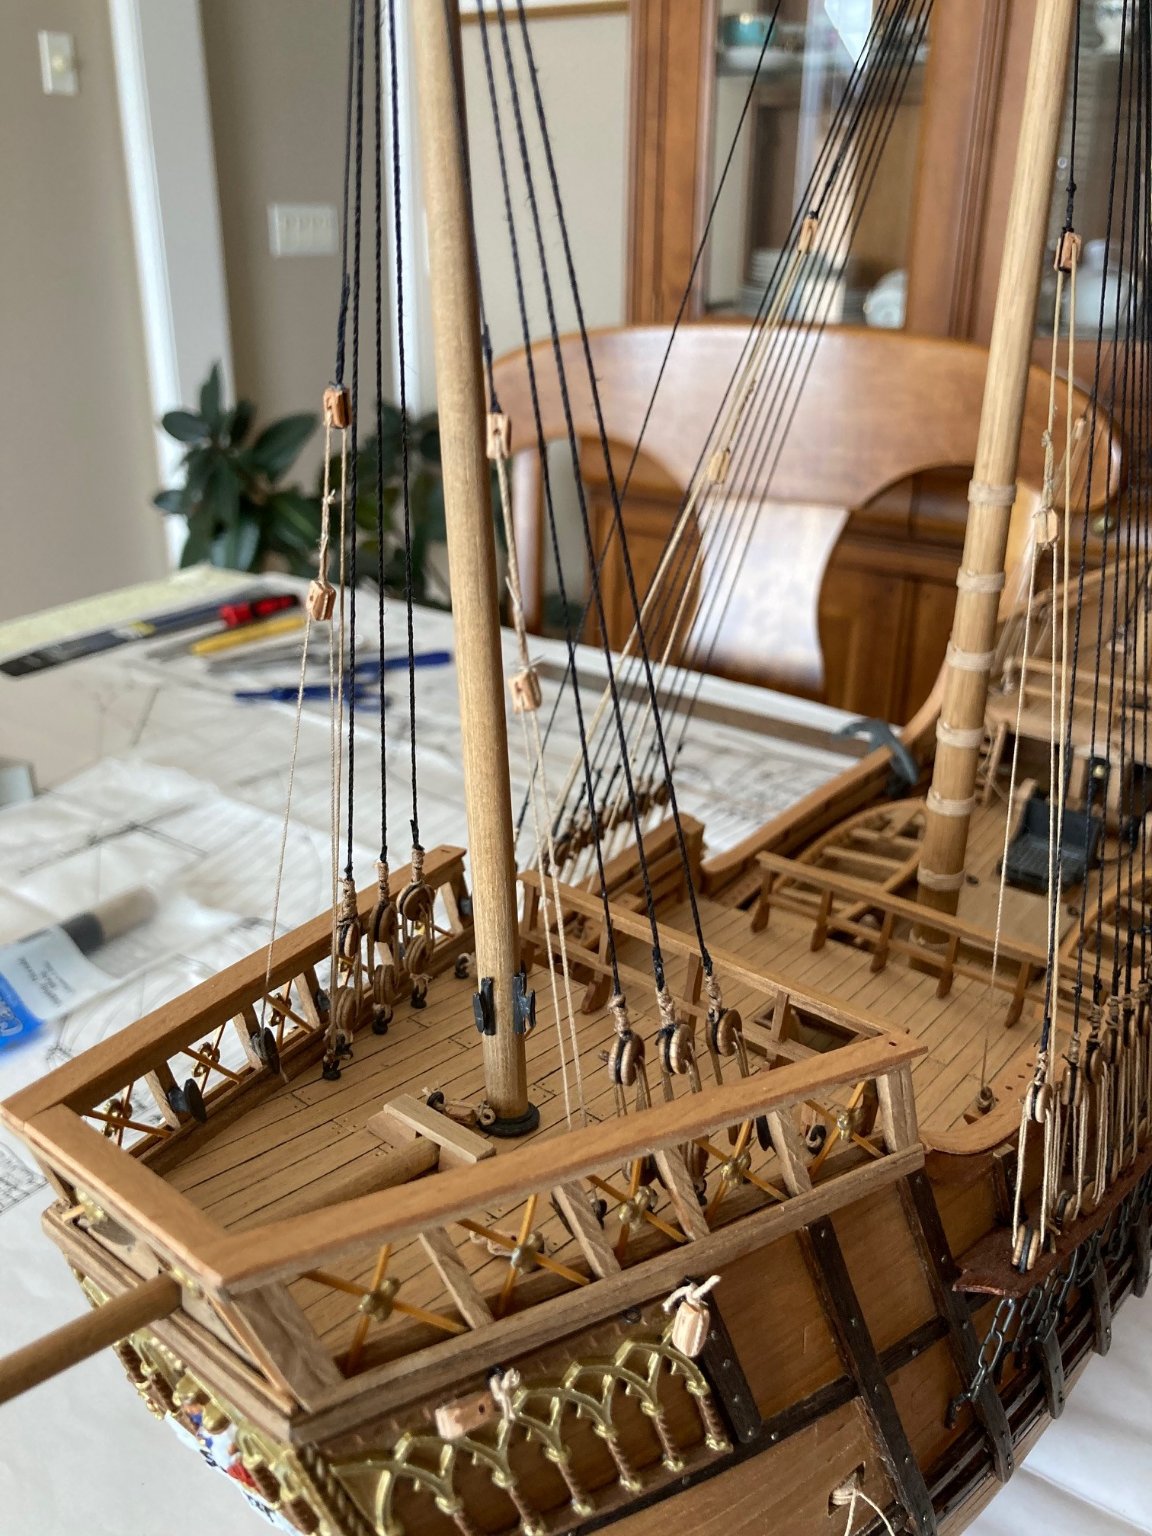
Anyways... all my shrouds and ratlines are completed and I am very happy with how they all turned out! Pictures below... Now on to the sails... Some debate on what to do now with regards to the sails... the premade sails at hismodel.com look very very nice but a little expensive or I could purchase the premade sails that Mantua makes as I am sure they will fit as the Mantua Santa Maria is the exact same scale as my Mamoli. Or I can try and sew them myself...

- 179 replies
-
- 4
-
-
- santa maria
- mamoli
- (and 1 more)
-
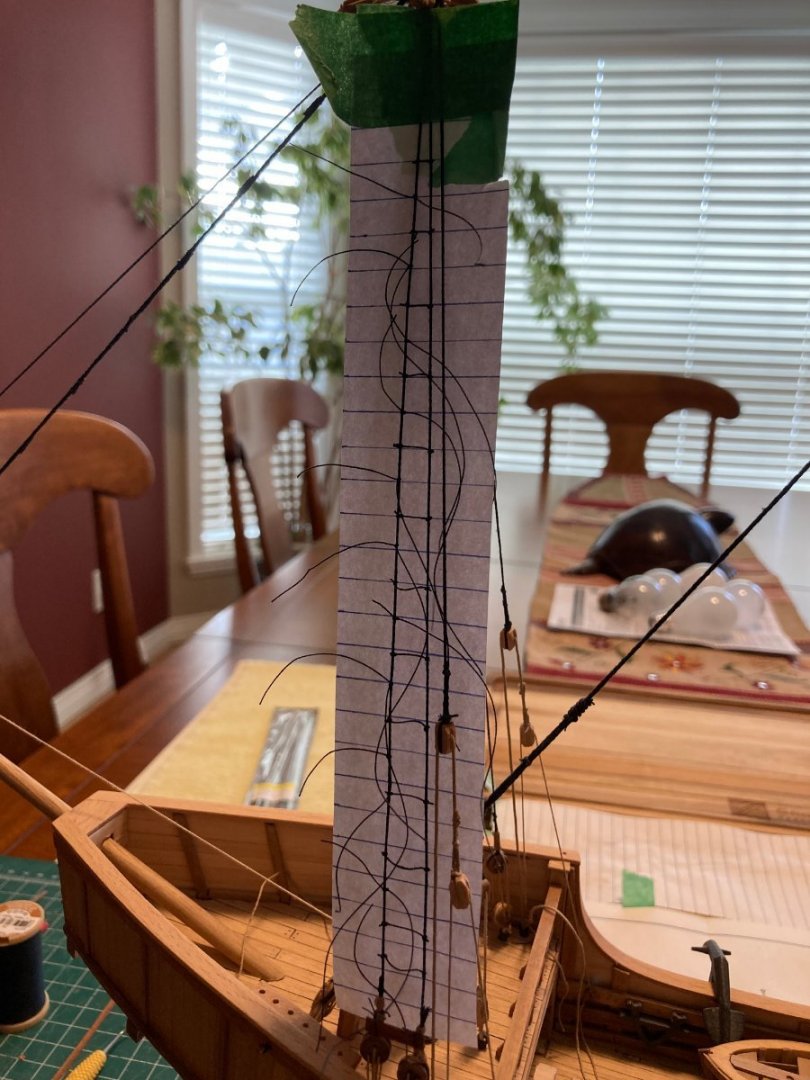
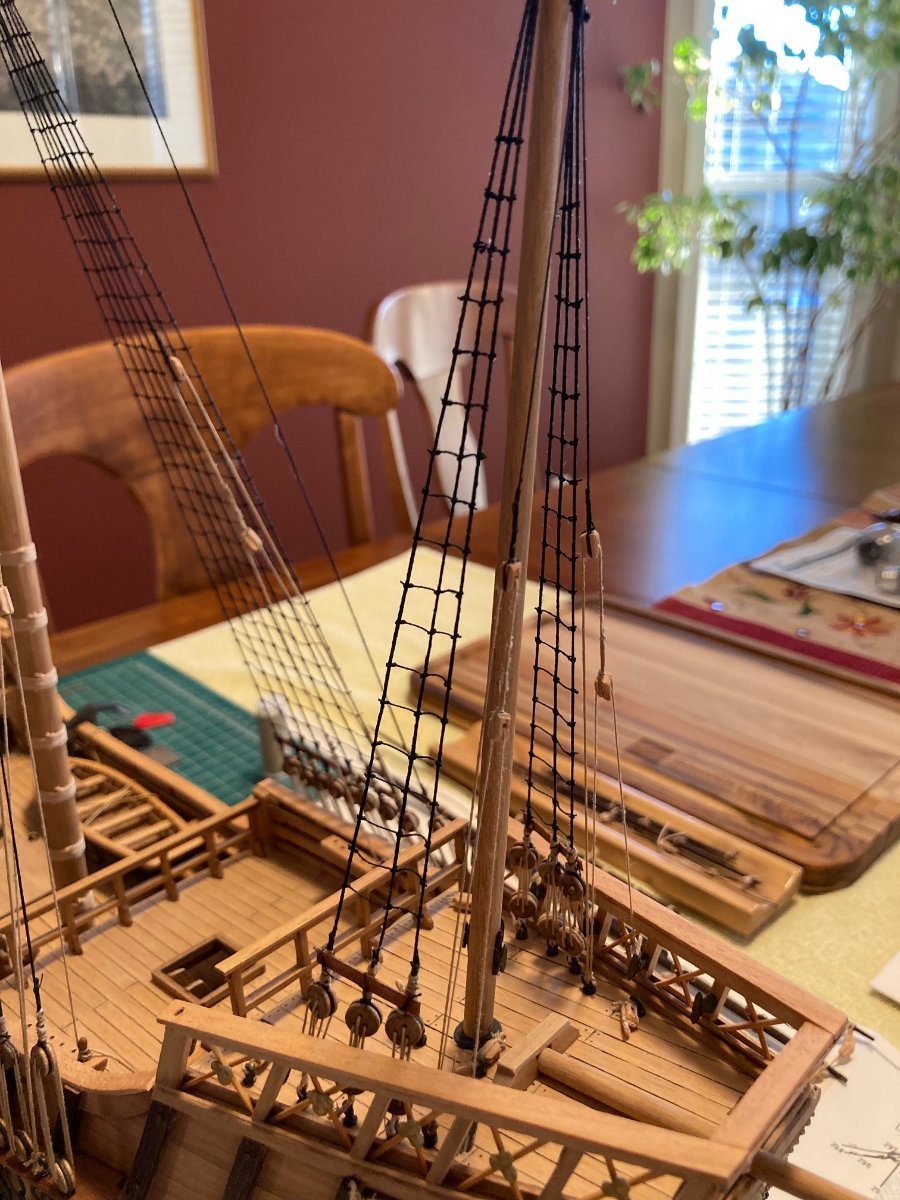
Further to my last post, as evident in the first picture below, I had to redo one of the shrouds and ratlines... The one on the port side was terrible and I can blame it on Covid as the last time I did work on my ship was late October 2020 and my work speaks for itself as I did those ratlines in the midst of my infection. Anyways picture following is corrected... really easy as I took a dental pick and teased apart the knots and luckily I did not have to tighten up the shrouds and there was only three of them anyways. Both looking good and in the same scale and appearance now

- 179 replies
-
- 1
-
-
- santa maria
- mamoli
- (and 1 more)
-
It has been a long year and a half since my last posting and I am embarrassed to say I took a break for this length of time as I was intimidated by doing the ratlines. Plus perhaps being a little lazy... Anyways... they are done on one side and they look good to my eyes! Now the other side...

- 179 replies
-
- 4
-
-
- santa maria
- mamoli
- (and 1 more)
-
Hi Gary... Found your build log... You will have no problem finding all the fittings from the specialty shops involved in this hobby for this build. Best to look ahead and make a list of what you think you may need and then I would look at Cornwall Model Boats out of England for them all... Please post any photos of your progress as certainly you will get lots of help and suggestions on this form... Good luck!
-
Hi Gary... Thanks for your post and yes I still see the occasional comments that trickle in over the years since completing the kit. I am sure you will have no problem tackling the kit as it is "supposed" to be an easy first build, for some anyways. The ship is such an iconic image for myself and all Canadians as it has been on our 10 cent coin since 1937. My skills were very limited at the beginning of the build... and you will find the accomplishment once finished most gratifying! Best of luck... PS Let me know when you start your build log as I will certainly follow it. Cheers, Julian
-
Hi Bob, Yes... Billing Boats kits are notorious for lack of details and plans. I know if you go on their website they have some instructions for this particular kit that are downloadable but I do not think it is any more than what you get in the box. Best to check there and then just look at the builds online... Best of luck,
-
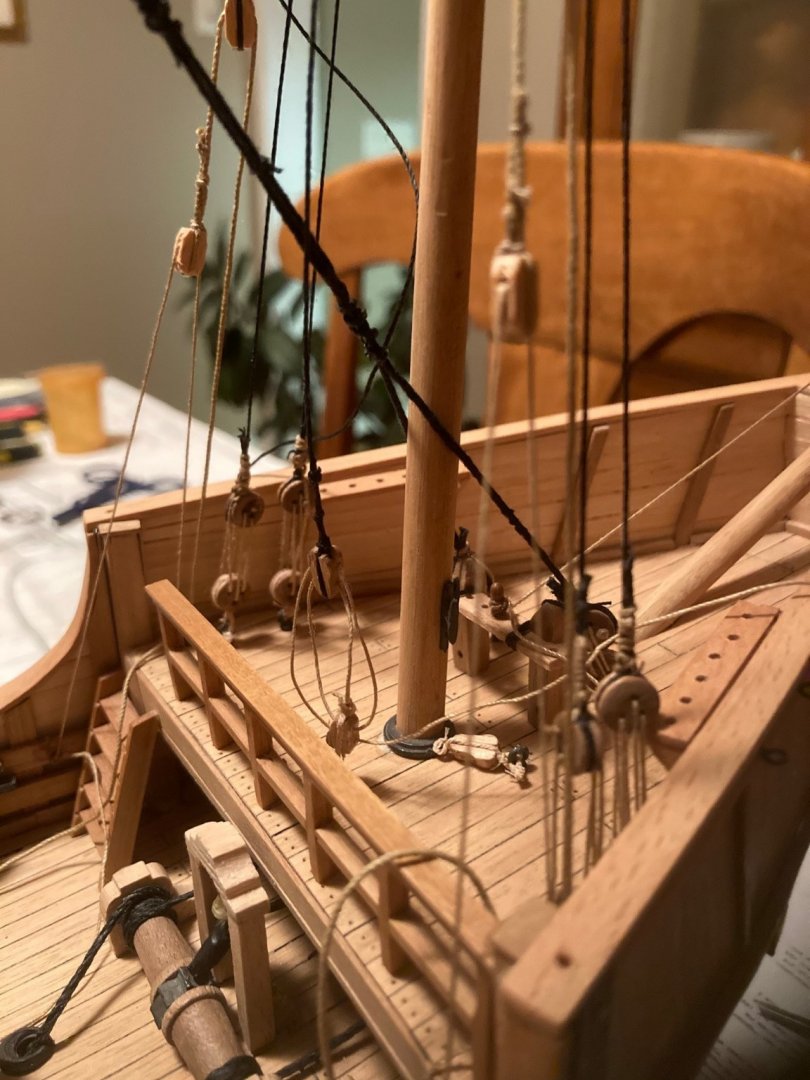
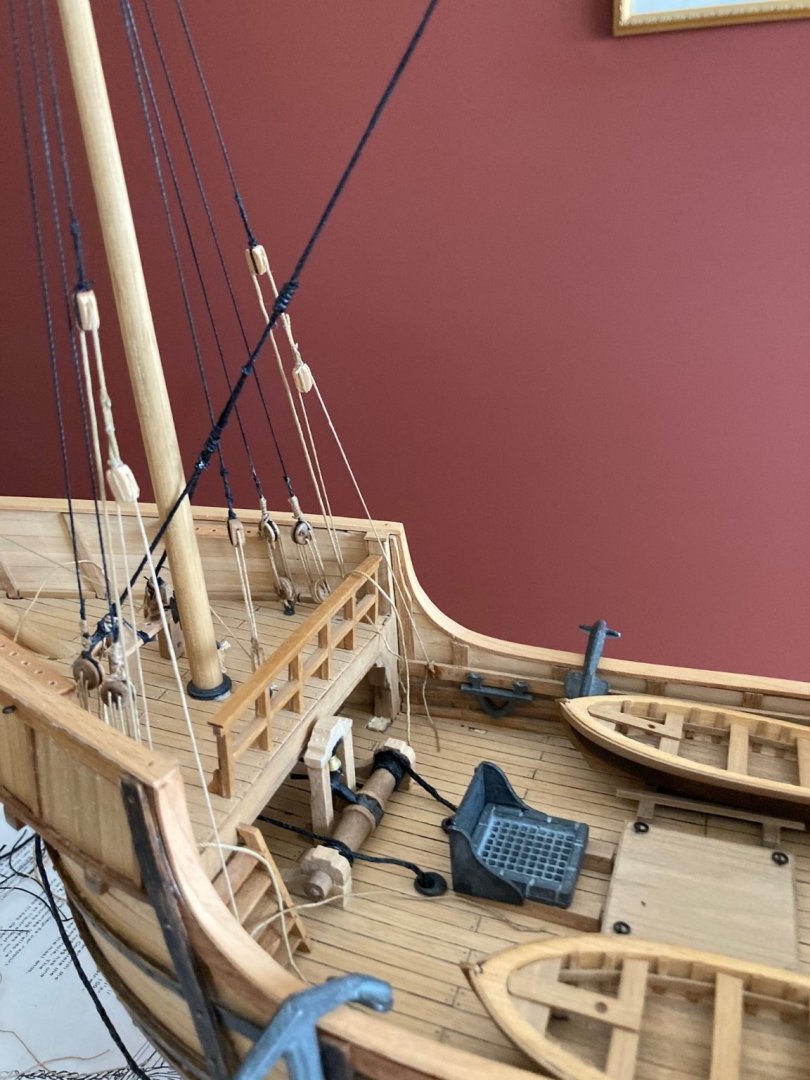
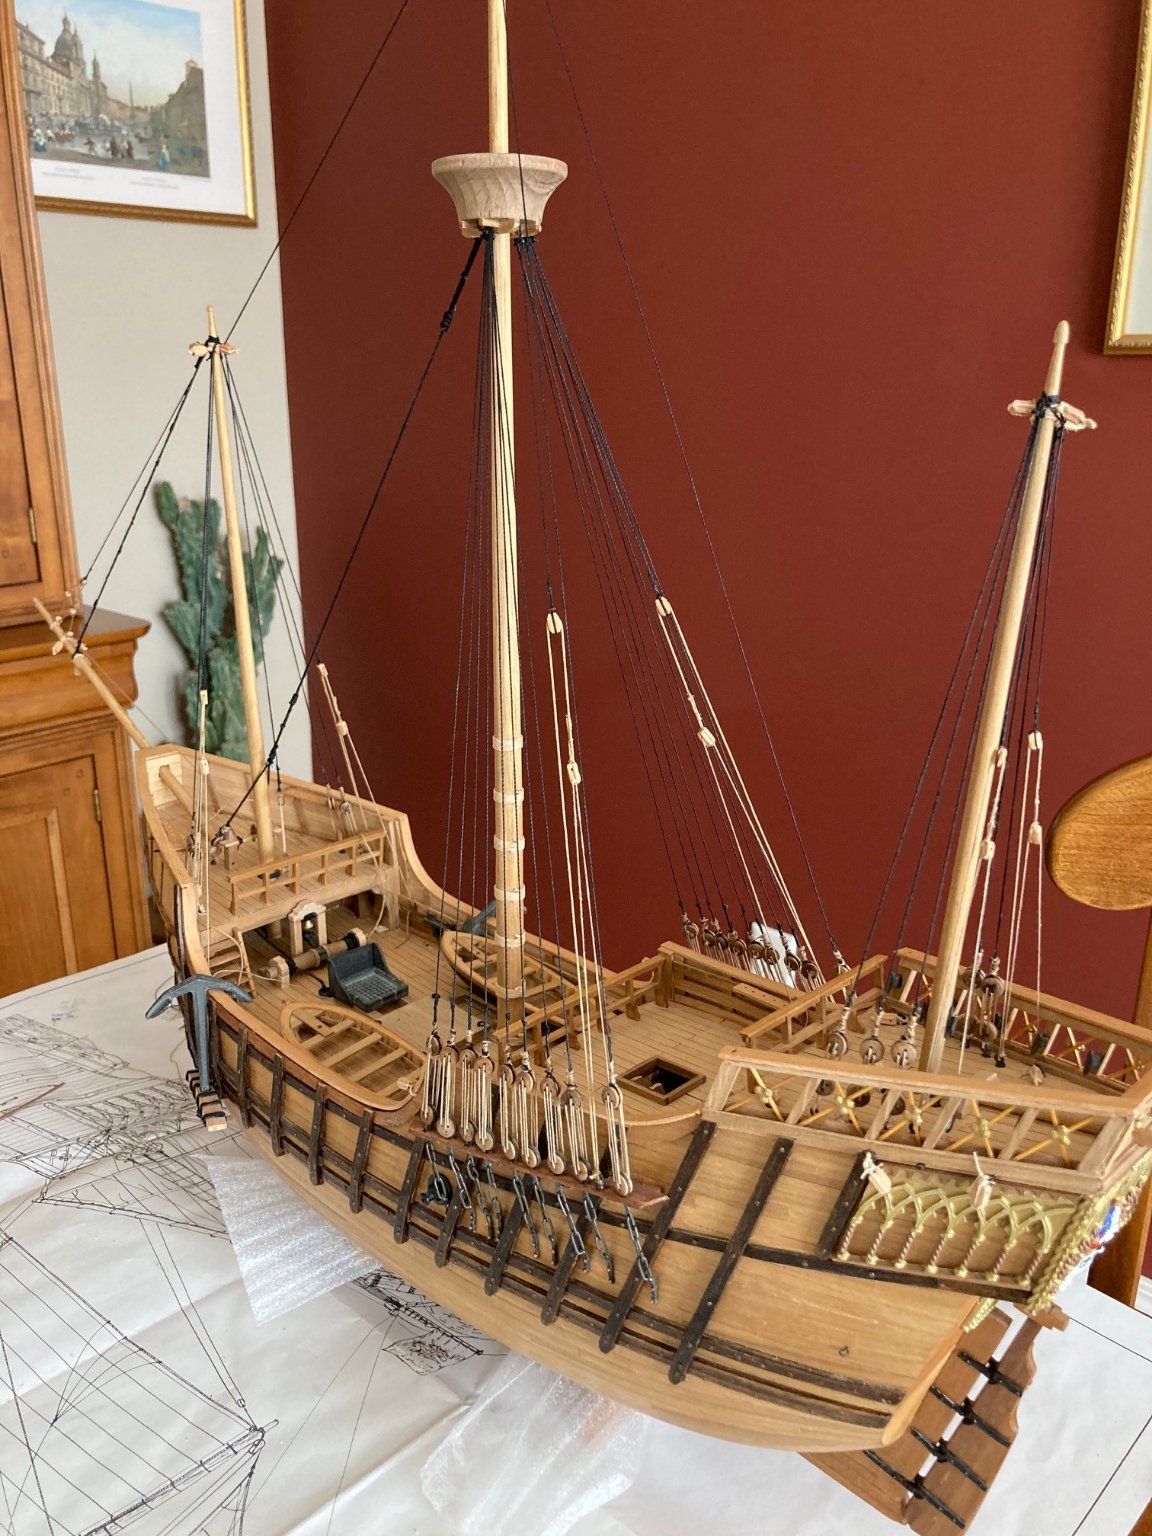
Finally some moments to spend on my Santa Maria... Summer is behind me and with winter and snow settled here in Alberta, Canada a bit early, I am sure I will have extra time to finish the model over this winter. Some work redone on some of the standing rigging as some of my fall lines were originally done in black and have now been redone as they should have been, natural or "untarred". Very happy with the progress except for the block pulled off the deck and a railing unglued from tying lines under too much tension... perhaps because of fiddling around in ever more tight margins, I yanked them out of their points of contact on the deck. Certainly a challenge getting them glued down again...


- 179 replies
-
- 5
-
-
- santa maria
- mamoli
- (and 1 more)
-
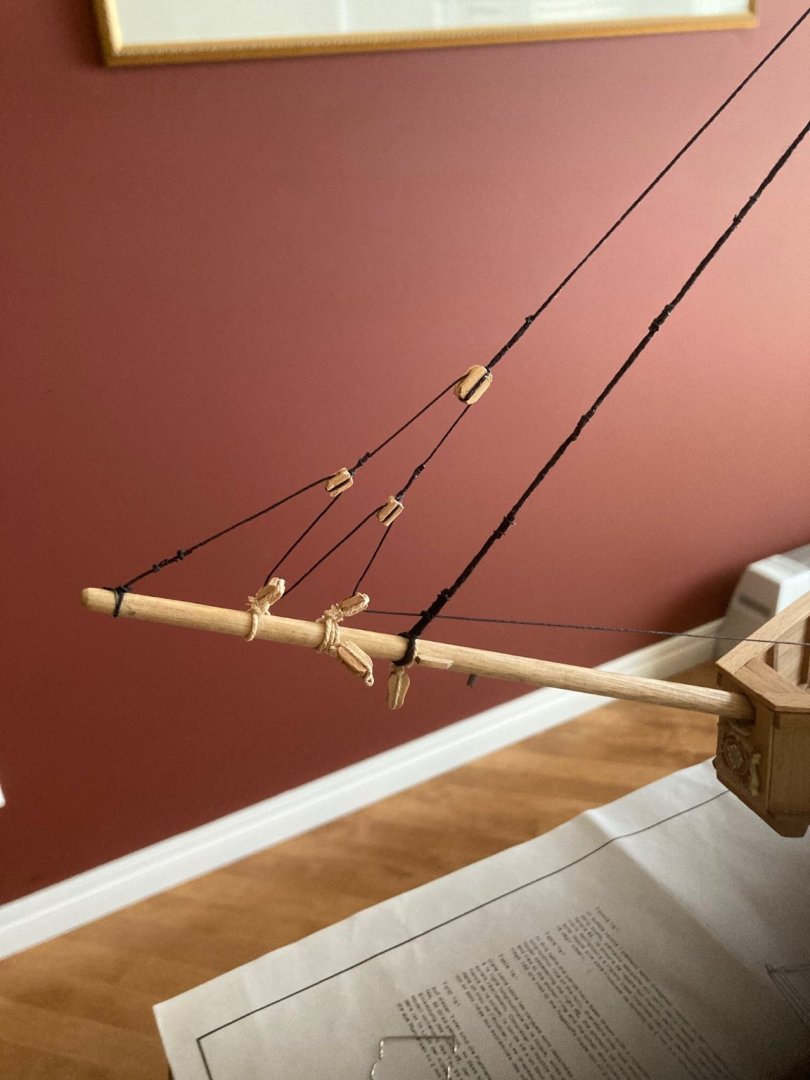
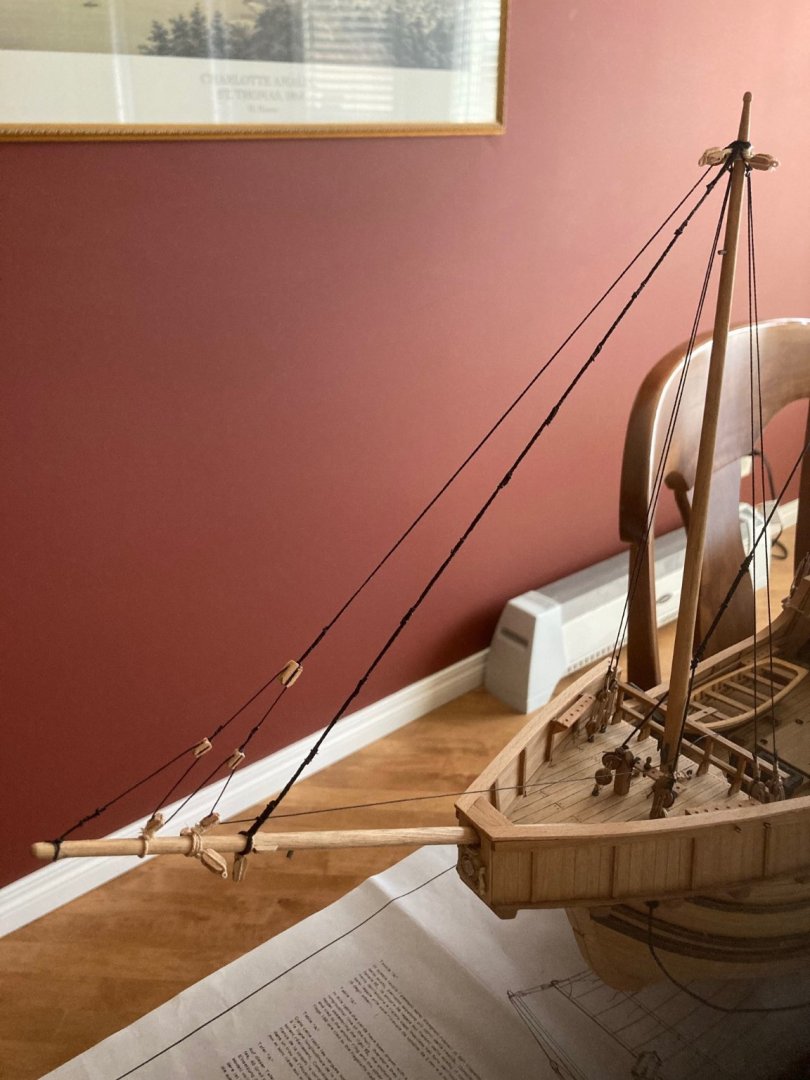
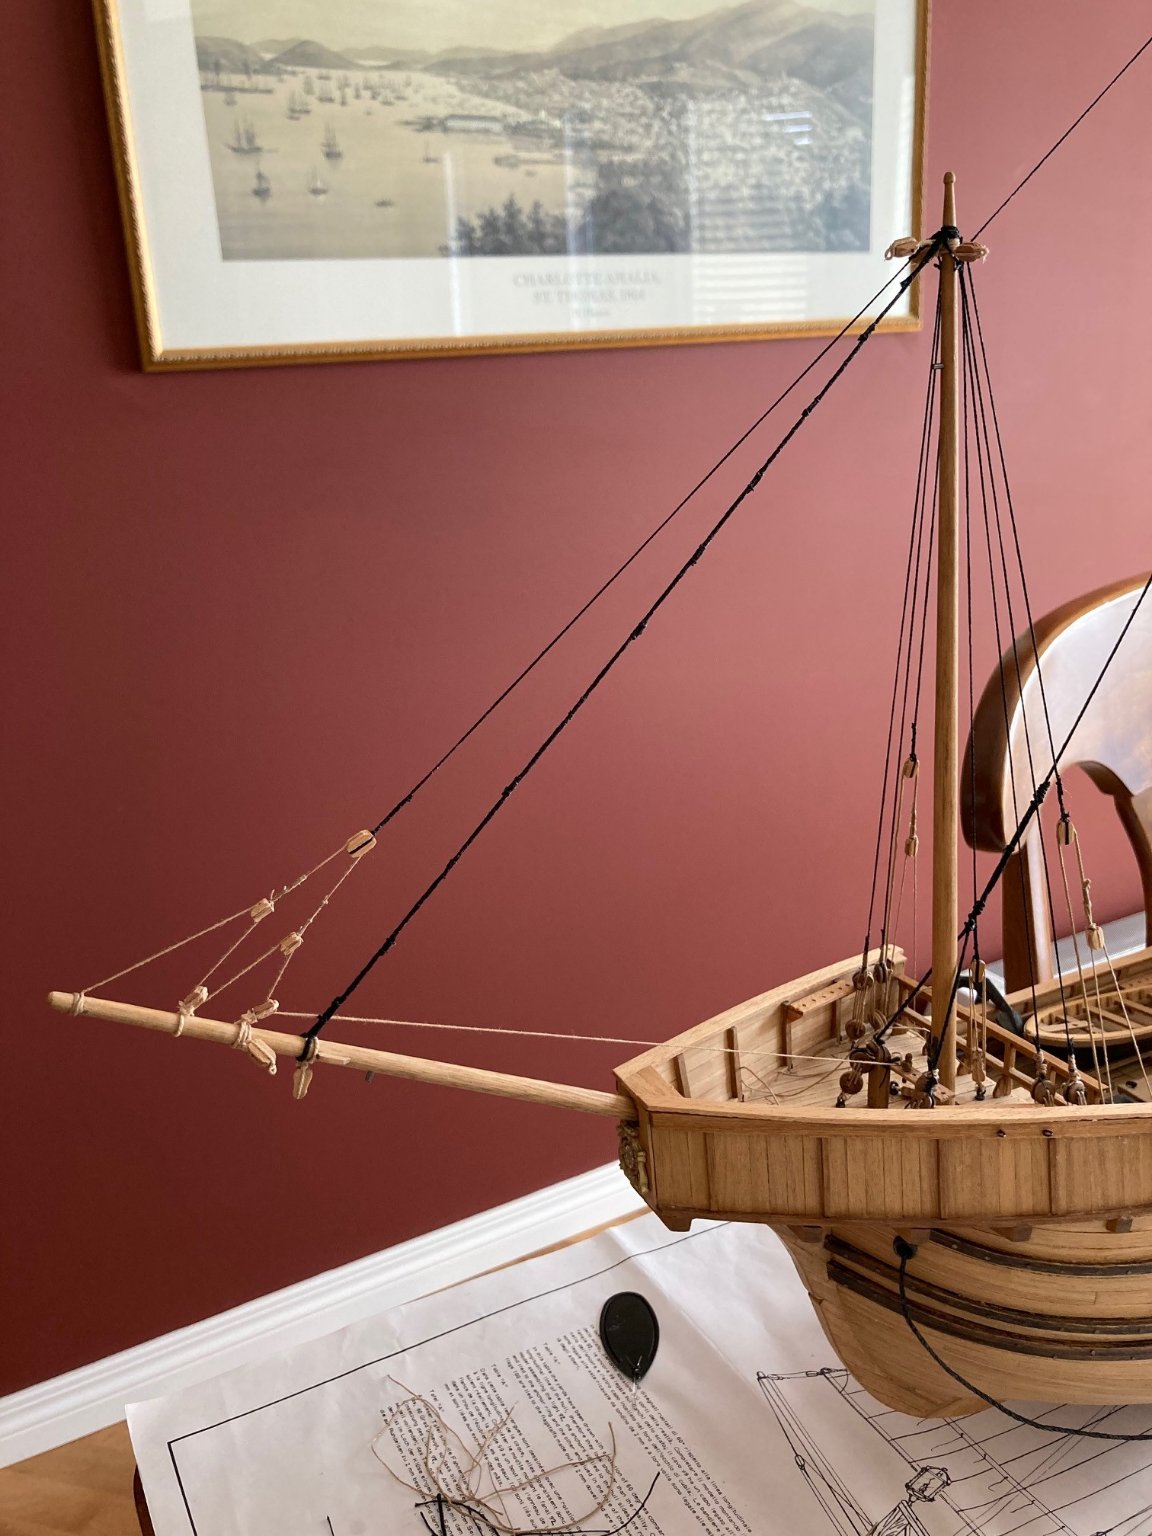
Thanks Jan-Willem for the compliments. Last summer when we went to Holland for a family reunion of my wife's... the Kinderdijk's was on my bucket list of things to do and see while there... amazing! I have an update on the forestay (which I redid) and some of the bowsprit rigging. The forestay is looking much better in my opinion...
- 179 replies
-
- 1
-
-
- santa maria
- mamoli
- (and 1 more)
-
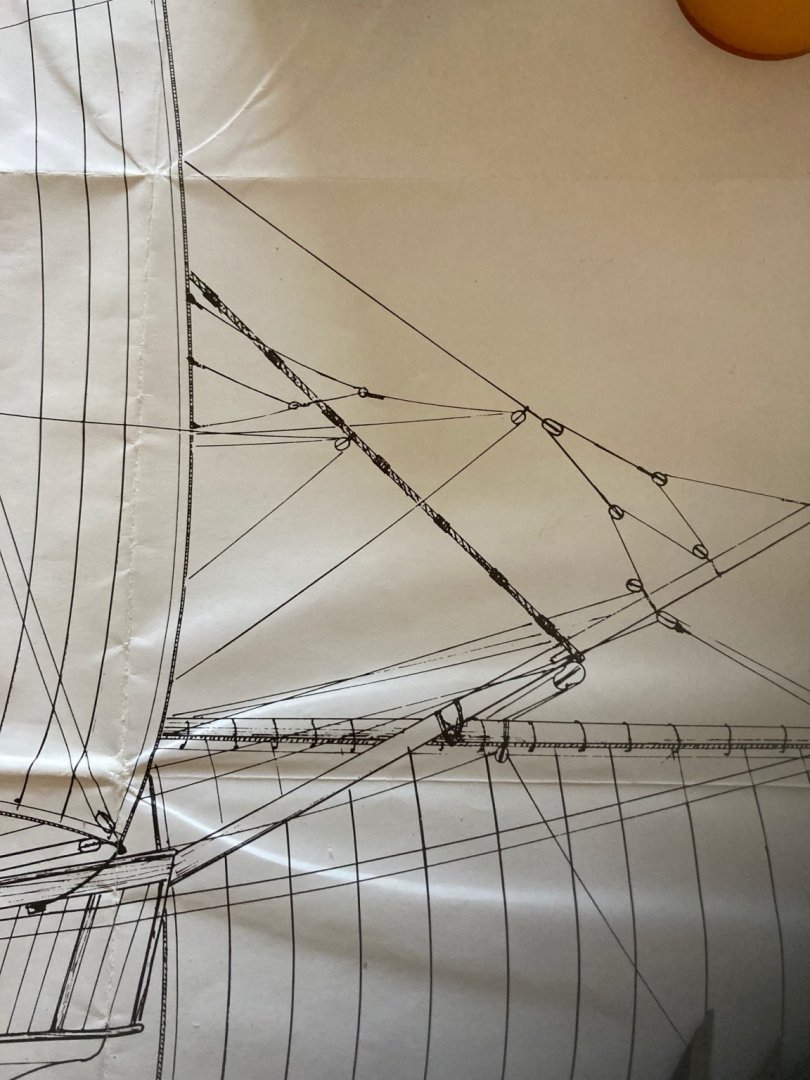
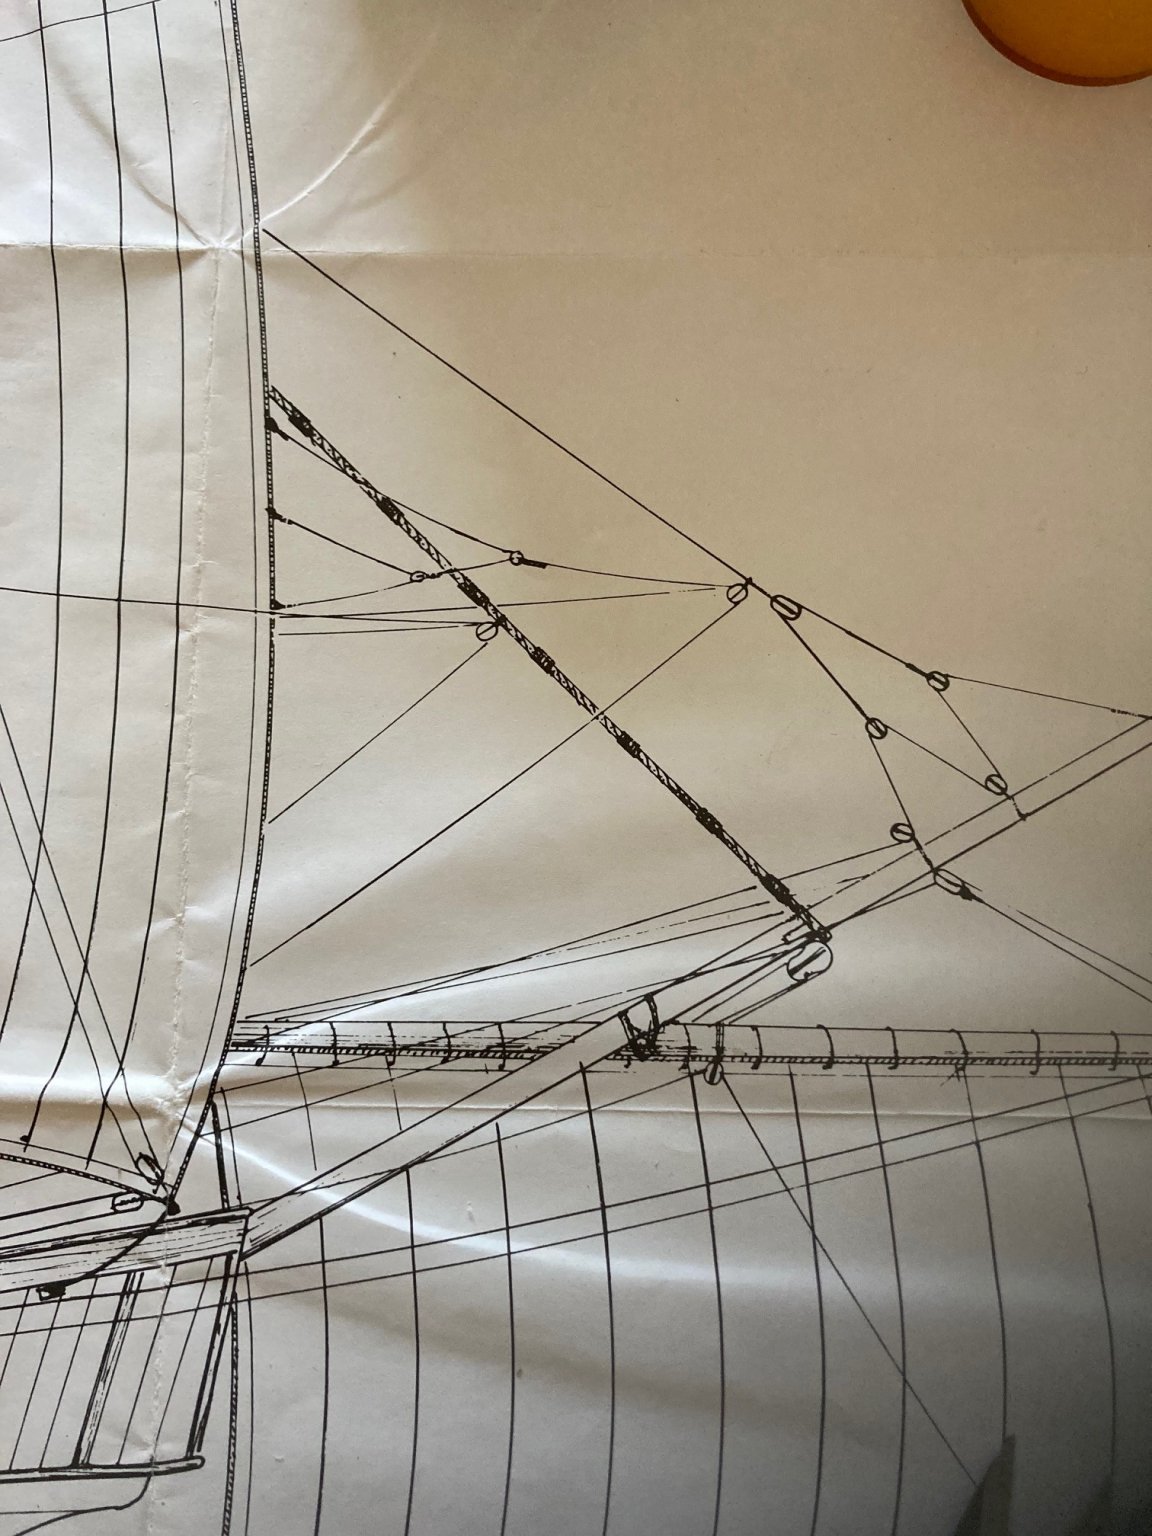
Doing some of the stays and noticed the forestay is completely out of scale to want should be in the plans in the first diagram... to my eyes, anyways... I will redo them tonight.
-
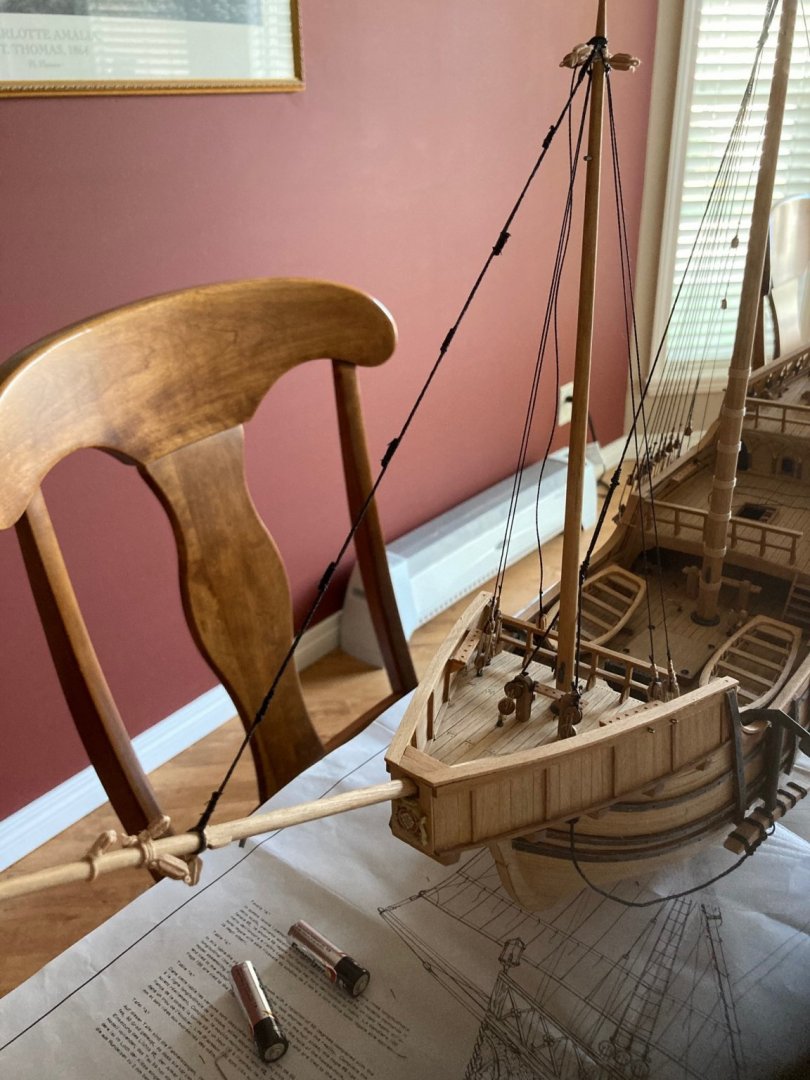
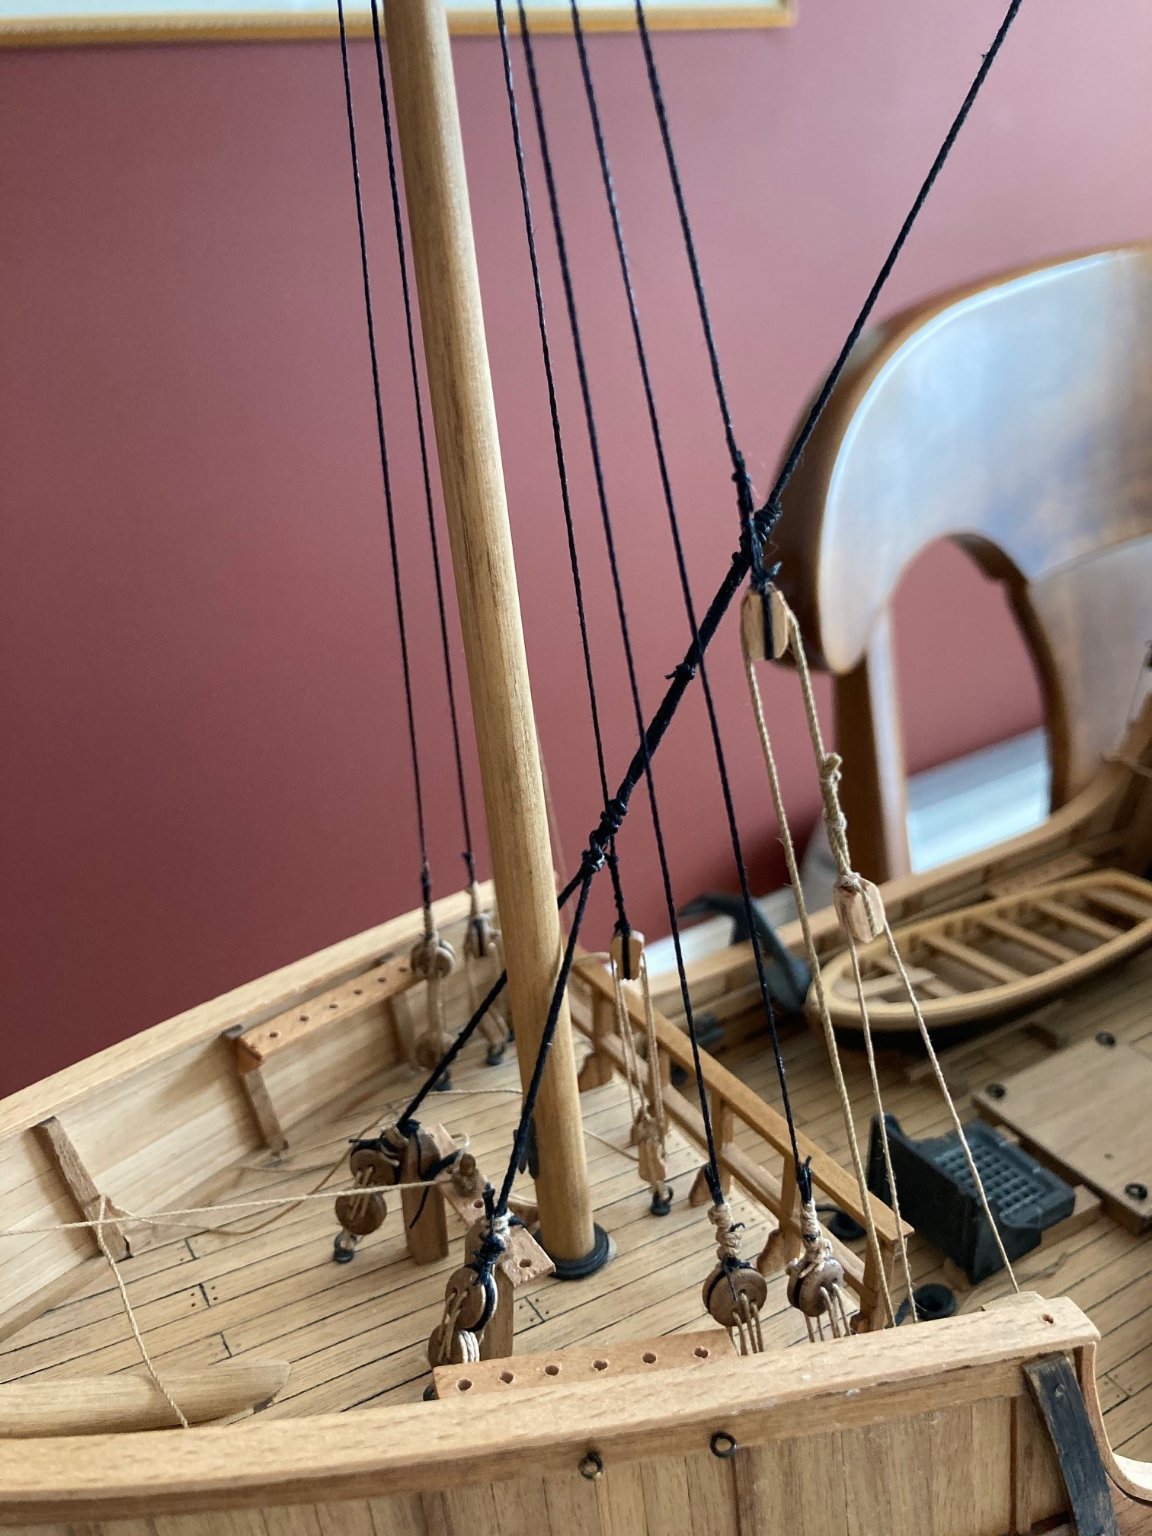
Finally developed the motivation and initiative to get the rigging started after a busy summer... Definitely not my favourite activity but getting "some" of the shrouds done was not too bad. Very happy with the Caldercraft branded rigging thread I should add. But I just realized that I did not order enough of the Black 0.75mm size last spring... I am going to run out and still need probably a meter to finish the standing rigging (each roll is 10 metres).
.thumb.jpg.d4fac51ca76cf2412507c90599b9104c.jpg)
.thumb.jpg.e57b09399cfa6525435aaad3e29e065a.jpg)
.thumb.jpg.ab57f140605dc126a6b5ae27441ae57d.jpg)
.thumb.jpg.ac182c669cbcdc37985a1860cd0bcf85.jpg)
.thumb.jpg.c533a0c5c6c018bf9a1e54c255c7f286.jpg)
- 179 replies
-
- 1
-
-
- santa maria
- mamoli
- (and 1 more)
-
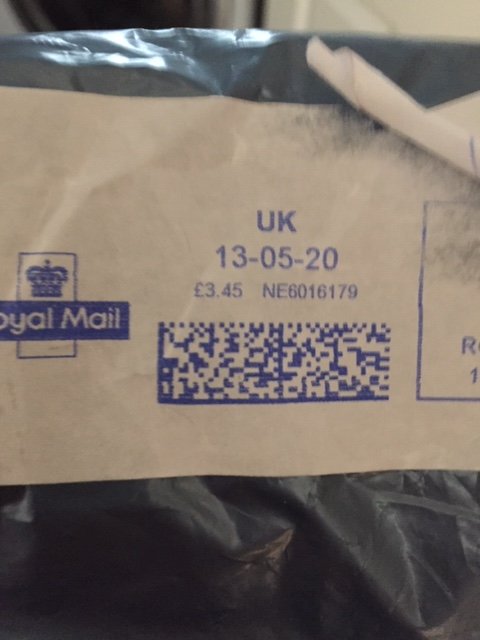
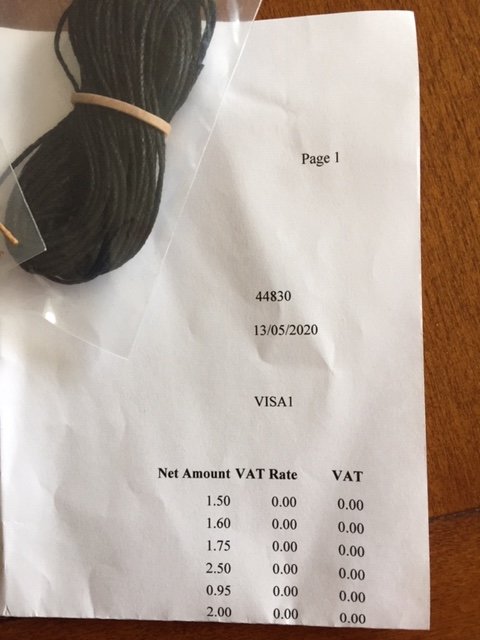
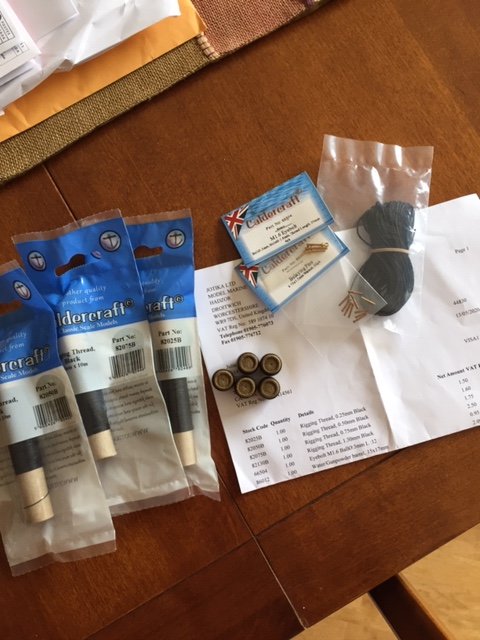
I know there has been some discussion on this forum how slow mail service has been for parts, etc online from overseas to North America and vice versa. I am late reporting this but basically at the peak of disruption in mail service (April-May) I ordered some miscellaneous parts directly from Jotika - my order was placed on May 13, postmarked on May 13 and delivered from England to my door (Canada) on May 27. Can't complain!
- 179 replies
-
- 1
-
-
- santa maria
- mamoli
- (and 1 more)
-
Agreed!
-
Hi Jan-Willem, In doing some research on "painting" rigging line, they may actually mean applying a stain to the line with a brush to get the tarred look. I noticed that some people on the forum have indeed "painted" or stained the lines... Of course the other option is dying the lines... but of course much easier to just purchase the rigging thread. Cheers,


.jpg.32027a337ee093d5a770b5046cc2537e.jpg)
.jpg.93ff0df5b96b42585a65792bf0ebec9f.jpg)
.jpg.6a71f4ad8753545ec4e944b60e1adf70.jpg)
.jpg.954c8d1ee26aa2ddd7060bbbc8bf7c57.jpg)
.jpg.3c8740c5dcb50657eb2938ee7a5b7a82.jpg)