mrcc
-
Posts
413 -
Joined
-
Last visited
Content Type
Profiles
Forums
Gallery
Events
Everything posted by mrcc
-
 Marvellous!
 -
Thanks Zappto for following along… You are very right, lots of patience is required with this build!
-
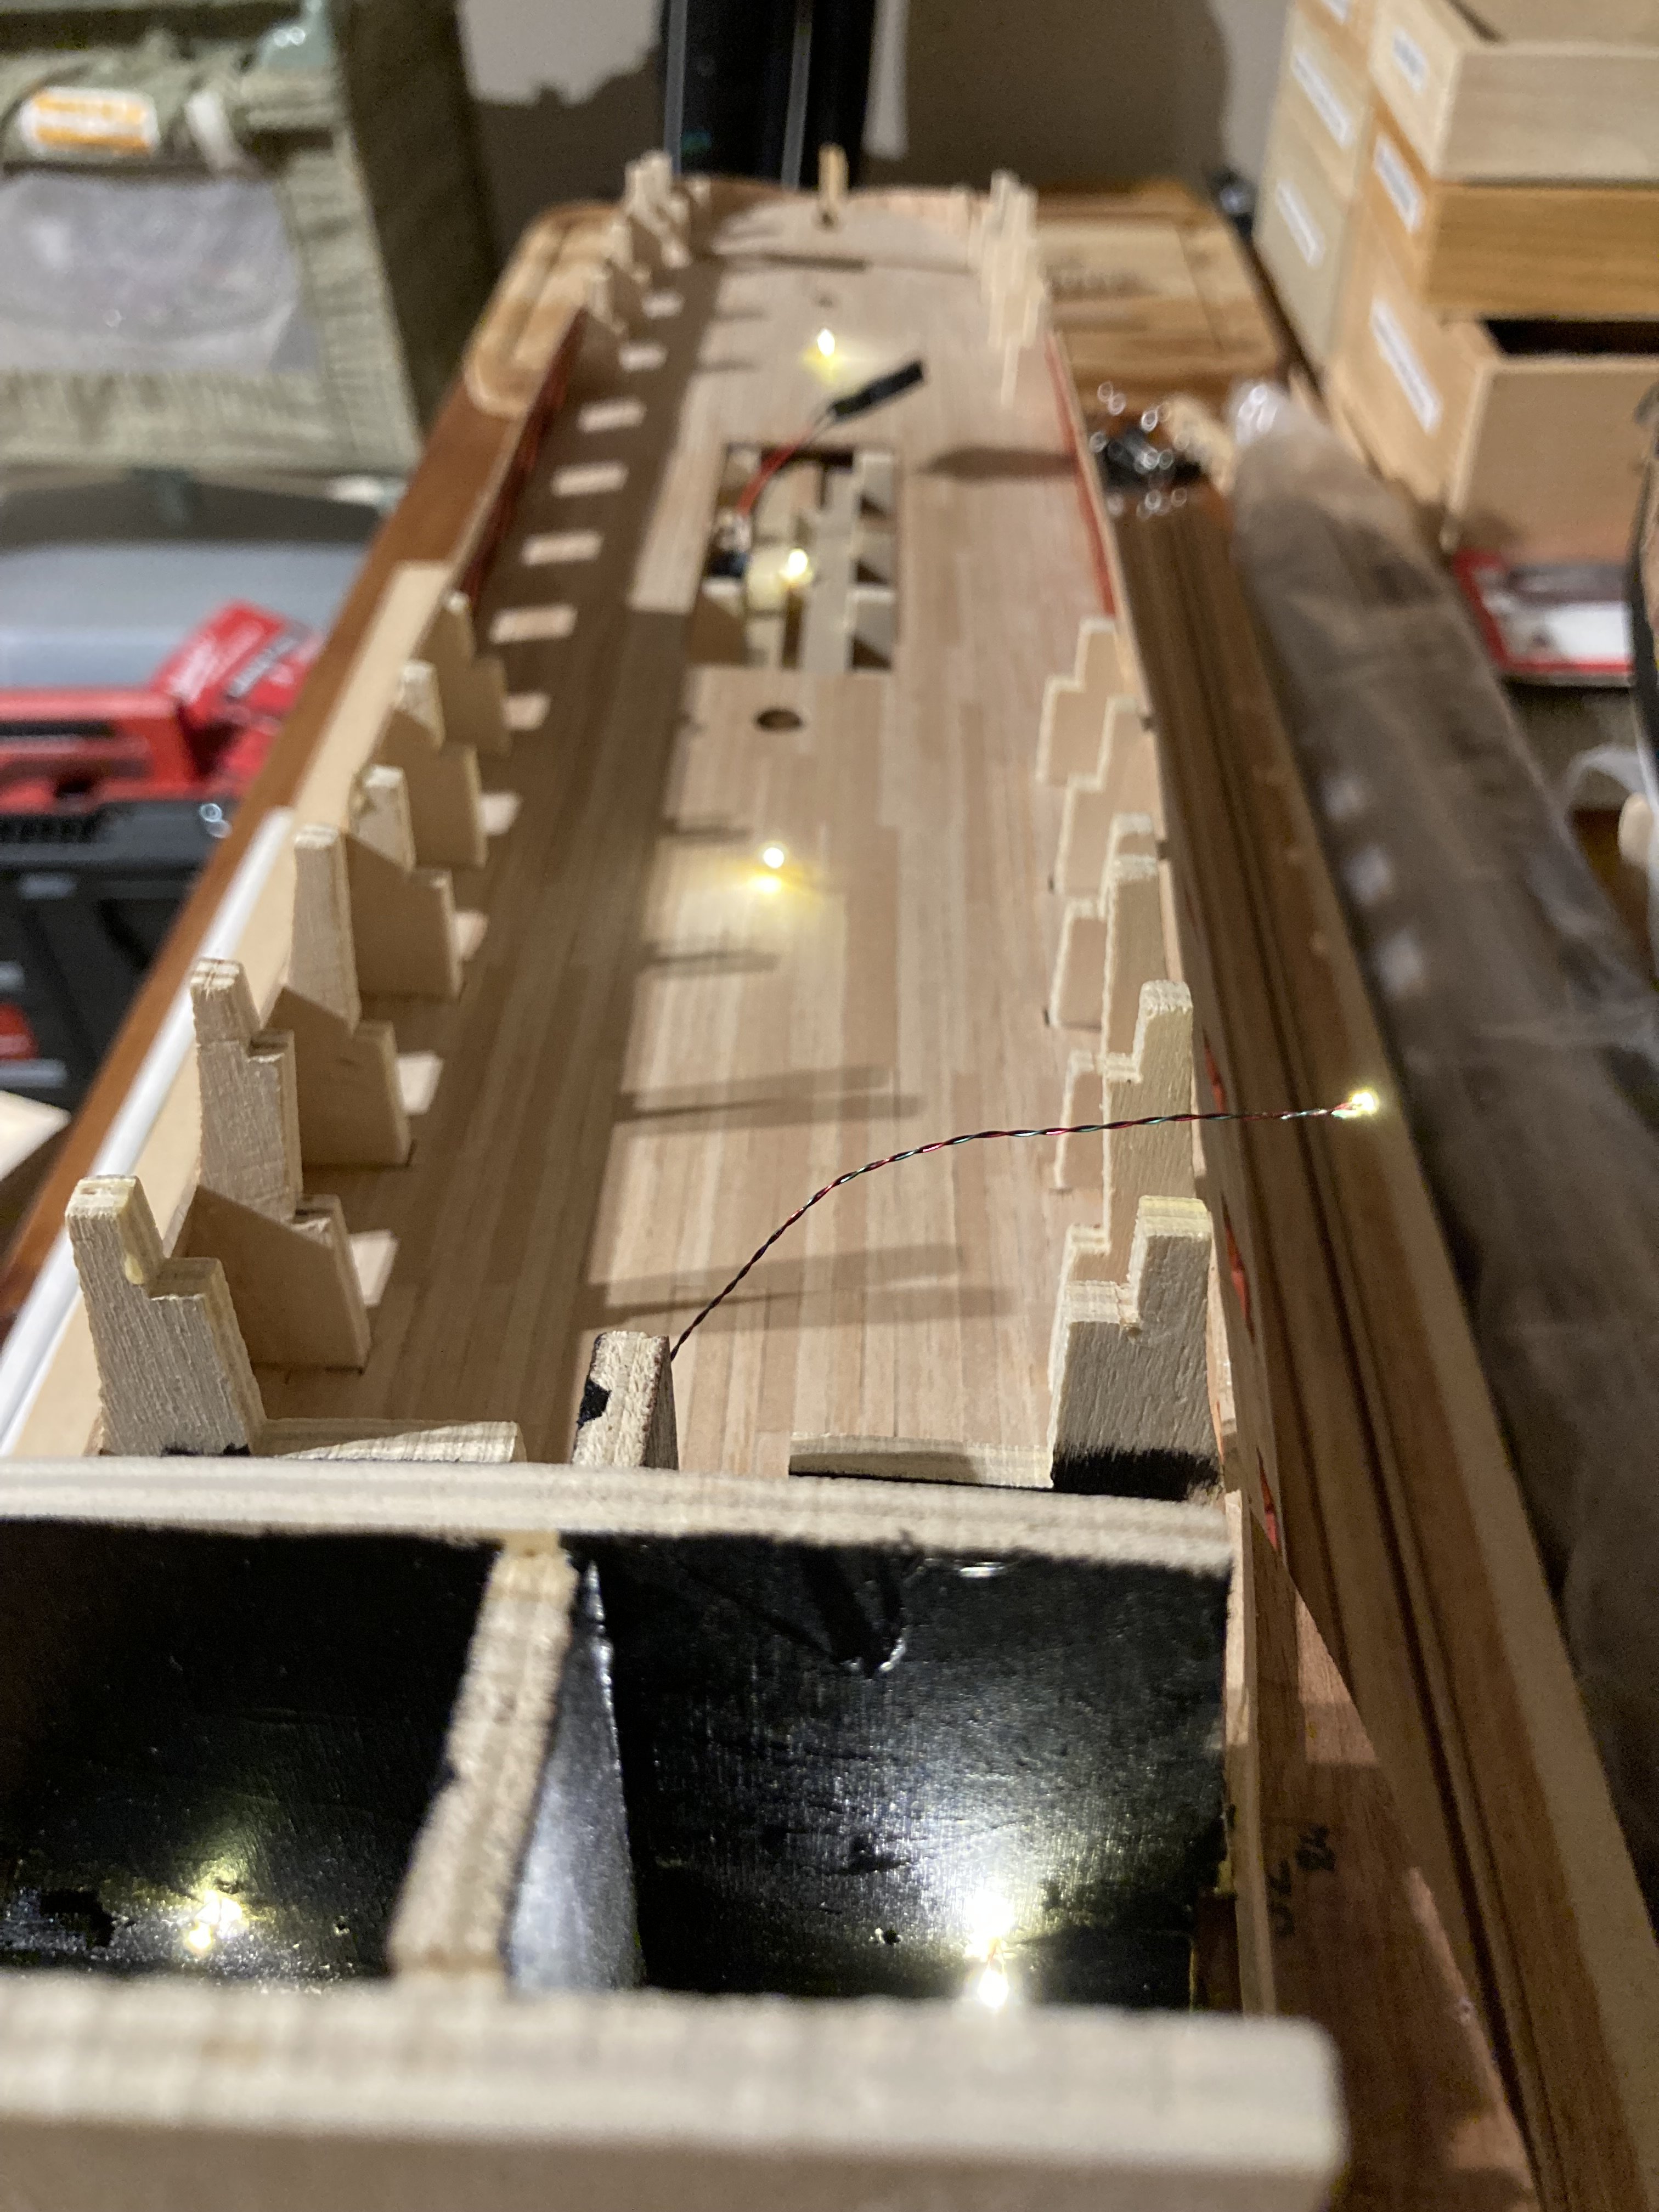
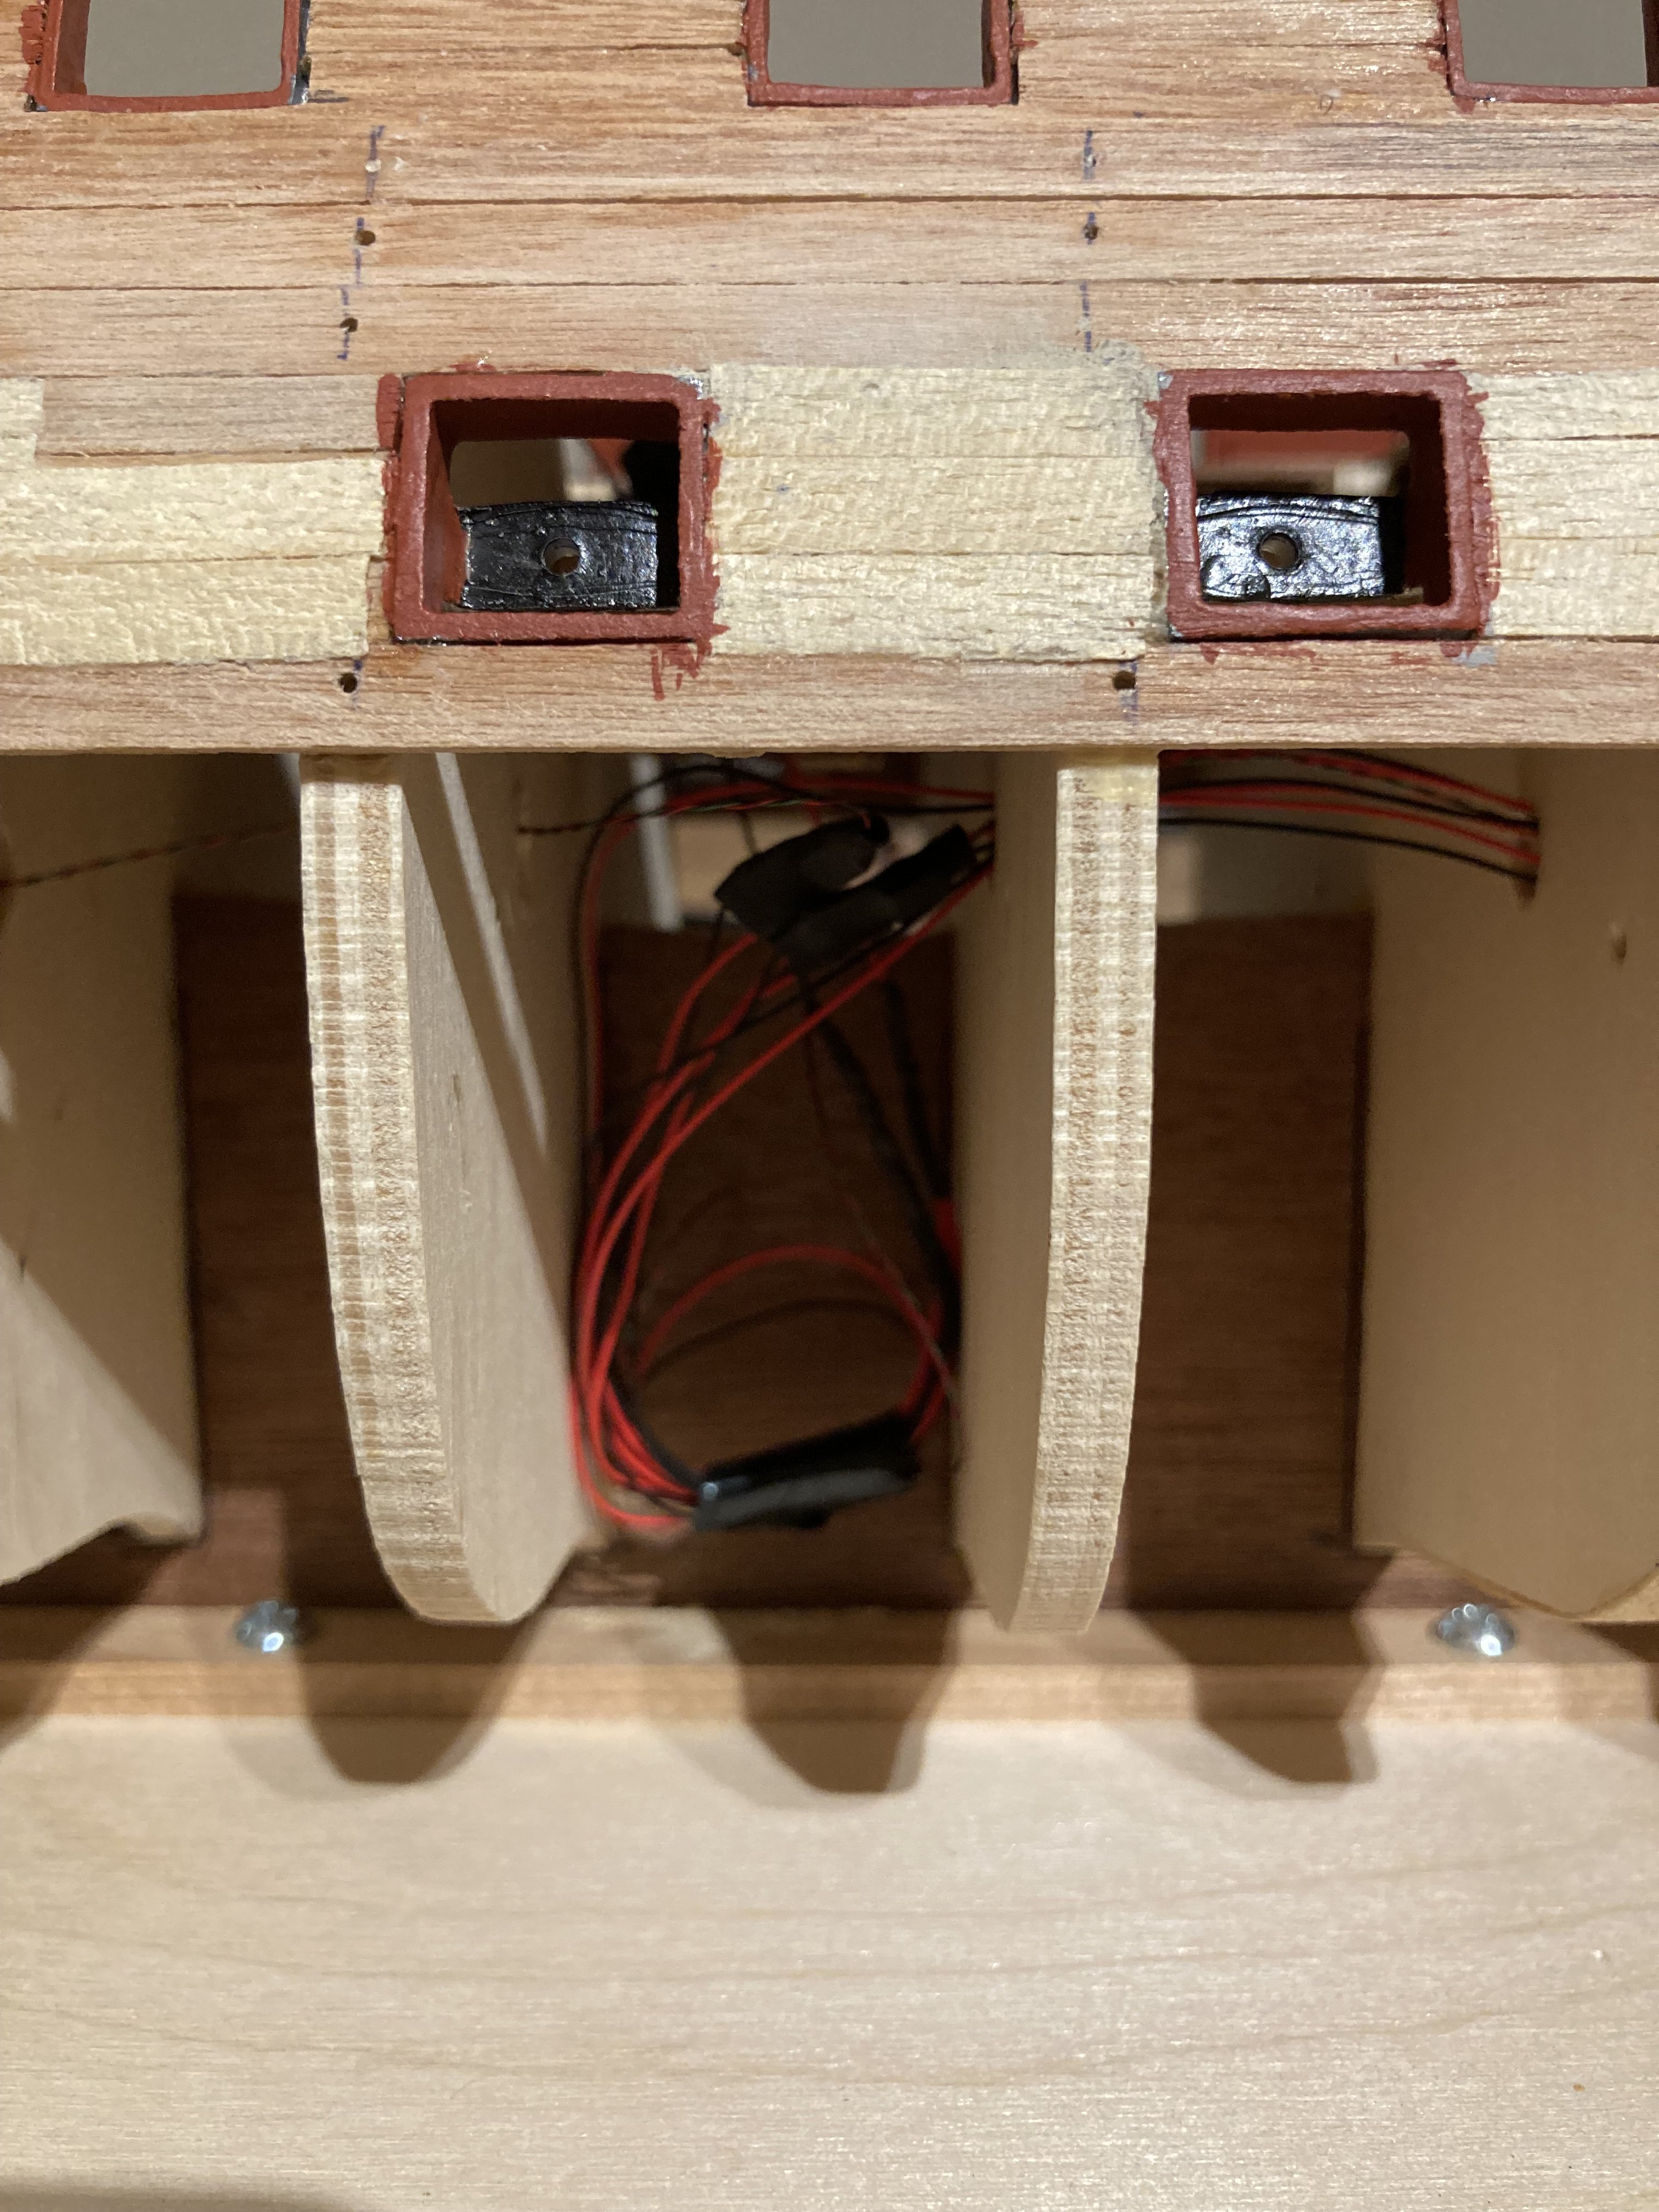
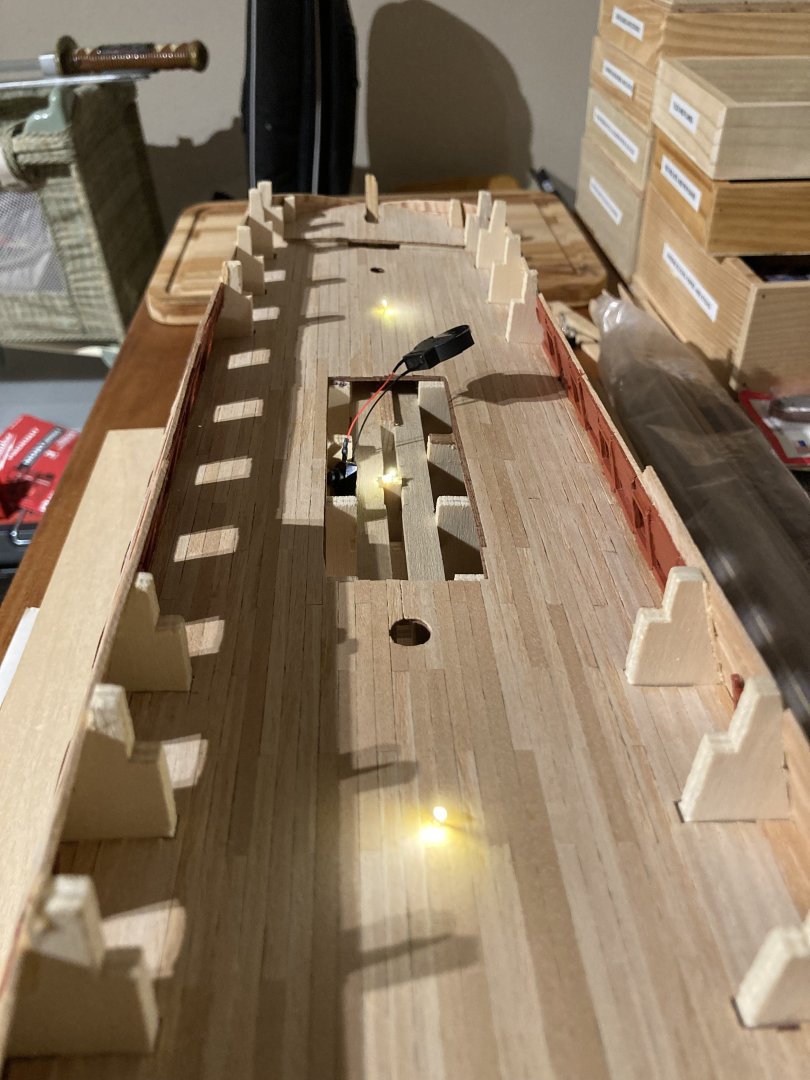
And they all work! The LED lights are flickering and warm white in tone.


-
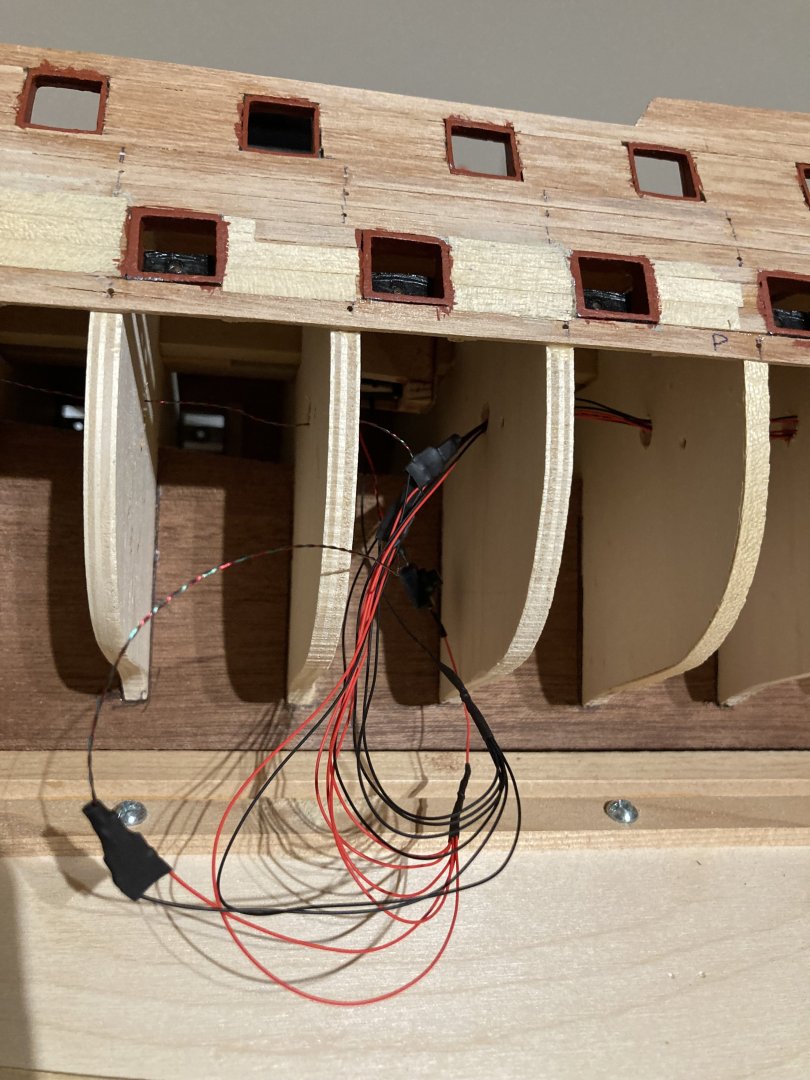
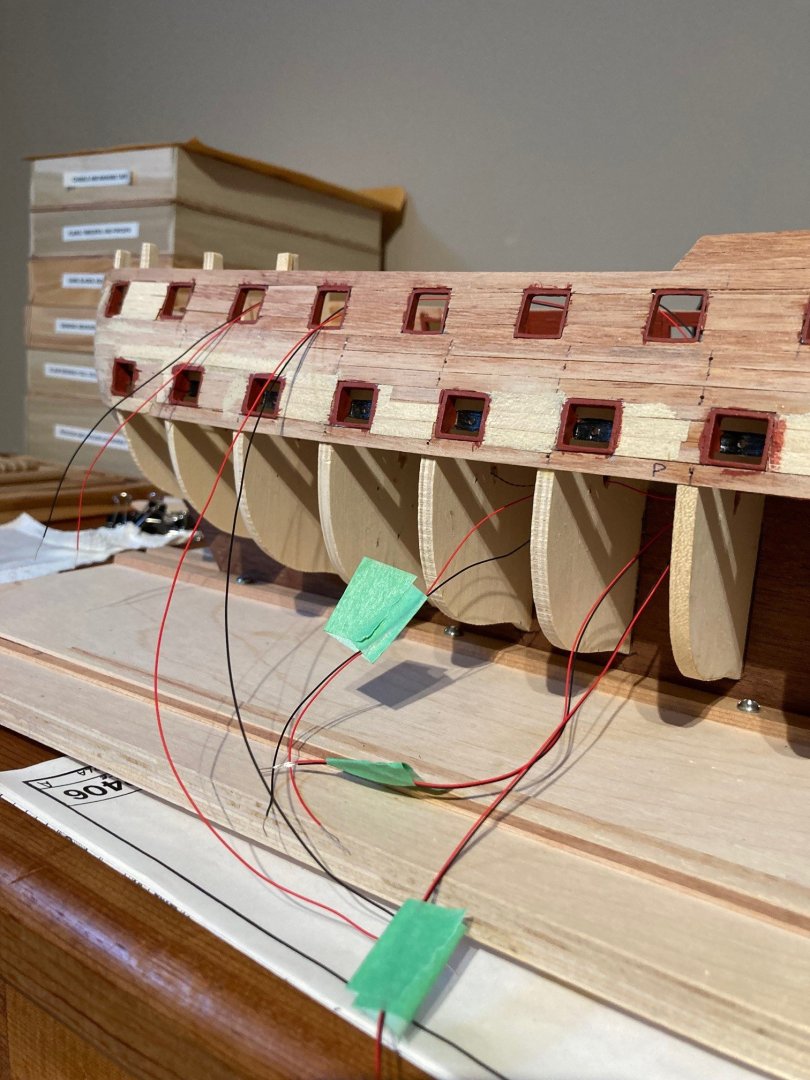
Thanks Bob! Just tied everything together and neatly folded the wires into the void between frames.

-
Looking good… You sure have an excellent work ethic in your output and production of finished kits. I was stalled for over a year before I tackled the rigging on my Santa Maria. Yep, the GAC400 is great… look forward to seeing your finished sails. Cheers!
-
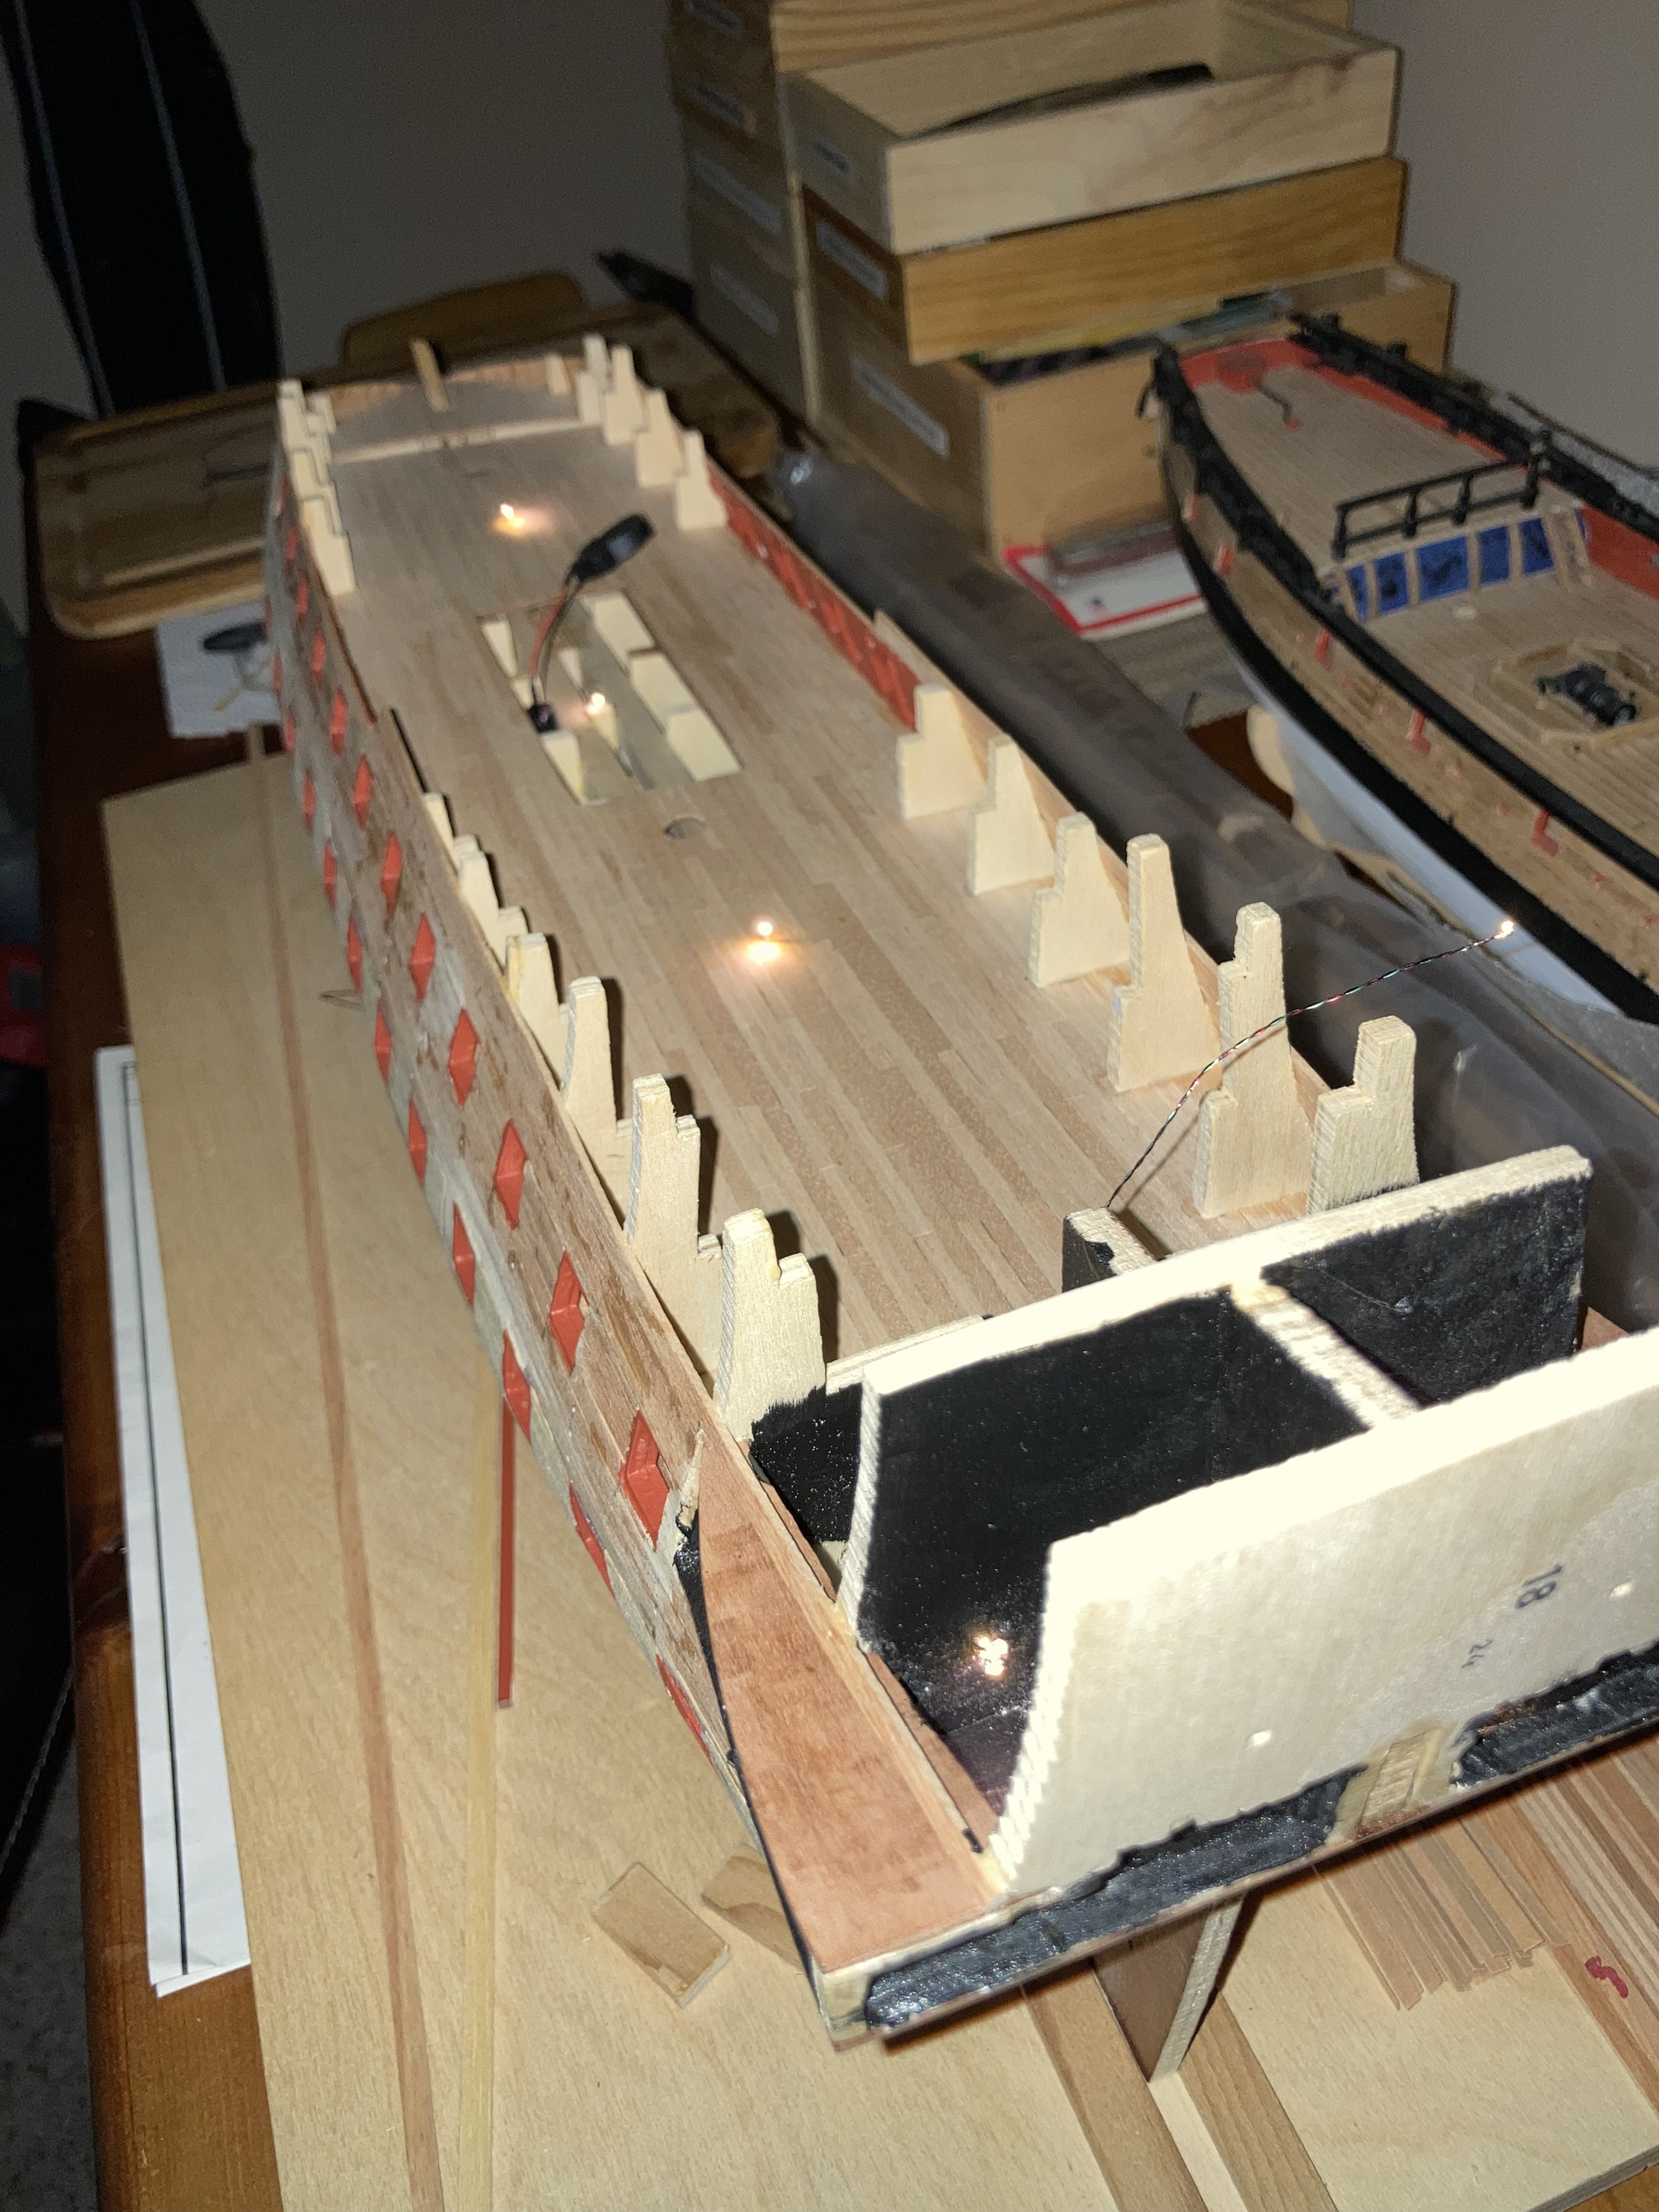
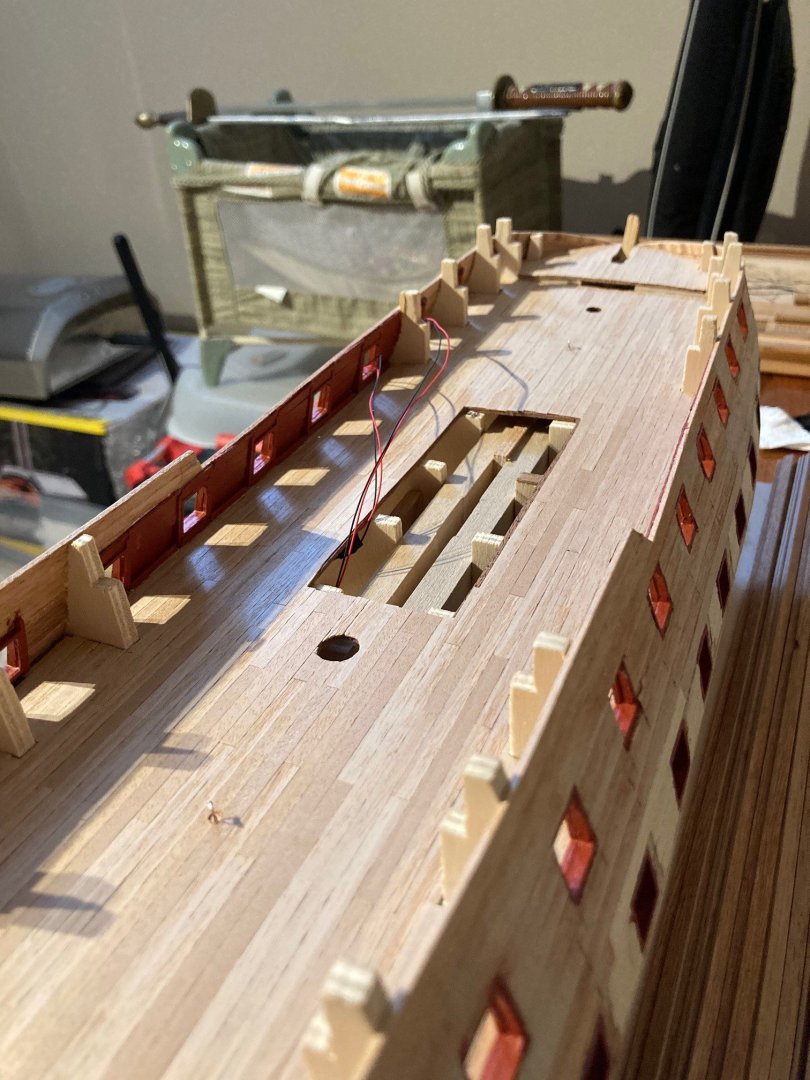
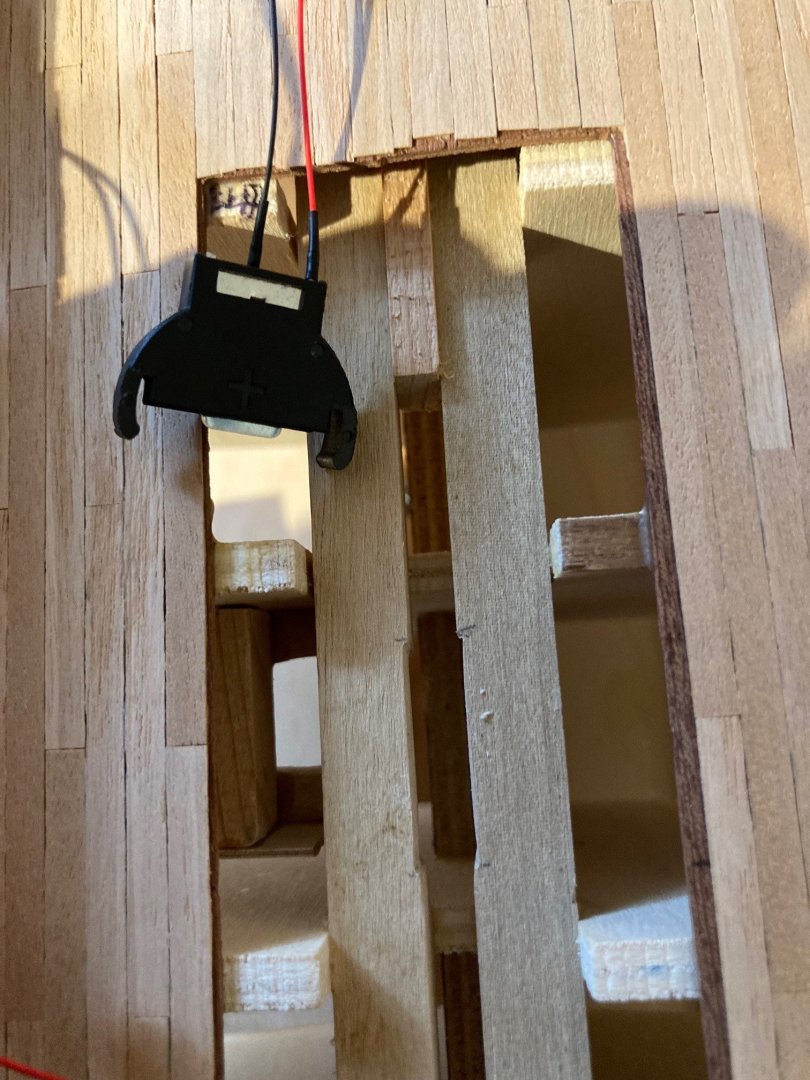
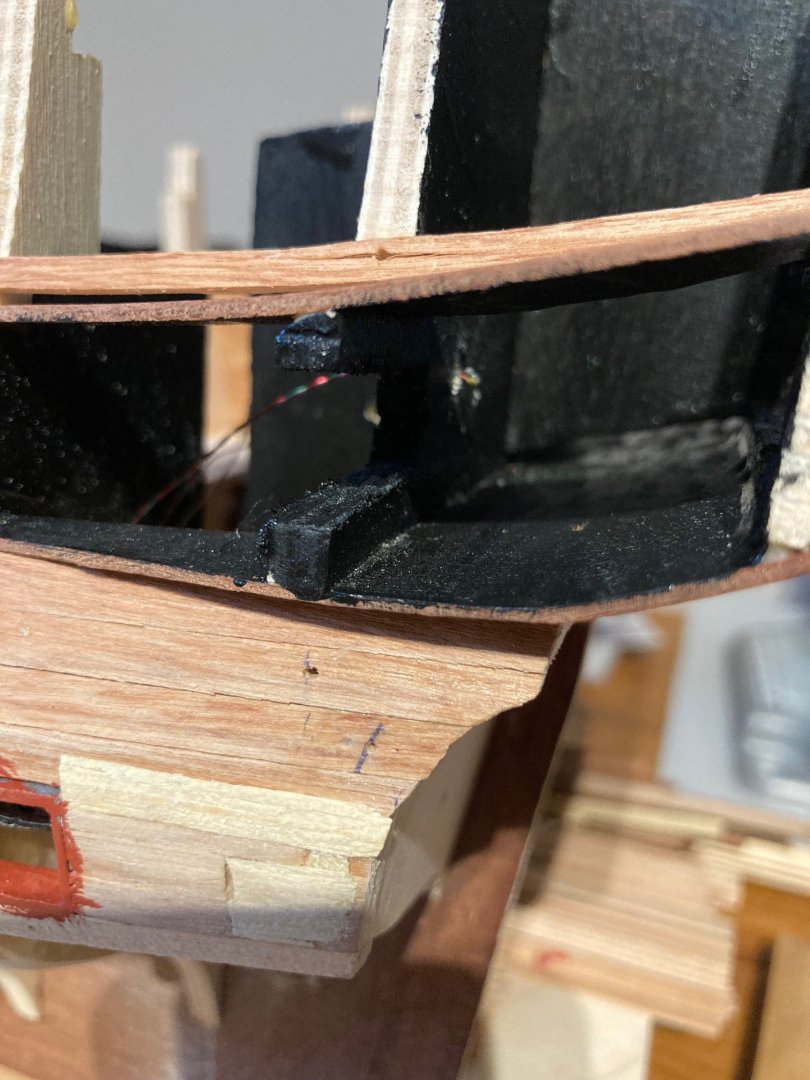
Been a bit lazy lately... Did manage to get my LED wiring setup completed. I purchased the kit from Evan Designs (all they do is miniature LED setups for hobbies). I spec'd out the pico LED lights with a 3 volt button battery as energy source. Everything came pre-wired and just a matter of running the line back to the battery source which I have hidden under the main deck grating panel which I will make removable in order to access the battery and supplied switch. I put two LEDs in the aft cabin and then 4 others along the length of the deck in order to illuminate under the gratings of the above positioned decks. I created a little battery holder under the main deck grating for easy access once the model is finished... I hope I have enough lighting to do the model justice.
-
Looking good!
-
Check out Dusek’s Santa Maria which is the rebrand of the Mamoli version of the kit. Highly recommend that version.
-
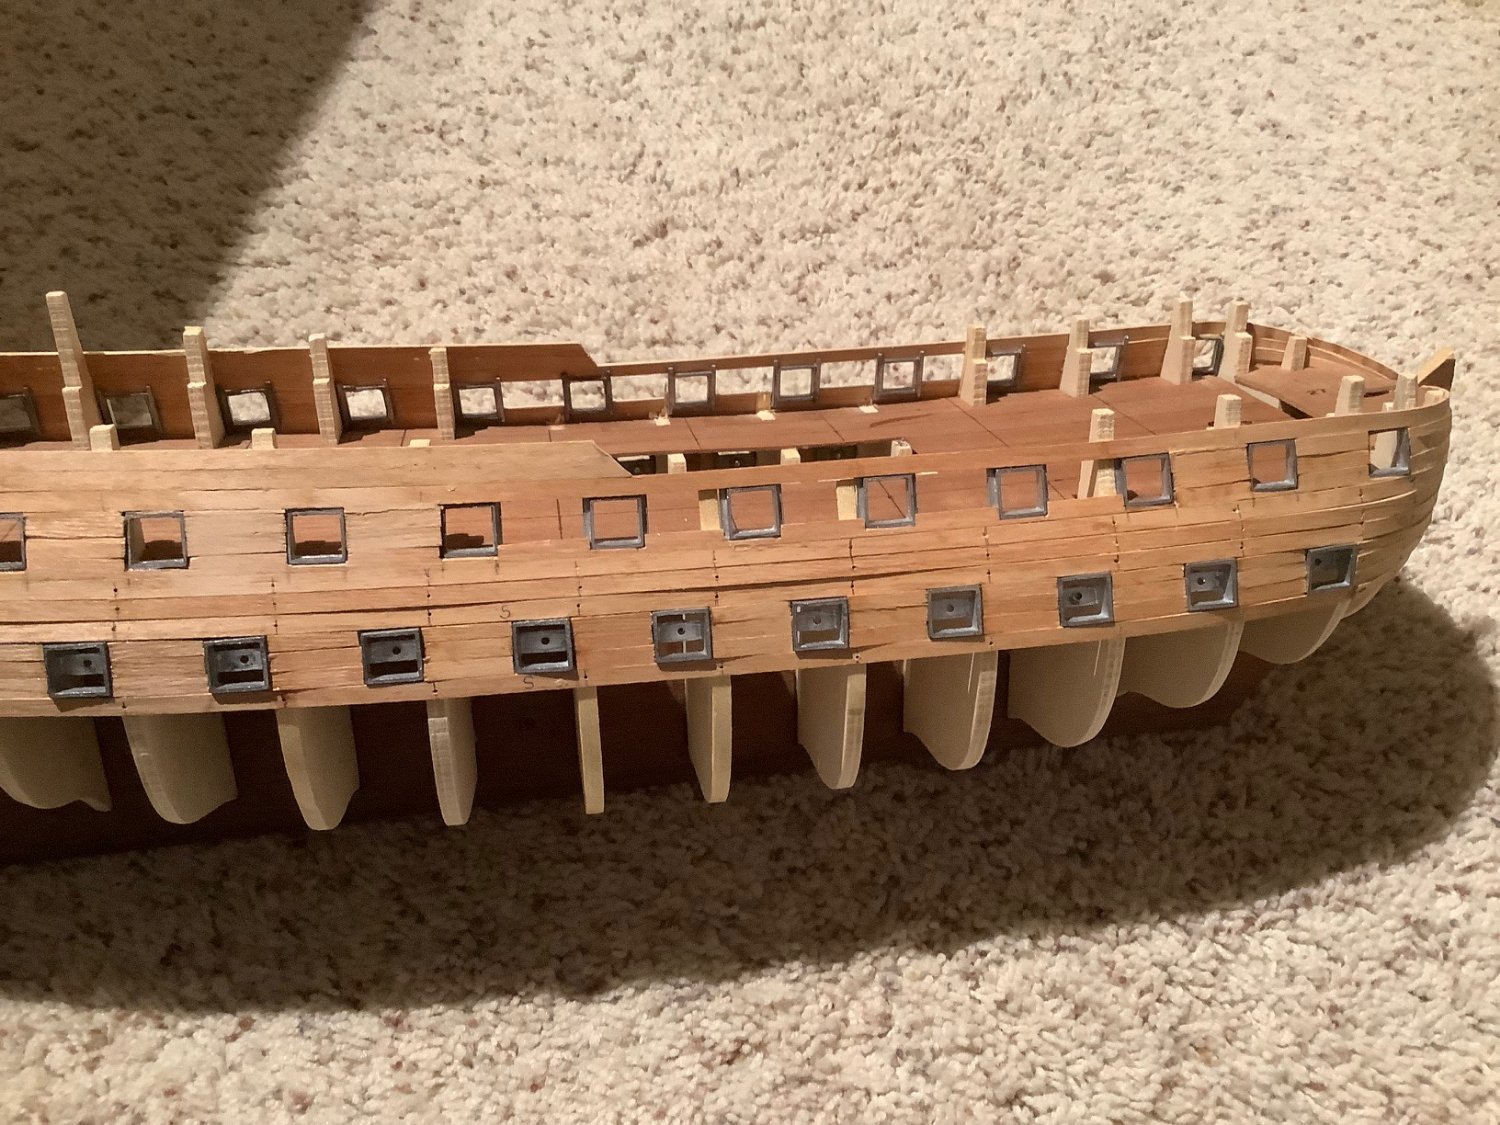
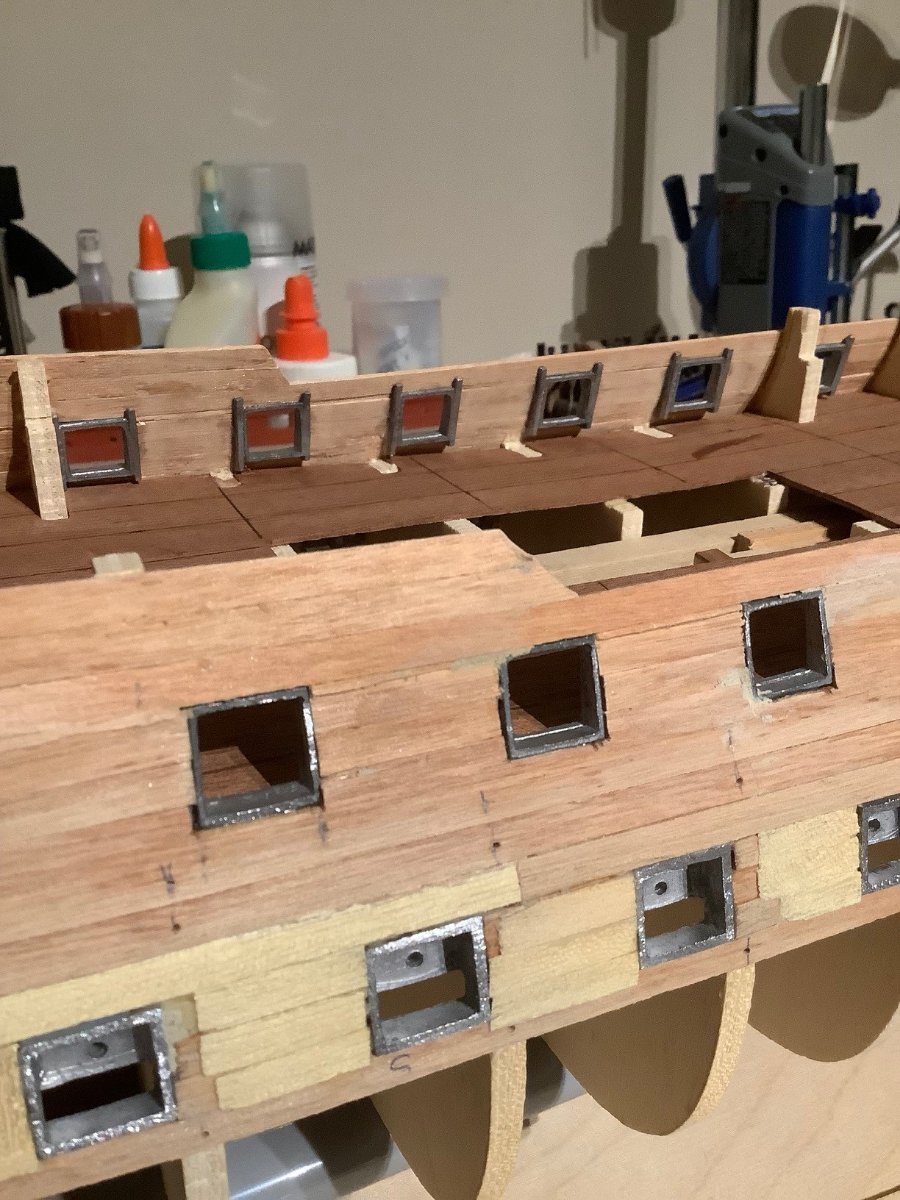
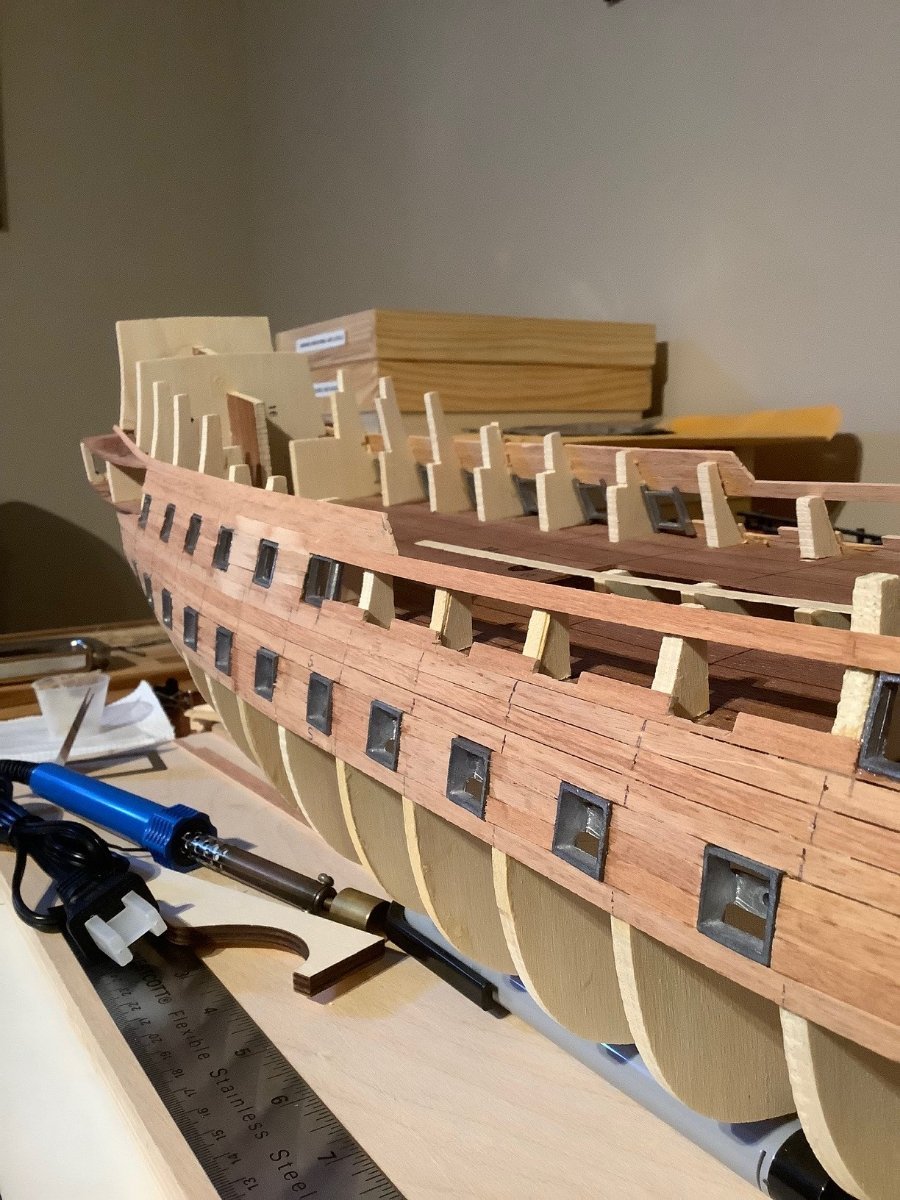
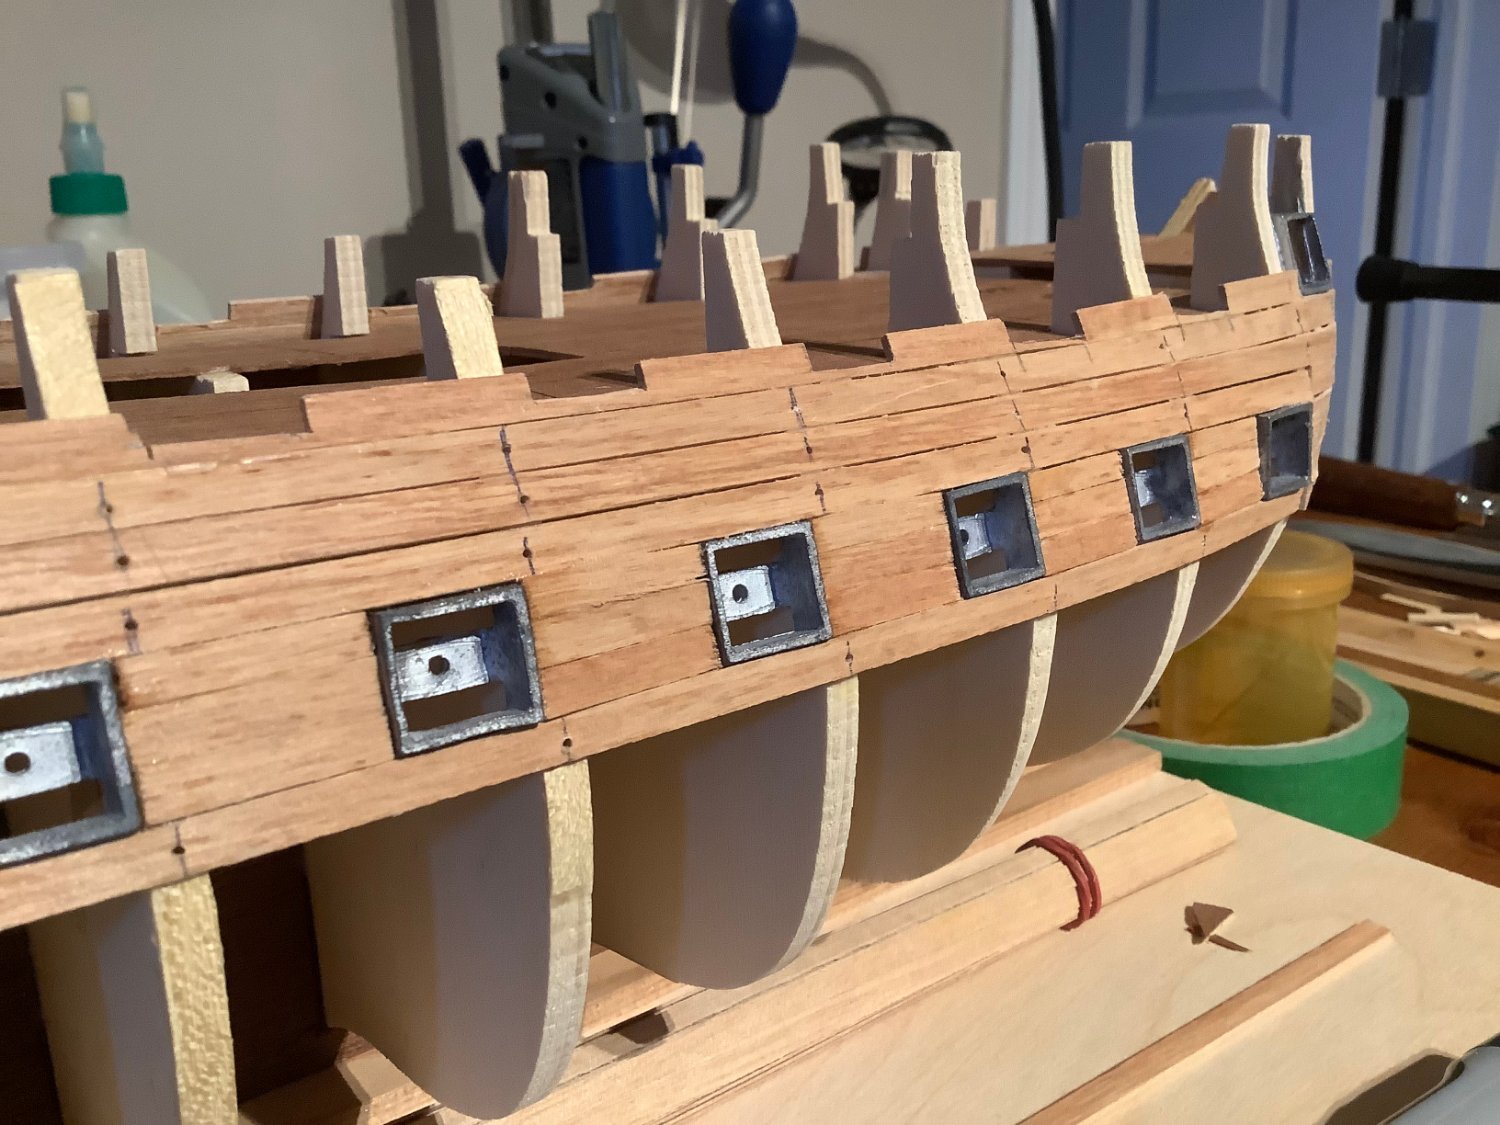
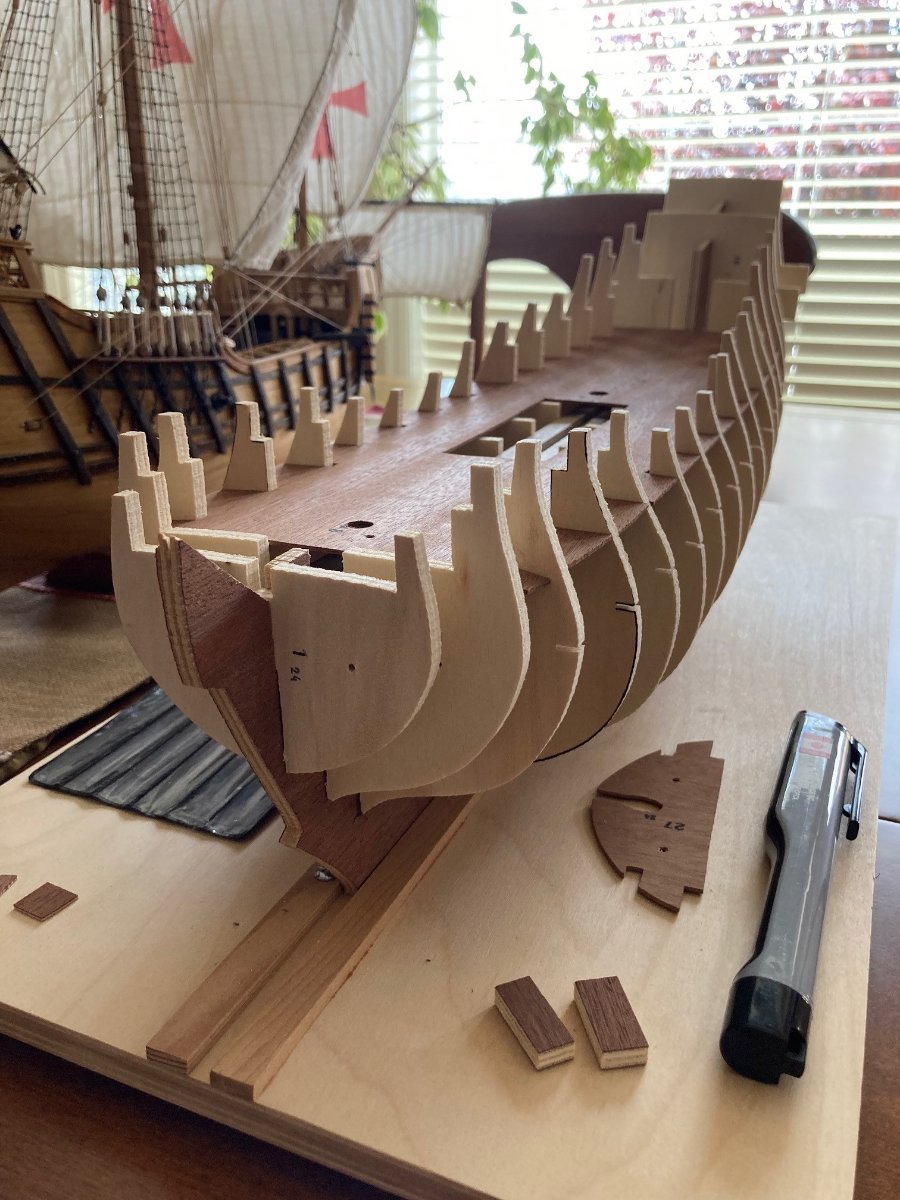
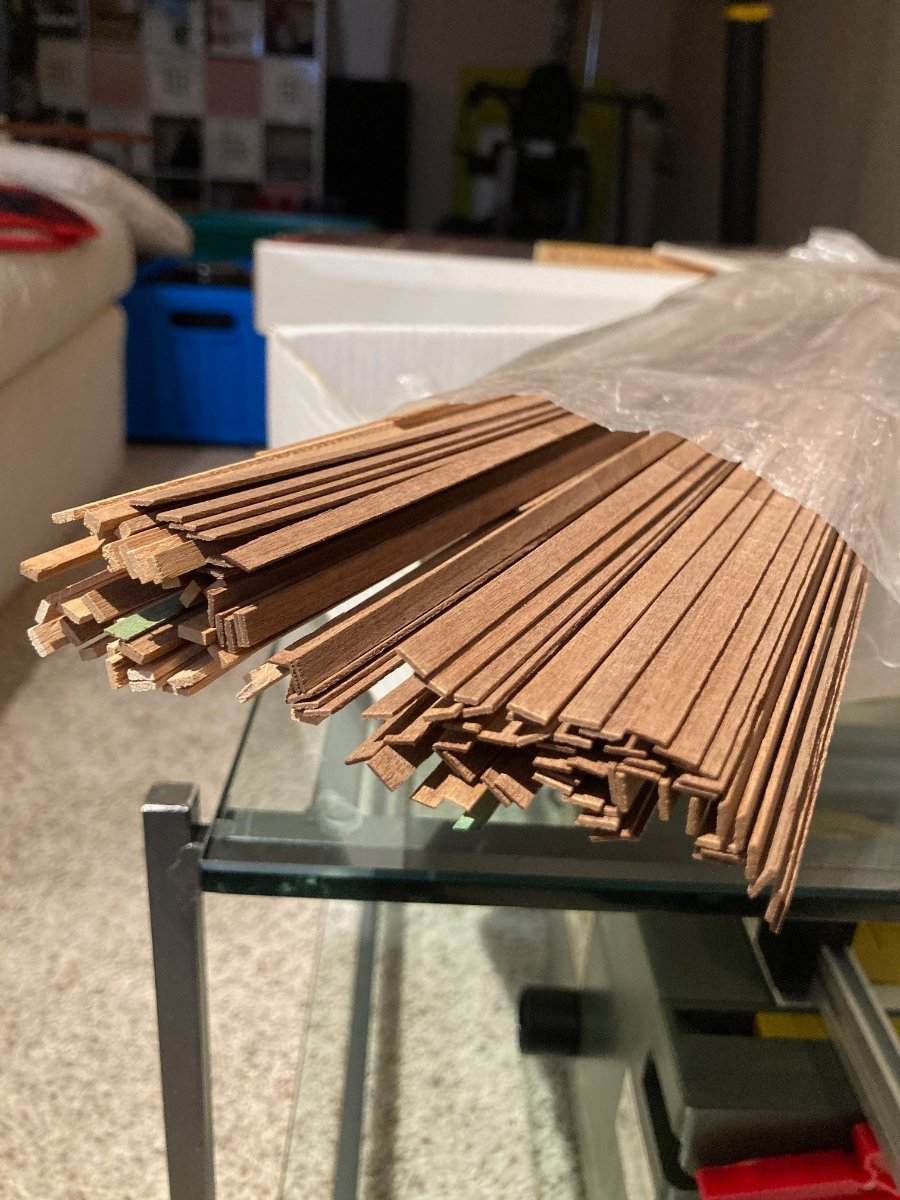
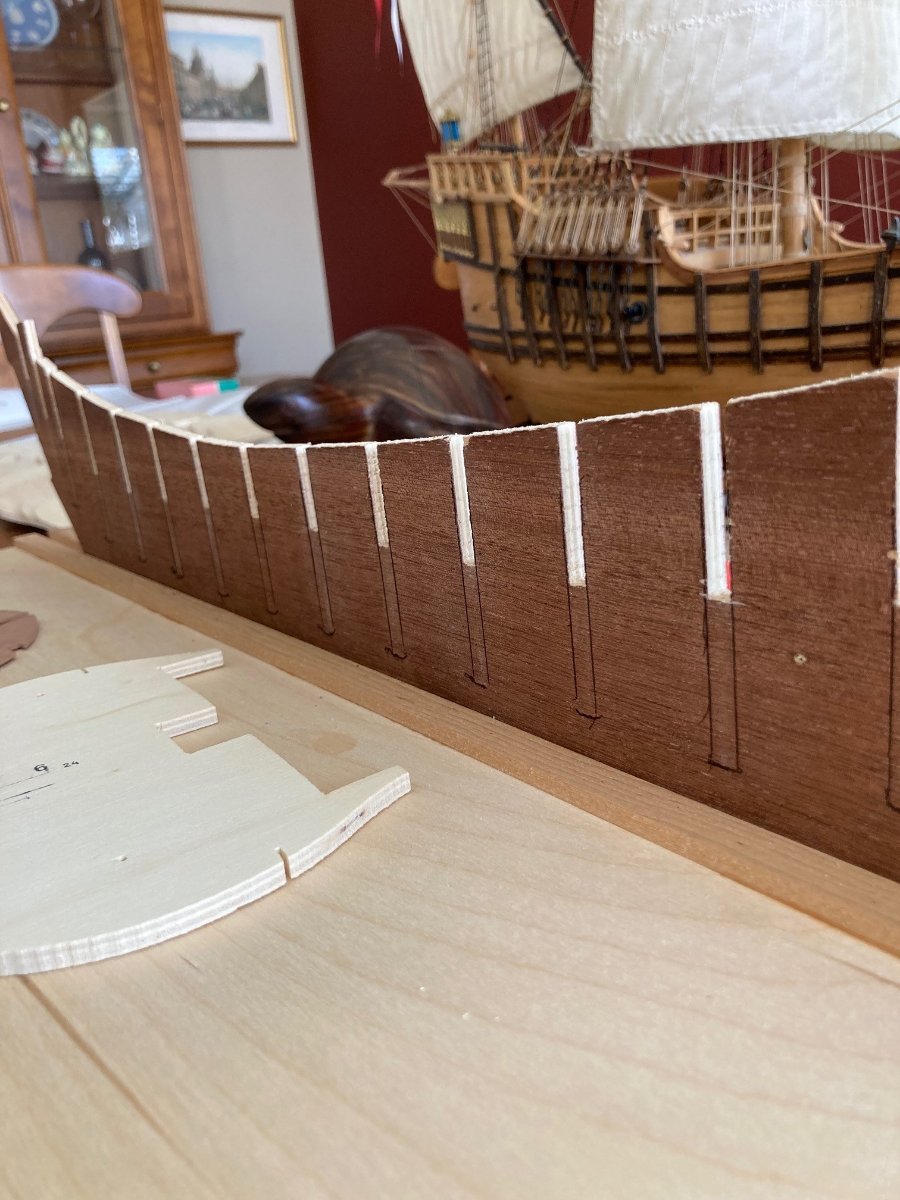
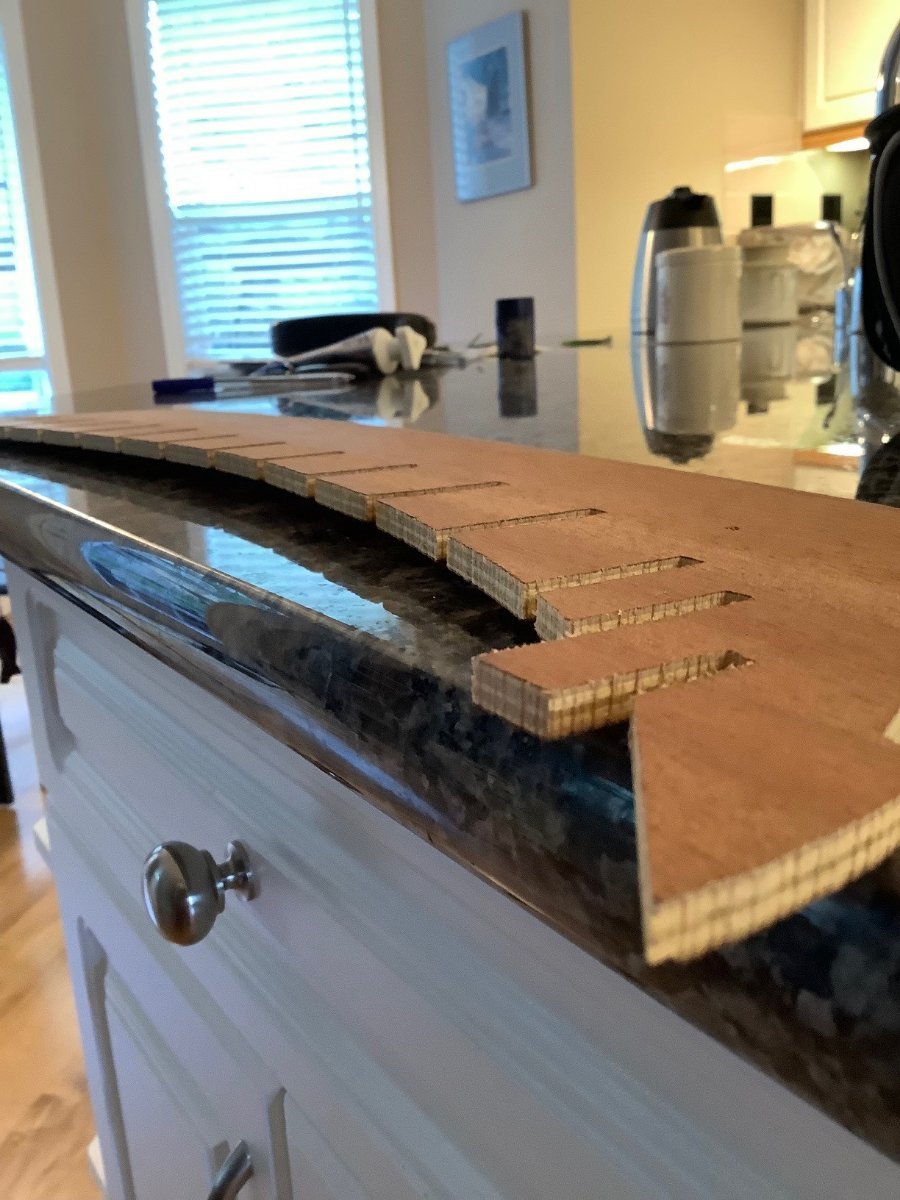
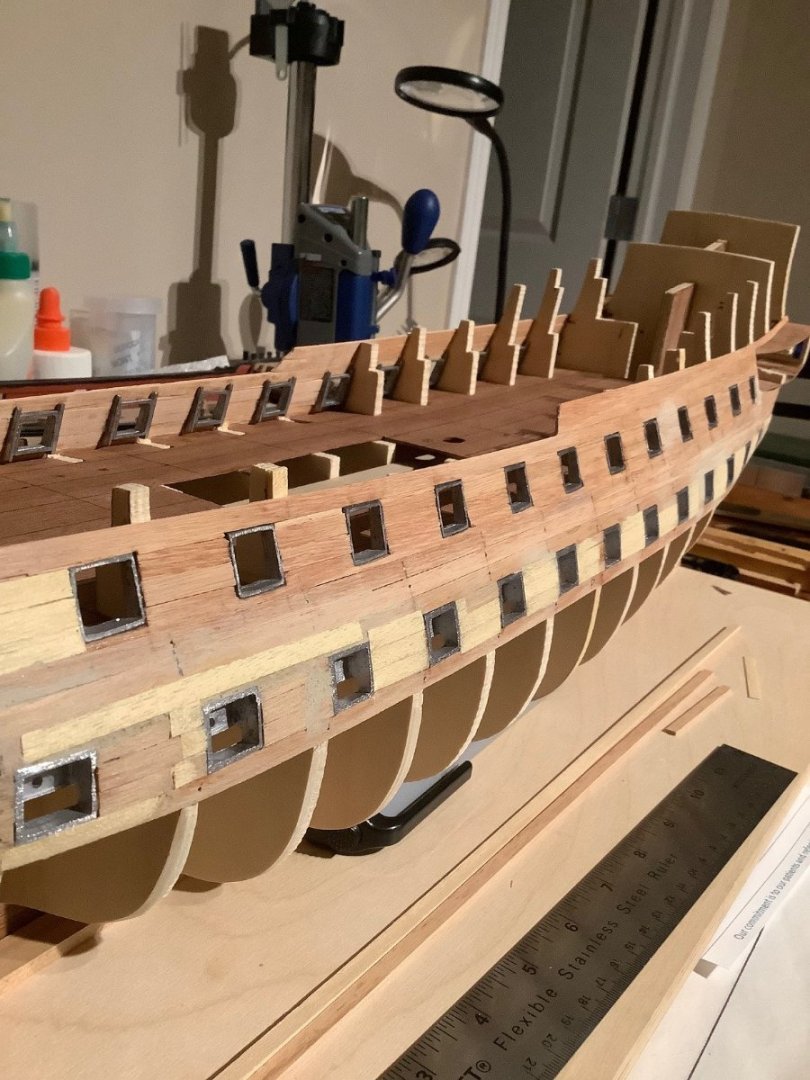
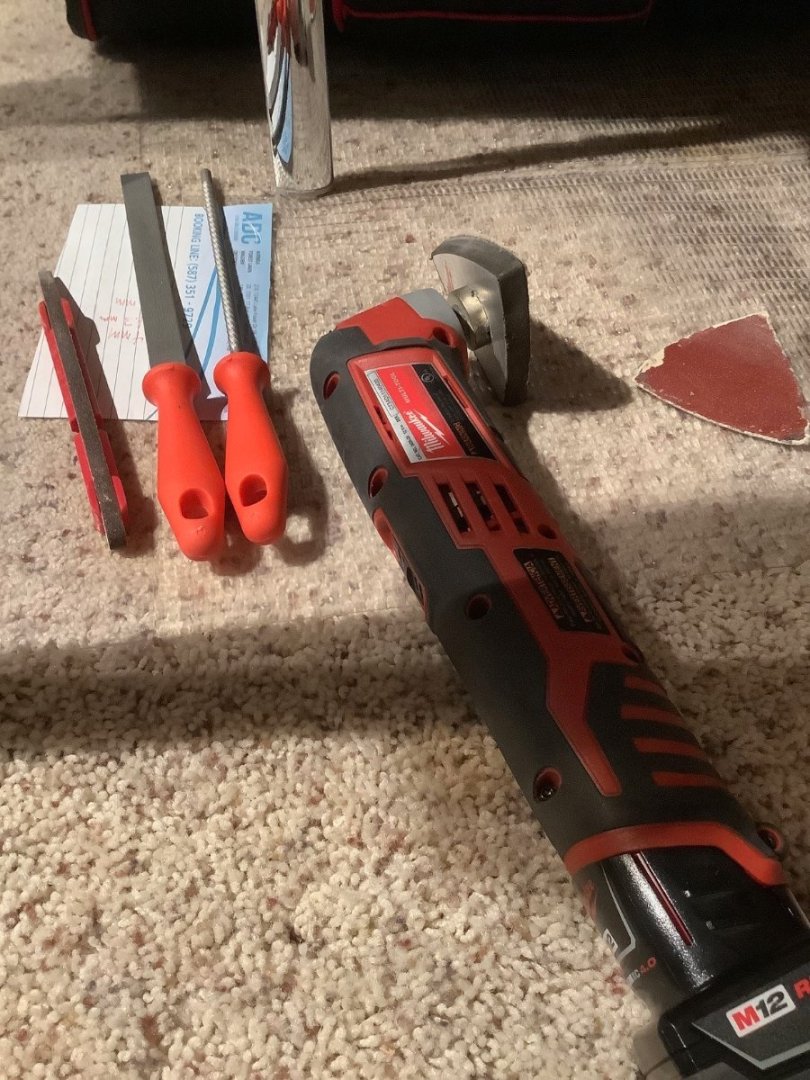
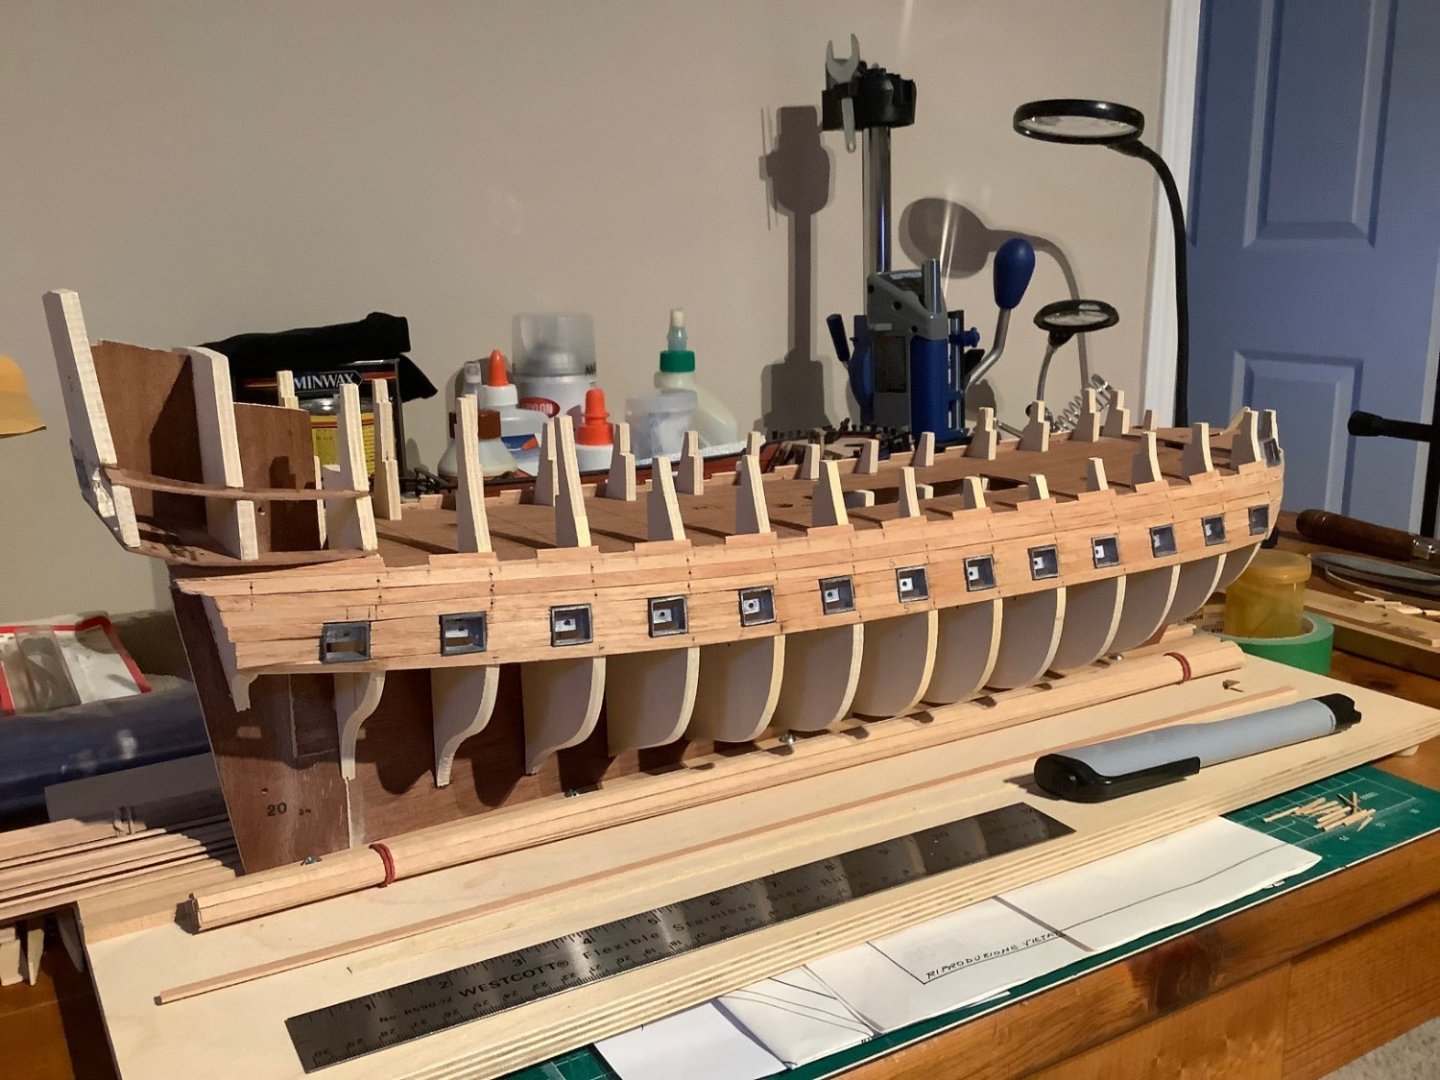
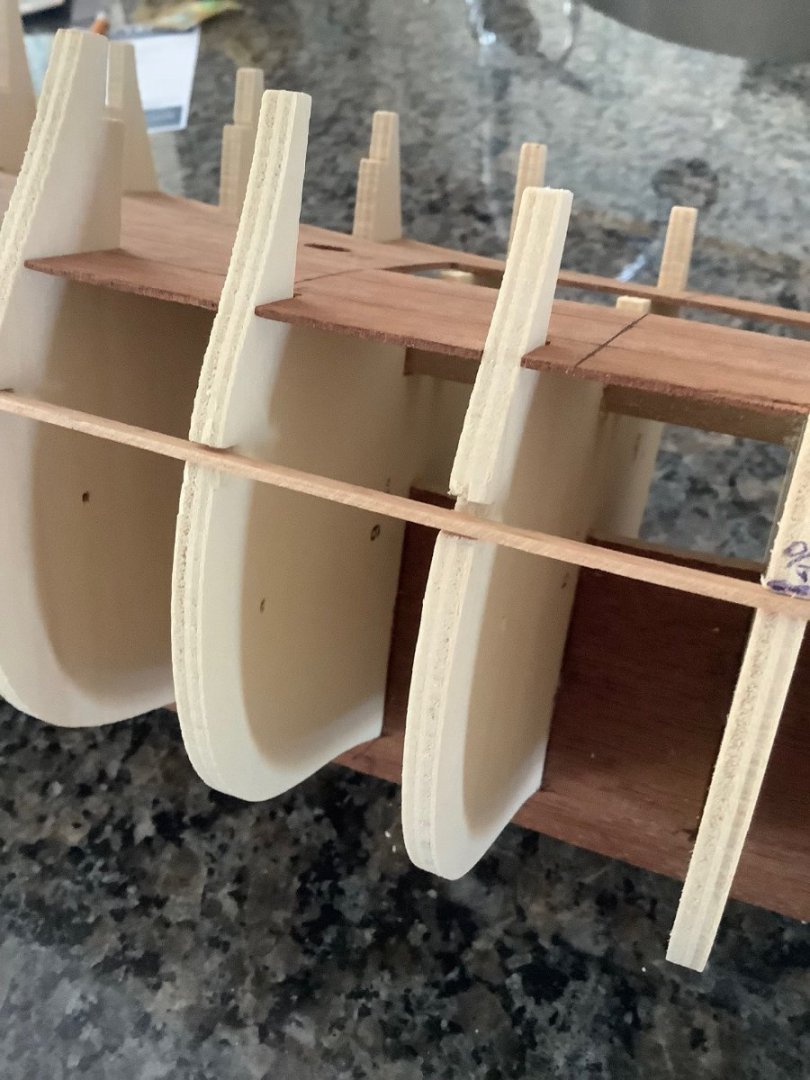
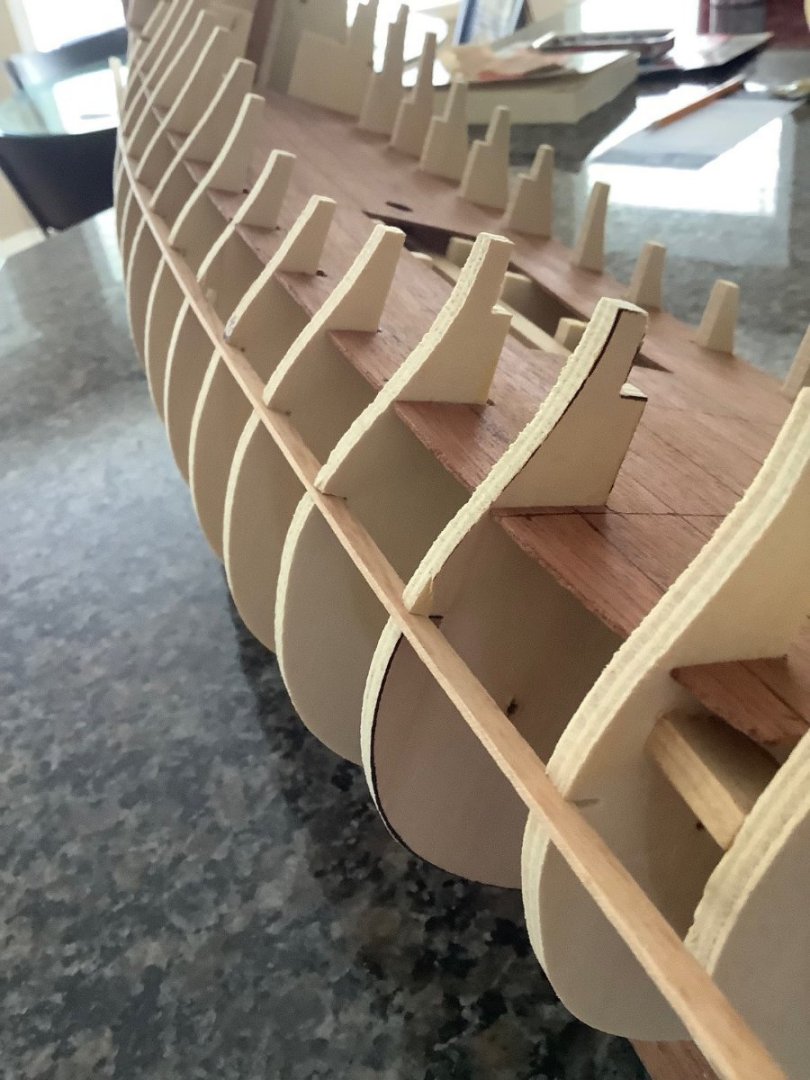
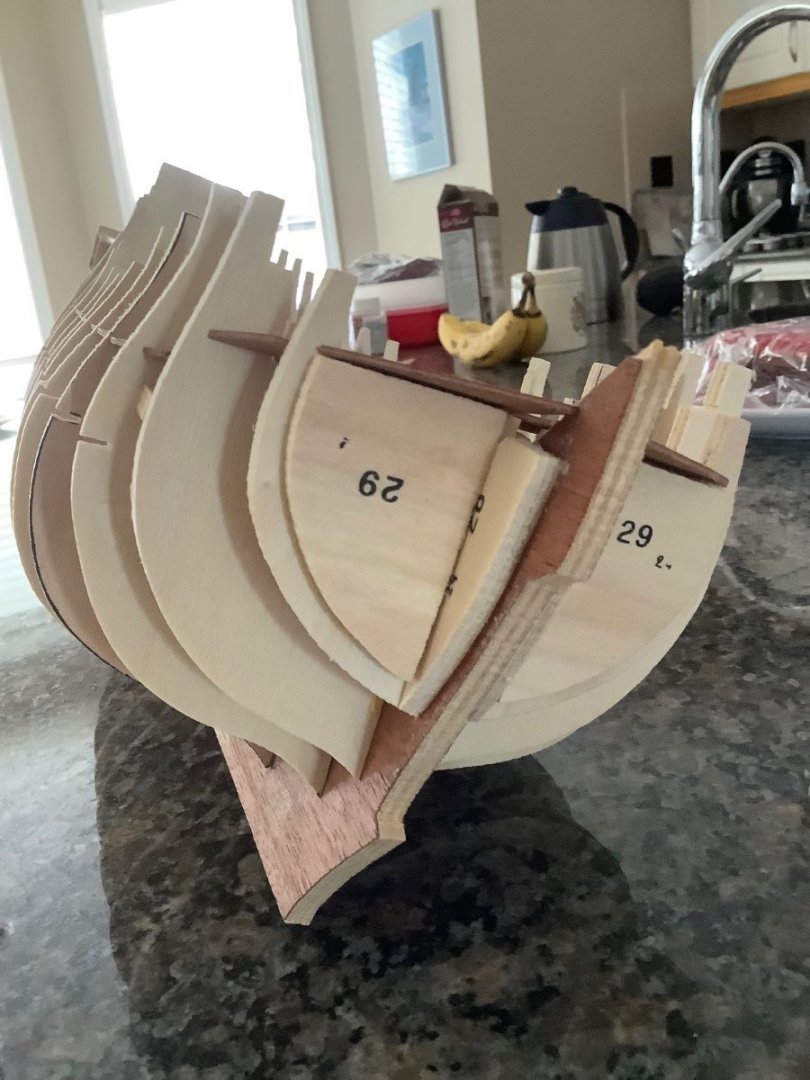
Some additional images of my framing process. The external hull profile is very poor between the gun ports with my effort, especially on the deck where the dummy ports are located as evident on the second picture. Instead of filling later, I decided to add strips between the ports varying in depth from .5 and 1.5 mm, depending on where the defects were most pronounced and then sanded back. Mamoli vintage kits are notorious for not supplying enough material so I decided to fill with some scrap wood and then with my Milwaukee multitool, sanded flush to the gun port exterior margins. Quick and easy work... The pictures may not show it but the exterior hull is quite smooth without waves and undulations.


-
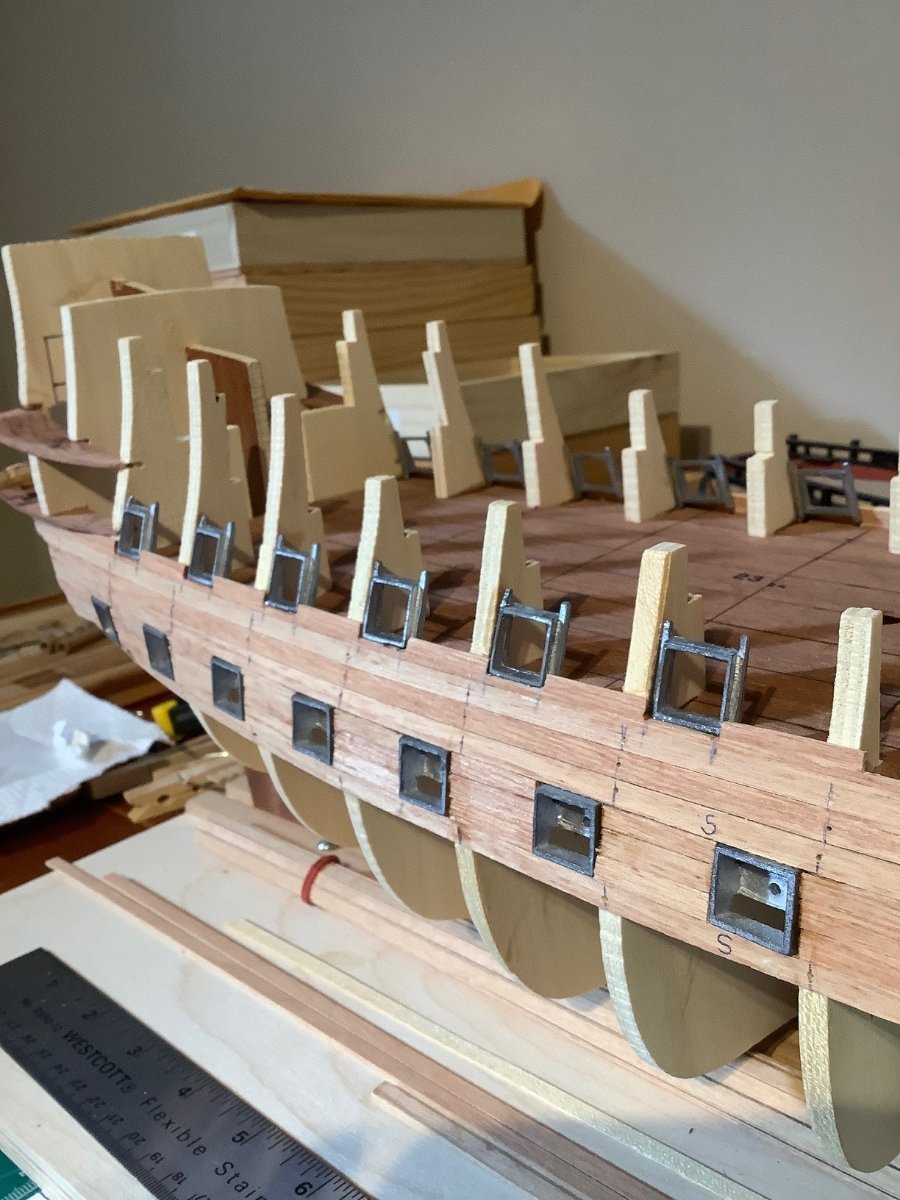
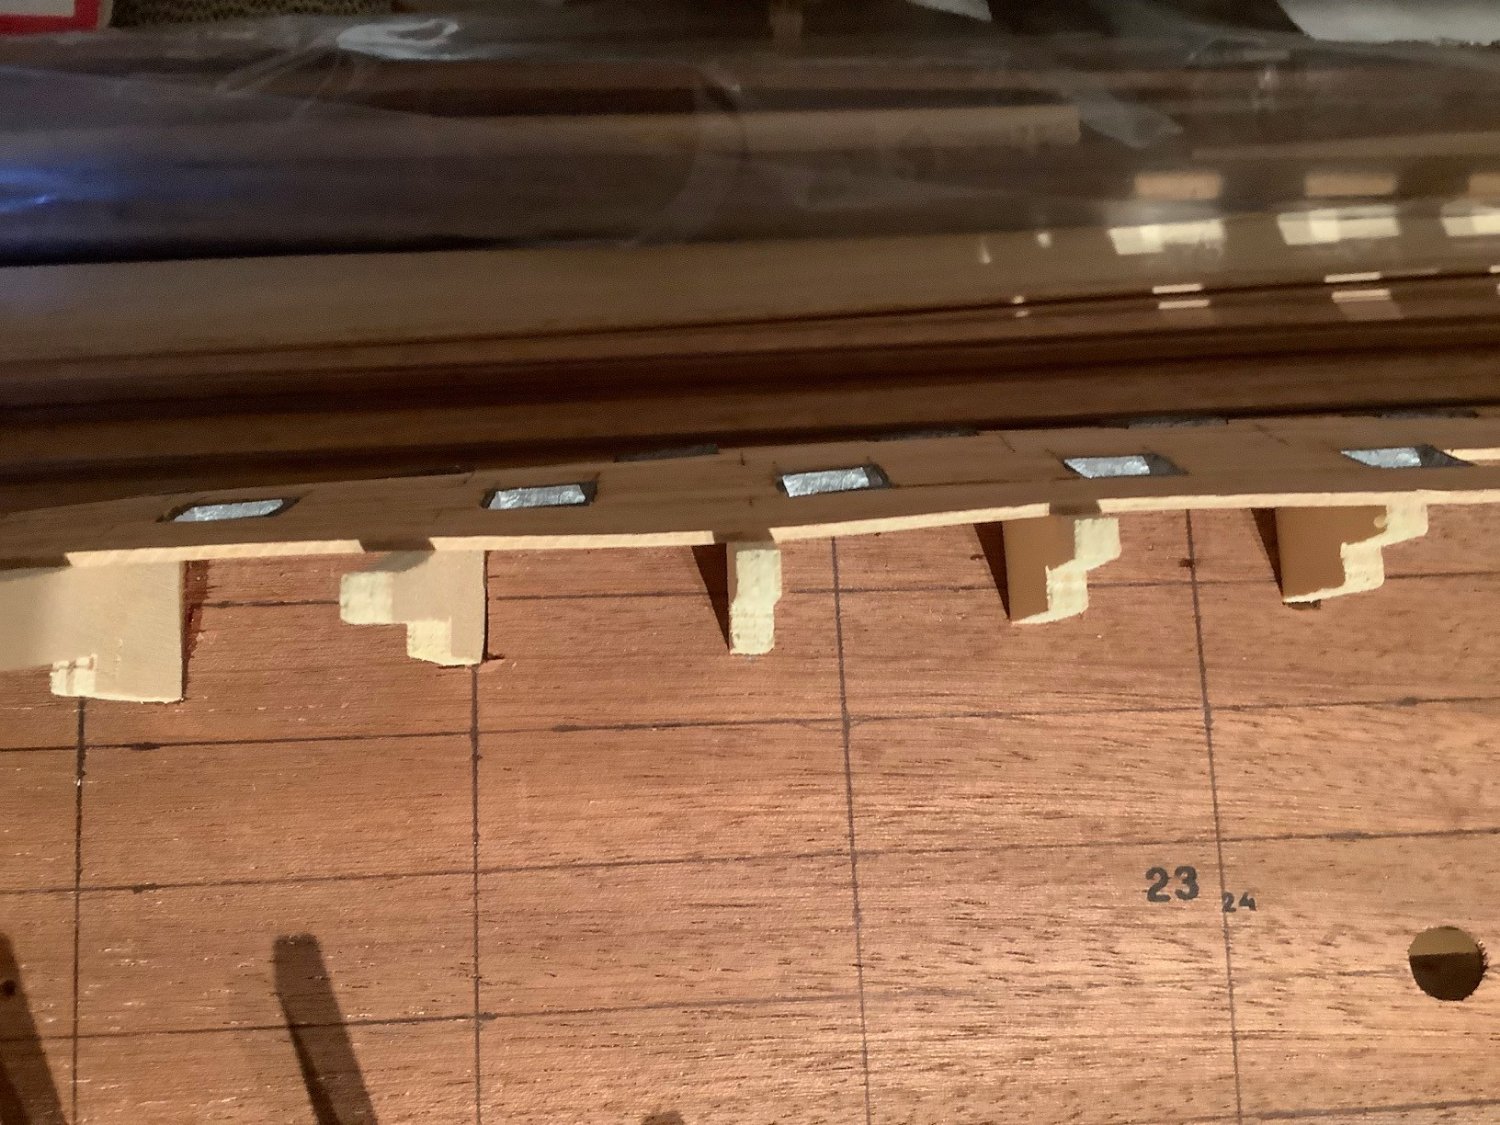
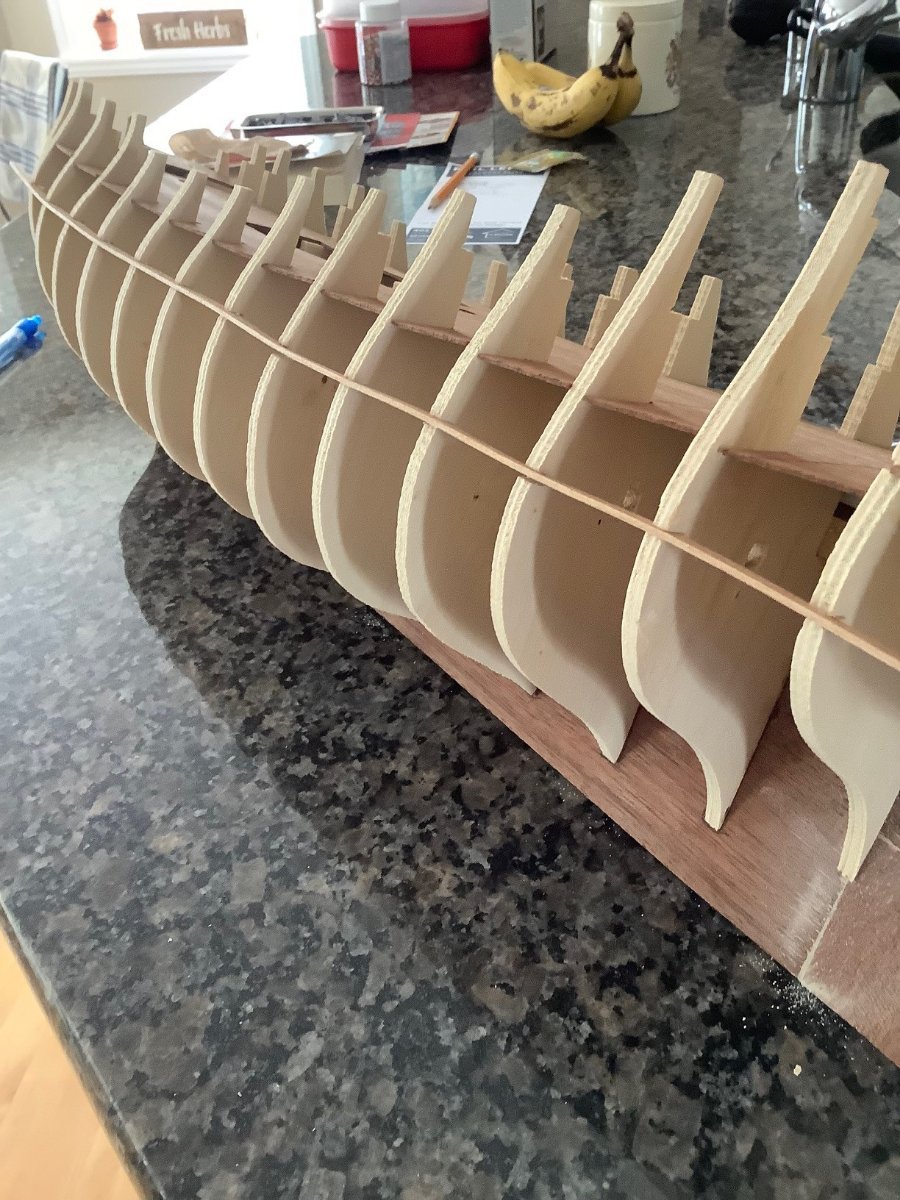
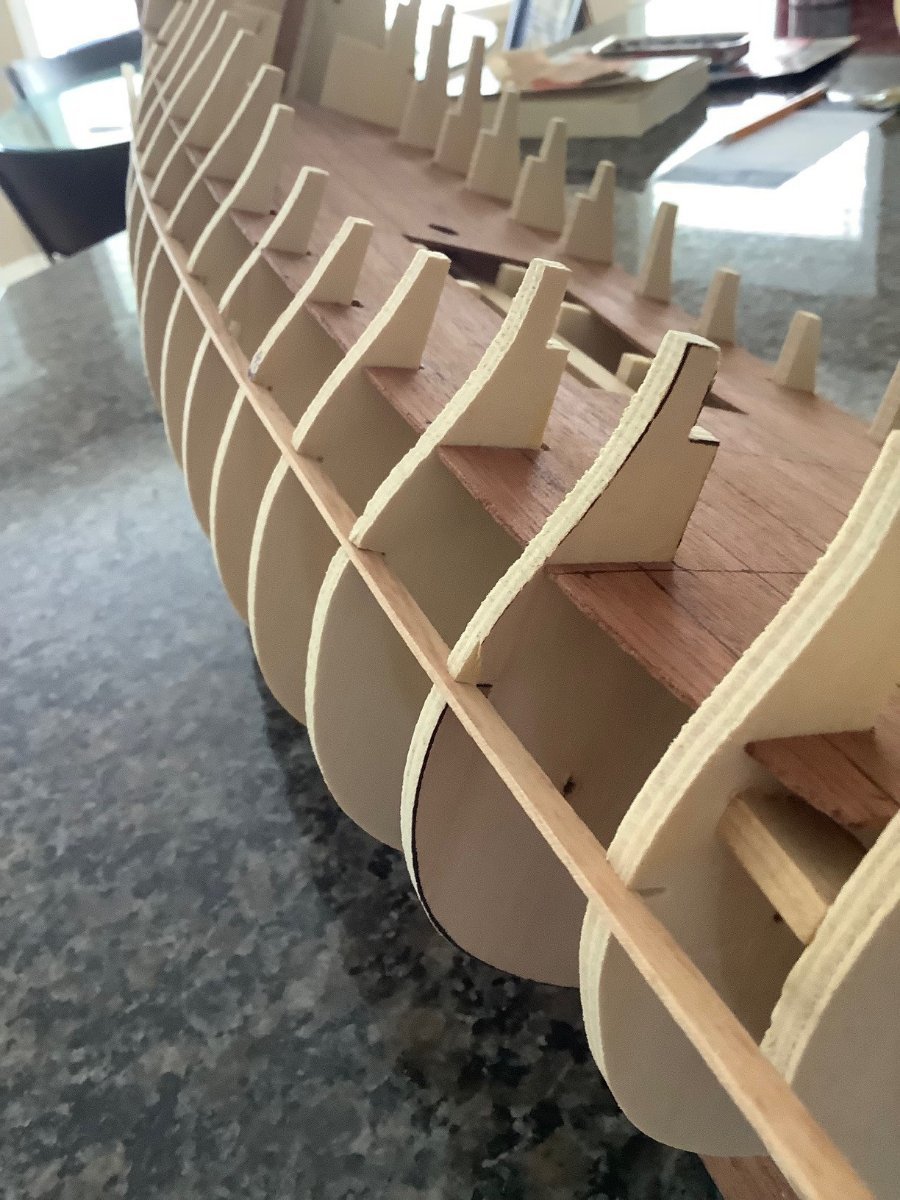
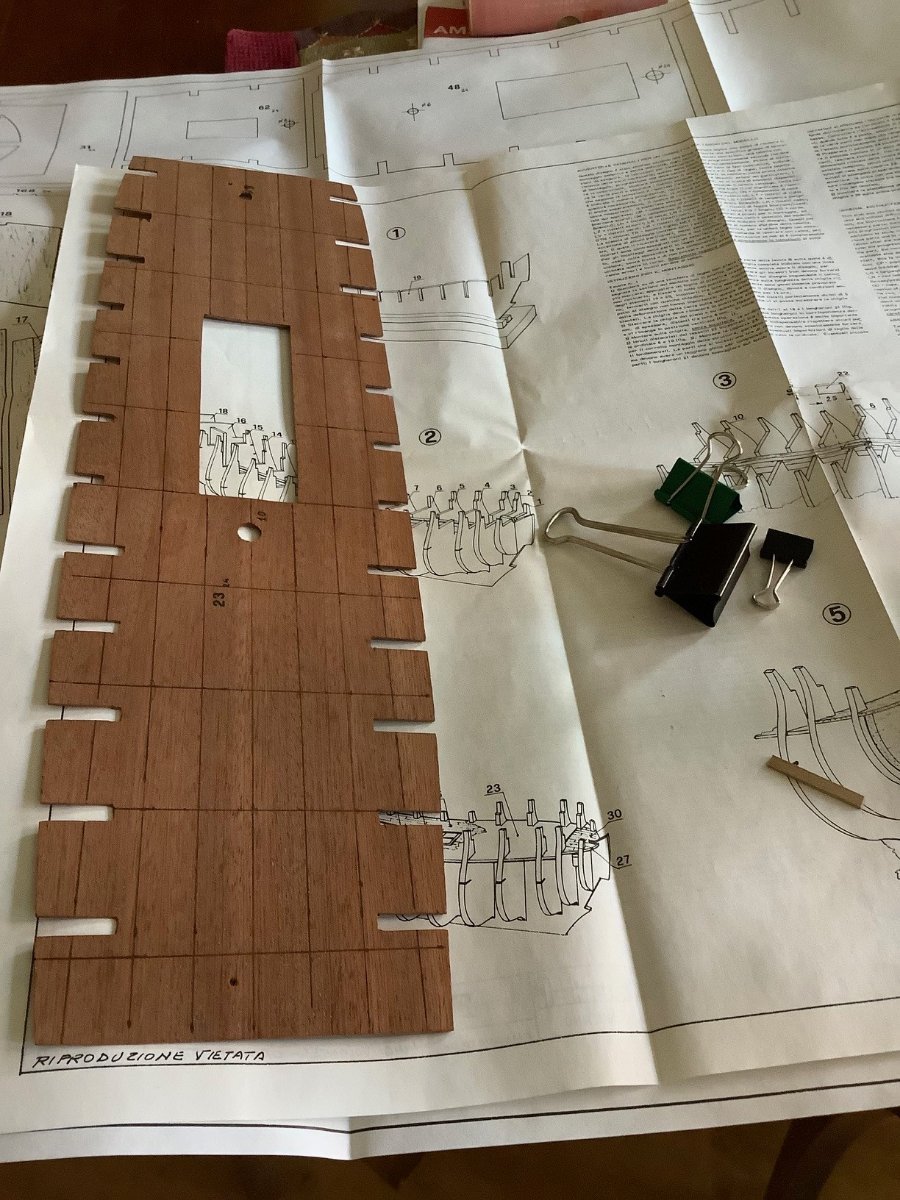
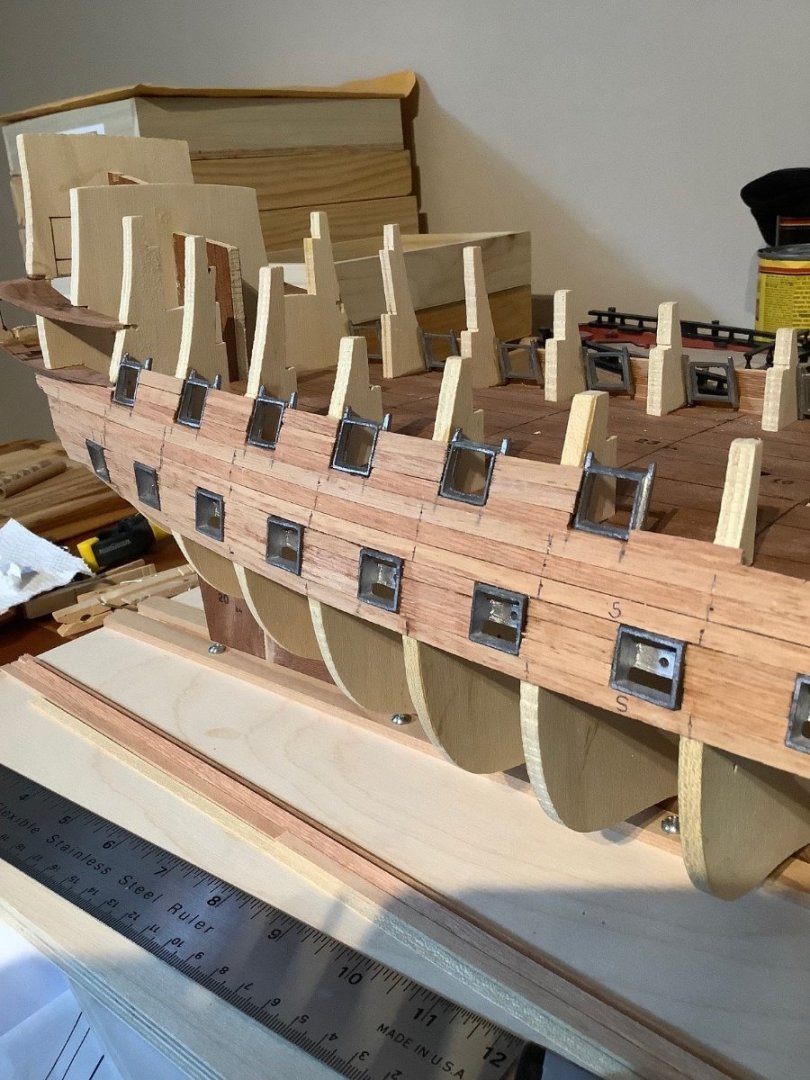
Continuing work on the cannon port frames. Tedious work but my measurements have panned out well as I have nice gentle and aligned sweeps of the two gun deck ports. Don't know how I missed adding the shim(s) to the outside frame on the last picture. Anyways, cut back the plank off the frame and slid in a 1.0mm shim. With these Mamoli vintage kits... there are lots of form and fit issues of parts and you always have to be diligent.


-
Wow… how did I miss this build log… Excellent job!
- 236 replies
-
- 1
-

-
- artesania latina
- kitbashing
- (and 2 more)
-
Thanks Peter for the compliments… I am eastern European myself but every time I am in Holland, I feel absolutely at home! My wife’s roots can be traced back to the 1600s to Rotterdam with a paternal branch of the family tree being traced to the late 1700s in Indonesia. Then of course all the Dutch left the East Indies after WWII.
-
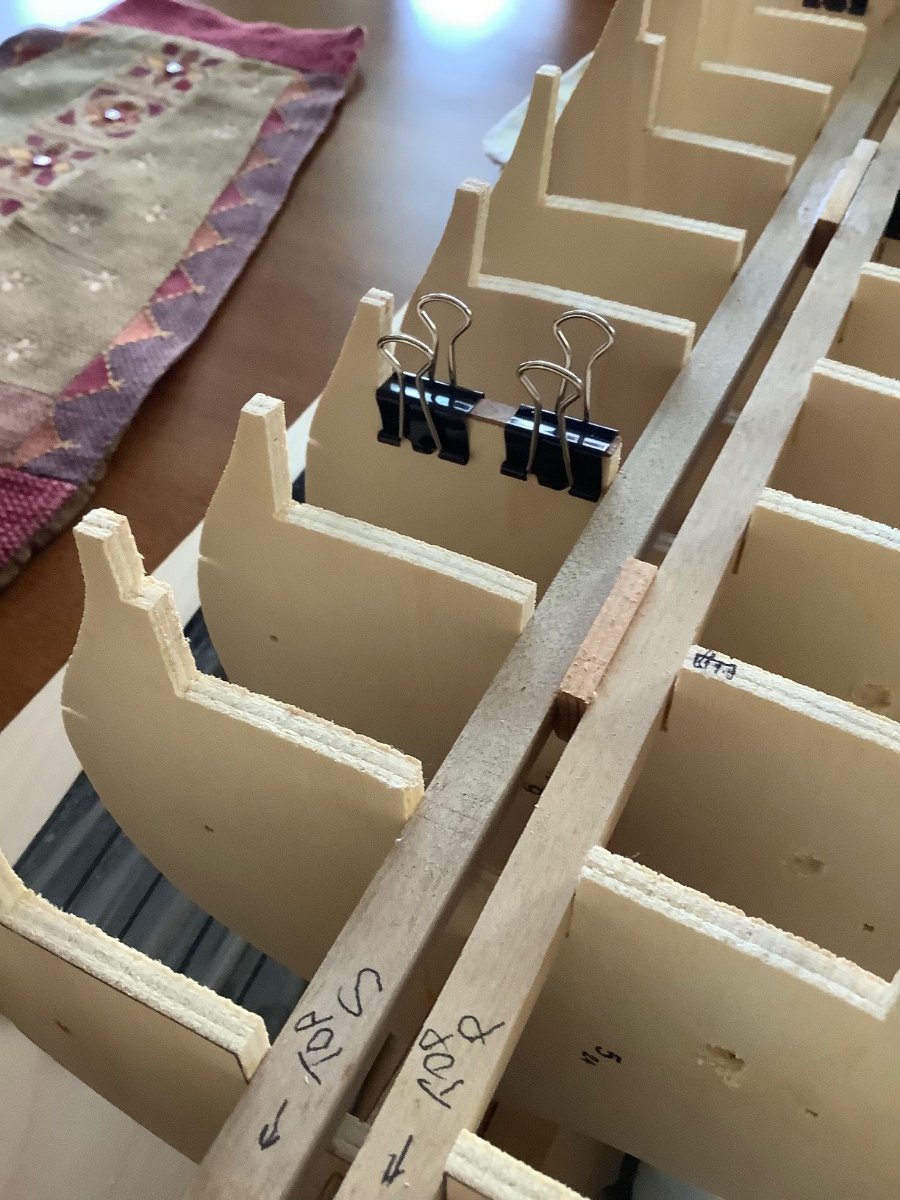
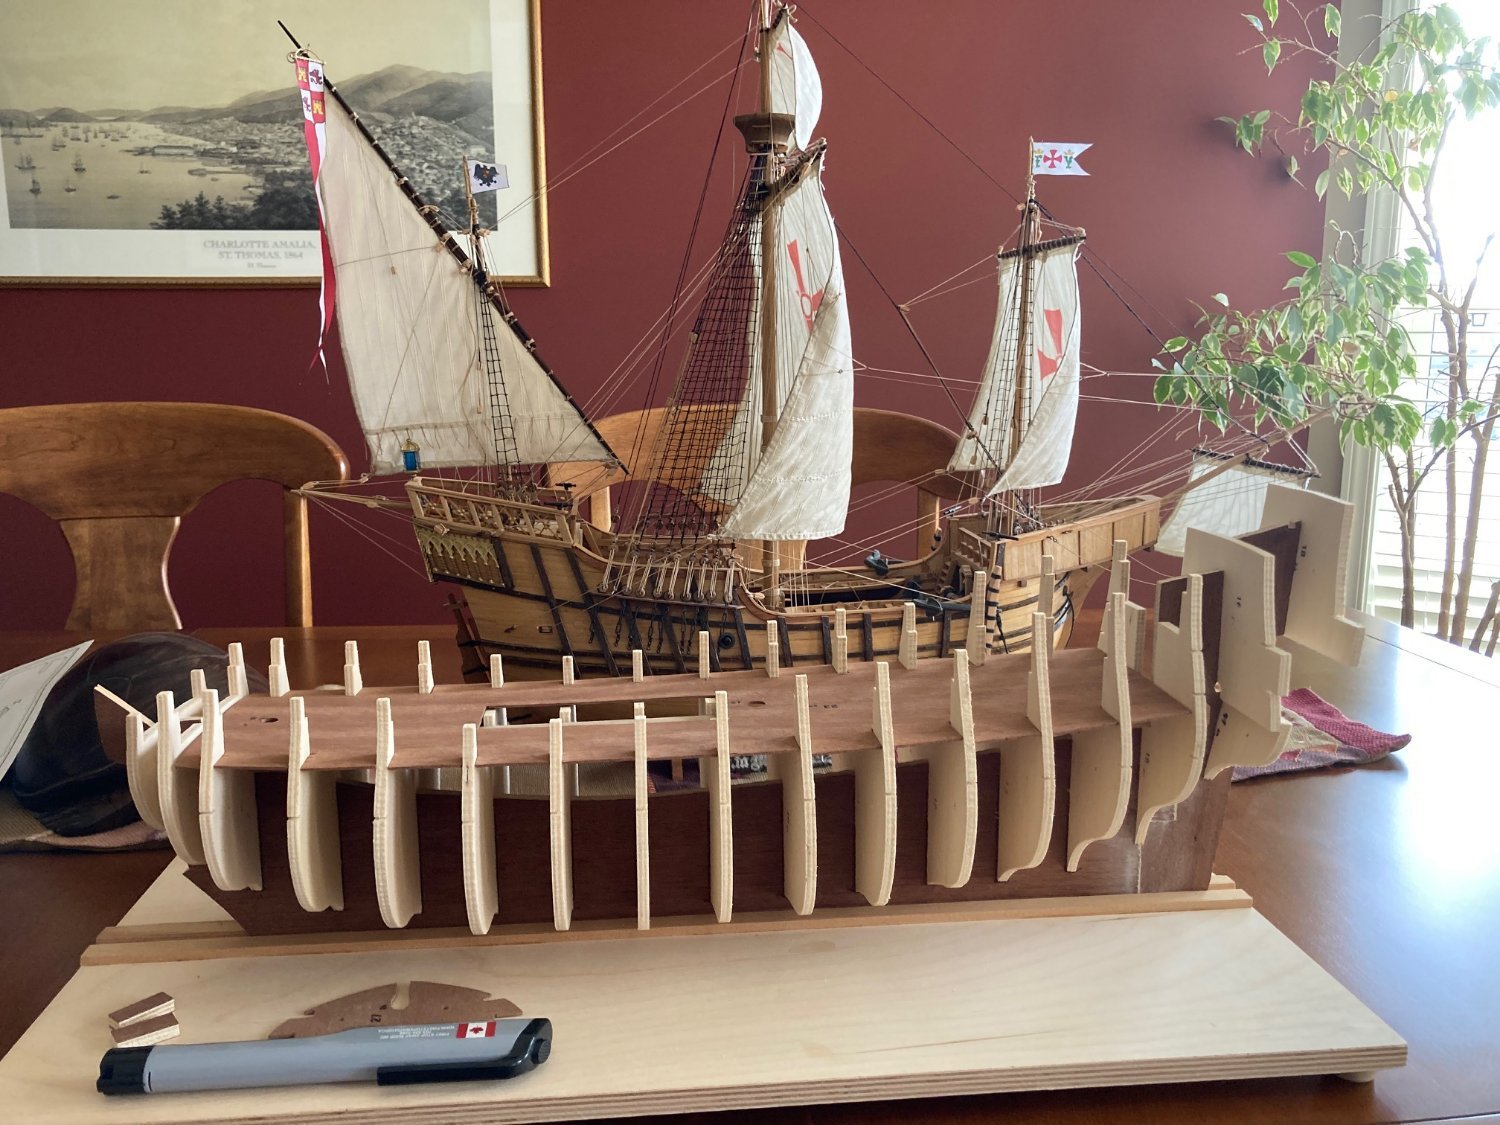
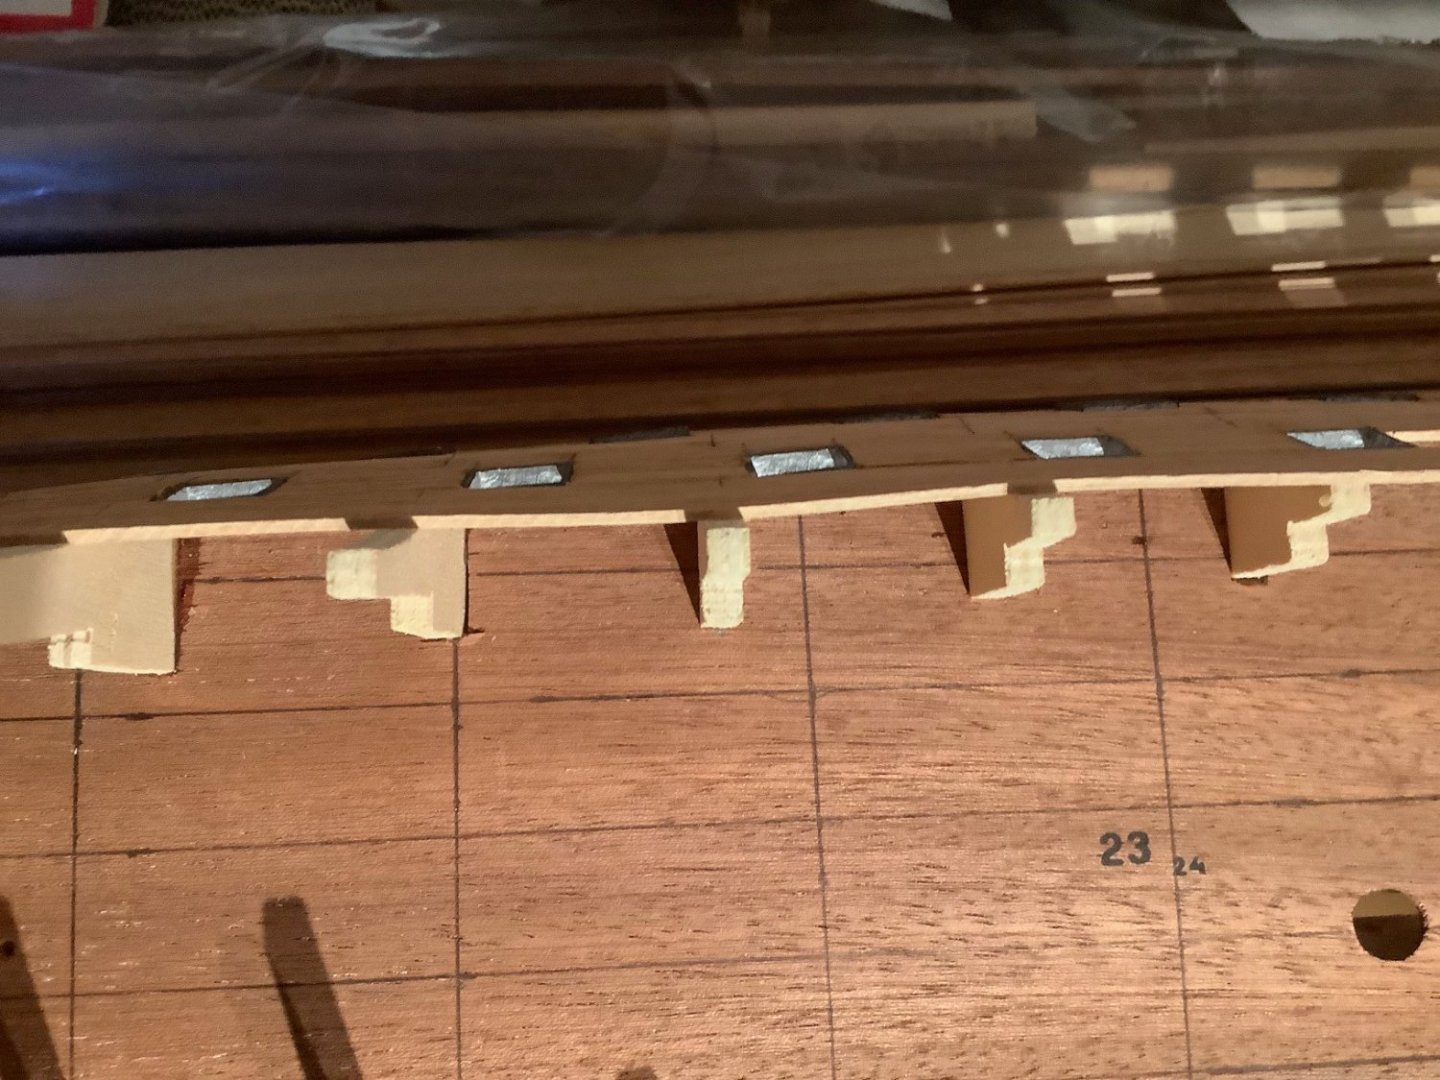
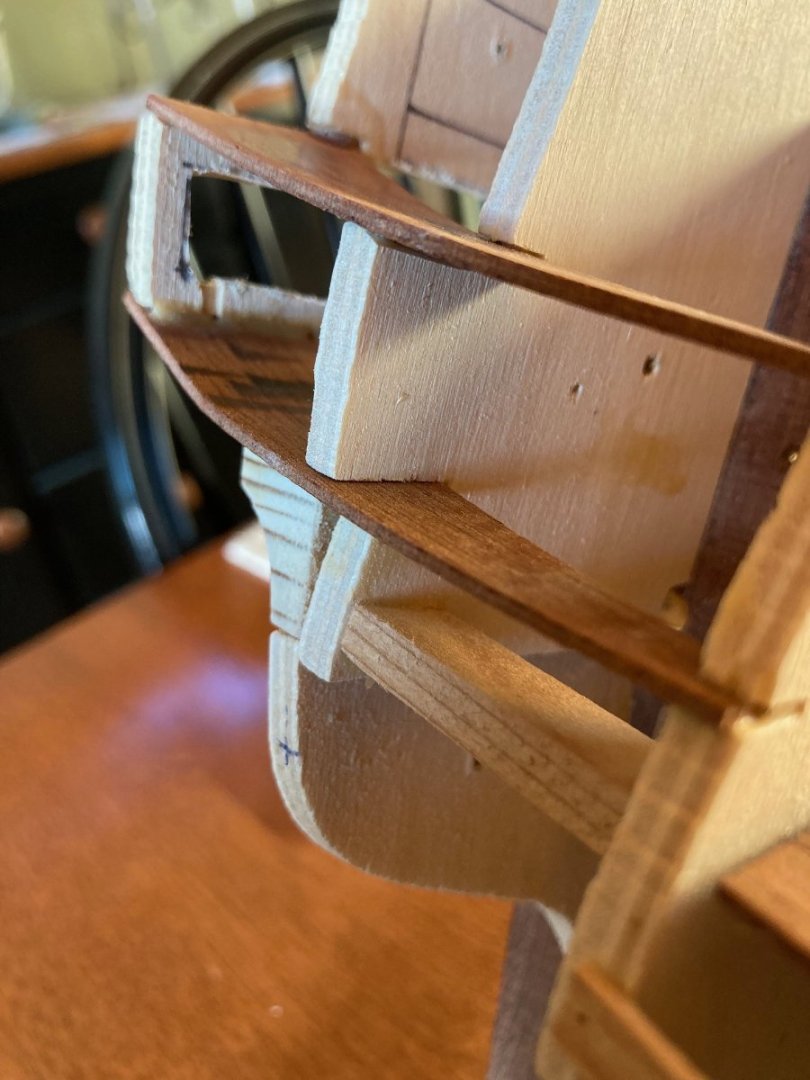
There is a number of ways noted on some of the other Friesland build logs on MSW in how to frame out the gunports but I followed the directions per the Mamoli plans with success. I loose fit the ports and created the ledger boards above and below watching for the sweep from the bow to stern. Once satisfied, I then glued the ports in with CA glue tweaking their alignment in the initial seconds before the glue firms up within the confines of the ledger boards directly above and below. I planked above noting that the main gun deck needed to be accounted for and according to the plans, there was 18mm from the bottom edge of the main gun deck ports to the top of the dummy port edges. On visual inspection, the gun ports adequately followed the main deck sweep with some minor adjustments of the flanges between frames, either up or down by a mm or two as they are not secured and essentially float between the frames at the moment (PS easier to visualize the individual flanges between the frames if you look at my posted images from yesterday). I am basically current now in terms of the build log and current state of the build. Progress will be slower at this time... Thanks for all the likes!


-
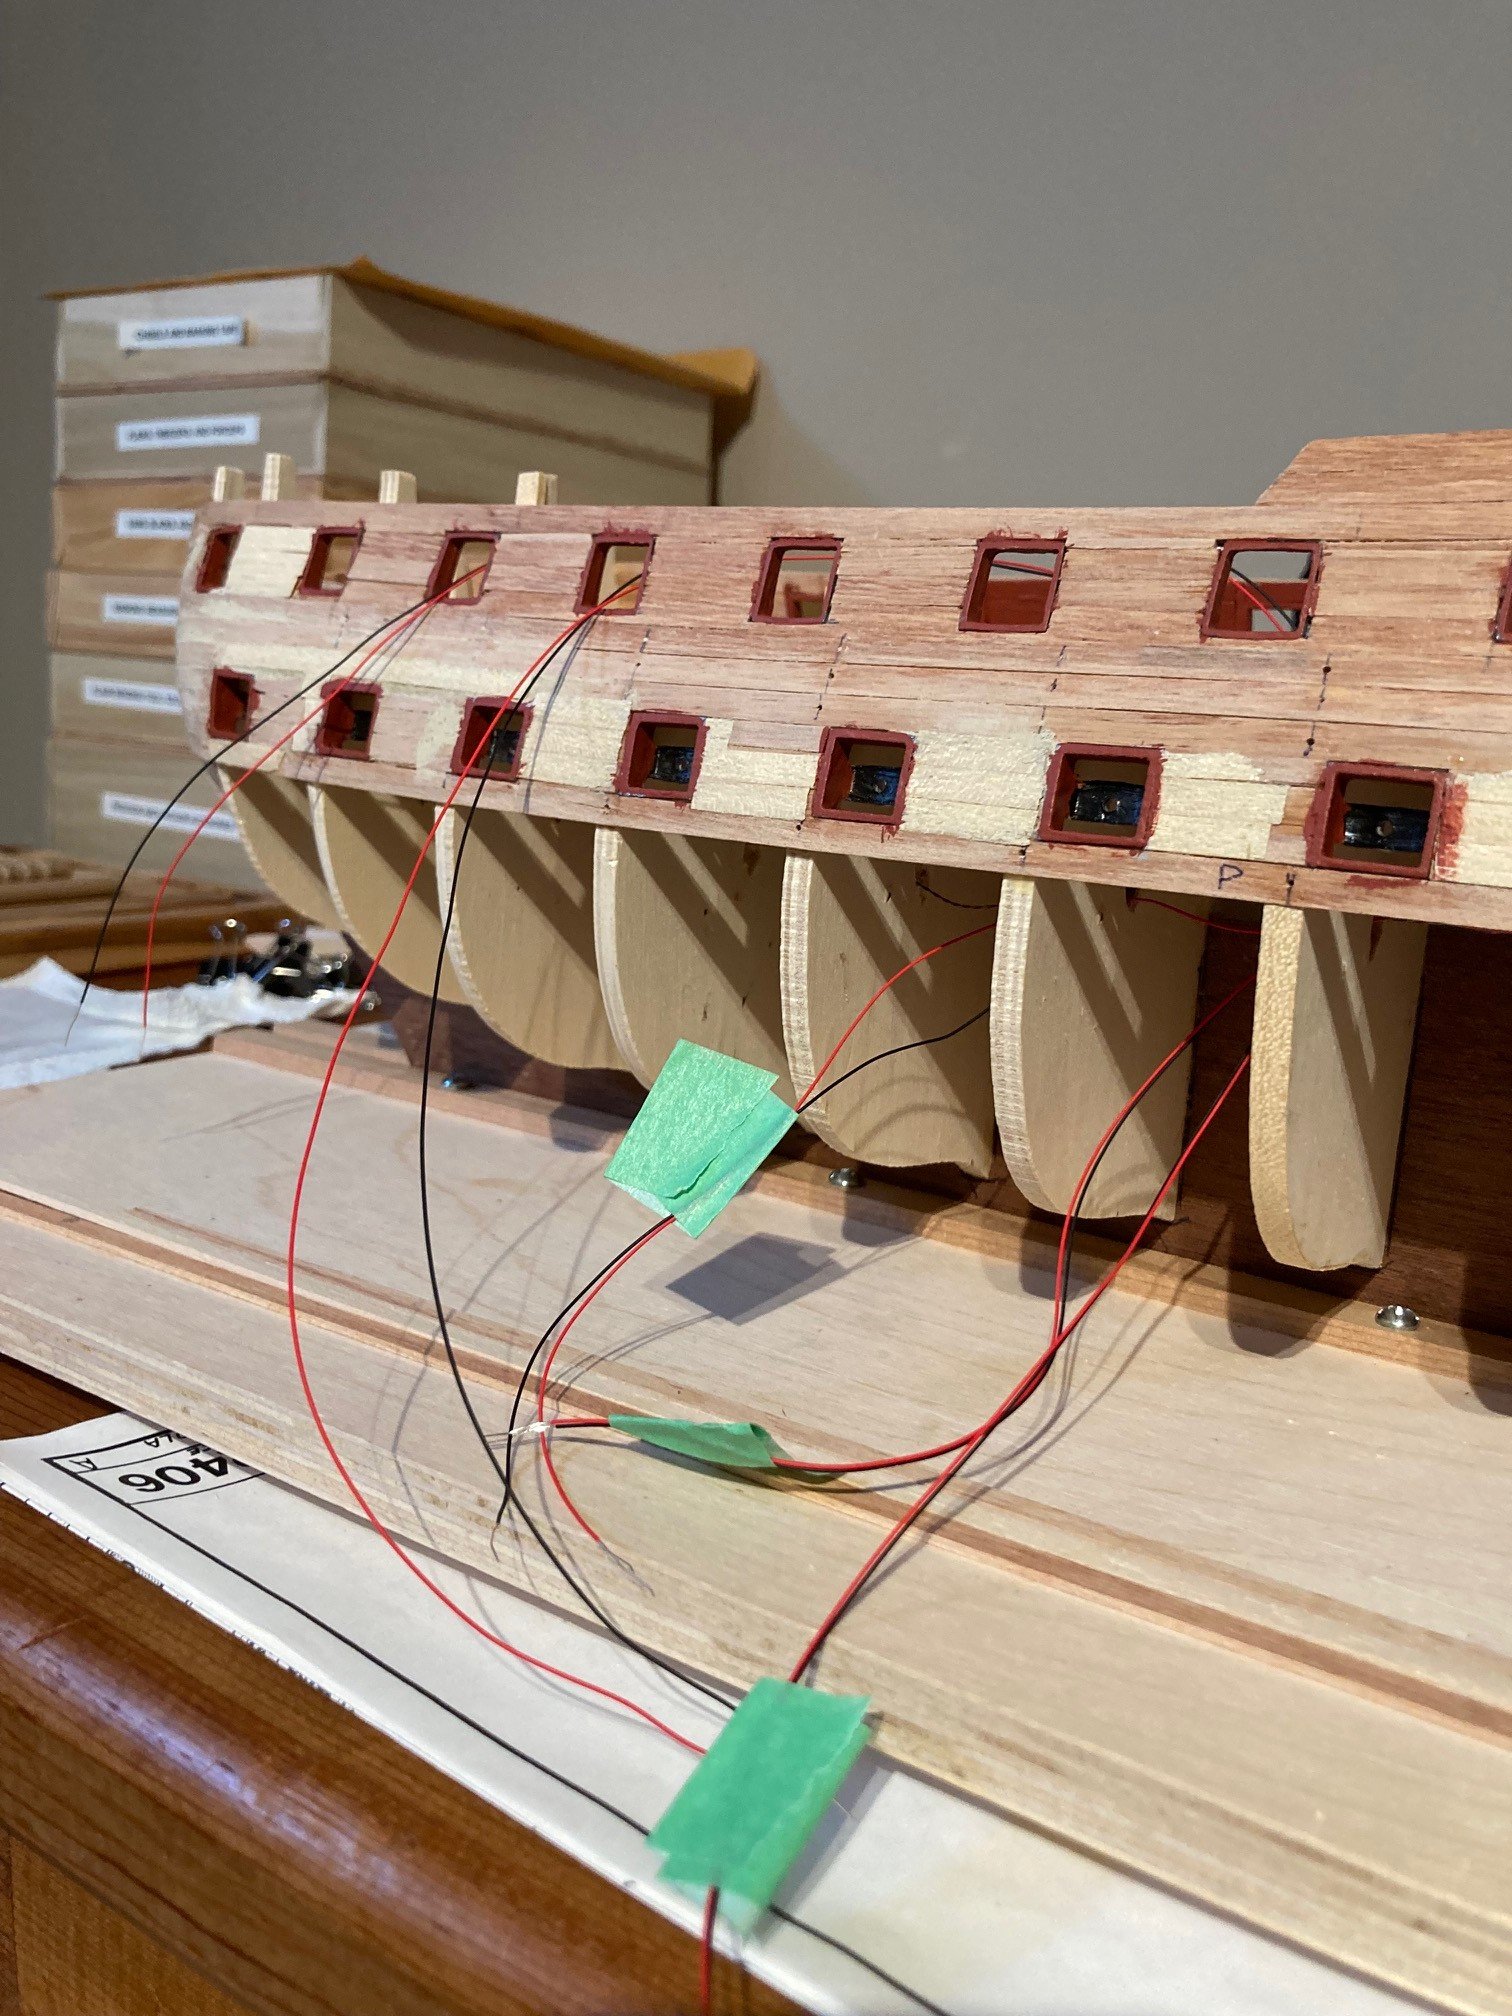
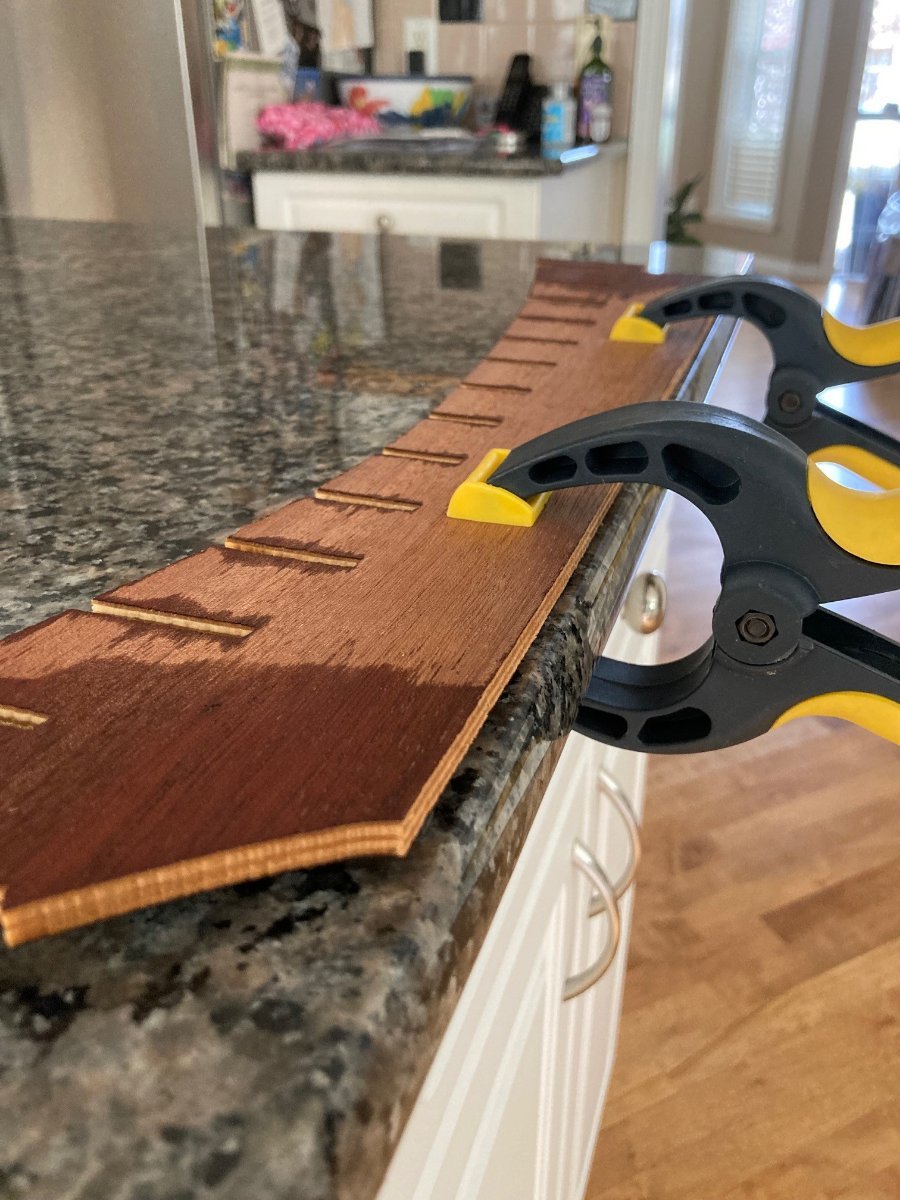
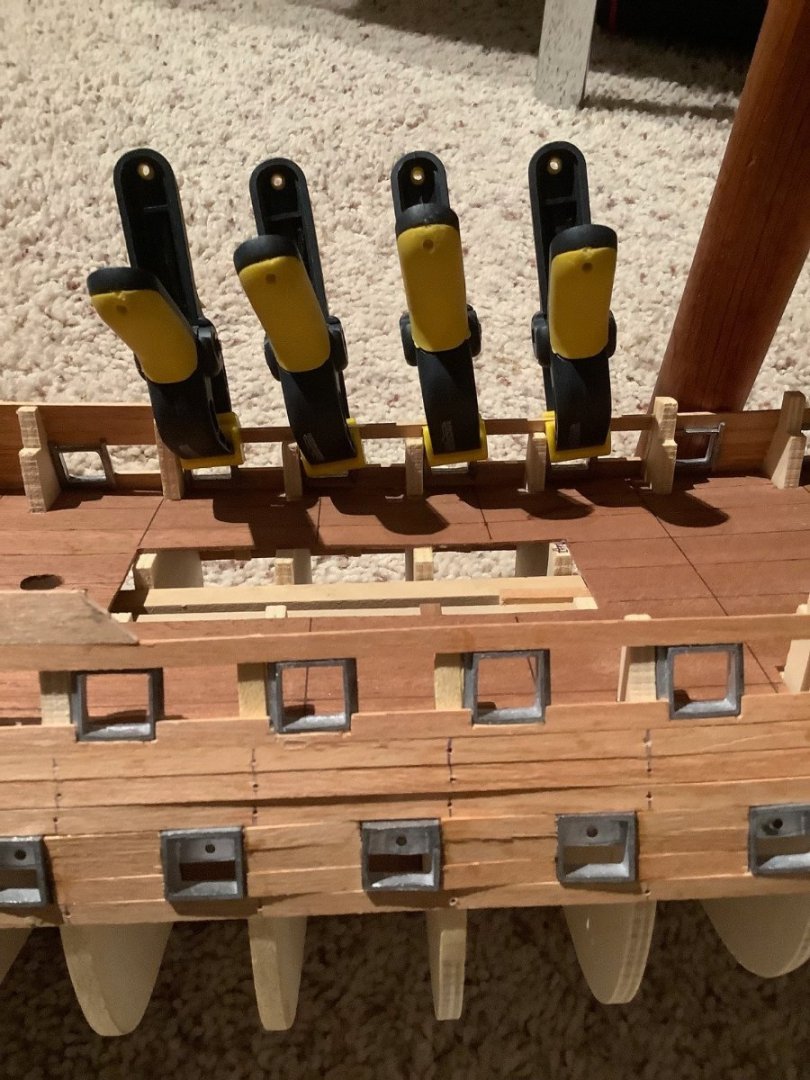
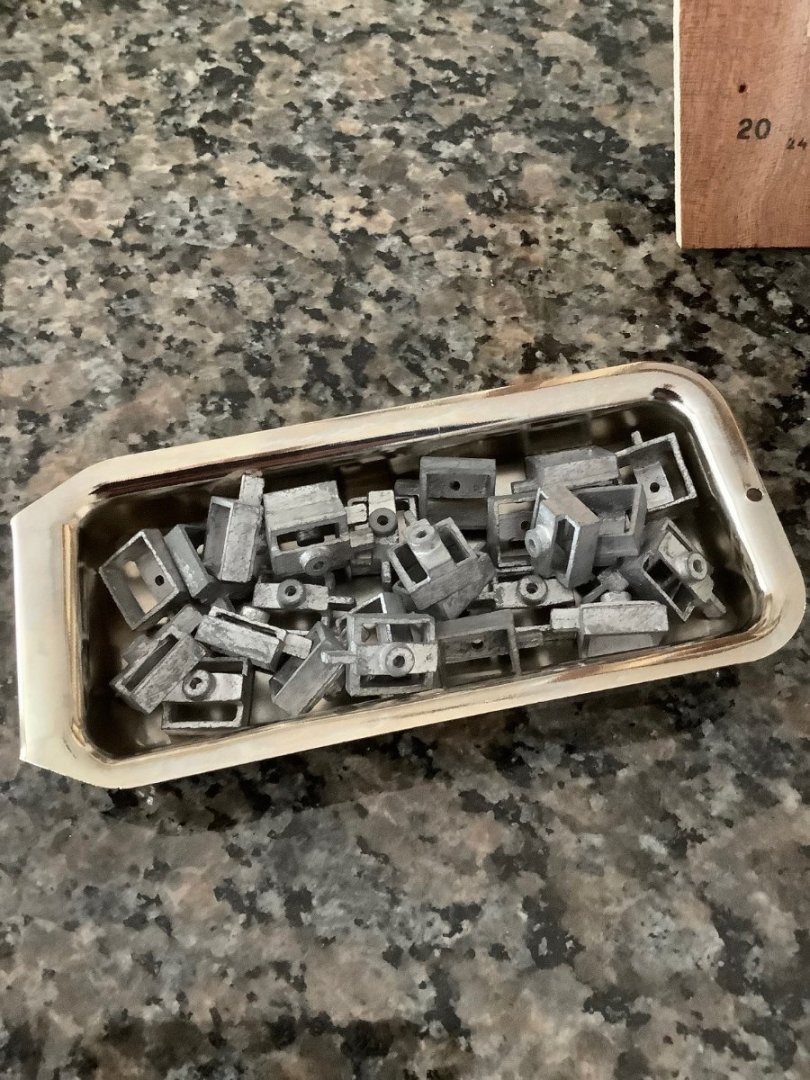
Last post for today... Going to use the supplied cast metal gun ports but as you can see from the first photo, my kit was not so lucky as other Friesland builds for getting a nice clean run when putting a strip of 1.5x5mm wood into the precut slots. I unfortunately had the pleasure of widening and deepening the slots in order for the gun port tabs to fit into place and get that nice sweep of the gun ports laid out.


-
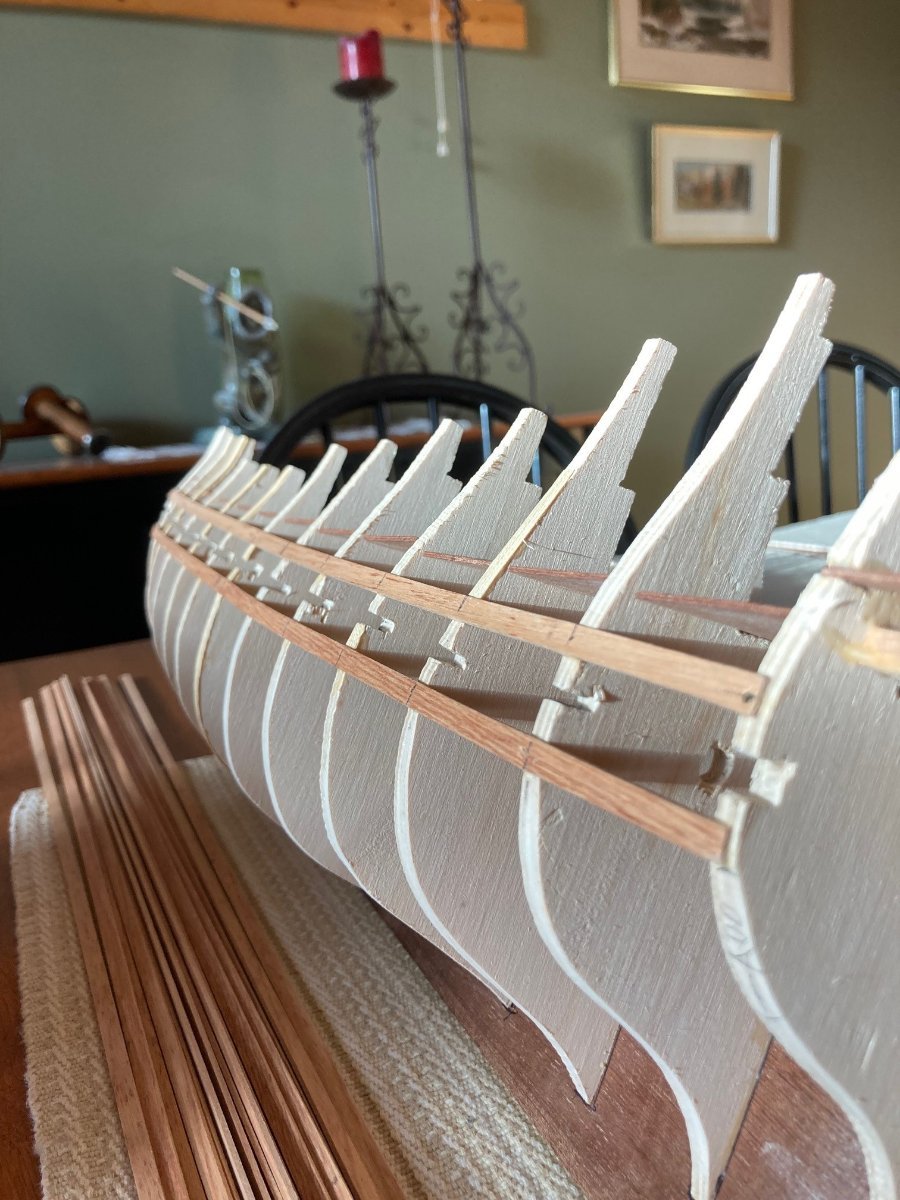
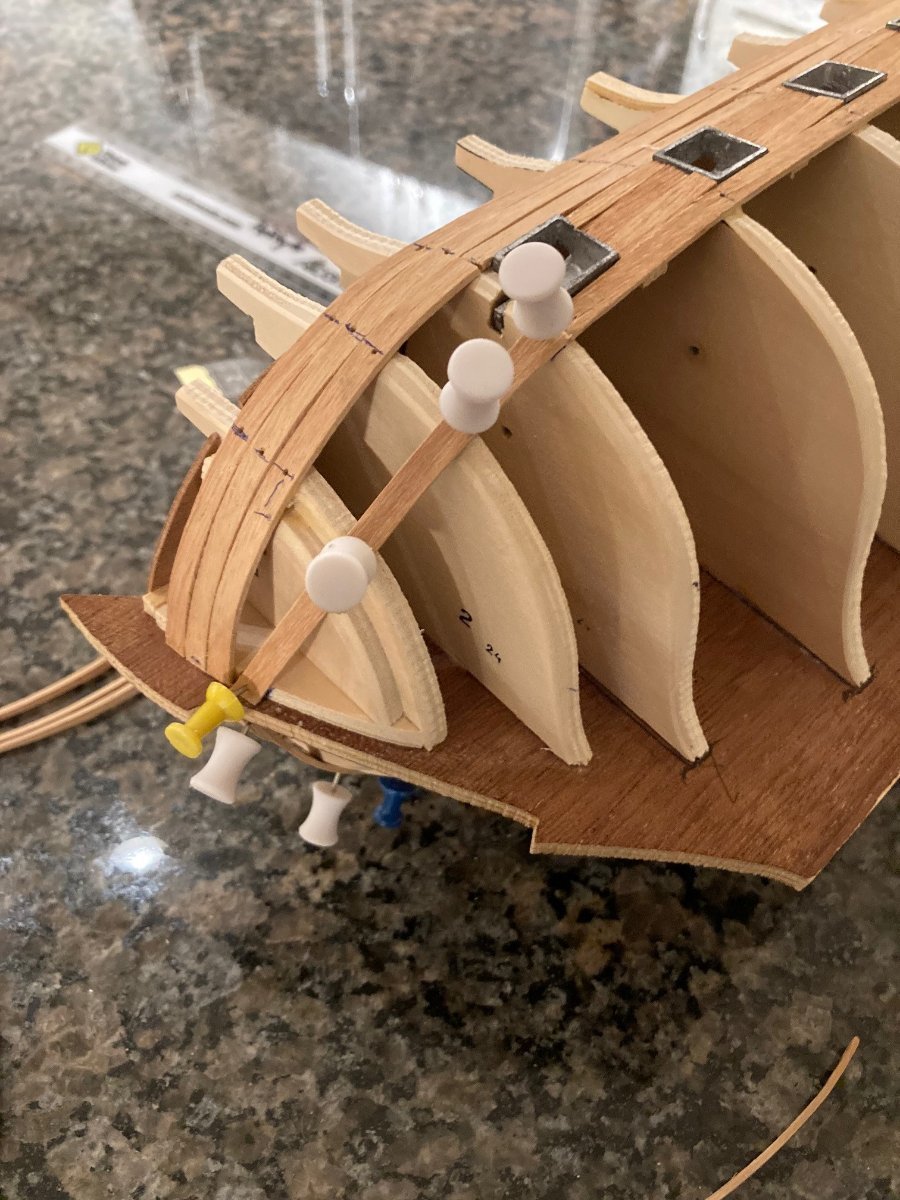
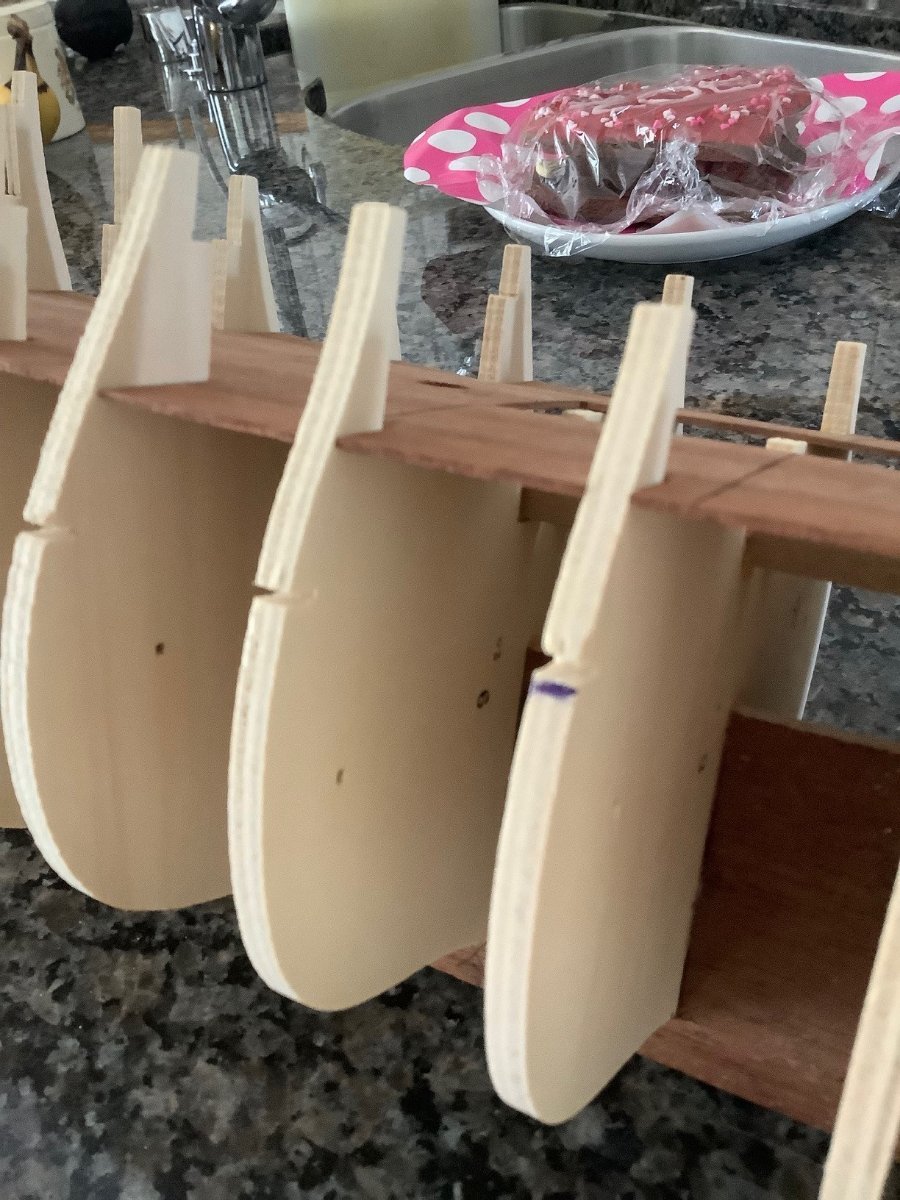
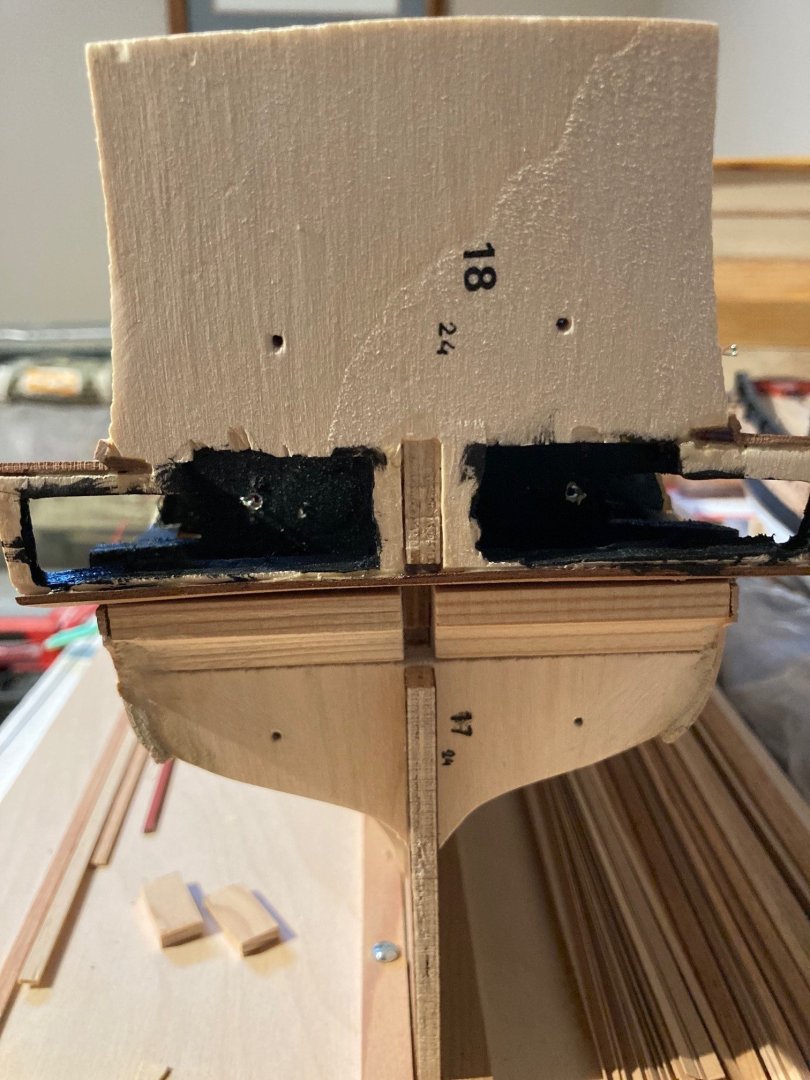
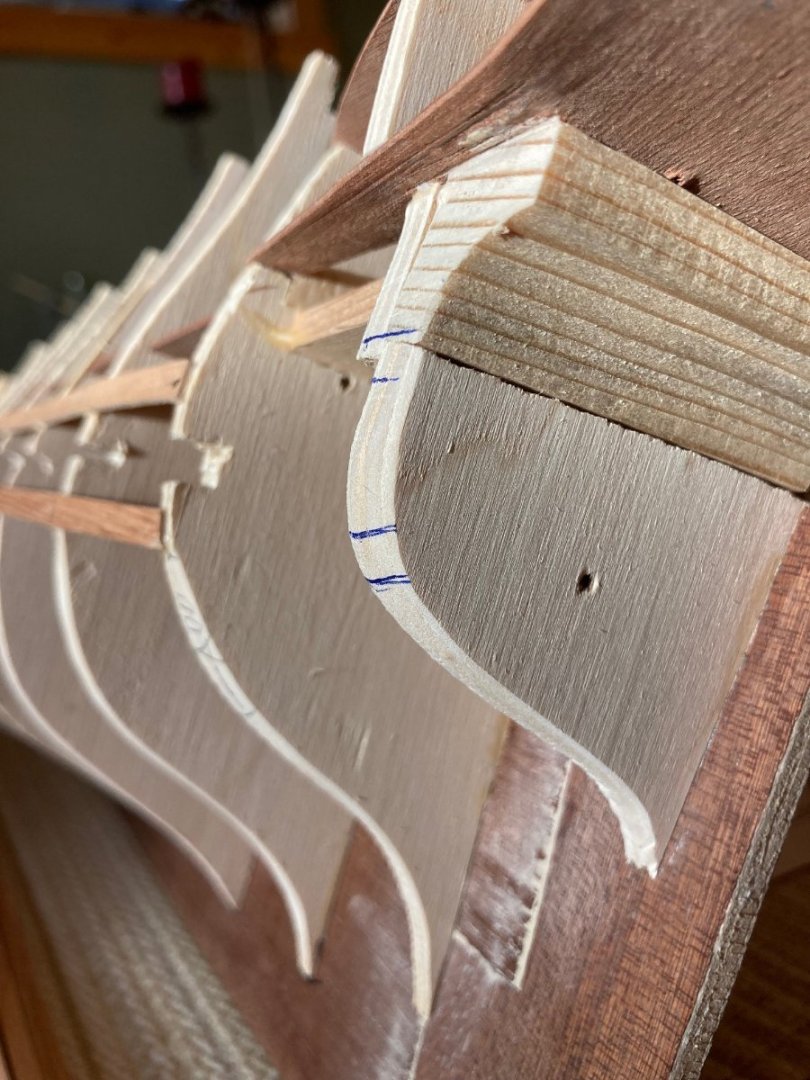
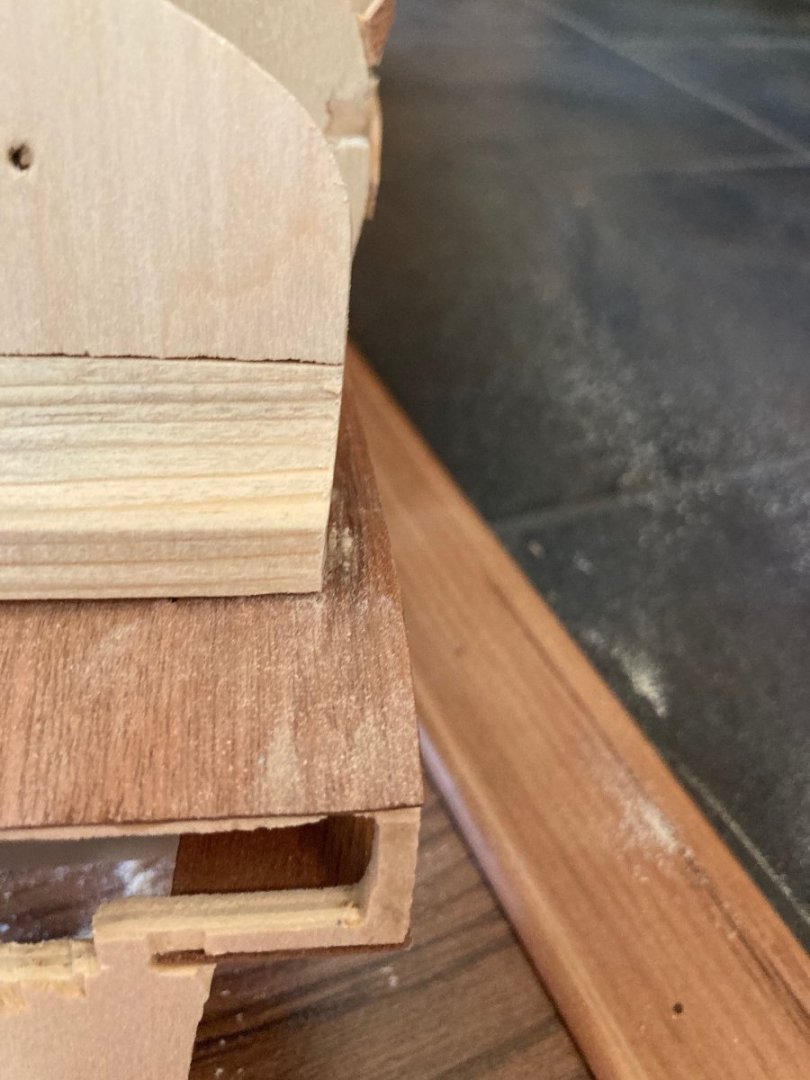
Deck fit nicely... I had no issues with the stern frameout, along with the quarterdeck framing.... I am going to add some LED lighting effects, so some cutout work was completed (in that last frame where the cabin and windows are to be situated).


-
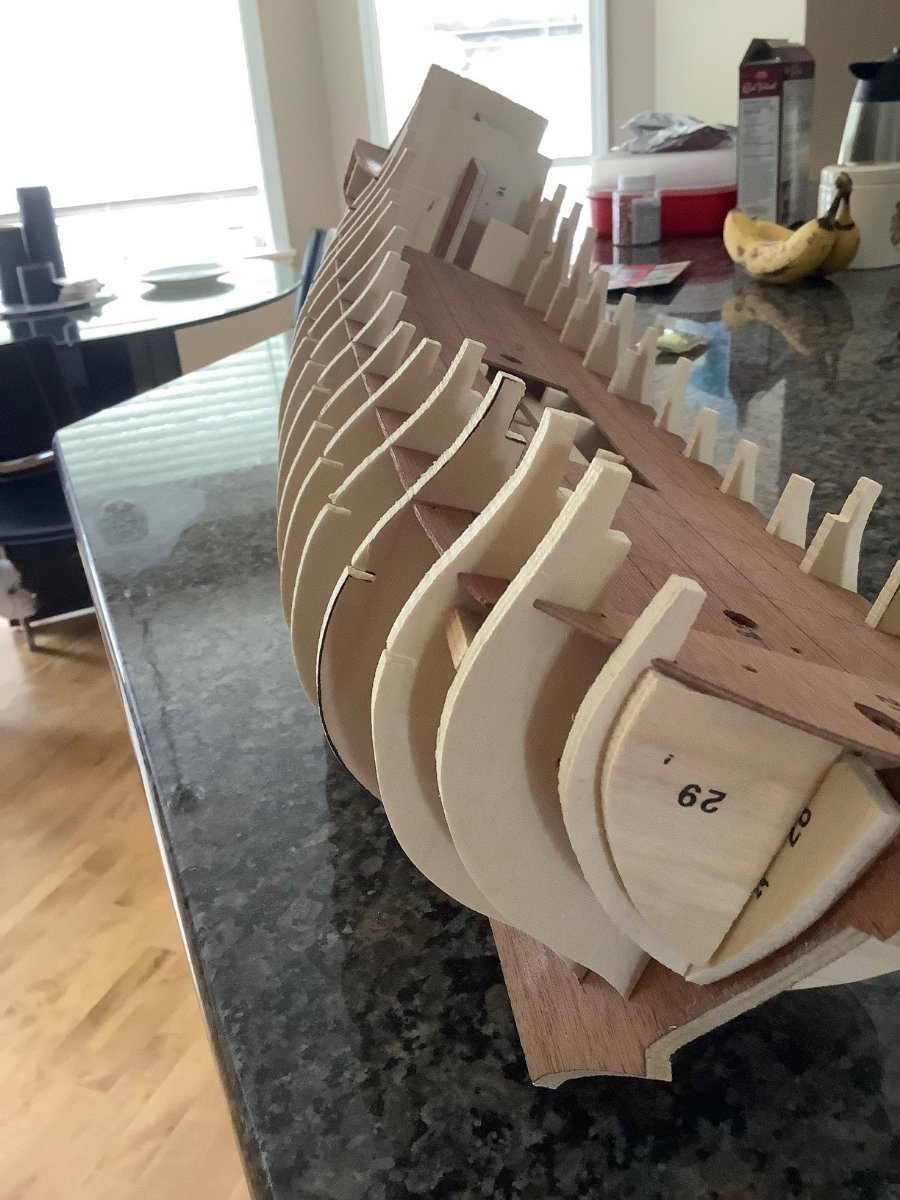
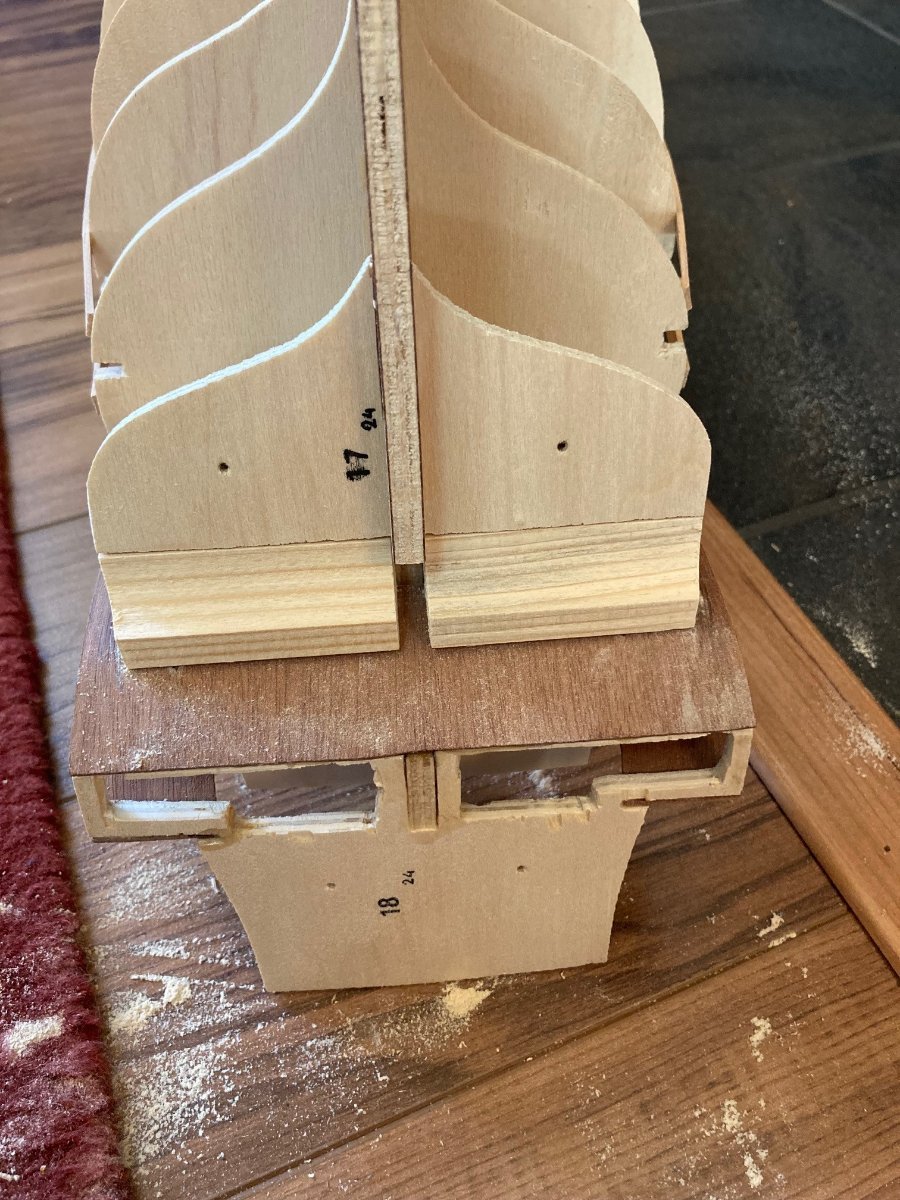
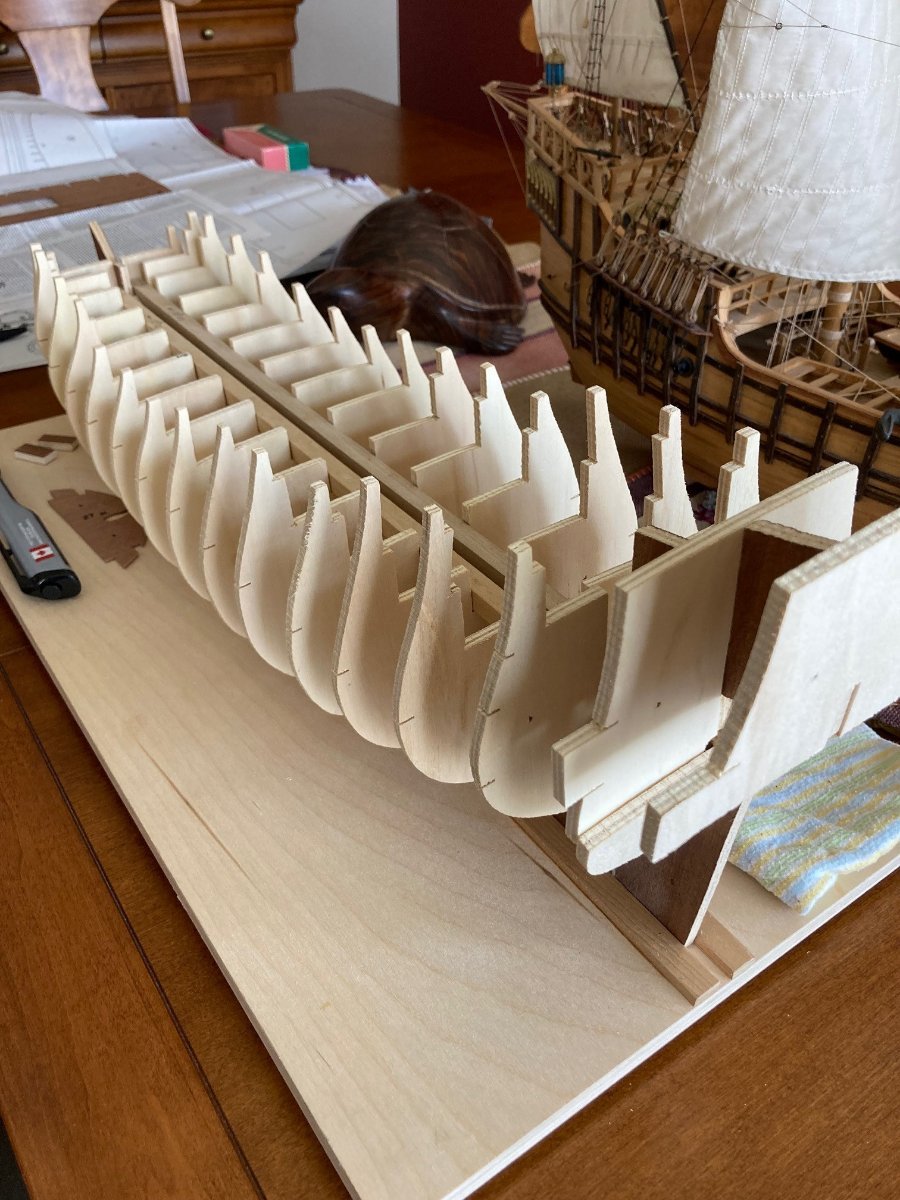
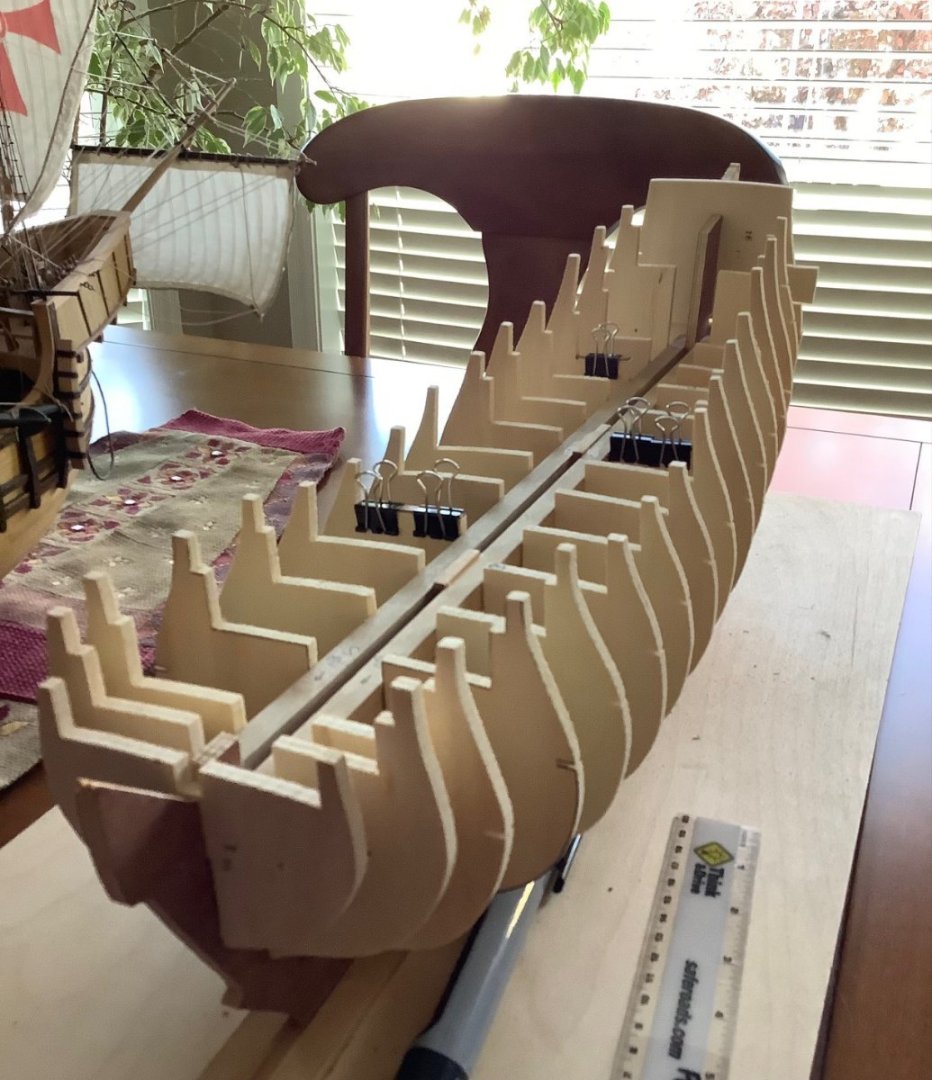
I had started this build in the fall and only now starting the build log so I have a few posts before I am up to date. Lots of fitting issues but always able to find solutions. This old kit is obviously prior to laser cutting and likely even prior to CNC cutting. The centering sticks (10x10mm) running along the midline (for the frames) also had some warping but I was able to create enough symmetry to be happy. I had to though add some 0.5 and 1.0 mm strips of wood on the inside tops of the frames as well some on the outside frames to create that extra "ounce" of symmetry from inside out and side to side. The deck fit relatively well onto the frame tops (lucky for me).


-
Yes, I have heard about this New Amsterdam… a small town in New York State I believe.
-
Thanks Mugje! The ship is as beautiful as the country... been to Holland a number of times as my wife is Dutch by only one generation past as her parents were born in Indonesia and Holland. Most of our time has been spent in Amersfoort, Hilversum, and of course Amstersdam. Her ancestral roots though are from Rotterdam. Anyways, a few more pictures... the deck is just dry fit at this time.


-
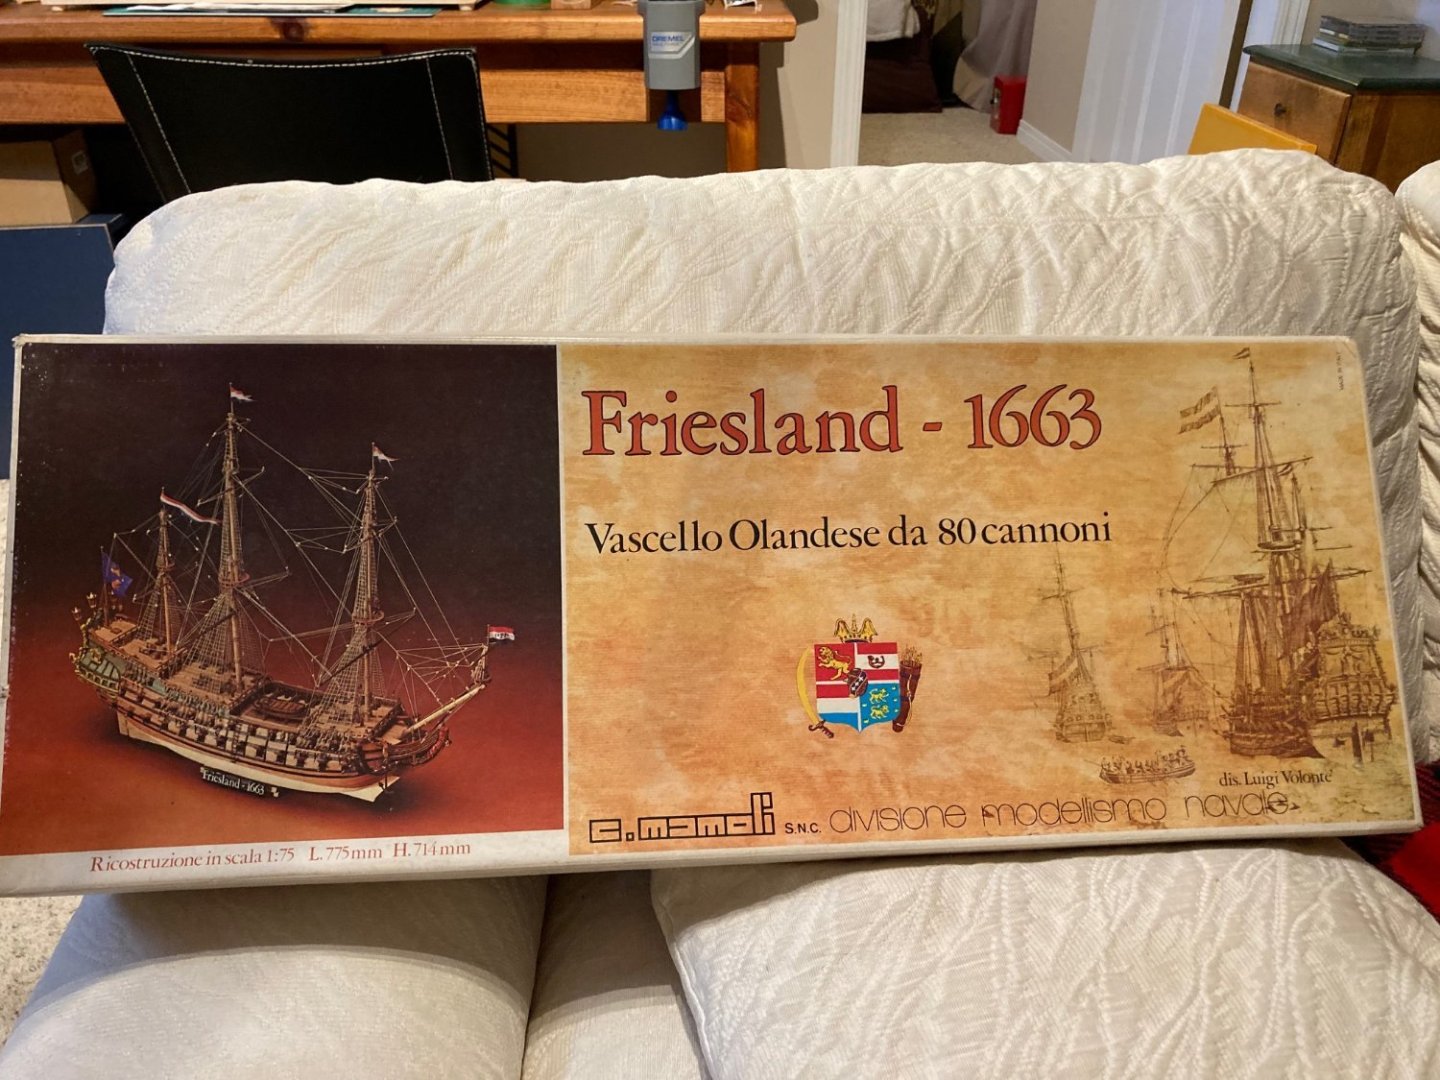
PS I forgot the token opening Box photos to begin my log...


-
Thanks Zappto! You have one of the main Friesland build logs that I have referenced the most in these early stages of development... cheers!
-
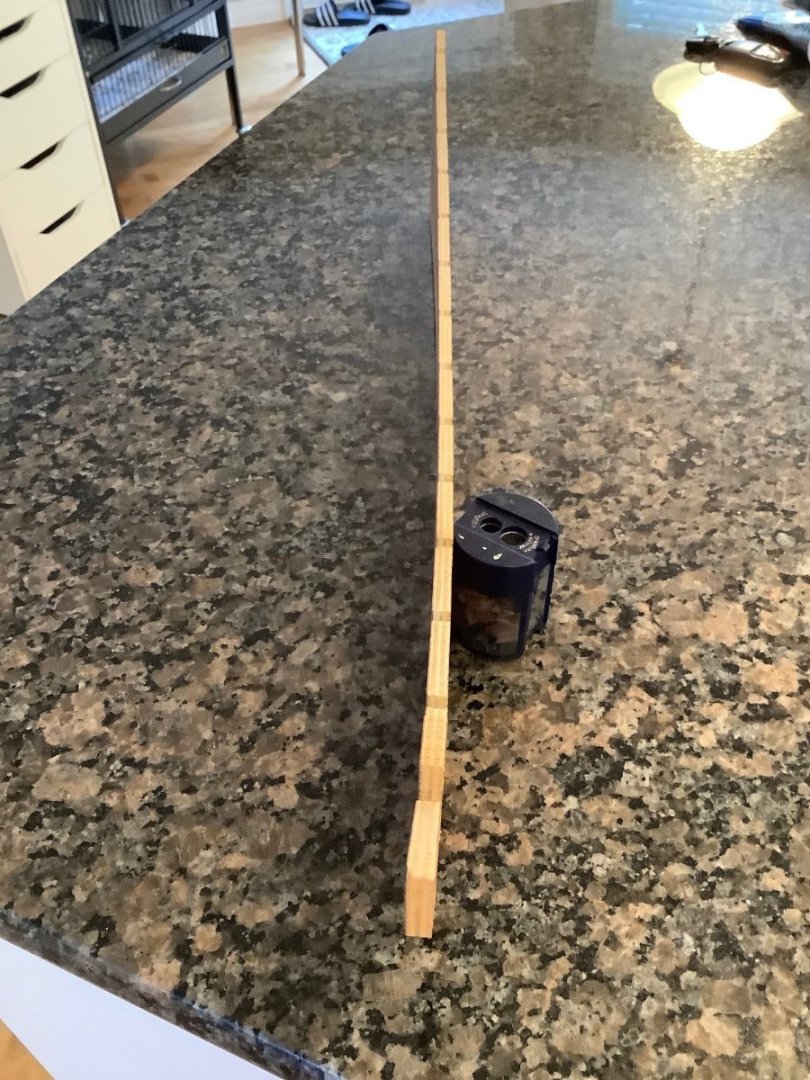
Thanks Knocklouder... I forgot to take a picture of the straightened keel down the length but... it is straight now!
-
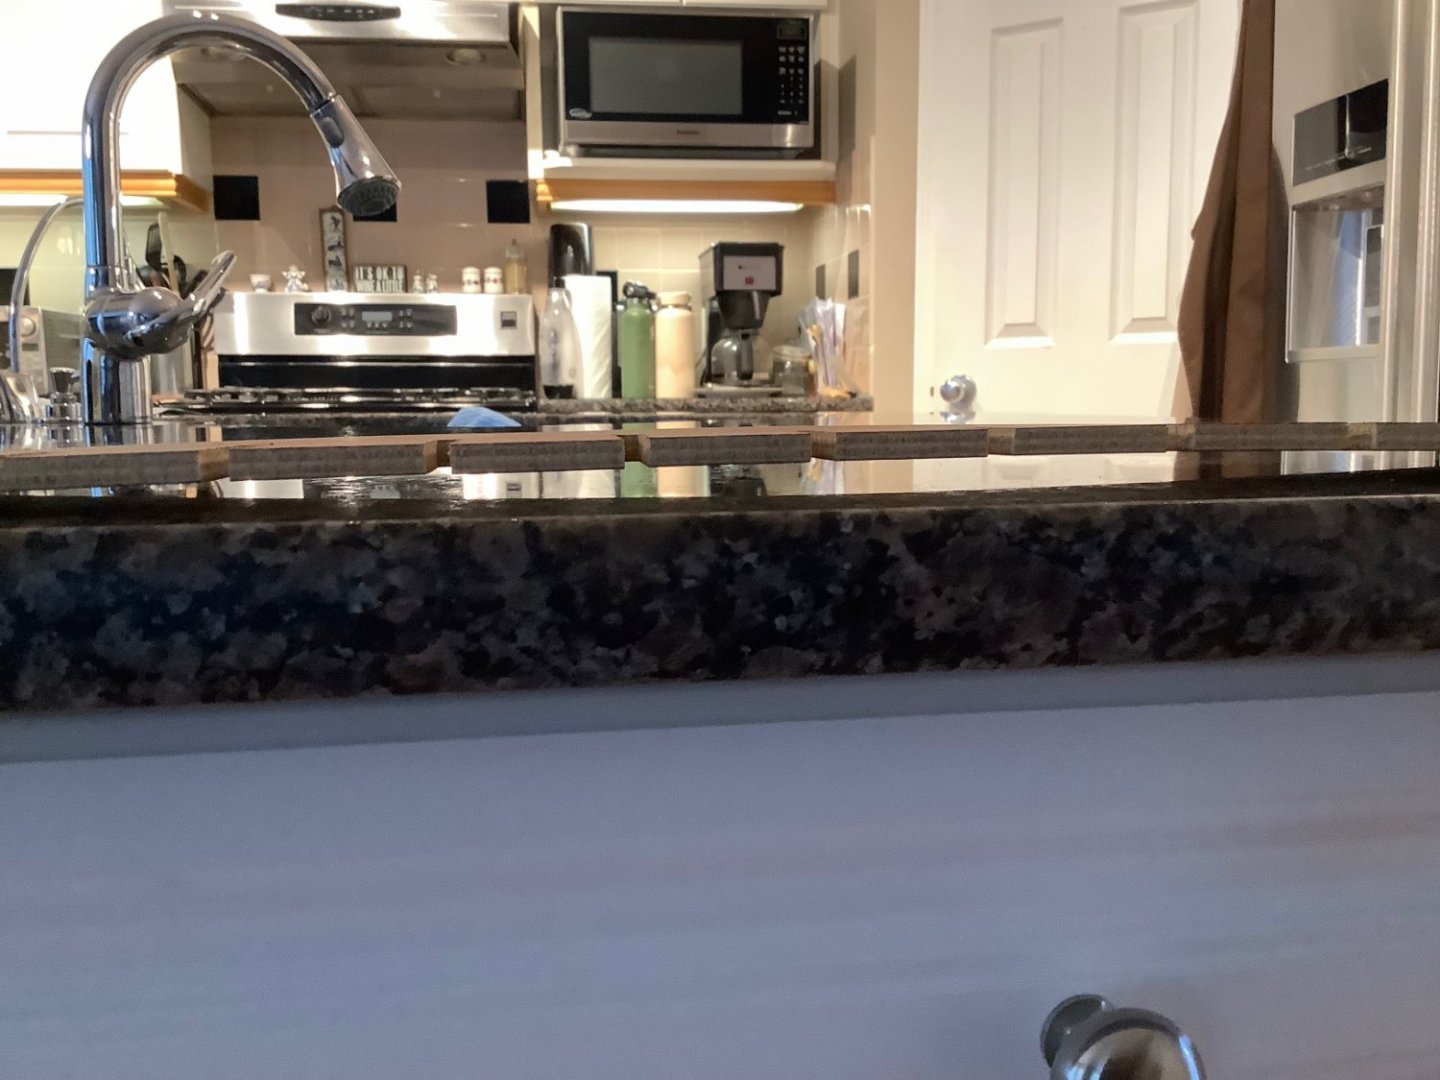
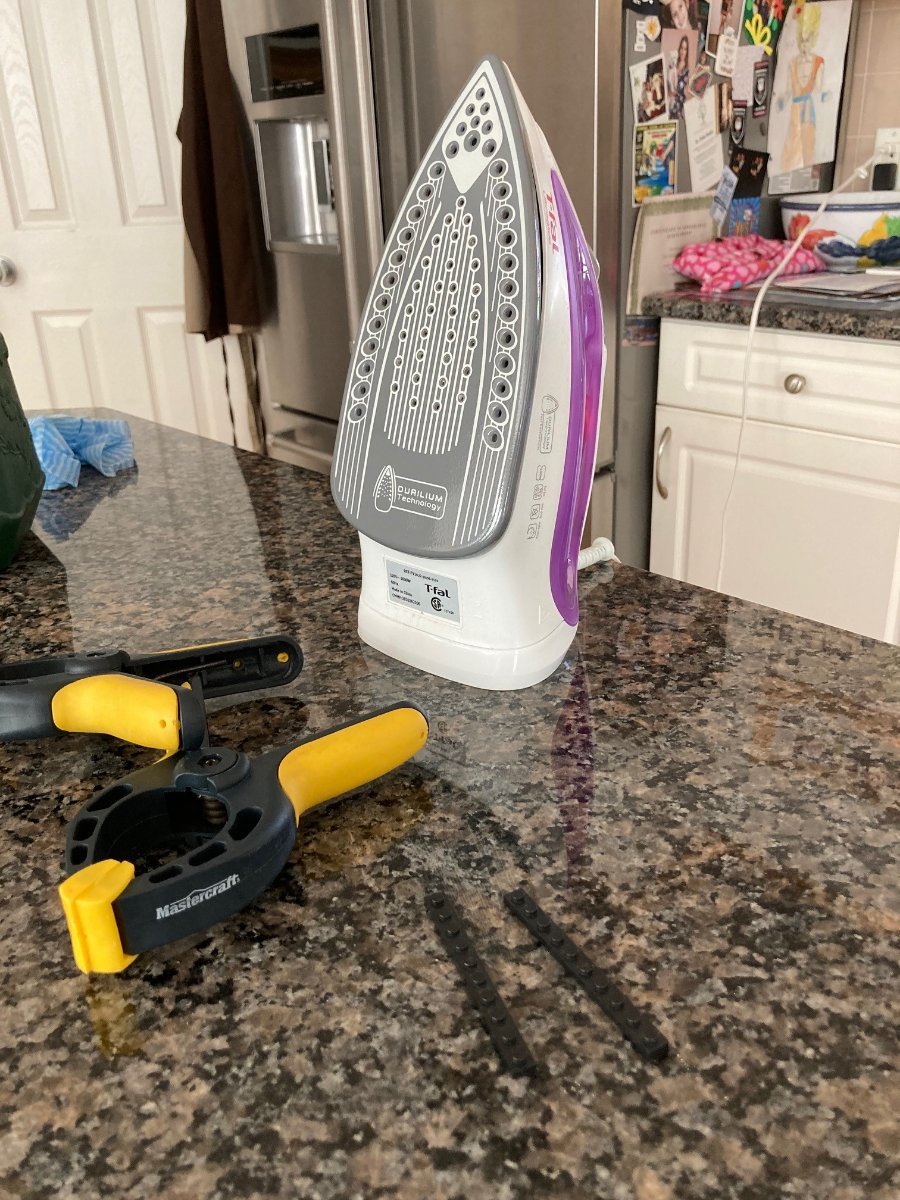
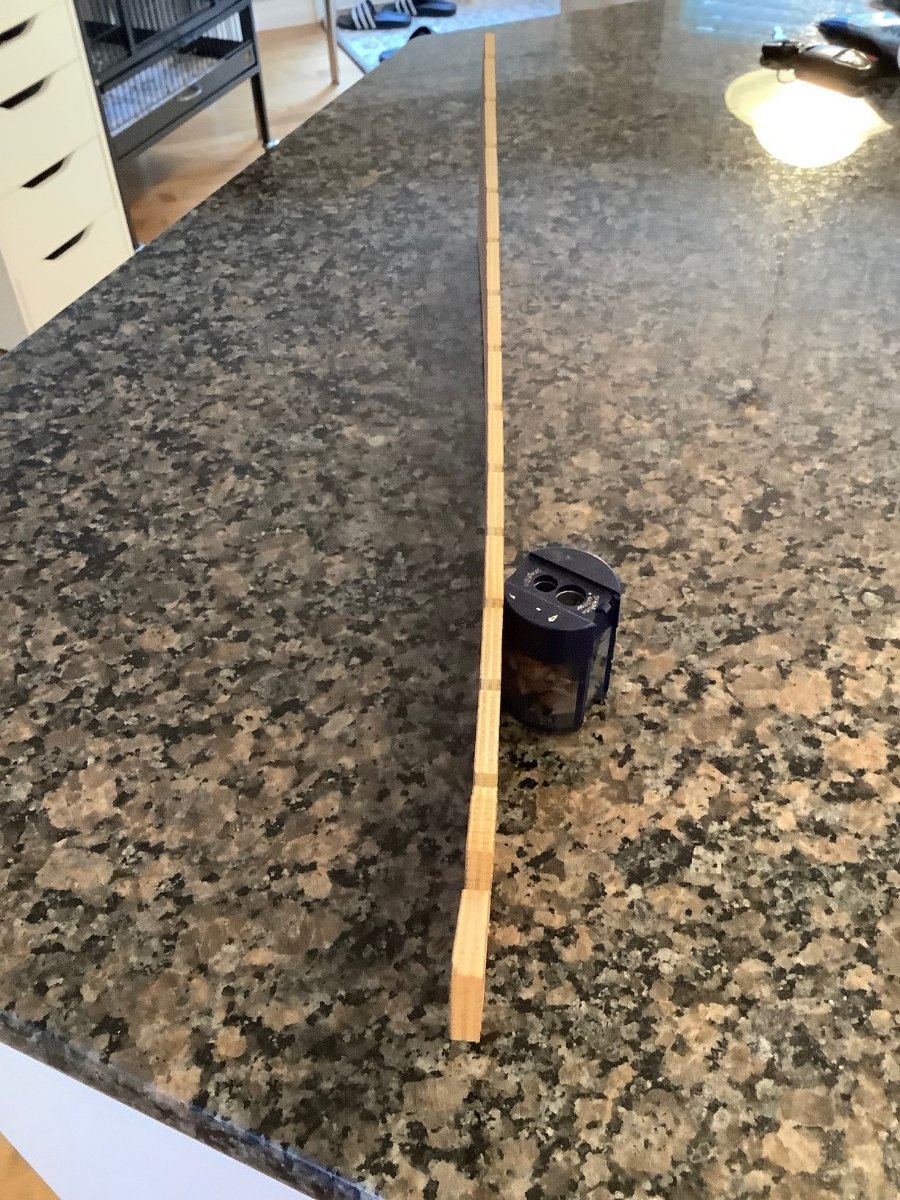
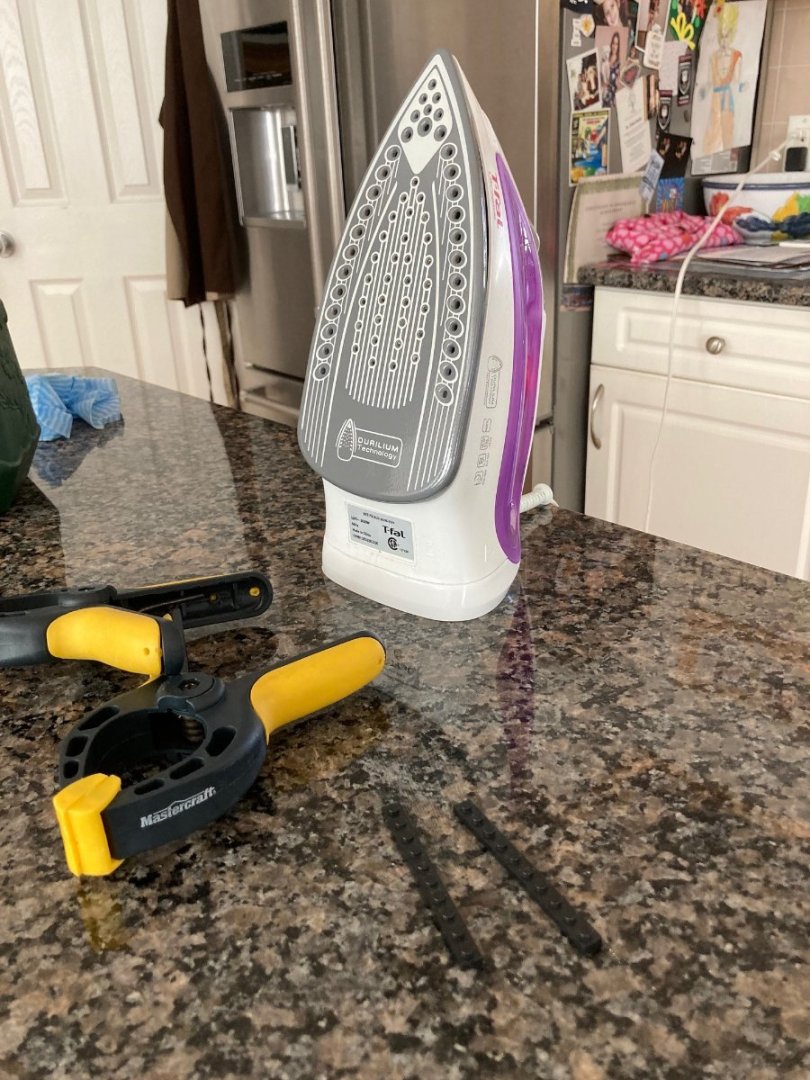
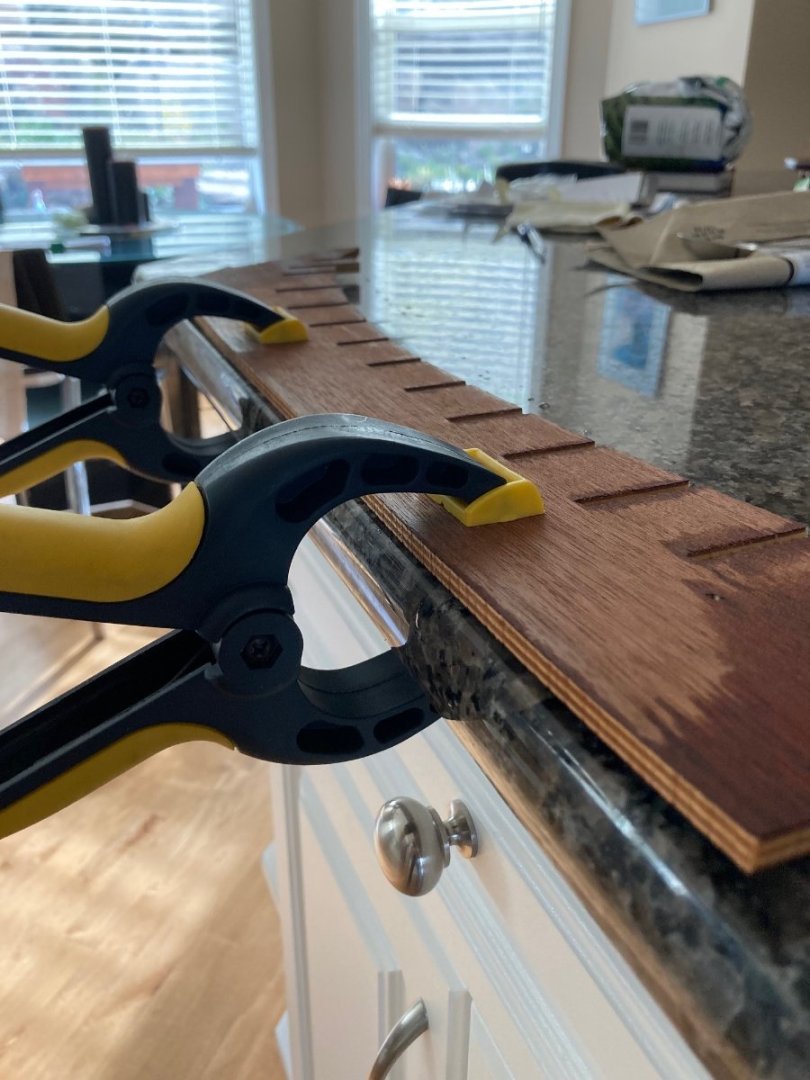
The warped keel was a steam and iron project, repeated probably 7- 8 times to get the result I needed. I did not want to soak the whole keel as it surely would have delaminated (given the kits age) if left in water for any length of time. Steaming and ironing flat and clamping overnight on my granite counter top was not getting the keel straight. I actually put a couple of sticks of Lego fore and aft (as the keel always wanted to return to its warped form when completely dry) to get the keel reverse bent while ironing and while heating the mid section of the keel. I repeated this probably 4 of the total 8 times and FINALLY got the keel to where it needed to be, the keel maintaining a straight line.


-
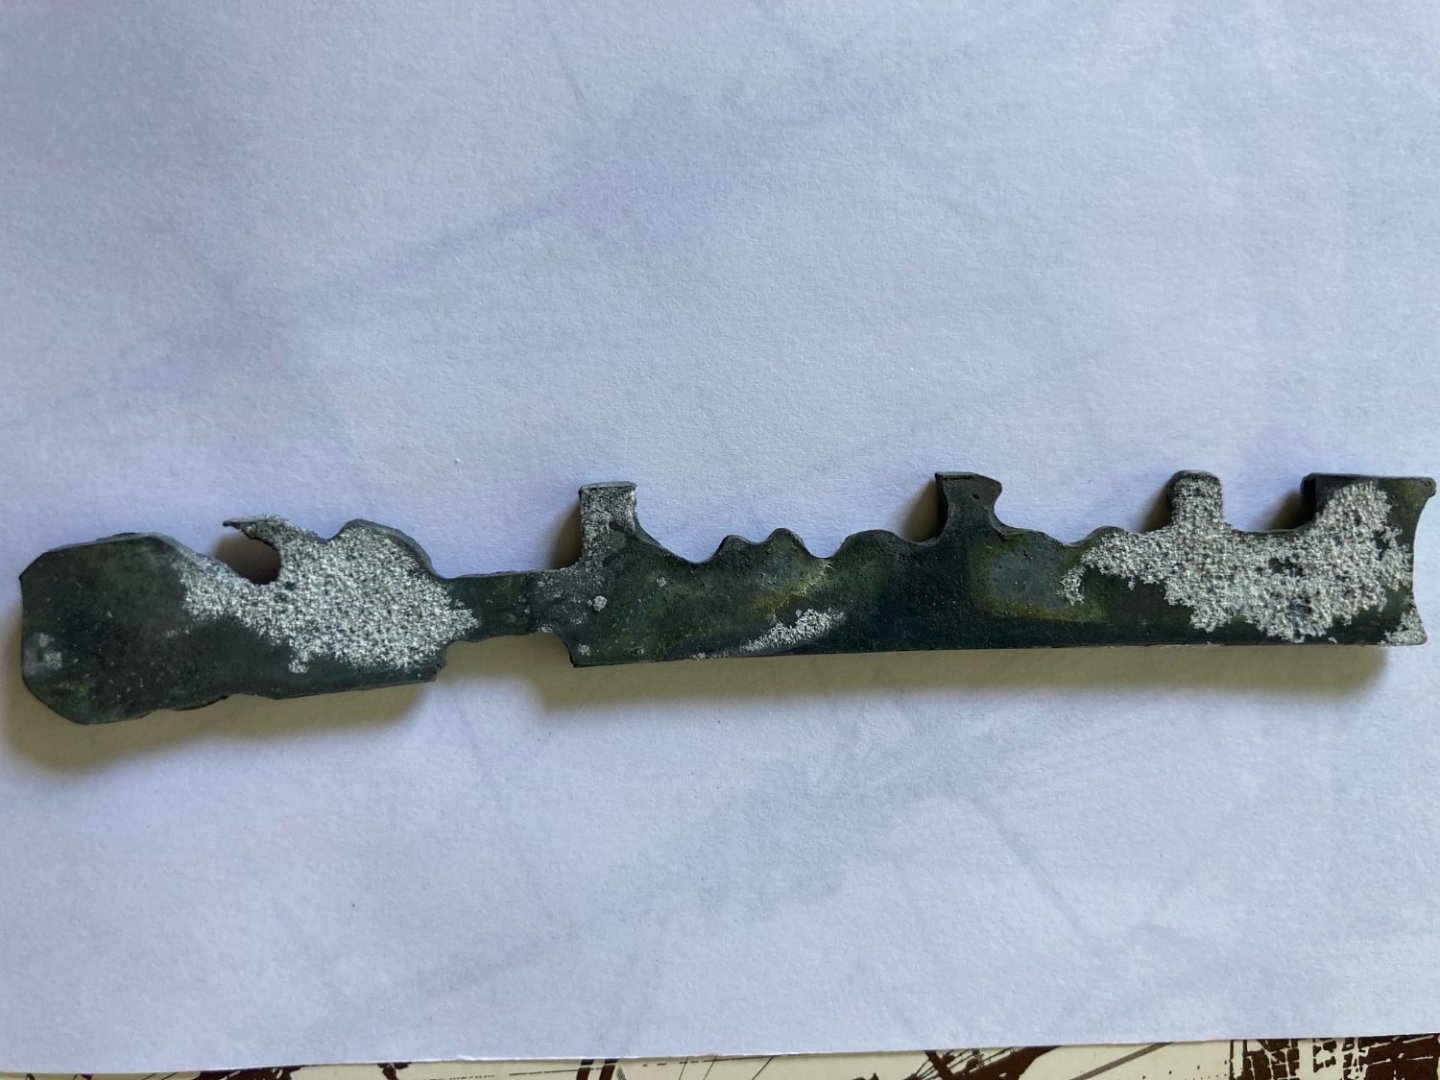
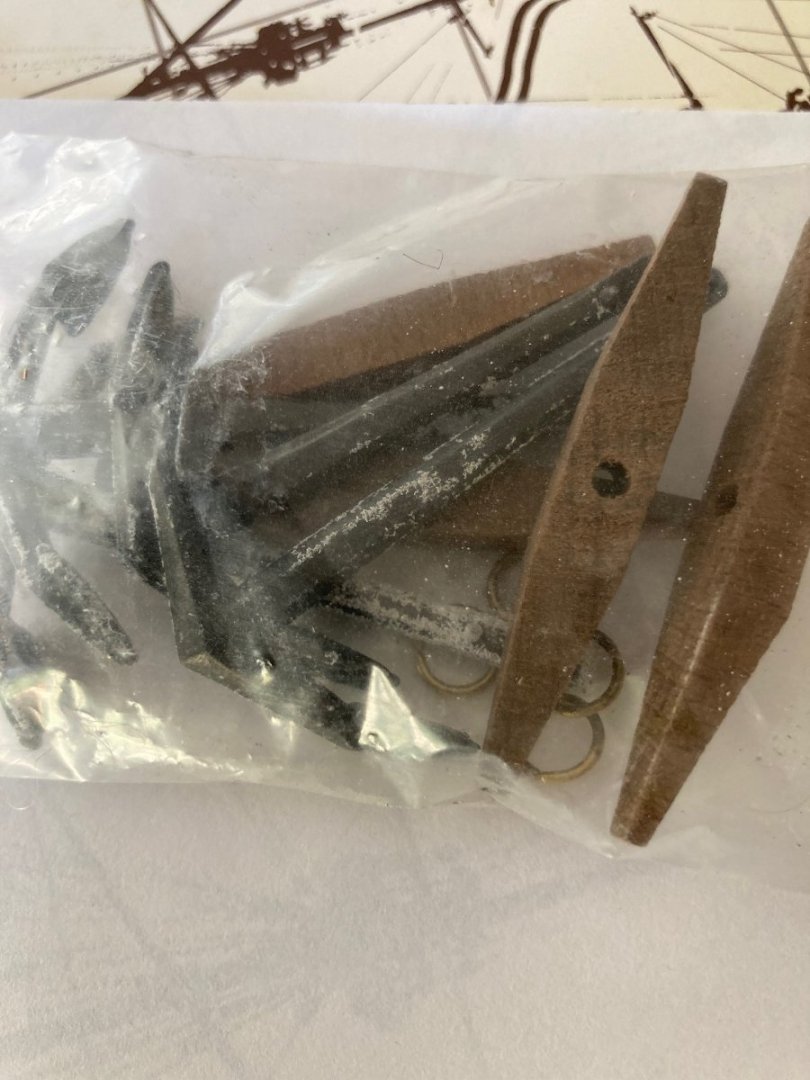
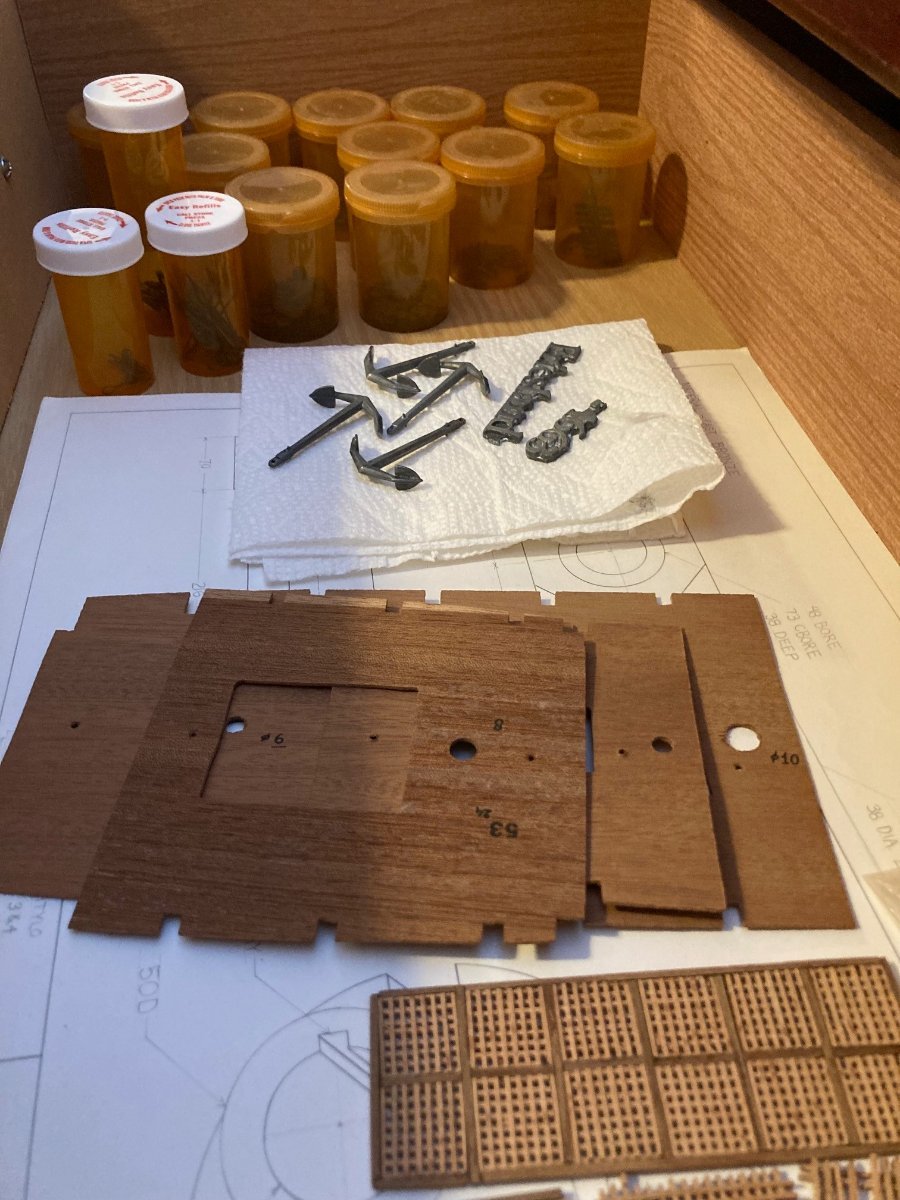
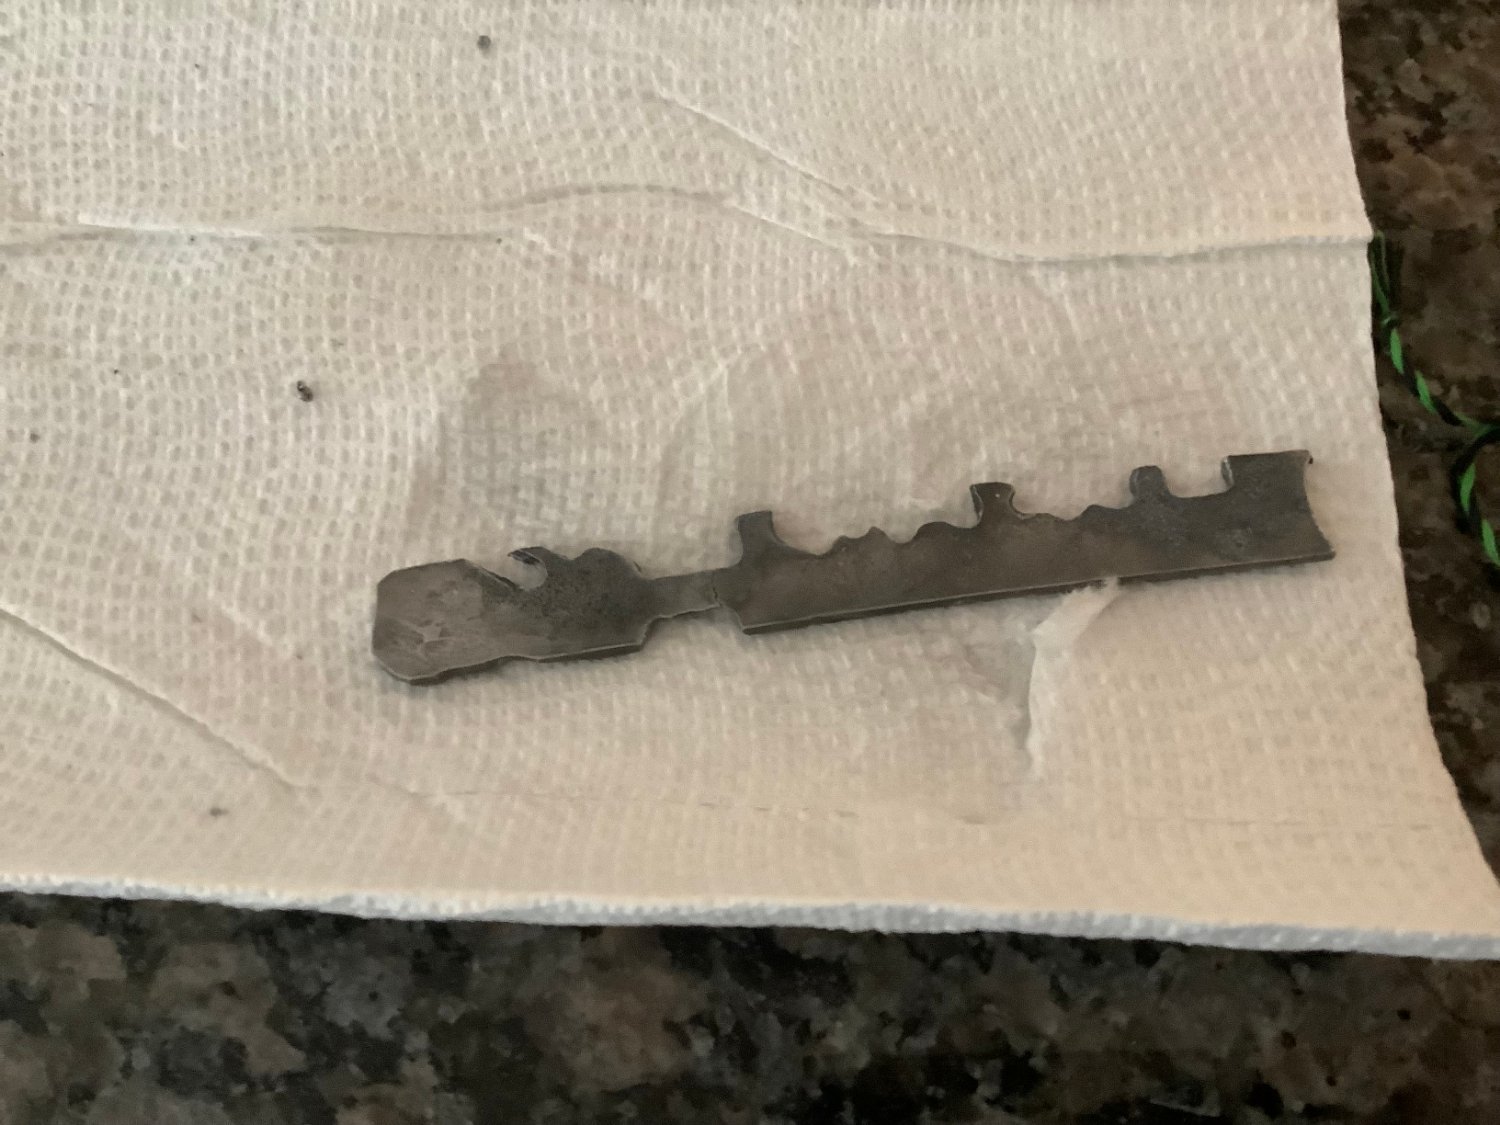
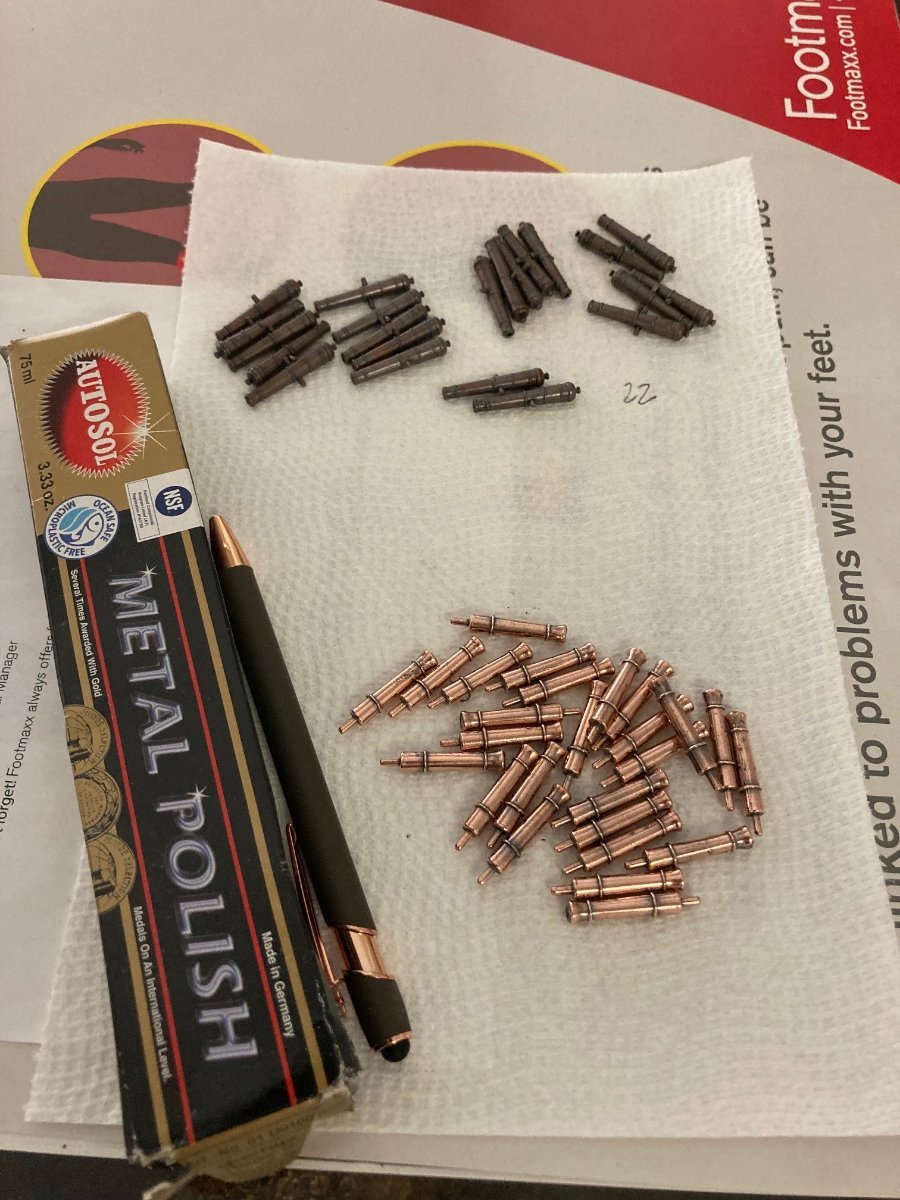
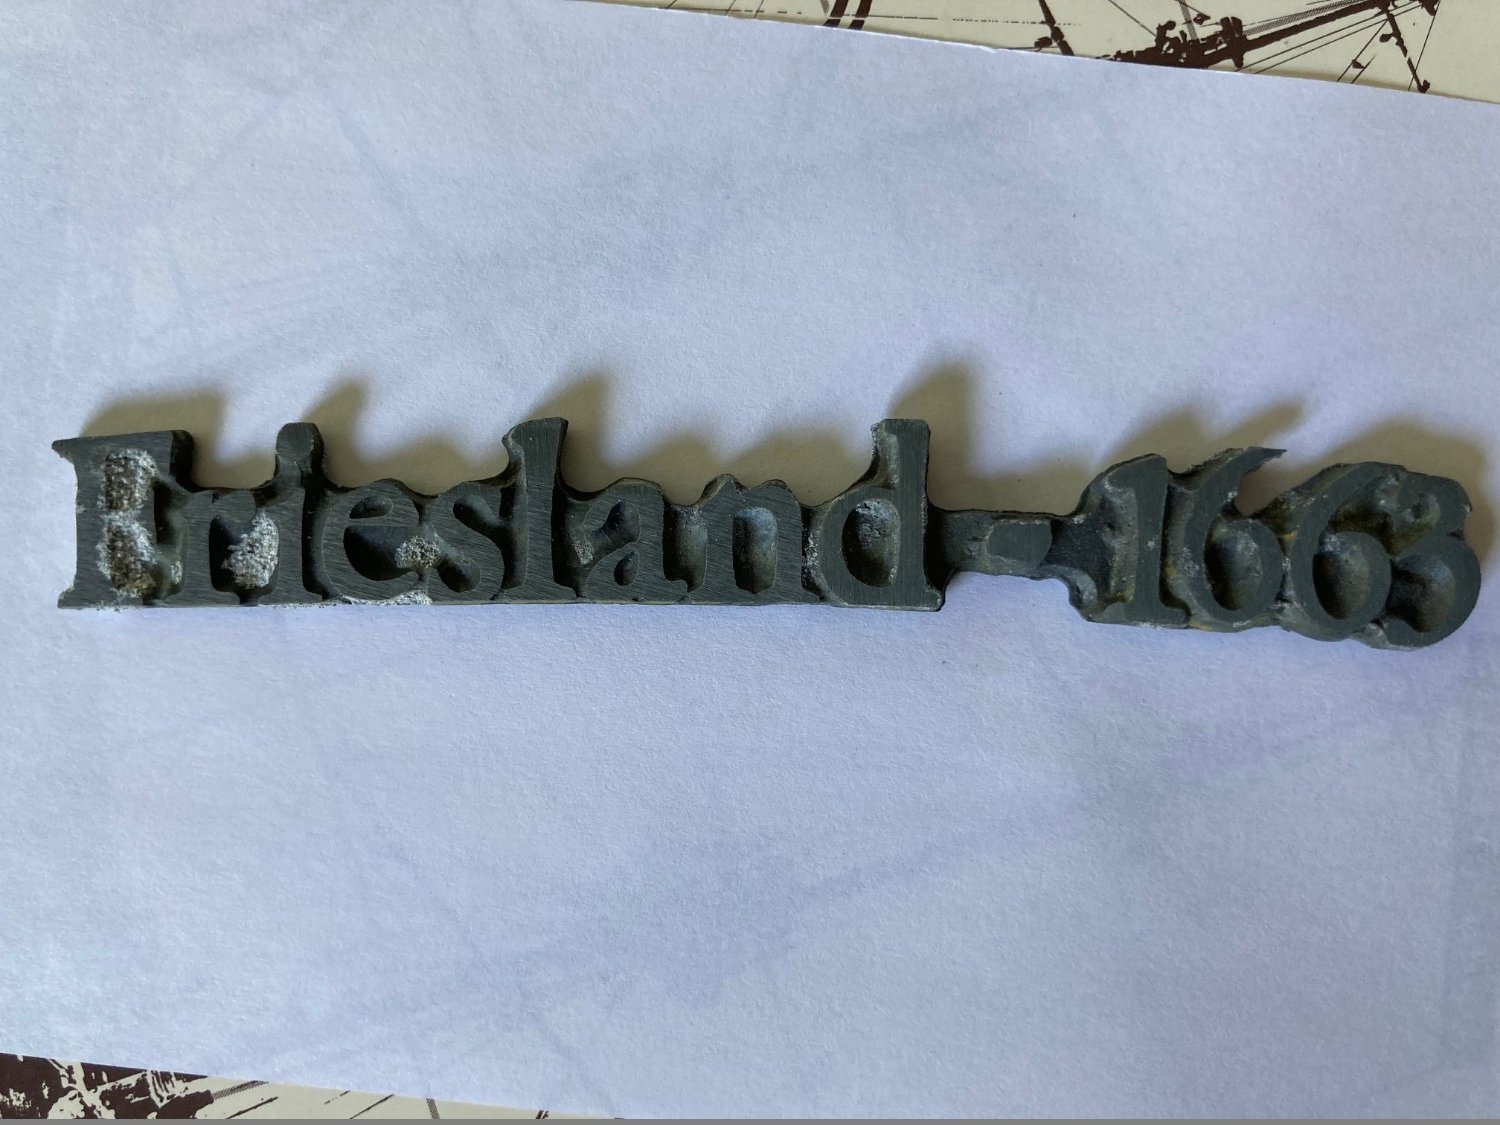
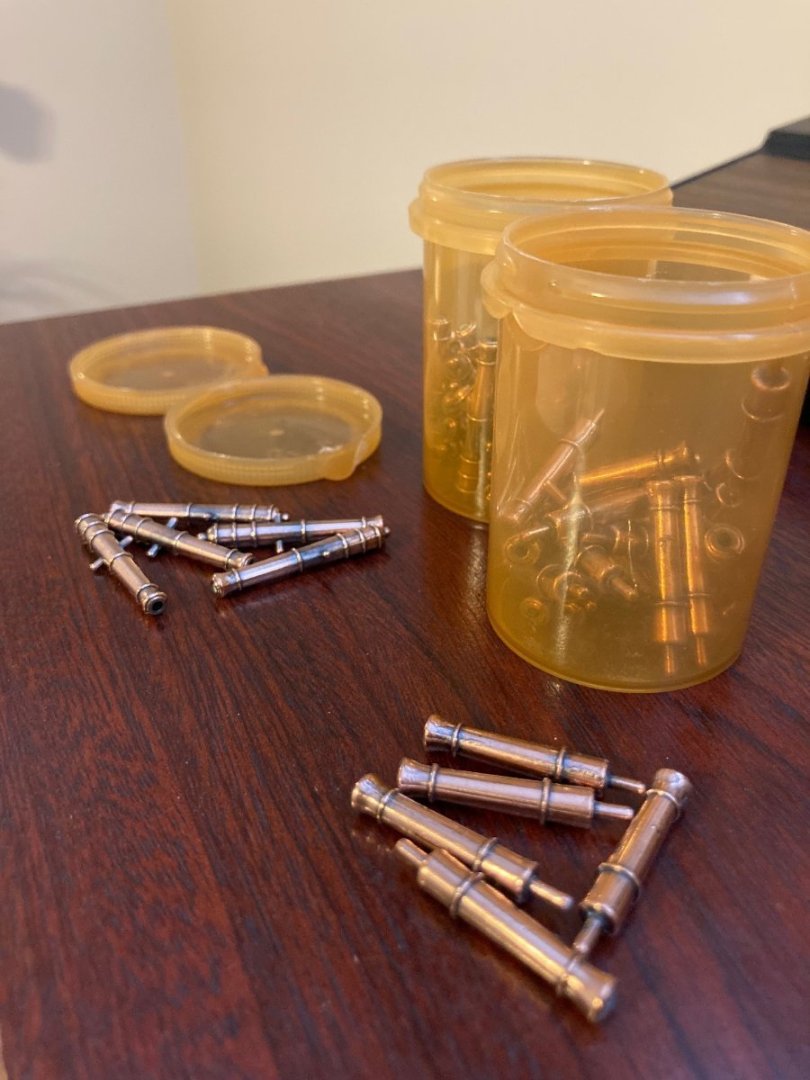
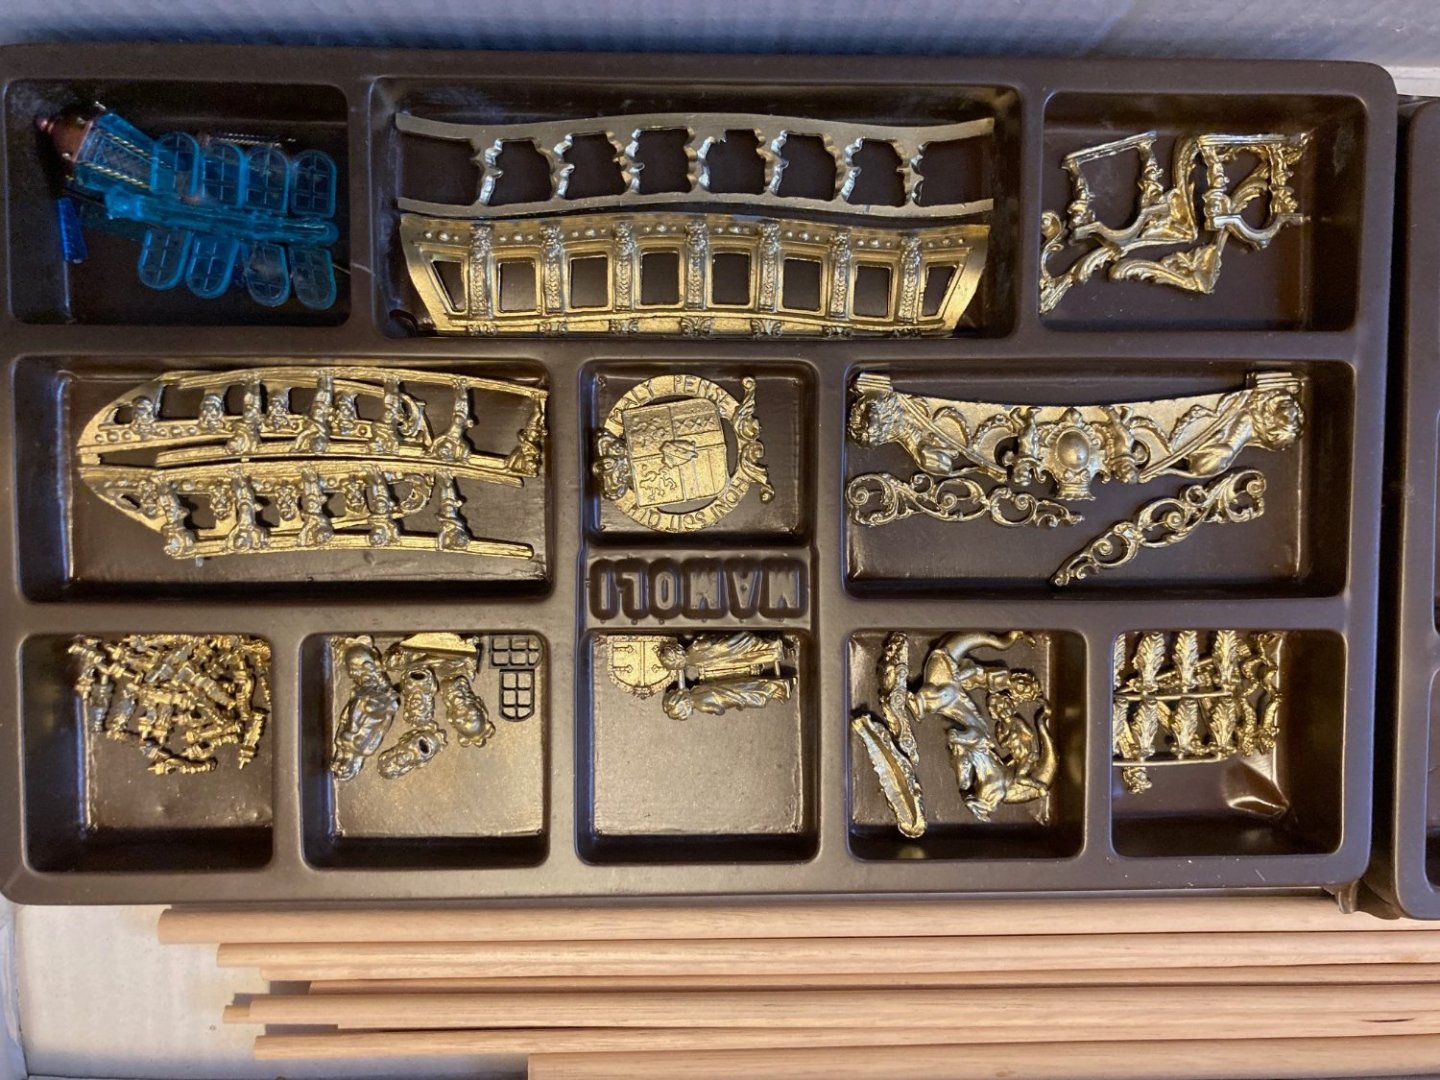
I cleaned the corroded cast metal pieces with vinegar and salt and the results were excellent... with only minor marring on the surfaces. I also polished the brass cannons with autosol metal polish and they also turned out excellent as you can see from the pictures. Perhaps should have left the cannons in their original state as would likely not need to "blacken" them. Quite a bit of work though...


-
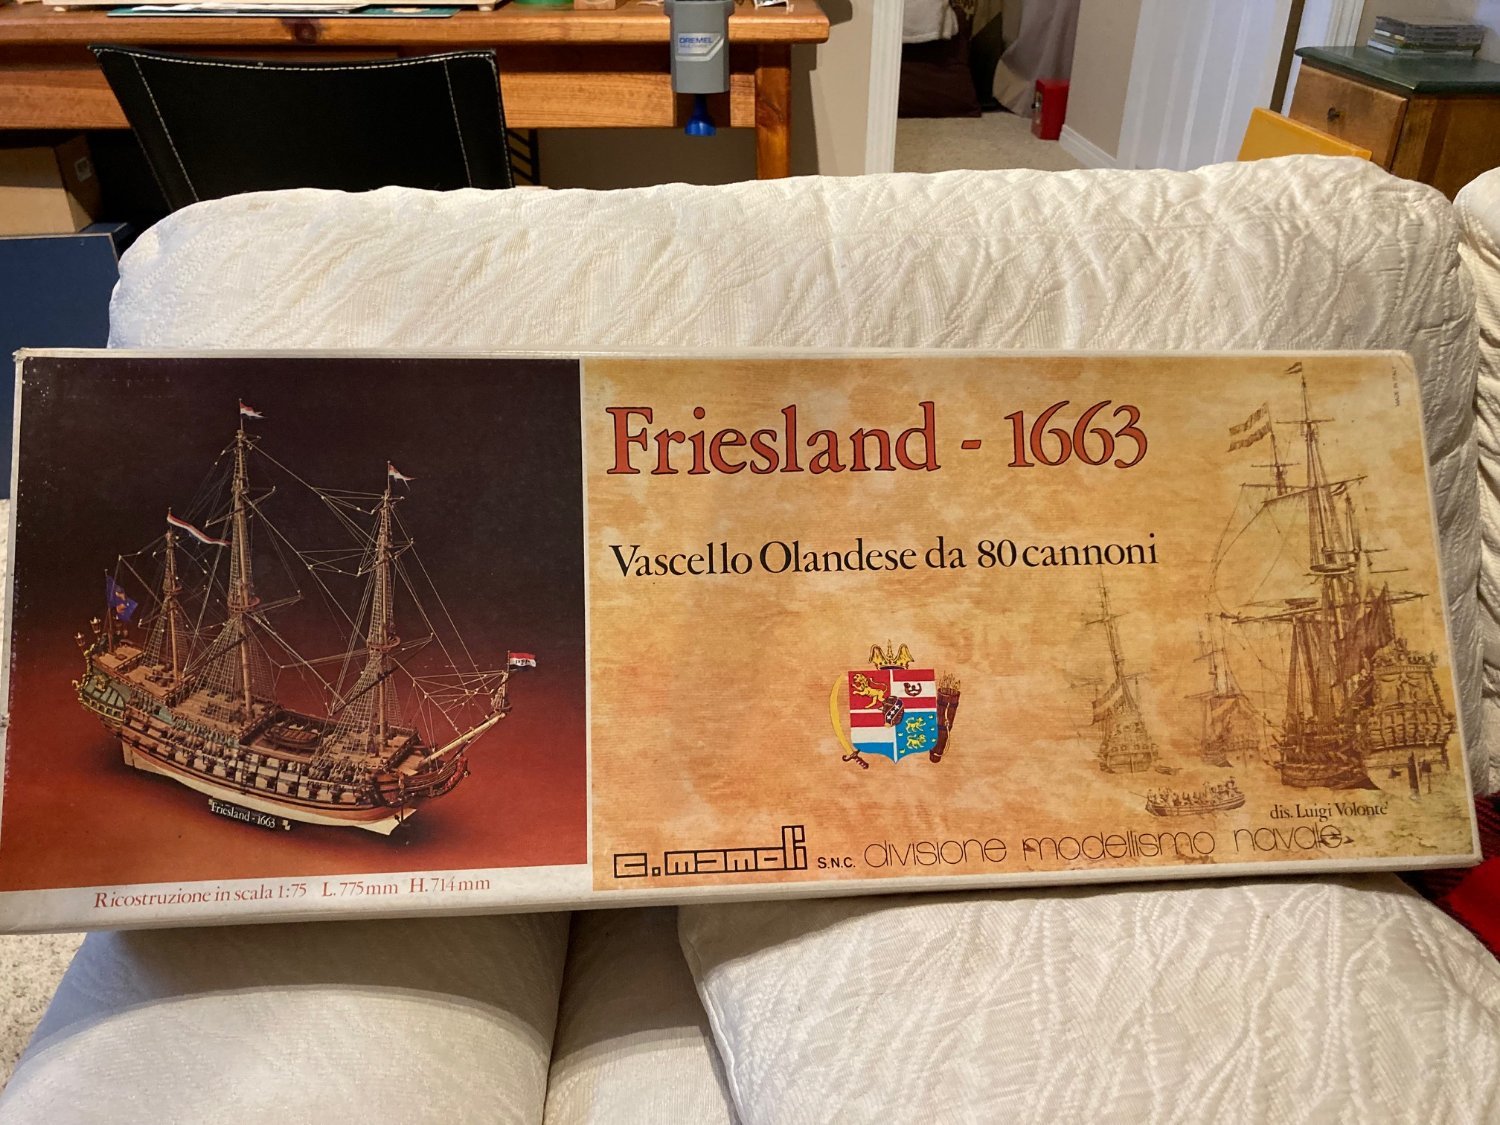
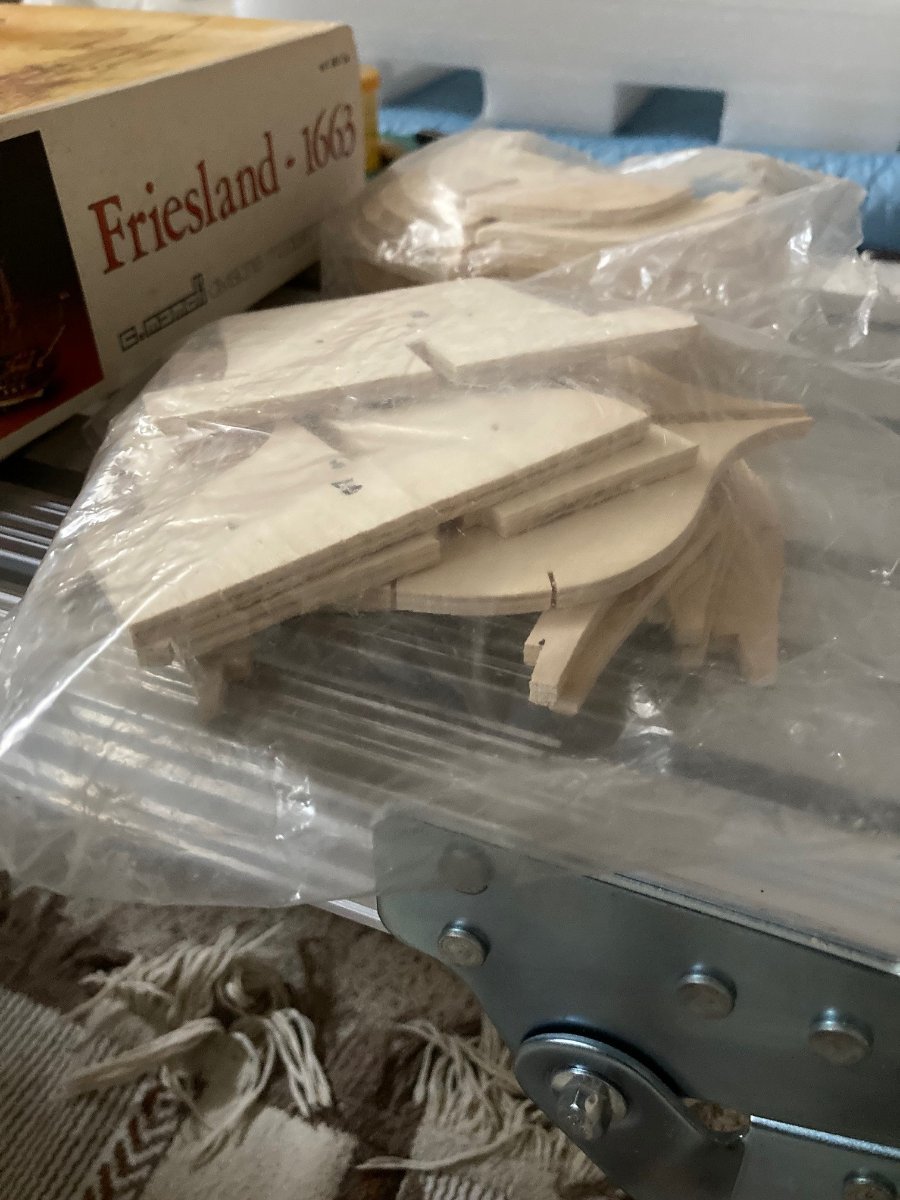
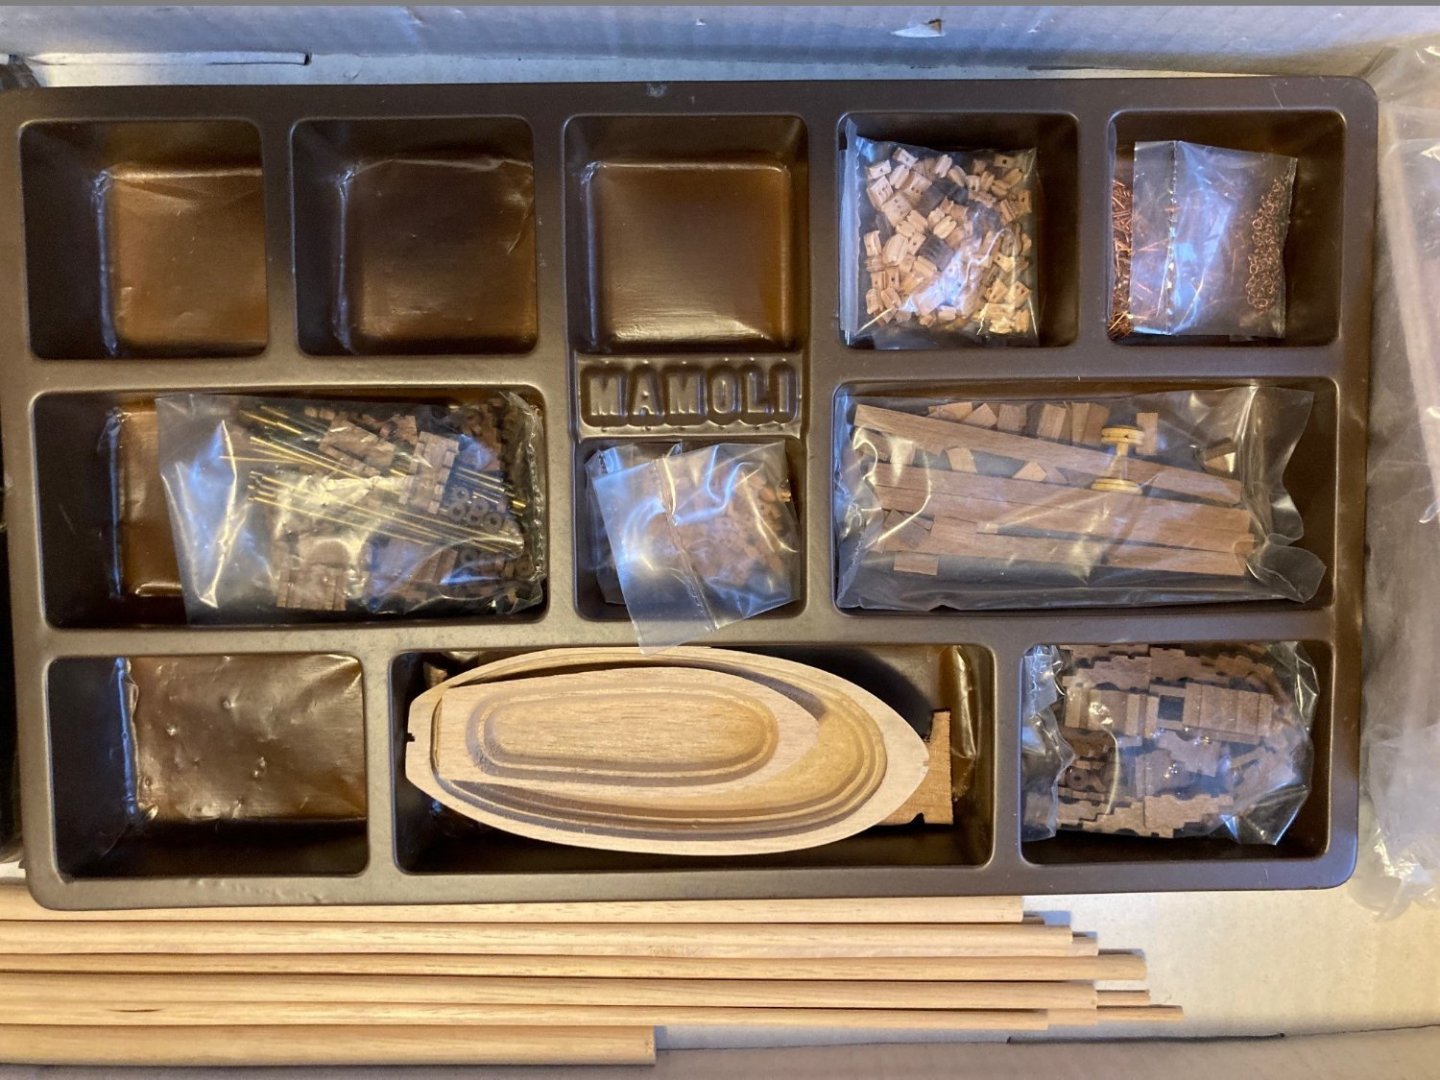
There are a few wonderful builds of this kit on MSW and thought I would add to the current roster. In my opinion, this kit builds into a wonderful static display and I have been working my skills up to the level required to complete this kit. My last and only Mamoli build previously was the Mamoli Santa Maria kit and I am very happy how it turned out given the limitations in instructions. Nevertheless, I have seemed to figure out the Mamoli way of building and though the present kit I purchased was a vintage kit off of Ebay, I am still very pleased with the quality of materials and metal castings. *Unfortunately I am missing the figurehead and noted some degradation in some of the metal casting and the keel is significantly warped. *Fortunately I have sourced the figurehead and the wood looks excellent given its age as I estimate the kit to be about 35-40 years old at this time.